This document provides an overview of getting started with Docker and includes chapters on installing Docker on various operating systems, building Docker images, connecting and running containers, managing Docker volumes and networks, and securing Docker deployments. It serves as an unofficial Docker guide, extracting content from Stack Overflow for educational purposes.
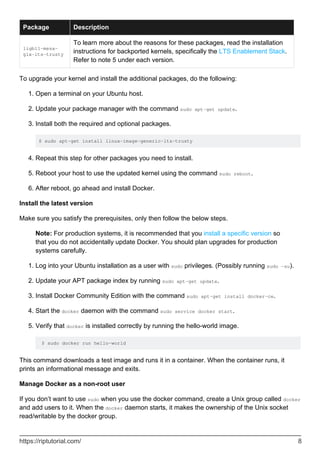
![Remarks 27
Examples 27
A) Launch a container with a volume 27
B) Now press [cont +P+Q] to move out from container without terminating the container chec 27
C) Run 'docker inspect' to check out more info about the volume 27
D) You can attach a running containers volume to another containers 27
E) You can also mount you base directory inside container 28
Chapter 5: Connecting Containers 29
Parameters 29
Remarks 29
Examples 29
Docker network 29
Docker-compose 29
Container Linking 30
Chapter 6: Creating a service with persistence 31
Syntax 31
Parameters 31
Remarks 31
Examples 31
Persistence with named volumes 31
Backup a named volume content 32
Chapter 7: Data Volumes and Data Containers 33
Examples 33
Data-Only Containers 33
Creating a data volume 33
Chapter 8: Debugging a container 35
Syntax 35
Examples 35
Entering in a running container 35
Monitoring resource usage 35
Monitoring processes in a container 36
Attach to a running container 36](https://image.slidesharecdn.com/docker-240207091918-356c1bb2/85/docker-pdf-3-320.jpg)

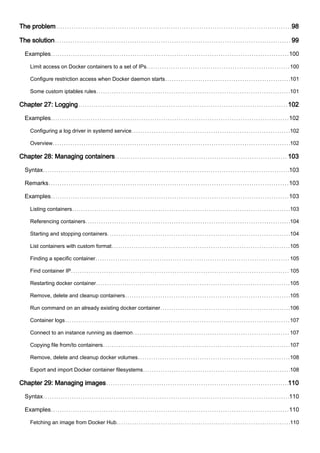


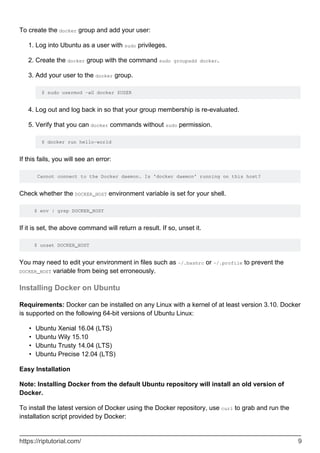
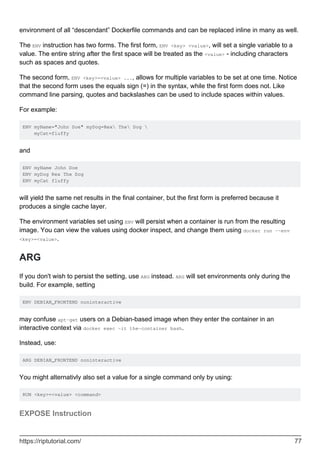
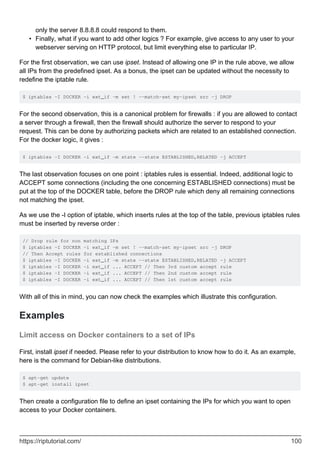
![$ sudo apt-get update
$ sudo apt-get install
apt-transport-https
ca-certificates
curl
software-properties-common
Add Docker’s official GPG key:
$ curl -fsSL https://download.docker.com/linux/ubuntu/gpg | sudo apt-key add -
Verify that the key fingerprint is 9DC8 5822 9FC7 DD38 854A E2D8 8D81 803C 0EBF CD88
.
$ sudo apt-key fingerprint 0EBFCD88
4.
pub 4096R/0EBFCD88 2017-02-22
Key fingerprint = 9DC8 5822 9FC7 DD38 854A E2D8 8D81 803C 0EBF CD88
uid Docker Release (CE deb) <docker@docker.com>
sub 4096R/F273FCD8 2017-02-22
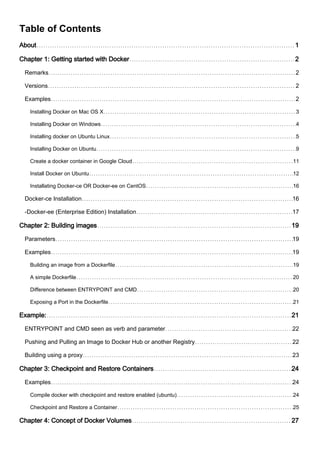
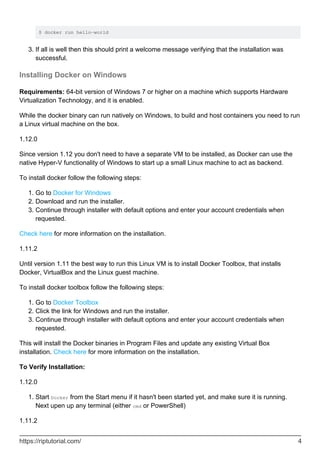
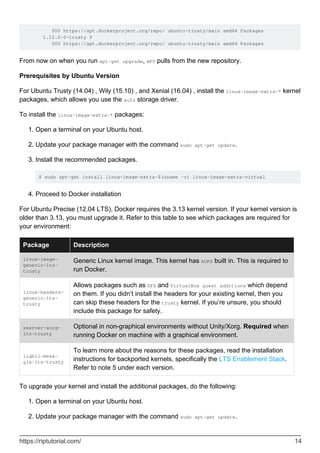
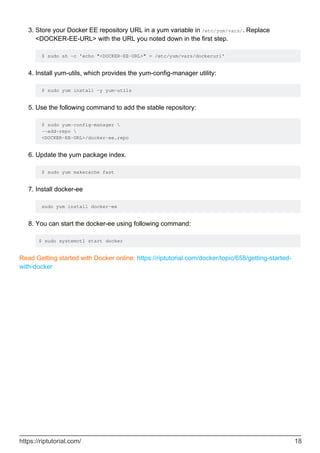
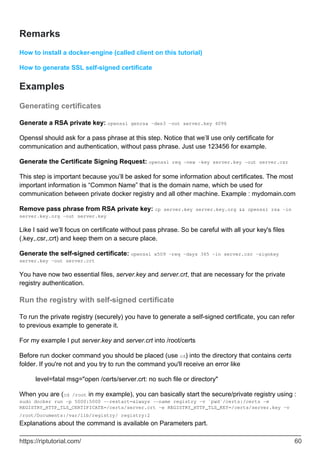
Find the entry in the table below which corresponds to your Ubuntu version. This determines
where APT will search for Docker packages. When possible, run a long-term support (LTS)
edition of Ubuntu.
5.
Ubuntu Version Repository
Precise 12.04 (LTS) deb https://apt.dockerproject.org/repo ubuntu-precise main
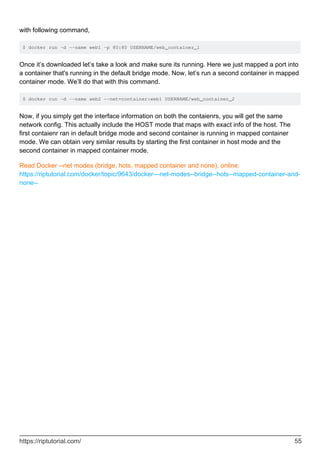
Trusty 14.04 (LTS) deb https://apt.dockerproject.org/repo ubuntu-trusty main
Wily 15.10 deb https://apt.dockerproject.org/repo ubuntu-wily main
Xenial 16.04 (LTS) deb https://apt.dockerproject.org/repo ubuntu-xenial main
Note: Docker does not provide packages for all architectures. Binary artifacts are built
nightly, and you can download them from https://master.dockerproject.org. To install
docker on a multi-architecture system, add an [arch=...] clause to the entry. Refer to
Debian Multiarch wiki for details.
Run the following command, substituting the entry for your operating system for the
placeholder <REPO>.
$ echo "" | sudo tee /etc/apt/sources.list.d/docker.list
6.
Update the APT package index by executing sudo apt-get update.
7.
Verify that APT is pulling from the right repository.
8.
When you run the following command, an entry is returned for each version of Docker that is
https://riptutorial.com/ 6](https://image.slidesharecdn.com/docker-240207091918-356c1bb2/85/docker-pdf-17-320.jpg)
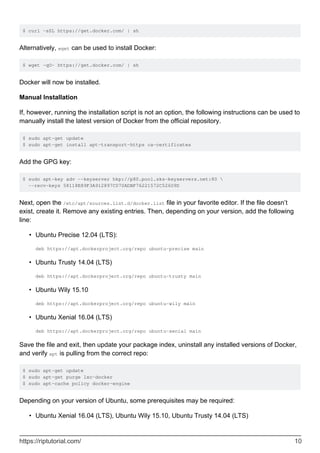
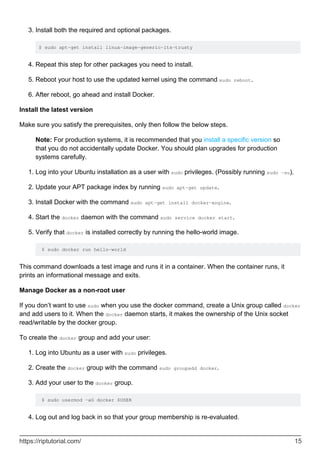
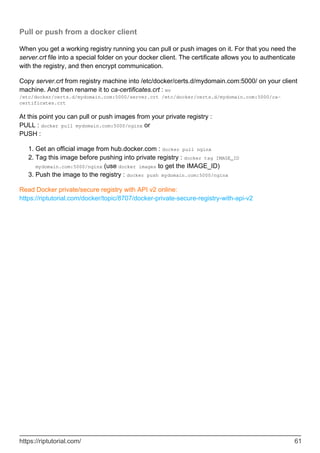
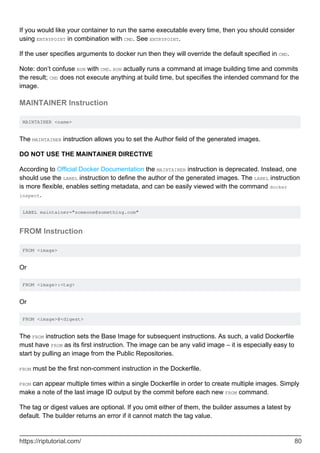
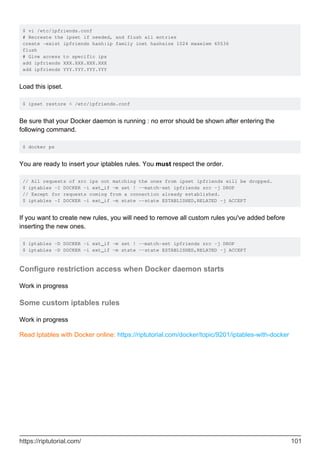
![Add the new GPG key. This commands downloads the key with the ID
58118E89F3A912897C070ADBF76221572C52609D from the keyserver hkp://ha.pool.sks-
keyservers.net:80 and adds it to the adv keychain. For more information, see the output of man
apt-key.
$ sudo apt-key adv
--keyserver hkp://ha.pool.sks-keyservers.net:80
--recv-keys 58118E89F3A912897C070ADBF76221572C52609D
4.
Find the entry in the table below which corresponds to your Ubuntu version. This determines
where APT will search for Docker packages. When possible, run a long-term support (LTS)
edition of Ubuntu.
5.
Ubuntu Version Repository
Precise 12.04 (LTS) deb https://apt.dockerproject.org/repo ubuntu-precise main
Trusty 14.04 (LTS) deb https://apt.dockerproject.org/repo ubuntu-trusty main
Wily 15.10 deb https://apt.dockerproject.org/repo ubuntu-wily main
Xenial 16.04 (LTS) deb https://apt.dockerproject.org/repo ubuntu-xenial main
Note: Docker does not provide packages for all architectures. Binary artifacts are built
nightly, and you can download them from https://master.dockerproject.org. To install
docker on a multi-architecture system, add an [arch=...] clause to the entry. Refer to
Debian Multiarch wiki for details.
Run the following command, substituting the entry for your operating system for the
placeholder <REPO>.
$ echo "" | sudo tee /etc/apt/sources.list.d/docker.list
6.
Update the APT package index by executing sudo apt-get update.
7.
Verify that APT is pulling from the right repository.
8.
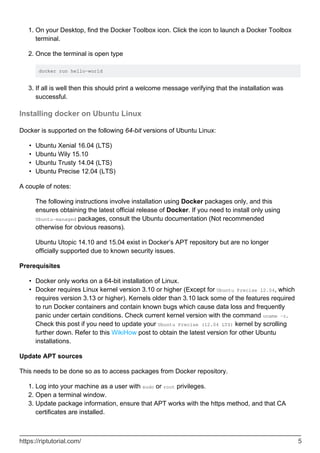
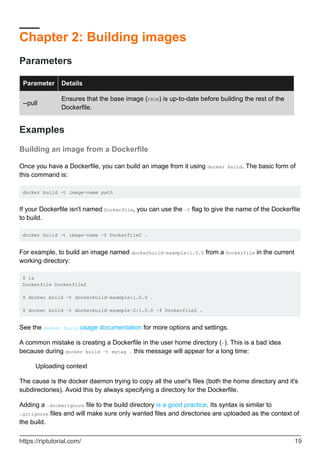
When you run the following command, an entry is returned for each version of Docker that is
available for you to install. Each entry should have the URL https://apt.dockerproject.org/repo/.
The version currently installed is marked with ***.See the below example's output.
$ apt-cache policy docker-engine
docker-engine:
Installed: 1.12.2-0~trusty
Candidate: 1.12.2-0~trusty
Version table:
*** 1.12.2-0~trusty 0
500 https://apt.dockerproject.org/repo/ ubuntu-trusty/main amd64 Packages
100 /var/lib/dpkg/status
1.12.1-0~trusty 0
https://riptutorial.com/ 13](https://image.slidesharecdn.com/docker-240207091918-356c1bb2/85/docker-pdf-24-320.jpg)
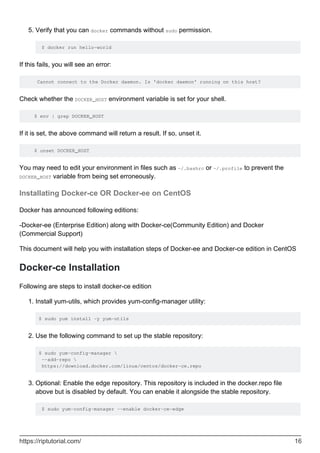
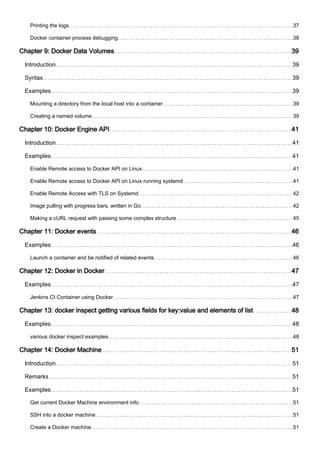
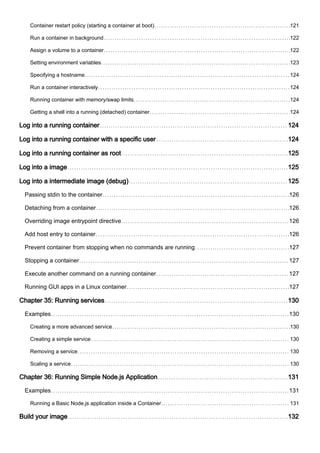
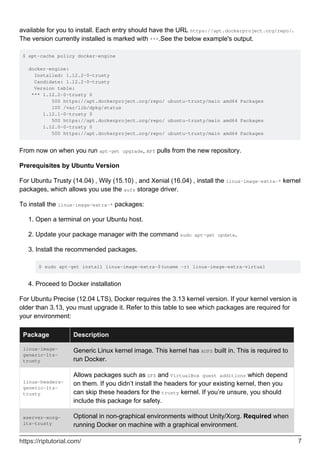
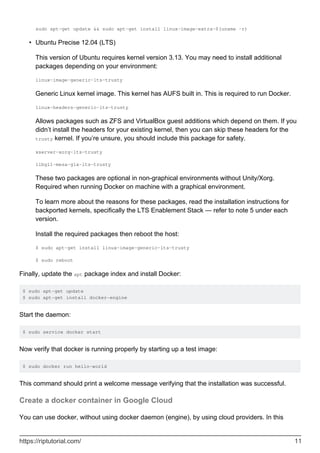
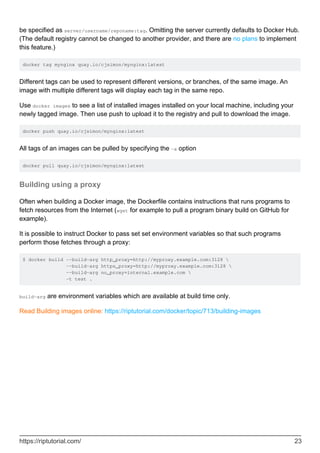
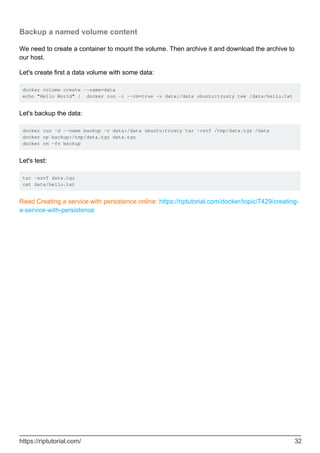
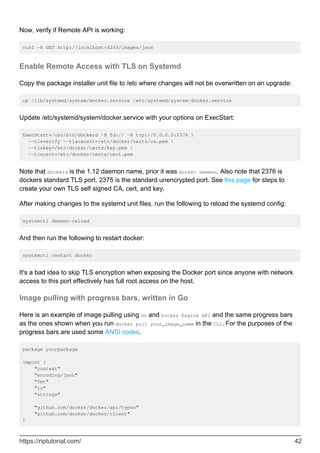
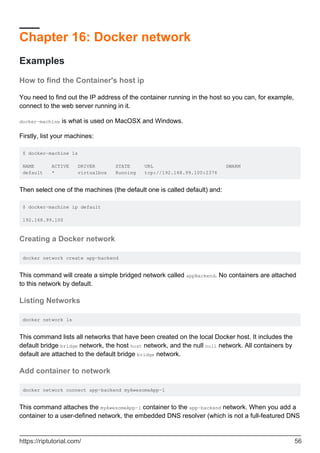
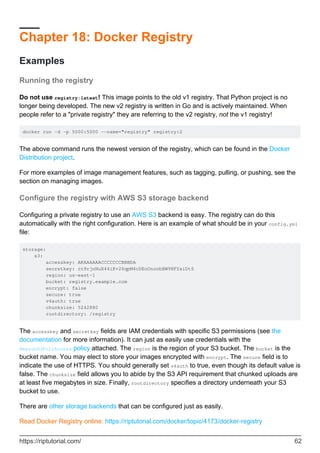
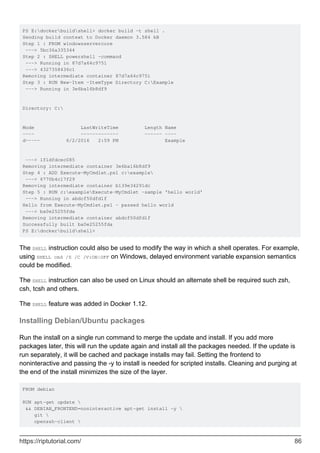
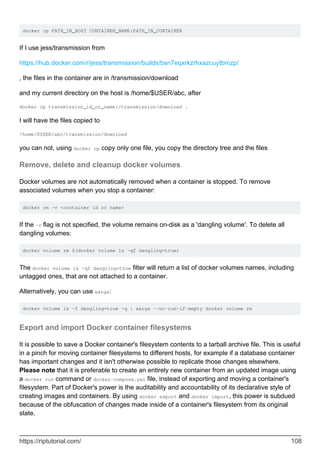
![A simple Dockerfile
FROM node:5
The FROM directive specifies an image to start from. Any valid image reference may be used.
WORKDIR /usr/src/app
The WORKDIR directive sets the current working directory inside the container, equivalent to running
cd inside the container. (Note: RUN cd will not change the current working directory.)
RUN npm install cowsay knock-knock-jokes
RUN executes the given command inside the container.
COPY cowsay-knockknock.js ./
COPY copies the file or directory specified in the first argument from the build context (the path
passed to docker build path) to the location in the container specified by the second argument.
CMD node cowsay-knockknock.js
CMD specifies a command to execute when the image is run and no command is given. It can be
overridden by passing a command to docker run.
There are many other instructions and options; see the Dockerfile reference for a complete list.
Difference between ENTRYPOINT and CMD
There are two Dockerfile directives to specify what command to run by default in built images. If
you only specify CMD then docker will run that command using the default ENTRYPOINT, which is
/bin/sh -c. You can override either or both the entrypoint and/or the command when you start up
the built image. If you specify both, then the ENTRYPOINT specifies the executable of your container
process, and CMD will be supplied as the parameters of that executable.
For example if your Dockerfile contains
FROM ubuntu:16.04
CMD ["/bin/date"]
Then you are using the default ENTRYPOINT directive of /bin/sh -c, and running /bin/date with that
default entrypoint. The command of your container process will be /bin/sh -c /bin/date. Once you
run this image then it will by default print out the current date
$ docker build -t test .
$ docker run test
Tue Jul 19 10:37:43 UTC 2016
https://riptutorial.com/ 20](https://image.slidesharecdn.com/docker-240207091918-356c1bb2/85/docker-pdf-31-320.jpg)
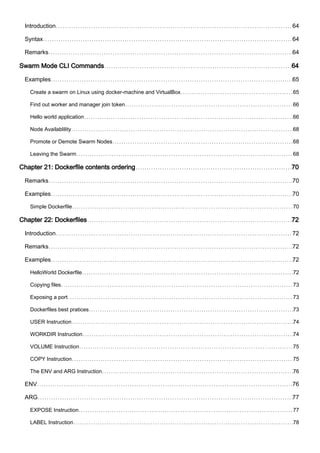
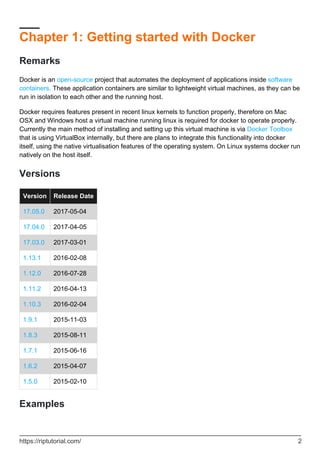
![You can override CMD on the command line, in which case it will run the command you have
specified.
$ docker run test /bin/hostname
bf0274ec8820
If you specify an ENTRYPOINT directive, Docker will use that executable, and the CMD directive
specifies the default parameter(s) of the command. So if your Dockerfile contains:
FROM ubuntu:16.04
ENTRYPOINT ["/bin/echo"]
CMD ["Hello"]
Then running it will produce
$ docker build -t test .
$ docker run test
Hello
You can provide different parameters if you want to, but they will all run /bin/echo
$ docker run test Hi
Hi
If you want to override the entrypoint listed in your Dockerfile (i.e. if you wish to run a different
command than echo in this container), then you need to specify the --entrypoint parameter on the
command line:
$ docker run --entrypoint=/bin/hostname test
b2c70e74df18
Generally you use the ENTRYPOINT directive to point to your main application you want to run, and
CMD to the default parameters.
Exposing a Port in the Dockerfile
EXPOSE <port> [<port>...]
From Docker's documentation:
The EXPOSE instruction informs Docker that the container listens on the specified
network ports at runtime. EXPOSE does not make the ports of the container accessible to
the host. To do that, you must use either the -p flag to publish a range of ports or the -P
flag to publish all of the exposed ports. You can expose one port number and publish it
externally under another number.
Example:
https://riptutorial.com/ 21](https://image.slidesharecdn.com/docker-240207091918-356c1bb2/85/docker-pdf-32-320.jpg)
![Inside your Dockerfile:
EXPOSE 8765
To access this port from the host machine, include this argument in your docker run command:
-p 8765:8765
ENTRYPOINT and CMD seen as verb and parameter
Suppose you have a Dockerfile ending with
ENTRYPOINT [ "nethogs"] CMD ["wlan0"]
if you build this image with a
docker built -t inspector .
launch the image built with such a Dockerfile with a command such as
docker run -it --net=host --rm inspector
,nethogs will monitor the interface named wlan0
Now if you want to monitor the interface eth0 (or wlan1, or ra1...), you will do something like
docker run -it --net=host --rm inspector eth0
or
docker run -it --net=host --rm inspector wlan1
Pushing and Pulling an Image to Docker Hub or another Registry
Locally created images can be pushed to Docker Hub or any other docker repo host, known as a
registry. Use docker login to sign in to an existing docker hub account.
docker login
Login with your Docker ID to push and pull images from Docker Hub.
If you don't have a Docker ID, head over to https://hub.docker.com to create one.
Username: cjsimon
Password:
Login Succeeded
A different docker registry can be used by specifying a server name. This also works for private or
self-hosted registries. Further, using an external credentials store for safety is possible.
docker login quay.io
You can then tag and push images to the registry that you are logged in to. Your repository must
https://riptutorial.com/ 22](https://image.slidesharecdn.com/docker-240207091918-356c1bb2/85/docker-pdf-33-320.jpg)

![Chapter 4: Concept of Docker Volumes
Remarks
People new to Docker often don't realize that Docker filesystems are temporary by default. If you
start up a Docker image you'll get a container that on the surface behaves much like a virtual
machine. You can create, modify, and delete files. However, unlike a virtual machine, if you stop
the container and start it up again, all your changes will be lost -- any files you previously deleted
will now be back, and any new files or edits you made won't be present.
Volumes in docker containers allow for persistent data, and for sharing host-machine data inside a
container.
Examples
A) Launch a container with a volume
[root@localhost ~]# docker run -it -v /data --name=vol3 8251da35e7a7 /bin/bash
root@d87bf9607836:/# cd /data/
root@d87bf9607836:/data# touch abc{1..10}
root@d87bf9607836:/data# ls
abc1 abc10 abc2 abc3 abc4 abc5 abc6 abc7 abc8 abc9
B) Now press [cont +P+Q] to move out from container without terminating the
container checking for container that is running
[root@localhost ~]# docker ps
CONTAINER ID IMAGE COMMAND CREATED STATUS PORTS NAMES d87bf9607836
8251da35e7a7 "/bin/bash" About a minute ago Up 31 seconds vol3 [root@localhost ~]#
C) Run 'docker inspect' to check out more info about the volume
[root@localhost ~]# docker inspect d87bf9607836
"Mounts": [ { "Name":
"cdf78fbf79a7c9363948e133abe4c572734cd788c95d36edea0448094ec9121c", "Source":
"/var/lib/docker/volumes/cdf78fbf79a7c9363948e133abe4c572734cd788c95d36edea0448094ec9121c/_d
"Destination": "/data", "Driver": "local", "Mode": "", "RW": true
D) You can attach a running containers volume to another containers
[root@localhost ~]# docker run -it --volumes-from vol3 8251da35e7a7 /bin/bash
https://riptutorial.com/ 27](https://image.slidesharecdn.com/docker-240207091918-356c1bb2/85/docker-pdf-38-320.jpg)
![root@ef2f5cc545be:/# ls
bin boot data dev etc home lib lib64 media mnt opt proc root run sbin srv sys tmp usr var
root@ef2f5cc545be:/# ls /data abc1 abc10 abc2 abc3 abc4 abc5 abc6 abc7 abc8 abc9
E) You can also mount you base directory inside container
[root@localhost ~]# docker run -it -v /etc:/etc1 8251da35e7a7 /bin/bash
Here: /etc is host machine directory and /etc1 is the target inside container
Read Concept of Docker Volumes online: https://riptutorial.com/docker/topic/5908/concept-of-
docker-volumes
https://riptutorial.com/ 28](https://image.slidesharecdn.com/docker-240207091918-356c1bb2/85/docker-pdf-39-320.jpg)


![Chapter 8: Debugging a container
Syntax
docker stats [OPTIONS] [CONTAINER...]
•
docker logs [OPTIONS] CONTAINER
•
docker top [OPTIONS] CONTAINER [ps OPTIONS]
•
Examples
Entering in a running container
To execute operations in a container, use the docker exec command. Sometimes this is called
"entering the container" as all commands are executed inside the container.
docker exec -it container_id bash
or
docker exec -it container_id /bin/sh
And now you have a shell in your running container. For example, list files in a directory and then
leave the container:
docker exec container_id ls -la
You can use the -u flag to enter the container with a specific user, e.g. uid=1013, gid=1023.
docker exec -it -u 1013:1023 container_id ls -la
The uid and gid does not have to exist in the container but the command can result in errors.If you
want to launch a container and immediately enter inside in order to check something, you can do
docker run...; docker exec -it $(docker ps -lq) bash
the command docker ps -lq outputs only the id of the last (the l in -lq) container started. (this
supposes you have bash as interpreter available in your container, you may have sh or zsh or any
other)
Monitoring resource usage
Inspecting system resource usage is an efficient way to find misbehaving applications. This
example is an equivalent of the traditional top command for containers:
docker stats
https://riptutorial.com/ 35](https://image.slidesharecdn.com/docker-240207091918-356c1bb2/85/docker-pdf-46-320.jpg)

![Chapter 9: Docker Data Volumes
Introduction
Docker data volumes provide a way to persist data independent of a container's life cycle.
Volumes present a number of helpful features such as:
Mounting a host directory within the container, sharing data in-between containers using the
filesystem and preserving data if a container gets deleted
Syntax
docker volume [OPTIONS] [COMMAND]
•
Examples
Mounting a directory from the local host into a container
It is possible to mount a host directory to a specific path in your container using the -v or --volume
command line option. The following example will mount /etc on the host to /mnt/etc in the
container:
(on linux) docker run -v "/etc:/mnt/etc" alpine cat /mnt/etc/passwd
(on windows) docker run -v "/c/etc:/mnt/etc" alpine cat /mnt/etc/passwd
The default access to the volume inside the container is read-write. To mount a volume read-only
inside of a container, use the suffix :ro:
docker run -v "/etc:/mnt/etc:ro" alpine touch /mnt/etc/passwd
Creating a named volume
docker volume create --name="myAwesomeApp"
Using a named volume makes managing volumes much more human-readable. It is possible to
create a named volume using the command specified above, but it's also possible to create a
named volume inside of a docker run command using the -v or --volume command line option:
docker run -d --name="myApp-1" -v="myAwesomeApp:/data/app" myApp:1.5.3
Note that creating a named volume in this form is similar to mounting a host file/directory as a
volume, except that instead of a valid path, the volume name is specified. Once created, named
volumes can be shared with other containers:
https://riptutorial.com/ 39](https://image.slidesharecdn.com/docker-240207091918-356c1bb2/85/docker-pdf-50-320.jpg)

![Chapter 10: Docker Engine API
Introduction
An API that allows you to control every aspect of Docker from within your own applications, build
tools to manage and monitor applications running on Docker, and even use it to build apps on
Docker itself.
Examples
Enable Remote access to Docker API on Linux
Edit /etc/init/docker.conf and update the DOCKER_OPTS variable to the following:
DOCKER_OPTS='-H tcp://0.0.0.0:4243 -H unix:///var/run/docker.sock'
Restart Docker deamon
service docker restart
Verify if Remote API is working
curl -X GET http://localhost:4243/images/json
Enable Remote access to Docker API on Linux running systemd
Linux running systemd, like Ubuntu 16.04, adding -H tcp://0.0.0.0:2375 to /etc/default/docker
does not have the effect it used to.
Instead, create a file called /etc/systemd/system/docker-tcp.socket to make docker available on a
TCP socket on port 4243:
[Unit]
Description=Docker Socket for the API
[Socket]
ListenStream=4243
Service=docker.service
[Install]
WantedBy=sockets.target
Then enable the new socket:
systemctl enable docker-tcp.socket
systemctl enable docker.socket
systemctl stop docker
systemctl start docker-tcp.socket
systemctl start docker
https://riptutorial.com/ 41](https://image.slidesharecdn.com/docker-240207091918-356c1bb2/85/docker-pdf-52-320.jpg)
![// Struct representing events returned from image pulling
type pullEvent struct {
ID string `json:"id"`
Status string `json:"status"`
Error string `json:"error,omitempty"`
Progress string `json:"progress,omitempty"`
ProgressDetail struct {
Current int `json:"current"`
Total int `json:"total"`
} `json:"progressDetail"`
}
// Actual image pulling function
func PullImage(dockerImageName string) bool {
client, err := client.NewEnvClient()
if err != nil {
panic(err)
}
resp, err := client.ImagePull(context.Background(), dockerImageName,
types.ImagePullOptions{})
if err != nil {
panic(err)
}
cursor := Cursor{}
layers := make([]string, 0)
oldIndex := len(layers)
var event *pullEvent
decoder := json.NewDecoder(resp)
fmt.Printf("n")
cursor.hide()
for {
if err := decoder.Decode(&event); err != nil {
if err == io.EOF {
break
}
panic(err)
}
imageID := event.ID
// Check if the line is one of the final two ones
if strings.HasPrefix(event.Status, "Digest:") || strings.HasPrefix(event.Status,
"Status:") {
fmt.Printf("%sn", event.Status)
continue
}
// Check if ID has already passed once
index := 0
for i, v := range layers {
if v == imageID {
index = i + 1
https://riptutorial.com/ 43](https://image.slidesharecdn.com/docker-240207091918-356c1bb2/85/docker-pdf-54-320.jpg)
![fmt.Printf("033[?25l")
}
func (cursor *Cursor) show() {
fmt.Printf("033[?25h")
}
func (cursor *Cursor) moveUp(rows int) {
fmt.Printf("033[%dF", rows)
}
func (cursor *Cursor) moveDown(rows int) {
fmt.Printf("033[%dE", rows)
}
func (cursor *Cursor) clearLine() {
fmt.Printf("033[2K")
}
After that in your main package you can call the PullImage function passing the image name you
want to pull. Of course, before calling it, you have to be logged into the Docker registry, where the
image is.
Making a cURL request with passing some complex structure
When using cURL for some queries to the Docker API, it might be a bit tricky to pass some complex
structures. Let's say, getting a list of images allows using filters as a query parameter, which have
to be a JSON representation of map[string][]string (about the maps in Go you can find more here).
Here is how to achieve this:
curl --unix-socket /var/run/docker.sock
-XGET "http:/v1.29/images/json"
-G
--data-urlencode 'filters={"reference":{"yourpreciousregistry.com/path/to/image": true},
"dangling":{"true": true}}'
Here the -G flag is used to specify that the data in the --data-urlencode parameter will be used in
an HTTP GET request instead of the POST request that otherwise would be used. The data will be
appended to the URL with a ? separator.
Read Docker Engine API online: https://riptutorial.com/docker/topic/3935/docker-engine-api
https://riptutorial.com/ 45](https://image.slidesharecdn.com/docker-240207091918-356c1bb2/85/docker-pdf-56-320.jpg)

![will return a list, such as
{running true false false false false 4525 0 2016-07-14T17:44:14.406286293Z 0001-01-
01T00:00:00Z}
I can get the value of State.Pid easily
docker inspect -f '{{ .State.Pid }}' ae1
I get
4525
Sometimes docker inspect gives a list as it begins with [ and ends with ]
another example, with another container
docker inspect -f ‘{{ .Config.Env }}’ 7a7
gives
[DISPLAY=:0 PATH=/usr/local/sbin:/usr/local/bin:/usr/sbin:/usr/bin:/sbin:/bin LANG=fr_FR.UTF-8
LANGUAGE=fr_FR:en LC_ALL=fr_FR.UTF-8 DEBIAN_FRONTEND=noninteractive HOME=/home/gg WINEARCH=win32
WINEPREFIX=/home/gg/.wine_captvty]
In order to get the first element of the list, we add index before the required field and 0 (as first
element) after, so
docker inspect -f ‘{{ index ( .Config.Env) 0 }}’ 7a7
gives
DISPLAY=:0
We get the next element with 1 instead of 0 using the same syntax
docker inspect -f ‘{{ index ( .Config.Env) 1 }}’ 7a7
gives
PATH=/usr/local/sbin:/usr/local/bin:/usr/sbin:/usr/bin:/sbin:/bin
We can get the number of elements of this list
docker inspect -f ‘{{ len .Config.Env }}’ 7a7
gives
9
and we can get the last element of the list, the syntax is not easy
docker inspect -f “{{ index .Config.Cmd $[$(docker inspect –format ‘{{ len .Config.Cmd }}’
$CID)-1]}}” 7a7
Read docker inspect getting various fields for key:value and elements of list online:
https://riptutorial.com/docker/topic/6470/docker-inspect-getting-various-fields-for-key-value-and-
https://riptutorial.com/ 49](https://image.slidesharecdn.com/docker-240207091918-356c1bb2/85/docker-pdf-60-320.jpg)


![server, and is not exportable) allows each container on the network to resolve each other
container on the same network. This simple DNS resolver is not available on the default bridge
bridge network.
Detach container from network
docker network disconnect app-backend myAwesomeApp-1
This command detaches the myAwesomeApp-1 container from the app-backend network. The container
will no longer be able to communicate with other containers on the network it has been
disconnected from, nor use the embedded DNS resolver to look up other containers on the
network it has been detached from.
Remove a Docker network
docker network rm app-backend
This command removes the user-defined app-backend network from the Docker host. All containers
on the network not otherwise connected via another network will lose communication with other
containers. It is not possible to remove the default bridge bridge network, the host host network, or
the null null network.
Inspect a Docker network
docker network inspect app-backend
This command will output details about the app-backend network.
The of the output of this command should look similar to:
[
{
"Name": "foo",
"Id": "a0349d78c8fd7c16f5940bdbaf1adec8d8399b8309b2e8a969bd4e3226a6fc58",
"Scope": "local",
"Driver": "bridge",
"EnableIPv6": false,
"IPAM": {
"Driver": "default",
"Options": {},
"Config": [
{
"Subnet": "172.18.0.0/16",
"Gateway": "172.18.0.1/16"
}
]
},
"Internal": false,
"Containers": {},
"Options": {},
"Labels": {}
https://riptutorial.com/ 57](https://image.slidesharecdn.com/docker-240207091918-356c1bb2/85/docker-pdf-68-320.jpg)
![}
]
Read Docker network online: https://riptutorial.com/docker/topic/3221/docker-network
https://riptutorial.com/ 58](https://image.slidesharecdn.com/docker-240207091918-356c1bb2/85/docker-pdf-69-320.jpg)
![Chapter 20: Docker swarm mode
Introduction
A swarm is a number of Docker Engines (or nodes) that deploy services collectively. Swarm is
used to distribute processing across many physical, virtual or cloud machines.
Syntax
Initialize a swarm: docker swarm init [OPTIONS]
•
Join a swarm as a node and/or manager: docker swarm join [OPTIONS] HOST:PORT
•
Create a new service: docker service create [OPTIONS] IMAGE [COMMAND] [ARG...]
•
Display detailed information on one or more services: docker service inspect [OPTIONS]
SERVICE [SERVICE...]
•
List services: docker service ls [OPTIONS]
•
Remove one or more services: docker service rm SERVICE [SERVICE...]
•
Scale one or multiple replicated services: docker service scale SERVICE=REPLICAS
[SERVICE=REPLICAS...]
•
List the tasks of one or more services: docker service ps [OPTIONS] SERVICE [SERVICE...]
•
Update a service: docker service update [OPTIONS] SERVICE
•
Remarks
Swarm mode implements the following features:
Cluster management integrated with Docker Engine
•
Decentralized design
•
Declarative service model
•
Scaling
•
Desired state reconciliation
•
Multi-host networking
•
Service discovery
•
Load balancing
•
Secure design by default
•
Rolling updates
•
For more official Docker documentation regarding Swarm visit: Swarm mode overview
https://riptutorial.com/ 64](https://image.slidesharecdn.com/docker-240207091918-356c1bb2/85/docker-pdf-75-320.jpg)
![Swarm Mode CLI Commands
Click on commands description for documentation
Initialize a swarm
docker swarm init [OPTIONS]
Join a swarm as a node and/or manager
docker swarm join [OPTIONS] HOST:PORT
Create a new service
docker service create [OPTIONS] IMAGE [COMMAND] [ARG...]
Display detailed information on one or more services
docker service inspect [OPTIONS] SERVICE [SERVICE...]
List services
docker service ls [OPTIONS]
Remove one or more services
docker service rm SERVICE [SERVICE...]
Scale one or multiple replicated services
docker service scale SERVICE=REPLICAS [SERVICE=REPLICAS...]
List the tasks of one or more services
docker service ps [OPTIONS] SERVICE [SERVICE...]
Update a service
docker service update [OPTIONS] SERVICE
Examples
Create a swarm on Linux using docker-machine and VirtualBox
https://riptutorial.com/ 65](https://image.slidesharecdn.com/docker-240207091918-356c1bb2/85/docker-pdf-76-320.jpg)
![# Create the nodes
# In a real world scenario we would use at least 3 managers to cover the fail of one manager.
docker-machine create -d virtualbox manager
docker-machine create -d virtualbox worker1
# Create the swarm
# It is possible to define a port for the *advertise-addr* and *listen-addr*, if none is
defined the default port 2377 will be used.
docker-machine ssh manager
docker swarm init
--advertise-addr $(docker-machine ip manager)
--listen-addr $(docker-machine ip manager)
# Extract the Tokens for joining the Swarm
# There are 2 different Tokens for joining the swarm.
MANAGER_TOKEN=$(docker-machine ssh manager docker swarm join-token manager --quiet)
WORKER_TOKEN=$(docker-machine ssh manager docker swarm join-token worker --quiet)
# Join a worker node with the worker token
docker-machine ssh worker1
docker swarm join
--token $WORKER_TOKEN
--listen-addr $(docker-machine ip worker1)
$(docker-machine ip manager):2377
Find out worker and manager join token
When automating the provisioning of new nodes to a swarm, you need to know what the right join
token is for the swarm as well as the advertised address of the manager. You can find this out by
running the following commands on any of the existing manager nodes:
# grab the ipaddress:port of the manager (second last line minus the whitespace)
export MANAGER_ADDRESS=$(docker swarm join-token worker | tail -n 2 | tr -d '[[:space:]]')
# grab the manager and worker token
export MANAGER_TOKEN=$(docker swarm join-token manager -q)
export WORKER_TOKEN=$(docker swarm join-token worker -q)
The -q option outputs only the token. Without this option you get the full command for registering
to a swarm.
Then on newly provisioned nodes, you can join the swarm using.
docker swarm join --token $WORKER_TOKEN $MANAGER_ADDRESS
Hello world application
Usually you'd want to create a stack of services to form a replicated and orchestrated application.
A typical modern web application consists of a database, api, frontend and reverse proxy.
https://riptutorial.com/ 66](https://image.slidesharecdn.com/docker-240207091918-356c1bb2/85/docker-pdf-77-320.jpg)

![Chapter 21: Dockerfile contents ordering
Remarks
Base image declaration (FROM)
1.
Metadata (e.g. MAINTAINER, LABEL)
2.
Installing system dependencies (e.g. apt-get install, apk add)
3.
Copying app dependencies file (e.g. bower.json, package.json, build.gradle, requirements.txt)
4.
Installing app dependencies (e.g. npm install, pip install)
5.
Copying entire code base
6.
Setting up default runtime configs (e.g. CMD, ENTRYPOINT, ENV, EXPOSE)
7.
These orderings are made for optimizing build time using Docker's built-in caching mechanism.
Rule of thumbs:
Parts that change often (e.g. codebase) should be placed near bottom of Dockerfile,
and vice-versa. Parts that rarely change (e.g. dependencies) should be placed at top.
Examples
Simple Dockerfile
# Base image
FROM python:2.7-alpine
# Metadata
MAINTAINER John Doe <johndoe@example.com>
# System-level dependencies
RUN apk add --update
ca-certificates
&& update-ca-certificates
&& rm -rf /var/cache/apk/*
# App dependencies
COPY requirements.txt /requirements.txt
RUN pip install -r /requirements.txt
# App codebase
WORKDIR /app
COPY . ./
# Configs
ENV DEBUG true
EXPOSE 5000
CMD ["python", "app.py"]
MAINTAINER will be deprecated in Docker 1.13, and should be replaced by using LABEL. (
Source)
https://riptutorial.com/ 70](https://image.slidesharecdn.com/docker-240207091918-356c1bb2/85/docker-pdf-81-320.jpg)

![Chapter 22: Dockerfiles
Introduction
Dockerfiles are files used to programatically build Docker images. They allow you to quickly and
reproducibly create a Docker image, and so are useful for collaborating. Dockerfiles contain
instructions for building a Docker image. Each instruction is written on one row, and is given in the
form <INSTRUCTION><argument(s)>. Dockerfiles are used to build Docker images using the docker
build command.
Remarks
Dockerfiles are of the form:
# This is a comment
INSTRUCTION arguments
Comments starts with a #
•
Instructions are upper case only
•
The first instruction of a Dockerfile must be FROM to specify the base image
•
When building a Dockerfile, the Docker client will send a "build context" to the Docker daemon.
The build context includes all files and folder in the same directory as the Dockerfile. COPY and ADD
operations can only use files from this context.
Some Docker file may start with:
# escape=`
This is used to instruct the Docker parser to use ` as an escape character instead of . This is
mostly useful for Windows Docker files.
Examples
HelloWorld Dockerfile
A minimal Dockerfile looks like this:
FROM alpine
CMD ["echo", "Hello StackOverflow!"]
This will instruct Docker to build an image based on Alpine (FROM), a minimal distribution for
containers, and to run a specific command (CMD) when executing the resulting image.
https://riptutorial.com/ 72](https://image.slidesharecdn.com/docker-240207091918-356c1bb2/85/docker-pdf-83-320.jpg)
![Build and run it:
docker build -t hello .
docker run --rm hello
This will output:
Hello StackOverflow!
Copying files
To copy files from the build context in a Docker image, use the COPY instruction:
COPY localfile.txt containerfile.txt
If the filename contains spaces, use the alternate syntax:
COPY ["local file", "container file"]
The COPY command supports wildcards. It can be used for example to copy all images to the
images/ directory:
COPY *.jpg images/
Note: in this example, images/ may not exist. In this case, Docker will create it automatically.
Exposing a port
To declare exposed ports from a Dockerfile use the EXPOSE instruction:
EXPOSE 8080 8082
Exposed ports setting can be overridden from the Docker commandline but it is a good practice to
explicitly set them in the Dockerfile as it helps understand what an application does.
Dockerfiles best pratices
Group common operations
Docker builds images as a collection of layers. Each layer can only add data, even if this data says
that a file has been deleted. Every instruction creates a new layer. For example:
RUN apt-get -qq update
RUN apt-get -qq install some-package
Has a couple of downsides:
https://riptutorial.com/ 73](https://image.slidesharecdn.com/docker-240207091918-356c1bb2/85/docker-pdf-84-320.jpg)
![RUN pwd
The output of the final pwd command in this Dockerfile would be /a/b/c.
The WORKDIR instruction can resolve environment variables previously set using ENV. You can only
use environment variables explicitly set in the Dockerfile. For example:
ENV DIRPATH /path
WORKDIR $DIRPATH/$DIRNAME
RUN pwd
The output of the final pwd command in this Dockerfile would be /path/$DIRNAME
VOLUME Instruction
VOLUME ["/data"]
The VOLUME instruction creates a mount point with the specified name and marks it as holding
externally mounted volumes from native host or other containers. The value can be a JSON array,
VOLUME ["/var/log/"], or a plain string with multiple arguments, such as VOLUME /var/log or VOLUME
/var/log /var/db. For more information/examples and mounting instructions via the Docker client,
refer to Share Directories via Volumes documentation.
The docker run command initializes the newly created volume with any data that exists at the
specified location within the base image. For example, consider the following Dockerfile snippet:
FROM ubuntu
RUN mkdir /myvol
RUN echo "hello world" > /myvol/greeting
VOLUME /myvol
This Dockerfile results in an image that causes docker run, to create a new mount point at /myvol
and copy the greeting file into the newly created volume.
Note: If any build steps change the data within the volume after it has been declared, those
changes will be discarded.
Note: The list is parsed as a JSON array, which means that you must use double-quotes (“)
around words not single-quotes (‘).
COPY Instruction
COPY has two forms:
COPY <src>... <dest>
COPY ["<src>",... "<dest>"] (this form is required for paths containing whitespace)
The COPY instruction copies new files or directories from <src> and adds them to the filesystem of
the container at the path <dest>.
https://riptutorial.com/ 75](https://image.slidesharecdn.com/docker-240207091918-356c1bb2/85/docker-pdf-86-320.jpg)
![EXPOSE <port> [<port>...]
The EXPOSE instruction informs Docker that the container listens on the specified network ports at
runtime. EXPOSE does NOT make the ports of the container accessible to the host. To do that, you
must use either the -p flag to publish a range of ports or the -P flag to publish all of the exposed
ports. These flags are used in the docker run [OPTIONS] IMAGE [COMMAND][ARG...] to expose the port
to the host. You can expose one port number and publish it externally under another number.
docker run -p 2500:80 <image name>
This command will create a container with the name <image> and bind the container’s port 80 to
the host machine’s port 2500.
To set up port redirection on the host system, see using the -P flag. The Docker network feature
supports creating networks without the need to expose ports within the network, for detailed
information see the overview of this feature).
LABEL Instruction
LABEL <key>=<value> <key>=<value> <key>=<value> ...
The LABEL instruction adds metadata to an image. A LABEL is a key-value pair. To include spaces
within a LABEL value, use quotes and backslashes as you would in command-line parsing. A few
usage examples:
LABEL "com.example.vendor"="ACME Incorporated"
LABEL com.example.label-with-value="foo"
LABEL version="1.0"
LABEL description="This text illustrates
that label-values can span multiple lines."
An image can have more than one label. To specify multiple labels, Docker recommends
combining labels into a single LABEL instruction where possible. Each LABEL instruction produces a
new layer which can result in an inefficient image if you use many labels. This example results in a
single image layer.
LABEL multi.label1="value1" multi.label2="value2" other="value3"
The above can also be written as:
LABEL multi.label1="value1"
multi.label2="value2"
other="value3"
Labels are additive including LABELs in FROM images. If Docker encounters a label/key that already
exists, the new value overrides any previous labels with identical keys.
To view an image’s labels, use the docker inspect command.
https://riptutorial.com/ 78](https://image.slidesharecdn.com/docker-240207091918-356c1bb2/85/docker-pdf-89-320.jpg)
!["Labels": {
"com.example.vendor": "ACME Incorporated"
"com.example.label-with-value": "foo",
"version": "1.0",
"description": "This text illustrates that label-values can span multiple lines.",
"multi.label1": "value1",
"multi.label2": "value2",
"other": "value3"
},
CMD Instruction
The CMD instruction has three forms:
CMD ["executable","param1","param2"] (exec form, this is the preferred form)
CMD ["param1","param2"] (as default parameters to ENTRYPOINT)
CMD command param1 param2 (shell form)
There can only be one CMD instruction in a Dockerfile. If you list more than one CMD then only the
last CMD will take effect.
The main purpose of a CMD is to provide defaults for an executing container. These defaults can
include an executable, or they can omit the executable, in which case you must specify an
ENTRYPOINT instruction as well.
Note: If CMD is used to provide default arguments for the ENTRYPOINT instruction, both the CMD and
ENTRYPOINT instructions should be specified with the JSON array format.
Note: The exec form is parsed as a JSON array, which means that you must use double-quotes (“)
around words not single-quotes (‘).
Note: Unlike the shell form, the exec form does not invoke a command shell. This means that
normal shell processing does not happen. For example, CMD [ "echo", "$HOME" ] will not do
variable substitution on $HOME. If you want shell processing then either use the shell form or
execute a shell directly, for example: CMD [ "sh", "-c", "echo $HOME" ].
When used in the shell or exec formats, the CMD instruction sets the command to be executed
when running the image.
If you use the shell form of the CMD, then the command will execute in /bin/sh -c:
FROM ubuntu
CMD echo "This is a test." | wc -
If you want to run your command without a shell then you must express the command as a JSON
array and give the full path to the executable. This array form is the preferred format of CMD. Any
additional parameters must be individually expressed as strings in the array:
FROM ubuntu
CMD ["/usr/bin/wc","--help"]
https://riptutorial.com/ 79](https://image.slidesharecdn.com/docker-240207091918-356c1bb2/85/docker-pdf-90-320.jpg)
![RUN Instruction
RUN has 2 forms:
RUN <command> (shell form, the command is run in a shell, which by default is /bin/sh -c on
Linux or cmd /S /C on Windows)
RUN ["executable", "param1", "param2"] (exec form)
The RUN instruction will execute any commands in a new layer on top of the current image and
commit the results. The resulting committed image will be used for the next step in the Dockerfile.
Layering RUN instructions and generating commits conforms to the core concepts of Docker where
commits are cheap and containers can be created from any point in an image’s history, much like
source control.
The exec form makes it possible to avoid shell string munging, and to RUN commands using a base
image that does not contain the specified shell executable.
The default shell for the shell form can be changed using the SHELL command.
In the shell form you can use a (backslash) to continue a single RUN instruction onto the next line.
For example, consider these two lines:
RUN /bin/bash -c 'source $HOME/.bashrc ;
echo $HOME'
Together they are equivalent to this single line:
RUN /bin/bash -c 'source $HOME/.bashrc ; echo $HOME'
Note: To use a different shell, other than ‘/bin/sh’, use the exec form passing in the desired shell.
For example, RUN ["/bin/bash", "-c", "echo hello"]
Note: The exec form is parsed as a JSON array, which means that you must use double-quotes (“
) around words not single-quotes (‘).
Note: Unlike the shell form, the exec form does not invoke a command shell. This means that
normal shell processing does not happen. For example, RUN [ "echo", "$HOME" ] will not do
variable substitution on $HOME. If you want shell processing then either use the shell form or
execute a shell directly, for example: RUN [ "sh", "-c", "echo $HOME" ].
Note: In the JSON form, it is necessary to escape backslashes. This is particularly relevant on
Windows where the backslash is the path separator. The following line would otherwise be treated
as shell form due to not being valid JSON, and fail in an unexpected way: RUN
["c:windowssystem32tasklist.exe"]
The correct syntax for this example is: RUN ["c:windowssystem32tasklist.exe"]
The cache for RUN instructions isn’t invalidated automatically during the next build. The cache for
https://riptutorial.com/ 81](https://image.slidesharecdn.com/docker-240207091918-356c1bb2/85/docker-pdf-92-320.jpg)
![an instruction like RUN apt-get dist-upgrade -y will be reused during the next build. The cache for
RUN instructions can be invalidated by using the --no-cache flag, for example docker build --no-
cache.
See the Dockerfile Best Practices guide for more information.
The cache for RUN instructions can be invalidated by ADD instructions. See below for details.
ONBUILD Instruction
ONBUILD [INSTRUCTION]
The ONBUILD instruction adds to the image a trigger instruction to be executed at a later time, when
the image is used as the base for another build. The trigger will be executed in the context of the
downstream build, as if it had been inserted immediately after the FROM instruction in the
downstream Dockerfile.
Any build instruction can be registered as a trigger.
This is useful if you are building an image which will be used as a base to build other images, for
example an application build environment or a daemon which may be customized with user-
specific configuration.
For example, if your image is a reusable Python application builder, it will require application
source code to be added in a particular directory, and it might require a build script to be called
after that. You can’t just call ADD and RUN now, because you don’t yet have access to the application
source code, and it will be different for each application build. You could simply provide application
developers with a boilerplate Dockerfile to copy-paste into their application, but that is inefficient,
error-prone and difficult to update because it mixes with application-specific code.
The solution is to use ONBUILD to register advance instructions to run later, during the next build
stage.
Here’s how it works:
When it encounters an ONBUILD instruction, the builder adds a trigger to the metadata of the image
being built. The instruction does not otherwise affect the current build.
At the end of the build, a list of all triggers is stored in the image manifest, under the key OnBuild.
They can be inspected with the docker inspect command. Later the image may be used as a base
for a new build, using the FROM instruction. As part of processing the FROM instruction, the
downstream builder looks for ONBUILD triggers, and executes them in the same order they were
registered. If any of the triggers fail, the FROM instruction is aborted which in turn causes the build to
fail. If all triggers succeed, the FROM instruction completes and the build continues as usual.
Triggers are cleared from the final image after being executed. In other words they are not
inherited by “grand-children” builds.
For example you might add something like this:
https://riptutorial.com/ 82](https://image.slidesharecdn.com/docker-240207091918-356c1bb2/85/docker-pdf-93-320.jpg)
![[...]
ONBUILD ADD . /app/src
ONBUILD RUN /usr/local/bin/python-build --dir /app/src
[...]
Warning: Chaining ONBUILD instructions using ONBUILD ONBUILD isn’t allowed.
Warning: The ONBUILD instruction may not trigger FROM or MAINTAINER instructions.
STOPSIGNAL Instruction
STOPSIGNAL signal
The STOPSIGNAL instruction sets the system call signal that will be sent to the container to exit. This
signal can be a valid unsigned number that matches a position in the kernel’s syscall table, for
instance 9, or a signal name in the format SIGNAME, for instance SIGKILL.
HEALTHCHECK Instruction
The HEALTHCHECK instruction has two forms:
HEALTHCHECK [OPTIONS] CMD command (check container health by running a command inside the
container)
HEALTHCHECK NONE (disable any healthcheck inherited from the base image)
The HEALTHCHECK instruction tells Docker how to test a container to check that it is still working. This
can detect cases such as a web server that is stuck in an infinite loop and unable to handle new
connections, even though the server process is still running.
When a container has a healthcheck specified, it has a health status in addition to its normal
status. This status is initially starting. Whenever a health check passes, it becomes healthy
(whatever state it was previously in). After a certain number of consecutive failures, it becomes
unhealthy.
The options that can appear before CMD are:
--interval=DURATION (default: 30s)
--timeout=DURATION (default: 30s)
--retries=N (default: 3)
The health check will first run interval seconds after the container is started, and then again
interval seconds after each previous check completes.
If a single run of the check takes longer than timeout seconds then the check is considered to
have failed.
It takes retries consecutive failures of the health check for the container to be considered
unhealthy.
https://riptutorial.com/ 83](https://image.slidesharecdn.com/docker-240207091918-356c1bb2/85/docker-pdf-94-320.jpg)
![There can only be one HEALTHCHECK instruction in a Dockerfile. If you list more than one then only
the last HEALTHCHECK will take effect.
The command after the CMD keyword can be either a shell command (e.g. HEALTHCHECK CMD
/bin/check-running) or an exec array (as with other Dockerfile commands; see e.g. ENTRYPOINT for
details).
The command’s exit status indicates the health status of the container. The possible values are:
0: success - the container is healthy and ready for use
•
1: unhealthy - the container is not working correctly
•
2: starting - the container is not ready for use yet, but is working correctly
•
If the probe returns 2 (“starting”) when the container has already moved out of the “starting” state
then it is treated as “unhealthy” instead.
For example, to check every five minutes or so that a web-server is able to serve the site’s main
page within three seconds:
HEALTHCHECK --interval=5m --timeout=3s
CMD curl -f http://localhost/ || exit 1
To help debug failing probes, any output text (UTF-8 encoded) that the command writes on stdout
or stderr will be stored in the health status and can be queried with docker inspect. Such output
should be kept short (only the first 4096 bytes are stored currently).
When the health status of a container changes, a health_status event is generated with the new
status.
The HEALTHCHECK feature was added in Docker 1.12.
SHELL Instruction
SHELL ["executable", "parameters"]
The SHELL instruction allows the default shell used for the shell form of commands to be
overridden. The default shell on Linux is ["/bin/sh", "-c"], and on Windows is ["cmd", "/S", "/C"]
. The SHELL instruction must be written in JSON form in a Dockerfile.
The SHELL instruction is particularly useful on Windows where there are two commonly used and
quite different native shells: cmd and powershell, as well as alternate shells available including sh.
The SHELL instruction can appear multiple times. Each SHELL instruction overrides all previous SHELL
instructions, and affects all subsequent instructions. For example:
FROM windowsservercore
# Executed as cmd /S /C echo default
RUN echo default
https://riptutorial.com/ 84](https://image.slidesharecdn.com/docker-240207091918-356c1bb2/85/docker-pdf-95-320.jpg)
![# Executed as cmd /S /C powershell -command Write-Host default
RUN powershell -command Write-Host default
# Executed as powershell -command Write-Host hello
SHELL ["powershell", "-command"]
RUN Write-Host hello
# Executed as cmd /S /C echo hello
SHELL ["cmd", "/S"", "/C"]
RUN echo hello
The following instructions can be affected by the SHELL instruction when the shell form of them is
used in a Dockerfile: RUN, CMD and ENTRYPOINT.
The following example is a common pattern found on Windows which can be streamlined by using
the SHELL instruction:
...
RUN powershell -command Execute-MyCmdlet -param1 "c:foo.txt"
...
The command invoked by docker will be:
cmd /S /C powershell -command Execute-MyCmdlet -param1 "c:foo.txt"
This is inefficient for two reasons. First, there is an un-necessary cmd.exe command processor
(aka shell) being invoked. Second, each RUN instruction in the shell form requires an extra
powershell -command prefixing the command.
To make this more efficient, one of two mechanisms can be employed. One is to use the JSON
form of the RUN command such as:
...
RUN ["powershell", "-command", "Execute-MyCmdlet", "-param1 "c:foo.txt""]
...
While the JSON form is unambiguous and does not use the un-necessary cmd.exe, it does require
more verbosity through double-quoting and escaping. The alternate mechanism is to use the SHELL
instruction and the shell form, making a more natural syntax for Windows users, especially when
combined with the escape parser directive:
# escape=`
FROM windowsservercore
SHELL ["powershell","-command"]
RUN New-Item -ItemType Directory C:Example
ADD Execute-MyCmdlet.ps1 c:example
RUN c:exampleExecute-MyCmdlet -sample 'hello world'
Resulting in:
https://riptutorial.com/ 85](https://image.slidesharecdn.com/docker-240207091918-356c1bb2/85/docker-pdf-96-320.jpg)

![in metadat.rb of custom_mongo add
depends 'docker', '~> 2.0'
Step 3: create attribute and recipe
Attributes
default['custom_mongo']['mongo_keyfile'] = '/data/keyfile'
default['custom_mongo']['mongo_datadir'] = '/data/db'
default['custom_mongo']['mongo_datapath'] = '/data'
default['custom_mongo']['keyfilename'] = 'mongodb-keyfile'
Recipe
#
# Cookbook Name:: custom_mongo
# Recipe:: default
#
# Copyright 2017, Innocent Anigbo
#
# All rights reserved - Do Not Redistribute
#
data_path = "#{node['custom_mongo']['mongo_datapath']}"
data_dir = "#{node['custom_mongo']['mongo_datadir']}"
key_dir = "#{node['custom_mongo']['mongo_keyfile']}"
keyfile_content = data_bag_item('mongo-keyfile', 'keyfile')
keyfile_name = "#{node['custom_mongo']['keyfilename']}"
#chown of keyfile to docker user
execute 'assign-user' do
command "chown 999 #{key_dir}/#{keyfile_name}"
action :nothing
end
#Declaration to create Mongo data DIR and Keyfile DIR
%W[ #{data_path} #{data_dir} #{key_dir} ].each do |path|
directory path do
mode '0755'
end
end
#declaration to copy keyfile from data_bag to keyfile DIR on your mongo server
file "#{key_dir}/#{keyfile_name}" do
content keyfile_content['key-file']
group 'root'
mode '0400'
notifies :run, 'execute[assign-user]', :immediately
end
#Install docker
docker_service 'default' do
action [:create, :start]
end
#Install mongo 3.4.2
docker_image 'mongo' do
https://riptutorial.com/ 90](https://image.slidesharecdn.com/docker-240207091918-356c1bb2/85/docker-pdf-101-320.jpg)
![tag '3.4.2'
action :pull
end
Create Role called mongo-role in role directory
{
"name": "mongo-role",
"description": "mongo DB Role",
"run_list": [
"recipe[custom_mongo]"
]
}
Add role above to the three mongo nodes run list
knife node run_list add FQDN_of_node_01 'role[mongo-role]'
knife node run_list add FQDN_of_node_02 'role[mongo-role]'
knife node run_list add FQDN_of_node_03 'role[mongo-role]'
Step 4: Initialise the three node Mongo to form repset
I'm assuming that the above role has already been applied on all three Mongo nodes. On node 01
only, Start Mongo with --auth to enable authentication
docker run --name mongo -v /data/db:/data/db -v /data/keyfile:/opt/keyfile --hostname="mongo-
01.example.com" -p 27017:27017 -d mongo:3.4.2 --keyFile /opt/keyfile/mongodb-keyfile --auth
Access the interactive shell of running docker container on node 01 and Create admin user
docker exec -it mongo /bin/sh
mongo
use admin
db.createUser( {
user: "admin-user",
pwd: "password",
roles: [ { role: "userAdminAnyDatabase", db: "admin" } ]
});
Create root user
db.createUser( {
user: "RootAdmin",
pwd: "password",
roles: [ { role: "root", db: "admin" } ]
});
Stop and Delete the Docker container created above on node 01. This will not affect the data and
keyfile in the host DIR. After deleting start Mongo again on node 01 but this time with with repset
flag
docker rm -fv mongo
https://riptutorial.com/ 91](https://image.slidesharecdn.com/docker-240207091918-356c1bb2/85/docker-pdf-102-320.jpg)
![Chapter 25: Inspecting a running container
Syntax
docker inspect [OPTIONS] CONTAINER|IMAGE [CONTAINER|IMAGE...]
•
Examples
Get container information
To get all the information for a container you can run:
docker inspect <container>
Get specific information from a container
You can get an specific information from a container by running:
docker inspect -f '<format>' <container>
For instance, you can get the Network Settings by running:
docker inspect -f '{{ .NetworkSettings }}' <container>
You can also get just the IP address:
docker inspect -f '{{ .NetworkSettings.IPAddress }}' <container>
The parameter -f means format and will receive a Go Template as input to format what is
expected, but this won’t bring a beautiful return, so try:
docker inspect -f '{{ json .NetworkSettings }}' {{containerIdOrName}}
the json keyword will bring the return as a JSON.
So to finish, a little tip is to use python in there to format the output JSON:
docker inspect -f '{{ json .NetworkSettings }}' <container> | python -mjson.tool
And voila, you can query anything on the docker inspect and make it look pretty in your terminal.
It's also possible to use a utility called "jq" in order to help process docker inspect command
output.
https://riptutorial.com/ 93](https://image.slidesharecdn.com/docker-240207091918-356c1bb2/85/docker-pdf-104-320.jpg)
![docker inspect -f '{{ json .NetworkSettings }}' aa1 | jq [.Gateway]
The above command will return the following output:
[
"172.17.0.1"
]
This output is actually a list containing one element. Sometimes, docker inspect displays a list of
several elements, and you may want to refer to a specific element. For example, if Config.Env
contains several elements, you can refer to the first element of this list using index:
docker inspect --format '{{ index (index .Config.Env) 0 }}' <container>
The first element is indexed at zero, which means that the second element of this list is at index 1:
docker inspect --format '{{ index (index .Config.Env) 1 }}' <container>
Using len it is possible to get the number of elements of the list:
docker inspect --format ‘{{ len .Config.Env }}’ <container>
And using negative numbers, it's possible to refer to the last element of the list:
docker inspect –format “{{ index .Config.Cmd $[$(docker inspect –format ‘{{ len .Config.Cmd
}}’ <container>)-1]}}” <container>
Some docker inspect information comes as a dictionary of key:value, here is an extract of a docker
inspectof a jess/spotify running container
"Config": { "Hostname": "8255f4804dde", "Domainname": "", "User": "spotify", "AttachStdin":
false, "AttachStdout": false, "AttachStderr": false, "Tty": false, "OpenStdin": false,
"StdinOnce": false, "Env": [ "DISPLAY=unix:0",
"PATH=/usr/local/sbin:/usr/local/bin:/usr/sbin:/usr/bin:/sbin:/bin", "HOME=/home/spotify" ],
"Cmd": [ "-stylesheet=/home/spotify/spotify-override.css" ], "Image": "jess/spotify", "Volumes":
null, "WorkingDir": "/home/spotify", "Entrypoint": [ "spotify" ], "OnBuild": null, "Labels": {}
},
so I an get the values of the whole Config section
docker inspect -f '{{.Config}}' 825
{8255f4804dde spotify false false false map[] false false false [DISPLAY=unix:0
PATH=/usr/local/sbin:/usr/local/bin:/usr/sbin:/usr/bin:/sbin:/bin HOME=/home/spotify] [-
stylesheet=/home/spotify/spotify-override.css] false jess/spotify map[] /home/spotify [spotify]
false [] map[] }
but also a single field, like the value of Config.Image
docker inspect -f '{{index (.Config) "Image" }}' 825
jess/spotify
https://riptutorial.com/ 94](https://image.slidesharecdn.com/docker-240207091918-356c1bb2/85/docker-pdf-105-320.jpg)
![or Config.Cmd
docker inspect -f '{{.Config.Cmd}}' 825
[-stylesheet=/home/spotify/spotify-override.css]
Inspect an image
In order to inspect an image, you can use the image ID or the image name, consisting of
repository and tag. Say, you have the CentOS 6 base image:
➜ ~ docker images
REPOSITORY TAG IMAGE ID CREATED SIZE
centos centos6 cf2c3ece5e41 2 weeks ago 194.6 MB
In this case you can run either of the following:
➜ ~ docker inspect cf2c3ece5e41
•
➜ ~ docker inspect centos:centos6
•
Both of these command will give you all information available in a JSON array:
[
{
"Id": "sha256:cf2c3ece5e418fd063bfad5e7e8d083182195152f90aac3a5ca4dbfbf6a1fc2a",
"RepoTags": [
"centos:centos6"
],
"RepoDigests": [],
"Parent": "",
"Comment": "",
"Created": "2016-07-01T22:34:39.970264448Z",
"Container": "b355fe9a01a8f95072e4406763138c5ad9ca0a50dbb0ce07387ba905817d6702",
"ContainerConfig": {
"Hostname": "68a1f3cfce80",
"Domainname": "",
"User": "",
"AttachStdin": false,
"AttachStdout": false,
"AttachStderr": false,
"Tty": false,
"OpenStdin": false,
"StdinOnce": false,
"Env": [
"PATH=/usr/local/sbin:/usr/local/bin:/usr/sbin:/usr/bin:/sbin:/bin"
],
"Cmd": [
"/bin/sh",
"-c",
"#(nop) CMD ["/bin/bash"]"
],
"Image":
"sha256:cdbcc7980b002dc19b4d5b6ac450993c478927f673339b4e6893647fe2158fa7",
"Volumes": null,
"WorkingDir": "",
"Entrypoint": null,
"OnBuild": null,
https://riptutorial.com/ 95](https://image.slidesharecdn.com/docker-240207091918-356c1bb2/85/docker-pdf-106-320.jpg)
!["Labels": {
"build-date": "20160701",
"license": "GPLv2",
"name": "CentOS Base Image",
"vendor": "CentOS"
}
},
"DockerVersion": "1.10.3",
"Author": "https://github.com/CentOS/sig-cloud-instance-images",
"Config": {
"Hostname": "68a1f3cfce80",
"Domainname": "",
"User": "",
"AttachStdin": false,
"AttachStdout": false,
"AttachStderr": false,
"Tty": false,
"OpenStdin": false,
"StdinOnce": false,
"Env": [
"PATH=/usr/local/sbin:/usr/local/bin:/usr/sbin:/usr/bin:/sbin:/bin"
],
"Cmd": [
"/bin/bash"
],
"Image":
"sha256:cdbcc7980b002dc19b4d5b6ac450993c478927f673339b4e6893647fe2158fa7",
"Volumes": null,
"WorkingDir": "",
"Entrypoint": null,
"OnBuild": null,
"Labels": {
"build-date": "20160701",
"license": "GPLv2",
"name": "CentOS Base Image",
"vendor": "CentOS"
}
},
"Architecture": "amd64",
"Os": "linux",
"Size": 194606575,
"VirtualSize": 194606575,
"GraphDriver": {
"Name": "aufs",
"Data": null
},
"RootFS": {
"Type": "layers",
"Layers": [
"sha256:2714f4a6cdee9d4c987fef019608a4f61f1cda7ccf423aeb8d7d89f745c58b18"
]
}
}
]
Printing specific informations
docker inspect supports Go Templates via the --format option. This allows for better integration in
scripts, without resorting to pipes/sed/grep traditional tools.
https://riptutorial.com/ 96](https://image.slidesharecdn.com/docker-240207091918-356c1bb2/85/docker-pdf-107-320.jpg)
![Chapter 26: Iptables with Docker
Introduction
This topic is about how to limit access to your docker containers from outside world using iptables.
For impatient people, you can check the examples. For the others, please read the remark section
to understand how to build new rules.
Syntax
iptables -I DOCKER [RULE ...] [ACCEPT|DROP] // To add a rule a the top of the DOCKER
table
•
iptables -D DOCKER [RULE ...] [ACCEPT|DROP] // To remove a rule from the DOCKER
table
•
ipset restore < /etc/ipfriends.conf // To reconfigure your ipset ipfriends
•
Parameters
Parameters Details
ext_if Your external interface on Docker host.
XXX.XXX.XXX.XXX A particular IP on which Docker containers access should be given.
YYY.YYY.YYY.YYY Another IP on which Docker containers access should be given.
ipfriends
The ipset name defining the IPs allowed to access your Docker
containers.
Remarks
The problem
Configuring iptables rules for Docker containers is a bit tricky. At first, you would think that
"classic" firewall rules should do the trick.
For example, let's assume that you have configured a nginx-proxy container + several service
containers to expose via HTTPS some personal web services. Then a rule like this should give
access to your web services only for IP XXX.XXX.XXX.XXX.
$ iptables -A INPUT -i eth0 -p tcp -s XXX.XXX.XXX.XXX -j ACCEPT
$ iptables -P INPUT DROP
https://riptutorial.com/ 98](https://image.slidesharecdn.com/docker-240207091918-356c1bb2/85/docker-pdf-109-320.jpg)
![Chapter 27: Logging
Examples
Configuring a log driver in systemd service
[Service]
# empty exec prevents error "docker.service has more than one ExecStart= setting, which is
only allowed for Type=oneshot services. Refusing."
ExecStart=
ExecStart=/usr/bin/dockerd -H fd:// --log-driver=syslog
This enables syslog logging for the docker daemon. The file should be created in the appropriate
directory with owner root, which typically would be /etc/systemd/system/docker.service.d on e.g.
Ubuntu 16.04.
Overview
Docker's approach to logging is that you construct your containers in such a way, so that logs are
written to standard output (console/terminal).
If you already have a container which writes logs to a file, you can redirect it by creating a
symbolic link:
ln -sf /dev/stdout /var/log/nginx/access.log
ln -sf /dev/stderr /var/log/nginx/error.log
After you've done that you can use various log drivers to put your logs where you need them.
Read Logging online: https://riptutorial.com/docker/topic/7378/logging
https://riptutorial.com/ 102](https://image.slidesharecdn.com/docker-240207091918-356c1bb2/85/docker-pdf-113-320.jpg)
![Chapter 28: Managing containers
Syntax
docker rm [OPTIONS] CONTAINER [CONTAINER...]
•
docker attach [OPTIONS] CONTAINER
•
docker exec [OPTIONS] CONTAINER COMMAND [ARG...]
•
docker ps [OPTIONS]
•
docker logs [OPTIONS] CONTAINER
•
docker inspect [OPTIONS] CONTAINER|IMAGE [CONTAINER|IMAGE...]
•
Remarks
In the examples above, whenever container is a parameter of the docker command, it is
mentioned as <container> or container id or <CONTAINER_NAME>. In all these places you can
either pass a container name or container id to specify a container.
•
Examples
Listing containers
$ docker ps
CONTAINER ID IMAGE COMMAND CREATED STATUS
PORTS NAMES
2bc9b1988080 redis "docker-entrypoint.sh" 2 weeks ago Up 2
hours 0.0.0.0:6379->6379/tcp elephant-redis
817879be2230 postgres "/docker-entrypoint.s" 2 weeks ago Up 2
hours 0.0.0.0:65432->5432/tcp pt-postgres
docker ps on its own only prints currently running containers. To view all containers (including
stopped ones), use the -a flag:
$ docker ps -a
CONTAINER ID IMAGE COMMAND CREATED STATUS
PORTS NAMES
9cc69f11a0f7 docker/whalesay "ls /" 26 hours ago Exited
(0) 26 hours ago berserk_wozniak
2bc9b1988080 redis "docker-entrypoint.sh" 2 weeks ago Up 2
hours 0.0.0.0:6379->6379/tcp elephant-redis
817879be2230 postgres "/docker-entrypoint.s" 2 weeks ago Up 2
hours 0.0.0.0:65432->5432/tcp pt-postgres
To list containers with a specific status, use the -f command line option to filter the results. Here is
an example of listing all containers which have exited:
$ docker ps -a -f status=exited
CONTAINER ID IMAGE COMMAND CREATED STATUS
https://riptutorial.com/ 103](https://image.slidesharecdn.com/docker-240207091918-356c1bb2/85/docker-pdf-114-320.jpg)
![PORTS NAMES
9cc69f11a0f7 docker/whalesay "ls /" 26 hours ago Exited
(0) 26 hours ago
It is also possible to list only the Container IDs with the -q switch. This makes it very easy to
operate on the result with other Unix utilities (such as grep and awk):
$ docker ps -aq
9cc69f11a0f7
2bc9b1988080
817879be2230
When launching a container with docker run --name mycontainer1 you give a specific name and not
a random name (in the form mood_famous, such as nostalgic_stallman), and it can be easy to find
them with such a command
docker ps -f name=mycontainer1
Referencing containers
Docker commands which take the name of a container accept three different forms:
Type Example
Full UUID 9cc69f11a0f76073e87f25cb6eaf0e079fbfbd1bc47c063bcd25ed3722a8cc4a
Short UUID 9cc69f11a0f7
Name berserk_wozniak
Use docker ps to view these values for the containers on your system.
The UUID is generated by Docker and cannot be modified. You can provide a name to the
container when you start it docker run --name <given name> <image>. Docker will generate a random
name to the container if you don't specify one at the time of starting the container.
NOTE: The value of the UUID (or a 'short' UUID) can be any length as long as the given value is
unique to one container
Starting and stopping containers
To stop a running container:
docker stop <container> [<container>...]
This will send the main process in the container a SIGTERM, followed by a SIGKILL if it doesn't
stop within the grace period. The name of each container is printed as it stops.
To start a container which is stopped:
https://riptutorial.com/ 104](https://image.slidesharecdn.com/docker-240207091918-356c1bb2/85/docker-pdf-115-320.jpg)
![docker start <container> [<container>...]
This will start each container passed in the background; the name of each container is printed as it
starts. To start the container in the foreground, pass the -a (--attach) flag.
List containers with custom format
docker ps --format 'table {{.ID}}t{{.Names}}t{{.Status}}'
Finding a specific container
docker ps --filter name=myapp_1
Find container IP
To find out the IP address of your container, use:
docker inspect <container id> | grep IPAddress
or use docker inspect
docker inspect --format '{{ .NetworkSettings.IPAddress }}' ${CID}
Restarting docker container
docker restart <container> [<container>...]
Option --time : Seconds to wait for stop before killing the container (default 10)
docker restart <container> --time 10
Remove, delete and cleanup containers
docker rm can be used to remove a specific containers like this:
docker rm <container name or id>
To remove all containers you can use this expression:
docker rm $(docker ps -qa)
By default docker will not delete a container that is running. Any container that is running will
produce a warning message and not be deleted. All other containers will be deleted.
Alternatively you can use xargs:
https://riptutorial.com/ 105](https://image.slidesharecdn.com/docker-240207091918-356c1bb2/85/docker-pdf-116-320.jpg)

![Container logs
Usage: docker logs [OPTIONS] CONTAINER
Fetch the logs of a container
-f, --follow=false Follow log output
--help=false Print usage
--since= Show logs since timestamp
-t, --timestamps=false Show timestamps
--tail=all Number of lines to show from the end of the logs
For example:
$ docker ps
CONTAINER ID IMAGE COMMAND CREATED STATUS PORTS
ff9716dda6cb nginx "nginx -g 'daemon off" 8 days ago Up 22 hours 443/tcp,
0.0.0.0:8080->80/tcp
$ docker logs ff9716dda6cb
xx.xx.xx.xx - - [15/Jul/2016:14:03:44 +0000] "GET /index.html HTTP/1.1" 200 511
"https://google.com" "Mozilla/5.0 (Windows NT 6.1; Win64; x64) AppleWebKit/537.36 (KHTML, like
Gecko) Chrome/50.0.2661.75 Safari/537.36"
xx.xx.xx.xx - - [15/Jul/2016:14:03:44 +0000] "GET /index.html HTTP/1.1" 200 511
"https://google.com" "Mozilla/5.0 (Windows NT 6.1; Win64; x64) AppleWebKit/537.36 (KHTML, like
Gecko) Chrome/50.0.2661.75 Safari/537.36"
Connect to an instance running as daemon
There are two ways to achieve that, the first and most known is the following:
docker attach --sig-proxy=false <container>
This one literally attaches your bash to the container bash, meaning that if you have a running
script, you will see the result.
To detach, just type: Ctl-P Ctl-Q
But if you need a more friendly way and to be able to create new bash instances, just run the
following command:
docker exec -it <container> bash
Copying file from/to containers
from container to host
docker cp CONTAINER_NAME:PATH_IN_CONTAINER PATH_IN_HOST
from host to container
https://riptutorial.com/ 107](https://image.slidesharecdn.com/docker-240207091918-356c1bb2/85/docker-pdf-118-320.jpg)

![Chapter 29: Managing images
Syntax
docker images [OPTIONS] [REPOSITORY[:TAG]]
•
docker inspect [OPTIONS] CONTAINER|IMAGE [CONTAINER|IMAGE...]
•
docker pull [OPTIONS] NAME[:TAG|@DIGEST]
•
docker rmi [OPTIONS] IMAGE [IMAGE...]
•
docker tag [OPTIONS] IMAGE[:TAG] [REGISTRYHOST/][USERNAME/]NAME[:TAG]
•
Examples
Fetching an image from Docker Hub
Ordinarily, images are pulled automatically from Docker Hub. Docker will attempt to pull any image
from Docker Hub that doesn't already exist on the Docker host. For example, using docker run
ubuntu when the ubuntu image is not already on the Docker host will cause Docker to initiate a pull
of the latest ubuntu image. It is possible to pull an image separately by using docker pull to
manually fetch or update an image from Docker Hub.
docker pull ubuntu
docker pull ubuntu:14.04
Additional options for pulling from a different image registry or pulling a specific version of an
image exist. Indicating an alternate registry is done using the full image name and optional
version. For example, the following command will attempt to pull the ubuntu:14.04 image from the
registry.example.com registry:
docker pull registry.example.com/username/ubuntu:14.04
Listing locally downloaded images
$ docker images
REPOSITORY TAG IMAGE ID CREATED SIZE
hello-world latest 693bce725149 6 days ago 967 B
postgres 9.5 0f3af79d8673 10 weeks ago 265.7 MB
postgres latest 0f3af79d8673 10 weeks ago 265.7 MB
Referencing images
Docker commands which take the name of an image accept four different forms:
Type Example
Short ID 693bce725149
https://riptutorial.com/ 110](https://image.slidesharecdn.com/docker-240207091918-356c1bb2/85/docker-pdf-121-320.jpg)
![(0) 12 seconds ago small_elion
Remove All Images With No Started Containers
To remove all local images that have no started containers, you can provide a listing of the images
as a parameter:
docker rmi $(docker images -qa)
Remove All Images
If you want to remove images regardless of whether or not they have a started container use the
force flag (-f):
docker rmi -f $(docker images -qa)
Remove Dangling Images
If an image is not tagged and not being used by any container, it is 'dangling' and may be removed
like this:
docker images -q --no-trunc -f dangling=true | xargs -r docker rmi
Search the Docker Hub for images
You can search Docker Hub for images by using the search command:
docker search <term>
For example:
$ docker search nginx
NAME DESCRIPTION STARS OFFICIAL
AUTOMATED
nginx Official build of Nginx. 3565 [OK]
jwilder/nginx-proxy Automated Nginx reverse proxy for docker c... 717
[OK]
richarvey/nginx-php-fpm Container running Nginx + PHP-FPM capable ... 232
[OK]
...
Inspecting images
docker inspect <image>
The output is in JSON format. You can use jq command line utility to parse and print only the
desired keys.
https://riptutorial.com/ 112](https://image.slidesharecdn.com/docker-240207091918-356c1bb2/85/docker-pdf-123-320.jpg)
![docker inspect <image> | jq -r '.[0].Author'
The above command will shows author name of the images.
Tagging images
Tagging an image is useful for keeping track of different image versions:
docker tag ubuntu:latest registry.example.com/username/ubuntu:latest
Another example of tagging:
docker tag myApp:1.4.2 myApp:latest
docker tag myApp:1.4.2 registry.example.com/company/myApp:1.4.2
Saving and loading Docker images
docker save -o ubuntu.latest.tar ubuntu:latest
This command will save the ubuntu:latest image as a tarball archive in the current directory with
the name ubuntu.latest.tar. This tarball archive can then be moved to another host, for example
using rsync, or archived in storage.
Once the tarball has been moved, the following command will create an image from the file:
docker load -i /tmp/ubuntu.latest.tar
Now it is possible to create containers from the ubuntu:latest image as usual.
Read Managing images online: https://riptutorial.com/docker/topic/690/managing-images
https://riptutorial.com/ 113](https://image.slidesharecdn.com/docker-240207091918-356c1bb2/85/docker-pdf-124-320.jpg)
![Chapter 30: Multiple processes in one
container instance
Remarks
Usually each container should hosts one process. In case you need multiple processes in one
container (e.g. an SSH server to login to your running container instance) you could get the idea to
write you own shell script that starts those processes. In that case you had to take care about the
SIGNAL handling yourself (e.g. redirecting a caught SIGINT to the child processes of your script).
That's not really what you want. A simple solution is to use supervisord as the containers root
process which takes care about SIGNAL handling and its child processes lifetime.
But keep in mind, that this ist not the "docker way". To achive this example in the docker way you
would log into the docker host (the machine the container runs on) and run docker exec -it
container_name /bin/bahs. This command opens you a shell inside the container as ssh would do.
Examples
Dockerfile + supervisord.conf
To run multiple processes e.g. an Apache web server together with an SSH daemon inside the
same container you can use supervisord.
Create your supervisord.conf configuration file like:
[supervisord]
nodaemon=true
[program:sshd]
command=/usr/sbin/sshd -D
[program:apache2]
command=/bin/bash -c "source /etc/apache2/envvars && exec /usr/sbin/apache2 -DFOREGROUND"
Then create a Dockerfile like:
FROM ubuntu:16.04
RUN apt-get install -y openssh-server apache2 supervisor
RUN mkdir -p /var/lock/apache2 /var/run/apache2 /var/run/sshd /var/log/supervisor
COPY supervisord.conf /etc/supervisor/conf.d/supervisord.conf
CMD ["/usr/bin/supervisord"]
Then you can build your image:
docker build -t supervisord-test .
https://riptutorial.com/ 114](https://image.slidesharecdn.com/docker-240207091918-356c1bb2/85/docker-pdf-125-320.jpg)

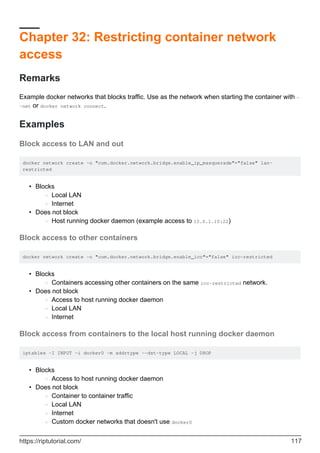
![Chapter 34: Running containers
Syntax
docker run [OPTIONS] IMAGE [COMMAND] [ARG...]
•
Examples
Running a container
docker run hello-world
This will fetch the latest hello-world image from the Docker Hub (if you don't already have it),
create a new container, and run it. You should see a message stating that your installation
appears to be working correctly.
Running a different command in the container
docker run docker/whalesay cowsay 'Hello, StackExchange!'
This command tells Docker to create a container from the docker/whalesay image and run the
command cowsay 'Hello, StackExchange!' in it. It should print a picture of a whale saying Hello,
StackExchange! to your terminal.
If the entrypoint in the image is the default you can run any command that's available in the image:
docker run docker/whalesay ls /
If it has been changed during image build you need to reverse it back to the default
docker run --entrypoint=/bin/bash docker/whalesay -c ls /
Automatically delete a container after running it
Normally, a Docker container persists after it has exited. This allows you to run the container
again, inspect its filesystem, and so on. However, sometimes you want to run a container and
delete it immediately after it exits. For example to execute a command or show a file from the
filesystem. Docker provides the --rm command line option for this purpose:
docker run --rm ubuntu cat /etc/hosts
This will create a container from the "ubuntu" image, show the content of /etc/hosts file and then
delete the container immediately after it exits. This helps to prevent having to clean up containers
after you're done experimenting.
https://riptutorial.com/ 120](https://image.slidesharecdn.com/docker-240207091918-356c1bb2/85/docker-pdf-131-320.jpg)
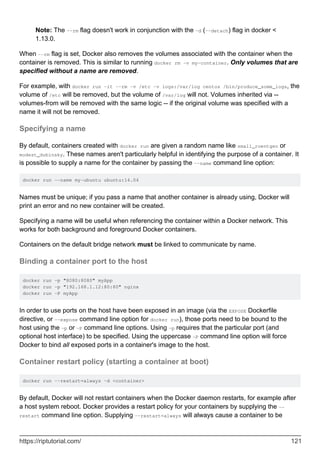
![restarted after the Docker daemon is restarted. However when that container is manually stopped
(e.g. with docker stop <container>), the restart policy will not be applied to the container.
Multiple options can be specified for --restart option, based on the requirement (--
restart=[policy]). These options effect how the container starts at boot as well.
Policy Result
no
The default value. Will not restart container automatically, when container
is stopped.
on-
failure[:max-
retries]
Restart only if the container exits with a failure (non-zero exit status). To
avoid restarting it indefinitely (in case of some problem), one can limit the
number of restart retries the Docker daemon attempts.
always
Always restart the container regardless of the exit status. When you
specify always, the Docker daemon will try to restart the container
indefinitely. The container will also always start on daemon startup,
regardless of the current state of the container.
unless-
stopped
Always restart the container regardless of its exit status, but do not start it
on daemon startup if the container has been put to a stopped state before.
Run a container in background
To keep a container running in the background, supply the -d command line option during
container startup:
docker run -d busybox top
The option -d runs the container in detached mode. It is also equivalent to -d=true.
A container in detached mode cannot be removed automatically when it stops, this means one
cannot use the --rm option in combination with -d option.
Assign a volume to a container
A Docker volume is a file or directory which persists beyond the lifetime of the container. It is
possible to mount a host file or directory into a container as a volume (bypassing the UnionFS).
Add a volume with the -v command line option:
docker run -d -v "/data" awesome/app bootstrap.sh
This will create a volume and mount it to the path /data inside the container.
Note: You can use the flag --rm to automatically remove the volume when the container is
removed.
•
https://riptutorial.com/ 122](https://image.slidesharecdn.com/docker-240207091918-356c1bb2/85/docker-pdf-133-320.jpg)
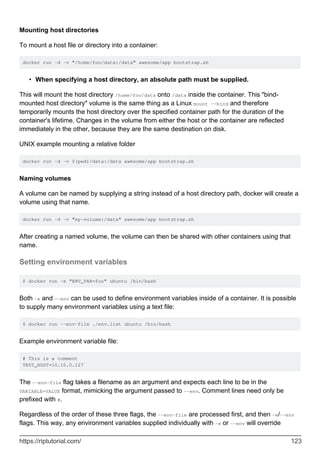
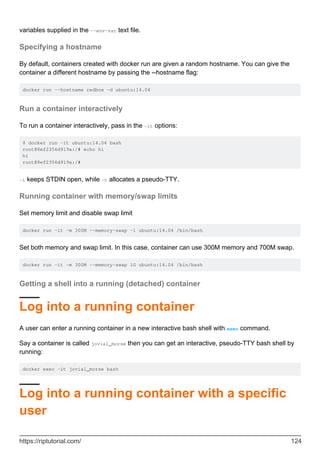
![If you want to enter a container as a specific user, you can set it with -u or --user parameter. The
username must exists in the container.
-u, --user Username or UID (format: <name|uid>[:<group|gid>])
This command will log into jovial_morse with the dockeruser user
docker exec -it -u dockeruser jovial_morse bash
Log into a running container as root
If you want to log in as root, just simply use the -u root parameter. Root user always exists.
docker exec -it -u root jovial_morse bash
Log into a image
You can also log into a image with the run command, but this requires an image name instead of a
container name.
docker run -it dockerimage bash
Log into a intermediate image (debug)
You can log into an intermediate image as well, which is created during a Dockerfile build.
Output of docker build .
$ docker build .
Uploading context 10240 bytes
Step 1 : FROM busybox
Pulling repository busybox
---> e9aa60c60128MB/2.284 MB (100%) endpoint: https://cdn-registry-1.docker.io/v1/
Step 2 : RUN ls -lh /
---> Running in 9c9e81692ae9
total 24
drwxr-xr-x 2 root root 4.0K Mar 12 2013 bin
drwxr-xr-x 5 root root 4.0K Oct 19 00:19 dev
drwxr-xr-x 2 root root 4.0K Oct 19 00:19 etc
drwxr-xr-x 2 root root 4.0K Nov 15 23:34 lib
lrwxrwxrwx 1 root root 3 Mar 12 2013 lib64 -> lib
dr-xr-xr-x 116 root root 0 Nov 15 23:34 proc
lrwxrwxrwx 1 root root 3 Mar 12 2013 sbin -> bin
dr-xr-xr-x 13 root root 0 Nov 15 23:34 sys
drwxr-xr-x 2 root root 4.0K Mar 12 2013 tmp
drwxr-xr-x 2 root root 4.0K Nov 15 23:34 usr
---> b35f4035db3f
Step 3 : CMD echo Hello world
https://riptutorial.com/ 125](https://image.slidesharecdn.com/docker-240207091918-356c1bb2/85/docker-pdf-136-320.jpg)


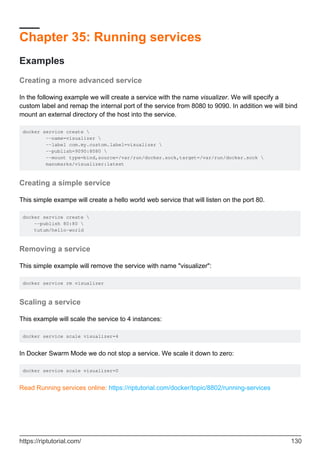
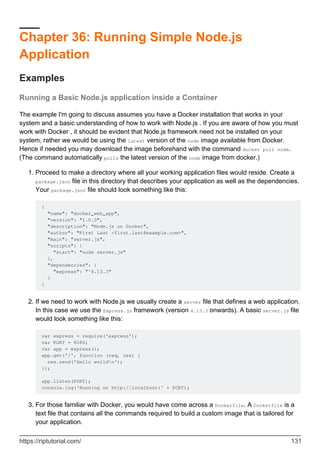
![Create an empty text file named Dockerfile in the current directory. The method to create one is
straightforward in Windows. In Linux, you may want to execute touch Dockerfile in the directory
containing all the files required for your application. Open the Dockerfile with any text editor and
add the following lines:
FROM node:latest
RUN mkdir -p /usr/src/my_first_app
WORKDIR /usr/src/my_first_app
COPY package.json /usr/src/my_first_app/
RUN npm install
COPY . /usr/src/my_first_app
EXPOSE 8080
FROM node:latest instructs the Docker daemon what image we want to build from. In this case
we use the latest version of the official Docker image node available from the Docker Hub.
•
Inside this image we proceed to create a working directory that contains all the required files
and we instruct the daemon to set this directory as the desired working directory for our
application. For this we add
RUN mkdir -p /usr/src/my_first_app
WORKDIR /usr/src/my_first_app
•
We then proceed to install application dependencies by first moving the package.json file
(which specifies app info including dependencies) to the /usr/src/my_first_app working
directory in the image. We do this by
COPY package.json /usr/src/my_first_app/
RUN npm install
•
We then type COPY . /usr/src/my_first_app to add all the application files and source code to
the working directory in the image.
•
We then use the EXPOSE directive to instruct the daemon to make port 8080 of the resulting
container visible (via a container-to-host mapping) since the application binds to port 8080.
•
In the last step, we instruct the daemon to run the command node server.js inside the image
by executing the basic npm start command. We use the CMD directive for this, which takes the
commands as arguments.
CMD [ "npm", "start" ]
•
We then create a .dockerignore file in the same directory as the Dockerfile to prevent our
copy of node_modules and logs used by our Node.js system installation from being copied on
to the Docker image. The .dockerignore file must have the following content:
node_modules
npm-debug.log
4.
5.
https://riptutorial.com/ 132](https://image.slidesharecdn.com/docker-240207091918-356c1bb2/85/docker-pdf-143-320.jpg)