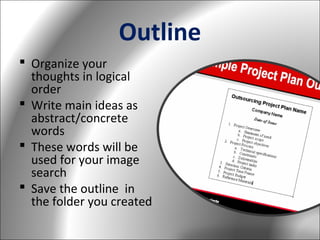
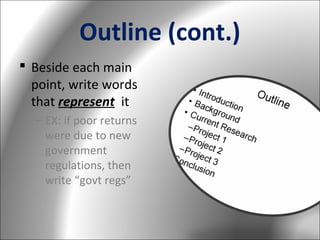
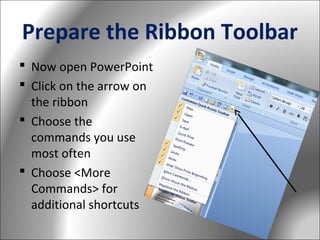
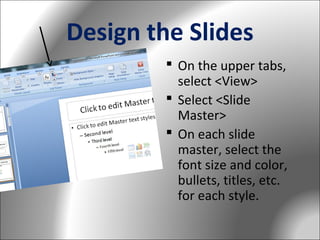
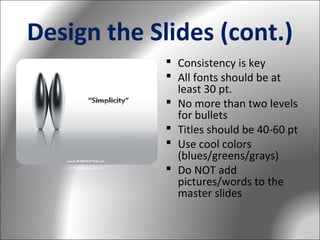
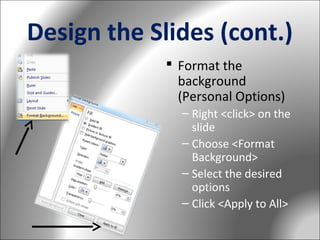
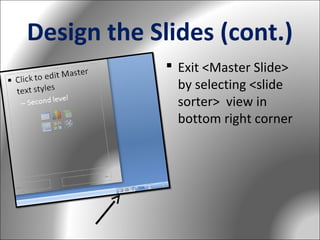
Creating a Professional
PowerPoint
Preparation
 Make a folder to
gather all
information
 Save/move
documents, Excel
files, regulations,
reports, .pdf files,
etc. that are relevant
here
Outline
 Organize your
thoughts in logical
order
 Write main ideas as
abstract/concrete
words
 These words will be
used for your image
search
 Save the outline in
the folder you created
Outline (cont.)
 Beside each main
point, write words
that represent it
– EX: if poor returns
were due to new
government
regulations, then
write “govt regs”
Relevant Images
 Use Bing Images to
find relevant photos
 Search for the key
words you identified
in your outline
 Right <click> the
image and choose
<Open Link in New
Tab>
 In the new tab, <click>
the image
Relevant Images (cont.)
 When the image
opens, right <click>
and choose <Save
Picture As>
 Choose the folder
you created
 Name the photo the
same as your key
word search.
Download Video/Audio
 Capture your
audience’s attention
 Appeal to the emotion
 Perk up the
presentation
 Choose video/audio
that enhance your
ideas/outline
 Download and save in
the folder you created
Download Video/Audio (cont.)
 Resources

– Video
– Podcasts
– Music

 Video/Audio
Converter

– Zamzar
– Internet is unreliable
or unavailable
– Download directly to
your computer
Prepare the Ribbon Toolbar
 Now open PowerPoint
 Click on the arrow on
the ribbon
 Choose the
commands you use
most often
 Choose <More
Commands> for
additional shortcuts
Design the Slides
 On the upper tabs,
select <View>
 Select <Slide
Master>
 On each slide
master, select the
font size and color,
bullets, titles, etc.
for each style.
Design the Slides (cont.)
 Consistency is key
 All fonts should be at
least 30 pt.
 No more than two levels
for bullets
 Titles should be 40-60 pt
 Use cool colors
(blues/greens/grays)
 Do NOT add
pictures/words to the
master slides
Design the Slides (cont.)
 Format the
background
(Personal Options)
– Right <click> on the
slide
– Choose <Format
Background>
– Select the desired
options
– Click <Apply to All>
Design the Slides (cont.)
 Format the
background
(Templates)
– Click the <Design> tab
at the top of the page
– Choose the template
you would like to use
– OR go here: MS Office
PowerPoint
Templates
Design the Slides (cont.)
 Exit <Master Slide>
by selecting <slide
sorter> view in
bottom right corner
Making the Presentation
 All of the
information you
need is in the folder
you created
 We are ready to
begin creating the
PowerPoint
 Clean and Simple is
our motto
Key Words
 Titles come from the
outline
 If you MUST use
bullets:
– Fewer than 6 per
page
– Fewer than 6
words/line
Key Words
 Should be big, bold
– No smaller than 3236 pt
– Need to be seen
across the room

 Should appeal to
emotion
Pictures Tell the Story
 Let the IMAGE do
the work that
bulleted lists cannot
 Be a minimalist in
text
 Should also appeal
to emotion
 Should be relevant
to the title
Diagrams/Graphs
 Should be easy to
read
 Should be unique
 Should use bold,
bright colors
 Innovative manner
to convey important
information
Diagrams/Graphs

Enter your data in Excel and
name the X/Y axes. It will
automatically be inserted
into your PowerPoint.

Click this bar
graph so you can
create a graph
with your data

 To insert a graph, click
the graph icon
 On the menu, choose
the graph you would like
to create with your data
 When the Excel sheet
opens, enter your data
and name the x/y axes
 A graph will appear in
your PowerPoint with
your data
Inserting Links
 Go to the <Insert>
tab
 Choose <Hyperlink>
 Choose the item you
wish to include from
the folder you
created
 Name the link in the
line <Text to
Display>

Name
the link
here

Choose the
document here
Choose
the
document
location
here
Type the web
address here
Inserting Links (cont.)
 Names of links
should be one or
two words
 Linked files should
be downloaded on
your computer
 All files should be in
one folder with your
presentation
Transitions
 Anywhere in the
presentation click
<Animations> tab
 Choose the transition
you would like for the
slides to transition
from one to the next
 Choose the speed you
would like for the
transition
 Select <Apply to All>
3. Select
<Add Effect>

Animations

1. Highlight
the text you
will animate

4. Select how
you would
like it to
appear

2. Select
<Custom
Animation>

 Animate text and
pictures
 <Animations> Tab
 Select the text or picture
you want to appear
 Select <Custom
Animation>
 Select <Add Effect>
 Select the effect you
want and the speed/how
it will appear (mouse
click, timer, etc)
Consistency
In font size
In use of bullets
In use of photos/size
In transitions/
animations
 In color scheme
 Preview your
PowerPoint multiple
times alone and with a
colleague to test it out
before presenting




Creating a Professional PowerPoint

Creating a Professional PowerPoint

  • 1.
  • 2.
    Preparation  Make afolder to gather all information  Save/move documents, Excel files, regulations, reports, .pdf files, etc. that are relevant here
  • 3.
    Outline  Organize your thoughtsin logical order  Write main ideas as abstract/concrete words  These words will be used for your image search  Save the outline in the folder you created
  • 4.
    Outline (cont.)  Besideeach main point, write words that represent it – EX: if poor returns were due to new government regulations, then write “govt regs”
  • 5.
    Relevant Images  UseBing Images to find relevant photos  Search for the key words you identified in your outline  Right <click> the image and choose <Open Link in New Tab>  In the new tab, <click> the image
  • 6.
    Relevant Images (cont.) When the image opens, right <click> and choose <Save Picture As>  Choose the folder you created  Name the photo the same as your key word search.
  • 7.
    Download Video/Audio  Captureyour audience’s attention  Appeal to the emotion  Perk up the presentation  Choose video/audio that enhance your ideas/outline  Download and save in the folder you created
  • 8.
    Download Video/Audio (cont.) Resources – Video – Podcasts – Music  Video/Audio Converter – Zamzar – Internet is unreliable or unavailable – Download directly to your computer
  • 9.
    Prepare the RibbonToolbar  Now open PowerPoint  Click on the arrow on the ribbon  Choose the commands you use most often  Choose <More Commands> for additional shortcuts
  • 10.
    Design the Slides On the upper tabs, select <View>  Select <Slide Master>  On each slide master, select the font size and color, bullets, titles, etc. for each style.
  • 11.
    Design the Slides(cont.)  Consistency is key  All fonts should be at least 30 pt.  No more than two levels for bullets  Titles should be 40-60 pt  Use cool colors (blues/greens/grays)  Do NOT add pictures/words to the master slides
  • 12.
    Design the Slides(cont.)  Format the background (Personal Options) – Right <click> on the slide – Choose <Format Background> – Select the desired options – Click <Apply to All>
  • 13.
    Design the Slides(cont.)  Format the background (Templates) – Click the <Design> tab at the top of the page – Choose the template you would like to use – OR go here: MS Office PowerPoint Templates
  • 14.
    Design the Slides(cont.)  Exit <Master Slide> by selecting <slide sorter> view in bottom right corner
  • 15.
    Making the Presentation All of the information you need is in the folder you created  We are ready to begin creating the PowerPoint  Clean and Simple is our motto
  • 16.
    Key Words  Titlescome from the outline  If you MUST use bullets: – Fewer than 6 per page – Fewer than 6 words/line
  • 17.
    Key Words  Shouldbe big, bold – No smaller than 3236 pt – Need to be seen across the room  Should appeal to emotion
  • 18.
    Pictures Tell theStory  Let the IMAGE do the work that bulleted lists cannot  Be a minimalist in text  Should also appeal to emotion  Should be relevant to the title
  • 19.
    Diagrams/Graphs  Should beeasy to read  Should be unique  Should use bold, bright colors  Innovative manner to convey important information
  • 20.
    Diagrams/Graphs Enter your datain Excel and name the X/Y axes. It will automatically be inserted into your PowerPoint. Click this bar graph so you can create a graph with your data  To insert a graph, click the graph icon  On the menu, choose the graph you would like to create with your data  When the Excel sheet opens, enter your data and name the x/y axes  A graph will appear in your PowerPoint with your data
  • 21.
    Inserting Links  Goto the <Insert> tab  Choose <Hyperlink>  Choose the item you wish to include from the folder you created  Name the link in the line <Text to Display> Name the link here Choose the document here Choose the document location here Type the web address here
  • 22.
    Inserting Links (cont.) Names of links should be one or two words  Linked files should be downloaded on your computer  All files should be in one folder with your presentation
  • 23.
    Transitions  Anywhere inthe presentation click <Animations> tab  Choose the transition you would like for the slides to transition from one to the next  Choose the speed you would like for the transition  Select <Apply to All>
  • 24.
    3. Select <Add Effect> Animations 1.Highlight the text you will animate 4. Select how you would like it to appear 2. Select <Custom Animation>  Animate text and pictures  <Animations> Tab  Select the text or picture you want to appear  Select <Custom Animation>  Select <Add Effect>  Select the effect you want and the speed/how it will appear (mouse click, timer, etc)
  • 25.
    Consistency In font size Inuse of bullets In use of photos/size In transitions/ animations  In color scheme  Preview your PowerPoint multiple times alone and with a colleague to test it out before presenting    