This document provides detailed guidelines on the insertion of central and arterial lines, including indications, contraindications, preparation steps, equipment, procedural techniques, and post-insertion care. It emphasizes the importance of sterile technique, adequate patient monitoring, and proper documentation to minimize complications. Additionally, it outlines the potential risks associated with the procedures and necessary follow-up care for both central and arterial lines.


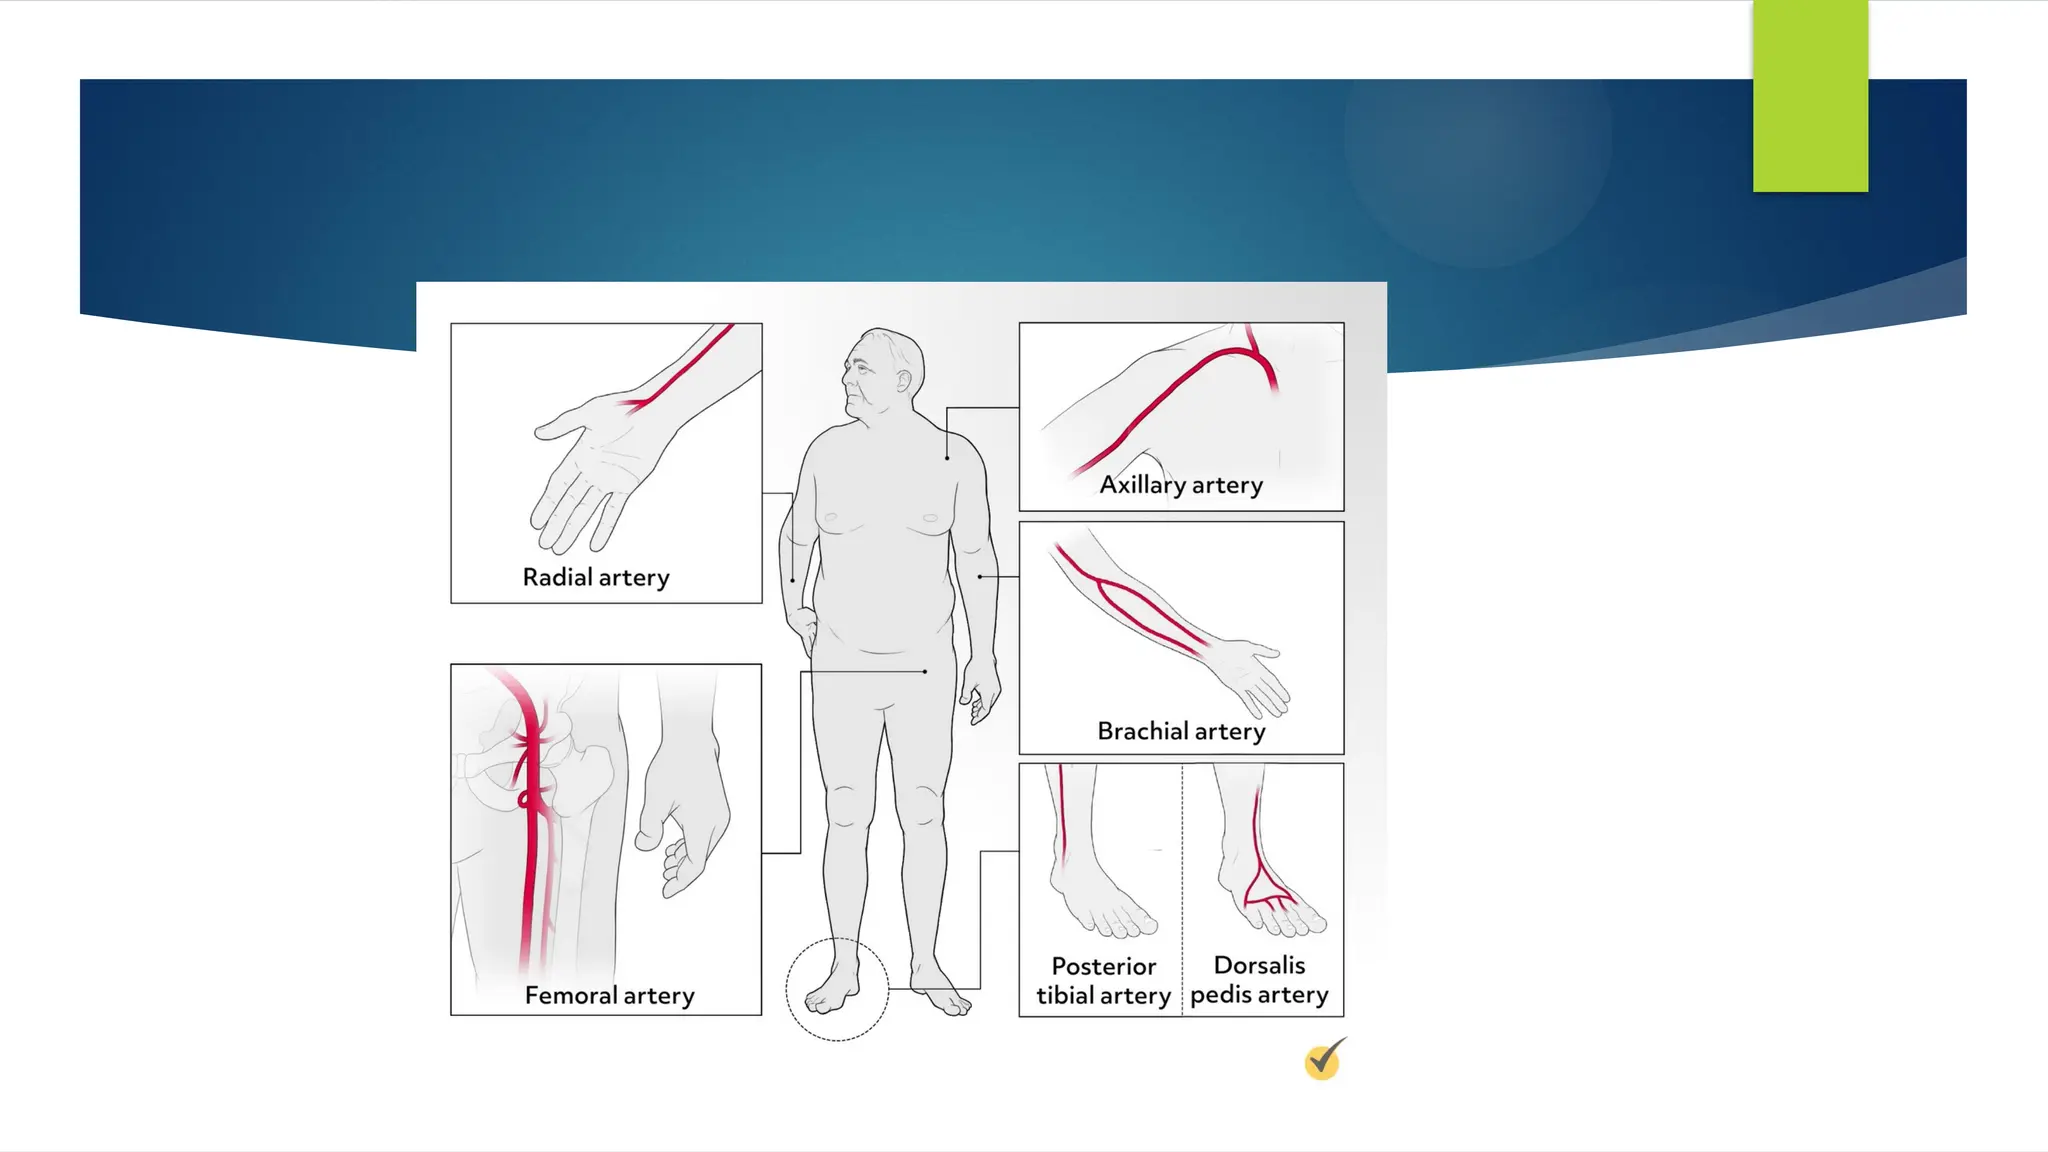
![SITE SELECTION
location of a palpable arterial pulse.
peripheral arteries (radial [most common], brachial, or dorsalis pedis sites)
and
central arteries (femoral [most common] or axillary sites).
Immobilization – If the radial artery is selected, the wrist is often
immobilized on a padded arm board. At the brachial or femoral site,
positioning to straighten the extremity is helpful for initial catheter insertion
and maintenance of catheter integrity.](https://image.slidesharecdn.com/centralarterialline-240818183644-2d280933/75/central-and-arterial-line-in-medicine-pptx-35-2048.jpg)