
Recommended
More Related Content
More from fusjekddud3e
More from fusjekddud3e (8)
Recently uploaded
Recently uploaded (20)
Caterpillar Cat 637G WHEEL SCRAPER (Prefix AWE) Service Repair Manual (AWE00001 and up).pdf
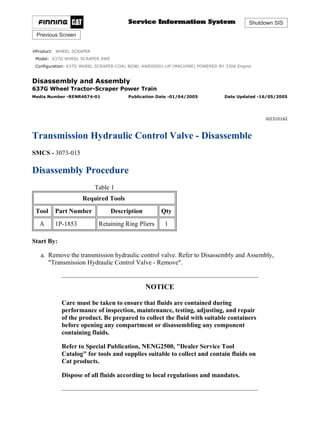
- 1. Shutdown SIS Previous Screen Product: WHEEL SCRAPER Model: 637G WHEEL SCRAPER AWE Configuration: 637G WHEEL SCRAPER-COAL BOWL AWE00001-UP (MACHINE) POWERED BY 3306 Engine Disassembly and Assembly 637G Wheel Tractor-Scraper Power Train Media Number -RENR4074-01 Publication Date -01/04/2005 Date Updated -16/05/2005 i02310162 Transmission Hydraulic Control Valve - Disassemble SMCS - 3073-015 Disassembly Procedure Table 1 Required Tools Tool Part Number Description Qty A 1P-1853 Retaining Ring Pliers 1 Start By: a. Remove the transmission hydraulic control valve. Refer to Disassembly and Assembly, "Transmission Hydraulic Control Valve - Remove". NOTICE Care must be taken to ensure that fluids are contained during performance of inspection, maintenance, testing, adjusting, and repair of the product. Be prepared to collect the fluid with suitable containers before opening any compartment or disassembling any component containing fluids. Refer to Special Publication, NENG2500, "Dealer Service Tool Catalog" for tools and supplies suitable to collect and contain fluids on Cat products. Dispose of all fluids according to local regulations and mandates. 1/6(W) w 2021/7/25 https://127.0.0.1/sisweb/sisweb/techdoc/techdoc_print_page.jsp?returnurl=/sisweb/sisw...
- 2. Note: Hold each cover securely in order to contain the spring pressure when you remove the bolts. Illustration 1 g01096879 Personal injury can result from being struck by parts propelled by a released spring force. Make sure to wear all necessary protective equipment. Follow the recommended procedure and use all recommended tooling to release the spring force. 1. Remove bolts (3) from cover (1). 2. Remove bolts (2A) from cover (2). Illustration 2 g01034814 3. Remove cover (1) and cover (2). Remove piston (4). Remove spool (5). 2/6(W) w 2021/7/25 https://127.0.0.1/sisweb/sisweb/techdoc/techdoc_print_page.jsp?returnurl=/sisweb/sisw...
- 3. Illustration 3 g01034815 Personal injury can result from being struck by parts propelled by a released spring force. Make sure to wear all necessary protective equipment. Follow the recommended procedure and use all recommended tooling to release the spring force. 4. Remove piston (4), spring (6), and spring (7). Remove spacers (8). 5. Remove slug (13). 6. Use Tooling (A) in order to remove retaining ring (12). 7. Remove retainer (11). Remove spring (10). 8. Remove plunger (9) from spool (5). Illustration 4 g00822724 3/6(W) w 2021/7/25 https://127.0.0.1/sisweb/sisweb/techdoc/techdoc_print_page.jsp?returnurl=/sisweb/sisw...
- 4. 9. Remove spool (14). Remove stop (15). 10. Remove spring (16). 11. Remove slug (20) and remove spool (19). 12. Remove spring (18). Remove washer (17). Illustration 5 g01096790 13. Remove load spool (21). Remove speed spool (22). Illustration 6 g01096791 14. If necessary, loosen locknuts (24) and remove links (23) from spools (21) and (22). 4/6(W) w 2021/7/25 https://127.0.0.1/sisweb/sisweb/techdoc/techdoc_print_page.jsp?returnurl=/sisweb/sisw...
- 5. Illustration 7 g01096792 Personal injury can result from being struck by parts propelled by a released spring force. Make sure to wear all necessary protective equipment. Follow the recommended procedure and use all recommended tooling to release the spring force. Note: Hold the cover securely in order to contain the spring pressure when you remove the bolts. 15. Remove bolts (25) and cover (26). Illustration 8 g01096793 Personal injury can result from being struck by parts propelled by a released spring force. Make sure to wear all necessary protective equipment. Follow the recommended procedure and use all recommended tooling to release the spring force. 16. Remove spring (29) and spool assembly (30). 17. Use Tooling (A) to remove retaining ring (34) from spool (30). 5/6(W) w 2021/7/25 https://127.0.0.1/sisweb/sisweb/techdoc/techdoc_print_page.jsp?returnurl=/sisweb/sisw...
- 6. 18. Remove retainer (33), spring (32), and plunger (31). 19. If necessary, remove dowel (27) and remove stop (28). Copyright 1993 - 2021 Caterpillar Inc. All Rights Reserved. Private Network For SIS Licensees. Sun Jul 25 00:31:04 UTC+0800 2021 6/6(W) w 2021/7/25 https://127.0.0.1/sisweb/sisweb/techdoc/techdoc_print_page.jsp?returnurl=/sisweb/sisw...
- 7. Shutdown SIS Previous Screen Product: WHEEL SCRAPER Model: 637G WHEEL SCRAPER AWE Configuration: 637G WHEEL SCRAPER-COAL BOWL AWE00001-UP (MACHINE) POWERED BY 3306 Engine Disassembly and Assembly 637G Wheel Tractor-Scraper Power Train Media Number -RENR4074-01 Publication Date -01/04/2005 Date Updated -16/05/2005 i02310163 Transmission Hydraulic Control Valve - Assemble SMCS - 3073-016 Assembly Procedure Table 1 Required Tools Tool Part Number Description Qty A 1P-1853 Retaining Ring Pliers 1 NOTICE Keep all parts clean from contaminants. Contamination of the hydraulic system with foreign material will reduce the service life of the hydraulic system components. To prevent contaminants from entering the hydraulic system, always plug or cap the lines, fittings, or hoses as they are disconnected. Cover any disassembled components and clean them properly before assembly. Clean the hydraulic system properly after any major component exchange or especially after a component failure, to remove any contamination. 1/6(W) w 2021/7/25 https://127.0.0.1/sisweb/sisweb/techdoc/techdoc_print_page.jsp?returnurl=/sisweb/sisw...
- 8. Illustration 1 g01096793 Improper assembly of parts that are spring loaded can cause bodily injury. To prevent possible injury, follow the established assembly procedure and wear protective equipment. 1. If necessary, install dowel (27) and install stop (28). 2. Install retainer (33), spring (32), and plunger (31). 3. Use Tooling (A) to install retaining ring (34) onto spool (30). 4. Install spring (29) and spool assembly (30). Illustration 2 g01096792 2/6(W) w 2021/7/25 https://127.0.0.1/sisweb/sisweb/techdoc/techdoc_print_page.jsp?returnurl=/sisweb/sisw...
- 9. Improper assembly of parts that are spring loaded can cause bodily injury. To prevent possible injury, follow the established assembly procedure and wear protective equipment. Note: Hold the cover securely while you install the bolts. 5. Position cover (26). Install bolts (25). Tighten bolts (25) to a torque of 30 ± 4 N·m (22 ± 3 lb ft). Illustration 3 g01096791 6. If necessary, install links (23) and tighten locknuts (24) onto spools (21) and (22). Illustration 4 g01096790 7. Install load spool (21). Install speed spool (22). 3/6(W) w 2021/7/25 https://127.0.0.1/sisweb/sisweb/techdoc/techdoc_print_page.jsp?returnurl=/sisweb/sisw...
- 10. Illustration 5 g00822724 8. Install spool (19). Install slug (20). 9. Install spring (18). Install washer (17). 10. Install spring (16). 11. Install spool (14). Install stop (15). Illustration 6 g01034815 Improper assembly of parts that are spring loaded can cause bodily injury. To prevent possible injury, follow the established assembly procedure and wear protective equipment. 12. Install plunger (9) to spool (5). 13. Install spring (10). Install retainer (11). 4/6(W) w 2021/7/25 https://127.0.0.1/sisweb/sisweb/techdoc/techdoc_print_page.jsp?returnurl=/sisweb/sisw...
- 11. 14. Use Tooling (A) in order to install retaining ring (12). 15. Install slug (13). 16. Install spacers (8). Install spring (6), spring (7), and spool (4). Illustration 7 g01034814 Illustration 8 g01096879 Improper assembly of parts that are spring loaded can cause bodily injury. To prevent possible injury, follow the established assembly procedure and wear protective equipment. 17. Install spool (5). Install piston (4). Note: Hold each cover securely while you tighten the bolts. 5/6(W) w 2021/7/25 https://127.0.0.1/sisweb/sisweb/techdoc/techdoc_print_page.jsp?returnurl=/sisweb/sisw...
- 12. 18. Position cover (2). Install bolts (2A). Tighten bolts (2A) to a torque of 30 ± 4 N·m (22 ± 3 lb ft). 19. Install cover (1). Install bolts (3). Tighten bolts (3) to a torque of 30 ± 4 N·m (22 ± 3 lb ft). End By: a. Install the transmission hydraulic control valve. Refer to Disassembly and Assembly, "Transmission Hydraulic Control Valve - Install". Copyright 1993 - 2021 Caterpillar Inc. All Rights Reserved. Private Network For SIS Licensees. Sun Jul 25 00:31:59 UTC+0800 2021 6/6(W) w 2021/7/25 https://127.0.0.1/sisweb/sisweb/techdoc/techdoc_print_page.jsp?returnurl=/sisweb/sisw...
- 13. Shutdown SIS Previous Screen Product: WHEEL SCRAPER Model: 637G WHEEL SCRAPER AWE Configuration: 637G WHEEL SCRAPER-COAL BOWL AWE00001-UP (MACHINE) POWERED BY 3306 Engine Disassembly and Assembly 637G Wheel Tractor-Scraper Power Train Media Number -RENR4074-01 Publication Date -01/04/2005 Date Updated -16/05/2005 i02304747 Transmission Hydraulic Control Valve - Install SMCS - 3073-012 Installation Procedure NOTICE Keep all parts clean from contaminants. Contamination of the hydraulic system with foreign material will reduce the service life of the hydraulic system components. To prevent contaminants from entering the hydraulic system, always plug or cap the lines, fittings, or hoses as they are disconnected. Cover any disassembled components and clean them properly before assembly. Clean the hydraulic system properly after any major component exchange or especially after a component failure, to remove any contamination. 1/3(W) w 2021/7/25 https://127.0.0.1/sisweb/sisweb/techdoc/techdoc_print_page.jsp?returnurl=/sisweb/sisw...
- 14. Illustration 1 g01096669 1. Position priority valve (11). Connect priority valve (11) onto tubes (12). Connect priority valve (11) onto tube (10). Tighten the shift cylinder. Install bolts (13). Illustration 2 g01096667 2. Install selector valve (9). Illustration 3 g01096666 3. Install manifold (8). Install plate (7). 2/3(W) w 2021/7/25 https://127.0.0.1/sisweb/sisweb/techdoc/techdoc_print_page.jsp?returnurl=/sisweb/sisw...
- 15. Illustration 4 g00822714 4. Position transmission hydraulic control valve (6). 5. Install bolts (5). Tighten bolts (5) to a torque of 30 ± 4 N·m (22 ± 3 lb ft). 6. Install the gasket. Illustration 5 g01096780 7. Reposition harness assembly (2), harness assembly (3), and harness assembly (4) when you install cover (1). 8. Install cover (1). 9. Refill the transmission oil. Refer to Operation and Maintenance Manual, "Lubrication Viscocities and Refill Capacities". End By: a. Install the hood. Refer to the engine supplement for the scraper Disassembly and Assembly, "Hood - Remove and Install". Copyright 1993 - 2021 Caterpillar Inc. All Rights Reserved. Private Network For SIS Licensees. Sun Jul 25 00:32:55 UTC+0800 2021 3/3(W) w 2021/7/25 https://127.0.0.1/sisweb/sisweb/techdoc/techdoc_print_page.jsp?returnurl=/sisweb/sisw...
- 16. Shutdown SIS Previous Screen Product: WHEEL SCRAPER Model: 637G WHEEL SCRAPER AWE Configuration: 637G WHEEL SCRAPER-COAL BOWL AWE00001-UP (MACHINE) POWERED BY 3306 Engine Disassembly and Assembly 637G Wheel Tractor-Scraper Power Train Media Number -RENR4074-01 Publication Date -01/04/2005 Date Updated -16/05/2005 i01659901 Drive Shaft - Remove SMCS - 3253-011 Removal Procedure 1. Move the ejector forward. Illustration 1 g00844512 2. Remove guard (1). Remove block (2) . 1/2(W) w 2021/7/25 https://127.0.0.1/sisweb/sisweb/techdoc/techdoc_print_page.jsp?returnurl=/sisweb/sisw...
- 17. Illustration 2 g00844513 3. Remove eight bolts (3). The bolts must be discarded. Remove drive shaft (4). The drive shaft weighs approximately 30 kg (65 lb). Use two people in order to remove the drive shaft. Copyright 1993 - 2021 Caterpillar Inc. All Rights Reserved. Private Network For SIS Licensees. Sun Jul 25 00:33:51 UTC+0800 2021 2/2(W) w 2021/7/25 https://127.0.0.1/sisweb/sisweb/techdoc/techdoc_print_page.jsp?returnurl=/sisweb/sisw...
- 18. Shutdown SIS Previous Screen Product: WHEEL SCRAPER Model: 637G WHEEL SCRAPER AWE Configuration: 637G WHEEL SCRAPER-COAL BOWL AWE00001-UP (MACHINE) POWERED BY 3306 Engine Disassembly and Assembly 637G Wheel Tractor-Scraper Power Train Media Number -RENR4074-01 Publication Date -01/04/2005 Date Updated -16/05/2005 i01659905 Drive Shaft - Install SMCS - 3253-012 Installation Procedure Illustration 1 g00844513 1. Install drive shaft (4). The drive shaft weighs approximately 30 kg (65 lb). Use two people in order to install the drive shaft. Install eight bolts (3). Bolts (3) must be replaced with new bolts. The bolts must be torqued properly. For the proper torque, refer to Specifications, "Drive Shaft" for the Scraper Power Train. 1/2(W) w 2021/7/25 https://127.0.0.1/sisweb/sisweb/techdoc/techdoc_print_page.jsp?returnurl=/sisweb/sisw...
- 19. Illustration 2 g00844512 2. Install block (2). Install guard (1) . Copyright 1993 - 2021 Caterpillar Inc. All Rights Reserved. Private Network For SIS Licensees. Sun Jul 25 00:34:48 UTC+0800 2021 2/2(W) w 2021/7/25 https://127.0.0.1/sisweb/sisweb/techdoc/techdoc_print_page.jsp?returnurl=/sisweb/sisw...
- 20. Shutdown SIS Previous Screen Product: WHEEL SCRAPER Model: 637G WHEEL SCRAPER AWE Configuration: 637G WHEEL SCRAPER-COAL BOWL AWE00001-UP (MACHINE) POWERED BY 3306 Engine Disassembly and Assembly 637G Wheel Tractor-Scraper Power Train Media Number -RENR4074-01 Publication Date -01/04/2005 Date Updated -16/05/2005 i01655983 Axle Shaft - Remove SMCS - 3259-011 Removal Procedure Table 1 Required Tools Tool Part Number Description Quantity A 138-7575 Link Bracket 1 B 1P-7407 Eyebolt 1 NOTICE Care must be taken to ensure that fluids are contained during performance of inspection, maintenance, testing, adjusting and repair of the product. Be prepared to collect the fluid with suitable containers before opening any compartment or disassembling any component containing fluids. Refer to Special Publication, NENG2500, "Caterpillar Tools and Shop Products Guide" for tools and supplies suitable to collect and contain fluids on Caterpillar products. Dispose of all fluids according to local regulations and mandates. 1/3(W) w 2021/7/25 https://127.0.0.1/sisweb/sisweb/techdoc/techdoc_print_page.jsp?returnurl=/sisweb/sisw...
- 21. Illustration 1 g00843570 1. Remove drain plug (1) in order to drain the final drive. The capacity of the final drive is approximately 19 L (5 US gal). Illustration 2 g00843571 2. Install Tool (A) to cover (2). Install a suitable lifting device to Tool (A). Remove the cover. The cover weighs approximately 32 kg (70 lb). Illustration 3 g00843572 2/3(W) w 2021/7/25 https://127.0.0.1/sisweb/sisweb/techdoc/techdoc_print_page.jsp?returnurl=/sisweb/sisw...
- 22. 3. Install Tool (B) to axle shaft (3). Partially remove the axle shaft. Illustration 4 g00843573 4. Install a suitable lifting device to axle shaft (3). Remove the axle shaft. The right axle shaft weighs approximately 41 kg (90 lb). The left axle shaft weighs approximately 68 kg (150 lb). Copyright 1993 - 2021 Caterpillar Inc. All Rights Reserved. Private Network For SIS Licensees. Sun Jul 25 00:35:43 UTC+0800 2021 3/3(W) w 2021/7/25 https://127.0.0.1/sisweb/sisweb/techdoc/techdoc_print_page.jsp?returnurl=/sisweb/sisw...
- 23. Shutdown SIS Previous Screen Product: WHEEL SCRAPER Model: 637G WHEEL SCRAPER AWE Configuration: 637G WHEEL SCRAPER-COAL BOWL AWE00001-UP (MACHINE) POWERED BY 3306 Engine Disassembly and Assembly 637G Wheel Tractor-Scraper Power Train Media Number -RENR4074-01 Publication Date -01/04/2005 Date Updated -16/05/2005 i01656019 Axle Shaft - Install SMCS - 3259-012 Installation Procedure Table 1 Required Tools Tool Part Number Description Qty A 138-7575 Link Bracket 1 B 1P-7407 Eyebolt 1 NOTICE Keep all parts clean from contaminants. Contaminants may cause rapid wear and shortened component life. 1/3(W) w 2021/7/25 https://127.0.0.1/sisweb/sisweb/techdoc/techdoc_print_page.jsp?returnurl=/sisweb/sisw...
- 24. Illustration 1 g00843573 1. Install a suitable lifting device to axle shaft (3). Partially install the axle shaft. The right axle shaft weighs approximately 41 kg (90 lb). The left axle shaft weighs approximately 68 kg (150 lb). Illustration 2 g00843572 2. Install the axle shaft. Remove Tool (B) . Illustration 3 g00843571 2/3(W) w 2021/7/25 https://127.0.0.1/sisweb/sisweb/techdoc/techdoc_print_page.jsp?returnurl=/sisweb/sisw...
- 25. 3. Install Tool (A) to cover (2). Install a suitable lifting device to Tool (A). Install the cover. The cover weighs approximately 32 kg (70 lb). 4. Refill the final drive. Refer to Operation and Maintenance Manual, "Capacities (Refill)". Copyright 1993 - 2021 Caterpillar Inc. All Rights Reserved. Private Network For SIS Licensees. Sun Jul 25 00:36:39 UTC+0800 2021 3/3(W) w 2021/7/25 https://127.0.0.1/sisweb/sisweb/techdoc/techdoc_print_page.jsp?returnurl=/sisweb/sisw...
- 26. Shutdown SIS Previous Screen Product: WHEEL SCRAPER Model: 637G WHEEL SCRAPER AWE Configuration: 637G WHEEL SCRAPER-COAL BOWL AWE00001-UP (MACHINE) POWERED BY 3306 Engine Disassembly and Assembly 637G Wheel Tractor-Scraper Power Train Media Number -RENR4074-01 Publication Date -01/04/2005 Date Updated -16/05/2005 i01656077 Axle Shaft Guard - Remove and Install SMCS - 7185-010 Removal Procedure Start By: A. Remove the left axle shaft. Refer to Disassembly and Assembly, "Axle Shaft - Remove". NOTICE Care must be taken to ensure that fluids are contained during performance of inspection, maintenance, testing, adjusting and repair of the product. Be prepared to collect the fluid with suitable containers before opening any compartment or disassembling any component containing fluids. Refer to Special Publication, NENG2500, "Caterpillar Tools and Shop Products Guide" for tools and supplies suitable to collect and contain fluids on Caterpillar products. Dispose of all fluids according to local regulations and mandates. 1. Drain the differential into a suitable container. The capacity of the differential is 12 L (3 US gal). 1/3(W) w 2021/7/25 https://127.0.0.1/sisweb/sisweb/techdoc/techdoc_print_page.jsp?returnurl=/sisweb/sisw...
- 27. Illustration 1 g00845448 2. Disconnect the hose assembly (1). Disconnect the retainer (2). Slide the retainer toward the differential and bevel gear. Illustration 2 g00845557 3. Remove four bolts (3). Remove the guard. 4. Remove two O-ring seals from the tube assembly. Installation Procedure 1. Install two O-ring seals to the tube assembly. 2/3(W) w 2021/7/25 https://127.0.0.1/sisweb/sisweb/techdoc/techdoc_print_page.jsp?returnurl=/sisweb/sisw...
- 28. Illustration 3 g00845557 2. Install the guard. Install four bolts (3) . Illustration 4 g00845448 3. Slide the retainer toward the left axle housing. Connect the retainer (2). Connect the hose assembly (1) . 4. Refill the differential. Refer to Operation and Maintenance Manual, "Capacities (Refil)". Copyright 1993 - 2021 Caterpillar Inc. All Rights Reserved. Private Network For SIS Licensees. Sun Jul 25 00:37:34 UTC+0800 2021 3/3(W) w 2021/7/25 https://127.0.0.1/sisweb/sisweb/techdoc/techdoc_print_page.jsp?returnurl=/sisweb/sisw...
- 29. Shutdown SIS Previous Screen Product: WHEEL SCRAPER Model: 637G WHEEL SCRAPER AWE Configuration: 637G WHEEL SCRAPER-COAL BOWL AWE00001-UP (MACHINE) POWERED BY 3306 Engine Disassembly and Assembly 637G Wheel Tractor-Scraper Power Train Media Number -RENR4074-01 Publication Date -01/04/2005 Date Updated -16/05/2005 i01590210 Power Pack - Remove SMCS - 1000-011; 3030-011 Removal Procedure Start By: a. Remove the hood. Refer to the engine supplement for the scraper Disassembly and Assembly, "Hood - Remove and Install". b. Remove the hook. Refer to machine systems Disassembly and Assembly, "Hook - Remove and Install". Hot engine components can cause injury from burns. Before performing maintenance on the engine, allow the engine and the components to cool. Fuel leaked or spilled onto hot surfaces or electrical components can cause a fire. To help prevent possible injury, turn the start switch off when changing fuel filters or water separator elements. Clean up fuel spills immediately. 1/6(W) w 2021/7/25 https://127.0.0.1/sisweb/sisweb/techdoc/techdoc_print_page.jsp?returnurl=/sisweb/sisw...
- 30. NOTICE Care must be taken to ensure that fluids are contained during performance of inspection, maintenance, testing, adjusting, and repair of the product. Be prepared to collect the fluid with suitable containers before opening any compartment or disassembling any component containing fluids. Refer to Special Publication, NENG2500, "Dealer Service Tool Catalog" for tools and supplies suitable to collect and contain fluids on Cat products. Dispose of all fluids according to local regulations and mandates. Illustration 1 g00824437 1. Disconnect battery cables (1) at the batteries. 2. Remove cover (2) and two brackets (3). Remove battery cables (1) from the battery box. Illustration 2 g00824444 3. Disconnect three plugs (4). 2/6(W) w 2021/7/25 https://127.0.0.1/sisweb/sisweb/techdoc/techdoc_print_page.jsp?returnurl=/sisweb/sisw...
- 31. Illustration 3 g00830088 4. Disconnect two plugs (7). Remove wiring harness (6) from clip (5). Illustration 4 g00830089 5. Disconnect two plugs (8). Remove clip (9). Illustration 5 g00830091 6. Remove cover (10). 3/6(W) w 2021/7/25 https://127.0.0.1/sisweb/sisweb/techdoc/techdoc_print_page.jsp?returnurl=/sisweb/sisw...
- 32. Please write to us. Our email: aservicemanualpdf@yahoo.com Please go to the homepage to get the full manual, or other brand PDF manuals. Home Site: aservicemanualpdf.com
- 33. Thank you very much for your reading. Please Click Here. Then Get COMPLETE MANUAL. NO WAITING NOTE: If there is no response to click on the link above, please download the PDF document first and then click on it. GET MORE OTHER MANUALS https://www.aservicemanualpdf.com/ GET MORE OTHER MANUALS https://www.aservicemanualpdf.com/
- 34. Illustration 6 g00830101 7. Disconnect plug (11) and pull the wiring harness through tube (12). Illustration 7 g00824312 8. Turn fuel shutoff valve (13) to the OFF position. Illustration 8 g00830112 9. Turn fuel shutoff valve (14) to the OFF position. Disconnect four hose assemblies (15). 4/6(W) w 2021/7/25 https://127.0.0.1/sisweb/sisweb/techdoc/techdoc_print_page.jsp?returnurl=/sisweb/sisw...
- 35. Illustration 9 g00830121 10. Attach a suitable lifting device to lifting eye assembly (16). Illustration 10 g00830209 11. Disconnect drive shaft (17) from the transfer gears. Illustration 11 g00830117 12. Remove clip (18). Remove two bolts (19). 13. Repeat Step 12 at each corner of the power pack. 14. Remove the power pack. The weight of the power pack is approximately 3085 kg (6800 lb). 5/6(W) w 2021/7/25 https://127.0.0.1/sisweb/sisweb/techdoc/techdoc_print_page.jsp?returnurl=/sisweb/sisw...
- 36. Copyright 1993 - 2021 Caterpillar Inc. All Rights Reserved. Private Network For SIS Licensees. Sun Jul 25 00:38:30 UTC+0800 2021 6/6(W) w 2021/7/25 https://127.0.0.1/sisweb/sisweb/techdoc/techdoc_print_page.jsp?returnurl=/sisweb/sisw...