This document provides a summary and guide to developing applications using OpenAM, an open source authentication, authorization, entitlement and federation software. It covers using the OpenAM APIs and protocols, developing client applications, authenticating using the Java SDK, handling single sign-on, requesting policy decisions, using fedlets, extending OpenAM functionality, and customizing various aspects of OpenAM like profiles, authentication modules, policies and identity storage.


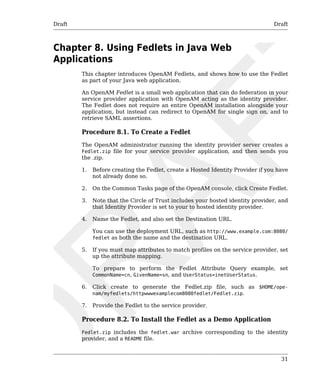
![Draft Draft
v
Preface
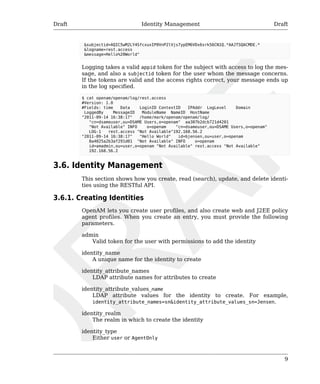
This guide demonstrates how to handle sessions to permit single sign on
and single log out in OpenAM client applications. This guide further demon-strates
how to use the OpenAM APIs including both APIs for client applica-tions,
and also SPIs for authentication, policy, service management, delega-tion,
and identity storage. Finally, this guide demonstrates how to write your
own web policy agent.
1. Who Should Use this Guide
This guide is written for developers who adapt client applications to use Ope-nAM
access management capabilities. It is also written for designers and de-velopers
extending and integrating OpenAM services for their organizations.
You do not need to be an OpenAM wizard to learn something from this guide,
though a background in access management and developing web applica-tions
or developing for web and application servers can help. You can never-theless
get started with this guide, and then learn more as you go along.
2. Formatting Conventions
Some items are formatted differently from other text, like filenames, com-mands,
and literal values.
$ echo Terminal sessions are formatted with line folding for easier reading.
In the HTML version, double-click to toggle between the folded version and
the flat, copy-paste version. > /dev/null
In many cases, sections pertaining to UNIX, GNU/Linux, Mac OS X, BSD, and
so forth are marked (UNIX). Sections pertaining to Microsoft Windows might
be marked (Windows). To avoid repetition, however, file system directory
names are often given only in UNIX format as in /path/to/OpenAM, even if the
text applies to C:pathtoOpenAM as well.
class Test
{
public static void main(String [] args)
{
System.out.println("This is a program listing.");
}
}
3. Accessing OpenAM Documentation Online
Core documentation, such as what you are now reading, aims to be techni-cally
accurate and complete with respect to the software documented. Core](https://image.slidesharecdn.com/83851003-openam-dev-guide-141212071459-conversion-gate02/85/83851003-open-am-dev-guide-5-320.jpg)


![Draft Draft
18
import java.io.BufferedReader;
import java.io.InputStreamReader;
import java.io.IOException;
import javax.security.auth.callback.Callback;
import javax.security.auth.callback.ChoiceCallback;
import javax.security.auth.callback.NameCallback;
import javax.security.auth.callback.PasswordCallback;
import javax.security.auth.callback.TextInputCallback;
import javax.security.auth.callback.TextOutputCallback;
import javax.security.auth.callback.UnsupportedCallbackException;
import com.sun.identity.authentication.AuthContext;
import com.sun.identity.authentication.spi.AuthLoginException;
import com.sun.identity.shared.debug.Debug;
public class Login {
private String loginIndexName;
private String orgName;
private String locale;
private Login(String loginIndexName, String orgName) {
this.loginIndexName = loginIndexName;
this.orgName = orgName;
}
private Login(String loginIndexName, String orgName, String locale) {
this.loginIndexName = loginIndexName;
this.orgName = orgName;
this.locale = locale;
}
protected AuthContext getAuthContext()
throws AuthLoginException {
AuthContext lc = new AuthContext(orgName);
AuthContext.IndexType indexType = AuthContext.IndexType.MODULE_INSTANCE;
if (locale == null || locale.length() == 0) {
lc.login(indexType, loginIndexName);
} else {
lc.login(indexType, loginIndexName, locale);
}
debugMessage(loginIndexName + ": Obtained login context");
return lc;
}
private void addLoginCallbackMessage(Callback[] callbacks)
throws UnsupportedCallbackException {
int i = 0;
try {
for (i = 0; i < callbacks.length; i++) {
if (callbacks[i] instanceof TextOutputCallback) {
handleTextOutputCallback((TextOutputCallback)callbacks[i]);
} else if (callbacks[i] instanceof NameCallback) {
handleNameCallback((NameCallback)callbacks[i]);
} else if (callbacks[i] instanceof PasswordCallback) {
handlePasswordCallback((PasswordCallback)callbacks[i]);
} else if (callbacks[i] instanceof TextInputCallback) {
handleTextInputCallback((TextInputCallback)callbacks[i]);
} else if (callbacks[i] instanceof ChoiceCallback) {
handleChoiceCallback((ChoiceCallback)callbacks[i]);
}
}
} catch (IOException e) {
e.printStackTrace();](https://image.slidesharecdn.com/83851003-openam-dev-guide-141212071459-conversion-gate02/85/83851003-open-am-dev-guide-24-320.jpg)
![Draft Draft
19
throw new UnsupportedCallbackException(callbacks[i],e.getMessage());
}
}
private void handleTextOutputCallback(TextOutputCallback toc) {
debugMessage("Got TextOutputCallback");
// display the message according to the specified type
switch (toc.getMessageType()) {
case TextOutputCallback.INFORMATION:
debugMessage(toc.getMessage());
break;
case TextOutputCallback.ERROR:
debugMessage("ERROR: " + toc.getMessage());
break;
case TextOutputCallback.WARNING:
debugMessage("WARNING: " + toc.getMessage());
break;
default:
debugMessage("Unsupported message type: " +
toc.getMessageType());
}
}
private void handleNameCallback(NameCallback nc)
throws IOException {
// prompt the user for a username
System.out.print(nc.getPrompt());
System.out.flush();
nc.setName((new BufferedReader
(new InputStreamReader(System.in))).readLine());
}
private void handleTextInputCallback(TextInputCallback tic)
throws IOException {
// prompt for text input
System.out.print(tic.getPrompt());
System.out.flush();
tic.setText((new BufferedReader
(new InputStreamReader(System.in))).readLine());
}
private void handlePasswordCallback(PasswordCallback pc)
throws IOException {
// prompt the user for sensitive information
System.out.print(pc.getPrompt());
System.out.flush();
String passwd = (new BufferedReader(new InputStreamReader(System.in))).
readLine();
pc.setPassword(passwd.toCharArray());
}
private void handleChoiceCallback(ChoiceCallback cc)
throws IOException {
// ignore the provided defaultValue
System.out.print(cc.getPrompt());
String[] strChoices = cc.getChoices();
for (int j = 0; j < strChoices.length; j++) {
System.out.print("choice[" + j + "] : " + strChoices[j]);
}
System.out.flush();](https://image.slidesharecdn.com/83851003-openam-dev-guide-141212071459-conversion-gate02/85/83851003-open-am-dev-guide-25-320.jpg)
![Draft Draft
20
cc.setSelectedIndex(Integer.parseInt((new BufferedReader
(new InputStreamReader(System.in))).readLine()));
}
protected boolean login(AuthContext lc)
throws UnsupportedCallbackException {
boolean succeed = false;
Callback[] callbacks = null;
// get information requested from module
while (lc.hasMoreRequirements()) {
callbacks = lc.getRequirements();
if (callbacks != null) {
addLoginCallbackMessage(callbacks);
lc.submitRequirements(callbacks);
}
}
if (lc.getStatus() == AuthContext.Status.SUCCESS) {
System.out.println("Login succeeded.");
succeed = true;
} else if (lc.getStatus() == AuthContext.Status.FAILED) {
System.out.println("Login failed.");
} else {
System.out.println("Unknown status: " + lc.getStatus());
}
return succeed;
}
protected void logout(AuthContext lc)
throws AuthLoginException {
lc.logout();
System.out.println("Logged Out!!");
}
static void debugMessage(String msg) {
System.out.println(msg);
}
public static void main(String[] args) {
try {
System.out.print("Realm (e.g. /): ");
String orgName = (new BufferedReader(
new InputStreamReader(System.in))).readLine();
System.out.print("Login module name (e.g. DataStore or LDAP): ");
String moduleName = (new BufferedReader(
new InputStreamReader(System.in))).readLine();
System.out.print("Login locale (e.g. en_US or fr_FR): ");
String locale = (new BufferedReader(
new InputStreamReader(System.in))).readLine();
Login login = new Login(moduleName, orgName, locale);
AuthContext lc = login.getAuthContext();
if (login.login(lc)) {
login.logout(lc);
}
} catch (IOException e) {
e.printStackTrace();
} catch (AuthLoginException e) {](https://image.slidesharecdn.com/83851003-openam-dev-guide-141212071459-conversion-gate02/85/83851003-open-am-dev-guide-26-320.jpg)

![Draft Draft
24
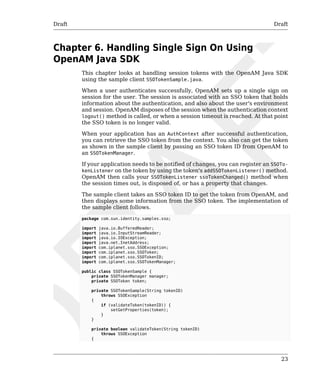
boolean validated = false;
manager = SSOTokenManager.getInstance();
token = manager.createSSOToken(tokenID);
// isValid method returns true for valid token.
if (manager.isValidToken(token)) {
// let us get all the values from the token
String host = token.getHostName();
java.security.Principal principal = token.getPrincipal();
String authType = token.getAuthType();
int level = token.getAuthLevel();
InetAddress ipAddress = token.getIPAddress();
long maxTime = token.getMaxSessionTime();
long idleTime = token.getIdleTime();
long maxIdleTime = token.getMaxIdleTime();
System.out.println("SSOToken host name: " + host);
System.out.println("SSOToken Principal name: " +
principal.getName());
System.out.println("Authentication type used: " + authType);
System.out.println("IPAddress of the host: " +
ipAddress.getHostAddress());
validated = true;
}
return validated;
}
private void setGetProperties(SSOToken token)
throws SSOException
{
/*
* Validate the token again, with another method
* if token is invalid, this method throws an exception
*/
manager.validateToken(token);
System.out.println("SSO Token validation test Succeeded.");
// Get the SSOTokenID associated with the token and print it.
SSOTokenID id = token.getTokenID();
String tokenId = id.toString();
System.out.println("Token ID: " + tokenId);
// Set and get properties in the token.
token.setProperty("TimeZone", "PST");
token.setProperty("County", "SantaClara");
String tZone = token.getProperty("TimeZone");
String county = token.getProperty("County");
System.out.println("Property: TimeZone: " + tZone);
System.out.println("Property: County: " + county);
}
public static void main(String[] args) {
try {
System.out.print("Enter SSOToken ID: ");
String ssoTokenID = (new BufferedReader(
new InputStreamReader(System.in))).readLine();
new SSOTokenSample(ssoTokenID.trim());
} catch (SSOException e) {
e.printStackTrace();
} catch (IOException e) {](https://image.slidesharecdn.com/83851003-openam-dev-guide-141212071459-conversion-gate02/85/83851003-open-am-dev-guide-30-320.jpg)

![Draft Draft
28
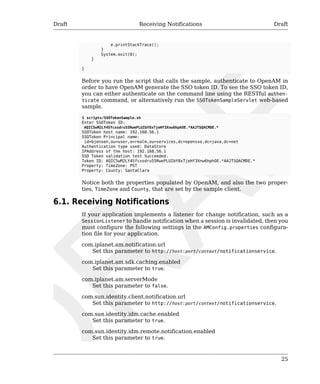
public class PolicyEvaluationSample {
public PolicyEvaluationSample() {
}
public static void main(String[] args) throws Exception {
PolicyEvaluationSample clientSample = new PolicyEvaluationSample();
clientSample.runSample(args);
System.exit(0);
}
public void runSample(String[] args) throws Exception {
if (args.length == 0 || args.length > 1) {
System.out.println("Missing argument:"
+ "properties file name not specified");
} else {
System.out.println("Using properties file:" + args[0]);
Properties sampleProperties = getProperties(args[0]);
SSOToken ssoToken = getSSOToken(
(String)sampleProperties.get("user.name"),
(String)sampleProperties.get("user.password")
);
getPolicyDecision(
ssoToken,
(String)sampleProperties.get("service.name"),
(String)sampleProperties.get("resource.name"),
(String)sampleProperties.get("action.name")
);
}
}
private SSOToken getSSOToken(
String userName, String password) throws Exception {
System.out.println("Entering getSSOToken():"
+ "userName=" + userName + ","
+ "password=" + password);
SSOToken ssoToken = TokenUtils.getSessionToken("/",
userName, password);
System.out.println("TokenID:" + ssoToken.getTokenID().toString());
System.out.println("returning from getSSOToken()");
return ssoToken;
}
private void getPolicyDecision(
SSOToken ssoToken,
String serviceName,
String resourceName,
String actionName)
throws Exception {
System.out.println("Entering getPolicyDecision():"
+ "resourceName=" + resourceName + ","
+ "serviceName=" + serviceName + ","
+ "actionName=" + actionName);
PolicyEvaluator pe = PolicyEvaluatorFactory.getInstance().
getPolicyEvaluator(serviceName);
Map env = new HashMap();
Set attrSet = new HashSet();
Set actions = new HashSet();](https://image.slidesharecdn.com/83851003-openam-dev-guide-141212071459-conversion-gate02/85/83851003-open-am-dev-guide-34-320.jpg)


![Draft Draft
46
$ ln -s libxml2.so.2 libxml2.so
$ cd ../samples
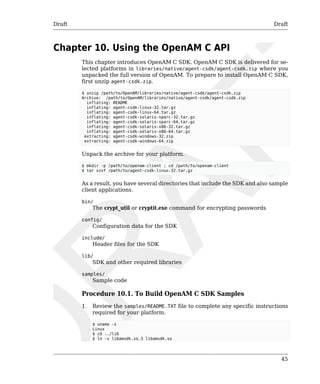
2. Build the samples in the appropriate way for your platform.
$ LD_LIBRARY_PATH=../lib gmake
On recent systems, you might need to install compatibility libraries for
the build to complete successfully. You might make the following change
on Linux, for example.
$ diff Makefile Makefile.orig
115c115
< LDFLAGS = -L$(AM_LIB_DIR) $(LIBS) /usr/lib/libstdc++.so.5
---
> LDFLAGS = -L$(AM_LIB_DIR) $(LIBS)
3. Set up OpenSSOAgentBootstrap.properties and
OpenSSOAgentConfiguration.properties as appropriate for your environ-ment.
Base your work on the template files in the config/ directory. You can
find the Password Encryption Key in the OpenAM console under Config-uration
> Servers and Sites > Server Name > Security.
4. Try one of the samples you built to test your build.
$ LD_LIBRARY_PATH=../lib
./am_auth_test
-f ../config/OpenSSOAgentBootstrap.properties
-u demo
-p changeit
-o /
Login 1 Succeeded!
SSOToken = AQIC5wM2LY4SfcxZfk4EzC9Y46P9cXG9ogwf2ixnYOeZ0K0.*AAJTSQACMDE.*
Organization = /
Module Instance Name [0] = SAE
Module Instance Name [1] = LDAP
Module Instance Name [2] = WSSAuthModule
Module Instance Name [3] = Federation
Module Instance Name [4] = HOTP
Module Instance Name [5] = DataStore
Logout 1 Succeeded!](https://image.slidesharecdn.com/83851003-openam-dev-guide-141212071459-conversion-gate02/85/83851003-open-am-dev-guide-52-320.jpg)


![Draft The Sample Au-thentication
Logic
Draft
56
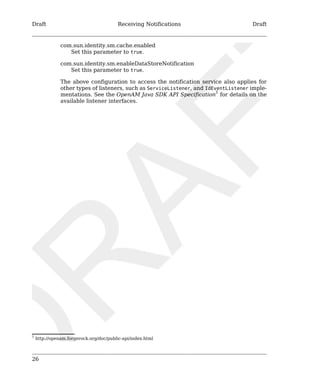
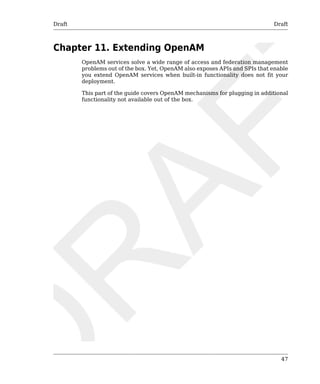
// OpenAM calls the init() method once when the module is created.
public void init(Subject subject, Map sharedState, Map options)
// OpenAM calls the process() method when the user submits authentication
// information. The process() method determines what happens next:
// success, failure, or the next state specified by the order
// attribute in the callbacks XML file.
public int process(Callback[] callbacks, int state) throws LoginException
// OpenAM expects the getPrincipal() method to return an implementation of
// the java.security.Principal interface.
public Principal getPrincipal()
OpenAM does not reuse authentication module instances. This means that
you can store information specific to the authentication process in the in-stance.
The implementation, SimpleAuth.java, is shown below.
/**
* DO NOT ALTER OR REMOVE COPYRIGHT NOTICES OR THIS HEADER.
*
* Copyright (c) 2011 ForgeRock AS. All Rights Reserved
*
* The contents of this file are subject to the terms
* of the Common Development and Distribution License
* (the License). You may not use this file except in
* compliance with the License.
*
* You can obtain a copy of the License at
* http://forgerock.org/license/CDDLv1.0.html
* See the License for the specific language governing
* permission and limitations under the License.
*
* When distributing Covered Code, include this CDDL
* Header Notice in each file and include the License file
* at http://forgerock.org/license/CDDLv1.0.html
* If applicable, add the following below the CDDL Header,
* with the fields enclosed by brackets [] replaced by
* your own identifying information:
* "Portions Copyrighted [year] [name of copyright owner]"
*
*/
package com.forgerock.openam.examples;
import java.security.Principal;
import java.util.Map;
import java.util.ResourceBundle;
import javax.security.auth.Subject;
import javax.security.auth.callback.Callback;
import javax.security.auth.callback.NameCallback;
import javax.security.auth.callback.PasswordCallback;
import javax.security.auth.login.LoginException;
import com.sun.identity.authentication.spi.AMLoginModule;
import com.sun.identity.authentication.spi.AuthLoginException;
import com.sun.identity.authentication.spi.InvalidPasswordException;
import com.sun.identity.authentication.util.ISAuthConstants;](https://image.slidesharecdn.com/83851003-openam-dev-guide-141212071459-conversion-gate02/85/83851003-open-am-dev-guide-62-320.jpg)
![Draft The Sample Au-thentication
Logic
Draft
57
import com.sun.identity.shared.datastruct.CollectionHelper;
import com.sun.identity.shared.debug.Debug;
public class SampleAuth extends AMLoginModule
{
// Name for the debug-log
private final static String DEBUG_NAME = "SampleAuth";
// Name of the resource bundle
private final static String amAuthSampleAuth = "amAuthSampleAuth";
// User names for authentication logic
private final static String USERNAME = "test";
private final static String ERROR_1_NAME = "test1";
private final static String ERROR_2_NAME = "test2";
// Orders defined in the callbacks file
private final static int STATE_BEGIN = 1;
private final static int STATE_AUTH = 2;
private final static int STATE_ERROR = 3;
private final static Debug debug = Debug.getInstance(DEBUG_NAME);
private Map options;
private ResourceBundle bundle;
public SampleAuth()
{
super();
}
@Override
// This method stores service attributes and localized properties
// for later use.
public void init(Subject subject, Map sharedState, Map options)
{
if (debug.messageEnabled())
{
debug.message("SampleAuth::init");
}
this.options = options;
bundle = amCache.getResBundle(amAuthSampleAuth, getLoginLocale());
}
@Override
public int process(Callback[] callbacks, int state) throws LoginException
{
if (debug.messageEnabled())
{
debug.message("SampleAuth::process state: " + state);
}](https://image.slidesharecdn.com/83851003-openam-dev-guide-141212071459-conversion-gate02/85/83851003-open-am-dev-guide-63-320.jpg)
![Draft The Sample Au-thentication
Logic
Draft
58
switch (state)
{
case STATE_BEGIN:
// No time wasted here - simply modify the UI and
// proceed to next state
substituteUIStrings();
return STATE_AUTH;
case STATE_AUTH:
// Get data from callbacks. Refer to callbacks XML file.
NameCallback nc = (NameCallback) callbacks[0];
PasswordCallback pc = (PasswordCallback) callbacks[1];
String username = nc.getName();
String password = new String(pc.getPassword());
// First errorstring is stored in "sampleauth-error-1" property.
if (username.equals(ERROR_1_NAME))
{
setErrorText("sampleauth-error-1");
return STATE_ERROR;
}
// Second errorstring is stored in "sampleauth-error-2" property.
if (username.equals(ERROR_2_NAME))
{
setErrorText("sampleauth-error-2");
return STATE_ERROR;
}
if (username.equals(USERNAME) && password.equals("password"))
{
return ISAuthConstants.LOGIN_SUCCEED;
}
throw new InvalidPasswordException("password is wrong", USERNAME);
case STATE_ERROR:
return STATE_ERROR;
default:
throw new AuthLoginException("invalid state");
}
}
@Override
public Principal getPrincipal()
{
return new SampleAuthPrincipal(USERNAME);
}
private void setErrorText(String err) throws AuthLoginException
{
// Receive correct string from properties and substitute the
// header in callbacks order 3.
substituteHeader(STATE_ERROR, bundle.getString(err));
}](https://image.slidesharecdn.com/83851003-openam-dev-guide-141212071459-conversion-gate02/85/83851003-open-am-dev-guide-64-320.jpg)
![Draft The Sample Auth Principal Draft
59
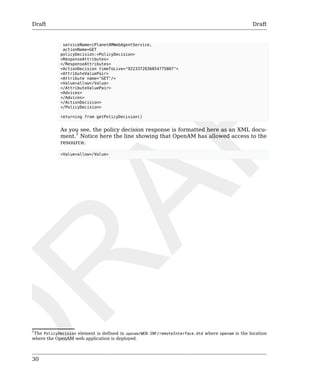
private void substituteUIStrings() throws AuthLoginException
{
// Get service specific attribute configured in OpenAM
String ssa = CollectionHelper.getMapAttr(options,
"sampleauth-service-specific-attribute");
// Get property from bundle
String new_hdr = ssa + " "
+ bundle.getString("sampleauth-ui-login-header");
substituteHeader(STATE_AUTH, new_hdr);
replaceCallback(STATE_AUTH, 0, new NameCallback(bundle
.getString("sampleauth-ui-username-prompt")));
replaceCallback(STATE_AUTH, 1, new PasswordCallback(bundle
.getString("sampleauth-ui-password-prompt"), false));
}
}
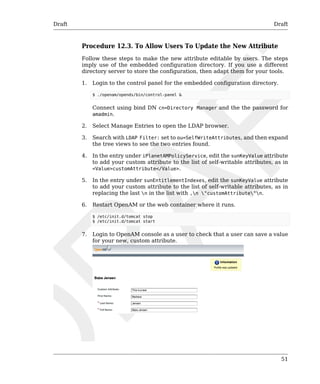
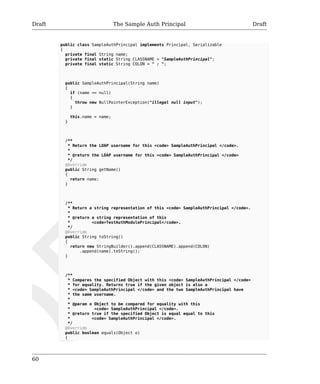
13.4. The Sample Auth Principal
The implementation, SimpleAuthPrincipal.java, is shown below.
/**
* DO NOT ALTER OR REMOVE COPYRIGHT NOTICES OR THIS HEADER.
*
* Copyright (c) 2011 ForgeRock AS. All Rights Reserved
*
* The contents of this file are subject to the terms
* of the Common Development and Distribution License
* (the License). You may not use this file except in
* compliance with the License.
*
* You can obtain a copy of the License at
* http://forgerock.org/license/CDDLv1.0.html
* See the License for the specific language governing
* permission and limitations under the License.
*
* When distributing Covered Code, include this CDDL
* Header Notice in each file and include the License file
* at http://forgerock.org/license/CDDLv1.0.html
* If applicable, add the following below the CDDL Header,
* with the fields enclosed by brackets [] replaced by
* your own identifying information:
* "Portions Copyrighted [year] [name of copyright owner]"
*
*/
package com.forgerock.openam.examples;
import java.io.Serializable;
import java.security.Principal;](https://image.slidesharecdn.com/83851003-openam-dev-guide-141212071459-conversion-gate02/85/83851003-open-am-dev-guide-65-320.jpg)
![Draft The Sample Auth Ser-vice
Configuration
Draft
62
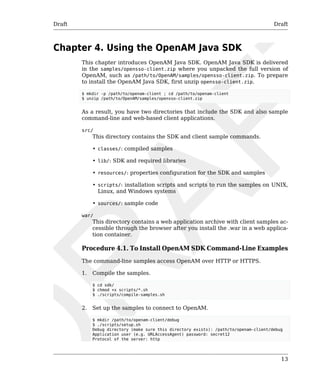
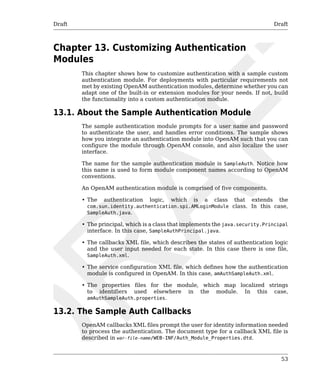
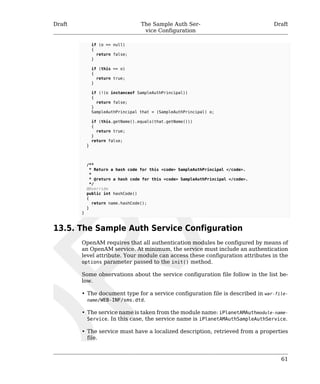
• The i18nFileName attribute in the service configuration holds the default
(non-localized) base name of the Java properties file. The i18nKey attributes
indicate properties keys to string values in the Java properties file.
• The authentication level attribute name is taken from the module name:
iplanet-am-auth-module-name-auth-level, where the module-name is all lower
case. Here, the authentication level attribute is named iplanet-am-auth-sampleauth-
auth-level.
• The Sample Auth service configuration includes an example sam-pleauth-
service-specific-attribute, which can be configured through
OpenAM console.
The service configuration file, amAuthSampleAuth.xml, is shown below.
<?xml version="1.0" encoding="UTF-8"?>
<!--
DO NOT ALTER OR REMOVE COPYRIGHT NOTICES OR THIS HEADER.
Copyright (c) 2011 ForgeRock AS. All Rights Reserved
The contents of this file are subject to the terms
of the Common Development and Distribution License
(the License). You may not use this file except in
compliance with the License.
You can obtain a copy of the License at
http://forgerock.org/license/CDDLv1.0.html
See the License for the specific language governing
permission and limitations under the License.
When distributing Covered Code, include this CDDL
Header Notice in each file and include the License file
at http://forgerock.org/license/CDDLv1.0.html
If applicable, add the following below the CDDL Header,
with the fields enclosed by brackets [] replaced by
your own identifying information:
"Portions Copyrighted [year] [name of copyright owner]"
-->
<!DOCTYPE ServicesConfiguration
PUBLIC "=//iPlanet//Service Management Services (SMS) 1.0 DTD//EN"
"jar://com/sun/identity/sm/sms.dtd">
<ServicesConfiguration>
<Service name="iPlanetAMAuthSampleAuthService" version="1.0">
<Schema
serviceHierarchy="/DSAMEConfig/authentication/iPlanetAMAuthSampleAuthService"
i18nFileName="amAuthSampleAuth" revisionNumber="10"
i18nKey="sampleauth-service-description">
<Organization>
<AttributeSchema name="iplanet-am-auth-sampleauth-auth-level"
type="single" syntax="number_range" rangeStart="0" rangeEnd="2147483647"
i18nKey="a500">
<DefaultValues>
<Value>1</Value>
</DefaultValues>
</AttributeSchema>](https://image.slidesharecdn.com/83851003-openam-dev-guide-141212071459-conversion-gate02/85/83851003-open-am-dev-guide-68-320.jpg)

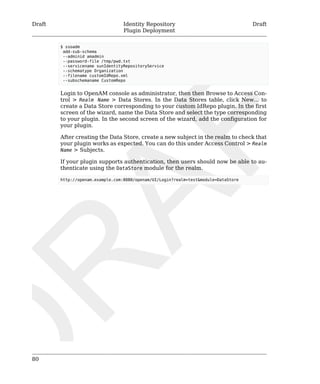
![Draft Configuring A Sam-ple
Policy Plugin
Draft
--classname com.sun.identity.samples.policy.SampleCondition
Plug-in schema, Condition was added to service, iPlanetAMPolicyService.
Set the choice values of the schema to include your plugin with other policy
conditions in the policy service.
$ ssoadm
set-attr-choicevals
--adminid amadmin
--password-file /tmp/pwd.txt
--servicename iPlanetAMPolicyConfigService
--schematype Organization
--attributename iplanet-am-policy-selected-conditions
--add
--choicevalues "x100=Sample Condition"
Choice Values were set.
Set the plugin policy condition as one of the default attibutes of the policy
service.
$ ssoadm
add-attr-defs
--adminid amadmin
--password-file /tmp/pwd.txt
--servicename iPlanetAMPolicyConfigService
--schematype Organization
--attributevalues "iplanet-am-policy-selected-conditions=Sample Condition"
Schema attribute defaults were added.
After completing configuration, restart OpenAM or the web application con-tainer.
$ /etc/init.d/tomcat stop
Password:
Using CATALINA_BASE: /path/to/tomcat
Using CATALINA_HOME: /path/to/tomcat
Using CATALINA_TMPDIR: /path/to/tomcat/temp
Using JRE_HOME: /path/to/jdk1.6/jre
Using CLASSPATH: /path/to/tomcat/bin/bootstrap.jar:
/path/to/tomcat/bin/tomcat-juli.jar
[mark@openam-ter bin]$ /etc/init.d/tomcat start
Password:
Using CATALINA_BASE: /path/to/tomcat
Using CATALINA_HOME: /path/to/tomcat
Using CATALINA_TMPDIR: /path/to/tomcat/temp
Using JRE_HOME: /path/to/jdk1.6/jre
Using CLASSPATH: /path/to/tomcat/bin/bootstrap.jar:
/path/to/tomcat/bin/tomcat-juli.jar
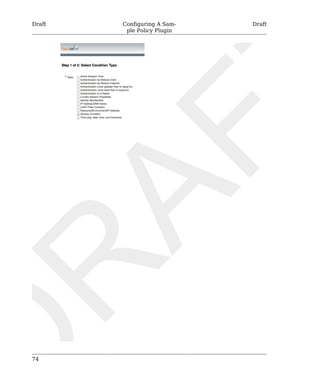
In OpenAM console, browse to Access Control > Realm Name > Policies >
Policy Name > Conditions > New... Notice in the list of conditions that you
can now apply your Sample Condition.
73](https://image.slidesharecdn.com/83851003-openam-dev-guide-141212071459-conversion-gate02/85/83851003-open-am-dev-guide-79-320.jpg)


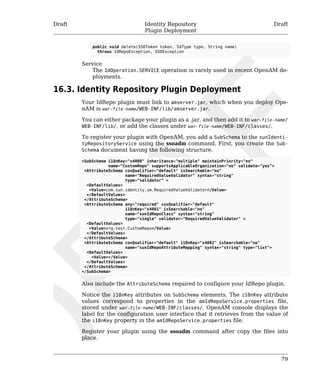
![Draft Identity Repository Plu-gin
Implementation
Draft
78
Map avPairs,
boolean recursive
) throws IdRepoException, SSOException
Edit
OpenAM calls the following methods to update a subject in the identity
repository.
public void setAttributes(
SSOToken token,
IdType type,
String name,
Map attributes,
boolean isAdd
) throws IdRepoException, SSOException
public void setBinaryAttributes(
SSOToken token,
IdType type,
String name,
Map attributes,
boolean isAdd
) throws IdRepoException, SSOException
public void removeAttributes(
SSOToken token,
IdType type,
String name,
Set attrNames
) throws IdRepoException, SSOException
public void modifyMemberShip(
SSOToken token,
IdType type,
String name,
Set members,
IdType membersType,
int operation
) throws IdRepoException, SSOException
public void setActiveStatus(
SSOToken token,
IdType type,
String name,
boolean active
)
Authenticate
OpenAM calls authenticate() with the credentials from the DataStore au-thentication
module.
public boolean authenticate(Callback[] credentials)
throws IdRepoException, AuthLoginException
Delete
The delete() method removes the subject from the identity repository.
The name specifies the subject.](https://image.slidesharecdn.com/83851003-openam-dev-guide-141212071459-conversion-gate02/85/83851003-open-am-dev-guide-84-320.jpg)