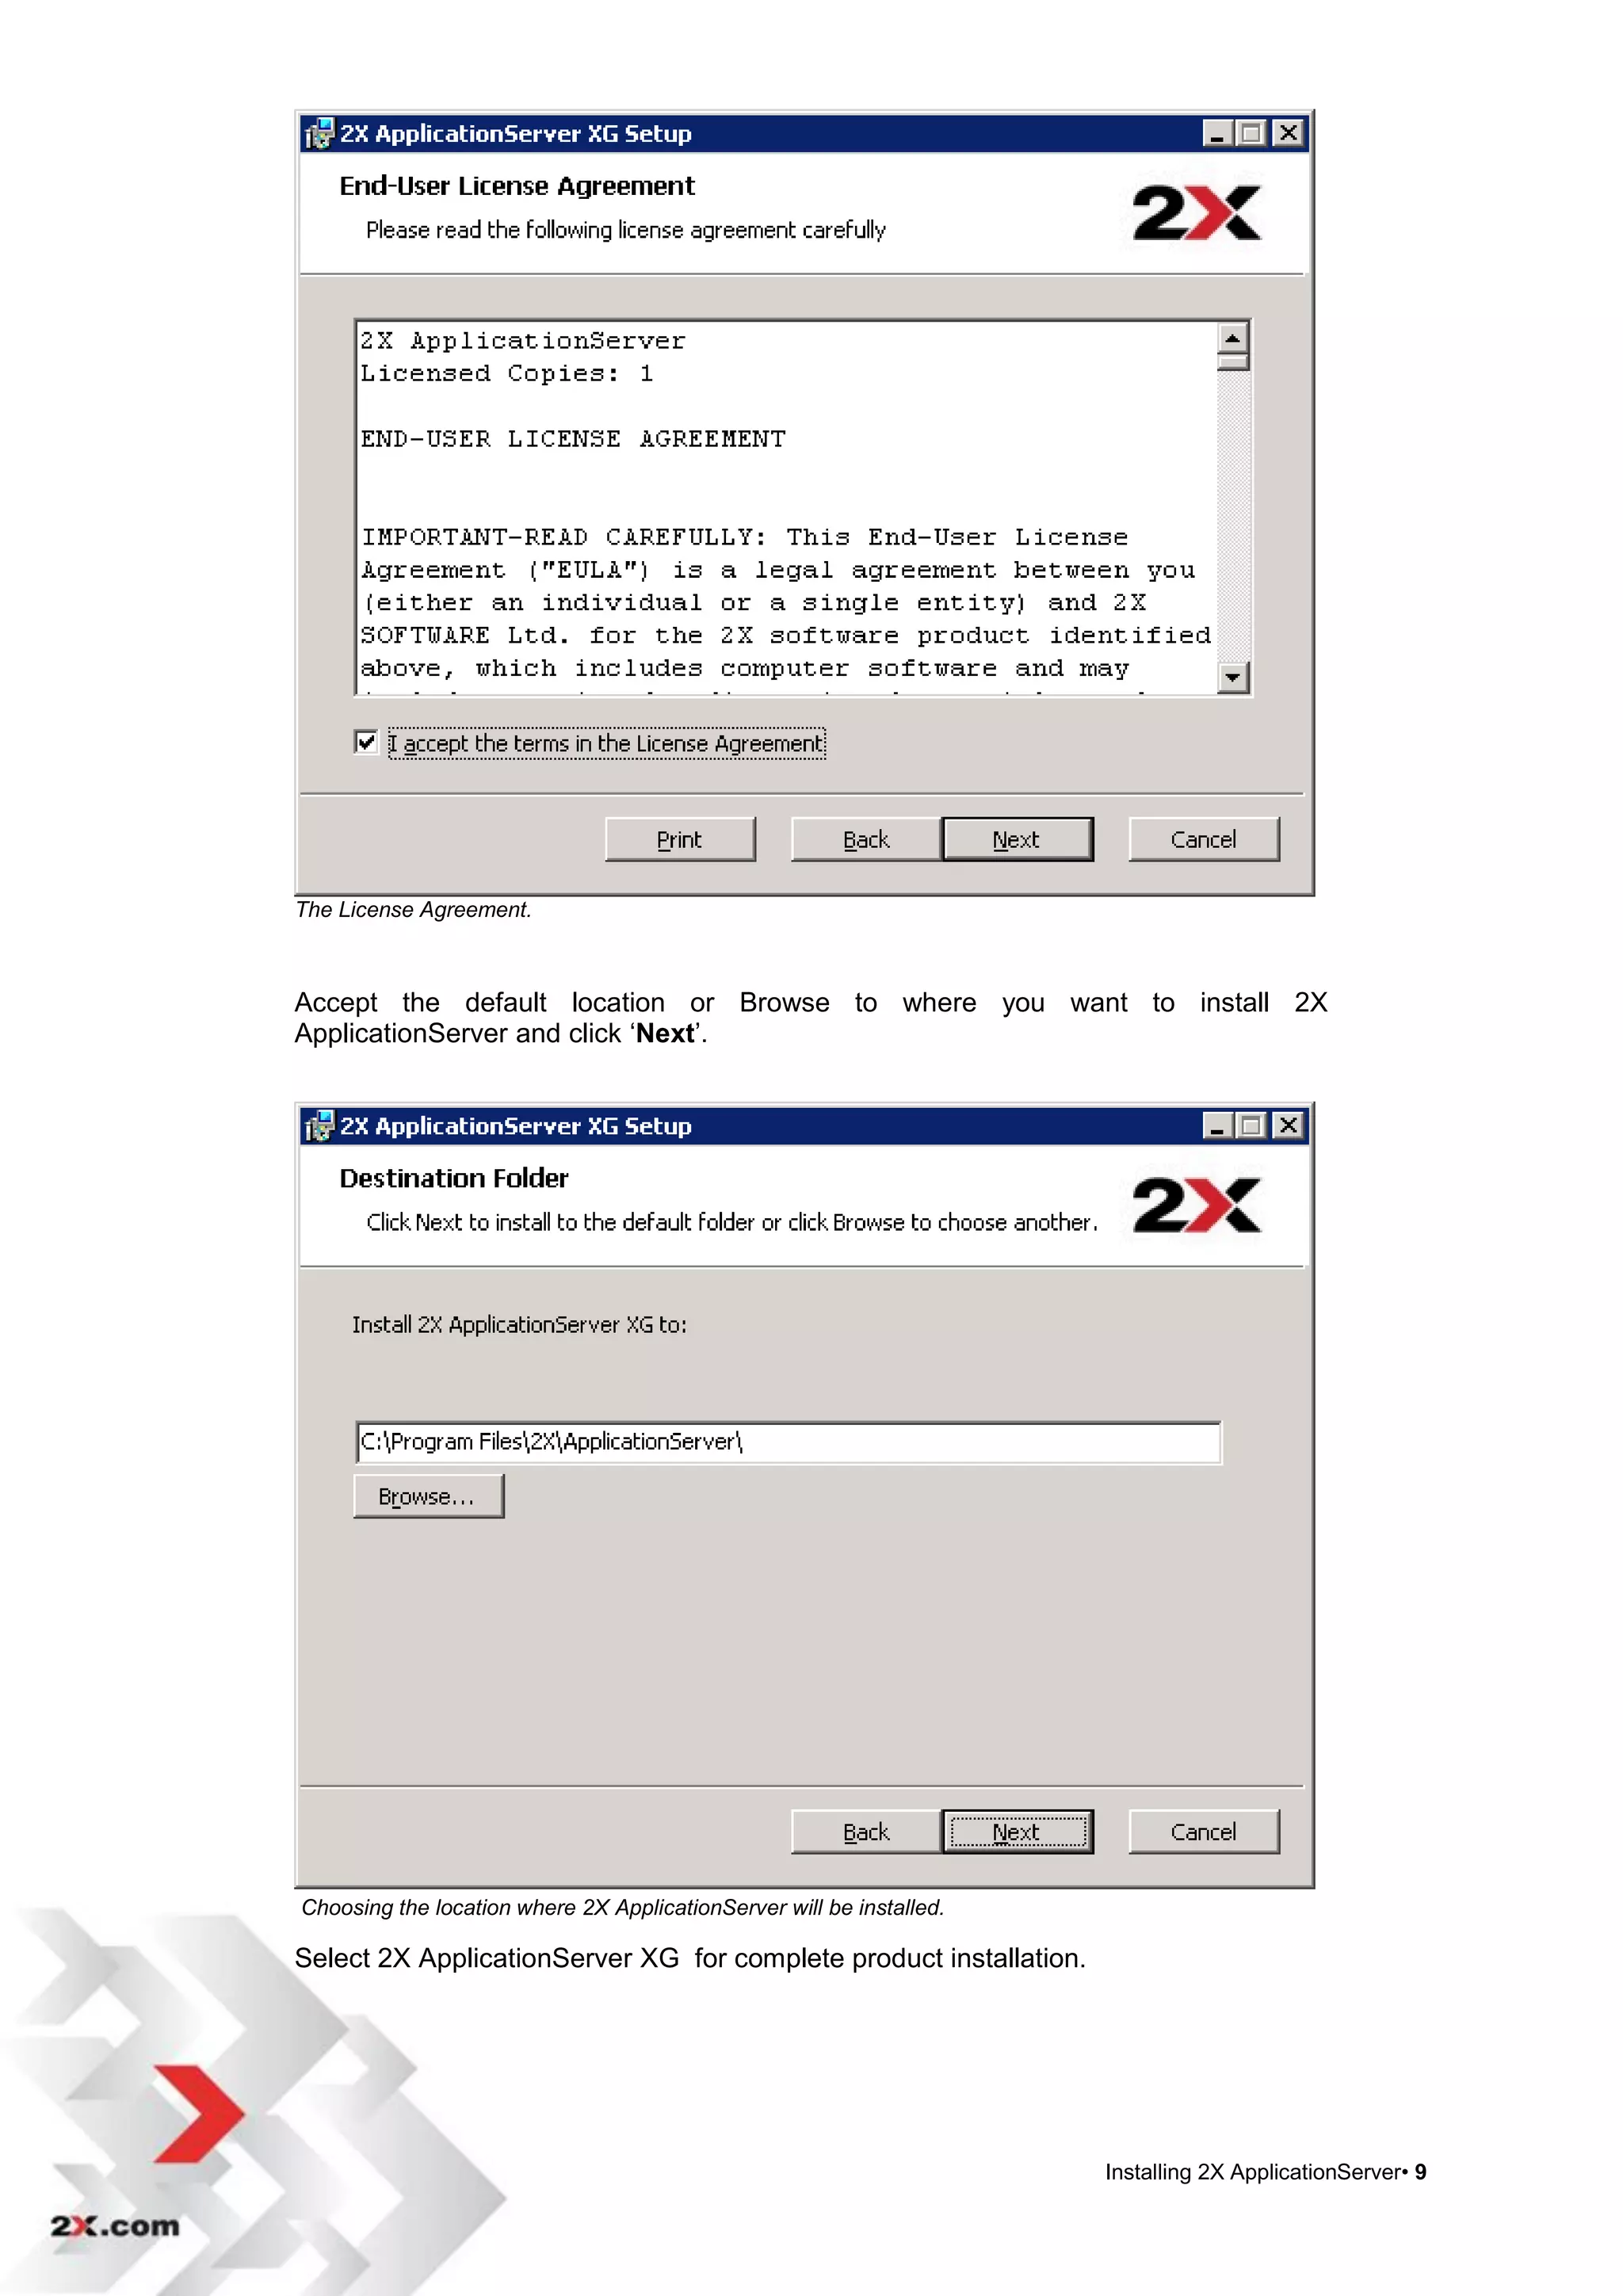
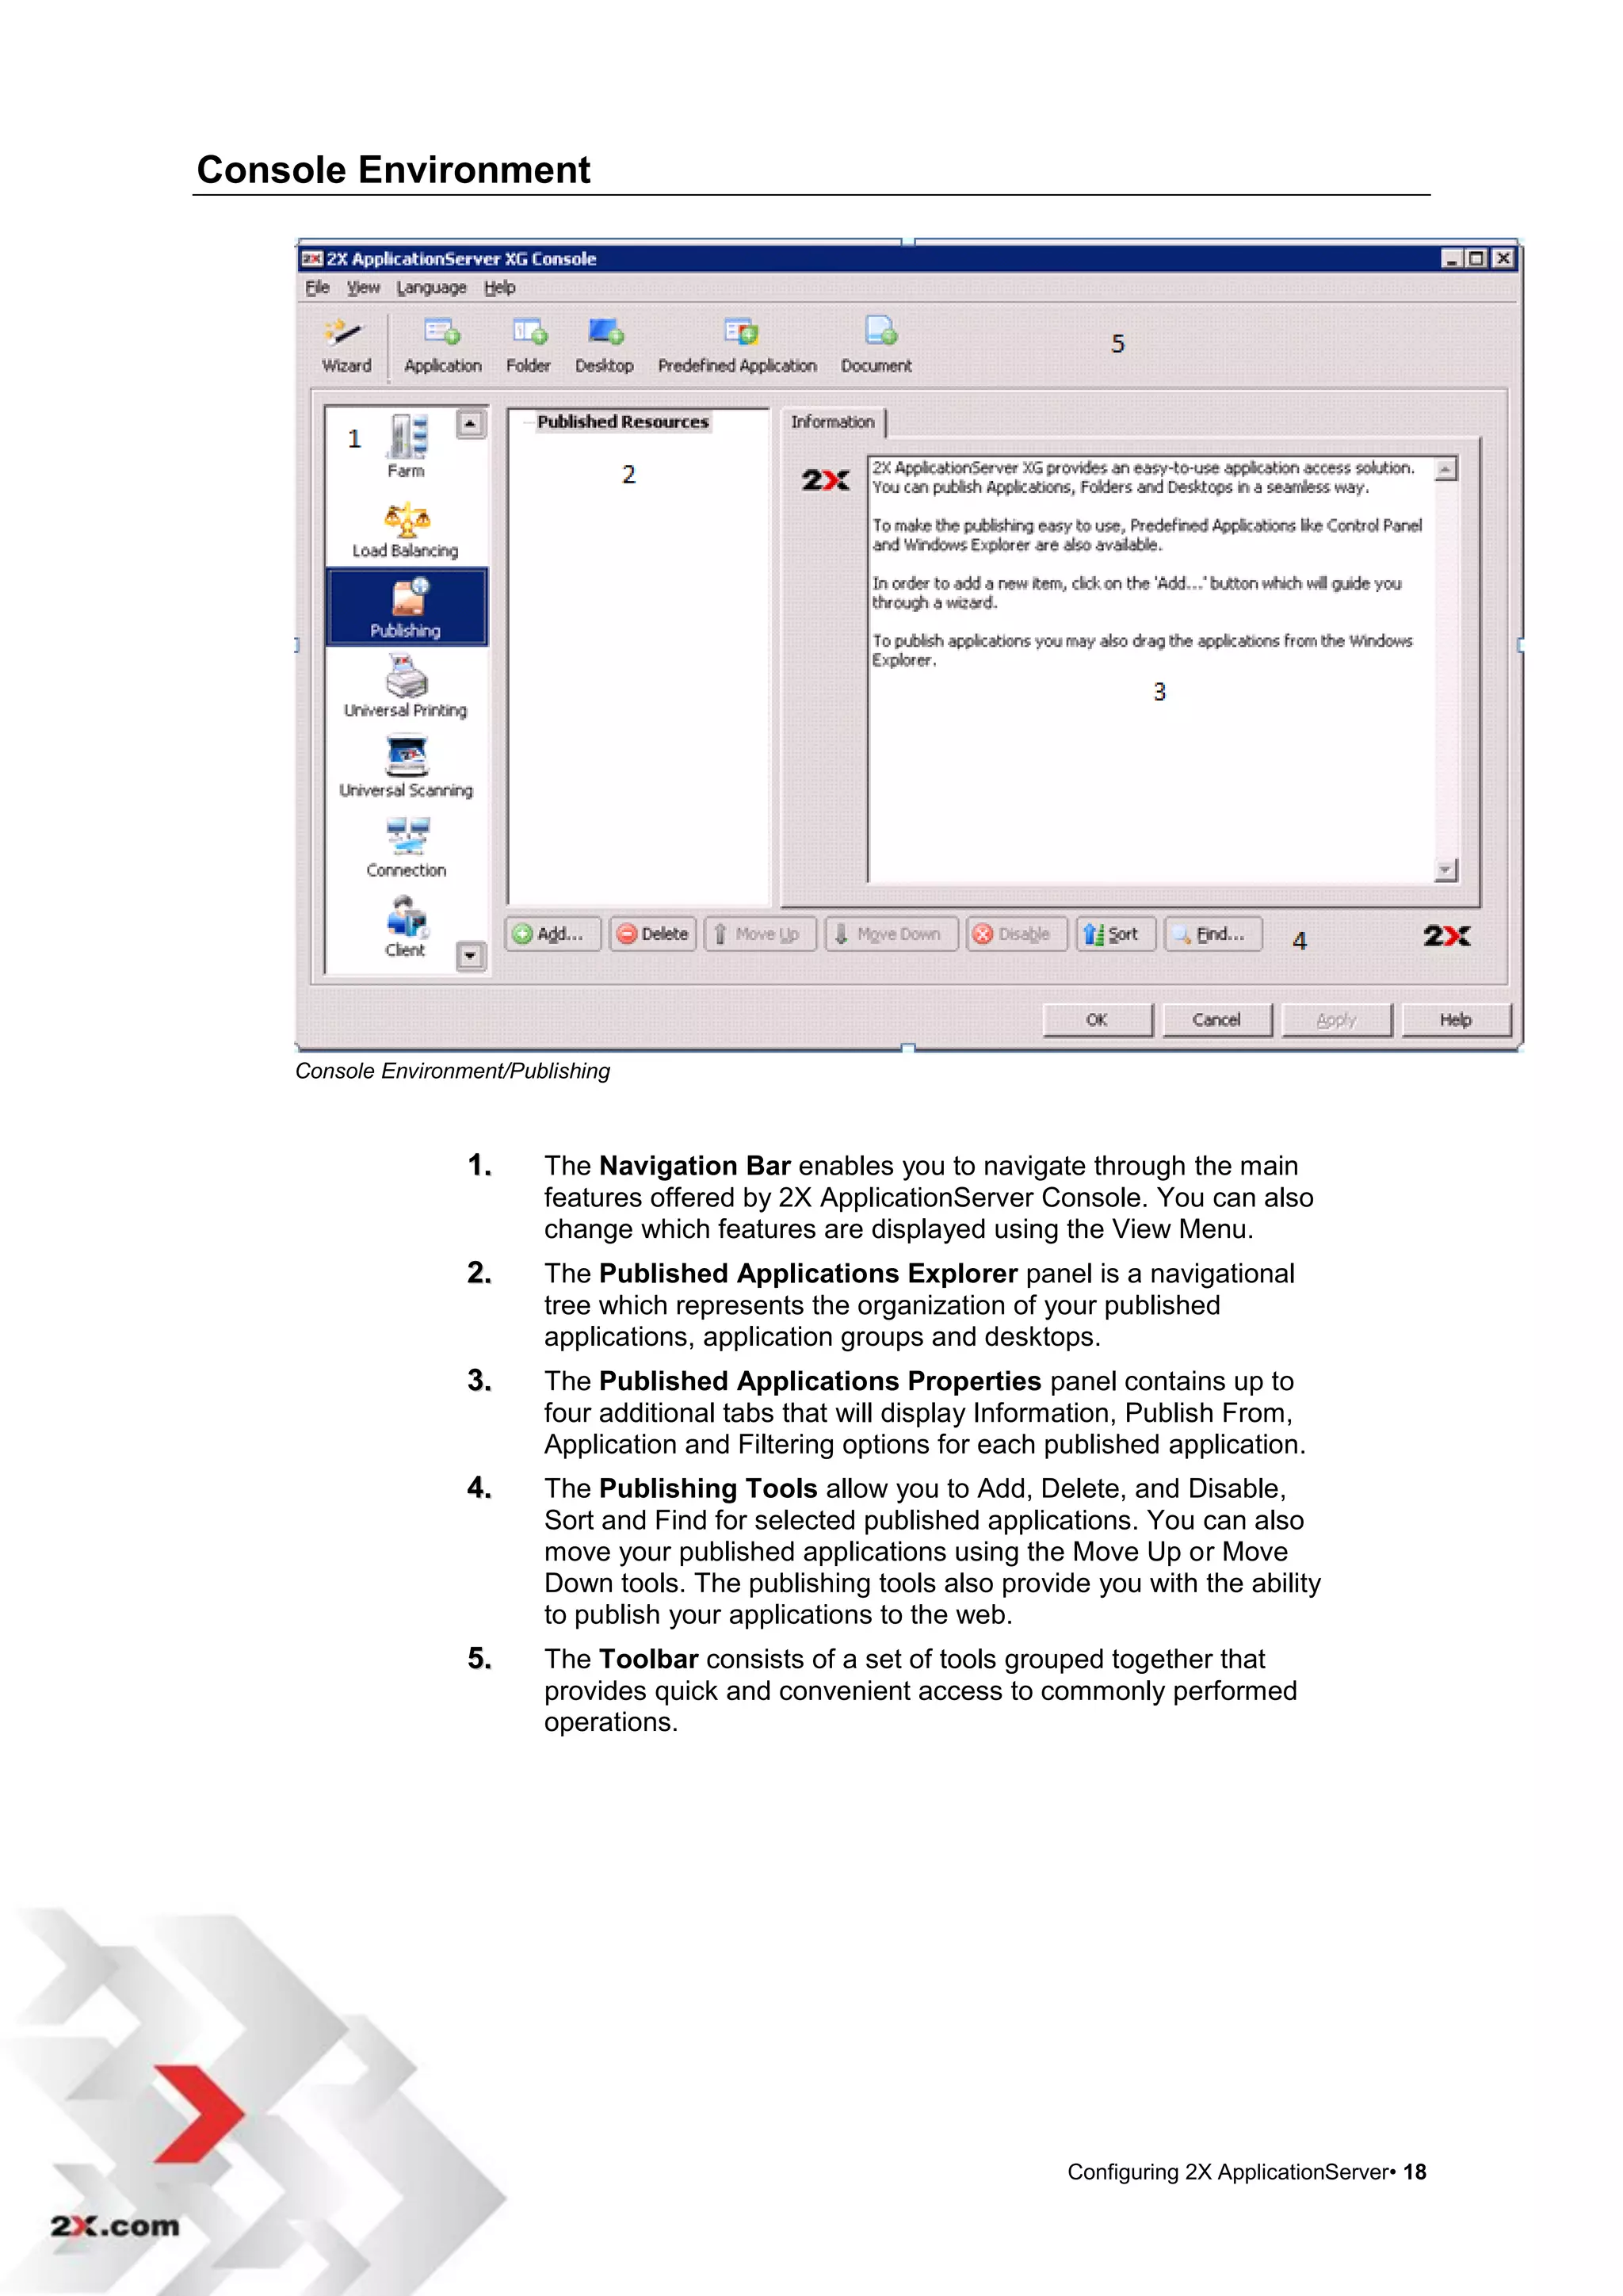
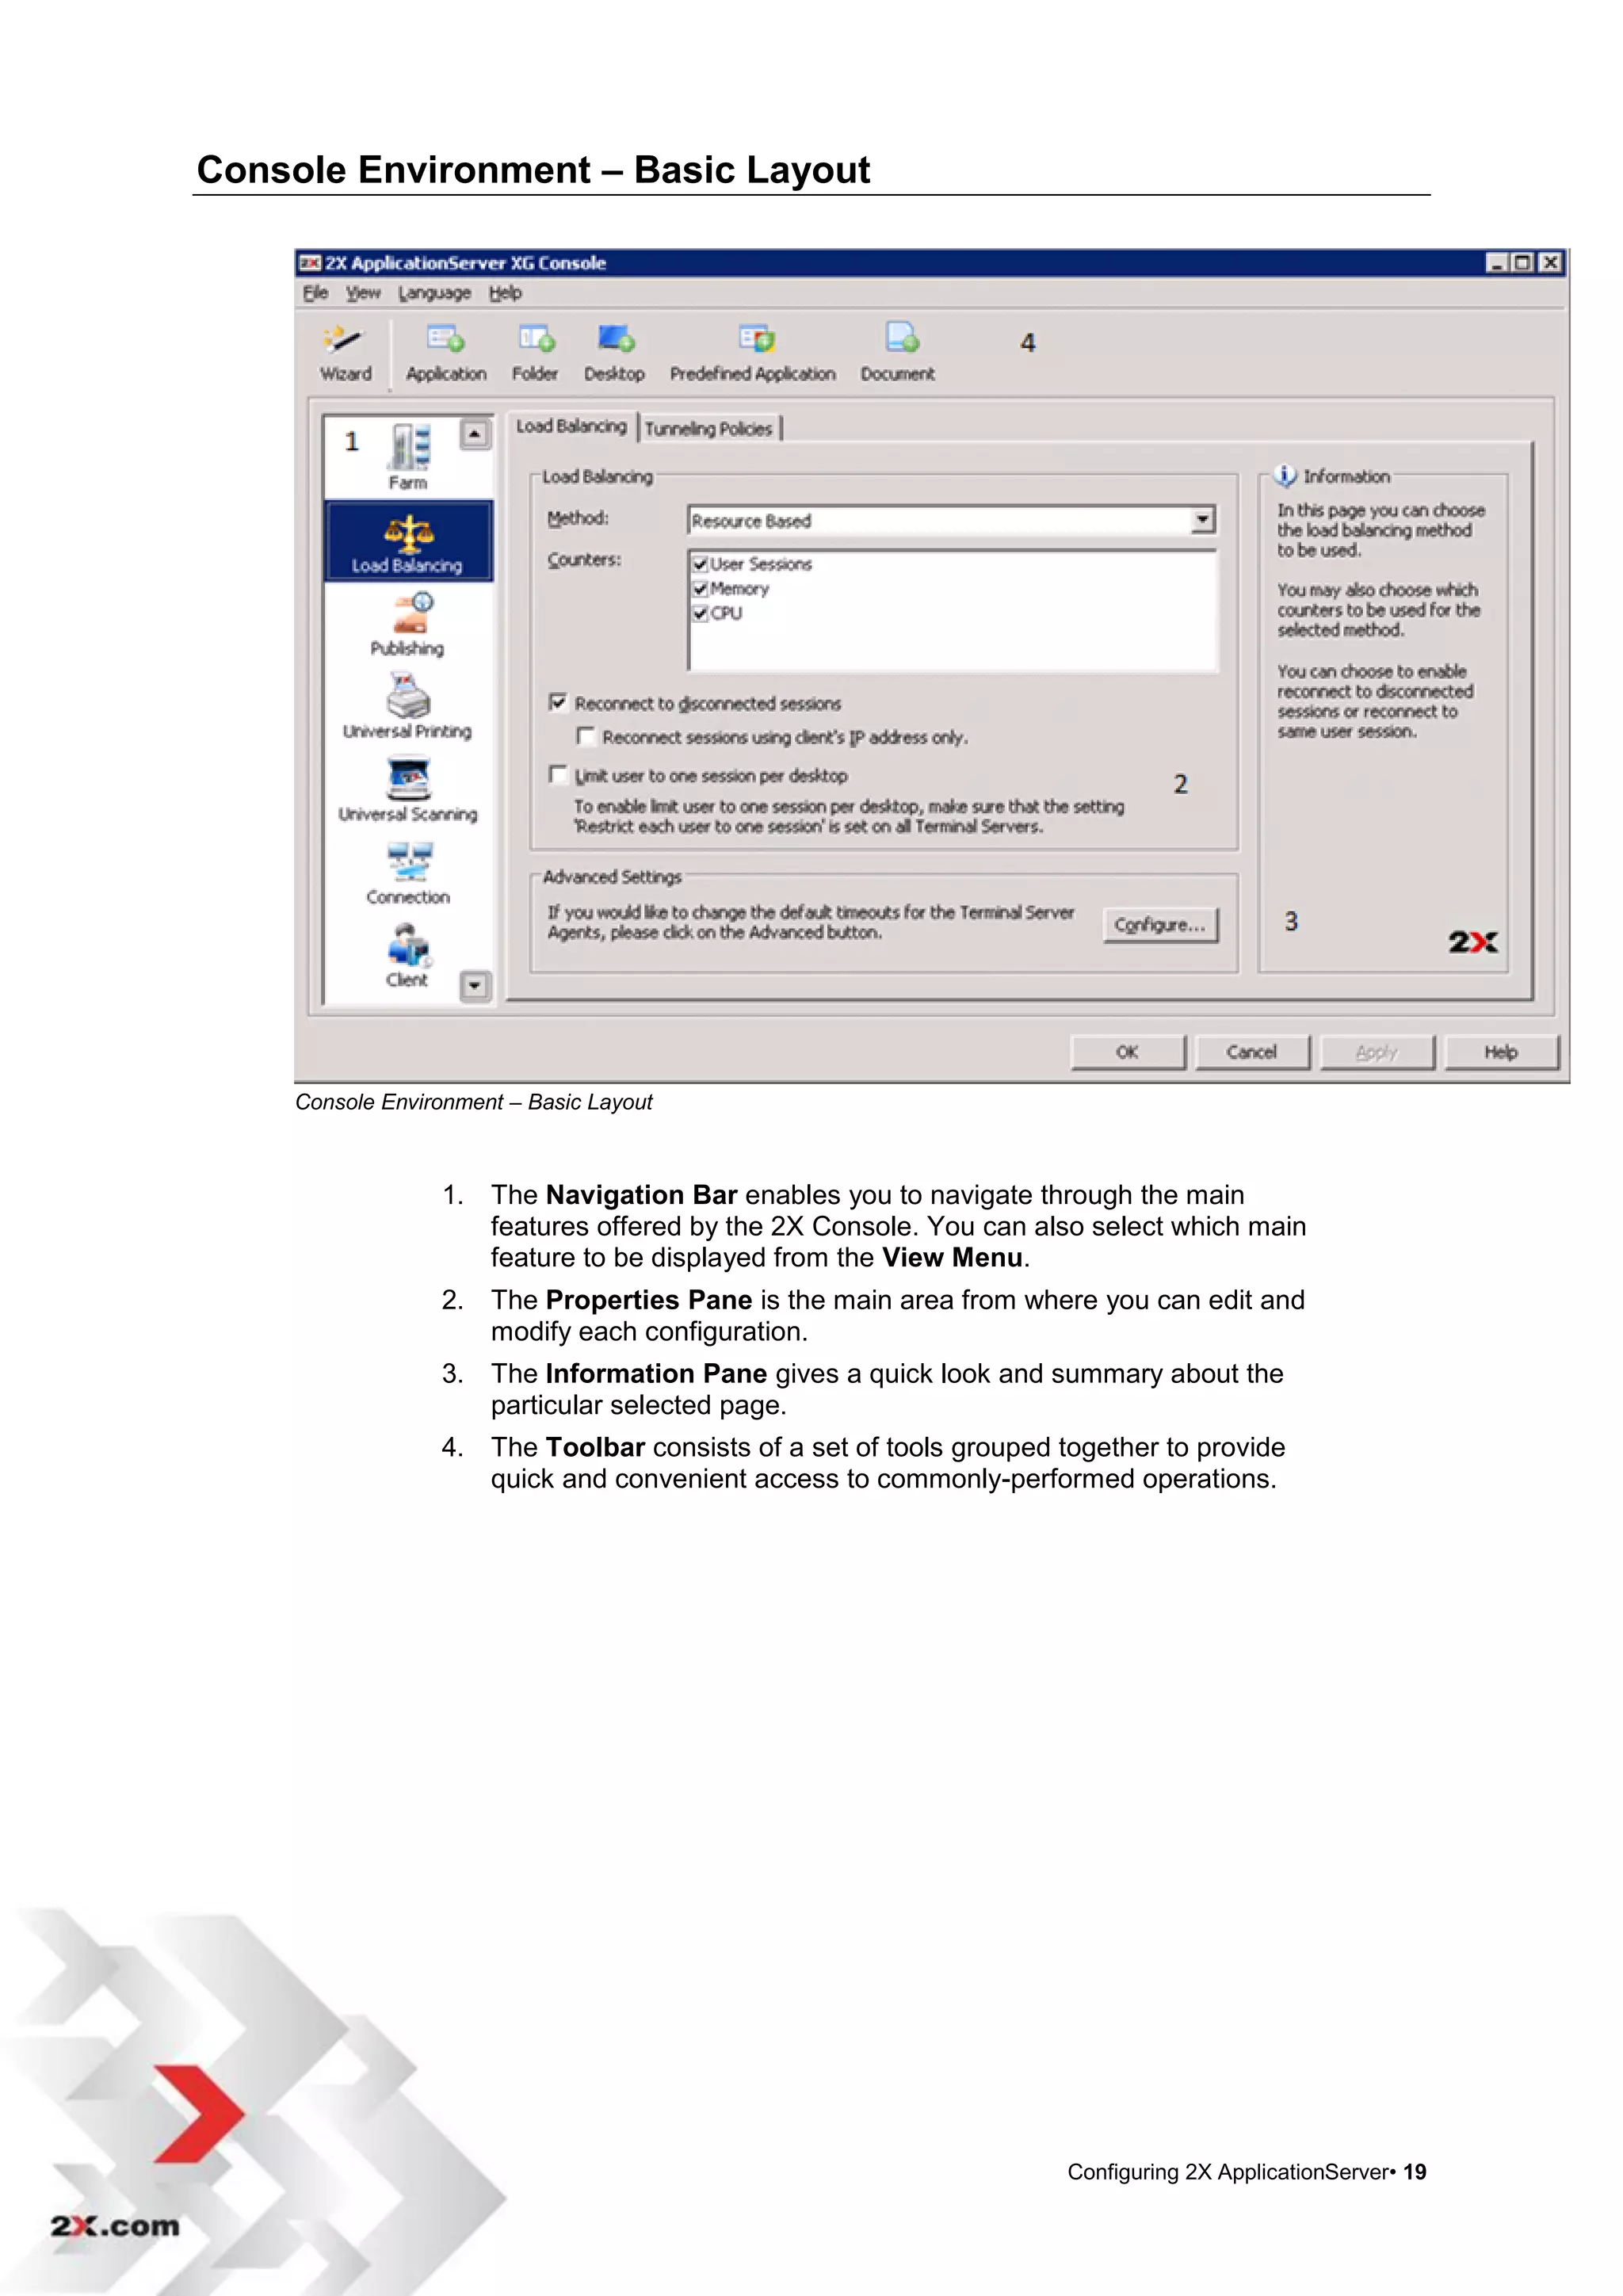
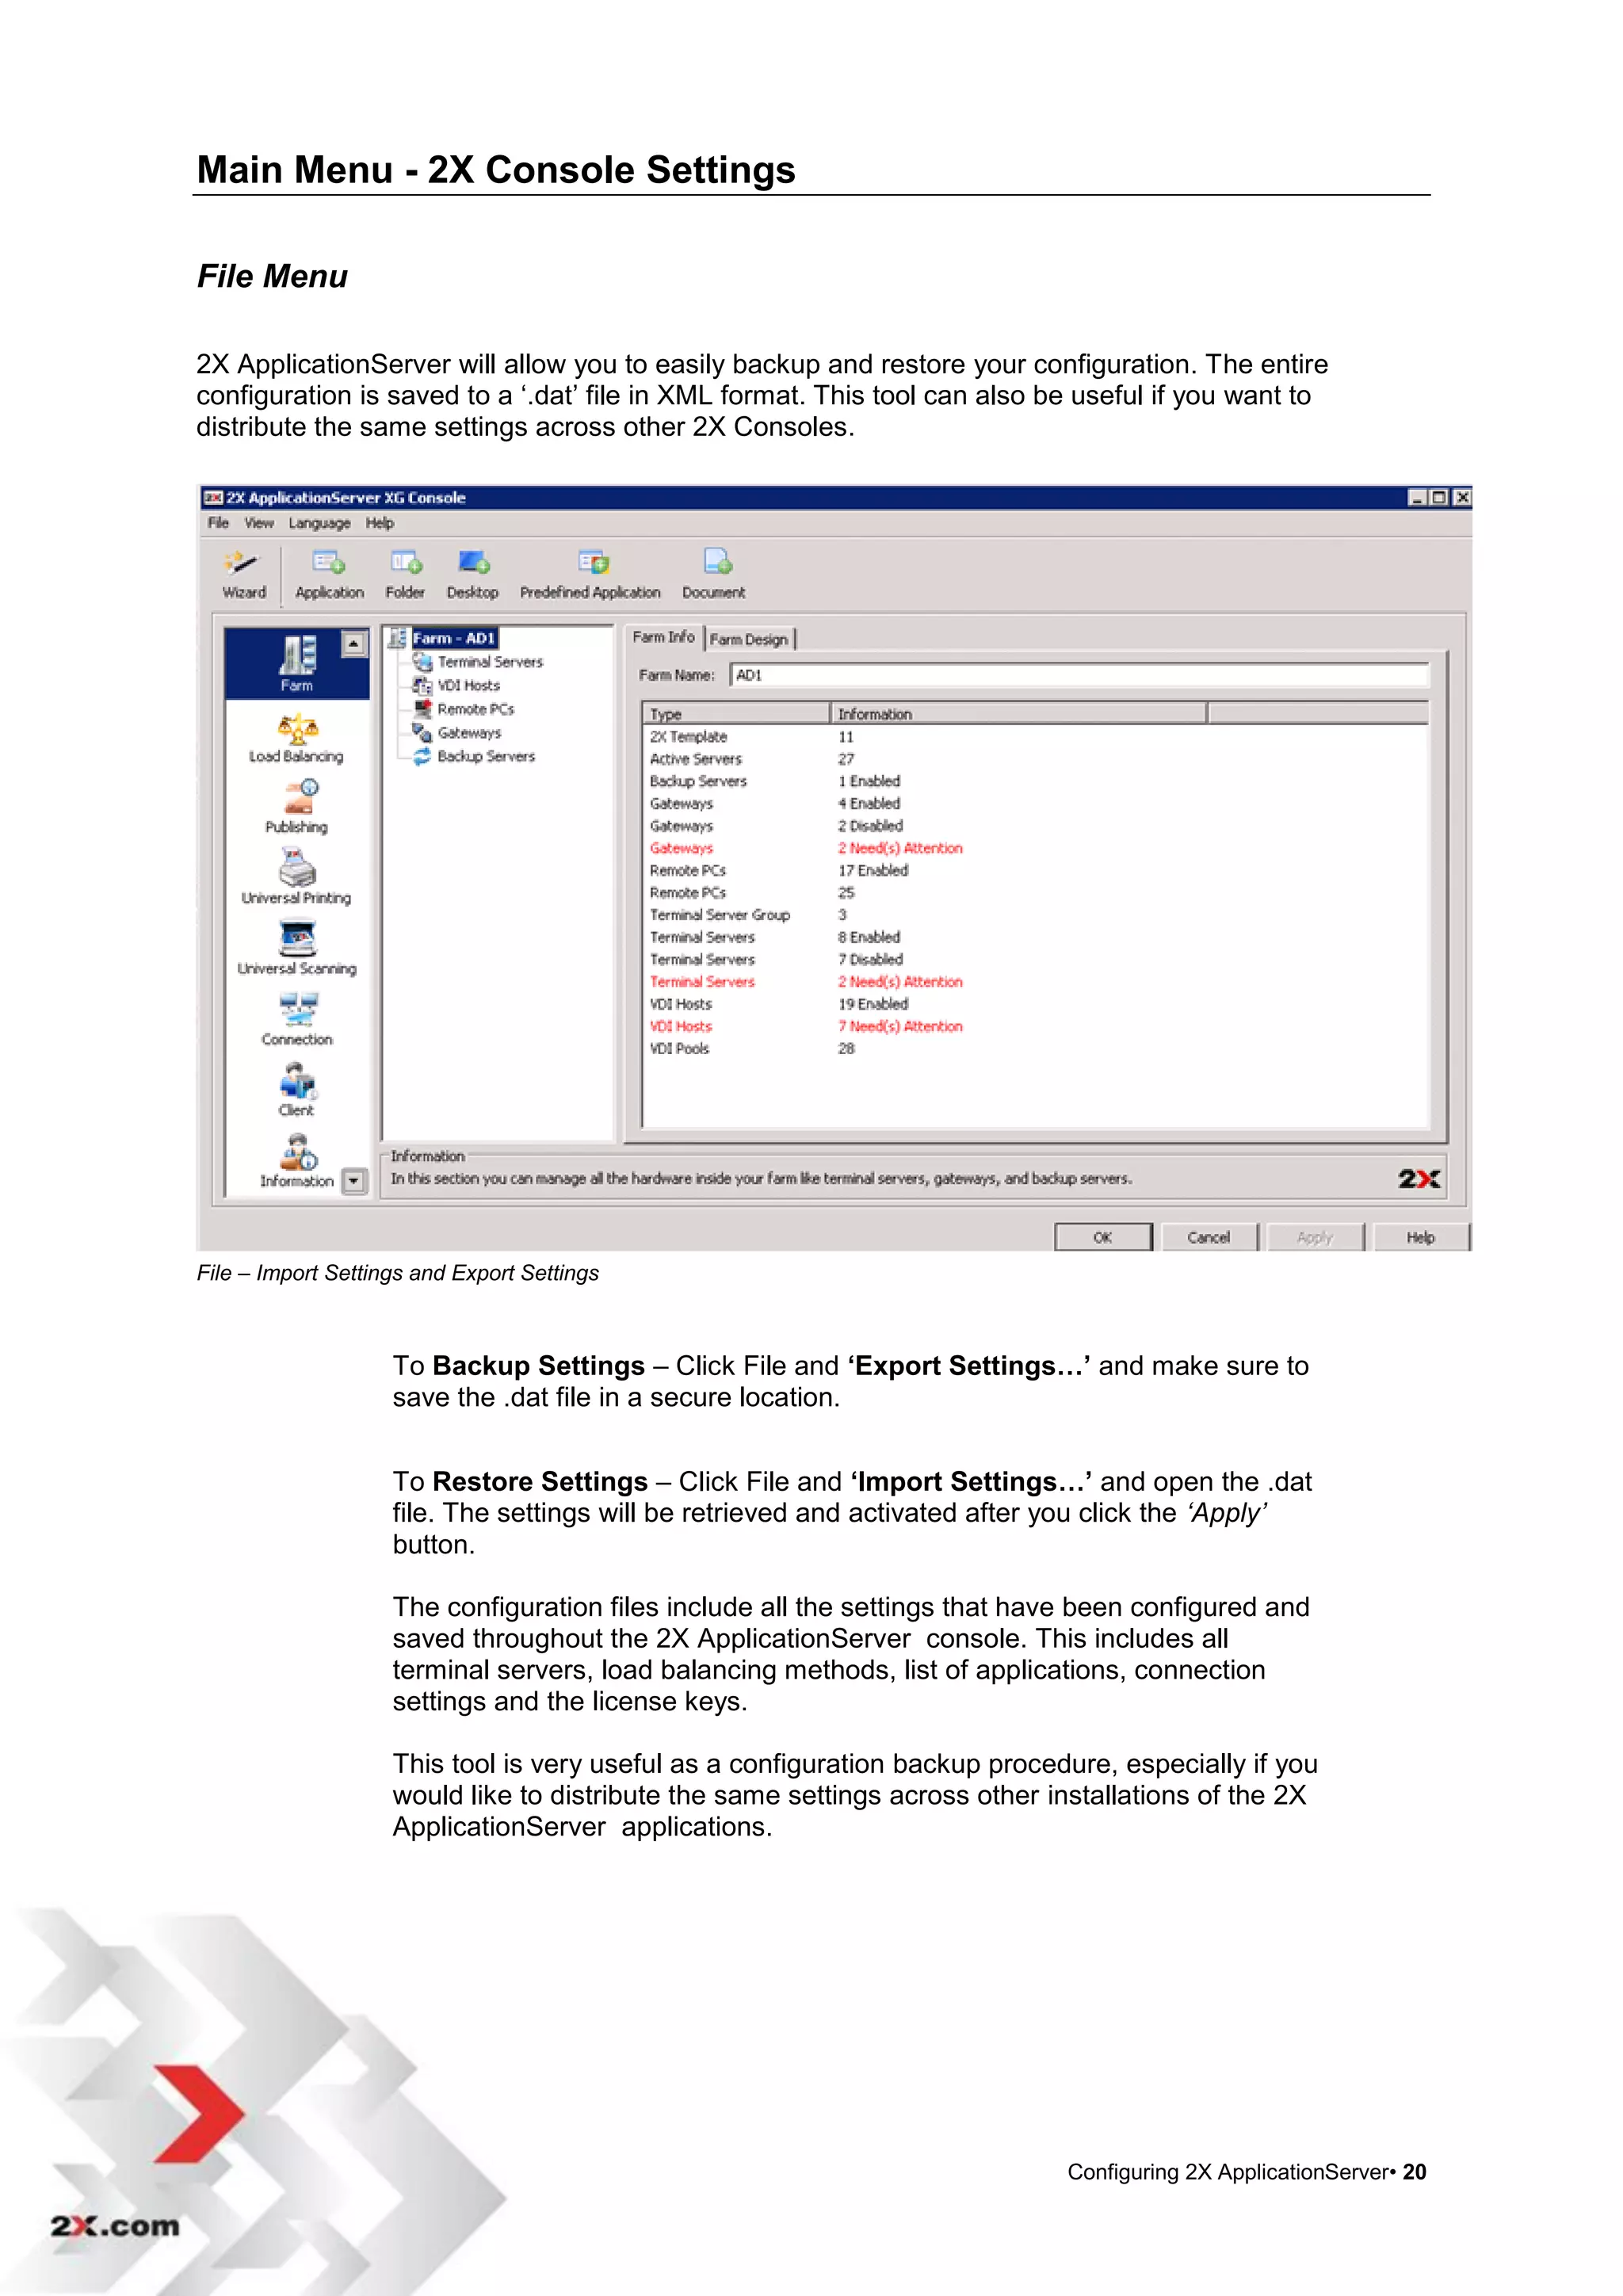
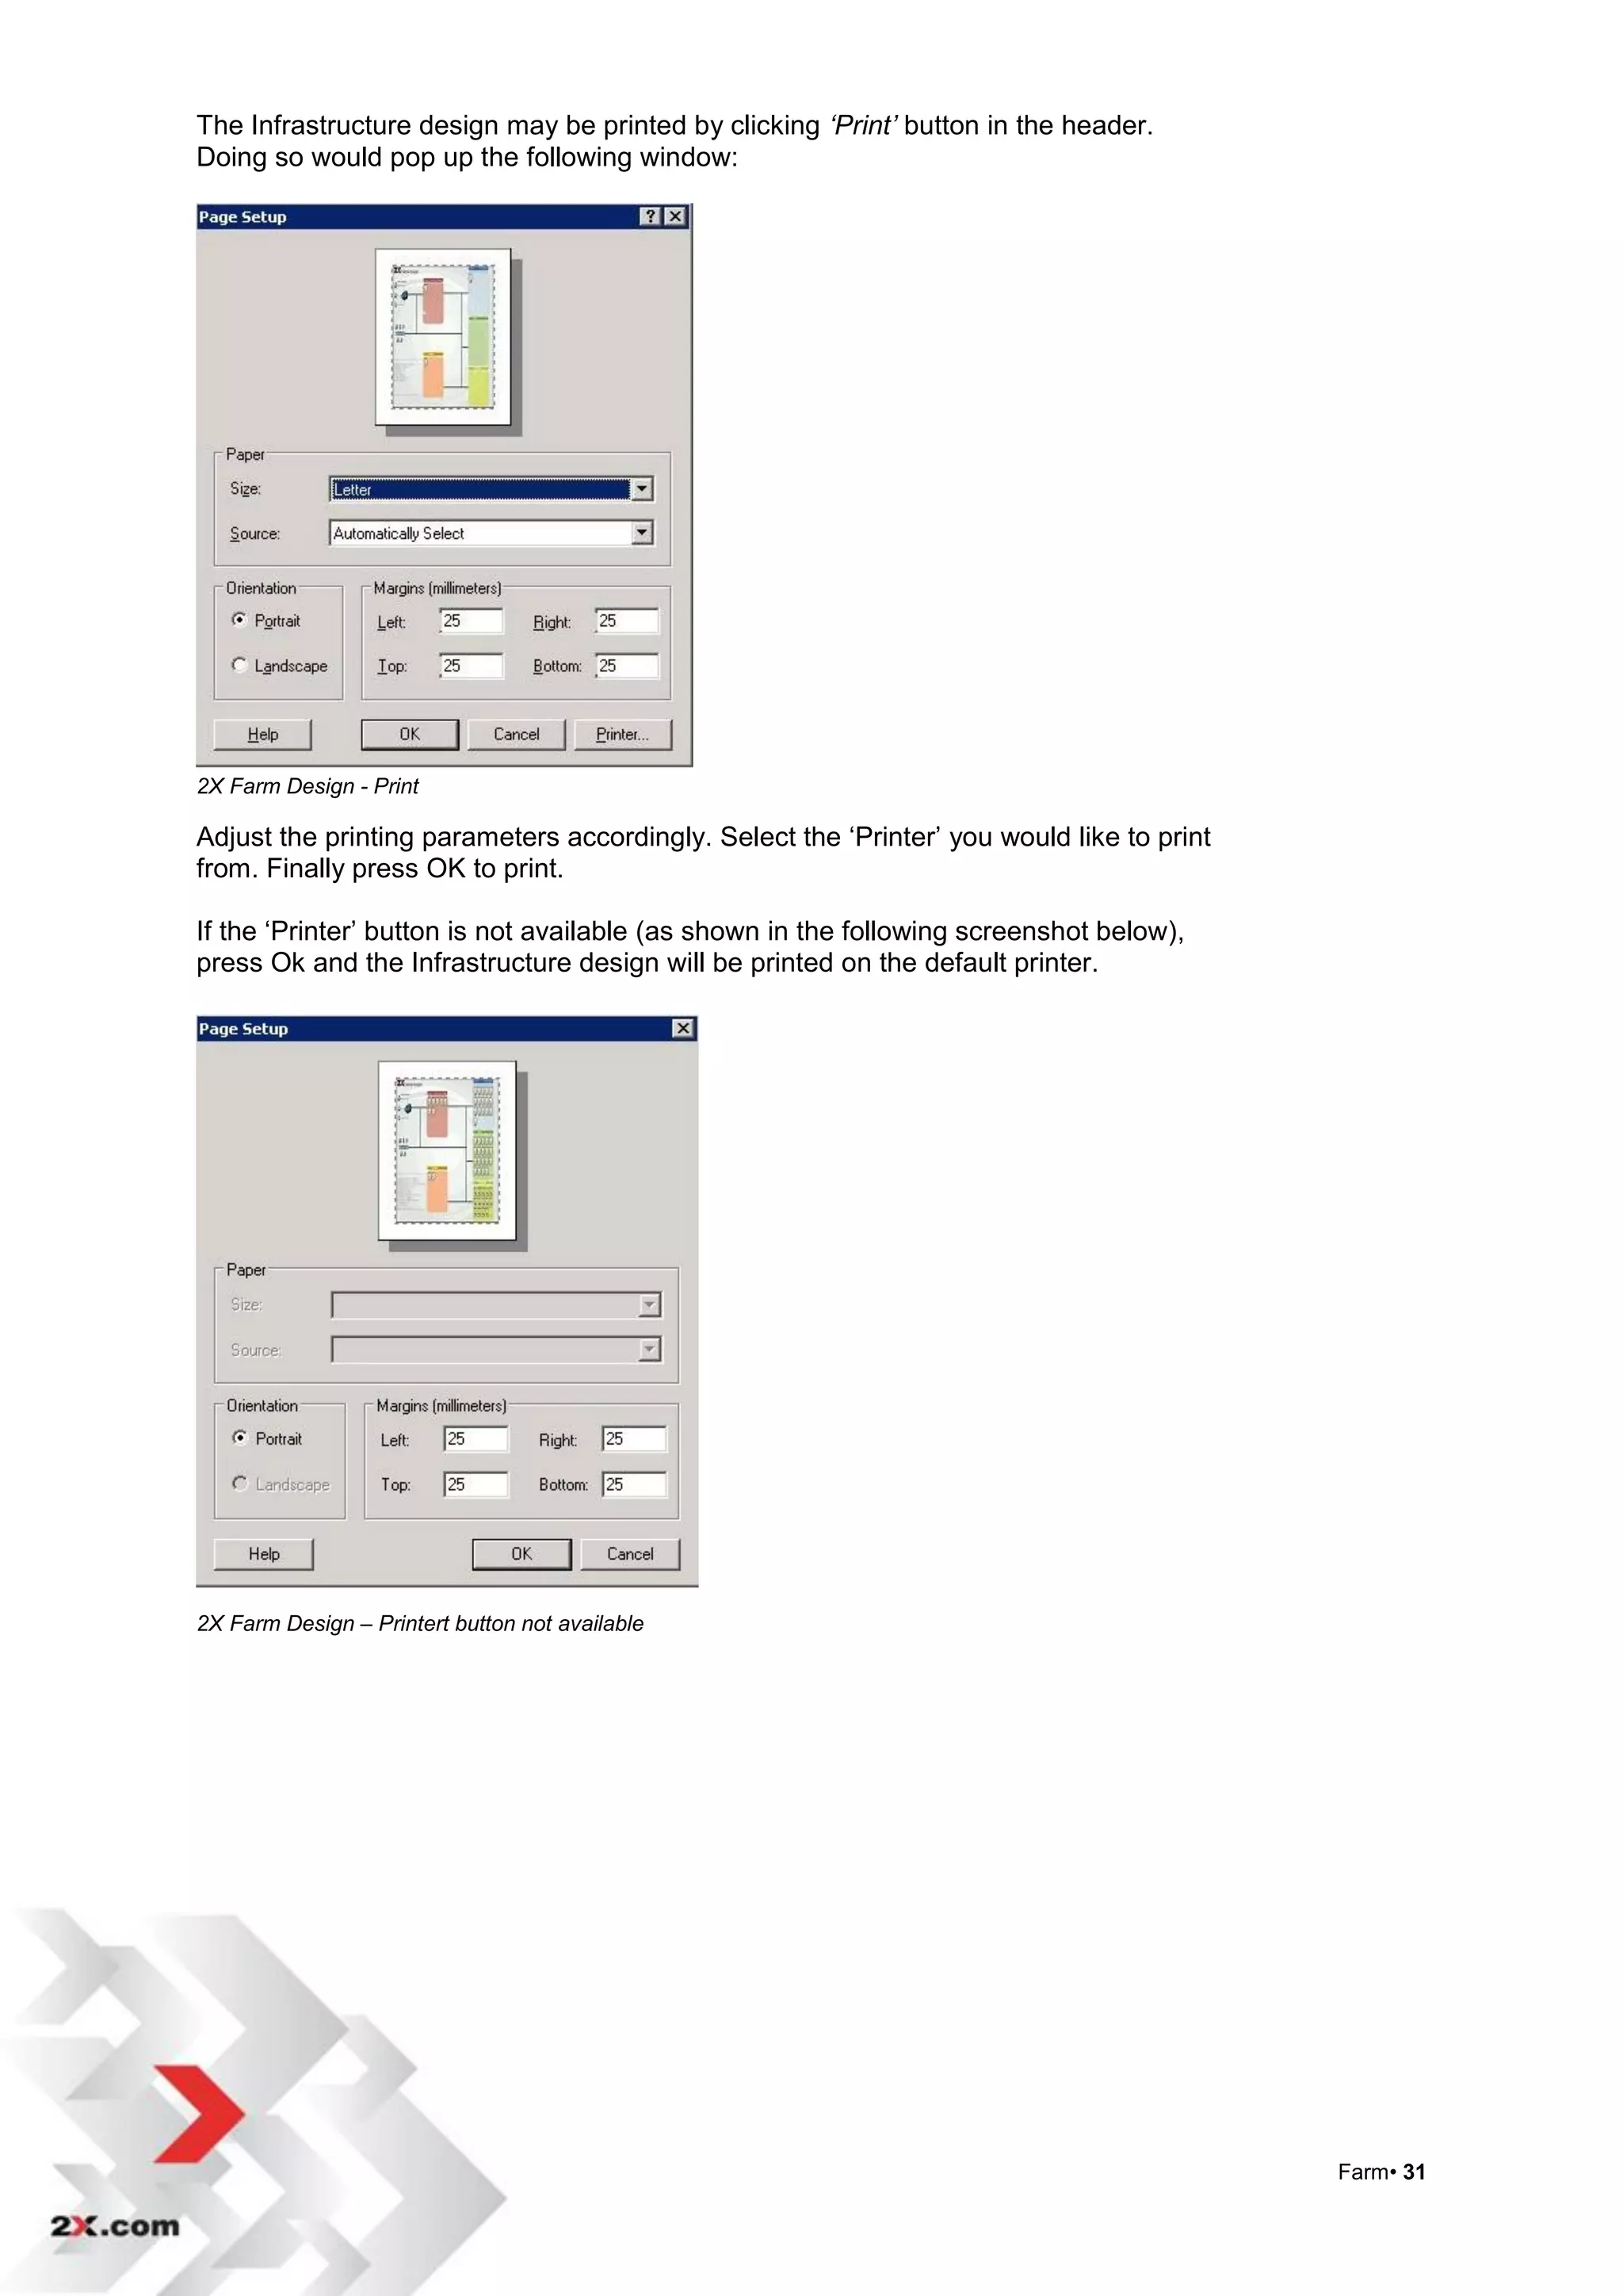
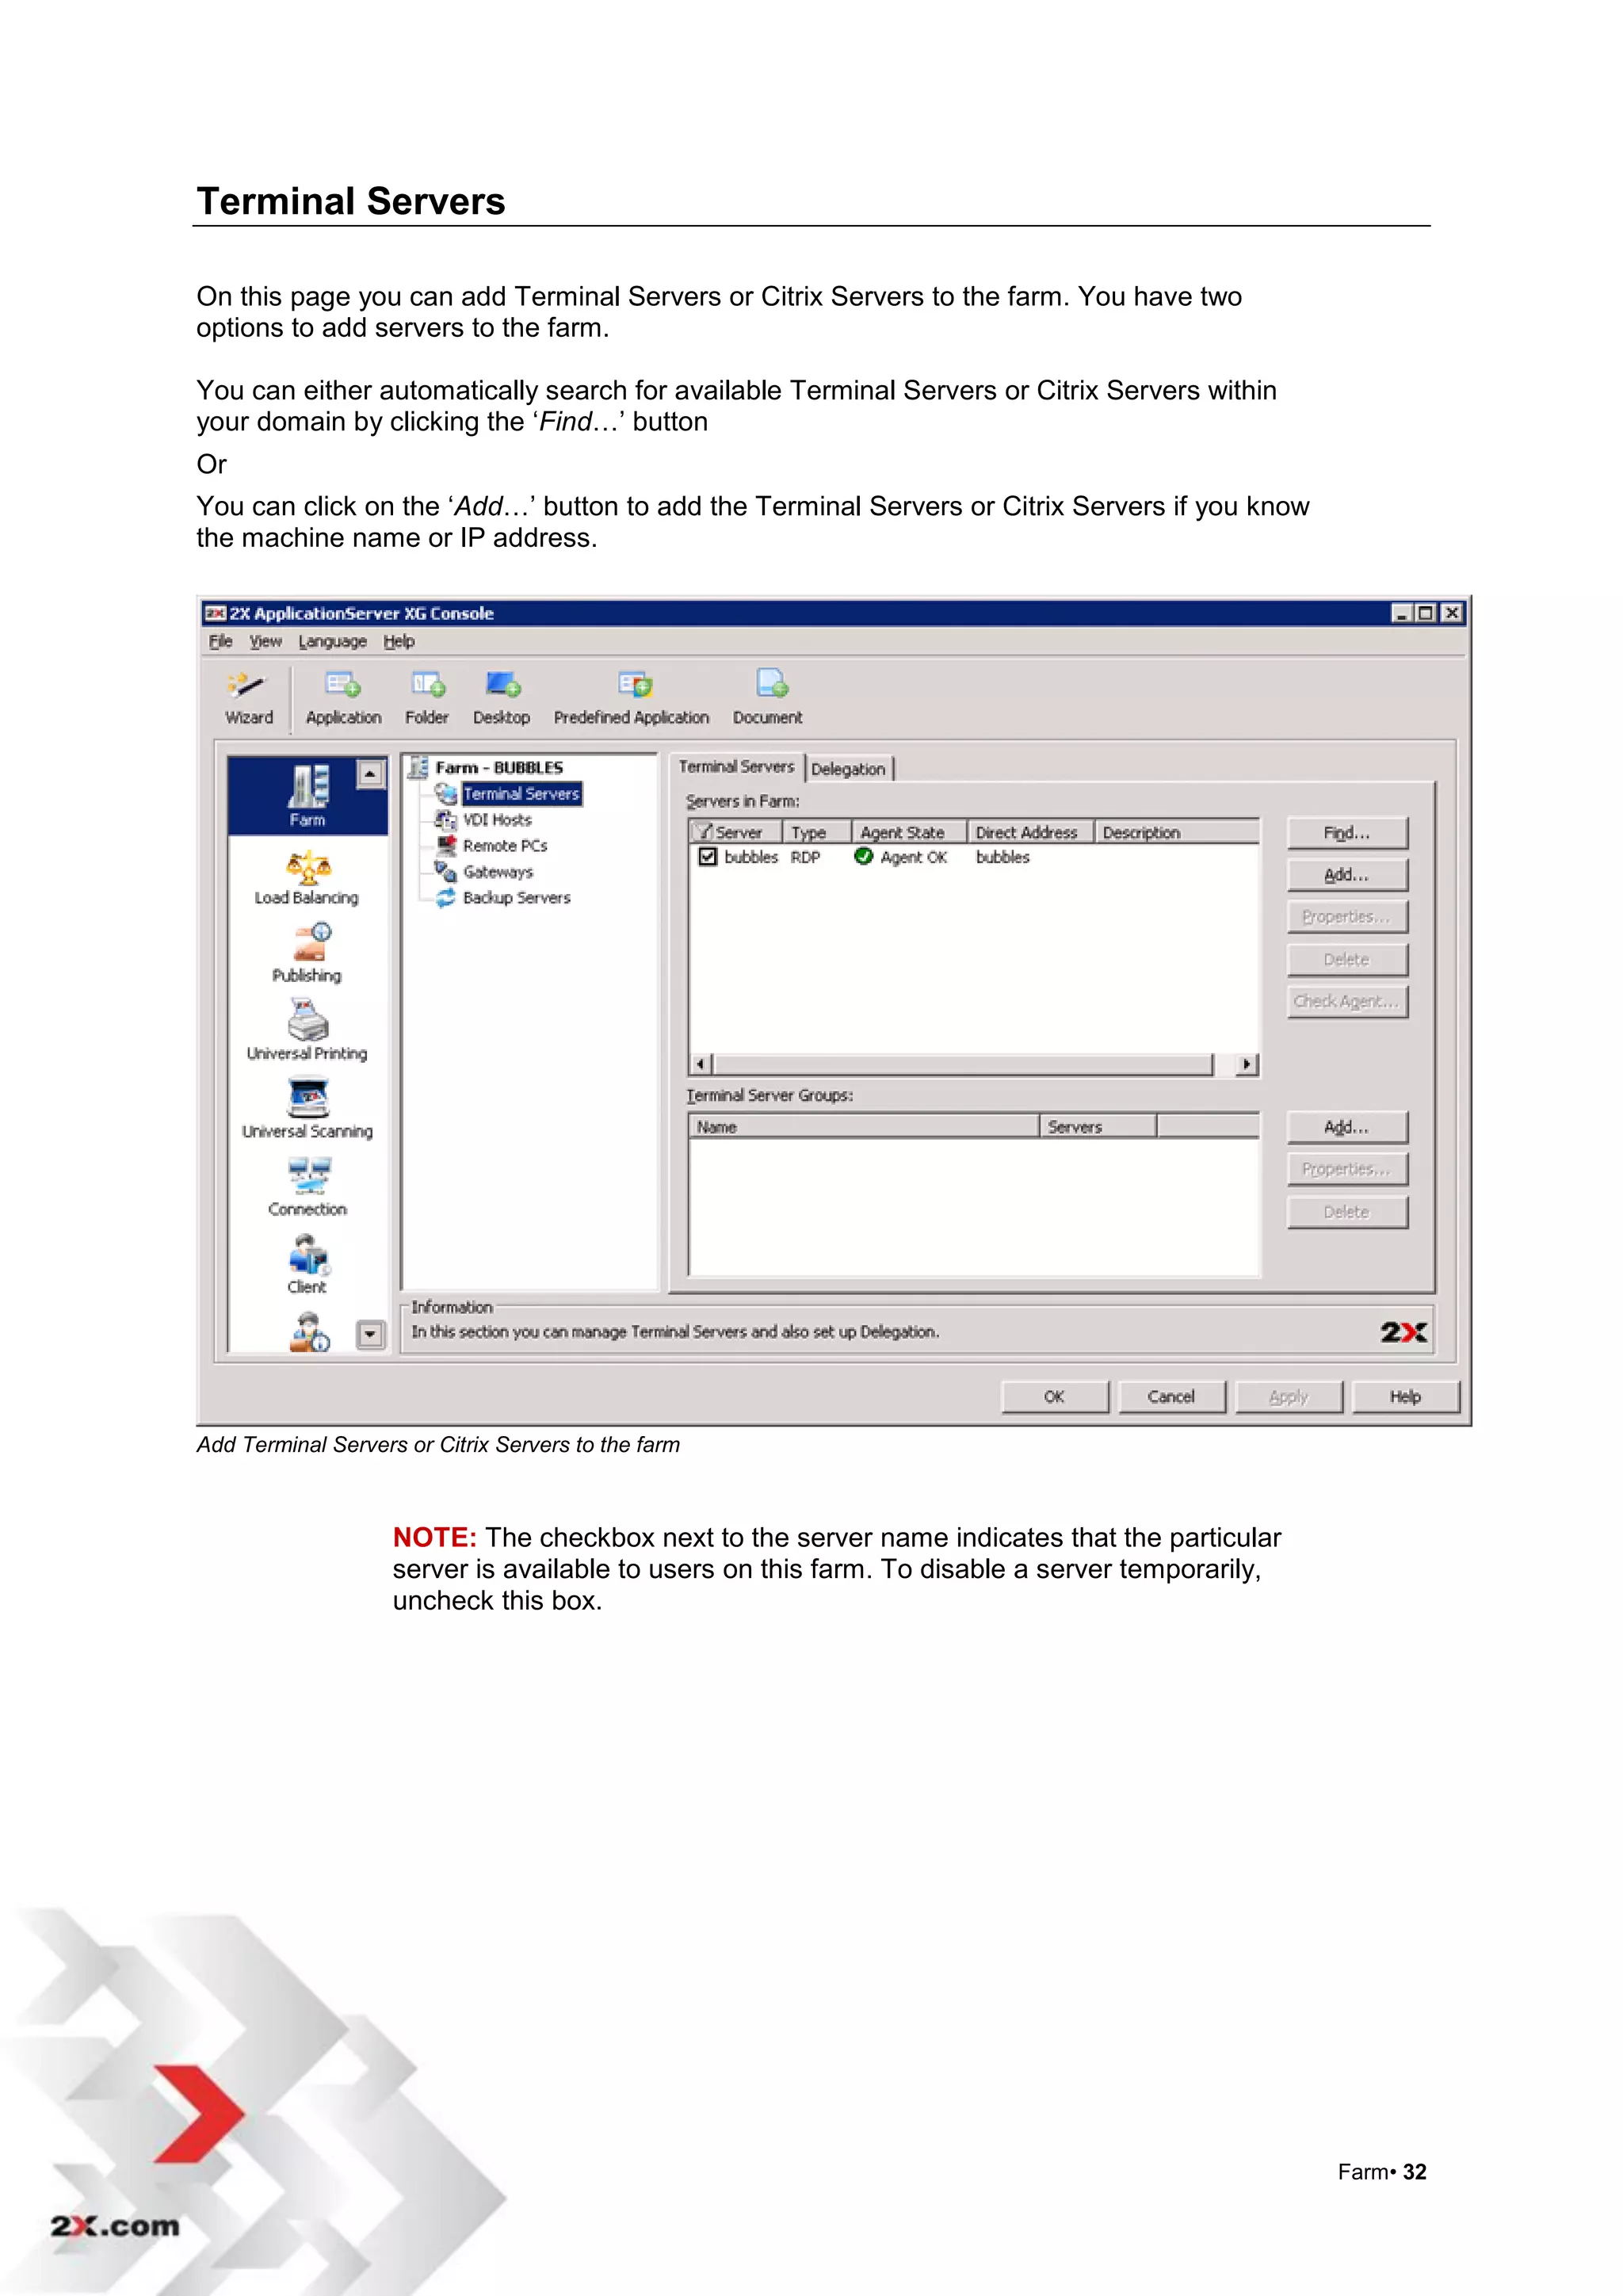
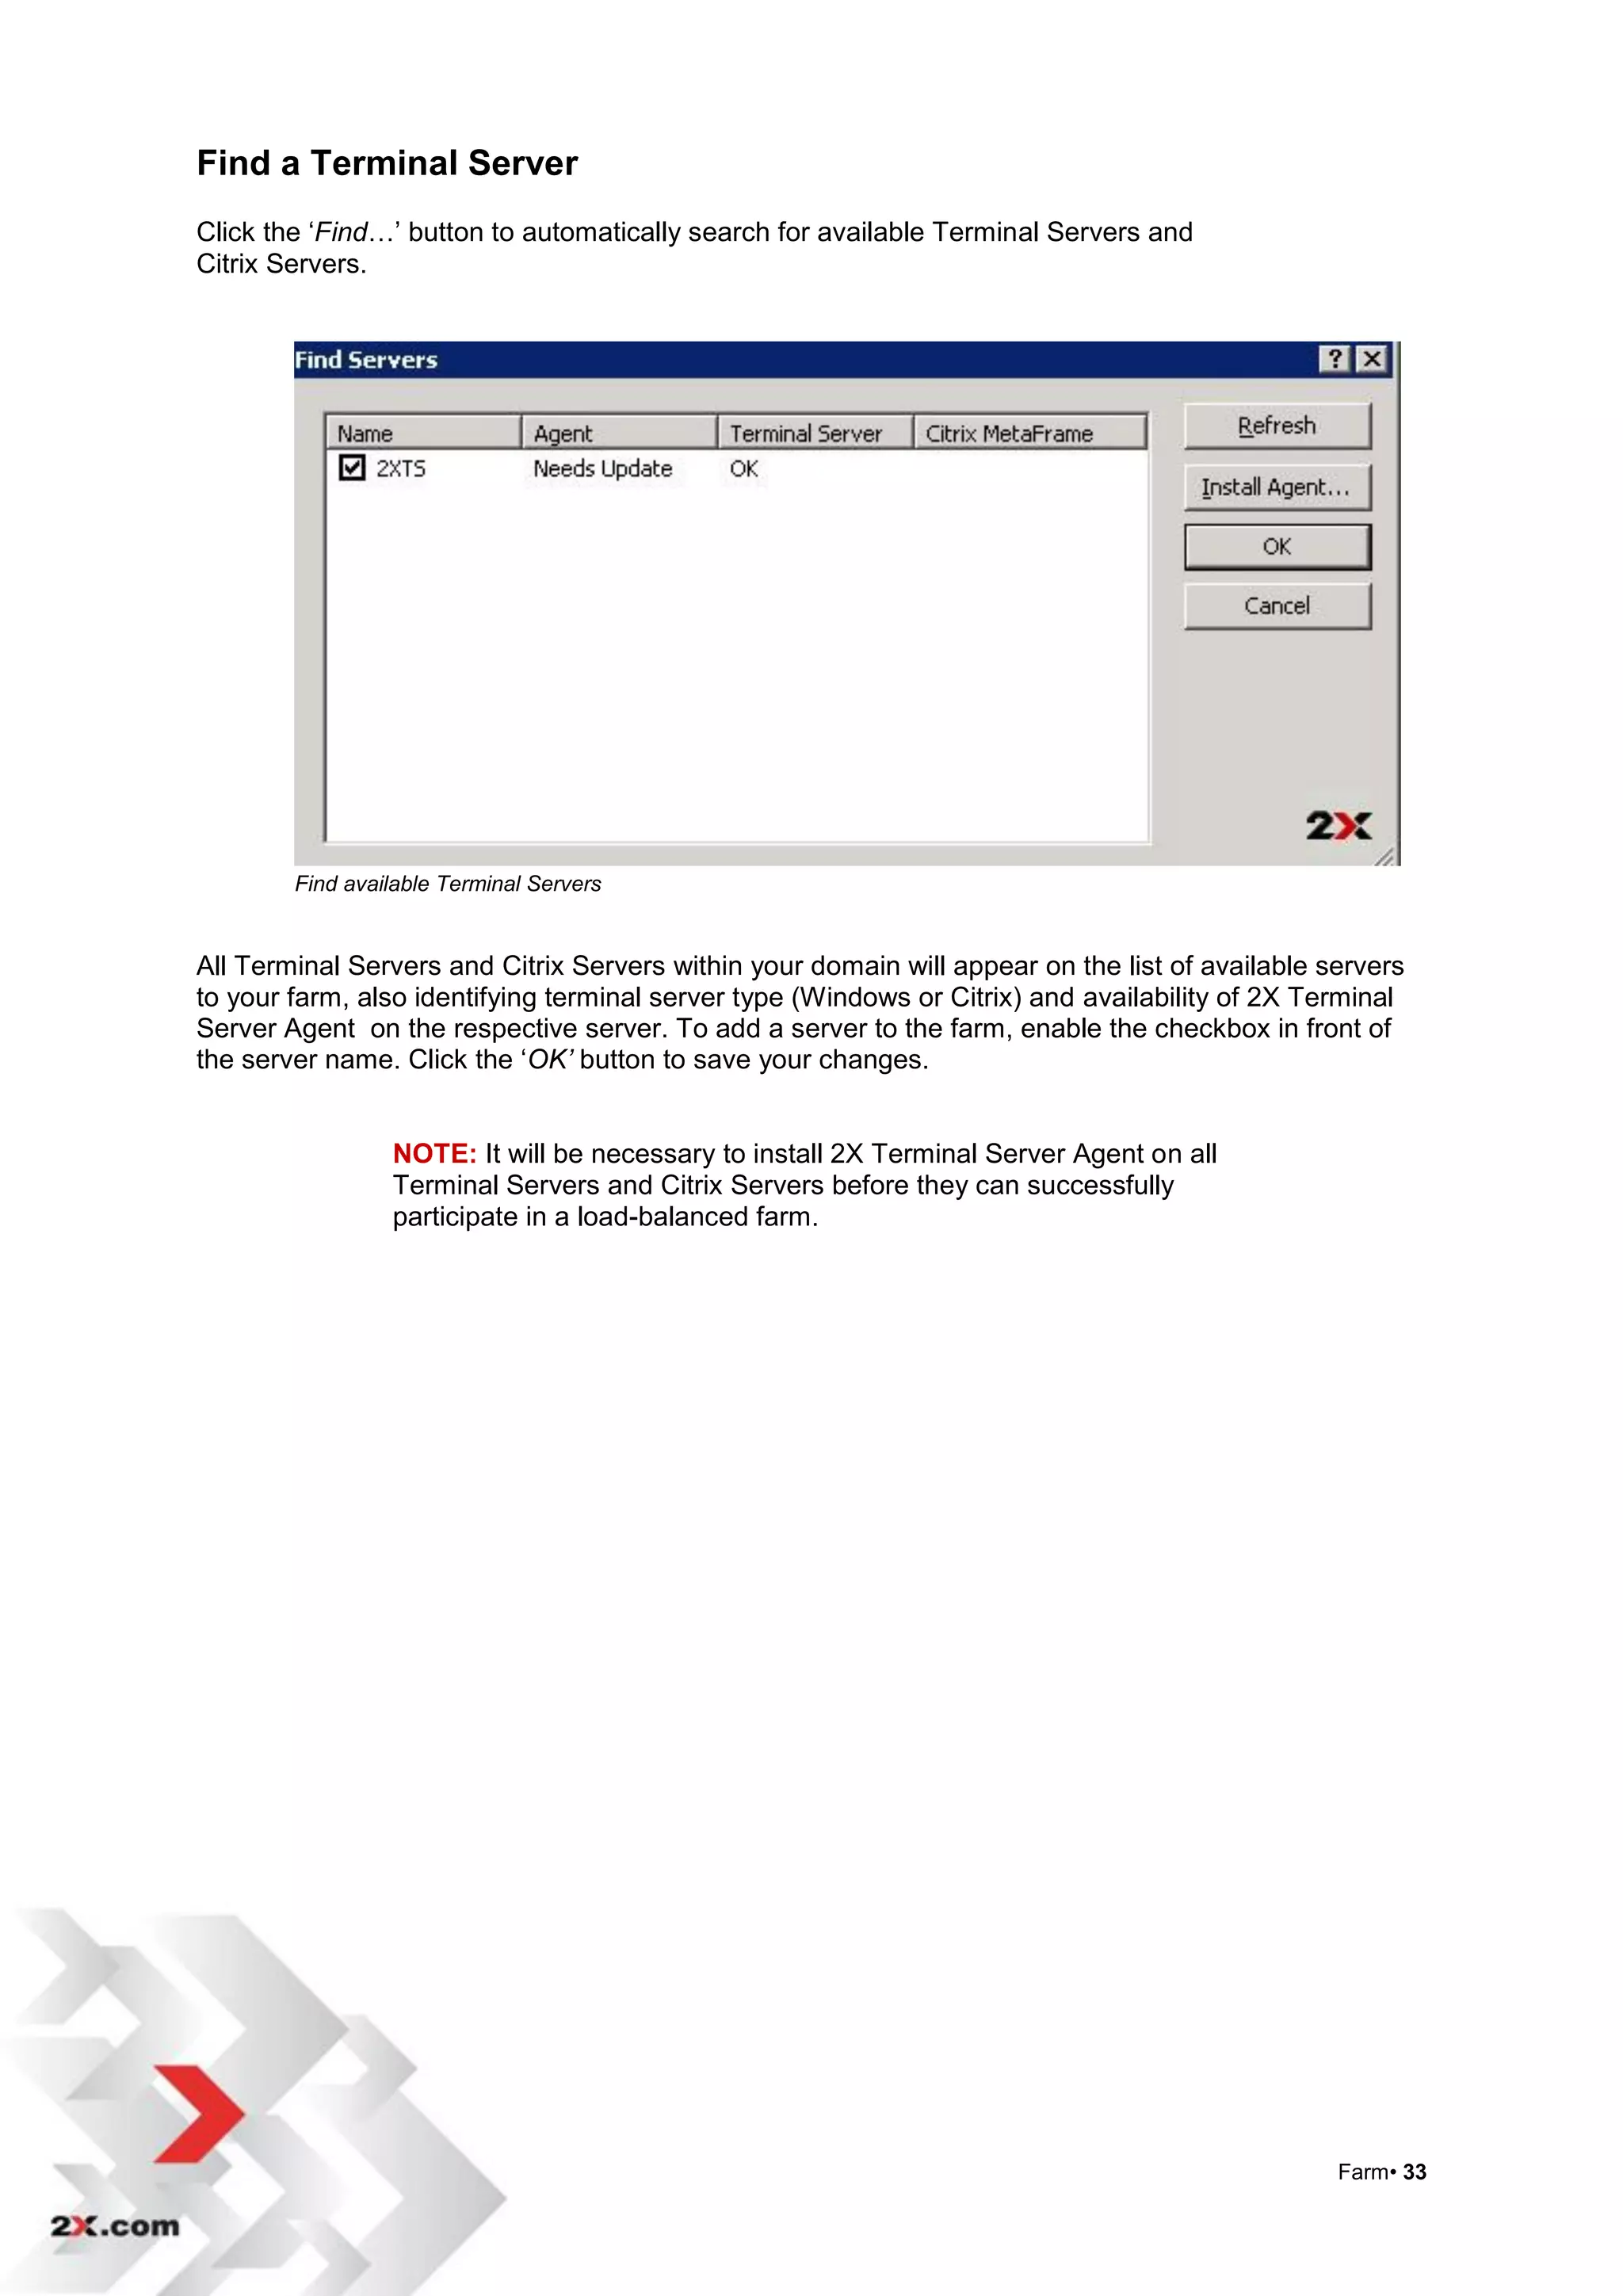
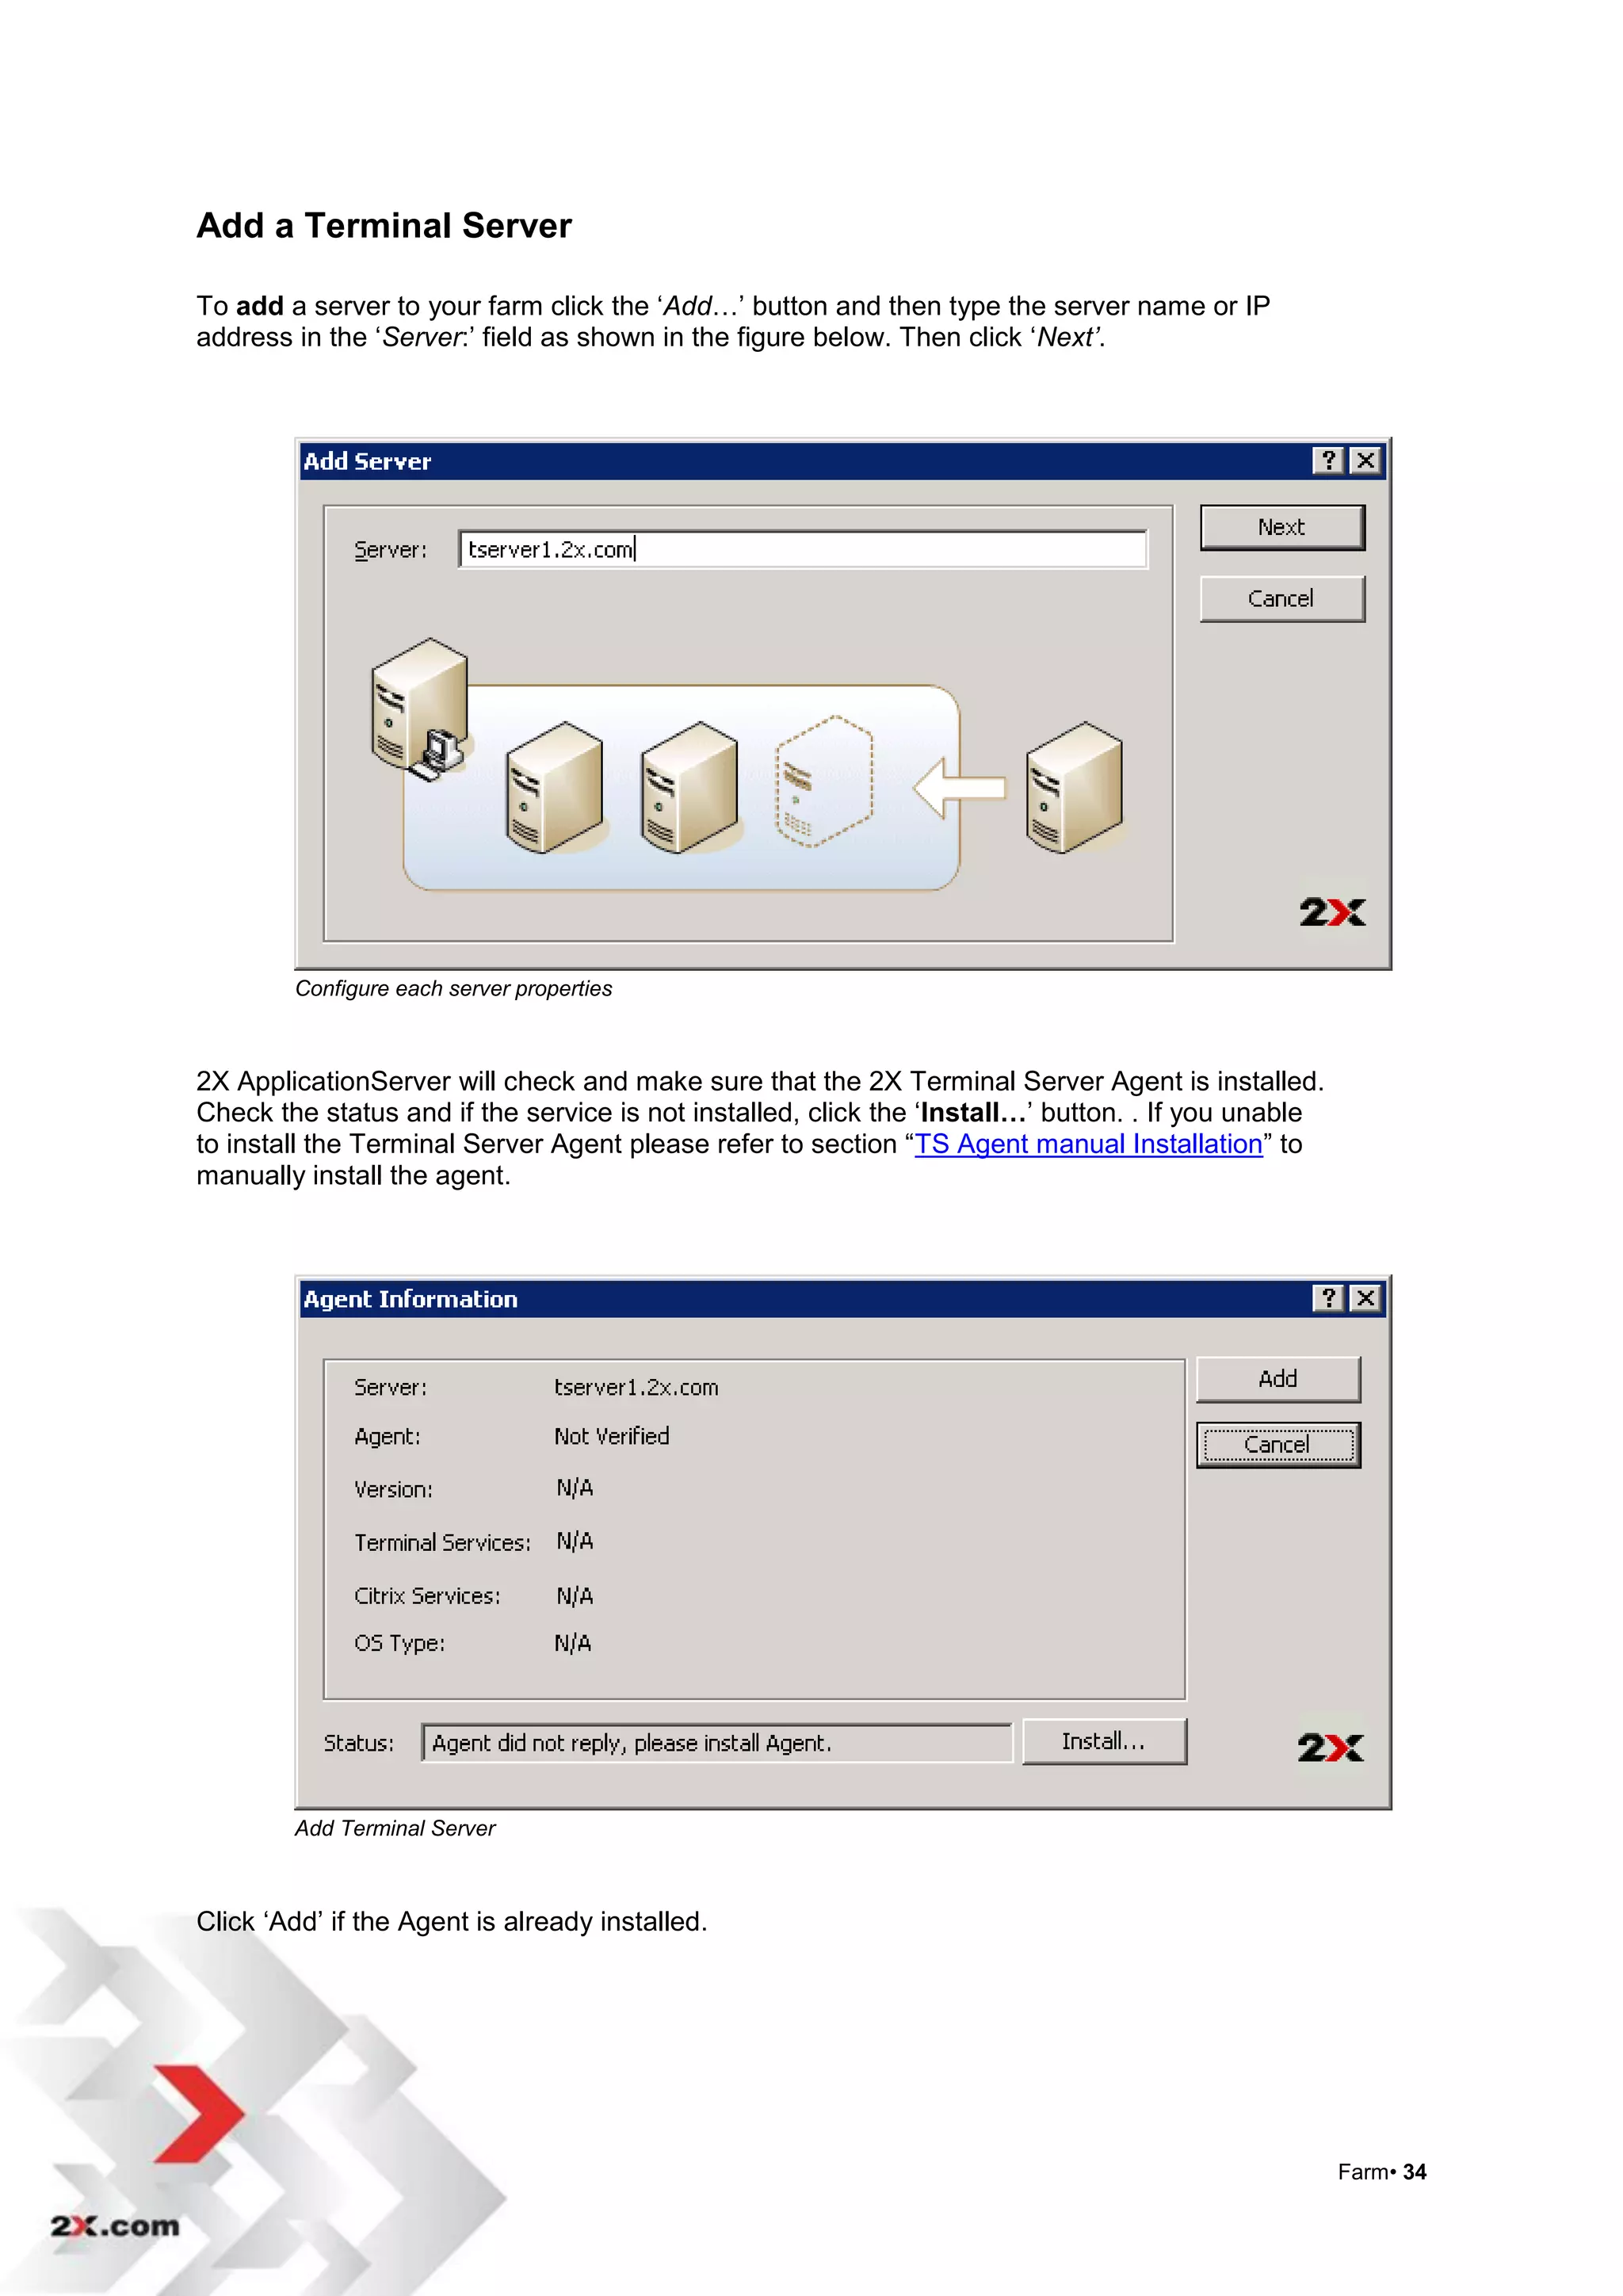
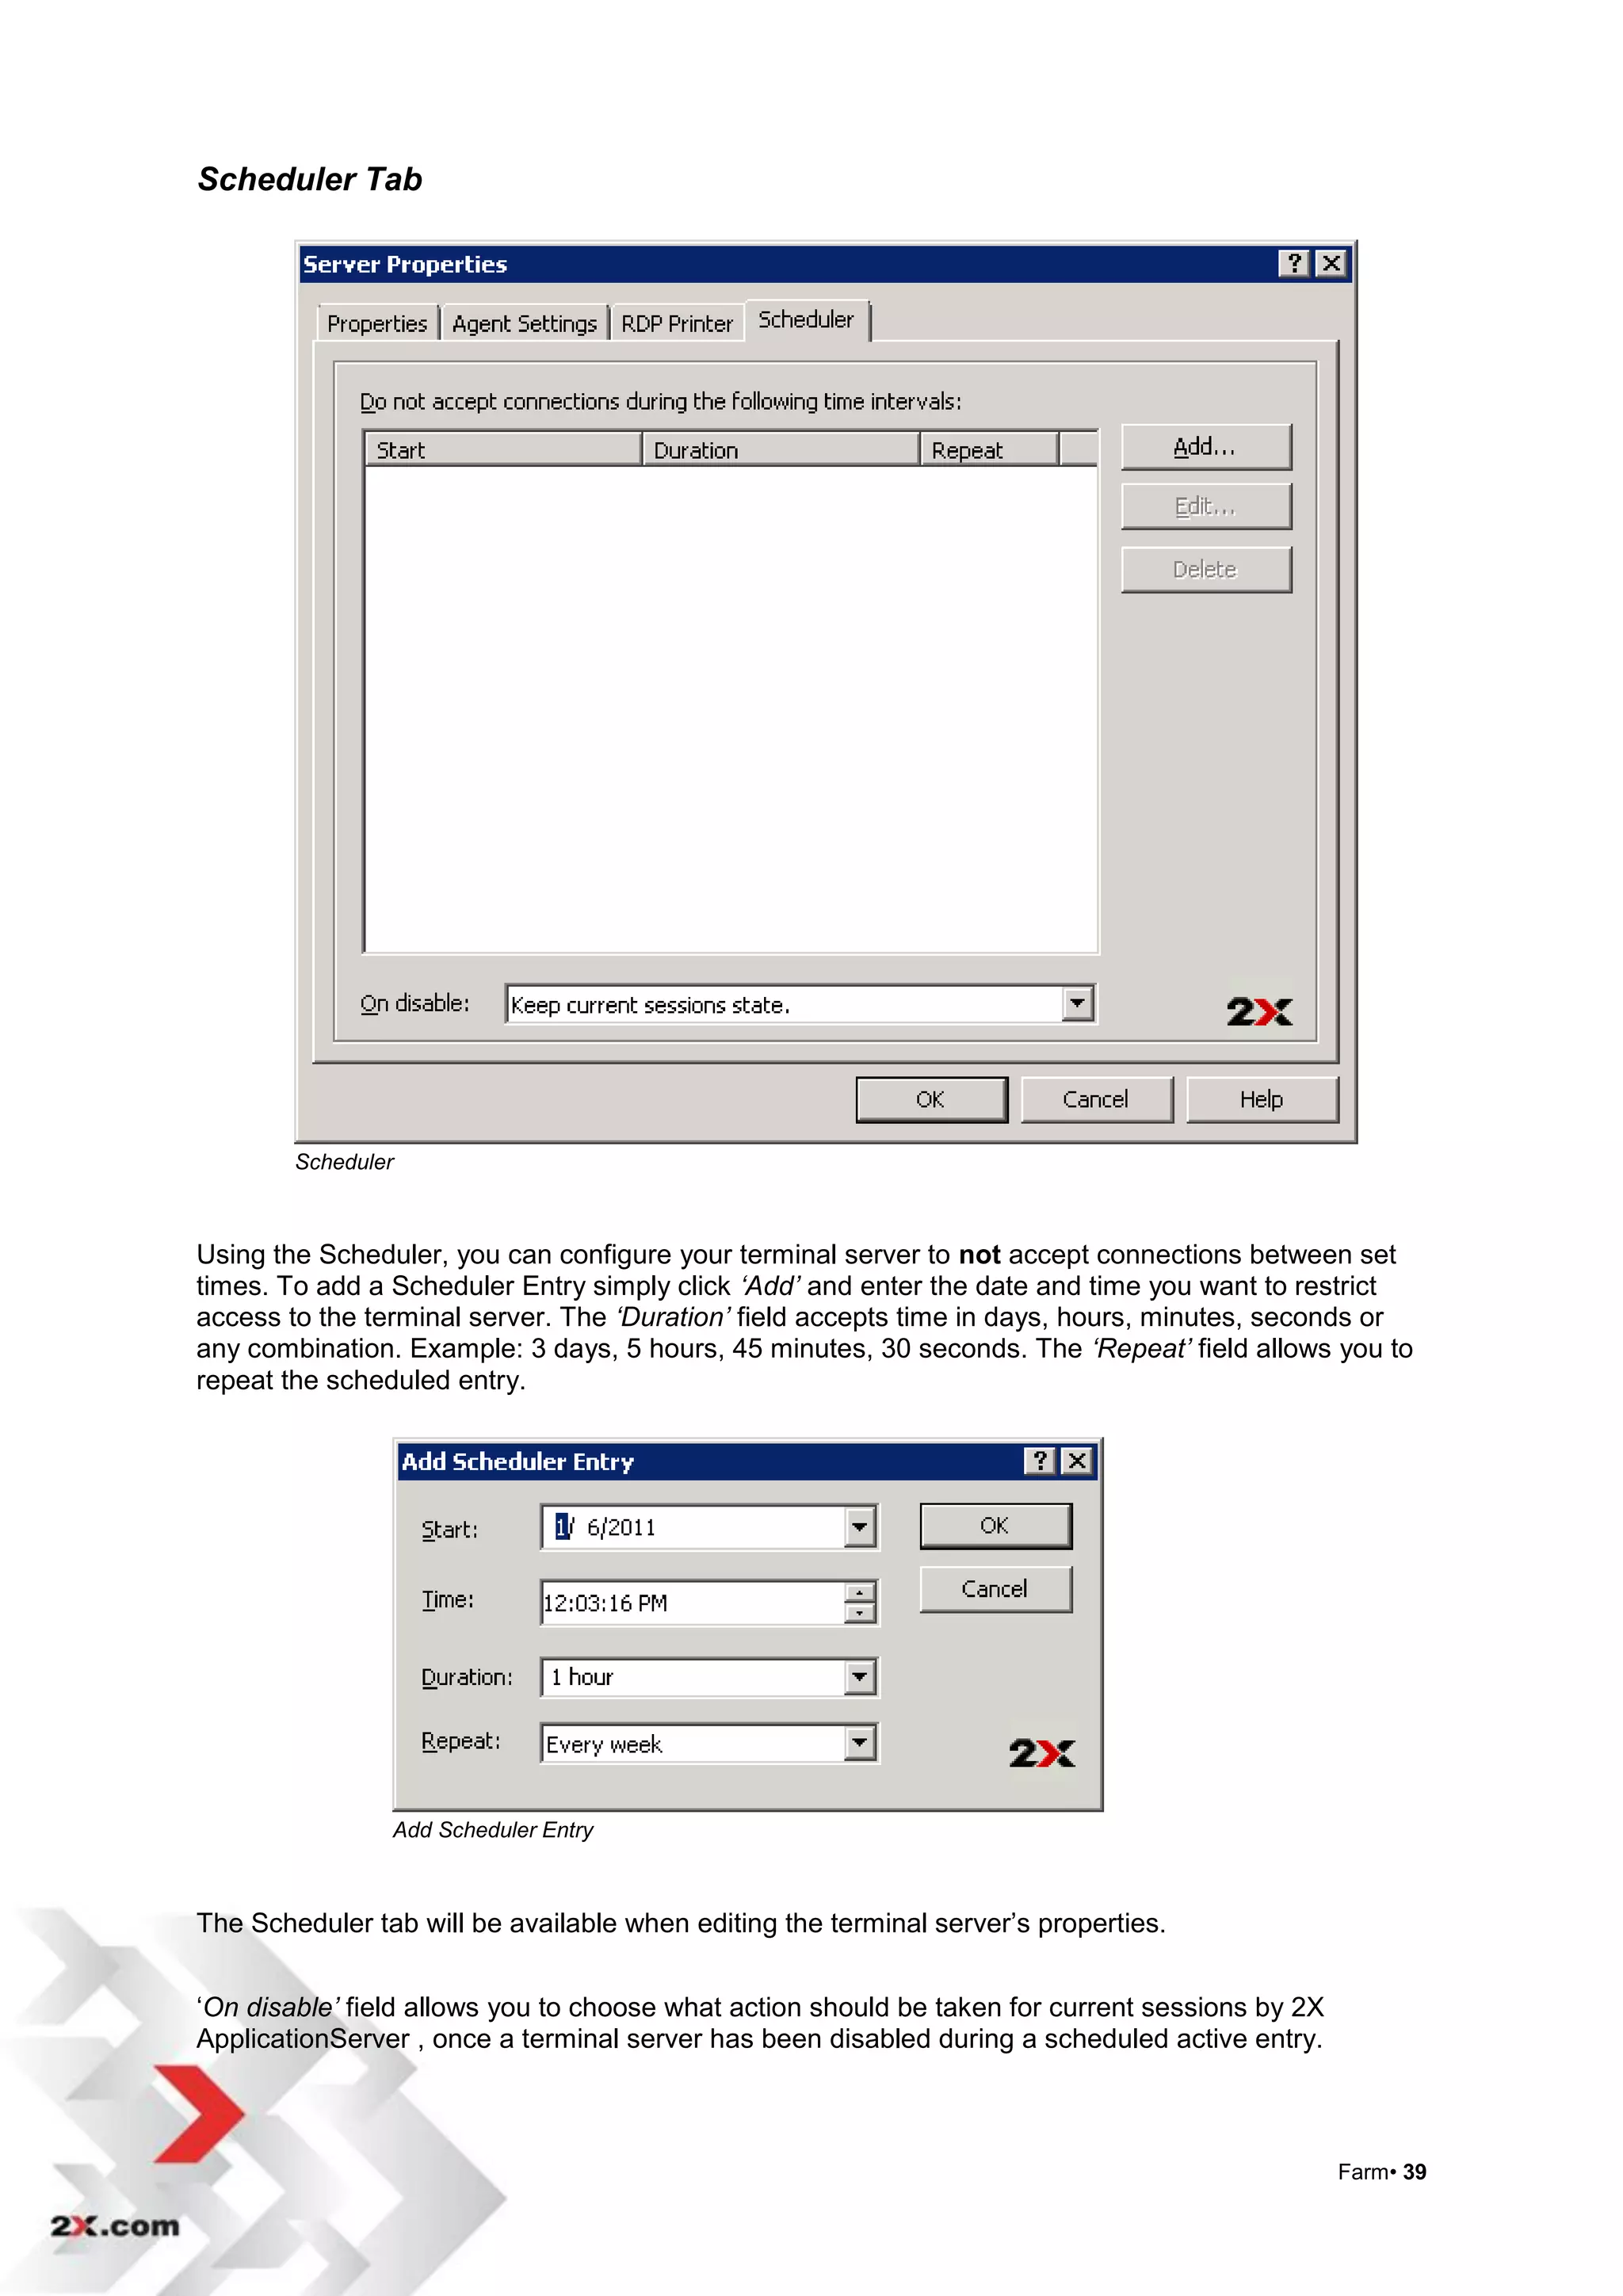
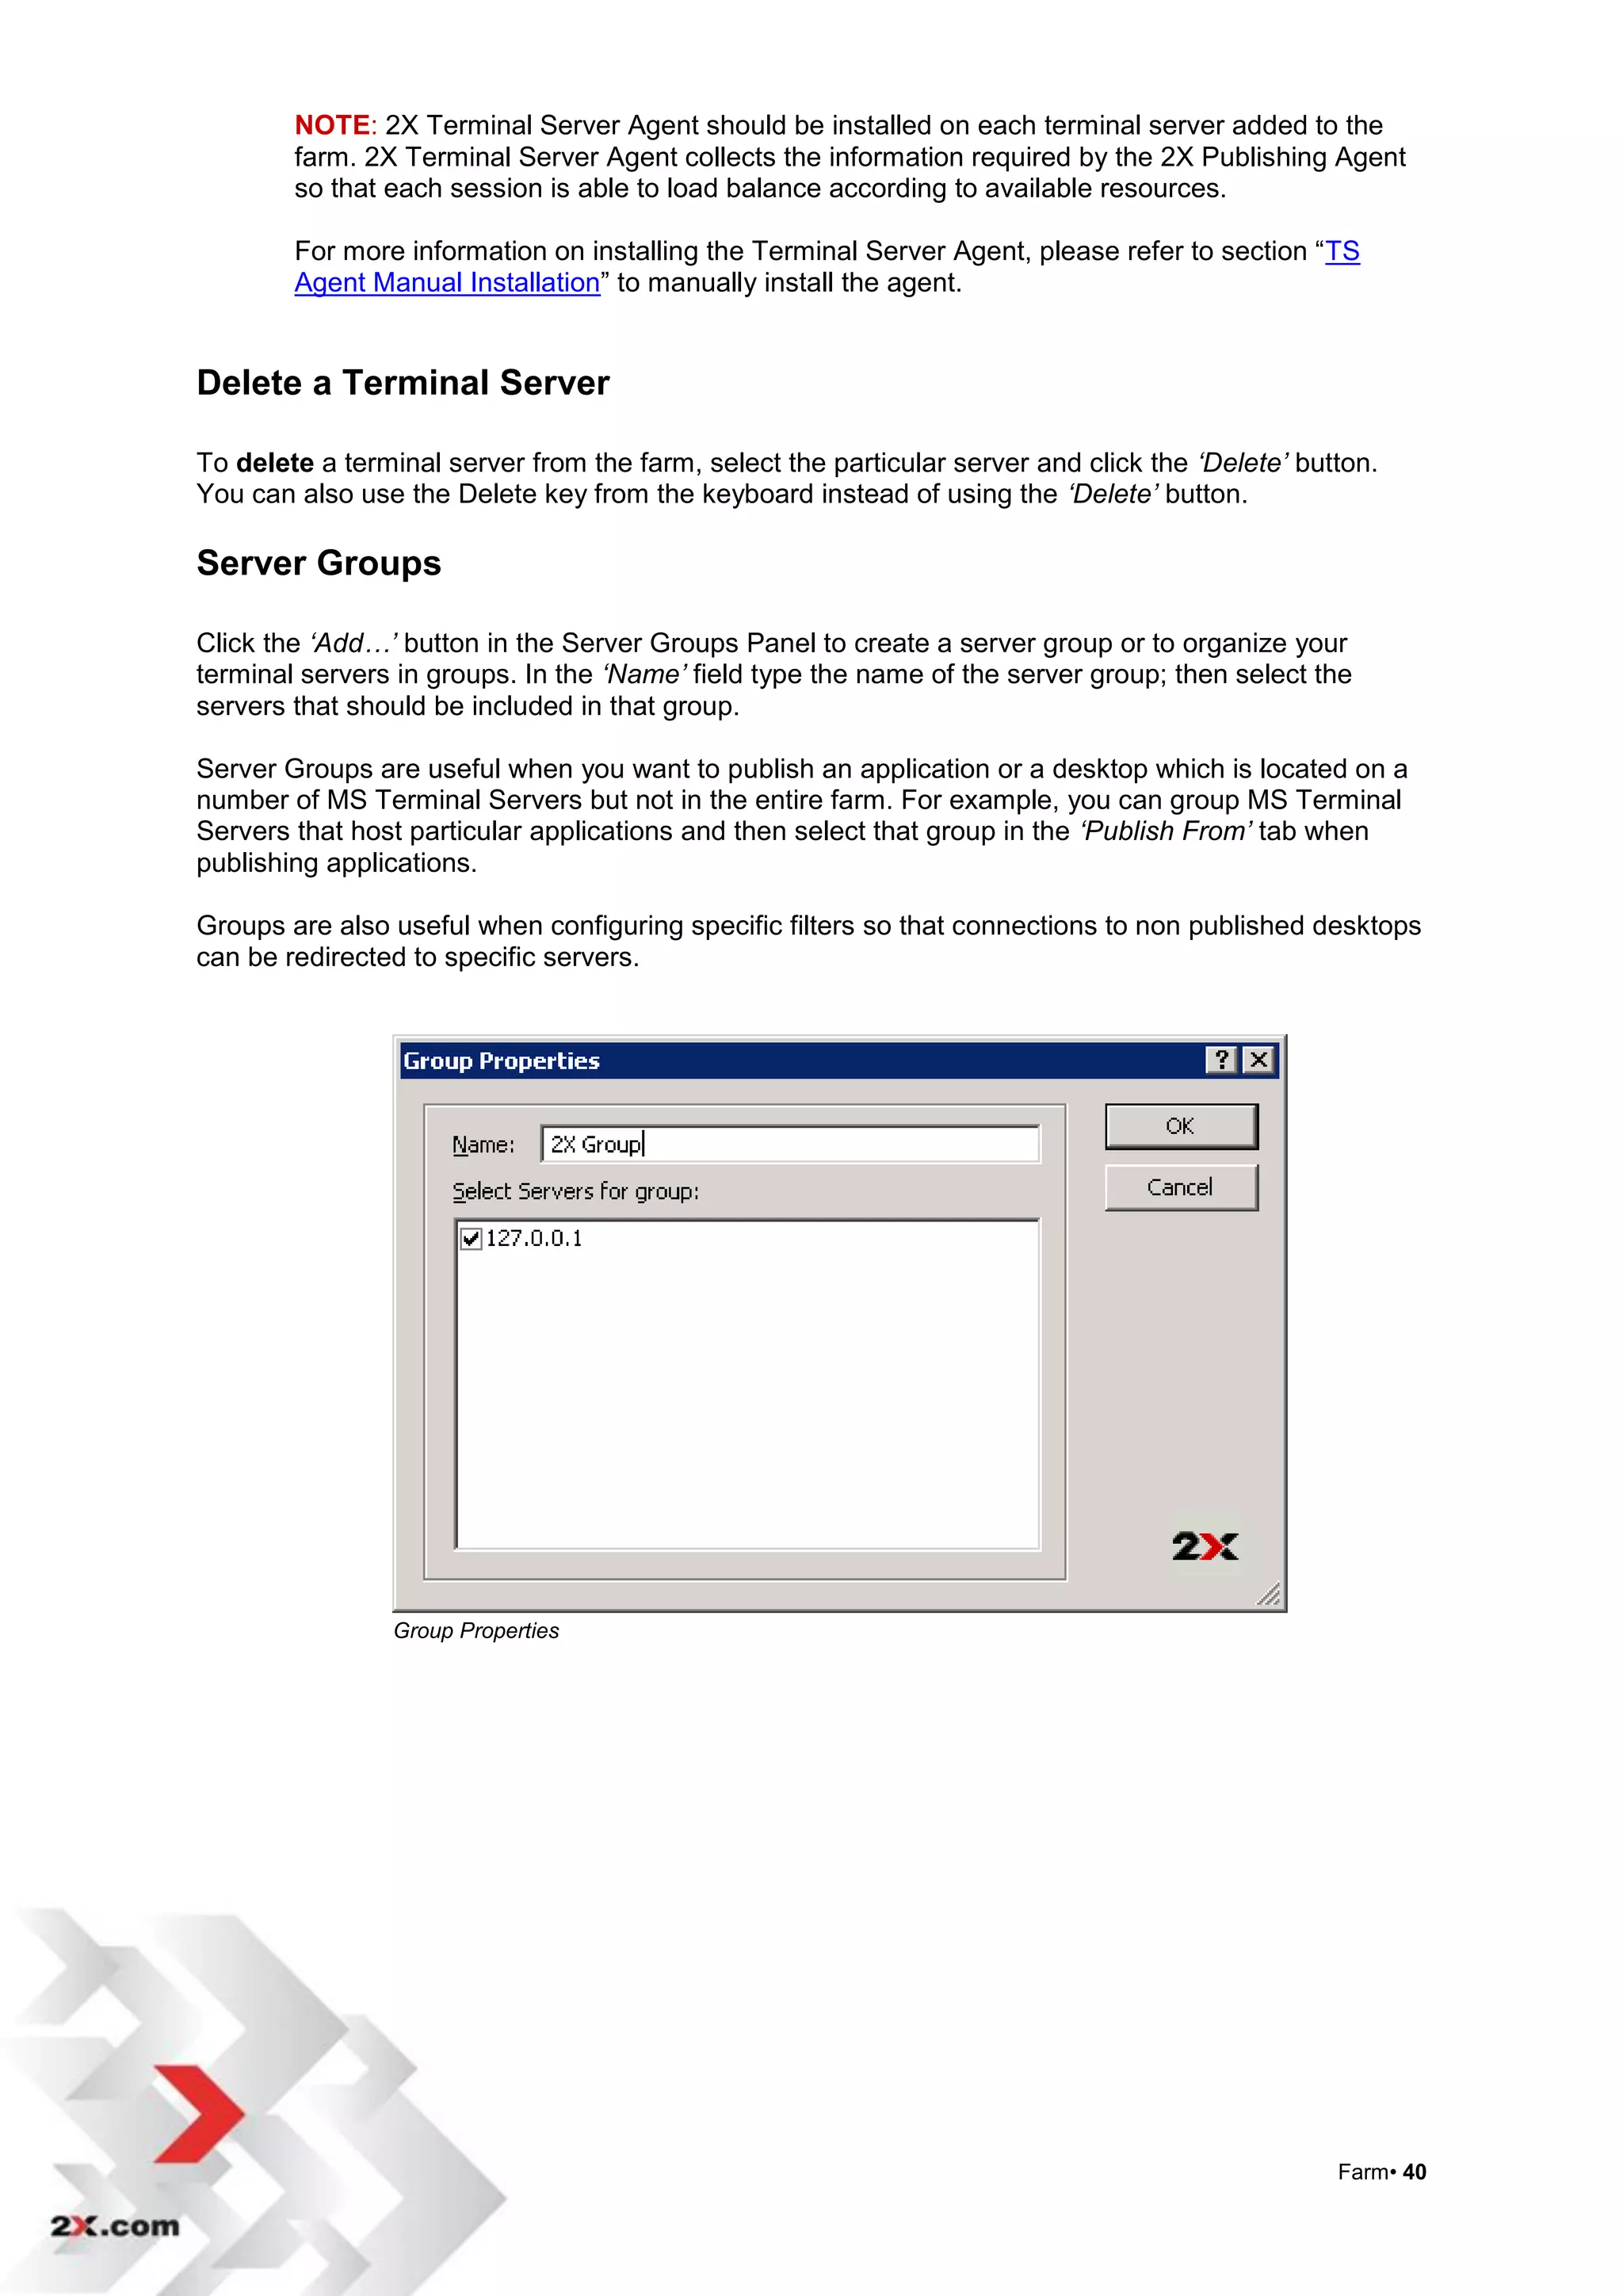
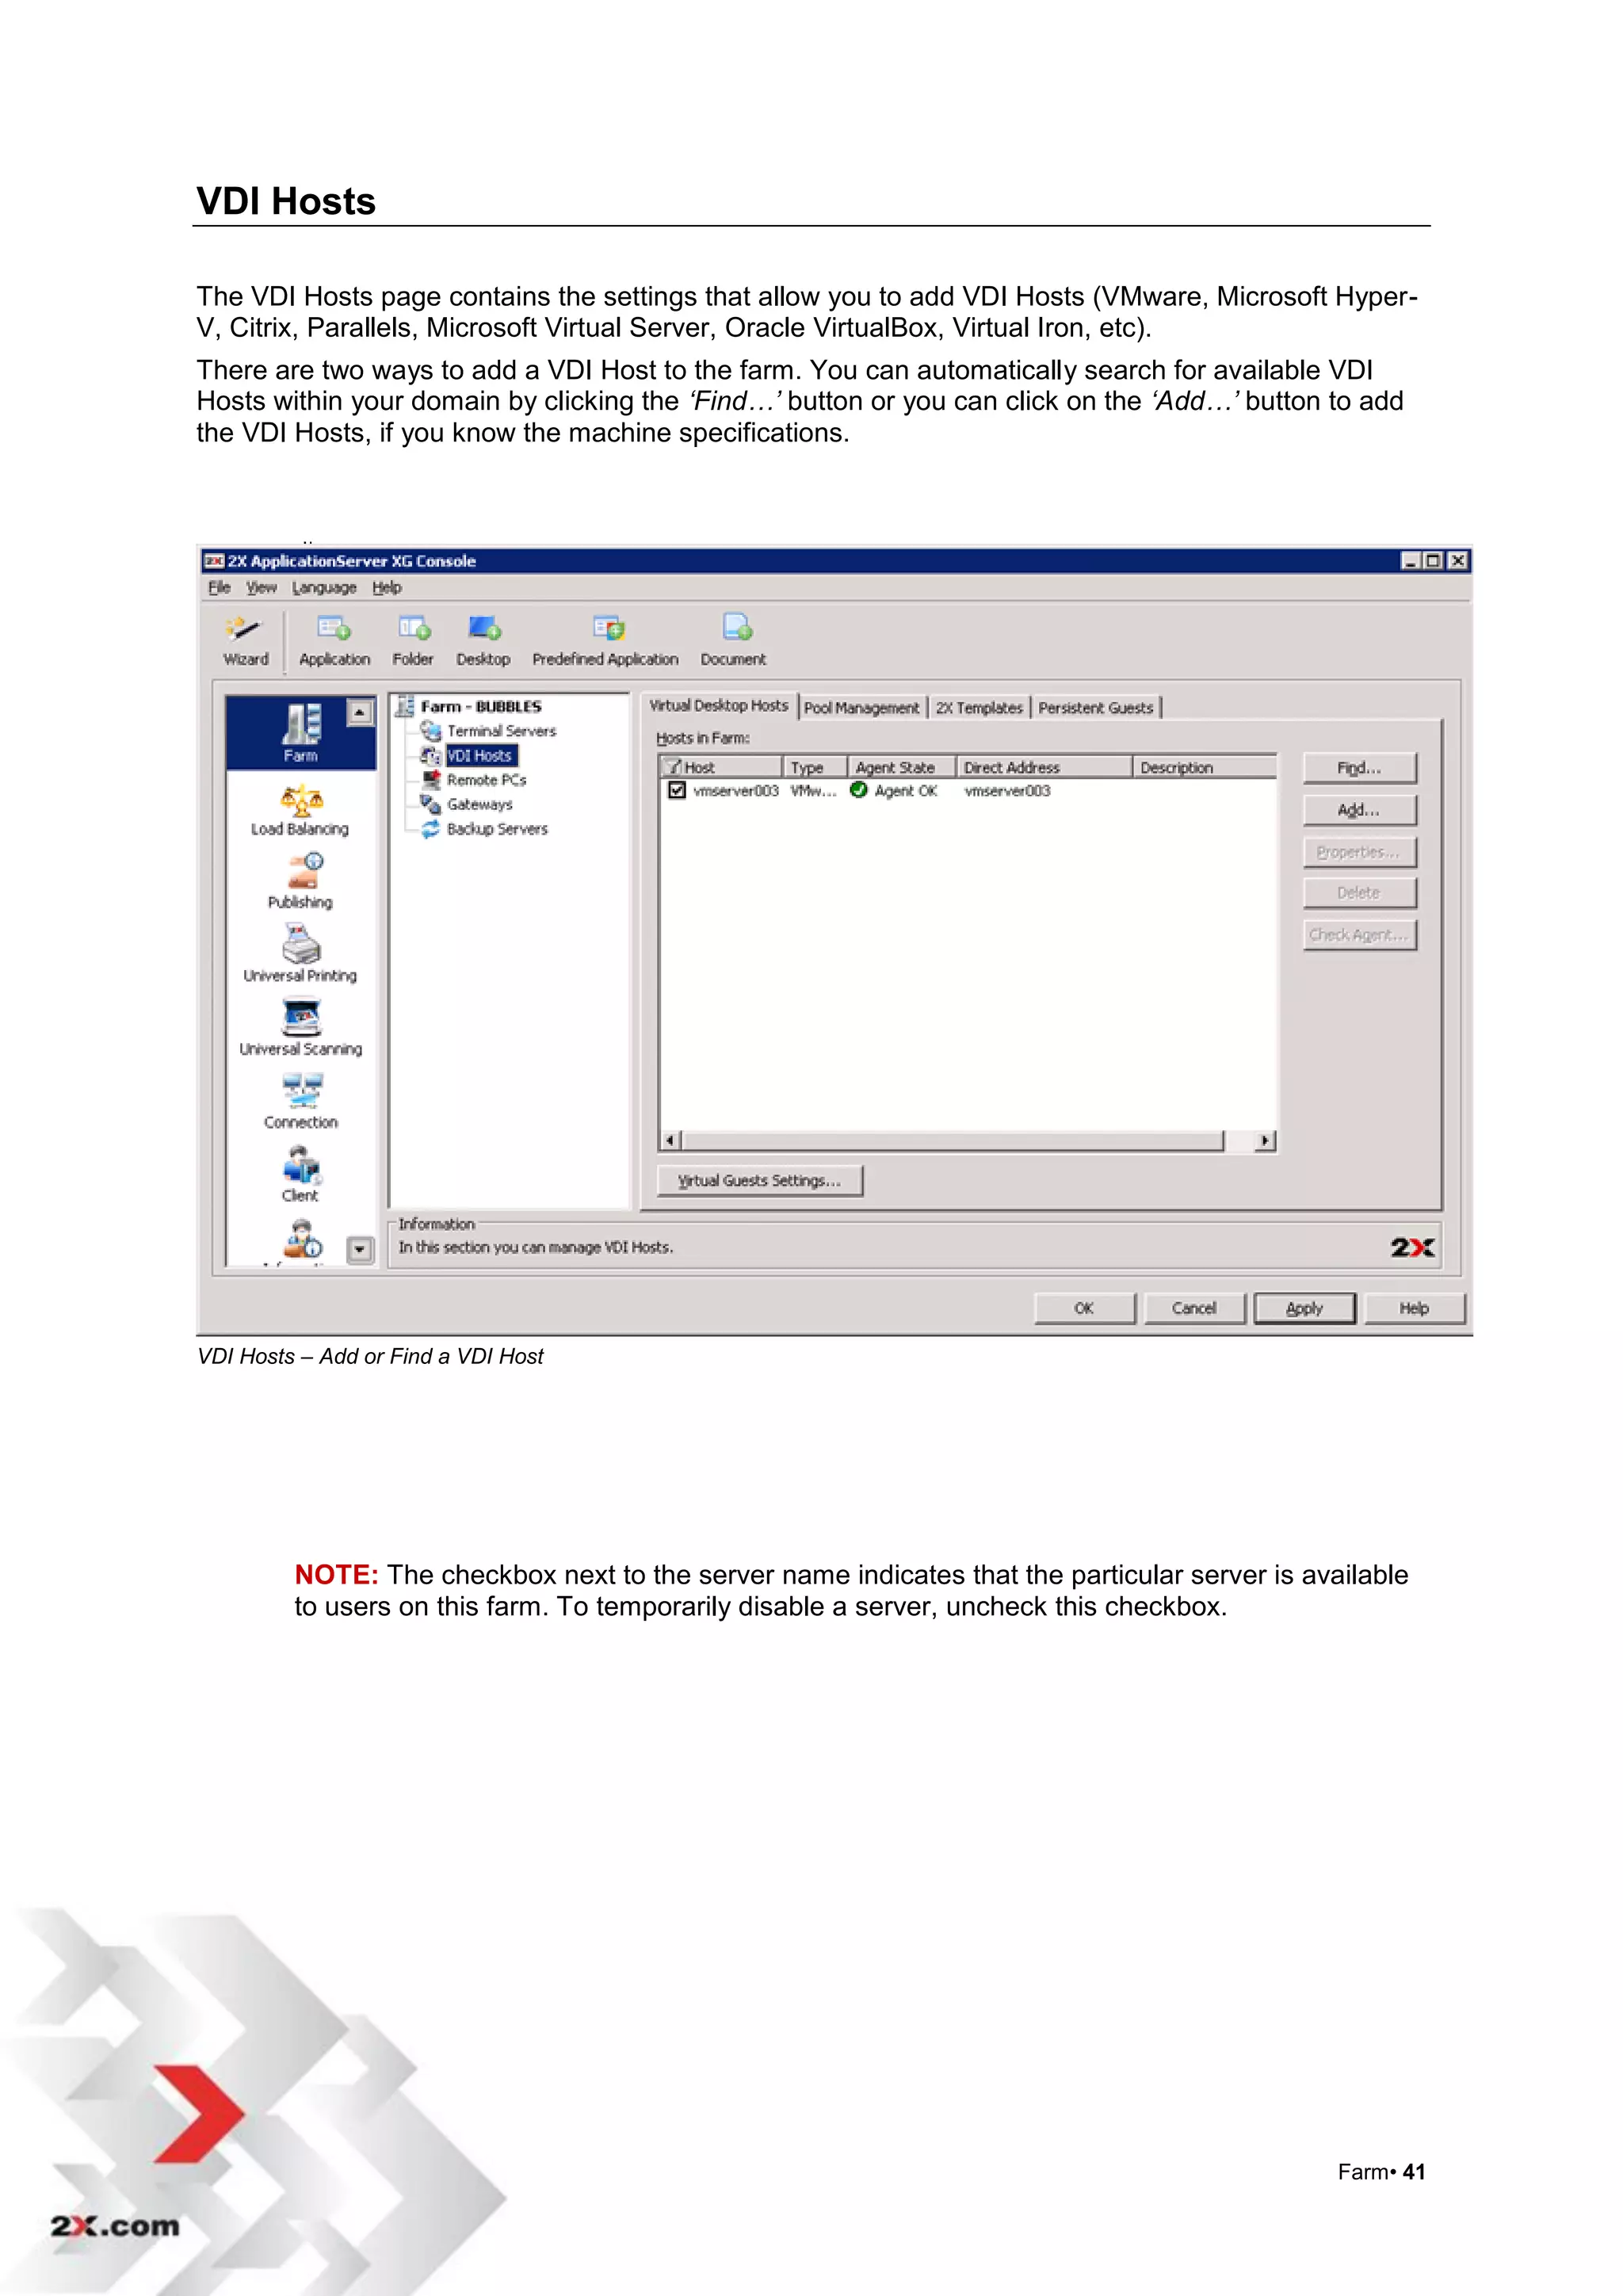
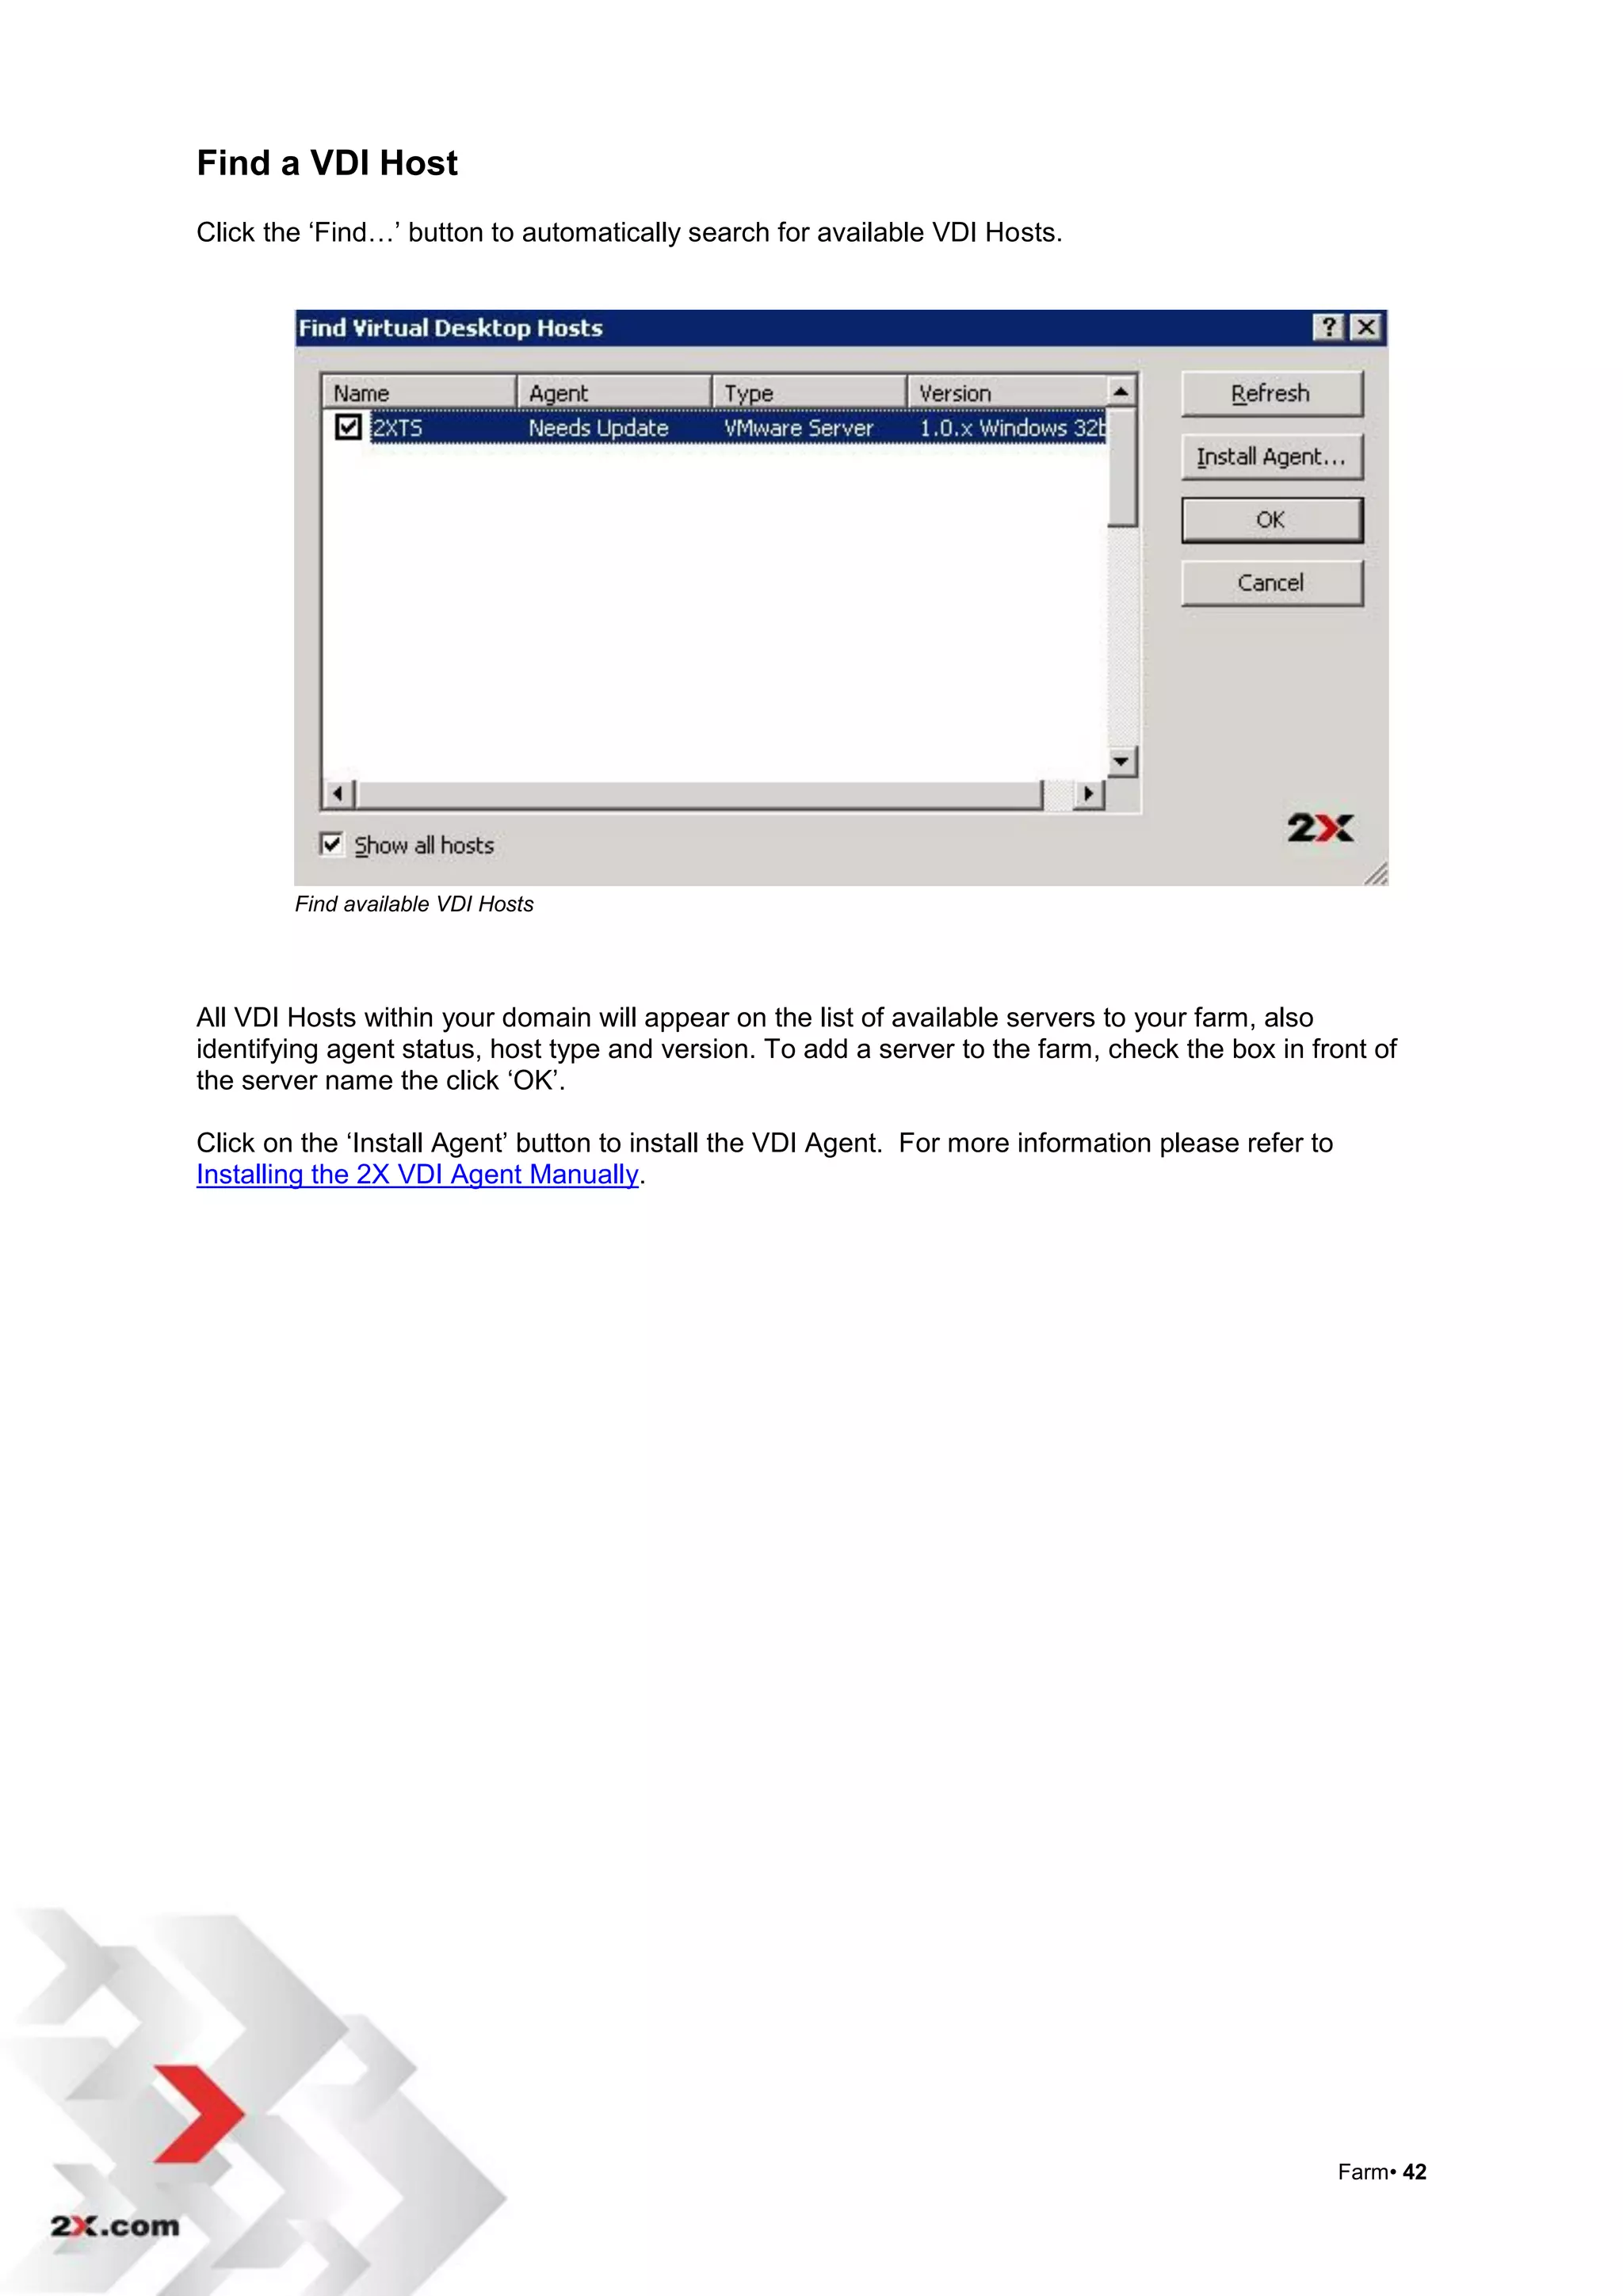
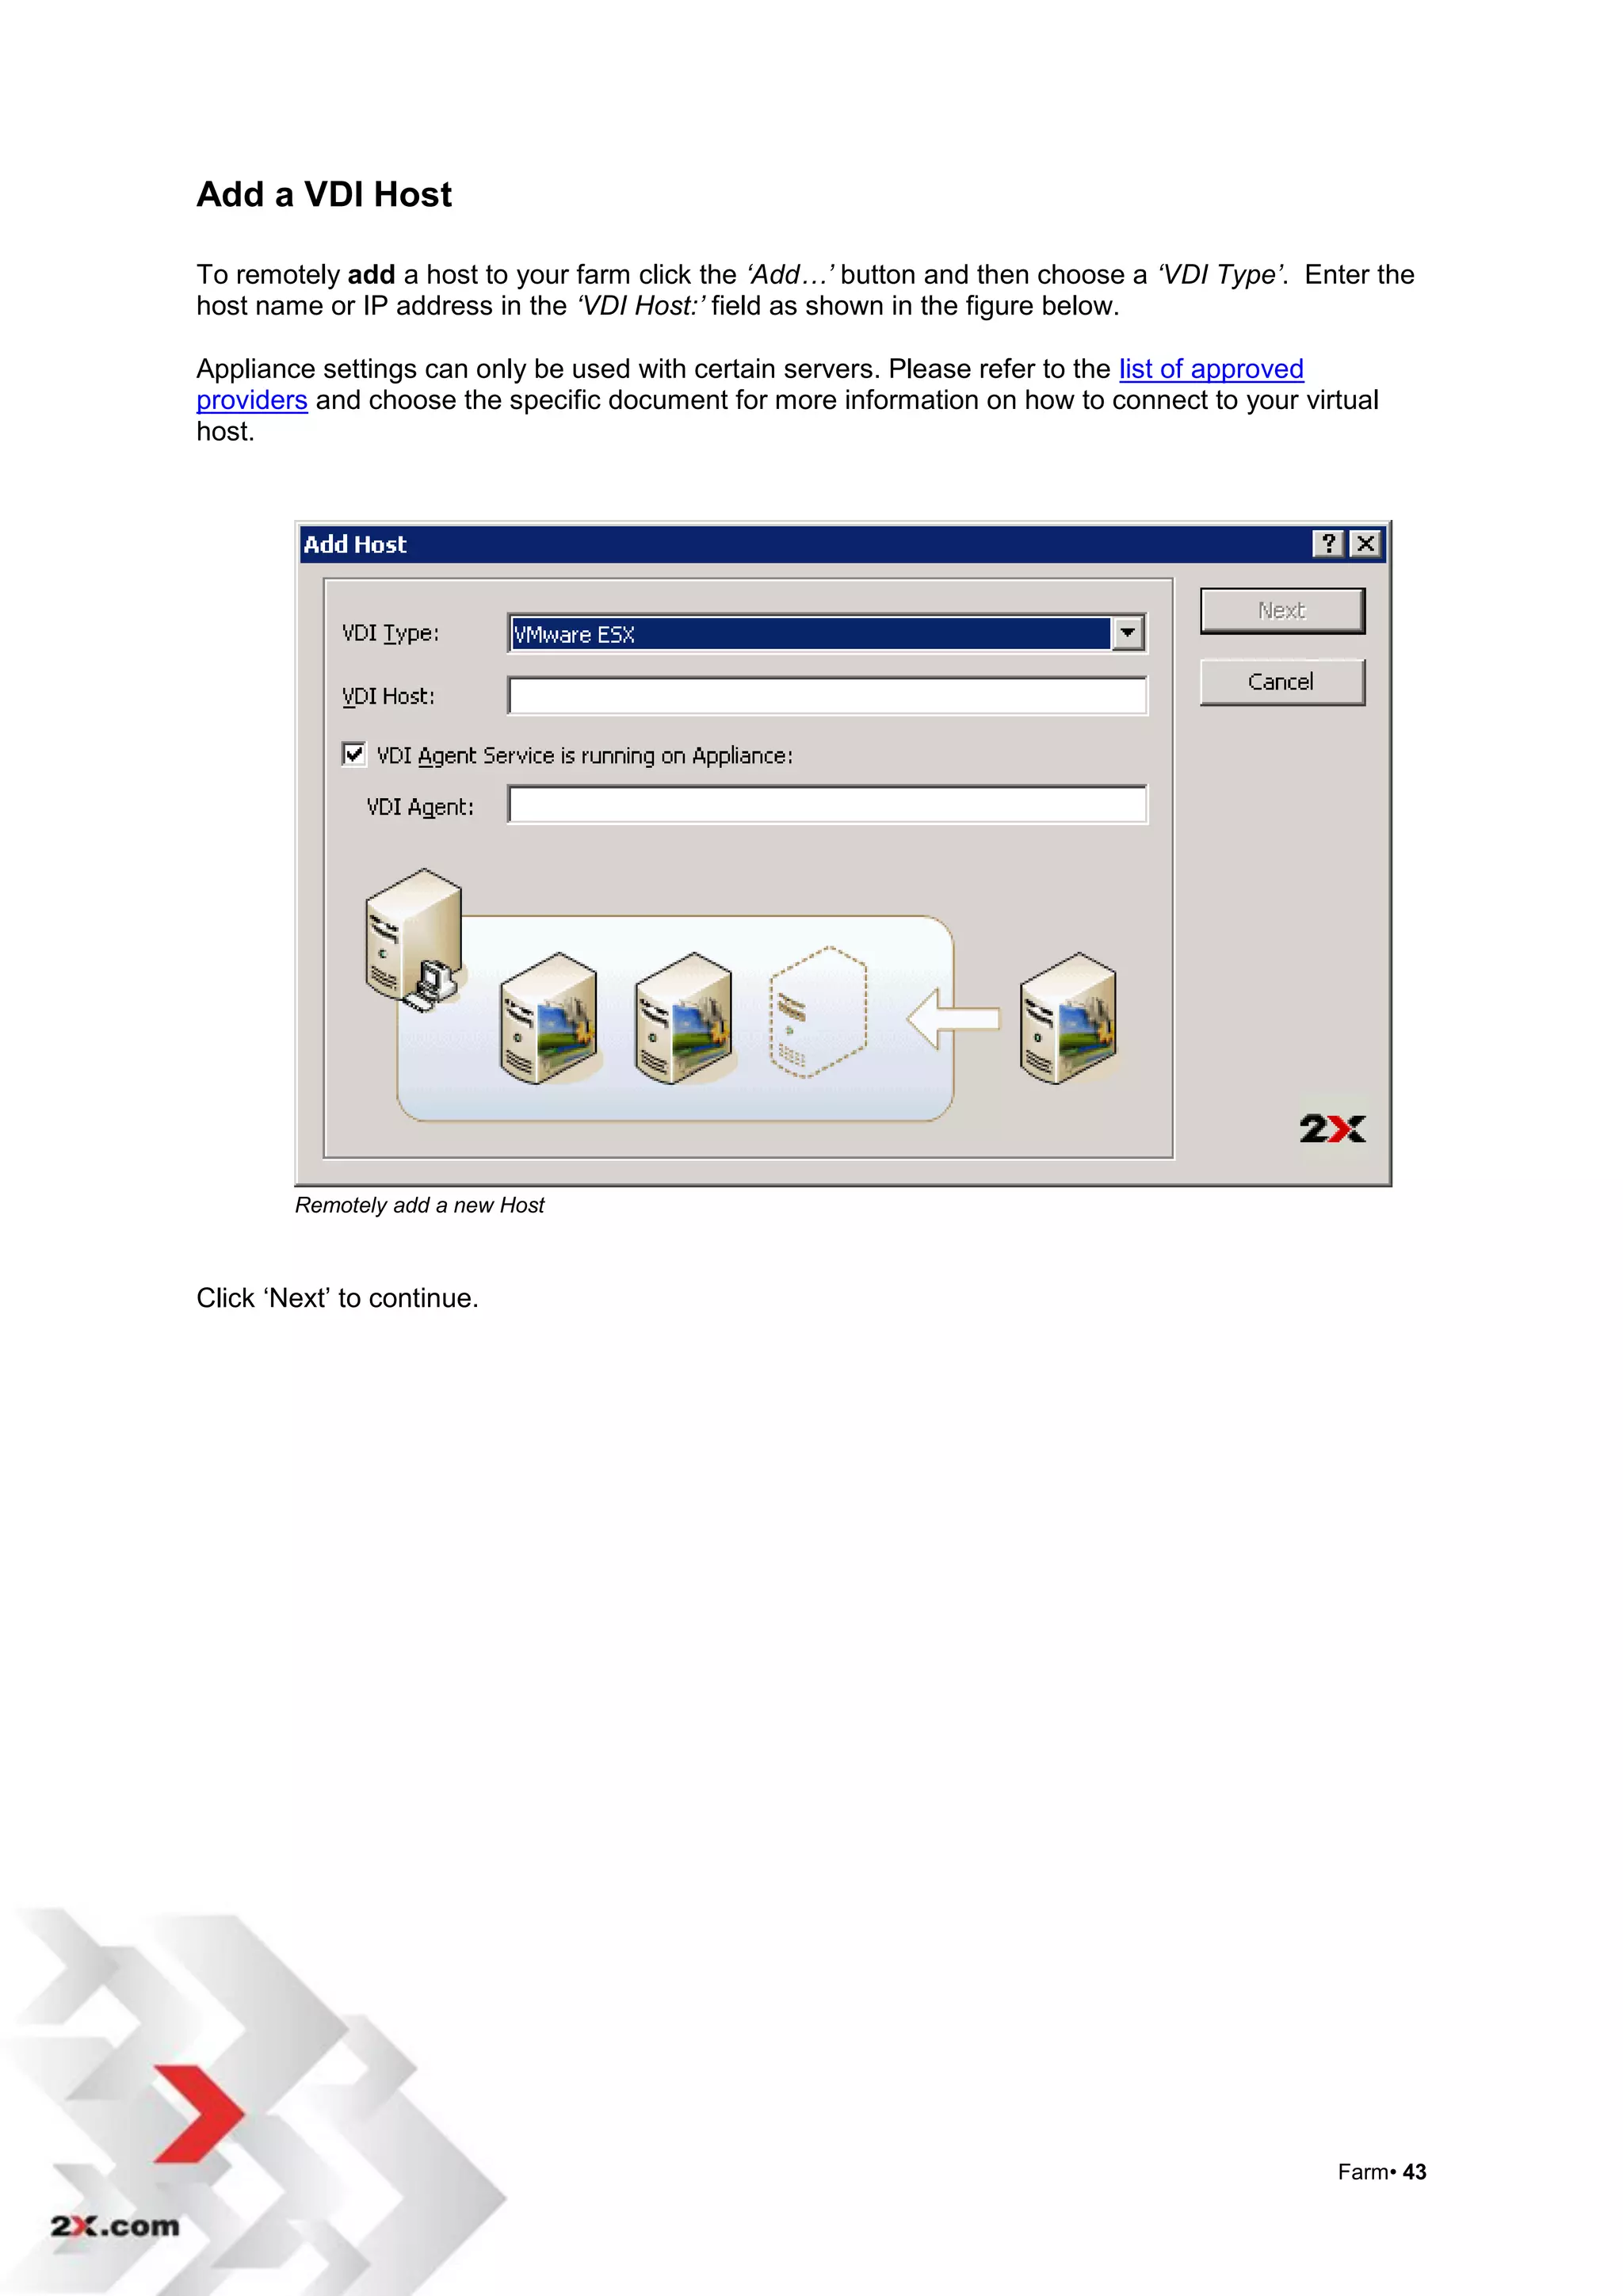
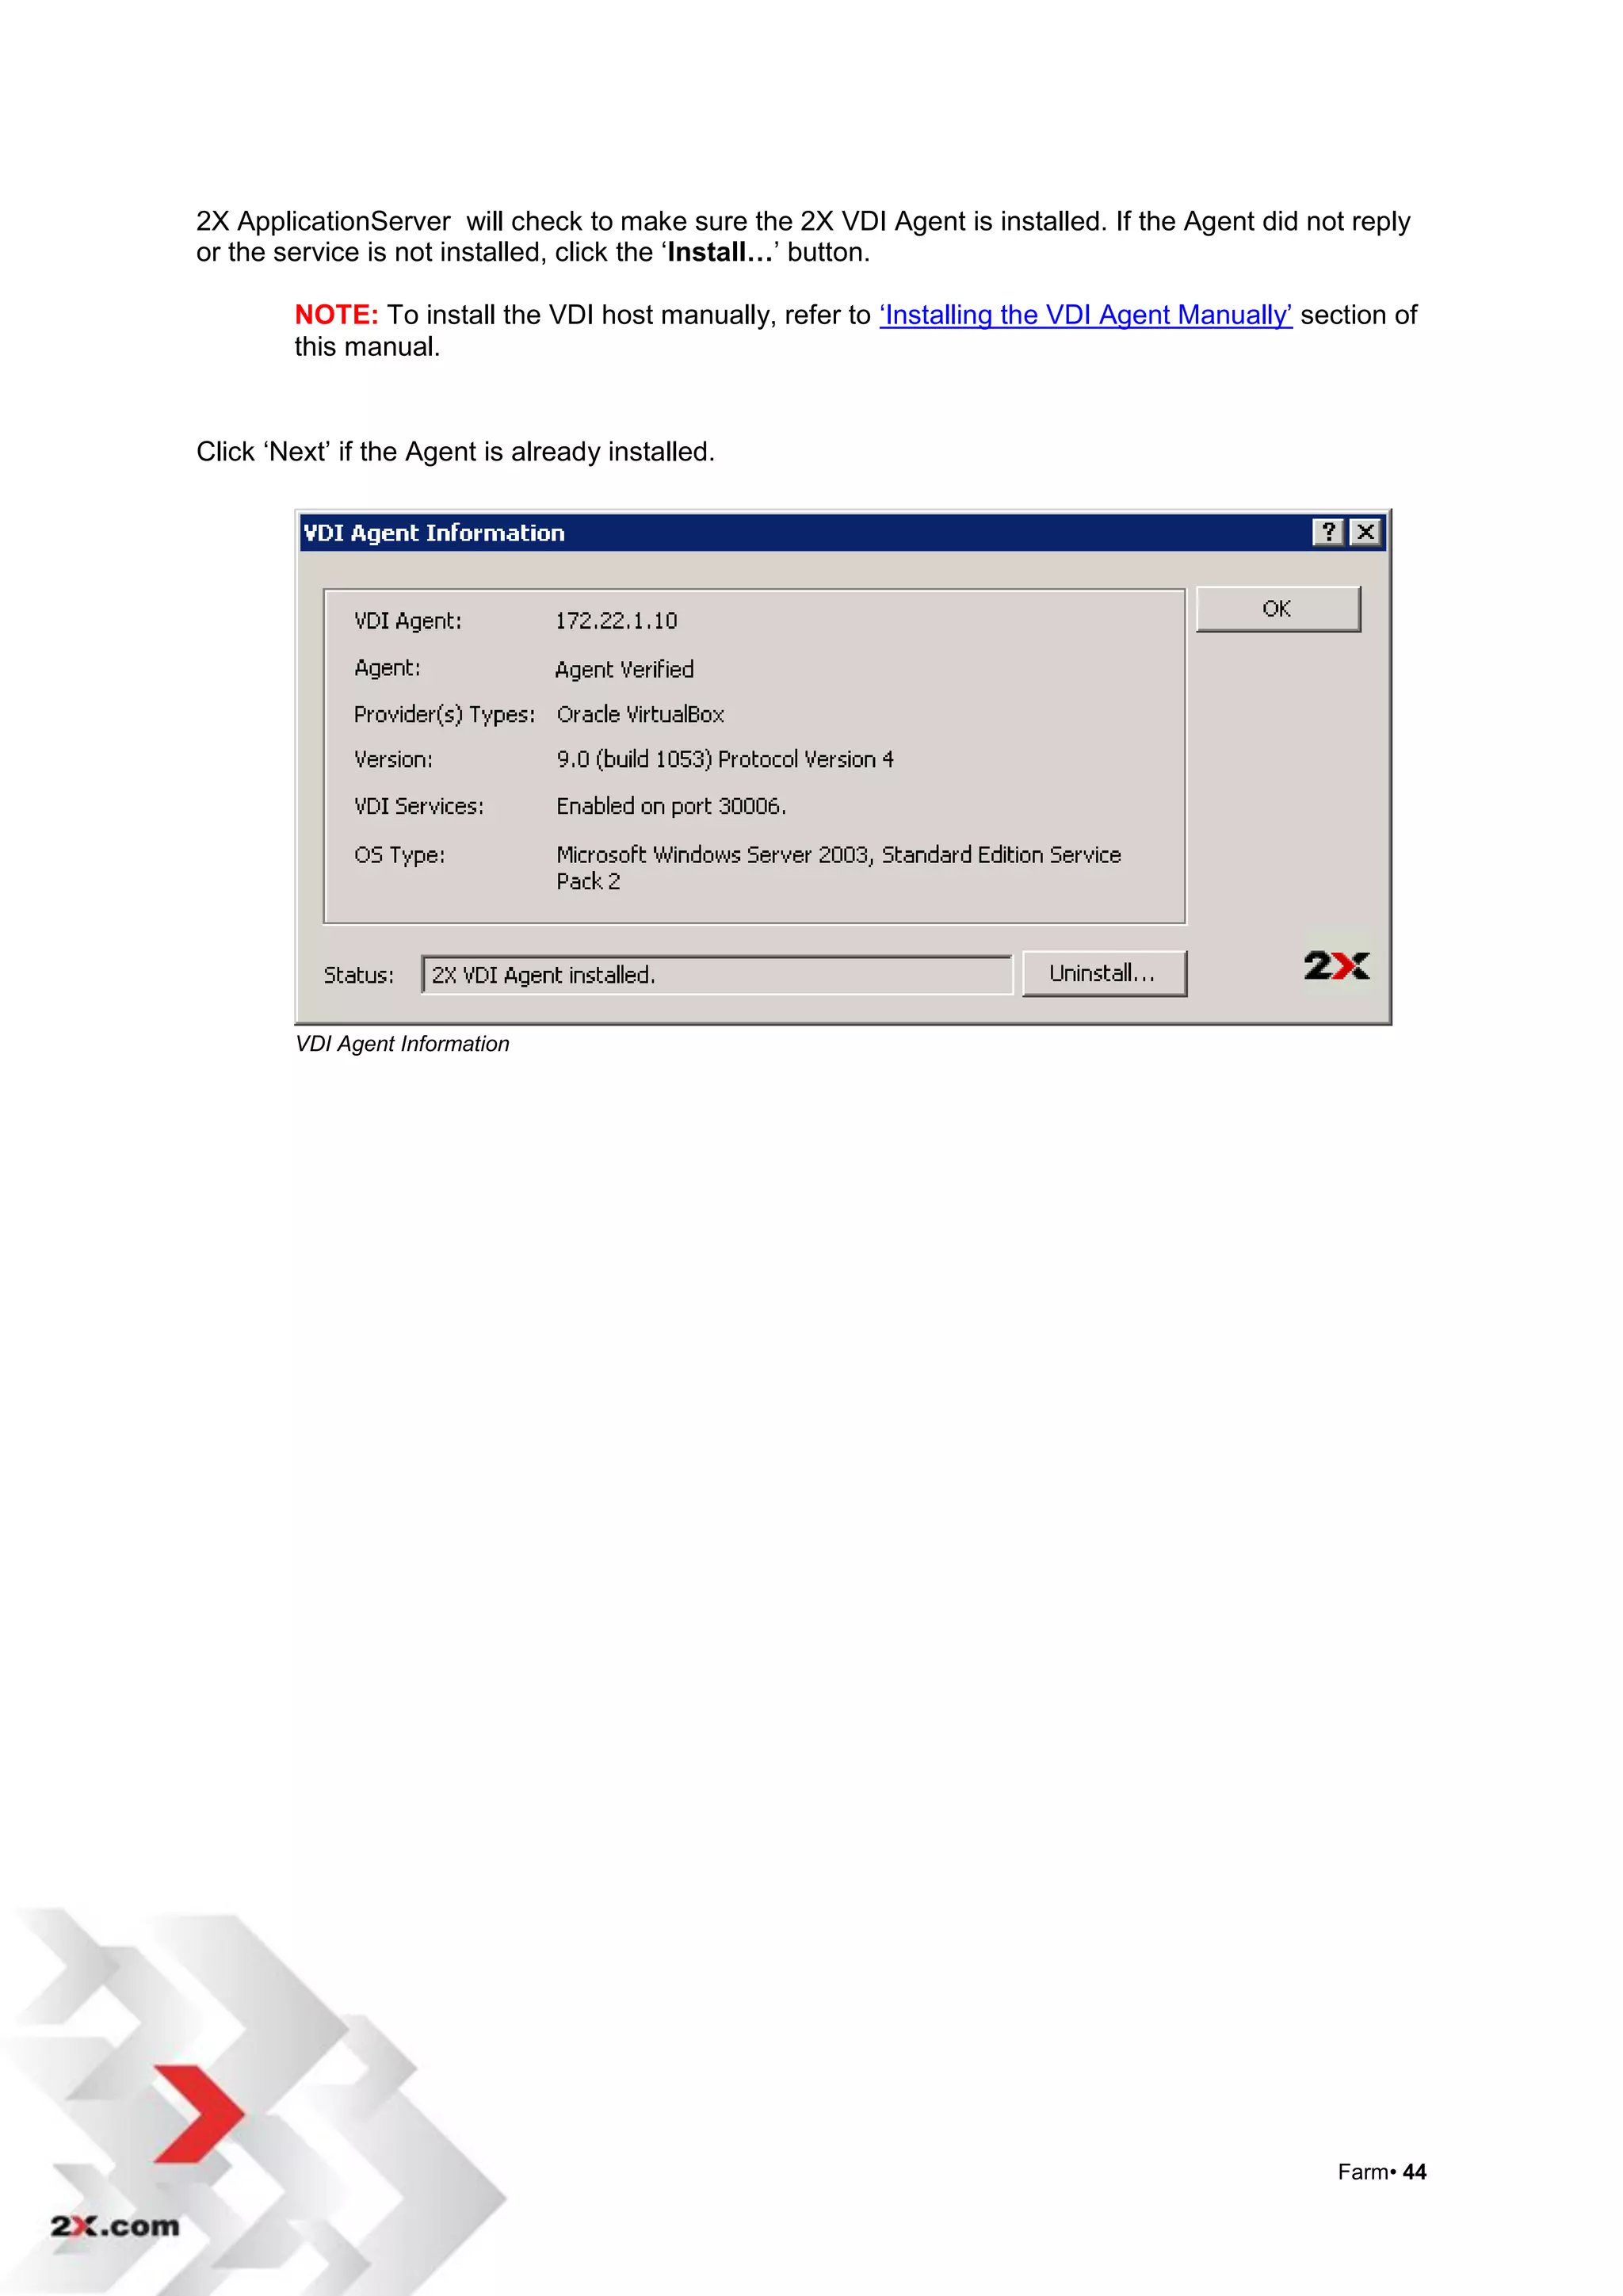
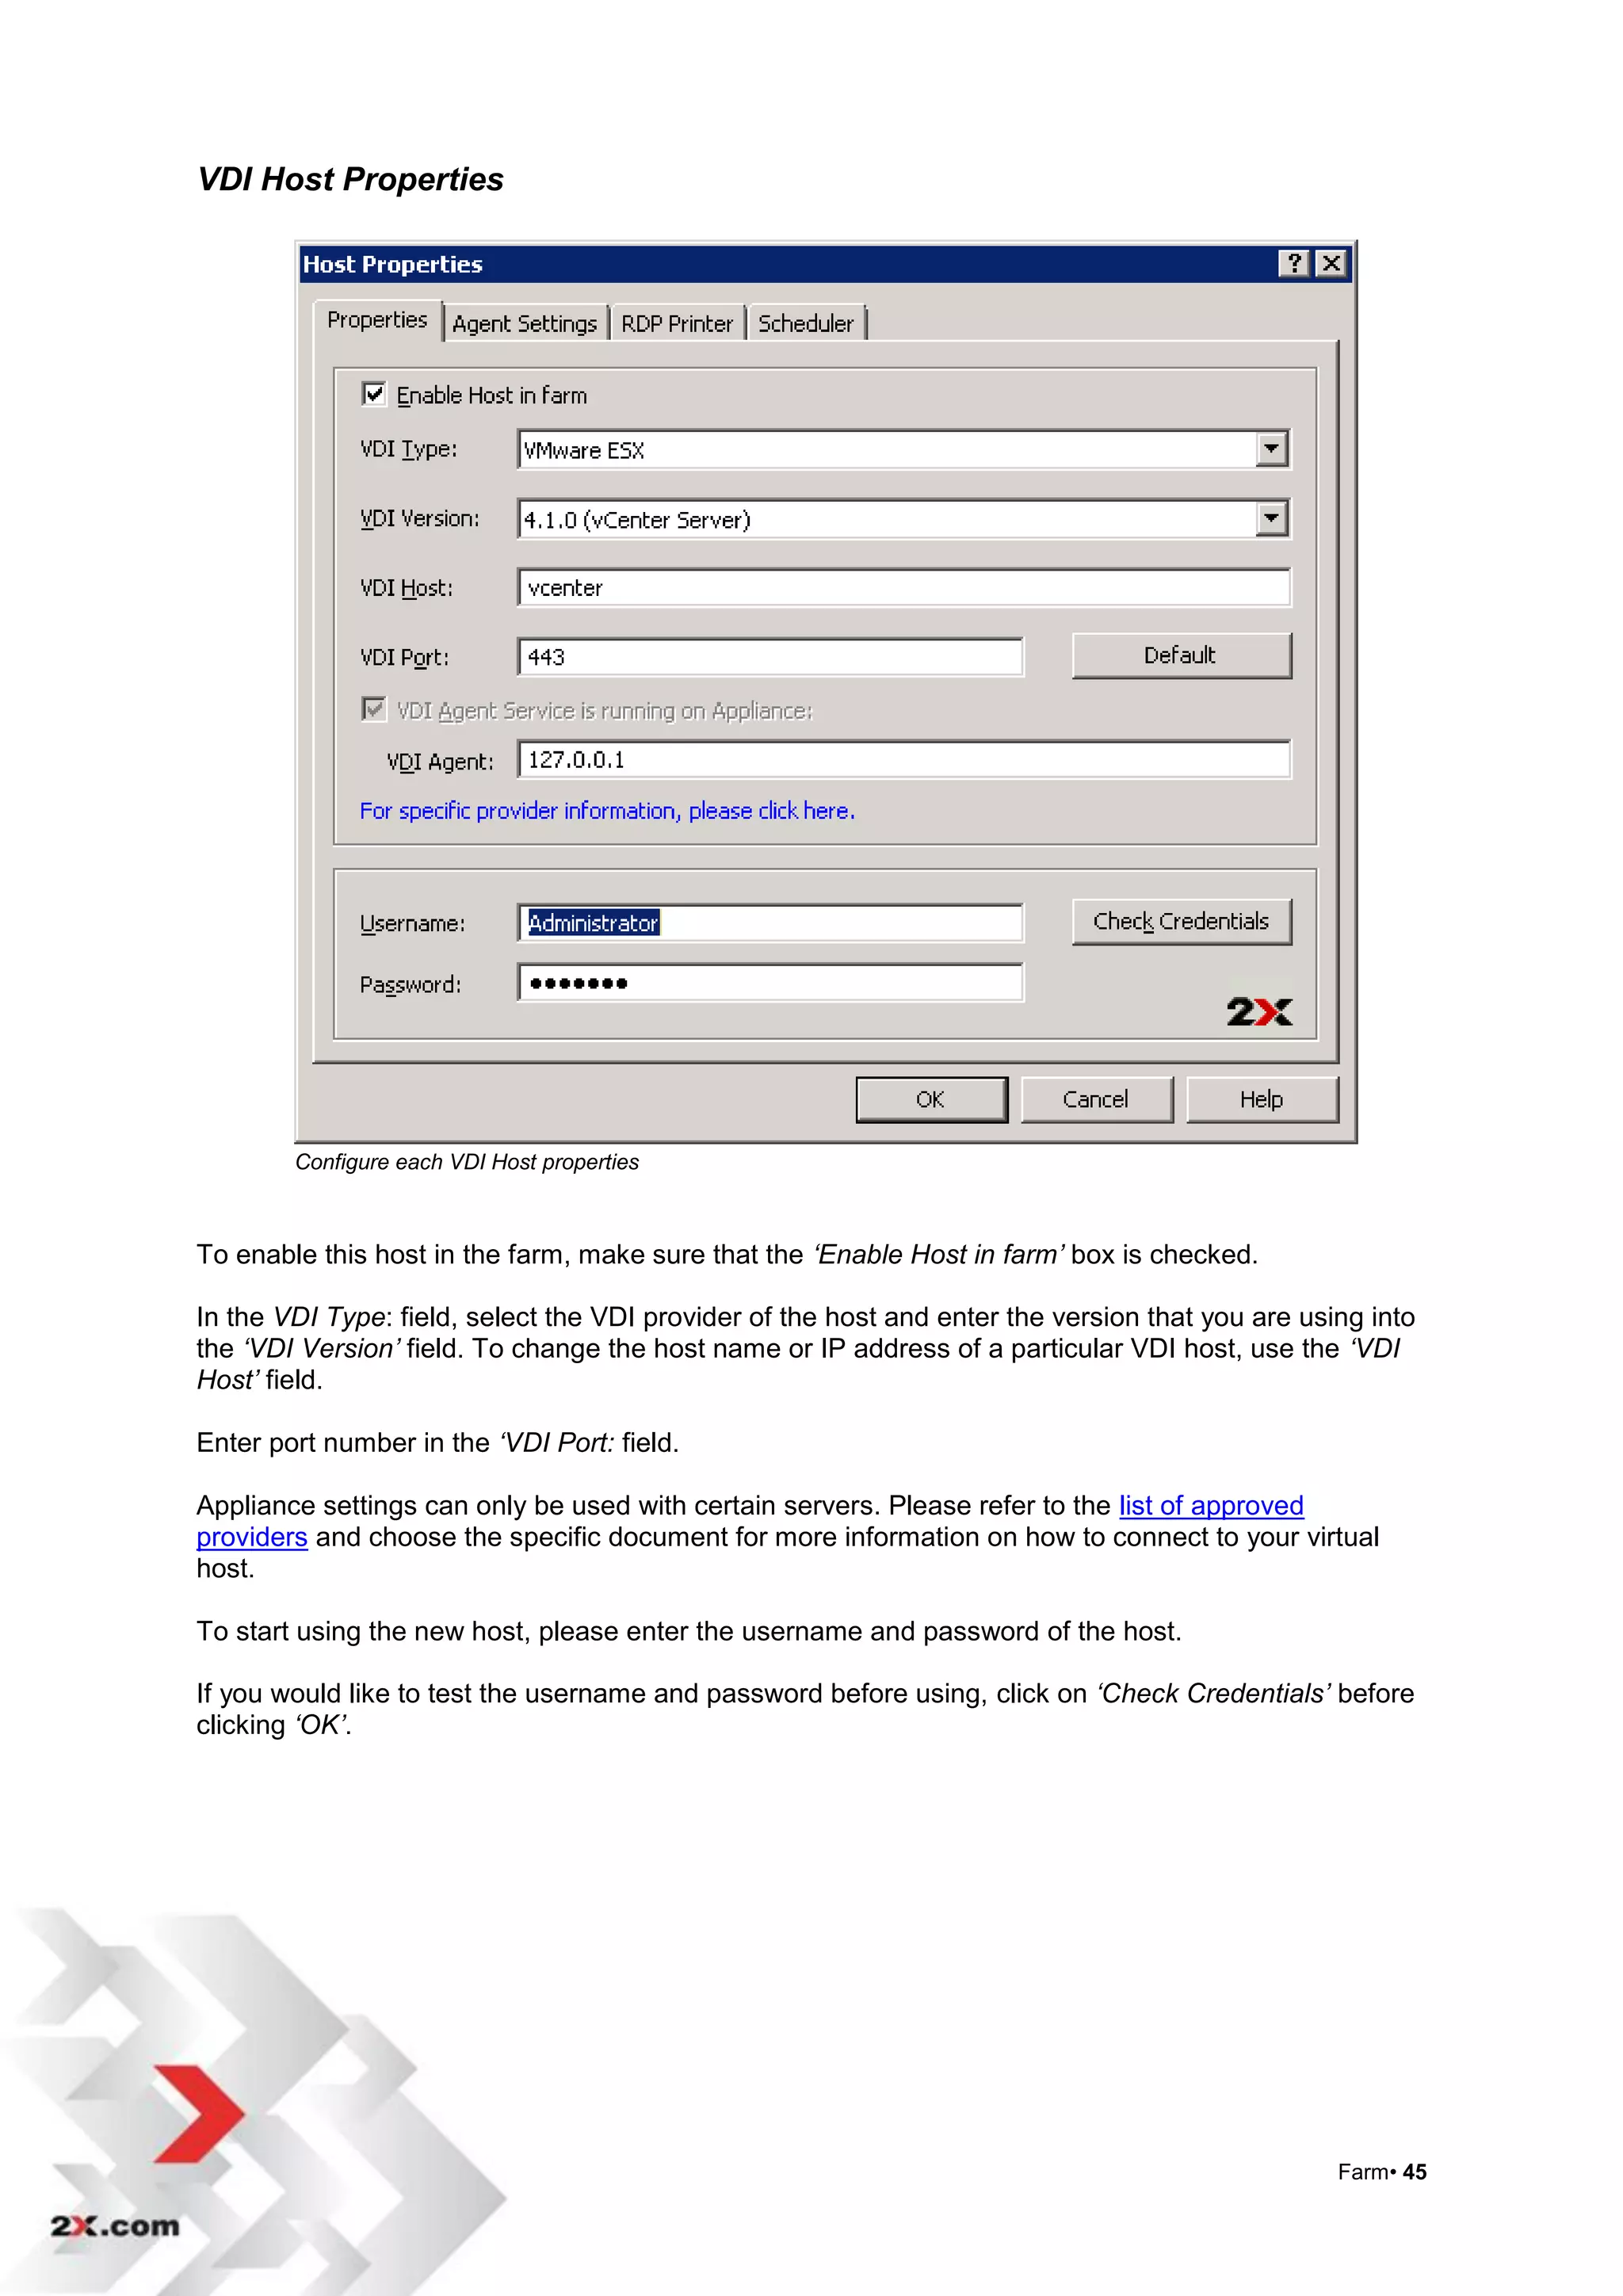
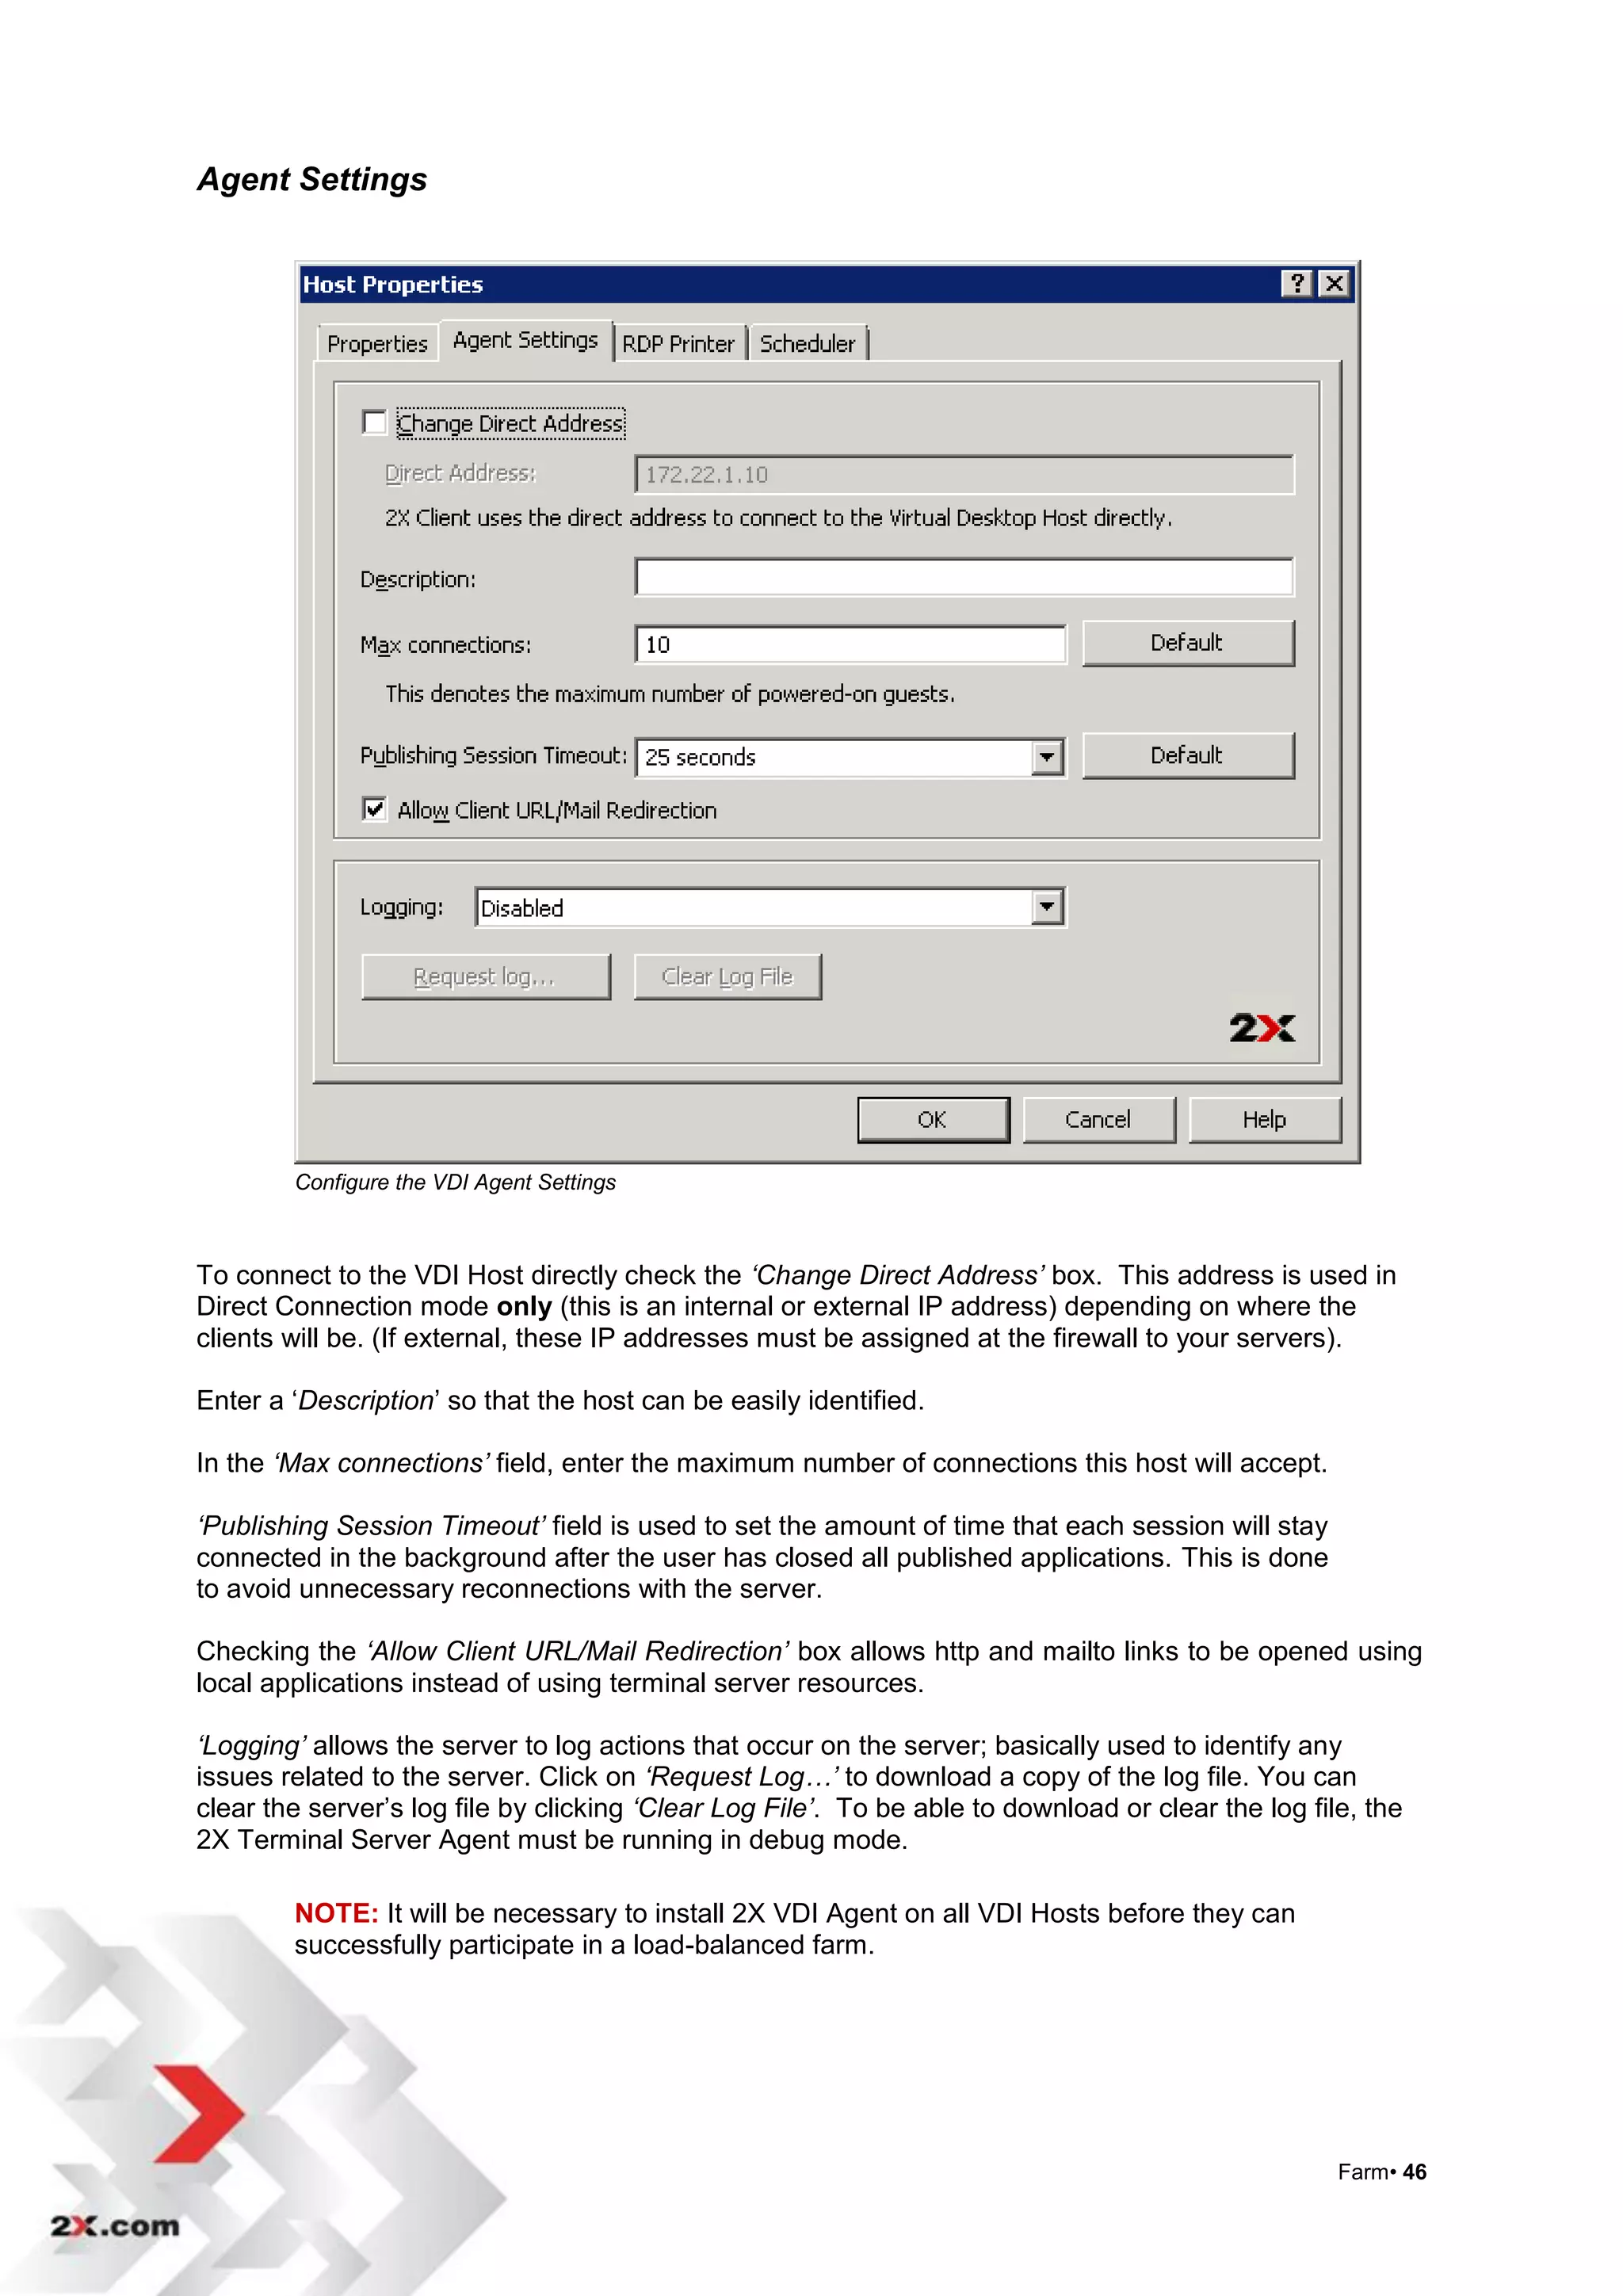
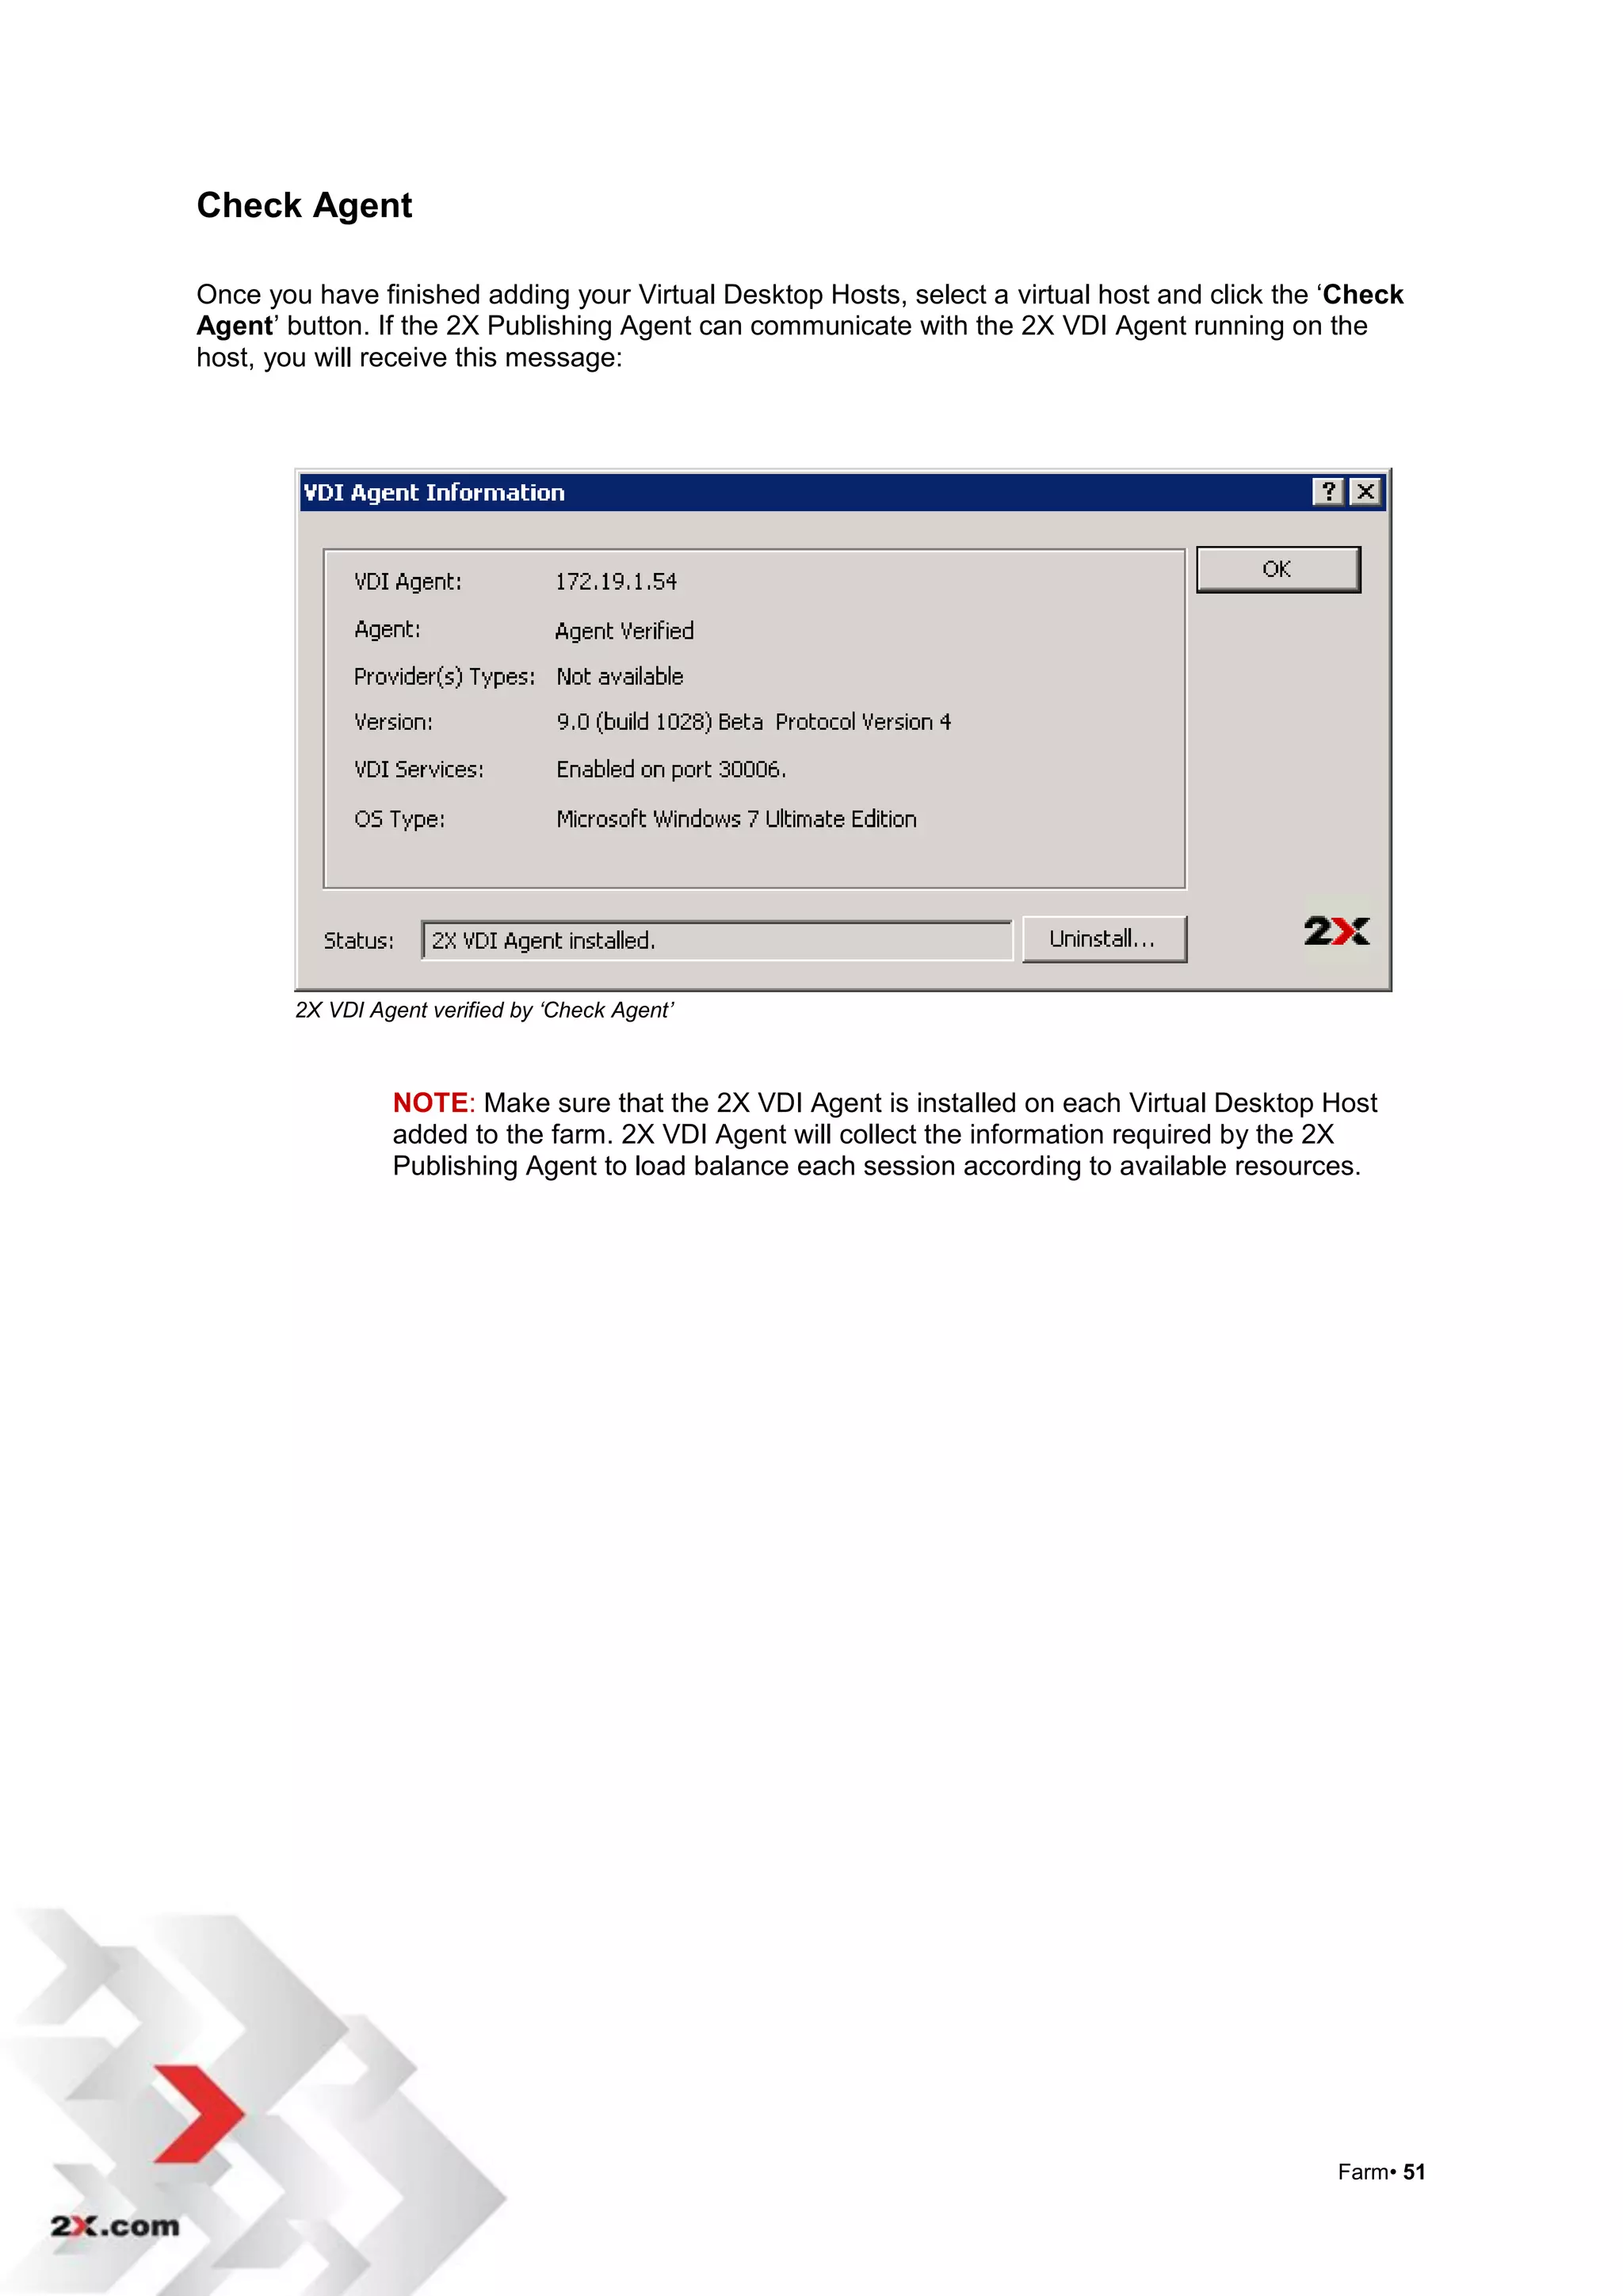
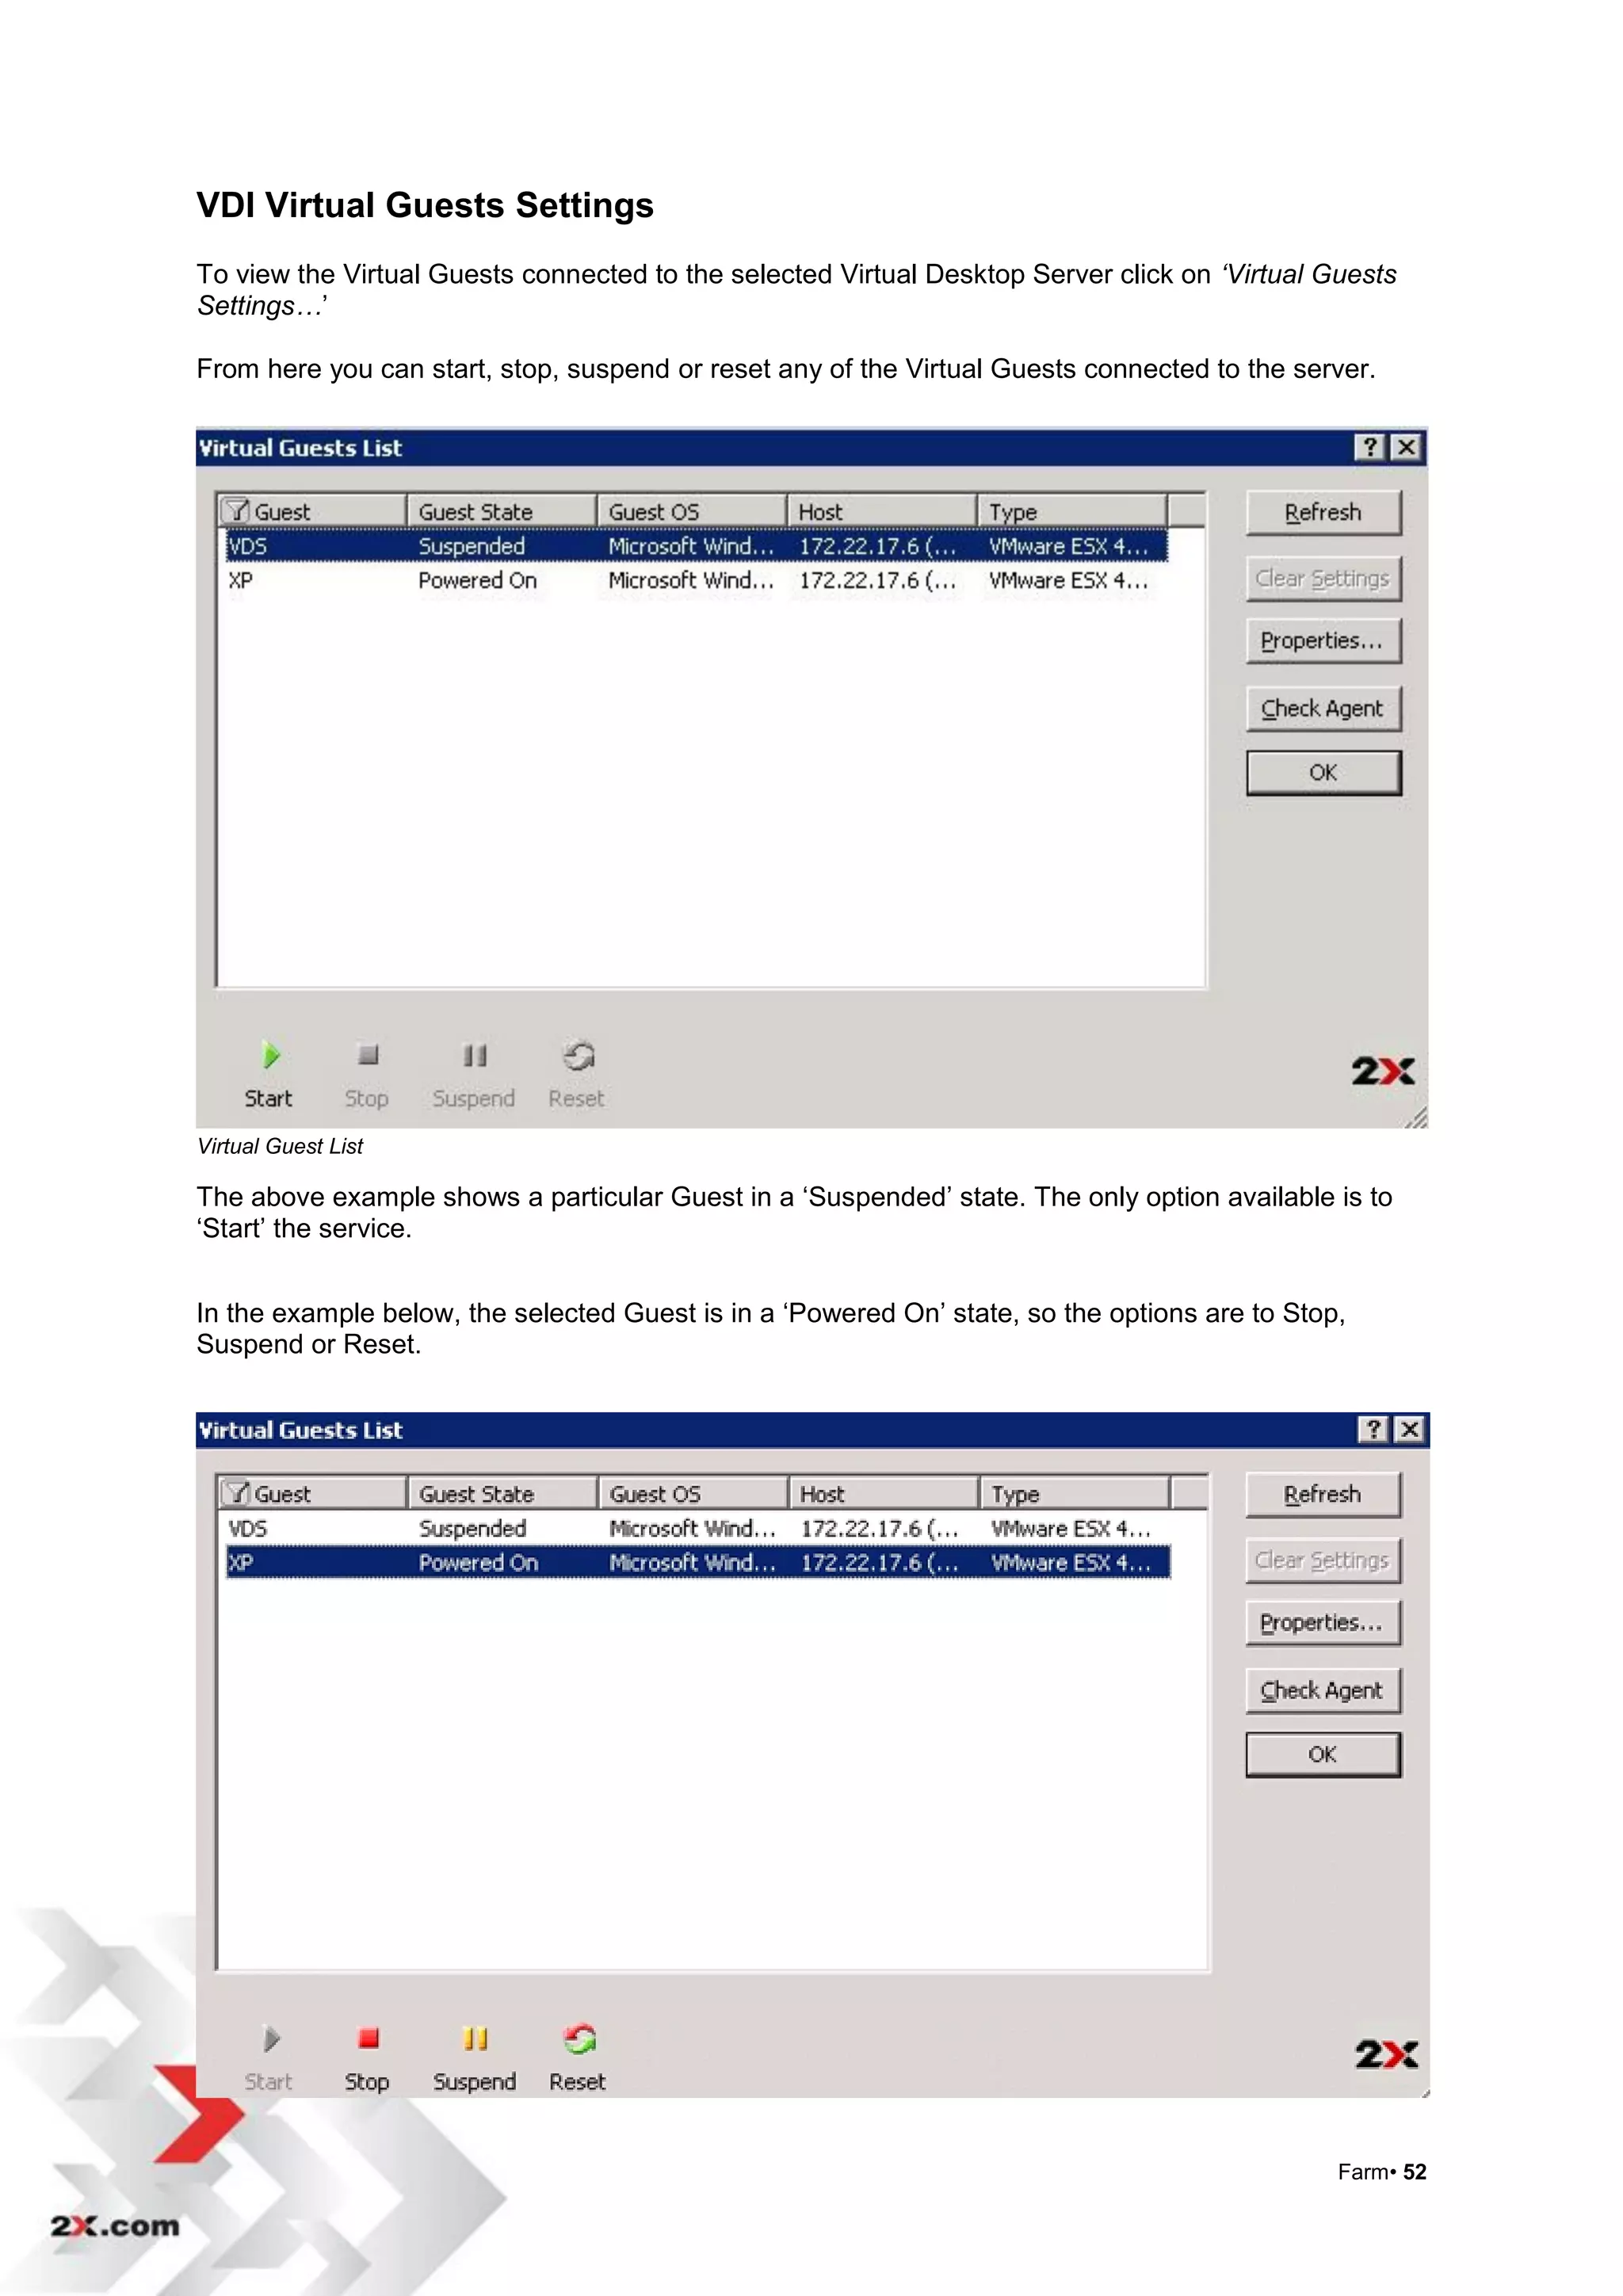
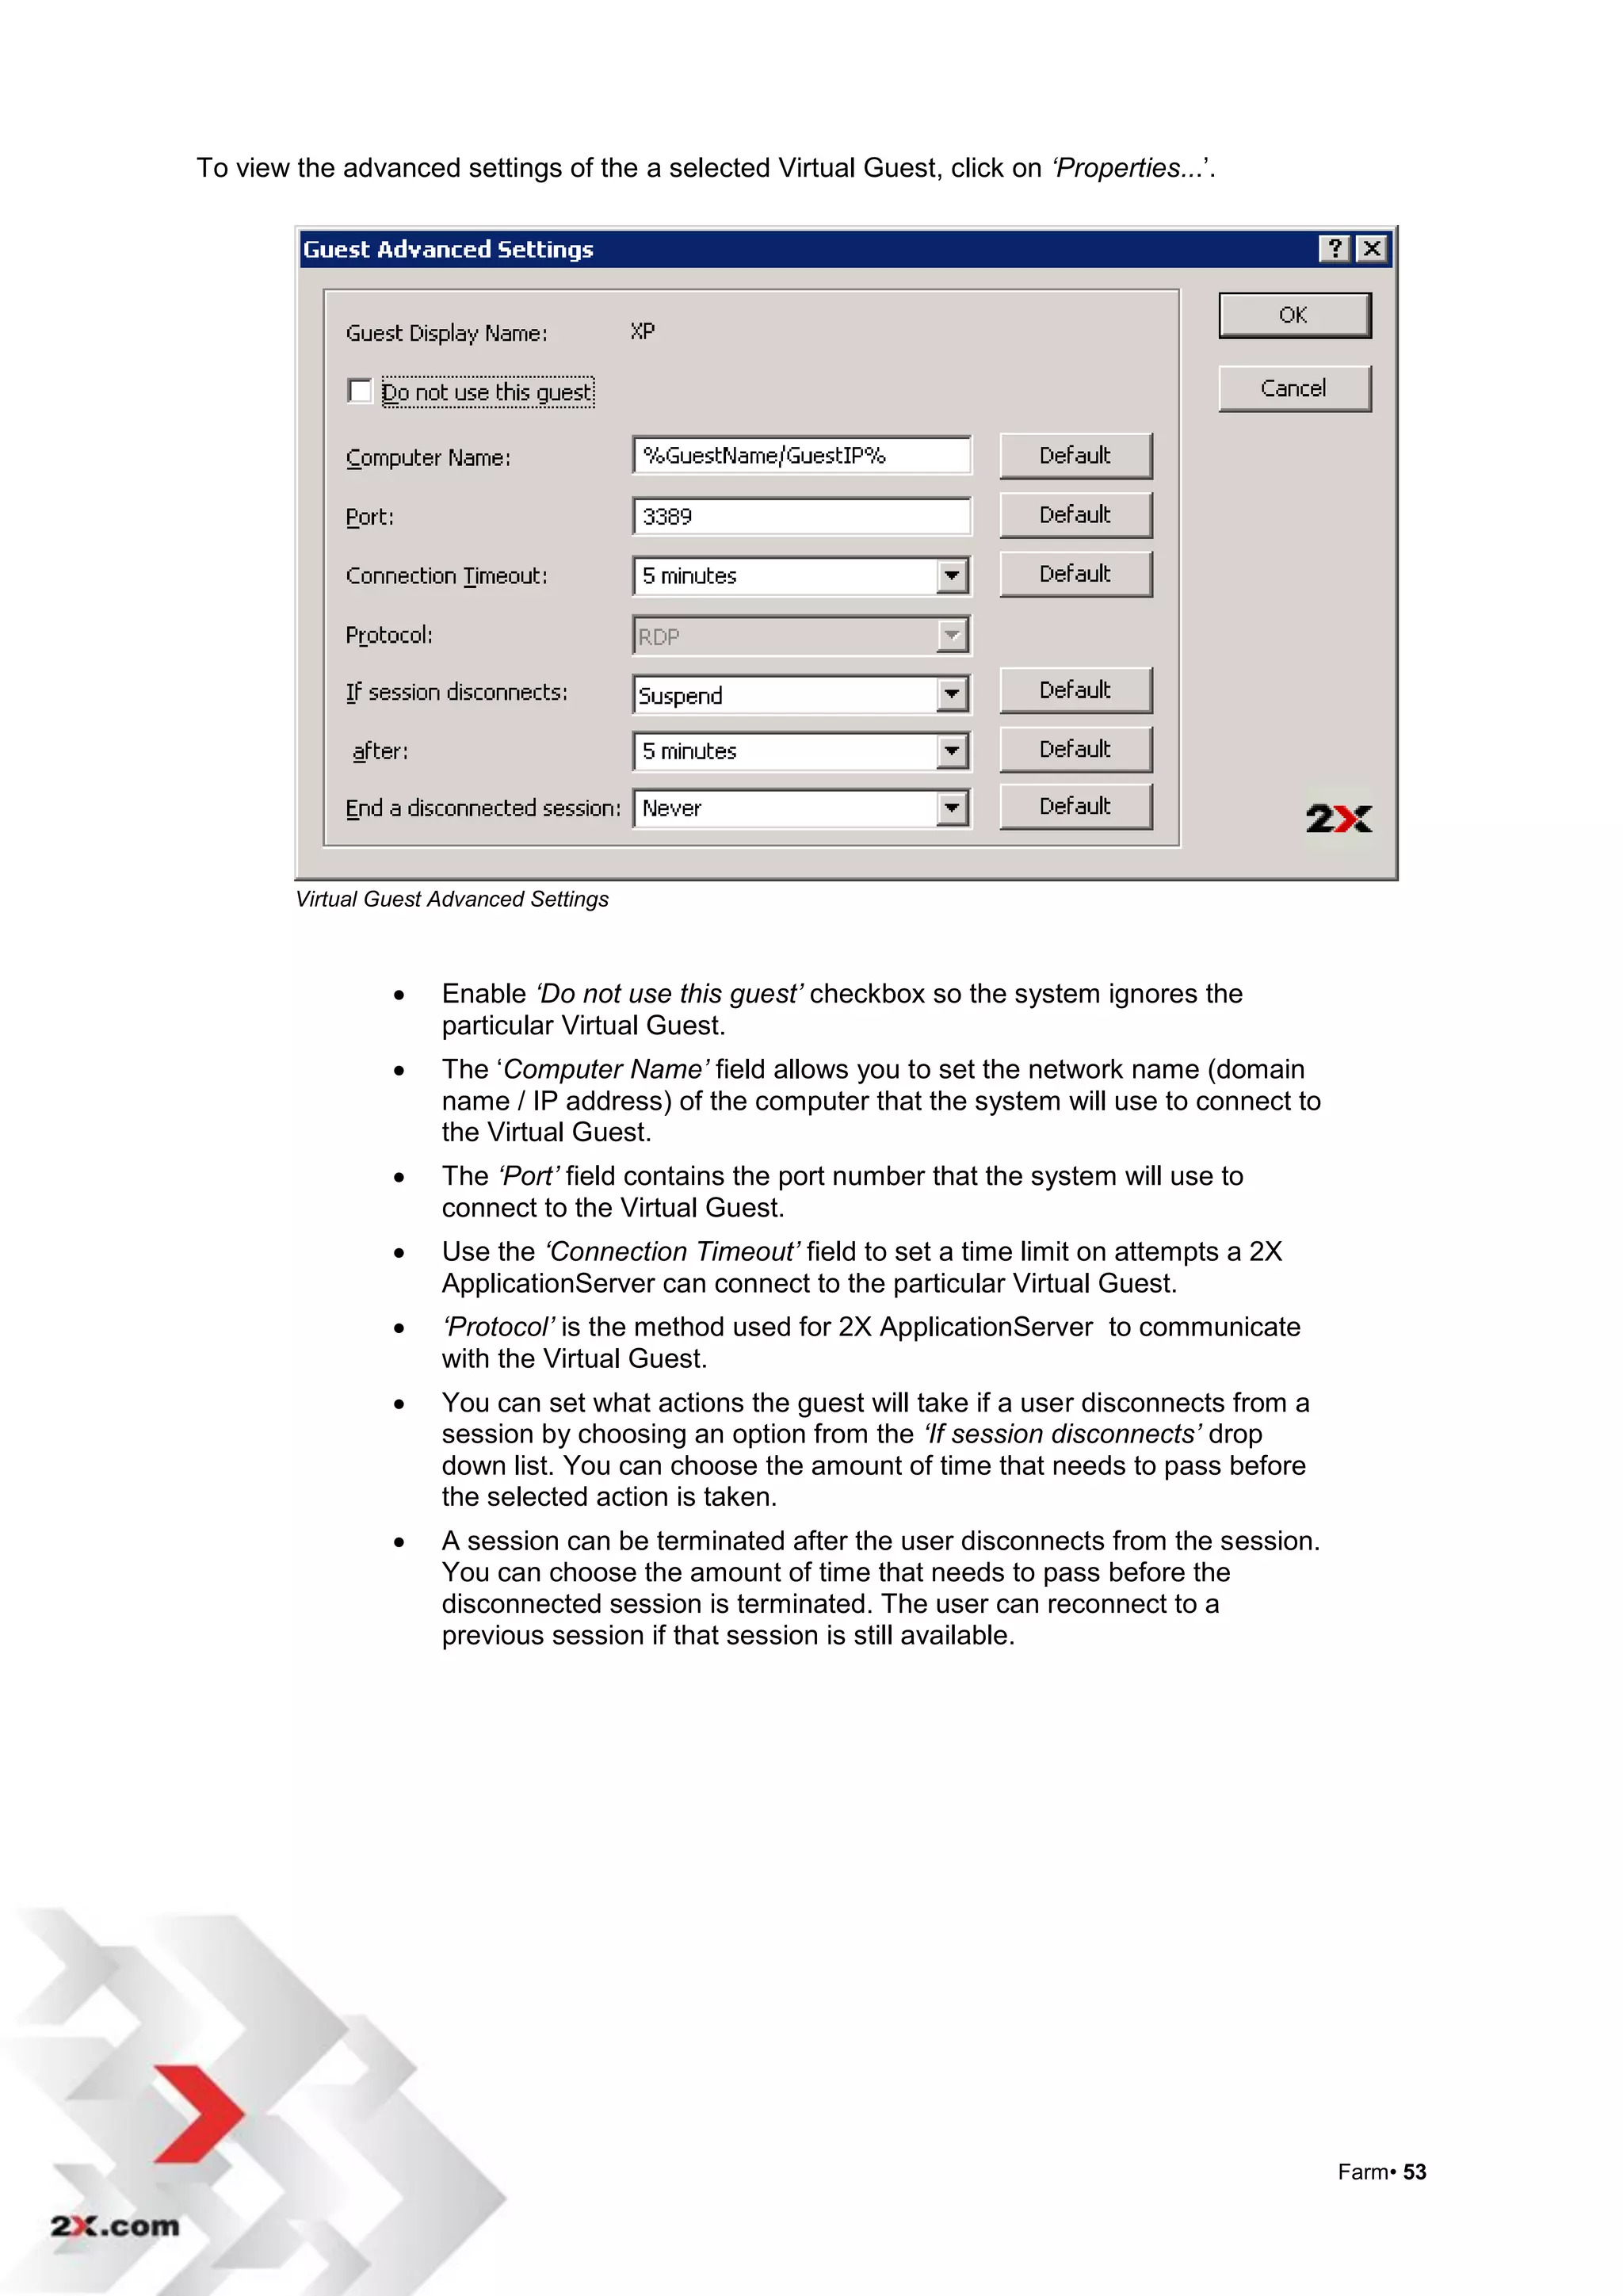
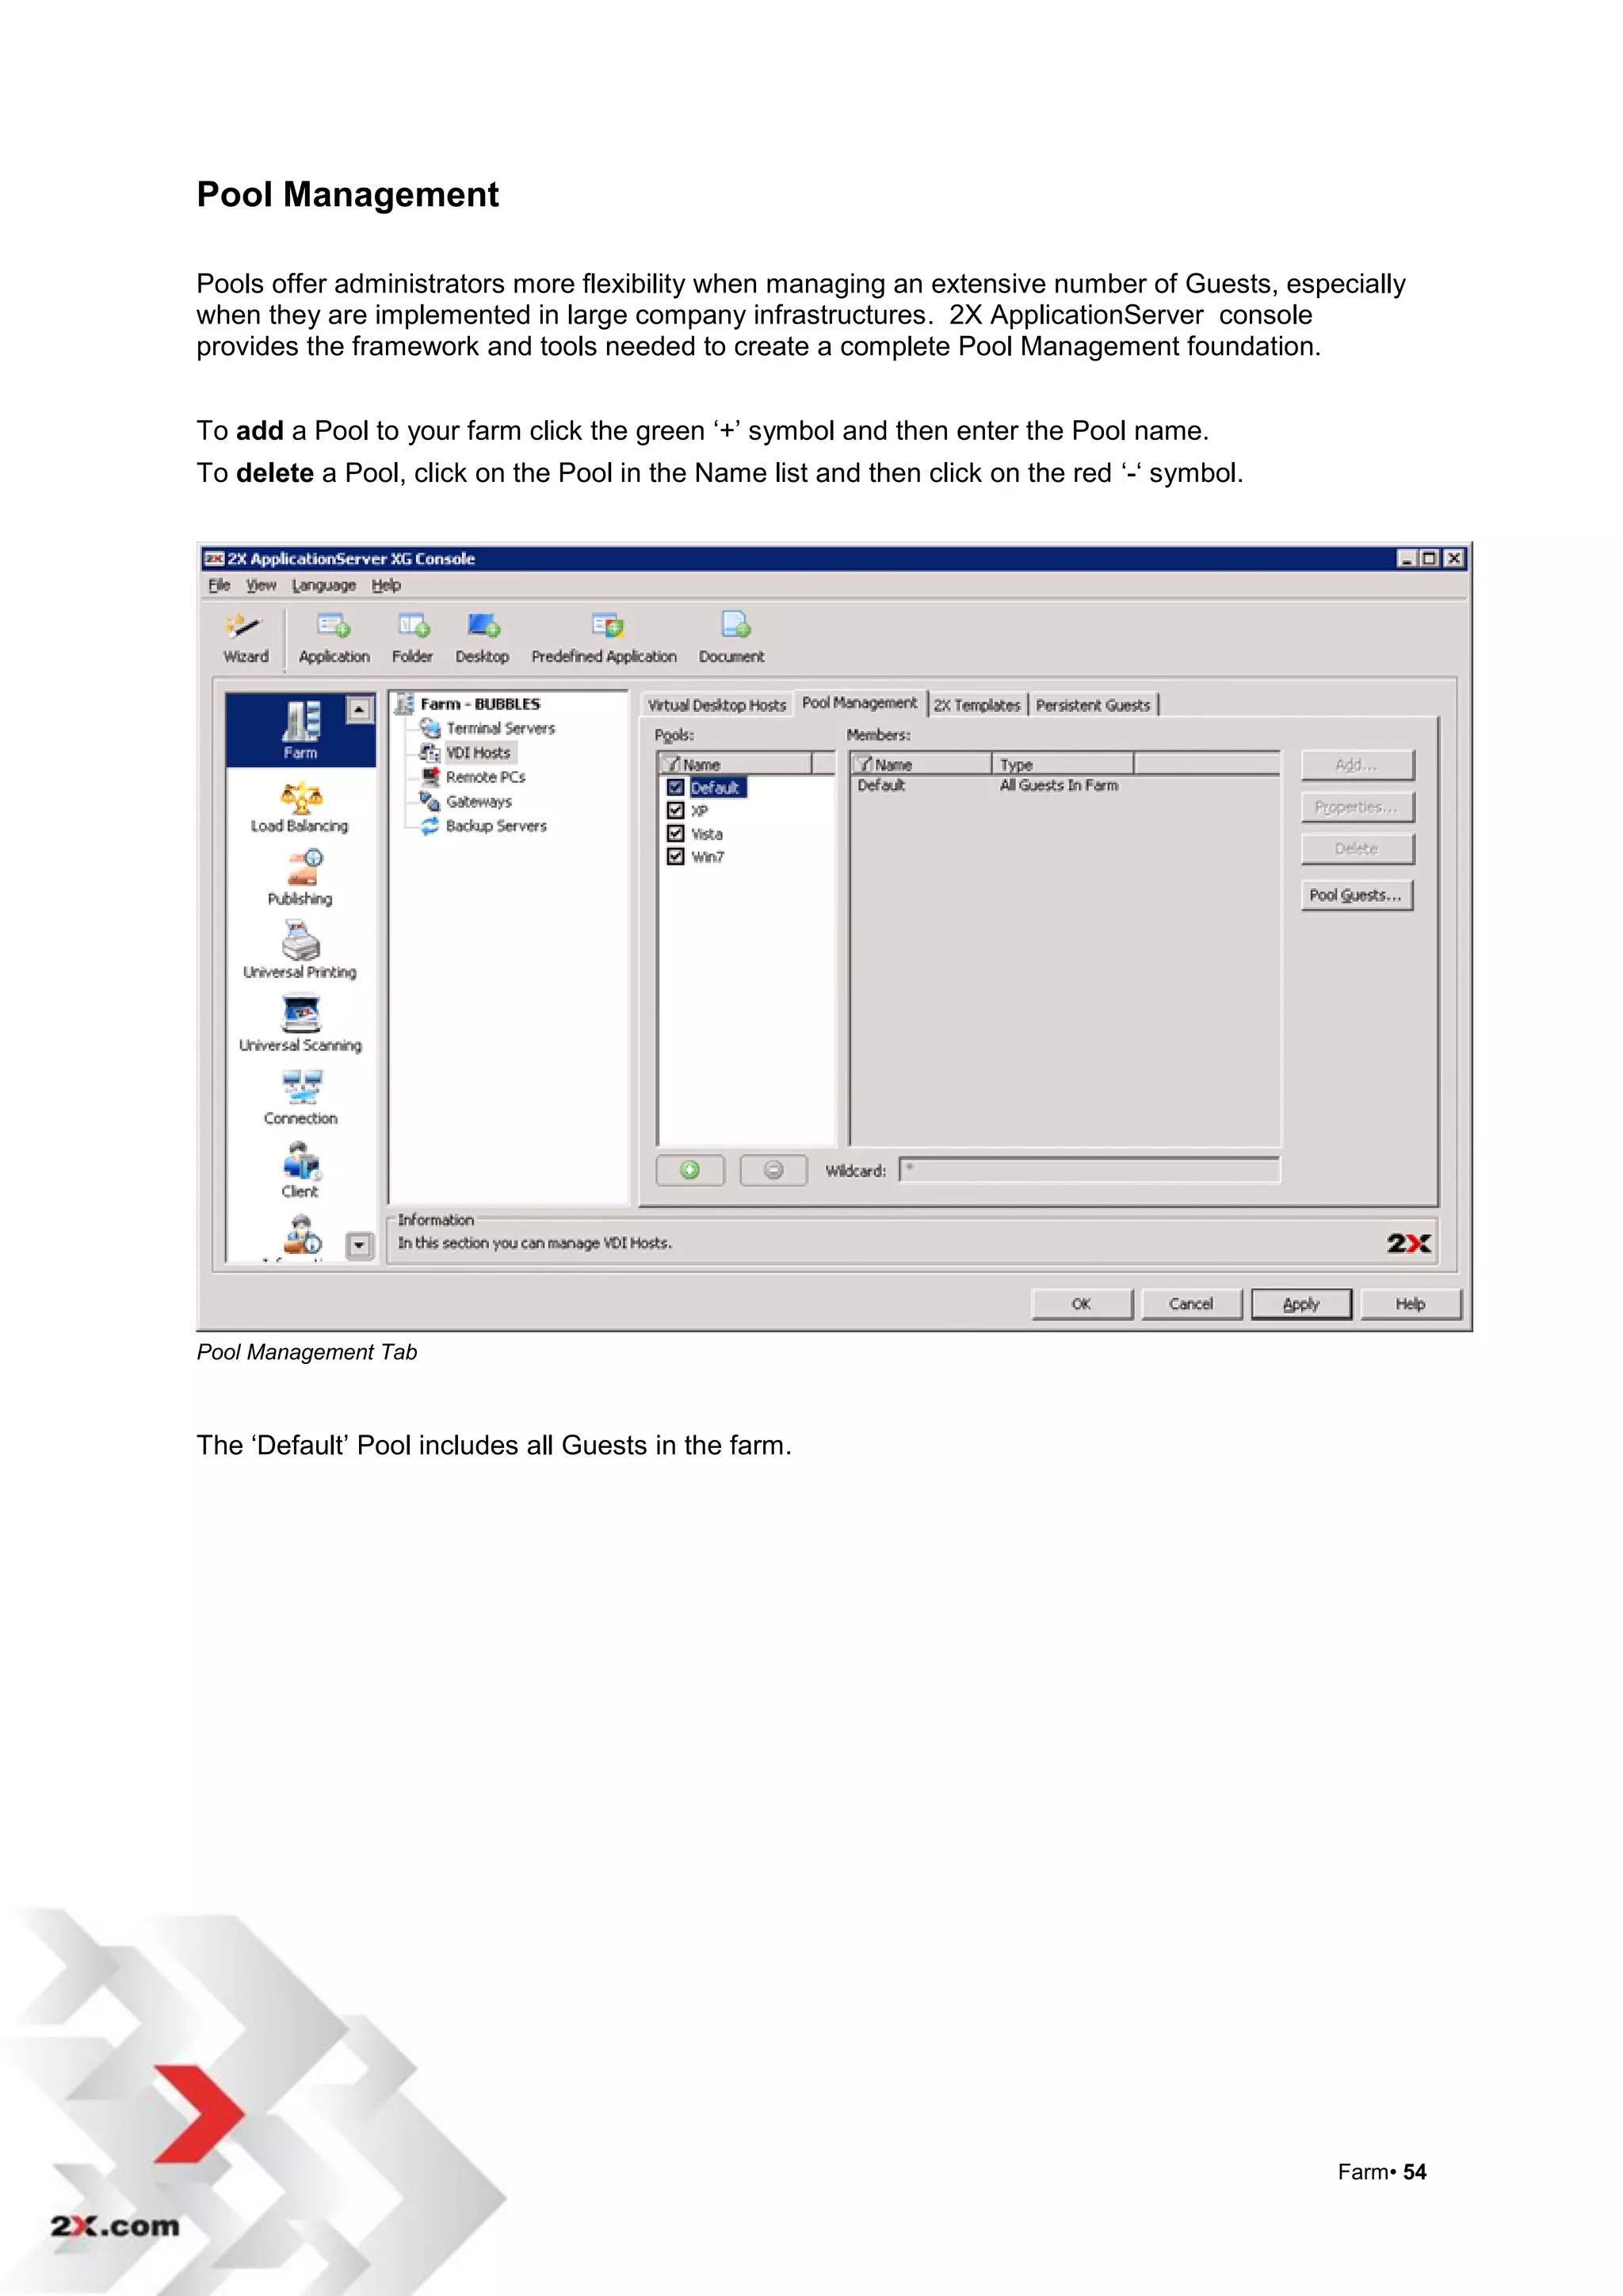
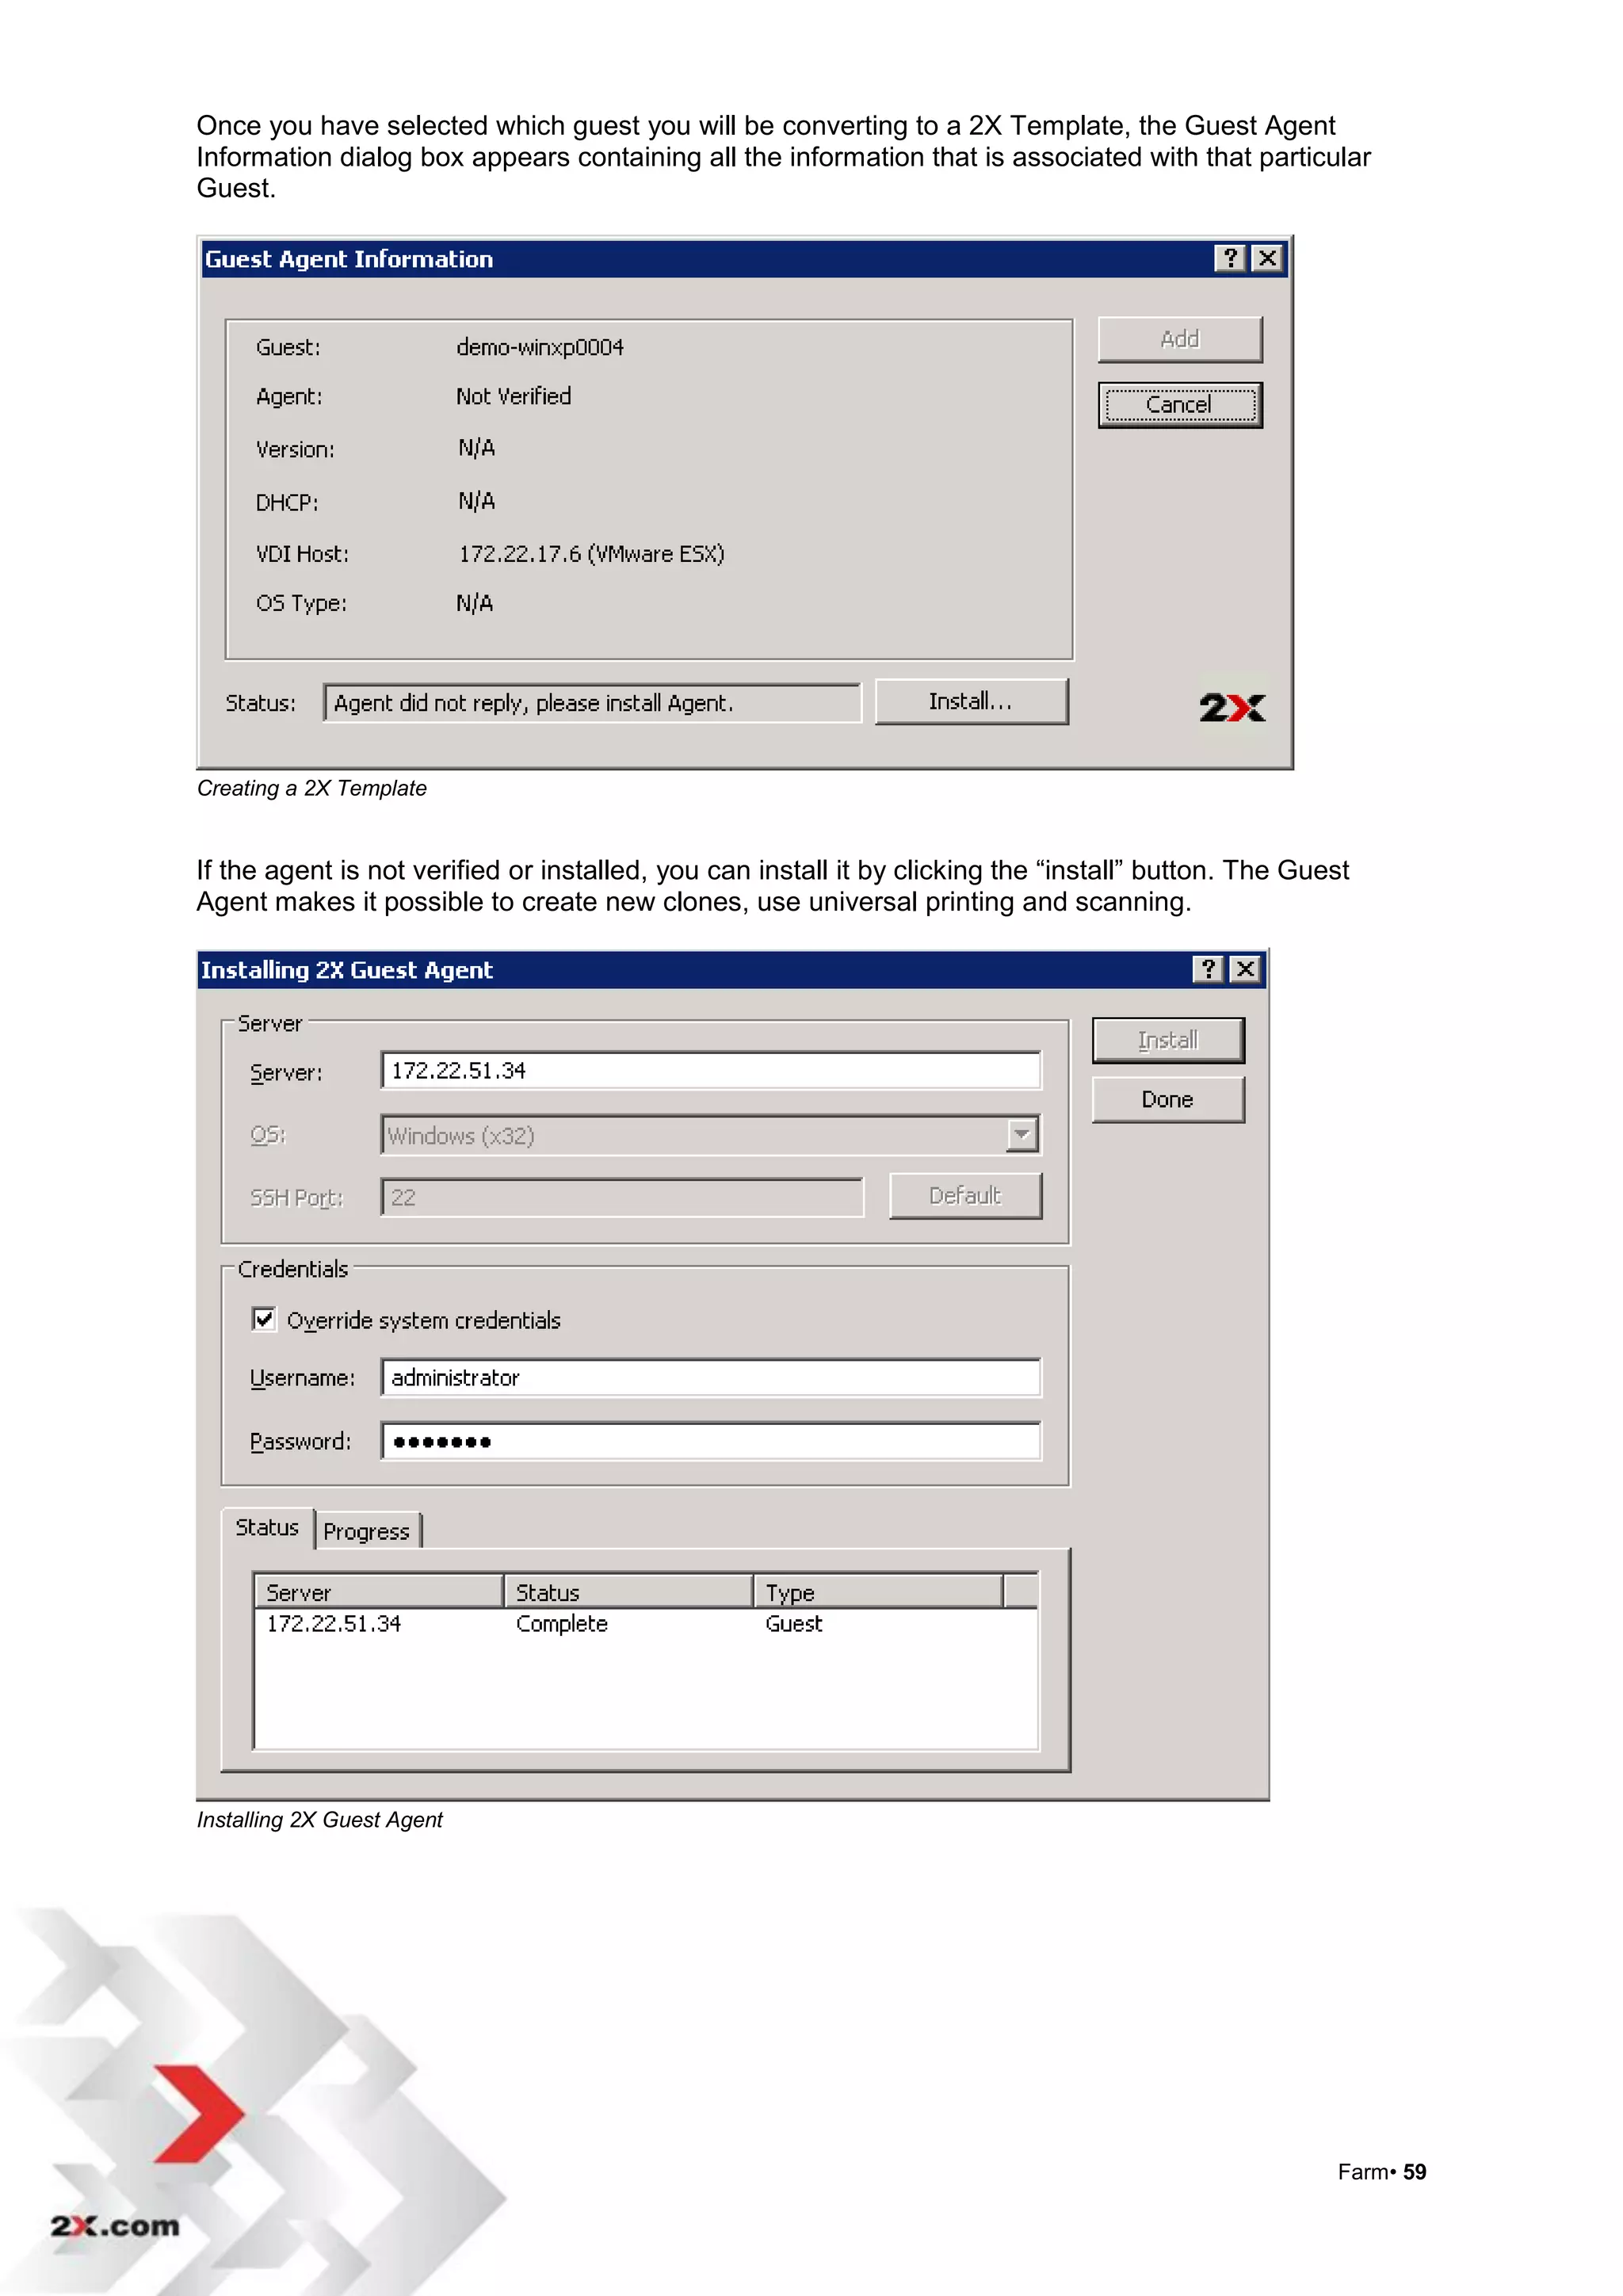
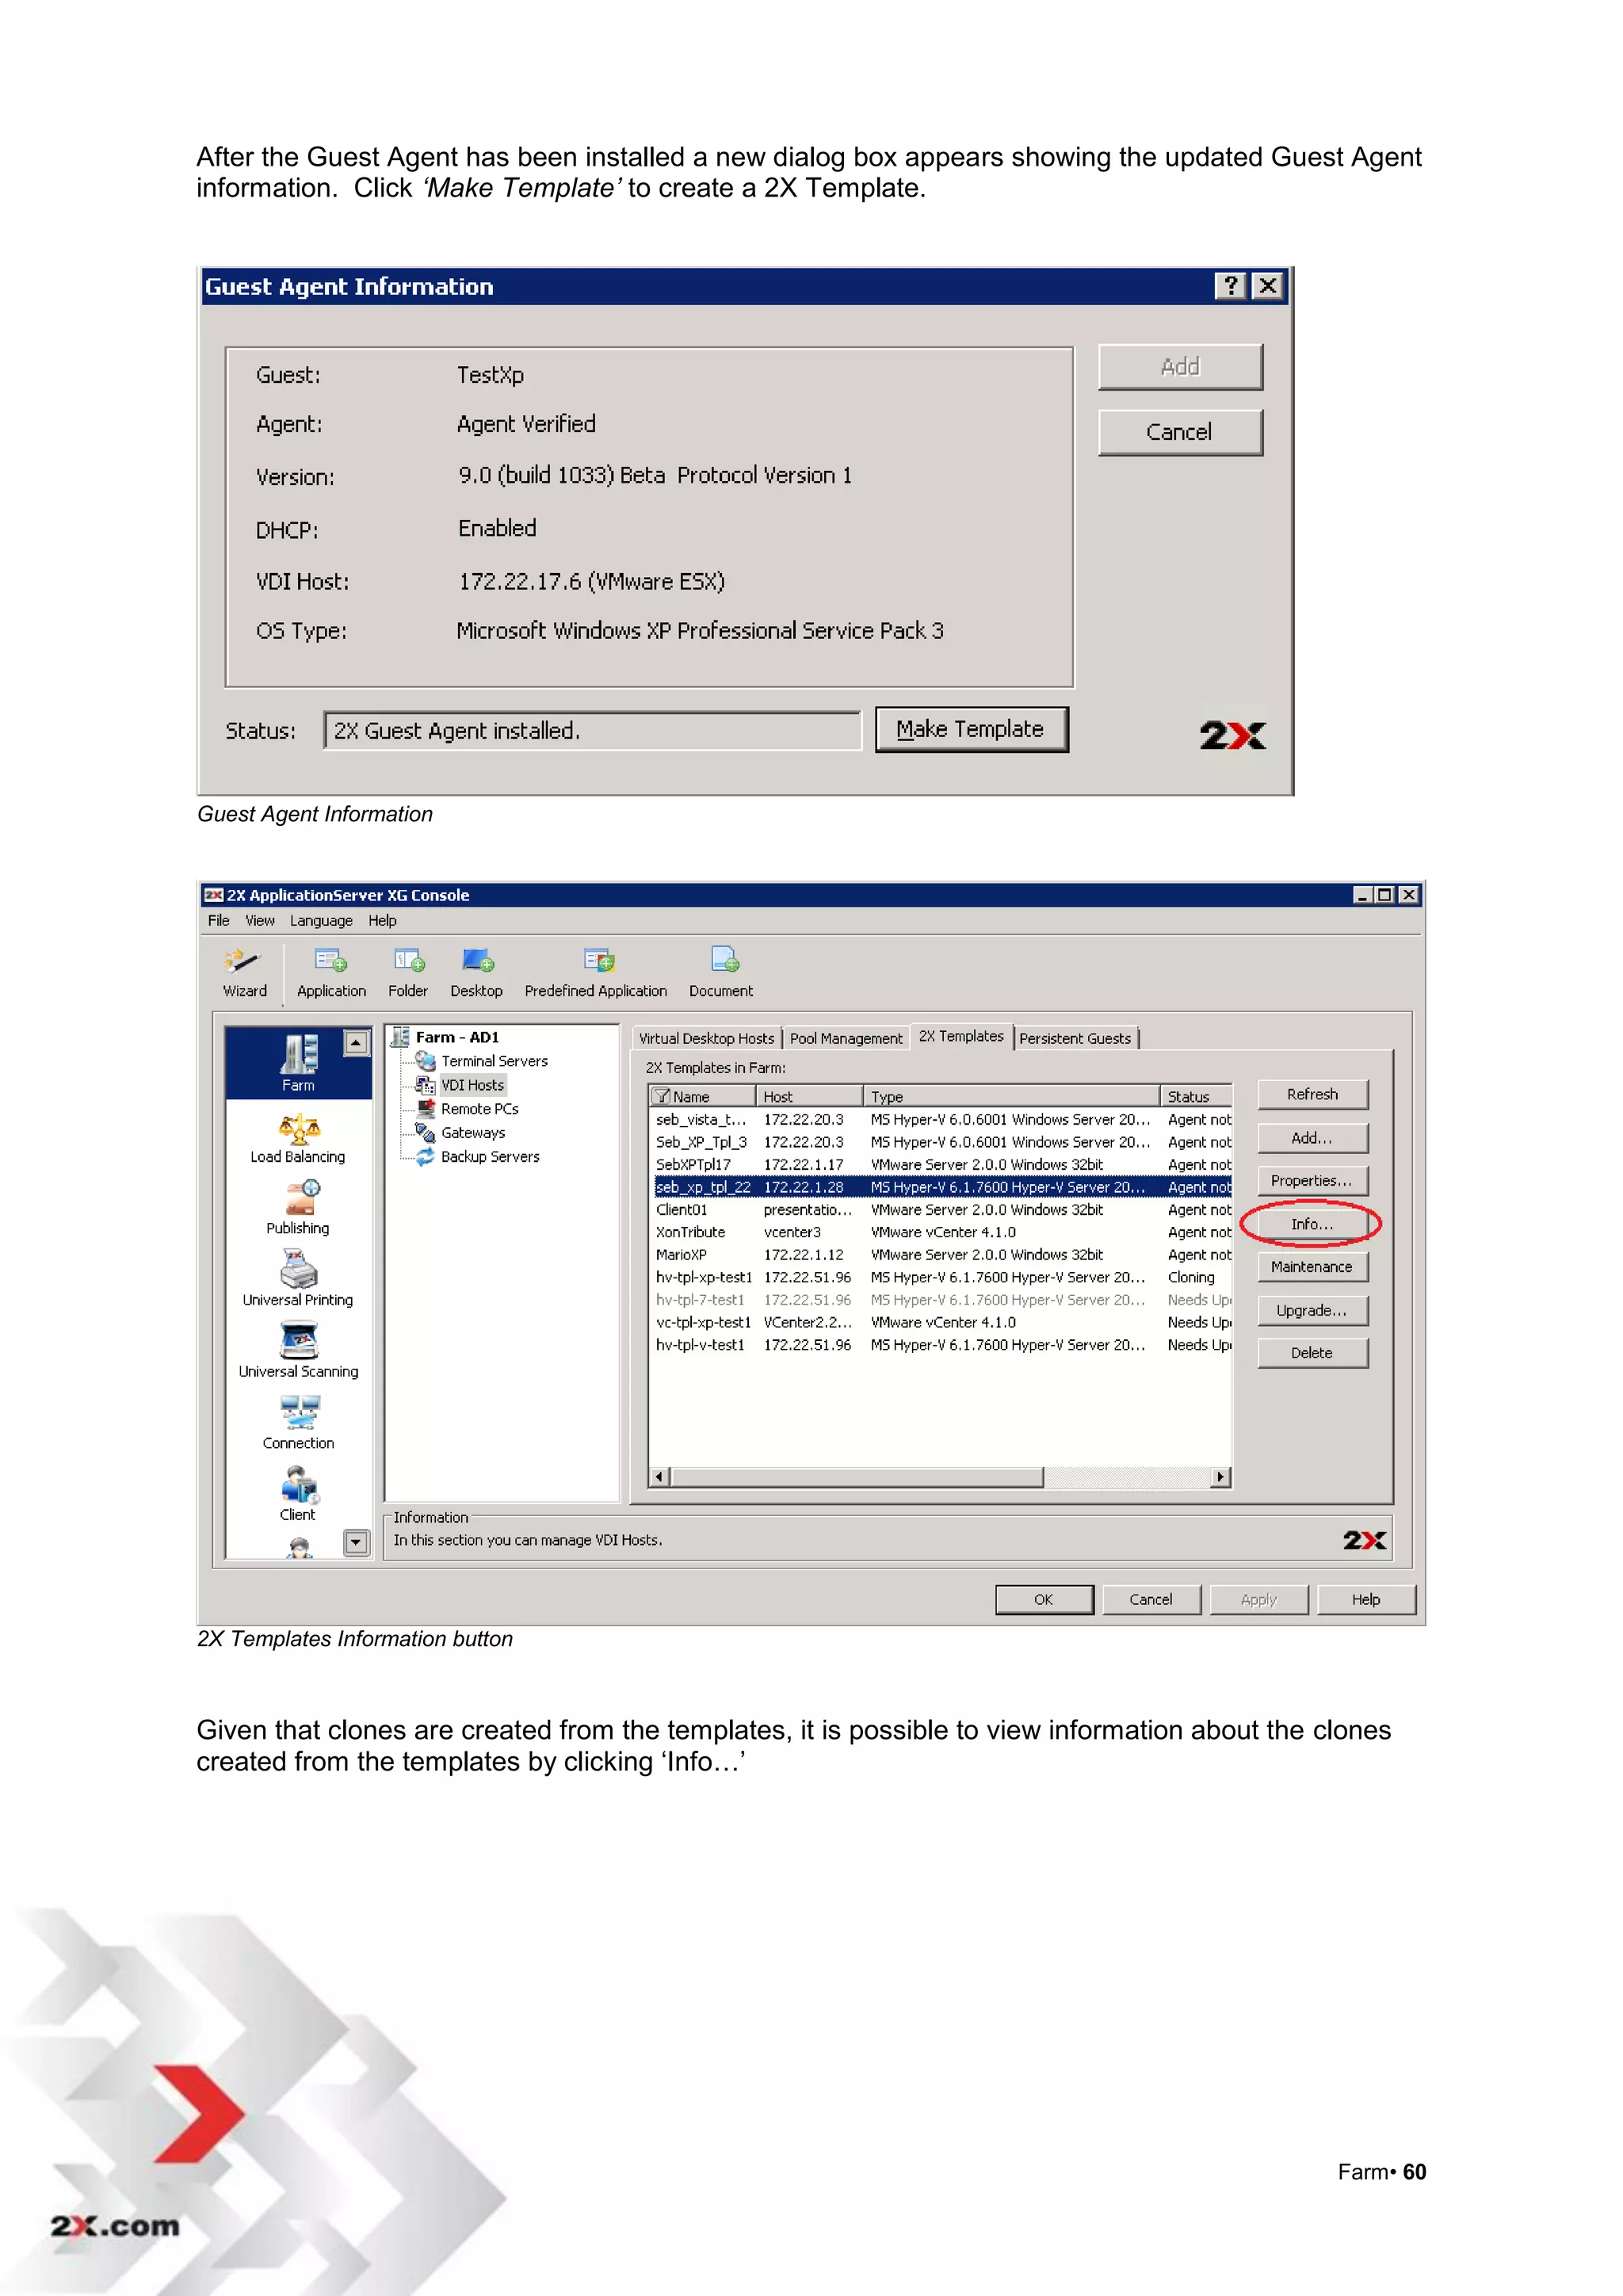
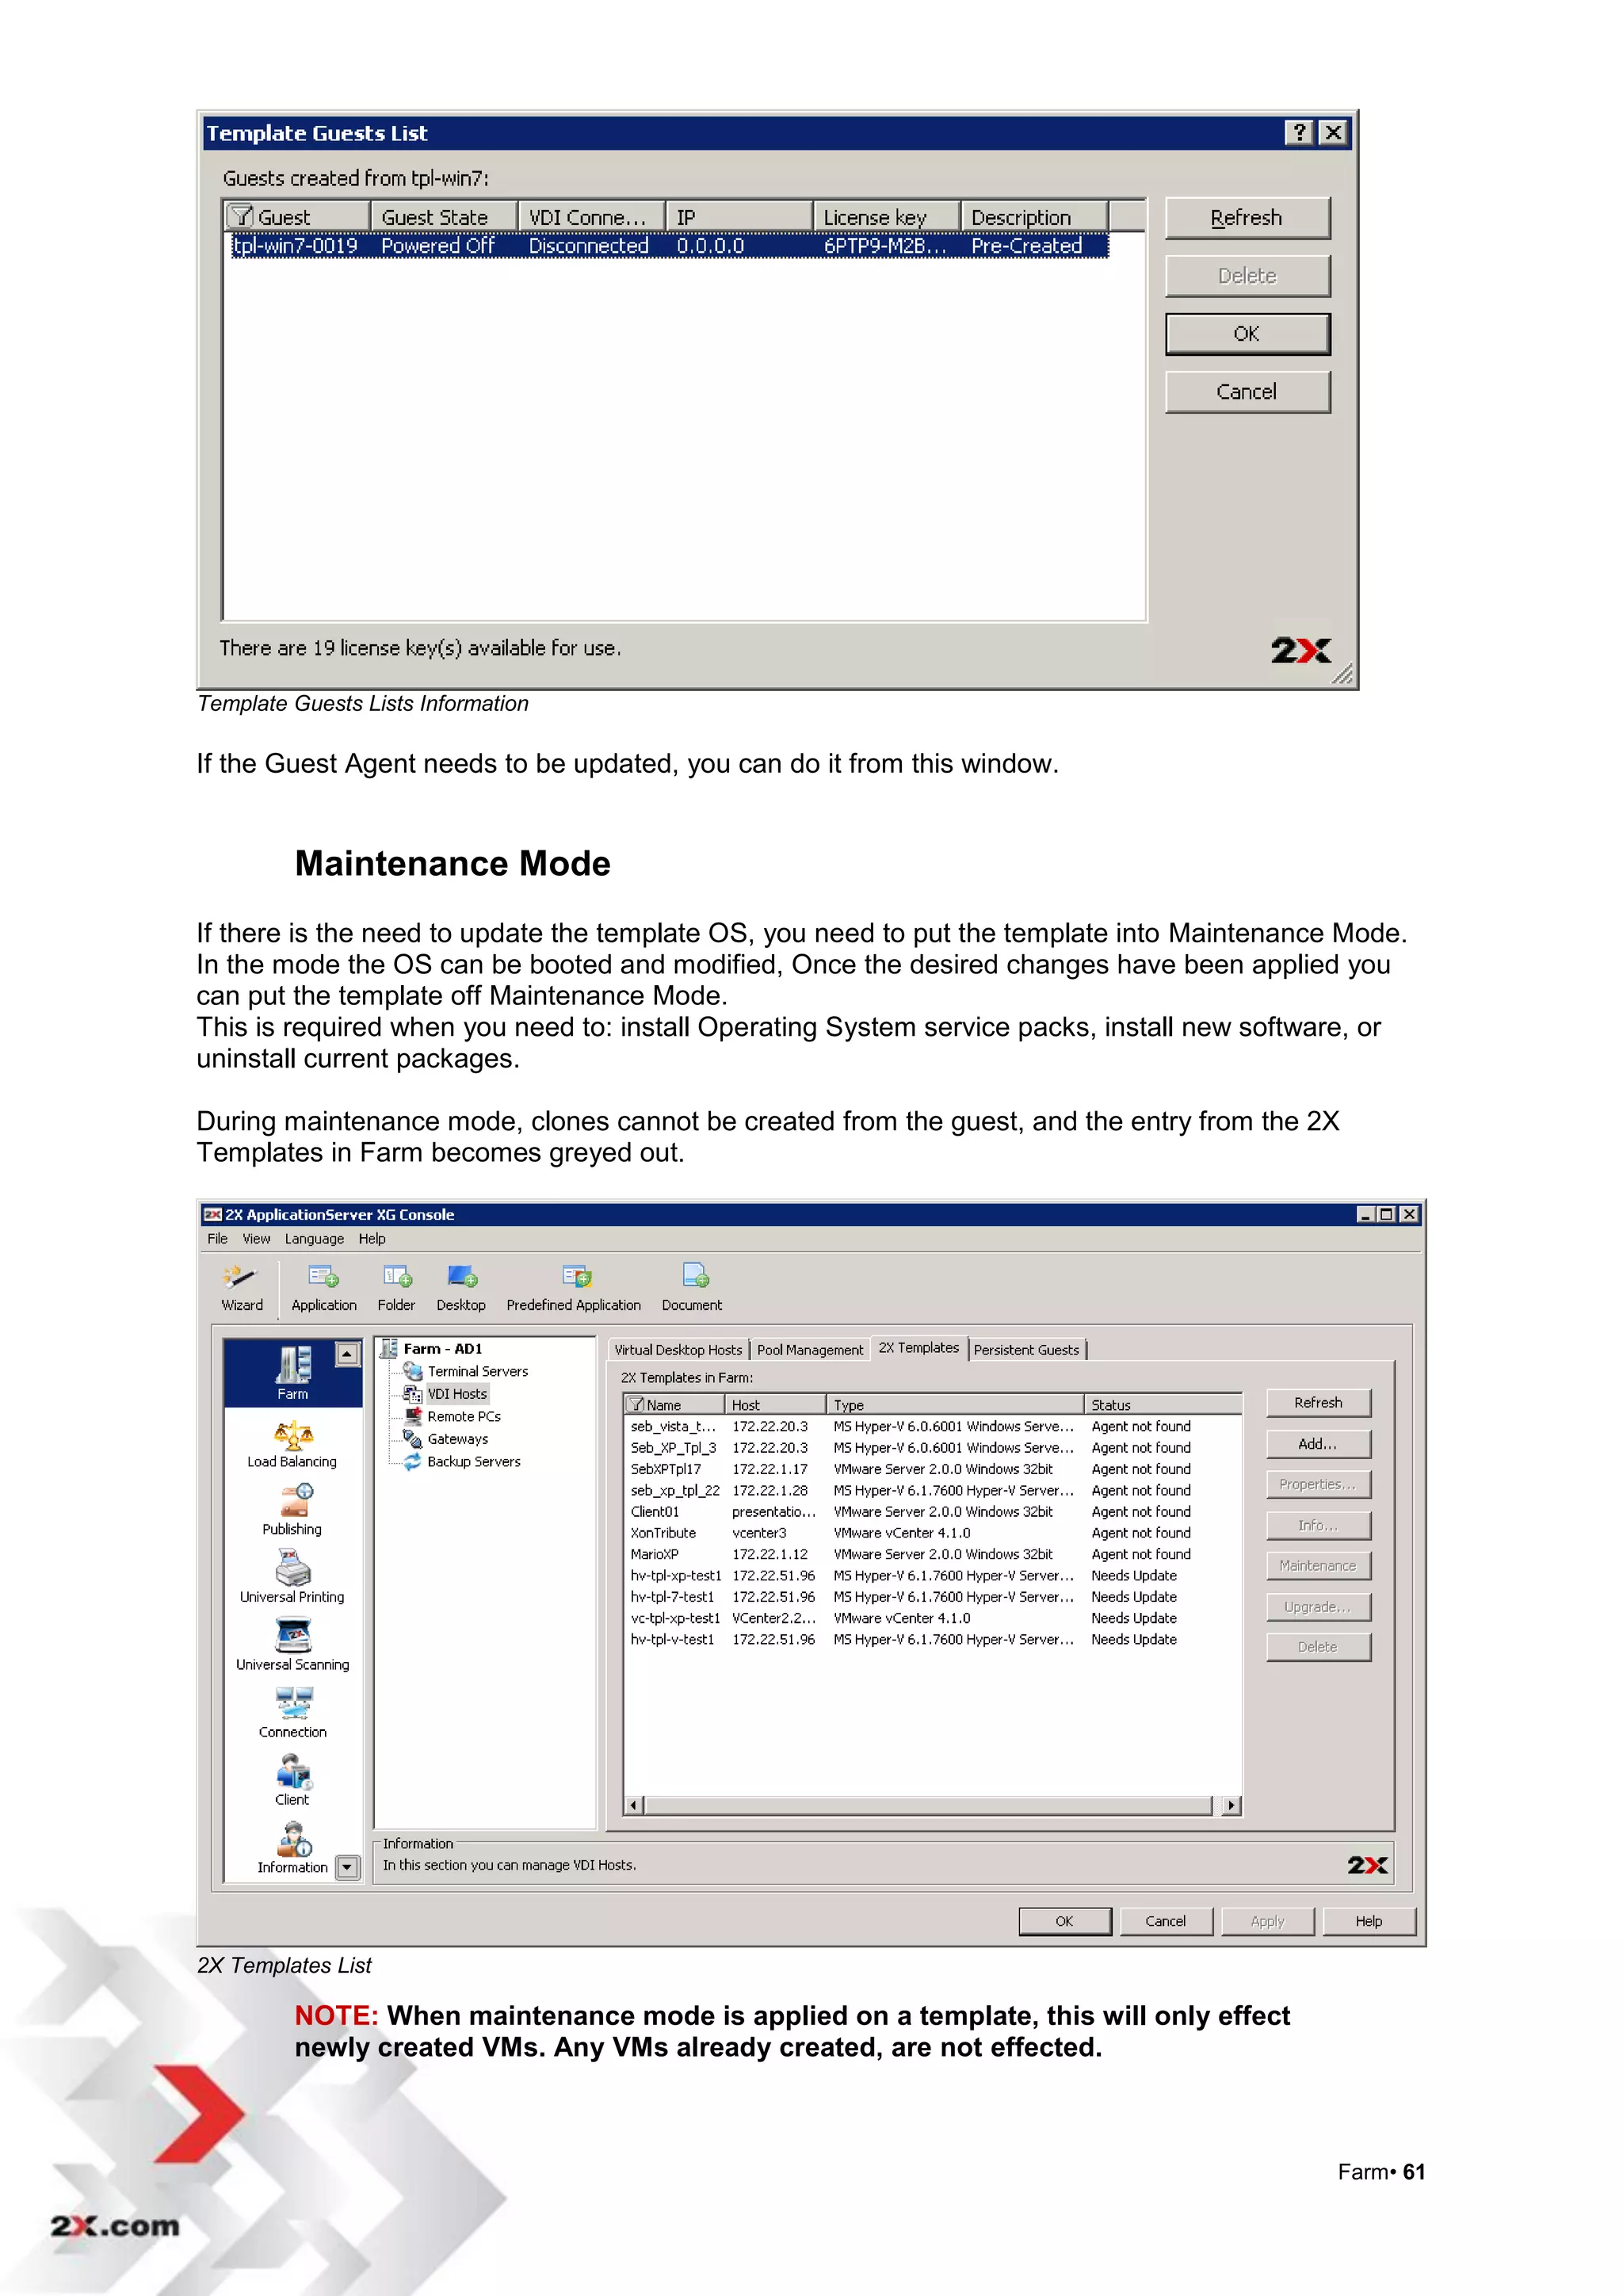
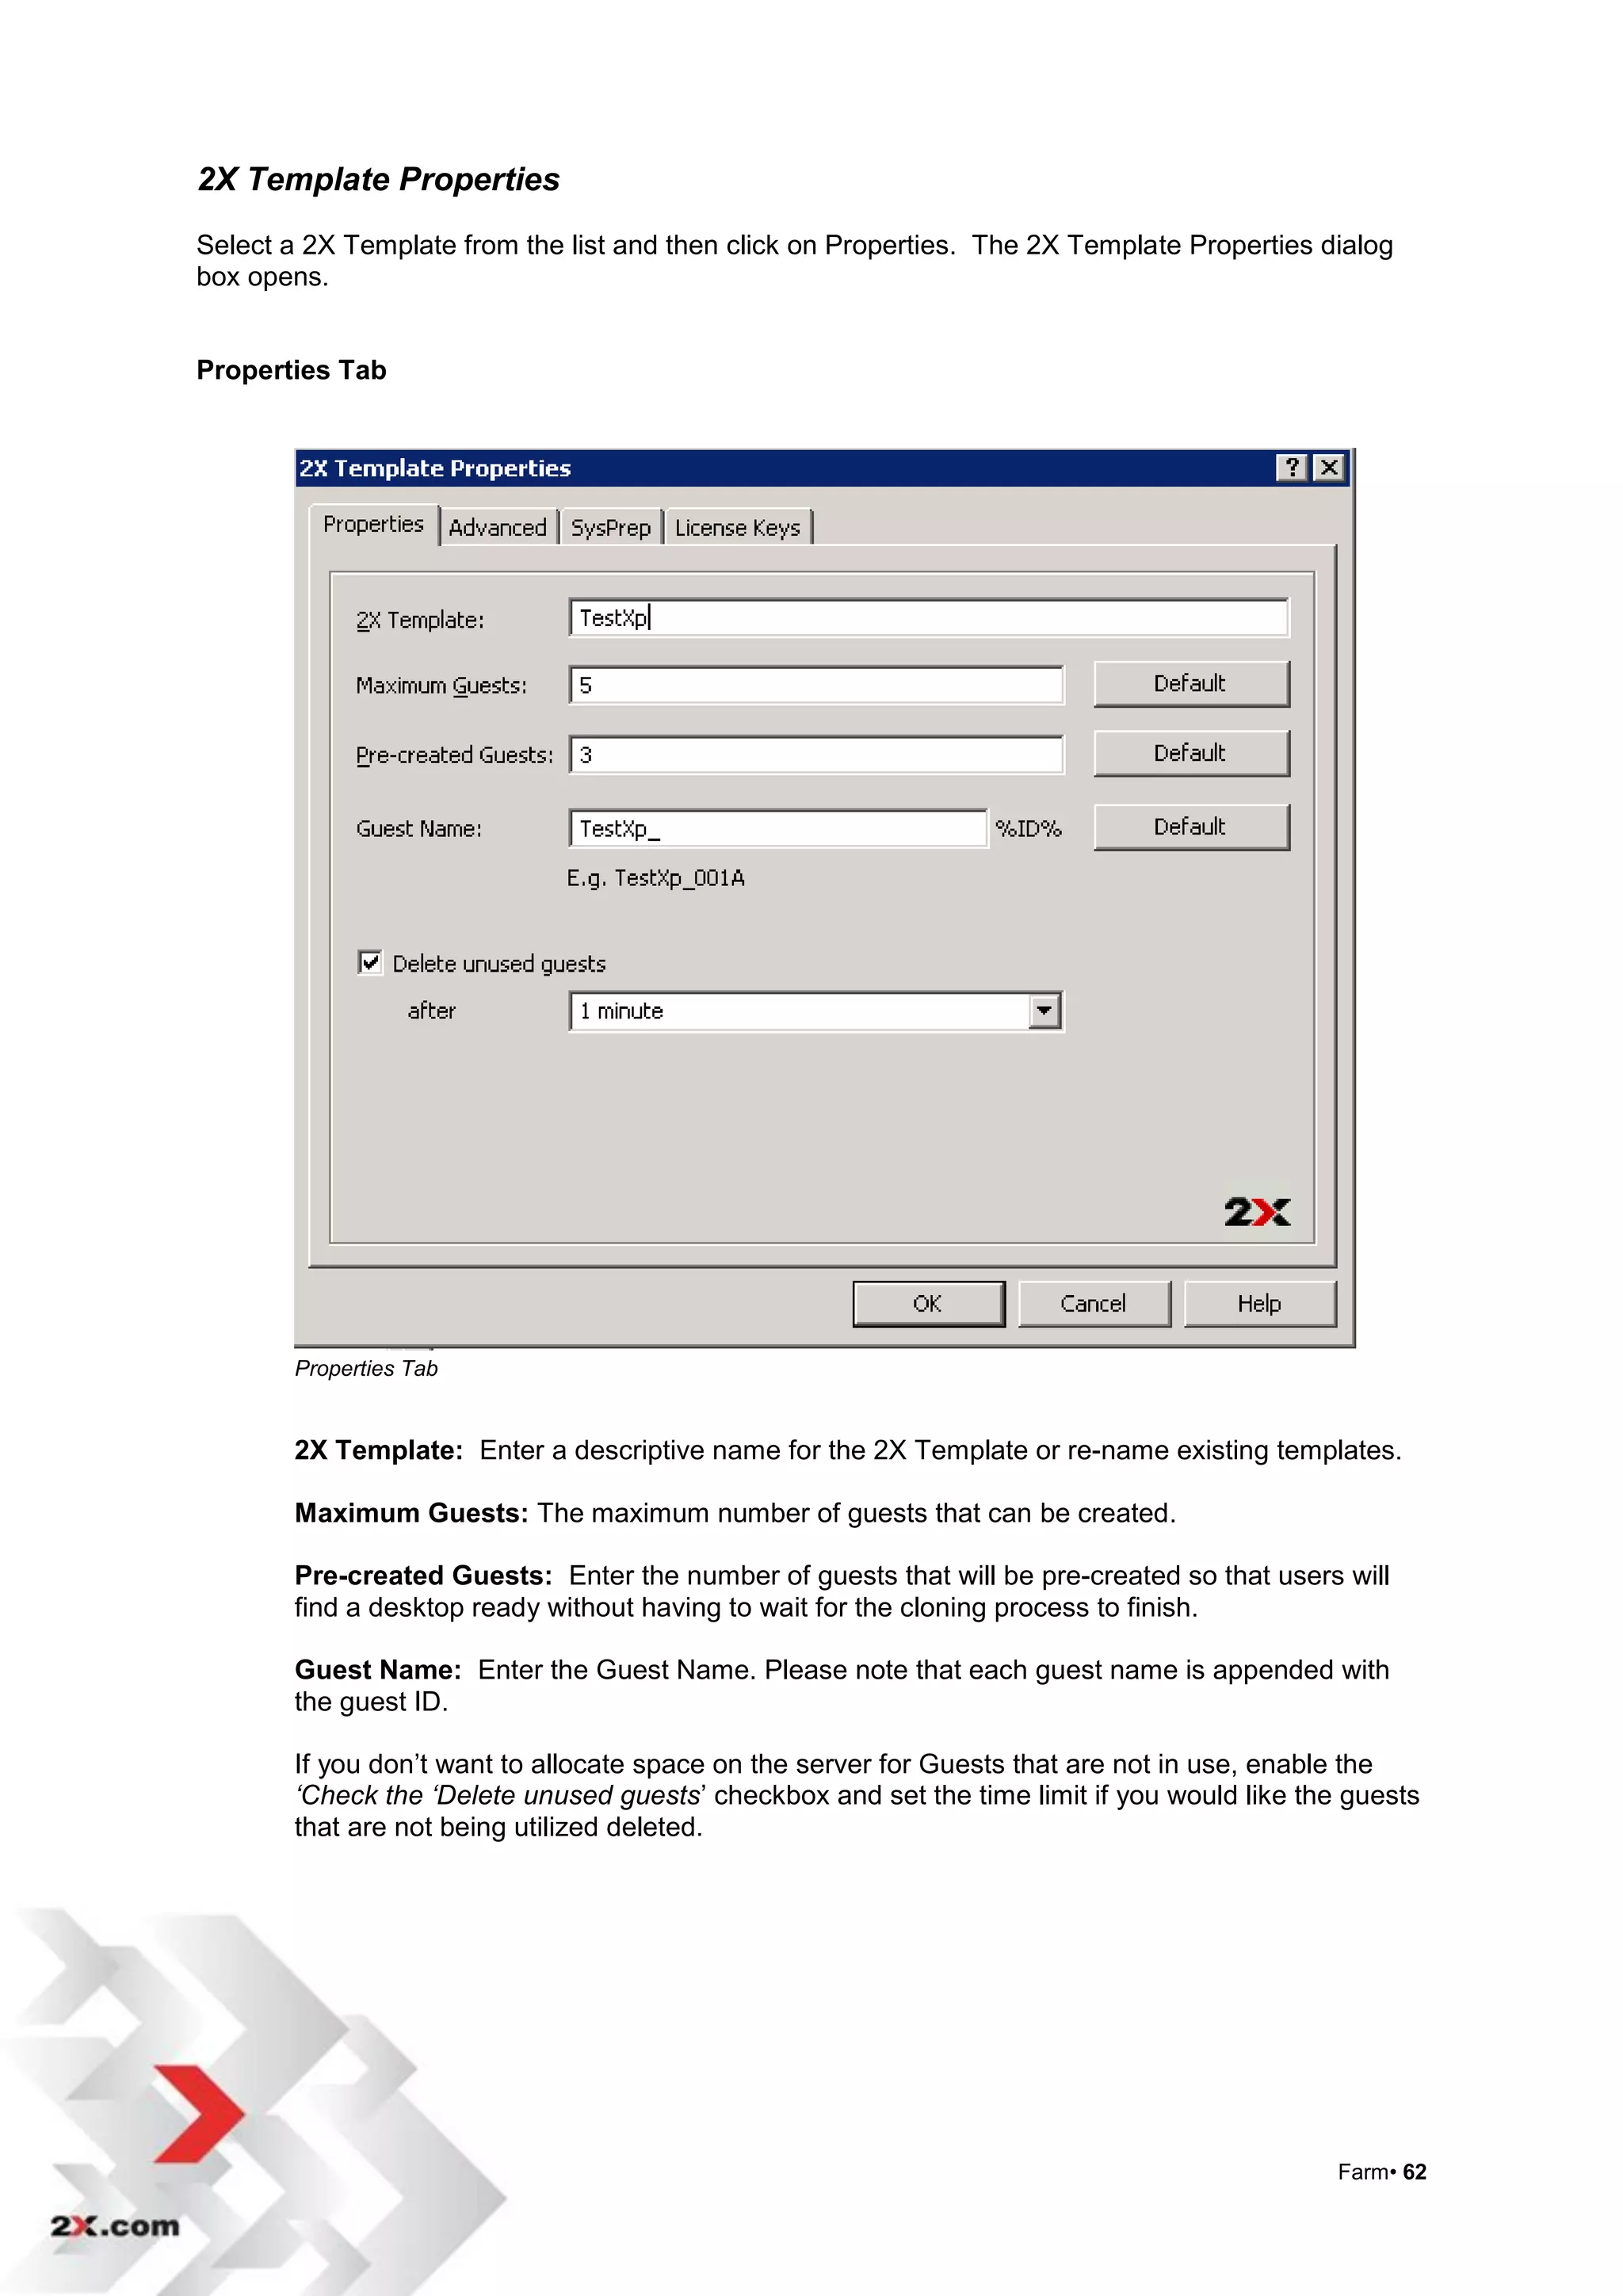
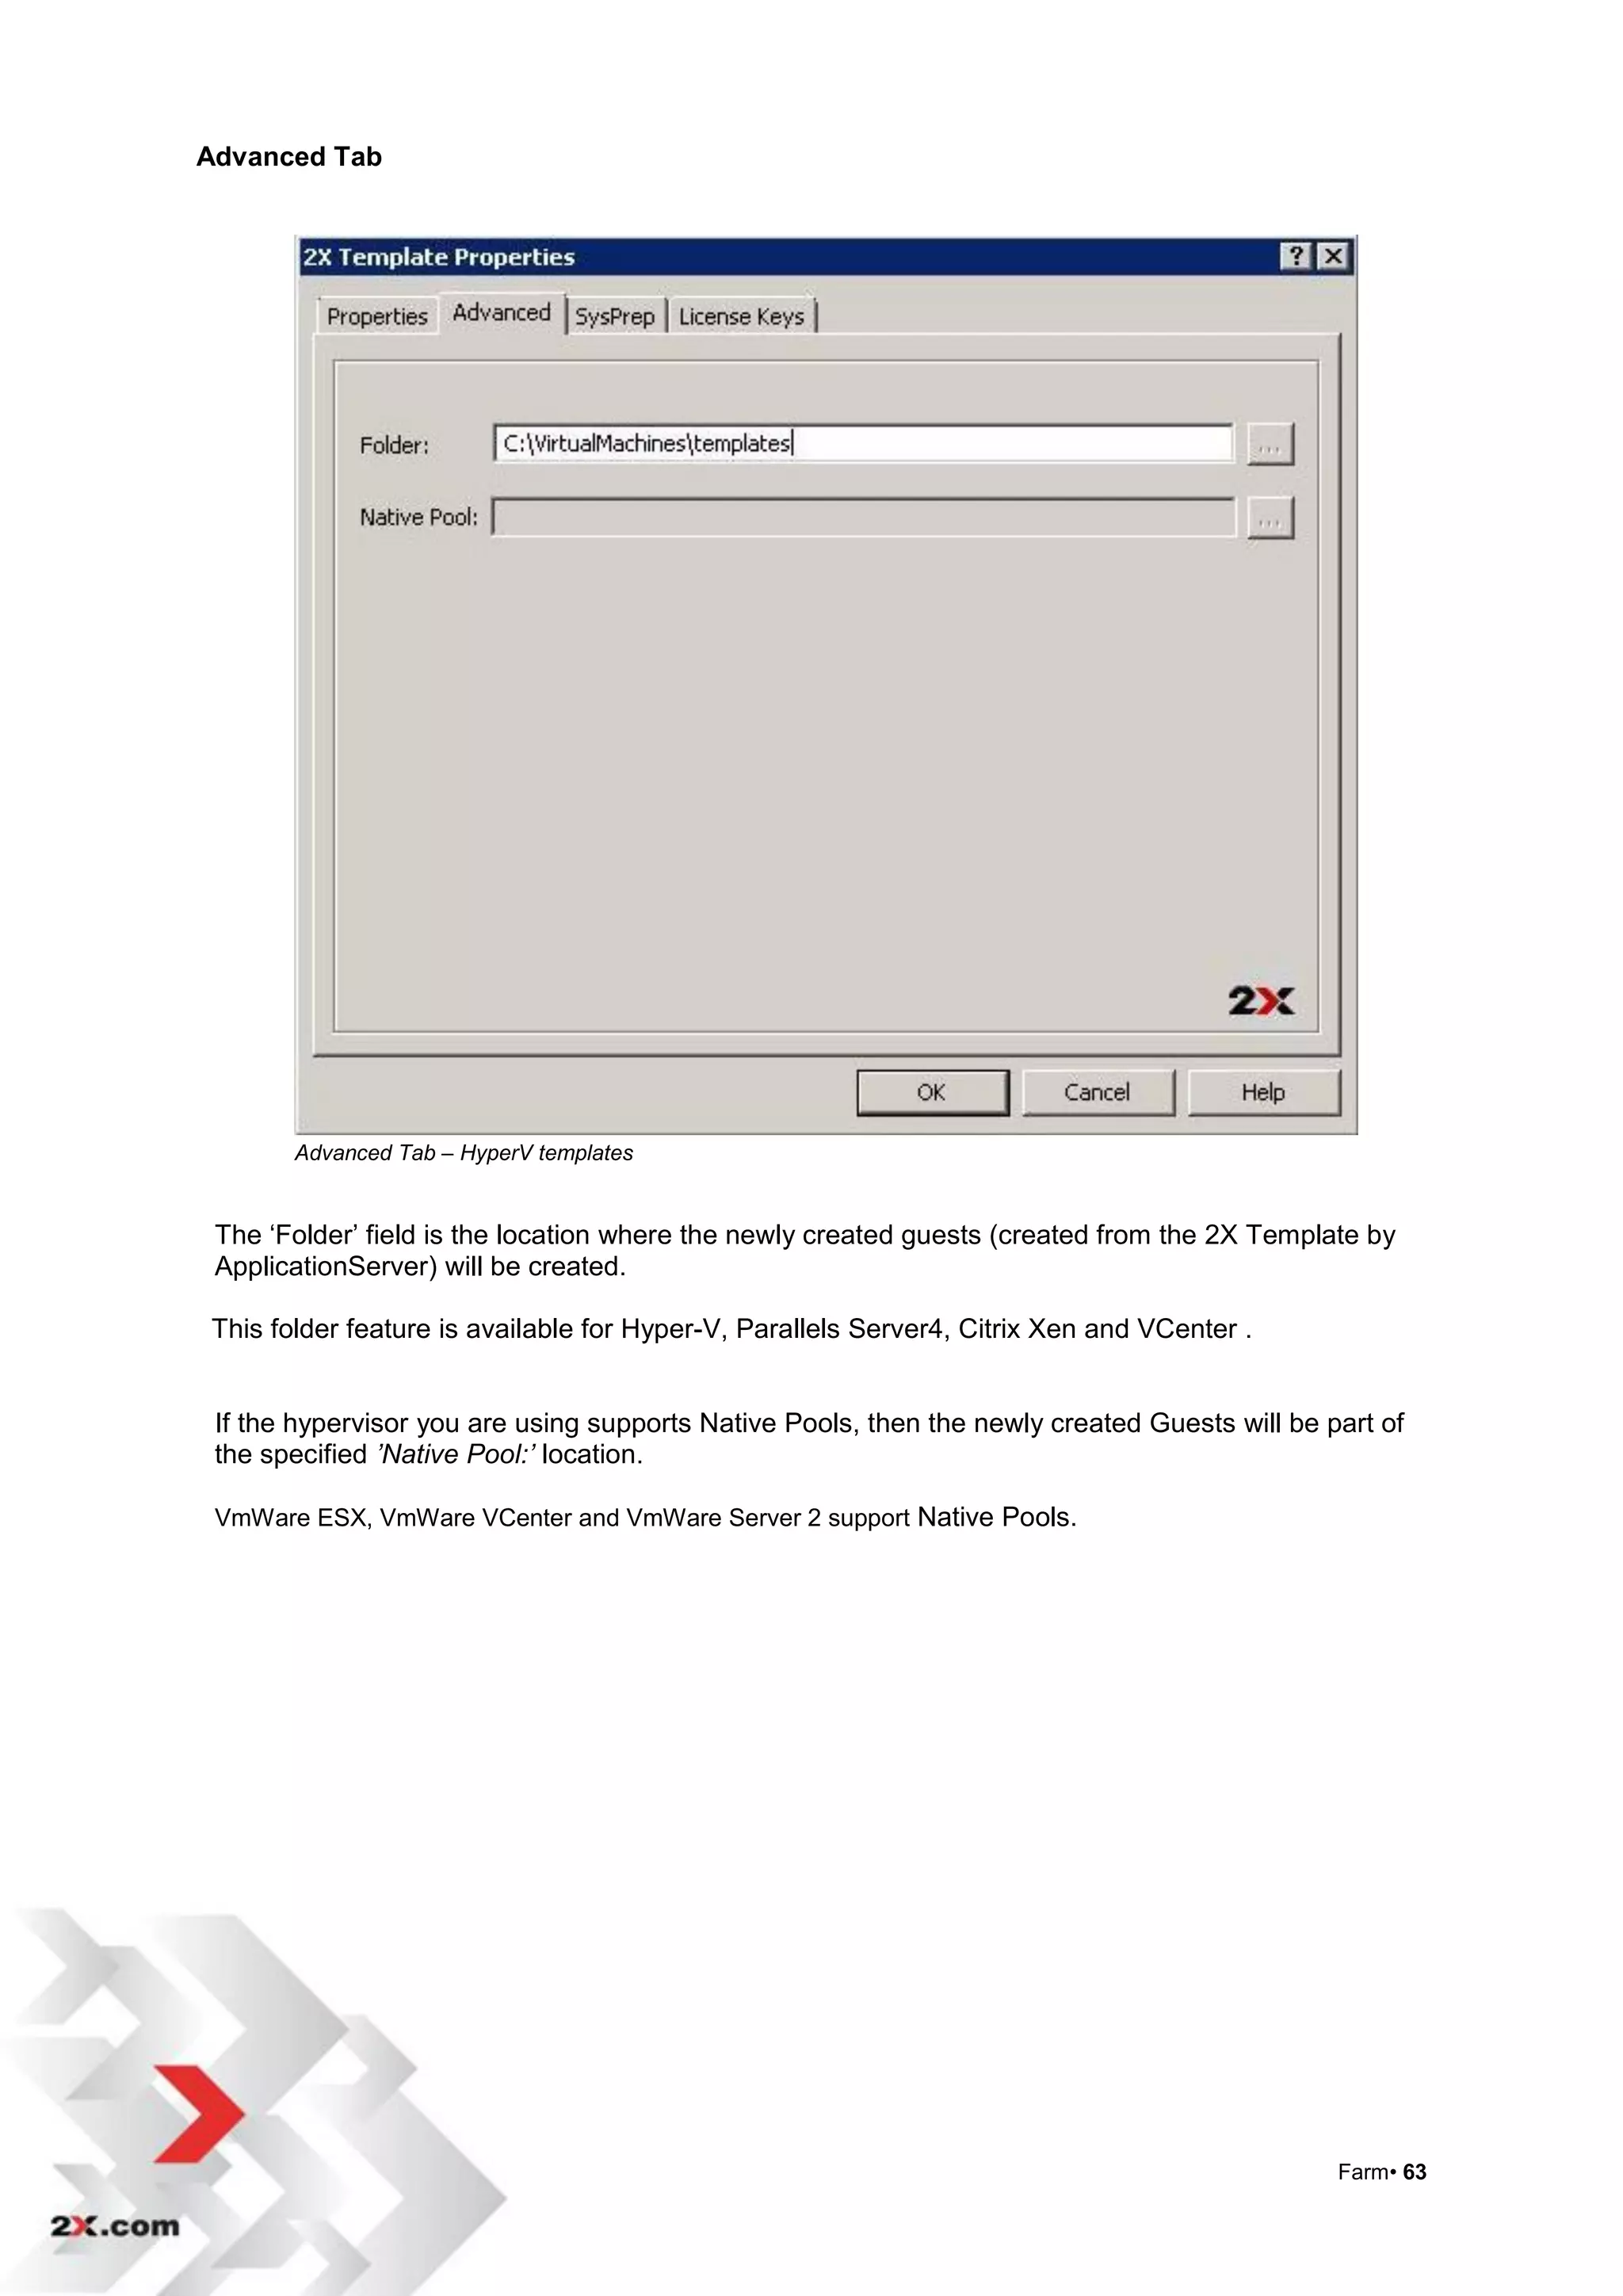
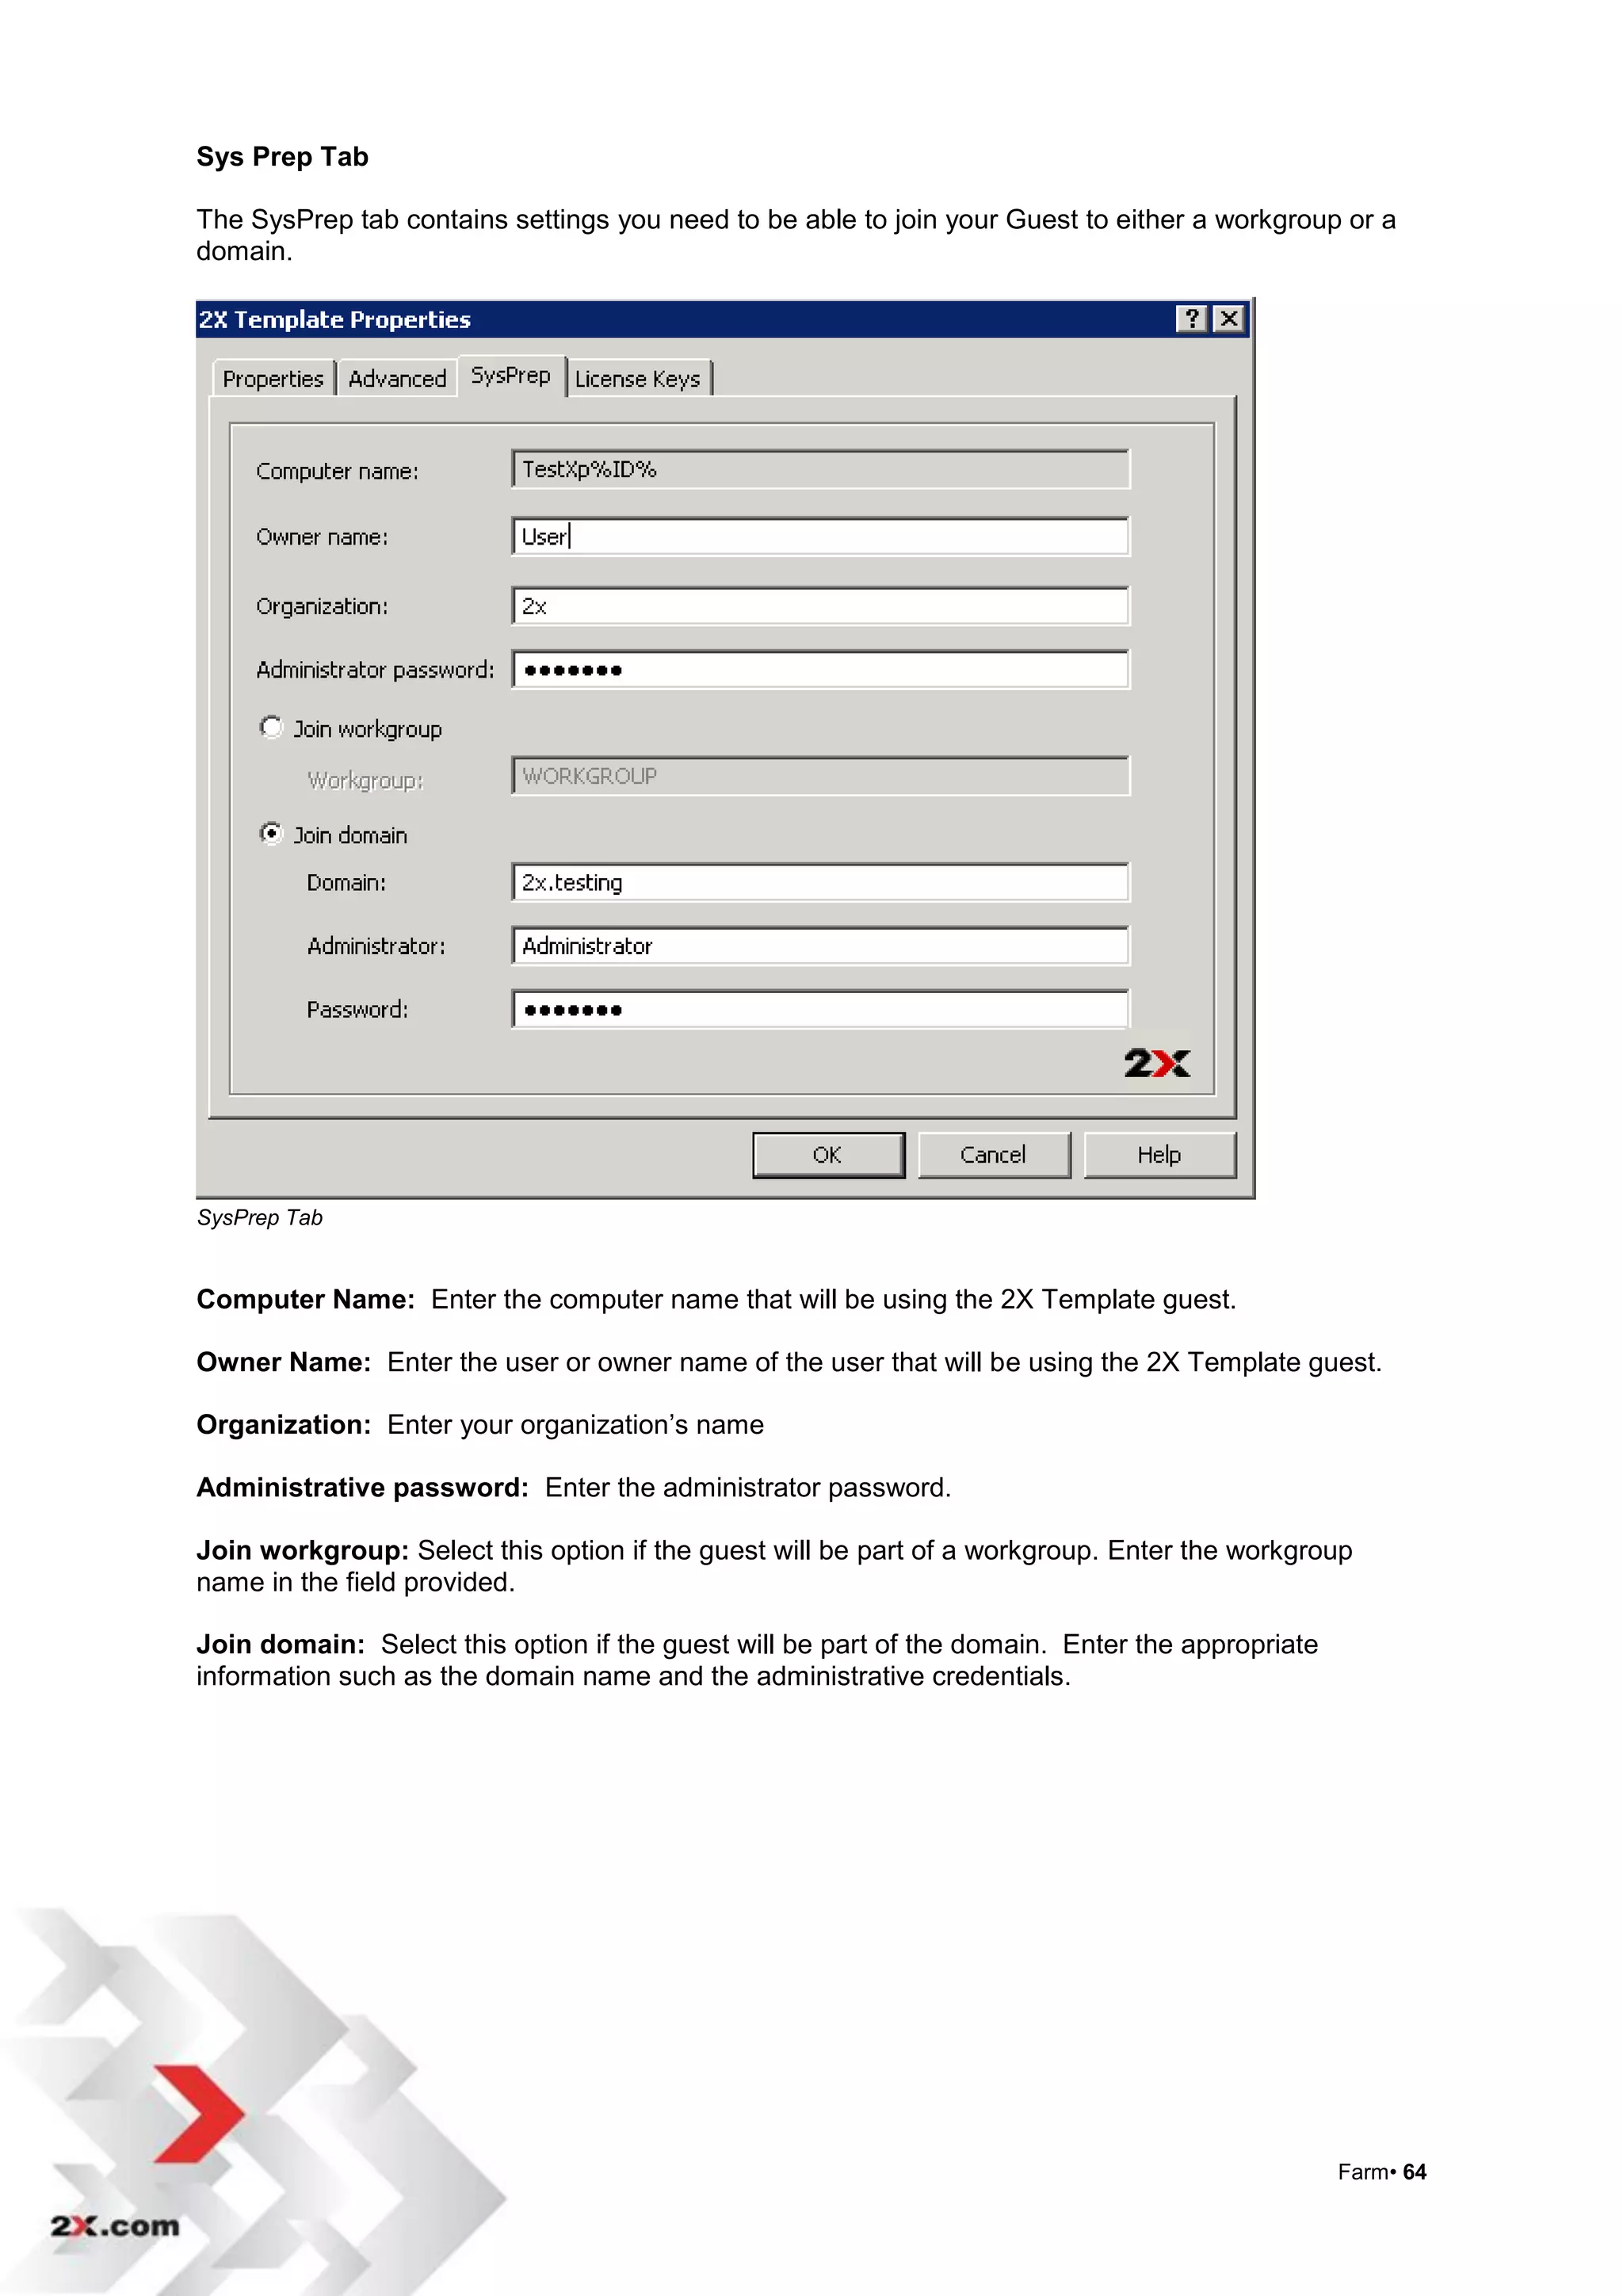
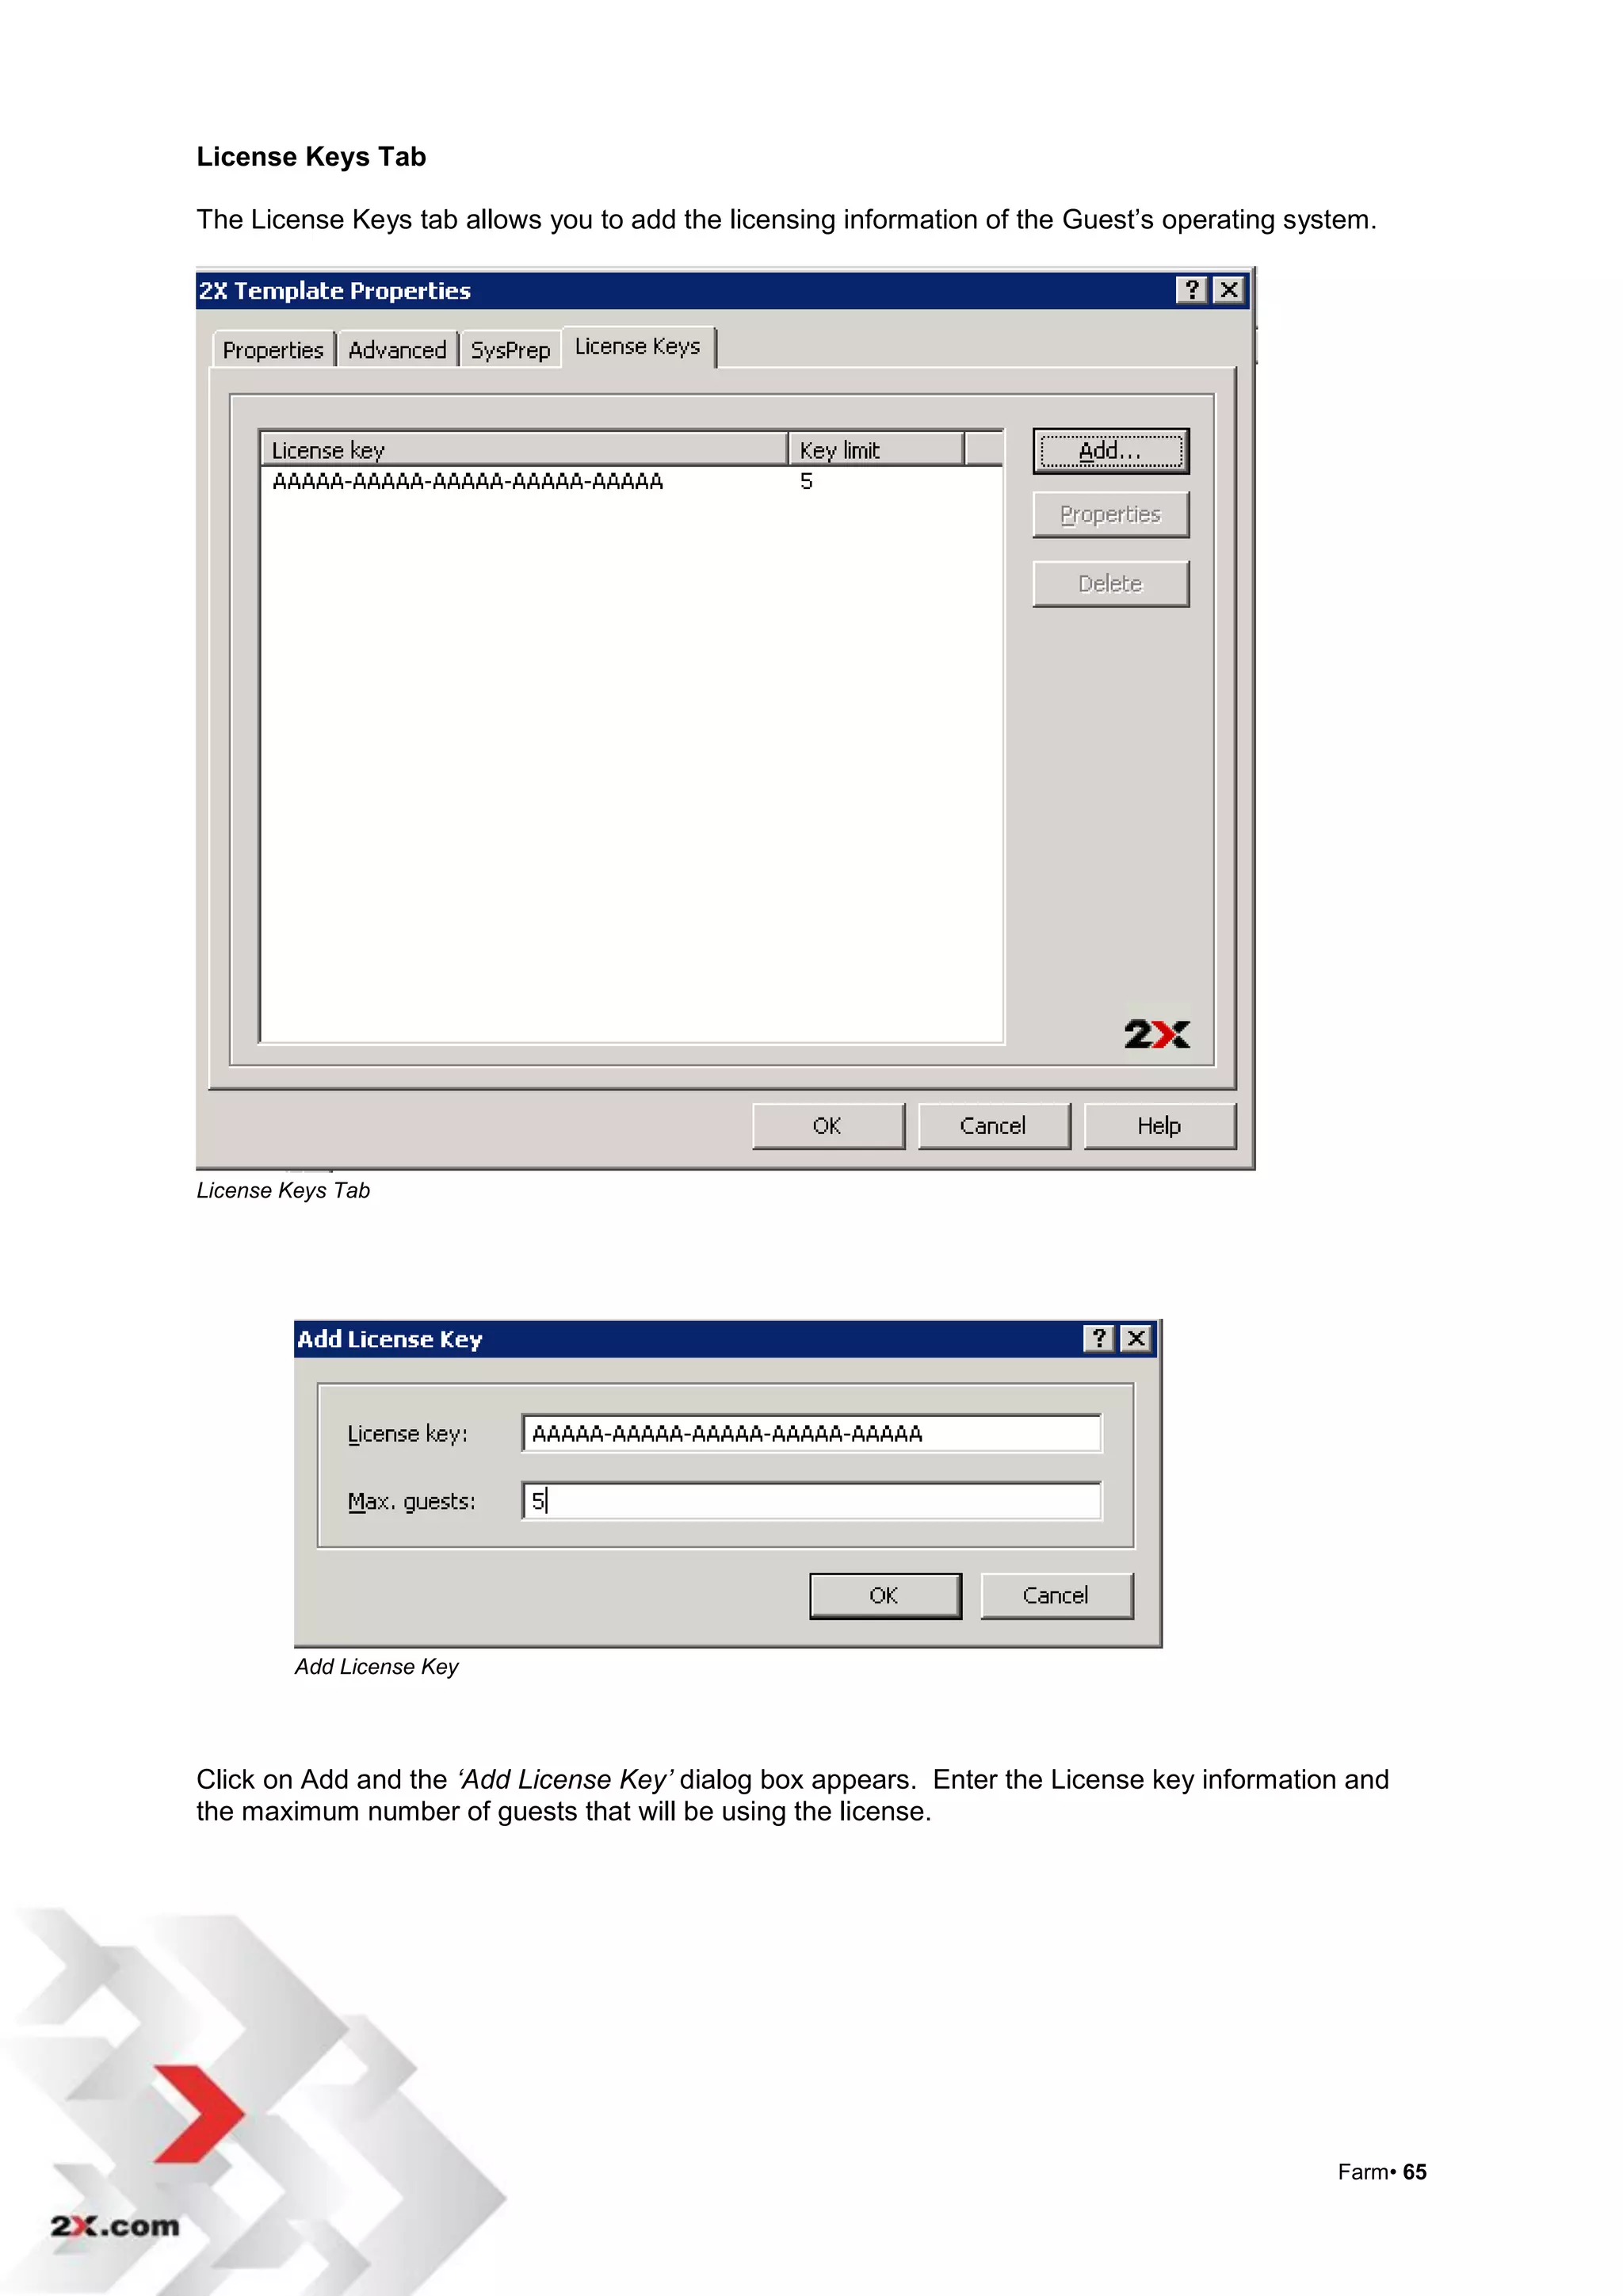
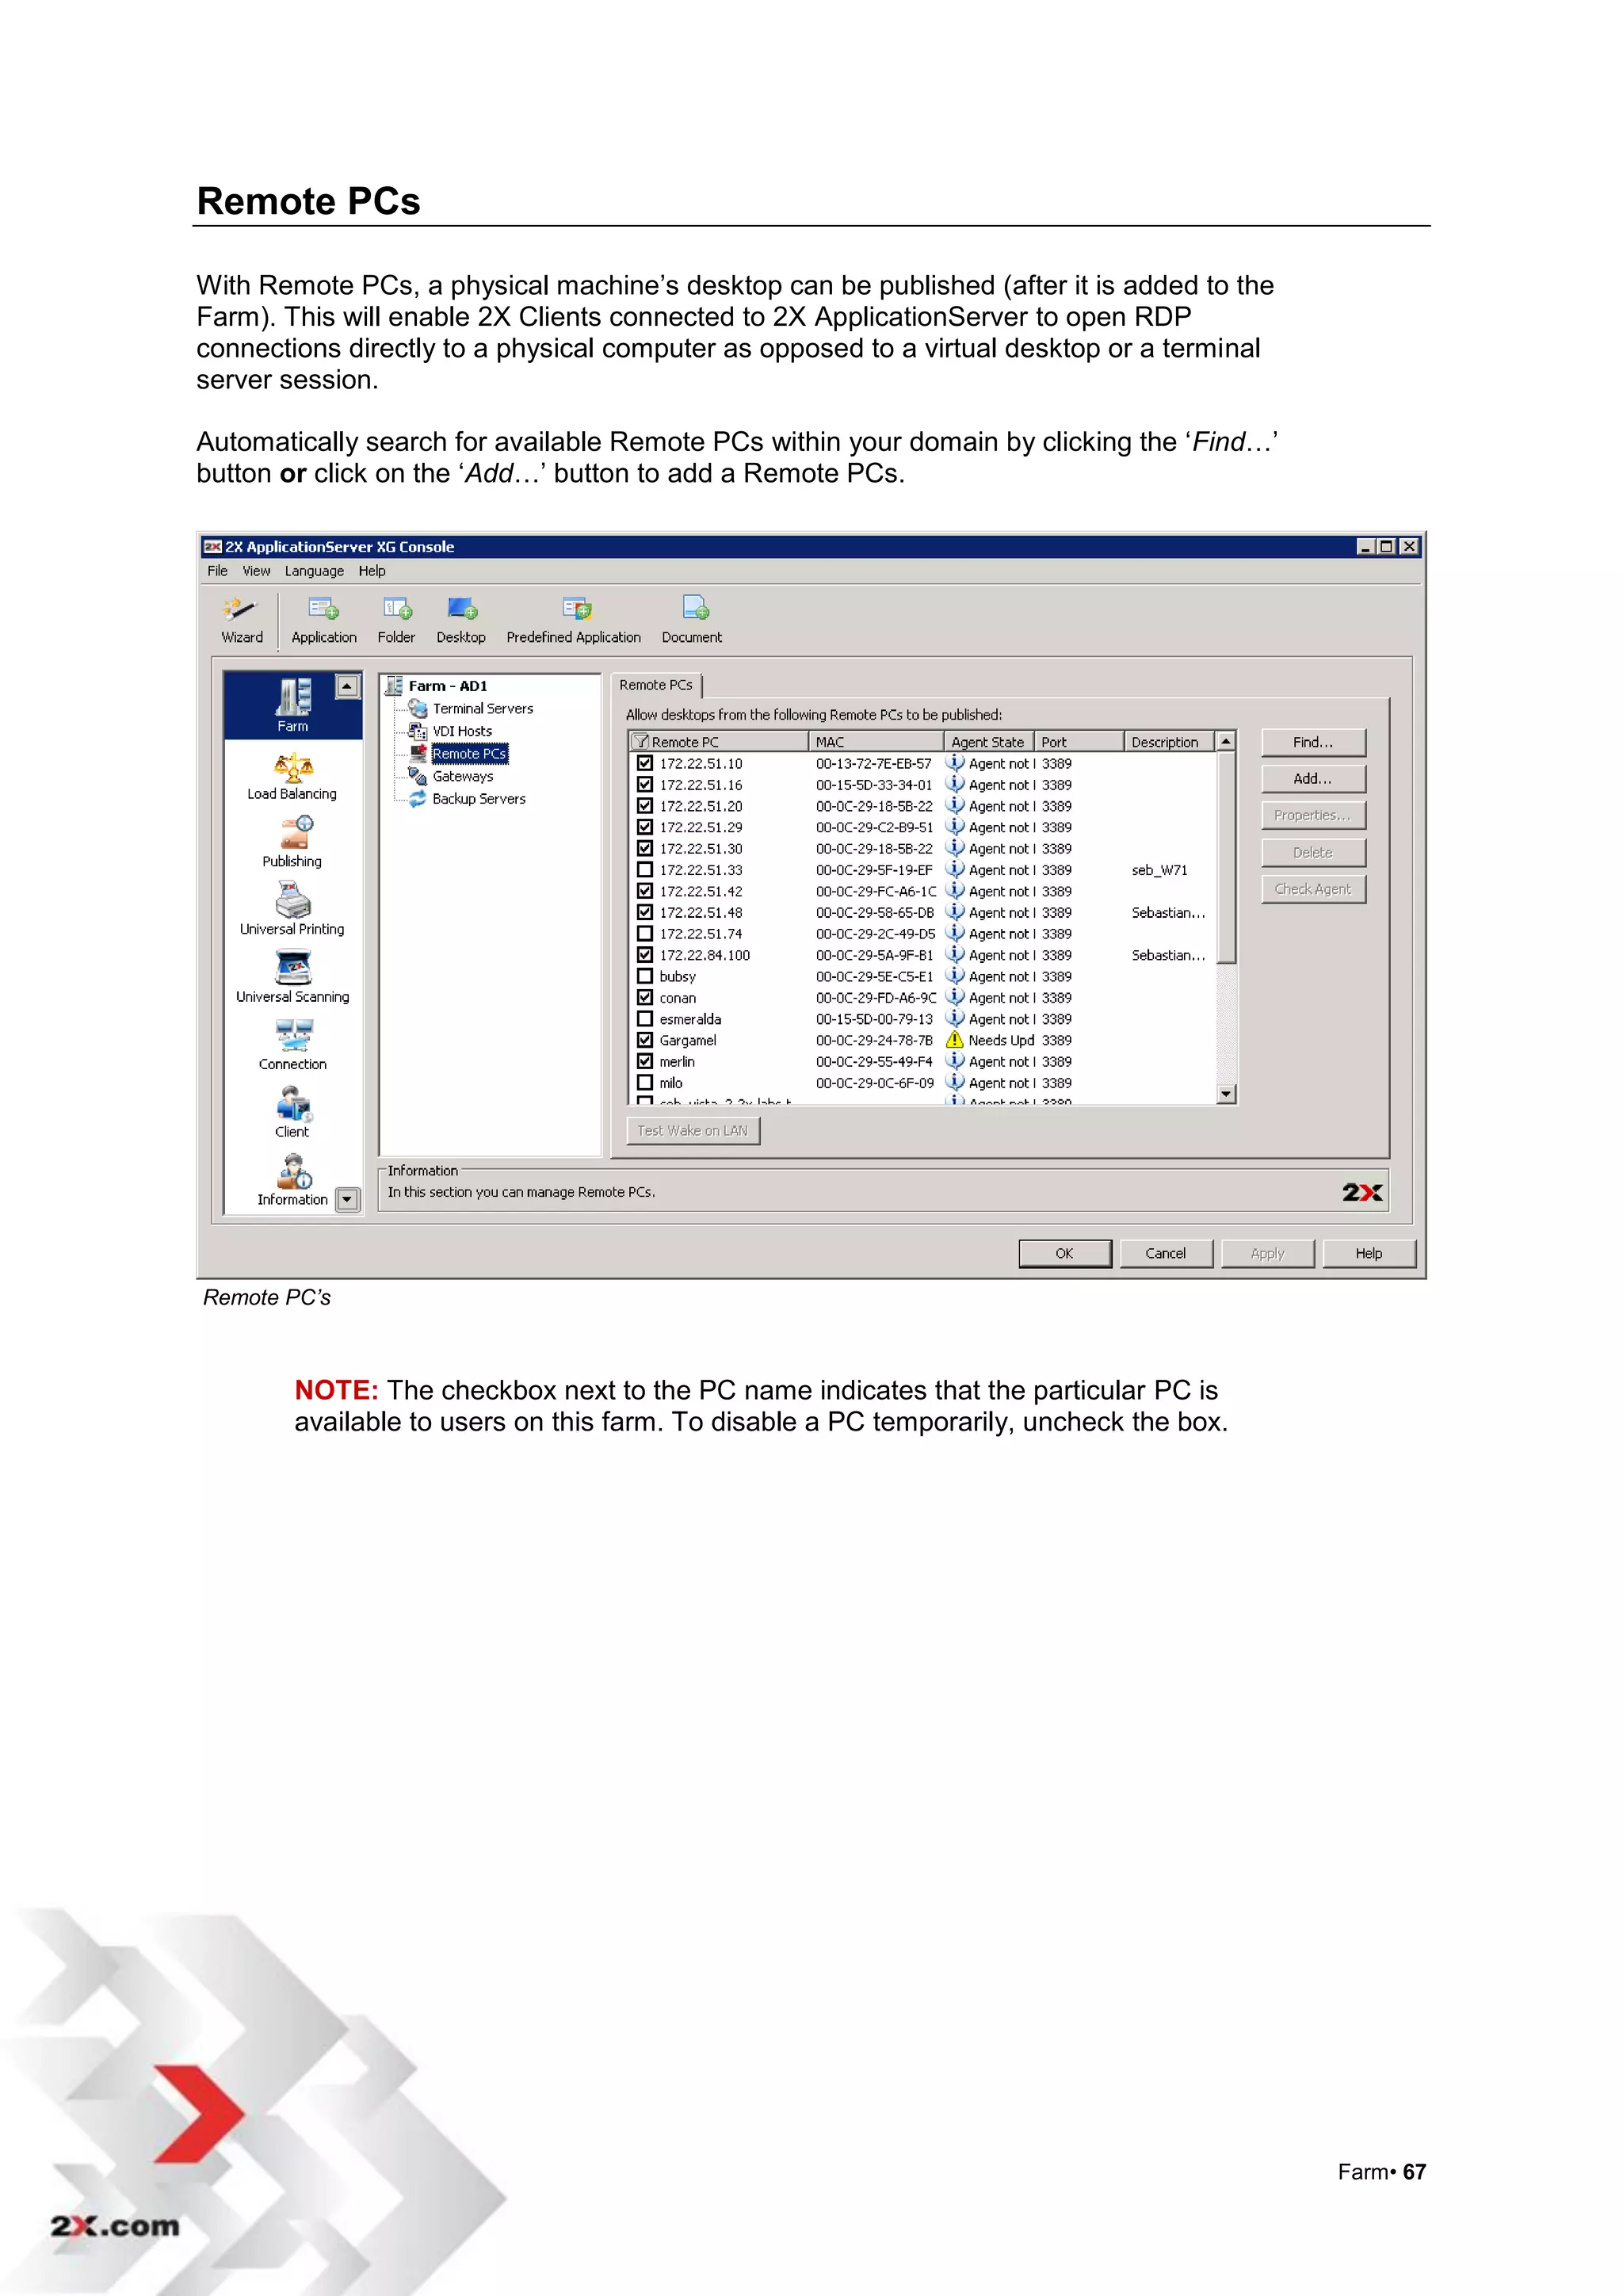
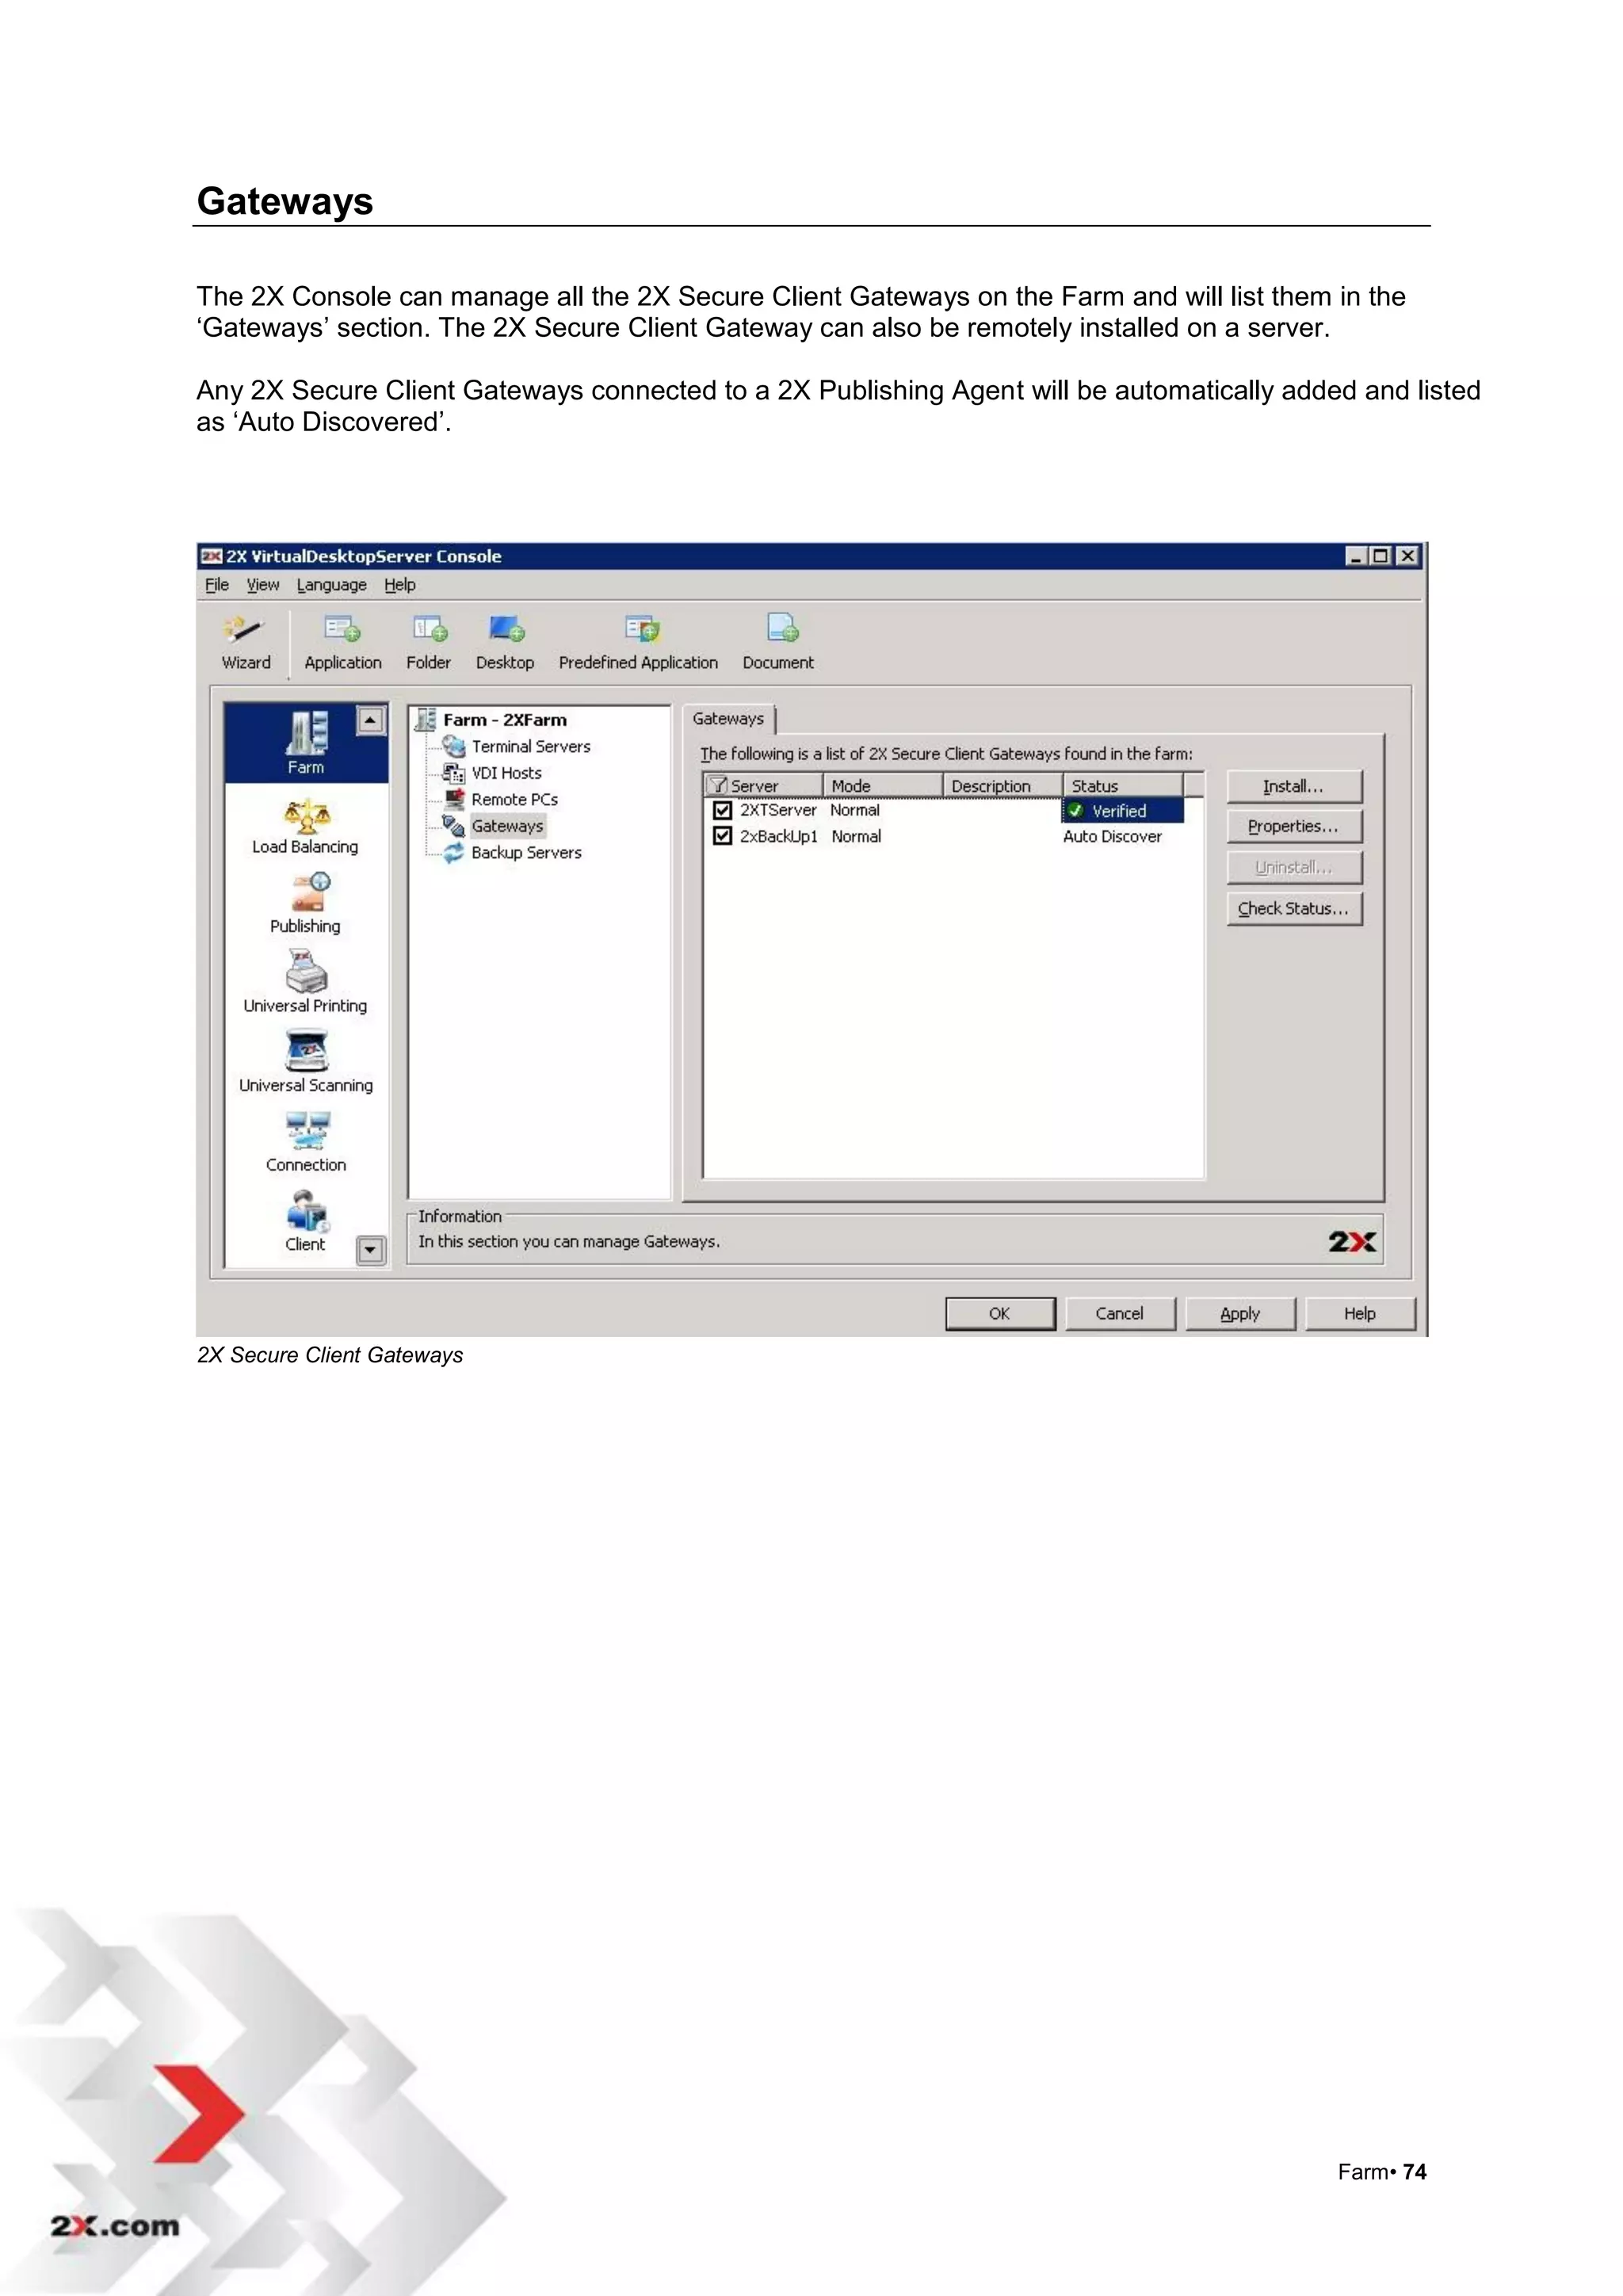
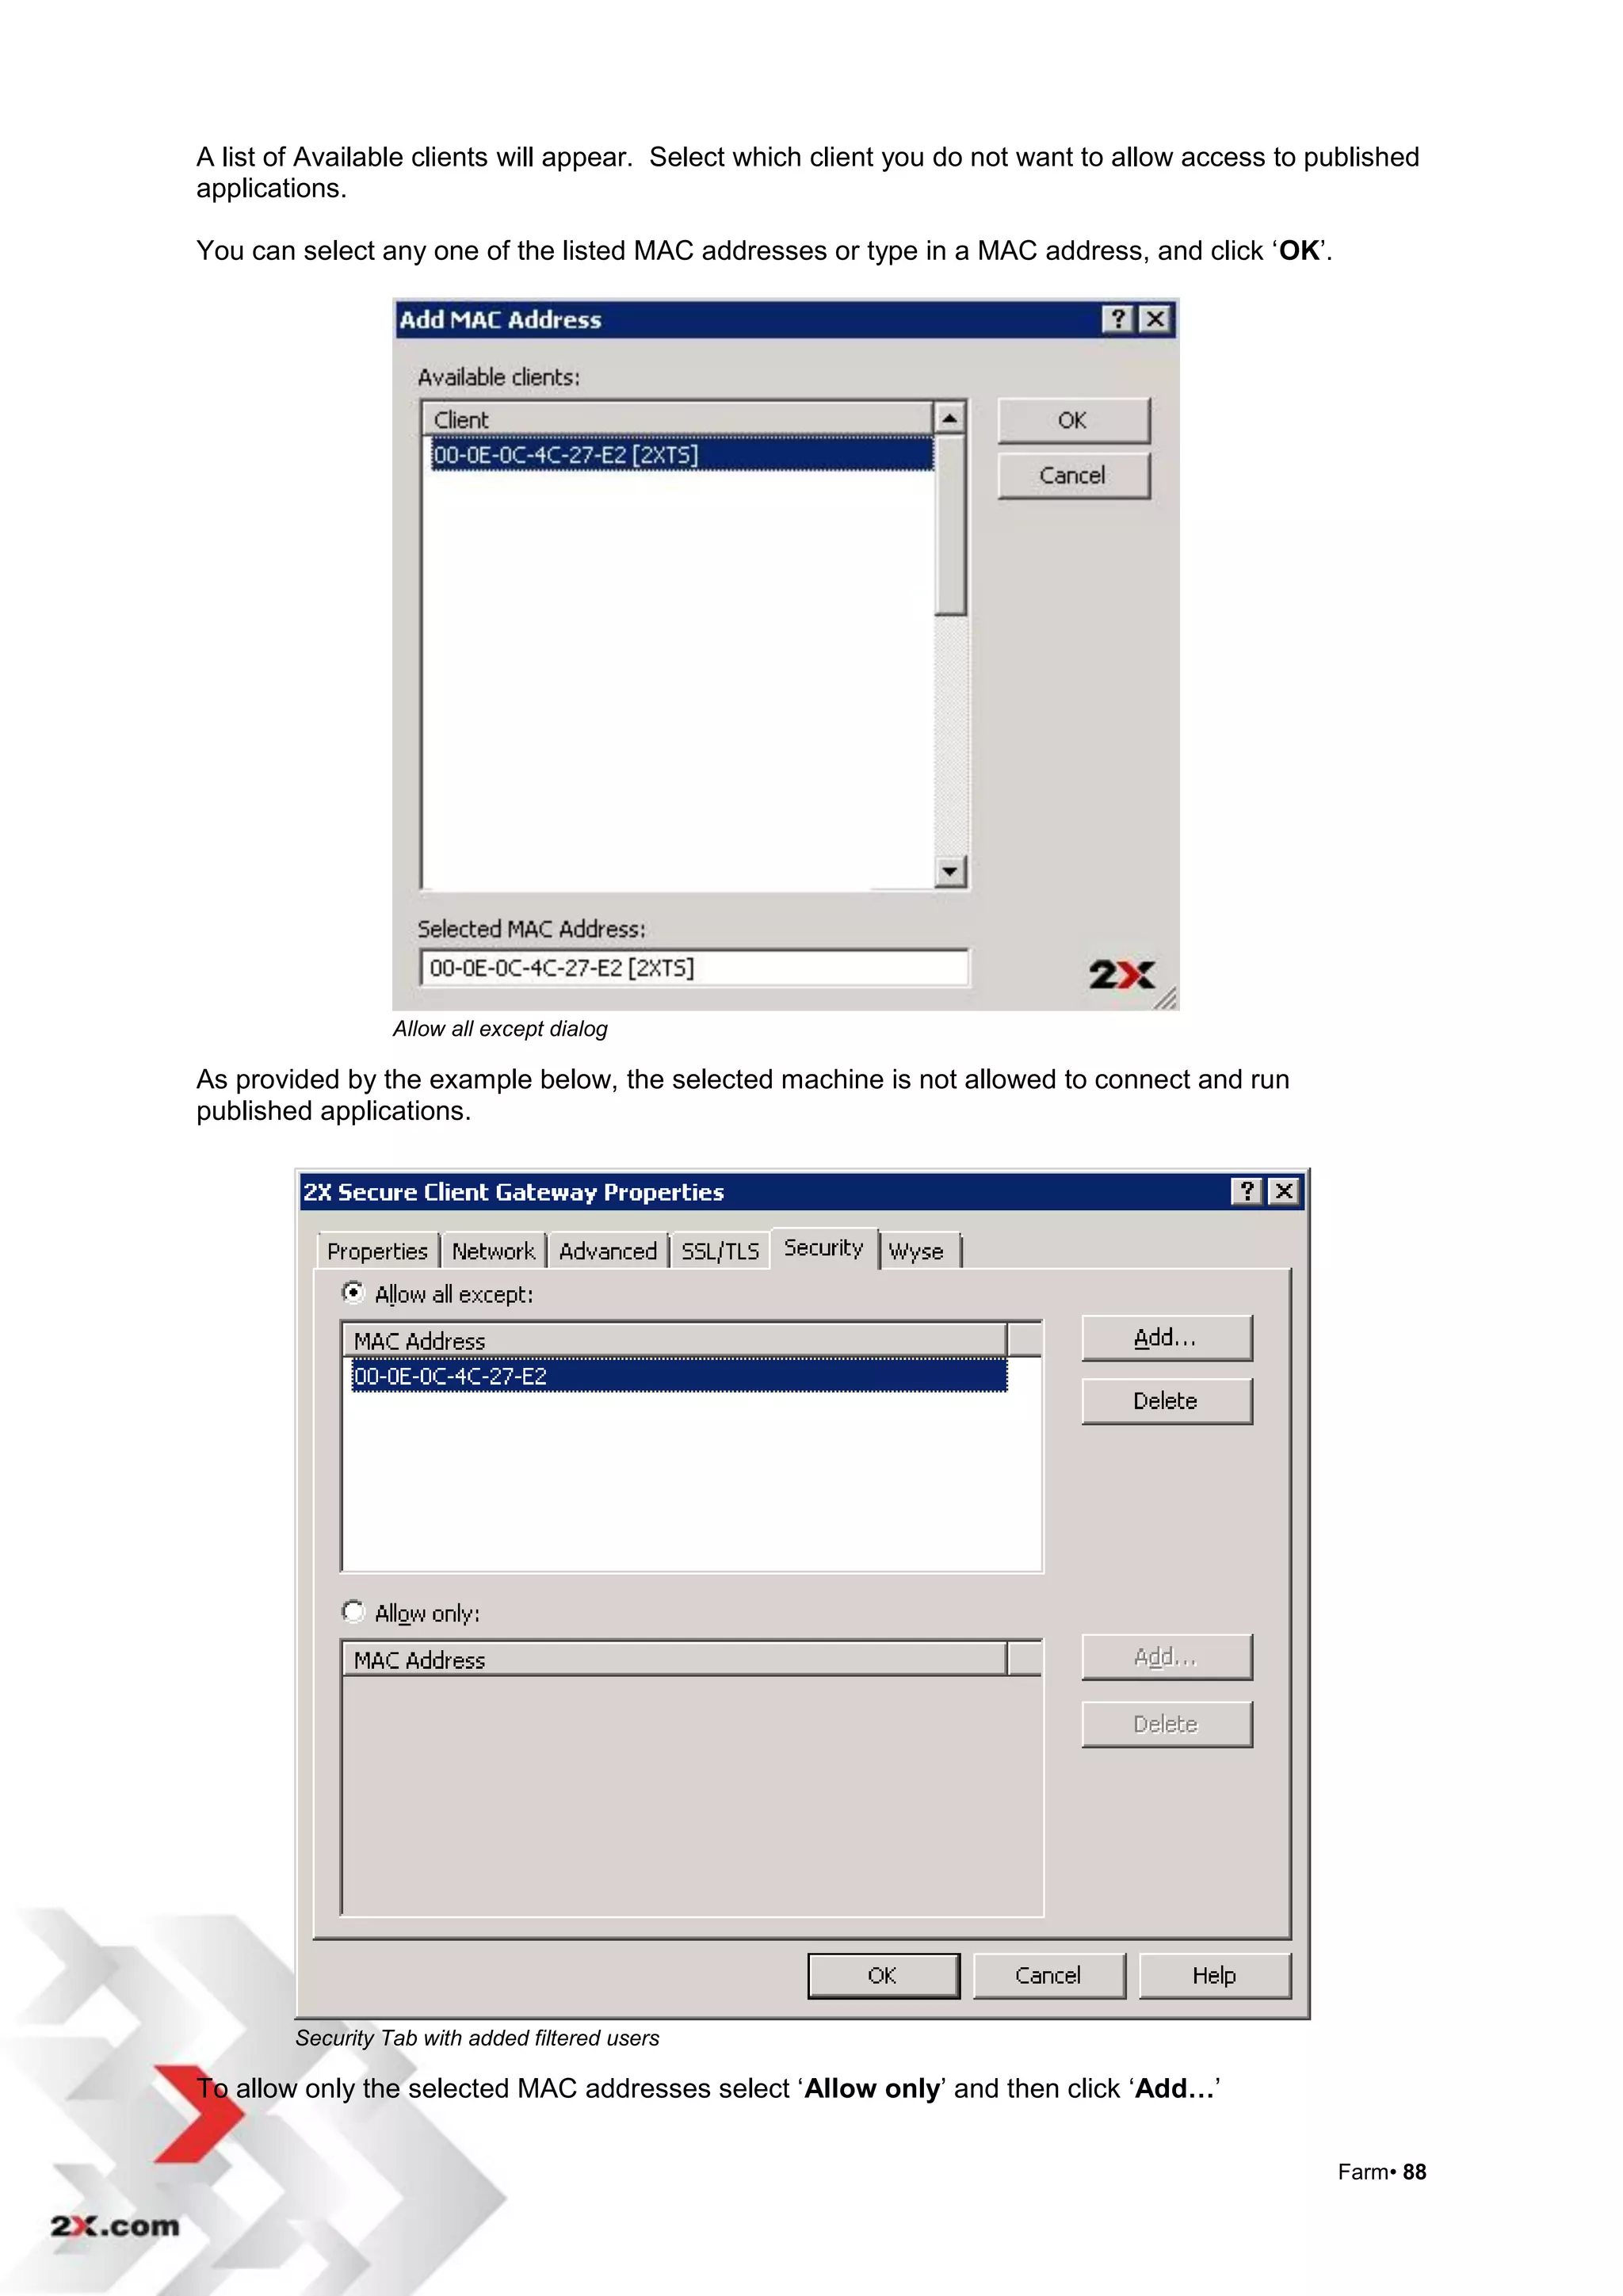
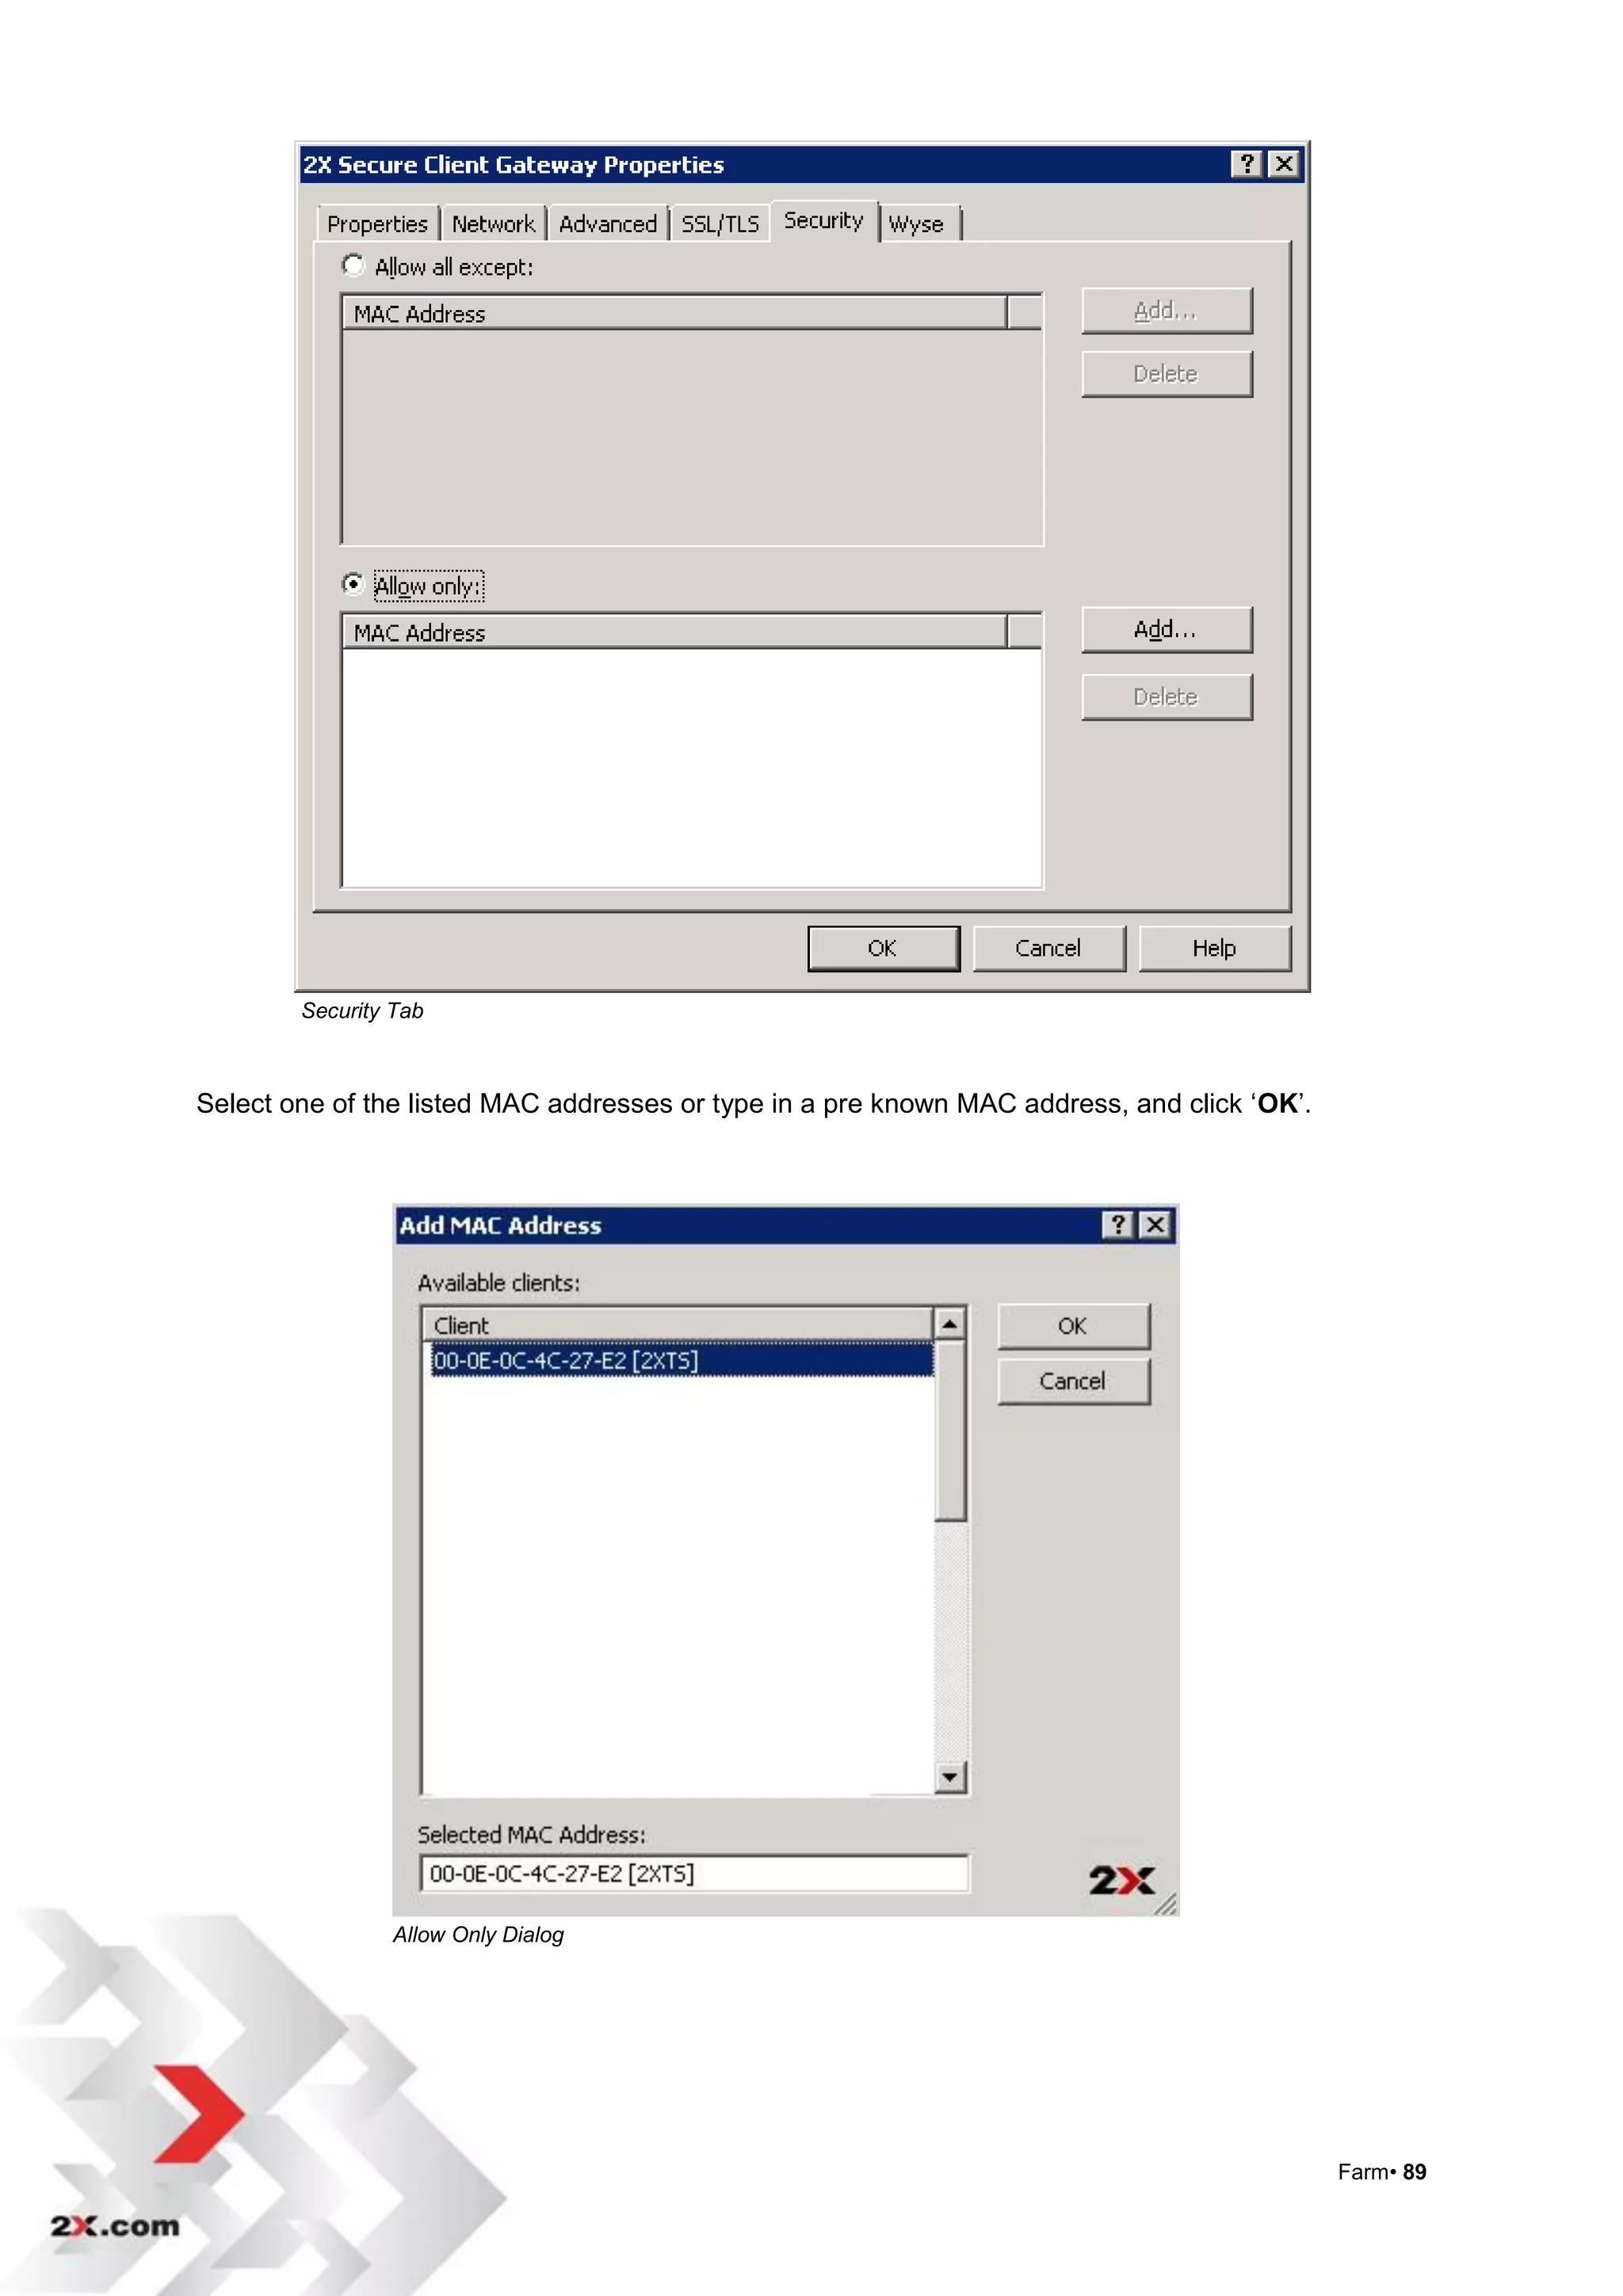
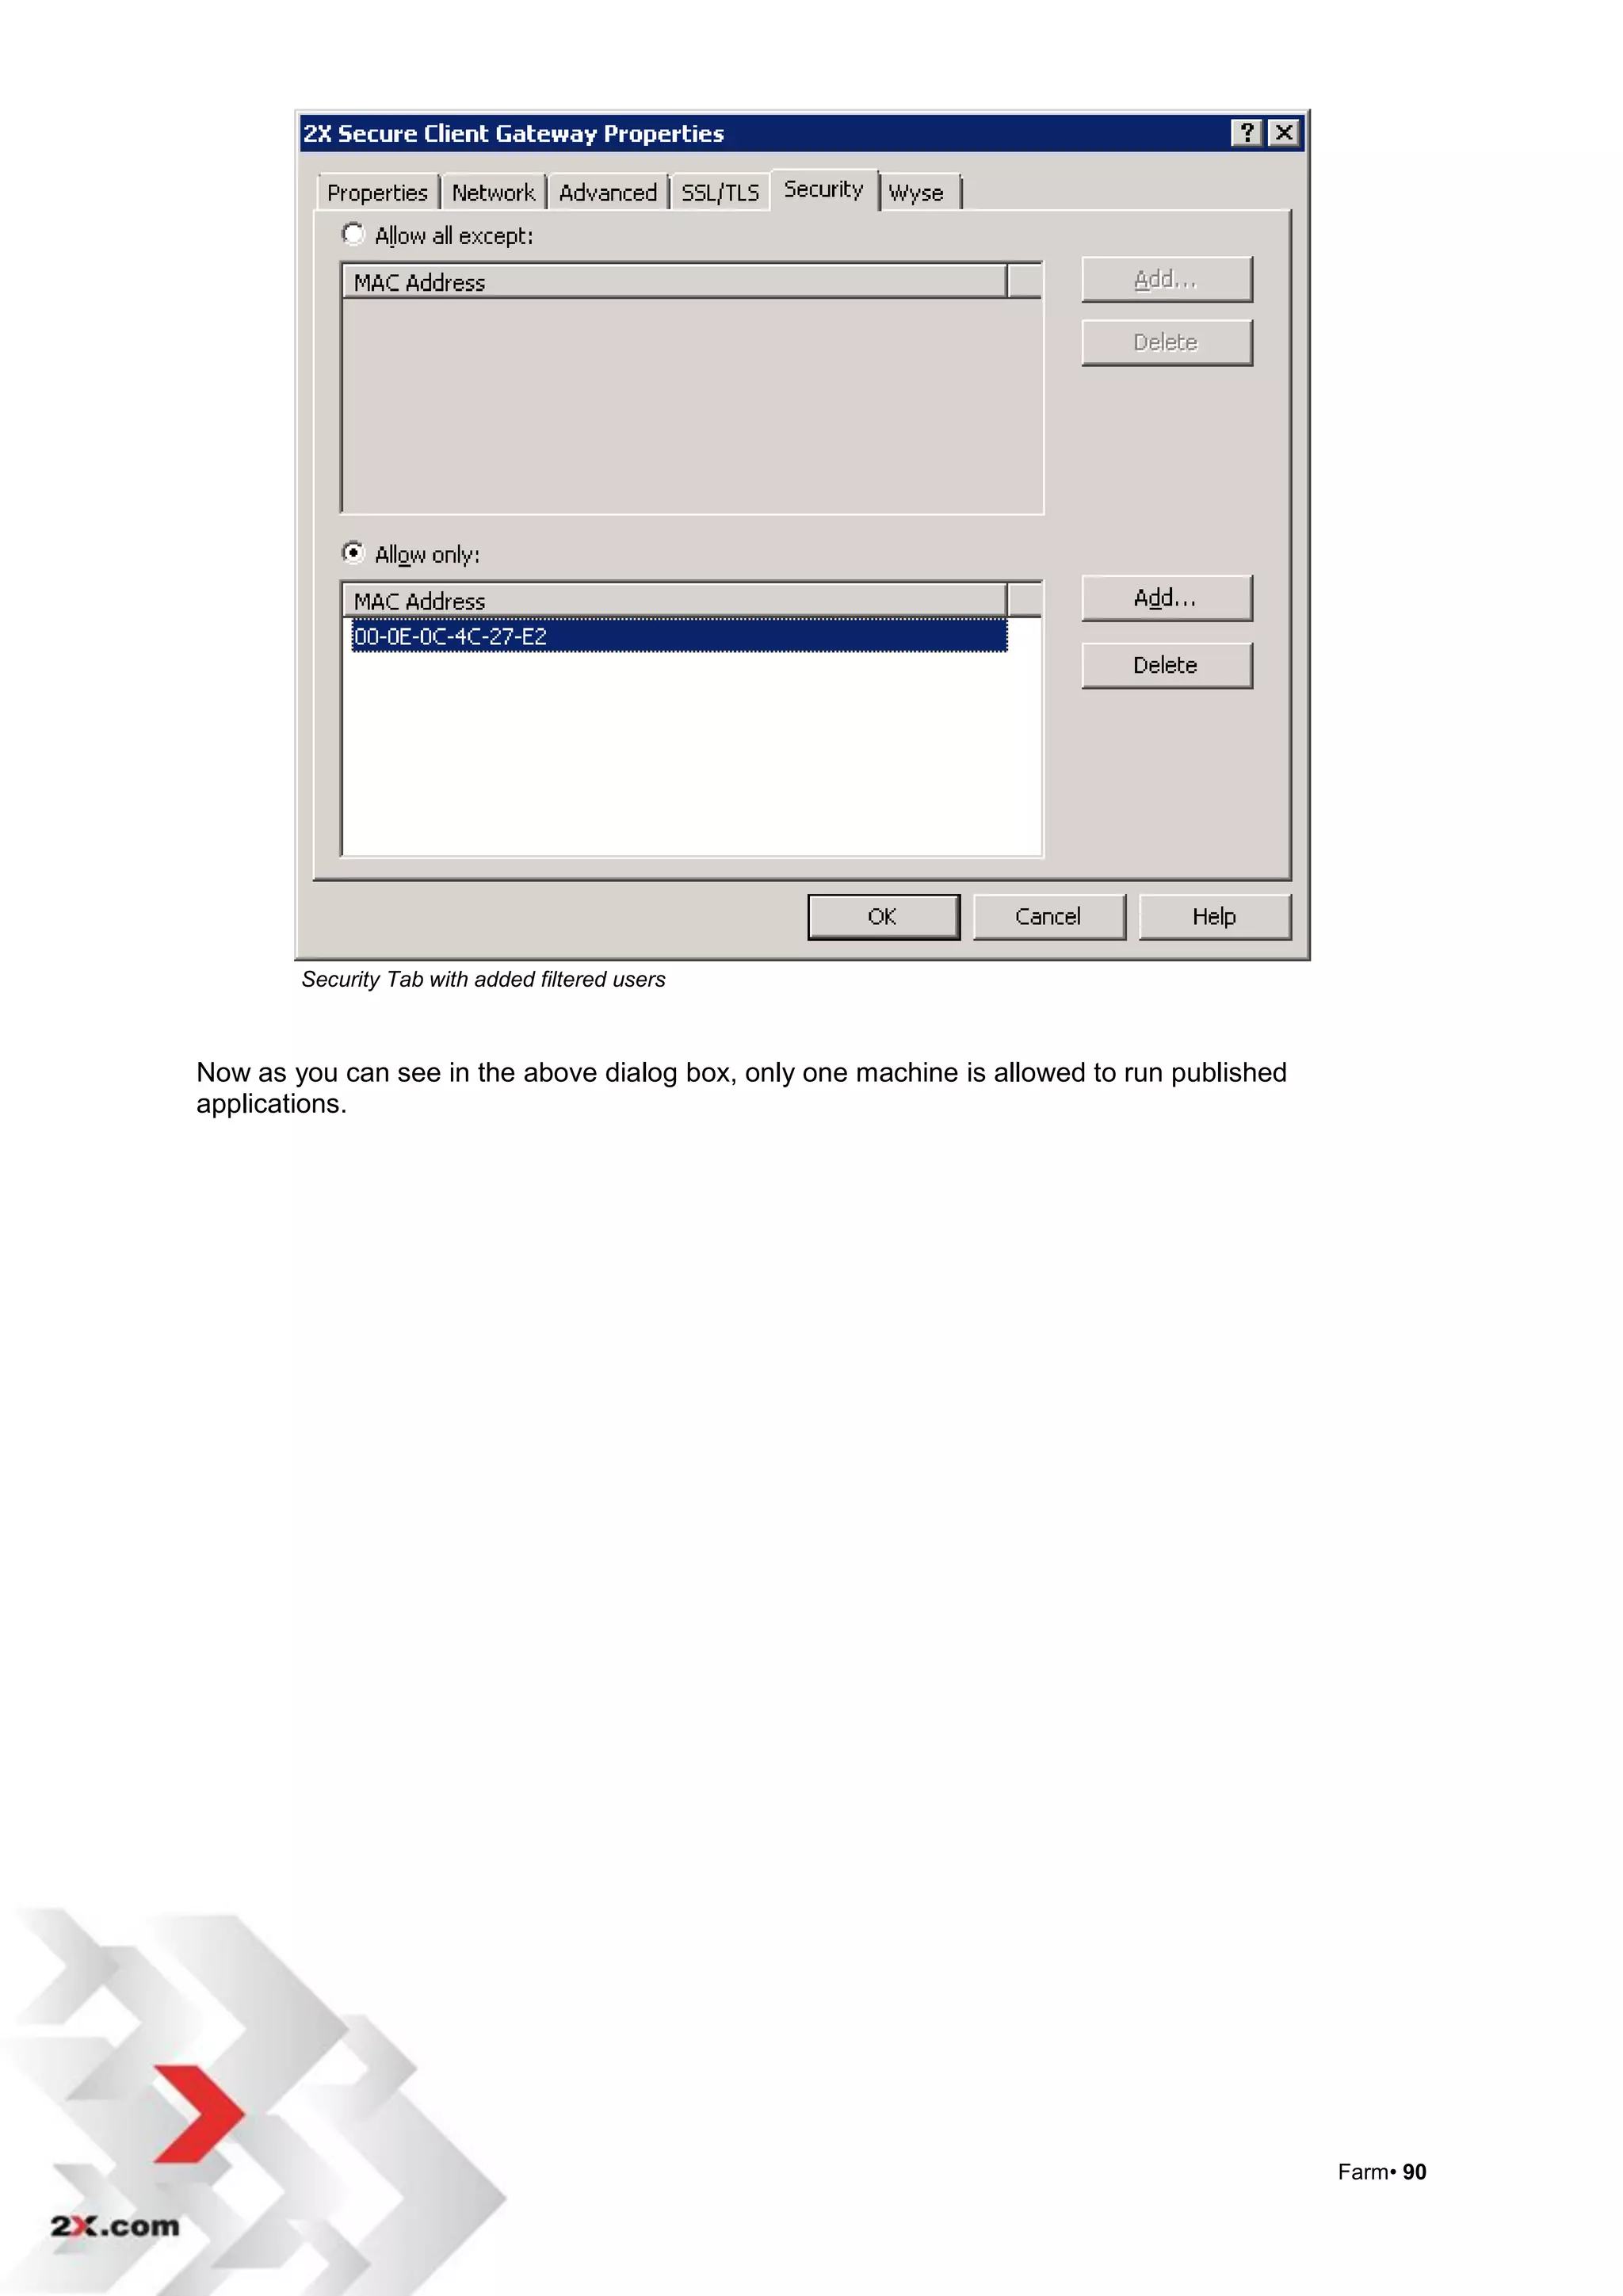
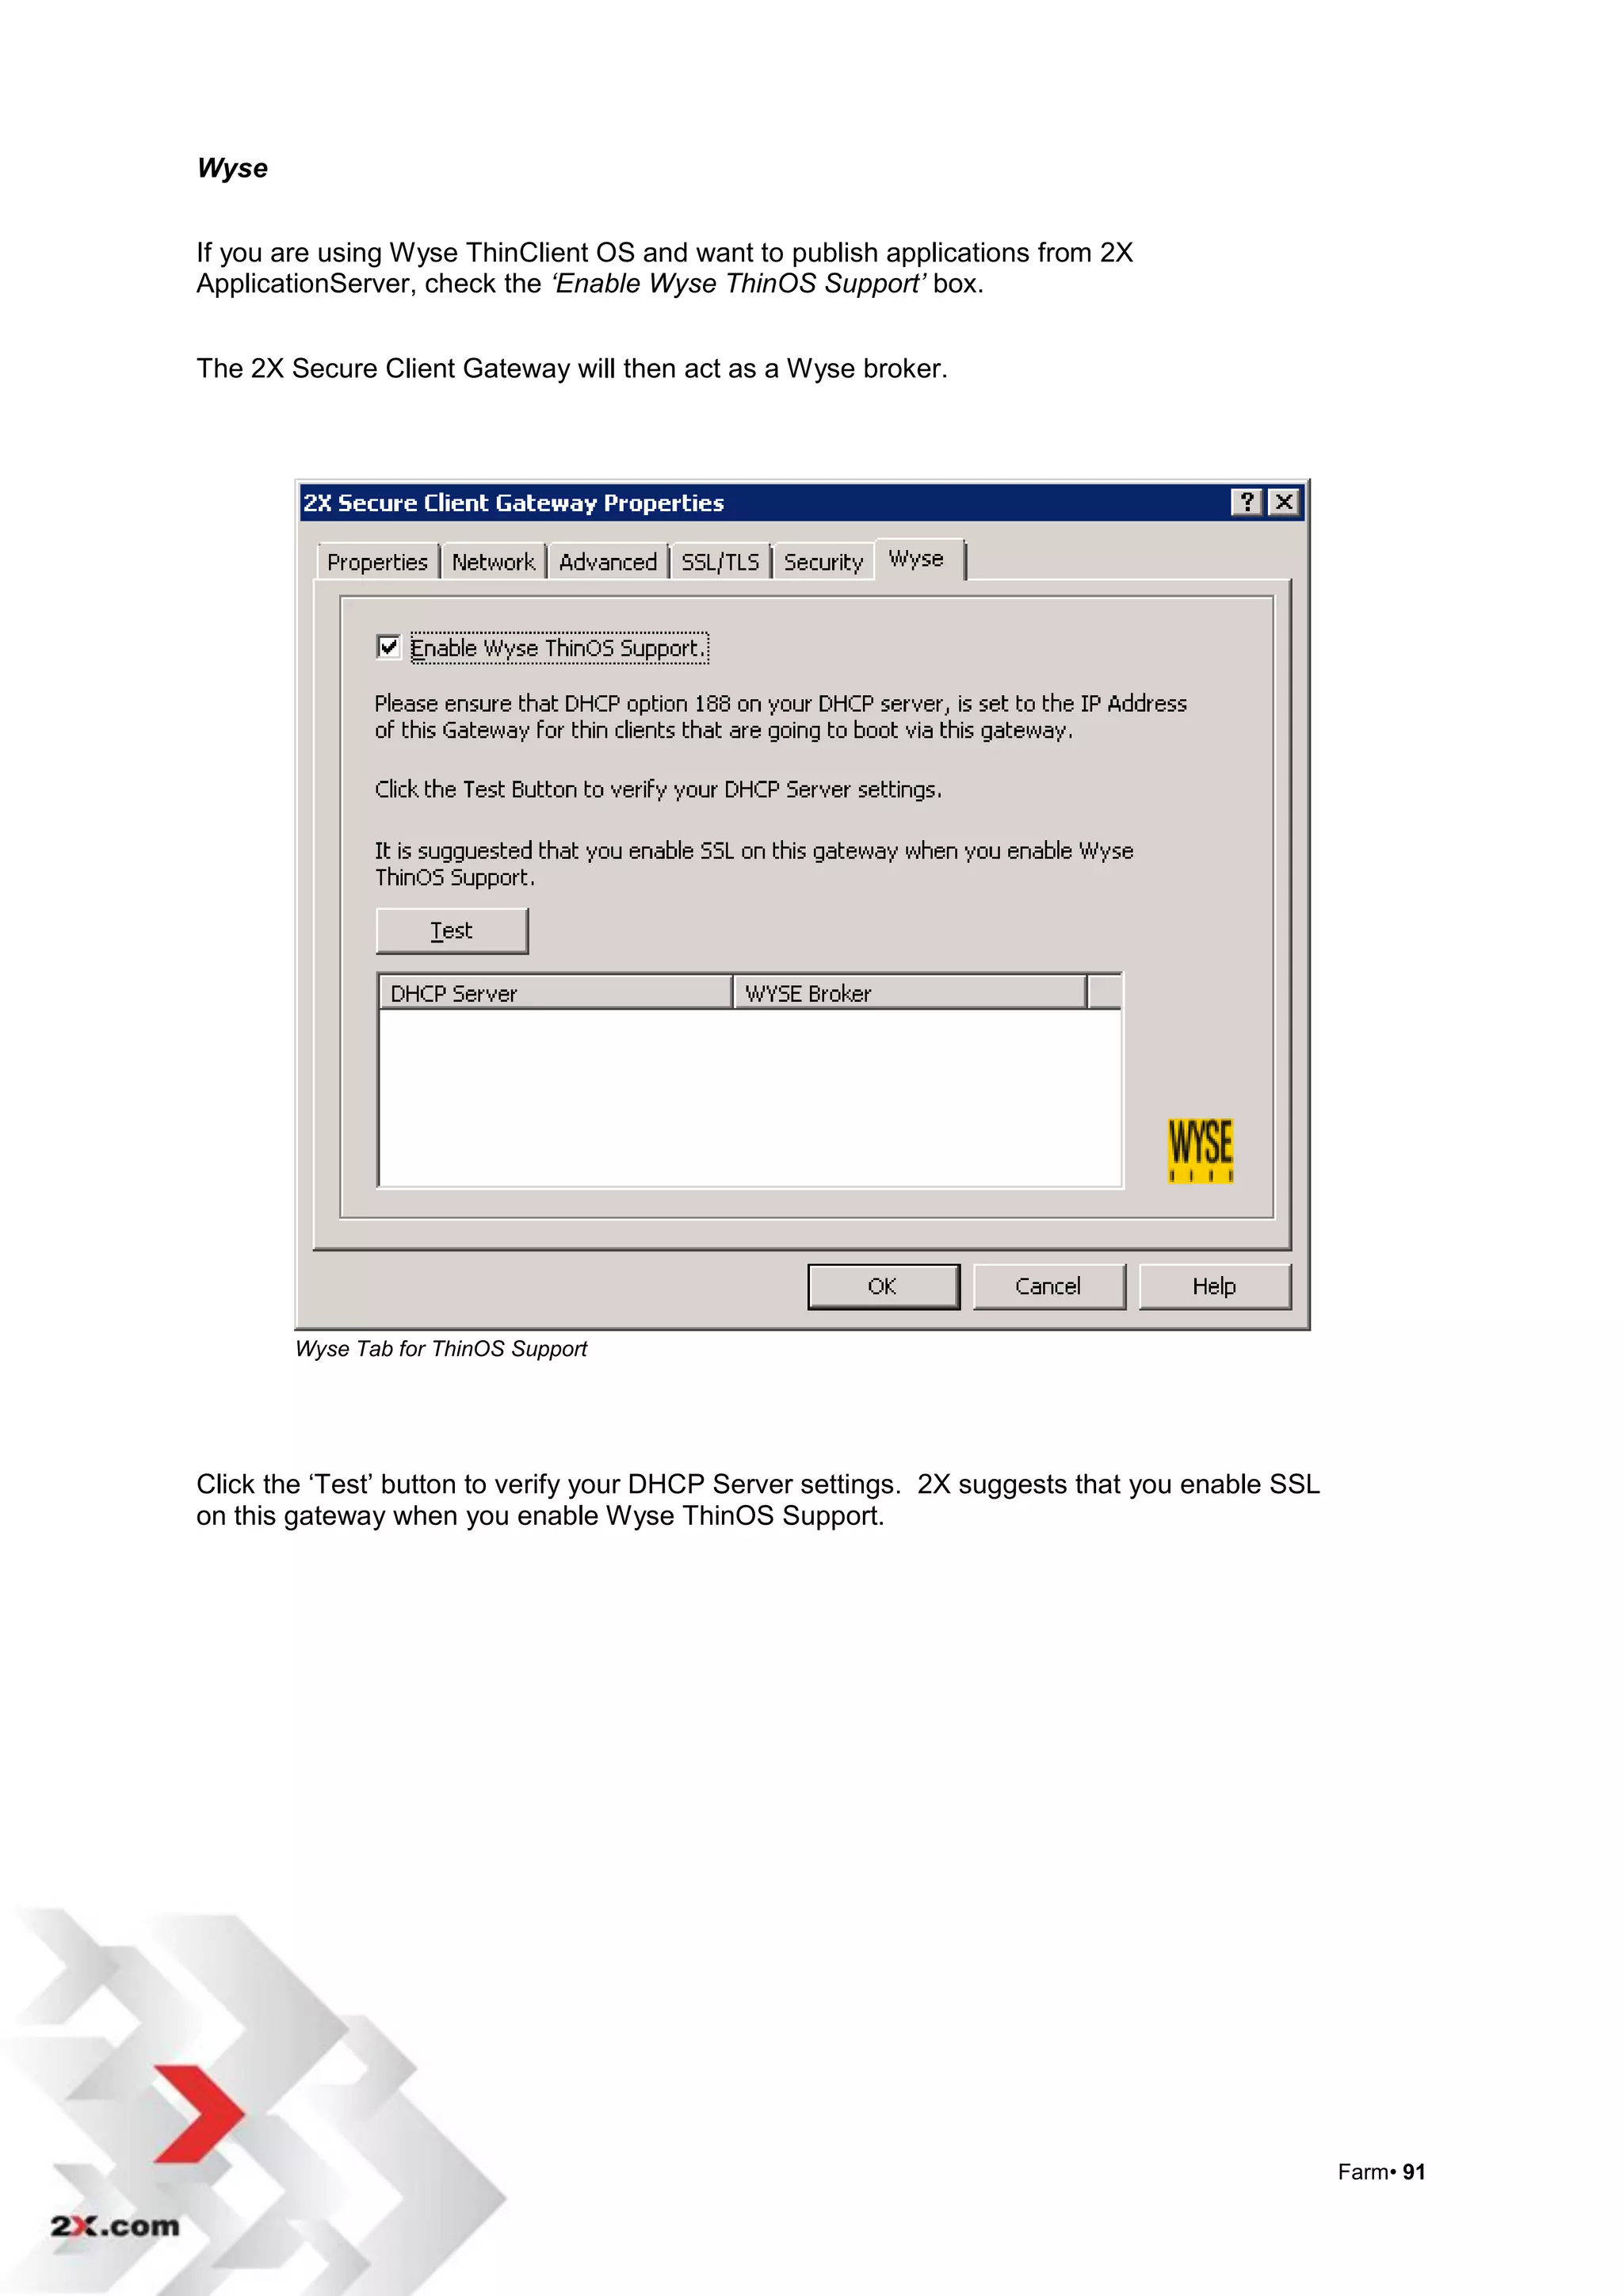
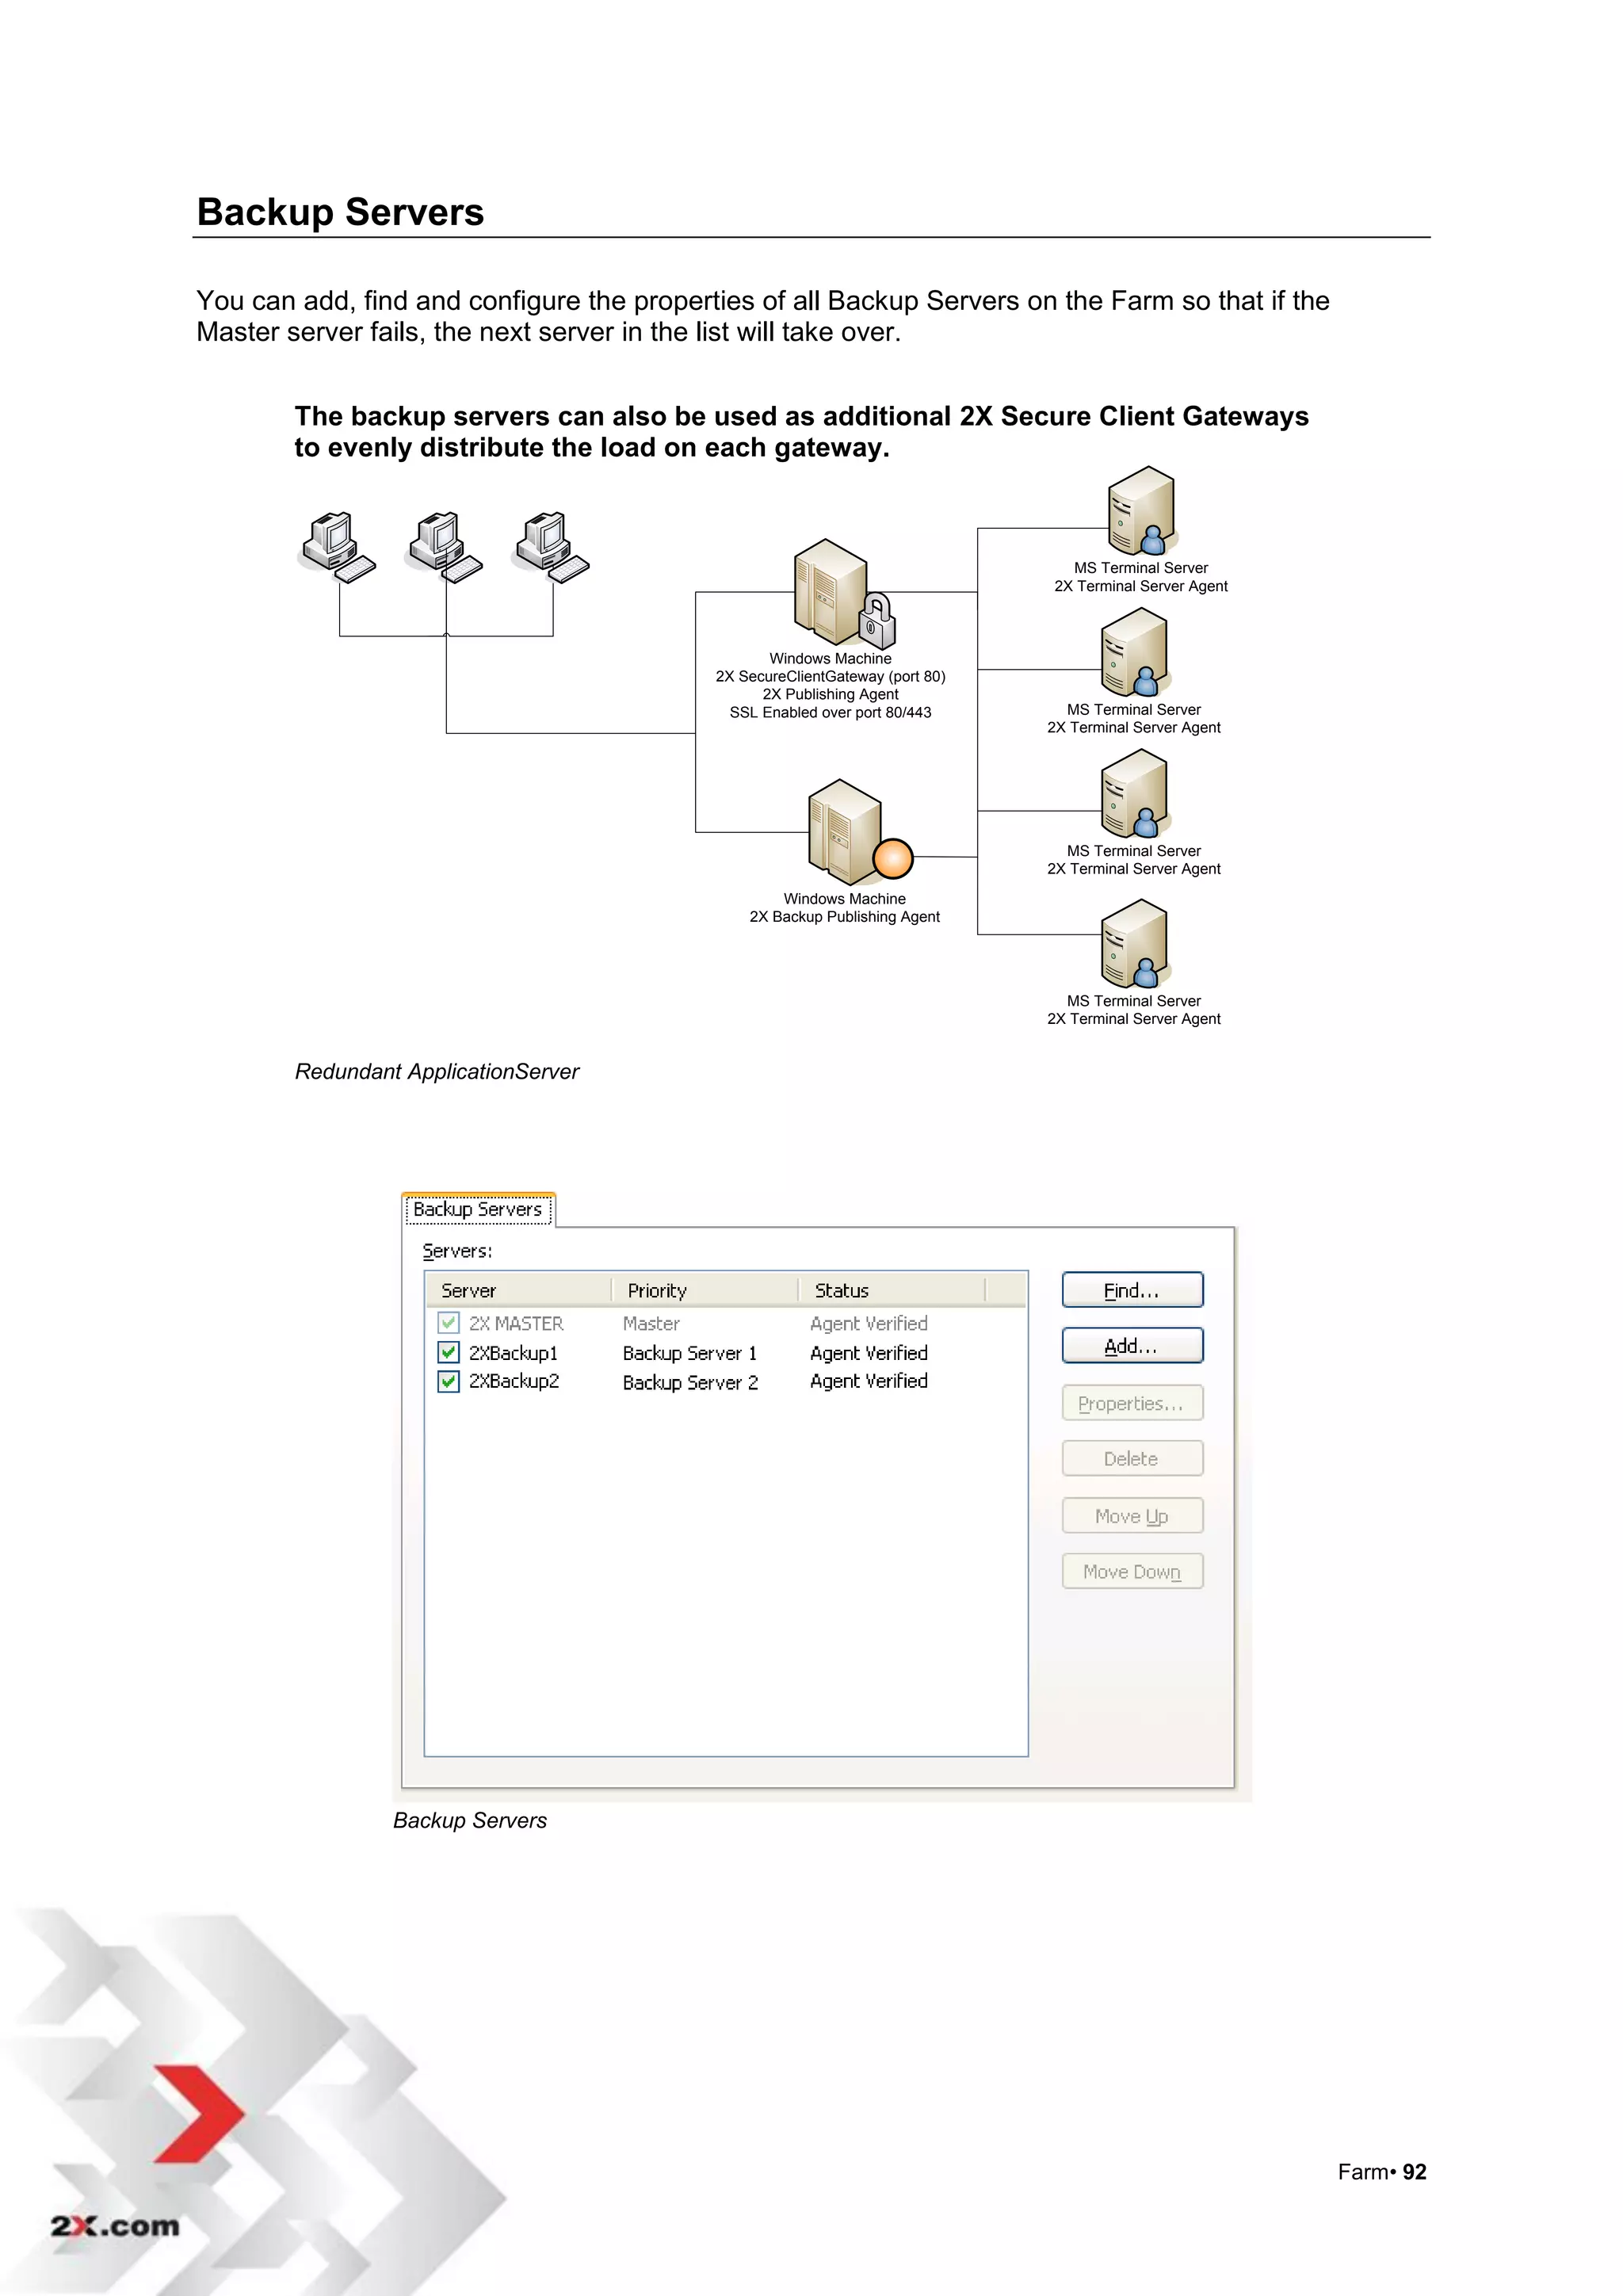
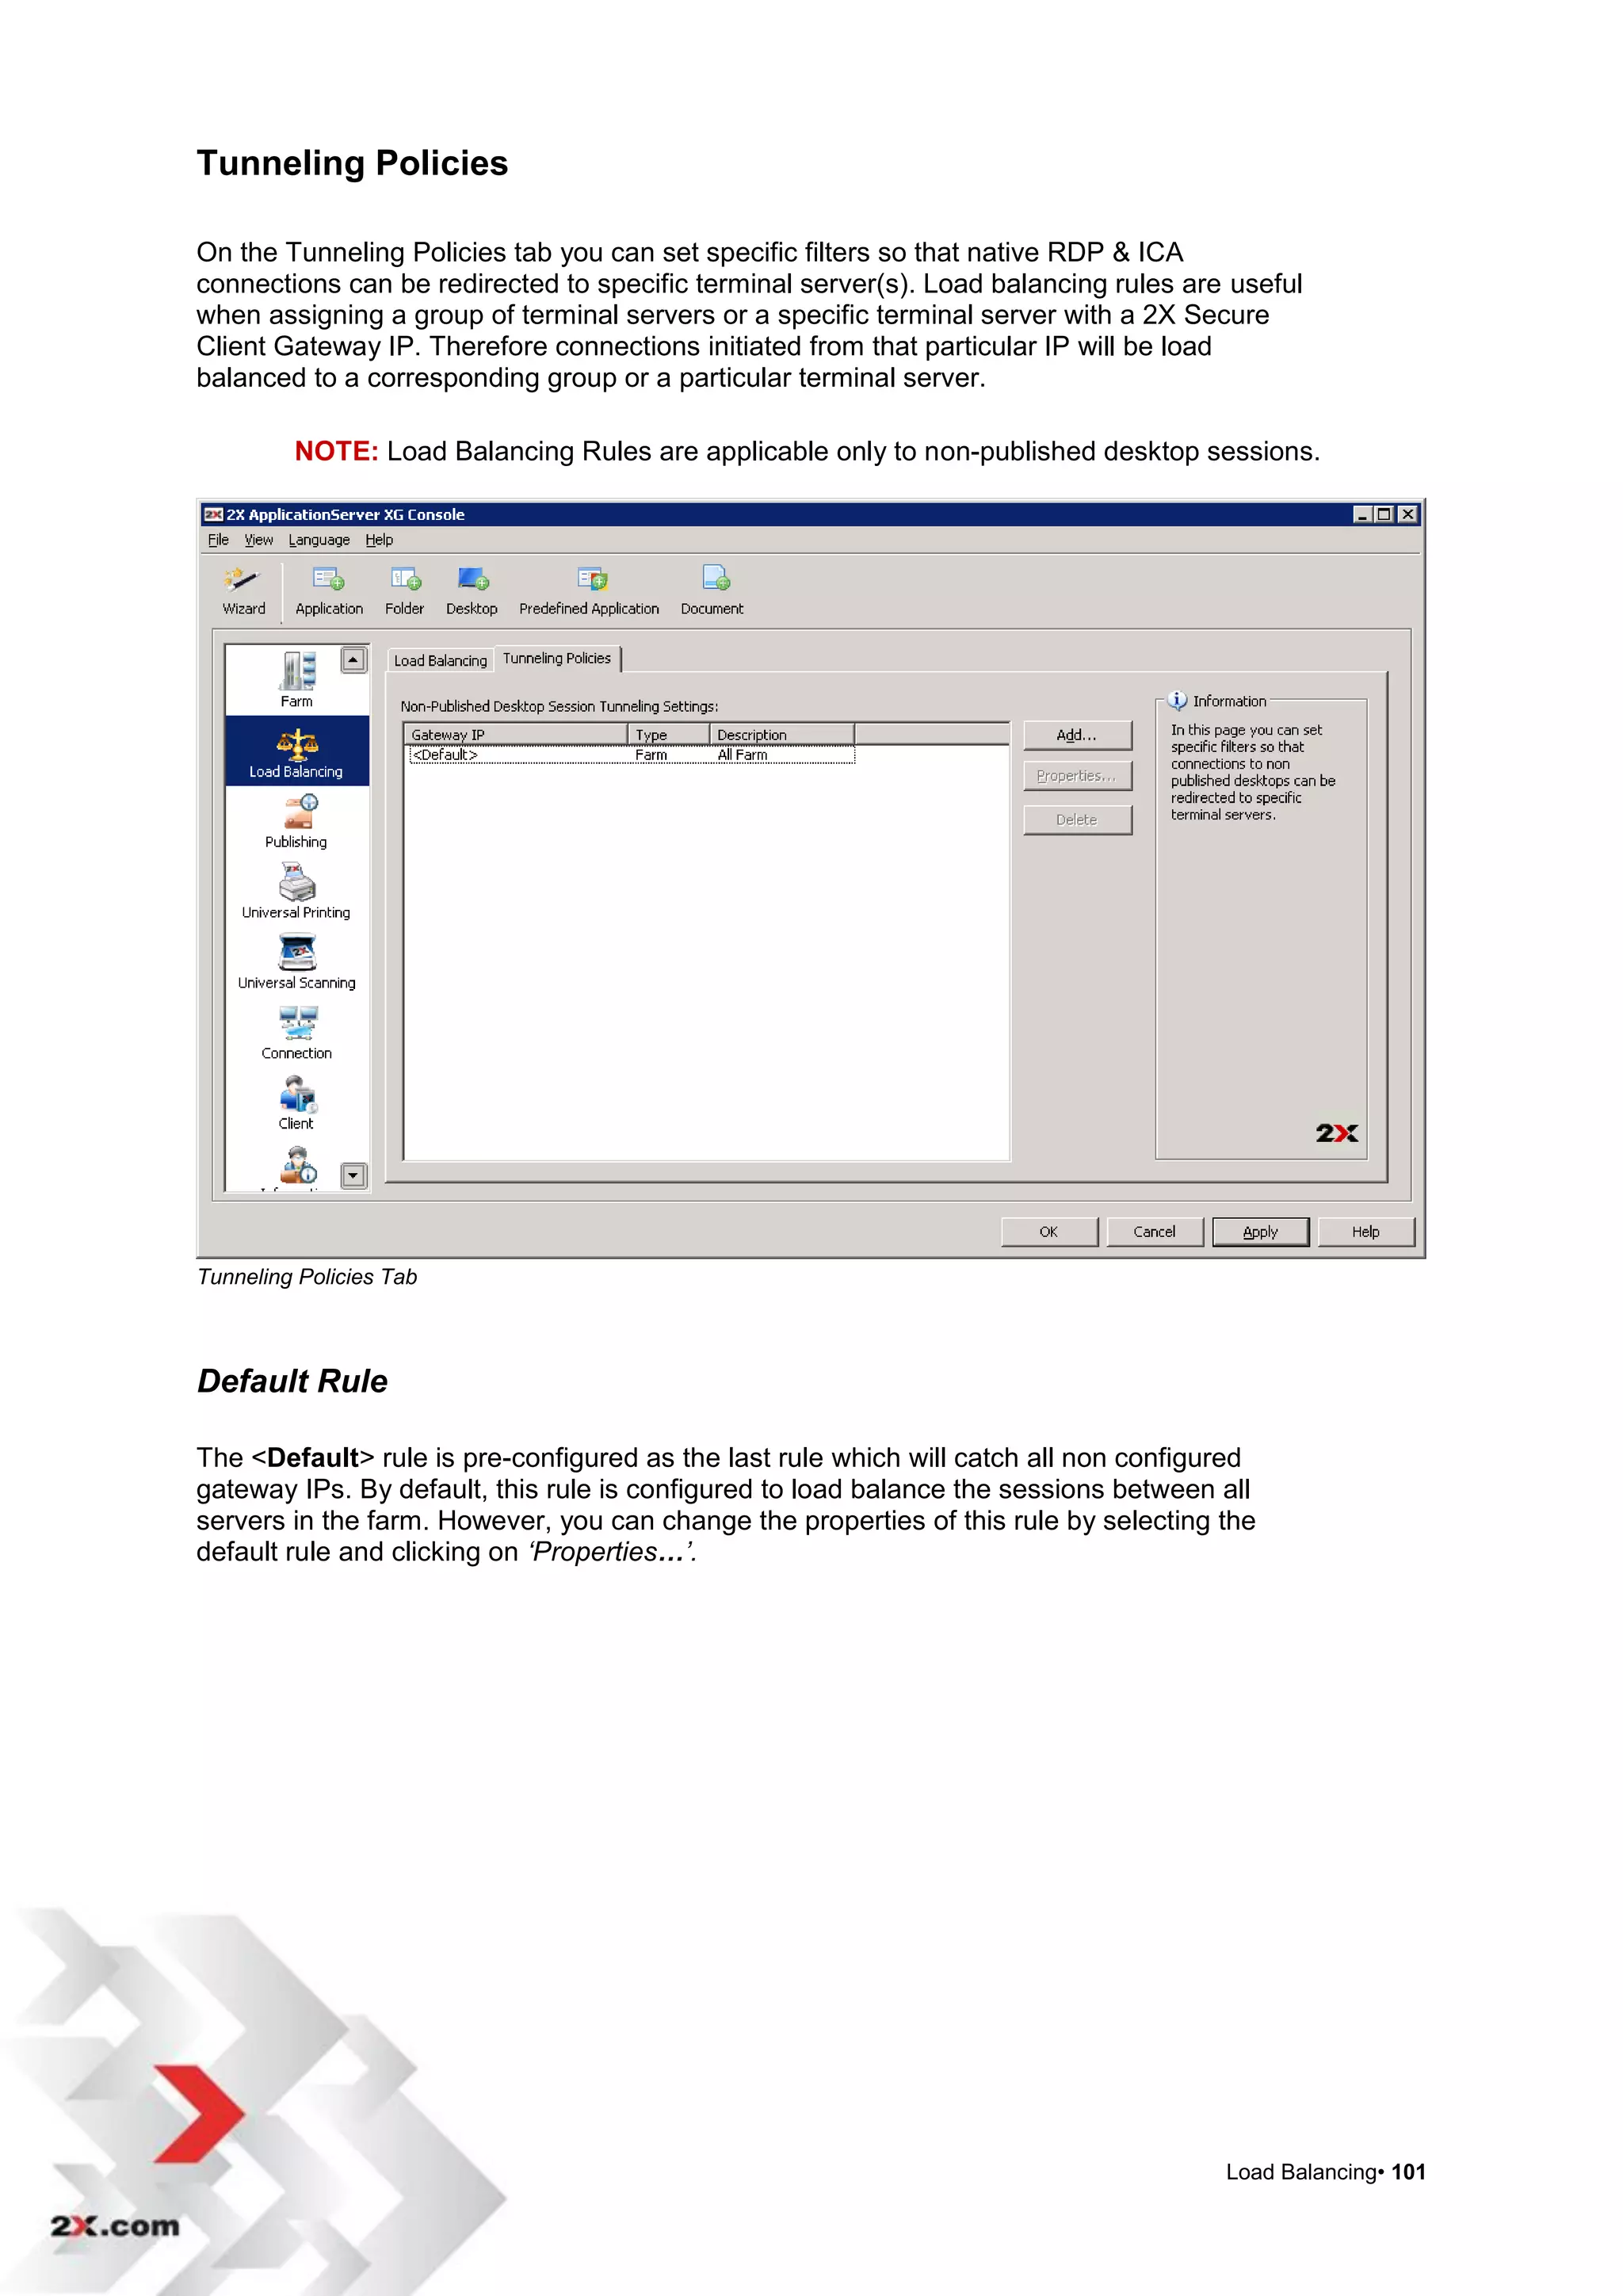
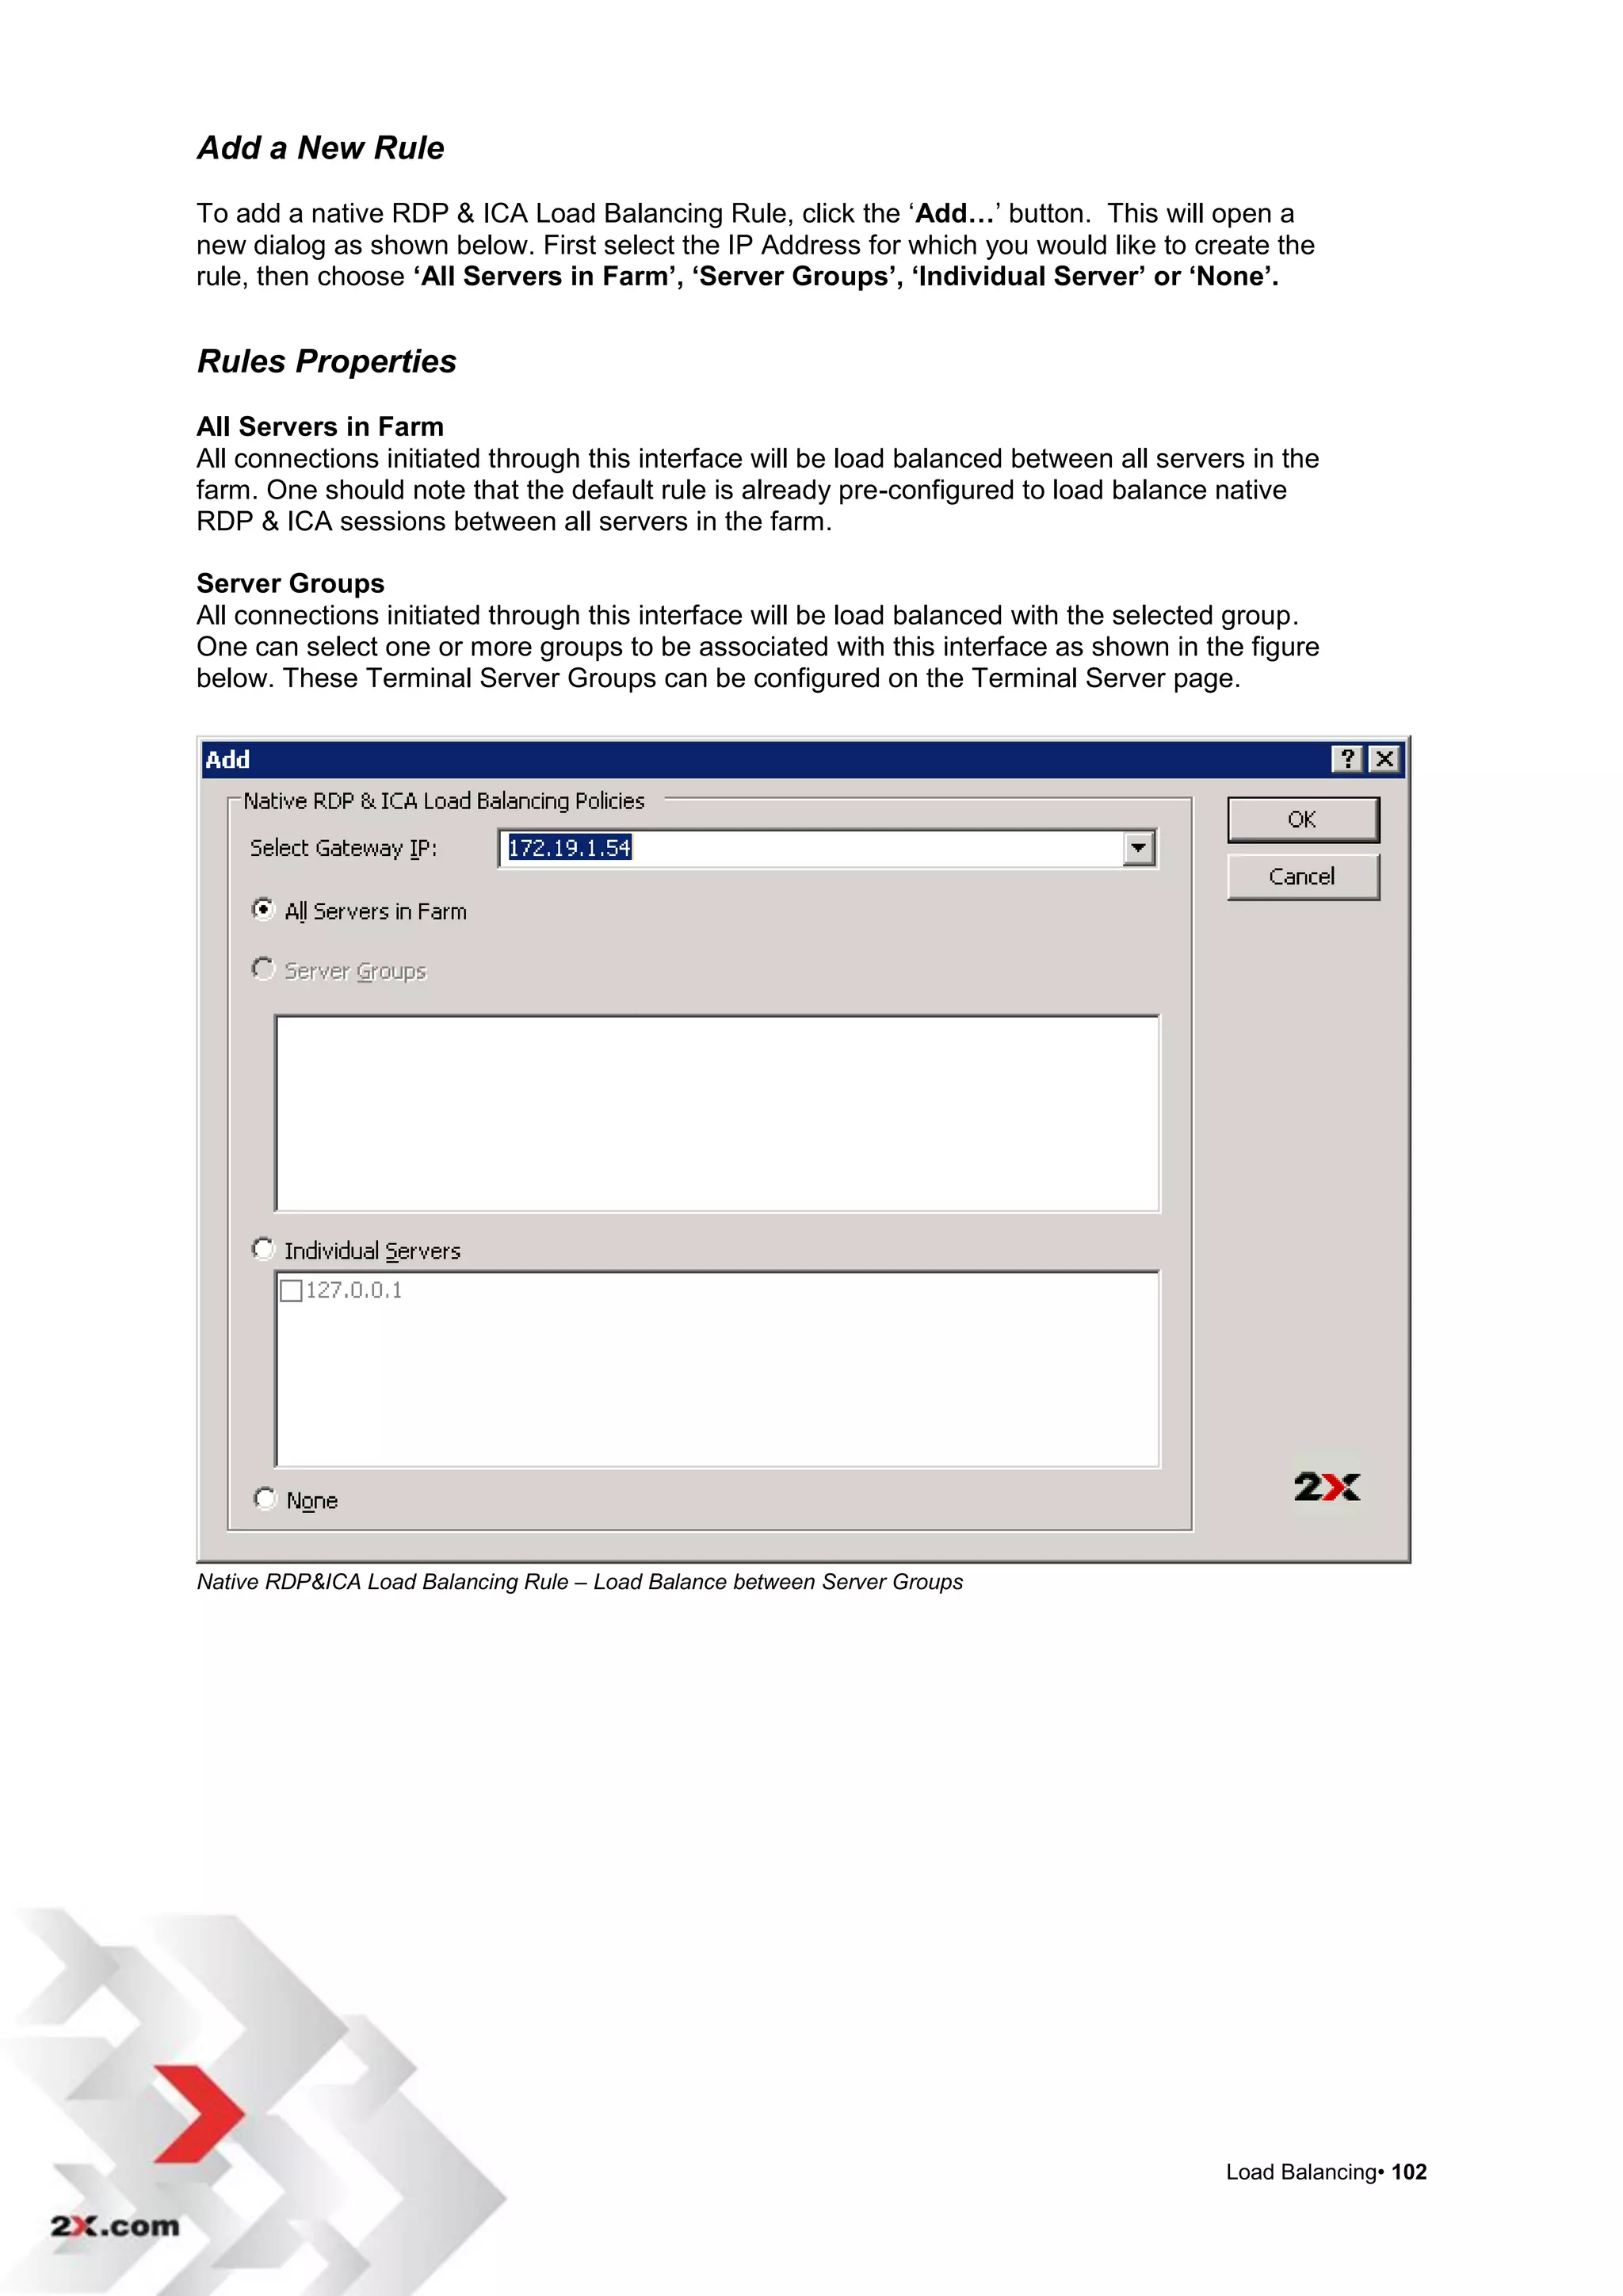
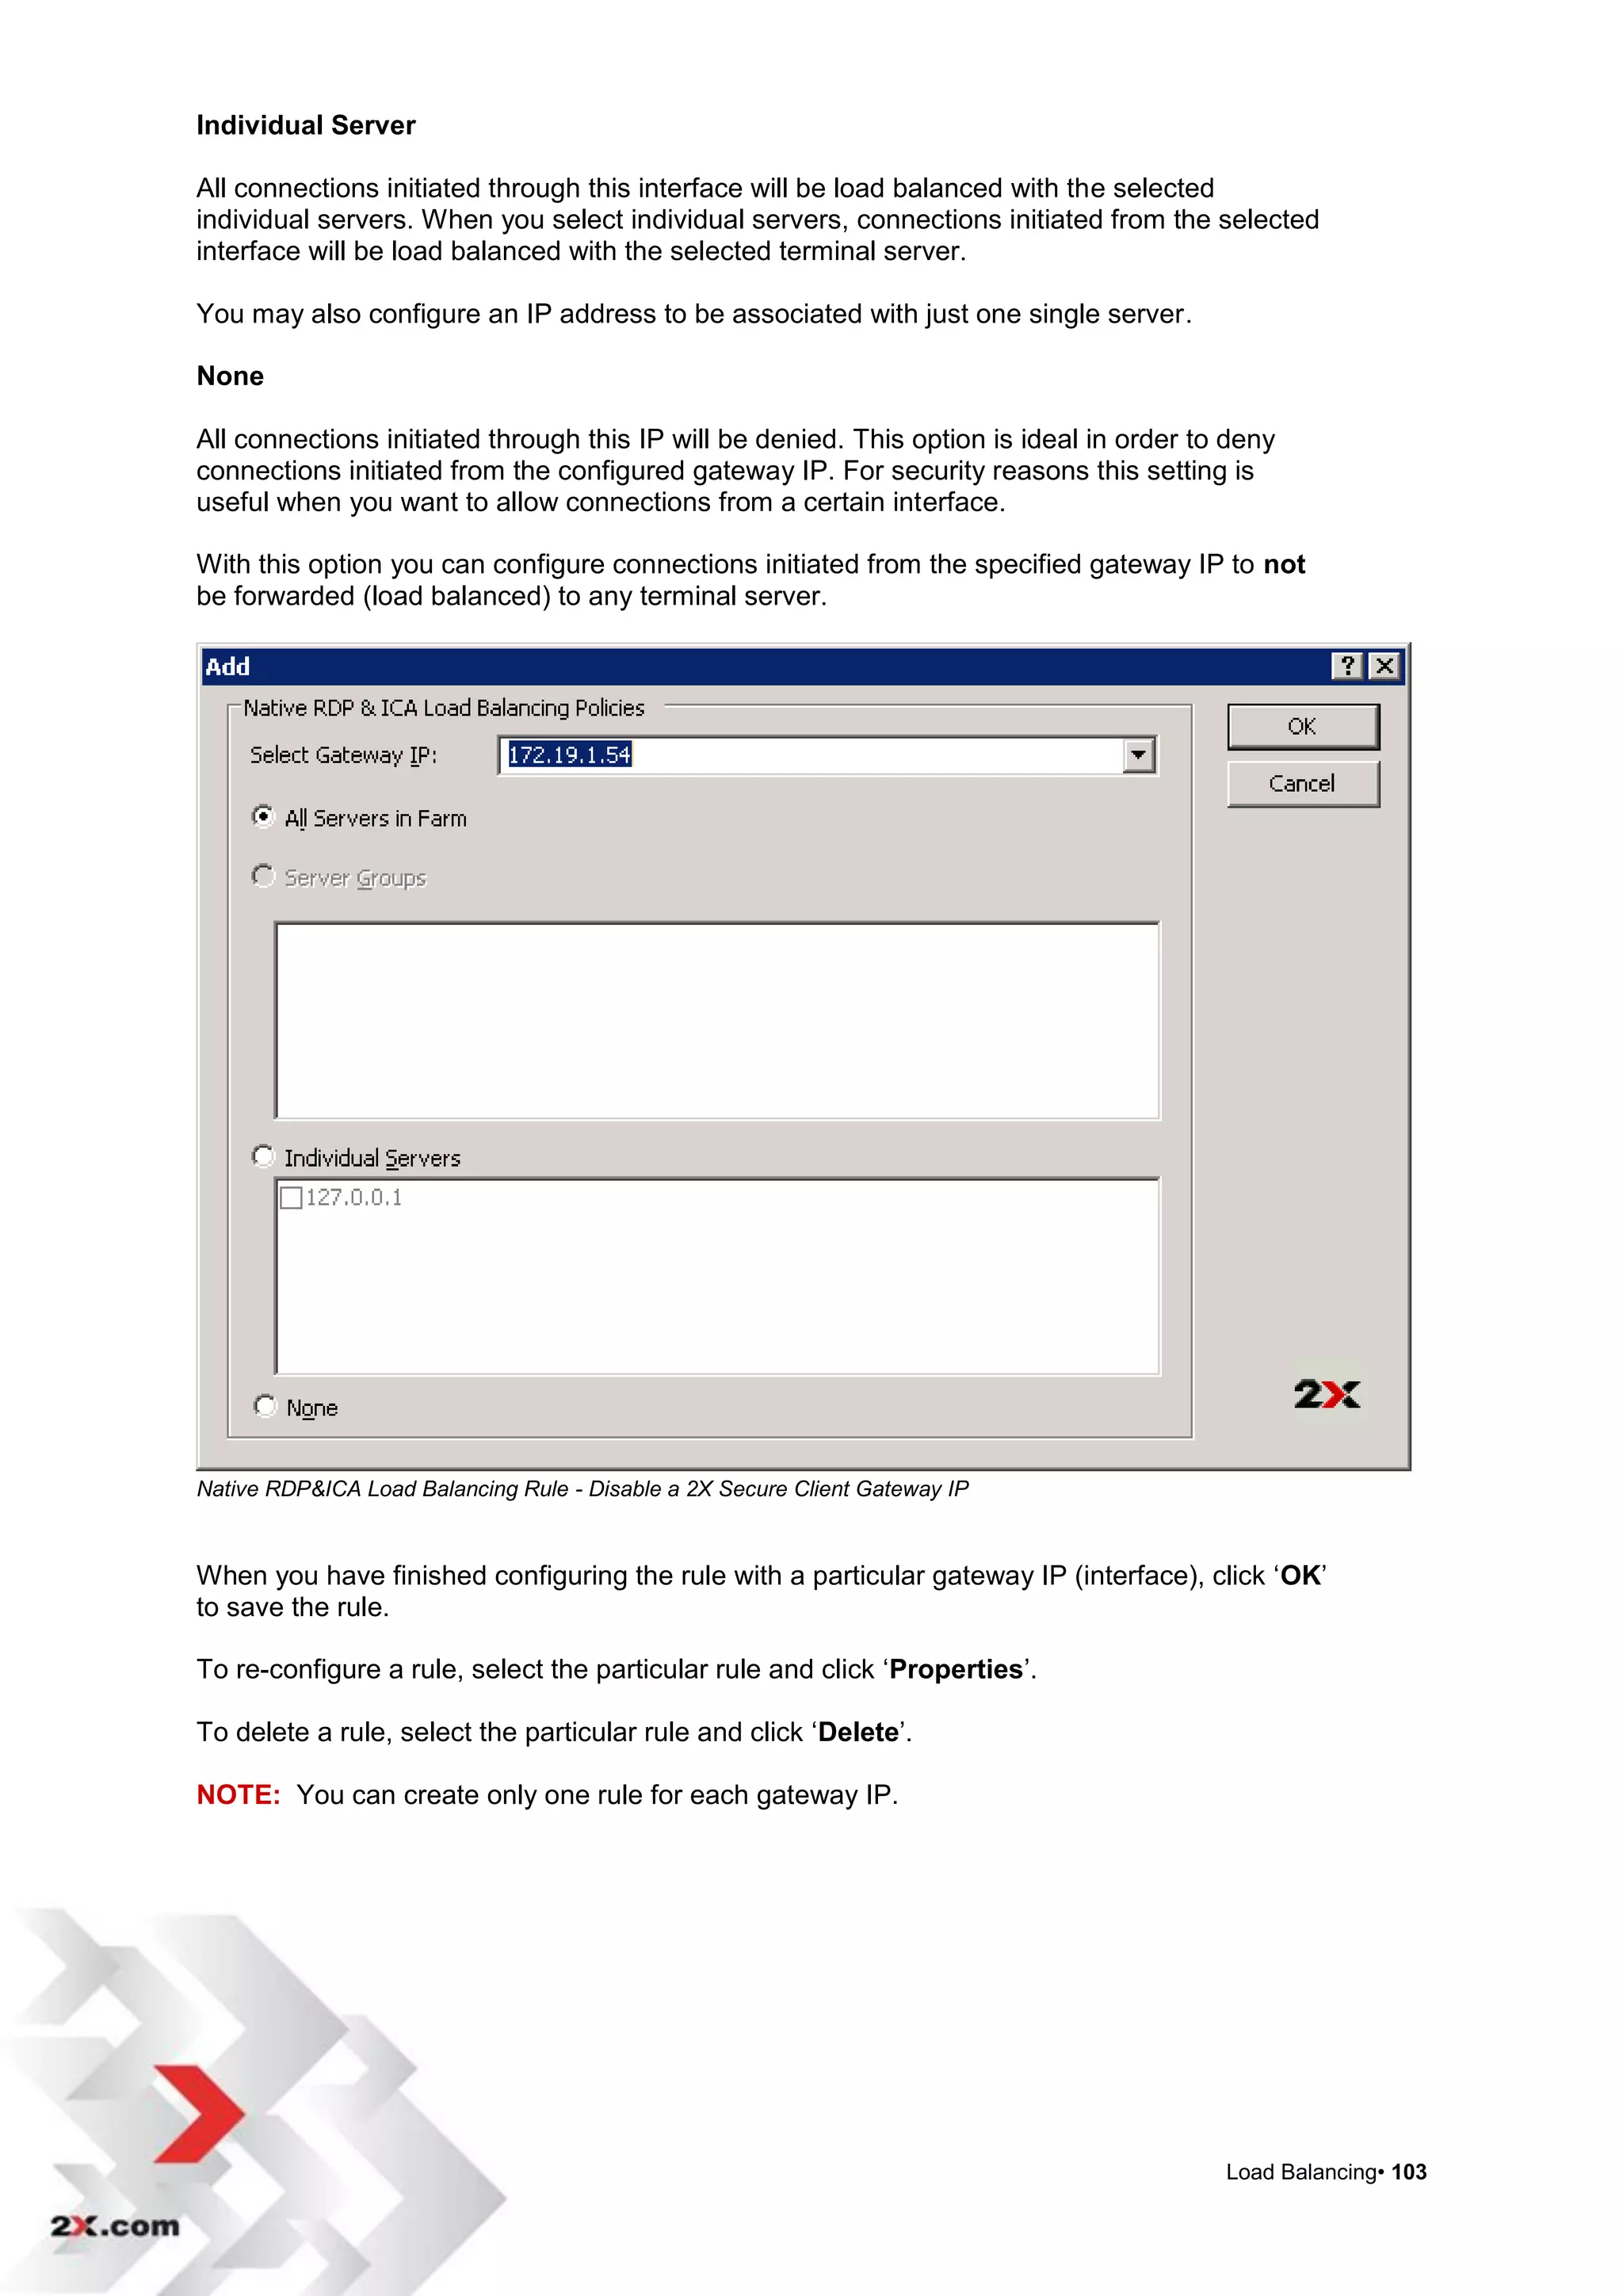
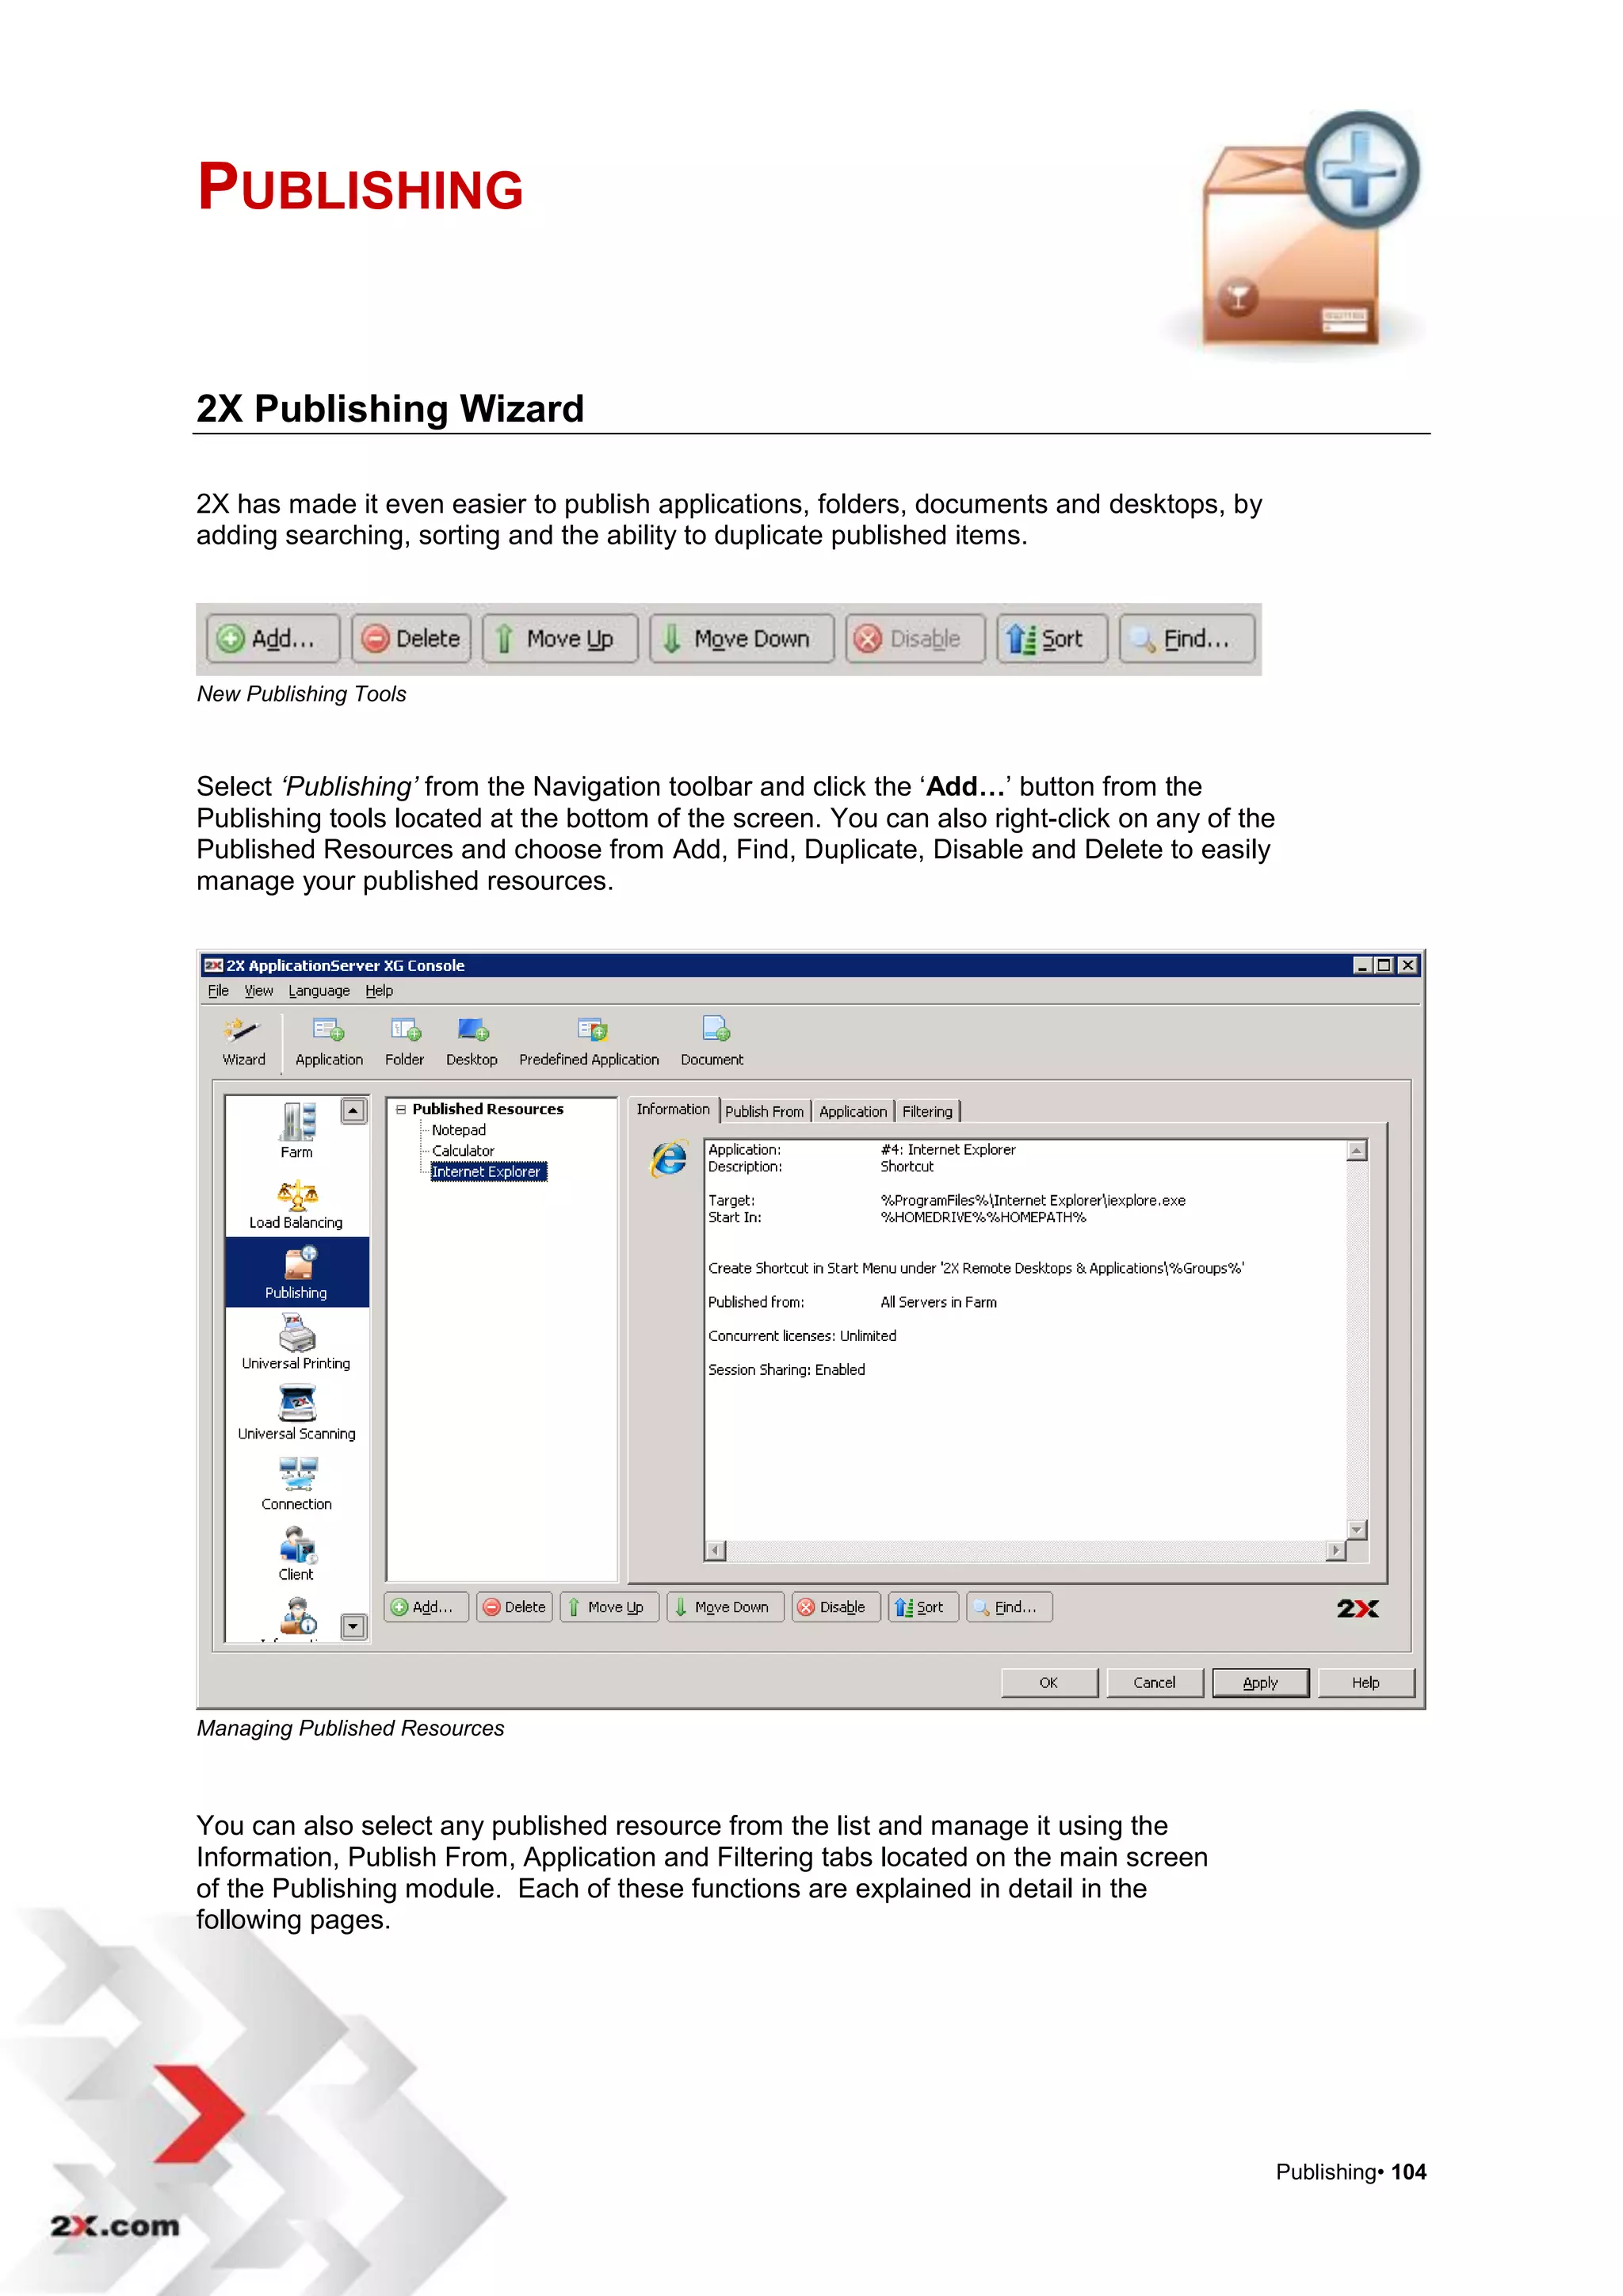
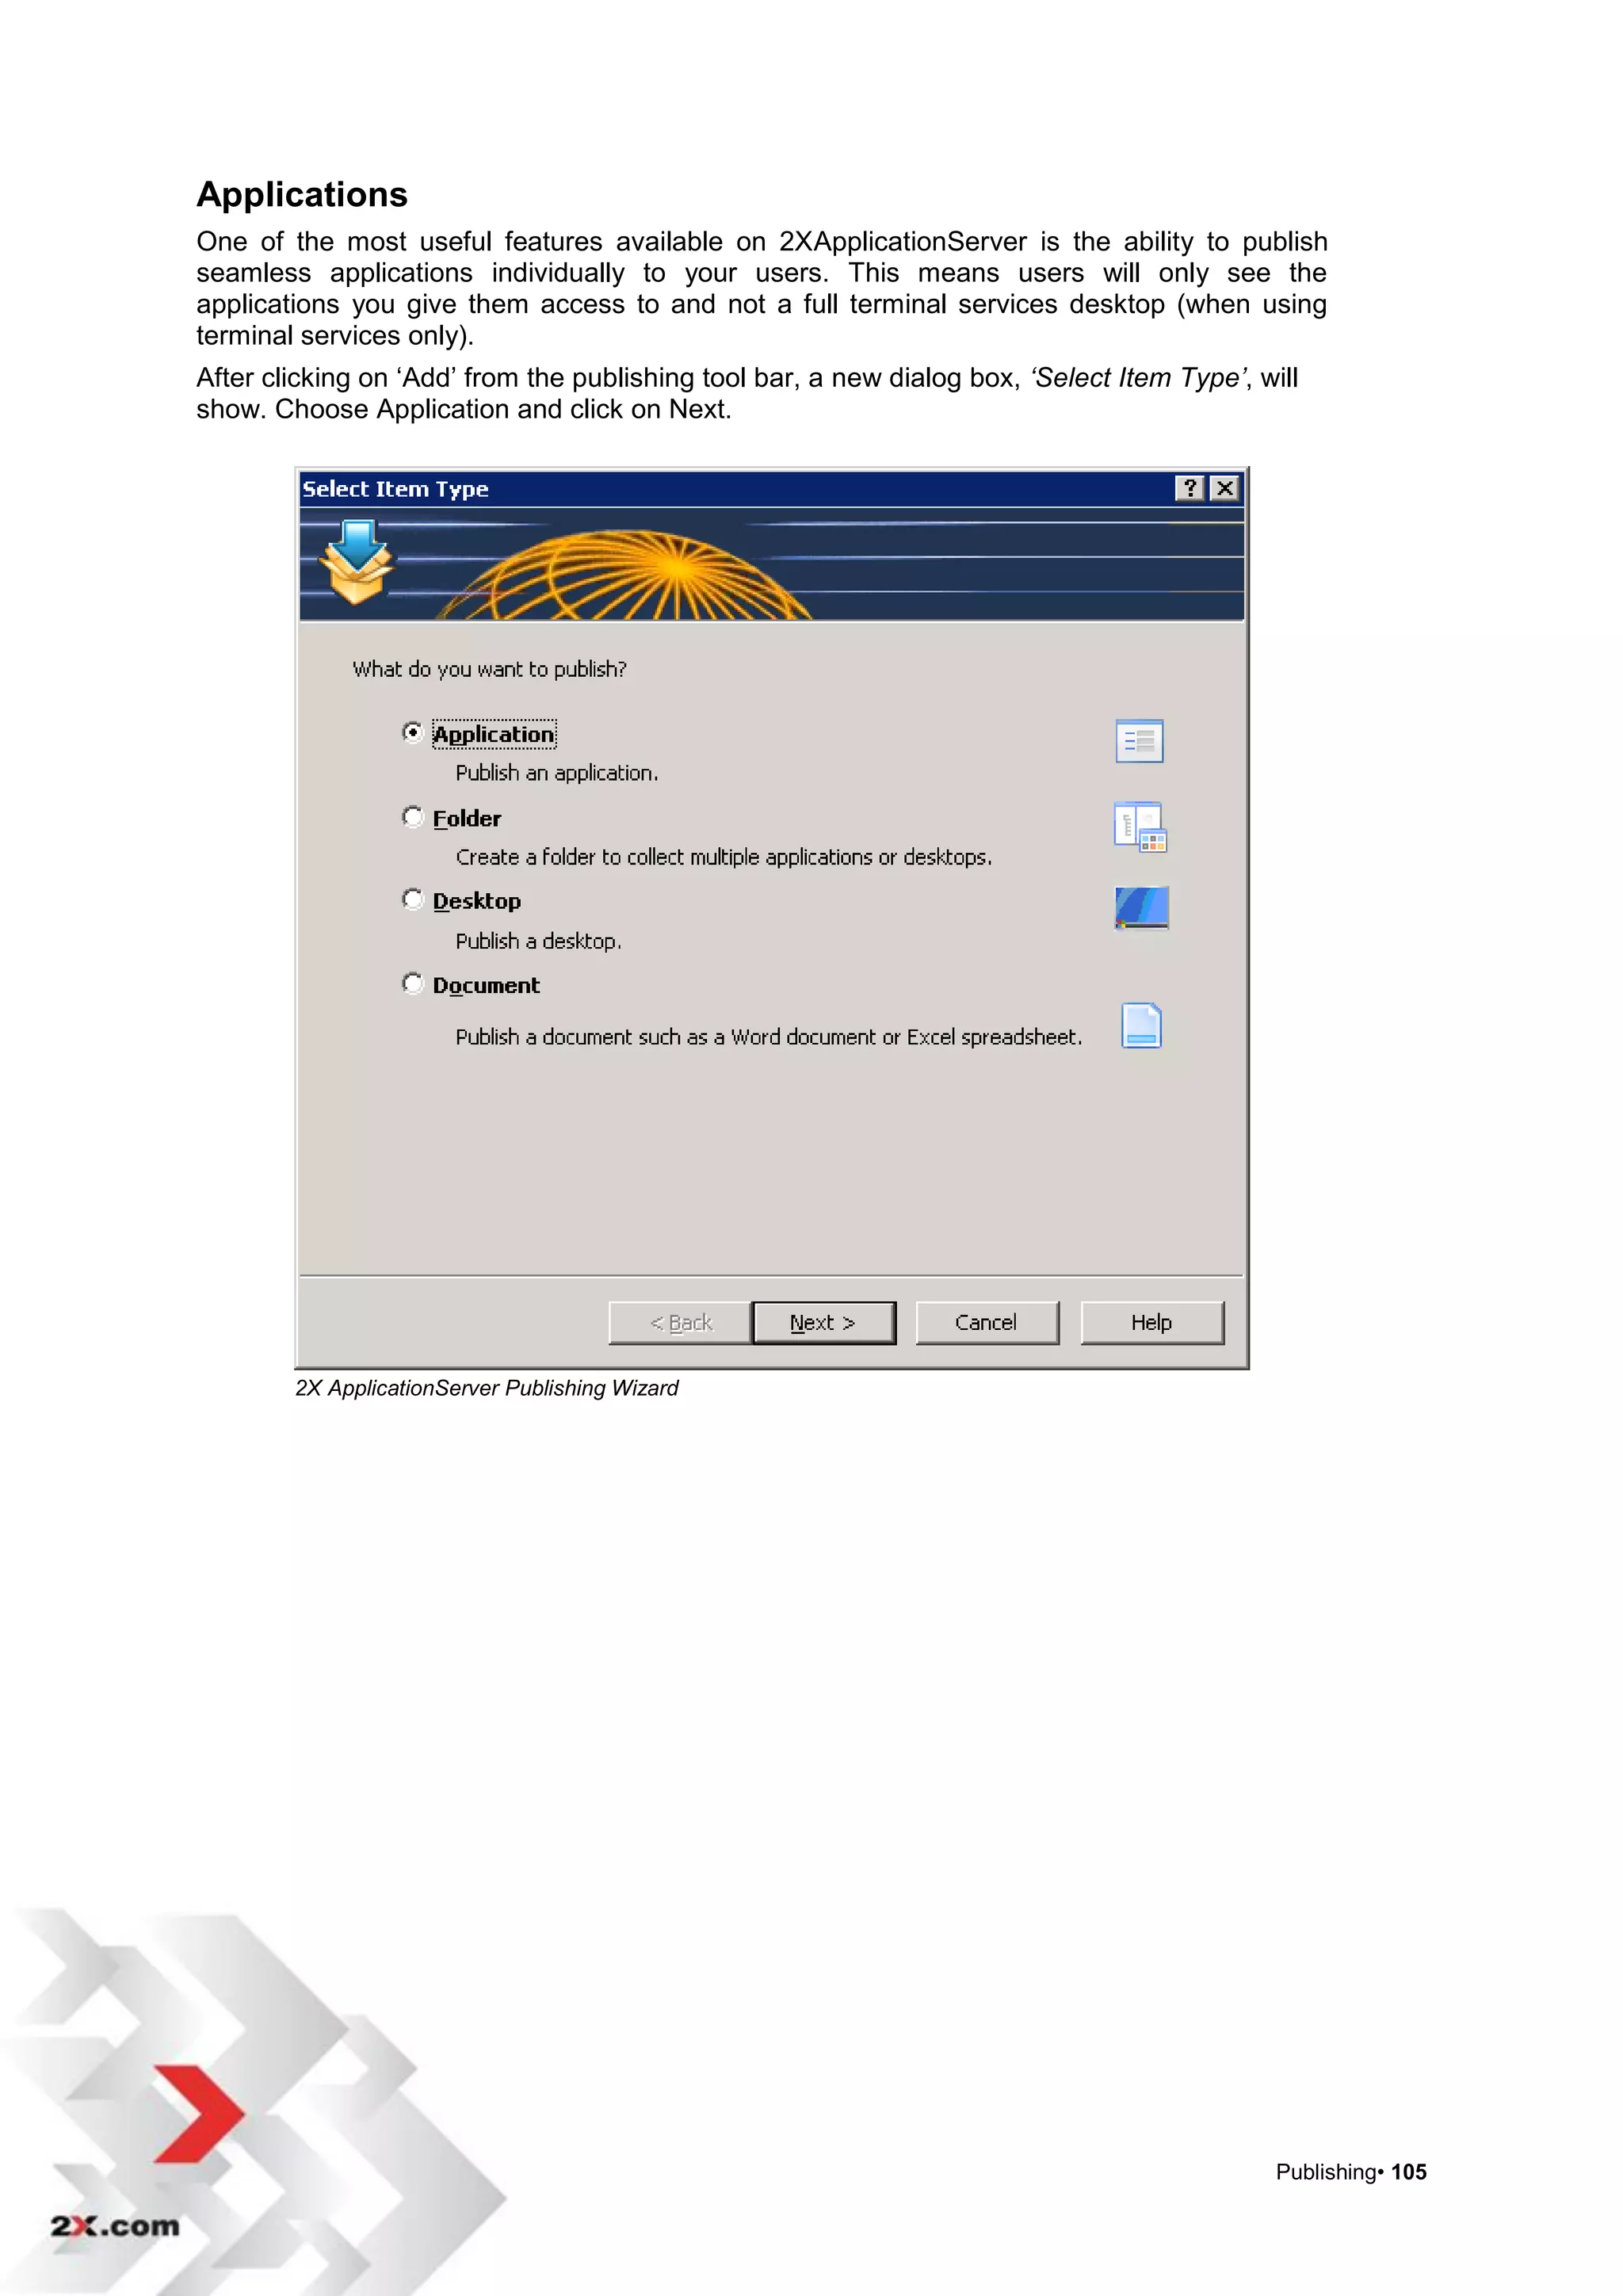
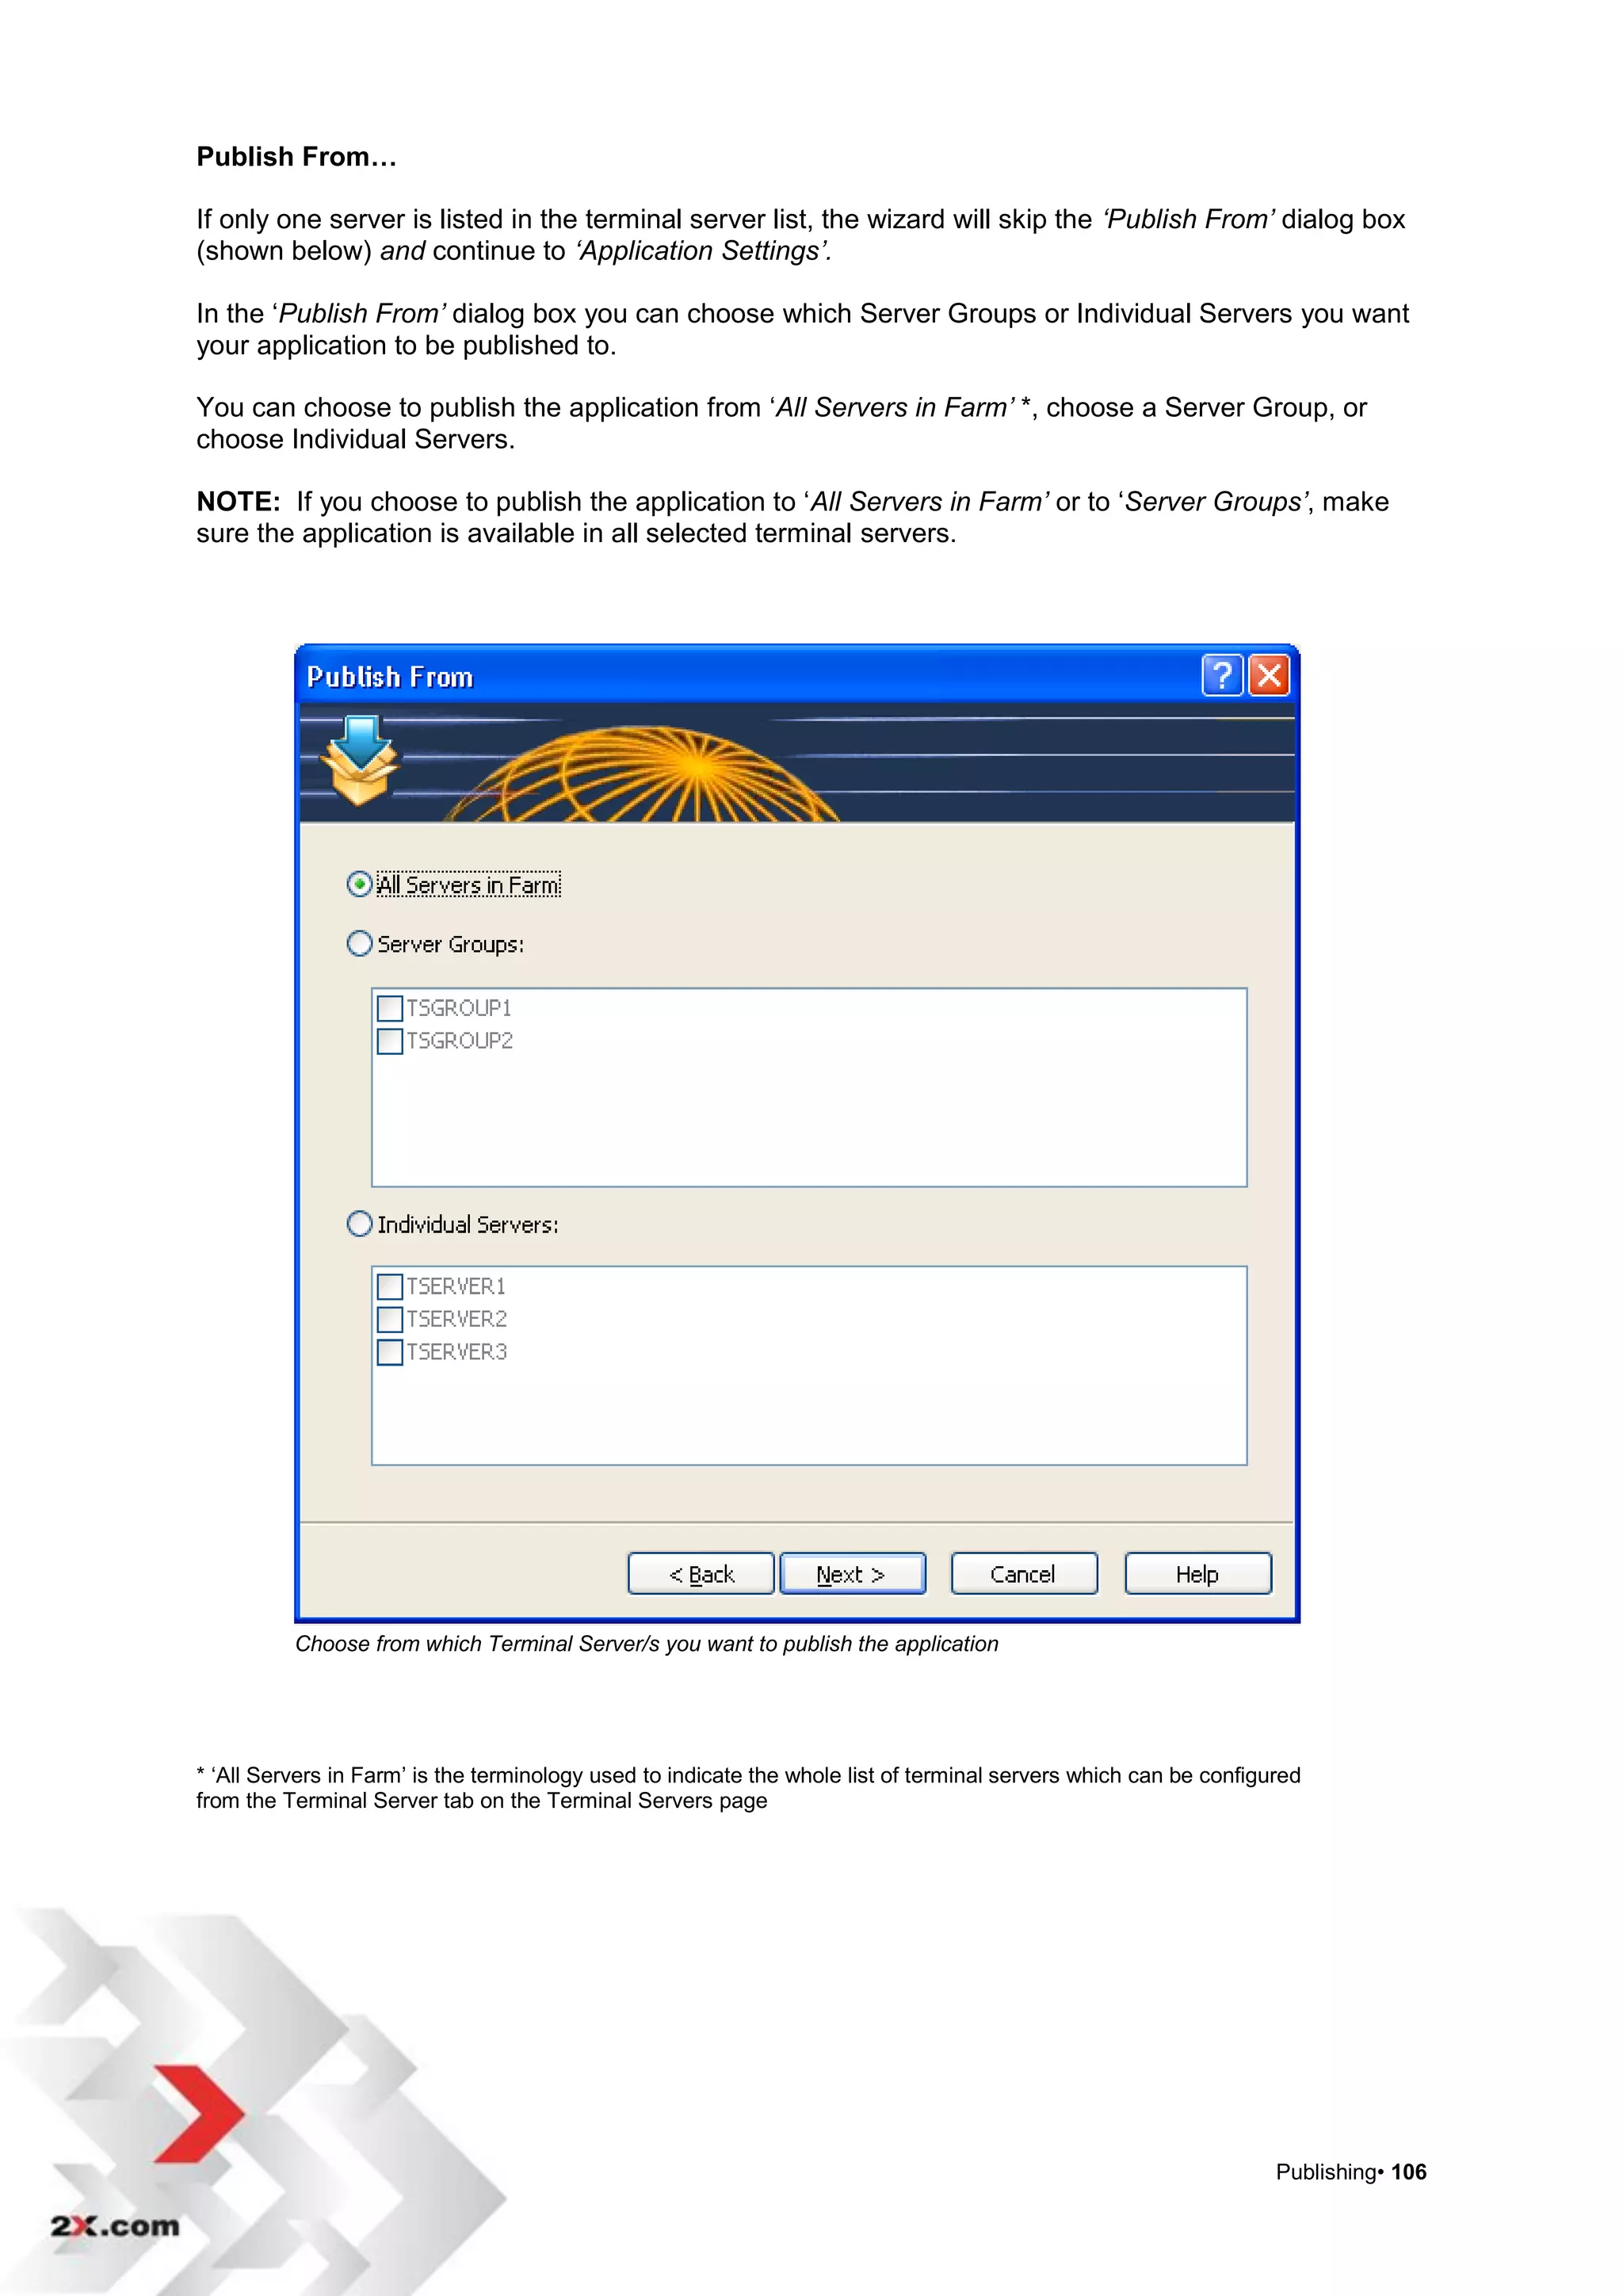
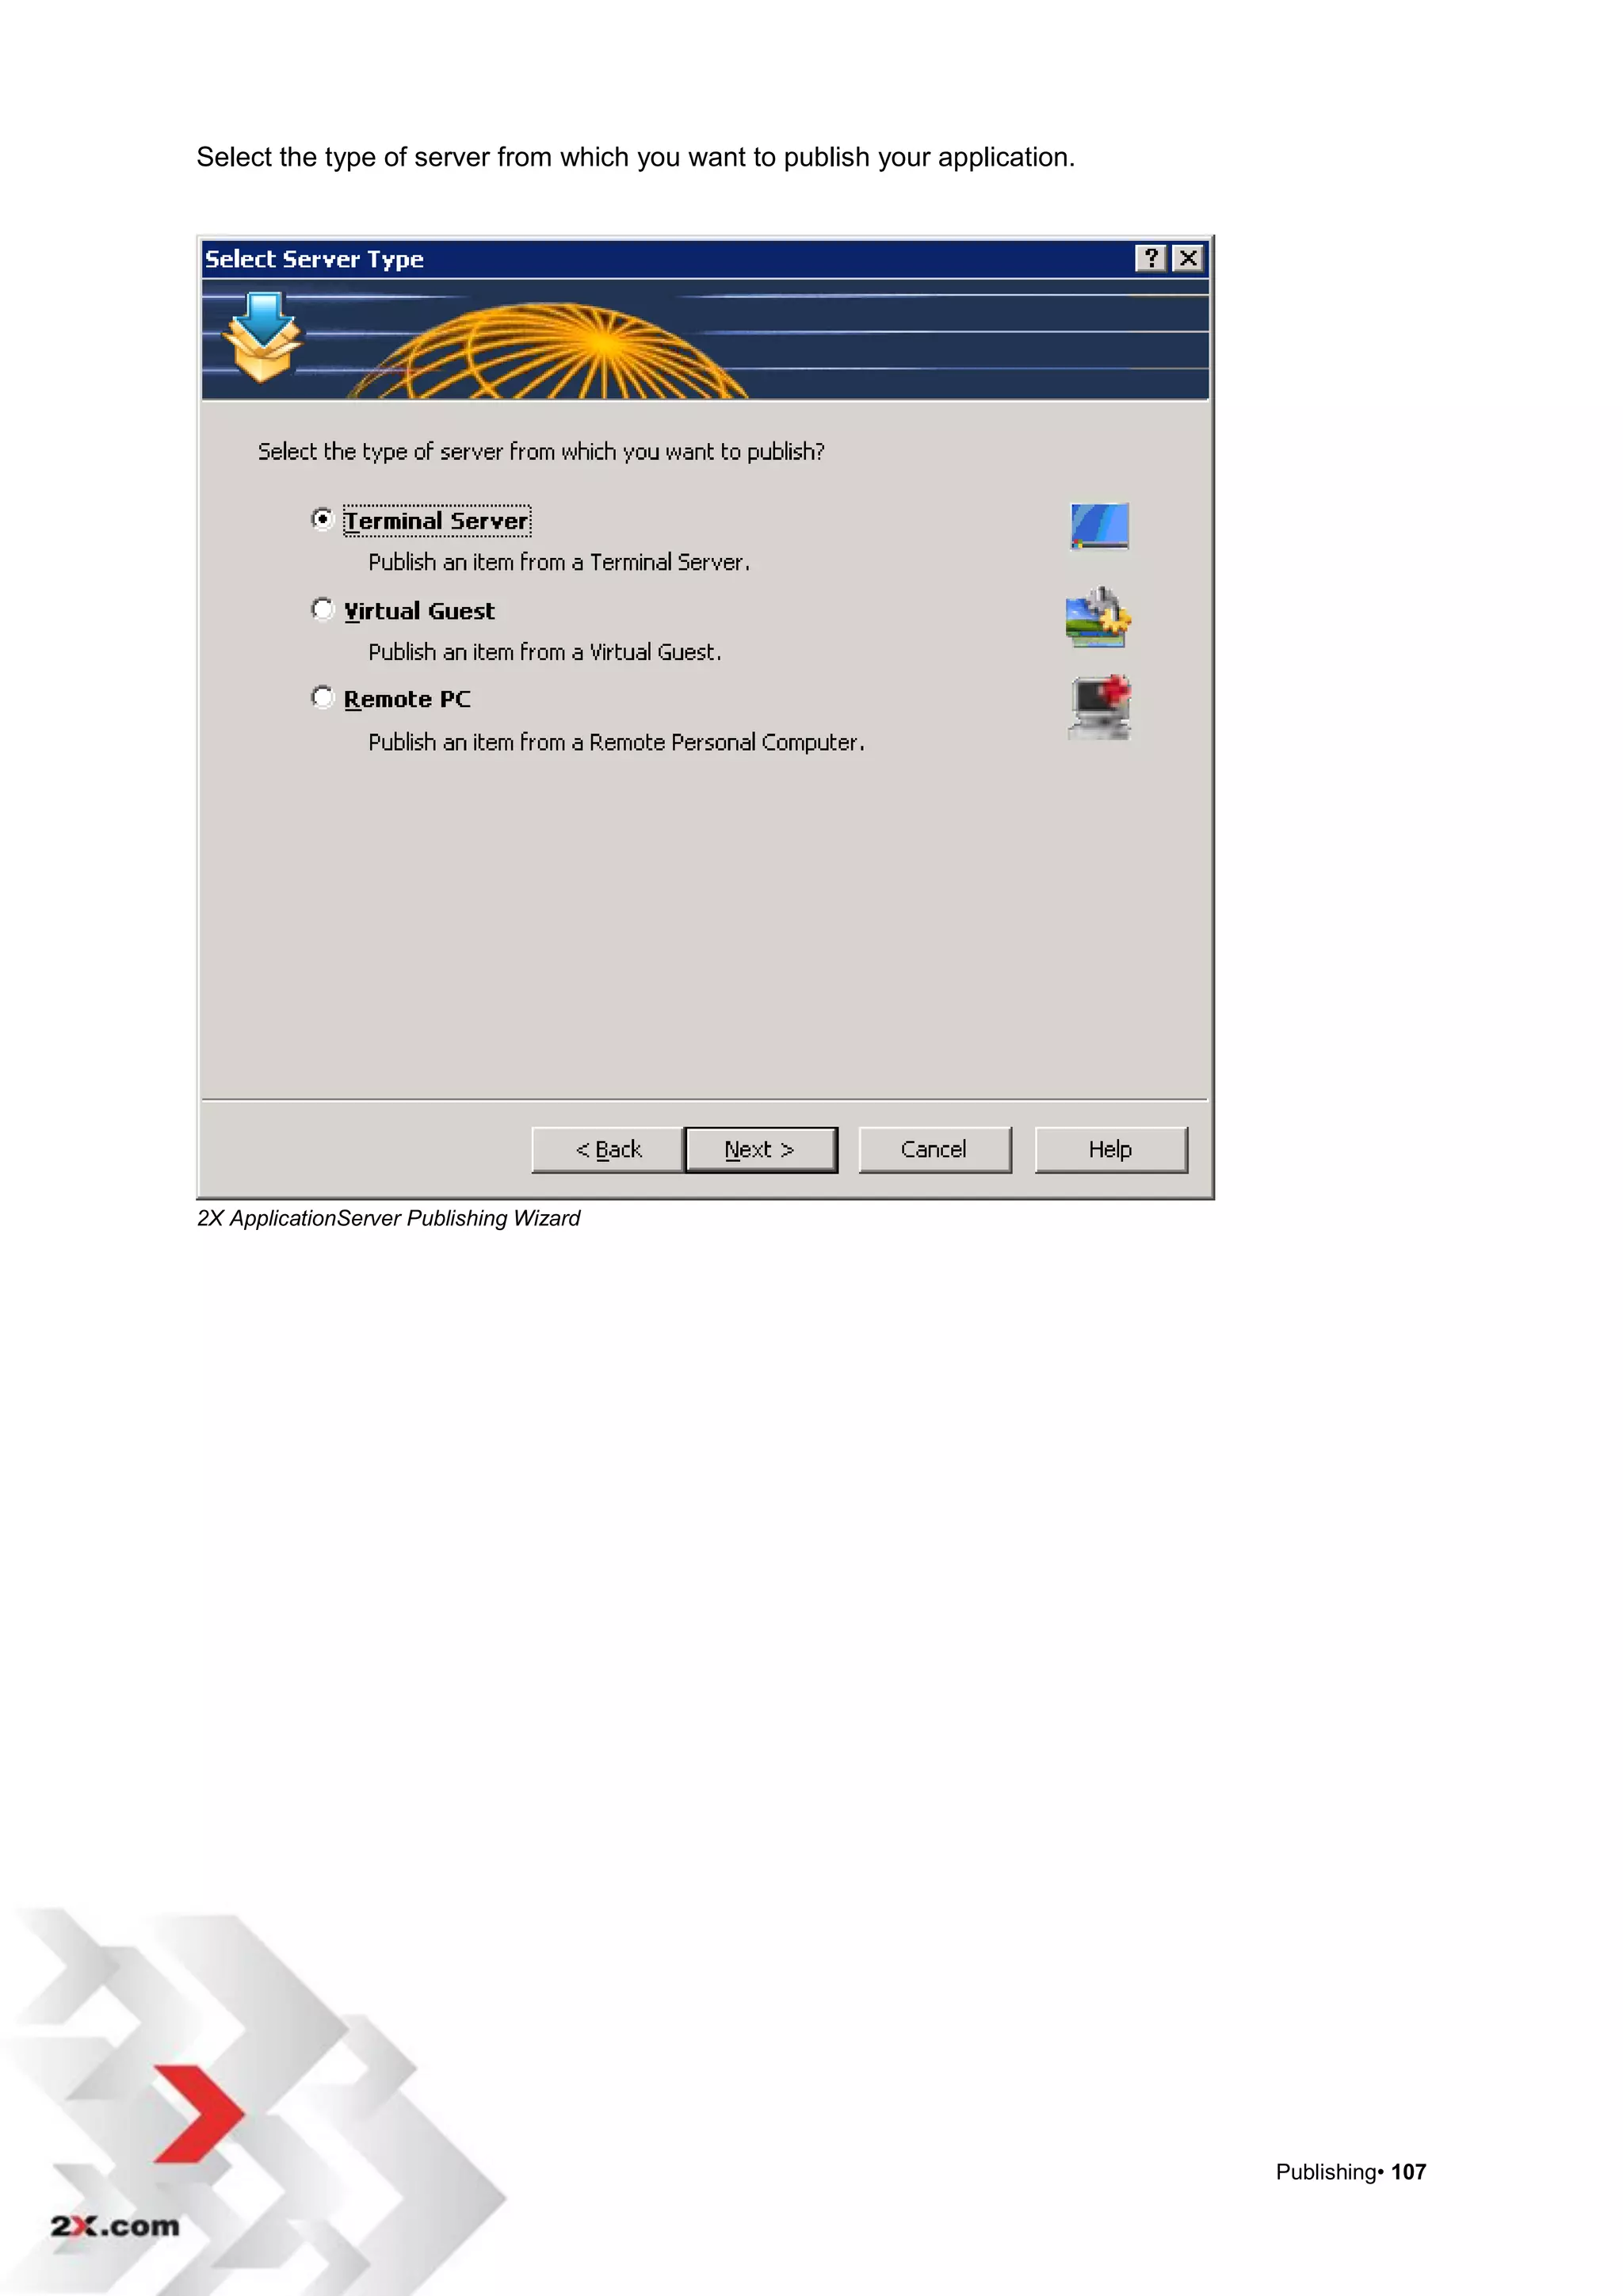
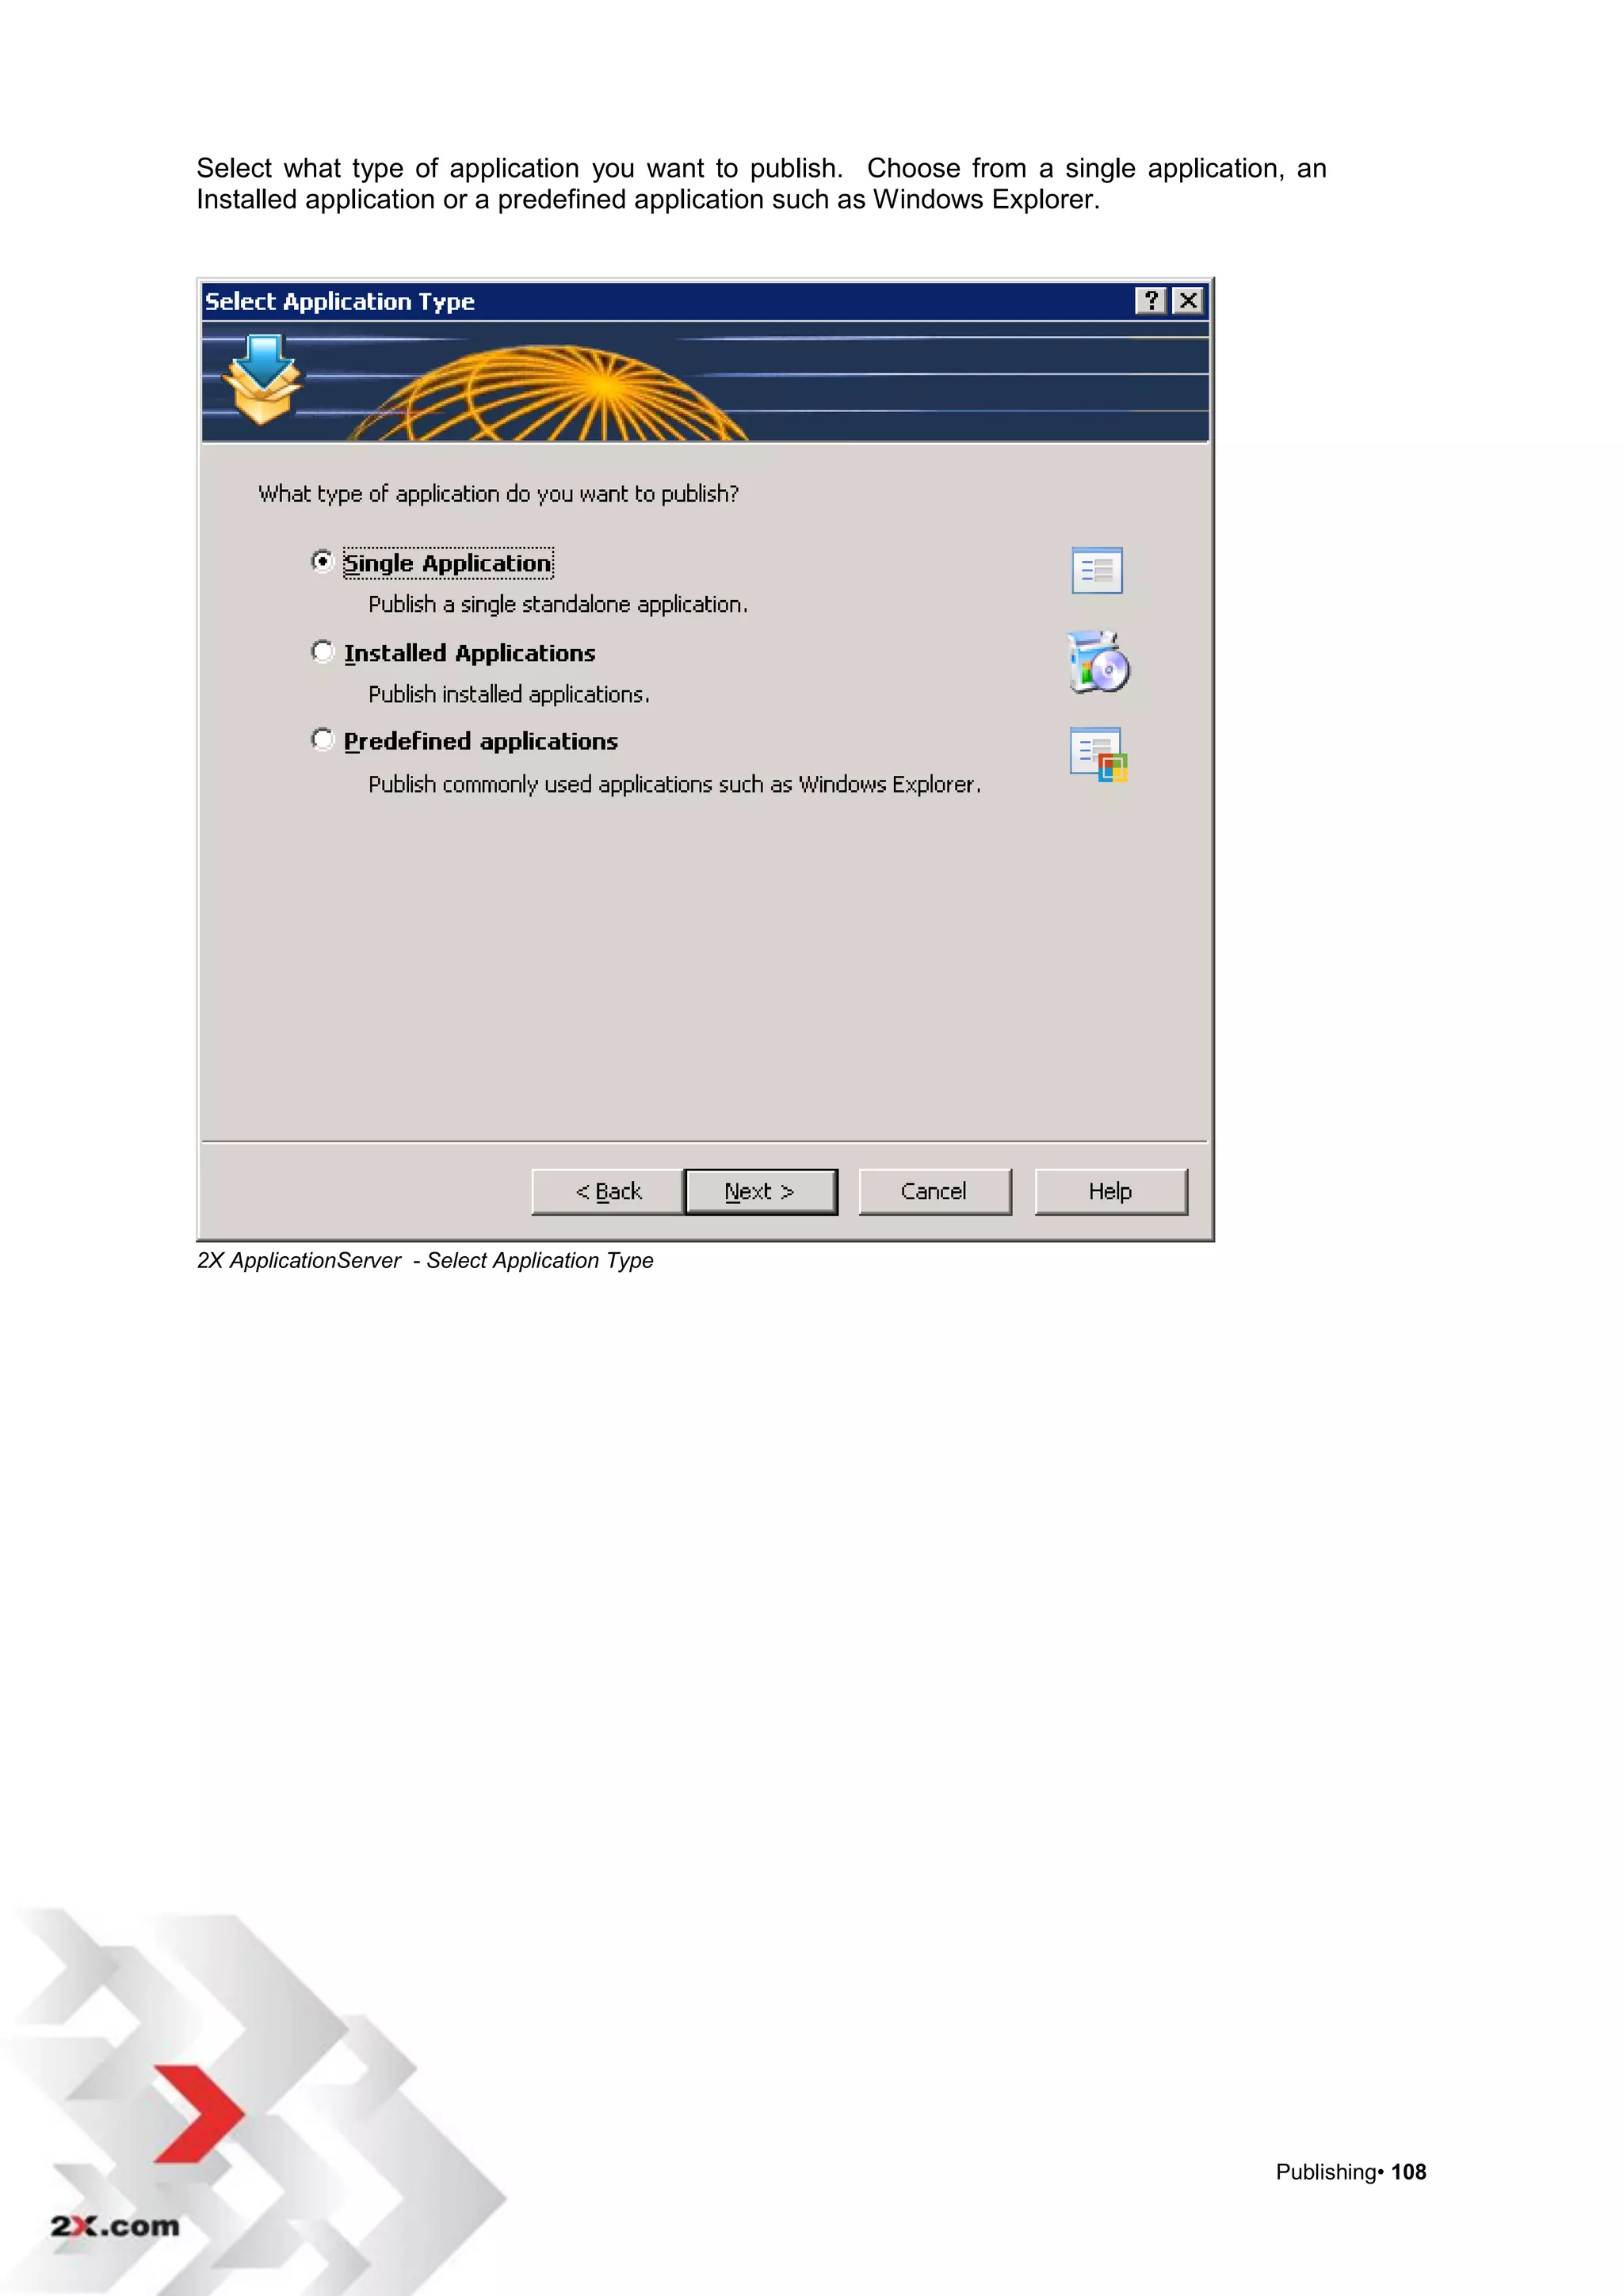
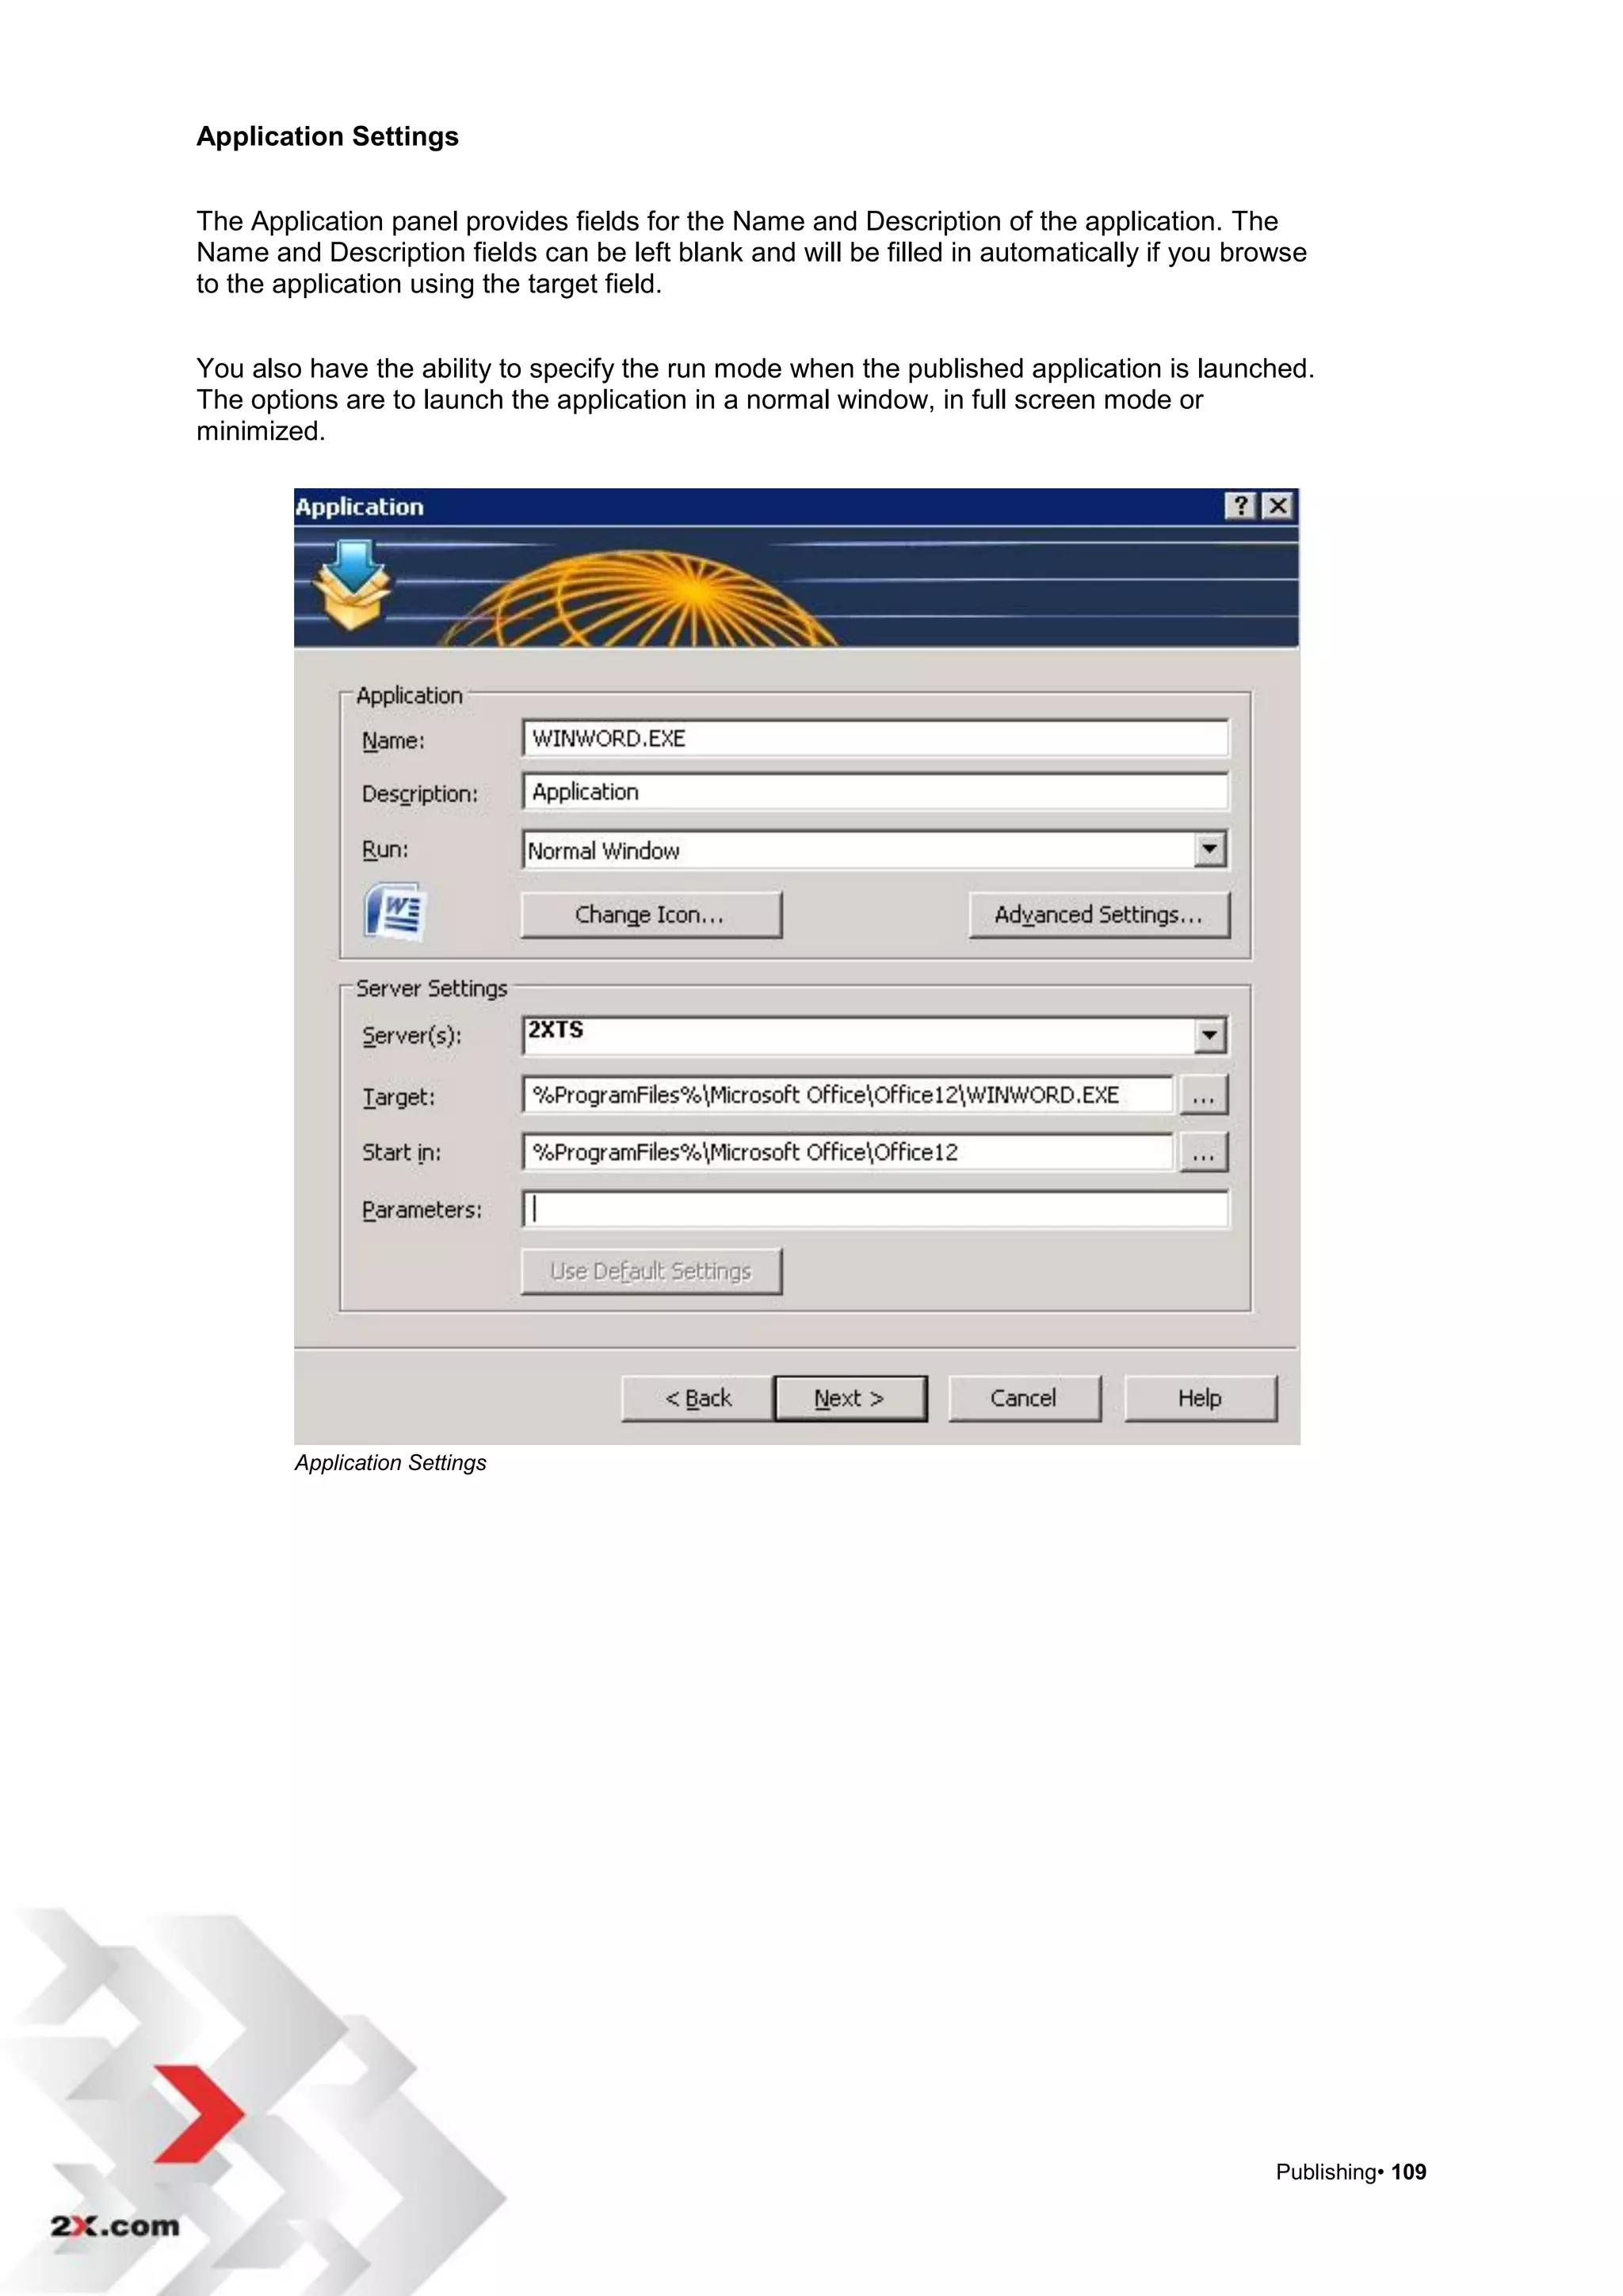
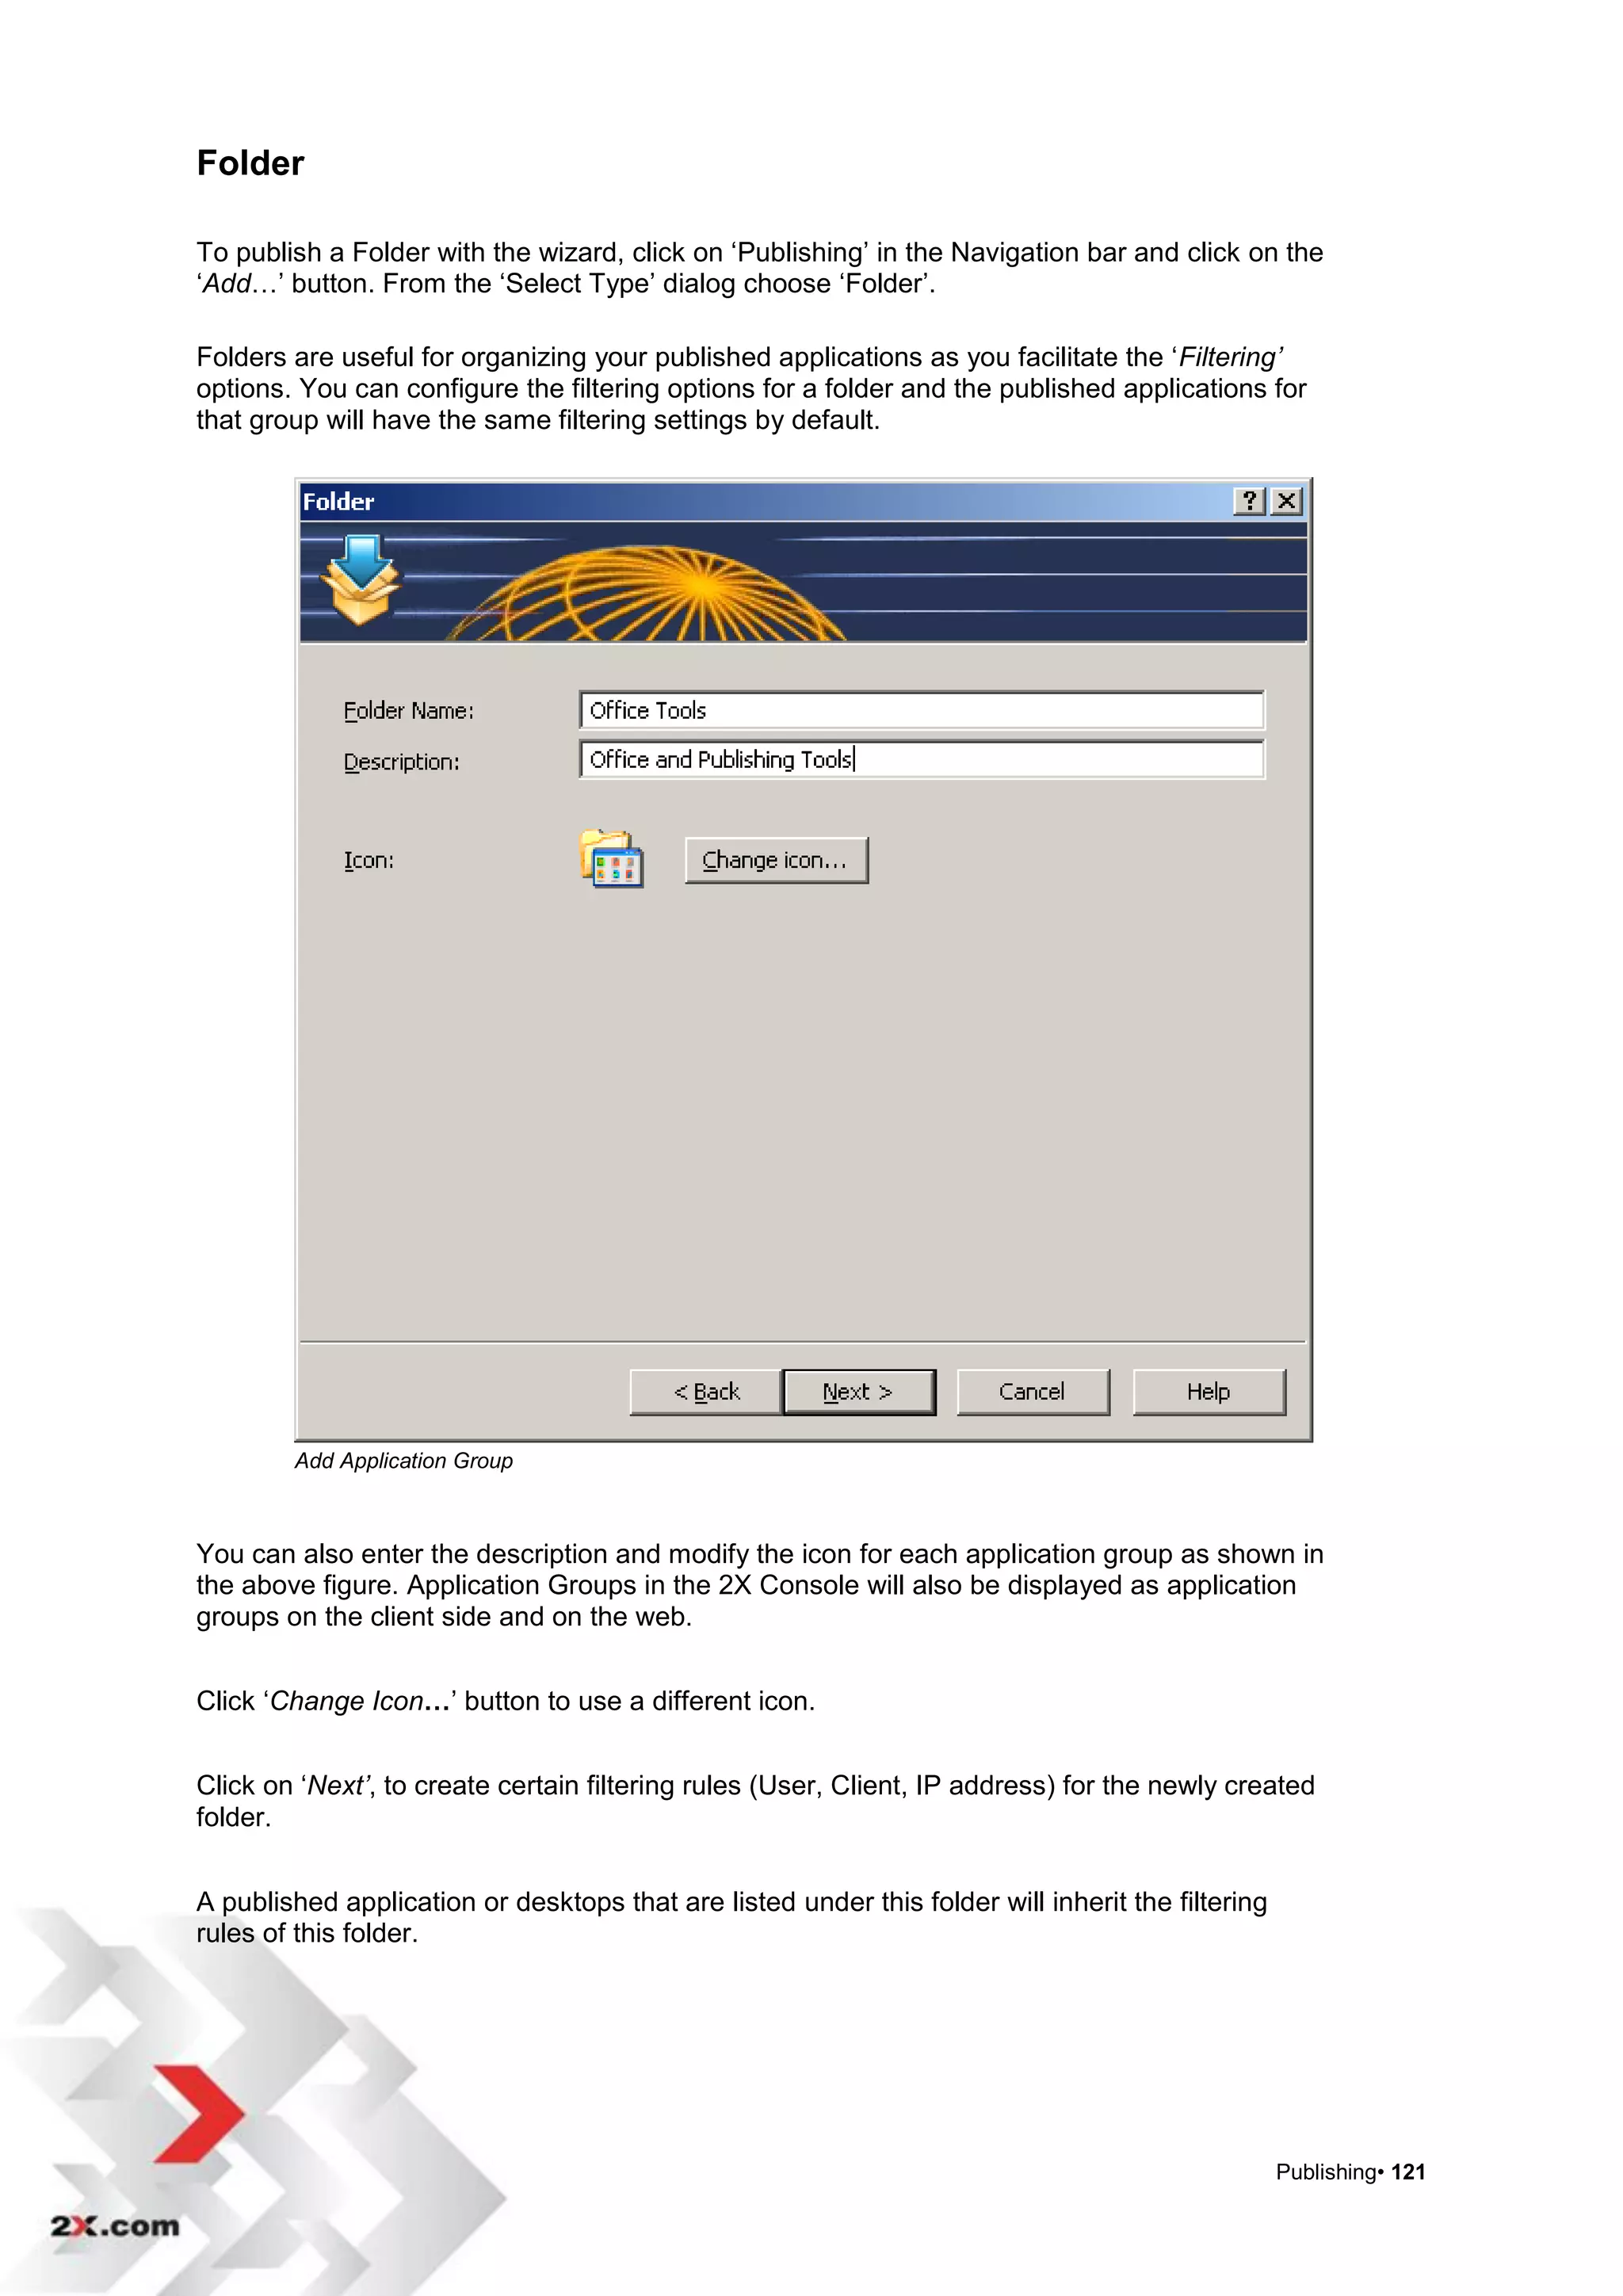
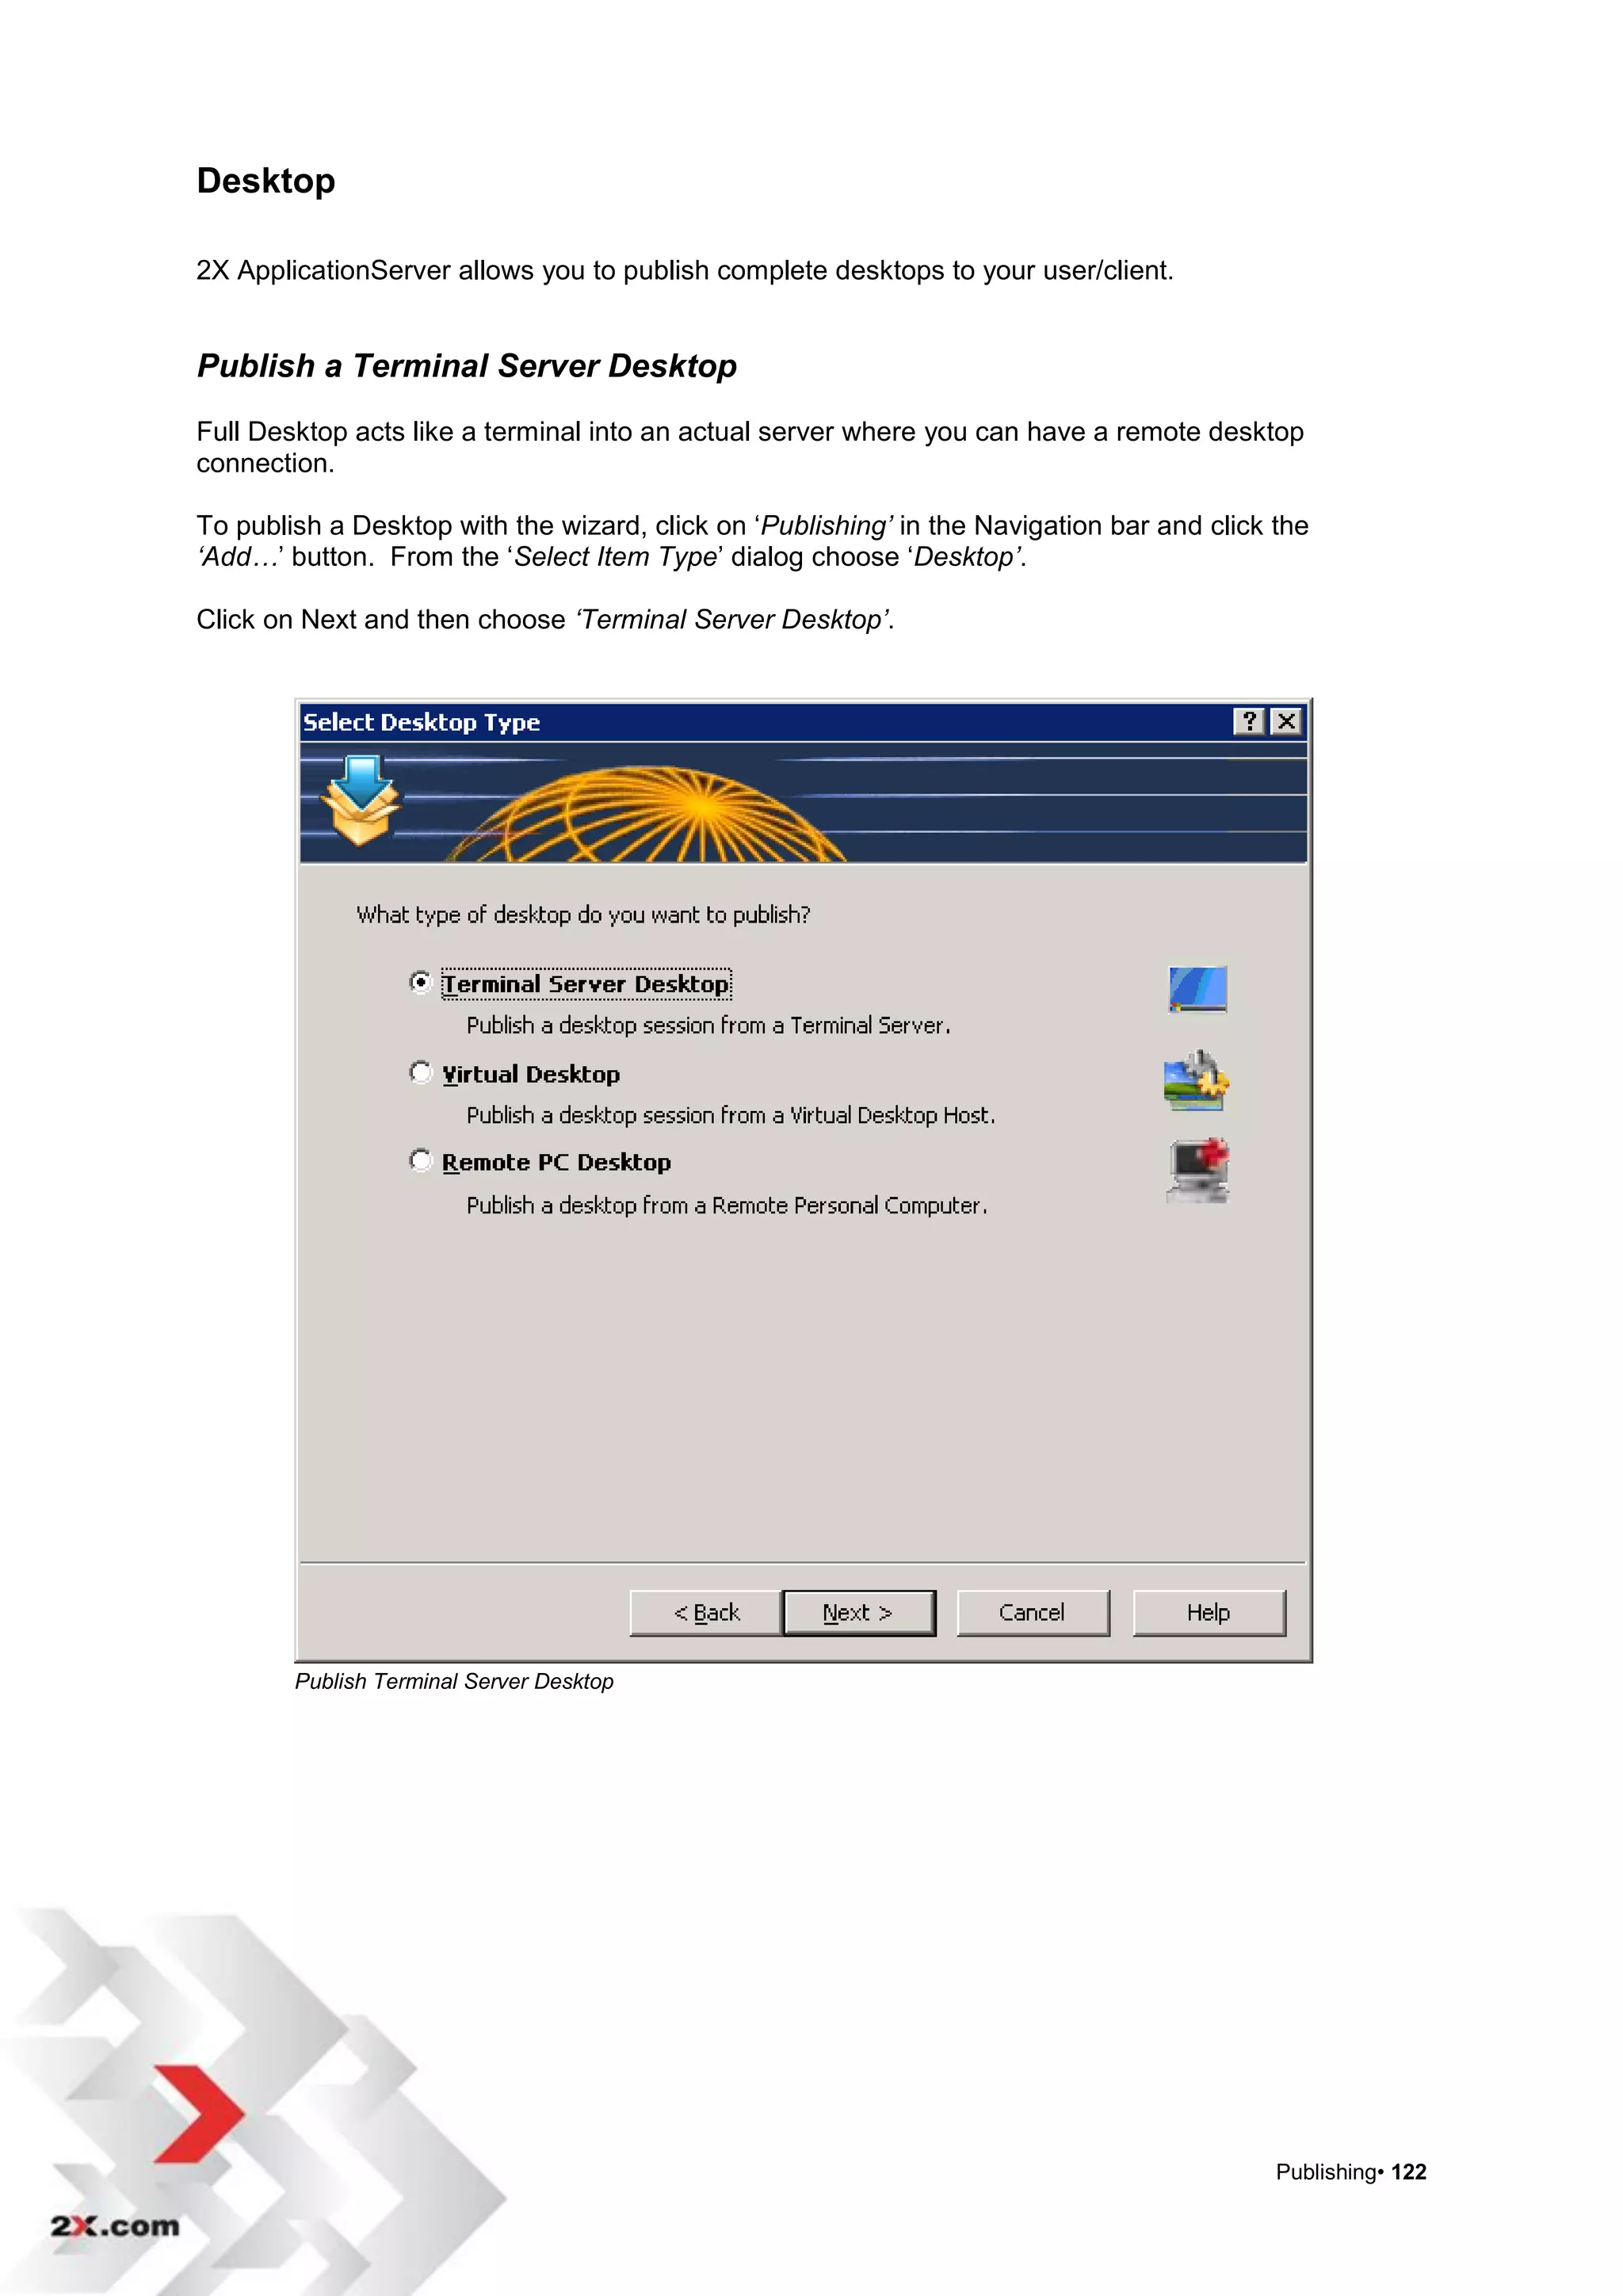
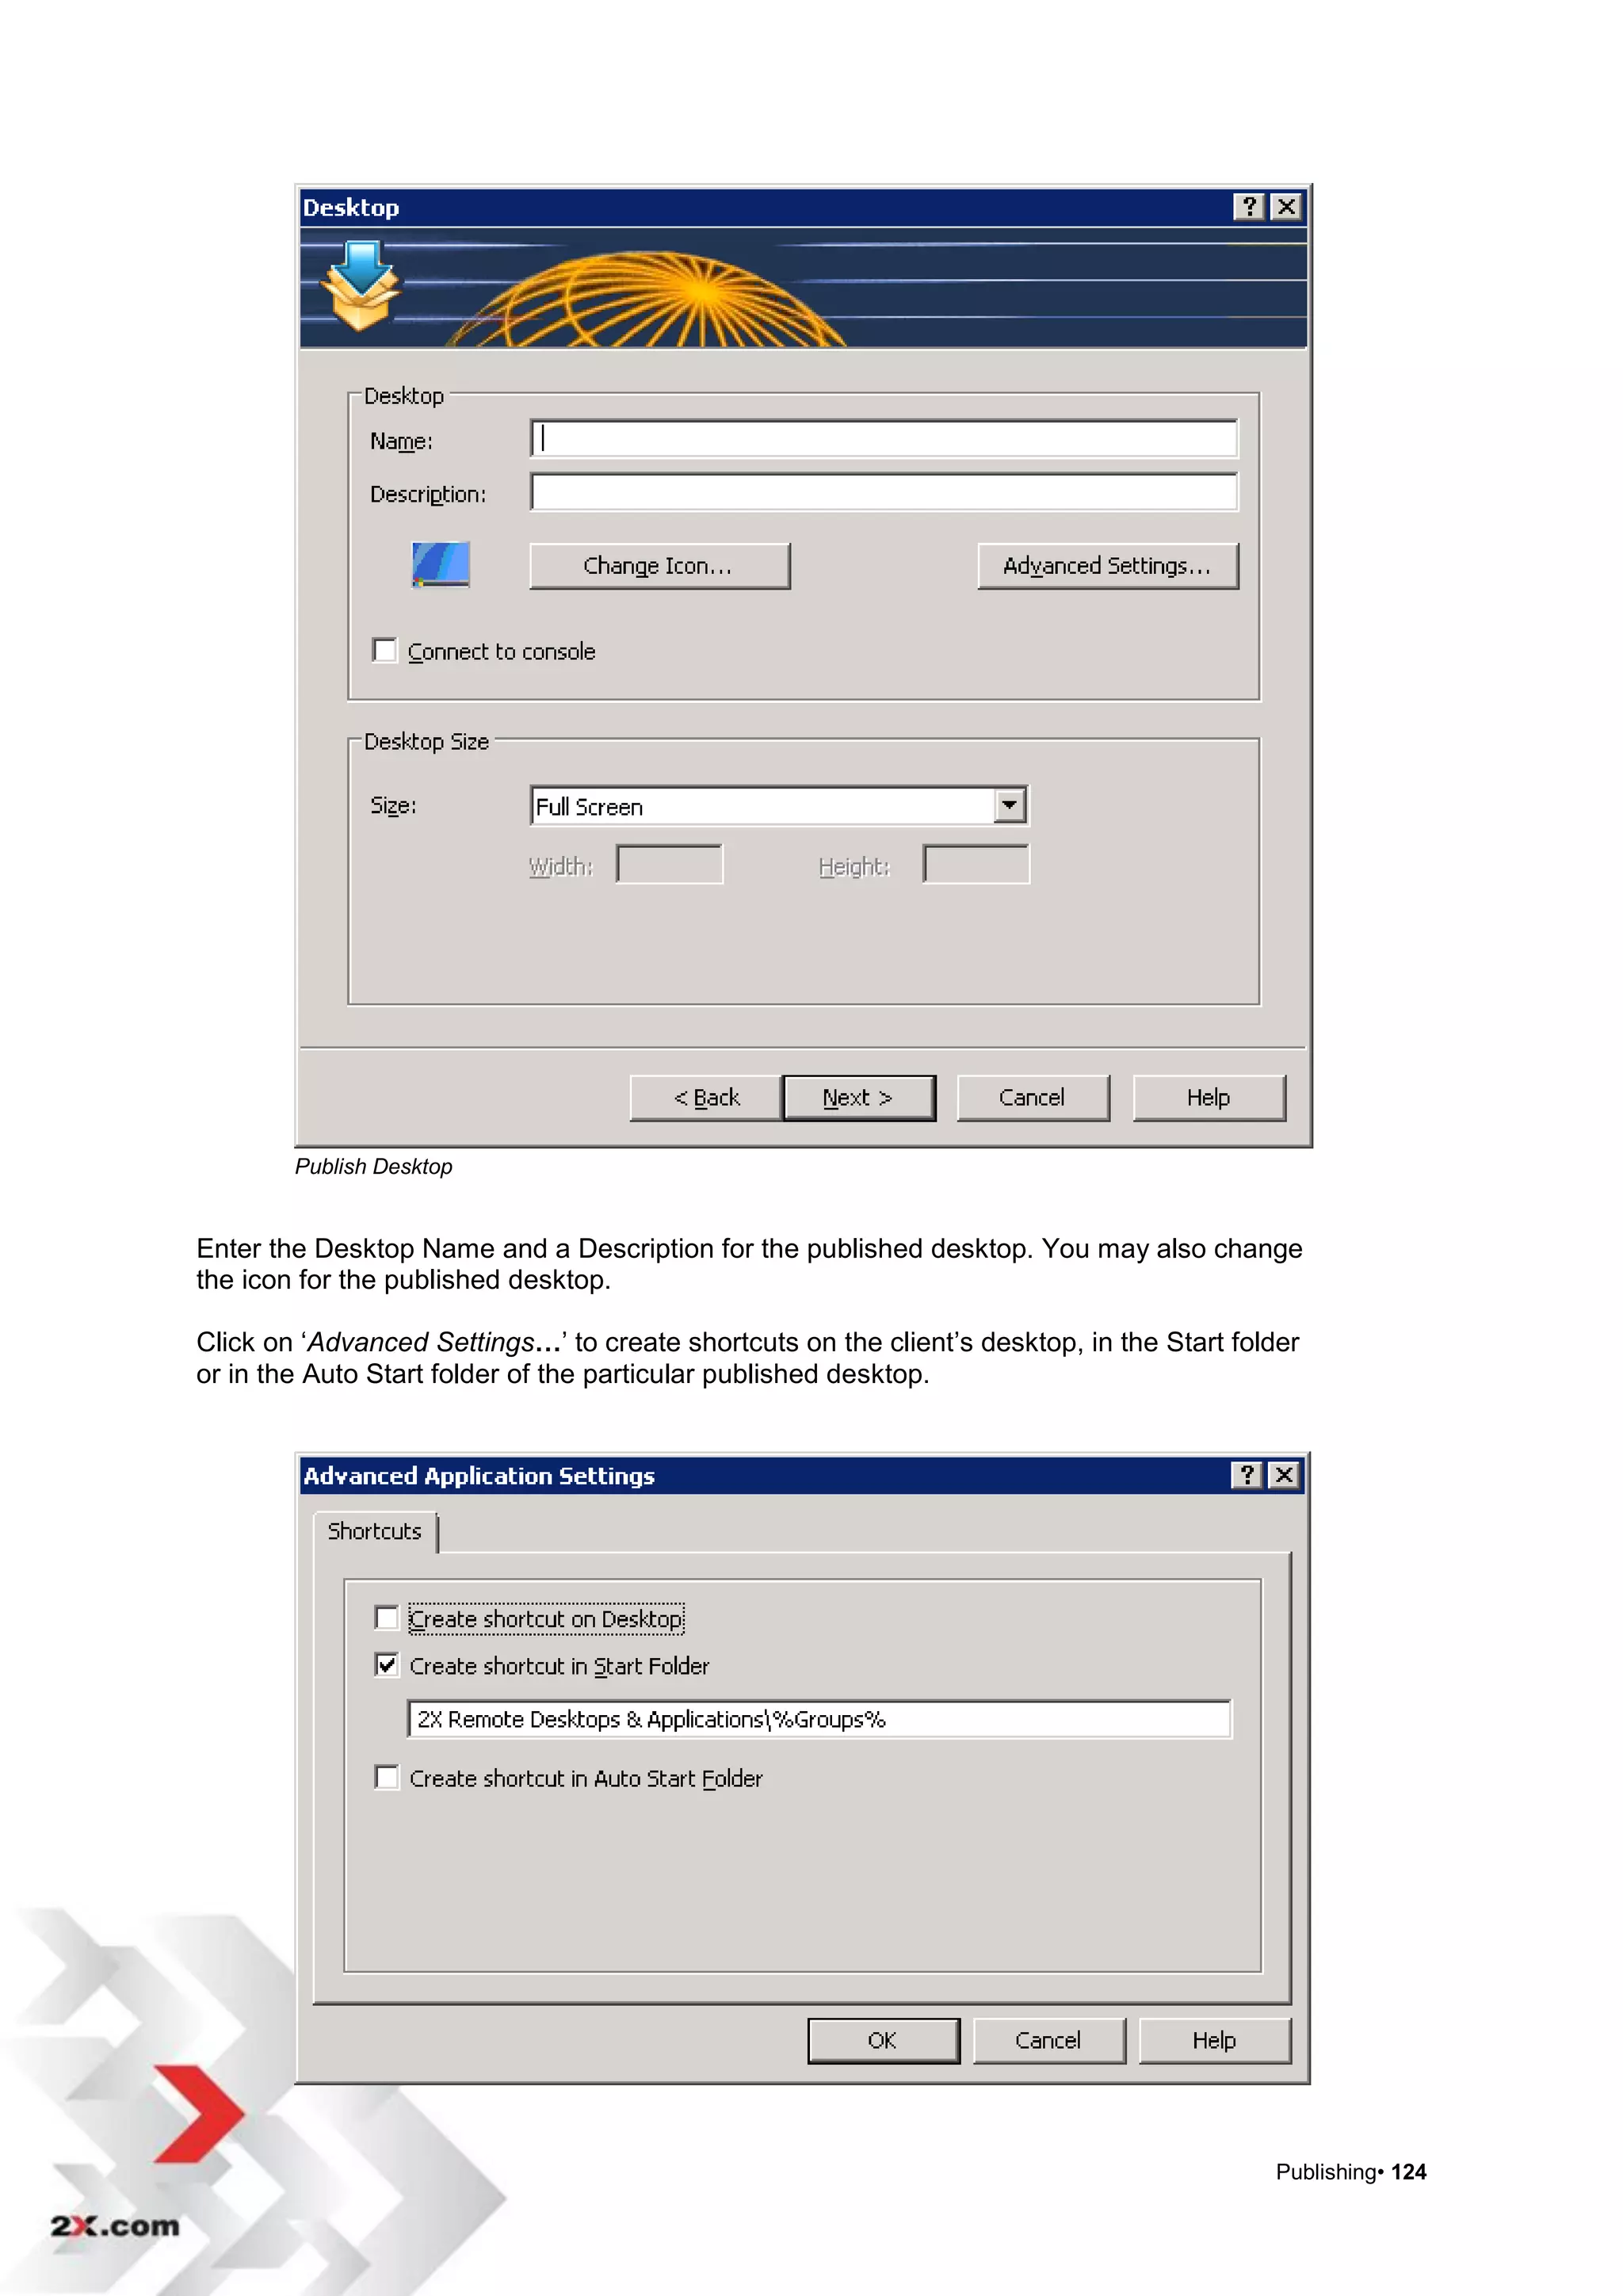
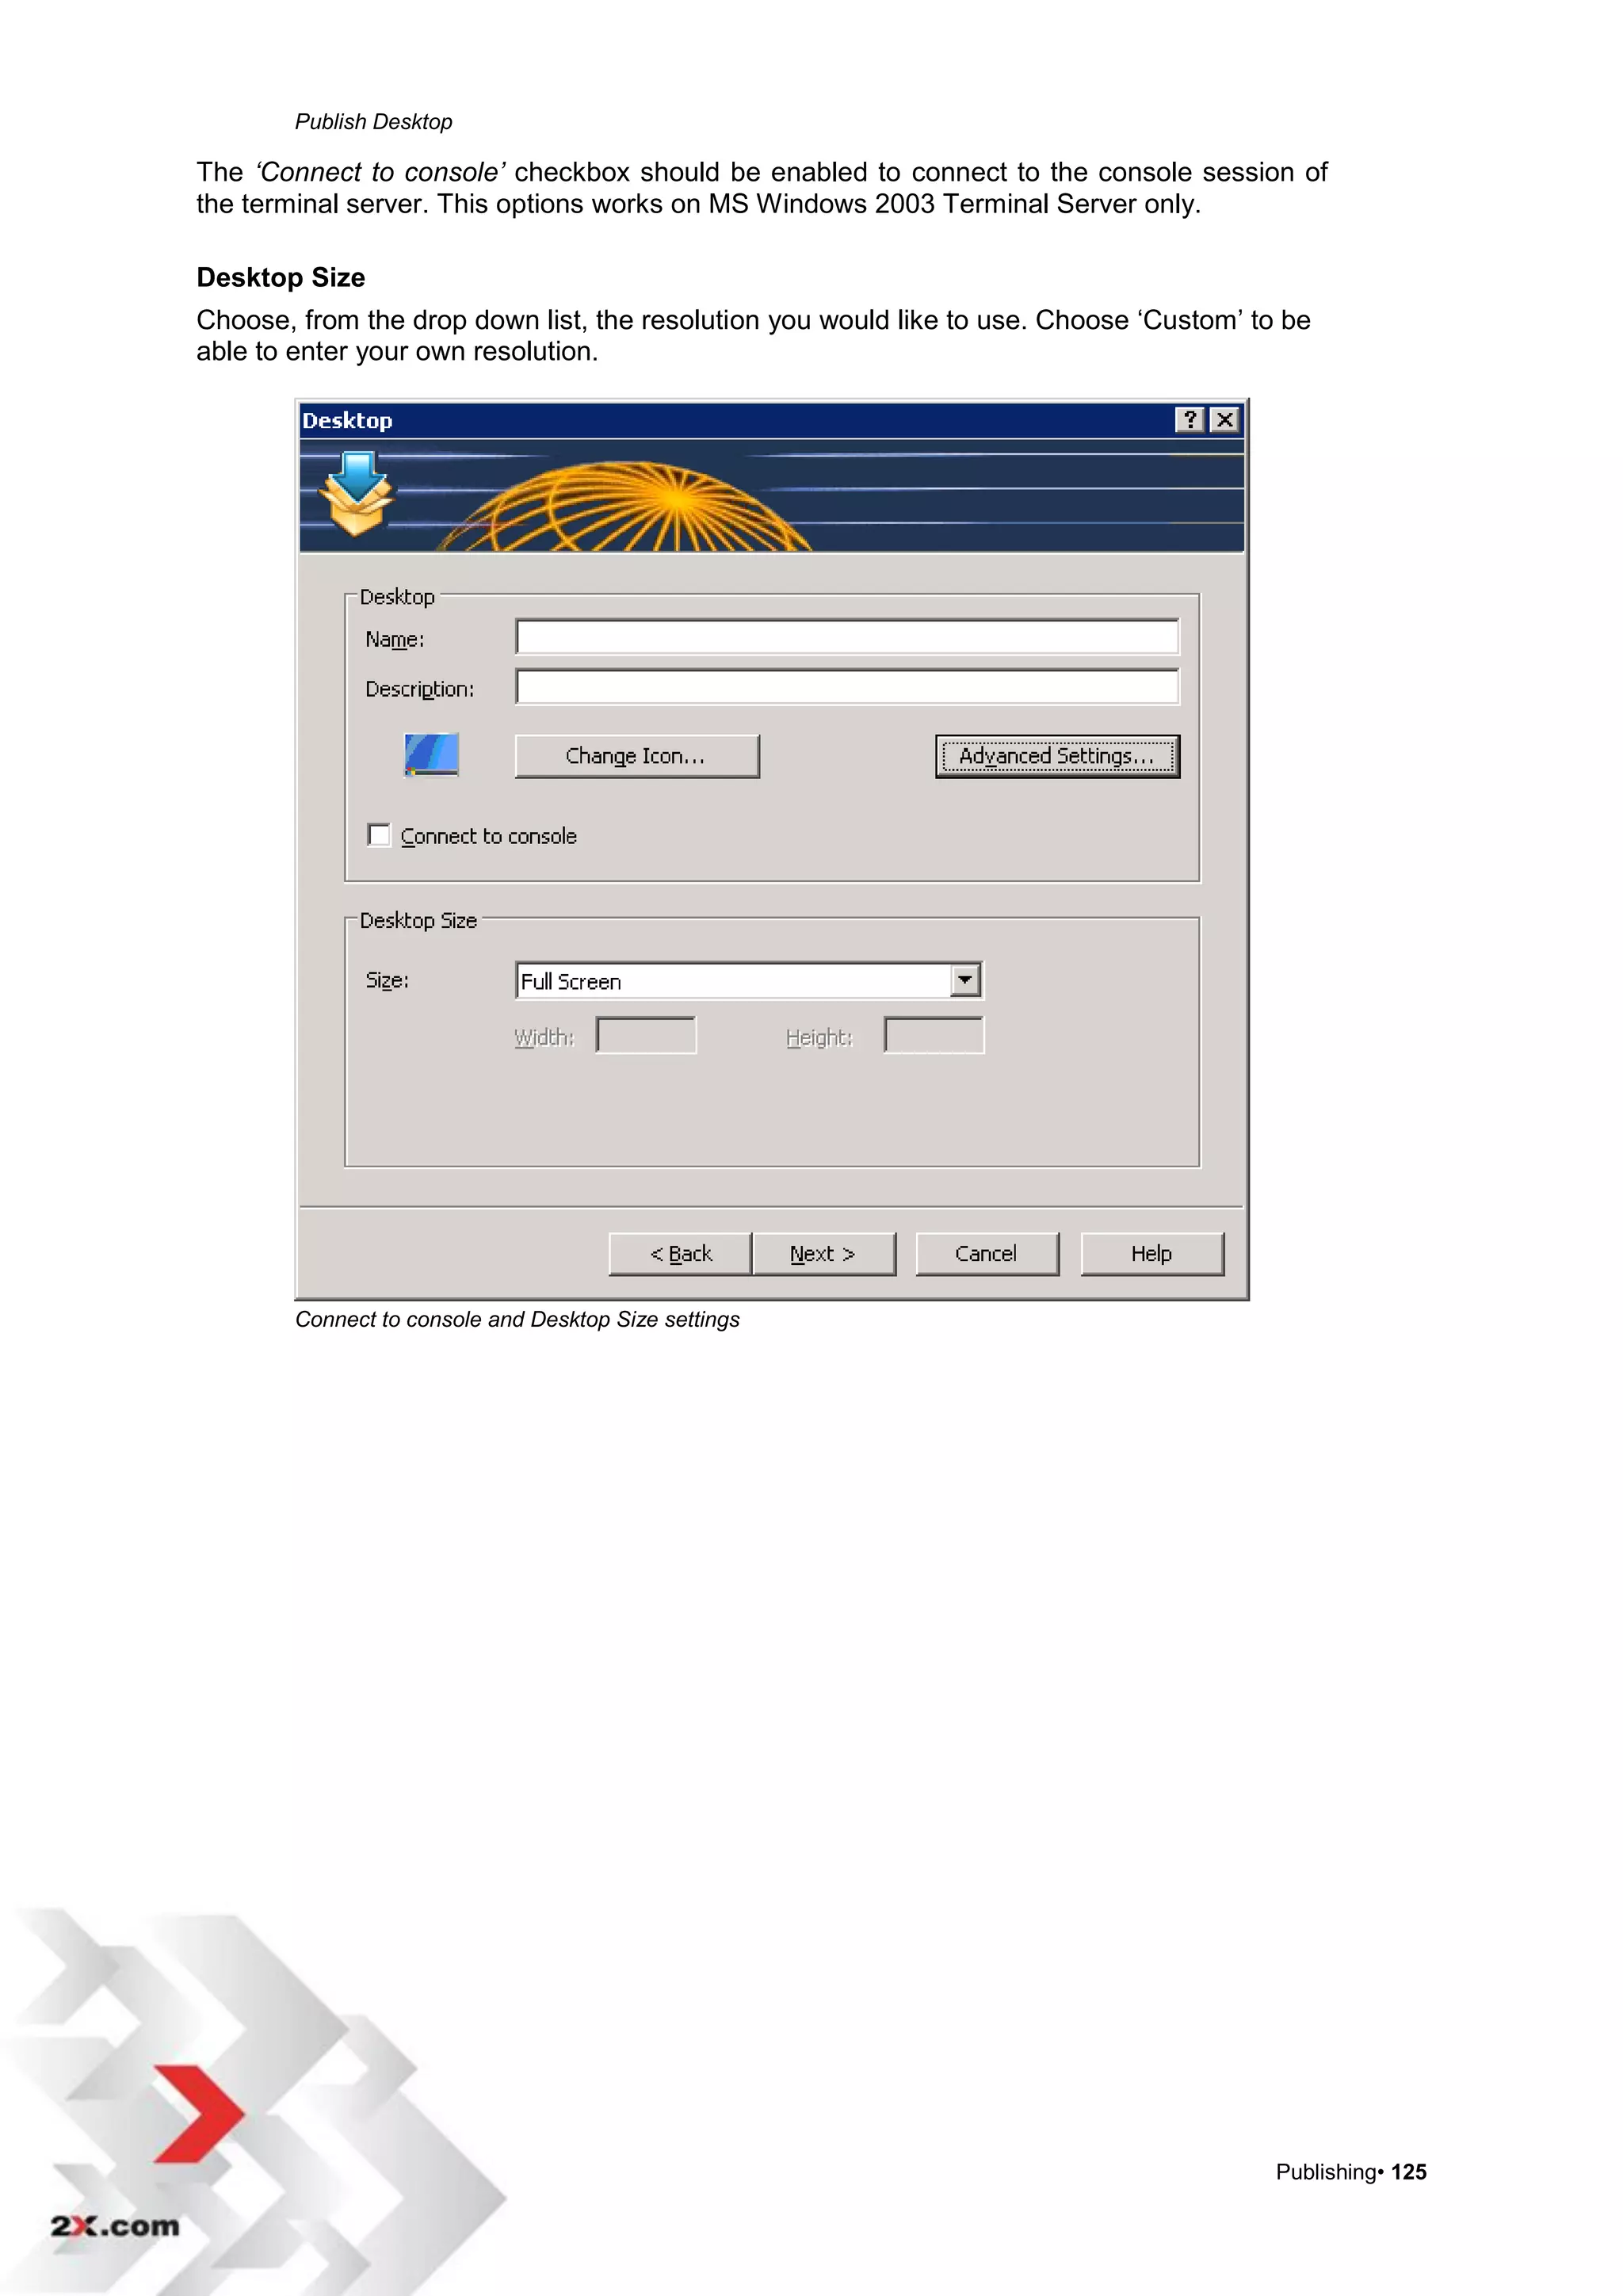
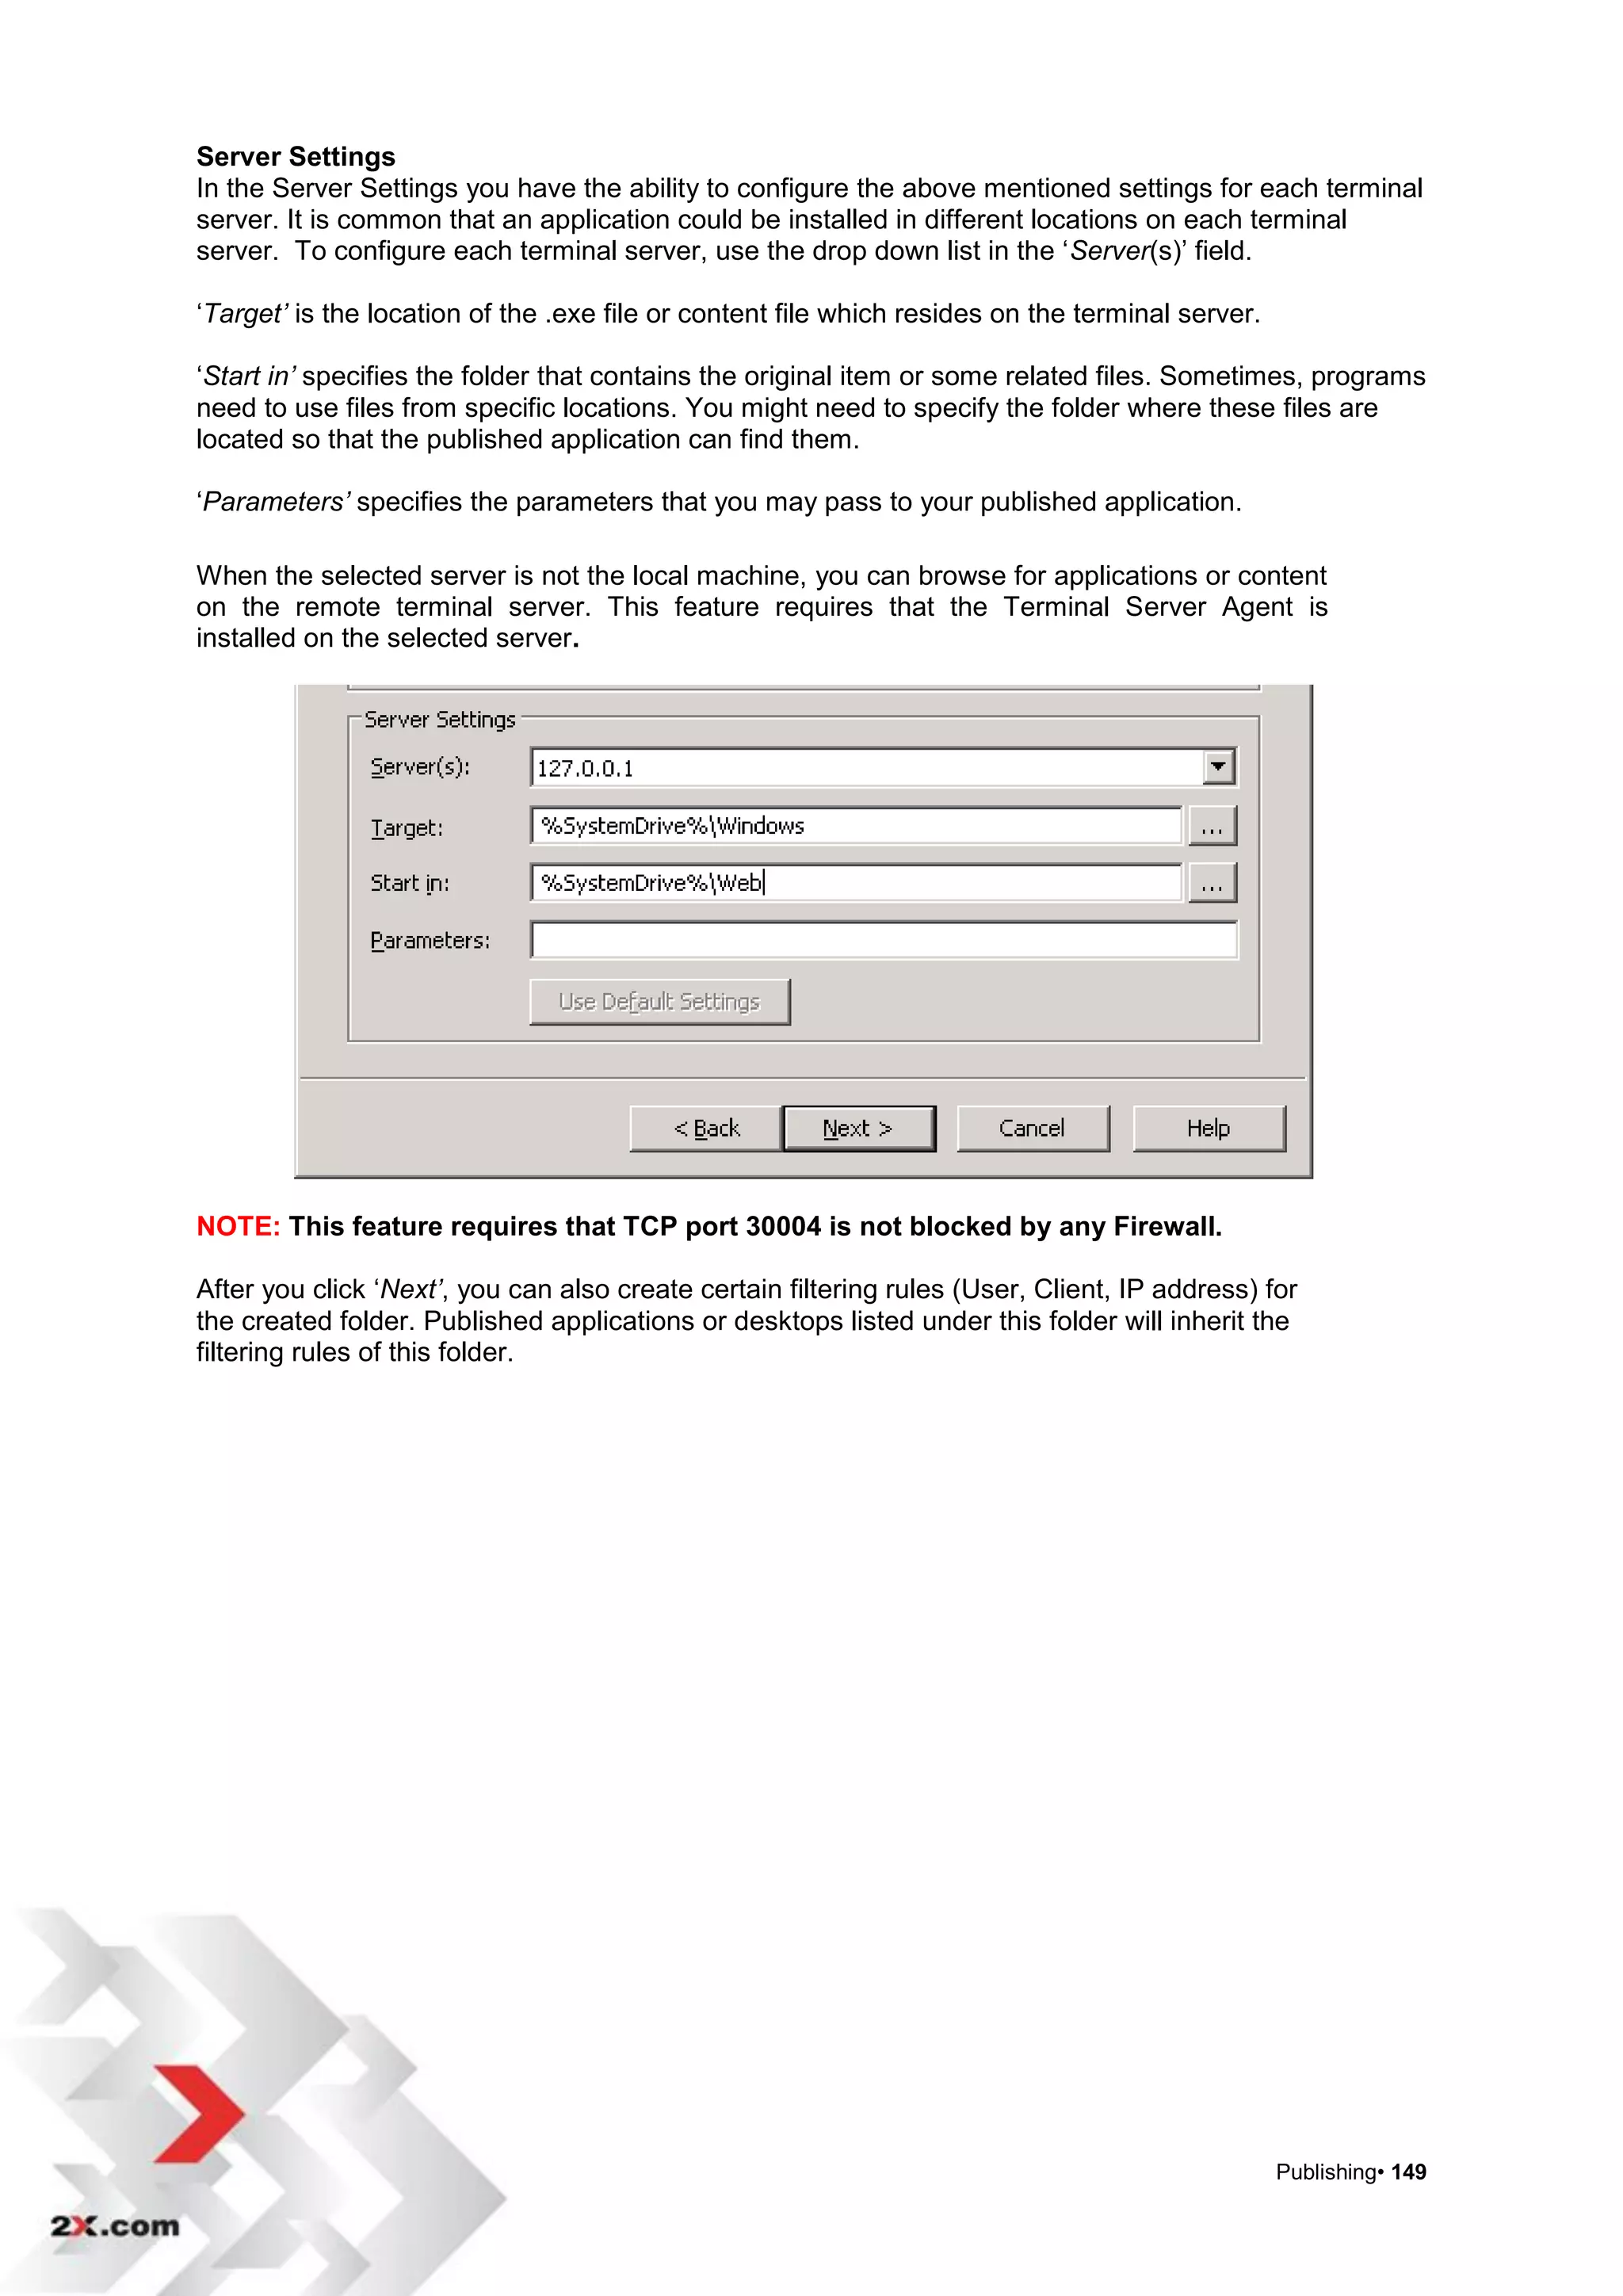
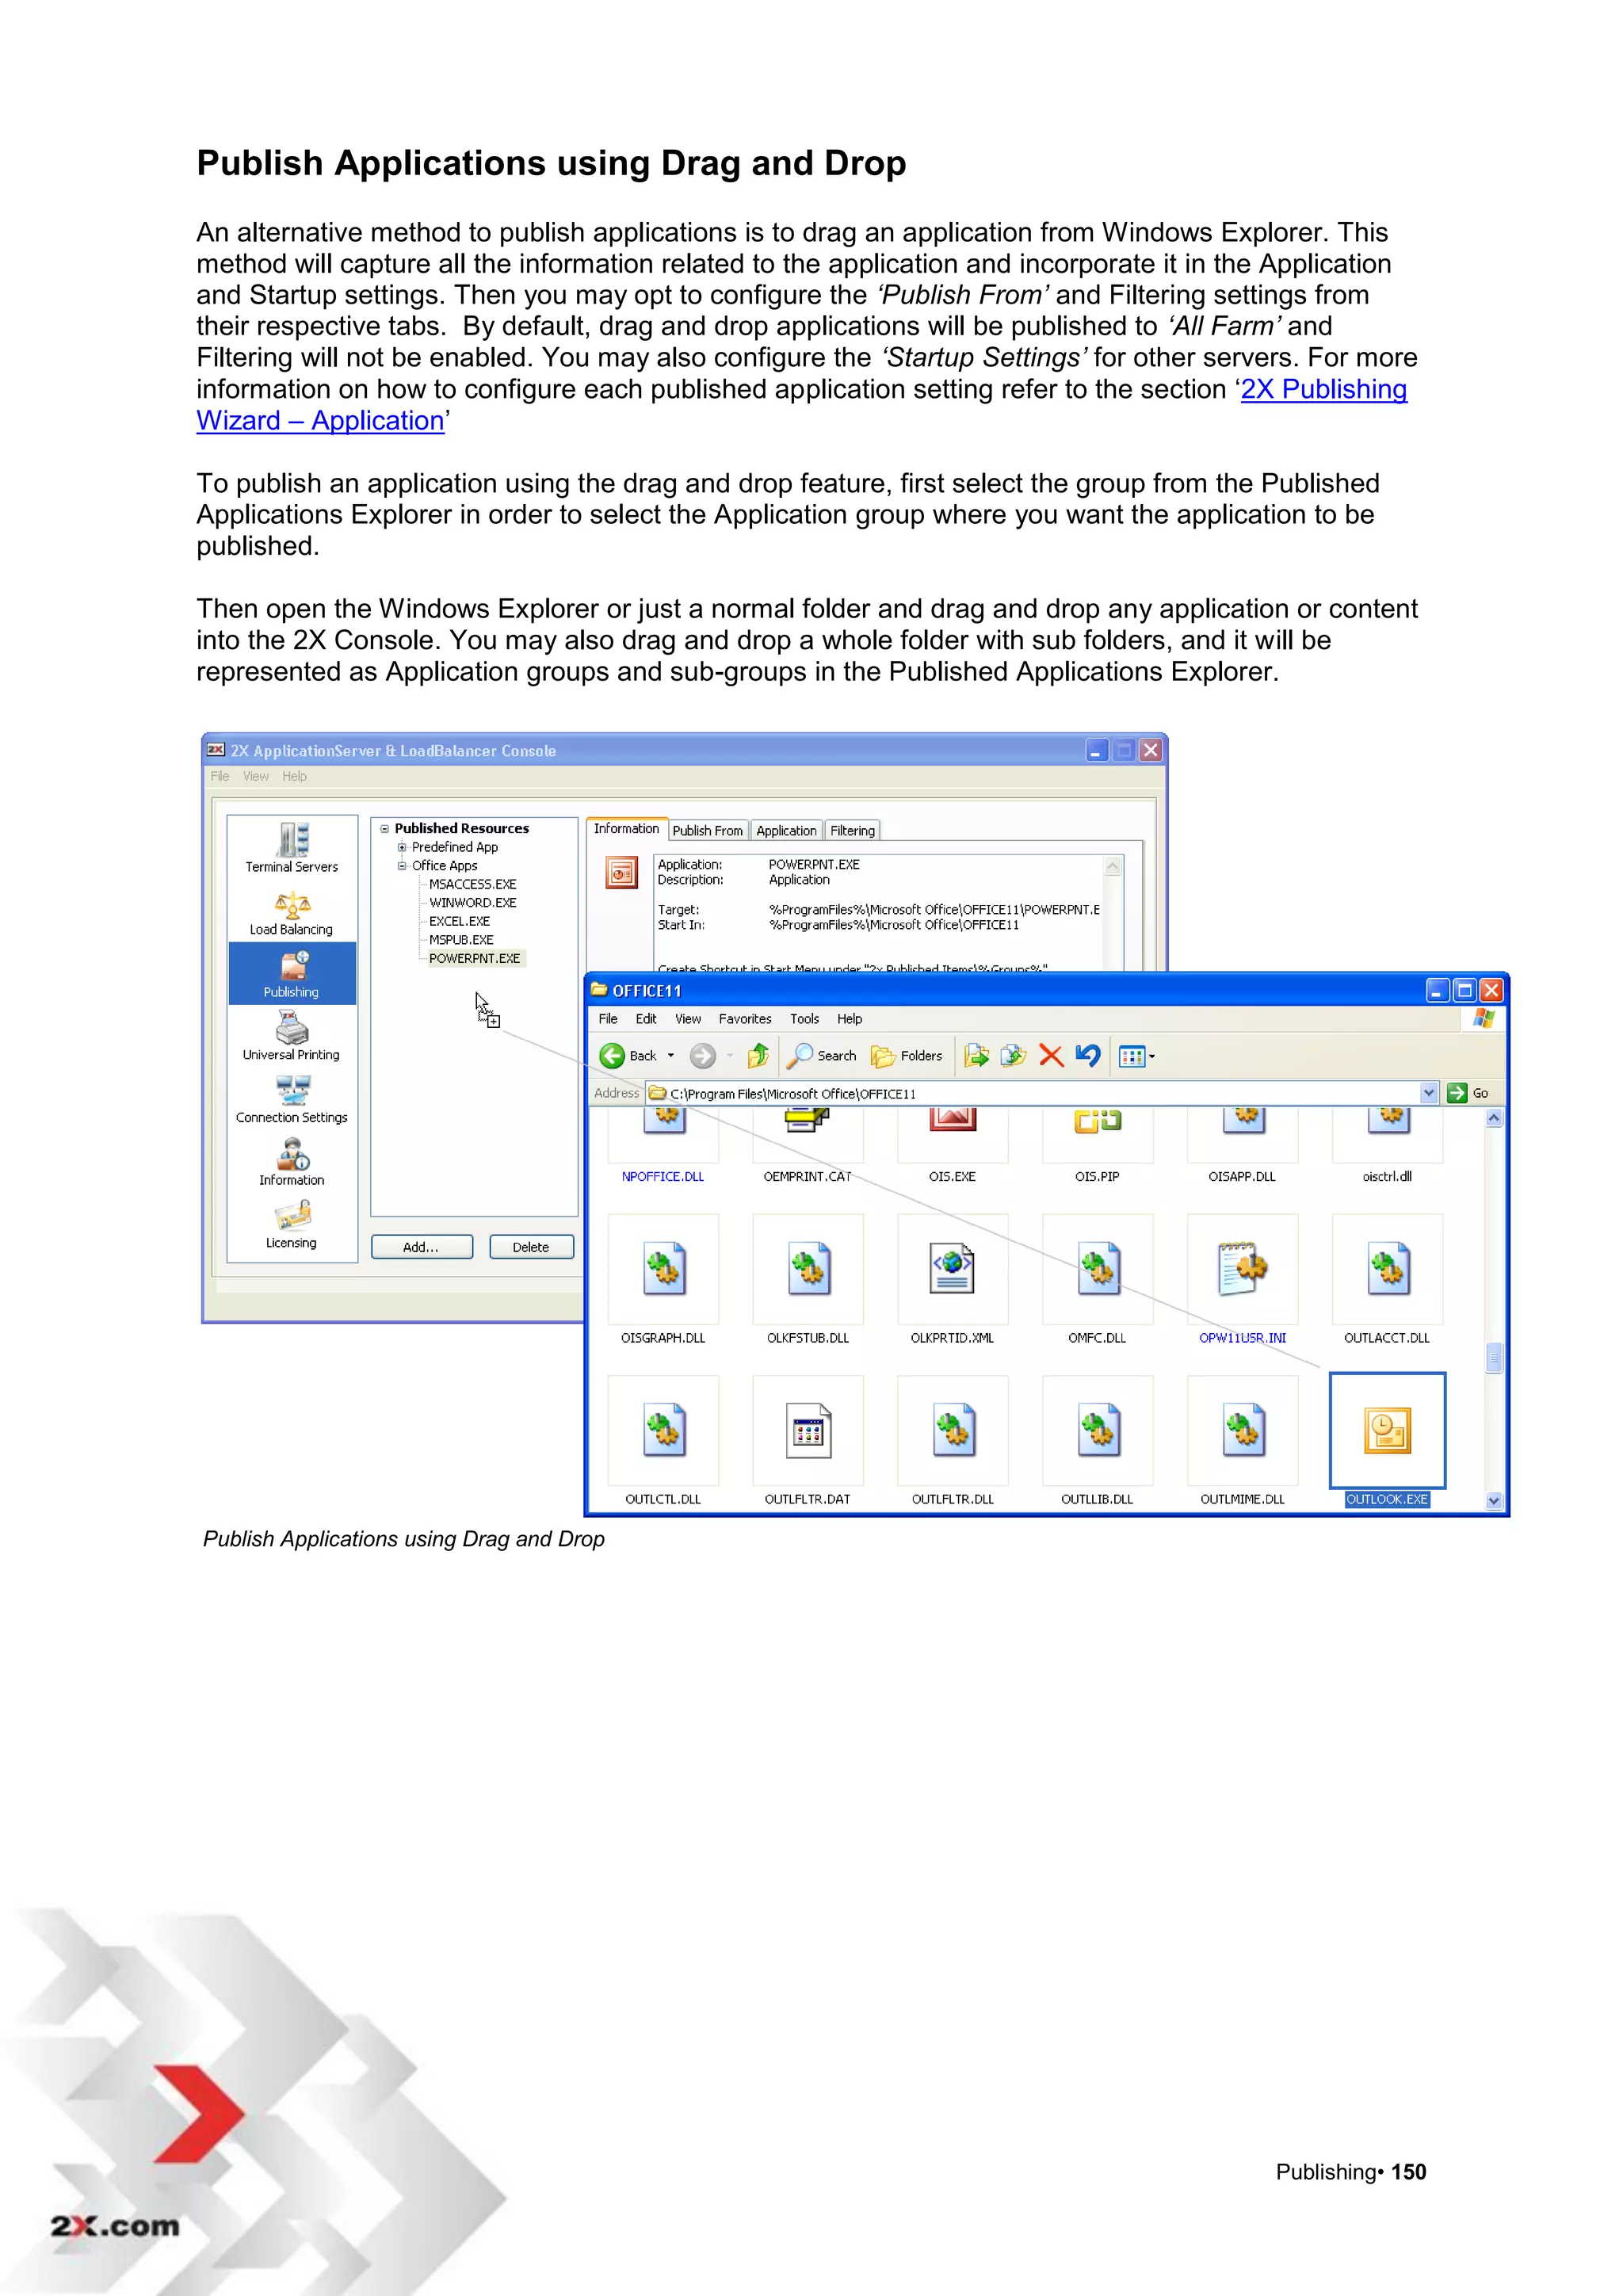
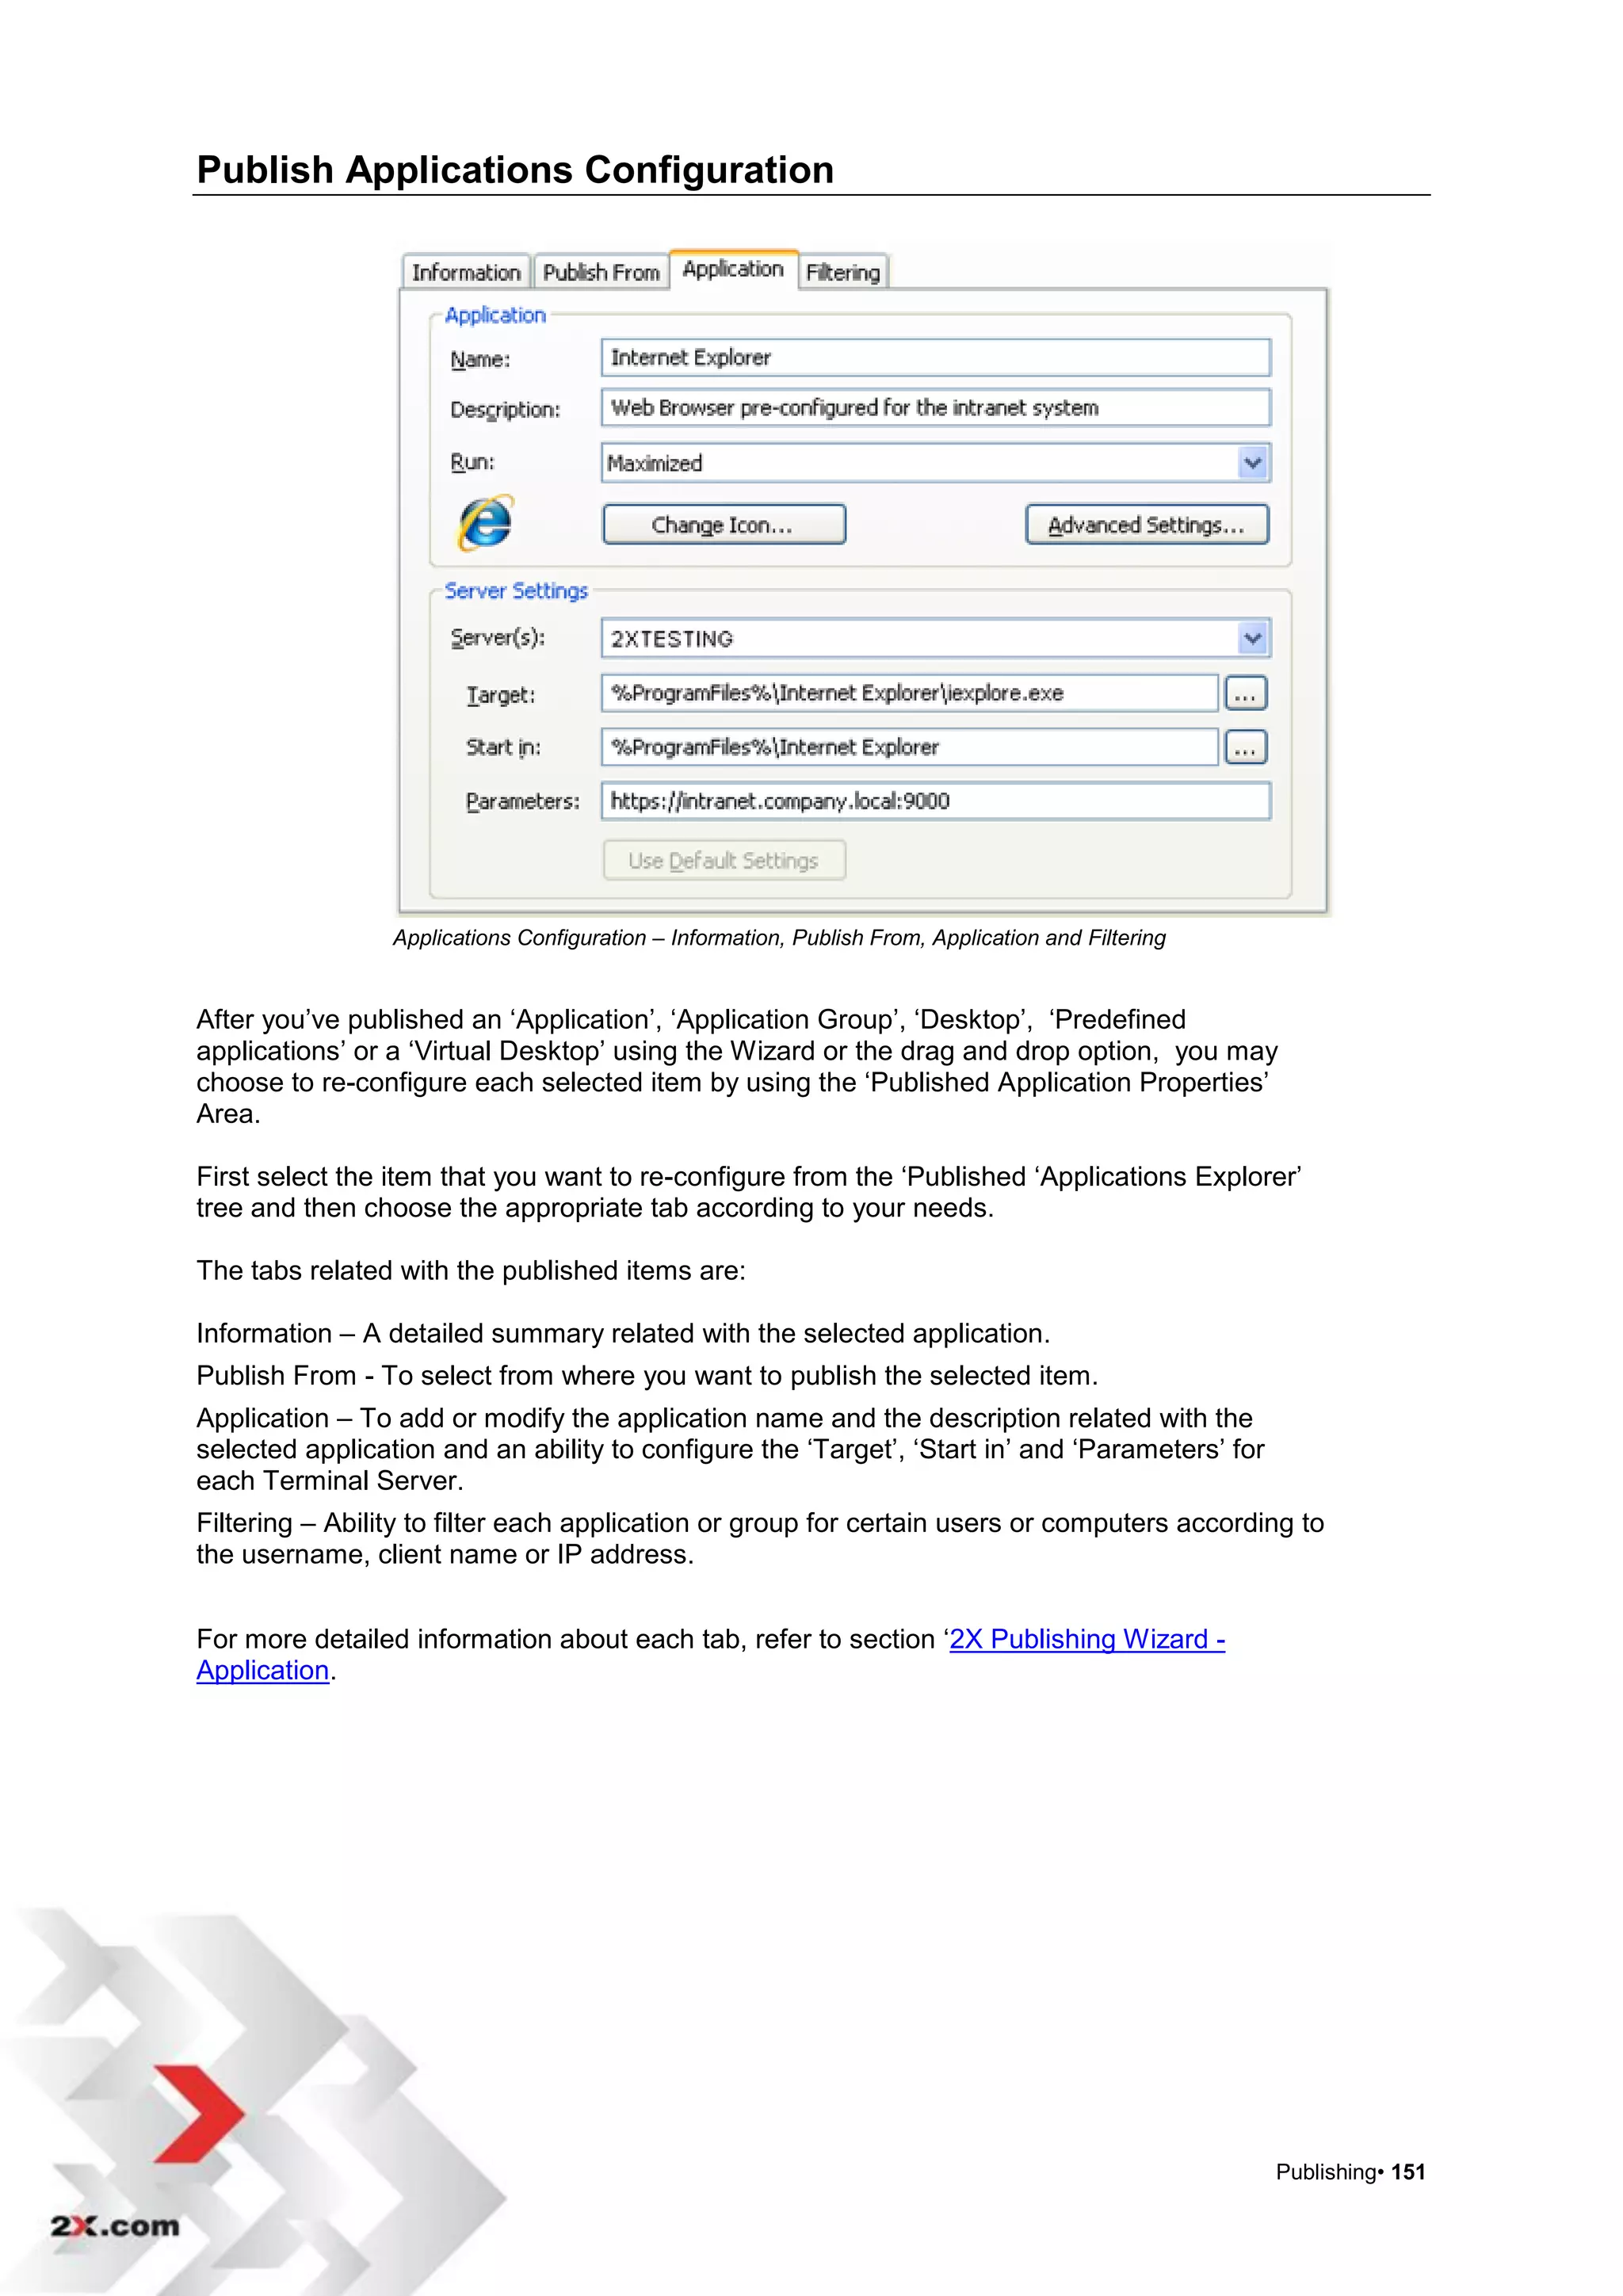
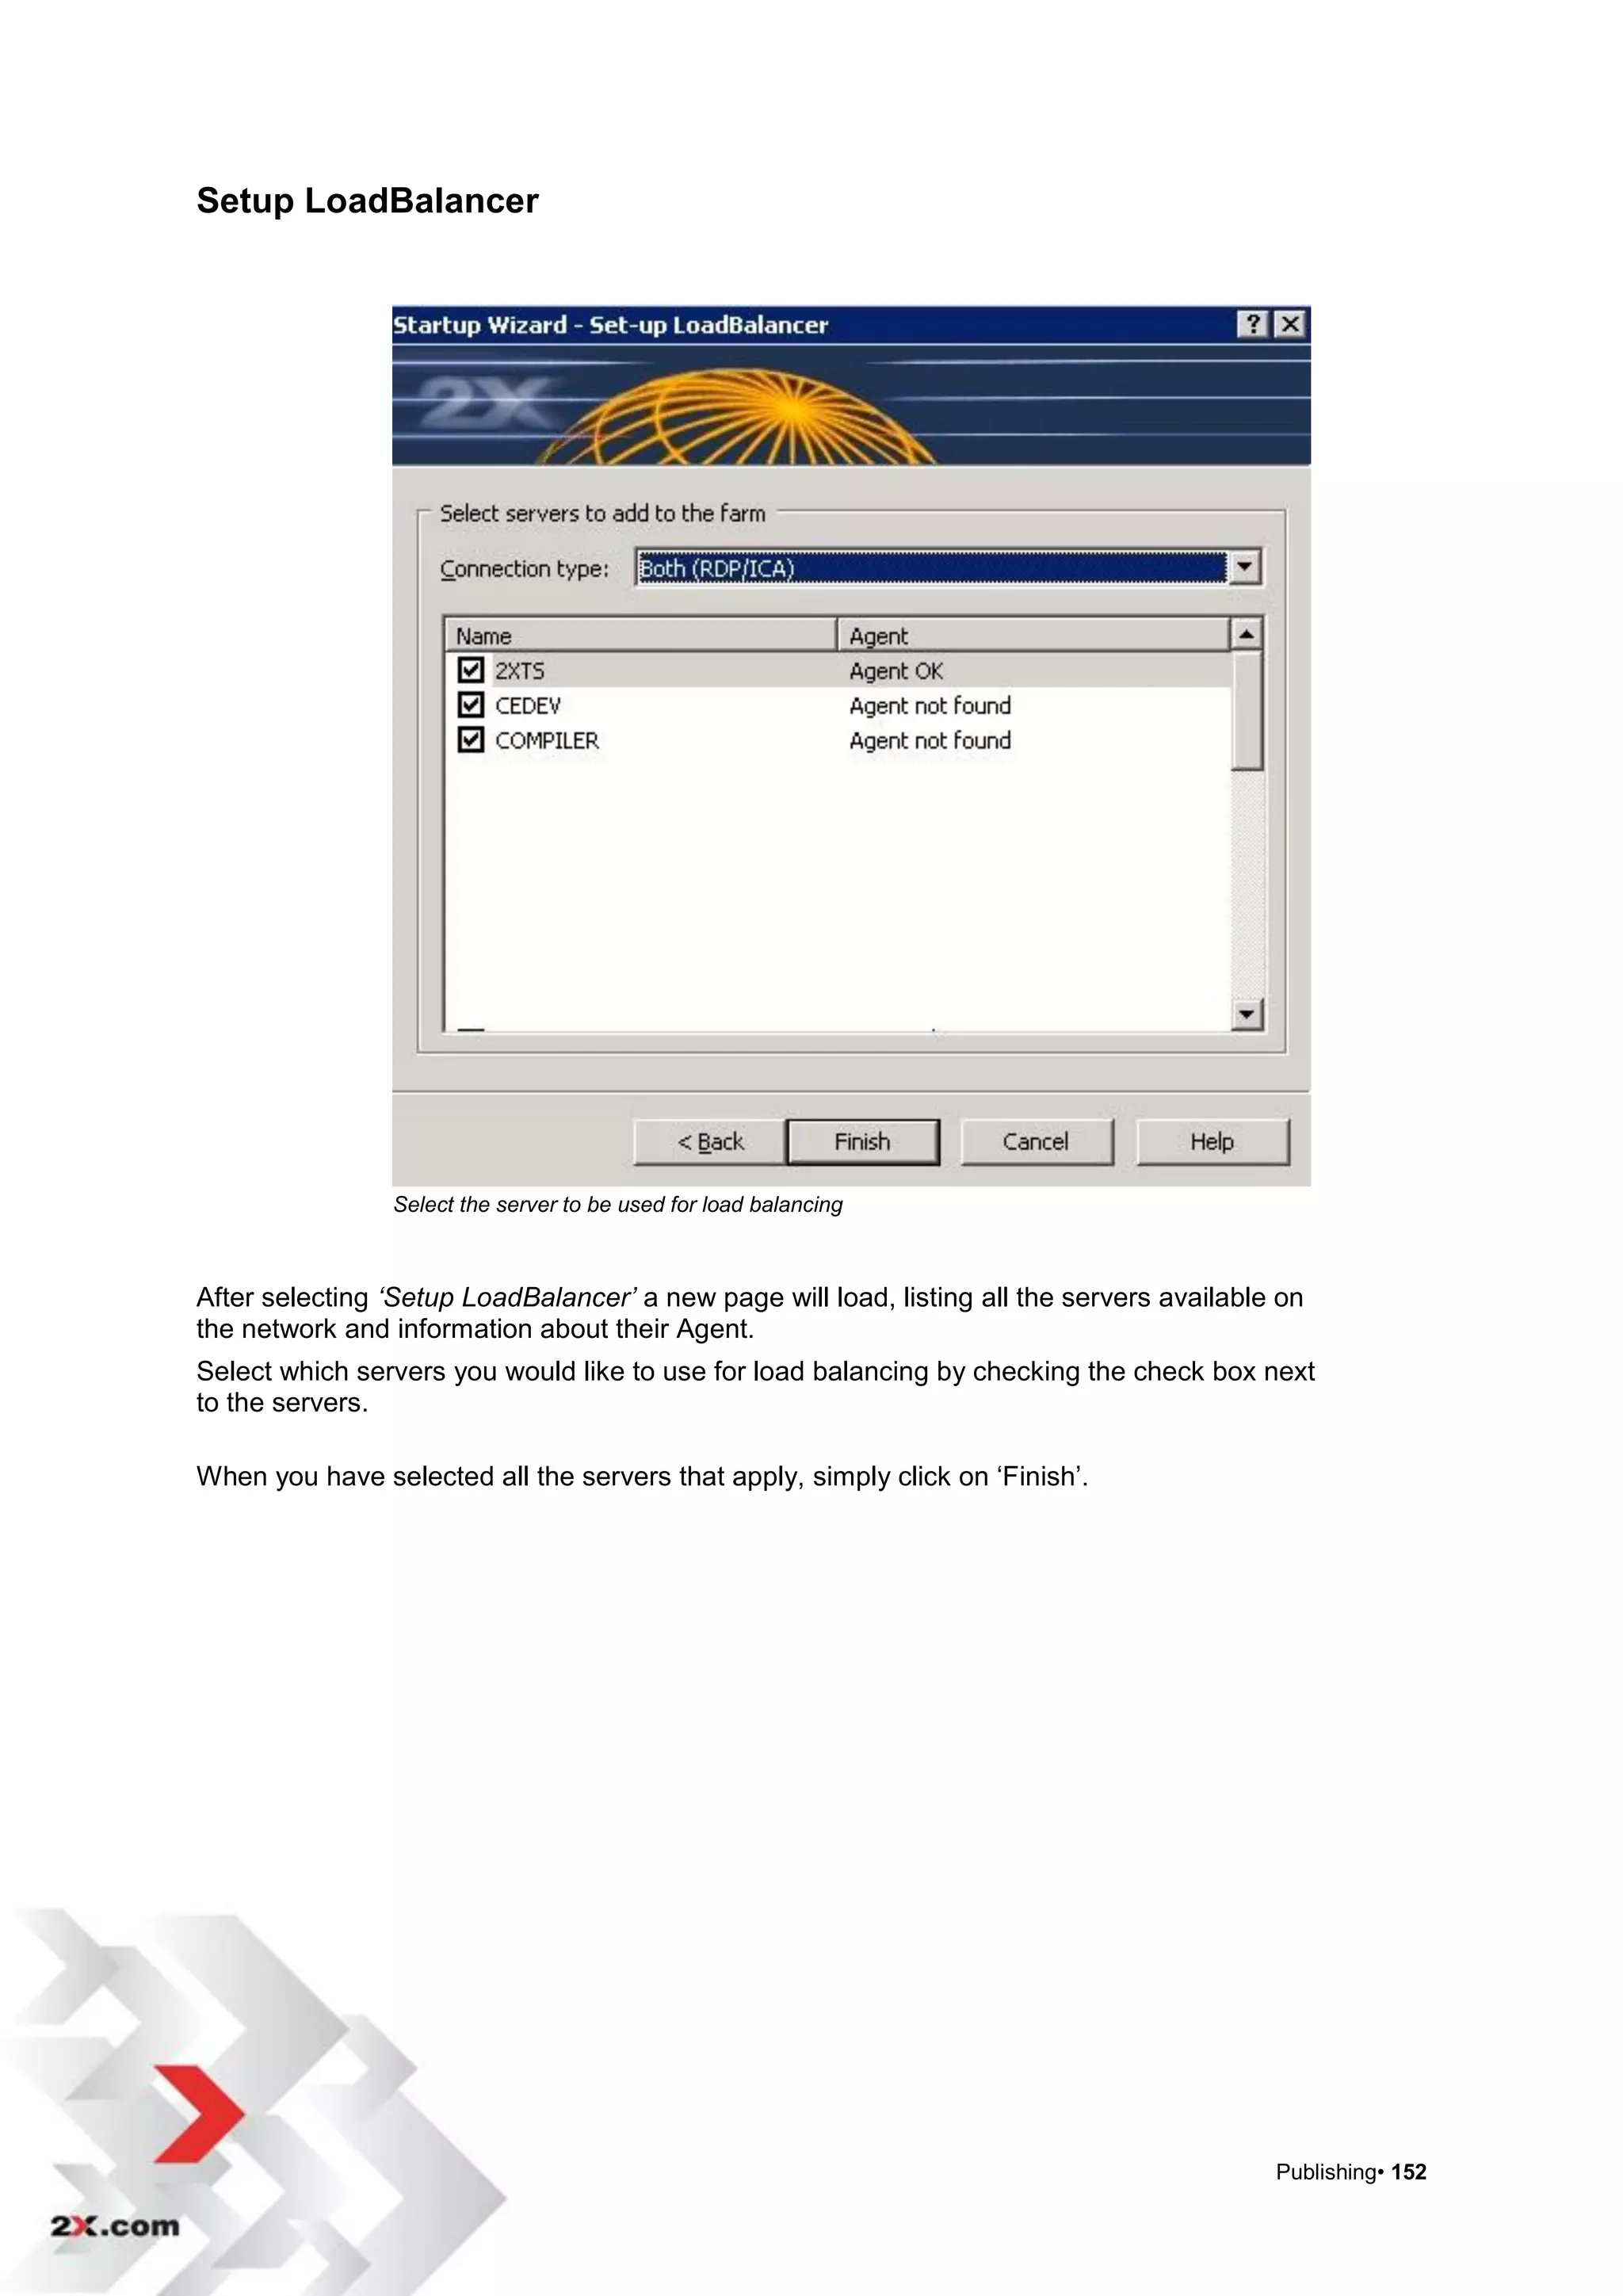
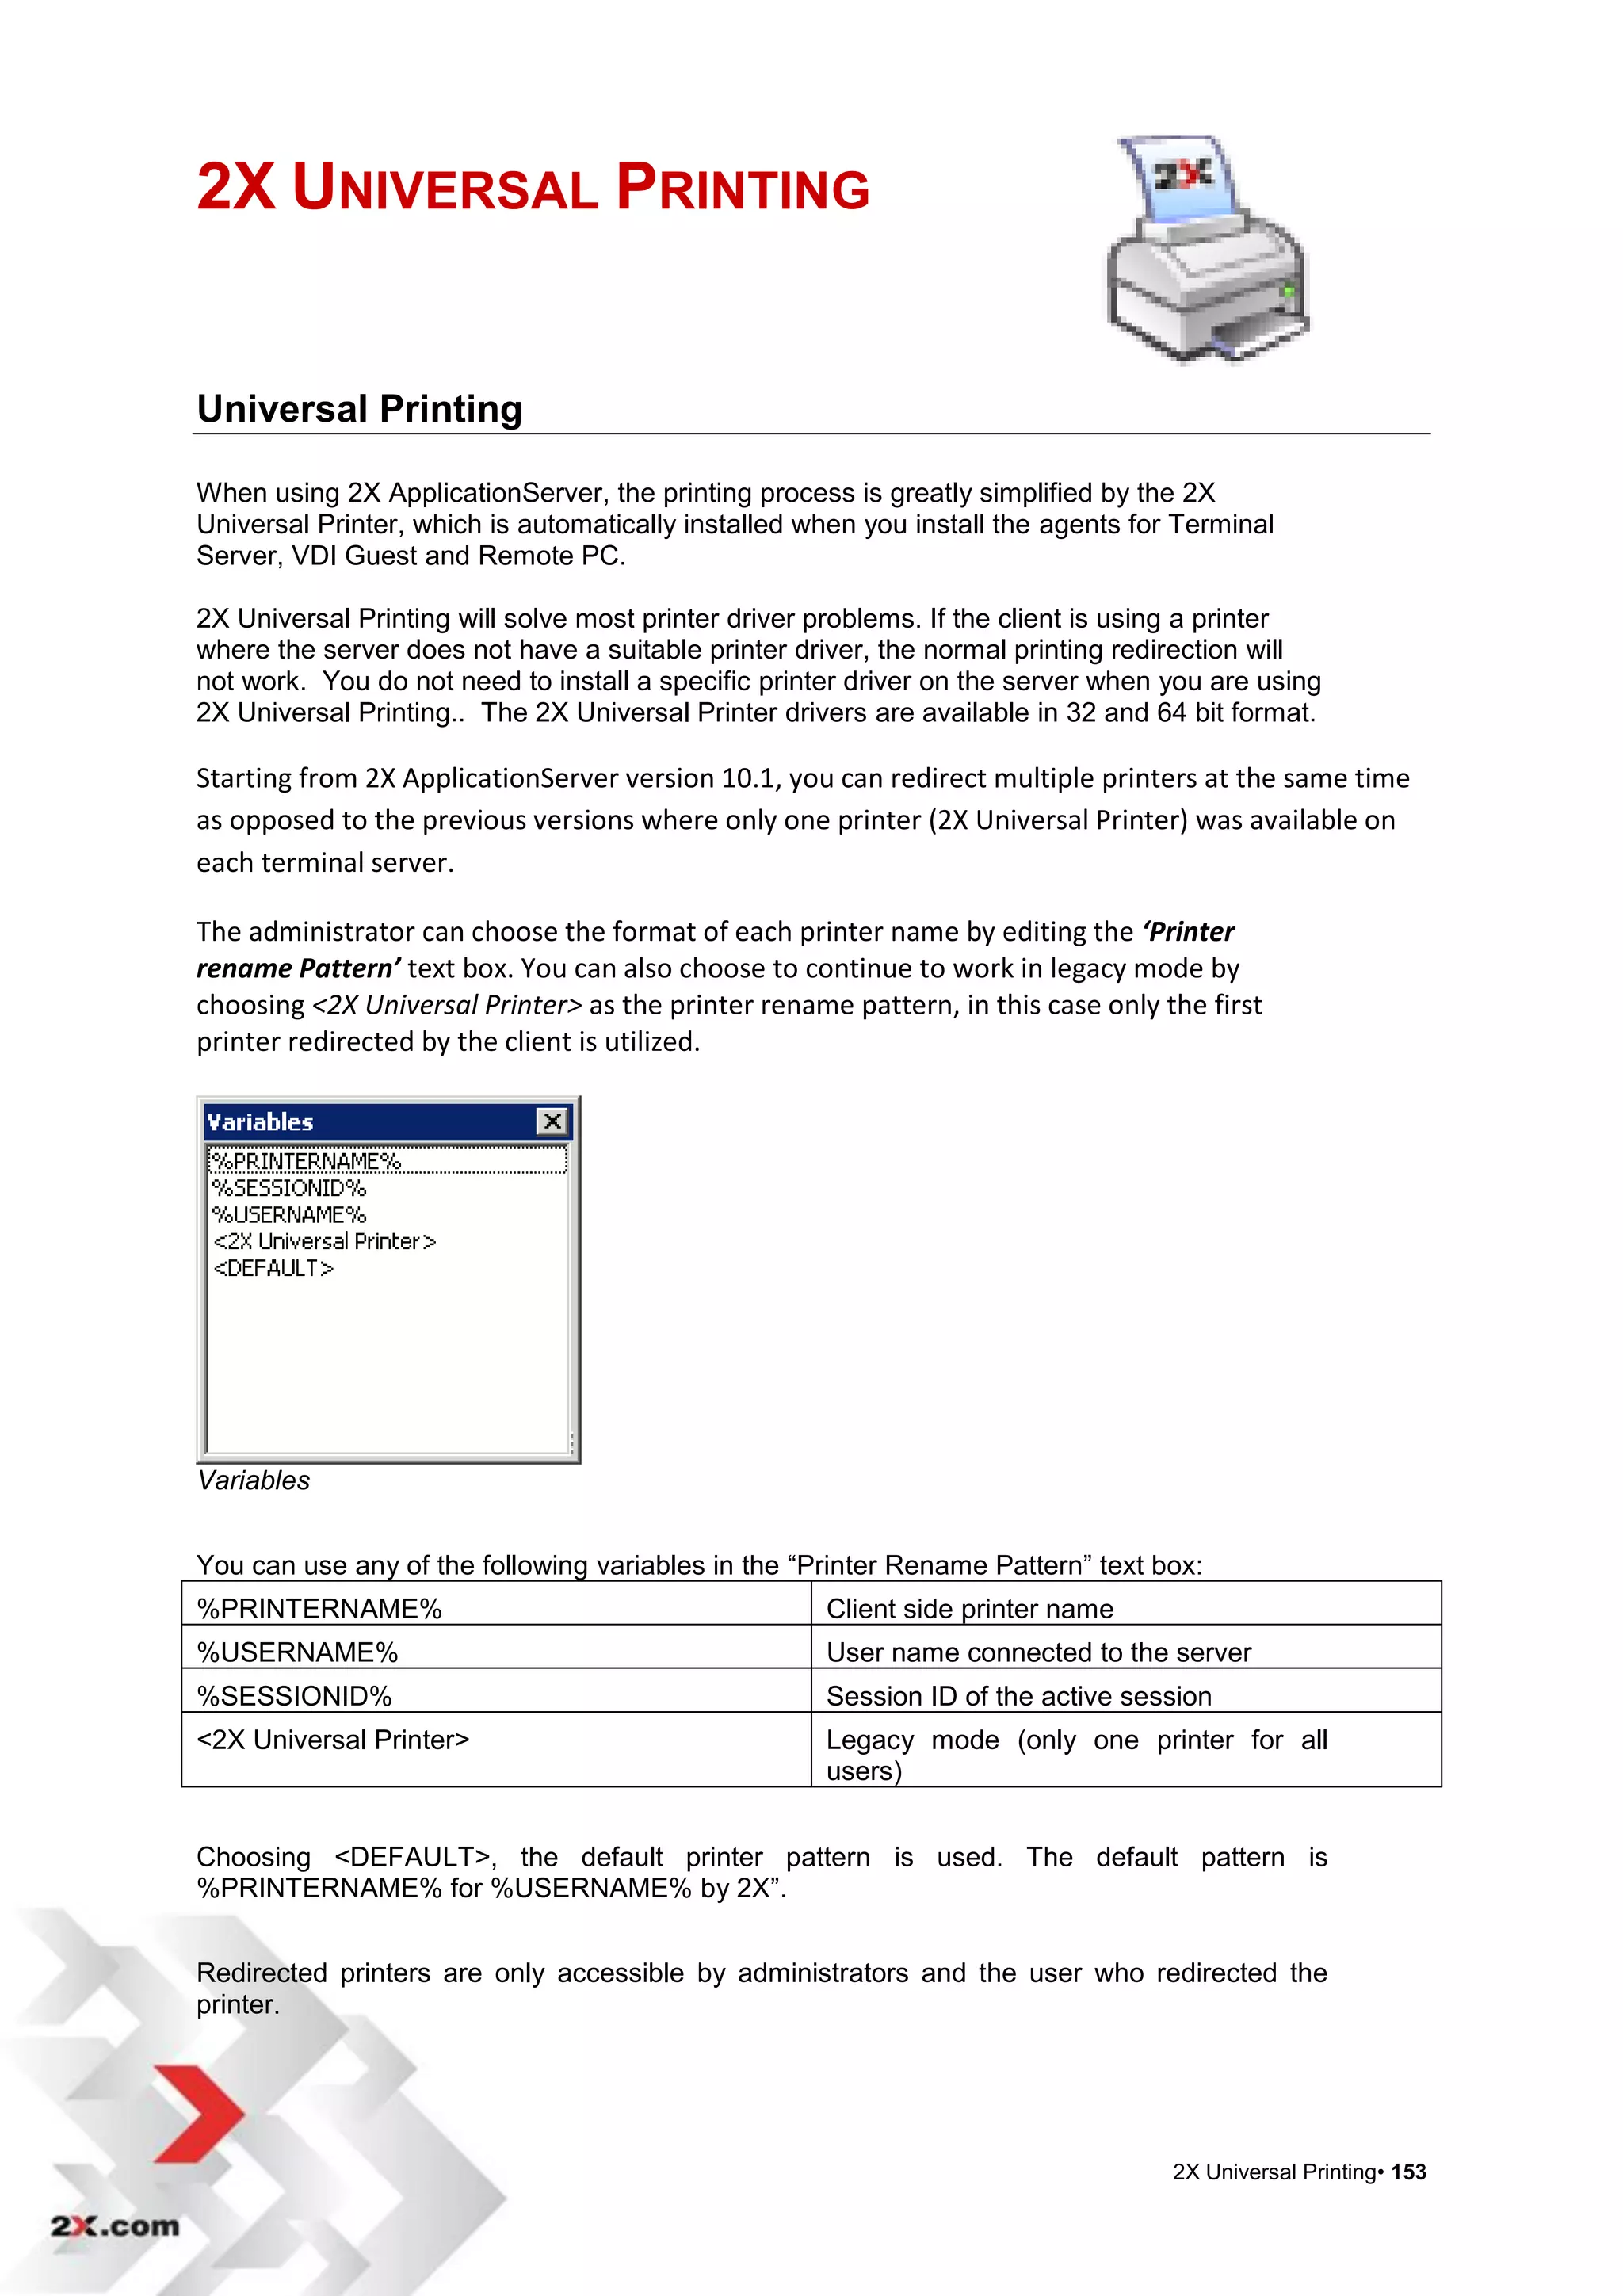
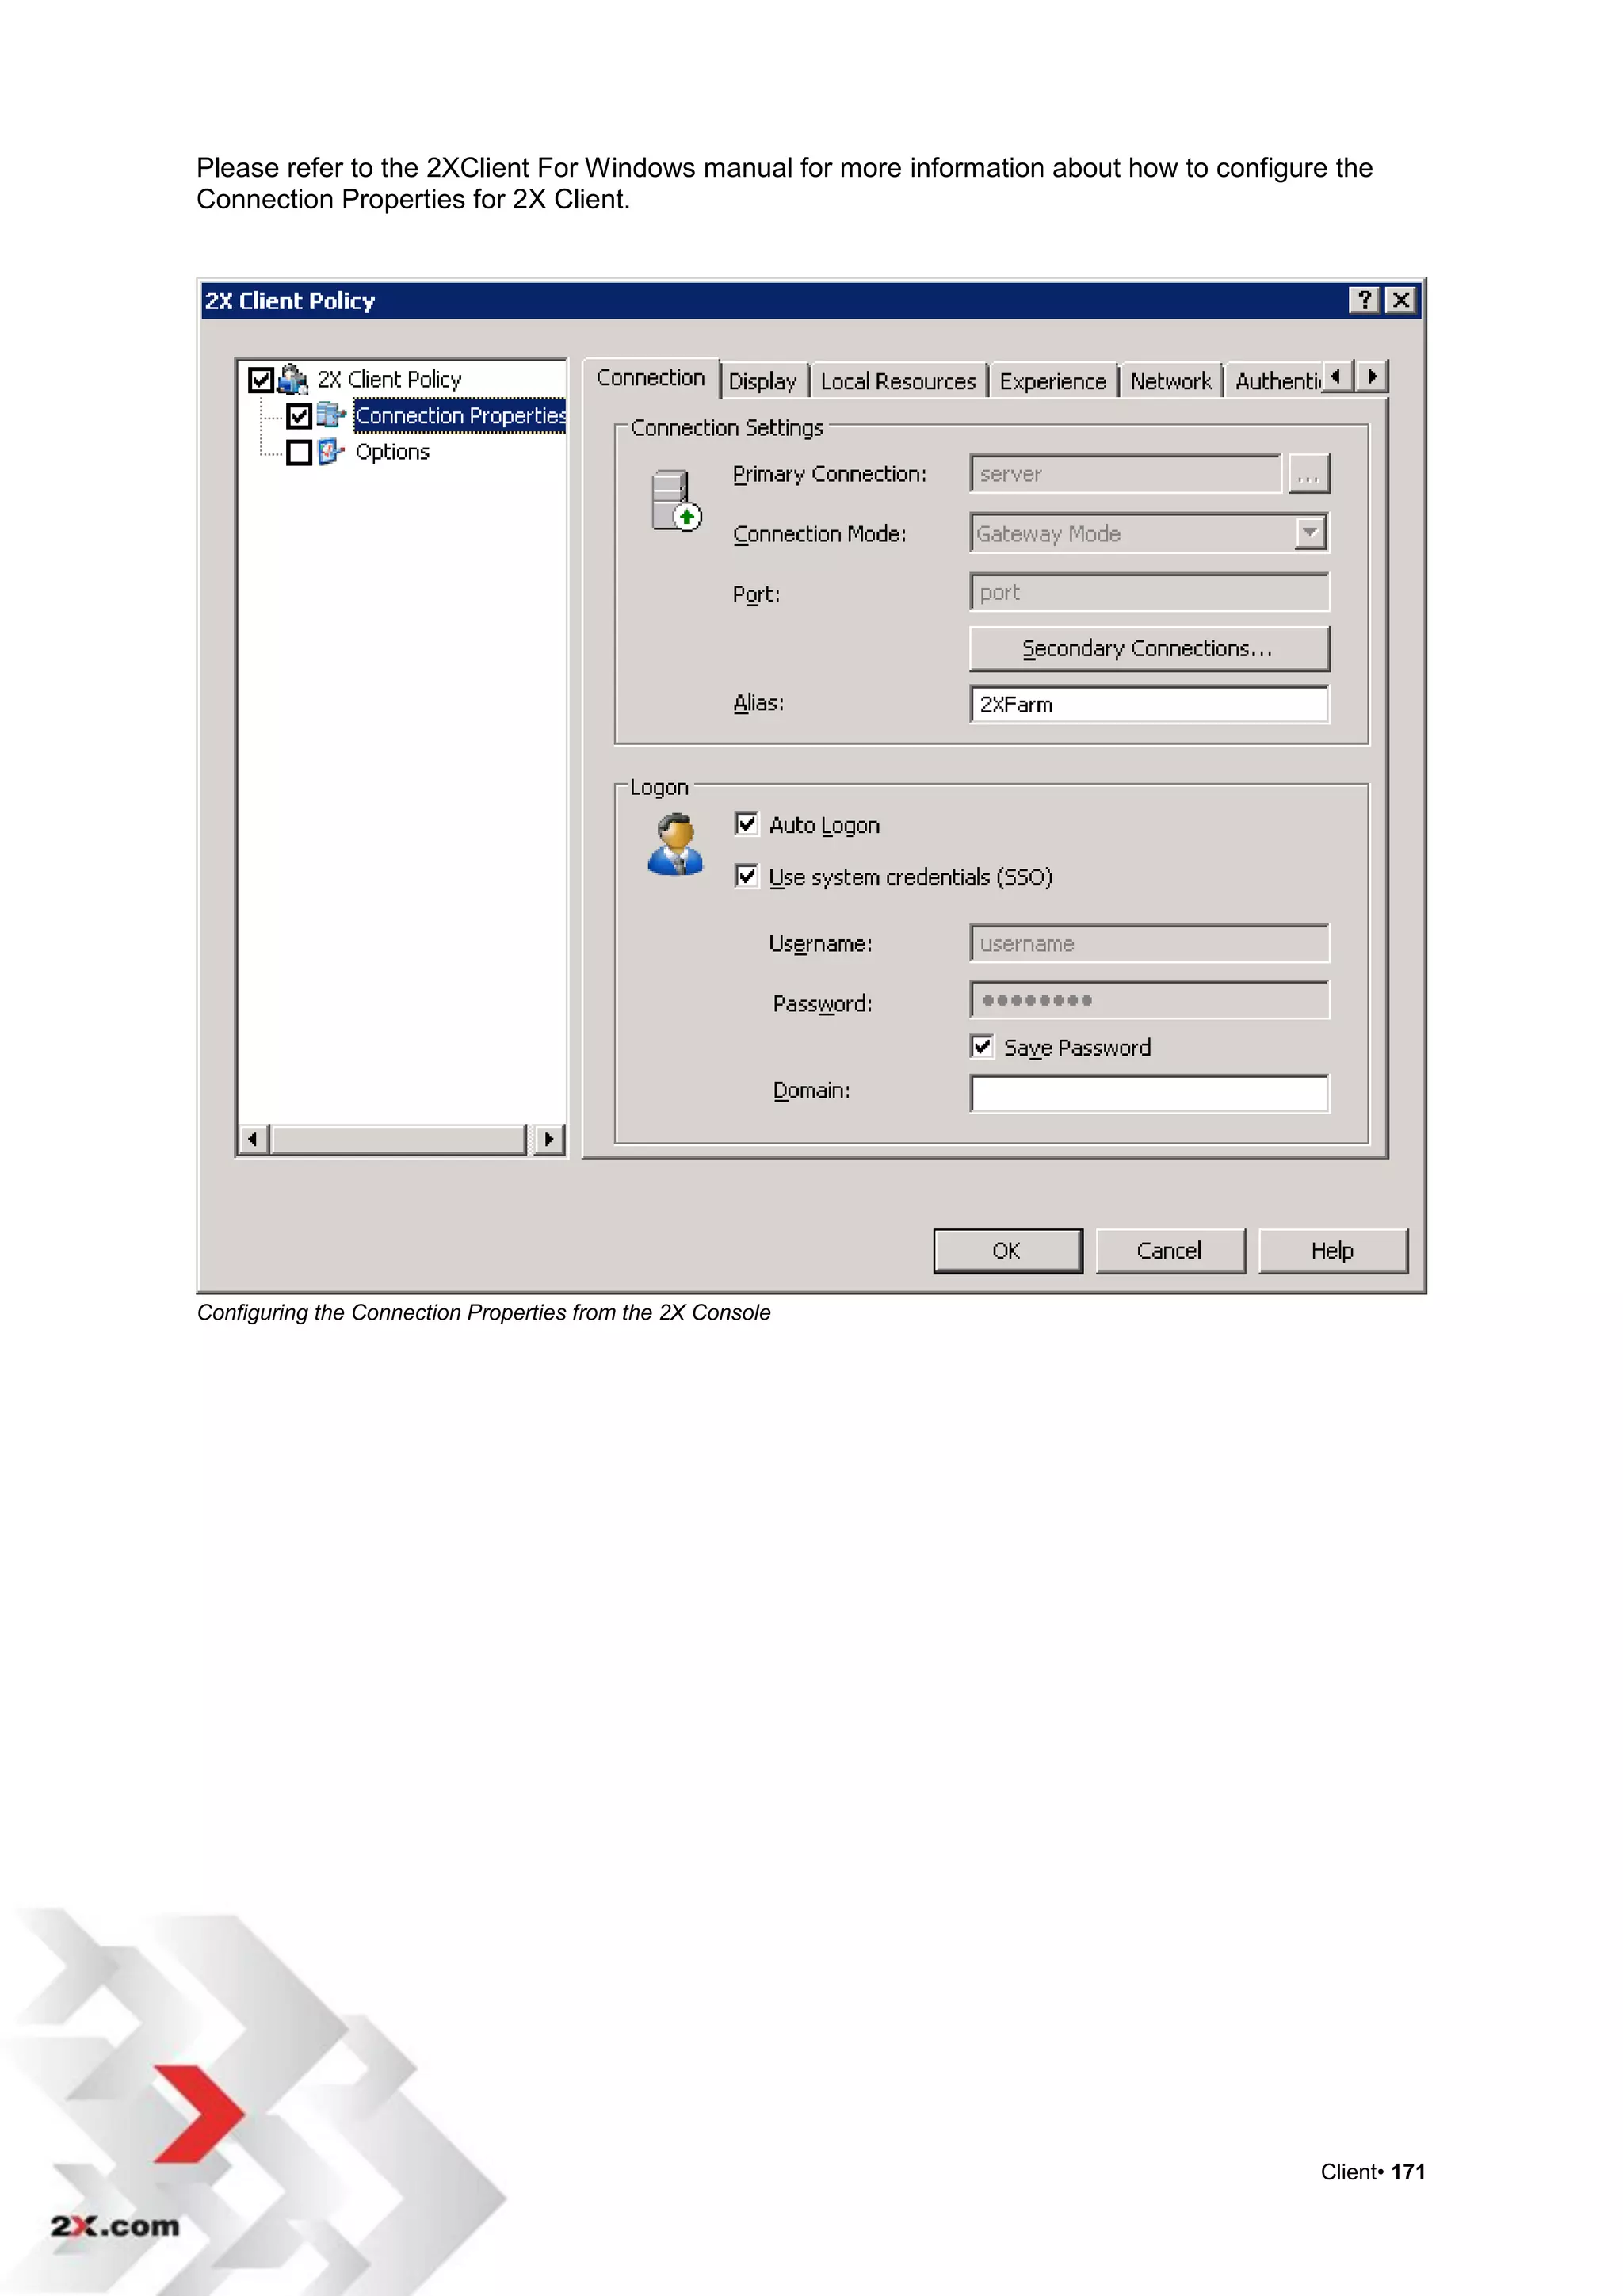
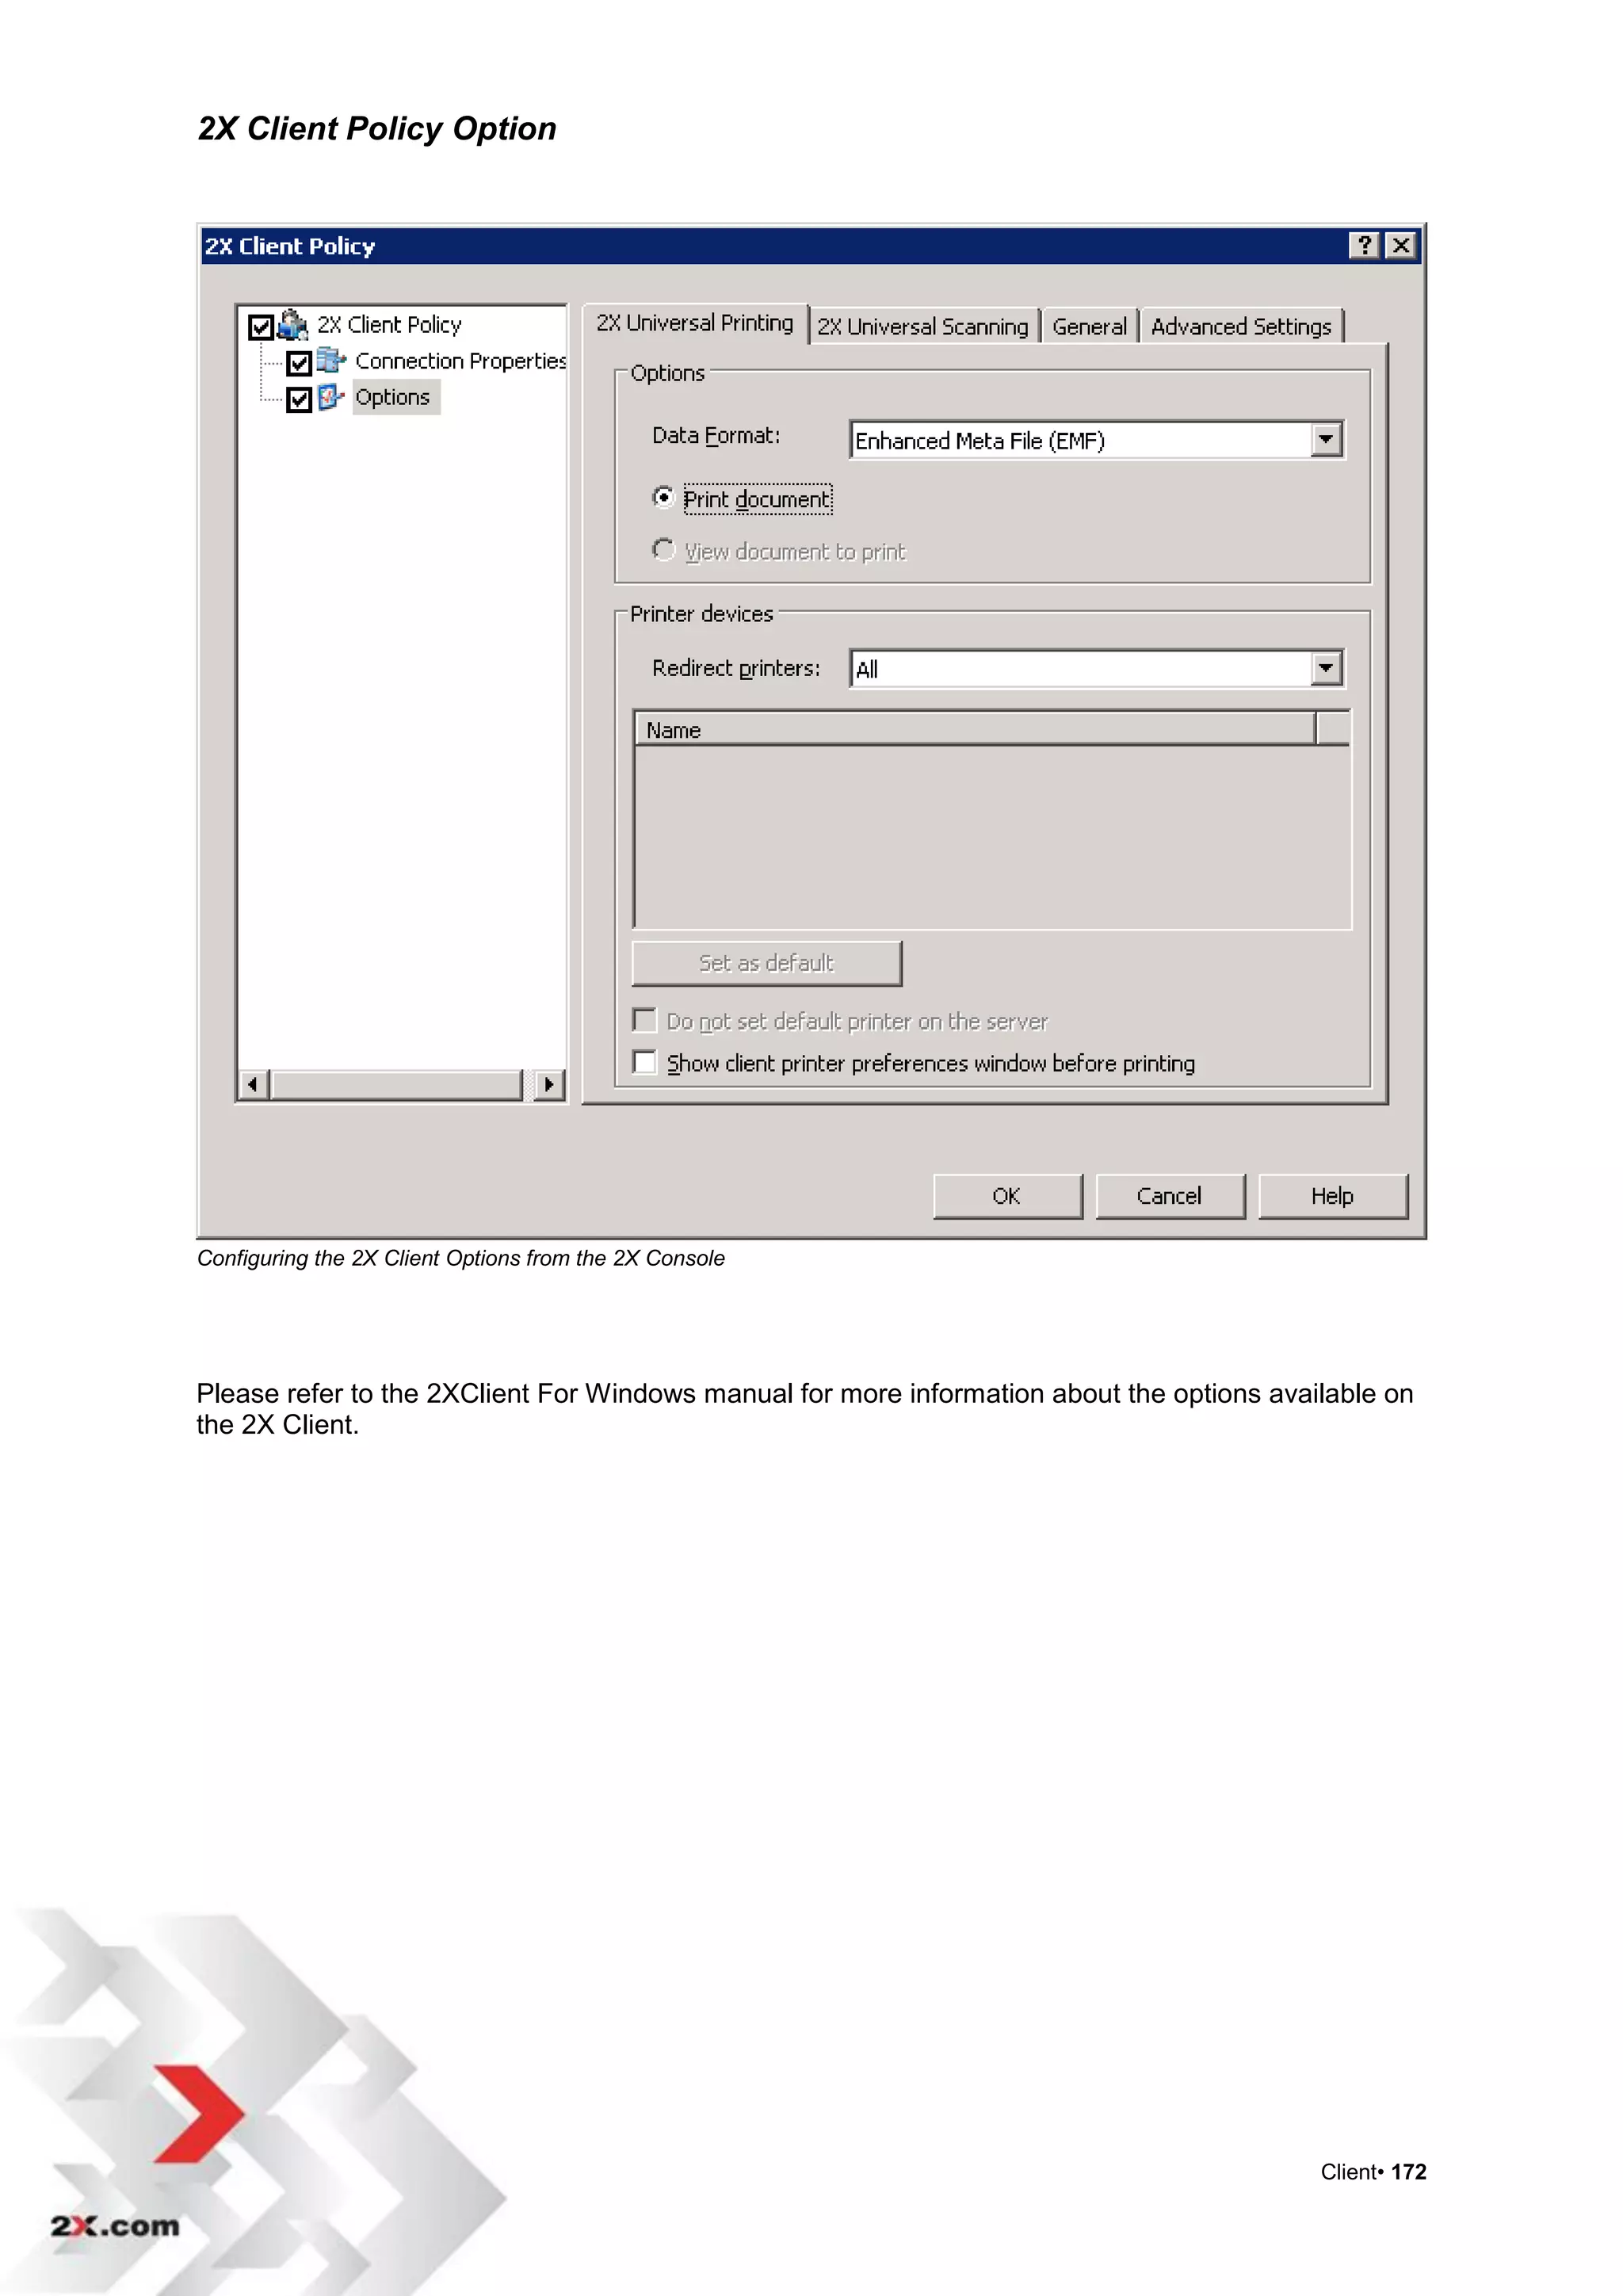
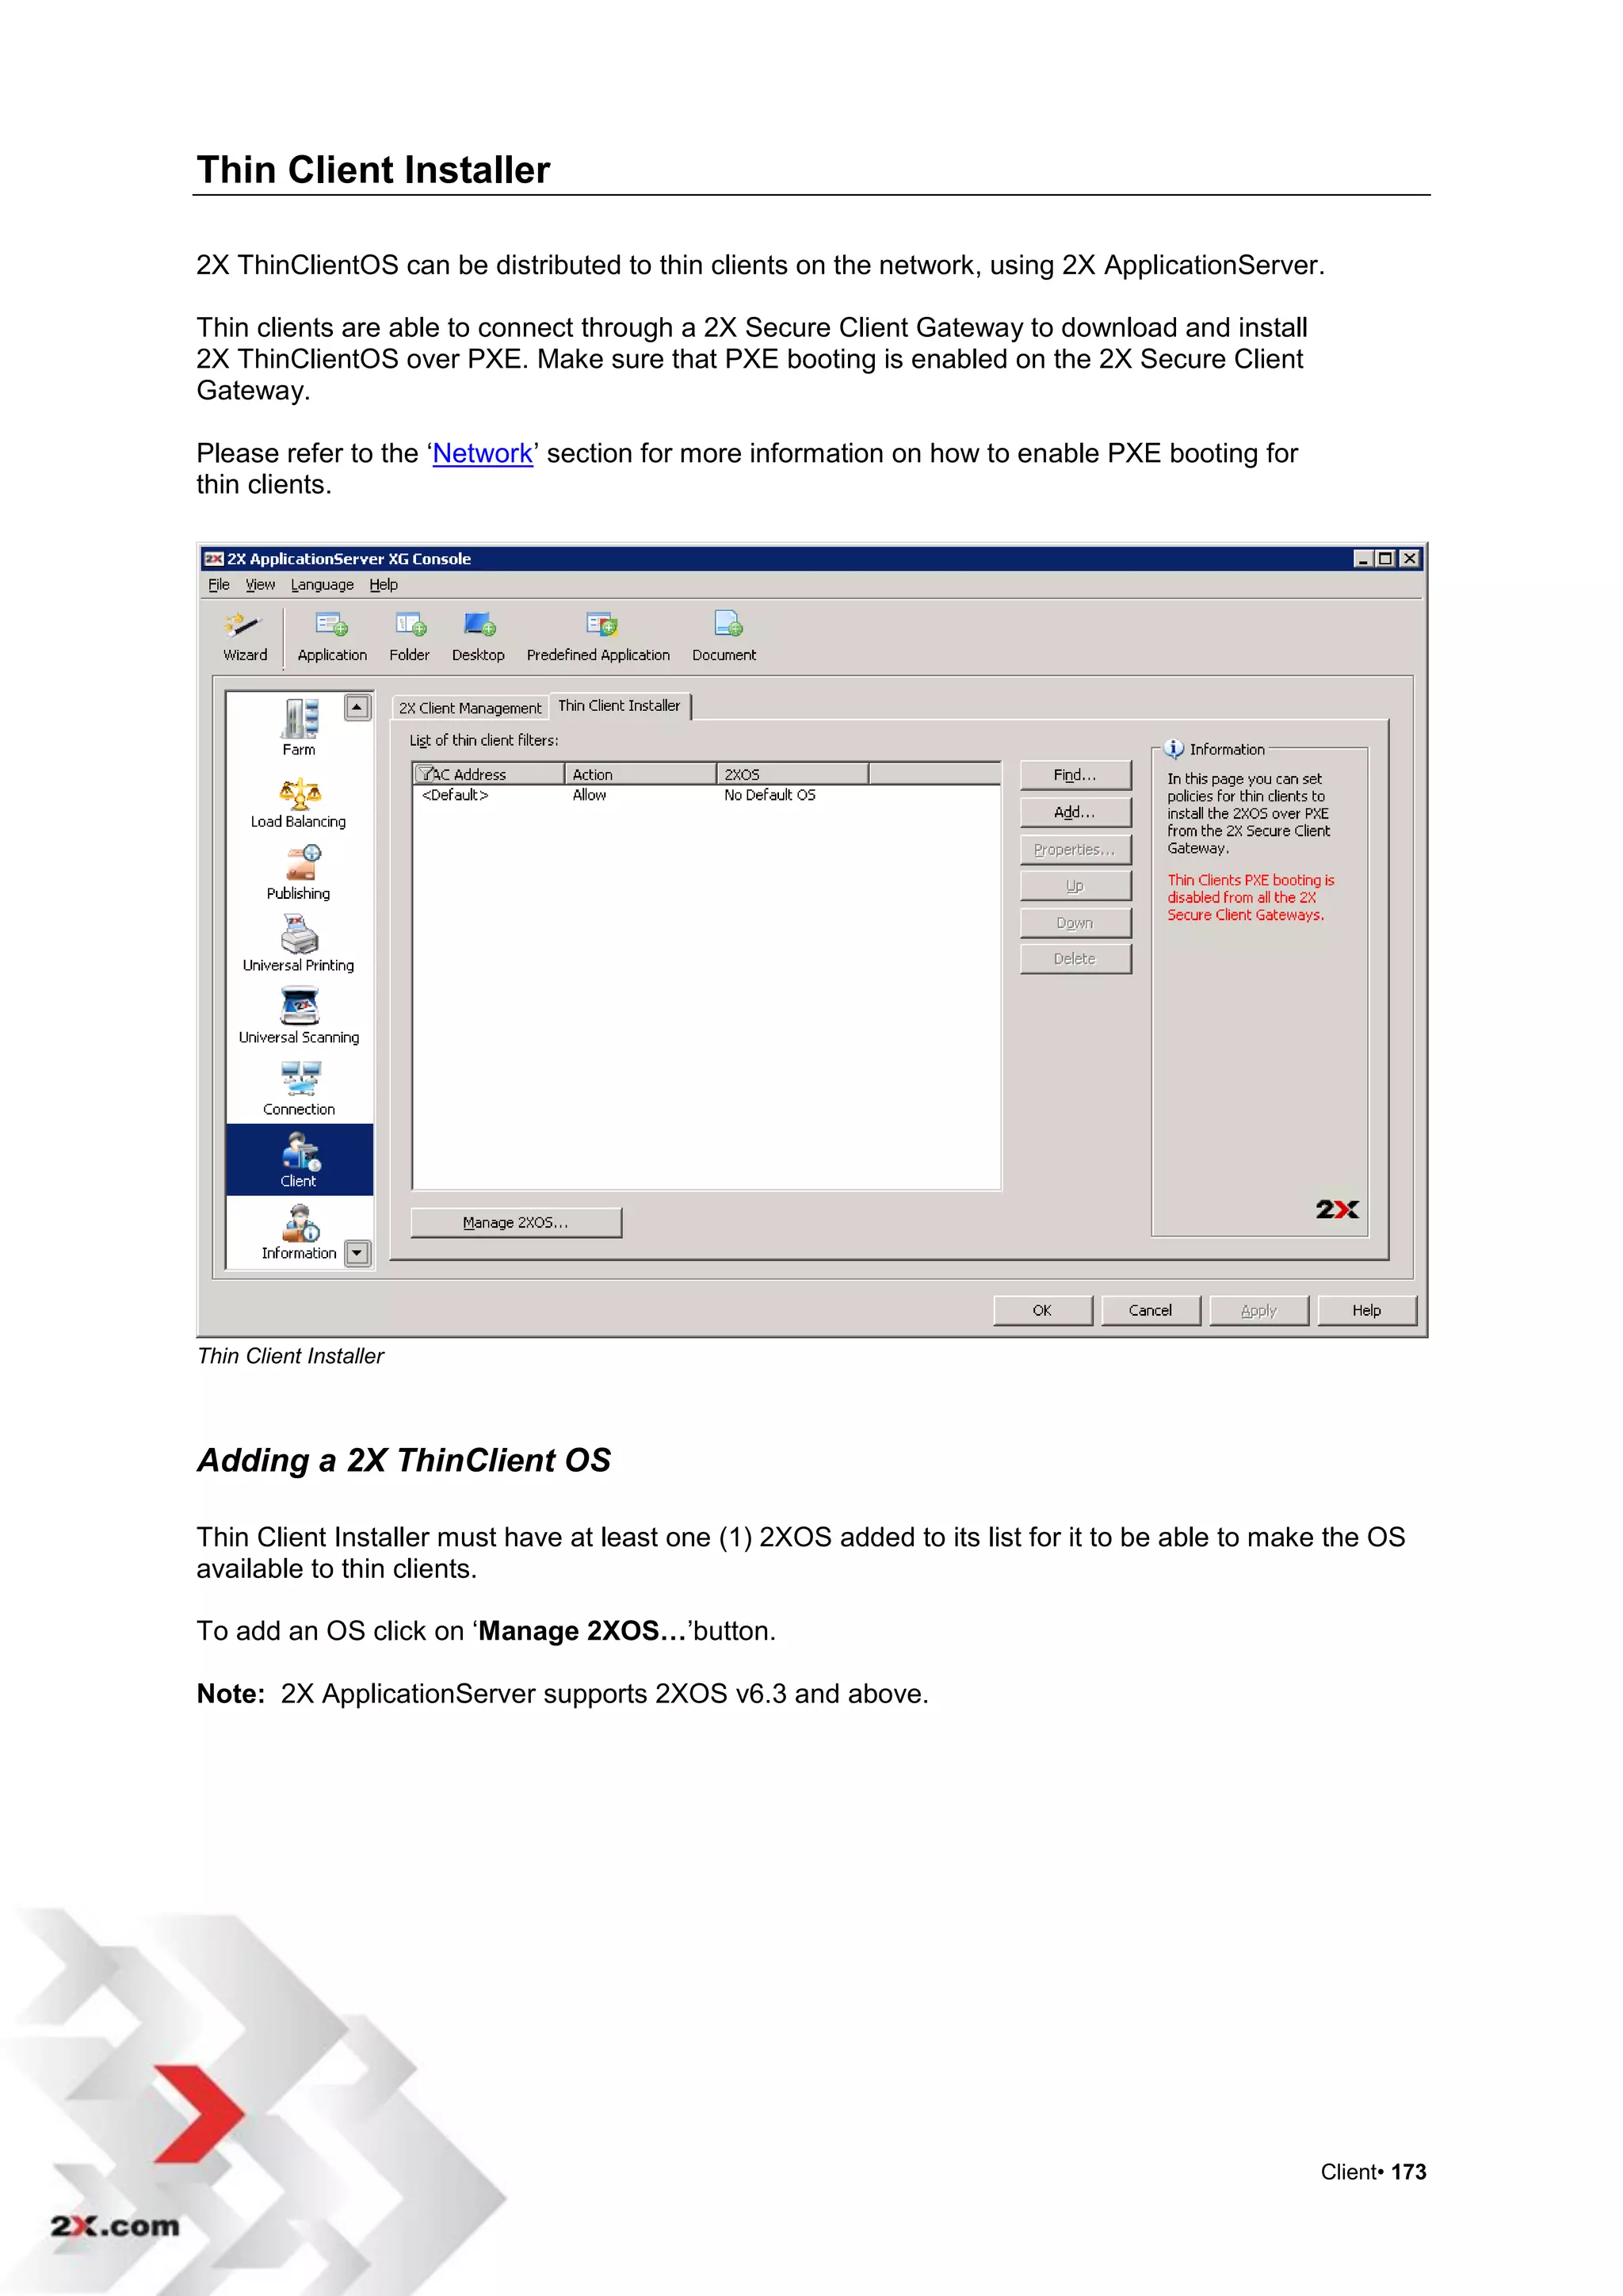
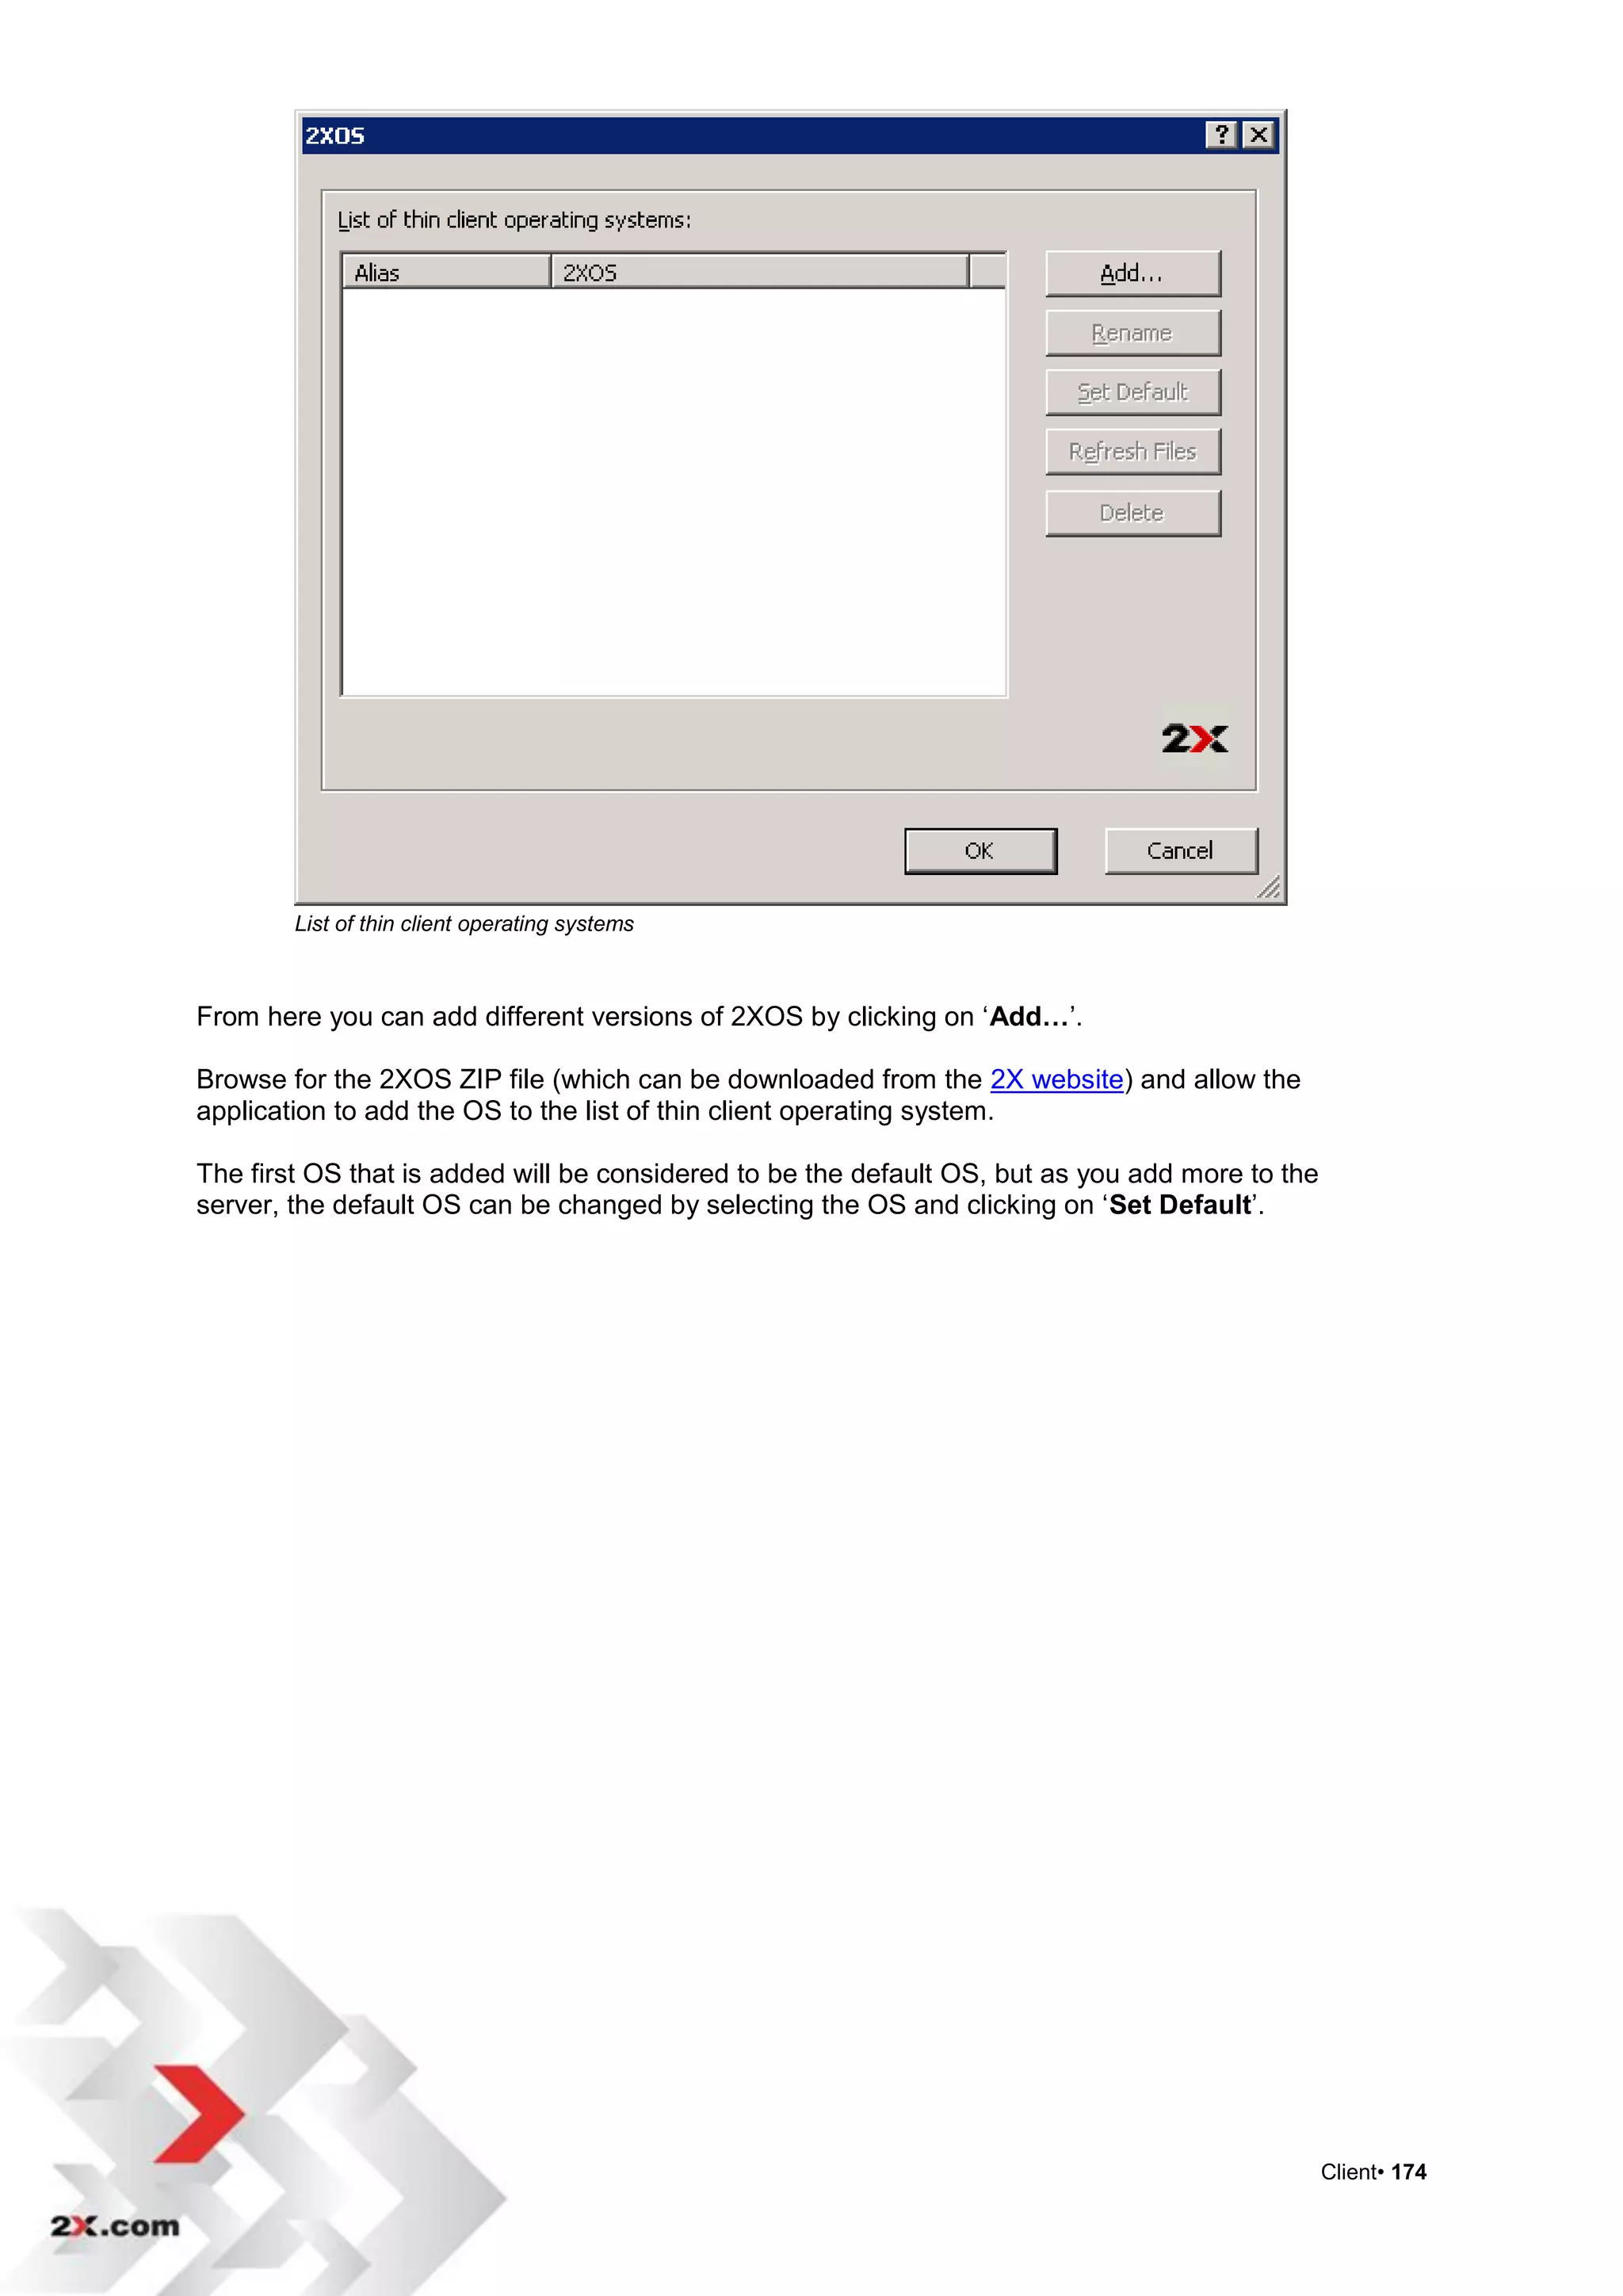
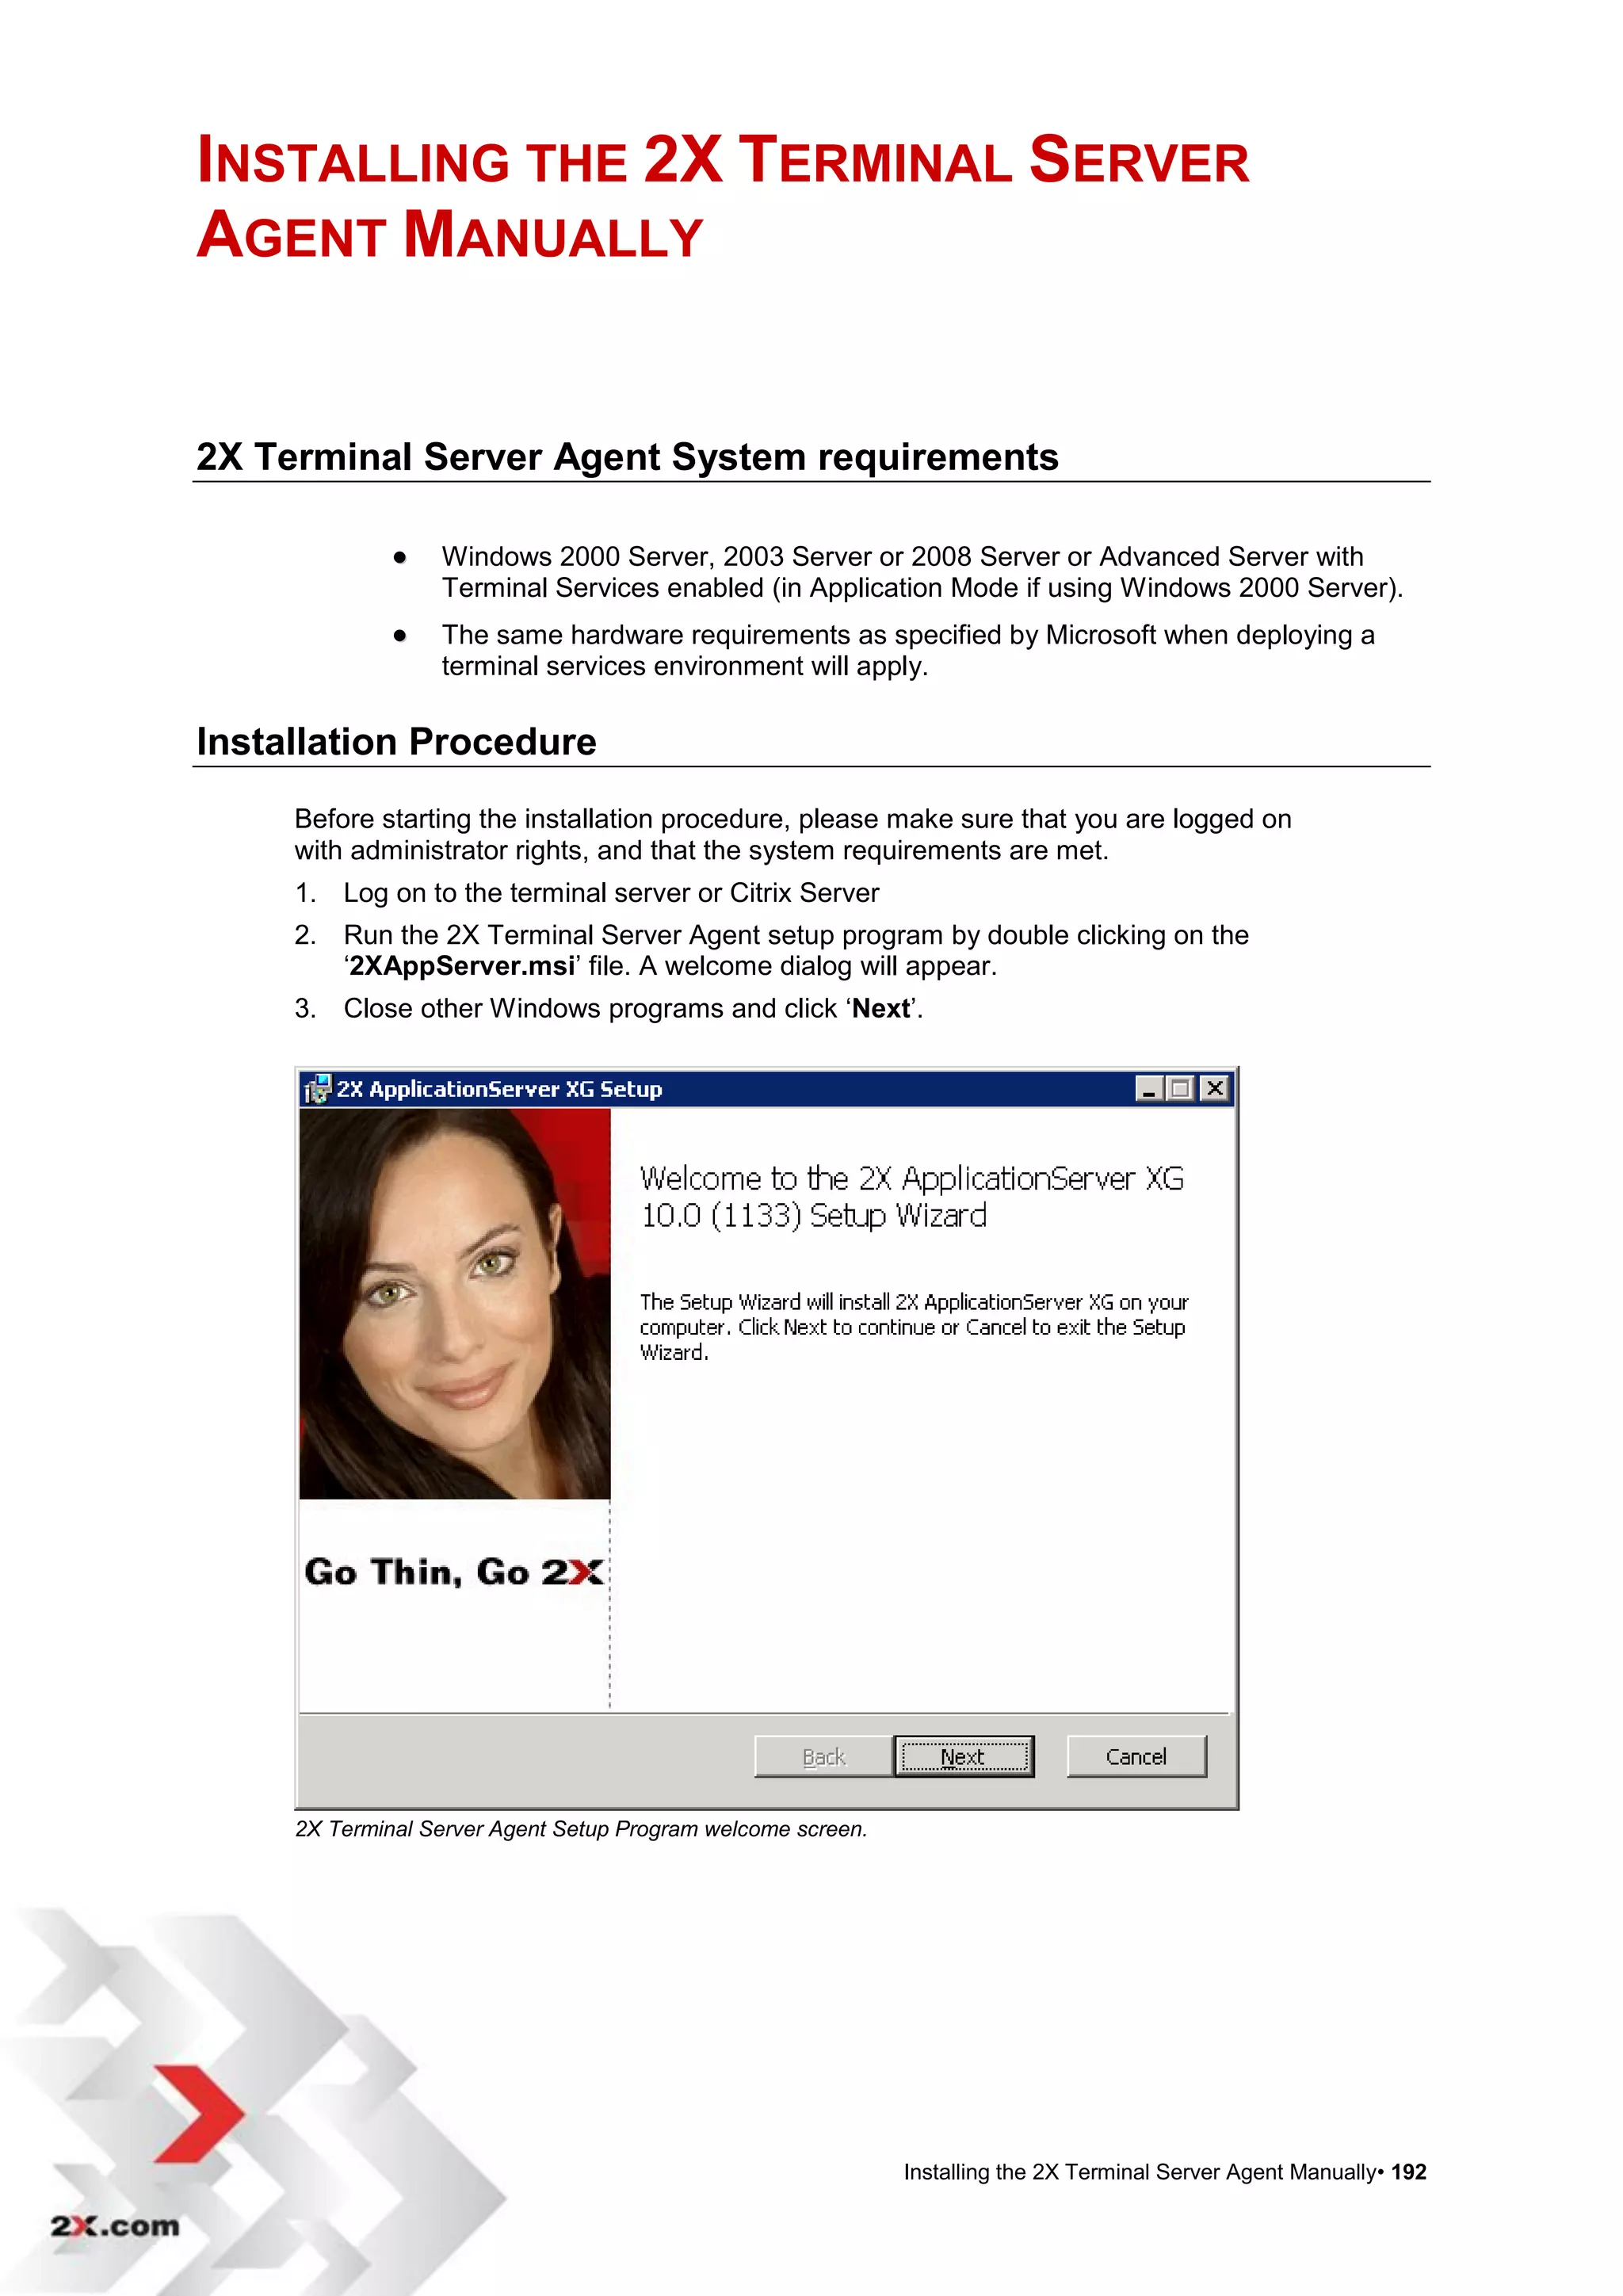
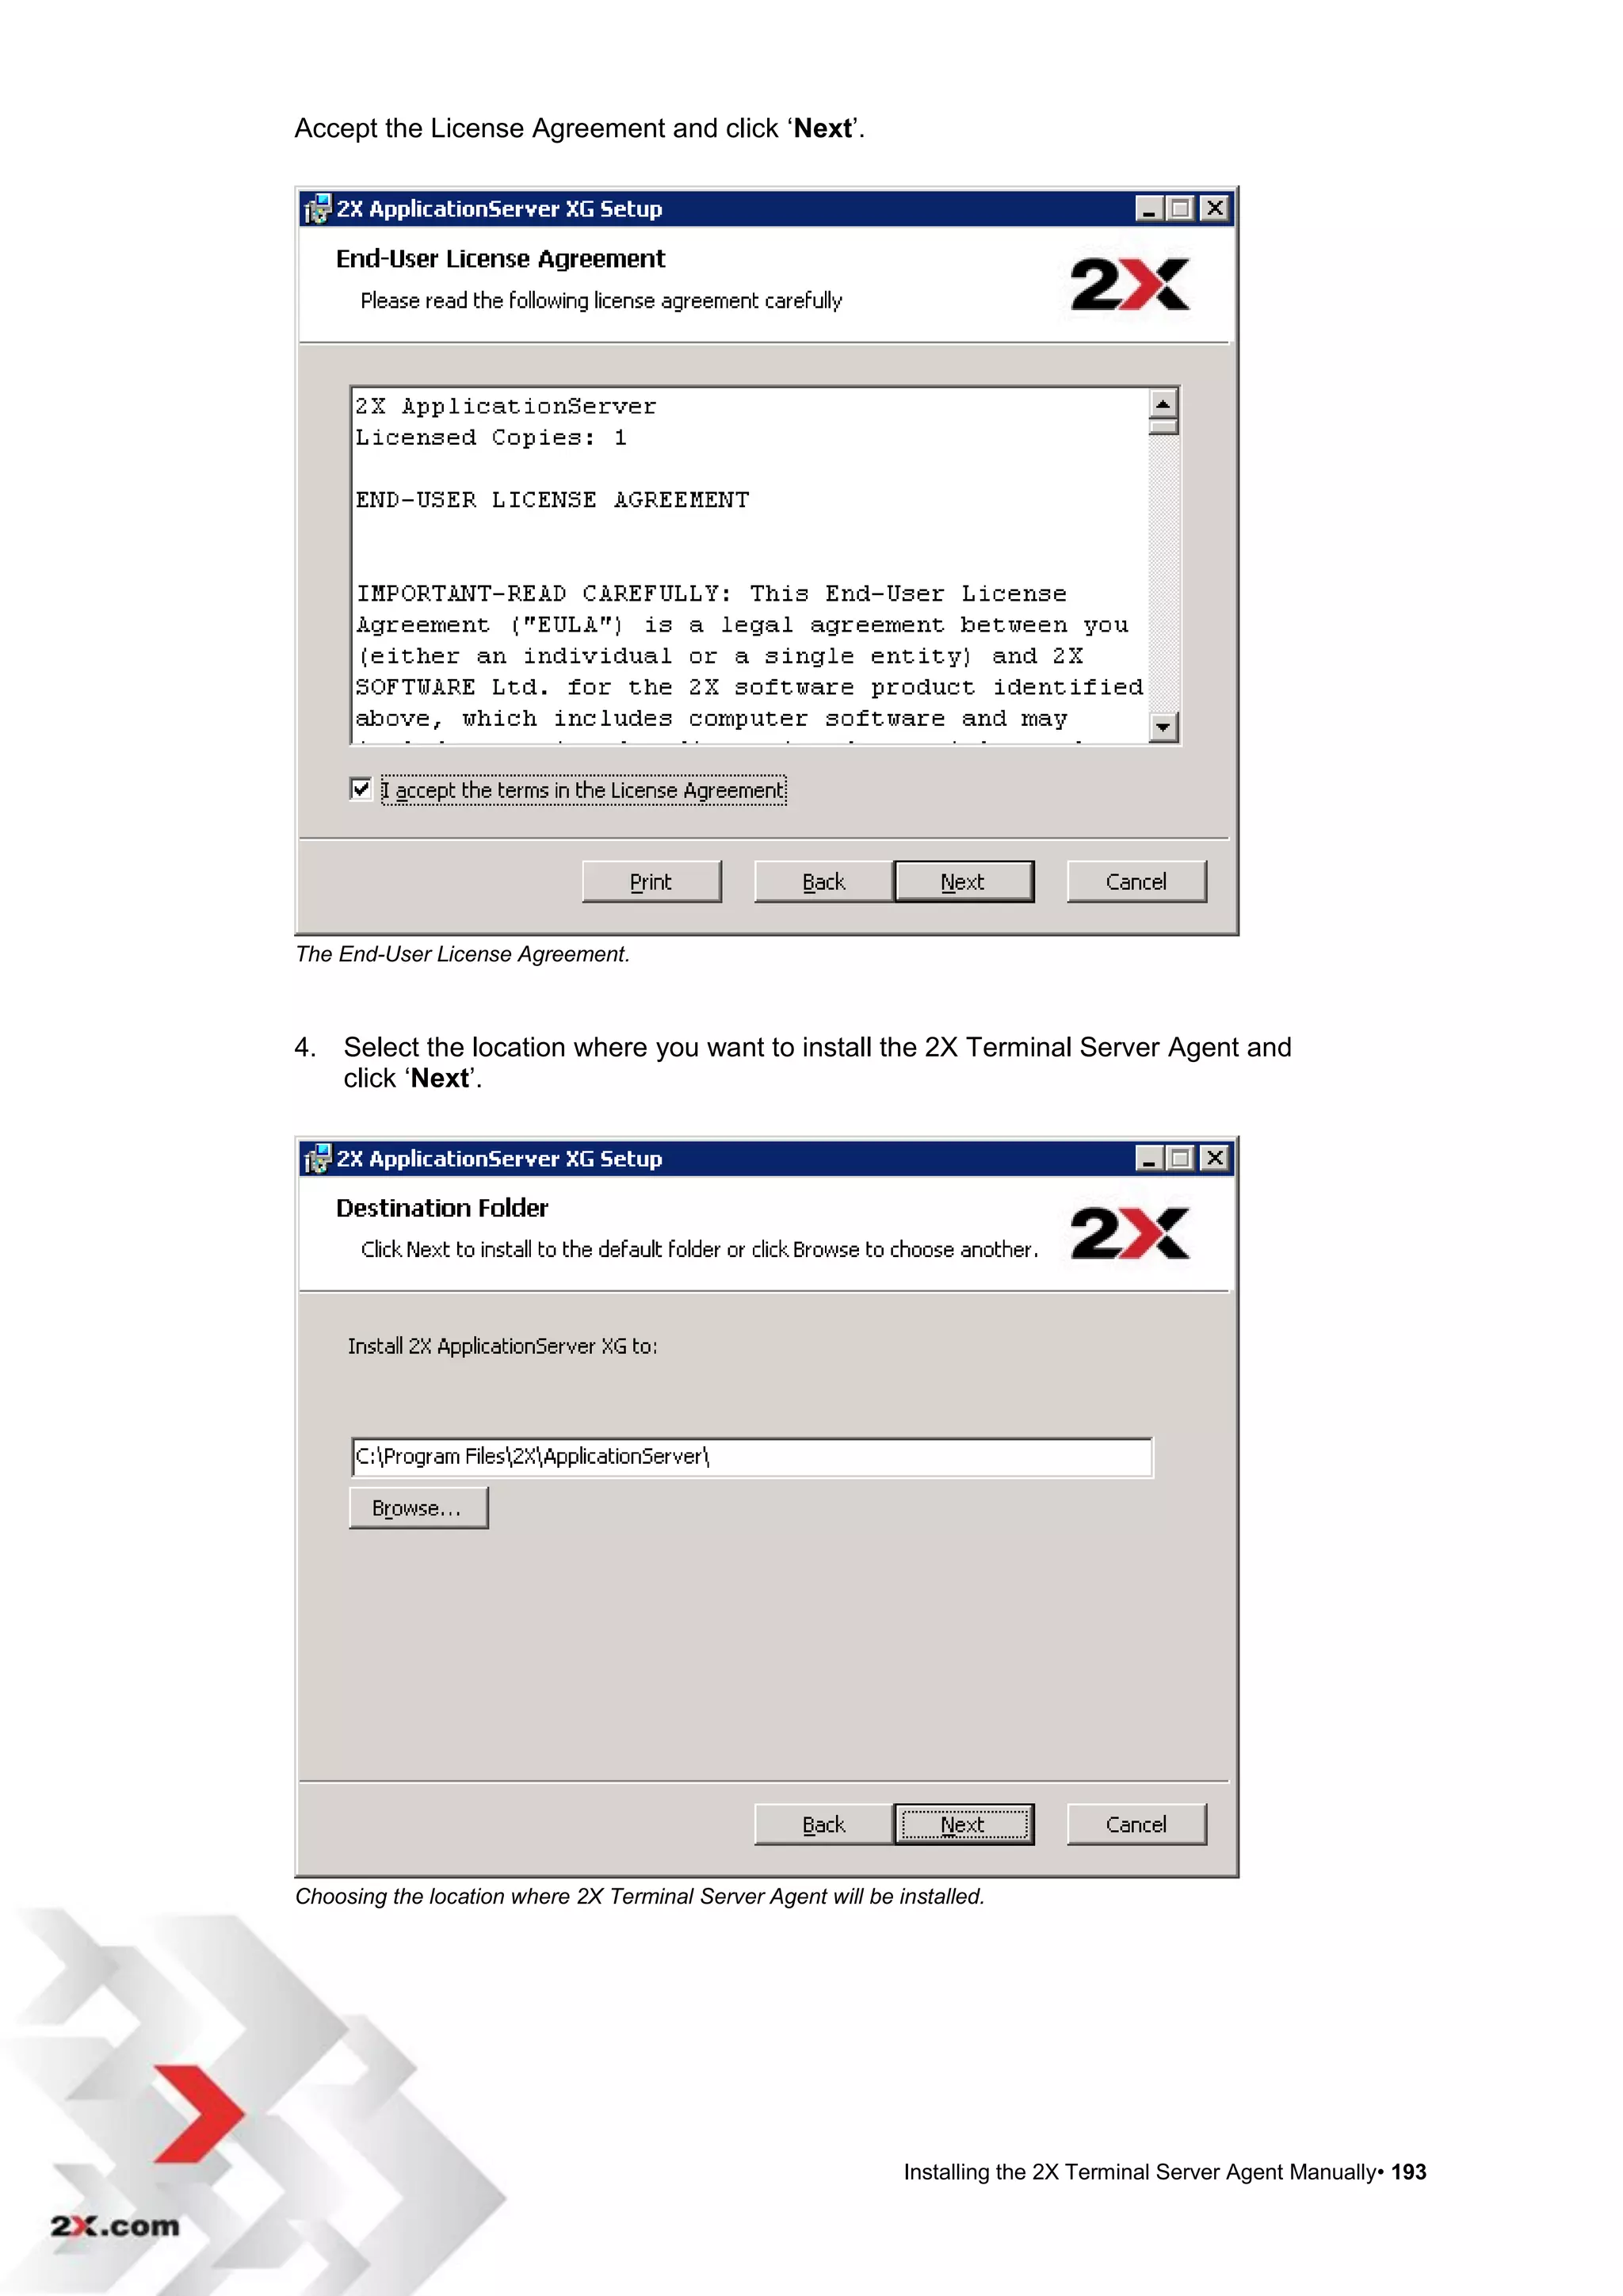
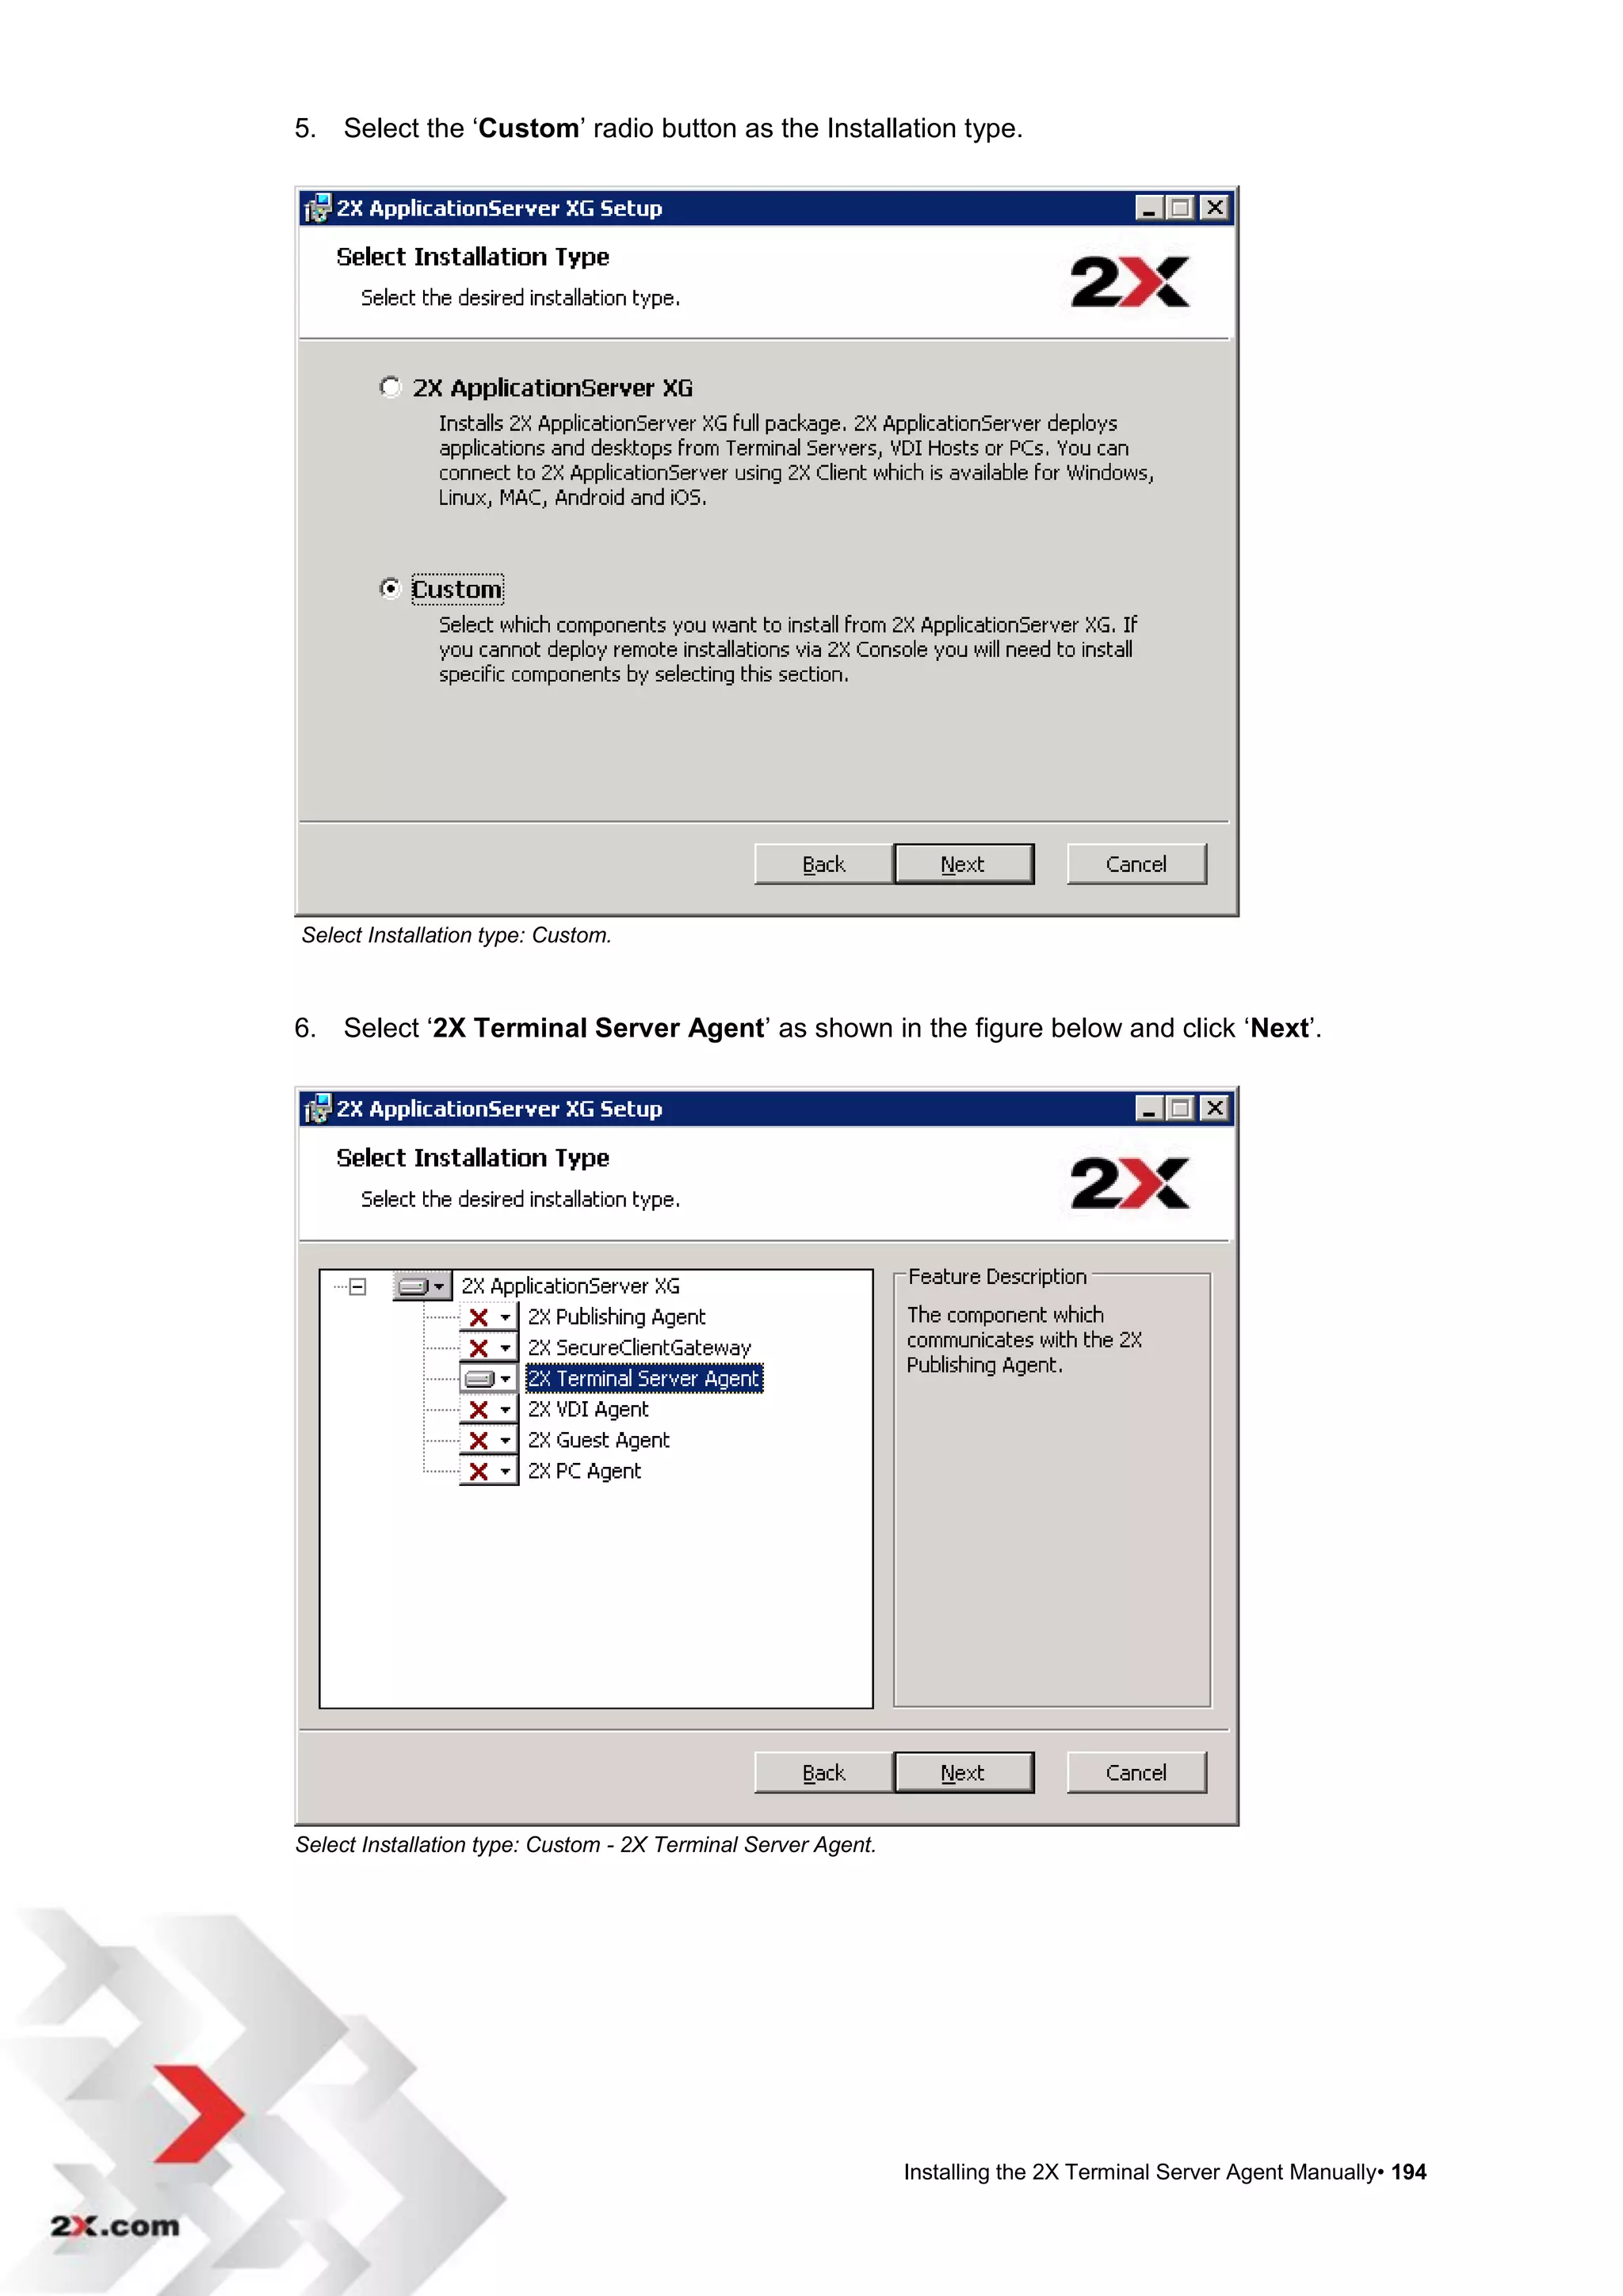
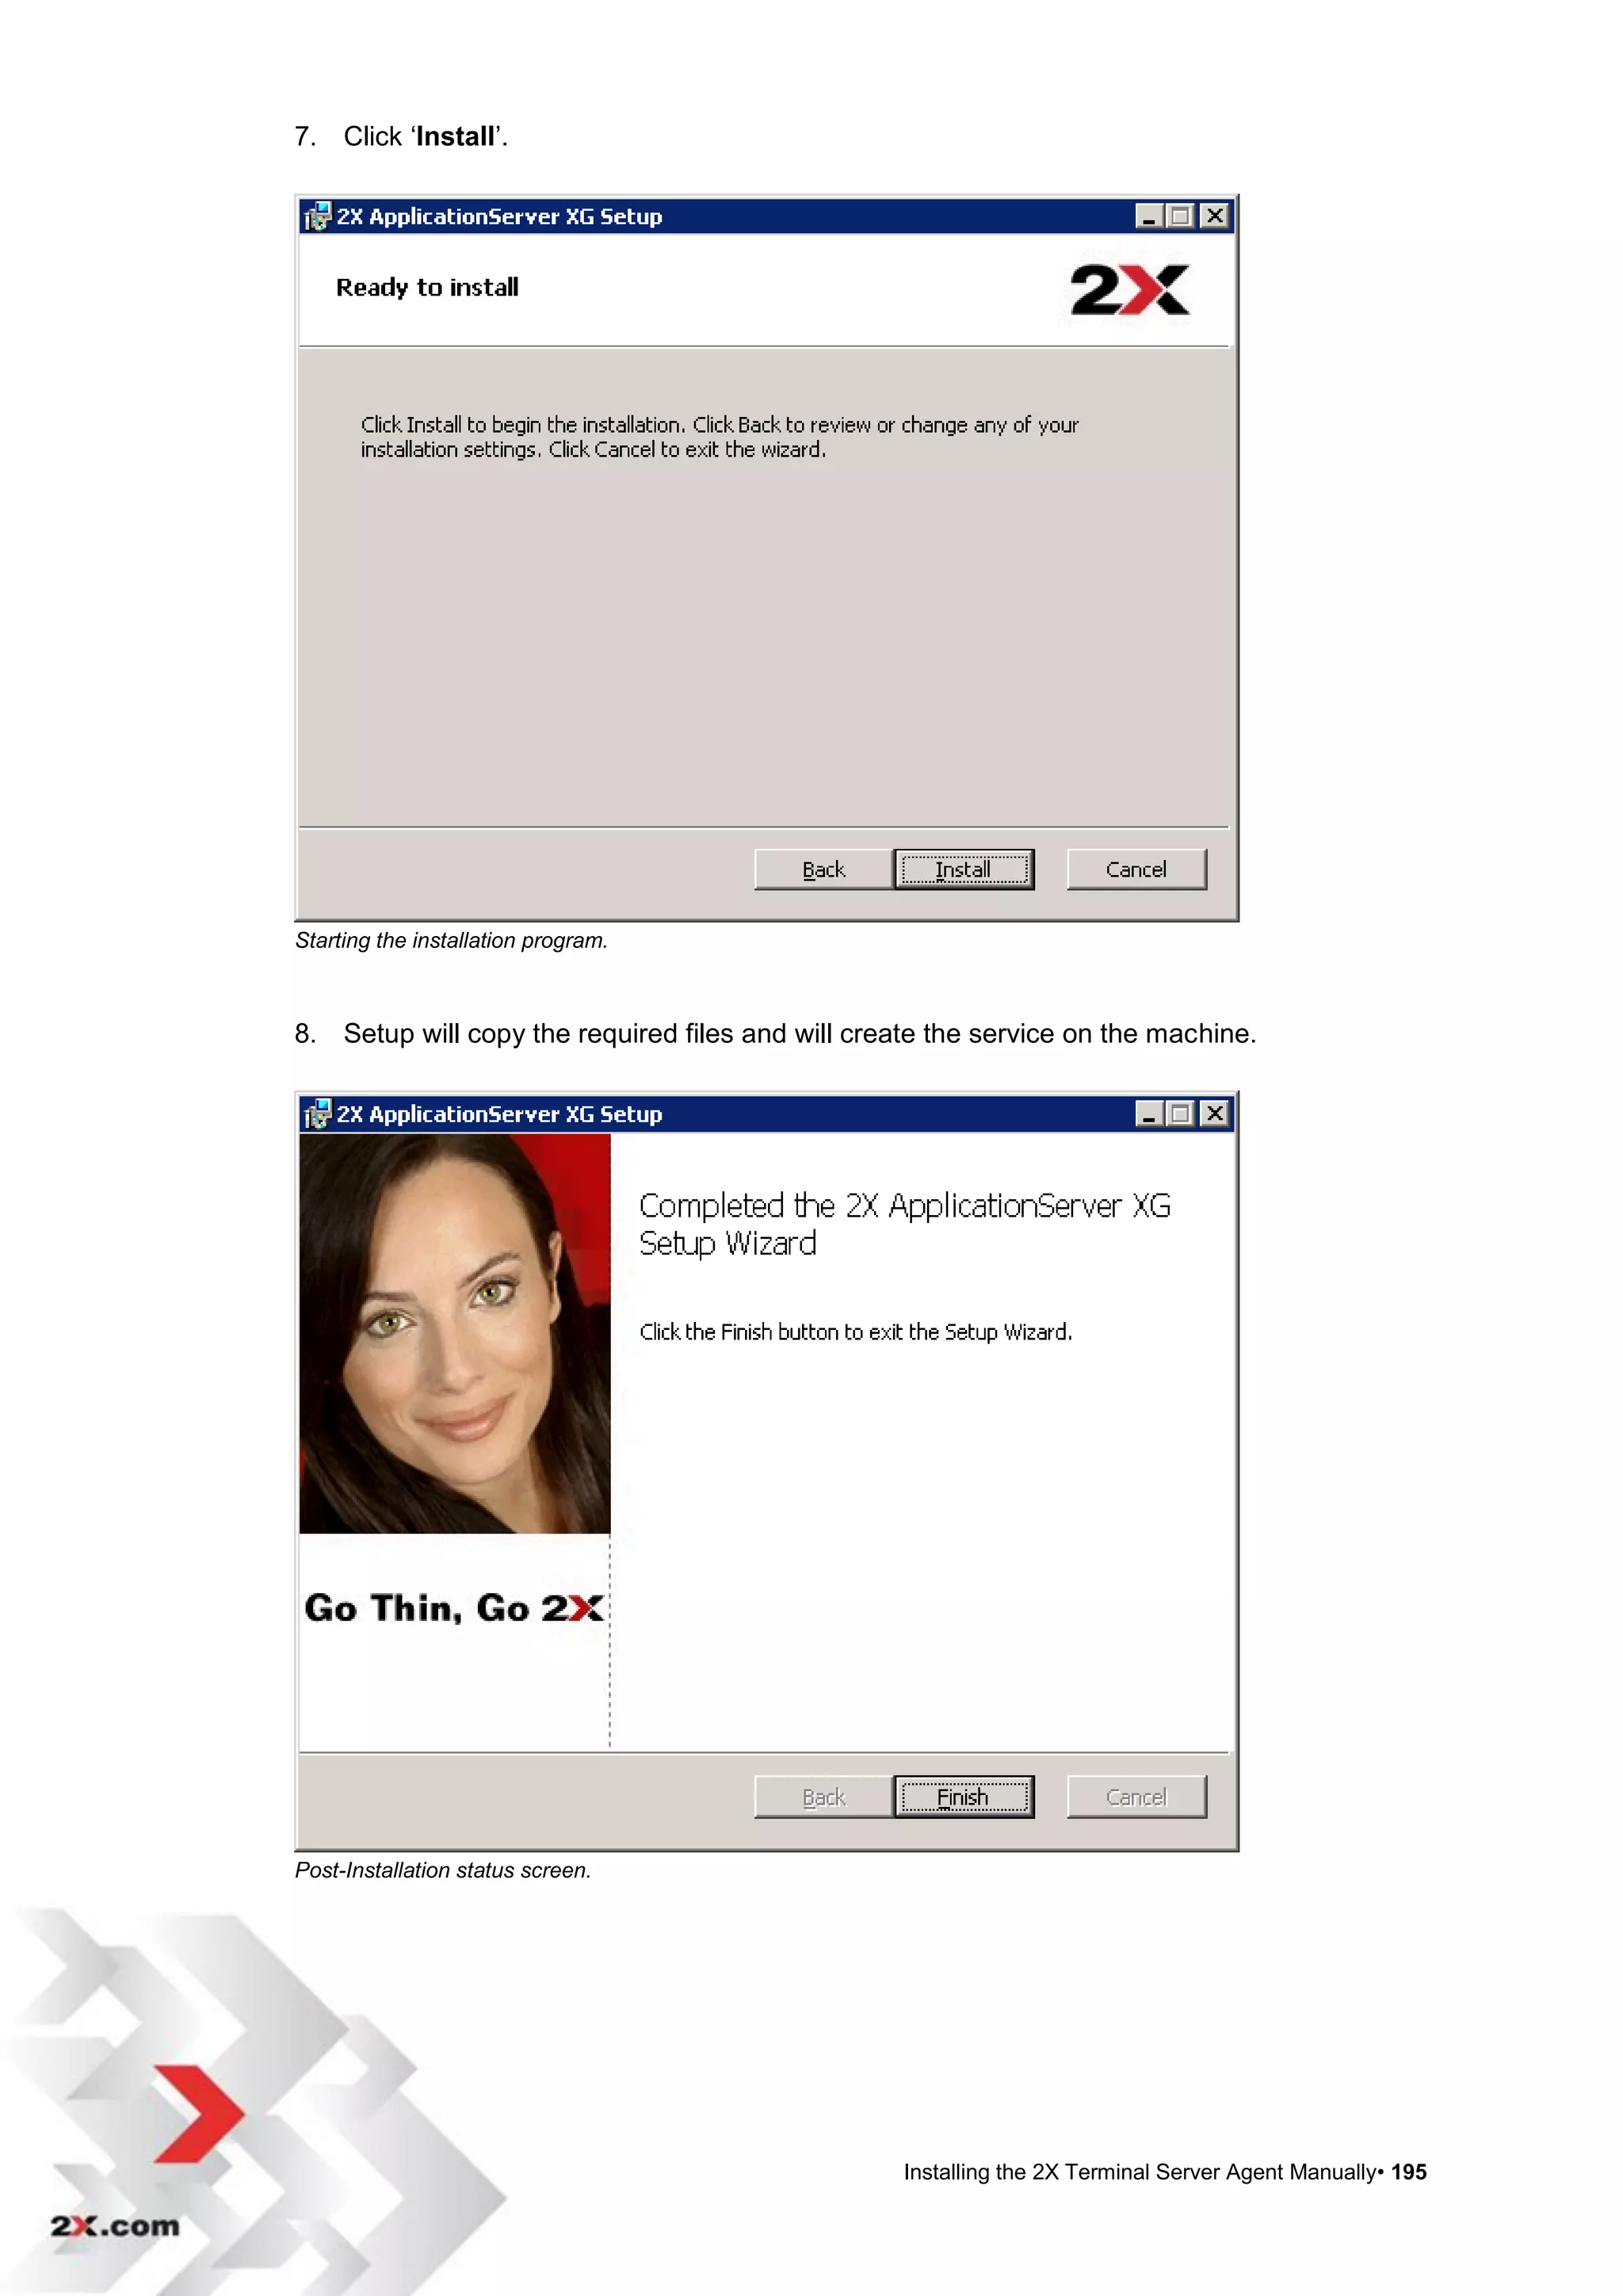
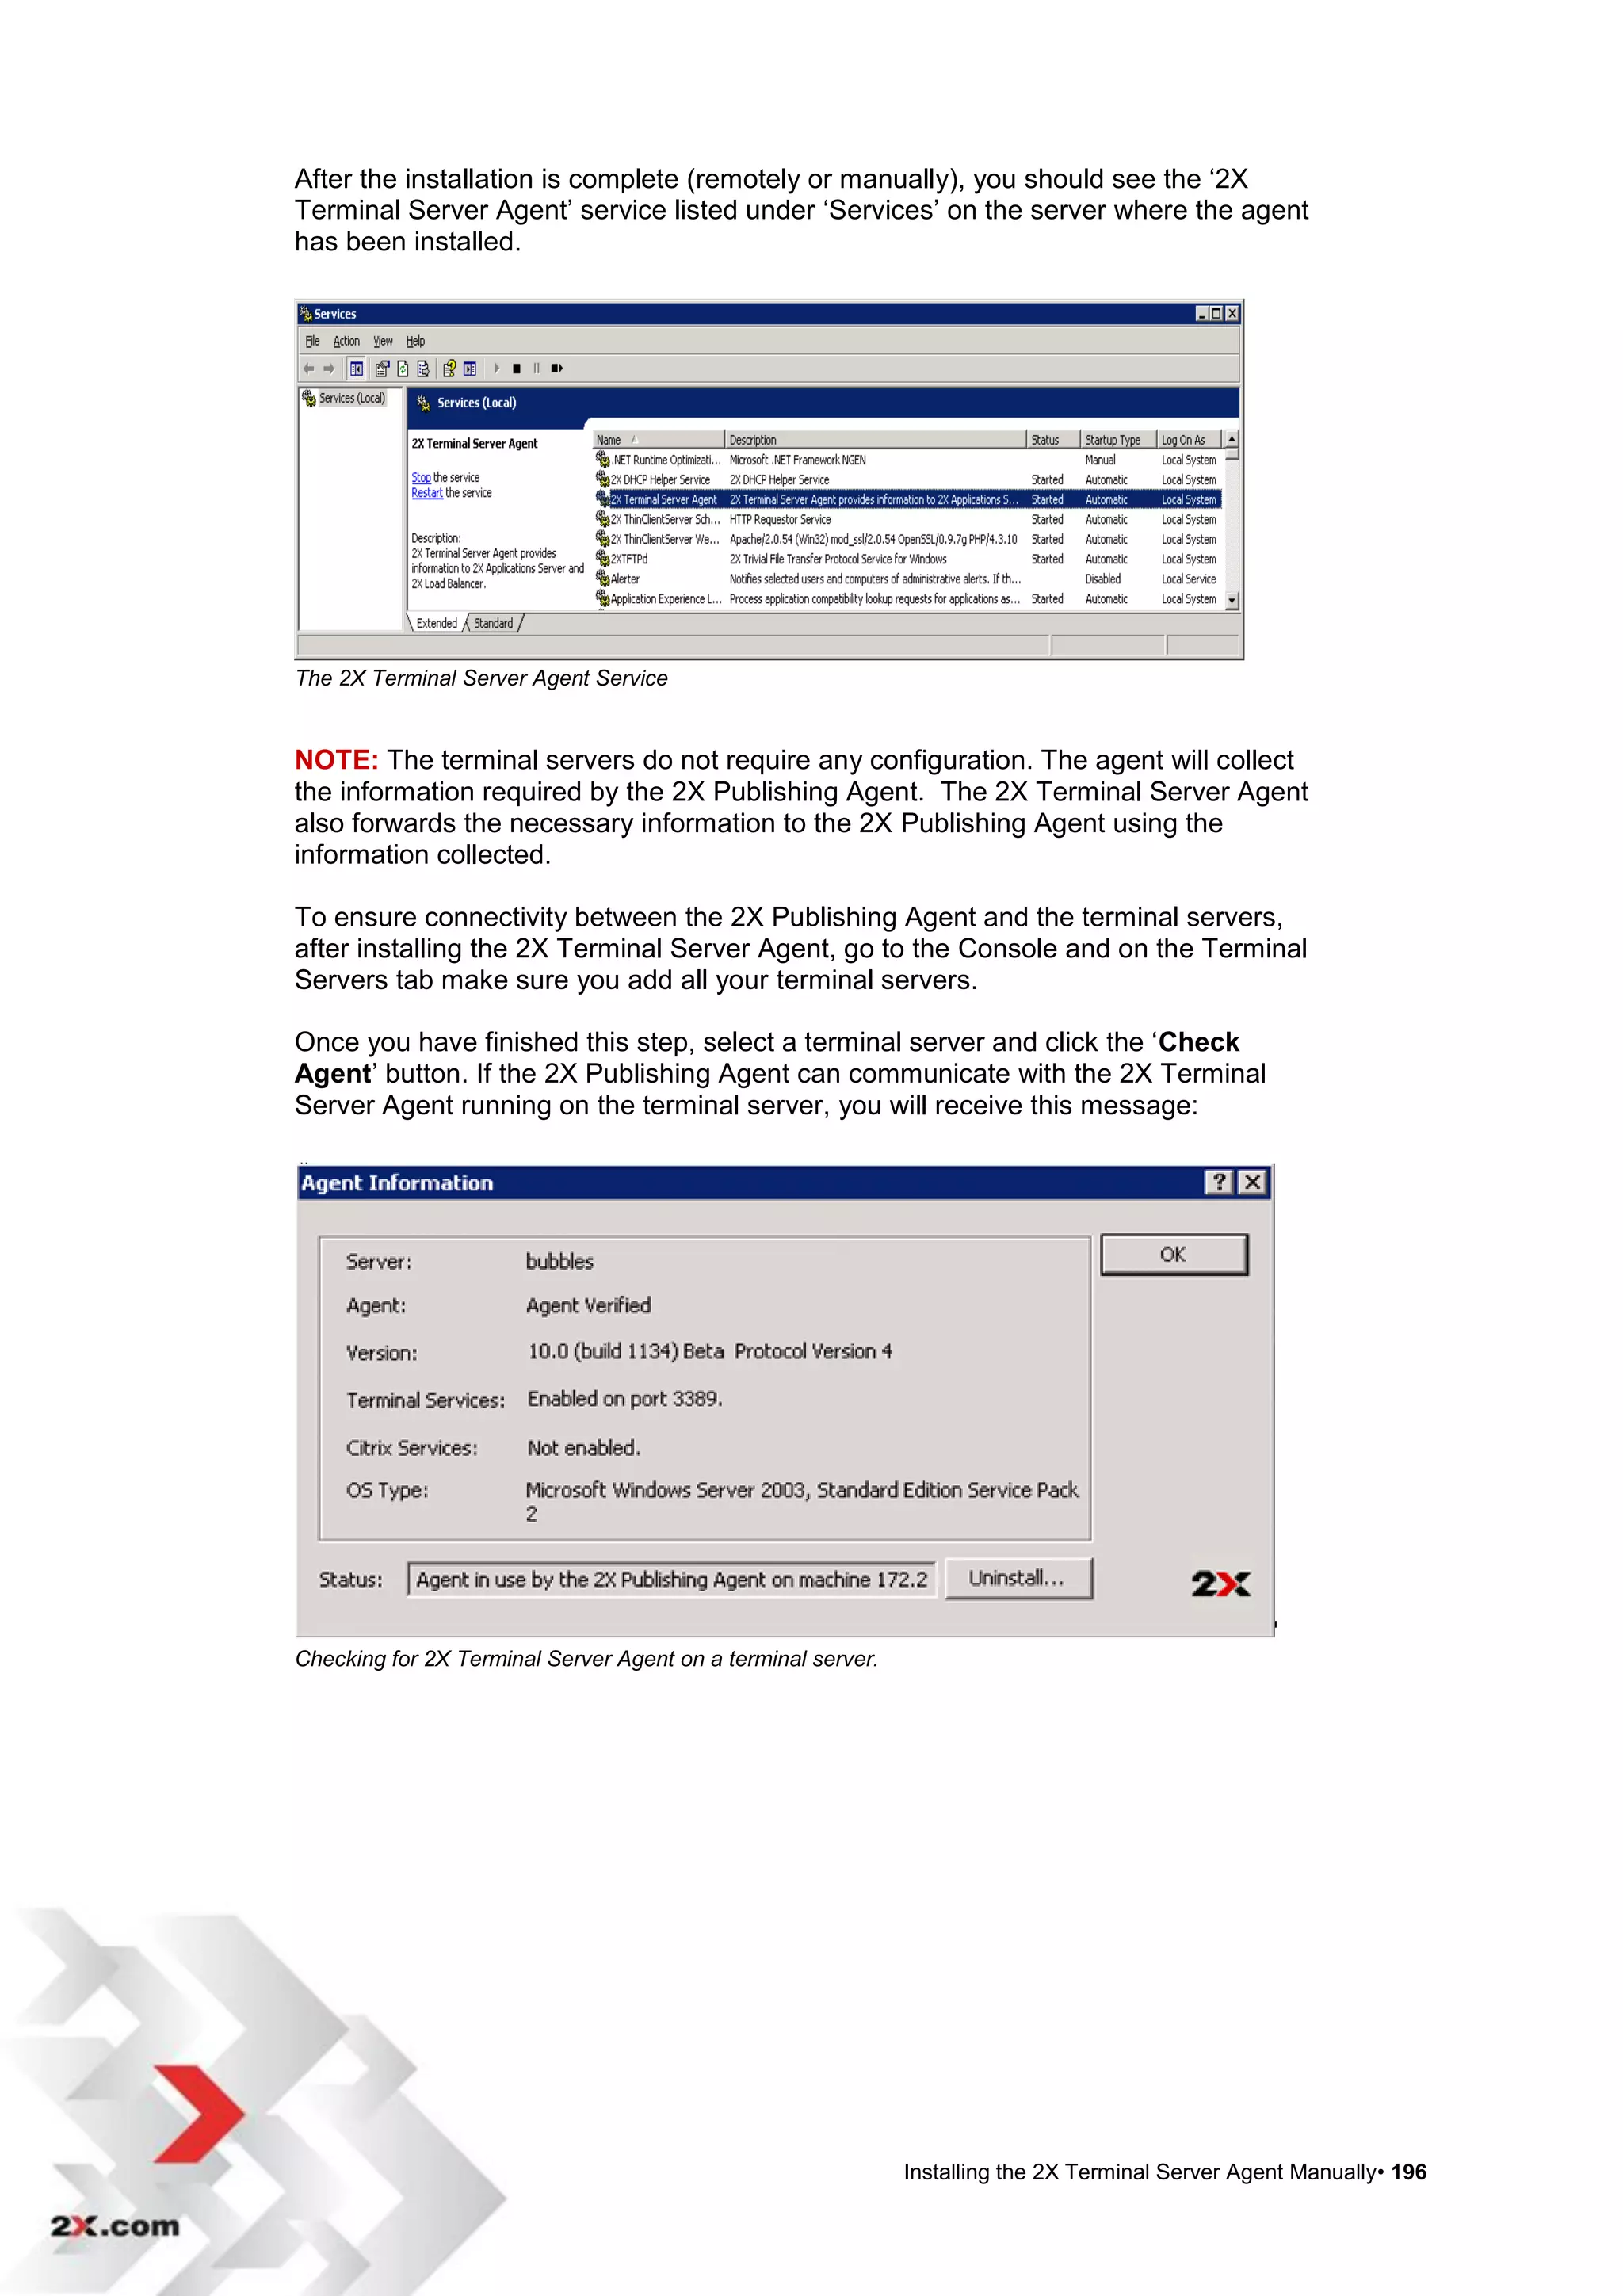
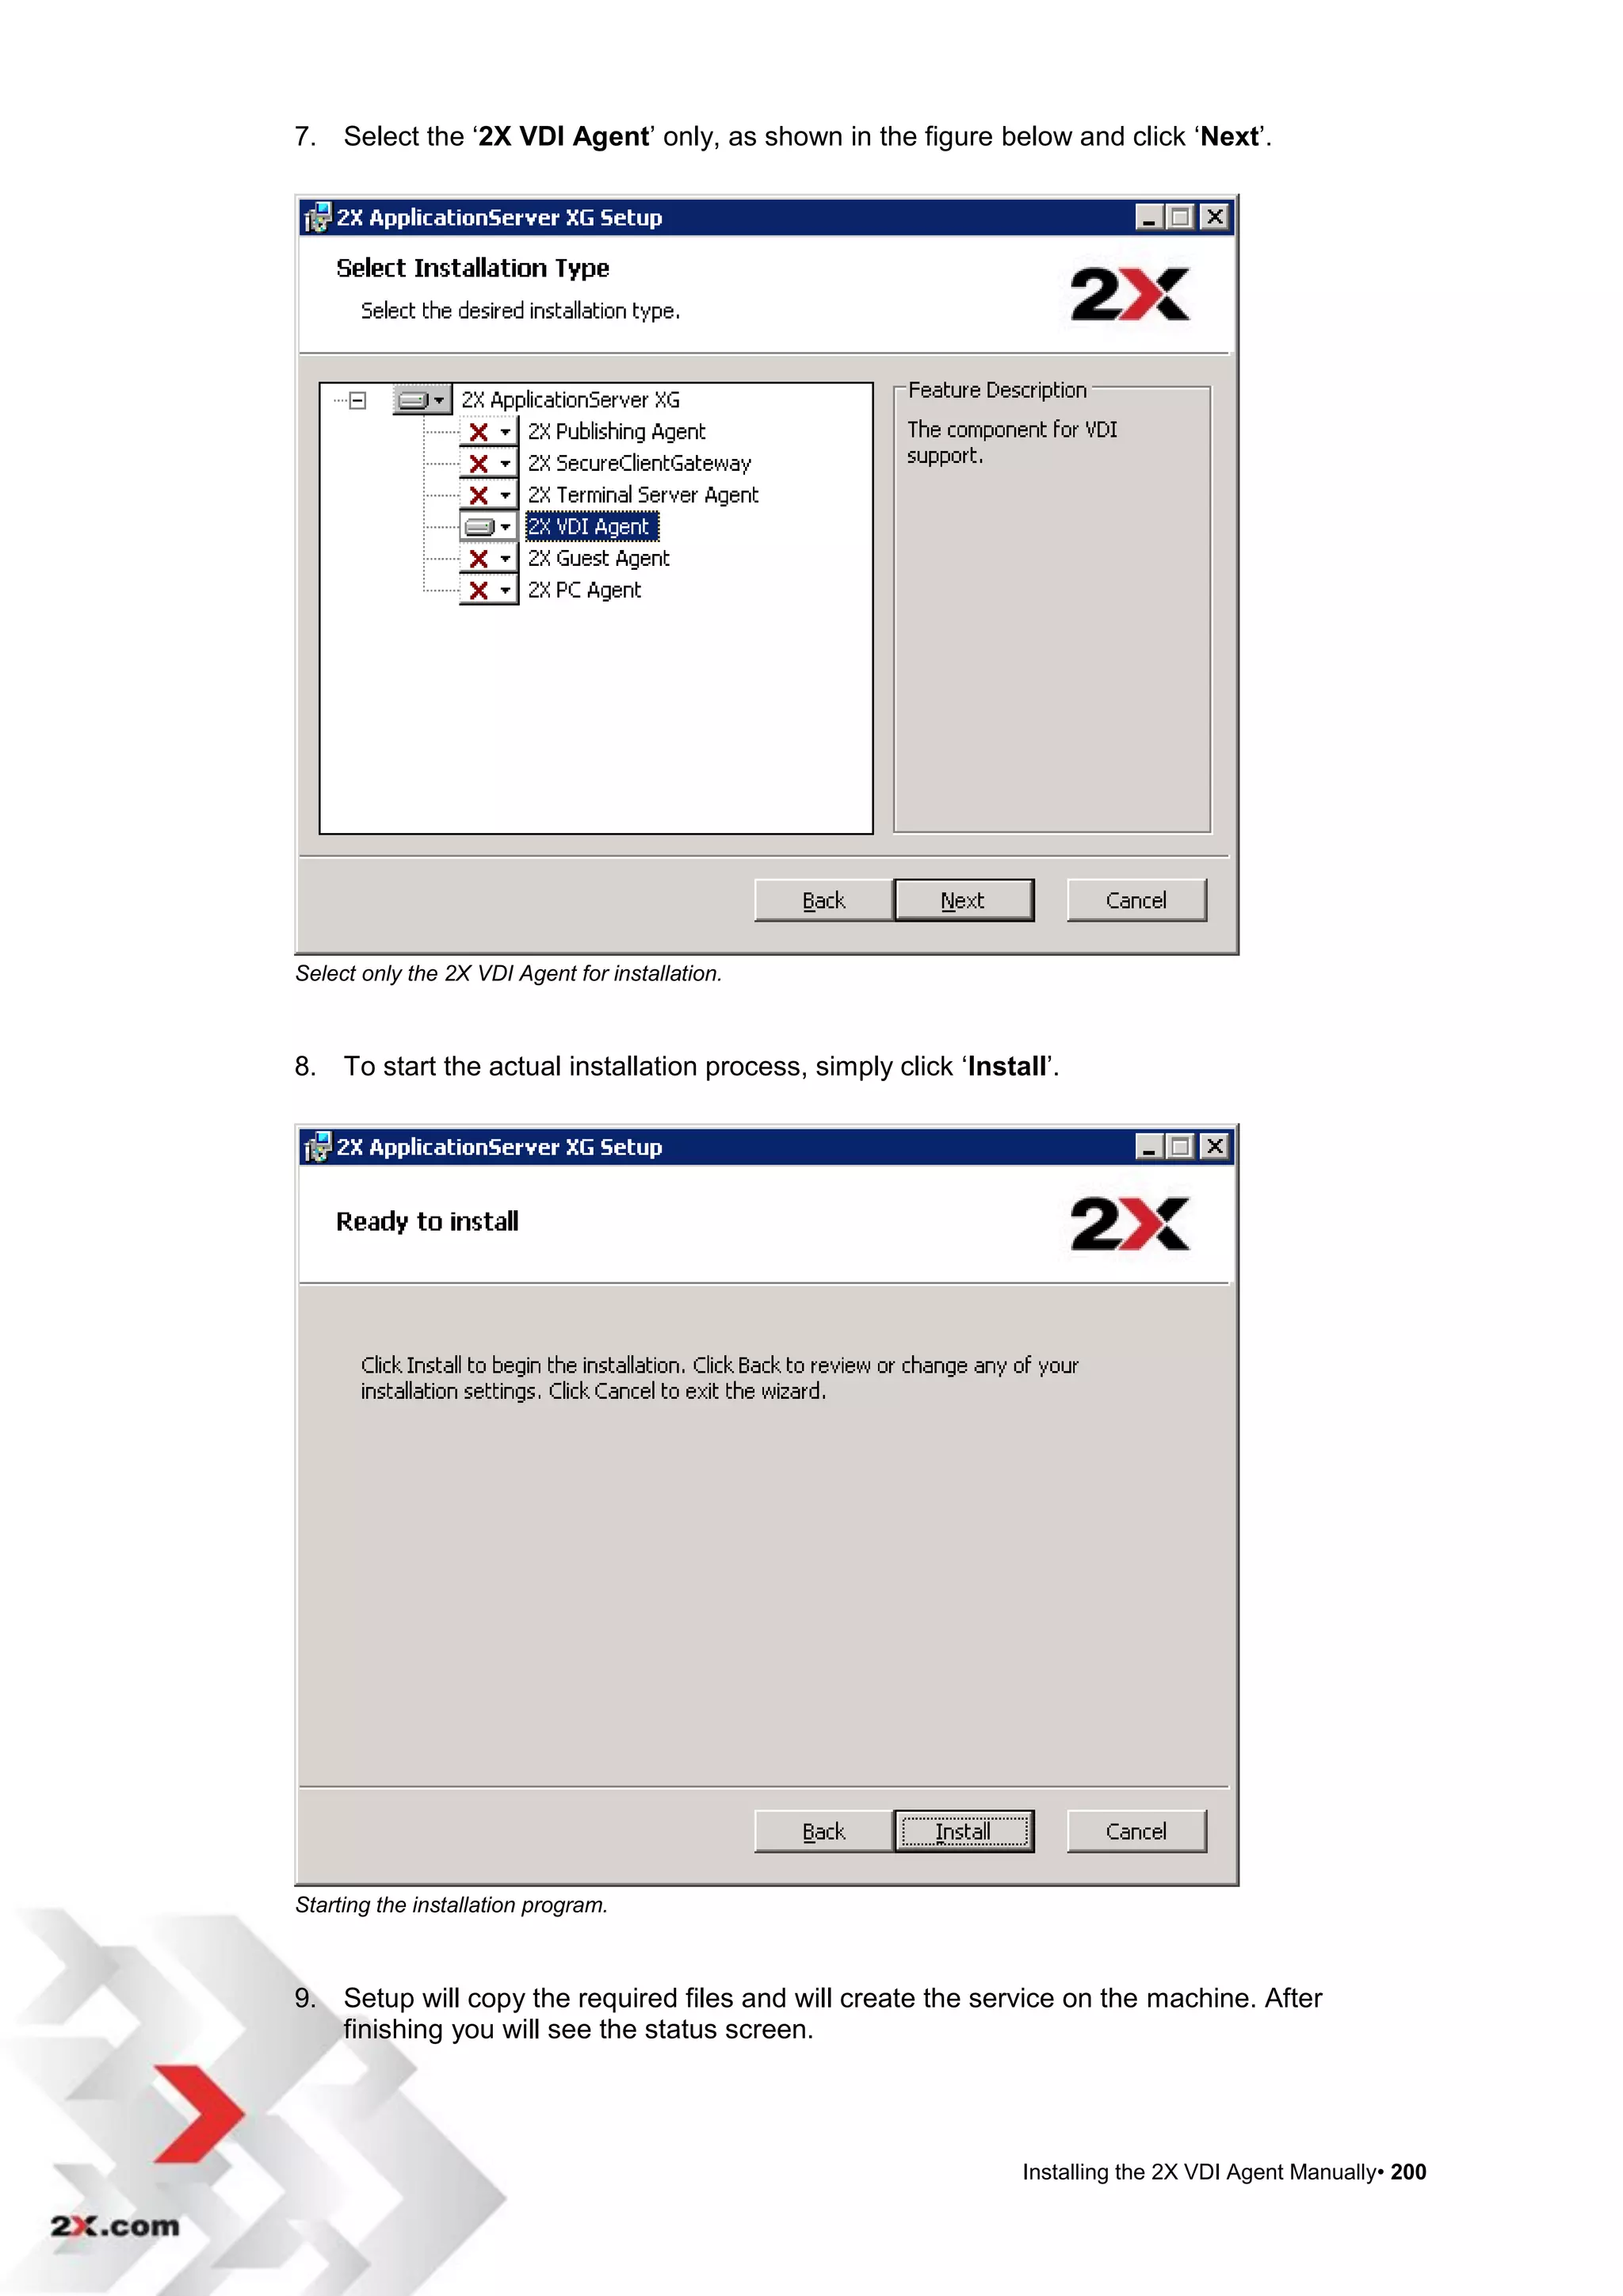
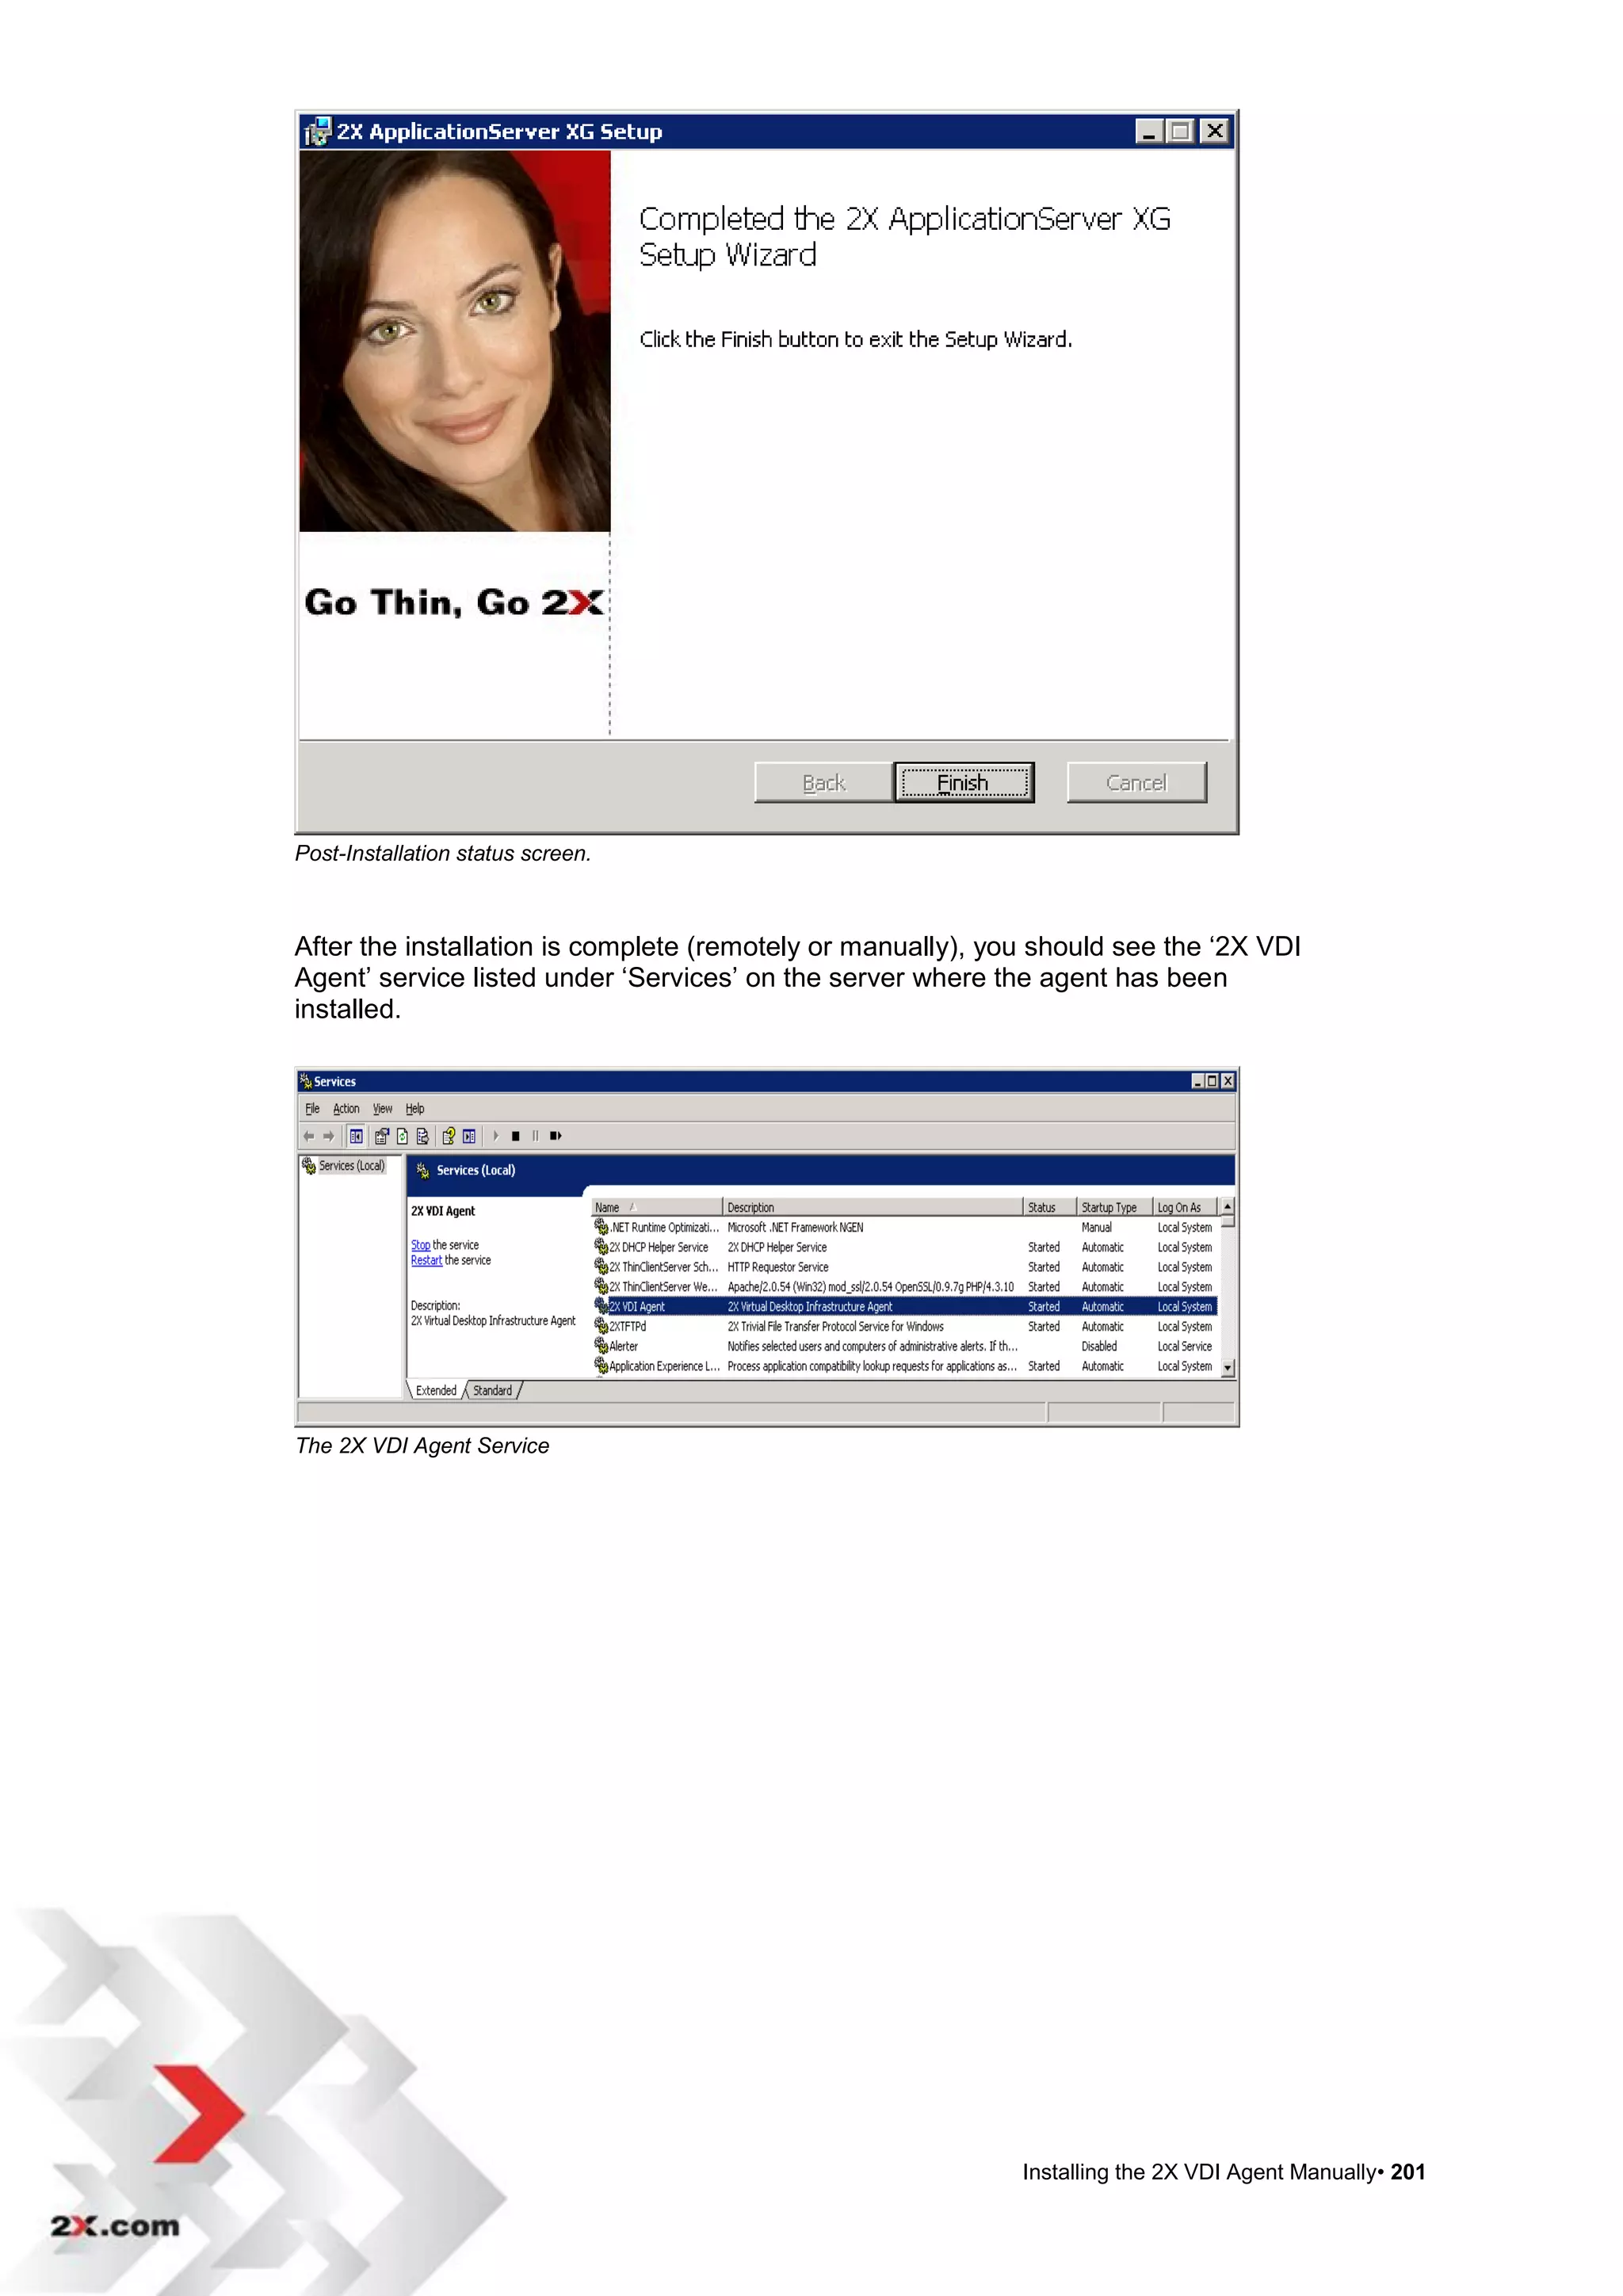
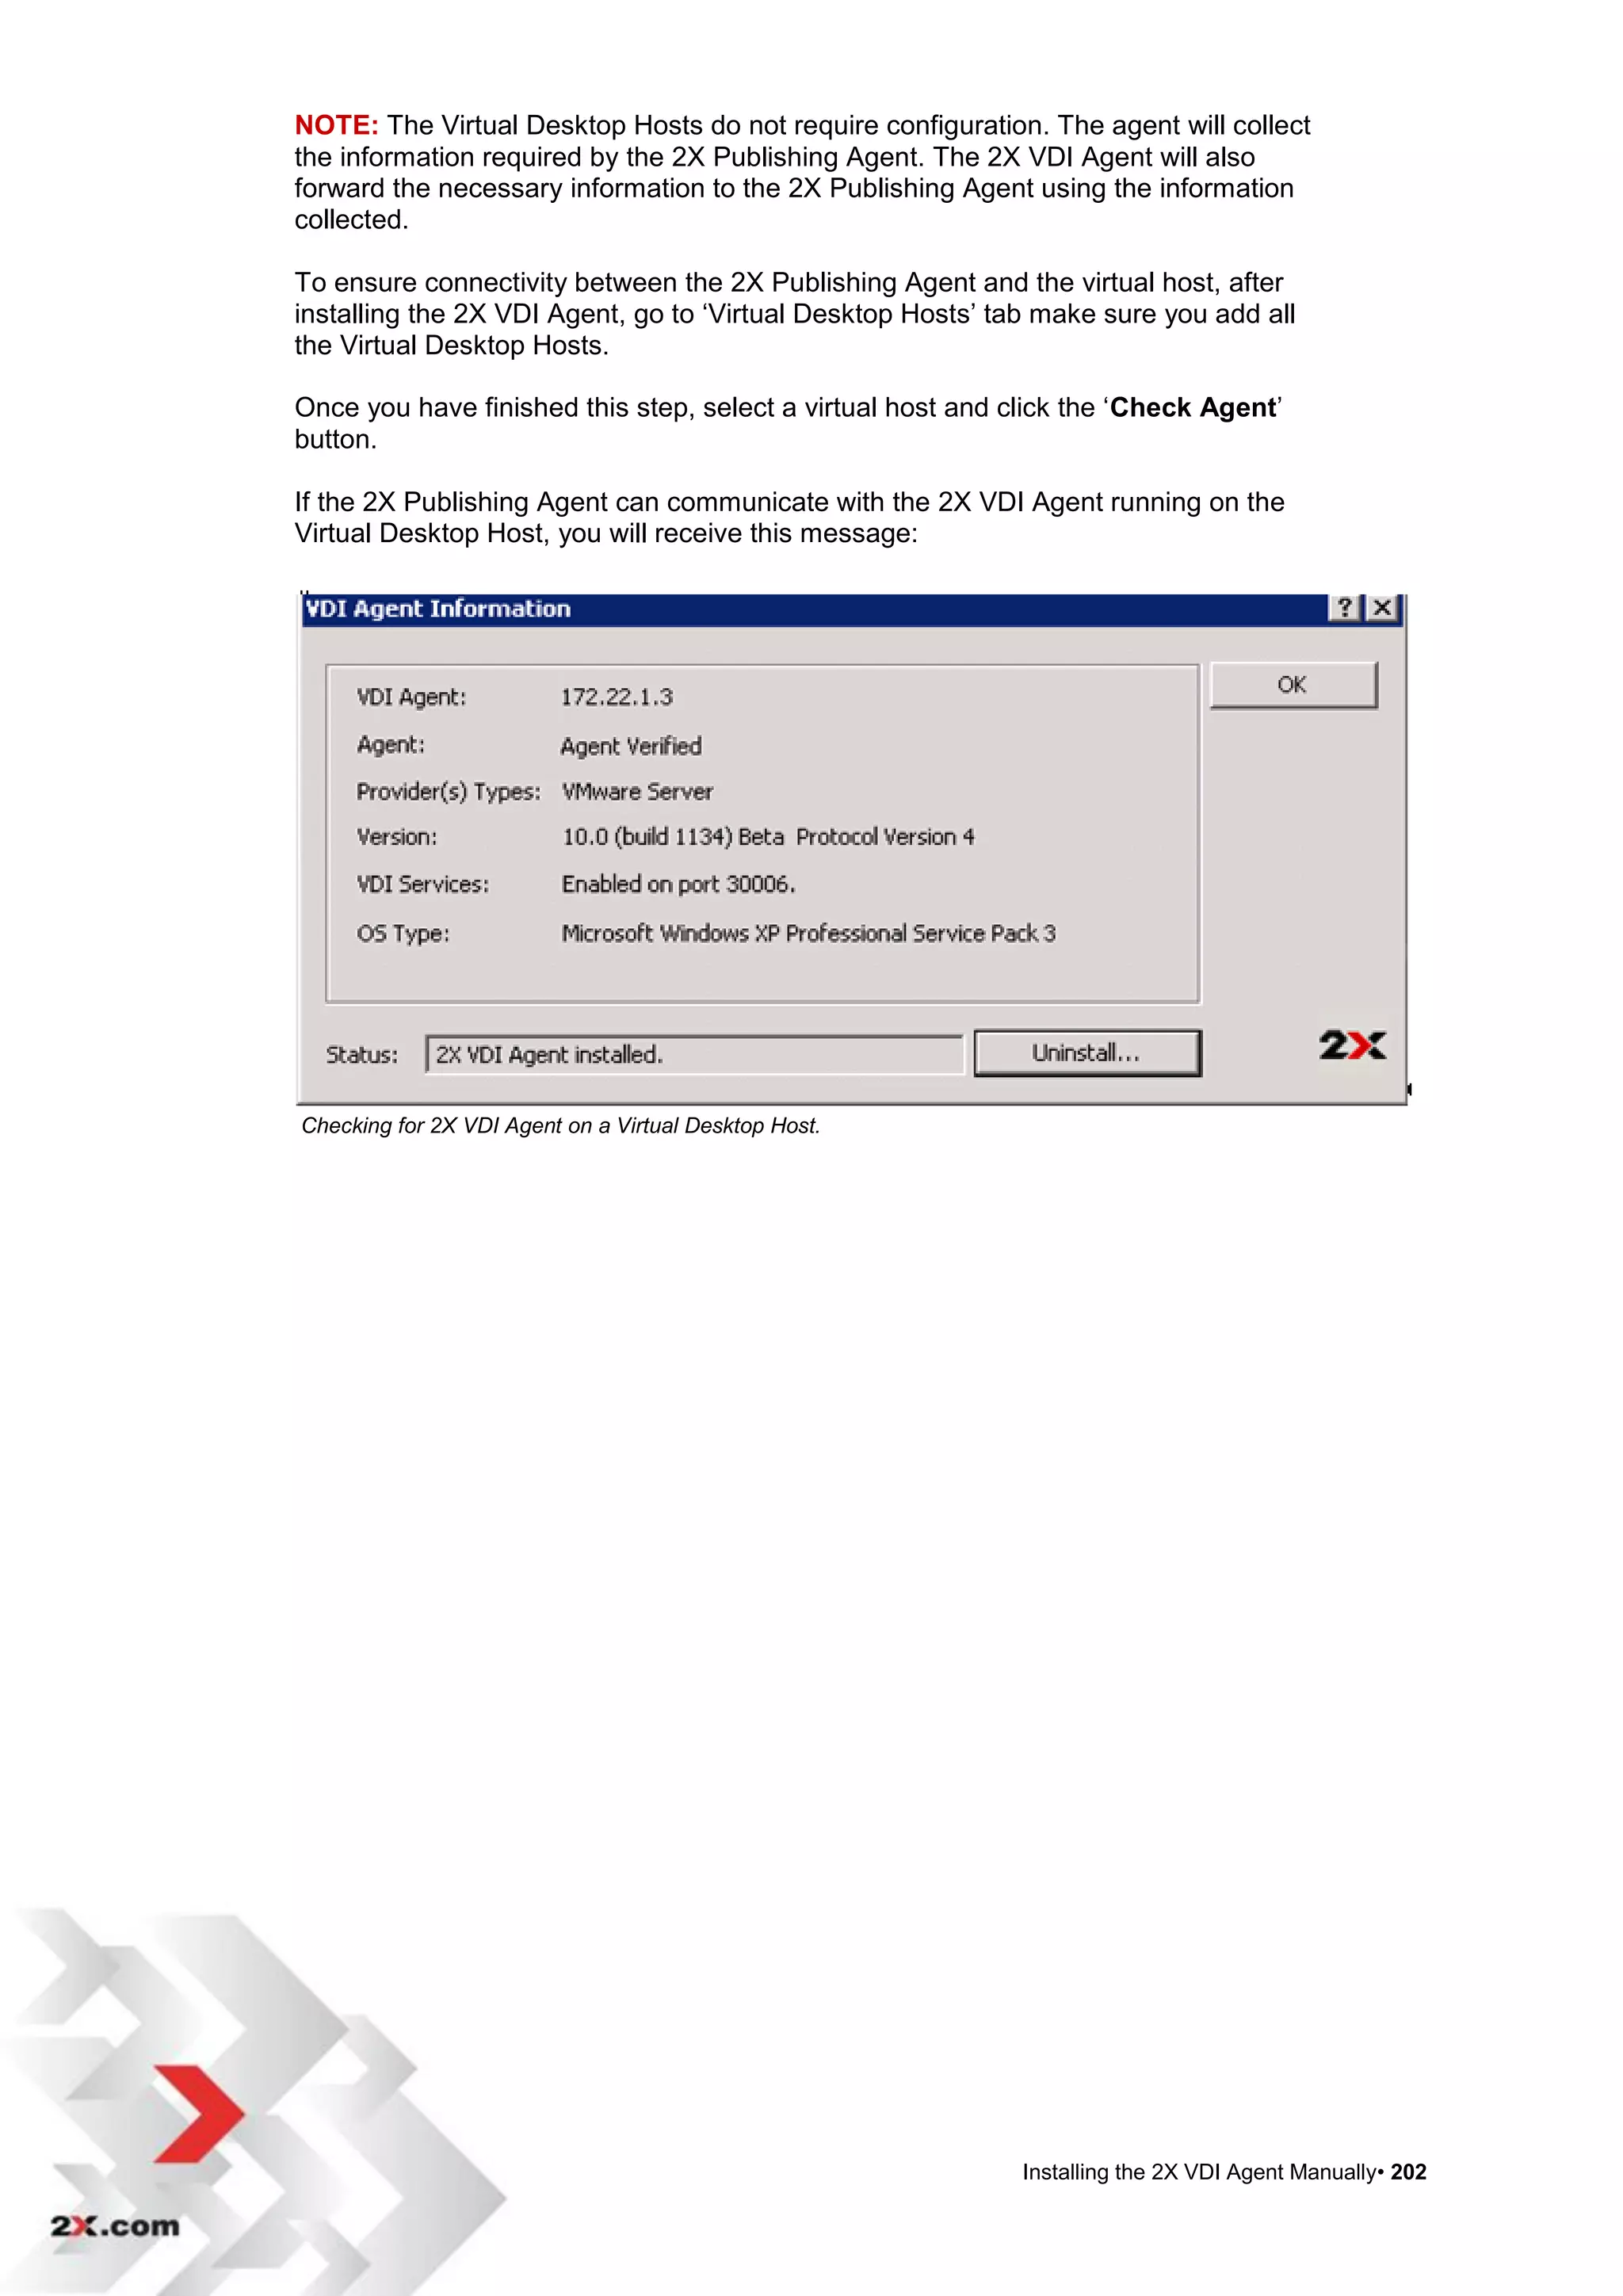
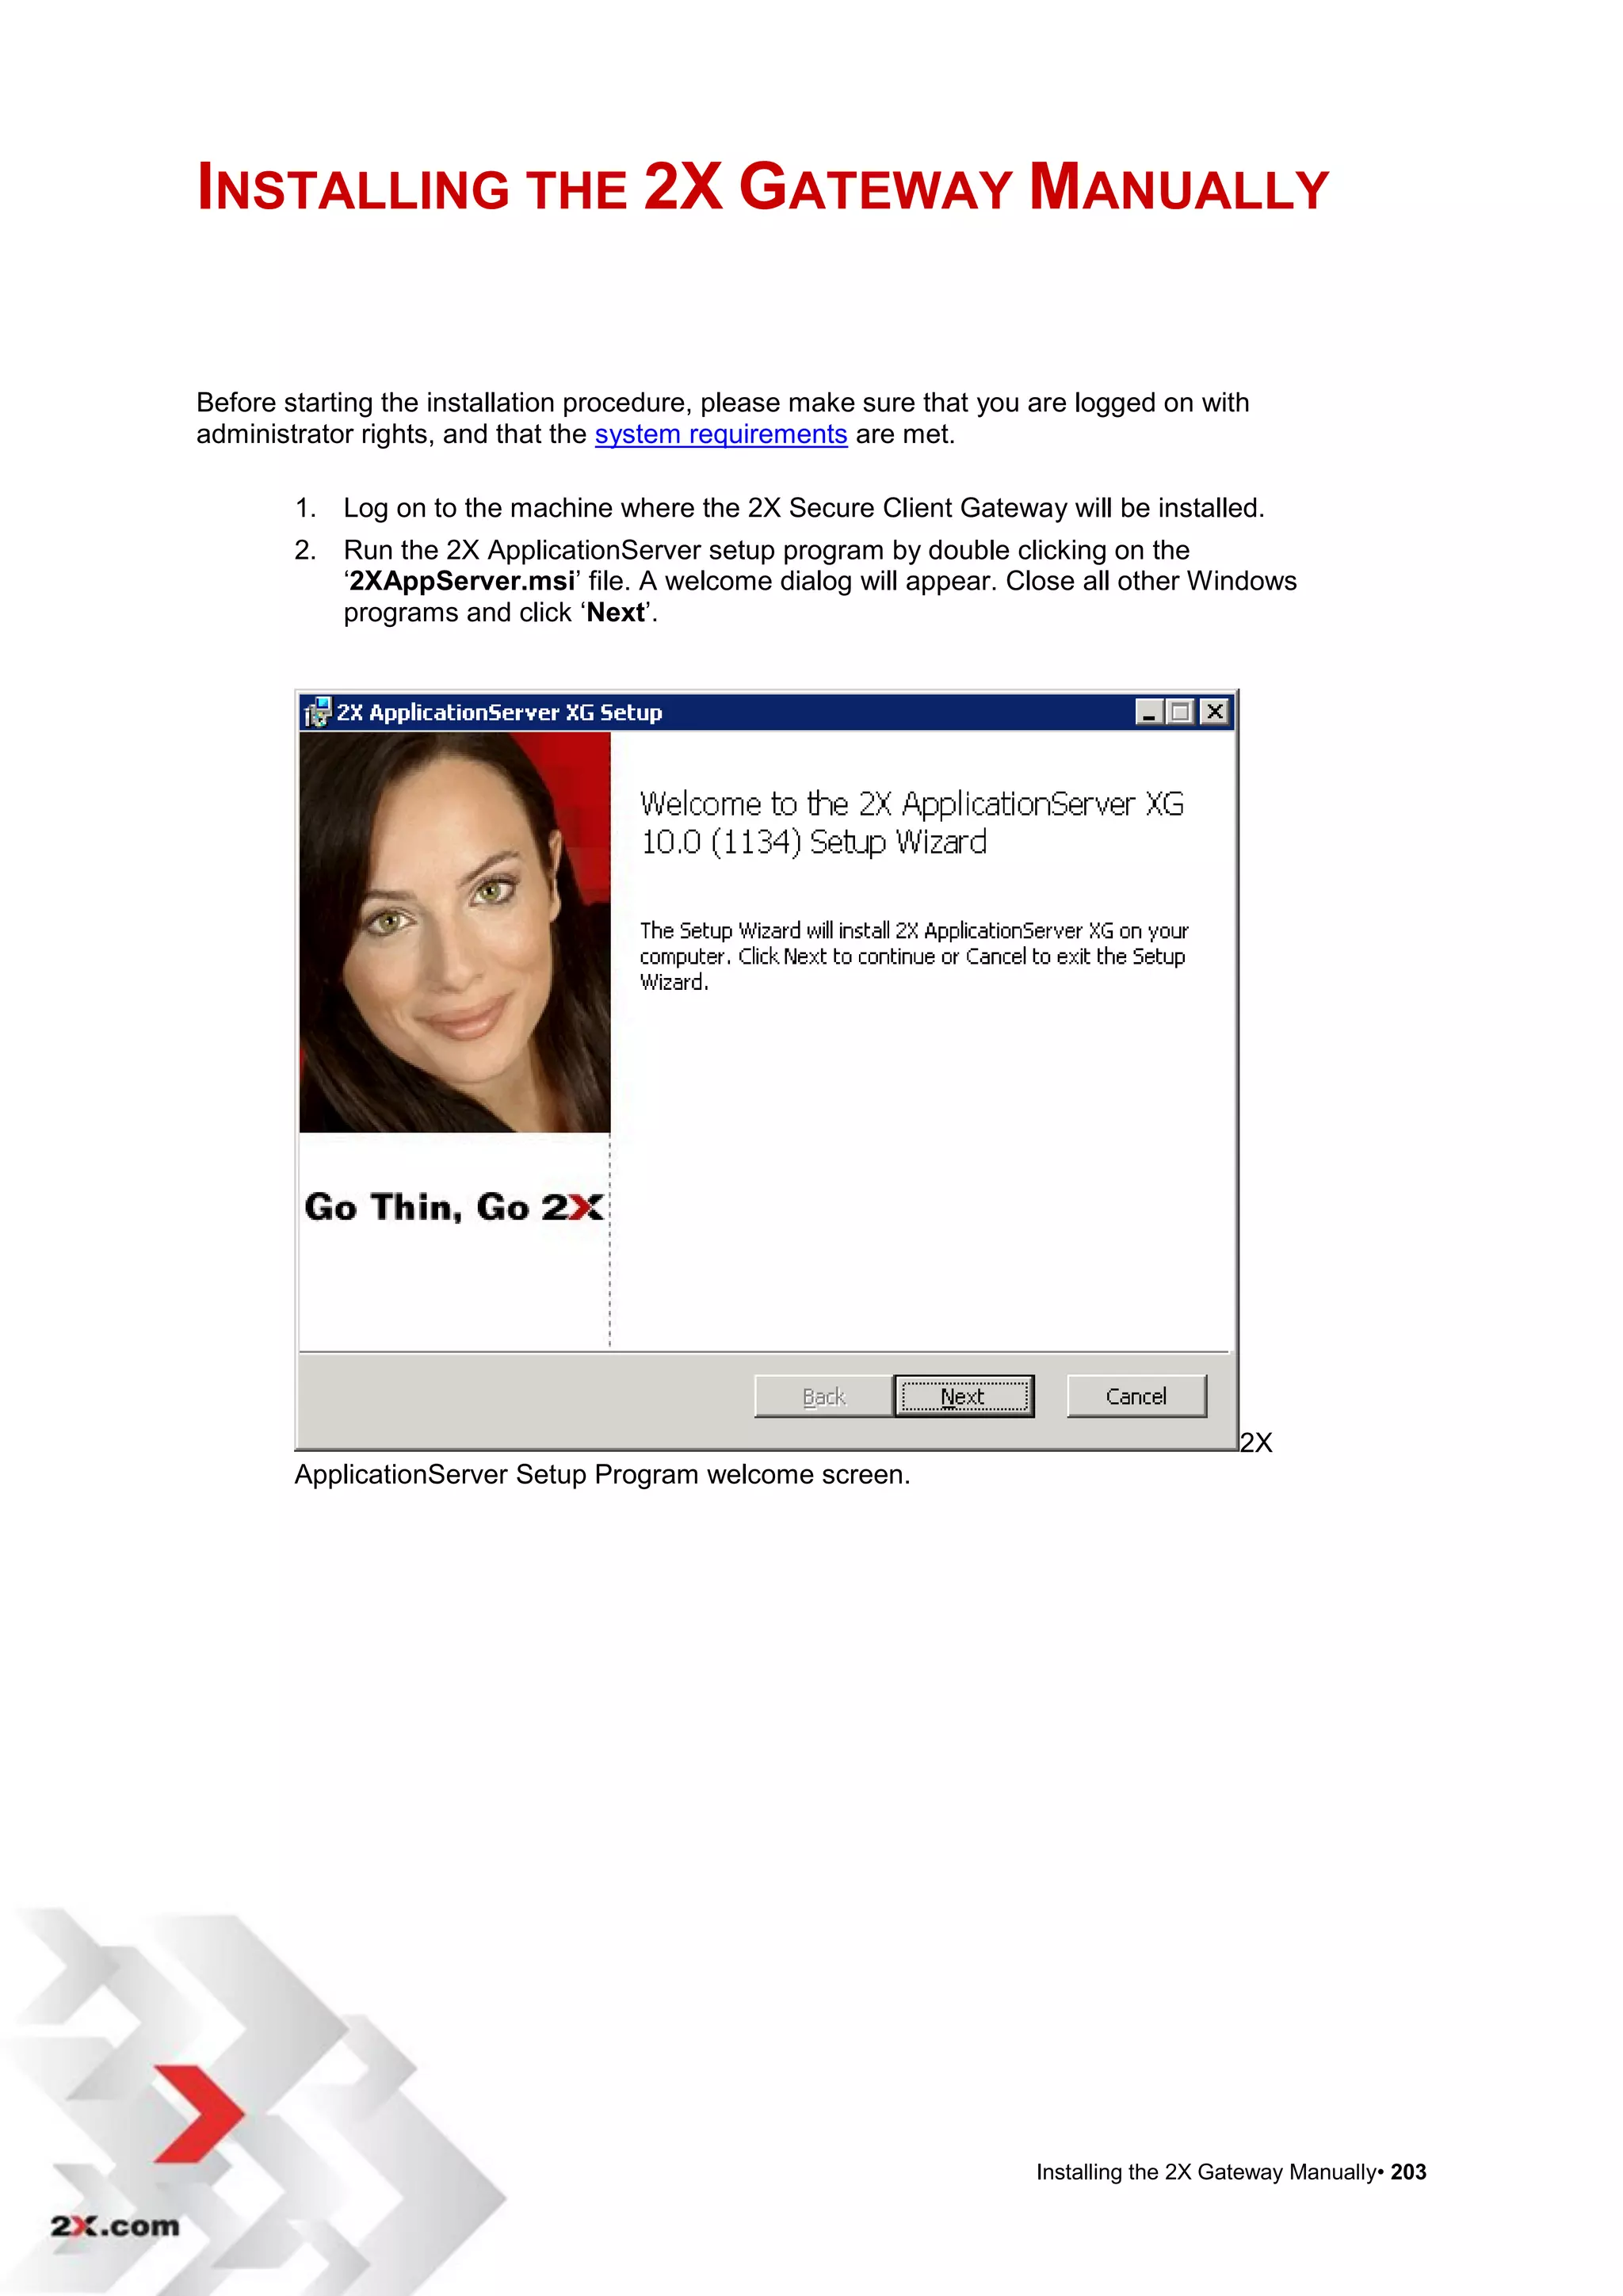
2X ApplicationServer is a software that provides virtual desktops and applications that can be accessed from anywhere. It allows publishing full desktops and applications within a virtual environment to improve manageability, security, and performance. The document provides instructions on installing 2X ApplicationServer, configuring its console, adding servers and hosts to the farm, publishing applications and desktops, and setting up load balancing, printing, scanning and other features.
![CONFIGURING 2X APPLICATIONSERVER
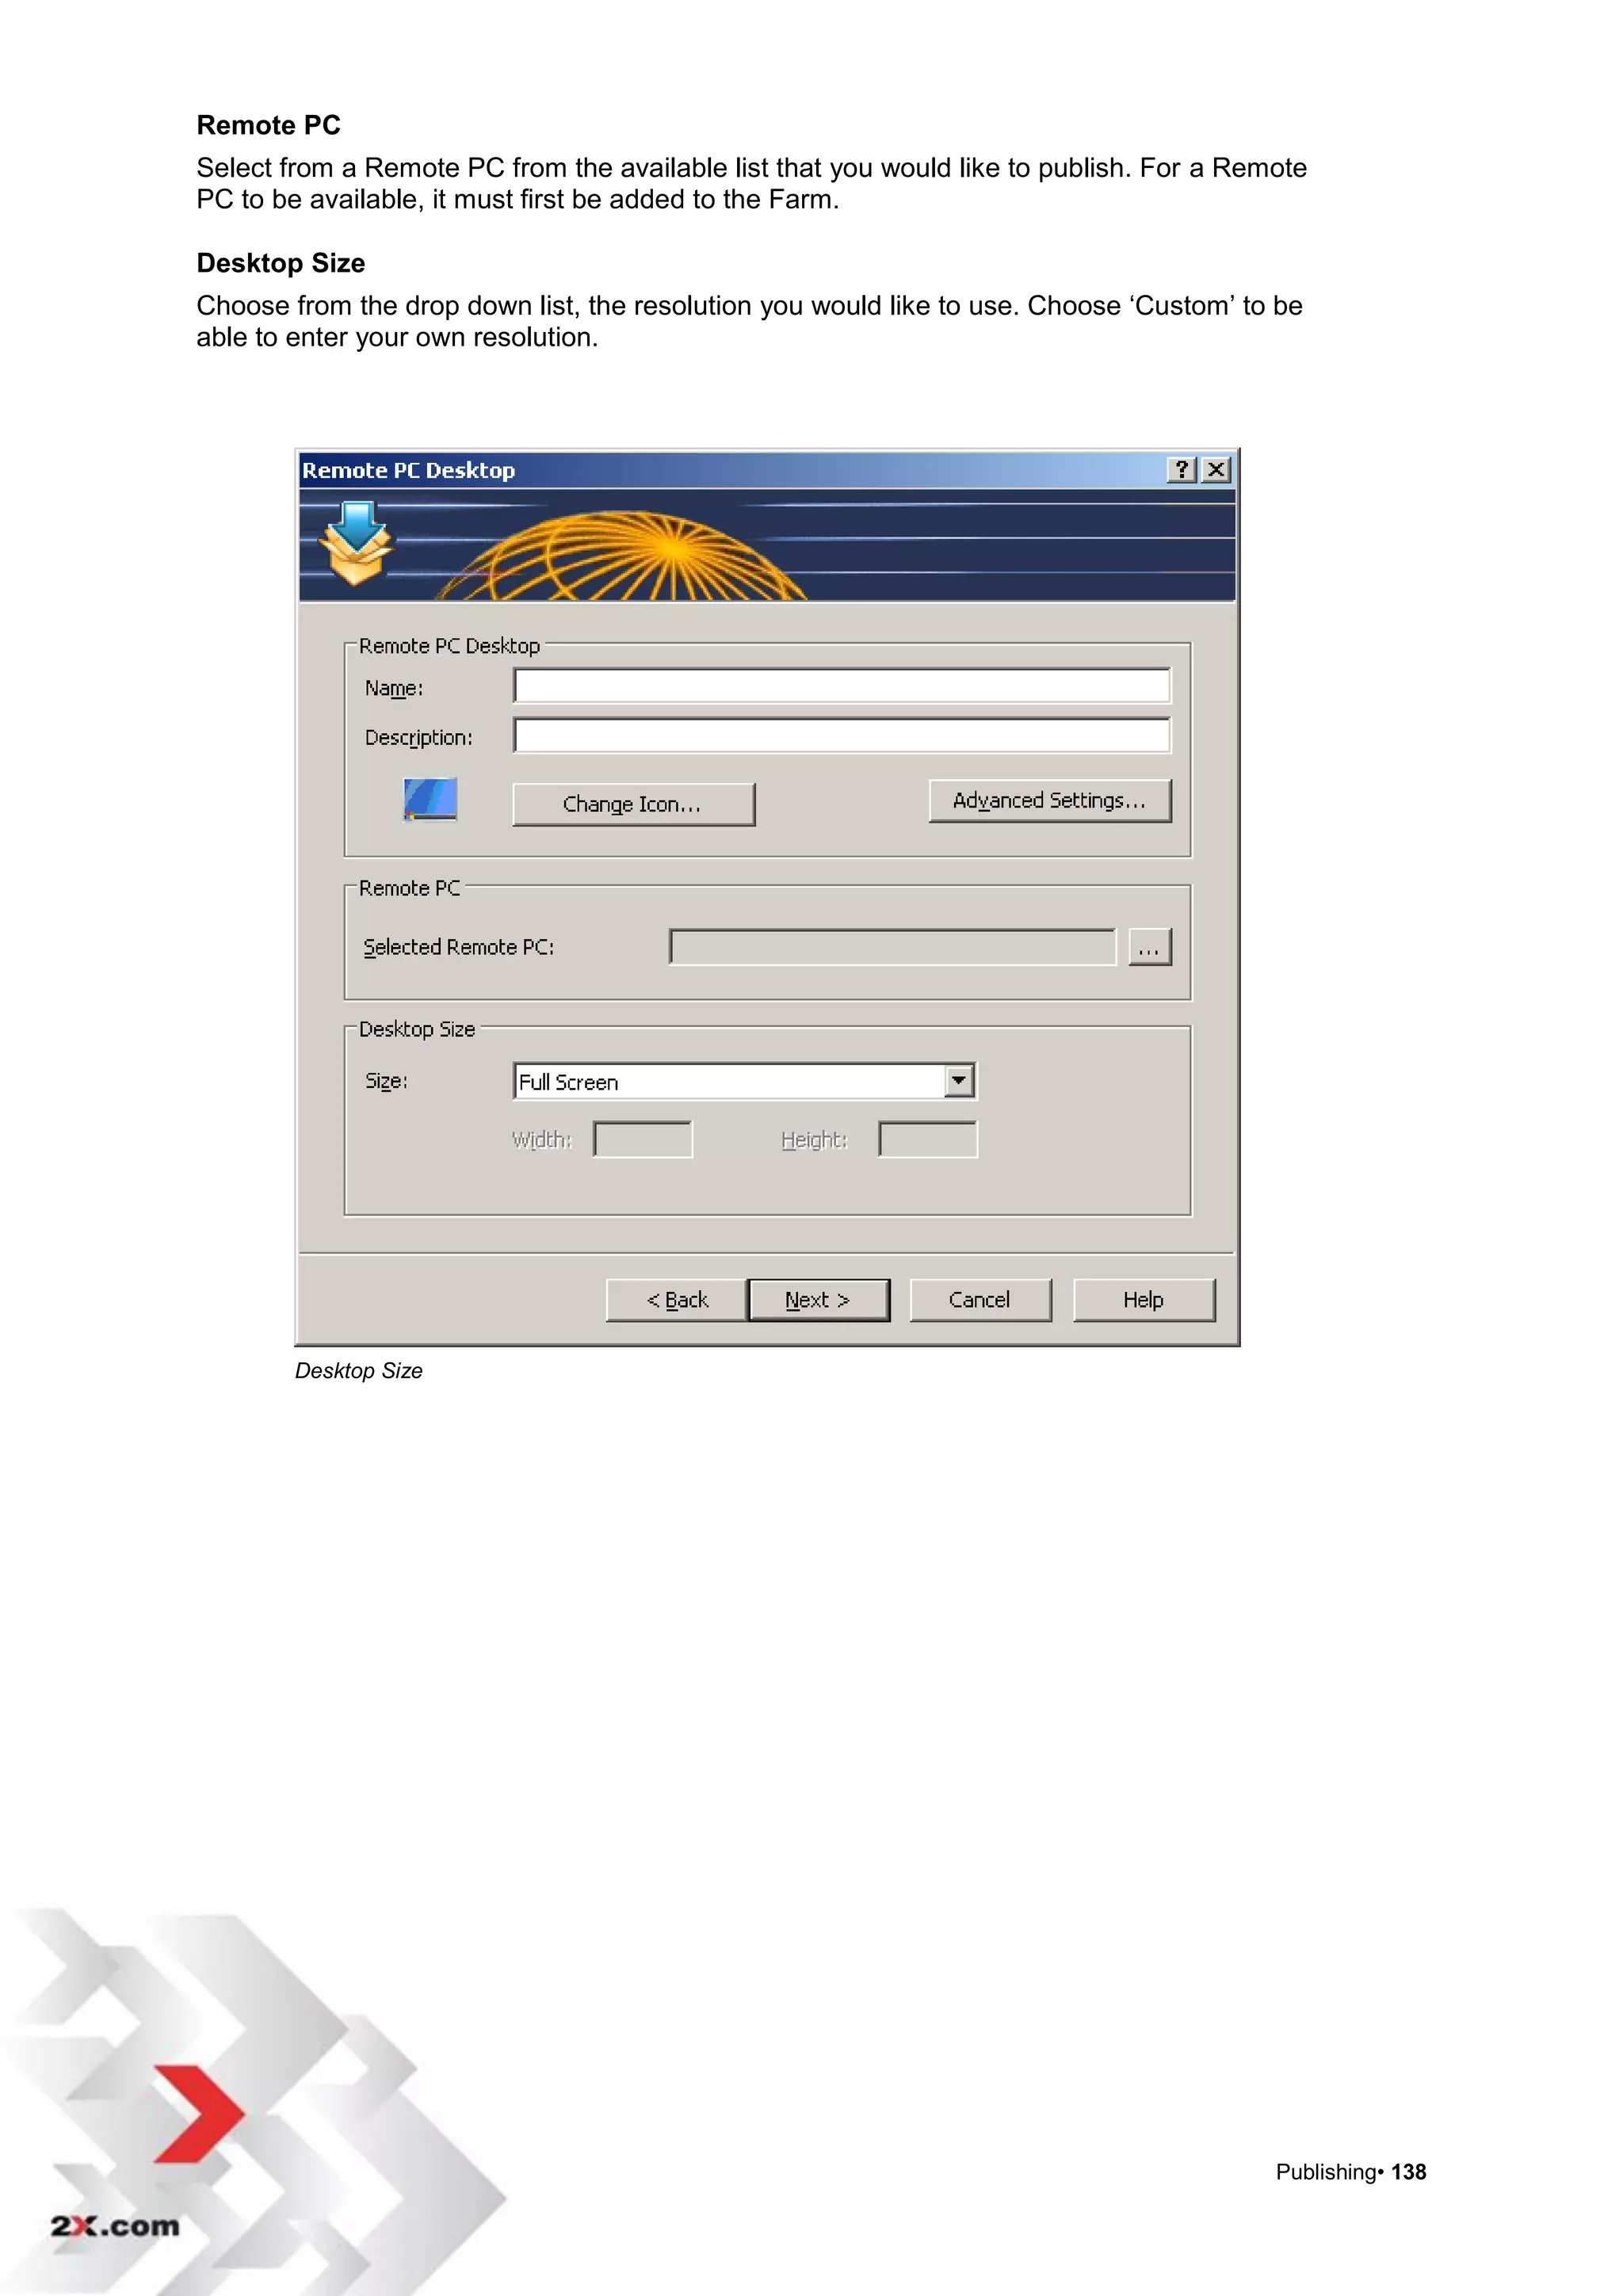
Introduction to the Configuration of ApplicationServer
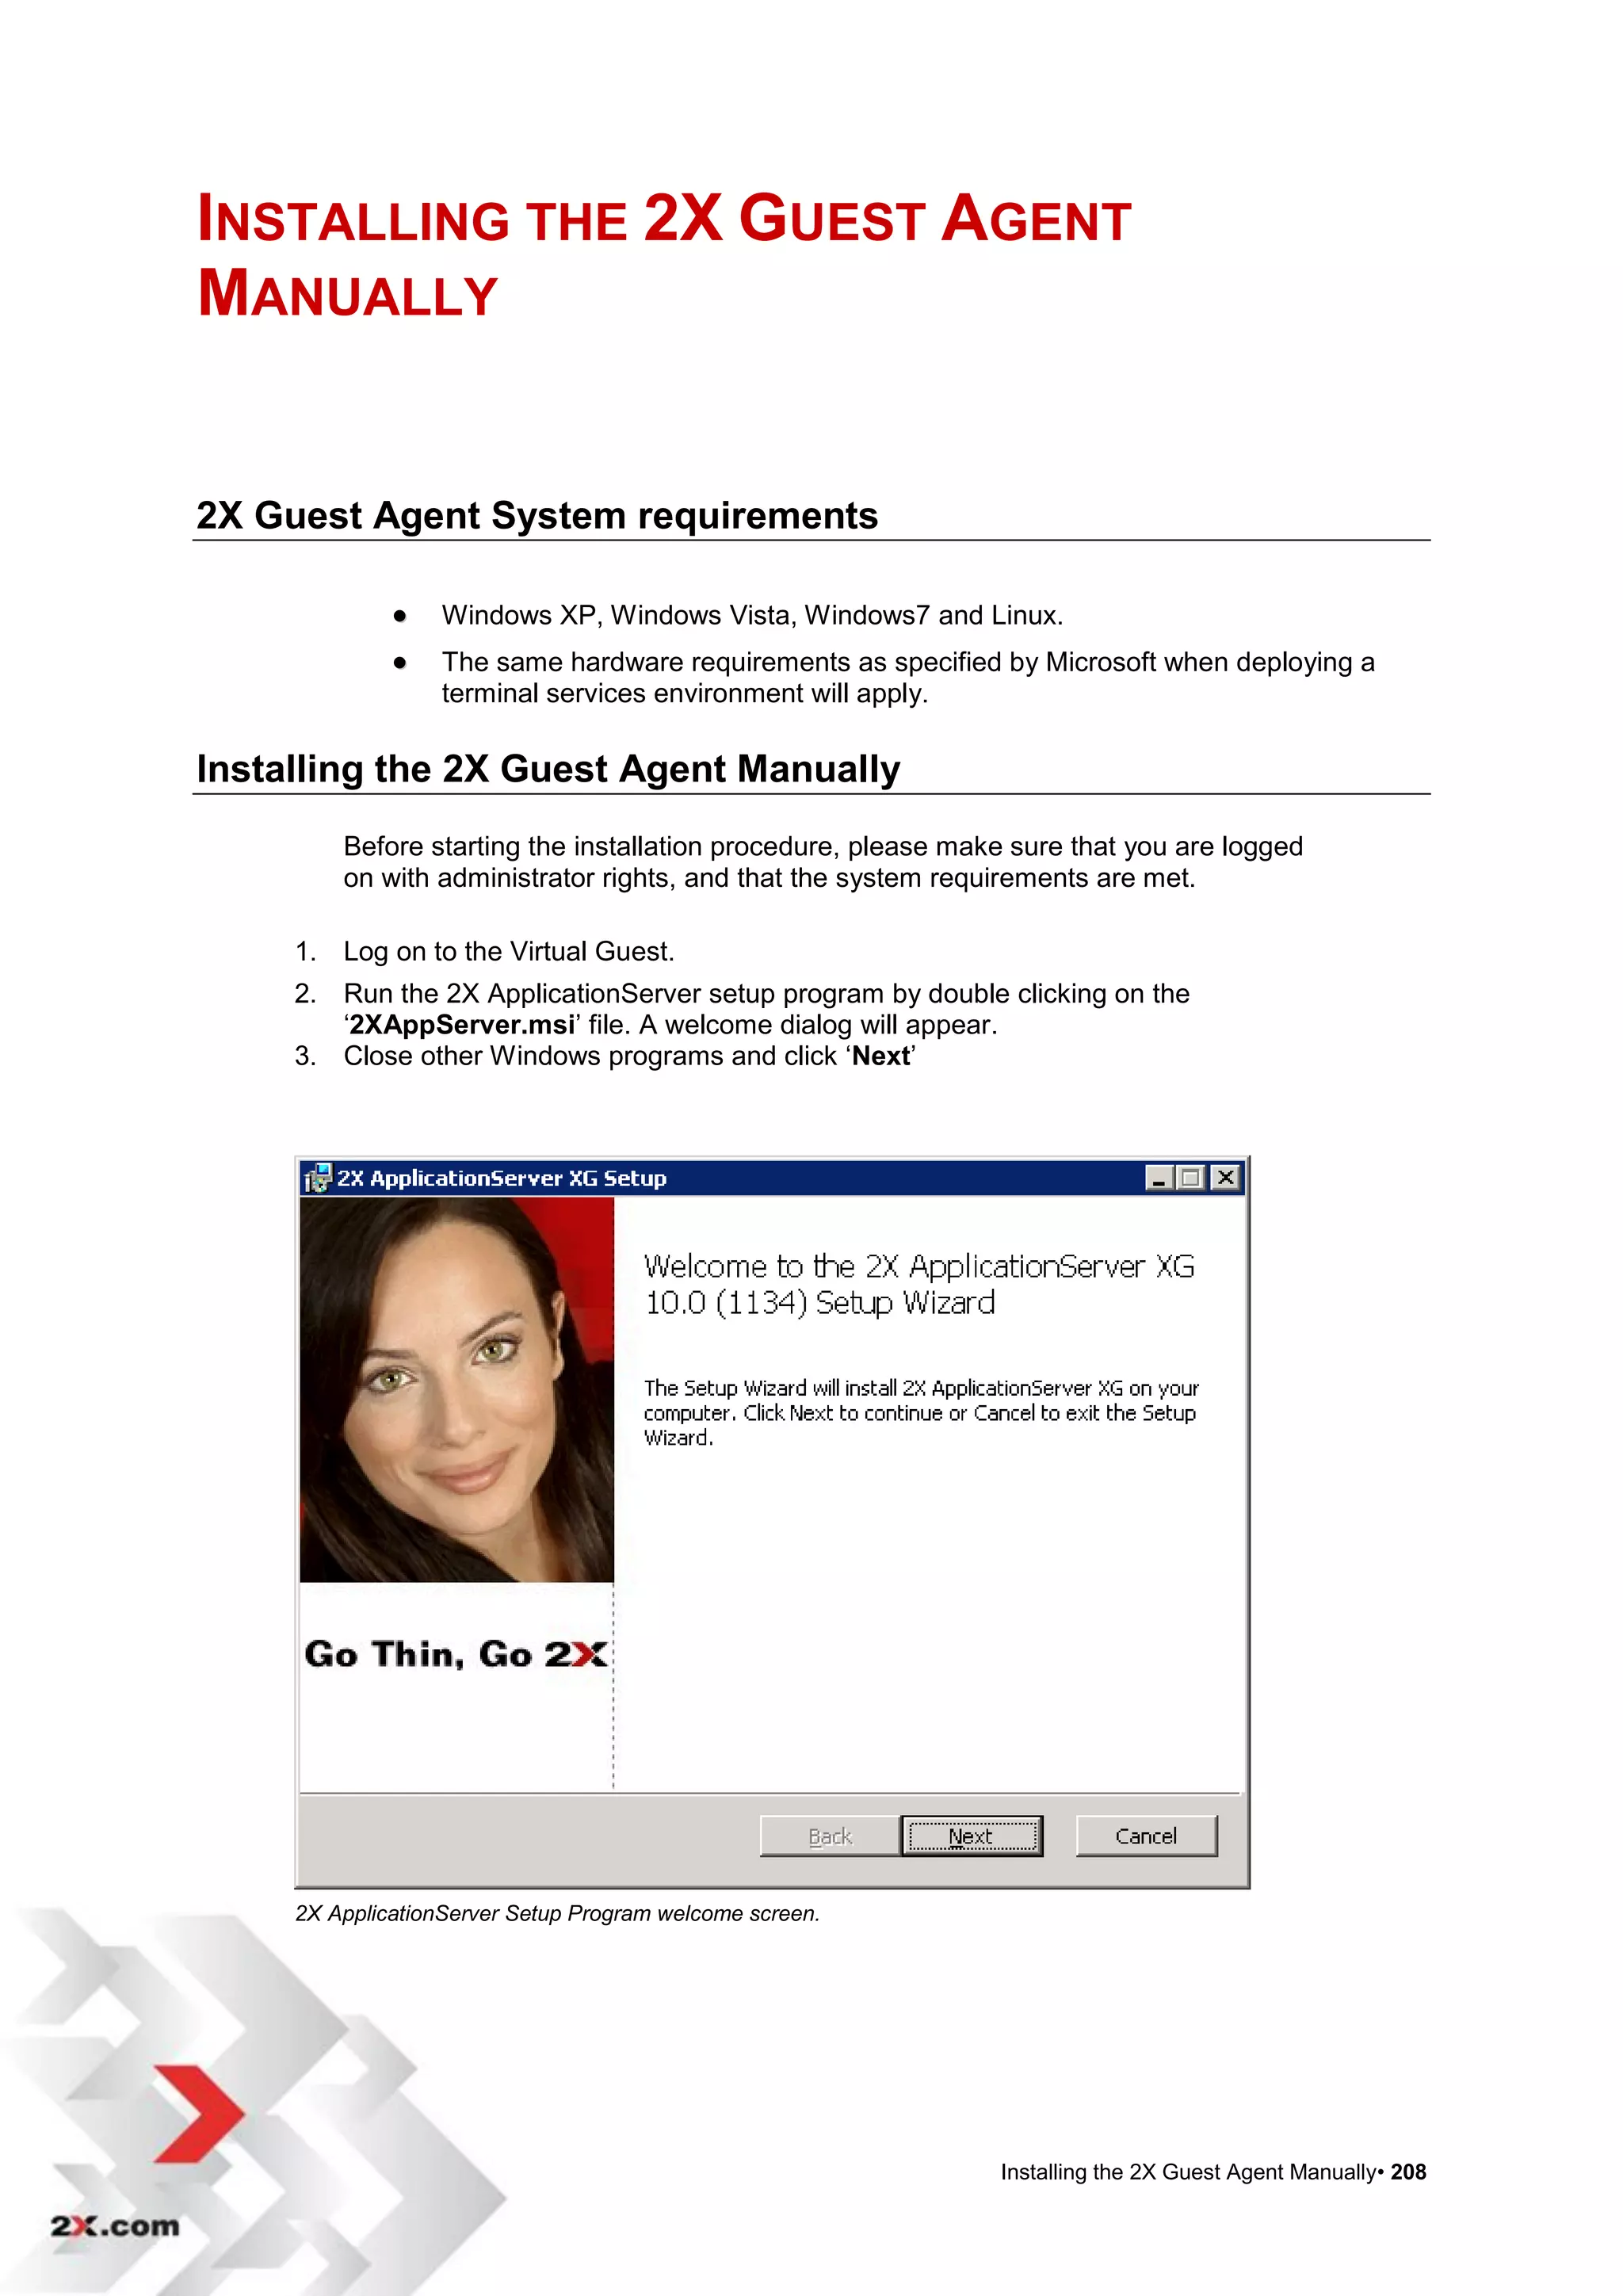
After you have installed 2X ApplicationServer you can now launch the 2X ApplicationServer
Console for additional configuration.
Launching the 2X ApplicationServer Console
To open the 2X ApplicationServer Console go to:
Start > [All] Programs > 2X > ApplicationServer > 2X ApplicationServer
Console
Configuring 2X ApplicationServer• 16](https://image.slidesharecdn.com/2xapplicationserver-120214155302-phpapp02/75/2-x-applicationserver-16-2048.jpg)


![The first publishing agent in the Servers list will be used by default. In the event that the first
2X Publishing Agent fails to respond, the next 2X Publishing Agent will be used.
NOTE: 2X Terminal Server Agents cannot be assigned to multiple 2X Publishing Agents.
Therefore each 2X Publishing Agent should have a unique group of terminal servers. For
more advanced and alternative scenarios and solutions please read 2X Server Based
Computing Guide.
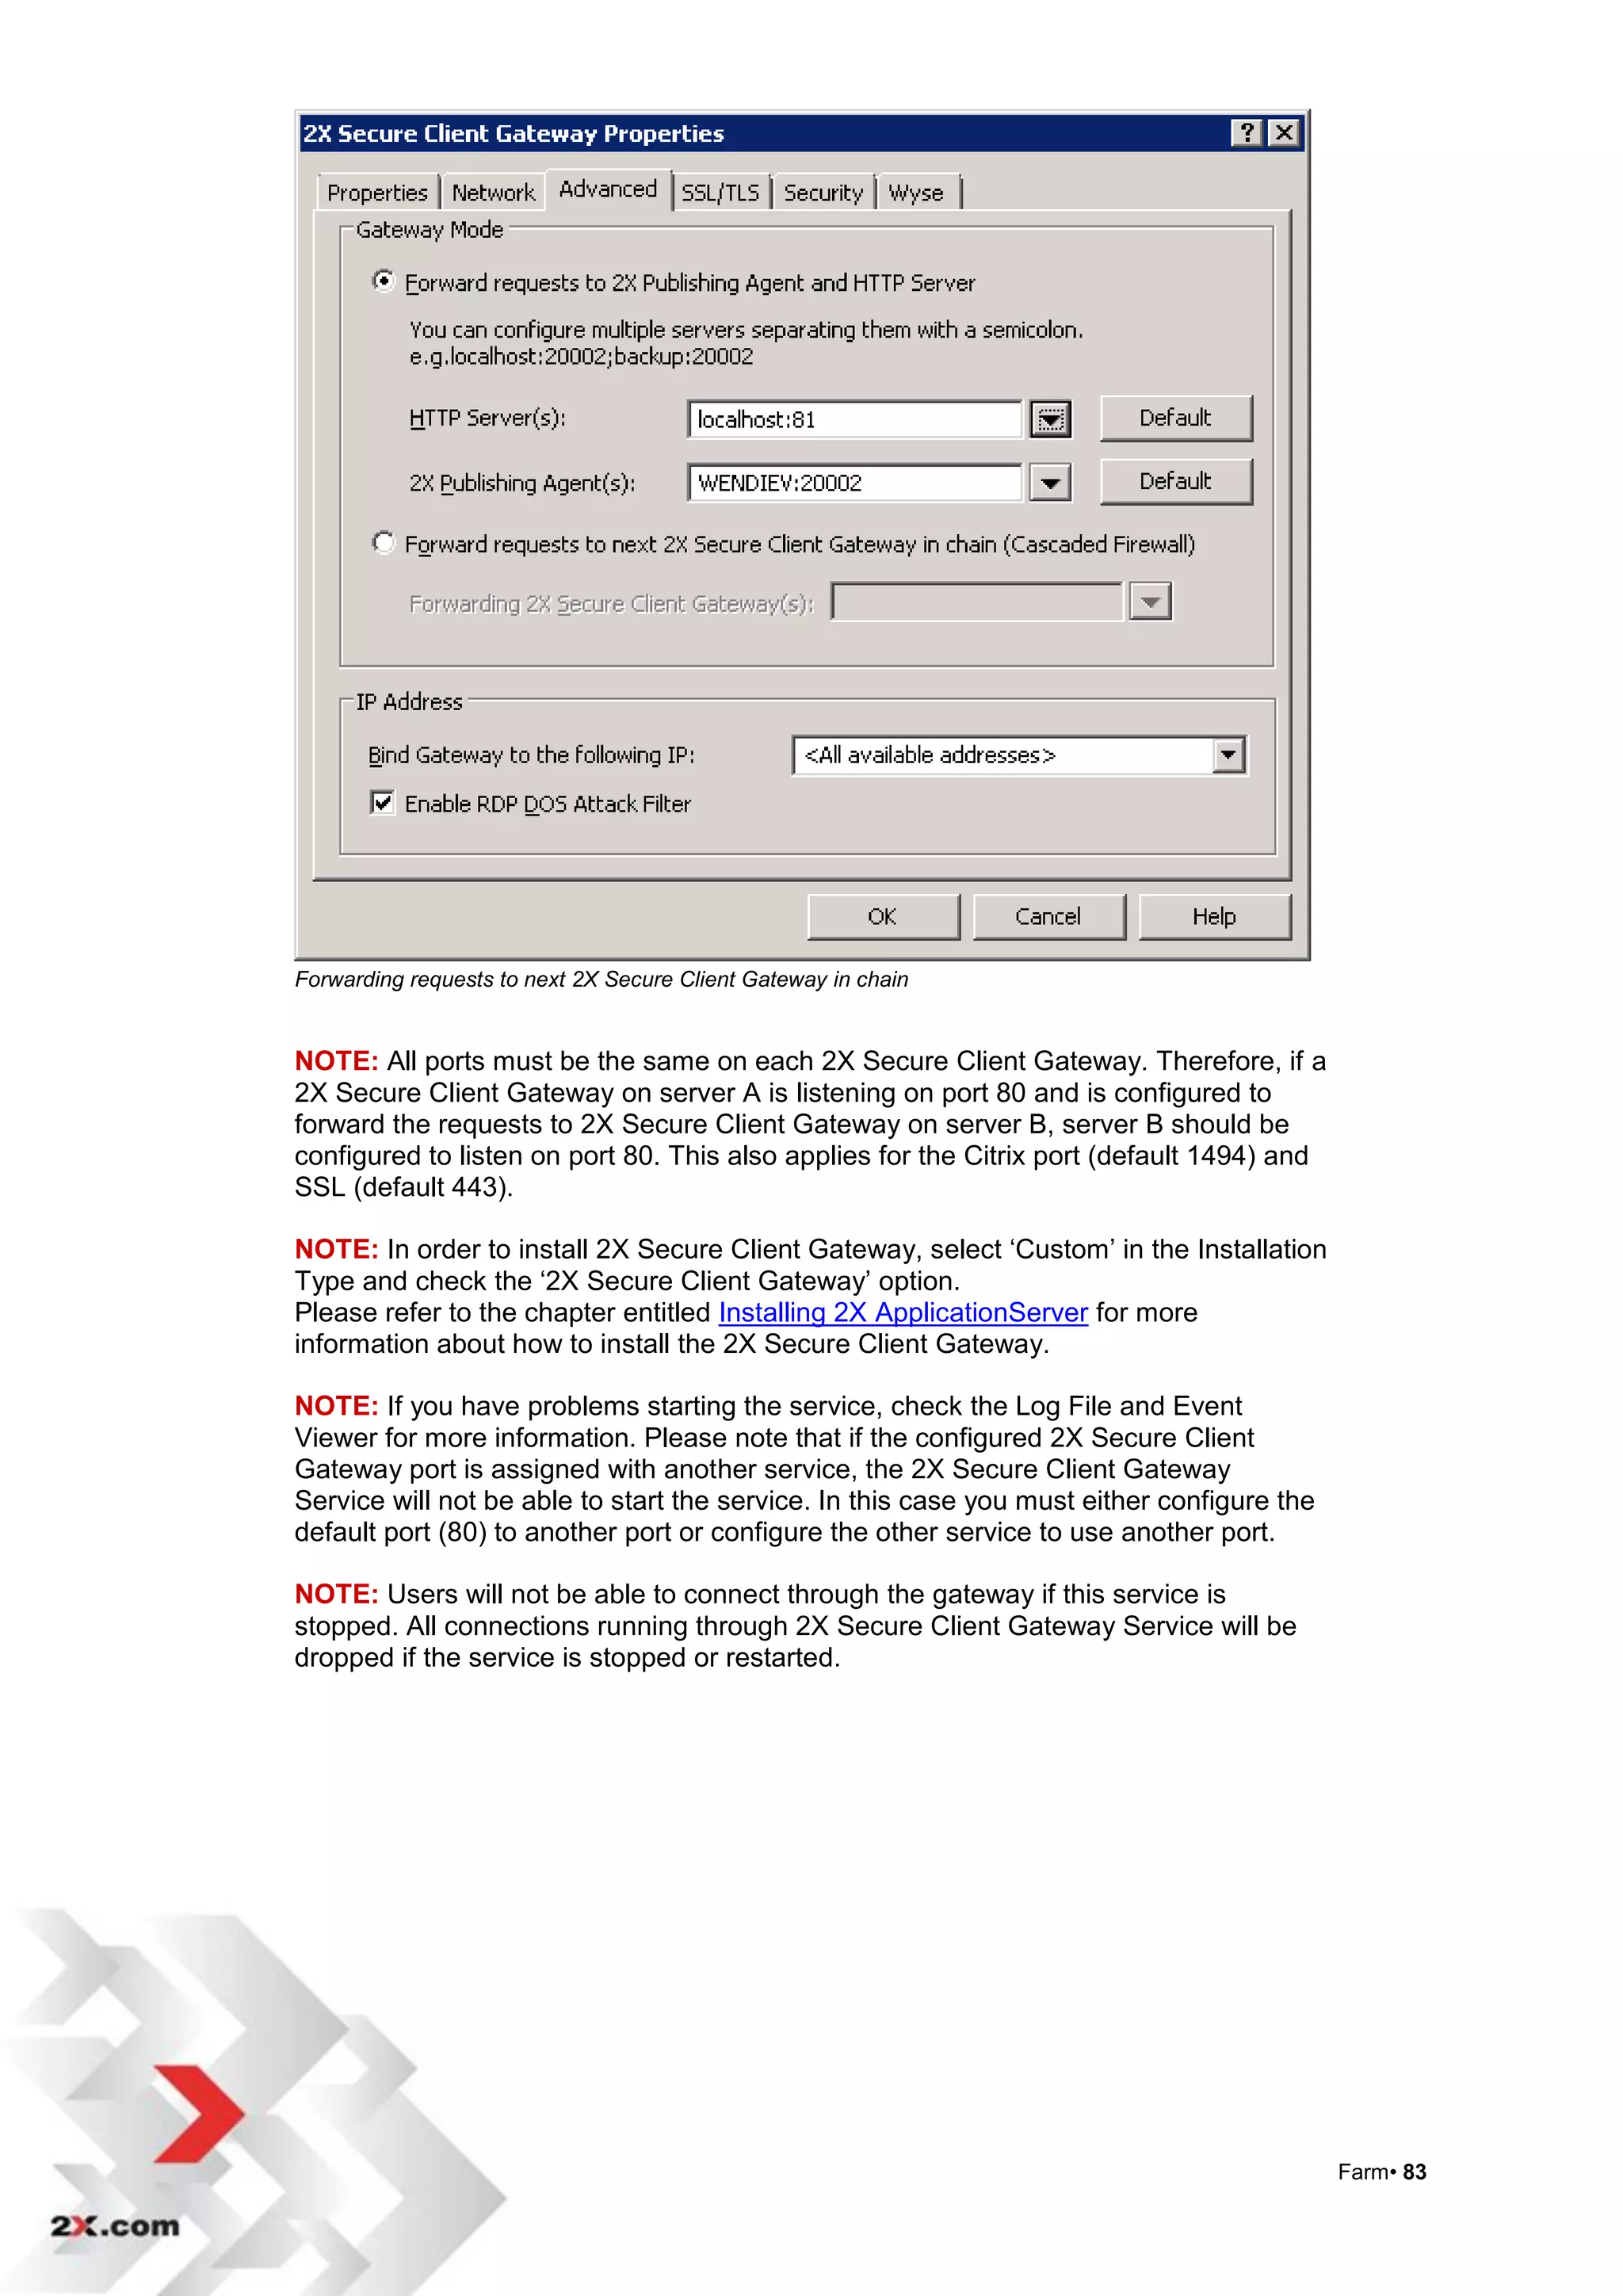
Advanced 2X Secure Client Gateway (Forwarding Mode)
2X Secure Client Gateway can forward requests to the next 2X Secure Client Gateway in the
chain (Cascading Firewall).
With this option enabled the 2X Secure Client Gateway installed on this machine [GATEWAY
1] (port:80 by default) will forward the requests to the next 2X Secure Client Gateway
[GATEWAY 2] configured in the 'Forwarding 2X Secure Client Gateway(s) list.
MS Terminal Server
LAN 2X Terminal Server Agent
MS Terminal Server
2X Terminal Server Agent
MS Windows Machine
2X Publishing Agent
2X SecureClientGateway
SSL Enabled (443/80)
GATEWAY 2
MS Terminal Server
2X Terminal Server Agent
WAN / INTENRET
MS Windows Machine
MS Terminal Server
2X SecureClientGateway
2X Terminal Server Agent
SSL Enabled (443/80)
GATEWAY 1
Scenario with forwarding requests to next 2X Secure Client Gateway in chain
Farm• 82](https://image.slidesharecdn.com/2xapplicationserver-120214155302-phpapp02/75/2-x-applicationserver-82-2048.jpg)


![It is recommended that you check the ‘Always require User Credentials for application list‟, so
that all users must authenticate before acquiring the application list.
Click on the ‘Clear cached session IDs’ to clear all cached session IDs.
Make sure to click ‘Apply’ to activate the above settings.
Settings Panel
In the Settings panel on the 2X Publishing Agent tab, the 2X Publishing Agent Port (default
TCP 20002) uses a specific port to pass information about the published applications
available to its clients.
The default port is TCP 20002. Make sure the 2X Secure Client Gateway has access to this
port otherwise it will not be able to retrieve the published applications list and load balance
the application requests.
The 2X Terminal Server Agent Port (default TCP 20003) is used to communicate with the
2X Terminal Server Agents which should be installed on the terminal servers or Citrix
MetaFrame Servers. The 2X Terminal Server Agent provides information to the 2X
ApplicationServer over this port.
Settings Panel
NOTE: In case you want to authenticate with a workstation not joined within a
domain, you can also authenticate with the local users of the workstation.
In order to specify authentication with a workstation, you must enter [workgroup_name] /
[machine_name]. Therefore if you would like to authenticate against a machine named
„SERVER1‟ that is a member of the workgroup named „WORKGROUP‟, you would have to
enter: WORKGROUP/SERVER1 in the domain field.
NOTE: In order to avoid user filtering problems, it is suggested to use the NetBIOS
name instead the FQDN in the domain field.
Connection Settings• 160](https://image.slidesharecdn.com/2xapplicationserver-120214155302-phpapp02/75/2-x-applicationserver-160-2048.jpg)

![2X ADDITIONAL UTILITIES
2XA Generator
2XA Generator is a command line utility to create 2xa files. 2xa files contains
the required information to launch a published item. To use 2XA Generator,
run 2XAGen.exe [c:Program Files2XAPPLICATIONSERVER2XAGen.exe]
in a command prompt and pass the appropriate parameters.
Figure 1 - 2XA Generator
Parameters
-h Displays the help message
-v Displays the version number
-s server Primary 2X Secure Client Gateway Server
-p port 2X Secure Client Gateway Port
-a application Application Name
-u user User Name
-pw password User's password
-pc password User's password, saved as clear text
-d domain Domain
-ss server Secondary 2X Secure Client Gateway Server
-pr parameters Application Parameters
-o file Output file
2X Additional Utilities• 218](https://image.slidesharecdn.com/2xapplicationserver-120214155302-phpapp02/75/2-x-applicationserver-218-2048.jpg)
![2XA Generator Examples
EXAMPLE 1:
2XAGen.exe -s "TSServer1" –p 80 -a "Word"
OUTPUT OF EXAMPLE 1:
<App xmlns:dt="urn:schemas-microsoft-com:datatypes">
<Connection>
<Port dt:dt="ui4">80</Port>
<PrimaryServer>TSServer1</PrimaryServer>
</Connection>
<Startup>
<PublishedApp>Word</PublishedApp>
</Startup>
</App>
EXAMPLE 2:
2XAGen -s "TSServer1" -p 80 -a "Word" -u "Testuser1" –pc
"mypassword" -d "mydomain" -ss "TSServer2" –pr"C:document.doc"
-o word.2xa
OUTPUT OF EXAMPLE 2: [content of word.2xa]
<App xmlns:dt="urn:schemas-microsoft-com:datatypes">
<Connection>
<Port dt:dt="ui4">80</Port>
<PrimaryServer>TSServer1</PrimaryServer>
<SecondaryServer>TSServer2</SecondaryServer>
</Connection>
<Logon>
<Passworddt:dt="bin.base64">nqLSKZch8PVBrG5l+Iq0qQ==</Pas
sword>
<Domain>mydomain</Domain>
<User>Testuser1</User>
</Logon>
<Startup>
<OverrideParams>C:document.doc</OverrideParams>
<PublishedApp>Word</PublishedApp>
</Startup>
</App>
2X Additional Utilities• 219](https://image.slidesharecdn.com/2xapplicationserver-120214155302-phpapp02/75/2-x-applicationserver-219-2048.jpg)