
Recommended
More Related Content
Viewers also liked
Recently uploaded
Recently uploaded (20)
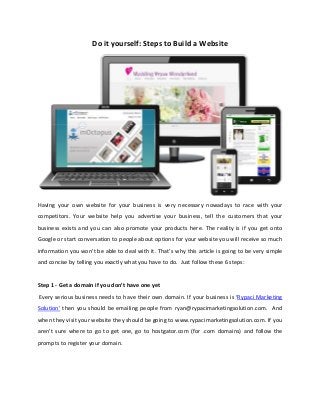
Steps to build yourself a website
- 1. Do it yourself: Steps to Build a Website Having your own website for your business is very necessary nowadays to race with your competitors. Your website help you advertise your business, tell the customers that your business exists and you can also promote your products here. The reality is if you get onto Google or start conversation to people about options for your website you will receive so much information you won’t be able to deal with it. That’s why this article is going to be very simple and concise by telling you exactly what you have to do. Just follow these 6 steps: Step 1 ‐ Get a domain if you don’t have one yet Every serious business needs to have their own domain. If your business is ‘Rypaci Marketing Solution’ then you should be emailing people from ryan@rypacimarketingsolution.com. And when they visit your website they should be going to www.rypacimarketingsolution.com. If you aren’t sure where to go to get one, go to hostgator.com (for .com domains) and follow the prompts to register your domain.
- 2. Step 2 – Get a hosting If you want to use your domain you need a hosting account. A web hosting service is a type of Internet hosting service that allows individuals and organizations to make their website accessible via the World Wide Web. Web hosts are companies that provide space on a server owned or leased for use by clients, as well as providing Internet connectivity, typically in a data center. Web hosts can also provide data center space and connectivity to the Internet for other servers located in their data center, called colocation. Apparently being a web developer and host myself I advise hosting with your web developer because I believe it makes it easier for both of you but make the decision that is best for you in this case. If you are going to take things into your own hands there are some things that you will need from your host in order to make it easy. The first thing you need is cPanel. Every host will push their own preferred hosting control panel but I’ve seen them all (well a lot of them anyway) and cPanel is the best. If your host does not offer cPanel, it would be better to choose a new host. The best feature is simplicity in which you can swap between hosting providers if it doesn’t work out. Don’t underestimate the importance of this as there are a lot of deceitful hosts out there. Now while cPanel makes your life easier, there is something else you will need if you are doing it alone and that is a 1‐click WordPress install. Installing WordPress is not difficult by any means ‐ especially for web developers but if you don’t want to learn all the technical things a 1‐click WordPress install is essential. If you are using cPanel usually your choices are Fantastico or Softaculous. I use Fantastico but I’ve used both, they are both good. Step 3 ‐ Point your domain to your host This step sounds complicated but it’s not. This is how it works. Your domain is just a name that will identify you from others; it doesn’t give you anything other than the right to use the name. In order to ‘use’ the domain you need hosting. Unless your domain provider is the same company as your host then you will have to ‘point’ your domain to your host. Right at the moment if you visited your domain name in the browser you would most likely just get a ‘page cannot be found’. That is because it’s not pointed anywhere. So to point it somewhere what
- 3. you need to do is update your ‘nameservers’ to those provided by your web host. This is very easy to do and works as follows: • When you registered your domain you would have received a welcome email with the access details for your control panel. Log into your control panel now and look around for the word ‘nameservers’. Usually this will be pretty easy to find but if it’s not, you might need to contact the company you registered with and ask them how to ‘re‐point the nameservers’ to your host. • Once you find the area where you can manage your nameservers you need to replace whatever is there with the ones given to you by your host. These should be provided in your welcome email from your host but again if they aren’t then contact your host and ask them what the nameservers are (it would be very unusual for these not to be included). The nameservers will be something like ‘ns1.hostingcompany.com and ns2.hostingcompany. com’ sometimes they will be accompanied by an IP address but often they won’t be. All you need to do is enter the nameserver details into the appropriate place (enter the IP addresses as well if you have them and if there is a field for them). Another thing if you are unsure about this the huge mass of providers will actually do this for you. • There is frequently a delay when doing this for it to work, often only minutes but sometimes hours or days depending on who you use to connect to the internet so be patient. Check back in a few hours and when you go to your domain name in a browser if it’s worked you should see a cPanel welcome screen or the default screen shown by your host. You are done if your domain is pointed to your host then you are ready to start building your website. Step 4 ‐ Install WordPress We talked about the 1‐click WordPress install a while ago. I’m not going to spend too much time on explaining why you should use WordPress for your website but if you aren’t convinced check out what is WordPress and why should you use it where I run through the main reasons. This is the time to go through and install WordPress. Here are the specific steps:
- 4. • When you signed up for hosting you would have been provided with a hosting control panel (hopefully cPanel) login. If you are using cPanel you should be able to go to www.yourdomainname.com/cpanel and log in there. After you log in you should see something like the screen here (note there are a number of themes available so it might look slightly different). • There is a lot to see here but all you are looking for at this point is the 1‐click install. Depending on what is provided it might be Softaculous or Fantastico or something else. Either utilizes the handy find tool on the left or just searches the page and click on the icon. • When you get to the installation page you will get a lot of options. Assuming you want to install WordPress as the main site on your domain (so it shows up when people go to www.yourdomain.com) then just make sure the folder field is empty so it doesn’t try to install it in a folder on the site. Most of the other fields are very self explanatory. You will have to create a username and a password for your own account so make sure you write these down. Then click install and watch the magic happen. • After installation you should be provided with 2 links. One link will take you to your main website homepage and the other will take you to the admin area where you can manage the site. They will be: www.yourdomainname.com ‐ for the front end and www.yourdomainname.com/wp‐admin for the admin area. Step 5 – Make your WordPress live! What you have now is a very basic website, so your task now is to make it into an awesome one. • The first step is to change the look and feel because you want something that looks and performs better than the standard WordPress theme. The worst thing you can do is search Google for ‘Free wordpress themes’ ‐ if you are interested as to why this is the case, see this post for the reasons. What you want is a trustworthy provider of quality themes. On my site Rypaci Marketing Solution I have a heap of totally free WordPress themes that have been designed specifically for small business owners. Not only do they look good, but they contain the main features needed by small business (social media integration, newsletter
- 5. signup, news items, product slider etc) and most importantly they can be set up via a super easy 1‐page configuration screen. Theme Forest is a great provider of themes both free and paid. We have used them and their designs are excellent, their service is great and the configuration options available for the themes are impressive. • Through logging in at www.yourdomainname.com/wp‐admin, you should make yourself familiar with the interface; you’ll be using it quite often. Anything and everything that you do to your website will be done from the Dashboard. In the “Right now” section you’ll notice a quick link section to posts, pages, tags, category and comments. This will allow you to quickly get into the areas that you’ll most frequently use. Pay close attention to the “Update” button as well, it’s important to keep your WordPress software updated at all times! On the left side, you’ll see a navigation menu that will give you access to all the other tools available to you. There are tons of things, but I’ll talk about the important ones: • Posts — this is used more often when your website is acting as a blog. It will allow you to publish articles, select the category in which they’ll be archived, and let to set options specifically for that post. • Media — you’ll be able to manage your images, videos, sounds from this menu. • Links — if you’ve ever wanted to create a “friendly links” list, this is where you would do it. You can then use it for your sidebar widget. • Pages — this is where you’ll create static pages, like about us, product information, contact information, etc. • Appearance — this is where WordPress is absolutely amazing. You’ll be able to totally customize the look and feel of your website by using themes, menus, widgets and more. • Plugins — there are thousands of plugins available to make your site cooler or your life easier for managing things. Browse the plugins area to find what you’re looking for. • Users — you can give access to other people to modify your website, add posts, pages, etc. • Settings — this is where you’ll manage the configuration of your WordPress installation, such as site name, URL, date format, media settings, comment settings, etc.
- 6. Step 6 – Getting your website Indexed on the Search Engines If you have followed the steps here you have single‐handedly built yourself an amazing looking, powerful, world class website. But what’s the point of building a website if no one is ever going to find it. I’ll walk you through an easy method of getting your site listed on Google, Bing and Yahoo. It doesn’t require much work at all you have to do is go to a single link at www.submitexpress.com/free‐submission.html. That’s it! You’ve set up your domain, web hosting account, installed WordPress, configured it and got your website indexed on the search engines. Go out and tell everyone about your website and look for other places to get linked from. If you have any questions or need any help please check out http://rypacimarketingsolution.com/ which is my blog and main resource for helping small businesses succeed online. Kudos! To your success online! I’m Ryan T. Pacificador, I’m an Outsource Freelancer based in Davao City, Philippines. For more details about this document please visit my website at http://rypacimarketingsolution.com/