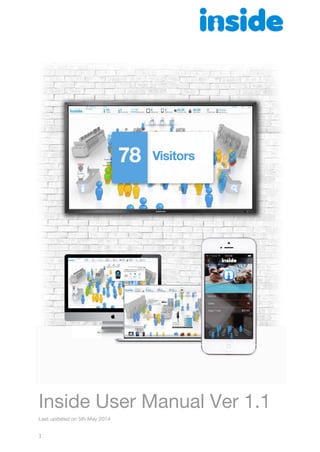
2. The Inside Chat system gives you a visualisation of your customers in real-time that are
browsing on your website in a way that we are all familiar with. Inside provides this
information in the form of a 3D store. Just as you would in a typical store, Inside lets you
communicate with your visitors and customers, as well as, giving you a more targeted and
informative view into your customers mind.
To access the system, go to http://live.inside.tm/ and log in with your previously supplied
credentials.
Once you log in, you’ll be presented with your 3D space representing your website.
Customers who are on your website will be represented by avatars, looking for information,
services and products.
Customers move around according to what part of your site they are navigating through.
A - Customers enter and exit the website through the front / bottom.
A - Customers on the homepage are shown on front / bottom centre.
B - Customers that are using the search box are shown on front / bottom right.
C - Customers reading information pages are located in front of the information desk on the
left
D - Customers on product pages are around the product aisle
E - Customers who are in the checkout process are at the register at the back
2
3. Types of Customers
Customers are colour identified by their shopping habits. Here are the customers that you
will see:
The blue customers are
people who have not been
on your website before.
A yellow customer is someone
who has been on your site
before.
A customer with a suitcase
means they are browsing from
outside your country.
A customer who is ‘sleeping’ means
they are still on your page, however
the person is not looking at the page
right now (usually they are looking at
another tab in their browser)
This is a VIP customer. This means
they have purchased from you
before:
A customer with flames on them
means they are a hot lead. They have
visited your site a lot recently.
This is a Google Search bot. Just
ignore these, as it isn’t a real
person.
This is a chat agent (you)
(left: unavailable, right:
available)
You can click and drag to ‘move’ customers around the store for convenience.
3
4. Customer information
One of the most useful tools of the Inside system is the ability to see a customer’s browsing
information. This will help you assist
with any queries, or tailor a sales pitch.
There are two information screens for
you to use.
If you hover your mouse over a
customer, a window will pop up
showing you some basic information:
Visitor Details
The window that appears shows you
what page the customer is on, what type of device they are using (desktop, tablet or phone),
how long they have been on our website, and how many visits. The amount on their shopping
cart will always be $0, please ignore this.
You can also see what city and country the customer is in.
If you click on this customer, you will be presented with even more information. This is called
the Visitor Details screen.
This will show you what pages the customer has been on, and any previous purchases will be
listed. You can even click on the Sale icon to see the order number from their last purchase.
4
5. Chat interactions
To make yourself available for chat, make sure you are set to active. Click the Availability
switch in the top right corner to On:
Chatting to a specific customer is easy. Just click on the customer’s avatar, and select Chat
on the left hand side of the Visitor Details screen. Enter what you would like to say to the
customer in the chat box on the right, and click send.
Saved Responses
A list of saved responses is in the middle column. You can click on these rather than typing.
An example of a saved response would be, “Welcome to (your site), I’m one of the support
team members, how can I help you today?”
On the customer’s screen (the frontend website), a chat window will appear:
When the customer replies to a message, they type in the box shown. Just chat as normal.
5
6. Red Chat Bubble
If you have the Visitor Details screen closed, you will see that the
customer you were talking to will now have a red timer above their heads
if they reply, showing how long it has been since they sent a message.
Make sure to keep the response time under 10-15 seconds when talking
to a customer.
Responding to a customer
If you have responded to a customer but they have not
messaged back, their customer will have a green text box
above their head. If you have sent an initial message but the
customer has not responded, the text box will be white.
Quick Chat
TIP: To open a smaller chat window, click on
the small text box above a customer’s head
or right click on them:
You can always go back to the full “Visitor
Details” screen in quick chat by clicking
“more” in the top right corner.
6
7. Tracking a Lead
Tracking a lead allows you to follow up a
potential customer at a later date by saving
their information. If a visitor/customer puts in
their name, phone number or email address,
the lead tracker will recognize this and put it
into the appropriate fields when you open
the lead tracker.
This is what the New Lead
submission box looks like.
You can find all saved leads under the Statistics tab as “Leads.
Below is an image of what this looks like:
7
8. Filters
You can easily filter for specific customer types by using the filters across the bottom of the
window, making it easy to search for a specific type of customer.
For example, if you want to see people who have items in their cart so you can help them,
you just need to click on the shopping basket icon and you will only see avatars with items in
their cart. To switch back to the regular view, simply click the icon a second time.
If you click on one of these icons, it will filter out anything that isn’t what you clicked. For
example, if you click the blue avatar, nothing except blue avatars will show.
The first are desktop (and laptop) users.
The second are tablet users.
And the third are mobile phone users.
Blue = New customers, if it is the first time they have been on the site.
Green = Customers who are logged into the site (not used for the Inside channel)
Yellow = Customers have visited the site multiple times.
Flames = Customers who are a big opportunity, calculated by visits, basket load
and more.
8
9. The white chat bubble indicates the customer has been contacted but has not
responded.
The green chat bubble indicates the customers has been contacted and is a live
engagement.
The red shopping basket indicate customers with items in their cart (not used)
The coupon indicates customers that have been given offers (not used)
The star indicates tracked customers (not used for Inside)
The badge indicates VIP customers (previous purchase)
The briefcase indicates overseas customers
9
10. Floor Layout
The floor layout is the virtual shop that you will see when you log into live.inside.tm. You can
change the look of your floor layout in settings under “Industry Type”. There are specific
paths that the avatars follow depending on where they navigate through your site. These
paths come in three variants: eCommerce floor layouts, brochure floor layouts and the
machine layout.
The picture above shows the different style of floor layouts available. These floor layouts
come in different styles to suit your website.
Floor Layout Styles
eCommerce sites can use the floor styles that have registers and checkouts. Giving a real
and authentic feel, rather than your customers floating around a brochure stand when they
are shopping for clothes.
Any sites that want to see what stage their customers are at navigating through their website
at specific stages would use the Machine Layout. This could include non-eCommerce and
eCommerce websites. The Machine Layout is also useful for any websites that use a
configuration process, so they can see exactly where their customers are.
Non-eCommerce sites would use the Brochure Floor Layout. This is because these sites
typically don’t have anything to sell and don’t need specific stages to see what
customers/visitors are where.
The image below shows what a typical eCommerce floor layout looks like. At the front you
have the registers, this is where visitors will stand if they are on the home page, in the middle
you have the shelves, this is where visitors will stand when looking at product pages and at
10
11. the back you will see the checkout registers, this is where customers will stand when going
through the checkout process.
Floor Locations
It is also possible to assign Floor Locations to the visiting customers depending on what
page they are on.
The above picture shows the node numbers of the store layout.
11
12. Above is a picture of the machine layout with the node numbers. This machine nodes in this
layout can also be name.
Events
An event will trigger based on the parameters you have set. They can be
used to automate messages sent to visitors, or notifications for you.
There are three types of events; Automated greetings, automated
messages and alerts. You can access the event tab in “Settings”, in the
top right corner.
12
13. Automated Greetings and Alerts
Automated greeting:
Sent to the customer upon arrival and can be something like, “Happy New Year from Inside!
All the best of health and happiness to you and your family.” This will be sent when there is a
chat agent that is “available” and will be sent automatically. As one of the parameters, you
can also set how long to wait before the automated message is sent.
Automated message:
For sending a message to the visitor when they meet the selected criteria. eg. Completing a
purchase, becoming an opportunity, visiting a custom page.
Alerts:
Notify the chat agent or you when a
visitor has met the criteria you specified
in the event. This could be something
such as landing on a broken or missing
page. It will pop up as a red message
next to the visitor.
All events are completely customisable
to accommodate whatever alerts or
messages you want to send or be
notified for.
13
14. Help
You can find the help tab button, which looks like a question mark
on top of a speech bubble in the top right corner next to the settings
button.
The help button will open news and help. Help will inform you on
events and channels, how to set them up and gives you a better
understanding on how to use them.
The image below is of the Help/News/How To page:
News Tab
The second tab is the News tab, the news tab has past and current news updates on Inside
changes such as; Festive updates and how it will change the look of your floor layout.
14
15. How-to Tab
The third tab is the How To tab, this tab has helpful tips and how-to’s on things such as; how
to setup a “wind down channel” or “how
to control Inside sounds”.
Underneath these three tabs you will find
the “Take a tour” button. This button will
give you a brief rundown of the basics on
Inside.
Event Properties
Message:
The message to send to the visitor (for Automated greetings or Automated messages) or to
notify you for Alert events.
Visitor:
Filter the visitor criteria using the visitor filters.
Cooldown:
How often this message can be sent to a visitor. A visitor may meet the criteria for an event
many times, you can control how often they will trigger the event. Setting this to 1440 will
trigger the event a maximum of once a day per visitor.
15
16. Channels
Channels are a way of showing a select number of visitors.
You can change channels by clicking the channel selector, top left.
Channel list
After clicking the channel selector, the channel list will appear.
The 'General' channel will always show, containing all visitors. This channel cannot be edited
or deleted.
Channels can be created or edited by going to the channel config menu (Settings >
channels).
Create a channel by clicking the 'NEW' button at the top.
Edit a channel by clicking the 'edit' icon on the right side of a channel.
16
17. Channel properties
Channel Name:
The name of the channel.
Max Visitors:
The cap on the visitors. If the cap is reached, a sub-channel will be created to hold the
overflow.
Spread visitors across x channels:
The number of sub channels the visitors will be evenly spread between.
Channel Filters
Filter what visitors will show in this channel.
Page Type:
If selected, visitors must be on the selected page types to show in the channel.
Visitor type:
Logged in, Returning or first time visitor.
Device type:
If they are using a desktop, mobile, tablet or unknown.
Visitor properties:
VIP, starred, International, with a basket
Page Names:
Add custom page names to filter the visitors by.
Custom tags:
Add custom tags to filter the visitors by.
Has a chat:
if checked, only visitors with a chat will show in this channel. This is useful for setting up
a wind-down channel.
Has a cart:
If checked, only visitors with items in their basket will show in the channel.
Enforce filter criteria:
If checked, visitors will not remain in the channel after they stop meeting the filter criteria.
Time on site (mins):
Minimum time on site before the visitor will show in the channel.
17
18. How to Wind Down a Channel
Sometimes it can be difficult to finish up any current chats and change your status to
unavailable without new chats starting.
A solution to this is to set up a wind-down channel.
1. Create a new channel, and name it ‘wind-down channel’.
2. Check the ‘Has a chat’ checkbox.
3. Check the ‘Enforce filter criteria’ checkbox.
4. Save the channel.
This channel will now only show visitors with an active chat, and only visitors with a current
chat will see the inside chat tab. This wind-down channel will grab all currently engaged
visitors and put them in your wind-down channel. You can now comfortably finish up and
close any remaining chats without visitors starting any new chats
How to control automatic messages
So you’ve got some automatic messages set up using the automatic messages wizard
(the icon, top right ).
18
19. But some of you may have noticed that you can’t open this window without being ‘available’.
Available Unavailable
So, how do you control these automatic messages, without first being available?
Easy: Settings > Events
All of your auto messages are shown in the events menu for you to toggle, edit and remove.
19
20. Control Inside Sounds
Depending on how you use Inside, you may want
to adjust how the notifications sounds work. The
sounds are controlled using the sounds panel.
Open it by clicking on the speaker icon.
Enable Sounds:
Toggle all sounds on or off.
Visitor requires assistance:
An alert sound will play when a visitor initiates a chat.
Note: This notification sound will only play if you have not interacted with the user after 10
seconds.
Tip: Enable this sound if you have inside running passively in the background.
New visitor:
A bell sound will play when a new visitor enters the store.
Note: this bell sound will only play on low traffic sites.
Sale:
“Cha-ching” sound will play after every sale.
Visitor reply:
A notification sound will play when a visitor replies to a chat conversation.
20
21. Setup Basic Auto Greeting
Auto greeting changes the way your Insiders (operators) work. Instead of spending time
clicking and engaging manually with each customer, the auto greeting function will greet the
new customer automatically for you. This will allow the Insider to focus only on conversations
and socially engage with more customers.
The system will never auto engage with customers that are already engaged or more than
once a day.
Take advantage of this new feature and engage with as many customers as you can. We
have tested this, and it has delivered amazing results on the first day. We recommend the
following:
● Configure Inside to auto greet every new visitor in the channel after x minutes on the
site
● Configure Inside to send a shorter message to every returning visitor after x minutes
● Note: Change your messages daily so returning customers understand that there is a
human behind the message
In order to configure the above, you will need to setup 2 events. Below is a quick guide with
how to set this up in 2 minutes, please print this email and follow the instructions below:
Adding the New Visitors Event
● Click setting icon (?) at the bottom right corner of your live console
● Click Event Setup icon (Calendar) at the upper right corner of the popup window
● Add new events by clicking the add button; a new pop up window will appear.
Complete as per the example below:
21
22. ● A second popup will appear, complete as below. Note that when you type the
message you simply click the ADD+ blue button, which will add the
‘{operator.data.name}’ to the message. You should type your desired message and
not the one we used.
● Click Save and you will see the new event appear in the list.
22
23. Adding the Returning Visitors Event
● Add new events by clicking the add button; a new pop up window will appear.
Complete as per the example below:
● A second popup will appear, complete as below. Note that when you type the
message you simply click the ADD+ blue button, which will add the
‘{operator.data.name}’ to the message. You should type your desired message and
not the one we use.
These 2 Events will start communicating automatically once you turn your service bell on.
Please let us know if you need assistance.
23
24. Time-out Window
After you set your self to ‘active’ (bell) customers can request assistance from you the Inside.
To avoid not responding to customers, Inside will check if you are in front of your monitor
every 10 minutes. If you would like to stop these auto checks then you have the option to
delay the check. Simply select from the list the required period and click ‘I am here!’
Note that you need to set this selection every day.
24
25. Live Stats Bar
The Live Stats Bar shows you who is on your site, how many people are on your site, what
device they are using, the total amount/worth of everyone’s shopping car ton your site and
the total sales of your sate for the day.
The live Stats bar also houses the channel changer, the world map, the statistics and chat
log, settings and help.
Below is a short description of each stat:
This is the channel changer; it shows the different channels for your site. You can set up new
ones here, like the “wind down channel’ and you can switch between channels.
This shows how many visitors/customers are on your website.
This shows how many of your visitors/customers are using a desktop or laptop.
This shows how many of your visitors/customers are using a tablet device.
25
26. This shows how many of your visitors/customers are using a mobile phone.
This shows what the total cart amount ($) of all current visitors on the channel you are on.
This shows the total amount of sales across all channels.
The plus button will open up the Statistics Settings (image above)
In the Statistics Settings you can change what you see in the Live Stats bar. You can have
the full site stats showing constantly or just the stats for the channel you are on.
Alternatively, you could have a few from each, while you watch the visitors for the channel
you are on, you can also monitor how many visitors are accessing your site in total.
26
27. This is the options tab, here you can look at the world map and see where your
visitors/customers are browsing from, you can access the statistics and chat logs, change
the settings and search for tips, how-to’s and news.
This is the world map for visitors/customers on your site, showing you which country they
are browsing from.
This shows you all the conversion stats, engagement history, insider performance and
operation analysis.
This is the Inside settings. This has the settings for saved responses, links, offers, website
settings, channel settings, event settings, industry type (floor layout) and your account.
This is the News/Help button, which opens up the Help, News and How To tabs.
27
28. How to change Inside Chat Button Image
Inside chat button is the button that shows up on the website and can be clicked by the
customers in order to start chatting with any Insiders. This chat button image can be
changed to suit the style of the website.
In order to change the image, go to the Settings window by pressing the Settings button and
then choose the Website menu and click on the Chat Tab button. This will open the Chat Tab
settings window.
There are two Chat Tab images that can be uploaded. One will show up on PC browsers and
the other one will show up on Mobile browsers.
The picture below shows the steps needed to change the Chat Tab image.
The recommended size for the Chat Tab image is around 130px X 190px. The size can be
changed according to what is wished for so some trial and error to see if the new image suits
the website would be very ideal.
28
29. How to change the Store Image
Store image is the image that shows up on the customer side by clicking the down arrow on
the chat pane. The image is tied to the account of the insider and not to the website. So, in
order for the expected store image to show up correctly, the correct insider must log in into
the instance and make itself available after uploading the store image into his account.
First, to get to the window to change the store image, press the Settings button to open the
settings window, then choose the My Account menu and click on the Store Image small
button. Then just either upload the image or delete the previous uploaded image and save
the settings.
29
30. The picture below shows the steps to upload a new Store Image.
The recommended size for a Store Image 300px X 330px. It is actually possible to upload a
picture of any size but the if the picture is too large, it will be resized accordingly.
30
31. How to change Insider face image
Insider face image is the image shown in the chat pane when they are chatting with a
customer (The inside logo in the above image). The image is tied to the account of the insider
and can be changed.
To get to the window to change the face image, press the Settings button to open the
settings window, then choose My Account menu and click on the Face Image small button.
Then just either upload the image or delete the previous uploaded image and save the
settings.
The picture below shows the steps to do this,
31
32. How to change Insider T-Shirt
Insider T-Shirt is the image that shows up on the T-Shirt the Insider Avatar is wearing. The
image is tied to the account of the insider and can be changed.
To get to the window to change the image, press the Settings button to open the settings
window, then choose My Account menu and click on the T-Shirt Image small button. Then
just either upload the image or delete the previous uploaded image and save the settings.
The picture below shows the steps to change the T-Shirt Image,
32
33. How to change store Logo
Store Logo is the icon that shows up on the upper part of the chat pane. It is tied to the
website instance and can be changed.
To get to the window to change the icon, press the Settings button to open the settings
window, then choose Website menu and click on the Chat Pane button. Then just either
upload the image or delete the previous uploaded image and save the settings.
33
35. Popups are split to the following categories.
Conversion related popups, example:
✓ “Other visitors who viewed this item also view these items”
✓ “You may need to purchase this as well” (i.e. batteries for a toy)
○ “Other visitors who viewed this item also purchased these items”
○ “Items just purchased”
○ “Items just added to basket”
○ “This category is 20% off – expires in few days”
○ “This item is 10% off – today only”
○ “This product was just rated by another customer: “Loved it, highly recommended” “
○ “We noticed that you have some items on your basket from your previous visit. Can we offer
you free shipping to finalized the basket today?“
○ “You are $27 a way from free shipping”
○ “This item is running out of stock – hurry”
○ “Welcome back, we appreciate your business. Here is a $25 gift voucher that can be used in
the next 30 days. Please use the code =DFJ456KL during checkout”
Input base popups, examples:
○ Ecommerce service related questions such as “how would you rate our shipping speed?”
○ Once off questions such as “should we stock watches?”
○ Join our mailing list
○ “We hope you loved your recent purchase of xxxxxx, how would you rate the product?”
Informative messages
○ “We would like to wish you Happy Birthday, we hope you had a great day”
○ “Please note we are experiencing high volume of sales, please expect 1 day delay for today’s
purchase”
○ “Please note: this product requires forklift access”
35
36. Inside Monitor Mode
Inside monitor mode is designed for running inside on a screen without interaction. It will
periodically show interesting stats and info.
How to Configure the Monitor Mode
Stats and info that shows up in the Monitor Mode can be configured in the Settings. To get
to the window to configure the Monitor Mode, press the Settings button to open the settings
window, then choose Monitor Mode menu. In this window, you can select which notifications
you wish to show up in the Monitor Mode or not.
36
37. How to Start and Stop the Monitor Mode
In order to start or stop the Monitor Mode, it’s only as simple as a click on a button. The
button is an image of a monitor that’s located on the right side of the inside back-end.
The same button will still show up during the Monitor Mode and it can be used to stop
running the Monitor Mode.
37