SlideShare a Scribd company logo
1 of 47
Download to read offline
Service Manual
99719-6C120For use with K25 Engine Service Manual.
Chassis, Mast & Options
GC20N AT90-10121-up
GC25N AT90-10121-up
GC28N AT83F-10121-up
GC30N AT83F-10121-up
GC33N AT83F-60121-up
FOREWORD
This service manual is a guide for servicing Cat
®
lift trucks. For your convenience the
instructions are grouped by systems as a ready reference.
The long productive life of your lift truck(s) depends on regular and proper servicing. Servicing
consistent with what you will learn by reading this service manual. Read the respective
sections of this manual carefully and familiarize yourself with all of the components before
attempting to start a test, repair or rebuild job.
The descriptions, illustrations and specifications contained in this manual are for trucks with
serial numbers in effect at the time of printing. Cat Lift Truck reserves the right to change
specifications or design without notice and without incurring obligation.
The trucks in this manual are powered by K25 gasoline engines. For engine servicing, please
refer to the applicable engine service manual.
This service manual contains servicing and maintenance information for the following trucks.
• Gasoline Engine Truck (GC) . . . . . . . . . . . Equipped with K25 Gasoline engine
Pub. No. 99719-6C120
Safety Related Signs
The following safety related signs are used in this service
manual to emphasize important and critical instructions:
Indicate a potentially hazardous
situation which, if not avoided, could
result in death or serious injury.
Indicate a potentially hazardous
situation which, if not avoided, may
result in minor or moderate injury, or
damage to your machine.
Indicates a condition that can cause
damage to, or shorten service life of,
the machine.
NOTE
WARNING!
CAUTION!
The serviceman or mechanic may be unfamiliar with
many of the systems on this truck. This makes it
important to use caution when performing service
work. A knowledge of the system and/or components
is important before the removal or disassembly of any
component.
Because of the size of some of the truck components,
the serviceman or mechanic should check the weights
noted in this Manual. Use proper lifting procedures
when removing any components.
Following is a list of basic precautions that should
always be observed.
1. Read and understand all warning plates and decals
on the truck before operating, lubricating or
repairing the product.
2. Always wear protective glasses and protective
shoes when working around trucks. In particular,
wear protective glasses when pounding on any part
of the truck or its attachments with a hammer or
sledge. Use welders gloves, hood/goggles, apron
and other protective clothing appropriate to the
welding job being performed. Do not wear loose-
fitting or torn clothing. Remove all rings from
fingers when working on machinery.
3. Do not work on any truck that is supported only by
lift jacks or a hoist. Always use blocks or jack
stands to support the truck before performing any
disassembly.
4. Lower the forks or other implements to the ground
before performing any work on the truck. If this
cannot be done, make sure the forks or other
implements are blocked correctly to prevent them
from dropping unexpectedly.
5. Use steps and grab handles (if applicable) when
mounting or dismounting a truck. Clean any mud
or debris from steps, walkways or work platforms
before using. Always face truck when using steps,
ladders and walkways. When it is not possible to
use the designed access system, provide ladders,
scaffolds, or work platforms to perform safe repair
operations.
6. To avoid back injury, use a hoist when lifting
components which weight 23 kg (50 lb.) or more.
Make sure all chains, hooks, slings, etc., are in
good condition and are of the correct capacity. Be
sure hooks are positioned correctly. Lifting eyes
are not to be side loaded during a lifting operation.
7. To avoid burns, be alert for hot parts on trucks
which have just been stopped and hot fluids in
lines, tubes and compartments.
8. Be careful when removing cover plates. Gradually
back off the last two bolts or nuts located at
opposite ends of the cover or device and pry cover
loose to relieve any spring or other pressure, before
removing the last two bolts or nuts completely.
9. Be careful when removing filler caps, breathers and
plugs on the truck. Hold a rag over the cap or plug
to prevent being sprayed or splashed by liquids
under pressure. The danger is even greater if the
truck has just been stopped because fluids can be
hot.
SAFETY
The proper and safe lubrication and
maintenance for these lift trucks,
recommended by Cat lift truck, are outlined in
the OPERATION & MAINTENANCE MANUAL for
these trucks.
Improper performance of lubrication or
maintenance procedures is dangerous and
could result in injury or death. Read and
understand the OPERATION & MAINTENANCE
MANUAL before performing any lubrication or
maintenance on these trucks.
WARNING!
Do not operate these trucks unless you have
read and understood the instructions in the
OPERATION & MAINTENANCE MANUAL.
Improper truck operation is dangerous and
could result in injury or death.
WARNING!
WARNING!
10. Always use tools that are in good condition and be
sure you understand how to use them before
performing any service work.
11. Reinstall all fasteners with same part number. Do
not use a lesser quality fastener if replacements are
necessary.
12. If possible, make all repairs with the truck parked
on a level, hard surface. Block truck so it does not
roll while working on or under truck.
13. Disconnect battery and discharge any capacitors
(electric trucks) before starting to work on truck.
Hang “Do not Operate” tag in the Operator’s
Compartment.
14. Repairs, which require welding, should be
performed only with the benefit of the appropriate
reference information and by personnel adequately
trained and knowledgeable in welding procedures.
Determine type of metal being welded and select
correct welding procedure and electrodes, rods or
wire to provide a weld metal strength equivalent at
least to that of parent metal.
15. Do not damage wiring during removal operations.
Reinstall the wiring so it is not damaged nor will it
be damaged in operation by contacting sharp
corners, or by rubbing against some object or hot
surface. Place wiring away from oil pipe.
16. Be sure all protective devices including guards and
shields are properly installed and functioning
correctly before starting a repair. If a guard or
shield must be removed to perform the repair work,
use extra caution.
17. Always support the mast and carriage to keep
carriage or attachments raised when maintenance
or repair work is performed, which requires the
mast in the raised position.
18. Loose or damaged fuel, lubricant and hydraulic
lines, tubes and hoses can cause fires. Do not bend
or strike high pressure lines or install ones which
have been bent or damaged. Inspect lines, tubes
and hoses carefully. Do not check for leaks with
your hands. Pin hole (very small) leaks can result
in a high velocity oil stream that will be invisible
close to the hose. This oil can penetrate the skin
and cause personal injury. Use cardboard or paper
to locate pin hole leaks.
19. Tighten connections to the correct torque. Make
sure that all heat shields, clamps and guards are
installed correctly to avoid excessive heat,
vibration or rubbing against other parts during
operation. Shields that protect against oil spray
onto hot exhaust components in event of a line,
tube or seal failure, must be installed correctly.
20. Relieve all pressure in air, oil or water systems
before any lines, fittings or related items are
disconnected or removed. Always make sure all
raised components are blocked correctly and be
alert for possible pressure when disconnecting any
device from a system that utilizes pressure.
21. Do not operate a truck if any rotating part is
damaged or contacts any other part during
operation. Any high speed rotating component that
has been damaged or altered should be checked for
balance before reusing.
HOW TO USE THIS MANUAL
(Removal, Installation, Assembly and Disassembly)
Disassembly diagram (example)
Suggestion for disassembling
1. Output shaft, Removing
Remove output shaft using a special tool.
Service Data
A: Standard Value
B: Repair or Service Limit
1
2
209603
Sequence
1 Cover , Bolt, Washer (part name)
2 Snap ring ................ (part name)
A
0.11 to 0.28 mm
Gear Backlash (0.0043 to 0.0110 in.)
B 0.5 mm (0.020 in.)
209604
Disassembling sequence
Procedures are described in the text.
Symbols or abbreviation
OP Option
R1/4 Taper pipe thread (external) 1/4 inch (formerly PT1/4)
Rc1/8 Taper pipe thread (internal) 1/8 inch (formerly PT1/8)
G1/4A Straight pipe thread (external) 1/4 inch (formerly PF1/4-A)
Rp1/8 Straight pipe thread (internal) 1/8 inch (formerly PS1/8)
Units
1. SI Units are used in this manual.
2. The following table shows the conversion of SI unit and customary unit.
Item SI unit Customary unit
Force
1 N 0.1020 kgf
(1 lbf) (0.4536 kgf)
Pressure
1 kPa 0.0102 kgf/cm2
(1 psi) (0.0703 kgf/cm2
)
Torque
1 N·m 0.1020 kgf·m
(1 lbf·ft) (0.1383 kgf·m)
GROUP INDEX Items
1
2
3
4
5
6
7
8
9
10
11
12
13
14
GROUP INDEX
GENERAL INFORMATION
COOLING SYSTEM
ELECTRICAL SYSTEM
CONTROLLERS
POWER TRAIN
POWERSHIFT TRANSMISSION
FRONT AXLE
REAR AXLE
BRAKE SYSTEM
STEERING SYSTEM
HYDRAULIC SYSTEM
MAST AND FORKS
Specification, Structure, Removal and Installation,
Inspection and Adjustment
Chassis Electrical Devices Wiring Outline, Structure, Console Box,
Battery, Wire Color, Troubleshooting, Electrical Schematic
Outline, Main Functions, Service Tool Functions,
Locations of Sensors and Switches
Removal and Installation
Structure and Function, Removal and Installation, Control Valve,
Input Shaft Assembly, Oil Pump Assembly, Inspection and Adjustment,
Troubleshooting, Tightening Torque, Service Data
Structure, Removal and Installation, Disassembly and Reassembly,
Service Data
REDUCTION DIFFERENTIAL
Structure and Function, Removal and Installation,
Disassembly and Reassembly, Troubleshooting
Structure and Functions, Removal and Installation,
Disassembly and Reassembly, Troubleshooting, Service Data
Structure, Disassembly and Reassembly, Inspection and Adjustment,
Troubleshooting, Service Data
Model View, Truck Models Covered, Serial Number Locations,
Dimensions, Technical Data
Structure and Functions, Disassembly and Reassembly, Steering Valve,
Trobleshooting, Service Data
Structure and Functions, Disassembly and Reassembly,
Inspection and Adjustment, Troubleshooting, Service Data,
Control Valve
Mast Systems, Structure, Removal and Installation,
Disassembly and Reassembly, Inspections and Adjustment,
Troubleshooting, Service Data
SERVICE DATA
Maintenance Schedule, Tightening Torques for Standard Bolts and Nuts,
Parts to be Changed Periodically, Lubrication Instructions,
Weight of Major Components, Special Service Tool
Model View ............................................................................................... 1 – 1
Truck Models Covered ........................................................................... 1 – 2
Serial Number Locations ...................................................................... 1 – 3
Dimensions ............................................................................................... 1 – 4
Technical Data ......................................................................................... 1 – 5
1
GENERAL INFORMATION
1-1
GENERAL INFORMATION
Model View
MC Truck
209605
1-2
GENERAL INFORMATION
Truck Models Covered
This Service Manual provides servicing and maintenance information for the following trucks:
LPG-engine models
Truck class
Truck model Serial number Engine mounted
2 ton class
GC20N AT90-10121-up K25
GC25N AT90-10121-up K25
GC28N AT83F-10121-up K25
3 ton class GC30N AT83F-10121-up K25
GC33N AT83F-60121-up K25
Gasoline-engine models
Truck class
Truck model Serial number Engine mounted
2 ton class
GC20N AT90-10121-up K25
GC25N AT90-10121-up K25
GC28N AT83F-10121-up K25
3 ton class GC30N AT83F-10121-up K25
GC33N AT83F-60121-up K25
Dual fuel Gasoline-engine models
Truck class
Truck model Serial number Engine mounted
2 ton class
GC20N AT90-10121-up K25
GC25N AT90-10121-up K25
GC28N AT83F-10121-up K25
3 ton class GC30N AT83F-10121-up K25
GC33N AT83F-60121-up K25
1-3
GENERAL INFORMATION
Serial Number Locations
210693
1-4
GENERAL INFORMATION
Dimensions
KCG
L
I
OMN
F
D
P
E
B
H
A
J
209608
1-5
GENERAL INFORMATION
Technical Data
Ref.
Truck Model
GC20N GC25N GC28N GC30N GC33N
No.
Item
A Maximum lift 3340 (131.5) 3315 (130.5)
B Free lift 130 (5.1) 135 (5.3)
C Fork spread (outside) 220 to 920 (8.7 to 36.2) 200 to 960 (7.9 to 37.8)
D Fork length 1070 (42.1)
E Tilt angle (forward – backward) 5° – 9° 5° – 6°
F Overall length 3358 (132.2) 3419 (134.6) 3484 (137.2) 3518 (138.5)
G
Overall width Single tire 1064 (41.9) 1115 (43.9)
(outside of tires) Wide-Stance 1128 (44.4) 1155.2 (45.5)
H Overall height (to top of mast lowered) 2110 (83.1)
I Overall height (to top of overhead guard) 2072 (81.6)
J Overall height (mast extended) 4570 (179.9) 4540 (178.7) 4570 (179.9)
K Tread (front)
Single tire 886 (34.9) 912 (35.9)
Wide-Stance 950 (37.4) 952 (37.5)
L Tread (rear) 990 (39.0)
M Wheelbase 1400 (55.2)
N Front overhang 414 (16.3) 436 (17.2)
O Rear overhang 474 (18.7) 535 (21.1) 578 (22.8) 612 (24.1)
P Underclearance (at frame) 139 (5.5)
Unit: mm (in.)
Specification ............................................................................................ 2 – 1
Structure .................................................................................................... 2 – 2
Removal and Installation ...................................................................... 2 – 3
Inspection and Adjustment .................................................................. 2 – 5
Fan Belt Inspection .................................................................................... 2 – 5
Fan Belt Tension ........................................................................................ 2 – 5
Connecting Radiator Hoses ....................................................................... 2 – 5
Unit Layout ................................................................................................ 2 – 6
Coolant ...................................................................................................... 2 – 6
Radiator Cap ............................................................................................. 2 – 6
2
COOLING SYSTEM
2-1
COOLING SYSTEM
Specification
Truck Models
2 ton class 3 ton class
Items
Type Water-cooled, forced circulation
Radiator Corrugated fin (pressure) type
Water pump Centrifugal type
Thermostat Wax Pellet Type
Cooling
System
2-2
COOLING SYSTEM
Structure
210696
Fan (directly coupled to engine)
209610
2-3
COOLING SYSTEM
Removal and Installation
Fan Belt Removal
Start by:
Remove the radiator cover.
Suggestions for Removal
(1) Loosen the tension pulley lock bolt by three or four
turns. If the bolt is loosened insufficiently, the tension
pulley will not be moved.
(2) Move the tension pulley fully toward the fan, then
remove the belt.
Engine
Fan
21
209612
Sequence
1 Tension pulley assembly, Bolt
2 Fan belt
Fan
Tension
pulley
209613
NOTE
Do not loosen the lock bolt to such an extent that the
bolt would be removed.
2-4
COOLING SYSTEM
Installation
To install, follow the removal sequence in reverse. Also
follow the instructions given below.
(1) Before installing the belt, turn the fan to check for
smooth rotation. Replace the bearing if it generates
abnormal sound.
(2) After installing the belt, push it to make sure that the
tension pulley moves, then tighten the pulley lock bolt
firmly.
2-5
COOLING SYSTEM
Inspection and Adjustment
Fan Belt Inspection
(1) Check the belt for contamination from oil, grease or
dust. Replace the belt if required. When the
contamination is slight, clean the belt with rag or paper
towel. Do not use gasoline, oil or any other solvent to
clean the belt.
(2) During the engine overhaul or belt tension adjustment,
check the condition of the belt. Replace the belt if it
has any damage.
Fan Belt Tension
Apply a force of 98 N (10 kgf) [22 lbf] perpendicularly to
the belt at a point midway between the fan pulley and
tension pulley. Adjust the tension until belt deflection is
between 11 to 13 mm (0.43 to 0.51 in.).
Connecting Radiator Hoses
When connecting the hoses to the radiator, fit their ends
fully on the fittings and secure them with clamps. Make
sure that each hose is correctly connected and over the flare
of the fitting.
Fan pulley
Tension
pulley
209614
Hose
209615
When inspecting the fan belt tension, always stop
the Engine.
WARNING!
2-6
COOLING SYSTEM
Unit Layout
Coolant
Fill the radiator with coolant. After starting the engine and
letting it warm up during operation, check for abnormal
noises. Check the coolant level in the reserve tank to
ensure it meets the specification.
Quantity of coolant
Radiator Cap
Truck Models
2 ton class 3 ton class
Items
Engine (K25) 3.95 (1.04) 3.95 (1.04)
Radiator 2.7 (0.71) 2.7 (0.71)
Reserve tank (FULL level) 0.65 (0.17) 0.65 (0.17)
Total quantity of coolant
7.4 (1.96) 8.7 (2.30)
(including coolant in hoses)
Oil cooler 0.094 (0.02) 0.094 (0.02)
Unit: liter (U.S. gal.)
90±15 kPa
Opening pressure (0.92±0.15 kgf/cm2
)
[13.1±2.2 psi]
0 to 5 kPa
Vacuum valve (0 to 0.05 kgf/cm2
)
[0 to 0.73 psi]
210700
Chassis Electrical Devices Wiring Outline ....................................... 3 – 1
Structure .................................................................................................... 3 – 3
Console Box .............................................................................................. 3 – 3
Major Electrical Components ..................................................................... 3 – 5
Lamp Bulb Specifications .......................................................................... 3 – 16
Console Box ............................................................................................. 3 – 17
Disassembly .............................................................................................. 3 – 17
Instrument Panel ....................................................................................... 3 – 18
Battery ....................................................................................................... 3 – 19
Wire Color .................................................................................................. 3 – 20
Troubleshooting........................................................................................ 3 – 21
Electrical Schematic .............................................................................. 3 – 24
3
ELECTRICAL SYSTEM
3-1
ELECTRICAL SYSTEM
Chassis Electrical Devices Wiring Outline (No. 1)
Main harness
Harness, front
combination
Harness, front
combination
Harness, rear
combination
209620
3-2
ELECTRICAL SYSTEM
Chassis Electrical Devices Wiring Outline (No. 2)
Starter switch
Key
Select switch
Warning buzzer
Harness, Front
combination
Controller
Horn
Connector
bracket
Vehicle speed sensor
(Pulse generator)
Transmission
Relay box,
Relay
Harness, Front
combination
Fuse box,
Fuse
Battery seat
Clip
Back buzzer
Harness,
Rear combination
Main harness
209621
3-3
ELECTRICAL SYSTEM
Structure
Console Box
1 Engine coolant temperature gauge
2 Fuel gauge
3 Hour Meter/Warning blinks
4 Instrument panel
5 Starter switch
6 Light switch, turn signal switch
7 Direction lever
5
6
1
34
2
7
210703
3-4
ELECTRICAL SYSTEM
Function of Instrument Panel
Description of function
Inspection method of blown bulbs for Instrument panel
All warning and indicator lamps are normal, if they illuminate, when the starter switch is turned to ON position.
A
I
B C D E F G H
KL3L2L1LJ 104936
Code Name of monitor When not illuminated
When illuminated
Remarks
or flashing
A
Parking brake warning lamp Parking brake released Parking brake applied
Brake fluid level warning lamp /normal level /low level
B ECM warning lamp Normal ECM abnormal
C Engine oil pressure warning lamp Normal oil pressure Low oil pressure
D Seat belt warning lamp Fastened Not fastened
Multi-purpose warning lamp (illuminates when
E warnings indicated by printed symbols occur or Normal Malfunction Printed symbol
minor failures occur)
F Alternator not charging warning lamp Normal charging
Abnormal charging
system
G LP-Gas warning lamp Normal
LPG fuel level low or
LP-Gas truck
pressure low
H Mast interlock indicator lamp Free Locked
I
Driving interlock indicator lamp Free Locked (flashing)
Neutral indicator lamp F or R Neutral
J Fuel gauge Indicates remaining fuel amount with key in “ON” position.
K Engine coolant temperature gauge Indicates “Overheat” condition if pointer enters the red zone.
L Liquid crystal (normally acting as hour meter) Indicates operating hours with key in “ON” position.
L1 Torque converter fluid warning lamp Normal temperature Overheat
L2 Coolant level warning lamp Normal level Low level Option
L3 Clogged air cleaner element warning lamp Normal element Clogged Option
When major failures occur, bulbs A, C, D, E, and H simultaneously flash.
Positionand
contentof
printedsymbols
3-5
ELECTRICAL SYSTEM
Major Electrical Components
Starter switch (with Anti-Restart Lock)
This switch has a built-in anti-restart lock, so the key cannot be turned from (ON) to (START) position while
the engine is running. This prevents starter breakage or flywheel damage caused by an operator restarting the truck
when the engine is running.
Connection Table
Gasoline-engine truck
M
G1
G2
S
B1
B2
(OFF)
(ON)
(START)
208540
Terminal B1, B2 G1 G2 M S
Connected to Battery,
alternator, Fuse box Direction lever
Key position fuse box
OFF
ON (when driving)
START (when starting engine)
3-6
ELECTRICAL SYSTEM
Lighting switch and turn signal switch
Light switch and
turn signal switch
Horn contact
Horn
Steering angle sensor
Forward-reverse
selector switch
T-3 L-2
L-4
L-5
L-3L-1
T-2
T-1
421
3 5
4
2
31
5
209627
Light and
turn signal lever
Boot
Horn contact
Steering angle sensor
Boot
Direction lever
Lighting switch, turn signal switch
Forward of truck
209625
Forward-reverse
selector switch
Forward of truck
Light switch,
turn signal switch
F
N
R
L
N
R
1 2
3
OFF
209626A
3-7
ELECTRICAL SYSTEM
Horn
Check that the horn sounds when applying the specified
voltage to both terminals of the horn, T1 and T2.
Replace the horn if it does not sound or its sound is
abnormal.
Operating voltage: DC 12 V
NOTICE: Refer to the illustration for the horn installed
position.
Tank Unit
Up
Down
Coil
T1
T2
Vent hole
Contact
209628
210710
Float position E 1/4 1/2 3/4 F
Standard resistance value (ohm) 80 49.5 32 19 10
Tolerance (ohm)
+12
– ±3 –
+1.0
+12 −0.5
Referential Standards
3-8
ELECTRICAL SYSTEM
Brake fluid sensor
Refer to the brake system.
Stop lamp switch
Connect a tester across the terminals and check that the
lamps turn ON and OFF when the push rod extended
projection is to the specified value.
Measure the insulation resistance value across the terminals
when the push rod is pushed in.
Replace the switch if the measured insulation resistance
value is less than the value below.
Rated voltage: DC 12 V
IndicatorONactivatingposition
3±2mm
(0.12±0.08in.)
206672
OFF ON
(illuminates)
4
(0.16)
2 (0.08)
Push
rod
Unit : mm (in.)
M10 × 1.25
208543
Insulation resistance value
1 M ohm or more
(at 500 V megger)
3-9
ELECTRICAL SYSTEM
Direction lever assembly
Forward of vehicle
F Forward
N Neutral
R Reverse
(10°)(10°)
209632A
Terminal 1 2 3 4 5
Wire color
Lever position GR/L B G/R B L/W
F (Forward)
N (Neutral)
R (Reverse)
Connection table
3-10
ELECTRICAL SYSTEM
Sender unit (engine coolant temperature)
(1) Apply an ohmmeter unit between the terminal and
body of the sender unit and check for continuity
(resistance value).
(2) Replace the sender unit if there is no continuity or the
measured resistance value is outside the standard
resistance value.
Gasoline-engine truck
(3) When installing the sender unit, tighten it to the
specified torque.
TerminalBody
208546
Temperature 50 70 100 110 120
[°C (°F)] (122) (158) (212) (230) (248)
Standard resistance
136 66 27.2 20.5 17.2
value (ohm)
Sender unit tightening
19.6 to 27.4 N·m
torque
(2.0 to 2.8 kgf·m)
[14.5 to 20.2 lbf·ft]
3-11
ELECTRICAL SYSTEM
Thermoswitch (T/C oil)
Apply an ohmmeter between the terminal and body and
check for continuity (resistance value). Replace the
thermoswitch if the measured insulation resistance value is
less than the value below.
Internal resistance: 0.5 ohm or less (with contact ON)
Allowable load: 0.5 A
BodyTerminal
208547
1 M ohm or more
Insulation resistance value (with contact OFF)
(at 500 V megger)
Main specifications
OFF→ON
122±3 °C
Operating temperature
(251.6±37.4 °F)
ON→OFF
115 °C (239 °F)
or higher
Insulation resistance
1 M ohm or more
(with contact OFF)
31.4 to 47.1 N·m
Tightening torque (3.2 to 4.8 kgf·m)
[23.2 to 34.7 lbf·ft]
Replace the thermoswitch if it was dropped or
abused.
CAUTION!
NOTE
When installing the thermoswitch, tighten it to the
specified torque.
3-12
ELECTRICAL SYSTEM
Power relay (Backup lamps)
Inspection of coil
Apply an ohmmeter across terminal 1 and terminal 2 and
measure the resistance value of the relay coil. If there is no
continuity or the resistance value measured is outside the
standard resistance value, replace the coil.
Inspection of contact
(1) Measure the insulation resistance value between
terminal 3 and terminal 4. Replace the relay with a
new one if the measured insulation resistance value is
less than the value below.
(2) Apply an ohmmeter across terminal 3 and terminal 4.
(3) Apply a voltage of 12 V ON and OFF across terminal 1
and terminal 2, and check to see if the relay activates
to cause continuity between terminal 3 and terminal 4.
Replace the relay with a new one if it does not activate
properly.
Coil rating [at 20°C (68°F)]
2 4
31
1
2
3
4
Diode
Connection diagram
208548
Insulation resistance value
10 M ohm or more
(at 500 V megger)
Resistance value of coil 80 ohm ±10%
Rated operating voltage DC 12 V
Working voltage DC 8 V or less
Open-circuit voltage DC 0.6 to 6 V or more
Coil resistance 80 ohm ±10%
Rated exciting current 150 mA ±10%
This part operates on DC 12 V power supply.
CAUTION!
As the relay has an integrated diode between
terminals, be careful about the polarity when
inspecting. Replace the relay if it was dropped or
abused.
CAUTION!
3-13
ELECTRICAL SYSTEM
Coil rating [in case of 20°C (68°F)]
Rated operating voltage: DC 12 V
Coil resistance: 52 ohm
Rated exciting current: 80 mA
Fuel pump
Fuel pump
209640
3-14
ELECTRICAL SYSTEM
Solenoid valve (for selector valve)
This is an ON/OFF valve (normal open type).
The valve opens the IN/OUT circuit in a non-energized
condition.
Rated operating voltage: DC 12V (gasoline-engine truck,
resin color: grey)
3-15
ELECTRICAL SYSTEM
Fuse Box
QGS/OTHERS
10A
VCM
20A
10A 15A
EGI
30A
EGI
30A
ETC
15A
A/C
20A
20A 30A
METER PANEL
10A
BACK UP/OTHERS
15A
SPARE
WORKING
LAMP
15A
HEAD
LAMP
15A
WIPER
15A
HORN
10A
STOP LANP
10A
FUSE
PULLER
SBF 50A
GLOW
SBF 100A
ALTNR
SBF 100A
BATTERYSPARE
209646
209645
Fuse box, Fuse
3-16
ELECTRICAL SYSTEM
Lamp Bulb Specifications
Item
No. of
Watts
Color of lens Shape Remarks
Type of lamp
bulbs
12 volt
Head lamps 2 Colorless 45
Turn
2 Amber 27
Combination
signals
Standard:
Installed on
lamps (front)
Clearance
overhead guard
2 Amber 10
lamps
Turn
2 Amber 27
signals
Combination Tail/stop
2 Red 8/23
lamps (rear) lamps
Backup
2 Colorless 10
lamps
Working lamps
4 Colorless 45 Optional
(front and rear)
Instrument panel lamps 7 Colorless 3
210713
3-17
ELECTRICAL SYSTEM
Console Box
Disassembly
(1) Disconnect the electrical wiring from connector 1.
(2) Remove the screw using a flatblade screwdriver and
remove cover 2.
(3) Remove the screw and then, remove cover (U-Re) 3.
(4) Remove the screw and then, remove cover (U-Fr) 4.
(5) Remove the direction lever and turn signal lever 5.
(6) Remove the bolt and then, remove console box
assembly 6.
Reassembly
Follow the disassembly sequence in reverse.
210714
3-18
ELECTRICAL SYSTEM
Instrument Panel
Disassembly
Sequence
1 Meter cover
2 Dial
3 Water temperature gauge
4 Liquid crystal
5 Fuel gauge
6 Meter case
7 Rigid board
8 Bulb
9 Socket
206480
Reassembly
To reassemble the instrument panel, follow the reverse
of disassembly procedure.
Bulb replacement
For bulb replacement, remove the socket from the rigid
board by turning it counterclockwise. For configuration
of the indicator lights, refer to page 3-4.
Be careful not to damage the rigid board when
disassembling the instrument panel.
CAUTION!
3-19
ELECTRICAL SYSTEM
Battery
1. Specific gravity reading and state of charge
To check the battery for state of charge, take
hydrometer readings on its electrolyte. The battery may
be fully charged if the S.G. reading is 1.280 to 1.265 at
20°C (68°F). The state of charge can be told from the
way the electrolyte level goes down to expose the cell
plates. If addition of distilled water is necessary every
month or so, the battery is overcharged. If addition is
not required for more than 3 months, it is likely that the
battery is inadequately charged.
2. Charging precautions
(1) In slow charging, the charging current should be
about 1/10 the capacity of the battery to be charged.
(2) In quick charging, the battery capacity in ampere
should not be exceeded.
(3) During charging, adjust the charging current to
prevent the electrolyte temperature from rising
beyond 45°C (113°F).
(4) When connecting the cables to the battery, begin by
installing the cable to the positive (+) terminal.
When disconnecting them from the battery, begin
by removing the cable for the negative (−) terminal.
210716
Be sure to turn OFF the starter switch and
lighting switch before disconnecting or
connecting the battery cable to prevent the IC
regulator from damage.
CAUTION!
3-20
ELECTRICAL SYSTEM
Wire Color
Wire colors listed in the table below show standard colors (base colors). For wiring composed of two colors, the first
color shows a base color and the second color a marking color.
Example: The wire color of BW shows that its base color is B with a marking W.
B W
Marking color
Base color
List of wire colors
Wire color Color
B BLACK
W WHITE
R RED
G GREEN
Y YELLOW
Br BROWN
L BLUE
Lg LIGHT GREEN
O ORANGE
P PINK
Gr GRAY
Lb LIGHT BLUE
Dg DARK GREEN
ch CHOCOLATE
Be careful that allowable current differs between solid wires and stranded wires even if they are of the
same gauge.
CAUTION!
NOTE
For wiring identification, the same color, in principle, must be used for the circuit from the power supply to the
load.
Thank you very much
for your reading.
Please Click Here
Then Get More
Information.

More Related Content

What's hot

Caterpillar cat dp70 forklift lift trucks service repair manual sn:t20 c 6000...
Caterpillar cat dp70 forklift lift trucks service repair manual sn:t20 c 6000...Caterpillar cat dp70 forklift lift trucks service repair manual sn:t20 c 6000...
Caterpillar cat dp70 forklift lift trucks service repair manual sn:t20 c 6000...jsemd suekd
 
Caterpillar Cat DP30N Forklift Lift Trucks Service Repair Manual SN:T14E-3001...
Caterpillar Cat DP30N Forklift Lift Trucks Service Repair Manual SN:T14E-3001...Caterpillar Cat DP30N Forklift Lift Trucks Service Repair Manual SN:T14E-3001...
Caterpillar Cat DP30N Forklift Lift Trucks Service Repair Manual SN:T14E-3001...kjkemjd
 
Mitsubishi FD25K MC Forklift Trucks Service Repair Manual SN: EF18B-55001-UP
Mitsubishi FD25K MC Forklift Trucks Service Repair Manual SN: EF18B-55001-UPMitsubishi FD25K MC Forklift Trucks Service Repair Manual SN: EF18B-55001-UP
Mitsubishi FD25K MC Forklift Trucks Service Repair Manual SN: EF18B-55001-UPfjjsekmdmme
 
Mitsubishi fg15 n forklift trucks service repair manual sn:ef34l 0001-up
Mitsubishi fg15 n forklift trucks service repair manual sn:ef34l 0001-upMitsubishi fg15 n forklift trucks service repair manual sn:ef34l 0001-up
Mitsubishi fg15 n forklift trucks service repair manual sn:ef34l 0001-upjkmsme ekdmm
 
Mitsubishi fg40 kl forklift trucks service repair manual sn:f29c 50001-up
Mitsubishi fg40 kl forklift trucks service repair manual sn:f29c 50001-upMitsubishi fg40 kl forklift trucks service repair manual sn:f29c 50001-up
Mitsubishi fg40 kl forklift trucks service repair manual sn:f29c 50001-upjksmmde
 
Mitsubishi fgc15 n forklift trucks chassis, mast and options service repair m...
Mitsubishi fgc15 n forklift trucks chassis, mast and options service repair m...Mitsubishi fgc15 n forklift trucks chassis, mast and options service repair m...
Mitsubishi fgc15 n forklift trucks chassis, mast and options service repair m...jksjdmd
 
MITSUBISHI FD10N FORKLIFT TRUCKS Service Repair Manual SN:F16D-04001-UP
MITSUBISHI FD10N FORKLIFT TRUCKS Service Repair Manual SN:F16D-04001-UPMITSUBISHI FD10N FORKLIFT TRUCKS Service Repair Manual SN:F16D-04001-UP
MITSUBISHI FD10N FORKLIFT TRUCKS Service Repair Manual SN:F16D-04001-UPkjsekmd fhsemmd
 
Caterpillar cat dp30 k fc forklift lift trucks service repair manual sn:et14c...
Caterpillar cat dp30 k fc forklift lift trucks service repair manual sn:et14c...Caterpillar cat dp30 k fc forklift lift trucks service repair manual sn:et14c...
Caterpillar cat dp30 k fc forklift lift trucks service repair manual sn:et14c...jksjekmd
 
Caterpillar Cat GP18N Forklift Lift Trucks Service Repair Manual SN:T25C-7000...
Caterpillar Cat GP18N Forklift Lift Trucks Service Repair Manual SN:T25C-7000...Caterpillar Cat GP18N Forklift Lift Trucks Service Repair Manual SN:T25C-7000...
Caterpillar Cat GP18N Forklift Lift Trucks Service Repair Manual SN:T25C-7000...yhskemjkm
 

What's hot (9)

Caterpillar cat dp70 forklift lift trucks service repair manual sn:t20 c 6000...
Caterpillar cat dp70 forklift lift trucks service repair manual sn:t20 c 6000...Caterpillar cat dp70 forklift lift trucks service repair manual sn:t20 c 6000...
Caterpillar cat dp70 forklift lift trucks service repair manual sn:t20 c 6000...
 
Caterpillar Cat DP30N Forklift Lift Trucks Service Repair Manual SN:T14E-3001...
Caterpillar Cat DP30N Forklift Lift Trucks Service Repair Manual SN:T14E-3001...Caterpillar Cat DP30N Forklift Lift Trucks Service Repair Manual SN:T14E-3001...
Caterpillar Cat DP30N Forklift Lift Trucks Service Repair Manual SN:T14E-3001...
 
Mitsubishi FD25K MC Forklift Trucks Service Repair Manual SN: EF18B-55001-UP
Mitsubishi FD25K MC Forklift Trucks Service Repair Manual SN: EF18B-55001-UPMitsubishi FD25K MC Forklift Trucks Service Repair Manual SN: EF18B-55001-UP
Mitsubishi FD25K MC Forklift Trucks Service Repair Manual SN: EF18B-55001-UP
 
Mitsubishi fg15 n forklift trucks service repair manual sn:ef34l 0001-up
Mitsubishi fg15 n forklift trucks service repair manual sn:ef34l 0001-upMitsubishi fg15 n forklift trucks service repair manual sn:ef34l 0001-up
Mitsubishi fg15 n forklift trucks service repair manual sn:ef34l 0001-up
 
Mitsubishi fg40 kl forklift trucks service repair manual sn:f29c 50001-up
Mitsubishi fg40 kl forklift trucks service repair manual sn:f29c 50001-upMitsubishi fg40 kl forklift trucks service repair manual sn:f29c 50001-up
Mitsubishi fg40 kl forklift trucks service repair manual sn:f29c 50001-up
 
Mitsubishi fgc15 n forklift trucks chassis, mast and options service repair m...
Mitsubishi fgc15 n forklift trucks chassis, mast and options service repair m...Mitsubishi fgc15 n forklift trucks chassis, mast and options service repair m...
Mitsubishi fgc15 n forklift trucks chassis, mast and options service repair m...
 
MITSUBISHI FD10N FORKLIFT TRUCKS Service Repair Manual SN:F16D-04001-UP
MITSUBISHI FD10N FORKLIFT TRUCKS Service Repair Manual SN:F16D-04001-UPMITSUBISHI FD10N FORKLIFT TRUCKS Service Repair Manual SN:F16D-04001-UP
MITSUBISHI FD10N FORKLIFT TRUCKS Service Repair Manual SN:F16D-04001-UP
 
Caterpillar cat dp30 k fc forklift lift trucks service repair manual sn:et14c...
Caterpillar cat dp30 k fc forklift lift trucks service repair manual sn:et14c...Caterpillar cat dp30 k fc forklift lift trucks service repair manual sn:et14c...
Caterpillar cat dp30 k fc forklift lift trucks service repair manual sn:et14c...
 
Caterpillar Cat GP18N Forklift Lift Trucks Service Repair Manual SN:T25C-7000...
Caterpillar Cat GP18N Forklift Lift Trucks Service Repair Manual SN:T25C-7000...Caterpillar Cat GP18N Forklift Lift Trucks Service Repair Manual SN:T25C-7000...
Caterpillar Cat GP18N Forklift Lift Trucks Service Repair Manual SN:T25C-7000...
 

Similar to K25 Engine Service Manual Guide

Mitsubishi FB35K PAC Forklift Trucks Service Repair Manual SN:EFB9C-50001-UP.pdf
Mitsubishi FB35K PAC Forklift Trucks Service Repair Manual SN:EFB9C-50001-UP.pdfMitsubishi FB35K PAC Forklift Trucks Service Repair Manual SN:EFB9C-50001-UP.pdf
Mitsubishi FB35K PAC Forklift Trucks Service Repair Manual SN:EFB9C-50001-UP.pdfkm7seyduh7dw
 
Mitsubishi FB30K PAC Forklift Trucks Service Repair Manual SN:EFB9C-00011-UP.pdf
Mitsubishi FB30K PAC Forklift Trucks Service Repair Manual SN:EFB9C-00011-UP.pdfMitsubishi FB30K PAC Forklift Trucks Service Repair Manual SN:EFB9C-00011-UP.pdf
Mitsubishi FB30K PAC Forklift Trucks Service Repair Manual SN:EFB9C-00011-UP.pdfkm7seyduh7dw
 
Mitsubishi FB25K PAC Forklift Trucks Service Repair Manual SN:EFB8C-50001-UP.pdf
Mitsubishi FB25K PAC Forklift Trucks Service Repair Manual SN:EFB8C-50001-UP.pdfMitsubishi FB25K PAC Forklift Trucks Service Repair Manual SN:EFB8C-50001-UP.pdf
Mitsubishi FB25K PAC Forklift Trucks Service Repair Manual SN:EFB8C-50001-UP.pdfkm7seyduh7dw
 
Mitsubishi FB20K PAC Forklift Trucks Service Repair Manual SN:EFB8C-00011-UP.pdf
Mitsubishi FB20K PAC Forklift Trucks Service Repair Manual SN:EFB8C-00011-UP.pdfMitsubishi FB20K PAC Forklift Trucks Service Repair Manual SN:EFB8C-00011-UP.pdf
Mitsubishi FB20K PAC Forklift Trucks Service Repair Manual SN:EFB8C-00011-UP.pdfkm7seyduh7dw
 
Mitsubishi FB35K PAC Forklift Trucks Service Repair Manual SN:EFB9C-50001-UP
Mitsubishi FB35K PAC Forklift Trucks Service Repair Manual SN:EFB9C-50001-UPMitsubishi FB35K PAC Forklift Trucks Service Repair Manual SN:EFB9C-50001-UP
Mitsubishi FB35K PAC Forklift Trucks Service Repair Manual SN:EFB9C-50001-UPkjksemjdmkdm
 
Mitsubishi fb20 cn forklift trucks service repair manual snefb17 20011-up
Mitsubishi fb20 cn forklift trucks service repair manual snefb17 20011-upMitsubishi fb20 cn forklift trucks service repair manual snefb17 20011-up
Mitsubishi fb20 cn forklift trucks service repair manual snefb17 20011-upjksemmmd
 
Caterpillar cat dp100 forklift lift trucks service repair manual sn:3 dp10011...
Caterpillar cat dp100 forklift lift trucks service repair manual sn:3 dp10011...Caterpillar cat dp100 forklift lift trucks service repair manual sn:3 dp10011...
Caterpillar cat dp100 forklift lift trucks service repair manual sn:3 dp10011...jksmenmd
 
Caterpillar Cat M120D 36/48 VOLT 8AG00600 Service Repair Manual SN :A1EC5-60001
Caterpillar Cat M120D 36/48 VOLT 8AG00600 Service Repair Manual SN :A1EC5-60001Caterpillar Cat M120D 36/48 VOLT 8AG00600 Service Repair Manual SN :A1EC5-60001
Caterpillar Cat M120D 36/48 VOLT 8AG00600 Service Repair Manual SN :A1EC5-60001yjksmemd
 
Caterpillar Cat M120D 36/48 VOLT 8AG00600 Service Repair Manual SN :A1EC5-60001
Caterpillar Cat M120D 36/48 VOLT 8AG00600 Service Repair Manual SN :A1EC5-60001Caterpillar Cat M120D 36/48 VOLT 8AG00600 Service Repair Manual SN :A1EC5-60001
Caterpillar Cat M120D 36/48 VOLT 8AG00600 Service Repair Manual SN :A1EC5-60001jkjskemm rtert
 
Caterpillar Cat EP20K PAC Forklift Lift Trucks Service Repair Manual SN:ETB8C...
Caterpillar Cat EP20K PAC Forklift Lift Trucks Service Repair Manual SN:ETB8C...Caterpillar Cat EP20K PAC Forklift Lift Trucks Service Repair Manual SN:ETB8C...
Caterpillar Cat EP20K PAC Forklift Lift Trucks Service Repair Manual SN:ETB8C...jkmmem
 
Caterpillar Cat EP35K Forklift Lift Truck Service Repair Manual SN: ETB9B-500...
Caterpillar Cat EP35K Forklift Lift Truck Service Repair Manual SN: ETB9B-500...Caterpillar Cat EP35K Forklift Lift Truck Service Repair Manual SN: ETB9B-500...
Caterpillar Cat EP35K Forklift Lift Truck Service Repair Manual SN: ETB9B-500...ukjsemd djfmmmd
 
Caterpillar Cat EP25K Forklift Lift Truck Service Repair Manual SN:ETB8B-5000...
Caterpillar Cat EP25K Forklift Lift Truck Service Repair Manual SN:ETB8B-5000...Caterpillar Cat EP25K Forklift Lift Truck Service Repair Manual SN:ETB8B-5000...
Caterpillar Cat EP25K Forklift Lift Truck Service Repair Manual SN:ETB8B-5000...jkjskemm rtert
 
Caterpillar Cat EP18KT Forklift Lift Trucks Service Repair Manual SN:ETB5A-00...
Caterpillar Cat EP18KT Forklift Lift Trucks Service Repair Manual SN:ETB5A-00...Caterpillar Cat EP18KT Forklift Lift Trucks Service Repair Manual SN:ETB5A-00...
Caterpillar Cat EP18KT Forklift Lift Trucks Service Repair Manual SN:ETB5A-00...jksmemd eyeujdj
 
CATERPILLAR CAT EP18K FORKLIFT LIFT TRUCK Service Repair Manual SN:ETB6A-5000...
CATERPILLAR CAT EP18K FORKLIFT LIFT TRUCK Service Repair Manual SN:ETB6A-5000...CATERPILLAR CAT EP18K FORKLIFT LIFT TRUCK Service Repair Manual SN:ETB6A-5000...
CATERPILLAR CAT EP18K FORKLIFT LIFT TRUCK Service Repair Manual SN:ETB6A-5000...jkjskemm rtert
 

Similar to K25 Engine Service Manual Guide (14)

Mitsubishi FB35K PAC Forklift Trucks Service Repair Manual SN:EFB9C-50001-UP.pdf
Mitsubishi FB35K PAC Forklift Trucks Service Repair Manual SN:EFB9C-50001-UP.pdfMitsubishi FB35K PAC Forklift Trucks Service Repair Manual SN:EFB9C-50001-UP.pdf
Mitsubishi FB35K PAC Forklift Trucks Service Repair Manual SN:EFB9C-50001-UP.pdf
 
Mitsubishi FB30K PAC Forklift Trucks Service Repair Manual SN:EFB9C-00011-UP.pdf
Mitsubishi FB30K PAC Forklift Trucks Service Repair Manual SN:EFB9C-00011-UP.pdfMitsubishi FB30K PAC Forklift Trucks Service Repair Manual SN:EFB9C-00011-UP.pdf
Mitsubishi FB30K PAC Forklift Trucks Service Repair Manual SN:EFB9C-00011-UP.pdf
 
Mitsubishi FB25K PAC Forklift Trucks Service Repair Manual SN:EFB8C-50001-UP.pdf
Mitsubishi FB25K PAC Forklift Trucks Service Repair Manual SN:EFB8C-50001-UP.pdfMitsubishi FB25K PAC Forklift Trucks Service Repair Manual SN:EFB8C-50001-UP.pdf
Mitsubishi FB25K PAC Forklift Trucks Service Repair Manual SN:EFB8C-50001-UP.pdf
 
Mitsubishi FB20K PAC Forklift Trucks Service Repair Manual SN:EFB8C-00011-UP.pdf
Mitsubishi FB20K PAC Forklift Trucks Service Repair Manual SN:EFB8C-00011-UP.pdfMitsubishi FB20K PAC Forklift Trucks Service Repair Manual SN:EFB8C-00011-UP.pdf
Mitsubishi FB20K PAC Forklift Trucks Service Repair Manual SN:EFB8C-00011-UP.pdf
 
Mitsubishi FB35K PAC Forklift Trucks Service Repair Manual SN:EFB9C-50001-UP
Mitsubishi FB35K PAC Forklift Trucks Service Repair Manual SN:EFB9C-50001-UPMitsubishi FB35K PAC Forklift Trucks Service Repair Manual SN:EFB9C-50001-UP
Mitsubishi FB35K PAC Forklift Trucks Service Repair Manual SN:EFB9C-50001-UP
 
Mitsubishi fb20 cn forklift trucks service repair manual snefb17 20011-up
Mitsubishi fb20 cn forklift trucks service repair manual snefb17 20011-upMitsubishi fb20 cn forklift trucks service repair manual snefb17 20011-up
Mitsubishi fb20 cn forklift trucks service repair manual snefb17 20011-up
 
Caterpillar cat dp100 forklift lift trucks service repair manual sn:3 dp10011...
Caterpillar cat dp100 forklift lift trucks service repair manual sn:3 dp10011...Caterpillar cat dp100 forklift lift trucks service repair manual sn:3 dp10011...
Caterpillar cat dp100 forklift lift trucks service repair manual sn:3 dp10011...
 
Caterpillar Cat M120D 36/48 VOLT 8AG00600 Service Repair Manual SN :A1EC5-60001
Caterpillar Cat M120D 36/48 VOLT 8AG00600 Service Repair Manual SN :A1EC5-60001Caterpillar Cat M120D 36/48 VOLT 8AG00600 Service Repair Manual SN :A1EC5-60001
Caterpillar Cat M120D 36/48 VOLT 8AG00600 Service Repair Manual SN :A1EC5-60001
 
Caterpillar Cat M120D 36/48 VOLT 8AG00600 Service Repair Manual SN :A1EC5-60001
Caterpillar Cat M120D 36/48 VOLT 8AG00600 Service Repair Manual SN :A1EC5-60001Caterpillar Cat M120D 36/48 VOLT 8AG00600 Service Repair Manual SN :A1EC5-60001
Caterpillar Cat M120D 36/48 VOLT 8AG00600 Service Repair Manual SN :A1EC5-60001
 
Caterpillar Cat EP20K PAC Forklift Lift Trucks Service Repair Manual SN:ETB8C...
Caterpillar Cat EP20K PAC Forklift Lift Trucks Service Repair Manual SN:ETB8C...Caterpillar Cat EP20K PAC Forklift Lift Trucks Service Repair Manual SN:ETB8C...
Caterpillar Cat EP20K PAC Forklift Lift Trucks Service Repair Manual SN:ETB8C...
 
Caterpillar Cat EP35K Forklift Lift Truck Service Repair Manual SN: ETB9B-500...
Caterpillar Cat EP35K Forklift Lift Truck Service Repair Manual SN: ETB9B-500...Caterpillar Cat EP35K Forklift Lift Truck Service Repair Manual SN: ETB9B-500...
Caterpillar Cat EP35K Forklift Lift Truck Service Repair Manual SN: ETB9B-500...
 
Caterpillar Cat EP25K Forklift Lift Truck Service Repair Manual SN:ETB8B-5000...
Caterpillar Cat EP25K Forklift Lift Truck Service Repair Manual SN:ETB8B-5000...Caterpillar Cat EP25K Forklift Lift Truck Service Repair Manual SN:ETB8B-5000...
Caterpillar Cat EP25K Forklift Lift Truck Service Repair Manual SN:ETB8B-5000...
 
Caterpillar Cat EP18KT Forklift Lift Trucks Service Repair Manual SN:ETB5A-00...
Caterpillar Cat EP18KT Forklift Lift Trucks Service Repair Manual SN:ETB5A-00...Caterpillar Cat EP18KT Forklift Lift Trucks Service Repair Manual SN:ETB5A-00...
Caterpillar Cat EP18KT Forklift Lift Trucks Service Repair Manual SN:ETB5A-00...
 
CATERPILLAR CAT EP18K FORKLIFT LIFT TRUCK Service Repair Manual SN:ETB6A-5000...
CATERPILLAR CAT EP18K FORKLIFT LIFT TRUCK Service Repair Manual SN:ETB6A-5000...CATERPILLAR CAT EP18K FORKLIFT LIFT TRUCK Service Repair Manual SN:ETB6A-5000...
CATERPILLAR CAT EP18K FORKLIFT LIFT TRUCK Service Repair Manual SN:ETB6A-5000...
 

More from kjsekmd fhsemmd

Yanmar YSM8-R Marine Diesel Engine Service Repair Manual
Yanmar YSM8-R Marine Diesel Engine Service Repair ManualYanmar YSM8-R Marine Diesel Engine Service Repair Manual
Yanmar YSM8-R Marine Diesel Engine Service Repair Manualkjsekmd fhsemmd
 
YALE E818 GDC40VX LIFT TRUCK (EUROPE) Service Repair Manual
YALE E818 GDC40VX LIFT TRUCK (EUROPE) Service Repair ManualYALE E818 GDC40VX LIFT TRUCK (EUROPE) Service Repair Manual
YALE E818 GDC40VX LIFT TRUCK (EUROPE) Service Repair Manualkjsekmd fhsemmd
 
Toyota 6FD18 Forklift Service Repair Manual
Toyota 6FD18 Forklift Service Repair ManualToyota 6FD18 Forklift Service Repair Manual
Toyota 6FD18 Forklift Service Repair Manualkjsekmd fhsemmd
 
MITSUBISHI FGE15N FORKLIFT TRUCKS Service Repair Manual SN:F25C-50001-UP
MITSUBISHI FGE15N FORKLIFT TRUCKS Service Repair Manual SN:F25C-50001-UPMITSUBISHI FGE15N FORKLIFT TRUCKS Service Repair Manual SN:F25C-50001-UP
MITSUBISHI FGE15N FORKLIFT TRUCKS Service Repair Manual SN:F25C-50001-UPkjsekmd fhsemmd
 
DAEWOO DOOSAN SOLAR 180W-V WHEEL EXCAVATOR Service Repair Manual
DAEWOO DOOSAN SOLAR 180W-V WHEEL EXCAVATOR Service Repair ManualDAEWOO DOOSAN SOLAR 180W-V WHEEL EXCAVATOR Service Repair Manual
DAEWOO DOOSAN SOLAR 180W-V WHEEL EXCAVATOR Service Repair Manualkjsekmd fhsemmd
 
2005 Polaris 900 RMK 151 SNOWMOBILE Service Repair Manual
2005 Polaris 900 RMK 151 SNOWMOBILE Service Repair Manual2005 Polaris 900 RMK 151 SNOWMOBILE Service Repair Manual
2005 Polaris 900 RMK 151 SNOWMOBILE Service Repair Manualkjsekmd fhsemmd
 
2001 Arctic Cat Arctic Cat 300 4X4 ATV Service Repair Manual
2001 Arctic Cat Arctic Cat 300 4X4 ATV Service Repair Manual2001 Arctic Cat Arctic Cat 300 4X4 ATV Service Repair Manual
2001 Arctic Cat Arctic Cat 300 4X4 ATV Service Repair Manualkjsekmd fhsemmd
 

More from kjsekmd fhsemmd (7)

Yanmar YSM8-R Marine Diesel Engine Service Repair Manual
Yanmar YSM8-R Marine Diesel Engine Service Repair ManualYanmar YSM8-R Marine Diesel Engine Service Repair Manual
Yanmar YSM8-R Marine Diesel Engine Service Repair Manual
 
YALE E818 GDC40VX LIFT TRUCK (EUROPE) Service Repair Manual
YALE E818 GDC40VX LIFT TRUCK (EUROPE) Service Repair ManualYALE E818 GDC40VX LIFT TRUCK (EUROPE) Service Repair Manual
YALE E818 GDC40VX LIFT TRUCK (EUROPE) Service Repair Manual
 
Toyota 6FD18 Forklift Service Repair Manual
Toyota 6FD18 Forklift Service Repair ManualToyota 6FD18 Forklift Service Repair Manual
Toyota 6FD18 Forklift Service Repair Manual
 
MITSUBISHI FGE15N FORKLIFT TRUCKS Service Repair Manual SN:F25C-50001-UP
MITSUBISHI FGE15N FORKLIFT TRUCKS Service Repair Manual SN:F25C-50001-UPMITSUBISHI FGE15N FORKLIFT TRUCKS Service Repair Manual SN:F25C-50001-UP
MITSUBISHI FGE15N FORKLIFT TRUCKS Service Repair Manual SN:F25C-50001-UP
 
DAEWOO DOOSAN SOLAR 180W-V WHEEL EXCAVATOR Service Repair Manual
DAEWOO DOOSAN SOLAR 180W-V WHEEL EXCAVATOR Service Repair ManualDAEWOO DOOSAN SOLAR 180W-V WHEEL EXCAVATOR Service Repair Manual
DAEWOO DOOSAN SOLAR 180W-V WHEEL EXCAVATOR Service Repair Manual
 
2005 Polaris 900 RMK 151 SNOWMOBILE Service Repair Manual
2005 Polaris 900 RMK 151 SNOWMOBILE Service Repair Manual2005 Polaris 900 RMK 151 SNOWMOBILE Service Repair Manual
2005 Polaris 900 RMK 151 SNOWMOBILE Service Repair Manual
 
2001 Arctic Cat Arctic Cat 300 4X4 ATV Service Repair Manual
2001 Arctic Cat Arctic Cat 300 4X4 ATV Service Repair Manual2001 Arctic Cat Arctic Cat 300 4X4 ATV Service Repair Manual
2001 Arctic Cat Arctic Cat 300 4X4 ATV Service Repair Manual
 

Recently uploaded

2024 WRC Hyundai World Rally Team’s i20 N Rally1 Hybrid
2024 WRC Hyundai World Rally Team’s i20 N Rally1 Hybrid2024 WRC Hyundai World Rally Team’s i20 N Rally1 Hybrid
2024 WRC Hyundai World Rally Team’s i20 N Rally1 HybridHyundai Motor Group
 
Hyundai World Rally Team in action at 2024 WRC
Hyundai World Rally Team in action at 2024 WRCHyundai World Rally Team in action at 2024 WRC
Hyundai World Rally Team in action at 2024 WRCHyundai Motor Group
 
Delhi Call Girls Saket 9711199171 ☎✔👌✔ Full night Service for more than 1 person
Delhi Call Girls Saket 9711199171 ☎✔👌✔ Full night Service for more than 1 personDelhi Call Girls Saket 9711199171 ☎✔👌✔ Full night Service for more than 1 person
Delhi Call Girls Saket 9711199171 ☎✔👌✔ Full night Service for more than 1 personshivangimorya083
 
(COD) ̄Young Call Girls In Dwarka , New Delhi꧁❤ 7042364481❤꧂ Escorts Service i...
(COD) ̄Young Call Girls In Dwarka , New Delhi꧁❤ 7042364481❤꧂ Escorts Service i...(COD) ̄Young Call Girls In Dwarka , New Delhi꧁❤ 7042364481❤꧂ Escorts Service i...
(COD) ̄Young Call Girls In Dwarka , New Delhi꧁❤ 7042364481❤꧂ Escorts Service i...Hot Call Girls In Sector 58 (Noida)
 
The 10th anniversary, Hyundai World Rally Team's amazing journey
The 10th anniversary, Hyundai World Rally Team's amazing journeyThe 10th anniversary, Hyundai World Rally Team's amazing journey
The 10th anniversary, Hyundai World Rally Team's amazing journeyHyundai Motor Group
 
VDA 6.3 Process Approach in Automotive Industries
VDA 6.3 Process Approach in Automotive IndustriesVDA 6.3 Process Approach in Automotive Industries
VDA 6.3 Process Approach in Automotive IndustriesKannanDN
 
John Deere 200lc Excavator Operation And Tests Repair Manual.pdf
John Deere 200lc Excavator Operation And Tests Repair Manual.pdfJohn Deere 200lc Excavator Operation And Tests Repair Manual.pdf
John Deere 200lc Excavator Operation And Tests Repair Manual.pdfExcavator
 
John Deere 300 3029 4039 4045 6059 6068 Engine Operation and Service Manual
John Deere 300 3029 4039 4045 6059 6068 Engine Operation and Service ManualJohn Deere 300 3029 4039 4045 6059 6068 Engine Operation and Service Manual
John Deere 300 3029 4039 4045 6059 6068 Engine Operation and Service ManualExcavator
 
Vip Hot Call Girls 🫤 Mahipalpur ➡️ 9711199171 ➡️ Delhi 🫦 Whatsapp Number
Vip Hot Call Girls 🫤 Mahipalpur ➡️ 9711199171 ➡️ Delhi 🫦 Whatsapp NumberVip Hot Call Girls 🫤 Mahipalpur ➡️ 9711199171 ➡️ Delhi 🫦 Whatsapp Number
Vip Hot Call Girls 🫤 Mahipalpur ➡️ 9711199171 ➡️ Delhi 🫦 Whatsapp Numberkumarajju5765
 
定制昆士兰大学毕业证(本硕)UQ学位证书原版一比一
定制昆士兰大学毕业证(本硕)UQ学位证书原版一比一定制昆士兰大学毕业证(本硕)UQ学位证书原版一比一
定制昆士兰大学毕业证(本硕)UQ学位证书原版一比一fjjhfuubb
 
如何办理(UQ毕业证书)昆士兰大学毕业证毕业证成绩单原版一比一
如何办理(UQ毕业证书)昆士兰大学毕业证毕业证成绩单原版一比一如何办理(UQ毕业证书)昆士兰大学毕业证毕业证成绩单原版一比一
如何办理(UQ毕业证书)昆士兰大学毕业证毕业证成绩单原版一比一hnfusn
 
Call me @ 9892124323 Call Girl in Andheri East With Free Home Delivery
Call me @ 9892124323 Call Girl in Andheri East With Free Home DeliveryCall me @ 9892124323 Call Girl in Andheri East With Free Home Delivery
Call me @ 9892124323 Call Girl in Andheri East With Free Home DeliveryPooja Nehwal
 
( Best ) Genuine Call Girls In Mandi House =DELHI-| 8377087607
( Best ) Genuine Call Girls In Mandi House =DELHI-| 8377087607( Best ) Genuine Call Girls In Mandi House =DELHI-| 8377087607
( Best ) Genuine Call Girls In Mandi House =DELHI-| 8377087607dollysharma2066
 
꧁༒☬ 7042364481 (Call Girl) In Dwarka Delhi Escort Service In Delhi Ncr☬༒꧂
꧁༒☬ 7042364481 (Call Girl) In Dwarka Delhi Escort Service In Delhi Ncr☬༒꧂꧁༒☬ 7042364481 (Call Girl) In Dwarka Delhi Escort Service In Delhi Ncr☬༒꧂
꧁༒☬ 7042364481 (Call Girl) In Dwarka Delhi Escort Service In Delhi Ncr☬༒꧂Hot Call Girls In Sector 58 (Noida)
 
FULL ENJOY - 9953040155 Call Girls in Sector 61 | Noida
FULL ENJOY - 9953040155 Call Girls in Sector 61 | NoidaFULL ENJOY - 9953040155 Call Girls in Sector 61 | Noida
FULL ENJOY - 9953040155 Call Girls in Sector 61 | NoidaMalviyaNagarCallGirl
 
办理埃默里大学毕业证Emory毕业证原版一比一
办理埃默里大学毕业证Emory毕业证原版一比一办理埃默里大学毕业证Emory毕业证原版一比一
办理埃默里大学毕业证Emory毕业证原版一比一mkfnjj
 
Vip Hot🥵 Call Girls Delhi Delhi {9711199012} Avni Thakur 🧡😘 High Profile Girls
Vip Hot🥵 Call Girls Delhi Delhi {9711199012} Avni Thakur 🧡😘 High Profile GirlsVip Hot🥵 Call Girls Delhi Delhi {9711199012} Avni Thakur 🧡😘 High Profile Girls
Vip Hot🥵 Call Girls Delhi Delhi {9711199012} Avni Thakur 🧡😘 High Profile Girlsshivangimorya083
 

Recently uploaded (20)

2024 WRC Hyundai World Rally Team’s i20 N Rally1 Hybrid
2024 WRC Hyundai World Rally Team’s i20 N Rally1 Hybrid2024 WRC Hyundai World Rally Team’s i20 N Rally1 Hybrid
2024 WRC Hyundai World Rally Team’s i20 N Rally1 Hybrid
 
Hyundai World Rally Team in action at 2024 WRC
Hyundai World Rally Team in action at 2024 WRCHyundai World Rally Team in action at 2024 WRC
Hyundai World Rally Team in action at 2024 WRC
 
Delhi Call Girls Saket 9711199171 ☎✔👌✔ Full night Service for more than 1 person
Delhi Call Girls Saket 9711199171 ☎✔👌✔ Full night Service for more than 1 personDelhi Call Girls Saket 9711199171 ☎✔👌✔ Full night Service for more than 1 person
Delhi Call Girls Saket 9711199171 ☎✔👌✔ Full night Service for more than 1 person
 
(COD) ̄Young Call Girls In Dwarka , New Delhi꧁❤ 7042364481❤꧂ Escorts Service i...
(COD) ̄Young Call Girls In Dwarka , New Delhi꧁❤ 7042364481❤꧂ Escorts Service i...(COD) ̄Young Call Girls In Dwarka , New Delhi꧁❤ 7042364481❤꧂ Escorts Service i...
(COD) ̄Young Call Girls In Dwarka , New Delhi꧁❤ 7042364481❤꧂ Escorts Service i...
 
The 10th anniversary, Hyundai World Rally Team's amazing journey
The 10th anniversary, Hyundai World Rally Team's amazing journeyThe 10th anniversary, Hyundai World Rally Team's amazing journey
The 10th anniversary, Hyundai World Rally Team's amazing journey
 
Call Girls in Shri Niwas Puri Delhi 💯Call Us 🔝9953056974🔝
Call Girls in  Shri Niwas Puri  Delhi 💯Call Us 🔝9953056974🔝Call Girls in  Shri Niwas Puri  Delhi 💯Call Us 🔝9953056974🔝
Call Girls in Shri Niwas Puri Delhi 💯Call Us 🔝9953056974🔝
 
VDA 6.3 Process Approach in Automotive Industries
VDA 6.3 Process Approach in Automotive IndustriesVDA 6.3 Process Approach in Automotive Industries
VDA 6.3 Process Approach in Automotive Industries
 
John Deere 200lc Excavator Operation And Tests Repair Manual.pdf
John Deere 200lc Excavator Operation And Tests Repair Manual.pdfJohn Deere 200lc Excavator Operation And Tests Repair Manual.pdf
John Deere 200lc Excavator Operation And Tests Repair Manual.pdf
 
John Deere 300 3029 4039 4045 6059 6068 Engine Operation and Service Manual
John Deere 300 3029 4039 4045 6059 6068 Engine Operation and Service ManualJohn Deere 300 3029 4039 4045 6059 6068 Engine Operation and Service Manual
John Deere 300 3029 4039 4045 6059 6068 Engine Operation and Service Manual
 
Vip Hot Call Girls 🫤 Mahipalpur ➡️ 9711199171 ➡️ Delhi 🫦 Whatsapp Number
Vip Hot Call Girls 🫤 Mahipalpur ➡️ 9711199171 ➡️ Delhi 🫦 Whatsapp NumberVip Hot Call Girls 🫤 Mahipalpur ➡️ 9711199171 ➡️ Delhi 🫦 Whatsapp Number
Vip Hot Call Girls 🫤 Mahipalpur ➡️ 9711199171 ➡️ Delhi 🫦 Whatsapp Number
 
定制昆士兰大学毕业证(本硕)UQ学位证书原版一比一
定制昆士兰大学毕业证(本硕)UQ学位证书原版一比一定制昆士兰大学毕业证(本硕)UQ学位证书原版一比一
定制昆士兰大学毕业证(本硕)UQ学位证书原版一比一
 
如何办理(UQ毕业证书)昆士兰大学毕业证毕业证成绩单原版一比一
如何办理(UQ毕业证书)昆士兰大学毕业证毕业证成绩单原版一比一如何办理(UQ毕业证书)昆士兰大学毕业证毕业证成绩单原版一比一
如何办理(UQ毕业证书)昆士兰大学毕业证毕业证成绩单原版一比一
 
Call me @ 9892124323 Call Girl in Andheri East With Free Home Delivery
Call me @ 9892124323 Call Girl in Andheri East With Free Home DeliveryCall me @ 9892124323 Call Girl in Andheri East With Free Home Delivery
Call me @ 9892124323 Call Girl in Andheri East With Free Home Delivery
 
( Best ) Genuine Call Girls In Mandi House =DELHI-| 8377087607
( Best ) Genuine Call Girls In Mandi House =DELHI-| 8377087607( Best ) Genuine Call Girls In Mandi House =DELHI-| 8377087607
( Best ) Genuine Call Girls In Mandi House =DELHI-| 8377087607
 
꧁༒☬ 7042364481 (Call Girl) In Dwarka Delhi Escort Service In Delhi Ncr☬༒꧂
꧁༒☬ 7042364481 (Call Girl) In Dwarka Delhi Escort Service In Delhi Ncr☬༒꧂꧁༒☬ 7042364481 (Call Girl) In Dwarka Delhi Escort Service In Delhi Ncr☬༒꧂
꧁༒☬ 7042364481 (Call Girl) In Dwarka Delhi Escort Service In Delhi Ncr☬༒꧂
 
(NEHA) Call Girls Pushkar Booking Open 8617697112 Pushkar Escorts
(NEHA) Call Girls Pushkar Booking Open 8617697112 Pushkar Escorts(NEHA) Call Girls Pushkar Booking Open 8617697112 Pushkar Escorts
(NEHA) Call Girls Pushkar Booking Open 8617697112 Pushkar Escorts
 
FULL ENJOY - 9953040155 Call Girls in Sector 61 | Noida
FULL ENJOY - 9953040155 Call Girls in Sector 61 | NoidaFULL ENJOY - 9953040155 Call Girls in Sector 61 | Noida
FULL ENJOY - 9953040155 Call Girls in Sector 61 | Noida
 
办理埃默里大学毕业证Emory毕业证原版一比一
办理埃默里大学毕业证Emory毕业证原版一比一办理埃默里大学毕业证Emory毕业证原版一比一
办理埃默里大学毕业证Emory毕业证原版一比一
 
Vip Hot🥵 Call Girls Delhi Delhi {9711199012} Avni Thakur 🧡😘 High Profile Girls
Vip Hot🥵 Call Girls Delhi Delhi {9711199012} Avni Thakur 🧡😘 High Profile GirlsVip Hot🥵 Call Girls Delhi Delhi {9711199012} Avni Thakur 🧡😘 High Profile Girls
Vip Hot🥵 Call Girls Delhi Delhi {9711199012} Avni Thakur 🧡😘 High Profile Girls
 
Indian Downtown Call Girls # 00971528903066 # Indian Call Girls In Downtown D...
Indian Downtown Call Girls # 00971528903066 # Indian Call Girls In Downtown D...Indian Downtown Call Girls # 00971528903066 # Indian Call Girls In Downtown D...
Indian Downtown Call Girls # 00971528903066 # Indian Call Girls In Downtown D...
 

K25 Engine Service Manual Guide

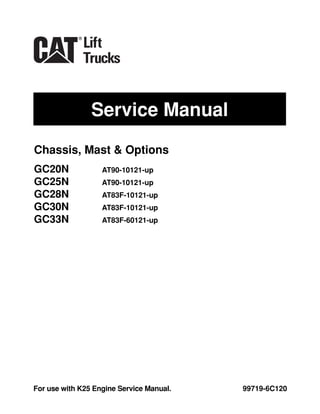
  • 1. Service Manual 99719-6C120For use with K25 Engine Service Manual. Chassis, Mast & Options GC20N AT90-10121-up GC25N AT90-10121-up GC28N AT83F-10121-up GC30N AT83F-10121-up GC33N AT83F-60121-up
  • 2.
  • 3. FOREWORD This service manual is a guide for servicing Cat ® lift trucks. For your convenience the instructions are grouped by systems as a ready reference. The long productive life of your lift truck(s) depends on regular and proper servicing. Servicing consistent with what you will learn by reading this service manual. Read the respective sections of this manual carefully and familiarize yourself with all of the components before attempting to start a test, repair or rebuild job. The descriptions, illustrations and specifications contained in this manual are for trucks with serial numbers in effect at the time of printing. Cat Lift Truck reserves the right to change specifications or design without notice and without incurring obligation. The trucks in this manual are powered by K25 gasoline engines. For engine servicing, please refer to the applicable engine service manual. This service manual contains servicing and maintenance information for the following trucks. • Gasoline Engine Truck (GC) . . . . . . . . . . . Equipped with K25 Gasoline engine Pub. No. 99719-6C120 Safety Related Signs The following safety related signs are used in this service manual to emphasize important and critical instructions: Indicate a potentially hazardous situation which, if not avoided, could result in death or serious injury. Indicate a potentially hazardous situation which, if not avoided, may result in minor or moderate injury, or damage to your machine. Indicates a condition that can cause damage to, or shorten service life of, the machine. NOTE WARNING! CAUTION!
  • 4. The serviceman or mechanic may be unfamiliar with many of the systems on this truck. This makes it important to use caution when performing service work. A knowledge of the system and/or components is important before the removal or disassembly of any component. Because of the size of some of the truck components, the serviceman or mechanic should check the weights noted in this Manual. Use proper lifting procedures when removing any components. Following is a list of basic precautions that should always be observed. 1. Read and understand all warning plates and decals on the truck before operating, lubricating or repairing the product. 2. Always wear protective glasses and protective shoes when working around trucks. In particular, wear protective glasses when pounding on any part of the truck or its attachments with a hammer or sledge. Use welders gloves, hood/goggles, apron and other protective clothing appropriate to the welding job being performed. Do not wear loose- fitting or torn clothing. Remove all rings from fingers when working on machinery. 3. Do not work on any truck that is supported only by lift jacks or a hoist. Always use blocks or jack stands to support the truck before performing any disassembly. 4. Lower the forks or other implements to the ground before performing any work on the truck. If this cannot be done, make sure the forks or other implements are blocked correctly to prevent them from dropping unexpectedly. 5. Use steps and grab handles (if applicable) when mounting or dismounting a truck. Clean any mud or debris from steps, walkways or work platforms before using. Always face truck when using steps, ladders and walkways. When it is not possible to use the designed access system, provide ladders, scaffolds, or work platforms to perform safe repair operations. 6. To avoid back injury, use a hoist when lifting components which weight 23 kg (50 lb.) or more. Make sure all chains, hooks, slings, etc., are in good condition and are of the correct capacity. Be sure hooks are positioned correctly. Lifting eyes are not to be side loaded during a lifting operation. 7. To avoid burns, be alert for hot parts on trucks which have just been stopped and hot fluids in lines, tubes and compartments. 8. Be careful when removing cover plates. Gradually back off the last two bolts or nuts located at opposite ends of the cover or device and pry cover loose to relieve any spring or other pressure, before removing the last two bolts or nuts completely. 9. Be careful when removing filler caps, breathers and plugs on the truck. Hold a rag over the cap or plug to prevent being sprayed or splashed by liquids under pressure. The danger is even greater if the truck has just been stopped because fluids can be hot. SAFETY The proper and safe lubrication and maintenance for these lift trucks, recommended by Cat lift truck, are outlined in the OPERATION & MAINTENANCE MANUAL for these trucks. Improper performance of lubrication or maintenance procedures is dangerous and could result in injury or death. Read and understand the OPERATION & MAINTENANCE MANUAL before performing any lubrication or maintenance on these trucks. WARNING! Do not operate these trucks unless you have read and understood the instructions in the OPERATION & MAINTENANCE MANUAL. Improper truck operation is dangerous and could result in injury or death. WARNING! WARNING!
  • 5. 10. Always use tools that are in good condition and be sure you understand how to use them before performing any service work. 11. Reinstall all fasteners with same part number. Do not use a lesser quality fastener if replacements are necessary. 12. If possible, make all repairs with the truck parked on a level, hard surface. Block truck so it does not roll while working on or under truck. 13. Disconnect battery and discharge any capacitors (electric trucks) before starting to work on truck. Hang “Do not Operate” tag in the Operator’s Compartment. 14. Repairs, which require welding, should be performed only with the benefit of the appropriate reference information and by personnel adequately trained and knowledgeable in welding procedures. Determine type of metal being welded and select correct welding procedure and electrodes, rods or wire to provide a weld metal strength equivalent at least to that of parent metal. 15. Do not damage wiring during removal operations. Reinstall the wiring so it is not damaged nor will it be damaged in operation by contacting sharp corners, or by rubbing against some object or hot surface. Place wiring away from oil pipe. 16. Be sure all protective devices including guards and shields are properly installed and functioning correctly before starting a repair. If a guard or shield must be removed to perform the repair work, use extra caution. 17. Always support the mast and carriage to keep carriage or attachments raised when maintenance or repair work is performed, which requires the mast in the raised position. 18. Loose or damaged fuel, lubricant and hydraulic lines, tubes and hoses can cause fires. Do not bend or strike high pressure lines or install ones which have been bent or damaged. Inspect lines, tubes and hoses carefully. Do not check for leaks with your hands. Pin hole (very small) leaks can result in a high velocity oil stream that will be invisible close to the hose. This oil can penetrate the skin and cause personal injury. Use cardboard or paper to locate pin hole leaks. 19. Tighten connections to the correct torque. Make sure that all heat shields, clamps and guards are installed correctly to avoid excessive heat, vibration or rubbing against other parts during operation. Shields that protect against oil spray onto hot exhaust components in event of a line, tube or seal failure, must be installed correctly. 20. Relieve all pressure in air, oil or water systems before any lines, fittings or related items are disconnected or removed. Always make sure all raised components are blocked correctly and be alert for possible pressure when disconnecting any device from a system that utilizes pressure. 21. Do not operate a truck if any rotating part is damaged or contacts any other part during operation. Any high speed rotating component that has been damaged or altered should be checked for balance before reusing.
  • 6. HOW TO USE THIS MANUAL (Removal, Installation, Assembly and Disassembly) Disassembly diagram (example) Suggestion for disassembling 1. Output shaft, Removing Remove output shaft using a special tool. Service Data A: Standard Value B: Repair or Service Limit 1 2 209603 Sequence 1 Cover , Bolt, Washer (part name) 2 Snap ring ................ (part name) A 0.11 to 0.28 mm Gear Backlash (0.0043 to 0.0110 in.) B 0.5 mm (0.020 in.) 209604 Disassembling sequence Procedures are described in the text.
  • 7. Symbols or abbreviation OP Option R1/4 Taper pipe thread (external) 1/4 inch (formerly PT1/4) Rc1/8 Taper pipe thread (internal) 1/8 inch (formerly PT1/8) G1/4A Straight pipe thread (external) 1/4 inch (formerly PF1/4-A) Rp1/8 Straight pipe thread (internal) 1/8 inch (formerly PS1/8) Units 1. SI Units are used in this manual. 2. The following table shows the conversion of SI unit and customary unit. Item SI unit Customary unit Force 1 N 0.1020 kgf (1 lbf) (0.4536 kgf) Pressure 1 kPa 0.0102 kgf/cm2 (1 psi) (0.0703 kgf/cm2 ) Torque 1 N·m 0.1020 kgf·m (1 lbf·ft) (0.1383 kgf·m)
  • 8.
  • 9. GROUP INDEX Items 1 2 3 4 5 6 7 8 9 10 11 12 13 14 GROUP INDEX GENERAL INFORMATION COOLING SYSTEM ELECTRICAL SYSTEM CONTROLLERS POWER TRAIN POWERSHIFT TRANSMISSION FRONT AXLE REAR AXLE BRAKE SYSTEM STEERING SYSTEM HYDRAULIC SYSTEM MAST AND FORKS Specification, Structure, Removal and Installation, Inspection and Adjustment Chassis Electrical Devices Wiring Outline, Structure, Console Box, Battery, Wire Color, Troubleshooting, Electrical Schematic Outline, Main Functions, Service Tool Functions, Locations of Sensors and Switches Removal and Installation Structure and Function, Removal and Installation, Control Valve, Input Shaft Assembly, Oil Pump Assembly, Inspection and Adjustment, Troubleshooting, Tightening Torque, Service Data Structure, Removal and Installation, Disassembly and Reassembly, Service Data REDUCTION DIFFERENTIAL Structure and Function, Removal and Installation, Disassembly and Reassembly, Troubleshooting Structure and Functions, Removal and Installation, Disassembly and Reassembly, Troubleshooting, Service Data Structure, Disassembly and Reassembly, Inspection and Adjustment, Troubleshooting, Service Data Model View, Truck Models Covered, Serial Number Locations, Dimensions, Technical Data Structure and Functions, Disassembly and Reassembly, Steering Valve, Trobleshooting, Service Data Structure and Functions, Disassembly and Reassembly, Inspection and Adjustment, Troubleshooting, Service Data, Control Valve Mast Systems, Structure, Removal and Installation, Disassembly and Reassembly, Inspections and Adjustment, Troubleshooting, Service Data SERVICE DATA Maintenance Schedule, Tightening Torques for Standard Bolts and Nuts, Parts to be Changed Periodically, Lubrication Instructions, Weight of Major Components, Special Service Tool
  • 10. Model View ............................................................................................... 1 – 1 Truck Models Covered ........................................................................... 1 – 2 Serial Number Locations ...................................................................... 1 – 3 Dimensions ............................................................................................... 1 – 4 Technical Data ......................................................................................... 1 – 5 1 GENERAL INFORMATION
  • 11.
  • 13. 1-2 GENERAL INFORMATION Truck Models Covered This Service Manual provides servicing and maintenance information for the following trucks: LPG-engine models Truck class Truck model Serial number Engine mounted 2 ton class GC20N AT90-10121-up K25 GC25N AT90-10121-up K25 GC28N AT83F-10121-up K25 3 ton class GC30N AT83F-10121-up K25 GC33N AT83F-60121-up K25 Gasoline-engine models Truck class Truck model Serial number Engine mounted 2 ton class GC20N AT90-10121-up K25 GC25N AT90-10121-up K25 GC28N AT83F-10121-up K25 3 ton class GC30N AT83F-10121-up K25 GC33N AT83F-60121-up K25 Dual fuel Gasoline-engine models Truck class Truck model Serial number Engine mounted 2 ton class GC20N AT90-10121-up K25 GC25N AT90-10121-up K25 GC28N AT83F-10121-up K25 3 ton class GC30N AT83F-10121-up K25 GC33N AT83F-60121-up K25
  • 16. 1-5 GENERAL INFORMATION Technical Data Ref. Truck Model GC20N GC25N GC28N GC30N GC33N No. Item A Maximum lift 3340 (131.5) 3315 (130.5) B Free lift 130 (5.1) 135 (5.3) C Fork spread (outside) 220 to 920 (8.7 to 36.2) 200 to 960 (7.9 to 37.8) D Fork length 1070 (42.1) E Tilt angle (forward – backward) 5° – 9° 5° – 6° F Overall length 3358 (132.2) 3419 (134.6) 3484 (137.2) 3518 (138.5) G Overall width Single tire 1064 (41.9) 1115 (43.9) (outside of tires) Wide-Stance 1128 (44.4) 1155.2 (45.5) H Overall height (to top of mast lowered) 2110 (83.1) I Overall height (to top of overhead guard) 2072 (81.6) J Overall height (mast extended) 4570 (179.9) 4540 (178.7) 4570 (179.9) K Tread (front) Single tire 886 (34.9) 912 (35.9) Wide-Stance 950 (37.4) 952 (37.5) L Tread (rear) 990 (39.0) M Wheelbase 1400 (55.2) N Front overhang 414 (16.3) 436 (17.2) O Rear overhang 474 (18.7) 535 (21.1) 578 (22.8) 612 (24.1) P Underclearance (at frame) 139 (5.5) Unit: mm (in.)
  • 17. Specification ............................................................................................ 2 – 1 Structure .................................................................................................... 2 – 2 Removal and Installation ...................................................................... 2 – 3 Inspection and Adjustment .................................................................. 2 – 5 Fan Belt Inspection .................................................................................... 2 – 5 Fan Belt Tension ........................................................................................ 2 – 5 Connecting Radiator Hoses ....................................................................... 2 – 5 Unit Layout ................................................................................................ 2 – 6 Coolant ...................................................................................................... 2 – 6 Radiator Cap ............................................................................................. 2 – 6 2 COOLING SYSTEM
  • 18.
  • 19. 2-1 COOLING SYSTEM Specification Truck Models 2 ton class 3 ton class Items Type Water-cooled, forced circulation Radiator Corrugated fin (pressure) type Water pump Centrifugal type Thermostat Wax Pellet Type Cooling System
  • 21. 2-3 COOLING SYSTEM Removal and Installation Fan Belt Removal Start by: Remove the radiator cover. Suggestions for Removal (1) Loosen the tension pulley lock bolt by three or four turns. If the bolt is loosened insufficiently, the tension pulley will not be moved. (2) Move the tension pulley fully toward the fan, then remove the belt. Engine Fan 21 209612 Sequence 1 Tension pulley assembly, Bolt 2 Fan belt Fan Tension pulley 209613 NOTE Do not loosen the lock bolt to such an extent that the bolt would be removed.
  • 22. 2-4 COOLING SYSTEM Installation To install, follow the removal sequence in reverse. Also follow the instructions given below. (1) Before installing the belt, turn the fan to check for smooth rotation. Replace the bearing if it generates abnormal sound. (2) After installing the belt, push it to make sure that the tension pulley moves, then tighten the pulley lock bolt firmly.
  • 23. 2-5 COOLING SYSTEM Inspection and Adjustment Fan Belt Inspection (1) Check the belt for contamination from oil, grease or dust. Replace the belt if required. When the contamination is slight, clean the belt with rag or paper towel. Do not use gasoline, oil or any other solvent to clean the belt. (2) During the engine overhaul or belt tension adjustment, check the condition of the belt. Replace the belt if it has any damage. Fan Belt Tension Apply a force of 98 N (10 kgf) [22 lbf] perpendicularly to the belt at a point midway between the fan pulley and tension pulley. Adjust the tension until belt deflection is between 11 to 13 mm (0.43 to 0.51 in.). Connecting Radiator Hoses When connecting the hoses to the radiator, fit their ends fully on the fittings and secure them with clamps. Make sure that each hose is correctly connected and over the flare of the fitting. Fan pulley Tension pulley 209614 Hose 209615 When inspecting the fan belt tension, always stop the Engine. WARNING!
  • 24. 2-6 COOLING SYSTEM Unit Layout Coolant Fill the radiator with coolant. After starting the engine and letting it warm up during operation, check for abnormal noises. Check the coolant level in the reserve tank to ensure it meets the specification. Quantity of coolant Radiator Cap Truck Models 2 ton class 3 ton class Items Engine (K25) 3.95 (1.04) 3.95 (1.04) Radiator 2.7 (0.71) 2.7 (0.71) Reserve tank (FULL level) 0.65 (0.17) 0.65 (0.17) Total quantity of coolant 7.4 (1.96) 8.7 (2.30) (including coolant in hoses) Oil cooler 0.094 (0.02) 0.094 (0.02) Unit: liter (U.S. gal.) 90±15 kPa Opening pressure (0.92±0.15 kgf/cm2 ) [13.1±2.2 psi] 0 to 5 kPa Vacuum valve (0 to 0.05 kgf/cm2 ) [0 to 0.73 psi] 210700
  • 25. Chassis Electrical Devices Wiring Outline ....................................... 3 – 1 Structure .................................................................................................... 3 – 3 Console Box .............................................................................................. 3 – 3 Major Electrical Components ..................................................................... 3 – 5 Lamp Bulb Specifications .......................................................................... 3 – 16 Console Box ............................................................................................. 3 – 17 Disassembly .............................................................................................. 3 – 17 Instrument Panel ....................................................................................... 3 – 18 Battery ....................................................................................................... 3 – 19 Wire Color .................................................................................................. 3 – 20 Troubleshooting........................................................................................ 3 – 21 Electrical Schematic .............................................................................. 3 – 24 3 ELECTRICAL SYSTEM
  • 26.
  • 27. 3-1 ELECTRICAL SYSTEM Chassis Electrical Devices Wiring Outline (No. 1) Main harness Harness, front combination Harness, front combination Harness, rear combination 209620
  • 28. 3-2 ELECTRICAL SYSTEM Chassis Electrical Devices Wiring Outline (No. 2) Starter switch Key Select switch Warning buzzer Harness, Front combination Controller Horn Connector bracket Vehicle speed sensor (Pulse generator) Transmission Relay box, Relay Harness, Front combination Fuse box, Fuse Battery seat Clip Back buzzer Harness, Rear combination Main harness 209621
  • 29. 3-3 ELECTRICAL SYSTEM Structure Console Box 1 Engine coolant temperature gauge 2 Fuel gauge 3 Hour Meter/Warning blinks 4 Instrument panel 5 Starter switch 6 Light switch, turn signal switch 7 Direction lever 5 6 1 34 2 7 210703
  • 30. 3-4 ELECTRICAL SYSTEM Function of Instrument Panel Description of function Inspection method of blown bulbs for Instrument panel All warning and indicator lamps are normal, if they illuminate, when the starter switch is turned to ON position. A I B C D E F G H KL3L2L1LJ 104936 Code Name of monitor When not illuminated When illuminated Remarks or flashing A Parking brake warning lamp Parking brake released Parking brake applied Brake fluid level warning lamp /normal level /low level B ECM warning lamp Normal ECM abnormal C Engine oil pressure warning lamp Normal oil pressure Low oil pressure D Seat belt warning lamp Fastened Not fastened Multi-purpose warning lamp (illuminates when E warnings indicated by printed symbols occur or Normal Malfunction Printed symbol minor failures occur) F Alternator not charging warning lamp Normal charging Abnormal charging system G LP-Gas warning lamp Normal LPG fuel level low or LP-Gas truck pressure low H Mast interlock indicator lamp Free Locked I Driving interlock indicator lamp Free Locked (flashing) Neutral indicator lamp F or R Neutral J Fuel gauge Indicates remaining fuel amount with key in “ON” position. K Engine coolant temperature gauge Indicates “Overheat” condition if pointer enters the red zone. L Liquid crystal (normally acting as hour meter) Indicates operating hours with key in “ON” position. L1 Torque converter fluid warning lamp Normal temperature Overheat L2 Coolant level warning lamp Normal level Low level Option L3 Clogged air cleaner element warning lamp Normal element Clogged Option When major failures occur, bulbs A, C, D, E, and H simultaneously flash. Positionand contentof printedsymbols
  • 31. 3-5 ELECTRICAL SYSTEM Major Electrical Components Starter switch (with Anti-Restart Lock) This switch has a built-in anti-restart lock, so the key cannot be turned from (ON) to (START) position while the engine is running. This prevents starter breakage or flywheel damage caused by an operator restarting the truck when the engine is running. Connection Table Gasoline-engine truck M G1 G2 S B1 B2 (OFF) (ON) (START) 208540 Terminal B1, B2 G1 G2 M S Connected to Battery, alternator, Fuse box Direction lever Key position fuse box OFF ON (when driving) START (when starting engine)
  • 32. 3-6 ELECTRICAL SYSTEM Lighting switch and turn signal switch Light switch and turn signal switch Horn contact Horn Steering angle sensor Forward-reverse selector switch T-3 L-2 L-4 L-5 L-3L-1 T-2 T-1 421 3 5 4 2 31 5 209627 Light and turn signal lever Boot Horn contact Steering angle sensor Boot Direction lever Lighting switch, turn signal switch Forward of truck 209625 Forward-reverse selector switch Forward of truck Light switch, turn signal switch F N R L N R 1 2 3 OFF 209626A
  • 33. 3-7 ELECTRICAL SYSTEM Horn Check that the horn sounds when applying the specified voltage to both terminals of the horn, T1 and T2. Replace the horn if it does not sound or its sound is abnormal. Operating voltage: DC 12 V NOTICE: Refer to the illustration for the horn installed position. Tank Unit Up Down Coil T1 T2 Vent hole Contact 209628 210710 Float position E 1/4 1/2 3/4 F Standard resistance value (ohm) 80 49.5 32 19 10 Tolerance (ohm) +12 – ±3 – +1.0 +12 −0.5 Referential Standards
  • 34. 3-8 ELECTRICAL SYSTEM Brake fluid sensor Refer to the brake system. Stop lamp switch Connect a tester across the terminals and check that the lamps turn ON and OFF when the push rod extended projection is to the specified value. Measure the insulation resistance value across the terminals when the push rod is pushed in. Replace the switch if the measured insulation resistance value is less than the value below. Rated voltage: DC 12 V IndicatorONactivatingposition 3±2mm (0.12±0.08in.) 206672 OFF ON (illuminates) 4 (0.16) 2 (0.08) Push rod Unit : mm (in.) M10 × 1.25 208543 Insulation resistance value 1 M ohm or more (at 500 V megger)
  • 35. 3-9 ELECTRICAL SYSTEM Direction lever assembly Forward of vehicle F Forward N Neutral R Reverse (10°)(10°) 209632A Terminal 1 2 3 4 5 Wire color Lever position GR/L B G/R B L/W F (Forward) N (Neutral) R (Reverse) Connection table
  • 36. 3-10 ELECTRICAL SYSTEM Sender unit (engine coolant temperature) (1) Apply an ohmmeter unit between the terminal and body of the sender unit and check for continuity (resistance value). (2) Replace the sender unit if there is no continuity or the measured resistance value is outside the standard resistance value. Gasoline-engine truck (3) When installing the sender unit, tighten it to the specified torque. TerminalBody 208546 Temperature 50 70 100 110 120 [°C (°F)] (122) (158) (212) (230) (248) Standard resistance 136 66 27.2 20.5 17.2 value (ohm) Sender unit tightening 19.6 to 27.4 N·m torque (2.0 to 2.8 kgf·m) [14.5 to 20.2 lbf·ft]
  • 37. 3-11 ELECTRICAL SYSTEM Thermoswitch (T/C oil) Apply an ohmmeter between the terminal and body and check for continuity (resistance value). Replace the thermoswitch if the measured insulation resistance value is less than the value below. Internal resistance: 0.5 ohm or less (with contact ON) Allowable load: 0.5 A BodyTerminal 208547 1 M ohm or more Insulation resistance value (with contact OFF) (at 500 V megger) Main specifications OFF→ON 122±3 °C Operating temperature (251.6±37.4 °F) ON→OFF 115 °C (239 °F) or higher Insulation resistance 1 M ohm or more (with contact OFF) 31.4 to 47.1 N·m Tightening torque (3.2 to 4.8 kgf·m) [23.2 to 34.7 lbf·ft] Replace the thermoswitch if it was dropped or abused. CAUTION! NOTE When installing the thermoswitch, tighten it to the specified torque.
  • 38. 3-12 ELECTRICAL SYSTEM Power relay (Backup lamps) Inspection of coil Apply an ohmmeter across terminal 1 and terminal 2 and measure the resistance value of the relay coil. If there is no continuity or the resistance value measured is outside the standard resistance value, replace the coil. Inspection of contact (1) Measure the insulation resistance value between terminal 3 and terminal 4. Replace the relay with a new one if the measured insulation resistance value is less than the value below. (2) Apply an ohmmeter across terminal 3 and terminal 4. (3) Apply a voltage of 12 V ON and OFF across terminal 1 and terminal 2, and check to see if the relay activates to cause continuity between terminal 3 and terminal 4. Replace the relay with a new one if it does not activate properly. Coil rating [at 20°C (68°F)] 2 4 31 1 2 3 4 Diode Connection diagram 208548 Insulation resistance value 10 M ohm or more (at 500 V megger) Resistance value of coil 80 ohm ±10% Rated operating voltage DC 12 V Working voltage DC 8 V or less Open-circuit voltage DC 0.6 to 6 V or more Coil resistance 80 ohm ±10% Rated exciting current 150 mA ±10% This part operates on DC 12 V power supply. CAUTION! As the relay has an integrated diode between terminals, be careful about the polarity when inspecting. Replace the relay if it was dropped or abused. CAUTION!
  • 39. 3-13 ELECTRICAL SYSTEM Coil rating [in case of 20°C (68°F)] Rated operating voltage: DC 12 V Coil resistance: 52 ohm Rated exciting current: 80 mA Fuel pump Fuel pump 209640
  • 40. 3-14 ELECTRICAL SYSTEM Solenoid valve (for selector valve) This is an ON/OFF valve (normal open type). The valve opens the IN/OUT circuit in a non-energized condition. Rated operating voltage: DC 12V (gasoline-engine truck, resin color: grey)
  • 41. 3-15 ELECTRICAL SYSTEM Fuse Box QGS/OTHERS 10A VCM 20A 10A 15A EGI 30A EGI 30A ETC 15A A/C 20A 20A 30A METER PANEL 10A BACK UP/OTHERS 15A SPARE WORKING LAMP 15A HEAD LAMP 15A WIPER 15A HORN 10A STOP LANP 10A FUSE PULLER SBF 50A GLOW SBF 100A ALTNR SBF 100A BATTERYSPARE 209646 209645 Fuse box, Fuse
  • 42. 3-16 ELECTRICAL SYSTEM Lamp Bulb Specifications Item No. of Watts Color of lens Shape Remarks Type of lamp bulbs 12 volt Head lamps 2 Colorless 45 Turn 2 Amber 27 Combination signals Standard: Installed on lamps (front) Clearance overhead guard 2 Amber 10 lamps Turn 2 Amber 27 signals Combination Tail/stop 2 Red 8/23 lamps (rear) lamps Backup 2 Colorless 10 lamps Working lamps 4 Colorless 45 Optional (front and rear) Instrument panel lamps 7 Colorless 3 210713
  • 43. 3-17 ELECTRICAL SYSTEM Console Box Disassembly (1) Disconnect the electrical wiring from connector 1. (2) Remove the screw using a flatblade screwdriver and remove cover 2. (3) Remove the screw and then, remove cover (U-Re) 3. (4) Remove the screw and then, remove cover (U-Fr) 4. (5) Remove the direction lever and turn signal lever 5. (6) Remove the bolt and then, remove console box assembly 6. Reassembly Follow the disassembly sequence in reverse. 210714
  • 44. 3-18 ELECTRICAL SYSTEM Instrument Panel Disassembly Sequence 1 Meter cover 2 Dial 3 Water temperature gauge 4 Liquid crystal 5 Fuel gauge 6 Meter case 7 Rigid board 8 Bulb 9 Socket 206480 Reassembly To reassemble the instrument panel, follow the reverse of disassembly procedure. Bulb replacement For bulb replacement, remove the socket from the rigid board by turning it counterclockwise. For configuration of the indicator lights, refer to page 3-4. Be careful not to damage the rigid board when disassembling the instrument panel. CAUTION!
  • 45. 3-19 ELECTRICAL SYSTEM Battery 1. Specific gravity reading and state of charge To check the battery for state of charge, take hydrometer readings on its electrolyte. The battery may be fully charged if the S.G. reading is 1.280 to 1.265 at 20°C (68°F). The state of charge can be told from the way the electrolyte level goes down to expose the cell plates. If addition of distilled water is necessary every month or so, the battery is overcharged. If addition is not required for more than 3 months, it is likely that the battery is inadequately charged. 2. Charging precautions (1) In slow charging, the charging current should be about 1/10 the capacity of the battery to be charged. (2) In quick charging, the battery capacity in ampere should not be exceeded. (3) During charging, adjust the charging current to prevent the electrolyte temperature from rising beyond 45°C (113°F). (4) When connecting the cables to the battery, begin by installing the cable to the positive (+) terminal. When disconnecting them from the battery, begin by removing the cable for the negative (−) terminal. 210716 Be sure to turn OFF the starter switch and lighting switch before disconnecting or connecting the battery cable to prevent the IC regulator from damage. CAUTION!
  • 46. 3-20 ELECTRICAL SYSTEM Wire Color Wire colors listed in the table below show standard colors (base colors). For wiring composed of two colors, the first color shows a base color and the second color a marking color. Example: The wire color of BW shows that its base color is B with a marking W. B W Marking color Base color List of wire colors Wire color Color B BLACK W WHITE R RED G GREEN Y YELLOW Br BROWN L BLUE Lg LIGHT GREEN O ORANGE P PINK Gr GRAY Lb LIGHT BLUE Dg DARK GREEN ch CHOCOLATE Be careful that allowable current differs between solid wires and stranded wires even if they are of the same gauge. CAUTION! NOTE For wiring identification, the same color, in principle, must be used for the circuit from the power supply to the load.
  • 47. Thank you very much for your reading. Please Click Here Then Get More Information.