FC OPERATION MANUAL
•
0 likes•15 views

FC MANUAL GATE VALVE USER MANUAL - API-6A / 16A / 16C

Recommended
More Related Content
Featured
Featured (20)
FC OPERATION MANUAL
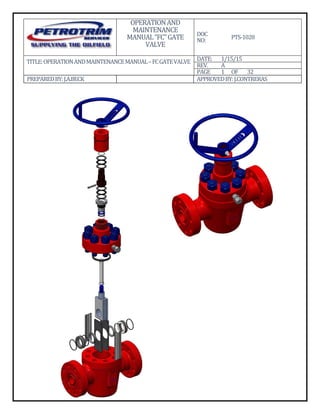
- 1. OPERATION AND MAINTENANCE MANUAL “FC” GATE VALVE DOC NO: PTS‐1028 TITLE: OPERATION AND MAINTENANCE MANUAL – FC GATE VALVE DATE: 1/15/15 REV. A PAGE 1 OF 32 PREPARED BY: J.A.BECK APPROVED BY: J.CONTRERAS
- 2. 2 DISCLAIMER Any recommendation for use, oral or written, shall be considered advisory in content and as such, Petrotrim Services, LLC. shall not be held liable under any warranty, expressed or implied, should this product not perform under conditions other than its intended use as fluid gate valve device. Petrotrim Services, LLC. Shall in no way be liable for damages incurred while using this product. File copies of this manual are maintained. Revisions and/or additions will be made as deemed necessary. The drawings in this book are not drawn to scale, but the dimensions are accurate. PRECAUTIONS This product is designed for use under high pressure conditions, and as such, extreme caution should always be taken when servicing, operating, or testing this equipment. Never attempt to disassemble a gate valve assembly until all pressure has been released from the body cavity. Always be sure that when pressure testing any product that all air has been purged from the system. Do not approach any equipment for visual inspection until a suitable pressure stabilization period has been allowed for. Always use suitable protective equipment when performing any maintenance or testing. Always use caution when servicing this equipment as the retained fluids may present a H2S gas hazard.
- 3. 3 INTRODUCTION The FC Manual Gate Valve is a full‐bore through conduit non‐rising stem gate valve. Designed and manufactured in accordance with API 6A, H2S Service per NACE MR‐01‐75 and all applicable industry standards at time of manufacture. As with any pressure containing equipment the FC Gate Valve is subject to wear and eventual failure. Periodic disassembly and inspection is required and should be left to a qualified repair technician. Every precaution has been taken to ensure the highest quality product has been provided for use. Any question or correspondence should be directed to: Petrotrim Services, LLC E‐mail: sales@petrotrim.com
- 4. 4 Table of Contents Page I. Periodic Maintenance 5 Lubrication 5 Body Cavity Lubrication 6 Thrust Bearing Lubrication 7 II. Bonnet Grease Fitting Replacement 7 Valves 5,000 psi WP and below 7 Valves 10,000 psi WP 8 Valves 15,000 psi WP 10 III. Stem Shear Pin and Thrust Bearing Replacement 12 Removal of Thrust Bearing 13 Installation of New Thrust Bearing 13 IV. Stem Packing Replacement w/ Pressure in the Valve 15 Removal of Stem Packing 16 Installation of New Packing 17 V. Gate and Seat Replacement 20 Gate and Seat Disassembly – Manual Valve 20 Gate and Seat Assembly – Manual Valve 21 VII. Troubleshooting 24
- 5. 5 PERIODIC MAINTENANCE Lubrication For normal operation (‐20°F to 250°F) use Everlast 4B or equivalent, in the body cavity and stem bearing cap. For continuous service below 0°F, use low temperature grease such as “artic grease” LL1600A or equivalent, in the body cavity and stem bearing cap.
- 6. 6 Body Cavity Lubrication Normal Operating Conditions Petrotrim Services recommends lubricating gate valves during assembly. When the valve has been in service for one month, ten (10) operating cycles (One cycle equals opening and closing the valve one time) or if the valve is removed from service, the body cavity should be lubricated as follows: 1. Remove the grease fitting cap located on the bonnet flange OD. 2, Using either a bucket‐type gun or hand‐held type gun, connect the grease gun coupler to the grease fitting. 3. Pump the appropriate amount of lubricant into the valve body cavity. Unusual Temporary Operating Conditions If the valve has been subjected to cementing or acidizing through the bore, the following operation should be performed: 1. Lubricate the valve body prior to placing into service. 2. Flush the valve with an appropriate neutralizing fluid after it is removed from service. 3. Operate the valve with fresh water or appropriate neutralizing fluid in the line. 4. Lubricate the valve body cavity.
- 8. 8 2. Test the effectiveness of the backseat. 1. Remove the cap on the grease fitting. 2. Trip the ball in the grease fitting check valve by inserting Petrotrim Pressure release tool. 3. Slowly turn the release tool handle until the ball in the fitting is unseated and the pressure trapped by the backseating process is released. 4. If pressure escapes quickly, then stops, the backseat is effective. 5. Proceed to step 7. 6. If pressure continues to escape, the backseat is ineffective. Backseat the valve again. If the backseat still will not seal the grease fitting cannot be changed without isolating and removing all pressure from the valve. 7. Remove the grease fitting from the valve bonnet. 8. Install a new grease fitting. B. Valves 10,000 psi WP NOTE: These valves have a “buried” check valve beneath the bonnet grease fitting. 1. Remove the grease fitting cap. 2. Trip the ball in the grease fitting check valve by inserting Petrotrim Pressure release tool.
- 9. 9 3. If pressure escapes quickly, then stops, the “buried” check valve is holding pressure. In this case, the grease fitting can then be removed and a new grease fitting can be installed. 4. If pressure continues to escape, the “buried” check valve is leaking. In this case, DO NOT remove the grease fitting. Backseat the valve. If the backseat still will not seal the grease fitting cannot be changed without isolating and removing all pressure from the valve. Backseat the valve 1. Close the valve fully. 2. Loosen the bearing cap four complete turns. 3. Turn the handwheel clockwise (closing direction) until the gate firmly contacts the bottom of the cavity and the stem moves outward, contacting the internal backseat shoulder. 4. Bump the handwheel in the closing direction. 5. Tighten the grease fitting cap to unseat the ball in the grease fitting check valve and release the trapped pressure. 6. Remove the grease fitting from the valve bonnet OD. 7. Replace the buried check valve using a ¼” Allen wrench. 8. Clean female check valve and grease fitting threads. 9. Install new check valve. 10.Install new grease fitting.
- 10. 10 C. Valves 15,000 psi WP NOTE: The standard grease fitting for 15,000 psi WP FC valves is a special metal‐sealing, high pressure fitting, containing a check valve. The bonnet port housing this fitting is a special preparation without pipe threads which accepts only this type of fitting. Important: DO NOT use Teflon tape or thread sealant on these fittings. 1. Backseat the valve 2. Close the valve fully. 3. Loosen the bearing cap four complete turns. 4. Turn the handwheel clockwise (closing direction) until the gate firmly contacts the bottom of the cavity and the stem moves outward, contacting the internal backseat shoulder. 5. Bump the handwheel in the closing direction.
- 11. 11 Test the effectiveness of the backseat 1. Remove the grease fitting cap. 2. Place a wrench on the hex preparation of the fitting gland and back out the fitting approximately one turn, this procedure unseats the metal seal and vents any pressure on the fitting. 3. If pressure escapes quickly and then stops, the backseat is effective. Go to step (5). 4. If pressure continues to escape, the backseat is ineffective. Backseat the valve again. If the backseat continues to be ineffective, contact a Petrotrim representative. 5. Remove the grease fitting from the valve bonnet. 6. Remove the cap from the new grease fitting and install in the bonnet, torque to 80 to 100 ft‐lb. 7. Install and tighten the cap on the fitting. Caution: Installing the fitting with the cap in place prevents the fitting from seating and could cause damage to the cap. DO NOT install the fitting with the cap in place. 8. Un‐backseat the valve 9. Tighten the bearing cap. 10.Turn the handwheel counterclockwise (opening direction) one full turn while simultaneously tightening the bearing cap.
- 13. 13 Removal of the Thrust Bearings 1. Loosen the bearing cap using a 24” pipe wrench. After two or three turns, the cap will rotate freely by hand. CAUTION: If the cap does not rotate freely after three (3) turns, the packing gland may be moving outward with the bearing cap. DO NOT remove the cap. Tighten the cap and contact Petrotrim Services, LLC. 2. If the bearing cap rotates freely, remove the cap from the bonnet. 3. Using a punch, drive the stem shear pin from the stem adapter, ensuring that the adapter is not damaged. 4. Remove the adapter from the stem. 5. Remove both sets of bearings and bearing races from the stem adapter. 6. Discard any pitted, cracked or damaged bearings or races. 7. Replace the stem adapter if either of the bearing surfaces on the adapter shoulder is damaged. Installation of the New Thrust Bearings 1. Remove the new bearings from the protective package. 2. Pack the bearings with grease. 3. Place each bearing between a pair of carefully cleaned races. 4. Carefully clean the stem adapter
- 14. 14 5. Install one set of bearings and races over the bottom of the adapter and one set over the top of the adapter. NOTE: The adapter O‐ring maybe removed temporarily to allow the installation of the top bearing and race assembly. 6. Insert the stem adapter over the end of the stem, and align the pin hole in the adapter with the hole in the stem. 7. Using a punch, drive in the stem pin and ensure that the pin does not protrude over the O.D. of the adapter shoulder. CAUTION: Do not strike the bearings, races, or stem adapter with the punch or hammer. 8. Replace the stem adapter O‐Ring if necessary. 9. Inspect the bearing cap to ensure that an extra race, held by grease tension, is not retained inside. 10. Clean the bearing cap and lubricate the threads. 11. Install the cap using a 24” pipe wrench. 12. Rotate the stem adapter counterclockwise to ensure that the gate is off the bottom of the body. This procedure will confirm that the stem backseating shoulder is not contacting the bonnet shoulder. 13. Inject grease through the bearing cap grease fittings with a hand held grease gun until excess grease passes through the bleed port.
- 15. 15 STEM PACKING REPLACEMENT WITH PRESSURE IN THE VALVE. Removal of the Stem Packing. Note: If there is no pressure in the valve, proceed to step (3). Backseat the valve. 1. Close the valve fully. 2. Loosen the bearing cap four complete turns. 3. Turn the handwheel clockwise (closing direction) until the gate firmly contacts the bottom of the cavity and the stem moves outward, contacting the internal backseat shoulder. 4. Bump the handwheel in the closing direction. 5. Test the effectiveness of the backseat. Valves 10,000 psi WP and Below 1. Remove the bonnet grease fitting cap. 2. Trip the ball in the grease fitting check valve by inserting, Petrotrim Pressure release tool. 3. Slowly turn the release tool handle until the ball in the fitting is unseated and the pressure trapped by the backseating process is released. 4. If pressure escapes quickly and then stops, the backseat is effective. Proceed to next step. 5. If pressure continues to escape, the backseat is ineffective. Backseat the valve again. If backseat continues to be ineffective, contact Petrotrim representative.
- 16. 16 Valves 15,000 psi WP 1. Remove the grease fitting cap. 2. Place a wrench on the hex preparation of the fitting gland and back out the fitting approximately on turn. This procedure unseats the metal seal and vents and pressure on the fitting. This can also be done by using Petrotrim Pressure release tool. 3. If pressure escapes quickly and then stops, the backseat is effectives. Proceed to next step. 4. If pressure continues to escape, the backseat is ineffective. Backseat the valve again. If backseat continues to be ineffective, contact Petrotrim representative. 5. Remove the handwheel and bearing cap. 6. Remove the cap from the bonnet. 7. Using a punch, drive the stem shear pin from the stem adapter, ensuring that the adapter is not damaged. 8. Remove the adapter from the stem 9. Remove both seat of bearings and bearing race. 10.Loosen the packing gland. 11.Remove the stem packing and back ring (if applicable). Remove the stem packing by one of the following methods. 1. Pump the packing out with grease until the grease bypasses or the packing refuses to move further. 2. Pull the packing out with a corkscrew. Caution: DO NOT damage the stem or packing bore.
- 17. 17 Installation of the New Packing 1. Clean the grease from the packing area. 2. Inspect the packing area to ensure that the bore is clean and free of pits or scars. 3. Inspect the stem to ensure that the surface is free of burrs and pits. 4. Apply a light coat of grease to the stem, packing area, OD/ID of the stem packing and the nose and threads of the packing gland. 5. Install packing with rounded nose facing pressure. 6. Using the packing gland as a push tool, push the packing into the bonnet.
- 18. 18 7. Install the packing gland, ensuring that the bonnet threads are not damaged. 8. Inspect the bearings and bearing races on the stem adapter for pits, scores, or cracks. Replace if damaged. 9. Pack the bearings with grease. 10.Place each bearing between a pair of clean races. 11.Install one seat of bearings and races over the bottom of the adapter and one set over the top of the adapter. Note: The adapter O‐ring may be removed temporally to allow for the installation of the top bearing and race assembly.
- 20. 20 GATE AND SEAT REPLACEMENT Gate and Seat Disassembly – Manual Valve 1. Isolate the valve from the line pressure and bleed all pressure from the body cavity. Open and close the valve several times to help bleed trapped body pressure. 2. Fully open the valve to ensure that the stem is completely within the gate neck. 3. Remove the bonnet nuts. 4. Turn the handwheel clockwise to raise the bonnet from the body. Continue handwheel rotation until the face of the bonnet clears the body. 5. Place bonnet nuts as spacers on each side of the body cavity between the bonnet and body. 6. Turn the handwheel counterclockwise to pull out the gate. 7. Lift up on the bonnet assembly to remove the gate from the body cavity. If the gate cannot easily be removed, repeat steps 4 through 7. 8. The gate may be removed from the stem with clockwise rotation. 9. Remove the seats, retainer plates and gate guides from the body cavity. 10. Remove the body bushings. If they are difficult to remove, they may be pried out with a screwdriver. 11. Clean the body cavity and all parts thoroughly with a suitable solvent and wipe clean.
- 21. 21 GATE AND SEAT REPLACEMENT Gate and Seat Assembly – Manual Valve 1. Inspect all parts for damage. a) Check the retainer plates to ensure they are not bent, twisted, or distorted. Solid material should not be built up on the ends. b) Check all seals for cuts or other damage. c) Check all sealing surfaces on gate, body bushings, seats, stem and valve body. Determine which parts need to be replaced. d) Ensure that the body cavity is free of all foreign matter such as solid particles, grit, trash, etc. 2. Replace any damaged or worn parts with original Petrotrim Services, LLC. parts. 3. Clean and lightly lubricate all parts and both body bushing cavities 4. Install the body bushings with new seal rings, into the body cavity. The body bushings must be installed with the seal ring against the valve body. 5. Replace the seat seal rings on the seats and install one seat in each retainer plate. The seat seal rings must face the body bushings away from the gate. 6. Place each retainer plate assembly in the valve body with the seal ring touching the face of the body bushing. The retainer plates should not protrude above the face of the body. The retainer plates when installed must be square with the seats and body installation in order to allow the gate to slide freely.
- 22. 22 NOTE: Beveled edges on retainer plate must face toward seat pockets of the valve body. 7. Grease the gate and carefully slide the gate into the body between the retainer plate assemblies with the following guidelines: a) Do not pinch the seat‐to‐body seals, or apply impact loads to the parts. Only light tapping on the top of the gate can be tolerated. Extreme care must be taken and no excessive force used as seat ring damage could result. b) Push or tap the gate down until the top of the threaded neck is ½” above the bonnet face of the body. 8. Install the gate guides. 9. Pack the body cavity with grease. 10. Remove the bonnet gasket from the bonnet groove. 11. Clean the grooves and/ or sealing surface of the body and bonnet. 12. Apply a very thin film of grease to the bonnet gasket and sealing groove. 13. Install the new bonnet gasket in the valve body bonnet groove. Install New Stem Packing. 14. Install bonnet over body studs. On valves 10,000 psi WP and above, rotate the bonnet until the grease fitting is 90° from the gate valve bore.
- 23. 23 15. Turn the handwheel counter‐clockwise to thread the stem fully into the gate and pull the bonnet down over the studs. 16. Hand tighten the bonnet nuts. 17. Ensure that the gate is not touching the bottom of the valve cavity. Rotate the handwheel counterclockwise to move the gate up and away from the bottom of the cavity. 18. Evenly tighten the bonnet nuts. Note: on Valves 5000 psi and below, rotate the bonnet so that the bonnet location pins in the body align with the pin holes in the bonnet. Note: The raised bonnet on valves 10,000 psi and above will fully contact the body face when the bonnet nuts are tight. 19. Lubricate the stem thrust bearing by pumping grease through the fitting on the bearing cap until the grease returns out of the bleed hole on the opposite side of the bearing cap under O‐ring trash seal. 20. Lubricate the body cavity. Remove the cap of the grease fitting on the bonnet flange OD. Connect the grease pump and inject the grease.
- 24. 24 TROUBLESHOOTING Problem Cause Solution Fluid leaks past the gate and seat assembly. Gate and seat assembly is worn. Handwheel is not backed off. Replace the gate and seat assembly. Back off the handwheel 1/4 turn. Fluid leaks around the valve stem. Stem packing is worn. Replace the stem packing. Fluid leaks at the bonnet flange. Bonnet seal ring is worn.Loose bonnet nuts. Bonnet or body ring groove is damaged. Replace the bonnet seal ring. Retighten the bonnet bolts. Return the valve to Petrotrim Services, LLC. for repair. Fluid leaks from the bonnet grease fitting. Check valve inside the grease fitting is worn. Replace the grease fitting. Handwheel is hard to turn. Thrust bearings have lost lubricant. Thrust bearings are corroded. Gate and stem threads have Lost lubricant. Lubricate the thrust bearings. Replace the thrust bearings. Lubricate the gate and stem through the bonnet grease fi i Handwheel turns without opening or closing the valve. Stem shear pin is sheared. Replace the stem shear pin.
- 25. 25
- 26. 26
- 27. 27
- 28. 28
- 29. 29
- 30. 30
- 31. 31
- 32. 32