SlideShare a Scribd company logo
1 of 26
Download to read offline
Product: INDUSTRIAL ENGINE
Model: C15 INDUSTRIAL ENGINE N5F
Configuration: C15 Industrial Engine N5F00001-UP
Disassembly and Assembly
C15 and C18 Industrial Engines
Media Number -UENR0185-03 Publication Date -01/08/2015 Date Updated -27/08/2015
i05949761
Gear Group (Front) - Remove and Install
SMCS - 1206-010
S/N - N5F1-UP
S/N - N8F1-UP
Removal Procedure
Table 1
Required Tools
Tool Part Number Part Description Qty
A 1P-0510 Driver Gp 1
B 8T-2998 Lubricant -
C 8T-9022 Silicone Gasket -
D 9S-3263 Thread Lock Compound -
Start By:
a. Remove the front housing.
b. Remove the air compressor, if necessary.
c. Remove the water pump, if necessary.
NOTICE
Keep all parts clean from contaminants.
1/15(W)
w
2022/3/13
https://127.0.0.1/sisweb/sisweb/techdoc/techdoc_print_page.jsp?returnurl=/sisweb/sisw...
Contaminants may cause rapid wear and shortened component life.
NOTICE
Do not turn the crankshaft or the camshaft while the camshaft gear is
removed. If the front gear group is not correctly timed during
installation, interference can occur between the pistons and the valves,
resulting in damage to the engine.
Note: Be sure to mark the orientation of each of the gears for installation purposes.
Illustration 1 g01008429
1. Remove bolts (2) and thrust plate (1).
2/15(W)
w
2022/3/13
https://127.0.0.1/sisweb/sisweb/techdoc/techdoc_print_page.jsp?returnurl=/sisweb/sisw...
Illustration 2 g01008430
2. Remove sealing plate (3) and adapter (4).
Illustration 3 g01008431
3. Remove O-ring seal (5) and O-ring seal (6) from sealing plate (3).
3/15(W)
w
2022/3/13
https://127.0.0.1/sisweb/sisweb/techdoc/techdoc_print_page.jsp?returnurl=/sisweb/sisw...
Illustration 4 g01101536
4. Remove bolts (8), plate (9), and adjustable idler gear assembly (7).
5. Use Tooling (A) and remove the sleeve bearing from adjustable idler gear assembly (7).
4/15(W)
w
2022/3/13
https://127.0.0.1/sisweb/sisweb/techdoc/techdoc_print_page.jsp?returnurl=/sisweb/sisw...
Illustration 5 g01101045
6. Remove bolts (11), plate (12), and idler gear assembly (10).
7. Use Tooling (A) and remove the sleeve bearing from idler gear assembly (10).
5/15(W)
w
2022/3/13
https://127.0.0.1/sisweb/sisweb/techdoc/techdoc_print_page.jsp?returnurl=/sisweb/sisw...
Illustration 6 g01101048
8. Remove bolts (14), plate (15), and cluster gear assembly (13).
9. Use Tooling (A) and remove the sleeve bearing from cluster gear assembly (13).
6/15(W)
w
2022/3/13
https://127.0.0.1/sisweb/sisweb/techdoc/techdoc_print_page.jsp?returnurl=/sisweb/sisw...
Illustration 7 g01101050
Note: Stub shaft assembly (16) must be removed in order to remove plate (22). The
backlash for the camshaft gear and the adjustable idler gear assembly will need to be
readjusted at assembly.
10. Remove nuts (17) and remove stub shaft assembly (16).
Note: Stub shaft (18) must be removed in order to remove plate (22).
11. Remove nuts (19) and remove stub shaft (18).
12. Remove bolts (21) and remove stub shaft (20).
13. Remove bolts (23) that hold plate (22) to the cylinder block. Remove plate (22).
14. If studs (24) are loose or the threads are damaged, remove the studs from the front plate.
7/15(W)
w
2022/3/13
https://127.0.0.1/sisweb/sisweb/techdoc/techdoc_print_page.jsp?returnurl=/sisweb/sisw...
Illustration 8 g01101052
15. Remove integral seal (25) from the cylinder block.
Installation Procedure
NOTICE
Keep all parts clean from contaminants.
Contaminants may cause rapid wear and shortened component life.
NOTICE
Do not turn the crankshaft or the camshaft while the camshaft gear is
removed. If the front gear group is not correctly timed during
installation, interference can occur between the pistons and the valves,
resulting in damage to the engine.
8/15(W)
w
2022/3/13
https://127.0.0.1/sisweb/sisweb/techdoc/techdoc_print_page.jsp?returnurl=/sisweb/sisw...
1. Thoroughly clean the gasket material from the cylinder block and both sides of the plate.
Illustration 9 g01101567
2. If studs (24) are loose or the threads are damaged, install new studs (24) in the front plate.
Apply Tooling (D) to the serrations of studs (24). Install studs (24) in the front plate.
3. Install integral seal (25) on the dowel pins on the cylinder block.
Note: Apply Tooling (C) to the bottom of integral seal (25) in order to fill the space at the
cylinder block, the front housing, and the engine oil pan.
4. Install plate (22) on the dowel pins on the cylinder block. Install new locking bolts (23)
(Marked "X") in order to fasten the front plate to the cylinder block. Tighten locking bolts
(23) to a torque of 55 N·m (41 lb ft).
Note: Clean the old sealant from the bolts and apply Tooling (D) to the bolts.
5. Tighten locking bolts (23) again to a torque of 55 N·m (41 lb ft).
9/15(W)
w
2022/3/13
https://127.0.0.1/sisweb/sisweb/techdoc/techdoc_print_page.jsp?returnurl=/sisweb/sisw...
Illustration 10 g01101565
6. Install stub shaft (18). Apply Tooling (D) to the studs and the bolt for stub shaft (18).
Tighten nuts (19) and the bolt to a torque of 55 ± 10 N·m (41 ± 7 lb ft).
7. Install stub shaft assembly (16). Apply Tooling (D) to the studs and the bolt for stub shaft
assembly (16). Do not tighten nuts (17) and the bolt for stub shaft assembly (16) at this
time. Nuts (17) and the bolt for stub shaft assembly (16) will need to be tightened when the
backlash is adjusted.
8. Adjust the backlash between the camshaft gear and the adjustable idler gear assembly. The
backlash should be 0.356 ± 0.254 mm (0.014 ± 0.010 inch). Refer to Testing and Adjusting,
"Gear Group (Front) - Time" for the backlash adjustment procedure. Tighten nuts (17) and
the bolt to a torque of 55 ± 10 N·m (41 ± 7 lb ft).
9. Install stub shaft (20). Apply Tooling (D) to bolts (21). Install bolts (21) and tighten in a
numeric sequence 1, 3, 4, 5, 2, 1, 2, 3, 4, 5, 1 to a torque of 55 ± 10 N·m (41 ± 7 lb ft).
10/15(W)
w
2022/3/13
https://127.0.0.1/sisweb/sisweb/techdoc/techdoc_print_page.jsp?returnurl=/sisweb/sisw...
Illustration 11 g01101161
10. Use Tooling (A) to install the sleeve bearing in cluster gear assembly (13).
11. Put cluster gear assembly (13) on the stub shaft. Ensure that Timing Marks (V) are aligned
on the cluster gear assembly and the crankshaft gear.
12. Position plate (15) with the oil groove toward the face of the gear. Apply Tooling (D) to
bolts (14). Install bolts (14). Tighten bolts (14) to a torque of 30 ± 7 N·m (22 ± 5 lb ft).
11/15(W)
w
2022/3/13
https://127.0.0.1/sisweb/sisweb/techdoc/techdoc_print_page.jsp?returnurl=/sisweb/sisw...
Illustration 12 g01101045
13. Use Tooling (A) to install the sleeve in idler gear (10).
14. Put idler gear assembly (10) on the stub shaft. Install plate (12) with the oil groove toward
the gear face. Apply Tooling (D) to bolts (11). Install bolts (11). Tighten bolts (11) to a
torque of 30 ± 7 N·m (22 ± 5 lb ft).
12/15(W)
w
2022/3/13
https://127.0.0.1/sisweb/sisweb/techdoc/techdoc_print_page.jsp?returnurl=/sisweb/sisw...
Illustration 13 g01008436
15. Use Tooling (A) to install the sleeve bearing in adjustable idler gear (7).
Note: Align the oil hole in the bearing with the oil hole in the adjustable idler gear.
16. Put adjustable idler gear assembly (7) on the stub shaft assembly. Position plate (9) with the
oil groove toward the face of the gear. Apply Tooling (D) to bolts (8). Install bolts (8).
Tighten bolts (8) to a torque of 30 ± 7 N·m (22 ± 5 lb ft).
Note: Check the backlash for the camshaft gear and the adjustable idler gear assembly. The
camshaft gear must be installed and the adjustable idler gear assembly must be removed in
order to perform the backlash adjustment procedure. Refer to Testing and Adjusting, "Gear
Group (Front) - Time".
13/15(W)
w
2022/3/13
https://127.0.0.1/sisweb/sisweb/techdoc/techdoc_print_page.jsp?returnurl=/sisweb/sisw...
Illustration 14 g01008431
17. Install O-ring seal (5) and O-ring seal (6) in sealing plate (3). Lubricate O-ring seal (6) with
a 50/50 mixture of Tooling (B) and clean engine oil.
Illustration 15 g01008430
14/15(W)
w
2022/3/13
https://127.0.0.1/sisweb/sisweb/techdoc/techdoc_print_page.jsp?returnurl=/sisweb/sisw...
Illustration 16 g01010256
18. Install adapter (4). Ensure that the dowel in the adapter engages the hole in the camshaft.
19. Install sealing plate (3) and thrust plate (1). Ensure that the dowel in the adapter engages the
hole in the thrust plate. Apply Tooling (D) to bolts (2). Install bolts (2). Evenly tighten bolts
(2) in order to ensure that sealing plate (3) and O-ring seal (5) are seated against the cylinder
head.
20. Adjust the backlash for the camshaft gear and the adjustable idler gear, if necessary. Refer
to Testing and Adjusting, "Gear Group (Front) - Time".
Note: The camshaft gear must be installed and the adjustable idler gear must be removed in
order to perform the backlash adjustment procedure.
End By:
a. Install the water pump.
b. Install the air compressor, if necessary.
c. Install the front housing.
15/15(W)
w
2022/3/13
https://127.0.0.1/sisweb/sisweb/techdoc/techdoc_print_page.jsp?returnurl=/sisweb/sisw...
Product: INDUSTRIAL ENGINE
Model: C15 INDUSTRIAL ENGINE N5F
Configuration: C15 Industrial Engine N5F00001-UP
Disassembly and Assembly
C15 and C18 Industrial Engines
Media Number -UENR0185-03 Publication Date -01/08/2015 Date Updated -27/08/2015
i05356423
Housing (Front) - Remove and Install
SMCS - 1151-010
S/N - N5F1-UP
S/N - N8F1-UP
Removal Procedure
Table 1
Required Tools
Tool Part Number Part Description Qty
A 154-9731 Thread Lock Compound -
B 8T-9022 Silicone Gasket -
Start By:
a. Remove the camshaft position sensor.
b. Remove the crankshaft position sensor.
c. Remove the engine support.
d. Remove the camshaft gear.
e. Remove the crankshaft front seal.
NOTICE
Care must be taken to ensure that fluids are contained during
performance of inspection, maintenance, testing, adjusting, and repair
1/6(W)
w
2022/3/13
https://127.0.0.1/sisweb/sisweb/techdoc/techdoc_print_page.jsp?returnurl=/sisweb/sisw...
of the product. Be prepared to collect the fluid with suitable containers
before opening any compartment or disassembling any component
containing fluids.
Refer to Special Publication, NENG2500, "Dealer Service Tool
Catalog" for tools and supplies suitable to collect and contain fluids on
Cat®
products.
Dispose of all fluids according to local regulations and mandates.
NOTICE
Keep all parts clean from contaminants.
Contaminants may cause rapid wear and shortened component life.
NOTICE
Do not turn the crankshaft or the camshaft while the camshaft gear is
removed. If the front gear group is not correctly timed during
installation, interference can occur between the pistons and the valves,
resulting in damage to the engine.
Illustration 1 g01078059
2/6(W)
w
2022/3/13
https://127.0.0.1/sisweb/sisweb/techdoc/techdoc_print_page.jsp?returnurl=/sisweb/sisw...
1. Remove the bolts and clips (1).
2. Remove bracket (2) from plate (4) and the cylinder head.
3. Remove bolts (3).
Illustration 2 g01078084
4. Remove cable strap (5) from the cylinder head and front housing (10).
5. Remove bolt (7) and nut (6) from the front housing.
6. Remove bolts (8) and nuts (9) from the front housing.
7. Remove bolts (11) from the front housing.
Illustration 3 g01078119
3/6(W)
w
2022/3/13
https://127.0.0.1/sisweb/sisweb/techdoc/techdoc_print_page.jsp?returnurl=/sisweb/sisw...
8. Loosen bolts (15) from the engine oil pan.
Note: It is not necessary to remove the engine oil pan from the engine.
9. Remove front housing (10).
10. If necessary, remove studs (14) and the O-ring seals from the front housing.
11. Remove gasket (12) from plate (13) and the front housing.
Installation Procedure
NOTICE
Keep all parts clean from contaminants.
Contaminants may cause rapid wear and shortened component life.
NOTICE
Do not turn the crankshaft or the camshaft while the camshaft gear is
removed. If the front gear group is not correctly timed during
installation, interference can occur between the pistons and the valves,
resulting in damage to the engine.
Illustration 4 g01078406
4/6(W)
w
2022/3/13
https://127.0.0.1/sisweb/sisweb/techdoc/techdoc_print_page.jsp?returnurl=/sisweb/sisw...
1. If studs (14) are loose or the threads are damaged, install new studs in front housing (10).
Apply Tooling (A) to the threads of studs (14). Install the O-ring seals on the studs and
install the studs in the front housing.
2. Thoroughly clean the mating surfaces of plate (13) and front housing (10).
3. Install gasket (12) on plate (13).
Note: Trim the gasket even with the bottom of the front housing after assembly.
4. Apply Tooling (B) to the bottom of gasket (12) in order to fill the space at the front housing
and the engine oil pan.
5. Install front housing (10) on the dowel pins on the cylinder block.
6. Install bolts (11) in front housing (10).
7. Tighten bolts (15).
Illustration 5 g01078272
8. Install bolt (7) and nuts (6).
9. Install bolts (8) and nuts (9).
10. Install cable strap (5) on the front housing and on the cylinder head.
5/6(W)
w
2022/3/13
https://127.0.0.1/sisweb/sisweb/techdoc/techdoc_print_page.jsp?returnurl=/sisweb/sisw...
Illustration 6 g01078059
11. Install the bolts and clips (1).
12. Install bolts (3).
13. Install bracket (2) on plate (4) and the front housing.
End By:
a. Install the crankshaft front seal and the wear sleeve.
b. Install the camshaft gear.
c. Install the engine support.
d. Install the camshaft position sensor.
e. Install the crankshaft position sensor.
6/6(W)
w
2022/3/13
https://127.0.0.1/sisweb/sisweb/techdoc/techdoc_print_page.jsp?returnurl=/sisweb/sisw...
Product: INDUSTRIAL ENGINE
Model: C15 INDUSTRIAL ENGINE N5F
Configuration: C15 Industrial Engine N5F00001-UP
Disassembly and Assembly
C15 and C18 Industrial Engines
Media Number -UENR0185-03 Publication Date -01/08/2015 Date Updated -27/08/2015
i04730375
Fumes Disposal Filter - Remove and Install
SMCS - 1317-010
S/N - N5F1-UP
S/N - N8F1-UP
Removal Procedure
Illustration 1 g02831020
1. Disconnect hoses (2), (4), (5).
2. Remove bolts (3) and remove fumes disposal filter assembly (1).
1/2(W)
w
2022/3/13
https://127.0.0.1/sisweb/sisweb/techdoc/techdoc_print_page.jsp?returnurl=/sisweb/sisw...
Illustration 2 g02831066
3. Remove the cap from fumes disposal filter assembly (1). Remove element (6) and the O-
ring seal.
Installation Procedure
1. Install fumes disposal filter assembly (1) in the reverse order of removal.
2/2(W)
w
2022/3/13
https://127.0.0.1/sisweb/sisweb/techdoc/techdoc_print_page.jsp?returnurl=/sisweb/sisw...
Suggest:
For more complete manuals. Please go to
the home page.
https://www.ebooklibonline.com
If the above button click is invalid. Please
download this document first, and then
click the above link to download the
complete manual.
Thank you so much for reading
Product: INDUSTRIAL ENGINE
Model: C15 INDUSTRIAL ENGINE N5F
Configuration: C15 Industrial Engine N5F00001-UP
Disassembly and Assembly
C15 and C18 Industrial Engines
Media Number -UENR0185-03 Publication Date -01/08/2015 Date Updated -27/08/2015
i05375406
Valve Mechanism Cover - Remove and Install
SMCS - 1107-010
S/N - N5F1-UP
S/N - N8F1-UP
Removal Procedure
Start By:
A. Remove the clean emissions module.
NOTICE
Keep all parts clean from contaminants.
Contaminants may cause rapid wear and shortened component life.
1/3(W)
w
2022/3/13
https://127.0.0.1/sisweb/sisweb/techdoc/techdoc_print_page.jsp?returnurl=/sisweb/sisw...
Illustration 1 g01078498
1. Remove bolts (1).
2. Remove valve mechanism cover (2) .
Installation Procedure
NOTICE
Keep all parts clean from contaminants.
Contaminants may cause rapid wear and shortened component life.
2/3(W)
w
2022/3/13
https://127.0.0.1/sisweb/sisweb/techdoc/techdoc_print_page.jsp?returnurl=/sisweb/sisw...

More Related Content

More from gua6982552kun

More from gua6982552kun (20)

Massey Ferguson MF 384 S TRACTOR (- 300993) Parts Catalogue Manual Instant Do...
Massey Ferguson MF 384 S TRACTOR (- 300993) Parts Catalogue Manual Instant Do...Massey Ferguson MF 384 S TRACTOR (- 300993) Parts Catalogue Manual Instant Do...
Massey Ferguson MF 384 S TRACTOR (- 300993) Parts Catalogue Manual Instant Do...
 
Massey Ferguson MF 384 F TRACTOR, - 0894 Parts Catalogue Manual Instant Downl...
Massey Ferguson MF 384 F TRACTOR, - 0894 Parts Catalogue Manual Instant Downl...Massey Ferguson MF 384 F TRACTOR, - 0894 Parts Catalogue Manual Instant Downl...
Massey Ferguson MF 384 F TRACTOR, - 0894 Parts Catalogue Manual Instant Downl...
 
Caterpillar Cat TH460B Telehandler (Prefix SLF) Service Repair Manual Instant...
Caterpillar Cat TH460B Telehandler (Prefix SLF) Service Repair Manual Instant...Caterpillar Cat TH460B Telehandler (Prefix SLF) Service Repair Manual Instant...
Caterpillar Cat TH460B Telehandler (Prefix SLF) Service Repair Manual Instant...
 
Caterpillar Cat TH350B Telehandler (Prefix SLD) Service Repair Manual Instant...
Caterpillar Cat TH350B Telehandler (Prefix SLD) Service Repair Manual Instant...Caterpillar Cat TH350B Telehandler (Prefix SLD) Service Repair Manual Instant...
Caterpillar Cat TH350B Telehandler (Prefix SLD) Service Repair Manual Instant...
 
Caterpillar Cat TH340B Telehandler (Prefix SLC) Service Repair Manual Instant...
Caterpillar Cat TH340B Telehandler (Prefix SLC) Service Repair Manual Instant...Caterpillar Cat TH340B Telehandler (Prefix SLC) Service Repair Manual Instant...
Caterpillar Cat TH340B Telehandler (Prefix SLC) Service Repair Manual Instant...
 
Caterpillar Cat TH215 Telehandler (Prefix CEG) Service Repair Manual Instant ...
Caterpillar Cat TH215 Telehandler (Prefix CEG) Service Repair Manual Instant ...Caterpillar Cat TH215 Telehandler (Prefix CEG) Service Repair Manual Instant ...
Caterpillar Cat TH215 Telehandler (Prefix CEG) Service Repair Manual Instant ...
 
Caterpillar Cat TH210 Telehandler (Prefix CEC) Service Repair Manual Instant ...
Caterpillar Cat TH210 Telehandler (Prefix CEC) Service Repair Manual Instant ...Caterpillar Cat TH210 Telehandler (Prefix CEC) Service Repair Manual Instant ...
Caterpillar Cat TH210 Telehandler (Prefix CEC) Service Repair Manual Instant ...
 
Caterpillar Cat TH103 Telehandler (Prefix 3PN) Service Repair Manual Instant ...
Caterpillar Cat TH103 Telehandler (Prefix 3PN) Service Repair Manual Instant ...Caterpillar Cat TH103 Telehandler (Prefix 3PN) Service Repair Manual Instant ...
Caterpillar Cat TH103 Telehandler (Prefix 3PN) Service Repair Manual Instant ...
 
Caterpillar Cat TH103 Telehandler (Prefix 3PN) Service Repair Manual Instant ...
Caterpillar Cat TH103 Telehandler (Prefix 3PN) Service Repair Manual Instant ...Caterpillar Cat TH103 Telehandler (Prefix 3PN) Service Repair Manual Instant ...
Caterpillar Cat TH103 Telehandler (Prefix 3PN) Service Repair Manual Instant ...
 
Caterpillar Cat TH83 Telehandler (Prefix 3RN) Service Repair Manual Instant D...
Caterpillar Cat TH83 Telehandler (Prefix 3RN) Service Repair Manual Instant D...Caterpillar Cat TH83 Telehandler (Prefix 3RN) Service Repair Manual Instant D...
Caterpillar Cat TH83 Telehandler (Prefix 3RN) Service Repair Manual Instant D...
 
Caterpillar Cat TH83 Telehandler (Prefix 3RN) Service Repair Manual Instant D...
Caterpillar Cat TH83 Telehandler (Prefix 3RN) Service Repair Manual Instant D...Caterpillar Cat TH83 Telehandler (Prefix 3RN) Service Repair Manual Instant D...
Caterpillar Cat TH83 Telehandler (Prefix 3RN) Service Repair Manual Instant D...
 
Caterpillar Cat D6R STD TRACK-TYPE TRACTOR (Prefix EMM) Service Repair Manual...
Caterpillar Cat D6R STD TRACK-TYPE TRACTOR (Prefix EMM) Service Repair Manual...Caterpillar Cat D6R STD TRACK-TYPE TRACTOR (Prefix EMM) Service Repair Manual...
Caterpillar Cat D6R STD TRACK-TYPE TRACTOR (Prefix EMM) Service Repair Manual...
 
Caterpillar Cat D6G2 XL TRACK-TYPE TRACTOR (Prefix P6G) Service Repair Manual...
Caterpillar Cat D6G2 XL TRACK-TYPE TRACTOR (Prefix P6G) Service Repair Manual...Caterpillar Cat D6G2 XL TRACK-TYPE TRACTOR (Prefix P6G) Service Repair Manual...
Caterpillar Cat D6G2 XL TRACK-TYPE TRACTOR (Prefix P6G) Service Repair Manual...
 
Caterpillar Cat D5R2 TRACK-TYPE TRACTOR (Prefix WRE) Service Repair Manual In...
Caterpillar Cat D5R2 TRACK-TYPE TRACTOR (Prefix WRE) Service Repair Manual In...Caterpillar Cat D5R2 TRACK-TYPE TRACTOR (Prefix WRE) Service Repair Manual In...
Caterpillar Cat D5R2 TRACK-TYPE TRACTOR (Prefix WRE) Service Repair Manual In...
 
Caterpillar Cat D5N TRACK-TYPE TRACTOR (Prefix AKD) Service Repair Manual Ins...
Caterpillar Cat D5N TRACK-TYPE TRACTOR (Prefix AKD) Service Repair Manual Ins...Caterpillar Cat D5N TRACK-TYPE TRACTOR (Prefix AKD) Service Repair Manual Ins...
Caterpillar Cat D5N TRACK-TYPE TRACTOR (Prefix AKD) Service Repair Manual Ins...
 
Caterpillar Cat D5K XL TRACK-TYPE TRACTOR (Prefix WWW) Service Repair Manual ...
Caterpillar Cat D5K XL TRACK-TYPE TRACTOR (Prefix WWW) Service Repair Manual ...Caterpillar Cat D5K XL TRACK-TYPE TRACTOR (Prefix WWW) Service Repair Manual ...
Caterpillar Cat D5K XL TRACK-TYPE TRACTOR (Prefix WWW) Service Repair Manual ...
 
Caterpillar Cat D4K2 XL TRACK-TYPE TRACTOR (Prefix MT3) Service Repair Manual...
Caterpillar Cat D4K2 XL TRACK-TYPE TRACTOR (Prefix MT3) Service Repair Manual...Caterpillar Cat D4K2 XL TRACK-TYPE TRACTOR (Prefix MT3) Service Repair Manual...
Caterpillar Cat D4K2 XL TRACK-TYPE TRACTOR (Prefix MT3) Service Repair Manual...
 
Caterpillar Cat D4K2 XL TRACK-TYPE TRACTOR (Prefix KM2) Service Repair Manual...
Caterpillar Cat D4K2 XL TRACK-TYPE TRACTOR (Prefix KM2) Service Repair Manual...Caterpillar Cat D4K2 XL TRACK-TYPE TRACTOR (Prefix KM2) Service Repair Manual...
Caterpillar Cat D4K2 XL TRACK-TYPE TRACTOR (Prefix KM2) Service Repair Manual...
 
Caterpillar Cat CB564D Vibratory Compactor (Prefix D4M) Service Repair Manual...
Caterpillar Cat CB564D Vibratory Compactor (Prefix D4M) Service Repair Manual...Caterpillar Cat CB564D Vibratory Compactor (Prefix D4M) Service Repair Manual...
Caterpillar Cat CB564D Vibratory Compactor (Prefix D4M) Service Repair Manual...
 
Caterpillar Cat C13 Industrial Engine (Prefix N3F) Service Repair Manual Inst...
Caterpillar Cat C13 Industrial Engine (Prefix N3F) Service Repair Manual Inst...Caterpillar Cat C13 Industrial Engine (Prefix N3F) Service Repair Manual Inst...
Caterpillar Cat C13 Industrial Engine (Prefix N3F) Service Repair Manual Inst...
 

Recently uploaded

Vip Mumbai Call Girls Panvel Call On 9920725232 With Body to body massage wit...
Vip Mumbai Call Girls Panvel Call On 9920725232 With Body to body massage wit...Vip Mumbai Call Girls Panvel Call On 9920725232 With Body to body massage wit...
Vip Mumbai Call Girls Panvel Call On 9920725232 With Body to body massage wit...
amitlee9823
 
Majestic Call Girls: 🍓 7737669865 🍓 High Profile Model Escorts | Bangalore Es...
Majestic Call Girls: 🍓 7737669865 🍓 High Profile Model Escorts | Bangalore Es...Majestic Call Girls: 🍓 7737669865 🍓 High Profile Model Escorts | Bangalore Es...
Majestic Call Girls: 🍓 7737669865 🍓 High Profile Model Escorts | Bangalore Es...
amitlee9823
 
Call Girls Hongasandra Just Call 👗 7737669865 👗 Top Class Call Girl Service B...
Call Girls Hongasandra Just Call 👗 7737669865 👗 Top Class Call Girl Service B...Call Girls Hongasandra Just Call 👗 7737669865 👗 Top Class Call Girl Service B...
Call Girls Hongasandra Just Call 👗 7737669865 👗 Top Class Call Girl Service B...
amitlee9823
 
Top Rated Call Girls South Mumbai : 9920725232 We offer Beautiful and sexy Ca...
Top Rated Call Girls South Mumbai : 9920725232 We offer Beautiful and sexy Ca...Top Rated Call Girls South Mumbai : 9920725232 We offer Beautiful and sexy Ca...
Top Rated Call Girls South Mumbai : 9920725232 We offer Beautiful and sexy Ca...
amitlee9823
 
+971565801893>>SAFE AND ORIGINAL ABORTION PILLS FOR SALE IN ABUDHABI,DUBAI MA...
+971565801893>>SAFE AND ORIGINAL ABORTION PILLS FOR SALE IN ABUDHABI,DUBAI MA...+971565801893>>SAFE AND ORIGINAL ABORTION PILLS FOR SALE IN ABUDHABI,DUBAI MA...
+971565801893>>SAFE AND ORIGINAL ABORTION PILLS FOR SALE IN ABUDHABI,DUBAI MA...
Health
 
Escorts Service Rajajinagar ☎ 7737669865☎ Book Your One night Stand (Bangalore)
Escorts Service Rajajinagar ☎ 7737669865☎ Book Your One night Stand (Bangalore)Escorts Service Rajajinagar ☎ 7737669865☎ Book Your One night Stand (Bangalore)
Escorts Service Rajajinagar ☎ 7737669865☎ Book Your One night Stand (Bangalore)
amitlee9823
 
+97470301568>>buy vape oil,thc oil weed,hash and cannabis oil in qatar doha}}
+97470301568>>buy vape oil,thc oil weed,hash and cannabis oil in qatar doha}}+97470301568>>buy vape oil,thc oil weed,hash and cannabis oil in qatar doha}}
+97470301568>>buy vape oil,thc oil weed,hash and cannabis oil in qatar doha}}
Health
 
Vip Mumbai Call Girls Navi Mumbai Call On 9920725232 With Body to body massag...
Vip Mumbai Call Girls Navi Mumbai Call On 9920725232 With Body to body massag...Vip Mumbai Call Girls Navi Mumbai Call On 9920725232 With Body to body massag...
Vip Mumbai Call Girls Navi Mumbai Call On 9920725232 With Body to body massag...
amitlee9823
 
Vip Mumbai Call Girls Colaba Call On 9920725232 With Body to body massage wit...
Vip Mumbai Call Girls Colaba Call On 9920725232 With Body to body massage wit...Vip Mumbai Call Girls Colaba Call On 9920725232 With Body to body massage wit...
Vip Mumbai Call Girls Colaba Call On 9920725232 With Body to body massage wit...
amitlee9823
 
Somya Surve Escorts Service Bilaspur ❣️ 7014168258 ❣️ High Cost Unlimited Har...
Somya Surve Escorts Service Bilaspur ❣️ 7014168258 ❣️ High Cost Unlimited Har...Somya Surve Escorts Service Bilaspur ❣️ 7014168258 ❣️ High Cost Unlimited Har...
Somya Surve Escorts Service Bilaspur ❣️ 7014168258 ❣️ High Cost Unlimited Har...
nirzagarg
 
➥🔝 7737669865 🔝▻ Moradabad Call-girls in Women Seeking Men 🔝Moradabad🔝 Esc...
➥🔝 7737669865 🔝▻ Moradabad Call-girls in Women Seeking Men  🔝Moradabad🔝   Esc...➥🔝 7737669865 🔝▻ Moradabad Call-girls in Women Seeking Men  🔝Moradabad🔝   Esc...
➥🔝 7737669865 🔝▻ Moradabad Call-girls in Women Seeking Men 🔝Moradabad🔝 Esc...
amitlee9823
 
如何办理麦考瑞大学毕业证(MQU毕业证书)成绩单原版一比一
如何办理麦考瑞大学毕业证(MQU毕业证书)成绩单原版一比一如何办理麦考瑞大学毕业证(MQU毕业证书)成绩单原版一比一
如何办理麦考瑞大学毕业证(MQU毕业证书)成绩单原版一比一
ozave
 
FULL NIGHT — 9999894380 Call Girls In Jagat Puri | Delhi
FULL NIGHT — 9999894380 Call Girls In Jagat Puri | DelhiFULL NIGHT — 9999894380 Call Girls In Jagat Puri | Delhi
FULL NIGHT — 9999894380 Call Girls In Jagat Puri | Delhi
SaketCallGirlsCallUs
 

Recently uploaded (20)

(ISHITA) Call Girls Service Jammu Call Now 8617697112 Jammu Escorts 24x7
(ISHITA) Call Girls Service Jammu Call Now 8617697112 Jammu Escorts 24x7(ISHITA) Call Girls Service Jammu Call Now 8617697112 Jammu Escorts 24x7
(ISHITA) Call Girls Service Jammu Call Now 8617697112 Jammu Escorts 24x7
 
Vip Mumbai Call Girls Panvel Call On 9920725232 With Body to body massage wit...
Vip Mumbai Call Girls Panvel Call On 9920725232 With Body to body massage wit...Vip Mumbai Call Girls Panvel Call On 9920725232 With Body to body massage wit...
Vip Mumbai Call Girls Panvel Call On 9920725232 With Body to body massage wit...
 
Majestic Call Girls: 🍓 7737669865 🍓 High Profile Model Escorts | Bangalore Es...
Majestic Call Girls: 🍓 7737669865 🍓 High Profile Model Escorts | Bangalore Es...Majestic Call Girls: 🍓 7737669865 🍓 High Profile Model Escorts | Bangalore Es...
Majestic Call Girls: 🍓 7737669865 🍓 High Profile Model Escorts | Bangalore Es...
 
Call Girls Hongasandra Just Call 👗 7737669865 👗 Top Class Call Girl Service B...
Call Girls Hongasandra Just Call 👗 7737669865 👗 Top Class Call Girl Service B...Call Girls Hongasandra Just Call 👗 7737669865 👗 Top Class Call Girl Service B...
Call Girls Hongasandra Just Call 👗 7737669865 👗 Top Class Call Girl Service B...
 
Top Rated Call Girls South Mumbai : 9920725232 We offer Beautiful and sexy Ca...
Top Rated Call Girls South Mumbai : 9920725232 We offer Beautiful and sexy Ca...Top Rated Call Girls South Mumbai : 9920725232 We offer Beautiful and sexy Ca...
Top Rated Call Girls South Mumbai : 9920725232 We offer Beautiful and sexy Ca...
 
Dubai Call Girls R0yalty O525547819 Call Girls Dubai
Dubai Call Girls R0yalty O525547819 Call Girls DubaiDubai Call Girls R0yalty O525547819 Call Girls Dubai
Dubai Call Girls R0yalty O525547819 Call Girls Dubai
 
Marathi Call Girls Santacruz WhatsApp +91-9930687706, Best Service
Marathi Call Girls Santacruz WhatsApp +91-9930687706, Best ServiceMarathi Call Girls Santacruz WhatsApp +91-9930687706, Best Service
Marathi Call Girls Santacruz WhatsApp +91-9930687706, Best Service
 
+971565801893>>SAFE AND ORIGINAL ABORTION PILLS FOR SALE IN ABUDHABI,DUBAI MA...
+971565801893>>SAFE AND ORIGINAL ABORTION PILLS FOR SALE IN ABUDHABI,DUBAI MA...+971565801893>>SAFE AND ORIGINAL ABORTION PILLS FOR SALE IN ABUDHABI,DUBAI MA...
+971565801893>>SAFE AND ORIGINAL ABORTION PILLS FOR SALE IN ABUDHABI,DUBAI MA...
 
Escorts Service Rajajinagar ☎ 7737669865☎ Book Your One night Stand (Bangalore)
Escorts Service Rajajinagar ☎ 7737669865☎ Book Your One night Stand (Bangalore)Escorts Service Rajajinagar ☎ 7737669865☎ Book Your One night Stand (Bangalore)
Escorts Service Rajajinagar ☎ 7737669865☎ Book Your One night Stand (Bangalore)
 
BOOK FARIDABAD CALL GIRL(VIP Sunny Leone) @8168257667 BOOK 24/7
BOOK FARIDABAD CALL GIRL(VIP Sunny Leone) @8168257667 BOOK  24/7BOOK FARIDABAD CALL GIRL(VIP Sunny Leone) @8168257667 BOOK  24/7
BOOK FARIDABAD CALL GIRL(VIP Sunny Leone) @8168257667 BOOK 24/7
 
+97470301568>>buy vape oil,thc oil weed,hash and cannabis oil in qatar doha}}
+97470301568>>buy vape oil,thc oil weed,hash and cannabis oil in qatar doha}}+97470301568>>buy vape oil,thc oil weed,hash and cannabis oil in qatar doha}}
+97470301568>>buy vape oil,thc oil weed,hash and cannabis oil in qatar doha}}
 
Vip Mumbai Call Girls Navi Mumbai Call On 9920725232 With Body to body massag...
Vip Mumbai Call Girls Navi Mumbai Call On 9920725232 With Body to body massag...Vip Mumbai Call Girls Navi Mumbai Call On 9920725232 With Body to body massag...
Vip Mumbai Call Girls Navi Mumbai Call On 9920725232 With Body to body massag...
 
Vip Mumbai Call Girls Colaba Call On 9920725232 With Body to body massage wit...
Vip Mumbai Call Girls Colaba Call On 9920725232 With Body to body massage wit...Vip Mumbai Call Girls Colaba Call On 9920725232 With Body to body massage wit...
Vip Mumbai Call Girls Colaba Call On 9920725232 With Body to body massage wit...
 
Connaught Place, Delhi Call girls :8448380779 Model Escorts | 100% verified
Connaught Place, Delhi Call girls :8448380779 Model Escorts | 100% verifiedConnaught Place, Delhi Call girls :8448380779 Model Escorts | 100% verified
Connaught Place, Delhi Call girls :8448380779 Model Escorts | 100% verified
 
Somya Surve Escorts Service Bilaspur ❣️ 7014168258 ❣️ High Cost Unlimited Har...
Somya Surve Escorts Service Bilaspur ❣️ 7014168258 ❣️ High Cost Unlimited Har...Somya Surve Escorts Service Bilaspur ❣️ 7014168258 ❣️ High Cost Unlimited Har...
Somya Surve Escorts Service Bilaspur ❣️ 7014168258 ❣️ High Cost Unlimited Har...
 
Is Your BMW PDC Malfunctioning Discover How to Easily Reset It
Is Your BMW PDC Malfunctioning Discover How to Easily Reset ItIs Your BMW PDC Malfunctioning Discover How to Easily Reset It
Is Your BMW PDC Malfunctioning Discover How to Easily Reset It
 
➥🔝 7737669865 🔝▻ Moradabad Call-girls in Women Seeking Men 🔝Moradabad🔝 Esc...
➥🔝 7737669865 🔝▻ Moradabad Call-girls in Women Seeking Men  🔝Moradabad🔝   Esc...➥🔝 7737669865 🔝▻ Moradabad Call-girls in Women Seeking Men  🔝Moradabad🔝   Esc...
➥🔝 7737669865 🔝▻ Moradabad Call-girls in Women Seeking Men 🔝Moradabad🔝 Esc...
 
(INDIRA) Call Girl Surat Call Now 8250077686 Surat Escorts 24x7
(INDIRA) Call Girl Surat Call Now 8250077686 Surat Escorts 24x7(INDIRA) Call Girl Surat Call Now 8250077686 Surat Escorts 24x7
(INDIRA) Call Girl Surat Call Now 8250077686 Surat Escorts 24x7
 
如何办理麦考瑞大学毕业证(MQU毕业证书)成绩单原版一比一
如何办理麦考瑞大学毕业证(MQU毕业证书)成绩单原版一比一如何办理麦考瑞大学毕业证(MQU毕业证书)成绩单原版一比一
如何办理麦考瑞大学毕业证(MQU毕业证书)成绩单原版一比一
 
FULL NIGHT — 9999894380 Call Girls In Jagat Puri | Delhi
FULL NIGHT — 9999894380 Call Girls In Jagat Puri | DelhiFULL NIGHT — 9999894380 Call Girls In Jagat Puri | Delhi
FULL NIGHT — 9999894380 Call Girls In Jagat Puri | Delhi
 

Caterpillar Cat C15 Industrial Engine (Prefix N5F) Service Repair Manual Instant Download (N5F00001 and up).pdf

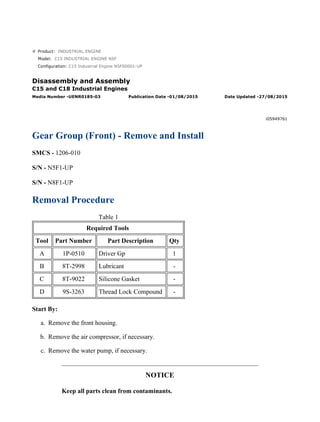
  • 1. Product: INDUSTRIAL ENGINE Model: C15 INDUSTRIAL ENGINE N5F Configuration: C15 Industrial Engine N5F00001-UP Disassembly and Assembly C15 and C18 Industrial Engines Media Number -UENR0185-03 Publication Date -01/08/2015 Date Updated -27/08/2015 i05949761 Gear Group (Front) - Remove and Install SMCS - 1206-010 S/N - N5F1-UP S/N - N8F1-UP Removal Procedure Table 1 Required Tools Tool Part Number Part Description Qty A 1P-0510 Driver Gp 1 B 8T-2998 Lubricant - C 8T-9022 Silicone Gasket - D 9S-3263 Thread Lock Compound - Start By: a. Remove the front housing. b. Remove the air compressor, if necessary. c. Remove the water pump, if necessary. NOTICE Keep all parts clean from contaminants. 1/15(W) w 2022/3/13 https://127.0.0.1/sisweb/sisweb/techdoc/techdoc_print_page.jsp?returnurl=/sisweb/sisw...
  • 2. Contaminants may cause rapid wear and shortened component life. NOTICE Do not turn the crankshaft or the camshaft while the camshaft gear is removed. If the front gear group is not correctly timed during installation, interference can occur between the pistons and the valves, resulting in damage to the engine. Note: Be sure to mark the orientation of each of the gears for installation purposes. Illustration 1 g01008429 1. Remove bolts (2) and thrust plate (1). 2/15(W) w 2022/3/13 https://127.0.0.1/sisweb/sisweb/techdoc/techdoc_print_page.jsp?returnurl=/sisweb/sisw...
  • 3. Illustration 2 g01008430 2. Remove sealing plate (3) and adapter (4). Illustration 3 g01008431 3. Remove O-ring seal (5) and O-ring seal (6) from sealing plate (3). 3/15(W) w 2022/3/13 https://127.0.0.1/sisweb/sisweb/techdoc/techdoc_print_page.jsp?returnurl=/sisweb/sisw...
  • 4. Illustration 4 g01101536 4. Remove bolts (8), plate (9), and adjustable idler gear assembly (7). 5. Use Tooling (A) and remove the sleeve bearing from adjustable idler gear assembly (7). 4/15(W) w 2022/3/13 https://127.0.0.1/sisweb/sisweb/techdoc/techdoc_print_page.jsp?returnurl=/sisweb/sisw...
  • 5. Illustration 5 g01101045 6. Remove bolts (11), plate (12), and idler gear assembly (10). 7. Use Tooling (A) and remove the sleeve bearing from idler gear assembly (10). 5/15(W) w 2022/3/13 https://127.0.0.1/sisweb/sisweb/techdoc/techdoc_print_page.jsp?returnurl=/sisweb/sisw...
  • 6. Illustration 6 g01101048 8. Remove bolts (14), plate (15), and cluster gear assembly (13). 9. Use Tooling (A) and remove the sleeve bearing from cluster gear assembly (13). 6/15(W) w 2022/3/13 https://127.0.0.1/sisweb/sisweb/techdoc/techdoc_print_page.jsp?returnurl=/sisweb/sisw...
  • 7. Illustration 7 g01101050 Note: Stub shaft assembly (16) must be removed in order to remove plate (22). The backlash for the camshaft gear and the adjustable idler gear assembly will need to be readjusted at assembly. 10. Remove nuts (17) and remove stub shaft assembly (16). Note: Stub shaft (18) must be removed in order to remove plate (22). 11. Remove nuts (19) and remove stub shaft (18). 12. Remove bolts (21) and remove stub shaft (20). 13. Remove bolts (23) that hold plate (22) to the cylinder block. Remove plate (22). 14. If studs (24) are loose or the threads are damaged, remove the studs from the front plate. 7/15(W) w 2022/3/13 https://127.0.0.1/sisweb/sisweb/techdoc/techdoc_print_page.jsp?returnurl=/sisweb/sisw...
  • 8. Illustration 8 g01101052 15. Remove integral seal (25) from the cylinder block. Installation Procedure NOTICE Keep all parts clean from contaminants. Contaminants may cause rapid wear and shortened component life. NOTICE Do not turn the crankshaft or the camshaft while the camshaft gear is removed. If the front gear group is not correctly timed during installation, interference can occur between the pistons and the valves, resulting in damage to the engine. 8/15(W) w 2022/3/13 https://127.0.0.1/sisweb/sisweb/techdoc/techdoc_print_page.jsp?returnurl=/sisweb/sisw...
  • 9. 1. Thoroughly clean the gasket material from the cylinder block and both sides of the plate. Illustration 9 g01101567 2. If studs (24) are loose or the threads are damaged, install new studs (24) in the front plate. Apply Tooling (D) to the serrations of studs (24). Install studs (24) in the front plate. 3. Install integral seal (25) on the dowel pins on the cylinder block. Note: Apply Tooling (C) to the bottom of integral seal (25) in order to fill the space at the cylinder block, the front housing, and the engine oil pan. 4. Install plate (22) on the dowel pins on the cylinder block. Install new locking bolts (23) (Marked "X") in order to fasten the front plate to the cylinder block. Tighten locking bolts (23) to a torque of 55 N·m (41 lb ft). Note: Clean the old sealant from the bolts and apply Tooling (D) to the bolts. 5. Tighten locking bolts (23) again to a torque of 55 N·m (41 lb ft). 9/15(W) w 2022/3/13 https://127.0.0.1/sisweb/sisweb/techdoc/techdoc_print_page.jsp?returnurl=/sisweb/sisw...
  • 10. Illustration 10 g01101565 6. Install stub shaft (18). Apply Tooling (D) to the studs and the bolt for stub shaft (18). Tighten nuts (19) and the bolt to a torque of 55 ± 10 N·m (41 ± 7 lb ft). 7. Install stub shaft assembly (16). Apply Tooling (D) to the studs and the bolt for stub shaft assembly (16). Do not tighten nuts (17) and the bolt for stub shaft assembly (16) at this time. Nuts (17) and the bolt for stub shaft assembly (16) will need to be tightened when the backlash is adjusted. 8. Adjust the backlash between the camshaft gear and the adjustable idler gear assembly. The backlash should be 0.356 ± 0.254 mm (0.014 ± 0.010 inch). Refer to Testing and Adjusting, "Gear Group (Front) - Time" for the backlash adjustment procedure. Tighten nuts (17) and the bolt to a torque of 55 ± 10 N·m (41 ± 7 lb ft). 9. Install stub shaft (20). Apply Tooling (D) to bolts (21). Install bolts (21) and tighten in a numeric sequence 1, 3, 4, 5, 2, 1, 2, 3, 4, 5, 1 to a torque of 55 ± 10 N·m (41 ± 7 lb ft). 10/15(W) w 2022/3/13 https://127.0.0.1/sisweb/sisweb/techdoc/techdoc_print_page.jsp?returnurl=/sisweb/sisw...
  • 11. Illustration 11 g01101161 10. Use Tooling (A) to install the sleeve bearing in cluster gear assembly (13). 11. Put cluster gear assembly (13) on the stub shaft. Ensure that Timing Marks (V) are aligned on the cluster gear assembly and the crankshaft gear. 12. Position plate (15) with the oil groove toward the face of the gear. Apply Tooling (D) to bolts (14). Install bolts (14). Tighten bolts (14) to a torque of 30 ± 7 N·m (22 ± 5 lb ft). 11/15(W) w 2022/3/13 https://127.0.0.1/sisweb/sisweb/techdoc/techdoc_print_page.jsp?returnurl=/sisweb/sisw...
  • 12. Illustration 12 g01101045 13. Use Tooling (A) to install the sleeve in idler gear (10). 14. Put idler gear assembly (10) on the stub shaft. Install plate (12) with the oil groove toward the gear face. Apply Tooling (D) to bolts (11). Install bolts (11). Tighten bolts (11) to a torque of 30 ± 7 N·m (22 ± 5 lb ft). 12/15(W) w 2022/3/13 https://127.0.0.1/sisweb/sisweb/techdoc/techdoc_print_page.jsp?returnurl=/sisweb/sisw...
  • 13. Illustration 13 g01008436 15. Use Tooling (A) to install the sleeve bearing in adjustable idler gear (7). Note: Align the oil hole in the bearing with the oil hole in the adjustable idler gear. 16. Put adjustable idler gear assembly (7) on the stub shaft assembly. Position plate (9) with the oil groove toward the face of the gear. Apply Tooling (D) to bolts (8). Install bolts (8). Tighten bolts (8) to a torque of 30 ± 7 N·m (22 ± 5 lb ft). Note: Check the backlash for the camshaft gear and the adjustable idler gear assembly. The camshaft gear must be installed and the adjustable idler gear assembly must be removed in order to perform the backlash adjustment procedure. Refer to Testing and Adjusting, "Gear Group (Front) - Time". 13/15(W) w 2022/3/13 https://127.0.0.1/sisweb/sisweb/techdoc/techdoc_print_page.jsp?returnurl=/sisweb/sisw...
  • 14. Illustration 14 g01008431 17. Install O-ring seal (5) and O-ring seal (6) in sealing plate (3). Lubricate O-ring seal (6) with a 50/50 mixture of Tooling (B) and clean engine oil. Illustration 15 g01008430 14/15(W) w 2022/3/13 https://127.0.0.1/sisweb/sisweb/techdoc/techdoc_print_page.jsp?returnurl=/sisweb/sisw...
  • 15. Illustration 16 g01010256 18. Install adapter (4). Ensure that the dowel in the adapter engages the hole in the camshaft. 19. Install sealing plate (3) and thrust plate (1). Ensure that the dowel in the adapter engages the hole in the thrust plate. Apply Tooling (D) to bolts (2). Install bolts (2). Evenly tighten bolts (2) in order to ensure that sealing plate (3) and O-ring seal (5) are seated against the cylinder head. 20. Adjust the backlash for the camshaft gear and the adjustable idler gear, if necessary. Refer to Testing and Adjusting, "Gear Group (Front) - Time". Note: The camshaft gear must be installed and the adjustable idler gear must be removed in order to perform the backlash adjustment procedure. End By: a. Install the water pump. b. Install the air compressor, if necessary. c. Install the front housing. 15/15(W) w 2022/3/13 https://127.0.0.1/sisweb/sisweb/techdoc/techdoc_print_page.jsp?returnurl=/sisweb/sisw...
  • 16. Product: INDUSTRIAL ENGINE Model: C15 INDUSTRIAL ENGINE N5F Configuration: C15 Industrial Engine N5F00001-UP Disassembly and Assembly C15 and C18 Industrial Engines Media Number -UENR0185-03 Publication Date -01/08/2015 Date Updated -27/08/2015 i05356423 Housing (Front) - Remove and Install SMCS - 1151-010 S/N - N5F1-UP S/N - N8F1-UP Removal Procedure Table 1 Required Tools Tool Part Number Part Description Qty A 154-9731 Thread Lock Compound - B 8T-9022 Silicone Gasket - Start By: a. Remove the camshaft position sensor. b. Remove the crankshaft position sensor. c. Remove the engine support. d. Remove the camshaft gear. e. Remove the crankshaft front seal. NOTICE Care must be taken to ensure that fluids are contained during performance of inspection, maintenance, testing, adjusting, and repair 1/6(W) w 2022/3/13 https://127.0.0.1/sisweb/sisweb/techdoc/techdoc_print_page.jsp?returnurl=/sisweb/sisw...
  • 17. of the product. Be prepared to collect the fluid with suitable containers before opening any compartment or disassembling any component containing fluids. Refer to Special Publication, NENG2500, "Dealer Service Tool Catalog" for tools and supplies suitable to collect and contain fluids on Cat® products. Dispose of all fluids according to local regulations and mandates. NOTICE Keep all parts clean from contaminants. Contaminants may cause rapid wear and shortened component life. NOTICE Do not turn the crankshaft or the camshaft while the camshaft gear is removed. If the front gear group is not correctly timed during installation, interference can occur between the pistons and the valves, resulting in damage to the engine. Illustration 1 g01078059 2/6(W) w 2022/3/13 https://127.0.0.1/sisweb/sisweb/techdoc/techdoc_print_page.jsp?returnurl=/sisweb/sisw...
  • 18. 1. Remove the bolts and clips (1). 2. Remove bracket (2) from plate (4) and the cylinder head. 3. Remove bolts (3). Illustration 2 g01078084 4. Remove cable strap (5) from the cylinder head and front housing (10). 5. Remove bolt (7) and nut (6) from the front housing. 6. Remove bolts (8) and nuts (9) from the front housing. 7. Remove bolts (11) from the front housing. Illustration 3 g01078119 3/6(W) w 2022/3/13 https://127.0.0.1/sisweb/sisweb/techdoc/techdoc_print_page.jsp?returnurl=/sisweb/sisw...
  • 19. 8. Loosen bolts (15) from the engine oil pan. Note: It is not necessary to remove the engine oil pan from the engine. 9. Remove front housing (10). 10. If necessary, remove studs (14) and the O-ring seals from the front housing. 11. Remove gasket (12) from plate (13) and the front housing. Installation Procedure NOTICE Keep all parts clean from contaminants. Contaminants may cause rapid wear and shortened component life. NOTICE Do not turn the crankshaft or the camshaft while the camshaft gear is removed. If the front gear group is not correctly timed during installation, interference can occur between the pistons and the valves, resulting in damage to the engine. Illustration 4 g01078406 4/6(W) w 2022/3/13 https://127.0.0.1/sisweb/sisweb/techdoc/techdoc_print_page.jsp?returnurl=/sisweb/sisw...
  • 20. 1. If studs (14) are loose or the threads are damaged, install new studs in front housing (10). Apply Tooling (A) to the threads of studs (14). Install the O-ring seals on the studs and install the studs in the front housing. 2. Thoroughly clean the mating surfaces of plate (13) and front housing (10). 3. Install gasket (12) on plate (13). Note: Trim the gasket even with the bottom of the front housing after assembly. 4. Apply Tooling (B) to the bottom of gasket (12) in order to fill the space at the front housing and the engine oil pan. 5. Install front housing (10) on the dowel pins on the cylinder block. 6. Install bolts (11) in front housing (10). 7. Tighten bolts (15). Illustration 5 g01078272 8. Install bolt (7) and nuts (6). 9. Install bolts (8) and nuts (9). 10. Install cable strap (5) on the front housing and on the cylinder head. 5/6(W) w 2022/3/13 https://127.0.0.1/sisweb/sisweb/techdoc/techdoc_print_page.jsp?returnurl=/sisweb/sisw...
  • 21. Illustration 6 g01078059 11. Install the bolts and clips (1). 12. Install bolts (3). 13. Install bracket (2) on plate (4) and the front housing. End By: a. Install the crankshaft front seal and the wear sleeve. b. Install the camshaft gear. c. Install the engine support. d. Install the camshaft position sensor. e. Install the crankshaft position sensor. 6/6(W) w 2022/3/13 https://127.0.0.1/sisweb/sisweb/techdoc/techdoc_print_page.jsp?returnurl=/sisweb/sisw...
  • 22. Product: INDUSTRIAL ENGINE Model: C15 INDUSTRIAL ENGINE N5F Configuration: C15 Industrial Engine N5F00001-UP Disassembly and Assembly C15 and C18 Industrial Engines Media Number -UENR0185-03 Publication Date -01/08/2015 Date Updated -27/08/2015 i04730375 Fumes Disposal Filter - Remove and Install SMCS - 1317-010 S/N - N5F1-UP S/N - N8F1-UP Removal Procedure Illustration 1 g02831020 1. Disconnect hoses (2), (4), (5). 2. Remove bolts (3) and remove fumes disposal filter assembly (1). 1/2(W) w 2022/3/13 https://127.0.0.1/sisweb/sisweb/techdoc/techdoc_print_page.jsp?returnurl=/sisweb/sisw...
  • 23. Illustration 2 g02831066 3. Remove the cap from fumes disposal filter assembly (1). Remove element (6) and the O- ring seal. Installation Procedure 1. Install fumes disposal filter assembly (1) in the reverse order of removal. 2/2(W) w 2022/3/13 https://127.0.0.1/sisweb/sisweb/techdoc/techdoc_print_page.jsp?returnurl=/sisweb/sisw...
  • 24. Suggest: For more complete manuals. Please go to the home page. https://www.ebooklibonline.com If the above button click is invalid. Please download this document first, and then click the above link to download the complete manual. Thank you so much for reading
  • 25. Product: INDUSTRIAL ENGINE Model: C15 INDUSTRIAL ENGINE N5F Configuration: C15 Industrial Engine N5F00001-UP Disassembly and Assembly C15 and C18 Industrial Engines Media Number -UENR0185-03 Publication Date -01/08/2015 Date Updated -27/08/2015 i05375406 Valve Mechanism Cover - Remove and Install SMCS - 1107-010 S/N - N5F1-UP S/N - N8F1-UP Removal Procedure Start By: A. Remove the clean emissions module. NOTICE Keep all parts clean from contaminants. Contaminants may cause rapid wear and shortened component life. 1/3(W) w 2022/3/13 https://127.0.0.1/sisweb/sisweb/techdoc/techdoc_print_page.jsp?returnurl=/sisweb/sisw...
  • 26. Illustration 1 g01078498 1. Remove bolts (1). 2. Remove valve mechanism cover (2) . Installation Procedure NOTICE Keep all parts clean from contaminants. Contaminants may cause rapid wear and shortened component life. 2/3(W) w 2022/3/13 https://127.0.0.1/sisweb/sisweb/techdoc/techdoc_print_page.jsp?returnurl=/sisweb/sisw...