
Recommended
Recommended
More Related Content
More from fujsjejfkskekem
More from fujsjejfkskekem (20)
Recently uploaded
Recently uploaded (20)
Toro greensmaster 1000 service repair manual
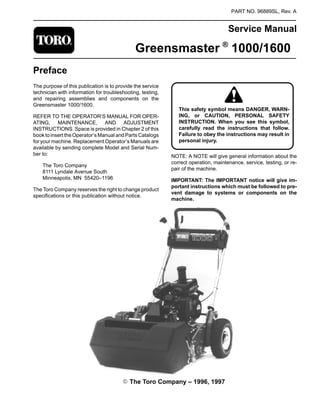
- 1. PART NO. 96889SL, Rev. A Service Manual Greensmaster ® 1000/1600 Preface The purpose of this publication is to provide the service technician with information for troubleshooting, testing, and repairing assemblies and components on the Greensmaster 1000/1600. REFER TO THE OPERATOR’S MANUAL FOR OPER- ATING, MAINTENANCE, AND ADJUSTMENT INSTRUCTIONS. Space is provided in Chapter 2 of this book to insert the Operator’s Manual and Parts Catalogs for your machine. Replacement Operator’s Manuals are available by sending complete Model and Serial Num- ber to: The Toro Company 8111 Lyndale Avenue South Minneapolis, MN 55420–1196 The Toro Company reserves the right to change product specifications or this publication without notice. ING, or CAUTION, PERSONAL SAFETY Failure to obey the instructions may result in This safety symbol means DANGER, WARN- INSTRUCTION. When you see this symbol, carefully read the instructions that follow. personal injury. NOTE: A NOTE will give general information about the correct operation, maintenance, service, testing, or re- pair of the machine. IMPORTANT: The IMPORTANT notice will give im- portant instructions which must be followed to pre- vent damage to systems or components on the machine. E The Toro Company – 1996, 1997
- 2. Table Of Contents Chapter 1 – Safety Safety Instructions . . . . . . . . . . . . . . . . . . . . . . . . . . 1 – 1 Safety and Instruction Decals . . . . . . . . . . . . . . . . 1 – 4 Chapter 2 – Product Records and Manuals Product Records . . . . . . . . . . . . . . . . . . . . . . . . . . . 2 – 1 Equivalents and Conversions . . . . . . . . . . . . . . . . 2 – 2 Torque Specifications . . . . . . . . . . . . . . . . . . . . . . . 2 – 3 Operation and Service History Report . . . . . . . . . 2 – 5 Chapter 3 – Engine Introduction . . . . . . . . . . . . . . . . . . . . . . . . . . . . . . . . 3 – 2 Specifications . . . . . . . . . . . . . . . . . . . . . . . . . . . . . . 3 – 3 General Information . . . . . . . . . . . . . . . . . . . . . . . . 3 – 4 Adjustments . . . . . . . . . . . . . . . . . . . . . . . . . . . . . . . 3 – 6 Services and Repairs . . . . . . . . . . . . . . . . . . . . . . . 3 – 8 Kawasaki FE161 & FE170 Service Manual and Kawasaki FE120 Service Manual Supplement Chapter 4 – Traction and Reel Drive System Specifications . . . . . . . . . . . . . . . . . . . . . . . . . . . . . . 4 – 2 Special Tools . . . . . . . . . . . . . . . . . . . . . . . . . . . . . . 4 – 3 Adjustments . . . . . . . . . . . . . . . . . . . . . . . . . . . . . . . 4 – 4 Service and Repairs . . . . . . . . . . . . . . . . . . . . . . . . 4 – 8 Greensmaster 1000/1600 Chapter 5 – Electrical System Wiring Schematics . . . . . . . . . . . . . . . . . . . . . . . . . 5 – 2 Special Tools . . . . . . . . . . . . . . . . . . . . . . . . . . . . . . 5 – 6 Trouble Shooting . . . . . . . . . . . . . . . . . . . . . . . . . . . 5 – 7 Component Testing . . . . . . . . . . . . . . . . . . . . . . . . . 5 – 8 Service and Repairs 5 – 13. . . . . . . . . . . . . . . . . . . . . . . Chapter 6 – Controls, Wheels and Accessories Specifications . . . . . . . . . . . . . . . . . . . . . . . . . . . . . . 6 – 2 Adjustments . . . . . . . . . . . . . . . . . . . . . . . . . . . . . . . 6 – 3 Service and Repairs . . . . . . . . . . . . . . . . . . . . . . . . 6 – 4 Chapter 7 – Cutting Unit Introduction . . . . . . . . . . . . . . . . . . . . . . . . . . . . . . . . 7 – 2 Specifications . . . . . . . . . . . . . . . . . . . . . . . . . . . . . . 7 – 3 General Information . . . . . . . . . . . . . . . . . . . . . . . . 7 – 4 Special Tools . . . . . . . . . . . . . . . . . . . . . . . . . . . . . . 7 – 5 Troubleshooting . . . . . . . . . . . . . . . . . . . . . . . . . . . . 7 – 7 Adjustments . . . . . . . . . . . . . . . . . . . . . . . . . . . . . . . 7 – 9 Service and Repairs 7 – 13. . . . . . . . . . . . . . . . . . . . . . . Chapter 8 – Grooming Reel Kit (See Note Below) Specifications . . . . . . . . . . . . . . . . . . . . . . . . . . . . . . 8 – 2 General Information . . . . . . . . . . . . . . . . . . . . . . . . 8 – 3 Troubleshooting . . . . . . . . . . . . . . . . . . . . . . . . . . . . 8 – 4 Adjustments . . . . . . . . . . . . . . . . . . . . . . . . . . . . . . . 8 – 6 Service and Repairs . . . . . . . . . . . . . . . . . . . . . . . . 8 – 8 Note: This chapter covers the Model 04125 Grooming Reel Kit only (for the Greensmaster 1000). SafetyProductRecords andManuals Engine DriveSystem Electrical System WheelsandCuttingUnit Accessories GroomingReel Kit TractionandReel
- 3. Chapter 1 Safety Table of Contents SAFETY INSTRUCTIONS . . . . . . . . . . . . . . . . . . . . . . 1 Before Operating . . . . . . . . . . . . . . . . . . . . . . . . . . . . 1 While Operating . . . . . . . . . . . . . . . . . . . . . . . . . . . . 2 Safety Instructions The GREENSMASTER 1000 was tested and certified by TORO for compliance with the B71.4–1984 specifica- tions of the American National Standards Institute. Al- though hazard control and accident prevention partially are dependent upon the design and configuration of the machine, these factors are also dependent upon the awareness, concern, and proper training of the person- nel involved in the operation, transport, maintenance, and storage of the machine. Improper use or mainte- nance of the machine can result in injury or death. Maintenance and Service . . . . . . . . . . . . . . . . . . . . 2 SAFETY AND INSTRUCTION DECALS . . . . . . . . . . 3 To reduce the potential for injury or death, comply with the following safety instructions. or death, comply with the following safety instructions. To reduce the potential for injury WARNING Safety Before Operating 1. Operate the machine only after reading and under- standing the contents of this manual. A replacement manual is available by sending the complete model and serial number to: The Toro Company 8111 Lyndale Avenue South Minneapolis, Minnesota 55420–1196 2. Never allow children to operate the machine, nor al- low adults to operate it without proper instructions. 3. Become familiar with the controls, and know how to stop the engine quickly. 4. Keep all shields, safety devices, and decals in place. If a shield, safety device, or decal is malfunction- ing, illegible, or damaged, repair or replace it before op- erating the machine. 5. Always wear substantial shoes. Do not operate ma- chine while wearing sandals, tennis shoes or sneakers. Do not wear loose fitting clothing which could get caught in moving parts and cause personal injury. 6. Wearing safety glasses, safety shoes, long pants and a helmet is advisable and required by some local safety and insurance regulations. 7. Assure work area is clear of objects which might be picked up and thrown by the reel. 8. Keep everyone, especially children and pets away from the areas of operation. 9. Gasoline is highly flammable; handle it carefully. A. Use an approved gasoline container. B. Do not remove cap from fuel tank when engine is hot or running. C. Do not smoke while handling gasoline. D. Fill fuel tank outdoors and no higher than to the bottom of filter screen. Do not overfill. E. Wipe up any spilled gasoline. F. Fuel may leak from filler neck when mower is tilted for servicing if tank is over filled. Greensmaster 1000/1600 Page 1 – 1 Safety
- 4. 10. Check the safety interlock switch daily for proper op- operating machine. (After every two years, replace the eration; see Component Testing in Chapter 5 – Electri- interlock switch in the safety system, whether it is work- cal System. Replace malfunctioning switches before ing properly or not.) While Operating 11. Do not run the engine in a confined area without ad- equate ventilation. Exhaust fumes are hazardous and could be deadly. 12. Always stand behind the handles when starting and operating the machine. 13. To start and stop the engine: A. Open fuel shut-off valve. B. Verify that the traction drive lever on handle is in NEUTRAL position and reel drive lever on mower is DISENGAGED. C. Move on/off switch to ON position, set choke to full choke position (cold start) and throttle to half throttle. D. Pull starter cord to start engine. E. Move throttle to SLOW and on/off switch to OFF position to stop engine. 14. To transport mower from one area to another: A. Install transport wheels. B. Disengage reel drive lever. C. Start engine. D. Press down on handle to raise front of mower and engage traction drive. 15. Before beginning mowing operation: A. Stop engine. B. Disengage traction drive. C. Remove transport wheels. D. Engage reel drive lever. 16. Before emptying basket of clippings, disengage traction drive, reduce engine speed and move on/off switch to off position. 17. Do not touch engine, muffler or exhaust pipe while engine is running or soon after it has stopped because these areas are hot enough to cause burns. 18. If the cutting unit strikes a solid object or vibrates ab- normally, stop immediately, turn engine off,wait for all motion to stop and inspect for damage. A damaged reel or bedknife must be repaired or replaced before opera- tion is commenced. 19. Whenever machine is left unattended, be sure en- gine is stopped and cutting unit reel is not spinning. Close fuel shut-off valve if machine is not to be used for an extended period of time. Safety Maintenance and Service 20. Before servicing or making adjustments to the ma- chine, stop the engine and pull the spark plug wire off spark plug to prevent accidental starting of the engine. 21. To make sure entire machine is in good condition, keep all nuts, bolts, screws and belts properly tightened. 22. If major repairs are ever needed or assistance is re- quired, contact an Authorized TORO Distributor. 23. To reduce potential fire hazard, keep the engine area free of excessive grease, grass, leaves and accu- mulation of dirt. 24. If the engine must be running to perform a mainte- nance adjustment, keep hands, feet, clothing, and any parts of the body away from the cutting unit and any moving parts. Keep everyone away. 25. Do not overspeed the engine by changing governor settings. Maximum engine speed is 3600 rpm. To as- sure safety and accuracy, have an Authorized Toro Dis- tributor check maximum engine speed with a tachometer. 26. Engine must be shut off before checking oil or ad- ding oil to the crankcase. 27. To be sure of optimum performance and safety, al- ways purchase genuine TORO replacement parts and accessories. Replacement parts and accessories made by other manufacturers could be dangerous. Such use could void the product warranty of The Toro Company. Safety Page 1 – 2 Greensmaster 1000/1600
- 5. Chapter 2 Product Records and Manuals Table of Contents PRODUCT RECORDS . . . . . . . . . . . . . . . . . . . . . . . . . 1 EQUIVALENTS AND CONVERSIONS . . . . . . . . . . . 2 Decimal and Millimeter Equivalents . . . . . . . . . . . . 2 U.S. to Metric Conversions . . . . . . . . . . . . . . . . . . . 2 Product Records Record information about your Greensmaster 1000/1600 on the OPERATION AND SERVICE HISTO- RY REPORT form. Use this information when referring to your machine. TORQUE SPECIFICATIONS . . . . . . . . . . . . . . . . . . . 3 Capscrew Markings and Torque Values – U.S. . . 3 Capscrew Markings and Torque Values – Metric 3 OPERATION AND SERVICE HISTORY REPORT . 5 Insert Operator’s Manuals and Parts Catalogs for your Greensmaster 1000/1600 at the end of this section. ProductRecords andManuals Greensmaster 1000/1600 Page 2 – 1 Product Records and Manuals
- 6. Equivalents and Conversions Product Records and Manuals Page 2 – 2 Greensmaster 1000/1600
- 7. ProductRecords andManuals Greensmaster 1000/1600 Page 2 – 3 Product Records and Manuals Torque Specifications
- 8. Chapter 3 Engine Table of Contents INTRODUCTION . . . . . . . . . . . . . . . . . . . . . . . . . . . . . . 2 SERVICE AND REPAIRS . . . . . . . . . . . . . . . . . . . . . . 8 SPECIFICATIONS . . . . . . . . . . . . . . . . . . . . . . . . . . . . 3 Engine Oil . . . . . . . . . . . . . . . . . . . . . . . . . . . . . . . . . . 8 GENERAL INFORMATION . . . . . . . . . . . . . . . . . . . . . 4 Spark Plug and Ignition Components . . . . . . . . . . 8 Filling the Fuel Tank . . . . . . . . . . . . . . . . . . . . . . . . . 4 Air Cleaner . . . . . . . . . . . . . . . . . . . . . . . . . . . . . . . . . 9 Fuel Shut–off Valve . . . . . . . . . . . . . . . . . . . . . . . . . . 5 Fuel Filter . . . . . . . . . . . . . . . . . . . . . . . . . . . . . . . . . . 9 ADJUSTMENTS . . . . . . . . . . . . . . . . . . . . . . . . . . . . . . 6 Engine Removal and Installation 10. . . . . . . . . . . . . Throttle Linkage Adjustment . . . . . . . . . . . . . . . . . . 6 Lubrication 13. . . . . . . . . . . . . . . . . . . . . . . . . . . . . . . . Clutch Control Adjustment . . . . . . . . . . . . . . . . . . . . 6 Kawasaki FE161 & FE170 Service Manual and Adjusting V–belts . . . . . . . . . . . . . . . . . . . . . . . . . . . 7 Kawasaki FE120 Service Manual Supplement Greensmaster 1000/1600 Page 3 – 1 Engine Engine
- 9. Introduction This Chapter gives information about specifications, maintenance, troubleshooting, testing, and repair of the gasoline engine used in the Greensmaster 1000/1600 mower. Most repairs and adjustments require tools which are commonly available in many service shops. Special tools are described in the Kawasaki FE161 & FE170 Service Manual and Kawasaki FE120 Service Manual Supplement. The use of some specialized test equip- ment is explained. However, the cost of the test equip- ment and the specialized nature of some repairs may dictate that the work be done at an engine repair facility. Service and repair parts for Kawasaki engines are sup- plied through your local Toro distributor. If no parts list is available, be sure to provide your distributor with the Toro model and serial number. Engine Page 3 – 2 Greensmaster 1000/1600
- 10. Specifications Item Description Make / Designation Kawasaki, 4–stroke, OHV, single cylinder, air–cooled, gasoline engine, FE120G Bore x Stroke mm (in.) 60 x 44 (2.36 x 1.73) Total Displacement cc (cu. in.) 124 (7.6) Compression Ratio 8.4:1 Maximum Output kw (HP) 2.8 (3.7) Rated Output kw (HP) 2.2 (3.0) Carburetor Float feed fixed main jet Governor Mechanical flyweight Idle Speed (no load) 1600 100 RPM (at crankshaft) or 800 50 RPM (at camshaft) High Idle (no load) 3600 100 RPM (at crankshaft) or 1800 50 RPM (at camshaft) Direction of rotation Clockwise (facing PTO shaft) Fuel Un–leaded automotive grade gasoline Fuel Tank Capacity liter (U.S. qt.) 2.5 (2.6) Engine Oil See General Information Lubrication System Splash type Oil Capacity liter (U.S. qt.) 0.6 (0.63) Air Cleaner Dual element Ignition System Transistorized flywheel magneto with ignition advancing RFI Suppressor Radio suppressor plug cap and plug Dry Weight kg (U.S. lb) 14.6 (32.2) Engine Greensmaster 1000/1600 Page 3 – 3 Engine
- 11. General Information Filling the Fuel Tank DANGER Because must ning, flame SMOKE vent spilled gine. ling proved ventilated as� Since fumes hale. gasoline is flammable, caution be used when storing or handling it. Do not fill the fuel tank while engine is run� hot, or in an enclosed area. Vapors may build up and be ignited by a spark or source many feet away. DO NOT while filling the fuel tank to pre� the possibility of an explosion. Al� ways fill fuel tank outside. Wipe up any gasoline before starting the en� Use a funnel or spout to prevent spil� gasoline. Fill tank no higher than to the bottom of filter screen. DO NOT OVER FILL. Store gasoline in a clean safety ap� container and keep the cap on the container. Keep gasoline in a cool, well place; never in an enclosed area such as a hot storage shed. To sure volatility, do not buy more than a 30 day supply of gasoline. Gasoline is a fuel for internal combustion engines; there� fore do not use it for any other purpose. many children like the smell of gas, keep it out of their reach because the are explosive and dangerous to in� 1 Figure 1 1. Fuel tank cap IMPORTANT: Never use methanol, gasoline con- taining methanol, gasoline containing more than 10% ethanol, gasoline additives, premium gasoline, or white gas. Engine fuel system damage could re- sult. 1. Park mower on a level surface. Make sure engine is OFF. 2. Clean around fuel tank cap and remove cap from tank (Fig. 1). Using unleaded gasoline, fill fuel tank to bottom of filter screen. DO NOT OVER FILL. 3. Install fuel tank cap. Wipe up any spilled gasoline. Engine Page 3 – 4 Greensmaster 1000/1600
- 12. Thank you very much for your reading. Please Click Here Then Get More Information. NOTE: If there is no response to click on the link above, please download the PDF document first and then click on it.
- 13. Fuel Shut–off Valve The valve is located on the left front side of the engine. It has two positions: CLOSED and OPEN. Position valve to the closed position when storing or transporting the machine. Open valve before starting the engine. 1 Figure 2 1. Fuel shut–off valve Greensmaster 1000/1600 Page 3 – 5 Engine Engine
- 14. Adjustments Throttle Control Adjustment If a new throttle cable must be installed or the cable is out of adjustment, adjust the cable as follows: 1. Park mower on a level surface. Make sure engine is OFF. Remove high tension lead from the spark plug. 2. Move throttle lever to the SLOW position. 3. Loosen throttle cable screw securing the throttle cable to the governor lever. Note: Engine speed is measured at the input drive pulley (Fig. 6). Actual engine speed is twice the input drive pulley speed. 4. The governor lever will move to the slow idle posi- tion if it is improperly adjusted. A. Check low idle speed setting with a tachometer. Low idle speed should be 750 to 850 rpm. Adjust low speed idle screw in or out to attain the correct speed setting. B. Check high idle speed setting with a tachometer. High idle speed should be 1750 to 1850 rpm. Ad- just high speed idle screw in or out to attain the cor- rect speed setting. 1 3 2 5 4 Figure 2 1. Throttle cable screw 4. Low speed idle screw 2. Throttle cable 5. High speed idle screw 3. Governor lever 5. Make sure throttle lever is in the SLOW position and the governor lever is against the low speed idle screw. 6. Tighten throttle cable screw securing the throttle cable to the governor lever. Clutch Control Adjustment If clutch control does not engage or it slips during opera- tion, an adjustment is required. 1. Park mower on a level surface. Make sure engine is OFF. Remove high tension lead from the spark plug. 2. Move traction control to DISENGAGED position. 3. Loosen retainer securing V–belt cover and pivot cover open. 4. To increase cable tension, loosen front cable jam nut and tighten back cable jam nut (Fig. 3) until a force of 7 to 9 lbs (31 to 40 N) is required to engage clutch con- trol. The force should be measured at the control knob. 2 1 3 Figure 3 1. Clutch 5. Tighten front cable jam nut. 2. Front jam nut 3. Back jam nut 6. Close cover and secure retainer. 7. Check control operation. Engine Page 3 – 6 Rev. A Greensmaster 1000/1600
- 15. Adjusting V–belts To adjust belt tension on V–belts (Fig. 5), first check ad- justment of clutch control. Refer to Clutch Control in this section. If unable to attain the 7 to 9 lbs (31 to 40 N) of force that is required in adjusting the clutch control, pro- ceed to the next step. 1. Park mower on a level surface. Make sure engine is OFF. Remove high tension lead from the spark plug. 2. Loosen retainer securing the V–belt cover and pivot cover open. 3. To increase V–belt tension, loosen cap screws se- curing the engine to the engine base (Fig. 12). Move en- gine backwards in slots. DO NOT OVER TENSION BELTS. Tighten cap screws. Figure 5 2 1 1. V–belt cover 2. V–belts 4. Check that a force of 7 to 9 lbs (31 to 40 N) is re- quired to engage the clutch control. Adjust engine in slots as necessary to get required tension on V–belts. 5. After tensioning V–belts, check alignment of the in- put drive pulley and input shaft pulley with a straight edge. A. Inside pulley faces should be flush to each other to within 0.030 inch (0.762 mm) maximum (Fig. 6). B. If pulleys are misaligned, loosen cap screws se - curing the engine mounting base to the mower frame. Slide engine from side to side until the pul - leys are aligned (Fig. 7). 6. Tighten cap screws and recheck alignment. 1 2 INSIDE FACE Figure 6 7. Close V–belt cover and secure retainer. 1. Input drive pulley 2. Input shaft pulley 3 2 1 Figure 7 1. Cap screws 3. Engine base 2. Engine Engine Greensmaster 1000/1600 Page 3 – 7 Engine