Top Rated Call Girls Vashi : 9920725232 We offer Beautiful and sexy Call Girl...
Still Wagner GX10 Forklift Service Repair Manual.pdf
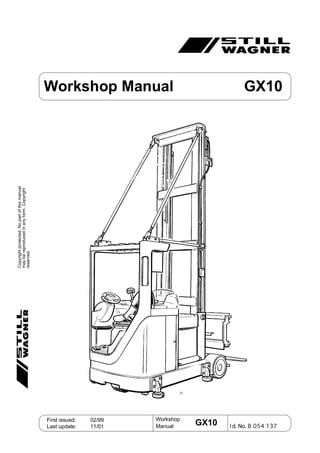
1. Workshop
Manual I d. No. 8 054 137
First issued: 02/99
Last update: 11/01
Copyright
protected.
No
part
of
this
manual
may
be
reproduced
in
any
form.
Copyright
reserved.
GX10
Workshop Manual GX10
7/
2. Foreword
This workshop manual (WM) is a collection of
technical data and functional descriptions for
the standard vehicle.
It is intended as a guide which should be kept
at hand at all times, to help explain the techni-
cal features of the vehicle and consequently en-
sure that maintenance and repair are carried
out
correctly.
The WM is updated on a regular basis.
Updating workshop manuals
Our range of equipment is subject to continuous
development and improvement. A consequence
of this is that components or assemblies are
sometimes replaced or their function changed.
In order to guarantee that the owner of a
workshop manual is always in possession of
up-to-date and relevant documentation, the
manual must be updated using the method
described overleaf.
Foreword
Copyright
protected.
No
part
of
this
manual
may
be
reproduced
in
any
form.
Copyright
reserved.
Issue: 11/01 Workshop Sheet no.
Replaces issue: 02/99 Manual GX10 I
5/
5/
5/
7/
3. Updating workshop manuals
(continued)
1. Replacing incorrect sheets
If a sheet contains an error, e.g. if adjustment
values have been altered, the sheet in
question must be replaced.
The new sheet can be identified by the left-
hand side of the page footer (1). The date of
issue is updated here in the Issue line (2).
The date of issue of the sheet which needs
replacing is specified in the Replaces issue
line (3). The sheet no. remains the same (4).
Every time a change is made, the cover
sheet is replaced. The date of first issue
and the date of the last update are shown in
field (9). This means that the workshop
manual edition is immediately obvious.
2. Inserting new sheets
If new, altered or additional components are
introduced to the series, it may be necessary
to insert one or more additional sheets.
An additional sheet can be identified by the
changes at the left and right of the page
footer (5 + 6).
At the left, in the Issue line, is the current
date of issue (7). At the right, the additional
sheet is marked with the sheet no. with a
consecutive index (8).
The list of contents for the component in
question must also be replaced.
We send new sheets, whether they are
replacement or additional sheets, and new
lists of contents, to all the vehicle owners we
know of by mail.
Foreword
Copyright
protected.
No
part
of
this
manual
may
be
reproduced
in
any
form.
Copyright
reserved.
Issue: 02/99
Replaces issue:
Workshop
Manual
Sheet no.
GX10 A 1
Issue: 12/98
Replaces issue: 02/99
Workshop
Manual
Sheet no.
GX10 A 1
Page footer of an existing sheet
Page footer of a corrected sheet
1 4
2
3
Issue: 02/99
Replaces issue:
Workshop
Manual
Sheet no.
GX10 A 1
Issue: 12/98
Replaces issue:
Workshop
Manual
Sheet no.
GX10 A 1.1
Page footer of an existing sheet
Page footer of an additional sheet
6
5
7
8
Issue: 11/01 Workshop Sheet no.
Replaces issue: 02/99 Manual GX10 II
First issued: 02/99
Last update:
Workshop
Manual
GX10 Id. no.
Page footer of a cover sheet
9
4. Notes, imprint
We can accept no liability for warranty claims
relating to work carried out in accordance
with the instructions in this workshop manual.
The warranty terms remain unaffected.
STILL WAGNER works continuously on the
development of its trucks. We would ask for
your understanding that we reserve the right
to make alterations and that errors cannot be
excluded, and that no warranty claims may
be based on the information, illustrations or
descriptions contained in this workshop
manual.
Issued by
STILL WAGNER GMBH & CO KG
Trainingszentrum (Training centre)
Ernst-Wagner-Weg 1-5
72766 Reutlingen-Mittelstadt
Germany
Foreword
Copyright
protected.
No
part
of
this
manual
may
be
reproduced
in
any
form.
Copyright
reserved.
Issue: 11/01 Workshop Sheet no.
Replaces issue: 02/99 Manual GX10 III
5. Foreword
Issue: 11/01 Workshop Sheet no.
Replaces issue: 02/99 Manual GX10 IV
Copyright
protected.
No
part
of
this
manual
may
be
reproduced
in
any
form.
Copyright
reserved.
Views of the vehicle
In order to prevent confusion, the vehicle travel directions and sides are defined
below, for use in all areas:
Circuit diagram: Load side = Forks leading
Drive wheel side = Forks trailing
Right-hand vehicle side = Right
Left-hand vehicle side = Left
LR80: Load side = Reverse
Drive wheel side = Forwards
Right-hand vehicle side = Left
Left-hand vehicle side = Right
SPS program/
WPG7: Load side = Foreward
Drive wheel side = Reverse
Right-hand vehicle side = Right
Left-hand vehicle side = Left
9/0065
Load side
LS
Drive wheel side
DWS
Left-hand
vehicle side
Right-hand
vehicle side
6. Guide to chapters:
A Travel drive
B Steering
C Brake
D Chassis
E Lifting device
M Electrical system
N Hydraulics
Q Telescopic fork
V PLC
W PG7
Guide to chapters
Copyright
protected.
No
part
of
this
manual
may
be
reproduced
in
any
form.
Copyright
reserved.
Issue: 11/01 Workshop Sheet no.
Replaces issue: 02/99 Manual GX10 0
7. Contents Sheet no.
Motor and gear - removal ..............................................................................A 2
Dismantling the travel motor..........................................................................A 4
Travel motor components..............................................................................A 6
Bedding the carbon brushes..........................................................................A 7
Cooling blower...............................................................................................A 8
Gear components..........................................................................................A 9
Assembling the gear......................................................................................A 10
Checking the tooth contact............................................................................A 11
Speed sensor ................................................................................................A 13
Chapter A Travel drive
Issue: 02/99 Workshop Sheet no.
Replaces issue: Manual GX10 A 1
Copyright
protected.
No
part
of
this
manual
may
be
reproduced
in
any
form.
Copyright
reserved.
8. Motor and gear
Removal
Two people are needed to remove the
gear. Lifting tackle with sufficient carrying
capacity is required for raising the truck (for
fork-lift truck weight, see the factory plate).
- Position the truck under a loading crane
or gantry-type crane.
- Pull out the battery plug and block the
load-bearing wheels securely.
- Disconnect the seat switch connections
and lift the seat out of the truck.
- Disconnect the leads for the
electromagnetic brake and the speed
sensor.
- Remove the brake element and the
speed sensor.
- Note the route of the four motor cables
and disconnect them. Pull out the
connector of the temperature sensor
supply cable.
- Remove all six 8-mm hexagon socket
screws (2) which hold the travel motor to
the chassis of the power unit.
- Using a suitable sling and lifting gear (1)
(carrying capacity 70 kg), which must be
clamped to the motor, lift the travel motor
carefully out of the truck.
7/0040
7/0044
Chapter A Travel drive
Issue: 02/99 Workshop Sheet no.
Replaces issue: Manual GX10 A 2
Copyright
protected.
No
part
of
this
manual
may
be
reproduced
in
any
form.
Copyright
reserved.
2
1
9. Continued
Motor and gear
Removal
- Remove the two 8-mm hexagon socket
screws from the baseplate brackets (one
screw per bracket).
- Remove the connection leads for the
accelerator pedal. Lift out the baseplate.
- Release the tensioning screw (2) of the
steering unit and the two hexagon screws (3).
This loosens the steering chain.
- Undo the steering chain at the chain joint and
bind the two ends round the gear.
- Drain off the gear oil.
- Support the truck by fixing a sling, which is
attached to a suitable fork-lift truck, gantry
crane or loading crane, around the protective
roof frame. This is a safe way of raising the
truck at the drive unit end, and also
guarantees more room for movement when
replacing the gear.
- The drive wheel does not have to be
removed.
- Loosen the six 12-mm hexagon screws (1)
which secure the rotary disc of the gear in the
chassis. Remove four of the six screws, so
that the gear is just held in the chassis by two
screws which are diagonally opposite one
another.
- Raise the chassis slightly and at the same
time carefully remove the last two 12-mm
fastening screws (1) of the gear.
- Lift the chassis up above the gear and remo-
ve the gear from underneath. Lower the chas-
sis onto suitable wooden chocks.
7/0042
Chapter A Travel drive
Issue: 02/99 Workshop Sheet no.
Replaces issue: Manual GX10 A 3
Copyright
protected.
No
part
of
this
manual
may
be
reproduced
in
any
form.
Copyright
reserved.
2
3
3
7/0044
1
10. Chapter A Travel drive
Issue: 02/99 Workshop Sheet no.
Replaces issue: Manual GX10 A 4
Copyright
protected.
No
part
of
this
manual
may
be
reproduced
in
any
form.
Copyright
reserved.
Dismantling the travel motor
(see illustration on sheet A6)
- Remove the commutator cover '33'.
- Remove the brushes '23' from the brush holders in
the brush holder (support housing) '21'.
- Disconnect the brush connecting wires and
remove the brushes '23' from the brush holder '21'.
Note the brush position, so that the brushes are
replaced in the correct position on assembly.
- Mark the bearing cover '5', bearing cover '28' and
the motor housing, so that these can be
assembled correctly later.
- Remove the four screws '29' and spring washers
'30'.
- Remove the slotted nut '1', retaining washer '2' and
pinion '41' from the armature '10'.
- Remove the eight screws '7' and pull off the
bearing cover '8'.
- Using a suitable pulling tool, pull bearing '8' off
armature '10'.
- Remove the blower '9' and pull off armature '10'
together with bearing cover '28'.
- Support bearing cover '28' with two suitable
wooden chocks. Use a plastic mallet to remove the
armature '10' from the bearing cover '28'.
- Remove the bearing '32' from the bearing cover
'28'.
- Remove the four screws '26' and nuts '27' and pull
the brush holder '21' off the bearing cover (28).
- Ring '4' and O-ring '3' only need to be removed if
they are damaged.
When using a pulling tool, ensure that the
drive end of the armature shaft is protected
by a shim or washer. If the keyway is
damaged, the armature must be replaced.
Continued on sheet no. A5
11. Chapter A Travel drive
Issue: 02/99 Workshop Sheet no.
Replaces issue: Manual GX10 A 5
Copyright
protected.
No
part
of
this
manual
may
be
reproduced
in
any
form.
Copyright
reserved.
Continued
Dismantling the travel motor
Inspecting the individual components
After the motor has been dismantled, the individual components must
be carefully cleaned and checked for wear or damage. Clean the
components with a petroleum oil based cleaning solution and leave
them to dry. Replace all old bearings with new bearings.
Check the brushes to ensure that they are worn evenly; replace
brushes which are very worn (minimum carbon brush length: 17 mm)
or damaged by pitting or overheating. Always replace the full set of
carbon brushes. Ensure that the brushes can move freely in the
holders and that the brush spring pressure is correct.
Armature inspection
Check the bearing journals of the armature shaft and keyway for
wear. Inspect the windings and commutator connections and rails for
signs of burning. Burn marks in the brush track or on the raised ends
of the commutator rails indicate an interruption or short circuit in the
armature windings.
Reworking commutators
The commutator can be reworked on a lathe with fine emery paper,
to remove notches or pitting from the surface. If there is a great deal
of pitting, large notches or heavy wear, the commutator must be
re-turned (minimum diameter 100 mm). Only slight cuts of 0.13 mm
and a final removal of 0.005 mm are permissible. The mica insulation
should then be cut into by about the same degree as the width of the
insulation (usually 1 mm). After cutting, smooth off the commutator
with fine emery paper and clean it, to remove dust and fine particles
of dirt.
Assembling the travel motor
The motor is assembled by following the instructions in reverse
order. Check that all the screwed and clamped connections are
secure. Bed in the new brushes as described in the section 'Bedding
in the carbon brushes'.
12. Chapter A Travel drive
Issue: 02/99 Workshop Sheet no.
Replaces issue: Manual GX10 A 6
Copyright
protected.
No
part
of
this
manual
may
be
reproduced
in
any
form.
Copyright
reserved.
22. Spring
23. Brush
24. Hexagon screw, M6 x 16
25. Spring washer
26. Hexagon socket screw, M6 x 25
27. Nut M6
28. Bearing cover
29. Hexagon screw M8 x 20
30. Spring washer
31. Circlip
32. Bearing
33. Commutator cover
34. Cable
35. Feed-through bush
36. Pin housing
37. Housing
38. Cheese-head screw, M3,5 x 16
39. Spring washer
40. Nut, M4
41. Pinion
1. Slotted nut
2. Lock nut
3. O-ring
4. Joint
5. Bearing cover
6. Spring washer
7. Screw, M6 x 16
8. Bearing
9. Blower
10. Armature
11. Key
12. Lead
13. Insulating bush
14. Bush
15. Cheese-head screw
16. Hexagon screw, M8 x 16
17. Spring washer
18. Clip
19. Hexagon screw, M8 x 35
20. Spring washer
21. Brush holder
Travel motor
7/0039
13. Chapter A Travel drive
Issue: 02/99 Workshop Sheet no.
Replaces issue: Manual GX10 A 7
Copyright
protected.
No
part
of
this
manual
may
be
reproduced
in
any
form.
Copyright
reserved.
Bedding in the carbon brushes
When new carbon brushes are inserted or when the
neutral position has been adjusted, the brushes must be
bedded in at the commutator.
New brushes should first be bedded in at the
commutator with fine sandpaper, to achieve a rough
surface. A commutator grindstone can be used for the
final grinding-in stage.
1. Lay a sheet of fine glass paper around the collec-
tor so that the rough side faces the brushes.
2. Insert new brushes in the holders and check that
the brush springs are positioned in the middle.
3. Turn the armature slowly until there is contact
across the entire brush surface.
4. Mark which brushes belong in which holders.
5. Pull out the brushes and glass paper and remove
the carbon deposits from the commutator.
6. Wipe off the commutator using a clean cloth moi-
stened with paraffin, in order to remove oil and gre-
ase deposits. Insert the brushes in their correct po-
sitions again.
7. Start up the travel motor at a low speed.
8. Position the grinding stone close behind a brush
and move it over the commutator. During this pro-
cess, exert just so much pressure that you can see
that an even amount of dust is removed from the
surface.
9. Change the direction of rotation and repeat steps 7
and 8 until all the brushes are perfectly bedded in.
10. Thoroughly clean the motor, brushes and hou-
sing. This last step is extremely important, to ensu-
re that no abrasive material is allowed to co-
me into contact with the brushes or commutator
during operation.
14. Chapter A Travel drive
Issue: 02/99 Workshop Sheet no.
Replaces issue: Manual GX10 A 8
Copyright
protected.
No
part
of
this
manual
may
be
reproduced
in
any
form.
Copyright
reserved.
Cooling blower
Both the motors are cooled by a single brushless cooling blower (48 volts, 3.3 watts). The
blower is located under the LTM controllers. The air is fed to the motors through a rubber
tube. The cooler is started up when the key-operated relay is switched on.
Cooling system
1. Hose clamp
2. Blower
3. Cooler air connection (travel motor)
4. Cooler air connection (pump motor)
5. Hose
6. Hose clamp
7. Hose clamp
8. Baffle plate
9. Plate
10. Plate
11. Hose
12. Screw
13. Screw
14. Nut
15. Spring lock washer
7/0041
15. Gear
1. Chain anchor
2. Spring pin, M8 x 20
3. Gear
4. Housing
5. Plate
6. Shaft
7. Pinion
8. Toothed wheel
9. Pinion
10. Toothed wheel
11. Nut
12. Washer
13. Wheel bolt
14. Distance sleeve
15. Distance ring
16. Ring
7/0046
Chapter A Travel drive
Issue: 02/99 Workshop Sheet no.
Replaces issue: Manual GX10 A 9
Copyright
protected.
No
part
of
this
manual
may
be
reproduced
in
any
form.
Copyright
reserved.
16. Ring
17. Spacer
18. Shim
19. Washer
20. Bearing
21. Bearing
22. Bearing
23. Bearing
24. Bearing
25. Seal
26. O-ring
27. O-ring
28. Spacer
29. Retainer ring
30. Screw, M16
31. Screw, M16
32. Seal
33. Durlok screw
34. Screw, M8 x 22
35. Screw, M8 x 30
36. Screw, M8 x 60
37. Screw, M10 x 50
38. Screw, M10 x 60
39. Spring washer, M8
40. Spring washer, M10
41. Alignment pin, M8
42. Screw, M12 x 45
43. Spring washer
44. Washer
45. Screw, M12 x 20
16. Assembling the gear
(see also sheet no. A9)
- Before assembling the gear, ensure that the housing '3' is clean.
- Mount the outer bearing bush of the tapered roller bearings '21, '22', '23' and '24' on
housing '3'.
- Mount ring '16' on the housing '3'.
- Insert the inner track ring of the tapered roller bearing '2' (apply Loctite 620 to the
inner track ring) in the outer bearing bush in housing '3'.
- Mount the washer '12', distance sleeve '14' and toothed wheel '10' on pinion '7'.
- Position the inner track ring of the tapered roller bearing '22' on pinion '7'. Apply
Loctite 620.
- The complete pinion assembly can now be mounted in housing '3' and secured with
the nut '11'. Apply Loctite 270.
- Attach tapered roller bearing '24' to toothed wheel '8'.
- Mount the inner track ring of the tapered roller bearing '23' to shaft '6', once the wheel
bolts '13' have been attached securely.
- Attach retainer ring '29' and oil seal '25' (apply Loctite 307 around the circumference)
to housing '3'.
- Insert distance ring '15' and washer '19' in the housing '3', together with the toothed
wheel '8'.
- Attach the assembled shaft '6' to housing '3'. The shaft '6' is mounted on toothed
wheel '8' and secured with shim '18' and screws '33'.
- Clean the surfaces of the housing '3' and upper plate '4' and seal with sealant
Hermatite Green.
- Mount the upper plate '4' on the housing '3' and secure with screws (M10 x 50) '37'
and the spring washers '40'. Tightening torque: 90-94 Nm.
- Mount the steering bearing '20' on the gear and secure with the fifteen screws
(M8 x 30) '35', the screws (M8 x 60) '36' and the spring washers '39'. Tightening
torque: 44-47 Nm.
- Adjust the toothed wheels so that the surface contact between the teeth is correct and
so that there is sufficient play between the bearing and the main drive shaft and the
vertical drive shaft.
Once the optimum tooth contact is achieved at the toothed gear rim, the spur gear shaft
must be blocked and a play of between 0.25 and 0.30 mm set at the bevel gear. To
adjust the play, shim the hub/bevel gear assembly at the serrated end of the gear shaft
as required with spacers '17'.
Carry out the final assembly stages and check the play, bearing clearance and tooth
engagement. Tighten nut '11' on the drive shaft to 400 Nm.
Chapter A Travel drive
Issue: 02/99 Workshop Sheet no.
Replaces issue: Manual GX10 A 10
Copyright
protected.
No
part
of
this
manual
may
be
reproduced
in
any
form.
Copyright
reserved.
17. Checking the tooth contact
To check the tooth contact, mark two or three tooth surfaces on the toothed gear rim with marking colour.
Engage the marked surfaces in the bevel gear pinion several times. The contact pattern is more clearly visible
if the bevel gear pinion is braked slightly. Compare the observed markings with the diagrams below. If the
tooth contact needs to be corrected, proceed as illustrated in the diagram. The gear shaft (vertical drive shaft)
is adjusted using the spacers '28'. The horizontal shaft (main drive shaft) is adjusted by changing the thickness
of spacers no. '17'.
Tooth contact at gear rim Incorrect tooth contact
concave profile convex profile
To achieve correct surface contact, adjust toothed
wheels in direction of arrow
Contact at the
top of tooth
Contact at the
bottom of
Contact at the
front of tooth
Contact at the
back of tooth
Correct contact
Loaded
surface
Once the optimum tooth contact is achieved at the toothed gear rim, the spur gear shaft must be blocked and
a play of between 0.25 and 0.30 mm set at the bevel gear. To adjust the play, shim the hub/bevel gear
assembly at the serrated end of the gear shaft as required with spacers '17'.
Carry out the final assembly stages and check the play, bearing clearance and tooth engagement. Tighten
nut '11' on the drive shaft to 400 Nm.
7/0047
7/0048
7/0049
7/0050
7/0051
7/0052
Chapter A Travel drive
Issue: 02/99 Workshop Sheet no.
Replaces issue: Manual GX10 A 11
Copyright
protected.
No
part
of
this
manual
may
be
reproduced
in
any
form.
Copyright
reserved.
18. Continued
Checking the tooth contact
(For illustration see sheet no. A9)
- Mount the plate '5' and O-ring '26' on the housing '3'
and secure with the eight screws (M8 x 22) '34' and
the spring washers '39'. tightening torque: 44-47 Nm.
Ensure that the drainage screw '31' and seal '32' are
at the bottom of the gear.
- Check that the gear runs smoothly.
- Fill the gear up to the edge of the filler hole '30' in
housing '3' with 3.75 litres of gear oil type SHC 75W/
90. Check the gear for signs of oil leaks.
- Fasten the chain anchor '1' with the two spring pins '2'
on the upper plate '4'.
- The gear can now be mounted in the truck and tested.
- With new gears, the lubricating oil should be changed
after approximately 150 to 200 operating hours and
then every 2000 operating hours.
Removing the drive wheel
- Apply the handbrake, turn off the key-operated switch
and pull out the battery plug.
- Use a jack to raise the truck at the drive unit end by
approx. 300 mm (truck weight approx. 3110 kg).
- Support safely at both sides with suitable wooden
chocks.
- To access the nuts of the drive wheel, turn the drive
unit towards the chassis.
- Release the handbrake and turn the drive unit until
the nuts on the drive wheel are visible. During this
process, reapply the handbrake after each nut is
released, to prevent the drive wheel turning. Remove
the wheel nuts one after another.
- Pull the drive wheel carefully out from under the
chassis.
Mounting the drive wheel
To mount the drive wheel, follow the instructions for
removal in reverse order. Tighten the wheel nuts to
140 Nm. 7/0209
Chapter A Travel drive
Issue: 02/99 Workshop Sheet no.
Replaces issue: Manual GX10 A 12
Copyright
protected.
No
part
of
this
manual
may
be
reproduced
in
any
form.
Copyright
reserved.
19. Speed sensor
8/0110
Chapter A Travel drive
Issue: 02/99 Workshop Sheet no.
Replaces issue: Manual GX10 A 13
Copyright
protected.
No
part
of
this
manual
may
be
reproduced
in
any
form.
Copyright
reserved.
For removal and test
instructions, see sheet
no. M81.
20. Thank you very much
for your reading. Please
Click Here Then Get
More Information.
NOTE:
If there is no response to
click on the link above,
please download the PDF
document first and then
click on it.
21. Contents Sheet no.
Hydraulic steering
Description.....................................................................................................B 2
Removing the steering control valve .............................................................B 4
Removing the steering motor ........................................................................B 4
Removing the steering pump and motor .......................................................B 5
Replacing the steering pump and motor........................................................B 5
Steering pump motor.....................................................................................B 6
Individual components of the steering pump motor.......................................B 7
Inspecting the individual components and the carbon brushes.....................B 8
Checking the armature ..................................................................................B 8
Reworking commutators................................................................................B 8
Assembling the steering pump motor............................................................B 8
Dismantling the steering pump......................................................................B 9
Individual components of the steering pump.................................................B 10
Adjusting the steering chain ..........................................................................B 11
Wheel position display...................................................................................B 12
LR80
Block diagram................................................................................................B 13
Operating modes...........................................................................................B 14
Operating unit................................................................................................B 18
Steering output stage ....................................................................................B 19
Central processing unit..................................................................................B 21
Base plate .....................................................................................................B 21
DC/DC converter ...........................................................................................B 23
CPU...............................................................................................................B 24
CPU outputs ..................................................................................................B 25
Guide frequency generator............................................................................B 26
LR80 adjustment
- Checking the mechanical elements...........................................B 31
- Determining the centre of the vehicle........................................B 32
- Aerials .......................................................................................B 33
- Digital setpoint generator ..........................................................B 35
- Actual value potentiometer........................................................B 38
- Offset potentiometer..................................................................B 39
- Balancing the digital filter ..........................................................B 40
- Speed sensor ............................................................................B 41
- Steering angle limitation............................................................B 42
- Adapter module 8A8..................................................................B 46
- Aisle detection with light barrier.................................................B 47
- Aisle detection with guide wire ..................................................B 52
Chapter B Steering
Issue: 02/99 Workshop Sheet no.
Replaces issue: Manual GX10 B 1
Copyright
protected.
No
part
of
this
manual
may
be
reproduced
in
any
form.
Copyright
reserved.
22. Contents Sheet no.
LR80
Notebook
- Reading out parameters.............................................................B 53
- List of parameters.......................................................................B 59
- Storing parameters.....................................................................B 60
- Standard parameter set..............................................................B 62
- Language selection ....................................................................B 63
Emergency-off parameter..............................................................................B 64
Error messages .............................................................................................B 69
Guide to frequency/operating mode switch positions....................................B 75
Guide to frequency/operating mode switch positions and test mode ............B 76
Guide to the tests conducted with a notebook...............................................B 77
Chapter B Steering
Issue: 02/99 Workshop Sheet no.
Replaces issue: Manual GX10 B 1.1
Copyright
protected.
No
part
of
this
manual
may
be
reproduced
in
any
form.
Copyright
reserved.