
Recommended
More Related Content
More from fhsjekkdkem
More from fhsjekkdkem (20)
Recently uploaded
Recently uploaded (20)
Claas jaguar 850 speedstar (type 492) forage harvesters service repair manual
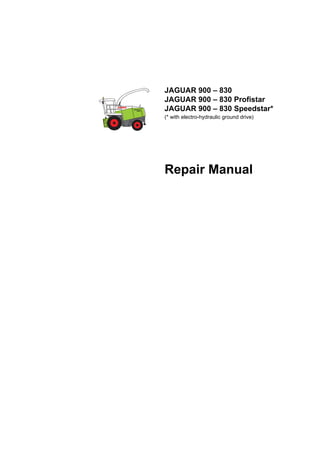
- 1. JAGUAR 900 – 830 JAGUAR 900 – 830 Profistar JAGUAR 900 – 830 Speedstar* (* with electro-hydraulic ground drive) Repair Manual
- 2. 0298 826.1 - RHB JAGUAR 900 – 830 Profistar / Speedstar 0.1.1 Table of contents TABLE OF CONTENTS 1. General information General .................................................................................. 1.1.1 Introduction ...................................................................... 1.1.1 Introduction to the CLAAS Repair Manual ....................... 1.1.2 Picture symbol description ............................................... 1.1.3 Safety rules ............................................................................ 1.2.1 Important note ................................................................. 1.2.1 Identification of warning and danger signs ...................... 1.2.2 Correct use of the vehicle ................................................ 1.2.2 General safety and accident prevention regulations ....... 1.2.2 Leaving the machine ....................................................... 1.2.3 Air conditioner .................................................................. 1.2.3 Maintenance .................................................................... 1.2.3 Basic Rules ...................................................................... 1.2.3 Pressure accumulator ...................................................... 1.2.3 General repair notes .............................................................. 1.3.1 Cause of damage ............................................................ 1.3.1 Parts ................................................................................ 1.3.1 The repair will be quick and correct if the following is observed ................................................. 1.3.1 Engine ............................................................................. 1.3.1 Transmissions ................................................................. 1.3.1 Welding work ................................................................... 1.3.1 Three phase AC generator .............................................. 1.3.1 Tensioning the steel roller chain ...................................... 1.3.2 Conical ring connectors ................................................... 1.3.2 Self-locking screws (MK-screws) ..................................... 1.3.2 Liquid screw locking material ........................................... 1.3.2 Clamping ring bearings (lock collar bearings) .................. 1.3.3 Adapter sleeve bearing fitting .......................................... 1.3.3 Ferrule fittings on hydraulic lines ..................................... 1.3.3 Conical seating fittings on hydraulic/air conditioning lines ............................................................. 1.3.4 Hydraulic hoses ............................................................... 1.3.5 Tightening torques ................................................................. 1.4.1 Tightening torques screws ............................................... 1.4.1 Tightening torques hydraulic fittings ................................ 1.4.3 Tightening torques brake pipe fittings .............................. 1.4.4 Tightening torques wheel bolts/wheel nuts ...................... 1.4.5 Specifications ......................................................................... 1.5.1 Lubricants chart ............................................................... 1.5.1 Hydraulic pressures ......................................................... 1.5.3 Engine data ..................................................................... 1.5.5 2. Operator's platform Cab ........................................................................................ 2.1.1 Removing front frame ...................................................... 2.1.1 Fitting the front frame ...................................................... 2.1.4 Heating .................................................................................. 2.2.1 Removing the heating elements ...................................... 2.2.1 Fitting the heating element .............................................. 2.2.3 Removing the regulating valve ........................................ 2.2.5 Fitting the regulating valve ............................................... 2.2.7 Air conditioning ...................................................................... 2.3.1 Air conditioning unit – filling up the refrigerant ................. 2.3.1 Removing the evaporator ................................................ 2.3.2 Air conditioner (cab side) dismantled .............................. 2.3.4 Fitting the evaporator ...................................................... 2.3.5 Removing the expansion valve ....................................... 2.3.6 Fitting the expansion valve .............................................. 2.3.7 Removing the temperature switch ................................... 2.3.8 Fitting the temperature switch ....................................... 2.3.10 Removing the filter drier ................................................ 2.3.11 Filter drier disassembled ............................................... 2.3.12 Fitting the filter drier ...................................................... 2.3.12 Removing the condenser .............................................. 2.3.12 Fitting the condenser ..................................................... 2.3.13 Removing the compressor coupling .............................. 2.3.14 Fitting the coupling compressor .................................... 2.3.17 Removing the compressor ............................................ 2.3.19 Fitting the compressor ................................................... 2.3.21 Driver's seat ........................................................................... 2.4.1 Fitting the driver's seat .................................................... 2.4.1 Driver's seat dismantled (Isringhausen, pneumatically adjustable) ........................ 2.4.2 Driver's seat dismantled (Grammer, pneumatically adjustable) ............................. 2.4.3 Fitting the driver's seat .................................................... 2.4.4 Operating Elements ............................................................... 2.5.1 Dismantling the traverse regulation (Mechanical-hydraulic traverse drive, up to serial no. ...) ........................................................... 2.5.1 Traverse regulation dismantled (Mechanical-hydraulic ground drive, up to serial no. ...) ........................................................... 2.5.2 Assembling the traverse regulation (Mechanical-hydraulic ground drive, up to serial no. ...) ........................................................... 2.5.3 Dismantling the traverse regulation (Mechanical-hydraulic traverse drive, from serial no. ...) ............................................................ 2.5.7 Traverse regulation dismantled (Mechanical-hydraulic ground drive, from serial no. ...) ............................................................ 2.5.9 Assembling the traverse regulation (Mechanical-hydraulic ground drive, from serial no. ...) .......................................................... 2.5.10 Dismantling the traverse regulation (electro-hydraulic ground drive) .................................... 2.5.15 Dismantled traverse regulation (electro-hydraulic ground drive) .................................... 2.5.17 Assembling the traverse regulation (electro-hydraulic ground drive) .................................... 2.5.19 Removing the traverse lever pull actuation (mechanical-hydraulic ground drive) ............................. 2.5.24 Fitting the traverse lever pull actuation (mechanical-hydraulic ground drive) ............................. 2.5.25 Steering ................................................................................. 2.6.1 Removing the steering column ........................................ 2.6.1 Dismantling the steering column ..................................... 2.6.5 Steering column dismantled: ........................................... 2.6.8 Assembling the steering column ..................................... 2.6.9 Fitting the Steering Column ........................................... 2.6.12 Table of contents
- 3. 0.1.2 RHB JAGUAR 900 – 830 Profistar / Speedstar - 0298 826.1 Table of contents Removing the steering column (adjustable) .................. 2.6.17 Dismantling the steering column (adjustable) ................ 2.6.23 Steering column (adjustable) dismantled: ...................... 2.6.25 Assembling the steering column (adjustable) ................ 2.6.26 Fitting the steering column (adjustable) ......................... 2.6.28 Removing the steering unit (fixed steering column) ....... 2.6.32 Fitting the steering unit (fixed steering column) ............. 2.6.34 Removing the steering unit (adjustable steering column) .......................................... 2.6.37 Removing the steering unit (adjustable steering column) .......................................... 2.6.40 Checking/setting the steering unit .................................. 2.6.43 Brakes .................................................................................... 2.7.1 Removing the parking brake actuation cable ................... 2.7.1 Fitting the parking brake actuation cable ......................... 2.7.2 Removing the brake cylinder ........................................... 2.7.4 Fitting the brake cylinder .................................................. 2.7.4 3. Electrics Central electrics ..................................................................... 3.1.1 Removing the monitor (CIS) ............................................ 3.1.1 Fitting the monitor (CIS) ................................................... 3.1.2 Power supply ......................................................................... 3.2.1 Removing the regulator ................................................... 3.2.1 Fitting the regulator .......................................................... 3.2.2 Removing the starter ....................................................... 3.2.3 Fitting the starter .............................................................. 3.2.4 4. Feed Feeder housing ...................................................................... 4.1.1 Removing the feeder housing .......................................... 4.1.1 Fitting the feeder housing ................................................ 4.1.2 Rollers .................................................................................... 4.2.1 Removing the feed roller and magnetic boxes ................ 4.2.1 Dismantling the lower feed roller and magnetic boxes .... 4.2.2 Lower feed roller and magnetic boxes dismantled: ......... 4.2.7 Assembling the lower feed roller and magnetic boxes .... 4.2.9 Fitting the lower feed roller and magnetic boxes ........... 4.2.15 Removing the upper compression roller ........................ 4.2.17 Dismantling the upper compression roller ..................... 4.2.19 Upper compression roller dismantled: ........................... 4.2.22 Assembling the upper compression roller ...................... 4.2.23 Fitting the upper compression roller .............................. 4.2.28 Removing the upper rear compression roller ................. 4.2.29 Dismantling the upper rear compression roller .............. 4.2.31 Upper rear compression roller dismantled: .................... 4.2.34 Assembling the upper rear compression roller .............. 4.2.35 Assembling the upper rear compression roller .............. 4.2.39 Removing the lower smooth roller ................................. 4.2.41 Dismantling the lower smooth roller ............................... 4.2.42 Lower smooth roller dismantled: .................................... 4.2.43 Assembling the lower smooth roller ............................... 4.2.44 Fitting the lower smooth roller ........................................ 4.2.45 Tensioning the tension springs for the rollers ................ 4.2.46 5. Forage device Drum housing ......................................................................... 5.1.1 Removing the drum housing ............................................ 5.1.1 Fitting the drum housing .................................................. 5.1.4 Adjusting the drum disc ................................................... 5.1.7 Shear bar ............................................................................... 5.2.1 Removing the shear bar .................................................. 5.2.1 Fitting the shear bar ........................................................ 5.2.2 Removing the shear bar support ..................................... 5.2.5 Shear bar support dismantled ......................................... 5.2.7 Fitting the shear bar support ........................................... 5.2.8 Removing the shear bar adjustment ............................. 5.2.10 Shear bar adjustment dismantled .................................. 5.2.13 Fitting the shear bar adjustment .................................... 5.2.14 Basic setting of the shear bar ........................................ 5.2.20 Setting the shear bar (with mechanical shear bar adjustment) ........................ 5.2.24 Setting the shear bar (with mechanical shear bar adjustment) ........................ 5.2.25 Cutting cylinder ...................................................................... 5.3.1 Changing and setting the forage knife ............................. 5.3.1 Removing the cutting cylinder ......................................... 5.3.4 Dismantling the cutting cylinder ....................................... 5.3.7 Cutting cylinder dismantled: ............................................ 5.3.9 Assembling the cutting cylinder ..................................... 5.3.11 Fitting the cutting cylinder .............................................. 5.3.13 Sharpening device ................................................................. 5.4.1 Changing the sharpening stone ...................................... 5.4.1 Removing the sharpening device .................................... 5.4.4 Dismantling the sharpening device ................................. 5.4.5 Sharpening device dismantled: ....................................... 5.4.7 Assembling the sharpening unit ...................................... 5.4.8 Fitting the sharpening device ........................................ 5.4.10 6. Corn-Cracker Corn-Cracker ......................................................................... 6.1.1 Removing the Corn-Cracker ............................................ 6.1.1 Fitting the Corn-Cracker .................................................. 6.1.4 Removing the front roller ................................................. 6.1.6 Dismantling the front roller .............................................. 6.1.7 Front roller dismantled: .................................................... 6.1.9 Assembling the front roller ............................................. 6.1.10 Fitting the front roller ..................................................... 6.1.12 Removing the rear roller ................................................ 6.1.14 Dismantling the rear roller ............................................. 6.1.16 Rear roller dismantled: .................................................. 6.1.18 Assembling the rear roller ............................................. 6.1.19 Fitting the rear roller ...................................................... 6.1.22 Corn-Cracker gap adjustment ............................................... 6.2.1 Corn-Cracker gap adjustment removal ........................... 6.2.1 Corn-Cracker gap adjustment dismantling ...................... 6.2.2 Corn-Cracker gap adjustment (electric) dismantled: ....... 6.2.3 Corn-Cracker gap adjustment assembling ...................... 6.2.4 Corn-Cracker gap adjustment fitting ................................ 6.2.5 Transition piece ..................................................................... 6.3.1 Removing the guide plate ................................................ 6.3.1 Transition piece and guide plate dismantled ................... 6.3.2 Fitting the guide plate ...................................................... 6.3.3 7. Discharge Blower .................................................................................... 7.1.1 Removing the blower bearing left .................................... 7.1.1 Dismantling the blower bearing left ................................. 7.1.2
- 4. 0298 826.1 - RHB JAGUAR 900 – 830 Profistar / Speedstar 0.1.3 Table of contents Blower bearing left dismantled: ....................................... 7.1.3 Assembling the blower bearing left .................................. 7.1.4 Fitting the blower bearing left .......................................... 7.1.5 Removing the blower bearing right .................................. 7.1.8 Fitting the blower bearing right ........................................ 7.1.9 Removing the blower ..................................................... 7.1.11 Fitting the blower ........................................................... 7.1.13 Removing the blower housing ....................................... 7.1.17 Blower housing dismantled ............................................ 7.1.19 Fitting the blower housing .............................................. 7.1.20 Tower ..................................................................................... 7.2.1 Removing the upper discharge chute .............................. 7.2.1 Upper discharge chute dismantled: ................................. 7.2.3 Fitting the upper discharge chute .................................... 7.2.4 Rotary ring removal ......................................................... 7.2.5 Gear ring dismantled ....................................................... 7.2.7 Fitting the gear ring .......................................................... 7.2.8 Removing the tower ....................................................... 7.2.12 Tower dismantled .......................................................... 7.2.14 Fitting the tower ............................................................. 7.2.15 8. Drives Drive schematic ..................................................................... 8.1.1 Drive schematic left ......................................................... 8.1.1 Drive schematic right ....................................................... 8.1.2 Drive belt left .......................................................................... 8.2.1 Removing the main drive belt (1) (up to serial no. ...) ........................................................... 8.2.1 Fit the main drive belt (1) and adjust (up to serial no. ...) ........................................................... 8.2.3 Removing the main drive belt (1) (from serial no.) ............................................................... 8.2.8 Fit the main drive belt (1) and adjust (from serial no.) ............................................................. 8.2.10 Drive belt right ........................................................................ 8.3.1 Removing the fan drive belt (10) ..................................... 8.3.1 Fitting the fan drive belt (10) and adjusting ..................... 8.3.2 Removing the Corn-Cracker drive belt (11) ..................... 8.3.3 Fitting the Corn-Cracker drive belt (11) and setting ......... 8.3.4 Removing the feeder drive belt (12) ................................ 8.3.5 Fitting the feeder drive belt (12) and adjusting ................ 8.3.6 Removing the compressor drive belt (13) ........................ 8.3.7 Fitting the compressor drive belt (13) .............................. 8.3.7 Motor drive ............................................................................. 8.4.1 Removing the coupling motor drive ................................. 8.4.1 Motor drive coupling dismantled ...................................... 8.4.2 Coupling motor drive dismantled: .................................... 8.4.3 Assembling motor drive coupling ..................................... 8.4.4 Fitting motor drive coupling ............................................. 8.4.6 Removing the rotary through guide ................................. 8.4.8 Dismantling the rotary through guide ............................... 8.4.8 Rotary through guide dismantled: .................................. 8.4.10 Assembling the rotary through guide ............................. 8.4.11 Fitting the rotary through guide ...................................... 8.4.13 Removing the motor drive ............................................. 8.4.13 Dismantling the motor drive ........................................... 8.4.14 Motor drive dismantled: ................................................. 8.4.17 Assembling the motor drive ........................................... 8.4.18 Fitting motor drive .......................................................... 8.4.21 Removing the distribution gearbox ................................ 8.4.22 Dismantling the distribution gearbox ............................. 8.4.27 Distribution gearbox dismantled: ................................... 8.4.29 Assembling the distribution gearbox ............................. 8.4.30 Fitting the distribution gearbox ...................................... 8.4.33 Removing the torsion damper ....................................... 8.4.37 Fitting the torsion damper ............................................. 8.4.38 Drum drive ............................................................................. 8.5.1 Removing the V-belt pulley blower .................................. 8.5.1 V-belt pulley blower dismantled ...................................... 8.5.2 Fitting the V-belt pulley blower ........................................ 8.5.3 Removing the tensioning roller drum drive ...................... 8.5.5 Dismantling the tensioning roller drum drive ................... 8.5.6 Tensioning roller drum drive dismantled: ........................ 8.5.8 Fitting the tensioning roller drum drive ............................ 8.5.9 Fitting the tensioning roller drum drive .......................... 8.5.10 Removing the guide roller drum drive (up to serial no. ...) ........................................................ 8.5.11 Dismantling the guide roller drum drive (up to serial no. ...) ........................................................ 8.5.12 Guide roller drum drive dismantled: (up to serial no. ...) ........................................................ 8.5.12 Assembling the guide roller drum drive (up to serial no. ...) ........................................................ 8.5.13 Fitting the guide roller drum drive (up to serial no. ...) ........................................................ 8.5.13 Removing the guide roller drum drive (from serial no. ...) ......................................................... 8.5.14 Dismantling the guide roller drum drive (from serial no. ...) ......................................................... 8.5.15 Guide roller drum drive dismantled: (from serial no. ...) ......................................................... 8.5.15 Assembling the guide roller drum drive (from serial no. ...) ......................................................... 8.5.16 Fitting the guide roller drum drive (from serial no. ...) ......................................................... 8.5.16 Removing the V-belt pulley tensioning roller drum drive 8.5.17 V-belt pulley drum drive dismantled: ............................. 8.5.18 Fitting the V-belt pulley drum drive ................................ 8.5.18 Setting the jockey pulley arm drum drive ...................... 8.5.20 Corn-Cracker drive ................................................................ 8.6.1 Removing the guide roller Corn-Cracker ......................... 8.6.1 Corn-Cracker drive dismantled ....................................... 8.6.3 Guide roller Corn-Cracker assembling and fitting ........... 8.6.4 Removing the V-belt pulley Corn-Cracker drive (with key fixing) ............................................................... 8.6.6 Fitting the V-belt pulley Corn-Cracker drive (with key fixing) ............................................................... 8.6.7 Removing the V-belt pulley Corn-Cracker drive (with clamping disc fixing) ............................................... 8.6.7 Fitting the V-belt pulley Corn-Cracker drive (with clamping disc fixing) ............................................... 8.6.9 Feeder drive .......................................................................... 8.7.1 Removing the V-belt pulley feeder drive ......................... 8.7.1 Removing the V-belt pulley feeder drive ......................... 8.7.1 Removing the drive disc feeder drive .............................. 8.7.2 Drive disc feeder drive dismantled .................................. 8.7.3 Removing the drive disc feeder drive .............................. 8.7.3
- 5. 0.1.4 RHB JAGUAR 900 – 830 Profistar / Speedstar - 0298 826.1 Table of contents Removing the tensioning roller feeder drive .................... 8.7.4 Tensioning roller feeder drive .......................................... 8.7.5 Removing the tensioning roller feeder drive .................... 8.7.5 Manual and reversing gearbox .............................................. 8.8.1 Removing the switch off mechanism ............................... 8.8.1 Switch off mechanism dismantled ................................... 8.8.4 Removing the switch off mechanism ............................... 8.8.5 Removing the manual and reversing gearbox ................. 8.8.7 Fitting the manual and reversing gearbox ..................... 8.8.11 Removing the drive head ............................................... 8.8.17 Dismantling the drive head ............................................ 8.8.17 Drive head housing dismantled: .................................... 8.8.23 Drive head dismantled: .................................................. 8.8.24 Drive head dismantled: .................................................. 8.8.25 Assembling the drive head ............................................ 8.8.26 Pre-assembling the gearbox shafts: .............................. 8.8.27 Fitting the drive head ..................................................... 8.8.35 Dismantling the manual and reversing gearbox ............ 8.8.35 Gearbox shaft overview ................................................. 8.8.37 Removing the clutch shaft (A) ........................................ 8.8.37 Removing the gearbox shaft (B) .................................... 8.8.38 Removing the gearbox shaft (D) .................................... 8.8.40 Removing the gearbox shaft (E) .................................... 8.8.41 Removing the drive shaft (F) ......................................... 8.8.42 Removing the drive shaft (G) ......................................... 8.8.43 Removing the bevel spur shaft (H) ................................ 8.8.44 Removing the hollow shaft (C) ....................................... 8.8.46 Assembling the manual and reversing gearbox ............. 8.8.49 Shifting shafts dismantled .............................................. 8.8.50 Bevel spur shaft (H) dismantled ..................................... 8.8.51 Fitting the bevel spur shaft (H) ....................................... 8.8.52 Gearbox shaft (E) dismantled ........................................ 8.8.55 Fitting gearbox shaft (E) ................................................ 8.8.56 Drive shaft (G) dismantled ............................................. 8.8.62 Fitting the drive shaft (G) ............................................... 8.8.63 Drive shaft (F) dismantled .............................................. 8.8.66 Fitting the drive shaft (F) ................................................ 8.8.67 Gearbox shaft (D) dismantled ........................................ 8.8.69 Fitting the gearbox shaft (D) .......................................... 8.8.70 Gearbox shaft (B) dismantled ........................................ 8.8.76 Fitting the gearbox shaft (B) .......................................... 8.8.77 Chain housing ........................................................................ 8.9.1 Removing chain housing ................................................. 8.9.1 Dismantling the chain housing ......................................... 8.9.2 Chain housing dismantled: .............................................. 8.9.3 Assembling the chain housing ......................................... 8.9.4 Fitting the chain housing .................................................. 8.9.6 Conical shift clutch ............................................................... 8.10.1 Removing the conical shaft clutch ................................. 8.10.1 Conical shift clutch dismantled ...................................... 8.10.2 Assembling and fitting the conical shift clutch ............... 8.10.3 Gearbox upper shafts .......................................................... 8.11.1 Removing the gearbox upper shafts .............................. 8.11.1 Gearbox upper shafts dismantling ................................. 8.11.4 Gearbox upper shafts dismantled: ................................. 8.11.7 Assembling the gearbox upper shafts ........................... 8.11.8 Fitting the gearbox upper shafts .................................. 8.11.10 Universal shaft feeder drive ................................................. 8.12.1 Removing the universal shaft ........................................ 8.12.1 Dismantling the universal shaft ..................................... 8.12.1 Universal shaft dismantled: ........................................... 8.12.3 Assembling the universal shaft ...................................... 8.12.4 Fitting the universal shaft .............................................. 8.12.6 Shear bar adjustment drive ................................................. 8.13.1 Removing the geared motor .......................................... 8.13.1 Fitting the geared motor ................................................ 8.13.2 Removing the bevel gear .............................................. 8.13.3 Dismantling the bevel gear ............................................ 8.13.4 Bevel gear dismantled: .................................................. 8.13.5 Assembling the bevel gear ............................................ 8.13.6 Fitting bevel gear ........................................................... 8.13.7 Axial gearbox ....................................................................... 8.14.1 Removing axial gearbox ................................................ 8.14.1 Dismantling the axial gearbox ....................................... 8.14.2 Axial gearbox dismantled: ............................................. 8.14.9 Assembling the axial gearbox ..................................... 8.14.10 Fitting the axial gearbox .............................................. 8.14.16 Manual gearbox ................................................................... 8.15.1 Removing manual gearbox ........................................... 8.15.1 Dismantling the manual gearbox and compensation gearbox (without servo shifting) .................................................. 8.15.7 Differential dismantled: ................................................ 8.15.17 Manual gearbox dismantled (without servo shifting): ............................................... 8.15.18 Assembling the manual gearbox and differential (without servo shifting) ................................................ 8.15.19 Fitting the manual gearbox .......................................... 8.15.36 Removing the shifting cylinder servo shifting .............. 8.15.41 Dismantling shifting cylinder servo shifting .................. 8.15.43 Shifting cylinder servo shifting dismantled: ................. 8.15.44 Assembling the shifting cylinder servo shifting ............ 8.15.44 Fitting the shifting cylinder servo shifting ..................... 8.15.45 Bleeding the shifting cylinder servo shifting ................ 8.15.47 Drive axle ............................................................................. 8.16.1 Removing the drive axle ................................................ 8.16.1 Fitting the drive axle ...................................................... 8.16.4 Brake ................................................................................... 8.17.1 Bleeding the brake system ............................................ 8.17.1 Removing the brake blocks ........................................... 8.17.3 Fitting the brake blocks ................................................. 8.17.4 Removing the brake saddle ........................................... 8.17.6 Fitting the brake saddles ............................................... 8.17.8 Removing the brake disc ............................................. 8.17.10 Fitting the brake disc ................................................... 8.17.11 Parking brake ...................................................................... 8.18.1 Removing the brake blocks ........................................... 8.18.1 Fitting brake shoes ........................................................ 8.18.1 9. Steering Axle Steering Axle ......................................................................... 9.1.1 Removing the steering axle/rear wheel drive .................. 9.1.1 Fitting the steering axle/rear wheel drive ......................... 9.1.5 Removing the wheel bearings ......................................... 9.1.8 Wheel bearing dismantled ............................................. 9.1.10 Fitting the wheel bearing ............................................... 9.1.10
- 6. 0298 826.1 - RHB JAGUAR 900 – 830 Profistar / Speedstar 0.1.5 Table of contents Removing the stub axle ................................................. 9.1.12 Stub axle dismantled ..................................................... 9.1.14 Fitting the stub axle ....................................................... 9.1.14 Removing the steering rod (from serial no. ...) ......................................................... 9.1.16 Steering rod dismantled (without CLAAS 4-Trac-System) (from serial no. ...) ......................................................... 9.1.18 Fitting the steering rod (from serial no. ...) ......................................................... 9.1.18 Setting the tracking (up to serial no.) ............................................................. 9.1.20 Setting the tracking (from serial no. ...) ......................................................... 9.1.21 Setting the steering axle stops ...................................... 9.1.22 Rear wheel drive .................................................................... 9.2.1 Removing the multiplate clutch ........................................ 9.2.1 Dismantling the multiplate clutch ..................................... 9.2.2 Multiplate clutch dismantled: ........................................... 9.2.6 Assembling the multiplate clutch ..................................... 9.2.8 Fitting the multiplate clutch ............................................ 9.2.13 Removing the bevel gear ............................................... 9.2.15 Fitting bevel gear ........................................................... 9.2.17 Dismantling the bevel gearbox (20/25 km/h-Version) ..................................................... 9.2.19 Bevel gearbox dismantled (20/25 km/h-Version): .................................................... 9.2.26 Assembling the bevel gearbox (20/25 km/h-Version) ..................................................... 9.2.27 Dismantling the bevel gearbox (40/km/h-Version) .......................................................... 9.2.34 Bevel gearbox dismantled (40/km/h-Version): ......................................................... 9.2.42 Assembling the bevel gearbox (40/km/h-Version) .......................................................... 9.2.43 10. Machine body 11. Hydraulics Hydraulic tank ...................................................................... 11.1.1 Removing the hydraulic tank ......................................... 11.1.1 Hydraulic tank dismantled ............................................. 11.1.3 Fitting the hydraulic tank ................................................ 11.1.4 Hydraulic pump .................................................................... 11.2.1 Removing the double pump ........................................... 11.2.1 Double pump/hydraulic variable displacement pump dismantled ........................................................... 11.2.4 Fitting the double pump ................................................. 11.2.5 Removing the hydraulic variable displacement pump ... 11.2.8 Fitting the hydraulic variable displacement pump ........ 11.2.13 Bleeding the hydrostatic system .................................. 11.2.20 Hydraulic motor .................................................................... 11.3.1 Removing the hydraulic motor tower swing ................... 11.3.1 Fitting the hydraulic motor tower swing ......................... 11.3.2 Removing hydraulic motor traverse drive (20/25 km/h-Version) ..................................................... 11.3.3 Fitting hydraulic motor traverse drive (20/25 km/h-Version) ..................................................... 11.3.6 Removing hydraulic motor traverse drive (40 km/h-Version) .......................................................... 11.3.9 Fitting hydraulic motor traverse drive (40 km/h-Version) ........................................................ 11.3.13 Removing the hydraulic motor reversing ..................... 11.3.17 Fitting the hydraulic motor reversing ........................... 11.3.18 Removing the hydraulic motor cooling cage extraction ..................................................................... 11.3.20 Fitting the hydraulic motor cooling cage extraction ..................................................................... 11.3.21 Control valves ...................................................................... 11.4.1 Removing 3/3-way solenoid valve front attachment lowering (Y87) and (743) ............................ 11.4.1 Dismantling 3/3-way solenoid valve front attachment lowering (Y87) and (743) ............................ 11.4.2 Assembling the 3/3-way solenoid valve front attachment lowering (Y87) and (743) ............................ 11.4.3 Fitting 3/3-way solenoid valve front attachment lowering (Y87) and (743) ............................ 11.4.4 Removing 3/2-way solenoid valve front attachment lifting (Y85) ................................................. 11.4.5 Fitting 3/2-way solenoid valve front attachment lifting (Y85) ................................................. 11.4.6 Removing the circulation block valve (Y77) .................. 11.4.8 Fitting the circulation block valve (Y77) ......................... 11.4.9 Removing the flow regulating valve lowering (614) ............................................................. 11.4.10 Dismantling the flow regulating valve lowering (614) .. 11.4.11 Assembling the flow regulating valve lowering (614) .. 11.4.12 Fitting the flow regulating valve lowering (614) ........... 11.4.13 Removing the pressure regulating valve working hydraulics (703) ............................................. 11.4.14 Fitting the pressure regulating valve working hydraulics (703) ........................................................... 11.4.16 Checking/adjusting pressure regulating valve working hydraulics (703) ............................................. 11.4.17 Removing the non return valve (707) .......................... 11.4.18 Fitting the non return valve (707) ................................ 11.4.19 Removing the main valve ............................................ 11.4.20 Dismantling the main valve ......................................... 11.4.22 Main valve dismantled: ................................................ 11.4.23 Assembling the main valve ......................................... 11.4.25 Fitting the main valve .................................................. 11.4.26 Removing the 3/2 way solenoid valve knife sharpening (Y61 and Y62) .......................................... 11.4.27 Fitting the 3/2 way solenoid valve knife sharpening (Y61 and Y62) .......................................... 11.4.29 Removing the 3/2 way solenoid valve front attachments (Y72/Y93 and Y73/Y94) .......................... 11.4.30 Fitting the 3/2 way solenoid valve front attachments (Y72/Y93 and Y73/Y94) .......................... 11.4.32 Removing the valve block knife sharpening/ front attachments ........................................................ 11.4.33 Valve block knife sharpening/front attachments dismantled ................................................................... 11.4.36 Fitting the valve block knife sharpening/front attachments ................................................................. 11.4.37
- 7. 0.1.6 RHB JAGUAR 900 – 830 Profistar / Speedstar - 0298 826.1 Table of contents Removing 3/2 way valve Autopilot/waggon hitch (Y9/Y29 and Y10/Y30) ........................................ 11.4.38 Fitting 3/2 way valve Autopilot/ waggon hitch (Y9/Y29 and Y10/Y30). .......................... 11.4.40 Removing lock-up valve unit Autopilot/ waggon hitch (734) ...................................................... 11.4.41 Fitting lock-up valve unit Autopilot/ waggon hitch (734) ...................................................... 11.4.44 Removing valve block Autopilot/waggon hitch ............. 11.4.46 Valve block Autopilot/waggon hitch dismantled ........... 11.4.48 Fitting valve block Autopilot/waggon hitch ................... 11.4.49 Removing 3/2-way solenoid valve front attachment reversing (Y86) ......................................... 11.4.50 Fitting 3/2-way solenoid valve front attachment reversing (Y86) ......................................... 11.4.52 Removing valve block front attachment reversing ....... 11.4.53 Valve block front attachment reversing dismantled ..... 11.4.55 Fitting valve block front attachment reversing ............. 11.4.56 Removing pressure accumulator/pressure sensor Autopilot (501 and B5) ..................................... 11.4.57 Fitting pressure accumulator/pressure sensor Autopilot (501 and B5) ................................................. 11.4.58 Removing valve block discharge chute ....................... 11.4.59 Valve block discharge chute control dismantled .......... 11.4.62 Fitting valve block discharge chute control .................. 11.4.63 Removing 2/2 way solenoid valve discharge chute turning (fast/slow) (Y4) ....................................... 11.4.64 Fitting 2/2 way solenoid valve discharge chute turning (fast/slow) (Y4) ................................................. 11.4.66 Removing 3/2 way solenoid valve discharge chute turning (Y5 and Y6) ............................................ 11.4.67 Fitting 3/2 way solenoid valve discharge chute turning (Y5 and Y6) ...................................................... 11.4.69 Removing 3/2 way solenoid valve discharge flap lifting/lowering, tower lifting/lowering (Y3/Y7 and Y2/Y8) ..................... 11.4.70 Fitting 3/2 way solenoid valve discharge flap lifting/lowering, tower lifting/lowering (Y3/Y7 and Y2/Y8) ..................... 11.4.72 Removing lock-up valve unit discharge flap lifting/lowering, tower lifting/lowering ........................... 11.4.73 Fitting lock-up valve unit discharge flap lifting/lowering, tower lifting/lowering ........................... 11.4.74 Removing pressure accumulator forage harvester drive (504) .................................................... 11.4.75 Fitting pressure accumulator forage harvester drive (504) .................................................................... 11.4.76 Removing flow regulating valve cooling cage drive (744) .................................................................... 11.4.76 Flow regulating valve cooling cage drive (744) dismantled ................................................................... 11.4.77 Flow regulating valve cooling cage drive (744) dismantled: .................................................................. 11.4.79 Assembling flow regulating valve cooling cage drive (744) .................................................................... 11.4.80 Fitting flow regulating valve cooling cage drive (744) .. 11.4.80 Removing 3 way cock (612) with pressure accumulator front attachment lifting/lowering (511) ..... 11.4.81 Dismantling 3 way cock (612) with pressure accumulator front attachment lifting/lowering (511) ..... 11.4.82 Assembling 3 way cock (612) with pressure accumulator front attachment lifting/lowering (511) ..... 11.4.85 Fitting 3 way cock (612) with pressure accumulator front attachment lifting/lowering (511) ..... 11.4.88 Removing 3/2 way valve low pressure hydraulics ....... 11.4.90 Valve block low pressure hydraulics dismantled ......... 11.4.92 Fitting 3/2 way valve low pressure hydraulics ............. 11.4.93 Removing the pressure regulating valve low pressure hydraulics (729) ............................................ 11.4.93 Fitting the pressure regulating valve low pressure hydraulics (729) ............................................ 11.4.95 Checking/adjusting pressure regulating valve low pressure hydraulics (729) ..................................... 11.4.95 Removing locking valve charge pressure (40 km/h-Version) (716) .............................................. 11.4.96 Dismantling locking valve charge pressure (40 km/h-Version) (716) .............................................. 11.4.96 Locking valve charge pressure (40 km/h-Version) (716) dismantled: ........................... 11.4.97 Assembling locking valve charge pressure (40 km/h-Version) (716) .............................................. 11.4.98 Fitting locking valve charge pressure (40 km/h-Version) (716) .............................................. 11.4.99 Lifting cylinder ...................................................................... 11.5.1 Removing hydraulic cylinder front attachment .............. 11.5.1 Dismantling hydraulic cylinder front attachment ............ 11.5.2 Hydraulic cylinder front attachment dismantled: ............ 11.5.3 Assembling hydraulic cylinder front attachment ............ 11.5.4 Fitting hydraulic cylinder front attachment ..................... 11.5.6 Removing hydraulic cylinder feeder drive (up to serial no. ...) ........................................................ 11.5.7 Dismantling hydraulic cylinder feeder drive (up to serial no. ...) ........................................................ 11.5.8 Hydraulic cylinder feeder drive dismantled: (up to serial no. ...) ........................................................ 11.5.9 Assembling hydraulic cylinder feeder drive (up to serial no. ...) ...................................................... 11.5.10 Fitting hydraulic cylinder feeder drive (up to serial no. ...) ...................................................... 11.5.11 Removing hydraulic cylinder feeder drive (from serial no. ...) ....................................................... 11.5.12 Dismantling hydraulic cylinder feeder drive (from serial no. ...) ....................................................... 11.5.13 Hydraulic cylinder feeder drive dismantled (from serial no. ...) ....................................................... 11.5.14 Assembling hydraulic cylinder feeder drive (from serial no. ...) ....................................................... 11.5.15 Fitting hydraulic cylinder feeder drive (from serial no. ...) ....................................................... 11.5.16 Removing hydraulic cylinder sharpening stone ........... 11.5.17 Dismantling the hydraulic cylinder sharpening stone .. 11.5.19 Hydraulic cylinder sharpening stone dismantled: ........ 11.5.21 Assembling hydraulic cylinder sharpening stone ........ 11.5.22 Fitting hydraulic cylinder sharpening stone ................. 11.5.24 Removing hydraulic sharpening flap (up to serial no. ...) ...................................................... 11.5.26
- 8. 0298 826.1 - RHB JAGUAR 900 – 830 Profistar / Speedstar 0.1.7 Table of contents Dismantling hydraulic sharpening flap (up to serial no. ...) ....................................................... 11.5.26 Hydraulic cylinder sharpening flap dismantled: (up to serial no. ...) ....................................................... 11.5.28 Assembling hydraulic sharpening flap (up to serial no. ...) ....................................................... 11.5.29 Fitting hydraulic cylinder sharpening flap (up to serial no. ...) ....................................................... 11.5.30 Removing hydraulic cylinder sharpening flap (from serial no. ...) ....................................................... 11.5.31 Dismantling hydraulic cylinder sharpening flap (from serial no. ...) ....................................................... 11.5.32 Hydraulic cylinder sharpening flap dismantled: (from serial no. ...) ....................................................... 11.5.33 Assembling hydraulic cylinder sharpening flap (from serial no. ...) ....................................................... 11.5.34 Fitting hydraulic cylinder sharpening flap (from serial no. ...) ....................................................... 11.5.35 Removing hydraulic cylinder discharge chute ............. 11.5.37 Dismantling hydraulic cylinder discharge chute ........... 11.5.37 Hydraulic cylinder discharge chute dismantled: ........... 11.5.39 Assembling hydraulic cylinder discharge chute ........... 11.5.40 Fitting hydraulic cylinder discharge chute .................... 11.5.41 Removing the hydraulic cylinder discharge flap .......... 11.5.42 Dismantling hydraulic cylinder discharge flap .............. 11.5.42 Hydraulic cylinder discharge flap dismantled: .............. 11.5.44 Assembling hydraulic cylinder discharge flap .............. 11.5.45 Fitting hydraulic cylinder discharge flap ....................... 11.5.47 Removing the hydraulic cylinder Corn-Cracker ........... 11.5.48 Dismantling the hydraulic cylinder Corn-Cracker ......... 11.5.49 Hydraulic cylinder Corn-Cracker dismantled: .............. 11.5.50 Assembling the hydraulic cylinder Corn-Cracker ......... 11.5.51 Fitting the hydraulic cylinder Corn-Cracker .................. 11.5.52 Removing steering cylinder (without CLAAS 4-Trac-System) (up to serial no. ...) ....................................................... 11.5.54 Dismantling steering cylinder (without CLAAS 4-Trac-System) (up to serial no. ...) ....................................................... 11.5.55 Steering cylinder dismantled: (Without CLAAS 4-Trac-System) (up to serial no. ...): ...................................................... 11.5.56 Assembling steering cylinder (without CLAAS 4-Trac-System) (up to serial no. ...) ....................................................... 11.5.57 Fitting steering cylinder (without CLAAS 4-Trac-System) (up to serial no. ...) ....................................................... 11.5.59 Removing steering cylinder (without CLAAS 4-Trac-System) (from serial no. ...) ....................................................... 11.5.60 Fitting steering cylinder (without CLAAS 4-Trac-System) (from serial no. ...) ....................................................... 11.5.60 Removing steering cylinder left (with CLAAS Autopilot) (up to serial no. ...) ....................................................... 11.5.60 Dismantling steering cylinder left (with CLAAS Autopilot) (up to serial no. ...) ...................................................... 11.5.61 Steering cylinder left dismantled: (with CLAAS Autopilot) (up to serial no. ...) ...................................................... 11.5.64 Assembling steering cylinder left (with CLAAS Autopilot) (up to serial no. ...) ...................................................... 11.5.65 Fitting steering cylinder left (with CLAAS Autopilot) (up to serial no. ...) ...................................................... 11.5.68 Removing steering cylinder (with CLAAS 4-Trac-System, with CLAAS Autopilot) (up to serial no. ...) ...................................................... 11.5.69 Dismantling steering cylinder (with CLAAS 4-Trac-System, with CLAAS Autopilot) (up to serial no. ...) ...................................................... 11.5.70 Steering cylinder dismantled: (with CLAAS 4-Trac-System, with CLAAS Autopilot) (up to serial no. ...) ...................................................... 11.5.72 Assembling steering cylinder (with CLAAS 4-Trac-System, with CLAAS Autopilot) (up to serial no. ...) ...................................................... 11.5.73 Fitting steering cylinder (with CLAAS 4-Trac-System, with CLAAS Autopilot) (up to serial no. ...) ...................................................... 11.5.75 Removing steering cylinder (with CLAAS 4-Trac-System, with CLAAS Autopilot) (from serial no. ...) ....................................................... 11.5.76 Dismantling steering cylinder (with CLAAS 4-Trac-System, with CLAAS Autopilot) (from serial no. ...) ....................................................... 11.5.78 Steering cylinder dismantled: (with CLAAS 4-Trac-System, with CLAAS Autopilot) (from serial no. ...) ....................................................... 11.5.80 Assembling steering cylinder (with CLAAS 4-Trac-System, with CLAAS Autopilot) (from serial no. ...) ....................................................... 11.5.81 Fitting steering cylinder (with CLAAS 4-Trac-System, with CLAAS Autopilot) (from serial no. ...) ....................................................... 11.5.83 12. Central lubrication system Lubricant vessel .................................................................. 12.1.1 Removing lubricant vessel ............................................ 12.1.1 Lubricant vessel dismantled .......................................... 12.1.1 Lubricant vessel dismantled: ......................................... 12.1.4 Assembling lubricant vessel .......................................... 12.1.5 Fitting lubricant vessel ................................................... 12.1.7 Replacing lubrication line .............................................. 12.1.8 13. Engine Fuel system ......................................................................... 13.1.1 Removing fuel tank (up to serial no. ...) ........................................................ 13.1.1 Fitting fuel tank (up to serial no. ...) ........................................................ 13.1.5
- 9. 0.1.8 RHB JAGUAR 900 – 830 Profistar / Speedstar - 0298 826.1 Table of contents Removing fuel tank (from serial no. ...) .......................................................... 13.1.9 Fitting fuel tank (from serial no. ...) ........................................................ 13.1.12 Removing additional fuel tank (up to serial no. ...) ....................................................... 13.1.15 Fitting additional fuel tank (up to serial no. ...) ....................................................... 13.1.16 Removing additional fuel tank (from serial no. ...) ........................................................ 13.1.18 Fitting additional fuel tank (from serial no. ...) ........................................................ 13.1.20 Cooling system .................................................................... 13.2.1 Removing water cooler .................................................. 13.2.1 Fitting water cooler ........................................................ 13.2.2 Removing charge air cooler ........................................... 13.2.5 Fitting charge air cooler ................................................. 13.2.8 Removing oil cooler ..................................................... 13.2.10 Fitting oil cooler ............................................................ 13.2.12 Fan drive .............................................................................. 13.3.1 Removing tensioning roller fan drive ............................. 13.3.1 Tensioning roller fan drive dismantled ........................... 13.3.1 Fitting tensioning roller fan drive .................................... 13.3.2 Removing angle gearbox fan drive ................................ 13.3.3 Dismantling angle gearbox fan drive ............................. 13.3.4 Angle gearbox fan drive dismantled: ........................... 13.3.10 Assembling angle gearbox fan drive ............................ 13.3.11 Fitting angle gearbox fan drive .................................... 13.3.18 Engine .................................................................................. 13.4.1 Removing engine (DaimlerChrysler OM 457 LA/OM 502 LA) .................... 13.4.1 Fitting engine (DaimlerChrysler OM 457 LA/OM 502 LA) .................... 13.4.8 14. Silaging system Silaging system .................................................................... 14.1.1 Removing silaging material pump .................................. 14.1.1 Silaging material tank dismantled .................................. 14.1.3 Fitting silaging material pump ........................................ 14.1.4 Removing silaging material tank .................................... 14.1.5 Fitting silaging material tank .......................................... 14.1.7 15. Compressed air system Compressed air system ....................................................... 15.1.1 Removing pressure regulator ........................................ 15.1.1 Compressed air system dismantled ............................... 15.1.2 Removing air vessel ...................................................... 15.1.4 Fitting air vessel ............................................................. 15.1.5 16. Index
- 11. 0298 826.1 - RHB JAGUAR 900 – 830 Profistar / Speedstar 1.1.1 General GENERAL Introduction The enclosed CLAAS-REPAIR-MANUAL is intended to help maintain the continuous readiness for opera- tion, and thus the high value, of the CLAAS forage har- vester, by dedicated care and customer service technical monitoring. The experience of our customer service technicians and the experience gained in the factory is gathered together in this REPAIR-MANUAL. The sequence of illustrations shows the progression of each repair process, the text provides more informa- tion in the form of the notes required for the setting, the use of the CLAAS special tools etc. This includes the representation of the most important repairs so that individual and small tasks can be extracted and followed easily. The CLAAS-REPAIR-MANUAL is designed as a loose-leaf binder. It is added to continuously in the course of further technical developments of the machines and is therefore always an up-to-date reference document. For safety reasons, we would ask you always to compare the setting values and filling volumes with the currently-valid operating instructions of the individual machine. CLAAS KGaA mbH Service Department General
- 12. 1.1.2 RHB JAGUAR 900 – 830 Profistar / Speedstar - 0298 826.1 General Introduction to the CLAAS Repair Manual The CLAAS-REPAIR-MANUAL is divided into main groups and sub-groups. With regard to the numbering at the foot of each page, the first figure indicates the main group, the figure behind the point is the sub-group and the figure after the second point is the page number. In each sub-group, the illustrations and pages are continuously numbered starting from 1. Differences between machine types are indicated by text or illustration notes. Fitting procedures which are valid for all machine types referred to in this manual, are kept neutral. In the case of additions, the sub-groups are added to or replaced. Any additions are filed under the relevant main group/sub-group and the index is replaced. The picture symbols serve to provide quick orientation in the case of recurring fitting procedures. Their signifi- cance is described at the beginning of this book. Extensive descriptions are given under the designation “GENERAL REPAIR NOTES” at the beginning of this book. Read and observe these important notes. They provide the basis for safe and long-term operation after repair work. The index for the relevant main group/sub-group provides easy, quick access to all fitting descrip- tions.
- 14. 0298 826.1 - RHB JAGUAR 900 – 830 Profistar / Speedstar 2.1.1 Cab CAB Removing front frame Remove screen (A). (Fig. 1) Remove the windscreen wiper (B). Unscrew the wiper motor (D) from the front plate. (Fig. 2) Remove the air ducting (E) from the left and right hand sides. (Fig. 3) Unscrew the doors (F) on the left and right hand sides from the side wall at the hinge. (Fig. 4) A 1 D B 2 E 3 F 4 Cab
- 15. 2.1.2 RHB JAGUAR 900 – 830 Profistar / Speedstar - 0298 826.1 Cab Remove blind (G). (Fig. 5) Unscrew the clamp (H) and hex head bolt (K). (Fig. 6) Unscrew the four plate screws at the front of the roof lining (L). (Fig. 7) Carefully pull the front of the roof lining (L) downwards. Remove the four hex head bolts from the upper front screen. (Fig. 8) G 5 K H 6 L 7 L 8
- 16. 0298 826.1 - RHB JAGUAR 900 – 830 Profistar / Speedstar 2.1.3 Cab Also remove the four hex head bolts on both the left and right hand sides of the front screen frame. (Fig. 9) Unscrew the three hex head bolts (O) on the lower front screen frame. Unscrew the holders (P) on the left and right hand sides. Remove the front screen complete with front screen frame, if necessary using a suitable suction device. Caution! The front screen frame is fitted using sealant around the entire frame. When removing the front screen, the sealant must be cut out in steps using a sharp knife. Danger! The front screen must not be compressed or stretched excessively during the removal process, since it can become stressed and lead to cracking. Always wear gloves during the entire removal process. – Danger of injury – (Fig. 10, 11) 9 O 10 P 11
- 17. 2.1.4 RHB JAGUAR 900 – 830 Profistar / Speedstar - 0298 826.1 Cab Fitting the front frame Caution! Before fitting, the front screen frame and the connection points on the cab must be cleaned to remove any traces of sealant 1. Apply liquid sealant, e.g. Sikaflex-255 FC-black, (Part no. 0320 808.0), to the entire circumference of the front screen frame. 2. The front screen should be lifted to a position in front of the cab, if necessary using a suitable suction device, then screw in the three hex head bolts (O) on the lower front screen frame, and then screw in the four hex head bolts (N) on each of the side front screen frames on the left and right hand sides. 3. Screw on the holders (P) on the left and right hand sides. (Fig. 12, 13) 4. Screw in the four hex head bolts on the upper screen frame. (Fig. 14) O P P 12 13 14
- 18. 0298 826.1 - RHB JAGUAR 900 – 830 Profistar / Speedstar 2.1.5 Cab 5. Screw back the roof lining (L) at the front edge using the four plate screws onto the upper front screen frame. (Fig. 15) 6. Screw back the clamp (H) and hex head bolt (K). (Fig. 16) 7. Screw back the panel (G). (Fig. 17) 8. Screw back the doors (F) on the left and right hand sides from the side wall at the hinge. (Fig. 18) L 15 K H 16 G 17 F 18
- 19. 2.1.6 RHB JAGUAR 900 – 830 Profistar / Speedstar - 0298 826.1 Cab 9. Refit the air ducting (E) on the left and right hand sides. (Fig. 19) 10. Screw the wiper motor (D) back onto the front screen. 11. Screw back the wipers (B). (Fig. 20) 12. Screw back the blind (A). (Fig. 21) E 19 D B 20 A 21
- 20. 0298 826.1 - RHB JAGUAR 900 – 830 Profistar / Speedstar 2.2.1 Heating HEATING Removing the heating elements Completely open the cab heating regulating valve using the rotary knob (A). (Fig. 1) Drain about 5 Litres of coolant through he drain cock (B) and collect in a suitable container. Environment! The coolant should be disposed of in a proper way. After draining, the drain cock (B) should be tightly closed again. (Fig. 2) Hinge up the cab roof. Unscrew the cover (C) from the top of the cab. (Fig. 3) A 1 B 2 C 3 Heating
- 21. 2.2.2 RHB JAGUAR 900 – 830 Profistar / Speedstar - 0298 826.1 Heating Unscrew the gas struts (D) on the left and right hand sides of the cab upper area at (E). Remove the front air filter (V). Lift the cab roof and fit a mounting bracket (M self-made) on the left and right hand side further forwards and fix to an existing hex head bolt. (Fig. 4, 5) Release the hose clamps (G) of the heating hoses (H and P) from the heater body (K) and pull off the heating hoses. Collect the coolant which comes out. Environment! The coolant should be disposed of in a proper way. (Fig. 6, 7) D V E 4 M 5 G H 6 K P G 7
- 22. Thank you very much for your reading. Please Click Here. Then Get COMPLETE MANUAL. NO WAITING NOTE: If there is no response to click on the link above, please download the PDF document first and then click on it.
- 23. 0298 826.1 - RHB JAGUAR 900 – 830 Profistar / Speedstar 2.2.3 Heating Unscrew the bracket (L) from the side wall of the cab. (Fig. 8) Pull out the heating element (K) upwards. Collect any coolant which leaks out while doing this. Environment! The coolant should be disposed of in a proper way. (Fig. 9) Fitting the heating element Caution! Before fitting, check the hoses for damage and replace if necessary. 1. Insert the heating element (K) into the top of the cab. 2. Fix the bracket (L) to the side of the cab in such a way that the heating element (K) is in good contact at (M and N). (Fig. 10) L 8 K 9 L NM K 10
- 24. 2.2.4 RHB JAGUAR 900 – 830 Profistar / Speedstar - 0298 826.1 Heating 3. Fit the heating hoses (H and P) using the hose clamps (G) on the heating body (K). (Fig. 11, 12) 4. Fit the gas struts (D) to the left and right hand sides at (E) using new locknuts on the top of the cab in such a way that there is a small amount of play. 5. Fit the front air filter (V). (Fig. 13) 6. Screw the cover (C) to the top of the cab. (Fig. 14) K P G 11 G H 12 D V E 13 C 14
- 25. 0298 826.1 - RHB JAGUAR 900 – 830 Profistar / Speedstar 2.2.5 Heating 7. Pouring in the coolant: – Pour the coolant in through the filling spigot at (E) until it reaches the sight glass (F). – Start the diesel engine and let it run with fully open regulating valve for a short period of time. – Check the coolant level once again. Coolant quantity/type – see page 1.5.1, Lubri- cants chart. (Fig. 1, 15, 16) Removing the regulating valve Completely open the cab heating regulating valve using the rotary knob (A). (Fig. 17) Drain about 5 Litres of coolant through he drain cock (B) and collect in a suitable container. Environment! The coolant should be disposed of in a proper way. After draining, the drain cock (B) should be tightly closed again. (Fig. 18) E 15 F 16 A 17 B 18