SlideShare a Scribd company logo
1 of 40
Download to read offline
Suzuki Swift Sport
(RS416)
2004-2008 Service/Repair Manual
This Service Manual has been prepared with the latest service information available at the time
of publication. It is subdivided into various group categories and each section contains diagnostic,
disassembly, repair and installation procedures along with complete specifications and tightening
references. Please read this manual carefully before proceeding, as incorrect service procedures
may result in injury or death to service personnel or to the operator’s of the vehicle.



   



 

















 







 

 


 









             

























Volume 1
Precautions............................................................... 00-i
Precautions ............................................................ 00-1
General Information ................................................... 0-i
General Information ...............................................0A-1
Maintenance and Lubrication.................................0B-1
Engine ......................................................................... 1-i
Precautions .............................................................. 1-1
Engine General Information and Diagnosis ...........1A-1
Aux. Emission Control Devices..............................1B-1
Engine Electrical Devices.......................................1C-1
Engine Mechanical.................................................1D-1
Engine Lubrication System ....................................1E-1
Engine Cooling System.......................................... 1F-1
Fuel System ...........................................................1G-1
Ignition System.......................................................1H-1
Starting System....................................................... 1I-1
Charging System.....................................................1J-1
Exhaust System .....................................................1K-1
Suspension................................................................. 2-i
Precautions .............................................................. 2-1
Suspension General Diagnosis..............................2A-1
Front Suspension...................................................2B-1
Rear Suspension....................................................2C-1
Wheels and Tires ...................................................2D-1
Driveline / Axle ........................................................... 3-i
Precautions .............................................................. 3-1
Drive Shaft / Axle ...................................................3A-1
Brakes ......................................................................... 4-i
Precautions .............................................................. 4-1
Brake Control System and Diagnosis ....................4A-1
Front Brakes...........................................................4B-1
Rear Brakes ...........................................................4C-1
Parking Brake.........................................................4D-1
ABS........................................................................4E-1
Electronic Stability Program................................... 4F-1
Volume 2
Precautions............................................................... 00-i
Precautions ............................................................ 00-1
Transmission / Transaxle .......................................... 5-i
Precautions .............................................................. 5-1
Automatic Transmission/Transaxle ........................5A-1
Manual Transmission/Transaxle ............................5B-1
Clutch .....................................................................5C-1
Steering....................................................................... 6-i
Precautions .............................................................. 6-1
Steering General Diagnosis ...................................6A-1
Steering Wheel and Column ..................................6B-1
Power Assisted Steering System ...........................6C-1
HVAC ........................................................................... 7-i
Precautions .............................................................. 7-1
Heater and Ventilation............................................7A-1
Air Conditioning System.........................................7B-1
Restraint...................................................................... 8-i
Precautions .............................................................. 8-1
Seat Belts...............................................................8A-1
Air Bag System ......................................................8B-1
Body, Cab and Accessories...................................... 9-i
Precautions .............................................................. 9-1
Wiring Systems ......................................................9A-1
Lighting Systems....................................................9B-1
Instrumentation / Driver Info. / Horn .......................9C-1
Wipers / Washers...................................................9D-1
Glass / Windows / Mirrors ......................................9E-1
Security and Locks.................................................9F-1
Seats..................................................................... 9G-1
Interior Trim............................................................9H-1
Hood / Fenders / Doors.......................................... 9J-1
Body Structure .......................................................9K-1
Paint / Coatings...................................................... 9L-1
Exterior Trim.......................................................... 9M-1
Control Systems....................................................... 10-i
Precautions ............................................................ 10-1
Body Electrical Control System............................10B-1
Immobilizer Control System .................................10C-1
Keyless Start System ...........................................10E-1
TABLE OF CONTENTS
Table of Contents 00- i

Section 00
CONTENTS
Precautions
Precautions...............................................00-1
Precautions........................................................... 00-1
Precautions for Vehicles Equipped with a
Supplemental Restraint (Air Bag) System ........ 00-1
General Precautions ........................................... 00-4
Warning for Wheel (with tire) Removal ............... 00-7
Warning for Handling Emergency Flat Tire
Repair Kit .......................................................... 00-7
Precautions for Catalytic Converter .................... 00-7
Precautions for Installing Mobile
Communication Equipment............................... 00-7
Precaution for CAN Communication System ...... 00-7
Precautions for Electrical Circuit Service ............ 00-8
Air Bag Warning................................................ 00-10
Air Bag System Service Warning ...................... 00-10
Fastener Caution............................................... 00-10
Suspension Caution.......................................... 00-10
Wheels and Tires Caution................................. 00-10
Precaution for Vehicle Equipped with ESP
System ............................................................ 00-11
Brake Caution ................................................... 00-11
Repair Instructions ............................................ 00-11
Electrical Circuit Inspection Procedure ............. 00-11
Intermittent and Poor Connection Inspection.... 00-13
00-1 Precautions:
Precautions
Precautions
Precautions
Precautions for Vehicles Equipped with a
Supplemental Restraint (Air Bag) System
S7RS0B0000001
WARNING
!
• The configuration of air bag system parts
are as shown in the figure. When it is
necessary to service (remove, reinstall and
inspect) these parts, be sure to follow
procedures described in Air Bag System
section. Failure to follow proper
procedures could result in possible air bag
system activation, personal injury, damage
to parts or air bag system being unable to
activate when necessary.
• If the air bag system and another vehicle
system both need repair, SUZUKI
recommends that the air bag system be
repaired first, to help avoid unintended air
bag system activation.
• Do not modify the steering wheel,
dashboard, or any other air bag system
components. Modifications can adversely
affect air bag system performance and
lead to injury.
• If the vehicle will be exposed to
temperatures over 93 C (200 F) (for
example, during a paint baking process),
remove the air bag system components
beforehand to avoid component damage
or unintended air bag system activation.
Diagnosis
• When troubleshooting air bag system, be sure to
follow “Diagnosis” in Air Bag System section.
Bypassing these procedures may result in extended
diagnostic time, incorrect diagnosis, and incorrect
parts replacement.
• Never use electrical test equipment other than that
specified.
WARNING
!
Never attempt to measure the resistance of
the air bag (inflator) modules (driver,
passenger, side and curtain) and seat belt
pretensioners (driver and passenger). It is
very dangerous as the electric current from
the tester may deploy the air bag or activate
the pretensioner.
1. Air bag wire harness (in floor, main
and instrument panel harness)
6. Driver air bag (inflator) module
2. Passenger air bag (inflator) module 7. Side air bag (inflator) module
(if equipped)
3. SDM 8. Curtain air bag (inflator)
module (if equipped)
4. Seat belt pretensioner 9. Forward sensor
5. Contact coil 10. Side sensor (if equipped)

 










I4RS0B000001-02
I4RS0A000002-02
Precautions: 00-2
Servicing and Handling
WARNING
!
Many of service procedures require
disconnection of “A/BAG” fuse and all air
bag (inflator) module(s) from initiator circuit
to avoid an accidental deployment.
Driver, Passenger, Side and Curtain Air Bag
(Inflator) Modules
• For handling and storage of a live air bag
(inflator) module, select a place where the
ambient temperature below 65 C (150 F),
without high humidity and away from
electric noise.
• When carrying a live air bag (inflator)
module, make sure the bag opening is
pointed away from you. In case of an
accidental deployment, the bag will then
deploy with minimal chance of injury.
Never carry the air bag (inflator) module by
the wires or connector on the underside of
the module. When placing a live air bag
(inflator) module on a bench or other
surface, always face the bag up, away from
the surface. As the live passenger air bag
(inflator) module must be placed with its
bag (trim cover) facing up, place it on the
workbench with a slit (1) or use the
workbench vise (2) to hold it securely at its
lower mounting bracket (3). It is also
prohibited to place anything on top of the
trim cover and stack air bag (inflator)
modules. This is necessary so that a free
space is provided to allow the air bag to
expand in the unlikely event of accidental
deployment. Otherwise, personal injury
may result.
• Never dispose of live (undeployed) air bag
(inflator) modules (driver, passenger, side
and curtain). If disposal is necessary, be
sure to deploy them according to
deployment procedures described in “Air
Bag (Inflator) Module and Seat Belt
Pretensioner Disposal in Section 8B”
before disposal.
• The air bag (inflator) module immediately
after deployment is very hot. Wait for at
least half an hour to cool it off before
proceeding the work.
• After an air bag (inflator) module has been
deployed, the surface of the air bag may
contain a powdery residue. This powder
consists primarily of cornstarch (used to
lubricate the bag as it inflates) and by-
products of the chemical reaction. As with
many service procedures, gloves and
safety glasses should be worn.
[A]: Always carry air bag (inflator) module with trim cover (air bag opening)
away from body.
[B]: Always place air bag (inflator) module on workbench with trim cover (air
bag opening) up, away from loose objects.





I4RS0A000003-02
00-3 Precautions:
WARNING
!
SDM
• For handling and storage of a SDM, select
a place where the ambient temperature
below 65 C (150 F), without high humidity
and away from electric noise.
• During service procedures, be very careful
when handling a Sensing and Diagnostic
Module (SDM). Never strike or jar the SDM.
• Never power up the air bag system when
the SDM is not rigidly attached to the
vehicle. All SDM and mounting bracket
fasteners must be carefully torqued and
the arrow must be pointing toward the
front of the vehicle to ensure proper
operation of the air bag system.
The SDM could be activated when powered
while not rigidly attached to the vehicle
which could cause deployment and result
in personal injury.
WARNING
!
Driver and Passenger Seat Belt
Pretensioners
• For handling and storage of a live seat belt
pretensioner, select a place where the
ambient temperature below 65 C (150 F),
without high humidity and away from
electric noise.
• Never carry seat belt pretensioner by wire
or connector of pretensioner. When
placing a live seat belt pretensioner on the
workbench or some place like that, never
put something on seat belt pretensioner.
Otherwise, personal injury may result.
• Never dispose of live (inactivated) seat belt
pretensioners (drive and passenger). If
disposal is necessary, be sure to activate
them according to activation procedures
described in “Air Bag (Inflator) Module and
Seat Belt Pretensioner Disposal in Section
8B” before disposal.
• The seat belt pretensioner immediately
after activation is very hot. Wait for at least
half an hour to cool it off before
proceeding the work.
• With many service procedures, gloves and
safety glasses should be worn to prevent
any possible irritation of the skin or eyes.
• Even when the accident was light enough not to
cause air bags to activate, be sure to inspect system
parts and other related parts according to instructions
under “Repair and Inspection Required after Accident
in Section 8B”.
• When servicing parts other than air bag system, if
shocks may be applied to air bag system component
parts, remove those parts beforehand.
• When handling the air bag (inflator) modules (driver,
passenger, side and curtain), seat belt pretensioners
(driver and passenger), forward sensor, side sensors
or SDM, be careful not to drop it or apply an impact to
it. If an excessive impact was applied, never attempt
disassembly or repair but replace it with a new one.
• When grease, cleaning agent, oil, water, etc. has got
onto air bag (inflator) modules (driver, passenger, side
and curtain) or seat belt pretensioners (drive and
passenger), wipe off immediately with a dry cloth.
• Air bag wire harness is included in floor and
instrument panel wire harnesses. Air bag wire
harness branched off from floor and instrument panel
wire harnesses can be identified easily as it is covered
with a yellow protection tube and it has yellow
connectors. Be very careful when handling it.
• When an open in air bag wire harness, damaged wire
harness, connector or terminal is found, replace wire
harness, connectors and terminals as an assembly.
• Do not apply power to the air bag system unless all
components are connected or a diagnostic flow
requests it, as this will set a DTC.
• Never use air bag system component parts from
another vehicle.
• When using electric welding, be sure to disconnect all
air bag (inflator) module connectors and pretensioner
connectors from air bag wire harness respectively.
• Never expose air bag system component parts
directly to hot air (drying or baking the vehicle after
painting) or flames.
• WARNING / CAUTION labels are attached on each
part of air bag system components. Be sure to follow
the instructions.
• After vehicle is completely repaired, perform “Air Bag
Diagnostic System Check in Section 8B”.
Precautions: 00-4
General Precautions
S7RS0B0000002
The WARNING and CAUTION describe some general
precautions that you should observe when servicing a
vehicle. These general precautions apply to many of the
service procedures, and they will not necessarily be
repeated with each procedure to which they apply.
WARNING
!
• Whenever raising a vehicle for service, be
sure to follow the instructions under
“Vehicle Lifting Points in Section 0A”.
• When it is necessary to do service work
with the engine running, make sure that
the parking brake is set fully and the
transmission is in Neutral (for manual
transmission vehicles) or Park (for
automatic transmission vehicles), Keep
hands, hair, clothing, tools, etc. away from
the fan and belts when the engine is
running.
• When it is necessary to run the engine
indoors, make sure that the exhaust gas is
forced outdoors.
• Do not perform service work in areas
where combustible materials can come in
contact with a hot exhaust system. When
working with toxic or flammable materials
(such as gasoline and refrigerant), make
sure that the area you work in is well-
ventilated.
• To avoid getting burned, keep away from
hot metal parts such as the radiator,
exhaust manifold, tail pipe, muffler, etc.
• New and used engine oil can be
hazardous. Children and pets may be
harmed by swallowing new or used oil.
Keep new and used oil and used engine oil
filters away from children and pets.
Continuous contact with used engine oil
has been found to cause [skin] cancer in
laboratory animals. Brief contact with used
oil may irritate skin. To minimize your
exposure to used engine oil, wear a long-
sleeve shirt and moisture-proof gloves
(such as dish washing gloves) when
changing engine oil. If engine oil contacts
your skin, wash thoroughly with soap and
water. Launder any clothing or rags if wet
with oil, recycle or properly dispose of
used oil and filters.
• Be sure to observe following instructions
when handling service materials such as
fuel, oil, fluid, coolant, grease, sealant,
thread lock cement, etc. Otherwise, your
health may be ruined.
– Whenever handling any of these service
materials, wear safety glasses to protect
your eyes. If it gets into your eye, it may
cause inflammation.
– Whenever handling any of these service
materials, wear moisture-proof gloves to
protect your skin. If it adheres to your
skin, it may cause inflammation.
– Do not swallow any of these service
materials. It would cause diarrhea or
nausea.
– Keep all these materials out of children’s
reach.
• Make sure the bonnet is fully closed and
latched before driving. If it is not, it can fly
up unexpectedly during driving,
obstructing your view and resulting in an
accident.
• Before starting any service work, cover fenders, seats
and any other parts that are likely to get scratched or
stained during servicing. Also, be aware that what you
wear (e.g., buttons) may cause damage to the
vehicle’s finish.
I2RH01010025-01
00-5 Precautions:
• When performing service to electrical parts that does
not require use of battery power, disconnect the
negative cable of the battery.
• When disconnecting the negative cable from the
battery, be careful to the following.
– Check and record DTCs in ECM and HVAC control
module if necessary before disconnecting.
– Record displayed contents of the clock and/or
audio system, etc. before disconnecting and reset it
as before after connecting.
– For vehicle equipped with electric throttle body
system, perform electric throttle body system
calibration referring to “Electric Throttle Body
System Calibration in Section 1C” after
reconnecting the negative cable to the battery.
– For vehicle equipped with ESP , calibrate steering
angle sensor referring to “Sensor Calibration in
Section 4F” after reconnecting the negative cable
to the battery.
• When removing the battery, be sure to disconnect the
negative cable first and then the positive cable. When
reconnecting the battery, connect the positive cable
first and then the negative cable, and replace the
terminal cover.
• When removing parts that are to be reused, be sure to
keep them arranged in an orderly manner so that they
may be reinstalled in the proper order and position.
• Whenever you use oil seals, gaskets, packing, O-
rings, locking washers, split pins, self-locking nuts,
and certain other parts as specified, be sure to use
new ones. Also, before installing new gaskets,
packing, etc., be sure to remove any residual material
from the mating surfaces.
• Make sure that all parts used in reassembly are
perfectly clean.
When use of a certain type of lubricant, bond or
sealant is specified, be sure to use the specified type.
“A”: Water tight sealant 99000–31250 (SUZUKI
Bond No.1207F)
I2RH01010026-01
I2RH01010027-01
I2RH01010028-01
I2RH01010029-01
I2RH01010030-01
Precautions: 00-6
• Be sure to use special tools when instructed.
Special tool
(A): 09917-98221
(B): 09916-58210
• When disconnecting vacuum hoses, attach a tag
describing the correct installation positions so that the
hoses can be reinstalled correctly.
• After servicing fuel, oil, coolant, vacuum, exhaust or
brake systems, check all lines related to the system
for leaks.
• For vehicles equipped with fuel injection systems,
never disconnect the fuel line between the fuel pump
and injector without first releasing the fuel pressure, or
fuel can be sprayed out under pressure.
• When performing a work that produces a heat
exceeding 80 C (176 F) in the vicinity of the
electrical parts, remove the heat sensitive electrical
part(s) beforehand.
• Use care not to expose connectors and electrical
parts to water which will be a cause of a trouble.
• Always be careful not to handle electrical parts
(computer, relay, etc.) in a rough manner or drop
them.
I2RH01010031-01
I2RH01010032-01
I2RH01010033-01
I2RH01010034-01
I2RH01010035-01
I2RH01010036-01
00-7 Precautions:
Warning for Wheel (with tire) Removal
S7RS0B0000003
WARNING
!
When removing any of these wheels installed
with wheel bolts, never remove all wheel
bolts at the same time. Leave at least 1 bolt
for each wheel as it is to prevent wheel from
dropping. When removing this remaining 1
bolt, hold wheel and tire so as not to allow
them to come off.
Warning for Handling Emergency Flat Tire
Repair Kit
S7RS0B0000004
WARNING
!
If vehicle is equipped with Emergency Flat
Tire Repair Kit instead of spare tire, be sure
to observe “Precaution for Emergency Flat
Tire Repair Kit in Section 2D” when handling
Emergency Flat Tire Repair Kit and repairing
flat tire.
Otherwise, your health may be ruined or it
will be impossible to repair flat tire.
Precautions for Catalytic Converter
S7RS0B0000005
For vehicles equipped with a catalytic converter, use
only unleaded gasoline and be careful not to let a large
amount of unburned gasoline enter the converter or it
can be damaged.
• Conduct a spark jump test only when necessary,
make it as short as possible, and do not open the
throttle.
• Conduct engine compression checks within the
shortest possible time.
• Avoid situations which can result in engine misfire
(e.g. starting the engine when the fuel tank is nearly
empty.)
Precautions for Installing Mobile
Communication Equipment
S7RS0B0000006
When installing mobile communication equipment such
as CB (Citizens-Band)-radio or cellular-telephone, be
sure to observe the following precautions.
Failure to follow cautions may adversely affect electronic
control system.
• Keep the antenna as far away as possible from the
vehicle’s electronic control unit.
• Keep the antenna feeder more than 20 cm (7.9 in.)
away from electronic control unit and its wire
harnesses.
• Do not run the antenna feeder parallel with other wire
harnesses.
• Confirm that the antenna and feeder are correctly
adjusted.
Precaution for CAN Communication System
S7RS0B0000007
• The loose (1) in the wire harnesses twist of the CAN
lines except around the connector (3) should be within
100 mm (3.9 in.). Refer to the wiring diagram for the
CAN lines discrimination. Excessively-loosed lines
may be influenced by the electric noise.
• Do not connect terminals of the CAN line using a
bypass wire (1). Otherwise, the CAN line may be
influenced by the electric noise.
 



I4JA01000002-01

I4JA01000003-01
Precautions: 00-8
Precautions for Electrical Circuit Service
S7RS0B0000008
• When replacing a fuse, make sure to use a fuse of the
specified capacity. Use of a fuse with a larger capacity
will cause a damage to the electrical parts and a fire.
• When disconnecting and connecting coupler, make
sure to turn ignition switch OFF, or electronic parts
may get damaged.
• When disconnecting connectors, never pull the wiring
harness. Unlock the connector lock first and then pull
them apart by holding connectors themselves.
• When connecting connectors, also hold connectors
and put them together until they lock securely (a click
is heard).
• When installing the wiring harness, fix it with clamps
so that no slack is left.
• When installing vehicle parts, be careful so that the
wiring harness is not interfered with or caught by any
other part.
• To avoid damage to the harness, protect its part which
may contact against a part forming a sharp angle by
winding tape or the like around it.
I2RH01010038-01
I2RH01010039-01
I2RH01010040-01
I2RH01010041-01
I2RH01010042-01
I2RH01010043-01
I2RH01010044-01
00-9 Precautions:
• Be careful not to touch the electrical terminals of parts
which use microcomputers (e.g. electronic control unit
like as ECM, PCM, P/S controller, etc.). The static
electricity from your body can damage these parts.
• Never connect any tester (voltmeter, ohmmeter, or
whatever) to electronic control unit when its coupler is
disconnected. Attempt to do it may cause damage to
it.
• Never connect an ohmmeter to electronic control unit
with its coupler connected to it. Attempt to do it may
cause damage to electronic control unit and sensors.
• Be sure to use a specified voltmeter / ohmmeter.
Otherwise, accurate measurements may not be
obtained or personal injury may result. If not specified,
use a voltmeter with high impedance (M /V
minimum) or a digital type voltmeter.
• When taking measurements at electrical connectors
using a tester probe, be sure to insert the probe (2)
from the wire harness side (backside) of the
connector (1).
• When connecting meter probe (2) from terminal side
of coupler (1) because it can’t be connected from
harness side, use extra care not to bend male
terminal of coupler of force its female terminal open
for connection.
In case of such coupler as shown connect probe as
shown to avoid opening female terminal.
Never connect probe where male terminal is
supposed to fit.
• When checking connection of terminals, check its
male half for bend and female half for excessive
opening and both for locking (looseness), corrosion,
dust, etc.
• Before measuring voltage at each terminal, check to
make sure that battery voltage is 11 V or higher. Such
terminal voltage check at low battery voltage will lead
to erroneous diagnosis.
I3RM0A000004-01
I2RH01010046-01
I2RH01010047-01
I2RH01010048-01
Precautions: 00-10
Air Bag Warning
S7RS0B0000009
WARNING
!
For vehicles equipped with Supplemental
Restraint (Air Bag) System:
• Service on and around the air bag system
components or wiring must be performed
only by an authorized SUZUKI dealer. Refer
to “Air Bag System Components, Wiring
and Connectors Location in Section 8B” in
order to confirm whether you are
performing service on or near the air bag
system components or wiring. Please
observe all WARNINGS in Air Bag System
section and “Precautions on Service and
Diagnosis of Air Bag System in Section
8B” before performing service on or
around the air bag system components or
wiring. Failure to follow WARNINGS could
result in unintentional activation of the
system or could render the system
inoperative. Either of these two conditions
may result in severe injury.
• Technical service work must be started at
least 90 seconds after the ignition switch is
turned to the LOCK position and the
negative cable is disconnected from the
battery. Otherwise, the system may be
activated by reserve energy in the Sensing
and Diagnostic Module (SDM).
Air Bag System Service Warning
S7RS0B0000010
WARNING
!
• Service on or around the air bag system
components or wiring must be performed
only by an authorized SUZUKI dealer.
Please observe all WARNINGS in Air Bag
System section and “Precautions on
Service and Diagnosis of Air Bag System
in Section 8B” before performing service
on or around the air bag system
components or wiring. Failure to follow
WARNINGS could result in unintended
activation of the system or could render
the system inoperative. Either of these two
conditions may result in severe injury.
• The procedures in the air bag system
section must be followed in the order
listed to disable the air bag system
temporarily and prevent false DTCs from
setting. Failure to follow procedures could
result in possible activation of the air bag
system, personal injury or otherwise
unneeded air bag system repairs.
Fastener Caution
S7RS0B0000011
CAUTION
!
When fasteners are removed, always reinstall
them at the same location from which they
were removed. If a fastener needs to be
replaced, use the correct part number
fastener for that application. If the correct
part number fastener is not available, a
fastener of equal size and strength (or
stronger) may be used. Fasteners that are not
reused, and those requiring thread-locking
compound, will be called out. The correct
torque value must be used when installing
fasteners that require it. If the conditions are
not followed, parts or system damage could
result.
Suspension Caution
S7RS0B0000012
CAUTION
!
• All suspension fasteners are an important
attaching part in that it could affect the
performance of vital parts and systems,
and/or could result in major repair
expense. They must be replaced with one
of the same part number or with an
equivalent part if replacement becomes
necessary. Do not use a replacement part
of lesser quality or substitute design.
Torque values must be used as specified
during reassembly to assure proper
retention of this part.
• Never attempt to heat, quench or
straighten any suspension part. Replace it
with a new part or damage to the part may
result.
Wheels and Tires Caution
S7RS0B0000013
CAUTION
!
All wheel fasteners are important attaching
parts in that they could affect the
performance of vital parts and systems, and/
or could result in major repair expense. They
must be replaced with one of the same part
number or with an equivalent part if
replacement becomes necessary. Do not use
a replacement part of lesser quality or
substitute design. Torque values must be
used as specified during reassembly to
assure proper retention of all parts.
There is to be no welding as it may result in
extensive damage and weakening of the
metal.
00-11 Precautions:
Precaution for Vehicle Equipped with ESP
System
S7RS0B0000015
• When testing with any of the following equipments
(when vehicle is tested by rotating wheels (tires)
under vehicle stop), be sure to deactivate ESP
system referring to “Precautions in Speedometer Test
or Other Tests in Section 4F” to obtain correct data.
– 2 or 4-wheel chassis dynamometer
– Speedometer tester
– Brake tester
– Etc.
ESP control module
• When ESP control module is removed / installed, do
not use impact wrenches which generate shock or
impact to avoid damaging sensors in ESP control
module.
• When any of the following operation is done, calibrate
steering angle sensor referring to “Sensor Calibration
in Section 4F”.
– When battery or dome fuse is removed.
– When steering angle sensor is replaced.
Brake Caution
S7RS0B0000014
CAUTION
!
All brake fasteners are important attaching
parts in that they could affect the
performance of vital parts and systems, and/
or could result in major repair expense. They
must be replaced with one of same part
number or with an equivalent part if
replacement becomes necessary. Do not use
a replacement part of lesser quality or
substitute design. Torque values must be
used as specified during reassembly to
assure proper retention of all parts. There is
to be no welding as it may result in extensive
damage and weakening of the metal.
Repair Instructions
Electrical Circuit Inspection Procedure
S7RS0B0006001
While there are various electrical circuit inspection
methods, described here is a general method to check
its open and short circuit by using an ohmmeter and a
voltmeter.
Open Circuit Check
Possible causes for the open circuit are as follows. As
the cause is in the connector or terminal in many cases,
they need to be checked particularly carefully.
• Loose connection of connector
• Poor contact of terminal (due to dirt, corrosion or rust
on it, poor contact tension, entry of foreign object etc.)
• Wire harness being open
When checking system circuits including an electronic
control unit such as ECM, TCM, ABS control module,
etc., it is important to perform careful check, starting with
items which are easier to check.
1) Disconnect negative (–) cable from battery
2) Check each connector at both ends of the circuit
being checked for loose connection. Also check lock
condition of connector if equipped with connector
lock.
3) Using a test male terminal, check both terminals of
the circuit being checked for contact tension of its
female terminal. Check each terminal visually for
poor contact (possibly caused by dirt, corrosion, rust
entry of foreign object, etc.). At the same time, check
to make sure that each terminal is locked in the
connector fully.
1. Check contact tension by inserting and removing just for once.
I2RH01010049-01
I2RH01010050-01
Precautions: 00-12
4) Using continuity check or voltage check the following
procedure, check the wire harness for open circuit
and poor connection with its terminals. Locate
abnormality, if any.
Continuity Check
1) Measure resistance between connector terminals at
both ends of the circuit being checked (between “A-
1” and “C-1” in the figure). If no continuity is indicated
(infinity or over limit), that means that the circuit is
open between terminals “A-1” and “C-1”.
2) Disconnect the connector included in the circuit
(connector-B in the figure) and measure resistance
between terminals “A-1” and “B-1”.
If no continuity is indicated, that means that the
circuit is open between terminals “A-1” and “B-1”. If
continuity is indicated, there is an open circuit
between terminals “B-1” and “C-1” or an abnormality
in connector-B.
Voltage Check
If voltage is supplied to the circuit being checked, voltage
check can be used as circuit check.
1) With all connectors connected and voltage applied to
the circuit being checked, measure voltage between
each terminal and body ground.
a) If measurements were taken as shown in the
figure and results were as listed in the following,
it means that the circuit is open between
terminals “B-1” and “A-1”.
Voltage between
“C-1” and body ground: Approx. 5 V
“B-1” and body ground: Approx. 5 V
“A-1” and body ground: 0 V
b) Also, if measured values were as listed in the
following, it means that there is a resistance
(abnormality) of such level that corresponds to
the voltage drop in the circuit between terminals
“A-1” and “B-1”.
Voltage between
“C-1” and body ground: Approx. 5 V
“B-1” and body ground: Approx. 5 V
“A-1” and body ground: Approx. 3 V
1. Looseness of crimping
2. Open
3. Thin wire (single strand of wire)
I2RH01010051-01
I2RH01010052-01
I2RH01010053-01
I5RH01000005-01
00-13 Precautions:
Short Circuit Check (Wire Harness to Ground)
1) Disconnect negative (–) cable at battery.
2) Disconnect connectors at both ends of the circuit to
be checked.
NOTE
If the circuit to be checked is connected to
other parts (1), disconnect all connectors of
those parts.
Otherwise, diagnosis will be misled.
3) Measure resistance between terminal at one end of
circuit (“A-1” terminal in the figure) and body ground.
If continuity is indicated, it means that there is a short
to ground between terminals “A-1” and “C-1” of the
circuit.
4) Disconnect the connector included in circuit
(connector-B) and measure resistance between “A-
1” and body ground. If continuity is indicated, it
means that the circuit is shorted to the ground
between terminals “A-1” and “B-1”.
Intermittent and Poor Connection Inspection
S7RS0B0006002
Most intermittent are caused by faulty electrical
connections or wiring, although a sticking relay or
solenoid can occasionally be at fault. When checking it
for proper connection, perform careful check of suspect
circuits for:
• Poor mating of connector halves, or terminals not fully
seated in the connector body (backed out).
• Dirt or corrosion on the terminals. The terminals must
be clean and free of any foreign material which could
impede proper terminal contact. However, cleaning
the terminal with a sand paper or the like is prohibited.
• Damaged connector body, exposing the terminals to
moisture and dirt, as well as not maintaining proper
terminal orientation with the component or mating
connector.
I5RH01000006-01
1. To other parts
I2RH01010056-01
I2RH01010057-01
Precautions: 00-14
• Improperly formed or damaged terminals.
Check each connector terminal in problem circuits
carefully to ensure good contact tension by using the
corresponding mating terminal.
If contact tension is not enough, reform it to increase
contact tension or replace.
• Poor terminal-to-wire connection.
Check each wire harness in problem circuits for poor
connection by shaking it by hand lightly. If any
abnormal condition is found, repair or replace.
• Wire insulation which is rubbed through, causing an
intermittent short as the bare area touches other
wiring or parts of the vehicle.
• Wiring broken inside the insulation. This condition
could cause continuity check to show a good circuit,
but if only 1 or 2 strands of a multi-strand-type wire
are intact, resistance could be far too high.
If any abnormality is found, repair or replace.
1. Check contact tension by inserting and removing just once.
2. Check each terminal for bend and proper alignment.
I5RH01000007-01
I2RH01010059-01
I2RH01010060-01
00-15 Precautions:
Table of Contents 0- i

Section 0
CONTENTS
General Information
General Information ................................ 0A-1
General Description.............................................0A-1
Abbreviations ......................................................0A-1
Symbols ..............................................................0A-2
Wire Color Symbols ............................................0A-2
Fasteners Information .........................................0A-3
Vehicle Lifting Points...........................................0A-5
Engine Supporting Points ...................................0A-7
Vehicle Identification Number .............................0A-7
Engine Identification Number..............................0A-7
Transmission Identification Number....................0A-7
Component Location ...........................................0A-8
Warning, Caution and Information Labels
Location ............................................................0A-8
Maintenance and Lubrication................. 0B-1
Precautions...........................................................0B-1
Precautions for Maintenance and Lubrication.....0B-1
Scheduled Maintenance ......................................0B-1
Maintenance Schedule under Normal Driving
Conditions .........................................................0B-1
Maintenance Recommended under Severe
Driving Conditions.............................................0B-2
Repair Instructions ..............................................0B-3
Accessory Drive Belt Inspection..........................0B-3
Accessory Drive Belt Replacement.....................0B-4
Valve Lash (Clearance) Inspection .....................0B-4
Engine Oil and Filter Change..............................0B-4
Engine Coolant Change......................................0B-5
Exhaust System Inspection.................................0B-6
Spark Plug Replacement ....................................0B-6
Air Cleaner Filter Inspection................................0B-6
Air Cleaner Filter Replacement...........................0B-6
Fuel Lines and Connections Inspection ..............0B-6
Fuel Filter Replacement......................................0B-7
Fuel Tank Inspection...........................................0B-7
PCV Valve Inspection .........................................0B-7
Fuel Evaporative Emission Control System
Inspection..........................................................0B-7
Brake Discs and Pads Inspection .......................0B-7
Brake Hoses and Pipes Inspection .....................0B-7
Brake Fluid Inspection.........................................0B-8
Brake Fluid Replacement....................................0B-8
Brake Lever and Cable Inspection......................0B-8
Clutch Fluid Inspection........................................0B-8
Tires Inspection...................................................0B-9
Wheel Discs Inspection.......................................0B-9
Wheel Bearing Inspection ...................................0B-9
Suspension System Inspection...........................0B-9
Steering System Inspection ..............................0B-10
Drive Shaft (Axle) Boots Inspection ..................0B-10
Manual Transaxle Oil Inspection.......................0B-10
Manual Transaxle Oil Replacement..................0B-10
Automatic Transaxle Fluid Level Inspection......0B-11
Automatic Transaxle Fluid Replacement ..........0B-11
Automatic Transaxle Fluid Cooler Hose
Inspection........................................................0B-11
All Latches, Hinges and Locks Inspection.........0B-11
HVAC Air Filter (If Equipped) Inspection...........0B-12
HVAC Air Filter (If Equipped) Replacement......0B-12
Final Inspection for Maintenance Service .........0B-12
Specifications.....................................................0B-13
Tightening Torque Specifications......................0B-13
Special Tools and Equipment ...........................0B-13
Recommended Fluids and Lubricants...............0B-13
Special Tool ......................................................0B-14
0A-1 General Information:
General Information
General Information
General Description
Abbreviations
S7RS0B0101001
A:
ABDC: After Bottom Dead Center
ABS: Anti-lock Brake System
AC: Alternating Current
A/C: Air Conditioning
A-ELR: Automatic-Emergency Locking Retractor
A/F: Air Fuel Mixture Ratio
ALR: Automatic Locking Retractor
API: American Petroleum Institute
APP sensor: Accelerator Pedal Position Sensor
A/T: Automatic Transmission, Automatic Transaxle
ATDC: After Top Dead Center
ATF: Automatic Transmission Fluid, Automatic
Transaxle Fluid
B:
B+: Battery Positive Voltage
BBDC: Before Bottom Dead Center
BCM: Body Electrical Control Module
BDC: Bottom Dead Center
BTDC: Before Top Dead Center
C:
CAN: Controller Area Network
CKT: Circuit
CKP Sensor: Crankshaft Position Sensor
CMP Sensor: Camshaft Position Sensor
CO: Carbon Monoxide
CPP Switch: Clutch Pedal Position Switch (Clutch
Switch, Clutch Start Switch)
CPU: Central Processing Unit
CRS: Child Restraint System
D:
DC: Direct Current
DLC: Data Link Connector (Assembly Line Diag. Link,
ALDL, Serial Data Link, SDL)
DOHC: Double Over Head Camshaft
DOJ: Double Offset Joint
DRL: Daytime Running Light
DTC: Diagnostic Trouble Code (Diagnostic Code)
E:
EBCM: Electronic Brake Control Module, ABS Control
Module
EBD: Electronic Brake Force Distribution
ECM: Engine Control Module
ECT Sensor: Engine Coolant Temperature Sensor
(Water Temp. Sensor, WTS)
EFE Heater: Early Fuel Evaporation Heater (Positive
Temperature Coefficient, PTC Heater)
EGR: Exhaust Gas Recirculation
EGRT Sensor: EGR Temperature Sensor (Recirculated
Exhaust Gas Temp. Sensor, REGTS)
ELR: Emergency Locking Retractor
ESP : Electronic Stability Program
EPS: Electronic Power Steering
EVAP: Evaporative Emission
EVAP Canister: Evaporative Emission Canister
(Charcoal Canister)
F:
4WD: 4 Wheel Drive
G:
GEN: Generator
GND: Ground
GPS: Global Positioning System
H:
HVAC: Heating, Ventilating and Air Conditioning
HC: Hydrocarbons
HO2S: Heated Oxygen Sensor
I:
IAC Valve: Idle Air Control Valve (Idle Speed Control
Solenoid Valve, ISC Solenoid Valve)
IAT Sensor: Intake Air Temperature Sensor (Air
temperature Sensor, ATS)
ICM: Immobilizer Control Module
IG: Ignition
ISC Actuator: Idle Speed Control Actuator
L:
LH: Left Hand
LHD: Left Hand Drive Vehicle
LSPV: Load Sensing Proportioning Valve
M:
MAF Sensor: Mass Air Flow Sensor (Air Flow Sensor,
AFS, Air Flow Meter, AFM)
MAP Sensor: Manifold Absolute Pressure Sensor
(Pressure Sensor, PS)
Max: Maximum
MFI: Multiport Fuel Injection (Multipoint Fuel Injection)
Min: Minimum
MIL: Malfunction Indicator Lamp (“SERVICE ENGINE
SOON” Light)
M/T: Manual Transmission, Manual Transaxle
N:
NOx: Nitrogen Oxides
O:
OBD: On-Board Diagnostic System (Self-Diagnosis
Function)
O/D: Overdrive
OHC: Over Head Camshaft
O2S: Oxygen Sensor
P:
PCM: Powertrain Control Module
PCV: Positive Crankcase Ventilation
PNP: Park / Neutral Position
P/S: Power Steering
PSP Switch: Power Steering Pressure Switch (P/S
Pressure Switch)
R:
RH: Right Hand
RHD: Right Hand Drive Vehicle
S:
SAE: Society of Automotive Engineers
General Information: 0A-2
SAS: Steering Angle Sensor
SDM: Sensing and Diagnostic Module (Air Bag
Controller, Air bag Control Module)
SDT: Smart Diagnostic Tester
SFI: Sequential Multiport Fuel Injection
SOHC: Single Over Head Camshaft
T:
TBI: Throttle Body Fuel Injection (Single-Point Fuel
Injection, SPI)
TCC: Torque Converter Clutch
TCM: Transmission Control Module (A/T Controller, A/T
Control Module)
TDC: Top Dead Center
TP Sensor: Throttle Position Sensor
TVV: Thermal Vacuum Valve (Thermal Vacuum
Switching Valve, TVSV, Bimetal Vacuum Switching
Valve, BVSV)
TWC: Three Way Catalytic Converter (Three Way
Catalyst)
2WD: 2 Wheel Drive
U:
USB: Universal Serial Bus
V:
VIN: Vehicle Identification Number
VSS: Vehicle Speed Sensor
VVT: Variable Valve Timing (Camshaft Position Control)
W:
WU-OC: Warm Up Oxidation Catalytic Converter
WU-TWC: Warm Up Three Way Catalytic Converter
Symbols
S7RS0B0101002
Wire Color Symbols
S7RS0B0101003
Symbol Definition Symbol Definition
Tightening torque Apply SUZUKI BOND NO. 1216B
99000-31230
Apply oil (engine, transmission, transfer,
differential)
Apply SILICONE SEALANT
99000-31120
Apply fluid (brake, power steering or
automatic transmission fluid)
Apply SEALING COMPOUND 366E
99000-31090
Apply SUZUKI SUPER GREASE A
99000-25011
Apply SUZUKI SUPER GREASE C
99000-25030
Apply THREAD LOCK 1322
99000-32110
Apply SUZUKI SUPER GREASE E
99000-25050
Apply THREAD LOCK 1333B
99000-32020
Apply SUZUKI SUPER GREASE H
99000-25121
Apply THREAD LOCK 1342
99000-32050
Apply SUZUKI SUPER GREASE I
99000-25210
Apply SUZUKI BOND NO. 1215
99000-31110
Do not reuse
Apply SUZUKI BOND NO. 1207F
99000-31250
Note on reassembly
Apply SUZUKI BOND NO. 1217G
99000-31260
Symbol Wire Color Symbol Wire Color
B BLK Black O, Or ORN Orange
Bl BLU Blue R RED Red
Br BRN Brown W WHT White
G GRN Green Y YEL Yellow
Gr GRY Gray P PNK Pink
Lbl LT BLU Light blue V PPL Violet
Lg LT GRN Light green
0A-3 General Information:
There are two kinds of colored wire used in this vehicle. One is single-colored wire and the other is dual-colored
(striped) wire.
The single-colored wire uses only one color symbol (i.e. “GRN”).
The dual-colored wire uses two color symbols (i.e. “GRN/YEL”). The first symbol represents the base color of the wire
(“GRN” in the figure) and the second symbol represents the color of the stripe (“YEL” in the figure).
Fasteners Information
S7RS0B0101004
Metric Fasteners
Most of the fasteners used for this vehicle are JIS-
defined and ISO-defined metric fasteners. When
replacing any fasteners, it is most important that
replacement fasteners be the correct diameter, thread
pitch and strength.
CAUTION
!
Even when the nominal diameter (1) of thread
is the same, the thread pitch (2) or the width
across flats (3) may vary between ISO and
JIS. Refer to JIS-TO-ISO Main Fasteners
Comparison Table below for the difference.
Installing a mismatched bolt or nut will cause
damage to the thread.
Before installing, check the thread pitch for
correct matching and then tighten it by hand
temporarily. If it is tight, recheck the thread
pitch.
JIS-TO-ISO Main Fasteners Comparison Table
Fastener Strength Identification
Most commonly used metric fastener strength property
classes are 4T, 6.8, 7T, 8.8 and radial line with the class
identification embossed on the head of each bolt. Some
metric nuts will be marked with punch, 6 or 8 mark
strength identification on the nut face. Figure shows the
different strength markings.
When replacing metric fasteners, be careful to use bolts
and nuts of the same strength or greater than the original
fasteners (the same number marking or higher). It is
likewise important to select replacement fasteners of the
correct diameter and thread pitch. Correct replacement
bolts and nuts are available through the parts division.
Metric bolts: Identification class numbers or marks
correspond to bolt strength (increasing numbers
represent increasing strength).
I2RH01010010-01
Nominal diameter
M6 M8 M10 M12 M14
JIS
Thread pitch 1.0 1.25 1.25 1.25 1.5
Width across flats 10 12 14 17 19
ISO
Thread pitch 1.0 1.25 1.5 1.5 1.5
Width across flats 10 13 16 18 21
I4RH0A010005-01
1. Nut strength identification
I5RH01010001-01
General Information: 0A-4
Standard Tightening Torque
Each fastener should be tightened to the torque specified in each section. If no description or specification is provided,
refer to the following tightening torque chart for the applicable torque for each fastener. When a fastener of greater
strength than the original one is used, however, use the torque specified for the original fastener.
NOTE
• For the flanged bolt, flanged nut and self-lock nut of 4T and 7T strength, add 10% to the tightening
torque given in the following chart.
• The following chart is applicable only where the fastened parts are made of steel light alloy.
Tightening torque chart
*:Self-lock nut
Strength Unit
Thread diameter (Nominal diameter) (mm)
4 5 6 8 10 12 14 16 18
A equivalent of 4T strength fastener N m 1.5 3.0 5.5 13 29 45 65 105 160
kgf-m 0.15 0.30 0.55 1.3 2.9 4.5 6.5 10.5 16
lb-ft 1.0 2.5 4.0 9.5 21.0 32.5 47.0 76.0 116.0
A equivalent of 6.8 strength fastener
without flange
N m 2.4 4.7 8.4 20 42 80 125 193 280
kgf-m 0.24 0.47 0.84 2.0 4.2 8.0 12.5 19.3 28
lb-ft 2.0 3.5 6.0 14.5 30.5 58.0 90.5 139.5 202.5
A equivalent of 6.8 strength fastener
with flange
*: Self-lock nut (6 strength)
N m 2.4 4.9 8.8 21 44 84 133 203 298
kgf-m 0.24 0.49 0.88 2.1 4.4 8.4 13.3 20.3 29.8
lb-ft 2.0 3.5 6.5 15.5 32.0 61.0 96.5 147.0 215.5
A equivalent of 7T strength fastener N m 2.3 4.5 10 23 50 85 135 210 240
kgf-m 0.23 0.45 1.0 2.3 5.0 8.5 13.5 21 24
lb-ft 2.0 3.5 7.5 17.0 36.5 61.5 98.0 152.0 174.0
A equivalent of 8.8 strength bolt (8
strength nut) without flange
N m 3.1 6.3 11 27 56 105 168 258 373
kgf-m 0.31 0.63 1.1 2.7 5.6 10.5 16.8 25.8 37.3
lb-ft 2.5 4.5 8.0 19.5 40.5 76.0 121.5 187.0 270.0
A equivalent of 8.8 strength bolt (8
strength nut) with flange
N m 3.2 6.5 12 29 59 113 175 270 395
kgf-m 0.32 0.65 1.2 2.9 5.9 11.3 17.5 27 39.5
lb-ft 2.5 5.0 9.0 21.0 43.0 82.0 126.5 195.5 286.0
I2RH01010012-01
I2RH01010013-01
I2RH01010014-01
I2RH01010015-01
I2RH01010016-01
I2RH01010017-01
0A-5 General Information:
Vehicle Lifting Points
S7RS0B0101005
WARNING
!
• Before applying hoist to underbody, always take vehicle balance throughout service into
consideration. Vehicle balance on hoist may change depending on what part to be removed.
• Before lifting up the vehicle, check to be sure that end of hoist arm is not in contact with brake pipe,
fuel pipe, bracket or any other part.
• When using frame contact hoist, apply hoist as shown (right and left at the same position). Lift up
the vehicle till 4 tires are a little off the ground and make sure that the vehicle will not fall off by
trying to move vehicle body in both ways. Work can be started only after this confirmation.
• Make absolutely sure to lock hoist after vehicle is hoisted up.
When Using Frame Contact Hoist





I4RS0A010001-01
1. Vehicle front 3. Floor jack position
2. Support position for frame contact hoist and safety stand 4. Body mounting stay
General Information: 0A-6
When Using Floor Jack
WARNING
!
If the vehicle to be jacked up only at the front
or rear end, be sure to block the wheels on
ground in order to ensure safety.
After the vehicle is jacked up, be sure to
support it on stands. It is extremely
dangerous to do any work on the vehicle
raised on jack alone.
CAUTION
!
• Never apply jack against rear suspension
parts (i.e., stabilizer, etc.) or vehicle floor,
or it may get deformed.
• When jacking up the front end, be sure to
use an air type floor jack with the following
specified height or a manual type floor jack
of the following size. Otherwise, the jack
may cause the bumper or vehicle body
panel a damage.
Jack size
Height “h”: under 145 mm (under 5.71 in.)
Length “l”: above 900 mm (above 35.4 in.)
In raising front or rear vehicle end off the floor by jacking,
be sure to put the jack against front suspension frame
(1) or rear jacking bracket (2).
To perform service with either front or rear vehicle end
jacked up, be sure to place safety stands (1) under body
mounting stay (2) so that vehicle body is securely
supported. And then check to ensure that body mounting
stay (2) does not slide on safety stands (1) and the
vehicle is held stable for safety’s sake.


I4RS0A010002-01
[A]: Front [B]: Rear


I4RS0A010003-01






I4RS0A010004-01
0A-7 General Information:
Engine Supporting Points
S7RS0B0101006
WARNING
!
When using engine supporting device (1), be
sure to observe the followings.
Otherwise, not only deformation of vehicle
body but also personal injury may result.
• Apply supporting device at the specified
positions (2) indicated in figure
• Install supporting device taking a well-
balanced posture.
• Do not contact supporting device with
other parts than engine room body panel
and engine hooks.
Vehicle Identification Number
S7RS0B0101007
The number is punched close by the right side strut
support in engine room and it is also attached on the left
side of instrument panel depending on the vehicle
specification.
Engine Identification Number
S7RS0B0101008
The number is punched on cylinder block.
Transmission Identification Number
S7RS0B0101009
The automatic transmission identification number is
located on transmission case.

 

I4RS0A010005-01
I4RS0B010003-01
I3RM0A010005-01
I4RS0A010008-01
General Information: 0A-8
Component Location
Warning, Caution and Information Labels Location
S7RS0B0103001
The figure shows main labels among others that are attached to vehicle component parts.
When servicing and handling parts, refer to WARNING / CAUTION instructions printed on labels.
If any WARNING / CAUTION label is found stained or damaged, clean or replace it as necessary.






I5RS0C010001-02
1. Air bag label on sun visor (if equipped) 4. Steering shaft joint cover label (if equipped)
2. Radiator cap label 5. Jack label
3. Engine cooling fan label 6. Rear beam label
0A-9 General Information:










I4RS0B010002-03
1. Air bag label on driver air bag (inflator) module 6. Air bag label on SDM
2. Air bag label on combination switch and contact coil assembly 7. Pretensioner label on seat belt retractor
3. Air bag label on passenger air bag (inflator) module 8. Child seat label (if equipped)
4. Air bag label on side air bag (inflator) module (if equipped) 9. Side/Curtain air bag label on pillar (both right and left sides) (if equipped)
5. Air bag label on curtain air bag (inflator) module (if equipped) [A]: These labels are attached on vehicle equipped with air bag system only.
Maintenance and Lubrication: 0B-1
General Information
Maintenance and Lubrication
Precautions
Precautions for Maintenance and Lubrication
S7RS0B0200001
Air Bag Warning
Refer to “Air Bag Warning in Section 00”.
Scheduled Maintenance
Maintenance Schedule under Normal Driving Conditions
S7RS0B0205001
NOTE
• This interval should be judged by odometer reading or months, whichever comes first.
• This table includes service as scheduled up to 90,000 km (54,000 miles) mileage. Beyond 90,000 km
(54,000 miles), carry out the same services at the same intervals respectively.
Interval
Km (x 1,000) 15 30 45 60 75 90
Miles (x 1,000) 9 18 27 36 45 54
Months 12 24 36 48 60 72
Engine
Accessory drive belt (I: , R: ) — — I — — R
Valve lash (clearance) (I: ) — I — I — I
Engine oil and oil filter (R: ) R R R R R R
Engine coolant (R: ) — — R — — R
Exhaust system (I: ) — I — I — I
Ignition system
Spark plugs (R: )
When unleaded fuel is used Iridium Plug
Replace every 60,000 km (36,000
miles) or 48 months
When leaded fuel is used, refer to “Maintenance Recommended under Severe Driving
Conditions”.
Fuel system
Air cleaner filter (R: , I: )
Paved-road I I R I I R
Dusty conditions
Refer to “Maintenance Recommended
under Severe Driving Conditions”.
Fuel lines and connections (I: ) — I — I — I
Fuel filter (R: ) (See NOTE below)
Replace every 105,000 km (63,000
miles)
Fuel tank (I: ) — — I — — I
Emission control system
PCV valve (I: ) — — — — — I
Fuel evaporative emission control system (I: ) — — — — — I
Brake
Brake discs and pads (thickness, wear, damage) (I: ) I I I I I I
Brake hoses and pipes (leakage, damage, clamp) (I: ) — I — I — I
Brake fluid (R: ) — R — R — R
Brake lever and cable (damage, stroke, operation) (I: )
Inspect at first 15,000 km (9,000 miles
only)
Chassis and body
Clutch (fluid leakage, level) (I: ) — I — I — I
Tires (wear, damage, rotation) / wheels (damage) (I: / ) I I I I I I
Suspension system (tightness, damage, rattle, breakage) (I: ) — I — I — I
Steering system (tightness, damage, breakage, rattle) (I: ) — I — I — I
Drive shaft (axle) boots (I: ) — — I — — I
Manual transaxle oil (leakage, level) (I: 1st 15,000 km only) (R: ) I — R — — R
0B-2 Maintenance and Lubrication:
NOTE
• “R”: Replace or change
• “I”: Inspect and correct, replace or lubricate if necessary
• For spark plugs, replace every 50,000 km if the local law requires.
• Periodic replacement of fuel filter is not necessary if it is not instructed in “Periodic Maintenance
Schedule” section of the Owner’s manual. The scheduled maintenance varies depending on the
vehicle specification.
Maintenance Recommended under Severe Driving Conditions
S7RS0B0205002
If the vehicle is usually used under the conditions corresponding to any severe condition code given below, IT IS
RECOMMENDED that applicable maintenance operation be performed at the particular interval as shown in the
following table.
Severe condition code:
A: Repeated short trips
B: Driving on rough and/or muddy roads
C: Driving on dusty roads
D: Driving in extremely cold weather and/or salted roads
E: Repeated short trips in extremely cold weather
F: Leaded fuel use
G: – – – – –
H: Towing a trailer (if admitted)
Automatic transaxle fluid
Fluid level (I: ) — I — I — I
Fluid change (R: )
Replace every 165,000 km (99,000
miles)
Fluid hose (I: ) — — — I — —
All latches, hinges and locks (I: ) — I — I — I
HVAC air filter (if equipped) (I: ) (R: ) — I R — I R
Interval
Km (x 1,000) 15 30 45 60 75 90
Miles (x 1,000) 9 18 27 36 45 54
Months 12 24 36 48 60 72
Severe
condition code
Maintenance
Maintenance
operation
Maintenance interval
– B C D – – – – Accessory drive belt
I
Every 15,000 km
(9,000 miles) or 12 months
R
Every 45,000 km
(27,000 miles) or 36 months
A – C D E F – H Engine oil and oil filter R
Every 7,500 km
(4,500 miles) or 6 months
– – C – – – – – Air cleaner filter *1
I
Every 2,500 km
(1,500 miles)
R
Every 30,000 km
(18,000 miles) or 24 months
A B C – E F – H Spark plugs Iridium plug R
Every 30,000 km (18,000 miles) or
24 months
– B C D – – – H Wheel bearings I
Every 15,000 km
(9,000 miles) or 12 months
– B – D E – – H Drive shaft (axle) boots I
Every 15,000 km
(9,000 miles) or 12 months
– B – – E – – H Manual transaxle oil R
First time only:
15,000 km (9,000 miles) or 12
months
Second time and after:
Every 30,000 km (18,000 miles) or
24 months reckoning from 0 km (0
mile) or 0 month
Maintenance and Lubrication: 0B-3
NOTE
• “I”: Inspect and correct or replace if necessary
• “R”: Replace or change
• *1: Inspect or replace more frequently if the vehicle is used under dusty conditions.
• *2: Clean or replace more frequently if the air from the air conditioning decreases.
Repair Instructions
Accessory Drive Belt Inspection
S7RS0B0206001
WARNING
!
All inspection and replacement are to be
performed with ENGINE NOT RUNNING.
Water Pump and Generator Drive Belt
1) Disconnect negative (–) cable at battery.
2) Inspect belt for cracks, cuts, deformation, wear and
cleanliness. If any defect exists, replace.
Check belt for tension.
Water pump and generator belt tension
“a”: 4.5 – 5.5 mm (0.18 – 0.22 in.) deflection
under 100 N (10 kg, 22 lb) pressure
NOTE
When replacing belt with a new one, adjust
belt tension to 3.5 – 4 mm (0.14 – 0.16 in.)
3) If belt is too tight or too loose, adjust it to
specification by adjusting alternator position.
4) Tighten alternator adjusting bolts and pivot bolt.
5) Connect negative (–) cable to battery.
A/C Compressor Drive Belt
1) Disconnect negative (–) cable at battery.
2) Inspect belt for cracks, cuts, deformation, wear and
cleanliness. If any defect exists, replace.
Check belt for tension.
If belt tension is out of specification, adjust it
referring to “Compressor Drive Belt Inspection and
Adjustment in Section 7B”.
A/C compressor drive belt tension
“a”: 7 – 8 mm (0.28 – 0.31 in.) deflection under
100 N (10 kg, 22 lb) pressure
NOTE
When replacing belt with a new one, adjust
belt tension to 6 – 7 mm (0.24 – 0.28 in.).
3) Connect negative (–) cable to battery.
– B – – E – – H Automatic transaxle fluid R
Every 30,000 km (18,000 miles) or
24 months
– – C D – – – – HVAC air filter (if equipped) *2
I
Every 15,000 km (9,000 miles) or 12
months
R
Every 45,000 km (27,000 miles) or
36 months
Severe
condition code
Maintenance
Maintenance
operation
Maintenance interval
I3RM0A020001-01
I4RS0A020001-01
0B-4 Maintenance and Lubrication:
Accessory Drive Belt Replacement
S7RS0B0206002
Water Pump and Generator Drive Belt
Replace belt with new one referring to “Water Pump /
Generator Drive Belt Removal and Installation in Section
1J”.
A/C Compressor Drive Belt
Replace belt with new one referring to “Compressor
Drive Belt Removal and Installation in Section 7B”.
Valve Lash (Clearance) Inspection
S7RS0B0206003
Inspect intake and exhaust valve lash and adjust as
necessary.
Refer to “Valve Lash (Clearance) Inspection in Section
1D” for valve lash inspection and adjustment procedure.
Engine Oil and Filter Change
S7RS0B0206004
WARNING
!
• New and used engine oil can be
hazardous.
Be sure to read “WARNING” in “General
Precautions in Section 00” and observe
what is written there.
• Step 1) – 7) outlined below must be
performed with ENGINE NOT RUNNING.
For Step 8), be sure to have adequate
ventilation while engine is running.
Before draining engine oil, check engine for oil leakage.
If any evidence of leakage is found, make sure to correct
defective part before proceeding to the following work.
1) Drain engine oil by removing drain plug.
2) After draining oil, wipe drain plug clean. Reinstall
drain plug.
Tightening torque
Engine oil drain plug (a): 35 N·m (3.5 kgf-m, 25.5
lb-ft)
3) Loosen oil filter by using oil filter wrench (special
tool).
Special tool
(A): 09915–47331
NOTE
Before fitting new oil filter, be sure to oil its
O-ring. Use engine oil for this purpose.
1. Camshaft 2. Thickness gauge
I2RH0B020003-02
I2RH0B020004-01
I2RH0B020005-01
IYSQ01020009-01
Maintenance and Lubrication: 0B-5
4) Screw new filter on oil filter stand by hand until the
filter O-ring contacts mounting surface.
CAUTION
!
To tighten oil filter properly, it is important to
accurately identify the position at which filter
O-ring first contacts mounting surface.
5) Tighten the filter (1) 3/4 turn from the point of contact
with the mounting surface using an oil filter wrench
(2).
Tightening torque
Oil filter (b): 14 N·m (1.4 kgf-m, 10.5 lb-ft) for
reference
6) Replenish oil until oil level is brought to FULL level
mark on dipstick (oil pan and oil filter capacity). The
filler inlet is at the top of the cylinder head cover. It is
recommended to use engine oil of SG, SH, SJ, SL or
SM grade. Select the appropriate oil viscosity
according to the proper engine oil viscosity chart [A].
NOTE
Engine oil capacity is specified as the
following.
However, note that the amount of oil required
when actually changing oil may somewhat
differ from the data depending on various
conditions (temperature, viscosity, etc.).
Engine oil specification
Oil pan capacity: About 3.7 liters (7.8 / 6.5 US /
lmp pt.)
Oil filter capacity: About 0.2 liter (0.4 / 0.3 US /
lmp pt.)
Others: About 0.3 liter (0.6 / 0.5 US / lmp pt.)
Total: About 4.2 liters (8.9 / 7.4 US / lmp pt.)
7) Check oil filter and drain plug for oil leakage.
8) Start engine and run it for 3 minutes. Stop it and wait
another 5 minutes before checking oil level. Add oil,
as necessary, to bring oil level to FULL level mark (1)
on dipstick.
Engine Coolant Change
S7RS0B0206005
WARNING
!
To help avoid danger of being burned, do not
remove radiator cap while engine and
radiator are still hot. Scalding fluid and steam
can be blown out under pressure if cap is
taken off too soon.
CAUTION
!
When changing engine coolant, use mixture
of 50% specified water and 50% ANTIFREEZE
/ ANTICORROSION COOLANT for the
purpose of corrosion protection and
lubrication.
Change engine coolant with new one referring to
“Cooling System Flush and Refill in Section 1F”.
IYSQ01020010-01









     
    





I7RS0B020001-02
2. Low level mark (hole)
IYSQ01020012-01
0B-6 Maintenance and Lubrication:
Exhaust System Inspection
S7RS0B0206006
WARNING
!
To avoid danger of being burned, do not
touch exhaust system when it is still hot.
Any service on exhaust system should be
performed when it is cool.
When carrying out periodic maintenance, or the vehicle
is raised for other service, check exhaust system as
follows:
• Check rubber mountings for damage, deterioration,
and out of position.
• Check exhaust system for leakage, loose
connections, dents and damages.
If bolts or nuts are loose, tighten them to specification.
• Check nearby body areas for damaged, missing or
mispositioned parts, open seams, holes, loose
connections or other defects which could permit
exhaust fumes to seep into the vehicle.
• Make sure that exhaust system components have
enough clearance from the underbody to avoid
overheating and possible damage to floor carpet.
• Any defects should be fixed at once.
Spark Plug Replacement
S7RS0B0206007
Replace spark plugs with new ones referring to “Spark
Plug Removal and Installation in Section 1H”.
Air Cleaner Filter Inspection
S7RS0B0206008
1) Remove air cleaner case clamps.
2) Take air cleaner filter out of case.
3) Check that filter is not excessively dirty, damaged or
oily, clean filter with compressed air from air outlet
side of filter.
4) Install air cleaner filter and Clamp cap securely.
Air Cleaner Filter Replacement
S7RS0B0206009
Replace air cleaner filter with new one according to
Steps 1), 2) and 4) of “Air Cleaner Filter Inspection”.
Fuel Lines and Connections Inspection
S7RS0B0206010
Visually inspect fuel lines and connections for evidence
of fuel leakage, hose cracking and damage. Make sure
all clamps are secure.
Repair leaky joints, if any.
Replace hoses that are suspected of being cracked.
I4RS0A020003-01
I2RH01140007-01
I4RS0B020001-01
I4RS0A020005-01
Maintenance and Lubrication: 0B-7
Fuel Filter Replacement
S7RS0B0206011
Fuel filter is installed in fuel pump assembly in fuel tank.
Replace fuel filter or fuel pump assembly with new one,
referring to “Fuel Pump Assembly Removal and
Installation in Section 1G” for proper procedure.
Fuel Tank Inspection
S7RS0B0206012
Check fuel tank damage, cracks, fuel leakage, corrosion
and tank bolts looseness.
If a problem is found, repair or replace.
PCV Valve Inspection
S7RS0B0206013
Check crankcase ventilation hose and PCV hose for
leaks, cracks or clog, and PCV valve for stick or clog.
Refer to “PCV Valve Inspection in Section 1B” for PCV
valve checking procedure.
Fuel Evaporative Emission Control System
Inspection
S7RS0B0206014
1) Visually inspect hoses for cracks, damage, or
excessive bends. Inspect all clamps for damage and
proper position.
2) Check EVAP canister for operation and clog,
referring to “EVAP Canister Inspection in Section
1B”.
If a malfunction is found, repair or replace.
Brake Discs and Pads Inspection
S7RS0B0206015
1) Remove wheel and caliper but don’t disconnect
brake hose from caliper.
2) Check disc brake pads and discs for excessive wear,
damage and deflection. Replace parts as necessary.
For details, refer to “Front Disc Brake Pad Inspection
in Section 4B”, “Front Brake Disc Inspection in
Section 4B”, “Rear Disc Brake Pad Inspection in
Section 4C” and/or “Rear Brake Disc Inspection in
Section 4C”.
Be sure to torque caliper pin bolts to specification.
Brake Hoses and Pipes Inspection
S7RS0B0206016
Perform this inspection where these is enough light and
use a mirror as necessary.
• Check brake hoses and pipes for proper hookup,
leaks, cracks, chafing and other damage.
• Check that hoses and pipes are clear of sharp edges
and moving parts.
Repair or replace any of these parts as necessary.
CAUTION
!
After replacing any brake pipe or hose, be
sure to carry out air purge operation.
I4RS0B020002-02
I4RS0A020006-01
I3RM0A020006-01
I4RS0A020008-01
0B-8 Maintenance and Lubrication:
Brake Fluid Inspection
S7RS0B0206035
1) Check around master cylinder and reservoir for fluid
leakage. If found leaky, correct.
2) Check fluid level.
If fluid level is lower than the minimum level of
reservoir, refilling is necessary. Fill reservoir with
specified brake fluid.
For the details, refer to “Brake Fluid Level Inspection
in Section 4A”.
CAUTION
!
Since brake system of this vehicle is factory-
filled with brake fluid indicated on reservoir
tank cap, do not use or mix different type of
fluid when refilling; otherwise serious
damage will occur.
Do not use old or used brake fluid, or any
fluid from an unsealed container.
Brake fluid
Refer to reservoir cap of brake master cylinder.
Brake Fluid Replacement
S7RS0B0206017
Change brake fluid as follows.
Drain existing fluid from brake system completely, fill
system with specified fluid and carry out air purge
operation.
For air purging procedure, refer to“Air Bleeding of Brake
System in Section 4A”.
Brake Lever and Cable Inspection
S7RS0B0206018
1) Inspect brake cable for damage and smooth
movement.
Replace cable if it is in deteriorated condition.
2) Check tooth tip of each notch for damage or wear. If
any damage or wear is found, replace parking lever.
3) Check parking brake lever for proper operation and
stroke, and adjust it if necessary.
For checking and adjusting procedures, refer to
“Parking Brake Inspection and Adjustment in Section
4D”.
Parking brake lever stroke
“a”: 4 – 9 notches (with 200 N (20 kg, 44 lbs) of pull
pressure)
Clutch Fluid Inspection
S7RS0B0206019
1) Check clutch system for evidence of fluid leakage.
Repair leaky point if any.
2) Check reservoir for fluid level referring to “Clutch
Fluid Level Inspection in Section 5C”.
If fluid is lower than minimum level of reservoir, refill
reservoir with specified brake fluid indicated on
reservoir cap.
I7RW01020002-01
I4RS0A020009-01
I4RS0B020005-01
I4RS0A410006-01
Maintenance and Lubrication: 0B-9
Tires Inspection
S7RS0B0206020
1) Check tires for uneven or excessive wear, or
damage. If defective, replace.
Refer to “Irregular and/or Premature Wear
Description in Section 2D” and “Wear Indicators
Description in Section 2D” for details.
2) Check inflating pressure of each tire and adjust
pressure to specification as necessary.
NOTE
• Tire inflation pressure should be checked
when tires are cool.
• Specified tire inflation pressure should be
found on tire placard or in owner’s manual
which came with the vehicle.
3) Rotate tires. For details, refer to “Tire Rotation in
Section 2D”.
Wheel Discs Inspection
S7RS0B0206021
Inspect each wheel disc for dents, distortion and cracks.
A disc in badly damaged condition must be replaced.
Wheel Bearing Inspection
S7RS0B0206022
1) Check front wheel bearing for wear, damage,
abnormal noise or rattles. For details, refer to “Front
Wheel Hub, Disc, Nut and Bearing Check in Section
2B”.
2) Check rear wheel bearing for wear, damage,
abnormal noise or rattles. For details, refer to“Rear
Wheel Disc, bolt and Bearing Inspection in Section
2C”.
Suspension System Inspection
S7RS0B0206023
• Inspect front struts and rear shock absorbers for
evidence of oil leakage, dents or any other damage on
sleeves; and inspect anchor ends for deterioration.
Replace defective parts, if any.
• Check front and rear suspension systems for
damaged, loose or missing parts; also for parts
showing signs of wear or lack of lubrication.
Repair or replace defective parts, if any.
• Check front suspension arm ball joint stud dust seals
for leakage, detachment, tear or any other damage.
Replace defective boot, if any.
1. Wear indicator
I2RH01020022-01
I2RH01020023-01
I4RS0A020011-01
I4RS0A020012-01
Thank you very much
for your reading.
Please Click Here
Then Get More
Information.

More Related Content

Similar to 2005 Suzuki Swift Sport RS416 Service Repair Manual.pdf

Similar to 2005 Suzuki Swift Sport RS416 Service Repair Manual.pdf (7)

Toyota 6 hbw23 electric walkie pallet jack service repair manual
Toyota 6 hbw23 electric walkie pallet jack service repair manualToyota 6 hbw23 electric walkie pallet jack service repair manual
Toyota 6 hbw23 electric walkie pallet jack service repair manual
 
Toyota 6 hbw23 electric walkie pallet jack service repair manual
Toyota 6 hbw23 electric walkie pallet jack service repair manualToyota 6 hbw23 electric walkie pallet jack service repair manual
Toyota 6 hbw23 electric walkie pallet jack service repair manual
 
Toyota 6 hbw23 electric walkie pallet jack service repair manual
Toyota 6 hbw23 electric walkie pallet jack service repair manualToyota 6 hbw23 electric walkie pallet jack service repair manual
Toyota 6 hbw23 electric walkie pallet jack service repair manual
 
Asv posi track rc-100 track loader service repair manual
Asv posi track rc-100 track loader service repair manualAsv posi track rc-100 track loader service repair manual
Asv posi track rc-100 track loader service repair manual
 
Asv posi track rc-100 track loader service repair manual
Asv posi track rc-100 track loader service repair manualAsv posi track rc-100 track loader service repair manual
Asv posi track rc-100 track loader service repair manual
 
Asv posi track rc-100 track loader service repair manual
Asv posi track rc-100 track loader service repair manualAsv posi track rc-100 track loader service repair manual
Asv posi track rc-100 track loader service repair manual
 
Asv posi track rc-100 track loader service repair manual
Asv posi track rc-100 track loader service repair manualAsv posi track rc-100 track loader service repair manual
Asv posi track rc-100 track loader service repair manual
 

More from f8usejkddmmde3

More from f8usejkddmmde3 (20)

2007 Honda Crv Service Repair Manual.pdf
2007 Honda Crv Service Repair Manual.pdf2007 Honda Crv Service Repair Manual.pdf
2007 Honda Crv Service Repair Manual.pdf
 
2008 Yamaha SJ700B Superjet Personal Watercraft Service Repair Manual.pdf
2008 Yamaha SJ700B Superjet Personal Watercraft Service Repair Manual.pdf2008 Yamaha SJ700B Superjet Personal Watercraft Service Repair Manual.pdf
2008 Yamaha SJ700B Superjet Personal Watercraft Service Repair Manual.pdf
 
2008 Suzuki Swift Sport RS416 Service Repair Manual.pdf
2008 Suzuki Swift Sport RS416 Service Repair Manual.pdf2008 Suzuki Swift Sport RS416 Service Repair Manual.pdf
2008 Suzuki Swift Sport RS416 Service Repair Manual.pdf
 
2008 Suzuki LT-A750XK8 KingQuad Service Repair Manual.pdf
2008 Suzuki LT-A750XK8 KingQuad Service Repair Manual.pdf2008 Suzuki LT-A750XK8 KingQuad Service Repair Manual.pdf
2008 Suzuki LT-A750XK8 KingQuad Service Repair Manual.pdf
 
2008 Kawasaki KFX450R (KSF450B8F) Service Repair Manual.pdf
2008 Kawasaki KFX450R (KSF450B8F) Service Repair Manual.pdf2008 Kawasaki KFX450R (KSF450B8F) Service Repair Manual.pdf
2008 Kawasaki KFX450R (KSF450B8F) Service Repair Manual.pdf
 
2008 Nissan Maxima Service Repair Manual.pdf
2008 Nissan Maxima Service Repair Manual.pdf2008 Nissan Maxima Service Repair Manual.pdf
2008 Nissan Maxima Service Repair Manual.pdf
 
2008 Pontiac Montana SV6 Service Repair Manual.pdf
2008 Pontiac Montana SV6 Service Repair Manual.pdf2008 Pontiac Montana SV6 Service Repair Manual.pdf
2008 Pontiac Montana SV6 Service Repair Manual.pdf
 
2008 Kawasaki KFX450R (KSF450A8F) Service Repair Manual.pdf
2008 Kawasaki KFX450R (KSF450A8F) Service Repair Manual.pdf2008 Kawasaki KFX450R (KSF450A8F) Service Repair Manual.pdf
2008 Kawasaki KFX450R (KSF450A8F) Service Repair Manual.pdf
 
2008 Honda Crv Service Repair Manual.pdf
2008 Honda Crv Service Repair Manual.pdf2008 Honda Crv Service Repair Manual.pdf
2008 Honda Crv Service Repair Manual.pdf
 
2007 Yamaha SJ700B Superjet Personal Watercraft Service Repair Manual.pdf
2007 Yamaha SJ700B Superjet Personal Watercraft Service Repair Manual.pdf2007 Yamaha SJ700B Superjet Personal Watercraft Service Repair Manual.pdf
2007 Yamaha SJ700B Superjet Personal Watercraft Service Repair Manual.pdf
 
2007 Suzuki GSX-R750 GSXR750 Service Repair Manual.pdf
2007 Suzuki GSX-R750 GSXR750 Service Repair Manual.pdf2007 Suzuki GSX-R750 GSXR750 Service Repair Manual.pdf
2007 Suzuki GSX-R750 GSXR750 Service Repair Manual.pdf
 
2007 Suzuki Swift Sport RS416 Service Repair Manual.pdf
2007 Suzuki Swift Sport RS416 Service Repair Manual.pdf2007 Suzuki Swift Sport RS416 Service Repair Manual.pdf
2007 Suzuki Swift Sport RS416 Service Repair Manual.pdf
 
2007 Suzuki LT-Z90K7 Service Repair Manual.pdf
2007 Suzuki LT-Z90K7 Service Repair Manual.pdf2007 Suzuki LT-Z90K7 Service Repair Manual.pdf
2007 Suzuki LT-Z90K7 Service Repair Manual.pdf
 
2007 Pontiac Montana SV6 Service Repair Manual.pdf
2007 Pontiac Montana SV6 Service Repair Manual.pdf2007 Pontiac Montana SV6 Service Repair Manual.pdf
2007 Pontiac Montana SV6 Service Repair Manual.pdf
 
2006 Yamaha SJ700B Superjet Personal Watercraft Service Repair Manual.pdf
2006 Yamaha SJ700B Superjet Personal Watercraft Service Repair Manual.pdf2006 Yamaha SJ700B Superjet Personal Watercraft Service Repair Manual.pdf
2006 Yamaha SJ700B Superjet Personal Watercraft Service Repair Manual.pdf
 
2006 Suzuki Swift Sport RS416 Service Repair Manual.pdf
2006 Suzuki Swift Sport RS416 Service Repair Manual.pdf2006 Suzuki Swift Sport RS416 Service Repair Manual.pdf
2006 Suzuki Swift Sport RS416 Service Repair Manual.pdf
 
2006 Pontiac GTO Service Repair Manual.pdf
2006 Pontiac GTO Service Repair Manual.pdf2006 Pontiac GTO Service Repair Manual.pdf
2006 Pontiac GTO Service Repair Manual.pdf
 
2006 Suzuki GSX-R750 GSXR750 Service Repair Manual.pdf
2006 Suzuki GSX-R750 GSXR750 Service Repair Manual.pdf2006 Suzuki GSX-R750 GSXR750 Service Repair Manual.pdf
2006 Suzuki GSX-R750 GSXR750 Service Repair Manual.pdf
 
2006 Pontiac Montana SV6 Service Repair Manual.pdf
2006 Pontiac Montana SV6 Service Repair Manual.pdf2006 Pontiac Montana SV6 Service Repair Manual.pdf
2006 Pontiac Montana SV6 Service Repair Manual.pdf
 
2006 Honda TRX300EX Sportrax Service Repair Manual.pdf
2006 Honda TRX300EX Sportrax Service Repair Manual.pdf2006 Honda TRX300EX Sportrax Service Repair Manual.pdf
2006 Honda TRX300EX Sportrax Service Repair Manual.pdf
 

Recently uploaded

Escorts Service Rajajinagar ☎ 7737669865☎ Book Your One night Stand (Bangalore)
Escorts Service Rajajinagar ☎ 7737669865☎ Book Your One night Stand (Bangalore)Escorts Service Rajajinagar ☎ 7737669865☎ Book Your One night Stand (Bangalore)
Escorts Service Rajajinagar ☎ 7737669865☎ Book Your One night Stand (Bangalore)
amitlee9823
 
Call Girls Kadugodi Just Call 👗 7737669865 👗 Top Class Call Girl Service Bang...
Call Girls Kadugodi Just Call 👗 7737669865 👗 Top Class Call Girl Service Bang...Call Girls Kadugodi Just Call 👗 7737669865 👗 Top Class Call Girl Service Bang...
Call Girls Kadugodi Just Call 👗 7737669865 👗 Top Class Call Girl Service Bang...
amitlee9823
 
Call Girls Hongasandra Just Call 👗 7737669865 👗 Top Class Call Girl Service B...
Call Girls Hongasandra Just Call 👗 7737669865 👗 Top Class Call Girl Service B...Call Girls Hongasandra Just Call 👗 7737669865 👗 Top Class Call Girl Service B...
Call Girls Hongasandra Just Call 👗 7737669865 👗 Top Class Call Girl Service B...
amitlee9823
 
如何办理麦考瑞大学毕业证(MQU毕业证书)成绩单原版一比一
如何办理麦考瑞大学毕业证(MQU毕业证书)成绩单原版一比一如何办理麦考瑞大学毕业证(MQU毕业证书)成绩单原版一比一
如何办理麦考瑞大学毕业证(MQU毕业证书)成绩单原版一比一
ozave
 
ELECTRICITÉ TMT 55.pdf electrick diagram manitout
ELECTRICITÉ TMT 55.pdf electrick diagram manitoutELECTRICITÉ TMT 55.pdf electrick diagram manitout
ELECTRICITÉ TMT 55.pdf electrick diagram manitout
ssjews46
 
Vip Mumbai Call Girls Mumbai Call On 9920725232 With Body to body massage wit...
Vip Mumbai Call Girls Mumbai Call On 9920725232 With Body to body massage wit...Vip Mumbai Call Girls Mumbai Call On 9920725232 With Body to body massage wit...
Vip Mumbai Call Girls Mumbai Call On 9920725232 With Body to body massage wit...
amitlee9823
 
Call Girls in Patel Nagar, Delhi 💯 Call Us 🔝9953056974 🔝 Escort Service
Call Girls in Patel Nagar, Delhi 💯 Call Us 🔝9953056974 🔝 Escort ServiceCall Girls in Patel Nagar, Delhi 💯 Call Us 🔝9953056974 🔝 Escort Service
Call Girls in Patel Nagar, Delhi 💯 Call Us 🔝9953056974 🔝 Escort Service
9953056974 Low Rate Call Girls In Saket, Delhi NCR
 
➥🔝 7737669865 🔝▻ narsinghpur Call-girls in Women Seeking Men 🔝narsinghpur🔝 ...
➥🔝 7737669865 🔝▻ narsinghpur Call-girls in Women Seeking Men  🔝narsinghpur🔝  ...➥🔝 7737669865 🔝▻ narsinghpur Call-girls in Women Seeking Men  🔝narsinghpur🔝  ...
➥🔝 7737669865 🔝▻ narsinghpur Call-girls in Women Seeking Men 🔝narsinghpur🔝 ...
nirzagarg
 
FULL NIGHT — 9999894380 Call Girls In Jagat Puri | Delhi
FULL NIGHT — 9999894380 Call Girls In Jagat Puri | DelhiFULL NIGHT — 9999894380 Call Girls In Jagat Puri | Delhi
FULL NIGHT — 9999894380 Call Girls In Jagat Puri | Delhi
SaketCallGirlsCallUs
 
Rekha Agarkar Escorts Service Kollam ❣️ 7014168258 ❣️ High Cost Unlimited Har...
Rekha Agarkar Escorts Service Kollam ❣️ 7014168258 ❣️ High Cost Unlimited Har...Rekha Agarkar Escorts Service Kollam ❣️ 7014168258 ❣️ High Cost Unlimited Har...
Rekha Agarkar Escorts Service Kollam ❣️ 7014168258 ❣️ High Cost Unlimited Har...
nirzagarg
 
Vip Mumbai Call Girls Navi Mumbai Call On 9920725232 With Body to body massag...
Vip Mumbai Call Girls Navi Mumbai Call On 9920725232 With Body to body massag...Vip Mumbai Call Girls Navi Mumbai Call On 9920725232 With Body to body massag...
Vip Mumbai Call Girls Navi Mumbai Call On 9920725232 With Body to body massag...
amitlee9823
 
Sanjay Nagar Call Girls: 🍓 7737669865 🍓 High Profile Model Escorts | Bangalor...
Sanjay Nagar Call Girls: 🍓 7737669865 🍓 High Profile Model Escorts | Bangalor...Sanjay Nagar Call Girls: 🍓 7737669865 🍓 High Profile Model Escorts | Bangalor...
Sanjay Nagar Call Girls: 🍓 7737669865 🍓 High Profile Model Escorts | Bangalor...
amitlee9823
 
➥🔝 7737669865 🔝▻ pathankot Call-girls in Women Seeking Men 🔝pathankot🔝 Esc...
➥🔝 7737669865 🔝▻ pathankot Call-girls in Women Seeking Men  🔝pathankot🔝   Esc...➥🔝 7737669865 🔝▻ pathankot Call-girls in Women Seeking Men  🔝pathankot🔝   Esc...
➥🔝 7737669865 🔝▻ pathankot Call-girls in Women Seeking Men 🔝pathankot🔝 Esc...
nirzagarg
 

Recently uploaded (20)

Escorts Service Rajajinagar ☎ 7737669865☎ Book Your One night Stand (Bangalore)
Escorts Service Rajajinagar ☎ 7737669865☎ Book Your One night Stand (Bangalore)Escorts Service Rajajinagar ☎ 7737669865☎ Book Your One night Stand (Bangalore)
Escorts Service Rajajinagar ☎ 7737669865☎ Book Your One night Stand (Bangalore)
 
Call Girls Kadugodi Just Call 👗 7737669865 👗 Top Class Call Girl Service Bang...
Call Girls Kadugodi Just Call 👗 7737669865 👗 Top Class Call Girl Service Bang...Call Girls Kadugodi Just Call 👗 7737669865 👗 Top Class Call Girl Service Bang...
Call Girls Kadugodi Just Call 👗 7737669865 👗 Top Class Call Girl Service Bang...
 
(ISHITA) Call Girls Service Jammu Call Now 8617697112 Jammu Escorts 24x7
(ISHITA) Call Girls Service Jammu Call Now 8617697112 Jammu Escorts 24x7(ISHITA) Call Girls Service Jammu Call Now 8617697112 Jammu Escorts 24x7
(ISHITA) Call Girls Service Jammu Call Now 8617697112 Jammu Escorts 24x7
 
What Does The Engine Malfunction Reduced Power Message Mean For Your BMW X5
What Does The Engine Malfunction Reduced Power Message Mean For Your BMW X5What Does The Engine Malfunction Reduced Power Message Mean For Your BMW X5
What Does The Engine Malfunction Reduced Power Message Mean For Your BMW X5
 
Call Girls in Malviya Nagar Delhi 💯 Call Us 🔝9205541914 🔝( Delhi) Escorts Ser...
Call Girls in Malviya Nagar Delhi 💯 Call Us 🔝9205541914 🔝( Delhi) Escorts Ser...Call Girls in Malviya Nagar Delhi 💯 Call Us 🔝9205541914 🔝( Delhi) Escorts Ser...
Call Girls in Malviya Nagar Delhi 💯 Call Us 🔝9205541914 🔝( Delhi) Escorts Ser...
 
Lecture-20 Kleene’s Theorem-1.pptx best for understanding the automata
Lecture-20 Kleene’s Theorem-1.pptx best for understanding the automataLecture-20 Kleene’s Theorem-1.pptx best for understanding the automata
Lecture-20 Kleene’s Theorem-1.pptx best for understanding the automata
 
Call Girls Hongasandra Just Call 👗 7737669865 👗 Top Class Call Girl Service B...
Call Girls Hongasandra Just Call 👗 7737669865 👗 Top Class Call Girl Service B...Call Girls Hongasandra Just Call 👗 7737669865 👗 Top Class Call Girl Service B...
Call Girls Hongasandra Just Call 👗 7737669865 👗 Top Class Call Girl Service B...
 
如何办理麦考瑞大学毕业证(MQU毕业证书)成绩单原版一比一
如何办理麦考瑞大学毕业证(MQU毕业证书)成绩单原版一比一如何办理麦考瑞大学毕业证(MQU毕业证书)成绩单原版一比一
如何办理麦考瑞大学毕业证(MQU毕业证书)成绩单原版一比一
 
Why Does My Porsche Cayenne's Exhaust Sound So Loud
Why Does My Porsche Cayenne's Exhaust Sound So LoudWhy Does My Porsche Cayenne's Exhaust Sound So Loud
Why Does My Porsche Cayenne's Exhaust Sound So Loud
 
ELECTRICITÉ TMT 55.pdf electrick diagram manitout
ELECTRICITÉ TMT 55.pdf electrick diagram manitoutELECTRICITÉ TMT 55.pdf electrick diagram manitout
ELECTRICITÉ TMT 55.pdf electrick diagram manitout
 
Vip Mumbai Call Girls Mumbai Call On 9920725232 With Body to body massage wit...
Vip Mumbai Call Girls Mumbai Call On 9920725232 With Body to body massage wit...Vip Mumbai Call Girls Mumbai Call On 9920725232 With Body to body massage wit...
Vip Mumbai Call Girls Mumbai Call On 9920725232 With Body to body massage wit...
 
Connaught Place, Delhi Call girls :8448380779 Model Escorts | 100% verified
Connaught Place, Delhi Call girls :8448380779 Model Escorts | 100% verifiedConnaught Place, Delhi Call girls :8448380779 Model Escorts | 100% verified
Connaught Place, Delhi Call girls :8448380779 Model Escorts | 100% verified
 
Call Girls in Patel Nagar, Delhi 💯 Call Us 🔝9953056974 🔝 Escort Service
Call Girls in Patel Nagar, Delhi 💯 Call Us 🔝9953056974 🔝 Escort ServiceCall Girls in Patel Nagar, Delhi 💯 Call Us 🔝9953056974 🔝 Escort Service
Call Girls in Patel Nagar, Delhi 💯 Call Us 🔝9953056974 🔝 Escort Service
 
➥🔝 7737669865 🔝▻ narsinghpur Call-girls in Women Seeking Men 🔝narsinghpur🔝 ...
➥🔝 7737669865 🔝▻ narsinghpur Call-girls in Women Seeking Men  🔝narsinghpur🔝  ...➥🔝 7737669865 🔝▻ narsinghpur Call-girls in Women Seeking Men  🔝narsinghpur🔝  ...
➥🔝 7737669865 🔝▻ narsinghpur Call-girls in Women Seeking Men 🔝narsinghpur🔝 ...
 
FULL NIGHT — 9999894380 Call Girls In Jagat Puri | Delhi
FULL NIGHT — 9999894380 Call Girls In Jagat Puri | DelhiFULL NIGHT — 9999894380 Call Girls In Jagat Puri | Delhi
FULL NIGHT — 9999894380 Call Girls In Jagat Puri | Delhi
 
Rekha Agarkar Escorts Service Kollam ❣️ 7014168258 ❣️ High Cost Unlimited Har...
Rekha Agarkar Escorts Service Kollam ❣️ 7014168258 ❣️ High Cost Unlimited Har...Rekha Agarkar Escorts Service Kollam ❣️ 7014168258 ❣️ High Cost Unlimited Har...
Rekha Agarkar Escorts Service Kollam ❣️ 7014168258 ❣️ High Cost Unlimited Har...
 
Vip Mumbai Call Girls Navi Mumbai Call On 9920725232 With Body to body massag...
Vip Mumbai Call Girls Navi Mumbai Call On 9920725232 With Body to body massag...Vip Mumbai Call Girls Navi Mumbai Call On 9920725232 With Body to body massag...
Vip Mumbai Call Girls Navi Mumbai Call On 9920725232 With Body to body massag...
 
Sanjay Nagar Call Girls: 🍓 7737669865 🍓 High Profile Model Escorts | Bangalor...
Sanjay Nagar Call Girls: 🍓 7737669865 🍓 High Profile Model Escorts | Bangalor...Sanjay Nagar Call Girls: 🍓 7737669865 🍓 High Profile Model Escorts | Bangalor...
Sanjay Nagar Call Girls: 🍓 7737669865 🍓 High Profile Model Escorts | Bangalor...
 
➥🔝 7737669865 🔝▻ pathankot Call-girls in Women Seeking Men 🔝pathankot🔝 Esc...
➥🔝 7737669865 🔝▻ pathankot Call-girls in Women Seeking Men  🔝pathankot🔝   Esc...➥🔝 7737669865 🔝▻ pathankot Call-girls in Women Seeking Men  🔝pathankot🔝   Esc...
➥🔝 7737669865 🔝▻ pathankot Call-girls in Women Seeking Men 🔝pathankot🔝 Esc...
 
BOOK FARIDABAD CALL GIRL(VIP Sunny Leone) @8168257667 BOOK 24/7
BOOK FARIDABAD CALL GIRL(VIP Sunny Leone) @8168257667 BOOK  24/7BOOK FARIDABAD CALL GIRL(VIP Sunny Leone) @8168257667 BOOK  24/7
BOOK FARIDABAD CALL GIRL(VIP Sunny Leone) @8168257667 BOOK 24/7
 

2005 Suzuki Swift Sport RS416 Service Repair Manual.pdf

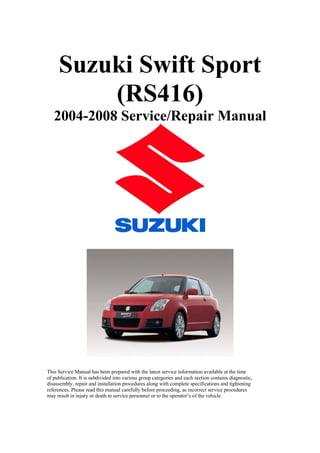
  • 1. Suzuki Swift Sport (RS416) 2004-2008 Service/Repair Manual This Service Manual has been prepared with the latest service information available at the time of publication. It is subdivided into various group categories and each section contains diagnostic, disassembly, repair and installation procedures along with complete specifications and tightening references. Please read this manual carefully before proceeding, as incorrect service procedures may result in injury or death to service personnel or to the operator’s of the vehicle.
  • 2.                                                   
  • 3.                               
  • 4.              Volume 1 Precautions............................................................... 00-i Precautions ............................................................ 00-1 General Information ................................................... 0-i General Information ...............................................0A-1 Maintenance and Lubrication.................................0B-1 Engine ......................................................................... 1-i Precautions .............................................................. 1-1 Engine General Information and Diagnosis ...........1A-1 Aux. Emission Control Devices..............................1B-1 Engine Electrical Devices.......................................1C-1 Engine Mechanical.................................................1D-1 Engine Lubrication System ....................................1E-1 Engine Cooling System.......................................... 1F-1 Fuel System ...........................................................1G-1 Ignition System.......................................................1H-1 Starting System....................................................... 1I-1 Charging System.....................................................1J-1 Exhaust System .....................................................1K-1 Suspension................................................................. 2-i Precautions .............................................................. 2-1 Suspension General Diagnosis..............................2A-1 Front Suspension...................................................2B-1 Rear Suspension....................................................2C-1 Wheels and Tires ...................................................2D-1 Driveline / Axle ........................................................... 3-i Precautions .............................................................. 3-1 Drive Shaft / Axle ...................................................3A-1 Brakes ......................................................................... 4-i Precautions .............................................................. 4-1 Brake Control System and Diagnosis ....................4A-1 Front Brakes...........................................................4B-1 Rear Brakes ...........................................................4C-1 Parking Brake.........................................................4D-1 ABS........................................................................4E-1 Electronic Stability Program................................... 4F-1 Volume 2 Precautions............................................................... 00-i Precautions ............................................................ 00-1 Transmission / Transaxle .......................................... 5-i Precautions .............................................................. 5-1 Automatic Transmission/Transaxle ........................5A-1 Manual Transmission/Transaxle ............................5B-1 Clutch .....................................................................5C-1 Steering....................................................................... 6-i Precautions .............................................................. 6-1 Steering General Diagnosis ...................................6A-1 Steering Wheel and Column ..................................6B-1 Power Assisted Steering System ...........................6C-1 HVAC ........................................................................... 7-i Precautions .............................................................. 7-1 Heater and Ventilation............................................7A-1 Air Conditioning System.........................................7B-1 Restraint...................................................................... 8-i Precautions .............................................................. 8-1 Seat Belts...............................................................8A-1 Air Bag System ......................................................8B-1 Body, Cab and Accessories...................................... 9-i Precautions .............................................................. 9-1 Wiring Systems ......................................................9A-1 Lighting Systems....................................................9B-1 Instrumentation / Driver Info. / Horn .......................9C-1 Wipers / Washers...................................................9D-1 Glass / Windows / Mirrors ......................................9E-1 Security and Locks.................................................9F-1 Seats..................................................................... 9G-1 Interior Trim............................................................9H-1 Hood / Fenders / Doors.......................................... 9J-1 Body Structure .......................................................9K-1 Paint / Coatings...................................................... 9L-1 Exterior Trim.......................................................... 9M-1 Control Systems....................................................... 10-i Precautions ............................................................ 10-1 Body Electrical Control System............................10B-1 Immobilizer Control System .................................10C-1 Keyless Start System ...........................................10E-1 TABLE OF CONTENTS
  • 5. Table of Contents 00- i  Section 00 CONTENTS Precautions Precautions...............................................00-1 Precautions........................................................... 00-1 Precautions for Vehicles Equipped with a Supplemental Restraint (Air Bag) System ........ 00-1 General Precautions ........................................... 00-4 Warning for Wheel (with tire) Removal ............... 00-7 Warning for Handling Emergency Flat Tire Repair Kit .......................................................... 00-7 Precautions for Catalytic Converter .................... 00-7 Precautions for Installing Mobile Communication Equipment............................... 00-7 Precaution for CAN Communication System ...... 00-7 Precautions for Electrical Circuit Service ............ 00-8 Air Bag Warning................................................ 00-10 Air Bag System Service Warning ...................... 00-10 Fastener Caution............................................... 00-10 Suspension Caution.......................................... 00-10 Wheels and Tires Caution................................. 00-10 Precaution for Vehicle Equipped with ESP System ............................................................ 00-11 Brake Caution ................................................... 00-11 Repair Instructions ............................................ 00-11 Electrical Circuit Inspection Procedure ............. 00-11 Intermittent and Poor Connection Inspection.... 00-13
  • 6. 00-1 Precautions: Precautions Precautions Precautions Precautions for Vehicles Equipped with a Supplemental Restraint (Air Bag) System S7RS0B0000001 WARNING ! • The configuration of air bag system parts are as shown in the figure. When it is necessary to service (remove, reinstall and inspect) these parts, be sure to follow procedures described in Air Bag System section. Failure to follow proper procedures could result in possible air bag system activation, personal injury, damage to parts or air bag system being unable to activate when necessary. • If the air bag system and another vehicle system both need repair, SUZUKI recommends that the air bag system be repaired first, to help avoid unintended air bag system activation. • Do not modify the steering wheel, dashboard, or any other air bag system components. Modifications can adversely affect air bag system performance and lead to injury. • If the vehicle will be exposed to temperatures over 93 C (200 F) (for example, during a paint baking process), remove the air bag system components beforehand to avoid component damage or unintended air bag system activation. Diagnosis • When troubleshooting air bag system, be sure to follow “Diagnosis” in Air Bag System section. Bypassing these procedures may result in extended diagnostic time, incorrect diagnosis, and incorrect parts replacement. • Never use electrical test equipment other than that specified. WARNING ! Never attempt to measure the resistance of the air bag (inflator) modules (driver, passenger, side and curtain) and seat belt pretensioners (driver and passenger). It is very dangerous as the electric current from the tester may deploy the air bag or activate the pretensioner. 1. Air bag wire harness (in floor, main and instrument panel harness) 6. Driver air bag (inflator) module 2. Passenger air bag (inflator) module 7. Side air bag (inflator) module (if equipped) 3. SDM 8. Curtain air bag (inflator) module (if equipped) 4. Seat belt pretensioner 9. Forward sensor 5. Contact coil 10. Side sensor (if equipped)              I4RS0B000001-02 I4RS0A000002-02
  • 7. Precautions: 00-2 Servicing and Handling WARNING ! Many of service procedures require disconnection of “A/BAG” fuse and all air bag (inflator) module(s) from initiator circuit to avoid an accidental deployment. Driver, Passenger, Side and Curtain Air Bag (Inflator) Modules • For handling and storage of a live air bag (inflator) module, select a place where the ambient temperature below 65 C (150 F), without high humidity and away from electric noise. • When carrying a live air bag (inflator) module, make sure the bag opening is pointed away from you. In case of an accidental deployment, the bag will then deploy with minimal chance of injury. Never carry the air bag (inflator) module by the wires or connector on the underside of the module. When placing a live air bag (inflator) module on a bench or other surface, always face the bag up, away from the surface. As the live passenger air bag (inflator) module must be placed with its bag (trim cover) facing up, place it on the workbench with a slit (1) or use the workbench vise (2) to hold it securely at its lower mounting bracket (3). It is also prohibited to place anything on top of the trim cover and stack air bag (inflator) modules. This is necessary so that a free space is provided to allow the air bag to expand in the unlikely event of accidental deployment. Otherwise, personal injury may result. • Never dispose of live (undeployed) air bag (inflator) modules (driver, passenger, side and curtain). If disposal is necessary, be sure to deploy them according to deployment procedures described in “Air Bag (Inflator) Module and Seat Belt Pretensioner Disposal in Section 8B” before disposal. • The air bag (inflator) module immediately after deployment is very hot. Wait for at least half an hour to cool it off before proceeding the work. • After an air bag (inflator) module has been deployed, the surface of the air bag may contain a powdery residue. This powder consists primarily of cornstarch (used to lubricate the bag as it inflates) and by- products of the chemical reaction. As with many service procedures, gloves and safety glasses should be worn. [A]: Always carry air bag (inflator) module with trim cover (air bag opening) away from body. [B]: Always place air bag (inflator) module on workbench with trim cover (air bag opening) up, away from loose objects.      I4RS0A000003-02
  • 8. 00-3 Precautions: WARNING ! SDM • For handling and storage of a SDM, select a place where the ambient temperature below 65 C (150 F), without high humidity and away from electric noise. • During service procedures, be very careful when handling a Sensing and Diagnostic Module (SDM). Never strike or jar the SDM. • Never power up the air bag system when the SDM is not rigidly attached to the vehicle. All SDM and mounting bracket fasteners must be carefully torqued and the arrow must be pointing toward the front of the vehicle to ensure proper operation of the air bag system. The SDM could be activated when powered while not rigidly attached to the vehicle which could cause deployment and result in personal injury. WARNING ! Driver and Passenger Seat Belt Pretensioners • For handling and storage of a live seat belt pretensioner, select a place where the ambient temperature below 65 C (150 F), without high humidity and away from electric noise. • Never carry seat belt pretensioner by wire or connector of pretensioner. When placing a live seat belt pretensioner on the workbench or some place like that, never put something on seat belt pretensioner. Otherwise, personal injury may result. • Never dispose of live (inactivated) seat belt pretensioners (drive and passenger). If disposal is necessary, be sure to activate them according to activation procedures described in “Air Bag (Inflator) Module and Seat Belt Pretensioner Disposal in Section 8B” before disposal. • The seat belt pretensioner immediately after activation is very hot. Wait for at least half an hour to cool it off before proceeding the work. • With many service procedures, gloves and safety glasses should be worn to prevent any possible irritation of the skin or eyes. • Even when the accident was light enough not to cause air bags to activate, be sure to inspect system parts and other related parts according to instructions under “Repair and Inspection Required after Accident in Section 8B”. • When servicing parts other than air bag system, if shocks may be applied to air bag system component parts, remove those parts beforehand. • When handling the air bag (inflator) modules (driver, passenger, side and curtain), seat belt pretensioners (driver and passenger), forward sensor, side sensors or SDM, be careful not to drop it or apply an impact to it. If an excessive impact was applied, never attempt disassembly or repair but replace it with a new one. • When grease, cleaning agent, oil, water, etc. has got onto air bag (inflator) modules (driver, passenger, side and curtain) or seat belt pretensioners (drive and passenger), wipe off immediately with a dry cloth. • Air bag wire harness is included in floor and instrument panel wire harnesses. Air bag wire harness branched off from floor and instrument panel wire harnesses can be identified easily as it is covered with a yellow protection tube and it has yellow connectors. Be very careful when handling it. • When an open in air bag wire harness, damaged wire harness, connector or terminal is found, replace wire harness, connectors and terminals as an assembly. • Do not apply power to the air bag system unless all components are connected or a diagnostic flow requests it, as this will set a DTC. • Never use air bag system component parts from another vehicle. • When using electric welding, be sure to disconnect all air bag (inflator) module connectors and pretensioner connectors from air bag wire harness respectively. • Never expose air bag system component parts directly to hot air (drying or baking the vehicle after painting) or flames. • WARNING / CAUTION labels are attached on each part of air bag system components. Be sure to follow the instructions. • After vehicle is completely repaired, perform “Air Bag Diagnostic System Check in Section 8B”.
  • 9. Precautions: 00-4 General Precautions S7RS0B0000002 The WARNING and CAUTION describe some general precautions that you should observe when servicing a vehicle. These general precautions apply to many of the service procedures, and they will not necessarily be repeated with each procedure to which they apply. WARNING ! • Whenever raising a vehicle for service, be sure to follow the instructions under “Vehicle Lifting Points in Section 0A”. • When it is necessary to do service work with the engine running, make sure that the parking brake is set fully and the transmission is in Neutral (for manual transmission vehicles) or Park (for automatic transmission vehicles), Keep hands, hair, clothing, tools, etc. away from the fan and belts when the engine is running. • When it is necessary to run the engine indoors, make sure that the exhaust gas is forced outdoors. • Do not perform service work in areas where combustible materials can come in contact with a hot exhaust system. When working with toxic or flammable materials (such as gasoline and refrigerant), make sure that the area you work in is well- ventilated. • To avoid getting burned, keep away from hot metal parts such as the radiator, exhaust manifold, tail pipe, muffler, etc. • New and used engine oil can be hazardous. Children and pets may be harmed by swallowing new or used oil. Keep new and used oil and used engine oil filters away from children and pets. Continuous contact with used engine oil has been found to cause [skin] cancer in laboratory animals. Brief contact with used oil may irritate skin. To minimize your exposure to used engine oil, wear a long- sleeve shirt and moisture-proof gloves (such as dish washing gloves) when changing engine oil. If engine oil contacts your skin, wash thoroughly with soap and water. Launder any clothing or rags if wet with oil, recycle or properly dispose of used oil and filters. • Be sure to observe following instructions when handling service materials such as fuel, oil, fluid, coolant, grease, sealant, thread lock cement, etc. Otherwise, your health may be ruined. – Whenever handling any of these service materials, wear safety glasses to protect your eyes. If it gets into your eye, it may cause inflammation. – Whenever handling any of these service materials, wear moisture-proof gloves to protect your skin. If it adheres to your skin, it may cause inflammation. – Do not swallow any of these service materials. It would cause diarrhea or nausea. – Keep all these materials out of children’s reach. • Make sure the bonnet is fully closed and latched before driving. If it is not, it can fly up unexpectedly during driving, obstructing your view and resulting in an accident. • Before starting any service work, cover fenders, seats and any other parts that are likely to get scratched or stained during servicing. Also, be aware that what you wear (e.g., buttons) may cause damage to the vehicle’s finish. I2RH01010025-01
  • 10. 00-5 Precautions: • When performing service to electrical parts that does not require use of battery power, disconnect the negative cable of the battery. • When disconnecting the negative cable from the battery, be careful to the following. – Check and record DTCs in ECM and HVAC control module if necessary before disconnecting. – Record displayed contents of the clock and/or audio system, etc. before disconnecting and reset it as before after connecting. – For vehicle equipped with electric throttle body system, perform electric throttle body system calibration referring to “Electric Throttle Body System Calibration in Section 1C” after reconnecting the negative cable to the battery. – For vehicle equipped with ESP , calibrate steering angle sensor referring to “Sensor Calibration in Section 4F” after reconnecting the negative cable to the battery. • When removing the battery, be sure to disconnect the negative cable first and then the positive cable. When reconnecting the battery, connect the positive cable first and then the negative cable, and replace the terminal cover. • When removing parts that are to be reused, be sure to keep them arranged in an orderly manner so that they may be reinstalled in the proper order and position. • Whenever you use oil seals, gaskets, packing, O- rings, locking washers, split pins, self-locking nuts, and certain other parts as specified, be sure to use new ones. Also, before installing new gaskets, packing, etc., be sure to remove any residual material from the mating surfaces. • Make sure that all parts used in reassembly are perfectly clean. When use of a certain type of lubricant, bond or sealant is specified, be sure to use the specified type. “A”: Water tight sealant 99000–31250 (SUZUKI Bond No.1207F) I2RH01010026-01 I2RH01010027-01 I2RH01010028-01 I2RH01010029-01 I2RH01010030-01
  • 11. Precautions: 00-6 • Be sure to use special tools when instructed. Special tool (A): 09917-98221 (B): 09916-58210 • When disconnecting vacuum hoses, attach a tag describing the correct installation positions so that the hoses can be reinstalled correctly. • After servicing fuel, oil, coolant, vacuum, exhaust or brake systems, check all lines related to the system for leaks. • For vehicles equipped with fuel injection systems, never disconnect the fuel line between the fuel pump and injector without first releasing the fuel pressure, or fuel can be sprayed out under pressure. • When performing a work that produces a heat exceeding 80 C (176 F) in the vicinity of the electrical parts, remove the heat sensitive electrical part(s) beforehand. • Use care not to expose connectors and electrical parts to water which will be a cause of a trouble. • Always be careful not to handle electrical parts (computer, relay, etc.) in a rough manner or drop them. I2RH01010031-01 I2RH01010032-01 I2RH01010033-01 I2RH01010034-01 I2RH01010035-01 I2RH01010036-01
  • 12. 00-7 Precautions: Warning for Wheel (with tire) Removal S7RS0B0000003 WARNING ! When removing any of these wheels installed with wheel bolts, never remove all wheel bolts at the same time. Leave at least 1 bolt for each wheel as it is to prevent wheel from dropping. When removing this remaining 1 bolt, hold wheel and tire so as not to allow them to come off. Warning for Handling Emergency Flat Tire Repair Kit S7RS0B0000004 WARNING ! If vehicle is equipped with Emergency Flat Tire Repair Kit instead of spare tire, be sure to observe “Precaution for Emergency Flat Tire Repair Kit in Section 2D” when handling Emergency Flat Tire Repair Kit and repairing flat tire. Otherwise, your health may be ruined or it will be impossible to repair flat tire. Precautions for Catalytic Converter S7RS0B0000005 For vehicles equipped with a catalytic converter, use only unleaded gasoline and be careful not to let a large amount of unburned gasoline enter the converter or it can be damaged. • Conduct a spark jump test only when necessary, make it as short as possible, and do not open the throttle. • Conduct engine compression checks within the shortest possible time. • Avoid situations which can result in engine misfire (e.g. starting the engine when the fuel tank is nearly empty.) Precautions for Installing Mobile Communication Equipment S7RS0B0000006 When installing mobile communication equipment such as CB (Citizens-Band)-radio or cellular-telephone, be sure to observe the following precautions. Failure to follow cautions may adversely affect electronic control system. • Keep the antenna as far away as possible from the vehicle’s electronic control unit. • Keep the antenna feeder more than 20 cm (7.9 in.) away from electronic control unit and its wire harnesses. • Do not run the antenna feeder parallel with other wire harnesses. • Confirm that the antenna and feeder are correctly adjusted. Precaution for CAN Communication System S7RS0B0000007 • The loose (1) in the wire harnesses twist of the CAN lines except around the connector (3) should be within 100 mm (3.9 in.). Refer to the wiring diagram for the CAN lines discrimination. Excessively-loosed lines may be influenced by the electric noise. • Do not connect terminals of the CAN line using a bypass wire (1). Otherwise, the CAN line may be influenced by the electric noise.      I4JA01000002-01  I4JA01000003-01
  • 13. Precautions: 00-8 Precautions for Electrical Circuit Service S7RS0B0000008 • When replacing a fuse, make sure to use a fuse of the specified capacity. Use of a fuse with a larger capacity will cause a damage to the electrical parts and a fire. • When disconnecting and connecting coupler, make sure to turn ignition switch OFF, or electronic parts may get damaged. • When disconnecting connectors, never pull the wiring harness. Unlock the connector lock first and then pull them apart by holding connectors themselves. • When connecting connectors, also hold connectors and put them together until they lock securely (a click is heard). • When installing the wiring harness, fix it with clamps so that no slack is left. • When installing vehicle parts, be careful so that the wiring harness is not interfered with or caught by any other part. • To avoid damage to the harness, protect its part which may contact against a part forming a sharp angle by winding tape or the like around it. I2RH01010038-01 I2RH01010039-01 I2RH01010040-01 I2RH01010041-01 I2RH01010042-01 I2RH01010043-01 I2RH01010044-01
  • 14. 00-9 Precautions: • Be careful not to touch the electrical terminals of parts which use microcomputers (e.g. electronic control unit like as ECM, PCM, P/S controller, etc.). The static electricity from your body can damage these parts. • Never connect any tester (voltmeter, ohmmeter, or whatever) to electronic control unit when its coupler is disconnected. Attempt to do it may cause damage to it. • Never connect an ohmmeter to electronic control unit with its coupler connected to it. Attempt to do it may cause damage to electronic control unit and sensors. • Be sure to use a specified voltmeter / ohmmeter. Otherwise, accurate measurements may not be obtained or personal injury may result. If not specified, use a voltmeter with high impedance (M /V minimum) or a digital type voltmeter. • When taking measurements at electrical connectors using a tester probe, be sure to insert the probe (2) from the wire harness side (backside) of the connector (1). • When connecting meter probe (2) from terminal side of coupler (1) because it can’t be connected from harness side, use extra care not to bend male terminal of coupler of force its female terminal open for connection. In case of such coupler as shown connect probe as shown to avoid opening female terminal. Never connect probe where male terminal is supposed to fit. • When checking connection of terminals, check its male half for bend and female half for excessive opening and both for locking (looseness), corrosion, dust, etc. • Before measuring voltage at each terminal, check to make sure that battery voltage is 11 V or higher. Such terminal voltage check at low battery voltage will lead to erroneous diagnosis. I3RM0A000004-01 I2RH01010046-01 I2RH01010047-01 I2RH01010048-01
  • 15. Precautions: 00-10 Air Bag Warning S7RS0B0000009 WARNING ! For vehicles equipped with Supplemental Restraint (Air Bag) System: • Service on and around the air bag system components or wiring must be performed only by an authorized SUZUKI dealer. Refer to “Air Bag System Components, Wiring and Connectors Location in Section 8B” in order to confirm whether you are performing service on or near the air bag system components or wiring. Please observe all WARNINGS in Air Bag System section and “Precautions on Service and Diagnosis of Air Bag System in Section 8B” before performing service on or around the air bag system components or wiring. Failure to follow WARNINGS could result in unintentional activation of the system or could render the system inoperative. Either of these two conditions may result in severe injury. • Technical service work must be started at least 90 seconds after the ignition switch is turned to the LOCK position and the negative cable is disconnected from the battery. Otherwise, the system may be activated by reserve energy in the Sensing and Diagnostic Module (SDM). Air Bag System Service Warning S7RS0B0000010 WARNING ! • Service on or around the air bag system components or wiring must be performed only by an authorized SUZUKI dealer. Please observe all WARNINGS in Air Bag System section and “Precautions on Service and Diagnosis of Air Bag System in Section 8B” before performing service on or around the air bag system components or wiring. Failure to follow WARNINGS could result in unintended activation of the system or could render the system inoperative. Either of these two conditions may result in severe injury. • The procedures in the air bag system section must be followed in the order listed to disable the air bag system temporarily and prevent false DTCs from setting. Failure to follow procedures could result in possible activation of the air bag system, personal injury or otherwise unneeded air bag system repairs. Fastener Caution S7RS0B0000011 CAUTION ! When fasteners are removed, always reinstall them at the same location from which they were removed. If a fastener needs to be replaced, use the correct part number fastener for that application. If the correct part number fastener is not available, a fastener of equal size and strength (or stronger) may be used. Fasteners that are not reused, and those requiring thread-locking compound, will be called out. The correct torque value must be used when installing fasteners that require it. If the conditions are not followed, parts or system damage could result. Suspension Caution S7RS0B0000012 CAUTION ! • All suspension fasteners are an important attaching part in that it could affect the performance of vital parts and systems, and/or could result in major repair expense. They must be replaced with one of the same part number or with an equivalent part if replacement becomes necessary. Do not use a replacement part of lesser quality or substitute design. Torque values must be used as specified during reassembly to assure proper retention of this part. • Never attempt to heat, quench or straighten any suspension part. Replace it with a new part or damage to the part may result. Wheels and Tires Caution S7RS0B0000013 CAUTION ! All wheel fasteners are important attaching parts in that they could affect the performance of vital parts and systems, and/ or could result in major repair expense. They must be replaced with one of the same part number or with an equivalent part if replacement becomes necessary. Do not use a replacement part of lesser quality or substitute design. Torque values must be used as specified during reassembly to assure proper retention of all parts. There is to be no welding as it may result in extensive damage and weakening of the metal.
  • 16. 00-11 Precautions: Precaution for Vehicle Equipped with ESP System S7RS0B0000015 • When testing with any of the following equipments (when vehicle is tested by rotating wheels (tires) under vehicle stop), be sure to deactivate ESP system referring to “Precautions in Speedometer Test or Other Tests in Section 4F” to obtain correct data. – 2 or 4-wheel chassis dynamometer – Speedometer tester – Brake tester – Etc. ESP control module • When ESP control module is removed / installed, do not use impact wrenches which generate shock or impact to avoid damaging sensors in ESP control module. • When any of the following operation is done, calibrate steering angle sensor referring to “Sensor Calibration in Section 4F”. – When battery or dome fuse is removed. – When steering angle sensor is replaced. Brake Caution S7RS0B0000014 CAUTION ! All brake fasteners are important attaching parts in that they could affect the performance of vital parts and systems, and/ or could result in major repair expense. They must be replaced with one of same part number or with an equivalent part if replacement becomes necessary. Do not use a replacement part of lesser quality or substitute design. Torque values must be used as specified during reassembly to assure proper retention of all parts. There is to be no welding as it may result in extensive damage and weakening of the metal. Repair Instructions Electrical Circuit Inspection Procedure S7RS0B0006001 While there are various electrical circuit inspection methods, described here is a general method to check its open and short circuit by using an ohmmeter and a voltmeter. Open Circuit Check Possible causes for the open circuit are as follows. As the cause is in the connector or terminal in many cases, they need to be checked particularly carefully. • Loose connection of connector • Poor contact of terminal (due to dirt, corrosion or rust on it, poor contact tension, entry of foreign object etc.) • Wire harness being open When checking system circuits including an electronic control unit such as ECM, TCM, ABS control module, etc., it is important to perform careful check, starting with items which are easier to check. 1) Disconnect negative (–) cable from battery 2) Check each connector at both ends of the circuit being checked for loose connection. Also check lock condition of connector if equipped with connector lock. 3) Using a test male terminal, check both terminals of the circuit being checked for contact tension of its female terminal. Check each terminal visually for poor contact (possibly caused by dirt, corrosion, rust entry of foreign object, etc.). At the same time, check to make sure that each terminal is locked in the connector fully. 1. Check contact tension by inserting and removing just for once. I2RH01010049-01 I2RH01010050-01
  • 17. Precautions: 00-12 4) Using continuity check or voltage check the following procedure, check the wire harness for open circuit and poor connection with its terminals. Locate abnormality, if any. Continuity Check 1) Measure resistance between connector terminals at both ends of the circuit being checked (between “A- 1” and “C-1” in the figure). If no continuity is indicated (infinity or over limit), that means that the circuit is open between terminals “A-1” and “C-1”. 2) Disconnect the connector included in the circuit (connector-B in the figure) and measure resistance between terminals “A-1” and “B-1”. If no continuity is indicated, that means that the circuit is open between terminals “A-1” and “B-1”. If continuity is indicated, there is an open circuit between terminals “B-1” and “C-1” or an abnormality in connector-B. Voltage Check If voltage is supplied to the circuit being checked, voltage check can be used as circuit check. 1) With all connectors connected and voltage applied to the circuit being checked, measure voltage between each terminal and body ground. a) If measurements were taken as shown in the figure and results were as listed in the following, it means that the circuit is open between terminals “B-1” and “A-1”. Voltage between “C-1” and body ground: Approx. 5 V “B-1” and body ground: Approx. 5 V “A-1” and body ground: 0 V b) Also, if measured values were as listed in the following, it means that there is a resistance (abnormality) of such level that corresponds to the voltage drop in the circuit between terminals “A-1” and “B-1”. Voltage between “C-1” and body ground: Approx. 5 V “B-1” and body ground: Approx. 5 V “A-1” and body ground: Approx. 3 V 1. Looseness of crimping 2. Open 3. Thin wire (single strand of wire) I2RH01010051-01 I2RH01010052-01 I2RH01010053-01 I5RH01000005-01
  • 18. 00-13 Precautions: Short Circuit Check (Wire Harness to Ground) 1) Disconnect negative (–) cable at battery. 2) Disconnect connectors at both ends of the circuit to be checked. NOTE If the circuit to be checked is connected to other parts (1), disconnect all connectors of those parts. Otherwise, diagnosis will be misled. 3) Measure resistance between terminal at one end of circuit (“A-1” terminal in the figure) and body ground. If continuity is indicated, it means that there is a short to ground between terminals “A-1” and “C-1” of the circuit. 4) Disconnect the connector included in circuit (connector-B) and measure resistance between “A- 1” and body ground. If continuity is indicated, it means that the circuit is shorted to the ground between terminals “A-1” and “B-1”. Intermittent and Poor Connection Inspection S7RS0B0006002 Most intermittent are caused by faulty electrical connections or wiring, although a sticking relay or solenoid can occasionally be at fault. When checking it for proper connection, perform careful check of suspect circuits for: • Poor mating of connector halves, or terminals not fully seated in the connector body (backed out). • Dirt or corrosion on the terminals. The terminals must be clean and free of any foreign material which could impede proper terminal contact. However, cleaning the terminal with a sand paper or the like is prohibited. • Damaged connector body, exposing the terminals to moisture and dirt, as well as not maintaining proper terminal orientation with the component or mating connector. I5RH01000006-01 1. To other parts I2RH01010056-01 I2RH01010057-01
  • 19. Precautions: 00-14 • Improperly formed or damaged terminals. Check each connector terminal in problem circuits carefully to ensure good contact tension by using the corresponding mating terminal. If contact tension is not enough, reform it to increase contact tension or replace. • Poor terminal-to-wire connection. Check each wire harness in problem circuits for poor connection by shaking it by hand lightly. If any abnormal condition is found, repair or replace. • Wire insulation which is rubbed through, causing an intermittent short as the bare area touches other wiring or parts of the vehicle. • Wiring broken inside the insulation. This condition could cause continuity check to show a good circuit, but if only 1 or 2 strands of a multi-strand-type wire are intact, resistance could be far too high. If any abnormality is found, repair or replace. 1. Check contact tension by inserting and removing just once. 2. Check each terminal for bend and proper alignment. I5RH01000007-01 I2RH01010059-01 I2RH01010060-01
  • 21. Table of Contents 0- i  Section 0 CONTENTS General Information General Information ................................ 0A-1 General Description.............................................0A-1 Abbreviations ......................................................0A-1 Symbols ..............................................................0A-2 Wire Color Symbols ............................................0A-2 Fasteners Information .........................................0A-3 Vehicle Lifting Points...........................................0A-5 Engine Supporting Points ...................................0A-7 Vehicle Identification Number .............................0A-7 Engine Identification Number..............................0A-7 Transmission Identification Number....................0A-7 Component Location ...........................................0A-8 Warning, Caution and Information Labels Location ............................................................0A-8 Maintenance and Lubrication................. 0B-1 Precautions...........................................................0B-1 Precautions for Maintenance and Lubrication.....0B-1 Scheduled Maintenance ......................................0B-1 Maintenance Schedule under Normal Driving Conditions .........................................................0B-1 Maintenance Recommended under Severe Driving Conditions.............................................0B-2 Repair Instructions ..............................................0B-3 Accessory Drive Belt Inspection..........................0B-3 Accessory Drive Belt Replacement.....................0B-4 Valve Lash (Clearance) Inspection .....................0B-4 Engine Oil and Filter Change..............................0B-4 Engine Coolant Change......................................0B-5 Exhaust System Inspection.................................0B-6 Spark Plug Replacement ....................................0B-6 Air Cleaner Filter Inspection................................0B-6 Air Cleaner Filter Replacement...........................0B-6 Fuel Lines and Connections Inspection ..............0B-6 Fuel Filter Replacement......................................0B-7 Fuel Tank Inspection...........................................0B-7 PCV Valve Inspection .........................................0B-7 Fuel Evaporative Emission Control System Inspection..........................................................0B-7 Brake Discs and Pads Inspection .......................0B-7 Brake Hoses and Pipes Inspection .....................0B-7 Brake Fluid Inspection.........................................0B-8 Brake Fluid Replacement....................................0B-8 Brake Lever and Cable Inspection......................0B-8 Clutch Fluid Inspection........................................0B-8 Tires Inspection...................................................0B-9 Wheel Discs Inspection.......................................0B-9 Wheel Bearing Inspection ...................................0B-9 Suspension System Inspection...........................0B-9 Steering System Inspection ..............................0B-10 Drive Shaft (Axle) Boots Inspection ..................0B-10 Manual Transaxle Oil Inspection.......................0B-10 Manual Transaxle Oil Replacement..................0B-10 Automatic Transaxle Fluid Level Inspection......0B-11 Automatic Transaxle Fluid Replacement ..........0B-11 Automatic Transaxle Fluid Cooler Hose Inspection........................................................0B-11 All Latches, Hinges and Locks Inspection.........0B-11 HVAC Air Filter (If Equipped) Inspection...........0B-12 HVAC Air Filter (If Equipped) Replacement......0B-12 Final Inspection for Maintenance Service .........0B-12 Specifications.....................................................0B-13 Tightening Torque Specifications......................0B-13 Special Tools and Equipment ...........................0B-13 Recommended Fluids and Lubricants...............0B-13 Special Tool ......................................................0B-14
  • 22. 0A-1 General Information: General Information General Information General Description Abbreviations S7RS0B0101001 A: ABDC: After Bottom Dead Center ABS: Anti-lock Brake System AC: Alternating Current A/C: Air Conditioning A-ELR: Automatic-Emergency Locking Retractor A/F: Air Fuel Mixture Ratio ALR: Automatic Locking Retractor API: American Petroleum Institute APP sensor: Accelerator Pedal Position Sensor A/T: Automatic Transmission, Automatic Transaxle ATDC: After Top Dead Center ATF: Automatic Transmission Fluid, Automatic Transaxle Fluid B: B+: Battery Positive Voltage BBDC: Before Bottom Dead Center BCM: Body Electrical Control Module BDC: Bottom Dead Center BTDC: Before Top Dead Center C: CAN: Controller Area Network CKT: Circuit CKP Sensor: Crankshaft Position Sensor CMP Sensor: Camshaft Position Sensor CO: Carbon Monoxide CPP Switch: Clutch Pedal Position Switch (Clutch Switch, Clutch Start Switch) CPU: Central Processing Unit CRS: Child Restraint System D: DC: Direct Current DLC: Data Link Connector (Assembly Line Diag. Link, ALDL, Serial Data Link, SDL) DOHC: Double Over Head Camshaft DOJ: Double Offset Joint DRL: Daytime Running Light DTC: Diagnostic Trouble Code (Diagnostic Code) E: EBCM: Electronic Brake Control Module, ABS Control Module EBD: Electronic Brake Force Distribution ECM: Engine Control Module ECT Sensor: Engine Coolant Temperature Sensor (Water Temp. Sensor, WTS) EFE Heater: Early Fuel Evaporation Heater (Positive Temperature Coefficient, PTC Heater) EGR: Exhaust Gas Recirculation EGRT Sensor: EGR Temperature Sensor (Recirculated Exhaust Gas Temp. Sensor, REGTS) ELR: Emergency Locking Retractor ESP : Electronic Stability Program EPS: Electronic Power Steering EVAP: Evaporative Emission EVAP Canister: Evaporative Emission Canister (Charcoal Canister) F: 4WD: 4 Wheel Drive G: GEN: Generator GND: Ground GPS: Global Positioning System H: HVAC: Heating, Ventilating and Air Conditioning HC: Hydrocarbons HO2S: Heated Oxygen Sensor I: IAC Valve: Idle Air Control Valve (Idle Speed Control Solenoid Valve, ISC Solenoid Valve) IAT Sensor: Intake Air Temperature Sensor (Air temperature Sensor, ATS) ICM: Immobilizer Control Module IG: Ignition ISC Actuator: Idle Speed Control Actuator L: LH: Left Hand LHD: Left Hand Drive Vehicle LSPV: Load Sensing Proportioning Valve M: MAF Sensor: Mass Air Flow Sensor (Air Flow Sensor, AFS, Air Flow Meter, AFM) MAP Sensor: Manifold Absolute Pressure Sensor (Pressure Sensor, PS) Max: Maximum MFI: Multiport Fuel Injection (Multipoint Fuel Injection) Min: Minimum MIL: Malfunction Indicator Lamp (“SERVICE ENGINE SOON” Light) M/T: Manual Transmission, Manual Transaxle N: NOx: Nitrogen Oxides O: OBD: On-Board Diagnostic System (Self-Diagnosis Function) O/D: Overdrive OHC: Over Head Camshaft O2S: Oxygen Sensor P: PCM: Powertrain Control Module PCV: Positive Crankcase Ventilation PNP: Park / Neutral Position P/S: Power Steering PSP Switch: Power Steering Pressure Switch (P/S Pressure Switch) R: RH: Right Hand RHD: Right Hand Drive Vehicle S: SAE: Society of Automotive Engineers
  • 23. General Information: 0A-2 SAS: Steering Angle Sensor SDM: Sensing and Diagnostic Module (Air Bag Controller, Air bag Control Module) SDT: Smart Diagnostic Tester SFI: Sequential Multiport Fuel Injection SOHC: Single Over Head Camshaft T: TBI: Throttle Body Fuel Injection (Single-Point Fuel Injection, SPI) TCC: Torque Converter Clutch TCM: Transmission Control Module (A/T Controller, A/T Control Module) TDC: Top Dead Center TP Sensor: Throttle Position Sensor TVV: Thermal Vacuum Valve (Thermal Vacuum Switching Valve, TVSV, Bimetal Vacuum Switching Valve, BVSV) TWC: Three Way Catalytic Converter (Three Way Catalyst) 2WD: 2 Wheel Drive U: USB: Universal Serial Bus V: VIN: Vehicle Identification Number VSS: Vehicle Speed Sensor VVT: Variable Valve Timing (Camshaft Position Control) W: WU-OC: Warm Up Oxidation Catalytic Converter WU-TWC: Warm Up Three Way Catalytic Converter Symbols S7RS0B0101002 Wire Color Symbols S7RS0B0101003 Symbol Definition Symbol Definition Tightening torque Apply SUZUKI BOND NO. 1216B 99000-31230 Apply oil (engine, transmission, transfer, differential) Apply SILICONE SEALANT 99000-31120 Apply fluid (brake, power steering or automatic transmission fluid) Apply SEALING COMPOUND 366E 99000-31090 Apply SUZUKI SUPER GREASE A 99000-25011 Apply SUZUKI SUPER GREASE C 99000-25030 Apply THREAD LOCK 1322 99000-32110 Apply SUZUKI SUPER GREASE E 99000-25050 Apply THREAD LOCK 1333B 99000-32020 Apply SUZUKI SUPER GREASE H 99000-25121 Apply THREAD LOCK 1342 99000-32050 Apply SUZUKI SUPER GREASE I 99000-25210 Apply SUZUKI BOND NO. 1215 99000-31110 Do not reuse Apply SUZUKI BOND NO. 1207F 99000-31250 Note on reassembly Apply SUZUKI BOND NO. 1217G 99000-31260 Symbol Wire Color Symbol Wire Color B BLK Black O, Or ORN Orange Bl BLU Blue R RED Red Br BRN Brown W WHT White G GRN Green Y YEL Yellow Gr GRY Gray P PNK Pink Lbl LT BLU Light blue V PPL Violet Lg LT GRN Light green
  • 24. 0A-3 General Information: There are two kinds of colored wire used in this vehicle. One is single-colored wire and the other is dual-colored (striped) wire. The single-colored wire uses only one color symbol (i.e. “GRN”). The dual-colored wire uses two color symbols (i.e. “GRN/YEL”). The first symbol represents the base color of the wire (“GRN” in the figure) and the second symbol represents the color of the stripe (“YEL” in the figure). Fasteners Information S7RS0B0101004 Metric Fasteners Most of the fasteners used for this vehicle are JIS- defined and ISO-defined metric fasteners. When replacing any fasteners, it is most important that replacement fasteners be the correct diameter, thread pitch and strength. CAUTION ! Even when the nominal diameter (1) of thread is the same, the thread pitch (2) or the width across flats (3) may vary between ISO and JIS. Refer to JIS-TO-ISO Main Fasteners Comparison Table below for the difference. Installing a mismatched bolt or nut will cause damage to the thread. Before installing, check the thread pitch for correct matching and then tighten it by hand temporarily. If it is tight, recheck the thread pitch. JIS-TO-ISO Main Fasteners Comparison Table Fastener Strength Identification Most commonly used metric fastener strength property classes are 4T, 6.8, 7T, 8.8 and radial line with the class identification embossed on the head of each bolt. Some metric nuts will be marked with punch, 6 or 8 mark strength identification on the nut face. Figure shows the different strength markings. When replacing metric fasteners, be careful to use bolts and nuts of the same strength or greater than the original fasteners (the same number marking or higher). It is likewise important to select replacement fasteners of the correct diameter and thread pitch. Correct replacement bolts and nuts are available through the parts division. Metric bolts: Identification class numbers or marks correspond to bolt strength (increasing numbers represent increasing strength). I2RH01010010-01 Nominal diameter M6 M8 M10 M12 M14 JIS Thread pitch 1.0 1.25 1.25 1.25 1.5 Width across flats 10 12 14 17 19 ISO Thread pitch 1.0 1.25 1.5 1.5 1.5 Width across flats 10 13 16 18 21 I4RH0A010005-01 1. Nut strength identification I5RH01010001-01
  • 25. General Information: 0A-4 Standard Tightening Torque Each fastener should be tightened to the torque specified in each section. If no description or specification is provided, refer to the following tightening torque chart for the applicable torque for each fastener. When a fastener of greater strength than the original one is used, however, use the torque specified for the original fastener. NOTE • For the flanged bolt, flanged nut and self-lock nut of 4T and 7T strength, add 10% to the tightening torque given in the following chart. • The following chart is applicable only where the fastened parts are made of steel light alloy. Tightening torque chart *:Self-lock nut Strength Unit Thread diameter (Nominal diameter) (mm) 4 5 6 8 10 12 14 16 18 A equivalent of 4T strength fastener N m 1.5 3.0 5.5 13 29 45 65 105 160 kgf-m 0.15 0.30 0.55 1.3 2.9 4.5 6.5 10.5 16 lb-ft 1.0 2.5 4.0 9.5 21.0 32.5 47.0 76.0 116.0 A equivalent of 6.8 strength fastener without flange N m 2.4 4.7 8.4 20 42 80 125 193 280 kgf-m 0.24 0.47 0.84 2.0 4.2 8.0 12.5 19.3 28 lb-ft 2.0 3.5 6.0 14.5 30.5 58.0 90.5 139.5 202.5 A equivalent of 6.8 strength fastener with flange *: Self-lock nut (6 strength) N m 2.4 4.9 8.8 21 44 84 133 203 298 kgf-m 0.24 0.49 0.88 2.1 4.4 8.4 13.3 20.3 29.8 lb-ft 2.0 3.5 6.5 15.5 32.0 61.0 96.5 147.0 215.5 A equivalent of 7T strength fastener N m 2.3 4.5 10 23 50 85 135 210 240 kgf-m 0.23 0.45 1.0 2.3 5.0 8.5 13.5 21 24 lb-ft 2.0 3.5 7.5 17.0 36.5 61.5 98.0 152.0 174.0 A equivalent of 8.8 strength bolt (8 strength nut) without flange N m 3.1 6.3 11 27 56 105 168 258 373 kgf-m 0.31 0.63 1.1 2.7 5.6 10.5 16.8 25.8 37.3 lb-ft 2.5 4.5 8.0 19.5 40.5 76.0 121.5 187.0 270.0 A equivalent of 8.8 strength bolt (8 strength nut) with flange N m 3.2 6.5 12 29 59 113 175 270 395 kgf-m 0.32 0.65 1.2 2.9 5.9 11.3 17.5 27 39.5 lb-ft 2.5 5.0 9.0 21.0 43.0 82.0 126.5 195.5 286.0 I2RH01010012-01 I2RH01010013-01 I2RH01010014-01 I2RH01010015-01 I2RH01010016-01 I2RH01010017-01
  • 26. 0A-5 General Information: Vehicle Lifting Points S7RS0B0101005 WARNING ! • Before applying hoist to underbody, always take vehicle balance throughout service into consideration. Vehicle balance on hoist may change depending on what part to be removed. • Before lifting up the vehicle, check to be sure that end of hoist arm is not in contact with brake pipe, fuel pipe, bracket or any other part. • When using frame contact hoist, apply hoist as shown (right and left at the same position). Lift up the vehicle till 4 tires are a little off the ground and make sure that the vehicle will not fall off by trying to move vehicle body in both ways. Work can be started only after this confirmation. • Make absolutely sure to lock hoist after vehicle is hoisted up. When Using Frame Contact Hoist      I4RS0A010001-01 1. Vehicle front 3. Floor jack position 2. Support position for frame contact hoist and safety stand 4. Body mounting stay
  • 27. General Information: 0A-6 When Using Floor Jack WARNING ! If the vehicle to be jacked up only at the front or rear end, be sure to block the wheels on ground in order to ensure safety. After the vehicle is jacked up, be sure to support it on stands. It is extremely dangerous to do any work on the vehicle raised on jack alone. CAUTION ! • Never apply jack against rear suspension parts (i.e., stabilizer, etc.) or vehicle floor, or it may get deformed. • When jacking up the front end, be sure to use an air type floor jack with the following specified height or a manual type floor jack of the following size. Otherwise, the jack may cause the bumper or vehicle body panel a damage. Jack size Height “h”: under 145 mm (under 5.71 in.) Length “l”: above 900 mm (above 35.4 in.) In raising front or rear vehicle end off the floor by jacking, be sure to put the jack against front suspension frame (1) or rear jacking bracket (2). To perform service with either front or rear vehicle end jacked up, be sure to place safety stands (1) under body mounting stay (2) so that vehicle body is securely supported. And then check to ensure that body mounting stay (2) does not slide on safety stands (1) and the vehicle is held stable for safety’s sake.   I4RS0A010002-01 [A]: Front [B]: Rear   I4RS0A010003-01       I4RS0A010004-01
  • 28. 0A-7 General Information: Engine Supporting Points S7RS0B0101006 WARNING ! When using engine supporting device (1), be sure to observe the followings. Otherwise, not only deformation of vehicle body but also personal injury may result. • Apply supporting device at the specified positions (2) indicated in figure • Install supporting device taking a well- balanced posture. • Do not contact supporting device with other parts than engine room body panel and engine hooks. Vehicle Identification Number S7RS0B0101007 The number is punched close by the right side strut support in engine room and it is also attached on the left side of instrument panel depending on the vehicle specification. Engine Identification Number S7RS0B0101008 The number is punched on cylinder block. Transmission Identification Number S7RS0B0101009 The automatic transmission identification number is located on transmission case.     I4RS0A010005-01 I4RS0B010003-01 I3RM0A010005-01 I4RS0A010008-01
  • 29. General Information: 0A-8 Component Location Warning, Caution and Information Labels Location S7RS0B0103001 The figure shows main labels among others that are attached to vehicle component parts. When servicing and handling parts, refer to WARNING / CAUTION instructions printed on labels. If any WARNING / CAUTION label is found stained or damaged, clean or replace it as necessary.       I5RS0C010001-02 1. Air bag label on sun visor (if equipped) 4. Steering shaft joint cover label (if equipped) 2. Radiator cap label 5. Jack label 3. Engine cooling fan label 6. Rear beam label
  • 30. 0A-9 General Information:           I4RS0B010002-03 1. Air bag label on driver air bag (inflator) module 6. Air bag label on SDM 2. Air bag label on combination switch and contact coil assembly 7. Pretensioner label on seat belt retractor 3. Air bag label on passenger air bag (inflator) module 8. Child seat label (if equipped) 4. Air bag label on side air bag (inflator) module (if equipped) 9. Side/Curtain air bag label on pillar (both right and left sides) (if equipped) 5. Air bag label on curtain air bag (inflator) module (if equipped) [A]: These labels are attached on vehicle equipped with air bag system only.
  • 31. Maintenance and Lubrication: 0B-1 General Information Maintenance and Lubrication Precautions Precautions for Maintenance and Lubrication S7RS0B0200001 Air Bag Warning Refer to “Air Bag Warning in Section 00”. Scheduled Maintenance Maintenance Schedule under Normal Driving Conditions S7RS0B0205001 NOTE • This interval should be judged by odometer reading or months, whichever comes first. • This table includes service as scheduled up to 90,000 km (54,000 miles) mileage. Beyond 90,000 km (54,000 miles), carry out the same services at the same intervals respectively. Interval Km (x 1,000) 15 30 45 60 75 90 Miles (x 1,000) 9 18 27 36 45 54 Months 12 24 36 48 60 72 Engine Accessory drive belt (I: , R: ) — — I — — R Valve lash (clearance) (I: ) — I — I — I Engine oil and oil filter (R: ) R R R R R R Engine coolant (R: ) — — R — — R Exhaust system (I: ) — I — I — I Ignition system Spark plugs (R: ) When unleaded fuel is used Iridium Plug Replace every 60,000 km (36,000 miles) or 48 months When leaded fuel is used, refer to “Maintenance Recommended under Severe Driving Conditions”. Fuel system Air cleaner filter (R: , I: ) Paved-road I I R I I R Dusty conditions Refer to “Maintenance Recommended under Severe Driving Conditions”. Fuel lines and connections (I: ) — I — I — I Fuel filter (R: ) (See NOTE below) Replace every 105,000 km (63,000 miles) Fuel tank (I: ) — — I — — I Emission control system PCV valve (I: ) — — — — — I Fuel evaporative emission control system (I: ) — — — — — I Brake Brake discs and pads (thickness, wear, damage) (I: ) I I I I I I Brake hoses and pipes (leakage, damage, clamp) (I: ) — I — I — I Brake fluid (R: ) — R — R — R Brake lever and cable (damage, stroke, operation) (I: ) Inspect at first 15,000 km (9,000 miles only) Chassis and body Clutch (fluid leakage, level) (I: ) — I — I — I Tires (wear, damage, rotation) / wheels (damage) (I: / ) I I I I I I Suspension system (tightness, damage, rattle, breakage) (I: ) — I — I — I Steering system (tightness, damage, breakage, rattle) (I: ) — I — I — I Drive shaft (axle) boots (I: ) — — I — — I Manual transaxle oil (leakage, level) (I: 1st 15,000 km only) (R: ) I — R — — R
  • 32. 0B-2 Maintenance and Lubrication: NOTE • “R”: Replace or change • “I”: Inspect and correct, replace or lubricate if necessary • For spark plugs, replace every 50,000 km if the local law requires. • Periodic replacement of fuel filter is not necessary if it is not instructed in “Periodic Maintenance Schedule” section of the Owner’s manual. The scheduled maintenance varies depending on the vehicle specification. Maintenance Recommended under Severe Driving Conditions S7RS0B0205002 If the vehicle is usually used under the conditions corresponding to any severe condition code given below, IT IS RECOMMENDED that applicable maintenance operation be performed at the particular interval as shown in the following table. Severe condition code: A: Repeated short trips B: Driving on rough and/or muddy roads C: Driving on dusty roads D: Driving in extremely cold weather and/or salted roads E: Repeated short trips in extremely cold weather F: Leaded fuel use G: – – – – – H: Towing a trailer (if admitted) Automatic transaxle fluid Fluid level (I: ) — I — I — I Fluid change (R: ) Replace every 165,000 km (99,000 miles) Fluid hose (I: ) — — — I — — All latches, hinges and locks (I: ) — I — I — I HVAC air filter (if equipped) (I: ) (R: ) — I R — I R Interval Km (x 1,000) 15 30 45 60 75 90 Miles (x 1,000) 9 18 27 36 45 54 Months 12 24 36 48 60 72 Severe condition code Maintenance Maintenance operation Maintenance interval – B C D – – – – Accessory drive belt I Every 15,000 km (9,000 miles) or 12 months R Every 45,000 km (27,000 miles) or 36 months A – C D E F – H Engine oil and oil filter R Every 7,500 km (4,500 miles) or 6 months – – C – – – – – Air cleaner filter *1 I Every 2,500 km (1,500 miles) R Every 30,000 km (18,000 miles) or 24 months A B C – E F – H Spark plugs Iridium plug R Every 30,000 km (18,000 miles) or 24 months – B C D – – – H Wheel bearings I Every 15,000 km (9,000 miles) or 12 months – B – D E – – H Drive shaft (axle) boots I Every 15,000 km (9,000 miles) or 12 months – B – – E – – H Manual transaxle oil R First time only: 15,000 km (9,000 miles) or 12 months Second time and after: Every 30,000 km (18,000 miles) or 24 months reckoning from 0 km (0 mile) or 0 month
  • 33. Maintenance and Lubrication: 0B-3 NOTE • “I”: Inspect and correct or replace if necessary • “R”: Replace or change • *1: Inspect or replace more frequently if the vehicle is used under dusty conditions. • *2: Clean or replace more frequently if the air from the air conditioning decreases. Repair Instructions Accessory Drive Belt Inspection S7RS0B0206001 WARNING ! All inspection and replacement are to be performed with ENGINE NOT RUNNING. Water Pump and Generator Drive Belt 1) Disconnect negative (–) cable at battery. 2) Inspect belt for cracks, cuts, deformation, wear and cleanliness. If any defect exists, replace. Check belt for tension. Water pump and generator belt tension “a”: 4.5 – 5.5 mm (0.18 – 0.22 in.) deflection under 100 N (10 kg, 22 lb) pressure NOTE When replacing belt with a new one, adjust belt tension to 3.5 – 4 mm (0.14 – 0.16 in.) 3) If belt is too tight or too loose, adjust it to specification by adjusting alternator position. 4) Tighten alternator adjusting bolts and pivot bolt. 5) Connect negative (–) cable to battery. A/C Compressor Drive Belt 1) Disconnect negative (–) cable at battery. 2) Inspect belt for cracks, cuts, deformation, wear and cleanliness. If any defect exists, replace. Check belt for tension. If belt tension is out of specification, adjust it referring to “Compressor Drive Belt Inspection and Adjustment in Section 7B”. A/C compressor drive belt tension “a”: 7 – 8 mm (0.28 – 0.31 in.) deflection under 100 N (10 kg, 22 lb) pressure NOTE When replacing belt with a new one, adjust belt tension to 6 – 7 mm (0.24 – 0.28 in.). 3) Connect negative (–) cable to battery. – B – – E – – H Automatic transaxle fluid R Every 30,000 km (18,000 miles) or 24 months – – C D – – – – HVAC air filter (if equipped) *2 I Every 15,000 km (9,000 miles) or 12 months R Every 45,000 km (27,000 miles) or 36 months Severe condition code Maintenance Maintenance operation Maintenance interval I3RM0A020001-01 I4RS0A020001-01
  • 34. 0B-4 Maintenance and Lubrication: Accessory Drive Belt Replacement S7RS0B0206002 Water Pump and Generator Drive Belt Replace belt with new one referring to “Water Pump / Generator Drive Belt Removal and Installation in Section 1J”. A/C Compressor Drive Belt Replace belt with new one referring to “Compressor Drive Belt Removal and Installation in Section 7B”. Valve Lash (Clearance) Inspection S7RS0B0206003 Inspect intake and exhaust valve lash and adjust as necessary. Refer to “Valve Lash (Clearance) Inspection in Section 1D” for valve lash inspection and adjustment procedure. Engine Oil and Filter Change S7RS0B0206004 WARNING ! • New and used engine oil can be hazardous. Be sure to read “WARNING” in “General Precautions in Section 00” and observe what is written there. • Step 1) – 7) outlined below must be performed with ENGINE NOT RUNNING. For Step 8), be sure to have adequate ventilation while engine is running. Before draining engine oil, check engine for oil leakage. If any evidence of leakage is found, make sure to correct defective part before proceeding to the following work. 1) Drain engine oil by removing drain plug. 2) After draining oil, wipe drain plug clean. Reinstall drain plug. Tightening torque Engine oil drain plug (a): 35 N·m (3.5 kgf-m, 25.5 lb-ft) 3) Loosen oil filter by using oil filter wrench (special tool). Special tool (A): 09915–47331 NOTE Before fitting new oil filter, be sure to oil its O-ring. Use engine oil for this purpose. 1. Camshaft 2. Thickness gauge I2RH0B020003-02 I2RH0B020004-01 I2RH0B020005-01 IYSQ01020009-01
  • 35. Maintenance and Lubrication: 0B-5 4) Screw new filter on oil filter stand by hand until the filter O-ring contacts mounting surface. CAUTION ! To tighten oil filter properly, it is important to accurately identify the position at which filter O-ring first contacts mounting surface. 5) Tighten the filter (1) 3/4 turn from the point of contact with the mounting surface using an oil filter wrench (2). Tightening torque Oil filter (b): 14 N·m (1.4 kgf-m, 10.5 lb-ft) for reference 6) Replenish oil until oil level is brought to FULL level mark on dipstick (oil pan and oil filter capacity). The filler inlet is at the top of the cylinder head cover. It is recommended to use engine oil of SG, SH, SJ, SL or SM grade. Select the appropriate oil viscosity according to the proper engine oil viscosity chart [A]. NOTE Engine oil capacity is specified as the following. However, note that the amount of oil required when actually changing oil may somewhat differ from the data depending on various conditions (temperature, viscosity, etc.). Engine oil specification Oil pan capacity: About 3.7 liters (7.8 / 6.5 US / lmp pt.) Oil filter capacity: About 0.2 liter (0.4 / 0.3 US / lmp pt.) Others: About 0.3 liter (0.6 / 0.5 US / lmp pt.) Total: About 4.2 liters (8.9 / 7.4 US / lmp pt.) 7) Check oil filter and drain plug for oil leakage. 8) Start engine and run it for 3 minutes. Stop it and wait another 5 minutes before checking oil level. Add oil, as necessary, to bring oil level to FULL level mark (1) on dipstick. Engine Coolant Change S7RS0B0206005 WARNING ! To help avoid danger of being burned, do not remove radiator cap while engine and radiator are still hot. Scalding fluid and steam can be blown out under pressure if cap is taken off too soon. CAUTION ! When changing engine coolant, use mixture of 50% specified water and 50% ANTIFREEZE / ANTICORROSION COOLANT for the purpose of corrosion protection and lubrication. Change engine coolant with new one referring to “Cooling System Flush and Refill in Section 1F”. IYSQ01020010-01                          I7RS0B020001-02 2. Low level mark (hole) IYSQ01020012-01
  • 36. 0B-6 Maintenance and Lubrication: Exhaust System Inspection S7RS0B0206006 WARNING ! To avoid danger of being burned, do not touch exhaust system when it is still hot. Any service on exhaust system should be performed when it is cool. When carrying out periodic maintenance, or the vehicle is raised for other service, check exhaust system as follows: • Check rubber mountings for damage, deterioration, and out of position. • Check exhaust system for leakage, loose connections, dents and damages. If bolts or nuts are loose, tighten them to specification. • Check nearby body areas for damaged, missing or mispositioned parts, open seams, holes, loose connections or other defects which could permit exhaust fumes to seep into the vehicle. • Make sure that exhaust system components have enough clearance from the underbody to avoid overheating and possible damage to floor carpet. • Any defects should be fixed at once. Spark Plug Replacement S7RS0B0206007 Replace spark plugs with new ones referring to “Spark Plug Removal and Installation in Section 1H”. Air Cleaner Filter Inspection S7RS0B0206008 1) Remove air cleaner case clamps. 2) Take air cleaner filter out of case. 3) Check that filter is not excessively dirty, damaged or oily, clean filter with compressed air from air outlet side of filter. 4) Install air cleaner filter and Clamp cap securely. Air Cleaner Filter Replacement S7RS0B0206009 Replace air cleaner filter with new one according to Steps 1), 2) and 4) of “Air Cleaner Filter Inspection”. Fuel Lines and Connections Inspection S7RS0B0206010 Visually inspect fuel lines and connections for evidence of fuel leakage, hose cracking and damage. Make sure all clamps are secure. Repair leaky joints, if any. Replace hoses that are suspected of being cracked. I4RS0A020003-01 I2RH01140007-01 I4RS0B020001-01 I4RS0A020005-01
  • 37. Maintenance and Lubrication: 0B-7 Fuel Filter Replacement S7RS0B0206011 Fuel filter is installed in fuel pump assembly in fuel tank. Replace fuel filter or fuel pump assembly with new one, referring to “Fuel Pump Assembly Removal and Installation in Section 1G” for proper procedure. Fuel Tank Inspection S7RS0B0206012 Check fuel tank damage, cracks, fuel leakage, corrosion and tank bolts looseness. If a problem is found, repair or replace. PCV Valve Inspection S7RS0B0206013 Check crankcase ventilation hose and PCV hose for leaks, cracks or clog, and PCV valve for stick or clog. Refer to “PCV Valve Inspection in Section 1B” for PCV valve checking procedure. Fuel Evaporative Emission Control System Inspection S7RS0B0206014 1) Visually inspect hoses for cracks, damage, or excessive bends. Inspect all clamps for damage and proper position. 2) Check EVAP canister for operation and clog, referring to “EVAP Canister Inspection in Section 1B”. If a malfunction is found, repair or replace. Brake Discs and Pads Inspection S7RS0B0206015 1) Remove wheel and caliper but don’t disconnect brake hose from caliper. 2) Check disc brake pads and discs for excessive wear, damage and deflection. Replace parts as necessary. For details, refer to “Front Disc Brake Pad Inspection in Section 4B”, “Front Brake Disc Inspection in Section 4B”, “Rear Disc Brake Pad Inspection in Section 4C” and/or “Rear Brake Disc Inspection in Section 4C”. Be sure to torque caliper pin bolts to specification. Brake Hoses and Pipes Inspection S7RS0B0206016 Perform this inspection where these is enough light and use a mirror as necessary. • Check brake hoses and pipes for proper hookup, leaks, cracks, chafing and other damage. • Check that hoses and pipes are clear of sharp edges and moving parts. Repair or replace any of these parts as necessary. CAUTION ! After replacing any brake pipe or hose, be sure to carry out air purge operation. I4RS0B020002-02 I4RS0A020006-01 I3RM0A020006-01 I4RS0A020008-01
  • 38. 0B-8 Maintenance and Lubrication: Brake Fluid Inspection S7RS0B0206035 1) Check around master cylinder and reservoir for fluid leakage. If found leaky, correct. 2) Check fluid level. If fluid level is lower than the minimum level of reservoir, refilling is necessary. Fill reservoir with specified brake fluid. For the details, refer to “Brake Fluid Level Inspection in Section 4A”. CAUTION ! Since brake system of this vehicle is factory- filled with brake fluid indicated on reservoir tank cap, do not use or mix different type of fluid when refilling; otherwise serious damage will occur. Do not use old or used brake fluid, or any fluid from an unsealed container. Brake fluid Refer to reservoir cap of brake master cylinder. Brake Fluid Replacement S7RS0B0206017 Change brake fluid as follows. Drain existing fluid from brake system completely, fill system with specified fluid and carry out air purge operation. For air purging procedure, refer to“Air Bleeding of Brake System in Section 4A”. Brake Lever and Cable Inspection S7RS0B0206018 1) Inspect brake cable for damage and smooth movement. Replace cable if it is in deteriorated condition. 2) Check tooth tip of each notch for damage or wear. If any damage or wear is found, replace parking lever. 3) Check parking brake lever for proper operation and stroke, and adjust it if necessary. For checking and adjusting procedures, refer to “Parking Brake Inspection and Adjustment in Section 4D”. Parking brake lever stroke “a”: 4 – 9 notches (with 200 N (20 kg, 44 lbs) of pull pressure) Clutch Fluid Inspection S7RS0B0206019 1) Check clutch system for evidence of fluid leakage. Repair leaky point if any. 2) Check reservoir for fluid level referring to “Clutch Fluid Level Inspection in Section 5C”. If fluid is lower than minimum level of reservoir, refill reservoir with specified brake fluid indicated on reservoir cap. I7RW01020002-01 I4RS0A020009-01 I4RS0B020005-01 I4RS0A410006-01
  • 39. Maintenance and Lubrication: 0B-9 Tires Inspection S7RS0B0206020 1) Check tires for uneven or excessive wear, or damage. If defective, replace. Refer to “Irregular and/or Premature Wear Description in Section 2D” and “Wear Indicators Description in Section 2D” for details. 2) Check inflating pressure of each tire and adjust pressure to specification as necessary. NOTE • Tire inflation pressure should be checked when tires are cool. • Specified tire inflation pressure should be found on tire placard or in owner’s manual which came with the vehicle. 3) Rotate tires. For details, refer to “Tire Rotation in Section 2D”. Wheel Discs Inspection S7RS0B0206021 Inspect each wheel disc for dents, distortion and cracks. A disc in badly damaged condition must be replaced. Wheel Bearing Inspection S7RS0B0206022 1) Check front wheel bearing for wear, damage, abnormal noise or rattles. For details, refer to “Front Wheel Hub, Disc, Nut and Bearing Check in Section 2B”. 2) Check rear wheel bearing for wear, damage, abnormal noise or rattles. For details, refer to“Rear Wheel Disc, bolt and Bearing Inspection in Section 2C”. Suspension System Inspection S7RS0B0206023 • Inspect front struts and rear shock absorbers for evidence of oil leakage, dents or any other damage on sleeves; and inspect anchor ends for deterioration. Replace defective parts, if any. • Check front and rear suspension systems for damaged, loose or missing parts; also for parts showing signs of wear or lack of lubrication. Repair or replace defective parts, if any. • Check front suspension arm ball joint stud dust seals for leakage, detachment, tear or any other damage. Replace defective boot, if any. 1. Wear indicator I2RH01020022-01 I2RH01020023-01 I4RS0A020011-01 I4RS0A020012-01
  • 40. Thank you very much for your reading. Please Click Here Then Get More Information.