Basic woodworking text book for beginners and professionals, 78 pages ebook in pdf format ready for download. sold at 57$ now I donate for free download, you can resell it or give it to your friends.
Woodworking
Essentials A-Z
http://www.downloadpdfreview.com
Here's What You CAN Do With These Products:
[YES] Sell it
[YES] Sell At Online Auctions.
[YES] Give Away.
[YES] Offer As A Bonus.
[YES] Offer As Subscriber Incentives.
[NO] Alter The Source Documents.
[YES] Charge Any Price YOU Want.
[YES] Add Them To Membership Sites.
[NO] Create BRAND NEW Products
[YES] Publish The Products Offline
[NO] Put Your Name On The Products As The Author
[NO] Change The Content.
Woodworking Resources & Manual Lists Directory: http://www.downloadpdfreview.com
2.
Table of Contents
Woodworking Essentials A-Z .................................................................................................... 1
http://www.downloadpdfreview.com ...................................................................................... 1
Here's What You CAN Do With These Products: .................................................................... 1
[YES] Sell it ............................................................................................................................... 1
[YES] Sell At Online Auctions................................................................................................... 1
[YES] Give Away. ...................................................................................................................... 1
[YES] Offer As A Bonus. ........................................................................................................... 1
[YES] Offer As Subscriber Incentives. ..................................................................................... 1
[NO] Alter The Source Documents. ......................................................................................... 1
[YES] Charge Any Price YOU Want. ........................................................................................ 1
[YES] Add Them To Membership Sites. .................................................................................. 1
[NO] Create BRAND NEW Products ......................................................................................... 1
[YES] Publish The Products Offline ......................................................................................... 1
[NO] Put Your Name On The Products As The Author .......................................................... 1
[NO] Change The Content. ...................................................................................................... 1
Table of Contents......................................................................................................... 2
How it all began…for me ........................................................................................................ 10
Forward.................................................................................................................................... 11
Introduction ............................................................................................................................. 13
What is woodworking? ....................................................................................................... 14
The Aim................................................................................................................................ 15
Woodworking 101 ................................................................................................................... 16
The Basics ............................................................................................................................ 17
Design /Plan .................................................................................................................... 17
Get the Necessaries ........................................................................................................ 17
Safety Check .................................................................................................................... 18
Clearing some Space....................................................................................................... 18
Measuring & Marking ...................................................................................................... 18
Cutting.............................................................................................................................. 19
Sanding ............................................................................................................................ 19
Joining .............................................................................................................................. 20
Finishing ........................................................................................................................... 20
Safety First .............................................................................................................................. 20
Safety Do’s and Don’ts ....................................................................................................... 22
Wear safety equipment .................................................................................................. 22
Don’t wear loose clothing ............................................................................................... 22
Bind your hair .................................................................................................................. 22
Avoid any distractions ..................................................................................................... 22
Keep your eye on the blade when you’re working ....................................................... 23
This one is basically the same as avoiding distractions, but takes things a step further. 23
Make sure there’s a safety ring around the “On” button ............................................. 23
Take a break when you’re tired ..................................................................................... 23
Allow the tool to stop fully, before putting your hands anywhere near it .................. 23
Unplug the tool first, before changing the bits and blades ......................................... 23
Never touch a moving blade or bit ................................................................................ 24
Never reach over a tool in use ....................................................................................... 24
Download Free eBooks Here: http://downloadpdfreview.com/download-ebook/
3.
Use a minimumof extension cords ............................................................................... 24
Hang any wires or secure them ..................................................................................... 24
Keep alcohol out of the workshop ................................................................................. 25
Don’t work if you’re sick ................................................................................................. 25
Use push sticks ................................................................................................................ 25
Check your wood stock first ........................................................................................... 25
Keep your tools in good working condition ................................................................... 25
Keep your blades sharp .................................................................................................. 26
Ensure you have good ventilation ................................................................................. 26
Keep your working area clean of any clutter ................................................................ 26
Don’t force a situation .................................................................................................... 27
Maintain good lighting .................................................................................................... 27
Keep children away from your work area ..................................................................... 27
Keep yourself hydrated ................................................................................................... 28
Have a first aid station.................................................................................................... 28
But most of all, just Think .............................................................................................. 29
Do keep your head, and Don’t lose it in the heat of the moment. ..................................... 29
Safety Equipment ................................................................................................................ 30
Here I’ve compiled a list of the safety equipment you’ll need. ........................................... 30
Goggles ............................................................................................................................ 30
Face Masks ...................................................................................................................... 30
Hearing Protection .......................................................................................................... 31
Gloves............................................................................................................................... 31
Lighting ............................................................................................................................ 31
Push Sticks ....................................................................................................................... 32
Remember, push sticks good, chopped finger bad. ............................................................ 32
First Aid Kit ...................................................................................................................... 32
Your Mind ......................................................................................................................... 32
When to Buy your Tools? ....................................................................................................... 33
Your Basic Toolbox ................................................................................................................. 34
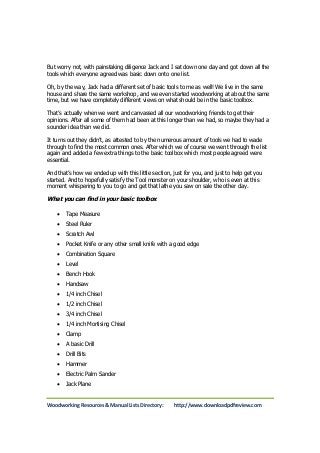
What you can find in your basic toolbox ........................................................................... 35
Tools ........................................................................................................................................ 36
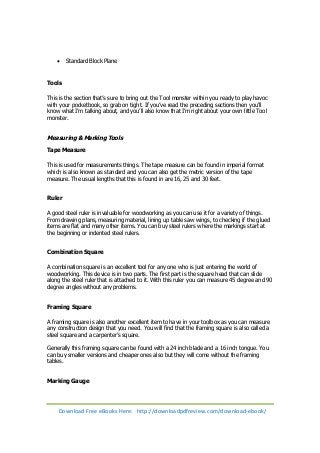
Measuring & Marking Tools ................................................................................................ 36
Tape Measure .................................................................................................................. 36
Ruler ................................................................................................................................. 36
Combination Square ........................................................................................................ 36
Framing Square ............................................................................................................... 36
Marking Gauge ................................................................................................................ 36
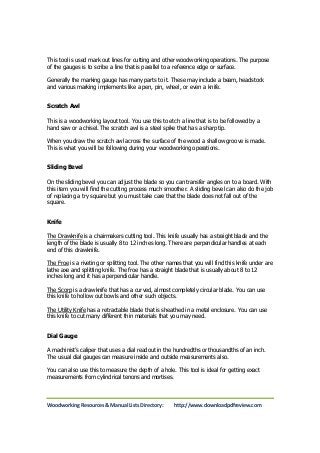
Scratch Awl ...................................................................................................................... 37
Sliding Bevel .................................................................................................................... 37
Knife ................................................................................................................................. 37
Dial Gauge ....................................................................................................................... 37
Cutting Tools ....................................................................................................................... 38
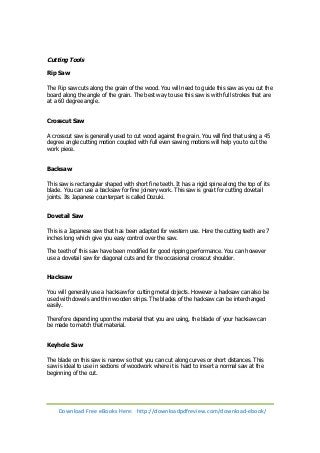
Rip Saw ............................................................................................................................ 38
Crosscut Saw ................................................................................................................... 38
Backsaw ........................................................................................................................... 38
Dovetail Saw .................................................................................................................... 38
Hacksaw ........................................................................................................................... 38
Woodworking Resources & Manual Lists Directory: http://www.downloadpdfreview.com
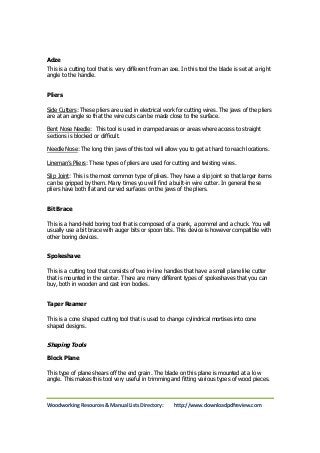
Drill ................................................................................................................................... 46
Router .............................................................................................................................. 46
Belt Sander ...................................................................................................................... 47
Palm Sander .................................................................................................................... 47
Circular Saw ..................................................................................................................... 47
Scroll Saw ........................................................................................................................ 47
Radial Arm Saw ............................................................................................................... 47
Random Orbital Sander .................................................................................................. 47
Jigsaw............................................................................................................................... 47
Miter Saw ......................................................................................................................... 47
Equipment ........................................................................................................................... 48
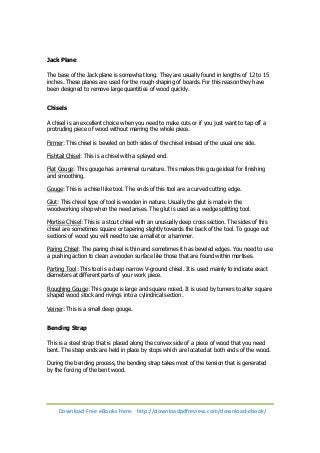
Workbench ....................................................................................................................... 48
Sawhorse ......................................................................................................................... 48
Bench hook ...................................................................................................................... 48
Sharpening Tools ................................................................................................................ 48
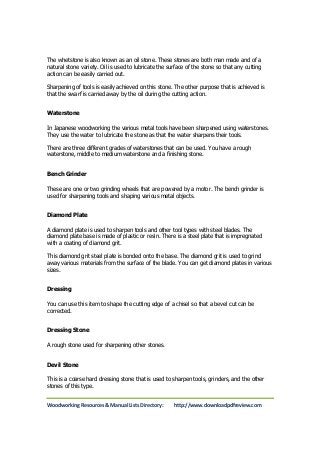
Whetstone or Oil Stone .................................................................................................. 48
Waterstone ...................................................................................................................... 49
Bench Grinder .................................................................................................................. 49
Diamond Plate ................................................................................................................. 49
Dressing ........................................................................................................................... 49
Dressing Stone ................................................................................................................ 49
Devil Stone....................................................................................................................... 49
Hardwood? or Softwood? ....................................................................................................... 50
Hardwood ............................................................................................................................ 51
Softwood .............................................................................................................................. 52
Going Against the Grain ......................................................................................................... 52
Fine Finishes ............................................................................................................................ 53
Problems .................................................................................................................................. 54
A few “knotty” problems .................................................................................................... 54
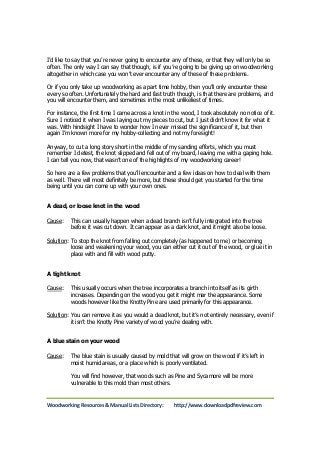
A dead, or loose knot in the wood................................................................................. 55
A tight knot ...................................................................................................................... 55
A blue stain on your wood ............................................................................................. 55
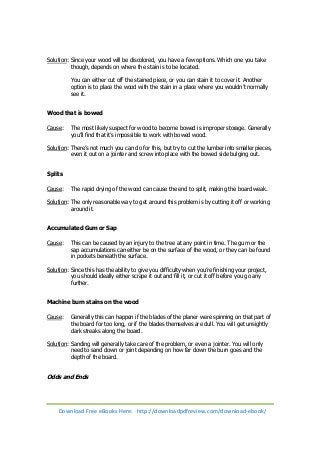
Wood that is bowed ........................................................................................................ 56
Splits ................................................................................................................................. 56
Cause: The rapid drying of the wood can cause the end to split, making the
board weak. 56
Accumulated Gum or Sap ............................................................................................... 56
Machine burn stains on the wood .................................................................................. 56
Odds and Ends .................................................................................................................... 56
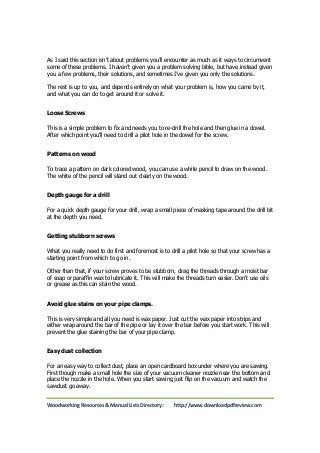
Loose Screws ................................................................................................................... 57
Patterns on wood ............................................................................................................ 57
Depth gauge for a drill .................................................................................................... 57
Getting stubborn screws ................................................................................................. 57
Avoid glue stains on your pipe clamps. ......................................................................... 57
Easy dust collection......................................................................................................... 57
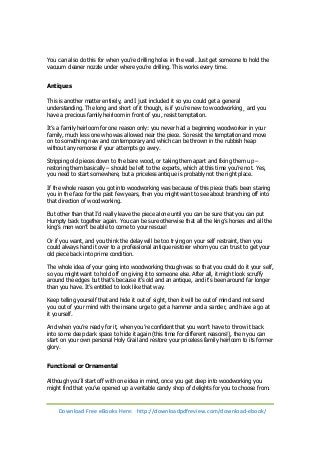
Antiques ................................................................................................................................... 58
Functional or Ornamental ...................................................................................................... 58
Woodworking in all its glory................................................................................................... 59
Woodworking Resources & Manual Lists Directory: http://www.downloadpdfreview.com
Linear Foot .......................................................................................................................70
Lumber Ruler ................................................................................................................... 70
M........................................................................................................................................... 71
Medium Density Fiberboard (It is also called MDF) ..................................................... 71
Miter-and-Spline Joint ..................................................................................................... 71
Miter Gauge ..................................................................................................................... 71
Moisture Content (mc) .................................................................................................... 71
Mortise ............................................................................................................................. 71
Mortise and Tenon Joint ................................................................................................. 71
N ........................................................................................................................................... 71
Non-piloted bit ................................................................................................................. 71
O ........................................................................................................................................... 71
Ogee ................................................................................................................................. 71
Open Coat ........................................................................................................................ 71
OC ..................................................................................................................................... 71
Outfeed ............................................................................................................................ 72
P ........................................................................................................................................... 72
Particle Board .................................................................................................................. 72
Particleboard-core Plywood ............................................................................................ 72
Pilot Bit (Pilot Bearing) also called Piloted Bit ............................................................... 72
Pin Router ........................................................................................................................ 72
Plate Joint See Biscuit Joint ............................................................................................ 72
Plunge Router .................................................................................................................. 72
Pumice.............................................................................................................................. 72
Push Stick ........................................................................................................................ 72
Q ........................................................................................................................................... 73
Queen Anne ..................................................................................................................... 73
R ........................................................................................................................................... 73
Rabbet .............................................................................................................................. 73
Rail.................................................................................................................................... 73
Raised Panel .................................................................................................................... 73
Ripcut (Ripping) .............................................................................................................. 73
Rotary Cut Veneer ........................................................................................................... 73
Round Edge Lumber ....................................................................................................... 73
Rub Bearing ..................................................................................................................... 73
Rule Joint ......................................................................................................................... 73
Runout.............................................................................................................................. 73
S ........................................................................................................................................... 74
Safety glasses .................................................................................................................. 74
Scarf Joint ........................................................................................................................ 74
Seasoning ........................................................................................................................ 74
Slab................................................................................................................................... 74
Sliding Dovetail Joints ..................................................................................................... 74
Softwoods ........................................................................................................................ 74
Sound ............................................................................................................................... 74
Specific Gravity ................................................................................................................ 74
Spindle ............................................................................................................................. 74
Spline................................................................................................................................ 74
Download Free eBooks Here: http://downloadpdfreview.com/download-ebook/
9.
Squeeze-out ..................................................................................................................... 75
Stain ................................................................................................................................. 75
Starved Joint .................................................................................................................... 75
Sticker .............................................................................................................................. 75
Stile .................................................................................................................................. 75
Surfaced Lumber ............................................................................................................. 75
Surfacing .......................................................................................................................... 75
T ........................................................................................................................................... 75
Tack Time ........................................................................................................................ 75
Tape Measure .................................................................................................................. 75
Tearout............................................................................................................................. 75
Tempered Hardboard ...................................................................................................... 76
Template .......................................................................................................................... 76
Template Guide ............................................................................................................... 76
Tenon ............................................................................................................................... 76
Through Dovetail Joint.................................................................................................... 76
Toe Kick ........................................................................................................................... 76
Tongue and Groove ........................................................................................................ 76
Torque .............................................................................................................................. 76
Tyloses ............................................................................................................................. 76
U ........................................................................................................................................... 77
Underlayment .................................................................................................................. 77
Universal Chuck ............................................................................................................... 77
V ........................................................................................................................................... 77
Veneer .............................................................................................................................. 77
Veneer-core Plywood ...................................................................................................... 77
W .......................................................................................................................................... 77
Wane ................................................................................................................................ 77
Warp ................................................................................................................................. 77
Most of all though…Have Fun ................................................................................................ 77
Resource & Recommended .............................................................................................. 78
Woodworking Resources & Manual Lists Directory: http://www.downloadpdfreview.com
10.
How it allbegan…for me
What do a skiing trip, a broken leg and woodworking have in common? Nothing, unless
you’re Attila the Hun and want to replace my broken leg with a new wooden one! Or, of
course, unless you’re me.
As you might have guessed I’m the one with the broken leg, and I managed it while we
were on our skiing trip. The woodworking ties into this whole thing because I was forced to
stay almost immobile for too long with nothing better to do except twiddle my thumbs and
gaze off into space.
Where, the “space” involved in this case, turned out to be the roof our host’s log cabin and a
nicer roof I’ve never seen. But it still left me to my mournful thoughts.
I mean there I was, stuck indoors virtually for the rest of our trip without being able to take
advantage of the great skiing conditions, and having to listen everyone else enjoying
themselves. And if that sounds like grousing, it was, and I’m not too ashamed to admit it.
I know that I’m no saint, so I know that I get cranky. Anyway, to allay my boredom and I
suspect to stop me from becoming cranky, between them, Jack, my long suffering husband,
and our host found and supplied me with a mile high stack of books.
Now, I’m voracious reader so it didn’t take me that long to whittle the stack almost down to
nothing, but it was enjoyable nonetheless. I was even carried out and placed ever so gently
in a cozy chair and tucked up with enormous blankets every morning so that I could better
enjoy myself.
Having whittled down the pile of books to almost nothingness, I was left with a few
magazines and books on woodworking. Not being particularly interested in woodworking at
that point, but having nothing better to do, I started to go through the magazines first,
deciding to leave the books to the last.
And that, my friends, is what skiing, broken legs and woodworking all have to do with each
other, because as they say, the rest was history. I was caught, hook, line and sinker and it
even got to the point where I had to be persuaded to put the book down.
Since the books belonged to out erstwhile host, I figured he had to have had some passing
interest in woodworking so I plied him unashamedly for all the information I could get. Jack,
the poor dear, only looked at my host and thanked him quite laconically for supplying me
with a new hobby.
My hobby-collecting1 was legend amongst our friends by then, so everyone only laughed,
and I just ploughed doggedly on, determined to get all the information that I could. Which,
brings us to this point and my introduction to you into the world of woodworking.
It’s been a considerable number of years since that fateful skiing trip and I haven’t looked
back since. That doesn’t mean that I’ve stopped my hobby-collecting, only that I find new
and inventive ways in which to merge everything together, without any mishaps.
1 A term I’ve coined and which I tell you about in the next section.
Download Free eBooks Here: http://downloadpdfreview.com/download-ebook/
11.
Except for theone time of course when I tried my hand at pottery and ended up using a
chisel instead of a shaper. Not a big accident by any means, and don’t ask me how it
happened – it just did!
But at the time I remember seeing my nicely forming pot collapsing on my wheel in two
distinct pieces. And that’s what you get for absentmindedness. There’s a good chance that I
just reached for and found the nearest tool that would fit into my hand to do the job.
That was Jack’s fault of course. We were both working at the same time in the workshop
and he had left the chisel on the table next to me where I had unfortunately left my pottery
tools as well.
Needless to say, I didn’t pursue pottery very far, although it was nice for a while. It just
didn’t have the same impact or oomph! for me that woodworking did. Can you imagine
taking a saw to a piece of clay the way you’d do for a piece of wood? Just not the same
satisfaction.
Forward
Be it rigs, jigs, or power saws, if you’re going to be doing any type of woodworking for any
length of time, then you’re going to need all of these tools and more. The thing with all of
these though is the fact that if you’re just beginning, then you really need only a few of
them.
Everything can come later as you need it and depending on what you’re doing. But how do
you get started with your new hobby though? Even to decide first whether you want to
continue woodworking, you need to first do something. And to do something you need tools.
Then you’ll need somewhere to store your tools. And of course you need somewhere to
work, and don’t forget somewhere to keep your wood, and finished and unfinished projects.
Whoa! It sounds like you might be needing a whole lot of things and you’re still not even
sure whether you want to continue with this woodworking lark yet.
Or was that just me? Go on, tell me that from the minute you decided to take up
woodworking you weren’t overwhelmed by the myriad of tools in the stores.
Only whereas earlier you might have ignored the callings of these tools, now with the
prospect of a new hobby under your belt you just can’t wait to buy them and get started on
your projects.
The best thing about this whole thing though is that so far you’ve had only the bare bones
of an idea to get into woodworking and you want to set up shop! I know that’s what I was
about to do. Jack, ever the patient man, didn’t even bat an eyelid at my enthusiastic plans.
Instead he allowed me to go through the remodeling of a new workshop, the addition of a
new chest of drawers and armoire, and a new set of kitchen cabinets.
Woodworking Resources & Manual Lists Directory: http://www.downloadpdfreview.com
12.
At which pointwhen I slowed down he merely pointed to the stash of magazines and frames
which I had collected just as enthusiastically for my last latest hobby – needlepoint.
A sheepish smile was my only answer, there was really nothing I could say, especially not
with such overwhelming evidence stacked up against me. I couldn’t even deny any of the
other various hobbies which I had tried – and put away – over the years.
I can’t help it, I think “hobby-collecting” should be my official hobby, but since that’s just too
expensive, I think I’ll stick to denying any such notion. Besides, if I became a hobby-collector
that would be too much like admitting that I was a ditz who just liked to go from
one thing to the other, without stopping in between.
So now that I’ve cleared up the fact that I’m not exactly a ditz (only sometimes!) we can
perhaps hopefully move on to more pressing matters. Like whether or not I would be able to
wheedle my long suffering spouse into helping me outfit my new woodworking workshop.
Well, since by that time I had as yet to take up even a hammer or saw in my hands to start
off my hobby, I was quite wisely asked whether or not I wouldn’t perhaps like to start out by
wielding these items in an attempt at getting my feet wet.
Luckily ours is a chaotic household and the kids are grown enough not to need constant
supervision. (And since they weren’t of a college going age either, we didn’t need to watch
every penny that I would be spending!)
Anyway, the point of the whole earlier rambling discourse was to show you just what a dear
the man is, and how he managed to rein me in, by first helping me to get a feel for my
latest hobby. Ever so thoughtfully, the next day, he placed two books in front of me, and
told me he’d go along with whatever I chose.
I know that might sound like an ultimatum, but it wasn’t. It was Jack’s attempts at getting
me firmly back on the course I had charted and keeping me from skipping steps one through
infinity and going straight to the one before the last.
Of the two books, one was a beginner’s guide to woodworking and the other was a college
prospectus with a bright green post-it sticking out of the top with the words, “Read me!” on
it. I was naturally enough intrigued and duly opened the prospectus to the read-me page.
What I found delighted me because I had never even thought of this route to begin my
woodworking. Jack had highlighted a series of potential woodworking courses which I might
like to take, and which were all basically the equivalent of Woodworking 101.
I kept the woodworking book as well, and the very next day enrolled myself for two classes
in beginner’s woodworking. This worked well on two fronts, since now I was able to get a
feel for woodworking without an initial costly expenditure, and since I was also able to soak
up everything I needed to learn firsthand.
Since it was still the early days of summer, Jack set up a temporary space for me to work on
the back patio. This let me play around a bit more, and also gave me the excuse to buy at
least a few of the basic tools.
Download Free eBooks Here: http://downloadpdfreview.com/download-ebook/
13.
And the outcomeof this whole thing? Well, would you believe that while Jack was keeping
me company during the nights when it was balmy enough for me to work outside, he also
got the woodworking bug.
Suffice it to say that we now have a workshop where the both of us can work when the kids
are busy elsewhere doing their own thing.
And unlike my previous hobbies, I didn’t become bored with this one and walk away from it.
Partly because Jack was also involved and that made it all the more fun, but mainly because
it’s just very satisfying to be able to make something from your own skill, and with your own
two hands.
Pride in your work goes a long way to keeping you on a steady course, and it really is
fascinating to watch a simple block of wood, or a few planks of lumber take shape into
whatever it is that you want it to be.
Now that’s power, and that’s the reason you become so caught up in woodworking once you
start. For my part anyway that was the reason, besides which I don’t think I was meant for
anything dainty like needlework, or anything with flair like painting.
There was just something satisfying on a very primal level of being able to wield all those
tools and to watch your sweat and blood go into making that piece. And yes, I said sweat
and blood, because that’s what I meant.
If you’re going to be working with tools for any length of time, you just can’t get away from
the fact that you will get cuts and bruises and a few other things. And as long as the “few
other things” don’t include anything too worrisome, then you’re okay.
So the whole sweat-and-blood I mentioned was very real, but don’t let that scare you off.
You will become injured during the course of your woodworking. It’s just a matter of making
sure the injuries stay to a bare minimum and taking all the right safety precautions. These
I’ve discussed in the section “Safety First” if you want to skip ahead to that section.
Introduction
Whenever you think of woodworking – if you ever do, that is – what’s the first thing that
comes to your mind? Before I got involved in woodworking myself, I know that I always
linked woodworking with high school and a few unfortunate experiences.
Quite a few people in fact might feel the same, but it doesn’t need to be that way.
Woodworking can be a fun and interesting hobby, and in time you’ll come to look forward to
the part of your day that you can devote to sharpening your woodworking skills.
What is woodworking though? It’s such a broad range of things that for the most part you’d
probably always link it with fine or antique furniture. But woodworking can be so much more
than just furniture, or refurbishing antiques.
Woodworking Resources & Manual Lists Directory: http://www.downloadpdfreview.com
14.
When you startto learn woodworking, the first thing that you’ll make definitely won’t be a
fine piece of furniture. And you definitely won’t want to start immediately on refurbishing
any heirloom pieces either.
In fact, in the beginning you could probably get away with starting off your hobby with a
prefabricated kit, if you like. It’s easy and because it’s pre-fabricated, you won’t have too
much to do as a first step. Think of it along the lines of taking your first dip into the baby
pool.
Buying a prefabricated kit is also good in that it saves you money. It might not be all that
cheap, but if you don’t want to spend too much while you’re still in the deciding stage of
your new hobby, then these kits are cheaper than buying your wood and a set of
rudimentary tools.
On the other hand, if you’re like me, the first thing you’ll want to do is to outfit your new
woodworking workshop, then buy your pieces of wood and your tools.
After that of course, you’ll either go around frantically trying to find someone to tell you
what to do next, or you’ll do the sensible thing and buy a beginner’s book to go with your
wood and your new tools.
Then again, you could of course just get right into the heart of the matter and use
enthusiasm instead of knowledge or skill, and turn out something or other that still
resembles a block of wood.
Yes, despite the fact that I had only a very rudimentary workshop, and only the barest of
tools at my disposal. And despite the fact that I also had a beginner’s book at my disposal,
and was also enrolled in woodworking classes, I went ahead and attacked – and that’s the
only word for it – a completely harmless piece of wood with gusto and happy vigor.
The outcome was a testament of what not to do, but I was impatient and the classes were
only starting in two weeks. I couldn’t wait that long! The suspense would do me in. And yes,
although I had been reading up on the book that Jack had given me, it still didn’t make too
much of a difference.
That piece of wood wasn’t a total loss though, and it taught me what not to do and also that
my tools weren’t the right ones. However, it taught me one, even more valuable lesson. And
that was that knowledge and theory were no substitute for experience, and skill.
Luckily for any more poor innocent blocks of wood, I was momentarily preoccupied with
something else for the next two weeks, and by then I had already started my woodworking
class. Otherwise you can be sure that I would have been at another piece without any
further delay!
What is woodworking?
I could probably give you a very boring description of what woodworking is and what it
encompasses, but I thought I’d save that until later on in the book, when you’re at a point
Download Free eBooks Here: http://downloadpdfreview.com/download-ebook/
15.
where you simplyhave to read the whole thing to finish it off. But that’s only because I’m
such a nice person, you understand!
Is there any good way to explain to someone what woodworking is? I find it to be along the
lines of explaining to a blind man what a rainbow looks like. Unless he’s seen and knows
what color is, to the blind man, a rainbow will have no meaning in his life.
So, just like the rainbow I could try and explain to you what woodworking is. But just like
the blind man, you won’t be able to fully grasp what it is I’m trying to say. You might have a
slightly better idea but you won’t be any the wiser for it.
The easiest thing would be for me to tell you that wood working is exactly what it says: the
working of wood. And in case that’s not too clear I’ll tell you that it involves the use of wood
and various tools, and that you can carve figures, or make your own furniture.
I’ll go one better and tell you that the oak table in your dinning room, and the cherry wood
rocking chair in your living room, and just about any other piece of well turned furniture was
crafted by a skilled woodworker.
And thing about that is, that although you might now have a slight idea of what it might be,
you still haven’t grasped the whole concept as yet. And until you try it for it for the first time,
and turn out your first piece of woodworking wonder, you can’t truly understand what it is.
But you can try.
If you take away just one thing from this section, don’t let it be that woodworking is about
making furniture, or about making ornaments. It’s not about marquetry or even parquetry,
and it’s not about inlaying or lathe work, or hand tools and power tools.
It’s not about a lot of things, but it is most definitely one thing. And that is, that
woodworking is an art all by itself.
The Aim
Having now sorted out, quite satisfactorily what woodworking is and isn’t, I feel that we can
now move on to greater things, namely that of woodworking itself. Before we do that
however, there are a few things that you’ll want to know about this book. Like what you can
expect out of it.
I could start out by telling you what it’s not about, but I won’t bore you with those details
since that could go on for pages. I could tell you what it is about, but then you already know
that. It’s about woodworking, nothing more nothing less.
And this is where we depart from conventional norms and head off into a different part of
woodworking. I’m not going to presume to teach you how-to woodworking techniques
without the benefit of actually being there with you and showing you what you need to
know.
Woodworking Resources & Manual Lists Directory: http://www.downloadpdfreview.com
16.
That’s just notmine or Jack’s way, we prefer a more hands on method and we practice what
we preach. Besides, there are more than enough books out there whose authors will take
you step by step through the ins and outs of woodworking for the beginner.
My aim instead, is to give you as much of the necessary information you’ll eventually need
as possible, stuff that you might normally have had to sift through more than one book to
get at. I’m not claiming that it’s all in here or that I’ve managed to cover the whole of
woodworking.
That would be beyond me and the scope of this book. In fact it might require more than one
book. So instead of handing you a series of how-to woodworking books I ended up with this,
my piece de resistance.
Very simply, what I have tried to do is give you an overview of what you might expect from
woodworking, and interspersed all of that with various terms and phrases which you might
hear from time to time. In other words you can think of this as sort of a beginner’s guide to
speaking woodworking!
Finishing meant a lot more than I thought it did, joinery was a whole new world, and let’s
not even start with mortise and tenon joints. And what was I supposed to do with a biscuit
cutter in woodworking? Despite my enthusiasm, it was all very confusing.
And although I can now understand, and converse in this different language with ease, I
know how difficult it is for the beginner. However, don’t expect to become instantly
knowledgeable or a genius about woodworking just because you’ve read this book.
Don’t get discouraged though, you need to start somewhere and I can personally guarantee
that there’s no better place to start than at the beginning. Or if you like, at the ending where
I’ve included a handy “Glossary of Woodworking Terms” section for you to use.
Woodworking 101
The minute I even thought about doing this book, I knew that one of my titles was going to
be Woodworking 101. There was no question about that. So here we are, in the section I
planned before anything else, and now I barely know what to say to you.
Since I knew that I didn’t want to go into any detail on techniques and the like, what could I
do here then, that would be of benefit to you. It took some doing but I went back to the
days when I first started and tried to remember what it was that I needed to know about
most.
And it was then that I realized that I needed to know just about everything. Well, since that
wouldn’t do in this book, I decided instead to cover what I think of as the basics. It still
won’t be easy to get your head around woodworking, but it will help.
And once you get the hang of it and once you can wrap your head around the number of
odd terms that you’ll come across in woodworking then you should okay. The really difficult
part for me at least was trying to make it all come together for me
Download Free eBooks Here: http://downloadpdfreview.com/download-ebook/
17.
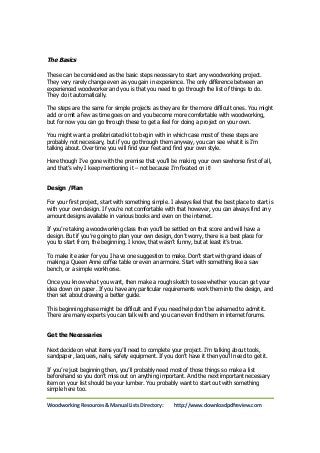
The Basics
Thesecan be considered as the basic steps necessary to start any woodworking project.
They very rarely change even as you gain in experience. The only difference between an
experienced woodworker and you is that you need to go through the list of things to do.
They do it automatically.
The steps are the same for simple projects as they are for the more difficult ones. You might
add or omit a few as time goes on and you become more comfortable with woodworking,
but for now you can go through these to get a feel for doing a project on your own.
You might want a prefabricated kit to begin with in which case most of these steps are
probably not necessary, but if you go through them anyway, you can see what it is I’m
talking about. Over time you will find your feet and find your own style.
Here though I’ve gone with the premise that you’ll be making your own sawhorse first of all,
and that’s why I keep mentioning it – not because I’m fixated on it!
Design /Plan
For your first project, start with something simple. I always feel that the best place to start is
with your own design. If you’re not comfortable with that however, you can always find any
amount designs available in various books and even on the internet.
If you’re taking a woodworking class then you’ll be settled on that score and will have a
design. But if you’re going to plan your own design, don’t worry, there is a best place for
you to start from, the beginning. I know, that wasn’t funny, but at least it’s true.
To make it easier for you I have one suggestion to make. Don’t start with grand ideas of
making a Queen Anne coffee table or even an armoire. Start with something like a saw
bench, or a simple workhorse.
Once you know what you want, then make a rough sketch to see whether you can get your
idea down on paper. If you have any particular requirements work them into the design, and
then set about drawing a better guide.
This beginning phase might be difficult and if you need help don’t be ashamed to admit it.
There are many experts you can talk with and you can even find them in internet forums.
Get the Necessaries
Next decide on what items you’ll need to complete your project. I’m talking about tools,
sandpaper, lacquers, nails, safety equipment. If you don’t have it then you’ll need to get it.
If you’re just beginning then, you’ll probably need most of those things so make a list
beforehand so you don’t miss out on anything important. And the next important necessary
item on your list should be your lumber. You probably want to start out with something
simple here too.
Woodworking Resources & Manual Lists Directory: http://www.downloadpdfreview.com
18.
Pine is theeasiest to get and the easiest for you to start with. As you progress you can
decide whether you need hardwoods or softwoods, and which type of wood you want.
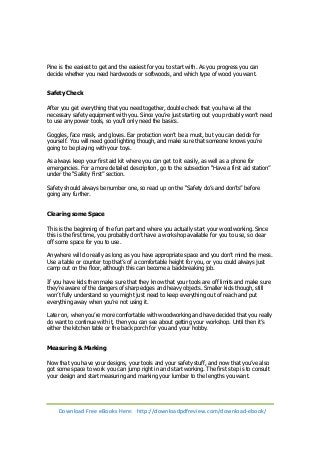
Safety Check
After you get everything that you need together, double check that you have all the
necessary safety equipment with you. Since you’re just starting out you probably won’t need
to use any power tools, so you’ll only need the basics.
Goggles, face mask, and gloves. Ear protection won’t be a must, but you can decide for
yourself. You will need good lighting though, and make sure that someone knows you’re
going to be playing with your toys.
As always keep your first aid kit where you can get to it easily, as well as a phone for
emergencies. For a more detailed description, go to the subsection “Have a first aid station”
under the “Safety First” section.
Safety should always be number one, so read up on the “Safety do’s and don’ts” before
going any further.
Clearing some Space
This is the beginning of the fun part and where you actually start your woodworking. Since
this is the first time, you probably don’t have a workshop available for you to use, so clear
off some space for you to use.
Anywhere will do really as long as you have appropriate space and you don’t mind the mess.
Use a table or counter top that’s of a comfortable height for you, or you could always just
camp out on the floor, although this can become a backbreaking job.
If you have kids then make sure that they know that your tools are off limits and make sure
they’re aware of the dangers of sharp edges and heavy objects. Smaller kids though, still
won’t fully understand so you might just need to keep everything out of reach and put
everything away when you’re not using it.
Later on, when you’re more comfortable with woodworking and have decided that you really
do want to continue with it, then you can see about getting your workshop. Until then it’s
either the kitchen table or the back porch for you and your hobby.
Measuring & Marking
Now that you have your designs, your tools and your safety stuff, and now that you’ve also
got some space to work you can jump right in and start working. The first step is to consult
your design and start measuring and marking your lumber to the lengths you want.
Download Free eBooks Here: http://downloadpdfreview.com/download-ebook/
19.
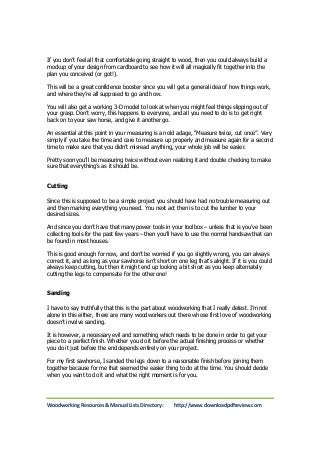
If you don’tfeel all that comfortable going straight to wood, then you could always build a
mockup of your design from cardboard to see how it will all magically fit together into the
plan you conceived (or got!).
This will be a great confidence booster since you will get a general idea of how things work,
and where they’re all supposed to go and how.
You will also get a working 3-D model to look at when you might feel things slipping out of
your grasp. Don’t worry, this happens to everyone, and all you need to do is to get right
back on to your saw horse, and give it another go.
An essential at this point in your measuring is an old adage, “Measure twice, cut once”. Very
simply if you take the time and care to measure up properly and measure again for a second
time to make sure that you didn’t misread anything, your whole job will be easier.
Pretty soon you’ll be measuring twice without even realizing it and double checking to make
sure that everything’s as it should be.
Cutting
Since this is supposed to be a simple project you should have had no trouble measuring out
and then marking everything you need. You next act then is to cut the lumber to your
desired sizes.
And since you don’t have that many power tools in your toolbox – unless that is you’ve been
collecting tools for the past few years – then you’ll have to use the normal handsaw that can
be found in most houses.
This is good enough for now, and don’t be worried if you go slightly wrong, you can always
correct it, and as long as your sawhorse isn’t short on one leg that’s alright. If it is you could
always keep cutting, but then it might end up looking a bit short as you keep alternately
cutting the legs to compensate for the other one!
Sanding
I have to say truthfully that this is the part about woodworking that I really detest. I’m not
alone in this either, there are many woodworkers out there whose first love of woodworking
doesn’t involve sanding.
It is however, a necessary evil and something which needs to be done in order to get your
piece to a perfect finish. Whether you do it before the actual finishing process or whether
you do it just before the end depends entirely on your project.
For my first sawhorse, I sanded the legs down to a reasonable finish before joining them
together because for me that seemed the easier thing to do at the time. You should decide
when you want to do it and what the right moment is for you.
Woodworking Resources & Manual Lists Directory: http://www.downloadpdfreview.com
20.
But as Isaid earlier it also depends on your project. And if you still have a ways to go before
you’re anywhere near finishing and you still sand your piece down, then you might need to
give it an extensive touch up later on. Tools can leave their marks on your wood.
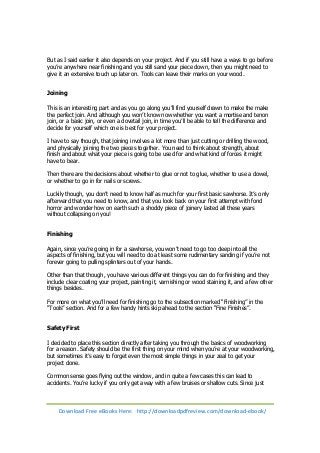
Joining
This is an interesting part and as you go along you’ll find yourself drawn to make the make
the perfect join. And although you won’t know now whether you want a mortise and tenon
join, or a basic join, or even a dovetail join, in time you’ll be able to tell the difference and
decide for yourself which one is best for your project.
I have to say though, that joining involves a lot more than just cutting or drilling the wood,
and physically joining the two pieces together. You need to think about strength, about
finish and about what your piece is going to be used for and what kind of forces it might
have to bear.
Then there are the decisions about whether to glue or not to glue, whether to use a dowel,
or whether to go in for nails or screws.
Luckily though, you don’t need to know half as much for your first basic sawhorse. It’s only
afterward that you need to know, and that you look back on your first attempt with fond
horror and wonder how on earth such a shoddy piece of joinery lasted all these years
without collapsing on you!
Finishing
Again, since you’re going in for a sawhorse, you won’t need to go too deep into all the
aspects of finishing, but you will need to do at least some rudimentary sanding if you’re not
forever going to pulling splinters out of your hands.
Other than that though, you have various different things you can do for finishing and they
include clear coating your project, painting it, varnishing or wood staining it, and a few other
things besides.
For more on what you’ll need for finishing go to the subsection marked “Finishing” in the
“Tools” section. And for a few handy hints skip ahead to the section “Fine Finishes”.
Safety First
I decided to place this section directly after taking you through the basics of woodworking
for a reason. Safety should be the first thing on your mind when you’re at your woodworking,
but sometimes it’s easy to forget even the most simple things in your zeal to get your
project done.
Common sense goes flying out the window, and in quite a few cases this can lead to
accidents. You’re lucky if you only get away with a few bruises or shallow cuts. Since just
Download Free eBooks Here: http://downloadpdfreview.com/download-ebook/
21.
about everything thatyou handle while working has the potential to cause harm, you do
need to watch out.
There are many things that people do while they are working and this applies to just about
everything in life, not only woodworking that they wouldn’t normally do.
If you were a bystander watching as someone pushed themselves beyond their limits while
working near potentially lethal tools you would be horrified and at the same shake your head
at someone doing anything so rankly idiotic.
After all, they should know better than to put themselves at risk when they can barely even
function, right? Now put yourself in that same position and think how many times you’ve
pushed yourself past the very outer limits of your endurance to get that extra mile.
It might not have been in a woodshop, but you have done it, and you’ll still do it, thinking
the difference between you and that other person is that you’re aware of all the dangers and
that you can take the necessary action if needed. Besides you’re way more careful, even if
you are pushing yourself.
You’d be wrong on all counts. When you’ve reached your limits, no matter how aware you
are of your surroundings or your situation, your reactions are slower and you won’t have the
same speed of body or mind to stop anything from going wrong.
And you’re definitely not more careful than that other person you were watching and
shaking your head over. In fact you’re just as bad because you also believe the same thing
he does, that you’re in control of the situation.
When you’re exhausted, or sick, or distracted or anything else, you’re not in control of
anything, much less the tools you’re working, the situation you’re in, or the potential danger
you’re facing.
And that’s not the only thing. There are a number of things that can go wrong in the
workplace and you need to be aware of every one of them. Otherwise you might end up
with more than you bargained for, and some things just can’t put back together again, no
matter how hard you try.
So read carefully through the safety do’s and don’ts list and follow each one as stringently as
possible. These are all very important and can help you to avoid any serious mishaps. And
then go on to the safety equipment list to get a feel of what things you should ideally have
when you’re woodworking.
You won’t be able to avoid the little things like scrapes and bruises, that’s a part of life and a
part of woodworking, so expect little nicks and cuts but try to avoid anything more serious
than that.
And no matter how eager you are to get through to the next sections, don’t skip over this
one, it could save yours or someone else’s life.
Woodworking Resources & Manual Lists Directory: http://www.downloadpdfreview.com
22.
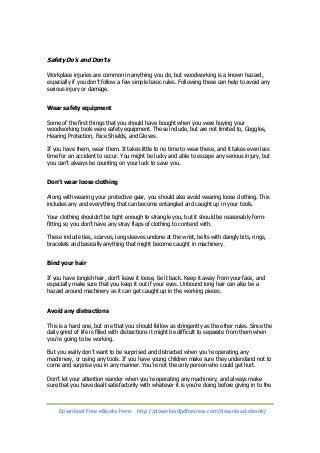
Safety Do’s andDon’ts
Workplace injuries are common in anything you do, but woodworking is a known hazard,
especially if you don’t follow a few simple basic rules. Following these can help to avoid any
serious injury or damage.
Wear safety equipment
Some of the first things that you should have bought when you were buying your
woodworking tools were safety equipment. These include, but are not limited to, Goggles,
Hearing Protection, Face Shields, and Gloves.
If you have them, wear them. It takes little to no time to wear these, and it takes even less
time for an accident to occur. You might be lucky and able to escape any serious injury, but
you can’t always be counting on your luck to save you.
Don’t wear loose clothing
Along with wearing your protective gear, you should also avoid wearing loose clothing. This
includes any and everything that can become entangled and caught up in your tools.
Your clothing shouldn’t be tight enough to strangle you, but it should be reasonably form-fitting
so you don’t have any stray flaps of clothing to contend with.
These include ties, scarves, long sleeves undone at the wrist, belts with dangly bits, rings,
bracelets and basically anything that might become caught in machinery.
Bind your hair
If you have longish hair, don’t leave it loose, tie it back. Keep it away from your face, and
especially make sure that you keep it out if your eyes. Unbound long hair can also be a
hazard around machinery as it can get caught up in the working pieces.
Avoid any distractions
This is a hard one, but one that you should follow as stringently as the other rules. Since the
daily grind of life is filled with distractions it might be difficult to separate from them when
you’re going to be working.
But you really don’t want to be surprised and distracted when you’re operating any
machinery, or using any tools. If you have young children make sure they understand not to
come and surprise you in any manner. You’re not the only person who could get hurt.
Don’t let your attention wander when you’re operating any machinery, and always make
sure that you have dealt satisfactorily with whatever it is you’re doing before giving in to the
Download Free eBooks Here: http://downloadpdfreview.com/download-ebook/
23.
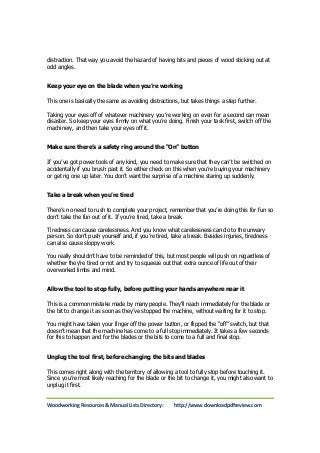
distraction. That wayyou avoid the hazard of having bits and pieces of wood sticking out at
odd angles.
Keep your eye on the blade when you’re working
This one is basically the same as avoiding distractions, but takes things a step further.
Taking your eyes off of whatever machinery you’re working on even for a second can mean
disaster. So keep your eyes firmly on what you’re doing. Finish your task first, switch off the
machinery, and then take your eyes off it.
Make sure there’s a safety ring around the “On” button
If you’ve got power tools of any kind, you need to make sure that they can’t be switched on
accidentally if you brush past it. So either check on this when you’re buying your machinery
or get rig one up later. You don’t want the surprise of a machine staring up suddenly.
Take a break when you’re tired
There’s no need to rush to complete your project, remember that you’re doing this for fun so
don’t take the fun out of it. If you’re tired, take a break.
Tiredness can cause carelessness. And you know what carelessness can do to the unwary
person. So don’t push yourself and, if you’re tired, take a break. Besides injuries, tiredness
can also cause sloppy work.
You really shouldn’t have to be reminded of this, but most people will push on regardless of
whether they’re tired or not and try to squeeze out that extra ounce of life out of their
overworked limbs and mind.
Allow the tool to stop fully, before putting your hands anywhere near it
This is a common mistake made by many people. They’ll reach immediately for the blade or
the bit to change it as soon as they’ve stopped the machine, without waiting for it to stop.
You might have taken your finger off the power button, or flipped the “off” switch, but that
doesn’t mean that the machine has come to a full stop immediately. It takes a few seconds
for this to happen and for the blades or the bits to come to a full and final stop.
Unplug the tool first, before changing the bits and blades
This comes right along with the territory of allowing a tool to fully stop before touching it.
Since you’re most likely reaching for the blade or the bit to change it, you might also want to
unplug it first.
Woodworking Resources & Manual Lists Directory: http://www.downloadpdfreview.com
24.
There have beenmany injuries caused by leaving your machine plugged in while still
changing the parts. Any number of things can go wrong and the only way to avoid these is
to unplug the tool fist before doing anything to it.
It’s also a good habit once you get into, because that way, even if you do have a guard over
your “on” button, there is no way that it can be turned on accidentally.
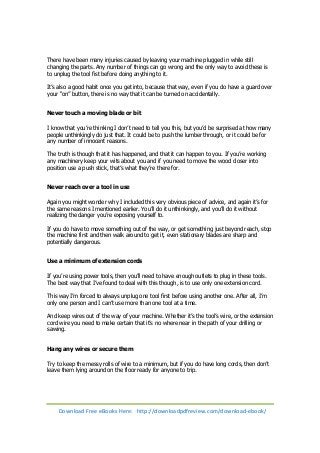
Never touch a moving blade or bit
I know that you’re thinking I don’t need to tell you this, but you’d be surprised at how many
people unthinkingly do just that. It could be to push the lumber through, or it could be for
any number of innocent reasons.
The truth is though that it has happened, and that it can happen to you. If you’re working
any machinery keep your wits about you and if you need to move the wood closer into
position use a push stick, that’s what they’re there for.
Never reach over a tool in use
Again you might wonder why I included this very obvious piece of advice, and again it’s for
the same reasons I mentioned earlier. You’ll do it unthinkingly, and you’ll do it without
realizing the danger you’re exposing yourself to.
If you do have to move something out of the way, or get something just beyond reach, stop
the machine first and then walk around to get it, even stationary blades are sharp and
potentially dangerous.
Use a minimum of extension cords
If you’re using power tools, then you’ll need to have enough outlets to plug in these tools.
The best way that I’ve found to deal with this though, is to use only one extension cord.
This way I’m forced to always unplug one tool first before using another one. After all, I’m
only one person and I can’t use more than one tool at a time.
And keep wires out of the way of your machine. Whether it’s the tool’s wire, or the extension
cord wire you need to make certain that it’s no where near in the path of your drilling or
sawing.
Hang any wires or secure them
Try to keep the messy rolls of wire to a minimum, but if you do have long cords, then don’t
leave them lying around on the floor ready for anyone to trip.
Download Free eBooks Here: http://downloadpdfreview.com/download-ebook/
25.
Alternately you couldtry dropping them from the ceiling to keep them off the floor. In this
case, they should come within a safe distance of any machinery and should be kept as much
out of the way as possible.
Keep alcohol out of the workshop
Drugs, alcohol and medications don’t mix very well with woodworking. They each of them in
their own way cause you to lose control over yourself, and over your motor functions.
They can impair your brain functions and cause it to shut down to a minimum level, which
will place you in grave risk of a serious accident.
Don’t work if you’re sick
Another rule which I really shouldn’t have to tell you about, but which nevertheless, I will.
No matter how urgent you consider finishing your piece off is, if you’re ill, then don’t.
You won’t be functioning at full capacity and you might be on pain relievers as well. Besides
which, if you’re ill, it’s because your body is fighting off something or other that’s probably
attacking it, so you really should help it and get as much rest as possible.
Use push sticks
Use push sticks to push the wood where you want it to go, as I said earlier, that’s what
they’re there for. You can buy these handy little gadgets, or you can even make them easily.
There’s more than one way and need to push to lumber, so there’s more than one type of
push stick available as well. These little tools are handy for keeping your fingers where they
belong – on your hand.
Check your wood stock first
You never know what could be on the lumber you buy, so check it over carefully first before
running it through a machine or working with it. And protruding parts or metallic bits, like
nails or anything else should be removed before you start work.
Leaving these in, or not checking can pave the way for an accident. Your tools can jump
back, or veer in a manner you’re not expecting and so aren’t prepared for. And this could
not only cause injuries it can also damage your tools as well.
Keep your tools in good working condition
All of your tools should be taken care of, and kept in good condition. If you don’t treat them
with the respect they deserve, then you’ll find how quickly they can go to rot. Clean your
tools and make sure they’re in working order.
Woodworking Resources & Manual Lists Directory: http://www.downloadpdfreview.com
26.
And before youstart any job, make sure that your tools and machinery don’t have any
missing parts or that they’re not broken or damaged in any way. If you do notice any
damaging, keep that tool to aside and get it fixed as soon as possible. And in the meanwhile,
don’t work with it. Find something else for you to work with until it’s fixed.
Keep your blades sharp
Although you may not believe it, dull blades or dulled machine parts can also lead to
accidents. Since the blades are dull you need to exert more force on the tool or machine to
get the job done. This in turn will leave you vulnerable if the tool suddenly slips or kicks back.
You won’t be prepared for this eventuality since your whole concentration was on forcing the
tool to perform properly, thus leaving you wide open to any accidents.
Ensure you have good ventilation
Sawdust can become a health hazard, and it doesn’t need to build up over time either, like
smoking does. You need to take the proper precautions to avoid inhalation of sawdust and
fumes from lacquers and such. Both of these aren’t good for you and in the case of chemical
fumes can even impair your functions to the point where you lose control over yourself.
On the other hand, proper ventilation and the use of face masks and goggles can go a long
way. There are also ventilation fans available if you want to install these in your workshop,
but you should use the explosion proof ventilation fans instead of the normal ones.
Keep your working area clean of any clutter
A clean work place can do wonders for cutting back on potential dangers and hazards. If you
have a cluttered work place there are a great many things that can go wrong, from grabbing
the wrong tool, to cutting yourself on any sharp blades or things, to tripping over fallen tools
and wires.
Things like spills should be cleaned up immediately, and your tools should be put away after
you finish with them. Get organized and have separate places for all your tools to be. This
way, you not only know where to find any given tool at any moment, it also makes it easier
to put them away.
If you have to hunt around for a place to put your tools, you’ll also have to hunt around to
find them, and you won’t put them away immediately either.
At the end of the day when you finish up, take the extra few minutes to clear up after
yourself. This is a good practice, and will make your life easier in the long run. You’ll find
that you spend less time looking for things, and cleaning up after yesterday’s mess than you
used to.
Download Free eBooks Here: http://downloadpdfreview.com/download-ebook/
27.
Don’t force asituation
If you feel that something isn’t right, stop what you’re doing. Trusting your instincts is one
of the best ways to avoid accidents. If you aren’t happy continuing something, or starting
something there might an underlying reason for this.
Let your instincts guide you and stop whatever it is that you’re doing. Maybe even put it
away for the moment. That nagging feeling that tells you something’s wrong might become
resolved later on it’s own, or you might even spot something wrong which you wouldn’t have
earlier.
So don’t force a situation. There are reasons for everything that happens and you don’t
necessarily have to be aware of all of them on a conscious level to understand that
something isn’t the way it should be.
Maintain good lighting
Along with good ventilation, good lighting is a must if you want to woodwork. You can’t do
anything worth doing in a poorly lit area, and this can only lead to serious accidents and
injuries.
Natural light is always good, but since we can’t have it all year long, or even all day long,
you’ll have to spring for a good lighting system.
This doesn’t need to be anything more expensive than a really good swivel lamp which you
can use in the area you’re working. But if you can go for anything better then I would
suggest getting some bright daylight bulbs to shine the way.
Keep children away from your work area
Children are inquisitive and curious by nature. Unfortunately these are two things that don’t
mix well in a woodworking shop, especially when they’re coupled with mischief making
tendencies and agile young bodies.
And the younger they are the more difficult it becomes to control their impulses, which
leaves you with more grey hair than you bargained for.
If your kids are curious about what’s going on don’t ban them from coming into the shop.
That just makes it all the more interesting and urgent for them to get in, with or without you.
So take them inside and show them what’s there.
As much as possible downplay the “fun” angle, and impress on them instead the dangers. By
the “fun” angle I mean the vast possibilities that they might see in all the various tools.
After a certain age though, when kids are more likely to listen to reason and are more
responsible, you can introduce them to joys of woodworking. They shouldn’t be allowed to
work the machinery, but starting them off with something small can get their interest fueled.
Woodworking Resources & Manual Lists Directory: http://www.downloadpdfreview.com
28.
And above all,either keep your work area off limits when you’re gone and put your tools
away out of reach of small hands, or if you have a separate lockable work space then lock it.
Locks were invented for a specific purpose, so use it!
Keep yourself hydrated
Woodworking is a very physical hobby and something which you can throw yourself into. But
just because you’re not in a gym pumping iron or out in the park jogging, doesn’t mean that
you’re not working up a sweat.
Quite the contrary in fact. You’ll be doing you fair share of hard labor most of the time and
you should recognize that fact. If you’re going to be at it all day, or even for an hour or so,
bring something along with you to drink.
You might promise yourself regular breaks to have something to drink. But you know that
rarely happens. You get so caught up in doing something that before you even know it the
time has flown by and you have yet to have even a gulp of water.
That hasn’t stopped you from expending your energy or even from sweating while you
worked. So now, without your even realizing it, you’ve become dehydrated and there’s a
good chance that you might fall away in a faint. Not good.
So bring something with you to keep you company while you work, and as long as it’s not
alcoholic, you’ll be okay. Water of course is the best bet, but not everyone can stomach that.
Anything is fine though as long as you bring it and as long as you come up for air from your
project long enough to have a gulp of that something.
Have a first aid station
This is the one area of your workshop where you should be absolutely forbidden to do
anything relating to woodwork. This area should be clearly off-limits to you unless you need
it for an emergency.
Keep a well stocked first aid kit around, a kit that you stocked yourself is far better than the
ready made ones. Keep a phone handy, and if it’s a cordless phone, don’t walk about with it!
That defeats the purpose. Also keep a list of all the emergency services numbers and those
of family and friends who you can call on in an emergency.
It’s no use thinking that you know the numbers by heart. The minute something happens it
all flies right out of your head, and you don’t want to have to devote precious seconds to
trying to remembering the numbers.
Keep a fire extinguisher or two handy for emergencies, and also keep a good eyewash and
distilled water along with a bowl, nearby. Remember that you’ll also be working with
solvents and the such, so a good eyewash is a necessity.
And because things can and will go wrong, always keep these things within easy reach and
in plain sight. It’s no use having them if you have to hunt for it while you’re bleeding away.
Download Free eBooks Here: http://downloadpdfreview.com/download-ebook/
29.
If the sightof blood distresses you or you’re feeling faintish, sit down immediately, on a
chair preferably but don’t go looking for one, the floor will do just as fine.
If you’re bleeding, then however much it distresses you you’re going to have to look at it
and at least try to stem the blood by applying pressure on it. The main thing though, is not
to panic. Panicking will only make a bad situation worse, so keep your head about and asses
the situation as calmly and clearly as you can.
If it’s nothing serious then by all means use the first aid kit. But if it’s something you can’t or
shouldn’t handle by yourself, then use the phone to call emergency services. That’s the
whole reason you have the phone.
And if you know you’re going to be working it’s always a good idea to use the buddy system.
In this case you don’t necessarily need to have someone there with you each and every time
that you work, but you should be able to tell someone that you’ll be working.
If there’s someone at home when you’re working, tell them. This serves a dual purpose, as
there will be someone who knows that you’re working in case of an emergency, and also this
person will be less likely to surprise you by coming unexpectedly into the workshop.
And if there’s no one at home for you to tell, call someone you can count on in an
emergency and make sure they know where you are. There are many instances where
people have been injured with no way of getting to any help, and no way for anyone to
come get them because no one knew where they were or what they were doing.
This might seem cumbersome or restrictive, especially in the beginning, but trust me, having
someone who knows where you are and what you’re doing is a good idea and works well for
just about every aspect of life’s situations as well.
But most of all, just Think
This one should be obvious to just about everyone, but unfortunately common sense is
never as abundant as people might think. Whenever something happens common sense
seems to be the first thing to take a flying leap and everything else just follows!
If you train yourself though, and rigorously keep to a few guidelines you, and your common
sense, might yet come out on top. And that’s what this part of the safety do’s and don’ts is
about.
Do keep your head, and Don’t lose it in the heat of the moment.
And yes, most of all, the best thing that you can do is to think first, before doing anything.
There’s no substitute for thinking and planning ahead.
If you’re going to start cutting something then, think before you cut. Check if your hands or
any part of your body is going to be in the path of the cut, if so, adjust things accordingly.
Woodworking Resources & Manual Lists Directory: http://www.downloadpdfreview.com
30.
If you’re goingto be drilling make sure that you don’t have any thumbs or other fingers
anywhere near the drill, and make sure that your feet are also clear of the path of the drill.
Keep your wits about you at all times. It’s the one thing that you can help you out of a bad
situation. Giving way to panic won’t do anyone any good.
Asses any situation you’re in first, and then decide whether you can handle it by yourself or
whether you need help. This applies to both emergencies, and also to your woodworking. If
the job you have is too large for you to handle alone then try and get some help with it.
Safety Equipment
Here I’ve compiled a list of the safety equipment you’ll need.
Just remember to take off all your protective gear before leaving your workshop – otherwise
you might scare the neighbors with your intensely alien-like appearance! This actually
happened to me one day soon after I had started woodworking. Luckily it wasn’t a big deal
but it was funny, even at the time!
Goggles
Goggles or an eye mask of some sort is a must. You should be able to see through them
properly so that you don’t make any mistakes, but they must also be of a high quality to
stop flying wood chips and the like going into your eyes.
It’ll also stop any saw dust or other debris getting into your eyes at a crucial time. If you
wear normal glasses then find a comfortable pair of goggles you can wear over them. You
should definitely stay away from contact lenses when you’re doing any woodworking as the
small particles may irritate your eyes.
Also whatever you might think, your normal prescription glasses cannot be substituted for
safety goggles or glasses, so don’t try. That can be just as dangerous as going without
safety goggles.
Face Masks
Depending on the task at hand, there’s a good chance that you'll need to wear a face mask
of some sort or the other. This is in addition to your goggles and other protective gear as
well. Face masks can be anything from your basic surgical mask type to the state-of-the-art
face masks that do everything for you but breathe.
Any of these face masks will do, but the normal paper mask will only be good for a short
time and if you aren’t doing any heavy-duty sanding. If you’re going to continue with
woodworking then you really should invest in a good half mask which will filter out all the
unwanted dust and fumes from the air.
Download Free eBooks Here: http://downloadpdfreview.com/download-ebook/
31.
Remember that thisis a very important part of your protective gear as you will be working
closely with your projects and most times be within a foot’s distance. This means that
without a face mask, you will be breathing in all the sawdust, sanding dust, solvent fumes
and whatever else might be flying around your shop at the time.
To avoid breathing in these unhealthy substances for a long period of time a good face mask
is a necessity. You don’t need to invest in one that will cost you the earth, but a good mid-range
face mask will do the job just fine.
Hearing Protection
Although you might be wondering what you might need with ear muffs or ear plugs, don’t
worry at some point in time you will need it. Then again this is only if you’re going to be
working with the high powered whine of power tools.
If you’re not going to be working with any power tools though or only very infrequently, you
should be able to dispense with the need for any hearing protection.
If however, you’ve been raised on power tools and you can’t get through a job without using
your power saw, your power sander, your power drill and your power router, then you'll
definitely want to get a good set of ear muffs.
You might be surprised at just how much your hearing goes when you stay for a long time in
the company of these good friends. And the best way to avoid having to say, “Eh sonny?
Say that again please” before you’ve even turned forty, is to invest in ear muffs or ear plugs
and wear them when you’re working with these noisy monsters.
Gloves
It’s difficult to work with any type of glove, at least that’s been my experience and I heartily
dislike wearing them. But it’s either the gloves or get splinters in your hands.
A pair of heavy-duty gloves will come in handy when you’re moving your lumber around or
when you’re checking to make sure there aren’t any nails or anything in the wood before
you work with it.
Gloves are also good when you’re feeding your lumber through your saws. However, you
can dispense with the gloves when you need to handle a tool or a machine and can’t afford
to have your grip impaired by the gloves.
Lighting
Most people take this for granted and rely on good strong natural light. Your woodshop
might even be built to take advantage of the natural sunlight which you can get. But like I
was saying earlier, there’s only so much sunlight you can get before you have to account for
natural things like nightfall, the world rotating on its axis, storms and cloudy days.
Woodworking Resources & Manual Lists Directory: http://www.downloadpdfreview.com
32.
You’re getting thepicture, right? So since you can’t strike a bargain with Mother Nature to
have eternal sunlight shining through your workshop windows, you need to make do with
the next best thing. Artificial lighting systems.
The advantages of getting a good lighting system far outweigh the disadvantages, if there
are any. You don’t need to sink major cash into this, just get a few swivel lamps and keep it
next to your workstation. Oh, and remember that you also need to turn them on when it
gets dark, not keep squinting at your work!
Push Sticks
I’ve said it before and I’ll say it again. Push sticks are there for a reason, so use them. Don’t
just buy them and keep them to a side. Use them to push the wood pieces or the lumber
through your machinery and keep your fingers out of harm’s way.
And if you like, you can even make your own push sticks as one of your woodworking
projects. They’re quite easy to do, and if you know what they look like and you know which
type you need, you can make one easily enough.
Remember, push sticks good, chopped finger bad.
First Aid Kit
A good first aid kit is essential and something which you definitely shouldn’t skimp on. I
mentioned this in the earlier section, but I’ll say it again here for good measure. Keep your
first aid kit in a place where you can easily get to it and where you can find it in a pinch.
Stock it properly with essential first aid items which you might need, but hopefully won’t
have to use. A generic store bought first aid kit will do in a pinch, but it’s always better if
you can stock up your own first aid kit.
You should also update your kit regularly and throw out and replace any outdated medicines.
These might prove to be just as hazardous as anything else in your woodshop!
Only use your first aid kit to attend to any minor injuries however, for everything else get
proper medical attention.
Your Mind
That’s right, your mind is the one safety tools which you can’t buy, and the one you need to
keep at peak condition when you’re working in your woodshop. You can’t afford to give your
brain the day off and let it go wandering around all manner of subjects except the one at
hand.
Not only that, you should learn to keep your mind firmly focused and on the task at hand
especially when something comes along to distract you. Train yourself not look away from
what you’re doing, but to wait until you’re finished. You can avoid many mishaps that way.
Download Free eBooks Here: http://downloadpdfreview.com/download-ebook/
33.
And just likeany other tool you use, and in fact just like a car, to keep your brain in good
running condition you need to take exceptional care of it. That means you need to fuel it up
with the right foods, and when it becomes overheated or starts spluttering, you need to give
it a little time to breathe and recuperate.
Most of all though, don’t push it, and yourself, too hard. If you’re sick or tired or restless or
frustrated, just stop what you’re doing. Your brain is giving you a clear warning which you
should heed. Come back to whatever it is that you were doing, later.
Don’t take any alcohol while you’re on the job and working with sharp tools and even
machinery. If you’re taking medications to get better, then do what it says on the labels,
stay away from machinery of any sort and get plenty of rest. Even your brain needs to be
put in the garage once in a while.
And if you’re doing a tedious or repetitious job and you find your mind wandering, then stop
whatever it is you’re doing and take a break or switch to something else for the time being.
Learn to recognize the signs and take appropriate action before you’re forced to.
When to Buy your Tools?
You’ve got yourself a new hobby and you’re raring to go. You’ve already read about one
tenth of the books that you can find on woodworking – this is part of the second tenth – and
now you’re chomping on the bit to get started.
When do you buy your tools though? You’ve already covered as much about the basics as
you possibly could in the past two weeks and you’ve done everything that you’ve been
advised to do.
You’ve bought the right books, you’ve enrolled yourself, last minute of course, in a college
woodworking course, and you’ve even gotten a little corner of your house or yard separated
as a temporary workshop. Now you just want to get started and that to you, means getting
some tools in your hands.
Do you rush out and get everything that you can lay your hands on though, or do you wait
and exercise a little restraint? Unfortunately once you’ve gotten the woodworking bug in
your blood it’s very hard to exercise any restraint. I know that first hand.
However, also from experience I can say that you should definitely not give in to this instinct.
It can only lead to disaster of the money and the storage kind.
You spend cash extra on tools you don’t want or need, and if it’s going for a song you
probably picked it up on your way to the cashier’s counter. So now you also have tools
which are most likely inferior and which you can’t use above once.
And this of course, leads you to another problem: Storage. Now that you have your tools
where do you store it? Do you just dump your new tools in the nearest closet which has
enough space for you to get a finger in, or do you get yourself a new workshop added to
your house?
Woodworking Resources & Manual Lists Directory: http://www.downloadpdfreview.com
34.
It’s a trickyquestion and one that as a novice in the woodworking field you really shouldn’t
have to answer. It can’t be helped however, you’ve let go of the reins and you’re being
dragged firmly in the wake of the little monster that is your own nemesis, The Tool monster.
There’s only one thing for it, and that’s to yank on the reins as hard as possible and stop the
monster in its tracks. If you can manage that you might come out of the whole thing with
your pocketbook still intact – barely.
You won’t however, be obliged to shell out even more cash on getting storage space for
your tools, although that does take away your very valid reason for getting your own
workshop as soon as possible!
But the burning question here still, is when do you buy your tools? Well, although opinions
on that vary from person to person, there is one thing that seems to be unanimous amongst
everyone that I’ve spoken with.
And that is, if you’re still a beginning woodworker with little to no experience under your belt
then settle for a few essential items first. You can’t go wrong with that. And then as you go
along and get more experience, and do more projects, buy the tools you need for that
particular job then and there, and so on.
Getting a whole slew of tools before you need it won’t help you any in the long run since
some tools are quite expensive. So getting them only as you need them per each job will
help you. It’ll also get you used to the tools you have without overwhelming you.
For a list of basic tools, go to the next section “Your Basic Toolbox”. Other than that, for a
broader overview of some of the tools available, the section after the basic toolbox, “Tools”
can be of help to you.
And when you’re buying your tools there a few, simple things, that you should be aware of.
If you see a price that’s unbelievable, look, don’t touch and just walk on. There’s a good
chance that it’s dirt cheap for a reason.
Conversely if you recognize the brand and you know it to be a good one, then you should
grab it while the going is good. Real bargains don’t come along everyday.
If you remember and try as far as possible to keep to this one single restraint, then you
should be fine: Buy your tools only as you need them, not beforehand.
Your Basic Toolbox
Now, you might be asking the question, “What are the basic tools you need to get started?”
I can tell you that no matter what you read, or hear, or are told, there’s one thing that’s
common to all of them. Nobody’s basic tool needs are ever the same.
Everybody has their own preferences and everybody’s views on what the basic tool chest
should comprise of, are different. That’s why I found it very difficult to get a straight answer
from anyone. And anyway, they all had different answers from mine!
Download Free eBooks Here: http://downloadpdfreview.com/download-ebook/
35.
But worry not,with painstaking diligence Jack and I sat down one day and got down all the
tools which everyone agreed was basic down onto one list.
Oh, by the way, Jack had a different set of basic tools to me as well! We live in the same
house and share the same workshop, and we even started woodworking at about the same
time, but we have completely different views on what should be in the basic toolbox.
That’s actually when we went and canvassed all our woodworking friends to get their
opinions. After all some of them had been at this longer than we had, so maybe they had a
sounder idea than we did.
It turns out they didn’t, as attested to by the numerous amount of tools we had to wade
through to find the most common ones. After which we of course we went through the list
again and added a few extra things to the basic toolbox which most people agreed were
essential.
And that’s how we ended up with this little section, just for you, and just to help get you
started. And to hopefully satisfy the Tool monster on your shoulder, who is even at this
moment whispering to you to go and get that lathe you saw on sale the other day.
What you can find in your basic toolbox
Tape Measure
Steel Ruler
Scratch Awl
Pocket Knife or any other small knife with a good edge
Combination Square
Level
Bench Hook
Handsaw
1/4 inch Chisel
1/2 inch Chisel
3/4 inch Chisel
1/4 inch Mortising Chisel
Clamp
A basic Drill
Drill Bits
Hammer
Electric Palm Sander
Jack Plane
Woodworking Resources & Manual Lists Directory: http://www.downloadpdfreview.com
36.
Standard BlockPlane
Tools
This is the section that’s sure to bring out the Tool monster within you ready to play havoc
with your pocketbook, so grab on tight. If you’ve read the preceding sections then you'll
know what I’m talking about, and you’ll also know that I’m right about your own little Tool
monster.
Measuring & Marking Tools
Tape Measure
This is used for measurements things. The tape measure can be found in imperial format
which is also known as standard and you can also get the metric version of the tape
measure. The usual lengths that this is found in are 16, 25 and 30 feet.
Ruler
A good steel ruler is invaluable for woodworking as you can use it for a variety of things.
From drawing plans, measuring material, lining up table saw wings, to checking if the glued
items are flat and many other items. You can buy steel rulers where the markings start at
the beginning or indented steel rulers.
Combination Square
A combination square is an excellent tool for any one who is just entering the world of
woodworking. This device is in two parts. The first part is the square head that can slide
along the steel ruler that is attached to it. With this ruler you can measure 45 degree and 90
degree angles without any problems.
Framing Square
A framing square is also another excellent item to have in your toolbox as you can measure
any construction design that you need. You will find that the framing square is also called a
steel square and a carpenter’s square.
Generally this framing square can be found with a 24 inch blade and a 16 inch tongue. You
can buy smaller versions and cheaper ones also but they will come without the framing
tables.
Marking Gauge
Download Free eBooks Here: http://downloadpdfreview.com/download-ebook/
37.
This tool isused mark out lines for cutting and other woodworking operations. The purpose
of the gauges is to scribe a line that is parallel to a reference edge or surface.
Generally the marking gauge has many parts to it. These may include a beam, headstock
and various marking implements like a pen, pin, wheel, or even a knife.
Scratch Awl
This is a woodworking layout tool. You use this to etch a line that is to be followed by a
hand saw or a chisel. The scratch awl is a steel spike that has a sharp tip.
When you draw the scratch awl across the surface of the wood a shallow groove is made.
This is what you will be following during your woodworking operations.
Sliding Bevel
On the sliding bevel you can adjust the blade so you can transfer angles on to a board. With
this item you will find the cutting process much smoother. A sliding bevel can also do the job
of replacing a try square but you must take care that the blade does not fall out of the
square.
Knife
The Drawknife is a chairmakers cutting tool. This knife usually has a straight blade and the
length of the blade is usually 8 to 12 inches long. There are perpendicular handles at each
end of this drawknife.
The Froe is a riveting or splitting tool. The other names that you will find this knife under are
lathe axe and splitting knife. The froe has a straight blade that is usually about 8 to 12
inches long and it has a perpendicular handle.
The Scorp is a drawknife that has a curved, almost completely circular blade. You can use
this knife to hollow out bowls and other such objects.
The Utility Knife has a retractable blade that is sheathed in a metal enclosure. You can use
this knife to cut many different thin materials that you may need.
Dial Gauge
A machinist’s caliper that uses a dial readout in the hundredths or thousandths of an inch.
The usual dial gauges can measure inside and outside measurements also.
You can also use this to measure the depth of a hole. This tool is ideal for getting exact
measurements from cylindrical tenons and mortises.
Woodworking Resources & Manual Lists Directory: http://www.downloadpdfreview.com
38.
Cutting Tools
RipSaw
The Rip saw cuts along the grain of the wood. You will need to guide this saw as you cut the
board along the angle of the grain. The best way to use this saw is with full strokes that are
at a 60 degree angle.
Crosscut Saw
A crosscut saw is generally used to cut wood against the grain. You will find that using a 45
degree angle cutting motion coupled with full even sawing motions will help you to cut the
work piece.
Backsaw
This saw is rectangular shaped with short fine teeth. It has a rigid spine along the top of its
blade. You can use a backsaw for fine joinery work. This saw is great for cutting dovetail
joints. Its Japanese counterpart is called Dozuki.
Dovetail Saw
This is a Japanese saw that has been adapted for western use. Here the cutting teeth are 7
inches long which give you easy control over the saw.
The teeth of this saw have been modified for good ripping performance. You can however
use a dovetail saw for diagonal cuts and for the occasional crosscut shoulder.
Hacksaw
You will generally use a hacksaw for cutting metal objects. However a hacksaw can also be
used with dowels and thin wooden strips. The blades of the hacksaw can be interchanged
easily.
Therefore depending upon the material that you are using, the blade of your hacksaw can
be made to match that material.
Keyhole Saw
The blade on this saw is narrow so that you can cut along curves or short distances. This
saw is ideal to use in sections of woodwork where it is hard to insert a normal saw at the
beginning of the cut.
Download Free eBooks Here: http://downloadpdfreview.com/download-ebook/
39.
Adze
This isa cutting tool that is very different from an axe. In this tool the blade is set at a right
angle to the handle.
Pliers
Side Cutters: These pliers are used in electrical work for cutting wires. The jaws of the pliers
are at an angle so that the wire cuts can be made close to the surface.
Bent Nose Needle: This tool is used in cramped areas or areas where access to straight
sections is blocked or difficult.
Needle Nose: The long thin jaws of this tool will allow you to get at hard to reach locations.
Lineman’s Pliers: These types of pliers are used for cutting and twisting wires.
Slip Joint: This is the most common type of pliers. They have a slip joint so that larger items
can be gripped by them. Many times you will find a built-in wire cutter. In general these
pliers have both flat and curved surfaces on the jaws of the pliers.
Bit Brace
This is a hand-held boring tool that is composed of a crank, a pommel and a chuck. You will
usually use a bit brace with auger bits or spoon bits. This device is however compatible with
other boring devices.
Spokeshave
This is a cutting tool that consists of two in-line handles that have a small plane like cutter
that is mounted in the center. There are many different types of spokeshaves that you can
buy, both in wooden and cast iron bodies.
Taper Reamer
This is a cone shaped cutting tool that is used to change cylindrical mortises into cone
shaped designs.
Shaping Tools
Block Plane
This type of plane shears off the end grain. The blade on this plane is mounted at a low
angle. This makes this tool very useful in trimming and fitting various types of wood pieces.
Woodworking Resources & Manual Lists Directory: http://www.downloadpdfreview.com
40.
Jack Plane
Thebase of the Jack plane is somewhat long. They are usually found in lengths of 12 to 15
inches. These planes are used for the rough shaping of boards. For this reason they have
been designed to remove large quantities of wood quickly.
Chisels
A chisel is an excellent choice when you need to make cuts or if you just want to tap off a
protruding piece of wood without marring the whole piece.
Firmer: This chisel is beveled on both sides of the chisel instead of the usual one side.
Fishtail Chisel: This is a chisel with a splayed end.
Flat Gouge: This gouge has a minimal curvature. This makes this gouge ideal for finishing
and smoothing.
Gouge: This is a chisel like tool. The ends of this tool are a curved cutting edge.
Glut: This chisel type of tool is wooden in nature. Usually the glut is made in the
woodworking shop when the need arises. The glut is used as a wedge splitting tool.
Mortise Chisel: This is a stout chisel with an unusually deep cross section. The sides of this
chisel are sometimes square or tapering slightly towards the back of the tool. To gouge out
sections of wood you will need to use a mallet or a hammer.
Paring Chisel: The paring chisel is thin and sometimes it has beveled edges. You need to use
a pushing action to clean a wooden surface like those that are found within mortises.
Parting Tool: This tool is a deep narrow V-ground chisel. It is used mainly to indicate exact
diameters at different parts of your work piece.
Roughing Gouge: This gouge is large and square nosed. It is used by turners to alter square
shaped wood stock and rivings into a cylindrical section.
Veiner: This is a small deep gouge.
Bending Strap
This is a steel strap that is placed along the convex side of a piece of wood that you need
bent. The strap ends are held in place by stops which are located at both ends of the wood.
During the bending process, the bending strap takes most of the tension that is generated
by the forcing of the bent wood.
Download Free eBooks Here: http://downloadpdfreview.com/download-ebook/
41.
Sandpaper
Sandpaper isa paper that has abrasive elements on the paper. These elements are flint,
garnet, emery, aluminum oxide or silicone carbide. These particles are found sand “paper” or
“cloth”. You can find either a closed or an open coat density.
Rasp
This is a long flat tool that has raised teeth. You can use this rasp tool to shape different
pieces of wood.
Flat Rasp
A flat rasp is used to smooth and straighten various wooden surfaces. Only one edge of the
rasp is stitched and the other side is safe.
Therefore you can choose what you will need to rasp without any unwanted rasping. The tip
and the sides of the rasp are slightly curved inward but the body of the rasp as the name
implies is flat.
Saw Rasp
This rasp has saw shaped teeth.
File
A file is also like a rasp. This is a hand tool that you will need to use to shape various
material by abrasion method. The file is usually a hardened steel bar which is covered by a
series of sharp parallel ridges or teeth.
Most of the files that you will find have a narrow pointed tang at one end of the tool. You
can fix a handle on this tang.
Pin Router
This is a router that is fixed above a table. The bit of this router is pointing downwards. A
pin in the table is aligned with the pin router’s bit and you use these as your guide during
the cutting process.
Joining Tools
Hammer
Woodworking Resources & Manual Lists Directory: http://www.downloadpdfreview.com
42.
The hammer performsthe actions of driving nails into wood and other surfaces that are
needed. It is also good for removing unwanted nails from pieces of wood.
There are different types of hammers that you can use. Therefore you should only select the
ones that will be suitable for your tasks.
Claw Hammer
This is one of the most basic of woodworking tools. You can use this for driving and
removing nails from pieces of wood. You will find the claw hammer has different types of
handles. These range from wood, steel, rubber, fiberglass to even plastic grips.
Wooden Mallet
This is basically a wooden hammer, although it can be somewhat larger than your normal
hammer.
Screwdrivers
Flat Slot: These types of screwdrivers are a basic item to have in your tool chest and they
come in assorted sizes. You will need to select the right size for the screw head slot
otherwise the screwdriver will slip off the head. You can keep the bit sharp by filing or
grinding it back into a square shape.
Phillips: The best sizes of these screwdrivers to have are no. 1, no. 2 and no. 3. With this
type of screwdriver your screw head is less likely to slip off.
Robertson: These are also called socket head screws. The way to tell the type of screwdriver
apart is from their handles. Black, red and green are the most favored colors. They have the
same advantages of Philips screwdrivers and they also stay on the screw head much more.
Nails & Screws
Screws: There are three different types of screws that are most commonly used. They are
flat, pan and round headed. In the flat head screw the head is countersunk. This way they
are almost invisible on the surface of the material that you are working on.
You can use a round head screw whenever a flat countersunk screw is not needed. The last
type of screw that is used is that of pan head screws. They are similar to round head screws
but they are self threading and the head is flat.
Nails: Similar in appearance to screws but without the threads. You drive them into the
surface generally using a hammer.
Just about everyone has used one in their lifetime, and these are an invaluable part of
woodworking and something that your toolbox shouldn’t be without.
Download Free eBooks Here: http://downloadpdfreview.com/download-ebook/
43.
Vise Grip ora Vice Grip
A vise is a mechanical screw that is used for holding or clamping a work piece. This allows
you to perform various types of work on it with other tools. There are different types of vises
that you can use.
Countersink
This is another type of drill that will allow you to drill a hole so that the head of a screw will
be sitting right (flush against) next to the face of a wood board.
Table Saw
The table saw is a very versatile item to have in your tool chest. With this item you can rip,
cut dados, tenons, rabbets, miters and many other woodworking items.
Veneer Saw
This tool is a specialty tool. You will use this veneer saw when you need to trim the veneer
on various items that you have.
Dozuki
This is a Japanese woodworking tool that is used for fine joinery work. With this tool the
main items that will be cut are dovetails and other such cuts. We know the western
equivalent of this tool. We call it the backsaw.
Fret Saw
This saw has a very fine toothed blade that is used in delicate cuts on thin material.
Hallow Auger
You will use this tool to form cylindrical tenons. You can find these tenons on the ends of
rungs.
Bench Vise
The vise can be screwed or clamped onto the bench or the worktable. It is usually portable.
You will be able to find different styles and sizes to fit your various projects.
Woodworking Resources & Manual Lists Directory: http://www.downloadpdfreview.com
44.
Workshop Vise
Youcan find these vises with swivel bases. Sometimes you will find that there is a built in
anvil as well.
Woodworker’s Vise
You need to mount this vise on to the workbench. There is a pin that is located on the vise
that slides up to work with the bench dogs so that your material is held in place.
Clamps
It is a good idea to use clamps to ensure that your various projects stay glued fully during
the drying out process. There are many different types that you can use and they are all
good to have in your tool box.
C-Clamps are double rolled threaded for faster clamping and durability.
F-clamps are similar to C-clamps but they have wider jaws to give you a wide wood capacity.
This clamp is also called a bar clamp or a speed clamp.
Band Clamp: This tool is also called a web clamp. You can use this clamp where the surfaces
of the clamping items are not parallel to each other, when you need clamping pressure from
more than one direction and also when you are using multiple surfaces.
Miter Clamp: This clamp has been designed to hold miter joints together. The design of the
miter clamp is somewhat complicated looking. There is one fixed jaw and a movable jaw
that becomes activated by a cam.
Dowel
This is a cylindrical wooden pin that is used to reinforce a wooden joint.
Fine Finishes
Sandpaper
This is a form of paper that has abrasive particles coated on to it. The sandpaper is used to
remove small amounts of material from the surface of your work piece so that the surface is
smoother.
Sometimes you can use sandpaper to make a surface rougher. The smooth and rough
surfaces are dependent upon the type of process that you will need, and the type of
Download Free eBooks Here: http://downloadpdfreview.com/download-ebook/
45.
sandpaper you need.Sandpaper also comes in many grits also different types for different
tasks.
Sanding Blocks
This sanding block is used in the hand sanding process. You simply wrap 1/4 sheet of
sandpaper around the sanding block and you then sand your item against the grain of the
block.
Steel or Bronze Wool
This wool pad comes in different grades and different brands. You can use a steel or bronze
wool pad for the final finishing of your wood works but if you are planning on using water to
raise the grain then you should avoid the steel or bronze grain.
This steel wool pad should be used degreased when you are using this product for
woodworking.
Wood Stains
These are a type of paint that becomes absorbed into the wood itself. However the color of
this stain is visible on the surface of the wood. In addition to the wood stain the natural
pattern of the wood is still visible.
Straight Oils
These are suitable for things like butchers blocks, cutting boards and workbenches. You can
recoat as many times as you need with these oils. The straight oils are best avoided for any
items that have a constant and regular handling as they have the ability to collect dirt and
grime.
The oils that you can use for straight oils are pure tung oil, raw or boiled linseed oil, walnut
oil and mineral oil.
Varnish
A varnish is a straight oil that has a resin added to it. These have polyurethane or other
resins in the mix to make then blend even more flexible.
Oil and Varnish Blends
The oils that are in this category fall into the best of the varnishing world. They combine the
protection of varnishes with the ease of application that straight oils give. They are not good
for any items that will see a lot of use but they are still great to use.
Woodworking Resources & Manual Lists Directory: http://www.downloadpdfreview.com
46.
Lacquers
This finishingcoloring is a semi-translucent light brown color. You can also find black, yellow,
green, red, and blue colored lacquers. With lacquer, the more that is applied the more
vibrant the finish is.
Water Based Finishes
They are milky white in color and when they dry the color become clear. These are excellent
to use in high use areas as they have a good wear and tear resistance to them. You can use
these over light colored paints or stains so that the undercoat becomes clearly visible.
Brushes
You’ll need a number of these to apply your finishes and they also come in many different
sizes. What you use depends entirely on how big your finished piece turns out to be.
Spray Guns
An alternate, and most times smoother, way of applying your finishing coats.
Power Tools
Drill
The drill is a handheld power tool. You can use this tool for drilling holes and also for
attaching screws. There are different sized bits that you need to use in order to get the
various hole sizes that you want.
You can get either the corded or the cordless variety. If you’re going in for the cordless
variety then you might want to think about getting an extra battery pack to go with your
first one so that you can continue working while one is charging.
Router
Plunge Router: This power tool can be used for cutting profiles and outlines on wood pieces.
The bit from this power tool can be lowered into the wood while you are cutting through it.
Stationary Base Router: The stationary base router cuts various needed shapes on the edges.
It does however have a fixed depth that can’t be adjusted while the cutting process in
ongoing.
Download Free eBooks Here: http://downloadpdfreview.com/download-ebook/
47.
Belt Sander
Abelt sander is a machine that is used to sand down wood projects very quickly. It is an
excellent tool to use for the finishing process. You can find both hand held belt sanders or
fixed belt sanders.
Palm Sander
This is a nifty piece of machinery and very handy. Because it is small and portable you can
use it for just about any job without any problem.
Circular Saw
This is yet another handheld power tool. You can use this saw for ripping and crosscutting
hardwoods, softwoods and other types of materials that are not composed of wood.
Scroll Saw
This is a motorized version of the Fret saw.
Radial Arm Saw
With the radial arm saw you can cut or even rip wood to different lengths very quickly.
There are different methods that you can use with a radial arm saw. Crosscutting and
ripping of the wood can be easily accomplished.
Random Orbital Sander
This is a very versatile power sander. You can use this tool when you need to have less
sanding marks on the surface of your work piece. As the sanding motion of this power
sander is random the chances of sanding marks appearing on your work is reduced.
Jigsaw
The Jigsaw is a handheld power tool that will enable you to make curved cuts on various
materials like plywood. It is an excellent tool to use for cutting thin wood type pieces.
The Jigsaw cuts through the wood by moving the blade up and down through the wood as it
is guided along the profile of the wood piece.
Miter Saw
Woodworking Resources & Manual Lists Directory: http://www.downloadpdfreview.com
48.
This tool isused to make quick accurate crosscuts in your wood project. This type of saw is
small sized and portable. The blade of this saw is about 8 to 12 inches in length. There will
also be a miter index on the saw that allows the angle of the blade to be changed.
Equipment
Workbench
A workbench is a table where you can carry out other types of work that need this type of a
work area. Many workbenches have vices and dogs attached to their surfaces. They also
make use of dog holes and bench dogs to perform the various activities that are required of
them.
Bench Dog: This is a round or square sectioned device that fits into matching mortises in the
top of a workbench. These bench dogs are usually used with a vise dog.
The bench dogs can be placed at varying heights above the surface of the workbench. This
helps you to secure the work at whatever places that you need.
Shaving Horse: This is a wooden holding device that is based on a low bench upon which
the woodworker sits. There is a foot operated swinging arm that acts as a clamp.
There are two basic variations to found of this workbench. The German version is called a
“dumb head”. This English version of the workbench is called a “bodger’s” bench.
Sawhorse
This is something comes in handy and many a good piece of furniture has been built on a
sawhorse. These are very easy to make for the beginning woodworker as well.
Bench hook
This is a little gadget which, again, you can make yourself. It very handily helps to keep your
lumber straight while you cut it, ensuring that you don’t have any crooked edges.
Sharpening Tools
These are the tools needed to keep your tools in good and sharp working condition. For the
most part you can sharpen your hand tools and the smaller yourself, but for the bigger items,
you will be better off sending it off to be sharpened for you.
Whetstone or Oil Stone
Download Free eBooks Here: http://downloadpdfreview.com/download-ebook/
49.
The whetstone isalso known as an oil stone. These stones are both man made and of a
natural stone variety. Oil is used to lubricate the surface of the stone so that any cutting
action can be easily carried out.
Sharpening of tools is easily achieved on this stone. The other purpose that is achieved is
that the swarf is carried away by the oil during the cutting action.
Waterstone
In Japanese woodworking the various metal tools have been sharpened using waterstones.
They use the water to lubricate the stone as that the water sharpens their tools.
There are three different grades of waterstones that can be used. You have a rough
waterstone, middle to medium waterstone and a finishing stone.
Bench Grinder
These are one or two grinding wheels that are powered by a motor. The bench grinder is
used for sharpening tools and shaping various metal objects.
Diamond Plate
A diamond plate is used to sharpen tools and other tool types with steel blades. The
diamond plate base is made of plastic or resin. There is a steel plate that is impregnated
with a coating of diamond grit.
This diamond grit steel plate is bonded onto the base. The diamond grit is used to grind
away various materials from the surface of the blade. You can get diamond plates in various
sizes.
Dressing
You can use this item to shape the cutting edge of a chisel so that a bevel cut can be
corrected.
Dressing Stone
A rough stone used for sharpening other stones.
Devil Stone
This is a coarse hard dressing stone that is used to sharpen tools, grinders, and the other
stones of this type.
Woodworking Resources & Manual Lists Directory: http://www.downloadpdfreview.com
50.
Hardwood? or Softwood?
Whether you want to go with hardwood or softwood for your project depends entirely on
what type of project you’re doing. If you’re a beginner you’re probably wondering what the
need is to make a decision, right?
Hardwood is obviously going to be harder and denser than softwood, making it the ideal
choice for most things. And that’s where you’d be wrong. Hardwood per se is no less harder
or denser than softwood.
In fact the difference lies entirely in the types of the trees and not on their density.
Generally speaking hardwoods can be classed as deciduous trees and softwoods as
coniferous trees.
In plain terms, hardwoods are leafy and shed their leaves in winter, while softwood is
evergreen and lasts throughout the whole year. Softwoods also don’t have much color in
them, whereas some hardwood species are richly colored like oak or maple.
That description however, didn’t make it any easier for you to choose whether you want to
use hardwood or softwood for your project. It only made it easier for you to understand the
difference (hopefully!).
So first of all decide what you want to use the wood for: what purpose is your finished
project going to serve? Is it going to be something that’s only functional but which doesn’t
need to be “prettied-up”?
If so then you’ll want to go for softwood as this is perfect for just such a job. Besides
softwood is decidedly less expensive than hardwood as it grows more widely in the northern
hemisphere. If you’re going with softwood, then you’ll also probably be painting over it, so
softwood is also suitable for use as furniture.
On the other hand if you’re going for hardwood, you again need to decide what you’re going
to do with it beforehand. If you’re going to paint over it then avoid the color rich species like
what I mentioned earlier (oak, maple, mahogany etc.).
If, on the other hand you want to stain or clear coat the wood to bring out the color and the
grain, then going for these color rich hardwoods is just the ticket for you.
Also another factor to take into consideration is whether you’re going to keep your pieces
outside. In which case you almost definitely don’t want to go in for softwoods as they do
tend to absorb moisture more readily than many hardwoods, and they also lose it just as
readily as well.
In the instance of hardwood too, you should take into account whether you’re going to be
keeping your pieces outside open to the elements. If you are then you should perhaps look
into getting something like teak or cypress. Both these woods are considered to be moisture
resistant.
Download Free eBooks Here: http://downloadpdfreview.com/download-ebook/
51.
When you’re usingsoftwoods, remember to buy your lumber at least two weeks beforehand,
so that it has enough time to acclimatize itself to its new surroundings. This will cause less
movement in the wood later after you’ve finished everything.
In the end though it comes down to a few things,
Personal choice
Functionality
Whether you’re going to paint or stain
Where the finished piece is going to end up: indoors or outdoors
And your pocket book
In the following two sections I’ve marked down some of the hardwood and softwood types
you will most likely come across.
Hardwood
There are more hardwood varieties in the world than there are softwoods, so this list is of a
necessity longer than the softwood list.
Chestnut
Hard Maple
Soft Maple
Black Cherry
Teak
Indian Rosewood
Brazilian Rosewood
Ebony
Sycamore
White Oak
Red Oak
Yellow Birch
White Ash
Hickory
Elm
Boxwood
Mahogany
Black Walnut
Woodworking Resources & Manual Lists Directory: http://www.downloadpdfreview.com
52.
European Walnut
Poplar
Softwood
Douglas Fir
Silver Fir
Pine
European Redwood
Western Red Cedar
Yellow Cedar
Larch
Yew
Hemlock
SPF – this is really lumber and made of up of three predominant woods. Spruce,
(white) Pine, and (Douglas) Fir
Going Against the Grain
Contrary to what you might be expecting here I’m not going to go into any vast detail on
how you should handle the cutting of your wood.
Whether you go against the grain or whether you go with the grain, depends on a few
things, and I find that these are best learnt by trial and error than through reading it from a
book.
So instead I’ve gone in a completely different direction, of matching grain in your lumber
stock to create a flowing finished piece which looks good to the eye.
Matching the grain in any piece of furniture can be a most important aspect of woodworking,
and this holds especially true if you’re going to clear coat or stain the wood, instead of
painting it.
So one good tip when buying your wood is to buy in excess of what you need. This will save
you the time and trouble later on of having to go down and get more wood.
Buying excess will also allow you to cut your lumber with extra length so that you have the
flexibility of matching grains by moving the cut pieces slightly up or down against each other.
Like I said, matching the grain is a crucial part of most woodworking as unmatched grain on
a finished piece will completely throw off the whole look that you were aiming for.
Unmatched grain can also make an otherwise fine piece look sloppy and unfinished.
Download Free eBooks Here: http://downloadpdfreview.com/download-ebook/
53.
So before youeven begin your measuring and your cutting, but after you’ve done your
preparation like surface planing, line up all your stock and see what you have. This will be a
good way to visualize what you have and how it would fit in neatly with your design.
Another thing that you might want to take into consideration when trying to match the
grains is how you want the grain to appear. Do you want a horizontal effect, or maybe you
might prefer a vertical effect with the dips and rises going in nice symmetry throughout the
whole of the piece.
And when you’re buying lumber check for any knots or other defects such as warping which
has occurred. These will also count towards the end product and that’s ultimately what you
want. Even if the people at the lumber yard seem busy, take the time to select and check
what you’re buying to make sure they’re the pieces you want.
Don’t be intimidated by their knowledge or more specifically your lack thereof. You’re
learning steadily and you’re already far more advanced than when you first picked up this
book. In no time at all you’ll be able to go down there with confidence and say “I want that,
that and that, but I definitely don’t want that!”
Fine Finishes
I felt that all I’ve said to date about finishing isn’t enough so here I am again, but this time
with a few pointers all designed to make the whole thing easier on you.
I know that the easiest and most obvious method to finishing off your piece with its final
coats of stain or varnish, is to place it on top of old newspapers and then proceed from there.
And this is what most of us will do.
This has a few drawbacks however that aren’t immediately apparent, or at least not until
you’re actually half way through the whole messy operation.
To avoid this problem altogether you have a few options open to you.
You could get a few castoff wood pieces and cut them into triangular wedge shapes.
Place them on top of your newspapers and then place your nearly-there piece of
woodworking on top of it so that drips and stuff don’t gather at the end.
Alternately you could always do the bed of nails trick. This doesn’t involve you
getting onto a bed of nails, more like setting your project onto one.
Take a 1 x 4 board and drive thin nails into it at two inch intervals. Set up about two
to four of these and place them as you need. Then place your project on top of the
nail points.
The points won’t leave any noticeable mark on your finish either, so you can flip over
the piece if you need and get started right away on the other side without having to
wait for the delays of drying.
Woodworking Resources & Manual Lists Directory: http://www.downloadpdfreview.com
54.
One daywhen I was in a bind and didn’t have access to my bed of nails, I purloined
the kids’ jacks and scattered them on my table on top of the newspapers! And it
worked in a just fine too.
If you want to protect your workbench from spills, and newspapers just don’t cut it,
you could always try using a plastic sheet underneath to protect it.
But these can be notoriously slippery and loose limbed so you might want to have
some method of securing it. I just hook it onto a few convenient nails I’ve placed at
either side of my table.
And when you’ve finished all but the last coat, you can use a few old blankets to
protect your work. Drape them over the table and place your finished piece on top.
Now you don’t need to worry about scratches as you give it a final buff.
And as an added reminder, if you’re working in your woodshop, make sure you have a good
ventilation system going. If you don’t have a workshop per se, then do your finishing in a
well ventilated area.
If at any time you feel faint however, leave your work area and the fumes immediately. Get
some fresh air and stay away for about a good ten minutes, more if you can manage it.
And if you still don’t feel any better after ten minutes has passed then call emergency
services. Don’t attempt to drive yourself anywhere, you might just pass out while driving the
car!
I said this earlier but like most warnings I’ll say it again. If you’re going to be working in
your woodshop tell someone, so that at least one person knows where you are and what
you’re doing.
Problems
Here, I’ve mentioned a few problems you will almost definitely come across if you’re going
to keep woodworking. And for the sake of sparing my blushes I have not mentioned which
of these I’ve encountered and the embarrassing manner in which they happened.
Without a doubt the only way I ever seem to encounter problems is in a way that’s
guaranteed to make the onlooker laugh, and myself to want to run screaming from my
woodshop, asking “Why? Why? Why!”
That said, the first lot of problems is what you can generally expect to find when dealing
with wood. And the in second lot I’ve dealt primarily with a few things that might come in
handy when you’re woodworking and aren’t problems as such, more like solutions to
problems you didn’t know you had!
A few “knotty” problems
Download Free eBooks Here: http://downloadpdfreview.com/download-ebook/
55.
I’d like tosay that you’re never going to encounter any of these, or that they will only be so
often. The only way I can say that though, is if you’re going to be giving up on woodworking
altogether in which case you won’t ever encounter any of these of these problems.
Or if you only take up woodworking as a part time hobby, then you’ll only encounter these
every so often. Unfortunately the hard and fast truth though, is that there are problems, and
you will encounter them, and sometimes in the most unlikeliest of times.
For instance, the first time I came across a knot in the wood, I took absolutely no notice of it.
Sure I noticed it when I was laying out my pieces to cut, but I just didn’t know it for what it
was. With hindsight I have to wonder how I never missed the significance of it, but then
again I’m known more for my hobby-collecting and not my foresight!
Anyway, to cut a long story short in the middle of my sanding efforts, which you must
remember I detest, the knot slipped and fell out of my board, leaving me with a gaping hole.
I can tell you now, that wasn’t one of the highlights of my woodworking career!
So here are a few problems that you’ll encounter and a few ideas on how to deal with them
as well. There will most definitely be more, but these should get you started for the time
being until you can come up with your own ones.
A dead, or loose knot in the wood
Cause: This can usually happen when a dead branch isn’t fully integrated into the tree
before it was cut down. It can appear as a dark knot, and it might also be loose.
Solution: To stop the knot from falling out completely (as happened to me) or becoming
loose and weakening your wood, you can either cut it out of the wood, or glue it in
place with and fill with wood putty.
A tight knot
Cause: This usually occurs when the tree incorporates a branch into itself as its girth
increases. Depending on the wood you get it might mar the appearance. Some
woods however like the Knotty Pine are used primarily for this appearance.
Solution: You can remove it as you would a dead knot, but it’s not entirely necessary, even if
it isn’t the Knotty Pine variety of wood you’re dealing with.
A blue stain on your wood
Cause: The blue stain is usually caused by mold that will grow on the wood if it’s left in
moist humid areas, or a place which is poorly ventilated.
You will find however, that woods such as Pine and Sycamore will be more
vulnerable to this mold than most others.
Woodworking Resources & Manual Lists Directory: http://www.downloadpdfreview.com
56.
Solution: Since yourwood will be discolored, you have a few options. Which one you take
though, depends on where the stain is to be located.
You can either cut off the stained piece, or you can stain it to cover it. Another
option is to place the wood with the stain in a place where you wouldn’t normally
see it.
Wood that is bowed
Cause: The most likely suspect for wood to become bowed is improper storage. Generally
you’ll find that it’s impossible to work with bowed wood.
Solution: There’s not much you can do for this, but try to cut the lumber into smaller pieces,
even it out on a jointer and screw into place with the bowed side bulging out.
Splits
Cause: The rapid drying of the wood can cause the end to split, making the board weak.
Solution: The only reasonable way to get around this problem is by cutting it off or working
around it.
Accumulated Gum or Sap
Cause: This can be caused by an injury to the tree at any point in time. The gum or the
sap accumulations can either be on the surface of the wood, or they can be found
in pockets beneath the surface.
Solution: Since this has the ability to give you difficulty when you’re finishing your project,
you should ideally either scrape it out and fill it, or cut it off before you go any
further.
Machine burn stains on the wood
Cause: Generally this can happen if the blades of the planer were spinning on that part of
the board for too long, or if the blades themselves are dull. You will get unsightly
dark streaks along the board.
Solution: Sanding will generally take care of the problem, or even a jointer. You will only
need to sand down or joint depending on how far down the burn goes and the
depth of the board.
Odds and Ends
Download Free eBooks Here: http://downloadpdfreview.com/download-ebook/
57.
As I saidthis section isn’t about problems you’ll encounter as much as it ways to circumvent
some of these problems. I haven’t given you a problem solving bible, but have instead given
you a few problems, their solutions, and sometimes I’ve given you only the solutions.
The rest is up to you, and depends entirely on what your problem is, how you came by it,
and what you can do to get around it or solve it.
Loose Screws
This is a simple problem to fix and needs you to re-drill the hole and then glue in a dowel.
After which point you’ll need to drill a pilot hole in the dowel for the screw.
Patterns on wood
To trace a pattern on dark colored wood, you can use a white pencil to draw on the wood.
The white of the pencil will stand out clearly on the wood.
Depth gauge for a drill
For a quick depth gauge for your drill, wrap a small piece of masking tape around the drill bit
at the depth you need.
Getting stubborn screws
What you really need to do first and foremost is to drill a pilot hole so that your screw has a
starting point from which to go in.
Other than that, if your screw proves to be stubborn, drag the threads through a moist bar
of soap or paraffin wax to lubricate it. This will make the threads turn easier. Don’t use oils
or grease as this can stain the wood.
Avoid glue stains on your pipe clamps.
This is very simple and all you need is wax paper. Just cut the wax paper into strips and
either wrap around the bar of the pipe or lay it over the bar before you start work. This will
prevent the glue staining the bar of your pipe clamp.
Easy dust collection
For an easy way to collect dust, place an open cardboard box under where you are sawing.
First though make a small hole the size of your vacuum cleaner nozzle near the bottom and
place the nozzle in the hole. When you start sawing just flip on the vacuum and watch the
sawdust go away.
Woodworking Resources & Manual Lists Directory: http://www.downloadpdfreview.com
58.
You can alsodo this for when you’re drilling holes in the wall. Just get someone to hold the
vacuum cleaner nozzle under where you’re drilling. This works every time.
Antiques
This is another matter entirely, and I just included it so you could get a general
understanding. The long and short of it though, is if you’re new to woodworking¸ and you
have a precious family heirloom in front of you, resist temptation.
It’s a family heirloom for one reason only: you never had a beginning woodworker in your
family, much less one who was allowed near the piece. So resist the temptation and move
on to something new and contemporary and which can be thrown in the rubbish heap
without any remorse if your attempts go awry.
Stripping old pieces down to the bare wood, or taking them apart and fixing them up –
restoring them basically – should be left to the experts, which at this time you’re not. Yes,
you need to start somewhere, but a priceless antique is probably not the right place.
If the whole reason you got into woodworking was because of this piece that’s been staring
you in the face for the past few years, then you might want to see about branching off into
that direction of woodworking.
But other than that I’d really leave the piece alone until you can be sure that you can put
Humpty back together again. You can be sure otherwise that all the king’s horses and all the
king’s men won’t be able to come to your rescue!
Or if you want, and you think the delay will be too trying on your self restraint, then you
could always hand it over to a professional antique restorer whom you can trust to get your
old piece back into prime condition.
The whole idea of your going into woodworking though was so that you could do it your self,
so you might want to hold off on giving it to someone else. After all, it might look scruffy
around the edges but that’s because it’s old and an antique, and it’s been around far longer
than you have. It’s entitled to look like that way.
Keep telling yourself that and hide it out of sight, then it will be out of mind and not send
you out of your mind with the insane urge to get a hammer and a sander, and have a go at
it yourself.
And when you’re ready for it, when you’re confident that you won’t have to throw it back
into some deep dark space to hide it again (this time for different reasons!), then you can
start on your own personal Holy Grail and restore your priceless family heirloom to its former
glory.
Functional or Ornamental
Although you’ll start off with one idea in mind, once you get deep into woodworking you
might find that you’ve opened up a veritable candy shop of delights for you to choose from.
Download Free eBooks Here: http://downloadpdfreview.com/download-ebook/
59.
Whereas you mighthave gotten into woodworking in the first place to build furniture, now
that you’ve sampled what there is, you might shift direction to take advantage of your new
skills and move onto to ornamental figures instead.
Or you could have started out with the express intention of restoring the antiques that were
passed down to you or which you found in a bargain garage sale. Or perhaps you needed a
new shoe stand and couldn’t find one that was the right size to fit into the small space under
the stairs.
Whatever your first intentions were there’s a better than even chance that you’ll find
yourself reevaluating the direction you want to take your woodworking.
You might have started out wanting to do functional woodworking, and instead now find
yourself drawn to ornamental woodworking instead.
Woodworking in all its glory
Remember that old nursery rhyme, Rub-a Dub-Dub, Three men in a tub? Have you ever
wondered why there was only a butcher, a baker and a candlestick maker? Why wasn’t there
a cabinet maker around? Didn’t he have just as much right to be in that tub as the butcher,
the baker or the candlestick maker?
I realize that this is entirely frivolous in nature but it makes for a great distraction, besides
which, as a dedicated woodworker, I find it to be intriguing. The closest that I could come to
a good answer was that the cabinet maker was the one who built the tub.
And since he was a cabinet maker and not a shipwright, he very prudently declined all offers
to join his hapless peers! I kind of like that explanation and although Jack is even now at my
elbow reading this and rolling his eyes, I shall stick with it.
Which segues us nicely into this section. “Woodworking in all its glory” was intended to show
you the many paths you can take in your woodworking enterprises, and it also aims to open
up that Pandora’s Box of woodworking and make you change your mind over and over again
on what you really want to do.
So here are some of your options, although not all of these might be what you would call a
mainstream woodworking hobby. Then again what is a mainstream woodworking hobby?
Only you can decide that, although I have to say that if you’re going to build a boat for
yourself you might first want to see if you have enough room in your yard for the finished
product!
Carpenter
The Carpenter is probably what you call the jack of all trades in the woodworking profession.
That doesn’t however mean that he is master of none. On the contrary he might not be the
Woodworking Resources & Manual Lists Directory: http://www.downloadpdfreview.com
60.
master of all,but a carpenter can generally turn his hands to just about any woodworking
job with skill and ease.
You will also find a carpenter to be part and parcel of the whole building-new-houses
process. Without a carpenter many of the woodworking jobs, well, they just wouldn’t be
done at all.
Cabinet Maker
As you might have guessed a Cabinet Maker makes cabinets. And shelving. And furniture.
That aside, it doesn’t mean that because you’ve made one cabinet or a particularly nice
chest of drawers that you’re a cabinet maker! You need a bit more skill and experience in
that direction before you can consider yourself anywhere in the caliber of a good cabinet
maker.
Take heart though, with time and practice you can also become an artist in your own field
and become a master cabinet maker.
Wood Carver
And as you might have guessed a Wood Carver is a person who turns out piece after piece
of fantastically carved wooden objects.
Although all the other woodworking jobs need imagination and an artistic touch for you to
become one of the best, only another one or two require you to have some artistic skill
almost from the get go.
Without this all-essential ingredient I’m sad to say that your wood carving efforts might fall
flat. Not that it will come easily to you the first time you have a go at it, or that you will turn
out the most amazing pieces without thinking twice about it.
You will have to work very hard to get even a passable carving that looks something like
what you had in mind, but then, that’s the whole point of learning.
The point here is that you need to be able to envision what it is that you want to do and be
able to get that thought down in some form, either on paper first, or straight to wood if you
can.
If you can’t get that done, then you might end up with something that looks like a cross
between a rabid dog, and a weeping willow when, what you were really aiming for was a
cute little bunny! And that folks, was my first, (second, third, tenth), and last attempt at
wood carving.
Shipwright
Download Free eBooks Here: http://downloadpdfreview.com/download-ebook/
61.
As far Ican see, there won’t be too many people out there interested in becoming a
Shipwright. For one thing if you get seasick then the last thing you want to take up as a
hobby is something which you put a lot of a hard work into but which in the end you
ultimately can’t appreciate.
Shipwrights, you see, are people who build boats and yachts and ships, but with wood, not
with the fiberglass of today. With the introduction of fiberglass onto the ship building scene
it has to be said that many a skilled shipwright has been put out of business and made
obsolete and redundant.
Be that as it may, if sailing’s your passion, or you can tolerate it better than I can, then
perhaps ship building should be your thing. For my part the up and down and side to side
motion of whatever sea going vessel I’m in makes my head and my stomach churn.
So I can’t say that I’ve looked too deeply into the needs of being a shipwright, but I’m sure
that if you’re dedicated you can do whatever you want. Even to building your own boat or
yacht.
And even though I’m not a good sailor, Jack loved the idea of building his own boat and it
was only through sheer luck that circumstance that stopped him. There was no room in the
front or the back yards to accommodate him, and he wasn’t able to find alternate lodgings
for his dream either!
Luthier
At a guess not many people know what a Luthier is, and are probably feeling a little puzzled.
A luthier is a person who makes stringed musical instruments, like guitars and violins, and in
the olden days, probably many harps as well.
If you wanted a custom made violin with a new design, then a master luthier is probably
who you would want to go to. Certainly not to someone like me, since I also have a tin ear
amongst my many other attributes! You might be closer to understanding why I hobby-collect,
now?
However the simple fact of the matter is that you need to be skilled more than only in
woodworking.
You also need to have a good grasp of the concepts of what makes that particular
instrument work so well, and you have to have imagination and insight to build something
new that will still give you the same sound and quality of the old design.
Cooper
A Cooper on the other hand makes the casks and barrels which are so famous for storing
beers, ales and other liquors in. You’ll also find these days that many wooden flower pots
are also turned out like barrel halves and this will also be the work of a cooper.
Woodworking Resources & Manual Lists Directory: http://www.downloadpdfreview.com
62.
And although itmight seem like the easiest job in the world to make a barrel, don’t be
fooled. This aspect of woodworking also requires considerable skill, so before you go
scoffing at a barrel maker, I’d try making one first!
Pattern Maker
This one might be a bit of a mystery to all and sundry but it too can be explained quite
easily enough. Very simply a Pattern Maker makes wooden moulds for sand casting, which in
turn is an entirely different type of skill and hobby.
Going back to pattern making, although the design for the mould is generally not theirs,
these woodworkers still need to be able to turn out consistent moulds that match exactly all
the required specifications.
And over and above that, they also need to take into account many other things like metal
shrinkage when the molten metal is cooling, and outlets for the gases to escape, and an
inlet for the metal to be poured in, and many other little details like that.
Parquetry & Marquetry
A lot of us would have for the most part heard of Parquetry, but have you ever heard of
Marquetry? The idea and the techniques are basically the same with only a small difference
between them to distinguish the two.
There’s a good chance that you’ve seen marquetry work and never even knew it for what it
was, and thought it instead to be parquetry. So what’s the difference?
Well, let me start by saying first of all that both techniques requires you to create various
designs and patterns by inlaying pieces of wood with different veneers, grains, stains etc., to
make pleasing designs.
The main difference between marquetry and parquetry is in the patterns they make.
Whereas marquetry generally tends to depict scenic pictures and designs, parquetry on the
other hand leans more towards the geometric designs.
Both however, are complex and most times ornate. They are also on par with wood carving
for sheer artistic beauty and conception, and requires an artistic touch to become a thing of
beauty.
Turning
Strictly speaking, Turning, along with parquetry and marquetry are not specific woodworking
crafts. They do however require a certain amount of skill from you, and in the case of
parquetry, a certain visual artistic bent as well.
Download Free eBooks Here: http://downloadpdfreview.com/download-ebook/
63.
Turning requires theuse of a lathe, or a turning wheel, on which you secure your wood, and
get the shape you want by holding the various tools – cutting tools naturally – against it as it
turns.
It’s not as simple as it sounds and it does take a goodly bit of skill and experience for you to
get the desired shape, but all in all it is well worth it. And if you ever have the chance to try
out a lathe, give it a go, it can be exhilarating and just downright fun!
Glossary of woodworking terms
A
Air Cleaner
A machine that is used to filter fine dust from the air in a workshop.
Air Dried Lumber
Lumber that has been dried, usually outside so that the moisture content in the wood is the
same as the environment.
Alligator Chuck
A two-piece bit brace chuck which pivots at one end.
Annual Growth Rings
These rings show the growth rate of a tree during a year. You can see these annual growth
rings at the end grain of lumber.
Arbor
This is a shaft that turns blades or other cutting tools via the tool’s motor.
Ascending Grain
The wood grain pattern which runs up into the progressing cut. This type makes a smooth
cut.
See Descending Grain.
B
Bead
A small rounded, raised shape that is found along the edge of a board.
Woodworking Resources & Manual Lists Directory: http://www.downloadpdfreview.com
64.
Bench Dog
Thisis a metal or wooden peg that fits into a hole on the work bench. It is used a hold a
work-in-progress piece of wood. This peg can be round or square shaped and sometimes it
will be equipped with special springs.
Bevel Cut
An angled cut through a board
Biscuit Cutter
The machine that cuts out the football shaped biscuits needed for biscuit jointing. See
Biscuit Joint
Biscuit Joint
This is a butt joint that is reinforced with a football shaped “biscuit”. These biscuits are
usually made from compressed pieces of wood like birch. When this biscuit comes into
contact with any glue that is in the joint the biscuit swells creating an even tighter joint. Also
Plate Joint.
Blast Gate
This is a special fitting that is designed to control the flow of air in a dust collection system
from the entire premises of a woodworking shop.
Bit Brace
A hand held boring device. Usually comprises of a pommel, a crank and a chuck.
Board Foot
A system for measuring hardwood. Here one board foot is equivalent to 144 cubic inches.
Bookmatch
A term that is used in veneering. Here successive pieces of veneer from a flitch are arranged
side by side.
Bore
A hole for the arbor in a circular saw blade.
Bow
This is a defective piece of wood that is warped along its length.
Download Free eBooks Here: http://downloadpdfreview.com/download-ebook/
65.
Box Joint
Thisis a corner joint that is made from interlocking “fingers”.
Brad
A finishing nail that is about 1 inch long.
Burl
Bulges and bumps that are found on trunks and the roots of trees. These burls are highly
sought after for the excellent quality veneer that they give.
Burr
This is a raised ridge of metal that is used on a scraper to remove wood pieces.
Butt Joint
A wood working joint where the edges of two boards are placed against each other.
C
Cabriole Leg
This is a leg that is used on Queen Anne furniture. The shape of this leg is graceful and it is
made to resemble that of an animal’s.
Chamfer
This is a beveled cut along the edge of a piece of furniture. This cut is usually angled at 45
degrees.
Carcass
This is where the body of a piece of furniture has a box like shape.
Clear
A board which is free from all defects.
Closed Coat
This is a piece of sandpaper that has a surface area completely covered by rough particles.
This particular sandpaper type becomes easily clogged with sawdust and therefore it is not
used for woodworking.
Collet
In a router tool this is the sleeve that grips the shank of a bit
Woodworking Resources & Manual Lists Directory: http://www.downloadpdfreview.com
66.
Compound Cut
Thisis a cut that is inclined towards both the edge and the face of a board.
Concave
An inward curving shape, like the well of a spoon.
Convex
An outward curving shape, like balloon.
Cope-and-stick joint
A method of constructing raised panel doors where the tongues of the horizontal rails
connect to the grooves of the vertical stiles.
Cord
This is a unit of measurement that is used for firewood that is stacked 4 feet long by 4 feet
high by 8 feet long.
Crosscut (crosscutting)
This is a cut that is made perpendicular to the grain of a board. See Ripcut (Ripping)
Crotch
You can get this piece of wood from the fork of a tree. The crotch veneer is very highly
prized for its figuring.
D
Dado
This is a groove that is cut into a piece of wood, in order to hold another piece of wood. You
can usually see this being used in cabinetry.
Deflection
The amount of sag that can be detected in a shelf, floor, joist, or a counter that is caused by
the weight that it is supporting.
Descending Grain
The wood grain pattern which is made down into a progressive cut. Doesn’t cut smoothly
and can cause a loss of control in your machine.
Download Free eBooks Here: http://downloadpdfreview.com/download-ebook/
67.
Devil Stone
Acoarse, hard dressing stone used for sharpening other stones, tools and grinders. See also
Dressing Stone
Dovetail Joint
A method of joining wood at the corners by using interlocking pins and tails.
Dowel
This is a cylindrical wooden pin that is used to reinforce a wooden joint.
Dowel Center
This is a cylindrical metal pin that has a raised point. This is inserted into a dowel hole in
order to find the exact center of the piece of wood that is under construction.
Drawer Stop
A device that is installed in a cabinet so that the drawer will open and close within certain
limits.
Dressing
Shaping the cutting edge of a chisel so that the bevel cut can be corrected.
Dressing Stone
A rough stone used for sharpening other stones. See Devil Stone.
E
Edge guide
This is a straightedge that is used to guide tools like a circular saw or a router along a piece
of wood that is being worked on.
Edge joining
Here you smooth and square the edge of a board so that it can be glued up squarely to
another piece of wood.
Elbow
This device is used in a dust collection system to turn corners.
End Grain
A wood surface where the cross-grain is exposed.
Woodworking Resources & Manual Lists Directory: http://www.downloadpdfreview.com
68.
Equilibrium moisture Content(emc)
The moisture content (mc) of piece of wood after it has been fully exposed to the
environment around it. Usually this is about two weeks after a piece has been kept in one
place. See also Moisture Content (mc).
F
Face Frame
In cabinet making a face frame is flat frame that is attached to the front of a carcass. The
face frame is used in cabinet making to hide the exposed edges of the plywood panels that
are used to build the carcass.
Face Veneer
A high quality veneer that is used on the surface of the exposed plywood pieces.
Featherboard
A featherboard is used on a table saw or a router table to hold smaller pieces of stock
against the blade or the bit. This ensures a clean cut.
Fence
A straight guide that is used to keep a board a set distance from a blade or other cutters.
Fiddleback
A decorative wood figure that is caused by a wavy grain. The veneer of the fiddleback is
very highly prized for the character that it displays. This decorative wood figure is also used
in musical instruments.
Fittings
Various accessories that are used to connect hoses, pipes and tool to a dust collection
system.
G
Glue Joint
This is a special interlocking grooved pattern that is used to join two pieces of wood
together, edge to edge. This ensures a secure joining.
Goggles
See Safety Glasses
Download Free eBooks Here: http://downloadpdfreview.com/download-ebook/
69.
Grit
A measurementof the rough particles that are found in the making of sandpaper.
H
Half-Blind Dovetail
This is a dovetail joint where the cut does not go all the way through the board. Here the
ends of the half-blind dovetail are hidden.
Hardwood
The classification of types of wood, as in hardwood and softwood. Hardwood is not
necessarily harder than softwood. The hardwood class however shows these trees to be
deciduous. See also Softwood. And for more details go to the section “Hardwood? or
Softwood?”
Hearing Protection
Any item like ear plugs or ear muffs that will protect your hearing when you are using loud
power tools.
Herringbone Pattern
In veneering a herringbone pattern is created when successive layers of veneering are glued
together so that they make a mirror image. This veneering pattern has a tendency to slant
upwards and outwards, very much like a herringbone.
Hygrometer
A device used to measure the moisture content of wood.
I
Included Angle
This is the angle to be found formed by the two facets of a cutting edge.
Infeed
The direction that a piece of wood is fed into a blade or a cutter.
Iron
Referring to the blade that can be found in planes and spokeshaves.
Woodworking Resources & Manual Lists Directory: http://www.downloadpdfreview.com
70.
J
Jig
Thisis a device that is used to make special cuts. It is also used to guide a tool or to help in
various woodworking operations.
K
Kerf
A groove that is left in a board when it has been cut by a saw blade.
Kickback
When the piece of wood that is being worked on is thrown back. Usually in the opposite
direction to the turning of the cutter.
Kiln
A kiln is a room or a building where the temperature, moisture and air that is found in the
room is controlled to help with the drying process of lumber.
Knockdown
This is a design feature that lets a piece of furniture be taken apart easily with the use of
special hardware or joinery.
L
Laminate
A thin plastic material that is used to cover a board. The most common usage of laminates is
for counters and table tops. You will usually recognize it by the brand name of Formica®.
Level
This device is used to see if an object is totally horizontally level or vertically straight. The
vertical level is called a plumb line. The torpedo and full length levels are used in
woodworking.
Linear Foot
The measurement that is the length of a board.
Lumber Ruler
This tool looks like a ruler but it has a handle at one end and a hood at the other end. This
tool is used to calculate the board footage for a piece of lumber.
Download Free eBooks Here: http://downloadpdfreview.com/download-ebook/
71.
M
Medium DensityFiberboard (It is also called MDF)
This is a special type of tempered hardboard that has very fine, smooth finish. This wood
type is used in cabinet making.
Miter-and-Spline Joint
A joint with 2 mitered surfaces that are connected by a spline. See spline
Miter Gauge
A tool that slides into a slot on a power tool like a table saw, router table, bandsaw and
others. The miter gauge can be adjusted to different angles and it can be used to slide the
wood piece in use past the blade.
Moisture Content (mc)
The percentage of water that can be found in a piece of wood
Mortise
A rectangular shaped hole that is cut into a piece of wood in order to accept a tenon. See
tenon
Mortise and Tenon Joint
This is a joinery technique where the tenon from one board fits into the mortise of another.
N
Non-piloted bit
This device is a router bit that does not have a guide bearing. See piloted bit
O
Ogee
This is a decorative molding with an “S” shaped profile.
Open Coat
This is a piece of sandpaper with rough particles that are spread out to prevent clogging.
OC
This is an abbreviation that means “on center”. This refers to the position of the stock when
you are connecting it to a joint.
Woodworking Resources & Manual Lists Directory: http://www.downloadpdfreview.com
72.
Outfeed
The sideof a power tool where the board exits. see Infeed
P
Particle Board
A type of manufactured plywood that is made from ground up and glued scrap wood. This
particle board is therefore very dense, heavy and flat.
Particleboard-core Plywood
This plywood is created by gluing a thin layer of veneer to a piece of particle board.
Pilot Bit (Pilot Bearing) also called Piloted Bit
A router bit that is fitted with a bearing that is above the cutter which rides on the edge of a
board or template keeping the bit a fixed distance from the edge. See Non-piloted Bit
Pin Router
A router that is fixed above a table with its bit point down. A pin in the table is lined up with
the bit and this pin router directs the wood piece that is being used.
Plate Joint See Biscuit Joint
Plunge Router
A router that is mounted on to a spring loaded base. The router can be turned on and
plunged down into the wood in progress piece.
Pumice
A fine abrasive powder that is made from volcanic ash. Pumice is usually used with a felt
block in wood working to give a fine finishing polish.
Push Stick
A tool that is used to safely push through a table saw or other power tool.
Download Free eBooks Here: http://downloadpdfreview.com/download-ebook/
73.
Q
Queen Anne
This is a style of furniture that first made popular in England during the reign of Queen Ann.
This style was almost used exclusively by early colonial cabinet makers. The Cabriole leg is
one of the main character features of the Queen Anne style.
R
Rabbet
This is a cut that is made partway through the edge of a board that is used as part of a joint.
Rail
1. A horizontal board that runs along the underside of a table.
2. The horizontal part of a raised panel door.
Raised Panel
This is a piece of wood that is the center of a frame and panel assembly.
Ripcut (Ripping)
A cut, that is made parallel to the grain of the wood.
Rotary Cut Veneer
This is a veneer that is cut from a log in one long sheet.
Round Edge Lumber
Wood boards that have bark attached to the ends.
Rub Bearing
A ball bearing rub collar that is near the top or the bottom of a spindle shaper that is used to
keep the wood work piece a fixed distance away from the cutters.
Rule Joint
A joinery method that is used in drop leaf tables where the table has a convex profile and
the leaf has a concave cut. The two pieces are joined together by a hinge.
Runout
The amount of wobble that is detected in a shaper or router.
Woodworking Resources & Manual Lists Directory: http://www.downloadpdfreview.com
74.
S
Safety glasses
These are glasses that should be worn during woodworking. They have sturdy frames,
impact resistant lenses and side guards to protect the eyes. Also Goggles.
Scarf Joint
A wood working joint that is made by cutting or notching two boards at an angle. You then
join them together by strapping, gluing or bolting them together.
Seasoning
The process of removing the moisture from green wood so that the wood is stable and
workable.
Slab
This is a broad flat piece of wood that is cut directly from the log. Many times it will still have
the bark on both of the edges.
Sliding Dovetail Joints
A sliding dovetail joint is similar to a tongue and groove except that the tongue and groove
are matching dovetails.
Softwoods
Generally lumber from a conifer like pine or cedar. The term softwood doesn’t refer to the
density of the wood. It is instead a classification of the type of wood. See also Hardwood.
For more detail see the section “Hardwood? or Softwood?”
Sound
A term referring to a board of wood that has no or very little defects that will affect its
strength.
Specific Gravity
The ratio of the weight of wood to an equal volume of water. The higher the specific gravity,
the heavier the wood.
Spindle
The threaded arbor on a shaper that holds the cutters.
Spline
A thin piece of wood that fits into the mating grooves that are cut into two pieces of wood.
Download Free eBooks Here: http://downloadpdfreview.com/download-ebook/
75.
Squeeze-out
A beador drops of glue that are forced out of a joint when pressure is applied.
Stain
1. This is a discoloration in wood that is caused by chemicals or a fungus.
2. A die or pigment that is used to color wood.
Starved Joint
A poorly bonded joint that is caused by a lack of sufficient glue.
Sticker
A thin wood strip that is inserted between stacks of green wood to let air flow through the
stacks to ensure that the entire stack is properly drying.
Stile
The vertical part of a raised panel door.
Surfaced Lumber
A piece of wood that has been planed smooth on one or more surfaces.
Surfacing
The way that a piece of lumber has been prepared at the lumber mill.
T
Tack Time
The amount of time that it takes for an adhesive substance to set-up before it can form a
bond.
Tape Measure
This is used to measure the length of stock pieces. The measurements can be found in both
metric and imperial (or standard) form. The tape measures can be found in 16, 25 and 30
foot lengths.
Tearout
The tendency for a blade to fragment apart the last part of a wood piece during the
crosscutting operation.
Woodworking Resources & Manual Lists Directory: http://www.downloadpdfreview.com
76.
Tempered Hardboard
Thisis a dense fiberboard that has been specially treated so that its strength, durability,
moisture resistance and density have all been increased.
Template
This is a pattern. Many times in woodworking a template is made from hardboard and it is
used with a pilot bit to route a shape in a board.
Template Guide
A jig that is mounted to the bottom of a router that is used to keep the router on the outline
of a template when you are routing with a non-pilot beating bit.
Tenon
An extension from a board that fits into a mortise. This extension and mortise will then form
a joint.
Through Dovetail Joint
This is a way of joining wood where the interlocking pins and tails of the dovetail joint go
through to the other side of its mating piece.
Toe Kick
This is a groove that has been designed into the bottom of a cabinet so that the end user
can stand closer to the countertop.
Tongue and Groove
A joinery technique where one wood board is cut with a jutting out groove. A matching piece
is then cut with a similar matching groove along its edge.
Torque
The amount of force that is needed to turn an object like a screw or a bolt.
Tyloses
This is a waterproof foam like substance that is found in the pores of some types of wood.
The Tyloses helps to make the wood less permeable to various types of liquids. You will find
Tyloses in White Oak which is generally used for wine barrels.
Download Free eBooks Here: http://downloadpdfreview.com/download-ebook/
77.
U
Underlayment
Thisis a layer of plywood or another type of manufactured board that is used as a base
material under finished flooring. Underlayment is often used as a substrate to increase the
strength and / or the smoothness of the flooring.
Universal Chuck
A bit brace type of chuck with two jaws which pivot from their mid-points.
V
Veneer
This is a thin sheet of wood that has been cut from a log.
Veneer-core Plywood
This is plywood that is made from three or more pieces veneer that has been glued in
alternating grain patterns.
W
Wane
Sawed lumber that still has its natural bark or surface edge. This is produced by flitch, or
through-and-through sawing.
Warp
Distortion of the lumber due to external causes.
Also used in chair weaving. Refers to the initial strands which are wrapped around the front
and back rungs.
Most of all though…Have Fun
Like the caption says, most of all though…have fun. That’s what woodworking is all about
really, once you get rid of everything else, the chance to play with your toys and be able to
create something at the same time.
So keeping in mind all the safety factors, and keeping your Tool monster well within control
when you go shopping you can be sure that once you start to woodwork in earnest you
won’t want to go back to anything else.
And although I’m still hobby-collecting, the one hobby which I never gave up was
woodworking. So have fun, work safe, and keep woodworking!
Woodworking Resources & Manual Lists Directory: http://www.downloadpdfreview.com
78.
Resource & Recommended
16,000 Woodworking Plans (House, Furniture plans, Table, Chair
Plans, Bed plans, Children’s Plans, Shed Plans etc.) All in one
elite package:
http://downloadpdfreview.com/tedsplan/
12,000 Shed plans, (focus on shed woodworking projects):
http://downloadpdfreview.com/myshedplan
How to Set-up Your Profitable Home Woodworking Business:
http://downloadpdfreview.com/homewoodworking
Boat Plans, (How to build a boat as a beginner):
http://downloadpdfreview.com/boatplan
Cheap Woodworking Secret (insights, money saving):
http://downloadpdfreview.com/secretwoodworking
Download Free eBooks Here: http://downloadpdfreview.com/download-ebook/
![Woodworking
Essentials A-Z
http://www.downloadpdfreview.com
Here's What You CAN Do With These Products:
[YES] Sell it
[YES] Sell At Online Auctions.
[YES] Give Away.
[YES] Offer As A Bonus.
[YES] Offer As Subscriber Incentives.
[NO] Alter The Source Documents.
[YES] Charge Any Price YOU Want.
[YES] Add Them To Membership Sites.
[NO] Create BRAND NEW Products
[YES] Publish The Products Offline
[NO] Put Your Name On The Products As The Author
[NO] Change The Content.
Woodworking Resources & Manual Lists Directory: http://www.downloadpdfreview.com](https://image.slidesharecdn.com/woodworkingessentialsa-z-141008032132-conversion-gate02/85/Woodworking-Essentials-From-A-to-Z-1-320.jpg?cb=1412738883)
![Table of Contents
Woodworking Essentials A-Z .................................................................................................... 1
http://www.downloadpdfreview.com ...................................................................................... 1
Here's What You CAN Do With These Products: .................................................................... 1
[YES] Sell it ............................................................................................................................... 1
[YES] Sell At Online Auctions................................................................................................... 1
[YES] Give Away. ...................................................................................................................... 1
[YES] Offer As A Bonus. ........................................................................................................... 1
[YES] Offer As Subscriber Incentives. ..................................................................................... 1
[NO] Alter The Source Documents. ......................................................................................... 1
[YES] Charge Any Price YOU Want. ........................................................................................ 1
[YES] Add Them To Membership Sites. .................................................................................. 1
[NO] Create BRAND NEW Products ......................................................................................... 1
[YES] Publish The Products Offline ......................................................................................... 1
[NO] Put Your Name On The Products As The Author .......................................................... 1
[NO] Change The Content. ...................................................................................................... 1
Table of Contents......................................................................................................... 2
How it all began…for me ........................................................................................................ 10
Forward.................................................................................................................................... 11
Introduction ............................................................................................................................. 13
What is woodworking? ....................................................................................................... 14
The Aim................................................................................................................................ 15
Woodworking 101 ................................................................................................................... 16
The Basics ............................................................................................................................ 17
Design /Plan .................................................................................................................... 17
Get the Necessaries ........................................................................................................ 17
Safety Check .................................................................................................................... 18
Clearing some Space....................................................................................................... 18
Measuring & Marking ...................................................................................................... 18
Cutting.............................................................................................................................. 19
Sanding ............................................................................................................................ 19
Joining .............................................................................................................................. 20
Finishing ........................................................................................................................... 20
Safety First .............................................................................................................................. 20
Safety Do’s and Don’ts ....................................................................................................... 22
Wear safety equipment .................................................................................................. 22
Don’t wear loose clothing ............................................................................................... 22
Bind your hair .................................................................................................................. 22
Avoid any distractions ..................................................................................................... 22
Keep your eye on the blade when you’re working ....................................................... 23
This one is basically the same as avoiding distractions, but takes things a step further. 23
Make sure there’s a safety ring around the “On” button ............................................. 23
Take a break when you’re tired ..................................................................................... 23
Allow the tool to stop fully, before putting your hands anywhere near it .................. 23
Unplug the tool first, before changing the bits and blades ......................................... 23
Never touch a moving blade or bit ................................................................................ 24
Never reach over a tool in use ....................................................................................... 24
Download Free eBooks Here: http://downloadpdfreview.com/download-ebook/](https://image.slidesharecdn.com/woodworkingessentialsa-z-141008032132-conversion-gate02/85/Woodworking-Essentials-From-A-to-Z-2-320.jpg?cb=1412738883)