Demonstration of steps and tasks in process 9 stages draw flow charts power point slides
•
0 likes•118 views

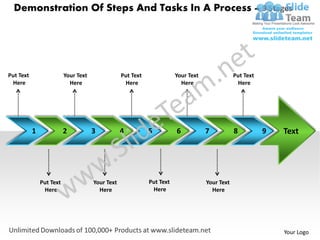
The document describes a 9 stage process demonstration involving putting text in various places and labeling the stages 1 through 9. The process demonstration utilizes text boxes that can be edited and placed in different areas, and a logo can be added at the end.

Recommended
Recommended
More Related Content
Viewers also liked
Similar to Demonstration of steps and tasks in process 9 stages draw flow charts power point slides
Similar to Demonstration of steps and tasks in process 9 stages draw flow charts power point slides (20)
More from SlideTeam.net
More from SlideTeam.net (20)
Demonstration of steps and tasks in process 9 stages draw flow charts power point slides
- 1. Demonstration Of Steps And Tasks In A Process – 9 Stages Put Text Your Text Put Text Your Text Put Text Here Here Here Here Here 1 2 3 4 5 6 7 8 9 Text Put Text Your Text Put Text Your Text Here Here Here Here Your Logo
- 2. Demonstration Of Steps And Tasks In A Process – 9 Stages Put Text Your Text Put Text Your Text Put Text Here Here Here Here Here 1 2 3 4 5 6 7 8 9 Text Put Text Your Text Put Text Your Text Here Here Here Here Your Logo
- 3. Demonstration Of Steps And Tasks In A Process – 9 Stages Put Text Your Text Put Text Your Text Put Text Here Here Here Here Here 1 2 3 4 5 6 7 8 9 Text Put Text Your Text Put Text Your Text Here Here Here Here Your Logo
- 4. Demonstration Of Steps And Tasks In A Process – 9 Stages Put Text Your Text Put Text Your Text Put Text Here Here Here Here Here 1 2 3 4 5 6 7 8 9 Text Put Text Your Text Put Text Your Text Here Here Here Here Your Logo
- 5. Demonstration Of Steps And Tasks In A Process – 9 Stages Put Text Your Text Put Text Your Text Put Text Here Here Here Here Here 1 2 3 4 5 6 7 8 9 Text Put Text Your Text Put Text Your Text Here Here Here Here Your Logo
- 6. Demonstration Of Steps And Tasks In A Process – 9 Stages Put Text Your Text Put Text Your Text Put Text Here Here Here Here Here 1 2 3 4 5 6 7 8 9 Text Put Text Your Text Put Text Your Text Here Here Here Here Your Logo
- 7. Demonstration Of Steps And Tasks In A Process – 9 Stages Put Text Your Text Put Text Your Text Put Text Here Here Here Here Here 1 2 3 4 5 6 7 8 9 Text Put Text Your Text Put Text Your Text Here Here Here Here Your Logo
- 8. Demonstration Of Steps And Tasks In A Process – 9 Stages Put Text Your Text Put Text Your Text Put Text Here Here Here Here Here 1 2 3 4 5 6 7 8 9 Text Put Text Your Text Put Text Your Text Here Here Here Here Your Logo
- 9. Demonstration Of Steps And Tasks In A Process – 9 Stages Put Text Your Text Put Text Your Text Put Text Here Here Here Here Here 1 2 3 4 5 6 7 8 9 Text Put Text Your Text Put Text Your Text Here Here Here Here Your Logo
- 10. Demonstration Of Steps And Tasks In A Process – 9 Stages Put Text Your Text Put Text Your Text Put Text Here Here Here Here Here 1 2 3 4 5 6 7 8 9 Text Put Text Your Text Put Text Your Text Here Here Here Here Your Logo
- 11. Demonstration Of Steps And Tasks In A Process – 9 Stages Put Text Your Text Put Text Your Text Put Text Here Here Here Here Here 1 2 3 4 5 6 7 8 9 Text Put Text Your Text Put Text Your Text Here Here Here Here Your Logo
- 12. All images are 100% editable in PowerPoint “Change color, size and orientation of any icon to your liking”
- 13. Ungrouping the object 2 1 3 1. Right click the object. 2. Choose Group and then Ungroup. 3. Click beside the object and drag the arrow over it.
- 14. Edit Color 2 3 1 1. Select the shape to change the color and Right click the object( click any object which you want to change color) 2. Choose Format Shape in the dialog box. 3. Choose “Fill” in the Format Shape box then “Solid” or “Gradient” depending on the appearance of the object. Change colour as shown in the picture.
- 15. Edit Color by Theme Colors 2 1 3 1. Select the shape to change the color 2. Go to Design Tab then “Colors” 3. Choose any theme color “Built In” depending on the appearance of the object.