SlideShare a Scribd company logo
1 of 32
Download to read offline
NIGHT VISION RIFLESCOPE
PHANTOM
I N S T R U C T I O N S
неисправность возможная причина исправление
Прицел
не включается.
Нечеткое изображение
красной метки - не удается
навестись окуляром.
При четком изображении
красной метки нечеткое
изображение объекта,
находящегося
на расстоянии
не менее 30 м.
Отдельные мелкие четкие
темные точки в поле зрения
при четком изображении
объекта.
Прицел или ИК-осветитель
не выключаются ручкой
выключателя на прицеле.
Сбивается метка
при стрельбе.
Прицел не фокусируется.
Батарея установлена
неправильно.
Напряжение на батарее составляет
менее 1,0 В (для АА) или менее
2,2 В (для CR123А).
Окислены контакты в контейнере
батарей - "потекла" батарея или на
контакты попала химически активная
жидкость.
Для коррекции Вашего зрения
не хватает диоптрийного расхода
окуляра.
Пыль и влага на наружных оптических
поверхностях объектива и окуляра.
Влага на внутренних поверхностях
объектива и окуляра, на оптических
поверхностях ЭОП возможна при
переноске прицела с холода в теплое
помещение.
Напряжение на батарее составляет
менее 1,0 В (для АА) или менее 2,2 В
(для CR123А).
Точки на экране ЭОП, обусловленные
технологией его изготовления, не
влияют на работоспособность
и надежность.
Размеры точек оговорены
в технических условиях на ЭОП
и прибор.
Прицел включен с помощью пульта
дистанционного управления (ПДУ).
Нет жесткости установки прицела
на оружии.
Неправильная настройка.
Установите батарею в соответствии
с маркировкой.
Замените батарею.
Очистите контейнер батарей,
зачистите контакты.
Если Вы пользуетесь очками с силой
линз более +/- 5, то наблюдайте
в окуляр прицела через очки.
Протрите наружные оптические
поверхности мягкой хлопчатобумажной
салфеткой.
Просушите прицел - дайте постоять
4 часа в теплом помещении.
Замените батарею.
Причин для возврата нет.
Выключите прибор и ИК-осветитель
нажатием кнопок ПДУ.
Проверьте жесткость установки
прицела. Убедитесь, что Вы
используете именно тот тип патронов,
которым ранее пристреливали Ваше
оружие и прицел. Если Вы
пристреливали прицел летом,
а эксплуатируете его зимой (или
наоборот), то не исключено некоторое
изменение нулевой точки пристрелки.
Настройте прибор в соответствии
с разделом "Использование прицела".
Проверьте наружные поверхности линз
объектива и окуляра; при необходимости
очистите их от пыли, конденсата, инея
и т.д. В холодную погоду Вы можете
использовать специальные
антизапотевающие покрытия (например,
как для корригирующих очков).
v.0614
60
WEAVER
Прицел имеет дополнительную планку Weaver (14), установленную на его
корпусе слева. С помощью планки Вы можете установить дополнительно
следующие приборы:
Инфракрасный фонарь Pulsar-805 (#79071)/Pulsar-X850 (#79074);
Храните прибор всегда только в чехле, в сухом, хорошо вентилируемом
помещении. При длительном хранении обязательно извлеките батарею
питания.
В таблице приведен список возможных проблем, которые могут возникнуть
при эксплуатации прицела. Произведите рекомендуемую проверку и
исправление в порядке, указанном в таблице. Если в данном списке не
приведена проблема или указанное действие по устранению
неисправности не дает результата, сообщите об этом производителю.
Очистите наружные поверхности металлических и пластмассовых
деталей от пыли, грязи и влаги; протрите их хлопчатобумажной
салфеткой, слегка смоченной оружейным маслом или вазелином.
Почистите электрические контакты батарейного отсека, пользуясь любым
нежирным органическим растворителем.
Осмотрите линзы окуляра, объектива и ИК-осветителя; осторожно
смахните пыль и песок, если необходимо, почистите их наружные
поверхности.
Техническое обслуживание проводится не реже двух раз в год и заключается
в выполнении изложенных ниже пунктов:
NV 1,7x
Использование телескопической насадки NV 1,7x (#79091) позволяет
повысить увеличение прицела "Phantom" с диаметром объектива 50 мм в
1,7 раза. Насадка вкручивается в объектив прицела. При установке
пользуйтесь инструкцией к насадке. В связи с возможным смещением точки
прицеливания, после установки насадки обязательно следует произвести
пристрелку прицела.
PHANTOM Night vision riflescope 2-11
12-21
22-31
32-41
42-51
52-61
Viseur de noctovision PHANTOM
Nachtsicht-Zielfernrohr PHANTOM
Visor de visión nocturna PHANTOM
Cannocchiale per visione notturna PHANTOM
PHANTOM
В комплект поставки прицела Phantom входит выносной ПДУ (пульт
дистанционного управления). На пульте находятся три кнопки:
- кнопка “ON” – включение/выключение прицела (фиксируется при
нажатии);
- кнопка “IR” - включение/выключение ИК-осветителя (работает при
удержании);
- кнопка “Быстрый старт” – моментальное (кратковременное) включение
прицела и ИК-осветителя (работает при ее удержании). Если кнопку
отпустить, прибор выключается, ИК-осветитель и прицельная метка гаснут.
Лазерный инфракрасный фонарь Pulsar L-808S (#79072).
Внешний вид прицела (трещины, глубокие вмятины и следы коррозии
не допускаются).
Правильность и надежность крепления прицела на оружии (люфты
категорически не допускаются).
Состояние линз объектива, окуляра и ИК-подсветки (трещины,
жировые пятна, грязь, капли воды и другие налеты не допускаются).
Состояние элементов питания и электрических контактов батарейного
отсека (батарейка не должна быть разряжена; следы электролита,
солей и окисления не допускаются).
Надежность срабатывания переключателя режимов работы (3),
регулятора яркости прицельной метки (4), кнопок выбора метки (5) и
мгновенного включения (11).
Плавность хода ручки фокусировки объектива (6), кольца окуляра (7) и
бленды ИК- осветителя (8).
При техническом осмотре, рекомендуемом перед каждым выездом на
охоту, обязательно проверьте:
PACKAGE CONTENTS
2
Assembled riflescope
Carrying case
Remote control
User manual
Warranty card
Ширина или высота объекта (в метрах) x 1000
Ширина или высота объекта (в милах)
или
Ширина или высота объекта (в сантиметрах) x 10
Ширина или высота объекта (в милах)
Дистанция
(в метрах)
=
Дистанция
(в метрах)
=
или
Ширина или высота объекта (в ярдах) x 1000
Ширина или высота объекта (в милах)
Пример:
40 см x 10 400
2 мила 2
Дистанция
(в ярдах)
=
200 метров==
При расчете следует учитывать,
что цена одного щелчка прицела
составляет:
Для модели Phantom 3x50:
0,527 MOA(угл. минут);
0,5519”/100 ярдов;
1,533см/100м
Для модели Phantom 4x60:
0,4235 MOA;
0,4435”/100 ярдов;
1,232см/100м
1 мил = 10 см. на 100 м. или 1 м на 1000 м; 1 мил = 3,6 дюйма на
100 ярдах или 36 дюймов на 1000 ярдах
1 миллирадиан (1 мил) = 1 тысячная дистанции = 3,4377 MOA
Дополнительную информацию по использованию метки Mil-Dot
(таблицы пересчета, калькулятор) можно найти по следующим
ссылкам:
http://www.ada.ru/guns/ballistic/MilDot/MilDot_calculator.htm
http://www.ada.ru/guns/ballistic/MilDot/ranging_table.htm
59
SPECIFICATIONS
For improvement purposes, design of this product is subject to change.
The riflescopes use these or similar electronic-optical intensifiers.
Max. detection range of an object measuring 1.7x0.5 m in natural night conditions
(0.05 lux, quarter moon).
We recommend using Alkaline batteries as they have a longer life.
**
*
MIL-DOTMODEL#
76057T 76058T 76067 76068T
76157T 76158T 76167 76168T
Magnification, x
Objective lens, mm
Image intensifier tube,
generation
Image intensifier tube, type
Resolution, lines/mm, min.
Eye relief distance, mm
Field of view, deg/m
Maximum detection
range, m/yd**
Diopter setting, D
Close-up range, m
Battery type, voltage
Battery life with continuous use
with IR off, hr (AA*** / CR123А)
Battery life with continuous use
with IR on, hr (AA*** / CR123А)
Degree of protection,
IP code (IEC 60529)
Operating temperature range
Dimensions, mm / inch:
Length
Width
Height
Weight without the mount, kg / oz
Compatibility with NV 1.7x
Lens Converter
3
50 mm, F / 1.63
2+
DEP ХХ1441*
45
53
13/23
600/656
±2.5
5
15/24
5/8
IPX6
257/10.1
95/3.7
103/4
1.0/35.2
Yes
4
60 mm, F / 1.68
2+
DEP ХХ1441*
45
53
11/19
700/765
±2.5
8
15/24
5/8
IPX6
288/11.3
95/3.7
103/4
1.0/35.2
No
MODEL#
3
50 mm, F / 1.63
2+
EPM221G-00-11А*
45
50
11/20
600/656
±3.5
5
1.5V (1xAA) or 3V (1xCR123A)
15/24
5/8
IPX6
-30 °С to +40 °С/-22 °F to +104 °F
278/11
95/3.7
103/4
1.0/35.2
Yes
4
60 mm, F / 1.68
2+
45
50
9/15.7
700/765
±3.5
8
15/24
5/8
IPX6
320/12.5
95/3.7
103/4
1.0/35.2
No
Operational characteristics
Optical characteristics
***
Five (three - if EMP221Gtube is employed) readilyavailableconfigurationsof
illuminated red-on-green reticles that are able to be switched at a moment's
notice
Functionswith one AA(1.5V)or CR123А (3V) battery
Accurateinternalfrontlens focusadjustment
Lightweight and highly durable; manufacturing employs carbon plastic and
othermoderntechnologies
High magnification,3x or 4x
Closeobservationalrangeof 5 meters
IPX6 ratingagainstwaterintrusion
Shockproofwith the use of heavyrecoilammunition
(.375H&H, .416 Rigby, .50 cal.), up to 6000 joules
Vertical positioning of the battery ensures an uninterrupted power supply
when firing
The imageintensifiertube is protectedagainstexcessivelightexposure
Incrementalreticlebrightnessadjustment
The reticlewill blink as a warning15-30 minutesbefore the device shuts down
automaticallyas a low batteryindicator
Stabilized power supply for optimal consumption, ensuring no shift of the
aimingpointundera continuouspowerdraw or drop in temperature
Faststart-up
Ergonomicdesign;the adjustmentcontrolsare locatedon top
Precisioninternalwindage/elevationadjustmentMOAper click
Built-inhigh-powerPULSEhazardfree IR illuminator
with beam focus
Remotecontrol
with secureattachment
Additionalweaver
MIL-STD-1913rail for
accessories
Flip-upobjectivelens
cover
Stylishcarryingcase
FEATURES
Установите оружие с прицелом на прицельном станке.
Убедитесь в отсутствии в поле зрения прицела ярких источников света.
Установите мишень на пристреливаемую дальность, например, 100 м.
Освещенность в районе мишени при пристрелке должна быть не более
1 люкса.
Снимите крышку объектива, сдвинув ее на корпус объектива (2).
Включите прицел, установив переключатель (3) в положение ON.
Наведите оружие на центр мишени по механическому прицелу.
Настройте прицел согласно рекомендации раздела "Использование
прицела".
Вращая ручку кольца фокусировки объектива (6), добейтесь четкого
видения изображения мишени.
Установите оптимальную яркость прицельной метки регулятором (4).
Если центр мишени не совпадает с прицельной точкой (центр
перекрестия красной прицельной метки), то, предварительно отвернув
колпачки на дисках выверки (13), вращением дисков R и UP добейтесь
совмещения центра мишени с центром перекрестия прицельной метки.
Произведите 3-4 контрольных выстрела, тщательно и однообразно
прицеливаясь в точку прицеливания.
Определите кучность стрельбы и положение средней точки попадания
(СТП). При отклонении СТП в какую-либо сторону более чем на
допустимую величину, вращением диска выверки (по вертикали UP, по
горизонту - R), добейтесь совмещения СТП с прицельной точкой. При
этом надо иметь в виду, что один щелчок при повороте диска
соответствует смещению метки на 16,5/13,5 мм (Phantom 3x50/4x60) на
расстоянии 100 м.
Проверьте правильность выверки повторной стрельбой.
Прицел пристрелян на выбранную дистанцию.
Пристрелку прицела рекомендуется производить при температуре,
близкой к температуре эксплуатации прицела в следующем порядке:
The PHANTOM is a complex electro-optical device designed using innovative
technology.
We strongly recommend reading and following all the instructions carefully before
turningontheriflescope.
Not following the instructions and guidelines outlined in this instruction manual can
causedamagetothedevice,as wellas voidinganyapplicablewarranty.
!
MIL-DOT
В Вашем прицеле Phantom установлена прицельная сетка Mil-Dot, которая
позволяет определить расстояние до объекта, если известны его размеры.
Использование метки Mil-Dot:
Наблюдая через окуляр прицела, оцените размер объекта, по которому
Вы будете определять дистанцию. Для этого совместите один край
овальной точки метки Mil-Dot с нижним, верхним либо боковым краем
цели таким образом, чтобы цель располагалась вдоль либо поперек
перекрестия.
Измерьте объект в милах с помощью сетки Mil-Dot: посчитайте, сколько
овальных точек помещается от одного края цели до другого.
Определив количество милов, вычислите дистанцию до объекта по
формуле:
58 3
GUIDELINES FOR OPERATION
The PHANTOM has been designed for extensive usage. To ensure longevity and
performance, it is necessary to adhere to the following:
Under illuminated conditions measuring more than 1 lux (deep dusk), do not
power on the riflescope with the objective lens cap open and do not point the
product towards a direct light source! Daylight, vehicle headlights, flame, sun
or similar light sources can irreversibly decrease its performance.
Some examples of common illuminated conditions:
Conditions
No moon, cloud cover
Starry sky, no moon, clear
Quarter moon, clear
Full moon, clear
Deep dusk
Dusk
Cloudy weather
Natural illumination in the field, lux
-4
10 (0.0001)
-3
10 (0.001)
0,05
0,380.4
1.0
10
500
OPERATING INSTRUCTIONS
The PHANTOM night vision riflescope is intended for observation and hunting at
dusk or during nighttime hours. When operated in conditions without artificial
sources of light, it is a passive device. However, in environments of absolute
darkness the built-in IR illuminator provides viewing ability. The PHANTOM is a very
capable night vision device, and equally serves the amateur or professional for:
Night observation and hunting
Patrolling and safeguarding
Search and rescue
4 57
4 3 8
13 6
CI
T
L
E
E
R
3
4 5
1
12
11
12
1
13 14 7
9 10
2
Отвинтите против часовой стрелки крышку батарейного отсека (1).
Вставьте батарею типа АА (1,5 В) или типа CR123А (3 В) таким образом,
чтобы (+) и (-) соответствовали маркировке на корпусе. Завинтите крышку (1).
Установите батарею в соответствии с указаниями раздела "Установка
батареи".
Войдите в темную зону.
Снимите крышку объектива, сдвинув ее на корпус объектива (2).
Включите прибор, повернув рукоятку (3) в положение "ON" - начнет
светиться зеленый экран ЭОП.
Вы также можете проверить прицел и в освещенной зоне. Этот режим
работы предусмотрен исключительно для проверки работоспособности
прибора; крышка (2) должна быть плотно надета на объектив.
Для регулировки яркости красной прицельной метки поворачивайте
ручку (4).
Для выбора одной из пяти (трех - для ЭОП ЭПМ221Г) конфигураций
красной прицельной метки нажимайте кнопку (5).
Выберите неподвижный объект наблюдения, удаленный на расстоянии
100 м.
Установите ручку фокусировки объектива (6) напротив метки "100" - об
этом будет свидетельствовать повышенное усилие ее фиксации.
Наблюдайте выбранный объект через прицел; вращайте кольцо
фокусировки окуляра (7) до получения максимального качества
изображения.
При необходимости включите ИК-осветитель (предварительно его
следует установить согласно указаниям в следующем пункте). Для этого
поверните рукоятку (3) в положение "IR".
Для установки ИК-осветителя (входит в комплект) отвинтите винт (12) и
закрутите осветитель по часовой стрелке до упора .
Поворачивайте бленду ИК-осветителя (8) до получения необходимой
фокусировки ИК светового пятна.
После данной настройки, независимо от дистанции и других условий,
вращать кольцо окуляра (7) не требуется. Настраивайте качество
изображения только вращением ручки фокусировки объектива (6) и
бленды ИК-осветителя (8).
По окончании использования выключите прицел, повернув рукоятку (3) в
положение "OFF".
Закройте крышкой (2) объектив прибора.
Вы можете установить прицел на оружие с помощью специального
кронштейна (9). После первой установки Вашего прицела на оружие,
необходимо выполнить рекомендации раздела "Пристрелка прицела к
оружию".
Моментальное включение прицела может выполняться с помощью
выносного пульта, подсоединенного к гнезду (10) или кнопки
моментального включения (11).
When using in bright conditions (early morning or late evening), do not leave
the device on with the objective lens cap open for more than 30 minutes.
Continuous observation of bright stationary objects can cause the electronic-
optical converter to fade, leading to the appearance of dark spots in the field
of vision.
Do not forget to turn off the scope after each use!
Store with the lens cap on, in the accompanying carrying case.
The scope has been reinforced with an IPX6 rating against water intrusion
and can be used in inclement weather; however, it is not intended for full
submersion.
Attempting to disassemble or repair the scope will void the warranty!
Clean the scope's optical surfaces only if necessary, and use caution. First,
remove (by blowing or carefully wiping off) any dust or sand particles. Then
proceed to clean by using a soft cotton tissue and alcohol or a cleaning
solution approved for use with multicoated lenses. Do not pour the solution
directly onto the lens!
The scope can be used in operating temperatures, ranging from -30°C to
+40°C. However, if it has been brought indoors from cold temperatures, do
not turn it on for 3 to 4 hours.
If the riflescope is unable to mount onto the rifle securely, or if there are
doubts about the mounting system, see a qualified gunsmith. Using the
weapon with a poorly mounted scope can lead to inaccurate target shooting!
To ensure reliable performance, it is recommended to carry out regular
technical inspections of the unit.
Unscrew the cap (1) of the battery compartment counter-clockwise.
Install oneAA(1.5V) or CR123А (3V) battery, so that the (+) and (-) match the
markings on the body of the unit.
Tighten the cap (1).
BATTERY INSTALLATION
Install the batteries according to the directions in the section entitled
“BATTERYINSTALLATION”.
Enter a dark environment.
Remove the objective lens cap by sliding it up on top of the objective lens (2).
Turn on the unit by turning the selector switch (3) to the “ON” position; you will
see the screen of the electronic-optical converter light up green.
The scope can also be checked in an illuminated area, but this is meant
solely for testing the device; the lens cap (2) must tightly cover the objective
lens.
To adjust the brightness of the red reticle, turn knob (4).
To select one of the five (three - if EPM66G-2 tube employed) types of red
reticles, press button (5).
Choose a removed stationary object to observe, at a distance of about
100 m.
Turn the focusing knob (6) to “100”, it will settle into a notch.
OPERATING THE PHANTOM
56 5
При использовании прицела в условиях повышенной освещенности
(раннее утреннее или позднее вечернее время), нельзя оставлять
включенный прицел с открытой крышкой в неподвижном состоянии
более 30 мин.
При наблюдении статических ярких объектов это может привести к
выгоранию люминофора ЭОП и появлению в поле зрения темных пятен.
Храните прицел с надетой на объектив светозащитной крышкой и в
чехле.
Не забудьте выключить прибор после использования!
Прицел имеет повышенную степень защиты от попадания влаги IPX6 и
может эксплуатироваться при атмосферных осадках любой
интенсивности. Прицел не предназначен для погружения в воду.
Ремонтировать и разбирать гарантийный прицел запрещается!
Наружную чистку оптических деталей производите очень аккуратно и
только в случае явной необходимости. Вначале осторожно удалите
(смахните или сдуйте) с оптической поверхности пыль и песок, после
осуществляйте чистку. Пользуйтесь чистой хлопчатобумажной
салфеткой (ватой и деревянной палочкой), специальными средствами
для линз с многослойными покрытиями или спиртом. Не лейте жидкость
прямо на линзу!
Прицел может эксплуатироваться в широком диапазоне температур - от
минус 30 °С до плюс 40 °С. Однако, если прицел внесен с холода в теплое
помещение, изображение может быть несколько мутным в связи с
образованием конденсата.
Если Вам не удалось легко и надежно (без люфта, строго вдоль линии
ствола) установить прицел на ружье или у Вас имеются сомнения в
правильности крепежа - обязательно обратитесь в специализированную
оружейную мастерскую. Стрельба с неправильно установленным
прицелом снижает точность попадания в цель!
Для обеспечения безотказности работы, предупреждения и устранения
причин, вызывающих преждевременный износ или выход из строя узлов
и деталей, необходимо своевременно проводить технический осмотр и
обслуживание прицела.
Observe the object through the scope and turn the diopter focus knob (7) until
the image appears crisp.
If necessary, turn on the IR illuminator by turning the selector switch (3) to
“IR” position. To mount the IR Illuminator, unscrew and remove the plug (12)
and screw the IR clockwise.
Turn the knob of the IR illuminator (8) until you get a focused IR spot.
After making these adjustments, no further tuning of the diopter is required,
regardless of distance or other factors; perfect the image quality using only
the knob for the objective lens (6) and that for the IR illuminator (8).
When finished, turn off the riflescope by turning the selector switch (3) to the
“OFF” position and replace the objective lens cap (2).
It is possible to mount the scope onto the firearm using a special bracket (9);
after the initial mounting is performed, it is important to follow further
mounting instructions in the section entitled “SIGHTING IN THE
PHANTOM”.
The riflescope can be turned on instantaneously with either the remote
control housed in its bracket (10) or by button (11).
SIGHTING IN THE PHANTOM
Mount the rifle with the scope installed on a bench rest.
Make sure that no sources of light are visible through the scope's field of vision.
Set a target at a distance of about 100m; the light levels around the target should
not exceed 1 lux.
Remove the objective lens cap (2), by sliding it up on top of the objective lens.
Turn on the scope by turning the selector switch (3) to the “ON” position.
Aim the firearm at the target using the mechanical sight.
Adjust the scope according to the steps in the section entitled “OPERATING
THE PHANTOM”.
Turn the objective lens focusing knob (6) until you get a crisp image of the target.
Set the desired reticle brightness level by turning knob (4).
If the center of the reticle crosshairs and the target center do not line up, remove
the covers protecting the windage / elevation adjustment knobs.
Using live ammunition, take 3 or 4 control shots, continually aiming at the same
hit point on the target (you may also use a laser bore sighter and align the laser
point to the center of the cross hairs).
Examine the target and determine if the aiming point coincides with point of
impact, if you determine it's necessary to make corrections, you will need to
adjust your aiming point. To move it downwards and to the left, turn the knob (13)
counterclockwise, in the directions Down and Left respectively, the aiming poin
moves upwards and to the right; keep in mind that one click of the knob
corresponds to a 16.5/13.5 mm (Phantom 3x50/4x60) shift of the hit point at a
distance of 100m.
Check the accuracy of your adjustments by firing another 3 or 4 control shots.
The scope should now be zeroed-in for the specified distance.
Sighting in of the scope should be done at operating temperatures, by following
the order of these steps:
6 55
54
Прицел ночного видения Phantom является сложным электронно-оптическим
изделием cприменением передовыхтехнологий.
Мы настоятельно рекомендуем Вам внимательно изучить инструкцию
прежде, чемвключитьприцел.
Несоблюдение рекомендаций и указаний, изложенных в инструкции по
использованию, может стать причиной быстрого или даже мгновенного
выхода прибора из строя, с одновременной утратой права на гарантийный
ремонт!
!
Прицел ночного видения "Phantom" предназначен для наблюдения и
ведения прицельной стрельбы в сумеречное и ночное время. Это
пассивный прибор, в реальных условиях применения уверенно
работающий без искусственных источников света. Однако, в условиях
полной темноты (отсутствие света звезд и луны), возможность применения
встроенной ИК-подсветки не исключается. Ваш прицел "Phantom" -
универсальный прибор ночного видения, идеально подходит для
различных сфер профессионального и любительского применения,
включая:
Ночное наблюдение и ночную охоту
Охрану и безопасность
Поисково-спасательные работы
Прицел ночного видения "Phantom" предназначен для длительного
использования. Для обеспечения долговечности и полной
работоспособности прибора необходимо придерживаться следующих
рекомендаций:
Не включайте прицел с открытой крышкой объектива при освещенности
более 1 люкс (глубокие сумерки), не направляйте на яркие источники
света! Дневной свет, автомобильная фара, солнце или такой источник
света, как сварка или горящий костер, может значительно снизить
эффективность работы прицела и его ресурс.
Некоторые примеры типовых освещенностей, люкс
условия
луны нет, облачно
звездное небо, луны нет, ясно
1/4 луны, ясно
полная луна, ясно
глубокие сумерки
сумерки
пасмурный день
естественная освещенность
на местности, люкс
-4
10 (0,0001)
-3
10 (0,001)
0,05
0,380,4
1,0
10
500
7
4 3 8
13 6
CI
T
L
E
E
R
3
4 5
1
12
11
12
1
13 14 7
9 10
2
"PHANTOM"
Класс герметичности IPX6 (водонепроницаемый); оптический тракт -
газонаполненный
Допускается применение особо мощных патронов, с дульной
энергией до 6000 Дж. (.375 H&H,.416 Rigby,.416 Rem. Magnum)
Максимальная дистанция обнаружения до 700 м
ЭОП поколения (2+) - прибор эффективен практически в любых
условиях естественной ночной освещенности, в том числе и при ее
-4
крайне низких уровнях (10 лк - ночное небо в облаках)
Высокое разрешение и качество изображения по всему полю экрана
ЭОП
Защита ЭОП от превышения общего уровня освещенности
Высококачественная светосильная оптика с оптимальным 3х и 4х
увеличением
Минимальная дистанция наблюдения 5м
Пять конфигураций красной прицельной метки (для прицелов с ЭОП
типа ЭПМ221Г - три конфигурации): возможность выбора и
моментального переключения
Плавная регулировка яркости метки
Выбор креплений, позволяющих установить прицел практически на
любой тип охотничьего оружия
Стабилизированный блок питания: оптимизированное энергопотреб-
ление, отсутствие смещения точки прицеливания при постепенном
разряде батареи (и при понижении температуры воздуха)
Автономная работа прибора на одной батарее типа AA (1,5 В) или типа
СR123А (3 B) (Допускается применение аккумуляторной батареи 1,2В,
эквивалентной батарее типа АА)
Вертикальное расположение батареи - надежность энергоснабжения
при стрельбе
Индикация разряда батареи: предупредительное мигание прицельной
метки за 15 - 30 мин. до автоматического выключения прибора
Эргономичный дизайн - управление прицелом
расположено сверху
Фокусируемая легкосъемная ИК-подсветка
Дистанционный пульт управления с разъемом повышенной надежности
Дополнительная боковая планка Weaver
Нетеряющаяся крышка объектива
Кнопка моментального
включения
Малый вес
и высокая
прочность -
в конструкции
широко применен
углепластик и другие
типы современных
пластмасс
Your night vision riflescope Phantom has a Mil-Dot reticle installed which helps
you determine distance to the target if you know its actual size.
MIL-DOT RETICLE
= Range in Yards
= Range in Meters
= Range in Meters
== 532 Yards
The Measured object's width or height in Yards x 1000
Object's Width or Height in Mils
or
The Measured object's width or height in Meters x 1000
Object's Width or Height in Mils
or
The Measured object's width or height in cm x 10
Object's Width or Height in Mils
Example:
1.33 yards x 1000 1330
2.5 mils 2.5
Viewing the target through the riflescope place the edge of one post against
one edge (top, bottom, or either side) of the target so that the crosshair
extends along either its width or height.
Using the dots, measure along the crosshair to the opposite edge of the
target.
Once the measurement of the target has been estimated in mils, use the
following formula to determine the range:
The Use of a Mil-Dot reticle:
When making windage/elevation
adjustments please note that
one click of the riflescope's
adjustment equals to:
For the model Phantom 3x50:
0.527 MOA(minute of angle);
0.5519”/100yds;
1.533cm/100m
For the model Phantom 4x60:
0.4235 MOA;
0.4435”/100 yds;
1.232cm/100m
1 mil (millirad) equals 3.6 inches at 100 yards or 36 inches at 1,000 yards,
or 10 centimeters at 100 meters or 1 meter at 1,000 meters.
1 millirad (1 mil) = 0.001 of the distance = 3.4377 MOA
8 53
Прибор в сборе
Чехол
Пульт дистанционного управления
Инструкция по эксплуатации
Гарантийный талон
It is recommended to inspect the riflescope before every use. Make sure to check
for the following:
TECHNICAL INSPECTION
Visually inspect the unit is free from any physical damage; cracks, dents or
signs of corrosion disqualify it from proper use.
Check the sturdiness and proper fit of the mounting system.
Ensure the condition of the objective lens, eyepiece and the IR illuminator are
free of cracks, grease spots, dirt, water stains and other residue before use.
Visually inspect the condition of the battery and the battery compartment; the
battery should be free of electrolyte and oxidation residue, especially where the
battery makes contact with metal.
Verify the proper function of the following; selector switch (3), reticle brightness
knob (4), reticle selector button and the instant power-on button (11).
Verify the smoothness of the objective lens focusing mechanism (6), diopter
focusing knob (7) and the IR illuminator knob (8).
USING THE NV 1.7x LENS CONVERTER
The NV 1.7x Lens Converter (#79091) increases the magnification power of the
50mm PHANTOM 1.7 times.
The lens converter screws into the internal groove of the riflescope's objective
lens; refer to the instruction manual for the Lens Converter when installing. A
possible shift of the aiming point may occur and, in that case, it is important to
sight in the scope as previously described.
Clean the outside metallic and plastic surfaces from dust, dirt and moisture;
wipe the scope with a soft cotton tissue, lightly coating it with gun oil or
petroleum jelly.
Clean the battery compartment's electric contact points using an oil-free
solvent.
Inspect the eyepiece lens, the objective lens and the IR illuminator and gently
blow off any dust and sand, and clean using lens cleaner and a soft cloth; see
section entitled “GUIDELINES FOR OPERATION”.
TECHNICAL MAINTENANCE
Technical maintenance should be done no less than twice a year, and is
comprised in the following steps:
Further information on the use of the Mil-Dot reticle (reference
charts, calculators etc.) you can find at the following links:
http://www.mildot.com
http://www.mil-dot.com/Mil_Dot_User_Guide.htm
http://www.shooterready.com/mildot.swf
52 9
Для улучшения потребительских свойств изделия в его конструкцию могут вноситься
усовершенствования.
MIL-DOT#
# 76057T 76058T 76067 76068T
76157T 76158T 76167 76168T
3
50 мм, F / 1.63
2+
ЭПМ221Г-00-11А*
45
50
11/20
600
±3,5
5
1,5V (1xAA) или 3V (1xCR123A)
15/24
5/8
IPX6
от -30 °С до +40 °С
278
95
103
1,0
да
3
50 мм, F / 1.63
2+
DEP ХХ1441*
45
53
13/23
600
±2,5
5
15/24
5/8
IPX6
257
95
103
1,0
да
4
60 мм F / 1.68
2+
45
50
9/15,7
700
±3,5
8
15/24
5/8
IPX6
320
95
103
1,0
нет
4
60 мм F / 1.68
2+
DEP ХХ1441*
45
53
11/19
700
±2,5
8
15/24
5/8
IPX6
288
95
103
1,0
нет
Визуальное увеличение, х
Объектив
Поколение ЭОП
Тип ЭОП
Разрешение, линий/мм, минимум
Удаление выходного зрачка, мм
Угол поля зрения, угл. град.
Максимальная дистанция
обнаружения, м**
Предел перефокусировки
окуляра, дптр
Минимальная дистанция
наблюдения, м
Тип элементов питания/ Рабочее
напряжение, В
Время непрерывной работы на
одной батарее, час (ИК-подсветка
выключена) AA***/ CR123А
Время непрерывной работы на
одной батарее, час (ИК-подсветка
включена) AA***/ CR123А
Класс защиты, код IP (IEC 60529)
Рабочая температура
Габаритные размеры, мм:
длина
ширина
высота
Масса без крепления, кг
Возможность установки
телескопич. насадки NV 1,7x
Вместо данных ЭОПов могут использоваться аналогичные.
Рекомендуется применять батареи типа АА "Alkaline", т.к. они характеризуются наибольшей
продолжительностью работы.
**
*
Оптические характеристики
Эксплуатационные характеристики
Максимальная дистанция обнаружения объекта размером 1,7x0,5 м при естественной ночной
освещенности 0,05 лк (четверть луны).
**
*
STORAGE
Always store the unit in its carrying case in a dry, well-ventilated space. For
prolonged storage, remove the battery.
TROUBLESHOOTING
Listed below are some potential problems that may occur when using the
PHANTOM. Carry out the recommended checks and troubleshooting steps in
the order listed. Please note that the table does not list all of the possible
problems. If the problem experienced with the scope is not listed, or if the
suggested action meant to correct it does not resolve the problem, please
contact the manufacturer.
Possible cause(s) Corrective action
The battery has been
installed incorrectly.
The total battery charge
is less than 2.0V.
Oxidized contact points in the
battery compartment due to
“leaky” batteries or contact points
becoming exposed to a
chemically-reactive solution.
The diopter cannot be adjusted
to your vision.
Reinstall the battery with the
correct polarity orientation.
Install fresh battery.
Clean the battery compartment,
focusing on the contact points.
If you wear prescription glasses
with a range of +/- 5, keep glasses
on when looking through the
eyepiece.
USING THE ADDITIONAL WEAVER RAIL
USE OF THE REMOTE-CONTROL CONSOLE
IR Flashlight Pulsar-805 (#79071)/Pulsar-X850 (#79074);
The scope has a built-in additional Weaver rail mount (14) housed on the left
portion of the body.This will allow the mount of additional devices, such as:
The Phantom is supplied with a remote-control console. The console has three
buttons:
- “ON” button turns on/off the riflescope (fixed when pressed).
- “IR” button turns on/off the built-in IR Illuminator (works when the button is kept
pressed).
- “Quick start” button - quick start-up of the riflescope and IR illuminator (the
device works only when the button is kept pressed). After this button is released,
the riflescope turns off, IR Illuminator and reticle go out.
10 51
Problem
The riflescope
does not turn on.
The red reticle is blurred
and cannot be focused
with the diopter knob.
Сannocchiale non si
accende.
Сannocchiale non si
accende.
Immagine del segno
rosso non chiara non
si riesce a centrare
l'oculare.
Immagine del segno
rosso chiara, l'immagine
dell'oggetto alla distanza
di meno 30 m
non e' chiara.
Singoli piccoli punti scuri
nel campo di vista,
l'immagine dell'oggetto
e' chiara.
Сannocchiale o l'illumina-
tore IR non si spenge con
la maniglia del selettore
di mirino.
Allo sparo il segno
si sposta.
Сannocchiale non si
centra.
Batteria d'alimentazione non
inserita correttamente.
Tensione totale sulle batterie
meno 2,0V.
Contatti sede batterie sono acidi
batterie “scorrono” oppure il
liquido reattivo sui contatti.
Per correggere la vista manca
diottria d'oculare.
Polvere e/o umidita' sulle superfici
esterne dell'obiettivo e dell'oculare.
Umidita' sulle superfici interne
dell'obiettivo/dell'oculare/di CIE
probabilmente causata dal
trasferimento dello strumento
dal freddo al caldo.
Tensione totale sulle batterie
meno 2,0V.
Punti sullo schermo CIE sono
causati dalla technologia adatta
e non provocano dei problemi di
funzionamento ne' sicurezza.
Dimensioni dei punti sono previste
sulle specifiche tecniche di CIE
e dello strumento.
Сannocchiale e' attivato dal
telecomando.
Fissaggio del mirino sull'arma
non e' solido.
Regolazione non é corretta.
Veda la marcatura per inserire
correttamente.
Cambiare batterie.
Pulire sede batterie e contatti.
Se si usa gli occhiali con lenti piu'
di +/- 5, si segue il mirino tramite
l'oculare con gli occhiali.
Pulire superfici esterne con la
stoffa di cotone.
Asciugare il mirino per 4 ore
nell'ambiente caldo.
Cambiare batterie.
Non e' il caso di ritornare lo
strumento al costruttore.
Spegnere lo strumento
e l'illuminatore IR pressando
il bottone telecomando.
Controllare il fissaggio del
сannocchiale. Verificare il titolo di
cartuccia, se precisamente quello
usato nelle prove del сannocchiale.
Se la cartuccia era usata per le
prove d'esate ed adesso e' l'inverno
(o all'contrario), l'eventuale
spostamento del punto zero non
e' escluso.
Per la regolazione dello strumento
veda sezione Uso Mirino.
Controllare superfici esterne di lenti
d'obiettivo e d'oculare, pulire se il
caso, rimuovere polvere,
condensato, brina ecc.
Alle temperature basse si puo'
ricorrere al rivestimento
anti appannato come per esempio
per gli occhiali correttivi.
Guasto Causa eventuale Eliminazione
Laser IR Flashlight Pulsar L-808S (#79072).
USO DEL CONTROLLO REMOTO
Il cannocchiale per visione notturna Phantom è dotato di un controllo remoto, che
ha tre pulsanti:
- Pulsante “ON” - accende/spegne il cannocchiale (in modo fisso quando
premuto).
- Pulsante “IR” - accende/spegne l'illuminatore IR incorporato (funzione solo
tenendo premuto il pulsante).
- Pulsante “Avvio rapido” - accensione rapida del cannocchiale e
dell'illuminatore IR (l'apparecchio funzione solo tenendo premuto il pulsante).
Dopo che il pulsante “Avvio rapido” viene rilasciato, il cannocchiale,
l'illuminatore ed il reticolo si spengono.
Possible cause(s) Corrective actionProblem
USO DELL'ASSICELLA AUXILIARIA WEAVER
Il mirino integra l'assicella auxiliaria Weaver (14), montata sul copro, parte
sinistra. Serve per attaccare i seguenti attrezzi:
Illuminatore IR Pulsar-805 (#79071)/Pulsar-X850 (#79074);
CONSERVAZIONE
Si conserva lo strumento nell'astuccio; l'ambiente e' secco, ben ventilato. Alla
conservazione lunga si toglie la batteria d'alimentazione.
GUASTI EVENTUALI E MODO DI ELIMINARLI
La tabella sotto si elenca eventuali guasti durante l'uso del visore. Si
raccomanda di seguire esattamente la procedura di controllo e di eliminazine
come per tabella indicata. Non tutti i guasti che potrebbero accadere sono
evidenziati sulla tabella. Le verifiche indicate nella tabella sono obbligatorie ai fini
di rivelare le cause dei guasti durante l'uso dello strumento; le azioni per
coreggerli sono indicati ai fini di eliminarli. Se il problema continua ad esistere, si
raccommanda di rivolgerlo al costruttore.
CONVERTITORE DI LENTE NV 1,7x
Il convertitore NV1,7x (#79091) consente a magnificare 1,7 volte il cannocchiale
Phantom col diametro d'obiettivo 50 mm.
Si avvita Il convertitore nell'obiettivo del visore. Ricordare di leggere il Manuale
fornito con Il convertitore.Attenzione: il segno del mirno si puo' spostare. Per tale
ragione e' considerato opportuno d'eseguire le prove di sparo.
50 11
With a crisp image
of the reticle, the image
of the observed target
that is at least 30 m
away is blurred.
Distinct black dots
or specs on the screen.
The scope or the
IR illuminator do not turn
off via the selector switch
on the scope.
The aiming point shifts
after firing rounds.
The riflescope does
not focus.
Dust and moisture are covering
the outside optical surfaces.
Moisture is on the inside of the
objective and the eyepiece lenses,
or is on the optical surfaces of the
electronic-optical intensifier and
may be caused by the unit
fogging up due to a rapid change
in temperature; when the device
is brought in from the cold into a
warm environment, for example.
The total battery charge is less
than 2.0V.
The dots on the screen are
cosmetic blemishes in the
intensifier tube and are a
by-product of the manufacturing
process; they do not in any way
affect the life or performance
of the unit, and if there is dust
on the lens, please clean
according to the instructions.
The scope is turned on via
the remote control.
The riflescope is not mounted
securely.
Wrong settings.
Clean the lens surfaces with a soft
cotton tissue or cloth.
Let the riflescope dry by leaving
it in a warm environment
for 4 hours.
Install fresh battery.
No need to take corrective action
or return the device.
Turn off the scope and the
IR illuminator using the
remote control.
Check how securely the riflescope
has been mounted and make
sure that the same type and caliber
bullets are being used as when
the scope was initially sighted in; if
your scope was sighted in during
the summer, and is now being used
in the winter (or the other way
around), a small displacement of
the aiming point is possible.
Adjust the riflescope according to
the instructions given in the section,
entitled “OPERATING THE
PHANTOM” and check the
surfaces of the eyepiece and
objective lenses and clean them if
necessary from dust, condensation,
frost, etc; to prevent fogging in cold
weather, apply a special anti-fog
solution.
Illuminatore IR laser Pulsar L-808S (#79072).
Le parte esterni (fissure, ammaccature profonde, traccia di corrosione non
sono accettabile).
Le correttefissureall'arma(gioconon accettabileassolutamente).
Le lenti d'obiettvo, d'oculare e d'illuminatore IR (fissure, machie di grasso,
goccied'acquaed altretraccienon accettabile).
Alimentatori e contatti elettrici della camera batterie (la batteria deve essere
caricata,eletrolita,sale,acidonon accettabili).
Il corretto funzionamento del selettore modi (3), regolatore d'intensita' del
segno(4), bottonedellaselezionedel segno(5) e abilitazioneimmediata(11).
Il funzionamento della maniglia d'obiettivo (6), anello d'oculare (7) e blenda
d'illuminatoreIR (8).
ISPEZIONE TECNICA
Si raccommanda procedere col manutenzione ogni volta di andare a caccia.
Controlli obligatori:
Pulire superifici di metallo esterne e di plastico, rimuovere la polvere, lo
sporco, l'acqua/umidita', pulire con la stoffa di cottone impregnata un po'
coll'olio adatto all'arma o vaselina.
Pulire i contatti elettrici della camera batterie, usare i solventi organici non
grassi.
Controllare visualmente lenti d'oculare, d'obiettivo e d'illuminatore IR,
rimuovere la sabbia, polvere e se necessario, pulire le superfici esterne.
MANUTENZIONE
La manutenzione ordinaria si esercita al minimo due volte all'anno e si procede
come segue:
1 mil equivale a 3,6" a 100 iarde, ovvero 36" a 1 000 oppure 10 cm a 100 m,
ovvero ad 1 m a 1 000 metri.
1 millirad (1 mil) = 0,001 della distanza = 3,4377 MOA
Ulteriori informazioni riguardo l'uso del reticolo Mil-Dot (tabelle di
riferimento, calcolatori ecc.) posso essere reperite ai seguenti indirizzi
internet (in lingua inglese):
http://www.mildot.com
http://www.mil-dot.com/Mil_Dot_User_Guide.htm
http://www.shooterready.com/mildot.swf
12 49
DONNÉES TECHNIQUES
L'appareil assemblé
L'étui
Le pupitre de commande à distance
Une carte de garantie
Guide d'emploi
MODÈLE MIL-DOT#
76057T 76058T 76067 76068T
76157T 76158T 76167 76168T
MODÈLE#
**
Le design de ce produit pourrait-être amené à changer, afin d'améliorer son utilisation.
DÉBALLAGE DE L'APPAREIL
Distance de la detection max. du object avec dimensions 1,7x0,5 m à l'éclairage nocturne naturel
0,05 lux (un quart de la lune).
Il est recommandé d'utiliser les batteriesde type AA “Alkaline” puisque elles sont caractérisées par la
plus grande durée de fonctionnement.
3
50 mm, F / 1.63
2+
45
50
11/20
600
±3,5
5
Au choix: 1xAA/1,5V ou 1xCR123A/3V
15/24
5/8
IPX6
de -30 °C à +40 °C
278
95
103
1,0
Oui
3
50 mm, F / 1.63
2+
DEP ХХ1441*
45
53
13/23
600
±2,5
5
15/24
5/8
IPX6
257
95
103
1,0
Oui
4
60 mm F / 1.68
2+
45
50
9/15,7
700
±3,5
8
15/24
5/8
IPX6
320
95
103
1,0
Non
4
60 mm F / 1.68
2+
DEP ХХ1441*
45
53
11/19
700
±2,5
8
15/24
5/8
IPX6
288
95
103
1,0
Non
Grossissement visuel, x
Objectif
Génération du convertisseur
d'image électronique (CIE)
Type du CIE
Résolution, lignes/mm, min.
Dégagement oculaire, mm
Angle du champ de vision, degrés
Distance de la detection max, m**
Ajustement de l'oculaire, dioptre
Distance d'observation minimale, m
Type d'élements d'alimentation /
tension de fonctionnement, V
Durée de fonctionnement continu
avec une seule pile, h (l'eclairage
infrarouge est arreté) AA**/CR123A
Durée de fonctionnement continu
avec une seule pile, h (avec
l’eclairage infrarouge) AA**/CR123A
Classe de protection,
code IP (IEC 60529)
Températures d'utilisation
Dimensions, mm:
Longueur
Largeur
Hauteur
Poids (sans l'emballage), kg
Possibilité de montage du
onvertisseur de lentille NV 1,7x
Caractéristiques optiques:
Caractéristiques fonctionnelles:
* Au lieu de ces convertisseurs d'image électroniques on peut utiliser les analogues CIEs.
***
EPM221G-00-11А*
CARACTERISTIQUES PARTICULIERES DU VISEUR PHANTOM
Classe d'hermétisation IPX6 (étanche à l'eau); trajet optique - remplis de gaz
Admis l'utilisation des cartouches à haute puissance, avec l'énergie de
bouche jusqu'à 6000 Joules (375 H&H, 416 Rigby, 416 Rem.Magnum)
Distance de la detection jusqu'à 700 m au maximum
Convertisseur d'image électronique de la 2-ème génération (2+) - est
efficace dans n'importes quelles conditions d'éclairement nocturne naturel y
-4
compris aux niveaux extremement bas (10 lux ciel nocturne nuageux)
Une haute résolution et qualité d'image sur tout le champ de l'écran de
l'appareil
Protection de l'appareil contre le dépassement du niveau général
d'éclairement
Optique lumineuse à haute qualité avec grossissement optimal de 3-4 fois
Distance d'observation minimale - 5 m
Cinq (trois - pour le CIE du type EMP221G) configurations de la marque de
pointage rouge: possibilité de choixet commutation momentané
Réglage continu de luminosité de la marque
Choix de fixations, permettant de monter le viseur pratiquement sur tout type
de fusil de chasse
Bloc d'alimentation stabilisé: consommation d'énergie optimisée, absence
d'écart du point de mire à la décharge progressif des piles (et à la baisse de
température de l'air)
Fonctionnement autonome avec une seule pile de typeAA(1,5 V)
ou de type CR123А (3 V). (Il est admis d'utiliser une batterie
d'accumulateurs de 1,2 V équivalente à une batterie de typeAA)
Position verticale d'une batterie est une sureté d'alimentation
au moment du tir
Indication du décharge de la batterie: signal clignotant
de la maque de pointage avertit de l'arret automatique
de l'appareil avant de 15-30 minutes
Design ergonomique la commande de l'apparetil
est située en haut
Eclairage infrarouge focalisé facilement démontable
Pupitre de commande à distance avec raccord de haute sureté
Planche supplémentaire latérale Weaver
Couvercle de l'obectif non détachable
Bouton de mise en marche instante
Petite masse et
haute solidité -
on utilise dans la
construction de
l'appareil un
carboplastique et
d'autres types de
matières plastique
avancées
Quando si effettua la regolazione
dell'alzo o della deriva, fare
attenzione che un click della
torretta equivale a:
Per il modello Phantom 3x50:
0,527 MOA;
0,5519”/100yds;
1,533cm/100m
Per il modello Phantom 4x60:
0,4235 MOA;
0,4435”/100 yds;
1,232cm/100m
== 532 iarde
Esempio:
1.33 iarde x 1000 1330
2,5 mils 2,5
Il cannocchiale notturno Phantom è dotato di un reticolo Mil-Dot che aiuta a
determinare la distanza del bersaglio, conoscendone le dimensioni.
RETICOLO MIL-DOT
Utilizzo del reticolo Mil-Dot:
Per utilizzare il reticolo Mil-Dot occorre conoscere le dimensioni effettive del
bersaglio.
Guardare il bersaglio con il cannocchiale da puntamento.
Posizionare il bordo di un'astina contro il bordo (superiore, inferiore, o
laterale) del bersaglio in modo che il crocicchio si trovi lungo la sua larghezza
o altezza.
Servendosi dei dot, effettuare la misurazione lungo il crocicchio fino al bordo
opposto del bersaglio.
Una volta determinate le dimensioni del bersaglio in mil è possibile
determinarne la distanza.
Questa può essere calcolata applicando la seguente formula:
=
=
Altezza o larghezza del bersaglio in iarde x 1000
Altezza o larghezza del bersaglio in mil
oppure
Altezza o larghezza del bersaglio in metri x 1000
Altezza o larghezza del bersaglio in mil
Distanza del
bersaglio in iarde
Distanza del
bersaglio in metri
=
oppure
Altezza o larghezza del bersaglio in cm x 10
Altezza o larghezza del bersaglio in mil
Distanza del
bersaglio in metri
48 13
PARTICULARITES D'EMPLOI
Le viseur de noctovision “Phantom” est destiné pour l'utilisation prolongée. Pour
assurer la longevité et un bon fonctionnement de l'appareil il faut suivre les
recommandations suivantes.
Ne mettez pas en marche le viseur avec le couvercle ouvert de l'objectif à
l'éclairage dépassant 1 lux. (crepuscule profond), ne le pointez pas sur de
fortes sources de lumière! La lumière de jour, de phare automobile, de soleil
et une telle source de lumiére comme soudure ou feu de bois peuvent
diminuer irréparablement l'efficacité de son fonctionnement et la resource.
Certains exemples des types de lumière, lux
Le viseur de noctovision Phantom est un appareil électronique optique complexe
construitsur labasedestechnologiesavancées.
Il est réclamé d'étudier attentivement le Guide d'emploi du viseur avant que vous
lemettiezenservice.
La non-observation des recommandations et des indications figurées dans le Guide
d'emploi peut causer la mise hors service, prématurée ou meme en un instant du
viseuravecl'annulationsimultanéedesgarantiesduproducteur.
Le viseur de noctovision “Phantom” est déstiné à l'observation et au tir ajusté
dans les crepuscule et temps de nuit. C'est un appareil passif, dans des
conditions réelles d'utilisation fonctionne sans sources de lumière artificiels.
Néanmoins, dans l'obscurité complète (absence de clair des étoiles et de la lune)
la possibilité d'utiliser l'éclairage infrarouge incorporé n'est pas exclue. Votre
viseur “Phantom” est un appareil universel de noctovision et parfait pour les
différents domaines d'application professionnelle et d'amateur, y compris:
Observation nocturne et la chasse à la nuit
Protection et sécurité
Recherche et sauvetage
14
!
GUIDE D'EMPLOI
47
4 3 8
13 6
CI
T
L
E
E
R
3
4 5
1
12
11
12
1
13 14 7
9 10
2
Conditions
La lune est absente,
le ciel est nuageux
Le ciel avec étoiles,
absence de lune, le temps est clair
¼ de la lune, le temps est clair
La lune est pleine, le temps est clair
Le crépuscule profond
Le crépuscule
Le temps est couvert
Eclairage naturel, lux
-4
10 (0,0001)
-3
10 (0,001)
0,05
0,380,4
1,0
10
500
A l'utilisation du viseur dans des conditions d'eclairage élevé (le petit matin
ou le soir tard) il est défendu de laisser l'appareil mis en marche avec le
couvercle ouvert dans l'état immobile dépassant 30 minutes.
A l'observation des objets de vive lumière statiques cela peut causer la
brulure de lumenophore et l'apparition des taches noires dans le champ.
N'oubliez pas d'arreter le viseur après l'exploitation!
Conservez le viseur avec le couvercle de protection à lumière mis sur
l'objectif et dans son étui.
Le viseur a un haut niveau de protection contre la pénétration d'humidité
IPX6 et peut etre exploité dans les conditions de précipitations
atmosphériques abondantes d'une importe quelle intensité.
Le viseur ne doit etre plongé dans l'eau. Il est défendu de réparer et
démonter le viseur sous garantie.
Le nettoyage extérieur des pièces optiques est effectué soigneusement et
en cas d'une vraie nécessité. D'abor enlevez avec precaution (souffler ou
secouer) la poussière et la boue de la surface optique puis faites le
nettoyage. Utilisez pour cela une serviette à coton (ouate ou un petit baton de
bois), des moyens speciaux destinés aux lentilles avec le revetement
multicouches. Ne versez pas de l'eau tout droit sur la lentille!
Le viseur peut etre exploité dans une large étendue de températures de
-30°C à +40°C.
Néanmois si l'appareil est apporté du froid dans un local chaud ne le mettez
pas en marche depuis 3-4 minutes.
Si vous ne pouvez pas monter facilement et surement le viseur sur le fusil
(sans le jeu, tout droit le long du canon) ou si vous mettez en doute la dureté
de fixation adressez-vous obligatoirement à un atelier spécialisé de
réparation des armes. Le tir avec le viseur monté irrégulièrement sur le fusil
peut causer la déterioration de la marque de pointage ou l'impossibilité du
réglage de tir.
Afin d'assurer le fonctionnement sans défaillance ainsi que la constatation
opportune et la réparation des défauts causant l'usure prématurée et mise
hors marche des unités et des pièces il faut effectuer à temps la visite et
l'entretien techniques du viseur.
Trovare un oggetto d'osservazione immobile alla distanza di 100 m.
Premere il bottone di concentrazione (6) contro il segno 100, si applica la
forza se la posizione scelta e' corretta.
Seguire l'obietto scelto con il visore, girare la ghiera (7) per raggiungere
l'ottima immagine possibile.
Abilitare l'illuminazione IR se opportuno. Per tale scopo girare la maniglia (3)
alla posizione IR.
Girare la blenda dell’illuminatore IR (8) fino a raggiungere la concentrazione
del punto luminoso.
Dopo regolazione non girare la ghiera dell'oculare (7). L'immagine si
aggiusta con la maniglia (6) e blenda dell’illuminatore IR (8).
Dopo l'uso spegnere lo strumento con la maniglia (3) girandola su OFF.
Chiudere il coperchio (2) dell'obiettivo dello strumento.
Si puo' sistemare il mirino sull'arma mediante la mensola (9) adatta. Dopo la
prima messa seguire le indicazioni Tiro Prove del Cannocchiale.
Si accende il mirino immediatament col telecomando collegato alla sede (10)
oppure col bottone (11).
Svitare la vite (12) per smontare l’illuminatore IR.
TIRO PROVE DEL CANNOCCHIALE
Collocare l'arma a cannocchiale su tiro tavola.
Assicurarsi di non rivelare i sorgenti della luce luminosa nel campo visione.
Centrare il bersaglio alla distanza di 100 m, l'illuminazione non supera 1 lux.
Togliere il coperchio d'obiettivo spostandolo sul corpo (2) d'obiettivo.
Attivare il cannocchiale con selettore (3) in posizione ON.
Centrare l'arma sul centro di bersaglio mediante il cannocchiale meccanico.
Regolare il cannocchiale, veda Funzionamento di cannocchiale.
Ottenere l'immagine chiara con la maniglia d'obiettivo (6).
Girando la ghiera dell'obiettivo ottenere l'intensita' di bersaglio ottima col
regolatore (4).
Se il centro del bersaglio ed il punto di mira non coincidono (croce rossa),
aprire le cappe dei dischi, girare R e UP per far cadere il centro del bersaglio
sul centro del segno.
Sparare 3-4 volte per far verifiche repetitvamente sempre allo stesso punto.
Determinare il ragruppamentî di spari e la posizione del punto medio colpito
(PMC); se qualsiasi spostamento del PMC supera il limite accettabile,
regolando il disco campione (UP-verticale; R-oizzontale) far coincidere il
PMC ed il bersaglio. Attenzione: uno clic del disco significa lo spostamento
del segno a 16,5/13,5 mm (Phantom 3x50/4x60) alla distanza di 100 m.
Controllare la corretezza del secondo tiro.
Aquesto punto il cannocchiale e' considerato di aver superato le prove.
Si raccomanda di fare tiro prove alla temperature di esercizio secondo la
procedura sottoindicata:
46 15
Dévissez au sens contraire le couvercle du compartiment de batteries (1).
Inserez la batterie de type AA (1,5 V) ou de type CR123A (3 V) de façon que
les (+) et (-) concident au marquage sur le corps.
Vissez le couvercle (1).
INSTALLATION DE LA BATTERIE
Inserez la batterie en conformité avec les indications du chapitre “Installation
de la batterie”.
Entrez dans la zone obscure.
Enlevez le couvercle en le déposant sur le corps de l'objectif (2).
Mettez l'appareil en marche, en tournant le régulateur (3) en position “ON”
l'écran vert de l'appareil commence à éclairer.
Vous pouvez controler le fonctionnement du viseur dans la zone éclairée. Ce
régime de fonctionnement est prévue exclusivement pour controler le
fonctionnement de l'appareil; le couvercle de l'objectif (2) doit etre mis
étroitement sur l'objectif.
Pour régler la luminosité de la marque de pointage rouge tournez le
régulateur (4).
Pour le choix d'une de cinq (trois - pour le CIE du type EMP221G)
configurations de la marque de pointage rouge appuyez le bouton (5).
Choisissez l'objet d'observation immobile éloigné à la distance de 100 m.
Installez le régulateur de focalisation de l'objectif (6) en face de la marque
“100” l'effort élevé de sa fixation en signifie.
Observez l'objet choisi par le viseur; tournez l'anneau de focalisation de
l'oculaire (7) en trouvant la meilleure qualité de l'image.
En cas nécessaire mettez en marche l'éclairage infrarouge (pour monter
l'éclairage infrarouge dévissez le vis (12)). Pour cela tournez le régulateur (3)
en position “IR”. Tournez la blende de l'éclairage infrarouge (8) jusqu'à la
focalisation nécessaire de la tache infrarouge lumineuse.
Ce reglage fait, indépendamment de la distance et des autres conditions, il
ne faut pas tourner l'anneau de l'oculaire (7). Reglez la qualité de l'image
seulement en tournant le régulateur de focalisation de l'objectif (6) et de la
blende de l'éclairage infrarouge (8).
A la fin d'utilisation arretez le viseur en tournant le régulateur (3) en position
“OFF”. Fermez l'objectif de l'appareil par le couvercle (2).
Vous pouvez monter le viseur sur l'arme avec le support spécial (9). Après le
premier montage du viseur sur l'arme il est nécessaire accomplir les
recommandations du chapitre “Réglage par tir du viseur”.
La mise en marche instantanée du viseur peut etre effectuée avec le pupitre
transportable branché dans la douille (10) ou par le bouton de mise en
marche instantanée (11).
UTILISATION DU VISEUR
Con l'illuminazione superiore (mattinato, sera tarda) non lasciare il
сannocchiale acceso con l'astuccio aperto piu' di 30 minuti.
Osservando gli obbietti luminosi, luminoforo CIE si scolore percio' nel campo
visione si apparono macchie scure.
Non scordare di spegnere il сannocchiale dopo l'uso.
Conservare l'obiettivo nell'astuccio coperto.
Grado impermeabilita' IPX6, si funziona in qualsiasi condizione
meteorologica. Non immergere nell'acqua.
La garanzia si perde se lo strumento viene riparato oppure smontato.
Pulizia dei parti ottici esterni si fa con cautela e nel caso di necessita'
evidenziale. Si rimuove (togliere oppure soffiare via) la sabbia e la polvere. Si
usa la stoffa di cotone o bastoncino di legno nonche' soluzioni o alcohol
adatto alle pulizie di lenti. Non porre liquido su lente.
Il сannocchiale funziona nell'ampia scala di temperatura - 30°C piu' +40°C.
Se pero' il сannocchiale si e' esposto al freddo, non accenderlo entro 3 o 4
ore.
Se non si riesce a fissare facilmente il сannocchiale (senza gioco, lungo la
canna) sulla fucile o nel caso dei dubbi sul fissaggio, si consigla di contattare
l'officina d'armaiolo specializzata.
Sparare col сannocchiale non correttamente posizionato causa la
spostazione di taratura che rende il tiro impossibile.
Per assicurare il funzionamento corretto e per eliminare i guasti che
provocano l'usura anticipata o la rottura, e' obbligatoria la manutenzione
ordinaria.
Svitare nel senso contro orario il coperchio della camera batterie (1).
Inserire batteria di tipo AA (1,5V) o CR123А (3V) facendo nota di marcatura
(+) è (-) sul corpo.
Serrare il coperchio (1).
INSTALLAZIONE DI BATTERIA
Sistemare le batterie come indicato sopra Installazione di batteria.
Entrare nella zona buia.
Remuovere il coperchio d'obiettivo spostandolo sul corpo (2).
Accendere lo strumento mettendo la panopola su ON; si illumina lo schermo
verde di CIE.
Si puo' verificare il funzionamento del mirino anche alla luce. In questo modo
e' previsto solo far verifiche del funzionamento dello strumento; il coperchio
(2) e' sull'obiettivo.
Per aggiustare l'intensita' del controssegno rosso si gira la maniglia (4).
Premere il bottone (5) per far scelta della configurazione.
FUNZIONAMENTO DI CANNOCCHIALE
16 45
MANUALE D'USO
Il cannocchiale per visione notturna Phantom e' uno strumento ottico elettronico
costruitosullabasedelletecnologieavanzate.
Siraccomanda:leggereManuale d'Uso primad'accendereilcannocchiale.
Non osservazione di tali consiglii nonche' delle indicazioni sulla Manuale d'Uso
puo' causare un guasto anche immeddiato e come le conseguenze, si perde la
garanzia.
!
Il сannochiale per visione notturna PHANTOM si intende ad osservare e sparare
a mira all'imbruire e di notte. Codesto e' uno strumento passivo che funziona
senza l'illuminazione artificiale. Tuttavia, al buio assoluto (senza stelle ne' luna)
s'implica l'illuminazione IR integrata. La Vostra scelta PHANTOM multiplico di
visione nottruna si applica perfettamente in vari campi professionisti ed amatori
quali sono:
Osservazione e caccia notturna
Salvaguardia e securiti
Lavoro di soccorso
USO PARTICOLARE
Il сannocchiale per visione notturna PHANTOM s'intende ad uso prolungato. La
vita e l'efficacia dello strumento dipende dall'osservazione d'indicazioni:
Non accendere il сannochiale con l'astuccio (coperchio) d'obiettivo aperto
alla luce piu' di 1 lux (al crepuscolo profondo). Non orientare alla luce viva.
Luce diurnal, faro di autoveicolo, di saldatura o di falo' pussono rudurre
l'efficacia di stesso.
Esempio d'illuminazione, lux
Condizioni
Senza la Luna, nuvoloso
Senza la Luna,
cielo stellato, chiaro
1/4 della Luna, chiaro
Luna piena, chiaro
Crepuscolo profondo
Crepuscolo
Nuvoloso
Luce naturale, lux
-4
10 (0,0001)
-3
10 (0,001)
0,05
0,380,4
1,0
10
500
44 17
4 3 8
13 6
CI
T
L
E
E
R
3
4 5
1
12
11
12
1
13 14 7
9 10
2
RÉGLAGE PAR LE TIR
Monter l'arme avec le viseur sur le dispositif de pointage.
S'assurer de l'absence dans le champ de vision du viseur de fortes sources de
lumière.
Installer la cible à la distance de réglage, par exemple, à 100 m. L'éclairage
dans la zone de la cible ne doit pas dépasser 1 lux.
Enlever le couvercle de l'objectif, le déposant sur le corps de l'objectif (2).
Mettre en marche le viseur, tout en mettant le commutateur (3) en position ON.
Pointer l'arme sur le centre de la cible selon le viseur mécanique.
Régler le viseur conformément à la recommandation du chapitre “Utilisation
du viseur”.
En tournat la bague de focalisation de l'objectif (6) trouvez l'image fine de la
cible.
Régler la luminosité optimale de la marque de pointage par le régulateur (4).
Si le centre de la cible ne coïncide pas avec le point de mire (le centre du
réticule de la marque rouge de pointage), alors préalablement dévissant les
coiffes des disques d'ajustage (13), tout en tournant les disques R et UPfaites
coïncider le centre de la cible avec le centre du réticule de la marque de
pointage.
Faites par tir 3-4 coups de controle, en essuyant de faire soigneusement et
uniformement le pointage dans le point de mire.
Déterminez la précision du tir et la position du point moyen d'impact (PMI); en
cas de l'écart du PMI dépassant la valeur admissible, en tournant le disque
d'ajustage (réglage vertical UP, réglage horizontal R) faites coïncider le PMI
avec le point de mire. En le faisant il faut prendre en considération qu'un
chiquenaude correspond au déplacement de la marque de 16,5/13,5 mm
(Phantom 3x50/4x60) à la distance de 100 m.
Vérifiez l'ajustage par la répétition du tir.
Il est recommandé d'effectuer le réglage par le tir à la température d'exploitation
du viseur dans l'ordre suivant:
SPECIFICHE
Grado d'impermeabilita' IPX6 (impermeabilità all'acqua); tratto ottico
riempito di gas
Si accetta l'uso di cartuccia extra potente, capacita' della canna fino a
6000 J(.375 H&H, .416 Rigby, 416 Rem. Magnum)
Distanza massima di fino a 700 mlocalizzazione
Seria convertitore di immagine elettronica (CIE) (2+) il dispositivo e' efficace
praticamente in tutte le condizioni d'illuminazione notturna nonche' a quella
-4
dei livelli inferiori (10 lux il cielo nuvoloso notturno)
Alto contrasto e qualita' d'immagine su tutto lo schermo CIE
Protezione CIE di livello superiore
Ottica di alta efficienza, magnificazione 3x/4x ottima
Minima distanza d'osservazione 5 m
Cinque (tré - per CIE di titolo EPM221G) configurazioni di visore: la scelta ed
accenzione immeddiata
Regolazione d'intensita' calibro continua
Selezione d'attacco che consente a sistemare il cannocchiale ad ogni
modello di fucile da caccia
Alimentatore stabilizzato, consumo energia ottimizzato, senza spostamento
del segno alla batteria scaricata gradualmente (nonche' alla temperatura
d'aria in discesa)
Auto gestione della batteria singola del titolo AA (1,5V) oppure CR123А (3V)
(permessa batteria di accumulatori 1,2V, uguale al titoloAA)
Posizione verticale della batteria assicura l'alimentazione per sparare
Identificazione dello scarico di batteria: flash preventivo del segno 30 minuti
prima di auto interruzione
Design ergonomico: posizione di comando mirino superiore
Illuminazione a fuoco IR staccabile
Telecomando a contatto extra efficace
Piastrina laterale auxiliaria
Astuccio d'obiettivo da non perdere
Bottone d'accensione immediata
Peso inferiore, costruzione dai materiali solidi: carbone/plastico ed altri
materiali plastici di tecnologie avanzate
Votre viseur de noctovision Phantom comporte un réticule Mil-Dot installé, qui
vous permettra de déterminer la distance de votre cible, si vous connaissez sa
taille exacte.
RETICULE MIL-DOT
Utilisation d'un reticule Mil-Dot
Pour utiliser le réticule Mil-Dot, vous devez connaître la taille réelle de la cible.
En regardant la cible à travers le viseur, placez la cible au centre du réticule, à
égale distance des quatre extrémités du réticule.
En utilisant les points lumineux, mesurez la taille de votre cible.
Une fois que la mesure de la cible a été estimée en mils, utilisez la formule
suivante pour déterminer le champs de vision:
18 43
= Portée en yards
Hauteur ou largeur de la cible en yards x 1000
Hauteur ou largeur de la cible en Mils
=
ou
Hauteur ou largeur de la cible en mètres x 1000
Hauteur ou largeur de la cible en Mils
Portée en mètres
Controle extérieur de l'appareil (les fissures, enfoncements profonds, traces de
rouille ne sont pas admissibles).
Controle de la régularité et de la sureté de fixation du viseur sur l'arme (le jeu
dans la fixation est inadmissible).
Controle de l'état des lentilles de l'objectif, de l'oculaire et de l'éclairage
infrarouge (les fissures, taches grasses, saleté, gouttes d'eau et d'autres dépots
sont inadmissibles).
Controle de l'état des piles d'alimentation et des contacts électriques du
compartiment de batteries (la batterie ne doit pas déchargée: les traces
d'électrolyte, de sels et d'oxydation sont inadmissibles).
Controle de la sureté du fonctionnement du commutateur des regimes de travail
(3), du régulateur de luminosité de la marque de mire (4); des boutons de
sélection des marques de mire (5); et de la mise en fonctionnement rapide (11).
Controle du douceur de fonctionnement du régulateur de focalisation de
l'objectif (6), de la bague d'oculaire (7) et de la blende d'éclairage infrarouge (8).
VISITE TECHNIQUE
Lors de la visite technique, recommandée chaque fois avant d'aller à la chasse, il
faut faire obligatoirement ce qui suit:
Strumento assemblato
Astuccio
Telecomando
Manuale d'Uso
Garanzia
ONTENUTO DELLA CONFEZIONE
Lorsque vous réalisez des
ajustements d'élévation, veuillez
noter qu'un click d'ajustement
du viseur, équivaut à:
Pour le modèle Phantom 3x50:
0,527 MOA;
0,5519”/100yds;
1,533cm/100m
Pour le modèle Phantom 4x60:
0,4235 MOA;
0,4435”/100 yds;
1,232cm/100m
1 mil (millirad) équivaut à : 3.6 pouces à 100 yards ou 36 pouces à 1,000 yards,
ou 10 cm à 100m, ou 1m à 1,000m. 1 millirad (1 mil) = 0,001 d'une distance =
3,4377 MOA
Pour davantage d'information sur l'utilisation du réticule Mil-Dot
(tableau de references, calculs, etc…) peuvent être trouvés sur les
liens suivants:
http://www.mildot.com
http://www.mil-dot.com/Mil_Dot_User_Guide.htm
http://www.shooterready.com/mildot.swf
Caratteristiche e specifiche sono soggette a migliorie e cambiamenti.
42 19
Portée en mètres=
==
ou
Hauteur ou largeur de la cible en cm x 10
Hauteur ou largeur de la cible en Mils
Exemple:
1,33 yards x 1000 1330
2,5 mils 2,5
532 yards
MODELLOMIL-DOT#
MODELLO# 76057T 76058T 76067 76068T
76157T 76158T 76167 76168T
CARATTERISTICHE TECNICHE
Il cannocchiale utilizza questi convertitori di immagine elettronica o CIE analoghi.
Si consiglia l'uso della batteria AA "Alkaline" per il periodo di funzionamento prolungato.**
*
3
50 mm, F / 1.63
2+
45
50
11/20
600
±3,5
5
1,5V (1xAA) o 3V (1xCR123A)
15/24
5/8
IPX6
-30 °С ... +40 °С
278
95
103
1,0
Si
3
50 mm, F / 1.63
2+
DEP ХХ1441*
45
53
13/23
600
±2,5
5
15/24
5/8
IPX6
257
95
103
1,0
Si
4
60 mm F / 1.68
2+
45
50
9/15,7
700
±3,5
8
15/24
5/8
IPX6
320
95
103
1,0
No
4
60 mm F / 1.68
2+
DEP ХХ1441*
45
53
11/19
700
±2,5
8
15/24
5/8
IPX6
288
95
103
1,0
No
Magnificazione visuale, x
Obiettivo
Generazione di convertitore di
immagine elettronica (CIE)
Titolo di CIE
Risoluzione lineare, linea/mm, min
Allontananza pupilla d'uscita, mm
Angolo visuale dell'obiettivo, grado
Distanza massima di
localizzazione, m**
Limite fuocolare, diottria
Distanza minima d'osservazione, m
Cellula alimentazione/tensione
nominale, V
Tempo di funzionamento
continuo a batteria singola, ore
(IR illuminazione disabilitata)
AA**/ CR123А
Tempo di funzionamento continuo
a batteria singola, ore
(IR illuminazione abilitata)
AA**/ CR123А
Grado di protezione,
codice IP (IEC 60529)
Scala di tempertura
Dimensioni, mm:
Lunghezza
Larghezza
Altezza
Peso senza attacco, kg
Possibilita' di montaggio
convertitore de lente NV 1,7x
Caratteriche della parte ottica
Caratteristiche operative
** Distanza massima di localizzazione di un oggetto di 1,7x0,5 m, all'illuminazione notturna
0,05 lux (luna quarto).
*
EPM221G-00-11А*
UTILISATION DE LA TELECOMMANDE
Le viseur Phantom vision nocturne est livrée avec une télécommande. La
console dispose de trois boutons:
- bouton «ON» allume et éteint le viseur (mise en fonction en appuyant).
- bouton «IR / torche infrarouge» allume et éteint la torche infrarouge intégrée
(en fonction lorsque le bouton est maintenu appuyé).
- bouton «Quick start / démarrage rapide» - pour démarrer rapidement le
viseur et la torche IR (l'appareil est en fonction uniquement lorsque le bouton est
maintenu appuyé). Après que le bouton «Quick start / démarrage rapide» soit
relâché, le viseur s'éteint, la torche IR et le réticule disparaissent.
Nettoyer les surfaces extérieures des pièces métalliques et plastiques de la
poussière, des boues et de l'humidité; les essuyer avec une serviette à
conton, légèrement imbibé d'huile d'arme ou de vaseline.
Nettoyer les contacts électriques du compartiment de batteries, en utilisant
n'importe quel dissolvant organique non-gras.
Examiner les lentilles d'oculaire, de l'objectif et de l'éclairage infrarouge;
enlever soigneusement la poussière et le sable; en cas nécessaire nettoyer
leurs surfaces extérieures.
ENTRETIEN TECHNIQUE
L'entretien technique se fait au moins deux fois par an et consiste en ce qui suit:
EMPLOI DU CONVERTISSEUR DE LENTILLE NV 1,7x
L'emploi du convertisseur de lentille NV 1,7x (#79091) permet d'agrandir le
groissisement du viseur “Phantom” avec le diamètre de l'objectif de 50 mm à 1,7
fois. L’convertisseur est vissé dans l'objectif du viseur. Au cours du montage
utilisez le guide d'emploi du convertisseur. A cause du déplacement possible du
point de mire, après le montage du convertisseur, il est necessaire d'effectuer le
réglage du tir du viseur.
EMPLOI DE LA PLANCHE WEAVER SUPPLEMENTAIRE
Le viseur a une planche Weaver (14) supplementaire montée sur son corps à
coté gauche. Avec cette planche vous pouvez monter en supplément les
appareil suivants:
Torche infrarouge Pulsar-805 (#79071)/Pulsar-X850 (#79074);
Conservez toujours l'appareil dans son étui, dans un endroit sec et bien aéré. Pour
la conservation de l'appareil d'une longue période la pile devra être retirée.
Le tableau présente la liste des dérangements eventuels pouvant apparaitre au
cours de l'utilisation du viseur.
20 41
CONSERVATION
DÉPANNAGE
Problema Causa posible Reparación
El visor no se enciende.
Hay una imagen imprecisa
de la marca roja - no
resulta enfocar el ocular.
Cuando hay una imagen
precisa de la marca roja,
se tiene una imagen
imprecisa del objetivo
que se encuentra a una
distancia de no menos
de 30 m.
Hay diferentes pequeños
puntos negros precisos en
el campo visual con una
imagen precisa del objeto.
El visor o la iluminación
infrarroja no se apagan
con la manilla del
interruptor que hay en
el visor.
Se desvía la marca
durante el tiro.
El visor no se enfoca.
Están oxidados los contactos en
el contenedor de las baterías - "se
derramaron" las pilas o a los
contactos cayó un líquido
quimicamente activo.
Para la corrección de su vista
hace falta un gasto de dioptrías
del ocular.
Hay polvo y humedad
en las superficies ópticas externas
del objetivo y del ocular.
Hay humedad en las superficies
ópticas internas del objetivo y del
ocular, en las superficies ópticas
del COE - que ha sido posible
durante el traslado del visor desde
el frío a un local cálido.
La tensión total de la baterías es
menor que 2,0 V.
Los puntos en la pantalla del COE
están condicionados por la
tecnología de su fabricación, no
influyen en su capacidad de
funcionamiento y en su seguridad.
Los tamaños de los puntos están
determinados en las condiciones
técnicas del COE y del instrumento.
El visor está conectado desde el
mando de control remoto (MCR).
No hay rigidez en la colocación del
visor sobre el arma.
Está incorrectamente ajustado.
Limpie el contenedor de las
baterías, limpie los contactos.
Si Ud. utiliza lentes con una fuerza
de los lentes de más de +/-5,
entonces Ud. debe mirar en el ocular
del visor a través de los lentes.
Frote las superficies ópticas con
una servilleta suave de algodón.
Seque el visor - déjelo estar
4 horas en un local cálido.
Reemplace la batería.
No hay razones para la devolución.
Apague el instrumento y la
iluminación infarroja, presionando
los botones del MCR.
Revise la rigidez de la colocación
del visor. Asegúrese que Ud. está
utilizando precisamente aquel tipo
de municiones con los que antes
hizo el reglaje de tiro de su arma y
del visor. Si Ud. regló el visor en
verano, y lo explota en invierno
(o al revés), entonces no se excluye
un cierto cambio del punto cero del
reglaje.
Ajuste el instrumento en conformidad
con el capítulo "Utilización del visor".
Revise las superficies externas de
los lentes del objetivo y del ocular;
en caso de necesidad límpielas del
polvo, del condensado, de la
escarcha, etc. Durante el tiempo frío
Ud. puede utilizar recubrimientos
especiales contra el empañamiento
(por ejemplo, tal como para lentes
correctivos).
Dérangements Cause Réparation
L'installation incorrecte de la
batterie.
La tension sommaire de la batterie
est moins de 2,0V.
Installer la batterie suivant
le marquage.
Remplacer la batterie.
Le viseur ne se met
en marche.
Torche infrarouge à laser Pulsar L-808S (#79072).
Dérangements Cause Réparation
Les contacts dans le container
des batteries sont oxydés les
batteries “se coulent” ou le liquide
chimiquement actif a été sur les
contacts.
Le manque du débit dioprique de
l'oculaire pour la correction de
votre vue.
La poussière et l'humidité sur les
surfaces optiques extérieures de
l'objectif et de l'oculaire.
Apparition de l'humidité sur les
surfaces intérieures de l'obectif et
de l'oculaire, sur les surfaces
optiques de l'appareil au moment
du placement du viseur du froid
au local chaud.
La tension sommaire est moins
de 2,0 V.
Les points sur l'écran de l'appareil
conditionnés par la technologie de
sa fabrication et n'influent pas à la
capacité et sureté du fonctionne-
ment. La grandeur des points est
déterminée par les conditions
techniques des convertisseurs
d'image életronique et de l'appareil.
Le viseur est branché sur le pupitre
de commande à distance (PCD).
Le montage du viseur sur le fusil
n'est pas rigide.
Réglage incorrecte.
Nettoyer le container des batteries,
dénuder les contacts.
Si vous portez les lunettes à
puissance dépassant ±5,
observez par l'oculaire du viseur
avec vos lunettes.
Nettoyer avec une serviette molle
à conton les surfaces
optiques extérieures.
Secher le viseur et le laisser dans
le local chaud depuis 4 heures.
Remplacer la batterie.
Pas de causes de retour.
Arreter l'appareil et l'éclairage
infrarouge en appuyant les
boutons du PCD.
Vérifier la rigidité du motage du
viseur. Assurez-vous que vous
utilisez un tel type de cartouches
que vous avez utilisé auparavant
au réglage par tir de vos fusil et
viseur. Si vous avez réglé le viseur
en été mais l'utilisez en hiver (ou
au contraire) alors il n'est pas exclu
un certain changement du point
zéro de mire.
Regler l'appareil suivant le chapitre
“Guide d'emploi du viseur”.
Vérifier les surfaces extérieures
des lentilles de l'objectif et de
l'oculaire; en cas necessaire les
nettoyer de la pouissière, du
condensat, du givre etc. Au temps
froid utiliser les moyens de protection
spéciaux (par exemple, les lunettes
de correction).
UTILIZACIÓN DEL CONVERTIDOR DE LENTE NV 1,7x
La utilización del convertidor de lente NV1,7x (#79091) permite aumentar la
ampliación del visor "Phantom" con el diámetro del objetivo 50 mm en 1,7 veces.
El convertidor se atornilla en el objetivo del visor. Durante la instalación utilice la
instrucción para el convertidor. A causa del posible desplazamiento del punto
del reglaje, después de colocar el convertidor, obligatoriamente hay que llevar a
cabo el tiro de ajuste del visor.
UTILIZACIÓN DEL CARRIL ADICIONAL WEAVER
El visor posee un carril adicional Weaver (14), que está colocado en su caja a la
izquierda. Con ayuda del carril, Ud. puede colocar adicionalmente accesorios
como:
ALMACENAMIENTO
Siempre hay que conservar el visor solamente en el estuche, en un local seco,
con ventilación. Durante un almacenamiento prolongado, extraiga la batería de
alimentación.
El Iluminador IR Pulsar-805 (#79071)/Pulsar-X850 (#79074);
LOCALIZACIÓN DE PROBLEMAS
En la tabla se exponen los posibles problemas que pueden surgir durante la
explotación del visor. Lleve a cabo la comprobación y la corrección
recomendadas de acuerdo al procedimiento indicado en la tabla. Si en la lista
indicada no estuviera expuesto un problema o la acción indicada para la
eliminación del desperfecto no da resultado, comuniquelo al fabricante.
40 21
Problema Causa posible Reparación
El visor no se enciende. La batería está colocada incorrecta-
mente.
La tensión total de la batería
es menor que 2,0 V.
Coloque la batería de acuerdo
con la marcación.
Reemplace la batería.
Le viseur ne se met
en marche.
L'image de la marque
rouge n'est pas nette -
on n'arrive pas de viser
l'oculaire.
A une bonne image
de la marque rouge
une mauvaise image
de l'objet éloigné pas
moins de 30 m.
De petits points noires
nets au champ de vision
à l'image nette
de l'objectif.
Le viseur ou l'éclairage
infrarouge ne sont pas
coupés avec le régulateur
d'arret sur le viseur.
La marque de pointage
s'écarte au moment du tir.
Le viseur ne focalise pas.
PANEL DE CONTROL REMOTO (a distancia)
El Phantom viene con un panel extraible del control remoto. En el panel hay tres
botones:
- Botón “ON” - conexión / desconexión del visor (fijado cuando está presionado);
- Botón “IR” - conexión / desconexión de la linterna infrarroja (funciona cuando
el botón está presionado);
- Botón “Quick start” - conexión del visor y del iluminador IR rápido (el visor
funciona solamete cuando el botón está presionado). Después de que este
botón es liberado, el visor apaga, el Iluminador de IR y el retículo se apagan,
salen.
El Iluminador IR de láser Pulsar L-808S (#79072).
El estado del instrumento por fuera (no se permiten grietas, abolladuras
profundas y huellas de corrosión).
La justeza y la confiabilidad de la fijación del visor al arma (en forma
categórica no se permiten los juegos).
El estado de las lentes del objetivo, del ocular y del foco infrarrojo (no se
permiten grietas, manchas grasosas, suciedad, gotas de agua y otros
sedimentos).
El estado de los elementos de alimentación y de los contactos eléctricos de
la sección de las baterías (la batería no debe estar descargada; no se
permiten huellas del electrólito, de sales y de oxidación).
La confiabilidad de los selectores de modos de funcionamiento (3), del
regulador del brillo de la marca de puntería (4); de los botones de elección de
la marca (5) y del encendido instantáneo (11).
La fluidez del movimiento de la manilla del enfoque del objetivo (6), del anillo
del ocular (7) y del tapa objetivo del foco infrarrojo (8).
REVISIÓN TÉCNICA
Durante la revisión técnica, que se recomienda antes de cada salida a cazar, sin
falta revise:
Limpie el polvo, la suciedad y la humedad de las superficies metálicas
externas y las piezas de plástico; frotelas con una servilleta de algodón
ligeramente empapada con aceite para armas o con vaselina.
Limpie los contactos eléctricos del compartimiento de las pilas, utilizando
cualquier disolvente orgánico no grasoso.
Revise los lentes del ocular, del objetivo y del foco infrarrojo; saque con
ciudado el polvo y la arena; si fuera necesario limpie sus superficies
externas.
MANTENIMIENTO TÉCNICO
El mantenimiento técnico se lleva a cabo no menos de dos veces al año y
consiste en la realización de los puntos expuestos a continuación:
Haciendo las correcciones utilizando los mecanismos de ajuste del visor,
hay que tener en cuenta que un capirotazo corresponde a:
Para el modelo Phantom 3x50: 0,527 MOA (minuta de ángulo);
0,5519”/100yds; 1,533cm/100m
Para el modelo Phantom 4x60: 0,4235 MOA; 0,4435”/100 yds;
1,232cm/100m
La subtensión de 1 mil equivale a 3,6 pulgadas a 100 yardas o 36 pulgadas a
1,000 yardas.
En unidades metricas, la correspondencia es que 1 mil equivale a 10
centimetros a 100 metros o 1 metro a 1,000 metros. 1 Milirradian (1 mil) =
0,001 de la distancia = 3,4377 MOA.
Detalles sobre el uso de la retícula Mil-Dot (tablas de referencia,
calculadores etc.) se puede encontrar sobre las referencias (en inglés):
http://www.mildot.com
http://www.mil-dot.com/Mil_Dot_User_Guide.htm
http://www.shooterready.com/mildot.swf
22 39
TECHNISCHE DATEN
MODELLMIL-DOT#
76057T 76058T 76067 76068T
76157T 76158T 76167 76168T
MODELL#
Statt dieser EOV können auch gleichartige EOV verwendet werden.
Es ist empfehlenswert, die Batterien AA "Alkaline" zu verwenden, da sie sich durch die längste
Betriebsdauer auszeichnen.
***
Änderung des Designs zwecks höherer Gebrauchseigenschaften vorbehalten.
LIEFERUMFANG
Das Gerät komplett
Aufbewahrungstasche
Fernsteuerpult
Gebrauchsanleitung
Garantieschein
3
50 mm, F / 1.63
2+
45
50
11/20
600
±3,5
5
Auf Wahl: 1 AA / 1.5V // 1 CR 123/ 3V
15/24
5/8
IPX6
von - 30°С bis + 40°С
278
95
103
1,0
ja
3
50 mm, F / 1.63
2+
DEP ХХ1441*
45
53
13/23
600
±2,5
5
15/24
5/8
IPX6
257
95
103
1,0
ja
4
60 mm F / 1.68
2+
45
50
9/15,7
700
±3,5
8
15/24
5/8
IPX6
320
95
103
1,0
nein
4
60 mm F / 1.68
2+
DEP ХХ1441*
45
53
11/19
700
±2,5
8
15/24
5/8
IPX6
288
95
103
1,0
nein
Visuelle Vergrößerung, x
Objektiv
Generation der elektro-optischen
Verstärkerröhre (EOV)
Typ der EOV
Auflösungsvermögen,
Linien/mm, min.
Austrittspupillenabstand, mm
Sichtfeldwinkel, Winkelgrad
Max. Entdeckungsdistanz, m**
Dioptrieneinstellung, Dioptrien
Naheinstellung, m
Batterietyp/
Betriebsspannung, V
Zeit des Dauerbetriebs mit einem
Batteriesatz, Stunden (IR-Leuchte
ist ausgeschaltet) AA**/ CR123
Zeit des Dauerbetriebs mit einem
Batteriesatz, Stunden (IR-Leuchte
ist eingeschaltet) AA**/ CR123
Schutzklasse, Code IP (IEC 60529)
Betriebstemperatur
Abmessungen, mm:
Länge
Breite
Höhe
Gewicht ohne Montage, kg
Vereinbar mit dem
Linsenkonverter NV 1,7x
Optische Kenndaten:
Betriebsparameter:
Max. Entdeckungsdistanz von einem Objekt mit Abmessungen 1,7x0,5 m bei der natürlichen
Nachtsbeleuchtungsstärke 0,05 lx (1/4 Mond).
**
*
EPM221G-00-11А*
Instructions PULSAR Phantom NV Riflescope | Optics Trade

More Related Content

What's hot

Instructions PULSAR Digisight LRF Digital Riflescope | Optics Trade
Instructions PULSAR Digisight LRF Digital Riflescope | Optics TradeInstructions PULSAR Digisight LRF Digital Riflescope | Optics Trade
Instructions PULSAR Digisight LRF Digital Riflescope | Optics TradeOptics-Trade
 
Instructions YUKON Tracker NV Binoculars | Optics Trade
Instructions YUKON Tracker NV Binoculars | Optics TradeInstructions YUKON Tracker NV Binoculars | Optics Trade
Instructions YUKON Tracker NV Binoculars | Optics TradeOptics-Trade
 
Instructions YUKON Stringer Digital NV Recording Monocular | Optics Trade
Instructions YUKON Stringer Digital NV Recording Monocular | Optics TradeInstructions YUKON Stringer Digital NV Recording Monocular | Optics Trade
Instructions YUKON Stringer Digital NV Recording Monocular | Optics TradeOptics-Trade
 
Manual de Instruções do Secador De Unhas Por Uv MPE 58 da Beurer
Manual de Instruções do Secador De Unhas Por Uv MPE 58 da BeurerManual de Instruções do Secador De Unhas Por Uv MPE 58 da Beurer
Manual de Instruções do Secador De Unhas Por Uv MPE 58 da BeurerViver Qualidade
 
Instructions PULSAR Challenger NV Scope | Optics Trade
Instructions PULSAR Challenger NV Scope | Optics TradeInstructions PULSAR Challenger NV Scope | Optics Trade
Instructions PULSAR Challenger NV Scope | Optics TradeOptics-Trade
 
Instruction Manual PULSAR Sentinel G2+ 3x50 Rifle Scope | Optics Trade
Instruction Manual PULSAR Sentinel G2+ 3x50 Rifle Scope | Optics TradeInstruction Manual PULSAR Sentinel G2+ 3x50 Rifle Scope | Optics Trade
Instruction Manual PULSAR Sentinel G2+ 3x50 Rifle Scope | Optics TradeOptics-Trade
 
Quick guide | Zeiss Victory SF Binoculars | Optics Trade
Quick guide | Zeiss Victory SF Binoculars | Optics TradeQuick guide | Zeiss Victory SF Binoculars | Optics Trade
Quick guide | Zeiss Victory SF Binoculars | Optics TradeOptics-Trade
 
Instruction Manual PULSAR Challenger GS 3.5x50 Monocular | Optics Trade
Instruction Manual PULSAR Challenger GS 3.5x50 Monocular | Optics TradeInstruction Manual PULSAR Challenger GS 3.5x50 Monocular | Optics Trade
Instruction Manual PULSAR Challenger GS 3.5x50 Monocular | Optics TradeOptics-Trade
 
Instructions ZEISS Victory HT Rifle Scope | Optics Trade
Instructions ZEISS Victory HT Rifle Scope | Optics TradeInstructions ZEISS Victory HT Rifle Scope | Optics Trade
Instructions ZEISS Victory HT Rifle Scope | Optics TradeOptics-Trade
 
Instructions TASCO Red Dot | Optics Trade
Instructions TASCO Red Dot | Optics TradeInstructions TASCO Red Dot | Optics Trade
Instructions TASCO Red Dot | Optics TradeOptics-Trade
 
Instructions AIMPOINT Micro Sight | Optics Trade
Instructions AIMPOINT Micro Sight | Optics TradeInstructions AIMPOINT Micro Sight | Optics Trade
Instructions AIMPOINT Micro Sight | Optics TradeOptics-Trade
 
Instruction manual | Zeiss Victory SF | Optics Trade
Instruction manual | Zeiss Victory SF | Optics TradeInstruction manual | Zeiss Victory SF | Optics Trade
Instruction manual | Zeiss Victory SF | Optics TradeOptics-Trade
 
Instructions LEICA APO-TELEVID 65,82mm | Optics Trade
Instructions LEICA APO-TELEVID 65,82mm | Optics TradeInstructions LEICA APO-TELEVID 65,82mm | Optics Trade
Instructions LEICA APO-TELEVID 65,82mm | Optics TradeOptics-Trade
 
Instruction Manual PULSAR Sentinel GS 2.5x60 Rifle Scope | Optics Trade
Instruction Manual PULSAR Sentinel GS 2.5x60 Rifle Scope | Optics TradeInstruction Manual PULSAR Sentinel GS 2.5x60 Rifle Scope | Optics Trade
Instruction Manual PULSAR Sentinel GS 2.5x60 Rifle Scope | Optics TradeOptics-Trade
 
Quick guide | Zeiss Victory Pocket Binoculars | Optics Trade
Quick guide | Zeiss Victory Pocket Binoculars | Optics TradeQuick guide | Zeiss Victory Pocket Binoculars | Optics Trade
Quick guide | Zeiss Victory Pocket Binoculars | Optics TradeOptics-Trade
 
Instructions DOCTER®sight III | Optics Trade
Instructions DOCTER®sight III | Optics TradeInstructions DOCTER®sight III | Optics Trade
Instructions DOCTER®sight III | Optics TradeOptics-Trade
 
Instructions ZEISS Victory Compact Point | Optics Trade
Instructions ZEISS Victory Compact Point | Optics TradeInstructions ZEISS Victory Compact Point | Optics Trade
Instructions ZEISS Victory Compact Point | Optics TradeOptics-Trade
 
Quick guide | Zeiss V6 Riflescope | Optics Trade
Quick guide | Zeiss V6 Riflescope | Optics TradeQuick guide | Zeiss V6 Riflescope | Optics Trade
Quick guide | Zeiss V6 Riflescope | Optics TradeOptics-Trade
 
Instructions PULSAR Edge GS 2.7x50, 3.5x50 NV Binoculars | Optics Trade
Instructions PULSAR Edge GS 2.7x50, 3.5x50 NV Binoculars | Optics TradeInstructions PULSAR Edge GS 2.7x50, 3.5x50 NV Binoculars | Optics Trade
Instructions PULSAR Edge GS 2.7x50, 3.5x50 NV Binoculars | Optics TradeOptics-Trade
 
Instructions ZEISS Victory FL Diavari Rifle Scope | Optics Trade
Instructions ZEISS Victory FL Diavari Rifle Scope | Optics TradeInstructions ZEISS Victory FL Diavari Rifle Scope | Optics Trade
Instructions ZEISS Victory FL Diavari Rifle Scope | Optics TradeOptics-Trade
 

What's hot (20)

Instructions PULSAR Digisight LRF Digital Riflescope | Optics Trade
Instructions PULSAR Digisight LRF Digital Riflescope | Optics TradeInstructions PULSAR Digisight LRF Digital Riflescope | Optics Trade
Instructions PULSAR Digisight LRF Digital Riflescope | Optics Trade
 
Instructions YUKON Tracker NV Binoculars | Optics Trade
Instructions YUKON Tracker NV Binoculars | Optics TradeInstructions YUKON Tracker NV Binoculars | Optics Trade
Instructions YUKON Tracker NV Binoculars | Optics Trade
 
Instructions YUKON Stringer Digital NV Recording Monocular | Optics Trade
Instructions YUKON Stringer Digital NV Recording Monocular | Optics TradeInstructions YUKON Stringer Digital NV Recording Monocular | Optics Trade
Instructions YUKON Stringer Digital NV Recording Monocular | Optics Trade
 
Manual de Instruções do Secador De Unhas Por Uv MPE 58 da Beurer
Manual de Instruções do Secador De Unhas Por Uv MPE 58 da BeurerManual de Instruções do Secador De Unhas Por Uv MPE 58 da Beurer
Manual de Instruções do Secador De Unhas Por Uv MPE 58 da Beurer
 
Instructions PULSAR Challenger NV Scope | Optics Trade
Instructions PULSAR Challenger NV Scope | Optics TradeInstructions PULSAR Challenger NV Scope | Optics Trade
Instructions PULSAR Challenger NV Scope | Optics Trade
 
Instruction Manual PULSAR Sentinel G2+ 3x50 Rifle Scope | Optics Trade
Instruction Manual PULSAR Sentinel G2+ 3x50 Rifle Scope | Optics TradeInstruction Manual PULSAR Sentinel G2+ 3x50 Rifle Scope | Optics Trade
Instruction Manual PULSAR Sentinel G2+ 3x50 Rifle Scope | Optics Trade
 
Quick guide | Zeiss Victory SF Binoculars | Optics Trade
Quick guide | Zeiss Victory SF Binoculars | Optics TradeQuick guide | Zeiss Victory SF Binoculars | Optics Trade
Quick guide | Zeiss Victory SF Binoculars | Optics Trade
 
Instruction Manual PULSAR Challenger GS 3.5x50 Monocular | Optics Trade
Instruction Manual PULSAR Challenger GS 3.5x50 Monocular | Optics TradeInstruction Manual PULSAR Challenger GS 3.5x50 Monocular | Optics Trade
Instruction Manual PULSAR Challenger GS 3.5x50 Monocular | Optics Trade
 
Instructions ZEISS Victory HT Rifle Scope | Optics Trade
Instructions ZEISS Victory HT Rifle Scope | Optics TradeInstructions ZEISS Victory HT Rifle Scope | Optics Trade
Instructions ZEISS Victory HT Rifle Scope | Optics Trade
 
Instructions TASCO Red Dot | Optics Trade
Instructions TASCO Red Dot | Optics TradeInstructions TASCO Red Dot | Optics Trade
Instructions TASCO Red Dot | Optics Trade
 
Instructions AIMPOINT Micro Sight | Optics Trade
Instructions AIMPOINT Micro Sight | Optics TradeInstructions AIMPOINT Micro Sight | Optics Trade
Instructions AIMPOINT Micro Sight | Optics Trade
 
Instruction manual | Zeiss Victory SF | Optics Trade
Instruction manual | Zeiss Victory SF | Optics TradeInstruction manual | Zeiss Victory SF | Optics Trade
Instruction manual | Zeiss Victory SF | Optics Trade
 
Instructions LEICA APO-TELEVID 65,82mm | Optics Trade
Instructions LEICA APO-TELEVID 65,82mm | Optics TradeInstructions LEICA APO-TELEVID 65,82mm | Optics Trade
Instructions LEICA APO-TELEVID 65,82mm | Optics Trade
 
Instruction Manual PULSAR Sentinel GS 2.5x60 Rifle Scope | Optics Trade
Instruction Manual PULSAR Sentinel GS 2.5x60 Rifle Scope | Optics TradeInstruction Manual PULSAR Sentinel GS 2.5x60 Rifle Scope | Optics Trade
Instruction Manual PULSAR Sentinel GS 2.5x60 Rifle Scope | Optics Trade
 
Quick guide | Zeiss Victory Pocket Binoculars | Optics Trade
Quick guide | Zeiss Victory Pocket Binoculars | Optics TradeQuick guide | Zeiss Victory Pocket Binoculars | Optics Trade
Quick guide | Zeiss Victory Pocket Binoculars | Optics Trade
 
Instructions DOCTER®sight III | Optics Trade
Instructions DOCTER®sight III | Optics TradeInstructions DOCTER®sight III | Optics Trade
Instructions DOCTER®sight III | Optics Trade
 
Instructions ZEISS Victory Compact Point | Optics Trade
Instructions ZEISS Victory Compact Point | Optics TradeInstructions ZEISS Victory Compact Point | Optics Trade
Instructions ZEISS Victory Compact Point | Optics Trade
 
Quick guide | Zeiss V6 Riflescope | Optics Trade
Quick guide | Zeiss V6 Riflescope | Optics TradeQuick guide | Zeiss V6 Riflescope | Optics Trade
Quick guide | Zeiss V6 Riflescope | Optics Trade
 
Instructions PULSAR Edge GS 2.7x50, 3.5x50 NV Binoculars | Optics Trade
Instructions PULSAR Edge GS 2.7x50, 3.5x50 NV Binoculars | Optics TradeInstructions PULSAR Edge GS 2.7x50, 3.5x50 NV Binoculars | Optics Trade
Instructions PULSAR Edge GS 2.7x50, 3.5x50 NV Binoculars | Optics Trade
 
Instructions ZEISS Victory FL Diavari Rifle Scope | Optics Trade
Instructions ZEISS Victory FL Diavari Rifle Scope | Optics TradeInstructions ZEISS Victory FL Diavari Rifle Scope | Optics Trade
Instructions ZEISS Victory FL Diavari Rifle Scope | Optics Trade
 

More from Optics-Trade

Technical Data | Sig Sauer Easy6 BDX 1-6x24 | Optics Trade
Technical Data | Sig Sauer Easy6 BDX 1-6x24 | Optics TradeTechnical Data | Sig Sauer Easy6 BDX 1-6x24 | Optics Trade
Technical Data | Sig Sauer Easy6 BDX 1-6x24 | Optics TradeOptics-Trade
 
Technical Data | ThermTec Wild 650L | Optics Trade
Technical Data | ThermTec Wild 650L | Optics TradeTechnical Data | ThermTec Wild 650L | Optics Trade
Technical Data | ThermTec Wild 650L | Optics TradeOptics-Trade
 
Technical Data | ThermTec Wild 635L | Optics Trade
Technical Data | ThermTec Wild 635L | Optics TradeTechnical Data | ThermTec Wild 635L | Optics Trade
Technical Data | ThermTec Wild 635L | Optics TradeOptics-Trade
 
Technical Data | ThermTec Wild 650 | Optics Trade
Technical Data | ThermTec Wild 650 | Optics TradeTechnical Data | ThermTec Wild 650 | Optics Trade
Technical Data | ThermTec Wild 650 | Optics TradeOptics-Trade
 
Technical Data | ThermTec Wild 635 | Optics Trade
Technical Data | ThermTec Wild 635 | Optics TradeTechnical Data | ThermTec Wild 635 | Optics Trade
Technical Data | ThermTec Wild 635 | Optics TradeOptics-Trade
 
Technical Data | ThermTec Wild 335 | Optics Trade
Technical Data | ThermTec Wild 335 | Optics TradeTechnical Data | ThermTec Wild 335 | Optics Trade
Technical Data | ThermTec Wild 335 | Optics TradeOptics-Trade
 
Technical Data | ThermTec Wild 325 | Optics Trade
Technical Data | ThermTec Wild 325 | Optics TradeTechnical Data | ThermTec Wild 325 | Optics Trade
Technical Data | ThermTec Wild 325 | Optics TradeOptics-Trade
 
Instruction Manual | ThermTec Wild Thermal Monoculars | Optics Trade
Instruction Manual | ThermTec Wild Thermal Monoculars | Optics TradeInstruction Manual | ThermTec Wild Thermal Monoculars | Optics Trade
Instruction Manual | ThermTec Wild Thermal Monoculars | Optics TradeOptics-Trade
 
Technical Data | ThermTec Hunt 335 | Optics Trade
Technical Data | ThermTec Hunt 335 | Optics TradeTechnical Data | ThermTec Hunt 335 | Optics Trade
Technical Data | ThermTec Hunt 335 | Optics TradeOptics-Trade
 
Instruction Manual | ThermTec Hunt Thermal Clip-On Series | Optics Trade
Instruction Manual | ThermTec Hunt Thermal Clip-On Series | Optics TradeInstruction Manual | ThermTec Hunt Thermal Clip-On Series | Optics Trade
Instruction Manual | ThermTec Hunt Thermal Clip-On Series | Optics TradeOptics-Trade
 
Instruction Manual | Steiner eRanger LRF 10x42 | Optics Trade
Instruction Manual | Steiner eRanger LRF 10x42 | Optics TradeInstruction Manual | Steiner eRanger LRF 10x42 | Optics Trade
Instruction Manual | Steiner eRanger LRF 10x42 | Optics TradeOptics-Trade
 
Flyer | Guide DN Series Handheld Digital Binoculars | Optics Trade
Flyer | Guide DN Series Handheld Digital Binoculars | Optics TradeFlyer | Guide DN Series Handheld Digital Binoculars | Optics Trade
Flyer | Guide DN Series Handheld Digital Binoculars | Optics TradeOptics-Trade
 
Quick Start Guide | Guide TB Series | Optics Trade
Quick Start Guide | Guide TB Series | Optics TradeQuick Start Guide | Guide TB Series | Optics Trade
Quick Start Guide | Guide TB Series | Optics TradeOptics-Trade
 
Instruction Manual | Pard FD1 Digital NV Front Attachment | Optics Trade
Instruction Manual | Pard FD1 Digital NV Front Attachment | Optics TradeInstruction Manual | Pard FD1 Digital NV Front Attachment | Optics Trade
Instruction Manual | Pard FD1 Digital NV Front Attachment | Optics TradeOptics-Trade
 
Instruction Manual | EOTech Vudu X 2-12x40 | Optics Trade
Instruction Manual | EOTech Vudu X 2-12x40 | Optics TradeInstruction Manual | EOTech Vudu X 2-12x40 | Optics Trade
Instruction Manual | EOTech Vudu X 2-12x40 | Optics TradeOptics-Trade
 
Instruction Manual | EOTech Vudu X 1-6x24 | Optics Trade
Instruction Manual | EOTech Vudu X 1-6x24 | Optics TradeInstruction Manual | EOTech Vudu X 1-6x24 | Optics Trade
Instruction Manual | EOTech Vudu X 1-6x24 | Optics TradeOptics-Trade
 
Instruction Manual | Nightforce CFS 6-36x50 F1 | Optics Trade
Instruction Manual | Nightforce CFS 6-36x50 F1 | Optics TradeInstruction Manual | Nightforce CFS 6-36x50 F1 | Optics Trade
Instruction Manual | Nightforce CFS 6-36x50 F1 | Optics TradeOptics-Trade
 
Instruction Manual | Athlon Cronus Tactical G2 ED 7-42x60 | Optics Trade
Instruction Manual | Athlon Cronus Tactical G2 ED 7-42x60 | Optics TradeInstruction Manual | Athlon Cronus Tactical G2 ED 7-42x60 | Optics Trade
Instruction Manual | Athlon Cronus Tactical G2 ED 7-42x60 | Optics TradeOptics-Trade
 
Insrtuction Manual | Swarovski CL Companion Habicht | Optics Trade
Insrtuction Manual | Swarovski CL Companion Habicht | Optics TradeInsrtuction Manual | Swarovski CL Companion Habicht | Optics Trade
Insrtuction Manual | Swarovski CL Companion Habicht | Optics TradeOptics-Trade
 
Technical Data | Swarovski CL Companion Habicht | Optics Trade
Technical Data | Swarovski CL Companion Habicht | Optics TradeTechnical Data | Swarovski CL Companion Habicht | Optics Trade
Technical Data | Swarovski CL Companion Habicht | Optics TradeOptics-Trade
 

More from Optics-Trade (20)

Technical Data | Sig Sauer Easy6 BDX 1-6x24 | Optics Trade
Technical Data | Sig Sauer Easy6 BDX 1-6x24 | Optics TradeTechnical Data | Sig Sauer Easy6 BDX 1-6x24 | Optics Trade
Technical Data | Sig Sauer Easy6 BDX 1-6x24 | Optics Trade
 
Technical Data | ThermTec Wild 650L | Optics Trade
Technical Data | ThermTec Wild 650L | Optics TradeTechnical Data | ThermTec Wild 650L | Optics Trade
Technical Data | ThermTec Wild 650L | Optics Trade
 
Technical Data | ThermTec Wild 635L | Optics Trade
Technical Data | ThermTec Wild 635L | Optics TradeTechnical Data | ThermTec Wild 635L | Optics Trade
Technical Data | ThermTec Wild 635L | Optics Trade
 
Technical Data | ThermTec Wild 650 | Optics Trade
Technical Data | ThermTec Wild 650 | Optics TradeTechnical Data | ThermTec Wild 650 | Optics Trade
Technical Data | ThermTec Wild 650 | Optics Trade
 
Technical Data | ThermTec Wild 635 | Optics Trade
Technical Data | ThermTec Wild 635 | Optics TradeTechnical Data | ThermTec Wild 635 | Optics Trade
Technical Data | ThermTec Wild 635 | Optics Trade
 
Technical Data | ThermTec Wild 335 | Optics Trade
Technical Data | ThermTec Wild 335 | Optics TradeTechnical Data | ThermTec Wild 335 | Optics Trade
Technical Data | ThermTec Wild 335 | Optics Trade
 
Technical Data | ThermTec Wild 325 | Optics Trade
Technical Data | ThermTec Wild 325 | Optics TradeTechnical Data | ThermTec Wild 325 | Optics Trade
Technical Data | ThermTec Wild 325 | Optics Trade
 
Instruction Manual | ThermTec Wild Thermal Monoculars | Optics Trade
Instruction Manual | ThermTec Wild Thermal Monoculars | Optics TradeInstruction Manual | ThermTec Wild Thermal Monoculars | Optics Trade
Instruction Manual | ThermTec Wild Thermal Monoculars | Optics Trade
 
Technical Data | ThermTec Hunt 335 | Optics Trade
Technical Data | ThermTec Hunt 335 | Optics TradeTechnical Data | ThermTec Hunt 335 | Optics Trade
Technical Data | ThermTec Hunt 335 | Optics Trade
 
Instruction Manual | ThermTec Hunt Thermal Clip-On Series | Optics Trade
Instruction Manual | ThermTec Hunt Thermal Clip-On Series | Optics TradeInstruction Manual | ThermTec Hunt Thermal Clip-On Series | Optics Trade
Instruction Manual | ThermTec Hunt Thermal Clip-On Series | Optics Trade
 
Instruction Manual | Steiner eRanger LRF 10x42 | Optics Trade
Instruction Manual | Steiner eRanger LRF 10x42 | Optics TradeInstruction Manual | Steiner eRanger LRF 10x42 | Optics Trade
Instruction Manual | Steiner eRanger LRF 10x42 | Optics Trade
 
Flyer | Guide DN Series Handheld Digital Binoculars | Optics Trade
Flyer | Guide DN Series Handheld Digital Binoculars | Optics TradeFlyer | Guide DN Series Handheld Digital Binoculars | Optics Trade
Flyer | Guide DN Series Handheld Digital Binoculars | Optics Trade
 
Quick Start Guide | Guide TB Series | Optics Trade
Quick Start Guide | Guide TB Series | Optics TradeQuick Start Guide | Guide TB Series | Optics Trade
Quick Start Guide | Guide TB Series | Optics Trade
 
Instruction Manual | Pard FD1 Digital NV Front Attachment | Optics Trade
Instruction Manual | Pard FD1 Digital NV Front Attachment | Optics TradeInstruction Manual | Pard FD1 Digital NV Front Attachment | Optics Trade
Instruction Manual | Pard FD1 Digital NV Front Attachment | Optics Trade
 
Instruction Manual | EOTech Vudu X 2-12x40 | Optics Trade
Instruction Manual | EOTech Vudu X 2-12x40 | Optics TradeInstruction Manual | EOTech Vudu X 2-12x40 | Optics Trade
Instruction Manual | EOTech Vudu X 2-12x40 | Optics Trade
 
Instruction Manual | EOTech Vudu X 1-6x24 | Optics Trade
Instruction Manual | EOTech Vudu X 1-6x24 | Optics TradeInstruction Manual | EOTech Vudu X 1-6x24 | Optics Trade
Instruction Manual | EOTech Vudu X 1-6x24 | Optics Trade
 
Instruction Manual | Nightforce CFS 6-36x50 F1 | Optics Trade
Instruction Manual | Nightforce CFS 6-36x50 F1 | Optics TradeInstruction Manual | Nightforce CFS 6-36x50 F1 | Optics Trade
Instruction Manual | Nightforce CFS 6-36x50 F1 | Optics Trade
 
Instruction Manual | Athlon Cronus Tactical G2 ED 7-42x60 | Optics Trade
Instruction Manual | Athlon Cronus Tactical G2 ED 7-42x60 | Optics TradeInstruction Manual | Athlon Cronus Tactical G2 ED 7-42x60 | Optics Trade
Instruction Manual | Athlon Cronus Tactical G2 ED 7-42x60 | Optics Trade
 
Insrtuction Manual | Swarovski CL Companion Habicht | Optics Trade
Insrtuction Manual | Swarovski CL Companion Habicht | Optics TradeInsrtuction Manual | Swarovski CL Companion Habicht | Optics Trade
Insrtuction Manual | Swarovski CL Companion Habicht | Optics Trade
 
Technical Data | Swarovski CL Companion Habicht | Optics Trade
Technical Data | Swarovski CL Companion Habicht | Optics TradeTechnical Data | Swarovski CL Companion Habicht | Optics Trade
Technical Data | Swarovski CL Companion Habicht | Optics Trade
 

Instructions PULSAR Phantom NV Riflescope | Optics Trade

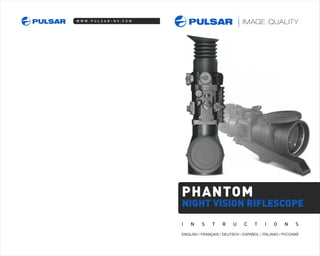
  • 1. NIGHT VISION RIFLESCOPE PHANTOM I N S T R U C T I O N S
  • 2. неисправность возможная причина исправление Прицел не включается. Нечеткое изображение красной метки - не удается навестись окуляром. При четком изображении красной метки нечеткое изображение объекта, находящегося на расстоянии не менее 30 м. Отдельные мелкие четкие темные точки в поле зрения при четком изображении объекта. Прицел или ИК-осветитель не выключаются ручкой выключателя на прицеле. Сбивается метка при стрельбе. Прицел не фокусируется. Батарея установлена неправильно. Напряжение на батарее составляет менее 1,0 В (для АА) или менее 2,2 В (для CR123А). Окислены контакты в контейнере батарей - "потекла" батарея или на контакты попала химически активная жидкость. Для коррекции Вашего зрения не хватает диоптрийного расхода окуляра. Пыль и влага на наружных оптических поверхностях объектива и окуляра. Влага на внутренних поверхностях объектива и окуляра, на оптических поверхностях ЭОП возможна при переноске прицела с холода в теплое помещение. Напряжение на батарее составляет менее 1,0 В (для АА) или менее 2,2 В (для CR123А). Точки на экране ЭОП, обусловленные технологией его изготовления, не влияют на работоспособность и надежность. Размеры точек оговорены в технических условиях на ЭОП и прибор. Прицел включен с помощью пульта дистанционного управления (ПДУ). Нет жесткости установки прицела на оружии. Неправильная настройка. Установите батарею в соответствии с маркировкой. Замените батарею. Очистите контейнер батарей, зачистите контакты. Если Вы пользуетесь очками с силой линз более +/- 5, то наблюдайте в окуляр прицела через очки. Протрите наружные оптические поверхности мягкой хлопчатобумажной салфеткой. Просушите прицел - дайте постоять 4 часа в теплом помещении. Замените батарею. Причин для возврата нет. Выключите прибор и ИК-осветитель нажатием кнопок ПДУ. Проверьте жесткость установки прицела. Убедитесь, что Вы используете именно тот тип патронов, которым ранее пристреливали Ваше оружие и прицел. Если Вы пристреливали прицел летом, а эксплуатируете его зимой (или наоборот), то не исключено некоторое изменение нулевой точки пристрелки. Настройте прибор в соответствии с разделом "Использование прицела". Проверьте наружные поверхности линз объектива и окуляра; при необходимости очистите их от пыли, конденсата, инея и т.д. В холодную погоду Вы можете использовать специальные антизапотевающие покрытия (например, как для корригирующих очков). v.0614
  • 3. 60 WEAVER Прицел имеет дополнительную планку Weaver (14), установленную на его корпусе слева. С помощью планки Вы можете установить дополнительно следующие приборы: Инфракрасный фонарь Pulsar-805 (#79071)/Pulsar-X850 (#79074); Храните прибор всегда только в чехле, в сухом, хорошо вентилируемом помещении. При длительном хранении обязательно извлеките батарею питания. В таблице приведен список возможных проблем, которые могут возникнуть при эксплуатации прицела. Произведите рекомендуемую проверку и исправление в порядке, указанном в таблице. Если в данном списке не приведена проблема или указанное действие по устранению неисправности не дает результата, сообщите об этом производителю. Очистите наружные поверхности металлических и пластмассовых деталей от пыли, грязи и влаги; протрите их хлопчатобумажной салфеткой, слегка смоченной оружейным маслом или вазелином. Почистите электрические контакты батарейного отсека, пользуясь любым нежирным органическим растворителем. Осмотрите линзы окуляра, объектива и ИК-осветителя; осторожно смахните пыль и песок, если необходимо, почистите их наружные поверхности. Техническое обслуживание проводится не реже двух раз в год и заключается в выполнении изложенных ниже пунктов: NV 1,7x Использование телескопической насадки NV 1,7x (#79091) позволяет повысить увеличение прицела "Phantom" с диаметром объектива 50 мм в 1,7 раза. Насадка вкручивается в объектив прицела. При установке пользуйтесь инструкцией к насадке. В связи с возможным смещением точки прицеливания, после установки насадки обязательно следует произвести пристрелку прицела. PHANTOM Night vision riflescope 2-11 12-21 22-31 32-41 42-51 52-61 Viseur de noctovision PHANTOM Nachtsicht-Zielfernrohr PHANTOM Visor de visión nocturna PHANTOM Cannocchiale per visione notturna PHANTOM PHANTOM В комплект поставки прицела Phantom входит выносной ПДУ (пульт дистанционного управления). На пульте находятся три кнопки: - кнопка “ON” – включение/выключение прицела (фиксируется при нажатии); - кнопка “IR” - включение/выключение ИК-осветителя (работает при удержании); - кнопка “Быстрый старт” – моментальное (кратковременное) включение прицела и ИК-осветителя (работает при ее удержании). Если кнопку отпустить, прибор выключается, ИК-осветитель и прицельная метка гаснут. Лазерный инфракрасный фонарь Pulsar L-808S (#79072).
  • 4. Внешний вид прицела (трещины, глубокие вмятины и следы коррозии не допускаются). Правильность и надежность крепления прицела на оружии (люфты категорически не допускаются). Состояние линз объектива, окуляра и ИК-подсветки (трещины, жировые пятна, грязь, капли воды и другие налеты не допускаются). Состояние элементов питания и электрических контактов батарейного отсека (батарейка не должна быть разряжена; следы электролита, солей и окисления не допускаются). Надежность срабатывания переключателя режимов работы (3), регулятора яркости прицельной метки (4), кнопок выбора метки (5) и мгновенного включения (11). Плавность хода ручки фокусировки объектива (6), кольца окуляра (7) и бленды ИК- осветителя (8). При техническом осмотре, рекомендуемом перед каждым выездом на охоту, обязательно проверьте: PACKAGE CONTENTS 2 Assembled riflescope Carrying case Remote control User manual Warranty card Ширина или высота объекта (в метрах) x 1000 Ширина или высота объекта (в милах) или Ширина или высота объекта (в сантиметрах) x 10 Ширина или высота объекта (в милах) Дистанция (в метрах) = Дистанция (в метрах) = или Ширина или высота объекта (в ярдах) x 1000 Ширина или высота объекта (в милах) Пример: 40 см x 10 400 2 мила 2 Дистанция (в ярдах) = 200 метров== При расчете следует учитывать, что цена одного щелчка прицела составляет: Для модели Phantom 3x50: 0,527 MOA(угл. минут); 0,5519”/100 ярдов; 1,533см/100м Для модели Phantom 4x60: 0,4235 MOA; 0,4435”/100 ярдов; 1,232см/100м 1 мил = 10 см. на 100 м. или 1 м на 1000 м; 1 мил = 3,6 дюйма на 100 ярдах или 36 дюймов на 1000 ярдах 1 миллирадиан (1 мил) = 1 тысячная дистанции = 3,4377 MOA Дополнительную информацию по использованию метки Mil-Dot (таблицы пересчета, калькулятор) можно найти по следующим ссылкам: http://www.ada.ru/guns/ballistic/MilDot/MilDot_calculator.htm http://www.ada.ru/guns/ballistic/MilDot/ranging_table.htm 59 SPECIFICATIONS For improvement purposes, design of this product is subject to change. The riflescopes use these or similar electronic-optical intensifiers. Max. detection range of an object measuring 1.7x0.5 m in natural night conditions (0.05 lux, quarter moon). We recommend using Alkaline batteries as they have a longer life. ** * MIL-DOTMODEL# 76057T 76058T 76067 76068T 76157T 76158T 76167 76168T Magnification, x Objective lens, mm Image intensifier tube, generation Image intensifier tube, type Resolution, lines/mm, min. Eye relief distance, mm Field of view, deg/m Maximum detection range, m/yd** Diopter setting, D Close-up range, m Battery type, voltage Battery life with continuous use with IR off, hr (AA*** / CR123А) Battery life with continuous use with IR on, hr (AA*** / CR123А) Degree of protection, IP code (IEC 60529) Operating temperature range Dimensions, mm / inch: Length Width Height Weight without the mount, kg / oz Compatibility with NV 1.7x Lens Converter 3 50 mm, F / 1.63 2+ DEP ХХ1441* 45 53 13/23 600/656 ±2.5 5 15/24 5/8 IPX6 257/10.1 95/3.7 103/4 1.0/35.2 Yes 4 60 mm, F / 1.68 2+ DEP ХХ1441* 45 53 11/19 700/765 ±2.5 8 15/24 5/8 IPX6 288/11.3 95/3.7 103/4 1.0/35.2 No MODEL# 3 50 mm, F / 1.63 2+ EPM221G-00-11А* 45 50 11/20 600/656 ±3.5 5 1.5V (1xAA) or 3V (1xCR123A) 15/24 5/8 IPX6 -30 °С to +40 °С/-22 °F to +104 °F 278/11 95/3.7 103/4 1.0/35.2 Yes 4 60 mm, F / 1.68 2+ 45 50 9/15.7 700/765 ±3.5 8 15/24 5/8 IPX6 320/12.5 95/3.7 103/4 1.0/35.2 No Operational characteristics Optical characteristics ***
  • 5. Five (three - if EMP221Gtube is employed) readilyavailableconfigurationsof illuminated red-on-green reticles that are able to be switched at a moment's notice Functionswith one AA(1.5V)or CR123А (3V) battery Accurateinternalfrontlens focusadjustment Lightweight and highly durable; manufacturing employs carbon plastic and othermoderntechnologies High magnification,3x or 4x Closeobservationalrangeof 5 meters IPX6 ratingagainstwaterintrusion Shockproofwith the use of heavyrecoilammunition (.375H&H, .416 Rigby, .50 cal.), up to 6000 joules Vertical positioning of the battery ensures an uninterrupted power supply when firing The imageintensifiertube is protectedagainstexcessivelightexposure Incrementalreticlebrightnessadjustment The reticlewill blink as a warning15-30 minutesbefore the device shuts down automaticallyas a low batteryindicator Stabilized power supply for optimal consumption, ensuring no shift of the aimingpointundera continuouspowerdraw or drop in temperature Faststart-up Ergonomicdesign;the adjustmentcontrolsare locatedon top Precisioninternalwindage/elevationadjustmentMOAper click Built-inhigh-powerPULSEhazardfree IR illuminator with beam focus Remotecontrol with secureattachment Additionalweaver MIL-STD-1913rail for accessories Flip-upobjectivelens cover Stylishcarryingcase FEATURES Установите оружие с прицелом на прицельном станке. Убедитесь в отсутствии в поле зрения прицела ярких источников света. Установите мишень на пристреливаемую дальность, например, 100 м. Освещенность в районе мишени при пристрелке должна быть не более 1 люкса. Снимите крышку объектива, сдвинув ее на корпус объектива (2). Включите прицел, установив переключатель (3) в положение ON. Наведите оружие на центр мишени по механическому прицелу. Настройте прицел согласно рекомендации раздела "Использование прицела". Вращая ручку кольца фокусировки объектива (6), добейтесь четкого видения изображения мишени. Установите оптимальную яркость прицельной метки регулятором (4). Если центр мишени не совпадает с прицельной точкой (центр перекрестия красной прицельной метки), то, предварительно отвернув колпачки на дисках выверки (13), вращением дисков R и UP добейтесь совмещения центра мишени с центром перекрестия прицельной метки. Произведите 3-4 контрольных выстрела, тщательно и однообразно прицеливаясь в точку прицеливания. Определите кучность стрельбы и положение средней точки попадания (СТП). При отклонении СТП в какую-либо сторону более чем на допустимую величину, вращением диска выверки (по вертикали UP, по горизонту - R), добейтесь совмещения СТП с прицельной точкой. При этом надо иметь в виду, что один щелчок при повороте диска соответствует смещению метки на 16,5/13,5 мм (Phantom 3x50/4x60) на расстоянии 100 м. Проверьте правильность выверки повторной стрельбой. Прицел пристрелян на выбранную дистанцию. Пристрелку прицела рекомендуется производить при температуре, близкой к температуре эксплуатации прицела в следующем порядке: The PHANTOM is a complex electro-optical device designed using innovative technology. We strongly recommend reading and following all the instructions carefully before turningontheriflescope. Not following the instructions and guidelines outlined in this instruction manual can causedamagetothedevice,as wellas voidinganyapplicablewarranty. ! MIL-DOT В Вашем прицеле Phantom установлена прицельная сетка Mil-Dot, которая позволяет определить расстояние до объекта, если известны его размеры. Использование метки Mil-Dot: Наблюдая через окуляр прицела, оцените размер объекта, по которому Вы будете определять дистанцию. Для этого совместите один край овальной точки метки Mil-Dot с нижним, верхним либо боковым краем цели таким образом, чтобы цель располагалась вдоль либо поперек перекрестия. Измерьте объект в милах с помощью сетки Mil-Dot: посчитайте, сколько овальных точек помещается от одного края цели до другого. Определив количество милов, вычислите дистанцию до объекта по формуле: 58 3
  • 6. GUIDELINES FOR OPERATION The PHANTOM has been designed for extensive usage. To ensure longevity and performance, it is necessary to adhere to the following: Under illuminated conditions measuring more than 1 lux (deep dusk), do not power on the riflescope with the objective lens cap open and do not point the product towards a direct light source! Daylight, vehicle headlights, flame, sun or similar light sources can irreversibly decrease its performance. Some examples of common illuminated conditions: Conditions No moon, cloud cover Starry sky, no moon, clear Quarter moon, clear Full moon, clear Deep dusk Dusk Cloudy weather Natural illumination in the field, lux -4 10 (0.0001) -3 10 (0.001) 0,05 0,380.4 1.0 10 500 OPERATING INSTRUCTIONS The PHANTOM night vision riflescope is intended for observation and hunting at dusk or during nighttime hours. When operated in conditions without artificial sources of light, it is a passive device. However, in environments of absolute darkness the built-in IR illuminator provides viewing ability. The PHANTOM is a very capable night vision device, and equally serves the amateur or professional for: Night observation and hunting Patrolling and safeguarding Search and rescue 4 57 4 3 8 13 6 CI T L E E R 3 4 5 1 12 11 12 1 13 14 7 9 10 2
  • 7. Отвинтите против часовой стрелки крышку батарейного отсека (1). Вставьте батарею типа АА (1,5 В) или типа CR123А (3 В) таким образом, чтобы (+) и (-) соответствовали маркировке на корпусе. Завинтите крышку (1). Установите батарею в соответствии с указаниями раздела "Установка батареи". Войдите в темную зону. Снимите крышку объектива, сдвинув ее на корпус объектива (2). Включите прибор, повернув рукоятку (3) в положение "ON" - начнет светиться зеленый экран ЭОП. Вы также можете проверить прицел и в освещенной зоне. Этот режим работы предусмотрен исключительно для проверки работоспособности прибора; крышка (2) должна быть плотно надета на объектив. Для регулировки яркости красной прицельной метки поворачивайте ручку (4). Для выбора одной из пяти (трех - для ЭОП ЭПМ221Г) конфигураций красной прицельной метки нажимайте кнопку (5). Выберите неподвижный объект наблюдения, удаленный на расстоянии 100 м. Установите ручку фокусировки объектива (6) напротив метки "100" - об этом будет свидетельствовать повышенное усилие ее фиксации. Наблюдайте выбранный объект через прицел; вращайте кольцо фокусировки окуляра (7) до получения максимального качества изображения. При необходимости включите ИК-осветитель (предварительно его следует установить согласно указаниям в следующем пункте). Для этого поверните рукоятку (3) в положение "IR". Для установки ИК-осветителя (входит в комплект) отвинтите винт (12) и закрутите осветитель по часовой стрелке до упора . Поворачивайте бленду ИК-осветителя (8) до получения необходимой фокусировки ИК светового пятна. После данной настройки, независимо от дистанции и других условий, вращать кольцо окуляра (7) не требуется. Настраивайте качество изображения только вращением ручки фокусировки объектива (6) и бленды ИК-осветителя (8). По окончании использования выключите прицел, повернув рукоятку (3) в положение "OFF". Закройте крышкой (2) объектив прибора. Вы можете установить прицел на оружие с помощью специального кронштейна (9). После первой установки Вашего прицела на оружие, необходимо выполнить рекомендации раздела "Пристрелка прицела к оружию". Моментальное включение прицела может выполняться с помощью выносного пульта, подсоединенного к гнезду (10) или кнопки моментального включения (11). When using in bright conditions (early morning or late evening), do not leave the device on with the objective lens cap open for more than 30 minutes. Continuous observation of bright stationary objects can cause the electronic- optical converter to fade, leading to the appearance of dark spots in the field of vision. Do not forget to turn off the scope after each use! Store with the lens cap on, in the accompanying carrying case. The scope has been reinforced with an IPX6 rating against water intrusion and can be used in inclement weather; however, it is not intended for full submersion. Attempting to disassemble or repair the scope will void the warranty! Clean the scope's optical surfaces only if necessary, and use caution. First, remove (by blowing or carefully wiping off) any dust or sand particles. Then proceed to clean by using a soft cotton tissue and alcohol or a cleaning solution approved for use with multicoated lenses. Do not pour the solution directly onto the lens! The scope can be used in operating temperatures, ranging from -30°C to +40°C. However, if it has been brought indoors from cold temperatures, do not turn it on for 3 to 4 hours. If the riflescope is unable to mount onto the rifle securely, or if there are doubts about the mounting system, see a qualified gunsmith. Using the weapon with a poorly mounted scope can lead to inaccurate target shooting! To ensure reliable performance, it is recommended to carry out regular technical inspections of the unit. Unscrew the cap (1) of the battery compartment counter-clockwise. Install oneAA(1.5V) or CR123А (3V) battery, so that the (+) and (-) match the markings on the body of the unit. Tighten the cap (1). BATTERY INSTALLATION Install the batteries according to the directions in the section entitled “BATTERYINSTALLATION”. Enter a dark environment. Remove the objective lens cap by sliding it up on top of the objective lens (2). Turn on the unit by turning the selector switch (3) to the “ON” position; you will see the screen of the electronic-optical converter light up green. The scope can also be checked in an illuminated area, but this is meant solely for testing the device; the lens cap (2) must tightly cover the objective lens. To adjust the brightness of the red reticle, turn knob (4). To select one of the five (three - if EPM66G-2 tube employed) types of red reticles, press button (5). Choose a removed stationary object to observe, at a distance of about 100 m. Turn the focusing knob (6) to “100”, it will settle into a notch. OPERATING THE PHANTOM 56 5
  • 8. При использовании прицела в условиях повышенной освещенности (раннее утреннее или позднее вечернее время), нельзя оставлять включенный прицел с открытой крышкой в неподвижном состоянии более 30 мин. При наблюдении статических ярких объектов это может привести к выгоранию люминофора ЭОП и появлению в поле зрения темных пятен. Храните прицел с надетой на объектив светозащитной крышкой и в чехле. Не забудьте выключить прибор после использования! Прицел имеет повышенную степень защиты от попадания влаги IPX6 и может эксплуатироваться при атмосферных осадках любой интенсивности. Прицел не предназначен для погружения в воду. Ремонтировать и разбирать гарантийный прицел запрещается! Наружную чистку оптических деталей производите очень аккуратно и только в случае явной необходимости. Вначале осторожно удалите (смахните или сдуйте) с оптической поверхности пыль и песок, после осуществляйте чистку. Пользуйтесь чистой хлопчатобумажной салфеткой (ватой и деревянной палочкой), специальными средствами для линз с многослойными покрытиями или спиртом. Не лейте жидкость прямо на линзу! Прицел может эксплуатироваться в широком диапазоне температур - от минус 30 °С до плюс 40 °С. Однако, если прицел внесен с холода в теплое помещение, изображение может быть несколько мутным в связи с образованием конденсата. Если Вам не удалось легко и надежно (без люфта, строго вдоль линии ствола) установить прицел на ружье или у Вас имеются сомнения в правильности крепежа - обязательно обратитесь в специализированную оружейную мастерскую. Стрельба с неправильно установленным прицелом снижает точность попадания в цель! Для обеспечения безотказности работы, предупреждения и устранения причин, вызывающих преждевременный износ или выход из строя узлов и деталей, необходимо своевременно проводить технический осмотр и обслуживание прицела. Observe the object through the scope and turn the diopter focus knob (7) until the image appears crisp. If necessary, turn on the IR illuminator by turning the selector switch (3) to “IR” position. To mount the IR Illuminator, unscrew and remove the plug (12) and screw the IR clockwise. Turn the knob of the IR illuminator (8) until you get a focused IR spot. After making these adjustments, no further tuning of the diopter is required, regardless of distance or other factors; perfect the image quality using only the knob for the objective lens (6) and that for the IR illuminator (8). When finished, turn off the riflescope by turning the selector switch (3) to the “OFF” position and replace the objective lens cap (2). It is possible to mount the scope onto the firearm using a special bracket (9); after the initial mounting is performed, it is important to follow further mounting instructions in the section entitled “SIGHTING IN THE PHANTOM”. The riflescope can be turned on instantaneously with either the remote control housed in its bracket (10) or by button (11). SIGHTING IN THE PHANTOM Mount the rifle with the scope installed on a bench rest. Make sure that no sources of light are visible through the scope's field of vision. Set a target at a distance of about 100m; the light levels around the target should not exceed 1 lux. Remove the objective lens cap (2), by sliding it up on top of the objective lens. Turn on the scope by turning the selector switch (3) to the “ON” position. Aim the firearm at the target using the mechanical sight. Adjust the scope according to the steps in the section entitled “OPERATING THE PHANTOM”. Turn the objective lens focusing knob (6) until you get a crisp image of the target. Set the desired reticle brightness level by turning knob (4). If the center of the reticle crosshairs and the target center do not line up, remove the covers protecting the windage / elevation adjustment knobs. Using live ammunition, take 3 or 4 control shots, continually aiming at the same hit point on the target (you may also use a laser bore sighter and align the laser point to the center of the cross hairs). Examine the target and determine if the aiming point coincides with point of impact, if you determine it's necessary to make corrections, you will need to adjust your aiming point. To move it downwards and to the left, turn the knob (13) counterclockwise, in the directions Down and Left respectively, the aiming poin moves upwards and to the right; keep in mind that one click of the knob corresponds to a 16.5/13.5 mm (Phantom 3x50/4x60) shift of the hit point at a distance of 100m. Check the accuracy of your adjustments by firing another 3 or 4 control shots. The scope should now be zeroed-in for the specified distance. Sighting in of the scope should be done at operating temperatures, by following the order of these steps: 6 55
  • 9. 54 Прицел ночного видения Phantom является сложным электронно-оптическим изделием cприменением передовыхтехнологий. Мы настоятельно рекомендуем Вам внимательно изучить инструкцию прежде, чемвключитьприцел. Несоблюдение рекомендаций и указаний, изложенных в инструкции по использованию, может стать причиной быстрого или даже мгновенного выхода прибора из строя, с одновременной утратой права на гарантийный ремонт! ! Прицел ночного видения "Phantom" предназначен для наблюдения и ведения прицельной стрельбы в сумеречное и ночное время. Это пассивный прибор, в реальных условиях применения уверенно работающий без искусственных источников света. Однако, в условиях полной темноты (отсутствие света звезд и луны), возможность применения встроенной ИК-подсветки не исключается. Ваш прицел "Phantom" - универсальный прибор ночного видения, идеально подходит для различных сфер профессионального и любительского применения, включая: Ночное наблюдение и ночную охоту Охрану и безопасность Поисково-спасательные работы Прицел ночного видения "Phantom" предназначен для длительного использования. Для обеспечения долговечности и полной работоспособности прибора необходимо придерживаться следующих рекомендаций: Не включайте прицел с открытой крышкой объектива при освещенности более 1 люкс (глубокие сумерки), не направляйте на яркие источники света! Дневной свет, автомобильная фара, солнце или такой источник света, как сварка или горящий костер, может значительно снизить эффективность работы прицела и его ресурс. Некоторые примеры типовых освещенностей, люкс условия луны нет, облачно звездное небо, луны нет, ясно 1/4 луны, ясно полная луна, ясно глубокие сумерки сумерки пасмурный день естественная освещенность на местности, люкс -4 10 (0,0001) -3 10 (0,001) 0,05 0,380,4 1,0 10 500 7 4 3 8 13 6 CI T L E E R 3 4 5 1 12 11 12 1 13 14 7 9 10 2
  • 10. "PHANTOM" Класс герметичности IPX6 (водонепроницаемый); оптический тракт - газонаполненный Допускается применение особо мощных патронов, с дульной энергией до 6000 Дж. (.375 H&H,.416 Rigby,.416 Rem. Magnum) Максимальная дистанция обнаружения до 700 м ЭОП поколения (2+) - прибор эффективен практически в любых условиях естественной ночной освещенности, в том числе и при ее -4 крайне низких уровнях (10 лк - ночное небо в облаках) Высокое разрешение и качество изображения по всему полю экрана ЭОП Защита ЭОП от превышения общего уровня освещенности Высококачественная светосильная оптика с оптимальным 3х и 4х увеличением Минимальная дистанция наблюдения 5м Пять конфигураций красной прицельной метки (для прицелов с ЭОП типа ЭПМ221Г - три конфигурации): возможность выбора и моментального переключения Плавная регулировка яркости метки Выбор креплений, позволяющих установить прицел практически на любой тип охотничьего оружия Стабилизированный блок питания: оптимизированное энергопотреб- ление, отсутствие смещения точки прицеливания при постепенном разряде батареи (и при понижении температуры воздуха) Автономная работа прибора на одной батарее типа AA (1,5 В) или типа СR123А (3 B) (Допускается применение аккумуляторной батареи 1,2В, эквивалентной батарее типа АА) Вертикальное расположение батареи - надежность энергоснабжения при стрельбе Индикация разряда батареи: предупредительное мигание прицельной метки за 15 - 30 мин. до автоматического выключения прибора Эргономичный дизайн - управление прицелом расположено сверху Фокусируемая легкосъемная ИК-подсветка Дистанционный пульт управления с разъемом повышенной надежности Дополнительная боковая планка Weaver Нетеряющаяся крышка объектива Кнопка моментального включения Малый вес и высокая прочность - в конструкции широко применен углепластик и другие типы современных пластмасс Your night vision riflescope Phantom has a Mil-Dot reticle installed which helps you determine distance to the target if you know its actual size. MIL-DOT RETICLE = Range in Yards = Range in Meters = Range in Meters == 532 Yards The Measured object's width or height in Yards x 1000 Object's Width or Height in Mils or The Measured object's width or height in Meters x 1000 Object's Width or Height in Mils or The Measured object's width or height in cm x 10 Object's Width or Height in Mils Example: 1.33 yards x 1000 1330 2.5 mils 2.5 Viewing the target through the riflescope place the edge of one post against one edge (top, bottom, or either side) of the target so that the crosshair extends along either its width or height. Using the dots, measure along the crosshair to the opposite edge of the target. Once the measurement of the target has been estimated in mils, use the following formula to determine the range: The Use of a Mil-Dot reticle: When making windage/elevation adjustments please note that one click of the riflescope's adjustment equals to: For the model Phantom 3x50: 0.527 MOA(minute of angle); 0.5519”/100yds; 1.533cm/100m For the model Phantom 4x60: 0.4235 MOA; 0.4435”/100 yds; 1.232cm/100m 1 mil (millirad) equals 3.6 inches at 100 yards or 36 inches at 1,000 yards, or 10 centimeters at 100 meters or 1 meter at 1,000 meters. 1 millirad (1 mil) = 0.001 of the distance = 3.4377 MOA 8 53
  • 11. Прибор в сборе Чехол Пульт дистанционного управления Инструкция по эксплуатации Гарантийный талон It is recommended to inspect the riflescope before every use. Make sure to check for the following: TECHNICAL INSPECTION Visually inspect the unit is free from any physical damage; cracks, dents or signs of corrosion disqualify it from proper use. Check the sturdiness and proper fit of the mounting system. Ensure the condition of the objective lens, eyepiece and the IR illuminator are free of cracks, grease spots, dirt, water stains and other residue before use. Visually inspect the condition of the battery and the battery compartment; the battery should be free of electrolyte and oxidation residue, especially where the battery makes contact with metal. Verify the proper function of the following; selector switch (3), reticle brightness knob (4), reticle selector button and the instant power-on button (11). Verify the smoothness of the objective lens focusing mechanism (6), diopter focusing knob (7) and the IR illuminator knob (8). USING THE NV 1.7x LENS CONVERTER The NV 1.7x Lens Converter (#79091) increases the magnification power of the 50mm PHANTOM 1.7 times. The lens converter screws into the internal groove of the riflescope's objective lens; refer to the instruction manual for the Lens Converter when installing. A possible shift of the aiming point may occur and, in that case, it is important to sight in the scope as previously described. Clean the outside metallic and plastic surfaces from dust, dirt and moisture; wipe the scope with a soft cotton tissue, lightly coating it with gun oil or petroleum jelly. Clean the battery compartment's electric contact points using an oil-free solvent. Inspect the eyepiece lens, the objective lens and the IR illuminator and gently blow off any dust and sand, and clean using lens cleaner and a soft cloth; see section entitled “GUIDELINES FOR OPERATION”. TECHNICAL MAINTENANCE Technical maintenance should be done no less than twice a year, and is comprised in the following steps: Further information on the use of the Mil-Dot reticle (reference charts, calculators etc.) you can find at the following links: http://www.mildot.com http://www.mil-dot.com/Mil_Dot_User_Guide.htm http://www.shooterready.com/mildot.swf 52 9 Для улучшения потребительских свойств изделия в его конструкцию могут вноситься усовершенствования. MIL-DOT# # 76057T 76058T 76067 76068T 76157T 76158T 76167 76168T 3 50 мм, F / 1.63 2+ ЭПМ221Г-00-11А* 45 50 11/20 600 ±3,5 5 1,5V (1xAA) или 3V (1xCR123A) 15/24 5/8 IPX6 от -30 °С до +40 °С 278 95 103 1,0 да 3 50 мм, F / 1.63 2+ DEP ХХ1441* 45 53 13/23 600 ±2,5 5 15/24 5/8 IPX6 257 95 103 1,0 да 4 60 мм F / 1.68 2+ 45 50 9/15,7 700 ±3,5 8 15/24 5/8 IPX6 320 95 103 1,0 нет 4 60 мм F / 1.68 2+ DEP ХХ1441* 45 53 11/19 700 ±2,5 8 15/24 5/8 IPX6 288 95 103 1,0 нет Визуальное увеличение, х Объектив Поколение ЭОП Тип ЭОП Разрешение, линий/мм, минимум Удаление выходного зрачка, мм Угол поля зрения, угл. град. Максимальная дистанция обнаружения, м** Предел перефокусировки окуляра, дптр Минимальная дистанция наблюдения, м Тип элементов питания/ Рабочее напряжение, В Время непрерывной работы на одной батарее, час (ИК-подсветка выключена) AA***/ CR123А Время непрерывной работы на одной батарее, час (ИК-подсветка включена) AA***/ CR123А Класс защиты, код IP (IEC 60529) Рабочая температура Габаритные размеры, мм: длина ширина высота Масса без крепления, кг Возможность установки телескопич. насадки NV 1,7x Вместо данных ЭОПов могут использоваться аналогичные. Рекомендуется применять батареи типа АА "Alkaline", т.к. они характеризуются наибольшей продолжительностью работы. ** * Оптические характеристики Эксплуатационные характеристики Максимальная дистанция обнаружения объекта размером 1,7x0,5 м при естественной ночной освещенности 0,05 лк (четверть луны). ** *
  • 12. STORAGE Always store the unit in its carrying case in a dry, well-ventilated space. For prolonged storage, remove the battery. TROUBLESHOOTING Listed below are some potential problems that may occur when using the PHANTOM. Carry out the recommended checks and troubleshooting steps in the order listed. Please note that the table does not list all of the possible problems. If the problem experienced with the scope is not listed, or if the suggested action meant to correct it does not resolve the problem, please contact the manufacturer. Possible cause(s) Corrective action The battery has been installed incorrectly. The total battery charge is less than 2.0V. Oxidized contact points in the battery compartment due to “leaky” batteries or contact points becoming exposed to a chemically-reactive solution. The diopter cannot be adjusted to your vision. Reinstall the battery with the correct polarity orientation. Install fresh battery. Clean the battery compartment, focusing on the contact points. If you wear prescription glasses with a range of +/- 5, keep glasses on when looking through the eyepiece. USING THE ADDITIONAL WEAVER RAIL USE OF THE REMOTE-CONTROL CONSOLE IR Flashlight Pulsar-805 (#79071)/Pulsar-X850 (#79074); The scope has a built-in additional Weaver rail mount (14) housed on the left portion of the body.This will allow the mount of additional devices, such as: The Phantom is supplied with a remote-control console. The console has three buttons: - “ON” button turns on/off the riflescope (fixed when pressed). - “IR” button turns on/off the built-in IR Illuminator (works when the button is kept pressed). - “Quick start” button - quick start-up of the riflescope and IR illuminator (the device works only when the button is kept pressed). After this button is released, the riflescope turns off, IR Illuminator and reticle go out. 10 51 Problem The riflescope does not turn on. The red reticle is blurred and cannot be focused with the diopter knob. Сannocchiale non si accende. Сannocchiale non si accende. Immagine del segno rosso non chiara non si riesce a centrare l'oculare. Immagine del segno rosso chiara, l'immagine dell'oggetto alla distanza di meno 30 m non e' chiara. Singoli piccoli punti scuri nel campo di vista, l'immagine dell'oggetto e' chiara. Сannocchiale o l'illumina- tore IR non si spenge con la maniglia del selettore di mirino. Allo sparo il segno si sposta. Сannocchiale non si centra. Batteria d'alimentazione non inserita correttamente. Tensione totale sulle batterie meno 2,0V. Contatti sede batterie sono acidi batterie “scorrono” oppure il liquido reattivo sui contatti. Per correggere la vista manca diottria d'oculare. Polvere e/o umidita' sulle superfici esterne dell'obiettivo e dell'oculare. Umidita' sulle superfici interne dell'obiettivo/dell'oculare/di CIE probabilmente causata dal trasferimento dello strumento dal freddo al caldo. Tensione totale sulle batterie meno 2,0V. Punti sullo schermo CIE sono causati dalla technologia adatta e non provocano dei problemi di funzionamento ne' sicurezza. Dimensioni dei punti sono previste sulle specifiche tecniche di CIE e dello strumento. Сannocchiale e' attivato dal telecomando. Fissaggio del mirino sull'arma non e' solido. Regolazione non é corretta. Veda la marcatura per inserire correttamente. Cambiare batterie. Pulire sede batterie e contatti. Se si usa gli occhiali con lenti piu' di +/- 5, si segue il mirino tramite l'oculare con gli occhiali. Pulire superfici esterne con la stoffa di cotone. Asciugare il mirino per 4 ore nell'ambiente caldo. Cambiare batterie. Non e' il caso di ritornare lo strumento al costruttore. Spegnere lo strumento e l'illuminatore IR pressando il bottone telecomando. Controllare il fissaggio del сannocchiale. Verificare il titolo di cartuccia, se precisamente quello usato nelle prove del сannocchiale. Se la cartuccia era usata per le prove d'esate ed adesso e' l'inverno (o all'contrario), l'eventuale spostamento del punto zero non e' escluso. Per la regolazione dello strumento veda sezione Uso Mirino. Controllare superfici esterne di lenti d'obiettivo e d'oculare, pulire se il caso, rimuovere polvere, condensato, brina ecc. Alle temperature basse si puo' ricorrere al rivestimento anti appannato come per esempio per gli occhiali correttivi. Guasto Causa eventuale Eliminazione Laser IR Flashlight Pulsar L-808S (#79072).
  • 13. USO DEL CONTROLLO REMOTO Il cannocchiale per visione notturna Phantom è dotato di un controllo remoto, che ha tre pulsanti: - Pulsante “ON” - accende/spegne il cannocchiale (in modo fisso quando premuto). - Pulsante “IR” - accende/spegne l'illuminatore IR incorporato (funzione solo tenendo premuto il pulsante). - Pulsante “Avvio rapido” - accensione rapida del cannocchiale e dell'illuminatore IR (l'apparecchio funzione solo tenendo premuto il pulsante). Dopo che il pulsante “Avvio rapido” viene rilasciato, il cannocchiale, l'illuminatore ed il reticolo si spengono. Possible cause(s) Corrective actionProblem USO DELL'ASSICELLA AUXILIARIA WEAVER Il mirino integra l'assicella auxiliaria Weaver (14), montata sul copro, parte sinistra. Serve per attaccare i seguenti attrezzi: Illuminatore IR Pulsar-805 (#79071)/Pulsar-X850 (#79074); CONSERVAZIONE Si conserva lo strumento nell'astuccio; l'ambiente e' secco, ben ventilato. Alla conservazione lunga si toglie la batteria d'alimentazione. GUASTI EVENTUALI E MODO DI ELIMINARLI La tabella sotto si elenca eventuali guasti durante l'uso del visore. Si raccomanda di seguire esattamente la procedura di controllo e di eliminazine come per tabella indicata. Non tutti i guasti che potrebbero accadere sono evidenziati sulla tabella. Le verifiche indicate nella tabella sono obbligatorie ai fini di rivelare le cause dei guasti durante l'uso dello strumento; le azioni per coreggerli sono indicati ai fini di eliminarli. Se il problema continua ad esistere, si raccommanda di rivolgerlo al costruttore. CONVERTITORE DI LENTE NV 1,7x Il convertitore NV1,7x (#79091) consente a magnificare 1,7 volte il cannocchiale Phantom col diametro d'obiettivo 50 mm. Si avvita Il convertitore nell'obiettivo del visore. Ricordare di leggere il Manuale fornito con Il convertitore.Attenzione: il segno del mirno si puo' spostare. Per tale ragione e' considerato opportuno d'eseguire le prove di sparo. 50 11 With a crisp image of the reticle, the image of the observed target that is at least 30 m away is blurred. Distinct black dots or specs on the screen. The scope or the IR illuminator do not turn off via the selector switch on the scope. The aiming point shifts after firing rounds. The riflescope does not focus. Dust and moisture are covering the outside optical surfaces. Moisture is on the inside of the objective and the eyepiece lenses, or is on the optical surfaces of the electronic-optical intensifier and may be caused by the unit fogging up due to a rapid change in temperature; when the device is brought in from the cold into a warm environment, for example. The total battery charge is less than 2.0V. The dots on the screen are cosmetic blemishes in the intensifier tube and are a by-product of the manufacturing process; they do not in any way affect the life or performance of the unit, and if there is dust on the lens, please clean according to the instructions. The scope is turned on via the remote control. The riflescope is not mounted securely. Wrong settings. Clean the lens surfaces with a soft cotton tissue or cloth. Let the riflescope dry by leaving it in a warm environment for 4 hours. Install fresh battery. No need to take corrective action or return the device. Turn off the scope and the IR illuminator using the remote control. Check how securely the riflescope has been mounted and make sure that the same type and caliber bullets are being used as when the scope was initially sighted in; if your scope was sighted in during the summer, and is now being used in the winter (or the other way around), a small displacement of the aiming point is possible. Adjust the riflescope according to the instructions given in the section, entitled “OPERATING THE PHANTOM” and check the surfaces of the eyepiece and objective lenses and clean them if necessary from dust, condensation, frost, etc; to prevent fogging in cold weather, apply a special anti-fog solution. Illuminatore IR laser Pulsar L-808S (#79072).
  • 14. Le parte esterni (fissure, ammaccature profonde, traccia di corrosione non sono accettabile). Le correttefissureall'arma(gioconon accettabileassolutamente). Le lenti d'obiettvo, d'oculare e d'illuminatore IR (fissure, machie di grasso, goccied'acquaed altretraccienon accettabile). Alimentatori e contatti elettrici della camera batterie (la batteria deve essere caricata,eletrolita,sale,acidonon accettabili). Il corretto funzionamento del selettore modi (3), regolatore d'intensita' del segno(4), bottonedellaselezionedel segno(5) e abilitazioneimmediata(11). Il funzionamento della maniglia d'obiettivo (6), anello d'oculare (7) e blenda d'illuminatoreIR (8). ISPEZIONE TECNICA Si raccommanda procedere col manutenzione ogni volta di andare a caccia. Controlli obligatori: Pulire superifici di metallo esterne e di plastico, rimuovere la polvere, lo sporco, l'acqua/umidita', pulire con la stoffa di cottone impregnata un po' coll'olio adatto all'arma o vaselina. Pulire i contatti elettrici della camera batterie, usare i solventi organici non grassi. Controllare visualmente lenti d'oculare, d'obiettivo e d'illuminatore IR, rimuovere la sabbia, polvere e se necessario, pulire le superfici esterne. MANUTENZIONE La manutenzione ordinaria si esercita al minimo due volte all'anno e si procede come segue: 1 mil equivale a 3,6" a 100 iarde, ovvero 36" a 1 000 oppure 10 cm a 100 m, ovvero ad 1 m a 1 000 metri. 1 millirad (1 mil) = 0,001 della distanza = 3,4377 MOA Ulteriori informazioni riguardo l'uso del reticolo Mil-Dot (tabelle di riferimento, calcolatori ecc.) posso essere reperite ai seguenti indirizzi internet (in lingua inglese): http://www.mildot.com http://www.mil-dot.com/Mil_Dot_User_Guide.htm http://www.shooterready.com/mildot.swf 12 49 DONNÉES TECHNIQUES L'appareil assemblé L'étui Le pupitre de commande à distance Une carte de garantie Guide d'emploi MODÈLE MIL-DOT# 76057T 76058T 76067 76068T 76157T 76158T 76167 76168T MODÈLE# ** Le design de ce produit pourrait-être amené à changer, afin d'améliorer son utilisation. DÉBALLAGE DE L'APPAREIL Distance de la detection max. du object avec dimensions 1,7x0,5 m à l'éclairage nocturne naturel 0,05 lux (un quart de la lune). Il est recommandé d'utiliser les batteriesde type AA “Alkaline” puisque elles sont caractérisées par la plus grande durée de fonctionnement. 3 50 mm, F / 1.63 2+ 45 50 11/20 600 ±3,5 5 Au choix: 1xAA/1,5V ou 1xCR123A/3V 15/24 5/8 IPX6 de -30 °C à +40 °C 278 95 103 1,0 Oui 3 50 mm, F / 1.63 2+ DEP ХХ1441* 45 53 13/23 600 ±2,5 5 15/24 5/8 IPX6 257 95 103 1,0 Oui 4 60 mm F / 1.68 2+ 45 50 9/15,7 700 ±3,5 8 15/24 5/8 IPX6 320 95 103 1,0 Non 4 60 mm F / 1.68 2+ DEP ХХ1441* 45 53 11/19 700 ±2,5 8 15/24 5/8 IPX6 288 95 103 1,0 Non Grossissement visuel, x Objectif Génération du convertisseur d'image électronique (CIE) Type du CIE Résolution, lignes/mm, min. Dégagement oculaire, mm Angle du champ de vision, degrés Distance de la detection max, m** Ajustement de l'oculaire, dioptre Distance d'observation minimale, m Type d'élements d'alimentation / tension de fonctionnement, V Durée de fonctionnement continu avec une seule pile, h (l'eclairage infrarouge est arreté) AA**/CR123A Durée de fonctionnement continu avec une seule pile, h (avec l’eclairage infrarouge) AA**/CR123A Classe de protection, code IP (IEC 60529) Températures d'utilisation Dimensions, mm: Longueur Largeur Hauteur Poids (sans l'emballage), kg Possibilité de montage du onvertisseur de lentille NV 1,7x Caractéristiques optiques: Caractéristiques fonctionnelles: * Au lieu de ces convertisseurs d'image électroniques on peut utiliser les analogues CIEs. *** EPM221G-00-11А*
  • 15. CARACTERISTIQUES PARTICULIERES DU VISEUR PHANTOM Classe d'hermétisation IPX6 (étanche à l'eau); trajet optique - remplis de gaz Admis l'utilisation des cartouches à haute puissance, avec l'énergie de bouche jusqu'à 6000 Joules (375 H&H, 416 Rigby, 416 Rem.Magnum) Distance de la detection jusqu'à 700 m au maximum Convertisseur d'image électronique de la 2-ème génération (2+) - est efficace dans n'importes quelles conditions d'éclairement nocturne naturel y -4 compris aux niveaux extremement bas (10 lux ciel nocturne nuageux) Une haute résolution et qualité d'image sur tout le champ de l'écran de l'appareil Protection de l'appareil contre le dépassement du niveau général d'éclairement Optique lumineuse à haute qualité avec grossissement optimal de 3-4 fois Distance d'observation minimale - 5 m Cinq (trois - pour le CIE du type EMP221G) configurations de la marque de pointage rouge: possibilité de choixet commutation momentané Réglage continu de luminosité de la marque Choix de fixations, permettant de monter le viseur pratiquement sur tout type de fusil de chasse Bloc d'alimentation stabilisé: consommation d'énergie optimisée, absence d'écart du point de mire à la décharge progressif des piles (et à la baisse de température de l'air) Fonctionnement autonome avec une seule pile de typeAA(1,5 V) ou de type CR123А (3 V). (Il est admis d'utiliser une batterie d'accumulateurs de 1,2 V équivalente à une batterie de typeAA) Position verticale d'une batterie est une sureté d'alimentation au moment du tir Indication du décharge de la batterie: signal clignotant de la maque de pointage avertit de l'arret automatique de l'appareil avant de 15-30 minutes Design ergonomique la commande de l'apparetil est située en haut Eclairage infrarouge focalisé facilement démontable Pupitre de commande à distance avec raccord de haute sureté Planche supplémentaire latérale Weaver Couvercle de l'obectif non détachable Bouton de mise en marche instante Petite masse et haute solidité - on utilise dans la construction de l'appareil un carboplastique et d'autres types de matières plastique avancées Quando si effettua la regolazione dell'alzo o della deriva, fare attenzione che un click della torretta equivale a: Per il modello Phantom 3x50: 0,527 MOA; 0,5519”/100yds; 1,533cm/100m Per il modello Phantom 4x60: 0,4235 MOA; 0,4435”/100 yds; 1,232cm/100m == 532 iarde Esempio: 1.33 iarde x 1000 1330 2,5 mils 2,5 Il cannocchiale notturno Phantom è dotato di un reticolo Mil-Dot che aiuta a determinare la distanza del bersaglio, conoscendone le dimensioni. RETICOLO MIL-DOT Utilizzo del reticolo Mil-Dot: Per utilizzare il reticolo Mil-Dot occorre conoscere le dimensioni effettive del bersaglio. Guardare il bersaglio con il cannocchiale da puntamento. Posizionare il bordo di un'astina contro il bordo (superiore, inferiore, o laterale) del bersaglio in modo che il crocicchio si trovi lungo la sua larghezza o altezza. Servendosi dei dot, effettuare la misurazione lungo il crocicchio fino al bordo opposto del bersaglio. Una volta determinate le dimensioni del bersaglio in mil è possibile determinarne la distanza. Questa può essere calcolata applicando la seguente formula: = = Altezza o larghezza del bersaglio in iarde x 1000 Altezza o larghezza del bersaglio in mil oppure Altezza o larghezza del bersaglio in metri x 1000 Altezza o larghezza del bersaglio in mil Distanza del bersaglio in iarde Distanza del bersaglio in metri = oppure Altezza o larghezza del bersaglio in cm x 10 Altezza o larghezza del bersaglio in mil Distanza del bersaglio in metri 48 13
  • 16. PARTICULARITES D'EMPLOI Le viseur de noctovision “Phantom” est destiné pour l'utilisation prolongée. Pour assurer la longevité et un bon fonctionnement de l'appareil il faut suivre les recommandations suivantes. Ne mettez pas en marche le viseur avec le couvercle ouvert de l'objectif à l'éclairage dépassant 1 lux. (crepuscule profond), ne le pointez pas sur de fortes sources de lumière! La lumière de jour, de phare automobile, de soleil et une telle source de lumiére comme soudure ou feu de bois peuvent diminuer irréparablement l'efficacité de son fonctionnement et la resource. Certains exemples des types de lumière, lux Le viseur de noctovision Phantom est un appareil électronique optique complexe construitsur labasedestechnologiesavancées. Il est réclamé d'étudier attentivement le Guide d'emploi du viseur avant que vous lemettiezenservice. La non-observation des recommandations et des indications figurées dans le Guide d'emploi peut causer la mise hors service, prématurée ou meme en un instant du viseuravecl'annulationsimultanéedesgarantiesduproducteur. Le viseur de noctovision “Phantom” est déstiné à l'observation et au tir ajusté dans les crepuscule et temps de nuit. C'est un appareil passif, dans des conditions réelles d'utilisation fonctionne sans sources de lumière artificiels. Néanmoins, dans l'obscurité complète (absence de clair des étoiles et de la lune) la possibilité d'utiliser l'éclairage infrarouge incorporé n'est pas exclue. Votre viseur “Phantom” est un appareil universel de noctovision et parfait pour les différents domaines d'application professionnelle et d'amateur, y compris: Observation nocturne et la chasse à la nuit Protection et sécurité Recherche et sauvetage 14 ! GUIDE D'EMPLOI 47 4 3 8 13 6 CI T L E E R 3 4 5 1 12 11 12 1 13 14 7 9 10 2 Conditions La lune est absente, le ciel est nuageux Le ciel avec étoiles, absence de lune, le temps est clair ¼ de la lune, le temps est clair La lune est pleine, le temps est clair Le crépuscule profond Le crépuscule Le temps est couvert Eclairage naturel, lux -4 10 (0,0001) -3 10 (0,001) 0,05 0,380,4 1,0 10 500
  • 17. A l'utilisation du viseur dans des conditions d'eclairage élevé (le petit matin ou le soir tard) il est défendu de laisser l'appareil mis en marche avec le couvercle ouvert dans l'état immobile dépassant 30 minutes. A l'observation des objets de vive lumière statiques cela peut causer la brulure de lumenophore et l'apparition des taches noires dans le champ. N'oubliez pas d'arreter le viseur après l'exploitation! Conservez le viseur avec le couvercle de protection à lumière mis sur l'objectif et dans son étui. Le viseur a un haut niveau de protection contre la pénétration d'humidité IPX6 et peut etre exploité dans les conditions de précipitations atmosphériques abondantes d'une importe quelle intensité. Le viseur ne doit etre plongé dans l'eau. Il est défendu de réparer et démonter le viseur sous garantie. Le nettoyage extérieur des pièces optiques est effectué soigneusement et en cas d'une vraie nécessité. D'abor enlevez avec precaution (souffler ou secouer) la poussière et la boue de la surface optique puis faites le nettoyage. Utilisez pour cela une serviette à coton (ouate ou un petit baton de bois), des moyens speciaux destinés aux lentilles avec le revetement multicouches. Ne versez pas de l'eau tout droit sur la lentille! Le viseur peut etre exploité dans une large étendue de températures de -30°C à +40°C. Néanmois si l'appareil est apporté du froid dans un local chaud ne le mettez pas en marche depuis 3-4 minutes. Si vous ne pouvez pas monter facilement et surement le viseur sur le fusil (sans le jeu, tout droit le long du canon) ou si vous mettez en doute la dureté de fixation adressez-vous obligatoirement à un atelier spécialisé de réparation des armes. Le tir avec le viseur monté irrégulièrement sur le fusil peut causer la déterioration de la marque de pointage ou l'impossibilité du réglage de tir. Afin d'assurer le fonctionnement sans défaillance ainsi que la constatation opportune et la réparation des défauts causant l'usure prématurée et mise hors marche des unités et des pièces il faut effectuer à temps la visite et l'entretien techniques du viseur. Trovare un oggetto d'osservazione immobile alla distanza di 100 m. Premere il bottone di concentrazione (6) contro il segno 100, si applica la forza se la posizione scelta e' corretta. Seguire l'obietto scelto con il visore, girare la ghiera (7) per raggiungere l'ottima immagine possibile. Abilitare l'illuminazione IR se opportuno. Per tale scopo girare la maniglia (3) alla posizione IR. Girare la blenda dell’illuminatore IR (8) fino a raggiungere la concentrazione del punto luminoso. Dopo regolazione non girare la ghiera dell'oculare (7). L'immagine si aggiusta con la maniglia (6) e blenda dell’illuminatore IR (8). Dopo l'uso spegnere lo strumento con la maniglia (3) girandola su OFF. Chiudere il coperchio (2) dell'obiettivo dello strumento. Si puo' sistemare il mirino sull'arma mediante la mensola (9) adatta. Dopo la prima messa seguire le indicazioni Tiro Prove del Cannocchiale. Si accende il mirino immediatament col telecomando collegato alla sede (10) oppure col bottone (11). Svitare la vite (12) per smontare l’illuminatore IR. TIRO PROVE DEL CANNOCCHIALE Collocare l'arma a cannocchiale su tiro tavola. Assicurarsi di non rivelare i sorgenti della luce luminosa nel campo visione. Centrare il bersaglio alla distanza di 100 m, l'illuminazione non supera 1 lux. Togliere il coperchio d'obiettivo spostandolo sul corpo (2) d'obiettivo. Attivare il cannocchiale con selettore (3) in posizione ON. Centrare l'arma sul centro di bersaglio mediante il cannocchiale meccanico. Regolare il cannocchiale, veda Funzionamento di cannocchiale. Ottenere l'immagine chiara con la maniglia d'obiettivo (6). Girando la ghiera dell'obiettivo ottenere l'intensita' di bersaglio ottima col regolatore (4). Se il centro del bersaglio ed il punto di mira non coincidono (croce rossa), aprire le cappe dei dischi, girare R e UP per far cadere il centro del bersaglio sul centro del segno. Sparare 3-4 volte per far verifiche repetitvamente sempre allo stesso punto. Determinare il ragruppamentî di spari e la posizione del punto medio colpito (PMC); se qualsiasi spostamento del PMC supera il limite accettabile, regolando il disco campione (UP-verticale; R-oizzontale) far coincidere il PMC ed il bersaglio. Attenzione: uno clic del disco significa lo spostamento del segno a 16,5/13,5 mm (Phantom 3x50/4x60) alla distanza di 100 m. Controllare la corretezza del secondo tiro. Aquesto punto il cannocchiale e' considerato di aver superato le prove. Si raccomanda di fare tiro prove alla temperature di esercizio secondo la procedura sottoindicata: 46 15
  • 18. Dévissez au sens contraire le couvercle du compartiment de batteries (1). Inserez la batterie de type AA (1,5 V) ou de type CR123A (3 V) de façon que les (+) et (-) concident au marquage sur le corps. Vissez le couvercle (1). INSTALLATION DE LA BATTERIE Inserez la batterie en conformité avec les indications du chapitre “Installation de la batterie”. Entrez dans la zone obscure. Enlevez le couvercle en le déposant sur le corps de l'objectif (2). Mettez l'appareil en marche, en tournant le régulateur (3) en position “ON” l'écran vert de l'appareil commence à éclairer. Vous pouvez controler le fonctionnement du viseur dans la zone éclairée. Ce régime de fonctionnement est prévue exclusivement pour controler le fonctionnement de l'appareil; le couvercle de l'objectif (2) doit etre mis étroitement sur l'objectif. Pour régler la luminosité de la marque de pointage rouge tournez le régulateur (4). Pour le choix d'une de cinq (trois - pour le CIE du type EMP221G) configurations de la marque de pointage rouge appuyez le bouton (5). Choisissez l'objet d'observation immobile éloigné à la distance de 100 m. Installez le régulateur de focalisation de l'objectif (6) en face de la marque “100” l'effort élevé de sa fixation en signifie. Observez l'objet choisi par le viseur; tournez l'anneau de focalisation de l'oculaire (7) en trouvant la meilleure qualité de l'image. En cas nécessaire mettez en marche l'éclairage infrarouge (pour monter l'éclairage infrarouge dévissez le vis (12)). Pour cela tournez le régulateur (3) en position “IR”. Tournez la blende de l'éclairage infrarouge (8) jusqu'à la focalisation nécessaire de la tache infrarouge lumineuse. Ce reglage fait, indépendamment de la distance et des autres conditions, il ne faut pas tourner l'anneau de l'oculaire (7). Reglez la qualité de l'image seulement en tournant le régulateur de focalisation de l'objectif (6) et de la blende de l'éclairage infrarouge (8). A la fin d'utilisation arretez le viseur en tournant le régulateur (3) en position “OFF”. Fermez l'objectif de l'appareil par le couvercle (2). Vous pouvez monter le viseur sur l'arme avec le support spécial (9). Après le premier montage du viseur sur l'arme il est nécessaire accomplir les recommandations du chapitre “Réglage par tir du viseur”. La mise en marche instantanée du viseur peut etre effectuée avec le pupitre transportable branché dans la douille (10) ou par le bouton de mise en marche instantanée (11). UTILISATION DU VISEUR Con l'illuminazione superiore (mattinato, sera tarda) non lasciare il сannocchiale acceso con l'astuccio aperto piu' di 30 minuti. Osservando gli obbietti luminosi, luminoforo CIE si scolore percio' nel campo visione si apparono macchie scure. Non scordare di spegnere il сannocchiale dopo l'uso. Conservare l'obiettivo nell'astuccio coperto. Grado impermeabilita' IPX6, si funziona in qualsiasi condizione meteorologica. Non immergere nell'acqua. La garanzia si perde se lo strumento viene riparato oppure smontato. Pulizia dei parti ottici esterni si fa con cautela e nel caso di necessita' evidenziale. Si rimuove (togliere oppure soffiare via) la sabbia e la polvere. Si usa la stoffa di cotone o bastoncino di legno nonche' soluzioni o alcohol adatto alle pulizie di lenti. Non porre liquido su lente. Il сannocchiale funziona nell'ampia scala di temperatura - 30°C piu' +40°C. Se pero' il сannocchiale si e' esposto al freddo, non accenderlo entro 3 o 4 ore. Se non si riesce a fissare facilmente il сannocchiale (senza gioco, lungo la canna) sulla fucile o nel caso dei dubbi sul fissaggio, si consigla di contattare l'officina d'armaiolo specializzata. Sparare col сannocchiale non correttamente posizionato causa la spostazione di taratura che rende il tiro impossibile. Per assicurare il funzionamento corretto e per eliminare i guasti che provocano l'usura anticipata o la rottura, e' obbligatoria la manutenzione ordinaria. Svitare nel senso contro orario il coperchio della camera batterie (1). Inserire batteria di tipo AA (1,5V) o CR123А (3V) facendo nota di marcatura (+) è (-) sul corpo. Serrare il coperchio (1). INSTALLAZIONE DI BATTERIA Sistemare le batterie come indicato sopra Installazione di batteria. Entrare nella zona buia. Remuovere il coperchio d'obiettivo spostandolo sul corpo (2). Accendere lo strumento mettendo la panopola su ON; si illumina lo schermo verde di CIE. Si puo' verificare il funzionamento del mirino anche alla luce. In questo modo e' previsto solo far verifiche del funzionamento dello strumento; il coperchio (2) e' sull'obiettivo. Per aggiustare l'intensita' del controssegno rosso si gira la maniglia (4). Premere il bottone (5) per far scelta della configurazione. FUNZIONAMENTO DI CANNOCCHIALE 16 45
  • 19. MANUALE D'USO Il cannocchiale per visione notturna Phantom e' uno strumento ottico elettronico costruitosullabasedelletecnologieavanzate. Siraccomanda:leggereManuale d'Uso primad'accendereilcannocchiale. Non osservazione di tali consiglii nonche' delle indicazioni sulla Manuale d'Uso puo' causare un guasto anche immeddiato e come le conseguenze, si perde la garanzia. ! Il сannochiale per visione notturna PHANTOM si intende ad osservare e sparare a mira all'imbruire e di notte. Codesto e' uno strumento passivo che funziona senza l'illuminazione artificiale. Tuttavia, al buio assoluto (senza stelle ne' luna) s'implica l'illuminazione IR integrata. La Vostra scelta PHANTOM multiplico di visione nottruna si applica perfettamente in vari campi professionisti ed amatori quali sono: Osservazione e caccia notturna Salvaguardia e securiti Lavoro di soccorso USO PARTICOLARE Il сannocchiale per visione notturna PHANTOM s'intende ad uso prolungato. La vita e l'efficacia dello strumento dipende dall'osservazione d'indicazioni: Non accendere il сannochiale con l'astuccio (coperchio) d'obiettivo aperto alla luce piu' di 1 lux (al crepuscolo profondo). Non orientare alla luce viva. Luce diurnal, faro di autoveicolo, di saldatura o di falo' pussono rudurre l'efficacia di stesso. Esempio d'illuminazione, lux Condizioni Senza la Luna, nuvoloso Senza la Luna, cielo stellato, chiaro 1/4 della Luna, chiaro Luna piena, chiaro Crepuscolo profondo Crepuscolo Nuvoloso Luce naturale, lux -4 10 (0,0001) -3 10 (0,001) 0,05 0,380,4 1,0 10 500 44 17 4 3 8 13 6 CI T L E E R 3 4 5 1 12 11 12 1 13 14 7 9 10 2
  • 20. RÉGLAGE PAR LE TIR Monter l'arme avec le viseur sur le dispositif de pointage. S'assurer de l'absence dans le champ de vision du viseur de fortes sources de lumière. Installer la cible à la distance de réglage, par exemple, à 100 m. L'éclairage dans la zone de la cible ne doit pas dépasser 1 lux. Enlever le couvercle de l'objectif, le déposant sur le corps de l'objectif (2). Mettre en marche le viseur, tout en mettant le commutateur (3) en position ON. Pointer l'arme sur le centre de la cible selon le viseur mécanique. Régler le viseur conformément à la recommandation du chapitre “Utilisation du viseur”. En tournat la bague de focalisation de l'objectif (6) trouvez l'image fine de la cible. Régler la luminosité optimale de la marque de pointage par le régulateur (4). Si le centre de la cible ne coïncide pas avec le point de mire (le centre du réticule de la marque rouge de pointage), alors préalablement dévissant les coiffes des disques d'ajustage (13), tout en tournant les disques R et UPfaites coïncider le centre de la cible avec le centre du réticule de la marque de pointage. Faites par tir 3-4 coups de controle, en essuyant de faire soigneusement et uniformement le pointage dans le point de mire. Déterminez la précision du tir et la position du point moyen d'impact (PMI); en cas de l'écart du PMI dépassant la valeur admissible, en tournant le disque d'ajustage (réglage vertical UP, réglage horizontal R) faites coïncider le PMI avec le point de mire. En le faisant il faut prendre en considération qu'un chiquenaude correspond au déplacement de la marque de 16,5/13,5 mm (Phantom 3x50/4x60) à la distance de 100 m. Vérifiez l'ajustage par la répétition du tir. Il est recommandé d'effectuer le réglage par le tir à la température d'exploitation du viseur dans l'ordre suivant: SPECIFICHE Grado d'impermeabilita' IPX6 (impermeabilità all'acqua); tratto ottico riempito di gas Si accetta l'uso di cartuccia extra potente, capacita' della canna fino a 6000 J(.375 H&H, .416 Rigby, 416 Rem. Magnum) Distanza massima di fino a 700 mlocalizzazione Seria convertitore di immagine elettronica (CIE) (2+) il dispositivo e' efficace praticamente in tutte le condizioni d'illuminazione notturna nonche' a quella -4 dei livelli inferiori (10 lux il cielo nuvoloso notturno) Alto contrasto e qualita' d'immagine su tutto lo schermo CIE Protezione CIE di livello superiore Ottica di alta efficienza, magnificazione 3x/4x ottima Minima distanza d'osservazione 5 m Cinque (tré - per CIE di titolo EPM221G) configurazioni di visore: la scelta ed accenzione immeddiata Regolazione d'intensita' calibro continua Selezione d'attacco che consente a sistemare il cannocchiale ad ogni modello di fucile da caccia Alimentatore stabilizzato, consumo energia ottimizzato, senza spostamento del segno alla batteria scaricata gradualmente (nonche' alla temperatura d'aria in discesa) Auto gestione della batteria singola del titolo AA (1,5V) oppure CR123А (3V) (permessa batteria di accumulatori 1,2V, uguale al titoloAA) Posizione verticale della batteria assicura l'alimentazione per sparare Identificazione dello scarico di batteria: flash preventivo del segno 30 minuti prima di auto interruzione Design ergonomico: posizione di comando mirino superiore Illuminazione a fuoco IR staccabile Telecomando a contatto extra efficace Piastrina laterale auxiliaria Astuccio d'obiettivo da non perdere Bottone d'accensione immediata Peso inferiore, costruzione dai materiali solidi: carbone/plastico ed altri materiali plastici di tecnologie avanzate Votre viseur de noctovision Phantom comporte un réticule Mil-Dot installé, qui vous permettra de déterminer la distance de votre cible, si vous connaissez sa taille exacte. RETICULE MIL-DOT Utilisation d'un reticule Mil-Dot Pour utiliser le réticule Mil-Dot, vous devez connaître la taille réelle de la cible. En regardant la cible à travers le viseur, placez la cible au centre du réticule, à égale distance des quatre extrémités du réticule. En utilisant les points lumineux, mesurez la taille de votre cible. Une fois que la mesure de la cible a été estimée en mils, utilisez la formule suivante pour déterminer le champs de vision: 18 43 = Portée en yards Hauteur ou largeur de la cible en yards x 1000 Hauteur ou largeur de la cible en Mils = ou Hauteur ou largeur de la cible en mètres x 1000 Hauteur ou largeur de la cible en Mils Portée en mètres
  • 21. Controle extérieur de l'appareil (les fissures, enfoncements profonds, traces de rouille ne sont pas admissibles). Controle de la régularité et de la sureté de fixation du viseur sur l'arme (le jeu dans la fixation est inadmissible). Controle de l'état des lentilles de l'objectif, de l'oculaire et de l'éclairage infrarouge (les fissures, taches grasses, saleté, gouttes d'eau et d'autres dépots sont inadmissibles). Controle de l'état des piles d'alimentation et des contacts électriques du compartiment de batteries (la batterie ne doit pas déchargée: les traces d'électrolyte, de sels et d'oxydation sont inadmissibles). Controle de la sureté du fonctionnement du commutateur des regimes de travail (3), du régulateur de luminosité de la marque de mire (4); des boutons de sélection des marques de mire (5); et de la mise en fonctionnement rapide (11). Controle du douceur de fonctionnement du régulateur de focalisation de l'objectif (6), de la bague d'oculaire (7) et de la blende d'éclairage infrarouge (8). VISITE TECHNIQUE Lors de la visite technique, recommandée chaque fois avant d'aller à la chasse, il faut faire obligatoirement ce qui suit: Strumento assemblato Astuccio Telecomando Manuale d'Uso Garanzia ONTENUTO DELLA CONFEZIONE Lorsque vous réalisez des ajustements d'élévation, veuillez noter qu'un click d'ajustement du viseur, équivaut à: Pour le modèle Phantom 3x50: 0,527 MOA; 0,5519”/100yds; 1,533cm/100m Pour le modèle Phantom 4x60: 0,4235 MOA; 0,4435”/100 yds; 1,232cm/100m 1 mil (millirad) équivaut à : 3.6 pouces à 100 yards ou 36 pouces à 1,000 yards, ou 10 cm à 100m, ou 1m à 1,000m. 1 millirad (1 mil) = 0,001 d'une distance = 3,4377 MOA Pour davantage d'information sur l'utilisation du réticule Mil-Dot (tableau de references, calculs, etc…) peuvent être trouvés sur les liens suivants: http://www.mildot.com http://www.mil-dot.com/Mil_Dot_User_Guide.htm http://www.shooterready.com/mildot.swf Caratteristiche e specifiche sono soggette a migliorie e cambiamenti. 42 19 Portée en mètres= == ou Hauteur ou largeur de la cible en cm x 10 Hauteur ou largeur de la cible en Mils Exemple: 1,33 yards x 1000 1330 2,5 mils 2,5 532 yards MODELLOMIL-DOT# MODELLO# 76057T 76058T 76067 76068T 76157T 76158T 76167 76168T CARATTERISTICHE TECNICHE Il cannocchiale utilizza questi convertitori di immagine elettronica o CIE analoghi. Si consiglia l'uso della batteria AA "Alkaline" per il periodo di funzionamento prolungato.** * 3 50 mm, F / 1.63 2+ 45 50 11/20 600 ±3,5 5 1,5V (1xAA) o 3V (1xCR123A) 15/24 5/8 IPX6 -30 °С ... +40 °С 278 95 103 1,0 Si 3 50 mm, F / 1.63 2+ DEP ХХ1441* 45 53 13/23 600 ±2,5 5 15/24 5/8 IPX6 257 95 103 1,0 Si 4 60 mm F / 1.68 2+ 45 50 9/15,7 700 ±3,5 8 15/24 5/8 IPX6 320 95 103 1,0 No 4 60 mm F / 1.68 2+ DEP ХХ1441* 45 53 11/19 700 ±2,5 8 15/24 5/8 IPX6 288 95 103 1,0 No Magnificazione visuale, x Obiettivo Generazione di convertitore di immagine elettronica (CIE) Titolo di CIE Risoluzione lineare, linea/mm, min Allontananza pupilla d'uscita, mm Angolo visuale dell'obiettivo, grado Distanza massima di localizzazione, m** Limite fuocolare, diottria Distanza minima d'osservazione, m Cellula alimentazione/tensione nominale, V Tempo di funzionamento continuo a batteria singola, ore (IR illuminazione disabilitata) AA**/ CR123А Tempo di funzionamento continuo a batteria singola, ore (IR illuminazione abilitata) AA**/ CR123А Grado di protezione, codice IP (IEC 60529) Scala di tempertura Dimensioni, mm: Lunghezza Larghezza Altezza Peso senza attacco, kg Possibilita' di montaggio convertitore de lente NV 1,7x Caratteriche della parte ottica Caratteristiche operative ** Distanza massima di localizzazione di un oggetto di 1,7x0,5 m, all'illuminazione notturna 0,05 lux (luna quarto). * EPM221G-00-11А*
  • 22. UTILISATION DE LA TELECOMMANDE Le viseur Phantom vision nocturne est livrée avec une télécommande. La console dispose de trois boutons: - bouton «ON» allume et éteint le viseur (mise en fonction en appuyant). - bouton «IR / torche infrarouge» allume et éteint la torche infrarouge intégrée (en fonction lorsque le bouton est maintenu appuyé). - bouton «Quick start / démarrage rapide» - pour démarrer rapidement le viseur et la torche IR (l'appareil est en fonction uniquement lorsque le bouton est maintenu appuyé). Après que le bouton «Quick start / démarrage rapide» soit relâché, le viseur s'éteint, la torche IR et le réticule disparaissent. Nettoyer les surfaces extérieures des pièces métalliques et plastiques de la poussière, des boues et de l'humidité; les essuyer avec une serviette à conton, légèrement imbibé d'huile d'arme ou de vaseline. Nettoyer les contacts électriques du compartiment de batteries, en utilisant n'importe quel dissolvant organique non-gras. Examiner les lentilles d'oculaire, de l'objectif et de l'éclairage infrarouge; enlever soigneusement la poussière et le sable; en cas nécessaire nettoyer leurs surfaces extérieures. ENTRETIEN TECHNIQUE L'entretien technique se fait au moins deux fois par an et consiste en ce qui suit: EMPLOI DU CONVERTISSEUR DE LENTILLE NV 1,7x L'emploi du convertisseur de lentille NV 1,7x (#79091) permet d'agrandir le groissisement du viseur “Phantom” avec le diamètre de l'objectif de 50 mm à 1,7 fois. L’convertisseur est vissé dans l'objectif du viseur. Au cours du montage utilisez le guide d'emploi du convertisseur. A cause du déplacement possible du point de mire, après le montage du convertisseur, il est necessaire d'effectuer le réglage du tir du viseur. EMPLOI DE LA PLANCHE WEAVER SUPPLEMENTAIRE Le viseur a une planche Weaver (14) supplementaire montée sur son corps à coté gauche. Avec cette planche vous pouvez monter en supplément les appareil suivants: Torche infrarouge Pulsar-805 (#79071)/Pulsar-X850 (#79074); Conservez toujours l'appareil dans son étui, dans un endroit sec et bien aéré. Pour la conservation de l'appareil d'une longue période la pile devra être retirée. Le tableau présente la liste des dérangements eventuels pouvant apparaitre au cours de l'utilisation du viseur. 20 41 CONSERVATION DÉPANNAGE Problema Causa posible Reparación El visor no se enciende. Hay una imagen imprecisa de la marca roja - no resulta enfocar el ocular. Cuando hay una imagen precisa de la marca roja, se tiene una imagen imprecisa del objetivo que se encuentra a una distancia de no menos de 30 m. Hay diferentes pequeños puntos negros precisos en el campo visual con una imagen precisa del objeto. El visor o la iluminación infrarroja no se apagan con la manilla del interruptor que hay en el visor. Se desvía la marca durante el tiro. El visor no se enfoca. Están oxidados los contactos en el contenedor de las baterías - "se derramaron" las pilas o a los contactos cayó un líquido quimicamente activo. Para la corrección de su vista hace falta un gasto de dioptrías del ocular. Hay polvo y humedad en las superficies ópticas externas del objetivo y del ocular. Hay humedad en las superficies ópticas internas del objetivo y del ocular, en las superficies ópticas del COE - que ha sido posible durante el traslado del visor desde el frío a un local cálido. La tensión total de la baterías es menor que 2,0 V. Los puntos en la pantalla del COE están condicionados por la tecnología de su fabricación, no influyen en su capacidad de funcionamiento y en su seguridad. Los tamaños de los puntos están determinados en las condiciones técnicas del COE y del instrumento. El visor está conectado desde el mando de control remoto (MCR). No hay rigidez en la colocación del visor sobre el arma. Está incorrectamente ajustado. Limpie el contenedor de las baterías, limpie los contactos. Si Ud. utiliza lentes con una fuerza de los lentes de más de +/-5, entonces Ud. debe mirar en el ocular del visor a través de los lentes. Frote las superficies ópticas con una servilleta suave de algodón. Seque el visor - déjelo estar 4 horas en un local cálido. Reemplace la batería. No hay razones para la devolución. Apague el instrumento y la iluminación infarroja, presionando los botones del MCR. Revise la rigidez de la colocación del visor. Asegúrese que Ud. está utilizando precisamente aquel tipo de municiones con los que antes hizo el reglaje de tiro de su arma y del visor. Si Ud. regló el visor en verano, y lo explota en invierno (o al revés), entonces no se excluye un cierto cambio del punto cero del reglaje. Ajuste el instrumento en conformidad con el capítulo "Utilización del visor". Revise las superficies externas de los lentes del objetivo y del ocular; en caso de necesidad límpielas del polvo, del condensado, de la escarcha, etc. Durante el tiempo frío Ud. puede utilizar recubrimientos especiales contra el empañamiento (por ejemplo, tal como para lentes correctivos). Dérangements Cause Réparation L'installation incorrecte de la batterie. La tension sommaire de la batterie est moins de 2,0V. Installer la batterie suivant le marquage. Remplacer la batterie. Le viseur ne se met en marche. Torche infrarouge à laser Pulsar L-808S (#79072).
  • 23. Dérangements Cause Réparation Les contacts dans le container des batteries sont oxydés les batteries “se coulent” ou le liquide chimiquement actif a été sur les contacts. Le manque du débit dioprique de l'oculaire pour la correction de votre vue. La poussière et l'humidité sur les surfaces optiques extérieures de l'objectif et de l'oculaire. Apparition de l'humidité sur les surfaces intérieures de l'obectif et de l'oculaire, sur les surfaces optiques de l'appareil au moment du placement du viseur du froid au local chaud. La tension sommaire est moins de 2,0 V. Les points sur l'écran de l'appareil conditionnés par la technologie de sa fabrication et n'influent pas à la capacité et sureté du fonctionne- ment. La grandeur des points est déterminée par les conditions techniques des convertisseurs d'image életronique et de l'appareil. Le viseur est branché sur le pupitre de commande à distance (PCD). Le montage du viseur sur le fusil n'est pas rigide. Réglage incorrecte. Nettoyer le container des batteries, dénuder les contacts. Si vous portez les lunettes à puissance dépassant ±5, observez par l'oculaire du viseur avec vos lunettes. Nettoyer avec une serviette molle à conton les surfaces optiques extérieures. Secher le viseur et le laisser dans le local chaud depuis 4 heures. Remplacer la batterie. Pas de causes de retour. Arreter l'appareil et l'éclairage infrarouge en appuyant les boutons du PCD. Vérifier la rigidité du motage du viseur. Assurez-vous que vous utilisez un tel type de cartouches que vous avez utilisé auparavant au réglage par tir de vos fusil et viseur. Si vous avez réglé le viseur en été mais l'utilisez en hiver (ou au contraire) alors il n'est pas exclu un certain changement du point zéro de mire. Regler l'appareil suivant le chapitre “Guide d'emploi du viseur”. Vérifier les surfaces extérieures des lentilles de l'objectif et de l'oculaire; en cas necessaire les nettoyer de la pouissière, du condensat, du givre etc. Au temps froid utiliser les moyens de protection spéciaux (par exemple, les lunettes de correction). UTILIZACIÓN DEL CONVERTIDOR DE LENTE NV 1,7x La utilización del convertidor de lente NV1,7x (#79091) permite aumentar la ampliación del visor "Phantom" con el diámetro del objetivo 50 mm en 1,7 veces. El convertidor se atornilla en el objetivo del visor. Durante la instalación utilice la instrucción para el convertidor. A causa del posible desplazamiento del punto del reglaje, después de colocar el convertidor, obligatoriamente hay que llevar a cabo el tiro de ajuste del visor. UTILIZACIÓN DEL CARRIL ADICIONAL WEAVER El visor posee un carril adicional Weaver (14), que está colocado en su caja a la izquierda. Con ayuda del carril, Ud. puede colocar adicionalmente accesorios como: ALMACENAMIENTO Siempre hay que conservar el visor solamente en el estuche, en un local seco, con ventilación. Durante un almacenamiento prolongado, extraiga la batería de alimentación. El Iluminador IR Pulsar-805 (#79071)/Pulsar-X850 (#79074); LOCALIZACIÓN DE PROBLEMAS En la tabla se exponen los posibles problemas que pueden surgir durante la explotación del visor. Lleve a cabo la comprobación y la corrección recomendadas de acuerdo al procedimiento indicado en la tabla. Si en la lista indicada no estuviera expuesto un problema o la acción indicada para la eliminación del desperfecto no da resultado, comuniquelo al fabricante. 40 21 Problema Causa posible Reparación El visor no se enciende. La batería está colocada incorrecta- mente. La tensión total de la batería es menor que 2,0 V. Coloque la batería de acuerdo con la marcación. Reemplace la batería. Le viseur ne se met en marche. L'image de la marque rouge n'est pas nette - on n'arrive pas de viser l'oculaire. A une bonne image de la marque rouge une mauvaise image de l'objet éloigné pas moins de 30 m. De petits points noires nets au champ de vision à l'image nette de l'objectif. Le viseur ou l'éclairage infrarouge ne sont pas coupés avec le régulateur d'arret sur le viseur. La marque de pointage s'écarte au moment du tir. Le viseur ne focalise pas. PANEL DE CONTROL REMOTO (a distancia) El Phantom viene con un panel extraible del control remoto. En el panel hay tres botones: - Botón “ON” - conexión / desconexión del visor (fijado cuando está presionado); - Botón “IR” - conexión / desconexión de la linterna infrarroja (funciona cuando el botón está presionado); - Botón “Quick start” - conexión del visor y del iluminador IR rápido (el visor funciona solamete cuando el botón está presionado). Después de que este botón es liberado, el visor apaga, el Iluminador de IR y el retículo se apagan, salen. El Iluminador IR de láser Pulsar L-808S (#79072).
  • 24. El estado del instrumento por fuera (no se permiten grietas, abolladuras profundas y huellas de corrosión). La justeza y la confiabilidad de la fijación del visor al arma (en forma categórica no se permiten los juegos). El estado de las lentes del objetivo, del ocular y del foco infrarrojo (no se permiten grietas, manchas grasosas, suciedad, gotas de agua y otros sedimentos). El estado de los elementos de alimentación y de los contactos eléctricos de la sección de las baterías (la batería no debe estar descargada; no se permiten huellas del electrólito, de sales y de oxidación). La confiabilidad de los selectores de modos de funcionamiento (3), del regulador del brillo de la marca de puntería (4); de los botones de elección de la marca (5) y del encendido instantáneo (11). La fluidez del movimiento de la manilla del enfoque del objetivo (6), del anillo del ocular (7) y del tapa objetivo del foco infrarrojo (8). REVISIÓN TÉCNICA Durante la revisión técnica, que se recomienda antes de cada salida a cazar, sin falta revise: Limpie el polvo, la suciedad y la humedad de las superficies metálicas externas y las piezas de plástico; frotelas con una servilleta de algodón ligeramente empapada con aceite para armas o con vaselina. Limpie los contactos eléctricos del compartimiento de las pilas, utilizando cualquier disolvente orgánico no grasoso. Revise los lentes del ocular, del objetivo y del foco infrarrojo; saque con ciudado el polvo y la arena; si fuera necesario limpie sus superficies externas. MANTENIMIENTO TÉCNICO El mantenimiento técnico se lleva a cabo no menos de dos veces al año y consiste en la realización de los puntos expuestos a continuación: Haciendo las correcciones utilizando los mecanismos de ajuste del visor, hay que tener en cuenta que un capirotazo corresponde a: Para el modelo Phantom 3x50: 0,527 MOA (minuta de ángulo); 0,5519”/100yds; 1,533cm/100m Para el modelo Phantom 4x60: 0,4235 MOA; 0,4435”/100 yds; 1,232cm/100m La subtensión de 1 mil equivale a 3,6 pulgadas a 100 yardas o 36 pulgadas a 1,000 yardas. En unidades metricas, la correspondencia es que 1 mil equivale a 10 centimetros a 100 metros o 1 metro a 1,000 metros. 1 Milirradian (1 mil) = 0,001 de la distancia = 3,4377 MOA. Detalles sobre el uso de la retícula Mil-Dot (tablas de referencia, calculadores etc.) se puede encontrar sobre las referencias (en inglés): http://www.mildot.com http://www.mil-dot.com/Mil_Dot_User_Guide.htm http://www.shooterready.com/mildot.swf 22 39 TECHNISCHE DATEN MODELLMIL-DOT# 76057T 76058T 76067 76068T 76157T 76158T 76167 76168T MODELL# Statt dieser EOV können auch gleichartige EOV verwendet werden. Es ist empfehlenswert, die Batterien AA "Alkaline" zu verwenden, da sie sich durch die längste Betriebsdauer auszeichnen. *** Änderung des Designs zwecks höherer Gebrauchseigenschaften vorbehalten. LIEFERUMFANG Das Gerät komplett Aufbewahrungstasche Fernsteuerpult Gebrauchsanleitung Garantieschein 3 50 mm, F / 1.63 2+ 45 50 11/20 600 ±3,5 5 Auf Wahl: 1 AA / 1.5V // 1 CR 123/ 3V 15/24 5/8 IPX6 von - 30°С bis + 40°С 278 95 103 1,0 ja 3 50 mm, F / 1.63 2+ DEP ХХ1441* 45 53 13/23 600 ±2,5 5 15/24 5/8 IPX6 257 95 103 1,0 ja 4 60 mm F / 1.68 2+ 45 50 9/15,7 700 ±3,5 8 15/24 5/8 IPX6 320 95 103 1,0 nein 4 60 mm F / 1.68 2+ DEP ХХ1441* 45 53 11/19 700 ±2,5 8 15/24 5/8 IPX6 288 95 103 1,0 nein Visuelle Vergrößerung, x Objektiv Generation der elektro-optischen Verstärkerröhre (EOV) Typ der EOV Auflösungsvermögen, Linien/mm, min. Austrittspupillenabstand, mm Sichtfeldwinkel, Winkelgrad Max. Entdeckungsdistanz, m** Dioptrieneinstellung, Dioptrien Naheinstellung, m Batterietyp/ Betriebsspannung, V Zeit des Dauerbetriebs mit einem Batteriesatz, Stunden (IR-Leuchte ist ausgeschaltet) AA**/ CR123 Zeit des Dauerbetriebs mit einem Batteriesatz, Stunden (IR-Leuchte ist eingeschaltet) AA**/ CR123 Schutzklasse, Code IP (IEC 60529) Betriebstemperatur Abmessungen, mm: Länge Breite Höhe Gewicht ohne Montage, kg Vereinbar mit dem Linsenkonverter NV 1,7x Optische Kenndaten: Betriebsparameter: Max. Entdeckungsdistanz von einem Objekt mit Abmessungen 1,7x0,5 m bei der natürlichen Nachtsbeleuchtungsstärke 0,05 lx (1/4 Mond). ** * EPM221G-00-11А*