SlideShare a Scribd company logo
1 of 68
Download to read offline
Ballistic Turret
Odšroubujte krytku stávajícího točítka elevace a vyšroubujete oba
montážní šrouby. Potom odejměte ovladač a štítek. Krytku s ovladačem
a štítkem uschovejte pro případnou zpětnou montáž.
KRYTKA
MONTÁŽNÍ ŠROUBY M 1,6x4
OVLÁDAČ
ŠTÍTEK
Přiložte rohatku na místo původního ovladače a zašroubujte oba šrouby.
Rohatka musí být pevně zafixována.
MONTÁŽNÍ ŠROUBY M 1,6x4
ROHATKA
Nyní našroubujte nákružek na doraz. Nákružek patřičně dotáhněte.
NÁKRUŽEK
Na nákružek nasuňte posuvnou objímku. Nyní nasuňte hlavici, tak aby
při otáčení ve směru hod. ručiček byl doraz na hodnotě -5.
HLAVICE
POSUVNÁ OBJÍMKA
Vložte pružinu do hlavice a celou sestavu zajistěte centrálním šroubem,
který lehce přitáhněte.
CENTRÁLNÍ ŠROUB
PRUŽINA
POJISTNÉ ŠROUBY
Nyní přitáhněte pojistné šrouby - v posuvné objímce.
Nastavení:
Nastřelte zbraň obvyklým způsobem např. na 100 m. Potom proveďte
částečnou demontáž původního balistického točítka podle návodu.
Posuvnou objímku nastavte tak, aby trojúhelníkové indexy byly
orientovány v ose puškohledu přímo před vašima očima. Utáhněte čtyři
pojistné šrouby pomocí imbusového klíče, který najdete v příslušenství.
Povolte centrální šroub o jednu otáčku, povysuňte točítko a natočte ho
tak, aby nulový index na stupnici byl v koincidenci s indexy na posuvné
objímce. Přitáhněte centrální šroub. Po nastřelení zbraně nastavíme 2.
nástřelnou vzdálenost. Pootočte točítkem o patřičný počet kliků proti
směru hodinových ručiček . Po stlačení aretačního tlačítka natočte první
prstenec svým indexem proti indexům na posuvné objímce a uvolněte
aretační tlačítko. Počet potřebných kliků zjistíte pomocí balistického
programu, nebo nastřelením. Pro 3. nástřelnou vzdálenost použijeme
stejný postup jako pro druhé točítko. Vaše balistické točítko je nyní
připraveno k použití.
Funkce:
Pro nastavení příslušné vzdálenosti natočte hlavici balistického točítka
požadovaným indexem proti nulovým indexům na posuvné objímce.
Počet potřebných kliků můžete rovněž zjistit pomocí našeho balistického
programu. Počet kliků se odpočítává vždy od základní polohy nulových
indexů na posuvné objímce.
Remove the existing elevation turret cap and unscrew the two mounting
screws. Then remove the actuator and the shield. Keep the cap, actuator
and shield at a safe place for future reassembly.
CAP
MOUNTING SCREWS M 1,6x4
ACTUATOR
SHIELD
Put the ratchet wheel to the place of the original actuator and screw in
the two screws. The ratchet wheel must be firmly fixed.
MOUNTING SCREWS M 1,6x4
RATCHET WHEEL
Screw in the collar as far as it will go. Tighten the collar properly.
COLLAR
Put the sliding sleeve onto the collar. Now slide in the head so that when
turning clockwise, the stop is on digit -5.
HEAD
SLIDING SLEEVE
Insert the spring into the head and secure the assembly with the central
screw; tighten it gently.
CENTRAL SCREW
SPRING
LOCKING SCREWS
Screw in the locking screws in the sliding sleeve and secure in position.
Adjustment:
Use the standard procedure for sighting-in the rifle, e.g. at a 100 m
distance. Then, following the instructions, partially disassemble the
original ballistic turret. Adjust the sliding sleeve so that the vertical index
line is in the axis of the riflescope directly before your eyes. Tighten
the four locking screws with the Allen wrench from the accessory bag.
Loosen the central screw one turn, pull out the turret a little and turn it so
that the zero index on the turret coincides with the index on the sliding
sleeve and, at the same time, is in the stop position. Tighten the locking
screws. Tighten the central screw. The initial sighting-in distance is also
the stop position. After the initial adjustment, make the adjustment for
the 2nd sighting-in distance. Turn the turret counterclockwise by the
required number of clicks. Turn the first ring so that its index faces the
zero index on the turret; secure in position with the locking screw. The
number of clicks may be determined using our ballistic program or by
sighting-in. When adjusting the 3rd sighting-in distance, use the same
procedure as for the second turret.
Your ballistic turret is now ready for use.
Features:
To adjust the corresponding distance, turn the entire ballistic turret
with its zero index against the required mark (red, green).
Should you desire to sight-in the riflescope at an additional distance,
you may adjust this additional distance by turning the turret against the
vertical index on the sliding sleeve. The required number of clicks may
also be determined using our ballistic program. The number of clicks is
always calculated from the initial position - with the zero index on the
turret against the vertical index of the sliding sleeve.
Die Abdeckung der Taste Elevation abschrauben und beide Montag-
eschrauben herausschrauben. Danach Bedienung und Schild abne-
hmen. Die Abdeckung und die Bedienung mit Schild für eventuellen
Wiederanbau aufbewahren.
ABDECKUNG
MONTAGESCHRAUBEN M 1,6x4
BEDIENUNG
SCHILD
Die Ratsche an der Stelle der Bedienung anlegen und beide Schrauben
einschrauben. Die Ratsche muss fest fixiert sein.
MONTAGESCHRAUBEN M 1,6x4
RATSCHE
Nun den Ring auf Anschlag schrauben. Den Ring festziehen.
RING
Auf den Ring die Schiebehülse aufsetzen.
Nun den Kopf so aufschieben, dass sich beim Drehen in Uhrzeiger-
richtung der Anschlag auf dem Wert -5 liegt.
KOPF
SCHIEBEHÜLSE
Die Feder im Kopf einlegen und die gesamte Gruppe mit leicht fes-
tgezogener Zentralschraube sichern.
ZENTRALSCHRAUBE
FEDER
SICHERUNGSS-
CHRAUBEN
Nun die Sicherungsschrauben in die Schiebehülse schrauben und die
Position sichern.
Einstellen:
Mit der Waffe wie üblich, z.B. auf 100 m schießen. Danach den
ballistischen Drehknopf nach Anleitung teilweise demontieren.
Die Schiebehülse so einstellen, dass der vertikale Indexstrich
in der Zielfernrohrachse direkt vor Ihren Augen liegt. Die vier
Sicherungsschrauben mit Inbusschlüssel aus dem Zubehör festziehen.
Die Zentralschraube um eine Umdrehung lösen, den Drehknopf
herausziehen und so drehen, dass der Nullindex in Koinzidenz mit dem
Index auf der Schiebehülse und gleichzeitig auf Anschlag ist.
Die Sicherungsschrauben anziehen. Die Zentralschraube festziehen.
Die grundlegende Schussentfernung ist gleichzeitig Anschlagposition.
Nach Einstellen der Grundeinstellung die 2. Schussentfernung
einstellen. Den Drehknopf die entsprechende Anzahl Klicks entgegen
der Uhrzeigerrichtung drehen. Den ersten Ring mit seinem Index gegen
den Nullindex einstellen und diese Stellung mit Sicherheitsschraube
sichern. Die entsperechende Anzahl der Klicks mit ballistischem
Programm oder durch Schießn ermitteln.
Für die 3. Schussentfernung das gleiche Vorgehen auch für den
zweiten Drehknopf benutzen.
Ihr ballistischer Drehknopf ist zur Benutzung bereit.
Funktionen:
Für das Einstellen der zugehörigen Entfernung den ganzen
ballistischen Drehknopf mit Nullindex gegen das gewünschte Zeichen
(rot, grün) stellen.
Wenn Sie eine zusätzliche Schussentfernung wünschen, können Sie
eine weitere Entfernung durch Drehen des Knopfes gegen vertikalen
Index auf der Schiebehülse einstellen. Die Anzahl der erforderlichen
Klicks können Sie ebenfalls mit Hilfe unseres ballistischen Programms
ermitteln. Die Anzahl der Klicks wird immer aus der Grundstellung des
Nullindexes auf dem Drehknopf gegen den vertikalen Index auf der
Schiebehülse berechnet.
Desenrosque la tapa de la existente torreta de elevación y destornille los
dos tornillos de montaje. A continuación retire el elemento de control y
la placa. Guarde la tapa con el elemento de control y con la placa por si
desea volver a montarlos en el futuro.
TAPA
TORNILLOS DE MONTAJE M 1,6x4
ELEMENTO DE CONTROL
PLACA
Coloque el trinquete en el lugar del elemento de control original y
atornille los dos tornillos. El trinquete debe estar firmemente sujeto.
TORNILLOS DE MONTAJE M 1,6x4
TRINQUETE
Ahora enrosque el collarín hasta que haga tope. Apriete el collarín
firmemente.
COLLARÍN
Inserte la virola móvil en el collarín.
Ahora inserte la cabeza de modo que al girar en el sentido de las agujas
de reloj el tope esté en la cifra -5.
CABEZA
VIROLA MÓVIL
Inserte el muelle en la cabeza y asegure todo el conjunto con el tornillo
central, apretándolo suavemente.
TORNILLO CENTRAL
MUELLE
TORNILLOS DE
SEGURIDAD
Nun die Sicherungsschrauben in die Schiebehülse schrauben und die
Position sichern.
Ajuste:
Realice los tiros de ajuste como acostumbra, p.ej. a 100 metros de
distancia. A continuación desmonte parcialmente la torreta balística
original de acuerdo con las instrucciones. Ajuste la virola móvil de
manera que la línea de índice vertical esté en línea con el eje de la mira
telescópica justo delante de sus ojos. Apriete los cuatro tornillos de
seguridad con una llave Allen, incluida en la bolsa de accesorios. Afloje el
tornillo central un giro, saque parcialmente la torreta y gírela de manera
que el índice de cero en la torreta coincida con el índice en la virola móvil
y, al mismo tiempo, esté en el tope.
Apriete los tornillos de seguridad. Apriete el tornillo central. La
distancia básica para los tiros de ajuste es también la posición de tope.
Una vez finalizada la puesta a punto básica, realice el procedimiento
para la 2a distancia para los tiros de ajuste. Gire la torreta el sentido
contrario a las agujas del reloj para que haga el número requerido de
clics. Gire la primera anilla para que su índice esté contra el índice cero en
la torreta y asegure esta posición con el tornillo de seguridad. El número
necesario de clics lo determinará mediante un programa balístico o
realizando los tiros de ajuste.
En cuanto a la 3a distancia para los tiros de ajuste, utilice el mismo
procedimiento que para la segunda torreta.
Su torreta balística está lista para usar.
Funcionamiento:
Para ajustar la distancia correspondiente gire toda la torreta balística
para que su índice cero esté contra la marca correspondiente (roja,
verde).
Si desea realizar los tiros de ajuste a distancias adicionales, puede
hacerlo girando la torreta contra el índice vertical en la virola móvil. El
número necesario de clics lo puede determinar también usando nuestro
programa balístico. El número de clics se calcula siempre partiendo de
la posición básica - con el índice de cero en la torreta contra el índice
vertical en la virola móvil.
Desaperte a tampa do ajuste de elevação existente e desaparafuse os
dois parafusos de montagem. Depois, retire o anel e a anilha. Guarde a
tampa com o anel e a anilha para uma eventual remontagem.
TAMPA
PARAFUSOS DE MONTAGEM
ANEL
ANILHA
Fixe o roquete no lugar do anel original e aperte os dois parafusos. O
roquete deve ser fixado de modo firme.
PARAFUSOS DE MONTAGEM M1, 6x4
ROQUETE
Agora aparafuse o espigão até ao batente. Aperte bem o espigão.
ESPIGÃO
Coloque o espigão na manga ajustável.
Agora enfie a cabeça de modo que ao girar no sentido dos ponteiros do
relógio o batente fique no valor -5.
CABEÇA
MANGA AJUSTÁVEL
Coloque a mola na cabeça e fixe todo o conjunto com o parafuso central
que deve ser apertado ligeiramente.
PARAFUSO CENTRAL
MOLA
PARAFUSOS DE
FIXAÇÃO
Agora aperte os parafusos de fixação na manga ajustável e fixe a posição.
Configuração:
Calibre a arma como de costume, por ex. para 100m. A seguir
desmonte parcialmente o ajuste balístico original de acordo com as
instruções. Defina a manga ajustável de modo que a linha de vértice
vertical esteja no eixo da luneta diante dos seus olhos. Aperte os
quatro parafusos de fixação com a chave hexagonal que encontrará
nos acessórios. Desaperte o parafuso central girando-o uma vez, puxe
o ajuste e gire-o de modo a que o índice zero do ajuste coincida com o
índice na manga ajustável e ao mesmo tempo esteja no batente.
Aperte os parafusos de fixação. Aperte o parafuso central. A distância
de calibragem básica é também a posição do batente.
Uma vez definida a configuração básica, definimos também a segunda
distância de calibragem. Gire o ajuste o número apropriado de cliques,
no sentido contrário ao dos ponteiros do relógio. Rode o primeiro anel
de modo que o seu índice esteja frente ao índice zero no ajuste e fixe esta
posição com o parafuso de fixação. Para descobrir o número de cliques
necessários utilize o programa balístico ou a calibragem.
O mesmo procedimento será aplicado para a 3ª distância de
calibragem e para o segundo ajuste.
O vosso ajuste balístico está pronto para usar.
Funções:
Para definir a distância gire o ajuste balístico de modo a que o índice
zero corresponda à marca desejada (vermelha, verde).
Caso deseje mais distâncias de calibragem, pode definir mais
distâncias do ajuste correspondentes ao índice vertical da manga
ajustável. Para descobrir o número de cliques necessários utilize o nosso
programa balístico. O número de cliques é calculado a partir da posição
básica-índice zero, no ajuste correspondente ao índice vertical na manga
ajustável.
Dévissez le couvercle de la tourelle d’élévation existante et retirez les
deux vis de montage. Puis ôtez la commande et la plaque. Gardez le
couvercle et la plaque pour un remontage éventuel.
COUVERCLE
VIS DE FIXATION M 1,6x4
COMMANDE
PLAQUE
Fixez le cliquet au lieu de la commande d’origine et vissez les deux vis. Le
cliquet doit être solidement fixé.
VIS DE FIXATION M1,6x4
CLIQUET
Maintenant vissez le collet jusqu’au bout. Serrez correctement le collet.
COLLET
Enfilez le manchon coulissant sur le collet.
Maintenant, faites glisser la tête de sorte à atteindre la valeur de la butée
de -5 lorsque vous tournez dans le sens horaire.
TÊTE
MANCHON COULISSANT
Insérez le ressort dans la tête et fixez tout l’assemblage par la vis centrale,
serrez la vis doucement.
VIS CENTRALE
RESSORT
VIS DE BLOCAGE
Maintenant serrez les vis de blocage dans le manchon coulissant et fixez
la position.
Réglage:
Réglez l’arme comme d’habitude à 100 m. Puis faites un démontage
partiel de la tourelle balistique original selon les instructions. Réglez le
manchon coulissant de sorte que la ligne de repère verticale soit dans
l’axe des lunettes de tir juste devant vos yeux. Serrez les quatre vis de
blocage avec une clé Allen qui se trouve dans les accessoires. Desserrez
la vis centrale d’un tour, tirez la tourelle et tournez-la de sorte que l’indice
zéro sur la tourelle soit en coïncidence avec l’indice sur le manchon
coulissant et soit également en butée.
Serrez les vis de blocage. Serrez la vis centrale. La distance de réglage
de base représente également la position d’arrêt.
Après avoir effectué le réglage de base, réglez la 2ème distance.
Tournez la tourelle d’un nombre approprié de clics dans le sens
antihoraire. Tournez la première bague avec son indice contre l’indice
zéro et fixez cette position par la vis de blocage. Vous déterminerez le
nombre de clics nécessaires à l’aide du programme balistique ou du
réglage
Pour la 3ème distance, utilisez le même procédé comme pour la
deuxième tourelle.
Votre tourelle balistique est prête à l’emploi.
Fonction:
Pour régler la distance appropriée, tournez toute la tourelle balistique
par l’indice zéro contre le repère souhaité (rouge, vert).
Si vous souhaitez d’autres distances de réglage, vous pouvez régler
les distances supplémentaires de rotation de la tourelle contre l’indice
vertical sur le manchon coulissant. Vous pouvez déterminer le nombre
de clics nécessaires à l’aide de notre programme balistique. Le nombre
de clics est calculé à partir de la position initiale - l’indice zéro sur la
tourelle contre l’indice vertical sur le manchon coulissant.
Svitare il coperchio della manopola di elevazione esistente e le due viti
di montaggio. Poi rimuovere il regolatore e la targhetta. Conservare il
coperchio con il regolatore e la targhetta per il rimontaggio eventuale.
COPERCHIO
VITI DI MONTAGGIO M 1,6x4
REGOLATORE
TARGHETTA
Collocare la ruota d’arresto al posto del regolatore e avvitare le due viti.
La ruota d’arresto deve essere saldamente fissata.
VITI DI MONTAGGIO M1,6x4
RUOTA D’ARRESTO
Ora avvitare il collare fino in fondo. Stringere correttamente il collare.
COLLARE
Infilare il manicotto scorrevole nel collare.
Ora infilare la testa, in modo che, ruotando in senso orario, il valore di
arresto sia -5.
TESTA
MANICOTTO SCORREVOLE
Inserire la molla nella testa e fissare l’intero sistema con la vite centrale,
stringendola leggermente.
VITE CENTRALE
MOLLA
VITI DI
BLOCCAGGIO
Ora serrare le viti di bloccaggio nel manicotto scorrevole e assicurare la
posizione.
Impostazione:
Sparare con l’arma nel modo consueto, ad es. a 100 m. Quindi eseguire
il parziale smontaggio della manopola balistica originale secondo le
istruzioni. Impostare il manicotto scorrevole in modo che la linea d’indice
verticale, nell’asse del cannocchiale dell’arma, si trovi proprio davanti
agli occhi. Serrare le quattro viti di bloccaggio con una chiave a brugola,
che fa parte degli accessori. Allentare la vite centrale di un giro, tirare
e ruotare la manopola in modo che l’indice zero della manopola stessa
coincida con l’indice sul manicotto scorrevole e si trovi nel contempo
sull’arresto.
Serrare le viti di bloccaggio. Stringere la vite centrale. La distanza di tiro
iniziale è anche la posizione di arresto.
Dopo aver eseguito l’impostazione iniziale, impostiamo la seconda
distanza di tiro. Ruotare la manopola per il numero appropriato di clic
in senso antiorario. Ruotare il primo anello con l’indice in senso opposto
all’indice zero sulla manopola e fissare questa posizione con la vite di
bloccaggio. Il numero di clic necessari si può determinare mediante il
programma balistico o sparando.
Per la terza distanza di tiro utilizziamo la stessa procedura anche per
la seconda manopola.
La manopola balistica è pronta per l’uso.
Funzioni:
Per impostare la distanza adeguata, girare l’intera manopola balistica
con l’indice zero opposto al segno richiesto (rosso, verde).
Se si desiderano ulteriori distanze di tiro, è possibile impostare le altre
distanze ruotando la manopola in senso opposto all’indice verticale sul
manicotto scorrevole. Il numero di clic necessari si può determinare
anche mediante il nostro programma balistico. Il numero di clic viene
calcolato sempre dalla posizione iniziale-indice zero sulla manopola
rispetto all’indice verticale sul manicotto scorrevole.
Открутите крышку установленного маховика и открутите оба
монтажных винта. Снимите регулятор и заслон. Крышку вместе с
регулятором и заслоном сохраните на случай обратного монтажа.
КРЫШКА
МОНТАЖНЫЕ ВИНТЫ M 1,6x4
РЕГУЛЯТОР
ЗАСЛОН
Поставьте храповик на место первоначального регулятора и
закрутите оба винта. Храповик должен быть надежно зафиксирован.
МОНТАЖНЫЕ ВИНТЫ M 1,6x4
ХРАПОВИК
Теперь прикрутите кольцо к упору. Кольцо должно быть
соответствующим образом зажато.
КОЛЬЦО
На храповик наденьте подвижную муфту.
Теперь наденьте головку таким образом, чтобы при поворачивании
по часовой стрелке упор был на значении -5.
ГОЛОВКА
ПОДВИЖНАЯ МУФТА
Вставьте пружину в головку и весь комплект маховика зафиксируйте
центральным винтом, слегка его зажав.
ЦЕНТРАЛЬНЫЙ ВИНТ
ПРУЖИНА
ПРЕДОХРАНИТЕЛЬНЫЕ
БОЛТЫ
Теперь закрутите предохранительные болты в подвижной муфте и
зафиксируйте в нужном положении.
Настройка:
Пристреляйтевашеоружиеобычнымспособом,напр.,на100м.Потом
частично демонтируйте первоначальный баллистический маховик,
как это описано в инструкции. Подвижную муфту отрегулируйте так,
чтобы вертикальный индекс был в одной оси прицела прямо перед
вашими глазами. Зажмите четыре предохранительных болта с помощью
ключа, поставляемого в комплекте. Ослабьте центральный винт на
один оборот, слегка приподнимите маховик и поверните его так, чтобы
нулевой индекс на маховике совпадал с индексом на подвижной муфте
и одновременно был на упоре.
Зажмите предохранительные болты. Зажмите центральный
винт. Базовое пристрелянное расстояние одновременно является
положением упора.
После проведения базовой настройки проведем настройку 2-ого
пристрелянного расстояния. Поверните маховик на соответствующее
количество щелчков против часовой стрелки. Поставьте индекс
первой торцевой шайбы напротив нулевого индекса на маховике и
зафиксируйте данное положение с помощью предохранительного
болта. Количество необходимых щелчков выясните с помощью
баллистической программы или с помощью пристрелки.
Для настройки 3-его пристрелянного расстояния повторяем
вышеописанную последовательность со вторым маховиком.
Ваш баллистический маховик готов к эксплуатации.
Функции:
Длянастройкинеобходимогорасстоянияповернитевесьмаховиктак,
чтобы его нулевой индекс стоял на нужной отметке (красная, зеленая).
Если вы хотите пристрелять дополнительные расстояния, то
настройте другие расстояния, поворачивая маховик по отношению к
вертикальному индексу на подвижной муфте. Количество необходимых
щелчков можно также установить с помощью нашей баллистической
программы. Количество щелчков считаем от базового положения –
нулевого индекса на маховике по отношению к индексу на подвижной
муфте.
392 8654 90051 Ballistic turret MEOSTAR 30 -B
PZD Meostar R1 3-12x56
PZD Meostar R1 3-12x56 RD
392 8654 90052 Ballistic turret MEOSTAR 35 -B
PZD Meostar R1 4-12x40
PZD Meostar R1r 3-12x56
PZD Meostar R1r 3-12x56 RD
PZD Meostar R1r 3-12x56 RGD
PZD Meostar R1r 3-12x56 RD/MR
392 8654 90053 Ballistic turret MEOSTAR 40 -B PZD Meostar R1 3-10x50
392 8654 90054 Ballistic turret MEOSTAR 50 -B
PZD Meostar R1 1-4x22
PZD Meostar R1 1-4x22 RD
PZD Meostar R1 1-4x22 RD/MR
392 8654 90055 Ballistic turret MEOSTAR 60 -B PZD Meostar R1 1,5-6x42 RD
392 8654 90056 Ballistic turret MEOSTAR 80 -B PZD Meostar R1 1,5-5x20
Meopta - optika, s.r.o.
Kabelíkova 1
750 02 Přerov
Tel. 581 242 281
Fax: 581 242 222
E-mail: meopta@meopta.com
www.meopta.com
418040
Duben 2013, Rev. 01

More Related Content

More from Optics-Trade

Technical Data | ThermTec Wild 325 | Optics Trade
Technical Data | ThermTec Wild 325 | Optics TradeTechnical Data | ThermTec Wild 325 | Optics Trade
Technical Data | ThermTec Wild 325 | Optics TradeOptics-Trade
 
Instruction Manual | ThermTec Wild Thermal Monoculars | Optics Trade
Instruction Manual | ThermTec Wild Thermal Monoculars | Optics TradeInstruction Manual | ThermTec Wild Thermal Monoculars | Optics Trade
Instruction Manual | ThermTec Wild Thermal Monoculars | Optics TradeOptics-Trade
 
Technical Data | ThermTec Hunt 335 | Optics Trade
Technical Data | ThermTec Hunt 335 | Optics TradeTechnical Data | ThermTec Hunt 335 | Optics Trade
Technical Data | ThermTec Hunt 335 | Optics TradeOptics-Trade
 
Instruction Manual | ThermTec Hunt Thermal Clip-On Series | Optics Trade
Instruction Manual | ThermTec Hunt Thermal Clip-On Series | Optics TradeInstruction Manual | ThermTec Hunt Thermal Clip-On Series | Optics Trade
Instruction Manual | ThermTec Hunt Thermal Clip-On Series | Optics TradeOptics-Trade
 
Instruction Manual | Steiner eRanger LRF 10x42 | Optics Trade
Instruction Manual | Steiner eRanger LRF 10x42 | Optics TradeInstruction Manual | Steiner eRanger LRF 10x42 | Optics Trade
Instruction Manual | Steiner eRanger LRF 10x42 | Optics TradeOptics-Trade
 
Flyer | Guide DN Series Handheld Digital Binoculars | Optics Trade
Flyer | Guide DN Series Handheld Digital Binoculars | Optics TradeFlyer | Guide DN Series Handheld Digital Binoculars | Optics Trade
Flyer | Guide DN Series Handheld Digital Binoculars | Optics TradeOptics-Trade
 
Quick Start Guide | Guide TB Series | Optics Trade
Quick Start Guide | Guide TB Series | Optics TradeQuick Start Guide | Guide TB Series | Optics Trade
Quick Start Guide | Guide TB Series | Optics TradeOptics-Trade
 
Instruction Manual | Pard FD1 Digital NV Front Attachment | Optics Trade
Instruction Manual | Pard FD1 Digital NV Front Attachment | Optics TradeInstruction Manual | Pard FD1 Digital NV Front Attachment | Optics Trade
Instruction Manual | Pard FD1 Digital NV Front Attachment | Optics TradeOptics-Trade
 
Instruction Manual | EOTech Vudu X 2-12x40 | Optics Trade
Instruction Manual | EOTech Vudu X 2-12x40 | Optics TradeInstruction Manual | EOTech Vudu X 2-12x40 | Optics Trade
Instruction Manual | EOTech Vudu X 2-12x40 | Optics TradeOptics-Trade
 
Instruction Manual | EOTech Vudu X 1-6x24 | Optics Trade
Instruction Manual | EOTech Vudu X 1-6x24 | Optics TradeInstruction Manual | EOTech Vudu X 1-6x24 | Optics Trade
Instruction Manual | EOTech Vudu X 1-6x24 | Optics TradeOptics-Trade
 
Instruction Manual | Nightforce CFS 6-36x50 F1 | Optics Trade
Instruction Manual | Nightforce CFS 6-36x50 F1 | Optics TradeInstruction Manual | Nightforce CFS 6-36x50 F1 | Optics Trade
Instruction Manual | Nightforce CFS 6-36x50 F1 | Optics TradeOptics-Trade
 
Instruction Manual | Athlon Cronus Tactical G2 ED 7-42x60 | Optics Trade
Instruction Manual | Athlon Cronus Tactical G2 ED 7-42x60 | Optics TradeInstruction Manual | Athlon Cronus Tactical G2 ED 7-42x60 | Optics Trade
Instruction Manual | Athlon Cronus Tactical G2 ED 7-42x60 | Optics TradeOptics-Trade
 
Insrtuction Manual | Swarovski CL Companion Habicht | Optics Trade
Insrtuction Manual | Swarovski CL Companion Habicht | Optics TradeInsrtuction Manual | Swarovski CL Companion Habicht | Optics Trade
Insrtuction Manual | Swarovski CL Companion Habicht | Optics TradeOptics-Trade
 
Technical Data | Swarovski CL Companion Habicht | Optics Trade
Technical Data | Swarovski CL Companion Habicht | Optics TradeTechnical Data | Swarovski CL Companion Habicht | Optics Trade
Technical Data | Swarovski CL Companion Habicht | Optics TradeOptics-Trade
 
Instruction Manual | Athlon Midas G2 UHD PRO | Optics Trade
Instruction Manual | Athlon Midas G2 UHD PRO | Optics TradeInstruction Manual | Athlon Midas G2 UHD PRO | Optics Trade
Instruction Manual | Athlon Midas G2 UHD PRO | Optics TradeOptics-Trade
 
Catalog 2024 | Shield Sights | Optics Trade
Catalog 2024 | Shield Sights | Optics TradeCatalog 2024 | Shield Sights | Optics Trade
Catalog 2024 | Shield Sights | Optics TradeOptics-Trade
 
Instruction Manual | Burris Fastfire C | Optics Trade
Instruction Manual | Burris Fastfire C | Optics TradeInstruction Manual | Burris Fastfire C | Optics Trade
Instruction Manual | Burris Fastfire C | Optics TradeOptics-Trade
 
Instruction Manual | Burris Veracity PH Rifle Scopes | Optics Trade
Instruction Manual | Burris Veracity PH Rifle Scopes | Optics TradeInstruction Manual | Burris Veracity PH Rifle Scopes | Optics Trade
Instruction Manual | Burris Veracity PH Rifle Scopes | Optics TradeOptics-Trade
 
Product Sheet I Aimpoint 3X-P | Optics Trade
Product Sheet I Aimpoint 3X-P | Optics TradeProduct Sheet I Aimpoint 3X-P | Optics Trade
Product Sheet I Aimpoint 3X-P | Optics TradeOptics-Trade
 
Catalog 2024 | Holosun Products | Optics Trade
Catalog 2024 | Holosun Products | Optics TradeCatalog 2024 | Holosun Products | Optics Trade
Catalog 2024 | Holosun Products | Optics TradeOptics-Trade
 

More from Optics-Trade (20)

Technical Data | ThermTec Wild 325 | Optics Trade
Technical Data | ThermTec Wild 325 | Optics TradeTechnical Data | ThermTec Wild 325 | Optics Trade
Technical Data | ThermTec Wild 325 | Optics Trade
 
Instruction Manual | ThermTec Wild Thermal Monoculars | Optics Trade
Instruction Manual | ThermTec Wild Thermal Monoculars | Optics TradeInstruction Manual | ThermTec Wild Thermal Monoculars | Optics Trade
Instruction Manual | ThermTec Wild Thermal Monoculars | Optics Trade
 
Technical Data | ThermTec Hunt 335 | Optics Trade
Technical Data | ThermTec Hunt 335 | Optics TradeTechnical Data | ThermTec Hunt 335 | Optics Trade
Technical Data | ThermTec Hunt 335 | Optics Trade
 
Instruction Manual | ThermTec Hunt Thermal Clip-On Series | Optics Trade
Instruction Manual | ThermTec Hunt Thermal Clip-On Series | Optics TradeInstruction Manual | ThermTec Hunt Thermal Clip-On Series | Optics Trade
Instruction Manual | ThermTec Hunt Thermal Clip-On Series | Optics Trade
 
Instruction Manual | Steiner eRanger LRF 10x42 | Optics Trade
Instruction Manual | Steiner eRanger LRF 10x42 | Optics TradeInstruction Manual | Steiner eRanger LRF 10x42 | Optics Trade
Instruction Manual | Steiner eRanger LRF 10x42 | Optics Trade
 
Flyer | Guide DN Series Handheld Digital Binoculars | Optics Trade
Flyer | Guide DN Series Handheld Digital Binoculars | Optics TradeFlyer | Guide DN Series Handheld Digital Binoculars | Optics Trade
Flyer | Guide DN Series Handheld Digital Binoculars | Optics Trade
 
Quick Start Guide | Guide TB Series | Optics Trade
Quick Start Guide | Guide TB Series | Optics TradeQuick Start Guide | Guide TB Series | Optics Trade
Quick Start Guide | Guide TB Series | Optics Trade
 
Instruction Manual | Pard FD1 Digital NV Front Attachment | Optics Trade
Instruction Manual | Pard FD1 Digital NV Front Attachment | Optics TradeInstruction Manual | Pard FD1 Digital NV Front Attachment | Optics Trade
Instruction Manual | Pard FD1 Digital NV Front Attachment | Optics Trade
 
Instruction Manual | EOTech Vudu X 2-12x40 | Optics Trade
Instruction Manual | EOTech Vudu X 2-12x40 | Optics TradeInstruction Manual | EOTech Vudu X 2-12x40 | Optics Trade
Instruction Manual | EOTech Vudu X 2-12x40 | Optics Trade
 
Instruction Manual | EOTech Vudu X 1-6x24 | Optics Trade
Instruction Manual | EOTech Vudu X 1-6x24 | Optics TradeInstruction Manual | EOTech Vudu X 1-6x24 | Optics Trade
Instruction Manual | EOTech Vudu X 1-6x24 | Optics Trade
 
Instruction Manual | Nightforce CFS 6-36x50 F1 | Optics Trade
Instruction Manual | Nightforce CFS 6-36x50 F1 | Optics TradeInstruction Manual | Nightforce CFS 6-36x50 F1 | Optics Trade
Instruction Manual | Nightforce CFS 6-36x50 F1 | Optics Trade
 
Instruction Manual | Athlon Cronus Tactical G2 ED 7-42x60 | Optics Trade
Instruction Manual | Athlon Cronus Tactical G2 ED 7-42x60 | Optics TradeInstruction Manual | Athlon Cronus Tactical G2 ED 7-42x60 | Optics Trade
Instruction Manual | Athlon Cronus Tactical G2 ED 7-42x60 | Optics Trade
 
Insrtuction Manual | Swarovski CL Companion Habicht | Optics Trade
Insrtuction Manual | Swarovski CL Companion Habicht | Optics TradeInsrtuction Manual | Swarovski CL Companion Habicht | Optics Trade
Insrtuction Manual | Swarovski CL Companion Habicht | Optics Trade
 
Technical Data | Swarovski CL Companion Habicht | Optics Trade
Technical Data | Swarovski CL Companion Habicht | Optics TradeTechnical Data | Swarovski CL Companion Habicht | Optics Trade
Technical Data | Swarovski CL Companion Habicht | Optics Trade
 
Instruction Manual | Athlon Midas G2 UHD PRO | Optics Trade
Instruction Manual | Athlon Midas G2 UHD PRO | Optics TradeInstruction Manual | Athlon Midas G2 UHD PRO | Optics Trade
Instruction Manual | Athlon Midas G2 UHD PRO | Optics Trade
 
Catalog 2024 | Shield Sights | Optics Trade
Catalog 2024 | Shield Sights | Optics TradeCatalog 2024 | Shield Sights | Optics Trade
Catalog 2024 | Shield Sights | Optics Trade
 
Instruction Manual | Burris Fastfire C | Optics Trade
Instruction Manual | Burris Fastfire C | Optics TradeInstruction Manual | Burris Fastfire C | Optics Trade
Instruction Manual | Burris Fastfire C | Optics Trade
 
Instruction Manual | Burris Veracity PH Rifle Scopes | Optics Trade
Instruction Manual | Burris Veracity PH Rifle Scopes | Optics TradeInstruction Manual | Burris Veracity PH Rifle Scopes | Optics Trade
Instruction Manual | Burris Veracity PH Rifle Scopes | Optics Trade
 
Product Sheet I Aimpoint 3X-P | Optics Trade
Product Sheet I Aimpoint 3X-P | Optics TradeProduct Sheet I Aimpoint 3X-P | Optics Trade
Product Sheet I Aimpoint 3X-P | Optics Trade
 
Catalog 2024 | Holosun Products | Optics Trade
Catalog 2024 | Holosun Products | Optics TradeCatalog 2024 | Holosun Products | Optics Trade
Catalog 2024 | Holosun Products | Optics Trade
 

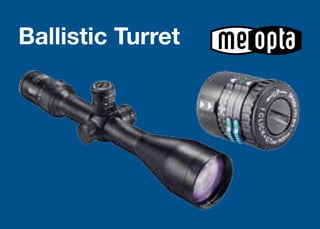
Instructions MEOPTA Ballistic Turret | Optics Trade

  • 2.
  • 3. Odšroubujte krytku stávajícího točítka elevace a vyšroubujete oba montážní šrouby. Potom odejměte ovladač a štítek. Krytku s ovladačem a štítkem uschovejte pro případnou zpětnou montáž. KRYTKA MONTÁŽNÍ ŠROUBY M 1,6x4 OVLÁDAČ ŠTÍTEK
  • 4. Přiložte rohatku na místo původního ovladače a zašroubujte oba šrouby. Rohatka musí být pevně zafixována. MONTÁŽNÍ ŠROUBY M 1,6x4 ROHATKA
  • 5. Nyní našroubujte nákružek na doraz. Nákružek patřičně dotáhněte. NÁKRUŽEK
  • 6. Na nákružek nasuňte posuvnou objímku. Nyní nasuňte hlavici, tak aby při otáčení ve směru hod. ručiček byl doraz na hodnotě -5. HLAVICE POSUVNÁ OBJÍMKA
  • 7. Vložte pružinu do hlavice a celou sestavu zajistěte centrálním šroubem, který lehce přitáhněte. CENTRÁLNÍ ŠROUB PRUŽINA
  • 8. POJISTNÉ ŠROUBY Nyní přitáhněte pojistné šrouby - v posuvné objímce.
  • 9. Nastavení: Nastřelte zbraň obvyklým způsobem např. na 100 m. Potom proveďte částečnou demontáž původního balistického točítka podle návodu. Posuvnou objímku nastavte tak, aby trojúhelníkové indexy byly orientovány v ose puškohledu přímo před vašima očima. Utáhněte čtyři pojistné šrouby pomocí imbusového klíče, který najdete v příslušenství. Povolte centrální šroub o jednu otáčku, povysuňte točítko a natočte ho tak, aby nulový index na stupnici byl v koincidenci s indexy na posuvné objímce. Přitáhněte centrální šroub. Po nastřelení zbraně nastavíme 2. nástřelnou vzdálenost. Pootočte točítkem o patřičný počet kliků proti směru hodinových ručiček . Po stlačení aretačního tlačítka natočte první prstenec svým indexem proti indexům na posuvné objímce a uvolněte aretační tlačítko. Počet potřebných kliků zjistíte pomocí balistického programu, nebo nastřelením. Pro 3. nástřelnou vzdálenost použijeme stejný postup jako pro druhé točítko. Vaše balistické točítko je nyní připraveno k použití.
  • 10. Funkce: Pro nastavení příslušné vzdálenosti natočte hlavici balistického točítka požadovaným indexem proti nulovým indexům na posuvné objímce. Počet potřebných kliků můžete rovněž zjistit pomocí našeho balistického programu. Počet kliků se odpočítává vždy od základní polohy nulových indexů na posuvné objímce.
  • 11. Remove the existing elevation turret cap and unscrew the two mounting screws. Then remove the actuator and the shield. Keep the cap, actuator and shield at a safe place for future reassembly. CAP MOUNTING SCREWS M 1,6x4 ACTUATOR SHIELD
  • 12. Put the ratchet wheel to the place of the original actuator and screw in the two screws. The ratchet wheel must be firmly fixed. MOUNTING SCREWS M 1,6x4 RATCHET WHEEL
  • 13. Screw in the collar as far as it will go. Tighten the collar properly. COLLAR
  • 14. Put the sliding sleeve onto the collar. Now slide in the head so that when turning clockwise, the stop is on digit -5. HEAD SLIDING SLEEVE
  • 15. Insert the spring into the head and secure the assembly with the central screw; tighten it gently. CENTRAL SCREW SPRING
  • 16. LOCKING SCREWS Screw in the locking screws in the sliding sleeve and secure in position.
  • 17. Adjustment: Use the standard procedure for sighting-in the rifle, e.g. at a 100 m distance. Then, following the instructions, partially disassemble the original ballistic turret. Adjust the sliding sleeve so that the vertical index line is in the axis of the riflescope directly before your eyes. Tighten the four locking screws with the Allen wrench from the accessory bag. Loosen the central screw one turn, pull out the turret a little and turn it so that the zero index on the turret coincides with the index on the sliding sleeve and, at the same time, is in the stop position. Tighten the locking screws. Tighten the central screw. The initial sighting-in distance is also the stop position. After the initial adjustment, make the adjustment for the 2nd sighting-in distance. Turn the turret counterclockwise by the required number of clicks. Turn the first ring so that its index faces the zero index on the turret; secure in position with the locking screw. The number of clicks may be determined using our ballistic program or by sighting-in. When adjusting the 3rd sighting-in distance, use the same
  • 18. procedure as for the second turret. Your ballistic turret is now ready for use. Features: To adjust the corresponding distance, turn the entire ballistic turret with its zero index against the required mark (red, green). Should you desire to sight-in the riflescope at an additional distance, you may adjust this additional distance by turning the turret against the vertical index on the sliding sleeve. The required number of clicks may also be determined using our ballistic program. The number of clicks is always calculated from the initial position - with the zero index on the turret against the vertical index of the sliding sleeve.
  • 19. Die Abdeckung der Taste Elevation abschrauben und beide Montag- eschrauben herausschrauben. Danach Bedienung und Schild abne- hmen. Die Abdeckung und die Bedienung mit Schild für eventuellen Wiederanbau aufbewahren. ABDECKUNG MONTAGESCHRAUBEN M 1,6x4 BEDIENUNG SCHILD
  • 20. Die Ratsche an der Stelle der Bedienung anlegen und beide Schrauben einschrauben. Die Ratsche muss fest fixiert sein. MONTAGESCHRAUBEN M 1,6x4 RATSCHE
  • 21. Nun den Ring auf Anschlag schrauben. Den Ring festziehen. RING
  • 22. Auf den Ring die Schiebehülse aufsetzen. Nun den Kopf so aufschieben, dass sich beim Drehen in Uhrzeiger- richtung der Anschlag auf dem Wert -5 liegt. KOPF SCHIEBEHÜLSE
  • 23. Die Feder im Kopf einlegen und die gesamte Gruppe mit leicht fes- tgezogener Zentralschraube sichern. ZENTRALSCHRAUBE FEDER
  • 24. SICHERUNGSS- CHRAUBEN Nun die Sicherungsschrauben in die Schiebehülse schrauben und die Position sichern.
  • 25. Einstellen: Mit der Waffe wie üblich, z.B. auf 100 m schießen. Danach den ballistischen Drehknopf nach Anleitung teilweise demontieren. Die Schiebehülse so einstellen, dass der vertikale Indexstrich in der Zielfernrohrachse direkt vor Ihren Augen liegt. Die vier Sicherungsschrauben mit Inbusschlüssel aus dem Zubehör festziehen. Die Zentralschraube um eine Umdrehung lösen, den Drehknopf herausziehen und so drehen, dass der Nullindex in Koinzidenz mit dem Index auf der Schiebehülse und gleichzeitig auf Anschlag ist. Die Sicherungsschrauben anziehen. Die Zentralschraube festziehen. Die grundlegende Schussentfernung ist gleichzeitig Anschlagposition. Nach Einstellen der Grundeinstellung die 2. Schussentfernung einstellen. Den Drehknopf die entsprechende Anzahl Klicks entgegen der Uhrzeigerrichtung drehen. Den ersten Ring mit seinem Index gegen den Nullindex einstellen und diese Stellung mit Sicherheitsschraube sichern. Die entsperechende Anzahl der Klicks mit ballistischem
  • 26. Programm oder durch Schießn ermitteln. Für die 3. Schussentfernung das gleiche Vorgehen auch für den zweiten Drehknopf benutzen. Ihr ballistischer Drehknopf ist zur Benutzung bereit. Funktionen: Für das Einstellen der zugehörigen Entfernung den ganzen ballistischen Drehknopf mit Nullindex gegen das gewünschte Zeichen (rot, grün) stellen. Wenn Sie eine zusätzliche Schussentfernung wünschen, können Sie eine weitere Entfernung durch Drehen des Knopfes gegen vertikalen Index auf der Schiebehülse einstellen. Die Anzahl der erforderlichen Klicks können Sie ebenfalls mit Hilfe unseres ballistischen Programms ermitteln. Die Anzahl der Klicks wird immer aus der Grundstellung des Nullindexes auf dem Drehknopf gegen den vertikalen Index auf der Schiebehülse berechnet.
  • 27. Desenrosque la tapa de la existente torreta de elevación y destornille los dos tornillos de montaje. A continuación retire el elemento de control y la placa. Guarde la tapa con el elemento de control y con la placa por si desea volver a montarlos en el futuro. TAPA TORNILLOS DE MONTAJE M 1,6x4 ELEMENTO DE CONTROL PLACA
  • 28. Coloque el trinquete en el lugar del elemento de control original y atornille los dos tornillos. El trinquete debe estar firmemente sujeto. TORNILLOS DE MONTAJE M 1,6x4 TRINQUETE
  • 29. Ahora enrosque el collarín hasta que haga tope. Apriete el collarín firmemente. COLLARÍN
  • 30. Inserte la virola móvil en el collarín. Ahora inserte la cabeza de modo que al girar en el sentido de las agujas de reloj el tope esté en la cifra -5. CABEZA VIROLA MÓVIL
  • 31. Inserte el muelle en la cabeza y asegure todo el conjunto con el tornillo central, apretándolo suavemente. TORNILLO CENTRAL MUELLE
  • 32. TORNILLOS DE SEGURIDAD Nun die Sicherungsschrauben in die Schiebehülse schrauben und die Position sichern.
  • 33. Ajuste: Realice los tiros de ajuste como acostumbra, p.ej. a 100 metros de distancia. A continuación desmonte parcialmente la torreta balística original de acuerdo con las instrucciones. Ajuste la virola móvil de manera que la línea de índice vertical esté en línea con el eje de la mira telescópica justo delante de sus ojos. Apriete los cuatro tornillos de seguridad con una llave Allen, incluida en la bolsa de accesorios. Afloje el tornillo central un giro, saque parcialmente la torreta y gírela de manera que el índice de cero en la torreta coincida con el índice en la virola móvil y, al mismo tiempo, esté en el tope. Apriete los tornillos de seguridad. Apriete el tornillo central. La distancia básica para los tiros de ajuste es también la posición de tope. Una vez finalizada la puesta a punto básica, realice el procedimiento para la 2a distancia para los tiros de ajuste. Gire la torreta el sentido contrario a las agujas del reloj para que haga el número requerido de clics. Gire la primera anilla para que su índice esté contra el índice cero en
  • 34. la torreta y asegure esta posición con el tornillo de seguridad. El número necesario de clics lo determinará mediante un programa balístico o realizando los tiros de ajuste. En cuanto a la 3a distancia para los tiros de ajuste, utilice el mismo procedimiento que para la segunda torreta. Su torreta balística está lista para usar. Funcionamiento: Para ajustar la distancia correspondiente gire toda la torreta balística para que su índice cero esté contra la marca correspondiente (roja, verde). Si desea realizar los tiros de ajuste a distancias adicionales, puede hacerlo girando la torreta contra el índice vertical en la virola móvil. El número necesario de clics lo puede determinar también usando nuestro programa balístico. El número de clics se calcula siempre partiendo de la posición básica - con el índice de cero en la torreta contra el índice vertical en la virola móvil.
  • 35. Desaperte a tampa do ajuste de elevação existente e desaparafuse os dois parafusos de montagem. Depois, retire o anel e a anilha. Guarde a tampa com o anel e a anilha para uma eventual remontagem. TAMPA PARAFUSOS DE MONTAGEM ANEL ANILHA
  • 36. Fixe o roquete no lugar do anel original e aperte os dois parafusos. O roquete deve ser fixado de modo firme. PARAFUSOS DE MONTAGEM M1, 6x4 ROQUETE
  • 37. Agora aparafuse o espigão até ao batente. Aperte bem o espigão. ESPIGÃO
  • 38. Coloque o espigão na manga ajustável. Agora enfie a cabeça de modo que ao girar no sentido dos ponteiros do relógio o batente fique no valor -5. CABEÇA MANGA AJUSTÁVEL
  • 39. Coloque a mola na cabeça e fixe todo o conjunto com o parafuso central que deve ser apertado ligeiramente. PARAFUSO CENTRAL MOLA
  • 40. PARAFUSOS DE FIXAÇÃO Agora aperte os parafusos de fixação na manga ajustável e fixe a posição.
  • 41. Configuração: Calibre a arma como de costume, por ex. para 100m. A seguir desmonte parcialmente o ajuste balístico original de acordo com as instruções. Defina a manga ajustável de modo que a linha de vértice vertical esteja no eixo da luneta diante dos seus olhos. Aperte os quatro parafusos de fixação com a chave hexagonal que encontrará nos acessórios. Desaperte o parafuso central girando-o uma vez, puxe o ajuste e gire-o de modo a que o índice zero do ajuste coincida com o índice na manga ajustável e ao mesmo tempo esteja no batente. Aperte os parafusos de fixação. Aperte o parafuso central. A distância de calibragem básica é também a posição do batente. Uma vez definida a configuração básica, definimos também a segunda distância de calibragem. Gire o ajuste o número apropriado de cliques, no sentido contrário ao dos ponteiros do relógio. Rode o primeiro anel de modo que o seu índice esteja frente ao índice zero no ajuste e fixe esta posição com o parafuso de fixação. Para descobrir o número de cliques
  • 42. necessários utilize o programa balístico ou a calibragem. O mesmo procedimento será aplicado para a 3ª distância de calibragem e para o segundo ajuste. O vosso ajuste balístico está pronto para usar. Funções: Para definir a distância gire o ajuste balístico de modo a que o índice zero corresponda à marca desejada (vermelha, verde). Caso deseje mais distâncias de calibragem, pode definir mais distâncias do ajuste correspondentes ao índice vertical da manga ajustável. Para descobrir o número de cliques necessários utilize o nosso programa balístico. O número de cliques é calculado a partir da posição básica-índice zero, no ajuste correspondente ao índice vertical na manga ajustável.
  • 43. Dévissez le couvercle de la tourelle d’élévation existante et retirez les deux vis de montage. Puis ôtez la commande et la plaque. Gardez le couvercle et la plaque pour un remontage éventuel. COUVERCLE VIS DE FIXATION M 1,6x4 COMMANDE PLAQUE
  • 44. Fixez le cliquet au lieu de la commande d’origine et vissez les deux vis. Le cliquet doit être solidement fixé. VIS DE FIXATION M1,6x4 CLIQUET
  • 45. Maintenant vissez le collet jusqu’au bout. Serrez correctement le collet. COLLET
  • 46. Enfilez le manchon coulissant sur le collet. Maintenant, faites glisser la tête de sorte à atteindre la valeur de la butée de -5 lorsque vous tournez dans le sens horaire. TÊTE MANCHON COULISSANT
  • 47. Insérez le ressort dans la tête et fixez tout l’assemblage par la vis centrale, serrez la vis doucement. VIS CENTRALE RESSORT
  • 48. VIS DE BLOCAGE Maintenant serrez les vis de blocage dans le manchon coulissant et fixez la position.
  • 49. Réglage: Réglez l’arme comme d’habitude à 100 m. Puis faites un démontage partiel de la tourelle balistique original selon les instructions. Réglez le manchon coulissant de sorte que la ligne de repère verticale soit dans l’axe des lunettes de tir juste devant vos yeux. Serrez les quatre vis de blocage avec une clé Allen qui se trouve dans les accessoires. Desserrez la vis centrale d’un tour, tirez la tourelle et tournez-la de sorte que l’indice zéro sur la tourelle soit en coïncidence avec l’indice sur le manchon coulissant et soit également en butée. Serrez les vis de blocage. Serrez la vis centrale. La distance de réglage de base représente également la position d’arrêt. Après avoir effectué le réglage de base, réglez la 2ème distance. Tournez la tourelle d’un nombre approprié de clics dans le sens antihoraire. Tournez la première bague avec son indice contre l’indice zéro et fixez cette position par la vis de blocage. Vous déterminerez le nombre de clics nécessaires à l’aide du programme balistique ou du
  • 50. réglage Pour la 3ème distance, utilisez le même procédé comme pour la deuxième tourelle. Votre tourelle balistique est prête à l’emploi. Fonction: Pour régler la distance appropriée, tournez toute la tourelle balistique par l’indice zéro contre le repère souhaité (rouge, vert). Si vous souhaitez d’autres distances de réglage, vous pouvez régler les distances supplémentaires de rotation de la tourelle contre l’indice vertical sur le manchon coulissant. Vous pouvez déterminer le nombre de clics nécessaires à l’aide de notre programme balistique. Le nombre de clics est calculé à partir de la position initiale - l’indice zéro sur la tourelle contre l’indice vertical sur le manchon coulissant.
  • 51. Svitare il coperchio della manopola di elevazione esistente e le due viti di montaggio. Poi rimuovere il regolatore e la targhetta. Conservare il coperchio con il regolatore e la targhetta per il rimontaggio eventuale. COPERCHIO VITI DI MONTAGGIO M 1,6x4 REGOLATORE TARGHETTA
  • 52. Collocare la ruota d’arresto al posto del regolatore e avvitare le due viti. La ruota d’arresto deve essere saldamente fissata. VITI DI MONTAGGIO M1,6x4 RUOTA D’ARRESTO
  • 53. Ora avvitare il collare fino in fondo. Stringere correttamente il collare. COLLARE
  • 54. Infilare il manicotto scorrevole nel collare. Ora infilare la testa, in modo che, ruotando in senso orario, il valore di arresto sia -5. TESTA MANICOTTO SCORREVOLE
  • 55. Inserire la molla nella testa e fissare l’intero sistema con la vite centrale, stringendola leggermente. VITE CENTRALE MOLLA
  • 56. VITI DI BLOCCAGGIO Ora serrare le viti di bloccaggio nel manicotto scorrevole e assicurare la posizione.
  • 57. Impostazione: Sparare con l’arma nel modo consueto, ad es. a 100 m. Quindi eseguire il parziale smontaggio della manopola balistica originale secondo le istruzioni. Impostare il manicotto scorrevole in modo che la linea d’indice verticale, nell’asse del cannocchiale dell’arma, si trovi proprio davanti agli occhi. Serrare le quattro viti di bloccaggio con una chiave a brugola, che fa parte degli accessori. Allentare la vite centrale di un giro, tirare e ruotare la manopola in modo che l’indice zero della manopola stessa coincida con l’indice sul manicotto scorrevole e si trovi nel contempo sull’arresto. Serrare le viti di bloccaggio. Stringere la vite centrale. La distanza di tiro iniziale è anche la posizione di arresto. Dopo aver eseguito l’impostazione iniziale, impostiamo la seconda distanza di tiro. Ruotare la manopola per il numero appropriato di clic in senso antiorario. Ruotare il primo anello con l’indice in senso opposto all’indice zero sulla manopola e fissare questa posizione con la vite di
  • 58. bloccaggio. Il numero di clic necessari si può determinare mediante il programma balistico o sparando. Per la terza distanza di tiro utilizziamo la stessa procedura anche per la seconda manopola. La manopola balistica è pronta per l’uso. Funzioni: Per impostare la distanza adeguata, girare l’intera manopola balistica con l’indice zero opposto al segno richiesto (rosso, verde). Se si desiderano ulteriori distanze di tiro, è possibile impostare le altre distanze ruotando la manopola in senso opposto all’indice verticale sul manicotto scorrevole. Il numero di clic necessari si può determinare anche mediante il nostro programma balistico. Il numero di clic viene calcolato sempre dalla posizione iniziale-indice zero sulla manopola rispetto all’indice verticale sul manicotto scorrevole.
  • 59. Открутите крышку установленного маховика и открутите оба монтажных винта. Снимите регулятор и заслон. Крышку вместе с регулятором и заслоном сохраните на случай обратного монтажа. КРЫШКА МОНТАЖНЫЕ ВИНТЫ M 1,6x4 РЕГУЛЯТОР ЗАСЛОН
  • 60. Поставьте храповик на место первоначального регулятора и закрутите оба винта. Храповик должен быть надежно зафиксирован. МОНТАЖНЫЕ ВИНТЫ M 1,6x4 ХРАПОВИК
  • 61. Теперь прикрутите кольцо к упору. Кольцо должно быть соответствующим образом зажато. КОЛЬЦО
  • 62. На храповик наденьте подвижную муфту. Теперь наденьте головку таким образом, чтобы при поворачивании по часовой стрелке упор был на значении -5. ГОЛОВКА ПОДВИЖНАЯ МУФТА
  • 63. Вставьте пружину в головку и весь комплект маховика зафиксируйте центральным винтом, слегка его зажав. ЦЕНТРАЛЬНЫЙ ВИНТ ПРУЖИНА
  • 64. ПРЕДОХРАНИТЕЛЬНЫЕ БОЛТЫ Теперь закрутите предохранительные болты в подвижной муфте и зафиксируйте в нужном положении.
  • 65. Настройка: Пристреляйтевашеоружиеобычнымспособом,напр.,на100м.Потом частично демонтируйте первоначальный баллистический маховик, как это описано в инструкции. Подвижную муфту отрегулируйте так, чтобы вертикальный индекс был в одной оси прицела прямо перед вашими глазами. Зажмите четыре предохранительных болта с помощью ключа, поставляемого в комплекте. Ослабьте центральный винт на один оборот, слегка приподнимите маховик и поверните его так, чтобы нулевой индекс на маховике совпадал с индексом на подвижной муфте и одновременно был на упоре. Зажмите предохранительные болты. Зажмите центральный винт. Базовое пристрелянное расстояние одновременно является положением упора. После проведения базовой настройки проведем настройку 2-ого пристрелянного расстояния. Поверните маховик на соответствующее количество щелчков против часовой стрелки. Поставьте индекс первой торцевой шайбы напротив нулевого индекса на маховике и
  • 66. зафиксируйте данное положение с помощью предохранительного болта. Количество необходимых щелчков выясните с помощью баллистической программы или с помощью пристрелки. Для настройки 3-его пристрелянного расстояния повторяем вышеописанную последовательность со вторым маховиком. Ваш баллистический маховик готов к эксплуатации. Функции: Длянастройкинеобходимогорасстоянияповернитевесьмаховиктак, чтобы его нулевой индекс стоял на нужной отметке (красная, зеленая). Если вы хотите пристрелять дополнительные расстояния, то настройте другие расстояния, поворачивая маховик по отношению к вертикальному индексу на подвижной муфте. Количество необходимых щелчков можно также установить с помощью нашей баллистической программы. Количество щелчков считаем от базового положения – нулевого индекса на маховике по отношению к индексу на подвижной муфте.
  • 67. 392 8654 90051 Ballistic turret MEOSTAR 30 -B PZD Meostar R1 3-12x56 PZD Meostar R1 3-12x56 RD 392 8654 90052 Ballistic turret MEOSTAR 35 -B PZD Meostar R1 4-12x40 PZD Meostar R1r 3-12x56 PZD Meostar R1r 3-12x56 RD PZD Meostar R1r 3-12x56 RGD PZD Meostar R1r 3-12x56 RD/MR 392 8654 90053 Ballistic turret MEOSTAR 40 -B PZD Meostar R1 3-10x50 392 8654 90054 Ballistic turret MEOSTAR 50 -B PZD Meostar R1 1-4x22 PZD Meostar R1 1-4x22 RD PZD Meostar R1 1-4x22 RD/MR 392 8654 90055 Ballistic turret MEOSTAR 60 -B PZD Meostar R1 1,5-6x42 RD 392 8654 90056 Ballistic turret MEOSTAR 80 -B PZD Meostar R1 1,5-5x20
  • 68. Meopta - optika, s.r.o. Kabelíkova 1 750 02 Přerov Tel. 581 242 281 Fax: 581 242 222 E-mail: meopta@meopta.com www.meopta.com 418040 Duben 2013, Rev. 01