1. Edible Traditions
fancy. There's no fabulous
art or eye-catching color.
The stamp on the bottom
says "USA" and nothing
else. The molded designs
around the rim are worn,
the chips on the enamel
redolent of dishwashing and
a lot of bumping around. It
comes by its charm and
beauty simply.
I decided to try using it.
Down into the bottom of
that bowl I made my warm
sugar water and sprinkled
the yeast. I observed shifting
bubbles expanding in the
murk. I listened to the sounds of air being made.
Pushing my electric mixer off to the side, I put my hands
deep into the bowl and mixed the flour into the water until
they became united. The soft warmth of it felt so good, I got
carried away, scraping along the sides with my fingers and
doing a really thorough job. When it came time to knead, I
didn't worry about surface coverings or dough hook attach-
ments. I sprinkled the flour right on my counter and worked
the dough there until my muscles ached and I had gotten all
of my grievances out. I didn't watch the clock, I watched the
dough and saw what it was becoming. When it was ready, I
slapped it back down into the bowl and I put it away for a
while so we both could rest.
In the end, it was Grandma's bowl that taught me how to
make bread. By understanding the value of the bowl, I learned
the value of a simple thing. Bread is a simple thing. Making it
is easy, but not mindless. It requires work at a pace that
matches the material. Yeast is living. If it gets cold, it won't rise
for you. Put it in water that's too hot, it dies.
But, like all living things, it gives back tenfold what you
give to it, and this is also true of bread. Even if you've always
failed at it before, it's worth giving it another try. You must
believe me when I say if! can do it, you can do it. I've learned
that whatever I put into my food with my two weary hands
comes back as nourishment, for both body and soul, because
making something yourself just feels good. And you don't
need all the books or gadgets or machines. Just a few well-cho-
sen items, like a well-designed bowl, for instance, and maybe
a thermometer. You'll discover the great kitchen secret that
our grandmas knew well-all food tastes better when it's been
made by hands. <>
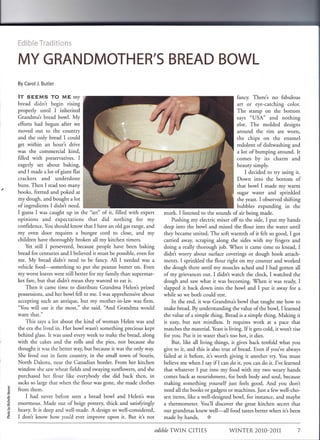
MY GRANDMOTHER'S BREAD BOWL
By Carol J. Butler
.,
IT SEEMS TO ME my
bread didn't begin rising
properly until I inherited
Grandma's bread bowl. My
efforts had begun after we
moved out to the country
and the only bread I could
get within an hour's drive
was the commercial kind,
filled with preservatives. I
eagerly set about baking,
and I made a lot of giant flat
crackers and underdone
buns. Then I read too many
books, fretted and poked at
my dough, and bought a lot
of ingredients I didn't need. , ~
I guess I was caught up in the "an" of it, filled with expert
opinions and expectations that did nothing for my
confidence. You should know that I have an old gas range, and
my oven door requires a bungee cord to close, and my
children have thoroughly broken all my kitchen timers.
Yet still I persevered, because people have been baking
bread for centuries and I believed it must be possible, even for
me. My bread didn't need to be fancy. All I needed was a
vehicle food-something to put the peanut butter on. Even
my worst loaves were still better for my family than supermar-
ket fare, but that didn't mean they wanted to eat it.
Then it came time to distribute Grandma Helen's prized
possessions, and her bowl fell to me. I was apprehensive about
accepting such an antique, but my mother-in-law was firm.
"You will use it the most," she said. "And Grandma would
want that."
This says a lot about the kind of woman Helen was and
the era she lived in. Her bowl wasn't something precious kept
behind glass. It was used every week to make the bread, along
with the cakes and the rolls and the pies, not because she
thought it was the better way, but because it was the only way.
She lived out in farm country, in the small town of Souris,
North Dakota, near the Canadian border. From her kitchen
window she saw wheat fields and swaying sunflowers, and she
purchased her flour like everybody else did back then, in
sacks so large that when the flour was gone, she made clothes
from them.
I had never before seen a bread bowl and Helen's was
enormous. Made out of beige pottery, thick and satisfYingly
heavy. It is deep and well-made. A design so well-considered,
I don't know how you'd ever improve upon it. But it's not
'"
'"'":I:
'"
~
~>-
.0
~c;
edible TWIN CITIES WINTER 2010-2011 7
2. Test the water: To "wake up" your yeast, you want the
sugar water to be between 120-130 "F, Use your pinky
finger to test the water. You don't want there to be much
of a difference between the temperature of your finger
and the liquid in the bowl. If it feels nice and warm, that's
usually good. If it's too hot, wait. Too cool, warm it up on
the stove. On cold days, warm your bowl first with hot
water, rinsing it out and then drying. If you're using a
metal bowl, or if you have cold hands or an especially
drafty kitchen, consider investing in a good thermometer.
MIGHTY GOOD BREAD or WHOLE WHEAT ROSEMARY BREAD
.; Makes 2 loaves
Inspired by Grandma's bowl, this simplified recipe uses ingredients easily found on hand. The sponge method allows you to start as late
as 2:30 and still have warm bread on your table by 6 p.m. Suggestions for tasty add-ins are written in the body of the recipe. Plan on
spending 20-35 minutes of actual kitchen time, and know that it may take longer the first time you do it.
2 tablespoons brown sugar
3 cups warm water
2% teaspoons active dry yeast (or one package Hodgson Mill yeast)
8-10 cups flour (2-3 of them can be whole wheat)
2 tablespoons salt (You can use less,or omit if desired. It will not affect the rising.)
Vegetable or olive oil (for oiling bowl)
A note on yeast
If buying in bulk, store yeast in a jar in the refrigerator and bring to room
temperature before using. If purchasing packets from a store, buy only
what you will use soon. I've had the most consistent results from the brown
Hodgson Mill packets, designed for rising whole grain. If your yeast doesn't
"bubble" in the first feeding stage, try again, checking your water temp. If
you still see no activity, get new yeast. Better to know you've got bum yeast
now rather than after you've invested all that good flour.
FEED: In a clean, warm bowl, put in
your brown sugar and add the warm
water. Test to make sure it is warm
enough. (Hot tap water can work fine
here, and the sugar will cool it down a
little bit.) Once you have tested the
bath, sprinkle in your yeast, stir, and
cover with a towel for about 5 minutes.
This is called "proofing;' but I think of it
as"feedinq.The yeast is having a snack
before getting down to the business of
rising your bread. You can tell the yeast is"eating" because bubbles will erupt on the surface of the liquid.
SPONGE:Add 3-4 cups of flour, stirring between cups. The consistency you want here is something like oatmeal, sticky but
stirrable. Cover with a towel and let your yeast have a picnic. Giving it a head start like this will ensure your bread has a better
chance of rising, and once you get comfortable with this process, it will cut your rising times down by half. You can start the next
step in half an hour, or wait as long as two hours.
SPICE:When you uncover your bowl, you should see something akin to a sloppy marshmallow as the sponge will have risen,
either a little or a lot, depending on the percentage of whole grain flours used. Add your 2 tablespoons of salt and whatever herbs
you'd like to try. Rosemary gives an aromatic flavor, but crush it first in your palms. It's great with chopped walnuts, about ),3 cup.
Basil and oregano tend to get lost but do add flavor. Dill works nicely with a tablespoon of onion powder. For sweet bread, try
cinnamon and nutmeg with a quarter cup more of brown sugar and an optional 1'3 cup raisins, (and still do add the salt).
8 WINTER 2010-2011 edible TWIN CITIES
3. BASIC BREAD TIPS
Start out white: In the early days, praise for my bread directly corresponded to the amount of white flour I used.
Because it rises the easiest, it makes for a good place to start, and you can find wonderful fresh, unbleached versions
at the co-op or specialty stores. When you're ready to ramp up the whole grain, any recipe calling for flour can
usually handle a % replacement with whole wheat. Whole Wheat Pastry flour, with its extra fine grind, will give your
bread even more of an advantage.
Find a cozy spot: If your kitchen is cozy, you can let your bread rise right there on the counter where you did
the kneading, under a kitchen towel. If you've got a wood stove or fireplace, try sliding the bread bowl down next to
it, also covered with the towel. I've placed my dough inside cupboards alongside water heaters or appliances run by
a pilot light, relying on that warmth. If your entire house is drafty, turn the oven on warm, preheat to 200 of and then
turn it off and slide your bread in there for the rising.
KNEAD:Add 3-4 cups of flour right on top of your salt, and with your hands in the bowl, begin working in the flour. Use your
fingers and scrape the dough off the sides, use your palms to press out the air. Stretch and fold the dough over, and incorporate
a~ that nice flour. Once you have a workable but sticky ball, cover your countertop with about a half cup of flour and put your
dough out onto that. Work in that flour, adding more as needed, half a cup at a time, until your
ball feels smooth. Now, this can be tricky to detect at first if you're not used to seeing it, because
your hands are covered in dough. Take a minute to lightly run a relatively dough-free finger
along your ball. It should feel soft and have something of a satiny surface, almost like the skin
of a balloon. If it still grabs, add more flour and keep working until you get the desired effect.
Don't be a wimp. Reallywork at the dough. There's no right or wrong way,just find a rhythm you
can really put your muscles into. From start to finish, this will take about 10-15 minutes. This is
the most work that you will have to do.
RISE& REST:Wash your hands and the bowl. Put a tablespoon of oil into your bowl and coat the
sides and bottom. Put in your smooth ball of dough and flip it over, so that the top is coated with
oil. Then cover with your kitchen towel and put it someplace warm to rest-one hour at least,
two to three hours at most. If you want to bake it the next day, put it in the refrigerator and
continue tomorrow. If you are crunched for time and using white flour, half an hour of rising can
suffice. You want the dough to roughly double its size.
PREPAREPANS:For rustic loaves, use a cookie sheet coated with cornmeal or oats. I like to add
course salt or herbs to this when making savory bread as it makes for a fine bottom crust. If
using loaf pans, grease the entire pan with butter.
>-
E.l!!
~Q
-5
'0
E8
o
<;-<=Q..
SHAPE:After the rising, punch down your dough and rip it into two equal halves. If making elongated loaves, squeeze into the
shape you desire, then roll the dough-not on the counter but with your hands. You want to grab at the surface of the dough
with your thumbs and "roll" or tuck the edges under. There's no wrong way or wrong shape here, you can even braid the dough.
Just find what pleasesyou. Placeit on your prepared baking sheet or tuck it into your loaf pan. If you'd like to make round loaves,
apply the same technique of tucking the dough underneath a ball shape. If you are baking both loaves side-by-side on the
baking sheet, give them room. They will puff up to double their size.Cover with your dishtowel, and put back to rise and rest.
BAKE:After 30 to 60 minutes, uncover your loaves and generously rub the tops with flour. This is to prevent over-browning. Slash
your loaves shallowly across the top and put them in the oven. I let them finish rising in here while the oven is preheating. Set
your oven for 450°, and once it reachesthis temp, allow loaves to bake for ten minutes before turning down to 350°. Bake loaves
for another 20-25 minutes, checking for brownness. Loavesare done when they sound hollow if thumped on the bottom. Allow
to cool slightly before slicing, or hold them with a dishtowel if you just can't wait.
edible TWIN ClTI ES WINTER 2010-2011 9