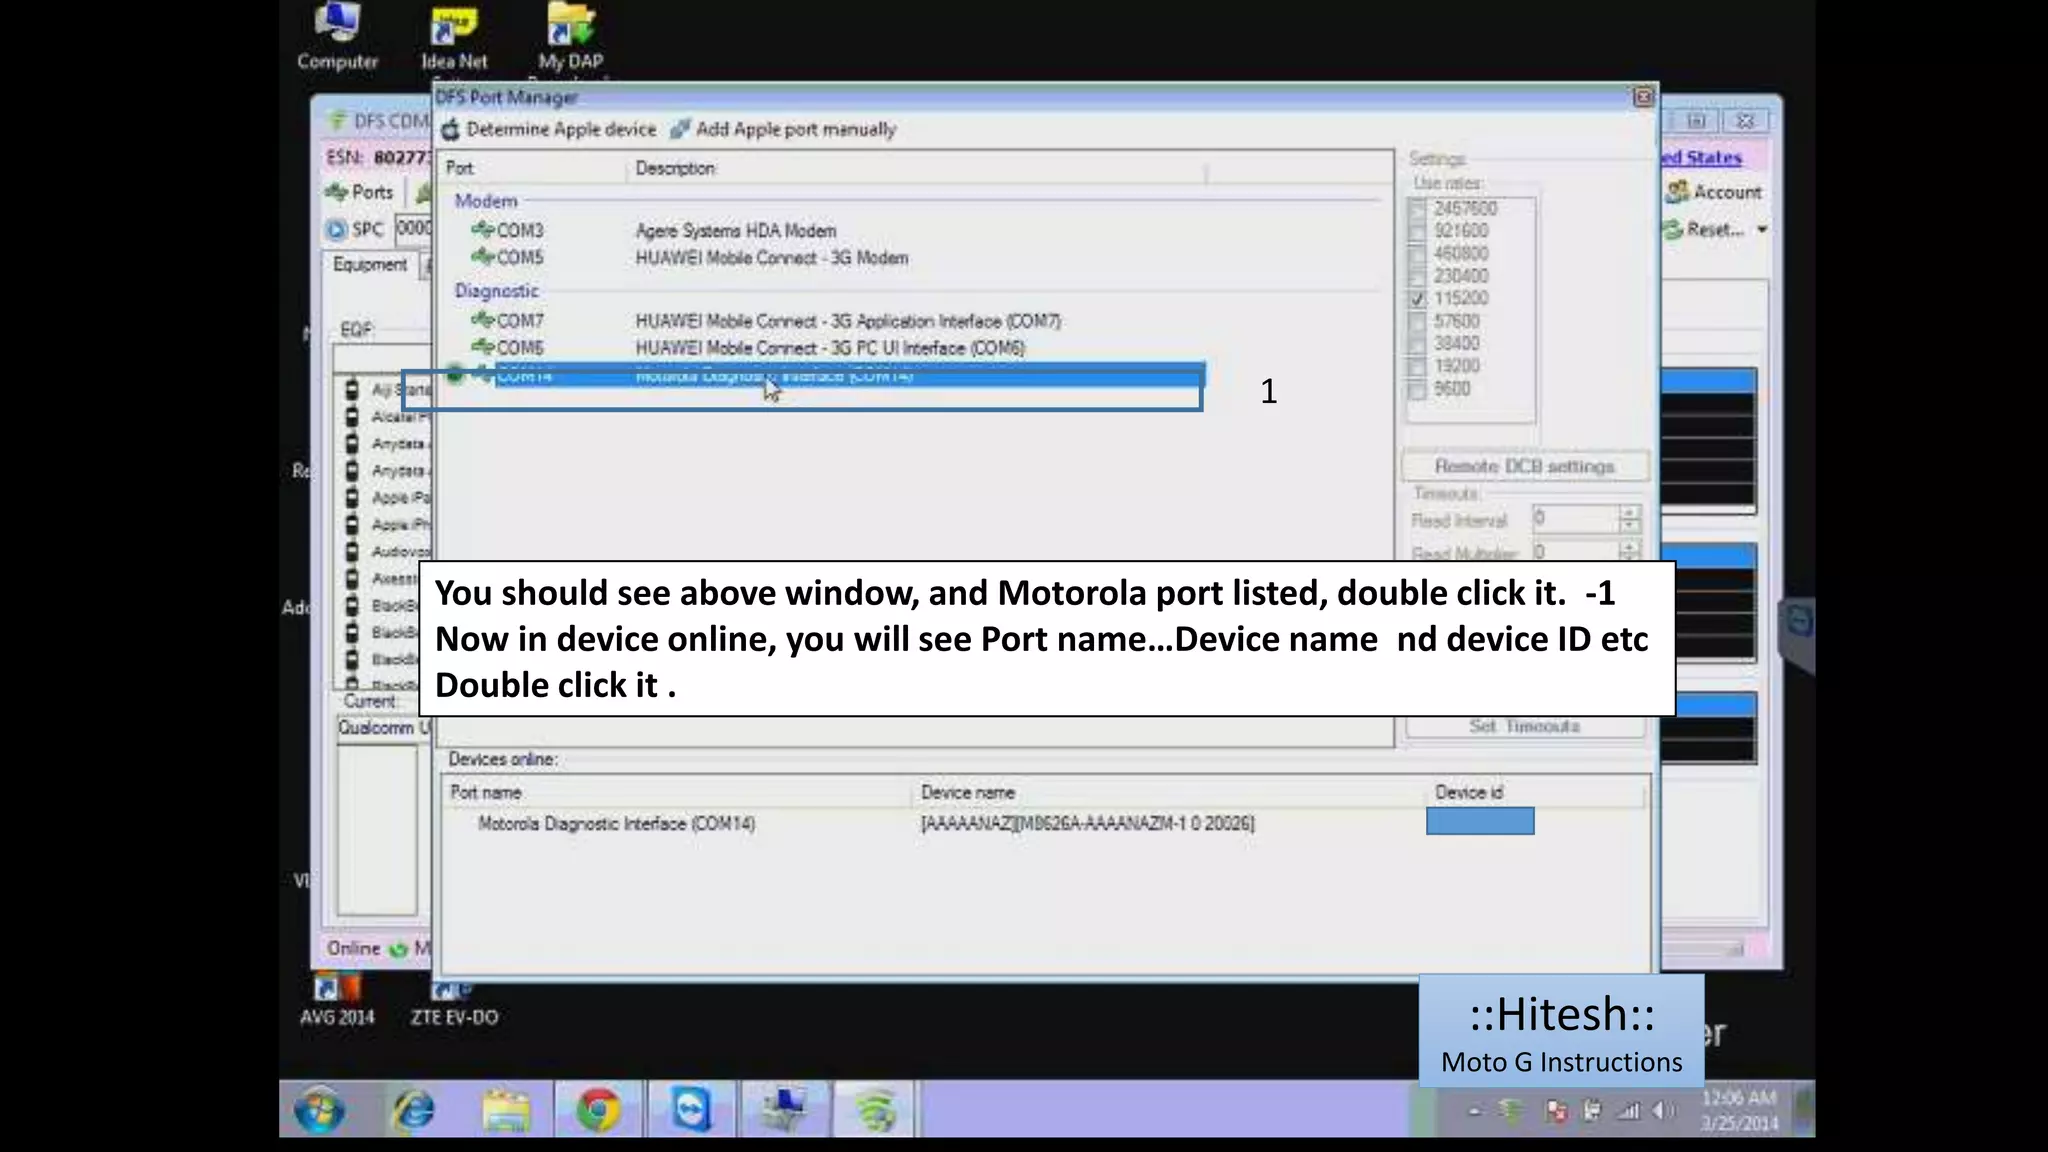
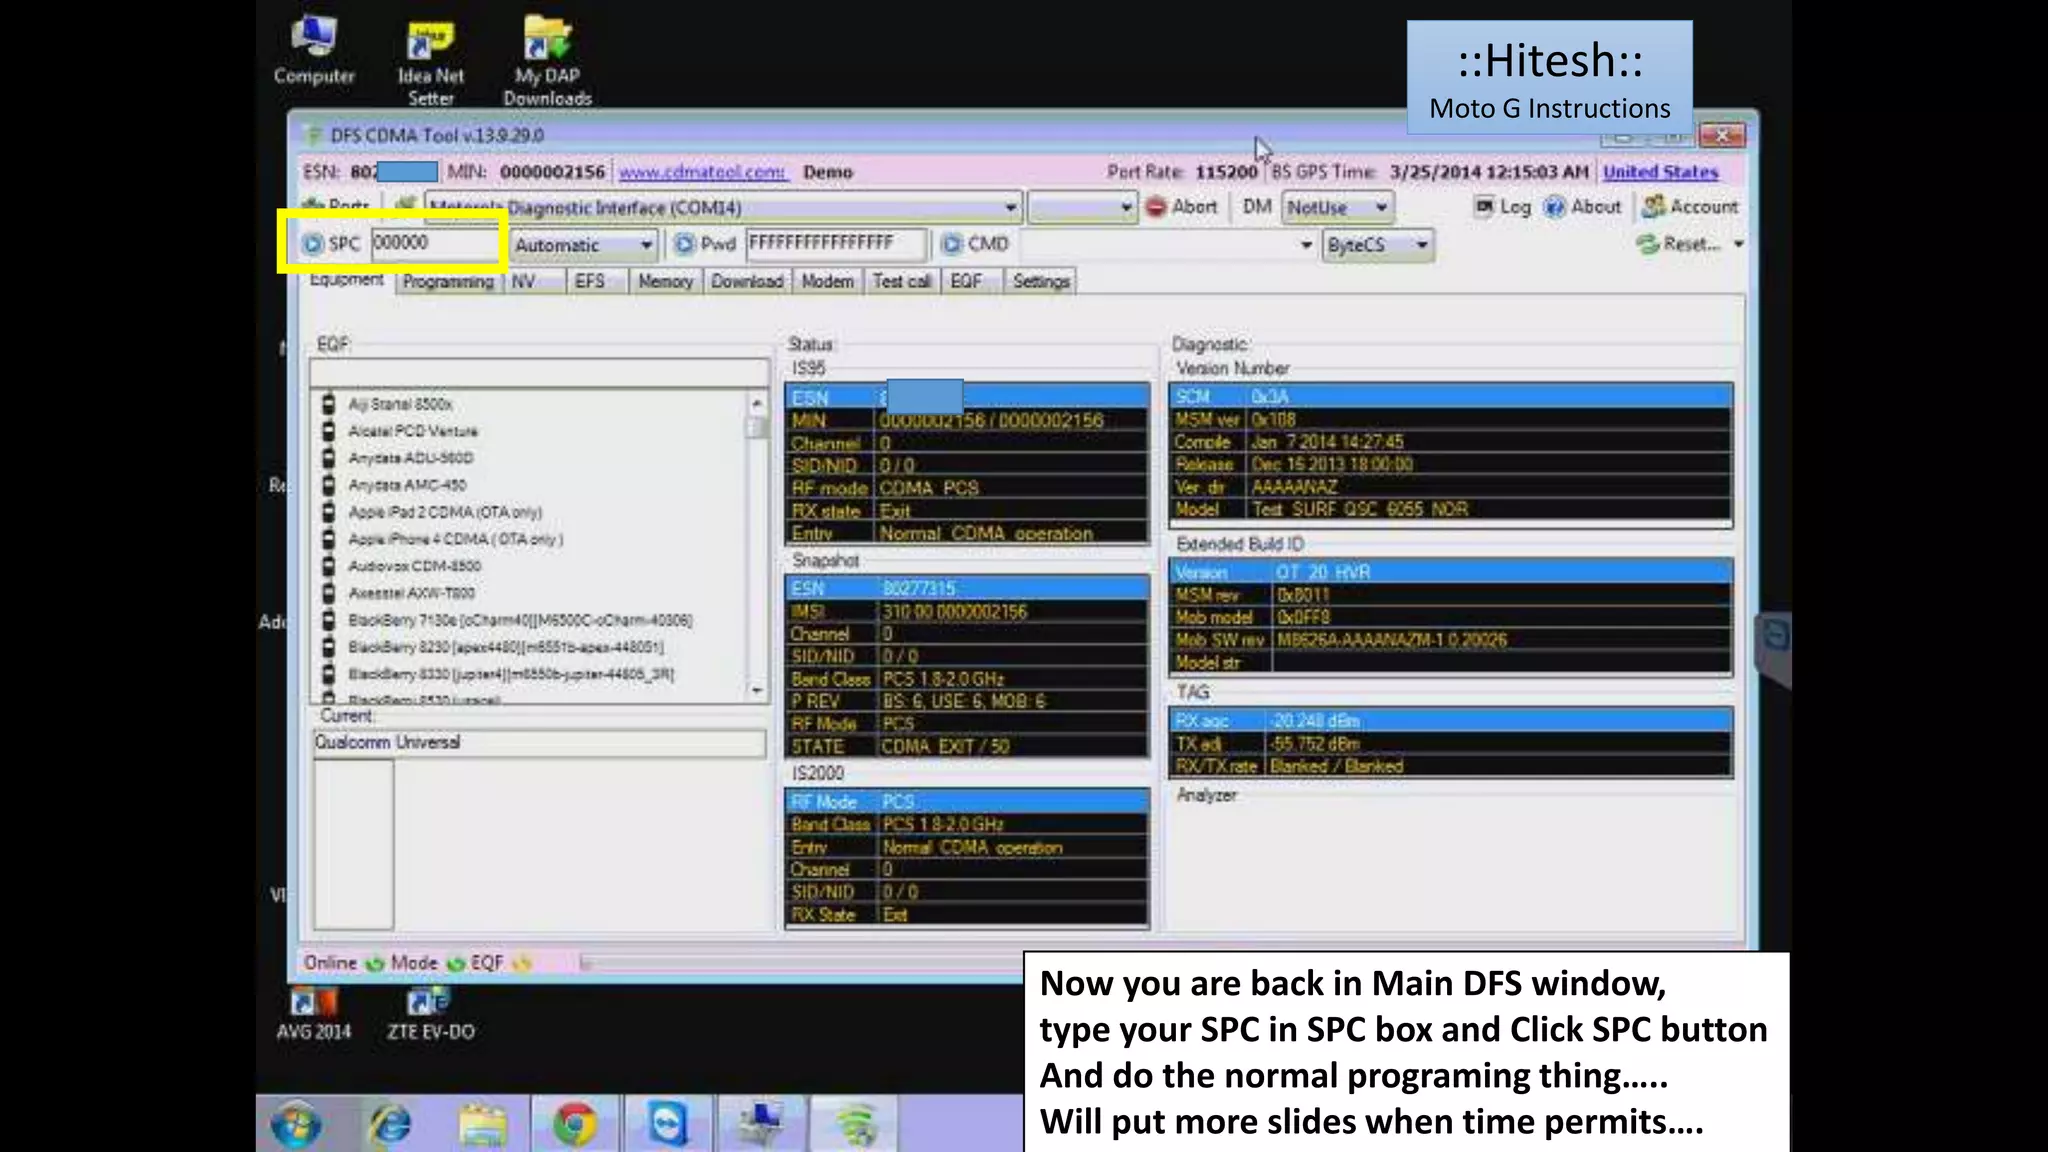
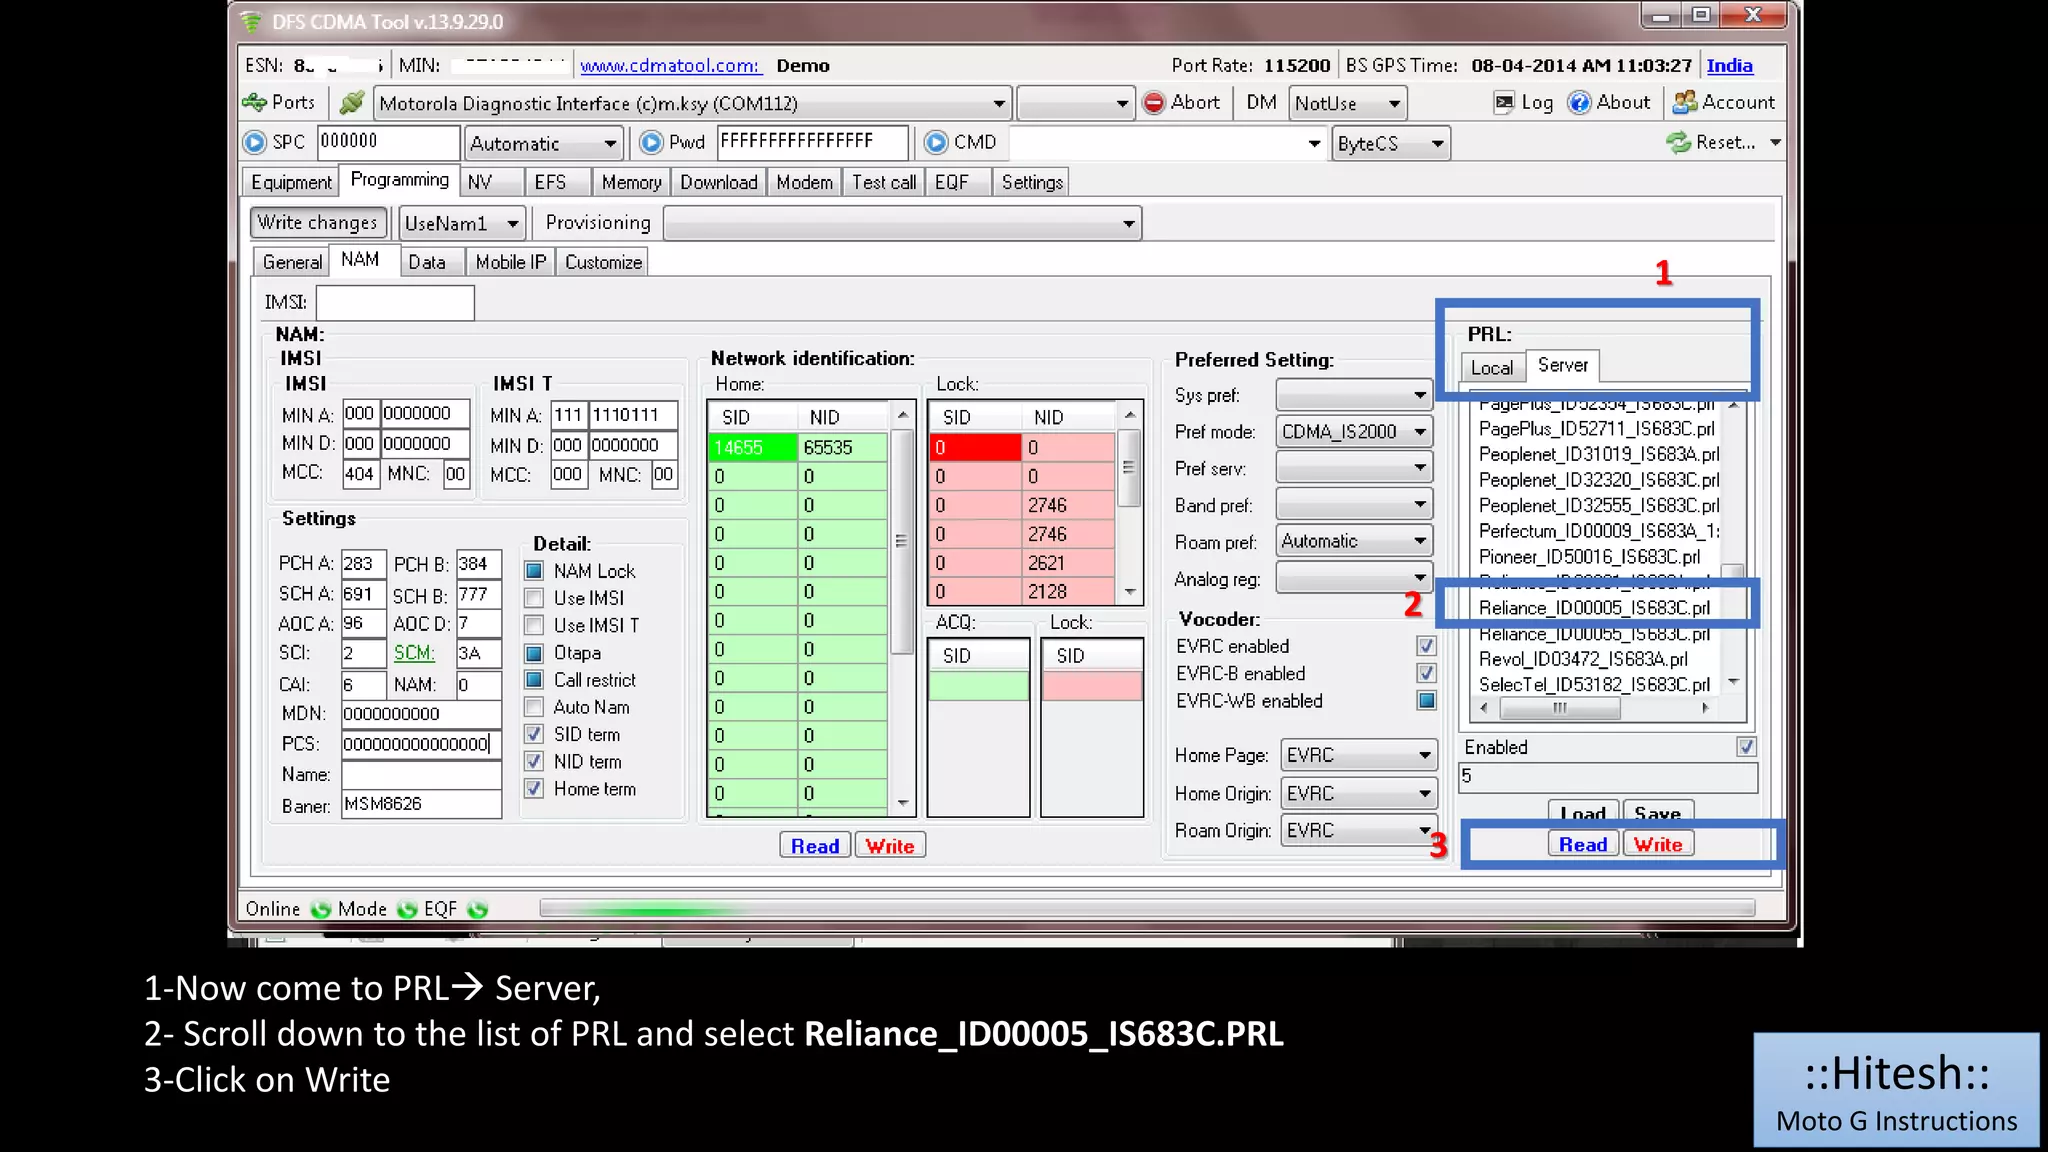
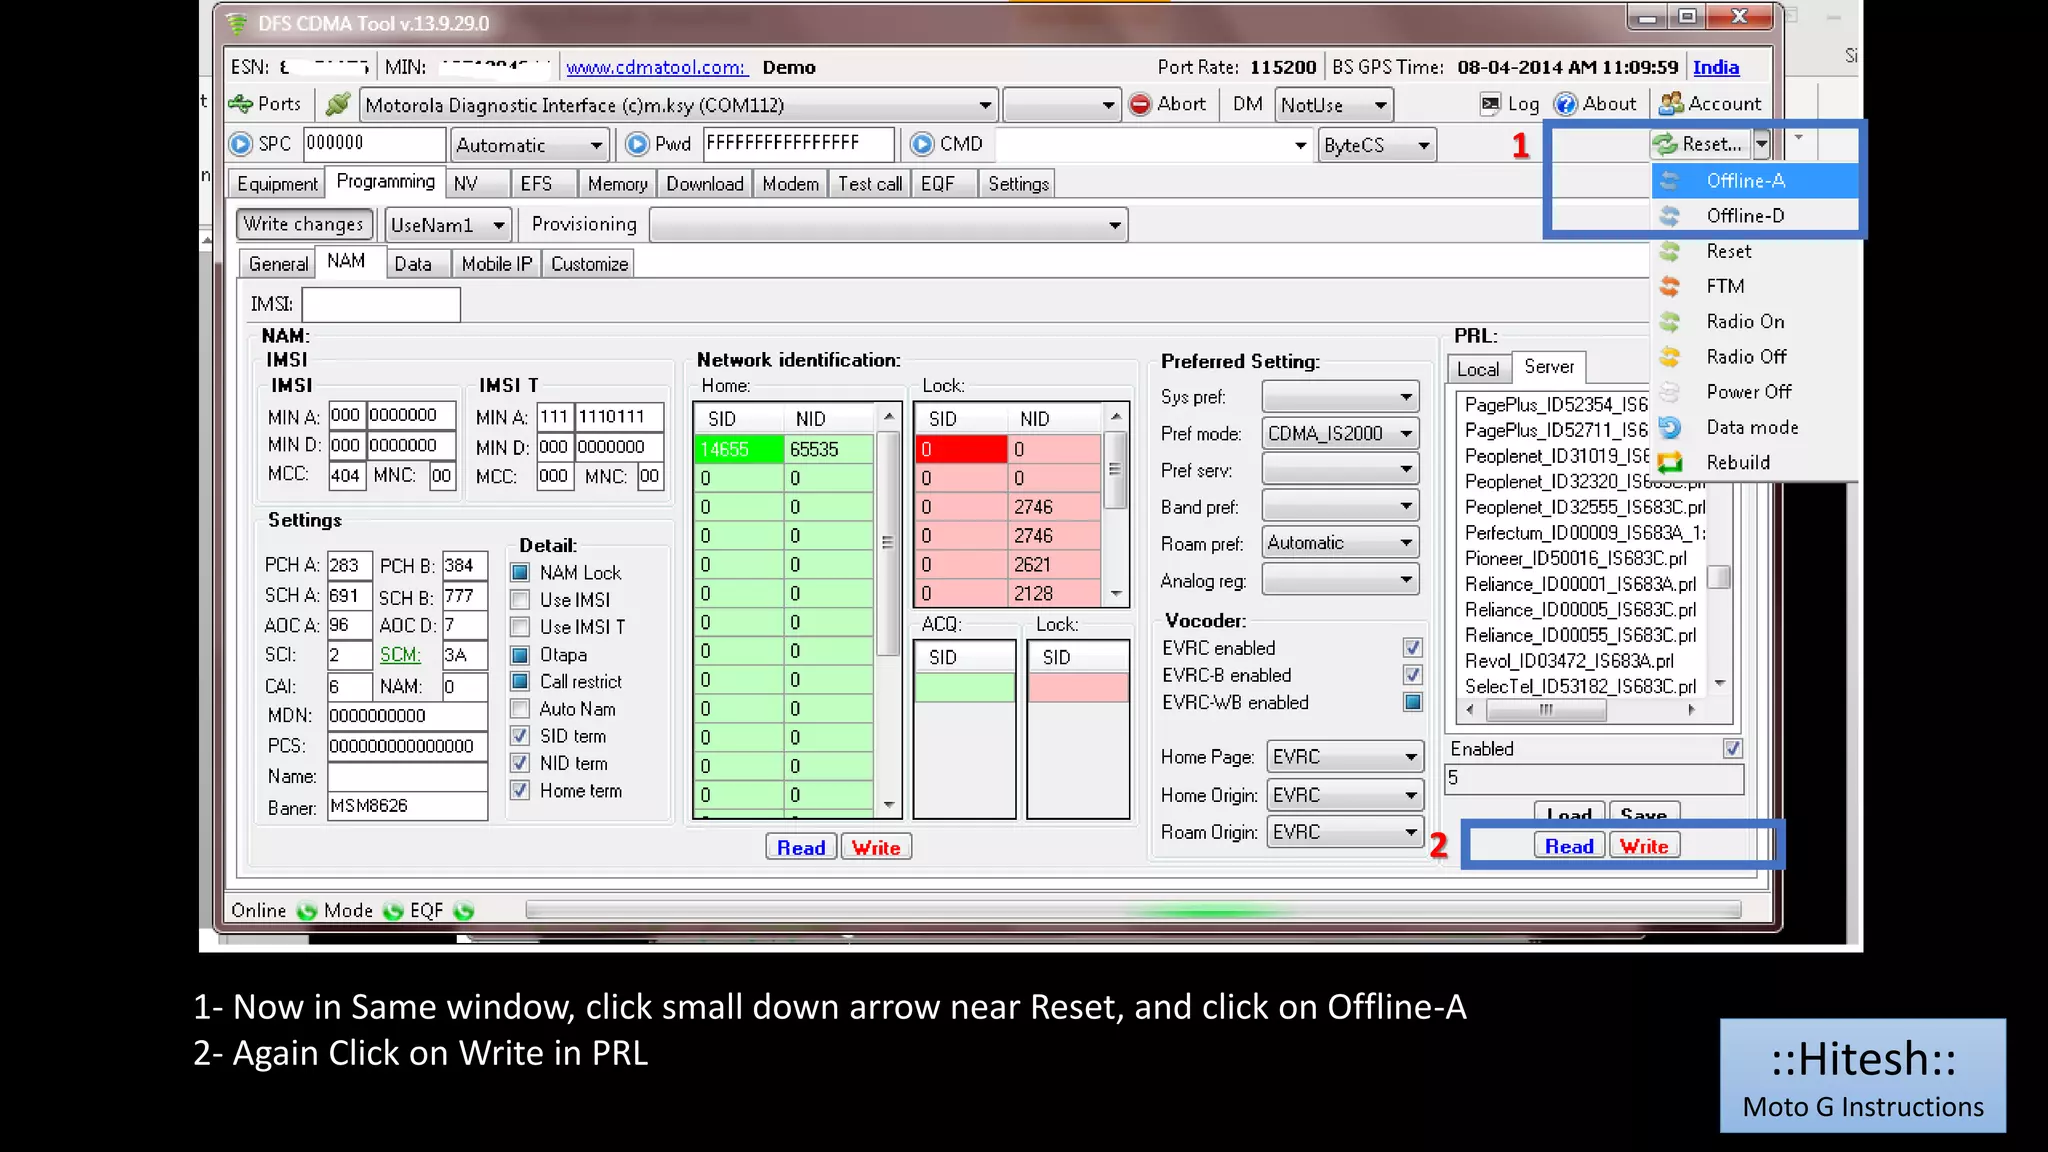
This document provides instructions for installing DIAG drivers and configuring a Moto G phone for use on the Reliance CDMA network. The steps include:
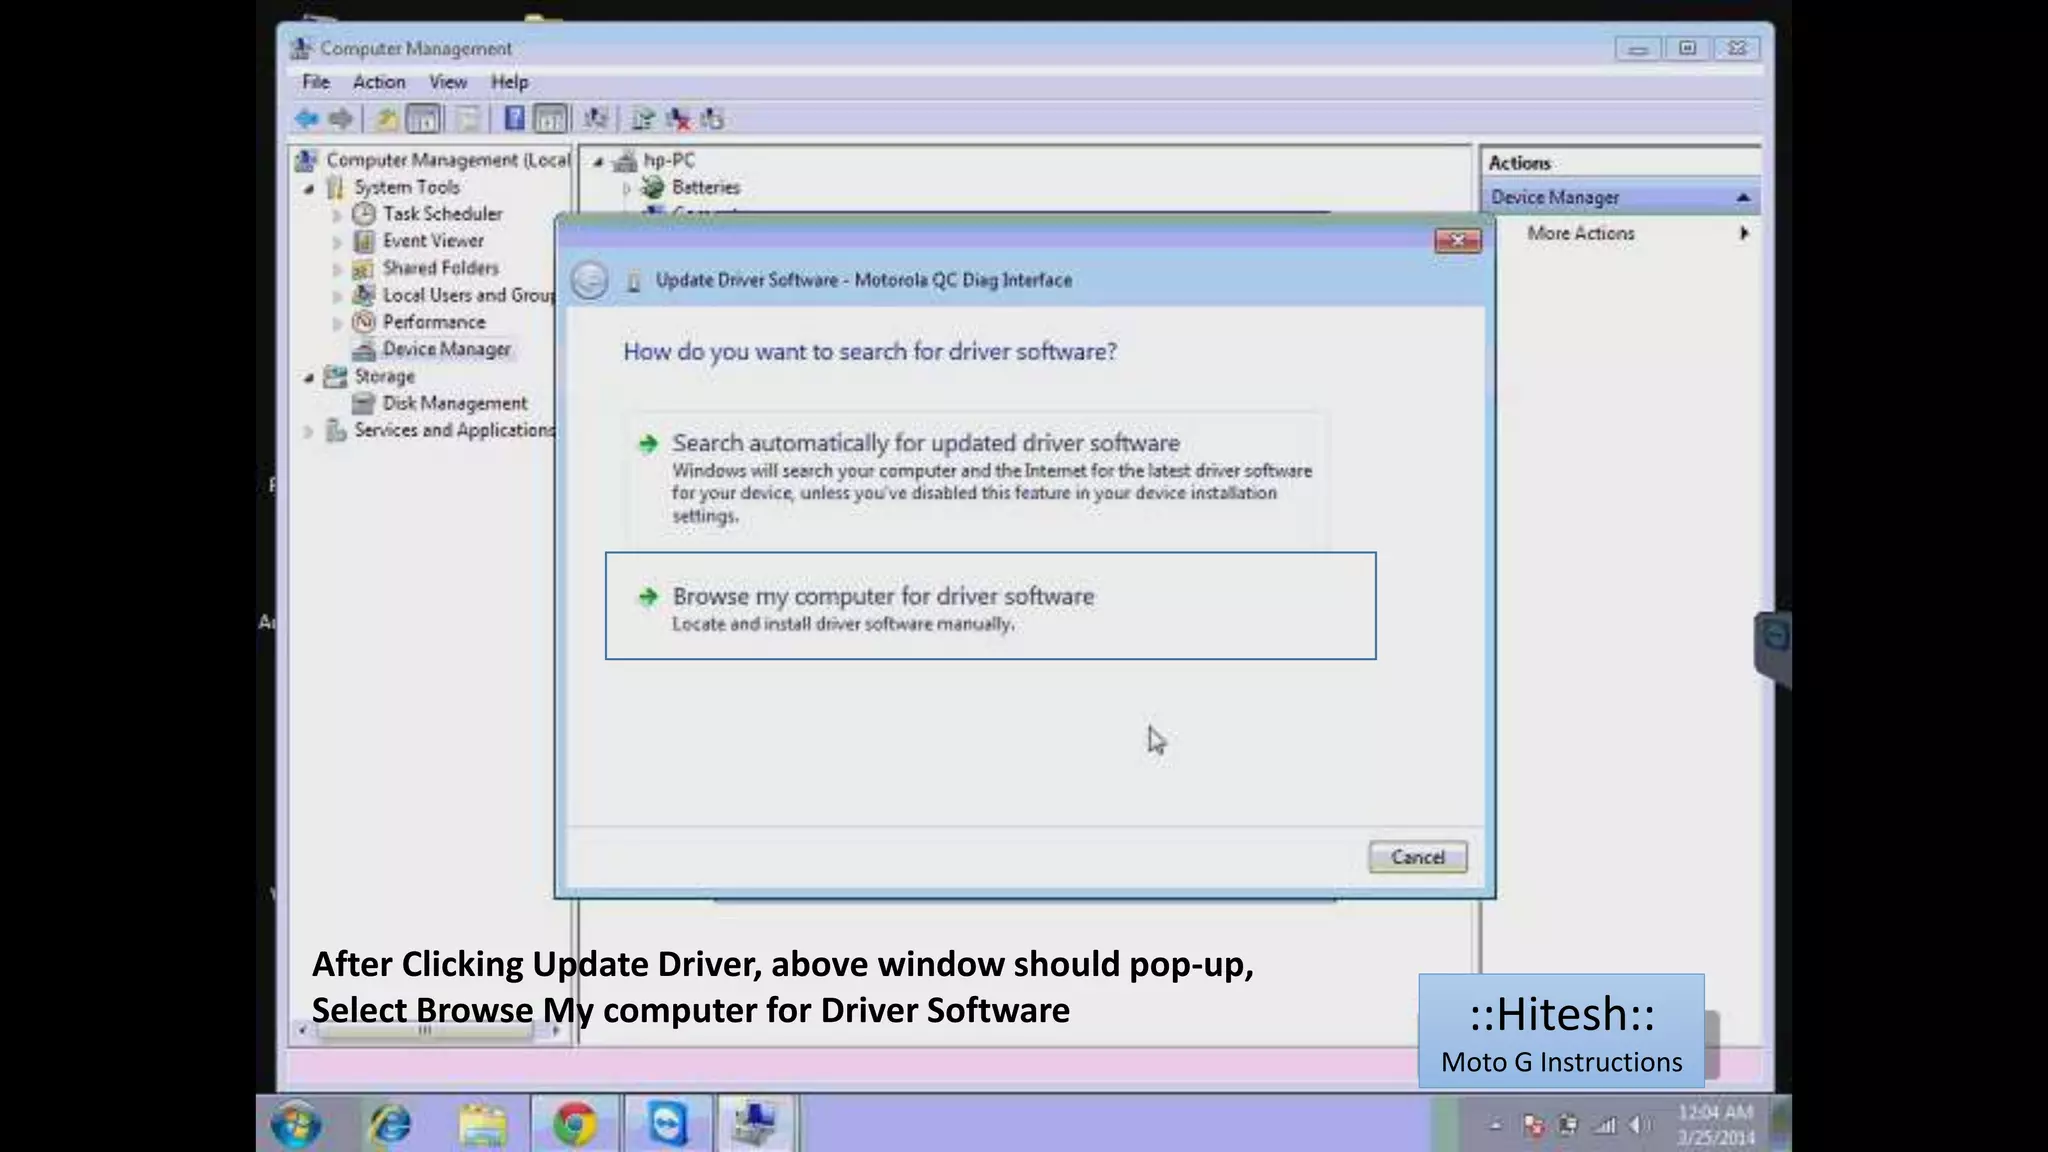
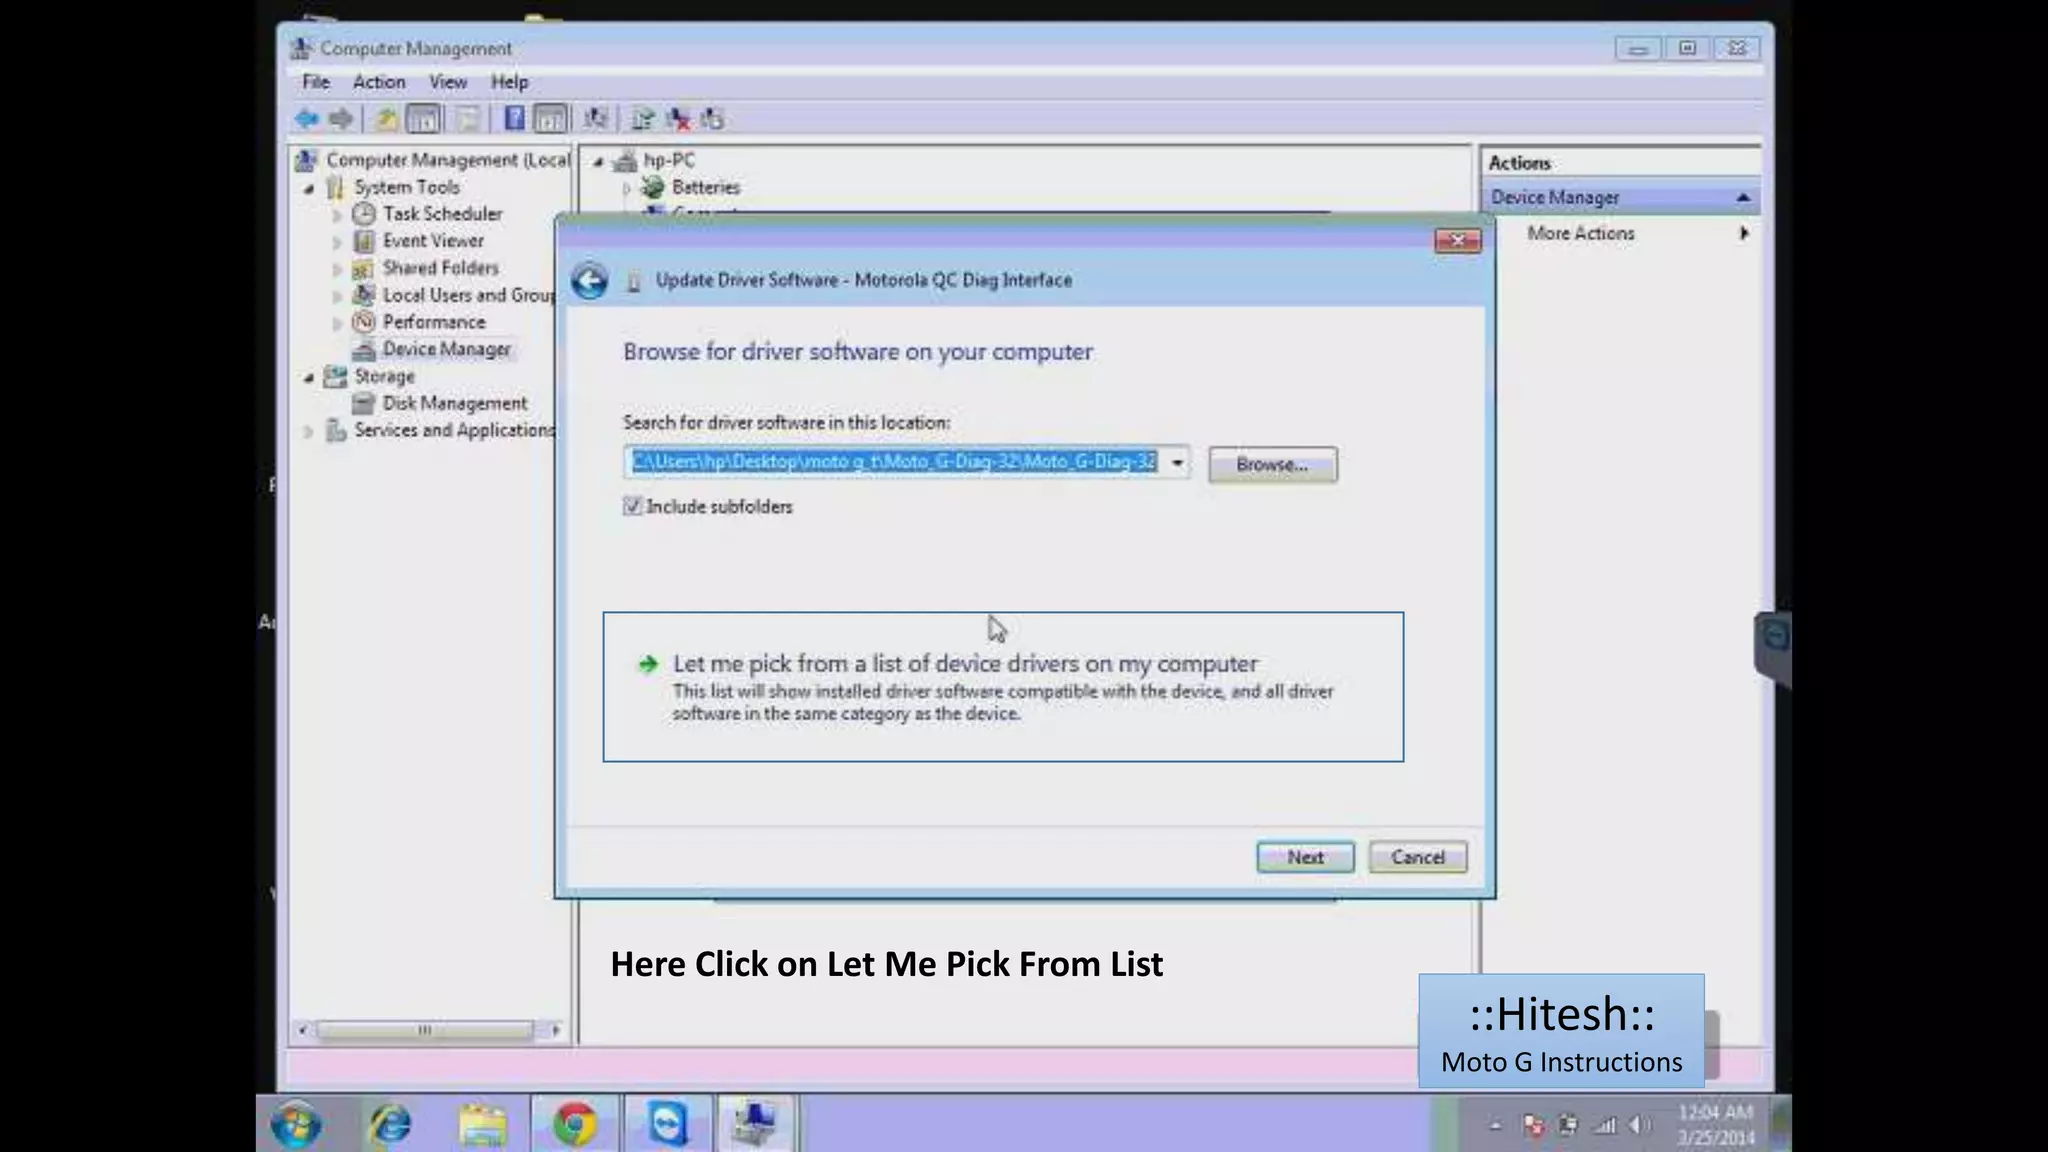
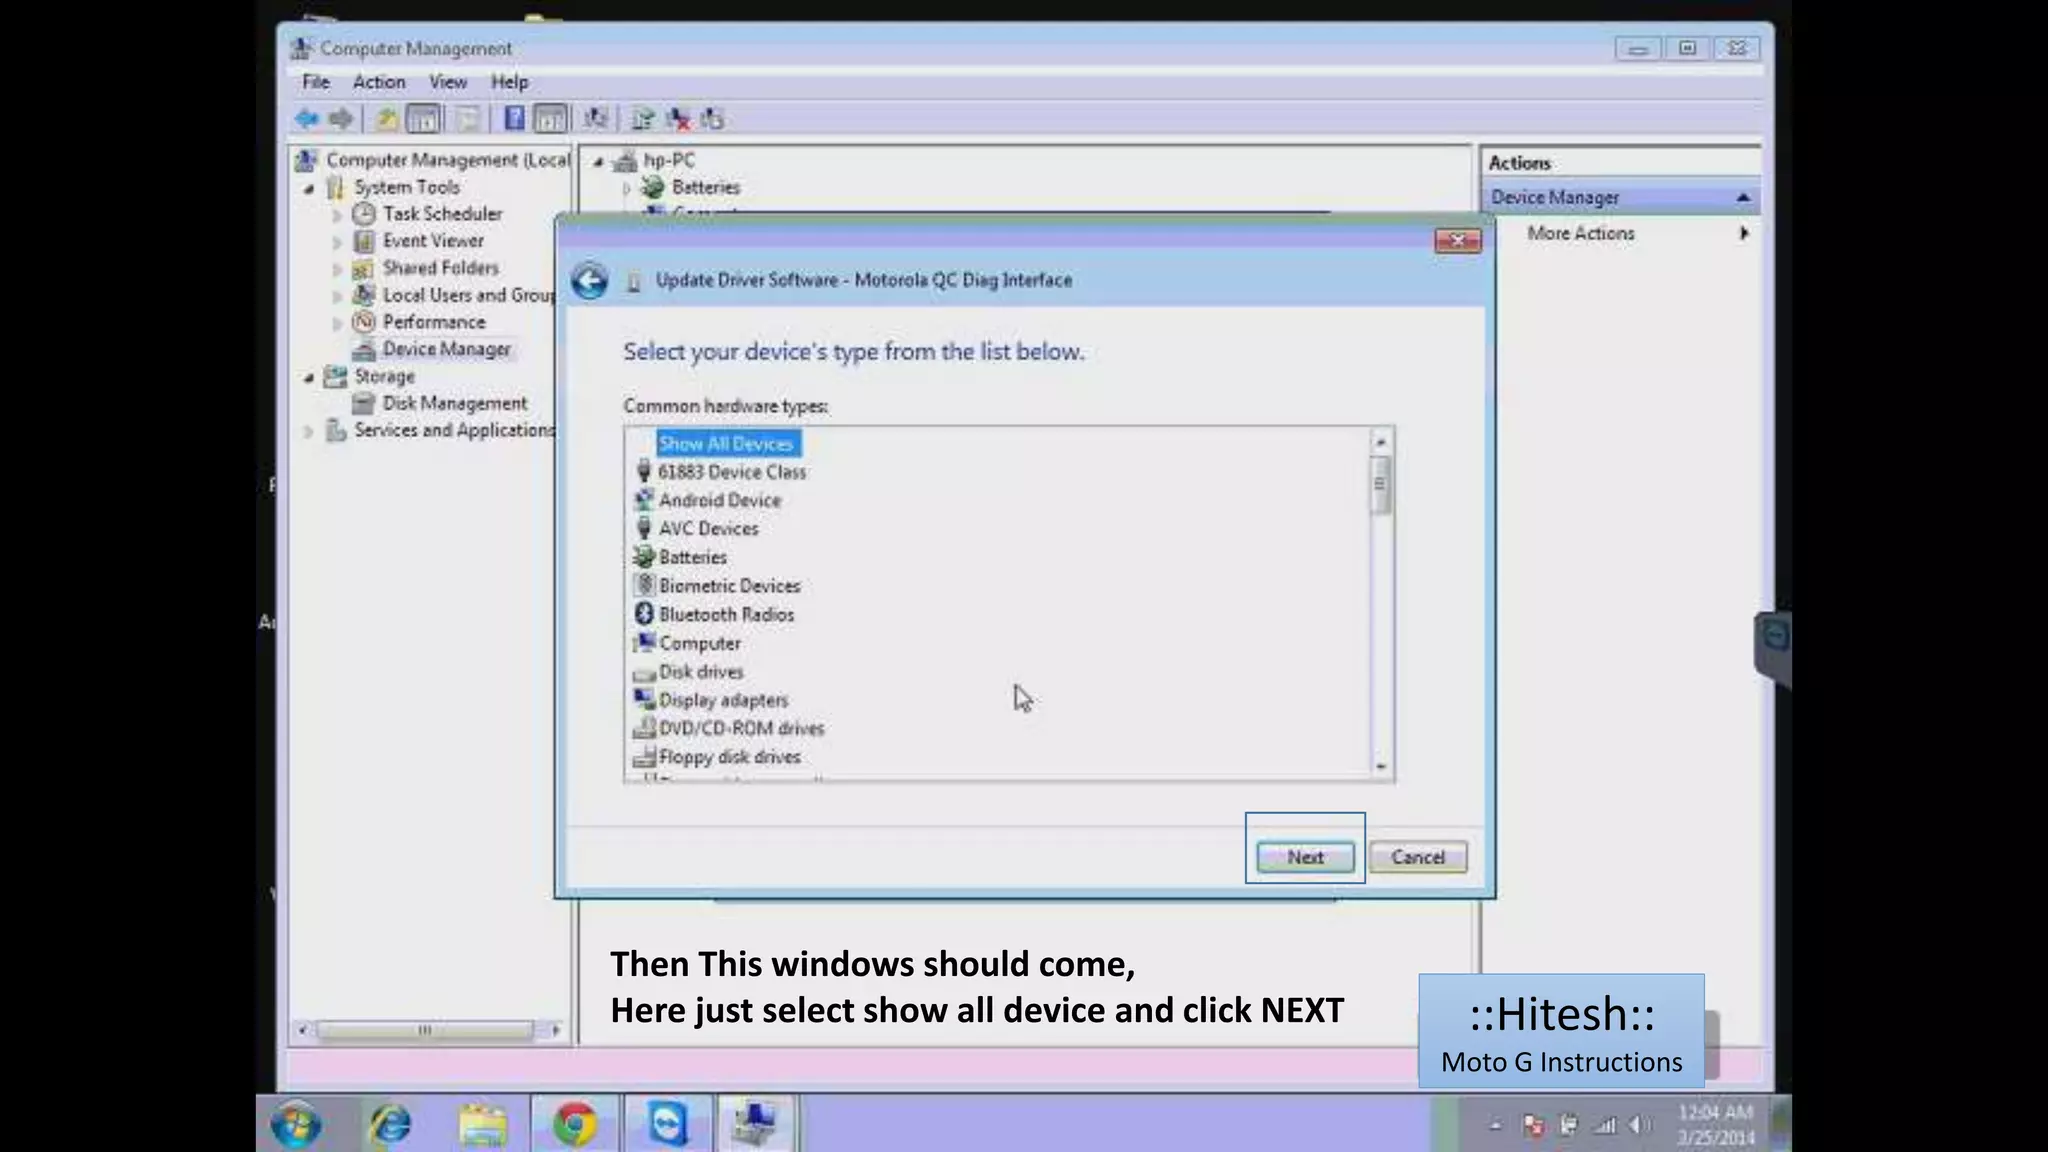
1. Installing the Motorola DIAG interface drivers through the Device Manager.
2. Configuring the phone's PRL, HDR, and MobileIP settings using the Motorola DFS software.
3. Unlocking the phone for use on Reliance CDMA by writing an NV dump file.
4. Resetting the phone to complete the configuration.
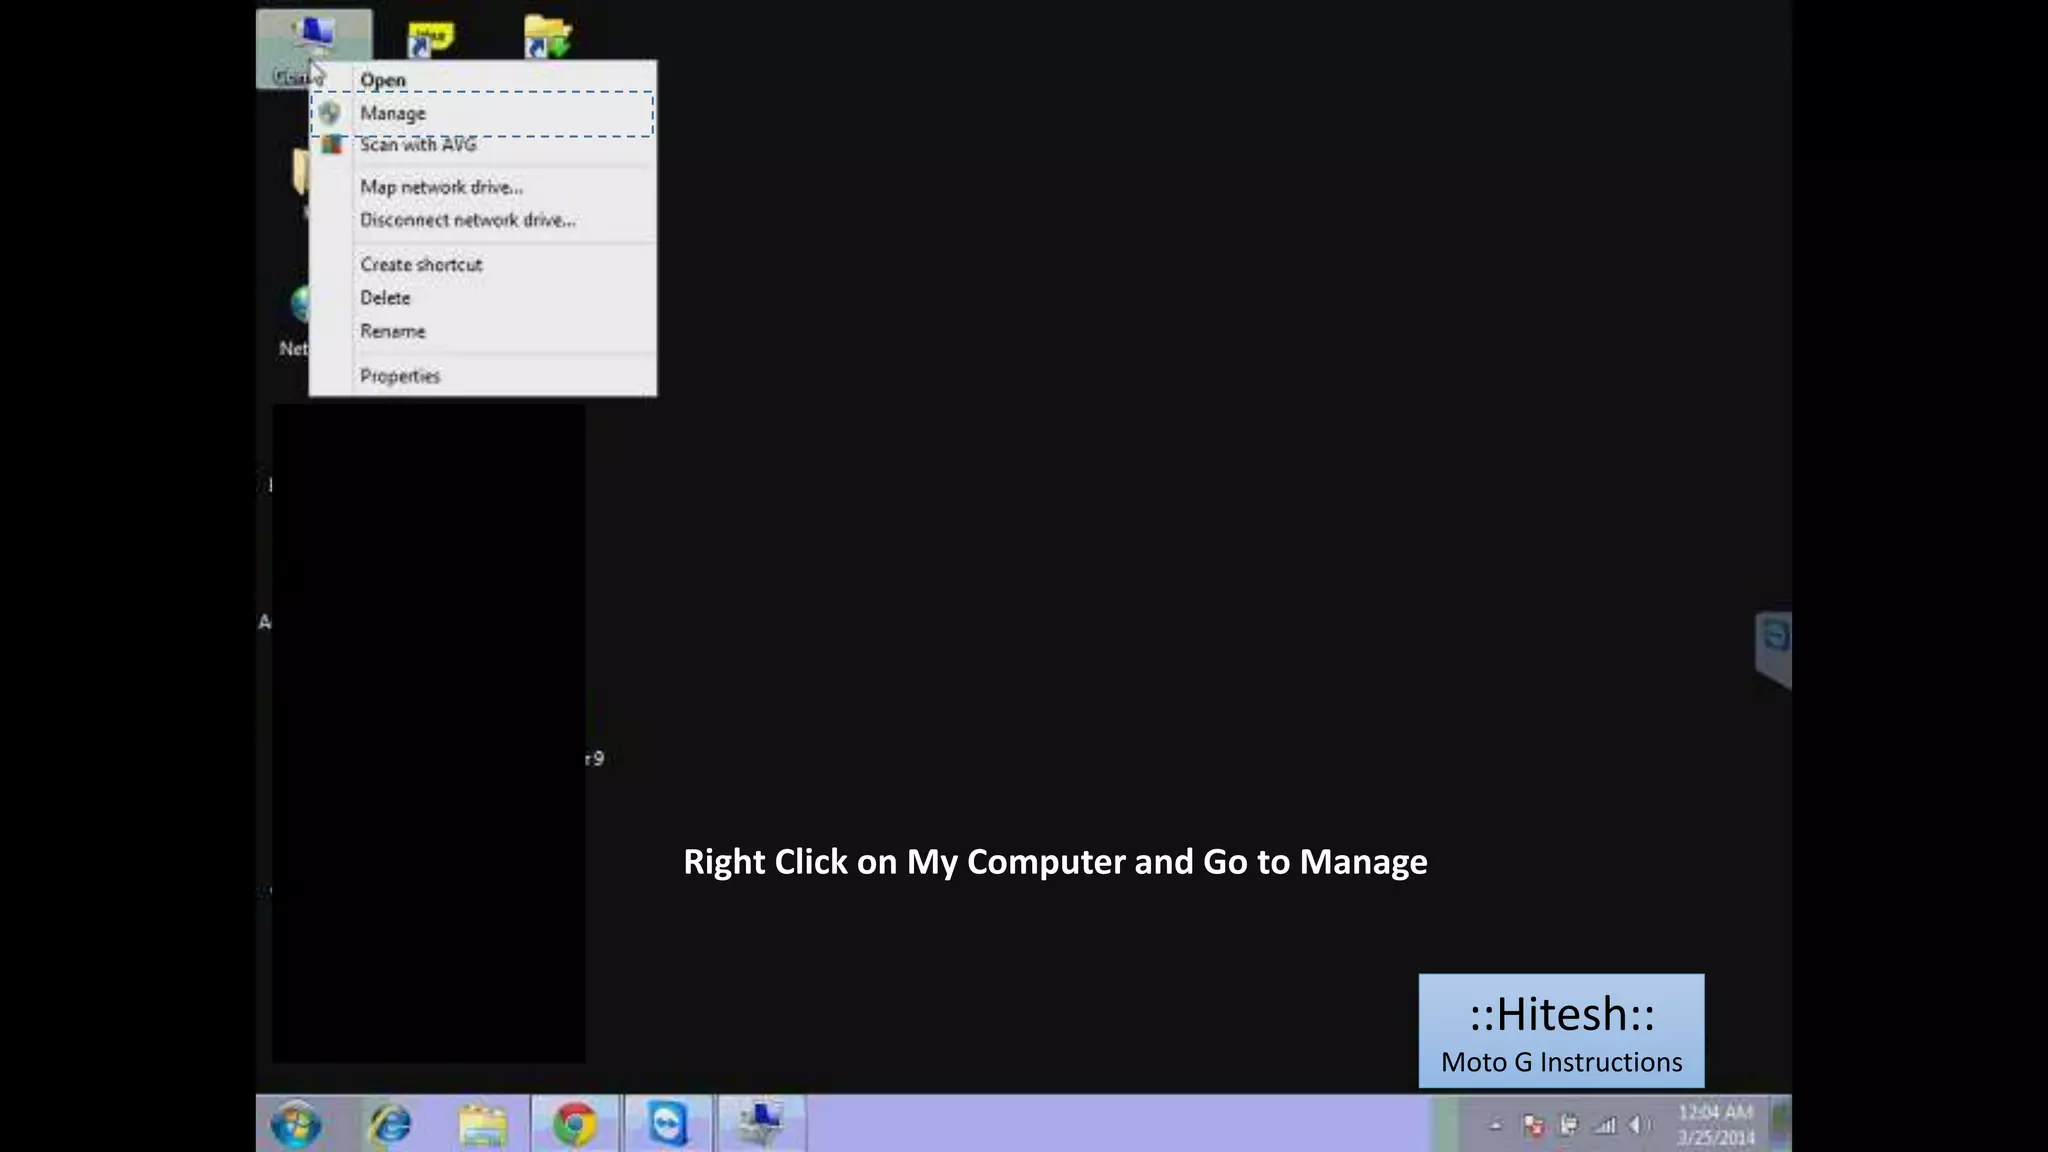

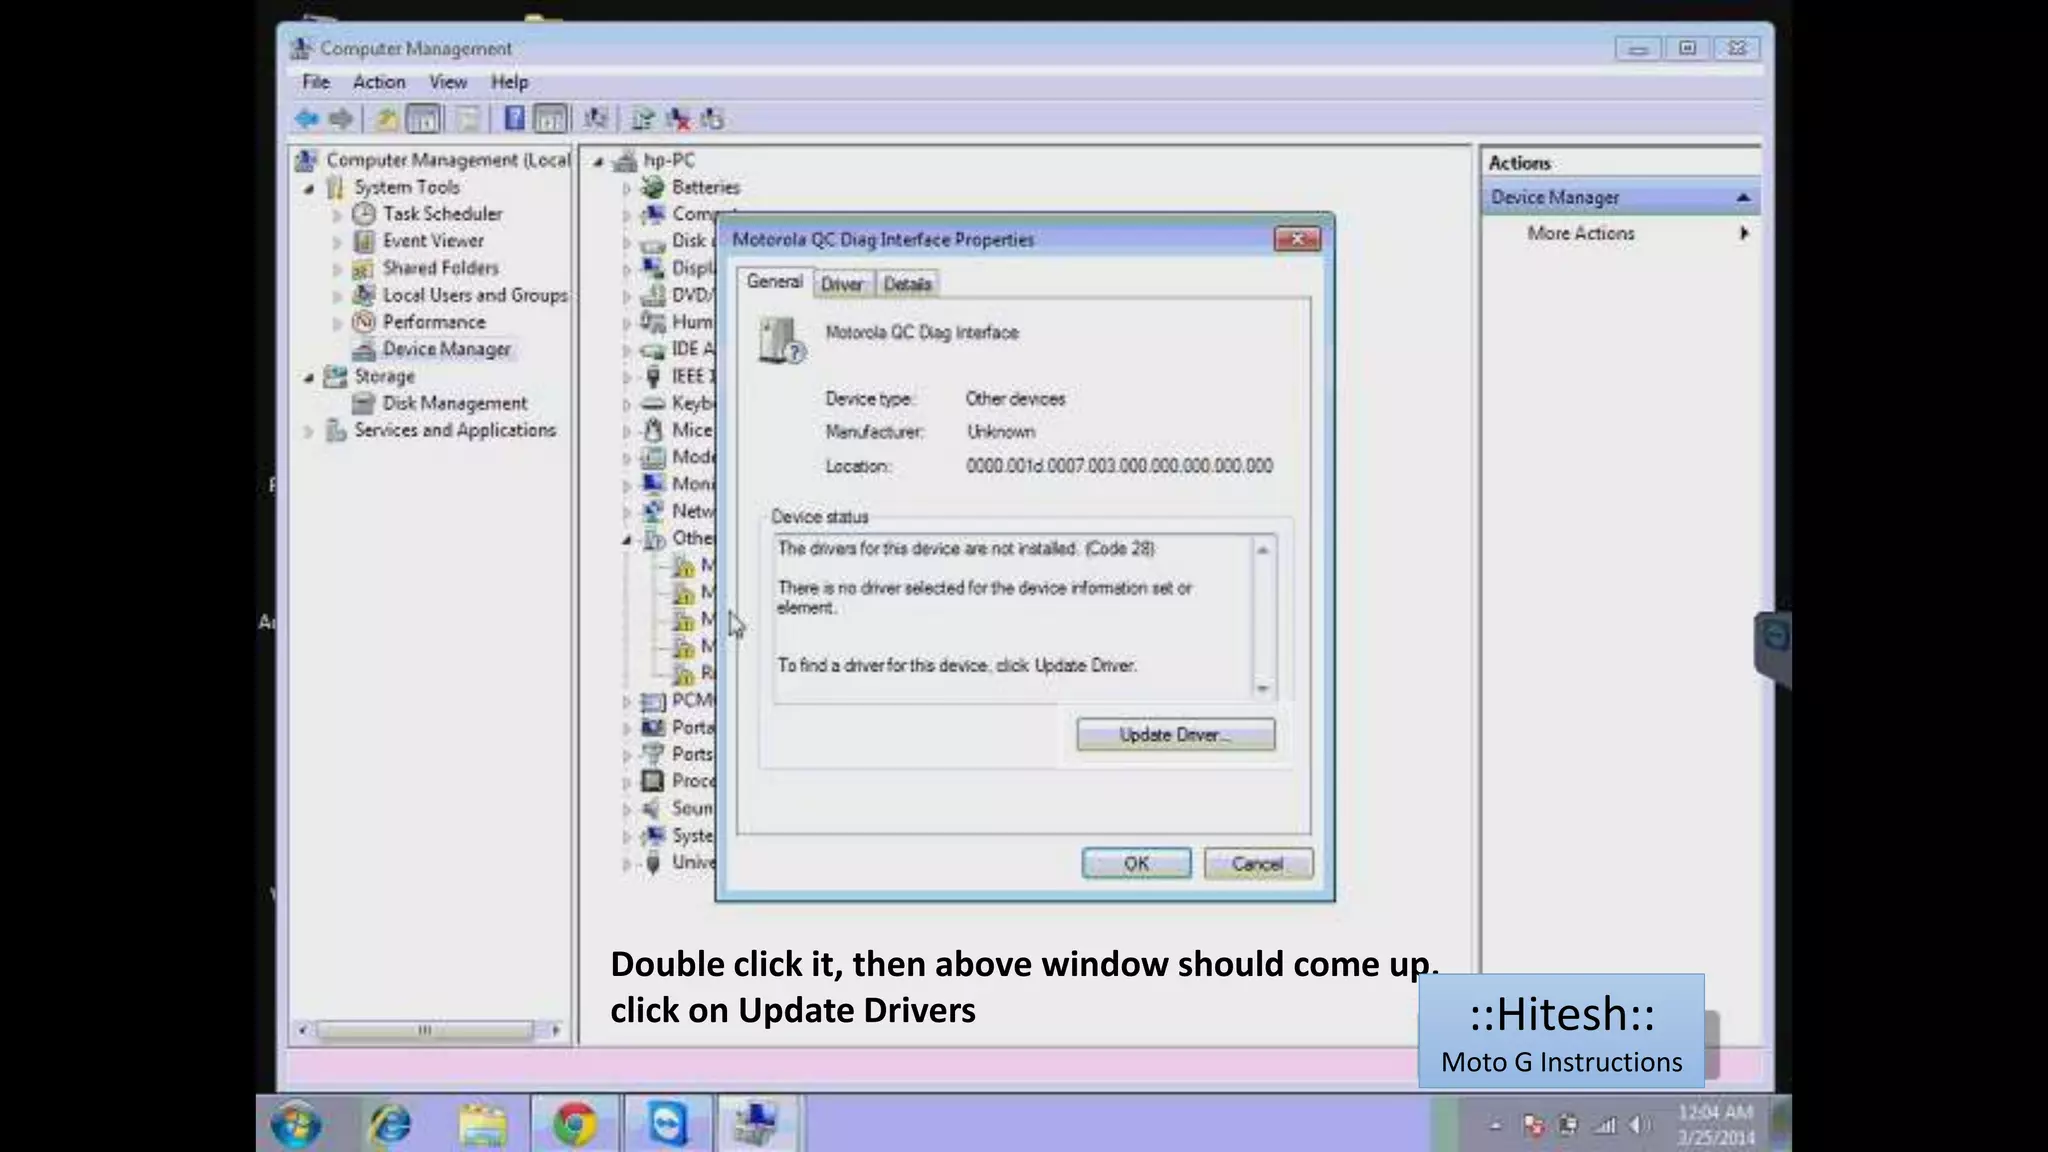

![Close all the windows, and come to device manager (computer management]
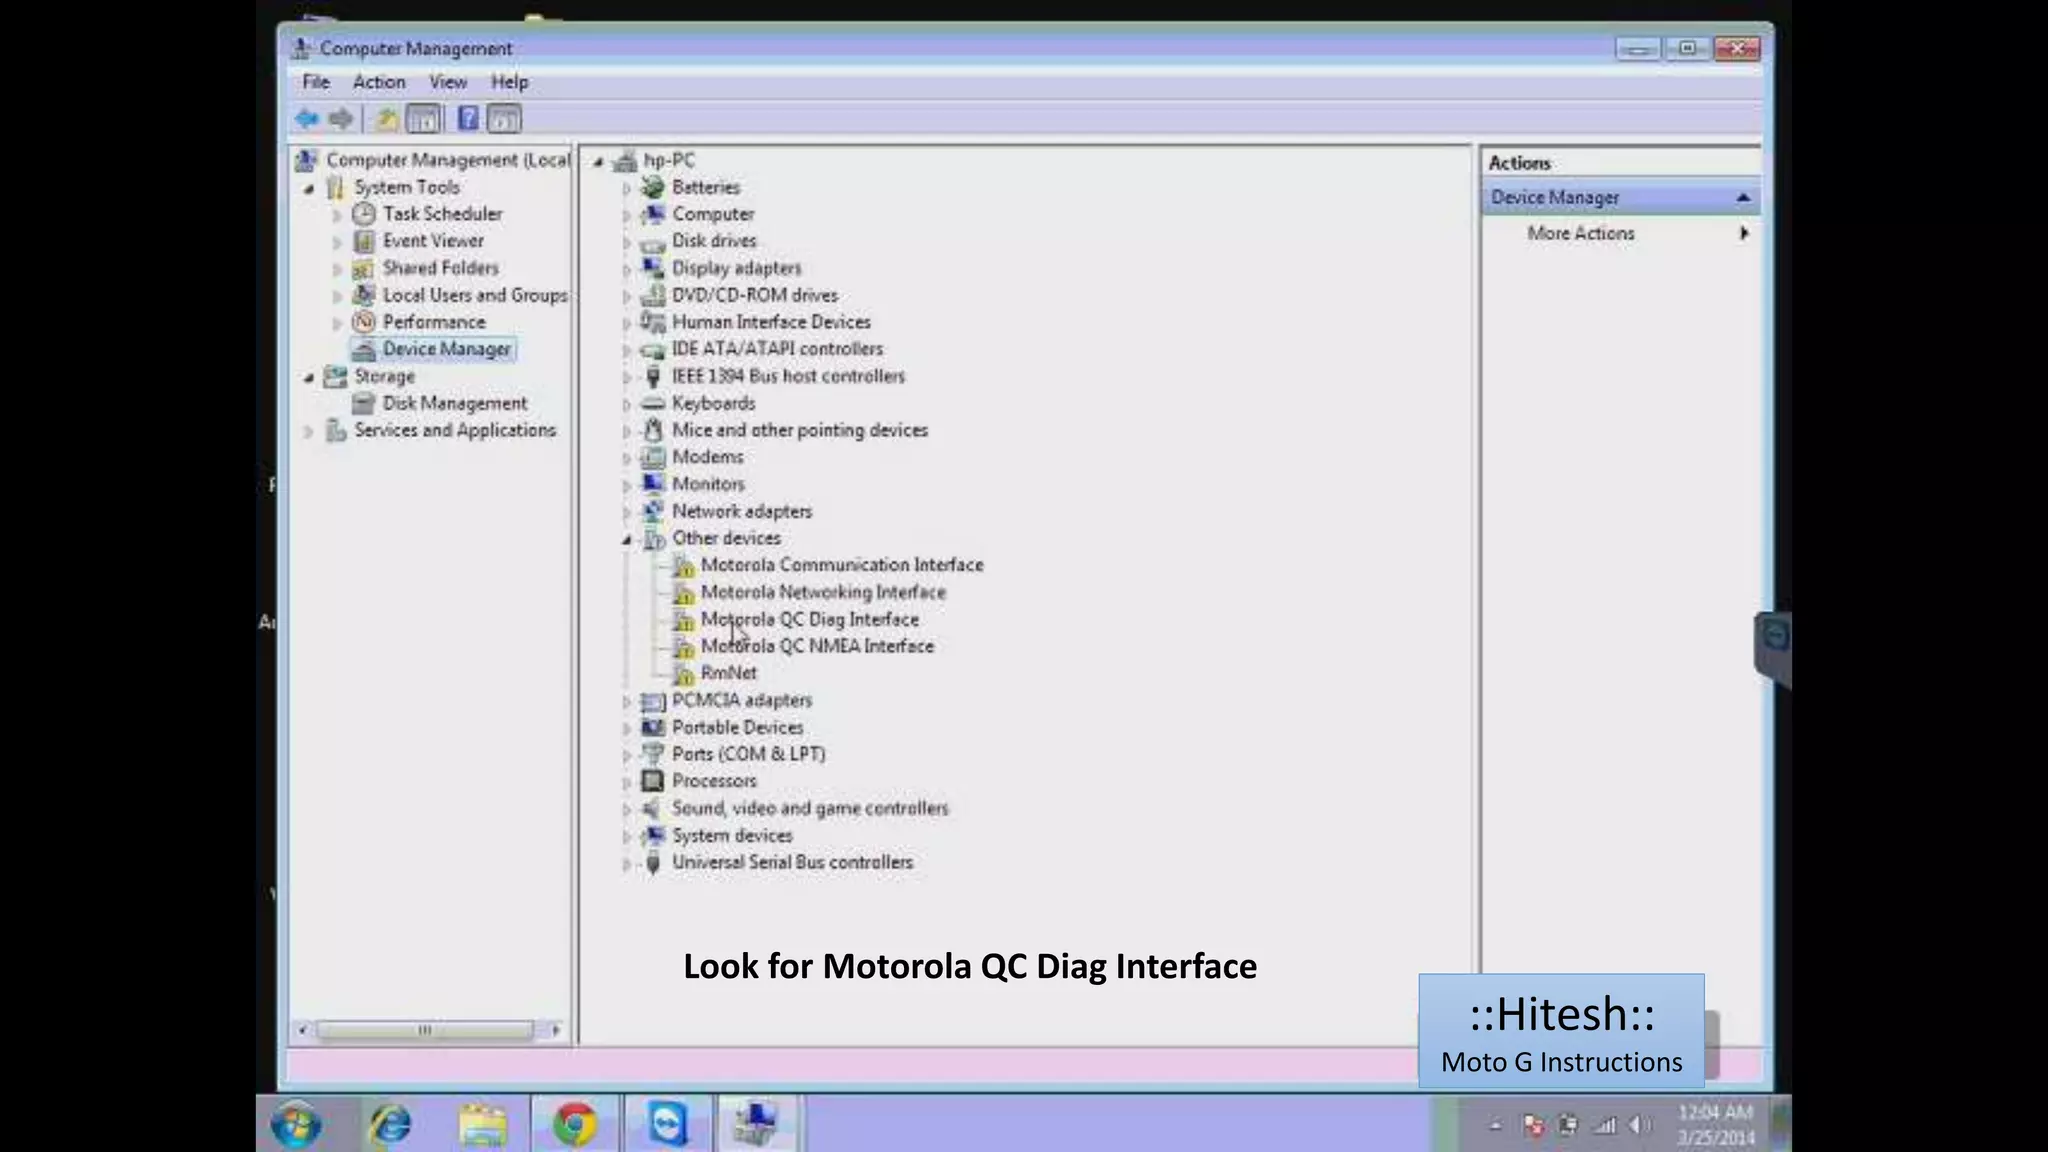
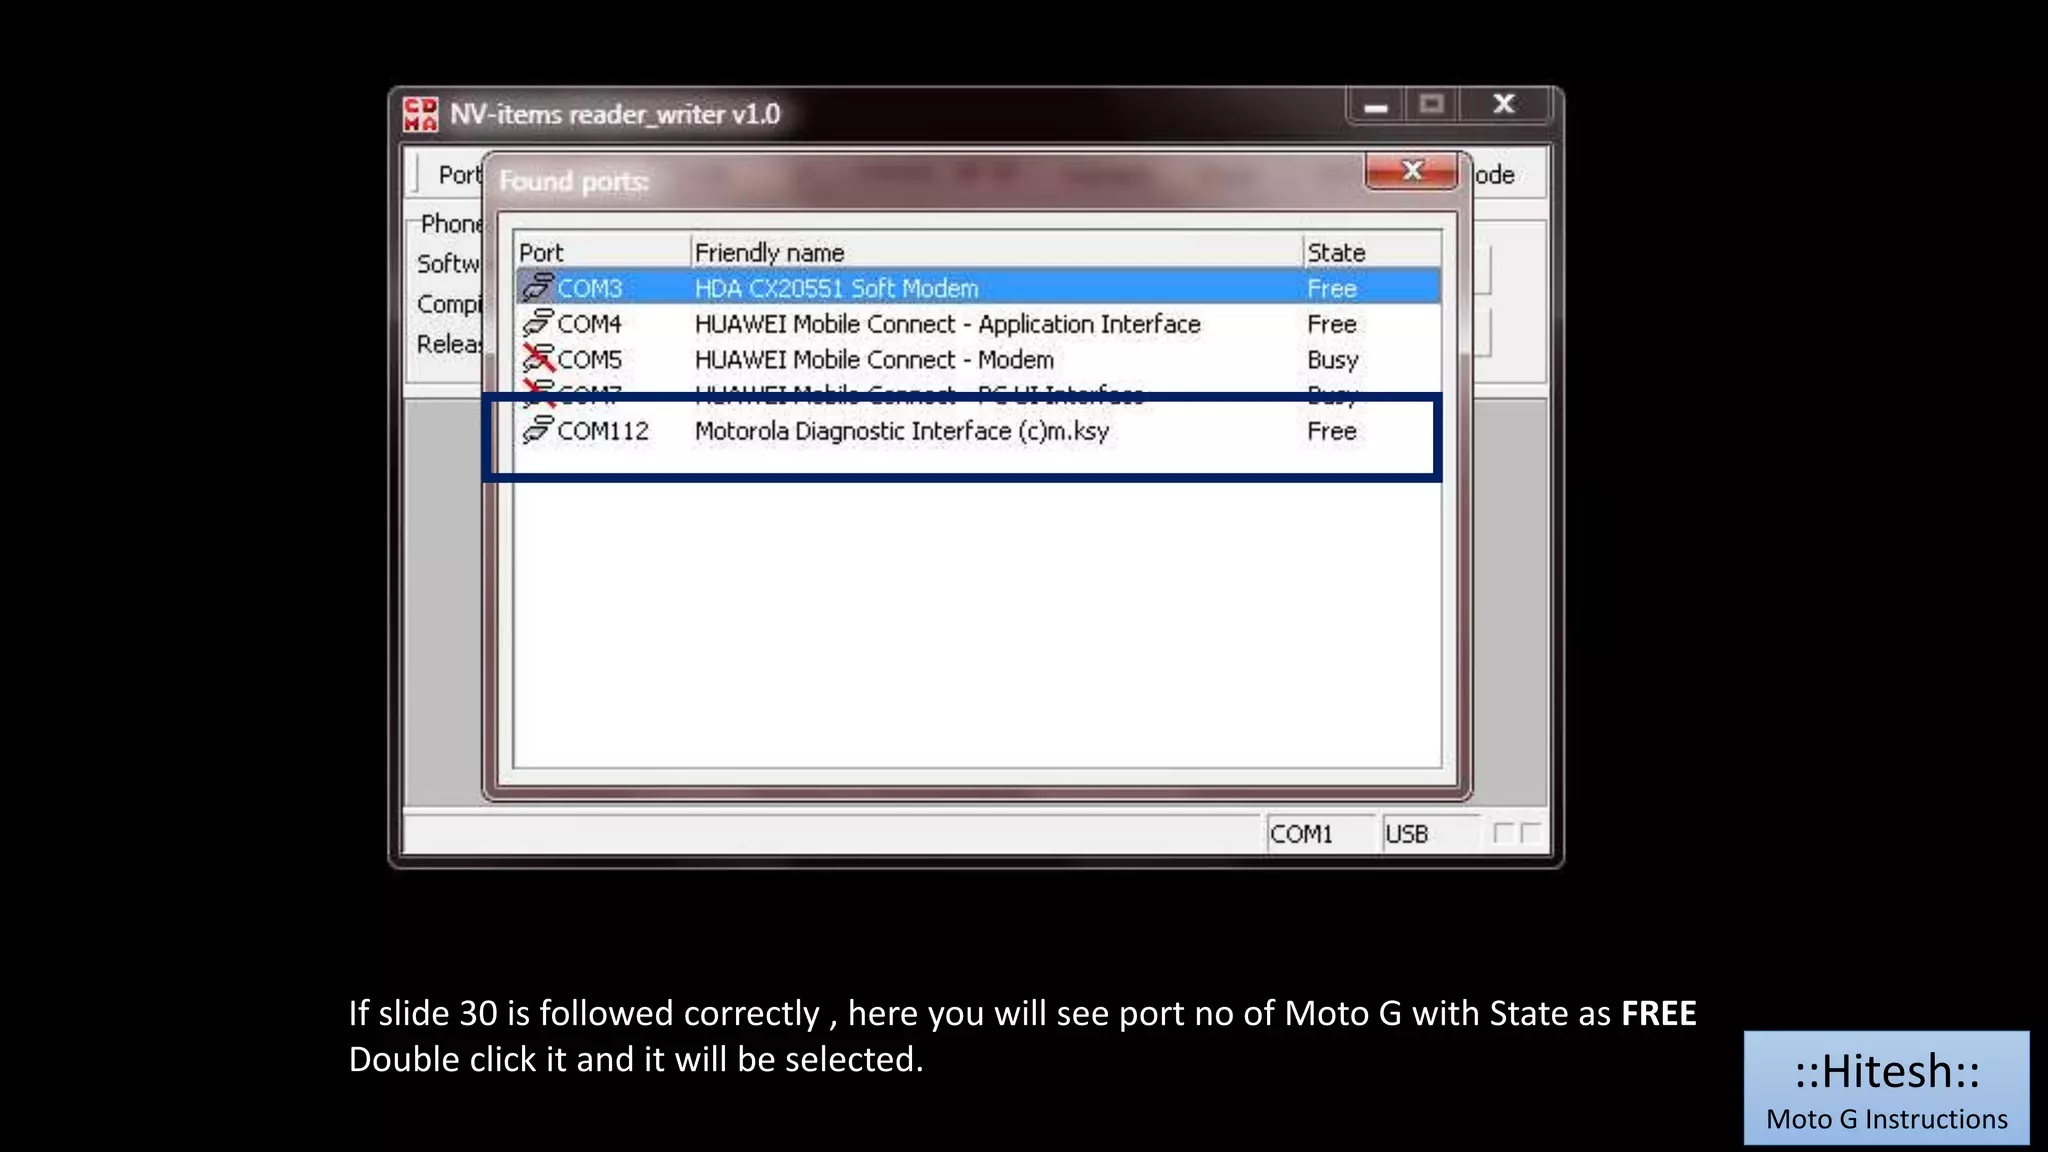
Now you can see Motorola Diag port no in PORTS,
note down your port no. ::Hitesh::
Moto G Instructions](https://image.slidesharecdn.com/motogprldatareliance-140912111713-phpapp02/75/Moto-g-prl_data_reliance-18-2048.jpg)

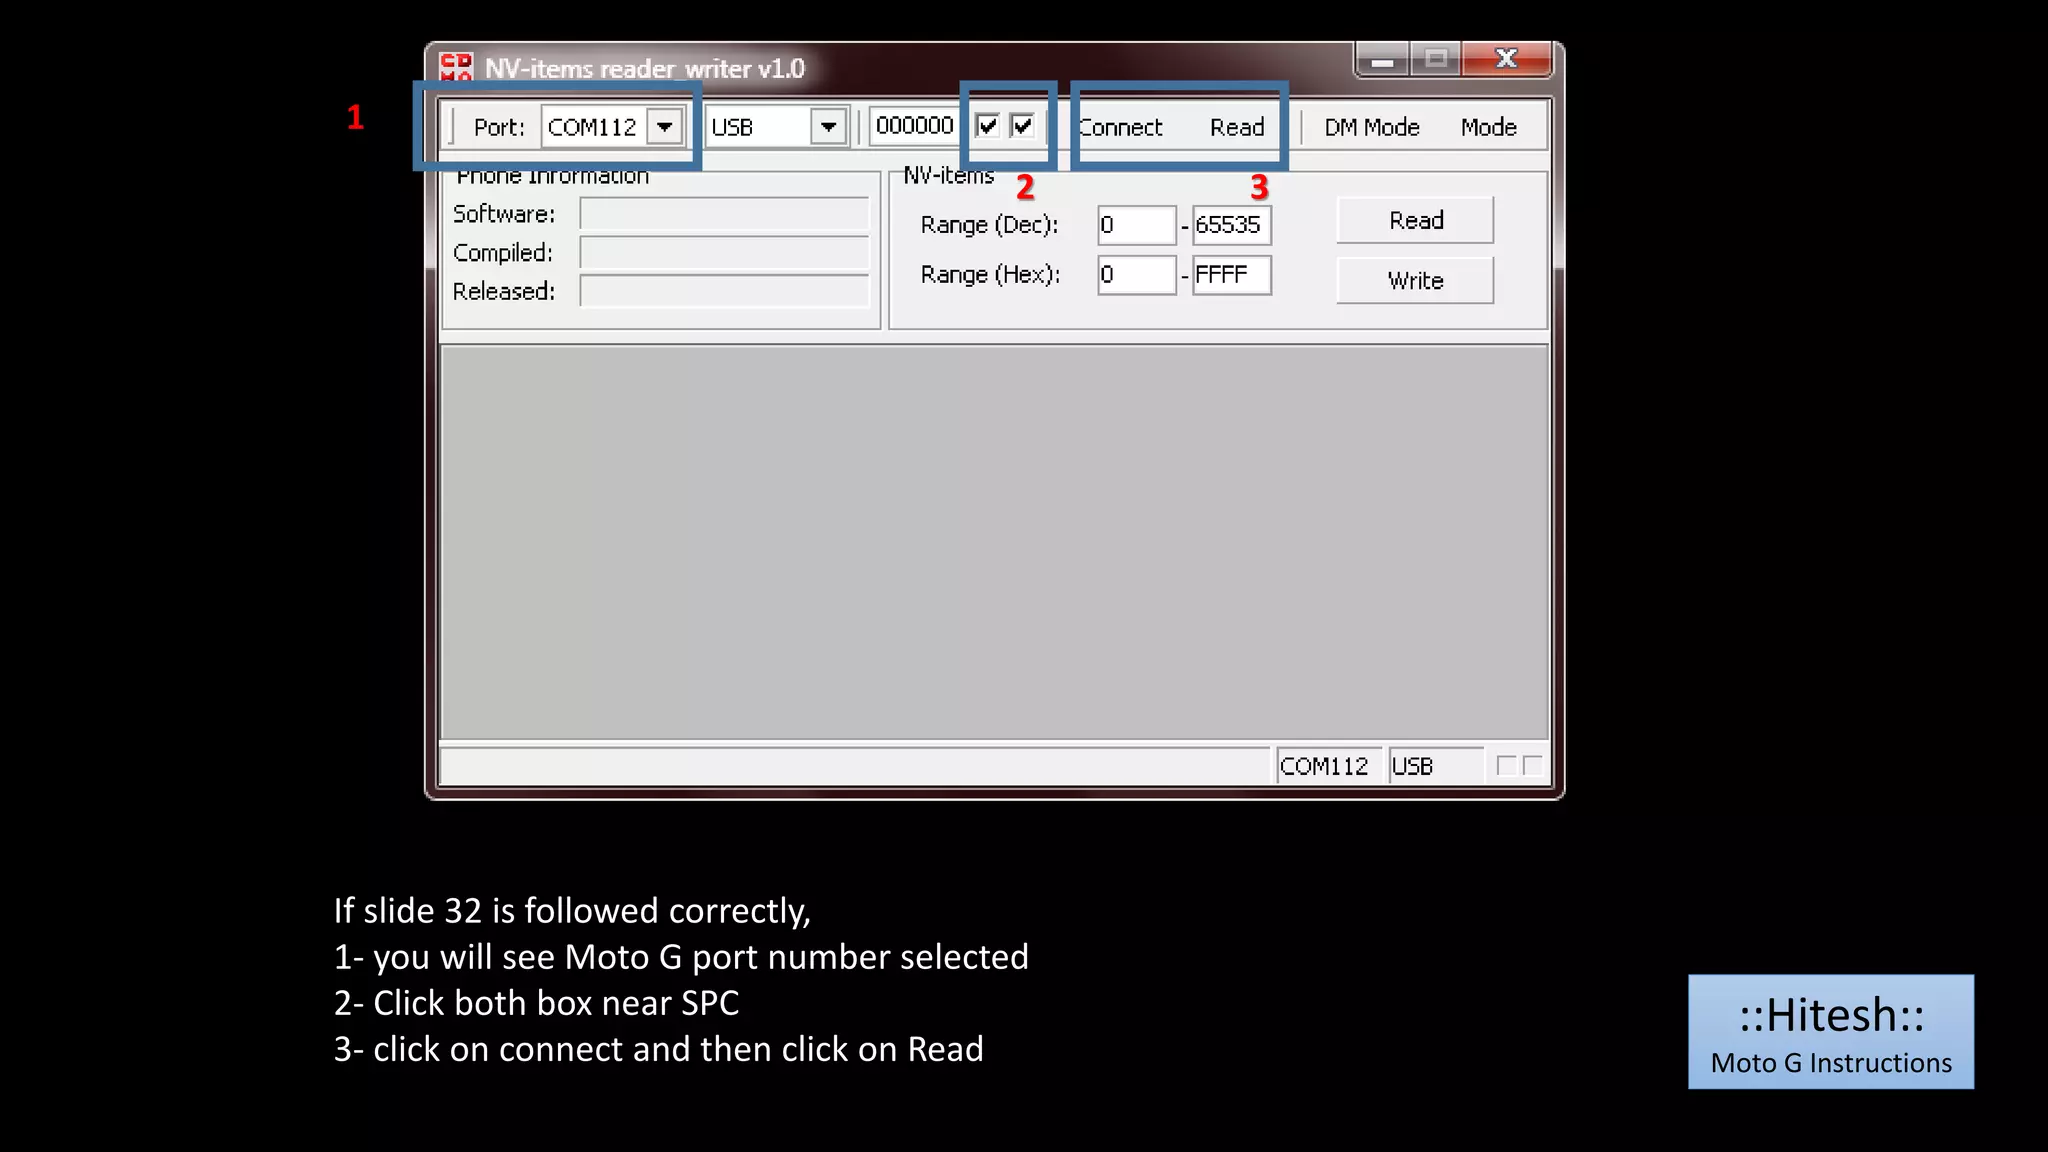

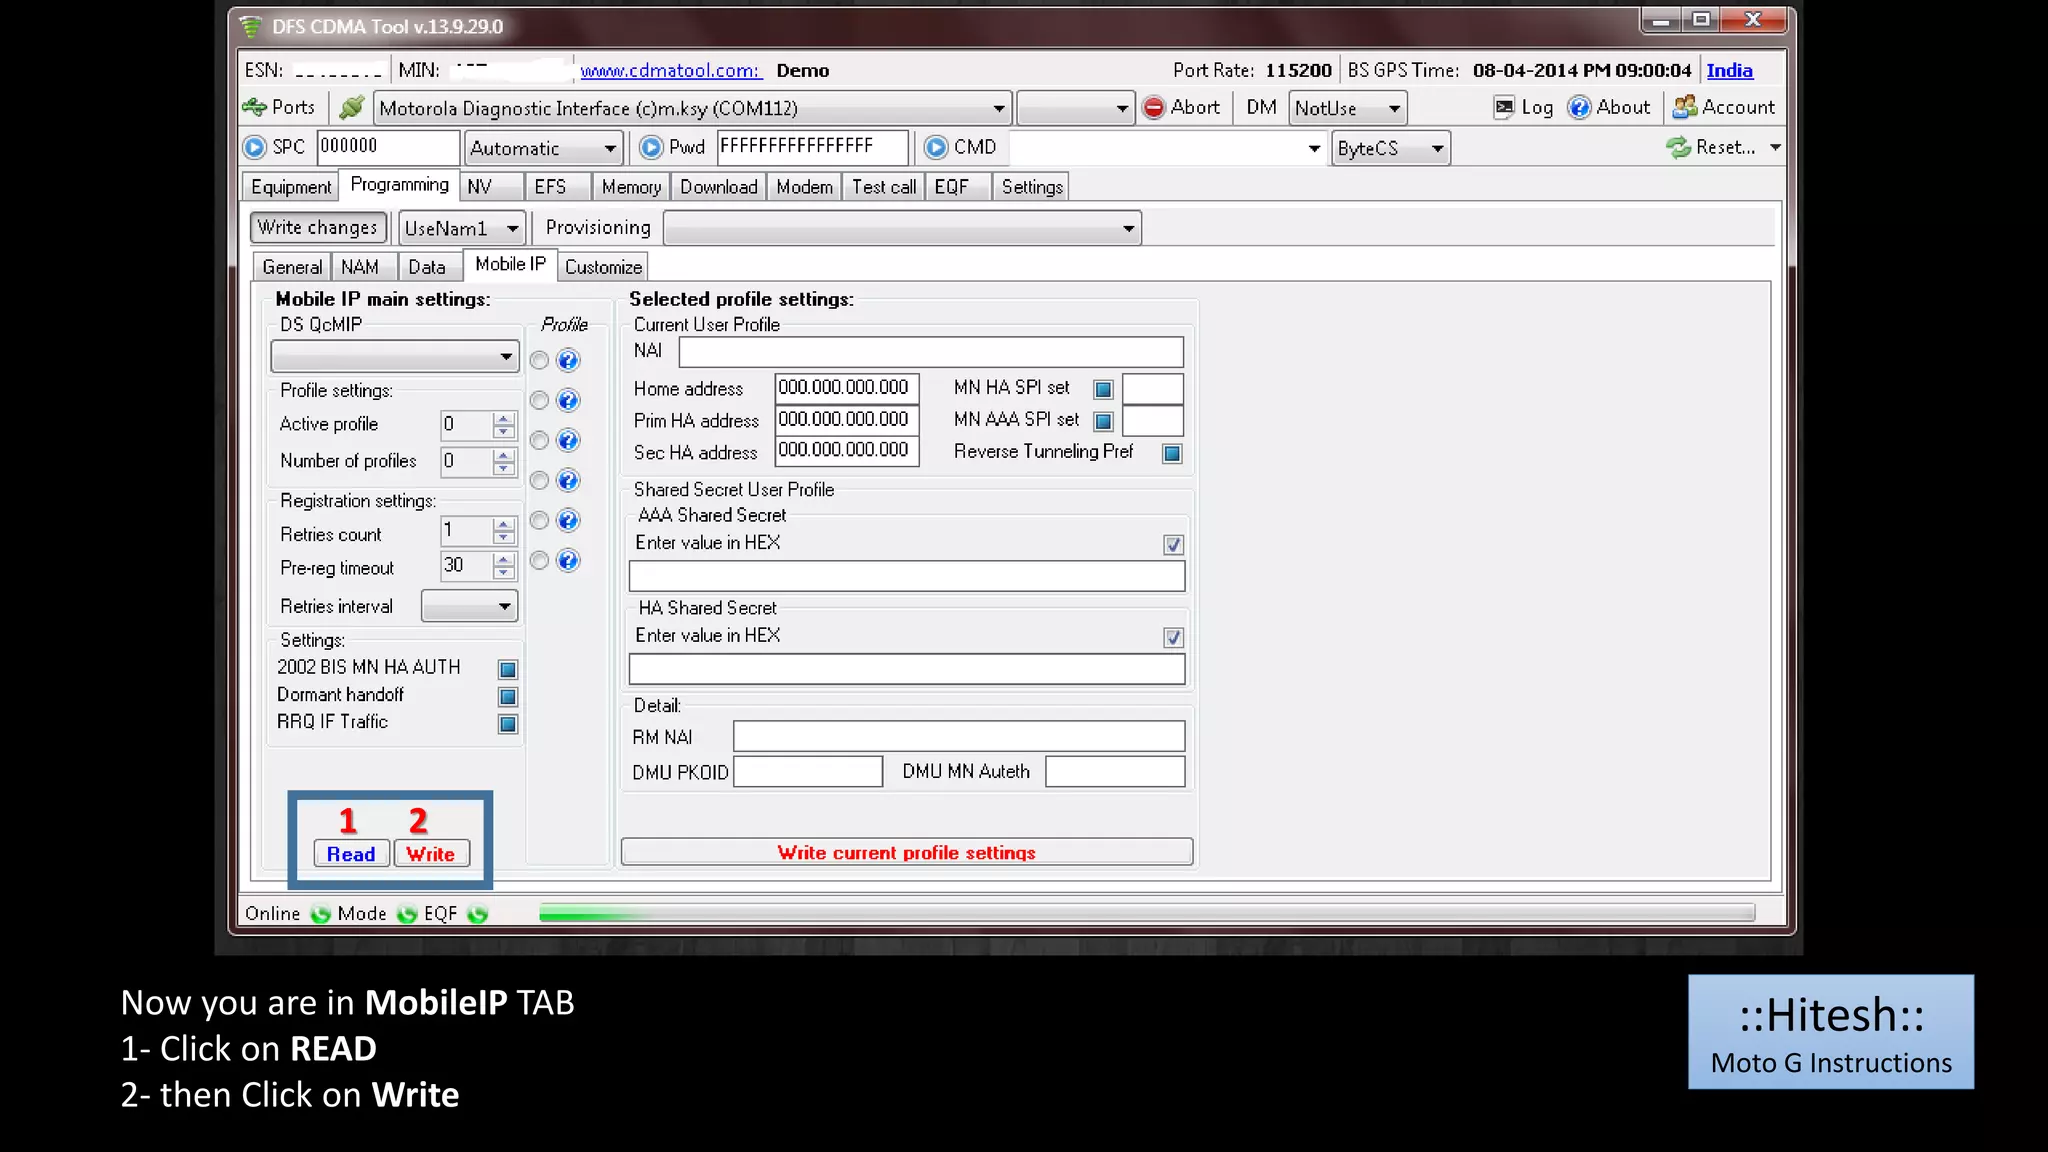
![1
2
1- After clicking Port connection, it should show connected
2- SPC box should have 6 Zero, Now click on SPC button, [Here log should show device unlocked]
::Hitesh::
Moto G Instructions](https://image.slidesharecdn.com/motogprldatareliance-140912111713-phpapp02/75/Moto-g-prl_data_reliance-36-2048.jpg)
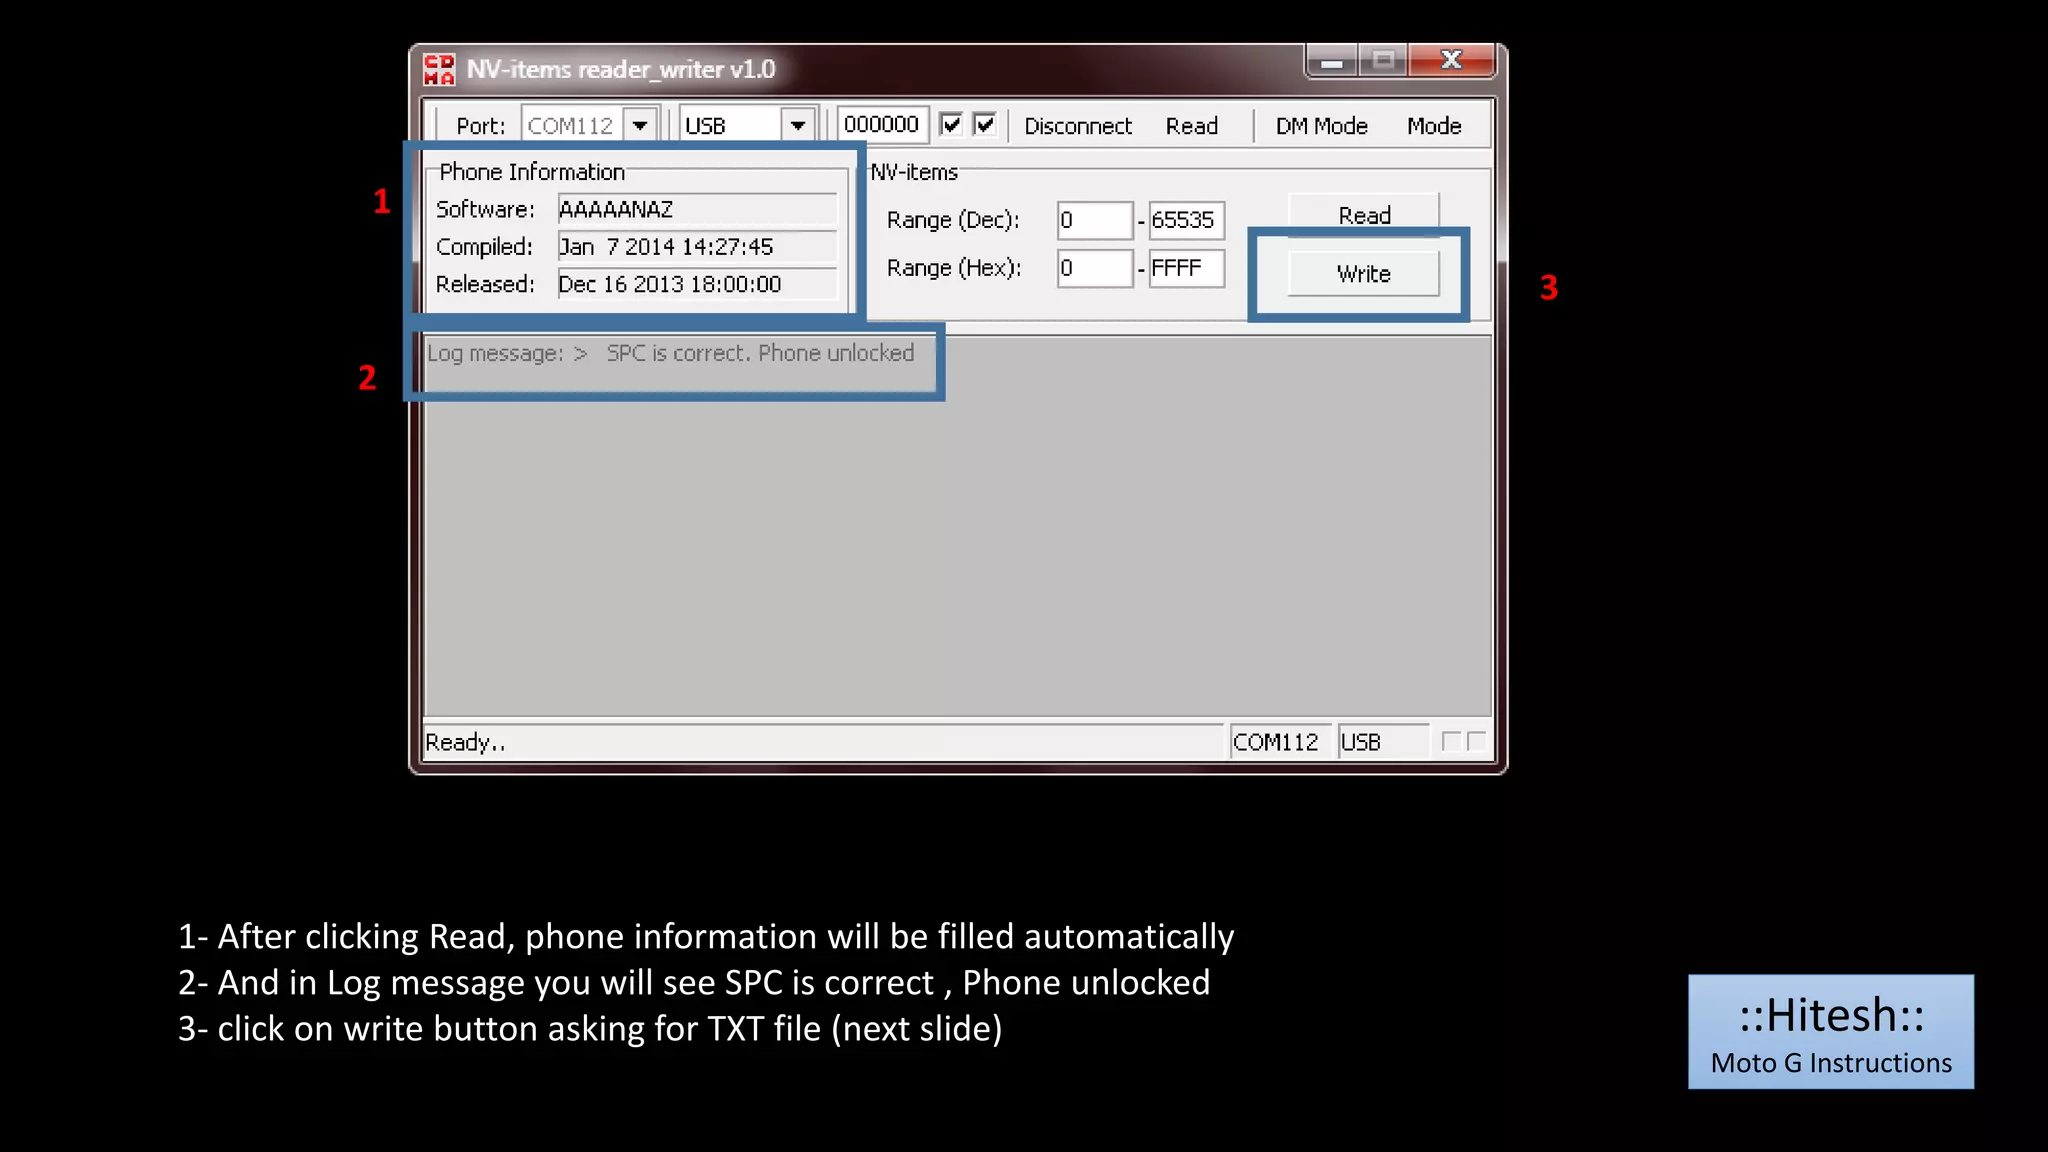
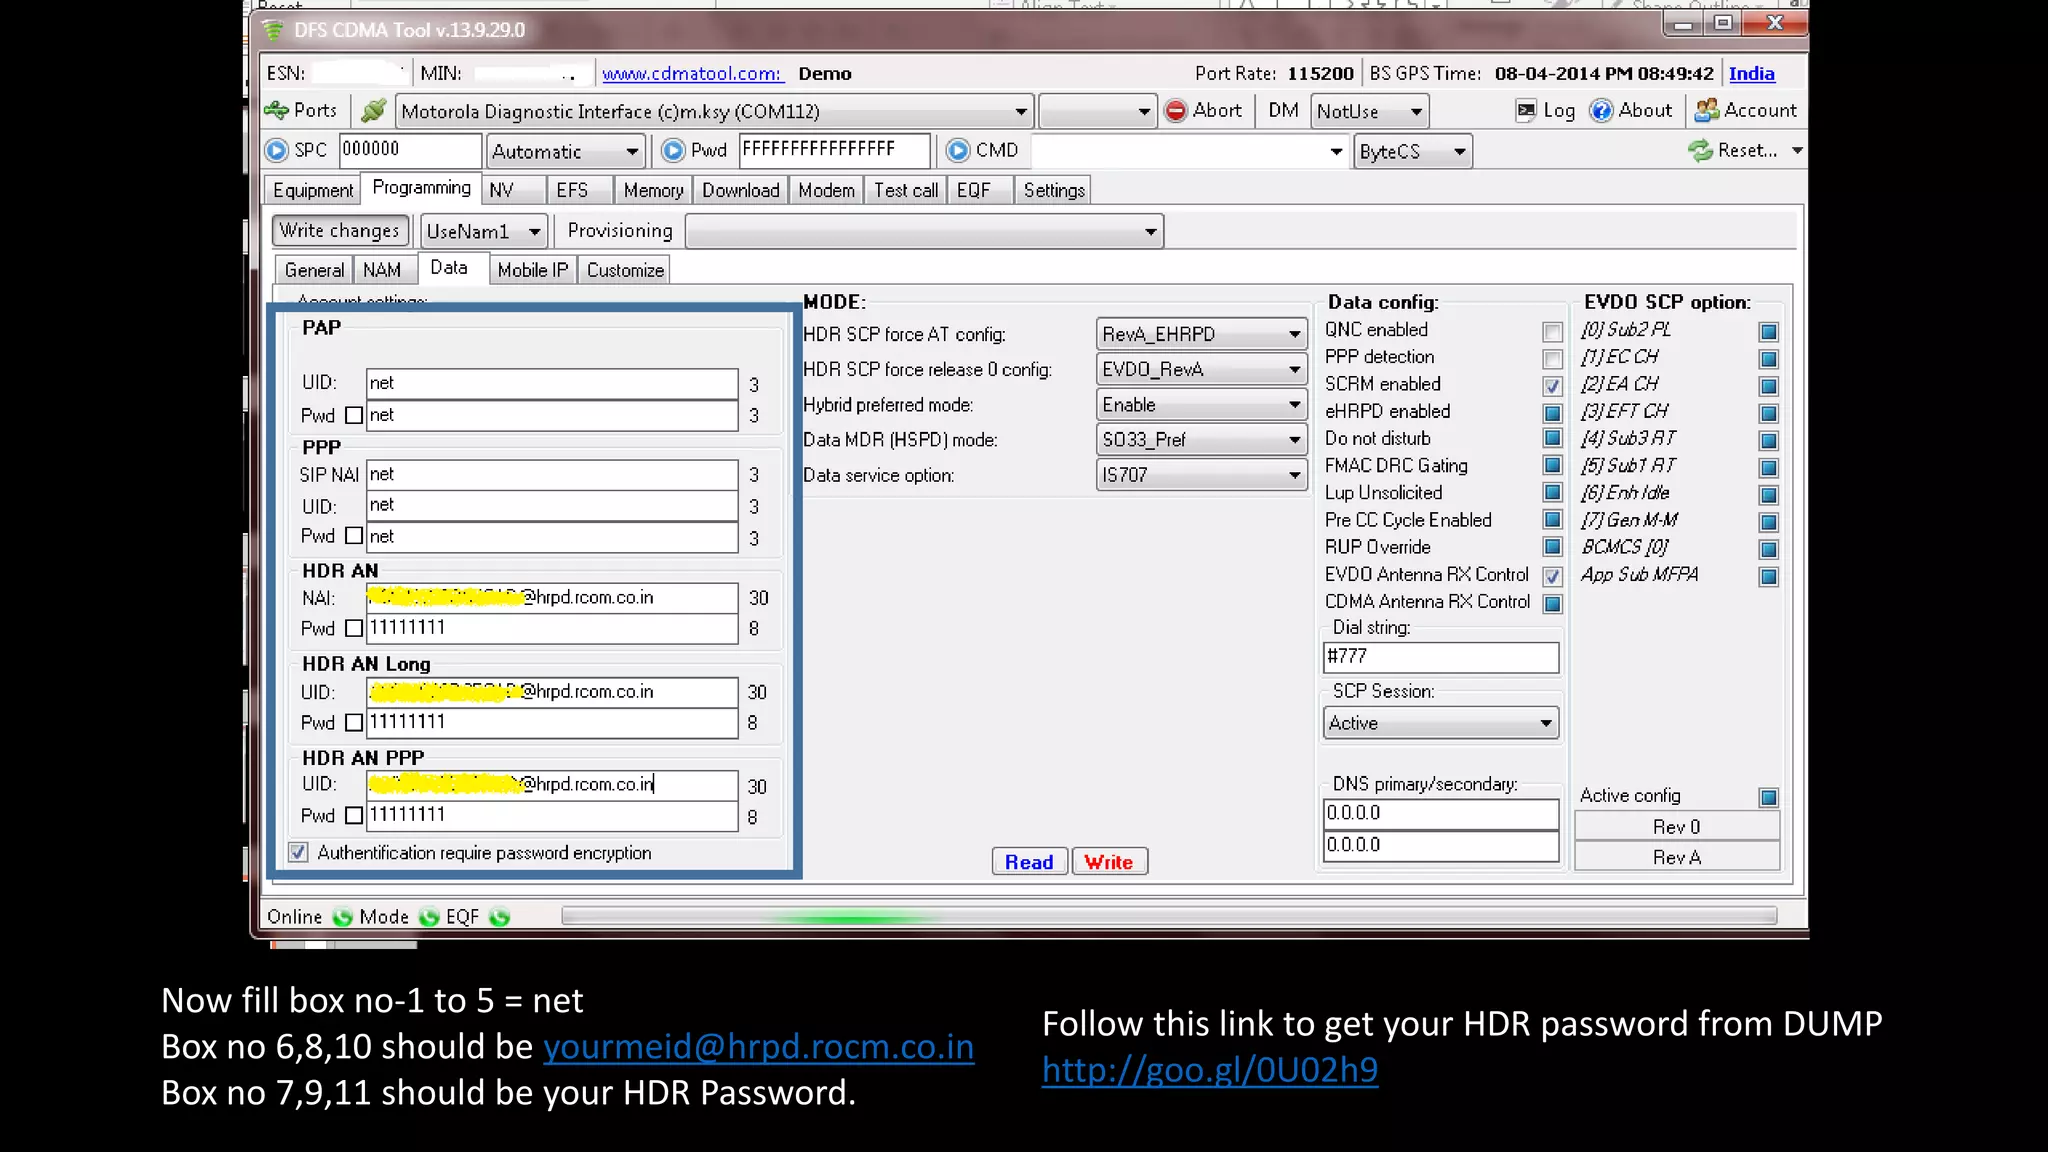
![After Clicking READ, It should look like above window
Box no 3-4 should show NET
Box no -6 & 8 should show HDR user ID [yourMEID@hrpd.rcom.co.in]
::Hitesh::
Moto G Instructions](https://image.slidesharecdn.com/motogprldatareliance-140912111713-phpapp02/75/Moto-g-prl_data_reliance-38-2048.jpg)
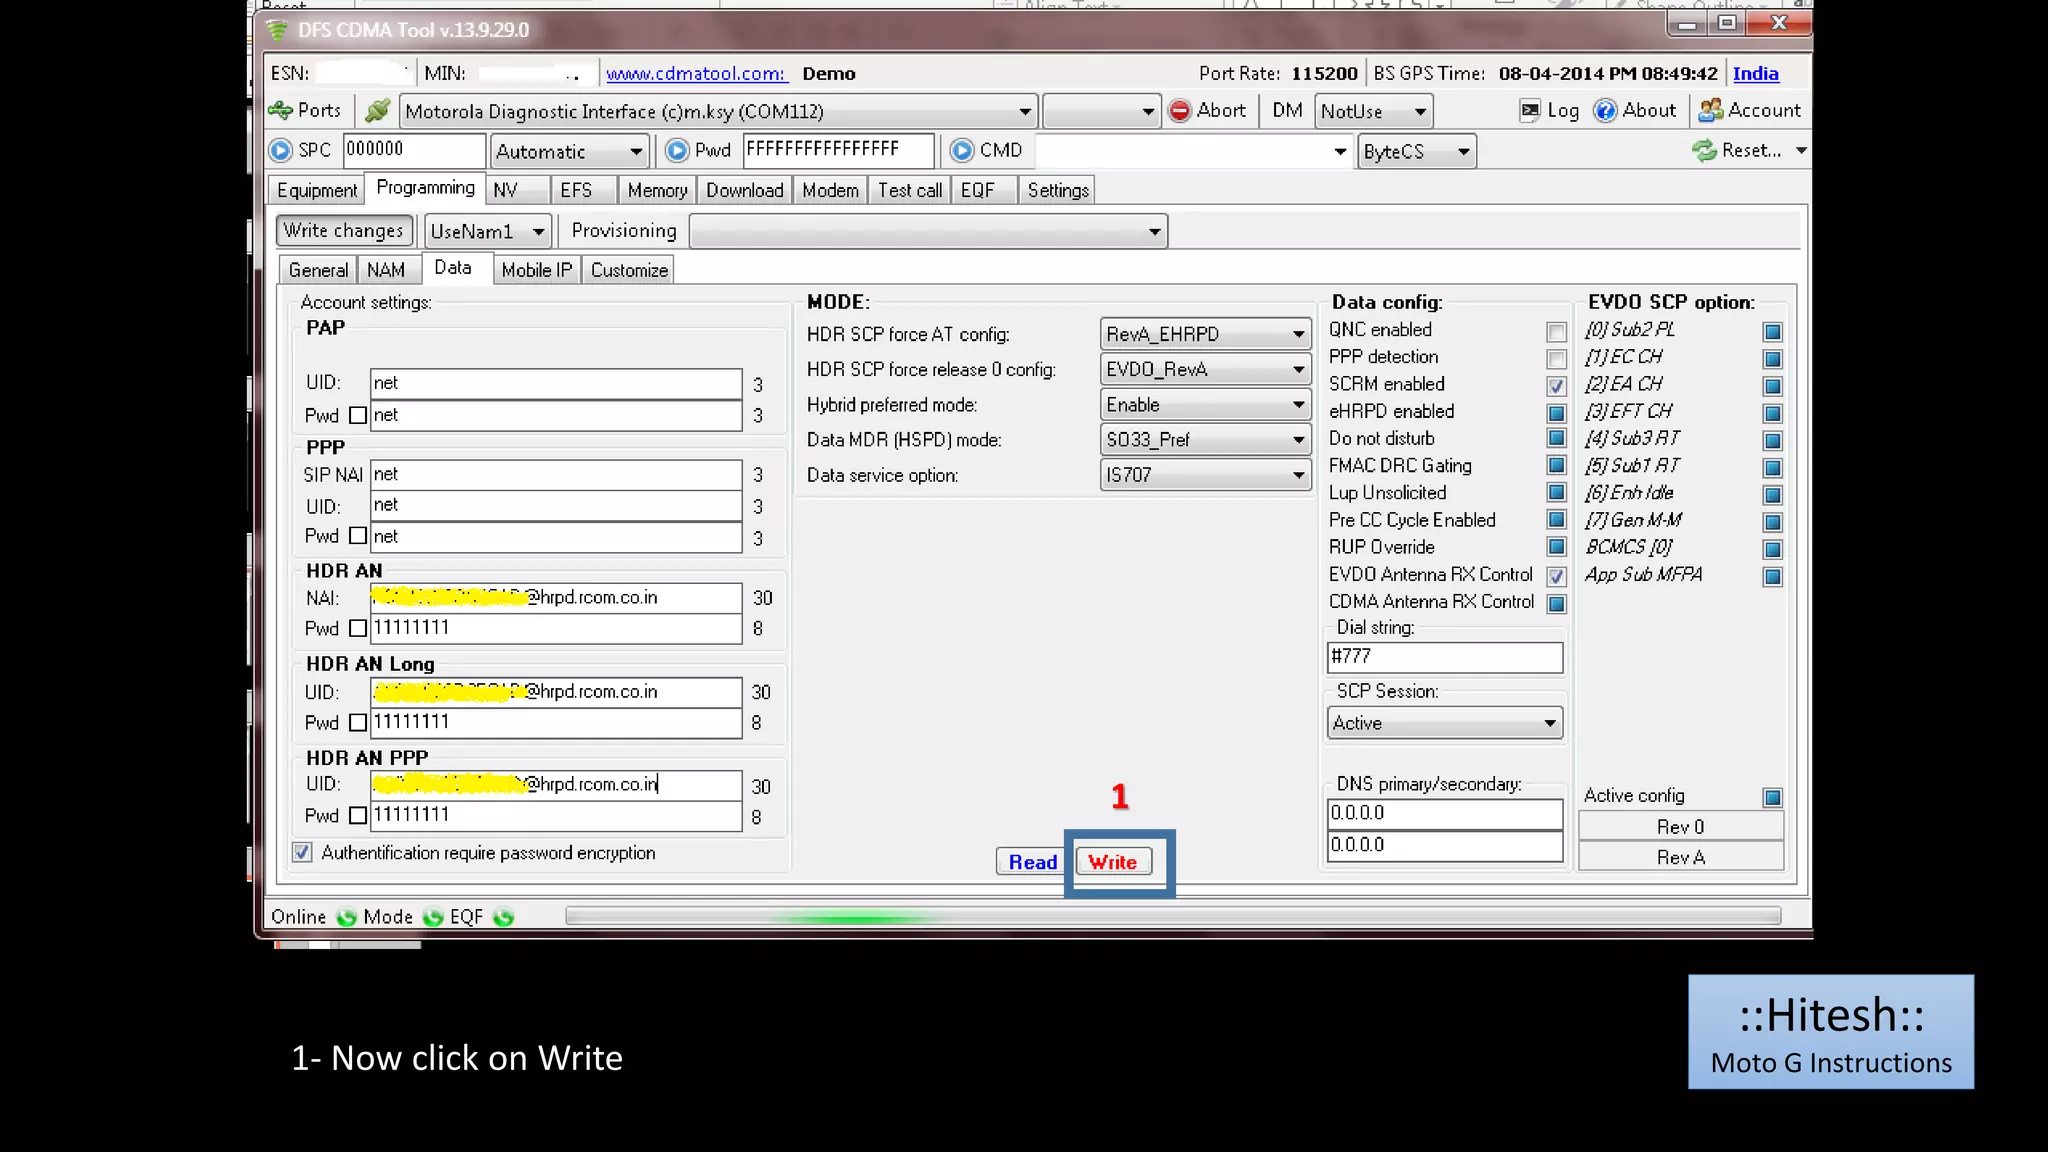
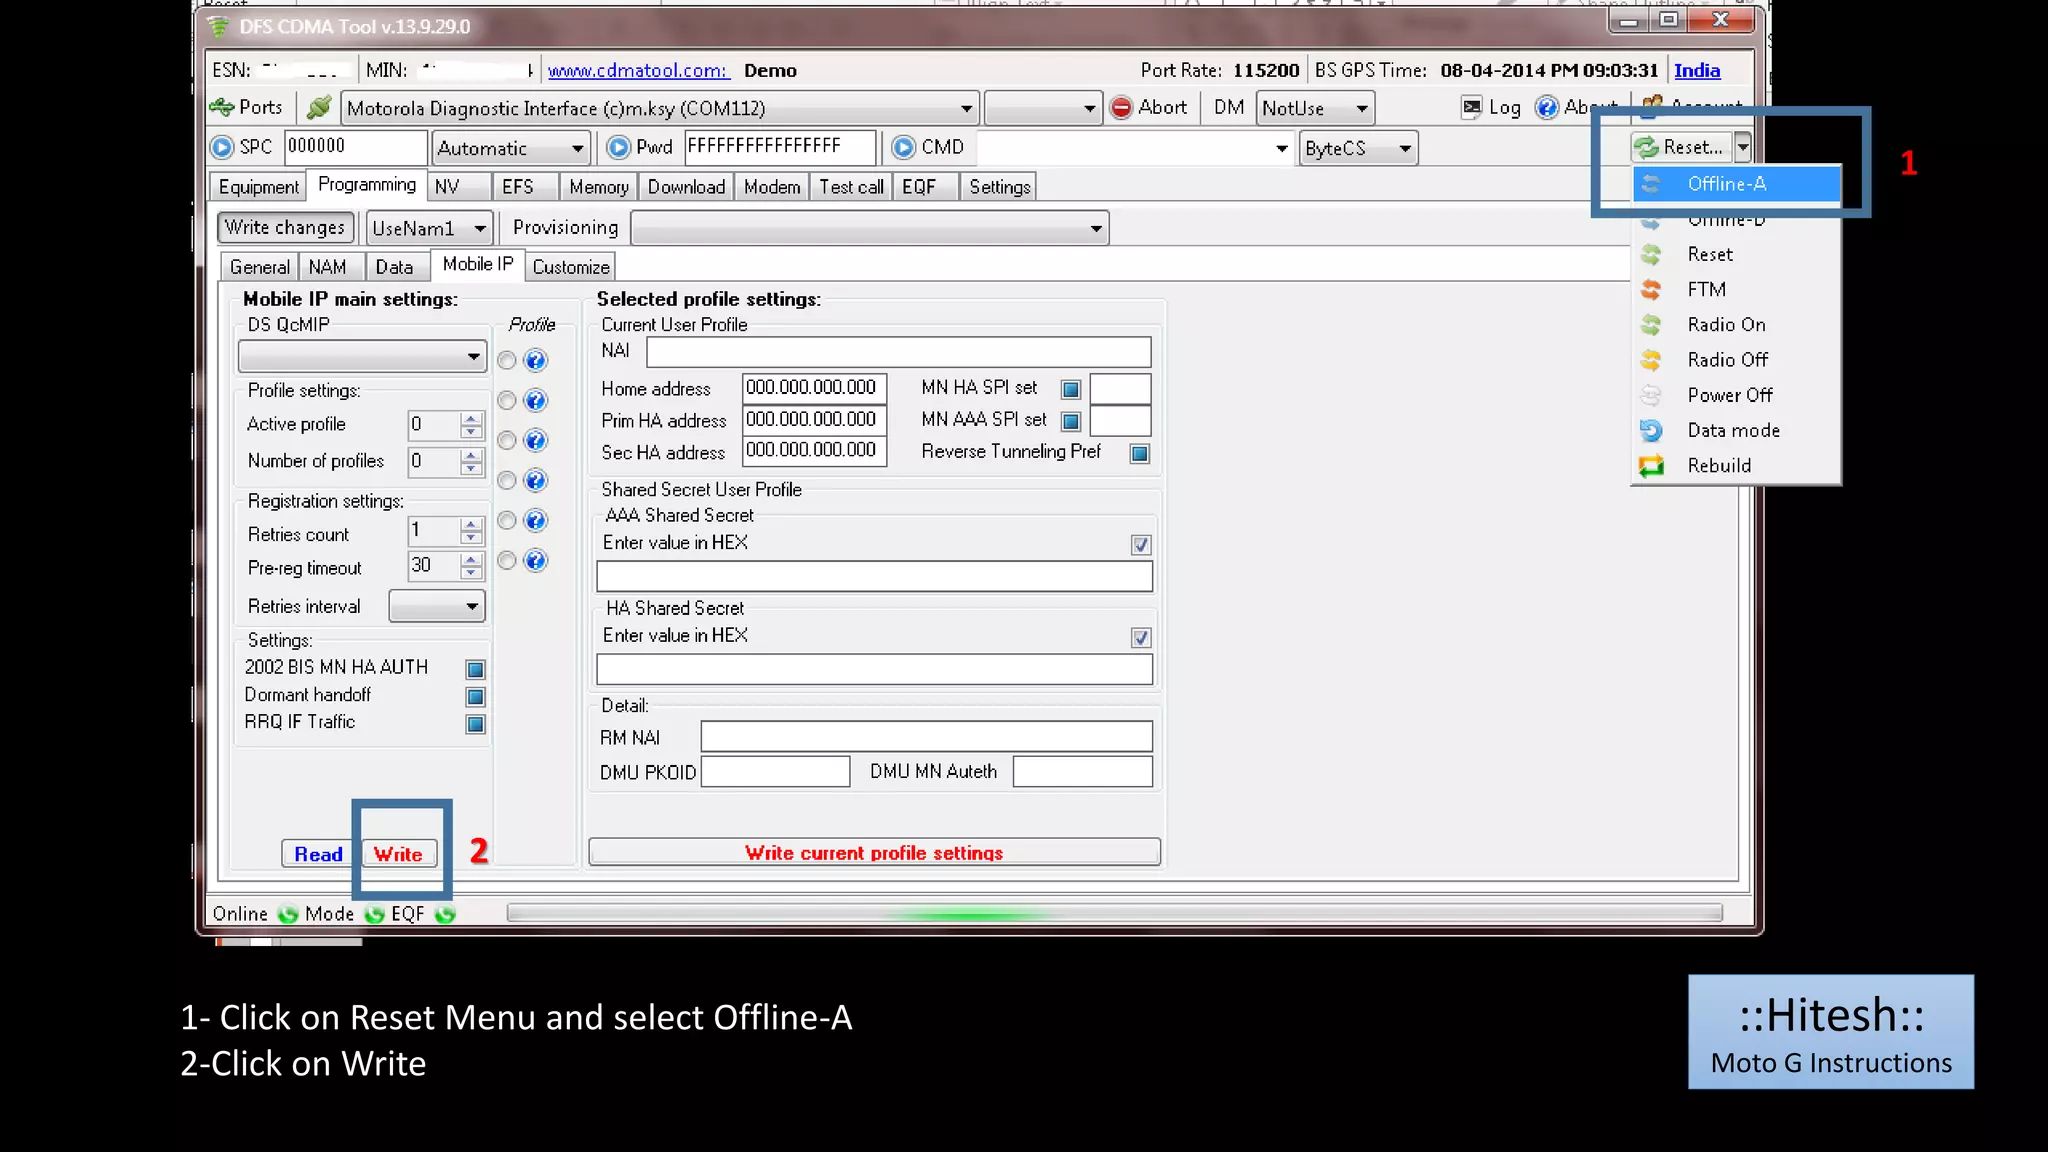

![1
1- Click on RESET , [Now phone should reboot]
Wait till phone is booted fully. Don’t close DFS yet.
::Hitesh::
Moto G Instructions](https://image.slidesharecdn.com/motogprldatareliance-140912111713-phpapp02/75/Moto-g-prl_data_reliance-46-2048.jpg)