1. How to Replace Damaged Wood Lap Siding
This is surely an fascinating post I discovered this evening. I don't fully concur with just concerning
all the writer, however I located it to become a good read. If you've any minute an individual should
take a new look.
How to Replace Damaged Wood Lap Siding
By: Danny Lipford
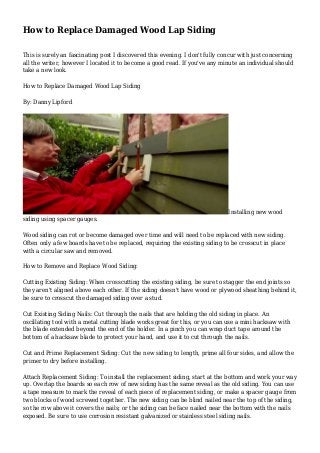
Installing new wood
siding using spacer gauges.
Wood siding can rot or become damaged over time and will need to be replaced with new siding.
Often only a few boards have to be replaced, requiring the existing siding to be crosscut in place
with a circular saw and removed.
How to Remove and Replace Wood Siding:
Cutting Existing Siding: When crosscutting the existing siding, be sure to stagger the end joints so
they aren't aligned above each other. If the siding doesn't have wood or plywood sheathing behind it,
be sure to crosscut the damaged siding over a stud.
Cut Existing Siding Nails: Cut through the nails that are holding the old siding in place. An
oscillating tool with a metal cutting blade works great for this, or you can use a mini hacksaw with
the blade extended beyond the end of the holder. In a pinch you can wrap duct tape around the
bottom of a hacksaw blade to protect your hand, and use it to cut through the nails.
Cut and Prime Replacement Siding: Cut the new siding to length, prime all four sides, and allow the
primer to dry before installing.
Attach Replacement Siding: To install the replacement siding, start at the bottom and work your way
up. Overlap the boards so each row of new siding has the same reveal as the old siding. You can use
a tape measure to mark the reveal of each piece of replacement siding, or make a spacer gauge from
two blocks of wood screwed together. The new siding can be blind nailed near the top of the siding,
so the row above it covers the nails; or the siding can be face nailed near the bottom with the nails
exposed. Be sure to use corrosion resistant galvanized or stainless steel siding nails.
2. Caulk and Paint Siding: When the repair is complete, caulk all the end joints, and then apply two
coats of high quality exterior paint.
Watch this video to find out more.
Further Information
Please Leave a Comment
We want to hear from you! In addition to posting comments on articles and videos, you can also send
your comments and questions to us on our contact page or at (800) 946-4420. While we can't answer
them all, we may use your question on our Today's Homeowner radio or TV show, or online at
todayshomeowner.com.
Danny Lipford: Before you begin removing damaged lap siding, be sure you can acquire the right
material to replace it. The width, thickness, and profile of the board should match perfectly.
Wood siding should be primed on all four sides before installing to protect it from any type of
moisture penetration. Tinting the primer to match the house color will reduce the number of finish
coats of paint required later.
Now, while the primer dries, begin removing the damaged siding pieces starting at the bottom of the
affected area. Use a pry bar to lift each piece up and pull it away from the wall.
When you get to the top of the area, you'll want to release the damaged pieces without affecting the
good ones above them. So you'll need to cut the nails behind the bottom of the upper piece of good
siding to free the damaged piece. An oscillating tool with a metal cutting blade is ideal for this job,
but a simple hacksaw blade will also work.
When the nails have been cut, the lower board can be pulled out. The vertical seams in lap siding
should never align one over the other, so you may also need to remove portions of boards that are
not damaged. In some cases this will require making a vertical cut in a piece of siding that's still
attached to the wall. Use a speed square to align your circular saw, and set the blade depth to match
the thickness of the siding.
Now, you can cut the new siding to fit the voids you've created. Installation starts at the bottom and
goes up. To maintain a consistent reveal, create a pair of gauges using scrap wood attached to each
other at 90-degree angles. The distance from the edge of the larger piece to the smaller piece should
be equal to the amount of siding revealed on each lap. By hooking that smaller piece on the row
below the repair you'll create the proper spacing every time.
The new siding is attached with galvanized nails to each stud at the top of the board so it will be
concealed by the next piece. Work your way up the wall with this method. The top piece in the repair
area will need to be nailed through the bottom edge of the row above it.
Finally, caulk all the seams and edges to prepare the area for finish paint.
http://feedproxy.google.com/~r/danny-lipford/~3/nWKezP0mJNU/