1. Install XenApp streaming profiler.
• Install the XenApp streaming profiler 1.2. You can find this on the components
disk of XenApp 5. You can usually download a trial copy of XenApp from Citrix
• You will also need to install Dot Net Framework 2
• Copy any software you will want to work with frequently to a folder on the virtual
machine
• If you are using a virtual machine to do the profiling on take a snapshot now
I won’t go through every aspect of the Office 2007 preparation. Citrix has produced a
very good guide for streaming Office 2007. See this document for how to rollup updates
in Office 2007.
Profile Office 2007
• copy the Office 2007 source files to the profiling machine if you haven’t already
• customize your Office installation using setup.exe /admin
• Download and extract any service packs and patches to the Updates subfolder of
the Office 2007 installation. To make sure your customized msp is running first
rename it to aaa_<name>.msp
• open the Citrix XenApp streaming profiler
• click New Profile
• give it a meaningful name
• Select which ever security model you want. I usually use relaxed for testing
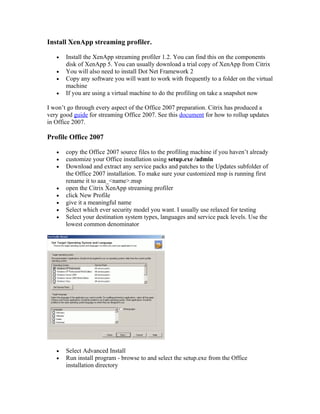
• Select your destination system types, languages and service pack levels. Use the
lowest common denominator
• Select Advanced Install
• Run install program - browse to and select the setup.exe from the Office
installation directory
2. • Click launch Installer. The office installation will now run through as per your
instructions in the MSP file
• Click next and select perform additional installations
• Select files and folders
• Browse to c:windowssystem32 and copy control.exe to c:windowssystem32.
This will allow you to use the Mail Profile control panel
• At this point you can install more applications if you like or need to. Just
remember the larger the profile the longer it will take to launch.
• You can edit the registry as required to make any customizations needed.
• Click Finish Installations once you’re done
• If required you can run the applications and change any settings you like
• Add a new application in the Select Applications screen. Browse and select
control.exe. Set the run and working directories and enter MLCFG32.cpl in the
command line parameter
• Click through and finish the profile. The profile will now be built, the time it
takes will depend on the size of the profile
3. • Select the fileshare where you wish to save the profile. It needs to be a UNC path
Isolation rules
Streamed applications isolate the application data from the normal drive files and as a
result if you try and save something from a profiled application to a system drive or the
drive where the application is installed it will be saved within the application profile. You
can get around this two ways.
The first way is to manually edit a file found within the streamed profile once it has been
downloaded to the client machine. The file to modify is SandboxData.xml. This is the
actual rule sets as they apply. This method is very manual and prone to causing you
issues if done wrong.
The second and easiest method is to modify the isolation rules within the application
profiler. If you right click on the profiled application you will see a number of options.
The one we are concerned with is Rules.
4. The rule we want to modify is the Default file ignore-rule. We need to do this because
the profiled application will essentially isolate all folders on the same drive the
application was installed that are not specified to be ignored. What this means is that if
you save a file from Outlook into a folder e.g. c:myfiles it will appear normal. But if you
browse the file system you will not be able to find it. This is because the file is actually
located within the user part of the streamed application. I simply add environmental
variables for additional drive letters e.g. %datadrive% to the rule as well as specific
folders that reside on the system drive. Have a play and see the behavior first hand.
Now the application has been profiled and is ready to be published.
To publish streamed applications you will need a Citrix XenApp 5.0 server with the
relevant licenses and a Program Neighborhood Agent site configured on the web
interface server. Part 2 of this article will step through the installation of the Web
Interface server and publishing applications to clients.