Beginners Guide to TikTok for Search - Rachel Pearson - We are Tilt __ Bright...
Carbon copy cloner
1. How to Make an Exact Data Copy from a Dying
Laptop to a New Drive?
As computers have gained an increased role in our lives, the need for safely
storing digital memories has grown to be more important than ever. Unlike
tangible objects like photographs, letters and postcards, a hard-drive full of
digital 0's and 1's is easily deleted or just lost track of, as technology improves
over time.
How to copy data from a dying laptop to a new drive? Remove the drive, and
then get yourself a drive dock or SATA to USB cable and copy the data over
manually. You can use Norton Ghost or Genie Timeline Server to do this, but
for Mac users, things are different.
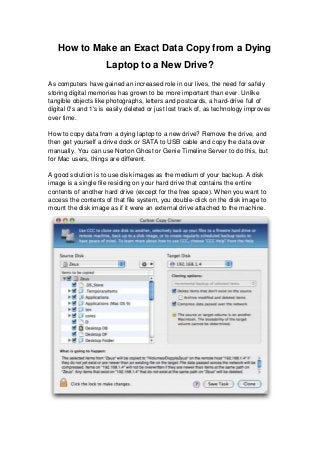
A good solution is to use disk images as the medium of your backup. A disk
image is a single file residing on your hard drive that contains the entire
contents of another hard drive (except for the free space). When you want to
access the contents of that file system, you double-click on the disk image to
mount the disk image as if it were an external drive attached to the machine.
2. Time Machine, a backup utility developed by Apple, is included with Mac OS X
and was introduced with the 10.5 "Leopard" release of Mac OS X. The
software is designed to work with the Time Capsule as well as other internal or
external drives.
Though Time Machine is useful and simple to use, you still have other choices.
Using Carbon Copy Cloner is a little more involved than Time Machine but
the benefit of making an exact, bootable duplicate is well worth the extra effort.
When you upgrade your hard drive, cloning the old drive makes for a
completely seamless transition to the new one. All of your passwords, apps,
files, etc. will be right where you expect them to be.
Head over to download Carbon Copy Cloner and go through the simple
installation process. Once installed, you can begin making your first backup, so
launch the program.
To back up to a new disk image:
Choose your source volume from the Source menu.
Choose "New disk image..." from the Destination menu.
Provide a name and choose a location to save your disk image.
If you plan to back up to this disk image again in the future, set the image
format to one of the read/write formats. If you want a read-only disk image for
archival purposes, set the image format to one of the read-only formats.
To back up to an existing disk image, select "Choose disk image..." from the
Destination menu and locate your disk image.