Odeo - Create audio files and post them in your blog
1.
Create audio filesand post them in your blog Maria Claudia Bellusci – Feb. 2007 for Blogging for Beginners ( EVO 2007 ) ( http :// groups.yahoo.com / group / bloggingforbeginners )
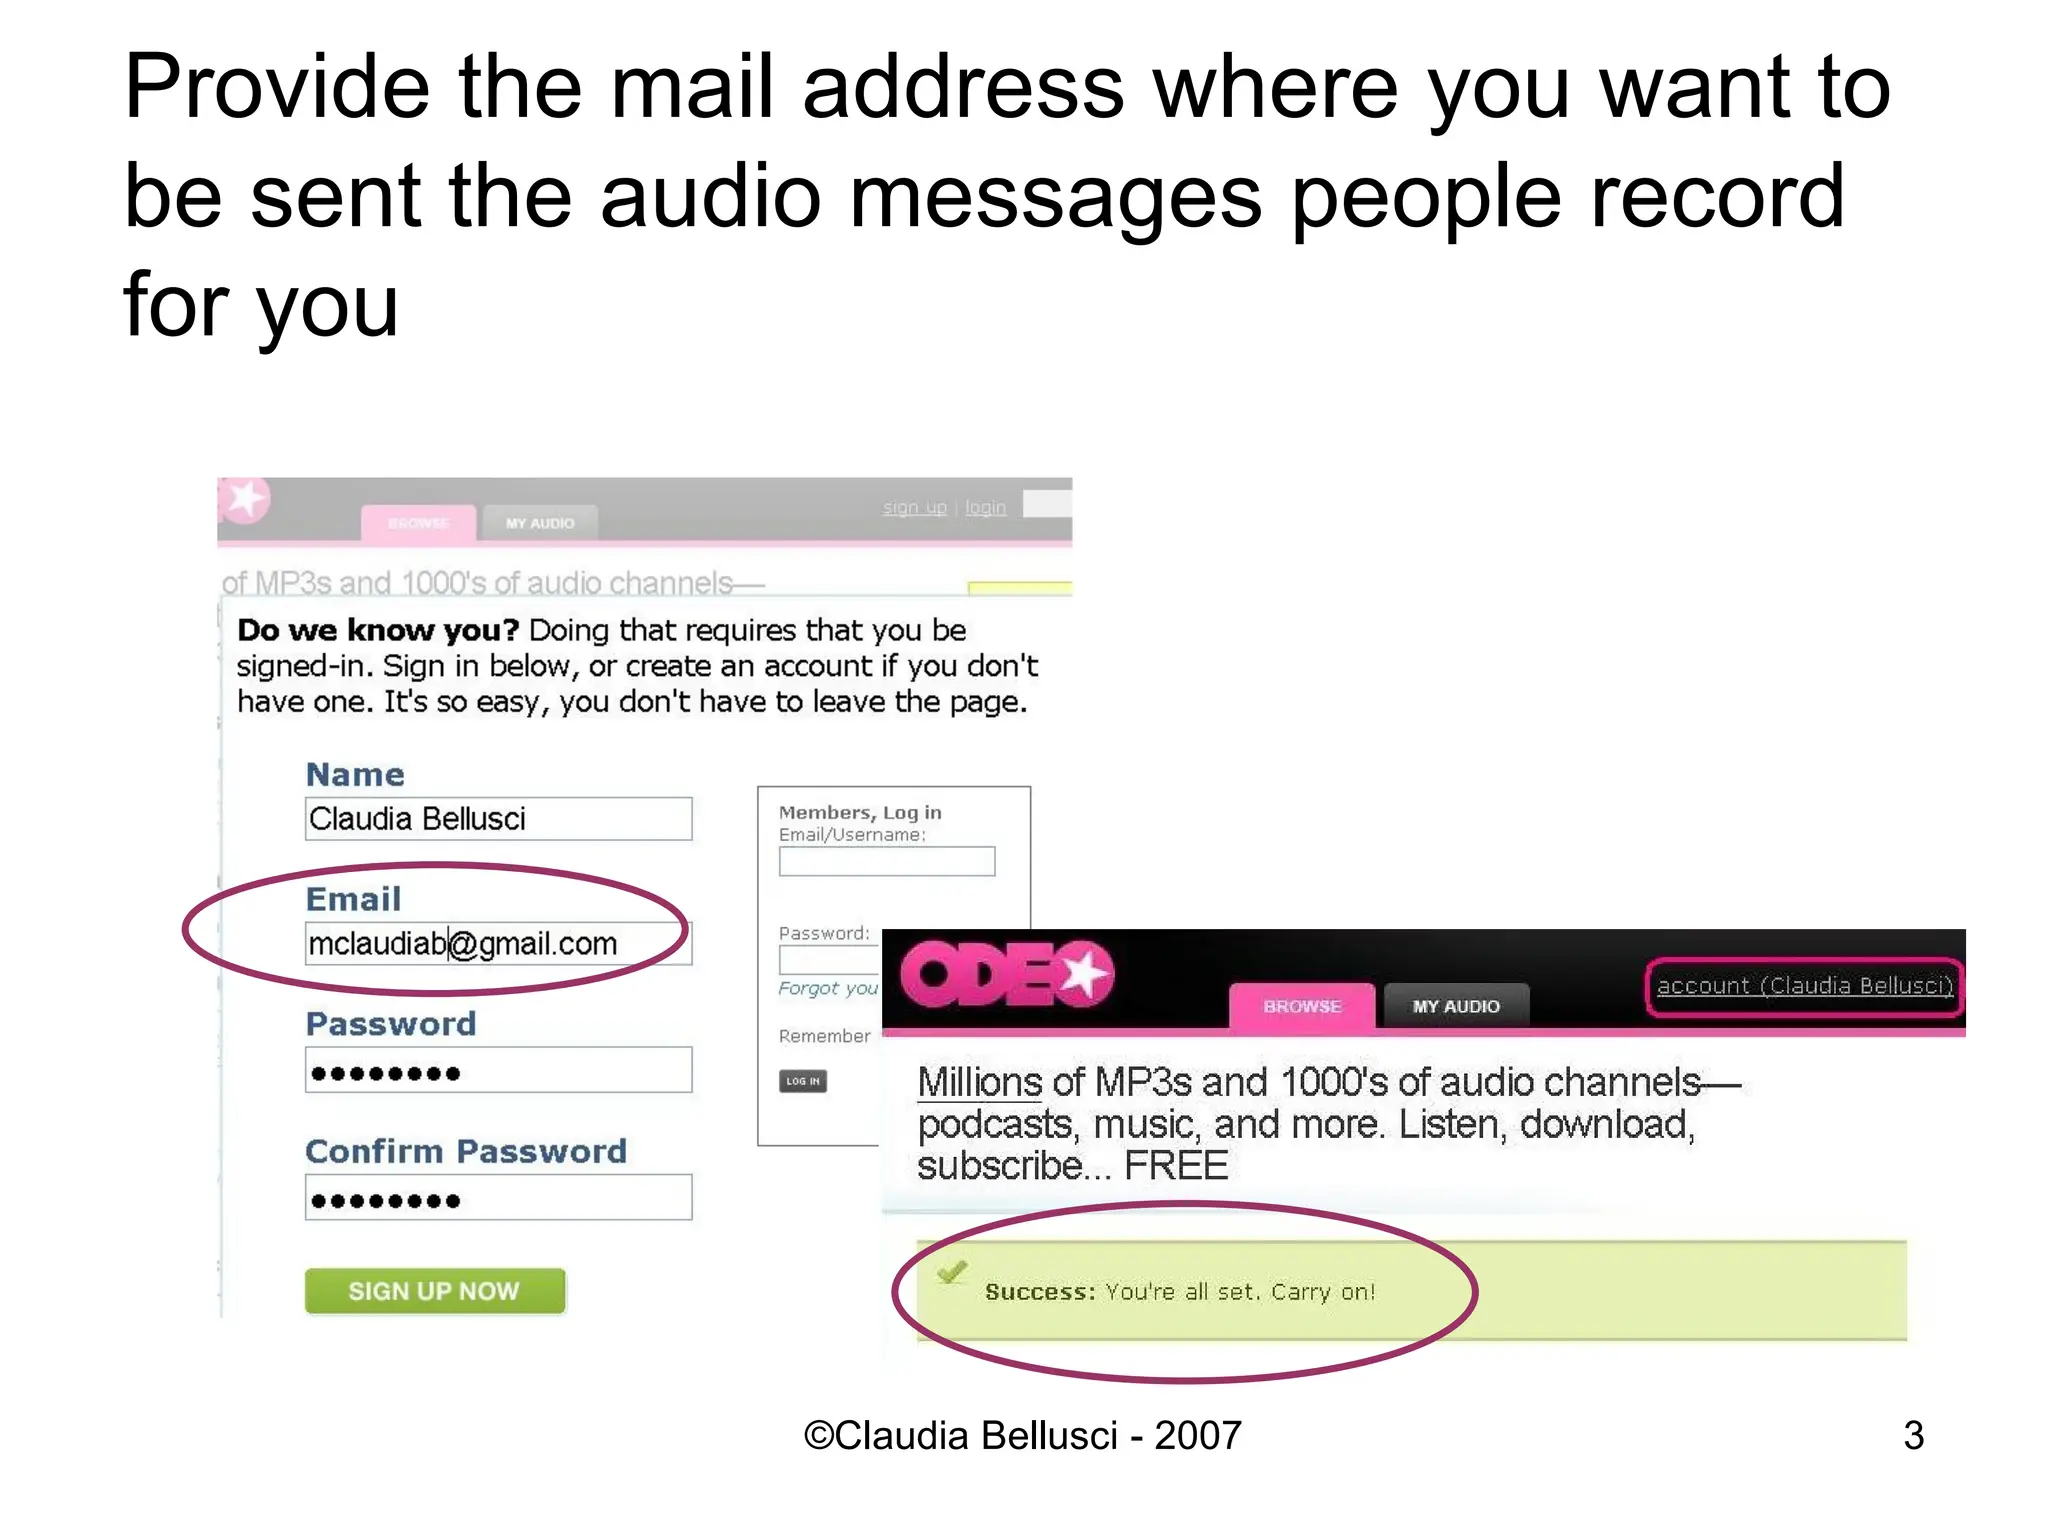
Provide the mailaddress where you want to be sent the audio messages people record for you
4.
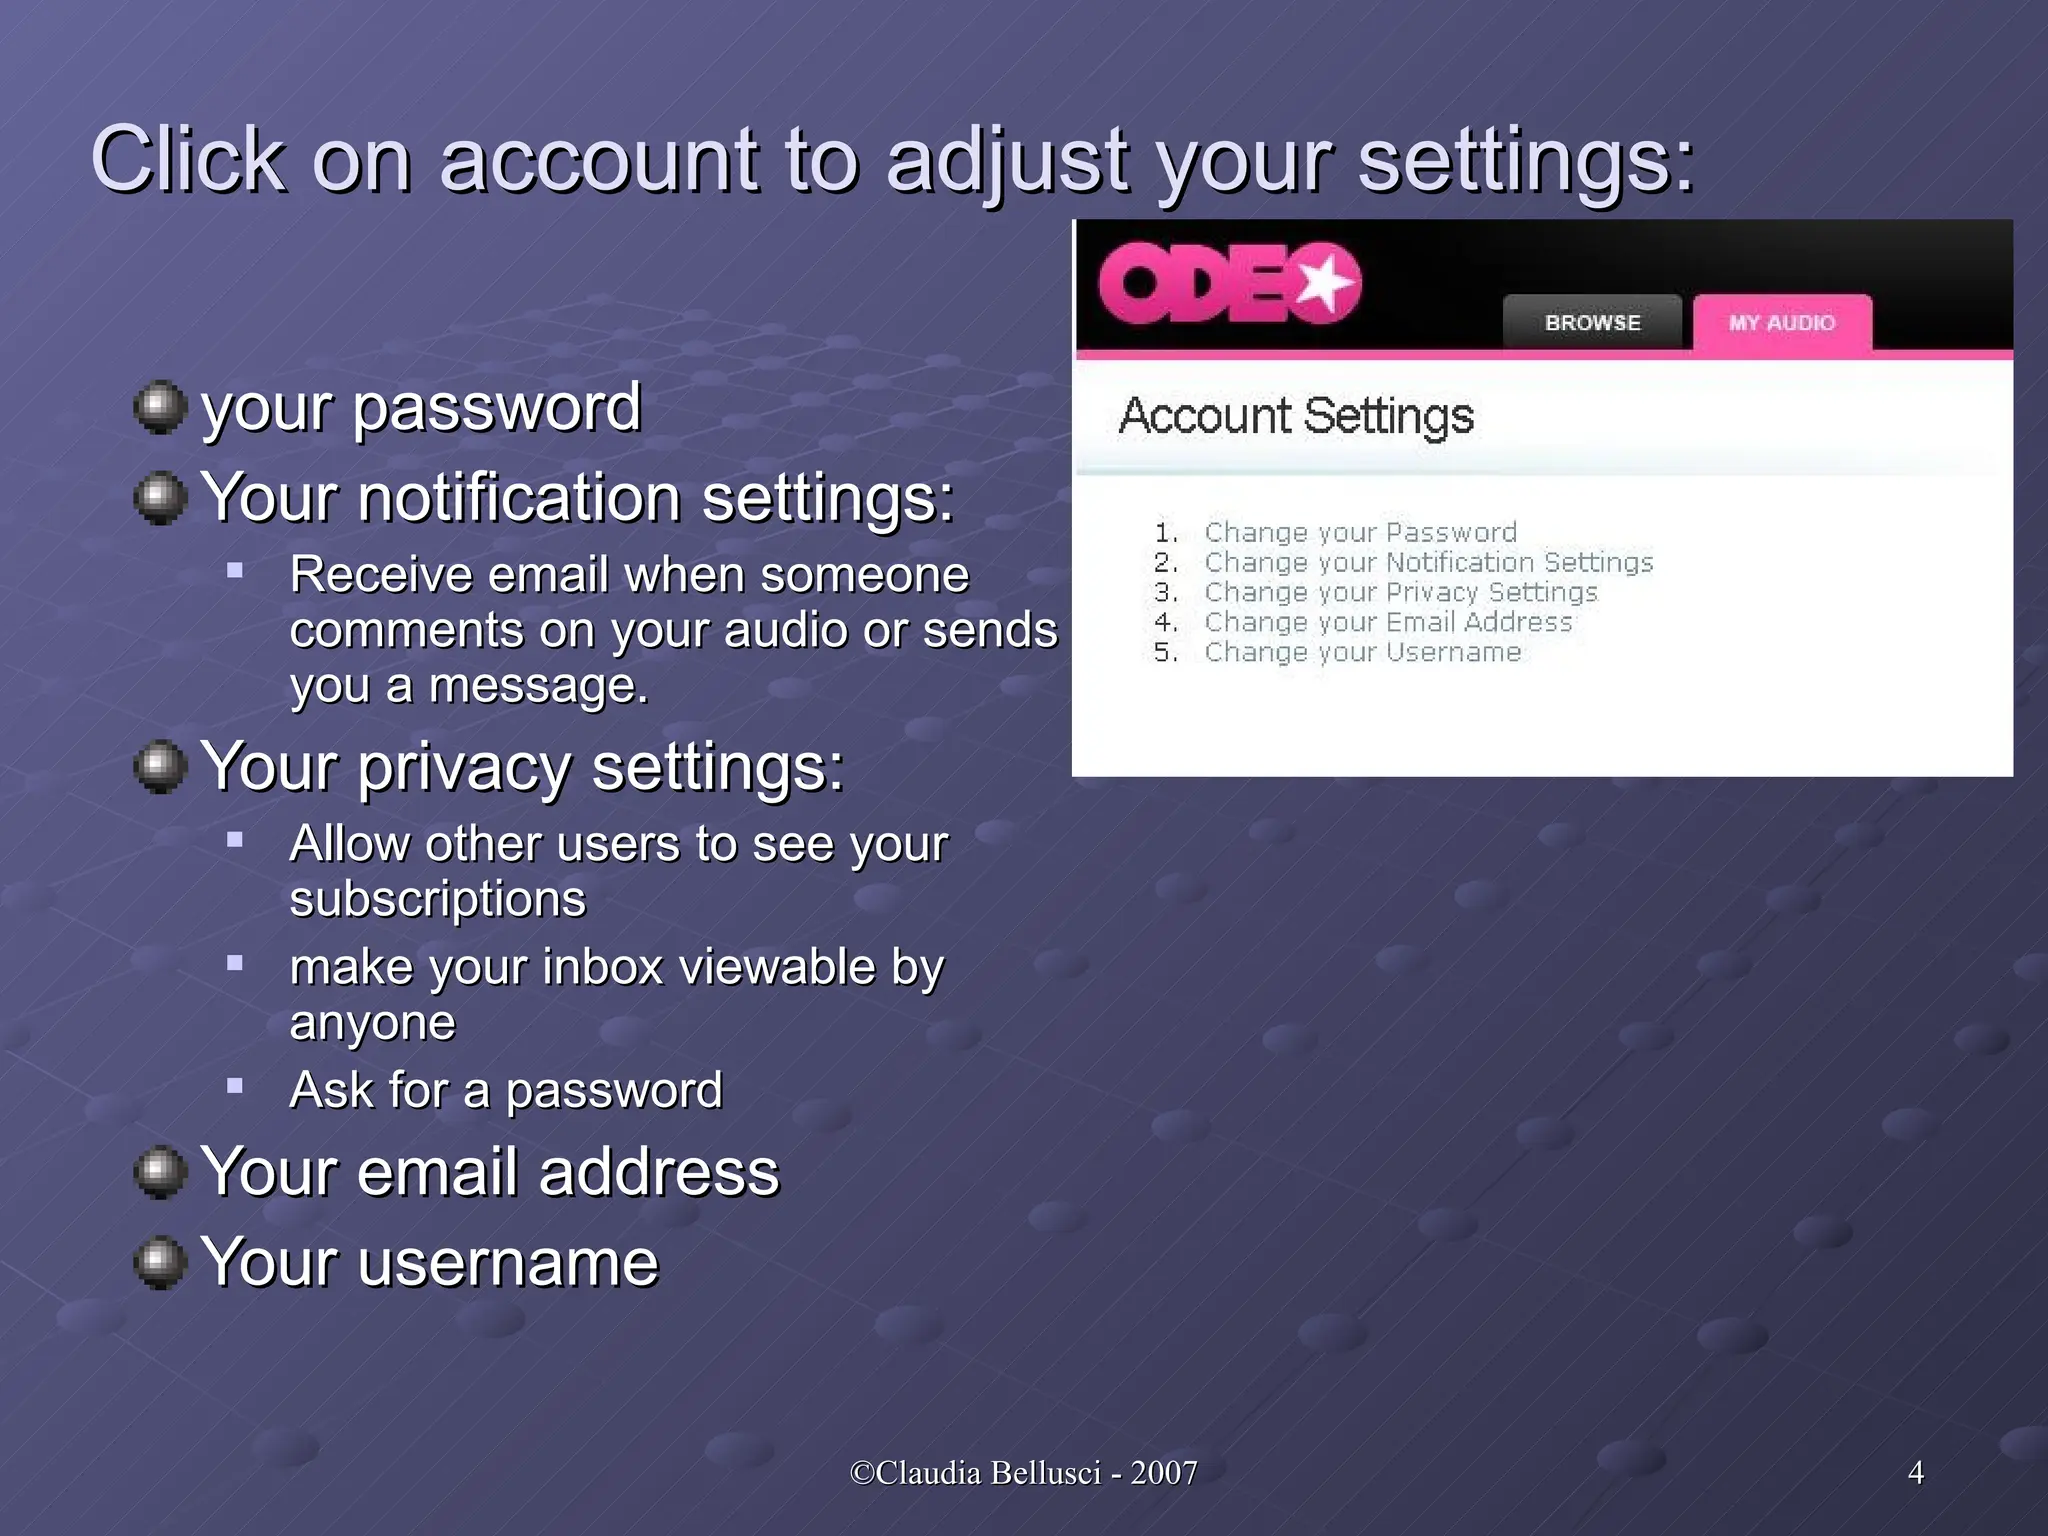
Click on accountto adjust your settings: your password Your notification settings: Receive email when someone comments on your audio or sends you a message. Your privacy settings: Allow other users to see your subscriptions make your inbox viewable by anyone Ask for a password Your email address Your username
5.
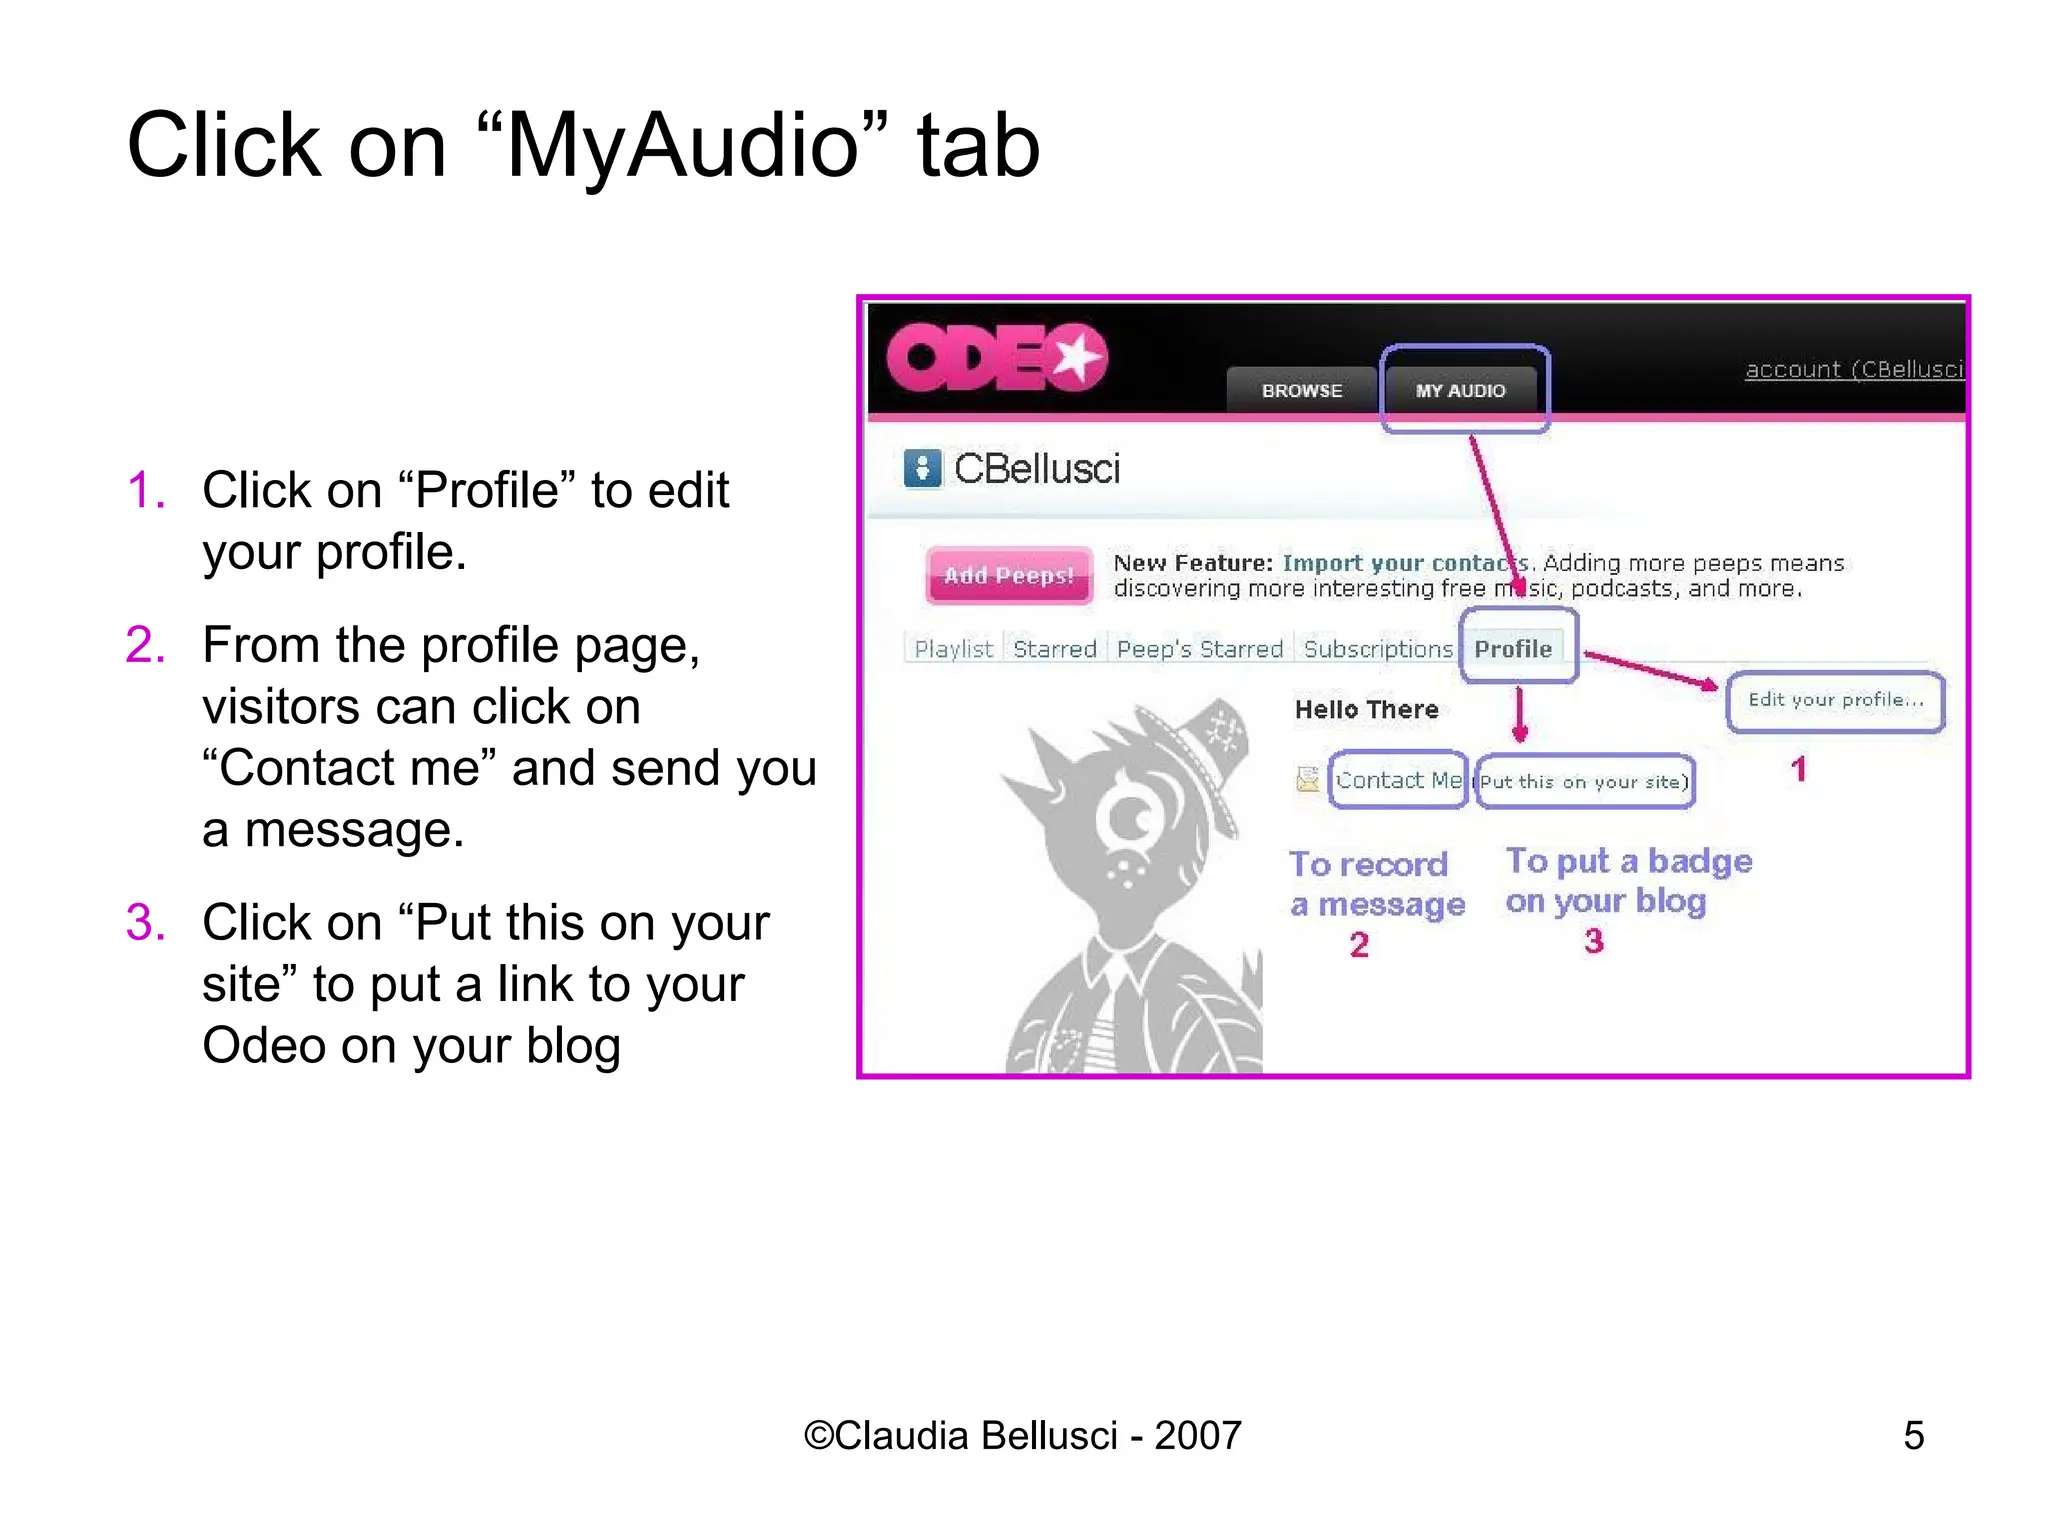
Click on “MyAudio”tab Click on “Profile” to edit your profile. From the profile page, visitors can click on “Contact me” and send you a message. Click on “Put this on your site” to put a link to your Odeo on your blog
6.
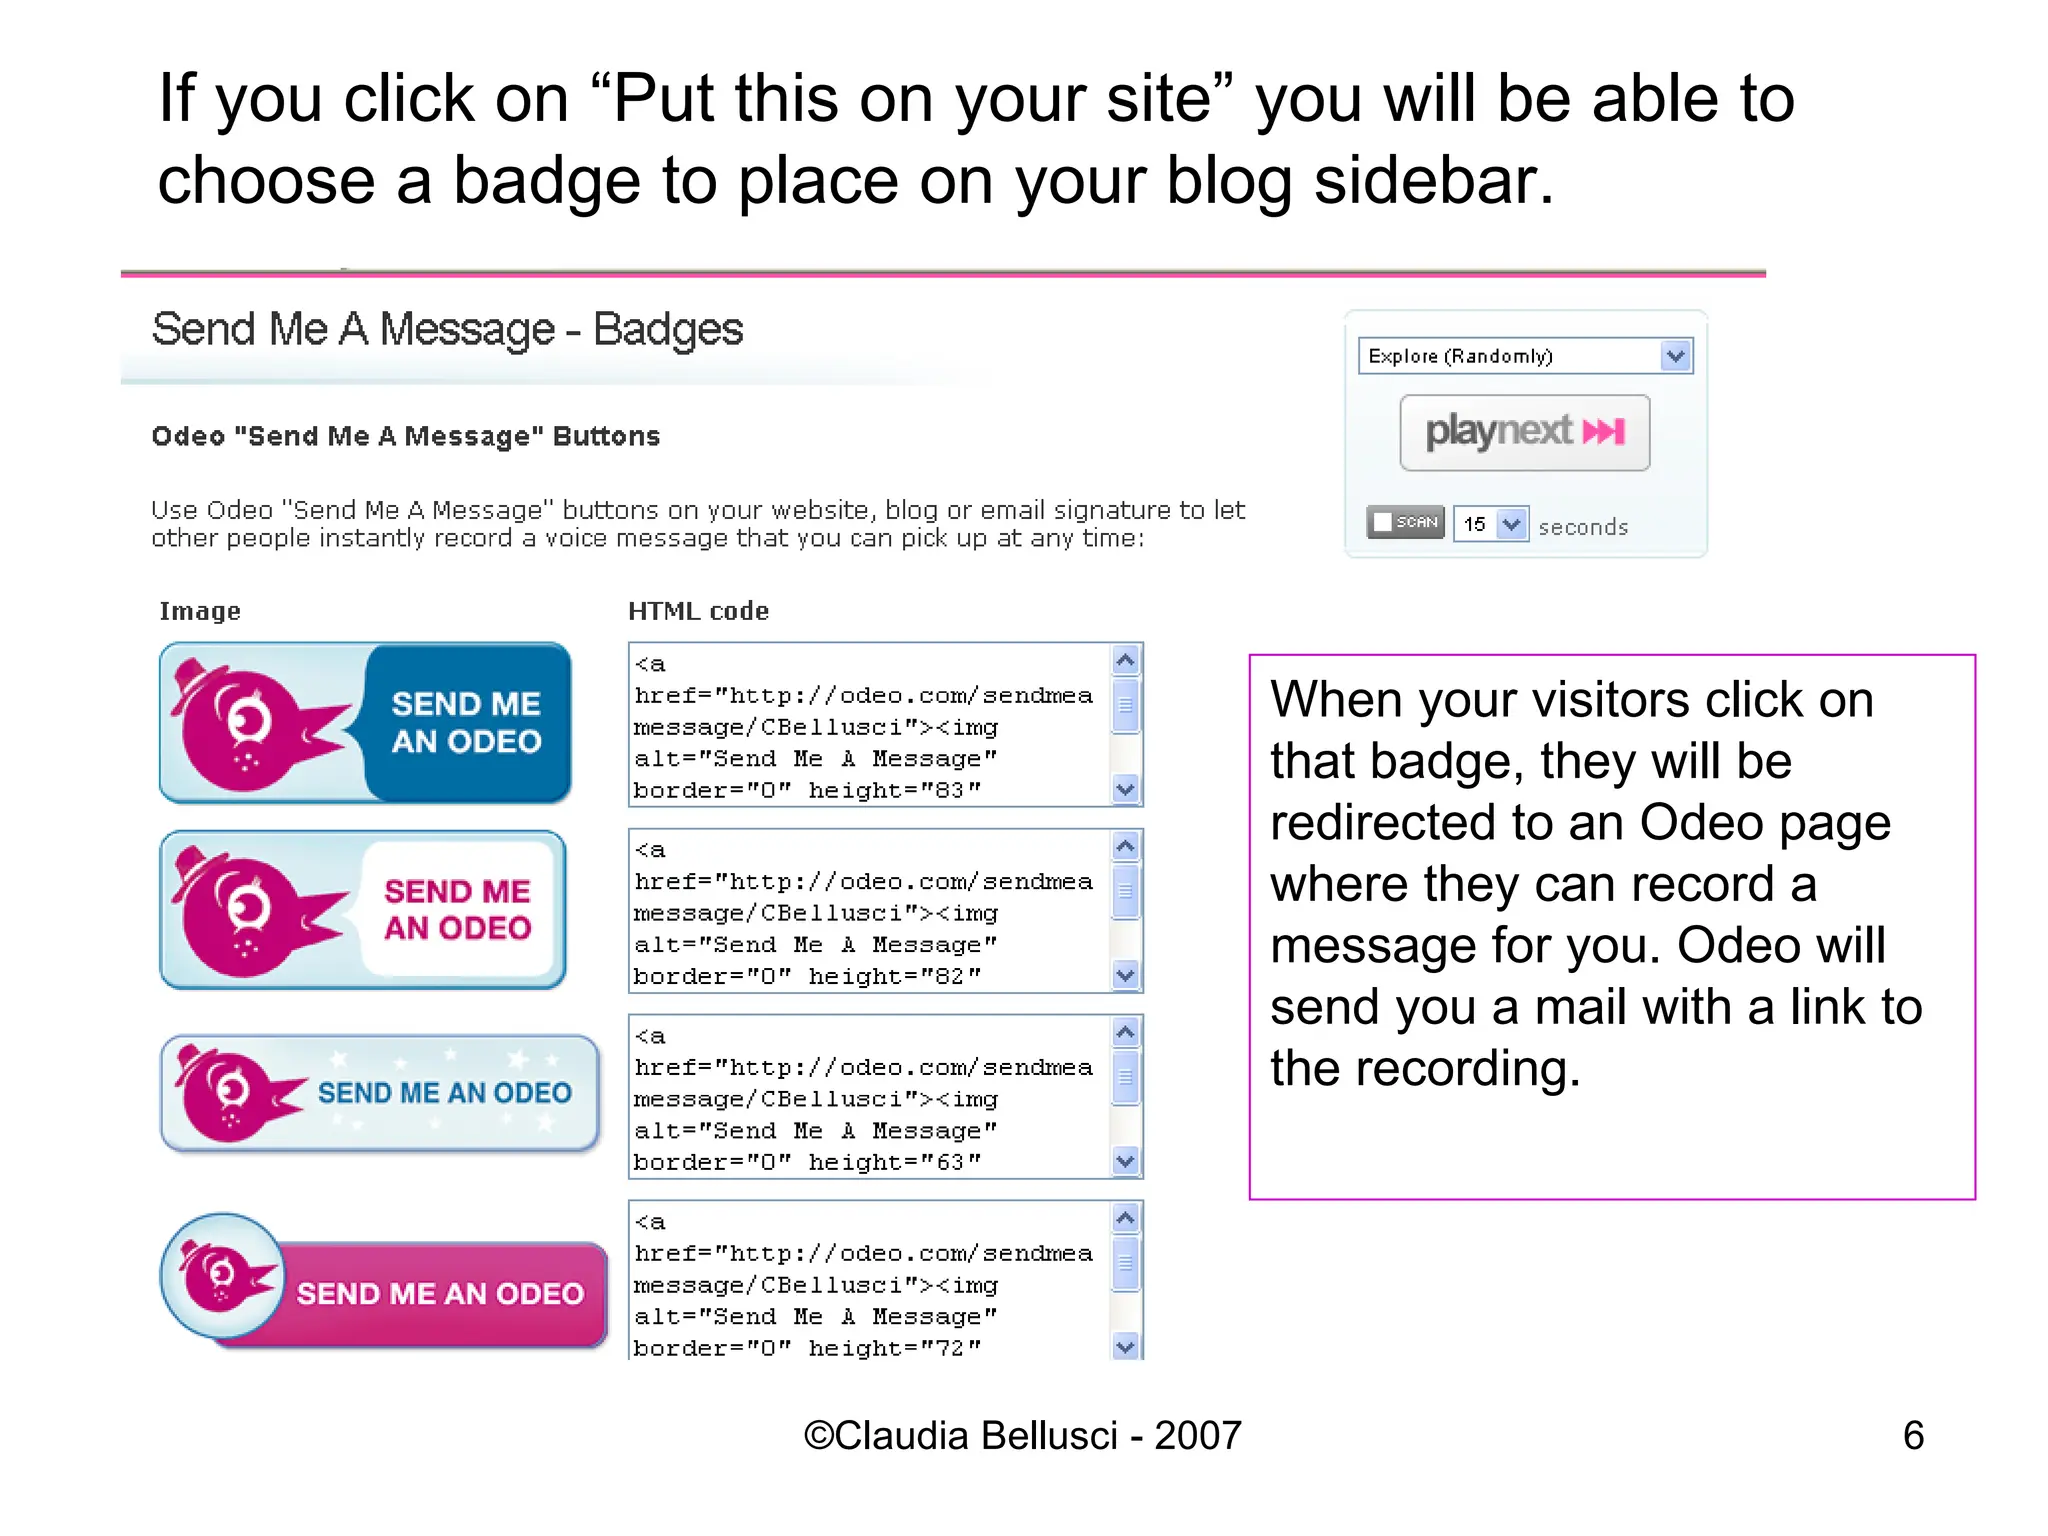
If you clickon “Put this on your site” you will be able to choose a badge to place on your blog sidebar. When your visitors click on that badge, they will be redirected to an Odeo page where they can record a message for you. Odeo will send you a mail with a link to the recording.
7.
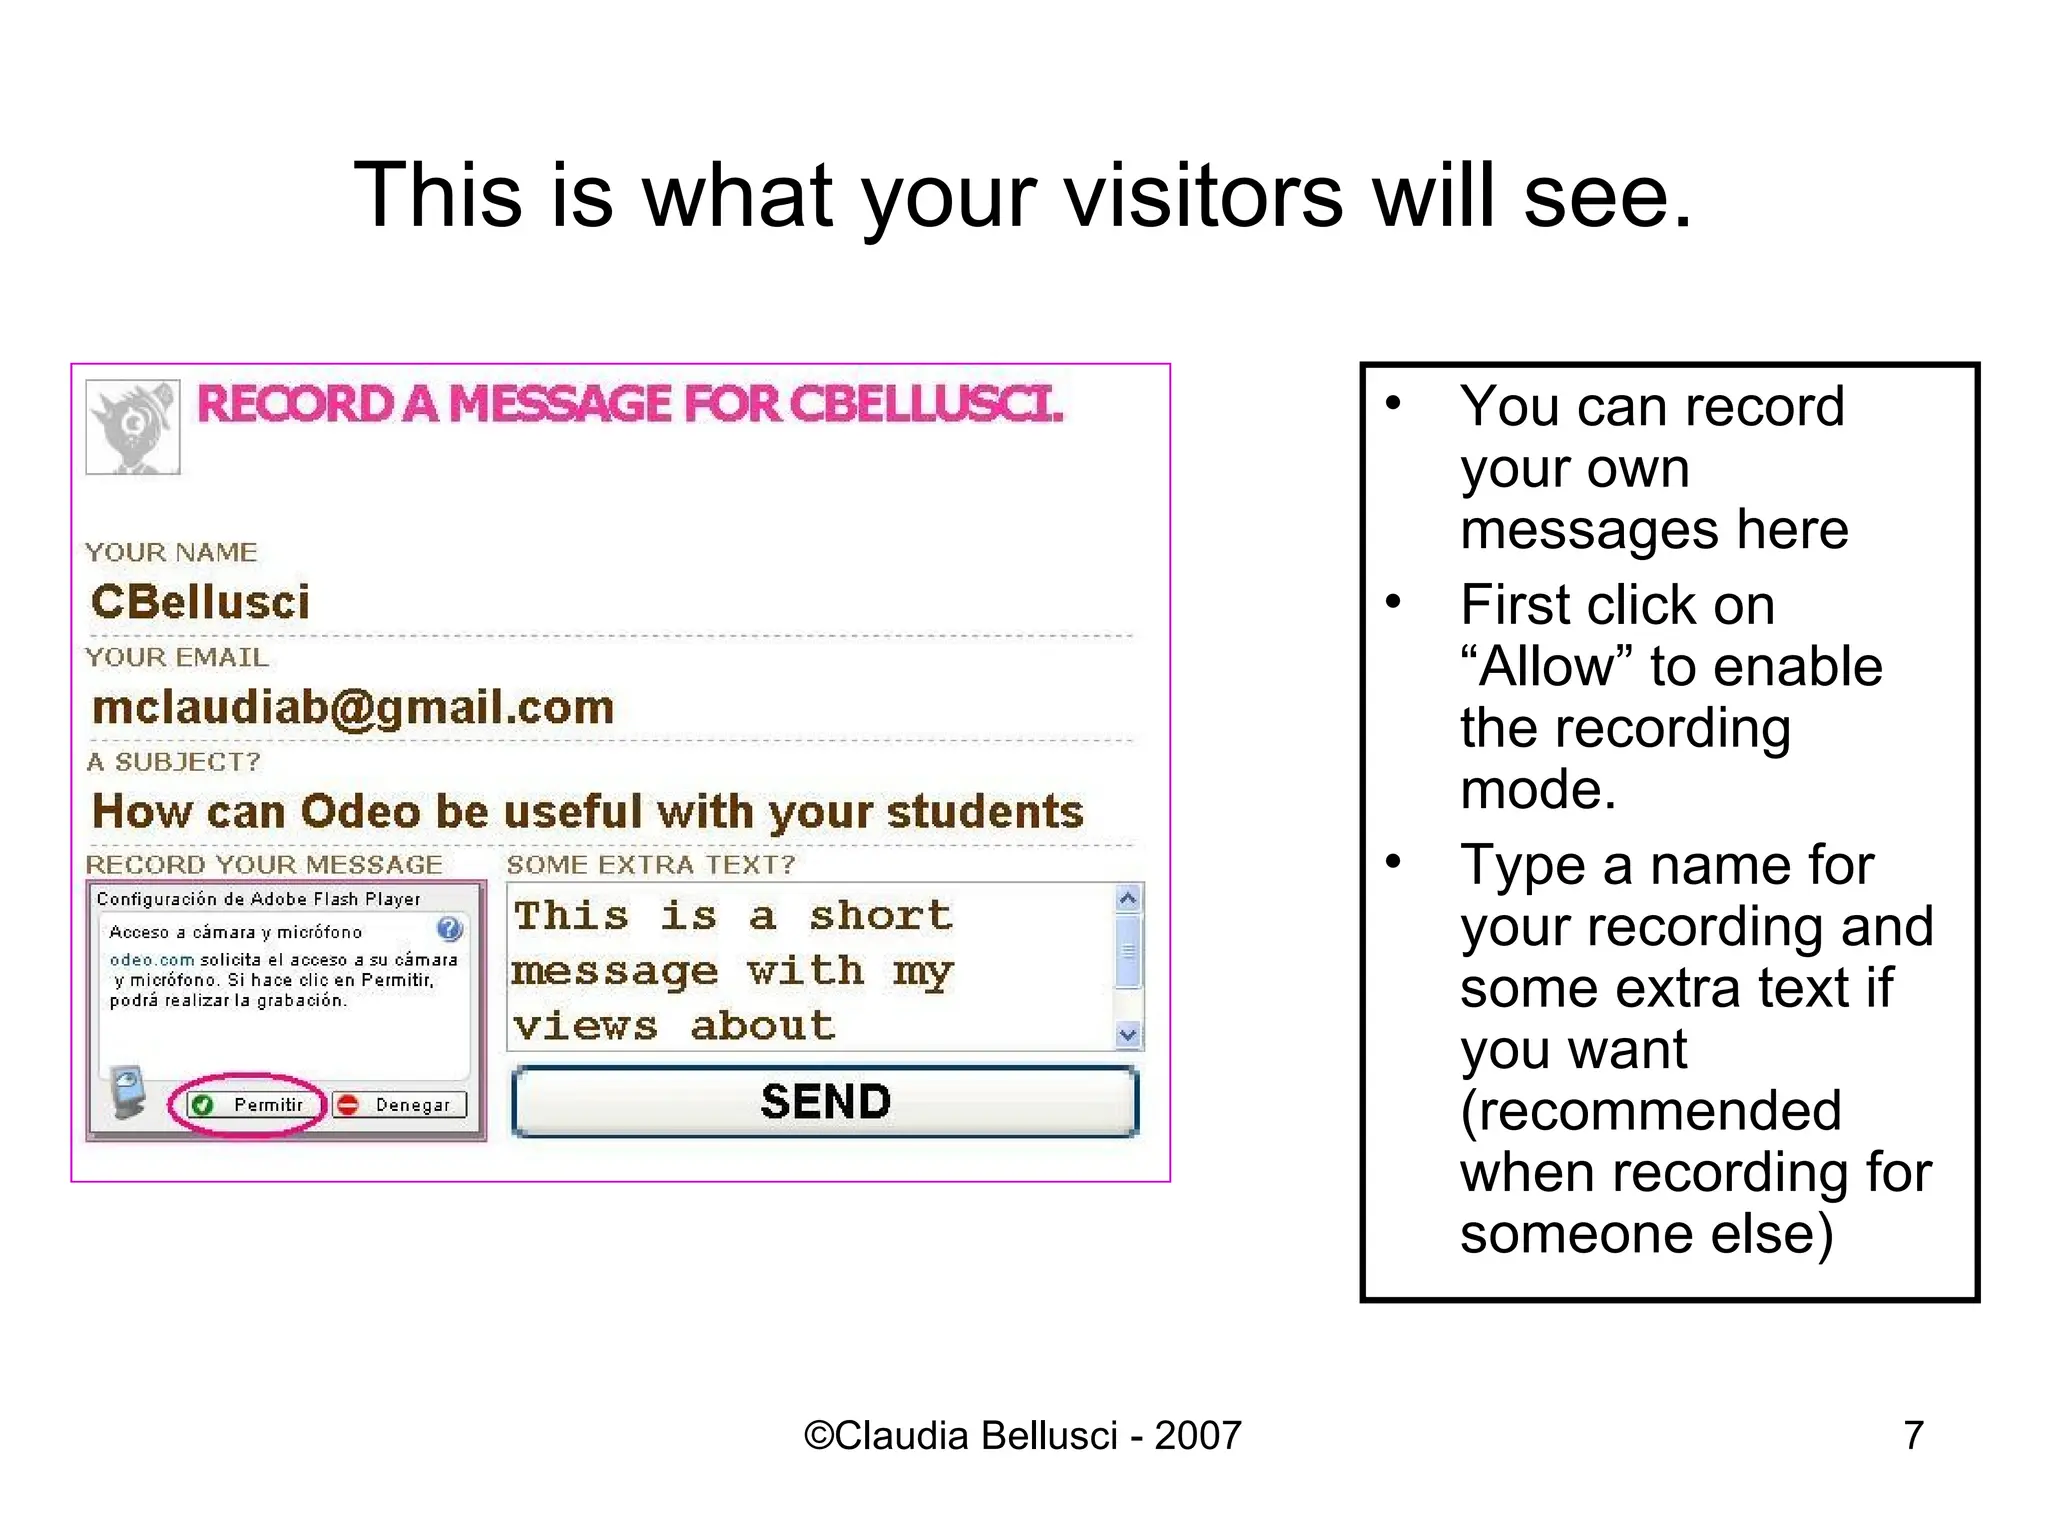
This is whatyour visitors will see. You can record your own messages here First click on “Allow” to enable the recording mode. Type a name for your recording and some extra text if you want (recommended when recording for someone else)
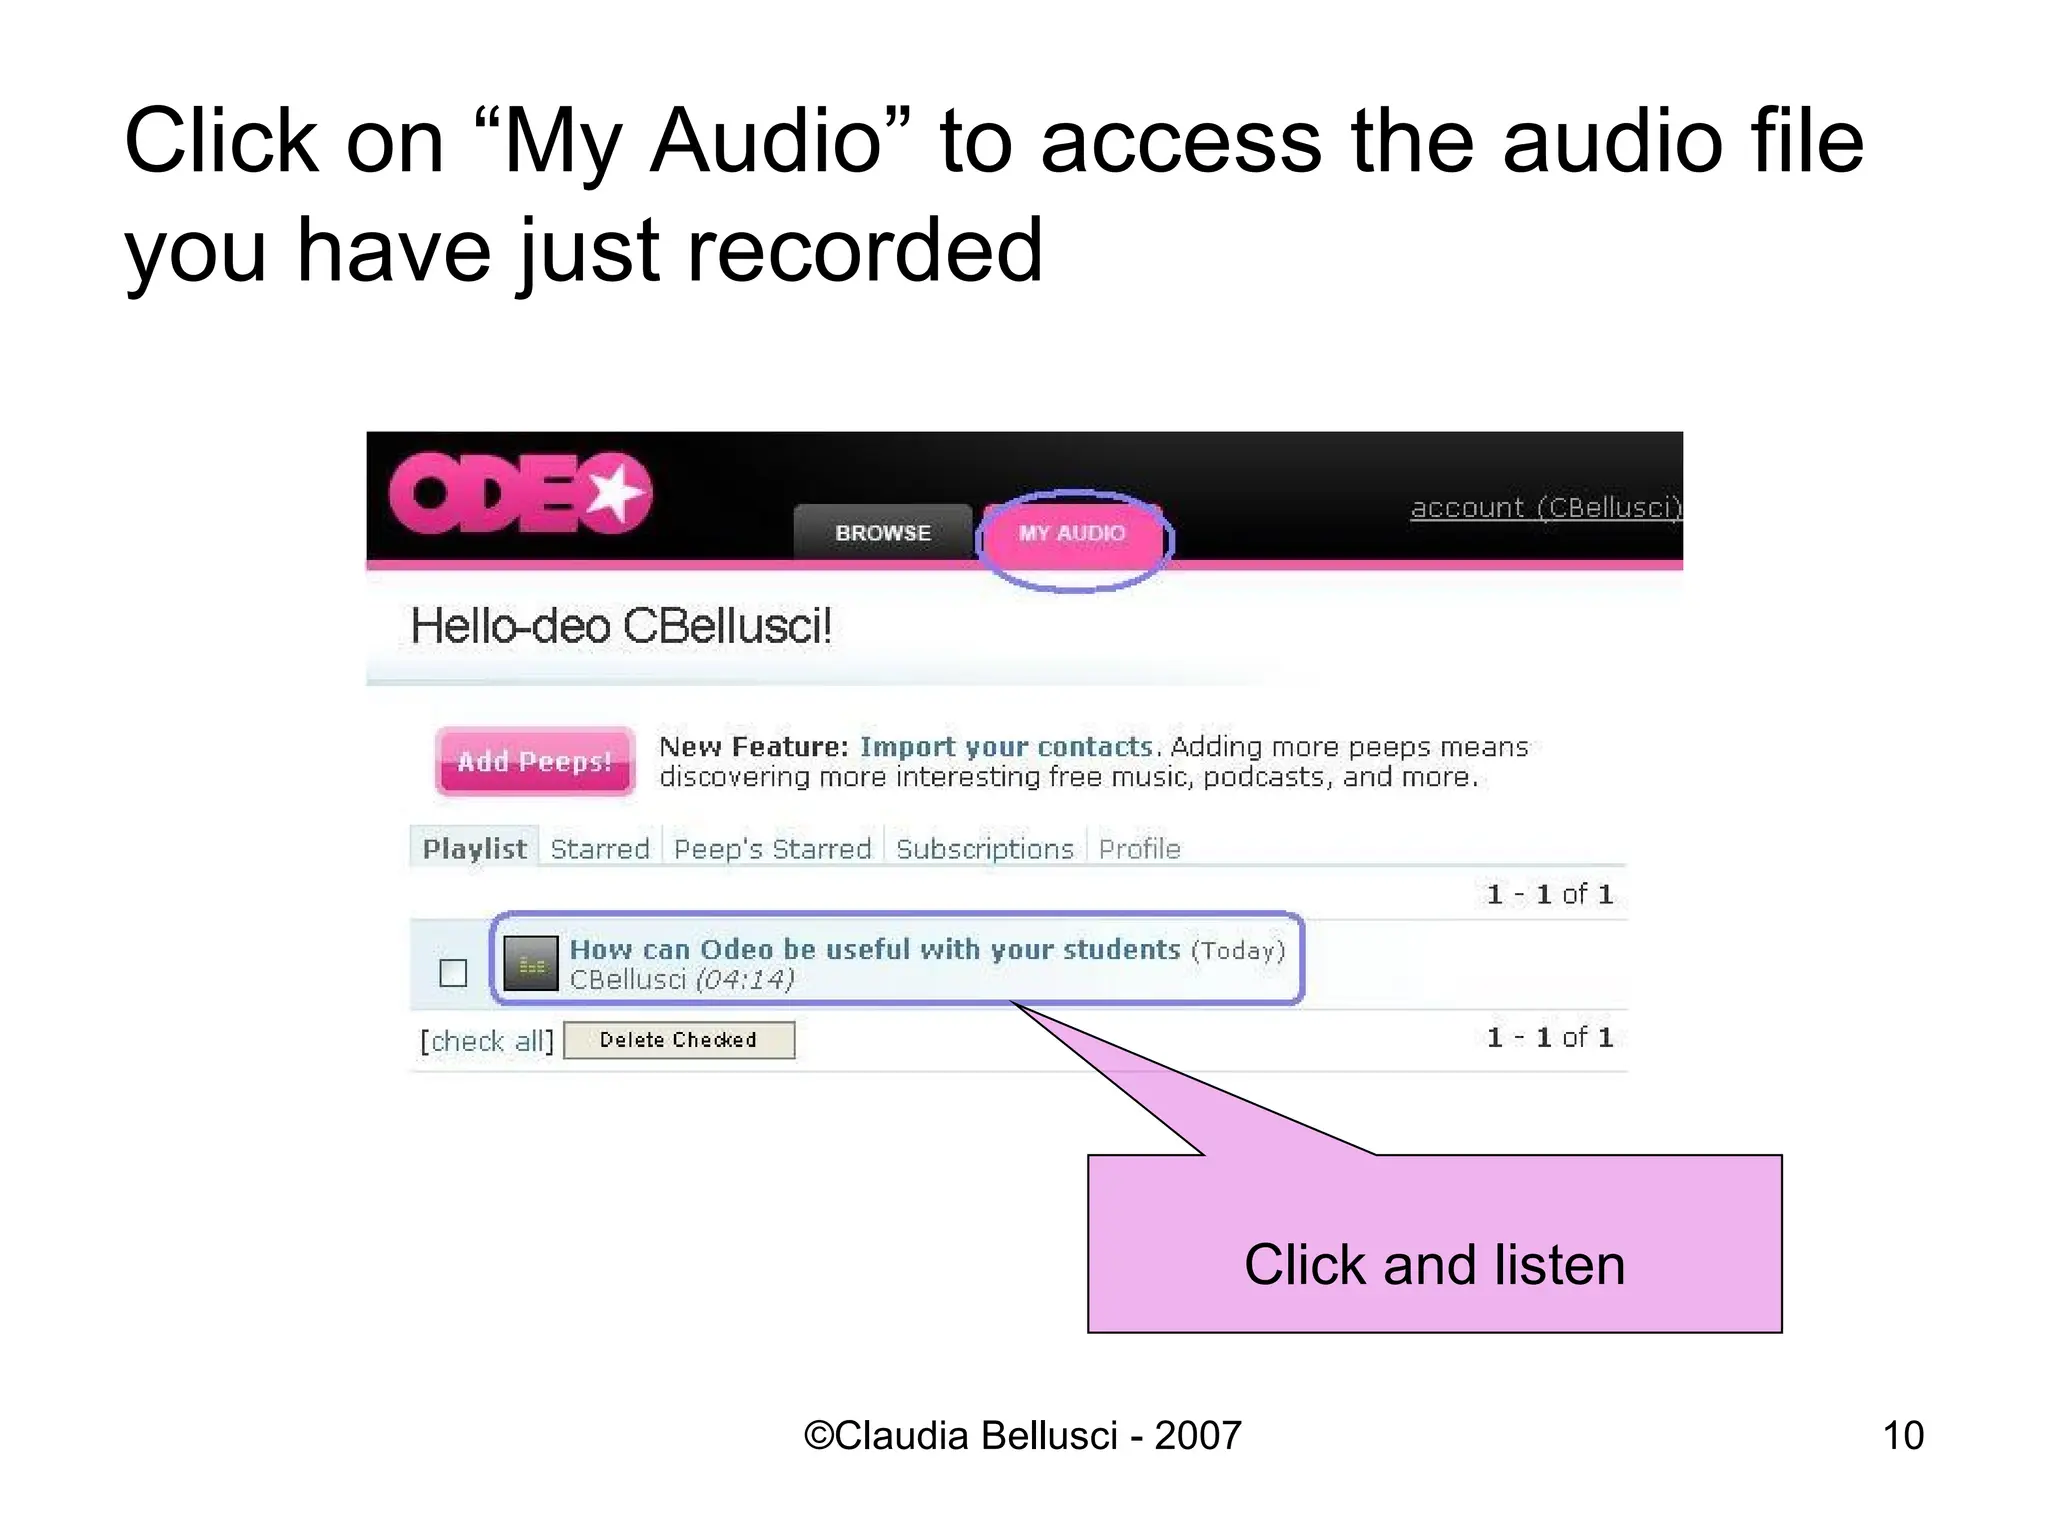
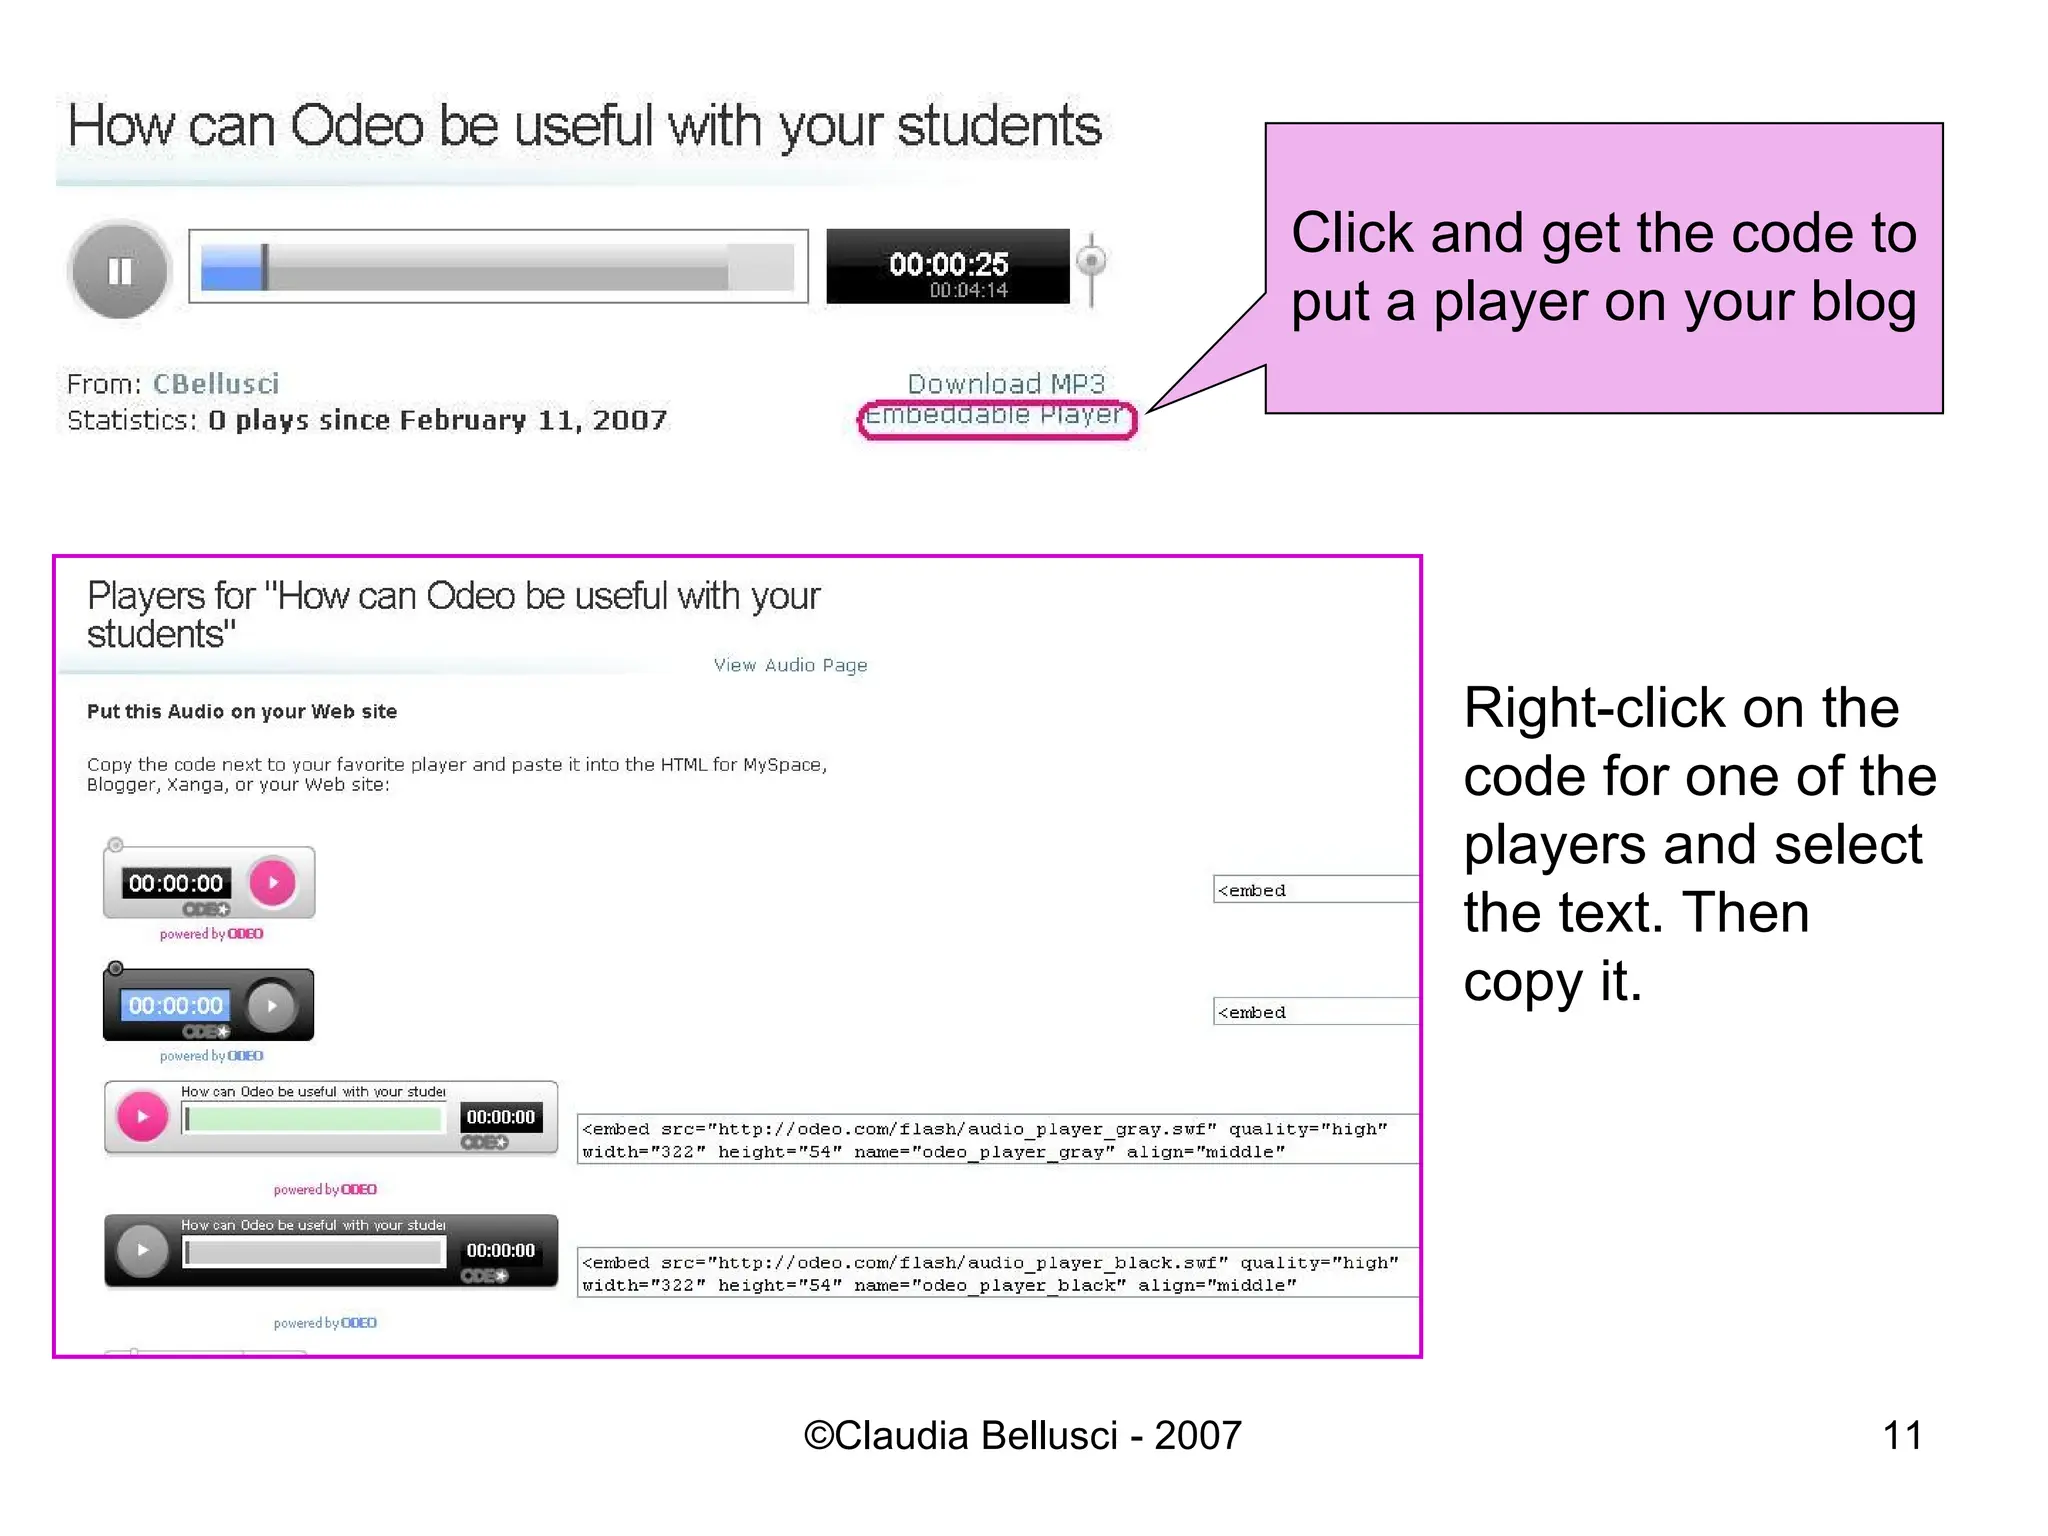
Click on “MyAudio” to access the audio file you have just recorded Click and listen
11.
Right-click on thecode for one of the players and select the text. Then copy it. Click and get the code to put a player on your blog
12.
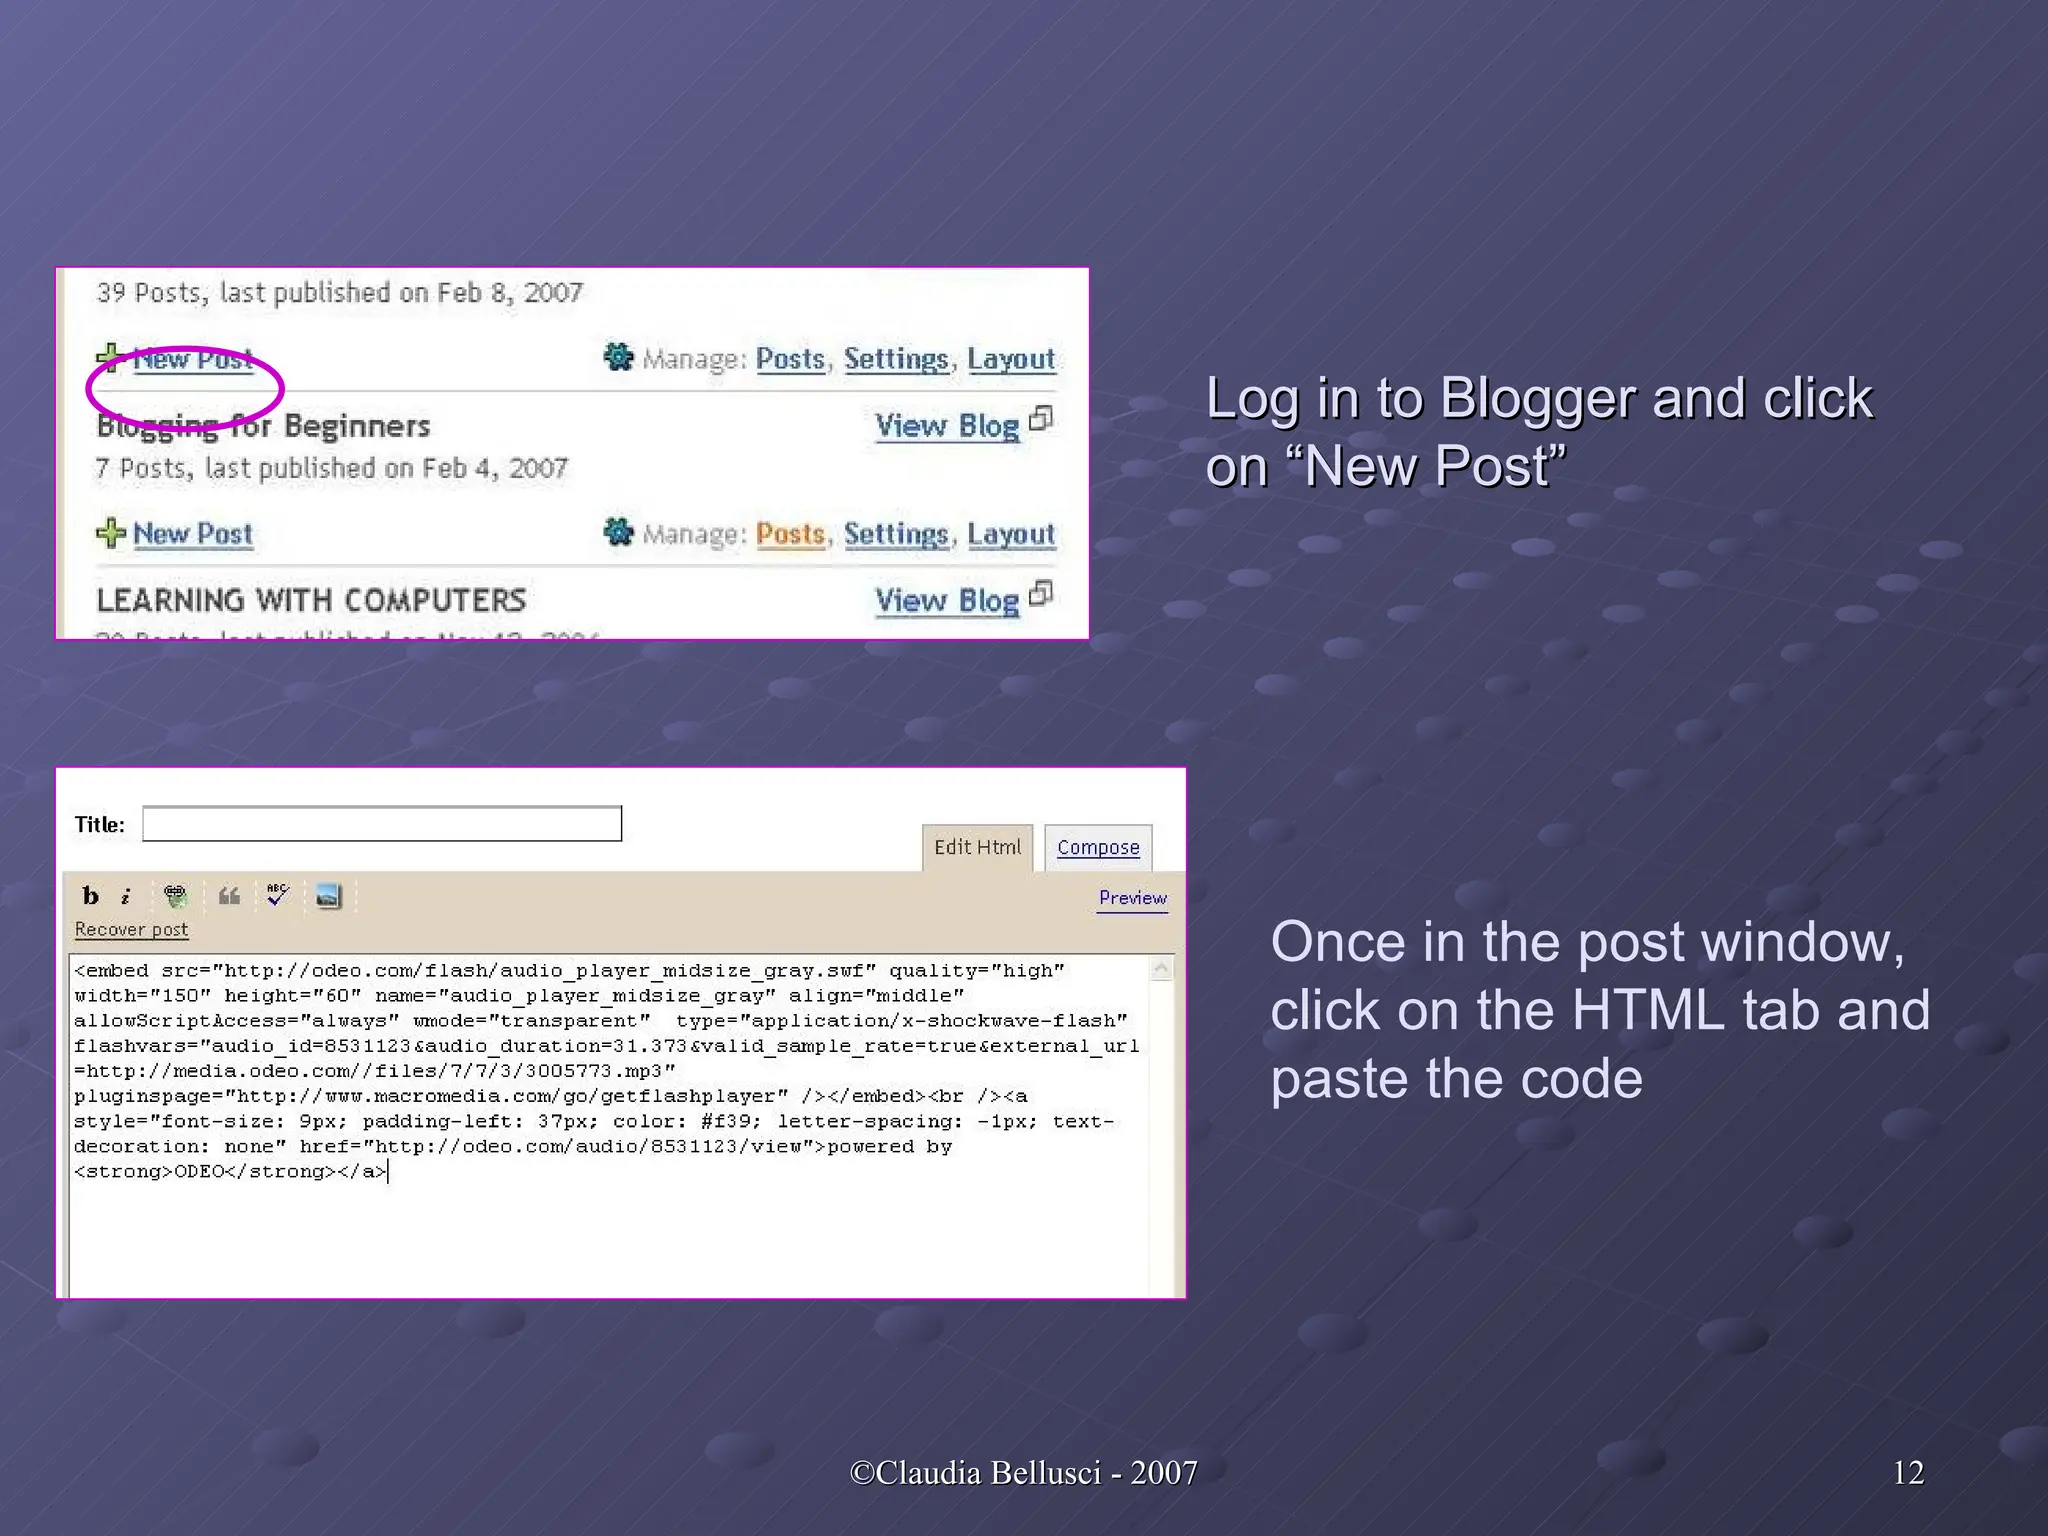
Log in toBlogger and click on “New Post” Once in the post window, click on the HTML tab and paste the code
13.
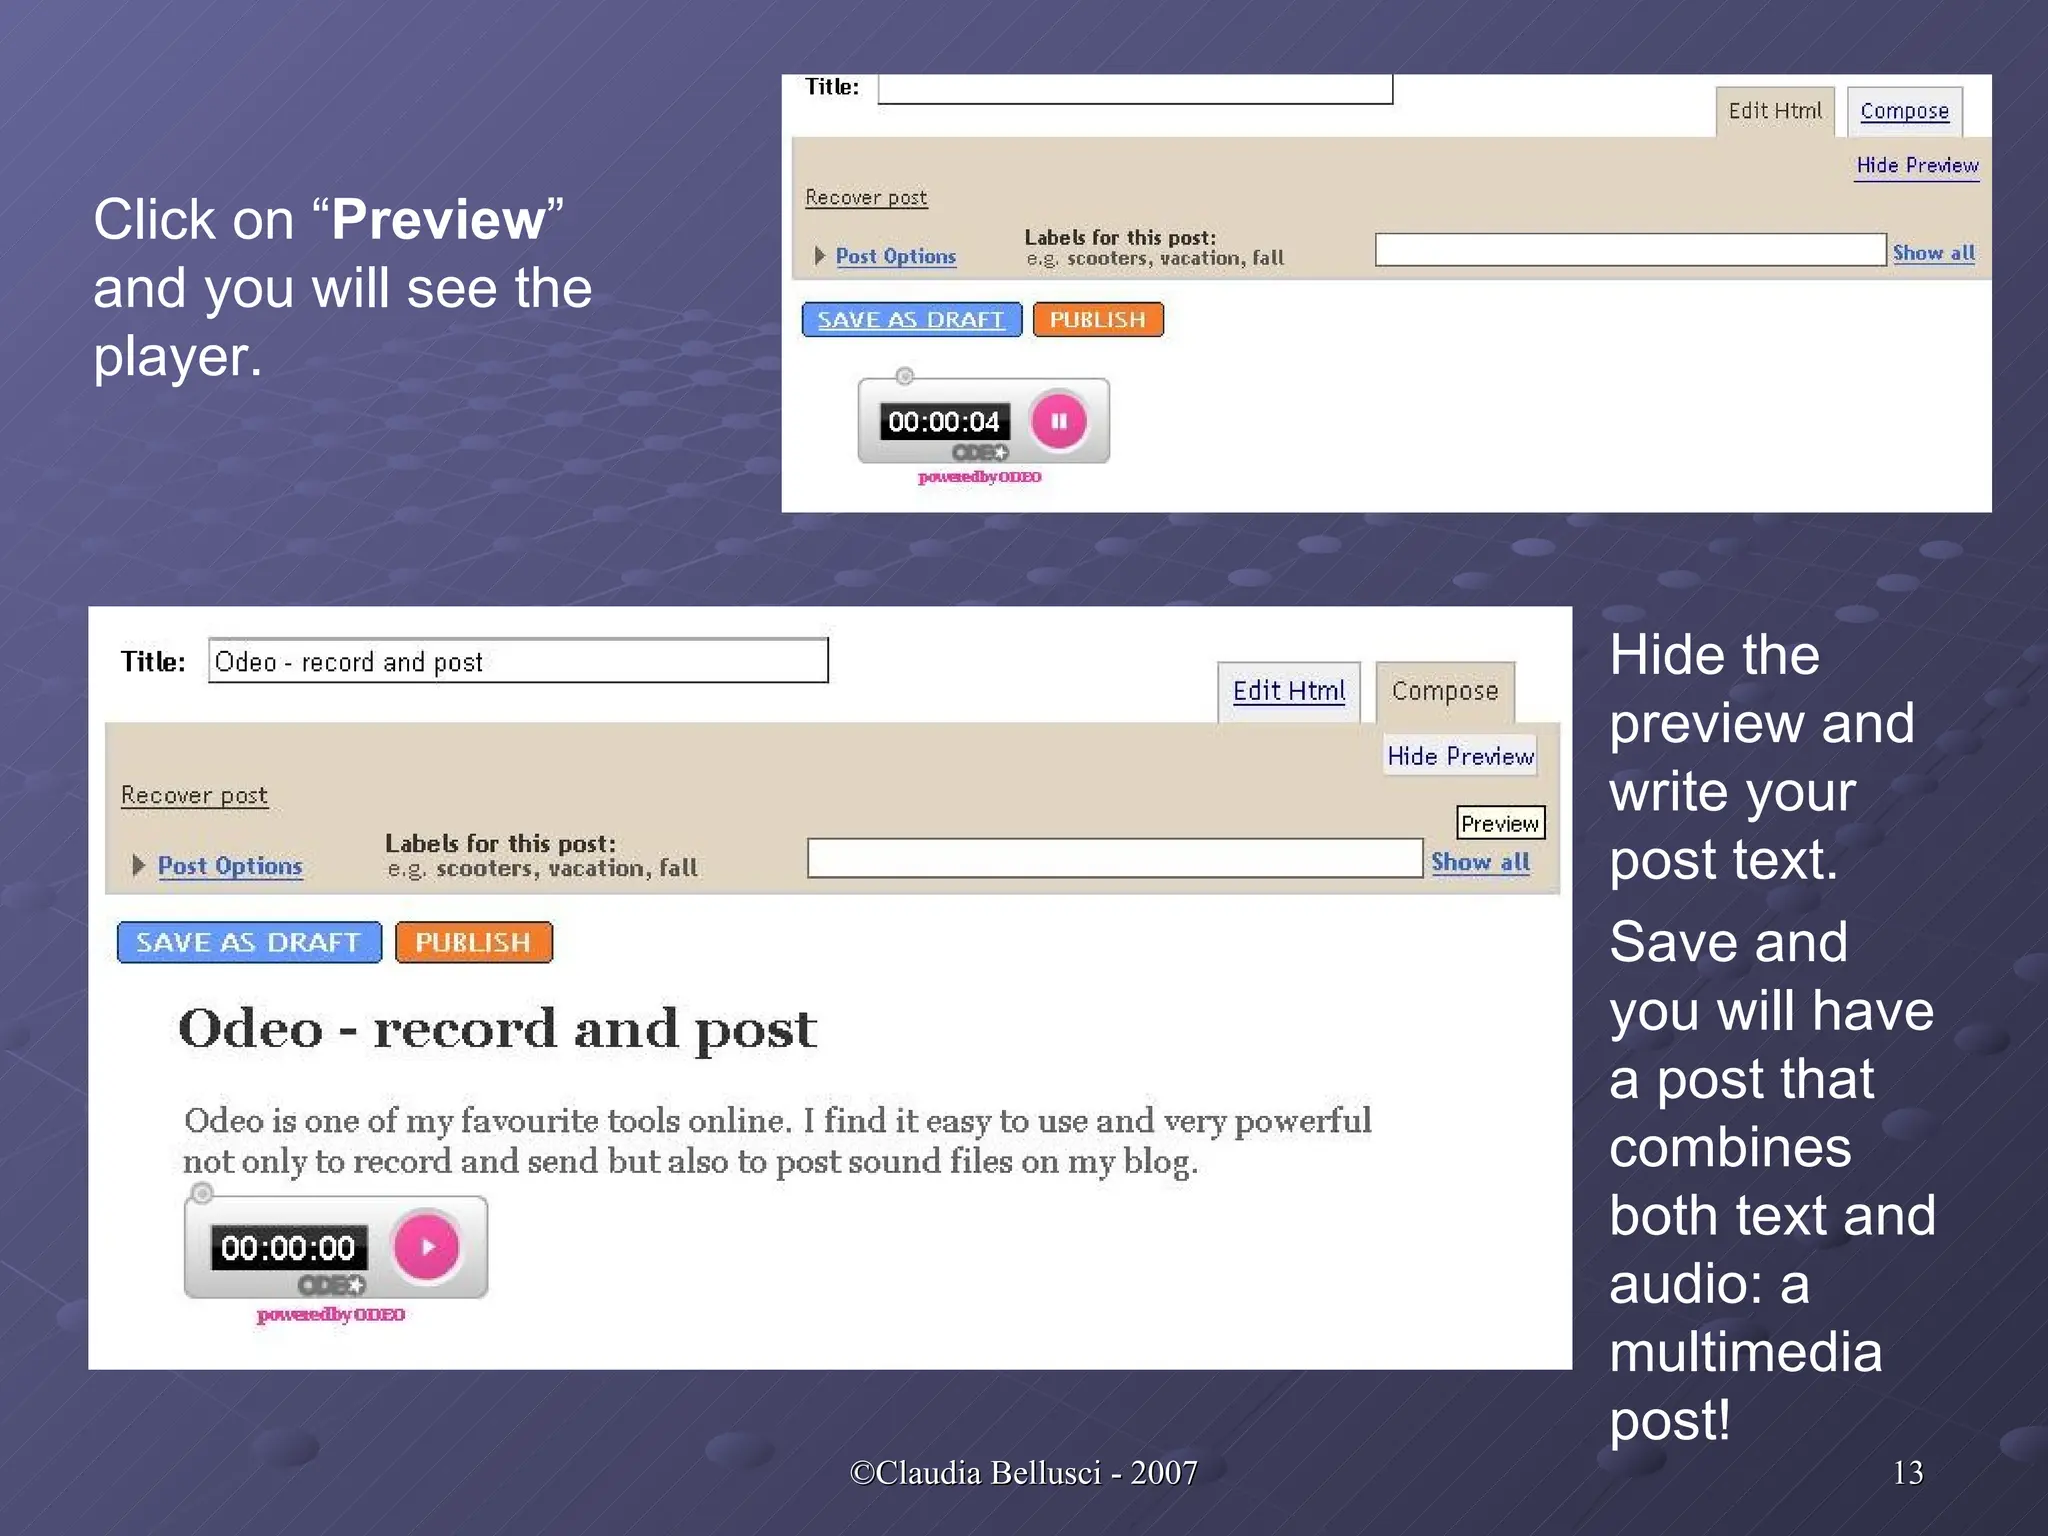
Click on “Preview ” and you will see the player. Hide the preview and write your post text. Save and you will have a post that combines both text and audio: a multimedia post!
14.
Blogging for Beginners( EVO 2007 ) ( http:// groups.yahoo.com / group / bloggingforbeginners )