
Recommended
More Related Content
Recently uploaded
Recently uploaded (20)
Featured
Featured (20)
Install wordpress-centos
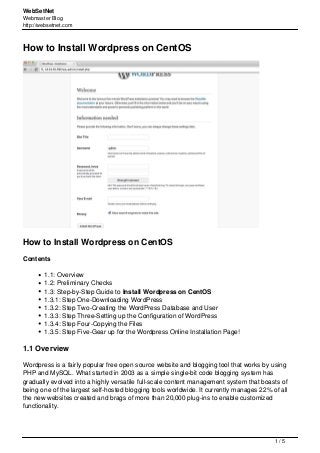
- 1. WebSetNet Webmaster Blog http://websetnet.com How to Install Wordpress on CentOS How to Install Wordpress on CentOS Contents 1.1: Overview 1.2: Preliminary Checks 1.3: Step-by-Step Guide to Install Wordpress on CentOS 1.3.1: Step One-Downloading WordPress 1.3.2: Step Two-Creating the WordPress Database and User 1.3.3: Step Three-Setting up the Configuration of WordPress 1.3.4: Step Four-Copying the Files 1.3.5: Step Five-Gear up for the Wordpress Online Installation Page! 1.1 Overview Wordpress is a fairly popular free open source website and blogging tool that works by using PHP and MySQL. What started in 2003 as a simple single-bit code blogging system has gradually evolved into a highly versatile full-scale content management system that boasts of being one of the largest self-hosted blogging tools worldwide. It currently manages 22% of all the new websites created and brags of more than 20,000 plug-ins to enable customized functionality. 1 / 5
- 2. WebSetNet Webmaster Blog http://websetnet.com In this tutorial, we shall learn the process of installing Wordpress on CentOS 1.2 Preliminary Checks 1. Before you start the steps explained in this tutorial, please ensure that you have access to root privileges as a user. 2. Before you begin work on Wordpress, you must ensure that Linux, Apache, MySQL, PHP (LAMP) stack is installed on your server. See tutorial Install Apache2, PHP5 And MySQL Support On CentOS 6.5 (LAMP) for the base setup. Once the above preconditions are fulfilled, you are good to go and you may begin the process of installing Wordpress on CentOS by following the steps outlined below. 1.3 Step-by-Step Guide to Install Wordpress on CentOS Outlined below are the steps that shall help you install Wordpress on CentOS. 1.3.1 Step One - Downloading WordPress As first step in the process, you must download Wordpress from the website by using the wget command: wget http://wordpress.org/latest.tar.gz The above command shall help you download the zipped Wordpress package straightaway to the home directory of the user. You may unzip g command: tar -xzvf latest.tar.gz The above command shall lead to unzipping of the downloaded Wordpress files, and you are now ready to move on to Step 2. 1.3.2 Step Two - Creating the WordPress Database and User After you have managed to unzip the Wordpress files, you will find them in a directory called Wordpress within the home directory. Subsequently, you need to create a new MySQL directory for Wordpress. For that, you need to log into the MySQL Shell using the following command: mysql -u root -p You must login here through your MySQL root password, and further create the following: 2 / 5
- 3. WebSetNet Webmaster Blog http://websetnet.com 1. A Wordpress Database 2. A User in the created database Subsequently, you would be required to assign new password. Here, it is important to remember that the whole lot of MySQL commands must certainly end with a semi-colon (;) First of all, you need to create the database, which has been named as WordPress1 for the purpose of this tutorial, though users are free to name the actual database as per their liking. Please use the following command to create the database: CREATE DATABASE wordpress1; Query OK, 1 row affected (0.00 sec) Next, you are required to create the new user. You may replace the database, name, and password values given below with values as per your preference: CREATE USER wordpressuser1@localhost; Query OK, 0 rows affected (0.00 sec) Once the user has been created, you need to set the password for the new user by using the following command: SET PASSWORD FOR wordpressuser1@localhost= PASSWORD("password123"); Query OK, 0 rows affected (0.00 sec) You must round up this step by granting all privileges to the newly created user. Please note that if you miss this step, you would not be able to start the Wordpress installer. Please use the following command to do the same: GRANT ALL PRIVILEGES ON wordpress.* TO wordpressuser1@localhost IDENTIFIED BY 'password123'; Query OK, 0 rows affected (0.00 sec) Subsequently, you need to refresh MySQL using the following command: FLUSH PRIVILEGES; Query OK, 0 rows affected (0.00 sec) Once done with the above steps, its now time to exit out of the MySQL shell by giving the 3 / 5
- 4. WebSetNet Webmaster Blog http://websetnet.com following command: exit You have now successfully exited out of the MySQL shell, and it is now time to move on to Step 3. 1.3.3 Step Three - Setting up the Configuration of WordPress First you need to copy the sample Wordpress configuration file, which is located in the Wordpress directory, into an altogether new file which would need to be edited, thus creating a new and usable Wordpress config. Please use the following command to execute the same: cp ~/wordpress/wp-config-sample.php ~/wordpress/wp-config.php Further, you need to open the wordpress configuration by keying in the following command: vi ~/wordpress/wp-config.php You need to search for the section containing the fields given below, and replace with precise details for your database name, username, and password: // ** MySQL settings - You can get this info from your web host ** // /** The name of the database for WordPress */ define('DB_NAME', 'wordpress1'); /** MySQL database1 username1 */ define('DB_USER', 'wordpressuser1'); /** MySQL database1 password123 */ define('DB_PASSWORD1', 'password123'); You need to save the changes made above before exiting. This brings you to the end of Step 3, and you can now graduate to step 4. 1.3.4 Step Four - Copying the Files The process of uploading Wordpress to the server is almost complete. The final step remains to transfer the unzipped WordPress files onto the website's root directory by using the following command : sudo cp -r ~/wordpress/* /var/www/html From this point onwards, WordPress shall have its own simple and user-friedly online installation form! Well done! However, the available form would require a specific PHP module for running. Do not lose sweat! If it has not yet been installed on your server, you may download php-gd by using the following command (yes! It is that simple!): sudo yum install php-gd 4 / 5
- 5. WebSetNet Webmaster Blog http://websetnet.com You have now successfully downloaded the requisite PHP module, and you may run the form in an unperturbed manner. Last but not the least, you are required to restart Apache by using the following command: sudo service httpd restart This brings you to the end of Step 4,and you may now move on the the nest and final step in the process. 1.3.5 Step Five - Gear up for the Wordpress Online Installation Page! The above steps shall lead you to the Wordpress Online Installation Page iin a fuss free manner. All you need to do to access the page is add /wp-admin/install.php to your website's domain or IP address (for instance. sample.com/wp-admin/install.php), and complete the short online form with the requested details. Given below is a screenshot of how the form would look like: Now that is fairly simple! (JavaScript must be enabled in your browser to view the large image as an image overlay.) Powered by TCPDF (www.tcpdf.org) 5 / 5