
Recommended
More Related Content
What's hot
What's hot (20)
Viewers also liked
Viewers also liked (20)
Similar to 4. hand out
Similar to 4. hand out (20)
More from shammasm
More from shammasm (19)
Recently uploaded
Recently uploaded (20)
4. hand out
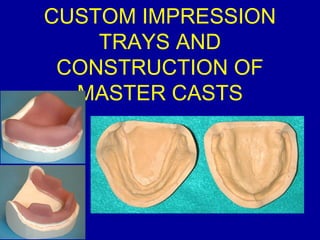
- 1. CUSTOM IMPRESSION TRAYS AND CONSTRUCTION OF MASTER CASTS
- 2. Learning outcomes 1. Define custom trays and list the materials for making custom tray. 2. Explain the procedure for making a custom tray. 3. Define border molding and list the materials for doing border molding. 4. Define final impressions and list the materials for making final impressions and master casts.
- 3. Patient Visit #2 Visit 2 Clinical procedure Lab. procedure Evaluation of custom impression trays Border molding Beading & Boxing & Pouring the casts Master casts Final impression Record Bases Occlusal Rims
- 4. Custom tray: an individualized impression tray made from a cast recovered from a preliminary impression. It is used in making a final impression.
- 5. Why Use Custom Trays? Custom trays provide anatomically correct extension of denture impressions. Allow homogeneous thickness of impression material. Provide accuracy.
- 6. Requirements of a custom tray a) stability in air and in a moist environment, b) volume stability over time, c) moisture resistance, d) rigidity, e) adhesion of the impression material in the tray and f) even thickness of impression material.
- 7. Materials Used for Custom Trays 1. The chemically-cured (CC) acrylic resin custom tray materials 2. Visible Light-Cured (VLC) resin custom tray materials
- 8. The chemically-cured (CC) acrylic resin custom tray materials have some disadvantages: Polymerization shrinkage A time interval must be allowed between the fabrication and the use of these custom trays The hazardous effects caused by the monomer (methyl methacrylate) include dermatologic reactions
- 9. VLC resin is: less hazardous, reduces preparation time, easy to use and has good handling properties.
- 10. Identify Denture Extensions Mark the anticipated final extension of the denture in pencil on the cast Method of fabrication of a custom tray
- 12. Mark Tray Extensions Mark the tray extension in pencil about two mm shorter than the first pencil line except in posterior palatal seal area.
- 14. Mark spacer outline Mark the spacer outline 2 mm short of the tray outline. Also mark the tissue stops in canine (2) and molar (2) region. Spacer in the posterior palatal seal should be bow shaped.
- 16. Why Spacer? The spacer provides room for the impression material It also minimizes the pressure that could distort the mucosa.
- 17. Tissue Stops: 1. To orient the tray 2. For uniform thickness of the impression material
- 18. Block-out undercuts Block-out under cuts with modelling wax. To avoid breakage of cast or the tray
- 19. undercut: the contour of a cross-sectional portion of a residual ridge or dental arch that prevents the insertion of a dental prosthesis
- 20. Separating media Sodium alginate + calcium sulfate = insoluble calcium alginate
- 21. Apply separating media on the cast so that acrylic resin does not stick to the cast. Applying separating media
- 22. Adapt Baseplate Wax to Spacer Line on Cast
- 23. Adapt Baseplate Wax to Spacer Line on Cast
- 24. Adapt Baseplate Wax to Spacer Line on Cast
- 25. Mixing acrylic The accepted polymer-to- monomer ratio is 3:l by volume.
- 26. When monomer and polymer are mixed in the proper proportions, a workable mass is produced. Upon standing, the resultant mass passes through five distinct stages.
- 27. Tray Resin Manipulation Check Consistency Sandy Stage Stringy Stage Dough Stage Mixing Completed Tray
- 28. These stages may be described as: (1) sandy, (2) stringy, (3) dough, (4) rubbery, or elastic, and (5) stiff
- 29. Adapting Tray Material in Dough Stage
- 30. Handle Design
- 31. Handle Design Functions of handle: 1. Supports the lip while making impression. 2. Tray handles are particularly helpful when loading, placing and orientating custom trays in the mouth.
- 32. Handle Design and placement
- 33. Handle Dimensions 3-4 mm thick 8-10 mm long 8-10 mm wide
- 34. Finger rests Finger rests Finger rests help in holding the tray in position when making the final impression.
- 35. Functions of finger rests Stabilize tray in mouth Equal distribution of pressure Reduces pressure applied to tissues
- 36. • The finger rests (arrow) should not impinge upon the tongue space and not extend above the occlusal plane and are placed near the 2nd premolar/1st molar teeth.
- 38. Tray periphery should be 2 -3 mm thick. The edges should be rounded. The rest of the tray should be about 2 mm in thickness.
- 39. Border Molding
- 40. Border molding - Maxillary
- 41. Border molding - Mandibular
- 42. Border molding: the shaping of the border areas of an impression material by functional or manual manipulation of the soft tissue adjacent to the borders to duplicate the contour and size of the vestibule.
- 43. MATERIALS USED FOR BORDER MOLDING 1. Low fusing compound 2. Putty consistency of elastomeric impression materials
- 44. Wax Spacer Removal After border molding, remove wax spacer Do not dislodge border molding
- 45. Final Impression: the impression that represents the completion of the registration of the surface or object. also called master impression Secondary impression ------ not a good term
- 46. MATERIALS USED FOR FINAL IMPRESSION 1. Zinc Oxide Eugenol Impression Paste 2. Elastomeric Impression Materials (medium body and light body)
- 47. Definitive Cast: a replica of the residual ridge areas, and/or other parts of the dental arch used to fabricate a prosthesis; also called final cast or master casts
- 48. Materials used for making final casts: Alpha hemihydrate (dental stone)
- 49. Methods of pouring casts 1. Inversion method (for preliminary casts) 2. Beading and boxing method (for master casts) A. Wax boxing method B. Plaster of paris and pumice boxing method
- 51. Beading
- 53. Land area Land Area: the portion of a dental cast that extends beyond the impression’s replica surface laterally.
- 54. Boxing an impression: The enclosure (box) of an impression to produce the desired size and form of the base of the cast and to preserve desired details.
- 56. Advantages of beading and boxing Superior hardness of cast surface Provides land area Preserves borders of the impression Minimizes trimming
- 58. Pouring of casts Once beading and boxing is done pour cast with dental stone (100 gm of stone to 28-30 ml of water) and allow it to set for about an hour.
- 59. Retrieving of casts After the cast has set, place the tray with cast in hot water to soften the low fusing compound and carefully separate the cast from the impression.
- 60. Plaster and pumice boxing method
- 61. The method we will use is the 1:1 plaster/pumice mixture. Equal parts of plaster and pumice are mixed together dry, then enough water is added for the mix to become smooth and creamy. H2O Plaster Pumice
- 62. Plaster and pumice boxing method
- 63. Boxing and Pouring an Impression
- 64. Trimming the master casts
- 65. Master Casts for Complete Dentures It is on these casts that dentures are made.
- 66. Outline of Bases for Trimmed Casts Follow the contour of the ridges, with rounded angles Mandibular Maxillary
- 67. Completed Master Cast Land (2-3 mm ) Base (15-17 mm thick) Depth of vestibule (2-3 mm)
- 68. The base for this cast was insufficient and eventually it fractured necessitating remaking of the impression Trimming the Master Cast
- 69. Trimmed Model
- 70. Indexing the master cast Indexing is done to accurately remount the cast on an articulator.
- 71. For laboratory remounting of dentures
- 72. Two types of indexing: 1.Groove indexing method 2.Notch indexing method
- 73. 1. Groove indexing method In this method, V- shaped grooves are made on the cast for indexing.
- 74. 2. Notch indexing method In this method, 3 notches are placed at the edges of the cast at its thickest portion.
Editor's Notes
- Gordon J. Christensen, D.D.S., M.S.D., Ph.D-JADA, May 1994:
- (Blatterfein , JPD 1985)
- The recommended ratio of plaster to pumice is about 50/50 or 1:1. It is not critical that these components are measured out exactly. All that is necessary, is to produce a mixture that is sufficiently soft to allow easy removal when set, yet sufficiently rigid to support the impression and boxing wax. The plaster and pumice should be mixed together in a powder form prior to adding the water. Only enough water is added to provide a smooth, creamy mix.
- The bases are trimmed to allow for about 4mm width in the area that will become the land area.
- The box must not leak, therefore, the area where the pieces of the wax box come together must be sealed by adding an additional piece of wax which is left sufficiently long so that it can be folded over the joint area and also sealed to the wax using a hot instrument. A piece of beading wax is then used to seal the box to a plastic slab.
- One of the most commonly seen problems that have resulted from undercuts on casts being insufficiently blocked out or insufficiently lubricated prior to making the baseplate Is a broken or marred surface of the cast. This is particularly distressing to the student and patient alike as the entire impression-making procedure must be repeated at another appointment. If a ridge is thin and is expected to possibly break during the constant placement and removal of a baseplate, a good preventive measure is to make an impression of the blocked-out master cast and duplicate it.