
Recommended
Recommended
More Related Content
Similar to Front headlight removal installation
Similar to Front headlight removal installation (10)
Recently uploaded
Recently uploaded (20)
Front headlight removal installation
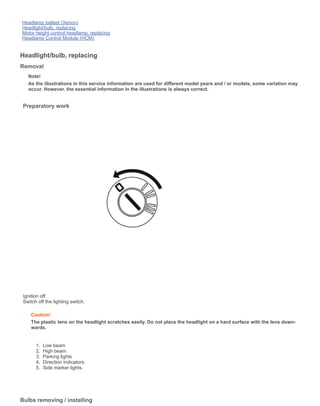
- 1. Headlamp ballast (Xenon) Headlight/bulb, replacing Motor height control headlamp, replacing Headlamp Control Module (HCM) Headlight/bulb, replacing Removal Note! As the illustrations in this service information are used for different model years and / or models, some variation may occur. However, the essential information in the illustrations is always correct. Bulbs removing / installing Preparatory work Ignition off. Switch off the lighting switch. Caution! The plastic lens on the headlight scratches easily. Do not place the headlight on a hard surface with the lens down- wards. 1. 2. 3. 4. 5. Low beam High beam Parking lights Direction indicators. Side marker lights. Model : XC90 (03-) Year : 2011 Engine : D5244T5 18/01/2017,11:13 Volvo Cars Corporation Proprietary Page 1/6
- 2. Installation Removing headlight Caution! For vehicles with Bi-Xenon lamps, see .Headlight bulb (Xenon), Pull the locking plate straight up. Disconnect the connector. Model : XC90 (03-) Year : 2011 Engine : D5244T5 18/01/2017,11:13 Volvo Cars Corporation Proprietary Page 2/6
- 3. Removing bulbs high/low beam Remove the cover. Release the spring catch. Remove the bulb. Model : XC90 (03-) Year : 2011 Engine : D5244T5 18/01/2017,11:13 Volvo Cars Corporation Proprietary Page 3/6
- 4. Installing bulbs high/low beam Align the brake light. Lock using the spring. Install the cover. Model : XC90 (03-) Year : 2011 Engine : D5244T5 18/01/2017,11:13 Volvo Cars Corporation Proprietary Page 4/6
- 5. Removing the bulb for parking lights / side marker lights / direction indicators Remove the bulb holder by pressing and twisting it. Remove the bulb. Model : XC90 (03-) Year : 2011 Engine : D5244T5 18/01/2017,11:13 Volvo Cars Corporation Proprietary Page 5/6
- 6. Installing the bulb for parking lights / side marker lights / direction indicators Install the bulb. Install the bulb holder by pressing and twisting it. Installing the headlight Connect the connector. Align the headlight. Install the locking plate. Finishing work Test the function. When replacing headlights or carrying out work which may have affected the headlight alignment, check and align the beam. See .Headlamps, aligning,
- 7. Operation number: 35162-2 Operation number: 35163-2 Headlight bulb (Xenon) Note! Some variation in the illustrations may occur, but the essential information is always correct. Removal Installation Warning! Wear safety goggles and protective gloves. 1. 2. 3. 4. 5. Bi-Xenon lamp High beam, halogen Parking lights Direction indicators Side marker lights Remove the headlight. Refer to: .Headlight/bulb, replacing, To install, reverse the removal procedure
- 9. Headlamps, aligning Note! As the illustrations in this service information are used for different model years and / or models, some variation may occur. However, the essential information in the illustrations is always correct. Caution! Cars equipped with Bi-Xenon lamps or halogen lamps are adjusted in the same way. To ensure that the position sensor for the Bi-Xenon lamps is correctly calibrated calibrate as follows. To calibrate the position sensor for the Bi-Xenon lamps see, VIDA, vehicle communication, function group 3, rear electronic module (REM), Calibrating the Bi-Xenon lamp position sensor. Preparatory work Caution! Always adjust the headlamp beam according to the legal requirements of the market. Ensure that there is sufficient battery voltage Check the button that controls the lighting level. Set the button to the 0 position Ignition and low beam on. Note! Always adjust the beam with low beam switched on. Headlamp alignment Adjust the beam vertically (Y) by turning the Allen screw. See the illustration Adjust the beam horizontally (X) by turning the Allen screw. See the illustration. Hint:
- 10. Use a Ø 6 mm Allen screw. Note! Adjust according to the illustration for the applicable market. 1. All markets except USA, United Kingdom and Japan.
- 11. 2. USA. 3. Great Britain.
- 12. 4. Japan. Model : XC90 (03-) Year : 2011 Engine : D5244T5 18/01/2017,11:14 Volvo Cars Corporation Proprietary Page 4/4