10.- Creating environmental layers 3D (Version ModestR 5.3 or higher)
•
0 likes•345 views

We describe how to create an environmental layer in ModestR, integrating several environmental variables in a single space. Environmental layers can be used to estimate distribution of a species, to visualize its niche, and to compare environmental conditions of different areas, among other things.

Recommended
Recommended
More Related Content
More from modestrsoftware
More from modestrsoftware (14)
Recently uploaded
Recently uploaded (20)
10.- Creating environmental layers 3D (Version ModestR 5.3 or higher)
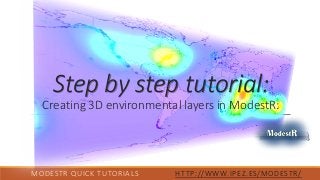
- 1. MODESTR QUICK TUTORIALS HTTP://WWW.IPEZ.ES/MODESTR/ Step by step tutorial: Creating 3D environmental layers in ModestR:
- 2. What do you need for this tutorial: 1. ModestR v5.3 or higher 2. Environmental data already integrated in ModestR (if you have not done that yet, tutorial “How to integrate and use environmental data in ModestR” can help you doing that; available in ModestR web site) 3. Internet connection ModestR software can be freely downloaded from http://www.ipez.es/ModestR MODESTR QUICK TUTORIALS HTTP://WWW.IPEZ.ES/MODESTR/
- 3. We’ll describe how to create a 3D environmental layer in ModestR, integrating several environmental variables in a single space. Environmental layers can be used to estimate distribution of a species, to visualize its niche, and to compare environmental conditions of different areas, among other things. Follow the next steps! MODESTR QUICK TUTORIALS HTTP://WWW.IPEZ.ES/MODESTR/
- 4. ¿When am I going to use a 3D environmental layer? MODESTR QUICK TUTORIALS HTTP://WWW.IPEZ.ES/MODESTR/ Every time I want to evaluate the conexion between stratification or mixing and biological, chemical or physical phenomena. ¿What do I need to work with 3D environmental layers in ModestR? Environmental layers at each depth of interest. ModestR will convert the set of layers in a single one: 3D one. Before starting with this tutorial, please take a look of the tutorial No. 9 (Adding NOAA's Word Ocean Atlas data to ModestR)
- 5. The first step is running ModestR and going to menu Mapping>> Niche of occurrence >>Create new environmental layer >> 3D. MODESTR QUICK TUTORIALS HTTP://WWW.IPEZ.ES/MODESTR/
- 6. To create a 3D environmental layer, select the environmental variables that will be part of it. In some way, an environmental layer represents way of visualizing and working with multiple environmental dimensions in a simpler way. MODESTR QUICK TUTORIALS HTTP://WWW.IPEZ.ES/MODESTR/ Environmental data is not provided with ModestR. It should be the user who adds those data. For details of how to integrate environmental data in ModestR, see the step-by-step tutorial “How to integrate and use environmental data in ModestR” or the ModestR user’s manual, in the Modestr website. See also “Step by step tutorial 9- Adding NOAA's Word Ocean Atlas data to ModestR.” For this example we are selecting WOA 2013 marine environmental variables such as temperature, oxygen and nitrate. You must select at least two variables, but an environmental layer may typically involve 4 or more variables. You should use variables that mostly cover the same geographic area.
- 7. In the next step, Variance Inflation Factor can be optionally calculated, in order to detect collinearities between variables, and, eventually, delete variables that can be redundant. This step is optional, and you can just skip and continue. MODESTR QUICK TUTORIALS HTTP://WWW.IPEZ.ES/MODESTR/ For this example we’ll neither calculate VIF nor delete variables. A value that already appears is the minimal relative % of coverage of each variable regarding the other ones. If one variable has a low value (e.g.< 50%) this usually indicates that there are many missing values for the geographic areas where the other variables do have values. An extreme case would be if you selected terrestrial and marine variables, that will not have the same geographic coverage, then they should not be used in the same environmental layer. Click on Continue button.
- 8. In the next step, the polar coordinates system that will constitute the environmental layer is depicted. MODESTR QUICK TUTORIALS HTTP://WWW.IPEZ.ES/MODESTR/ The default assignation of the variables to each axis of the polar coordinates system is done basing on the correlation of each variable with each other, trying this way to maximize data dispersion, and therefore a more visually descriptive environmental layer. You can optionally select variables in the list and change their position using those buttons. Click on Continue button.
- 9. In the next step, the environmental layer is generated and shown both on the map and in the polar coordinates system. MODESTR QUICK TUTORIALS HTTP://WWW.IPEZ.ES/MODESTR/
- 10. In the next step, the environmental 3D layer is generated and shown both on the map and in the polar coordinates system. MODESTR QUICK TUTORIALS HTTP://WWW.IPEZ.ES/MODESTR/ Here the current environmental data are projected on polar coordinates system. The result is a tridimensional representation of the different marine environmental conditions that occur in the world.
- 11. Finally, the new environmental layer can be optionally saved to be used later. A report can also be exported. MODESTR QUICK TUTORIALS HTTP://WWW.IPEZ.ES/MODESTR/ Enter a name and a description for the new layer and click on Save layer to save it. You can optionally export a report of the environmental layer, that contains several files such as the polar data map, the X and Y rasters and other ones.
- 12. Now we will load this new layer in MapMaker, to be able to use it inmediately after. MODESTR QUICK TUTORIALS HTTP://WWW.IPEZ.ES/MODESTR/
- 13. Now we’ll see another utility of environmental layers: estimate the potencial niche of a species. That is what is called “niche of occurrence” in ModestR. MODESTR QUICK TUTORIALS HTTP://WWW.IPEZ.ES/MODESTR/ The first step will be to add occurrences of a species to the map. We can download them from GBIF, for example. To do that, go to menu File >> Import Samples from online GBIF database. Then write “Lepidochelys olivacea” in the species name, and select “All” for the “Kind of records to download” option. Then, click on the Accept button.
- 14. The “Niche of occurrence” can be calculated from occurrence data, such as those downloaded from GBIF or imported from CSV files. MODESTR QUICK TUTORIALS HTTP://WWW.IPEZ.ES/MODESTR/ Once data downloaded from GBIF, you have to select habitats to be accepted for this species. For this example, we’ll select “Sea” Then click on the Accept button.
- 15. MODESTR QUICK TUTORIALS HTTP://WWW.IPEZ.ES/MODESTR/ The “Niche of occurrence” feature works by looking for environment similarities to infer the areas favorable to a species. To do that, it uses an environmental layer, to measure the distance between the environmental conditions where the species already has confirmed presences, and the other conditions that appear in the layer. Now data is added to the map. Samples that fall outside of the habitats selected for the species will appear in another color (by default black).
- 16. MODESTR QUICK TUTORIALS HTTP://WWW.IPEZ.ES/MODESTR/ Once occurrence data added to the map, we can do a density map using the “niche of occurrence” approach. Go to Mapping >> Niche of Occurrence >> Density map. Select the type of Z dimension to be used = the meaning you want to give to Z. You have five options: Depth, Date&Time, Year, Other Z value, Custom. At the moment, you’ll choose Depth. All occurrences will be used to perform calculations, whether they have Z value or not. For occurrences without Z value you can select which substitutive value will be used. Depth (Z) range for NOO calculation: Select the Z range to be used to perform calculations. This also determines which occurrences will be used. Only occurrences with a Z value within the selected range will be used. Options you have: 1.Use full compounded layer range: the whole range of the environmental variables will be used. 2.Use range of occurrences Z: only species Z range (according to occurrences Z values) will be used. 3.Use custom values: a custom range entered by the used will be used.
- 17. Density map uses a kernel density approach to determine the environmental areas with higher density of a species in the polar coordinates system of an environmental layer. MODESTR QUICK TUTORIALS HTTP://WWW.IPEZ.ES/MODESTR/ Several parameters can be adjusted, but most of the times, default options are OK (as usual in ModestR!). Just click on the Run button.
- 18. Therefore, environmental areas (not geographic!) where the species is already present will have more density, and then environmental areas nearest those ones, which will have a high density, can be considered also favorable to the species. MODESTR QUICK TUTORIALS HTTP://WWW.IPEZ.ES/MODESTR/ Polar density map show the environmental areas with higher density of the species in the environmental layer. Areas with higher density will be considered favorable to the species. They form the “niche of occurrence” of the species. Click on the 3D View button to visualize the 3D results.
- 19. Here you can see the 3D environmental layer for the Lepidochelys olivacea, based on kernel density estimation. For additional information >> ModestR User’s Manual. MODESTR QUICK TUTORIALS HTTP://WWW.IPEZ.ES/MODESTR/
- 20. The geographic niche of occurrence is just a projection of the areas with higher density in the environmental layer into the geographic space. Here you can see the density information for Lepidochelys olivacea, projected in a 2D map. MODESTR QUICK TUTORIALS HTTP://WWW.IPEZ.ES/MODESTR/ The same density information is shown in the map, but, obviously, translated to the geographic space. The geographic areas that have the environmental conditions with higher density of the species in the environmental layer will appear here highlighted.
- 21. It was the Step by step tutorial: Creating 3D environmental layers in ModestR Thank you for your interest. MODESTR QUICK TUTORIALS HTTP://WWW.IPEZ.ES/MODESTR/º You can find this one and other tutorials in http://www.ipez.es/ModestR By Estefanía Isaza Toro Collaborator of the ModestR Team