
Recommended
More Related Content
What's hot
What's hot (20)
Similar to iOS Platform & Architecture
Similar to iOS Platform & Architecture (20)
Recently uploaded
Recently uploaded (20)
iOS Platform & Architecture
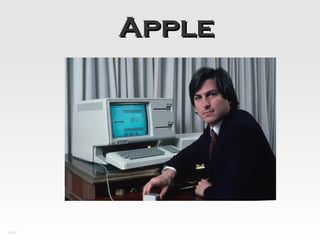
- 1. Apple
- 2. The History of Apple, Inc.
- 3. Why “Apple”? Steve Jobs, Steve Wozniak, and Mike Markkula formed Apple Computer on April 1, 1976, after taking out a $250,000 loan. At the time, the company to beat was Atarti, and “Apple” came before them alphabetically, and also therefore in the phone book.
- 4. Jobs and Woz First met in 1971; Jobs was 16, Wozniak was 21 Steve Wozniak built a computer to run on the 6502 chip from MOS technology, but Jobs had the idea to sell it
- 5. Apple I First demonstrated in April 1976 Used a TV as a display Many machines had no display Cassette interface Used fewer parts than anything in its class Apple Computer’s first logo, designed by Ronald Wayne, shows Isaac Newton underneath an apple tree.
- 6. Apple II First introduced in 1977 Recognized by many as being the first “computer” Production ended in 1993; Apple had sold over two million units Unlike Apple I, this version included graphics
- 8. Introduced on January 24, 1984, the Macintosh was the world’s first truly personal computer, with a user-friendly Graphical User Interface (GUI). Introduced desktop publishing with Adobe PageMaker Created an entire Mac Family: MacPlus (1986) Mac SE and Mac II (1987) Mac Classic and Mac LC (1990) Macintosh’s first icons were created by graphic Macintosh Portable designer Susan Kare. (1989) PowerBook (1991)
- 9. AIM Alliance In 1991, Apple Computer, IBM, and Motorola joined to create the PowerPC processors Apple & IBM created two side projects called Taligent and Kaleida Labs.
- 10. AIM Alliance Started Power Macintosh line in 1994 using PReP (PowerPC Reference Platform) Produced the first hand-held PDA, the Newton, in 1993 Did not take off for Apple, but was the forerunner for PalmPilot and Palm PC
- 11. Power Struggle Jobs was fired in 1985 by the board of directors, but after three unsuccessful CEOs throughout the early-mid 90s, was brought back in 1997 and assumed the position of interim CEO.
- 12. iMac is Born Jobs first recreated desktop, combining the monitor and CPU into one Sold over one million units a year Introduced Apple’s new emphasis on design and aesthetics
- 13. Mac OS X Jobs also created an entirely new operating system Wanted to emphasize the “digital lifestyle”
- 14. iPod Introduced on October In July 2005, iPod’s 23, 2001 U.S. market share was 5GB hard drive; 1000 estimated at 74% songs January 2007, Apple Apple had already reported record annual registered the name for a earnings of $7.1 billion, group of internet kiosks 48% of which was from that were never iPod sales. implemented
- 15. iPod + iTunes Launched in 2003; had 2 million downloads in 16 days Over 2 billion songs sold 1.2 billion songs sold in 2006 alone
- 16. Apple, Inc. In January, Steve Jobs announced the company would change it’s name to Apple, Inc. to incorporate their many endeavors
- 17. Technical Specifications Screen size 3.5 inches Screen 320 by 480 at 160 ppi resolution Input method Multi-touch Operating OS X system Storage 4GB or 8GB GSM Quad-band (MHz: 850, 900, 1800, 1900) Wireless data Wi-Fi (802.11b/g) + EDGE + Bluetooth 2.0 Camera 2.0 mega pixels Battery Talk / Video / Browsing - Up to 5 hours Audio playback - Up to 16 hours Dimensions 4.5 x 2.4 x 0.46 inches / 115 x 61 x 11.6mm Weight 4.8 ounces / 135 grams
- 18. iPhone iPhone 5 iPhone 4S iPhone 4 iPhone 3GS iPhone 3G iPhone Comparison 16GB/32GB/ 16GB/ 16GB/ 16GB/ 8GB/ 4GB/8GB Chart 64GB 32GB/ 32GB 32GB 16GB 64GB Songs 4,000/8,000/ 4,000/ 4,000/ 4,000/8,000 2,000/ 1,000/ 16,000 8,000/ 8,000 4,000 2,000 Held 16,000 Screen 4 3.5 3.5 3.5 3.5 3.5 Size** Resolution 1136x640 960x640 960x640 480x320 480x320 480x320 Processor Apple A6 Apple A5 1 Ghz Apple A4 600 Mhz 412 Mhz 412 Mhz Samsung Samsung ARM Samsung ARM ARM Cortex-A8 Connectivity Wi-Fi, Wi-Fi, Wi-Fi, Wi-Fi, Wi-Fi, Wi-Fi, 4G LTE, UMTS/ UMTS/ UMTS/3G, UMTS/3G, GSM, UMTS/HSDPA/ HSDPA/ HSDPA/ GSM, GSM, EDGE, HSUPA/3G, HSUPA/3G, HSUPA/3G, Bluetooth Bluetooth Bluetooth GSM, CDMA, GSM, CDMA, GSM, CDMA, Bluetooth Bluetooth Bluetooth Carrier AT&T, Sprint, AT&T, Sprint, AT&T, AT&T AT&T AT&T Verizon Verizon Verizon A-GPS? Yes Yes Yes Yes Yes No Max. OS iOS 6 iOS 6 iOS 6 iOS 5 iOS 4, limited iOS 3 Camera 2 cameras: 2 cameras: 2 cameras: 3 Megapixel 2 Megapixel 2 Megapixel 8 Megapixel 8 Megapixel 5 Megapixel & 720p HD & VGA & VGA Records 1080p HD 1080p HD 720p HD VGA No No Video? at 30 fps at 30 fps at 30 fps at 30 fps FaceTime Yes Yes Yes No No No
- 19. FaceTime Yes Yes Yes No No No Siri Yes Yes No No No No Weight 3.95 4.9 4.8 4.8 4.7 4.8 (ounces) Size** 4.87 x 2.31 4.5 x 2.31 4.51 x 2.31 4.5 x 2.4 4.5 x 2.4 4.5 x 2.4 x .30 x .37 x .37 x .48 x .48 x .46 Battery Life Talk: 8 Talk: 8 Talk: 7 Talk: 5 Talk: 5 Talk: 8 (in hours) Video: 10 Video: 10 Video: 10 Video: 10 Video: 7 Video: 7 Web: 10 Web: 9 Web: 10 Web: 9 Web: 5 Web: 6 Audio: 40 Audio: 40 Audio: 40 Audio: 30 Audio: 24 Audio: 24 Colors Black, White Black, White Black, White Black, White Black, White Black Price US$199/$29 US$199/ $199/ $199/ $199/ $499/ w/contract 9/ $299/ $299, $299, $299 $599, $399 $399, later later $99, later $49, later $399 $99 and then free and then free iphone Comparison Table
- 20. The iOS Platform From iOS reference Library iPhone Human Interface Guidelines http://developer.apple.com/library/ios/#documentation/UserExperience/Conceptual/MobileHIG/DevelopingSoftware/DevelopingSoftware.html
- 31. Apple provides a complete ecosystem for developers, so you can focus on making incredible apps.
- 32. Tools you’ll love to use. use Xcode IDE
- 33. Xcode Features Assistant Editor The Assistant button splits the editor in two, creating a secondary pane that automatically displays files that are most helpful to you, based on your current work, for instance displaying the corresponding header file to your current source file. Source Editor Write code using a professional editor with advanced code completion, code folding, syntax highlighting, and message bubbles that display warning, errors, and other context-sensitive information inline with your code. Interface Builder Built-In Design and test your user interface without writing a line of code, prototyping in minutes, then graphically connect your interface to the source within the Xcode editor. iOS Simulator With the iOS SDK, Xcode can build, install, run, and debug Cocoa Touch applications in a Mac-based iOS Simulator for a rocket-fast development workflow. Integrated Build System Handles the most complex builds, scaling to maximize the power of multi-core Macs, and will automatically sign, provision, and install iPhone apps onto a connected device. Compilers From within Xcode or Terminal, you have a complete set of open-source C, C++, and Objective-C compilers optimized by Apple, scalable for fast multi-core compiles.
- 34. Graphical Debugger Debug your Mac, iOS Simulator, or USB-connected iPhone application directly within the Xcode editor as data tips show variable values with a mouse hover. Static Analysis Find bugs in your code before the application is even run by letting Xcode’s built-in static analyzer try out thousands of possible code paths in a few seconds, reporting potential bugs that could have remained hidden or nearly impossible to replicate. Organizer The Organizer is a single window for managing projects, SCM repositories, app archives, and devices — including one- click setup of new iOS devices. The Organizer is also where you go to submit your Mac or iPhone app to the App Store. Snapshots Before performing a big, risky operation on your project simply make a Snapshot (or let Xcode do it automatically for you) to save your good state, confidently knowing you can easily restore it later. Refactoring Restructure your Objective-C application in a single operation, changing object hierarchies or names for all occurrences within your code and user interface designs. Complete Documentation Search for anything within Xcode and the documentation viewer will find it, either on your Mac or on the Apple Developer website. Version Editor Xcode’s Version editor displays a running timeline of commits, helps you determine blame, and graphically goes back in time to compare source files, with full support for Subversion and Git source control (SCM) systems.
- 35. Live Issues Just like a word processor highlights spelling errors, Live Issues highlights common coding mistakes, without the need to click ‘build’ first. Fix-it Beyond just reporting errors, Xcode is intelligent enough to fix the problem for you. When you make a coding mistake, Xcode will immediately alert you, and a single keyboard shortcut will instantly “fix-it” for you, so you won’t miss a beat while coding. Quick Help Streamlined documentation on API usage, definitions, or sample code are available within the Utility area of Xcode, without taking focus away from your code.
- 36. Instruments Data Recording Tell Instruments which application to analyze, which instruments to use, and simply click the big red button as data is collected and stored for further analysis. Visual Comparison As data is recorded and displayed over time it is easy to see relationships, both between different types of collected data, or the same data collected over multiple runs. Drill Down Inspect data spikes on the graph to see what code is executing at the time, then easily jump into Xcode to fix the problem. Play Back Create an ad-hoc test harness by recording a user interacting with your application, then play back the recording to see how your code changes affect the performance. Instrument Library Choose any of the bundled instruments in the library from low-level CPU, network, or file activity, to advanced graphics and user-event instruments. Zombie Detection Hard-to-find application errors and crashes can be trapped within Instruments when an application tries to access memory no longer available. Source View Drill down through data points, sort to find the most CPU-consuming methods, and view the code directly within the Instruments UI to pinpoint the problem.
- 37. Low-Overhead Sampling Without launching the Instruments application it is possible to begin sampling performance data with a simple keypress, using very low overhead to collect high-fidelity information. Custom Instruments Create your own Instruments using DTrace and the Instruments custom builder. System Trace Taking up very little resources, Instruments records information about all the processes on your system, revealing performance bottlenecks caused as processes interact.
- 38. IOS iOS is the world’s most advanced mobile operating system, continually redefining what people can do with a mobile device. Together, the iOS SDK and Xcode IDE make it easy for developers to create revolutionary mobile apps.
- 39. Cocoa Touch UIKit For iOS, the Cocoa Touch frameworks focus on touch-based interfaces and optimization. The UIKit provides the basic tools and infrastructure you need to implement graphical, event-driven apps in iOS. Foundation The building blocks of any Cocoa app, including collection classes and all the base objects used throughout Cocoa.
- 40. Below is a small sampling of the available frameworks included in Cocoa Touch: Audio and Video Data Management Core Audio Core Data OpenAL SQLite Media Library AV Foundation Networking and Internet Graphics and Bonjour Animation WebKit Core Animation BSD Sockets OpenGL ES Quartz 2D User Applications Address Book Core Location Map Kit Store Kit
- 41. Device Characteristics • An iOS-based device is not a desktop or laptop computer, and an iPhone application is not the same as a desktop application. • Designing software for iOS-based devices requires a state of mind that may or may not be second nature to you. • In particular, if the bulk of your experience lies in developing desktop applications, you should be aware of the significant differences between designing software for a mobile device and for a computer.
- 43. Design Considerations Screen Size is Compact • Use the compact screen size as a motivation to focus the user interface on the essentials. • You don’t have the room to include design elements that aren’t absolutely necessary, and crowding user interface elements makes your application unattractive and difficult to use.
- 44. Video Formats • iPad/iPhone/iPod Supported Video Formats • H.264 video up to 720p, 30 frames per second, Main Profile level 3.1 with AAC-LC audio up to 160 Kbps, 48kHz, stereo audio in .m4v, .mp4, and .mov file formats; • MPEG-4 video, up to 2.5 Mbps, 640 by 480 pixels, 30 frames per second, Simple Profile with AAC-LC audio up to 160 Kbps, 48kHz, stereo audio in .m4v, .mp4, and .mov file formats; • Motion JPEG (M-JPEG) up to 35 Mbps, 1280 by 720 pixels, 30 frames per second, audio in ulaw, PCM stereo audio in .avi file format • http://www.aneesoft.com/tutorials/ipad-supported-video-format.html • http://www.ilounge.com/index.php/articles/comments/the-complete-guide-to-ipo
- 45. TV Formats • iPad Supported TV Formats • Support for 1024 by 768 pixels with Dock Connector to VGA Adapter; • 576p and 480p with Apple Component AV Cable; • 576i and 480i with Apple Composite AV Cable
- 46. Audio Formats • iPad Supported Audio Formats • Frequency response: 20Hz to 20,000Hz • Audio formats supported: HE-AAC (V1), AAC (16 to 320 Kbps), Protected AAC (from iTunes Store), MP3 (16 to 320 Kbps), MP3 VBR, Audible (formats 2, 3, and 4), Apple Lossless, AIFF, and WAV • User-configurable maximum volume limit
- 47. Design Considerations • Memory is Limited • Memory is a critical resource in iOS. • iOS virtual memory model does not include disk swap space, you must take care to avoid allocating more memory than is available on the device • When low-memory conditions occur, iOS warns the running application and may terminate the application if the problem persists. • Be sure your application is responsive to memory usage warnings and cleans up memory in a timely manner. • As you design your application, strive to reduce the application’s memory.
- 48. Design Considerations • People See One Screen at a Time • One of the biggest differences between the iOS environment and the computer environment is the window paradigm. With the exceptions of some modal views, users see a single application screen at a time on an iOS-based device. iPhone applications can contain as many different screens as necessary, but users access and see them sequentially, not simultaneously. • If the desktop version of your application requires users to see several windows simultaneously, you need to decide if there’s a different way users can accomplish the same task in a single screen or a sequence of screens. If not, you should focus your iPhone application on a single subtask of your computer application, instead of trying to replicate a wider feature set.
- 49. People Interact with 1 Application at a Time • Only one application is visible in the foreground at a time. • When people switch from one application to another, the previous application quits and its user interface goes away. • Prior to iOS 4.0, this meant that the quitting application was immediately removed from memory. • In iOS 4.0 and later, the quitting application transitions to the background, where it may or may not continue running. • This feature, called multitasking, allows applications to remain in the background until they are launched again or until they are terminated. • Otherwise you need to save your program data and execution state • Use the Sandbox to do so.
- 50. Onscreen User Help is Minimal • Mobile users don’t have the time to read through a lot of help content before they can use your application. What’s more, you don’t want to give up valuable space to display or store it. A hallmark of the design of iOS-based devices is ease of use, so it’s crucial that you meet users’ expectations and make the use of your application immediately obvious. There are a few things you can do to achieve this: • Use standard controls correctly. Users are familiar with the standard controls they see in the built-in applications, so they already know how to use them in your application. • Be sure the path through the information you present is logical and easy for users to predict. In addition, be sure to provide markers, such as back buttons, that users can use to find out where they are and how to retrace their steps.
- 51. What Are Your Options? • You can create: • An iPhone application, which is an application you develop using the iOS SDK to run natively on iOS-based devices. • Web-only content, including web applications, which are websites that behave like built-in iPhone applications. • A hybrid application, which is an iPhone application that provides access to web content primarily through a web-content viewing area, but includes some iOS user interface elements. • iOS is also the development platform for the iPad and iPod Touch
- 52. iPhone Applications • iPhone applications resemble the built-in applications on iOS-based devices in that they reside on the device itself and take advantage of features of the iOS environment. • Users install iPhone applications on their devices and use them just as they use built-in applications, such as Stocks, Maps, Calculator, and Mail. • An iPhone application is quick to launch and easy to use. • Whether the application enables a task like sending email or provides entertainment to users, it is characterized by responsiveness, simplicity, and a beautiful, streamlined user interface.
- 53. Web-only Content • You have a few different options when it comes to providing web-only content to iOS users:
- 54. Web applications • Webpages that provide a focused solution to a task and conform to certain display guidelines are known as web applications, because they behave similarly to the built-in iOS applications. • A web application, like all web-only content, runs in Safari on iOS; users do not install it on their devices, instead they go to the web application’s URL.
- 55. Optimized WebPages • Webpages that are optimized for Safari on iOS display and operate as designed • Flash Player is not supported in this environment. • Recent announcements lead to an expectation for future support • But for now any elements that rely on unsupported technologies, such as plug-ins, Flash, and Java) are excepted. • In addition, an optimized webpage correctly scales content for the device screen and is often designed to detect when it is being viewed on iOS- based devices, so that it can adjust the content it provides accordingly.
- 56. Compatible WebPages • Webpages that are compatible with Safari on iOS display and operate as designed (with the exception of any elements that rely on unsupported technologies, such as plug-ins, Flash, and Java). • A compatible webpage does not tend to take extra steps to optimize the viewing experience on iOS-based devices, but the device usually displays the page successfully. • If you have an existing website or web application, first ensure that it works well on iOS-based devices. • Also, you should consider creating a custom icon users can put on their Home screens using the Web Clip feature. • In effect, this allows users to keep on their Home Screens a bookmark to your website that looks like a native application icon.
- 57. Hybrid Applications • With iOS, you can create an application that combines features of native applications and webpages. • A hybrid application is a native iPhone application that provides most of its structure and functionality through a web viewing area, but also tends to contain standard iOS user interface elements. • A hybrid application gives users access to web content with an element called a web view (described in “Web Views”). • Precisely how you use a web view in your application is up to you, but it’s important to avoid giving users the impression that your application is merely a mini web browser. • A hybrid application should behave and appear like a native iPhone application; it should not draw attention to the fact that it depends upon web sources.
- 58. Three Application Styles • Productivity • Utility • Immersive
- 59. Productivity Applications • A productivity application enables tasks that are based on the organization and manipulation of detailed information. • People use productivity applications to accomplish important tasks. • Mail is a good example of a productivity application. • Productivity applications often organize user data hierarchically. In this way, people can find information by making progressively more specific choices until they arrive at the desired level of detail. iOS provides table elements that make this process extremely efficient on iOS devices (see “Table Views” for more information about these user interface elements). Figure 1-1 shows an example of this type of data organization. • Productivity applications tend to use multiple views, usually displaying one level of the hierarchy per view.
- 60. Utility Applications • A utility application performs a simple task that requires a minimum of user input. • People open a utility application to see a quick summary of information or to perform a simple task on a limited number of objects. • The Weather application is a good example of a utility application because it displays a narrowly focused amount of information in an easy-to-scan summary. • A utility application tends to organize information into a flattened list of items; users do not usually need to drill down through a hierarchy of information.
- 61. Weather App
- 62. Immersive Applications • An immersive application offers a full-screen, visually rich environment that’s focused on the content and the user’s experience with that content. • People often use immersive applications to have fun, whether playing a game, viewing media-rich content, or performing a simple task. • Alternatively, an application that replicates the experience of using a bubble level works well in a graphics-rich, full-screen environment, even though it doesn’t fit the definition of a game. • In such an application, as in a game, the user’s focus is on the visual content and the experience, not on the data behind the experience. Figure 1-5 shows an example of an immersive application that replicates an actual experience and enables a simple task.
- 63. Bubble Level App
- 64. Choosing an Application and a Style • Think of an App you might like to develop. • For fun – any topic • For sale – • check the App Store first to see if there are other similar apps. • Study them to see if you can do better. • Try again for a new idea • After hearing about productivity, utility, and immersive application styles, think about the type of information your application displays and the task it enables. • In theory, the type of application you should create is obvious to you and you’re ready to get started; in practice, it’s not always that simple • Remember what we already know about human interface design and add in the new challenges of the mobile device.
- 65. When You Have an Existing Computer Application • Don’t just port it to iOS. • User want to open your application, use it briefly, and move on to something else. If your application relies on the user’s undivided attention for long stretches of time, you need to rethink its structure and goals if you want to bring it to iOS. • Reporting vs Editing • Apply the 80-20 rule to the design of your application. • Focus your iPhone application on the features that meet the needs of the greatest number of people.
Editor's Notes
- iOS supports numerous types of software, ranging from webpages that users view in Safari on iOS to iPhone applications that run natively on iOS-based devices. This chapter outlines the different types of software solutions you can create for iOS-based devices. If you’re new to the platform, be sure to begin with the summary of differences between iOS-based devices and computers given in the first section, “Platform Differences to Keep in Mind.” Although the information in that section is not comprehensive, it touches on the issues you need to be aware of as you design an iPhone application. Then, to help you plan an iPhone application, this chapter describes ways to think about different application styles and the characteristics that define them. This chapter also describes how some of the bundled Mac OS X applications were transformed into versions appropriate for iOS. If you have an existing computer application you’d like to refashion for iOS, understanding this process is key.
- The small, high-resolution screens of iOS-based devices make them powerful display devices that fit into users’ pockets. But that very advantage to users may be challenging to you, the developer, because it means that you must design a user interface that may be very different from those you’re accustomed to designing.
- This document identifies three application styles, based on visual and behavioral characteristics, data model, and user experience. Before you read further, it’s important to emphasize that these varieties are named and described to help you clarify some of your design decisions, not to imply that there is a rigid classification scheme that all iPhone software must follow. Instead, these styles are described to help you see how different approaches can be suitable for different types of information and functionality. Note: Bear in mind that application style does not dictate implementation method. This document focuses on designing native iPhone applications, but the application styles explored here can be implemented in web or hybrid applications for iOS-based devices. As you read about these three application styles, think about how the characteristics of each might enhance your proposed feature set and the overall user experience you plan to deliver in your iPhone application. To help you discover the combination of characteristics that best suit your application, keep the following questions in mind as you learn about different design styles for iPhone applications: What do you expect to be the user’s motivation for using the application? What do you intend to be the user’s experience while using the application? What is the goal or focus of your application? How does your application organize and display the information people care about? Is there a natural organization associated with the main task of the application?
- Typically, each view in a utility application provides the same organization of data and depth of detail, but can be served by a different source. In this way, users can open a single utility application to see similar treatments of multiple subjects. Some utility applications indicate the number of open views; users can navigate through them sequentially, selecting one view after another. The user interaction model for a utility application is very simple: Users open the application to scan a summary of information and, optionally, change the configuration or source of that information. Utility applications may need to support frequent changes to configuration or information source, so they often provide a small set of such options on the back of the main view. Users tap the familiar Info button in the lower-right corner of the main view to see the back. After making adjustments, users tap the Done button to return to the front of the main view. In a utility application, the options on the back of the main view are part of the functioning of the application, not a group of preference-style settings users access once and then rarely, if ever, again. For this reason, utility applications should not supply application-specific settings in the Settings application. Figure 1-4 shows how the Weather application provides configuration options on the back of the main view.
- Figure 1-5 An immersive application doesn’t have to be a game Note: Although applications that launch in landscape orientation should launch so that the Home button is on the right, the Bubble Level application shown above in Figure 1-5 launches in the opposite orientation. This ensures that the physical buttons on the edge of the device don’t interfere with the measurement. See “Starting” for more launch guidelines. An immersive application tends to hide much of the device’s user interface, replacing it with a custom user interface that strengthens the user’s sense of entering the world of the application. Users expect seeking and discovery to be part of the experience of an immersive application, so the use of nonstandard controls is often appropriate. Immersive applications may work with large amounts of data, but they do not usually organize and expose it so that users can view it sequentially or drill down through it. Instead, immersive applications present information in the context of the game-play, story, or experience. Also for this reason, immersive applications often present custom navigational methods that complement the environment, rather than the standard, data-driven methods used in utility or productivity applications. The user interaction model for an immersive application is determined by the experience the application provides. Although it’s not likely that a game would need to offer application-specific settings in Settings, other types of immersive applications might. Immersive applications might also furnish configuration options on the back of the main view.
- Don’t just port it to iOS. People use iOS-based devices very differently than they use desktop and laptop computers, and they have different expectations for the user experience. Remember that people use iOS-based devices while on the go, and often in environments filled with distractions. This generally means that they want to open your application, use it briefly, and move on to something else. If your application relies on the user’s undivided attention for long stretches of time, you need to rethink its structure and goals if you want to bring it to iOS. If your desktop application enables a complex task or set of tasks, examine how people use it in order to find a couple of subtasks they might appreciate being able to accomplish while they’re mobile. For example, a business-oriented application that supports project scheduling, billing, and expense reporting could spawn an iPhone utility application that shows progress summaries for a project, or an iPhone productivity application that allows mobile users to keep track of their business-related expenses. As you think about how to bring ideas from your desktop application to an iPhone application, apply the 80-20 rule to the design of your application. Estimate that the largest percentage of users (at least 80 percent) will use a very limited number of features in an application, while only a small percentage (no more than 20 percent) will use all the features. Then, consider carefully whether you want to load your iPhone application with the power features that only a small percentage of users want. Be aware that a desktop computer application might be the better environment in which to offer those features, and that it’s usually a good idea to focus your iPhone application on the features that meet the needs of the greatest number of people.