SlideShare a Scribd company logo
1 of 11
Download to read offline
Instruction Manual Ver. 0
■ Thank you for purchasing the product.
■ After you read the instruction manual,
please use it.
■ Please keep the instruction manual
for future reference.
● Table of Contents
Name and Use of each part 2~5
Product Installation--------- 6~7
■ Duplication of this product is prohibited.
Product Configuration------- 10
How to Use the Product and Cautions 8~9
Warranty---------------------- 11
Name and Use of Each Part
■ Body
■ Grip
■ Rubber Grip
■ Gender Installation Hole
■ Joint for fixing
grip
■ Body Slide
Button
■ Suction Plate
■ Rubber for
removal body
■ Suction Plate
Holder
■ Grip Slide Holder
■ Body As the main body of the product, it prevents suction plate
from receiving direct sunlight and covers the each part with
neat appearance.
■ Rubber Grip Rubber grips are moved about 10mm up and down and
presses the navigation/the cell phone not to stray from the
subject grip.
■ Gender
Installation
Hole
When user equips the cell phone, the hole is for equipping
charge gender.
■ Body Slide
Button
After equipping the navigation/the cell phone, the button is
for fixing or disengaging it to move back and forth.
■ Suction
Plate Holder
When the navigation cradle is equipped on the dashboard, its
role is to hold the suction plate.
■ Suction
Plate
Device for fixing the cradle on the dashboard.
■ Rubber for
removal
body
This is for reducing the frictional sound from the cradle when
driving.
■ Joint for
fixing grip
Part to joint the body and the grip not to move.
■ Grip Grip is for safely fixing the navigation/the cell phone.
■ Rubber for
removal grip
noise
Part to fix or to move the grip about 100mm up and down.
■ Grip Slide
Holder
Device to reduce the noise from the grip shaking.
■ Rubber for
removal grip noise
Name and Use of Each Part
■ Body As the main body of the product, it prevents suction plate
from receiving direct sunlight and covers the each part with
neat appearance.
■ Rubber Grip Rubber grips are moved about 15mm up and down and
presses the navigation/the cell phone not to stray from the
subject grip.
■ Gender
Installation
Hole
When user equips the cell phone, the hole is for equipping
charge gender.
-2-
■ Body Slide
Button
After equipping the Tablet PC, the button is for fixing or
disengaging it to move back and forth.
■ Suction
Plate Holder
When the navigation cradle is equipped on the dashboard, its
role is to hold the suction plate.
■ Suction
Plate
Device for fixing the cradle on the dashboard.
■ Joint for
fixing grip
Part to joint the body and the grip not to move.
■ Grip Grip is for safely fixing the navigation/the cell phone.
■ Grip Slide
Holder-1 Part to fix or to move the grip about 100mm up and down.
■ Power Supply
The vehicle's power connector (DC IN), navigating and other
devices, the power supply connector (5V, 12V, 5V USB power
supply terminal is composed
Name and Use of Each Part [ Model : HR – P850FTP ]
■ Body
■ Grip
■ Rubber Grip
■ Gender
Installation Hole
■ Grip SLIDE
HOLDER
RELEASE KEY
■ Body Slide
Button
■ Suction Plate
■ Rubber for
removal body
■ Suction
Plate Holder
■ Grip SLIDE
HOLDER
■ Body As the main body of the product, it prevents suction plate
from receiving direct sunlight and covers the each part with
neat appearance.
■ Rubber Grip Rubber grips are moved about 10mm up and down and
presses the navigation/the cell phone not to stray from the
subject grip.■ Gender
Installation
Hole
When user equips the cell phone, the hole is for equipping
charge gender.
■ Body Slide
Button
After equipping the Tablet PC, the button is for fixing or
disengaging it to move back and forth.
■ Suction
Plate Holder
When the navigation cradle is equipped on the dashboard, its
role is to hold the suction plate.
■ Suction
Plate
Device for fixing the cradle on the dashboard.
■ Joint for
fixing grip
Part to joint the body and the grip not to move.
■ Grip Grip is for safely fixing the navigation/the cell phone.
■ Grip Slide
Holder Part to fix or to move the grip about 100mm up and down.
■ Grip SLIDE
HOLDER
RELEASE KEY
Mount and release the grip slide (150mm~200mm)
-2-
HOLD MOVE
Name and Use of Each Part
■ Body As the main body of the product, it prevents suction plate
from receiving direct sunlight and covers the each part with
neat appearance.
■ Rubber Grip Rubber grips are moved about 10mm up and down and
presses the navigation/the cell phone not to stray from the
subject grip.■ Gender
Installation
Hole
When user equips the cell phone, the hole is for equipping
charge gender.
■ Body Slide
Button
After equipping the Tablet PC, the button is for fixing or
disengaging it to move back and forth.
■ Suction
Plate Holder
When the navigation cradle is equipped on the dashboard, its
role is to hold the suction plate.
■ Suction
Plate
Device for fixing the cradle on the dashboard.
■ Joint for
fixing grip
Part to joint the body and the grip not to move.
■ Grip Grip is for safely fixing the navigation/the cell phone.
■ Grip Slide
Holder Part to fix or to move the grip about 100mm up and down.
■ Grip Slide
Holder
release Key
-2-
■ Grip SLIDE
HOLDER
■ Grip
■ Grip SLIDE
HOLDER
RELEASE KEY
■ Body Slide
Button
■ Suction
Plate Holder
■ Rubber Grip
■ Gender
Installation Hole
■ Body
■ Power Supply
The vehicle's power connector (DC IN), navigating and other
devices, the power supply connector (5V, 12V, 5V USB power
supply terminal is composed
■ Power Supply
Mount and release the grip slide (150mm~200mm)
Product Installation
LOCK
RELEASE
-3-
◆ Wipe the place for
installation clean with a wet
cloth or a wipe.
◆ Dry the place perfectly.
◆ Remove the release paper
from the suction plate.
◆ After checking the suction plate
evenly located on the dashboard,
press strongly the body and turn
the holder clockwise to the end.
Keep the Suction Place even
Press Strongly
Suction
Suction
Release
◆ If the suction has been finished
completely, push the body slide
button and pull the grip to the
maximum.
Body Slide Button
30mm
Move
◆ Turn the joint anticlockwise
which is between the body and the
grip to release fixing.
Fixing Release
◆ After positioning at the angle
user wants, turn the joint again to
fix.
Fixing
Press
Remove
Red secondary
release paper
◆ 3M TAPE plate must be attached to the
secondary tape is removed.
Dashboard is attached and flattened on
top. (If you want to move the 3M sus-
plate, please remove 3M sus-plate after
buy new one.)
Product Installation
◆ If the front and rear position of
the grip has been fixed, turn the
grip slide holder anticlockwise at
the bottom of the grip to release
fixing.
◆ Hold the body not to shake, and
move the grip softly up and down
to find the handy position.
◆ After finding the up and down
position, turn the grip slide holder
clockwise at the bottom and fix it.
Release hold
Up and down
100mm
Hold
◆ In the case of installing on the speaker hole or the curved place, attach first the
enclosed metal plate 3M taped, and install the suction plate on the metal plate.
You can see the same effect.
-4-
◆ Release ( P850, P900 )
Push the release botton on grip left slide
◆ Mount ( P850, P900 )
1. Your device put on bottom rubber
2. Push up the grip slide
Side view Front view
-5-
How to Use the Product and Cautions
1. Cradle Suction
1-1 After checking the place on the dashboard for attaching cradle, and wipe cleanly with a wet cloth or a
wipe there.
1-2 Remove the release paper from the cradle suction plate.
1-3 To attach the cradle suction plate on the dashboard, turn the suction plate holder clockwise with
pressing the body strongly.
1-4. If the suction plate holder has been turned to the end, check it to attach perfectly by pulling the
body.
! Cautions
1) In the case of a dust or a foreign body at the place to attach on the dashboard, it prevents the
cradle from attaching perfectly.
2) If the place for attaching the cradle suction plate is not even or having a hole, suction will not
be finished.
3) Adsorptive power is so strong, there can be indentation on the dashboard, but it will be
removed when not in use.
2. Moving Grip Back and Forth
2-1 To move the grip back and forth, first push the body slide button to release the fixing of the body
and the slide.
2-2 With pushing the body slide button, set the holding grip where user wants by moving back and forth.
2-3 If the grip is positioned where user wants, release the body slide button to fix.
! Cautions.
1) If the body slide button is not pushed, the grip will not move.
2) After releasing the body slide button, check the fixing by touching the grip.
4) Check the cradle is attached safely before driving, because the adsorptive power can be
weakened if the suction plate has been left in a high or low temperature for a long time.
5) Suction can not be made on the protruding part such as the speaker hole and the curved place.
3. Adjustment of the Grip Angle
3-1 Turn the joint for fixing grip anticlockwise to release.
3-2 Take the a tablet PC / pads position for user’s convenience.
3-3 If user finds the right place, turn strongly the joint for fixing grip clockwise and fix not to move.
! Cautions
1) If user don’t fix the grip by turning strongly joint for fixing grip, a tablet PC / pads can be
moved.
2) User can also use the hex wrench to fix the joint for fixing grip.
3) If user spins the angle of the grip consistently, tightened part can come loose.
How to Use the Product and Cautions
4. Movement of the grip up and down
4-1 Turn anticlockwise the grip slide holder at the bottom of the grip to release fixing.
4-2 After releasing, hold the body not to shake and move the grip softly up and down.
4-3 After setting the position of the grip, turn the grip slide holder clockwise and fix it not to move.
! Cautions
1) If the grip slide holder doesn’t move easily, just move a little the grip up and down to be
turned completely.
2) If user moves the grip excessively under the grip holder fixed, the product can be damaged.
3) In the case of driving with the grip holder unfixed, noise can be generated by moving.
-6-
6. Maintain the Suction Plate
6-1 In the middle of use, if the adsorptive power weakens for the dust or the foreign body stuck on the
suction plate, just clean it with a wet cloth or a wipe. After natural drying, the adsorptive power can
be kept like the first time.
7. Power Supply ( N800, P900 )
7-1 'IN' in the enclosed display area to connect the car cigarette lighter.
7-2. Products of lower (Blue / Red) LED is light up make sure that
(When it does not light up the LED on the power supply problem, so please contact the call center)
7-3 Their navigation / phone / other device using the voltage (V) and then connect to the right 12V/5V/USB.
12V outputs "5V Navigation" When you connect to the navigation may cause a malfunction.
(Please be sure to check.)
5V output terminals must be connected to a 5V Navigation is turned on.
※ Must buy USB jack for charging
Galaxy tab
- Data cable will not charge.DC
IN
12V
5V
5. Tablet PC Mounting ( P850, P900 )
5-1 Press release button, Pull down grip slide
5-2 Device put on grip slide bottom rubber
5-3 Push up grip slide from bottom to top until the tabletPC is mounted
! Cautions
1) The rubber grip can move about 10mm.
2) Please take notice, the product can fall off for the striking impact.
◈ INPUT : DC 12V ( 3.5Φ Jack )
◈ OUTPUT : DC 5V ( 3.5Φ Jack )
DC 12V ( 3.5Φ Jack )
DC 5V ( USB Port )
◈ Electric Current : 3A
※ If 3A Exceed, your device isn't good used.
제품 구성 목록
-7-
Kropsson mount 1ea
hex wrench 1ea additional sponge for fixing additional rubber for fixing
Suction Compensation Objects : a 3M double-sided tape and a steel will be delivered with being
attached to the product.
3M SUS Plate Cigar jack (N800, P900)
HR-N800 FTP HR-P900 FTPHR-N750 FTP HR-P850 FTP
● This product is manufactured under strict quality control and
inspection processes.
● When this product goes out of order under the normal use of
customer, we will repair it free of charge during the warranty
period.
● Please show us the warranty card when you ask for repair
service .
● Please keep the warranty card securely as it is not reissued.
Product Kropsson Cradle Model
Date of
Manufacture
year month day
Warranty Period A year after date of purchase
Purchased from
Address
Date of
Purchase
Name of
Customer
Customer service : 2F, 100-16, Dodang-dong, Wonmi-gu, Bucheon-
si, Gyeonggi-do, Korea
Tel : + 82 + 32 - 684 – 0463~5 FAX : + 82 + 32 - 684 - 0467
Warranty

More Related Content

Similar to Kropsson install guide2013

Clark cmp20 30 dlg forklift service repair manual #2
Clark cmp20 30 dlg forklift service repair manual #2Clark cmp20 30 dlg forklift service repair manual #2
Clark cmp20 30 dlg forklift service repair manual #2fdhjsekdme
 
Clark cmp20 30 dlg forklift service repair manual #2
Clark cmp20 30 dlg forklift service repair manual #2Clark cmp20 30 dlg forklift service repair manual #2
Clark cmp20 30 dlg forklift service repair manual #2jdfjskekmdme
 
Clark cmc15 20 sl forklift service repair manual
Clark cmc15 20 sl forklift service repair manualClark cmc15 20 sl forklift service repair manual
Clark cmc15 20 sl forklift service repair manualdhjfjkmmmde
 
Clark sf15 20 slc forklift service repair manual
Clark sf15 20 slc forklift service repair manualClark sf15 20 slc forklift service repair manual
Clark sf15 20 slc forklift service repair manualidkkmdmd
 
Clark sf12 20 sdlg forklift service repair manual
Clark sf12 20 sdlg forklift service repair manualClark sf12 20 sdlg forklift service repair manual
Clark sf12 20 sdlg forklift service repair manualdhjfjkmmmde
 
Clark cmp15 20 sdlg forklift service repair manual
Clark cmp15 20 sdlg forklift service repair manualClark cmp15 20 sdlg forklift service repair manual
Clark cmp15 20 sdlg forklift service repair manualdhjfjkmmmde
 
Clark cmc15 20 sl forklift service repair manual
Clark cmc15 20 sl forklift service repair manualClark cmc15 20 sl forklift service repair manual
Clark cmc15 20 sl forklift service repair manualidkkmdmd
 
Clark sf12 20 sdlg forklift service repair manual
Clark sf12 20 sdlg forklift service repair manualClark sf12 20 sdlg forklift service repair manual
Clark sf12 20 sdlg forklift service repair manualfhsejkdkme
 
Clark sf12 20 sdlg forklift service repair manual
Clark sf12 20 sdlg forklift service repair manualClark sf12 20 sdlg forklift service repair manual
Clark sf12 20 sdlg forklift service repair manualidkkmdmd
 
Clark cmc15 20 sl forklift service repair manual
Clark cmc15 20 sl forklift service repair manualClark cmc15 20 sl forklift service repair manual
Clark cmc15 20 sl forklift service repair manualfhsejkdkme
 
Clark sf15 20 slc forklift service repair manual
Clark sf15 20 slc forklift service repair manualClark sf15 20 slc forklift service repair manual
Clark sf15 20 slc forklift service repair manualdhjfjkmmmde
 
Clark sf15 20 slc forklift service repair manual
Clark sf15 20 slc forklift service repair manualClark sf15 20 slc forklift service repair manual
Clark sf15 20 slc forklift service repair manualfhsejkdkme
 
Clark cmp15 20 sdlg forklift service repair manual
Clark cmp15 20 sdlg forklift service repair manualClark cmp15 20 sdlg forklift service repair manual
Clark cmp15 20 sdlg forklift service repair manualidkkmdmd
 
Clark cmp15 20 sdlg forklift service repair manual
Clark cmp15 20 sdlg forklift service repair manualClark cmp15 20 sdlg forklift service repair manual
Clark cmp15 20 sdlg forklift service repair manualfhsejkdkme
 
Chapter 5 : Clutches and Brakes
Chapter 5 : Clutches and BrakesChapter 5 : Clutches and Brakes
Chapter 5 : Clutches and BrakesAriefHaekal
 
Clark cmp20 30 dlg forklift service repair manual #2
Clark cmp20 30 dlg forklift service repair manual #2Clark cmp20 30 dlg forklift service repair manual #2
Clark cmp20 30 dlg forklift service repair manual #2fjkskefksmeme
 
Clark cmp40 50s dl forklift service repair manual
Clark cmp40 50s dl forklift service repair manualClark cmp40 50s dl forklift service repair manual
Clark cmp40 50s dl forklift service repair manualdhjfjkmmmde
 
Clark sf35 45 dl forklift service repair manual
Clark sf35 45 dl forklift service repair manualClark sf35 45 dl forklift service repair manual
Clark sf35 45 dl forklift service repair manualfjskksmem
 
Clark sf35 45 dl forklift service repair manual
Clark sf35 45 dl forklift service repair manualClark sf35 45 dl forklift service repair manual
Clark sf35 45 dl forklift service repair manualdhjfjkmmmde
 
Clark cmp40 50s dl forklift service repair manual
Clark cmp40 50s dl forklift service repair manualClark cmp40 50s dl forklift service repair manual
Clark cmp40 50s dl forklift service repair manualfjskksmem
 

Similar to Kropsson install guide2013 (20)

Clark cmp20 30 dlg forklift service repair manual #2
Clark cmp20 30 dlg forklift service repair manual #2Clark cmp20 30 dlg forklift service repair manual #2
Clark cmp20 30 dlg forklift service repair manual #2
 
Clark cmp20 30 dlg forklift service repair manual #2
Clark cmp20 30 dlg forklift service repair manual #2Clark cmp20 30 dlg forklift service repair manual #2
Clark cmp20 30 dlg forklift service repair manual #2
 
Clark cmc15 20 sl forklift service repair manual
Clark cmc15 20 sl forklift service repair manualClark cmc15 20 sl forklift service repair manual
Clark cmc15 20 sl forklift service repair manual
 
Clark sf15 20 slc forklift service repair manual
Clark sf15 20 slc forklift service repair manualClark sf15 20 slc forklift service repair manual
Clark sf15 20 slc forklift service repair manual
 
Clark sf12 20 sdlg forklift service repair manual
Clark sf12 20 sdlg forklift service repair manualClark sf12 20 sdlg forklift service repair manual
Clark sf12 20 sdlg forklift service repair manual
 
Clark cmp15 20 sdlg forklift service repair manual
Clark cmp15 20 sdlg forklift service repair manualClark cmp15 20 sdlg forklift service repair manual
Clark cmp15 20 sdlg forklift service repair manual
 
Clark cmc15 20 sl forklift service repair manual
Clark cmc15 20 sl forklift service repair manualClark cmc15 20 sl forklift service repair manual
Clark cmc15 20 sl forklift service repair manual
 
Clark sf12 20 sdlg forklift service repair manual
Clark sf12 20 sdlg forklift service repair manualClark sf12 20 sdlg forklift service repair manual
Clark sf12 20 sdlg forklift service repair manual
 
Clark sf12 20 sdlg forklift service repair manual
Clark sf12 20 sdlg forklift service repair manualClark sf12 20 sdlg forklift service repair manual
Clark sf12 20 sdlg forklift service repair manual
 
Clark cmc15 20 sl forklift service repair manual
Clark cmc15 20 sl forklift service repair manualClark cmc15 20 sl forklift service repair manual
Clark cmc15 20 sl forklift service repair manual
 
Clark sf15 20 slc forklift service repair manual
Clark sf15 20 slc forklift service repair manualClark sf15 20 slc forklift service repair manual
Clark sf15 20 slc forklift service repair manual
 
Clark sf15 20 slc forklift service repair manual
Clark sf15 20 slc forklift service repair manualClark sf15 20 slc forklift service repair manual
Clark sf15 20 slc forklift service repair manual
 
Clark cmp15 20 sdlg forklift service repair manual
Clark cmp15 20 sdlg forklift service repair manualClark cmp15 20 sdlg forklift service repair manual
Clark cmp15 20 sdlg forklift service repair manual
 
Clark cmp15 20 sdlg forklift service repair manual
Clark cmp15 20 sdlg forklift service repair manualClark cmp15 20 sdlg forklift service repair manual
Clark cmp15 20 sdlg forklift service repair manual
 
Chapter 5 : Clutches and Brakes
Chapter 5 : Clutches and BrakesChapter 5 : Clutches and Brakes
Chapter 5 : Clutches and Brakes
 
Clark cmp20 30 dlg forklift service repair manual #2
Clark cmp20 30 dlg forklift service repair manual #2Clark cmp20 30 dlg forklift service repair manual #2
Clark cmp20 30 dlg forklift service repair manual #2
 
Clark cmp40 50s dl forklift service repair manual
Clark cmp40 50s dl forklift service repair manualClark cmp40 50s dl forklift service repair manual
Clark cmp40 50s dl forklift service repair manual
 
Clark sf35 45 dl forklift service repair manual
Clark sf35 45 dl forklift service repair manualClark sf35 45 dl forklift service repair manual
Clark sf35 45 dl forklift service repair manual
 
Clark sf35 45 dl forklift service repair manual
Clark sf35 45 dl forklift service repair manualClark sf35 45 dl forklift service repair manual
Clark sf35 45 dl forklift service repair manual
 
Clark cmp40 50s dl forklift service repair manual
Clark cmp40 50s dl forklift service repair manualClark cmp40 50s dl forklift service repair manual
Clark cmp40 50s dl forklift service repair manual
 

More from jumiss

Zilog manual eng(1)
Zilog manual eng(1)Zilog manual eng(1)
Zilog manual eng(1)jumiss
 
Zi log quickguide_eng
Zi log quickguide_engZi log quickguide_eng
Zi log quickguide_engjumiss
 
Pb 100 영문
Pb 100 영문Pb 100 영문
Pb 100 영문jumiss
 
Brochure 32 page-english
Brochure 32 page-englishBrochure 32 page-english
Brochure 32 page-englishjumiss
 
Rex karaⅱ eng
Rex karaⅱ engRex karaⅱ eng
Rex karaⅱ engjumiss
 
Nfc manual
Nfc manualNfc manual
Nfc manualjumiss
 
Rex karaⅱ eng
Rex karaⅱ engRex karaⅱ eng
Rex karaⅱ engjumiss
 
rex-kara II Brochure 32 page-english
rex-kara II Brochure 32 page-englishrex-kara II Brochure 32 page-english
rex-kara II Brochure 32 page-englishjumiss
 
Wiz manual(chn)
Wiz manual(chn)Wiz manual(chn)
Wiz manual(chn)jumiss
 
Wiz manual(kor)
Wiz manual(kor)Wiz manual(kor)
Wiz manual(kor)jumiss
 
Wiz manual(usa)
Wiz manual(usa)Wiz manual(usa)
Wiz manual(usa)jumiss
 
Hud mx2 en
Hud mx2 enHud mx2 en
Hud mx2 enjumiss
 
Kropsson cd 850
Kropsson cd 850Kropsson cd 850
Kropsson cd 850jumiss
 
Kropsson cd 750max
Kropsson cd 750maxKropsson cd 750max
Kropsson cd 750maxjumiss
 
Kropsson cd aero
Kropsson cd aeroKropsson cd aero
Kropsson cd aerojumiss
 
Fv726 user manual (eng)
Fv726 user manual (eng)Fv726 user manual (eng)
Fv726 user manual (eng)jumiss
 
Fv726 user manual (eng)
Fv726 user manual (eng)Fv726 user manual (eng)
Fv726 user manual (eng)jumiss
 
Km s200 manual-20110922
Km s200 manual-20110922Km s200 manual-20110922
Km s200 manual-20110922jumiss
 
Nexusone userguide
Nexusone userguideNexusone userguide
Nexusone userguidejumiss
 
Iroad manual eng_20120815
Iroad manual eng_20120815Iroad manual eng_20120815
Iroad manual eng_20120815jumiss
 

More from jumiss (20)

Zilog manual eng(1)
Zilog manual eng(1)Zilog manual eng(1)
Zilog manual eng(1)
 
Zi log quickguide_eng
Zi log quickguide_engZi log quickguide_eng
Zi log quickguide_eng
 
Pb 100 영문
Pb 100 영문Pb 100 영문
Pb 100 영문
 
Brochure 32 page-english
Brochure 32 page-englishBrochure 32 page-english
Brochure 32 page-english
 
Rex karaⅱ eng
Rex karaⅱ engRex karaⅱ eng
Rex karaⅱ eng
 
Nfc manual
Nfc manualNfc manual
Nfc manual
 
Rex karaⅱ eng
Rex karaⅱ engRex karaⅱ eng
Rex karaⅱ eng
 
rex-kara II Brochure 32 page-english
rex-kara II Brochure 32 page-englishrex-kara II Brochure 32 page-english
rex-kara II Brochure 32 page-english
 
Wiz manual(chn)
Wiz manual(chn)Wiz manual(chn)
Wiz manual(chn)
 
Wiz manual(kor)
Wiz manual(kor)Wiz manual(kor)
Wiz manual(kor)
 
Wiz manual(usa)
Wiz manual(usa)Wiz manual(usa)
Wiz manual(usa)
 
Hud mx2 en
Hud mx2 enHud mx2 en
Hud mx2 en
 
Kropsson cd 850
Kropsson cd 850Kropsson cd 850
Kropsson cd 850
 
Kropsson cd 750max
Kropsson cd 750maxKropsson cd 750max
Kropsson cd 750max
 
Kropsson cd aero
Kropsson cd aeroKropsson cd aero
Kropsson cd aero
 
Fv726 user manual (eng)
Fv726 user manual (eng)Fv726 user manual (eng)
Fv726 user manual (eng)
 
Fv726 user manual (eng)
Fv726 user manual (eng)Fv726 user manual (eng)
Fv726 user manual (eng)
 
Km s200 manual-20110922
Km s200 manual-20110922Km s200 manual-20110922
Km s200 manual-20110922
 
Nexusone userguide
Nexusone userguideNexusone userguide
Nexusone userguide
 
Iroad manual eng_20120815
Iroad manual eng_20120815Iroad manual eng_20120815
Iroad manual eng_20120815
 

Kropsson install guide2013

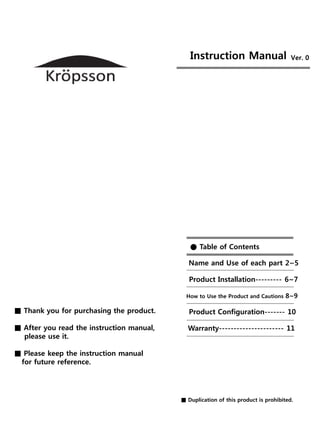
  • 1. Instruction Manual Ver. 0 ■ Thank you for purchasing the product. ■ After you read the instruction manual, please use it. ■ Please keep the instruction manual for future reference. ● Table of Contents Name and Use of each part 2~5 Product Installation--------- 6~7 ■ Duplication of this product is prohibited. Product Configuration------- 10 How to Use the Product and Cautions 8~9 Warranty---------------------- 11
  • 2. Name and Use of Each Part ■ Body ■ Grip ■ Rubber Grip ■ Gender Installation Hole ■ Joint for fixing grip ■ Body Slide Button ■ Suction Plate ■ Rubber for removal body ■ Suction Plate Holder ■ Grip Slide Holder ■ Body As the main body of the product, it prevents suction plate from receiving direct sunlight and covers the each part with neat appearance. ■ Rubber Grip Rubber grips are moved about 10mm up and down and presses the navigation/the cell phone not to stray from the subject grip. ■ Gender Installation Hole When user equips the cell phone, the hole is for equipping charge gender. ■ Body Slide Button After equipping the navigation/the cell phone, the button is for fixing or disengaging it to move back and forth. ■ Suction Plate Holder When the navigation cradle is equipped on the dashboard, its role is to hold the suction plate. ■ Suction Plate Device for fixing the cradle on the dashboard. ■ Rubber for removal body This is for reducing the frictional sound from the cradle when driving. ■ Joint for fixing grip Part to joint the body and the grip not to move. ■ Grip Grip is for safely fixing the navigation/the cell phone. ■ Rubber for removal grip noise Part to fix or to move the grip about 100mm up and down. ■ Grip Slide Holder Device to reduce the noise from the grip shaking. ■ Rubber for removal grip noise
  • 3. Name and Use of Each Part ■ Body As the main body of the product, it prevents suction plate from receiving direct sunlight and covers the each part with neat appearance. ■ Rubber Grip Rubber grips are moved about 15mm up and down and presses the navigation/the cell phone not to stray from the subject grip. ■ Gender Installation Hole When user equips the cell phone, the hole is for equipping charge gender. -2- ■ Body Slide Button After equipping the Tablet PC, the button is for fixing or disengaging it to move back and forth. ■ Suction Plate Holder When the navigation cradle is equipped on the dashboard, its role is to hold the suction plate. ■ Suction Plate Device for fixing the cradle on the dashboard. ■ Joint for fixing grip Part to joint the body and the grip not to move. ■ Grip Grip is for safely fixing the navigation/the cell phone. ■ Grip Slide Holder-1 Part to fix or to move the grip about 100mm up and down. ■ Power Supply The vehicle's power connector (DC IN), navigating and other devices, the power supply connector (5V, 12V, 5V USB power supply terminal is composed
  • 4. Name and Use of Each Part [ Model : HR – P850FTP ] ■ Body ■ Grip ■ Rubber Grip ■ Gender Installation Hole ■ Grip SLIDE HOLDER RELEASE KEY ■ Body Slide Button ■ Suction Plate ■ Rubber for removal body ■ Suction Plate Holder ■ Grip SLIDE HOLDER ■ Body As the main body of the product, it prevents suction plate from receiving direct sunlight and covers the each part with neat appearance. ■ Rubber Grip Rubber grips are moved about 10mm up and down and presses the navigation/the cell phone not to stray from the subject grip.■ Gender Installation Hole When user equips the cell phone, the hole is for equipping charge gender. ■ Body Slide Button After equipping the Tablet PC, the button is for fixing or disengaging it to move back and forth. ■ Suction Plate Holder When the navigation cradle is equipped on the dashboard, its role is to hold the suction plate. ■ Suction Plate Device for fixing the cradle on the dashboard. ■ Joint for fixing grip Part to joint the body and the grip not to move. ■ Grip Grip is for safely fixing the navigation/the cell phone. ■ Grip Slide Holder Part to fix or to move the grip about 100mm up and down. ■ Grip SLIDE HOLDER RELEASE KEY Mount and release the grip slide (150mm~200mm) -2- HOLD MOVE
  • 5. Name and Use of Each Part ■ Body As the main body of the product, it prevents suction plate from receiving direct sunlight and covers the each part with neat appearance. ■ Rubber Grip Rubber grips are moved about 10mm up and down and presses the navigation/the cell phone not to stray from the subject grip.■ Gender Installation Hole When user equips the cell phone, the hole is for equipping charge gender. ■ Body Slide Button After equipping the Tablet PC, the button is for fixing or disengaging it to move back and forth. ■ Suction Plate Holder When the navigation cradle is equipped on the dashboard, its role is to hold the suction plate. ■ Suction Plate Device for fixing the cradle on the dashboard. ■ Joint for fixing grip Part to joint the body and the grip not to move. ■ Grip Grip is for safely fixing the navigation/the cell phone. ■ Grip Slide Holder Part to fix or to move the grip about 100mm up and down. ■ Grip Slide Holder release Key -2- ■ Grip SLIDE HOLDER ■ Grip ■ Grip SLIDE HOLDER RELEASE KEY ■ Body Slide Button ■ Suction Plate Holder ■ Rubber Grip ■ Gender Installation Hole ■ Body ■ Power Supply The vehicle's power connector (DC IN), navigating and other devices, the power supply connector (5V, 12V, 5V USB power supply terminal is composed ■ Power Supply Mount and release the grip slide (150mm~200mm)
  • 6. Product Installation LOCK RELEASE -3- ◆ Wipe the place for installation clean with a wet cloth or a wipe. ◆ Dry the place perfectly. ◆ Remove the release paper from the suction plate. ◆ After checking the suction plate evenly located on the dashboard, press strongly the body and turn the holder clockwise to the end. Keep the Suction Place even Press Strongly Suction Suction Release ◆ If the suction has been finished completely, push the body slide button and pull the grip to the maximum. Body Slide Button 30mm Move ◆ Turn the joint anticlockwise which is between the body and the grip to release fixing. Fixing Release ◆ After positioning at the angle user wants, turn the joint again to fix. Fixing Press Remove Red secondary release paper ◆ 3M TAPE plate must be attached to the secondary tape is removed. Dashboard is attached and flattened on top. (If you want to move the 3M sus- plate, please remove 3M sus-plate after buy new one.)
  • 7. Product Installation ◆ If the front and rear position of the grip has been fixed, turn the grip slide holder anticlockwise at the bottom of the grip to release fixing. ◆ Hold the body not to shake, and move the grip softly up and down to find the handy position. ◆ After finding the up and down position, turn the grip slide holder clockwise at the bottom and fix it. Release hold Up and down 100mm Hold ◆ In the case of installing on the speaker hole or the curved place, attach first the enclosed metal plate 3M taped, and install the suction plate on the metal plate. You can see the same effect. -4- ◆ Release ( P850, P900 ) Push the release botton on grip left slide ◆ Mount ( P850, P900 ) 1. Your device put on bottom rubber 2. Push up the grip slide Side view Front view
  • 8. -5- How to Use the Product and Cautions 1. Cradle Suction 1-1 After checking the place on the dashboard for attaching cradle, and wipe cleanly with a wet cloth or a wipe there. 1-2 Remove the release paper from the cradle suction plate. 1-3 To attach the cradle suction plate on the dashboard, turn the suction plate holder clockwise with pressing the body strongly. 1-4. If the suction plate holder has been turned to the end, check it to attach perfectly by pulling the body. ! Cautions 1) In the case of a dust or a foreign body at the place to attach on the dashboard, it prevents the cradle from attaching perfectly. 2) If the place for attaching the cradle suction plate is not even or having a hole, suction will not be finished. 3) Adsorptive power is so strong, there can be indentation on the dashboard, but it will be removed when not in use. 2. Moving Grip Back and Forth 2-1 To move the grip back and forth, first push the body slide button to release the fixing of the body and the slide. 2-2 With pushing the body slide button, set the holding grip where user wants by moving back and forth. 2-3 If the grip is positioned where user wants, release the body slide button to fix. ! Cautions. 1) If the body slide button is not pushed, the grip will not move. 2) After releasing the body slide button, check the fixing by touching the grip. 4) Check the cradle is attached safely before driving, because the adsorptive power can be weakened if the suction plate has been left in a high or low temperature for a long time. 5) Suction can not be made on the protruding part such as the speaker hole and the curved place. 3. Adjustment of the Grip Angle 3-1 Turn the joint for fixing grip anticlockwise to release. 3-2 Take the a tablet PC / pads position for user’s convenience. 3-3 If user finds the right place, turn strongly the joint for fixing grip clockwise and fix not to move. ! Cautions 1) If user don’t fix the grip by turning strongly joint for fixing grip, a tablet PC / pads can be moved. 2) User can also use the hex wrench to fix the joint for fixing grip. 3) If user spins the angle of the grip consistently, tightened part can come loose.
  • 9. How to Use the Product and Cautions 4. Movement of the grip up and down 4-1 Turn anticlockwise the grip slide holder at the bottom of the grip to release fixing. 4-2 After releasing, hold the body not to shake and move the grip softly up and down. 4-3 After setting the position of the grip, turn the grip slide holder clockwise and fix it not to move. ! Cautions 1) If the grip slide holder doesn’t move easily, just move a little the grip up and down to be turned completely. 2) If user moves the grip excessively under the grip holder fixed, the product can be damaged. 3) In the case of driving with the grip holder unfixed, noise can be generated by moving. -6- 6. Maintain the Suction Plate 6-1 In the middle of use, if the adsorptive power weakens for the dust or the foreign body stuck on the suction plate, just clean it with a wet cloth or a wipe. After natural drying, the adsorptive power can be kept like the first time. 7. Power Supply ( N800, P900 ) 7-1 'IN' in the enclosed display area to connect the car cigarette lighter. 7-2. Products of lower (Blue / Red) LED is light up make sure that (When it does not light up the LED on the power supply problem, so please contact the call center) 7-3 Their navigation / phone / other device using the voltage (V) and then connect to the right 12V/5V/USB. 12V outputs "5V Navigation" When you connect to the navigation may cause a malfunction. (Please be sure to check.) 5V output terminals must be connected to a 5V Navigation is turned on. ※ Must buy USB jack for charging Galaxy tab - Data cable will not charge.DC IN 12V 5V 5. Tablet PC Mounting ( P850, P900 ) 5-1 Press release button, Pull down grip slide 5-2 Device put on grip slide bottom rubber 5-3 Push up grip slide from bottom to top until the tabletPC is mounted ! Cautions 1) The rubber grip can move about 10mm. 2) Please take notice, the product can fall off for the striking impact. ◈ INPUT : DC 12V ( 3.5Φ Jack ) ◈ OUTPUT : DC 5V ( 3.5Φ Jack ) DC 12V ( 3.5Φ Jack ) DC 5V ( USB Port ) ◈ Electric Current : 3A ※ If 3A Exceed, your device isn't good used.
  • 10. 제품 구성 목록 -7- Kropsson mount 1ea hex wrench 1ea additional sponge for fixing additional rubber for fixing Suction Compensation Objects : a 3M double-sided tape and a steel will be delivered with being attached to the product. 3M SUS Plate Cigar jack (N800, P900) HR-N800 FTP HR-P900 FTPHR-N750 FTP HR-P850 FTP
  • 11. ● This product is manufactured under strict quality control and inspection processes. ● When this product goes out of order under the normal use of customer, we will repair it free of charge during the warranty period. ● Please show us the warranty card when you ask for repair service . ● Please keep the warranty card securely as it is not reissued. Product Kropsson Cradle Model Date of Manufacture year month day Warranty Period A year after date of purchase Purchased from Address Date of Purchase Name of Customer Customer service : 2F, 100-16, Dodang-dong, Wonmi-gu, Bucheon- si, Gyeonggi-do, Korea Tel : + 82 + 32 - 684 – 0463~5 FAX : + 82 + 32 - 684 - 0467 Warranty