SlideShare a Scribd company logo
1 of 57
Download to read offline
CF/CMtsaM&sissahC
Service Manual
FD40N EF12B-00011-up
FD45N EF19D-50001-up
FD50CN EF19D-80001-up
FD50N EF28C-50001-up
FD55N EF28C-80001-up
FG40N EF40-00011-up
FG45N EF29D-50001-up
FG50CN EF29D-80001-up
FG50N EF33C-50001-up
FG55N EF33C-80001-up
99739-57100
For use with S6S and TB45 Engine
Service Manuals.
1
Pub. No. 99739-57100
FOREWORD
This service manual is a guide for servicing Mitsubishi Forklift Trucks. For your convenience the instructions are
grouped by systems as a ready reference.
The long productive life of your lift truck(s) depends on regular and proper servicing. Servicing consistent with what
you will learn by reading this service manual.
Read the respective sections of this manual carefully and familiarize yourself with all of the components before
attempting to start a test, repair or rebuild job.
The descriptions, illustrations and specifications contained in this manual are for trucks with serial numbers in effect
at the time of printing.
Mitsubishi Forklift Trucks reserves the right to change specifications or designs without notice and without incurring
obligations.
The trucks listed in this manual are powered by TB45 gasoline engines or S6S diesel engines.
For engine servicing, please refer to the applicable engine service manual.
TB45 Gasoline engine
S6S Diesel engine
<Safety Related Signs>
Indicates a potentially hazardous situation which, if not
avoided, could result in death or serious injury.
Indicates a potentially hazardous situation which, if not
avoided, may result in minor or moderate injury, or damage
to your machine.
Indicates a condition that can cause damage to, or shorten
service life of, the machine.
WARNING
CAUTION
NOTE
2
SAFETY
The proper and safe lubrication and maintenance
for these lift trucks, recommended by Mitsubishi
Forklift Trucks, are outlined in the OPERATION &
MAINTENANCE MANUAL.
Read and understand the OPERATION & MAINTE-
NANCE MANUAL before performing any lubrica-
tion or maintenance on these trucks.
Improper performance of lubrication or mainte-
nance procedures is dangerous and could result
in injury or death.
The serviceman or mechanic may be unfamiliar with
many of the systems on this truck. This makes it
important to use caution when performing service
work. A knowledge of the system and/or components
is important before the removal or disassembly of any
component.
Because of the size of some of the truck components,
the serviceman or mechanic should check the weights
noted in this Manual. Use proper lifting procedures
when removing any components.
Following is a list of basic precautions that should
always be observed.
(1) Read and understand all warning plates and
decals on the truck before operating, lubricating or
repairing the product.
(2) Always wear protective glasses and protective
shoes when working around trucks. In particular,
wear protective glasses when pounding on any
part of the truck or its attachments with a hammer
or sledge. Use welders gloves, hood/goggles,
apron and other protective clothing appropriate to
the welding job being performed. Do not wear
loose fitting or torn clothing. Remove all rings from
fingers when working on machinery.
(3) Do not work on any truck that is supported only by
lift jacks or a hoist. Always use blocks or jack
stands to support the truck before performing any
disassembly.
(4) Lower the forks or other implements to the ground
before performing any work on the truck. If this
cannot be done, make sure the forks or other
implements are blocked correctly to prevent them
from dropping unexpectedly.
Do not operate these trucks unless you have read
and understood the instructions in the OPERA-
TION & MAINTENANCE MANUAL. Improper truck
operation is dangerous and could result in injury
or death.
(5) Use steps and grab handles (if applicable) when
mounting or dismounting a truck. Clean any mud
or debris from steps, walkways or work platforms
before using. Always face truck when using steps,
ladders and walkways. When it is not possible to
use the designed access system, provide ladders,
scaffolds, or work platforms to perform safe repair
operations.
(6) To avoid back injury, use a hoist when lifting com-
ponents which weigh 23 kg or more. Make sure all
chains, hooks, slings, etc., are in good condition
and are of the correct capacity. Be sure hooks are
positioned correctly. Lifting eyes are not to be side
loaded during a lifting operation.
(7) To avoid burns, be alert for hot parts on trucks
which have just been stopped and hot fluids in
lines, tubes and compartments.
(8) Be careful when removing cover plates. Gradually
back off the last two bolts or nuts located at oppo-
site ends of the cover or device and pry cover
loose to relieve any spring or other pressure,
before removing the last two bolts or nuts com-
pletely.
(9) Be careful when removing filler caps, breathers
and plugs on the truck. Hold a rag over the cap or
plug to prevent being sprayed or splashed by liq-
uids under pressure. The danger is even greater if
the truck has just been stopped because fluids
can be hot.
(10)Always use tools that are in good condition and
be sure you understand how to use them before
performing any service work.
(11)Reinstall all fasteners with same part number. Do
not use a lesser quality fastener if replacements
are necessary.
(12)If possible, make all repairs with the truck parked
on a level, hard surface. Block truck so it does not
roll while working on or under truck.
3
(13)Before starting to work on truck, hang "Do not
Operate" tag in the Operator's Compartment.
(14)Repairs, which require welding, should be per-
formed only with the benefit of the appropriate ref-
erence information and by personnel adequately
trained and knowledgeable in welding proce-
dures. Determine type of metal being welded and
select correct welding procedure and electrodes,
rods or wire to provide a weld metal strength
equivalent at least to that of parent metal.
(15)Do not damage wiring during removal operations.
Reinstall the wiring so it is not damaged nor will it
be damaged in operation by contacting sharp cor-
ners, or by rubbing against some object or hot
surface. Place wiring away from oil pipe.
(16)Be sure all protective devices including guards
and shields are properly installed and functioning
correctly before starting a repair. If a guard or
shield must be removed to perform the repair
work, use extra caution.
(17)Always support the mast and carriage to keep
carriage or attachments raised when maintenance
or repair work is performed, which requires the
mast in the raised position.
(18)Loose or damaged fuel, lubricant and hydraulic
lines, tubes and hoses could cause fires. Do not
bend or strike high pressure lines or install ones
which have been bent or damaged. Inspect lines,
tubes and hoses carefully. Do not check for leaks
with your hands. Pin hole (very small) leaks could
result in a high velocity oil stream that will be invis-
ible close to the hose. This oil could penetrate the
skin and cause personal injury. Use cardboard or
paper to locate pin hole leaks.
(19)Tighten connections to the correct torque. Make
sure that all heat shields, clamps and guards are
installed correctly to avoid excessive heat, vibra-
tion or rubbing against other parts during opera-
tion. Shields that protect against oil spray onto hot
exhaust components in event of a line, tube or
seal failure, must be installed correctly.
(20)Relieve all pressure in air, oil or water systems
before any lines, fittings or related items are dis-
connected or removed. Always make sure all
raised components are blocked correctly and be
alert for possible pressure when disconnecting
any device from a system that utilizes pressure.
(21)Do not operate a truck if any rotating part is dam-
aged or contacts any other part during operation.
Any high speed rotating component that has been
damaged or altered should be checked for bal-
ance before reusing.
4
HOW TO USE THIS MANUAL
Lift truck model covered in this manual
MC Truck (Mechanical Control System)
Mechanically controlled hydraulic system (conventional lever system)
FC Truck (Finger-tip Control System)
Electronically controlled hydraulic system
Gasoline-Engine Trucks (FG)....... Trucks Equipped with TB45 Gasoline Engine
Diesel-Engine Trucks (FD) .................... Trucks Equipped with S6S Diesel Engine
Powershift Trucks................................... Trucks Equipped with Powershift Transmission
FC lever box
Lever
VCM Controller
Electric wiring
Flow regulator valve
Electromagnetic control valve
Control valve
MC Truck
FC Truck
216300
5
HOW TO USE THUS MANUAL(continued)
Disassembly diagram(example)
Suggestions for Disassembly
Output shaft, Removing
Remove output shaft using a special tool.
Service Data
1
2
213445
Sequence
1 Cover, Bolt, Washer (part name)
2 Out put shaft assembly (part name)
213446
Unit:mm(in.)
Gear Backlash
A
0.11 to 0.28
(0.004 to 0.011)
B
0.5
(0.012)
A: Standard value B: Repair or Service Limit
6
Symbols and abbreviations
Units
(1) SI Units are used in this manual.
(2) The following table shows the conversion of SI
unit and customary unit.
OP Option
R1/4 Taper pipe thread (external) 1/4 inch (formerly PT1/4)
RC1/8 Taper pipe thread (external) 1/4 inch (formerly PT1/8)
G1/4A Straight pipe thread (external) 1/4 inch (formerly PF1/4-A)
Rp1/8 Straight pipe thread (internal) 1/8 inch (formerly PS1/8)
Item SI unit Customary unit
Force
1 N 0.102 kgf
1 lbf 0.4536 kgf
Pressure
1 kPa 0.0102 kgf/cm2
1 psi 0.0703 kgf/cm2
Torque
1 N·m 0.102 kgf·m
1 lbf·ft 0.1383 kgf·m
CHAPTER INDEX
CHAPTER INDEX
CHAPTER INDEX Items
GENERAL INFORMATION
Truck Models Covered, Serial Number Locations,
Dimensions, Technical Data
COOLING SYSTEM Fan Belt Removal and Installation, Fan Belt Tension
ELECTRICAL SYSTEM
Console Box, Chassis Electrical Devices,
Battery Maintenance, Electrical Schematic
CONTROLLERS
Main Functions of Controller, Input/Output Monitor,
Error Codes and Troubleshooting
POWER TRAIN Removal and Installation of Power Line
POWERSHIFT TRANSMISSION
Torque Converter,
Singe Speed Powershift Transmission Control Valve,
Automatic Two-Speed Transmission
FRONT AXLE AND
REDUCTION DIFFERENTIAL
Front Tire, Front Axle, Reduction, Differential
REAR AXLE Rear Axle, Rear Tire
BRAKE SYSTEM Master Cylinder, Wheel Brake, Brake Booster
STEERING SYSTEM Steering Gear, Power Cylinder, Flow Divider
HYDRAULIC SYSTEM
Tank, Pump, Control Valve, Lift and Tilt Cylinders,
Flow Regulator Valve, Down Safety Valve
MAST AND FORKS Simplex and Duplex Masts, Triplex Mast
SERVICE DATA
Maintenance Standard, Maintenance Schedule,
Periodic Replacement Parts, Lubrication Instruction,
Special Tool Needed
1
2
3
4
5
6
7
8
9
10
11
12
13
1
Chapter 1 GENERAL INFORMATION
1. Model View............................................................................................... 1-1
2. Lift Truck Models Covered..................................................................... 1-2
3. Serial Number Locations........................................................................ 1-3
4. Dimensions.............................................................................................. 1-4
5. Technical Data......................................................................................... 1-5
6. Performance ............................................................................................ 1-6
1-1
GENERAL INFORMATION
Chapter 1 GENERAL INFORMATION
1. Model View
MC model
215315
215316
FC model
1-2
GENERAL INFORMATION
2. Lift Truck Models Covered
This Service Manual provides service and maintenance information for the following lift trucks:
Mounted engine Gasoline model Diesel model
Non-electronic control - MC / FC
Electronic control MC / FC -
Electronic Gasoline engine models Non-electronic diesel engine models
Truck model Serial number Mounted engine Truck model Serial number Mounted engine
FG40N EF40-00011-up TB45 FD40N EF12B-00011-up S6S
FG45N EF29D-50001-up TB45 FD45N EF19D-50001-up S6S
FG50CN EF29D-80001-up TB45 FD50CN EF19D-80001-up S6S
FG50N EF33C-50001-up TB45 FD50N EF28C-50001-up S6S
FG55N EF33C-80001-up TB45 FD55N EF28C-80001-up S6S
1-3
GENERAL INFORMATION
3. Serial Number Locations
215340
Diesel engine model serial number
Name plate
Chassis serial number
Gasoline engine model serial number
Transmission serial numberMast serial number
1-4
GENERAL INFORMATION
4. Dimensions
A
B
H
J
E
D N
P
M
F
I
L
O
K
CG
215339
1-5
GENERAL INFORMATION
5. Technical Data
Unit:mm (in.)
Truck model
class 4 ton class 5 ton class
Gasoline model FG40N FG45N FG50CN FG50N FG55N
Diesel model FD40N FD45N FD50CN FD50N FD55N
A Maximum lift 3350 (132) 3360 (132.5)
B Free lift height 150 (5.9) 160 (6.3)
C Fork spread <min - max> 320 - 1184 (12.6 - 46.6)
D Fork length 1220 (48.0)
E Tilt angle <forward - backward> Deg 6 - 10
F Overall length 3000 (118) 3130 (123) 3170 (125) 3310 (130) 3360 (132)
G
Overall width
<outside-to-outside
of tires>
Single 1415 (55.5) 1460 (57.5)
Double 1780 (70.0)
Special double 1965 (77.5)
H Overall height <with mast lowered> 2320 (91.5) 2400 (94.5)
I Height of the overhead guard 2280 (89.5)
J
Overall height
<with mast
extended>
With backrest 4570 (180) 4590 (181)
Without backrest 4230 (167) 4190 (165) 4330 (170)
K
Tread
<front wheel>
Single 1175 (46.5)
Double 1310 (51.5)
Special double 1445 (57.0)
L Tread <rear wheel> 1180 (46.5)
M Wheelbase 1850 (73.0) 2000 (78.5) 2150 (84.5)
N Front overhang 577 (22.7) 582 (22.9) 602 (23.7)
O Minimum turning radius 2580 (101) 2730 (107) 2760 (109) 2890 (114) 2940 (116)
P Under clearance <at frame> 227 (8.9)
1-6
GENERAL INFORMATION
6. Performance
Truck
model
Class 4 ton class 5 ton class
Gasoline
model
Truck model FG40N FG45N FG50CN FG50N FG55N
Capacity
kg
(lb)
3500
(8000)
4000
(9000)
4500
(10000)
5000
(11000)
5500
(12000)
Load center mm (in.) 600 (24)
Lift speed
Loaded
2SP mast
mm/s
(fpm)
570 (110) 490 (96)
2FF mast 530 (105) 430 (85)
3FF mast 530 (105) 450 (89)
Unloaded
2SP mast 600 (120) 520 (100)
2FF mast 560 (110) 460 (90)
3FF mast 560 (110) 480 (94)
Travel
speed
Forward
Loaded
1st speed
km/h
(mph)
13.5 (8.5)
2nd speed 22.0 (14.0) 21.5 (13.5)
Unloaded
1st speed 13.5 (8.5)
2nd speed 22.5 (14.0)
Reverse
Loaded 1st speed 18.5 (11.5)
Unloaded 1st speed 19.0 (12.0) 18.5 (11.5)
Truck
model
Class 4 ton class 5 ton class
Diesel
model
Truck model FD40N FD45N FD50CN FD50N FD55N
Capacity
kg
(lb)
3500
(8000)
4000
(9000)
4500
(10000)
5000
(11000)
5500
(12000)
Load center mm (in.) 600 (24)
Lift speed
Loaded
2SP mast
mm/s
(fpm)
550 (110) 470 (93)
2FF mast 510 (100) 420 (83)
3FF mast 520 (102) 440 (86)
Unloaded
2SP mast 610 (120) 530 (105)
2FF mast 570 (112) 470 (92)
3FF mast 570 (112) 490 (96)
Travel
speed
Forward
Loaded
1st speed
km/h
(mph)
13.5 (8.5)
2nd speed 21.5 (13.5) 21.0 (13.0)
Unloaded
1st speed 13.5 (8.5)
2nd speed 22.0 (13.5)
Reverse
Loaded 1st speed 18.0 (11.0) 17.5 (11.0)
Unloaded 1st speed 18.5 (11.5)
2
Chapter 2 COOLING SYSTEM
1. Specifications.......................................................................................... 2-1
2. Structure .................................................................................................. 2-2
3. Removal and Installation........................................................................ 2-3
3.1 Fan Belt Removal....................................................................................................2-3
4. Inspection and Adjustment.................................................................... 2-5
4.1 Fan Belt ...................................................................................................................2-5
4.2 Radiator...................................................................................................................2-6
4.3 Upper Hose, Lower Hose ........................................................................................2-6
4.4 Coolant ....................................................................................................................2-7
5. Troubleshooting...................................................................................... 2-8
2-1
COOLING SYSTEM
Chapter 2 COOLING SYSTEM
1. Specifications
Item
Truck model
FG40N FG45N FG50CN FG50N FG55N
FD40N FD45N FD50CN FD50N FD55N
Cooling
system
Cooling method Water-cooled, forced circulation
Radiator Corrugated fin (pressure) type
Water pump Centrifugal type
Thermostat Wax pellet type
2-2
COOLING SYSTEM
2. Structure
6
5
3 4
1
2
7
6
5
3 4
1
2 7
Gasoline model Diesel model 215476
1 Engine
2 Fan (coupled directly to the engine crankshaft)
3 Shroud
4 Radiator
5 Oil cooler for torque converter
6 Reserve tank
7 Radiator cap
2-3
COOLING SYSTEM
3. Removal and Installation
3.1 Fan Belt Removal
3.1.1 Start by
Remove the radiator cover.
1
2
215477
1
Gasoline model Diesel model
3 3
1 Tension assembly (pulley lock bolt)
2 Alternator lock bolt
3 Fan belt
2-4
COOLING SYSTEM
3.1.2 Removal
Gasoline model
(1) Loosen the pulley lock bolts by rotating 3 to 4
turns.
If the pulley lock bolts are not loosened ade-
quately, the fan pulley will not move.
Note: Do not remove the pulley lock bolts by loosen-
ing them too much.
(2) Loosen the lock nut.
(3) Loosen the adjusting screw and push the fan pul-
ley against the crankshaft pulley side to remove
the belt.
Diesel model
(1) Loosen the pulley lock bolts and the alternator
lock bolts by rotating 3 to 4 turns.
If the lock bolts are not loosened adequately, the
alternator will not move.
Note: Do not remove the lock bolts by loosening them
too much.
(2) Push the alternator pulley against the fan side to
remove the belt.
3.1.3 Installation
For installation, follow the removal sequence in
reverse. Also follow the instructions below.
(1) Before installing the belt, turn the fan to check for
smooth rotation. Replace the bearing if it gener-
ates unusual noises.
(2) After installing the belt, check that the pulley
moves when pushing the tension belt.
(3) Tighten the lock bolts and lock nut firmly.
216926
Adjusting screw
Fan belt
Fan pulley
Pulley
lock bolts
Lock nut
2-5
COOLING SYSTEM
4. Inspection and Adjustment
4.1 Fan Belt
4.1.1 Fan Belt Inspection
(1) Check the belt for contamination from oil, grease
or dust. Replace the belt if needed when the con-
tamination is found. When the belt is slightly con-
taminated, clean it with a rag or paper towel. Do
not use gasoline, oil or any other solvent for
cleaning.
(2) During the engine overhaul or belt tension adjust-
ment, check the condition of the belt. Replace the
belt if it has any damage.
4.1.2 Fan Belt Tension
Apply force, as specified below, perpendicularly to the
belt midway between the fan pulley and tension pulley
(or crank shaft pulley), and make sure the belt tension
is within the specified range.
Force 98 N (9.99 kgf) [22.03 lbf]
Belt tension 11 to 13 mm (0.43 to 0.51 in.)
Gasoline model Diesel model
215478
2-6
COOLING SYSTEM
4.2 Radiator
4.2.1 Radiator unit
Check the core for foreign substances such as dust. If
foreign substances are adhered to the core surface,
remove them by blowing compressed water from the
opposite direction.
4.2.2 Radiator rubber mount
Replace radiator rubber mount if it is hardened and
has no elasticity.
4.2.3 Radiator cap
4.3 Upper Hose, Lower Hose
4.3.1 Connecting Hoses
(1) Check the hoses and replace them if they are
swollen or damaged.
(2) When connecting the hoses to the radiator, make
sure that their ends are fully inserted into the fit-
tings and secure them with clamps.
Be careful not to damage the water pipe while clean-
ing.
Unit: Kpa (kgf/cm2) [psi]
Opening
pressure
88 ± 14.7 (0.9 ± 0.15) [12.77 ± 2.13]
Vacuum valve 0 to 4.9 (0 to 0.05) [0 to 0.71]
Diesel model
215479
2-7
COOLING SYSTEM
4.4 Coolant
4.4.1 Draining coolant
(1) Drain the coolant from the radiator by loosening
the drain cock.
(2) Drain the coolant from the reservoir tank.
4.4.2 Refilling coolant
Mix antifreeze with soft water (tap water) at the proper
concentration as shown below and fill the radiator and
reserve tank up to the specified level.
4.4.3 Coolant level check
(1) Warm up the engine while paying attention to any
unusual noises.
(2) Stop the engine and check the reserve tank for
coolant level, then refill if needed.
Coolant quantity Unit: liter (cu.in.)
Item Gasoline Diesel
Total quantity of coolant
(including coolant in hoses)
15.95
(973.3)
12.94
(789.6)
Reservoir tank (FULL level)
0.65
(39.7)
0.65
(39.7)
Be sure to store antifreeze/coolant mixture carefully
because it is hazardous waste. Ask your local dealer
for information pertaining to the proper disposal of
the coolant.
Diesel model
215480
Example: MHI Long Life Coolant
Temperature
°C (°F)
-39
(-38)
-30
(-22)
-25
(-13)
-20
(-4)
-15
(5)
-10
(14)
Concentra-
tion (%)
55 50 45 40 35 30
Antifreeze concentration ratio varies depending on
brands. Be sure to mix the coolant according to a
manufacture's recommended mix ratio.
215481
Diesel model
2-8
COOLING SYSTEM
5. Troubleshooting
Condition Possible cause Action
Leaking coolant from radiator
Damaged radiator core or tank Replace
Damaged radiator hoses Replace
Hose clamp is defective. Replace
Drain cock is defective. Replace
Engine overheated
Radiator fins are clogged. Clean
Fins are excessively distorted. Replace
Loose belt
Check the belt for tension, elongation,
and cracks. Replace the belt if such
defect is found.
Not enough coolant Refill
Leaking oil from oil cooler hose Insufficient tightening torque of hose
clamp
Retighten or replace
3
Chapter 3 ELECTRIC SYSTEM
1. Chassis Electrical Devices Wiring Outline ........................................... 3-1
1.1 Gasoline Model........................................................................................................3-1
1.2 Diesel Model............................................................................................................3-2
1.3 Gasoline and Diesel Models....................................................................................3-3
2. Structure .................................................................................................. 3-4
2.1 Console Box ............................................................................................................3-4
2.2 Main Electrical Components....................................................................................3-6
2.3 Table of Lamps......................................................................................................3-17
3. Console Box .......................................................................................... 3-18
3.1 Disassembly ..........................................................................................................3-18
4. Battery Maintenance............................................................................. 3-19
4.1 State of Charge and Electrolyte Specific Gravity (S.G.) Adjustment.....................3-19
4.2 Specific Gravity Reading and State of Charge......................................................3-19
4.3 Charging Precautions............................................................................................3-19
5. Instrument Panel................................................................................... 3-20
5.1 Instrument Panel Screen Components..................................................................3-20
5.2 Basic Screen Display.............................................................................................3-21
5.3 Basic Operation.....................................................................................................3-24
5.4 When an Error Occurs...........................................................................................3-29
5.5 Warning Lamps .....................................................................................................3-31
5.6 Optional Functions.................................................................................................3-32
5.7 Hour Meters...........................................................................................................3-39
5.8 Troubleshooting.....................................................................................................3-41
6. Wire Color.............................................................................................. 3-42
6.1 List of Wire Colors .................................................................................................3-42
7. Troubleshooting.................................................................................... 3-43
7.1 Starter System.......................................................................................................3-43
7.2 Gauges..................................................................................................................3-43
7.3 Lighting System.....................................................................................................3-44
8. Electrical Schematic ............................................................................. 3-46
3-1
ELECTRIC SYSTEM
Chapter 3 ELECTRIC SYSTEM
1. Chassis Electrical Devices Wiring Outline
1.1 Gasoline Model
215355
Rear combination lamp
Rear combination harness
Seat switchSeat
To armrest
(FC model only)
Back-up buzzer
Thermoswitch
Battery
To starter
To engine harness
ECM (Engine control module)
To engine harness
Earth
Relay box
Fuse box
Battery cable (+)
Battery cable (-)
Transmission
control solenoid
Stop lamp switch
Head lamp
Instrument panel
Harness B
Front
combination lamp
Front
combination harness
VCM
(Vehicle control module)
OCM
(Option control module)
(Wet disc brake only)
3-2
ELECTRIC SYSTEM
1.2 Diesel Model
215356
OCM
(Option control module)
(Wet disc brake only)
Instrument panel
Head lamp
Front
combination lamp
Front
combination harness
Harness B
Stop lamp switch
Transmission
control solenoid
Relay box
DCM
(Diesel control module)
(Wet disc brake only)
Fuse box
Battery cable (-)
Earth
Battery
Battery cable (+)
To starter
Thermoswitch
(Sending unit)
Back-up buzzer
To armrest
(FC model only)
Seat switch
Seat
Rear combination harness
Rear combination lamp
Glow relay
Glow timer
3-3
ELECTRIC SYSTEM
1.3 Gasoline and Diesel Models
215357
Instrument panel
Combination switch
Select switch
Parking brake switch
Horn harness
Horn
Warning buzzer Key switch
Control valve
Output unit
Output harness
Control valve
Parking brake valve
Parking brake
pressure switch
Harness
FC control lever
Input unit
Thermoswitch (T/C oil)Speed sensor
MC FC
Console Box
Control valve
Transmission
FC Armrest
3-4
ELECTRIC SYSTEM
2. Structure
2.1 Console Box
1 Water temperature gauge
2 Fuel gauge
3 Hour meter, warning lamps
4 Instrument panel
5 Key switch
6 Light switch, turn signal switch
7 Direction Lever
8 Speedometer
214140
N
2
4 38 1
6
7
5
3-5
ELECTRIC SYSTEM
2.1.1 Function of Instrument Panel
Description of function
Inspection method for blown bulbs of instrument panel
All the warning and indicator lamps are normal if they glow when the key switch is turned to the | (ON) position.
Ref. Name of indicators and warning lamps When turned off When glows or blinks Remark
A Parking brake warning lamp Normal
This lamp glows when the parking
brake is applied.
-
B Seat belt warning lamp Fastened
This lamp glows when the seat belt is
not fastened.
-
C Charge warning lamp Normal charging
This lamp glows when charging is not
normal.
(This lamp glows all the time while
the engine is stopped.)
-
D Multi-purpose warning lamp Normal
This lamp glows when a minor failure
occurs or operating cautions are
issued.
-
E
Torque converter oil temperature warn-
ing lamp
Normal temperature
This lamp glows when the torque con-
verter oil temperature is not normal.
-
F Engine oil pressure warning lamp Normal
This lamp glows when the engine oil
pressure is low.
(This lamp glows all the time while
the engine is stopped.)
-
G Engine warning lamp Normal
This lamp glows when the engine is
failed.
-
H Glow pilot indicator lamp Preheating completed
This lamp glows when the glow plug
heating is ON.
-
I Flex control indicator lamp -
This lamp glows when sudden accel-
eration or full reverse (shifting of
travel to the opposite direction) acti-
vates protective function.
Option
J Mast interlock indicator lamp -
When mast interlock is activated
(glows)
-
K Cursor buttons - - -
L Fuel gauge Indicates remaining fuel amount with key in "ON" position -
M LCD screen - - -
N Water temperature gauge Indicates water temperature with key in "ON" position -
O Enter/display switch button - - -
214141
A B C D E F G H I J K
L M N O
3-6
ELECTRIC SYSTEM
2.2 Main Electrical Components
2.2.1 Key switch
The diesel model uses a distributor type injection
pump. Its starter switch is equipped with an automatic
fuel cut engine stop mechanism.
The gasoline model is also equipped with an auto-
matic fuel cut engine stop mechanism.
(Key switch with anti-restart lock)
This key switch has an anti-restarting function.
This switch has a built-in anti-restart lock, so the key
switch cannot be turned from the | (ON) to the
(START) position while the engine is running. This pre-
vents engine trouble or starter breakage caused by an
operator's improper operation when starting the
engine.
The gasoline and diesel models use the same key
switch. On the diesel model, the key switch is electri-
cally connected to the engine so that the | (ON) key
switch position turns on the glow plugs.
Connection Table
215358
ST M
G B
(OFF)
(ON)
(START)
Terminal G B M ST Key in and out
OFF Yes
ON (when operating) ○--------- -----------○ No
START
(when starting engine)
○--------- -----------○----------- -----------○ No
3-7
ELECTRIC SYSTEM
2.2.2 Combination switch
(1) Light switch, turn signal switch
215359
Power Power
Tail,
clearance lamp
Head lamp
L - 1 L - 2 L - 3 L - 4
T - 1
Turn signal switch connector
Terminal
Target
Knob position
Terminal
Target
Lever position
Flash unit
Turn signal
lamp (Right)
Turn signal
lamp (Left)
R (Right)
N (Neutral)
L (Left)
OFF
1
2
3
T - 2 T - 3
Horn contact
T-1
T-3
L-2
L-4
T-2
L-1
L-3
Light switch
turn signal switch connector
Light switch connector
Forward of truck
Light switch
turn signal lever
L
N
R
OFF 1
2
3
10°10°
25° 25° 25°
OFF
3-8
ELECTRIC SYSTEM
(2) Direction switch
215360
10°10°
F
N
R
Forward-reverse selector lever (FNR)
Forward of truck
Forward-reverse
shift change switch (FNR)
4
2
3
1
5
Connection table
F (Forward)
N (Neutral)
R (Reverse)
L/B
1 2 3 4 5Terminal
Lever position
Wire color
B BL/R L/W
OFF
3-9
ELECTRIC SYSTEM
2.2.3 Horn
Check that the horn activates when applying the spec-
ified voltage to both terminals of the horn, T1 and T2.
Replace the horn if it does not activate or its sound is
unusual.
Operating voltage: DC12V (Gasoline and diesel mod-
els)
Note: The proper installation of the horn to the lift
truck is shown in the illustration.
2.2.4 Tank unit
215361
Vent hole
Up
Down
Contact
Coil
T1
T2
T1
T2
215362
F
3/4
242.7mm
(9.56in.)
61.2mm
(2.41in.)
424.2mm
(16.7in.)
1/2
Illustration shows gasoline model.
Pressure relief valve
Fuel pump
Fuel filter
Fuel suction strainer
The number in parenthesis is a reference value.
E
1/4
E 1/4 1/2 3/4 F
Referential Standards
Float position
Standard resistance value (Ω)
Tolerance (Ω)
80 (49.5) 32 (19) 10
– –
+12
+2
±3
+1.0
- 0.5
3-10
ELECTRIC SYSTEM
2.2.5 Stop lamp switch
Apply an ohmmeter across the terminals and check
that the stop lamp switch is turned ON and OFF when
the push rod protrusion is at the specified value.
Measure the insulation resistance value across the ter-
minals when the push rod is pushed in.
Replace the stop lamp switch if its measured insula-
tion resistance value is less than the value below.
Rated voltage: DC12V
2.2.6 Thermoswitch (Engine cooling water temperature)
(1) Apply an ohmmeter between the terminal and
body of the sending unit and check for continuity
(resistance value).
(2) Replace the sending unit if there is no continuity
or the resistance value measured is outside the
standard resistance value.
Note: The illustration is for gasoline models.
Insulation resistance value
1 M Ω or more
(at 500 V megger)
215363
M10×1.25
OFF ON
2 mm
(0.08 in.)
4 mm
(0.16 in.)
Push rod
215364
Terminal
Body
Gasoline model
Temperature
[°C (°F)]
60 ± 0.2
(140 ± 32.36)
65 ± 0.2
(149 ± 32.36)
80 ± 0.2
(176 ± 32.36)
100 ± 0.3
(210 ± 32.54)
125 ± 0.3
(257 ± 32.54)
130 ± 0.3
(266 ± 32.54)
Standard resis-
tance value (Ω)
80 ± 10 67 ± 7.8 40.6 ± 3.7 22.2 ± 1.4 11.3 ± 0.4 10 ± 0.3
Diesel model
Temperature
[°C (°F)]
50
(122)
60 ± 0.2
(140 ± 32.36)
80
(176)
100
(212)
106 ± 0.3
(222.8 ± 32.54)
120
(248)
Standard resis-
tance value (Ω)
(80) 56.3 ± 5 (29.5) (16.5) 14.3 ± 0.5 (10)
3-11
ELECTRIC SYSTEM
2.2.7 Thermoswitch (T/C oil)
Apply an ohmmeter between the terminal and body
and check for continuity (resistance value). Replace
the thermoswitch if its measured insulation resistance
value is less than the value below.
Internal resistance: 0.5 Ω or less (with contact point
ON)
Allowable load: 0.5 A
Note: When installing the thermoswitch, tighten it to
the specified torque.
2.2.8 Parking brake switch
Measure the insulation resistance between each ter-
minal.
(1) Parking switch at pulled position
(2) Parking switch at pushed position
Operation method: Push-pull operation
Contact resistance: 1a-ab
Insulation resis-
tance value
1 M Ω or more
(with contact point OFF)
(with 500 V megger)
Tightening torque
31.4 to 47.1 N·m
(3.2 to 4.8 kgf·m)
[23.2 to 34.8 lbf·ft]
Replace the thermoswitch if it is dropped or abused.
Technical data
Operating
temperature
OFF to ON
122 ± 3°C
(251.6 ± 37.4°F)
ON to OFF
115 °C (239 °F)
or higher
Insulation resistance
(with contact point OFF)
1 M Ω or more
215365
Terminal Body
Between terminals B and W
Insulation
resistance
100 M Ω or more (at 500 V megger)
Between terminals B and R
Insulation
resistance
100 M Ω or more (at 500 V megger)
215366
P
W B R
6 mm (0.24 in.) (Stroke)
PushPull
3-12
ELECTRIC SYSTEM
2.2.9 Relay box
215367
Relay box 2
(Gasoline model only)
Relay box 1
Illustration shows gasoline model
Relay box 1 Relay box 2
(Gasoline model only)
Warning buzzer relay
Flasher relay
Starter relay
Back-up lamp relay
Ignition relay
Fuel pump relay
ETC motor relay
EGI relay
MAIN/C relay
EGI relay
3-13
ELECTRIC SYSTEM
(1) Relay box 1
CB relay (Ignition relay, back-up lamp relay, and
starter relay)
CM relay (Warning buzzer relay)
Coil rating [at 20°C (68°F)]
Item
Truck model
Gasoline and diesel models
Rated operating voltage DC12 V
Working voltage DC3.0 to 7.0 V
Open-circuit voltage DC1.2 to 3.9 V
Coil resistance 80 Ω ± 10%
Rated exciting current 168 mA ± 10%
215368
Connection diagram
(Bottom view)
z
X
Y
Coil rating [at 20°C (68°F)]
Item
Truck model
Gasoline and diesel models
Rated operating voltage DC12 V
Working voltage DC 30 to 7 V
Open-circuit voltage DC 0.5 to 3.1 V
Coil resistance 120 Ω ± 10%
Rated exciting current 117.6 mA ± 10%
215370
Connection diagram
(Bottom view)
z
X
Y
3-14
ELECTRIC SYSTEM
(2) Relay box 2 (gasoline models only)
CM relay (EGI relay, MAIN/C relay, ETC motor relay,
and fuel pump relay)
Coil rating [at 20°C (68°F)]
Item
Truck model
Gasoline model
Rated operating voltage DC12 V
Working voltage DC 30 to 7 V
Open-circuit voltage DC 0.5 to 3.1 V
Coil resistance 120 Ω ± 10%
Rated exciting current 117.6 mA ± 10%
215370
Connection diagram
(Bottom view)
z
X
Y
3-15
ELECTRIC SYSTEM
2.2.10 Glow timer (diesel model)
Inspecting the output time when key switch is turned to
ON
When a tester is applied to terminal 6 and terminal 3
and a voltage of 24 V is applied between terminals 4
and 3, there should be continuity between 6 and termi-
nal 3 for 6 seconds. Replace the glow timer with a new
one if it does not function properly.
Initial characteristic (Normal temperature and humidity,
Vcc=12 V)
Preglow timer 6.0 ± 0
1.4
sec
Environmental characteristic (-30°C to 70°C, Vcc=7 V
to 15 V)
Preglow timer 6.0 ± 0.6
2.0
sec
2.2.11 Glow relay (diesel model)
(1) Apply an ohmmeter across terminal 3 and termi-
nal 4 and measure the resistance value of the
relay coil. Replace the coil if there is no continuity
or the resistance value measured is out of stan-
dard resistance value.
(2) Measure the insulation resistance value between
terminal 1 and terminal 2.
Replace the coil if its measured insulation resis-
tance value is less than the value below.
Rated voltage: DC12V
215371
Controller
Key switch
ON
ST
OFF
Glow
relay
LampGlow
plug
5 4
6
3Battery
DC12V
Connection diagram
5
3
6
4
Coil resistance 13 Ω
Insulation resistance value
1 M Ω or more
(at 500 V megger)
215372
3
4
1
2
1
2
3
4
Connection diagram
3-16
ELECTRIC SYSTEM
2.2.12 Fuse box
215373
Fuse box
*1: Gasoline model only
*2: Diesel model only
Instrument panel
10A
Glow timer
10A
VCM
20A
10A
15A
EGI
30A
EGI
30A
Working lamp
15A
ETC
15A
20A 30A
15A
Spare
Spare
20A
Wiper
15A
Head lamp
15A
Horn
10A
Stop lamp
10A
Fuse puller
SBF 50A
Glow
SBF 100A
Alternator
SBF 100A
*1
A/C
*1 *1
*2
Illustration shows diesel model
Back-up lamp
Battery
3-17
ELECTRIC SYSTEM
2.3 Table of Lamps
Item Quantity Lens color
Valve
Remark
Illustration
Type of
lamps
Head lamp 2 Colorless Standard
Combination
lamp (front)
Turn signal
lamp
2 Amber
Standard
(Installed to
head guard)
Clearance
lamp
2 Amber
Combination
lamp (rear)
Turn signal
lamp
2 Amber Standard
Tail and
stop lamp
2 Red Standard
Back-up
lamp
2 Colorless Standard
3-18
ELECTRIC SYSTEM
3. Console Box
3.1 Disassembly
3.1.1 Preparation
Place the key switch to the OFF position, and remove the cable from the ground side of the battery.
3.1.2 Removal sequence
(1) Disconnect the electrical wiring from connector 1.
(2) Remove the screw using a Phillips screwdriver and remove cover 2.
(3) Remove the screw and then, remove cover (U-Re) 3.
(4) Remove the screw and then, remove cover (U-Fr) 4.
(5) Remove the bolt, then remove console box assembly 5.
3.1.3 Installation
For installation, follow the removal sequence in reverse.
216938
5
2
4
3
1
3-19
ELECTRIC SYSTEM
4. Battery Maintenance
4.1 State of Charge and Electrolyte Specific Gravity (S.G.) Adjustment
4.2 Specific Gravity Reading and State of Charge
To tell whether a battery is fully charged, check the
electrolyte S.G. of each cell with hydrometer or the
electrolyte reduction speed. If the electrolyte in battery
cell decreases to the level where the pole plates are
exposed within one month, it may be overcharged. If
the electrolyte amount remains sufficient for more than
three months, the battery may be charged less.
4.3 Charging Precautions
(1) In slow charging, the charging current should be
about 1/10 the capacity of the battery being
charged.
(2) In quick charging, the battery capacity in ampere
(A) should not be exceeded.
(3) During charging, adjust the charging current so
that the electrolyte temperature does not exceed
45°C (113°F).
(4) When connecting cables to battery terminals,
always connect the (+) terminal first, and when
disconnecting, remove the (-) terminal first.
(5) Ventilate well during the battery charge because
hydrogen gas is generated.
Specific gravity reading
at 20°C (68°F)
Condition Adjustment
1.280 to 1.265 Good
If the difference in S.G. between any two cells is 0.020 or less,
continue to use as is.
If the difference is more than 0.020, discharge the battery in
an efficient manner. If the battery recovers, charge the battery
to adjust the electrolyte S.G.
1.260 to 1.225 Half charged
Recharge battery to adjust electrolyte S.G. Check for any
short-circuited cables or corroded cable connections in the
electrical system.
1.220 (0.2) or less Battery low (caution required)
Recharge battery.
If the difference in S.G. is too much, charge the battery to
adjust the electrolyte S.G.
If the difference in S.G. is
more than 0.040.
A cell with a low S.G. may
cause a short circuit.
It is caused when electrolyte
leaks or electrolyte rate is too
high or too low.
Recharge the battery until its voltage and S.G. stabilize and
remain constant for more than 2 hours.
Charge the battery to adjust the electrolyte S.G. It should read
between 1.280 and 1.265.
If the difference in S.G. is more than 0.040 and a low S.G. is
found in any of the cells, replace the battery with a new one.
Conduct a high current discharge test after leaving the battery
for 12 to 96 hours.
Be sure to turn OFF the key switch and light switch
before disconnecting or connecting the battery cables.
(This prevents damage to the IC regulator.)
215375
+
55D23L (Gasoline)
130E41L (Diesel)
Identification
3-20
ELECTRIC SYSTEM
5. Instrument Panel
5.1 Instrument Panel Screen Components
Instrument panel screen consists of warning lamps,
LCD (Liquid crystal display) screen, and and
buttons, and enter/display switch button.
The LCD screen consists of six areas: main area, fuel
gauge area, travel direction area, symbol mark area,
hour meter area, and water temperature gauge area.
The main area is divided into two parts: right and left.
Note: The instrument panel has functions below to
protect circuits in the panel.
Note: a) Back-up light illuminates both the fuel mark
and water temperature mark on the LCD from
inside.
b) Warnings are not automatically turned off for
safety reasons.
c) When the temperature is extremely low [0°C
(32°F) or below], the response of the LCD dis-
play is slower.
Warning lamps button
button
LCD screen Enter/display switch button
(Ο button)
215114
Instrument panel internal
(ambient) temperature
-
85°C (185°F) or higher LCD screen is not displayed.
105°C (221°F) or higher Backlight goes off.
Fuel gauge Main display Water temperature
gauge
Travel
direction
Symbol mark
(Optional feature)
Time/hour meter
display
215115
3-21
ELECTRIC SYSTEM
5.2 Basic Screen Display
5.2.1 LCD screen display with the key switch in the ON position
With the key switch turned to the ON position, LCD
screen displays the brand logo screen, the password
authentication screen, and the normal display screen
in sequence. Also, error history is displayed by press-
ing a button.
(1) Brand logo screen
When the engine key is turned to the ON position,
the brand logo screen is displayed for 2 seconds
while lamp check is being executed.
(2) Password authentication screen
(Optional function)
Inputting the registered password in advance
enables an operator to operate the lift truck.
(3) Standard display screen
The screen shows the conditions of the lift truck.
215116
215117
215118
3-22
ELECTRIC SYSTEM
5.2.2 Speed meter display
This display shows current lift truck speed.
Note:
Speed display value is rounded to a higher number.
5.2.3 Fuel gauge
This gauge shows the remaining amount of fuel (gaso-
line or diesel fuel). It shows the remaining amount of
fuel just after the key switch is turned to the ON posi-
tion. After that, the remaining amount is displayed for 2
minutes on average.
Note:
Note: LPG dual fuel truck shows gasoline remaining
amount only.
Actual speed Display
0.1 to 1.0 km/h
(0.06 to 0.62 Mph)
1 km/h
(0.62 Mph)
1.1 to 2.0 km/h
(0.68 to 1.24 Mph)
2 km/h
(1.24 Mph)
•
•
•
•
24.1 to 25.0 km/h
(14.97 to 15.53 Mph)
•
•
•
•
25 km/h
(15.53 Mph)
Speed meter display
215119
E (Empty) remaining amount
Truck model Remaining amount
4.0 to 5.5 ton
14.3 liter
(872.6 cu.in.)
or less
Fuel gauge
With fuel gauge image
Without fuel gauge image (LE models) 215120
3-23
ELECTRIC SYSTEM
5.2.4 Water temperature display
This display shows engine coolant temperature.
Note: The graph below shows the relation between
engine coolant temperature and water tempera-
ture gauge shown on the LCD.
Water temperature gauge
215121
50
40
30
20
10
0
100 20 30 40 50 60 70 80 90 100 110 120 130
44 dots
29 dots
Engine coolant temperature - the number of dots in the gauge
Diesel model
Gasoline model
Range of overheating (red zone)
Pertinent range of temperature (rough standard for diesel/gasoline model)
Overheat (red zone) temperature
215122
Numberofdotsinthegauge(Dots)
Engine coolant temperature (°C) [°F]
(°C)
0 50 68 86 104 122 140 158 176 194 212 230 248 266 (°F)
Range displayed on
LCD screen (50 to 120°C)
[122 to 248°F]
• Diesel model: Approx. 109 °C (228.2 °F) or higher
• Gasoline model: Approx. 107 °C (224.6 °F) or higher
3-24
ELECTRIC SYSTEM
5.2.5 Direction display
This display shows truck traveling direction. If the
direction lever is positioned to a place other than N
(neutral) position when starting the engine, symbol N
blinks and the engine can not be started. If an operator
leaves the seat while the engine is running and the
direction lever is placed to other than the N (neutral)
position, the symbol N blinks and the transmission is
electrically shifted to the N (neutral) position.
Note: Travel direction display changes to the signals
from the direction lever.
5.3 Basic Operation
5.3.1 How to use operation buttons
There are three types of manual operation buttons:
button, button, and button, which are
located on the right side of the instrument panel. The
operation of each button varies with the item being dis-
played on the screen.
Button operation is available only when the key
switch is in the ON position and not available
when the engine is running. Note that adjustment
of screen contrast and selection between the hour
meter display and the time display are available
even when the engine is running.
Short press of button
It is effective when the button is pressed for less than
two seconds.
Long press of button
It is effective when the button is pressed for more than
two seconds.
Multiple button presses
It is effective when more than two buttons are long
pressed at the same time.
Travel direction
215123
0.5sec 0.5sec
215377
Forward Reverse Neutral
Travel interlock indication (powershift truck)
215125
button
button
button
3-25
ELECTRIC SYSTEM
5.3.2 How to adjust the screen contrast
Turn the key switch to the ON position. Screen con-
trast can be adjusted while the engine is running.
Note: The screen becomes dark when the tempera-
ture inside the instrument panel (ambient tem-
perature) is high, and the screen becomes light
when the temperature is low.
5.3.3 How to display the clock time
Turn the key switch to the ON position. Screen con-
trast can be adjusted while the engine is running. With
a short press of the button, the display alternately
changes between the hour meter and the clock time.
With a long press of the button while the clock is
displayed, the clock display alternately changes
between 12-hour and 24-hour mode.
Button Press Display
Short
Light → Dark
Dark → Light
Button Press Display
Short Hour meter ←→ clock
(with clock time
display)
Long
12-hour mode display
←→24-hour mode display
Time/hour meter
215126
3-26
ELECTRIC SYSTEM
5.3.4 How to set up the clock time
(1) Turn the key switch to the ON position.
(2) Select clock time display (when the hour meter is
being displayed).
(3) Select time adjust mode and unit adjust mode.
(4) Time unit adjustment
Note: When the time display is set to the 12-hour
mode display, 11:00 AM changes to 00:00 PM
at noon.
(5) Minute adjustment
Note: • Second time display is not available.
• If more than 3 minutes have passed since the
last button operation, the display automatically
returns to the standard screen.
• Precision errors are one minute or less per
month.
• When a battery is changed, the time resets.
Be sure to set the time after changing a
battery.
• If the engine is started during the setup
procedure, the setup being made is cancelled
and the display returns to the standard screen.
Button Press Display
Short Clock time blink
Button Press Display
Long Time unit adjust mode
Blinking
215127
Button Press Display
Short
01→12 or 24
(one hour at each press)
Long 01→12 or 24 (continuous)
Short
12 or 24→01
(one hour at each press)
Long 12 or 24→01 (continuous)
Short
After adjusting, change to the min-
ute adjust mode.
Digits to be adjusted is blinking
215128
Button Press Display
Short 01→59 (one minute at each press)
Long 00→59 (continuous)
Short 59→00 (one minute at each press)
Long 59→00 (continuous)
Short
After adjusting, change to the
standard screen.
Digits to be adjusted is blinking
215129
3-27
ELECTRIC SYSTEM
5.3.5 How to display the hour meter
Turn the key switch to the ON position. Screen con-
trast can be adjusted while the engine is running. With
a short press of the button, the display alternately
changes between the clock time and the hour meter.
5.3.6 How to change types of hour meters
Turn the key switch to the ON position. There are three
counters: key-on time, engine-on time, and seat
switch-on time. The counter display changes with a
long press of the button.
Key-on time: Accumulated key switch ON time.
Engine-on time: Accumulated engine operation time.
This is helpful in comparing the wear of engine related
parts to the actual engine operation hours.
Seat switch-on time: Accumulated time the operator
has seated.
This is helpful in comparing the actual working hours
to the actual hours of operation.
Note: • When six minutes have passed, 0.1 hour is
added.
• Warranty is terminated based on the key-on
time.
Button Press Display
Short Clock ←→ hour meter
Hour meter
215130
Button Press Display
Long
Key-on time
↓
Engine-on time
↓
Seat switch-on time
Key-on time display
Engine-on time display
Seat switch-on time display
215131
3-28
ELECTRIC SYSTEM
5.3.7 How to display the error history
Turn the key switch to the ON position. A long press
on the three buttons at the same time brings up the
error history display.
Error message displays only the F error codes. Error
codes are displayed from the latest error (
-1) up to the past 32 errors ( -32). Oldest data
(error) exceeding the limit (32 errors) is automatically
erased.
Note: Use the service tool to erase the error message
being displayed.
To change the error code display, operate the
or the button.
A long press on the three buttons at the same time
returns to the standard display screen.
The illustration shows the error history screen when
there is no error record.
Note: • If more than 3 minutes have passed since the
last button operation, the display automatically
returns to the standard screen.
• If the engine is started during the setup
procedure, the setup being made is cancelled
and the display returns to the standard screen.
Button Press Display
Multiple Error history
215125
button
button
button
Button Press Display
Short
Old → New
New → Old
Button Press Display
Multiple Standard display screen
Error history display
With , buttons,
error record on the
display changes.
Error history Hour meter Error code
215133
When there is no error record
215134
3-29
ELECTRIC SYSTEM
5.4 When an Error Occurs
When an error occurs, the corresponding error code is
displayed on the screen. The error code will be erased
by placing the key switch to the ON position after solv-
ing the cause of the trouble and then by turning the
key switch to the OFF position. (The error code
remains displayed until the cause of the trouble is
solved.)
Refer to the engine service manual for the error codes
related to engine troubles (error codes from ECM).
The priority order of the error display is: engine fail-
ures, serious failures, and minor failures.
5.4.1 When an engine failure occurs
The corresponding error code is displayed in the main
area, and the black and white in the error code display
is reversed. Also the engine warning lamp glows.
5.4.2 When a serious failure occurs
The corresponding error code is displayed in the main
area, and the black and white in the error code display
is reversed. Also all warning lamps shown in the figure
(right) will blink.
When an engine failure occurs, the error code alternately
changes between black characters on a white background
and white characters on a black background.
Engine warning lamp glows
215135
Warning lamps within the dotted line boxes blink
215136
When a serious failure occurs, the error code alternately
changes between black characters on a white background
to white characters on a black background.
3-30
ELECTRIC SYSTEM
5.4.3 When a minor failure occurs
The corresponding error code is displayed in the main
area, and the black and white in the error code display
is reversed. Also the multi-purpose warning lamp
glows.
Note: The minor failure display is also shown when
the fuel gauge reaches the empty level (E).
5.4.4 Error symbols
Error symbols displayed in the main area are as follows:
Multi-purpose warning lamp glows
The error code and
symbol alternately
change between black
characters/lines on a
white background to
white characters/lines
on a black background.
215137
Symbol Name Indicated condition
Fuel filter warning lamp
This lamp glows when the water in the fuel filter
needs to be drained. (diesel model)
Low coolant level warning lamp
This lamp glows when the coolant level is low.
(option)
Clogged air cleaner element warning lamp
This lamp glows when the air cleaner element is
clogged. (option)
Low fuel level warning lamp
When fuel level is low (on E level)
(On the LPG/gasoline dual fuel model, this lamp
glows when the gasoline level becomes low.)
LPG level warning lamp
On the LPG model, this lamp glows when the LPG
level becomes low. (option)
3-31
ELECTRIC SYSTEM
5.5 Warning Lamps
The function of each warning lamp is shown in the
table below.
Lamp Name Color Glow (blink) condition Model applicable
Parking brake warn-
ing lamp
Red
This lamp glows when the parking brake is
applied.
All models (Standard)
Seat belt warning
lamp
Red
This lamp glows when the seat belt is not
fastened.
All models (Standard)
Charge warning
lamp
Red
This lamp glows when charging is not nor-
mal.
(Glows/the lamp glows all the time while the
engine is stopped)
All models (Standard)
Multi-purpose warn-
ing lamp
Red
This lamp glows when a minor failure occurs
or operating cautions are issued.
All models (Standard)
Torque converter oil
temperature warn-
ing lamp
Red
This lamp glows when the torque converter
oil temperature is not normal.
Powershift transmission
models (Standard)
Engine oil pressure
warning lamp
Red
This lamp glows when the engine oil pres-
sure is low.
(Glows/the lamp glows all the time while the
engine is stopped)
All models (Standard)
Engine warning
lamp
Amber This lamp glows when the engine is failed.
Electronic control gaso-
line engine models
(Standard)
Glow pilot indicator
lamp
Amber
This lamp glows when the glow plug heating
is ON.
Diesel engine models
(Standard)
Flex control indicator
lamp
Amber
This lamp glows when sudden acceleration
or full reverse (shifting of travel to the oppo-
site direction) activates protective function.
Option
Mast interlock indi-
cator lamp
Amber When mast interlock is activated (glows) All models (Standard)
Thank you very much
for your reading.
Please Click Here
Then Get More
Information.

More Related Content

What's hot

1997 1998 1999 Yamaha VMAX 500/600/700 Service Repair Manual
1997 1998 1999 Yamaha VMAX 500/600/700 Service Repair Manual1997 1998 1999 Yamaha VMAX 500/600/700 Service Repair Manual
1997 1998 1999 Yamaha VMAX 500/600/700 Service Repair Manualjkmsedol
 
Caterpillar Cat EP25K Forklift Lift Truck Service Repair Manual SN:ETB8B-5000...
Caterpillar Cat EP25K Forklift Lift Truck Service Repair Manual SN:ETB8B-5000...Caterpillar Cat EP25K Forklift Lift Truck Service Repair Manual SN:ETB8B-5000...
Caterpillar Cat EP25K Forklift Lift Truck Service Repair Manual SN:ETB8B-5000...jkjskemm rtert
 
Caterpillar Cat DP30N Forklift Lift Trucks Service Repair Manual SN:T14E-3001...
Caterpillar Cat DP30N Forklift Lift Trucks Service Repair Manual SN:T14E-3001...Caterpillar Cat DP30N Forklift Lift Trucks Service Repair Manual SN:T14E-3001...
Caterpillar Cat DP30N Forklift Lift Trucks Service Repair Manual SN:T14E-3001...kjkemjd
 
Mitsubishi fg40 kl forklift trucks service repair manual sn:f29c 50001-up
Mitsubishi fg40 kl forklift trucks service repair manual sn:f29c 50001-upMitsubishi fg40 kl forklift trucks service repair manual sn:f29c 50001-up
Mitsubishi fg40 kl forklift trucks service repair manual sn:f29c 50001-upjksmmde
 
Mitsubishi fg15 n forklift trucks service repair manual sn:f25c 50001-up
Mitsubishi fg15 n forklift trucks service repair manual sn:f25c 50001-upMitsubishi fg15 n forklift trucks service repair manual sn:f25c 50001-up
Mitsubishi fg15 n forklift trucks service repair manual sn:f25c 50001-upjksmmde
 
Manual de Taller Retroexcavadora Komatsu WB146-5.pdf
Manual de Taller Retroexcavadora Komatsu WB146-5.pdfManual de Taller Retroexcavadora Komatsu WB146-5.pdf
Manual de Taller Retroexcavadora Komatsu WB146-5.pdfCristianCardenasNez
 
2005 suzuki outboard df90, df100, df115, df140 service repair manual
2005 suzuki outboard df90, df100, df115, df140 service repair manual2005 suzuki outboard df90, df100, df115, df140 service repair manual
2005 suzuki outboard df90, df100, df115, df140 service repair manualfjsekkmsem
 
Caterpillar Cat DP30N Forklift Lift Trucks Service Repair Manual SN: ET14E-00...
Caterpillar Cat DP30N Forklift Lift Trucks Service Repair Manual SN: ET14E-00...Caterpillar Cat DP30N Forklift Lift Trucks Service Repair Manual SN: ET14E-00...
Caterpillar Cat DP30N Forklift Lift Trucks Service Repair Manual SN: ET14E-00...jkmsejfmd uefkjfmm
 
Kubota kx61 3 excavator service repair manual
Kubota kx61 3 excavator service repair manualKubota kx61 3 excavator service repair manual
Kubota kx61 3 excavator service repair manualjkmsme ekdmm
 
1994 1995 1996 yamaha vmax 500600 service repair manual
1994 1995 1996 yamaha vmax 500600 service repair manual1994 1995 1996 yamaha vmax 500600 service repair manual
1994 1995 1996 yamaha vmax 500600 service repair manualjksmenmd
 
Manual+de+taller+en+español+pc+200+ +6
Manual+de+taller+en+español+pc+200+ +6Manual+de+taller+en+español+pc+200+ +6
Manual+de+taller+en+español+pc+200+ +6Rogger Vanegas Ardila
 
Caterpillar Cat DP30N Forklift Lift Trucks Service Repair Manual SN:T14E-4000...
Caterpillar Cat DP30N Forklift Lift Trucks Service Repair Manual SN:T14E-4000...Caterpillar Cat DP30N Forklift Lift Trucks Service Repair Manual SN:T14E-4000...
Caterpillar Cat DP30N Forklift Lift Trucks Service Repair Manual SN:T14E-4000...kjkemmd
 
Mitsubishi fg15 n forklift trucks service repair manual sn:ef34l 0001-up
Mitsubishi fg15 n forklift trucks service repair manual sn:ef34l 0001-upMitsubishi fg15 n forklift trucks service repair manual sn:ef34l 0001-up
Mitsubishi fg15 n forklift trucks service repair manual sn:ef34l 0001-upjkmsme ekdmm
 
Mitsubishi fge15 n forklift trucks service repair manual snf34 0000119001-up
Mitsubishi fge15 n forklift trucks service repair manual snf34 0000119001-upMitsubishi fge15 n forklift trucks service repair manual snf34 0000119001-up
Mitsubishi fge15 n forklift trucks service repair manual snf34 0000119001-upjkskjdkm
 
Drill Press Safety PPT
Drill Press Safety PPTDrill Press Safety PPT
Drill Press Safety PPTjnordtvedt
 
Nylon Web Slings Inspection Checklist
Nylon Web Slings Inspection ChecklistNylon Web Slings Inspection Checklist
Nylon Web Slings Inspection ChecklistHoist and Crane Depot
 
KOMATSU WA270-3 WHEEL LOADER Service Repair Manual SN:WA270H20051 and up
KOMATSU WA270-3 WHEEL LOADER Service Repair Manual SN:WA270H20051 and upKOMATSU WA270-3 WHEEL LOADER Service Repair Manual SN:WA270H20051 and up
KOMATSU WA270-3 WHEEL LOADER Service Repair Manual SN:WA270H20051 and upjkmsmns
 
MITSUBISHI FD20CN FORKLIFT TRUCKS Service Repair Manual SN:EF16D-61001-UP
MITSUBISHI FD20CN FORKLIFT TRUCKS Service Repair Manual SN:EF16D-61001-UPMITSUBISHI FD20CN FORKLIFT TRUCKS Service Repair Manual SN:EF16D-61001-UP
MITSUBISHI FD20CN FORKLIFT TRUCKS Service Repair Manual SN:EF16D-61001-UPkjdmjys
 
Caterpillar Cat DP50K Forklift Lift Trucks Service Repair Manual SN:ET28B-500...
Caterpillar Cat DP50K Forklift Lift Trucks Service Repair Manual SN:ET28B-500...Caterpillar Cat DP50K Forklift Lift Trucks Service Repair Manual SN:ET28B-500...
Caterpillar Cat DP50K Forklift Lift Trucks Service Repair Manual SN:ET28B-500...hdjksmemm
 

What's hot (20)

1997 1998 1999 Yamaha VMAX 500/600/700 Service Repair Manual
1997 1998 1999 Yamaha VMAX 500/600/700 Service Repair Manual1997 1998 1999 Yamaha VMAX 500/600/700 Service Repair Manual
1997 1998 1999 Yamaha VMAX 500/600/700 Service Repair Manual
 
Caterpillar Cat EP25K Forklift Lift Truck Service Repair Manual SN:ETB8B-5000...
Caterpillar Cat EP25K Forklift Lift Truck Service Repair Manual SN:ETB8B-5000...Caterpillar Cat EP25K Forklift Lift Truck Service Repair Manual SN:ETB8B-5000...
Caterpillar Cat EP25K Forklift Lift Truck Service Repair Manual SN:ETB8B-5000...
 
Caterpillar Cat DP30N Forklift Lift Trucks Service Repair Manual SN:T14E-3001...
Caterpillar Cat DP30N Forklift Lift Trucks Service Repair Manual SN:T14E-3001...Caterpillar Cat DP30N Forklift Lift Trucks Service Repair Manual SN:T14E-3001...
Caterpillar Cat DP30N Forklift Lift Trucks Service Repair Manual SN:T14E-3001...
 
Mitsubishi fg40 kl forklift trucks service repair manual sn:f29c 50001-up
Mitsubishi fg40 kl forklift trucks service repair manual sn:f29c 50001-upMitsubishi fg40 kl forklift trucks service repair manual sn:f29c 50001-up
Mitsubishi fg40 kl forklift trucks service repair manual sn:f29c 50001-up
 
Mitsubishi fg15 n forklift trucks service repair manual sn:f25c 50001-up
Mitsubishi fg15 n forklift trucks service repair manual sn:f25c 50001-upMitsubishi fg15 n forklift trucks service repair manual sn:f25c 50001-up
Mitsubishi fg15 n forklift trucks service repair manual sn:f25c 50001-up
 
Manual de Taller Retroexcavadora Komatsu WB146-5.pdf
Manual de Taller Retroexcavadora Komatsu WB146-5.pdfManual de Taller Retroexcavadora Komatsu WB146-5.pdf
Manual de Taller Retroexcavadora Komatsu WB146-5.pdf
 
2005 suzuki outboard df90, df100, df115, df140 service repair manual
2005 suzuki outboard df90, df100, df115, df140 service repair manual2005 suzuki outboard df90, df100, df115, df140 service repair manual
2005 suzuki outboard df90, df100, df115, df140 service repair manual
 
Caterpillar Cat DP30N Forklift Lift Trucks Service Repair Manual SN: ET14E-00...
Caterpillar Cat DP30N Forklift Lift Trucks Service Repair Manual SN: ET14E-00...Caterpillar Cat DP30N Forklift Lift Trucks Service Repair Manual SN: ET14E-00...
Caterpillar Cat DP30N Forklift Lift Trucks Service Repair Manual SN: ET14E-00...
 
Kubota kx61 3 excavator service repair manual
Kubota kx61 3 excavator service repair manualKubota kx61 3 excavator service repair manual
Kubota kx61 3 excavator service repair manual
 
1994 1995 1996 yamaha vmax 500600 service repair manual
1994 1995 1996 yamaha vmax 500600 service repair manual1994 1995 1996 yamaha vmax 500600 service repair manual
1994 1995 1996 yamaha vmax 500600 service repair manual
 
Manual+de+taller+en+español+pc+200+ +6
Manual+de+taller+en+español+pc+200+ +6Manual+de+taller+en+español+pc+200+ +6
Manual+de+taller+en+español+pc+200+ +6
 
Caterpillar Cat DP30N Forklift Lift Trucks Service Repair Manual SN:T14E-4000...
Caterpillar Cat DP30N Forklift Lift Trucks Service Repair Manual SN:T14E-4000...Caterpillar Cat DP30N Forklift Lift Trucks Service Repair Manual SN:T14E-4000...
Caterpillar Cat DP30N Forklift Lift Trucks Service Repair Manual SN:T14E-4000...
 
Mitsubishi fg15 n forklift trucks service repair manual sn:ef34l 0001-up
Mitsubishi fg15 n forklift trucks service repair manual sn:ef34l 0001-upMitsubishi fg15 n forklift trucks service repair manual sn:ef34l 0001-up
Mitsubishi fg15 n forklift trucks service repair manual sn:ef34l 0001-up
 
Mitsubishi fge15 n forklift trucks service repair manual snf34 0000119001-up
Mitsubishi fge15 n forklift trucks service repair manual snf34 0000119001-upMitsubishi fge15 n forklift trucks service repair manual snf34 0000119001-up
Mitsubishi fge15 n forklift trucks service repair manual snf34 0000119001-up
 
Drill Press Safety PPT
Drill Press Safety PPTDrill Press Safety PPT
Drill Press Safety PPT
 
Nylon Web Slings Inspection Checklist
Nylon Web Slings Inspection ChecklistNylon Web Slings Inspection Checklist
Nylon Web Slings Inspection Checklist
 
KOMATSU WA270-3 WHEEL LOADER Service Repair Manual SN:WA270H20051 and up
KOMATSU WA270-3 WHEEL LOADER Service Repair Manual SN:WA270H20051 and upKOMATSU WA270-3 WHEEL LOADER Service Repair Manual SN:WA270H20051 and up
KOMATSU WA270-3 WHEEL LOADER Service Repair Manual SN:WA270H20051 and up
 
Zf error codes (1)
Zf error codes (1)Zf error codes (1)
Zf error codes (1)
 
MITSUBISHI FD20CN FORKLIFT TRUCKS Service Repair Manual SN:EF16D-61001-UP
MITSUBISHI FD20CN FORKLIFT TRUCKS Service Repair Manual SN:EF16D-61001-UPMITSUBISHI FD20CN FORKLIFT TRUCKS Service Repair Manual SN:EF16D-61001-UP
MITSUBISHI FD20CN FORKLIFT TRUCKS Service Repair Manual SN:EF16D-61001-UP
 
Caterpillar Cat DP50K Forklift Lift Trucks Service Repair Manual SN:ET28B-500...
Caterpillar Cat DP50K Forklift Lift Trucks Service Repair Manual SN:ET28B-500...Caterpillar Cat DP50K Forklift Lift Trucks Service Repair Manual SN:ET28B-500...
Caterpillar Cat DP50K Forklift Lift Trucks Service Repair Manual SN:ET28B-500...
 

Similar to MITSUBISHI FG55N FORKLIFT TRUCKS Service Repair Manual SN: EF33C-80001-UP

Mitsubishi fd80 n forklift trucks service repair manual snf32c 10011-up
Mitsubishi fd80 n forklift trucks service repair manual snf32c 10011-upMitsubishi fd80 n forklift trucks service repair manual snf32c 10011-up
Mitsubishi fd80 n forklift trucks service repair manual snf32c 10011-upjksjdmd
 
Mitsubishi fd90 n forklift trucks service repair manual snf32c 60011-up
Mitsubishi fd90 n forklift trucks service repair manual snf32c 60011-upMitsubishi fd90 n forklift trucks service repair manual snf32c 60011-up
Mitsubishi fd90 n forklift trucks service repair manual snf32c 60011-upjksjmdmd
 
Mitsubishi fd80 n forklift trucks service repair manual snf32c 10011-up
Mitsubishi fd80 n forklift trucks service repair manual snf32c 10011-upMitsubishi fd80 n forklift trucks service repair manual snf32c 10011-up
Mitsubishi fd80 n forklift trucks service repair manual snf32c 10011-upjskemmdn eukdms
 
Mitsubishi FD60 Forklift Trucks Service Repair Manual SNF20C-20001-UP.pdf
Mitsubishi FD60 Forklift Trucks Service Repair Manual SNF20C-20001-UP.pdfMitsubishi FD60 Forklift Trucks Service Repair Manual SNF20C-20001-UP.pdf
Mitsubishi FD60 Forklift Trucks Service Repair Manual SNF20C-20001-UP.pdf7fuseidjkdmd
 
Mitsubishi FD60 Forklift Trucks Service Repair Manual SNF20C-20001-UP.pdf
Mitsubishi FD60 Forklift Trucks Service Repair Manual SNF20C-20001-UP.pdfMitsubishi FD60 Forklift Trucks Service Repair Manual SNF20C-20001-UP.pdf
Mitsubishi FD60 Forklift Trucks Service Repair Manual SNF20C-20001-UP.pdffujsekkdmdm3e
 
Mitsubishi FD60 Forklift Trucks Service Repair Manual SNF20C-10001-UP.pdf
Mitsubishi FD60 Forklift Trucks Service Repair Manual SNF20C-10001-UP.pdfMitsubishi FD60 Forklift Trucks Service Repair Manual SNF20C-10001-UP.pdf
Mitsubishi FD60 Forklift Trucks Service Repair Manual SNF20C-10001-UP.pdffujsekkdmdm3e
 
Mitsubishi FD70 Forklift Trucks Service Repair Manual SNF20C-70001-UP.pdf
Mitsubishi FD70 Forklift Trucks Service Repair Manual SNF20C-70001-UP.pdfMitsubishi FD70 Forklift Trucks Service Repair Manual SNF20C-70001-UP.pdf
Mitsubishi FD70 Forklift Trucks Service Repair Manual SNF20C-70001-UP.pdffujsekkdmdm3e
 
Mitsubishi FD70 Forklift Trucks Service Repair Manual SNF20C-70001-UP.pdf
Mitsubishi FD70 Forklift Trucks Service Repair Manual SNF20C-70001-UP.pdfMitsubishi FD70 Forklift Trucks Service Repair Manual SNF20C-70001-UP.pdf
Mitsubishi FD70 Forklift Trucks Service Repair Manual SNF20C-70001-UP.pdf7fuseidjkdmd
 
Mitsubishi FD70 Forklift Trucks Service Repair Manual SNF20C-60001-UP.pdf
Mitsubishi FD70 Forklift Trucks Service Repair Manual SNF20C-60001-UP.pdfMitsubishi FD70 Forklift Trucks Service Repair Manual SNF20C-60001-UP.pdf
Mitsubishi FD70 Forklift Trucks Service Repair Manual SNF20C-60001-UP.pdf7fuseidjkdmd
 
Mitsubishi FD70 Forklift Trucks Service Repair Manual SNF20C-60001-UP.pdf
Mitsubishi FD70 Forklift Trucks Service Repair Manual SNF20C-60001-UP.pdfMitsubishi FD70 Forklift Trucks Service Repair Manual SNF20C-60001-UP.pdf
Mitsubishi FD70 Forklift Trucks Service Repair Manual SNF20C-60001-UP.pdffujsekkdmdm3e
 
Mitsubishi FD60 Forklift Trucks Service Repair Manual SNF20C-10001-UP.pdf
Mitsubishi FD60 Forklift Trucks Service Repair Manual SNF20C-10001-UP.pdfMitsubishi FD60 Forklift Trucks Service Repair Manual SNF20C-10001-UP.pdf
Mitsubishi FD60 Forklift Trucks Service Repair Manual SNF20C-10001-UP.pdf7fuseidjkdmd
 
Mitsubishi FD60 Forklift Trucks Service Repair Manual SNF20C-20001-UP.pdf
Mitsubishi FD60 Forklift Trucks Service Repair Manual SNF20C-20001-UP.pdfMitsubishi FD60 Forklift Trucks Service Repair Manual SNF20C-20001-UP.pdf
Mitsubishi FD60 Forklift Trucks Service Repair Manual SNF20C-20001-UP.pdffijskekmdmd4e
 
Mitsubishi FD70 Forklift Trucks Service Repair Manual SNF20C-70001-UP.pdf
Mitsubishi FD70 Forklift Trucks Service Repair Manual SNF20C-70001-UP.pdfMitsubishi FD70 Forklift Trucks Service Repair Manual SNF20C-70001-UP.pdf
Mitsubishi FD70 Forklift Trucks Service Repair Manual SNF20C-70001-UP.pdffijskekmdmd4e
 
Mitsubishi FD60 Forklift Trucks Service Repair Manual SNF20C-10001-UP.pdf
Mitsubishi FD60 Forklift Trucks Service Repair Manual SNF20C-10001-UP.pdfMitsubishi FD60 Forklift Trucks Service Repair Manual SNF20C-10001-UP.pdf
Mitsubishi FD60 Forklift Trucks Service Repair Manual SNF20C-10001-UP.pdffijskekmdmd4e
 
Mitsubishi FD70 Forklift Trucks Service Repair Manual SNF20C-60001-UP.pdf
Mitsubishi FD70 Forklift Trucks Service Repair Manual SNF20C-60001-UP.pdfMitsubishi FD70 Forklift Trucks Service Repair Manual SNF20C-60001-UP.pdf
Mitsubishi FD70 Forklift Trucks Service Repair Manual SNF20C-60001-UP.pdffijskekmdmd4e
 
Mitsubishi FD60 Forklift Trucks Service Repair Manual SNF20C-10001-UP.pdf
Mitsubishi FD60 Forklift Trucks Service Repair Manual SNF20C-10001-UP.pdfMitsubishi FD60 Forklift Trucks Service Repair Manual SNF20C-10001-UP.pdf
Mitsubishi FD60 Forklift Trucks Service Repair Manual SNF20C-10001-UP.pdff8uejdkdmdmd3
 
Mitsubishi FD70 Forklift Trucks Service Repair Manual SNF20C-60001-UP.pdf
Mitsubishi FD70 Forklift Trucks Service Repair Manual SNF20C-60001-UP.pdfMitsubishi FD70 Forklift Trucks Service Repair Manual SNF20C-60001-UP.pdf
Mitsubishi FD70 Forklift Trucks Service Repair Manual SNF20C-60001-UP.pdff8uejdkdmdmd3
 
Mitsubishi FD60 Forklift Trucks Service Repair Manual SNF20C-20001-UP.pdf
Mitsubishi FD60 Forklift Trucks Service Repair Manual SNF20C-20001-UP.pdfMitsubishi FD60 Forklift Trucks Service Repair Manual SNF20C-20001-UP.pdf
Mitsubishi FD60 Forklift Trucks Service Repair Manual SNF20C-20001-UP.pdff8uejdkdmdmd3
 
Mitsubishi FD70 Forklift Trucks Service Repair Manual SNF20C-70001-UP.pdf
Mitsubishi FD70 Forklift Trucks Service Repair Manual SNF20C-70001-UP.pdfMitsubishi FD70 Forklift Trucks Service Repair Manual SNF20C-70001-UP.pdf
Mitsubishi FD70 Forklift Trucks Service Repair Manual SNF20C-70001-UP.pdff8uejdkdmdmd3
 
CATERPILLAR CAT DP70 FORKLIFT LIFT TRUCKS Service Repair Manual SN:T20C-60001...
CATERPILLAR CAT DP70 FORKLIFT LIFT TRUCKS Service Repair Manual SN:T20C-60001...CATERPILLAR CAT DP70 FORKLIFT LIFT TRUCKS Service Repair Manual SN:T20C-60001...
CATERPILLAR CAT DP70 FORKLIFT LIFT TRUCKS Service Repair Manual SN:T20C-60001...jsenmde8udj
 

Similar to MITSUBISHI FG55N FORKLIFT TRUCKS Service Repair Manual SN: EF33C-80001-UP (20)

Mitsubishi fd80 n forklift trucks service repair manual snf32c 10011-up
Mitsubishi fd80 n forklift trucks service repair manual snf32c 10011-upMitsubishi fd80 n forklift trucks service repair manual snf32c 10011-up
Mitsubishi fd80 n forklift trucks service repair manual snf32c 10011-up
 
Mitsubishi fd90 n forklift trucks service repair manual snf32c 60011-up
Mitsubishi fd90 n forklift trucks service repair manual snf32c 60011-upMitsubishi fd90 n forklift trucks service repair manual snf32c 60011-up
Mitsubishi fd90 n forklift trucks service repair manual snf32c 60011-up
 
Mitsubishi fd80 n forklift trucks service repair manual snf32c 10011-up
Mitsubishi fd80 n forklift trucks service repair manual snf32c 10011-upMitsubishi fd80 n forklift trucks service repair manual snf32c 10011-up
Mitsubishi fd80 n forklift trucks service repair manual snf32c 10011-up
 
Mitsubishi FD60 Forklift Trucks Service Repair Manual SNF20C-20001-UP.pdf
Mitsubishi FD60 Forklift Trucks Service Repair Manual SNF20C-20001-UP.pdfMitsubishi FD60 Forklift Trucks Service Repair Manual SNF20C-20001-UP.pdf
Mitsubishi FD60 Forklift Trucks Service Repair Manual SNF20C-20001-UP.pdf
 
Mitsubishi FD60 Forklift Trucks Service Repair Manual SNF20C-20001-UP.pdf
Mitsubishi FD60 Forklift Trucks Service Repair Manual SNF20C-20001-UP.pdfMitsubishi FD60 Forklift Trucks Service Repair Manual SNF20C-20001-UP.pdf
Mitsubishi FD60 Forklift Trucks Service Repair Manual SNF20C-20001-UP.pdf
 
Mitsubishi FD60 Forklift Trucks Service Repair Manual SNF20C-10001-UP.pdf
Mitsubishi FD60 Forklift Trucks Service Repair Manual SNF20C-10001-UP.pdfMitsubishi FD60 Forklift Trucks Service Repair Manual SNF20C-10001-UP.pdf
Mitsubishi FD60 Forklift Trucks Service Repair Manual SNF20C-10001-UP.pdf
 
Mitsubishi FD70 Forklift Trucks Service Repair Manual SNF20C-70001-UP.pdf
Mitsubishi FD70 Forklift Trucks Service Repair Manual SNF20C-70001-UP.pdfMitsubishi FD70 Forklift Trucks Service Repair Manual SNF20C-70001-UP.pdf
Mitsubishi FD70 Forklift Trucks Service Repair Manual SNF20C-70001-UP.pdf
 
Mitsubishi FD70 Forklift Trucks Service Repair Manual SNF20C-70001-UP.pdf
Mitsubishi FD70 Forklift Trucks Service Repair Manual SNF20C-70001-UP.pdfMitsubishi FD70 Forklift Trucks Service Repair Manual SNF20C-70001-UP.pdf
Mitsubishi FD70 Forklift Trucks Service Repair Manual SNF20C-70001-UP.pdf
 
Mitsubishi FD70 Forklift Trucks Service Repair Manual SNF20C-60001-UP.pdf
Mitsubishi FD70 Forklift Trucks Service Repair Manual SNF20C-60001-UP.pdfMitsubishi FD70 Forklift Trucks Service Repair Manual SNF20C-60001-UP.pdf
Mitsubishi FD70 Forklift Trucks Service Repair Manual SNF20C-60001-UP.pdf
 
Mitsubishi FD70 Forklift Trucks Service Repair Manual SNF20C-60001-UP.pdf
Mitsubishi FD70 Forklift Trucks Service Repair Manual SNF20C-60001-UP.pdfMitsubishi FD70 Forklift Trucks Service Repair Manual SNF20C-60001-UP.pdf
Mitsubishi FD70 Forklift Trucks Service Repair Manual SNF20C-60001-UP.pdf
 
Mitsubishi FD60 Forklift Trucks Service Repair Manual SNF20C-10001-UP.pdf
Mitsubishi FD60 Forklift Trucks Service Repair Manual SNF20C-10001-UP.pdfMitsubishi FD60 Forklift Trucks Service Repair Manual SNF20C-10001-UP.pdf
Mitsubishi FD60 Forklift Trucks Service Repair Manual SNF20C-10001-UP.pdf
 
Mitsubishi FD60 Forklift Trucks Service Repair Manual SNF20C-20001-UP.pdf
Mitsubishi FD60 Forklift Trucks Service Repair Manual SNF20C-20001-UP.pdfMitsubishi FD60 Forklift Trucks Service Repair Manual SNF20C-20001-UP.pdf
Mitsubishi FD60 Forklift Trucks Service Repair Manual SNF20C-20001-UP.pdf
 
Mitsubishi FD70 Forklift Trucks Service Repair Manual SNF20C-70001-UP.pdf
Mitsubishi FD70 Forklift Trucks Service Repair Manual SNF20C-70001-UP.pdfMitsubishi FD70 Forklift Trucks Service Repair Manual SNF20C-70001-UP.pdf
Mitsubishi FD70 Forklift Trucks Service Repair Manual SNF20C-70001-UP.pdf
 
Mitsubishi FD60 Forklift Trucks Service Repair Manual SNF20C-10001-UP.pdf
Mitsubishi FD60 Forklift Trucks Service Repair Manual SNF20C-10001-UP.pdfMitsubishi FD60 Forklift Trucks Service Repair Manual SNF20C-10001-UP.pdf
Mitsubishi FD60 Forklift Trucks Service Repair Manual SNF20C-10001-UP.pdf
 
Mitsubishi FD70 Forklift Trucks Service Repair Manual SNF20C-60001-UP.pdf
Mitsubishi FD70 Forklift Trucks Service Repair Manual SNF20C-60001-UP.pdfMitsubishi FD70 Forklift Trucks Service Repair Manual SNF20C-60001-UP.pdf
Mitsubishi FD70 Forklift Trucks Service Repair Manual SNF20C-60001-UP.pdf
 
Mitsubishi FD60 Forklift Trucks Service Repair Manual SNF20C-10001-UP.pdf
Mitsubishi FD60 Forklift Trucks Service Repair Manual SNF20C-10001-UP.pdfMitsubishi FD60 Forklift Trucks Service Repair Manual SNF20C-10001-UP.pdf
Mitsubishi FD60 Forklift Trucks Service Repair Manual SNF20C-10001-UP.pdf
 
Mitsubishi FD70 Forklift Trucks Service Repair Manual SNF20C-60001-UP.pdf
Mitsubishi FD70 Forklift Trucks Service Repair Manual SNF20C-60001-UP.pdfMitsubishi FD70 Forklift Trucks Service Repair Manual SNF20C-60001-UP.pdf
Mitsubishi FD70 Forklift Trucks Service Repair Manual SNF20C-60001-UP.pdf
 
Mitsubishi FD60 Forklift Trucks Service Repair Manual SNF20C-20001-UP.pdf
Mitsubishi FD60 Forklift Trucks Service Repair Manual SNF20C-20001-UP.pdfMitsubishi FD60 Forklift Trucks Service Repair Manual SNF20C-20001-UP.pdf
Mitsubishi FD60 Forklift Trucks Service Repair Manual SNF20C-20001-UP.pdf
 
Mitsubishi FD70 Forklift Trucks Service Repair Manual SNF20C-70001-UP.pdf
Mitsubishi FD70 Forklift Trucks Service Repair Manual SNF20C-70001-UP.pdfMitsubishi FD70 Forklift Trucks Service Repair Manual SNF20C-70001-UP.pdf
Mitsubishi FD70 Forklift Trucks Service Repair Manual SNF20C-70001-UP.pdf
 
CATERPILLAR CAT DP70 FORKLIFT LIFT TRUCKS Service Repair Manual SN:T20C-60001...
CATERPILLAR CAT DP70 FORKLIFT LIFT TRUCKS Service Repair Manual SN:T20C-60001...CATERPILLAR CAT DP70 FORKLIFT LIFT TRUCKS Service Repair Manual SN:T20C-60001...
CATERPILLAR CAT DP70 FORKLIFT LIFT TRUCKS Service Repair Manual SN:T20C-60001...
 

Recently uploaded

Electric Nation Upper Midwest Inter-Tribal Electric Vehicle (EV) Charging Com...
Electric Nation Upper Midwest Inter-Tribal Electric Vehicle (EV) Charging Com...Electric Nation Upper Midwest Inter-Tribal Electric Vehicle (EV) Charging Com...
Electric Nation Upper Midwest Inter-Tribal Electric Vehicle (EV) Charging Com...Forth
 
原版1:1定制(IC大学毕业证)帝国理工学院大学毕业证国外文凭复刻成绩单#电子版制作#留信入库#多年经营绝对保证质量
原版1:1定制(IC大学毕业证)帝国理工学院大学毕业证国外文凭复刻成绩单#电子版制作#留信入库#多年经营绝对保证质量原版1:1定制(IC大学毕业证)帝国理工学院大学毕业证国外文凭复刻成绩单#电子版制作#留信入库#多年经营绝对保证质量
原版1:1定制(IC大学毕业证)帝国理工学院大学毕业证国外文凭复刻成绩单#电子版制作#留信入库#多年经营绝对保证质量208367051
 
(办理学位证)(Rice毕业证)莱斯大学毕业证成绩单修改留信学历认证原版一模一样
(办理学位证)(Rice毕业证)莱斯大学毕业证成绩单修改留信学历认证原版一模一样(办理学位证)(Rice毕业证)莱斯大学毕业证成绩单修改留信学历认证原版一模一样
(办理学位证)(Rice毕业证)莱斯大学毕业证成绩单修改留信学历认证原版一模一样gfghbihg
 
Pros and cons of buying used fleet vehicles.pptx
Pros and cons of buying used fleet vehicles.pptxPros and cons of buying used fleet vehicles.pptx
Pros and cons of buying used fleet vehicles.pptxjennifermiller8137
 
办理克莱姆森大学毕业证成绩单|购买美国文凭证书
办理克莱姆森大学毕业证成绩单|购买美国文凭证书办理克莱姆森大学毕业证成绩单|购买美国文凭证书
办理克莱姆森大学毕业证成绩单|购买美国文凭证书zdzoqco
 
Building a Future Where Everyone Can Ride and Drive Electric by Bridget Gilmore
Building a Future Where Everyone Can Ride and Drive Electric by Bridget GilmoreBuilding a Future Where Everyone Can Ride and Drive Electric by Bridget Gilmore
Building a Future Where Everyone Can Ride and Drive Electric by Bridget GilmoreForth
 
Mastering Mercedes Engine Care Top Tips for Rowlett, TX Residents
Mastering Mercedes Engine Care Top Tips for Rowlett, TX ResidentsMastering Mercedes Engine Care Top Tips for Rowlett, TX Residents
Mastering Mercedes Engine Care Top Tips for Rowlett, TX ResidentsRowlett Motorwerks
 
Centering Equity Panel by Samantha Bingham
Centering Equity Panel by Samantha BinghamCentering Equity Panel by Samantha Bingham
Centering Equity Panel by Samantha BinghamForth
 
Transportation Electrification Funding Strategy by Jeff Allen and Brandt Hert...
Transportation Electrification Funding Strategy by Jeff Allen and Brandt Hert...Transportation Electrification Funding Strategy by Jeff Allen and Brandt Hert...
Transportation Electrification Funding Strategy by Jeff Allen and Brandt Hert...Forth
 
Trent engineer.pptx presentation reports
Trent engineer.pptx presentation reportsTrent engineer.pptx presentation reports
Trent engineer.pptx presentation reportsbasant11731
 
办理科廷科技大学毕业证Curtin毕业证留信学历认证
办理科廷科技大学毕业证Curtin毕业证留信学历认证办理科廷科技大学毕业证Curtin毕业证留信学历认证
办理科廷科技大学毕业证Curtin毕业证留信学历认证jdkhjh
 
办理阳光海岸大学毕业证成绩单原版一比一
办理阳光海岸大学毕业证成绩单原版一比一办理阳光海岸大学毕业证成绩单原版一比一
办理阳光海岸大学毕业证成绩单原版一比一F La
 
Building a Budget by Cat Plein and Josh Rodriguez
Building a Budget by Cat Plein and Josh RodriguezBuilding a Budget by Cat Plein and Josh Rodriguez
Building a Budget by Cat Plein and Josh RodriguezForth
 
Program Design by Prateek Suri and Christian Williss
Program Design by Prateek Suri and Christian WillissProgram Design by Prateek Suri and Christian Williss
Program Design by Prateek Suri and Christian WillissForth
 
原版1:1定制阳光海岸大学毕业证(JCU毕业证)#文凭成绩单#真实留信学历认证永久存档
原版1:1定制阳光海岸大学毕业证(JCU毕业证)#文凭成绩单#真实留信学历认证永久存档原版1:1定制阳光海岸大学毕业证(JCU毕业证)#文凭成绩单#真实留信学历认证永久存档
原版1:1定制阳光海岸大学毕业证(JCU毕业证)#文凭成绩单#真实留信学历认证永久存档208367051
 
原版工艺美国普林斯顿大学毕业证Princeton毕业证成绩单修改留信学历认证
原版工艺美国普林斯顿大学毕业证Princeton毕业证成绩单修改留信学历认证原版工艺美国普林斯顿大学毕业证Princeton毕业证成绩单修改留信学历认证
原版工艺美国普林斯顿大学毕业证Princeton毕业证成绩单修改留信学历认证jjrehjwj11gg
 
(办理学位证)墨尔本大学毕业证(Unimelb毕业证书)成绩单留信学历认证原版一模一样
(办理学位证)墨尔本大学毕业证(Unimelb毕业证书)成绩单留信学历认证原版一模一样(办理学位证)墨尔本大学毕业证(Unimelb毕业证书)成绩单留信学历认证原版一模一样
(办理学位证)墨尔本大学毕业证(Unimelb毕业证书)成绩单留信学历认证原版一模一样whjjkkk
 
办理原版学位证(UofT毕业证)多伦多大学毕业证成绩单修改留信学历认证永久查询
办理原版学位证(UofT毕业证)多伦多大学毕业证成绩单修改留信学历认证永久查询办理原版学位证(UofT毕业证)多伦多大学毕业证成绩单修改留信学历认证永久查询
办理原版学位证(UofT毕业证)多伦多大学毕业证成绩单修改留信学历认证永久查询gejoij
 
办理(PITT毕业证书)美国匹兹堡大学毕业证成绩单原版一比一
办理(PITT毕业证书)美国匹兹堡大学毕业证成绩单原版一比一办理(PITT毕业证书)美国匹兹堡大学毕业证成绩单原版一比一
办理(PITT毕业证书)美国匹兹堡大学毕业证成绩单原版一比一F La
 

Recently uploaded (20)

Electric Nation Upper Midwest Inter-Tribal Electric Vehicle (EV) Charging Com...
Electric Nation Upper Midwest Inter-Tribal Electric Vehicle (EV) Charging Com...Electric Nation Upper Midwest Inter-Tribal Electric Vehicle (EV) Charging Com...
Electric Nation Upper Midwest Inter-Tribal Electric Vehicle (EV) Charging Com...
 
原版1:1定制(IC大学毕业证)帝国理工学院大学毕业证国外文凭复刻成绩单#电子版制作#留信入库#多年经营绝对保证质量
原版1:1定制(IC大学毕业证)帝国理工学院大学毕业证国外文凭复刻成绩单#电子版制作#留信入库#多年经营绝对保证质量原版1:1定制(IC大学毕业证)帝国理工学院大学毕业证国外文凭复刻成绩单#电子版制作#留信入库#多年经营绝对保证质量
原版1:1定制(IC大学毕业证)帝国理工学院大学毕业证国外文凭复刻成绩单#电子版制作#留信入库#多年经营绝对保证质量
 
(办理学位证)(Rice毕业证)莱斯大学毕业证成绩单修改留信学历认证原版一模一样
(办理学位证)(Rice毕业证)莱斯大学毕业证成绩单修改留信学历认证原版一模一样(办理学位证)(Rice毕业证)莱斯大学毕业证成绩单修改留信学历认证原版一模一样
(办理学位证)(Rice毕业证)莱斯大学毕业证成绩单修改留信学历认证原版一模一样
 
Pros and cons of buying used fleet vehicles.pptx
Pros and cons of buying used fleet vehicles.pptxPros and cons of buying used fleet vehicles.pptx
Pros and cons of buying used fleet vehicles.pptx
 
办理克莱姆森大学毕业证成绩单|购买美国文凭证书
办理克莱姆森大学毕业证成绩单|购买美国文凭证书办理克莱姆森大学毕业证成绩单|购买美国文凭证书
办理克莱姆森大学毕业证成绩单|购买美国文凭证书
 
Building a Future Where Everyone Can Ride and Drive Electric by Bridget Gilmore
Building a Future Where Everyone Can Ride and Drive Electric by Bridget GilmoreBuilding a Future Where Everyone Can Ride and Drive Electric by Bridget Gilmore
Building a Future Where Everyone Can Ride and Drive Electric by Bridget Gilmore
 
Mastering Mercedes Engine Care Top Tips for Rowlett, TX Residents
Mastering Mercedes Engine Care Top Tips for Rowlett, TX ResidentsMastering Mercedes Engine Care Top Tips for Rowlett, TX Residents
Mastering Mercedes Engine Care Top Tips for Rowlett, TX Residents
 
Centering Equity Panel by Samantha Bingham
Centering Equity Panel by Samantha BinghamCentering Equity Panel by Samantha Bingham
Centering Equity Panel by Samantha Bingham
 
Transportation Electrification Funding Strategy by Jeff Allen and Brandt Hert...
Transportation Electrification Funding Strategy by Jeff Allen and Brandt Hert...Transportation Electrification Funding Strategy by Jeff Allen and Brandt Hert...
Transportation Electrification Funding Strategy by Jeff Allen and Brandt Hert...
 
Trent engineer.pptx presentation reports
Trent engineer.pptx presentation reportsTrent engineer.pptx presentation reports
Trent engineer.pptx presentation reports
 
Hot Sexy call girls in Pira Garhi🔝 9953056974 🔝 escort Service
Hot Sexy call girls in Pira Garhi🔝 9953056974 🔝 escort ServiceHot Sexy call girls in Pira Garhi🔝 9953056974 🔝 escort Service
Hot Sexy call girls in Pira Garhi🔝 9953056974 🔝 escort Service
 
办理科廷科技大学毕业证Curtin毕业证留信学历认证
办理科廷科技大学毕业证Curtin毕业证留信学历认证办理科廷科技大学毕业证Curtin毕业证留信学历认证
办理科廷科技大学毕业证Curtin毕业证留信学历认证
 
办理阳光海岸大学毕业证成绩单原版一比一
办理阳光海岸大学毕业证成绩单原版一比一办理阳光海岸大学毕业证成绩单原版一比一
办理阳光海岸大学毕业证成绩单原版一比一
 
Building a Budget by Cat Plein and Josh Rodriguez
Building a Budget by Cat Plein and Josh RodriguezBuilding a Budget by Cat Plein and Josh Rodriguez
Building a Budget by Cat Plein and Josh Rodriguez
 
Program Design by Prateek Suri and Christian Williss
Program Design by Prateek Suri and Christian WillissProgram Design by Prateek Suri and Christian Williss
Program Design by Prateek Suri and Christian Williss
 
原版1:1定制阳光海岸大学毕业证(JCU毕业证)#文凭成绩单#真实留信学历认证永久存档
原版1:1定制阳光海岸大学毕业证(JCU毕业证)#文凭成绩单#真实留信学历认证永久存档原版1:1定制阳光海岸大学毕业证(JCU毕业证)#文凭成绩单#真实留信学历认证永久存档
原版1:1定制阳光海岸大学毕业证(JCU毕业证)#文凭成绩单#真实留信学历认证永久存档
 
原版工艺美国普林斯顿大学毕业证Princeton毕业证成绩单修改留信学历认证
原版工艺美国普林斯顿大学毕业证Princeton毕业证成绩单修改留信学历认证原版工艺美国普林斯顿大学毕业证Princeton毕业证成绩单修改留信学历认证
原版工艺美国普林斯顿大学毕业证Princeton毕业证成绩单修改留信学历认证
 
(办理学位证)墨尔本大学毕业证(Unimelb毕业证书)成绩单留信学历认证原版一模一样
(办理学位证)墨尔本大学毕业证(Unimelb毕业证书)成绩单留信学历认证原版一模一样(办理学位证)墨尔本大学毕业证(Unimelb毕业证书)成绩单留信学历认证原版一模一样
(办理学位证)墨尔本大学毕业证(Unimelb毕业证书)成绩单留信学历认证原版一模一样
 
办理原版学位证(UofT毕业证)多伦多大学毕业证成绩单修改留信学历认证永久查询
办理原版学位证(UofT毕业证)多伦多大学毕业证成绩单修改留信学历认证永久查询办理原版学位证(UofT毕业证)多伦多大学毕业证成绩单修改留信学历认证永久查询
办理原版学位证(UofT毕业证)多伦多大学毕业证成绩单修改留信学历认证永久查询
 
办理(PITT毕业证书)美国匹兹堡大学毕业证成绩单原版一比一
办理(PITT毕业证书)美国匹兹堡大学毕业证成绩单原版一比一办理(PITT毕业证书)美国匹兹堡大学毕业证成绩单原版一比一
办理(PITT毕业证书)美国匹兹堡大学毕业证成绩单原版一比一
 

MITSUBISHI FG55N FORKLIFT TRUCKS Service Repair Manual SN: EF33C-80001-UP

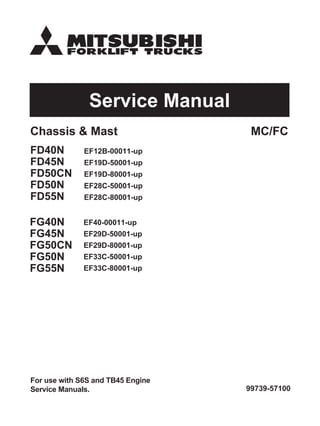
  • 1. CF/CMtsaM&sissahC Service Manual FD40N EF12B-00011-up FD45N EF19D-50001-up FD50CN EF19D-80001-up FD50N EF28C-50001-up FD55N EF28C-80001-up FG40N EF40-00011-up FG45N EF29D-50001-up FG50CN EF29D-80001-up FG50N EF33C-50001-up FG55N EF33C-80001-up 99739-57100 For use with S6S and TB45 Engine Service Manuals.
  • 2. 1 Pub. No. 99739-57100 FOREWORD This service manual is a guide for servicing Mitsubishi Forklift Trucks. For your convenience the instructions are grouped by systems as a ready reference. The long productive life of your lift truck(s) depends on regular and proper servicing. Servicing consistent with what you will learn by reading this service manual. Read the respective sections of this manual carefully and familiarize yourself with all of the components before attempting to start a test, repair or rebuild job. The descriptions, illustrations and specifications contained in this manual are for trucks with serial numbers in effect at the time of printing. Mitsubishi Forklift Trucks reserves the right to change specifications or designs without notice and without incurring obligations. The trucks listed in this manual are powered by TB45 gasoline engines or S6S diesel engines. For engine servicing, please refer to the applicable engine service manual. TB45 Gasoline engine S6S Diesel engine <Safety Related Signs> Indicates a potentially hazardous situation which, if not avoided, could result in death or serious injury. Indicates a potentially hazardous situation which, if not avoided, may result in minor or moderate injury, or damage to your machine. Indicates a condition that can cause damage to, or shorten service life of, the machine. WARNING CAUTION NOTE
  • 3. 2 SAFETY The proper and safe lubrication and maintenance for these lift trucks, recommended by Mitsubishi Forklift Trucks, are outlined in the OPERATION & MAINTENANCE MANUAL. Read and understand the OPERATION & MAINTE- NANCE MANUAL before performing any lubrica- tion or maintenance on these trucks. Improper performance of lubrication or mainte- nance procedures is dangerous and could result in injury or death. The serviceman or mechanic may be unfamiliar with many of the systems on this truck. This makes it important to use caution when performing service work. A knowledge of the system and/or components is important before the removal or disassembly of any component. Because of the size of some of the truck components, the serviceman or mechanic should check the weights noted in this Manual. Use proper lifting procedures when removing any components. Following is a list of basic precautions that should always be observed. (1) Read and understand all warning plates and decals on the truck before operating, lubricating or repairing the product. (2) Always wear protective glasses and protective shoes when working around trucks. In particular, wear protective glasses when pounding on any part of the truck or its attachments with a hammer or sledge. Use welders gloves, hood/goggles, apron and other protective clothing appropriate to the welding job being performed. Do not wear loose fitting or torn clothing. Remove all rings from fingers when working on machinery. (3) Do not work on any truck that is supported only by lift jacks or a hoist. Always use blocks or jack stands to support the truck before performing any disassembly. (4) Lower the forks or other implements to the ground before performing any work on the truck. If this cannot be done, make sure the forks or other implements are blocked correctly to prevent them from dropping unexpectedly. Do not operate these trucks unless you have read and understood the instructions in the OPERA- TION & MAINTENANCE MANUAL. Improper truck operation is dangerous and could result in injury or death. (5) Use steps and grab handles (if applicable) when mounting or dismounting a truck. Clean any mud or debris from steps, walkways or work platforms before using. Always face truck when using steps, ladders and walkways. When it is not possible to use the designed access system, provide ladders, scaffolds, or work platforms to perform safe repair operations. (6) To avoid back injury, use a hoist when lifting com- ponents which weigh 23 kg or more. Make sure all chains, hooks, slings, etc., are in good condition and are of the correct capacity. Be sure hooks are positioned correctly. Lifting eyes are not to be side loaded during a lifting operation. (7) To avoid burns, be alert for hot parts on trucks which have just been stopped and hot fluids in lines, tubes and compartments. (8) Be careful when removing cover plates. Gradually back off the last two bolts or nuts located at oppo- site ends of the cover or device and pry cover loose to relieve any spring or other pressure, before removing the last two bolts or nuts com- pletely. (9) Be careful when removing filler caps, breathers and plugs on the truck. Hold a rag over the cap or plug to prevent being sprayed or splashed by liq- uids under pressure. The danger is even greater if the truck has just been stopped because fluids can be hot. (10)Always use tools that are in good condition and be sure you understand how to use them before performing any service work. (11)Reinstall all fasteners with same part number. Do not use a lesser quality fastener if replacements are necessary. (12)If possible, make all repairs with the truck parked on a level, hard surface. Block truck so it does not roll while working on or under truck.
  • 4. 3 (13)Before starting to work on truck, hang "Do not Operate" tag in the Operator's Compartment. (14)Repairs, which require welding, should be per- formed only with the benefit of the appropriate ref- erence information and by personnel adequately trained and knowledgeable in welding proce- dures. Determine type of metal being welded and select correct welding procedure and electrodes, rods or wire to provide a weld metal strength equivalent at least to that of parent metal. (15)Do not damage wiring during removal operations. Reinstall the wiring so it is not damaged nor will it be damaged in operation by contacting sharp cor- ners, or by rubbing against some object or hot surface. Place wiring away from oil pipe. (16)Be sure all protective devices including guards and shields are properly installed and functioning correctly before starting a repair. If a guard or shield must be removed to perform the repair work, use extra caution. (17)Always support the mast and carriage to keep carriage or attachments raised when maintenance or repair work is performed, which requires the mast in the raised position. (18)Loose or damaged fuel, lubricant and hydraulic lines, tubes and hoses could cause fires. Do not bend or strike high pressure lines or install ones which have been bent or damaged. Inspect lines, tubes and hoses carefully. Do not check for leaks with your hands. Pin hole (very small) leaks could result in a high velocity oil stream that will be invis- ible close to the hose. This oil could penetrate the skin and cause personal injury. Use cardboard or paper to locate pin hole leaks. (19)Tighten connections to the correct torque. Make sure that all heat shields, clamps and guards are installed correctly to avoid excessive heat, vibra- tion or rubbing against other parts during opera- tion. Shields that protect against oil spray onto hot exhaust components in event of a line, tube or seal failure, must be installed correctly. (20)Relieve all pressure in air, oil or water systems before any lines, fittings or related items are dis- connected or removed. Always make sure all raised components are blocked correctly and be alert for possible pressure when disconnecting any device from a system that utilizes pressure. (21)Do not operate a truck if any rotating part is dam- aged or contacts any other part during operation. Any high speed rotating component that has been damaged or altered should be checked for bal- ance before reusing.
  • 5. 4 HOW TO USE THIS MANUAL Lift truck model covered in this manual MC Truck (Mechanical Control System) Mechanically controlled hydraulic system (conventional lever system) FC Truck (Finger-tip Control System) Electronically controlled hydraulic system Gasoline-Engine Trucks (FG)....... Trucks Equipped with TB45 Gasoline Engine Diesel-Engine Trucks (FD) .................... Trucks Equipped with S6S Diesel Engine Powershift Trucks................................... Trucks Equipped with Powershift Transmission FC lever box Lever VCM Controller Electric wiring Flow regulator valve Electromagnetic control valve Control valve MC Truck FC Truck 216300
  • 6. 5 HOW TO USE THUS MANUAL(continued) Disassembly diagram(example) Suggestions for Disassembly Output shaft, Removing Remove output shaft using a special tool. Service Data 1 2 213445 Sequence 1 Cover, Bolt, Washer (part name) 2 Out put shaft assembly (part name) 213446 Unit:mm(in.) Gear Backlash A 0.11 to 0.28 (0.004 to 0.011) B 0.5 (0.012) A: Standard value B: Repair or Service Limit
  • 7. 6 Symbols and abbreviations Units (1) SI Units are used in this manual. (2) The following table shows the conversion of SI unit and customary unit. OP Option R1/4 Taper pipe thread (external) 1/4 inch (formerly PT1/4) RC1/8 Taper pipe thread (external) 1/4 inch (formerly PT1/8) G1/4A Straight pipe thread (external) 1/4 inch (formerly PF1/4-A) Rp1/8 Straight pipe thread (internal) 1/8 inch (formerly PS1/8) Item SI unit Customary unit Force 1 N 0.102 kgf 1 lbf 0.4536 kgf Pressure 1 kPa 0.0102 kgf/cm2 1 psi 0.0703 kgf/cm2 Torque 1 N·m 0.102 kgf·m 1 lbf·ft 0.1383 kgf·m
  • 8. CHAPTER INDEX CHAPTER INDEX CHAPTER INDEX Items GENERAL INFORMATION Truck Models Covered, Serial Number Locations, Dimensions, Technical Data COOLING SYSTEM Fan Belt Removal and Installation, Fan Belt Tension ELECTRICAL SYSTEM Console Box, Chassis Electrical Devices, Battery Maintenance, Electrical Schematic CONTROLLERS Main Functions of Controller, Input/Output Monitor, Error Codes and Troubleshooting POWER TRAIN Removal and Installation of Power Line POWERSHIFT TRANSMISSION Torque Converter, Singe Speed Powershift Transmission Control Valve, Automatic Two-Speed Transmission FRONT AXLE AND REDUCTION DIFFERENTIAL Front Tire, Front Axle, Reduction, Differential REAR AXLE Rear Axle, Rear Tire BRAKE SYSTEM Master Cylinder, Wheel Brake, Brake Booster STEERING SYSTEM Steering Gear, Power Cylinder, Flow Divider HYDRAULIC SYSTEM Tank, Pump, Control Valve, Lift and Tilt Cylinders, Flow Regulator Valve, Down Safety Valve MAST AND FORKS Simplex and Duplex Masts, Triplex Mast SERVICE DATA Maintenance Standard, Maintenance Schedule, Periodic Replacement Parts, Lubrication Instruction, Special Tool Needed 1 2 3 4 5 6 7 8 9 10 11 12 13
  • 9. 1 Chapter 1 GENERAL INFORMATION 1. Model View............................................................................................... 1-1 2. Lift Truck Models Covered..................................................................... 1-2 3. Serial Number Locations........................................................................ 1-3 4. Dimensions.............................................................................................. 1-4 5. Technical Data......................................................................................... 1-5 6. Performance ............................................................................................ 1-6
  • 10. 1-1 GENERAL INFORMATION Chapter 1 GENERAL INFORMATION 1. Model View MC model 215315 215316 FC model
  • 11. 1-2 GENERAL INFORMATION 2. Lift Truck Models Covered This Service Manual provides service and maintenance information for the following lift trucks: Mounted engine Gasoline model Diesel model Non-electronic control - MC / FC Electronic control MC / FC - Electronic Gasoline engine models Non-electronic diesel engine models Truck model Serial number Mounted engine Truck model Serial number Mounted engine FG40N EF40-00011-up TB45 FD40N EF12B-00011-up S6S FG45N EF29D-50001-up TB45 FD45N EF19D-50001-up S6S FG50CN EF29D-80001-up TB45 FD50CN EF19D-80001-up S6S FG50N EF33C-50001-up TB45 FD50N EF28C-50001-up S6S FG55N EF33C-80001-up TB45 FD55N EF28C-80001-up S6S
  • 12. 1-3 GENERAL INFORMATION 3. Serial Number Locations 215340 Diesel engine model serial number Name plate Chassis serial number Gasoline engine model serial number Transmission serial numberMast serial number
  • 14. 1-5 GENERAL INFORMATION 5. Technical Data Unit:mm (in.) Truck model class 4 ton class 5 ton class Gasoline model FG40N FG45N FG50CN FG50N FG55N Diesel model FD40N FD45N FD50CN FD50N FD55N A Maximum lift 3350 (132) 3360 (132.5) B Free lift height 150 (5.9) 160 (6.3) C Fork spread <min - max> 320 - 1184 (12.6 - 46.6) D Fork length 1220 (48.0) E Tilt angle <forward - backward> Deg 6 - 10 F Overall length 3000 (118) 3130 (123) 3170 (125) 3310 (130) 3360 (132) G Overall width <outside-to-outside of tires> Single 1415 (55.5) 1460 (57.5) Double 1780 (70.0) Special double 1965 (77.5) H Overall height <with mast lowered> 2320 (91.5) 2400 (94.5) I Height of the overhead guard 2280 (89.5) J Overall height <with mast extended> With backrest 4570 (180) 4590 (181) Without backrest 4230 (167) 4190 (165) 4330 (170) K Tread <front wheel> Single 1175 (46.5) Double 1310 (51.5) Special double 1445 (57.0) L Tread <rear wheel> 1180 (46.5) M Wheelbase 1850 (73.0) 2000 (78.5) 2150 (84.5) N Front overhang 577 (22.7) 582 (22.9) 602 (23.7) O Minimum turning radius 2580 (101) 2730 (107) 2760 (109) 2890 (114) 2940 (116) P Under clearance <at frame> 227 (8.9)
  • 15. 1-6 GENERAL INFORMATION 6. Performance Truck model Class 4 ton class 5 ton class Gasoline model Truck model FG40N FG45N FG50CN FG50N FG55N Capacity kg (lb) 3500 (8000) 4000 (9000) 4500 (10000) 5000 (11000) 5500 (12000) Load center mm (in.) 600 (24) Lift speed Loaded 2SP mast mm/s (fpm) 570 (110) 490 (96) 2FF mast 530 (105) 430 (85) 3FF mast 530 (105) 450 (89) Unloaded 2SP mast 600 (120) 520 (100) 2FF mast 560 (110) 460 (90) 3FF mast 560 (110) 480 (94) Travel speed Forward Loaded 1st speed km/h (mph) 13.5 (8.5) 2nd speed 22.0 (14.0) 21.5 (13.5) Unloaded 1st speed 13.5 (8.5) 2nd speed 22.5 (14.0) Reverse Loaded 1st speed 18.5 (11.5) Unloaded 1st speed 19.0 (12.0) 18.5 (11.5) Truck model Class 4 ton class 5 ton class Diesel model Truck model FD40N FD45N FD50CN FD50N FD55N Capacity kg (lb) 3500 (8000) 4000 (9000) 4500 (10000) 5000 (11000) 5500 (12000) Load center mm (in.) 600 (24) Lift speed Loaded 2SP mast mm/s (fpm) 550 (110) 470 (93) 2FF mast 510 (100) 420 (83) 3FF mast 520 (102) 440 (86) Unloaded 2SP mast 610 (120) 530 (105) 2FF mast 570 (112) 470 (92) 3FF mast 570 (112) 490 (96) Travel speed Forward Loaded 1st speed km/h (mph) 13.5 (8.5) 2nd speed 21.5 (13.5) 21.0 (13.0) Unloaded 1st speed 13.5 (8.5) 2nd speed 22.0 (13.5) Reverse Loaded 1st speed 18.0 (11.0) 17.5 (11.0) Unloaded 1st speed 18.5 (11.5)
  • 16. 2 Chapter 2 COOLING SYSTEM 1. Specifications.......................................................................................... 2-1 2. Structure .................................................................................................. 2-2 3. Removal and Installation........................................................................ 2-3 3.1 Fan Belt Removal....................................................................................................2-3 4. Inspection and Adjustment.................................................................... 2-5 4.1 Fan Belt ...................................................................................................................2-5 4.2 Radiator...................................................................................................................2-6 4.3 Upper Hose, Lower Hose ........................................................................................2-6 4.4 Coolant ....................................................................................................................2-7 5. Troubleshooting...................................................................................... 2-8
  • 17. 2-1 COOLING SYSTEM Chapter 2 COOLING SYSTEM 1. Specifications Item Truck model FG40N FG45N FG50CN FG50N FG55N FD40N FD45N FD50CN FD50N FD55N Cooling system Cooling method Water-cooled, forced circulation Radiator Corrugated fin (pressure) type Water pump Centrifugal type Thermostat Wax pellet type
  • 18. 2-2 COOLING SYSTEM 2. Structure 6 5 3 4 1 2 7 6 5 3 4 1 2 7 Gasoline model Diesel model 215476 1 Engine 2 Fan (coupled directly to the engine crankshaft) 3 Shroud 4 Radiator 5 Oil cooler for torque converter 6 Reserve tank 7 Radiator cap
  • 19. 2-3 COOLING SYSTEM 3. Removal and Installation 3.1 Fan Belt Removal 3.1.1 Start by Remove the radiator cover. 1 2 215477 1 Gasoline model Diesel model 3 3 1 Tension assembly (pulley lock bolt) 2 Alternator lock bolt 3 Fan belt
  • 20. 2-4 COOLING SYSTEM 3.1.2 Removal Gasoline model (1) Loosen the pulley lock bolts by rotating 3 to 4 turns. If the pulley lock bolts are not loosened ade- quately, the fan pulley will not move. Note: Do not remove the pulley lock bolts by loosen- ing them too much. (2) Loosen the lock nut. (3) Loosen the adjusting screw and push the fan pul- ley against the crankshaft pulley side to remove the belt. Diesel model (1) Loosen the pulley lock bolts and the alternator lock bolts by rotating 3 to 4 turns. If the lock bolts are not loosened adequately, the alternator will not move. Note: Do not remove the lock bolts by loosening them too much. (2) Push the alternator pulley against the fan side to remove the belt. 3.1.3 Installation For installation, follow the removal sequence in reverse. Also follow the instructions below. (1) Before installing the belt, turn the fan to check for smooth rotation. Replace the bearing if it gener- ates unusual noises. (2) After installing the belt, check that the pulley moves when pushing the tension belt. (3) Tighten the lock bolts and lock nut firmly. 216926 Adjusting screw Fan belt Fan pulley Pulley lock bolts Lock nut
  • 21. 2-5 COOLING SYSTEM 4. Inspection and Adjustment 4.1 Fan Belt 4.1.1 Fan Belt Inspection (1) Check the belt for contamination from oil, grease or dust. Replace the belt if needed when the con- tamination is found. When the belt is slightly con- taminated, clean it with a rag or paper towel. Do not use gasoline, oil or any other solvent for cleaning. (2) During the engine overhaul or belt tension adjust- ment, check the condition of the belt. Replace the belt if it has any damage. 4.1.2 Fan Belt Tension Apply force, as specified below, perpendicularly to the belt midway between the fan pulley and tension pulley (or crank shaft pulley), and make sure the belt tension is within the specified range. Force 98 N (9.99 kgf) [22.03 lbf] Belt tension 11 to 13 mm (0.43 to 0.51 in.) Gasoline model Diesel model 215478
  • 22. 2-6 COOLING SYSTEM 4.2 Radiator 4.2.1 Radiator unit Check the core for foreign substances such as dust. If foreign substances are adhered to the core surface, remove them by blowing compressed water from the opposite direction. 4.2.2 Radiator rubber mount Replace radiator rubber mount if it is hardened and has no elasticity. 4.2.3 Radiator cap 4.3 Upper Hose, Lower Hose 4.3.1 Connecting Hoses (1) Check the hoses and replace them if they are swollen or damaged. (2) When connecting the hoses to the radiator, make sure that their ends are fully inserted into the fit- tings and secure them with clamps. Be careful not to damage the water pipe while clean- ing. Unit: Kpa (kgf/cm2) [psi] Opening pressure 88 ± 14.7 (0.9 ± 0.15) [12.77 ± 2.13] Vacuum valve 0 to 4.9 (0 to 0.05) [0 to 0.71] Diesel model 215479
  • 23. 2-7 COOLING SYSTEM 4.4 Coolant 4.4.1 Draining coolant (1) Drain the coolant from the radiator by loosening the drain cock. (2) Drain the coolant from the reservoir tank. 4.4.2 Refilling coolant Mix antifreeze with soft water (tap water) at the proper concentration as shown below and fill the radiator and reserve tank up to the specified level. 4.4.3 Coolant level check (1) Warm up the engine while paying attention to any unusual noises. (2) Stop the engine and check the reserve tank for coolant level, then refill if needed. Coolant quantity Unit: liter (cu.in.) Item Gasoline Diesel Total quantity of coolant (including coolant in hoses) 15.95 (973.3) 12.94 (789.6) Reservoir tank (FULL level) 0.65 (39.7) 0.65 (39.7) Be sure to store antifreeze/coolant mixture carefully because it is hazardous waste. Ask your local dealer for information pertaining to the proper disposal of the coolant. Diesel model 215480 Example: MHI Long Life Coolant Temperature °C (°F) -39 (-38) -30 (-22) -25 (-13) -20 (-4) -15 (5) -10 (14) Concentra- tion (%) 55 50 45 40 35 30 Antifreeze concentration ratio varies depending on brands. Be sure to mix the coolant according to a manufacture's recommended mix ratio. 215481 Diesel model
  • 24. 2-8 COOLING SYSTEM 5. Troubleshooting Condition Possible cause Action Leaking coolant from radiator Damaged radiator core or tank Replace Damaged radiator hoses Replace Hose clamp is defective. Replace Drain cock is defective. Replace Engine overheated Radiator fins are clogged. Clean Fins are excessively distorted. Replace Loose belt Check the belt for tension, elongation, and cracks. Replace the belt if such defect is found. Not enough coolant Refill Leaking oil from oil cooler hose Insufficient tightening torque of hose clamp Retighten or replace
  • 25. 3 Chapter 3 ELECTRIC SYSTEM 1. Chassis Electrical Devices Wiring Outline ........................................... 3-1 1.1 Gasoline Model........................................................................................................3-1 1.2 Diesel Model............................................................................................................3-2 1.3 Gasoline and Diesel Models....................................................................................3-3 2. Structure .................................................................................................. 3-4 2.1 Console Box ............................................................................................................3-4 2.2 Main Electrical Components....................................................................................3-6 2.3 Table of Lamps......................................................................................................3-17 3. Console Box .......................................................................................... 3-18 3.1 Disassembly ..........................................................................................................3-18 4. Battery Maintenance............................................................................. 3-19 4.1 State of Charge and Electrolyte Specific Gravity (S.G.) Adjustment.....................3-19 4.2 Specific Gravity Reading and State of Charge......................................................3-19 4.3 Charging Precautions............................................................................................3-19 5. Instrument Panel................................................................................... 3-20 5.1 Instrument Panel Screen Components..................................................................3-20 5.2 Basic Screen Display.............................................................................................3-21 5.3 Basic Operation.....................................................................................................3-24 5.4 When an Error Occurs...........................................................................................3-29 5.5 Warning Lamps .....................................................................................................3-31 5.6 Optional Functions.................................................................................................3-32 5.7 Hour Meters...........................................................................................................3-39 5.8 Troubleshooting.....................................................................................................3-41 6. Wire Color.............................................................................................. 3-42 6.1 List of Wire Colors .................................................................................................3-42 7. Troubleshooting.................................................................................... 3-43 7.1 Starter System.......................................................................................................3-43 7.2 Gauges..................................................................................................................3-43 7.3 Lighting System.....................................................................................................3-44 8. Electrical Schematic ............................................................................. 3-46
  • 26. 3-1 ELECTRIC SYSTEM Chapter 3 ELECTRIC SYSTEM 1. Chassis Electrical Devices Wiring Outline 1.1 Gasoline Model 215355 Rear combination lamp Rear combination harness Seat switchSeat To armrest (FC model only) Back-up buzzer Thermoswitch Battery To starter To engine harness ECM (Engine control module) To engine harness Earth Relay box Fuse box Battery cable (+) Battery cable (-) Transmission control solenoid Stop lamp switch Head lamp Instrument panel Harness B Front combination lamp Front combination harness VCM (Vehicle control module) OCM (Option control module) (Wet disc brake only)
  • 27. 3-2 ELECTRIC SYSTEM 1.2 Diesel Model 215356 OCM (Option control module) (Wet disc brake only) Instrument panel Head lamp Front combination lamp Front combination harness Harness B Stop lamp switch Transmission control solenoid Relay box DCM (Diesel control module) (Wet disc brake only) Fuse box Battery cable (-) Earth Battery Battery cable (+) To starter Thermoswitch (Sending unit) Back-up buzzer To armrest (FC model only) Seat switch Seat Rear combination harness Rear combination lamp Glow relay Glow timer
  • 28. 3-3 ELECTRIC SYSTEM 1.3 Gasoline and Diesel Models 215357 Instrument panel Combination switch Select switch Parking brake switch Horn harness Horn Warning buzzer Key switch Control valve Output unit Output harness Control valve Parking brake valve Parking brake pressure switch Harness FC control lever Input unit Thermoswitch (T/C oil)Speed sensor MC FC Console Box Control valve Transmission FC Armrest
  • 29. 3-4 ELECTRIC SYSTEM 2. Structure 2.1 Console Box 1 Water temperature gauge 2 Fuel gauge 3 Hour meter, warning lamps 4 Instrument panel 5 Key switch 6 Light switch, turn signal switch 7 Direction Lever 8 Speedometer 214140 N 2 4 38 1 6 7 5
  • 30. 3-5 ELECTRIC SYSTEM 2.1.1 Function of Instrument Panel Description of function Inspection method for blown bulbs of instrument panel All the warning and indicator lamps are normal if they glow when the key switch is turned to the | (ON) position. Ref. Name of indicators and warning lamps When turned off When glows or blinks Remark A Parking brake warning lamp Normal This lamp glows when the parking brake is applied. - B Seat belt warning lamp Fastened This lamp glows when the seat belt is not fastened. - C Charge warning lamp Normal charging This lamp glows when charging is not normal. (This lamp glows all the time while the engine is stopped.) - D Multi-purpose warning lamp Normal This lamp glows when a minor failure occurs or operating cautions are issued. - E Torque converter oil temperature warn- ing lamp Normal temperature This lamp glows when the torque con- verter oil temperature is not normal. - F Engine oil pressure warning lamp Normal This lamp glows when the engine oil pressure is low. (This lamp glows all the time while the engine is stopped.) - G Engine warning lamp Normal This lamp glows when the engine is failed. - H Glow pilot indicator lamp Preheating completed This lamp glows when the glow plug heating is ON. - I Flex control indicator lamp - This lamp glows when sudden accel- eration or full reverse (shifting of travel to the opposite direction) acti- vates protective function. Option J Mast interlock indicator lamp - When mast interlock is activated (glows) - K Cursor buttons - - - L Fuel gauge Indicates remaining fuel amount with key in "ON" position - M LCD screen - - - N Water temperature gauge Indicates water temperature with key in "ON" position - O Enter/display switch button - - - 214141 A B C D E F G H I J K L M N O
  • 31. 3-6 ELECTRIC SYSTEM 2.2 Main Electrical Components 2.2.1 Key switch The diesel model uses a distributor type injection pump. Its starter switch is equipped with an automatic fuel cut engine stop mechanism. The gasoline model is also equipped with an auto- matic fuel cut engine stop mechanism. (Key switch with anti-restart lock) This key switch has an anti-restarting function. This switch has a built-in anti-restart lock, so the key switch cannot be turned from the | (ON) to the (START) position while the engine is running. This pre- vents engine trouble or starter breakage caused by an operator's improper operation when starting the engine. The gasoline and diesel models use the same key switch. On the diesel model, the key switch is electri- cally connected to the engine so that the | (ON) key switch position turns on the glow plugs. Connection Table 215358 ST M G B (OFF) (ON) (START) Terminal G B M ST Key in and out OFF Yes ON (when operating) ○--------- -----------○ No START (when starting engine) ○--------- -----------○----------- -----------○ No
  • 32. 3-7 ELECTRIC SYSTEM 2.2.2 Combination switch (1) Light switch, turn signal switch 215359 Power Power Tail, clearance lamp Head lamp L - 1 L - 2 L - 3 L - 4 T - 1 Turn signal switch connector Terminal Target Knob position Terminal Target Lever position Flash unit Turn signal lamp (Right) Turn signal lamp (Left) R (Right) N (Neutral) L (Left) OFF 1 2 3 T - 2 T - 3 Horn contact T-1 T-3 L-2 L-4 T-2 L-1 L-3 Light switch turn signal switch connector Light switch connector Forward of truck Light switch turn signal lever L N R OFF 1 2 3 10°10° 25° 25° 25° OFF
  • 33. 3-8 ELECTRIC SYSTEM (2) Direction switch 215360 10°10° F N R Forward-reverse selector lever (FNR) Forward of truck Forward-reverse shift change switch (FNR) 4 2 3 1 5 Connection table F (Forward) N (Neutral) R (Reverse) L/B 1 2 3 4 5Terminal Lever position Wire color B BL/R L/W OFF
  • 34. 3-9 ELECTRIC SYSTEM 2.2.3 Horn Check that the horn activates when applying the spec- ified voltage to both terminals of the horn, T1 and T2. Replace the horn if it does not activate or its sound is unusual. Operating voltage: DC12V (Gasoline and diesel mod- els) Note: The proper installation of the horn to the lift truck is shown in the illustration. 2.2.4 Tank unit 215361 Vent hole Up Down Contact Coil T1 T2 T1 T2 215362 F 3/4 242.7mm (9.56in.) 61.2mm (2.41in.) 424.2mm (16.7in.) 1/2 Illustration shows gasoline model. Pressure relief valve Fuel pump Fuel filter Fuel suction strainer The number in parenthesis is a reference value. E 1/4 E 1/4 1/2 3/4 F Referential Standards Float position Standard resistance value (Ω) Tolerance (Ω) 80 (49.5) 32 (19) 10 – – +12 +2 ±3 +1.0 - 0.5
  • 35. 3-10 ELECTRIC SYSTEM 2.2.5 Stop lamp switch Apply an ohmmeter across the terminals and check that the stop lamp switch is turned ON and OFF when the push rod protrusion is at the specified value. Measure the insulation resistance value across the ter- minals when the push rod is pushed in. Replace the stop lamp switch if its measured insula- tion resistance value is less than the value below. Rated voltage: DC12V 2.2.6 Thermoswitch (Engine cooling water temperature) (1) Apply an ohmmeter between the terminal and body of the sending unit and check for continuity (resistance value). (2) Replace the sending unit if there is no continuity or the resistance value measured is outside the standard resistance value. Note: The illustration is for gasoline models. Insulation resistance value 1 M Ω or more (at 500 V megger) 215363 M10×1.25 OFF ON 2 mm (0.08 in.) 4 mm (0.16 in.) Push rod 215364 Terminal Body Gasoline model Temperature [°C (°F)] 60 ± 0.2 (140 ± 32.36) 65 ± 0.2 (149 ± 32.36) 80 ± 0.2 (176 ± 32.36) 100 ± 0.3 (210 ± 32.54) 125 ± 0.3 (257 ± 32.54) 130 ± 0.3 (266 ± 32.54) Standard resis- tance value (Ω) 80 ± 10 67 ± 7.8 40.6 ± 3.7 22.2 ± 1.4 11.3 ± 0.4 10 ± 0.3 Diesel model Temperature [°C (°F)] 50 (122) 60 ± 0.2 (140 ± 32.36) 80 (176) 100 (212) 106 ± 0.3 (222.8 ± 32.54) 120 (248) Standard resis- tance value (Ω) (80) 56.3 ± 5 (29.5) (16.5) 14.3 ± 0.5 (10)
  • 36. 3-11 ELECTRIC SYSTEM 2.2.7 Thermoswitch (T/C oil) Apply an ohmmeter between the terminal and body and check for continuity (resistance value). Replace the thermoswitch if its measured insulation resistance value is less than the value below. Internal resistance: 0.5 Ω or less (with contact point ON) Allowable load: 0.5 A Note: When installing the thermoswitch, tighten it to the specified torque. 2.2.8 Parking brake switch Measure the insulation resistance between each ter- minal. (1) Parking switch at pulled position (2) Parking switch at pushed position Operation method: Push-pull operation Contact resistance: 1a-ab Insulation resis- tance value 1 M Ω or more (with contact point OFF) (with 500 V megger) Tightening torque 31.4 to 47.1 N·m (3.2 to 4.8 kgf·m) [23.2 to 34.8 lbf·ft] Replace the thermoswitch if it is dropped or abused. Technical data Operating temperature OFF to ON 122 ± 3°C (251.6 ± 37.4°F) ON to OFF 115 °C (239 °F) or higher Insulation resistance (with contact point OFF) 1 M Ω or more 215365 Terminal Body Between terminals B and W Insulation resistance 100 M Ω or more (at 500 V megger) Between terminals B and R Insulation resistance 100 M Ω or more (at 500 V megger) 215366 P W B R 6 mm (0.24 in.) (Stroke) PushPull
  • 37. 3-12 ELECTRIC SYSTEM 2.2.9 Relay box 215367 Relay box 2 (Gasoline model only) Relay box 1 Illustration shows gasoline model Relay box 1 Relay box 2 (Gasoline model only) Warning buzzer relay Flasher relay Starter relay Back-up lamp relay Ignition relay Fuel pump relay ETC motor relay EGI relay MAIN/C relay EGI relay
  • 38. 3-13 ELECTRIC SYSTEM (1) Relay box 1 CB relay (Ignition relay, back-up lamp relay, and starter relay) CM relay (Warning buzzer relay) Coil rating [at 20°C (68°F)] Item Truck model Gasoline and diesel models Rated operating voltage DC12 V Working voltage DC3.0 to 7.0 V Open-circuit voltage DC1.2 to 3.9 V Coil resistance 80 Ω ± 10% Rated exciting current 168 mA ± 10% 215368 Connection diagram (Bottom view) z X Y Coil rating [at 20°C (68°F)] Item Truck model Gasoline and diesel models Rated operating voltage DC12 V Working voltage DC 30 to 7 V Open-circuit voltage DC 0.5 to 3.1 V Coil resistance 120 Ω ± 10% Rated exciting current 117.6 mA ± 10% 215370 Connection diagram (Bottom view) z X Y
  • 39. 3-14 ELECTRIC SYSTEM (2) Relay box 2 (gasoline models only) CM relay (EGI relay, MAIN/C relay, ETC motor relay, and fuel pump relay) Coil rating [at 20°C (68°F)] Item Truck model Gasoline model Rated operating voltage DC12 V Working voltage DC 30 to 7 V Open-circuit voltage DC 0.5 to 3.1 V Coil resistance 120 Ω ± 10% Rated exciting current 117.6 mA ± 10% 215370 Connection diagram (Bottom view) z X Y
  • 40. 3-15 ELECTRIC SYSTEM 2.2.10 Glow timer (diesel model) Inspecting the output time when key switch is turned to ON When a tester is applied to terminal 6 and terminal 3 and a voltage of 24 V is applied between terminals 4 and 3, there should be continuity between 6 and termi- nal 3 for 6 seconds. Replace the glow timer with a new one if it does not function properly. Initial characteristic (Normal temperature and humidity, Vcc=12 V) Preglow timer 6.0 ± 0 1.4 sec Environmental characteristic (-30°C to 70°C, Vcc=7 V to 15 V) Preglow timer 6.0 ± 0.6 2.0 sec 2.2.11 Glow relay (diesel model) (1) Apply an ohmmeter across terminal 3 and termi- nal 4 and measure the resistance value of the relay coil. Replace the coil if there is no continuity or the resistance value measured is out of stan- dard resistance value. (2) Measure the insulation resistance value between terminal 1 and terminal 2. Replace the coil if its measured insulation resis- tance value is less than the value below. Rated voltage: DC12V 215371 Controller Key switch ON ST OFF Glow relay LampGlow plug 5 4 6 3Battery DC12V Connection diagram 5 3 6 4 Coil resistance 13 Ω Insulation resistance value 1 M Ω or more (at 500 V megger) 215372 3 4 1 2 1 2 3 4 Connection diagram
  • 41. 3-16 ELECTRIC SYSTEM 2.2.12 Fuse box 215373 Fuse box *1: Gasoline model only *2: Diesel model only Instrument panel 10A Glow timer 10A VCM 20A 10A 15A EGI 30A EGI 30A Working lamp 15A ETC 15A 20A 30A 15A Spare Spare 20A Wiper 15A Head lamp 15A Horn 10A Stop lamp 10A Fuse puller SBF 50A Glow SBF 100A Alternator SBF 100A *1 A/C *1 *1 *2 Illustration shows diesel model Back-up lamp Battery
  • 42. 3-17 ELECTRIC SYSTEM 2.3 Table of Lamps Item Quantity Lens color Valve Remark Illustration Type of lamps Head lamp 2 Colorless Standard Combination lamp (front) Turn signal lamp 2 Amber Standard (Installed to head guard) Clearance lamp 2 Amber Combination lamp (rear) Turn signal lamp 2 Amber Standard Tail and stop lamp 2 Red Standard Back-up lamp 2 Colorless Standard
  • 43. 3-18 ELECTRIC SYSTEM 3. Console Box 3.1 Disassembly 3.1.1 Preparation Place the key switch to the OFF position, and remove the cable from the ground side of the battery. 3.1.2 Removal sequence (1) Disconnect the electrical wiring from connector 1. (2) Remove the screw using a Phillips screwdriver and remove cover 2. (3) Remove the screw and then, remove cover (U-Re) 3. (4) Remove the screw and then, remove cover (U-Fr) 4. (5) Remove the bolt, then remove console box assembly 5. 3.1.3 Installation For installation, follow the removal sequence in reverse. 216938 5 2 4 3 1
  • 44. 3-19 ELECTRIC SYSTEM 4. Battery Maintenance 4.1 State of Charge and Electrolyte Specific Gravity (S.G.) Adjustment 4.2 Specific Gravity Reading and State of Charge To tell whether a battery is fully charged, check the electrolyte S.G. of each cell with hydrometer or the electrolyte reduction speed. If the electrolyte in battery cell decreases to the level where the pole plates are exposed within one month, it may be overcharged. If the electrolyte amount remains sufficient for more than three months, the battery may be charged less. 4.3 Charging Precautions (1) In slow charging, the charging current should be about 1/10 the capacity of the battery being charged. (2) In quick charging, the battery capacity in ampere (A) should not be exceeded. (3) During charging, adjust the charging current so that the electrolyte temperature does not exceed 45°C (113°F). (4) When connecting cables to battery terminals, always connect the (+) terminal first, and when disconnecting, remove the (-) terminal first. (5) Ventilate well during the battery charge because hydrogen gas is generated. Specific gravity reading at 20°C (68°F) Condition Adjustment 1.280 to 1.265 Good If the difference in S.G. between any two cells is 0.020 or less, continue to use as is. If the difference is more than 0.020, discharge the battery in an efficient manner. If the battery recovers, charge the battery to adjust the electrolyte S.G. 1.260 to 1.225 Half charged Recharge battery to adjust electrolyte S.G. Check for any short-circuited cables or corroded cable connections in the electrical system. 1.220 (0.2) or less Battery low (caution required) Recharge battery. If the difference in S.G. is too much, charge the battery to adjust the electrolyte S.G. If the difference in S.G. is more than 0.040. A cell with a low S.G. may cause a short circuit. It is caused when electrolyte leaks or electrolyte rate is too high or too low. Recharge the battery until its voltage and S.G. stabilize and remain constant for more than 2 hours. Charge the battery to adjust the electrolyte S.G. It should read between 1.280 and 1.265. If the difference in S.G. is more than 0.040 and a low S.G. is found in any of the cells, replace the battery with a new one. Conduct a high current discharge test after leaving the battery for 12 to 96 hours. Be sure to turn OFF the key switch and light switch before disconnecting or connecting the battery cables. (This prevents damage to the IC regulator.) 215375 + 55D23L (Gasoline) 130E41L (Diesel) Identification
  • 45. 3-20 ELECTRIC SYSTEM 5. Instrument Panel 5.1 Instrument Panel Screen Components Instrument panel screen consists of warning lamps, LCD (Liquid crystal display) screen, and and buttons, and enter/display switch button. The LCD screen consists of six areas: main area, fuel gauge area, travel direction area, symbol mark area, hour meter area, and water temperature gauge area. The main area is divided into two parts: right and left. Note: The instrument panel has functions below to protect circuits in the panel. Note: a) Back-up light illuminates both the fuel mark and water temperature mark on the LCD from inside. b) Warnings are not automatically turned off for safety reasons. c) When the temperature is extremely low [0°C (32°F) or below], the response of the LCD dis- play is slower. Warning lamps button button LCD screen Enter/display switch button (Ο button) 215114 Instrument panel internal (ambient) temperature - 85°C (185°F) or higher LCD screen is not displayed. 105°C (221°F) or higher Backlight goes off. Fuel gauge Main display Water temperature gauge Travel direction Symbol mark (Optional feature) Time/hour meter display 215115
  • 46. 3-21 ELECTRIC SYSTEM 5.2 Basic Screen Display 5.2.1 LCD screen display with the key switch in the ON position With the key switch turned to the ON position, LCD screen displays the brand logo screen, the password authentication screen, and the normal display screen in sequence. Also, error history is displayed by press- ing a button. (1) Brand logo screen When the engine key is turned to the ON position, the brand logo screen is displayed for 2 seconds while lamp check is being executed. (2) Password authentication screen (Optional function) Inputting the registered password in advance enables an operator to operate the lift truck. (3) Standard display screen The screen shows the conditions of the lift truck. 215116 215117 215118
  • 47. 3-22 ELECTRIC SYSTEM 5.2.2 Speed meter display This display shows current lift truck speed. Note: Speed display value is rounded to a higher number. 5.2.3 Fuel gauge This gauge shows the remaining amount of fuel (gaso- line or diesel fuel). It shows the remaining amount of fuel just after the key switch is turned to the ON posi- tion. After that, the remaining amount is displayed for 2 minutes on average. Note: Note: LPG dual fuel truck shows gasoline remaining amount only. Actual speed Display 0.1 to 1.0 km/h (0.06 to 0.62 Mph) 1 km/h (0.62 Mph) 1.1 to 2.0 km/h (0.68 to 1.24 Mph) 2 km/h (1.24 Mph) • • • • 24.1 to 25.0 km/h (14.97 to 15.53 Mph) • • • • 25 km/h (15.53 Mph) Speed meter display 215119 E (Empty) remaining amount Truck model Remaining amount 4.0 to 5.5 ton 14.3 liter (872.6 cu.in.) or less Fuel gauge With fuel gauge image Without fuel gauge image (LE models) 215120
  • 48. 3-23 ELECTRIC SYSTEM 5.2.4 Water temperature display This display shows engine coolant temperature. Note: The graph below shows the relation between engine coolant temperature and water tempera- ture gauge shown on the LCD. Water temperature gauge 215121 50 40 30 20 10 0 100 20 30 40 50 60 70 80 90 100 110 120 130 44 dots 29 dots Engine coolant temperature - the number of dots in the gauge Diesel model Gasoline model Range of overheating (red zone) Pertinent range of temperature (rough standard for diesel/gasoline model) Overheat (red zone) temperature 215122 Numberofdotsinthegauge(Dots) Engine coolant temperature (°C) [°F] (°C) 0 50 68 86 104 122 140 158 176 194 212 230 248 266 (°F) Range displayed on LCD screen (50 to 120°C) [122 to 248°F] • Diesel model: Approx. 109 °C (228.2 °F) or higher • Gasoline model: Approx. 107 °C (224.6 °F) or higher
  • 49. 3-24 ELECTRIC SYSTEM 5.2.5 Direction display This display shows truck traveling direction. If the direction lever is positioned to a place other than N (neutral) position when starting the engine, symbol N blinks and the engine can not be started. If an operator leaves the seat while the engine is running and the direction lever is placed to other than the N (neutral) position, the symbol N blinks and the transmission is electrically shifted to the N (neutral) position. Note: Travel direction display changes to the signals from the direction lever. 5.3 Basic Operation 5.3.1 How to use operation buttons There are three types of manual operation buttons: button, button, and button, which are located on the right side of the instrument panel. The operation of each button varies with the item being dis- played on the screen. Button operation is available only when the key switch is in the ON position and not available when the engine is running. Note that adjustment of screen contrast and selection between the hour meter display and the time display are available even when the engine is running. Short press of button It is effective when the button is pressed for less than two seconds. Long press of button It is effective when the button is pressed for more than two seconds. Multiple button presses It is effective when more than two buttons are long pressed at the same time. Travel direction 215123 0.5sec 0.5sec 215377 Forward Reverse Neutral Travel interlock indication (powershift truck) 215125 button button button
  • 50. 3-25 ELECTRIC SYSTEM 5.3.2 How to adjust the screen contrast Turn the key switch to the ON position. Screen con- trast can be adjusted while the engine is running. Note: The screen becomes dark when the tempera- ture inside the instrument panel (ambient tem- perature) is high, and the screen becomes light when the temperature is low. 5.3.3 How to display the clock time Turn the key switch to the ON position. Screen con- trast can be adjusted while the engine is running. With a short press of the button, the display alternately changes between the hour meter and the clock time. With a long press of the button while the clock is displayed, the clock display alternately changes between 12-hour and 24-hour mode. Button Press Display Short Light → Dark Dark → Light Button Press Display Short Hour meter ←→ clock (with clock time display) Long 12-hour mode display ←→24-hour mode display Time/hour meter 215126
  • 51. 3-26 ELECTRIC SYSTEM 5.3.4 How to set up the clock time (1) Turn the key switch to the ON position. (2) Select clock time display (when the hour meter is being displayed). (3) Select time adjust mode and unit adjust mode. (4) Time unit adjustment Note: When the time display is set to the 12-hour mode display, 11:00 AM changes to 00:00 PM at noon. (5) Minute adjustment Note: • Second time display is not available. • If more than 3 minutes have passed since the last button operation, the display automatically returns to the standard screen. • Precision errors are one minute or less per month. • When a battery is changed, the time resets. Be sure to set the time after changing a battery. • If the engine is started during the setup procedure, the setup being made is cancelled and the display returns to the standard screen. Button Press Display Short Clock time blink Button Press Display Long Time unit adjust mode Blinking 215127 Button Press Display Short 01→12 or 24 (one hour at each press) Long 01→12 or 24 (continuous) Short 12 or 24→01 (one hour at each press) Long 12 or 24→01 (continuous) Short After adjusting, change to the min- ute adjust mode. Digits to be adjusted is blinking 215128 Button Press Display Short 01→59 (one minute at each press) Long 00→59 (continuous) Short 59→00 (one minute at each press) Long 59→00 (continuous) Short After adjusting, change to the standard screen. Digits to be adjusted is blinking 215129
  • 52. 3-27 ELECTRIC SYSTEM 5.3.5 How to display the hour meter Turn the key switch to the ON position. Screen con- trast can be adjusted while the engine is running. With a short press of the button, the display alternately changes between the clock time and the hour meter. 5.3.6 How to change types of hour meters Turn the key switch to the ON position. There are three counters: key-on time, engine-on time, and seat switch-on time. The counter display changes with a long press of the button. Key-on time: Accumulated key switch ON time. Engine-on time: Accumulated engine operation time. This is helpful in comparing the wear of engine related parts to the actual engine operation hours. Seat switch-on time: Accumulated time the operator has seated. This is helpful in comparing the actual working hours to the actual hours of operation. Note: • When six minutes have passed, 0.1 hour is added. • Warranty is terminated based on the key-on time. Button Press Display Short Clock ←→ hour meter Hour meter 215130 Button Press Display Long Key-on time ↓ Engine-on time ↓ Seat switch-on time Key-on time display Engine-on time display Seat switch-on time display 215131
  • 53. 3-28 ELECTRIC SYSTEM 5.3.7 How to display the error history Turn the key switch to the ON position. A long press on the three buttons at the same time brings up the error history display. Error message displays only the F error codes. Error codes are displayed from the latest error ( -1) up to the past 32 errors ( -32). Oldest data (error) exceeding the limit (32 errors) is automatically erased. Note: Use the service tool to erase the error message being displayed. To change the error code display, operate the or the button. A long press on the three buttons at the same time returns to the standard display screen. The illustration shows the error history screen when there is no error record. Note: • If more than 3 minutes have passed since the last button operation, the display automatically returns to the standard screen. • If the engine is started during the setup procedure, the setup being made is cancelled and the display returns to the standard screen. Button Press Display Multiple Error history 215125 button button button Button Press Display Short Old → New New → Old Button Press Display Multiple Standard display screen Error history display With , buttons, error record on the display changes. Error history Hour meter Error code 215133 When there is no error record 215134
  • 54. 3-29 ELECTRIC SYSTEM 5.4 When an Error Occurs When an error occurs, the corresponding error code is displayed on the screen. The error code will be erased by placing the key switch to the ON position after solv- ing the cause of the trouble and then by turning the key switch to the OFF position. (The error code remains displayed until the cause of the trouble is solved.) Refer to the engine service manual for the error codes related to engine troubles (error codes from ECM). The priority order of the error display is: engine fail- ures, serious failures, and minor failures. 5.4.1 When an engine failure occurs The corresponding error code is displayed in the main area, and the black and white in the error code display is reversed. Also the engine warning lamp glows. 5.4.2 When a serious failure occurs The corresponding error code is displayed in the main area, and the black and white in the error code display is reversed. Also all warning lamps shown in the figure (right) will blink. When an engine failure occurs, the error code alternately changes between black characters on a white background and white characters on a black background. Engine warning lamp glows 215135 Warning lamps within the dotted line boxes blink 215136 When a serious failure occurs, the error code alternately changes between black characters on a white background to white characters on a black background.
  • 55. 3-30 ELECTRIC SYSTEM 5.4.3 When a minor failure occurs The corresponding error code is displayed in the main area, and the black and white in the error code display is reversed. Also the multi-purpose warning lamp glows. Note: The minor failure display is also shown when the fuel gauge reaches the empty level (E). 5.4.4 Error symbols Error symbols displayed in the main area are as follows: Multi-purpose warning lamp glows The error code and symbol alternately change between black characters/lines on a white background to white characters/lines on a black background. 215137 Symbol Name Indicated condition Fuel filter warning lamp This lamp glows when the water in the fuel filter needs to be drained. (diesel model) Low coolant level warning lamp This lamp glows when the coolant level is low. (option) Clogged air cleaner element warning lamp This lamp glows when the air cleaner element is clogged. (option) Low fuel level warning lamp When fuel level is low (on E level) (On the LPG/gasoline dual fuel model, this lamp glows when the gasoline level becomes low.) LPG level warning lamp On the LPG model, this lamp glows when the LPG level becomes low. (option)
  • 56. 3-31 ELECTRIC SYSTEM 5.5 Warning Lamps The function of each warning lamp is shown in the table below. Lamp Name Color Glow (blink) condition Model applicable Parking brake warn- ing lamp Red This lamp glows when the parking brake is applied. All models (Standard) Seat belt warning lamp Red This lamp glows when the seat belt is not fastened. All models (Standard) Charge warning lamp Red This lamp glows when charging is not nor- mal. (Glows/the lamp glows all the time while the engine is stopped) All models (Standard) Multi-purpose warn- ing lamp Red This lamp glows when a minor failure occurs or operating cautions are issued. All models (Standard) Torque converter oil temperature warn- ing lamp Red This lamp glows when the torque converter oil temperature is not normal. Powershift transmission models (Standard) Engine oil pressure warning lamp Red This lamp glows when the engine oil pres- sure is low. (Glows/the lamp glows all the time while the engine is stopped) All models (Standard) Engine warning lamp Amber This lamp glows when the engine is failed. Electronic control gaso- line engine models (Standard) Glow pilot indicator lamp Amber This lamp glows when the glow plug heating is ON. Diesel engine models (Standard) Flex control indicator lamp Amber This lamp glows when sudden acceleration or full reverse (shifting of travel to the oppo- site direction) activates protective function. Option Mast interlock indi- cator lamp Amber When mast interlock is activated (glows) All models (Standard)
  • 57. Thank you very much for your reading. Please Click Here Then Get More Information.