SlideShare a Scribd company logo
1 of 37
Download to read offline
1 www.handsontec.com
Handson Technology
BASCOM-AVR Course
Programming the AVR in BASIC
2 www.handsontec.com
Table of Contents
1. Introduction ..............................................................................................................................................................3
1.1 The serial interface............................................................................................................................................3
1.2 Calculating.........................................................................................................................................................4
1.3 Procedures ........................................................................................................................................................5
1.4 The software serial interface ............................................................................................................................6
2. Using the ATmega Ports............................................................................................................................................6
2.1 Reading input values.........................................................................................................................................7
2.2 Writing to an output port .................................................................................................................................8
2.3 Using the pull-up resistors ................................................................................................................................9
2.4 Measuring Capacitance...................................................................................................................................10
2.5 Driving a stepper motor..................................................................................................................................11
3. Timers and Interrupts .............................................................................................................................................13
3.1 Reading the timer ...........................................................................................................................................14
3.2 Timer Interrupt ...............................................................................................................................................15
3.3 Averaged measurements................................................................................................................................16
4. Counter and PWM ..................................................................................................................................................17
4.1 Frequency measurement................................................................................................................................18
4.2 PWM outputs..................................................................................................................................................19
4.3 LED control using six PWM channels ..............................................................................................................20
5. Memory, switch polling and time management.....................................................................................................22
5.1 RAM and EEPROM...........................................................................................................................................23
5.2 Reading the status of switches .......................................................................................................................24
5.3 Switch polling using timer interrupt ...............................................................................................................26
6. A DDS generator using the ATmega32....................................................................................................................27
6.1 The principle....................................................................................................................................................28
6.2 LC display.........................................................................................................................................................29
6.3 Sine table and frequency selection.................................................................................................................31
6.4 Timer and DDS ................................................................................................................................................31
7. Appendix .................................................................................................................................................................32
7.1 Using Bascom-AVR with Arduino....................................................................................................................32
7.2 Web Resources ...............................................................................................................................................34
7.3 Project with BASCOM-AVR..............................................................................................................................35
3 www.handsontec.com
1. Introduction
The AVR series of microcontrollers from Atmel are very popular. In this mini course we turn the potlight
onto software development for these controllers. BASCOM is an ideal programming language for the
newcomer; it has a steep learning curve ensuring that your path to success (and a working prototype) is
reassuringly short.
The ATmega controller and BASCOM together make a strong team! Whatever application you have in mind,
controllers from the ATmega range are sure to have the majority of the necessary peripheral hardware
already integrated on-board: ports, timer, A/D converter, PWM output, and UART are all standard together
with a choice of RAM, ROM and EEPROM size. BASCOM is one of the easier languages to use and makes
interfacing to peripherals using LCDs, RC5 and I2C a simple task requiring very few instructions.
There is a good range of development hardware for this microcontroller family. The STK500 from Atmel is
suitable platforms for this course. Alternatively there is no reason why you should not experiment with your
own homebrew design built on a piece of vero-board. It also makes little difference whether you choose a
Mega8, Mega88 or even the larger Mega16or Mega32. They all basically have the same core; the main
differences are in the number of port pins and the amount of internal memory space. In this chapter we look
at the controller’s UART and A/D.
1.1 The serial interface
All of the ATmega series have a built-in serial interface (UART) using pins RXD (PD0) and TXD (PD1).
Figure 1-1. The serial interface. Figure 1-2. The simplest serial interface without an inverter.
The signals are TTL compatible so it is necessary to add an RS232 interface buffer such as the MAX232 to implement
a true RS232 interface. These buffers are already implemented on the Atmel STK500 development system. The PC
will need to be running a terminal emulator program before serial communication from the ATmega can be viewed on
the screen. The serial interface is covered here first because the software routine is very simple and can be easily
modified if required. Listing 1-1 shows all the elements necessary for all of the BASCOM programs.
The first line $regfile = “m88def.dat” indicates which controller the code will be running on; in this case it is the
ATmega88. The line can be omitted and the controller type specified using the Options/Compiler/Chip menu but this
method will generate an error if a different AVR system is used. It is far better to declare the controller type clearly in
the program header with any program that you write. It also has priority and overwrites any setting defined in the
Options menu.
Listing 1-1:
Print ‘hello’
‚Bascom ATmega88, Print
$regfile = “m88def.dat”
$crystal = 16000000
Baud = 9600
4 www.handsontec.com
Goto Test1
Test1:
Do
Print „hello“
Waitms 2000
Loop
Test2:
…
Test3:
…
End
It is also important to specify the crystal frequency ($crystal= 16000000 for 16 MHz). It influences both the division
ratio necessary to provide the requested communications baud rate clock (Baud = 9600) and also the time base used to
count milliseconds in the ‘wait’ statements (Waitms 2000 for 2s).
One feature of the test program given here is the use of the unconditional jump instruction Goto Test1. It is normally
good programming practice to avoid using Goto statements because they interrupt the program structure. In this
instance we have included several programming examples in the same source code so it is only necessary to alter the
first Goto Test1 to Goto Test2 or 3, etc. (depending on which example you want to run) and then recompile. This
avoids the need to compile individual source files for each example and reduces the number of files generated in the
compilation process. Additional test programs can simply be added to the code and run using an appropriate Goto
statement. The small program example used for Test1 forms an endless loop between the Do and Loop statements.
The program outputs a ‘hello’ message every two seconds. A terminal emulator program like HyperTerminal is
needed to receive the message.
1.2 Calculating
The program in Listing 1-2 is used to calculate the area (C) of a circle where ‘A’ is the given radius:
C = A² * 3.1415
‘A’ must be an integer variable, which is dimensioned as a byte and input via the serial interface. The value of ‘A’ (in
the range 0 to 255) is first multiplied by itself. The resultant intermediate value ‘B’ can be up to a word long (0 to
65535). The result ‘C’ is a real value and is dimensioned as single which requires four bytes to store its value. Anyone
familiar with other dialects of BASIC may be wondering why the calculation has not been written as
C =3.1415 *A *A or Print 3.1415*A*A.
The reason is that BASCOM only allows one calculation per expression so it is necessary to break down complex
calculations into series of single steps to avoid violating this rule.
Listing 1-2
Calculating in BASCOM
Dim A As Byte
Dim B As Word
Dim C As Single
Do
Print “ input 0...255”
Input A
B = A * A
C = B * 3.1415
5 www.handsontec.com
‘not allowed: C = 3.1415 * A * A
Print C
Loop
1.3 Procedures
The A/D converter in the ATmega has a 10-bit resolution. Listing 1-3 shows an example of how the converter is
initialised:
Config Adc = Single, Prescaler = 64, Reference = Off.
The converter clock frequency is defined here as 1/64 of the processor clock, i.e. 250kHz with a processor clock of
16MHz. The internal reference voltage is not used but is derived externally and applied to pin AREF. In most cases
the 5V stabilized supply voltage can be used.
A procedure is used to input the ADC measurement and convert it to a voltage reading. It is only worthwhile using a
procedure if it can be reused by different parts of the main program body. In this example two voltage measurements
are displayed. The new procedure is called Sub Voltage.
Before the procedure can be called it must first be declared:
Declare Sub Voltage.
The program fragment shown here does not conform to good software writing practice. In Visual Basic it is usual to
pass the channel parameter ‘N’ when the procedure is called: Voltage(N). Alternatively a function could be written
and then called using: U = Voltage(N). In the example here we are using only global variables so that D, N and U are
accessible from all parts of the program including other procedures. All of the accepted software guidelines indicate
that this is not good programming practice but in this instance it simplifies the job for the compiler and controller.
Experience has shown that even large programs occupying 100% of the flash memory of a Mega32 and using a large
number of global variables are completely stable in operation and run without problem. Passing variables to
procedures can sometimes generate errors which are quite difficult to trace.
Listing 1-3
Using a procedure
Declare Sub Voltage
Dim N As Byte
ConfigAdc = Single , Prescaler = 64 , Reference = Off
Start Adc
Do
N = 0 : Voltage
Print „ ADC(0) = „ ; U ; „ V“ „
N = 1 : Voltage
Print „ ADC(1) = „ ; U ; „ V“ „
Print
Waitms 500
Loop
Sub Voltage
D = Getadc(n)
D = D * 5
U = D / 1023
End Sub
6 www.handsontec.com
1.4 The software serial interface
One of the many highlights of the BASCOM compiler is its software serial interface. Say you are already using the
hardware serial interface with the RXD and TXD pins and you require another COM interface? Alternatively it could
be that you do not have any RS232 interface inverter chip (e.g. a MAX232) on your board but still need to provide a
connection for an RS232 cable. In both cases BASCOM has a solution to the problem. Any available port pins can be
defined in software as serial interface pins for the software serial interface.
The example Listing 1-4 uses PD3 as a serial output. Communication speed is set to 9600 Baud and the interface
number 2. To output a simple message you can use Print#2, ‘hello’ for example. Using the INVERTED parameter
allows the interface to be built without the need for a MAX232 interface inverter. BASCOM inverts the signal so that
inactive level is a logic Low. The PC interface RXD signal can then be connected directly. The signal levels are not
truly RS232 but it provides a useable interface solution.
Listing 1-4
Using the Software UART
Baud = 9600
‚Open „comd.3:9600,8,n,1“ For Output As #2
Open „comd.3:9600,8,n,1,INVERTED“ For Output As #2
ConfigAdc = Single , Prescaler = 64 , Reference = Off
Do
N = 0 : Voltage
Print #2 , „ADC(0) = „ ; U ; „ V“ „
N = 1 : Voltage
Print #2 , „ADC(1) = „ ; U ; „ V“ „
Print #2 ,
Waitms 500
Loop
2. Using the ATmega Ports
The port pins are the gateway between real world events and the microcontroller. The user can send out
control signals and read back information. Here we give a few simple programming examples to quickly
get you started inputting and outputting data.
A look at the data sheet gives some insight into the complexity of the port architecture of these
microcontrollers (Figure 2-1). The ports can be configured as output or input (with or without pull-up
resistors). Despite their complexity they are quite easy to use and only three important registers are needed
to define the port configuration: The Data Direction Register (DDRx), the Port Output Register (PORTx)
and the Port Input Register (PINx). There is also a single PUD bit (pull-up disable) which disconnects all
pull-ups. The following example programs begin by using Port B.
7 www.handsontec.com
Figure 2-1.The ATmega port architecture.
2.1 Reading input values
After a reset the internal Data Direction Register is reset to zero which configures all the ports as inputs. The Port
Register is also reset to zero. In this condition the port pins look to the outside world like typical high impedance
digital CMOS inputs (Figure 2-2). With all the inputs open-circuit the value stored in PINB is random and changes if
you touch the pins with your finger (first discharge any static charge you may be carrying).
Figure 2-2. A floating CMOS input.
Listing 2-1 uses Port B as an input port. The following is an example of values you will see on the screen.
8 www.handsontec.com
63
0
61
0
The values of PINB are changing but PORTB remains at zero, which is not surprising because we have not yet
changed the port output register. PORTB is displayed in this example just to underline the difference between the
PINB and PORTB registers. Experience has shown that this causes a great deal of frustration for newcomers who
confuse the two register names: “how come I get a reading of zero when there is 5V on the input pin?” The answer of
course is that you should not read PORTB but PINB (read it as Port In B) to get the value of the input pin.
Listing 2-1
Port input
‘Bascom ATmega Ports
$regfile = “m88def.dat”
$crystal = 16000000
Baud = 9600
Goto Test1
Test1:
Dim D As Byte
Do
D = Pinb
Print D
D = Portb
Print D
Waitms 300
Loop
2.2 Writing to an output port
The second example outputs data from Port B. It is necessary to write to the Data Direction Register to configure Bas
an output port. In BASCOM-AVR there are two ways this can be achieved; you can use the Register notation method
(Ddrb=255) or the BASIC version (ConfigPortb = Output) either method has the same effect.
To run this example it’s necessary to change the Goto instruction at the beginning of the program to read GotoTest2
and recompile. To turn on alternate LEDs at the output port the decimal value 85 is written into Portb. Listing 2-2
includes the hexadecimal (&H55) and binary equivalent (&B01010101) of this value, they are only included to
demonstrate alternate formats. All of the LEDs on PortB are switched (Figure 2-3) to produce the lighting effect (the
LED boogie-woogie!).The Mega32 has all eight port lines available for use but the Mega8 or Mega88 uses port pins
PB6 and PB7 for connection of a crystal. When the fuses are configured to use an external crystal these two port pins
are no longer available as I/O. The same is true for other dual purpose pins i.e. if the hardware UART is used PD0 and
PD1are not available as I/O pins.
Figure 2-3.Connecting an LED.
9 www.handsontec.com
Listing 2-2
Port output
Test2:
ConfigPortb = Output
‘Ddrb = 255
Do
Portb = 85
Portb = &H55
Portb = &B01010101
Waitms 200
Portb = 170
Portb = &HAA
Portb = &B10101010
Waitms 200
Loop
2.3 Using the pull-up resistors
When the inputs are connected to devices like switches or opto-couplers (with open-collector outputs requiring a load
resistor connected to VCC) it is ideal to use the built-in pullup resistors instead of fitting additional external resistors
(Figure 2-4). Writing a ‘0’ to any of the DDRx bits configures the port pin as an input and writing a ‘1’ to the
corresponding PORTx bit connects a pull-up resistor to that pin (Listing2-3). With nothing connected to the inputs the
program displays:
63
255
63
255
When the pull-ups are used the quiescent state of the input pin is a logic ‘1’ so external signals must pull the input low.
Connecting PB0 to ground produces a PINB value of 62. With an input shorted a current of around 100μA flows to
ground which indicates that the pull-up resistor has a value of 50kΩ. This corresponds well with the 20kΩ to 100kΩ
range quoted in the datasheet.
Figure 2-4.The internal pull-up resistors.
10 www.handsontec.com
Listing 2-3
Using the pull-ups
Test3:
Ddrb = 0
Portb = 255
‘Pullups
Do
D = Pinb
Print D
D = Portb
Print D
Waitms 300
Loop
2.4 Measuring Capacitance
The ATmega port architecture is very versatile and allows a very simple capacitance meter to be built. The capacitor
under test (in the range 1 nF to 10 μF) is simply connected directly to port PB0 and ground (Figure 5). The program
Test 4 (Listing 2-4) first discharges the capacitor by outputting an active low level. The internal pull-up resistor is then
enabled which charges the capacitor. The program measures the time taken for the capacitor voltage to reach a logic
‘1’ (2.5 V approximately). The value of capacitance is proportional to the charge time.
Listing 2-4
Capacitance measurement
Test4:
‘C-meter 1 nF .. 10μF
Dim T As Word
Dim C As Single
Dim S As String * 10
Do
T = 0
Ddrb.0 = 1
Portb.0 = 0 ‘low Z, 0 V
Waitms 1000
Ddrb.0 = 0
Portb.0 = 1 ‘Pullup
Do
T = T + 1
Loop Until Pinb.0 = 1
C = T * 0.0730
C = Round(c)
Print C ; “ nF “
Loop
It is necessary to calibrate the unit because of the manufacturing tolerances in the values of both the pull-up
resistance and the input voltage threshold. Calibrate using a close-tolerance capacitor and change the multiplication
11 www.handsontec.com
factor (0.0730) to obtain a result corresponding to the stated capacitor value. The measurements show some
variation but should be accurate enough for most applications. Repeated measurements of the same capacitor gave
the following spread:
1009 nF
1001 nF
1005 nF
1002 nF
Figure 2-5.The principle used for capacitance measuring.
2.5 Driving a stepper motor
Those of you who have a unipolar stepper motor (maybe salvaged from an old printer or 5.25-inch disk drive) may
wish to experiment using this next example. Here the microcontroller uses the ULN2003 open-collector driver chip
Figure 2-6. Only four outputs are required so we use pins PC0 to PC3. When this chip is required to drive inductive
loads (e.g. motors or relays) it is necessary to connect the common cathode of the chip’s protection diodes (pin9 on
IC2 or pin8 on K6) to the load supply voltage pin2 on K2 (VIN). The supply voltage on K2 depends on the type of
motor used and can be in the range 6V to 12V.
Figure 2-6. Connecting a unipolar stepper motor.
Two pushbuttons are connected to PB0 and PB1 to provide direction control of the motor. The BASCOM program is
really simple, it just sequences through all four phases with four variables Phase(1) to Phase(4).
12 www.handsontec.com
In the case where the motor just vibrates instead of rotating it is a simple job to swap phases in the program and
saves changing the motor connections. The programming examples Test5 to Test7 in Ports.bas contain several
exercises to drive a stepper motor one of which shows how to build an analogue voltmeter where the motor
controls the needle position.
Test5:
'Steppermotor 4 phase PC0...PC3
'Left PB0, right PB1
Dim Phase(4) As Byte
Dim Pos As Long
Dim Stp As Byte
Dim Ticks As Byte
Config Portc = Output
Phase(1) = 8
Phase(2) = 2
Phase(3) = 1
Phase(4) = 4
Do
If Pinb.0 = 0 Then Pos = Pos - 1
If Pinb.1 = 0 Then Pos = Pos + 1
Stp = Pos And 3
Stp = Stp + 1
Portc = Phase(stp)
Waitms 10
Loop
Test6:
'Steppermotor 4 phase PC0...PC3
'Voltmeter
Dim U As Word
Config Portc = &B00001111
Config Adc = Single , Prescaler = Auto , Reference = Off
Phase(1) = 8
Phase(2) = 2
Phase(3) = 1
Phase(4) = 4
Do
U = Getadc(7)
U = U / 10
If U > Pos Then Pos = Pos + 1
If U < Pos Then Pos = Pos - 1
Stp = Pos And 3
Stp = Stp + 1
Portc = Phase(stp)
Waitms 10
Loop
13 www.handsontec.com
Test7:
'Steppermotor 4 phase PC0...PC3
'Voltmeter 200 steps
Dim Phaseb(8) As Byte
Dim Pos2 As Word
Config Portc = &B00001111
Config Adc = Single , Prescaler = Auto , Reference = Off
Phaseb(1) = 8
Phaseb(2) = 9
Phaseb(3) = 2
Phaseb(4) = 3
Phaseb(5) = 1
Phaseb(6) = 5
Phaseb(7) = 4
Phaseb(8) = 12
Do
U = Getadc(7)
U = U / 5
Pos2 = Pos2 + U
Pos2 = Pos2 - Pos
Pos = Pos2 / 102
Stp = Pos And 7
Stp = Stp + 1
Portc = Phaseb(stp)
Waitms 10
Loop
3. Timers and Interrupts
Many practical tasks can only be solved by using accurate timing. The ATmega controllers are well
equipped in this respect; the Mega8 to Mega32 controllers all have three timers, Timer 0 and 2 are 8-bit
while Timer 1 is a full 16 bit wide.
The ATmega controller’s timer/counter section looks a little daunting at first sight (Figure 3-1). They are highly
configurable and require a certain amount of care to ensure they are set up correctly for your application. For those
programming in Assembler this configuration procedure is quite involved but as you will see BASCOM simplifies
things a lot. The first thing to decide is the source of the timer/counter clock signal. It can come from the internal
clock (directly or via a prescaler) or from an external source (e.g. connect to pin P1 for Timer 1). The counters can
count on either the rising or falling clock edge and the counter value can be read or changed at any time via the
TCNT1 register. When an overflow occurs it can generate an interrupt. The counters are commonly used for
generating Pulse Width Modulated (PWM) signals. This is just a brief outline of some of the more basic properties of
the timer/counters, as you become more familiar with the controller you will begin to get a better appreciation of their
versatility.
14 www.handsontec.com
Figure 3-1. Block diagram of the timers.
3.1 Reading the timer
For the first exercise we are using the 16-bit timer driven by the system clock crystal and divided by 256 in the
prescaler. In BASCOM all this information can be written on one line: Config Timer1 = Timer, Prescale = 256. The
timer also begins counting so it is not necessary to use Start Timer1.
Listing 3-1 is the first test, as before we are using a Goto to reduce ‘compilation clutter’. The listing as printed will
only ever go to the first example, you will need to change fifth line to Goto Test2 and recompile for the next exercise.
In Test1 timer/counter1 just runs continuously and the counter value is displayed five times per second. The values are
in the range from 0 to 65535, and we can see that after roughly one second an overflow occurs:
088
17864
30706
43547
56389
3695
16471
Listing 3-1
Reading the timer registers
‘Bascom ATmega88, Timer
$regfile = “m88def.dat”
$crystal = 16000000
Baud = 9600
15 www.handsontec.com
Goto Test1
Test1:
Config Timer1 = Timer , Prescale = 256
‘Start Timer1
Do
Print Timer1
Waitms 200
Loop
We know the clock frequency and the counter size so it is possible to work out the exact time between overflows: the
counter clock is 16 MHz divided by 256 which gives 62.5kHz. The counter overflows after 65536 clocks so the
interval between each overflow is 1.049s.In this application the counter produces a precise time reference. We can
now use this information to test how long the program takes to complete the two instructions: “PrintTimer1” and
“Waitms 200”. Using for example the consecutive readings 43547 and 30706 the interval is 43547– 30706 = 12841
clock periods. One clock period equals1/62.5kHz = 15.267μs.
The time between the two readings will therefore be 12841*15.267μs = 196ms and not 200ms. We can see that the
Waitms instruction should not be used if it is necessary to make accurate time measurements.
3.2 Timer Interrupt
This exercise programs the controller to generate an accurate1 second clock. The 16-bit Timer 1 is not necessary for
this application; we can use 8-bit Timer 0. The timer will be programmed to overflow every 1000μs and generate an
interrupt.
An interrupt causes a forced interruption of the main program and directs the controller to execute a sub routine
(Interrupt Service Routine or ISR) to service the interrupt. Different events can be programmed to generate an
interrupt and an ISR is required to respond to each type of interrupt. Here Tim0_isr would be the subroutine name but
in this example we have just used Tim0_isr: as a label which indicates where the program jumps to on interrupt. The
last instruction of the interrupt routine must be a RETURN. In this example further interrupts will not be serviced until
the return is executed. Listing 3-2 Test 2 configures timer 0 with a prescaler of 64, which gives it a clock frequency of
250kHz. The counter is 8-bits wide so without further programming it will generate an overflow interrupt every 256
clock cycles. We need the counter to interrupt every 250 clocks for an accurate 1ms time base so it is necessary to load
the counter with the value 6 each time it overflows. A word variable called Ticks is incremented every time the
counter overflows. When this variable reaches 1000 it indicates that one second has elapsed and the variable called
Seconds is incremented. The value of either variable can be read by the main program. In this example the program
sends the value of seconds to the terminal every second starting from zero at program start.
Listing 3-2
Exact seconds using interrupts
Test2:
Dim Ticks As Word
Dim Seconds As Word
Dim Seconds_old As Word
Config Timer0 = Timer , Prescale = 64
On Ovf0 Tim0_isr
Enable Timer0
Enable Interrupts
Do
If Seconds <> Seconds_old Then
Print Seconds
Seconds_old = Seconds
End If
Loop
16 www.handsontec.com
Tim0_isr:
‘1000 μs
Timer0 = 6
Ticks = Ticks + 1
If Ticks = 1000 Then
Ticks = 0
Seconds = Seconds + 1
End If
Return
It is necessary to allow the interrupts to occur by enabling the global interrupt (Enable Interrupts) and also allow the
timer 0 overflow conditions to generate an interrupt (Enable Timer0). The display shows the value of seconds:
0
1
2
3
All interrupt sources can be disabled by using Disable Interrupts.
3.3 Averaged measurements
Measurements made of analogue signal levels are often affected by a 50Hz mains signal superimposed on the voltage
level. The unwanted 50 Hz component can effectively be cancelled out by sampling the analogue voltage level several
times during a complete cycle of the mains voltage (20ms) and then averaging all the measurements.
For this exercise, Listing 3-3 Test3, we will use a timer interrupt again to generate an accurate time base. The average
value is achieved by sampling the analogue signal 25 times in a 20ms time window. The sampling interval is therefore
800μs. Timer 2 will be used with a prescale value of 64. Each time it overflows Timer2 is loaded with the value 56 so
that the next overflow occurs 200 clocks later. 800μs is more than enough time to make the analogue measurement
and calculate the sum and mean value. The variable Ticks is incremented each time a measurement is taken every
interrupt. After 25 measurements the sum stored in AD0 is transferred to the variable AD0_mean. The main program
averages the value and then sends it to the screen. Averaging in this way gives such good suppression of the 50Hz
components that by using half wave rectification the system can be used to measure ac signals. The low voltage AC
signal is connected to the ADC0 input via a 10k protection resistor (Figure 3- 2).
Listing 3-3
Measuring averages
Test3:
Dim Ad0 As Word
Dim Ad0_mean As Word
Config Adc = Single , Prescaler = 64 , Reference = Off
Config Timer2 = Timer , Prescale = 64
On Ovf2 Tim2_isr
Enable Timer2
Enable Interrupts
Do
Ad0_mean = Ad0_mean / 25
Print Ad0_mean
Waitms 100
Loop
17 www.handsontec.com
Tim2_isr:
‘800 μs
Timer2 = 56
Ticks = Ticks + 1
Ad0 = Ad0 + Getadc(0)
If Ticks > 24 Then
Ticks = 0
Ad0_mean = Ad0
Ad0 = 0
End If
Return
The program now finds the average value of the positive half wave which is equal to half of the absolute average value
of the sine wave. A typical sequence of measurements would be:
226
227
226
226
226
Figure 3-2.Measuring an ac voltage.
Although there is some variation the measured average value is mostly 226. This can be converted into a real voltage
level: 5V * 226/1023 = 1.10V. The measured alternating voltage therefore has an absolute average value of 2.20V. For
a sine wave this equates to an RMS value of 2.44V and a peak to peak value of 3.46Vp-p. The relationship between
the peak and RMS value of a sine wave is √2 = 1.414. For arithmetic averaging the relationship of the peak value to
the average value is π/2=1.571, so the absolute average value is 90.03 % of the RMS.
4. Counter and PWM
We have already taken a look at timers in part 3 of the course. The ATmega timer/counters have far more
to offer than just measuring time. Here we look at impulse counting, frequency measurement and PWM
signal generation.
In the first exercise we set up timer 1 to count impulses over a period of one second. A look at the program Listing 4-1
indicates that timer 1 is configured as a counter, counting on the falling edge of the input pulse and with a prescale
value of 1.
18 www.handsontec.com
The counter input is labeled T1 which for example on the Mega8 and Mega88 is pin PD5 (Figure 4-1). In this exercise
we connect a low-voltage 50 Hz signal to this input via a 10 k󲐀 series resistor. A signal generator is not necessary here;
the input impedance is relatively high so just touching the input resistor with your finger will inject a signal of
sufficient level from the ambient mains field for measurement.
Listing 4-1 Impulse counter
Test1:
Config Timer1 = Counter , Edge = Falling ,
Prescale = 1
Start Timer1
Do
Print Timer1
Waitms 1000
Loop
In Europe the signal is 50 Hz, in the USA 60 Hz. The routine counts the number of pulses in 1 second so the screen
shows:
0
50
100
150
201
251
Figure 4-1. A 50Hz signal on T1.
After the fourth value a slight inaccuracy in the measured value creeps in. This is because the Waitms 1000 instruction
is not an exact time interval and also we have not taken into account the time necessary to output values to the display.
To improve the accuracy of frequency measurements we go on in the next exercise to use timer interrupts.
4.1 Frequency measurement
The timer can reliably count external impulses with a repetition rate of up to 4MHz. To make accurate frequency
measurements we need a precise time window, in this example we use interrupts from two timers. Each time timer 1
overflows, the interrupt is serviced by Tim1_isr which increments the variable Highword. Without this variable the
counter would only be able to measure frequencies up to 65535Hz (Listing 4-2).
Timer 0 generates an exact time window of one second. When the variable Ticks = 1, timer 1 is reset and the
measurement begins. Exactly 1000ms later the counter value of timer 1 is copied to Lowword and then added to the
number of overflows stored in Highword (multiplied by 65536) before storing the result in Freq. The main program
outputs Freq (in Hz) to the display every second. Initializing timer 1 in timer mode with a clock of 16MHz (Config
Timer1 = Timer , Prescale = 1) would display a frequency of 16000000Hz. As a counter however, timer 1 can run at
just a little more than a quarter of this frequency and its prescaler is synchronized to the processor clock. When you try
to measure a frequency as high as 6MHz for example the counter gating runs too slowly to register every edge of the
19 www.handsontec.com
input pulses so it misses some and shows a false reading of around 3MHz. The design can be used to accurately
measure frequencies up to and just beyond 4MHz.
Listing 4-2
Frequency measurements up to 4 MHz
Test2:
Dim Lowword As Word
Dim Highword As Word
Dim Ticks As Word
Dim Freq As Long
Config Adc = Single , Prescaler = 32 , Reference = Off
Config Timer0 = Timer , Prescale = 64
Config Timer1 = Counter , Edge = Falling , Prescale = 1
‘Config Timer1 = Timer , Prescale = 1
On Ovf0 Tim0_isr
On Ovf1 Tim1_isr
Enable Timer0
Enable Timer1
Enable Interrupts
Do
Print Freq
Waitms 1000
Loop
Tim0_isr:
‘1000 μs
Timer0 = 6
Ticks = Ticks + 1
If Ticks = 1 Then
Timer1 = 0
Highword = 0
End If
If Ticks = 1001 Then
Lowword = Timer1
Freq = Highword * 65536
Freq = Freq + Lowword
Ticks = 0
End If
Return
Tim1_isr:
Highword = Highword + 1
Return
4.2 PWM outputs
Pulse Width Modulation (PWM) is a technique used in many applications to provide a quasi-analogue control of
power to a load without the need for a true D/A converter. Timers in the ATmega controllers can be used to generate
PWM signals. Timer 1 has two independent PWM output channels with a resolution of 8, 9 or 10 bits.
20 www.handsontec.com
Listing 4-3 shows how both channels Pwm1a and Pwm1b of timer 1 can be programmed to produce output signals
with 10-bit resolution. The signals are output from OC1A (PB1) and OC1B (PB2). Their electrical characteristics are
the same as other port pins so you can just hang an LED together with a series current-limiting resistor on the output
or connect the output to a buffer like the ULN2003. The program produces increasing brightness signal from channel
A and decreasing brightness signal from channel B.
Listing 4-3
10-bit PWM
Test3:
Dim Pwm As Word
Config Timer1 = Pwm , Prescale = 8 , Pwm = 10 , Compare A Pwm = Clear Down ,
Compare B Pwm = Clear Down
Do
For Pwm = 0 To 1023
Pwm1a = Pwm
Pwm1b = 1023 - Pwm
Waitms 5
Next Pwm
Loop
4.3 LED control using six PWM channels
The Mega88 provides six PWM outputs signals. Timers 0 and 2 both offer a resolution of eight bits. The individual
outputs are on the following output pins:
OC1A on PB1
OC1B on PB2
OC0A on PD6
OC0B on PD5
OC2A on PB3
OC2B on PD3
In this last exercise we use all six PWM outputs, for the sake of symmetry in this application, timer 1 is configured
with a resolution of only eight bits. The aim of this example (Listing 4-4) is to smoothly control the brightness of a
row of LEDs such that a sinusoidal ‘wave’ of light travels along the row.
Listing 4-4
Six PWM outputs produce an LED light ‘wave’.
Test4:
Dim A As Single
Dim B As Single
Dim I As Byte
Dim K As Byte
Declare Sub Wave
Config Timer0 = Pwm , Prescale = 8 , Compare A Pwm = Clear Down , Compare B
Pwm = Clear Down
Config Timer1 = Pwm , Prescale = 8 , Pwm = 8 , Compare A Pwm = Clear Down , Compare
B Pwm = Clear Down
Config Timer2 = Pwm , Prescale = 8 ,
Compare A Pwm = Clear Down , Compare B
Pwm = Clear Down
21 www.handsontec.com
Do
For I = 1 To 60
K = I
Wave
Pwm1a = Pwm
K = I + 10
Wave
Pwm1b = Pwm
K = I + 20
Wave
Pwm0a = Pwm
K = I + 30
Wave
Pwm0b = Pwm
K = I + 40
Wave
Pwm2a = Pwm
K = I + 50
Wave
Pwm2b = Pwm
Waitms 50
Next Pwm
Loop
Sub Wave
A = 6.1415 * K
A = A / 60
B = Sin(a)
B = B + 1
B = B * B
B = B * 63
Pwm = Int(b)
If Pwm < 2 Then Pwm = 2
End Sub
A loop with 60 brightness levels per LED is sufficient to produce a smooth transition between levels. The value of
variable I is used in the sub Wave to produce the light level value. It is first multiplied by 2π, divided by 60 and then
its sine function is found. The result in the range ±1 is then offset to the range 0 to 2. The eye’s perception of
brightness is nonlinear so to compensate, the value is squared. It now lies in the range 0 to 4 so multiplying by 63
converts to the 0 to 255 range (almost) of PWM values used to control the LEDs. The steps at lower values of
brightness are quite noticeable so the lowest possible level is limited to 2. Using this calculation and the corresponding
phase shift generated in the program produces an interesting lighting effect. The overall result is a wave of brightness
moving along the line of LEDs. The LEDs can be arranged in a line or as a circle. It is possible to expand the line
further by adding six, twelve or more LEDs.
22 www.handsontec.com
Figure 4-2. Brightness control of six outputs.
5. Memory, switch polling and time management
In the microcontroller embedded scene, complaints about systems having too much memory or too much
processing power are rare if not non-existent — we never seem to have enough! Microcontrollers in
particular have limited resources with no possibility of expansion, so it’s important not to squander them
by using inefficient programming practices.
Figure 5-1. ATmega88 Block diagram.
23 www.handsontec.com
Software engineers aim to produce efficient code. A simple routine like reading the value of a switch could be
programmed in such a way that it uses up 100 % of the microcontrollers processing time. In this case there would be
no capacity spare for the controller to perform any other tasks. It is important when designing any software that the
processor resources are used efficiently. We expand on this theme here and give some pointers to how the
microcontroller can be better employed.
5.1 RAM and EEPROM
In addition to the 8 kBytes of Flash memory the ATmega88 is fitted with 1024 bytes of RAM and 512 bytes of
EEPROM. BASCOM uses the RAM to store variables and various stacks so how much memory is left over? To test
memory allocation we will write some data into an array. The array dimension is given A(500). This is handled as 500
individual bytes A(1) to A(500). Note that there is no A(0). The short test program given in Listing 5-1 contains a loop
which writes an incrementing data byte to memory. A second loop reads the memory and sends it to the PC. A report
file Memory.rpt is generated which gives an overview of how the memory has been used in the program. The file is in
text file format and can be read using Notepad. The file shows memory size, exact location of all the variables and
much more; very useful to see how much elbow room you have in reserve as you progress to writing larger programs.
Listing 5-1
Data storage in RAM
Test1:
Dim A(500) As Byte
Dim N As Word
Do
For N = 1 To 500
A(n) = Low(n)
Next N
For N = 1 To 500
Print A(n)
Waitms 100
Next N
Loop
Listing 5-2 The EEPROM
Test2:
For N = 0 To 511
Writeeeprom N , N
Next N
Dim D As Byte
Do
For N = 0 To 511
Readeeprom D , N
Print N , D
Waitms 100
Next N
Loop
Test 2 in Listing 5-2 shows how data can be written to and read from EEPROM. In contrast to RAM the EEPROM
will not lose its data when power is switched off. Data is written using the format Writeeeprom, Variable, Memory
address and read using Readeeprom, Variable, Memory address. A wiped EEPROM memory location has the value
FF (255). From this it is possible to determine if any data has been programmed into the EEPROM. Test 2 (Listing 5-2)
first writes 512 Bytes to the EEPROM, reads then displays them on the PC.
24 www.handsontec.com
5.2 Reading the status of switches
Firmware running in stand-alone equipment will undoubtedly need to read the status of switches or pushbuttons so
that the user can control the equipment. Reading the status of switches would seem at first sight to be quite a trivial
process but there are a number of pitfalls. One problem is that we do not know when and for how long the button will
be pressed so it is necessary to continuously read (or ‘poll’) the switch status to ensure we do not miss a press. A
systematic approach to software design is also important; it can create many problems if you need to add a switch poll
routine to existing software, much better to design it in from the start where each function can be built up logically.
Another, more practical problem is that most switches suffer from contact bounce. When the contacts come together
they do not switch cleanly but instead bounce, producing an output that looks like the button has been pressed several
times off and on very quickly. It would therefore not be a good idea to use the switch input directly to clock a timer or
counter. The bounce time is quite short, one common debouncing method is to filter out the bounce by reading the
switch status say once every 10ms. In the next series of examples we use three pushbuttons connected on D5, D6 and
D7. The corresponding port bits are set high and the data direction register sets these pins to inputs so that internal
pull-up resistors are connected. An open circuit input will be read as a ‘1’ and a ‘0’ when the button is pressed. The
port pins are given aliases so that you can use statements like: If S1 = 0 then (Listing 5-3). Test 3 actually uses just
two buttons to toggle two outputs. S1 switches the first output high and the second low while S2 toggles them back.
Each key press sends a message to the PC screen. The polling is repeated after a 50ms wait. When either button is
pressed continuously, a message is sent to the serial interface every 50ms but the port outputs do not change state. Test
4 (Listing 5-4) uses two buttons to control the mark/space ratio of a PWM signal OC1A = PB1. One button increases
the PWM value while the other decreases it. An oscilloscope shows the variation in mark/space ratio and an LED
connected at the output will change in brightness. Switch debouncing is not necessary here because the routine only
measures the time that the buttons are pressed.
Listing 5-3
LED control
Test3:
S1 Alias Pind.6
S2 Alias Pind.5
S3 Alias Pind.7
Out1 Alias Portd.2
Out2 Alias Portd.3
Config Portd = &B00001100
Portd.6 = 1
Portd.5 = 1
Portd.7 = 1
Out1 = 1
Do
If S1 = 0 Then
Out1 = 1
Out2 = 0
Print “1 on”
End If
If S2 = 0 Then
Out1 = 0
Out2 = 1
Print “1 off”
End If
Waitms 50
Loop
25 www.handsontec.com
Test 5 (Listing 5-5) uses two buttons to toggle the state of two LEDs. Each press of S1 causes the LED on Out1 to
change state; likewise S2 controls the LED on Out2. Once a key press is detected the program switches the LED and
loops until the switch is released. A 10ms wait is used to filter any bounce otherwise the LED would change state on
every edge of the switch bounce waveform, leaving the LED randomly on or off. The same routine can be used to
increment the values of two counters (Test 6) Listing 5-6. Each time a counter value changes, its value is sent to the
PC.
Listing 5-4
PWM control
Test4:
Dim Pwmold As Integer
Pwma = 0
Do
If S1 = 0 Then Pwma = Pwma + 1
If Pwma > 1023 Then Pwma = 1023
If S2 = 0 Then Pwma = Pwma - 1
If Pwma < 0 Then Pwma = 0
If S3 = 0 Then Pwma = 0
Waitms 20
Pwm1a = Pwma
If Pwma <> Pwmold Then
Print Pwma
End If
Pwmold = Pwma
Loop
Listing 5-5
Two toggle flipflops
Test5:
Do
If S1 = 0 Then
If Out1 = 0 Then
Out1 = 1
Else
Out1 = 0
End If
Waitms 10
End If
Do
Loop Until S1 = 1
If S2 = 0 Then
If Out2 = 0 Then
Out2 = 1
Else
Out2 = 0
End If
Waitms 10
End If
Do
Loop Until S2 = 1
Waitms 100
Loop
Listing 5-6
Two counters
Test6:
Dim Count1 As Word
Dim Count2 As Word
Do
If S1 = 0 Then
Count1 = Count1 + 1
Print “Count1 “;
Print Count1
Waitms 50
Do
Loop Until S1 = 1
End If
If S2 = 0 Then
Count2 = Count2 + 1
Print “Count2 “;
Print Count2
Waitms 50
Do
Loop Until S2 = 1
End If
Loop
26 www.handsontec.com
5.3 Switch polling using timer interrupt
All of the preceding methods of switch polling do not use the processor resources efficiently, it spends its time either
waiting or reading the switch inputs. In reality there will be more switches to read and other tasks for the firmware to
take care of. The next stage is to take a more structured approach to software design so that resources are better
managed.
Listing 5-7
Switch polling using interrupt
Test7:
Dim Ticks As Byte
Dim Sw1 As Byte
Dim Sw2 As Byte
Dim Sw3 As Byte
Dim Sw4 As Byte
Dim Pwm1 As Integer
Dim Pwm1old As Integer
Dim Ledtimer As Byte
Dim Ledblink As Byte
Ledblink = 1
Enable Timer0
Enable Interrupts
Cls
Lcd 0
Do
If Ticks = 1 Then Out1 = 1
If Ticks = 5 Then Out1 = 0
Loop
Timer0isr:
Ticks = Ticks + 1
If Ticks = 1 Then
If S1 = 0 Then Sw1 = Sw1 + 1 Else Sw1
= 0
If Sw1 > 100 Then Sw1 = 100
If S2 = 0 Then Sw2 = Sw2 + 1 Else Sw2
= 0
If Sw2 > 100 Then Sw2 = 100
If S3 = 0 Then Sw3 = Sw3 + 1 Else Sw3
= 0
If Sw3 > 100 Then Sw3 = 100
End If
If Ticks = 2 Then
If Sw1 = 3 Then
Pwm1 = Pwm1 + 1
If Pwm1 > 1023 Then Pwm1 = 1023
End If
If Sw1 = 100 Then
Pwm1 = Pwm1 + 1
If Pwm1 > 1023 Then Pwm1 = 1023
End If
If Sw2 = 3 Then
Pwm1 = Pwm1 - 1
If Pwm1 < 0 Then Pwm1 = 0
End If
If Sw2 = 100 Then
Pwm1 = Pwm1 - 1
If Pwm1 < 0 Then Pwm1 = 0
End If
If Pwm1 <> Pwm1old Then
Print Pwm1
End If
Pwm1a = Pwm1
Pwm1old = Pwm1
End If
If Ticks = 3 Then
If Sw3 = 3 Then
If Ledblink = 1 Then
Ledblink = 0
Else
Ledblink = 1
End If
End If
End If
If Ticks = 4 Then
Ledtimer = Ledtimer + 1
If Ledtimer > 100 Then Ledtimer = 0
If Ledtimer = 1 Then
If Ledblink = 1 Then Out2 = 1
End If
If Ledtimer = 50 Then Out2 = 0
End If
If Ticks = 10 Then Ticks = 0
Return
Test 7 (Listing 5-7) shows one method of how this can be achieved. Switch polling occurs in the background in a
timer interrupt routine. The main program is now free to take care of other tasks. For each button S1, S2 and S3 there
is an associated variable Sw1, Sw2 and Sw3. While a button is not pressed its variable has the value zero. As long as a
button is pressed the variable is incremented up to 100 where it stops. The variable indicates how long the key has
been pressed, so you may for example wish to initiate some process only when its value reaches three. A long key
27 www.handsontec.com
press gives a value of 100. The timer routine uses a counter to produce short time intervals Ticks which is incremented
each time the timer interrupts (it is reset when it reaches 10). The three switches are read only once every ten Ticks
(when Ticks = 1). The interval takes care of switch debouncing and occurs often enough not to miss any press. At
other tick values different duties are performed. When Ticks = 2 switch counters are read and a PWM signal is
generated. When Ticks = 3 the switch counter is read and Ledblink is toggled to switch a flashing LED. The LED
output is produced when Ticks = 4. The sequential distribution of tasks gives the impression that all the activities are
performed simultaneously. The processor still has ample processing power in reserve for many additional tasks. The
main program switches output Out1 high for five ticks and low for five ticks. An LED connected to this output
appears slightly dim; the on/off repetition rate is so fast that you cannot see any flickering. The LED brightness is
constant, indicating that the program is maintaining a 50:50 output clock. The mark/space ratio of the PWM output is
controlled by buttons Sw1 and Sw2. The software determines if there is a short button press or a long one. A short
press changes the value by one, a longer press changes the counter value continuously. This allows the user to quickly
reach the desired value.
6. A DDS generator using the ATmega32
The first five installments of this course have already covered many programming techniques with an
emphasis on practical applications. This final installment builds on this theme giving a detailed insight
into all the software routines needed to make a simple DDS generator. We also have an offer for you, see
the final page of this article!
To get a good overview of some of the possibilities of the BASCOM language and the ATmega controllers it is worth
looking through the BASCOM AVR help pages, particularly all the Config options (Figure 6-1). Some of the topics
we have already covered in this course and in other ATM-18 projects include:
• COM-interface, hardware and software
• Ports, input, input pull-ups, output
• A/D converter
• Timer and counter
• Timer interrupts
• PWM outputs
• RC5 input
• I2C master
• Servo impulse
• One-wire bus (elsewhere in this edition)
There is of course much more internal and external hardware that can be used. The ATmega family share the same
basic core but more specialised applications call for a careful study of the datasheets to find the version best suited to
the task. This time we build an AF generator using the principles of DDS to produce the signal. The microcontroller
interfaces to an LCD which is driven from the port pins. The DDS generator produces a sine wave signal from a
digital PWM output. Two pushbuttons increment or decrement the output frequency in steps of 10Hz. The output
frequency is shown on an LCD and also sent to the COM interface port. For this test a Mega32 type controller has
been used, it has many I/O pins and is a popular choice. It would be simple to make changes to allow the program to
run on other controllers from the ATmega family.
28 www.handsontec.com
Figure 6-1.Bascom help for the config options.
6.1 The principle
The block diagram in Figure 6-2 gives an overview of the external components connected to the microcontroller. The
PWM signal is output from pin OC1B, and passes through a low-pass filter to produce a sine wave. The filter design is
very simple but for test purposes is sufficient. A better solution would use a (many-poled) filter with a much steeper
response and a cut-off frequency of around 15kHz. A simple piezo buzzer can be directly connected to the output
without the need for any filter at all.
29 www.handsontec.com
Figure 6-2. Block diagram of the DDS generator.
6.2 LC display
Whenever a design calls for an LCD to display lines of characters it can be achieved using six port pins for the drive
signals. The LCD usually works in 4-bit mode with each data byte split into two before being sent to the display. Two
control signals, E and RS, are also needed. In addition to these six signals we need three for the power supply and
contrast setting. The port pin assignments can be defined in the Menu Options/Compiler/LCD (Figure 6-3).
Figure 6-3.The LCD setup page.
A better method is to make the assignments in the source file (Config Lcdpin). This ensures that it runs successfully
on different systems. It is also necessary to define the type of LCD used (Config Lcd = 16 * 2). When the system is
first switched on one line of the LCD will be dark and the other light. After the display is initialised (Initlcd) the dark
line becomes light. Characters (Lcd “Text”) or a variable (LCD Freq) can now be sent to the display. After each
30 www.handsontec.com
character is written to the display the position is automatically incremented ready for the next character, but the second
line does not automatically follow from the first. Writing to the second line it is necessary to define the position
(Locate 2, 5). The entire screen can be cleared at any time using the Cls command. The example given in Listing 6-1
writes the text ‘DDS’ to the first line. The frequency value is sent to the second line of the display (Listing 6-2)
followed by the units ‘Hz’. The displayed frequency value will not always have the same number of characters so it is
necessary to include enough spaces to ensure that all characters previously displayed will be overwritten by the new
value.
Listing 6-1
Initialising and writing to the LCD
Config Lcdpin = Pin , Db4 = Portb.4 ,
Db5 = Portb.5 , Db6 = Portb.6 , Db7 = Portb.7 , E = Portb.3 , Rs = Portb.2
Config Lcd = 16 * 2
Initlcd
Cls
Lcd “DDS”
Listing 6-2
Sine wave lookup table and frequency selection
For N = 1 To 256
A = N - 1
A = A * 3.1415
A = A / 128
B = Sin(a)
B = B * 120
B = B + 128
Table(n) = Int(b)
Next N
Freq = 10
Do
Locate 2 , 1
Lcd Freq
Lcd “ Hz “
If Pind.6 = 0 Then
Freq = Freq + 10
Print Freq
End If
If Pind.7 = 0 Then
Freq = Freq - 10
Print Freq
End If
Waitms 10
A = Freq
‘43200/65535
B = A / 0.65918
F = Int(b)
Loop
31 www.handsontec.com
6.3 Sine table and frequency selection
A sine function lookup table must be written into memory for use by the DDS generator. The table size is 256 bytes.
These represent the analogue values of the wave which are sent to the PWM output to produce the sine wave. At start
up the generator has an output frequency Freq = 10Hz (Listing 6-2). The two pushbuttons PD6 and PD7 increment
and decrement the output frequency in 10Hz steps. The output frequency value is written to the two line display and
each time the frequency is changed the new value is sent to the PC. Operation without an LCD is therefore possible.
The generator can be used for example to tune an instrument; the standard ‘A’ note (440 Hz) produced on a tuning
fork can be selected without problem. The frequency in Hz is scaled to give the variable F. Every change of F
immediately affects the output frequency. This is made possible by the use of an interrupt routine.
6.4 Timer and DDS
The sine wave generator uses the DDS (Direct Digital Synthesis) principle with values of a sine waveform stored (as
bytes) in a lookup table. A phase accumulator (the variable Accu) is increased by the value of the variable F to point to
the next value in the lookup table. Only the high byte of the 16-bit Accu is used as a pointer to the table. When F has
the value 1 it will therefore take 256 timer interrupts before the next value in the table is used and produces an output
sine wave with a frequency of 0.65918Hz. This is the resolution of the frequency generator.
Listing 6-3
The DDS
Config Timer1 = Pwm , Prescale = 1 , Pwm =8 , Compare A Pwm = Clear Down ,
Compare B Pwm = Clear Down
Config Timer0 = Timer , Prescale = 1
On Ovf0 Tim0_isr
Enable Timer0
Enable Interrupts
Pwm1a = 127
Pwm1b = 0
Tim0_isr:
‘Timer 43.2 kHz at 11.0592 MHz
Portb.0 = 1
Accu = Accu + F
N = High(accu)
Pwm1b = Table(n)
‘F = F + 1
‘If F > 15000 Then F = 1
Portb.0 = 0
Return
As the value of F increases the pointer steps through the table more quickly. When its value reaches 256 the pointer
will start to jump over individual values but the output will still be sinusoidal. At the highest frequency of 10 kHz only
around four values are used to produce a complete sine wave cycle. The lowpass filter ensures that a good
approximation to a sine wave will still appear at the output. The program uses two timers. Timer 1 generates the 8- bit
PWM signal. In this setup the PWM frequency is 11059200Hz/256 = 43200Hz. The 8-bit Timer0 without any
prescaler overflows at a rate of 43.2kHz. This is therefore the rate at which the interrupt service routine is called, a
new value is fetched from the lookup table and written to the PWM register before the next interrupt occurs (Listing 6-
3).
Without any prescaler an 8-bit timer will interrupt every 256 clock cycles. Between interrupts the controller must not
only execute all the instructions in the interrupt service routine, but also push all the working registers onto a stack and
lastly pop them off again. In some cases the timing could be a little tight. It is important to be sure that there will be
enough time to carry out all the activities. The simplest way to indicate how long the controller spends servicing the
interrupt is to get it to set a port pin (Port.0 = 1) as it enters the ISR and reset it (Portb.0 = 0) when it exits. With an
32 www.handsontec.com
oscilloscope probe on the pin we can now observe the mark/space ratio directly to see how much time is available. In
the example here the pin is high for less than 50% of the time. The main routine can only execute its tasks when this
waveform is low. Using a simple software delay like Delayms will produce noticeably longer delay times than
expected.
Two lines are ‘commented out’ in the interrupt routine. When these comment characters are removed the signal
generator now has a sweep function. The frequency is incremented each time an interrupt occurs, the generator now
sweeps from 0 to 10kHz approximately three times per second. The oscilloscope display (Figure 6-4) shows the
resulting output waveform after the low-pass filter. A piezo buzzer connected to the output will produce a
characteristic twittering sound.
Figure 6-4.Oscilloscope display of the swept output signal.
7. Appendix
7.1 Using Bascom-AVR with Arduino
The ARDUINO is a hardware platform based on AVR processors. ARDUINO boards/chips are programmed with a
bootloader. This bootloader is the old STK500 protocol, not longer supported by Atmel in Studio. There are various
programmers for ARDUINO, AVRDUDE is probably the most versatile. BASCOM also supports the
ARDUINO/STK500 v1 protocol. The DTR/RTS lines are used to reset the board. You can program/read
flash/EEPROM but you cannot read/write fuse/lock bytes. The STK500 bootloader for ARDUINO does not support
this.
Under options you only need to select the programmer, and the COM port. Since an FTDI chip is used on most
ARDUINO boards, this is a virtual COM port. Only present when the USB cable is connected to your PC.
Select 57600baud for the baud rate. Older ARDUINO boards work with 19200baud. Optiboot Bootloader (under
Windows 7)
ARDUINO V2:
The developers of the ARDUINO finally implemented the STK500V2 protocol. This protocol is supported by Atmel
and of course by BASCOM. Select the ARDUINO STK500V2 programmer in BASCOM programmer options to use
this protocol. A board like the MEGA2560 R3 uses this protocol and probably all newer AVR based ARDUINO
boards will support this protocol. The baud rate should be 115200 but could be different for your board.
For more information on Optiboot visit following website:
Using Bascom-AVR with Arduino Optiboot Bootloader (under Windows 7):
http://code.google.com/p/optiboot/
1. Download AVRDUDE from http://www.nongnu.org/avrdude/
33 www.handsontec.com
2. Latest Windows Version (April 2012): avrdude-5.11-Patch7610-win32.zip. Complete
link: http://download.savannah.gnu.org/releases/avrdude/avrdude-5.11-Patch7610-win32.zip
3. Create a folder like c:AVRDUDE
4. Copy the content of avrdude-5.11-Patch7610-win32.zip in this new folder
5. Open BASCOM-AVR
6. Click on Options >>> Programmer
7. Choose External programmer
8. Checkmark Use HEX file
9. Include the path to avrdude.exe
10. User Parameter: -C c:avrdudeavrdude.conf -p m328p -P com19 -c arduino -b 115200 -U flash:w:{FILE}:i
Here is where we specify the programmer type, if you're using an STK500 use stk500, use arduino for Optiboot
Explanation of Parameter:
-C
c:avrdudeavrdude.conf The config file tells avrdude about all the different ways it can talk to the programmer.
-p
m328p This is just to tell it what microcontroller its programming. For example, if you are programming an
Atmega328p, use m328p as the part number
-P
com19 This is the communication port to use to talk to the programmer (COM19) in this case. Change it to your COM
port.
-c
arduino
34 www.handsontec.com
-b
115200
Set serial baudrate for programmer. Use 115200 baud for Optiboot.
-U
flash:w:{FILE}:i
You define here:
• the memory type: flash or eeprom (this could be also hfuse, lfuse or effuse if you want to verfiy this)
• r (read), w (write) or v (verify)
• Use {FILE} to insert the filename {EEPROM} to insert the filename of the generated EEP file.
• i = Intel Hex File
After clicking on the F4 (Program Chip) Button in Bascom-AVR you see the CMD window of Windows 7 until
AVRDUDE is ready flashing the Arduino.
Complete documentation of AVRDUDE parameters:
http://www.nongnu.org/avrdude/user-manual/avrdude_4.html#Option-Descriptions
http://avrhelp.mcselec.com/index.html?arduino.htm
7.2 Web Resources
• MSC BASCOM-AVR Application Notes
• BASCOM AVR Course 1
• BASCOM-AVR V2.0.7.5
• BASCOM-AVR User Manual
35 www.handsontec.com
7.3 Project with BASCOM-AVR
• Ultrasonic Distance Meter
• Pico-C Capacitance Meter ( in progress…)
• CAN Bus Tester ( in progress…)
Bookmark this page for future publishing project…
HandsOn Technology support Open Source
Hardware(OSHW) Development Platform.
HandsOn Tech provides a multimedia and interactive platform for
everyone interested in electronics. From beginner to diehard, from
student to lecturer… Information, education, inspiration and
entertainment. Analog and digital; practical and theoretical; software
and hardware…
Learn : Design : Share
www.handsontec.com
50
LCD+Ke
Ard
20x4 LCD
Breakout Boa
Modules
eyboard Shie
duino Uno
D Display Mod
ard &
s
In
ld
dule
ntegrated Circ
www.ha
10ͲSegme
MicroSD
Stepp
cuits D
ndsontec
ents LED Bar D
D Breakout B
er Motor Driv
Discrete Parts
c.com
Display
oard
ver
Asse
http://
Eth
W
PWM Motor
embled Kits
/www.handso
ernet Module
WiFi Module
r Speed Contr
Conn
ontec.com
e
roller
nectors

More Related Content

What's hot

Kupdf.com ashtonfrederick 55-lun-i-dugovecni
Kupdf.com ashtonfrederick 55-lun-i-dugovecniKupdf.com ashtonfrederick 55-lun-i-dugovecni
Kupdf.com ashtonfrederick 55-lun-i-dugovecnizoran radovic
 
Sejn121 dzek slejd - sejn i lovci na bizone (vasojevic &amp; folpi &amp; em...
Sejn121   dzek slejd - sejn i lovci na bizone (vasojevic &amp; folpi &amp; em...Sejn121   dzek slejd - sejn i lovci na bizone (vasojevic &amp; folpi &amp; em...
Sejn121 dzek slejd - sejn i lovci na bizone (vasojevic &amp; folpi &amp; em...zoran radovic
 
Paragrafoa motak teoria eta adibideak
Paragrafoa motak teoria eta adibideakParagrafoa motak teoria eta adibideak
Paragrafoa motak teoria eta adibideakeuskararenerraietan
 
Plantilla para-gafas-anaglifo
Plantilla para-gafas-anaglifoPlantilla para-gafas-anaglifo
Plantilla para-gafas-anaglifobennyquiar
 
Plc presentation
Plc presentationPlc presentation
Plc presentationAkshay Modi
 

What's hot (7)

Kupdf.com ashtonfrederick 55-lun-i-dugovecni
Kupdf.com ashtonfrederick 55-lun-i-dugovecniKupdf.com ashtonfrederick 55-lun-i-dugovecni
Kupdf.com ashtonfrederick 55-lun-i-dugovecni
 
Sejn121 dzek slejd - sejn i lovci na bizone (vasojevic &amp; folpi &amp; em...
Sejn121   dzek slejd - sejn i lovci na bizone (vasojevic &amp; folpi &amp; em...Sejn121   dzek slejd - sejn i lovci na bizone (vasojevic &amp; folpi &amp; em...
Sejn121 dzek slejd - sejn i lovci na bizone (vasojevic &amp; folpi &amp; em...
 
Paragrafoa motak teoria eta adibideak
Paragrafoa motak teoria eta adibideakParagrafoa motak teoria eta adibideak
Paragrafoa motak teoria eta adibideak
 
Allen bradley
Allen bradleyAllen bradley
Allen bradley
 
Type iii contour integral
Type iii contour integralType iii contour integral
Type iii contour integral
 
Plantilla para-gafas-anaglifo
Plantilla para-gafas-anaglifoPlantilla para-gafas-anaglifo
Plantilla para-gafas-anaglifo
 
Plc presentation
Plc presentationPlc presentation
Plc presentation
 

Viewers also liked (20)

Presentación tips youtube
Presentación tips youtubePresentación tips youtube
Presentación tips youtube
 
Actividad 2 diana
Actividad 2 dianaActividad 2 diana
Actividad 2 diana
 
Cstierra
CstierraCstierra
Cstierra
 
Plan Decenal de Educación 2008 2018
Plan Decenal de Educación 2008 2018Plan Decenal de Educación 2008 2018
Plan Decenal de Educación 2008 2018
 
Power Point, Prezi y SlideShare
Power Point, Prezi y SlideSharePower Point, Prezi y SlideShare
Power Point, Prezi y SlideShare
 
La nanotecnología y la biotecnología
La nanotecnología y la biotecnologíaLa nanotecnología y la biotecnología
La nanotecnología y la biotecnología
 
Debate rule
Debate ruleDebate rule
Debate rule
 
Social Network Website 'Midterm Project'
Social Network Website 'Midterm Project'Social Network Website 'Midterm Project'
Social Network Website 'Midterm Project'
 
Alcatel-Lucent 409089307
Alcatel-Lucent 409089307Alcatel-Lucent 409089307
Alcatel-Lucent 409089307
 
IPv6 Basics
IPv6 BasicsIPv6 Basics
IPv6 Basics
 
Scientific Review Article
Scientific Review ArticleScientific Review Article
Scientific Review Article
 
Clase morfología1
Clase morfología1Clase morfología1
Clase morfología1
 
Sistema nervioso parte 3
Sistema nervioso parte 3Sistema nervioso parte 3
Sistema nervioso parte 3
 
Announcements 09.11.16
Announcements 09.11.16Announcements 09.11.16
Announcements 09.11.16
 
The love
The loveThe love
The love
 
Informe prensa
Informe prensaInforme prensa
Informe prensa
 
CopyofRRBCBS
CopyofRRBCBSCopyofRRBCBS
CopyofRRBCBS
 
Apostila -atualidades
Apostila -atualidades Apostila -atualidades
Apostila -atualidades
 
Ordenar oraciones co m - n
Ordenar oraciones co m - nOrdenar oraciones co m - n
Ordenar oraciones co m - n
 
Contrato colectivo-grupal
Contrato colectivo-grupalContrato colectivo-grupal
Contrato colectivo-grupal
 

Similar to Bascom avr-course

L10 assembly-language-programming-of-atmega328 p
L10 assembly-language-programming-of-atmega328 pL10 assembly-language-programming-of-atmega328 p
L10 assembly-language-programming-of-atmega328 prsamurti
 
Rodrigo Almeida - Microkernel development from project to implementation
Rodrigo Almeida - Microkernel development from project to implementationRodrigo Almeida - Microkernel development from project to implementation
Rodrigo Almeida - Microkernel development from project to implementationFelipe Prado
 
Wireless appliances control report
Wireless appliances control reportWireless appliances control report
Wireless appliances control reportengineerssolution
 
3245731 tele-controlled-steper-motor-thesis
3245731 tele-controlled-steper-motor-thesis3245731 tele-controlled-steper-motor-thesis
3245731 tele-controlled-steper-motor-thesisThanh Nguyen
 
CodeWarrior, Linux; OrCad and Hyperlynx; QMS Tools
CodeWarrior, Linux; OrCad and Hyperlynx; QMS ToolsCodeWarrior, Linux; OrCad and Hyperlynx; QMS Tools
CodeWarrior, Linux; OrCad and Hyperlynx; QMS Toolsdjerrybellott
 
Microcontroladores: programación con microcontrolador AVR
Microcontroladores: programación con microcontrolador AVRMicrocontroladores: programación con microcontrolador AVR
Microcontroladores: programación con microcontrolador AVRSANTIAGO PABLO ALBERTO
 
AVR Micro controller Interfacing
AVR Micro controller Interfacing AVR Micro controller Interfacing
AVR Micro controller Interfacing Raghav Shetty
 
Assembler Programming
Assembler ProgrammingAssembler Programming
Assembler ProgrammingOmar Sanchez
 
20081114 Friday Food iLabt Bart Joris
20081114 Friday Food iLabt Bart Joris20081114 Friday Food iLabt Bart Joris
20081114 Friday Food iLabt Bart Jorisimec.archive
 
NetSim Technology Library- Military radio-tdma-and-dtdma
NetSim Technology Library- Military radio-tdma-and-dtdmaNetSim Technology Library- Military radio-tdma-and-dtdma
NetSim Technology Library- Military radio-tdma-and-dtdmaVishal Sharma
 
Effisiensi prog atmel
Effisiensi prog atmelEffisiensi prog atmel
Effisiensi prog atmelrm_dhozooo
 
Atmel-7735-Automotive-Microcontrollers-ATmega169P_-968165.pdf
Atmel-7735-Automotive-Microcontrollers-ATmega169P_-968165.pdfAtmel-7735-Automotive-Microcontrollers-ATmega169P_-968165.pdf
Atmel-7735-Automotive-Microcontrollers-ATmega169P_-968165.pdfMiguel Angel Sejas Villarroel
 
Gas leakage detection system
Gas leakage detection systemGas leakage detection system
Gas leakage detection systemAashiq Ahamed N
 

Similar to Bascom avr-course (20)

DSP_Assign_1
DSP_Assign_1DSP_Assign_1
DSP_Assign_1
 
Assignment
AssignmentAssignment
Assignment
 
L10 assembly-language-programming-of-atmega328 p
L10 assembly-language-programming-of-atmega328 pL10 assembly-language-programming-of-atmega328 p
L10 assembly-language-programming-of-atmega328 p
 
Rodrigo Almeida - Microkernel development from project to implementation
Rodrigo Almeida - Microkernel development from project to implementationRodrigo Almeida - Microkernel development from project to implementation
Rodrigo Almeida - Microkernel development from project to implementation
 
Wireless appliances control report
Wireless appliances control reportWireless appliances control report
Wireless appliances control report
 
3245731 tele-controlled-steper-motor-thesis
3245731 tele-controlled-steper-motor-thesis3245731 tele-controlled-steper-motor-thesis
3245731 tele-controlled-steper-motor-thesis
 
CodeWarrior, Linux; OrCad and Hyperlynx; QMS Tools
CodeWarrior, Linux; OrCad and Hyperlynx; QMS ToolsCodeWarrior, Linux; OrCad and Hyperlynx; QMS Tools
CodeWarrior, Linux; OrCad and Hyperlynx; QMS Tools
 
Atmega tutorial
Atmega tutorialAtmega tutorial
Atmega tutorial
 
Avr book
Avr bookAvr book
Avr book
 
Microcontroladores: programación con microcontrolador AVR
Microcontroladores: programación con microcontrolador AVRMicrocontroladores: programación con microcontrolador AVR
Microcontroladores: programación con microcontrolador AVR
 
AVR Micro controller Interfacing
AVR Micro controller Interfacing AVR Micro controller Interfacing
AVR Micro controller Interfacing
 
Assembler Programming
Assembler ProgrammingAssembler Programming
Assembler Programming
 
20081114 Friday Food iLabt Bart Joris
20081114 Friday Food iLabt Bart Joris20081114 Friday Food iLabt Bart Joris
20081114 Friday Food iLabt Bart Joris
 
Divya
DivyaDivya
Divya
 
Doc8453
Doc8453Doc8453
Doc8453
 
Csd01
Csd01Csd01
Csd01
 
NetSim Technology Library- Military radio-tdma-and-dtdma
NetSim Technology Library- Military radio-tdma-and-dtdmaNetSim Technology Library- Military radio-tdma-and-dtdma
NetSim Technology Library- Military radio-tdma-and-dtdma
 
Effisiensi prog atmel
Effisiensi prog atmelEffisiensi prog atmel
Effisiensi prog atmel
 
Atmel-7735-Automotive-Microcontrollers-ATmega169P_-968165.pdf
Atmel-7735-Automotive-Microcontrollers-ATmega169P_-968165.pdfAtmel-7735-Automotive-Microcontrollers-ATmega169P_-968165.pdf
Atmel-7735-Automotive-Microcontrollers-ATmega169P_-968165.pdf
 
Gas leakage detection system
Gas leakage detection systemGas leakage detection system
Gas leakage detection system
 

Recently uploaded

OOP concepts -in-Python programming language
OOP concepts -in-Python programming languageOOP concepts -in-Python programming language
OOP concepts -in-Python programming languageSmritiSharma901052
 
US Department of Education FAFSA Week of Action
US Department of Education FAFSA Week of ActionUS Department of Education FAFSA Week of Action
US Department of Education FAFSA Week of ActionMebane Rash
 
List of Accredited Concrete Batching Plant.pdf
List of Accredited Concrete Batching Plant.pdfList of Accredited Concrete Batching Plant.pdf
List of Accredited Concrete Batching Plant.pdfisabel213075
 
Industrial Applications of Centrifugal Compressors
Industrial Applications of Centrifugal CompressorsIndustrial Applications of Centrifugal Compressors
Industrial Applications of Centrifugal CompressorsAlirezaBagherian3
 
Mine Environment II Lab_MI10448MI__________.pptx
Mine Environment II Lab_MI10448MI__________.pptxMine Environment II Lab_MI10448MI__________.pptx
Mine Environment II Lab_MI10448MI__________.pptxRomil Mishra
 
KCD Costa Rica 2024 - Nephio para parvulitos
KCD Costa Rica 2024 - Nephio para parvulitosKCD Costa Rica 2024 - Nephio para parvulitos
KCD Costa Rica 2024 - Nephio para parvulitosVictor Morales
 
Ch10-Global Supply Chain - Cadena de Suministro.pdf
Ch10-Global Supply Chain - Cadena de Suministro.pdfCh10-Global Supply Chain - Cadena de Suministro.pdf
Ch10-Global Supply Chain - Cadena de Suministro.pdfChristianCDAM
 
TEST CASE GENERATION GENERATION BLOCK BOX APPROACH
TEST CASE GENERATION GENERATION BLOCK BOX APPROACHTEST CASE GENERATION GENERATION BLOCK BOX APPROACH
TEST CASE GENERATION GENERATION BLOCK BOX APPROACHSneha Padhiar
 
Cost estimation approach: FP to COCOMO scenario based question
Cost estimation approach: FP to COCOMO scenario based questionCost estimation approach: FP to COCOMO scenario based question
Cost estimation approach: FP to COCOMO scenario based questionSneha Padhiar
 
Comparative study of High-rise Building Using ETABS,SAP200 and SAFE., SAFE an...
Comparative study of High-rise Building Using ETABS,SAP200 and SAFE., SAFE an...Comparative study of High-rise Building Using ETABS,SAP200 and SAFE., SAFE an...
Comparative study of High-rise Building Using ETABS,SAP200 and SAFE., SAFE an...Erbil Polytechnic University
 
Comprehensive energy systems.pdf Comprehensive energy systems.pdf
Comprehensive energy systems.pdf Comprehensive energy systems.pdfComprehensive energy systems.pdf Comprehensive energy systems.pdf
Comprehensive energy systems.pdf Comprehensive energy systems.pdfalene1
 
Paper Tube : Shigeru Ban projects and Case Study of Cardboard Cathedral .pdf
Paper Tube : Shigeru Ban projects and Case Study of Cardboard Cathedral .pdfPaper Tube : Shigeru Ban projects and Case Study of Cardboard Cathedral .pdf
Paper Tube : Shigeru Ban projects and Case Study of Cardboard Cathedral .pdfNainaShrivastava14
 
DEVICE DRIVERS AND INTERRUPTS SERVICE MECHANISM.pdf
DEVICE DRIVERS AND INTERRUPTS  SERVICE MECHANISM.pdfDEVICE DRIVERS AND INTERRUPTS  SERVICE MECHANISM.pdf
DEVICE DRIVERS AND INTERRUPTS SERVICE MECHANISM.pdfAkritiPradhan2
 
Prach: A Feature-Rich Platform Empowering the Autism Community
Prach: A Feature-Rich Platform Empowering the Autism CommunityPrach: A Feature-Rich Platform Empowering the Autism Community
Prach: A Feature-Rich Platform Empowering the Autism Communityprachaibot
 
Robotics-Asimov's Laws, Mechanical Subsystems, Robot Kinematics, Robot Dynami...
Robotics-Asimov's Laws, Mechanical Subsystems, Robot Kinematics, Robot Dynami...Robotics-Asimov's Laws, Mechanical Subsystems, Robot Kinematics, Robot Dynami...
Robotics-Asimov's Laws, Mechanical Subsystems, Robot Kinematics, Robot Dynami...Sumanth A
 
FUNCTIONAL AND NON FUNCTIONAL REQUIREMENT
FUNCTIONAL AND NON FUNCTIONAL REQUIREMENTFUNCTIONAL AND NON FUNCTIONAL REQUIREMENT
FUNCTIONAL AND NON FUNCTIONAL REQUIREMENTSneha Padhiar
 
High Voltage Engineering- OVER VOLTAGES IN ELECTRICAL POWER SYSTEMS
High Voltage Engineering- OVER VOLTAGES IN ELECTRICAL POWER SYSTEMSHigh Voltage Engineering- OVER VOLTAGES IN ELECTRICAL POWER SYSTEMS
High Voltage Engineering- OVER VOLTAGES IN ELECTRICAL POWER SYSTEMSsandhya757531
 
Energy Awareness training ppt for manufacturing process.pptx
Energy Awareness training ppt for manufacturing process.pptxEnergy Awareness training ppt for manufacturing process.pptx
Energy Awareness training ppt for manufacturing process.pptxsiddharthjain2303
 
System Simulation and Modelling with types and Event Scheduling
System Simulation and Modelling with types and Event SchedulingSystem Simulation and Modelling with types and Event Scheduling
System Simulation and Modelling with types and Event SchedulingBootNeck1
 
Module-1-(Building Acoustics) Noise Control (Unit-3). pdf
Module-1-(Building Acoustics) Noise Control (Unit-3). pdfModule-1-(Building Acoustics) Noise Control (Unit-3). pdf
Module-1-(Building Acoustics) Noise Control (Unit-3). pdfManish Kumar
 

Recently uploaded (20)

OOP concepts -in-Python programming language
OOP concepts -in-Python programming languageOOP concepts -in-Python programming language
OOP concepts -in-Python programming language
 
US Department of Education FAFSA Week of Action
US Department of Education FAFSA Week of ActionUS Department of Education FAFSA Week of Action
US Department of Education FAFSA Week of Action
 
List of Accredited Concrete Batching Plant.pdf
List of Accredited Concrete Batching Plant.pdfList of Accredited Concrete Batching Plant.pdf
List of Accredited Concrete Batching Plant.pdf
 
Industrial Applications of Centrifugal Compressors
Industrial Applications of Centrifugal CompressorsIndustrial Applications of Centrifugal Compressors
Industrial Applications of Centrifugal Compressors
 
Mine Environment II Lab_MI10448MI__________.pptx
Mine Environment II Lab_MI10448MI__________.pptxMine Environment II Lab_MI10448MI__________.pptx
Mine Environment II Lab_MI10448MI__________.pptx
 
KCD Costa Rica 2024 - Nephio para parvulitos
KCD Costa Rica 2024 - Nephio para parvulitosKCD Costa Rica 2024 - Nephio para parvulitos
KCD Costa Rica 2024 - Nephio para parvulitos
 
Ch10-Global Supply Chain - Cadena de Suministro.pdf
Ch10-Global Supply Chain - Cadena de Suministro.pdfCh10-Global Supply Chain - Cadena de Suministro.pdf
Ch10-Global Supply Chain - Cadena de Suministro.pdf
 
TEST CASE GENERATION GENERATION BLOCK BOX APPROACH
TEST CASE GENERATION GENERATION BLOCK BOX APPROACHTEST CASE GENERATION GENERATION BLOCK BOX APPROACH
TEST CASE GENERATION GENERATION BLOCK BOX APPROACH
 
Cost estimation approach: FP to COCOMO scenario based question
Cost estimation approach: FP to COCOMO scenario based questionCost estimation approach: FP to COCOMO scenario based question
Cost estimation approach: FP to COCOMO scenario based question
 
Comparative study of High-rise Building Using ETABS,SAP200 and SAFE., SAFE an...
Comparative study of High-rise Building Using ETABS,SAP200 and SAFE., SAFE an...Comparative study of High-rise Building Using ETABS,SAP200 and SAFE., SAFE an...
Comparative study of High-rise Building Using ETABS,SAP200 and SAFE., SAFE an...
 
Comprehensive energy systems.pdf Comprehensive energy systems.pdf
Comprehensive energy systems.pdf Comprehensive energy systems.pdfComprehensive energy systems.pdf Comprehensive energy systems.pdf
Comprehensive energy systems.pdf Comprehensive energy systems.pdf
 
Paper Tube : Shigeru Ban projects and Case Study of Cardboard Cathedral .pdf
Paper Tube : Shigeru Ban projects and Case Study of Cardboard Cathedral .pdfPaper Tube : Shigeru Ban projects and Case Study of Cardboard Cathedral .pdf
Paper Tube : Shigeru Ban projects and Case Study of Cardboard Cathedral .pdf
 
DEVICE DRIVERS AND INTERRUPTS SERVICE MECHANISM.pdf
DEVICE DRIVERS AND INTERRUPTS  SERVICE MECHANISM.pdfDEVICE DRIVERS AND INTERRUPTS  SERVICE MECHANISM.pdf
DEVICE DRIVERS AND INTERRUPTS SERVICE MECHANISM.pdf
 
Prach: A Feature-Rich Platform Empowering the Autism Community
Prach: A Feature-Rich Platform Empowering the Autism CommunityPrach: A Feature-Rich Platform Empowering the Autism Community
Prach: A Feature-Rich Platform Empowering the Autism Community
 
Robotics-Asimov's Laws, Mechanical Subsystems, Robot Kinematics, Robot Dynami...
Robotics-Asimov's Laws, Mechanical Subsystems, Robot Kinematics, Robot Dynami...Robotics-Asimov's Laws, Mechanical Subsystems, Robot Kinematics, Robot Dynami...
Robotics-Asimov's Laws, Mechanical Subsystems, Robot Kinematics, Robot Dynami...
 
FUNCTIONAL AND NON FUNCTIONAL REQUIREMENT
FUNCTIONAL AND NON FUNCTIONAL REQUIREMENTFUNCTIONAL AND NON FUNCTIONAL REQUIREMENT
FUNCTIONAL AND NON FUNCTIONAL REQUIREMENT
 
High Voltage Engineering- OVER VOLTAGES IN ELECTRICAL POWER SYSTEMS
High Voltage Engineering- OVER VOLTAGES IN ELECTRICAL POWER SYSTEMSHigh Voltage Engineering- OVER VOLTAGES IN ELECTRICAL POWER SYSTEMS
High Voltage Engineering- OVER VOLTAGES IN ELECTRICAL POWER SYSTEMS
 
Energy Awareness training ppt for manufacturing process.pptx
Energy Awareness training ppt for manufacturing process.pptxEnergy Awareness training ppt for manufacturing process.pptx
Energy Awareness training ppt for manufacturing process.pptx
 
System Simulation and Modelling with types and Event Scheduling
System Simulation and Modelling with types and Event SchedulingSystem Simulation and Modelling with types and Event Scheduling
System Simulation and Modelling with types and Event Scheduling
 
Module-1-(Building Acoustics) Noise Control (Unit-3). pdf
Module-1-(Building Acoustics) Noise Control (Unit-3). pdfModule-1-(Building Acoustics) Noise Control (Unit-3). pdf
Module-1-(Building Acoustics) Noise Control (Unit-3). pdf
 

Bascom avr-course

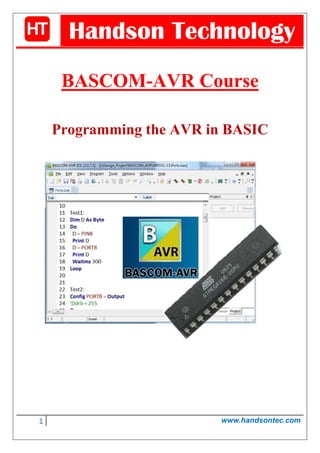
  • 1. 1 www.handsontec.com Handson Technology BASCOM-AVR Course Programming the AVR in BASIC
  • 2. 2 www.handsontec.com Table of Contents 1. Introduction ..............................................................................................................................................................3 1.1 The serial interface............................................................................................................................................3 1.2 Calculating.........................................................................................................................................................4 1.3 Procedures ........................................................................................................................................................5 1.4 The software serial interface ............................................................................................................................6 2. Using the ATmega Ports............................................................................................................................................6 2.1 Reading input values.........................................................................................................................................7 2.2 Writing to an output port .................................................................................................................................8 2.3 Using the pull-up resistors ................................................................................................................................9 2.4 Measuring Capacitance...................................................................................................................................10 2.5 Driving a stepper motor..................................................................................................................................11 3. Timers and Interrupts .............................................................................................................................................13 3.1 Reading the timer ...........................................................................................................................................14 3.2 Timer Interrupt ...............................................................................................................................................15 3.3 Averaged measurements................................................................................................................................16 4. Counter and PWM ..................................................................................................................................................17 4.1 Frequency measurement................................................................................................................................18 4.2 PWM outputs..................................................................................................................................................19 4.3 LED control using six PWM channels ..............................................................................................................20 5. Memory, switch polling and time management.....................................................................................................22 5.1 RAM and EEPROM...........................................................................................................................................23 5.2 Reading the status of switches .......................................................................................................................24 5.3 Switch polling using timer interrupt ...............................................................................................................26 6. A DDS generator using the ATmega32....................................................................................................................27 6.1 The principle....................................................................................................................................................28 6.2 LC display.........................................................................................................................................................29 6.3 Sine table and frequency selection.................................................................................................................31 6.4 Timer and DDS ................................................................................................................................................31 7. Appendix .................................................................................................................................................................32 7.1 Using Bascom-AVR with Arduino....................................................................................................................32 7.2 Web Resources ...............................................................................................................................................34 7.3 Project with BASCOM-AVR..............................................................................................................................35
  • 3. 3 www.handsontec.com 1. Introduction The AVR series of microcontrollers from Atmel are very popular. In this mini course we turn the potlight onto software development for these controllers. BASCOM is an ideal programming language for the newcomer; it has a steep learning curve ensuring that your path to success (and a working prototype) is reassuringly short. The ATmega controller and BASCOM together make a strong team! Whatever application you have in mind, controllers from the ATmega range are sure to have the majority of the necessary peripheral hardware already integrated on-board: ports, timer, A/D converter, PWM output, and UART are all standard together with a choice of RAM, ROM and EEPROM size. BASCOM is one of the easier languages to use and makes interfacing to peripherals using LCDs, RC5 and I2C a simple task requiring very few instructions. There is a good range of development hardware for this microcontroller family. The STK500 from Atmel is suitable platforms for this course. Alternatively there is no reason why you should not experiment with your own homebrew design built on a piece of vero-board. It also makes little difference whether you choose a Mega8, Mega88 or even the larger Mega16or Mega32. They all basically have the same core; the main differences are in the number of port pins and the amount of internal memory space. In this chapter we look at the controller’s UART and A/D. 1.1 The serial interface All of the ATmega series have a built-in serial interface (UART) using pins RXD (PD0) and TXD (PD1). Figure 1-1. The serial interface. Figure 1-2. The simplest serial interface without an inverter. The signals are TTL compatible so it is necessary to add an RS232 interface buffer such as the MAX232 to implement a true RS232 interface. These buffers are already implemented on the Atmel STK500 development system. The PC will need to be running a terminal emulator program before serial communication from the ATmega can be viewed on the screen. The serial interface is covered here first because the software routine is very simple and can be easily modified if required. Listing 1-1 shows all the elements necessary for all of the BASCOM programs. The first line $regfile = “m88def.dat” indicates which controller the code will be running on; in this case it is the ATmega88. The line can be omitted and the controller type specified using the Options/Compiler/Chip menu but this method will generate an error if a different AVR system is used. It is far better to declare the controller type clearly in the program header with any program that you write. It also has priority and overwrites any setting defined in the Options menu. Listing 1-1: Print ‘hello’ ‚Bascom ATmega88, Print $regfile = “m88def.dat” $crystal = 16000000 Baud = 9600
  • 4. 4 www.handsontec.com Goto Test1 Test1: Do Print „hello“ Waitms 2000 Loop Test2: … Test3: … End It is also important to specify the crystal frequency ($crystal= 16000000 for 16 MHz). It influences both the division ratio necessary to provide the requested communications baud rate clock (Baud = 9600) and also the time base used to count milliseconds in the ‘wait’ statements (Waitms 2000 for 2s). One feature of the test program given here is the use of the unconditional jump instruction Goto Test1. It is normally good programming practice to avoid using Goto statements because they interrupt the program structure. In this instance we have included several programming examples in the same source code so it is only necessary to alter the first Goto Test1 to Goto Test2 or 3, etc. (depending on which example you want to run) and then recompile. This avoids the need to compile individual source files for each example and reduces the number of files generated in the compilation process. Additional test programs can simply be added to the code and run using an appropriate Goto statement. The small program example used for Test1 forms an endless loop between the Do and Loop statements. The program outputs a ‘hello’ message every two seconds. A terminal emulator program like HyperTerminal is needed to receive the message. 1.2 Calculating The program in Listing 1-2 is used to calculate the area (C) of a circle where ‘A’ is the given radius: C = A² * 3.1415 ‘A’ must be an integer variable, which is dimensioned as a byte and input via the serial interface. The value of ‘A’ (in the range 0 to 255) is first multiplied by itself. The resultant intermediate value ‘B’ can be up to a word long (0 to 65535). The result ‘C’ is a real value and is dimensioned as single which requires four bytes to store its value. Anyone familiar with other dialects of BASIC may be wondering why the calculation has not been written as C =3.1415 *A *A or Print 3.1415*A*A. The reason is that BASCOM only allows one calculation per expression so it is necessary to break down complex calculations into series of single steps to avoid violating this rule. Listing 1-2 Calculating in BASCOM Dim A As Byte Dim B As Word Dim C As Single Do Print “ input 0...255” Input A B = A * A C = B * 3.1415
  • 5. 5 www.handsontec.com ‘not allowed: C = 3.1415 * A * A Print C Loop 1.3 Procedures The A/D converter in the ATmega has a 10-bit resolution. Listing 1-3 shows an example of how the converter is initialised: Config Adc = Single, Prescaler = 64, Reference = Off. The converter clock frequency is defined here as 1/64 of the processor clock, i.e. 250kHz with a processor clock of 16MHz. The internal reference voltage is not used but is derived externally and applied to pin AREF. In most cases the 5V stabilized supply voltage can be used. A procedure is used to input the ADC measurement and convert it to a voltage reading. It is only worthwhile using a procedure if it can be reused by different parts of the main program body. In this example two voltage measurements are displayed. The new procedure is called Sub Voltage. Before the procedure can be called it must first be declared: Declare Sub Voltage. The program fragment shown here does not conform to good software writing practice. In Visual Basic it is usual to pass the channel parameter ‘N’ when the procedure is called: Voltage(N). Alternatively a function could be written and then called using: U = Voltage(N). In the example here we are using only global variables so that D, N and U are accessible from all parts of the program including other procedures. All of the accepted software guidelines indicate that this is not good programming practice but in this instance it simplifies the job for the compiler and controller. Experience has shown that even large programs occupying 100% of the flash memory of a Mega32 and using a large number of global variables are completely stable in operation and run without problem. Passing variables to procedures can sometimes generate errors which are quite difficult to trace. Listing 1-3 Using a procedure Declare Sub Voltage Dim N As Byte ConfigAdc = Single , Prescaler = 64 , Reference = Off Start Adc Do N = 0 : Voltage Print „ ADC(0) = „ ; U ; „ V“ „ N = 1 : Voltage Print „ ADC(1) = „ ; U ; „ V“ „ Print Waitms 500 Loop Sub Voltage D = Getadc(n) D = D * 5 U = D / 1023 End Sub
  • 6. 6 www.handsontec.com 1.4 The software serial interface One of the many highlights of the BASCOM compiler is its software serial interface. Say you are already using the hardware serial interface with the RXD and TXD pins and you require another COM interface? Alternatively it could be that you do not have any RS232 interface inverter chip (e.g. a MAX232) on your board but still need to provide a connection for an RS232 cable. In both cases BASCOM has a solution to the problem. Any available port pins can be defined in software as serial interface pins for the software serial interface. The example Listing 1-4 uses PD3 as a serial output. Communication speed is set to 9600 Baud and the interface number 2. To output a simple message you can use Print#2, ‘hello’ for example. Using the INVERTED parameter allows the interface to be built without the need for a MAX232 interface inverter. BASCOM inverts the signal so that inactive level is a logic Low. The PC interface RXD signal can then be connected directly. The signal levels are not truly RS232 but it provides a useable interface solution. Listing 1-4 Using the Software UART Baud = 9600 ‚Open „comd.3:9600,8,n,1“ For Output As #2 Open „comd.3:9600,8,n,1,INVERTED“ For Output As #2 ConfigAdc = Single , Prescaler = 64 , Reference = Off Do N = 0 : Voltage Print #2 , „ADC(0) = „ ; U ; „ V“ „ N = 1 : Voltage Print #2 , „ADC(1) = „ ; U ; „ V“ „ Print #2 , Waitms 500 Loop 2. Using the ATmega Ports The port pins are the gateway between real world events and the microcontroller. The user can send out control signals and read back information. Here we give a few simple programming examples to quickly get you started inputting and outputting data. A look at the data sheet gives some insight into the complexity of the port architecture of these microcontrollers (Figure 2-1). The ports can be configured as output or input (with or without pull-up resistors). Despite their complexity they are quite easy to use and only three important registers are needed to define the port configuration: The Data Direction Register (DDRx), the Port Output Register (PORTx) and the Port Input Register (PINx). There is also a single PUD bit (pull-up disable) which disconnects all pull-ups. The following example programs begin by using Port B.
  • 7. 7 www.handsontec.com Figure 2-1.The ATmega port architecture. 2.1 Reading input values After a reset the internal Data Direction Register is reset to zero which configures all the ports as inputs. The Port Register is also reset to zero. In this condition the port pins look to the outside world like typical high impedance digital CMOS inputs (Figure 2-2). With all the inputs open-circuit the value stored in PINB is random and changes if you touch the pins with your finger (first discharge any static charge you may be carrying). Figure 2-2. A floating CMOS input. Listing 2-1 uses Port B as an input port. The following is an example of values you will see on the screen.
  • 8. 8 www.handsontec.com 63 0 61 0 The values of PINB are changing but PORTB remains at zero, which is not surprising because we have not yet changed the port output register. PORTB is displayed in this example just to underline the difference between the PINB and PORTB registers. Experience has shown that this causes a great deal of frustration for newcomers who confuse the two register names: “how come I get a reading of zero when there is 5V on the input pin?” The answer of course is that you should not read PORTB but PINB (read it as Port In B) to get the value of the input pin. Listing 2-1 Port input ‘Bascom ATmega Ports $regfile = “m88def.dat” $crystal = 16000000 Baud = 9600 Goto Test1 Test1: Dim D As Byte Do D = Pinb Print D D = Portb Print D Waitms 300 Loop 2.2 Writing to an output port The second example outputs data from Port B. It is necessary to write to the Data Direction Register to configure Bas an output port. In BASCOM-AVR there are two ways this can be achieved; you can use the Register notation method (Ddrb=255) or the BASIC version (ConfigPortb = Output) either method has the same effect. To run this example it’s necessary to change the Goto instruction at the beginning of the program to read GotoTest2 and recompile. To turn on alternate LEDs at the output port the decimal value 85 is written into Portb. Listing 2-2 includes the hexadecimal (&H55) and binary equivalent (&B01010101) of this value, they are only included to demonstrate alternate formats. All of the LEDs on PortB are switched (Figure 2-3) to produce the lighting effect (the LED boogie-woogie!).The Mega32 has all eight port lines available for use but the Mega8 or Mega88 uses port pins PB6 and PB7 for connection of a crystal. When the fuses are configured to use an external crystal these two port pins are no longer available as I/O. The same is true for other dual purpose pins i.e. if the hardware UART is used PD0 and PD1are not available as I/O pins. Figure 2-3.Connecting an LED.
  • 9. 9 www.handsontec.com Listing 2-2 Port output Test2: ConfigPortb = Output ‘Ddrb = 255 Do Portb = 85 Portb = &H55 Portb = &B01010101 Waitms 200 Portb = 170 Portb = &HAA Portb = &B10101010 Waitms 200 Loop 2.3 Using the pull-up resistors When the inputs are connected to devices like switches or opto-couplers (with open-collector outputs requiring a load resistor connected to VCC) it is ideal to use the built-in pullup resistors instead of fitting additional external resistors (Figure 2-4). Writing a ‘0’ to any of the DDRx bits configures the port pin as an input and writing a ‘1’ to the corresponding PORTx bit connects a pull-up resistor to that pin (Listing2-3). With nothing connected to the inputs the program displays: 63 255 63 255 When the pull-ups are used the quiescent state of the input pin is a logic ‘1’ so external signals must pull the input low. Connecting PB0 to ground produces a PINB value of 62. With an input shorted a current of around 100μA flows to ground which indicates that the pull-up resistor has a value of 50kΩ. This corresponds well with the 20kΩ to 100kΩ range quoted in the datasheet. Figure 2-4.The internal pull-up resistors.
  • 10. 10 www.handsontec.com Listing 2-3 Using the pull-ups Test3: Ddrb = 0 Portb = 255 ‘Pullups Do D = Pinb Print D D = Portb Print D Waitms 300 Loop 2.4 Measuring Capacitance The ATmega port architecture is very versatile and allows a very simple capacitance meter to be built. The capacitor under test (in the range 1 nF to 10 μF) is simply connected directly to port PB0 and ground (Figure 5). The program Test 4 (Listing 2-4) first discharges the capacitor by outputting an active low level. The internal pull-up resistor is then enabled which charges the capacitor. The program measures the time taken for the capacitor voltage to reach a logic ‘1’ (2.5 V approximately). The value of capacitance is proportional to the charge time. Listing 2-4 Capacitance measurement Test4: ‘C-meter 1 nF .. 10μF Dim T As Word Dim C As Single Dim S As String * 10 Do T = 0 Ddrb.0 = 1 Portb.0 = 0 ‘low Z, 0 V Waitms 1000 Ddrb.0 = 0 Portb.0 = 1 ‘Pullup Do T = T + 1 Loop Until Pinb.0 = 1 C = T * 0.0730 C = Round(c) Print C ; “ nF “ Loop It is necessary to calibrate the unit because of the manufacturing tolerances in the values of both the pull-up resistance and the input voltage threshold. Calibrate using a close-tolerance capacitor and change the multiplication
  • 11. 11 www.handsontec.com factor (0.0730) to obtain a result corresponding to the stated capacitor value. The measurements show some variation but should be accurate enough for most applications. Repeated measurements of the same capacitor gave the following spread: 1009 nF 1001 nF 1005 nF 1002 nF Figure 2-5.The principle used for capacitance measuring. 2.5 Driving a stepper motor Those of you who have a unipolar stepper motor (maybe salvaged from an old printer or 5.25-inch disk drive) may wish to experiment using this next example. Here the microcontroller uses the ULN2003 open-collector driver chip Figure 2-6. Only four outputs are required so we use pins PC0 to PC3. When this chip is required to drive inductive loads (e.g. motors or relays) it is necessary to connect the common cathode of the chip’s protection diodes (pin9 on IC2 or pin8 on K6) to the load supply voltage pin2 on K2 (VIN). The supply voltage on K2 depends on the type of motor used and can be in the range 6V to 12V. Figure 2-6. Connecting a unipolar stepper motor. Two pushbuttons are connected to PB0 and PB1 to provide direction control of the motor. The BASCOM program is really simple, it just sequences through all four phases with four variables Phase(1) to Phase(4).
  • 12. 12 www.handsontec.com In the case where the motor just vibrates instead of rotating it is a simple job to swap phases in the program and saves changing the motor connections. The programming examples Test5 to Test7 in Ports.bas contain several exercises to drive a stepper motor one of which shows how to build an analogue voltmeter where the motor controls the needle position. Test5: 'Steppermotor 4 phase PC0...PC3 'Left PB0, right PB1 Dim Phase(4) As Byte Dim Pos As Long Dim Stp As Byte Dim Ticks As Byte Config Portc = Output Phase(1) = 8 Phase(2) = 2 Phase(3) = 1 Phase(4) = 4 Do If Pinb.0 = 0 Then Pos = Pos - 1 If Pinb.1 = 0 Then Pos = Pos + 1 Stp = Pos And 3 Stp = Stp + 1 Portc = Phase(stp) Waitms 10 Loop Test6: 'Steppermotor 4 phase PC0...PC3 'Voltmeter Dim U As Word Config Portc = &B00001111 Config Adc = Single , Prescaler = Auto , Reference = Off Phase(1) = 8 Phase(2) = 2 Phase(3) = 1 Phase(4) = 4 Do U = Getadc(7) U = U / 10 If U > Pos Then Pos = Pos + 1 If U < Pos Then Pos = Pos - 1 Stp = Pos And 3 Stp = Stp + 1 Portc = Phase(stp) Waitms 10 Loop
  • 13. 13 www.handsontec.com Test7: 'Steppermotor 4 phase PC0...PC3 'Voltmeter 200 steps Dim Phaseb(8) As Byte Dim Pos2 As Word Config Portc = &B00001111 Config Adc = Single , Prescaler = Auto , Reference = Off Phaseb(1) = 8 Phaseb(2) = 9 Phaseb(3) = 2 Phaseb(4) = 3 Phaseb(5) = 1 Phaseb(6) = 5 Phaseb(7) = 4 Phaseb(8) = 12 Do U = Getadc(7) U = U / 5 Pos2 = Pos2 + U Pos2 = Pos2 - Pos Pos = Pos2 / 102 Stp = Pos And 7 Stp = Stp + 1 Portc = Phaseb(stp) Waitms 10 Loop 3. Timers and Interrupts Many practical tasks can only be solved by using accurate timing. The ATmega controllers are well equipped in this respect; the Mega8 to Mega32 controllers all have three timers, Timer 0 and 2 are 8-bit while Timer 1 is a full 16 bit wide. The ATmega controller’s timer/counter section looks a little daunting at first sight (Figure 3-1). They are highly configurable and require a certain amount of care to ensure they are set up correctly for your application. For those programming in Assembler this configuration procedure is quite involved but as you will see BASCOM simplifies things a lot. The first thing to decide is the source of the timer/counter clock signal. It can come from the internal clock (directly or via a prescaler) or from an external source (e.g. connect to pin P1 for Timer 1). The counters can count on either the rising or falling clock edge and the counter value can be read or changed at any time via the TCNT1 register. When an overflow occurs it can generate an interrupt. The counters are commonly used for generating Pulse Width Modulated (PWM) signals. This is just a brief outline of some of the more basic properties of the timer/counters, as you become more familiar with the controller you will begin to get a better appreciation of their versatility.
  • 14. 14 www.handsontec.com Figure 3-1. Block diagram of the timers. 3.1 Reading the timer For the first exercise we are using the 16-bit timer driven by the system clock crystal and divided by 256 in the prescaler. In BASCOM all this information can be written on one line: Config Timer1 = Timer, Prescale = 256. The timer also begins counting so it is not necessary to use Start Timer1. Listing 3-1 is the first test, as before we are using a Goto to reduce ‘compilation clutter’. The listing as printed will only ever go to the first example, you will need to change fifth line to Goto Test2 and recompile for the next exercise. In Test1 timer/counter1 just runs continuously and the counter value is displayed five times per second. The values are in the range from 0 to 65535, and we can see that after roughly one second an overflow occurs: 088 17864 30706 43547 56389 3695 16471 Listing 3-1 Reading the timer registers ‘Bascom ATmega88, Timer $regfile = “m88def.dat” $crystal = 16000000 Baud = 9600
  • 15. 15 www.handsontec.com Goto Test1 Test1: Config Timer1 = Timer , Prescale = 256 ‘Start Timer1 Do Print Timer1 Waitms 200 Loop We know the clock frequency and the counter size so it is possible to work out the exact time between overflows: the counter clock is 16 MHz divided by 256 which gives 62.5kHz. The counter overflows after 65536 clocks so the interval between each overflow is 1.049s.In this application the counter produces a precise time reference. We can now use this information to test how long the program takes to complete the two instructions: “PrintTimer1” and “Waitms 200”. Using for example the consecutive readings 43547 and 30706 the interval is 43547– 30706 = 12841 clock periods. One clock period equals1/62.5kHz = 15.267μs. The time between the two readings will therefore be 12841*15.267μs = 196ms and not 200ms. We can see that the Waitms instruction should not be used if it is necessary to make accurate time measurements. 3.2 Timer Interrupt This exercise programs the controller to generate an accurate1 second clock. The 16-bit Timer 1 is not necessary for this application; we can use 8-bit Timer 0. The timer will be programmed to overflow every 1000μs and generate an interrupt. An interrupt causes a forced interruption of the main program and directs the controller to execute a sub routine (Interrupt Service Routine or ISR) to service the interrupt. Different events can be programmed to generate an interrupt and an ISR is required to respond to each type of interrupt. Here Tim0_isr would be the subroutine name but in this example we have just used Tim0_isr: as a label which indicates where the program jumps to on interrupt. The last instruction of the interrupt routine must be a RETURN. In this example further interrupts will not be serviced until the return is executed. Listing 3-2 Test 2 configures timer 0 with a prescaler of 64, which gives it a clock frequency of 250kHz. The counter is 8-bits wide so without further programming it will generate an overflow interrupt every 256 clock cycles. We need the counter to interrupt every 250 clocks for an accurate 1ms time base so it is necessary to load the counter with the value 6 each time it overflows. A word variable called Ticks is incremented every time the counter overflows. When this variable reaches 1000 it indicates that one second has elapsed and the variable called Seconds is incremented. The value of either variable can be read by the main program. In this example the program sends the value of seconds to the terminal every second starting from zero at program start. Listing 3-2 Exact seconds using interrupts Test2: Dim Ticks As Word Dim Seconds As Word Dim Seconds_old As Word Config Timer0 = Timer , Prescale = 64 On Ovf0 Tim0_isr Enable Timer0 Enable Interrupts Do If Seconds <> Seconds_old Then Print Seconds Seconds_old = Seconds End If Loop
  • 16. 16 www.handsontec.com Tim0_isr: ‘1000 μs Timer0 = 6 Ticks = Ticks + 1 If Ticks = 1000 Then Ticks = 0 Seconds = Seconds + 1 End If Return It is necessary to allow the interrupts to occur by enabling the global interrupt (Enable Interrupts) and also allow the timer 0 overflow conditions to generate an interrupt (Enable Timer0). The display shows the value of seconds: 0 1 2 3 All interrupt sources can be disabled by using Disable Interrupts. 3.3 Averaged measurements Measurements made of analogue signal levels are often affected by a 50Hz mains signal superimposed on the voltage level. The unwanted 50 Hz component can effectively be cancelled out by sampling the analogue voltage level several times during a complete cycle of the mains voltage (20ms) and then averaging all the measurements. For this exercise, Listing 3-3 Test3, we will use a timer interrupt again to generate an accurate time base. The average value is achieved by sampling the analogue signal 25 times in a 20ms time window. The sampling interval is therefore 800μs. Timer 2 will be used with a prescale value of 64. Each time it overflows Timer2 is loaded with the value 56 so that the next overflow occurs 200 clocks later. 800μs is more than enough time to make the analogue measurement and calculate the sum and mean value. The variable Ticks is incremented each time a measurement is taken every interrupt. After 25 measurements the sum stored in AD0 is transferred to the variable AD0_mean. The main program averages the value and then sends it to the screen. Averaging in this way gives such good suppression of the 50Hz components that by using half wave rectification the system can be used to measure ac signals. The low voltage AC signal is connected to the ADC0 input via a 10k protection resistor (Figure 3- 2). Listing 3-3 Measuring averages Test3: Dim Ad0 As Word Dim Ad0_mean As Word Config Adc = Single , Prescaler = 64 , Reference = Off Config Timer2 = Timer , Prescale = 64 On Ovf2 Tim2_isr Enable Timer2 Enable Interrupts Do Ad0_mean = Ad0_mean / 25 Print Ad0_mean Waitms 100 Loop
  • 17. 17 www.handsontec.com Tim2_isr: ‘800 μs Timer2 = 56 Ticks = Ticks + 1 Ad0 = Ad0 + Getadc(0) If Ticks > 24 Then Ticks = 0 Ad0_mean = Ad0 Ad0 = 0 End If Return The program now finds the average value of the positive half wave which is equal to half of the absolute average value of the sine wave. A typical sequence of measurements would be: 226 227 226 226 226 Figure 3-2.Measuring an ac voltage. Although there is some variation the measured average value is mostly 226. This can be converted into a real voltage level: 5V * 226/1023 = 1.10V. The measured alternating voltage therefore has an absolute average value of 2.20V. For a sine wave this equates to an RMS value of 2.44V and a peak to peak value of 3.46Vp-p. The relationship between the peak and RMS value of a sine wave is √2 = 1.414. For arithmetic averaging the relationship of the peak value to the average value is π/2=1.571, so the absolute average value is 90.03 % of the RMS. 4. Counter and PWM We have already taken a look at timers in part 3 of the course. The ATmega timer/counters have far more to offer than just measuring time. Here we look at impulse counting, frequency measurement and PWM signal generation. In the first exercise we set up timer 1 to count impulses over a period of one second. A look at the program Listing 4-1 indicates that timer 1 is configured as a counter, counting on the falling edge of the input pulse and with a prescale value of 1.
  • 18. 18 www.handsontec.com The counter input is labeled T1 which for example on the Mega8 and Mega88 is pin PD5 (Figure 4-1). In this exercise we connect a low-voltage 50 Hz signal to this input via a 10 k󲐀 series resistor. A signal generator is not necessary here; the input impedance is relatively high so just touching the input resistor with your finger will inject a signal of sufficient level from the ambient mains field for measurement. Listing 4-1 Impulse counter Test1: Config Timer1 = Counter , Edge = Falling , Prescale = 1 Start Timer1 Do Print Timer1 Waitms 1000 Loop In Europe the signal is 50 Hz, in the USA 60 Hz. The routine counts the number of pulses in 1 second so the screen shows: 0 50 100 150 201 251 Figure 4-1. A 50Hz signal on T1. After the fourth value a slight inaccuracy in the measured value creeps in. This is because the Waitms 1000 instruction is not an exact time interval and also we have not taken into account the time necessary to output values to the display. To improve the accuracy of frequency measurements we go on in the next exercise to use timer interrupts. 4.1 Frequency measurement The timer can reliably count external impulses with a repetition rate of up to 4MHz. To make accurate frequency measurements we need a precise time window, in this example we use interrupts from two timers. Each time timer 1 overflows, the interrupt is serviced by Tim1_isr which increments the variable Highword. Without this variable the counter would only be able to measure frequencies up to 65535Hz (Listing 4-2). Timer 0 generates an exact time window of one second. When the variable Ticks = 1, timer 1 is reset and the measurement begins. Exactly 1000ms later the counter value of timer 1 is copied to Lowword and then added to the number of overflows stored in Highword (multiplied by 65536) before storing the result in Freq. The main program outputs Freq (in Hz) to the display every second. Initializing timer 1 in timer mode with a clock of 16MHz (Config Timer1 = Timer , Prescale = 1) would display a frequency of 16000000Hz. As a counter however, timer 1 can run at just a little more than a quarter of this frequency and its prescaler is synchronized to the processor clock. When you try to measure a frequency as high as 6MHz for example the counter gating runs too slowly to register every edge of the
  • 19. 19 www.handsontec.com input pulses so it misses some and shows a false reading of around 3MHz. The design can be used to accurately measure frequencies up to and just beyond 4MHz. Listing 4-2 Frequency measurements up to 4 MHz Test2: Dim Lowword As Word Dim Highword As Word Dim Ticks As Word Dim Freq As Long Config Adc = Single , Prescaler = 32 , Reference = Off Config Timer0 = Timer , Prescale = 64 Config Timer1 = Counter , Edge = Falling , Prescale = 1 ‘Config Timer1 = Timer , Prescale = 1 On Ovf0 Tim0_isr On Ovf1 Tim1_isr Enable Timer0 Enable Timer1 Enable Interrupts Do Print Freq Waitms 1000 Loop Tim0_isr: ‘1000 μs Timer0 = 6 Ticks = Ticks + 1 If Ticks = 1 Then Timer1 = 0 Highword = 0 End If If Ticks = 1001 Then Lowword = Timer1 Freq = Highword * 65536 Freq = Freq + Lowword Ticks = 0 End If Return Tim1_isr: Highword = Highword + 1 Return 4.2 PWM outputs Pulse Width Modulation (PWM) is a technique used in many applications to provide a quasi-analogue control of power to a load without the need for a true D/A converter. Timers in the ATmega controllers can be used to generate PWM signals. Timer 1 has two independent PWM output channels with a resolution of 8, 9 or 10 bits.
  • 20. 20 www.handsontec.com Listing 4-3 shows how both channels Pwm1a and Pwm1b of timer 1 can be programmed to produce output signals with 10-bit resolution. The signals are output from OC1A (PB1) and OC1B (PB2). Their electrical characteristics are the same as other port pins so you can just hang an LED together with a series current-limiting resistor on the output or connect the output to a buffer like the ULN2003. The program produces increasing brightness signal from channel A and decreasing brightness signal from channel B. Listing 4-3 10-bit PWM Test3: Dim Pwm As Word Config Timer1 = Pwm , Prescale = 8 , Pwm = 10 , Compare A Pwm = Clear Down , Compare B Pwm = Clear Down Do For Pwm = 0 To 1023 Pwm1a = Pwm Pwm1b = 1023 - Pwm Waitms 5 Next Pwm Loop 4.3 LED control using six PWM channels The Mega88 provides six PWM outputs signals. Timers 0 and 2 both offer a resolution of eight bits. The individual outputs are on the following output pins: OC1A on PB1 OC1B on PB2 OC0A on PD6 OC0B on PD5 OC2A on PB3 OC2B on PD3 In this last exercise we use all six PWM outputs, for the sake of symmetry in this application, timer 1 is configured with a resolution of only eight bits. The aim of this example (Listing 4-4) is to smoothly control the brightness of a row of LEDs such that a sinusoidal ‘wave’ of light travels along the row. Listing 4-4 Six PWM outputs produce an LED light ‘wave’. Test4: Dim A As Single Dim B As Single Dim I As Byte Dim K As Byte Declare Sub Wave Config Timer0 = Pwm , Prescale = 8 , Compare A Pwm = Clear Down , Compare B Pwm = Clear Down Config Timer1 = Pwm , Prescale = 8 , Pwm = 8 , Compare A Pwm = Clear Down , Compare B Pwm = Clear Down Config Timer2 = Pwm , Prescale = 8 , Compare A Pwm = Clear Down , Compare B Pwm = Clear Down
  • 21. 21 www.handsontec.com Do For I = 1 To 60 K = I Wave Pwm1a = Pwm K = I + 10 Wave Pwm1b = Pwm K = I + 20 Wave Pwm0a = Pwm K = I + 30 Wave Pwm0b = Pwm K = I + 40 Wave Pwm2a = Pwm K = I + 50 Wave Pwm2b = Pwm Waitms 50 Next Pwm Loop Sub Wave A = 6.1415 * K A = A / 60 B = Sin(a) B = B + 1 B = B * B B = B * 63 Pwm = Int(b) If Pwm < 2 Then Pwm = 2 End Sub A loop with 60 brightness levels per LED is sufficient to produce a smooth transition between levels. The value of variable I is used in the sub Wave to produce the light level value. It is first multiplied by 2π, divided by 60 and then its sine function is found. The result in the range ±1 is then offset to the range 0 to 2. The eye’s perception of brightness is nonlinear so to compensate, the value is squared. It now lies in the range 0 to 4 so multiplying by 63 converts to the 0 to 255 range (almost) of PWM values used to control the LEDs. The steps at lower values of brightness are quite noticeable so the lowest possible level is limited to 2. Using this calculation and the corresponding phase shift generated in the program produces an interesting lighting effect. The overall result is a wave of brightness moving along the line of LEDs. The LEDs can be arranged in a line or as a circle. It is possible to expand the line further by adding six, twelve or more LEDs.
  • 22. 22 www.handsontec.com Figure 4-2. Brightness control of six outputs. 5. Memory, switch polling and time management In the microcontroller embedded scene, complaints about systems having too much memory or too much processing power are rare if not non-existent — we never seem to have enough! Microcontrollers in particular have limited resources with no possibility of expansion, so it’s important not to squander them by using inefficient programming practices. Figure 5-1. ATmega88 Block diagram.
  • 23. 23 www.handsontec.com Software engineers aim to produce efficient code. A simple routine like reading the value of a switch could be programmed in such a way that it uses up 100 % of the microcontrollers processing time. In this case there would be no capacity spare for the controller to perform any other tasks. It is important when designing any software that the processor resources are used efficiently. We expand on this theme here and give some pointers to how the microcontroller can be better employed. 5.1 RAM and EEPROM In addition to the 8 kBytes of Flash memory the ATmega88 is fitted with 1024 bytes of RAM and 512 bytes of EEPROM. BASCOM uses the RAM to store variables and various stacks so how much memory is left over? To test memory allocation we will write some data into an array. The array dimension is given A(500). This is handled as 500 individual bytes A(1) to A(500). Note that there is no A(0). The short test program given in Listing 5-1 contains a loop which writes an incrementing data byte to memory. A second loop reads the memory and sends it to the PC. A report file Memory.rpt is generated which gives an overview of how the memory has been used in the program. The file is in text file format and can be read using Notepad. The file shows memory size, exact location of all the variables and much more; very useful to see how much elbow room you have in reserve as you progress to writing larger programs. Listing 5-1 Data storage in RAM Test1: Dim A(500) As Byte Dim N As Word Do For N = 1 To 500 A(n) = Low(n) Next N For N = 1 To 500 Print A(n) Waitms 100 Next N Loop Listing 5-2 The EEPROM Test2: For N = 0 To 511 Writeeeprom N , N Next N Dim D As Byte Do For N = 0 To 511 Readeeprom D , N Print N , D Waitms 100 Next N Loop Test 2 in Listing 5-2 shows how data can be written to and read from EEPROM. In contrast to RAM the EEPROM will not lose its data when power is switched off. Data is written using the format Writeeeprom, Variable, Memory address and read using Readeeprom, Variable, Memory address. A wiped EEPROM memory location has the value FF (255). From this it is possible to determine if any data has been programmed into the EEPROM. Test 2 (Listing 5-2) first writes 512 Bytes to the EEPROM, reads then displays them on the PC.
  • 24. 24 www.handsontec.com 5.2 Reading the status of switches Firmware running in stand-alone equipment will undoubtedly need to read the status of switches or pushbuttons so that the user can control the equipment. Reading the status of switches would seem at first sight to be quite a trivial process but there are a number of pitfalls. One problem is that we do not know when and for how long the button will be pressed so it is necessary to continuously read (or ‘poll’) the switch status to ensure we do not miss a press. A systematic approach to software design is also important; it can create many problems if you need to add a switch poll routine to existing software, much better to design it in from the start where each function can be built up logically. Another, more practical problem is that most switches suffer from contact bounce. When the contacts come together they do not switch cleanly but instead bounce, producing an output that looks like the button has been pressed several times off and on very quickly. It would therefore not be a good idea to use the switch input directly to clock a timer or counter. The bounce time is quite short, one common debouncing method is to filter out the bounce by reading the switch status say once every 10ms. In the next series of examples we use three pushbuttons connected on D5, D6 and D7. The corresponding port bits are set high and the data direction register sets these pins to inputs so that internal pull-up resistors are connected. An open circuit input will be read as a ‘1’ and a ‘0’ when the button is pressed. The port pins are given aliases so that you can use statements like: If S1 = 0 then (Listing 5-3). Test 3 actually uses just two buttons to toggle two outputs. S1 switches the first output high and the second low while S2 toggles them back. Each key press sends a message to the PC screen. The polling is repeated after a 50ms wait. When either button is pressed continuously, a message is sent to the serial interface every 50ms but the port outputs do not change state. Test 4 (Listing 5-4) uses two buttons to control the mark/space ratio of a PWM signal OC1A = PB1. One button increases the PWM value while the other decreases it. An oscilloscope shows the variation in mark/space ratio and an LED connected at the output will change in brightness. Switch debouncing is not necessary here because the routine only measures the time that the buttons are pressed. Listing 5-3 LED control Test3: S1 Alias Pind.6 S2 Alias Pind.5 S3 Alias Pind.7 Out1 Alias Portd.2 Out2 Alias Portd.3 Config Portd = &B00001100 Portd.6 = 1 Portd.5 = 1 Portd.7 = 1 Out1 = 1 Do If S1 = 0 Then Out1 = 1 Out2 = 0 Print “1 on” End If If S2 = 0 Then Out1 = 0 Out2 = 1 Print “1 off” End If Waitms 50 Loop
  • 25. 25 www.handsontec.com Test 5 (Listing 5-5) uses two buttons to toggle the state of two LEDs. Each press of S1 causes the LED on Out1 to change state; likewise S2 controls the LED on Out2. Once a key press is detected the program switches the LED and loops until the switch is released. A 10ms wait is used to filter any bounce otherwise the LED would change state on every edge of the switch bounce waveform, leaving the LED randomly on or off. The same routine can be used to increment the values of two counters (Test 6) Listing 5-6. Each time a counter value changes, its value is sent to the PC. Listing 5-4 PWM control Test4: Dim Pwmold As Integer Pwma = 0 Do If S1 = 0 Then Pwma = Pwma + 1 If Pwma > 1023 Then Pwma = 1023 If S2 = 0 Then Pwma = Pwma - 1 If Pwma < 0 Then Pwma = 0 If S3 = 0 Then Pwma = 0 Waitms 20 Pwm1a = Pwma If Pwma <> Pwmold Then Print Pwma End If Pwmold = Pwma Loop Listing 5-5 Two toggle flipflops Test5: Do If S1 = 0 Then If Out1 = 0 Then Out1 = 1 Else Out1 = 0 End If Waitms 10 End If Do Loop Until S1 = 1 If S2 = 0 Then If Out2 = 0 Then Out2 = 1 Else Out2 = 0 End If Waitms 10 End If Do Loop Until S2 = 1 Waitms 100 Loop Listing 5-6 Two counters Test6: Dim Count1 As Word Dim Count2 As Word Do If S1 = 0 Then Count1 = Count1 + 1 Print “Count1 “; Print Count1 Waitms 50 Do Loop Until S1 = 1 End If If S2 = 0 Then Count2 = Count2 + 1 Print “Count2 “; Print Count2 Waitms 50 Do Loop Until S2 = 1 End If Loop
  • 26. 26 www.handsontec.com 5.3 Switch polling using timer interrupt All of the preceding methods of switch polling do not use the processor resources efficiently, it spends its time either waiting or reading the switch inputs. In reality there will be more switches to read and other tasks for the firmware to take care of. The next stage is to take a more structured approach to software design so that resources are better managed. Listing 5-7 Switch polling using interrupt Test7: Dim Ticks As Byte Dim Sw1 As Byte Dim Sw2 As Byte Dim Sw3 As Byte Dim Sw4 As Byte Dim Pwm1 As Integer Dim Pwm1old As Integer Dim Ledtimer As Byte Dim Ledblink As Byte Ledblink = 1 Enable Timer0 Enable Interrupts Cls Lcd 0 Do If Ticks = 1 Then Out1 = 1 If Ticks = 5 Then Out1 = 0 Loop Timer0isr: Ticks = Ticks + 1 If Ticks = 1 Then If S1 = 0 Then Sw1 = Sw1 + 1 Else Sw1 = 0 If Sw1 > 100 Then Sw1 = 100 If S2 = 0 Then Sw2 = Sw2 + 1 Else Sw2 = 0 If Sw2 > 100 Then Sw2 = 100 If S3 = 0 Then Sw3 = Sw3 + 1 Else Sw3 = 0 If Sw3 > 100 Then Sw3 = 100 End If If Ticks = 2 Then If Sw1 = 3 Then Pwm1 = Pwm1 + 1 If Pwm1 > 1023 Then Pwm1 = 1023 End If If Sw1 = 100 Then Pwm1 = Pwm1 + 1 If Pwm1 > 1023 Then Pwm1 = 1023 End If If Sw2 = 3 Then Pwm1 = Pwm1 - 1 If Pwm1 < 0 Then Pwm1 = 0 End If If Sw2 = 100 Then Pwm1 = Pwm1 - 1 If Pwm1 < 0 Then Pwm1 = 0 End If If Pwm1 <> Pwm1old Then Print Pwm1 End If Pwm1a = Pwm1 Pwm1old = Pwm1 End If If Ticks = 3 Then If Sw3 = 3 Then If Ledblink = 1 Then Ledblink = 0 Else Ledblink = 1 End If End If End If If Ticks = 4 Then Ledtimer = Ledtimer + 1 If Ledtimer > 100 Then Ledtimer = 0 If Ledtimer = 1 Then If Ledblink = 1 Then Out2 = 1 End If If Ledtimer = 50 Then Out2 = 0 End If If Ticks = 10 Then Ticks = 0 Return Test 7 (Listing 5-7) shows one method of how this can be achieved. Switch polling occurs in the background in a timer interrupt routine. The main program is now free to take care of other tasks. For each button S1, S2 and S3 there is an associated variable Sw1, Sw2 and Sw3. While a button is not pressed its variable has the value zero. As long as a button is pressed the variable is incremented up to 100 where it stops. The variable indicates how long the key has been pressed, so you may for example wish to initiate some process only when its value reaches three. A long key
  • 27. 27 www.handsontec.com press gives a value of 100. The timer routine uses a counter to produce short time intervals Ticks which is incremented each time the timer interrupts (it is reset when it reaches 10). The three switches are read only once every ten Ticks (when Ticks = 1). The interval takes care of switch debouncing and occurs often enough not to miss any press. At other tick values different duties are performed. When Ticks = 2 switch counters are read and a PWM signal is generated. When Ticks = 3 the switch counter is read and Ledblink is toggled to switch a flashing LED. The LED output is produced when Ticks = 4. The sequential distribution of tasks gives the impression that all the activities are performed simultaneously. The processor still has ample processing power in reserve for many additional tasks. The main program switches output Out1 high for five ticks and low for five ticks. An LED connected to this output appears slightly dim; the on/off repetition rate is so fast that you cannot see any flickering. The LED brightness is constant, indicating that the program is maintaining a 50:50 output clock. The mark/space ratio of the PWM output is controlled by buttons Sw1 and Sw2. The software determines if there is a short button press or a long one. A short press changes the value by one, a longer press changes the counter value continuously. This allows the user to quickly reach the desired value. 6. A DDS generator using the ATmega32 The first five installments of this course have already covered many programming techniques with an emphasis on practical applications. This final installment builds on this theme giving a detailed insight into all the software routines needed to make a simple DDS generator. We also have an offer for you, see the final page of this article! To get a good overview of some of the possibilities of the BASCOM language and the ATmega controllers it is worth looking through the BASCOM AVR help pages, particularly all the Config options (Figure 6-1). Some of the topics we have already covered in this course and in other ATM-18 projects include: • COM-interface, hardware and software • Ports, input, input pull-ups, output • A/D converter • Timer and counter • Timer interrupts • PWM outputs • RC5 input • I2C master • Servo impulse • One-wire bus (elsewhere in this edition) There is of course much more internal and external hardware that can be used. The ATmega family share the same basic core but more specialised applications call for a careful study of the datasheets to find the version best suited to the task. This time we build an AF generator using the principles of DDS to produce the signal. The microcontroller interfaces to an LCD which is driven from the port pins. The DDS generator produces a sine wave signal from a digital PWM output. Two pushbuttons increment or decrement the output frequency in steps of 10Hz. The output frequency is shown on an LCD and also sent to the COM interface port. For this test a Mega32 type controller has been used, it has many I/O pins and is a popular choice. It would be simple to make changes to allow the program to run on other controllers from the ATmega family.
  • 28. 28 www.handsontec.com Figure 6-1.Bascom help for the config options. 6.1 The principle The block diagram in Figure 6-2 gives an overview of the external components connected to the microcontroller. The PWM signal is output from pin OC1B, and passes through a low-pass filter to produce a sine wave. The filter design is very simple but for test purposes is sufficient. A better solution would use a (many-poled) filter with a much steeper response and a cut-off frequency of around 15kHz. A simple piezo buzzer can be directly connected to the output without the need for any filter at all.
  • 29. 29 www.handsontec.com Figure 6-2. Block diagram of the DDS generator. 6.2 LC display Whenever a design calls for an LCD to display lines of characters it can be achieved using six port pins for the drive signals. The LCD usually works in 4-bit mode with each data byte split into two before being sent to the display. Two control signals, E and RS, are also needed. In addition to these six signals we need three for the power supply and contrast setting. The port pin assignments can be defined in the Menu Options/Compiler/LCD (Figure 6-3). Figure 6-3.The LCD setup page. A better method is to make the assignments in the source file (Config Lcdpin). This ensures that it runs successfully on different systems. It is also necessary to define the type of LCD used (Config Lcd = 16 * 2). When the system is first switched on one line of the LCD will be dark and the other light. After the display is initialised (Initlcd) the dark line becomes light. Characters (Lcd “Text”) or a variable (LCD Freq) can now be sent to the display. After each
  • 30. 30 www.handsontec.com character is written to the display the position is automatically incremented ready for the next character, but the second line does not automatically follow from the first. Writing to the second line it is necessary to define the position (Locate 2, 5). The entire screen can be cleared at any time using the Cls command. The example given in Listing 6-1 writes the text ‘DDS’ to the first line. The frequency value is sent to the second line of the display (Listing 6-2) followed by the units ‘Hz’. The displayed frequency value will not always have the same number of characters so it is necessary to include enough spaces to ensure that all characters previously displayed will be overwritten by the new value. Listing 6-1 Initialising and writing to the LCD Config Lcdpin = Pin , Db4 = Portb.4 , Db5 = Portb.5 , Db6 = Portb.6 , Db7 = Portb.7 , E = Portb.3 , Rs = Portb.2 Config Lcd = 16 * 2 Initlcd Cls Lcd “DDS” Listing 6-2 Sine wave lookup table and frequency selection For N = 1 To 256 A = N - 1 A = A * 3.1415 A = A / 128 B = Sin(a) B = B * 120 B = B + 128 Table(n) = Int(b) Next N Freq = 10 Do Locate 2 , 1 Lcd Freq Lcd “ Hz “ If Pind.6 = 0 Then Freq = Freq + 10 Print Freq End If If Pind.7 = 0 Then Freq = Freq - 10 Print Freq End If Waitms 10 A = Freq ‘43200/65535 B = A / 0.65918 F = Int(b) Loop
  • 31. 31 www.handsontec.com 6.3 Sine table and frequency selection A sine function lookup table must be written into memory for use by the DDS generator. The table size is 256 bytes. These represent the analogue values of the wave which are sent to the PWM output to produce the sine wave. At start up the generator has an output frequency Freq = 10Hz (Listing 6-2). The two pushbuttons PD6 and PD7 increment and decrement the output frequency in 10Hz steps. The output frequency value is written to the two line display and each time the frequency is changed the new value is sent to the PC. Operation without an LCD is therefore possible. The generator can be used for example to tune an instrument; the standard ‘A’ note (440 Hz) produced on a tuning fork can be selected without problem. The frequency in Hz is scaled to give the variable F. Every change of F immediately affects the output frequency. This is made possible by the use of an interrupt routine. 6.4 Timer and DDS The sine wave generator uses the DDS (Direct Digital Synthesis) principle with values of a sine waveform stored (as bytes) in a lookup table. A phase accumulator (the variable Accu) is increased by the value of the variable F to point to the next value in the lookup table. Only the high byte of the 16-bit Accu is used as a pointer to the table. When F has the value 1 it will therefore take 256 timer interrupts before the next value in the table is used and produces an output sine wave with a frequency of 0.65918Hz. This is the resolution of the frequency generator. Listing 6-3 The DDS Config Timer1 = Pwm , Prescale = 1 , Pwm =8 , Compare A Pwm = Clear Down , Compare B Pwm = Clear Down Config Timer0 = Timer , Prescale = 1 On Ovf0 Tim0_isr Enable Timer0 Enable Interrupts Pwm1a = 127 Pwm1b = 0 Tim0_isr: ‘Timer 43.2 kHz at 11.0592 MHz Portb.0 = 1 Accu = Accu + F N = High(accu) Pwm1b = Table(n) ‘F = F + 1 ‘If F > 15000 Then F = 1 Portb.0 = 0 Return As the value of F increases the pointer steps through the table more quickly. When its value reaches 256 the pointer will start to jump over individual values but the output will still be sinusoidal. At the highest frequency of 10 kHz only around four values are used to produce a complete sine wave cycle. The lowpass filter ensures that a good approximation to a sine wave will still appear at the output. The program uses two timers. Timer 1 generates the 8- bit PWM signal. In this setup the PWM frequency is 11059200Hz/256 = 43200Hz. The 8-bit Timer0 without any prescaler overflows at a rate of 43.2kHz. This is therefore the rate at which the interrupt service routine is called, a new value is fetched from the lookup table and written to the PWM register before the next interrupt occurs (Listing 6- 3). Without any prescaler an 8-bit timer will interrupt every 256 clock cycles. Between interrupts the controller must not only execute all the instructions in the interrupt service routine, but also push all the working registers onto a stack and lastly pop them off again. In some cases the timing could be a little tight. It is important to be sure that there will be enough time to carry out all the activities. The simplest way to indicate how long the controller spends servicing the interrupt is to get it to set a port pin (Port.0 = 1) as it enters the ISR and reset it (Portb.0 = 0) when it exits. With an
  • 32. 32 www.handsontec.com oscilloscope probe on the pin we can now observe the mark/space ratio directly to see how much time is available. In the example here the pin is high for less than 50% of the time. The main routine can only execute its tasks when this waveform is low. Using a simple software delay like Delayms will produce noticeably longer delay times than expected. Two lines are ‘commented out’ in the interrupt routine. When these comment characters are removed the signal generator now has a sweep function. The frequency is incremented each time an interrupt occurs, the generator now sweeps from 0 to 10kHz approximately three times per second. The oscilloscope display (Figure 6-4) shows the resulting output waveform after the low-pass filter. A piezo buzzer connected to the output will produce a characteristic twittering sound. Figure 6-4.Oscilloscope display of the swept output signal. 7. Appendix 7.1 Using Bascom-AVR with Arduino The ARDUINO is a hardware platform based on AVR processors. ARDUINO boards/chips are programmed with a bootloader. This bootloader is the old STK500 protocol, not longer supported by Atmel in Studio. There are various programmers for ARDUINO, AVRDUDE is probably the most versatile. BASCOM also supports the ARDUINO/STK500 v1 protocol. The DTR/RTS lines are used to reset the board. You can program/read flash/EEPROM but you cannot read/write fuse/lock bytes. The STK500 bootloader for ARDUINO does not support this. Under options you only need to select the programmer, and the COM port. Since an FTDI chip is used on most ARDUINO boards, this is a virtual COM port. Only present when the USB cable is connected to your PC. Select 57600baud for the baud rate. Older ARDUINO boards work with 19200baud. Optiboot Bootloader (under Windows 7) ARDUINO V2: The developers of the ARDUINO finally implemented the STK500V2 protocol. This protocol is supported by Atmel and of course by BASCOM. Select the ARDUINO STK500V2 programmer in BASCOM programmer options to use this protocol. A board like the MEGA2560 R3 uses this protocol and probably all newer AVR based ARDUINO boards will support this protocol. The baud rate should be 115200 but could be different for your board. For more information on Optiboot visit following website: Using Bascom-AVR with Arduino Optiboot Bootloader (under Windows 7): http://code.google.com/p/optiboot/ 1. Download AVRDUDE from http://www.nongnu.org/avrdude/
  • 33. 33 www.handsontec.com 2. Latest Windows Version (April 2012): avrdude-5.11-Patch7610-win32.zip. Complete link: http://download.savannah.gnu.org/releases/avrdude/avrdude-5.11-Patch7610-win32.zip 3. Create a folder like c:AVRDUDE 4. Copy the content of avrdude-5.11-Patch7610-win32.zip in this new folder 5. Open BASCOM-AVR 6. Click on Options >>> Programmer 7. Choose External programmer 8. Checkmark Use HEX file 9. Include the path to avrdude.exe 10. User Parameter: -C c:avrdudeavrdude.conf -p m328p -P com19 -c arduino -b 115200 -U flash:w:{FILE}:i Here is where we specify the programmer type, if you're using an STK500 use stk500, use arduino for Optiboot Explanation of Parameter: -C c:avrdudeavrdude.conf The config file tells avrdude about all the different ways it can talk to the programmer. -p m328p This is just to tell it what microcontroller its programming. For example, if you are programming an Atmega328p, use m328p as the part number -P com19 This is the communication port to use to talk to the programmer (COM19) in this case. Change it to your COM port. -c arduino
  • 34. 34 www.handsontec.com -b 115200 Set serial baudrate for programmer. Use 115200 baud for Optiboot. -U flash:w:{FILE}:i You define here: • the memory type: flash or eeprom (this could be also hfuse, lfuse or effuse if you want to verfiy this) • r (read), w (write) or v (verify) • Use {FILE} to insert the filename {EEPROM} to insert the filename of the generated EEP file. • i = Intel Hex File After clicking on the F4 (Program Chip) Button in Bascom-AVR you see the CMD window of Windows 7 until AVRDUDE is ready flashing the Arduino. Complete documentation of AVRDUDE parameters: http://www.nongnu.org/avrdude/user-manual/avrdude_4.html#Option-Descriptions http://avrhelp.mcselec.com/index.html?arduino.htm 7.2 Web Resources • MSC BASCOM-AVR Application Notes • BASCOM AVR Course 1 • BASCOM-AVR V2.0.7.5 • BASCOM-AVR User Manual
  • 35. 35 www.handsontec.com 7.3 Project with BASCOM-AVR • Ultrasonic Distance Meter • Pico-C Capacitance Meter ( in progress…) • CAN Bus Tester ( in progress…) Bookmark this page for future publishing project…
  • 36. HandsOn Technology support Open Source Hardware(OSHW) Development Platform. HandsOn Tech provides a multimedia and interactive platform for everyone interested in electronics. From beginner to diehard, from student to lecturer… Information, education, inspiration and entertainment. Analog and digital; practical and theoretical; software and hardware… Learn : Design : Share www.handsontec.com
  • 37. 50 LCD+Ke Ard 20x4 LCD Breakout Boa Modules eyboard Shie duino Uno D Display Mod ard & s In ld dule ntegrated Circ www.ha 10ͲSegme MicroSD Stepp cuits D ndsontec ents LED Bar D D Breakout B er Motor Driv Discrete Parts c.com Display oard ver Asse http:// Eth W PWM Motor embled Kits /www.handso ernet Module WiFi Module r Speed Contr Conn ontec.com e roller nectors