Create_Juggling_Ball
•Download as PPT, PDF•
1 like•686 views

The most amusing way to the neurological harmony is juggling. Learn the cascade, it is the best for your brain and easiest to learn. It is an effective method to treat dyslexia, attention and hyperactivity disorder. Here you can learn the three ball cascade: http://www.youtube.com/watch?v=kCt1bmSASCI And you can make your own balls for juggle. These slides give you a step-by-step guide to create balls for juggling.

Recommended
More Related Content
Viewers also liked
Viewers also liked (19)
More from Eva Gyarmathy
More from Eva Gyarmathy (20)
Recently uploaded
Recently uploaded (20)
Create_Juggling_Ball
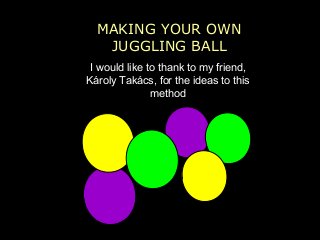
- 1. 1.MAKING YOUR OWN JUGGLING BALL I would like to thank to my friend, Károly Takács, for the ideas to this method
- 2. Ingredients (for one ball) - Three good quality balloons, preferably made of latex - Filling: Could be of a variety of types. Millet results in a smoother surface; flour makes it easier to mold. - It is worth experimenting a little: mix yellow peas with rice, try barley, etc. - Rice will make the balls crispy, but mixed with a little dusting powder, the balls will become nice and soft.
- 3. Filling the ball - You need 70-75g of barley for a ball with a 5.5 cm diameter - Different seeds result in different levels of roughness and weight, and which feels the best will differ by individual - You can make the weight of the ball lighter while keeping the same volume by adding bran or small paper balls (which you can buy in a hobby shop).
- 4. - When you've finished filling, you need to press and squeeze the seeds hard into the balloon, so that all the seeds from the funnel get into it. - You need to squeeze until no seeds are left in the neck of the balloon. - Balloons can be stuffed to become quite big, so it's important to measure the filling material to avoid making a ball that is too large. Filling the ball
- 5. Closing off the first balloon - Cut of the thick end of the neck of the balloon - You will smooth the neck of the balloon onto its body with a slight pull on the neck
- 6. 1. Preparing the next two balloons - Take two balloons in the colours of your choice, and cut off their neck with a gentle curve - The cut should be somewhat farther down from where the balloon widens out - The cut should not be jagged, because a ragged cut may later cause the material to tear
- 7. 1. Covering the ball with the next balloon - Put two fingers into the second balloon and press down the neck of the first balloon - Using your other hand, turn it inside out over the first balloon
- 8. 1. Covering the ball with the next balloon THIS IS NOT EASY - You should keep pulling and stretching ….. - There's no need to despair if it should spring off; you should just start over again …..
- 9. - If you lift its edge, you can reach into the balloon, and pull its edge a little higher up 1. Covering the ball with the next balloon Slight adjustments - Be careful with your nails, as they may tear the balloon - There should be no excess material flapping at the bottom of the ball; the balloon should fit the ball tightly
- 10. 1. Cover the ball with the third balloon in exactly the same way
- 11. 1. Press and roll the now finished ball into a round shape
- 12. 1. LEFT-OVERS You can use the left-overs from the balloons to cover paper balls or table tennis balls. You can pull it over your fingers to colour them. This way, you can play a number of games that develop finger skills. gyarmathy.eva@gmail.com