Vermicompost
•Download as PPTX, PDF•
1 like•308 views

Recycling food scraps with worms at home Composting with worms About Worms Making (or buying) a worm bin Getting worms for money and for free Making bedding and adding worms Feeding your worms Observation and Correction Troubleshooting your bin Harvesting finished compost Using your compost

Recommended
More Related Content
What's hot
What's hot (20)
Similar to Vermicompost
Similar to Vermicompost (20)
More from Gil Lopez
More from Gil Lopez (17)
Recently uploaded
Recently uploaded (16)
Vermicompost
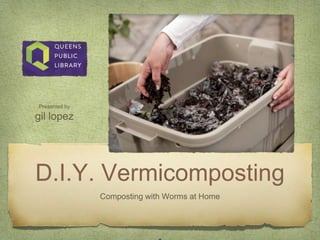
- 1. D.I.Y. Vermicomposting Composting with Worms at Home Presented by gil lopez
- 2. Land Acknowledgment I ACKNOWLEDGE THE TRADITIONAL CUSTODIANS OF THE LAND ON WHICH I LIVE, WORK AND PLAY. I HAVE DEVELOPED THIS PRESENTATION AND I AM OFFERING IT FROM WITHIN MY HOME IN THE TRADITIONAL LANDS OF THE LENAPE PEOPLES, NOW CALLED ASTORIA, QUEENS. WHILE COLONIZATION HAS LARGELY EXTIRPATED THE LENAPE PEOPLES, I RECOGNIZE THEIR CONTINUING CONNECTION TO LAND, WATER AND COMMUNITY. I ALSO PAY RESPECT TO ELDERS PAST, PRESENT AND EMERGING. MY INTENTION TODAY IS THAT THIS PRESENTATION WILL HELP BRING HONOR AND DIGNITY BACK TO LANDS AND WATERS OF LENAPEHOKING.
- 6. NYC Compost Project Excellent resource, free download from NYC Department of Sanitation https://www1.nyc.gov/assets/ds ny/downloads/pdf/promotional- materials/indoor-worm-bin- composting-brochure-06340- f.pdf
- 7. Overview About Worms Making (or buying) a worm bin Getting worms Making bedding and adding worms Feeding your worms Observation and Correction Harvesting finished compost Using your compost
- 9. There are over seven thousand species of earthworms! One species in particular is well suited for indoor composting: red wigglers (or Eisenia fetida). They are endogenic and live in the upper layer of soil feeding on small organisms and decaying organic matter. Unlike other species of earthworms, they don’t tunnel deeply or make permanent burrows. They reproduce quickly, thrive in habitats with high organic matter, can tolerate a wide range of temperatures and moisture conditions, and can live close to one another. An indoor worm bin mimics all of these natural conditions, which makes red wigglers ideal for indoor composting. Red Wiggler Worms
- 10. Worm Life Cycle Cocoon, Hatchling, Adult
- 11. Worm Anatomy
- 14. Red wigglers can eat half their body weight in food scraps a day. Worms are hermaphrodites (having both male and female reproductive organs) but still need another worm to reproduce. One mature worm can give birth to about 100 worms a year. The space and amount of food in a worm bin will keep their population size in check. Worms do not have eyes, but they have photoreceptors located in nerve fibers in their skin which are connected to special nerves called ganglia, which connect to an earthworm’s version of a brain. The earthworm’s tiny brain, called a ganglion, helps trigger chemical reactions to control the entire body of the worm. Bright or warming lights can harm so they move away from light. Thirty minutes of UV is toxic and they can become paralyzed if exposed for too long (approx. 1 hour). Earthworms do not have lungs; instead they breathe through their skin. Their skin needs to stay moist to allow the passage of dissolved oxygen into their bloodstream. If a worm's skin dries out, it will die. A worm’s life span is approximately one year. Red Wiggler Worms
- 15. Buying a worm bin
- 16. BUY Worms
- 17. • Electrocute Them With a Car Battery • Grunt for Them With Wood and Metal • Coax Them Out of the Ground With Water • Soap Them Out of the Ground • Irritate Them Out of the Ground With Mustard Powder • Catch Them Under Wood or Cardboard BUY Worms CATCH Worms
- 18. • • Grunt for Them With Wood and Metal • Coax Them Out of the Ground With Water • • • Catch Them Under Wood or Cardboard BUY Worms CATCH Worms
- 19. BUY Worms ASK for Worms CATCH Worms • • Grunt for Them With Wood and Metal • Coax Them Out of the Ground With Water • • • Catch Them Under Wood or Cardboard
- 20. Myth: Earthworms regenerate when cut in half, resulting in two earthworms.
- 21. Myth: Earthworms regenerate when cut in half, resulting in two earthworms. Truth: If you cut an earthworm, only the front survives. The back end dies, and the front regenerates the last half.
- 22. D.I.Y. Bin Materials List Plastic container at least one cubic foot. Plastic bins or a bucket work well Drill or hot poker Optional Fine screen to keep out pests Tray or bucket as Reservoir Pipe or vents for air flow Spigot
- 24. Drill
- 25. Drill Hot Poker
- 26. Drill Hot Poker
- 27. Making a Worm Bin (easy) Drill about 10 holes in the lid, or near the top of your bin. Drill several holes at the bottom of your bin to allow for drainage or (optional) add a spigot at the bottom. Add bedding and worms
- 28. Making a Worm Bin (involved) Drill at least 10 quarter-inch holes in the lid. These holes will provide oxygen to the worms and other decomposer organisms in the bin. Drill at least 10 quarter-inch holes in the sides of the bin. These holes will also provide oxygen in your bin. Drill at least 10 quarter-inch holes in the bottom of the bin. These holes are for drainage (optional). Use non-toxic glue to attach fine screen over holes (optional). This will help prevent pests like fruit flies from entering your bin. If you drilled holes in the bottom on the bin, place a tray under the bin to catch any “leachate”—this is a waste product of the composting process made of excess moisture. https://www1.nyc.gov/assets/dsny/downloads/pdf/promotional-materials/indoor-worm-bin-composting-brochure-06340-f.pdf
- 29. Optional
- 30. Optional
- 31. Optional
- 32. Optional
- 33. Optional
- 34. Worms have Five Hearts
- 35. Red wiggler compost worms, You may think they work hard … but they stay in bed all day!
- 36. Bedding Bedding is what makes up the bulk of what we add to our worm compost bins. If you add it to the bin and it isn’t naturally juicy (considered a green), then it’s a brown, and it can be considered bedding. Create a bottom layer of bedding that is roughly one third the height of the container. Evenly moist bedding decomposes aerobically. Oxygen supports billions of bacteria which feast on organic matter, then become food for your worms. Strive for a 60/40 bedding to food ratio.
- 37. Moisten & Fluff Bedding
- 38. Types of Bedding • Newsprint printed with soy ink • Coconut fibre • Shredded office paper • Brown, unwaxed cardboard • Unbleached paper towel that has been used to wipe counters without chemicals • Toilet paper roles • Wet wood chips (in moderation) • Bark (in moderation) • Moist straw • Brown leaves • Brown grasses
- 39. Types of Bedding • Newsprint printed with soy ink • Coconut fibre • Shredded office paper • Brown, unwaxed cardboard • Unbleached paper towel that has been used to wipe counters without chemicals • Toilet paper roles • Wet wood chips (in moderation) • Bark (in moderation) • Moist straw • Brown leaves • Brown grasses • Fresh Coffee Grounds -Coffee grounds that have been left to decompose become more neutralized and okay to add in moderation. • Wood Ash is highly caustic, alkaline (high pH) material that will burn your thin skinned worms. • Sharp Materials like thorns, prickles and some types of wood mulch. • Materials that mat, like unshredded, wet papers or thick layers of leaves which can trap and restrict flow of moisture and thus worms. • Non-absorbent Materials - Bedding that is basically dry is not a good place for worms to live. • No inorganic materials belong in the worm bin. Plastic, glass, metal, and polymers are non- absorbent, non-nutritive, and serve no beneficial purpose as part of the rich fertilizer harvested from a “finished” worm bin. Remove any tape, glue, labels, and stickers. To AVOID
- 40. Adding Grit Eggs shells - Cleaned, dried and crushed/ground to very small pieces (use a mortar/pestle or food processor). Sand, stone dust and/or rock powders Coffee Grinds - dried/decomposed and only in moderation. These can change the pH and create a toxic acidic environment if overdone.
- 41. Feeding Your Worms Chop food scraps into small 1”- 2” pieces. Try freezing food scraps to soften them up, but always defrost before adding them to your bin Cover the food scraps by adding more torn up newspaper strips. This prevents pests and odors.
- 44. Diverse Diet = Healthy Worms
- 45. Observation & Correction Feeding Schedule - Try feeding daily, every few days or once a week. Note the differences between short and long feeding schedules. What works for you? What do the worms prefer? Note the temperature of the bin. Especially as seasons or indoor temps change. Notice the moisture and humidity in the bin. Do different foods affect these? How about the type of bedding you used. Would more air circulation help or hurt your wormy world? Use your nose. Doe it smell must, moldy or anaerobic? Pay attention to the types of food scraps you are putting in and any smells that may arise. What other bugs are in there? A little leaf litter can increase the biiodiversity and health of your worm bin, but keep an eye on things to make sure populations stay in check.
- 46. Worms Trying to Escape Too hot Too wet Attracted to Condensation Reacting to vibrations
- 47. Worms Trying to Escape Place in a cooler spot Add dry bedding, feed less, add a spigot or drain holes and pan. Too hot Too wet Attracted to Condensation Reacting to vibrations
- 48. Sour Crop or Protein Poisoning As protein-rich foods break down, they release acidic compounds which can harm your worms.
- 49. Sour Crop or Protein Poisoning As protein-rich foods break down, they release acidic compounds which can harm your worms. Absorb some acidic compounds with clean crushed egg shells or other calcium rich food or bedding.
- 50. Not adding enough bedding can lead to wet conditions. Adding too much food with high water content, like melons
- 51. Not adding enough bedding can lead to wet conditions. Adding too much food with high water content, like melons Add bedding more bedding to absorb excess moisture. Feed less, especially melons and watery foods. Add aeration holes Add a spigot or overflow holes to drain excess compost tea
- 52. Too cool or too warm conditions can slow your worm bin productivity Too cold or hot and your worms could die
- 53. Too cool or too warm conditions can slow your worm bin productivity Too cold or hot and your worms could die Choose an area between 55°F and 80°F (13°C and 27°C). Temperatures a bit beyond this range will slow activity Use bedding to regulate moisture and humidity
- 55. Fruit Fly Traps
- 56. Harvesting the Castings I Under a strong light or outdoors in the sun, make a few small piles The worms will retreat from the light Remove compost from the top of each pile Repeat until you have a pile of mostly worms
- 57. Harvesting the Castings II Move all the contents over to one side of the bin. Add new moistened bedding (strips of newspaper) to the empty side, then start placing food scraps on that side. Over about a one-month period, most of the worms should move over to the new bedding, allowing you to scoop out the relatively worm-free vermicompost. https://www1.nyc.gov/assets/dsny/downloads/pdf/promotional-materials/indoor-worm-bin-composting-brochure-06340-f.pdf
- 58. Using Vermicompost Add a pinch to germinating seeds Add a teaspoon when transplanting seedlings into the garden Add 1-2 cups to established plants. Top-dress around the root zone. UV light kills microbes in castings so scratch it in soon. After application. Make compost tea by placing castings in a tightly-woven mesh bag suspended in water. Brew for 24-48 hours, periodically agitating the water, or submerge a fish tank air stone to introduce oxygen, which the aerobic microbes need to live. Add fish or seaweed meal for an added nutrient boost. Dilute and water plants or lawn with the compost tea. Worm tea can be applied as a foliar spray or root drench. Actively-aerated tea should be used within just a few hours after brewing is complete.
- 59. Benefits of Vermicompost Pathogen suppression - While vermicompost won’t kill soil born pathogens, it will keep them from becoming virulent and attacking your plants. Nutrient Delivery - Vermicompost normally possesses higher levels of plant-available nutrients, particularly nitrogen and phosphorus than conventional compost Water Retention - Thanks to it’s incredible density, worm castings to the soil will help keep the water in the soil and conserve that precious resource, especially in areas with depleted – or depleting – water sources and/or soil heavy in sand or clay. Increased Microorganism Populations - Vermicompost can be a thriving microbial community, full of beneficial fungi and bacteria that aid in soil health. Healthy soil is said to consist of around 5% organic material, but in over-farmed soil, that number has fallen to 1%. Introducing vermicompost to soil can help restore that balance. Pest Suppression - Similar to its effect on pathogens, vermicompost does not kill or repel pests, but can help stave off attack. Plant Growth Regulation and Higher Yields - Studies abound that show that vermicompost or worm castings application results in a higher yield with crops ranging from strawberries to tomatoes to peppers and more. Some vermicomposts can also feature hormones that regulate and promote plant growth. Polluted Soil Remediation numerous studies show that earthworms and the microbes found in lively vermicompost are shown to remediate soil contaminated with hydrocarbons, agrichemical pollutants, heavy metal free radicals, and more. https://urbanwormcompany.com/plant-and-soil-benefits-of-vermicompost/