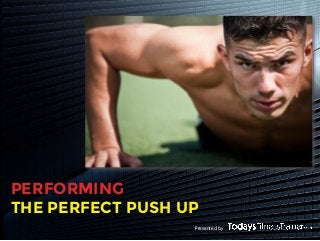
Performing the Perfect Pushup

The push up (when done properly) is the perfect anterior upper body and core stabilizing exercise. It can be done almost anywhere with open floor space, requires no equipment, works multiple muscle groups at one time, and is a movement everyone should include in their workout routine (with the exception of those with an injury that is aggravated by the movement). Unfortunately, it’s very easy to “cheat” when performing multi-joint (or compound) exercises. Just like a blueprint, the way that each person naturally does a push up is different because, without consciously thinking about it, our bodies try to make every movement as efficient as possible (i.e. use as little energy as possible to get the job done). To get the most out of a push up you need to focus on all aspects of the movement to keep muscles contracted for the best overall result. This presentation outlines five key steps to performing the perfect push up each and every time.

Recommended
More Related Content
More from ECHO Interactive Consulting
More from ECHO Interactive Consulting (9)
Recently uploaded
Recently uploaded (20)
Performing the Perfect Pushup
- 1. Presented by PERFORMING THE PERFECT PUSH UP
- 2. Presented byPERFORMING THE PERFECT PUSH UP PUSH UP is an upper body and core stabilizing functional exercise using one’s body weight.
- 3. Presented byPERFORMING THE PERFECT PUSH UP It is a multi-joint (compound) exercise working several muscle groups throughout the movement.
- 4. Presented byPERFORMING THE PERFECT PUSH UP Starting in a prone position (face down) the body is lowered and raised using the arms.
- 5. Presented byPERFORMING THE PERFECT PUSH UP The primary muscles used (not including synergists or stabilizers) include: • Chest (pectoralis major) • Arms (triceps brachi) • Shoulders (anterior deltoids) • Abdominals (rectus abdominis, transverse abdominis)
- 6. Presented byPERFORMING THE PERFECT PUSH UP Performing the “perfect” push up requires the following: • Proper form • Muscle coordination (smooth) • Challenging the muscles throughout the movement
- 7. Presented byPERFORMING THE PERFECT PUSH UP Five keys to performing the perfect pushup: 1. Hand position 2. Foot position 3. Shoulder stabilization 4. Core stabilization 5. Breathing
- 8. Presented byPERFORMING THE PERFECT PUSH UP HAND POSITION • Place hands directly outside the width of the shoulders • Fingers pointed forward • Finger tips directly below the top of the shoulder • Fingers together and thumbs in • Weight distributed evenly
- 9. Presented byPERFORMING THE PERFECT PUSH UP FOOT POSITION • Place feet hip distance apart with toes tucked under • Heels pointing upwards toward the ceiling • Avoid heels turning inwards (or out) during the exercise
- 10. Presented byPERFORMING THE PERFECT PUSH UP SHOULDER STABILIZATION • Lengthen the neck by pushing your shoulders away from the ears • Eyes fixed above an imaginary line between the two index fingers • Bend the elbows no less than a 90 degree angle (to avoid shoulder collapse or the scapula touching behind the back)
- 11. Presented byPERFORMING THE PERFECT PUSH UP CORE STABILIZATION • Maintain a straight line running through the ears, shoulders, hips, knees and heels • Engage the core stabilizers by pressing the toes (or knees) and palms of the hands into the floor
- 12. Presented byPERFORMING THE PERFECT PUSH UP BREATHING • Inhale during the descent towards the floor (“1 - 2 - 3” count) • Exhale during the ascent back to starting position (“1 - 2 - 3” count) • Pause for one second before repeating the process
- 13. Presented byPERFORMING THE PERFECT PUSH UP MODIFICATIONS
- 14. Presented byPERFORMING THE PERFECT PUSH UP PUSH UPS - KNEES • Beginner modifications (requires less upper body strength) 1. Knees on the ground, maintain a straight line through ears, shoulders, hips and knees 2. Same as above except keeping hips flexed
- 15. Presented byPERFORMING THE PERFECT PUSH UP PUSH UPS - MEDICINE BALL • Advanced modifications (requires more upper body strength) 1. Toes on medicine ball, maintain a straight line through ears, shoulders, hips and knees 2. Same as above except hands on ball and toes on floor
- 16. Presented byPERFORMING THE PERFECT PUSH UP THANK YOU! For more information visit www.todaysfitnesstrainer.com