
Recommended
More Related Content
What's hot
What's hot (19)
Similar to Setup contacts (2)
Similar to Setup contacts (2) (20)
More from HISASHI MIYAGI
More from HISASHI MIYAGI (19)
Recently uploaded
Recently uploaded (20)
Setup contacts (2)
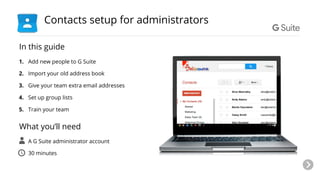
- 1. In this guide 1. Add new people to G Suite 2. Import your old address book 3. Give your team extra email addresses 4. Set up group lists 5. Train your team What you’ll need ● A G Suite administrator account ● 30 minutes Contacts setup for administrators
- 2. Contacts makes it easy for your team to connect. ● Your team gets a global directory that makes it easy to find addresses—when sending email, inviting people to meetings, or sharing documents. ● You can create group lists to email or invite several people at once. ● And every person can manage their own personal contacts. Meet Contacts From Gmail, you can find your G Suite contacts by clicking Mail, and then selecting Contacts. This will take you to your contacts page. You can also enter contacts.google.com, and you’ll be prompted to sign in to your G Suite account, if you haven’t already done so.
- 3. As the administrator, you can turn on the new Contacts Preview (Contact Manager) for your users, so they can see all their contacts in one place, with the people they talk to the most at the top. They’ll also be able to finds duplicates more easily and let Contacts automatically update new contacts. To turn on Contacts Preview for your users: 1. Sign in to your Admin console with your G Suite address and password. Turn on Contacts Preview 1. Add users 2. Import contacts 3. Add addresses 4. Create groups 5. Use your contacts 6. Train your team Click a step to browse. 2. Click Apps > G Suite > Contacts. 3. From the Contacts page, click Advanced settings. 4. Check the Contacts Preview box and click Save.
- 4. When someone new joins your organization, you add them as a user to your G Suite account. This gives them a primary address for sending mail and invitations. From your Google Admin console dashboard, click Users. You’ll see a list of all the users in your organization. These users are the same as those that are displayed in your company Directory in Contacts. See your current users 1. Add users 2. Import contacts 3. Add addresses 4. Create groups 5. Use your contacts 6. Train your team Click a step to browse.
- 5. The Users page lists everyone on your team. It’s also where you add new people: 1. At the bottom of the page, click . 2. Select Add user. 3. Under Create a new user, enter the first and last name of the person, and give them a username (the first part of their G Suite email address) and a password so they can sign in to their email and other G Suite services. Note: The username you choose will become the user’s new email address. 4. Click Create to save your new user. Add a new user 1. Add users 2. Import contacts 3. Add addresses 4. Create groups 5. Use your contacts 6. Train your team
- 6. After you click Create, you’ll see Getting started instructions: 1. Click Email instructions. 2. Enter an email address where the person can receive mail right now (not their new G Suite email). They’ll receive an email with their G Suite username and password, and a link to sign in to their new G Suite account. Note: If the person doesn’t currently have a personal email to receive instructions to sign in, you can print the instructions for them instead. Email instructions to your new user to sign in Learn more: See other ways to add users 1. Add users 2. Import contacts 3. Add addresses 4. Create groups 5. Use your contacts 6. Train your team
- 7. Your G Suite account includes all the users in your organization and any shared external contacts, which can be found under Directory in Contacts. But every team member can also import their own personal contacts as well from their old email program. Click a link below to learn how to import data from your old email program. You’ll be taken to a page outside this guide to learn how to import your contacts. When you’re done, come back here to finish this guide. Import your contacts to G Suite Import your personal contacts Learn more: See all import options 1. Add users 2. Import contacts 3. Add addresses 4. Create groups 5. Use your contacts 6. Train your team
- 8. If you or someone in your organization needs more than one email identity, you can give them another address by adding an email alias. For example, you might receive regular mail at you@your-domain.com but want customer queries sent to sales@your-domain.com. By adding an email alias, mail sent to either address goes to the same inbox. 1. Add users 2. Import contacts 3. Add addresses 4. Create groups 5. Use your contacts 6. Train your team Give people extra email addresses
- 9. To add another address for yourself or someone on your team: 1. From your Admin console, click Users. 2. Click the user who needs the address. 3. Click Account to open more settings and scroll down to the Aliases section. 4. Click Add an alias, and enter the secondary email address. 5. Click Save Changes at the bottom of the page. Messages sent to this new address will arrive at the same inbox as that person’s primary address. Add an email alias Learn more about email aliases 1. Add users 2. Import contacts 3. Add addresses 4. Create groups 5. Use your contacts 6. Train your team team
- 10. If you work or communicate regularly with a specific group of people, create a group list. Group lists are great for departments, office locations, or work groups. Emailing the group sends your message to everyone in the group. Inviting a group to a calendar event sends all members an invitation. And you can share documents with groups, too! Let’s see how to set this up... Create group mailing lists 1. Add users 2. Import contacts 3. Add addresses 4. Create groups 5. Use your contacts 6. Train your team
- 11. To make communications more efficient, you can create groups within your organization for project teams or units. One way to create a group list is by going to the Groups page in your Admin console: 1. Sign in to your Admin console with your G Suite email address and password. 2. Click Groups. Create Groups for your organization 1. Add users 2. Import contacts 3. Add addresses 4. Create groups 5. Use your contacts 6. Train your team
- 12. You can create a single address to email or send invitations to all members of a group from the Groups page. Only people with access to your Admin console can create groups here: 1. Click Create a group. 2. Fill out the form to name the group and give it an email address. 3. Set the access for this group, which will determine who can manage the group. You can change these settings later. 4. Click Create. Create the group 1. Add users 2. Import contacts 3. Add addresses 4. Create groups 5. Use your contacts 6. Train your team Learn more about group access levels (After you’ve created your first group, click to add your next group.)
- 13. Now, let’s add some group members. After creating your group, you’ll be taken to a page where you can add its members. 1. On the group’s page, click Manage users in the group’s page. 2. To add new members, enter each person’s address on a separate line. 3. Click Add. 4. You can also select other options, like making a member the owner of a group. You can find your group again by clicking Groups from the Admin console. Add group members Learn more about creating groups 1. Add users 2. Import contacts 3. Add addresses 4. Create groups 5. Use your contacts 6. Train your team
- 14. After you create contact addresses for people and groups on your team, you don’t have to know exact addresses by heart. Every user you create an account for is automatically added to your global directory, which your entire organization has access to. When composing a message in Gmail, just start typing the person’s name or address in the To field. As you type, a list of matching names will open, and you can select the person you want to email. Email your contacts 1. Add users 2. Import contacts 3. Add addresses 4. Create groups 5. Use your contacts 6. Train your team
- 15. It also works in Google Calendar and Hangouts, a list of matching names appears as you type so you can choose the correct recipient. Let’s say you’re creating an event. When you start typing to add a guest, the global directory list appears. You can choose a name even before you finish typing it. Remember, you can enter a group address to invite all members of the group to an event, instead of adding them individually. Invite contacts to a meeting 1. Add users 2. Import contacts 3. Add addresses 4. Create groups 5. Use your contacts 6. Train your team
- 16. You want to share a document or spreadsheet with others? You got it! Just click Share at the top of your document and start typing the names of people or groups you want to share it with. Your global directory will open so you can choose the correct people from your contacts. Share documents with your contacts 1. Add users 2. Import contacts 3. Add addresses 4. Create groups 5. Use your contacts 6. Train your team
- 17. Now that you’ve created your team’s addresses and groups, it’s time to help them get started managing their contacts. Here’s what we suggest each member of your team should do first. Have each person: 1. Import their old contacts to G Suite. 2. Learn basics of sending emails to your contacts. 3. Create personal mailing lists. Contacts to-do list for your team 1. Add users 2. Import contacts 3. Add addresses 4. Create groups 5. Use your contacts 6. Train your team
- 18. Get more training for your team ● G Suite user guides ● Tips for business use ● Mobile setup Visit the Learning Center 1. Add users 2. Import contacts 3. Add addresses 4. Create groups 5. Use your contacts 6. Train your team As for next steps? You and your team should visit the G Suite Learning Center at gsuite.google.com/learning-center for even more info and training.
- 19. Now you know how to: Add people to your G Suite account Import your address book to G Suite Give people extra addresses Create group lists Easily type contact addresses Train your team to use Contacts Congratulations! You’ve set up Contacts for your team.