Basics of Production Camera and Camera Operations
•Download as PPTX, PDF•
1 like•2,546 views

This Presentation includes the Basics of Production Camera and its Basic Operations.

Recommended
More Related Content
What's hot
What's hot (20)
Viewers also liked
Viewers also liked (11)
Similar to Basics of Production Camera and Camera Operations
Similar to Basics of Production Camera and Camera Operations (20)
Recently uploaded
Recently uploaded (20)
Basics of Production Camera and Camera Operations
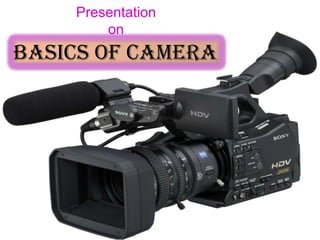
- 1. Presentation on Basics of Camera
- 2. About Camera:- Today I explain you the basic operations of Sony PD Camera. PD Camera is popular because it is small in size, light weight and easy to handle. It is popular for making documentaries. No need of setting manually when PD has the special function and it adjust automatically as per the shooting climate and provides a good videos. If u want to adjust manually you can. So, It is very user friendly.
- 3. Important Parts of Camera Lenswood
- 4. View Finder with Eyecup
- 5. Lens There are different types in Lens: Normal Lens, Wide Lens, Tele Lens, Zoom Lense. Normally Zoom Lens will be used in our Video Cams.
- 6. Lens Cap To protect the lens by dust, mastures, pinger prints etc
- 7. Record and VCR buttons
- 8. Zoom In/Out Button
- 9. LCD Screen
- 10. Audio Setting buttons
- 11. Recording Button Totally camera have 3 Recording buttons for the user comfort
- 12. Audio/MIC Ports With this the audio will be received. At the front-top of the camera we have audio ports. Through that we can add MIC. We have 2 channels we can connect 2 audio input sources. And It has 2 channels – CH1 and CH2
- 13. Zoom And Focus Rings Through this we can zoom the object and focus on the subject.
- 14. Some Basic Operations & Functions Adding and Removing Battery While adding the Battery you have to be very careful. You need to fallow proper steps.
- 15. Switching on the Camera and VCR Mode When you have a Battery of power supply you can on the Camera by just switching to Camera Mode. If you want to playback you need to switch to VCR Mode
- 16. Adding Recording Tape and Removing Right side of the camera we have a open button once we press the button automatically the tape case will open. Once we insert the Tape automatically the inside case will get close after we have to close outside door.
- 17. Audio/Video Ports Through this Audio/Video Ports we can connect the camera directly to TV.
- 18. DC In(Power Suply) When we don’t have battery backup, then we can directly use power supply.
- 19. How to use Manual Settings Audio Settings With the manual audio settings button you can control the audio input.
- 20. Audio Settings With the manual audio settings button you can control the audio input. You have 3 types of manual audio Input Level setting called- LINE(is used for Input from other sources like mixer etc.), MIC(Normally it is used), MIC ATT(For boosting the normal audio).
- 21. MENU Button With this button we can manually set the camera settings. It have 9 functions. Let us learn how we can use this Menu button which is set between LCD Screen. Once you press the Menu the menu will open in LCD Screen and use the scroll bar from the bottom back of the Camera. If you press scroll button it will take OK.
- 22. White Balance Setting We can set the white balance as per the available lighting by using the White Balance Button which is in the backside of the Camera. Once you press the button then you have to use scroll key. And you have 3 Options- Regular Light, Sun Light, and Manual set.
- 23. Shutter Speed Setting We can set shutter speed as per our requirements. When we take speed moving objects we have to increase the shutter speed. When we are taking normal videos set normal. Normal shutter set is 60(1/60 of a sec. and for moving fast objects 250th of a second). it is in-between the lens and the film or tape.
- 24. Aperture Setting Aperture is the Size of the opening the lens size. The more it open the more light enters. It is the magic in the photography field. If you understand this setting you can do magics with this. The Lesser the Aperture the more depth of field(DOB), the more the aperture the less depth of field.
- 25. Here is the Example - This have taken with This have taken with max aperture setting Lesser aperture setting f/22 f/2.8
- 26. Aperture Setting It is the magic in the photography field. If you understand this setting you can do magics in this. The Lesser the Aperture the the more depth of field(DOB), the more the aperture the less depth of field. See the Example -
- 27. Causion Once camera Work over we have to close with the lens Cap. We need to handle all buttons smoothly while manually setting up. We have to be careful while closing the cassette case. We should not close both doors in one time. We should not use the buttons which we don’t know what functions it do.
- 28. Any Questions?
- 29. Basayya M Hosurmath Educational Technology Multimedia Center Karnataka University Dharwad