
Recommended
More Related Content
What's hot
What's hot (15)
Viewers also liked
Viewers also liked (6)
Similar to 8085 Problems in Curriculum and Instruction
Similar to 8085 Problems in Curriculum and Instruction (20)
Recently uploaded
Recently uploaded (20)
8085 Problems in Curriculum and Instruction
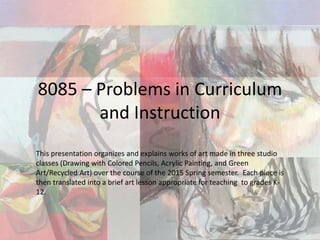
- 1. 8085 – Problems in Curriculum and Instruction This presentation organizes and explains works of art made in three studio classes (Drawing with Colored Pencils, Acrylic Painting, and Green Art/Recycled Art) over the course of the 2015 Spring semester. Each piece is then translated into a brief art lesson appropriate for teaching to grades K- 12.
- 2. Drawing with Colored Pencils March 27-29 (plus two weeks to complete homework) Classroom Application: these basic methods can be used to demonstrate to students the proper ways to blend analogous colors, how to create light and shadow using various pressures and adding complementary color, and how to use the pencil in other ways besides direct lead contact with the paper. This class began with formal refreshers on color blending and alternate techniques used to create texture with colored pencil.
- 3. Drawing with Colored Pencils Next we set up a simple still life with complementary colored construction papers and eggs. This exercise was about creating light and shadow and give the eggs form so that they did not look like a flat shapes. It also dealt with how the complementary colors will cast reflections onto one another to create depth. Classroom Application: A still life project for K-12 students that would target similar goals from the egg lesson can be found here: http://arteascuola.com/2015/01/vases-in-pencil-on- painted-background/ I would break down value using just graphite shading, per the example, showing students how to create forms. Next I would allow for creative expression with the more abstract background. I would have students use complementary colors instead of analogous, as pictured.
- 4. Drawing with Colored Pencils A Lego still life followed our eggs. Following the simple lines of the egg still life, the Lego posed the challenge of drawing sharp angles and short cylinders, as well as coloring a reflective surface. Classroom Application: Instead of having students draw Legos, I would allow them to use the Legos as stamps (as seen in the picture to the right) and have them create building-like structures. The lesson could extend into social studies with an in- depth discussion about what kind of town or city they have created and why, also building story-telling skills. Picture retrieved from: http://sjsartstudio.blogspot.com/2014/01/architecture-2nd-grade- castles.html
- 5. Drawing with Colored Pencils The third project we worked on was arranging colored strips of construction paper and drawing the values created where the strips curled and overlapped. Classroom Applications: This study helped me think of many lessons I could create for my students using strips of paper. 1) I could use white strips to form a 3-D word and have students sketch the word using the values they see in the shadows (Figure 1). 2) I could have younger students use colored strips to create whimsical 3-D sculptures (Figure 2). 3) Students could combine both ideas into an undulating 3-D painting, wherein students would create an abstract, monochromatic piece that they would cut apart into strips and glue in different arrangments (Figure 3). Figure 2: http://www.dentonisd.org/Page/25076 Figure 3: http://thebyrdneststudio.bl ogspot.com/2013/11/mono chromatic-paper- sculpture.html Figure 1: classroom example
- 6. Drawing with Colored Pencils We next moved to a more loosely defined portrait project. We chose a magazine clipping, then experimented with paper that had a fine, toothy grit that was very satisfying to draw on. I chose my clipping because of the challenge of the 3-quarter view of the face, and I was interested in the model’s expression. Classroom Application: I used this drawing exercise as a project with my students this fall. I talked with students about the types of expression we find in art: facial expression and creative expression. First students started by drawing half of their faces, making a facial expression of their choice. On the other half of the paper, students filled the paper with colors and abstract drawings that expressed their emotion creatively. The picture on the right is the first step of two of my 3rd grader’s expressions.
- 7. Drawing with Colored Pencils Our last in-class assignment was drawing a still life of our choice. I chose a bouquet of silk flowers and played around with drawing them loosely and expressively. Classroom Applications: I used this idea in my classroom recently by having different age groups pay homage to Georgia O’Keeffe by creating large-scale flowers. Students were able to experiment with a variety of materials and choose the flower that best represented them. They used O’Keeffe’s technique of zooming in close on their flowers so that they became abstracted. The examples to the right are in-progress.
- 8. Drawing with Colored Pencils Our final was creating a large-scale drawing of choice, to be completed outside of class over a two-week period. I chose to collage some interesting magazine clippings onto my paper and use mixed media drawing materials to connect the pieces expressively. https://www.pinterest.com/pin/413557178252492437/ http://artmommie.blogspot.com/2012/ 03/young-explorers-class_10.html Classroom Applications: I love the idea of using this to expand my students artistic story- telling skills. Letting them choose or take a picture and crop it down so that they can expand the image by drawing an imaginative scene to finish telling the story of the image.
- 9. Acrylic Painting March 6-8 (plus two weeks to complete homework) For my painting class, we started with basics, mixing grayscale values and painting box angles. Classroom Applications: For some reason, this box painting reminded me of a city and got me thinking about how much my students love the game Minecraft. They like the way they can build simple forms to make complex structures. I thought perhaps students could start by sketching isometric cubes and turning them into their own cities, then they could paint the values of each cube, much like in their favorite game. We could also experiment with the game in class and brainstorm ways we could make artistic designs using the computer. An article came out a couple of days ago explaining how Minecraft can be a useful tool for i- kids: http://www.usatoday.com/story/tech/gaming/2015/11/16/minecraft- code-building-demo/75849510/ http://thumbs.dreamstime.com/z/seamless-tilable-gray-isometric-cube-pattern-19745557.jpg https://www.pinterest.com/pin/244249979761056391/ http://www.notquitehippie.xyz/wp-content/uploads/2015/05/simple-minecraft-house-step.jpg
- 10. Acrylic Painting We continued with grayscale painting, but this time set up a complex still life with a striped cloth, eggs, and a reflective bowl. Classroom Application: I was really drawn to the reflective surface on this painting, and it made me think of how differently each person sees objects like this. I thought of eyes and how older students could draw large scale eyes, then paint the reflections of the objects they might be seeing, or imagine they’re seeing. This could be a very expressive and impressive piece when completed. http://www.usatoday.com/story/tech/gaming/2015/11/16/minecraft-code-building-demo/75849510/
- 11. Acrylic Painting After our grayscale still lifes, we put together a bright, cheery still life and began a day of color mixing. Classroom application: I found an awesome open-ended still life lesson I want to try created by Mrs. Hare at the blog Art at Becker Middle School. A breakdown of the lesson can be found at: http://beckermiddleart.blogspot.ca/2015/01/a-modified- choice-attempt-still-life.html
- 12. Acrylic Painting Our final in-class project was painting with a palette knife. I have always liked this technique and would love to try it with my students. Classroom Application: An awesome lesson I can’t wait to try with my Kinders that is all about creating texture (similar to that in palette painting) starts by crumbling a piece of paper in a ball, then painting the fractures with one color. Students continue by flattening, recrumbling and painting with a different color multiple times to create beautiful abstract paintings. After these have dried, students could use a palette knife to paint thick texture around some of their abstract shapes. This will be a fun, loose, messy and very expressive project that students will love experimenting with and exercising a much needed element of play in their day. http://buggyandbuddy.com/crumpled-paper-art-for-kids-inspired-by-ish/
- 13. Acrylic Painting For my final homework in Acrylic Painting, I had two weeks to paint a large-scale painting of my choice. Because I loved painting with color, but also loved the reflections in the second grayscale still life we completed in class, I decided to crumple some pop cans, then spray paint them gold and put them against a backdrop of red and green construction paper. I loved the abstract part of painting the reflections. My background ended up flatter than I would like, but I thought the cans turned out well. https://www.pinterest.com/pin/32299322302415792/ Classroom Application: The abstractness of the crumpled parts of the cans made me think I could have students paint and crumble cans of their own, then create a painting based on the colors and shapes they observe within the cans.
- 14. Green Art/Recycled Art April 24-26 (plus two weeks to complete homework) The final class I took dealt with using everyday materials that can be repurposed into art. The majority of these lessons can be directly applied to my elementary classroom without much change from the lesson taught to my adult class. For the first project, we were tasked with collaging strips from magazine pages, then adding a graphic black design over the top. Each student came up with amazing variances on the same idea:
- 15. Green Art/Recycled Art The next project was making a 3-D relief using multiple techniques of manipulating magazine scraps. Again, each project turned out so different, I am excited to see what young students could come up with.
- 16. Green Art/Recycled Art Our third project was using painted cardboard to create a 3-D sculpture. I chose to create another relief, using toilet paper rolls painted, cut into various heights, and bending them before gluing them onto an abstract painted piece of flat cardboard. Classroom Application: I found a great lesson using cardboard scraps that Kinders could use to practice cutting and gluing skills, as well as a beginning discussion about composition and color choices. These look like they can turn out beautiful, abstract, and very different depending on each student’s individual expression. http://artlessonsforkids.me/2009/06/29/cardboard-collages-in-kinder/
- 17. Green Art/Recycled Art A Louise Nevelson-inspired piece cam next in our class. I mostly used various cardboard and paper textures, but also added a few found objects. Classroom Application: My friend and colleague Melissa recently created a Nevelson-inspired project that I’m going to try, wherein collaboration is also key. Her students created a large scale collage of cardboard pieces and papers, which they manipulated in various ways and glued, then added pops of color for added interest. The students worked together to arrange and display the final composition.
- 18. Green Art/Recycled Art Our 5th project was to create a robot using found materials. Because one of the NAEA art standards for 2nd grade is to create repurposed art, this could be something they could create from various classroom materials. Classroom Application: For younger grades, the robot- relief picture to the right would be a good first step toward introducing repurposing found materials. This lesson would also be great for discussing basic printmaking techniques, and body movement. www.deepspacesparkle.com
- 19. Green Art/Recycled Art Our final in-class project was to create a mandala using an old CD and found objects. Rather than draw on top of the CD, I cut “windows” out so that the CD could peek through. I found a washer and a marble for the center and colored in the rest of my designs with paint markers. Classroom Application: There area all kinds of different ways to make mandala projects for students, but one that I am really excited to try is from an artist-teacher’s Instagram that I follow. Miss Lee used outdoor chalk and had her students create Heather Hansen-inspired drawings where they use their whole bodies to explore movement and symmetry. My students would LOVE this! I could even collaborate with the PE teacher with this very active, exciting project.
- 20. Green Art/Recycled Art For our homework, we were tasked with creating two more pieces of art created from found objects. For my first project, I went on a walk and gathered trash and little toys I found and put them together to make a wind chime. I sprayed the edges with gold paint to give the toys a more cohesive look, and add an ombre-effect to the plastic bags I cut apart for the strings. Classroom Application: Students could find objects outside that they can use for stamping into clay to make impressions. We would then fire the pieces, glaze them, and string them into wind chimes. We can also string the found objects onto the piece, provided they were made from metal so they could contribute to the chime sound. http://colorforeveryone.blogspot.com/2013/07/adaptive-art-clay- wind-chimes.html
- 21. Green Art/Recycled Art For my final project, I found an old book of landscapes and began creating an altered book. https://www.pinterest.com/pin/261279215852612610/ https://www.pinterest.com/pin/27450853975 6629299/ https://www.pinterest.com/pin/28429041368665245/ Classroom Applications: There are so many awesome ideas for altered books! My students could definitely create an altered book starting with notes taken in art and also using sketching prompts at the beginning of each class. This would be a great continuous project students could work on throughout the year.