
Recommended
More Related Content
What's hot
What's hot (18)
Viewers also liked
Viewers also liked (7)
Similar to Final bcon
Similar to Final bcon (20)
More from AaronMing93
Recently uploaded
Recently uploaded (20)
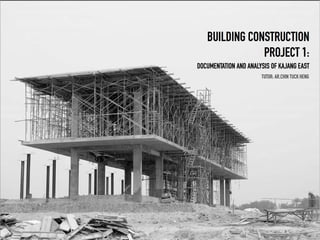
Final bcon
- 1. 1
- 2. 2
- 3. 3
- 4. 4
- 5. 5
- 6. 6
- 7. 7
- 8. 8
- 9. 9
- 10. 10
- 11. 11
- 12. 12
- 13. 13
- 14. 14
- 15. 15
- 16. 16
- 17. 17
- 18. 18
- 19. 19
- 20. 20
- 21. 21
- 22. 22
- 23. 23
- 24. 24
- 25. 25
- 26. 26
- 27. 27
- 28. 28
- 29. 29
- 30. 30
- 31. 31
- 32. 32
- 33. 33
- 34. 34
- 35. 35
- 36. 36
- 37. 37
- 38. 38
- 39. 39
- 40. 40
- 41. 41
- 42. 42
- 43. 43
- 44. 44
- 45. 45
- 46. 46
- 47. 47 11|
- 48. INSTALLATION OF DOORS Step 1 !Confirm the location of the door on the plan. Verify the dimensions of the opening that is instructed in the plans. !Ensure that the rough whole to be slightly larger then the door frame and sub-frame. HEADER STUD Door Terms Rough Door Opening HINGES SILL DOOR PANELS CASTING TRIM JAMB Step 2 Align the sub-frame and frame accordingly to the setting out line. In our site, sub frame plaster is used on the setting out line to grout the gap in so that it will disallow water flow between the sub-frame and the wall from external sources like blown rain fall etc. Step 3 After reconfirming the alignment of the door frame. Secure the frame temporarily using timber wedges while ensuring the vertical and horizontal alignments are intact. This is to insure that the doors would not collide with the floor, ceilings or walls when being interacted with. Step 4 The main frame, architrave and door panels should already be delivered to the unit where the door is being installed at. Insure the openings for the installation of the ironmongery such as the hinges and the lock set should already been cut out to minimize site cutting.
- 49. Mortice Lock Lever Handles Cylinder Locks Step 5 Apply bonding agents on the main frame and the sub-frame. On our site, silicon was requested because it is resistant to water. Once the agent is secures, only remove the timber wedges to reduce any chances of the frame moving when the bonding is still hardening. Step 6 Secure the main frame with nails to further secure it in place. Step 7 Select the correct door panel and install it with the hinges. A electric screwdriver is recommended for consistency on the security on all hinges. Step 8 Check and select the proper lockset for the doors and install it. Insure that the ironmongery are working smoothly by just swinging the door open and close. • Mortise lock is housed within a mortise cut into a door edge so that the lock mechanism covered and concealed on both sides • The faceplate at the door edge, knobs and operating trim are not concealed • Requires a backset : 64mm for 35mm doors or 70mm for 45mm doors • Lever handles are generally used more in this site • Push-type mechanism are more easier for people with disabilities as well • Lever Handles can be incorporated with mortise locks as well, which would be the case in our site • Cylinder locks houses two holes that is right angle to each other, one through the lock stile of a door and the other in the door edge • This locks are inexpensive and are really easy to install • Requires a backset : 2-3/8” (60mm) is standard but 2-3/4 (70mm) for heavier duty doors
- 50. INSTALLATION OF WINDOWS Step 1 Confirm the setting out of the sub-frame and anchor the sub-frames to the wall. The sub-frame would be bonded with sub frame plaster as well. Step 2 The anchor heads and joints should be sealed with sealant for effective water tightness. Step 3 After completion of all the water trades around the window opening, the main frame is then fixed onto the sub-frame. Be careful when installing, might cause physical damage to the sub-frames. Step 4 After completion of all the water trades around the window opening, the main frame is then fixed onto the sub-frame. Be careful when installing, might cause physical damage to the sub-frames. Main Window Frame • The main frame is fitted into the sub-frame • Followed by the inner frame • And lastly an aluminum exterior casing for the finishing Rough Opening • Confirmed setting out for the sub- frame Casing Trim • This casing refers to the finishing trimwork generally on the inside of the building. • A form of beautifying the interior Inner Window Frame • This is the frame where the sash and glazed window panels are fitted in Step 5 Non-shrink grout should then be used to prevent cracks and water seepage around the window. Approved waterproofing compound should be used in the mortar mix to enhance the water tightness performance of the grout. Advantages • More economical • Factory mass produced, more convenient • Easy maintenance • Easy to install • Efficient conduction for heat • Comes in many finishes • Required more shipping space but it reduces field labor Aluminium Frame
- 51. Step 6 With the usage of suction cups, the glazed window panel are fitted in with gasket at the corners of the glass panel. The gasket is placed between the glass panel and the inner frame/main frame (if it is a fixed window) to obtain a good fitting to hold the glass panel in place and to prevent water seepage. Step 7 The inner frame of casement window is fixed to the main frame using friction stays. The friction stays are fixed using adequate number of stainless steel screws or rivets. The screws/rivets are then sealed with sealant for water tightness. Step 8 The alignment and operation of the window panel should be checked before and after the installation . For the installation of awning window and fixed window panels are similar of the casement window. • It gives 0% ventilation • It is a fixed window that consist of a frame and a stationary sash • Its main purpose is to allow light to enter only • Commonly comes in rectangular shapes, either horizontal or vertical • It gives 100% ventilation when opened fully • This window type has operating sashes that are side-hinged and sings outwards • This windows are placed at the side of a set of fixed windows mostly on our site • It gives 100% ventilation when opened fully • This window type has operating sashes that swings outwards on a hinge on top of the frame • When open it forms a directional ventilation. This windows are mainly found in toilets, for awnings, they direct the ventilation downwards. Fixed Casement Awning
- 52. 52 ROOFING+ROOFING ELEMENTS THERE ARE MULTIPLE FORMS OF ROOFING THAT ARE USED IN THE CONSTRUCTION INDUSTRY. THE WHOLE IDEA OF A ROOF IS TO ACT AS A BUILDING EVELOPE, WHICH IS TO PROVIDE A SHEILDING FROM THE EXTERNAL NATURAL ENVIRONMENT ( RAIN, SUNLIGHT, HEAT, WIND & SNOW DEPENDING ON THE GEOLOGICAL LOCATION OF THE SITE. FURTHERMORE IT ACTS AS A FRAMING STRUCTURE THAT COMPLETES THE STRUCTURE OF A CONSTRUCTION. ! OFTEN THE CHARECTERISITICS OF THE ROOF DEPENDS UPON THE CONCEPT AND/OR THE PURPOSE OF THE BUILDING. THE TYPE OF CLADDING THAT IS USED FOR SURFACE AS WELL AS THE CHOICE OF MATERIAL. 10
- 53. 53
- 54. 54
- 55. 55
- 56. 56