
Recommended
More Related Content
What's hot
What's hot (20)
Similar to Arduino Meetup with Sonar and 433Mhz Radios
Similar to Arduino Meetup with Sonar and 433Mhz Radios (20)
Recently uploaded
Recently uploaded (20)
Arduino Meetup with Sonar and 433Mhz Radios
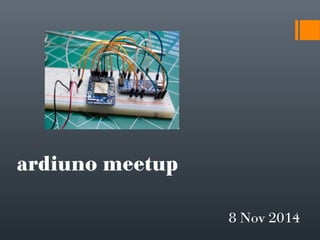
- 1. ardiuno meetup 8 Nov 2014
- 2. Arduino 101 • Started 2005 • Open-source electronics prototyping platform • Open-source hardware • Open-source software • Hardware based on 8-bit Atmel AVR microcontroller or 32-bit Atmel ARM • Very popular in the maker community http://arduino.cc/
- 3. 51 Flavours and counting • Uno is current “standard”, uses ATMega328 < $20 • Leonardo uses ATMega32u4 < $18 • Mini/Nano uses Atmega328P < $5
- 4. Arduino Nano • Microcontroller Atmel ATmega328 • Operating Voltage (logic level) 5 V • Input Voltage 7-12 V • Input Voltage (limits) 6-20 V • Digital I/O Pins 14 (of which 6 provide PWM output) • Analog Input Pins 8 • DC Current per I/O Pin 40 mA • Flash Memory 32 KB of which 2 KB used by bootloader • SRAM 2 KB • EEPROM 1 KB • Clock Speed 16 MHz • Dimensions 0.73" x 1.70" http://arduino.cc/en/Main/ArduinoBoardNano
- 5. Arduino IDE • Integrated Development Environment (IDE) • All-in-one programming tool with built in compiler • Arduino language is C-like Compile Upload to Board Save Serial Monitor Messages http://arduino.cc/en/Main/Software
- 11. HC-SR04 Ultrasonic Sensor • 2cm~500 cm resolution : 0.3 cm • Trig pin to any digital output • Echo pin to any digital input • Pulse Trig, read echo, calculate distance • Pace of Sound = 1 / Speed of Sound = 1 / 0.03435 = 29.1 ųs/cm
- 12. 433Mhz RF Transmitter + Receiver Module Other cheap modules are: 315/330MHz, 2.4GHz FCC regulates 433MHz: ~no more than 10 minutes on every hour o ~20-200m LOS; 4Kbps o Noisy, interference from door bell, garage openers, cordless phone o Easy to use with VirtualWire Library
- 14. Today's Task List • Install Arduino IDE • Install CH340G Driver • Modify Blink example to print to Serial console • Breadboard HC-SR04 Ultrasonic Sensor and read distance • Breadboard 433Mhz RF Transmitter and send distance • Breadboard RF Receiver and then transmit received messages
- 15. Stretch Goals • Add checksum to transmission • Use additional Components and Sensors • LEDs • Light Sensors • Pushbuttons • ?
- 16. Install Arduino IDE http://arduino.cc/en/Main/Software Arduino 1.0.6
- 17. Install CH340G Driver Some Arduino clones use a CH340G USB chip and you'll need to install a driver. https://github.com/fwin-dev/arduino_sonar_web_api/tree/master/CH340_drivers
- 18. Modify Blink example Print “on” and “off” as the LED blinks. In setup() you will need to opens serial port and set data rate to 9600 bps In loop() print “on” when the LED is on, “off” when LED is turned off
- 19. Breadboard HC-SR04 Arduino D8 => sonar trigger pin Arduino D9 => sonar echo pin
- 20. Read HC-SR04 Distance - Setup Review the HC-SR04 slide Define constants for the trigger and echo pins In setup, set pins to OUTPUT or INPUT
- 21. Read HC-SR04 Distance - loop In the loop() you will want to trigger for 1 second and then read the echo. Handy methods would include digitalWrite and pulseIn Calculate distance in cm distance = (duration / 2 ) / pace of sound; Print calculated distance to the Serial console Add short delay of at least ½ second at end of loop
- 22. Breadboard RF Transmitter Arduino D12 => Xmit data pin
- 23. RF Transmitter Install Virtual Wire Virtual Wire Library Unzip into Arduino libraries folder
- 24. RF Transmitter - setup You will transmit the sonar distance using the 433MHz radio Define constants for the on board LED and the transmit pin Define a constant for the name of your arduino: “ralph12” Include the Virtual Wire library Initialize the the Virtual Wire library and bitrate vw_set_ptt_inverted(true); vw_setup(2000); Calculate a random value between ½ a second and 1 ½ secs used to avoid transmit collision Print the calculated random delay to the Serial console
- 25. RF Transmitter - loop The transmitted JSON string will need to be in a format like this: {"i":"joe4", "d":97} A useful method for formatting the JSON string is sprintf() char msg[50]; sprintf(msg, "{"i":"%s", "d":%d}", NAME, distance); Flash LED when transmitting Send json string with virtual wire const char* temp = msg; vw_send((uint8_t *)temp, strlen(temp)); vw_wait_tx(); Delay a random amount at end of loop
- 26. Breadboard RF Receiver Arduino D11 => either data pin
- 27. RF Receiver - setup You will enable the 433MHz receiver to hear other arduino transmissions and report them in your transmission Define a constant for your receiver pin Creat a buffer for receiving data uint8_t recvbuf[VW_MAX_MESSAGE_LEN]; uint8_t recvbuflen = VW_MAX_MESSAGE_LEN; Start the Virtual Wire receiver vw_rx_start();
- 28. RF Receiver – loop The transmitted JSON needs to be in a format like this: {"i":"joe4", "d":97, "h":"herman789"} Always reset the length of your buffer at the top of the loop recvbuflen = VW_MAX_MESSAGE_LEN; Check if any data was received vw_get_message(recvbuf, &recvbuflen)) If you receive data, null terminate your message recvbuf[recvbuflen] = 0; Print received data to Serial console
- 29. RF Receiver – loop cont You can extract the ID of the received data using indexOf() String h = String((char *)recvbuf); int idEnd = s.indexOf('"', 6); h.toCharArray((char *)recvbuf, recvbuflen); Use sprintf to format into a JSON string sprintf(recvmsg, ""h":"%s"", recvbuf); Print formatted data to Serial console Transmit whole JSON message at once {"i":"joe4", "d":97, "h":"herman789"}