Retail epos-software-manual
•
0 likes•351 views

http://www.retailbuddy.co.uk - Retail buddy leading supplier of Epos Software, Electronic Point of Sale, Retail Software, Epos Till Systems, Epos System, E-commerce solutions.

Recommended
More Related Content
What's hot
What's hot (20)
Viewers also liked
Viewers also liked (15)
Similar to Retail epos-software-manual
Similar to Retail epos-software-manual (20)
Recently uploaded
Recently uploaded (20)
Retail epos-software-manual
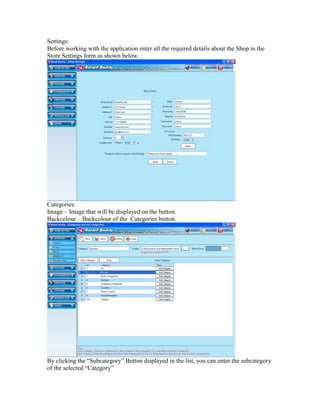
- 1. Settings: Before working with the application enter all the required details about the Shop in the Store Settings form as shown below. Categories: Image – Image that will be displayed on the button. Backcolour – Backcolour of the Categories button. By clicking the “Subcategory” Button displayed in the list, you can enter the subcategory of the selected “Category”
- 2. Products: Enter the details about the Products in the Product form as shown below. Sizes, Color are the attribute of the product. Some products may have these attributes. You can also enter the stock details by clicking the “Stock” button. VARIANTS Products having different variants can be added using this form. Once Variants are added in this form, it can be used in the Products. Just type the Variant and Variant value and then click save to save the values entered.
- 3. PRODUCT VARIANTS Variants which are added using the above form can be assigned to the product using this form. Select the category and then select the product. Choose the variant from the tree list, according to the variants you choose, boxes will be displayed to enter the value. STOCK STOCK ADJUSTMENT Stock of the product can be adjusted using the following form. Some times there may be a situation to adjust the stock if the product is damaged, this can be handled using the following form.
- 4. STOCK MINIMUM STOCK ITEM The current status of the Products which are under minimum stock level can be viewed using the following form. PURCHASE SUPPLIER SUPPLIER All the details about the supplier which supplies their product to your store can be maintained in the form shown below.
- 5. PURCHASE SUPPLIER SUPPLIER ITEM If you need to purchase from the supplier, you need to know the products they supply and enter the products to the supplier. This can be done using the following form. Select the category of the product from the tree. All the products that belong to the category will be listed in the products dropdown. Enter the Pack size, Pack cost of the Product and click save. These products will be listed when you select this supplier during the purchase order. PURCHASE NEW ORDER BY SUPPLIER You must use the following form if you want to purchase the product by selecting the supplier. Select the Supplier first and Select the Category of the products. This will display all the products of the selected category that were added to the supplier in the supplier product form. Now enter the Qty of the products you want to purchase. Once saved, Purchase order number will be raised.
- 6. PURCHASE NEW ORDER BY ITEM You must use the following form if you want to purchase the product by selecting the Category. Select the Category of the products from the tree view. This will display all the products of the selected category and their Supplier Name. Now enter the Qty of the products you want to purchase. Once saved, Purchase order number will be raised separately for different supplier. For eg: If you want to purchase 4 products that belong to 2 suppliers then two purchase order will be raised. PURCHASE NEW ORDER BY MINIMUM STOCK ITEM This is same as the process shown above. But this will display only minimum stock qty products.
- 7. PURCHASE NEW ORDER EDIT ORDER This form is used to edit the purchase order raised. You can either edit the qty of the product or you can add or edit the product to the purchase order. INVENTORY RECEIVING BY SUPPLIER The Product which is received from the supplier can be entered using the following form. This form is used only when the products that were not listed in the Purchase order but purchased from the supplier. Once the Products are saved the stock qty of the products will be automatically adjusted according to the qty of the product received.
- 8. INVENTORY RECEIVING BY PURCHASE ORDER The products which are received from the supplier are entered in the form shown below. Before this Purchase order must be raised for the supplier whom you need to purchase the product. Once purchase order is raised you can select those purchase order by selecting the From - To dates and picking up the Purchase order from the dropdown. This will display you the products that were ordered earlier. Now you can enter the delivered qty of the products. If the ordered and delivered qty are not equal you can also enter the reason. PURCHASE RECEIVED ORDER The Purchase order for which the stock has been received already can be viewed using the following form. Select the dates and pick the purchase order number from the dropdown list to view the delivered products.
- 9. COUPONS/OFFERS EXETERNAL COUPON Coupons can be added to the software using following form. Each coupon has coupon values. These values can be entered in the right side of the form shown below. Cheques can be added to this coupon without adding its value since the cheque amount will be known only during the payment. COUPONS/OFFERS OWN COUPON The coupons which are offered by the store can be added using the form shown below. Each coupon has separate discount value. In the payment of the epos screen when this coupon is used discount will be made in the total amount of the order.
- 10. COUPONS/OFFERS OFFERS All the Offers given for the product comes under any one of the option show in the below form. The offers can be added using the following form. COUPONS/OFFERS OFFER ITEM The Items that comes under the offer can be added using the following form. Click “Add” button next to offers for which you want to add Items to the offers. It will display a form where you can select the products you want to add to the selected offer.
- 11. EMPLOYEES DESIGNATION: Designation can be added using the following form. Here “Access form” is the form which will opened when the user login. EMPLOYEES ACCESS RIGHTS: Depending up on the designation added you can also set access rights to each designation using the form shown below.
- 12. EMPLOYEES EMPLOYEE: All the details about employees can be maintained using the following form. CUSTOMER CUSTOMER All the details about the customer can be maintained using the form shown below.
- 13. CUSTOMER PREMIER CUSTOMER ACCOUNT: Some of the customers in the store can be recognized as premier customer and can give credit offers to the customers. Those customers can be maintained using the form shown below. Credits cannot be given beyond the Purchase limit set here. CUSTOMER PREMIER CUSTOMER PURCHASED LIST: Purchase details about the premier customer can be accessed using the form shown below.
- 14. CUSTOMER PREMIER CUSTOMER PAID LIST: To know the Order’s pay status of each customer use the following form. Select the customer you want by searching it using the search option. All the purchase made by the customer will be displayed below. Orders which are paid already will be displayed as “Paid” other wise it will be displayed as “Pay Now”. CUSTOMER LOYALTY POINTS Loyalty point can be given for the purchase made by each and every customer. Details about the loyalty points can be managed using the form shown below. If the purchase amount of the customer exceeds beyond the scheme’s purchase amount the customer will be give scheme’s specified loyalty points. These loyalty points can be redeemed while making payment for the purchase
- 15. CUSTOMER RESERVED ITEM CUSTOMER ITEM : There may be some customer who buys particular items on regular intervals. These items can be saved separately for each customer in order to reserve those items on particular day. Click “New Button” in “Customer Reserved Item” group box. Select the customer you want to add the products. Enter the Reserved product Name and select the products you want to add by searching it from panel which is above the “Customer reserved item” group box. Once the products are added Click “Save” button to save those Products. Now select the dates in “Reserved Item Dates” group box and click “Add” button to add to the list. Finally click “Save” button to save those dates. These products must be reserved for the customer on the specific dates to ensure these products are available for that customer.
- 16. CUSTOMER RESERVED ITEM REPORT REPORT X REPORT
- 17. REPORT Z REPORT REPORT COLLECTION
- 18. REPORT OFFER ITEM’S SALE REPORT PURCHASE ORDER
- 19. REPORT HIGH SALES PRODUCT REPORT LOW SALES ITEM
- 20. REPORT DISCOUNT SALES ITEM REPORT REFUND