

Recommended
More Related Content
Viewers also liked
More from Michael Trung
More from Michael Trung (19)
Recently uploaded
Recently uploaded (20)
Cambodia transit cargo
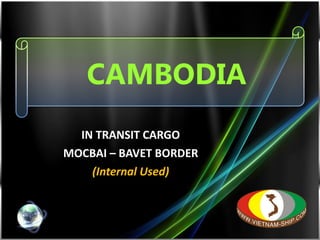
- 1. CAMBODIA IN TRANSIT CARGO MOCBAI – BAVET BORDER (Internal Used)
- 4. Map
- 5. Other basic information ** Distance >> Moc Bai – HCM: ~ 70 km >> Bavet – PNH: ~ 165km >> Bavet – SiemReap: ~ 470km ** Transit time >> HCM – Moc Bai: ~ 2-3 hours >> Bavet – PNH: ~ 6 hours
- 16. d. Total Cost Refernce
Editor's Notes
- Transparent 3-D steps with labels (Advanced) To reproduce the bottom rectangle with text effects on this slide, do the following: On the Home tab, in the Slides group, click Layout , and then click Blank . On the Home tab, in the Drawing group, click Shapes , and then under Rectangles , click Rectangle (first option from the left). On the slide, drag to draw a rectangle. Under Drawing Tools , on the Format tab, in the Size group, do the following: In the Shape Height box, enter 1.5” . In the Shape Width box, enter 3” . On the Home tab, in the bottom right corner of the Drawing group, click the Format Shape dialog box launcher. In the Format Shape dialog box, click Fill in the left pane, and then do the following in the right pane: Select Solid fill . Click the button next to Color , and then under Theme Colors click White, Background 1 (first row, first option from the left). In the Transparency box, enter 0% . Also in the Format Shape dialog box, click Line Color in the left pane, and then select No line in the right pane. Also in the Format Shape dialog box, click 3-D Rotation in the left pane. In the right pane, click the button next to Presets , and then under Parallel click Off Axis 2 Top (third row, second option from the left). Also in the Format Shape dialog box, click 3-D Format in the left pane, and then do the following in the right pane: Under Bevel , click the button next to Top , and then under Bevel click Circle (first row, first option from the left). Next to Top , in the Width box, enter 7 pt , and in the Height box, enter 7 pt . Under Depth , click the button next to Color , and then under Theme Colors click White, Background 1 (first row, first option from the left). In the Depth box, enter 40 pt . Under Surface , click the button next to Material , and then under Translucent click Clear (third option from the left). Click the button next to Lighting , and then under Special click Two Point (second option from the left). In the Angle box , enter 70° . On the Insert tab, in the Text group, click Text Box , and then on the slide, drag to draw the text box. Enter text in the text box, select the text, and then on the Home tab, in the Font group, select TW Cen MT Condensed from the Font list and then select 36 from the Font Size list. On the Home tab, in the Paragraph group, click Align Text Right to align the text right on the slide. Drag the text box and position it over the rectangle. Under Drawing Tools , on the Format tab, in the WordArt Styles group, click the arrow next to Text Fill , and then under Theme Colors click White, Background 1 (first row, first option from the left). Select the text box. Under Drawing Tools , on the Format tab, click Text Effects point to 3-D Rotation , and then click 3-D Rotation Options . In the Format Text Effects dialog box, click 3-D Rotation in the left pane. In the right pane, click the button next to Presets , and then under Parallel click Off Axis 2 Left (second row, fourth option from the left). To reproduce the background on this slide, do the following: Right-click the slide background area, then click Format Background . In the Format Background dialog box, click Fill in the left pane, select Gradient fill in the right pane, and then do the following: In the Type list, select Linear . Click the button next to Direction , and then click Linear Diagonal (first row, third option from the left). In the Angle box, enter 135% . Under Gradient stops , click Add or Remove until two stops appear in the drop-down list. Also under Gradient stops , customize the gradient stops that you added as follows: Select Stop 1 from the list, and then do the following: In the Stop position box, enter 0% . Click the button next to Color , and then under Theme Colors click White, Background 1 (first row, first option from the left). Select Stop 2 from the list, and then do the following: In the Stop position box, enter 100% . Click the button next to Color , and then under Theme Colors click White, Background 1, Darker 15% (third row, first option from the left). On the Home tab, in the Drawing group, click Shapes , and then under Rectangles , click Rectangle (first option from the left). On the slide, drag to draw a rectangle. Select the rectangle. Under Drawing Tools , on the Format tab, in the Size group, do the following: In the Shape Height box, enter 0.33” . In the Shape Width box, enter 10” . On the Home tab, in the Drawing group, click the arrow next to Shape Fill , and then under Theme Colors click White, Background 1, Darker 15% (third row, first option from the left). On the Home tab, in the Drawing group, click the arrow next to Shape Outline , and then click No Outline. On the Home tab, in the Drawing group, click Shapes , and then under Basic Shapes , click Right Triangle (first row, fourth option from the left). On the slide, drag to draw a triangle. Select the triangle. Under Drawing Tools , on the Format tab, in the Size group, do the following: In the Shape Height box, enter 1.33” . In the Shape Width box, enter 10” . On the Home tab, in the Drawing group, click the arrow next to Shape Fill , and then click White, Background 1, Darker 15% (third row, first option from the left). On the Home tab, in the Drawing group, click the arrow next to Shape Outline , and then click No Outline . Position the rectangle and the triangle so that the bottom edge of the triangle and the top edge of the rectangle are touching. Press and hold SHIFT and select both the rectangle and the triangle. On the Home tab, in the Drawing group, click Arrange , and then do the following: Under Group Objects , click Group . Point to Align , and then click Align Center . Point to Align , and then click Align Bottom . On the Home tab, in the Clipboard group, click the arrow under Paste, and then click Duplicate . Under Drawing Tools , on the Format tab, in the Arrange group, click the arrow next to Rotate, and then click More Rotation Options . In the Size and Position dialog box, on the Size tab, under Size and rotate , in the Rotation box, enter 180° . On the Home tab, in the Drawing group, click Arrange , point to Align , and then do the following: Click Align Center . Click Align Top . On the Home tab, in the Drawing group, click the arrow next to Shape Fill , and then under Theme Colors click White, Background 1 (first row, first option from the left). To reproduce the other rectangles with text effects on this slide, do the following: Press and hold SHIFT and select the original text box and rectangle. On the Home tab, in the Drawing group, click Arrange , and then under Group Objects click Group . On the Home tab, in the Clipboard group, click the arrow under Paste, and then click Duplicate . Repeat this step until you have a total of five groups of shapes. On the Home tab, in the Editing group, click Select , and then click Selection Pane . In the Selection and Visibility pane, select each of the groups and drag on the slide to form a series of steps. Also in the Selection and Visibility pane, press and hold CTRL and select all five groups of rectangles and text boxes. On the Home tab, in the Drawing group, click Arrange , point to Align , and then click Distribute Horizontally . On the Home tab, in the Drawing group, click Arrange , point to Align , and then click Distribute Vertically . To change the text on the duplicate rectangles, click in each text box and edit the text.
- Clear disk with floating text (Advanced) To reproduce the shape effects on this slide, do the following: On the Home tab, in the Slides group, click Layout , and then click Blank . On the Home tab, in the Drawing group, click Shapes , and then under Basic Shapes click Oval (first row, second option from the left). Press and hold SHIFT to constrain the shape to a circle, and then on the slide, drag to draw a circle. Select the circle. Under Drawing Tools , on the Format tab, in the Size group, do the following: In the Shape Height box, enter 4.07” . In the Shape Width box, enter 4.54” . Under Drawing Tools , on the Format tab, in the Shape Styles group, click Shape Fill , click More Fill Colors , and then in the Colors dialog box, on the Custom tab, enter values for Red: 204 , Green: 255 , Blue: 153 . Under Drawing Tools , on the Format tab, in the Shape Styles group, click Shape Outline , and then click No Outline . Under Drawing Tools , on the Format tab, in the Shape Styles group, click Shape Effects , and then do the following: Point to Bevel , and then under Bevel click Convex (second row, third option from the left). Point to 3-D Rotation , and then under Perspective click Perspective Relaxed (second row, third option from the left). On the Home tab, in the bottom right corner of the Drawing group, click the Format Shape dialog box launcher. In the Format Shape dialog box, click 3-D Rotation in the left pane, and then do the following in the right pane under Rotation : In the Y box, enter 289.6° . In the Perspective box, enter 30° . Also in the Format Shape dialog box, click 3-D Format in the left pane, and then do the following in the right pane: Under Bevel , click the button next to Bottom , and then under Bevel click Circle (first row, first option from the left). Under Depth , in the Depth box, enter 25 pt . Under Surface , click the button next to Material , and then under Translucent click Clear (third option from the left). Click the button next to Lighting , and then under Neutral click Balance (first row, second option from the left). Also in the Format Shape dialog box, click Shadow in the left pane, and then do the following in the right pane: In the Transparency box, enter 85% . In the Size box, enter 100% . In the Blur box, enter 21 pt . In the Angle box, enter 90% . In the Distance box, enter 27 pt . To reproduce the text effects on this slide, do the following: On the Insert tab, in the Text group, click Text Box , and then on the slide, drag to draw the text box. Enter text in the text box, select the text, and then on the Home tab, in the Font group, select Gill Sans MT Condensed from the Font list, select 80 from the Font Size list, click the arrow next to Font Color , and then under Theme Colors click White, Background 1, Darker 50% (sixth row, first option from the left). On the Home tab, in the Paragraph group, click Center to center the text in the text box. Under Drawing Tools , on the Format tab, in the WordArt Styles group, click Text Effects , and then do the following: Point to Reflection , and then under Reflection Variations click Tight Reflection, 4 pt offset (second row, first option from the left). Point to 3-D Rotation , and then under Parallel click Off Axis 2 Left (second row, fourth option from the left). Under Drawing Tools , on the Format tab, in the bottom right corner of the WordArt Styles group, click the Format Text Effects dialog box launcher. In the Format Text Effects dialog box, click 3-D Format in the left pane, and then do the following in the right pane: Under Depth , click the button next to Color and under Theme Colors then click White, Background 1 (first row, first option from the left). In the Depth box, enter 6.5 pt . Under Surface , click the button next to Material and then under Standard click Warm Matte (second option from the left). Click the button next to Lighting , and then under Neutral click Soft (first row, third option from the left). To reproduce the background effects on this slide, do the following: Right-click the slide background area, and then click Format Background . In the Format Background dialog box, click Fill in the left pane, select Gradient fill in the right pane, and then do the following: In the Type list, select Linear . Click the button next to Direction , and then click Linear Down (first row, second option from the left). Under Gradient stops , click Add or Remove until two stops appear in the drop-down list. Also under Gradient stops , customize the gradient stops that you added as follows: Select Stop 1 from the list, and then do the following: In the Stop position box, enter 46% . Click the button next to Color , and then under Theme Colors click White, Background 1 (first row, first option from the left). Select Stop 2 from the list, and then do the following: In the Stop position box, enter 100% . Click the button next to Color , click More Colors , and then in the Colors dialog box, on the Custom tab, enter values for Red: 228 , Green: 245 , Blue: 193 .
- Clear disk with floating text (Advanced) To reproduce the shape effects on this slide, do the following: On the Home tab, in the Slides group, click Layout , and then click Blank . On the Home tab, in the Drawing group, click Shapes , and then under Basic Shapes click Oval (first row, second option from the left). Press and hold SHIFT to constrain the shape to a circle, and then on the slide, drag to draw a circle. Select the circle. Under Drawing Tools , on the Format tab, in the Size group, do the following: In the Shape Height box, enter 4.07” . In the Shape Width box, enter 4.54” . Under Drawing Tools , on the Format tab, in the Shape Styles group, click Shape Fill , click More Fill Colors , and then in the Colors dialog box, on the Custom tab, enter values for Red: 204 , Green: 255 , Blue: 153 . Under Drawing Tools , on the Format tab, in the Shape Styles group, click Shape Outline , and then click No Outline . Under Drawing Tools , on the Format tab, in the Shape Styles group, click Shape Effects , and then do the following: Point to Bevel , and then under Bevel click Convex (second row, third option from the left). Point to 3-D Rotation , and then under Perspective click Perspective Relaxed (second row, third option from the left). On the Home tab, in the bottom right corner of the Drawing group, click the Format Shape dialog box launcher. In the Format Shape dialog box, click 3-D Rotation in the left pane, and then do the following in the right pane under Rotation : In the Y box, enter 289.6° . In the Perspective box, enter 30° . Also in the Format Shape dialog box, click 3-D Format in the left pane, and then do the following in the right pane: Under Bevel , click the button next to Bottom , and then under Bevel click Circle (first row, first option from the left). Under Depth , in the Depth box, enter 25 pt . Under Surface , click the button next to Material , and then under Translucent click Clear (third option from the left). Click the button next to Lighting , and then under Neutral click Balance (first row, second option from the left). Also in the Format Shape dialog box, click Shadow in the left pane, and then do the following in the right pane: In the Transparency box, enter 85% . In the Size box, enter 100% . In the Blur box, enter 21 pt . In the Angle box, enter 90% . In the Distance box, enter 27 pt . To reproduce the text effects on this slide, do the following: On the Insert tab, in the Text group, click Text Box , and then on the slide, drag to draw the text box. Enter text in the text box, select the text, and then on the Home tab, in the Font group, select Gill Sans MT Condensed from the Font list, select 80 from the Font Size list, click the arrow next to Font Color , and then under Theme Colors click White, Background 1, Darker 50% (sixth row, first option from the left). On the Home tab, in the Paragraph group, click Center to center the text in the text box. Under Drawing Tools , on the Format tab, in the WordArt Styles group, click Text Effects , and then do the following: Point to Reflection , and then under Reflection Variations click Tight Reflection, 4 pt offset (second row, first option from the left). Point to 3-D Rotation , and then under Parallel click Off Axis 2 Left (second row, fourth option from the left). Under Drawing Tools , on the Format tab, in the bottom right corner of the WordArt Styles group, click the Format Text Effects dialog box launcher. In the Format Text Effects dialog box, click 3-D Format in the left pane, and then do the following in the right pane: Under Depth , click the button next to Color and under Theme Colors then click White, Background 1 (first row, first option from the left). In the Depth box, enter 6.5 pt . Under Surface , click the button next to Material and then under Standard click Warm Matte (second option from the left). Click the button next to Lighting , and then under Neutral click Soft (first row, third option from the left). To reproduce the background effects on this slide, do the following: Right-click the slide background area, and then click Format Background . In the Format Background dialog box, click Fill in the left pane, select Gradient fill in the right pane, and then do the following: In the Type list, select Linear . Click the button next to Direction , and then click Linear Down (first row, second option from the left). Under Gradient stops , click Add or Remove until two stops appear in the drop-down list. Also under Gradient stops , customize the gradient stops that you added as follows: Select Stop 1 from the list, and then do the following: In the Stop position box, enter 46% . Click the button next to Color , and then under Theme Colors click White, Background 1 (first row, first option from the left). Select Stop 2 from the list, and then do the following: In the Stop position box, enter 100% . Click the button next to Color , click More Colors , and then in the Colors dialog box, on the Custom tab, enter values for Red: 228 , Green: 245 , Blue: 193 .
- Clear disk with floating text (Advanced) To reproduce the shape effects on this slide, do the following: On the Home tab, in the Slides group, click Layout , and then click Blank . On the Home tab, in the Drawing group, click Shapes , and then under Basic Shapes click Oval (first row, second option from the left). Press and hold SHIFT to constrain the shape to a circle, and then on the slide, drag to draw a circle. Select the circle. Under Drawing Tools , on the Format tab, in the Size group, do the following: In the Shape Height box, enter 4.07” . In the Shape Width box, enter 4.54” . Under Drawing Tools , on the Format tab, in the Shape Styles group, click Shape Fill , click More Fill Colors , and then in the Colors dialog box, on the Custom tab, enter values for Red: 204 , Green: 255 , Blue: 153 . Under Drawing Tools , on the Format tab, in the Shape Styles group, click Shape Outline , and then click No Outline . Under Drawing Tools , on the Format tab, in the Shape Styles group, click Shape Effects , and then do the following: Point to Bevel , and then under Bevel click Convex (second row, third option from the left). Point to 3-D Rotation , and then under Perspective click Perspective Relaxed (second row, third option from the left). On the Home tab, in the bottom right corner of the Drawing group, click the Format Shape dialog box launcher. In the Format Shape dialog box, click 3-D Rotation in the left pane, and then do the following in the right pane under Rotation : In the Y box, enter 289.6° . In the Perspective box, enter 30° . Also in the Format Shape dialog box, click 3-D Format in the left pane, and then do the following in the right pane: Under Bevel , click the button next to Bottom , and then under Bevel click Circle (first row, first option from the left). Under Depth , in the Depth box, enter 25 pt . Under Surface , click the button next to Material , and then under Translucent click Clear (third option from the left). Click the button next to Lighting , and then under Neutral click Balance (first row, second option from the left). Also in the Format Shape dialog box, click Shadow in the left pane, and then do the following in the right pane: In the Transparency box, enter 85% . In the Size box, enter 100% . In the Blur box, enter 21 pt . In the Angle box, enter 90% . In the Distance box, enter 27 pt . To reproduce the text effects on this slide, do the following: On the Insert tab, in the Text group, click Text Box , and then on the slide, drag to draw the text box. Enter text in the text box, select the text, and then on the Home tab, in the Font group, select Gill Sans MT Condensed from the Font list, select 80 from the Font Size list, click the arrow next to Font Color , and then under Theme Colors click White, Background 1, Darker 50% (sixth row, first option from the left). On the Home tab, in the Paragraph group, click Center to center the text in the text box. Under Drawing Tools , on the Format tab, in the WordArt Styles group, click Text Effects , and then do the following: Point to Reflection , and then under Reflection Variations click Tight Reflection, 4 pt offset (second row, first option from the left). Point to 3-D Rotation , and then under Parallel click Off Axis 2 Left (second row, fourth option from the left). Under Drawing Tools , on the Format tab, in the bottom right corner of the WordArt Styles group, click the Format Text Effects dialog box launcher. In the Format Text Effects dialog box, click 3-D Format in the left pane, and then do the following in the right pane: Under Depth , click the button next to Color and under Theme Colors then click White, Background 1 (first row, first option from the left). In the Depth box, enter 6.5 pt . Under Surface , click the button next to Material and then under Standard click Warm Matte (second option from the left). Click the button next to Lighting , and then under Neutral click Soft (first row, third option from the left). To reproduce the background effects on this slide, do the following: Right-click the slide background area, and then click Format Background . In the Format Background dialog box, click Fill in the left pane, select Gradient fill in the right pane, and then do the following: In the Type list, select Linear . Click the button next to Direction , and then click Linear Down (first row, second option from the left). Under Gradient stops , click Add or Remove until two stops appear in the drop-down list. Also under Gradient stops , customize the gradient stops that you added as follows: Select Stop 1 from the list, and then do the following: In the Stop position box, enter 46% . Click the button next to Color , and then under Theme Colors click White, Background 1 (first row, first option from the left). Select Stop 2 from the list, and then do the following: In the Stop position box, enter 100% . Click the button next to Color , click More Colors , and then in the Colors dialog box, on the Custom tab, enter values for Red: 228 , Green: 245 , Blue: 193 .
- Clear disk with floating text (Advanced) To reproduce the shape effects on this slide, do the following: On the Home tab, in the Slides group, click Layout , and then click Blank . On the Home tab, in the Drawing group, click Shapes , and then under Basic Shapes click Oval (first row, second option from the left). Press and hold SHIFT to constrain the shape to a circle, and then on the slide, drag to draw a circle. Select the circle. Under Drawing Tools , on the Format tab, in the Size group, do the following: In the Shape Height box, enter 4.07” . In the Shape Width box, enter 4.54” . Under Drawing Tools , on the Format tab, in the Shape Styles group, click Shape Fill , click More Fill Colors , and then in the Colors dialog box, on the Custom tab, enter values for Red: 204 , Green: 255 , Blue: 153 . Under Drawing Tools , on the Format tab, in the Shape Styles group, click Shape Outline , and then click No Outline . Under Drawing Tools , on the Format tab, in the Shape Styles group, click Shape Effects , and then do the following: Point to Bevel , and then under Bevel click Convex (second row, third option from the left). Point to 3-D Rotation , and then under Perspective click Perspective Relaxed (second row, third option from the left). On the Home tab, in the bottom right corner of the Drawing group, click the Format Shape dialog box launcher. In the Format Shape dialog box, click 3-D Rotation in the left pane, and then do the following in the right pane under Rotation : In the Y box, enter 289.6° . In the Perspective box, enter 30° . Also in the Format Shape dialog box, click 3-D Format in the left pane, and then do the following in the right pane: Under Bevel , click the button next to Bottom , and then under Bevel click Circle (first row, first option from the left). Under Depth , in the Depth box, enter 25 pt . Under Surface , click the button next to Material , and then under Translucent click Clear (third option from the left). Click the button next to Lighting , and then under Neutral click Balance (first row, second option from the left). Also in the Format Shape dialog box, click Shadow in the left pane, and then do the following in the right pane: In the Transparency box, enter 85% . In the Size box, enter 100% . In the Blur box, enter 21 pt . In the Angle box, enter 90% . In the Distance box, enter 27 pt . To reproduce the text effects on this slide, do the following: On the Insert tab, in the Text group, click Text Box , and then on the slide, drag to draw the text box. Enter text in the text box, select the text, and then on the Home tab, in the Font group, select Gill Sans MT Condensed from the Font list, select 80 from the Font Size list, click the arrow next to Font Color , and then under Theme Colors click White, Background 1, Darker 50% (sixth row, first option from the left). On the Home tab, in the Paragraph group, click Center to center the text in the text box. Under Drawing Tools , on the Format tab, in the WordArt Styles group, click Text Effects , and then do the following: Point to Reflection , and then under Reflection Variations click Tight Reflection, 4 pt offset (second row, first option from the left). Point to 3-D Rotation , and then under Parallel click Off Axis 2 Left (second row, fourth option from the left). Under Drawing Tools , on the Format tab, in the bottom right corner of the WordArt Styles group, click the Format Text Effects dialog box launcher. In the Format Text Effects dialog box, click 3-D Format in the left pane, and then do the following in the right pane: Under Depth , click the button next to Color and under Theme Colors then click White, Background 1 (first row, first option from the left). In the Depth box, enter 6.5 pt . Under Surface , click the button next to Material and then under Standard click Warm Matte (second option from the left). Click the button next to Lighting , and then under Neutral click Soft (first row, third option from the left). To reproduce the background effects on this slide, do the following: Right-click the slide background area, and then click Format Background . In the Format Background dialog box, click Fill in the left pane, select Gradient fill in the right pane, and then do the following: In the Type list, select Linear . Click the button next to Direction , and then click Linear Down (first row, second option from the left). Under Gradient stops , click Add or Remove until two stops appear in the drop-down list. Also under Gradient stops , customize the gradient stops that you added as follows: Select Stop 1 from the list, and then do the following: In the Stop position box, enter 46% . Click the button next to Color , and then under Theme Colors click White, Background 1 (first row, first option from the left). Select Stop 2 from the list, and then do the following: In the Stop position box, enter 100% . Click the button next to Color , click More Colors , and then in the Colors dialog box, on the Custom tab, enter values for Red: 228 , Green: 245 , Blue: 193 .
- Clear disk with floating text (Advanced) To reproduce the shape effects on this slide, do the following: On the Home tab, in the Slides group, click Layout , and then click Blank . On the Home tab, in the Drawing group, click Shapes , and then under Basic Shapes click Oval (first row, second option from the left). Press and hold SHIFT to constrain the shape to a circle, and then on the slide, drag to draw a circle. Select the circle. Under Drawing Tools , on the Format tab, in the Size group, do the following: In the Shape Height box, enter 4.07” . In the Shape Width box, enter 4.54” . Under Drawing Tools , on the Format tab, in the Shape Styles group, click Shape Fill , click More Fill Colors , and then in the Colors dialog box, on the Custom tab, enter values for Red: 204 , Green: 255 , Blue: 153 . Under Drawing Tools , on the Format tab, in the Shape Styles group, click Shape Outline , and then click No Outline . Under Drawing Tools , on the Format tab, in the Shape Styles group, click Shape Effects , and then do the following: Point to Bevel , and then under Bevel click Convex (second row, third option from the left). Point to 3-D Rotation , and then under Perspective click Perspective Relaxed (second row, third option from the left). On the Home tab, in the bottom right corner of the Drawing group, click the Format Shape dialog box launcher. In the Format Shape dialog box, click 3-D Rotation in the left pane, and then do the following in the right pane under Rotation : In the Y box, enter 289.6° . In the Perspective box, enter 30° . Also in the Format Shape dialog box, click 3-D Format in the left pane, and then do the following in the right pane: Under Bevel , click the button next to Bottom , and then under Bevel click Circle (first row, first option from the left). Under Depth , in the Depth box, enter 25 pt . Under Surface , click the button next to Material , and then under Translucent click Clear (third option from the left). Click the button next to Lighting , and then under Neutral click Balance (first row, second option from the left). Also in the Format Shape dialog box, click Shadow in the left pane, and then do the following in the right pane: In the Transparency box, enter 85% . In the Size box, enter 100% . In the Blur box, enter 21 pt . In the Angle box, enter 90% . In the Distance box, enter 27 pt . To reproduce the text effects on this slide, do the following: On the Insert tab, in the Text group, click Text Box , and then on the slide, drag to draw the text box. Enter text in the text box, select the text, and then on the Home tab, in the Font group, select Gill Sans MT Condensed from the Font list, select 80 from the Font Size list, click the arrow next to Font Color , and then under Theme Colors click White, Background 1, Darker 50% (sixth row, first option from the left). On the Home tab, in the Paragraph group, click Center to center the text in the text box. Under Drawing Tools , on the Format tab, in the WordArt Styles group, click Text Effects , and then do the following: Point to Reflection , and then under Reflection Variations click Tight Reflection, 4 pt offset (second row, first option from the left). Point to 3-D Rotation , and then under Parallel click Off Axis 2 Left (second row, fourth option from the left). Under Drawing Tools , on the Format tab, in the bottom right corner of the WordArt Styles group, click the Format Text Effects dialog box launcher. In the Format Text Effects dialog box, click 3-D Format in the left pane, and then do the following in the right pane: Under Depth , click the button next to Color and under Theme Colors then click White, Background 1 (first row, first option from the left). In the Depth box, enter 6.5 pt . Under Surface , click the button next to Material and then under Standard click Warm Matte (second option from the left). Click the button next to Lighting , and then under Neutral click Soft (first row, third option from the left). To reproduce the background effects on this slide, do the following: Right-click the slide background area, and then click Format Background . In the Format Background dialog box, click Fill in the left pane, select Gradient fill in the right pane, and then do the following: In the Type list, select Linear . Click the button next to Direction , and then click Linear Down (first row, second option from the left). Under Gradient stops , click Add or Remove until two stops appear in the drop-down list. Also under Gradient stops , customize the gradient stops that you added as follows: Select Stop 1 from the list, and then do the following: In the Stop position box, enter 46% . Click the button next to Color , and then under Theme Colors click White, Background 1 (first row, first option from the left). Select Stop 2 from the list, and then do the following: In the Stop position box, enter 100% . Click the button next to Color , click More Colors , and then in the Colors dialog box, on the Custom tab, enter values for Red: 228 , Green: 245 , Blue: 193 .