Simple and Collaborative Slideshow for
Applying and Changing a Theme in MS Powerpoint 2013
If the video does not work,Please download and check (Sorry if the inconvenience is caused)
Hope you like it,
Free to download and share,
Check our Other Tutorials onto other Microsoft Office Softwares and further more into miscellaneous slideshows.
Microsoft Office Powerpoint 2013 Tutorial- Applying and Changing a Theme
1. Apply and change a theme
j
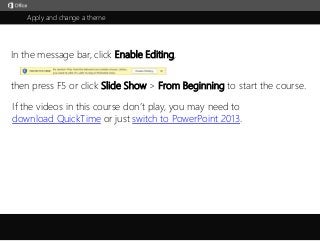
then press F5 or click Slide Show > From Beginning to start the course.
In the message bar, click Enable Editing,
If the videos in this course don’t play, you may need to
download QuickTime or just switch to PowerPoint 2013.
2. 5 61 2 3 4
Course summary Help
1/3 videos
Apply and change a theme Closed captions
Summary Feedback HelpApply & change Change background Customize & save
4:505:15 5:37
Press F5 to start, Esc to stop
Imagine you’ve created slides for your presentation, and now you’re thinking about slide design—the look
of the slides:
the background design, font styles, colors, and layouts.You want the slides to have a bit more visual pop. How do you get that?Now’s the time to explore themes. A theme provides a complete slide design for your presentation.Let’s look at some examples.To find themes, click Design. The different themes are shown by these thumbnails, here.Notice how when I point to a theme, it previews on the slide.To see more themes, click this middle arrow, which shows the themes, row by row.I’ll point to some to show their preview.To see the full Themes gallery, click this bottom arrow, called the More arrow.To apply a theme, click one of the thumbnails.The theme is applied to all the slides.Some details of this theme include a colorful background, an artful design for the slide number, and font
styles.
You see a color scheme applied throughout and a range of layouts.The aim of a theme is to give your presentation a designer-quality look, with all the slide elements
coordinated.
Another way to apply a theme is when you first open PowerPoint to start work on a presentation.In this opening view, you’re shown all the themes from the Themes gallery.You’ll notice that one of the choices is this very basic design, labeled Blank Presentation.This also has a theme applied, just a more plain one.A helpful aspect of this view is that when I click a theme, I see a larger example of it,and I can click More Images to see more examples of its color scheme and layouts.I also see three additional choices of background design and color scheme for the theme.When I click one of these, I see its preview.This is one way that PowerPoint offers alternatives, to help you get the theme you want.I’ll try this blue version of the theme, which is called Ion.When I click Create, PowerPoint applies the theme to the new presentation, starting with the first slide.When I click New Slide, the new slide takes on the theme.An advantage to starting out with the theme in place is that I see how it looks with my slide content as I
work.
If I want to try a different theme, I click Design, and apply another one from the gallery.Now, maybe you’re someone who prefers a more plain slide design.To start with that, apply the most simple theme: the Office theme.This is the theme PowerPoint applies when you choose Blank Presentation from the opening screen.What’s fun is that you can start with this basic theme and customize it.PowerPoint gives you several ways to change any theme’s design.To start with, you have the three alternative backgrounds and color schemes over here, in Variants.And when you click the More arrow, on the lower-right, here, you have more options for altering the theme.Within Colors, there’s a range of other color schemes available.Within Fonts, you’ll find other font combinations for title and body text.When I point to fonts in the list, notice how they preview on the slide.Effects offer subtle style differences for graphics, like shapes.And Background Styles includes more background colors—some light, some dark—that go with the current
color scheme.
If you alter some aspect of your theme and you want to save it for future use,open the Themes gallery and click Save Current Theme at the bottom of the gallery.Then save the theme with a new name.The customized theme now appears with all the other themes in the gallery, for use with other
presentations.
Up Next: Change the theme background.
3. 5 61 2 3 4
Course summary Help
2/3 videos
Apply and change a theme Closed captions
Summary Feedback Help
Press F5 to start, Esc to stop
One way to personalize a theme is to change its background.Working from the basic Office theme, which has a white background,let’s get more familiar with choosing a different background for a theme.Just so you know, the Office theme is this thumbnail in the Themes gallery.It also shows here, on the left, because it’s the theme that’s currently applied.What I’d like for this theme is a background with more color.To consider a different background, I should first look over in the Variants group.These three thumbnails on the right are variants to the current theme.I’m going to select this chart slide to help illustrate the differences in these theme variants.I’ll click the first variant.It keeps the white background and only changes the color scheme; you see that illustrated in the chart
colors.
The other two variants give a black background, with two different color schemes.Notice that with these backgrounds, the body text is white.I have more choices just for the background.To get the best view of these, let’s display the title slide because it shows more background.Then, I’ll click the More arrow and point to Background Styles.These additional 12 backgrounds — six light and six dark — are other options for a background that goes
with the Office theme.
They’re designed to complement and offer good contrast to the text and other theme colors.These top two rows are solid-color backgrounds.You can see the background’s preview on the slide when I point to it.These bottom four are gradient backgrounds, which means they fade from lighter at the top to darker at
the bottom.
Let’s try this one, a blue gradient.It’s really more of a blue-gray, but we’ll call it blue.I’ll click through the slides to see how it looks.One big change is that because it’s a dark background, the slide text is now white or light gray.In this background, the shading, which starts lighter at the top and gets darker toward the bottom, is pretty
subtle.
Let’s make it a little more dramatic and emphasize the light-to-dark contrast.To work with the background, you click Format Background.For a gradient type of fill, which this background has, you have these settings to work with.What I want to do is change the look of the gradient, so the lightest part is lighter and the darkest part is
darker.
So, I’ll focus on these Gradient Stops. I’ll explain what they are.The first stop shows the color of the blue at its lightest, in the top area of the slide.The last stop shows the color of the blue at its darkest, in the bottom area of the slide.To make the lightest blue lighter, I’ll select the first stop.Then, in the box that’s next to Brightness, I’ll use this arrow and increase the brightness of the blue, up to
25%.
See how that lightens the blue in the top area of the background?Next, I’ll select the last gradient stop, and decrease the brightness of the color, down to -25%.Now the bottom area of the background is a darker blue.I like the way this shading looks, so now I’ll click Apply to All, to make these changes on all the slides.One of the other things you can do with gradients is change the direction of the shading.When I click the Direction arrow, I see these options.This one, Linear Right, changes the light-to-dark shading from left to right.Linear Up changes the shading so it gets darker moving up, toward the top.So, these are some examples of alternatives with gradient shading.To get my original shading back, I’ll choose Linear Down, which shades darker, starting light at the top.But note that if I wasn’t sure what my earlier shading was,and I wanted to revert back to the settings I had when I last clicked Apply to All,I could click Reset Background to restore those settings.I like this background, so I’ll close the Format Background pane.To recap, you now know how to find variant choices for a theme background,choose one that goes with the theme colors, and tweak it in the Formatting pane.Up next: We’ll customize the theme colors and save the theme.
Apply & change Change background Customize & save
4:505:15 5:37
4. 5 61 2 3 4
Course summary Help
3/3 videos
Apply and change a theme Closed captions
Summary Feedback Help
Press F5 to start, Esc to stop
So far, in modifying the Office theme, I’ve changed the background from white to dark-blue,and I adjusted its gradient shading.Now, I’ve found a text color that I want to change.This hyperlinked text, in dark blue, is too dark against the background.How do I make it lighter and more readable?It’s not a matter of just selecting the text and changing the font colorbecause PPT applied this color automatically.Let’s back up a couple of steps and see how the color was applied.Here’s the slide before I created the hyperlink.It was when I created the hyperlink—when I selected the text and right-clicked, chose Hyperlink,and pasted in the web address—that PowerPoint changed the text color to blue.It did that because this blue is part of the Office theme’s color scheme: it’s designated for any hyperlink text.So, to change the color, we’re going to alter the color scheme. This is a useful thing to know how to do.We start by clicking the Design tab.Then, we click the More arrow in Variants and point to Colors.In the list of color schemes, the Office theme colors are at the top.They’re selected, which means that they’re currently applied.All these other sets of colors are alternative color schemes.But I don’t want to change the whole color scheme, only one color of the current scheme.To do that I use the command, at the bottom of this menu, called Customize Colors.This opens a detailed picture of the current color scheme and shows me which color is used for which things
on the slide.
The samples, here, are snapshots of the color scheme, showing the colors for both a dark and a light
background.
Under Theme colors, these top four represent alternatives for light and dark backgrounds and light and dark
text.
These accent colors are used for shapes and other graphics.These two colors, at the bottom, are the ones used for hyperlinks—the text color of the link,and the text color after you click the link.Looking again at the snapshots, I can see that the colors for hyperlinks work well on the light background,but not so well on the dark background.So, let’s change the hyperlink colors. I click the arrow next to Hyperlink and see the Office theme colors in
various shades.
The color currently being used is selected, over here.I’ll look for a lighter blue. How about this one?The snapshots update to show the changed hyperlink color. That looks better.Next to Followed Hyperlink, I’m going to make the same change.I’ll click to open the colors and select the same blue because I don’t want the color to change when I click
the link.
These are my new hyperlink colors.Now I need to save this customized color scheme with a new name.I’ll call it Office Blue, and click Save.The new hyperlink color is automatically applied to the hyperlink on the slide.When I open the Colors menu, I see that the new custom color scheme is there, at the top,and it’s selected, showing that it’s applied.Finally, I want to save this theme with the background and colors I’ve chosen, so I can use it again.To do that, I open the Themes gallery and click Save Current Theme.I’ll call it Office Blue, and click Save.Later, for other presentations, the Office Blue theme will be available in the Themes gallery.Now that you know how to apply, customize, and save a theme, you’ll design your presentations with
confidence and flair.
To learn more, read the course summary, and experiment on your own.
Apply & change Change background Customize & save
4:505:15 5:37
5. Help Course summary
Press F5 to start, Esc to stop
Course summary—Apply and change a theme
Summary Feedback Help
5 61 2 3 4
Apply & change Change background Customize & save
4:505:15 5:37
Remove the current slide design
To change the current theme to another theme:
1. On the Design tab, in the Themes group, click
More.
2. Do one of the following:
• Under Custom, choose a custom theme to apply.
• Under Office, click a built-in theme to apply. If
your goal is to display little to no color in your
presentation, (something plain with a white
background), apply the Office Theme
• Click Browse for Themes, and locate and click a
theme.
Change theme fonts
1. Click View > Slide Master > Fonts > Customize
Fonts.
2. In the Create New Theme Fonts dialog box,
under the Heading font and Body font boxes,
select the fonts that you want to use.
3. In the Name box, type an appropriate name for
the new theme fonts, and click Save.
Save your custom theme
Save the changes that you make to the colors, fonts, or
and effects as a theme (.thmx file). That way you can
apply this new theme to your other presentations.
1. Click View > Slide Master > Themes.
2. Click Save Current Theme.
3. In the File name box, type an appropriate
name for the theme, and click Save. The
revised theme is saved as a .thmx file in the
Document Themes folder on your local drive
and it is automatically added to the list of
custom themes on the Design tab in the
Themes group.
See also
• Change the colors, fonts, and effects
• Apply multiple slide designs (themes)
to one presentation
• Save a slide design (theme) as a
template
• More training courses
• Office Compatibility Pack
6. Check out more courses
Help Course summary
Press F5 to start, Esc to stop
Rating and comments
Thank you for viewing this course!
Please tell us what you think
Summary Feedback Help
5 61 2 3 4
Apply & change Change background Customize & save
4:505:15 5:37
7. Help Course summary
Press F5 to start, Esc to stop
Help
Summary Feedback Help
5 61 2 3 4
Using PowerPoint’s video controls
Going places
Stopping a course
If you download a course and the videos don’t play
get the PowerPoint Viewer. the QuickTime
player upgrade to PowerPoint 2013
Apply & change Change background Customize & save
4:505:15 5:37