SlideShare a Scribd company logo
1 of 16
Linksys Wireless Router and Adapter LAB 
USB Network Adapter 
Attach the USB Adapter to the USB port in the computer. Windows Plug and Play will find the new hardware 
and load the Windows Driver; or, use the linksys disk to install software. Power is provided by computer. 
Linksys AP Router Setup 
Hardware Installation 
1. Unpack the router and compare it to the following graphic to identify components. 
The Back Panel 
The Router’s ports, where a network cable is connected, are located on the back panel. 
· Internet - The Internet port connects to your modem. 
· LAN (1-4) - The LAN (Local Area Network) ports connect to your PC and other network devices. 
· Power - The Power port is where you will connect the power adapter. 
· Reset Button - There are two ways to Reset the Router's factory defaults. Either press the Reset Button, for 
approximately ten seconds, or restore the defaults from the Password tab in the Router’s Web-Based Utility. 
The Front Panel 
The Router's LEDs, where information about network activity is displayed, are located on the front panel. 
· Power - Green. The Power LED lights up when the Access Point is powered on. 
· DMZ - Red. The DMZ LED indicates the Access Point's self-diagnosis mode during boot-up and restart. It will turn off 
upon completing the diagnosis. If this LED stays on for an abnormally long period of time, then troubleshooting. 
· Internet - Green. The Internet LED lights whenever there is a successful wireless connection. If the LED is flickering, 
the Router is actively sending or receiving data to or from one of the devices on the network. 
· Wireless-G - Green. The Wireless-G LED lights whenever there is a successful wireless connection. 
1
· LAN (1-4) - Green. The LAN LED serves two purposes. If the LED is continuously lit, the Router is successfully 
connected to a device through the LAN port. If the LED is flickering, it is an indication of any network activity. 
The router can be accessed from a PC either of the following ways: 
Wired Connection to a PC 
1. Before you begin, make sure that all of your network’s hardware is powered off, including the Router, PCs, and cable or 
DSL modem. 
2. Connect one end of an Ethernet network cable to one of the LAN ports (labeled 1-4) on the back of the Router, and the 
other end to an Ethernet port on a PC. 
3. Repeat this step to connect more PCs, a switch, or other network devices to the Router. 
4. Connect a different Ethernet network cable from your cable or DSL modem to the Internet port on the Router’s rear 
panel. This is the only port that will work for your modem connection. 
5. Power on the cable or DSL modem. 
6. Connect the power adapter to the Router’s Power port , and then plug the power adapter into a power outlet. 
The Power LED on the front panel will light up green as soon as the power adapter is connected properly. The Power LED 
will flash for a few seconds, then it will light up steady when the self-test is complete. If the LED flashes for one minute or 
longer, then troubleshoot. 
7. Power on one of your PCs that is connected to the Router. 
Connect to PC 
Connect to DSL or cable modem. 
Connect Power 
2
Wireless Connection to a PC 
If you want to use a wireless connection to access the Router, follow these instructions: 
1. Before you begin, make sure that all of your network’s hardware is powered off, including the Router, or DSL modem. 
2. Connect an Ethernet network cable from your cable or DSL modem to the Internet port on the Router’s rear panel. This 
is the only port that will work for your modem connection. 
3. Power on the cable or DSL modem. 
4. Connect the power adapter to the Power port, and then plug the power adapter. The power LED on the front panel 
will light up green as soon as the power adapter is connected properly. The Power LED will flash for a few seconds, then 
light up steady when the self-test is complete. If the LED flashes for one minute or longer, then troubleshoot. 
5. Power on one of the PCs on your wireless network(s). 
6. For initial access to the Router through a wireless connection, make sure the PC’s wireless adapter has its SSID set 
to linksys (the Router’s default setting), and its WEP encryption is disabled. After you have accessed the Router, you 
can change the Router and this PC’s adapter settings to match your usual network settings. 
The Router’s hardware installation is now complete. 
CONFIGURE THE PC. 
Configure your PC’s network settings to obtain an IP (or TCP/IP) address automatically, so your PC can function as a DHCP client. 
Configuring Windows 98 and Millennium PCs 
1. Click the Start button. Select Settings and click the Control Panel icon. Double-click the Network icon. 
2. On the Configuration tab, select the TCP/IP line for the applicable Ethernet adapter. Click the Properties button. 
3. Click the IP Address tab. Select Obtain an IP address automatically. 
4. Now click the Gateway tab, and verify that the Installed Gateway field is blank. Click the OK button. 
5. Click the OK button again. 
6. Windows may ask you to restart your PC. Click the Yes button. If Windows does not ask you to restart, restart your 
computer anyway. 
Configuring Windows 2000 PCs 
1. Click the Start button. Select Settings and click the Control Panel icon. Double-click the Network and Dialup 
Connections icon. 
2. Select the Local Area Connection icon for the applicable Ethernet adapter (usually it is the first Local Area Connection 
listed). Double-click the Local Area Connection. Click the Properties button. 
3. Make sure the box next to Internet Protocol (TCP/IP) is checked. Highlight Internet Protocol (TCP/IP), and click the 
Properties button. 
4. Select Obtain an IP address automatically. Once the new window appears, click the OK button. Click the OK 
button again to complete the PC configuration. 
5. Restart your computer. 
Configuring Windows XP PCs 
The following instructions assume you are running Windows XP with the default interface. If you are using the Classic interface 
(where the icons and menus look like previous Windows versions), please follow the instructions for Windows 2000. 
1. Click the Start button and then the Control Panel icon. Click the Network and Internet Connections icon. Then click 
the Network Connections icon. 
2. Select the Local Area Connection icon for the applicable Ethernet adapter (usually it is the first Local Area Connection 
listed). Double-click the Local Area Connection. Click the Properties button. 
3. Make sure the box next to Internet Protocol (TCP/IP) is checked. Highlight Internet Protocol (TCP/IP), and click the 
Properties button. 
4. Select Obtain an IP address automatically. Once the new window appears, click the OK button. Click the OK button 
again to complete the PC configuration. 
3
Configuring the Router using the Web-based Utility 
To access the web-based utility, launch Internet Explorer or Netscape Navigator, and enter the Router’s default IP address, 
192.168.1.1, in the Address field. Then press Enter. A password request page will appear. Enter admin (the default user name) 
in the User Name field, and enter admin (the default password) in the Password field. Then click the OK button. 
The Setup Tab 
The Basic Setup Tab 
The first screen that appears is the Basic Setup tab. This tab allows you to change the Router's general settings. Change these 
settings as described here and Save. 
Internet Setup 
· Internet Connection Type. The Router supports four connection types: Automatic Configuration - DHCP (the default 
connection type), PPPoE, Static IP, and PPTP. Each Basic Setup screen and available features will differ depending on 
what kind of connection type you select. 
o Automatic Configuration - DHCP 
By default, the Router’s Configuration Type is set to Automatic Configuration - DHCP, and it should be kept only 
if your ISP supports DHCP or you are connecting through a dynamic IP address. 
o Static - If you are required to use a permanent IP address to connect to the Internet, then select Static IP, or If 
the Router is connected to more than one network, it may be necessary to set up a static route between them. 
· IP Address. This is the Router’s IP address, when seen from the WAN, or the Internet. Your ISP will provide you with 
the IP Address you need to specify here. 
· Subnet Mask. This is the Router’s Subnet Mask, as seen by external users on the Internet (including your ISP). Your 
ISP will provide you with the Subnet Mask. 
4
Optional Settings (Required by some ISPs) 
· Host Name and Domain Name. These fields allow you to supply a host and domain name for the Router. Some ISPs 
require these names as identification. You may have to check with your ISP to see if your broadband Internet service 
has been configured with a host and domain name. In most cases, leaving these fields blank will work. 
· MTU. The MTU (Maximum Transmission Unit) setting specifies the largest packet size permitted for network 
transmission. Select Enabled and enter the value desired. It is recommended that you leave this value in the 1200 to 
1500 range. For most DSL users, it is recommended to use the value 1492. By default, MTU is set at 1500 when 
disabled. 
Network Setup 
· Gateway IP. The values for the Router’s Local IP Address and Subnet Mask are shown here. In most cases, keeping the 
default values will work. 
· Local IP Address. The default value is 192.168.1.1. 
· Subnet Mask. The default value is 255.255.255.0. 
· Local DHCP Server. DHCP is already enabled by factory default. If you already have a DHCP server on your network, set 
the Router’s DHCP option to Disable. If you disable DHCP, remember to assign a static IP address to the Router. 
· Start IP Address. Enter a value for the DHCP server to start with when issuing IP addresses. This value must be 
192.168.1. 2 or greater, because the default IP address for the Router is 192.168.1.1. 
· Number of Address. Enter the maximum number of PCs that you want the DHCP server to assign IP addresses to. This 
number cannot be greater than 253. In order to determine the DHCP IP Address range, add the starting IP address (e.g., 
100) to the number of DHCP users. By default, add 100 to 50, and the range is 192.168.1.100 to 192.168.1.149. 
· DHCP Address Range. The range of DHCP addresses is displayed here. 
· Time Setting. This is where you set the time for your Router. You can set the time and date manually or automatically, 
by setting the time zone. When finished making your changes on this tab, Save. 
DDNS -The Dynamic Domain Name System (DDNS) feature lets you assign a fixed domain name to a dynamic 
Internet IP address. 
MAC Address Clone Tab 
· Some IPS may require you to register your computer's MAC address. If you do not wish to re-register your router with 
you WSP, you may clone the MAC address that you originally registered with your ISP. The Router’s MAC address is a 
12-digit code assigned to a unique piece of hardware for identification, like a social security number. 
Advanced Routing Tab 
· Use this feature if you are routing between two different networks. (See manual's instructions). 
The Wireless Tab - This screen allows you to choose your wireless network mode and wireless security. 
5
Basic Wireless Settings 
· Wireless Network Mode. If you have Wireless-G and 802.11b devices in your network, then keep the default setting, 
Mixed. If you have only Wireless-G devices, select G-Only 
· Wireless Network Name. Enter the Wireless Network Name (SSID) into the field. The SSID is the network name shared 
among all devices in a wireless network. The SSID must be identical for all devices in the wireless network. It is case-sensitive 
and must not exceed 32 alphanumeric characters, which may be any keyboard character. For added security, 
Linksys recommends that you change the default SSID (linksys) to a unique name of your choice. 
· Wireless Channel. Select the appropriate channel from the list provided to correspond with your network settings, 
between 1 and 11 (in North America). All devices in your wireless network must use the same channel in order to 
function correctly. Channels will overlap, therefore use 1, 6 and 11. 
Wireless Security 
Wireless SSID Broadcast. When wireless clients survey the local area for wireless networks to associate with, they will 
detect the SSID broadcast by the Router. To broadcast the Router's SSID, keep the default setting, Enabled. If you do not 
want to broadcast the Router's SSID, then select Disabled. 
· The router supports four different types of security settings for your network. Wi-Fi Protected 
Access (WPA) Pre-Shared key, WPA Remote Access Dial In User Service (RADIUS), RADIUS, 
and Wire Equivalence Protection (WEP). 
WEP 
· . An acronym for Wired Equivalent Privacy, WEP is an encryption method used to protect your wireless data 
communications. WEP uses 64-bit or 128-bit keys to provide access control to your network and encryption security for 
every data transmission. To decode data transmissions, all devices-Wireless-G and 802.11b-in a network must use an 
identical WEP key. Higher encryption levels offer higher levels of security, but due to the complexity of the encryption, 
they may decrease network performance. To enable WEP encryption, click the Enabled radio button. Then click the Edit 
WEP Settings button to configure the WEP settings. To disable WEP encryption, keep the default setting, Disabled. 
6
· The WEP screen allows you to configure your WEP settings. WEP encryption should always be enabled to increase the 
security of your wireless network. Default Transmit Key Select which WEP key (1-4) will be used when the Router sends 
data. Make sure the receiving device is using the same key. 
· WEP Encryption. Select the level of WEP encryption you wish to use, 64-bit 10 hex digits or 128-bit 26 hex digits. Higher 
encryption levels offer higher levels of security, but due to the complexity of the encryption, they may decrease network 
performance. 
· Passphrase. Instead of manually entering WEP keys, you can enter a Passphrase. This Passphrase is used to generate 
one or more WEP keys. It is case-sensitive and should not be longer than 16 alphanumeric characters. (This Passphrase 
function is compatible with Linksys wireless products only. If you want to communicate with non-Linksys wireless 
products, enter the WEP key manually on the non-Linksys wireless products.) After you enter the Passphrase, click the 
Generate button to create WEP keys. 
· Keys 1-4. WEP keys enable you to create an encryption scheme for wireless LAN transmissions. If you are not using a 
Passphrase, then manually enter a set of values. (Do not leave a key field blank, and do not enter all zeroes. These are 
not valid key values.) If you are using 64-bit WEP encryption, then the key must be exactly 10 hexadecimal characters 
in length. If you are using 128-bit WEP encryption, then the key must be exactly 26 hexadecimal characters in length. 
Valid hexadecimal characters are “0”-“9” and “A”-“F”. 
· WPA - There are two encryption options for WPA Pre-Shared Key, TKIP and AES. TKIP stands for 
Temporal Key Integrity Protocol. TKIP utilizes dynamic keys and incorporates Message Integrity Code 
(MIC) to provide protection against hackers. AES stands for Advanced Encryption System, which utilizes 
a symmetric 128-Bit block data encryption. 
To use WPA Pre-Shared Key, enter a password in the WPA Shared Key field between 8 and 63 
characters long. You may also enter a Group Key Renewal Interval time between 0 and 99,999 
seconds. 
· WPA RADIUS uses an external RADIUS server in conjunction with TKIP or AES to perform user 
authentication. To use WPA RADIUS, enter the IP address of the RADIUS server, the RADIUS Port 
(default is 1812) and the shared secret from the RADIUS server. 
Wireless Network Access 
· If this function is enabled, only the computers on the list will be allowed access to the wireless network. To add a 
computer to the network, click the Permit to access button, and enter the MAC address in the fields. Click the Select 
MAC Address From Networked Computers button. Select the MAC Address from the list and click the Select button. 
To prevent access, click the Prevent from accessing button, then click Select MAC Address from the list. Select the 
MAC Address from the list, and click the Select button. 
· Click the Refresh button if you want to refresh the screen. 
7
8
Advanced Wireless Settings 
On this screen you can access the Advanced Wireless features, including Authentication Type, Basic Data Rates, Control Tx Rates, 
Beacon Interval, DTIM Interval, RTS Threshold, and Fragmentation Threshold. 
The Security Tab 
Firewall 
When you click the Security tab, you will see the Firewall screen. This screen contains Filters and Block WAN Requests. Filters 
block specific internal users from accessing the Internet and block anonymous Internet requests and/or multicasting. 
· Firewall. To add Firewall Protection, click Enabled. If you do not want Firewall Protection, click Disabled. 
· Filter Proxy. Use of WAN proxy servers may compromise the Router's security. Denying Filter Proxy will disable access 
to any WAN proxy servers. To enable proxy filtering, click Enabled. 
· Filter Cookies. A cookie is data stored on your PC and used by Internet sites when you interact with them. To enable 
cookie filtering, click Enabled. 
· Filter Java Applets. Java is a programming language for websites. If you deny Java Applets, you run the risk of not 
having access to Internet sites created using this programming language. To enable Java Applet filtering, click Enabled. 
· Filter ActiveX. ActiveX is a programming language for websites. If you deny ActiveX, you run the risk of not having 
access to Internet sites created using this programming language. To enable ActiveX filtering, click Enabled. 
· Filter Multicast. Multicasting allows for multiple transmissions to specific recipients at the same time. If multicasting is 
9
permitted, then the Router will allow IP multicast packets to be forwarded to the appropriate computers. Select Enabled 
to filter multicasting, or Disabled to disable this feature. 
· Block Anonymous Internet Requests. This keeps your network from being “pinged” or detected and reinforces your 
network security by hiding your network ports, so it is more difficult for intruders to work their way into your network. 
Select Enabled to block anonymous Internet requests, or Disabled to allow anonymous Internet requests. 
VPN 
Virtual Private Networking (VPN) is a security measure that basically creates a secure connection between two remote locations. 
This connection is very specific as far as its settings are concerned; this is what creates the security. 
VPN Tunnel - The VPN Router creates a tunnel or channel between two endpoints, so that the data or information 
between these endpoints is secure. 
To establish this tunnel, select the tunnel you wish to create in the Select Tunnel Entry drop-down box. Click 
Enabled to enable the tunnel. Once the tunnel is enabled, enter the name of the tunnel in the Tunnel Name field. 
IPSec Passthrough - Internet Protocol Security (IPSec) is a suite of protocols used to implement secure 
exchange of packets at the IP layer. To allow IPSec Passthrough, click the Enabled button. 
PPTP Passthrough - PPTP Pass Through: Point-to-Point Tunneling Protocol Passthrough is the method used to 
enable VPN sessions to a Windows NT 4.0 or 2000 server. To allow PPTP Passthrough, click the Enabled 
button. 
L2TP Passthrough - Layering 2 Tunneling Protocol Passthrough is an extension of the Point-to-Point Tunneling 
Protocol (PPTP) used by to enable the operation of a virtual private network (VPN) over the Internet. To allow 
L2TP Passthrough, click the Enabled button. 
10
The Access Restrictions Tab 
Access Restriction 
The Access Restrictions tab, shown in Figure, allows you to block or allow specific kinds of Internet usage. You can set up 
Internet access policies for specific PCs and set up filters by using network port numbers. 
· Internet Access Policy. Multiple Filters can be saved as Internet Access Policies. When you wish to edit one, select the 
number of the Policy from the drop-down menu. The tab will change to reflect the settings of this Policy. If you wish to 
delete this Policy, click the Delete button. To see a summary of all Policies, click the Summary button. 
· Enter Policy Name. Policies are created from the fields presented here. 
To create an Internet Access policy: 
1. Enter a Policy Name in the field provided. Select Internet Access as the Policy Type. 
2. Click the Edit List button. This will open the List of PCs screen. From this screen, you can enter the IP address or 
MAC address of any PC to which this policy will apply. You can even enter ranges of PCs by IP address. 
3. If you wish to Deny or Allow Internet access for those PCs you listed on the List of PCs screen, click the option. 
4. You can filter access to various services accessed over the Internet, such as FTP or Telnet, by selecting a service 
from the drop-down menus next to Blocked Services. If a service isn’t listed, you can click the Add Service button to 
open the Service screen You will need to enter a Service name, as well as the Protocol and Port Range used by the 
service. 
5. By selecting the appropriate setting next to Days and Time, choose when Internet access will be filtered. 
6. Lastly, click the Save Settings button to activate the policy. 
To create an Inbound Traffic Policy 
1. Enter a Policy Name in the field provided. Select Inbound Traffic as the Policy Type. 
2. Enter the IP Address from which you want to block. Select the Protocol: TCP, UDP, or Both. Enter the port 
number or select Any. Enter the IP Address to which you want to block. 
3. Select Deny or Allow as appropriate. 
4. By selecting the appropriate setting next to Days and Time, choose when the Inbound Traffic will be filtered. 
Lastly, click the Save Settings button to activate the policy. 
· Internet Access can also be filtered by URL Address, the address entered to access Internet sites, by entering the 
address in one of the Website Blocking by URL Address fields. If you do not know the URL Address, filtering can be done 
by Keyword by entering a keyword in one of the Website Blocking by Keyword fields. 
VPN 
11
· You can allow remote users to easily establish a VPN connection to your router using the Linksys VPN 
Client utility to access resources on your local network. 
The Applications and Gaming Tab 
Port Range Forwarding 
The Port Forwarding screen sets up public services on your network, such as web servers, ftp servers, e-mail servers, or other 
specialized Internet applications. (Specialized Internet applications are any applications that use Internet access to perform 
functions such as videoconferencing or online gaming. Some Internet applications may not require any forwarding.) 
When users send this type of request to your network via the Internet, the Router will forward those requests to the appropriate 
PC. Any PC whose port is being forwarded must have its DHCP client function disabled and must have a new static IP address 
assigned to it because its IP address may change when using the DHCP function. 
· Application. Enter the name you wish to give each application. 
· Start and End. Enter the starting and ending numbers of the port you wish to forward. 
· Protocol. Select the type of protocol you wish to use for each application: TCP, UDP, or Both. 
· IP Address. Enter the IP Address and Click Enabled. 
Port Triggering 
Port Triggering is used for special Internet applications whose outgoing ports differ from the incoming ports. For this feature, the 
Router will watch outgoing data for specific port numbers. The Router will remember the IP address of the computer that sends a 
transmission requesting data, so that when the requested data returns through the Router, the data is pulled back to the proper 
computer by way of IP address and port 
mapping rules. 
· Application. Enter the name you wish to give each application. 
· Start Port and End Port. Enter the starting and ending Triggered range numbers and the Forwarded Range numbers of 
12
the port you wish to forward. 
· Protocol. Select the type of protocol you wish to use for each application: TCP, UDP, or Both. 
· Click Enabled. 
UPnP Forwarding 
The UPnP screen provides options for customization of port services for applications. 
Enter the Application in the field. Then, enter the External and Internal Port numbers in the fields. Select the type of protocol you 
wish to use for each application: TCP, UDP, or Both. Enter the IP Address in the field. Click Enabled to enable UPnP Forwarding 
for the chosen application. 
DMZ 
The DMZ screen allows one local user to be exposed to the Internet for use of a special-purpose service such as Internet gaming 
and videoconferencing, through Software DMZ, or a user can use LAN Port 4 as a DMZ Port, through Hardware DMZ. Whereas 
Port Range Forwarding can only forward a maximum of 10 ranges of ports, DMZ hosting forwards all the ports for one PC at the 
same time. 
· Software DMZ. This feature allows one local user to be exposed to the Internet for use of a special-purpose service such 
as Internet gaming and videoconferencing. To use this feature, select Enabled. To disable DMZ , select Disabled. 
· DMZ Host IP Address. To expose one PC, enter the computer’s IP address. To get the IP address of a computer, refer to 
“Appendix D: Finding the MAC Address and IP Address for Your Ethernet Adapter.” Deactivate DMZ by entering a 0 in the 
field. 
· Hardware DMZ. This feature allows a user to use LAN Port 4 as a DMZ Port. To use this feature, select Enabled. To 
disable DMZ , select Disabled. 
· Hardware DMZ IP Address. Enter the IP Address of the computer in the fields. 
· Hardware DMZ Netmask. Enter the Netmask in the fields. 
· Destination IP Address. Enter the IP Address of the destination in the fields. 
· Subnet Mask. Enter the Subnet Mask of the destination in the fields. 
· Default Gateway. Enter the Default Gateway in the fields. 
· metric. Enter the metric in the field. 
The Administration Tab 
Management 
The Management screen, allows you to change the Router’s access settings as well as configure the SNMP and UPnP (Universal 
Plug and Play) features. 
Router Password 
Local Router Access. To ensure the Router’s security, you will be asked for your password when you access the Router’s Web-based 
Utility. The default password is admin. 
· User Name. Enter the default admin. 
· Router Password. It is recommended that you change the default password to one of your choice. 
· Re-enter to confirm. Re-enter the Router’s new Password to confirm it. 
Remote Router Access. This feature allows you to access the Router from a remote location, via the Internet. 
· Remote Management. This feature allows you to manage the Router from a remote location, via the Internet. 
13
· To enable Remote Management, click Enabled. 
· Mangagement Port. Select the port number you will use to remotely access the Router from the drop-down menu. 
SNMP Simple Network Management Protocol (SNMP) is a popular network monitoring and management protocol. To enable 
SNMP, click Enabled. To disable SNMP, click Disabled. 
UPnP 
UPnP allows Windows XP to automatically configure the Router for various Internet applications, such as gaming and 
videoconferencing. To enable UPnP, click Enabled. 
Log 
The Log tab, provides you with a log of all incoming and outgoing URLs or IP addresses for your Internet connection. 
Email Alert 
To enable E-Mail Alert, click Enabled. 
· E-Mail Address for General Logs. Enter the E-Mail Address for General Logs in the field. 
· E-Mail Address for Alert Logs. Enter the E-Mail Address for Alert Logs in the field. 
· Return E-Mail address. Enter the address for the return E-Mail. 
· E-Mail Server IP Address. Enter the IP Address of the E-Mail Server in the fields. 
Syslog Notification 
To enable Syslog, click Enabled. 
· Device Name. Enter the Device Name in the field. 
· Syslog Server IP Address. Enter the IP Address of the Syslog Server. 
· Syslog Priority. Select the priority from the drop-down list. 
Notification Queue Length 
· Log queue Length. Enter the number of entries in the log queue in the field. 
· Log Time Threshold. Enter the time for the threshold in the field. 
Alert Log 
Select the type of attacks that you want to be alerted to. Select Syn Flooding, IP Spoofing, Win Nuke, Ping of Death, or 
Unauthorized Login attempt. 
General Log. 
Select the type of activity you would like to log. Select System Error Messages, Deny Policies, Allow Policies, Content Filtering, 
Data Inspection, authorized Login, or Configuration Changes. 
Diagnostics 
Ping Test 
· Ping Target IP. Enter the IP Address that you want to ping in the field. 
· No. of Pings. Enter the number of times that you want to ping. 
· Ping Size. Enter the size of the ping packets. 
· Ping Interval. Enter the ping interval in Milliseconds. 
· Ping Timeout. Enter the time in Milliseconds. 
· Click the Start Test button to start the Ping Test. Click the Abort Test button to stop the test. Click the Clear Result 
button to clear the results. The results of the test will display in the window. 
Factory Default 
If you have exhausted all other options and wish to restore the Router to its factory default settings and lose all your settings, 
click Yes. 
Firmware Upgrade 
To upgrade the Router’s firmware: 
1. Click the Browse button to find the firmware upgrade file that you downloaded from the Linksys website and then extracted. 
2. Double-click the firmware file you downloaded and extracted. Click the Upgrade button, and follow the instructions there. 
Reboot 
Config Management – Save configuration 
Status 
14
Router 
This screen displays information about your Router and its WAN (Internet) Connections. 
Information The information displayed is the Hardware Version, Software Version, MAC Address, Local MAC Address, and 
System Up Time. 
WAN Connections 
The WAN Connections displayed are the Network Access, WAN IP Address, Subnet Mask, Default Gateway, and DNS. 
Click the Refresh button if you want to Refresh your screen. 
Local Network 
The Local Network information that is displayed is the IP Address, Subnet Mask, DHCP Server, and DHCP Client Lease Info. To 
view the DHCP Clients Table, click the DHCP Clients button. 
The DHCP Active IP Table, displays the computer name, IP Address, MAC Address and the expiration 
time. Click the Close button to return to the Local Network screen. 
Wireless 
The Wireless Network information that is displayed is the MAC Address, Mode, SSID, Channel, and Encryption Function. ( 
Click the Refresh button if you want to Refresh your screen. 
System Performance 
The System Peformance information that is displayed is the Wireless, Internet, and/or LAN information for the IP Address, MAC 
Address, Connection Status, Packets Received, Packets Sent, Bytes Received, Bytes Sent, Error Packes Received, and Dropped 
Packets Received. 
Click the Refresh button if you want to Refresh your screen. 
VPN Clients - VP Choose the VPN clients you would like to see. You may display up to 5 clients at a time. 
15
BASIC NETWORK SETUP ONLY 
BASICS 
For a basic network setup, most users only have to use the following screens 
of the Utility: 
• Basic Setup. On the Basic Setup screen, enter the settings provided by your ISP. 
• Management. Click the Administration tab and then the Management tab. The Router’s default password is 
admin. To secure the Router, change the Password from its default. 
There are seven main tabs: Setup, Wireless, Security, Access Restrictions, Applications & Gaming, 
Administration, and Status. Additional tabs will be available after you click one of the main tabs. 
Setup 
• Basic Setup. Enter the Internet connection and network settings on this screen. 
• DDNS. To enable the Router’s Dynamic Domain Name System (DDNS) feature, complete the fields on this 
screen. 
• MAC Address Clone. If you need to clone a MAC address onto the Router, use this screen. 
• Advanced Routing. On this screen, you can alter Network Address Translation (NAT), Dynamic Routing, and 
Static Routing configurations. 
• Hot Spot. Register with your Hot Spot service provider on this screen. 
Wireless 
• Basic Wireless Settings. You can choose your Wireless Network Mode and Wireless Security on this screen. 
• Wireless Network Access. This screen displays your network access list. 
• Advanced Wireless Settings. On this screen you can access the Advanced Wireless features of Authentication 
Type, Basic Data Rates, Control Tx Rates, Beacon Interval, DTIM Interval, RTS Threshold, and Fragmentation 
Threshold. 
Security 
• Filter. To block specific users from Internet access, you can set up IP address, port, and MAC address filtering 
on the Filter screen. 
• VPN. To enable or disable IPSec, L2TP, and/or PPTP Pass-through, and set up VPN tunnels, use this screen. 
• 802.1x. Use this screen to set up RADIUS authentication. 
Access Restrictions 
• Access Restriction. This screen allows you to prevent or permit only certain users from attaching to your 
network. 
Applications & Gaming 
• Port Range Forwarding. To set up public services or other specialized Internet applications on your network, 
click this tab. 
• Port Triggering. To set up triggered ranges and forwarded ranges for Internet applications, click this tab. 
• UPnP Forwarding. Use this screen to alter UPnP forwarding settings. 
• DMZ. To allow one local user to be exposed to the Internet for use of special-purpose services, use this 
screen. 
Administration 
• Management. On this screen, alter router access privileges and UPnP settings. 
• Log. If you want to view or save activity logs, click this tab. 
• Diagnostics. Use this screen to check the connection between your Router and PC. 
• Factory Defaults. If you want to restore the Router’s factory defaults, then use this screen. 
• Firmware Upgrade. Click this tab if you want to upgrade the Router’s firmware. 
Status 
• Router. This screen provides status information about the Router. 
• Local Network. This provides status information about the local network. 
16

More Related Content

What's hot

Identify and resolve network problems
Identify and resolve network problemsIdentify and resolve network problems
Identify and resolve network problemsAbenezer Abiti
 
TLE 10 (ICT): Configuring a Wireless Router
TLE 10 (ICT): Configuring a Wireless RouterTLE 10 (ICT): Configuring a Wireless Router
TLE 10 (ICT): Configuring a Wireless RouterRomne Ryan Portacion
 
Uccn1003 -may10_-_lect03a_-_lan_design_issues
Uccn1003  -may10_-_lect03a_-_lan_design_issuesUccn1003  -may10_-_lect03a_-_lan_design_issues
Uccn1003 -may10_-_lect03a_-_lan_design_issuesShu Shin
 
Computer Networking Lab File
Computer Networking Lab FileComputer Networking Lab File
Computer Networking Lab FileNitin Bhasin
 
what is mean by default getway
what is mean by default getwaywhat is mean by default getway
what is mean by default getwayPadmakar Mangrule
 
LAN Design for 15 flats : Park Pride Apartments
LAN Design for 15 flats : Park Pride ApartmentsLAN Design for 15 flats : Park Pride Apartments
LAN Design for 15 flats : Park Pride ApartmentsSubhajit Sahu
 
How to use packet tracer
How to use packet tracerHow to use packet tracer
How to use packet tracerYunita Siswanti
 
Lecture 3 -_internet_infrastructure_updated_2011
Lecture 3 -_internet_infrastructure_updated_2011Lecture 3 -_internet_infrastructure_updated_2011
Lecture 3 -_internet_infrastructure_updated_2011Serious_SamSoul
 
Networking Chapter 8
Networking Chapter 8Networking Chapter 8
Networking Chapter 8mlrbrown
 
Networking Chapter 7
Networking Chapter 7Networking Chapter 7
Networking Chapter 7mlrbrown
 
Network Design for a company
Network Design for a companyNetwork Design for a company
Network Design for a companyrosu555
 
Networking
NetworkingNetworking
NetworkingISMAT CH
 
Manual wireless router cnet cwr 854
Manual wireless router cnet cwr 854Manual wireless router cnet cwr 854
Manual wireless router cnet cwr 854fgonzalez2005
 
Report on routing interface configuration
Report on routing interface configurationReport on routing interface configuration
Report on routing interface configurationDebjyotiSaha9
 
designandimplementanetwork
designandimplementanetworkdesignandimplementanetwork
designandimplementanetworkAdi Fang
 
Network Troubleshooting
Network TroubleshootingNetwork Troubleshooting
Network TroubleshootingJoy Sarker
 

What's hot (20)

Networking
NetworkingNetworking
Networking
 
Identify and resolve network problems
Identify and resolve network problemsIdentify and resolve network problems
Identify and resolve network problems
 
TLE 10 (ICT): Configuring a Wireless Router
TLE 10 (ICT): Configuring a Wireless RouterTLE 10 (ICT): Configuring a Wireless Router
TLE 10 (ICT): Configuring a Wireless Router
 
Uccn1003 -may10_-_lect03a_-_lan_design_issues
Uccn1003  -may10_-_lect03a_-_lan_design_issuesUccn1003  -may10_-_lect03a_-_lan_design_issues
Uccn1003 -may10_-_lect03a_-_lan_design_issues
 
Computer Networking Lab File
Computer Networking Lab FileComputer Networking Lab File
Computer Networking Lab File
 
Presentation on router
Presentation on routerPresentation on router
Presentation on router
 
what is mean by default getway
what is mean by default getwaywhat is mean by default getway
what is mean by default getway
 
LAN Design for 15 flats : Park Pride Apartments
LAN Design for 15 flats : Park Pride ApartmentsLAN Design for 15 flats : Park Pride Apartments
LAN Design for 15 flats : Park Pride Apartments
 
How to use packet tracer
How to use packet tracerHow to use packet tracer
How to use packet tracer
 
Lecture 3 -_internet_infrastructure_updated_2011
Lecture 3 -_internet_infrastructure_updated_2011Lecture 3 -_internet_infrastructure_updated_2011
Lecture 3 -_internet_infrastructure_updated_2011
 
Networking Chapter 8
Networking Chapter 8Networking Chapter 8
Networking Chapter 8
 
Router
RouterRouter
Router
 
Networking Chapter 7
Networking Chapter 7Networking Chapter 7
Networking Chapter 7
 
Network Design for a company
Network Design for a companyNetwork Design for a company
Network Design for a company
 
Networking
NetworkingNetworking
Networking
 
Manual wireless router cnet cwr 854
Manual wireless router cnet cwr 854Manual wireless router cnet cwr 854
Manual wireless router cnet cwr 854
 
Packet tracer
Packet tracerPacket tracer
Packet tracer
 
Report on routing interface configuration
Report on routing interface configurationReport on routing interface configuration
Report on routing interface configuration
 
designandimplementanetwork
designandimplementanetworkdesignandimplementanetwork
designandimplementanetwork
 
Network Troubleshooting
Network TroubleshootingNetwork Troubleshooting
Network Troubleshooting
 

Viewers also liked

expert_2009_HS_528x365mm
expert_2009_HS_528x365mmexpert_2009_HS_528x365mm
expert_2009_HS_528x365mmKimmo Nordstr
 
O avanço dos computadores e a história da internet.
O avanço dos computadores e a história da internet.O avanço dos computadores e a história da internet.
O avanço dos computadores e a história da internet.clara_ribeiro
 
Polio PR / communication
Polio PR / communicationPolio PR / communication
Polio PR / communicationSandra Prüfer
 
W1 Example 4 Answers
W1 Example 4 AnswersW1 Example 4 Answers
W1 Example 4 Answersjcocks
 
2015-Canadian-Municipal-Water-Consortium-Report-web
2015-Canadian-Municipal-Water-Consortium-Report-web2015-Canadian-Municipal-Water-Consortium-Report-web
2015-Canadian-Municipal-Water-Consortium-Report-webJennifer Dingman, PhD
 
Gouv. Québec - bail résidence privée
Gouv. Québec - bail résidence privéeGouv. Québec - bail résidence privée
Gouv. Québec - bail résidence privéeTransition-65
 
6218i2 wireless-router-users-guide2453
6218i2 wireless-router-users-guide24536218i2 wireless-router-users-guide2453
6218i2 wireless-router-users-guide2453mark scott
 
شبهات وردود الجزء الأول المرأة في الإسلام
شبهات وردود الجزء الأول المرأة في الإسلامشبهات وردود الجزء الأول المرأة في الإسلام
شبهات وردود الجزء الأول المرأة في الإسلامIslamic Invitation
 
Profile_Short_EN_Damodar Paralkar Jan 2016
Profile_Short_EN_Damodar Paralkar Jan 2016Profile_Short_EN_Damodar Paralkar Jan 2016
Profile_Short_EN_Damodar Paralkar Jan 2016Damodar Paralkar
 
Pete Townsend John Peel Lecture
Pete Townsend John Peel LecturePete Townsend John Peel Lecture
Pete Townsend John Peel Lecturenpamediastudies
 

Viewers also liked (10)

expert_2009_HS_528x365mm
expert_2009_HS_528x365mmexpert_2009_HS_528x365mm
expert_2009_HS_528x365mm
 
O avanço dos computadores e a história da internet.
O avanço dos computadores e a história da internet.O avanço dos computadores e a história da internet.
O avanço dos computadores e a história da internet.
 
Polio PR / communication
Polio PR / communicationPolio PR / communication
Polio PR / communication
 
W1 Example 4 Answers
W1 Example 4 AnswersW1 Example 4 Answers
W1 Example 4 Answers
 
2015-Canadian-Municipal-Water-Consortium-Report-web
2015-Canadian-Municipal-Water-Consortium-Report-web2015-Canadian-Municipal-Water-Consortium-Report-web
2015-Canadian-Municipal-Water-Consortium-Report-web
 
Gouv. Québec - bail résidence privée
Gouv. Québec - bail résidence privéeGouv. Québec - bail résidence privée
Gouv. Québec - bail résidence privée
 
6218i2 wireless-router-users-guide2453
6218i2 wireless-router-users-guide24536218i2 wireless-router-users-guide2453
6218i2 wireless-router-users-guide2453
 
شبهات وردود الجزء الأول المرأة في الإسلام
شبهات وردود الجزء الأول المرأة في الإسلامشبهات وردود الجزء الأول المرأة في الإسلام
شبهات وردود الجزء الأول المرأة في الإسلام
 
Profile_Short_EN_Damodar Paralkar Jan 2016
Profile_Short_EN_Damodar Paralkar Jan 2016Profile_Short_EN_Damodar Paralkar Jan 2016
Profile_Short_EN_Damodar Paralkar Jan 2016
 
Pete Townsend John Peel Lecture
Pete Townsend John Peel LecturePete Townsend John Peel Lecture
Pete Townsend John Peel Lecture
 

Similar to Configure Linksys Wireless Router and Network Adapter Setup

7106503678 td w8961-nd_qig
7106503678 td w8961-nd_qig7106503678 td w8961-nd_qig
7106503678 td w8961-nd_qigAkibo Davies
 
7106506104 tl wa701-nd(eu)_2.0_qig
7106506104 tl wa701-nd(eu)_2.0_qig7106506104 tl wa701-nd(eu)_2.0_qig
7106506104 tl wa701-nd(eu)_2.0_qigCesar Estela Zarate
 
Wi fi ruckus config
Wi fi ruckus configWi fi ruckus config
Wi fi ruckus configtmukumba
 
119163798 icnd1-practice-questions-9tut
119163798 icnd1-practice-questions-9tut119163798 icnd1-practice-questions-9tut
119163798 icnd1-practice-questions-9tutnicolelemmimg
 
PFSENSE Load Balance with Fail Over From Version Beta3
PFSENSE Load Balance with Fail Over From Version Beta3PFSENSE Load Balance with Fail Over From Version Beta3
PFSENSE Load Balance with Fail Over From Version Beta3series09
 
Paxton Access 477-901-US Instruction Manual
Paxton Access 477-901-US Instruction ManualPaxton Access 477-901-US Instruction Manual
Paxton Access 477-901-US Instruction ManualJMAC Supply
 
Packet tracer practical guide
Packet tracer practical guidePacket tracer practical guide
Packet tracer practical guideNishant Gandhi
 
How to configure a router
How to configure a router How to configure a router
How to configure a router IT Tech
 
Wli Tx4 G54 Manual V1.6 Web
Wli Tx4 G54 Manual V1.6 WebWli Tx4 G54 Manual V1.6 Web
Wli Tx4 G54 Manual V1.6 Web925351jay1
 
Manuale Router Sitecom Wl577
Manuale Router Sitecom Wl577Manuale Router Sitecom Wl577
Manuale Router Sitecom Wl577guest854c41d
 
802.11n wireless router enhwi n3-encore_electronics
802.11n wireless router enhwi n3-encore_electronics802.11n wireless router enhwi n3-encore_electronics
802.11n wireless router enhwi n3-encore_electronicsFelix Hernandez
 
KR2 Kyocera User Guide
KR2 Kyocera User GuideKR2 Kyocera User Guide
KR2 Kyocera User GuideAri Zoldan
 
Configure router for wap (wireless access point
Configure router for wap (wireless access pointConfigure router for wap (wireless access point
Configure router for wap (wireless access pointsergio goco
 
versa router teletronics
versa router teletronicsversa router teletronics
versa router teletronicsguestd33e17a
 
Wireless router-setup-manual
Wireless router-setup-manual Wireless router-setup-manual
Wireless router-setup-manual Dawood Aqlan
 

Similar to Configure Linksys Wireless Router and Network Adapter Setup (20)

7106503678 td w8961-nd_qig
7106503678 td w8961-nd_qig7106503678 td w8961-nd_qig
7106503678 td w8961-nd_qig
 
7106506104 tl wa701-nd(eu)_2.0_qig
7106506104 tl wa701-nd(eu)_2.0_qig7106506104 tl wa701-nd(eu)_2.0_qig
7106506104 tl wa701-nd(eu)_2.0_qig
 
Chapter
ChapterChapter
Chapter
 
Wi fi ruckus config
Wi fi ruckus configWi fi ruckus config
Wi fi ruckus config
 
Lightspeed ii-manual-2012-jan
Lightspeed ii-manual-2012-janLightspeed ii-manual-2012-jan
Lightspeed ii-manual-2012-jan
 
12 ict.pptx
12 ict.pptx12 ict.pptx
12 ict.pptx
 
119163798 icnd1-practice-questions-9tut
119163798 icnd1-practice-questions-9tut119163798 icnd1-practice-questions-9tut
119163798 icnd1-practice-questions-9tut
 
PFSENSE Load Balance with Fail Over From Version Beta3
PFSENSE Load Balance with Fail Over From Version Beta3PFSENSE Load Balance with Fail Over From Version Beta3
PFSENSE Load Balance with Fail Over From Version Beta3
 
Paxton Access 477-901-US Instruction Manual
Paxton Access 477-901-US Instruction ManualPaxton Access 477-901-US Instruction Manual
Paxton Access 477-901-US Instruction Manual
 
Packet tracer practical guide
Packet tracer practical guidePacket tracer practical guide
Packet tracer practical guide
 
How to configure a router
How to configure a router How to configure a router
How to configure a router
 
Wli Tx4 G54 Manual V1.6 Web
Wli Tx4 G54 Manual V1.6 WebWli Tx4 G54 Manual V1.6 Web
Wli Tx4 G54 Manual V1.6 Web
 
Manuale Router Sitecom Wl577
Manuale Router Sitecom Wl577Manuale Router Sitecom Wl577
Manuale Router Sitecom Wl577
 
802.11n wireless router enhwi n3-encore_electronics
802.11n wireless router enhwi n3-encore_electronics802.11n wireless router enhwi n3-encore_electronics
802.11n wireless router enhwi n3-encore_electronics
 
KR2 Kyocera User Guide
KR2 Kyocera User GuideKR2 Kyocera User Guide
KR2 Kyocera User Guide
 
Configure router for wap (wireless access point
Configure router for wap (wireless access pointConfigure router for wap (wireless access point
Configure router for wap (wireless access point
 
Wifi.pptx
Wifi.pptxWifi.pptx
Wifi.pptx
 
Computer Networking (Full)
Computer Networking (Full)Computer Networking (Full)
Computer Networking (Full)
 
versa router teletronics
versa router teletronicsversa router teletronics
versa router teletronics
 
Wireless router-setup-manual
Wireless router-setup-manual Wireless router-setup-manual
Wireless router-setup-manual
 

More from mark scott

Network troubleshooting-guide1889
Network troubleshooting-guide1889Network troubleshooting-guide1889
Network troubleshooting-guide1889mark scott
 
Reference manual-for-the-netgear-rangemax-wireless-router-wpn8241380
Reference manual-for-the-netgear-rangemax-wireless-router-wpn8241380Reference manual-for-the-netgear-rangemax-wireless-router-wpn8241380
Reference manual-for-the-netgear-rangemax-wireless-router-wpn8241380mark scott
 
Sip 140208055023-phpapp02
Sip 140208055023-phpapp02Sip 140208055023-phpapp02
Sip 140208055023-phpapp02mark scott
 
Wireless security837
Wireless security837Wireless security837
Wireless security837mark scott
 
My freeware-shareware-programs2205
My freeware-shareware-programs2205My freeware-shareware-programs2205
My freeware-shareware-programs2205mark scott
 

More from mark scott (7)

Network troubleshooting-guide1889
Network troubleshooting-guide1889Network troubleshooting-guide1889
Network troubleshooting-guide1889
 
Reference manual-for-the-netgear-rangemax-wireless-router-wpn8241380
Reference manual-for-the-netgear-rangemax-wireless-router-wpn8241380Reference manual-for-the-netgear-rangemax-wireless-router-wpn8241380
Reference manual-for-the-netgear-rangemax-wireless-router-wpn8241380
 
Etherfast3828
Etherfast3828Etherfast3828
Etherfast3828
 
Sip 140208055023-phpapp02
Sip 140208055023-phpapp02Sip 140208055023-phpapp02
Sip 140208055023-phpapp02
 
Wireless security837
Wireless security837Wireless security837
Wireless security837
 
My freeware-shareware-programs2205
My freeware-shareware-programs2205My freeware-shareware-programs2205
My freeware-shareware-programs2205
 
S000342 t
S000342 tS000342 t
S000342 t
 

Configure Linksys Wireless Router and Network Adapter Setup

  • 1. Linksys Wireless Router and Adapter LAB
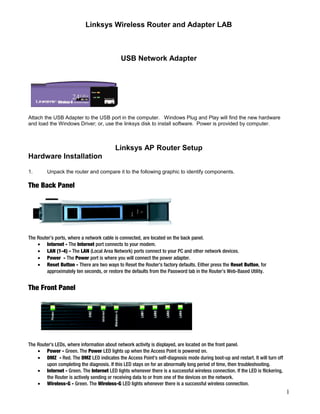
 USB Network Adapter Attach the USB Adapter to the USB port in the computer. Windows Plug and Play will find the new hardware and load the Windows Driver; or, use the linksys disk to install software. Power is provided by computer. Linksys AP Router Setup Hardware Installation 1. Unpack the router and compare it to the following graphic to identify components. The Back Panel The Router’s ports, where a network cable is connected, are located on the back panel. · Internet - The Internet port connects to your modem. · LAN (1-4) - The LAN (Local Area Network) ports connect to your PC and other network devices. · Power - The Power port is where you will connect the power adapter. · Reset Button - There are two ways to Reset the Router's factory defaults. Either press the Reset Button, for approximately ten seconds, or restore the defaults from the Password tab in the Router’s Web-Based Utility. The Front Panel The Router's LEDs, where information about network activity is displayed, are located on the front panel. · Power - Green. The Power LED lights up when the Access Point is powered on. · DMZ - Red. The DMZ LED indicates the Access Point's self-diagnosis mode during boot-up and restart. It will turn off upon completing the diagnosis. If this LED stays on for an abnormally long period of time, then troubleshooting. · Internet - Green. The Internet LED lights whenever there is a successful wireless connection. If the LED is flickering, the Router is actively sending or receiving data to or from one of the devices on the network. · Wireless-G - Green. The Wireless-G LED lights whenever there is a successful wireless connection. 1
  • 2. · LAN (1-4) - Green. The LAN LED serves two purposes. If the LED is continuously lit, the Router is successfully connected to a device through the LAN port. If the LED is flickering, it is an indication of any network activity. The router can be accessed from a PC either of the following ways: Wired Connection to a PC 1. Before you begin, make sure that all of your network’s hardware is powered off, including the Router, PCs, and cable or DSL modem. 2. Connect one end of an Ethernet network cable to one of the LAN ports (labeled 1-4) on the back of the Router, and the other end to an Ethernet port on a PC. 3. Repeat this step to connect more PCs, a switch, or other network devices to the Router. 4. Connect a different Ethernet network cable from your cable or DSL modem to the Internet port on the Router’s rear panel. This is the only port that will work for your modem connection. 5. Power on the cable or DSL modem. 6. Connect the power adapter to the Router’s Power port , and then plug the power adapter into a power outlet. The Power LED on the front panel will light up green as soon as the power adapter is connected properly. The Power LED will flash for a few seconds, then it will light up steady when the self-test is complete. If the LED flashes for one minute or longer, then troubleshoot. 7. Power on one of your PCs that is connected to the Router. Connect to PC Connect to DSL or cable modem. Connect Power 2
  • 3. Wireless Connection to a PC If you want to use a wireless connection to access the Router, follow these instructions: 1. Before you begin, make sure that all of your network’s hardware is powered off, including the Router, or DSL modem. 2. Connect an Ethernet network cable from your cable or DSL modem to the Internet port on the Router’s rear panel. This is the only port that will work for your modem connection. 3. Power on the cable or DSL modem. 4. Connect the power adapter to the Power port, and then plug the power adapter. The power LED on the front panel will light up green as soon as the power adapter is connected properly. The Power LED will flash for a few seconds, then light up steady when the self-test is complete. If the LED flashes for one minute or longer, then troubleshoot. 5. Power on one of the PCs on your wireless network(s). 6. For initial access to the Router through a wireless connection, make sure the PC’s wireless adapter has its SSID set to linksys (the Router’s default setting), and its WEP encryption is disabled. After you have accessed the Router, you can change the Router and this PC’s adapter settings to match your usual network settings. The Router’s hardware installation is now complete. CONFIGURE THE PC. Configure your PC’s network settings to obtain an IP (or TCP/IP) address automatically, so your PC can function as a DHCP client. Configuring Windows 98 and Millennium PCs 1. Click the Start button. Select Settings and click the Control Panel icon. Double-click the Network icon. 2. On the Configuration tab, select the TCP/IP line for the applicable Ethernet adapter. Click the Properties button. 3. Click the IP Address tab. Select Obtain an IP address automatically. 4. Now click the Gateway tab, and verify that the Installed Gateway field is blank. Click the OK button. 5. Click the OK button again. 6. Windows may ask you to restart your PC. Click the Yes button. If Windows does not ask you to restart, restart your computer anyway. Configuring Windows 2000 PCs 1. Click the Start button. Select Settings and click the Control Panel icon. Double-click the Network and Dialup Connections icon. 2. Select the Local Area Connection icon for the applicable Ethernet adapter (usually it is the first Local Area Connection listed). Double-click the Local Area Connection. Click the Properties button. 3. Make sure the box next to Internet Protocol (TCP/IP) is checked. Highlight Internet Protocol (TCP/IP), and click the Properties button. 4. Select Obtain an IP address automatically. Once the new window appears, click the OK button. Click the OK button again to complete the PC configuration. 5. Restart your computer. Configuring Windows XP PCs The following instructions assume you are running Windows XP with the default interface. If you are using the Classic interface (where the icons and menus look like previous Windows versions), please follow the instructions for Windows 2000. 1. Click the Start button and then the Control Panel icon. Click the Network and Internet Connections icon. Then click the Network Connections icon. 2. Select the Local Area Connection icon for the applicable Ethernet adapter (usually it is the first Local Area Connection listed). Double-click the Local Area Connection. Click the Properties button. 3. Make sure the box next to Internet Protocol (TCP/IP) is checked. Highlight Internet Protocol (TCP/IP), and click the Properties button. 4. Select Obtain an IP address automatically. Once the new window appears, click the OK button. Click the OK button again to complete the PC configuration. 3
  • 4. Configuring the Router using the Web-based Utility To access the web-based utility, launch Internet Explorer or Netscape Navigator, and enter the Router’s default IP address, 192.168.1.1, in the Address field. Then press Enter. A password request page will appear. Enter admin (the default user name) in the User Name field, and enter admin (the default password) in the Password field. Then click the OK button. The Setup Tab The Basic Setup Tab The first screen that appears is the Basic Setup tab. This tab allows you to change the Router's general settings. Change these settings as described here and Save. Internet Setup · Internet Connection Type. The Router supports four connection types: Automatic Configuration - DHCP (the default connection type), PPPoE, Static IP, and PPTP. Each Basic Setup screen and available features will differ depending on what kind of connection type you select. o Automatic Configuration - DHCP By default, the Router’s Configuration Type is set to Automatic Configuration - DHCP, and it should be kept only if your ISP supports DHCP or you are connecting through a dynamic IP address. o Static - If you are required to use a permanent IP address to connect to the Internet, then select Static IP, or If the Router is connected to more than one network, it may be necessary to set up a static route between them. · IP Address. This is the Router’s IP address, when seen from the WAN, or the Internet. Your ISP will provide you with the IP Address you need to specify here. · Subnet Mask. This is the Router’s Subnet Mask, as seen by external users on the Internet (including your ISP). Your ISP will provide you with the Subnet Mask. 4
  • 5. Optional Settings (Required by some ISPs) · Host Name and Domain Name. These fields allow you to supply a host and domain name for the Router. Some ISPs require these names as identification. You may have to check with your ISP to see if your broadband Internet service has been configured with a host and domain name. In most cases, leaving these fields blank will work. · MTU. The MTU (Maximum Transmission Unit) setting specifies the largest packet size permitted for network transmission. Select Enabled and enter the value desired. It is recommended that you leave this value in the 1200 to 1500 range. For most DSL users, it is recommended to use the value 1492. By default, MTU is set at 1500 when disabled. Network Setup · Gateway IP. The values for the Router’s Local IP Address and Subnet Mask are shown here. In most cases, keeping the default values will work. · Local IP Address. The default value is 192.168.1.1. · Subnet Mask. The default value is 255.255.255.0. · Local DHCP Server. DHCP is already enabled by factory default. If you already have a DHCP server on your network, set the Router’s DHCP option to Disable. If you disable DHCP, remember to assign a static IP address to the Router. · Start IP Address. Enter a value for the DHCP server to start with when issuing IP addresses. This value must be 192.168.1. 2 or greater, because the default IP address for the Router is 192.168.1.1. · Number of Address. Enter the maximum number of PCs that you want the DHCP server to assign IP addresses to. This number cannot be greater than 253. In order to determine the DHCP IP Address range, add the starting IP address (e.g., 100) to the number of DHCP users. By default, add 100 to 50, and the range is 192.168.1.100 to 192.168.1.149. · DHCP Address Range. The range of DHCP addresses is displayed here. · Time Setting. This is where you set the time for your Router. You can set the time and date manually or automatically, by setting the time zone. When finished making your changes on this tab, Save. DDNS -The Dynamic Domain Name System (DDNS) feature lets you assign a fixed domain name to a dynamic Internet IP address. MAC Address Clone Tab · Some IPS may require you to register your computer's MAC address. If you do not wish to re-register your router with you WSP, you may clone the MAC address that you originally registered with your ISP. The Router’s MAC address is a 12-digit code assigned to a unique piece of hardware for identification, like a social security number. Advanced Routing Tab · Use this feature if you are routing between two different networks. (See manual's instructions). The Wireless Tab - This screen allows you to choose your wireless network mode and wireless security. 5
  • 6. Basic Wireless Settings · Wireless Network Mode. If you have Wireless-G and 802.11b devices in your network, then keep the default setting, Mixed. If you have only Wireless-G devices, select G-Only · Wireless Network Name. Enter the Wireless Network Name (SSID) into the field. The SSID is the network name shared among all devices in a wireless network. The SSID must be identical for all devices in the wireless network. It is case-sensitive and must not exceed 32 alphanumeric characters, which may be any keyboard character. For added security, Linksys recommends that you change the default SSID (linksys) to a unique name of your choice. · Wireless Channel. Select the appropriate channel from the list provided to correspond with your network settings, between 1 and 11 (in North America). All devices in your wireless network must use the same channel in order to function correctly. Channels will overlap, therefore use 1, 6 and 11. Wireless Security Wireless SSID Broadcast. When wireless clients survey the local area for wireless networks to associate with, they will detect the SSID broadcast by the Router. To broadcast the Router's SSID, keep the default setting, Enabled. If you do not want to broadcast the Router's SSID, then select Disabled. · The router supports four different types of security settings for your network. Wi-Fi Protected Access (WPA) Pre-Shared key, WPA Remote Access Dial In User Service (RADIUS), RADIUS, and Wire Equivalence Protection (WEP). WEP · . An acronym for Wired Equivalent Privacy, WEP is an encryption method used to protect your wireless data communications. WEP uses 64-bit or 128-bit keys to provide access control to your network and encryption security for every data transmission. To decode data transmissions, all devices-Wireless-G and 802.11b-in a network must use an identical WEP key. Higher encryption levels offer higher levels of security, but due to the complexity of the encryption, they may decrease network performance. To enable WEP encryption, click the Enabled radio button. Then click the Edit WEP Settings button to configure the WEP settings. To disable WEP encryption, keep the default setting, Disabled. 6
  • 7. · The WEP screen allows you to configure your WEP settings. WEP encryption should always be enabled to increase the security of your wireless network. Default Transmit Key Select which WEP key (1-4) will be used when the Router sends data. Make sure the receiving device is using the same key. · WEP Encryption. Select the level of WEP encryption you wish to use, 64-bit 10 hex digits or 128-bit 26 hex digits. Higher encryption levels offer higher levels of security, but due to the complexity of the encryption, they may decrease network performance. · Passphrase. Instead of manually entering WEP keys, you can enter a Passphrase. This Passphrase is used to generate one or more WEP keys. It is case-sensitive and should not be longer than 16 alphanumeric characters. (This Passphrase function is compatible with Linksys wireless products only. If you want to communicate with non-Linksys wireless products, enter the WEP key manually on the non-Linksys wireless products.) After you enter the Passphrase, click the Generate button to create WEP keys. · Keys 1-4. WEP keys enable you to create an encryption scheme for wireless LAN transmissions. If you are not using a Passphrase, then manually enter a set of values. (Do not leave a key field blank, and do not enter all zeroes. These are not valid key values.) If you are using 64-bit WEP encryption, then the key must be exactly 10 hexadecimal characters in length. If you are using 128-bit WEP encryption, then the key must be exactly 26 hexadecimal characters in length. Valid hexadecimal characters are “0”-“9” and “A”-“F”. · WPA - There are two encryption options for WPA Pre-Shared Key, TKIP and AES. TKIP stands for Temporal Key Integrity Protocol. TKIP utilizes dynamic keys and incorporates Message Integrity Code (MIC) to provide protection against hackers. AES stands for Advanced Encryption System, which utilizes a symmetric 128-Bit block data encryption. To use WPA Pre-Shared Key, enter a password in the WPA Shared Key field between 8 and 63 characters long. You may also enter a Group Key Renewal Interval time between 0 and 99,999 seconds. · WPA RADIUS uses an external RADIUS server in conjunction with TKIP or AES to perform user authentication. To use WPA RADIUS, enter the IP address of the RADIUS server, the RADIUS Port (default is 1812) and the shared secret from the RADIUS server. Wireless Network Access · If this function is enabled, only the computers on the list will be allowed access to the wireless network. To add a computer to the network, click the Permit to access button, and enter the MAC address in the fields. Click the Select MAC Address From Networked Computers button. Select the MAC Address from the list and click the Select button. To prevent access, click the Prevent from accessing button, then click Select MAC Address from the list. Select the MAC Address from the list, and click the Select button. · Click the Refresh button if you want to refresh the screen. 7
  • 8. 8
  • 9. Advanced Wireless Settings On this screen you can access the Advanced Wireless features, including Authentication Type, Basic Data Rates, Control Tx Rates, Beacon Interval, DTIM Interval, RTS Threshold, and Fragmentation Threshold. The Security Tab Firewall When you click the Security tab, you will see the Firewall screen. This screen contains Filters and Block WAN Requests. Filters block specific internal users from accessing the Internet and block anonymous Internet requests and/or multicasting. · Firewall. To add Firewall Protection, click Enabled. If you do not want Firewall Protection, click Disabled. · Filter Proxy. Use of WAN proxy servers may compromise the Router's security. Denying Filter Proxy will disable access to any WAN proxy servers. To enable proxy filtering, click Enabled. · Filter Cookies. A cookie is data stored on your PC and used by Internet sites when you interact with them. To enable cookie filtering, click Enabled. · Filter Java Applets. Java is a programming language for websites. If you deny Java Applets, you run the risk of not having access to Internet sites created using this programming language. To enable Java Applet filtering, click Enabled. · Filter ActiveX. ActiveX is a programming language for websites. If you deny ActiveX, you run the risk of not having access to Internet sites created using this programming language. To enable ActiveX filtering, click Enabled. · Filter Multicast. Multicasting allows for multiple transmissions to specific recipients at the same time. If multicasting is 9
  • 10. permitted, then the Router will allow IP multicast packets to be forwarded to the appropriate computers. Select Enabled to filter multicasting, or Disabled to disable this feature. · Block Anonymous Internet Requests. This keeps your network from being “pinged” or detected and reinforces your network security by hiding your network ports, so it is more difficult for intruders to work their way into your network. Select Enabled to block anonymous Internet requests, or Disabled to allow anonymous Internet requests. VPN Virtual Private Networking (VPN) is a security measure that basically creates a secure connection between two remote locations. This connection is very specific as far as its settings are concerned; this is what creates the security. VPN Tunnel - The VPN Router creates a tunnel or channel between two endpoints, so that the data or information between these endpoints is secure. To establish this tunnel, select the tunnel you wish to create in the Select Tunnel Entry drop-down box. Click Enabled to enable the tunnel. Once the tunnel is enabled, enter the name of the tunnel in the Tunnel Name field. IPSec Passthrough - Internet Protocol Security (IPSec) is a suite of protocols used to implement secure exchange of packets at the IP layer. To allow IPSec Passthrough, click the Enabled button. PPTP Passthrough - PPTP Pass Through: Point-to-Point Tunneling Protocol Passthrough is the method used to enable VPN sessions to a Windows NT 4.0 or 2000 server. To allow PPTP Passthrough, click the Enabled button. L2TP Passthrough - Layering 2 Tunneling Protocol Passthrough is an extension of the Point-to-Point Tunneling Protocol (PPTP) used by to enable the operation of a virtual private network (VPN) over the Internet. To allow L2TP Passthrough, click the Enabled button. 10
  • 11. The Access Restrictions Tab Access Restriction The Access Restrictions tab, shown in Figure, allows you to block or allow specific kinds of Internet usage. You can set up Internet access policies for specific PCs and set up filters by using network port numbers. · Internet Access Policy. Multiple Filters can be saved as Internet Access Policies. When you wish to edit one, select the number of the Policy from the drop-down menu. The tab will change to reflect the settings of this Policy. If you wish to delete this Policy, click the Delete button. To see a summary of all Policies, click the Summary button. · Enter Policy Name. Policies are created from the fields presented here. To create an Internet Access policy: 1. Enter a Policy Name in the field provided. Select Internet Access as the Policy Type. 2. Click the Edit List button. This will open the List of PCs screen. From this screen, you can enter the IP address or MAC address of any PC to which this policy will apply. You can even enter ranges of PCs by IP address. 3. If you wish to Deny or Allow Internet access for those PCs you listed on the List of PCs screen, click the option. 4. You can filter access to various services accessed over the Internet, such as FTP or Telnet, by selecting a service from the drop-down menus next to Blocked Services. If a service isn’t listed, you can click the Add Service button to open the Service screen You will need to enter a Service name, as well as the Protocol and Port Range used by the service. 5. By selecting the appropriate setting next to Days and Time, choose when Internet access will be filtered. 6. Lastly, click the Save Settings button to activate the policy. To create an Inbound Traffic Policy 1. Enter a Policy Name in the field provided. Select Inbound Traffic as the Policy Type. 2. Enter the IP Address from which you want to block. Select the Protocol: TCP, UDP, or Both. Enter the port number or select Any. Enter the IP Address to which you want to block. 3. Select Deny or Allow as appropriate. 4. By selecting the appropriate setting next to Days and Time, choose when the Inbound Traffic will be filtered. Lastly, click the Save Settings button to activate the policy. · Internet Access can also be filtered by URL Address, the address entered to access Internet sites, by entering the address in one of the Website Blocking by URL Address fields. If you do not know the URL Address, filtering can be done by Keyword by entering a keyword in one of the Website Blocking by Keyword fields. VPN 11
  • 12. · You can allow remote users to easily establish a VPN connection to your router using the Linksys VPN Client utility to access resources on your local network. The Applications and Gaming Tab Port Range Forwarding The Port Forwarding screen sets up public services on your network, such as web servers, ftp servers, e-mail servers, or other specialized Internet applications. (Specialized Internet applications are any applications that use Internet access to perform functions such as videoconferencing or online gaming. Some Internet applications may not require any forwarding.) When users send this type of request to your network via the Internet, the Router will forward those requests to the appropriate PC. Any PC whose port is being forwarded must have its DHCP client function disabled and must have a new static IP address assigned to it because its IP address may change when using the DHCP function. · Application. Enter the name you wish to give each application. · Start and End. Enter the starting and ending numbers of the port you wish to forward. · Protocol. Select the type of protocol you wish to use for each application: TCP, UDP, or Both. · IP Address. Enter the IP Address and Click Enabled. Port Triggering Port Triggering is used for special Internet applications whose outgoing ports differ from the incoming ports. For this feature, the Router will watch outgoing data for specific port numbers. The Router will remember the IP address of the computer that sends a transmission requesting data, so that when the requested data returns through the Router, the data is pulled back to the proper computer by way of IP address and port mapping rules. · Application. Enter the name you wish to give each application. · Start Port and End Port. Enter the starting and ending Triggered range numbers and the Forwarded Range numbers of 12
  • 13. the port you wish to forward. · Protocol. Select the type of protocol you wish to use for each application: TCP, UDP, or Both. · Click Enabled. UPnP Forwarding The UPnP screen provides options for customization of port services for applications. Enter the Application in the field. Then, enter the External and Internal Port numbers in the fields. Select the type of protocol you wish to use for each application: TCP, UDP, or Both. Enter the IP Address in the field. Click Enabled to enable UPnP Forwarding for the chosen application. DMZ The DMZ screen allows one local user to be exposed to the Internet for use of a special-purpose service such as Internet gaming and videoconferencing, through Software DMZ, or a user can use LAN Port 4 as a DMZ Port, through Hardware DMZ. Whereas Port Range Forwarding can only forward a maximum of 10 ranges of ports, DMZ hosting forwards all the ports for one PC at the same time. · Software DMZ. This feature allows one local user to be exposed to the Internet for use of a special-purpose service such as Internet gaming and videoconferencing. To use this feature, select Enabled. To disable DMZ , select Disabled. · DMZ Host IP Address. To expose one PC, enter the computer’s IP address. To get the IP address of a computer, refer to “Appendix D: Finding the MAC Address and IP Address for Your Ethernet Adapter.” Deactivate DMZ by entering a 0 in the field. · Hardware DMZ. This feature allows a user to use LAN Port 4 as a DMZ Port. To use this feature, select Enabled. To disable DMZ , select Disabled. · Hardware DMZ IP Address. Enter the IP Address of the computer in the fields. · Hardware DMZ Netmask. Enter the Netmask in the fields. · Destination IP Address. Enter the IP Address of the destination in the fields. · Subnet Mask. Enter the Subnet Mask of the destination in the fields. · Default Gateway. Enter the Default Gateway in the fields. · metric. Enter the metric in the field. The Administration Tab Management The Management screen, allows you to change the Router’s access settings as well as configure the SNMP and UPnP (Universal Plug and Play) features. Router Password Local Router Access. To ensure the Router’s security, you will be asked for your password when you access the Router’s Web-based Utility. The default password is admin. · User Name. Enter the default admin. · Router Password. It is recommended that you change the default password to one of your choice. · Re-enter to confirm. Re-enter the Router’s new Password to confirm it. Remote Router Access. This feature allows you to access the Router from a remote location, via the Internet. · Remote Management. This feature allows you to manage the Router from a remote location, via the Internet. 13
  • 14. · To enable Remote Management, click Enabled. · Mangagement Port. Select the port number you will use to remotely access the Router from the drop-down menu. SNMP Simple Network Management Protocol (SNMP) is a popular network monitoring and management protocol. To enable SNMP, click Enabled. To disable SNMP, click Disabled. UPnP UPnP allows Windows XP to automatically configure the Router for various Internet applications, such as gaming and videoconferencing. To enable UPnP, click Enabled. Log The Log tab, provides you with a log of all incoming and outgoing URLs or IP addresses for your Internet connection. Email Alert To enable E-Mail Alert, click Enabled. · E-Mail Address for General Logs. Enter the E-Mail Address for General Logs in the field. · E-Mail Address for Alert Logs. Enter the E-Mail Address for Alert Logs in the field. · Return E-Mail address. Enter the address for the return E-Mail. · E-Mail Server IP Address. Enter the IP Address of the E-Mail Server in the fields. Syslog Notification To enable Syslog, click Enabled. · Device Name. Enter the Device Name in the field. · Syslog Server IP Address. Enter the IP Address of the Syslog Server. · Syslog Priority. Select the priority from the drop-down list. Notification Queue Length · Log queue Length. Enter the number of entries in the log queue in the field. · Log Time Threshold. Enter the time for the threshold in the field. Alert Log Select the type of attacks that you want to be alerted to. Select Syn Flooding, IP Spoofing, Win Nuke, Ping of Death, or Unauthorized Login attempt. General Log. Select the type of activity you would like to log. Select System Error Messages, Deny Policies, Allow Policies, Content Filtering, Data Inspection, authorized Login, or Configuration Changes. Diagnostics Ping Test · Ping Target IP. Enter the IP Address that you want to ping in the field. · No. of Pings. Enter the number of times that you want to ping. · Ping Size. Enter the size of the ping packets. · Ping Interval. Enter the ping interval in Milliseconds. · Ping Timeout. Enter the time in Milliseconds. · Click the Start Test button to start the Ping Test. Click the Abort Test button to stop the test. Click the Clear Result button to clear the results. The results of the test will display in the window. Factory Default If you have exhausted all other options and wish to restore the Router to its factory default settings and lose all your settings, click Yes. Firmware Upgrade To upgrade the Router’s firmware: 1. Click the Browse button to find the firmware upgrade file that you downloaded from the Linksys website and then extracted. 2. Double-click the firmware file you downloaded and extracted. Click the Upgrade button, and follow the instructions there. Reboot Config Management – Save configuration Status 14
  • 15. Router This screen displays information about your Router and its WAN (Internet) Connections. Information The information displayed is the Hardware Version, Software Version, MAC Address, Local MAC Address, and System Up Time. WAN Connections The WAN Connections displayed are the Network Access, WAN IP Address, Subnet Mask, Default Gateway, and DNS. Click the Refresh button if you want to Refresh your screen. Local Network The Local Network information that is displayed is the IP Address, Subnet Mask, DHCP Server, and DHCP Client Lease Info. To view the DHCP Clients Table, click the DHCP Clients button. The DHCP Active IP Table, displays the computer name, IP Address, MAC Address and the expiration time. Click the Close button to return to the Local Network screen. Wireless The Wireless Network information that is displayed is the MAC Address, Mode, SSID, Channel, and Encryption Function. ( Click the Refresh button if you want to Refresh your screen. System Performance The System Peformance information that is displayed is the Wireless, Internet, and/or LAN information for the IP Address, MAC Address, Connection Status, Packets Received, Packets Sent, Bytes Received, Bytes Sent, Error Packes Received, and Dropped Packets Received. Click the Refresh button if you want to Refresh your screen. VPN Clients - VP Choose the VPN clients you would like to see. You may display up to 5 clients at a time. 15
  • 16. BASIC NETWORK SETUP ONLY BASICS For a basic network setup, most users only have to use the following screens of the Utility: • Basic Setup. On the Basic Setup screen, enter the settings provided by your ISP. • Management. Click the Administration tab and then the Management tab. The Router’s default password is admin. To secure the Router, change the Password from its default. There are seven main tabs: Setup, Wireless, Security, Access Restrictions, Applications & Gaming, Administration, and Status. Additional tabs will be available after you click one of the main tabs. Setup • Basic Setup. Enter the Internet connection and network settings on this screen. • DDNS. To enable the Router’s Dynamic Domain Name System (DDNS) feature, complete the fields on this screen. • MAC Address Clone. If you need to clone a MAC address onto the Router, use this screen. • Advanced Routing. On this screen, you can alter Network Address Translation (NAT), Dynamic Routing, and Static Routing configurations. • Hot Spot. Register with your Hot Spot service provider on this screen. Wireless • Basic Wireless Settings. You can choose your Wireless Network Mode and Wireless Security on this screen. • Wireless Network Access. This screen displays your network access list. • Advanced Wireless Settings. On this screen you can access the Advanced Wireless features of Authentication Type, Basic Data Rates, Control Tx Rates, Beacon Interval, DTIM Interval, RTS Threshold, and Fragmentation Threshold. Security • Filter. To block specific users from Internet access, you can set up IP address, port, and MAC address filtering on the Filter screen. • VPN. To enable or disable IPSec, L2TP, and/or PPTP Pass-through, and set up VPN tunnels, use this screen. • 802.1x. Use this screen to set up RADIUS authentication. Access Restrictions • Access Restriction. This screen allows you to prevent or permit only certain users from attaching to your network. Applications & Gaming • Port Range Forwarding. To set up public services or other specialized Internet applications on your network, click this tab. • Port Triggering. To set up triggered ranges and forwarded ranges for Internet applications, click this tab. • UPnP Forwarding. Use this screen to alter UPnP forwarding settings. • DMZ. To allow one local user to be exposed to the Internet for use of special-purpose services, use this screen. Administration • Management. On this screen, alter router access privileges and UPnP settings. • Log. If you want to view or save activity logs, click this tab. • Diagnostics. Use this screen to check the connection between your Router and PC. • Factory Defaults. If you want to restore the Router’s factory defaults, then use this screen. • Firmware Upgrade. Click this tab if you want to upgrade the Router’s firmware. Status • Router. This screen provides status information about the Router. • Local Network. This provides status information about the local network. 16