SlideShare a Scribd company logo
1 of 19
Download to read offline
Adafruit's Raspberry Pi Lesson 1. Preparing an SD Card for your 
Raspberry Pi 
Created by Simon Monk 
Last updated on 2014-01-25 05:45:19 PM EST
2 
3 
4 
6 
6 
6 
8 
10 
13 
15 
15 
15 
15 
16 
18 
Guide Contents 
Guide Contents 
Overview 
You Will Need 
Downloading an Image 
Choose your Operating System 
Choose your Distribution 
Making an SD Card – Using a Windows Vista / 7 
Making an SD Card – Using a Mac 
Test & Configure 
BONUS! Make a Backup Image! 
Back it up! 
What You'll Need 
Get the Script File 
Run the Script 
Problems? 
© Adafruit Industries http://learn.adafruit.com/adafruit-raspberry-pi-lesson-1-preparing-and-sd- 
card-for-your-raspberry-pi 
Page 2 of 19
Overview 
When you buy a Raspberry Pi, it may or may not be sold with an SD card. The SD card is 
important because this is where the Raspberry Pi keeps its operating system and is also where 
you will store your documents and programs. 
Even if your Pi came with an SD card with the operating system on, it is a good idea to update it 
to the latest version, as improvements and bug fixes are going in all the time. Since putting the 
operating system onto an SD card wipes everything else off the card, it is worth considering 
using a USB flash drive for your documents, so that when you install a new version of the 
operating system, you don't have the complication of copying them off somewhere safe 
before reformatting the SD card. 
If your Pi did not come with an SD card then the minimum size you should get is 4GB, but buy a 
bigger SD card if you think you will need the space. 
This lesson shows you how to create an SD card for your Raspberry Pi. 
© Adafruit Industries http://learn.adafruit.com/adafruit-raspberry-pi-lesson-1-preparing-and-sd- 
card-for-your-raspberry-pi 
Page 3 of 19
You Will Need 
To prepare an SD card for your computer, you will need: 
A 'regular' computer with a built-in SD card reader, or an add-on USB SD card reader. The 
instructions here are for Windows and Mac. You can pick up a tiny microSD card reader/writer 
that is nice and fast and works with all USB-ports at the Adafruit shop (http://adafru.it/939) 
An SD card at least 4GB in capacity. You can pick one up that is tested guaranteed to work 
with the Raspberry Pi at the Adafruit shop (http://adafru.it/102) 
© Adafruit Industries http://learn.adafruit.com/adafruit-raspberry-pi-lesson-1-preparing-and-sd- 
card-for-your-raspberry-pi 
Page 4 of 19
© Adafruit Industries http://learn.adafruit.com/adafruit-raspberry-pi-lesson-1-preparing-and-sd- 
card-for-your-raspberry-pi 
Page 5 of 19
Downloading an Image 
The operating system that will be installed onto the SD card must be downloaded from the 
Internet. This will usually be a zip file that then extracts to a file of type .img an image file. 
Whatever image file you download, the actual installation process is the same. 
Choose your Operating System 
There are a bewildering number of operating systems that you can install on your Raspberry Pi, 
if you are a beginner, then do not consider anything except one of the Linux distributions, and if 
you are an advanced user, then you probably won't be reading this anyway. 
Choose your Distribution 
Having decided you want to install Linux, that is not the end of the story. You now have to 
decide which distribution or 'distro' of Linux you want to install. Being an Open Source operating 
system, anyone can take one of the existing distributions an add things to it or configure it in a 
certain way before packaging it up as another distribution option for anyone to use. This is how 
the most common Raspberry Pi distribution 'Raspbian' came into existence. The 'Debian' 
distribution was configured and kitted out with useful things like IDLE (a python-programming 
language development editor) and Scratch (a learn-to-program gaming system) to make it 
suitable for the Pi. Adafruit have then taken Raspbian and configured it to make it as easy as 
possible to use the GPIO connector to attach DIY electronics to the Pi. 
All of the Adafruit tutorials (and nearly every other tutorial online) will work with either so we 
suggest picking one of the two: 
Raspbian – the Raspberry Pi recommended distribution, best for those that want the 'default 
standard' - nearly every Pi out there runs Raspbian http://www.raspberrypi.org/downloads 
(http://adafru.it/aMY) 
Occidentalis – Adafruit's version of Raspbian configured for hardware support. Best used by 
people who know they want to connect sensors, LEDs, buttons, servos, etc to their Pi 
http://learn.adafruit.com/adafruit-raspberry-pi-educational-linux-distro/ (http://adafru.it/aTc) 
In fact, if like me, you decide to keep your documents on a separate USB Flash drive, it is no 
bad thing to buy two SD cards and try both. 
In appearance, there is very little to choose from between the two. When it come to how it 
behaves, then 'Raspbian' is the more 'standard' distribution, but then Occidentalis is more 
electronics-hardware ready. 
Having said that, both distributions are regularly updated and each will no doubt incorporate 
features found in the other. 
© Adafruit Industries http://learn.adafruit.com/adafruit-raspberry-pi-lesson-1-preparing-and-sd- 
card-for-your-raspberry-pi 
Page 6 of 19
Incidentally, the name Occidentalis come from the Latin name for the raspberry (Rubus 
Occidentalis). 
So, having made your choice, download the zip or img file and if it is in a zip file unzip it onto the 
Desktop. 
© Adafruit Industries http://learn.adafruit.com/adafruit-raspberry-pi-lesson-1-preparing-and-sd- 
card-for-your-raspberry-pi 
Page 7 of 19
Making an SD Card – Using a Windows Vista / 7 
There is a very useful utility that we can use to write a SD card available for Windows 7 and 
Vista. It is not unfortunately available for Windows XP. 
Step 1. 
Download Fedora ARM Installer from: 
http://fedoraproject.org/wiki/Fedora_ARM_Installer#Windows_Vista_.26_7 (http://adafru.it/aTd) 
Step 2. 
This will download a zip file that you must extract. The result will be a folder called 'faii-1.0.2-3- 
x32'. If you keep this outside of the Program Files area then you will be able to run it without 
changing its privileges. You can just leave it on your Desktop. 
Step 3. 
Eject any external storage devices such as USB flash drives and backup hard disks. This makes 
it easier to identify the SD card. Then insert the SD card into the slot on your computer or into 
the reader. 
Step 4. 
Right click to run the file fedo ra-arm-installer.exe as an administrator. This will launch the 
following application. 
Step 5. 
Select the image file and device. 
To do this, click the Browse button and navigate to the .img file for the distribution that you 
want to install and the select the device from the drop-down. 
© Adafruit Industries http://learn.adafruit.com/adafruit-raspberry-pi-lesson-1-preparing-and-sd- 
card-for-your-raspberry-pi 
Page 8 of 19
Check that you have the right device, as it will be reformatted, and then click Install. 
It will take a few minutes to install, but once the SD card is ready, you will see the following. 
That's all there is to it. Your SD card is ready for use in your Raspberry Pi. 
© Adafruit Industries http://learn.adafruit.com/adafruit-raspberry-pi-lesson-1-preparing-and-sd- 
card-for-your-raspberry-pi 
Page 9 of 19
Making an SD Card – Using a Mac 
Ray Vijoen has created a useful script that makes it really easy to make an SD card using a Mac. 
It is a shell script that takes all the necessary steps to create the SD card, including formatting 
it. You still have to run it from the command line. 
Step 1. 
Download Raspberry-PI-SD-Installer-OS-X from https://github.com/RayViljoen/Raspberry-PI-SD-Installer- 
OS-X (http://adafru.it/aTe) 
Look for the 'zip' button at the top and download it as a single zip file. 
Step 2. 
Extract the zip file. It will expand into a folder called 'Raspberry-PI-SD-Installer-OS-X-master'. 
Step 3. 
Use Finder to move the img file that you downloaded earlier into the Raspberry-PI-SD-Installer- 
OS-X-master folder. 
You can see here that I have both the Occidentalis and Raspbian images in the folder. That is 
fine, you can have as many images as you like in the folder. 
Step4. 
Open the Terminal app – you will find this in the Utilities folder of your Applications folder on 
your Mac. 
Then type the command 'cd' followed by the path of your Raspberry-PI-SD-Installer-OS-X-master 
folder. 
© Adafruit Industries http://learn.adafruit.com/adafruit-raspberry-pi-lesson-1-preparing-and-sd- 
card-for-your-raspberry-pi 
Page 10 of 19
Step 5. 
Eject any external drives that you have connected to your computer. This just makes it easier 
to identify the correct drive that corresponds to your SD card. 
Insert the SD card that you want to use. Note that all data on this card will be erazed. 
Step 6. 
Run the Pi Installer by typing the following command into the Terminal: 
> sudo ./install Occidentalis_v02.img 
'Occidentalis_v02.img' is the name of the img file for the distribution that you want to install. 
You will be prompted for your Mac password and then should see this: 
Step 7. 
© Adafruit Industries http://learn.adafruit.com/adafruit-raspberry-pi-lesson-1-preparing-and-sd- 
card-for-your-raspberry-pi 
Page 11 of 19
Enter the number next to the SD card drive. Make sure you get this right, because whichever 
drive you select will be erased. 
It is then just a matter of waiting until all the image file is installed. This will take a few minutes. 
You can check on the progress by pressing ctrl-T 
When everything is complete, you should see this: 
Thats all there is to it, the SD card is now ready to use with your Raspberry Pi. 
© Adafruit Industries http://learn.adafruit.com/adafruit-raspberry-pi-lesson-1-preparing-and-sd- 
card-for-your-raspberry-pi 
Page 12 of 19
Test & Configure 
If you plan to use multiple SD cards, it is not a bad idea to label them. Put the label on the side 
that shows when the SD card is inserted into the Pi. 
Testing the card is easy - insert it into your Pi, then connect a keyboard to the USB port and a 
NTSC/PAL TV to the composite port or an HDMI monitor to the HDMI Port. Then power it by 
connecting a Micro USB cable to the Pi and powering it via a computer or a USB wall charger 
You should see something like the following, an Adafruit/Raspberry logo in the top left, and a 
ton of text filling up the screen 
In the next tutorial, you will find out how to configure your Raspberry Pi the first time you boot it 
up. 
CClliicckk HHeerree ffoorr tthhee 
© Adafruit Industries http://learn.adafruit.com/adafruit-raspberry-pi-lesson-1-preparing-and-sd- 
card-for-your-raspberry-pi 
Page 13 of 19
CClliicckk HHeerree ffoorr tthhee 
NNeexxtt LLeessssoonn 
http://adafru.it/aUa 
© Adafruit Industries http://learn.adafruit.com/adafruit-raspberry-pi-lesson-1-preparing-and-sd- 
card-for-your-raspberry-pi 
Page 14 of 19
BONUS! Make a Backup Image! 
It took a while to get your SD card set up, didn't it? Bet you don't want to have to do that again, 
do you? 
Well, 
Back it up! 
Forum user, Mac user, and Adafruit Customer phil.drummond took it upon himself to find the 
best way to back up his system image. 
And he found a fast and easy way - a script which quickly creates a clone of your running 
Raspberry Pi system, ON THE PI ITSELF! 
NNoottee:: TThhiiss ssccrriipptt oonnllyy wwoorrkkss wwiitthh oocccciiddeennttaalliiss 00..22 aanndd oollddeerr vveerrssiioonnss ooff RRaassppbbiiaann 
The script comes to us by way of Pastebin user BILLW (http://adafru.it/cCG). 
CClliicckk ttoo ggeett 
BBIILLLLWW''ss CClloonniinngg 
SSccrriipptt 
http://adafru.it/cCH 
What You'll Need 
USB SD Card Reader 
Blank SD Card 
Booted and Running Raspberry Pi 
Get the Script File 
First, get a copy of the script file onto your Pi. You can do that in any one of several ways: 
First, download the file to your computer 
Then... 
Use ssh or vnc to transfer the file from the computer to the Pi 
...Or... 
Pop the blank SD into your USB Card Reader 
Plug the Card Reader into your computer 
Copy the file to the blank SD 
© Adafruit Industries http://learn.adafruit.com/adafruit-raspberry-pi-lesson-1-preparing-and-sd- 
card-for-your-raspberry-pi 
Page 15 of 19
Move the Card Reader to the Pi 
Copy the file from the SD to the Pi 
...Or... 
Use the Pi's Web Browser to navigate to this page and download the script file directly 
Run the Script 
1. Put the blank SD card into your USB Card Reader, and plug it into one of the PI's USB ports. 
2. Open a Terminal window on the Pi 
3. Navigate to the folder where you stored the script file. (If you stored the file on the Pi's 
Desktop, simply type 'cd Desktop') 
When you run the script, you will have to specify the name of your SD card. Raspbian and 
occidentalis assign the names 'sda', sdb', etc. to SD cards found on USB. If you only have one 
USB card reader attached, the name of your new SD card will be 'sda'. 
If you're not sure that sda is the right card, you can run this command to list the cards 
connected to your Pi. 
sudo fdisk -l 
The SD card slot with your running Pi system will show up as /dev/mmcblk0. Your blank card will 
be listed as /dev/sda1 (or possibly /dev/sdb1, if you have more than one USB card readers 
attached to the Pi). 
Note that you don't enter the '1' - if your card is listed as '/dev/sda1', then you would still enter 
'sda' when you run the script ('sda' is the name of the card, 'sda1' is the name of the first 
partition on the card). 
Ok, so now you should be ready to run the commands 
© Adafruit Industries http://learn.adafruit.com/adafruit-raspberry-pi-lesson-1-preparing-and-sd- 
card-for-your-raspberry-pi 
Page 16 of 19
chmod +x rpi-clone.sh 
sudo ./rpi_clone sda -f 
As noted earlier, the first parameter passed to the script is is the name of the target SD card, in 
this case 'sda'. The -f tells the script to entirely re-format the card. 
The script will ask you if you're sure you want to initialize the destination card. Type 'y', and hit 
the return key. 
If you see an error message instead, check below ffoorr ssoolluuttiioonnss!! 
Next, the script will ask you if you want to give your new backup a label. It's not necessary to do 
this - just hit the return key. 
Finally, the script will ask you if you're sure you really want to do this, before it begins creating 
the backup. Type 'y', and hit the return key. 
© Adafruit Industries http://learn.adafruit.com/adafruit-raspberry-pi-lesson-1-preparing-and-sd- 
card-for-your-raspberry-pi 
Page 17 of 19
Now it's time to wait - the process will take a little while. 
When the process is complete, the script will ask if it should unmount the card with your new 
system clone/ Reply with 'y', and you're done! 
Now you can shutdown the Pi, swap the clone into the Pi's SD Card Slot, and restart - Bingo! a 
fully-operational clone of your Raspberry Pi system! 
Problems? 
If you see an error message like this: 
© Adafruit Industries http://learn.adafruit.com/adafruit-raspberry-pi-lesson-1-preparing-and-sd- 
card-for-your-raspberry-pi 
Page 18 of 19
...it means that your SD card is mounted in the file system. You have to unmount it before you 
can proceed. In the picture, I'm writing over an earlier clone of my system, which has two 
partitions: /dev/sda2 and /dev/sda1. You might only have one partition. 
In any case, issue the umount command for each mounted partition on your destination SD 
card: 
sudo umount /dev/sda1 
Now try to run the script again! 
© Adafruit Industries Last Updated: 2014-01-25 05:45:22 PM EST Page 19 of 19

More Related Content

What's hot

CD/DVD Drive Error Cause Detection and Solution
CD/DVD Drive Error Cause Detection and SolutionCD/DVD Drive Error Cause Detection and Solution
CD/DVD Drive Error Cause Detection and SolutionSH Rajøn
 
Hbcd
HbcdHbcd
Hbcdbwryno
 
Media Literacy For Educators
Media Literacy For Educators Media Literacy For Educators
Media Literacy For Educators cck008
 
Distro Recipes 2013 : Contribution of RDF metadata for traceability among pro...
Distro Recipes 2013 : Contribution of RDF metadata for traceability among pro...Distro Recipes 2013 : Contribution of RDF metadata for traceability among pro...
Distro Recipes 2013 : Contribution of RDF metadata for traceability among pro...Anne Nicolas
 
Version Control with Git
Version Control with GitVersion Control with Git
Version Control with GitLuigi De Russis
 
Hardware course
Hardware courseHardware course
Hardware coursegurukullinfo
 
Introduction to linux
Introduction to linuxIntroduction to linux
Introduction to linuxplarsen67
 
Giarritano networking - user manual
Giarritano   networking - user manualGiarritano   networking - user manual
Giarritano networking - user manualleahg118
 
Partner reseller proposal ppt
Partner reseller proposal pptPartner reseller proposal ppt
Partner reseller proposal pptClayton Desouza
 
All in one
All in oneAll in one
All in oneAkash Sahoo
 

What's hot (13)

CD/DVD Drive Error Cause Detection and Solution
CD/DVD Drive Error Cause Detection and SolutionCD/DVD Drive Error Cause Detection and Solution
CD/DVD Drive Error Cause Detection and Solution
 
Inside Your Computer
Inside Your ComputerInside Your Computer
Inside Your Computer
 
Hbcd
HbcdHbcd
Hbcd
 
Media Literacy For Educators
Media Literacy For Educators Media Literacy For Educators
Media Literacy For Educators
 
Distro Recipes 2013 : Contribution of RDF metadata for traceability among pro...
Distro Recipes 2013 : Contribution of RDF metadata for traceability among pro...Distro Recipes 2013 : Contribution of RDF metadata for traceability among pro...
Distro Recipes 2013 : Contribution of RDF metadata for traceability among pro...
 
IniciaciĂłn a linux
IniciaciĂłn a linuxIniciaciĂłn a linux
IniciaciĂłn a linux
 
Version Control with Git
Version Control with GitVersion Control with Git
Version Control with Git
 
Hardware course
Hardware courseHardware course
Hardware course
 
Introduction to linux
Introduction to linuxIntroduction to linux
Introduction to linux
 
Giarritano networking - user manual
Giarritano   networking - user manualGiarritano   networking - user manual
Giarritano networking - user manual
 
Linux Intro
Linux   IntroLinux   Intro
Linux Intro
 
Partner reseller proposal ppt
Partner reseller proposal pptPartner reseller proposal ppt
Partner reseller proposal ppt
 
All in one
All in oneAll in one
All in one
 

Viewers also liked

PUM1 - 3PsikoanalisaHumanisticPsikologikontemporer
PUM1 - 3PsikoanalisaHumanisticPsikologikontemporerPUM1 - 3PsikoanalisaHumanisticPsikologikontemporer
PUM1 - 3PsikoanalisaHumanisticPsikologikontemporermfrids
 
PUM1 - 10Kepribadian
PUM1 - 10KepribadianPUM1 - 10Kepribadian
PUM1 - 10Kepribadianmfrids
 
PUM1 - 9PsikologiPerkembanganII
PUM1 - 9PsikologiPerkembanganIIPUM1 - 9PsikologiPerkembanganII
PUM1 - 9PsikologiPerkembanganIImfrids
 
PUM1 - 7Kesadaran
PUM1 - 7KesadaranPUM1 - 7Kesadaran
PUM1 - 7Kesadaranmfrids
 
Memorias mercy jimenez
Memorias mercy jimenezMemorias mercy jimenez
Memorias mercy jimenezVivianita Jime
 
PUM1 - 8PsikologiPerkembanganI
PUM1 - 8PsikologiPerkembanganIPUM1 - 8PsikologiPerkembanganI
PUM1 - 8PsikologiPerkembanganImfrids
 
PUM1 - 5DasarBiologisPerilaku
PUM1 - 5DasarBiologisPerilakuPUM1 - 5DasarBiologisPerilaku
PUM1 - 5DasarBiologisPerilakumfrids
 
PUM1 - 4MetodedalamPsikologi
PUM1 - 4MetodedalamPsikologiPUM1 - 4MetodedalamPsikologi
PUM1 - 4MetodedalamPsikologimfrids
 
PUM1 - 1StrukturalismeFungsionalismeGestalt
PUM1 - 1StrukturalismeFungsionalismeGestaltPUM1 - 1StrukturalismeFungsionalismeGestalt
PUM1 - 1StrukturalismeFungsionalismeGestaltmfrids
 
PUM1 - 6SensasiPersepsi
PUM1 - 6SensasiPersepsiPUM1 - 6SensasiPersepsi
PUM1 - 6SensasiPersepsimfrids
 
Social media final
Social media finalSocial media final
Social media finalkbarnes77
 
Hard tissue management
Hard tissue managementHard tissue management
Hard tissue managementTsung Yang
 
Dental patient Education part1
Dental patient Education part1Dental patient Education part1
Dental patient Education part1Tsung Yang
 
Experience sharing casting post&clp
Experience sharing casting post&clpExperience sharing casting post&clp
Experience sharing casting post&clpTsung Yang
 
Konus attachment(6:28)
Konus attachment(6:28)Konus attachment(6:28)
Konus attachment(6:28)Tsung Yang
 
Introduction of hybrid zirconium abutment
Introduction of hybrid zirconium abutmentIntroduction of hybrid zirconium abutment
Introduction of hybrid zirconium abutmentTsung Yang
 
Cad:cam in implant dentistry
Cad:cam in implant dentistryCad:cam in implant dentistry
Cad:cam in implant dentistryTsung Yang
 

Viewers also liked (17)

PUM1 - 3PsikoanalisaHumanisticPsikologikontemporer
PUM1 - 3PsikoanalisaHumanisticPsikologikontemporerPUM1 - 3PsikoanalisaHumanisticPsikologikontemporer
PUM1 - 3PsikoanalisaHumanisticPsikologikontemporer
 
PUM1 - 10Kepribadian
PUM1 - 10KepribadianPUM1 - 10Kepribadian
PUM1 - 10Kepribadian
 
PUM1 - 9PsikologiPerkembanganII
PUM1 - 9PsikologiPerkembanganIIPUM1 - 9PsikologiPerkembanganII
PUM1 - 9PsikologiPerkembanganII
 
PUM1 - 7Kesadaran
PUM1 - 7KesadaranPUM1 - 7Kesadaran
PUM1 - 7Kesadaran
 
Memorias mercy jimenez
Memorias mercy jimenezMemorias mercy jimenez
Memorias mercy jimenez
 
PUM1 - 8PsikologiPerkembanganI
PUM1 - 8PsikologiPerkembanganIPUM1 - 8PsikologiPerkembanganI
PUM1 - 8PsikologiPerkembanganI
 
PUM1 - 5DasarBiologisPerilaku
PUM1 - 5DasarBiologisPerilakuPUM1 - 5DasarBiologisPerilaku
PUM1 - 5DasarBiologisPerilaku
 
PUM1 - 4MetodedalamPsikologi
PUM1 - 4MetodedalamPsikologiPUM1 - 4MetodedalamPsikologi
PUM1 - 4MetodedalamPsikologi
 
PUM1 - 1StrukturalismeFungsionalismeGestalt
PUM1 - 1StrukturalismeFungsionalismeGestaltPUM1 - 1StrukturalismeFungsionalismeGestalt
PUM1 - 1StrukturalismeFungsionalismeGestalt
 
PUM1 - 6SensasiPersepsi
PUM1 - 6SensasiPersepsiPUM1 - 6SensasiPersepsi
PUM1 - 6SensasiPersepsi
 
Social media final
Social media finalSocial media final
Social media final
 
Hard tissue management
Hard tissue managementHard tissue management
Hard tissue management
 
Dental patient Education part1
Dental patient Education part1Dental patient Education part1
Dental patient Education part1
 
Experience sharing casting post&clp
Experience sharing casting post&clpExperience sharing casting post&clp
Experience sharing casting post&clp
 
Konus attachment(6:28)
Konus attachment(6:28)Konus attachment(6:28)
Konus attachment(6:28)
 
Introduction of hybrid zirconium abutment
Introduction of hybrid zirconium abutmentIntroduction of hybrid zirconium abutment
Introduction of hybrid zirconium abutment
 
Cad:cam in implant dentistry
Cad:cam in implant dentistryCad:cam in implant dentistry
Cad:cam in implant dentistry
 

Similar to Prepare SD Card Raspberry Pi OS

Raspi_TOR_Access_Point_BenMoore
Raspi_TOR_Access_Point_BenMooreRaspi_TOR_Access_Point_BenMoore
Raspi_TOR_Access_Point_BenMooreBenjamin Moore
 
Tac Presentation October 72014- Raspberry PI
Tac Presentation October 72014- Raspberry PITac Presentation October 72014- Raspberry PI
Tac Presentation October 72014- Raspberry PICliff Samuels Jr.
 
Desktop Ubutu on Laptops and RaspberryPi_practices how to use it with SD card...
Desktop Ubutu on Laptops and RaspberryPi_practices how to use it with SD card...Desktop Ubutu on Laptops and RaspberryPi_practices how to use it with SD card...
Desktop Ubutu on Laptops and RaspberryPi_practices how to use it with SD card...Masafumi Ohta
 
Raspberry pi Beginners Session
Raspberry pi Beginners SessionRaspberry pi Beginners Session
Raspberry pi Beginners SessionAnant Shrivastava
 
Raspberry Pi Free Session - 20_09_2014
Raspberry Pi Free Session - 20_09_2014Raspberry Pi Free Session - 20_09_2014
Raspberry Pi Free Session - 20_09_2014Mandeesh Singh
 
Hadoop on raspberry pi PART 1
Hadoop on raspberry pi PART 1Hadoop on raspberry pi PART 1
Hadoop on raspberry pi PART 1Aniket Maithani
 
Raspberry pi setting_cambodia
Raspberry pi setting_cambodiaRaspberry pi setting_cambodia
Raspberry pi setting_cambodiagongdigi24
 
Starting Raspberry Pi
Starting Raspberry PiStarting Raspberry Pi
Starting Raspberry PiLloydMoore
 
Banana pi bpi-m1 user manual
Banana pi  bpi-m1 user manualBanana pi  bpi-m1 user manual
Banana pi bpi-m1 user manualwang lion
 
Raspberry Pi Session - 22_11_2014
Raspberry Pi Session - 22_11_2014Raspberry Pi Session - 22_11_2014
Raspberry Pi Session - 22_11_2014Mandeesh Singh
 
PiFlash: Linux utility to flash SD cards for Raspberry Pi computers
PiFlash: Linux utility to flash SD cards for Raspberry Pi computersPiFlash: Linux utility to flash SD cards for Raspberry Pi computers
PiFlash: Linux utility to flash SD cards for Raspberry Pi computersIan Kluft
 
introduction to Raspberry pi
introduction to Raspberry piintroduction to Raspberry pi
introduction to Raspberry piluckyanks1992
 
Raspberry pi-video-looper
Raspberry pi-video-looperRaspberry pi-video-looper
Raspberry pi-video-looperTrung Toan Nguyen
 
Internet of things aktu lab file
Internet of things  aktu lab fileInternet of things  aktu lab file
Internet of things aktu lab fileNitesh Dubey
 
Java Device I/O at Raspberry PI to Build a Candy Vending Machine
Java Device I/O at Raspberry PI to Build a Candy Vending MachineJava Device I/O at Raspberry PI to Build a Candy Vending Machine
Java Device I/O at Raspberry PI to Build a Candy Vending MachineJeff Prestes
 

Similar to Prepare SD Card Raspberry Pi OS (20)

Raspi_TOR_Access_Point_BenMoore
Raspi_TOR_Access_Point_BenMooreRaspi_TOR_Access_Point_BenMoore
Raspi_TOR_Access_Point_BenMoore
 
Tac Presentation October 72014- Raspberry PI
Tac Presentation October 72014- Raspberry PITac Presentation October 72014- Raspberry PI
Tac Presentation October 72014- Raspberry PI
 
Desktop Ubutu on Laptops and RaspberryPi_practices how to use it with SD card...
Desktop Ubutu on Laptops and RaspberryPi_practices how to use it with SD card...Desktop Ubutu on Laptops and RaspberryPi_practices how to use it with SD card...
Desktop Ubutu on Laptops and RaspberryPi_practices how to use it with SD card...
 
Raspberry pi Beginners Session
Raspberry pi Beginners SessionRaspberry pi Beginners Session
Raspberry pi Beginners Session
 
Raspberry pi
Raspberry piRaspberry pi
Raspberry pi
 
Raspberry Pi Free Session - 20_09_2014
Raspberry Pi Free Session - 20_09_2014Raspberry Pi Free Session - 20_09_2014
Raspberry Pi Free Session - 20_09_2014
 
Hadoop on raspberry pi PART 1
Hadoop on raspberry pi PART 1Hadoop on raspberry pi PART 1
Hadoop on raspberry pi PART 1
 
Raspberry pi setting_cambodia
Raspberry pi setting_cambodiaRaspberry pi setting_cambodia
Raspberry pi setting_cambodia
 
Raspberry pi
Raspberry pi Raspberry pi
Raspberry pi
 
Starting Raspberry Pi
Starting Raspberry PiStarting Raspberry Pi
Starting Raspberry Pi
 
Banana pi bpi-m1 user manual
Banana pi  bpi-m1 user manualBanana pi  bpi-m1 user manual
Banana pi bpi-m1 user manual
 
Raspberry Pi Session - 22_11_2014
Raspberry Pi Session - 22_11_2014Raspberry Pi Session - 22_11_2014
Raspberry Pi Session - 22_11_2014
 
PiFlash: Linux utility to flash SD cards for Raspberry Pi computers
PiFlash: Linux utility to flash SD cards for Raspberry Pi computersPiFlash: Linux utility to flash SD cards for Raspberry Pi computers
PiFlash: Linux utility to flash SD cards for Raspberry Pi computers
 
introduction to Raspberry pi
introduction to Raspberry piintroduction to Raspberry pi
introduction to Raspberry pi
 
Feature satip4
Feature satip4Feature satip4
Feature satip4
 
Raspberry pi-video-looper
Raspberry pi-video-looperRaspberry pi-video-looper
Raspberry pi-video-looper
 
Internet of things aktu lab file
Internet of things  aktu lab fileInternet of things  aktu lab file
Internet of things aktu lab file
 
Java Device I/O at Raspberry PI to Build a Candy Vending Machine
Java Device I/O at Raspberry PI to Build a Candy Vending MachineJava Device I/O at Raspberry PI to Build a Candy Vending Machine
Java Device I/O at Raspberry PI to Build a Candy Vending Machine
 
Feature satip4
Feature satip4Feature satip4
Feature satip4
 
Feature satip4
Feature satip4Feature satip4
Feature satip4
 

Recently uploaded

Crystal Structure analysis and detailed information pptx
Crystal Structure analysis and detailed information pptxCrystal Structure analysis and detailed information pptx
Crystal Structure analysis and detailed information pptxachiever3003
 
chpater16.pptxMMMMMMMMMMMMMMMMMMMMMMMMMMM
chpater16.pptxMMMMMMMMMMMMMMMMMMMMMMMMMMMchpater16.pptxMMMMMMMMMMMMMMMMMMMMMMMMMMM
chpater16.pptxMMMMMMMMMMMMMMMMMMMMMMMMMMMNanaAgyeman13
 
Cooling Tower SERD pH drop issue (11 April 2024) .pptx
Cooling Tower SERD pH drop issue (11 April 2024) .pptxCooling Tower SERD pH drop issue (11 April 2024) .pptx
Cooling Tower SERD pH drop issue (11 April 2024) .pptxmamansuratman0253
 
Indian Dairy Industry Present Status and.ppt
Indian Dairy Industry Present Status and.pptIndian Dairy Industry Present Status and.ppt
Indian Dairy Industry Present Status and.pptMadan Karki
 
Software and Systems Engineering Standards: Verification and Validation of Sy...
Software and Systems Engineering Standards: Verification and Validation of Sy...Software and Systems Engineering Standards: Verification and Validation of Sy...
Software and Systems Engineering Standards: Verification and Validation of Sy...VICTOR MAESTRE RAMIREZ
 
Earthing details of Electrical Substation
Earthing details of Electrical SubstationEarthing details of Electrical Substation
Earthing details of Electrical Substationstephanwindworld
 
Class 1 | NFPA 72 | Overview Fire Alarm System
Class 1 | NFPA 72 | Overview Fire Alarm SystemClass 1 | NFPA 72 | Overview Fire Alarm System
Class 1 | NFPA 72 | Overview Fire Alarm Systemirfanmechengr
 
Robotics-Asimov's Laws, Mechanical Subsystems, Robot Kinematics, Robot Dynami...
Robotics-Asimov's Laws, Mechanical Subsystems, Robot Kinematics, Robot Dynami...Robotics-Asimov's Laws, Mechanical Subsystems, Robot Kinematics, Robot Dynami...
Robotics-Asimov's Laws, Mechanical Subsystems, Robot Kinematics, Robot Dynami...Sumanth A
 
Research Methodology for Engineering pdf
Research Methodology for Engineering pdfResearch Methodology for Engineering pdf
Research Methodology for Engineering pdfCaalaaAbdulkerim
 
complete construction, environmental and economics information of biomass com...
complete construction, environmental and economics information of biomass com...complete construction, environmental and economics information of biomass com...
complete construction, environmental and economics information of biomass com...asadnawaz62
 
11. Properties of Liquid Fuels in Energy Engineering.pdf
11. Properties of Liquid Fuels in Energy Engineering.pdf11. Properties of Liquid Fuels in Energy Engineering.pdf
11. Properties of Liquid Fuels in Energy Engineering.pdfHafizMudaserAhmad
 
List of Accredited Concrete Batching Plant.pdf
List of Accredited Concrete Batching Plant.pdfList of Accredited Concrete Batching Plant.pdf
List of Accredited Concrete Batching Plant.pdfisabel213075
 
Comparative study of High-rise Building Using ETABS,SAP200 and SAFE., SAFE an...
Comparative study of High-rise Building Using ETABS,SAP200 and SAFE., SAFE an...Comparative study of High-rise Building Using ETABS,SAP200 and SAFE., SAFE an...
Comparative study of High-rise Building Using ETABS,SAP200 and SAFE., SAFE an...Erbil Polytechnic University
 
Gravity concentration_MI20612MI_________
Gravity concentration_MI20612MI_________Gravity concentration_MI20612MI_________
Gravity concentration_MI20612MI_________Romil Mishra
 
DM Pillar Training Manual.ppt will be useful in deploying TPM in project
DM Pillar Training Manual.ppt will be useful in deploying TPM in projectDM Pillar Training Manual.ppt will be useful in deploying TPM in project
DM Pillar Training Manual.ppt will be useful in deploying TPM in projectssuserb6619e
 
Correctly Loading Incremental Data at Scale
Correctly Loading Incremental Data at ScaleCorrectly Loading Incremental Data at Scale
Correctly Loading Incremental Data at ScaleAlluxio, Inc.
 
Industrial Safety Unit-IV workplace health and safety.ppt
Industrial Safety Unit-IV workplace health and safety.pptIndustrial Safety Unit-IV workplace health and safety.ppt
Industrial Safety Unit-IV workplace health and safety.pptNarmatha D
 
Risk Management in Engineering Construction Project
Risk Management in Engineering Construction ProjectRisk Management in Engineering Construction Project
Risk Management in Engineering Construction ProjectErbil Polytechnic University
 
Past, Present and Future of Generative AI
Past, Present and Future of Generative AIPast, Present and Future of Generative AI
Past, Present and Future of Generative AIabhishek36461
 

Recently uploaded (20)

Crystal Structure analysis and detailed information pptx
Crystal Structure analysis and detailed information pptxCrystal Structure analysis and detailed information pptx
Crystal Structure analysis and detailed information pptx
 
chpater16.pptxMMMMMMMMMMMMMMMMMMMMMMMMMMM
chpater16.pptxMMMMMMMMMMMMMMMMMMMMMMMMMMMchpater16.pptxMMMMMMMMMMMMMMMMMMMMMMMMMMM
chpater16.pptxMMMMMMMMMMMMMMMMMMMMMMMMMMM
 
Cooling Tower SERD pH drop issue (11 April 2024) .pptx
Cooling Tower SERD pH drop issue (11 April 2024) .pptxCooling Tower SERD pH drop issue (11 April 2024) .pptx
Cooling Tower SERD pH drop issue (11 April 2024) .pptx
 
Indian Dairy Industry Present Status and.ppt
Indian Dairy Industry Present Status and.pptIndian Dairy Industry Present Status and.ppt
Indian Dairy Industry Present Status and.ppt
 
Software and Systems Engineering Standards: Verification and Validation of Sy...
Software and Systems Engineering Standards: Verification and Validation of Sy...Software and Systems Engineering Standards: Verification and Validation of Sy...
Software and Systems Engineering Standards: Verification and Validation of Sy...
 
Earthing details of Electrical Substation
Earthing details of Electrical SubstationEarthing details of Electrical Substation
Earthing details of Electrical Substation
 
Class 1 | NFPA 72 | Overview Fire Alarm System
Class 1 | NFPA 72 | Overview Fire Alarm SystemClass 1 | NFPA 72 | Overview Fire Alarm System
Class 1 | NFPA 72 | Overview Fire Alarm System
 
Robotics-Asimov's Laws, Mechanical Subsystems, Robot Kinematics, Robot Dynami...
Robotics-Asimov's Laws, Mechanical Subsystems, Robot Kinematics, Robot Dynami...Robotics-Asimov's Laws, Mechanical Subsystems, Robot Kinematics, Robot Dynami...
Robotics-Asimov's Laws, Mechanical Subsystems, Robot Kinematics, Robot Dynami...
 
Research Methodology for Engineering pdf
Research Methodology for Engineering pdfResearch Methodology for Engineering pdf
Research Methodology for Engineering pdf
 
complete construction, environmental and economics information of biomass com...
complete construction, environmental and economics information of biomass com...complete construction, environmental and economics information of biomass com...
complete construction, environmental and economics information of biomass com...
 
11. Properties of Liquid Fuels in Energy Engineering.pdf
11. Properties of Liquid Fuels in Energy Engineering.pdf11. Properties of Liquid Fuels in Energy Engineering.pdf
11. Properties of Liquid Fuels in Energy Engineering.pdf
 
List of Accredited Concrete Batching Plant.pdf
List of Accredited Concrete Batching Plant.pdfList of Accredited Concrete Batching Plant.pdf
List of Accredited Concrete Batching Plant.pdf
 
Comparative study of High-rise Building Using ETABS,SAP200 and SAFE., SAFE an...
Comparative study of High-rise Building Using ETABS,SAP200 and SAFE., SAFE an...Comparative study of High-rise Building Using ETABS,SAP200 and SAFE., SAFE an...
Comparative study of High-rise Building Using ETABS,SAP200 and SAFE., SAFE an...
 
Gravity concentration_MI20612MI_________
Gravity concentration_MI20612MI_________Gravity concentration_MI20612MI_________
Gravity concentration_MI20612MI_________
 
DM Pillar Training Manual.ppt will be useful in deploying TPM in project
DM Pillar Training Manual.ppt will be useful in deploying TPM in projectDM Pillar Training Manual.ppt will be useful in deploying TPM in project
DM Pillar Training Manual.ppt will be useful in deploying TPM in project
 
Correctly Loading Incremental Data at Scale
Correctly Loading Incremental Data at ScaleCorrectly Loading Incremental Data at Scale
Correctly Loading Incremental Data at Scale
 
Industrial Safety Unit-IV workplace health and safety.ppt
Industrial Safety Unit-IV workplace health and safety.pptIndustrial Safety Unit-IV workplace health and safety.ppt
Industrial Safety Unit-IV workplace health and safety.ppt
 
Risk Management in Engineering Construction Project
Risk Management in Engineering Construction ProjectRisk Management in Engineering Construction Project
Risk Management in Engineering Construction Project
 
Past, Present and Future of Generative AI
Past, Present and Future of Generative AIPast, Present and Future of Generative AI
Past, Present and Future of Generative AI
 
young call girls in Green Park🔝 9953056974 🔝 escort Service
young call girls in Green Park🔝 9953056974 🔝 escort Serviceyoung call girls in Green Park🔝 9953056974 🔝 escort Service
young call girls in Green Park🔝 9953056974 🔝 escort Service
 

Prepare SD Card Raspberry Pi OS

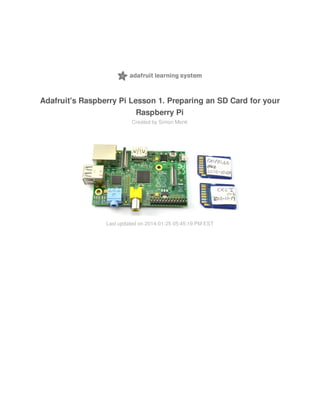
  • 1. Adafruit's Raspberry Pi Lesson 1. Preparing an SD Card for your Raspberry Pi Created by Simon Monk Last updated on 2014-01-25 05:45:19 PM EST
  • 2. 2 3 4 6 6 6 8 10 13 15 15 15 15 16 18 Guide Contents Guide Contents Overview You Will Need Downloading an Image Choose your Operating System Choose your Distribution Making an SD Card – Using a Windows Vista / 7 Making an SD Card – Using a Mac Test & Configure BONUS! Make a Backup Image! Back it up! What You'll Need Get the Script File Run the Script Problems? © Adafruit Industries http://learn.adafruit.com/adafruit-raspberry-pi-lesson-1-preparing-and-sd- card-for-your-raspberry-pi Page 2 of 19
  • 3. Overview When you buy a Raspberry Pi, it may or may not be sold with an SD card. The SD card is important because this is where the Raspberry Pi keeps its operating system and is also where you will store your documents and programs. Even if your Pi came with an SD card with the operating system on, it is a good idea to update it to the latest version, as improvements and bug fixes are going in all the time. Since putting the operating system onto an SD card wipes everything else off the card, it is worth considering using a USB flash drive for your documents, so that when you install a new version of the operating system, you don't have the complication of copying them off somewhere safe before reformatting the SD card. If your Pi did not come with an SD card then the minimum size you should get is 4GB, but buy a bigger SD card if you think you will need the space. This lesson shows you how to create an SD card for your Raspberry Pi. © Adafruit Industries http://learn.adafruit.com/adafruit-raspberry-pi-lesson-1-preparing-and-sd- card-for-your-raspberry-pi Page 3 of 19
  • 4. You Will Need To prepare an SD card for your computer, you will need: A 'regular' computer with a built-in SD card reader, or an add-on USB SD card reader. The instructions here are for Windows and Mac. You can pick up a tiny microSD card reader/writer that is nice and fast and works with all USB-ports at the Adafruit shop (http://adafru.it/939) An SD card at least 4GB in capacity. You can pick one up that is tested guaranteed to work with the Raspberry Pi at the Adafruit shop (http://adafru.it/102) © Adafruit Industries http://learn.adafruit.com/adafruit-raspberry-pi-lesson-1-preparing-and-sd- card-for-your-raspberry-pi Page 4 of 19
  • 5. © Adafruit Industries http://learn.adafruit.com/adafruit-raspberry-pi-lesson-1-preparing-and-sd- card-for-your-raspberry-pi Page 5 of 19
  • 6. Downloading an Image The operating system that will be installed onto the SD card must be downloaded from the Internet. This will usually be a zip file that then extracts to a file of type .img an image file. Whatever image file you download, the actual installation process is the same. Choose your Operating System There are a bewildering number of operating systems that you can install on your Raspberry Pi, if you are a beginner, then do not consider anything except one of the Linux distributions, and if you are an advanced user, then you probably won't be reading this anyway. Choose your Distribution Having decided you want to install Linux, that is not the end of the story. You now have to decide which distribution or 'distro' of Linux you want to install. Being an Open Source operating system, anyone can take one of the existing distributions an add things to it or configure it in a certain way before packaging it up as another distribution option for anyone to use. This is how the most common Raspberry Pi distribution 'Raspbian' came into existence. The 'Debian' distribution was configured and kitted out with useful things like IDLE (a python-programming language development editor) and Scratch (a learn-to-program gaming system) to make it suitable for the Pi. Adafruit have then taken Raspbian and configured it to make it as easy as possible to use the GPIO connector to attach DIY electronics to the Pi. All of the Adafruit tutorials (and nearly every other tutorial online) will work with either so we suggest picking one of the two: Raspbian – the Raspberry Pi recommended distribution, best for those that want the 'default standard' - nearly every Pi out there runs Raspbian http://www.raspberrypi.org/downloads (http://adafru.it/aMY) Occidentalis – Adafruit's version of Raspbian configured for hardware support. Best used by people who know they want to connect sensors, LEDs, buttons, servos, etc to their Pi http://learn.adafruit.com/adafruit-raspberry-pi-educational-linux-distro/ (http://adafru.it/aTc) In fact, if like me, you decide to keep your documents on a separate USB Flash drive, it is no bad thing to buy two SD cards and try both. In appearance, there is very little to choose from between the two. When it come to how it behaves, then 'Raspbian' is the more 'standard' distribution, but then Occidentalis is more electronics-hardware ready. Having said that, both distributions are regularly updated and each will no doubt incorporate features found in the other. © Adafruit Industries http://learn.adafruit.com/adafruit-raspberry-pi-lesson-1-preparing-and-sd- card-for-your-raspberry-pi Page 6 of 19
  • 7. Incidentally, the name Occidentalis come from the Latin name for the raspberry (Rubus Occidentalis). So, having made your choice, download the zip or img file and if it is in a zip file unzip it onto the Desktop. © Adafruit Industries http://learn.adafruit.com/adafruit-raspberry-pi-lesson-1-preparing-and-sd- card-for-your-raspberry-pi Page 7 of 19
  • 8. Making an SD Card – Using a Windows Vista / 7 There is a very useful utility that we can use to write a SD card available for Windows 7 and Vista. It is not unfortunately available for Windows XP. Step 1. Download Fedora ARM Installer from: http://fedoraproject.org/wiki/Fedora_ARM_Installer#Windows_Vista_.26_7 (http://adafru.it/aTd) Step 2. This will download a zip file that you must extract. The result will be a folder called 'faii-1.0.2-3- x32'. If you keep this outside of the Program Files area then you will be able to run it without changing its privileges. You can just leave it on your Desktop. Step 3. Eject any external storage devices such as USB flash drives and backup hard disks. This makes it easier to identify the SD card. Then insert the SD card into the slot on your computer or into the reader. Step 4. Right click to run the file fedo ra-arm-installer.exe as an administrator. This will launch the following application. Step 5. Select the image file and device. To do this, click the Browse button and navigate to the .img file for the distribution that you want to install and the select the device from the drop-down. © Adafruit Industries http://learn.adafruit.com/adafruit-raspberry-pi-lesson-1-preparing-and-sd- card-for-your-raspberry-pi Page 8 of 19
  • 9. Check that you have the right device, as it will be reformatted, and then click Install. It will take a few minutes to install, but once the SD card is ready, you will see the following. That's all there is to it. Your SD card is ready for use in your Raspberry Pi. © Adafruit Industries http://learn.adafruit.com/adafruit-raspberry-pi-lesson-1-preparing-and-sd- card-for-your-raspberry-pi Page 9 of 19
  • 10. Making an SD Card – Using a Mac Ray Vijoen has created a useful script that makes it really easy to make an SD card using a Mac. It is a shell script that takes all the necessary steps to create the SD card, including formatting it. You still have to run it from the command line. Step 1. Download Raspberry-PI-SD-Installer-OS-X from https://github.com/RayViljoen/Raspberry-PI-SD-Installer- OS-X (http://adafru.it/aTe) Look for the 'zip' button at the top and download it as a single zip file. Step 2. Extract the zip file. It will expand into a folder called 'Raspberry-PI-SD-Installer-OS-X-master'. Step 3. Use Finder to move the img file that you downloaded earlier into the Raspberry-PI-SD-Installer- OS-X-master folder. You can see here that I have both the Occidentalis and Raspbian images in the folder. That is fine, you can have as many images as you like in the folder. Step4. Open the Terminal app – you will find this in the Utilities folder of your Applications folder on your Mac. Then type the command 'cd' followed by the path of your Raspberry-PI-SD-Installer-OS-X-master folder. © Adafruit Industries http://learn.adafruit.com/adafruit-raspberry-pi-lesson-1-preparing-and-sd- card-for-your-raspberry-pi Page 10 of 19
  • 11. Step 5. Eject any external drives that you have connected to your computer. This just makes it easier to identify the correct drive that corresponds to your SD card. Insert the SD card that you want to use. Note that all data on this card will be erazed. Step 6. Run the Pi Installer by typing the following command into the Terminal: > sudo ./install Occidentalis_v02.img 'Occidentalis_v02.img' is the name of the img file for the distribution that you want to install. You will be prompted for your Mac password and then should see this: Step 7. © Adafruit Industries http://learn.adafruit.com/adafruit-raspberry-pi-lesson-1-preparing-and-sd- card-for-your-raspberry-pi Page 11 of 19
  • 12. Enter the number next to the SD card drive. Make sure you get this right, because whichever drive you select will be erased. It is then just a matter of waiting until all the image file is installed. This will take a few minutes. You can check on the progress by pressing ctrl-T When everything is complete, you should see this: Thats all there is to it, the SD card is now ready to use with your Raspberry Pi. © Adafruit Industries http://learn.adafruit.com/adafruit-raspberry-pi-lesson-1-preparing-and-sd- card-for-your-raspberry-pi Page 12 of 19
  • 13. Test & Configure If you plan to use multiple SD cards, it is not a bad idea to label them. Put the label on the side that shows when the SD card is inserted into the Pi. Testing the card is easy - insert it into your Pi, then connect a keyboard to the USB port and a NTSC/PAL TV to the composite port or an HDMI monitor to the HDMI Port. Then power it by connecting a Micro USB cable to the Pi and powering it via a computer or a USB wall charger You should see something like the following, an Adafruit/Raspberry logo in the top left, and a ton of text filling up the screen In the next tutorial, you will find out how to configure your Raspberry Pi the first time you boot it up. CClliicckk HHeerree ffoorr tthhee © Adafruit Industries http://learn.adafruit.com/adafruit-raspberry-pi-lesson-1-preparing-and-sd- card-for-your-raspberry-pi Page 13 of 19
  • 14. CClliicckk HHeerree ffoorr tthhee NNeexxtt LLeessssoonn http://adafru.it/aUa © Adafruit Industries http://learn.adafruit.com/adafruit-raspberry-pi-lesson-1-preparing-and-sd- card-for-your-raspberry-pi Page 14 of 19
  • 15. BONUS! Make a Backup Image! It took a while to get your SD card set up, didn't it? Bet you don't want to have to do that again, do you? Well, Back it up! Forum user, Mac user, and Adafruit Customer phil.drummond took it upon himself to find the best way to back up his system image. And he found a fast and easy way - a script which quickly creates a clone of your running Raspberry Pi system, ON THE PI ITSELF! NNoottee:: TThhiiss ssccrriipptt oonnllyy wwoorrkkss wwiitthh oocccciiddeennttaalliiss 00..22 aanndd oollddeerr vveerrssiioonnss ooff RRaassppbbiiaann The script comes to us by way of Pastebin user BILLW (http://adafru.it/cCG). CClliicckk ttoo ggeett BBIILLLLWW''ss CClloonniinngg SSccrriipptt http://adafru.it/cCH What You'll Need USB SD Card Reader Blank SD Card Booted and Running Raspberry Pi Get the Script File First, get a copy of the script file onto your Pi. You can do that in any one of several ways: First, download the file to your computer Then... Use ssh or vnc to transfer the file from the computer to the Pi ...Or... Pop the blank SD into your USB Card Reader Plug the Card Reader into your computer Copy the file to the blank SD © Adafruit Industries http://learn.adafruit.com/adafruit-raspberry-pi-lesson-1-preparing-and-sd- card-for-your-raspberry-pi Page 15 of 19
  • 16. Move the Card Reader to the Pi Copy the file from the SD to the Pi ...Or... Use the Pi's Web Browser to navigate to this page and download the script file directly Run the Script 1. Put the blank SD card into your USB Card Reader, and plug it into one of the PI's USB ports. 2. Open a Terminal window on the Pi 3. Navigate to the folder where you stored the script file. (If you stored the file on the Pi's Desktop, simply type 'cd Desktop') When you run the script, you will have to specify the name of your SD card. Raspbian and occidentalis assign the names 'sda', sdb', etc. to SD cards found on USB. If you only have one USB card reader attached, the name of your new SD card will be 'sda'. If you're not sure that sda is the right card, you can run this command to list the cards connected to your Pi. sudo fdisk -l The SD card slot with your running Pi system will show up as /dev/mmcblk0. Your blank card will be listed as /dev/sda1 (or possibly /dev/sdb1, if you have more than one USB card readers attached to the Pi). Note that you don't enter the '1' - if your card is listed as '/dev/sda1', then you would still enter 'sda' when you run the script ('sda' is the name of the card, 'sda1' is the name of the first partition on the card). Ok, so now you should be ready to run the commands © Adafruit Industries http://learn.adafruit.com/adafruit-raspberry-pi-lesson-1-preparing-and-sd- card-for-your-raspberry-pi Page 16 of 19
  • 17. chmod +x rpi-clone.sh sudo ./rpi_clone sda -f As noted earlier, the first parameter passed to the script is is the name of the target SD card, in this case 'sda'. The -f tells the script to entirely re-format the card. The script will ask you if you're sure you want to initialize the destination card. Type 'y', and hit the return key. If you see an error message instead, check below ffoorr ssoolluuttiioonnss!! Next, the script will ask you if you want to give your new backup a label. It's not necessary to do this - just hit the return key. Finally, the script will ask you if you're sure you really want to do this, before it begins creating the backup. Type 'y', and hit the return key. © Adafruit Industries http://learn.adafruit.com/adafruit-raspberry-pi-lesson-1-preparing-and-sd- card-for-your-raspberry-pi Page 17 of 19
  • 18. Now it's time to wait - the process will take a little while. When the process is complete, the script will ask if it should unmount the card with your new system clone/ Reply with 'y', and you're done! Now you can shutdown the Pi, swap the clone into the Pi's SD Card Slot, and restart - Bingo! a fully-operational clone of your Raspberry Pi system! Problems? If you see an error message like this: © Adafruit Industries http://learn.adafruit.com/adafruit-raspberry-pi-lesson-1-preparing-and-sd- card-for-your-raspberry-pi Page 18 of 19
  • 19. ...it means that your SD card is mounted in the file system. You have to unmount it before you can proceed. In the picture, I'm writing over an earlier clone of my system, which has two partitions: /dev/sda2 and /dev/sda1. You might only have one partition. In any case, issue the umount command for each mounted partition on your destination SD card: sudo umount /dev/sda1 Now try to run the script again! © Adafruit Industries Last Updated: 2014-01-25 05:45:22 PM EST Page 19 of 19