SlideShare a Scribd company logo
1 of 15
Download to read offline
All Creative Designs
Image Editing Tutorial
Preparing Images for the Web
Cropping, adjusting and web
optimizing images in Photoshop CS
© 2008 All Creative Designs Peter Krisch 2 of 15
Open Photoshop from desktop icon or use All Programs.
Create a new folder called “Web Ready Images”
Step 1: Open your image
File menu
Choose File > Open
Navigate to your image folder containing your originals to be
prepared for web use. Click small down arrow.
Change folder
view. Thumbnails
are small images.
Select Image
(Single left click)
than click Open
Image loads
© 2008 All Creative Designs Peter Krisch 3 of 15
Step 2: Make Duplicate
If you want to keep your image in its original state follow instructions below.
In the file menu go to Image and click Duplicate.
Rename the file if required and click OK.
© 2008 All Creative Designs Peter Krisch 4 of 15
Photoshop automatically saves this duplicate into the same folder containing the
original.
Close the original image in the background
And maximise your duplicate (copy)
Maximise duplicate
© 2008 All Creative Designs Peter Krisch 5 of 15
Step 3: Crop the image
Decide if your image needs cropping, if not go to step 4.
Select cropping tool from tool bar
To keep the ratio 4:3 most digital cameras use any of the dimensions below:
Height: 1280px Width: 960px
Height: 1024px Width: 768px
Height: 800px Width: 600px
Height: 600px Width: 450px
Height: 400px Width: 300px
In the properties bar for the crop tool type 800px for width and 600px for height.
Tool Bar
Properties tool bar with Crop tool selected
File menu
© 2008 All Creative Designs Peter Krisch 6 of 15
Than click starting point and drag crop tool over your image.
If crop area is correct click green tick in properties tool bar, if not click red circle
and try again.
Utilise Zoom tool in tool bar to enlarge cropped area and continue.
Check image size in file menu under Image > Image Size.
Values should read 800px by 600px, if not, select Edit in the file menu and click
Undo, and start again.
Red Circle Green Tick
© 2008 All Creative Designs Peter Krisch 7 of 15
Step 4: Change Image Size
If you have cropped your image go to Step 5.
If you have not cropped your image to desired size change the dimensions of
your image now by selecting Image in file menu, than click Image size.
In the Image Size dialog box make sure Constrain Proportions is ticked.
Type your desired width (800 for this example) and height should automatically
adjust. Click OK.
Constraint Proportions ticked
© 2008 All Creative Designs Peter Krisch 8 of 15
Step 5: Image Adjustments
Your image may need only one or none of the Image Adjustments described
below.
A. Auto Levels:
In file menu go to Image > Adjustments and click Auto Levels.
If the result is satisfactory continue
If not, use Edit > Undo Auto Levels
To compare changes toggle between Undo and Redo in the file menu under Edit.
Color Balance
Auto Levels
Brightness/Contrast
Shadow/Highlight
© 2008 All Creative Designs Peter Krisch 9 of 15
B. Colour Balance
(See image on previous page)
In file menu go to Image > Adjustments and click Color Balance
for dialog box to appear.
Use sliders to adjust colours than click OK.
Change Tone Balance to effect Shadows, Midtones or Highlights areas.
C. Contrast/Brightness
To adjust Contrast/Brightness go to Image > Adjustments and click
Contrast/Brightness. Use sliders to adjust and click OK.
(See image on previous page)
© 2008 All Creative Designs Peter Krisch 10 of 15
D. Shadow/Highlights
To fix an under or overexposed image go to Image > Adjustments and click
Shadow/Highlight.
Click OK after adjusting.
Step 6: Save your image for the Web
When you are happy with your results go to the file menu > file and click
Save for Web.
© 2008 All Creative Designs Peter Krisch 11 of 15
Image Ready opens with your image loaded.
Click 2 –Up and select JPEG (see image next page)
Adjust your quality from Low to Maximum by using drop down arrow, (See image on
page below) and see your image file size changing. Make sure Optimized is ticked.
Keep your file size below 200KB for faster downloads.
2 -Up
Select JPEG
Image file size after optimisationImage file size before optimisation
© 2008 All Creative Designs Peter Krisch 12 of 15
Click Save and Save Optimized As’ dialog box appears. (See next page)
Quality Levels
Optimized ticked
Select JPEG
Do Adjustments and then
Click Save
© 2008 All Creative Designs Peter Krisch 13 of 15
Navigate to your prepared Web Ready Image Folder.
Type file name (No more than 32 Characters) with an extension like _fs to
indicate full size, than click Save. This will save a web optimized copy of your
image at 800px by 600px. Click Save to automatically return to your Photoshop
image.
Change ViewSave Optimized
As’ dialog box
© 2008 All Creative Designs Peter Krisch 14 of 15
Step 7: Create Thumbnail Image
If you like to create a thumbnail image (to use as a link for your enlarged view)
follow Step 4: Change Image Size (Otherwise go to Step 8)
Type 200 for width, height should adjust to 150
Than click OK.
Follow instructions described in Step 6: Save your image for the Web
Keep your file size below 20KB for faster downloads.
Save an optimized thumbnail size image with an extension like _tn (thumbnail) to
indicate small size into your web ready image folder.
© 2008 All Creative Designs Peter Krisch 15 of 15
Step 8: Save changes to Original or Duplicate
After creating a web optimized copy save your changes to the original or
duplicate.
If you have created a thumbnail image select Edit > Undo Image Size as you
most probably want to save your Original/Duplicate at reasonable size for future
manipulations.
Click Save and in JPEG option select maximum for quality, click OK.
Close your image

More Related Content

Similar to Preparing images for_web

Introduction to PhotoFiltre
Introduction to PhotoFiltreIntroduction to PhotoFiltre
Introduction to PhotoFiltreZampichelli
 
Les16 Working With Pictures
Les16  Working With  PicturesLes16  Working With  Pictures
Les16 Working With Picturesguevarra_2000
 
Optimizing jpgs with MS Office Picture Manager
Optimizing jpgs with MS Office Picture ManagerOptimizing jpgs with MS Office Picture Manager
Optimizing jpgs with MS Office Picture Managernewgraham
 
Learning image retouch with Photoshop CS6 with 100 practical exercises
Learning image retouch with Photoshop CS6 with 100 practical exercisesLearning image retouch with Photoshop CS6 with 100 practical exercises
Learning image retouch with Photoshop CS6 with 100 practical exercisesMCB Press
 
How To Make a Business Card on Photoshop
How To Make a Business Card on PhotoshopHow To Make a Business Card on Photoshop
How To Make a Business Card on PhotoshopDesign and Printing
 
Grow Your Own Clip Art
Grow Your Own Clip ArtGrow Your Own Clip Art
Grow Your Own Clip ArtSharon Elin
 
edit-photos-in-windows-11.docx
edit-photos-in-windows-11.docxedit-photos-in-windows-11.docx
edit-photos-in-windows-11.docxssuser1eca7d
 
Instant Photo Overlays
Instant Photo OverlaysInstant Photo Overlays
Instant Photo OverlaysDesignEasy
 
Start a Blog: Module 7
Start a Blog: Module 7Start a Blog: Module 7
Start a Blog: Module 7Merri Dennis
 
Adobe photoshop cs6
Adobe photoshop cs6Adobe photoshop cs6
Adobe photoshop cs6Ila Azmil
 
Adobe photoshop cs6
Adobe photoshop cs6Adobe photoshop cs6
Adobe photoshop cs6ilaazmil2
 
Adobe photoshop cs6 tutorial
Adobe photoshop cs6 tutorialAdobe photoshop cs6 tutorial
Adobe photoshop cs6 tutorialAgung Yuwono
 
Grain size analysis by using ImageJ
Grain size analysis by using ImageJGrain size analysis by using ImageJ
Grain size analysis by using ImageJViet NguyenHoang
 

Similar to Preparing images for_web (20)

Class 20
Class 20Class 20
Class 20
 
Introduction to PhotoFiltre
Introduction to PhotoFiltreIntroduction to PhotoFiltre
Introduction to PhotoFiltre
 
Les16 Working With Pictures
Les16  Working With  PicturesLes16  Working With  Pictures
Les16 Working With Pictures
 
Basic tutorials
Basic tutorialsBasic tutorials
Basic tutorials
 
Basic tutorials
Basic tutorialsBasic tutorials
Basic tutorials
 
Optimizing jpgs with MS Office Picture Manager
Optimizing jpgs with MS Office Picture ManagerOptimizing jpgs with MS Office Picture Manager
Optimizing jpgs with MS Office Picture Manager
 
Learning image retouch with Photoshop CS6 with 100 practical exercises
Learning image retouch with Photoshop CS6 with 100 practical exercisesLearning image retouch with Photoshop CS6 with 100 practical exercises
Learning image retouch with Photoshop CS6 with 100 practical exercises
 
How To Make a Business Card on Photoshop
How To Make a Business Card on PhotoshopHow To Make a Business Card on Photoshop
How To Make a Business Card on Photoshop
 
Grow Your Own Clip Art
Grow Your Own Clip ArtGrow Your Own Clip Art
Grow Your Own Clip Art
 
edit-photos-in-windows-11.docx
edit-photos-in-windows-11.docxedit-photos-in-windows-11.docx
edit-photos-in-windows-11.docx
 
Pictures Resizing Images
Pictures Resizing ImagesPictures Resizing Images
Pictures Resizing Images
 
Graphic Fun
Graphic FunGraphic Fun
Graphic Fun
 
Photoshop
PhotoshopPhotoshop
Photoshop
 
Instant Photo Overlays
Instant Photo OverlaysInstant Photo Overlays
Instant Photo Overlays
 
Start a Blog: Module 7
Start a Blog: Module 7Start a Blog: Module 7
Start a Blog: Module 7
 
Fms Web Cms Training
Fms Web Cms TrainingFms Web Cms Training
Fms Web Cms Training
 
Adobe photoshop cs6
Adobe photoshop cs6Adobe photoshop cs6
Adobe photoshop cs6
 
Adobe photoshop cs6
Adobe photoshop cs6Adobe photoshop cs6
Adobe photoshop cs6
 
Adobe photoshop cs6 tutorial
Adobe photoshop cs6 tutorialAdobe photoshop cs6 tutorial
Adobe photoshop cs6 tutorial
 
Grain size analysis by using ImageJ
Grain size analysis by using ImageJGrain size analysis by using ImageJ
Grain size analysis by using ImageJ
 

Recently uploaded

call girls in Kamla Market (DELHI) 🔝 >༒9953330565🔝 genuine Escort Service 🔝✔️✔️
call girls in Kamla Market (DELHI) 🔝 >༒9953330565🔝 genuine Escort Service 🔝✔️✔️call girls in Kamla Market (DELHI) 🔝 >༒9953330565🔝 genuine Escort Service 🔝✔️✔️
call girls in Kamla Market (DELHI) 🔝 >༒9953330565🔝 genuine Escort Service 🔝✔️✔️9953056974 Low Rate Call Girls In Saket, Delhi NCR
 
Inclusivity Essentials_ Creating Accessible Websites for Nonprofits .pdf
Inclusivity Essentials_ Creating Accessible Websites for Nonprofits .pdfInclusivity Essentials_ Creating Accessible Websites for Nonprofits .pdf
Inclusivity Essentials_ Creating Accessible Websites for Nonprofits .pdfTechSoup
 
What is Model Inheritance in Odoo 17 ERP
What is Model Inheritance in Odoo 17 ERPWhat is Model Inheritance in Odoo 17 ERP
What is Model Inheritance in Odoo 17 ERPCeline George
 
Global Lehigh Strategic Initiatives (without descriptions)
Global Lehigh Strategic Initiatives (without descriptions)Global Lehigh Strategic Initiatives (without descriptions)
Global Lehigh Strategic Initiatives (without descriptions)cama23
 
Keynote by Prof. Wurzer at Nordex about IP-design
Keynote by Prof. Wurzer at Nordex about IP-designKeynote by Prof. Wurzer at Nordex about IP-design
Keynote by Prof. Wurzer at Nordex about IP-designMIPLM
 
Choosing the Right CBSE School A Comprehensive Guide for Parents
Choosing the Right CBSE School A Comprehensive Guide for ParentsChoosing the Right CBSE School A Comprehensive Guide for Parents
Choosing the Right CBSE School A Comprehensive Guide for Parentsnavabharathschool99
 
Visit to a blind student's school🧑‍🦯🧑‍🦯(community medicine)
Visit to a blind student's school🧑‍🦯🧑‍🦯(community medicine)Visit to a blind student's school🧑‍🦯🧑‍🦯(community medicine)
Visit to a blind student's school🧑‍🦯🧑‍🦯(community medicine)lakshayb543
 
FILIPINO PSYCHology sikolohiyang pilipino
FILIPINO PSYCHology sikolohiyang pilipinoFILIPINO PSYCHology sikolohiyang pilipino
FILIPINO PSYCHology sikolohiyang pilipinojohnmickonozaleda
 
Influencing policy (training slides from Fast Track Impact)
Influencing policy (training slides from Fast Track Impact)Influencing policy (training slides from Fast Track Impact)
Influencing policy (training slides from Fast Track Impact)Mark Reed
 
How to do quick user assign in kanban in Odoo 17 ERP
How to do quick user assign in kanban in Odoo 17 ERPHow to do quick user assign in kanban in Odoo 17 ERP
How to do quick user assign in kanban in Odoo 17 ERPCeline George
 
ACC 2024 Chronicles. Cardiology. Exam.pdf
ACC 2024 Chronicles. Cardiology. Exam.pdfACC 2024 Chronicles. Cardiology. Exam.pdf
ACC 2024 Chronicles. Cardiology. Exam.pdfSpandanaRallapalli
 
ISYU TUNGKOL SA SEKSWLADIDA (ISSUE ABOUT SEXUALITY
ISYU TUNGKOL SA SEKSWLADIDA (ISSUE ABOUT SEXUALITYISYU TUNGKOL SA SEKSWLADIDA (ISSUE ABOUT SEXUALITY
ISYU TUNGKOL SA SEKSWLADIDA (ISSUE ABOUT SEXUALITYKayeClaireEstoconing
 
MULTIDISCIPLINRY NATURE OF THE ENVIRONMENTAL STUDIES.pptx
MULTIDISCIPLINRY NATURE OF THE ENVIRONMENTAL STUDIES.pptxMULTIDISCIPLINRY NATURE OF THE ENVIRONMENTAL STUDIES.pptx
MULTIDISCIPLINRY NATURE OF THE ENVIRONMENTAL STUDIES.pptxAnupkumar Sharma
 
ECONOMIC CONTEXT - PAPER 1 Q3: NEWSPAPERS.pptx
ECONOMIC CONTEXT - PAPER 1 Q3: NEWSPAPERS.pptxECONOMIC CONTEXT - PAPER 1 Q3: NEWSPAPERS.pptx
ECONOMIC CONTEXT - PAPER 1 Q3: NEWSPAPERS.pptxiammrhaywood
 
HỌC TỐT TIẾNG ANH 11 THEO CHƯƠNG TRÌNH GLOBAL SUCCESS ĐÁP ÁN CHI TIẾT - CẢ NĂ...
HỌC TỐT TIẾNG ANH 11 THEO CHƯƠNG TRÌNH GLOBAL SUCCESS ĐÁP ÁN CHI TIẾT - CẢ NĂ...HỌC TỐT TIẾNG ANH 11 THEO CHƯƠNG TRÌNH GLOBAL SUCCESS ĐÁP ÁN CHI TIẾT - CẢ NĂ...
HỌC TỐT TIẾNG ANH 11 THEO CHƯƠNG TRÌNH GLOBAL SUCCESS ĐÁP ÁN CHI TIẾT - CẢ NĂ...Nguyen Thanh Tu Collection
 

Recently uploaded (20)

call girls in Kamla Market (DELHI) 🔝 >༒9953330565🔝 genuine Escort Service 🔝✔️✔️
call girls in Kamla Market (DELHI) 🔝 >༒9953330565🔝 genuine Escort Service 🔝✔️✔️call girls in Kamla Market (DELHI) 🔝 >༒9953330565🔝 genuine Escort Service 🔝✔️✔️
call girls in Kamla Market (DELHI) 🔝 >༒9953330565🔝 genuine Escort Service 🔝✔️✔️
 
Inclusivity Essentials_ Creating Accessible Websites for Nonprofits .pdf
Inclusivity Essentials_ Creating Accessible Websites for Nonprofits .pdfInclusivity Essentials_ Creating Accessible Websites for Nonprofits .pdf
Inclusivity Essentials_ Creating Accessible Websites for Nonprofits .pdf
 
What is Model Inheritance in Odoo 17 ERP
What is Model Inheritance in Odoo 17 ERPWhat is Model Inheritance in Odoo 17 ERP
What is Model Inheritance in Odoo 17 ERP
 
Global Lehigh Strategic Initiatives (without descriptions)
Global Lehigh Strategic Initiatives (without descriptions)Global Lehigh Strategic Initiatives (without descriptions)
Global Lehigh Strategic Initiatives (without descriptions)
 
Keynote by Prof. Wurzer at Nordex about IP-design
Keynote by Prof. Wurzer at Nordex about IP-designKeynote by Prof. Wurzer at Nordex about IP-design
Keynote by Prof. Wurzer at Nordex about IP-design
 
Choosing the Right CBSE School A Comprehensive Guide for Parents
Choosing the Right CBSE School A Comprehensive Guide for ParentsChoosing the Right CBSE School A Comprehensive Guide for Parents
Choosing the Right CBSE School A Comprehensive Guide for Parents
 
Visit to a blind student's school🧑‍🦯🧑‍🦯(community medicine)
Visit to a blind student's school🧑‍🦯🧑‍🦯(community medicine)Visit to a blind student's school🧑‍🦯🧑‍🦯(community medicine)
Visit to a blind student's school🧑‍🦯🧑‍🦯(community medicine)
 
FILIPINO PSYCHology sikolohiyang pilipino
FILIPINO PSYCHology sikolohiyang pilipinoFILIPINO PSYCHology sikolohiyang pilipino
FILIPINO PSYCHology sikolohiyang pilipino
 
Influencing policy (training slides from Fast Track Impact)
Influencing policy (training slides from Fast Track Impact)Influencing policy (training slides from Fast Track Impact)
Influencing policy (training slides from Fast Track Impact)
 
How to do quick user assign in kanban in Odoo 17 ERP
How to do quick user assign in kanban in Odoo 17 ERPHow to do quick user assign in kanban in Odoo 17 ERP
How to do quick user assign in kanban in Odoo 17 ERP
 
YOUVE GOT EMAIL_FINALS_EL_DORADO_2024.pptx
YOUVE GOT EMAIL_FINALS_EL_DORADO_2024.pptxYOUVE GOT EMAIL_FINALS_EL_DORADO_2024.pptx
YOUVE GOT EMAIL_FINALS_EL_DORADO_2024.pptx
 
LEFT_ON_C'N_ PRELIMS_EL_DORADO_2024.pptx
LEFT_ON_C'N_ PRELIMS_EL_DORADO_2024.pptxLEFT_ON_C'N_ PRELIMS_EL_DORADO_2024.pptx
LEFT_ON_C'N_ PRELIMS_EL_DORADO_2024.pptx
 
Raw materials used in Herbal Cosmetics.pptx
Raw materials used in Herbal Cosmetics.pptxRaw materials used in Herbal Cosmetics.pptx
Raw materials used in Herbal Cosmetics.pptx
 
Model Call Girl in Tilak Nagar Delhi reach out to us at 🔝9953056974🔝
Model Call Girl in Tilak Nagar Delhi reach out to us at 🔝9953056974🔝Model Call Girl in Tilak Nagar Delhi reach out to us at 🔝9953056974🔝
Model Call Girl in Tilak Nagar Delhi reach out to us at 🔝9953056974🔝
 
ACC 2024 Chronicles. Cardiology. Exam.pdf
ACC 2024 Chronicles. Cardiology. Exam.pdfACC 2024 Chronicles. Cardiology. Exam.pdf
ACC 2024 Chronicles. Cardiology. Exam.pdf
 
ISYU TUNGKOL SA SEKSWLADIDA (ISSUE ABOUT SEXUALITY
ISYU TUNGKOL SA SEKSWLADIDA (ISSUE ABOUT SEXUALITYISYU TUNGKOL SA SEKSWLADIDA (ISSUE ABOUT SEXUALITY
ISYU TUNGKOL SA SEKSWLADIDA (ISSUE ABOUT SEXUALITY
 
MULTIDISCIPLINRY NATURE OF THE ENVIRONMENTAL STUDIES.pptx
MULTIDISCIPLINRY NATURE OF THE ENVIRONMENTAL STUDIES.pptxMULTIDISCIPLINRY NATURE OF THE ENVIRONMENTAL STUDIES.pptx
MULTIDISCIPLINRY NATURE OF THE ENVIRONMENTAL STUDIES.pptx
 
FINALS_OF_LEFT_ON_C'N_EL_DORADO_2024.pptx
FINALS_OF_LEFT_ON_C'N_EL_DORADO_2024.pptxFINALS_OF_LEFT_ON_C'N_EL_DORADO_2024.pptx
FINALS_OF_LEFT_ON_C'N_EL_DORADO_2024.pptx
 
ECONOMIC CONTEXT - PAPER 1 Q3: NEWSPAPERS.pptx
ECONOMIC CONTEXT - PAPER 1 Q3: NEWSPAPERS.pptxECONOMIC CONTEXT - PAPER 1 Q3: NEWSPAPERS.pptx
ECONOMIC CONTEXT - PAPER 1 Q3: NEWSPAPERS.pptx
 
HỌC TỐT TIẾNG ANH 11 THEO CHƯƠNG TRÌNH GLOBAL SUCCESS ĐÁP ÁN CHI TIẾT - CẢ NĂ...
HỌC TỐT TIẾNG ANH 11 THEO CHƯƠNG TRÌNH GLOBAL SUCCESS ĐÁP ÁN CHI TIẾT - CẢ NĂ...HỌC TỐT TIẾNG ANH 11 THEO CHƯƠNG TRÌNH GLOBAL SUCCESS ĐÁP ÁN CHI TIẾT - CẢ NĂ...
HỌC TỐT TIẾNG ANH 11 THEO CHƯƠNG TRÌNH GLOBAL SUCCESS ĐÁP ÁN CHI TIẾT - CẢ NĂ...
 

Preparing images for_web

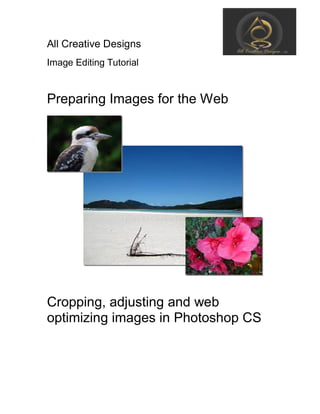
  • 1. All Creative Designs Image Editing Tutorial Preparing Images for the Web Cropping, adjusting and web optimizing images in Photoshop CS
  • 2. © 2008 All Creative Designs Peter Krisch 2 of 15 Open Photoshop from desktop icon or use All Programs. Create a new folder called “Web Ready Images” Step 1: Open your image File menu Choose File > Open Navigate to your image folder containing your originals to be prepared for web use. Click small down arrow. Change folder view. Thumbnails are small images. Select Image (Single left click) than click Open Image loads
  • 3. © 2008 All Creative Designs Peter Krisch 3 of 15 Step 2: Make Duplicate If you want to keep your image in its original state follow instructions below. In the file menu go to Image and click Duplicate. Rename the file if required and click OK.
  • 4. © 2008 All Creative Designs Peter Krisch 4 of 15 Photoshop automatically saves this duplicate into the same folder containing the original. Close the original image in the background And maximise your duplicate (copy) Maximise duplicate
  • 5. © 2008 All Creative Designs Peter Krisch 5 of 15 Step 3: Crop the image Decide if your image needs cropping, if not go to step 4. Select cropping tool from tool bar To keep the ratio 4:3 most digital cameras use any of the dimensions below: Height: 1280px Width: 960px Height: 1024px Width: 768px Height: 800px Width: 600px Height: 600px Width: 450px Height: 400px Width: 300px In the properties bar for the crop tool type 800px for width and 600px for height. Tool Bar Properties tool bar with Crop tool selected File menu
  • 6. © 2008 All Creative Designs Peter Krisch 6 of 15 Than click starting point and drag crop tool over your image. If crop area is correct click green tick in properties tool bar, if not click red circle and try again. Utilise Zoom tool in tool bar to enlarge cropped area and continue. Check image size in file menu under Image > Image Size. Values should read 800px by 600px, if not, select Edit in the file menu and click Undo, and start again. Red Circle Green Tick
  • 7. © 2008 All Creative Designs Peter Krisch 7 of 15 Step 4: Change Image Size If you have cropped your image go to Step 5. If you have not cropped your image to desired size change the dimensions of your image now by selecting Image in file menu, than click Image size. In the Image Size dialog box make sure Constrain Proportions is ticked. Type your desired width (800 for this example) and height should automatically adjust. Click OK. Constraint Proportions ticked
  • 8. © 2008 All Creative Designs Peter Krisch 8 of 15 Step 5: Image Adjustments Your image may need only one or none of the Image Adjustments described below. A. Auto Levels: In file menu go to Image > Adjustments and click Auto Levels. If the result is satisfactory continue If not, use Edit > Undo Auto Levels To compare changes toggle between Undo and Redo in the file menu under Edit. Color Balance Auto Levels Brightness/Contrast Shadow/Highlight
  • 9. © 2008 All Creative Designs Peter Krisch 9 of 15 B. Colour Balance (See image on previous page) In file menu go to Image > Adjustments and click Color Balance for dialog box to appear. Use sliders to adjust colours than click OK. Change Tone Balance to effect Shadows, Midtones or Highlights areas. C. Contrast/Brightness To adjust Contrast/Brightness go to Image > Adjustments and click Contrast/Brightness. Use sliders to adjust and click OK. (See image on previous page)
  • 10. © 2008 All Creative Designs Peter Krisch 10 of 15 D. Shadow/Highlights To fix an under or overexposed image go to Image > Adjustments and click Shadow/Highlight. Click OK after adjusting. Step 6: Save your image for the Web When you are happy with your results go to the file menu > file and click Save for Web.
  • 11. © 2008 All Creative Designs Peter Krisch 11 of 15 Image Ready opens with your image loaded. Click 2 –Up and select JPEG (see image next page) Adjust your quality from Low to Maximum by using drop down arrow, (See image on page below) and see your image file size changing. Make sure Optimized is ticked. Keep your file size below 200KB for faster downloads. 2 -Up Select JPEG Image file size after optimisationImage file size before optimisation
  • 12. © 2008 All Creative Designs Peter Krisch 12 of 15 Click Save and Save Optimized As’ dialog box appears. (See next page) Quality Levels Optimized ticked Select JPEG Do Adjustments and then Click Save
  • 13. © 2008 All Creative Designs Peter Krisch 13 of 15 Navigate to your prepared Web Ready Image Folder. Type file name (No more than 32 Characters) with an extension like _fs to indicate full size, than click Save. This will save a web optimized copy of your image at 800px by 600px. Click Save to automatically return to your Photoshop image. Change ViewSave Optimized As’ dialog box
  • 14. © 2008 All Creative Designs Peter Krisch 14 of 15 Step 7: Create Thumbnail Image If you like to create a thumbnail image (to use as a link for your enlarged view) follow Step 4: Change Image Size (Otherwise go to Step 8) Type 200 for width, height should adjust to 150 Than click OK. Follow instructions described in Step 6: Save your image for the Web Keep your file size below 20KB for faster downloads. Save an optimized thumbnail size image with an extension like _tn (thumbnail) to indicate small size into your web ready image folder.
  • 15. © 2008 All Creative Designs Peter Krisch 15 of 15 Step 8: Save changes to Original or Duplicate After creating a web optimized copy save your changes to the original or duplicate. If you have created a thumbnail image select Edit > Undo Image Size as you most probably want to save your Original/Duplicate at reasonable size for future manipulations. Click Save and in JPEG option select maximum for quality, click OK. Close your image