Ecología
•Descargar como PPTX, PDF•
0 recomendaciones•1,307 vistas

Este documento describe los conceptos fundamentales de la ecología en 3 oraciones. Explica que la ecología estudia las interrelaciones entre los organismos y su ambiente natural, y que esto se estudia a diferentes niveles como el organismo, la población y el ecosistema. También describe los ciclos biogeoquímicos que reciclan elementos entre los organismos y el medio ambiente, como el ciclo del agua.

Recomendados
Más contenido relacionado
La actualidad más candente
La actualidad más candente (20)
Similar a Ecología
Similar a Ecología (20)
Último
Último (20)
Ecología
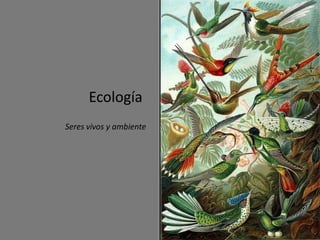
- 1. Ecología Seres vivos y ambiente
- 2. Índice -Objeto de Estructuras de un estudio de la ecosistema ecología Niveles de estudio Tipos de de la ecología ecosistemas Ciclo Índices ecológicos biogeoquimicos -Relaciones Energía de los interpoblacionales o ecosistemas interespecificas Relaciones intrapoblacionales o Bibliografía intraespecificas
- 3. 1 Ecología 2 Pretende 3 Del griego Ciencia que Establecer un orden «οίκος»= estudia las determinado dentro "casa", y interrelaciones de la naturaleza «λóγος»= " mediante principios de los conocimiento“ de ciencias como la organismos y su física (átomos), la = “estudio del ambiente natural. química lugar donde se (organismos) y la habita” biología (organismos).
- 4. 1 Haeckel 2 Investigación 3 Relación Indica que la De las relaciones Amistosa y hostil ecología es el totales del animal con aquellos cuerpo del con su ambiente animales y conocimiento tanto orgánico plantas con los relativo a la como inorgánico. cuales entra economía de la directa o naturaleza. indirectamente en contacto.
- 5. Método científico de la Ecología
- 6. La Ecología en México • En 1980, había solamente cinco ecólogos con el grado de doctor, en la actualidad hay más de 350 investigadores en ecología. • México es un país con una topografía muy accidentada, una gran variedad de climas y suelos, así como una muy compleja historia geológica y biológica. Esta es la razón de la gran diversidad de especies y que sea uno de los países conocidos como megadiversos.
- 7. Aquí se encuentra: • 12% de las especies conocidas en el planeta • Primer lugar en riqueza de reptiles con 707 • Segundo en mamíferos con 505 • Cuarto en anfibios con 293 • Quinto en plantas con 26 000 • 2 700 especies de peces • 1 060 de aves • 30 mil de invertebrados • La biodiversidad real existente y que se estima en unas 200 mil especies.
- 8. Gran diversidad en México • Ecosistemas • Especies de plantas • Especies de animales
- 9. Niveles de estudio de la ecología • 1. Organismo • 2. Población • 3. Comunidad • 4. Ecosistema • 5. Bioma • 6. Biosfera • 7. Gaia
- 12. POBLACIONES La mayoría de problemas ecológicos requiere del conocimiento de una serie de aspectos de las poblaciones naturales. -Densidad de la población -Densidad bruta Métodos: Censo directo o conteo Método de caza, marcado y recaptura Método de muestreo por parcelas Método sin parcelas Índices: Índices de porcentaje Índice de abundancia relativa Índice de crecimiento
- 14. Densidad de población mundial
- 15. Evolución • Es el proceso mediante el cual las poblaciones modifican sus características en el transcurso del tiempo. Estos cambios se presentan como resultado de una selección natural. En el nivel de jerarquía de la población se presentan ciertas características que ninguno de sus miembros individuales posee. Cada individuo nace, crece, y muere, pero sólo la población puede presentar un índice de natalidad, de crecimiento, de mortalidad, y un patrón de dispersión en el tiempo y en el espacio.
- 16. Natalidad • Es la propiedad de aumento intrínseca a una población. Es decir, la aparición de nuevos organismos en una población, ya sea por nacimiento, eclosión, germina ción o división. Es una propiedad que se refiere a la población y no a individuos aislados. Indice de natalidad = DNn/Dt, DNn es la producción de nuevos organismos en la población.
- 17. Mortalidad Es la desaparición por muerte de los individuos de una población. Se expresa mediante índices: DNm/Dt=M, índice de mortalidad. Índice de mortalidad específico, o número de organismos que mueren por unidad de tiempo y unidad de población, = DNm/NDt. Índice de supervivencia, es el número de sobrevivientes= 1-M.
- 18. • Crecimiento de la población Aumento o la disminución del número total de individuos de una población como resultado no sólo de la natalidad y la mortalidad, sino también de la emigración y de la inmigración. En condiciones óptimas el crecimiento de la población tiene carácter exponencial, es decir, - la población aumenta mediante un porcentaje constante del total en un de tiempo constante- . Por ejemplo en la relación predador-presa, donde la población de los carnívoros depende de la cantidad disponibles de presas. Para la regulación de la densidad de la población se consideran importantes aquellos factores, los cuales cuando la población se incrementa, ellos se reducen. Hay tres tipos de crecimiento: • Crecimiento exponencial • Crecimiento en J • Crecimiento en S o Sigmoide
- 19. • El tamaño de la población, el cual corresponde al número máximo de individuos que viven en el ecosistema corresponde a la capacidad de carga del ambiente para esa especie. • Cuando el tamaño de la población alcanza la capacidad de carga, la rata de crecimiento de la población disminuye. Debido a que la población supera la capacidad de carga, los recursos disponibles se agotan y la población se reduce. Esta situación involucra la competencia intraespecífica (dentro de la población) por los recursos. • La reproducción es un incremento claro de retroalimentación positiva. La descendencia, produce más descendencia que produce más descendencia. La retroalimentación positiva de la reproducción sin oposición, no puede mantenerse por mucho tiempo en un mundo de recursos limitados.
- 20. • El potencial biótico es la capacidad de los organismos para reproducirse en condiciones óptimas. La resistencia ambiental indica los factores bióticos y abióticos que impiden a los organismos alcanzar su potencial biótico o continuar en él.
- 21. Estructura de la población • La estructura de la población nos indica la distribución de los organismos que la componen. Como características estructurales de las poblaciones son importantes: a) el censo de distribución de sexos y b) la distribución de edades o estructura etaria. • La relación de sexos raramente es igual a la unidad. Lo más frecuente es que uno de los sexos esté mejor representado que el otro. En los vertebrados generalmente existe una predominancia de machos en el momento de nacer. Este es el caso en la mayoría de patos, y conejos; en las ardillas generalmente ocurre lo contrario.
- 22. El primer tipo es una pirámide con base amplia, es decir con una proporción alta de individuos jóvenes, este tipo es característico de las poblaciones de crecimiento rápido. El segundo es de tipo intermedio con un porcentaje moderado de los individuos en todas las edades, es propio de poblaciones estacionarias. El tercero es el que presenta una base estrecha con mayor cantidad de individuos adultos que jóvenes, característico de poblaciones que están declinando.
- 23. Curvas de sobrevivencia • Se emplean en el estudio del número de organismos de una población que sobreviven a una edad particular, se expresa como número de sobrevivientes por cada mil miembros de una población. La tasa de mortalidad bruta se expresa por el número de muertes por cada mil miembros de la población, sin importar la edad o el sexo. • En ecología se utilizan tablas de vida para analizar la tasa bruta de mortalidad de una población. La mortalidad también puede expresarse como una curva de supervivencia, la cual expresa el número de sobrevivientes en varios intervalos de edad.
- 24. Relaciones interpoblacionales o interespecificas Prima el interés por el alimento o el espacio, aunque en muchas ocasiones, para conseguir unos fines se recurra a compromisos que se manifiestan en asociaciones del tipo de una simbiosis. • Dentro de este amplio apartado se incluyen todas aquellas relaciones directas o indirectas entre individuos de especies diferentes y que se estudian en otros apartados. • La importancia de estas relaciones es que establecen muchas veces los flujos de energía dentro de las redes tróficas y por tanto contribuyen a la estructuración del ecosistema.
- 25. Las relaciones positivas: Cuando menos, una de las especies obtiene un beneficio de otra sin causarle daño o alterar el curso de su vida. Las relaciones interespecíficas neutrales: No existe un daño o beneficio directo hacia o desde una especie. El daño o beneficio se obtienen solo de manera indirecta. Las relaciones interespecíficas negativas: Una de las especies obtiene un beneficio en detrimento de otras especies.
- 27. Relaciones intrapoblacionales o intraespecificas Ocurren entre organismos de la misma especie. • Dominación Social: Es la estratificación de grupos sociales, de acuerdo con la influencia que ejercen sobre el resto de los grupos de una población. • Jerarquía Social: Es la estratificación de los individuos de acuerdo con la dominación que ejercen sobre el resto de los individuos de una población. • Territorialidad: Es la delimitación y defensa de una área definida por un individuo o por un grupo de individuos.
- 28. Estructuras de un ecosistema • Los componentes abióticos y bióticos son los que determinan la estructura del ecosistema.
- 29. Reguladores abióticos. • Son conocidos como los factores limitantes que determinan la estructura del ecosistema. Estos son la temperatura, la luz existente, la lluvia, la disponibilidad de fósforo, nitrógeno y oxígeno. • Los factores abióticos son un conjunto complejo de interacciones que limitan el control de las actividades de los organismos, poblaciones y comunidades. • El carbono, el oxigeno, el hidrogeno, el nitrógeno, el fósforo y el azufre constituyen a los macronutrientes, los cuales son los elementos esenciales con los que los organismos vivos construyen proteínas, grasas y carbohidratos o azucares. Estos seis elementos conforman los complejos orgánicos encontrados en todos los seres vivientes. Junto a estos se encuentran los micronutrientes, los cuales son sustancias traza necesarias, como el cobre, el zinc, el selenio y el litio, y son regulados por ciclos junto con los macronutrientes para que estén disponibles en el medio físico.
- 30. Reguladores bióticos. • Las afectaciones que una población puede provocar sobre un ecosistema es algo que los ecólogos han comenzado a comprender. En ciertos ecosistemas algunas especies, llamadas especies clave, cumplen un papel importante en la estructura de la comunidad. • Por ejemplo, los castores que construyen represas en los causes de los ríos ayudan a disminuir el flujo de agua, con lo cual se invaden áreas que son propicias para el desarrollo de una gran diversidad de plantas y animales. • Se dividen en dos categorías generales: • los autótrofos: Organismos capaces de producir su propio alimento. Auto, “a si mismo”; trophos, “nutrición”. • y los heterótrofos: Comen partes de células, tejidos o materiales de desecho orgánico de otros organismos para su subsistencia. Se dividen en macroconsumidores y microconsumidores
- 31. Tipos de ecosistemas Tundra: Veranos breves e inviernos largos y muy fríos. Musgos, líquenes, sauces enanos, renos, lemmings, zorros, distintas aves. Bosque caducifolio. Gran humedad. Temperaturas moderadas. Árboles de hoja caduca: Taiga. Temperaturas bajas en invierno y hayas, robles, castaños. Fauna deshielo en verano. Bosques de muy variada. coníferas, linces, lobos, ardillas, osos. Bosque mediterráneo. Inviernos suaves y veranos muy calurosos. Precipitaciones bajas, sobre todo en verano. Árboles de hoja perenne: encinas, alcornoques. Fauna muy variada.
- 32. Desierto. Precipitaciones muy escasas y fuertes oscilaciones de temperatura. Escasos vegetales. Termitas, reptiles, camélidos. Pradera. Diferencias muy acusadas de temperatura. Pocas Selva ecuatorial. precipitaciones. Vegetación Temperaturas elevadas y herbacea. Grandes constantes. Abundantes herbívoros, roedores, aves. lluvias. Exuberante vegetación. Monos, aves, reptiles, anfibio, insectos. Sabana. Una estación seca y otra de lluvias. Predominio de herbáceas con árboles dispersos. Gacelas, leones, cebras, ñus.
- 33. CICLOS BIOGEOQUÍMICOS Procesos naturales que reciclan elementos en diferentes formas químicas desde el medio ambiente hacia los organismos, y luego a la inversa. Se utilizan Agua, carbón, oxígeno, nitrógen Conectan los o, fósforo y otros elementos que componentes vivos y recorren estos ciclos. no vivos de la Tierra.
- 34. CICLO DEL AGUA • El agua es el elemento de mayor importancia para los seres vivos y funciona como solvente y como fuente de hidrogeno para la fotosíntesis. • El agua se evapora mediante el calor solar forma nubes y estas, al ser movidas por los vientos pasan del mar hacia la tierra. Ahí se enfrían lo suficiente como para precipitarse en forma de lluvia o de nieve. Parte de esta agua se pierde en el terreno y la mayor cantidad corre por la superficie en forma de corriente que va directamente de regreso al mar. El agua subterránea regresa a la superficie a través de los manantiales y gracias al bombeo producido por las actividades humanas.
- 36. • Al final el agua regresa al océano aunque puede incorporarse a los cuerpos de diferentes organismos. La energía que se utiliza para este ciclo es el calor procedente de la luz solar, indispensable para la evaporación del agua.
- 39. Ciclos de los minerales • CICLO DEL AZUFRE • CICLO DEL FÓSFORO • CICLO DEL NITRÓGENO • CICLO DEL CARBONO • CICLO DEL OXIGENO
- 40. Energía de los ecosistemas
- 41. El funcionamiento de todos los ecosistemas es parecido. Todos necesitan una fuente de energía que, fluyendo a través de los distintos componentes del ecosistema, mantiene la vida y moviliza el agua, los minerales y otros componentes físicos del ecosistema La fuente primera y principal de energía es el sol.
- 42. Ecosistemas Movimiento continuo de los materiales. Los diferentes elementos químicos pasan del suelo, el agua o el aire a los organismos y de unos seres vivos a otros, hasta que vuelven, cerrándose el ciclo, al suelo o al agua o al aire.
- 43. PIRÁMIDE DE ENERGÍA • Una pirámide de energía es la representación gráfica de los niveles tróficos (alimenticios) por los cuales la energía proveniente del Sol es transferida en un ecosistema.
- 44. Papel de los Organismos • Los organismos puede ser productores o consumidores en cuanto al flujo de energía a través de un ecosistema. Los productores convierten la energía ambiental en enlaces de carbono, como los encontrados en el azúcar glucosa. • Los consumidores obtienen su energía de los enlaces de carbono originados por los productores.
- 45. 4 tipos de heterótrofos en base a lo que comen
- 46. • El nivel trófico se refiere a la posición de los organismos en la cadena alimenticia, estando los autótrofos en la base. Un organismo que se alimente de autótrofos es llamado herbívoro o consumidor primario; uno que coma herbívoros es un carnívoro o consumidor secundario. Un carnívoro que coma carnívoros que se alimentan de herbívoros es un consumidor terciario, y así sucesivamente.
- 47. Flujo de Energía a través del Ecosistema • La energía "fluye" a través del ecosistema como enlaces carbono-carbono. Cuando ocurre respiración, los enlaces carbono-carbono se rompen y el carbono se combina con el oxígeno para formar dióxido de carbono (CO2). Este proceso libera energía, la que es usada por el organismo (para mover sus músculos, digerir alimento, excretar desechos, pensar, etc.) o perdida en forma de calor. Las flechas oscuras en el diagrama representa el movimiento de esta energía. Observe que toda la energía proviene del sol, y que el destino final de toda la energía es perderse en forma de calor. La energía no se recicla en los ecosistemas.
- 48. Cadenas y Redes Alimenticias Una cadena alimenticia es la ruta del alimento desde un consumidor final dado hasta el productor. Por ejemplo, una cadena alimenticia típica en un ecosistema de campo pudiera ser: • pasto ---> saltamonte --> ratón ---> culebra ---> halcón • Una red alimenticia consiste de cadenas alimenticias interrelacionadas, y la única manera de desenredar las cadenas es de seguir el curso de una cadena hacia atrás hasta llegar a la fuente.
- 49. Enlaces de consulta • http://ecologiacsc.blogspot.com/2006/10/niveles-de-estudio-de-ecologa.html • http://www.weetstraw.com/home/article/Ernst-Haeckel/103 • http://boingboing.net/2010/01/22/ernst-haeckel-the-in.html • http://www.virtual.unal.edu.co/cursos/ciencias/2000024/lecciones/cap04/capitul o4.htm • http://es.wikipedia.org/wiki/Ecolog%C3%ADa • http://www.izt.uam.mx/cosmosecm/ECOLOGIA.html • http://www.biocab.org/ecologia.html • http://www.slideshare.net/Arcyria/medio-ambiente-interacciones-biticas • http://biologas-biologia.blogspot.com/ • http://www.jmarcano.com/nociones/trofico.html#papelorganismos • http://www.wwf.org.mx/wwfmex/ecosistemas_pic.php?pic=ecos_selvassecas.jpg • http://www.wwf.org.mx/wwfmex/esp_lobom.php • http://epoliticainternacional.blogspot.com/p/la-liberacion-de-los-pueblos-no- sera.html • http://www.kalipedia.com/
- 50. Bibliografía • -Ondarza N. Raúl, Ecología- El hombre y su ambiente, México, editorial: Trillas, 1993. • -Clarke George L.- Elementos de Ecología, España, Ediciones Omega, 1976
Notas del editor
- Custom animation effects: line sweeps in picture and text(Basic)To reproduce the shape effects on this slide, do the following:On the Home tab, in theSlides group, click Layout, and then click Blank.On the Home tab, in the Drawing group, click Shapes, and then under Lines click Line (first option from the left).On the slide, press and hold SHIFT, and then drag to draw a straight, vertical line.Select the line. Under DrawingTools, on the Format tab, in the Size group, in the Shape Width box, enter 7.5”.Under DrawingTools, on the Format tab, in the ShapeStyles group, click the Format Shape dialog box launcher. In the Format Shape dialog box, click LineColor in the left pane. In the LineColor pane, select Solidline, click the button next to Color, and then under ThemeColors click Black, Text 1 (first row, second option from the left).Also in the Format Shape dialog box, click LineStyle in the left pane. In the LineStyle pane, in the Weight box, enter 2 pt.Under DrawingTools, on the Format tab, in the ShapeStyles group, click ShapeEffects, point to Glow, and then under GlowVariations click Accent color 1, 5 pt glow (first row, first option from the left). Under DrawingTools, on the Format tab, in the ShapeStyles group, click ShapeEffects, point to Glow, point to MoreGlowColors, and then under ThemeColors click White, Background 1 (first row, first option from the left).On the Home tab, in the Drawing group, click Arrange, point to Align, and then do the following:Click Align to Slide.Click AlignCenter.Click AlignMiddle.On the slide, select the line. On the Home tab, in the Clipboard group, click the arrow under Paste, and then click Duplicate.Drag the duplicate line slightly off the right edge of the slide.With the duplicate line still selected, on the Home tab, in the Drawing group, click Arrange, point to Align, and then do the following: Click Align to Slide. Click Align Middle.On the Insert tab, in the Illustrations group, click Picture. In the InsertPicture dialog box, select a picture, and then click Insert.On the slide, select the picture. Under Picture Tools, on the Format tab, in the bottom right corner of the Size group, click the Size and Position dialog box launcher. In the Size and Position dialog box, on the Size tab, resize or crop the picture as needed so that under Size and rotate, the Height box is set to 7.5” and the Width box is set to 5”. Resize the picture under Size and rotate by entering values into the Height and Width boxes. Crop the picture under Crop from by entering values into the Left, Right, Top, and Bottom boxes. On the Home tab, in the Drawing group, click Arrange, point to Align, and then do the following:Click Align to Slide.ClickAlignRight.ClickAlignMiddle.To reproduce the text effects on this slide, do the following:On the Insert tab, in the Illustrations group, click TextBox. On the slide, drag to draw a text box.Enter text in the text box, and then select the text. On the Home tab, in the Font group, do the following:In the Font list, select Arial.In the FontSize list, select 28.Click Bold.Click the button next to FontColor, and then under ThemeColors click White, Background 1 (first row, first option from the left).On the Home tab, in the Paragraph group, click AlignTextRight to align the text right in the text box. Drag the text box onto the left half of the slide.To reproduce the background effects on this slide, do the following:Right-click the slide background area, and then click Format Background. In the Format Background dialog box, click Fill in the left pane, select Gradient fill in the Fill pane, and then do the following:In the Type list, select Linear.Click the button next to Direction, and then click Linear Down (first row, second option from the left).Under Gradient stops, click Add or Remove until two stops appear in the drop-down list.Also under Gradient stops, customize the gradient stops that you added as follows:Select Stop 1 from the list, and then do the following:In the Stop position box, enter 40%.Click the button next to Color, and then click Black, Text 1 (first row, second option from the left).Select Stop 2 from the list, and then do the following: In the Stop position box, enter 100%.Click the button next to Color, and then click Black, Text 1, Lighter 50% (second row, second option from the left).To reproduce the animation effects on this slide, do the following:On the Animations tab, in the Animations group, click CustomAnimation. Select the line off the right edge of the slide. In the CustomAnimation task pane, do the following:Click AddEffect, point to Entrance, and then click MoreEffects. In the AddEntranceEffect dialog box, under Basic, click FlyIn.Select the animation effect (fly-in effect for the second line). Under Modify: Fly In,do the following:In the Start list, select After Previous.In the Direction list, select FromLeft.In the Speed list, select Fast.On the Home tab, in the Editing group, click Select, and then click Selection Pane.In the Selection and Visibility pane, select the first line you created (in the middle of the slide). In the CustomAnimation task pane, do the following:Click AddEffect, point to Entrance, and then click MoreEffects. In the AddEntranceEffect dialog box, under Basic, click FlyIn.Select the second animation effect (fly-in effect for the first line). Under Modify: Fly In,do the following:In the Start list, select AfterPrevious.In the Direction list, select FromRight.In the Speed list, select Fast.On the slide, select the picture. In the CustomAnimation task pane, do the following:Click AddEffect, point to Entrance, and then click MoreEffects. In the AddEntranceEffect dialog box, under Basic, click Wipe.Select the third animation effect (wipe effect for the picture). Under Modify: Wipe,do the following:In the Start list, select WithPrevious.In the Direction list, select FromRight.In the Speed list, select Fast.On the slide, select the text box. In the CustomAnimation task pane, do the following:Click AddEffect, point to Entrance, and then click MoreEffects. In the AddEntranceEffect dialog box, under Basic, clickFlyIn.Select the fourth animation effect (fly-in effect for the text box). Under Modify: Fly In,do the following:In the Start list, select WithPrevious.In the Direction list, select FromRight.In the Speed list, select Fast.
- Rounded corner rectangle tabs with inset pictures(Advanced)To reproduce the top rectangle (olive-green, “label one”) with text effects on this slide, do the following:On the Home tab, in theSlides group, click Layout, and then click Blank.On the Home tab, in the Drawing group, click Shapes, and then under Rectangles, click Rounded Diagonal Corner Rectangle(ninth option from the left). On the slide, drag to draw a rectangle.On the Home tab, in the bottom right corner of the Drawing group, click the Format Shape dialog box launcher. In the Format Shape dialog box, click Fill in the left pane, select Gradient fill in the right pane, and then do the following:In the Type list, select Linear.Click the button next to Direction, and then click Linear Down (first row, second option from the left).Under Gradient stops, click Add or Remove until two stops appear in the drop-down list.Also under Gradient stops, customize the gradient stops that you added as follows:Select Stop 1 from the list, and then do the following:In the Stop position box, enter32%.Click the button next to Color, and then under Theme Colorsclick White, Background 1 (first row, first option from the left).Select Stop 2 from the list, and then do the following:In the Stop position box, enter100%.Click the button next to Color, and then under Theme Colorsclick Olive Green, Accent 3, Lighter 60%(third row, seventh option from the left).Also in the Format Shape dialog box, click Line Color in the left pane, select Gradient line in the right pane, and then do the following:In the Type list, select Linear.Click the button next to Direction, and then click Linear Up (second row, second option from the left). Under Gradient stops, click Add or Remove until two stops appear in the drop-down list.Also under Gradient stops, customize the gradient stops that you added as follows:Select Stop 1 from the list, and then do the following:In the Stop position box, enter0%.Click the button next to Color, and then under Theme Colorsclick White, Background 1 (first row, first option from the left).Select Stop 2 from the list, and then do the following:In the Stop position box, enter100%.Click the button next to Color, and then under Theme Colorsclick White, Background 1, Darker 25%(fourth row, first option from the left).Also in the Format Shape dialog box, click Line Style in the left pane. In the Line Style pane, in the Width box, enter 1 pt. On the Home tab, in the Drawing group, click Shape Effects, point to Glow, and then do the following:Under Glow Variations, select any option in the first row (5 pt glow options). Point to More Glow Colors, and then under Theme Colors click White, Background 1, Darker 25% (fourth row, first option from the left). On the slide, right-click the rectangle and then click Edit Text. Enter text in the text box and select the text. On the Home tab, in the Font group, select Gill Sans MTfrom the Font list and then select 24 from the Font Size list.On the Home tab, in the Paragraph group, click Align Text Left to align the text left within the rectangle.Under Drawing Tools, on the Format tab, in the WordArt Styles group, click the arrow next toText Fill, click More Fill Colors, and then in the Colors dialog box, on the Custom tab, enter values for Red: 127, Green: 127, and Blue: 127.Select the rectangle. On the Home tab, in the bottom-right corner of the Drawing group, click the Format Shapes dialog box launcher. In the Format Shapes dialog box, click Text Box in the left pane. In the right pane, under Internal margin, enter 1” in the Left box to increase the left margin in the rectangle to accommodate the embossed picture. Under Drawing Tools, on the Format tab, in the Size group, do the following:In the Shape Height box, enter 0.92”.In the Shape Width box, enter 4.5”.To reproduce the olive-green embossed picture for the top rectangle on this slide, do the following:On the Home tab, in the Drawing group, click Shapes, and then under Rectangles, click Rounded Diagonal Corner Rectangle(ninth option from the left). On the slide, drag to draw a rectangle.On the Home tab, in the bottom right corner of the Drawing group, click the Format Shape dialog box launcher. In the Format Shape dialog box, click Fill in the left pane, select Picture or texture fill, and then under Insert from click File. In the Insert Picture dialog box, select a picture and then click Insert. Also in the Format Shape dialog box, click Line Color in the left pane. In the Line Color pane, select No line. Also in the Format Shape dialog box, click Picture in the left pane, click the button next to Recolor, and then under Light Variations click Accent color 3 Light (fourth option from the left).Also in the Format Shape dialog box, click Shadow in the left pane, and then do the following in the right pane:Click the button next to Preset, and then under Inner click Inside Diagonal Top Left (first row, first option from the left).In the Transparency box, enter 65%. Under Picture Tools, on the Format tab, in the bottom right corner of the Size group, click the Size and Position dialog box launcher. In the Size and Position dialog box, on the Size tab, do the following:UnderScale, select the Lock aspect ratio check box.Under Size and rotate, in the Height box, enter 0.75”. (Under Size and rotate, in the Width box, 0.75” will appear automatically.)Drag the picture onto the left side of the rectangle. Press and hold CTRL and select the picture and the rectangle. On the Home tab, in the Drawing group, click Arrange, point to Align, and then click Align Middle. To reproduce the other shapes on this slide, do the following:Press and hold CTRL and select the picture and the rectangle.On the Home tab, in the Drawing group, click Arrange, and then click Group.On the Home tab, in the Clipboard group, click the arrow under Paste, and then click Duplicate. Repeat the process until there is a total of four groups of shapes.Drag the groups so that they are distributed vertically on the slide. Press and hold CTRL and select all four groups.On the Home tab, in the Drawing group, click Arrange, and then do the following:Point to Align, and then click Align Center. Point to Align, and then clickDistribute Vertically. Click Ungroup. To change the color and text for the duplicate rectangles (second, third, and fourth from the top), do the following:Select the rectangle that you would like to recolor.Under Drawing Tools, on the Format tab, in the Shape Styles group, click the arrow next toShape Fill, point to Gradient, and then click More Gradients.In the Format Shape dialog box, click Fill in the left pane, selectGradient fill in the right pane, and then do the following:For the second rectangle from the top, under Gradient stops, select Stop 2 from the drop-down list, click the button next to Color, and then under Theme Colors click Orange, Accent 6, Lighter 60% (third row, tenth option from the left). For the third rectangle from the top, under Gradient stops, select Stop 2 from the drop-down list, click the button next to Color, and then under Theme Colors click Aqua, Accent 5, Lighter 60% (third row, ninth option from the left).For the fourth rectangle from the top, under Gradient stops, select Stop 2 from the drop-down list, click the button next to Color, and then under Theme Colors click Blue, Accent 1, Lighter 60% (third row, fifth option from the left).To change the text on the duplicate rectangles, click in each text box and edit the text. To change the picture on the duplicate rectangles (second, third, and fourth from the top), do the following:Right-click the second picture from the top, and then click Format Picture. In the Format Picture dialog box, click Fill in the left pane, and then underInsert from click File. In the Insert Picture dialog box, select a picture, and then click Insert.Repeat the process for the third and fourth rectangles from the top. To change the color for the duplicate pictures (second, third, and fourth from the top), do the following:Select the picture that you would like to recolor.Under Picture Tools, on the Format tab, in the Adjust group, click the arrow next toRecolor, and then do the following:For the second picture from the top, under Light Variations, clickAccent color 6 Light (seventh option from the left).For the third picture from the top, under Light Variations, clickAccent color 5 Light (sixth option from the left).For the fourth picture from the top, under Light Variations, clickAccent color 1 Light (second option from the left).To reproduce the background on this slide, do the following:Right-click the slide background area, and then clickFormat Background.In the Format Background dialog box, click Fill in the left pane, select Gradient fill in the right pane, and then do the following:In the Type list, select Radial.Click the button next to Direction, and then click From Center (third option from the left).Under Gradient stops, click Add or Remove until two stops appear in the drop-down list.Also under Gradient stops, customize the gradient stops that you added as follows:Select Stop 1 from the list, and then do the following:In the Stop position box, enter0%.Click the button next to Color, and then under Theme Colorsclick White, Background 1 (first row, first option from the left).Select Stop 2 from the list, and then do the following:In the Stop position box, enter100%.Click the button next to Color, and then under Theme Colorsclick White, Background 1, Darker 15% (third row, first option from the left).
- Picture with three text columns(Intermediate)To reproduce the picture effects on this slide, do the following:On the Home tab, in theSlides group, click Layout, and then click Blank.On the Insert tab, in the Illustrations group, click Picture. In the Insert Picture dialog box, select a picture and then click Insert. Select the picture. Under Picture Tools, on the Format tab, in the bottom right corner of the Size group, click the Size and Position dialog box launcher.In the Size and Position dialog box, on the Size tab, resize or crop the picture as needed so that under Size and rotate, the Height box is set to 1.48” and the Width box is set to 9.17”. Resize the picture under Size and rotate by entering values into the Height and Width boxes. Crop the picture under Crop from by entering values into the Left, Right, Top, and Bottom boxes. On the Home tab, in the bottom right corner of the Drawing group, click the Format Shape dialog box launcher. In the Format Shape dialog box, click Line Color in the left pane, select Gradient line in the right pane, and then do the following:In the Type list, select Linear. Click the button next to Direction, and then click Linear Up (second row, second option from the left). Under Gradient stops, click Add or Remove until two stops appear in the drop-down list.Also under Gradient stops, customize the gradient stops that you added as follows:Select Stop 1 from the list, and then do the following:In the Stop position box, enter0%.Click the button next to Color, and then under Theme Colorsclick White, Background 1(first row, first option from the left).Select Stop 2 from the list, and then do the following:In the Stop position box, enter100%.Click the button next to Color, and then under Theme Colorsclick White, Background 1, Darker 25%(fourth row, first option from the left).Also in the Format Shape dialog box, click Line Style in the left pane, and then in the right pane, in the Width box, enter 1 pt. On the Home tab, in the Drawing group, click Shape Effects, point to Glow,and then do the following:Under Glow Variations,select any option in the first row (5 pt glow options).Point to More Glow Colors, and then under Theme Colors click White, Background 1, Darker 25% (fourth row, first option from the left).On the Home tab, in theDrawing group, click Arrange, point to Align, and then click Align Center.To reproduce the first column heading on this slide, do the following:On the Home tab, in the Drawing group, click Shapes, and then under Rectangles, click Rectangle (first option from the left). On the slide, drag to draw a rectangle.Under Drawing Tools, on the Format tab, in the Size group, do the following:In the Shape Height box, enter 1”.In the Shape Width box, enter 2.92”.On the Home tab, in the bottom right corner of the Drawing group, click the Format Shape dialog box launcher. In the Format Shape dialog box, click Fill in the left pane, select Gradient fill in the right pane, and then do the following:In the Type list, select Linear.Click the button next to Direction, and then click Linear Down (first row, second option from the left).Under Gradient stops, click Add or Remove until two stops appear in the drop-down list.Also under Gradient stops, customize the gradient stops that you added as follows:Select Stop 1 from the list, and then do the following:In the Stop position box, enter32%.Click the button next to Color, and then under Theme Colorsclick Tan, Background 2 (first row, third option from the left).Select Stop 2 from the list, and then do the following:In the Stop position box, enter100%.Click the button next to Color, and then under Theme Colorsclick Tan, Background 2, Darker 25%(third row, third option from the left).Also in the Format Shape dialog box, click Line Color in the left pane, select Gradient line in the Line Color pane, and then do the following:In the Type list, select Linear.Click the button next to Direction, and then click Linear Up (second row, second option from the left).Under Gradient stops, click Add or Remove until two stops appear in the drop-down list.Also under Gradient stops, customize the gradient stops that you added as follows:Select Stop 1 from the list, and then do the following:In the Stop position box, enter0%.Click the button next to Color, and then under Theme Colorsclick White, Background 1 (first row, first option from the left).Select Stop 2 from the list, and then do the following:In the Stop position box, enter100%.Click the button next to Color, and then under Theme Colorsclick White, Background 1, Darker 25% (fourth row, first option from the left).Also in the Format Shape dialog box, click Line Style in the left pane. In the right pane, in the Width box, enter 1 pt. On the Home tab, in the Drawing group, click Shape Effects, point to Glow, and then do the following:Under Glow Variations,select any option in the first row (5 pt glow options).Point to More Glow Colors, and then under Theme Colors click White, Background 1, Darker 25% (fourth row, first option from the left).On the slide, right-click the rectangle and then click Edit Text. Enter text in the text box and select the text. On the Home tab, in the Font group, select Gill Sans MTfrom the Font list and then select 24 from the Font Size list.On the Home tab, in the Paragraph group, click Align Text Left to align the text left within the text box.Under Drawing Tools, on the Format tab, in the WordArt Styles group, click the arrow next toText Fill, and then under Theme Colors click Tan, Background 2, Darker 75% (fifth row, third option from the left). On the Home tab, in the bottom-right corner of the Drawing group, click the Format Shapes dialog box launcher. In the Format Shapes dialog box, click Text Box in the left pane. In the right pane, under Internal margin, enter 1” in the Left box to increase the left margin in the rectangle to accommodate the embossed number. On the Home tab, in the Drawing group, click Shapes, and then under Lines, click Line (first option from the left).Press and hold SHIFT, and then on the slide, drag to draw a straight, vertical line. Under Drawing Tools, on the Format tab, in the Size group, in the Width box, enter 0.75”.On the Home tab, in the bottom-right corner of the Drawing group, click the Format Shapes dialog box launcher. In the Format Shapes dialog box, click Line Style in the left pane, and then do the following in the right pane:In the Width box, enter 2.25 pt.Click the button next to Dash type, and then click Round Dot (second option from the top). Also in the Format Shapes dialog box, click Line Color in the left pane. In the right pane, click the button next to Color, and then under Theme Colors click White, Background 1 (first row, first option from the left). On the slide, drag the line onto the rectangle, just left of the text box. On the Insert tab, in the Text box, click Text Box and then on the slide, drag to draw another text box. Enter 1 in the text box and select the text. On the Home tab, in the Font group, select Calisto MT from the Font list and then enter 50 in the Font Size box.On the Home tab, in the Paragraph group, click Center to center the text within the text box.Under Drawing Tools, on the Format tab, in the WordArt Styles group, click the arrow next toText Fill, and then under Theme Colors click Tan, Background 2, Darker 25% (third row, third option from the left). Drag the text box onto the rectangle, left of the dotted vertical line. On the Home tab, in the Editing group, click Select, and then click Selection Pane. In the Selectionand Visibility pane, press and hold CTRL to select the text box, line, and rectangle.On the Home tab, in the Drawing group, click Arrange, point to Align, and then click Align Middle. To reproduce the other column headings on this slide, do the following:On the Home tab, in the Editing group, click Select, and then click Selection Pane. In the Selectionand Visibility pane, press and hold CTRL to select the text box, line, and rectangle.On the Home tab, in the Drawing group, click Arrange, and then under Group Objects click Group.On the Home tab, in the Clipboard group, click the arrow under Paste, and then click Duplicate. Repeat the process until you have a total of three groups of shapes.Select each group in the Selection and Visibility pane and drag it on the slide to form a row under the picture. Also in the Selection and Visibility pane, press and hold CTRL and select all three groups.On the Home tab, in the Drawing group, click Arrange, point to Align,and then do the following:Click Align Middle. ClickDistribute Horizontally. To change the numbers in the duplicate text boxes (second and third from the left), click in each text box and edit the text. To reproduce the first column (the “subtext” portion) on this slide, do the following:On the Home tab, in the Drawing group, click Shapes, and then under Rectangles click Rectangle (first option from the left). On the slide, drag to draw the rectangle so that the top edge is just below the first column heading and the bottom edge is at the bottom of the slide. Under Drawing Tools, on the Format tab, in the Size group, in the Shape Width box, enter 2.92” so that the subtext column is the same width as the column heading above it. On the Home tab, in the Drawing group, click the arrow next toShape Outline, and then click No Outline.On the Home tab, in the bottom right corner of the Drawing group, click the Format Shape dialog box launcher. In the Format Shape dialog box, click Fill in the left pane, select Gradient fill in the right pane, and then do the following:In the Type list, select Linear.Click the button next to Direction, and then click Linear Down (first row, second option from the left).Under Gradient stops, click Add or Remove until three stops appear in the drop-down list.Also under Gradient stops, customize the gradient stops that you added as follows:Select Stop 1 from the list, and then do the following:In the Stop position box, enter0%.Click the button next to Color, and then under Theme Colorsclick White, Background 1 (first row, first option from the left).In the Transparency box, enter 100%. Select Stop 2 from the list, and then do the following:In the Stop position box, enter50%.Click the button next to Color, and then under Theme Colorsclick Tan, Background 2, Darker 25%(third row, third option from the left).In the Transparency box, enter 25%. Select Stop 3 from the list, and then do the following:In the Stop position box, enter100%.Click the button next to Color, and then under Theme Colorsclick White, Background 1(first row, first option from the left).In the Transparency box, enter 100%. On the slide, right-click the column and then click Edit Text. Enter text in the text box and select the text. On the Home tab, in the Font group, select Gill Sans MTfrom the Font list and then enter 22 in the Font Size box.On the Home tab, in the Paragraph group, click Center to center the text within the rectangle.Under Drawing Tools, on the Format tab, in the WordArt Styles group, click the arrow next toText Fill, and then under Theme Colors click White, Background 1, Darker 50% (sixth row, first option from the left). On the Home tab, in the bottom-right corner of the Drawing group, click the Format Shapes dialog box launcher. In the Format Shapes dialog box, click Text Box in the left pane. In the right pane, under Text layout, in the Vertical Alignment list, select Top. To reproduce the other columns (the “subtext” portion) on this slide, do the following:Select the first “subtext” rectangle. On the Home tab, in the Clipboard group, click the arrow under Paste, and then click Duplicate. Repeat the process until you have a total of three “subtext” rectangles.Drag each duplicate on the slide to form a row under the “text heading” rectangles. Press and hold SHIFT and select all three “subtext” rectangles. On the Home tab, in the Drawing group, click Arrange, point to Align, and then click Distribute Horizontally. To reproduce the background on this slide, do the following:Right-click the slide background area, and then clickFormat Background.In the Format Background dialog box, click Fill in the left pane, select Gradient fill in the right pane, and then do the following:In the Type list, select Radial.Click the button next to Direction, and then click From Center (third option from the left).Under Gradient stops, click Add or Remove until two stops appear in the drop-down list.Also under Gradient stops, customize the gradient stops that you added as follows:Select Stop 1 from the list, and then do the following:In the Stop position box, enter0%.Click the button next to Color, and then under Theme Colorsclick White, Background 1 (first row, first option from the left).Select Stop 2 from the list, and then do the following:In the Stop position box, enter100%.Click the button next to Color, and then under Theme Colorsclick Tan, Background 2(first row, third option from the left).
- Picture with three text columns(Intermediate)To reproduce the picture effects on this slide, do the following:On the Home tab, in theSlides group, click Layout, and then click Blank.On the Insert tab, in the Illustrations group, click Picture. In the Insert Picture dialog box, select a picture and then click Insert. Select the picture. Under Picture Tools, on the Format tab, in the bottom right corner of the Size group, click the Size and Position dialog box launcher.In the Size and Position dialog box, on the Size tab, resize or crop the picture as needed so that under Size and rotate, the Height box is set to 1.48” and the Width box is set to 9.17”. Resize the picture under Size and rotate by entering values into the Height and Width boxes. Crop the picture under Crop from by entering values into the Left, Right, Top, and Bottom boxes. On the Home tab, in the bottom right corner of the Drawing group, click the Format Shape dialog box launcher. In the Format Shape dialog box, click Line Color in the left pane, select Gradient line in the right pane, and then do the following:In the Type list, select Linear. Click the button next to Direction, and then click Linear Up (second row, second option from the left). Under Gradient stops, click Add or Remove until two stops appear in the drop-down list.Also under Gradient stops, customize the gradient stops that you added as follows:Select Stop 1 from the list, and then do the following:In the Stop position box, enter0%.Click the button next to Color, and then under Theme Colorsclick White, Background 1(first row, first option from the left).Select Stop 2 from the list, and then do the following:In the Stop position box, enter100%.Click the button next to Color, and then under Theme Colorsclick White, Background 1, Darker 25%(fourth row, first option from the left).Also in the Format Shape dialog box, click Line Style in the left pane, and then in the right pane, in the Width box, enter 1 pt. On the Home tab, in the Drawing group, click Shape Effects, point to Glow,and then do the following:Under Glow Variations,select any option in the first row (5 pt glow options).Point to More Glow Colors, and then under Theme Colors click White, Background 1, Darker 25% (fourth row, first option from the left).On the Home tab, in theDrawing group, click Arrange, point to Align, and then click Align Center.To reproduce the first column heading on this slide, do the following:On the Home tab, in the Drawing group, click Shapes, and then under Rectangles, click Rectangle (first option from the left). On the slide, drag to draw a rectangle.Under Drawing Tools, on the Format tab, in the Size group, do the following:In the Shape Height box, enter 1”.In the Shape Width box, enter 2.92”.On the Home tab, in the bottom right corner of the Drawing group, click the Format Shape dialog box launcher. In the Format Shape dialog box, click Fill in the left pane, select Gradient fill in the right pane, and then do the following:In the Type list, select Linear.Click the button next to Direction, and then click Linear Down (first row, second option from the left).Under Gradient stops, click Add or Remove until two stops appear in the drop-down list.Also under Gradient stops, customize the gradient stops that you added as follows:Select Stop 1 from the list, and then do the following:In the Stop position box, enter32%.Click the button next to Color, and then under Theme Colorsclick Tan, Background 2 (first row, third option from the left).Select Stop 2 from the list, and then do the following:In the Stop position box, enter100%.Click the button next to Color, and then under Theme Colorsclick Tan, Background 2, Darker 25%(third row, third option from the left).Also in the Format Shape dialog box, click Line Color in the left pane, select Gradient line in the Line Color pane, and then do the following:In the Type list, select Linear.Click the button next to Direction, and then click Linear Up (second row, second option from the left).Under Gradient stops, click Add or Remove until two stops appear in the drop-down list.Also under Gradient stops, customize the gradient stops that you added as follows:Select Stop 1 from the list, and then do the following:In the Stop position box, enter0%.Click the button next to Color, and then under Theme Colorsclick White, Background 1 (first row, first option from the left).Select Stop 2 from the list, and then do the following:In the Stop position box, enter100%.Click the button next to Color, and then under Theme Colorsclick White, Background 1, Darker 25% (fourth row, first option from the left).Also in the Format Shape dialog box, click Line Style in the left pane. In the right pane, in the Width box, enter 1 pt. On the Home tab, in the Drawing group, click Shape Effects, point to Glow, and then do the following:Under Glow Variations,select any option in the first row (5 pt glow options).Point to More Glow Colors, and then under Theme Colors click White, Background 1, Darker 25% (fourth row, first option from the left).On the slide, right-click the rectangle and then click Edit Text. Enter text in the text box and select the text. On the Home tab, in the Font group, select Gill Sans MTfrom the Font list and then select 24 from the Font Size list.On the Home tab, in the Paragraph group, click Align Text Left to align the text left within the text box.Under Drawing Tools, on the Format tab, in the WordArt Styles group, click the arrow next toText Fill, and then under Theme Colors click Tan, Background 2, Darker 75% (fifth row, third option from the left). On the Home tab, in the bottom-right corner of the Drawing group, click the Format Shapes dialog box launcher. In the Format Shapes dialog box, click Text Box in the left pane. In the right pane, under Internal margin, enter 1” in the Left box to increase the left margin in the rectangle to accommodate the embossed number. On the Home tab, in the Drawing group, click Shapes, and then under Lines, click Line (first option from the left).Press and hold SHIFT, and then on the slide, drag to draw a straight, vertical line. Under Drawing Tools, on the Format tab, in the Size group, in the Width box, enter 0.75”.On the Home tab, in the bottom-right corner of the Drawing group, click the Format Shapes dialog box launcher. In the Format Shapes dialog box, click Line Style in the left pane, and then do the following in the right pane:In the Width box, enter 2.25 pt.Click the button next to Dash type, and then click Round Dot (second option from the top). Also in the Format Shapes dialog box, click Line Color in the left pane. In the right pane, click the button next to Color, and then under Theme Colors click White, Background 1 (first row, first option from the left). On the slide, drag the line onto the rectangle, just left of the text box. On the Insert tab, in the Text box, click Text Box and then on the slide, drag to draw another text box. Enter 1 in the text box and select the text. On the Home tab, in the Font group, select Calisto MT from the Font list and then enter 50 in the Font Size box.On the Home tab, in the Paragraph group, click Center to center the text within the text box.Under Drawing Tools, on the Format tab, in the WordArt Styles group, click the arrow next toText Fill, and then under Theme Colors click Tan, Background 2, Darker 25% (third row, third option from the left). Drag the text box onto the rectangle, left of the dotted vertical line. On the Home tab, in the Editing group, click Select, and then click Selection Pane. In the Selectionand Visibility pane, press and hold CTRL to select the text box, line, and rectangle.On the Home tab, in the Drawing group, click Arrange, point to Align, and then click Align Middle. To reproduce the other column headings on this slide, do the following:On the Home tab, in the Editing group, click Select, and then click Selection Pane. In the Selectionand Visibility pane, press and hold CTRL to select the text box, line, and rectangle.On the Home tab, in the Drawing group, click Arrange, and then under Group Objects click Group.On the Home tab, in the Clipboard group, click the arrow under Paste, and then click Duplicate. Repeat the process until you have a total of three groups of shapes.Select each group in the Selection and Visibility pane and drag it on the slide to form a row under the picture. Also in the Selection and Visibility pane, press and hold CTRL and select all three groups.On the Home tab, in the Drawing group, click Arrange, point to Align,and then do the following:Click Align Middle. ClickDistribute Horizontally. To change the numbers in the duplicate text boxes (second and third from the left), click in each text box and edit the text. To reproduce the first column (the “subtext” portion) on this slide, do the following:On the Home tab, in the Drawing group, click Shapes, and then under Rectangles click Rectangle (first option from the left). On the slide, drag to draw the rectangle so that the top edge is just below the first column heading and the bottom edge is at the bottom of the slide. Under Drawing Tools, on the Format tab, in the Size group, in the Shape Width box, enter 2.92” so that the subtext column is the same width as the column heading above it. On the Home tab, in the Drawing group, click the arrow next toShape Outline, and then click No Outline.On the Home tab, in the bottom right corner of the Drawing group, click the Format Shape dialog box launcher. In the Format Shape dialog box, click Fill in the left pane, select Gradient fill in the right pane, and then do the following:In the Type list, select Linear.Click the button next to Direction, and then click Linear Down (first row, second option from the left).Under Gradient stops, click Add or Remove until three stops appear in the drop-down list.Also under Gradient stops, customize the gradient stops that you added as follows:Select Stop 1 from the list, and then do the following:In the Stop position box, enter0%.Click the button next to Color, and then under Theme Colorsclick White, Background 1 (first row, first option from the left).In the Transparency box, enter 100%. Select Stop 2 from the list, and then do the following:In the Stop position box, enter50%.Click the button next to Color, and then under Theme Colorsclick Tan, Background 2, Darker 25%(third row, third option from the left).In the Transparency box, enter 25%. Select Stop 3 from the list, and then do the following:In the Stop position box, enter100%.Click the button next to Color, and then under Theme Colorsclick White, Background 1(first row, first option from the left).In the Transparency box, enter 100%. On the slide, right-click the column and then click Edit Text. Enter text in the text box and select the text. On the Home tab, in the Font group, select Gill Sans MTfrom the Font list and then enter 22 in the Font Size box.On the Home tab, in the Paragraph group, click Center to center the text within the rectangle.Under Drawing Tools, on the Format tab, in the WordArt Styles group, click the arrow next toText Fill, and then under Theme Colors click White, Background 1, Darker 50% (sixth row, first option from the left). On the Home tab, in the bottom-right corner of the Drawing group, click the Format Shapes dialog box launcher. In the Format Shapes dialog box, click Text Box in the left pane. In the right pane, under Text layout, in the Vertical Alignment list, select Top. To reproduce the other columns (the “subtext” portion) on this slide, do the following:Select the first “subtext” rectangle. On the Home tab, in the Clipboard group, click the arrow under Paste, and then click Duplicate. Repeat the process until you have a total of three “subtext” rectangles.Drag each duplicate on the slide to form a row under the “text heading” rectangles. Press and hold SHIFT and select all three “subtext” rectangles. On the Home tab, in the Drawing group, click Arrange, point to Align, and then click Distribute Horizontally. To reproduce the background on this slide, do the following:Right-click the slide background area, and then clickFormat Background.In the Format Background dialog box, click Fill in the left pane, select Gradient fill in the right pane, and then do the following:In the Type list, select Radial.Click the button next to Direction, and then click From Center (third option from the left).Under Gradient stops, click Add or Remove until two stops appear in the drop-down list.Also under Gradient stops, customize the gradient stops that you added as follows:Select Stop 1 from the list, and then do the following:In the Stop position box, enter0%.Click the button next to Color, and then under Theme Colorsclick White, Background 1 (first row, first option from the left).Select Stop 2 from the list, and then do the following:In the Stop position box, enter100%.Click the button next to Color, and then under Theme Colorsclick Tan, Background 2(first row, third option from the left).
- Custom animation effects: title fade-in on path and text fade by letter(Intermediate)Tip: For the effects on this slide, use a picture that measures 7.5” high (the height of the slide) and 2.61” wide.To reproduce the shape effects on this slide, do the following:On the Home tab, in theDrawing group, clickShapes, and then under Rectangles click Rectangle (first option from the left). On the slide, drag to draw a rectangle.Select the rectangle. Under DrawingTools, on the Format tab, in the Size group, do the following: In the ShapeHeight box, enter 3.17”.In the ShapeWidth box, enter 9.5”.Drag the rectangle slightly above the middle of the slide. Select the rectangle. On the Home tab, in the Drawing group, click Arrange, point to Align, and then do the following:Click Align to Slide.Click Align Left.Under DrawingTools, on theFormat tab, in the ShapeStyles group, click the next to ShapeOutline, and then click NoOutline.Under DrawingTools, on the Format tab, in the bottom right corner of the ShapeStyles group, click the FormatShape dialog box launcher. In the FormatShape dialog box, click Fill in the left pane, select Gradient fill in the Fill pane, and then do the following:In the Type list, select Linear.Click the button next to Direction, and then click Linear Right (first row, fourth option from the left). Under Gradient stops, click Add or Remove until two stops appear in the drop-down list.Also under Gradient stops, customize the gradient stops that you added as follows:Select Stop 1 from the list, and then do the following:In the Stop position box, enter 0%.Click the button next to Color, and then under Theme Colors click Orange, Accent 6, Darker 50% (fifth row, 10th option from the left).Select Stop 2 from the list, and then do the following: In the Stop position box, enter 100%.Click the button next to Color, and then under Theme Colors click Orange, Accent 6, Darker 25% (fourth row, 10th option from the left).To reproduce the “heading” text box on this slide, do the following:On the Insert tab, in the Text group, select TextBox. On the slide, drag to draw a text box.Enter the heading text, and then select text. On the Home tab, in the Font group, do the following:In the Font list, select Calibri.In the FontSize box, enter 38.Click Bold.Click the arrow next to FontColor, and then under ThemeColors click Orange, Accent 6, Darker 25% (fourth row, 10th option from the left).On the Home tab, in the Paragraph group, click AlignTextLeft.Drag the text box just above the rectangle, in the right half of the slide. To reproduce the second text box on this slide, do the following:On the Insert tab, in the Text group, click TextBox. On the slide, drag to draw a text box.Enter three lines of text with paragraph breaks, and then select the text. On the Home tab, in the Font group, do the following:In the Font list, select Calibri.In the FontSize list, select 28.Click Bold.Click the arrow next to FontColor, and then under ThemeColors click White, Background 1 (first row, first option from the left).On the Home tab, in the Paragraph group, click AlignTextLeft.Drag the second text box onto the rectangle, below the “heading” text box. To reproduce the full-color picture on this slide, do the following:On the Home tab, in theSlides group, click Layout, and then click Blank.On the Insert tab, in the Illustrations group, clickPicture. In the InsertPicture dialog box, select the 7.5” x 2.61” picture, and then click Insert.On the slide, select the picture. Under Picture Tools, on the Format tab, in the bottom right corner of the Size group, click the Size and Position dialog box launcher. In the Size and Position dialog box, on the Size tab, under Crop from,in the Bottom box, enter 2.43”. (Note: Under Size and rotate, the Height should now be 5.08”.)On the slide, select the picture. UnderPicture Tools, on the Format tab, in the Picture Styles group, click Picture Effects, point to Glow, and then under Glow Variations click Accent color 1, 5 pt glow (first row, first option from the left).Also under PictureTools, on the Format tab, in the PictureStyles group, click PictureEffects, point to Glow, point to MoreGlowColors, and then under ThemeColors click White, Background 1 (first row, first option from the left).Drag the full-color picture on top of the rectangle, to the left of the text boxes. On the Home tab, in the Drawing group, click Arrange, point to Align, and then do the following:Click Align to Slide.Click Align Top. To reproduce the second picture on this slide, do the following:On the Insert tab, in the Illustrations group, click Picture. In the InsertPicture dialog box, select the same 7.5” x 2.61” picture, and then click Insert. On the slide, select the picture. Under Picture Tools, on the Format tab, in the bottom right corner of the Size group, click the Size and Position dialog box launcher. In the Size and Position dialog box, on the Size tab, under Crop from,in the Top box, enter 5.08”. (Note: Under Size and rotate, the Height should now be 2.43”.)On the slide, select the second, smaller picture. Under PictureTools, on the Format tab, in the PictureStyles group, click the FormatShape dialog box launcher. In the FormatPicture dialog box, click Picture in the left pane, and in the Picture pane do the following:In the Brightness box, enter 70%.In the Contrast box, enter -70%.On the slide, drag the smaller picture until it is directly underneath the larger full-color picture.Select the smaller picture. On the Home tab, in the Drawing group, click Arrange, point to Align, and then do the following:Click Align to Slide.Click Align Bottom. Press and hold CTRL, and then select both pictures. On the Home tab, in the Drawing group, click Arrange, point to Align, and then do the following:Click Align Selected Objects.Click Align Center. To reproduce the animation effects on this slide, do the following:On the Animations tab, in the Animations group, click CustomAnimation. On the slide, select the “heading” text box. In the CustomAnimation task pane, do the following:Click AddEffect, point to Entrance, and then click MoreEffects. In the AddEntranceEffect dialog box, under Subtle, click Fade.Select the animation effect (fade effect for the “heading” text box). Click the arrow to the right of the selected text box, and then click Timing. In the Fade dialog box, on the Timing tab, do the following:In the Start list, select WithPrevious.In the Delay box, enter 1.5.In the Speed list, select 2 seconds (Medium).On the slide, select the “heading” text box. In the CustomAnimation task pane, do the following:ClickAddEffect, point to MotionPaths, and then click Left.Select the second animation effect (left motion path for the “heading” text box). Under Modify: Left,do the following:In the Start list, select WithPrevious.In the Speed list, select Medium. On the slide, right-click the left motion path and click ReversePathDirection. With the motion path still selected,point to the starting point (green arrow) of the motion path until the cursor becomes a two-headed arrow. Press and hold SHIFT, and then drag the starting pointabout 1.5” off the left edge of the slide. (Note: It may help to display the ruler. On the View tab, in the Show/Hide group, select Ruler. If your lines of text are longer than in the example above, you may need to further increase the length of the motion path. )On the slide, select the second text box. In the CustomAnimation task pane, do the following:Click AddEffect, point to Entrance, and then click MoreEffects. In the AddEntranceEffect dialog box, under Subtle, click Fade.Select the third animation effect (fade effect for the second text box). Click the arrow to the right of the selected effect, and then click Effect Options. In the Fade dialog box, do the following:On the Effect tab, do the following:In the Animate text list, select By Letter.In the % delay between letters box, enter 5.On the Timing tab, do the following:In the Start list, select AfterPrevious.In the Speed list, select 0.5 seconds (VeryFast).On the TextAnimation tab, in the Grouptext list, select By 1st Level Paragraphs.To reproduce the background on this slide, do the following:Right-click the slide background area, and then click Format Background. In the Format Background dialog box, click Fill in the left pane, select Gradient fill in the Fill pane, and then do the following:In the Type list, select Radial.Click the button next to Direction, and then click From Center (third option from the left).Under Gradient stops, click Add or Remove until three stops appear in the drop-down list.Also under Gradient stops, customize the gradient stops that you added as follows:Select Stop 1 from the list, and then do the following:In the Stop position box, enter 0%.Click the button next to Color, and then under Theme Colors click White, Background 1 (first row, first option from the left).Select Stop 2 from the list, and then do the following: In the Stop position box, enter 40%.Click the button next to Color, and then under Theme Colors click White, Background 1 (first row, first option from the left).Select Stop 3 from the list, and then do the following: In the Stop position box, enter 100%.Click the button next to Color, click More Colors, and then in the Colors dialog box, on the Custom tab, enter values for Red: 232, Green: 227, and Blue: 216.
- Custom animation effects: spinning clip art with text(Intermediate)To reproduce the clip art on this slide, do the following:On the Home tab, in theSlides group, click Layout, and then click Blank.On the Insert tab, in the Illustrations group, click Clip Art.In the Clip Art pane, in the Search for box, enter j0435540. In the Search in list, select Everywhere, and then click Go. Select the clip art file in the pane to insert it into the slide. (Note: If you choose another clip art file, the clip art must be in the Windows Metafile format [.wmf].)On the slide, select the clip art. Under Drawing Tools, on the Format tab, in the Size group, do the following:In the Shape Height box, enter 5.83”.In the Shape Width box, enter 8.12”.On the Home tab, in the Drawing group, click Arrange, and then click Ungroup.In the Microsoft Office PowerPoint dialog box, click Yes. On the slide, select the converted clip art. On the Home tab, in the Editing group, click Select, and then click Selection Pane. In the Selection and Visibility pane, select the top-level group. On the Home tab, in the Drawing group, click Arrange, and then click Ungroup. Also in the Selection and Visibility pane, select the Autoshape object, and then press DELETE. Press CTRL+A to select all of the objects on the slide. On the Home tab, in the Drawing group, click Arrange, and then click Group.Select the group. On the Home tab, in the Drawing group, click Shape Effects, point to Preset, and then under Presets click Preset 8 (second row, fourth option from the left). With the group still selected, under DrawingTools, on the Format tab, in the bottom right corner of the Size group, click the Size and Position dialog box launcher, and do the following:On the Size tab, in the Height box, enter 6.27”.On the Size tab, in the Width box, enter 6.27”.On the Position tab, in the Horizontal box, enter 3.89”. On the Position tab, in the Vertical box, enter 1.55”To reproduce the text on this slide, do the following:On the Insert tab, in the Text group, click TextBox.Drag to draw a text box on the slide.In the text box, enter text and select it. On the Home tab, in the Font group do the following:In the Font list, select Candara.In the FontSize box, enter 32 pt.In the FontColor list, under StandardColors select Orange (third option from the left). Click Italic. Select the text box on the slide, and then under DrawingTools, on the Format tab, in the Size group, do the following:In the ShapeHeight box, enter 7.29”.In the ShapeWidth box, enter 7.29”.Under DrawingTools, on the Format tab, in the WordArtStyles group, click TextEffects, point to Transform, and under FollowPath select ArchUp (first option from the left).To wrap the text upside down, at the bottom of the text box, drag the pink adjustment diamond from the center left position in the text box to the lower right corner of the text box. With the text box still selected, under DrawingTools, on the Format tab, in the bottom right corner of the Size group, click the Size and Position dialog box launcher, and then on the Position tab do the following:In the Horizontal box, enter 3.38”. In the Vertical box, enter 1.04”.To reproduce the animation effects on this slide, do the following:On the Animation tab, in the Animations group, click CustomAnimation.Select the circle clip art on the slide, and then in the CustomAnimation task pane, do the following:Click AddEffect, point to Emphasis effect and select MoreEffects. In the AddEmphasisEffect dialog box, under Basic select Spin, and then click OK.Click the arrow to the right of the spin emphasis effect, select Effect Options,and do the following:On the Effect tab, under Settings, in the Amount list, select QuarterSpin.On the Effect tab, under Settings, in the Amount list, select Counterclockwise.On the Timing tab, in the Start list, select WithPrevious.On the Timing tab, in the Speed box enter4.0 seconds.Click OK.On the slide, select the text box, and then in the CustomAnimation task pane, do the following:Click the AddEffect, point to Entrance and select MoreEffects. In the AddEntranceEffect dialog box, under Subtle select Fade, and then click OK.Select the fade entrance effect (second effect), and under Modify: Fade do the following:In the Start list, select WithPrevious.In the Speed list, select Slow. With the text box still selected, click AddEffect, point to Emphasis and select MoreEffects. In the AddEmphasisEffect dialog box, under Basic select Spin, and then click OK.Select the spin emphasis effect (third effect), and under Modify: Spin do the following:In the Start list, select WithPrevious.In the Amount list, select HalfSpin.In the Speed list select Slow. With the text box still selected, click AddEffect, point to Emphasis and select MoreEffects. In the AddEmphasisEffect dialog box, under Basic select Spin, and then click OK.Click the arrow to the right of the spin emphasis effect (fourth effect), select Effect Options,and do the following:On the Effect tab, under Settings, in the Amount list, in the Custom box enter 30°, and then press ENTER.On the Effect tab, under Settings, in the Amount list, select Counterclockwise.On the Timing tab, in the Start list, select WithPrevious.On the Timing tab, in the Delay box enter 3.0 seconds.On the Timing tab, in the Speed box enter1 seconds (Fast).Click OK.To reproduce the background on this slide, do the following:Right-click the slide background area, and then click Format Background. In the Format Background dialog box, click Fill in the left pane, select Gradient fill in the Fill pane, and then do the following:In the Type list, select Linear.In the Direction, list click Linear Down (first row, second option from the left)Under Gradient stops, click Add or Remove until two stops appear in the drop-down list.Also under Gradient stops, customize the gradient stops as follows:Select Stop 1 from the list, and then do the following:In the Stop position box, enter 0%.Click the button next to Color, and then under Theme Colors click Black, Text 1 (first row, second option from the left). Select Stop 2 from the list, and then do the following: In the Stop position box, enter 100%.Click the button next to Color, and then under Theme Colors clickBlack, Text 1, Lighter 50% (second row, second option from the left).
- Picture and text with reflection(Basic)To reproduce the picture effects on this slide, do the following:On the Home tab, in the Slides group, click Layout and then click Blank. On the Insert tab, in the Illustrations group, click Picture. In the Insert Picture dialog box, select a picture, and then click Insert. Under Picture Tools, on the Format tab, in the bottom right corner of the Size group, click the Size and Position dialog box launcher. In the Size and Position dialog box, on the Size tab, resize or crop the picture as needed so that under Size and rotate, the Height box is set to 3.17” and the Width box is set to 10”. Resize the picture under Size and rotate by entering values into the Height and Width boxes. Crop the picture under Crop from by entering values into the Left, Right, Top, and Bottom boxes. Select the picture. On the Home tab, in the Drawing group, click Arrange, point to Align, and then do the following:Click Align to Slide. Click Align Top.Under Picture Tools, on the Format tab, in the Picture Styles group, click Picture Effects, point to Reflections, and then under Reflection Variations click Half Reflection, touching (first row, second option from the left). On the Insert tab, in the Text group, click Text Box, and then on the slide, drag to draw the text box.Enter text in the text box, select the text, and then on the Home tab, in the Font group, select Impact from the Font list and then enter 42 in the Font Size box.On the Home tab, in the Paragraph group, click Align Text Right to align the text right in the text box.Select the text box. Under Drawing Tools, on the Format tab, in the WordArt Styles group, click Text Effects, point to Reflection, and then under Reflection Variations click Half Reflection, touching (first row, second option from the left). Under Drawing Tools, on the Format tab, in the bottom right corner of the WordArt Styles group, click the Format Text Effects dialog box launcher. In the Format Text Effects dialog box, click Text Fill in the left pane, select Solid fill in the Text Fill pane, and then do the following:Click the button next to Color, and then under Theme Colors, click White, Background 1 (first row, first option from the left). In the Transparency box, enter 12%.On the slide, drag the text box onto the picture to position as needed. To reproduce the background on this slide, do the following: Right-click the slide background area, and then click Format Background. In the Format Background dialog box, click Fill in the left pane, select Gradient fill in the Fill pane, and then do the following:In the Type list, select Radial.Click the button next to Direction, and then click From Center (third option from the left).In the Angle box, enter 0⁰.Under Gradient stops, click Add or Remove until two stops appear in the drop-down list.Also under Gradient stops, customize the gradient stops that you added as follows:Select Stop 1 from the list, and then do the following:In the Stop position box, enter 10%.Click the button next to Color, and then under Theme Colors click White, Background 1, Darker 5% (second row, first option from the left).Select Stop 2 from the list, and then do the following: In the Stop position box, enter 99%.Click the button next to Color, and then under Theme Colors click White, Background 1, Darker 35% (fifth row, first option from the left).
- Custom animation effects: motion path text and change color(Intermediate)To reproduce the picture on this slide, do the following:On the Home tab, in theSlides group, click Layout, and then click Blank.On the Insert tab, in the Illustrations group, click Picture. In the Insert Picture dialog box, select a picture, and then click Insert.On the slide, select the picture. Under Picture Tools, on the Format tab, in the bottom right corner of the Size group, click the Size and Position dialog box launcher. In the Size and Position dialog box, on the Size tab, resize or crop the picture as needed so that under Size and rotate, the Height box is set to 3” and the Width box is set to 10”. Resize the picture under Size and rotate by entering values into the Height and Width boxes. Crop the picture under Crop from by entering values into the Left, Right, Top, and Bottom boxes. Select the picture. On the Home tab, in the Drawing group, click the arrow under Arrange, point to Align, and do the following:Click Align to Slide.Click AlignCenter.Click Align Top.To reproduce the text effects on this slide, do the following:On the Insert tab, in the Text group, click Text Box, and then on the slide, drag to draw the text box. Enter text in the text box and select the text. On the Home tab, in the Font group, do the following:In the Font list, select Century Gothic.In the Font Size box, enter 30. Click Bold.Click the arrow next to FontColor, click More Colors, and then in the Colors dialog box, on the Custom tab, enter values for Red: 80, Green: 129, Blue: 226.On the Home tab, in the Paragraph group, click Align Text Left to align the text left in the text box.Drag the text box below the picture, in the middle of the left side of the slide.To reproduce the animation effects for the first text box on this slide, do the following:On the Animations tab, in the Animations group, click Custom Animation.On the slide, select the text box. In the CustomAnimation task pane, do the following:Click AddEffect, point to Entrance, and then click More Effects.In the Add Entrance Effect dialog box, under Subtle, click Fade. Select the animation effect (fade effect for the first text box). Under Modify: Fade, do the following:In theStart list, selectWith Previous. In the Speed list, select Medium.On the slide, select the text box. In the CustomAnimation task pane, do the following:Click AddEffect, point to Motion Paths, and then click Right. Select the second animation effect (right motion path for the first text box). Under Modify: Right, do the following:In theStart list, selectWithPrevious.In the Speed list, select Medium.On the slide, select the text box. In the CustomAnimation task pane, do the following:Click AddEffect, point to Emphasis, and then click More Effects.In the Add Emphasis Effect dialog box, under Basic, click Change Font Color. Select the third animation effect (change font color effect for the first text box). Under Modify: Change Font Color, do the following:In theStart list, selectAfterPrevious.In the Font Color list, select White (first option from the left).In the Speed list, select Fast.On the slide, select the motion path for the text box. Point to the endpoint (red arrow) until the cursor becomes a two-headed arrow, press and hold SHIFT, and then drag the endpoint to lengthen the motion path about 4”. (Note: It will help to use the ruler to measure the path. On the View tab, in the Show/Hide group, select Ruler.) Right-click the motion path, and then click Reverse Path Direction. To reproduce the other animated text boxes on this slide, do the following:On the slide, select the text box. On the Home tab, in the Clipboard group, click the arrow under Paste, and then click Duplicate. Drag the second text box below and to the right of the first text box.Click in the second text box, and then edit the text. Select the text in the second text box. On the Home tab, in the Font group, do the following:In the Font Size list, select 24.Click Bold to unbold the text.Click Italic. On the slide, select the motion path for the second text box. Point to the starting point (green arrow) until the cursor becomes a two-headed arrow. Press and hold SHIFT, and then drag the starting point to the left of the second text box, until the length of the path is about 4”. Select the first text box. On the Home tab, in the Clipboard group, click the arrow under Paste, and then click Duplicate. On the slide, Drag the third text box until it is below and to the left of the second text box, and to the right of the first text box.Click in the third text box, and then edit the text.Select the text in the third text box. On the Home tab, in the Font group, in the Font Size list, select 24.In the Custom Animation task pane, select the sixth animation effect (change font color effect for the second text box). Under Modify: Change Font Color, in the Speed list, select Fast. On the slide, press and hold CTRL, and then select all three text boxes. In the CustomAnimation task pane, do the following:Click AddEffect, point to Exit, and then click More Effects.In the Add Exit Effect dialog box, under Moderate, click Stretchy. Select the 10th, 11th, and 12th animation effects (stretchy effects for the text boxes). Under Modify: Stretchy, do the following:In theStart list, selectWith Previous. In the Speed list, select Medium.Select the 10th animation effect (stretchy effect for the first text box), and then drag it until it is ninth in the list of effects. Select the 12th animation effect (stretchy effect for the third text box), and then under Modify: Exit, in the Start list, select After Previous.To reproduce the background effects on this slide, do the following: Right-click the slide background area, and then click Format Background. In the Format Background dialog box, click Fill in the left pane, select Gradient fill in the Fill pane, and then do the following:In the Type list, select Linear.Click the button next to Direction, and then click Linear Up (second row, second option from the left).Under Gradient stops, click Add or Remove until four stops appear in the drop-down list.Also under Gradient stops, customize the gradient stops that you added as follows:Select Stop 1 from the list, and then do the following:In the Stop position box, enter 0%.Click the button next to Color, and then under Theme Colors click Black, Text 1, Lighter 25% (fourth row, second option from the left).Select Stop 2 from the list, and then do the following: In the Stop position box, enter 20%.Click the button next to Color, and then under Theme Colors click Black, Text 1 (first row, second option from the left).Select Stop 3 from the list, and then do the following: In the Stop position box, enter 80%.Click the button next to Color, and then under Theme Colors click Black, Text 1 (first row, second option from the left).Select Stop 4 from the list, and then do the following: In the Stop position box, enter 100%.Click the button next to Color, and then under Theme Colors click Black, Text 1, Lighter 25% (fourth row, second option from the left).