SlideShare a Scribd company logo
1 of 14
Download to read offline
Weaving on a
Cardboard Triangle
Loom
© 2008 – Blue Frog (blue.frog.fiber@gmail.com) for The Warkworth Spinners & Weavers Guild, Warkworth Ontario.
This document may be copied (photocopied, reproduced, or reprinted); in whole or part for personal, or small group use only. Please
contact the above if you wish to use this document on a website or other publication. This document may not be reproduced for
commercial use without the express written consent of Blue Frog.
Weaving on a Cardboard Triangle Loom
- 2 -©2008 Blue Frog (blue.frog.fiber@gmail.com)
© 2008 Blue Frog
(Blue.Frog.Fiber@gmail.com)
© 2008 Blue Frog
(Blue.Frog.Fiber@gmail.com)
© 2008 Blue Frog
(Blue.Frog.Fiber@gmail.com)
© 2008 Blue Frog
(Blue.Frog.Fiber@gmail.com)
© 2008 Blue Frog
(Blue.Frog.Fiber@gmail.com)
© 2008 Blue Frog
(Blue.Frog.Fiber@gmail.com)
© 2008 Blue Frog
(Blue.Frog.Fiber@gmail.com)
© 2008 Blue Frog
(Blue.Frog.Fiber@gmail.com)
© 2008 Blue Frog
(Blue.Frog.Fiber@gmail.com)
© 2008 Blue Frog
(Blue.Frog.Fiber@gmail.com)
Weaving on a Cardboard Triangle Loom
The following steps outline how to weave on a Cardboard Triangle Loom. The
Triangle Loom will allow you to create a woven scarf measuring 34” x 34” x 48”
inches long.
You will need:
• A Cardboard Loom (refer to: ”Weaving on a Cardboard Triangle Loom” for
instructions on building the loom).
• A minimum of 225 yards of yarn
• Scissors
• Weaving Needle or Blunt ended tapestry needle
A Note on Yarns …
The thickness and hairiness of the yarn will affect your finished product. Here are
some examples of different yarns, and the outcome of each.
A thin yarn will result in a very open weave
pattern.
A thick yarn will result in a tighter weave
pattern.
From the two examples shown
above, we can see the difference
in thickness of the finished
product when rolled and placed
together.
Note the difference in thickness
shown on the next page.
Weaving on a Cardboard Triangle Loom
- 3 -©2008 Blue Frog (blue.frog.fiber@gmail.com)
© 2008 Blue Frog
(Blue.Frog.Fiber@gmail.com)
© 2008 Blue Frog
(Blue.Frog.Fiber@gmail.com)
© 2008 Blue Frog
(Blue.Frog.Fiber@gmail.com)
© 2008 Blue Frog
(Blue.Frog.Fiber@gmail.com)
© 2008 Blue Frog
(Blue.Frog.Fiber@gmail.com)
© 2008 Blue Frog
(Blue.Frog.Fiber@gmail.com)
© 2008 Blue Frog
(Blue.Frog.Fiber@gmail.com)
© 2008 Blue Frog
(Blue.Frog.Fiber@gmail.com)
© 2008 Blue Frog
(Blue.Frog.Fiber@gmail.com)
© 2008 Blue Frog
(Blue.Frog.Fiber@gmail.com)
NOTE: When choosing yarn for your first piece, it is a good idea to think about
picking:
• A yarn that is not too thin.
• A yarn that is not too hairy.
• A yarn that is not too loosely plied, so you don’t accidentally weave into
the yarn instead of over/under it
• Yarns of different colors to help learn the over/under pattern.
A hairy yarn will cause the
weave to ‘mesh’ together,
and may felt more easily
when wet or after the scarf
has been worn for a while.
The same blue yarn was
used in both patterns shown;
however the resulting
thickness and mesh were
different because of the
second yarn selection.
Using a yarn with variations of thicknesses can give a
different and distinctive look to the finished piece.
In the piece on the left, note the thick and thin parts of
the weave.
Weaving on a Cardboard Triangle Loom
- 4 -©2008 Blue Frog (blue.frog.fiber@gmail.com)
© 2008 Blue Frog
(Blue.Frog.Fiber@gmail.com)
© 2008 Blue Frog
(Blue.Frog.Fiber@gmail.com)
© 2008 Blue Frog
(Blue.Frog.Fiber@gmail.com)
© 2008 Blue Frog
(Blue.Frog.Fiber@gmail.com)
© 2008 Blue Frog
(Blue.Frog.Fiber@gmail.com)
© 2008 Blue Frog
(Blue.Frog.Fiber@gmail.com)
© 2008 Blue Frog
(Blue.Frog.Fiber@gmail.com)
© 2008 Blue Frog
(Blue.Frog.Fiber@gmail.com)
© 2008 Blue Frog
(Blue.Frog.Fiber@gmail.com)
© 2008 Blue Frog
(Blue.Frog.Fiber@gmail.com)
Instructions
Traditionally, weaving on a loom requires a lot of initial setup - putting the Warp
onto the loom (which are the vertical threads), and then weaving a pattern
horizontally across (the Weft).
The major difference when weaving on a triangle loom is that very minimal setup
is required. Both the warp and weft occur at the same time as each piece of yarn
is added to the loom.
Stringing the Loom:
1. Take 2 pieces of yarn, and lay them along the outer side of the row of pins.
2. Wrap the yarn around the pin, and tuck it into one of the slits along the side.
Pull the yarn taut (but not super tight), and wrap it around the last pin on the far
side, tucking the ends into a slit in the loom.
Outer Side
Weaving on a Cardboard Triangle Loom
- 5 -©2008 Blue Frog (blue.frog.fiber@gmail.com)
© 2008 Blue Frog
(Blue.Frog.Fiber@gmail.com)
© 2008 Blue Frog
(Blue.Frog.Fiber@gmail.com)
© 2008 Blue Frog
(Blue.Frog.Fiber@gmail.com)
© 2008 Blue Frog
(Blue.Frog.Fiber@gmail.com)
© 2008 Blue Frog
(Blue.Frog.Fiber@gmail.com)
© 2008 Blue Frog
(Blue.Frog.Fiber@gmail.com)
© 2008 Blue Frog
(Blue.Frog.Fiber@gmail.com)
© 2008 Blue Frog
(Blue.Frog.Fiber@gmail.com)
© 2008 Blue Frog
(Blue.Frog.Fiber@gmail.com)
© 2008 Blue Frog
(Blue.Frog.Fiber@gmail.com)
Weaving on the Loom
3. Thread the flat needle (or tapestry needle) onto the end of your yarn.
NOTE: You do not have to cut the yarn at this point.
4. Thread the yarn over the long pieces of yarn (on the outer side of the pins),
before pin #1, then underneath the yarn. Pull the yarn through the first notch on
the loom, leaving a tail of approximately 7” in length. This will be the fringe.
5. Pull the rest of the yarn in a straight line to the far side of the loom. Use the
lines on the loom for guidance. Pull the yarn through a notch on the far side, and
cut the yarn, leaving a 6~8” tail for fringe.
NOTE: The total number of notches on parallel sides of the loom should match –
see the arrows on the diagram above.
Once the first yarn has been
strung on the loom, make sure that
the number of notches on both
parallel sides is the same (i.e. both
sides have 3 ½”, or 14 notches
open parallel to each other).
This is important when completing
the final stages of the scarf.
4
NOTE: The length of the fringe is
your choice… make it as short or
as long as you wish – as long as
you leave enough length to tie off
the ends for finishing!
Weaving on a Cardboard Triangle Loom
- 6 -©2008 Blue Frog (blue.frog.fiber@gmail.com)
© 2008 Blue Frog
(Blue.Frog.Fiber@gmail.com)
© 2008 Blue Frog
(Blue.Frog.Fiber@gmail.com)
© 2008 Blue Frog
(Blue.Frog.Fiber@gmail.com)
© 2008 Blue Frog
(Blue.Frog.Fiber@gmail.com)
© 2008 Blue Frog
(Blue.Frog.Fiber@gmail.com)
© 2008 Blue Frog
(Blue.Frog.Fiber@gmail.com)
© 2008 Blue Frog
(Blue.Frog.Fiber@gmail.com)
© 2008 Blue Frog
(Blue.Frog.Fiber@gmail.com)
© 2008 Blue Frog
(Blue.Frog.Fiber@gmail.com)
© 2008 Blue Frog
(Blue.Frog.Fiber@gmail.com)
6. Continue with the next pieces:
a.) Thread the yarn, and weave it over the long pieces of yarn (on the outer
side of the pins), between pins #1 and #2, then underneath the yarn. Pull
the yarn over the first piece, and pull the yarn through the next notch on
the loom, cutting it to leave a fringe tail approximately 6~8” long
b.) Weave the next piece over between pins #2 and #3, then underneath the
yarn. Pull the yarn over the first yarn, then under the second. Pull through
the notch, and cut the yarn to leave a tail.
c.) Repeat in a pattern of over the long piece, then under the long piece
between two pins. Follow through a repeating pattern of Over, then Under.
7. Continue weaving until the entire length of the yarn has been filled.
4
6a
6b
6c
Weaving on a Cardboard Triangle Loom
- 7 -©2008 Blue Frog (blue.frog.fiber@gmail.com)
© 2008 Blue Frog
(Blue.Frog.Fiber@gmail.com)
© 2008 Blue Frog
(Blue.Frog.Fiber@gmail.com)
© 2008 Blue Frog
(Blue.Frog.Fiber@gmail.com)
© 2008 Blue Frog
(Blue.Frog.Fiber@gmail.com)
© 2008 Blue Frog
(Blue.Frog.Fiber@gmail.com)
© 2008 Blue Frog
(Blue.Frog.Fiber@gmail.com)
© 2008 Blue Frog
(Blue.Frog.Fiber@gmail.com)
© 2008 Blue Frog
(Blue.Frog.Fiber@gmail.com)
© 2008 Blue Frog
(Blue.Frog.Fiber@gmail.com)
© 2008 Blue Frog
(Blue.Frog.Fiber@gmail.com)
8. Continue weaving the two lengths that are left, until the loom has been filled as
shown below:
Weaving on a Cardboard Triangle Loom
- 8 -©2008 Blue Frog (blue.frog.fiber@gmail.com)
© 2008 Blue Frog
(Blue.Frog.Fiber@gmail.com)
© 2008 Blue Frog
(Blue.Frog.Fiber@gmail.com)
© 2008 Blue Frog
(Blue.Frog.Fiber@gmail.com)
© 2008 Blue Frog
(Blue.Frog.Fiber@gmail.com)
© 2008 Blue Frog
(Blue.Frog.Fiber@gmail.com)
© 2008 Blue Frog
(Blue.Frog.Fiber@gmail.com)
© 2008 Blue Frog
(Blue.Frog.Fiber@gmail.com)
© 2008 Blue Frog
(Blue.Frog.Fiber@gmail.com)
© 2008 Blue Frog
(Blue.Frog.Fiber@gmail.com)
© 2008 Blue Frog
(Blue.Frog.Fiber@gmail.com)
Tying the Fringe
Select the number of yarn pieces to go into each tied tassel on the fringe. If the
yarn is thin, it is best to go with 3 pieces, but if the yarn is thicker then using 5
pieces works well.
9. Start at the bottom corner point of the loom. Separate the yarn into either 2
pieces (if doing 3-yarn tassels) or 3 pieces (if doing 5-yarn tassels) on each side
of the point. Do not tie these pieces yet.
A Thin Yarn fringe, tied using 3
pieces of yarn per tassel.
A Thick Yarn fringe, tied using 5
pieces of yarn per tassel.
Start at the bottom
corner
In the example below, we will be
making tassels with 5 pieces of
yarn per. We are separating out
3 pieces on each side of the
corner to keep it symmetrical.
Weaving on a Cardboard Triangle Loom
- 9 -©2008 Blue Frog (blue.frog.fiber@gmail.com)
© 2008 Blue Frog
(Blue.Frog.Fiber@gmail.com)
© 2008 Blue Frog
(Blue.Frog.Fiber@gmail.com)
© 2008 Blue Frog
(Blue.Frog.Fiber@gmail.com)
© 2008 Blue Frog
(Blue.Frog.Fiber@gmail.com)
© 2008 Blue Frog
(Blue.Frog.Fiber@gmail.com)
© 2008 Blue Frog
(Blue.Frog.Fiber@gmail.com)
© 2008 Blue Frog
(Blue.Frog.Fiber@gmail.com)
© 2008 Blue Frog
(Blue.Frog.Fiber@gmail.com)
© 2008 Blue Frog
(Blue.Frog.Fiber@gmail.com)
© 2008 Blue Frog
(Blue.Frog.Fiber@gmail.com)
10. Remove 5 pieces of yarn from the notches on the loom. Make sure the yarn
pieces are even.
11. Tie an overhand knot using all 5 pieces of yarn:
a.) Take the ends of the 5 pieces of yarn and place them over the other side
making a loop.
b.) Bring the loose ends around the base, and underneath. Pull the ends
through the loop (from underside outwards)
c.) Pull the knot tight up against the weaving.
11a 11b 11c
Weaving on a Cardboard Triangle Loom
- 10 -©2008 Blue Frog (blue.frog.fiber@gmail.com)
© 2008 Blue Frog
(Blue.Frog.Fiber@gmail.com)
© 2008 Blue Frog
(Blue.Frog.Fiber@gmail.com)
© 2008 Blue Frog
(Blue.Frog.Fiber@gmail.com)
© 2008 Blue Frog
(Blue.Frog.Fiber@gmail.com)
© 2008 Blue Frog
(Blue.Frog.Fiber@gmail.com)
© 2008 Blue Frog
(Blue.Frog.Fiber@gmail.com)
© 2008 Blue Frog
(Blue.Frog.Fiber@gmail.com)
© 2008 Blue Frog
(Blue.Frog.Fiber@gmail.com)
© 2008 Blue Frog
(Blue.Frog.Fiber@gmail.com)
© 2008 Blue Frog
(Blue.Frog.Fiber@gmail.com)
12. Continue tying every other group of 5 until you reach the far corner of the
loom. Do NOT tie the fringe at the corner yet.
NOTE: Leaving the fringe held to the loom at the corners will provide tension,
and make tying the rest of the fringe easier.
13. Do the other side of the loom, from the bottom corner to the top corner. Do
not tie the fringe at that corner yet either.
Tying the Corners
14. Tie the remaining
fringe on the short side,
leaving the corner pieces
in the notches.
Example: Pulling the knot tight
against the weave.
Example: Pulling the ends through
the loop to make the knot.
Weaving on a Cardboard Triangle Loom
- 11 -©2008 Blue Frog (blue.frog.fiber@gmail.com)
© 2008 Blue Frog
(Blue.Frog.Fiber@gmail.com)
© 2008 Blue Frog
(Blue.Frog.Fiber@gmail.com)
© 2008 Blue Frog
(Blue.Frog.Fiber@gmail.com)
© 2008 Blue Frog
(Blue.Frog.Fiber@gmail.com)
© 2008 Blue Frog
(Blue.Frog.Fiber@gmail.com)
© 2008 Blue Frog
(Blue.Frog.Fiber@gmail.com)
© 2008 Blue Frog
(Blue.Frog.Fiber@gmail.com)
© 2008 Blue Frog
(Blue.Frog.Fiber@gmail.com)
© 2008 Blue Frog
(Blue.Frog.Fiber@gmail.com)
© 2008 Blue Frog
(Blue.Frog.Fiber@gmail.com)
15. Lift the two corner pieces
out from each side of the corner
(4 pieces in total). Cross the
pieces over each other.
16. Tie the two remaining groups of fringe, one on each side of the loom corner.
Repeat for the far side of the loom.
17. Finish tying all remaining fringe on both sides of the loom, working back
towards the far corner.
Removing the Scarf
18. Carefully lift the finished scarf
off the loom by gently pulling it off
the holding pins.
NOTE: It is normal for a few pins
to come out during the removal
process. These pins can be
replaced into the loom once the
scarf has been removed.
Cross the pieces over
each other before
tying the corner fringe.
Weaving on a Cardboard Triangle Loom
- 12 -©2008 Blue Frog (blue.frog.fiber@gmail.com)
© 2008 Blue Frog
(Blue.Frog.Fiber@gmail.com)
© 2008 Blue Frog
(Blue.Frog.Fiber@gmail.com)
© 2008 Blue Frog
(Blue.Frog.Fiber@gmail.com)
© 2008 Blue Frog
(Blue.Frog.Fiber@gmail.com)
© 2008 Blue Frog
(Blue.Frog.Fiber@gmail.com)
© 2008 Blue Frog
(Blue.Frog.Fiber@gmail.com)
© 2008 Blue Frog
(Blue.Frog.Fiber@gmail.com)
© 2008 Blue Frog
(Blue.Frog.Fiber@gmail.com)
© 2008 Blue Frog
(Blue.Frog.Fiber@gmail.com)
© 2008 Blue Frog
(Blue.Frog.Fiber@gmail.com)
Finishing the Fringe
Now that the scarf has been lifted off the loom, you can trim the fringe to finish
the project.
19. Roll the scarf so that the fringe along one side are lined up. Trim evenly.
20. Use the trimmed
edges on the one side to
measure out the length
needed for the other side,
by lining up the two sides
together with the trimmed
fringe on top of the
untrimmed fringe.
Trim the fringe on the
lower side to match the
length from the trimmed
side.
Weaving on a Cardboard Triangle Loom
- 13 -©2008 Blue Frog (blue.frog.fiber@gmail.com)
© 2008 Blue Frog
(Blue.Frog.Fiber@gmail.com)
© 2008 Blue Frog
(Blue.Frog.Fiber@gmail.com)
© 2008 Blue Frog
(Blue.Frog.Fiber@gmail.com)
© 2008 Blue Frog
(Blue.Frog.Fiber@gmail.com)
© 2008 Blue Frog
(Blue.Frog.Fiber@gmail.com)
© 2008 Blue Frog
(Blue.Frog.Fiber@gmail.com)
© 2008 Blue Frog
(Blue.Frog.Fiber@gmail.com)
© 2008 Blue Frog
(Blue.Frog.Fiber@gmail.com)
© 2008 Blue Frog
(Blue.Frog.Fiber@gmail.com)
© 2008 Blue Frog
(Blue.Frog.Fiber@gmail.com)
21. Roll up the untrimmed
side in the same way as
step #19, until the roll
reaches the trimmed fringe
pieces.
Use the trimmed pieces to
measure the length
needed for trimming the
remaining fringe. Cut the
fringe to match the length.
22. Line up the fringe at the corners as shown below – trim as needed to make
the sides even.
Trimmed edges on the bottom
corner of the scarf.
Trimmed edges on the two top
corners of the scarf.
Enjoy your completed Scarf!
- 14 -©2008 Blue Frog (blue.frog.fiber@gmail.com)
© 2008 Blue Frog
(Blue.Frog.Fiber@gmail.com)
© 2008 Blue Frog
(Blue.Frog.Fiber@gmail.com)
© 2008 Blue Frog
(Blue.Frog.Fiber@gmail.com)
© 2008 Blue Frog
(Blue.Frog.Fiber@gmail.com)
© 2008 Blue Frog
(Blue.Frog.Fiber@gmail.com)
© 2008 Blue Frog
(Blue.Frog.Fiber@gmail.com)
© 2008 Blue Frog
(Blue.Frog.Fiber@gmail.com)
© 2008 Blue Frog
(Blue.Frog.Fiber@gmail.com)
© 2008 Blue Frog
(Blue.Frog.Fiber@gmail.com)
© 2008 Blue Frog
(Blue.Frog.Fiber@gmail.com)
Enjoy your completed Scarf!

More Related Content

Viewers also liked

Indian ocean travel
Indian ocean travelIndian ocean travel
Indian ocean travelJef Chouzier
 
바구니직조기법 총람
바구니직조기법 총람바구니직조기법 총람
바구니직조기법 총람Seongwon Kim
 
Atividades arquitetura gótica
Atividades arquitetura góticaAtividades arquitetura gótica
Atividades arquitetura góticaDoug Caesar
 
접이식 자가제작 베틀제작 도면
접이식 자가제작 베틀제작 도면접이식 자가제작 베틀제작 도면
접이식 자가제작 베틀제작 도면Seongwon Kim
 
2 mikrokontroler atmega 8535
2 mikrokontroler atmega 85352 mikrokontroler atmega 8535
2 mikrokontroler atmega 8535Agung Gumelar
 
사끼오리-일본 헝겊 재활용 직조법
사끼오리-일본 헝겊 재활용 직조법사끼오리-일본 헝겊 재활용 직조법
사끼오리-일본 헝겊 재활용 직조법Seongwon Kim
 
Running Text on LCD ATMEGA 8535
Running Text on LCD ATMEGA 8535Running Text on LCD ATMEGA 8535
Running Text on LCD ATMEGA 8535Chardian Arguta
 
마크라메 사전
마크라메 사전마크라메 사전
마크라메 사전Seongwon Kim
 
Atividades arte paleocristã
Atividades arte paleocristãAtividades arte paleocristã
Atividades arte paleocristãDoug Caesar
 
핸드메이드 도시계획 (Handmade urbanism)
핸드메이드 도시계획 (Handmade urbanism)핸드메이드 도시계획 (Handmade urbanism)
핸드메이드 도시계획 (Handmade urbanism)Seongwon Kim
 
레그러그 Ver 2.0
레그러그 Ver 2.0레그러그 Ver 2.0
레그러그 Ver 2.0Seongwon Kim
 
Plaques tectoniques et frontières de plaques
Plaques tectoniques et frontières de plaquesPlaques tectoniques et frontières de plaques
Plaques tectoniques et frontières de plaquesJef Chouzier
 
Effective communication management for urban infrastructure projects
Effective communication management for urban infrastructure projectsEffective communication management for urban infrastructure projects
Effective communication management for urban infrastructure projectsVanita Ahuja
 
트렌드가 된 적정기술을 다시 묻다
트렌드가 된 적정기술을 다시 묻다트렌드가 된 적정기술을 다시 묻다
트렌드가 된 적정기술을 다시 묻다Seongwon Kim
 

Viewers also liked (17)

Indian ocean travel
Indian ocean travelIndian ocean travel
Indian ocean travel
 
바구니직조기법 총람
바구니직조기법 총람바구니직조기법 총람
바구니직조기법 총람
 
Atividades arquitetura gótica
Atividades arquitetura góticaAtividades arquitetura gótica
Atividades arquitetura gótica
 
접이식 자가제작 베틀제작 도면
접이식 자가제작 베틀제작 도면접이식 자가제작 베틀제작 도면
접이식 자가제작 베틀제작 도면
 
2 mikrokontroler atmega 8535
2 mikrokontroler atmega 85352 mikrokontroler atmega 8535
2 mikrokontroler atmega 8535
 
사끼오리-일본 헝겊 재활용 직조법
사끼오리-일본 헝겊 재활용 직조법사끼오리-일본 헝겊 재활용 직조법
사끼오리-일본 헝겊 재활용 직조법
 
Running Text on LCD ATMEGA 8535
Running Text on LCD ATMEGA 8535Running Text on LCD ATMEGA 8535
Running Text on LCD ATMEGA 8535
 
마크라메 사전
마크라메 사전마크라메 사전
마크라메 사전
 
Atividades arte paleocristã
Atividades arte paleocristãAtividades arte paleocristã
Atividades arte paleocristã
 
핸드메이드 도시계획 (Handmade urbanism)
핸드메이드 도시계획 (Handmade urbanism)핸드메이드 도시계획 (Handmade urbanism)
핸드메이드 도시계획 (Handmade urbanism)
 
레그러그 Ver 2.0
레그러그 Ver 2.0레그러그 Ver 2.0
레그러그 Ver 2.0
 
Plaques tectoniques et frontières de plaques
Plaques tectoniques et frontières de plaquesPlaques tectoniques et frontières de plaques
Plaques tectoniques et frontières de plaques
 
Effective communication management for urban infrastructure projects
Effective communication management for urban infrastructure projectsEffective communication management for urban infrastructure projects
Effective communication management for urban infrastructure projects
 
트렌드가 된 적정기술을 다시 묻다
트렌드가 된 적정기술을 다시 묻다트렌드가 된 적정기술을 다시 묻다
트렌드가 된 적정기술을 다시 묻다
 
Mercantilismo
MercantilismoMercantilismo
Mercantilismo
 
CVoct16
CVoct16CVoct16
CVoct16
 
Tableau tp12
Tableau tp12Tableau tp12
Tableau tp12
 

More from Seongwon Kim

[2호] 독일 학교시설 복합화 및 개방 정책 사례와 시사점_내지(0422).pdf
[2호] 독일 학교시설 복합화 및 개방 정책 사례와 시사점_내지(0422).pdf[2호] 독일 학교시설 복합화 및 개방 정책 사례와 시사점_내지(0422).pdf
[2호] 독일 학교시설 복합화 및 개방 정책 사례와 시사점_내지(0422).pdfSeongwon Kim
 
학교 중심 공간의 사전기획 사례와 주안점에 대해-20240326.pptx
학교 중심 공간의 사전기획 사례와 주안점에 대해-20240326.pptx학교 중심 공간의 사전기획 사례와 주안점에 대해-20240326.pptx
학교 중심 공간의 사전기획 사례와 주안점에 대해-20240326.pptxSeongwon Kim
 
미래 학교의 학교 중심 공간, 광장형 공간의 사전 기획 사례와 사전 기획
미래 학교의 학교 중심 공간, 광장형 공간의 사전 기획 사례와 사전 기획미래 학교의 학교 중심 공간, 광장형 공간의 사전 기획 사례와 사전 기획
미래 학교의 학교 중심 공간, 광장형 공간의 사전 기획 사례와 사전 기획Seongwon Kim
 
자전거친화도시와 마을을 위하여.pdf
자전거친화도시와 마을을 위하여.pdf자전거친화도시와 마을을 위하여.pdf
자전거친화도시와 마을을 위하여.pdfSeongwon Kim
 
보행자친화도시와 마을을 위하여.pdf
보행자친화도시와 마을을 위하여.pdf보행자친화도시와 마을을 위하여.pdf
보행자친화도시와 마을을 위하여.pdfSeongwon Kim
 
현대교육학의 요구와 학습공간 모델 20230404.pdf
현대교육학의 요구와 학습공간 모델 20230404.pdf현대교육학의 요구와 학습공간 모델 20230404.pdf
현대교육학의 요구와 학습공간 모델 20230404.pdfSeongwon Kim
 
학교 건축 디자인의 역사와 주요 사례.pdf
학교 건축 디자인의 역사와 주요 사례.pdf학교 건축 디자인의 역사와 주요 사례.pdf
학교 건축 디자인의 역사와 주요 사례.pdfSeongwon Kim
 
학교 건축 디자인의 역사와 주요 사례.pdf
학교 건축 디자인의 역사와 주요 사례.pdf학교 건축 디자인의 역사와 주요 사례.pdf
학교 건축 디자인의 역사와 주요 사례.pdfSeongwon Kim
 
돌담쌓기 워크숍 강의자료 20230127.pdf
돌담쌓기 워크숍 강의자료 20230127.pdf돌담쌓기 워크숍 강의자료 20230127.pdf
돌담쌓기 워크숍 강의자료 20230127.pdfSeongwon Kim
 
미래학교의 교육개념과 중점교육 모델들 몇 가지.pdf
미래학교의 교육개념과 중점교육 모델들 몇 가지.pdf미래학교의 교육개념과 중점교육 모델들 몇 가지.pdf
미래학교의 교육개념과 중점교육 모델들 몇 가지.pdfSeongwon Kim
 
그린스마트 미래학교의 이해 20221204 (22년 최종 보완수정).pdf
그린스마트 미래학교의 이해 20221204 (22년 최종 보완수정).pdf그린스마트 미래학교의 이해 20221204 (22년 최종 보완수정).pdf
그린스마트 미래학교의 이해 20221204 (22년 최종 보완수정).pdfSeongwon Kim
 
학교 공간 배치와 건축 유형 202212104.pdf
학교 공간 배치와 건축 유형 202212104.pdf학교 공간 배치와 건축 유형 202212104.pdf
학교 공간 배치와 건축 유형 202212104.pdfSeongwon Kim
 
돌담 쌓기 자료 202201003.pdf
돌담 쌓기 자료 202201003.pdf돌담 쌓기 자료 202201003.pdf
돌담 쌓기 자료 202201003.pdfSeongwon Kim
 
마을교육공동체 공간 사례와 디자인 -김성원.pdf
마을교육공동체 공간 사례와 디자인 -김성원.pdf마을교육공동체 공간 사례와 디자인 -김성원.pdf
마을교육공동체 공간 사례와 디자인 -김성원.pdfSeongwon Kim
 
유휴교실을 활용한 21세기 학습공간 조성
유휴교실을 활용한 21세기 학습공간 조성유휴교실을 활용한 21세기 학습공간 조성
유휴교실을 활용한 21세기 학습공간 조성Seongwon Kim
 
예술주의 놀이터 운동.pdf
예술주의 놀이터 운동.pdf예술주의 놀이터 운동.pdf
예술주의 놀이터 운동.pdfSeongwon Kim
 
기술놀이와 협력놀이-20220529.pdf
기술놀이와 협력놀이-20220529.pdf기술놀이와 협력놀이-20220529.pdf
기술놀이와 협력놀이-20220529.pdfSeongwon Kim
 
21세기 도서관의 변화와 공간 디자인.pdf
21세기 도서관의 변화와 공간 디자인.pdf21세기 도서관의 변화와 공간 디자인.pdf
21세기 도서관의 변화와 공간 디자인.pdfSeongwon Kim
 
자연주의 숲 놀이터에 대한 이해 20201207.pdf
자연주의 숲 놀이터에 대한 이해 20201207.pdf자연주의 숲 놀이터에 대한 이해 20201207.pdf
자연주의 숲 놀이터에 대한 이해 20201207.pdfSeongwon Kim
 
도시의 풍경을 바꾸는 다양한 놀이터를 위하여 20201025.pdf
도시의 풍경을 바꾸는 다양한 놀이터를 위하여  20201025.pdf도시의 풍경을 바꾸는 다양한 놀이터를 위하여  20201025.pdf
도시의 풍경을 바꾸는 다양한 놀이터를 위하여 20201025.pdfSeongwon Kim
 

More from Seongwon Kim (20)

[2호] 독일 학교시설 복합화 및 개방 정책 사례와 시사점_내지(0422).pdf
[2호] 독일 학교시설 복합화 및 개방 정책 사례와 시사점_내지(0422).pdf[2호] 독일 학교시설 복합화 및 개방 정책 사례와 시사점_내지(0422).pdf
[2호] 독일 학교시설 복합화 및 개방 정책 사례와 시사점_내지(0422).pdf
 
학교 중심 공간의 사전기획 사례와 주안점에 대해-20240326.pptx
학교 중심 공간의 사전기획 사례와 주안점에 대해-20240326.pptx학교 중심 공간의 사전기획 사례와 주안점에 대해-20240326.pptx
학교 중심 공간의 사전기획 사례와 주안점에 대해-20240326.pptx
 
미래 학교의 학교 중심 공간, 광장형 공간의 사전 기획 사례와 사전 기획
미래 학교의 학교 중심 공간, 광장형 공간의 사전 기획 사례와 사전 기획미래 학교의 학교 중심 공간, 광장형 공간의 사전 기획 사례와 사전 기획
미래 학교의 학교 중심 공간, 광장형 공간의 사전 기획 사례와 사전 기획
 
자전거친화도시와 마을을 위하여.pdf
자전거친화도시와 마을을 위하여.pdf자전거친화도시와 마을을 위하여.pdf
자전거친화도시와 마을을 위하여.pdf
 
보행자친화도시와 마을을 위하여.pdf
보행자친화도시와 마을을 위하여.pdf보행자친화도시와 마을을 위하여.pdf
보행자친화도시와 마을을 위하여.pdf
 
현대교육학의 요구와 학습공간 모델 20230404.pdf
현대교육학의 요구와 학습공간 모델 20230404.pdf현대교육학의 요구와 학습공간 모델 20230404.pdf
현대교육학의 요구와 학습공간 모델 20230404.pdf
 
학교 건축 디자인의 역사와 주요 사례.pdf
학교 건축 디자인의 역사와 주요 사례.pdf학교 건축 디자인의 역사와 주요 사례.pdf
학교 건축 디자인의 역사와 주요 사례.pdf
 
학교 건축 디자인의 역사와 주요 사례.pdf
학교 건축 디자인의 역사와 주요 사례.pdf학교 건축 디자인의 역사와 주요 사례.pdf
학교 건축 디자인의 역사와 주요 사례.pdf
 
돌담쌓기 워크숍 강의자료 20230127.pdf
돌담쌓기 워크숍 강의자료 20230127.pdf돌담쌓기 워크숍 강의자료 20230127.pdf
돌담쌓기 워크숍 강의자료 20230127.pdf
 
미래학교의 교육개념과 중점교육 모델들 몇 가지.pdf
미래학교의 교육개념과 중점교육 모델들 몇 가지.pdf미래학교의 교육개념과 중점교육 모델들 몇 가지.pdf
미래학교의 교육개념과 중점교육 모델들 몇 가지.pdf
 
그린스마트 미래학교의 이해 20221204 (22년 최종 보완수정).pdf
그린스마트 미래학교의 이해 20221204 (22년 최종 보완수정).pdf그린스마트 미래학교의 이해 20221204 (22년 최종 보완수정).pdf
그린스마트 미래학교의 이해 20221204 (22년 최종 보완수정).pdf
 
학교 공간 배치와 건축 유형 202212104.pdf
학교 공간 배치와 건축 유형 202212104.pdf학교 공간 배치와 건축 유형 202212104.pdf
학교 공간 배치와 건축 유형 202212104.pdf
 
돌담 쌓기 자료 202201003.pdf
돌담 쌓기 자료 202201003.pdf돌담 쌓기 자료 202201003.pdf
돌담 쌓기 자료 202201003.pdf
 
마을교육공동체 공간 사례와 디자인 -김성원.pdf
마을교육공동체 공간 사례와 디자인 -김성원.pdf마을교육공동체 공간 사례와 디자인 -김성원.pdf
마을교육공동체 공간 사례와 디자인 -김성원.pdf
 
유휴교실을 활용한 21세기 학습공간 조성
유휴교실을 활용한 21세기 학습공간 조성유휴교실을 활용한 21세기 학습공간 조성
유휴교실을 활용한 21세기 학습공간 조성
 
예술주의 놀이터 운동.pdf
예술주의 놀이터 운동.pdf예술주의 놀이터 운동.pdf
예술주의 놀이터 운동.pdf
 
기술놀이와 협력놀이-20220529.pdf
기술놀이와 협력놀이-20220529.pdf기술놀이와 협력놀이-20220529.pdf
기술놀이와 협력놀이-20220529.pdf
 
21세기 도서관의 변화와 공간 디자인.pdf
21세기 도서관의 변화와 공간 디자인.pdf21세기 도서관의 변화와 공간 디자인.pdf
21세기 도서관의 변화와 공간 디자인.pdf
 
자연주의 숲 놀이터에 대한 이해 20201207.pdf
자연주의 숲 놀이터에 대한 이해 20201207.pdf자연주의 숲 놀이터에 대한 이해 20201207.pdf
자연주의 숲 놀이터에 대한 이해 20201207.pdf
 
도시의 풍경을 바꾸는 다양한 놀이터를 위하여 20201025.pdf
도시의 풍경을 바꾸는 다양한 놀이터를 위하여  20201025.pdf도시의 풍경을 바꾸는 다양한 놀이터를 위하여  20201025.pdf
도시의 풍경을 바꾸는 다양한 놀이터를 위하여 20201025.pdf
 

Recently uploaded

Khanpur Call Girls : ☎ 8527673949, Low rate Call Girls
Khanpur Call Girls : ☎ 8527673949, Low rate Call GirlsKhanpur Call Girls : ☎ 8527673949, Low rate Call Girls
Khanpur Call Girls : ☎ 8527673949, Low rate Call Girlsashishs7044
 
STAR Scholars Program Brand Guide Presentation
STAR Scholars Program Brand Guide PresentationSTAR Scholars Program Brand Guide Presentation
STAR Scholars Program Brand Guide Presentationmakaiodm
 
UNIT 5-6 anh văn chuyên nganhhhhhhh.docx
UNIT 5-6 anh văn chuyên nganhhhhhhh.docxUNIT 5-6 anh văn chuyên nganhhhhhhh.docx
UNIT 5-6 anh văn chuyên nganhhhhhhh.docxssuser519b4b
 
Indian High Profile Call Girls In Sector 18 Noida 8375860717 Escorts Service
Indian High Profile Call Girls In Sector 18 Noida 8375860717 Escorts ServiceIndian High Profile Call Girls In Sector 18 Noida 8375860717 Escorts Service
Indian High Profile Call Girls In Sector 18 Noida 8375860717 Escorts Servicedoor45step
 
Russian Call Girls Delhi NCR 9999965857 Call or WhatsApp Anytime
Russian Call Girls Delhi NCR 9999965857 Call or WhatsApp AnytimeRussian Call Girls Delhi NCR 9999965857 Call or WhatsApp Anytime
Russian Call Girls Delhi NCR 9999965857 Call or WhatsApp AnytimeKomal Khan
 
FULL ENJOY - 9953040155 Call Girls in Gandhi Vihar | Delhi
FULL ENJOY - 9953040155 Call Girls in Gandhi Vihar | DelhiFULL ENJOY - 9953040155 Call Girls in Gandhi Vihar | Delhi
FULL ENJOY - 9953040155 Call Girls in Gandhi Vihar | DelhiMalviyaNagarCallGirl
 
How Can You Get Dubai Call Girls +971564860409 Call Girls Dubai?
How Can You Get Dubai Call Girls +971564860409 Call Girls Dubai?How Can You Get Dubai Call Girls +971564860409 Call Girls Dubai?
How Can You Get Dubai Call Girls +971564860409 Call Girls Dubai?kexey39068
 
Jlt Call Girl +971509430017 Indian Call Girl in Jlt By Dubai Call Girl
Jlt Call Girl +971509430017 Indian Call Girl in Jlt By Dubai Call GirlJlt Call Girl +971509430017 Indian Call Girl in Jlt By Dubai Call Girl
Jlt Call Girl +971509430017 Indian Call Girl in Jlt By Dubai Call Girllijeho2176
 
Gurgaon Call Girls : ☎ 8527673949, Low rate Call Girls
Gurgaon Call Girls : ☎ 8527673949, Low rate Call GirlsGurgaon Call Girls : ☎ 8527673949, Low rate Call Girls
Gurgaon Call Girls : ☎ 8527673949, Low rate Call Girlsashishs7044
 
New_Cross_Over (Comedy storyboard sample)
New_Cross_Over (Comedy storyboard sample)New_Cross_Over (Comedy storyboard sample)
New_Cross_Over (Comedy storyboard sample)DavonBrooks
 
A Selection of Tim Walsh's Recent Paintings
A Selection of Tim Walsh's  Recent PaintingsA Selection of Tim Walsh's  Recent Paintings
A Selection of Tim Walsh's Recent PaintingsTim Walsh
 
Laxmi Nagar Call Girls : ☎ 8527673949, Low rate Call Girls
Laxmi Nagar Call Girls : ☎ 8527673949, Low rate Call GirlsLaxmi Nagar Call Girls : ☎ 8527673949, Low rate Call Girls
Laxmi Nagar Call Girls : ☎ 8527673949, Low rate Call Girlsashishs7044
 
Kalkaji Call Girls : ☎ 8527673949, Low rate Call Girls
Kalkaji Call Girls : ☎ 8527673949, Low rate Call GirlsKalkaji Call Girls : ☎ 8527673949, Low rate Call Girls
Kalkaji Call Girls : ☎ 8527673949, Low rate Call Girlsashishs7044
 
Russian⚡ Call Girls In Sector 39 Noida✨8375860717⚡Escorts Service
Russian⚡ Call Girls In Sector 39 Noida✨8375860717⚡Escorts ServiceRussian⚡ Call Girls In Sector 39 Noida✨8375860717⚡Escorts Service
Russian⚡ Call Girls In Sector 39 Noida✨8375860717⚡Escorts Servicedoor45step
 
Zoo_championship_Wrestling (action/comedy sample)
Zoo_championship_Wrestling (action/comedy sample)Zoo_championship_Wrestling (action/comedy sample)
Zoo_championship_Wrestling (action/comedy sample)DavonBrooks
 
Bobbie goods colorinsssssssssssg book.pdf
Bobbie goods colorinsssssssssssg book.pdfBobbie goods colorinsssssssssssg book.pdf
Bobbie goods colorinsssssssssssg book.pdflunavro0105
 
9654467111 Full Enjoy @24/7 Call Girls In Saket Delhi Ncr
9654467111 Full Enjoy @24/7 Call Girls In Saket Delhi Ncr9654467111 Full Enjoy @24/7 Call Girls In Saket Delhi Ncr
9654467111 Full Enjoy @24/7 Call Girls In Saket Delhi NcrSapana Sha
 
FULL ENJOY -9953040155 Call Girls In Aiims Metro
FULL ENJOY -9953040155 Call Girls In Aiims MetroFULL ENJOY -9953040155 Call Girls In Aiims Metro
FULL ENJOY -9953040155 Call Girls In Aiims MetroMalviyaNagarCallGirl
 
Mandi House Call Girls : ☎ 8527673949, Low rate Call Girls
Mandi House Call Girls : ☎ 8527673949, Low rate Call GirlsMandi House Call Girls : ☎ 8527673949, Low rate Call Girls
Mandi House Call Girls : ☎ 8527673949, Low rate Call Girlsashishs7044
 
Hauz Khas Call Girls : ☎ 8527673949, Low rate Call Girls
Hauz Khas Call Girls : ☎ 8527673949, Low rate Call GirlsHauz Khas Call Girls : ☎ 8527673949, Low rate Call Girls
Hauz Khas Call Girls : ☎ 8527673949, Low rate Call Girlsashishs7044
 

Recently uploaded (20)

Khanpur Call Girls : ☎ 8527673949, Low rate Call Girls
Khanpur Call Girls : ☎ 8527673949, Low rate Call GirlsKhanpur Call Girls : ☎ 8527673949, Low rate Call Girls
Khanpur Call Girls : ☎ 8527673949, Low rate Call Girls
 
STAR Scholars Program Brand Guide Presentation
STAR Scholars Program Brand Guide PresentationSTAR Scholars Program Brand Guide Presentation
STAR Scholars Program Brand Guide Presentation
 
UNIT 5-6 anh văn chuyên nganhhhhhhh.docx
UNIT 5-6 anh văn chuyên nganhhhhhhh.docxUNIT 5-6 anh văn chuyên nganhhhhhhh.docx
UNIT 5-6 anh văn chuyên nganhhhhhhh.docx
 
Indian High Profile Call Girls In Sector 18 Noida 8375860717 Escorts Service
Indian High Profile Call Girls In Sector 18 Noida 8375860717 Escorts ServiceIndian High Profile Call Girls In Sector 18 Noida 8375860717 Escorts Service
Indian High Profile Call Girls In Sector 18 Noida 8375860717 Escorts Service
 
Russian Call Girls Delhi NCR 9999965857 Call or WhatsApp Anytime
Russian Call Girls Delhi NCR 9999965857 Call or WhatsApp AnytimeRussian Call Girls Delhi NCR 9999965857 Call or WhatsApp Anytime
Russian Call Girls Delhi NCR 9999965857 Call or WhatsApp Anytime
 
FULL ENJOY - 9953040155 Call Girls in Gandhi Vihar | Delhi
FULL ENJOY - 9953040155 Call Girls in Gandhi Vihar | DelhiFULL ENJOY - 9953040155 Call Girls in Gandhi Vihar | Delhi
FULL ENJOY - 9953040155 Call Girls in Gandhi Vihar | Delhi
 
How Can You Get Dubai Call Girls +971564860409 Call Girls Dubai?
How Can You Get Dubai Call Girls +971564860409 Call Girls Dubai?How Can You Get Dubai Call Girls +971564860409 Call Girls Dubai?
How Can You Get Dubai Call Girls +971564860409 Call Girls Dubai?
 
Jlt Call Girl +971509430017 Indian Call Girl in Jlt By Dubai Call Girl
Jlt Call Girl +971509430017 Indian Call Girl in Jlt By Dubai Call GirlJlt Call Girl +971509430017 Indian Call Girl in Jlt By Dubai Call Girl
Jlt Call Girl +971509430017 Indian Call Girl in Jlt By Dubai Call Girl
 
Gurgaon Call Girls : ☎ 8527673949, Low rate Call Girls
Gurgaon Call Girls : ☎ 8527673949, Low rate Call GirlsGurgaon Call Girls : ☎ 8527673949, Low rate Call Girls
Gurgaon Call Girls : ☎ 8527673949, Low rate Call Girls
 
New_Cross_Over (Comedy storyboard sample)
New_Cross_Over (Comedy storyboard sample)New_Cross_Over (Comedy storyboard sample)
New_Cross_Over (Comedy storyboard sample)
 
A Selection of Tim Walsh's Recent Paintings
A Selection of Tim Walsh's  Recent PaintingsA Selection of Tim Walsh's  Recent Paintings
A Selection of Tim Walsh's Recent Paintings
 
Laxmi Nagar Call Girls : ☎ 8527673949, Low rate Call Girls
Laxmi Nagar Call Girls : ☎ 8527673949, Low rate Call GirlsLaxmi Nagar Call Girls : ☎ 8527673949, Low rate Call Girls
Laxmi Nagar Call Girls : ☎ 8527673949, Low rate Call Girls
 
Kalkaji Call Girls : ☎ 8527673949, Low rate Call Girls
Kalkaji Call Girls : ☎ 8527673949, Low rate Call GirlsKalkaji Call Girls : ☎ 8527673949, Low rate Call Girls
Kalkaji Call Girls : ☎ 8527673949, Low rate Call Girls
 
Russian⚡ Call Girls In Sector 39 Noida✨8375860717⚡Escorts Service
Russian⚡ Call Girls In Sector 39 Noida✨8375860717⚡Escorts ServiceRussian⚡ Call Girls In Sector 39 Noida✨8375860717⚡Escorts Service
Russian⚡ Call Girls In Sector 39 Noida✨8375860717⚡Escorts Service
 
Zoo_championship_Wrestling (action/comedy sample)
Zoo_championship_Wrestling (action/comedy sample)Zoo_championship_Wrestling (action/comedy sample)
Zoo_championship_Wrestling (action/comedy sample)
 
Bobbie goods colorinsssssssssssg book.pdf
Bobbie goods colorinsssssssssssg book.pdfBobbie goods colorinsssssssssssg book.pdf
Bobbie goods colorinsssssssssssg book.pdf
 
9654467111 Full Enjoy @24/7 Call Girls In Saket Delhi Ncr
9654467111 Full Enjoy @24/7 Call Girls In Saket Delhi Ncr9654467111 Full Enjoy @24/7 Call Girls In Saket Delhi Ncr
9654467111 Full Enjoy @24/7 Call Girls In Saket Delhi Ncr
 
FULL ENJOY -9953040155 Call Girls In Aiims Metro
FULL ENJOY -9953040155 Call Girls In Aiims MetroFULL ENJOY -9953040155 Call Girls In Aiims Metro
FULL ENJOY -9953040155 Call Girls In Aiims Metro
 
Mandi House Call Girls : ☎ 8527673949, Low rate Call Girls
Mandi House Call Girls : ☎ 8527673949, Low rate Call GirlsMandi House Call Girls : ☎ 8527673949, Low rate Call Girls
Mandi House Call Girls : ☎ 8527673949, Low rate Call Girls
 
Hauz Khas Call Girls : ☎ 8527673949, Low rate Call Girls
Hauz Khas Call Girls : ☎ 8527673949, Low rate Call GirlsHauz Khas Call Girls : ☎ 8527673949, Low rate Call Girls
Hauz Khas Call Girls : ☎ 8527673949, Low rate Call Girls
 

삼각 카드보드지를 이용한 스카프 직조

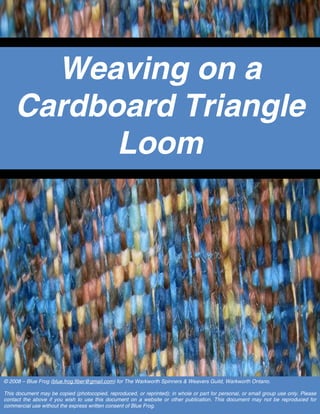
  • 1. Weaving on a Cardboard Triangle Loom © 2008 – Blue Frog (blue.frog.fiber@gmail.com) for The Warkworth Spinners & Weavers Guild, Warkworth Ontario. This document may be copied (photocopied, reproduced, or reprinted); in whole or part for personal, or small group use only. Please contact the above if you wish to use this document on a website or other publication. This document may not be reproduced for commercial use without the express written consent of Blue Frog.
  • 2. Weaving on a Cardboard Triangle Loom - 2 -©2008 Blue Frog (blue.frog.fiber@gmail.com) © 2008 Blue Frog (Blue.Frog.Fiber@gmail.com) © 2008 Blue Frog (Blue.Frog.Fiber@gmail.com) © 2008 Blue Frog (Blue.Frog.Fiber@gmail.com) © 2008 Blue Frog (Blue.Frog.Fiber@gmail.com) © 2008 Blue Frog (Blue.Frog.Fiber@gmail.com) © 2008 Blue Frog (Blue.Frog.Fiber@gmail.com) © 2008 Blue Frog (Blue.Frog.Fiber@gmail.com) © 2008 Blue Frog (Blue.Frog.Fiber@gmail.com) © 2008 Blue Frog (Blue.Frog.Fiber@gmail.com) © 2008 Blue Frog (Blue.Frog.Fiber@gmail.com) Weaving on a Cardboard Triangle Loom The following steps outline how to weave on a Cardboard Triangle Loom. The Triangle Loom will allow you to create a woven scarf measuring 34” x 34” x 48” inches long. You will need: • A Cardboard Loom (refer to: ”Weaving on a Cardboard Triangle Loom” for instructions on building the loom). • A minimum of 225 yards of yarn • Scissors • Weaving Needle or Blunt ended tapestry needle A Note on Yarns … The thickness and hairiness of the yarn will affect your finished product. Here are some examples of different yarns, and the outcome of each. A thin yarn will result in a very open weave pattern. A thick yarn will result in a tighter weave pattern. From the two examples shown above, we can see the difference in thickness of the finished product when rolled and placed together. Note the difference in thickness shown on the next page.
  • 3. Weaving on a Cardboard Triangle Loom - 3 -©2008 Blue Frog (blue.frog.fiber@gmail.com) © 2008 Blue Frog (Blue.Frog.Fiber@gmail.com) © 2008 Blue Frog (Blue.Frog.Fiber@gmail.com) © 2008 Blue Frog (Blue.Frog.Fiber@gmail.com) © 2008 Blue Frog (Blue.Frog.Fiber@gmail.com) © 2008 Blue Frog (Blue.Frog.Fiber@gmail.com) © 2008 Blue Frog (Blue.Frog.Fiber@gmail.com) © 2008 Blue Frog (Blue.Frog.Fiber@gmail.com) © 2008 Blue Frog (Blue.Frog.Fiber@gmail.com) © 2008 Blue Frog (Blue.Frog.Fiber@gmail.com) © 2008 Blue Frog (Blue.Frog.Fiber@gmail.com) NOTE: When choosing yarn for your first piece, it is a good idea to think about picking: • A yarn that is not too thin. • A yarn that is not too hairy. • A yarn that is not too loosely plied, so you don’t accidentally weave into the yarn instead of over/under it • Yarns of different colors to help learn the over/under pattern. A hairy yarn will cause the weave to ‘mesh’ together, and may felt more easily when wet or after the scarf has been worn for a while. The same blue yarn was used in both patterns shown; however the resulting thickness and mesh were different because of the second yarn selection. Using a yarn with variations of thicknesses can give a different and distinctive look to the finished piece. In the piece on the left, note the thick and thin parts of the weave.
  • 4. Weaving on a Cardboard Triangle Loom - 4 -©2008 Blue Frog (blue.frog.fiber@gmail.com) © 2008 Blue Frog (Blue.Frog.Fiber@gmail.com) © 2008 Blue Frog (Blue.Frog.Fiber@gmail.com) © 2008 Blue Frog (Blue.Frog.Fiber@gmail.com) © 2008 Blue Frog (Blue.Frog.Fiber@gmail.com) © 2008 Blue Frog (Blue.Frog.Fiber@gmail.com) © 2008 Blue Frog (Blue.Frog.Fiber@gmail.com) © 2008 Blue Frog (Blue.Frog.Fiber@gmail.com) © 2008 Blue Frog (Blue.Frog.Fiber@gmail.com) © 2008 Blue Frog (Blue.Frog.Fiber@gmail.com) © 2008 Blue Frog (Blue.Frog.Fiber@gmail.com) Instructions Traditionally, weaving on a loom requires a lot of initial setup - putting the Warp onto the loom (which are the vertical threads), and then weaving a pattern horizontally across (the Weft). The major difference when weaving on a triangle loom is that very minimal setup is required. Both the warp and weft occur at the same time as each piece of yarn is added to the loom. Stringing the Loom: 1. Take 2 pieces of yarn, and lay them along the outer side of the row of pins. 2. Wrap the yarn around the pin, and tuck it into one of the slits along the side. Pull the yarn taut (but not super tight), and wrap it around the last pin on the far side, tucking the ends into a slit in the loom. Outer Side
  • 5. Weaving on a Cardboard Triangle Loom - 5 -©2008 Blue Frog (blue.frog.fiber@gmail.com) © 2008 Blue Frog (Blue.Frog.Fiber@gmail.com) © 2008 Blue Frog (Blue.Frog.Fiber@gmail.com) © 2008 Blue Frog (Blue.Frog.Fiber@gmail.com) © 2008 Blue Frog (Blue.Frog.Fiber@gmail.com) © 2008 Blue Frog (Blue.Frog.Fiber@gmail.com) © 2008 Blue Frog (Blue.Frog.Fiber@gmail.com) © 2008 Blue Frog (Blue.Frog.Fiber@gmail.com) © 2008 Blue Frog (Blue.Frog.Fiber@gmail.com) © 2008 Blue Frog (Blue.Frog.Fiber@gmail.com) © 2008 Blue Frog (Blue.Frog.Fiber@gmail.com) Weaving on the Loom 3. Thread the flat needle (or tapestry needle) onto the end of your yarn. NOTE: You do not have to cut the yarn at this point. 4. Thread the yarn over the long pieces of yarn (on the outer side of the pins), before pin #1, then underneath the yarn. Pull the yarn through the first notch on the loom, leaving a tail of approximately 7” in length. This will be the fringe. 5. Pull the rest of the yarn in a straight line to the far side of the loom. Use the lines on the loom for guidance. Pull the yarn through a notch on the far side, and cut the yarn, leaving a 6~8” tail for fringe. NOTE: The total number of notches on parallel sides of the loom should match – see the arrows on the diagram above. Once the first yarn has been strung on the loom, make sure that the number of notches on both parallel sides is the same (i.e. both sides have 3 ½”, or 14 notches open parallel to each other). This is important when completing the final stages of the scarf. 4 NOTE: The length of the fringe is your choice… make it as short or as long as you wish – as long as you leave enough length to tie off the ends for finishing!
  • 6. Weaving on a Cardboard Triangle Loom - 6 -©2008 Blue Frog (blue.frog.fiber@gmail.com) © 2008 Blue Frog (Blue.Frog.Fiber@gmail.com) © 2008 Blue Frog (Blue.Frog.Fiber@gmail.com) © 2008 Blue Frog (Blue.Frog.Fiber@gmail.com) © 2008 Blue Frog (Blue.Frog.Fiber@gmail.com) © 2008 Blue Frog (Blue.Frog.Fiber@gmail.com) © 2008 Blue Frog (Blue.Frog.Fiber@gmail.com) © 2008 Blue Frog (Blue.Frog.Fiber@gmail.com) © 2008 Blue Frog (Blue.Frog.Fiber@gmail.com) © 2008 Blue Frog (Blue.Frog.Fiber@gmail.com) © 2008 Blue Frog (Blue.Frog.Fiber@gmail.com) 6. Continue with the next pieces: a.) Thread the yarn, and weave it over the long pieces of yarn (on the outer side of the pins), between pins #1 and #2, then underneath the yarn. Pull the yarn over the first piece, and pull the yarn through the next notch on the loom, cutting it to leave a fringe tail approximately 6~8” long b.) Weave the next piece over between pins #2 and #3, then underneath the yarn. Pull the yarn over the first yarn, then under the second. Pull through the notch, and cut the yarn to leave a tail. c.) Repeat in a pattern of over the long piece, then under the long piece between two pins. Follow through a repeating pattern of Over, then Under. 7. Continue weaving until the entire length of the yarn has been filled. 4 6a 6b 6c
  • 7. Weaving on a Cardboard Triangle Loom - 7 -©2008 Blue Frog (blue.frog.fiber@gmail.com) © 2008 Blue Frog (Blue.Frog.Fiber@gmail.com) © 2008 Blue Frog (Blue.Frog.Fiber@gmail.com) © 2008 Blue Frog (Blue.Frog.Fiber@gmail.com) © 2008 Blue Frog (Blue.Frog.Fiber@gmail.com) © 2008 Blue Frog (Blue.Frog.Fiber@gmail.com) © 2008 Blue Frog (Blue.Frog.Fiber@gmail.com) © 2008 Blue Frog (Blue.Frog.Fiber@gmail.com) © 2008 Blue Frog (Blue.Frog.Fiber@gmail.com) © 2008 Blue Frog (Blue.Frog.Fiber@gmail.com) © 2008 Blue Frog (Blue.Frog.Fiber@gmail.com) 8. Continue weaving the two lengths that are left, until the loom has been filled as shown below:
  • 8. Weaving on a Cardboard Triangle Loom - 8 -©2008 Blue Frog (blue.frog.fiber@gmail.com) © 2008 Blue Frog (Blue.Frog.Fiber@gmail.com) © 2008 Blue Frog (Blue.Frog.Fiber@gmail.com) © 2008 Blue Frog (Blue.Frog.Fiber@gmail.com) © 2008 Blue Frog (Blue.Frog.Fiber@gmail.com) © 2008 Blue Frog (Blue.Frog.Fiber@gmail.com) © 2008 Blue Frog (Blue.Frog.Fiber@gmail.com) © 2008 Blue Frog (Blue.Frog.Fiber@gmail.com) © 2008 Blue Frog (Blue.Frog.Fiber@gmail.com) © 2008 Blue Frog (Blue.Frog.Fiber@gmail.com) © 2008 Blue Frog (Blue.Frog.Fiber@gmail.com) Tying the Fringe Select the number of yarn pieces to go into each tied tassel on the fringe. If the yarn is thin, it is best to go with 3 pieces, but if the yarn is thicker then using 5 pieces works well. 9. Start at the bottom corner point of the loom. Separate the yarn into either 2 pieces (if doing 3-yarn tassels) or 3 pieces (if doing 5-yarn tassels) on each side of the point. Do not tie these pieces yet. A Thin Yarn fringe, tied using 3 pieces of yarn per tassel. A Thick Yarn fringe, tied using 5 pieces of yarn per tassel. Start at the bottom corner In the example below, we will be making tassels with 5 pieces of yarn per. We are separating out 3 pieces on each side of the corner to keep it symmetrical.
  • 9. Weaving on a Cardboard Triangle Loom - 9 -©2008 Blue Frog (blue.frog.fiber@gmail.com) © 2008 Blue Frog (Blue.Frog.Fiber@gmail.com) © 2008 Blue Frog (Blue.Frog.Fiber@gmail.com) © 2008 Blue Frog (Blue.Frog.Fiber@gmail.com) © 2008 Blue Frog (Blue.Frog.Fiber@gmail.com) © 2008 Blue Frog (Blue.Frog.Fiber@gmail.com) © 2008 Blue Frog (Blue.Frog.Fiber@gmail.com) © 2008 Blue Frog (Blue.Frog.Fiber@gmail.com) © 2008 Blue Frog (Blue.Frog.Fiber@gmail.com) © 2008 Blue Frog (Blue.Frog.Fiber@gmail.com) © 2008 Blue Frog (Blue.Frog.Fiber@gmail.com) 10. Remove 5 pieces of yarn from the notches on the loom. Make sure the yarn pieces are even. 11. Tie an overhand knot using all 5 pieces of yarn: a.) Take the ends of the 5 pieces of yarn and place them over the other side making a loop. b.) Bring the loose ends around the base, and underneath. Pull the ends through the loop (from underside outwards) c.) Pull the knot tight up against the weaving. 11a 11b 11c
  • 10. Weaving on a Cardboard Triangle Loom - 10 -©2008 Blue Frog (blue.frog.fiber@gmail.com) © 2008 Blue Frog (Blue.Frog.Fiber@gmail.com) © 2008 Blue Frog (Blue.Frog.Fiber@gmail.com) © 2008 Blue Frog (Blue.Frog.Fiber@gmail.com) © 2008 Blue Frog (Blue.Frog.Fiber@gmail.com) © 2008 Blue Frog (Blue.Frog.Fiber@gmail.com) © 2008 Blue Frog (Blue.Frog.Fiber@gmail.com) © 2008 Blue Frog (Blue.Frog.Fiber@gmail.com) © 2008 Blue Frog (Blue.Frog.Fiber@gmail.com) © 2008 Blue Frog (Blue.Frog.Fiber@gmail.com) © 2008 Blue Frog (Blue.Frog.Fiber@gmail.com) 12. Continue tying every other group of 5 until you reach the far corner of the loom. Do NOT tie the fringe at the corner yet. NOTE: Leaving the fringe held to the loom at the corners will provide tension, and make tying the rest of the fringe easier. 13. Do the other side of the loom, from the bottom corner to the top corner. Do not tie the fringe at that corner yet either. Tying the Corners 14. Tie the remaining fringe on the short side, leaving the corner pieces in the notches. Example: Pulling the knot tight against the weave. Example: Pulling the ends through the loop to make the knot.
  • 11. Weaving on a Cardboard Triangle Loom - 11 -©2008 Blue Frog (blue.frog.fiber@gmail.com) © 2008 Blue Frog (Blue.Frog.Fiber@gmail.com) © 2008 Blue Frog (Blue.Frog.Fiber@gmail.com) © 2008 Blue Frog (Blue.Frog.Fiber@gmail.com) © 2008 Blue Frog (Blue.Frog.Fiber@gmail.com) © 2008 Blue Frog (Blue.Frog.Fiber@gmail.com) © 2008 Blue Frog (Blue.Frog.Fiber@gmail.com) © 2008 Blue Frog (Blue.Frog.Fiber@gmail.com) © 2008 Blue Frog (Blue.Frog.Fiber@gmail.com) © 2008 Blue Frog (Blue.Frog.Fiber@gmail.com) © 2008 Blue Frog (Blue.Frog.Fiber@gmail.com) 15. Lift the two corner pieces out from each side of the corner (4 pieces in total). Cross the pieces over each other. 16. Tie the two remaining groups of fringe, one on each side of the loom corner. Repeat for the far side of the loom. 17. Finish tying all remaining fringe on both sides of the loom, working back towards the far corner. Removing the Scarf 18. Carefully lift the finished scarf off the loom by gently pulling it off the holding pins. NOTE: It is normal for a few pins to come out during the removal process. These pins can be replaced into the loom once the scarf has been removed. Cross the pieces over each other before tying the corner fringe.
  • 12. Weaving on a Cardboard Triangle Loom - 12 -©2008 Blue Frog (blue.frog.fiber@gmail.com) © 2008 Blue Frog (Blue.Frog.Fiber@gmail.com) © 2008 Blue Frog (Blue.Frog.Fiber@gmail.com) © 2008 Blue Frog (Blue.Frog.Fiber@gmail.com) © 2008 Blue Frog (Blue.Frog.Fiber@gmail.com) © 2008 Blue Frog (Blue.Frog.Fiber@gmail.com) © 2008 Blue Frog (Blue.Frog.Fiber@gmail.com) © 2008 Blue Frog (Blue.Frog.Fiber@gmail.com) © 2008 Blue Frog (Blue.Frog.Fiber@gmail.com) © 2008 Blue Frog (Blue.Frog.Fiber@gmail.com) © 2008 Blue Frog (Blue.Frog.Fiber@gmail.com) Finishing the Fringe Now that the scarf has been lifted off the loom, you can trim the fringe to finish the project. 19. Roll the scarf so that the fringe along one side are lined up. Trim evenly. 20. Use the trimmed edges on the one side to measure out the length needed for the other side, by lining up the two sides together with the trimmed fringe on top of the untrimmed fringe. Trim the fringe on the lower side to match the length from the trimmed side.
  • 13. Weaving on a Cardboard Triangle Loom - 13 -©2008 Blue Frog (blue.frog.fiber@gmail.com) © 2008 Blue Frog (Blue.Frog.Fiber@gmail.com) © 2008 Blue Frog (Blue.Frog.Fiber@gmail.com) © 2008 Blue Frog (Blue.Frog.Fiber@gmail.com) © 2008 Blue Frog (Blue.Frog.Fiber@gmail.com) © 2008 Blue Frog (Blue.Frog.Fiber@gmail.com) © 2008 Blue Frog (Blue.Frog.Fiber@gmail.com) © 2008 Blue Frog (Blue.Frog.Fiber@gmail.com) © 2008 Blue Frog (Blue.Frog.Fiber@gmail.com) © 2008 Blue Frog (Blue.Frog.Fiber@gmail.com) © 2008 Blue Frog (Blue.Frog.Fiber@gmail.com) 21. Roll up the untrimmed side in the same way as step #19, until the roll reaches the trimmed fringe pieces. Use the trimmed pieces to measure the length needed for trimming the remaining fringe. Cut the fringe to match the length. 22. Line up the fringe at the corners as shown below – trim as needed to make the sides even. Trimmed edges on the bottom corner of the scarf. Trimmed edges on the two top corners of the scarf.
  • 14. Enjoy your completed Scarf! - 14 -©2008 Blue Frog (blue.frog.fiber@gmail.com) © 2008 Blue Frog (Blue.Frog.Fiber@gmail.com) © 2008 Blue Frog (Blue.Frog.Fiber@gmail.com) © 2008 Blue Frog (Blue.Frog.Fiber@gmail.com) © 2008 Blue Frog (Blue.Frog.Fiber@gmail.com) © 2008 Blue Frog (Blue.Frog.Fiber@gmail.com) © 2008 Blue Frog (Blue.Frog.Fiber@gmail.com) © 2008 Blue Frog (Blue.Frog.Fiber@gmail.com) © 2008 Blue Frog (Blue.Frog.Fiber@gmail.com) © 2008 Blue Frog (Blue.Frog.Fiber@gmail.com) © 2008 Blue Frog (Blue.Frog.Fiber@gmail.com) Enjoy your completed Scarf!